1
magicolor 7300
Reference Guide
®
1800736-001B
EDNord - Istedgade 37A - 9000 Aalborg - telefon 96333500
Copyright Notice
The digitally encoded software and publication included with your printer are
Copyrighted © 2003 by KONICA MINOLTA PRINTING SOLUTIONS U.S.A.,
INC., One Magnum Pass, Mobile, AL 36618. All Rights Reserved.
This software may not be reproduced, modified, displayed, transferred, or
copied in any form or in any manner or on any media, in whole or in part,
without the express written permission of KONICA MINOLTA PRINTING
SOLUTIONS U.S.A., INC. No part of this publication may be reproduced,
stored in a retrieval system, or transmitted in any form or by any means,
electronic, mechanical, photocopying, recording, or otherwise, without the
prior written permission of KONICA MINOLTA. The information contained in
this guide is intended for use with the KONICA MINOLTA magicolor 7300
printers only.
Trademarks
KONICA MINOLTA and the KONICA MINOLTA logo are trademarks or
registered trademarks of KONICA MINOLTA HOLDINGS, INC.
magicolor is a trademark or registered trademark of KONICA MINOLTA
PRINTING SOLUTIONS U.S.A., INC.
Manual Notice
KONICA MINOLTA BUSINESS TECHNOLOGIES, INC. reserves the right to
make changes to this manual and to the equipment described herein without
notice. Considerable effort has been made to ensure that this manual is free of
inaccuracies and omissions. However, KONICA MINOLTA BUSINESS
TECHNOLOGIES, INC. makes no warranty of any kind including, but not
limited to, any implied warranties of merchantability and fitness for a particular
purpose with regard to this manual. KONICA MINOLTA BUSINESS
TECHNOLOGIES, INC. assumes no responsibility for, or liability for, errors
contained in this manual or for incidental, special, or consequential damages
arising out of the furnishing of this manual, or the use of this manual in
operating the equipment, or in connection with the performance of the
equipment when so operated.
EDNord - Istedgade 37A - 9000 Aalborg - telefon 96333500
Connecting to Windows Operating Systems 3
Introduction ............................................................................. 4
Local Connections ................................................................... 4
Parallel Interface ..................................................................... 5
USB Interface .......................................................................... 6
TCP/IP Connections ................................................................ 7
Ethernet Interface .................................................................... 8
Connecting to Macintosh Operating Systems 15
Introduction ........................................................................... 16
Your Printer’s Operating System 21
Your Printer’s Operating System ........................................... 22
Printer Firmware Updates ..................................................... 22
Installing the Printer Driver on
Windows XP 23
KONICA MINOLTA PostScript Drivers .................................. 24
Manually Installing the KONICA MINOLTA PostScript
Driver on Windows XP .......................................................... 25
Installing the Printer Driver on
Windows 2000 33
KONICA MINOLTA PostScript Drivers .................................. 34
Manually Installing the KONICA MINOLTA PostScript
Driver for Windows 2000 ....................................................... 35
iii
EDNord - Istedgade 37A - 9000 Aalborg - telefon 96333500
Installing the Printer Driver on
Windows Me/98 43
KONICA MINOLTA PostScript Drivers ..................................44
Manually Installing the KONICA MINOLTA PostScript
Driver for Windows Me and 98 ..............................................45
Customizing Driver Settings ..................................................49
Installing the Printer Driver on
Windows NT4 51
KONICA MINOLTA PostScript Drivers ..................................52
Manually Installing the KONICA MINOLTA PostScript
Driver on Windows NT4 ........................................................54
Customizing Driver Settings ..................................................56
PPDs and Utilities for Macintosh 59
Introduction ............................................................................60
Installing PPD Files ...............................................................60
Customizing the Printer Description ......................................61
KONICA MINOLTA PPDs for Macintosh ...............................63
Printer Features and Functions—OS 9 .................................64
Linux Setup 73
Printing from Linux ................................................................74
Common Printing Methods ....................................................74
Installation Steps ...................................................................76
Printing from Applications ......................................................79
Connecting to NetWare 5.x/6.x 87
NetWare 5.x/6.x Setup ..........................................................88
Printer Interface Setup ..........................................................89
iv
EDNord - Istedgade 37A - 9000 Aalborg - telefon 96333500
Using Printer Utilities 97
What’s Available .................................................................... 98
KONICA MINOLTA
Crown Print Monitor + 101
Installing the KONICA MINOLTA Crown Print Monitor+ .... 102
Adding a Crown Port after Crown Print
Monitor+ Installation ............................................................ 105
KONICA MINOLTA Status Monitor 107
Overview ............................................................................. 108
Installing from the CD-ROM ................................................ 109
Using the KONICA MINOLTA Status Monitor ..................... 111
Download Manager 121
Installing the Download Manager for Windows ................... 122
KONICA MINOLTA PageScope
Net Care 129
PageScope Net Care Overview .......................................... 130
System Requirements ......................................................... 130
Installing the PageScope Net Care Server ......................... 131
Starting the Server .............................................................. 132
Starting the Client ................................................................ 133
Logging In ........................................................................... 134
Starting the Server Console Tool ..................................... 136
Shutting Down the PageScope Net Care Server ................ 136
Upgrading PageScope Net Care ......................................... 138
Uninstalling PageScope Net Care ....................................... 139
v
EDNord - Istedgade 37A - 9000 Aalborg - telefon 96333500
NDPS Gateways 141
NDPS Gateways .................................................................142
Installing KONICA MINOLTA NDPS Gateway ....................142
Configuring NDPS ...............................................................144
Using KONICA MINOLTA NDPS Snap-in Controls .............154
Color Basics 161
Color Management ..............................................................162
Color Profiles, Halftone Screens, and Pantone
Tables 167
Color Profiles .......................................................................168
Halftone Screens .................................................................173
Pantone Tables ...................................................................175
Inside Your Printer 181
Inside Your Printer ...............................................................182
Rasterization .......................................................................183
Printable Areas ....................................................................184
Printing ................................................................................184
Printer Features 187
Serverless Printing ..............................................................188
Automatic Jam Recovery ....................................................189
Electronic Document Collation ............................................190
Overlay Printing ...................................................................191
Printer-based Accounting ....................................................193
Tray Chaining and Auto Continue .......................................194
vi
EDNord - Istedgade 37A - 9000 Aalborg - telefon 96333500
Printer Configuration 197
Configuring your Printer ...................................................... 198
Configuring your Printer via PageScope Light .................... 198
Configuring your Printer via the Printer Control
Panel Menus ....................................................................... 242
Configuring your Printer via the Printer Drivers ................... 259
Accounting 267
Printer-based Accounting .................................................... 268
Retrieving Accounting Information ...................................... 268
Accounting File Format ....................................................... 269
Log Accounting Fields ......................................................... 270
Field Definitions ................................................................... 271
Job Accounting Fields ......................................................... 272
Introduction 279
About PJL ............................................................................ 280
In This Section .................................................................... 280
Overview of PJL .................................................................. 280
Supported PJL Command Set ............................................ 280
Conventions 283
Introduction ......................................................................... 284
Document Conventions ....................................................... 284
PJL Command Syntax ........................................................ 285
Universal Exit Language (<UEL>) Usage ........................... 286
Additional Syntax Rules ...................................................... 286
Language Configuration ...................................................... 287
vii
EDNord - Istedgade 37A - 9000 Aalborg - telefon 96333500
Issuing PJL Commands 289
Introduction ..........................................................................290
Sending PJL Commands to the Printer ...............................290
PJL Commands 293
Introduction ..........................................................................294
Commands ..........................................................................294
Environmental Variables .....................................................301
Status Codes 307
Introduction ..........................................................................308
Status Codes .......................................................................308
DOC Matrix 311
Introduction ..........................................................................312
DOC/PJL Command Matrix .................................................312
Index 317
viii
EDNord - Istedgade 37A - 9000 Aalborg - telefon 96333500
Making Connections
In Section 1...
! Chapter 1.1 — “Connecting to Windows Operating Systems”
Instructions for connecting your printer to a PC
using parallel, USB, and Ethernet
connections.
! Chapter 1.2 — “Connecting to Macintosh Operating Systems”
Instructions for connecting your printer to a
Macintosh using Ethernet connections.
EDNord - Istedgade 37A - 9000 Aalborg - telefon 96333500
Chapter Location
Begins on
page...
Chapter
Title
1.1
“Connecting to Windows Operating
Systems”
3
1.2
“Connecting to Macintosh Operating
Systems”
15
EDNord - Istedgade 37A - 9000 Aalborg - telefon 96333500
Connecting to
Windows
Operating
Systems
1.1
EDNord - Istedgade 37A - 9000 Aalborg - telefon 96333500
Introduction
This chapter guides you through the installation of your printer in Windows
environments. The two most common ways to connect your printer to a PC
are using either a local connection (parallel or USB interface) or using a
network connection.
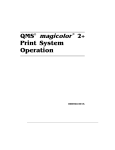
Local Connections
Local connection
A local connection is accomplished by connecting the workstation and the
printer directly by means of a parallel or USB interface. These interfaces
support only a one-to-one connection, which means that the workstation
exclusively “owns” the connection to the printer.
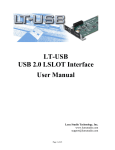
Some network
environments allow the
access of a printer locally
attached to one of the
workstations. Although
all users attached to the
network may use the
printer, the (print) data
flow to that particular
workstation may affect its
normal use. In most of
these cases, this
Local connection—shared over network
workstation is exclusively
needed as a print server
and cannot be used as a
normal workstation anymore.
4
Introduction
EDNord - Istedgade 37A - 9000 Aalborg - telefon 96333500
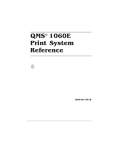
Parallel Interface
Pin
1
18
19
36
Description
Pin
Description
1
Strobe (-)
19
Return
2
Data_1
20
Return
3
Data_2
21
Return
4
Data_3
22
Return
5
Data_4
23
Return
6
Data_5
24
Return
7
Data_6
25
Return
8
Data_7
26
Return
9
Data_8
27
Return
10
Acknowledge (-)
28
Return
11
Busy (+)
29
Return
12
Printer Error (+)
30
Return
13
Select
31
Iprime
14
Autofeed
32
Fault (-)
15
Reserved
33
Reserved
16
Ground
34
Reserved
17
Ground
35
Reserved
18
Vcc Test
36
Select In
Making the Parallel Connection
Connecting your printer locally to your PC using a parallel connection
requires two steps.
1
2
Connect your printer to your PC.
Connect your printer to your PC by means of a parallel cable. The cable
must not be longer than 6.5 feet (2 meters).
Install the KONICA MINOLTA PostScript Driver for Windows.
Parallel Interface
EDNord - Istedgade 37A - 9000 Aalborg - telefon 96333500
5
USB Interface
Pin
Name
Description
1
Vcc
+5V DC
2
D-
Data -
3
D+
Data +
4
Gnd
Ground
Making the USB Connection
Make sure your operating system (Win98SE and above, not including
Windows NT4) supports USB and make sure USB drivers for the port are
already installed on your operating system (Start>Settings>Control
Panel>System found on the Device Manager tab). For Windows XP, select
the hardware tab, then click the Device Manager button.
These drivers are provided on your Windows CD-ROM, not on the magicolor
7300 Software Utilities CD-ROM.
1
2
Turn on the PC and the printer and
make sure the message window
displays READY.
"A" Plug
(To PC)
"B" Plug
(To Printer)
Plug one end of the USB cable into the
PC and the other into the printer USB
port.
The operating system displays New
Hardware Found, and lists USB
Device.
3
4
5
6
The Add New Hardware
Wizard listing KONICA MINOLTA
Printing Support appears.
Select Next.
Make sure that Search for the
Best Device, Recommended is
selected, and then select Next.
Select Specify A Location:.
USB Interface
EDNord - Istedgade 37A - 9000 Aalborg - telefon 96333500
6
7
8
9
Select Browse.
On the Software Utilities CD-ROM, browse to
\Drivers\Platform\ps\Language, and select Next.
For example, Driver\Windows 2000\ps\English.
Select Next, and then select Finish.
On the screen displaying Please insert disk labeled
KONICA MINOLTA Advanced Level 3 Driver, select OK, and
browse back to the directory selected in step 7, and then select OK.
"#
10
11
12
Some Windows Operating Systems may require you to repeat
step 9 as Plug and Play driver files are installed.
Select Finish.
The Plug and Play installation is completed.
When you have finished, remove the CD-ROM and store it in a safe place.
Customize the driver settings for your printer’s configuration. Refer to the
printer driver’s online help.
TCP/IP Connections
To connect your printer in a
TCP/IP network environment,
you must make sure that the
internal network addresses,
subnet, and gateway in the
printer have been set.
TCP/IP Connections
EDNord - Istedgade 37A - 9000 Aalborg - telefon 96333500
7
Ethernet Interface
1
Pin
1
2
3
4
5
6
7
8
8
Description
Transmit Data (+)
Transmit Data (-)
Receive Data (+)
Reserved
Reserved
Receive Data (-)
Reserved
Reserved
The standard Ethernet interface is an RJ45 type of connector, capable of
transmission speeds from 10 Mbit/s up to 100 Mbit/s.
"#
The above illustration shows the receptacle of the Ethernet interface
on the interface panel of the printer.
Making the Ethernet Connection
1
Set the Internet address.
This setting must contain a unique IP address. Printers are shipped with a
preset IP address. In most cases you may want to modify this address, so
it doesn’t conflict with any other IP address present in your network or in
networks attached.
"#
"#
Your network system administrator should assign the IP address.
You need the printer’s IP address when setting up the port on your
workstation.
With DHCP—If your network supports DHCP (Dynamic Host
Configuration Protocol), your IP address will be automatically assigned by
the DHCP server when you turn on your printer.
8
Ethernet Interface
EDNord - Istedgade 37A - 9000 Aalborg - telefon 96333500
Without DHCP—If you are not using DHCP, you may set the IP address
in one of two ways:
! Use the KONICA MINOLTA installation software. Refer to the
Software Utilities CD-ROM.
! Set the printer’s IP address manually.
Attention
You should always notify your network’s administrator before
changing the printer’s IP address.
a Turn on your printer.
b On the control panel, change the IP address of your printer through
the Interface/Ethernet/IP Address menu on the control panel:
Press Key
(Until) Display Reads
READY
MAGICOLOR 7300
MAIN MENU
PRINT MENU
MAIN MENU
INTERFACE MENU
INTERFACE MENU
ETHERNET
ETHERNET
IP ADDRESS
IP ADDRESS
XXX.XXX.XXX.XXX
Use the
and
keys to move to each of the four number triplets.
Use the
and
keys to increase or decrease each number.
IP ADDRESS
XXX.XXX.XXX.XXX
ETHERNET
IP ADDRESS
PLEASE WAIT
READY
MAGICOLOR 7300
Ethernet Interface
EDNord - Istedgade 37A - 9000 Aalborg - telefon 96333500
9
c Verify the IP address by printing a configuration page.
Press Key
(Until) Display Reads
READY
MAGICOLOR 7300
MAIN MENU
PRINT MENU
PRINT MENU
STATISTICS PAGE
PRINT MENU
CONFIGURATION
PROCESSING
READY
MAGICOLOR 7300
A configuration page prints.
4
Set the subnet mask address (Interface/Ethernet/Subnet Mask menu on
the control panel).
The subnet mask allows you to limit access to your printer (for example,
departmental divisions). The following table shows some examples.
5
6
Subnet Mask
User Access
000.000.000.000
No limitations
255.255.255.xxx
Only users (PCs) having a subnet mask of
255.255.255.xxx (default) have access to the
printer (the last triplet of the address xxx,
doesn’t affect access and can be any value).
Set the router/gateway address (Interface/Ethernet/Gateway menu on the
control panel).
If you have a router/gateway in your network and you allow users outside
your network environment to print on your printer, you may need to enter
the router/gateway’s IP address here.
If needed, configure additional printer settings.
Although the settings mentioned above are sufficient for normal
operation, you might want to change other settings in the TCP/IP menu to
accommodate your local requirements.
10
Ethernet Interface
EDNord - Istedgade 37A - 9000 Aalborg - telefon 96333500
7
Connect your printer to the network.
Attach your printer to the network by
plugging the network RJ45 connector into
the RJ45 receptacle on the interface panel
of your printer.
8
If you experience problems locating the
printer on your network, see “Checking
TCP/IP Connections” below.
Install the Crown Print Monitor+.
"#
9
10
In a TCP/IP environment, you
should install the Crown Print
Monitor+ and the printer driver on
each PC having network access to
your printer.
Install the printer driver.
When you have finished, remove the
Software Utilities CD-ROM, and store it in
a safe place.
What’s a Print Monitor?
?
A print monitor is software
that enables the
connection between
software applications and
the network port on your
PC. While some versions
of Windows come with a
print monitor, the Crown
Print Monitor+ that came
with your printer was
designed specifically for
your printer. It allows the
transportation of print data
using TCP/IP protocol for
serverless printing.
Checking TCP/IP Connections
Verify that the communication to
the printer is working properly by
“pinging” the printer.
1
2
3
From the Start button menu,
select Run, and then at the
prompt, type command
Select OK.
From the command line, type
ping <IP Address>
For example,
ping 161.33.128.5↵
Why Ping?
?
The Ping command sends a small
packet of information to the IP
Address and waits for a return
packet. If the connections and
addresses are good, a packet of
information is returned to the sending
workstation.
Ethernet Interface
EDNord - Istedgade 37A - 9000 Aalborg - telefon 96333500
11
If the printer connection is working correctly, your screen displays printer
information similar to the following:
Microsoft<R> Windows 98
<C>Copyright Microsoft Corp 1981-1998
C:\WINDOWS>ping 161.33.128.5
Pinging 161.33.128.5 with 32 bytes of data:
Reply from 161.33.128.5: bytes=32 time=2ms TTL=15
Reply from 161.33.128.5: bytes=32 time=2ms TTL=15
Reply from 161.33.128.5: bytes=32 time=2ms TTL=15
Reply from 161.33.128.5: bytes=32 time=2ms TTL=15
Ping statistics for 161.33.128.5:
Packets: Sent = 4, Received = 4, Lost = 0 <0% loss>,
Approximate round trip times in milliseconds:
Minimum = 2ms, Maximum = 2ms, Average = 2ms
C:\WINDOWS>
If your screen displays information similar to the following, you may have
bad network cabling or connectors attached to the printer.
Microsoft<R> Windows 98
<C>Copyright Microsoft Corp 1981-1998
C:\WINDOWS>ping 161.33.128.5
Pinging 161.33.128.5 with 32 bytes of data:
Request timed out.
Request timed out.
Request timed out.
Request timed out.
Ping statistics for 161.33.128.5:
Packets: Sent = 4, Received = 0, Lost = 4 <100% loss>,
Approximate round trip times in milliseconds:
Minimum = 0ms, Maximum = 0ms, Average = 0ms
C:\WINDOWS>
12
Ethernet Interface
EDNord - Istedgade 37A - 9000 Aalborg - telefon 96333500
Incorrect IP Addresses can cause errors similar to ones shown below:
Microsoft<R>
Microsoft<R> Windows
Windows 98
98
<C>Copyright Microsoft Corp 1981-1998
C:\WINDOWS>ping 161.33.128.5
Pinging 161.33.128.5 with 32 bytes of data:
Reply from 161.33.128.5: Destination host unreachable.
Reply from 161.33.128.5: Destination host unreachable.
Reply from 161.33.128.5: Destination host unreachable.
Reply from 161.33.128.5: Destination host unreachable.
Ping statistics for 161.33.128.5:
Packets: Sent = 4, Received = 4, Lost = 0 <0% loss>,
Approximate round trip times in milliseconds:
Minimum = 0ms, Maximum = 0ms, Average = 0ms
C:\WINDOWS>
4
If error messages or “time-out” messages appear, check your network
connections and the printer’s IP Address, and then try again.
Ethernet Interface
EDNord - Istedgade 37A - 9000 Aalborg - telefon 96333500
13
EDNord - Istedgade 37A - 9000 Aalborg - telefon 96333500
Connecting to
Macintosh
Operating Systems
1.2
EDNord - Istedgade 37A - 9000 Aalborg - telefon 96333500
Introduction
This chapter describes the steps for connecting your printer to a Macintosh
system, using an Ethernet connection. There are three steps for making the
connection.
1
2
Install the printer software.
Create the desktop printer (Macintosh OS 9) or the Printer Queue (OS X),
which includes
! Physically connecting the printer
! Configuring the Zone Name
"#
Once the printer is connected, you can download additional utilities,
such as ICC Profiles and Pantone tables for use with specialized color
printing.
Some Notes to Consider
! In the following sections, we assume that you are installing the software
for the first time.
! You can connect to your printer by
–
A crossover Ethernet cable
–
Ethernet patch cables and an Ethernet hub
Macintosh OS 9—PPDs and Utilities Installation
OS 9 Software Installation
a Insert the Software Utilities CD-ROM in your Macintosh’s CD-ROM
drive.
If this screen does not appear, double-click the KONICA MINOLTA
CD-ROM icon on your Macintosh desktop.
b Choose the Next
button and then choose Printer Setup.
c Follow the instructions on the screen to install the magicolor 7300
PPD and utilities.
d After the PPD and utilities installation is complete, choose Quit.
e When the system software installation is complete, remove the Software Utilities CD-ROM from your CD-ROM drive and store it in a safe
place.
16
Introduction
EDNord - Istedgade 37A - 9000 Aalborg - telefon 96333500
Manual PPD Installation for Macintosh OS 9 and Earlier
1
2
Download the PPD from the web site or copy it from the Software Utilities
CD-ROM. If you downloaded the PPD from the web site, unstuff the
PPD file.
Place the PPD on the Mactintosh’s hard drive in System Folder/
Extentions/Printer Descriptions.
Place the PPD on the Mactintosh’s hard drive(at the root level) in Library/
Printers/PPDs/Contents/Resources/en.lproj.
OS 9 Step 2. Creating a Desktop Printer
EtherTalk Connection
a You can connect via Ethernet. Open the Chooser and select LaserWriter 8.
When your printer boots up, it finds a default zone.
b Choose the Create button. If prompted, select the appropriate PPD
for the magicolor 7300, and click OK. Configure any options you may
have installed on your printer, and click OK.
A desktop printer icon will be created for your printer on the desktop.
LPR (TCP/IP) Connection
a You can connect via Ethernet in either of two ways:
! Plug one end of a crossover Ethernet cable into the Macintosh and
the other into the printer’s Ethernet port.
! Use Ethernet patch cables and an Ethernet hub. Plug one end of
each patch cable into the hub, then plug the other end of one into
the Macintosh and the other end of the second into the printer’s
Ethernet port.
b Locate the Desktop Printer Utility.
If you cannot locate it on your Macintosh hard disk, it can be found on
your Macintosh’s system CD-ROM.
c In the new desktop printer window, select Printer (LPR).
The setup window will open.
d In the PostScript Printer Description (PPD) File section, a generic
printer icon will be displayed. Click on the Change button and select
the PPD for the magicolor 7300.
17
Introduction
EDNord - Istedgade 37A - 9000 Aalborg - telefon 96333500
e In the LPR Printer Selection box, choose Change to specify your
printer. Enter your printer’s IP address for both Printer Address and
Queue. Choose Verify to confirm a connection to your printer. Click
OK.
f Click on the Create button. Name your printer, and click Save.
A desktop printer icon will be created on your desktop.
18
Introduction
EDNord - Istedgade 37A - 9000 Aalborg - telefon 96333500
Section 2
In Section 2...
Installing Printer Software,
Drivers, & PPDs
! Chapter 2.1 — “Your Printer’s Operating System”
Printer firmware download instructions.
! Chapter 2.2 — “Installing the Printer Driver on Windows XP”
Installation of the PostScript driver and the
PPD for your printer.
! Chapter 2.3 — “Installing the Printer Driver on Windows 2000”
Installation of the PostScript driver and the
PPD for your printer.
! Chapter 2.4 — “Installing the Printer Driver on Windows Me/98”
Installation of the PostScript driver and the
PPD for your printer.
! Chapter 2.5 — “Installing the Printer Driver on Windows NT4”
Installation of the PostScript driver and the
PPD for your printer.
! Chapter 2.6 — “PPDs and Utilities for Macintosh”
Installation of the Mac PPD and utilities for
your printer.
! Chapter 2.7 — “Linux Setup”
Printing from Linux.
! Chapter 2.8 — “Connecting to NetWare 5.x/6.x”
NDS setup using PCONSOLE and Admin.
EDNord - Istedgade 37A - 9000 Aalborg - telefon 96333500
Chapter Location
Chapter
Title
Begins on
page...
2.1
“Your Printer’s Operating System”
21
2.2
“Installing the Printer Driver on Windows
XP”
23
2.3
“Installing the Printer Driver on Windows
2000”
33
2.4
“Installing the Printer Driver on Windows
Me/98”
43
2.5
“Installing the Printer Driver on Windows
NT4”
51
2.6
“PPDs and Utilities for Macintosh”
59
2.7
“Linux Setup”
73
2.8
“Connecting to NetWare 5.x/6.x”
87
EDNord - Istedgade 37A - 9000 Aalborg - telefon 96333500
Your Printer’s
Operating
System
2.1
EDNord - Istedgade 37A - 9000 Aalborg - telefon 96333500
Your Printer’s Operating System
Your printer’s Operating System software resides inside the printer and is
referred to as printer firmware. The printer firmware is stored in flash ROM on
a Smart Media card.
Updating new printer firmware is performed via one of the printer’s interfaces.
When the printer firmware is downloaded to the printer, the printer recognizes
the nature of the code and replaces the older firmware with the new one that
is downloaded. After downloading, the printer restarts with the new printer
firmware resident and active.
Printer Firmware Updates
From time to time, printer firmware updates are created to enhance or expand
printer performance. If you should need to update your printer firmware,
contact Technical Support. The Service & Support Guide on the
Documentation CD-ROM provides contact numbers. For the current
information globally, check www.konicaminolta.net/printer/.
22
Your Printer’s Operating
System
EDNord - Istedgade 37A - 9000 Aalborg - telefon 96333500
Installing the
Printer Driver on
Windows XP
2.2
EDNord - Istedgade 37A - 9000 Aalborg - telefon 96333500
KONICA MINOLTA PostScript Drivers
KONICA MINOLTA PostScript Drivers are available from the Software Utilities
CD-ROM and from the Internet (www.konicaminolta.net/printer/). This
chapter includes instructions for manually installing the printer driver using
the Add Printer Wizard.
Installing from the CD-ROM
The Software Utilities CD-ROM has an automatic
printer driver installer program. Simply insert the
CD-ROM and follow the on-screen instructions for
driver installation.
The Installer application automatically runs on most
PCs. If your PC configuration prevents the Installer
from auto-running, browse to the CD and double-click
on the setup.exe file in the root directory to start the Installer application.
After driver installation is complete, remove the Software Utilities CD-ROM
and store it in a safe place.
You also have the option to manually install the printer driver located on the
CD-ROM. See “Manually Installing the KONICA MINOLTA PostScript Driver
on Windows XP” on page 25 for instructions.
"#
Efforts to enhance the features and performance of your KONICA
MINOLTA printer driver don’t stop when you purchase our product. We
make every effort to bring you the very best, and as a result,
occasionally update the printer driver software. For the latest printer
driver, check your printer’s Support page on our website at
printer.konicaminolta.net/support.
Downloading a Printer Driver from the
Internet
Our Internet website (www.konicaminolta.net/printer/)
contains the latest driver and support files for your printer.
To download a printer driver, follow the instructions below.
1
Using your Internet Browser, go to the Support page for
your printer and choose the platform and driver from the
Drivers, PPDs, and Utilities listing.
24
KONICA MINOLTA PostScript
Drivers
EDNord - Istedgade 37A - 9000 Aalborg - telefon 96333500
2
3
4
Select Save this program
to disk when prompted.
Save the download file to a
new directory on your PC.
After the download is
complete, browse to the
new directory created, and
double-click to open it.
Double-click on the .exe
file that was downloaded.
The .exe is a
self-extracting WinZip file
that allows you to uncompress the installation files. Select Browse, then
locate and choose the directory created in step 2 above. Select OK, and
then select Unzip.
5
After the files are unzipped, close the WinZip Self-Extractor, and then
continue with the installation steps described in the next section,
beginning with step 2 on page 26.
Manually Installing the KONICA MINOLTA
PostScript Driver on Windows XP
The following assumes that you are installing the KONICA MINOLTA
PostScript Driver for Windows XP for the first time.
"#
If you are using TCP/IP, make sure you have already installed the
Crown Print Monitor+ first.
Manually Installing the
KONICA MINOLTA PostScript
EDNord -XP
Istedgade 37A - 9000 Aalborg - telefon 96333500
Driver on Windows
25
Installing the Printer Driver
1
2
3
4
26
If the driver you are installing on a local level is on the Software Utilities
CD-ROM, make sure that the CD-ROM is in your CD-ROM drive.
If the CD-ROM installation application starts, close the application before
continuing.
From the Start menu,
choose Printers and
Faxes.
Select Add a printer
from the Printer Tasks
menu. The Add Printer
Wizard starts. Follow
the on-screen
instructions.
Select local printer
(you are attaching to a
port, not to a printer
attached to a server).
Then select Next.
Manually Installing the
KONICA MINOLTA PostScript
EDNord - Istedgade 37A - 9000 Aalborg - telefon
96333500
Driver
on Windows XP
5
Choose the
appropriate printer
port.
For a local (parallel)
connection, select
LPTx:. For a USB
connection, use
USBxxx:.
"#
6
If your port is not listed, the port can be added after the driver
installation (see “Adding a Crown Port after Crown Print Monitor+
Installation” on page 105 to create a new port).
Select Have Disk,
then click Browse.
Browse to the location
of the driver (see the
following table), select
the .inf file, select
Open, and then select
OK.
7300
KONICA MINOLTA magicolor
7300
KONICA MINOLTA magicolor 7300 Mono [Monochro
KONICA MINOLTA
MINOLTA
KONICA
Driver to be installed:
Browse to
Driver on CD-ROM
$:\drivers\windows XP\ps\
(where $ is the letter of your CD-ROM
drive)
Driver downloaded from
Internet
New directory containing the downloaded,
extracted files. Refer to step 2 of
“Downloading a Printer Driver from the
Internet” on page 24.
Manually Installing the
KONICA MINOLTA PostScript
EDNord -XP
Istedgade 37A - 9000 Aalborg - telefon 96333500
Driver on Windows
27
7
Choose your printer.
Then select Next.
"#
8
28
In some network
settings, it may be
desirable to limit the
number of users
that can print in
color. Selecting
magicolor 7300
PostScript
(Monochrome
Only) installs the
printer without color
printing options.
This screen allows you
to rename the printer
for your convenience
and to set the printer
as default printer.
Select Next.
Manually Installing the
KONICA MINOLTA PostScript
EDNord - Istedgade 37A - 9000 Aalborg - telefon
96333500
Driver
on Windows XP
9
Select Next twice, and
then select Finish.
The Add Printer
Wizard closes.
"#
Do Not Share is
automatically
selected
through the
port.
Customizing Driver
Settings
1
2
From the Start menu,
choose Printers and
Faxes, and locate the
(new) printer icon.
Click on the printer
icon with the right
mouse button and
choose Properties.
KKON
Manually Installing the
KONICA MINOLTA PostScript
EDNord -XP
Istedgade 37A - 9000 Aalborg - telefon 96333500
Driver on Windows
29
3
Select Settings.
"#
4
In this window, you
may choose certain
“options” available on
your printer. To add an
available option to the
installed options list,
select the option and
then click Add. After
making selections,
select OK.
"#
5
6
30
In TCP/IP
printing, this
step is done
automatically.
If your printer
connection
uses
bidirectional
communication, the options installed on the printer are
automatically identified in the Installed Options list. Only options
that are not currently installed on the printer display in the
Available Options list.
Select Device
Settings. In this
window, you should set
the defaults that are
not print job
dependent, such as
the media size you
have in your tray(s).
Finish customizing the
settings, and then
select OK.
Manually Installing the
KONICA MINOLTA PostScript
EDNord - Istedgade 37A - 9000 Aalborg - telefon
96333500
Driver
on Windows XP
"#
"#
For additional printer driver information, refer to the printer driver’s
online help.
You may continue installing other utilities available on the Software
Utilities CD-ROM.
Manually Installing the
KONICA MINOLTA PostScript
EDNord -XP
Istedgade 37A - 9000 Aalborg - telefon 96333500
Driver on Windows
31
EDNord - Istedgade 37A - 9000 Aalborg - telefon 96333500
Installing the
Printer Driver on
Windows 2000
2.3
EDNord - Istedgade 37A - 9000 Aalborg - telefon 96333500
KONICA MINOLTA PostScript Drivers
KONICA MINOLTA PostScript Drivers are available from the Software Utilities
CD-ROM and from the Internet (www.konicaminolta.net/printer/). This
chapter includes instructions for manually installing the printer driver using
the Add Printer Wizard.
Installing from the CD-ROM
The Software Utilities CD-ROM has an automatic
printer driver installer program. Simply insert the
CD-ROM and follow the on-screen instructions for
driver installation.
The Installer application automatically runs on most
PCs. If your PC configuration prevents the Installer
from auto-running, browse to the CD and double-click
on the setup.exe file in the root directory to start the Installer application.
After driver installation is complete, remove the Software Utilities CD-ROM
and store it in a safe place.
You also have the option to manually install the printer driver located on the
CD-ROM. See “Manually Installing the KONICA MINOLTA PostScript Driver
for Windows 2000” on page 35 for instructions.
"#
Efforts to enhance the features and performance of your KONICA
MINOLTA printer driver don’t stop when you purchase our product. We
make every effort to bring you the very best, and as a result,
occasionally update the printer driver software. For the latest printer
driver, check your printer’s Support page on our website at
www.konicaminolta.net/printer/.
Downloading a Printer Driver from the
Internet
Our Internet website (www.konicaminolta.net/printer/)
contains the latest driver and support files for your printer.
To download a printer driver, follow the instructions below.
1
Using your Internet Browser, go to the Support page for
your printer and choose the platform and driver from the
Drivers, PPDs, and Utilities listing.
34
KONICA MINOLTA PostScript
Drivers
EDNord - Istedgade 37A - 9000 Aalborg - telefon 96333500
2
3
4
Select Save this program
to disk when prompted.
Save the download file to a
new directory on your PC.
After the download is
complete, use Windows
Explorer to open the new
directory created in step 2.
Double-click on the .exe
file that was downloaded.
The .exe is a
self-extracting WinZip file
that allows you to uncompress the installation files. Select Browse, then
locate and choose the directory created in step 2 above. Select OK, and
then select Unzip.
5
After the files are unzipped, close the WinZip Self-Extractor, and then
continue with the installation steps described in the next section,
beginning with step 2 on page 36.
Manually Installing the KONICA MINOLTA
PostScript Driver for Windows 2000
The following assumes that you are installing the KONICA MINOLTA
PostScript Driver for Windows 2000 for the first time. You may also use the
standard installation, described below.
1
If the driver you are installing is on the Software Utilities CD-ROM, make
sure that the CD-ROM is in your CD-ROM drive.
If the CD-ROM installation application starts, close the application before
continuing.
Manually Installing the
KONICA MINOLTA PostScript
EDNord -2000
Istedgade 37A - 9000 Aalborg - telefon 96333500
Driver for Windows
35
2
3
4
36
From the Start menu,
choose Settings/
Printers.
Double-click on the
Add Printer icon
(Windows 2000). The
Add Printer Wizard
starts. Follow the
on-screen instructions.
Select local printer
(you are attaching to a
port, not to a printer
attached to a server).
Then select Next.
Manually Installing the
KONICA MINOLTA PostScript
EDNord - Istedgade 37A - 9000 Aalborg - telefon
Driver96333500
for Windows 2000
5
Choose the
appropriate printer
port.
"#
6
For a local
(parallel)
connection,
select LPTx:.
For a USB
connection, use
USBxxx:.
If your port is not listed, the port can be added after the driver
installation (see “Adding a Crown Port after Crown Print Monitor+
Installation” on page 105 to create a new port).
Select Have Disk,
then click Browse.
Browse to the
location of the driver
(see the following
table), select the .inf
file, select Open, and
then select OK.
Driver to be installed:
Browse to
Driver on CD-ROM
$:\drivers\windows 2000\ps\
(where $ is the letter of your CD-ROM
drive).
Driver downloaded from
Internet
New directory containing the
downloaded, extracted files. Refer to
step 2 of “Downloading a Printer Driver
from the Internet” on page 34.
Manually Installing the
KONICA MINOLTA PostScript
EDNord -2000
Istedgade 37A - 9000 Aalborg - telefon 96333500
Driver for Windows
37
7
Choose your printer.
Then select Next.
"#
8
38
In some
network
settings it may
be desirable to
limit the
number of
users that can
print in color.
Selecting
magicolor
7300
PostScript
(Monochrome
Only) installs
the printer without color printing options.
This screen allows you
to rename the printer
for your convenience
and to set the printer
as default printer.
Select Next.
Manually Installing the
KONICA MINOLTA PostScript
EDNord - Istedgade 37A - 9000 Aalborg - telefon
Driver96333500
for Windows 2000
9
Select Do not share
this printer. Select
Next twice, and then
select Finish.
The Add Printer
Wizard closes.
Customizing Driver Settings
1
2
From the Start menu,
choose Settings/
Printers, and locate
the (new) printer icon.
Right-click on the
printer icon and
choose Properties.
Manually Installing the
KONICA MINOLTA PostScript
EDNord -2000
Istedgade 37A - 9000 Aalborg - telefon 96333500
Driver for Windows
39
3
Select Settings.
"#
4
40
If your printer connection uses bidirectional communication, the
options installed on the printer are automatically identified in the
Installed Options list. Only options that are not currently installed
on the printer display in the Available Options list.
In this window you may choose certain “options” available on your printer.
To add an available option to the installed options list, select the option
and then click Add. After making selections, select OK.
Manually Installing the
KONICA MINOLTA PostScript
EDNord - Istedgade 37A - 9000 Aalborg - telefon
Driver96333500
for Windows 2000
5
6
Select Device
Settings. In this
window you should set
the defaults that are
not print job
dependent, such as
the media size you
have in your tray(s).
Finish customizing the
settings, and then
select OK.
"#
"#
For additional
printer driver
information,
refer to the
printer driver’s
online help.
You may
continue
installing other utilities available on the Software Utilities CD-ROM.
Manually Installing the
KONICA MINOLTA PostScript
EDNord -2000
Istedgade 37A - 9000 Aalborg - telefon 96333500
Driver for Windows
41
EDNord - Istedgade 37A - 9000 Aalborg - telefon 96333500
Installing the Printer
Driver on Windows
Me/98
2.4
EDNord - Istedgade 37A - 9000 Aalborg - telefon 96333500
KONICA MINOLTA PostScript Drivers
KONICA MINOLTA PostScript Drivers are available from the Software Utilities
CD-ROM and from the Internet (www.konicaminolta.net/printer/). This
chapter includes instructions for manually installing the printer driver using
the Add Printer Wizard.
Installing from the CD-ROM
The Software Utilities CD-ROM has an automatic
printer driver installer program. Simply insert the
CD-ROM and follow the on-screen instructions for
driver installation.
The Installer application automatically runs on most
PCs. If your PC configuration prevents the Installer
from auto-running, browse to the CD and double-click
on the setup.exe file in the root directory to start the Installer application.
After driver installation is complete, remove the Software Utilities CD-ROM
and store it in a safe place.
You also have the option to manually install the printer driver located on the
CD-ROM. See “Manually Installing the KONICA MINOLTA PostScript Driver
for Windows Me and 98” on page 45 for instructions.
"#
Efforts to enhance the features and performance of your KONICA
MINOLTA printer driver don’t stop when you purchase our product. We
make every effort to bring you the very best, and as a result,
occasionally update the printer driver software. For the latest printer
driver, check your printer’s Support page on our website at
www.konicaminolta.net/printer/.
Downloading a Printer Driver from the
Internet
Our Internet website (www.konicaminolta.net/printer/) contains the latest driver and support files for your printer. To
download a printer driver, follow the instructions below.
1
Using your Internet Browser, go to the Support page for
your printer and choose the platform and driver from the
Drivers, PPDs and Utilities listing.
44
KONICA MINOLTA PostScript
Drivers
EDNord - Istedgade 37A - 9000 Aalborg - telefon 96333500
2
3
4
Select Save this program
to disk when prompted.
Save the download file to a
new directory on your PC.
After the download is
complete, use Windows
Explorer to open the new
directory created in step 2.
Double-click on the .exe
file that was downloaded.
The .exe is a
self-extracting WinZip file
that allows you to uncompress the installation files. Select Browse, then
locate and choose the directory created in step 2 above. Select OK, and
then select Unzip.
5
After the files are unzipped, close the WinZip Self Extractor, and then
continue with the installation steps described in the next section,
beginning with step 2 on page 46.
Manually Installing the KONICA MINOLTA
PostScript Driver for Windows Me and 98
The following assumes that you are installing the KONICA MINOLTA PostScript Driver for Windows Me and 98 for the first time.
Manually Installing the
KONICA MINOLTA PostScript
EDNord -Me
Istedgade
37A - 9000 Aalborg - telefon 96333500
Driver for Windows
and 98
45
1
2
3
4
5
46
If the driver you are installing is on the
Software Utilities CD-ROM, make
sure that the CD-ROM is in your
CD-ROM drive.
If the CD-ROM installation application
starts, close the application before
continuing.
From the Start menu, choose
Settings/Printers.
Double-click on the Add Printer icon.
The Add Printer Wizard starts.
Select Next.
Select Local Printer, and then select Next.
Manually Installing the
KONICA MINOLTA PostScript
EDNord - Istedgade 37A - 9000 Aalborg
- telefon
96333500 Me and 98
Driver
for Windows
6
7
Select Have Disk and browse to the location of the driver you are
installing.
Driver to be
installed:
Browse to
Driver on CD-ROM
$:\drivers\windows me, 9x\ps\language\
(where $ is the letter of your CD-ROM drive).
Driver downloaded
from Internet
New directory containing the downloaded,
extracted files. Refer to step 2 of “Downloading
a Printer Driver from the Internet” on page 44.
Select OK twice.
Manually Installing the
KONICA MINOLTA PostScript
EDNord -Me
Istedgade
37A - 9000 Aalborg - telefon 96333500
Driver for Windows
and 98
47
8
Choose your printer from the list, and then select Next.
"#
9
In some network settings it may be desirable to limit the number of
users that can print in color. Selecting KONICA MINOLTA magicolor 7300 Mono installs the printer without color printing options.
Choose the
appropriate
printer port,
and then
select Next.
For a local
(parallel)
connection,
select LPTx:.
For a USB
connection,
use USBxxx:.
48
Manually Installing the
KONICA MINOLTA PostScript
EDNord - Istedgade 37A - 9000 Aalborg
- telefon
96333500 Me and 98
Driver
for Windows
10
This screen
allows you to
rename the
printer for your
convenience.
Select Next,
and then
Finish.
The Add Printer
Wizard closes.
Customizing Driver Settings
1 From the Start
2
3
4
menu, choose
Settings/
Printers and
locate the (new)
printer icon.
Right-click on
the printer icon.
Choose
Properties. In
the Properties
Window, select
Details. Verify
that the port and
the driver name
are correct.
Then select Setup.
Choose the Settings tab.
"#
If your printer connection uses bidirectional communication, the
options installed on the printer are automatically identified in the
Installed Options list. Only options that are not currently installed
on the printer display in the Available Options list.
Customizing Driver Settings
EDNord - Istedgade 37A - 9000 Aalborg - telefon 96333500
49
5
6
In this window
you may
choose certain
“options”
available on
your printer. To
add an
available option
to the installed
options list,
select the
option and then
click Add. After
making
selections,
select OK.
Choose the
Paper tab. From
this tab, you
should set the defaults that are not print job dependent such as Paper
Size, Source, and Media Type.
"#
7
8
For overlays, refer to “Overlay Printing” on page 191.
Finish the settings and select OK.
"#
50
For additional printer driver information, see the printer driver’s
online help.
You may continue installing other utilities available on the Software
Utilities CD-ROM.
Customizing Driver Settings
EDNord - Istedgade 37A - 9000 Aalborg - telefon 96333500
Installing the
Printer Driver on
Windows NT4
2.5
EDNord - Istedgade 37A - 9000 Aalborg - telefon 96333500
KONICA MINOLTA PostScript Drivers
KONICA MINOLTA PostScript Drivers are available from the Software Utilities
CD-ROM and from the Internet (www.konicaminolta.net/printer/). This
chapter includes instructions for manually installing the printer driver using
the Add Printer Wizard.
"#
"#
To use the KONICA MINOLTA PostScript printer driver, SNMP must
be running and you must have Windows NT4 Service Pack 6 or higher
installed.
Windows NT does not support Plug & Play. When you see the pop-up
menu to select where to install the driver from, select “Specify a
Location.” Do not select “from CD-ROM” for the driver location.
Installing from the CD-ROM
The Software Utilities CD-ROM has an automatic
printer driver installer program. Simply insert the
CD-ROM and follow the on-screen instructions for
driver installation.
The Installer application automatically runs on most
PCs. If your PC configuration prevents the Installer
from auto-running, browse to the CD and double-click
on the setup.exe file in the root directory to start the Installer application.
After driver installation is complete, remove the Software Utilities CD-ROM
and store it in a safe place.
You also have the option to manually install the printer driver located on the
CD-ROM. See “Manually Installing the KONICA MINOLTA PostScript Driver
on Windows NT4” on page 54 for instructions.
"#
52
Efforts to enhance the features and performance of your
KONICA MINOLTA printer driver don’t stop when you purchase our
product. We make every effort to bring you the very best, and as a
result, occasionally update the printer driver software. For the latest
printer driver, check your printer’s Support page on our website at
www.konicaminolta.net/printer/.
KONICA MINOLTA PostScript
Drivers
EDNord - Istedgade 37A - 9000 Aalborg - telefon 96333500
Downloading a Printer Driver from the
Internet
Our Internet website (www.konicaminolta.net/printer/)
contains the latest driver and support files for your printer.
To download a printer driver, follow the instructions below.
1
Using your Internet Browser, go to the Support page for
your printer and choose the platform and driver from the
Drivers, PPDs and Utilities listing.
2
3
4
Select Save this program
to disk when prompted.
Save the download file to a
new directory on your PC.
After the download is
complete, use Windows
Explorer to open the new
directory created in step 2.
Double-click on the .exe
file that was downloaded.
The .exe is a
self-extracting WinZip
file that allows you to
uncompress the
installation files. Select
Browse, then locate
and choose the
directory created in
step 2 above. Select
OK, and then select
Unzip.
5
After the files are unzipped, close the WinZip Self-Extractor, and then
continue with the installation steps described in the next section,
beginning with step 2 below.
KONICA MINOLTA PostScript
Drivers
EDNord - Istedgade 37A - 9000 Aalborg - telefon 96333500
53
Manually Installing the KONICA MINOLTA
PostScript Driver on Windows NT4
"#
Review the information in the driver’s readme.txt file for driver
availability notes and special instructions on driver installation and
use.
The following assumes that you are installing the KONICA MINOLTA
PostScript Driver for Windows NT4 for the first time.
1
2
3
4
54
If the driver you are installing is on the
Software Utilities CD-ROM, make
sure that the CD-ROM is in your
CD-ROM drive.
If the CD-ROM installation application
starts, close the application before
continuing.
From the Start menu, choose
Settings/Printers.
Double-click on the Add Printer icon.
The Add Printer Wizard starts.
Select My Computer,
and then select Next.
Manually Installing the
KONICA MINOLTA PostScript
EDNord - Istedgade 37A - 9000 Aalborg - telefon
96333500
Driver
on Windows NT4
5
Choose the
appropriate printer
port, and then select
Next.
For a local (parallel)
connection, select
LPTx:. For a USB
connection, use
USBxxx:.
6
Select Have Disk,
browse to the location
of the driver you are
installing (see the
following table), select
the .inf file, select
Open, and then select
Next.
Driver to be
installed:
Browse to
Driver on CD-ROM
$:\drivers\windows NT4\ps\language\ (where $
is the letter of your CD-ROM drive).
Driver downloaded
from Internet
New directory containing the downloaded,
extracted files. Refer to step 2 of “Downloading a
Printer Driver from the Internet” on page 53.
Manually Installing the
KONICA MINOLTA PostScript
EDNord -NT4
Istedgade 37A - 9000 Aalborg - telefon 96333500
Driver on Windows
55
7
8
This screen allows you
to rename the printer
for your convenience
and to set the printer
as the default printer.
Select Next.
Select Shared or Not
Shared. (If you select
Shared, enter the
share name). Select
Next, and then select
Finish.
The Add Printer
Wizard closes.
Customizing Driver Settings
"#
1
56
To use the KONICA MINOLTA PostScript printer driver, SNMP must
be running and you must have Windows NT4 Service Pack 6 or higher
installed.
From the Start menu, choose Settings/Printers and locate the (new)
printer icon.
Customizing Driver Settings
EDNord - Istedgade 37A - 9000 Aalborg - telefon 96333500
2
3
Right-click on the icon
and choose Properties.
Choose the Settings tab.
"#
4
If your printer
connection uses
bidirectional
communication,
the options
installed on the
printer are
automatically
identified in the
Installed Options
list. Only options
that are not
currently installed on the printer display in the Available Options
list.
In this tab you may
choose certain “options”
available on your printer.
To add an available
option to the installed
options list, select the
option and then click
Add. After making
selections, select OK.
Customizing Driver Settings
EDNord - Istedgade 37A - 9000 Aalborg - telefon 96333500
57
5
Select the Device
Settings tab.
In this tab you should set
the defaults that are not
print job dependent, such
as the media size you
have in your tray(s).
6
Finish customizing the settings and select OK.
"#
"#
58
For additional printer driver information, you may also refer to the
printer driver’s online help.
You may continue installing other utilities available on the Software
Utilities CD-ROM.
Customizing Driver Settings
EDNord - Istedgade 37A - 9000 Aalborg - telefon 96333500
PPDs and Utilities
for Macintosh
2.6
EDNord - Istedgade 37A - 9000 Aalborg - telefon 96333500
Introduction
This chapter describes how to install the PostScript Printer Description (PPD)
files and utilities needed to take advantage of all of your printer’s features.
The PPD works with the Macintosh Operating System’s PostScript printer
driver (LaserWriter) to provide support for the features on the magicolor 7300,
such as print resolution and media sizes, and optional features such as
duplexing.
Installing PPD Files
1 Insert the KONICA MINOLTA Software Utilities CD-ROM.
"#
2
3
4
5
6
7
Double-click the KONICA MINOLTA icon when it appears on the desktop.
If this screen appears, click the Install Additional Software button.
If this screen does not appear when you double-click the KONICA
MINOLTA icon, then double-click the Install icon and this screen appears.
After reading the Program License Agreement, select Agree to continue
the installation.
Select the Read Me... button to view information about PPDs and utilities
on the Software Utilities CD-ROM.
Close the Read Me file after reading the information.
From the Install Location drop-down list box, choose the disk where you
want to install the software.
"#
8
9
10
11
PPDs are also available on our website
at www.konicaminolta.net/printer/.
To change the install location, use the drop-down list box to display
and choose the appropriate disk.
Choose Easy Install or Custom Install.
Custom Install allows you to choose which printer files are installed during
installation.
Select Install.
When the installation
is complete, select
Quit.
Remove the Software
Utilities CD-ROM from
your CD-ROM drive and store it in a safe place.
60
Introduction
EDNord - Istedgade 37A - 9000 Aalborg - telefon 96333500
12
Customize the printer description (PPD) as described in the next section.
Customizing the Printer Description
1 Open the Chooser (under the Apple icon in the desktop menu bar).
2 Select the LaserWriter printer driver.
3
The chooser searches for available printers.
From the Select a PostScript Printer list, select your printer and then
select Create.
"#
4
5
If your network has more than one zone, select the zone that your
printer is configured for, select your printer from the Select a
PostScript Printer list, and then select Create.
Message boxes indicating the set up progress appear and close. When
you are returned to the Chooser window, the Create button is replaced by
the Setup button.
Select Setup.
In the setup window,
click on Select PPD.
Customizing the Printer
Description
EDNord - Istedgade 37A - 9000 Aalborg - telefon 96333500
61
6
From the folder
System Folder/
Extensions/Printer
Descriptions, select
the PPD file installed
for your printer, and
then click on Select.
Your Macintosh makes
a “connection”
between the selected
PPD file and your
printer.
7
8
9
62
In the setup window,
select Configure.
Configure the settings
by choosing from the
options available in the
drop-down list boxes.
Use the scroll buttons
to view the full list of
optional settings for
your printer.
When you are finished
customizing the PPD,
select OK, and then close the Chooser.
Customizing the Printer
Description
EDNord - Istedgade 37A - 9000 Aalborg - telefon 96333500
KONICA MINOLTA PPDs for Macintosh
This section describes the additional printer configuration items that are
available from your application’s print dialog.
Overview
1
While using the application that you want to print from, choose Page
Setup from the file menu. Choose OK.
"#
2
3
Make sure the proper media size for your job is selected in the
drop-down list.
Choose Print from the file menu.
Choose the options and settings that you want for the print job, and then
choose Print.
The job is printed.
The following sections describe the configuration items available from the
print dialog.
KONICA MINOLTA PPDs for
Macintosh
EDNord - Istedgade 37A - 9000 Aalborg - telefon 96333500
63
Printer Features and Functions—OS 9
General Dialog
64
Item
Description
Copies
Allows you to specify how many copies of the print job you
want printed.
Collated
If this item is selected, your print job is collated (one
complete copy of the document is printed before the next
copy is printed). Left unselected, the printing is uncollated.
Pages
Select All to print all pages in the open document. To print a
specific range of pages, select From, and then enter the
beginning page number in the From text box and the ending
page number in the To text box.
Paper Source
Allows you to select the tray that the printer uses for the
print job and to choose a different tray for the first page of
the document, if you have more than one tray installed.
Save Settings
Saves configuration changes made in the print dialog.
These changes remain as the default settings until the
configuration items are changed again.
Printer Features and
Functions—OS 9
EDNord - Istedgade 37A - 9000 Aalborg - telefon 96333500
Item
Description
Cancel
Closes the print dialog without printing and without saving
configuration changes.
Print
Sends the print job, using the configuration settings you
selected in the printer dialog, closes the print dialog, and
restores the last saved configuration settings.
Background Printing
Item
Description
Print In
Allows you to choose between printing in foreground and
printing in background. Printing in background creates a
spool file that is temporarily saved on your computer until
the print job is ready to be processed. This allows you to
continue working in your applications while the print job is
processing. If you don’t have enough free file space on your
computer to process a spool file, select Foreground
printing.
Print Time
Allows you to assign a priority status to the print job and
specify a particular time that the print job should be printed.
Save Settings
Saves configuration changes made in the print dialog.
These changes remain as the default settings until the
configuration items are changed again.
Cancel
Closes the print dialog without printing and without saving
configuration changes.
Print
Sends the print job, using the configuration settings you
selected in the printer dialog, closes the print dialog, and
restores the last saved configuration settings.
Printer Features and
Functions—OS 9
EDNord - Istedgade 37A - 9000 Aalborg - telefon 96333500
65
Color Matching
Item
Description
Print Color
Allows you to choose from the color configurations
available on your computer.
Intent
Allows you to specify the color matching configuration or
allow for automatic configuration. This item is disabled
(grayed out) unless ColorSync Color Matching is the
selected Print Color setting.
Printer Profile
Allows you to select from the printer profiles that are
available.
Save Settings
Saves configuration changes made in the print dialog.
These changes remain as the default settings until the
configuration items are changed again.
Cancel
Closes the print dialog without printing and without saving
configuration changes.
Print
Sends the print job, using the configuration settings you
selected in the printer dialog, closes the print dialog, and
restores the last saved configuration settings.
Cover Page
66
Item
Description
Print Cover
Page
Lets you choose whether to print a cover page, and specify
the placement of the cover page in relation to the remaining
pages of the print job.
Cover Page
Paper Source
Allows you to select the paper tray containing the cover
page media. The Cover Page contains information about
the print job such as: user name, application, document
name, date, time, printer, and number of pages. This option
is disabled (grayed out) if Print Cover Page is set to None.
Save Settings
Saves configuration changes made in the print dialog.
These changes remain as the default settings until the
configuration items are changed again.
Printer Features and
Functions—OS 9
EDNord - Istedgade 37A - 9000 Aalborg - telefon 96333500
Item
Description
Cancel
Closes the print dialog without printing and without saving
configuration changes.
Print
Sends the print job, using the configuration settings you
selected in the printer dialog, closes the print dialog, and
restores the last saved configuration settings.
Layout
Item
Description
Pages Per
Sheet
Allows you to set the number of logical pages per physical
sheet.
Layout
Direction
Lets you identify either left-right or right-left logical page
direction on the physical sheet.
Border
Allows you to select a border to surround each logical page.
Print on Both
Sides
Allows you to configure the print job for duplex printing.
Binding
Determines the orientation of the logical pages on the
physical sheet so the printed media is oriented for binding
on the short edge or long edge of the media.
Save Settings
Saves configuration changes made in the print dialog.
These changes remain as the default settings until the
configuration items are changed again.
Cancel
Closes the print dialog without printing and without saving
configuration changes.
Print
Sends the print job, using the configuration settings you
selected in the printer dialog, closes the print dialog, and
restores the last saved configuration settings.
This setting is disabled (grayed out) unless an optional
duplex unit is installed and identified in the PPD
configuration. See “Customizing the Printer Description” on
page 61 for additional information.
Printer Features and
Functions—OS 9
EDNord - Istedgade 37A - 9000 Aalborg - telefon 96333500
67
Paper Handling
Item
Description
If the
Cassette is
Out of Paper
Selects tray switching behavior, such as Use printer’s
default, Switch to another cassette with same paper size, or
Display alert.
Save Settings
Saves configuration changes made in the print dialog.
These changes remain as the default settings until the
configuration items are changed again.
Cancel
Closes the print dialog without printing and without saving
configuration changes.
Print
Sends the print job, using the configuration settings you
selected in the printer dialog, closes the print dialog, and
restores the last saved configuration settings.
Save as File
68
Item
Description
Format
Select the file format of the output file.
PostScript
Level
Allows you to select from available PostScript levels.
Data Format
Sends the print job data to the file in either ASCII or Binary
format.
Font
Inclusion
Allows you to choose the fonts that are included with the
print job as it is saved to a file.
Save Settings
Saves configuration changes made in the print dialog.
These changes remain as the default settings until the
configuration items are changed again.
Cancel
Closes the print dialog without printing and without saving
configuration changes.
Print
Sends the print job, using the configuration settings you
selected in the printer dialog, closes the print dialog, and
restores the last saved configuration settings.
Printer Features and
Functions—OS 9
EDNord - Istedgade 37A - 9000 Aalborg - telefon 96333500
Detailed Color Settings 1
Item
Description
RGB Source
Images
Allows you to select from standard or custom RGB source
profiles for ICC color matching on images.
RGB Source
Graphics
Allows you to select from standard or custom RGB source
profiles for ICC color matching on graphics and color text.
Gray
Treatment
Images
Allows you to select the way that the printer prints neutrals
within your print jobs.
Gray
Treatment
Graphics
Black and Gray—All RGB grays are converted to the
printer’s CMYK black only gray scale. Setting the RGB
Gray Treatment to this item guarantees that monochrome
documents print at full speed and that only black toner is
used to print gray shades.
"# Some gradient fills may not reproduce well using this
item as the setting.
Composite Black—RGB black and grays are converted to
CMYK according to the output profile. Setting the RGB
Gray Treatment to this item results in rich black colors using
varying amounts of cyan, magenta, yellow, and black toner.
"# Because all colors are used in this setting, toner
scattering and registration errors are more likely to
be seen in heavy text and lines.
Save Settings
Saves configuration changes made in the print dialog.
These changes remain as the default settings until the
configuration items are changed again.
Cancel
Closes the print dialog without printing and without saving
configuration changes.
Print
Sends the print job, using the configuration settings you
selected in the printer dialog, closes the print dialog, and
restores the last saved configuration settings.
?
What Is the Difference Between Color
Images and Color Graphics?
“Color images” refers to items such as
photographs. “Color graphics” refers to
items such as charts, logos, and clip art.
Printer Features and
Functions—OS 9
EDNord - Istedgade 37A - 9000 Aalborg - telefon 96333500
69
Detailed Color Settings 2
Item
Description
Image
Halftone
Allows you to customize the smoothness of the printed
image according to the number of grayscale levels used on
your images. Your choices depend on the halftones
available on your printer.
Graphics
Halftone
Allows you to customize the smoothness of the printed
image according to the number of grayscale levels used on
your graphics. Your choices depend on the halftones
available on your printer.
Color
Matching
Allows you to specify the color matching configuration or
allows for automatic configuration. This item is disabled
(grayed out) unless ColorSync Color Matching or
PostScript Color Matching is the selected Print Color
setting.
Colors As
Grayscale
Select (check) this check box if you’re printing image colors
as gray shades.
Save Settings
Saves configuration changes made in the print dialog.
These changes remain as the default settings until the
configuration items are changed again.
Cancel
Closes the print dialog without printing and without saving
configuration changes.
Print
Sends the print job, using the configuration settings you
selected in the printer dialog, closes the print dialog, and
restores the last saved configuration settings.
Detailed Color Settings 3
70
Item
Description
Simulation
Profile
Allows you to choose a CMYK source profile for ICC color
matching.
Destination
Profiles
The Destination Profiles relate to color matching options
supplied by the PPD.
Custom RGB
Source
Allows you to select RGB source profiles for the printer.
Printer Features and
Functions—OS 9
EDNord - Istedgade 37A - 9000 Aalborg - telefon 96333500
Item
Description
Save Settings
Saves configuration changes made in the print dialog.
These changes remain as the default settings until the
configuration items are changed again.
Cancel
Closes the print dialog without printing and without saving
configuration changes.
Print
Sends the print job, using the configuration settings you
selected in the printer dialog, closes the print dialog, and
restores the last saved configuration settings.
Printer Features and
Functions—OS 9
EDNord - Istedgade 37A - 9000 Aalborg - telefon 96333500
71
EDNord - Istedgade 37A - 9000 Aalborg - telefon 96333500
Linux Setup
2.7
EDNord - Istedgade 37A - 9000 Aalborg - telefon 96333500
Printing from Linux
This document describes some of the common methods used to print from a
Linux Operating System (OS) to a KONICA MINOLTA printer. These methods
range from providing minimum to maximum printing flexibility and access to
printer features from the Linux environment. A general description,
installation instructions, and application notes are included for each method.
Choose the method that best matches your printing environment and needs.
We recommend using PDQ with the XPDQ front-end for novice Linux users
as well as for any users who want to break from traditional Linux printing
techniques.
"#
The instructions contained in this document were verified on
RedHat 6.2 OS. Instructions may vary on different Operating Systems.
Common Printing Methods
PDQ
"#
KONICA MINOLTA printers that support printing from Linux are
shipped with the required PPDs (for use with CUPS) and PDQ drivers.
PDQ is a non-daemon-centric print system, which has a built-in and sensible
driver configuration syntax. PDQ works similarly to and takes the place of
LPD. To print, the pdq command is used instead of lpr. PDQ also includes a
file called printrc that contains all the needed information for each printer.
A printer is defined in PDQ as the combination of a "driver" and an "interface."
A PDQ interface describes how to send data to a printer. The most common
interfaces, which are defined in the PDQ distribution example printrc file, are
! Local-port-—The common parallel or serial port. This interface has a
device name such as /dev/lp0.
! Bsd-lpd—A bsd-lpd interface transmits over the network to an LPD
daemon or LPD-compatible network printer. It supports job
submissions, cancellations, and queries to LPD interfaces. The
bsd-lpd interface also has hostname and queuename arguments.
! AppleTalk—The AppleTalk interface allows you to print over an
AppleTalk network. Use this method if you have a printer connected to
your Macintosh computer.
"#
74
This interface requires that you have the Netatalk package
installed.
Printing from Linux
EDNord - Istedgade 37A - 9000 Aalborg - telefon 96333500
A PDQ driver contains all the printer options such as paper trays and media
types, as well as a system for translating print data into a format that your
printer can understand.
"#
If a driver is not available for your printer, an existing driver may be
modified. See the PDQ documentation for creating/modifying drivers.
XPDQ
XPDQ is a Graphical User Interface (GUI) for PDQ that displays a list of
available printers and a summary of the print queue. From this dialog all
printer options defined in the PDQ driver may be set.
CUPS
"#
KONICA MINOLTA printers that support printing from Linux are
shipped with the required PPDs (for use with CUPS) and PDQ drivers.
CUPS allows Linux users to manage print jobs and queues with the Internet
Printing Protocol (IPP). The Line Printer Daemon (LPD), Server Message
Block (SMB), and AppSocket (a.k.a. JetDirect) protocols are supported with
reduced functionality. CUPS adds network printer browsing and PostScript
Printer Description (PPD)-based options that support printing under Linux.
CUPS, with the use of PPD files, allows you to take advantage of the built-in
printer features such as duplex and multiple media trays, and to set the
default media size and type, all from the CUPS web-based GUI. However, a
problem may arise when printing from applications that allow you to choose
printer options because the application options override the CUPS options.
For example, if you choose a different paper size in the Netscape print dialog
than the one chosen in the CUPS options, then the Netscape choice would
override the CUPS choice and be used. To avoid this problem, confirm that
the application settings match the CUPS settings.
There are known margin alignment problems when printing duplex from Linux
using CUPS with Windows NT PPDs.
XPP
XPP is a GUI for the CUPS printing system. The X Printing Panel (XPP) is a
free tool (under the GNU General Public License - GPL) that allows you to
select from a list of available printers and to set printer options. One simply
uses the program (xpp) instead of the usual utilities (lpr or lp) at the command
line or from applications.
Common Printing Methods
EDNord - Istedgade 37A - 9000 Aalborg - telefon 96333500
75
Advantages and Features
! Manages printers more easily than the CUPS web-based system.
! Allows you to see and choose from printers available on the network.
! Can be started at the command line or from applications. The name of
the file to print can be chosen by a built-in file browser or be given as a
command line argument. Standard input can also be printed.
! No need to remember and type cryptic command line arguments to
access printer features. Feature options are easily chosen from a dialog window.
! Allows you to use advanced features of most PostScript printers such
as duplex units and additional media trays, without using proprietary
software.
! Preprocessing options for your documents such as choosing the
pages to print, setting brightness and gamma correction, and appearance of text or image printouts.
! Compatible with many of the command line tools of CUPS. It accepts
the command line options of lpr and most command line options of lp.
Installation Steps
The following steps are for quick reference only. For more detailed
instructions, see the documentation provided with each application.
Installing PDQ
1
2
3
4
5
6
7
8
Download the source distribution from http://pdq.sourceforge.net/.
Gzip the file.
Untar the file.
As root, go to the pdq directory formed from untarring the file.
Type ./configure, and then press Enter.
Type make, and then press Enter.
Type make install, and then press Enter.
Type cp/etc/pdq/printrc.example /etc/pdq/printrc, and then press Enter.
Adding A Printer
See the steps described in "Adding A Printer" in the XPDQ section.
76
Installation Steps
EDNord - Istedgade 37A - 9000 Aalborg - telefon 96333500
Installing XPDQ
XPDQ is automatically installed with PDQ.
Adding A Printer
1
2
3
4
5
6
Copy the printer driver to the directory /etc/pdq/drivers.
From the command line, type xpdq.
From the menu, choose printer, and then choose Add Printer.
The wizard starts.
Enter a printer name.
This can be any name you want.
Select the printer driver for your printer from the list.
Enter the interface that is being used. (i.e.: /dev/lp0).
Installing CUPS (from an RPM)
1
2
3
The current lpd print system must first be uninstalled. Instructions for
uninstalling lpd are found below.
Download CUPS 1.1.1 or newer from http://www.cups.org.
Type rpm -i cups-x.x.x-linux-x.x-intel.rpm (use the name of the RPM you
have).
Uninstalling lpd
As root, from the command line, type the following:
rpm -e printtool-3.44-1
rpm -e rhs-printfilters-1.63-1
rpm -e lpr
"#
The version numbers listed may be different than yours.
Adding A Printer
CUPS provides two methods for adding printers: a command-line program
called lpadmin and a Web interface. The lpadmin command allows you to
perform most printer administration tasks from the command-line and is
located in /usr/sbin. The Web interface is located at: http://localhost:631/
admin and steps you through printer configuration.
Installation Steps
EDNord - Istedgade 37A - 9000 Aalborg - telefon 96333500
77
Adding a Printer from the Command-Line
1
2
3
Copy the ppd file to /usr/share/cups/model.
Execute the command
/usr/sbin/lpadmin -p printername -E -v device -m filename.ppd
where printername is what you want to name the printer and device is the
printer is location (for example, parallel:/dev/lp0, or socket://11.22.33.44),
and filename.ppd is the name of the ppd file copied in step 1
To make this printer the default printer, type /usr/sbin/lpadmin -d printer
(where printer is the name of the printer from step 2).
Adding a Printer from the Web
To use the wizard from the local host you must first edit the cups.conf file.
1
vi the file /etc/cups/cups.conf and comment out the following lines in the
/admin section:
% Order deny allow
% Deny from all
% Allow from 127.0.0.1
2
3
4
5
"#
A # placed at the beginning of the line comments out the line.
Using your web browser, go to http://localhost:631/admin (where localhost
is the name of the computer with CUPS installed).
Enter root and root password in the dialog box.
Select Add Printer.
Follow the on-screen instructions and complete the setup.
Installing XPP
The easiest way to install xpp is by compiling the source distribution yourself.
1
2
3
4
5
78
Cups 1.1.1 or newer must be installed and working. See “Installing CUPS
(from an RPM)” on page 77.
Download source code for XPP 1.0 and FLTK 1.0.10 from
http://cups.sourceforge.net/xpp/.
"#
The following steps must be done as root.
Go to the FLTK 1.0.10 directory.
Type ./configure, and then press Enter.
Type make, and then press Enter.
Installation Steps
EDNord - Istedgade 37A - 9000 Aalborg - telefon 96333500
6
7
8
9
10
Type make install, and then press Enter.
Go to XPP 1.0 directory.
Type ./configure, and then press Enter.
Type make, and then press Enter.
Type make install, and then press Enter.
This automatically copies the xpp executable into the
/usr/local/bin directory.
Adding a Printer
A printer cannot be added through XPP. XPP lists printers installed from
CUPS.
Printing from Applications
The following steps are for quick reference only. For more detailed
instructions, see the documentation provided with each application.
StarOffice
StarOffice uses PPD files in combination with the installed printing system.
The following is a list of steps showing how to add and configure printers
using PDQ and CUPS.
Adding a Printer
1
Start StarOffice and select Printer Setup.
2
Select Install New Driver.
Printing from Applications
EDNord - Istedgade 37A - 9000 Aalborg - telefon 96333500
79
3
4
5
6
Browse or enter the
directory that contains
the PPD files for your
printer.
Select the printer to
install, and then
select OK.
Select desired printer
from the list, and then
select Add New
Printer.
To make your selection
the default printer,
select Default Printer.
Using XPDQ
1
80
7 7300
KONICA MINOLTA magicolor
KONICA MINOLTA magicolor 2200
KONICA MINOLTA magicolor 7300
7
With your printer
already added, select
the printer from the list
and select Connect.
Printing from Applications
EDNord - Istedgade 37A - 9000 Aalborg - telefon 96333500
2
In the text box, replace lpr with xpdq, and then select OK.
7 queue default_queue (lpr)
KONICA MINOLTA magicolor 7300
7 7300
KONICA MINOLTA magicolor
Using XPP
1
2
With your printer already added, select the desired printer from the list
and select Connect.
In the text box, replace lpr with xpp, and then select OK.
Netscape
When Print is selected, Netscape opens a print dialog box. From this dialog
box different print commands may be entered. The following is a listing of the
commands for the different options.
Printing from Applications
EDNord - Istedgade 37A - 9000 Aalborg - telefon 96333500
81
XPP: Enter xpp in the box to use the xpp/cups GUI option.
XPDQ: Enter xpdq in the box to use the pdq/xpdq GUI option.
"#
Netscape remembers the last option entered so you don’t have to
reenter the command each time you print.
Corel WordPerfect
WordPerfect offers two ways of setting up a printer: personal or system. A
personal printer only displays for the person who installed it and can only be
82
Printing from Applications
EDNord - Istedgade 37A - 9000 Aalborg - telefon 96333500
modified by that user. A system printer can be accessed by all users but may
be modified only by “root”.
The steps for setting up a personal or system printer are the same with the
exception that for a system printer you must login as “root” and start
WordPerfect with the -adm option.
Corel WordPerfect 7 or 8 GUI
1
2
3
Select Print.
Select Select.
Select Printer
Create/Edit.
Printing from Applications
EDNord - Istedgade 37A - 9000 Aalborg - telefon 96333500
83
4
5
Select Add.
Scroll through the list and choose the desired printer. A PostScript printer
driver must be chosen to work with CUPS or the drivers provided for PDQ.
"#
6
7
8
If your printer is not listed go to ftp://ftp.corel.com/pub/printdrivers
for a list of printer drivers.
Select OK twice.
With the desired
printer highlighted,
select Setup.
KONICA MINOLTA magicolor 7300
Select Destination.
KONICA MINOLTA magicolor 7300 Print System (SF)
84
Printing from Applications
EDNord - Istedgade 37A - 9000 Aalborg - telefon 96333500
9
10
Add any
spooler
options.
Select OK.
Printing from Applications
EDNord - Istedgade 37A - 9000 Aalborg - telefon 96333500
85
EDNord - Istedgade 37A - 9000 Aalborg - telefon 96333500
Connecting to
NetWare 5.x/6.x
2.8
EDNord - Istedgade 37A - 9000 Aalborg - telefon 96333500
NetWare 5.x/6.x Setup
This chapter describes the steps necessary to configure NetWare 5.x/6.x and
your printer to print jobs routed through a print server.
Setup Overview
Using NWAdmin (NetWare 5.x/6.x)
1
2
3
4
88
Insert the Software Utilities CD-ROM in your PC’s CD-ROM drive.
If the CD-ROM does not automatically open, double-click the
KONICA MINOLTA CD-ROM icon on your Macintosh desktop.
Choose the Next
button and then choose Printer Setup.
Choose the Network connection type.
Choose NetWare or Compatible Network. Press Next and follow the
instructions on the screen.
NetWare 5.x/6.x Setup
EDNord - Istedgade 37A - 9000 Aalborg - telefon 96333500
Printer Interface Setup
The following instructions describe how to configure your printer’s interface
for NDS PServer mode through the printer control panel and through
PageScope Net Care.
Configuring the Print Server Context Using
PageScope Light
In the Configuration page in the web-based utility, enter values for the
following parameters.
Item
Description
NetWare Configuration
NetWare Print
Enables or disables the NetWare Print option.
Choices: Enable
Disable
Default:
Enable
Printer Interface Setup
EDNord - Istedgade 37A - 9000 Aalborg - telefon 96333500
89
Item
Description
Frame Type
Identifies the IdentifiesIdentifies frame type.
Choices: Auto
Ethernet 2
802.2
802.3
SNAP
Default: Auto
Bindery/NDS
Identifies the bindery options.
Choices:
Default:
Print Server Name
Print Server
Password
Bindery
NDS
Both
NDS
Identifies the Print Server Name for the printer.
Range:
Up to 63 characters
Default:
Blank
Identifies the Print Server Name for the printer.
Range:
Up to 63 characters
Default:
Blank
Preferred File
Server
Identifiess the Preferred File Server for the printer.
Preferred NDS
Context
Identifies the Preferred NDS Context for the printer.
Range:
Up to 63 characters
Default:
Blank
Range:
Up to 191 characters
Default:
Blank
Preferred NDS Tree Identifies the Preferred NDS Tree for the printer.
Range:
Up to 63 characters
Default: Blank
Queue Scan Interval Identifies the number of the queue scan interval.
90
Range:
1–65535
Default:
1
Printer Interface Setup
EDNord - Istedgade 37A - 9000 Aalborg - telefon 96333500
Item
Description
Mode
Identifies the NetWare Configuration mode.
Choices:
PServer
NPrinter/RPrinter
Default:
PServer
Configuring the Print Server Context Using
PageScope Net Care
1
2
3
4
5
From the Device Management Screen, double-click on All Devices View
and then double-click on your printer in the printer list.
Choose the NetWare tab.
Select Enable NetWare and set the Frame Type as Auto for
Autodiscovery or Ethernet to set your frame type.
Enter the Print Mode.
Select PServer Mode or NPrinter Mode.
Printer Interface Setup
EDNord - Istedgade 37A - 9000 Aalborg - telefon 96333500
91
PServer Mode
1
2
92
Select the Set button.
Enter the required data
for the PServer.
Print Server
Name
If the print server is associated to the NDS tree,
also enter the Preferred NDS Tree Name.
If the print server is associated to a file server, also
enter the Preferred NDS Server Name.
Print Server
Password
If you want to use a password, enter it here, but
make sure it matches the NWAdmin File Server
password
Print Server
Mode
Allows you to select NDS, Bindery, or both
Preferred File
Server
Allows you to identify the name of the configuration
file server
Preferred NDS
Tree
Allows you to enter the NDS Tree Name associated
with the print server
Printer Interface Setup
EDNord - Istedgade 37A - 9000 Aalborg - telefon 96333500
3
4
Preferred NDS
Context
Allows you to set the Context. The Print Server
Context must match the one assigned in NetWare
setup.
Print Server
Polling Rate
Allows you to set the rate at which the print server
looks for print jobs
Click Apply.
Turn the printer off and then on again.
NPrinter Mode
1
2
3
4
Select the Set button.
Enter the
required data for
NPrinter.
Print Server
Name
If the print server is associated to the NDS tree,
also enter the Preferred NDS Tree Name.
If the print server is associated to a file server, also
enter the Preferred NDS Server Name.
Printer
Number
Allows you to check or change the printer number.
Make sure you use the same number here that you
set in NWAdmin.
Click Apply.
Turn the printer off and then on again.
Printer Interface Setup
EDNord - Istedgade 37A - 9000 Aalborg - telefon 96333500
93
EDNord - Istedgade 37A - 9000 Aalborg - telefon 96333500
Section 3
Printer Management Tools
In this Section...
! Chapter 3.1 — “Using Printer Utilities”
An introduction to the printer management
tools available for your printer.
! Chapter 3.2 — “KONICA MINOLTA Crown Print Monitor +”
Installation instructions for manually installing
the Crown Print Monitor utility.
! Chapter 3.3 — “KONICA MINOLTA Status Monitor”
Installation and user instructions for the Status
Monitor utility.
! Chapter 3.4 — “Download Manager”
Installation and user instructions for the
Download Manager utility.
! Chapter 3.5 — “KONICA MINOLTA PageScope Net Care”
Installation instructions for the PageScope Net
Care printer mana gement utility.
! Chapter 3.6 — “NDPS Gateways”
Installation and configuration information for
the NDPS printer utility.
EDNord - Istedgade 37A - 9000 Aalborg - telefon 96333500
Chapter Location
Chapter
Title
Begins on
page...
3.1
“Using Printer Utilities”
97
3.2
“KONICA MINOLTA Crown Print
Monitor +”
101
3.3
“KONICA MINOLTA Status Monitor”
107
3.4
“Download Manager”
121
3.5
“KONICA MINOLTA PageScope
Net Care”
129
3.6
“NDPS Gateways”
141
EDNord - Istedgade 37A - 9000 Aalborg - telefon 96333500
Using Printer
Utilities
3.1
EDNord - Istedgade 37A - 9000 Aalborg - telefon 96333500
What’s Available
Your magicolor 7300 comes with a variety of applications that are designed to
make the printer easier to use and manage. PageScope Light, a powerful
web-based tool that lets you configure all your printer settings from your
workstation via TCP/IP, is built into the printer. Five more utilities are available
on the Software Utilities CD-ROM that came with the printer. You can also
download many of these same utilities, as well as updated drivers and PPDs,
from our website at www.konicaminolta.net/printer/.
The following table presents an overview of these utilities.
98
Begins on
page...
Name
Description
Crown Print
Monitor+ for
Windows
Crown Print Monitor+ for Microsoft
Windows XP/2000/Me/98/95/NT4—
Transports print jobs to your printer over
TCP/IP protocol and displays status
information to the host via Print Manager.
Online help is available after installation.
101
Download
Manager
Download fonts, overlays, and color
profiles from your PC (Windows-only) to
your printer using this convenient tool. Can
be launched from the Start menu or from
the KONICA MINOLTA PostScript driver.
121
NDPS
Gateways
Contains two server-based Novell
Distributed Print System (NDPS) Gateway
installers and support files. Online help is
available after installation.
141
PageScope
Net Care
A cross-platform utility providing access to
printer management functions including
status monitoring and network/printer
parameter settings. Online help is
available after installation.
129
PageScope
Network
Setup Utility
This utility provides basic configuration
functions for network printers using
TCP/IP and IPX protocols. Online help is
available after installation.
See the
PageScope
Network
Setup User
Manual on the
Software
Utilities
CD-ROM.
What’s Available
EDNord - Istedgade 37A - 9000 Aalborg - telefon 96333500
Name
Description
PageScope
Light
Using your printer’s built-in web pages and
your Internet web browser, PageScope
Light gives you access to all of your printer
settings via TCP/IP Ethernet connections.
Begins on
page...
197
"# PageScope Light is built into your
printer and is not on the Software
Utilities CD-ROM.
Status
Monitor for
Windows
Printer Status Monitoring, Printer Polling,
Task Bar Alerts, Email Notification,
Consumable Supply Alerts, Recovery
Instructions, Recovery Video Help,
and Direct links via Internet to
KONICA MINOLTA approved printer
supplies, accessories, and support.
107
Installing Utilities from the CD-ROM
The Software Utilities CD-ROM has an automatic
installer program. Simply insert the CD-ROM and
follow the on-screen instructions for installation of most
utilities.
The Installer application automatically runs on most
PCs. If your PC configuration prevents the Installer
from auto-running, browse to the CD and double-click
on the setup.exe file in the root directory to start the Installer application.
After installation is complete, remove the Software Utilities CD-ROM and
store it in a safe place.
"#
Efforts to enhance the features and performance of your
KONICA MINOLTA printer utilities don’t stop when you purchase our
product.
We make every effort to bring you the very best, and as a result,
occasionally update the printer utility software. For the latest printer
utilities, check your printer’s Support page on our website at
www.konicaminolta.net/printer/.
What’s Available
EDNord - Istedgade 37A - 9000 Aalborg - telefon 96333500
99
Downloading Printer Utilities from the
Internet
Our Internet website (www.konicaminolta.net/printer/)
contains the latest versions of our printer utilities. To
download a printer utility, follow the instructions below.
1
Using your Internet Browser, go to the Support page for
your printer and choose the platform and utility from the
Drivers, PPDs and Utilities listing.
2
3
4
Select Save this program
to disk when prompted.
Save the download file to a
new directory on your PC.
After the download is
complete, use Windows
Explorer to open the new
directory created in step 2
above.
Double-click on the .exe
file that was downloaded.
The .exe is a
self-extracting WinZip file that allows you to uncompress the installation
files. Select Browse, then locate and choose the new directory created in
step 2. Select OK, and then select Unzip.
5
6
100
After the files are unzipped, close the WinZip Self-Extractor.
See the remaining chapters in this section for additional
information on manually installing your printer’s utilities.
What’s Available
EDNord - Istedgade 37A - 9000 Aalborg - telefon 96333500
KONICA MINOLTA
Crown Print
Monitor +
3.2
EDNord - Istedgade 37A - 9000 Aalborg - telefon 96333500
Installing the KONICA MINOLTA Crown
Print Monitor+
The KONICA MINOLTA Crown Print Monitor+ is on the Software Utilities
CD-ROM that comes with your printer and is also available from our Internet
website (www.konicaminolta.net/printer/).
1
Select the Manual radio button from the Add Crown Port dialog box.
"#
2
Auto Discovery
and Search for
Printers is not
supported for
magicolor 7300
printers.
Type the logical name for
the port in the Port Name
text box.
This is a descriptive
identifier of the port. Each
port name must be
unique. The maximum
port name is up to 128 characters. This name displays in the Print to: list
box of the Printer Properties dialog box in Print Manager.
If the port name already exists, the following message displays:
You must choose another Port Name.
"#
102
On initial access to the Add Port dialog box, whatever you type in
the Port Name text box is automatically copied to the IP Address
text box. The port name and IP address can be the same or they
can be different. However, if they are different, then first click the
cursor in the IP Address text box and type it. Then click the cursor
in the Port Name text box and type it.
Installing the KONICA
MINOLTA Crown Print
EDNord - Istedgade 37A - 9000 Aalborg - telefon 96333500
Monitor+
3
Type the Internet Protocol Address for the port.
This address is either the unique host name or the dot notation identifier
(IP address) of your printer.
? ?
What’s a Host Name?
What’s Dot Notation?
A symbolic name (a
convenient way for people
to refer to a host) that
identifies network devices
on your computer. This
name must exist in your
Network Host Name file
and must be unique.
A unique set of four
numbers (triplets),
separated by periods,
which identifies a 32-bit
device address on the
Internet. For example,
191.45.105.227 (note that
leading zeroes are not
used).
If an invalid or previously used IP address (host name or dot notation
identifier) is given, the following message displays:
If you receive this message, you must do one of the following:
a Select No and type another valid IP address (this is what we
recommend).
b Select Yes and add this address in the Network Host Name file on
your computer before you send any print jobs to the port. If a print job
is sent to the port before the address is entered in the Network Host
Name file, the job does not print.
4
5
c Select Cancel to abort adding the port and to exit from the Add Port
dialog box.
Select the Advanced button.
The Configure Crown Printer dialog box appears. Follow the configuration
instructions in “Configure the Port” on page 104.
Select OK.
The Configure Crown Port dialog box closes.
Installing the KONICA
MINOLTA Crown Print
EDNord - Istedgade 37A - 9000 Aalborg - telefon 96333500
Monitor+
103
Configure the Port
1
Configure the
Timers.
Name
Default Setting
Function
Status
Update
Interval
5 Seconds
Determines how often the Crown
Print Monitor+ updates Print Manager
with status information on the printer
attached to the port.
Status
Request
Timeout
10 Seconds
Sets the amount of time the Crown
Print Monitor+ waits for a response
from the printer before notifying the
Print Manager that the printer is not
responding.
Send
Request
Timeout
60 Minutes
Sets the amount of time the Crown
Print Monitor+ waits for a print job to
be sent before it returns control to the
Microsoft Print Spooler.
"# If this timer expires and the job
was sent via a Windows
Me/98/95 Server, the print job
is automatically terminated and
cleared from the system.
"# If this timer expires and the job
was sent via a workstation, the
Windows Me/98/95 Print
Spooler dialog box displays,
asking for a retry or cancel
response. Regardless of your
response, the job is terminated
and cleared from the system.
104
Installing the KONICA
MINOLTA Crown Print
EDNord - Istedgade 37A - 9000 Aalborg - telefon 96333500
Monitor+
2
3
4
Select the Port Settings option and select port 9100.
Select OK and close the dialog box.
Restart your computer when prompted.
"#
5
If you are updating an existing monitor, turn your system off and on
again when prompted.
If you haven’t already done so, install the printer driver for your printer.
Adding a Crown Port after Crown Print
Monitor+ Installation
During Crown Print Monitor+ installation, the Add Crown Port dialog box is
automatically opened for you so you can add a Crown port to your PC’s
configuration. You can use the following instructions to add a new Crown port
at any time following the Crown Print Monitor+ installation.
"#
The following assumes that Crown Print Monitor+ has already been
installed on your PC.
Windows XP/2000/NT4
1
2
3
4
5
6
7
8
9
From the Start menu, choose Settings.
Choose Printers.
In Printers window click the right mouse button.
In the Properties dialog box select the Ports tab.
Select the Add Port button.
Select the Printer Ports button.
Choose Crown Port from the list then select OK.
The Add Port window appears. Follow the instructions on the screen.
Select OK.
Choose Close in Printer Ports dialog box, then choose OK in Print
Server Properties to close the Printers window.
Windows Me/98/95
1
2
3
From the Start menu, choose Settings, and then Printers.
In the Printers window, click the right mouse button on an existing printer
to display the printer’s menu.
Choose Properties to display the Properties dialog box.
Adding a Crown Port after
Crown Print Monitor+
Installation EDNord - Istedgade 37A - 9000 Aalborg - telefon 96333500
105
4
5
6
7
8
106
Choose the Details tab, and then select Add Port.
Select Other.
Select Crown Port from the list, and then select OK.
The Add Port window appears. Follow the instructions on the screen.
Select OK.
Select Close in Printer Ports dialog box, then select OK in Print Server
Properties to close the Printers window.
Adding a Crown Port after
Crown Print Monitor+
EDNord - Istedgade 37A - 9000 Aalborg - telefon 96333500 Installation
KONICA MINOLTA
Status Monitor
3.3
EDNord - Istedgade 37A - 9000 Aalborg - telefon 96333500
Overview
The KONICA MINOLTA Status Monitor gives you a real-time link to your
printer status and can help you resolve most typical printer problems.
Features
! Printer Status Monitoring
! Printer Polling
! Task Bar Alerts
! Email Notification
! Consumable Supply Alerts
! Recovery Instructions
! Recovery Video Help
! Direct links (Internet access required) to KONICA MINOLTA approved
printer supplies, accessories, and support.
Requirements
! PC using Windows XP/2000/Me/98 or 95 Operating System
! magicolor 7300 connected via Ethernet (TCP/IP)
! KONICA MINOLTA PostScript Driver for Windows (installed)
"#
If you choose the Compact Installation option when installing the
KONICA MINOLTA Status Monitor you will also need the Software
Utilities CD-ROM (shipped with your printer) to view Recovery Video
Help when using the KONICA MINOLTA Status Monitor. The videos
on this CD-ROM are not copied to your PC unless the Complete
Installation option is chosen during installation.
KONICA MINOLTA PostScript Drivers are available from the Software
Utilities CD-ROM and from the Internet at www.konicaminolta.net/
printer/.
108
Overview
EDNord - Istedgade 37A - 9000 Aalborg - telefon 96333500
Installing from the CD-ROM
The Software Utilities CD-ROM has an automatic installer
program.
The Installer application automatically runs on most PCs.
If your PC configuration prevents the Installer from
auto-running, browse to the CD and double-click on the
setup.exe file in the root directory to start the Installer
application.
1
2
3
4
Select the language, select OK.
After reviewing and accepting
the license agreement, select
Next.
Select Next from the
Introduction dialog.
From the Main Menu dialog,
select Additional Software.
Installing from the CD-ROM
EDNord - Istedgade 37A - 9000 Aalborg - telefon 96333500
109
5
6
7
8
9
10
110
Choose the installation
directory (or use the
default directory setting).
Select Next.
Choose (check) KONICA
MINOLTA Printer
Management Utilities and
select Custom from the
Setup Type list.
Select Next.
From the Printer
Management Utilities
dialog, select (check)
KONICA MINOLTA
Status Monitor. Make
sure all other options are
not checked, and then select Next.
Select Next again.
Installing from the CD-ROM
EDNord - Istedgade 37A - 9000 Aalborg - telefon 96333500
11
12
Follow the onscreen
instructions until the Setup
Options of the
KONICA MINOLTA Status
Monitor installer appear.
When the
KONICA MINOLTA
Status Monitor installation is
complete, remove the
Software Utilities CD-ROM
from your CD-ROM drive
and store it in a safe place.
Using the KONICA MINOLTA Status Monitor
When a monitored printer issues an alert status, several things may occur
within the application depending on how the application options are
configured. Use the following procedure to detect and recover the printer
status conditions.
Starting the KONICA MINOLTA Status Monitor
To begin monitoring printer status messages, start the KONICA MINOLTA
Status Monitor program by selecting Programs/Status Monitor from the Start
menu.
The application icon
displays in the Windows task bar to indicate that
the KONICA MINOLTA Status Monitor is running.
Opening the KONICA MINOLTA Status Monitor
There is method of opening the KONICA MINOLTA Status Monitor program
windows:
! From the Windows task bar, double-click on the application’s icon.
Using the KONICA MINOLTA
Status Monitor
EDNord - Istedgade 37A - 9000 Aalborg - telefon 96333500
111
Status Tab
When the
KONICA MINOLTA
Status Monitor is
opened the Status tab
displays. From this tab
you can review the
current
status of the printer,
view recovery video
and instructions,
activate the link to an
Internet site for ordering
printer supplies, and
open the Advanced
Options dialog.
Item
Description
LCD display area
The upper portion of the tab is reserved for
displaying messages that appear on the printer’s
control panel.
Recovery video help
Recovery videos are displayed in this area.
Recovery videos illustrate many of the procedures
that must be performed to return the printer to a
ready status.
"# Because of the nature of some printer errors
and warnings, not all status messages have
a corresponding video file. If no video file
exists for the present status of the printer, the
KONICA MINOLTA logo is displayed.
Recovery Instructions This area displays the instructions that help guide
you through procedures for eliminating problems
and returning the printer to a ready status.
112
Advanced Options
button
This button opens the Advanced Options dialog,
which allows you to configure additional application
options.
Order Supplies
button
This button, configurable through the Advanced
Options dialog, opens the designated URL for
ordering printer supplies.
Using the KONICA MINOLTA
Status Monitor
EDNord - Istedgade 37A - 9000 Aalborg - telefon 96333500
Item
Description
Close button
Closes the KONICA MINOLTA Status Monitor window.
"# This button does not turn off the monitoring
element of the application which continues to
run in the background.
To stop monitoring, right-click on the
application icon in the Windows task bar and
choose Exit.
Help button
Opens the KONICA MINOLTA Status Monitor
online help file.
Advanced Options Dialog
The Advanced Options
dialog allows you to
configure how the
KONICA MINOLTA
Status Monitor
responds to printer
errors and warnings,
and to configure
additional options.
Item
Description
Automatically run
KONICA MINOLTA
Status Monitor at
Startup
Enabling (checking) this check box configures the
application to begin monitoring printer status as
soon as the PC is turned on.
Enable video aided
help
Enabling (checking) this check box allows recovery
videos to be displayed from the Status tab.
Using the KONICA MINOLTA
Status Monitor
EDNord - Istedgade 37A - 9000 Aalborg - telefon 96333500
113
Item
Description
Blink icon for errors/
warnings
Enabling (checking) this check box configures the
application to make the KONICA MINOLTA Status
Monitor icon blink whenever a status message is
received.
Enable polling
(monitor all installed
printers)
Checking this box causes the application to monitor
and respond to messages received from all
printers. When this option is not checked, the
application responds only to the messages from
the printer configured as the default printer.
Default printer
This drop-down list box is configurable when
Polling is enabled and allows you to specify which
printer is to be treated as the default printer. When
the KONICA MINOLTA Status Monitor window is
opened, the status area at the top of the Status tab
displays the status of the default printer.
"# If the default printer is not a supported
printer, the application uses the first printer it
finds in the list that is supported as the
default printer.
114
Notify when supplies
read
This box is configurable from 0%–100%.
Notify by email for
errors/warnings
Enabling (checking) this check box activates the
email notification feature and the email Settings
button to allow you to configure the email settings
for automatic messages. When email is enabled,
status messages from the monitored printer
automatically send an email message to the
designated recipient. See the Email Setting Dialog
for more information.
Email settings button
Opens the Email Settings dialog, which allows you
to configure the email account and sending
options.
Order supplies from
This field allows you to specify the URL that is
opened whenever the Order Supplies button on the
Status tab is clicked. The default value is the URL
for the Q-SHOP website (www.q-shop.com), which
offers online shopping for approved KONICA
MINOLTA printer supplies.
OK button
Saves any changes to the configuration and closes
the Advanced Options dialog.
Using the KONICA MINOLTA
Status Monitor
EDNord - Istedgade 37A - 9000 Aalborg - telefon 96333500
Item
Description
Cancel button
Ignores any changes to the configuration of this
dialog and closes the Advanced Options dialog.
Defaults button
Restores the configuration settings to the default
values. (Default values are the values that are set
when the application is first installed on the PC).
E-Mail Settings Dialog
The E-Mail Settings
dialog box (found on
the Advanced Options
Dialog) allows you to
configure the email
settings to be used
whenever the Notify
by email for errors/
warnings option is
enabled on the
Advanced Options
dialog.
Item
Description
SMTP Mail Server
Address
This field is provided for you to identify the IP
address of your SMTP Mail Server.
Sender’s Address
This field allows you to enter an email address that
appears as the source of the automatically
generated email message. If several workstations
are assigned to monitor different printers in your
organization, you can use this field to help identify
the physical location of the originating message.
To
This field identifies who receives the automatically
generated message when a status message is
received by the KONICA MINOLTA Status Monitor.
CC
This field allows you to send the automatically
generated message to additional email recipients.
This option can be helpful if the To recipient is out of
the office or unable to receive email.
Using the KONICA MINOLTA
Status Monitor
EDNord - Istedgade 37A - 9000 Aalborg - telefon 96333500
115
Item
Description
Wait time before email These option settings allow you to designate a delay
notification
period between a status alert and generation of an
email about the alert. This setting can help minimize
the number of email messages that are generated
by allowing time for printer operators to address
common alerts such as media out or toner low messages. Select from any of the available options.
Send mail on
Determines which type of status messages will
cause the application to generate and send an email
message. There are three types of status messages
recognized by the KONICA MINOLTA Status
Monitor:
Warnings—indicate a warning condition such as
“Toner Low.” No immediate user intervention is
required.
Errors—indicate that user intervention is required
before the printer can continue printing. For
example, “Toner out.”
Fatal Errors—indicate that the printer has
experienced an error that prevents it from printing.
Fatal Errors usually indicate that the printer requires
service.
OK button
Saves any configuration changes and closes the
E-Mail Settings dialog.
Cancel button
Ignores any changes made to the configuration of
this dialog and closes the E-Mail Settings dialog.
Consumables Tab
The consumables tab displays the status of consumables of the default
printer. It also allows you to specify the level of remaining consumables life
that will cause the application to send an email notification message.
"#
116
The Notify by email for errors/warnings option on the Advanced
Options dialog must be enabled to allow automatic email message
generation by the application.
Item
Description
Consumable Item
The consumables tab displays status information
about toner, print unit, and waste toner. For
consumables usage, refer to “Replacing
Consumables” in the User’s Guide.
Using the KONICA MINOLTA
Status Monitor
EDNord - Istedgade 37A - 9000 Aalborg - telefon 96333500
Item
Description
Status bar
The status bar for each listed consumables item
displays the percentage of consumables life
remaining. For toner and the print unit, when the bar
is green and fills the entire space of the field, the
toner is full or the print unit has a full life available.
When the amount reaches the threshold level set in
the “Notify” option, the display turns red. There is no
status bar for the waste toner box.
Notify when supplies
reach
This text box contains the trigger percentage value
that causes the application to send a status
message email. When a consumables item equals
the value in this field, the automatic email message
feature is activated and a message is sent to the
individual(s) configured as recipient(s).
Order Supplies button This button, configurable through the Advanced
Options dialog, opens the designated URL for ordering printer supplies.
Refresh button
When selected, this button causes the application to
retrieve the latest status condition of the printer’s
consumables items and then updates the status bars
on this tab to display the current conditions.
Close button
Closes the KONICA MINOLTA Status Monitor
window.
Help button
Opens the KONICA MINOLTA Status Monitor online
help file.
Recognizing a Printer Alert
When the printer issues an alert, one or more of the following notification
actions occur:
The application icon in the Windows Task Bar changes colors. The
application icon changes colors to indicate what type of alert the printer has
issued. This effect occurs regardless of optional configuration settings.
Task Bar
Indicates
Icon Color
Green indicates that the printer is operating normally.
Yellow indicates that a WARNING condition exists. No
immediate user intervention is required. Warnings indicate a
condition, such as “Toner Low.”
Using the KONICA MINOLTA
Status Monitor
EDNord - Istedgade 37A - 9000 Aalborg - telefon 96333500
117
Task Bar
Indicates
Icon Color
Red indicates a fatal stop that must be addressed, such as
“K Toner Out.”
! The application icon begins blinking. This effect is optional and is
configured by the Blink Icon for Errors/Warnings option on the Advanced
Options dialog.
! Email notification of the alert is automatically sent following the configured
delay time. This action is optional and is configured by the Notify by Email
for Errors/Warnings option on the Advanced Options dialog and the
options located on the Email Settings dialog.
Recovery from a Printer Alert
After you’ve received notification of an alert (see above, “Recognizing a
Printer Alert”), perform these steps to recover from the problem.
1
Double-click on the KONICA MINOLTA Status Monitor icon in the
Windows Task Bar.
The KONICA MINOLTA Status Monitor application window opens.
If not already selected, select the Status tab.
KONICA MINOLTA Status Monitor
2
3
Identify the printer that has issued an alert.
The printer identity is displayed at the top of the Status Message Area
(located near the top of the tab).
Review the status message.
The status message is displayed in the Status Message Area (located
near the top of the tab). The status message appearing on the Status tab
is identical to the message displayed on the printer control panel.
118
Using the KONICA MINOLTA
Status Monitor
EDNord - Istedgade 37A - 9000 Aalborg - telefon 96333500
4
5
6
Review the Recovery Instructions, and if present, review the Recovery
Video Help.
Recovery instructions are prepared specifically for each alert that your
printer can issue. However, due to the nature of some alerts, not all alerts
have a corresponding video available. If there is no video available or if
the Enable video aided help option is disabled (unchecked) on the
Advanced Options dialog, the KONICA MINOLTA logo is displayed.
Perform the actions described by the instructions and illustrated by the
video to clear the printer alert status.
The application icon in the Windows Task Bar changes to a green color to
indicate normal printer status.
Select the Close button at the bottom of the KONICA MINOLTA Status
Monitor window.
The KONICA MINOLTA Status Monitor application window is closed and
the application continues to run in the background.
Closing the Application
To close the KONICA MINOLTA Status Monitor application and to
halt all monitoring of printer status messages, right-click on the
KONICA MINOLTA Status Monitor icon in the Windows task bar and then
choose Exit.
Using the KONICA MINOLTA
Status Monitor
EDNord - Istedgade 37A - 9000 Aalborg - telefon 96333500
119
EDNord - Istedgade 37A - 9000 Aalborg - telefon 96333500
Download
Manager
3.4
EDNord - Istedgade 37A - 9000 Aalborg - telefon 96333500
Installing the Download Manager for
Windows
If your printer has an installed hard disk, you may want to install the
Download Manager. The Download Manager makes it easy to add ICC
(International Color Consortium) profiles, overlays, and fonts to your printer’s
hard drive. You can also use the Download Manager to install fonts to your
printer’s memory (RAM). This chapter describes how to install and use the
Download Manager application.
Requirements
! PC with Windows XP/2000/NT4/Me/98/95
! magicolor 7300 printer with a hard disk installed
! PostScript Level 3 printer driver with the port set to the target printer
"#
KONICA MINOLTA PostScript Drivers are available from the Software
Utilities CD-ROM and from the Internet at www.konicaminolta.net/
printer/.
Installing from the CD-ROM
The Software Utilities CD-ROM has an automatic
installer program.
The Installer application automatically runs on most
PCs. If your PC configuration prevents the Installer
from auto-running, browse to the CD and double-click
on the setup.exe file in the root directory to start the
Installer application.
Running the Easy setup type automatically installs the Download Manager for
you. Use the following instructions if you want to install only the Download
Manager, without installing the other items that are installed when Easy is
selected.
1
122
Select the language and select OK.
Installing the Download
Manager for Windows
EDNord - Istedgade 37A - 9000 Aalborg - telefon 96333500
2
3
4
5
Select Next from the
Introduction dialog.
From the Main Menu
dialog, select Additional
Software.
After reviewing and
accepting the license
agreement, choose the
installation directory (or
use the default directory
setting).
Select Next.
Installing the Download
Manager for Windows
EDNord - Istedgade 37A - 9000 Aalborg - telefon 96333500
123
6
7
8
9
10
Choose (check) Printer Driver
Software and select Custom
from the Setup Type list.
Select the Download Manager
Utility checkbox. Make sure all
other options are not checked
and then select Next.
Follow the onscreen
instructions to complete the
installation.
When the Information
message box appears, select
Finish.
After the installation is
complete, remove the
Software Utilities CD-ROM
from your CD-ROM drive and
store it in a safe place.
Downloading a Printer Utility from the
Internet
Our Internet website (www.konicaminolta.net/printer/)
contains the latest printer utilities. To download a printer
utility, follow the instructions below.
1Using your Internet Browser, go to the Support page for
your printer and choose the platform and utility from the
Drivers, PPDs and Utilities listing.
124
Installing the Download
Manager for Windows
EDNord - Istedgade 37A - 9000 Aalborg - telefon 96333500
2
3
4
Select Save this program
to disk when prompted.
Save the download file to a
new directory on your PC.
After the download is
complete, use Windows
Explorer to open the new
directory created in step 2.
Double-click on the
mqdl.exe file that was
downloaded.
The mqdl.exe is a
self-extracting WinZip file that allows you to uncompress the installation
files. Select Browse, then locate and choose the new directory created in
step 2 above. Select OK, and then select Unzip.
5
6
After the files are unzipped, close the WinZip Self-Extractor.
Open the directory containing the unzipped installation files and then
continue with the installation steps described in the next section,
beginning with step 2 on page 126.
Manual Installation
If you don’t want to use the Software Utilities CD-ROM auto-installer or if
you’ve downloaded a newer version of the Download Manager for
installation, use the following instructions to manually install the application.
"#
1
If you’ve downloaded the Download Manager from the Internet,
browse to the directory containing the extracted download files and
begin with step 2.
Insert the Software Utilities CD-ROM into your CD-ROM drive. If the
auto-installer opens, close it. Then using Windows Explorer, select your
Installing the Download
Manager for Windows
EDNord - Istedgade 37A - 9000 Aalborg - telefon 96333500
125
2
3
4
CD-ROM drive and browse to the folder $:\utilities\dlmanager(where $
is the letter of your CD-ROM drive).
Double-click on the
setup.exe icon. The
Setup program
automatically detects
the Windows platform,
and opens the Install
Wizard. Follow the
directions on the
screen.
When the information
message box appears, select OK.
After the installation is complete, remove the Software Utilities CD-ROM
from your CD-ROM drive and store it in a safe place.
Using the Download Manager
The Download Manager application can be opened from within the printer
driver or independently.
Opening the Download Manager from the Printer Driver—
PC
A link to the Download Manager is provided in the property windows of the
KONICA MINOLTA printer driver for the magicolor 7300.
Windows XP/2000/NT4
1
2
3
From the Start menu,
choose Settings/Printers
and locate the printer
icon.
KONICA MINOTA magicol
Right-click on the printer
icon and choose
Printing Preferences.
Choose the Overlays tab,
and then select the
Download Manager
button.
The Download Manager
application opens.
126
Installing the Download
Manager for Windows
EDNord - Istedgade 37A - 9000 Aalborg - telefon 96333500
See the Download Manager online help for information about using the
application’s controls and features.
Windows Me/98/95
1
2
3
4
5
From the Start menu,
choose Settings/
Printers and locate the
printer icon.
Right-click on the printer
icon.
Choose Properties.
Choose the Details tab,
and then select Setup.
Choose the Overlays
tab, and then select the
Download Manager
button.
The Download Manager application opens.
See the Download Manager online help for information about using the
application’s controls and features.
Installing the Download
Manager for Windows
EDNord - Istedgade 37A - 9000 Aalborg - telefon 96333500
127
EDNord - Istedgade 37A - 9000 Aalborg - telefon 96333500
KONICA MINOLTA
PageScope
Net Care
3.5
EDNord - Istedgade 37A - 9000 Aalborg - telefon 96333500
PageScope Net Care Overview
PageScope Net Care is a utility designed for administrators that want the
ability to manage all network printers from a single location. Management
tools include printer status checks, printer configuration, and job
accounting.This flexible tool can also be used to manage related equipment,
such as copiers, that are linked to the network.
PageScope Net Care is available for Windows and Linux platforms for the
server; and Windows, Macintosh, and Linux platforms for the client.
This chapter explains how to install PageScope Net Care, how to start the
server and the client, how to log in, and how to update your installed version
of PageScope Net Care. For details on how to use PageScope Net Care to
manage printers and other equipment on your network, see the PageScope
Net Care Quick Guide on the CD-ROM that came with your printer or on our
website at www.konicaminolta.net/printer/.
System Requirements
Network
Local Area Network Type
Ethernet (10/100BaseT)
Token Ring (4/16 Mbps)
Protocol
TCP/IP
Server
Operating System
Recommended Hardware
Windows XP/2000/NT4/Me/98/95
Pentium 300 with 128MB RAM
Linux (x86 kernel 2.2.12 and glibc
2.1.2-11 or higher)
Pentium 300 with 128MB RAM
130
PageScope Net Care
Overview
EDNord - Istedgade 37A - 9000 Aalborg - telefon 96333500
Client
Java Style View
Operating System
Web Browser
Java Environment
Windows
XP/2000/NT4 (SP3)/
Me/98
! Microsoft Internet
Explorer 4.x or later
Java Plug-in 1.3 or
higher
! Netscape
Communicator 4.x
or higher
! Netscape 6.x or
higher
Linux
(x86 kernel 2.2.12 and
glibc 2.1.2-11 or higher)
! Netscape 6.x or
higher
Notes: Do not downgrade from the web browser that comes installed with
your operating system.
HTML Style View
Operating System
Web Browser
Windows
XP/2000/NT4 (SP3)/
Me/98/95
! Microsoft Internet Explorer 4.x or later
Macintosh OSX/9
! Netscape 6.x or higher
Linux
(x86 kernel 2.2.12 and
glibc 2.1.2-11 or higher)
! Netscape 6.x or higher
! Netscape Communicator 4.x or higher
Notes: Windows XP (version X.1 or higher). Do not downgrade from the
web browser that comes installed with your operating system.
See the Read Me! file on the PageScope Net Care Quick Guide for
information about the Macintosh.
Installing the PageScope Net Care Server
Windows XP/2000/NT4/Me/98/95
1
2
Double-click the self-extracting file on the Software Utilities CD-ROM.
The file is also available in the Support & Drivers section of our website at
printer.konicaminolta.net/support.
Follow the instructions that appear on the screen.
Installing the PageScope Net
Care Server
EDNord - Istedgade 37A - 9000 Aalborg - telefon 96333500
131
Linux
"#
1
2
3
The server is started as a daemon process, so use root privileges to
perform the operations and install the package in the root partition.
Double-click the self-extracting file on the Software Utilities CD-ROM.
The file is also available in the Support & Drivers section of our website at
printer.konicaminolta.net/support.
Untar the archive PageScope Net Care.tar.gz. This creates a
directory called PageScope_Net_Care.
Open the PageScope_Net_Care directory and run the script
install.sh.
"#
If you use SuSE Linux, run the script install.suse.sh, which is
also located in the PageScope directory.
Starting the Server
Windows XP
1
2
Click Start/Control Panel.
Click the Administrative Tools icon.
Windows XP Professional: First click the Performance and Maintenance
icon, then the Administrative Tools icon.
3
4
5
Windows XP Home: The Administrative Tools icon is on the Control
Panel.
Double-click the Services icon.
Select KONICA MINOLTA PageScope Net Care from the list of services.
Click Start the service.
Windows 2000
1
2
3
4
5
132
Click Start/Settings/Control Panel.
Open the Administrative Tools folder.
Double-click the Services icon.
Select KONICA MINOLTA PageScope Net Care Service from the list of
services.
Click Start on the Action menu.
Starting the Server
EDNord - Istedgade 37A - 9000 Aalborg - telefon 96333500
Windows NT4
1
2
3
4
Click Start/Settings/Control Panel.
Double-click the Services icon.
Select KONICA MINOLTA PageScope Net Care Service from the list of
services.
Click Start.
Windows Me/98/95
To start the server, click Start/Programs/KONICA MINOLTA
PageScope_Net_Care/Start Server or double-click the
start_pagescope.bat file in the PageScope_Net_Care home directory.
"#
During the installation process, you can configure the server to start
automatically whenever the system boots up.
Linux
PageScope Net Care starts automatically on Linux systems once it is
installed. You can also start it manually, or shut it down momentarily and
restart it.
"#
Use root privileges to perform these operations.
To start PageScope manually, type:
#/etc/rc.d/init.d/nmu start
To stop momentarily and restart, type:
#/etc/rc.d/init.d/nmu restart
Starting the Client
1 Open a browser that includes the required Java plug-in.
2 Type the following URL:
http://SERVER_NAME:PORT_NUMBER/
In place of SERVER_NAME, type the IP address of the host that is running
the PageScope Net Care server.
"#
The default port number for PageScope Net Care is
http://server-name:9090.
Starting the Client
EDNord - Istedgade 37A - 9000 Aalborg - telefon 96333500
133
The following log-in screen appears:
Logging In
On the main Login screen, you can set your preferences for:
! Java mode
! HTML mode
134
Logging In
EDNord - Istedgade 37A - 9000 Aalborg - telefon 96333500
User Privileges
Login
Password
Privileges
Guest
Not Required
View status and settings of network
devices.
Registered User Required
Manage and change the
Administrator
configuration of assigned network
assigns name
devices.
and password to
registered users.
Administrator
Required
The default
password is
admin.
Configure device management
settings and PageScope Net Care
settings.
View Style Options
You can select from four view styles:
! Java-Metal
! Java-Motif
! Java-System
! HTML
"#
HTML is recommended for faster performance on low-end servers.
If you select Java mode but do not have the required plug-in, you are asked if
you want to install one. If you agree, the download process depends on your
web browser:
! Internet Explorer. The Java plug-in is downloaded and installed
automatically from the Internet.
! Netscape Communicator. The browser accesses a Java plug-in
download site, but you must perform the download and installation
manually.
Language
You can set the language in which PageScope Net Care text is displayed.
Choices are Czech, Danish, Dutch, English, German, French, Italian,
Japanese, and Spanish.
135
Logging In
EDNord - Istedgade 37A - 9000 Aalborg - telefon 96333500
Completing Your Login
Once you have set the user privileges, view style, and language options the
way you want them, click the Login button to select your choices and begin
using PageScope Net Care.
"#
For more information about using PageScope Net Care, see the
PageScope Net Care Quick Guide on the Documentation CD-ROM
that came with your printer.
Starting the Server Console Tool
The Server Console Tool is used to perform these operations in PageScope
Net Care:
! Change the PageScope Net Care Server (HTTP server) port
! Initialize, backup, restore, or upgrade the database
! Plug in new device modules
! Plug in new language modules
! Update PageScope Net Care
Windows
To start the Server Console Tool in any Windows platform, click Start/
Programs/KONICA MINOLTA/PageScope Net Care/Console Tool.
Linux
"#
Use root privileges to perform these operations. To use Console Tool,
the PageScope Net Care server cannot be running.
To start the Server Console Tool, type:
#/etc/rc.d/init.d/nmu console
Shutting Down the PageScope Net Care
Server
Windows XP
1
136
Click Start/Control Panel.
Starting the Server Console
Tool
EDNord - Istedgade 37A - 9000 Aalborg - telefon 96333500
2
Click the Administrative Tools icon.
Windows XP Professional: First click the Performance and Maintenance
icon, then the Administrative Tools icon.
3
4
5
Windows XP Home: The Administrative Tools icon is on the Control
Panel.
Double-click the Services icon.
Select KONICA MINOLTA PageScope Net Care.
Click Stop the service.
Windows 2000
1
2
3
4
5
Click Start/Settings/Control Panel.
Open the Administrative Tools folder.
Double-click the Services icon.
Select KONICA MINOLTA PageScope Net Care Service.
On the Action menu, select Stop.
Windows NT4
1
2
3
4
5
Click Start/Settings/Control Panel.
Double-click the Services icon.
Select KONICA MINOLTA PageScope Net Care Service.
Click the Stop button.
Click Yes on the confirmation dialog box.
Windows Me/98/95
1
2
3
Right click the PageScope Net Care icon in the task tray.
Select Exit.
Click the Shut Down button on the confirmation window.
Linux
"#
Use root privileges to perform these operations.
Shut down the PageScope server by typing.
#/etc/rc.d/init.d/nmu stop
Shutting Down the PageScope
Net Care Server
EDNord - Istedgade 37A - 9000 Aalborg - telefon 96333500
137
Upgrading PageScope Net Care
"#
If a printer on the server is upgraded, delete it from List Manager
and then let List Manager find and register it again or add it to the list
again using Add Printer. This updates the information about the
printer.
Upgrade Notes
You can upgrade from PageScope 3.6 or later, but not from earlier versions.
Upgrades work best if performed at the same time as the installation.
Upgrading after installation causes all PageScope Net Care 4.0 data to be
replaced by old PageScope data.
Shut down the PageScope Net Care server before upgrading it.
All Platforms
1
2
3
4
5
6
7
8
9
138
If you are running an old version of PageScope, shut down the server.
Specify a different directory for PageScope Net Care than the one where
the old version of PageScope is installed.
If PageScope Net Care is running, shut it down.
Start the Server Console Tool.
Click the Database tab.
Select Database Upgrade.
Click Browse and select the PageScope 3.x root directory.
Usually PageScope 3.x is stored in Program Files/PageScope.
Click Open.
Confirm the page and click OK.
The next time you start PageScope Net Care, the old PageScope Server
data is transferred to the PageScope Net Care server.
Uninstall the old version of PageScope.
Upgrading PageScope Net
Care
EDNord - Istedgade 37A - 9000 Aalborg - telefon 96333500
Uninstalling PageScope Net Care
Windows XP
1
2
3
4
5
6
Shut down the PageScope Net Care server.
Click Start/Control Panel.
Click the Add/Remove programs icon.
A dialog box appears.
On the Add/Remove Programs dialog box, select KONICA MINOLTA PageScope Net Care in the list of programs.
Click the Change/Remove button.
Follow the instructions that appear on the screen.
Windows 2000/NT4
1
2
3
4
Shut down the PageScope Net Care server.
Click Start/Settings/Control Panel.
Double-click the Add/Remove programs icon.
A dialog box appears.
On the Add/Remove Programs dialog box, select KONICA MINOLTA PageScope Net Care in the list of programs.
! Windows 2000. Click the Change/Remove button.
5
! Windows NT4. Click the Add/Remove button.
Follow the instructions that appear on the screen.
Windows Me/98/95
1
2
3
4
5
6
Shut down the PageScope Net Care server.
Click Start/Settings/Control Panel.
Double-click the Add/Remove programs icon.
A dialog box appears.
On the Add/Remove Programs dialog box, select KONICA MINOLTA PageScope Net Care in the list of programs.
Click the Add/Remove button.
Follow the instructions that appear on the screen.
Uninstalling PageScope Net
Care
EDNord - Istedgade 37A - 9000 Aalborg - telefon 96333500
139
Linux
"#
1
2
3
Use root privileges to perform these operations.
Shut down the PageScope Net Care server by typing:
#/etc/rc.d/init.d/nmu stop
Run the uninstall.sh script in the PageScope_Net_Care directory.
Delete the PageScope_Net_Care directory by typing:
# rm -rf PageScope_Net_Care
140
Uninstalling PageScope Net
Care
EDNord - Istedgade 37A - 9000 Aalborg - telefon 96333500
NDPS Gateways
3.6
EDNord - Istedgade 37A - 9000 Aalborg - telefon 96333500
NDPS Gateways
Your printer comes with two NDPS Gateways to choose from that support the
magicolor 7300 printer.
! KONICA MINOLTA PageScope NDPS Gateway—supports use with
the magicolor 7300 and KONICA MINOLTA digital copier products.
See the PageScope NDPS Gateway manual for installation and usage
instructions.
"#
The manual for PageScope NDPS Gateway can be
downloaded from http://www.pagescope.com.
! KONICA MINOLTA NDPS Gateway—supports use with the
magicolor 7300. The remainder of this chapter describes the
installation and usage instructions.
Installing KONICA MINOLTA NDPS Gateway
The KONICA MINOLTA NDPS Gateway components are designed for use
with printers supporting LPD/LPR and the Printer-MIB. Older printers, printers
that don’t use a CrownNet interface for TCP/IP connection, or printers with
variations in the interpretation of LPD/LPR may not be compatible or may not
be able to take advantage of the full functionality of our gateway components.
Refer to your printer documentation to determine if LPD/LPR support is
available for your printer.
1
2
3
4
142
If it’s not already inserted, insert the Software Utilities CD-ROM.
Using Windows Explorer, select your CD-ROM drive and browse to the
directory $:\Utilities\Gateway (where $ is the letter of your CD-ROM
drive).
Double-click the setup.exe icon.
The installation program starts.
Select Next.
NDPS Gateways
EDNord - Istedgade 37A - 9000 Aalborg - telefon 96333500
5
6
7
8
9
Verify that the path to
the system directory
is correct.
If you need to change
the path, select the
Change button to
locate and choose the
system directory.
Select Next.
Verify that the path to
the public\win32
directory is correct.
If you need to change
the path, select the
Change button to
locate and choose the
public\win32 directory.
Select Next.
Verify that the
installation information
is correct.
If you need to change
the installation, select
Back. Make your
changes before
continuing.
Installing KONICA MINOLTA
NDPS Gateway
EDNord - Istedgade 37A - 9000 Aalborg - telefon 96333500
143
10
Select Install.
The KONICA MINOLTA
Gateway and utilities
are installed.
11
12
When the installation is
complete, select
Finish.
After the installation
program closes,
remove the Software
Utilities CD-ROM and
store it in a safe place.
Configuring NDPS
The steps to configure KONICA MINOLTA NDPS components are
! Create a Broker
! Create a Manager
! Create a Printer Agent
! Setup NDPS Printers using
% Add Printer Wizard, or
% NetWare Print Manager
The following sections contain detailed instructions about these steps and
information about the printing features available through KONICA MINOLTA
NDPS components. For additional information about NDPS, refer to Novell
documentation and online help.
144
Configuring NDPS
EDNord - Istedgade 37A - 9000 Aalborg - telefon 96333500
Creating a Broker
1
2
3
4
5
Open NWAdmin and
select the container
where you want to
place the broker.
Select Object, and
then select Create.
Select NDPS Broker,
and then select OK.
Enter the name for the
NDPS Broker.
Select the button next
to the RMS Volume
text box. Choose the
volume where the
broker will reside.
Configuring NDPS
EDNord - Istedgade 37A - 9000 Aalborg - telefon 96333500
145
6
7
8
Select Create.
Check the
configuration for
access control to
make sure that the
Administrator is on
the list.
Load the Broker at the
Server console
by typing:
Load broker ".<broker name>.<context where broker
resides>"
Creating an NDPS Manager
1
2
3
146
In NWAdmin, select
the container where
you want to place the
manager.
Select Object, and
then select Create.
Select the NDPS
Manager, and then
select OK.
Configuring NDPS
EDNord - Istedgade 37A - 9000 Aalborg - telefon 96333500
4
5
6
7
8
9
10
11
Enter the name for the
NDPS Manager.
Select the button next
to the Resident Server
text box.
Select the Server
(usually in the server’s
SYS volume) where
the manager will be
created, and then
select OK.
Select the button next to the Database Volume text box.
Select the Volume
where the manager
will be created, and
then select OK.
Select Create.
Check the
configuration for
access control to make
sure that the
Administrator is
on the list.
Load the NDPS
Manager at the Server
console by typing:
Load ndpsm "<NDPS manager name>"
12
Check the Server console for the Windows Printer Agent List.
Configuring NDPS
EDNord - Istedgade 37A - 9000 Aalborg - telefon 96333500
147
Creating a Printer Agent
1
2
3
4
5
148
In NWAdmin, select
the container where
you want to place the
Printer Agent.
Select Object, and
then select Create.
Select NDPS Printer,
and then select OK.
Type in the name for
the Printer Agent’s
name.
Select Create, and
then select the
NDPS Manager.
Configuring NDPS
EDNord - Istedgade 37A - 9000 Aalborg - telefon 96333500
6
Choose KONICA MINOLTA
Gateway Configuration,
and then select OK.
KONICA MINOLTA Gateway Configuration
7
Choose the NDPS
Manager that has
access to the printer.
Look for the NPDS
Manager created in
the previous section.
KONICA MINOL
8
Select OK.
The snap-in
configuration
window appears.
KONICA MINOLTA NDPS Gateway Configuration
Use this wizard to configure the
KONICA MINOLTA NDPS gateway for a printer
you specify.
Configuring NDPS
EDNord - Istedgade 37A - 9000 Aalborg - telefon 96333500
149
9
10
11
Select Next.
Enter the IP Address
or Host Name of the
printer.
Enter the Community
Name of the printer.
"#
12
KONICA MINOLTA NDPS Gateway Configuration
The Host
Configuration
window appears
This step is
optional.
Select Next, and then
select Finish to
complete the
configuration of the
Printer Agent.
KONICA MINOLTA NDPS Gateway Configuration
A message window
displays to indicate that
the server is creating
the object on the server
and starts binding the
object with the print
system.
After the Printer Agent
is finished loading, the
Select Printer Driver
window appears.
150
Configuring NDPS
EDNord - Istedgade 37A - 9000 Aalborg - telefon 96333500
13
14
Select the drivers from
the drop-down list for
each OS (workstation).
Select Continue.
An Information
window displays.
15
Check the information
for the selected
drivers, and then
select OK.
KONICA MINOLTA magicolor 7300
To configure individual
workstations, see
Section 2 for
instructions on
installing drivers and host software, and then add NDPS printers as
described in the next section.
NDPS Printer Setup using Add Printer
1
2
3
Select Printers from the Start/Settings menu.
Select Add Printer.
Local or Network
Printer window
appears.
Select Network
printer, and then
select Next.
Locate Your Printer
window appears.
Configuring NDPS
EDNord - Istedgade 37A - 9000 Aalborg - telefon 96333500
151
4
Select Next to browse
your network.
Browse for Printer
window appears.
5
6
7
152
Double-click NDPS
Printers.
Double-click NDPS
Controlled Access
Printers.
Locate and
double-click the
printer you want
to add.
Configuring NDPS
EDNord - Istedgade 37A - 9000 Aalborg - telefon 96333500
8
When prompted to
make this the default
printer, select Yes
or No.
NDPS Printer Setup using NetWare Print Manager
1
2
3
Select NWPS32 from
the Public\Win32
directory.
Novell Printer Manager
window appears.
Choose New from the
Printer menu.
Novell Printers
window appears.
Select Add.
Configuring NDPS
EDNord - Istedgade 37A - 9000 Aalborg - telefon 96333500
153
4
5
6
Select Browse to look
for printers.
Select the printer to be
added.
Select OK.
Using KONICA MINOLTA NDPS Snap-in
Controls
The KONICA MINOLTA NDPS components have been designed to take
advantage of the configuration capabilities and information available from
KONICA MINOLTA printers.
154
Using KONICA MINOLTA
NDPS Snap-in Controls
EDNord - Istedgade 37A - 9000 Aalborg - telefon 96333500
Accessing the Controls
The Printer Control dialog automatically opens during the installation of the
KONICA MINOLTA NDPS components. Following the installation, you can
access these controls using NWAdmin.
1
2
3
4
5
Open NWAdmin, and
then double-click on an
NDPS printer.
If a Novell Printer
Control dialog appears,
complete the remaining
steps to open the
KONICA MINOLTA Printer
Control dialog. Otherwise,
see the next section for a
description of the
KONICA MINOLTA Printer
Control dialog.
From the Novell Printer
Control dialog, select
Identification.
Select MQIPCTRL.PC2
from the Printer Control
DLL Name drop-down
list.
Select OK, and then
close the Novell controls
dialog.
Repeat step 1.
The KONICA MINOLTA
Printer Control dialog
opens.
KONICA MINOLTA BUSINESS TECHNOLOGIES, INC.
KONICA MINOLTA magicolor 7300
Using KONICA MINOLTA
NDPS Snap-in Controls
EDNord - Istedgade 37A - 9000 Aalborg - telefon 96333500
155
Printer Control Dialog
The KONICA MINOLTA
Printer Control dialog gives
you access to
! Printer identification,
including installed features
of each printer
! Printer status
! Print job monitoring
! Spooling configuration
! Print management,
including
% Job holds
% Notification
% CrownView and Telnet access
The buttons on the Printer Control dialog give you access to all of the
KONICA MINOLTA NDPS component features. For additional information,
see the online help available from each dialog.
Identification
Opens the Printer Identification dialog, which displays
general information about the printer and NDPS
configuration, and allows you to select from available
Printer Control DLL Names.
Features
Opens the Features dialog where you can access
printer configuration and support service information.
Jobs
Displays a submenu that allows you to open the NDPS
Job List dialog and the Spooling Configuration dialog.
Pause Output
Sends a command to the server to pause printer
output. No print jobs are printed while the printer output
is paused.
After selecting Pause Output, the button is replaced
with a Resume Output button. Selecting Resume
Output removes the pause and allows print jobs to be
printed.
156
Using KONICA MINOLTA
NDPS Snap-in Controls
EDNord - Istedgade 37A - 9000 Aalborg - telefon 96333500
Pause Input
Sends a command to the server to pause input to the
printer. No print jobs are sent to the printer while input
is paused but the printer completes any jobs it has
already received.
After selecting Pause Input, the button is replaced with
a Resume Input button. Selecting Resume Input
removes the pause and allows print jobs to be sent to
the printer.
Control
Displays a submenu that allows you to select printer
commands such as Reset, Form Feed, and Mount
Media, or to open the Printer Defaults dialog.
Advanced…
Opens the KONICA MINOLTA Advanced dialog that
allows you to open a Telnet session with the selected
printer, and to view printer configuration and status
information from the printer’s internal web pages via
PageScope.
Status
Displays the current status of the selected printer.
OK
Saves changes and closes the Printer Control dialog.
Cancel
Discards changes and closes the Printer Control
dialog.
Page Options
Opens Novell’s Page Options dialog. See Novell’s
documentation and online help for additional information.
Help
Displays the help file.
Tabs
See Novell’s documentation and online help for
information about Printer Control, Access Control,
Configuration, NDPS Remote Printer Management,
IPP Client Support, and LPR Client Support tabs.
Using KONICA MINOLTA
NDPS Snap-in Controls
EDNord - Istedgade 37A - 9000 Aalborg - telefon 96333500
157
EDNord - Istedgade 37A - 9000 Aalborg - telefon 96333500
Color Printing
In this Section...
! Chapter 4.1 — “Color Basics”
An overview of the color printing fundamentals
used by your printer.
! Chapter 4.2 —“Color Profiles, Halftone Screens, and Pantone
Tables”
An introduction to the proper use of color
profiles and instructions for installing color
profiles for your printer.
EDNord - Istedgade 37A - 9000 Aalborg - telefon 96333500
Chapter Location
Chapter
Title
Begins on
page...
4.1
“Color Basics”
161
4.2
“Color Profiles, Halftone Screens, and
Pantone Tables”
167
EDNord - Istedgade 37A - 9000 Aalborg - telefon 96333500
Color Basics
4.1
EDNord - Istedgade 37A - 9000 Aalborg - telefon 96333500
Color Management
KONICA MINOLTA technology automatically optimizes color output to
produce professional quality, colorized documents without the use of
sophisticated manual optimization techniques.This chapter starts with a brief
introduction about color in general, and how your color laser printer
processes color.
Color is a visual perception involving:
! A light source.
! An object that absorbs, reflects, or transmits the light of the light source.
! A detector, which receives and interprets the reflected light from the
object.
A distinction must be made between light radiated by a source and light
reflected from an object. Although closely related, they represent two different
fundamental principles.
Additive Colors
Science has proved that
any color can be produced
with three colors: red,
green, and blue (the
illustration demonstrates
this with the help of three
flashlights). These are
called the primary additive
colors.
By mixing these colors in
different combinations at
various intensities, all
visible colors can be
simulated. Light sources
radiate light of various percentages of red, green, and blue.
"#
162
White light is a mix of 100% red, 100% green, and 100% blue.
Color Management
EDNord - Istedgade 37A - 9000 Aalborg - telefon 96333500
Subtractive Colors
If we direct white light
onto an object, such as a
red apple, the white light
seems to be modified in
such a way that only the
red part is reflected to our
eyes. This means that
the apple must have absorbed the green and blue portions of the white light.
This is why we say that the apple looks red. Further analysis shows that the
object may be considered as having certain pigments responsible for the
absorption. These pigments are cyan, magenta, and yellow (CMY) in a
particular ratio. These are called the primary subtractive colors (subtracting or
absorbing portions of red, green, and blue from white light).
The relationship between additive colors and subtractive colors may be
explained by using the result obtained with the flashlight experiment on the
previous page. Notice that for light sources (= light-emitting objects) the
following applies:
! Red light mixed with green
light produces yellow light
! Green light mixed with blue
light produces cyan light
! Blue light mixed with red light
produces magenta light
The opposite colors on this
“wheel” are complementary,
which means that for
light-reflecting objects, the
following applies:
! Red light is absorbed by
cyan pigments
! Green light is absorbed by
magenta pigments
! Blue light is absorbed by yellow pigments
In the case of our red apple, the pigments responsible for the absorption must
be magenta (absorbing the green light) and yellow (absorbing the blue light),
while the red light is not absorbed and is reflected.
"#
Mixing equal amounts of cyan, magenta, and yellow pigments
produce black pigment (because all the red, green, and blue portions
of white light are absorbed). Black, therefore, is the absence of color.
Color Management
EDNord - Istedgade 37A - 9000 Aalborg - telefon 96333500
163
A color printer uses the subtractive principle, which means that when we look
at a color printout, the pigments in the toners absorb portions of the white light
reflected from the white substrate. A color laser printer typically ships with
four toner cartridges: cyan, magenta, yellow and black. Mixing equal amounts
of cyan, magenta, and yellow produces black. However, since color toners
are never 100% pure, black toner is added to provide pure black. Moreover,
black toner provides a more economical way to print in black only, such as
for text.
When we talk about
printing colors, we
actually talk about
matching a design
created on a device
like a monitor, using
the additive principle
and printing these
colors on a color
printer, using the
subtractive principle.
To print correct colors
we need a module
capable of translating
the RGB colors of the
monitor into CMY(K)
colors used by color
laser printers. This translation is device dependent. The illustration shows
such a (software) module where certain RGB values (from a monitor) are
converted into CMYK values (for a color laser printer).
There are many devices capable of producing colors, like a monitor, a color
laser printer, a digital camera, and a scanner. To avoid a multitude of
translation modules, we first need to define a standard for colors.
Since color is defined as how the human eye perceives this, we introduce the
CIE LAB color model (also called color space, the organization of all colors of
the visible spectrum in a device-independent model). CIE is an acronym for
Commission Internationale d’Eclairage. Based on human perception, the CIE
LAB color model is most commonly used.
164
Color Management
EDNord - Istedgade 37A - 9000 Aalborg - telefon 96333500
Color Model
A monitor and a color printer
have limited color ranges
compared to the range of
colors visible to the human
eye. In the illustration we
have identified the range of
colors that a monitor is able to
produce and the range of
colors a color laser printer
may produce. This range of
colors is called a gamut and
is device dependent. To print
colors on a color laser printer
identical to the design as it
looks on the monitor, we first
need to translate the profile of
the monitor to a standard
color space and then
translate this to a color laser
printer profile. The standard
color space most commonly
used for these translations is
CIE LAB. The CIE LAB color space is based on the human perception of
color. Looking closely at the CIE LAB color model, we notice that the gamuts
for both devices are different. This means that the monitor may produce
certain colors we cannot accurately print on a color laser printer. This is called
the out-of-gamut range. This phenomenon is solely caused by the physical
properties of such a device. Therefore, the translation module also needs to
correct this out-of-gamut range or translate as close as possible.
Color Management
EDNord - Istedgade 37A - 9000 Aalborg - telefon 96333500
165
EDNord - Istedgade 37A - 9000 Aalborg - telefon 96333500
Color Profiles,
Halftone Screens,
and Pantone
Tables
4.2
EDNord - Istedgade 37A - 9000 Aalborg - telefon 96333500
Color Profiles
In the previous chapter, we considered the range of colors any device can
reproduce. Colors which a device can reproduce are said to be in the device’s
gamut; those it can’t reproduce are outside the gamut. For example, a
monitor can’t reproduce all the colors in nature, and a color printer can’t
reproduce as many colors as a monitor can—so some colors you see on the
monitor are outside the printer’s gamut.
ICC Profiles
International Color Consortium (ICC) profiles have been developed to resolve
the discrepancy between the color gamuts of various devices. Most color
device manufacturers comply with the ICC profile specifications.
This means that a device, such as a monitor or digital camera, ships with a
specific profile to convert its gamut into the CIE LAB model. A colorreproducing device (such as a color laser printer) should ship with a profile
that converts these CIE LAB colors to its reproduction method. Each color
producing or reproducing device has its own ICC profile that should be
provided by its manufacturer.
There are two ways to incorporate ICC profiles into what is called a Color
Management Module (CMM):
1
2
168
On the workstation. The disadvantage is that not all operating systems
support CMM (for example, Windows 95). Due to this, some software
manufacturers implemented CMM within their software (for example,
CorelDRAW 10, PageMaker 6.5, and PhotoShop 7). This may lead to
confusion and wrong implementations.
In the printer. This is the easiest way since all color processes are taken
care of inside the printer. The printer converts the color data received.
KONICA MINOLTA color printers are equipped with an internal Color
Management Module.
Color Profiles
EDNord - Istedgade 37A - 9000 Aalborg - telefon 96333500
The illustration shows the internal
Color Management Module of a
KONICA MINOLTA color laser printer. First,
the RGB Source ICC profile translates RGB
values of the color producing device (in this
case a monitor) to the standard CIE LAB
color model. Next, those CIE LAB model
values are translated into a Simulation
profile, if the user chooses to use one.
If a Simulation profile is used, the color
data is once again translated to the
standard CIE LAB color model. Finally, the
KONICA MINOLTA Output or Destination
profile converts the translated data into
CMYK to be sent to the print engine.
Several RGB Source, and Destination ICC
profiles are integrated into the Color
Management Module of KONICA MINOLTA
color laser printers. You may also download
other Source, Simulation, and Destination
ICC profiles.
A primary function of the internal Color
Management Module is to map
out-of-gamut colors to the closest in-gamut
color.
Downloading and Working with
Custom ICC Profiles
Requirements
! magicolor 7300 printer
! Internal hard disk
! Download Manager
! ICC profile
"#
KONICA MINOLTA does not provide
software or instructions to create
new ICC profiles, but does provide
the instructions to replace or add to
the resident ICC profiles.
The host and simulation profiles are
on the Software Utilities CD-ROM.
Color Profiles
EDNord - Istedgade 37A - 9000 Aalborg - telefon 96333500
169
Overview
Several RGB Source and Destination profiles are integrated into the Color
Management Module of the magicolor 7300. Custom profiles can be
downloaded for RGB Source, Simulation, and Destination profiles, in addition
to what is implemented in the printer.
Creating a Custom Destination Profile
1
Create an ICC output profile that describes the color space of your
magicolor 7300 at the desired resolution and halftone screen.
"#
2
Name the created profile.
"#
3
When creating the profile, set the maximum ink limit to 225% in the
separations setup of your profiling software. 225% is the maximum
ink limit that the fuser of the magicolor 7300 can handle; exceeding
this amount can damage the fuser and produce undesirable image
quality artifacts.
If you are using a Windows driver, you may use any naming
convention as long as it follows the 8.3 filename/extension
standard.
If you are using a Macintosh driver, name your destination profile
custdes1.icc, custdes2.icc, or custdes3.icc.
Download the file to your magicolor 7300’s hard disk using the Download
Manager procedure.
"#
You can also use the Download Manager procedure to download
custom RGB Source and Simulation profiles.
If you are using a Windows driver, you can use any name for
these profiles as long as it follows the 8.3 filename/extension
standard.
If you are using a Macintosh driver, you should name the RGB
Source profiles custrgb1.icc, custrgb2.icc, or custrgb3.icc, and the
Simulation profiles custsim1.icc, custsim2.icc, or custsim3.icc.
170
Color Profiles
EDNord - Istedgade 37A - 9000 Aalborg - telefon 96333500
Host Profiles
Windows and Macintosh
Some applications automatically install host profiles. Others do not. If your
application doesn’t install profiles automatically, refer to the application
documentation to install the profile.
Macintosh
1
2
Open the folder containing the host profiles.
Copy the icc files to one of the following folders, depending on the
MacOS/ColorSync version installed:
! System Folder/Preferences/ColorSync Profiles
! System Folder/ColorSync Profiles
Using the Download Manager to Download a Profile
1
2
3
4
5
Open the Download Manager. (See “Download Manager” on page 121.)
Select Color Profile as the type of file to be downloaded.
Specify your magicolor 7300 printer.
Under Download Options, locate
the profile to be downloaded by
choosing the Browse button and
selecting the correct file.
Download Manager V6.0.4
KONICA MINOLTA magicolor 7300
Choose Download to send the new
profile to the printer.
Working with Downloaded Profiles
1
Verify that the download was successful by using the printer keypad to
print a directory list (Print Menu/Directory List). The directory list provides
a list of files on the hard disk.
Color Profiles
EDNord - Istedgade 37A - 9000 Aalborg - telefon 96333500
171
2
3
Locate the downloaded profile in the listing of directory/ata0a/ps/color/
profiles.
To work with the downloaded profiles, use the appropriate instructions
below for your operating system:
Windows Users
1
2
3
4
5
6
7
Access the Detailed Color Settings database (Features tab/(Advanced)
Color Options/Change Color Settings).
Choose the appropriate Manage Profiles button.
Select Manage Profiles for the appropriate profile (source, simulation, or
destination).
Type a profile description as you want it to appear in the pull-down menu
Type the filename (no path) of the downloaded profile found in the
directory list of the hard disk’s /ata0a/ps/color/profiles directory).
Choose Add, then
Done.
In the RGB Source/Custom, Simulation Profile, or Destination Profile
drop-down list box, select the profile description you just set in step 3.
"#
The “None” setting for ICC Destination will use the destination profile in the printer’s ROM.
Macintosh Users
Use the Custom 1, Custom 2, or Custom 3 setting for RGB Source to use the
custrgb1.icc, custrgb2.icc, or custrgb3.icc profile downloaded; for Simulation
172
Color Profiles
EDNord - Istedgade 37A - 9000 Aalborg - telefon 96333500
to use the custsim1.icc, custsim2.icc, or custsim3.icc profile downloaded; for
Destination to use the custdes1.icc, custdes2.icc, or custdes3.icc profile
downloaded.
"#
The “Printer Default”
setting for ICC
Destination will use the
destination profile on the
printer’s ROM.
Halftone Screens
Continuous tone images have to be converted to dot pattern images on a
laser printer. Because of the limited resolving power of the eye, halftones
appear as continuous tone images. Halftones are defined by three
characteristics—screen frequency (or lines per inch, the number of lines of
dots that compose each inch of a halftone screen), screen angle (the angle at
which a halftone screen prints), and spot function (the shape of the dots).
Types of Halftones
Three halftones screens are available for this printer: Low, General, and High.
The following tables provide details about the specific screen angle, screen
frequency, and spot function of each toner color for each halftone screen.
Halftone Screens
EDNord - Istedgade 37A - 9000 Aalborg - telefon 96333500
173
Resolution—Standard (600x600 dpi)
Halftone
Screen
Toner Color
Screen Angle Screen
Frequency
Spot
Function
Low
Cyan
68.20
111.42
Line
Magenta
68.20
111.42
Line
Yellow
21.80
111.42
Line
Black
21.80
111.42
Line
Cyan
63.43
134.16
Line
Magenta
63.43
134.16
Line
Yellow
14.04
145.52
Line
Black
14.04
145.52
Line
Cyan
71.57
189.74
Line
Magenta
71.57
189.74
Line
Yellow
18.43
189.74
Line
Black
18.43
189.74
Line
General
High
Resolution—High (9600x600 dpi class)
Halftone
Screen
Toner Color
Screen Angle Screen
Frequency
Spot
Function
Low
Cyan
63.43
134.16
Euclidian
Magenta
26.57
134.16
Euclidian
Yellow
45.00
141.42
Euclidian
Black
90.00
150.00
Euclidian
Cyan
71.57
189.74
Euclidian
Magenta
26.57
134.16
Euclidian
Yellow
45.00
141.42
Euclidian
Black
90.00
150.00
Euclidian
Cyan
71.57
189.74
Euclidian
Magenta
18.43
189.74
Euclidian
Yellow
90.00
200.00
Euclidian
Black
45.00
212.13
Euclidian
General
High
174
Halftone Screens
EDNord - Istedgade 37A - 9000 Aalborg - telefon 96333500
Selecting Halftones
You can either allow your Quick Color Configuration selection in the Windows
drivers to set the halftone screens automatically, or you can choose separate
halftone screens for Characters/Graphics and for Images in the Detailed
Color Settings dialog box:
! Low—Best for photographs and scanned images
! General—Optimized for performance and quality
! High—Best for text and line art
Pantone Tables
Pantone Tables are available on our website at www.konicaminolta.net/
printer/.
Installing Pantone Tables on Windows
Downloading Pantone Tables from the Internet
1
2
3
4
5
6
7
Use your Internet browser to access www.konicaminolta.net/printer/.
Select the appropriate region.
From the Need Help or Drivers? list box, select your printer from the
drop-down list.
In the Drivers, PPDs & Utilities section, choose your PC platform.
Locate and download the Pantone file.
The downloaded file contains compressed files that need to be extracted,
or “unzipped” prior to use.
Double-click the .exe (or .zip) file to uncompress it.
Follow the on-screen instructions to extract the compressed files.
When prompted to
Unzip to folder, select
a folder location and
name the folder (for
example, PANTONE).
Click Unzip.
The Pantone Tables,
readme, and other files
are extracted.
Pantone Tables
EDNord - Istedgade 37A - 9000 Aalborg - telefon 96333500
175
8
Select Close after the files are extracted.
"#
See the information contained in the extracted files for additional
instructions on using Pantone Tables.
Installing Pantone Tables on a Macintosh
Pantone tables are available on our website at www.konicaminolta.net/
printer/
Downloading Pantone Tables from the Internet
1
2
3
4
5
6
176
Use your Internet browser to access www.konicaminolta.net/printer/.
From the Need Help or Drivers? list box, select your printer from the
drop-down list.
In the Drivers, PPDs & Utilities section, choose the Macintosh platform.
Locate and download the Pantone file.
The downloaded file contains compressed files that need to be extracted,
or “unstuffed,” prior to use.
Double-click the .sea file to uncompress it.
Follow the on-screen instructions to extract the compressed files.
When prompted to
select a folder to
UnStuff as:, select a
folder location and
name the folder (for
example, PANTONE).
Pantone Tables
EDNord - Istedgade 37A - 9000 Aalborg - telefon 96333500
7
8
9
Select Save.
The Pantone tables, readme, and other files are extracted.
Select Quit after the files are unstuffed.
See the information contained in the extracted files for additional
instructions on using Pantone tables.
Pantone Tables
EDNord - Istedgade 37A - 9000 Aalborg - telefon 96333500
177
EDNord - Istedgade 37A - 9000 Aalborg - telefon 96333500
Section 5
Features & Configuration
In this Section...
! Chapter 5.1 — “Inside Your Printer”
Information about what goes on inside of your
printer’s operating system and hardware when
a print job is received.
! Chapter 5.2 — “Printer Features”
Describes the key features that your printer
supports.
! Chapter 5.3 — “Printer Configuration”
Contains the methods and details of printer
configuration. Features a section about the
printer’s internal web page and how you can
access it using PageScope Light, a menu
map, and instructions for accessing the
printer configuration controls included with
the KONICA MINOLTA printer driver.
! Chapter 5.4 — “Accounting”
Describes how to retrieve and interpret
accounting information from a printer that has
a hard disk installed.
EDNord - Istedgade 37A - 9000 Aalborg - telefon 96333500
Chapter Location
Chapter
Title
Begins on
page...
5.1
“Inside Your Printer”
181
5.2
“Printer Features”
187
5.3
“Printer Configuration”
197
5.4
“Accounting”
267
EDNord - Istedgade 37A - 9000 Aalborg - telefon 96333500
Inside Your
Printer
5.1
EDNord - Istedgade 37A - 9000 Aalborg - telefon 96333500
Inside Your Printer
Your printer’s Operating System software resides inside the printer and is
referred to as printer firmware. The printer firmware is stored in flash ROM on
a Smart Media card.
Updating new printer firmware is performed via one of the printer’s interfaces.
When the printer firmware is downloaded to the printer, the printer recognizes
the nature of the code and replaces the older firmware with the new one that
is downloaded. After downloading, the printer restarts with the new printer
firmware resident and active.
When your printer is switched on, by default it prints a start page. This page is
generated internally by the Operating System. Below is a list of the
information pages that may be printed by the Operating System.
Information Pages
Remark(s)
Configuration Page
Each time your printer is switched on, it prints a
configuration page displaying the configuration
settings of the printer. This is particularly important
to verify the functionality of your printer and installed
options.
"# You may disable printing a configuration page
by means of the control panel.
182
Font List
The printer prints a list of installed fonts with a
sample of each.
Statistics Page
This page gives statistical information about the
usage of the printer and the current status of the
consumables.
Registration
This page shows the registration of the four colors
of your color printer in respect to each other.
Demo Page
This page displays a color demonstration page.
Menu Map
This page displays the menu map for the control
panel.
Directory List
This page displays the directory list.
Inside Your Printer
EDNord - Istedgade 37A - 9000 Aalborg - telefon 96333500
Rasterization
Each time the print engine is ready to print a new page, the print data is
translated into a bitmap format that is stored, and then read by the print
engine.
?
What’s a bitmap?
A bitmap is a graphic
representation of a page. All
characters and art representations are printed using tiny
dots.
For monochrome printing, the page bitmaps consist of black bitmaps only.
Color printers translate the print data into either four separate bitmaps, (one
for cyan, one for magenta, one for yellow, and one for black) or a black
bitmap only for monochrome output.
The below illustration demonstrates the color rasterization process with
bitmap representations. The rasterizer processes the data into four bitmaps,
one for cyan, one for magenta, one for yellow, and one for black. The print
engine processes these bitmaps and fuses the four toner layers onto the
media to produce a printed output.
"#
Cyan combined with yellow produces green, cyan combined with
magenta produces blue, and yellow combined with magenta produces
red. Cyan, magenta, and yellow combined produce black. In our
example, the black is produced by fusing all four toner colors.
183
Rasterization
EDNord - Istedgade 37A - 9000 Aalborg - telefon 96333500
Printable Areas
The printable area is defined as the media size minus the nonprintable edges
around the media. The value of the nonprintable edges is about 0.157"
(4 mm) from the edges of the media.
"#
See the magicolor 7300 User’s Guide for more information about
printable area(s).
Printing
The printing segment is the hardware, often referred to as the print engine.
To become familiar with the basic functions of a print engine we demonstrate
with a color print engine.
1
Laser Unit: The laser unit & is controlled
by the contents of the Frame Buffer (for
each color). For each dot color of the
Frame Buffer bitmap that is turned on, the
laser is switched on and “writes” an
electrical dot onto the OPC in the print
unit.
"#
2
3
184
&
An electrical dot is an isolated area
on the surface of the OPC. The OPC is initially charged. When the
laser beam strikes the surface, that area is electrically neutralized.
Toner: Each toner cartridge ' transfers its toner to the neutral areas on
the print unit by means of electrostatic attraction (the toner carries a
negative charge).
Print Unit with OPC: The
laser unit “writes” the dots from
one side to the other, while the
rotation of the OPC (Organic
Photo Conductive) in the print
unit ( is responsible for the
vertical movement (lines of
dots).
'
(
Printable Areas
EDNord - Istedgade 37A - 9000 Aalborg - telefon 96333500
4
5
Transfer Belt Unit: The
transfer belt unit ) collects all
four color images. Then the
total combined toner image is
transferred from the transfer
belt unit to the media drawn
from the media cassette. The
transfer is also obtained by
electrostatic attraction.
*
)
Fuser Unit: The fuser unit * contains pressurized hot rollers. As the
media passes the fuser, the toner images are melted and fused onto the
media. The printed media is then transported to the output area of the
print engine.
The various print engine units are controlled by the printer firmware. To detect
the status of these modules, the print engine provides specific sensor signals.
185
Printing
EDNord - Istedgade 37A - 9000 Aalborg - telefon 96333500
EDNord - Istedgade 37A - 9000 Aalborg - telefon 96333500
Printer Features
5.2
EDNord - Istedgade 37A - 9000 Aalborg - telefon 96333500
Serverless Printing
The illustration shows a
simplified section of a
typical network
environment. A workstation
(WS1) generates print data
from a software application
and transmits it via the
network to the network
server. The network server
stores the data on its hard
disk (in what is called a
print queue). After the data
transmission is completed,
the network server sends
the print job to the printer
via the same network.
This method has two major
disadvantages:
1
2
The print data is sent
two times across the
network, increasing the network traffic.
It also takes much longer to print from the time the workstation sends the
data until the print job is completely printed.
Not only do you have to wait a relatively long time before the printer starts to
process the job, but all other users on the network experience a slower
response time as well.
188
Serverless Printing
EDNord - Istedgade 37A - 9000 Aalborg - telefon 96333500
KONICA MINOLTA technology
offers a better solution:
Workstations send the print
data directly to the printer,
omitting the network server
routing.
"#
All KONICA MINOLTA
printers may still print
through a print queue
on a network server if
you need to use this
method.
All KONICA MINOLTA printers
behave like network servers
when connected to a
network, decreasing
unnecessary network
traffic. This becomes a major
benefit when multiple printers
are active in the same network. Everyone experiences a much faster
throughput of their print jobs.
Automatic Jam Recovery
After you remove any jammed media, printing automatically resumes from
the page the printer stopped at when the jam occurred.
"#
For automatic jam recovery to work, it is necessary to leave the printer
turned on when you remove the jammed media.
Automatic Jam Recovery
EDNord - Istedgade 37A - 9000 Aalborg - telefon 96333500
189
Electronic Document Collation
"#
"#
Note that this 12-page file is nothing more than THREE IDENTICAL
4-page documents.
The Collation feature is supported only on printers with an internal
hard disk installed.
When collate is not selected and the copy count is set to 3, the application
sends the 4-page file once, with a copy count of 3 embedded in the data
stream. Printers without collation features usually print page 1 three times,
followed by page 2 three times, page 3 three times, and page 4 three times.
You must manually collate the pages afterward to obtain the documents. The
example discusses what happens when only three copies are selected. In
some cases, many more copies are needed.
KONICA MINOLTA technology offers a better solution:
With your printer, you do not have to select collation in the software
application when you need multiple copies of your document. If the driver
collate setting is turned on, just enter the number of copies you need in the
driver. The print data is sent once, regardless of the number of copies you
selected. Your printer prints and automatically collates the specified amount
of documents, with the pages in the correct order for each copy of the
document. This feature allows a very efficient way of producing multiple
documents while keeping the network traffic at a minimum and saving you
from manually collating the printed pages into documents.
"#
190
Your printer is shipped with the collate feature switched off. You may
switch it on after installing a hard disk on your printer.
Electronic Document Collation
EDNord - Istedgade 37A - 9000 Aalborg - telefon 96333500
Overlay Printing
Printers with an internal hard disk may utilize overlay printing.
In certain cases a special kind of media, such as preprinted forms or
letterhead, is used. When you produce many documents with preprinted
forms (for a mailing) you may run out of this media. Or you must first reprint
this media, since something may have changed (like a telephone number).
Even though you are able to print, your production stops and becomes
dependent upon external situations.
KONICA MINOLTA technology offers a better solution:
You may download the entire preprinted form(s) onto the printer’s hard disk
and use this file as an overlay template.
Overlay printing features three major advantages:
1
2
3
You do not need a stock of preprinted forms anymore.
You may modify forms whenever needed, without scrapping existing
stock.
The overlays are printer resident and do not need to be transmitted from a
workstation to the printer each time.
Using Overlays
Up to five different overlays may be used for each document. For each
overlay, you may select the following criteria from the printer driver:
a Disk—Printer hard disk where the overlay file is located.
b File—The overlay filename.
c Placement—On All Pages, the First Page only, all Even Pages, all
Odd Pages or Complex (page number for the first placement, followed
by a cycle number, representing how many successive pages later the
overlay should be placed again).
"#
You are also able to include a “watermark”. A watermark is a text
line for special purposes, such as “Confidential” or “Draft.” A
watermark, however, is generated by the printer driver and is
independent from the contents of the document and function of
overlay printing.
The overlay may be designed from any available software application. It must
be a one-page document that can be printed. However, rather than physically
printing it, you must print the overlay to a file and temporarily store it on your
PC’s hard disk as a PostScript file, for example, overlay1.ps.
Overlay Printing
EDNord - Istedgade 37A - 9000 Aalborg - telefon 96333500
191
The next step is to transfer this file to the internal hard disk of your printer. You
can use the Download Manager application or FTP to transfer the files to the
hard disk of the printer.
"#
Overlays are not supported on Macintosh.
Important Note for KONICA MINOLTA Windows 98/Me
PostScript Driver Users
If you created the overlay file using the KONICA MINOLTA Windows 98/Me
PostScript driver, you must also perform the following step before downloading it to the printer.
Using any text editor, add a PostScript “end” command following the
PostScript “grestore” command.
Attention
Do not make this change to overlay files generated by any
KONICA MINOLTA driver other than the Windows 98/Me PostScript
driver.
After it’s edited, the file layout will appear as follows:
gsave
PS data 1
PS data 2
.
.
.
.
.
.
PS data N
grestore
end
Troubleshooting Overlays
If an overlay file doesn’t print, it may be because it contains PJL, UEL, or
non-device-independent PostScript commands. To fix the overlay, use any
text editor to remove the following commands from the overlay file and then
download it again to the printer.
In the file to be printed, remove:
1
All PJL commands.
Delete any commands that contain the character sequence “@PJL”.
192
Overlay Printing
EDNord - Istedgade 37A - 9000 Aalborg - telefon 96333500
2
3
All UEL commands.
Delete any commands the contain the character sequence
“<ESC>%12345X” where <ESC> is the escape character [0x1b,
decimal 27] (may be seen in some text editors as a box or a leftpointing arrow).
Device-specific commands.
Delete any section of code that starts with “<<” and
ends with “>>setpagedevice>’’. For example, a devicespecific command to select the color space may read
“<</ProcessColorModel/DeviceCMYK>>setpage device>”.
Also delete any section of the code that starts with “featurebegin{” and
ends with “}featurecleanup”.
Attention
Do not delete any lines that are not surrounded by this pair of terms.
"#
If you are not sure if a command sequence is device-specific, you
can check for the sequence in a PPD, refer to the Adobe
PostScript Level 2 Technical Language Reference Manual, or
contact KONICA MINOLTA Technical Support.
Printer-based Accounting
Printers with an internal hard disk may utilize Printer-Based Accounting. With
Printer-Based Accounting, individual print job information is saved on the
printer’s internal hard disk in an accounting file. This information can be
retrieved from the printer, filtered according to the individual customer
requirements and exported into a spreadsheet program in order to be
analyzed. There are over 40 different information fields available.
Printer-Based Accounting is important for System Administrators who need
interdepartmental accounting, pay-for-print applications, or workflow
management.
There are two types of accounting information captured by your printer:
Job Accounting
As each print job is completed, the information describing the print job is
saved in the accounting file. This information allows you to analyze
consumable usage, media usage, operator usage, and the history of printer
activities.
Printer-based Accounting
EDNord - Istedgade 37A - 9000 Aalborg - telefon 96333500
193
Printer Error Accounting
Capturing the information each time the printer experiences an error allows
you to analyze the types of errors and the down-time each error causes.
For More Information
See “Printer-based Accounting” on page 268 for details about the Accounting
records that are saved in the Accounting file on your printer’s hard disk.
Tray Chaining and Auto Continue
Tray Chaining
You can configure the printer to automatically switch input trays during a print
job when the first tray runs out of media. This is called tray chaining. Tray
chaining can be enabled from the printer’s control panel (Paper/Input Tray/
Tray Chain menu) and from the Administrator Mode/System tab/User Choice
topic/Paper window of PageScope Light. See the following section “Auto
Continue” for additional information concerning the use of tray chaining.
Auto Continue
If paper of the size specified for the print job is not loaded in the printer,
printing stops and a message appears, instructing that paper of the size
specified for that print job be loaded.
If the Auto Continue function is used, printing of the print job can automatically continue using the paper loaded in the printer when paper of the size
specified for the print job is not loaded.
If the Auto Continue function is enabled, the page size of the print job is automatically adjusted to fit the size of paper in the printer so it can be printed on
the size and type of paper loaded in the printer.
The Auto Continue function can be enable or disabled from the printer’s control panel (Sys Default menu/Auto Continue) or from the PageScope Light
window (Administrator mode/System tab/User Choice/System Default).
194
Tray Chaining and Auto
Continue
EDNord - Istedgade 37A - 9000 Aalborg - telefon 96333500
"#
If a tray is set to paper of the same size as the print job, even when the
Auto Continue function is enabled, instead of automatically continuing
printing, a message appears, instructing that paper be loaded into that
tray.
In addition, if paper of a different type and size is loaded into Tray 2
when the first tray runs out of paper during printing, printing cannot be
automatically continued.
If this occurs, load paper according to the message that appears in the
printer’s control panel.
Tray Chaining and Auto
Continue
EDNord - Istedgade 37A - 9000 Aalborg - telefon 96333500
195
EDNord - Istedgade 37A - 9000 Aalborg - telefon 96333500
Printer
Configuration
5.3
EDNord - Istedgade 37A - 9000 Aalborg - telefon 96333500
Configuring your Printer
There are several ways to configure how your printer works.
Configuring Your Printer via...
Page
PageScope Light
198
Using PageScope Light
199
System Requirements
200
Setting Up the Printer Web Page
200
Determining the Printer Name
201
Setting Up Your Browser Software
201
Operation
201
Logging in to the Administrator Mode
202
Navigating PageScope Light
203
User Mode
206
Administrator Mode
211
Printer Control Panel Menus
242
Printer Drivers
259
Configuring your Printer via PageScope
Light
This chapter describes how to configure printer settings via the printer’s
internal web page manager (PageScope Light), and provides a menu map of
the printer’s control panel.
To help you locate information about configuration items or
Menu
parameters for your printer, hyperlinks have been added to these
Select
pages to allow you to quickly jump from parameter descriptions in
the PageScope Light section to the corresponding page in the
menu map section (and vice versa). Parameter descriptions accompanied
with the menu button icon (shown at right) have a corresponding menu item
that can also be used for setting the default value. Just click on the menu icon
to jump to the menu page. When viewing the menu map pages, clicking on
the menu item leads you to the description in the PageScope Light section if
there’s an equivalent parameter.
198
Configuring your Printer
EDNord - Istedgade 37A - 9000 Aalborg - telefon 96333500
Using PageScope Light
Your printer has a built-in web
page manager (PageScope Light)
that you can access using your
web browser. With PageScope
Light, you can (with the proper
password) change the
configuration of the printer without
leaving your workstation.
Inside your printer resides an
HTTP (Hyper-Text Transfer
www
Protocol) based web page that
can be accessed from most
common web browser software,
such as Netscape Navigator and
Microsoft Explorer. This web page gives you access to the most frequently
used printer configurations and gives you instant access to printer status.
Anyone on your company Intranet can access the printer using their web
browser software.
"#
You do not need an Internet connection to view your printer web
pages. Only the web browser software application is needed on your
workstation.
In addition, with the proper password, you can change the configuration of
the printer without leaving your PC.
"#
Users who are not given passwords by the administrator can still view
some configuration settings and options via the User Mode, but are
not able to save or apply changes.
To use PageScope Light, you need to have the following installed on your
workstation:
! An Internet browser.
! TCP/IP communication software. This is needed since Internet browsers
use this communication protocol. Because the communication for PageScope Light is a direct one (from your workstation to the printer), the TCP/
IP communication software may be independently installed from the communication protocol of your network environment.
"#
"#
You cannot access PageScope Light using a local (parallel or USB)
connection.
Some of the menus shown on the following pages may vary per printer
model and/or options installed.
Configuring your Printer via
PageScope Light
EDNord - Istedgade 37A - 9000 Aalborg - telefon 96333500
199
System Requirements
The following items are required to use this utility.
Computer Software
Operating System
Web Browser
Windows 95/98/NT 4.0
Internet Explorer 4.0 or later
Netscape Navigator 4.0 or later
Windows 2000
Internet Explorer 5.0 or later
Netscape Navigator 4.0 or later
Windows Me
Internet Explorer 5.5 or later
Netscape Navigator 4.0 or later
Windows XP
Internet Explorer 6.0 or later
Netscape Navigator 4.0 or later
Macintosh OS 9 or later
Internet Explorer 4.5 or later
Netscape Navigator 4.0 or later
Linux
Netscape Navigator 4.0 or later
magicolor 7300—Network
! 10BaseT/100BaseTX Ethernet
! TCP/IP protocol
Setting Up the Printer Web Page
Setting up the printer web page to run on your Intranet involves two basic
steps:
1
2
200
Determining the name and address of your printer
Setting up the “no proxy” preferences in your browser software
Configuring your Printer via
PageScope Light
EDNord - Istedgade 37A - 9000 Aalborg - telefon 96333500
Determining the Printer Name
The printer web page can be
accessed only through the assigned
name of the printer or the printer’s IP
address. The IP address can be
found on the Start Page of your
printer. The name for the printer
comes from the IP host table on the
computer system and is usually
assigned by the system
administrator, for example,
magicolor 7300.
Name or Number?
?
It may be more convenient for you
to use a name rather than the IP
address, however, the IP address
of your printer is a unique number
and may be preferred if you have
many printers active on your
network.
Setting Up Your Browser Software
Since your printer resides on your Intranet, and is not accessible beyond the
firewall of your network, you must set up the proper “preferences” in your
browser software.
1
2
Start the web browser.
Your printer name or IP address must be added to the “no proxy” list in the
preferences dialog box of the browser.
"#
You need to do this procedure only once.
The sample screens below may be different from yours depending on
software versions and operating systems in use.
"#
Our examples represent the IP address of the printer with:
xxx.xx.xxx.xxx. Always enter your printer’s IP address without
leading zeros. For example, 131.011.010.001 should be entered
as 131.11.10.1.
In the Address Bar, enter the IP address of the printer as shown below.
http://<IP address of the printer>/
Example: When the IP address of the printer is 192.168.0.10:
http://192.168.0.10/
This will cause a PageScope Light screen to appear.
Operation
PageScope Light operation is identical to that for Internet web pages. Clicking
a hot link jumps to the link destination, and the [Back] and [Forward] buttons
scroll through pages backwards and forward.
Configuring your Printer via
PageScope Light
EDNord - Istedgade 37A - 9000 Aalborg - telefon 96333500
201
If an error message appears due to an incorrect setting, click the [Back]
button to return to the previous page, and then try specifying the setting
again.
In addition, if the KONICA MINOLTA PageScope Light logo in the top-left corner of the page is clicked, the KONICA MINOLTA web site opens up in the
browser.
Logging in to the Administrator Mode
By logging into PageScope Light in the Administrator Mode, you can
configure or confirm the printer system.
1
2
3
Enter the administrator password into the “Admin Password” box at the
upper left corner of the screen.
For the password, use the same password as the administrator password
for the printer. For details, consult your printer administrator. The default
password is 0000.
Click [Login] to log in using the Administrator Mode.
To log out, click [Logout].
Netscape Navigator (Version 6.2)
1
2
3
4
5
202
Start your web browser.
Access the Edit menu,
and choose
Preferences.
Select the Advanced/
Proxies directory from
the left pane of the
dialog box.
Select the Manual Proxy
Configuration radio
button.
In the No Proxy For: text
box, type a comma after
the last entry, and then
type the printer name or the IP address of your printer.
Configuring your Printer via
PageScope Light
EDNord - Istedgade 37A - 9000 Aalborg - telefon 96333500
6
7
Choose OK until you return to the main browser window.
Enter the printer name or IP address in the Go to: URL address box to
access the printer home page.
http://192.168.0.10/
Internet Explorer (Version 6.0)
1
2
3
4
5
6
7
8
Start your web browser.
Access the Tools menu
and choose Internet
Options.
Select the Connection
tab on the dialog box.
Select the LAN Settings
button to display the
Local Area Network
(LAN) Settings dialog
box.
Select Advanced to
open the Proxy Settings
dialog.
In the Exceptions text
box, type a comma after
the last entry and then
type the IP address of your printer.
Select OK until you return to the main browser window
Enter the IP address in the URL address box to access the printer home
page.
Navigating PageScope Light
The illustration below identifies the navigation and configuration areas of the
windows that you see in PageScope Light windows.
At the top of all PageScope Light windows, the current status of the printer is
displayed.
Configuring your Printer via
PageScope Light
EDNord - Istedgade 37A - 9000 Aalborg - telefon 96333500
203
The icon displays the type of status being displayed.
Icon
Status
Description
Ready
The printer is online READY
and either ready to WARMING UP
print or printing.
PROCESSING
Examples
Attention
The printer needs
attention, but
printing continues.
Fixable
Error
The printer needs
PRINT UNIT END
attention before
REPLACE BLACK
printing can resume. P-UNIT LOW YELLOW
TONER EMPTY
REPLACE YELLOW
MEDIA JAM
TRAY2
LOAD LETTER IN MANUAL
FEED TRAY
MEDIA EMPTY
TONER LOW CYAN
Fatal Error The printer must be SERVICE CALL N X
rebooted. If that
doesn’t fix the error,
“N” indicates the
service is required.
message ID; “X”
indicates the
message displayed.
"#
Selecting the main topic displays the configuration area for the printer options
(parameters) associated with your selections. To change a current setting,
click on the current setting and then select from the available choices. or
enter the new value.
"#
204
Many configuration items do not allow typed entries and must be
changed by selecting a value from a drop-down list that appears when
you click on the current setting.
Configuring your Printer via
PageScope Light
EDNord - Istedgade 37A - 9000 Aalborg - telefon 96333500
Windows Buttons
Windows may contain buttons to accomplish certain tasks:
Button
Purpose
Apply
Applies all parameter settings on the current web page.
Back
Returns to your last action.
Browse
Allows you to browse for the needed file.
Clear
Clears all parameter settings on the current web page.
Delete
Deletes the selected print job.
Detail
Provides more detail on the selected print job.
Display
Displays the specified records.
Format
Formats the hard disk.
Get
Gets the specified records.
Login
When the correct password is input, allows you to log
into the Administrator mode.
Logout
When in the Administrator mode, allows you to log out of
the Administrator mode and return to the User mode.
OK
Allows you to accept the current settings.
Print
Prints the selected page(s).
Save
Saves the current values.
Reset
Sets the parameter settings back to the next to last
settings.
Restore
Changes the parameter settings back to the original
settings after changes are made.
Configuring your Printer via
PageScope Light
EDNord - Istedgade 37A - 9000 Aalborg - telefon 96333500
205
User Mode
In the User Mode, you can view some configuration settings and options and
the printer’s current status, but you are not able to change them (except for
input tray, collate, and copies on the Print/Default Settings/General Settings
page).
Printer name
Current status
Password
login to
Administrator
Mode
Links to tabs
Configuration
Installed
options
Topics
Item
Description
Printer Name
Shows the name assigned to your printer.
Current Status
Displays the current status of the printer—just as
it’s displayed on the printer’s control panel
message window.
"# The status display allows you to remotely
identify possible printer problems, such as
out of paper and out of toner.
Password Login to
Administrator Mode
Allows you to log on to the Administrator Mode,
where you can change configuration settings.
"# Users who are not given passwords by the
administrator can still view some
configuration settings and options via the
User Mode, but are not able to change them.
206
Links to Tabs
Provides links to other PageScope Light web page
windows, such as the Print tab.
Configuration
Lists basic information about your printer.
Configuring your Printer via
PageScope Light
EDNord - Istedgade 37A - 9000 Aalborg - telefon 96333500
Item
Description
Installed Options
Identifies the type of printer that you are browsing
and identifies the installed options.
Topics
Allows you to view other PageScope links.
The User Mode consists of three tabs:
Tab
Purpose
Page
System
Lists basic information about the printer.
207
Job
Lists information about current and completed print 209
jobs.
Print
Allows you to view default printer settings, and font 210
information, print special pages, and send files
directly to the printer.
User Mode—System Tab
The System tab is the starting point for all access to the printer’s internal web
pages. On this page you find printer status and current configuration settings,
printer identification, and links to other User Mode web pages.
Configuring your Printer via
PageScope Light
EDNord - Istedgade 37A - 9000 Aalborg - telefon 96333500
207
Summary
The Summary topic displays the general printer settings.
"#
All of the information displayed on the Summary topic is read-only.
Detail
The Detail topic displays data for the trays, hard disk, interfaces,
consumables usage, and media sources.
Item
Description
Input Tray
Lists the media sources, sizes, types, orientation,
capacity, and paper status for each input tray
currently configured for each source.
Output Tray
Lists the capacity and status of the face-down
output tray.
Hard Disk
Lists the capacity, amount used, and amount
remaining of the hard disk.
"# The hard disk appears only if it is installed.
Interface Info
Lists information about the local and network
interfaces.
Consumables
Status bars graphically represent the remaining life
of each consumable item using a percentage of
total life based on plane or face counts.
"# Page counts are based on 5% toner
coverage for each page. If your pages
average more than 5% coverage, the
remaining life is less than the page count
displayed.
Counter
The Counter topic displays page counts.
208
Item
Description
Total Page Counters
Lists total and total normalized page counts for
black and white and color pages.
Paper Counter
Lists paper size and media type counts.
Total Error Counters
Lists jams and other error counts.
Configuring your Printer via
PageScope Light
EDNord - Istedgade 37A - 9000 Aalborg - telefon 96333500
Item
Description
Power-on Counter
Lists page, error, power-on time (<100 seconds
from a cold boot, <30 seconds from a warm boot),
and configuration change counts.
Online Assistance
The Online Assistance topic provides contact, help, and supplies ordering
information.
User Mode—Job Tab
Active Job
Active Job lists the job ID, owner, status, job type, and received time of
current print jobs.
Job History
Job History lists the job ID, owner, title, faces printed, status, finish time, job
type, and number of sheets of completed print jobs.
Configuring your Printer via
PageScope Light
EDNord - Istedgade 37A - 9000 Aalborg - telefon 96333500
209
User Mode—Print Tab
Default Setting
Item
Description
Default Setting
General Settings
Displays the current input tray, duplex option,
number of copies set on the printer, and PS
(PostScript) Protocol setting.
Font Info
Item
Description
Font Info
PostScript Fonts
Displays the PostScript fonts currently installed, font
type (for example, Adobe Type 1), and location of
the font on the printer.
Test Print
Test Print allows you to print a statistics page that indicates the condition of
consumables, a configuration page, PostScript font list pages, a registration
page, a menu map of the control panel menus available, and a directory list. It
display the product name and your printer name.
210
Configuring your Printer via
PageScope Light
EDNord - Istedgade 37A - 9000 Aalborg - telefon 96333500
Direct Print
Direct Print allows you to locate and send a PostScript or PDF file to the
printer.
Administrator Mode
Printer name
Current status
Password
logout
Links to tabs
Configuration
Topics
Item
Description
Printer Name
Shows the name assigned to your printer.
Current Status
Displays the current status of the printer—just as
it’s displayed on the printer’s control panel
message window.
"# The status display allows you to remotely
identify possible printer problems, such as
out of paper and out of toner.
Logout from
Administrator Mode
Logs out of the Administrator Mode and returns to
the User Mode.
Links to Tabs
Provides links to other PageScope Light web page
windows, such as the Print tab.
Configuration
Lists configuration options for your printer.
Topics
Allows you to view other PageScope links.
Configuring your Printer via
PageScope Light
EDNord - Istedgade 37A - 9000 Aalborg - telefon 96333500
211
The Administrator Mode consists of four tabs:
Tab
Purpose
System
Is the starting point for all access to the printer’s 212
internal PageScope web pages.
Page
Print
Allows you to view such items as the local
interface (I/F) I/O Timeout and IPP settings.
228
Network
Allows you to configure the printer’s network
settings.
230
Account
Allows you to configure and use the printer’s
accounting and email notification features.
238
Administrator Mode—System Tab
The System tab is also the starting point for all access to the printer’s internal
web pages. On this page you can configure printer settings.
"#
Click on the
Menu
Select
to view descriptions of equivalent printer menus.
User Choice
Paper
212
Configuring your Printer via
PageScope Light
EDNord - Istedgade 37A - 9000 Aalborg - telefon 96333500
Item
Description
Input Tray
Tray Chaining
Choices: On
Off
Default: On
Menu
Select
Configuration Menu Equivalent: Paper/Input Tray/
Tray Chain
Tray1 Control
Default Media
Choices: Plain paper
Transparency
Thick stock
Labels
Envelopes
Postcard Side1
Postcard Side2
Menu
Select
Default: Plain paper
Configuration Menu Equivalent: Paper/Input Tray/
Tray1 Control/Default Media
Chain Control
Choices: Include Tray1
Exclude Tray 1
Default: Include Tray1
Menu
Select
Configuration Menu Equivalent: Paper/Input Tray/
Tray1 Control/Chain Control
Collate
Collate
Choices: On
Off
Menu
Select
Default: On
"# Only displays if a hard disk is attached.
Configuration Menu Equivalent: Paper/Collate
Configuring your Printer via
PageScope Light
EDNord - Istedgade 37A - 9000 Aalborg - telefon 96333500
213
Quality
Item
Description
AIDC
Enables/disables Automatic Image Density Control
(AIDC) calibration.
Choices: Enable
Disable
Menu
Select
Default: Enable
Configuration Menu Equivalent: Quality/AIDC
214
Configuring your Printer via
PageScope Light
EDNord - Istedgade 37A - 9000 Aalborg - telefon 96333500
System Default
The Administrator can set parameters for the system defaults.
Item
Description
Keypad Language
Specifies the language used to display menus and
messages in the printer’s message window.
Choices: English
French
German
Italian
Portuguese
Spanish
Czech
Japanese
Menu
Select
Default: English
Configuration Menu Equivalent: Sys Default/
Language
Configuring your Printer via
PageScope Light
EDNord - Istedgade 37A - 9000 Aalborg - telefon 96333500
215
Item
Description
Energy Saver
If no print jobs are sent to the printer for the time
specified by this parameter, the printer’s Energy
Saver feature is activated.
Menu
Select
Sleep Mode
Choices: Deep Sleep
Light Sleep
Standby Mode
Off
Default: Light Sleep
Sleep Timer
Choices:15 Minutes
30 Minutes
1 Hour
3 Hours
Default: 30 Minutes
Deep Sleep
Choices: 00:00-24:00
18:00-06:00
20:00-06:00
22:00-06:00
24:00-06:00
Default: 00:00-24:00*
Configuration Menu Equivalent: Sys Default/
Energy Saver
Notes:
216
*Default time zone:
100V — Japan Standard Time
110V — Greenwich Mean Time
220V — Central European Time
Configuring your Printer via
PageScope Light
EDNord - Istedgade 37A - 9000 Aalborg - telefon 96333500
Item
Description
Buzzer Control
Error Beep
Choices: Yes
No
Menu
Select
Default: Yes
Key Click
Choices: Yes
No
Default: Yes
Configuration Menu Equivalent: Sys Default/Buzzer
Control
PostScript
Job Timeout
Range: 0–300 Seconds
Menu
Select
Default: 0 Seconds
Wait Timeout
Range: 0–300 Seconds
Default: 0 Seconds
Error Report
Choices: Yes
No
Default: Yes
Configuration Menu Equivalent: Sys Default/
PostScript
Configuring your Printer via
PageScope Light
EDNord - Istedgade 37A - 9000 Aalborg - telefon 96333500
217
Item
Description
Auto Continue
Configures the printer for automatically continuing
printing after the selected media tray is empty and
the additional media tray has a different media size
or media type installed.
Menu
Select
Choices: No—disables the auto continue feature.
When the first tray empties, printing will
stop until you’ve identified the media to
be used to complete the print job.
Yes—enables the auto continue feature.
When the first tray empties, the printer
will automatically adjust for the media
installed in the second tray and
continue printing.
Default: Yes
"# Tray Chain must be On to enable the Auto
Continue feature.
Configuration Menu Equivalent: Sys Default/
Autocontinue
Start Page
Menu
Select
Prints a start page, providing printer configuration
information, when the printer is turned on.
Choices: On
Off
Default: On
Configuration Menu Equivalent: Sys Default/Start
Page
Clock
Item
Description
Date
Allows you to set the date (y = year, m = month,
d = day).
Menu
Select
Default: Present Date
Configuration Menu Equivalent: Sys Default/Clock
218
Configuring your Printer via
PageScope Light
EDNord - Istedgade 37A - 9000 Aalborg - telefon 96333500
Item
Description
Time
Allows you to set the time (h = hour, m = minute).
Default: Present Time
Menu
Select
Configuration Menu Equivalent: Sys Default/Clock
Time Zone*
Allows you to identify your time zone (0 = midnight,
Greenwich Mean Time).
Hours
Range: +12 to -12
Default: 0
Minutes
Choices: 0
30
Default: 0
Notes:
*Default time zone:
100V — Japan Standard Time
110V — Greenwich Mean Time
220V — Central European Time
Configuring your Printer via
PageScope Light
EDNord - Istedgade 37A - 9000 Aalborg - telefon 96333500
219
Admin Password
"#
This is the Admin Password for PageScope Light, and is different than
the password set on the control panel for the printer.
Item
Description
Admin Password
Identifies the Admin Password.
Range: Up to 4 characters, 0000–9999,
AAAA–ZZZZ
Default: 0000
Input Admin
Password
Menu
Select
Changes the Admin Password set by the
Administrator.
Range: Up to 4 characters, 0000–9999,
AAAA–ZZZZ
Default: Blank
Configuration Menu Equivalent: Sys Default/
Change Password
220
Configuring your Printer via
PageScope Light
EDNord - Istedgade 37A - 9000 Aalborg - telefon 96333500
Item
Description
Retype Admin
Password
Confirms the Admin Password set by the
Administrator. This must match the inputted Admin
Password.
Range:
Up to 4 characters, 0000–9999,
AAAA–ZZZZ
Default: Blank
Preference
Item
Description
Refresh Rate
Sets the refresh rate of PageScope Light in
seconds.
Range:
30–7200
Default:
60
Configuring your Printer via
PageScope Light
EDNord - Istedgade 37A - 9000 Aalborg - telefon 96333500
221
Item
Description
Language/
PageScope Light
Language
Sets the language used to display PageScope Light
windows.
Choices: English
German
French
Italian
Spanish
Czech
Portuguese
Japanese
Chinese
Default:
English
ROM Version
Item
Description
Printer Controller
Printer Controller
F/W Version
Displays the current Printer Controller Firmware
version.
Example: 00.73
222
Configuring your Printer via
PageScope Light
EDNord - Istedgade 37A - 9000 Aalborg - telefon 96333500
Item
Description
Engine F/W Version Displays the current Engine Firmware version.
Example: 16.00
Boot ROM F/W
Version
Displays the current Boot ROM Firmware version.
Example: 00.85
PDL Info
PostScript Version
Displays the current PostScript version.
Example: 3
Online Assistance
Allows you to list or configure contact and product help information.
Item
Description
Contact
Specifies the name of the person or organization
that provides assistance with the printer.
Range: Up to 63 characters
Default: KONICA MINOLTA Customer
Support
Contact Info
Specifies specific contact information.
Range: Up to 127 characters
Default: Blank
Product Help URL
Sets the help web site address for printer
assistance.
Range: Up to 127 characters
Default: www.konicaminolta.net/printer/support/
current_printers/mc2350_sup.htm
KONICA MINOLTA
Corporate URL
Sets the KONICA MINOLTA corporate web site
address.
Range:
Up to 127 characters
Default: www.konicaminolta.net/printer/
Configuring your Printer via
PageScope Light
EDNord - Istedgade 37A - 9000 Aalborg - telefon 96333500
223
Item
Description
Supplies and
Accessories
Specifies (or sets) the name of the person or
organization that provides assistance with supplies
and accessories.
Range: Up to 127 characters
Default:
224
Blank
Configuring your Printer via
PageScope Light
EDNord - Istedgade 37A - 9000 Aalborg - telefon 96333500
Save Settings
Save Settings
Device Settings allows you to save the current device settings to a file.
Restore Settings
File Name allows you to browse for a file.
Send the File to the Device allows you to send a file to the printer to set the
device settings according to the values in the file.
Configuring your Printer via
PageScope Light
EDNord - Istedgade 37A - 9000 Aalborg - telefon 96333500
225
Maintenance
Reset
Item
Description
Printer Reset/Printer Allows you to reset the printer controller.
Controller
Configuration Menu Equivalent: Sys Default/
Menu
Restore Default/Restore Printer
Select
Network Reset/
Network Interface
Menu
Select
226
Allows you to reset the printer’s network interface.
Configuration Menu Equivalent: Sys Default/
Restore Default/Restore Network
Configuring your Printer via
PageScope Light
EDNord - Istedgade 37A - 9000 Aalborg - telefon 96333500
Initialize
Item
Description
Hard Disk Format/
Format Hard Disk
Reformats the printer’s hard disk. Data on the hard
disk cannot be restored once the hard disk is
formatted.
Menu
Select
Choices:
User Area Only
All
Default:
User Area Only
"# Not displayed if no hard drive installed.
Configuration Menu Equivalent: Sys Default/HDD
Format
Restore Factory
Defaults/Printer
Controller
Firmware
Includes all settings in Paper/Quality/Sys Default
except Tray Alignment and Control Panel Password.
Configuration Menu Equivalent: Sys Default/
Restore Default/Restore Printer
Menu
Select
Restore Factory
Defaults/Network
Firmware
Menu
Select
Restores the printer controller to factory default
settings.
Restores the printer’s network interface to factory
default settings.
Includes all settings except Parallel I/O timeout and
PageScope Light password.
Configuration Menu Equivalent: Sys Default/
Restore Default/Restore Network
Configuring your Printer via
PageScope Light
EDNord - Istedgade 37A - 9000 Aalborg - telefon 96333500
227
Administrator Mode—Print Tab
Local I/F
Local I/F
I/O TimeOut
Changes the I/O TimeOut.
Range: 10-300 Seconds
Menu
Select
Default: 15
Configuration Menu Equivalent: Interface/Parallel/IO
Timeout
228
Configuring your Printer via
PageScope Light
EDNord - Istedgade 37A - 9000 Aalborg - telefon 96333500
IPP
Item
Description
IPP
Printer Name
Allows you to enter the printer name.
Range: Up to 127 characters
Default: Blank
Configuring your Printer via
PageScope Light
EDNord - Istedgade 37A - 9000 Aalborg - telefon 96333500
229
Administrator Mode—Network Tab
TCP/IP
Item
Description
DHCP/BOOTP
Allows you to enable or disable DHCP and BOOTP.
Choices: On
Off
Menu
Select
Default: On
Configuration Menu Equivalent: Interface/Ethernet/
DHCP/BOOTP
IP Address*
Sets the printer’s IP address.
Range: 0–255 for each triplet
Menu
Select
Default:
0.0.0.0
If the IP address is outside the range, the following
message displays when you choose the Apply
button: “Update unsuccessful. The address entry is
incorrect. Please go back to the previous page.”
Choose the browser’s Back button and then type an
appropriate number.
Configuration Menu Equivalent: Interface/Ethernet/
IP Address
230
Configuring your Printer via
PageScope Light
EDNord - Istedgade 37A - 9000 Aalborg - telefon 96333500
Item
Description
Subnet Mask*
Sets the subnet mask address.
Range: 0–255 for each triplet
Menu
Select
Default: 0.0.0.0
If the subnet mask address is outside the range, the
following message displays when you choose the
Apply button: “Update unsuccessful. The address
entry is incorrect. Please go back to the previous
page.” Choose the browser’s Back button and then
type an appropriate number.
Configuration Menu Equivalent: Interface/Ethernet/
Subnet Mask
Default Gateway
Enables the gateway.
Range: 0–255 for each triplet
Menu
Select
Default: 0.0.0.0
Configuration Menu Equivalent: Interface/Ethernet/
Gateway
RAW Port Number
Range: 1–65535
Default: 9100
Notes: *Always enter these addresses without leading zeros. For example,
131.011.010.001 should be entered as 131.11.10.1.
Configuring your Printer via
PageScope Light
EDNord - Istedgade 37A - 9000 Aalborg - telefon 96333500
231
IPP
Item
Description
IPP Configuration
Enable IPP
Allows you to enable (checked) or disable IPP.
Accept Print Job
Enables or disables the IPP Printing option.
Choices: Enable
Disable
Default: Enable
Printer URI
Lists Printer URI, Authenticity, and Security for
current printers.
Operational Support Allows you to choose to activate and deactivate the
following settings:
Print Job
Validate Job
Cancel Job
Get-Job-Attributes
GetJob
Get-Printer-Attributes
232
Configuring your Printer via
PageScope Light
EDNord - Istedgade 37A - 9000 Aalborg - telefon 96333500
NetWare
Item
Description
NetWare Configuration
NetWare Print
Enables or disables the NetWare Print option.
Choices: Enable
Disable
Default:
Frame Type
Enable
Identifies the frame type.
Choices: Auto
Ethernet 2
802.2
802.3
SNAP
Default: Auto
Bindery/NDS
Identifies the bindery options.
Choices: Bindery
NDS
Both
Default: NDS
Configuring your Printer via
PageScope Light
EDNord - Istedgade 37A - 9000 Aalborg - telefon 96333500
233
Item
Description
Print Server Name
Print Server
Password
Identifies the Print Server Name for the printer.
Range:
Up to 63 characters
Default:
Blank
Identifies the Print Server Password for the printer.
Range:
Up to 63 characters
Default:
Blank
Preferred File
Server
Identifiess the Preferred File Server for the printer.
Preferred NDS
Context
Identifies the Preferred NDS Context for the printer.
Range:
Up to 63 characters
Default:
Blank
Range:
Up to 191 characters
Default:
Blank
Preferred NDS Tree Identifies the Preferred NDS Tree for the printer.
Range:
Up to 63 characters
Default: Blank
Queue Scan Interval Identifies the number of the queue scan interval.
Mode
234
Range:
1–65535
Default:
1
Identifies the NetWare Configuration mode.
Choices:
PServer
NPrinter/RPrinter
Default:
PServer
Configuring your Printer via
PageScope Light
EDNord - Istedgade 37A - 9000 Aalborg - telefon 96333500
NetWare Status
NetWare Server
Lists current NetWare server.
Queue Name
Lists current NetWare queue name.
Queue Status
Lists current NetWare queue status.
Configuring your Printer via
PageScope Light
EDNord - Istedgade 37A - 9000 Aalborg - telefon 96333500
235
AppleTalk
Item
Description
AppleTalk Configuration
AppleTalk
Enables or disables AppleTalk.
Choices: Enable
Disable
Default: Enable
Printer Name
Sets the printer name.
Range: Up to 31 characters
Default: Blank
Zone Name
Sets the zone name.
Range: Up to 31 characters
Default:
236
*
Configuring your Printer via
PageScope Light
EDNord - Istedgade 37A - 9000 Aalborg - telefon 96333500
Mail
Send
Item
Description
Send
SMTP Server
Sets the SMTP Server ID.
Range: 0–255 for each triplet
Default: 0.0.0.0
SMTP Server
Time Out
Displays SMTP Server Time Out in seconds.
Range:
30–300 Seconds
Default: 60 Seconds
Configuring your Printer via
PageScope Light
EDNord - Istedgade 37A - 9000 Aalborg - telefon 96333500
237
Administrator Mode—Account Tab
"#
Only displays if a hard disk is attached.
Log Accounting
Job
Item
Activation
Activation
Description
Choices: On
Off
Default: On
Choose Apply after making a change.
Choose Reset to reset the accounting utility.
Reset
"# In order for Reset Accounting to work,
Number of the
record to display
in the User
window
you need to download the PageScope
Net Care plug-in for the magicolor 7300 from
www.konicaminolta.net/printer/ and follow the
instructions in its readme file.
By Number
Range: 50, 100, 250, 500, All
Default: 50
Choose Display to display the records.
238
Configuring your Printer via
PageScope Light
EDNord - Istedgade 37A - 9000 Aalborg - telefon 96333500
Item
Number of the
record to retrieve
as a file
Description
By Number
Range: 50, 100, 250, 500, All
Default: 50
Choose Get to get the records.
Printer Error
Item
Description
Activation
Activation
Choices: On
Off
Default: Off
Choose Apply after making a change.
Reset
Choose Reset to reset the accounting utility.
Number of the
record to display
in the User
window
By Number
Range: 50, 100, 250, 500, All
Default: 50
Choose Display to display the records.
Configuring your Printer via
PageScope Light
EDNord - Istedgade 37A - 9000 Aalborg - telefon 96333500
239
Item
Description
Number of the
record to retrieve
as a file
By Number
Range: 50, 100, 250, 500, All
Default: 50
Choose Get to get the records.
Server-Based Management
Deactivation
The Apply button allows you to activate or deactivate Server-Based
Management.
240
Configuring your Printer via
PageScope Light
EDNord - Istedgade 37A - 9000 Aalborg - telefon 96333500
Email Notification
Configuration
Item
Description
Configuration Setting
From Address
Range: Up to 129 characters
Default: Blank
To Address
Range: Up to 129 characters
Default: Blank
Subject
Range: Up to 128 characters
Default: magicolor 7300
When to Send Email
Choices: Off
1 Minute
30 Minutes
1 Hour
Default: Off
Test Report
Test Report allows you to print a test report with the Apply button.
Configuring your Printer via
PageScope Light
EDNord - Istedgade 37A - 9000 Aalborg - telefon 96333500
241
Configuring your Printer via the Printer
Control Panel Menus
Many of the printer’s configuration settings can be made through the printer’s
control panel. The following menu charts identify option locations in the menu
structure.
"#
Clicking on a shaded
menu item opens a page in the PageScope
Light section (previous section) to provide information about
equivalent controls and settings. After viewing the PageScope Light
information, select the Previous View button
to return to the menu
section.
Main Menu
READY
MAGICOLOR 7300
MAIN MENU
PRINT MENU
MAIN MENU
PAPER
MAIN MENU
QUALITY
MAIN MENU
INTERFACE
MAIN MENU
SYS DEFAULT
MAIN MENU
SERVICE
Print Menu
PRINT MENU
PRINT MENU
STATISTICS PAGE
PRINT MENU
CONFIGURATION
PRINT MENU
FONT LIST
PRINT MENU
REGISTRATION
PRINT MENU
MENU MAP
PRINT MENU
DIRECTORY LIST
Statistics Page
Print a statistics page that indicates the condition of
consumables.
Configuration
Print a configuration page.
Font List
Print a font list of each PDL.
Demo Page
Print a demonstration page.
Registration
Print a registration page.
Menu Map
Print a menu map of the control panel menus available.
Directory List
Print a directory list.
"# Only displays if a hard disk is attached.
"#
242
Use letter/A4 media for printing statistics page, configuration page,
and font list.
Configuring your Printer via the
Printer Control Panel Menus
EDNord - Istedgade 37A - 9000 Aalborg - telefon 96333500
Paper Menu
PAPER MENU
INPUT TRAY
COPIES
DUPLEX
(duplex unit required)
COLLATE
(hard disk required)
1–999
OFF
SHORT EDGE
LONG EDGE
DEFAULT TRAY
TRAY 1
TRAY 2
Input Tray
TRAY 3
(optional)
TRAY 4
(optional)
OFF
ON
TRAY CHAIN
TRAY1 CONTROL
ON
OFF
DEFAULT
MEDIA
CHAIN
CONTROL
Enter settings related to the media tray.
Options:
Default Tray
Tray Chain
Tray1 Control
"# Tray selection may be overridden by the printer
driver.
"# If custom size media is installed in Tray1 when
TRAY CHAIN is ON, the media size may not be
recognized correctly when the tray is switched.
Default Tray
Tray Chain
Specify the tray that is normally used.
Choices:
Tray1
Tray2
Tray3
Tray4
Default:
Tray1
Specify whether to switch to a tray containing media of the
same size when the specified tray becomes empty.
Choices:
On
Off
Default:
On
Configuring your Printer via the
Printer Control Panel Menus
EDNord - Istedgade 37A - 9000 Aalborg - telefon 96333500
243
Tray1
Control
Duplex
Specify the default media type that is set in Tray1 (Default
Media). Specify whether to include Tray1 as a possible
switch tray for Tray chain (Chain Control).
Choices:
Default Media
Chain Control
Default:
Default Media
Set DUPLEX when you wish to perform duplex printing.
Choices:
Off: Simplex printing.
Short Edge: Duplex printing in
calendar style using
portrait orientation.
Long Edge: Duplex printing in book
style using portrait orientation.
Default:
Off
"# Displayed only when the optional duplex unit is
installed.
Copies
Collate
Specify the number of copies to be printed.
Range:
0–999
Defaut:
1
Set the sorting function. When turned ON and two or more
copies are printed, the copies are automatically sorted.
(ex. 1, 2, 3, 1, 2, 3, … 1, 2, 3)
Choices:
On
Off
Default:
Off
"# Displayed only when the optional hard disk drive is
installed.
244
Configuring your Printer via the
Printer Control Panel Menus
EDNord - Istedgade 37A - 9000 Aalborg - telefon 96333500
Quality Menu
QUALITY
AIDC
ENABLE
DISABLE
AIDC
TRAY ALIGNMENT
TOP ADJ
NORMAL
TOP ADJ
THICK
LEFT
ADJUST
LEFT ADJ
DUPLEX
Specify whether to enable the Automatic Image Density
Control. When turned ON, AIDC calibration is executed at a
constant cycle.
Tray Alignment
Choices:
Enable
Disable
Default:
Enable
Print position alignment is performed on each media tray.
Select the submenu below and select the tray you wish to
align.
Options:
Top Adj Normal
Top Adj Thick
Left Adjust
Left Adj Duplex
"# After making an alignment, print a test page to see
if the print position is appropriate.
Top Adj
Normal
Align the top margin in the feed direction for printing on
plain paper.
Tray1
Tray2
Tray3
Tray4
Duplex2pass
Manual Feed
Top Adj
Thick
Tray1
Manual Feed
Range:
–2.4 to +2.1 mm
Default:
0.0 mm
Align the top margin in the feed direction for printing on
thick stock.
Range:
–1.6 to +1.4 mm
Default:
0.0 mm
Configuring your Printer via the
Printer Control Panel Menus
EDNord - Istedgade 37A - 9000 Aalborg - telefon 96333500
245
Left Adjust
Tray1
Tray2
Tray3
Tray4
Manual Feed
Left Adj
Duplex
Tray1
Tray2
Tray3
Tray4
Align the left margin in the feed direction.
Range:
–2.4 to +2.1 mm
Default:
0.0 mm
Align the left margin of the backside of duplex printing.
Range:
–2.4 to +2.1 mm
Default:
0.0 mm
?
Why Would a Tray Need
Alignment?
The Top Adj Normal, Top Adj Thick,
Left Adjust, and Left Adj Duplex
adjustments allow you to modify
the way the image is placed on the
page.
This alignment is useful to users
who need the images shifted due
to stationery requirements (such as
photos or colored margins on the
left side of the paper), or when
printing on paper that will be
punched on any side for binding
holes.
246
Configuring your Printer via the
Printer Control Panel Menus
EDNord - Istedgade 37A - 9000 Aalborg - telefon 96333500
Interface Menu
INTERFACE MENU
ETHERNET
PARALLEL
Interface/Ethernet
INTERFACE
ETHERNET
IP ADDRESS
SUBNET MASK
GATEWAY
192.168.001.002
255.255.255.000
192.168.001.001
Ethernet
DHCP/BOOTP
ON
OFF
H/W
ADDRESS
00206Bxxxxxx
If the printer is connected and used on a network, the
following settings should be specified. For details about
each setting, contact your network administrator.
Options:
IP Address
Subnet Mask
IP Address
Subnet Mask
Gateway
H/W Address
Set the IP address of this printer on the network. Use the
Up, Down, Left, and Right keys to enter the value.
Range:
000.000.000.000 to
999.999.999.999
Default:
0.0.0.0
Set the subnet mask value of the network. Use the Up,
Down, Left, and Right keys to enter the value.
Range:
000.000.000.000 to
999.999.999.999
Default:
0.0.0.0
Configuring your Printer via the
Printer Control Panel Menus
EDNord - Istedgade 37A - 9000 Aalborg - telefon 96333500
247
Gateway
If a router is used on the network, enter the IP address of
the router. Use the Up, Down, Left, and Right keys to enter
the value.
Range:
000.000.000.000 to
999.999.999.999
Default:
0.0.0.0
DHCP/BOOTP DHCP/BOOTP: Set this setting to YES when there is a
DHCP server on the network or the IP address is assigned
automatically using BOOTP.
H/W Address
Choices:
On
Off
Default:
On
The Ethernet hardware address for this printer can be
displayed. (It cannot be changed.)
Default:
Notes:
00206Bxxxxxx
After the Ethernet settings are changed, the printer
automatically reboots.
Interface/Parallel
INTERFACE
PARALLEL
IO TIMEOUT
10
11
.
15
.
300
248
Parallel
If the printer is connected and used on a parallel
connection, the following setting should be specified.
IO Timeout
Set the time for timing out when there is no data exchange
for a given time for the parallel connection.
Range:
10–300
Default:
15
Configuring your Printer via the
Printer Control Panel Menus
EDNord - Istedgade 37A - 9000 Aalborg - telefon 96333500
System Default Menu
SYS DEFAULT
LANGUAGE
Notes:
ENERGY
SAVER
BUZZER
CONTROL
POSTSCRIPT
CHANGE
PASSWORD*
HDD
FORMAT**
CLOCK***
AUTOCONTINUE
START
PAGE
RESTORE
DEFAULT
*0000 = Disable Password.
**HDD (Hard Disk Drive) format only appears if an optional hard disk
is installed.
***Date conventions set at the factory:
220 volt: DD.MM.YYYY
100 volt: YYYY.MM.DD
110 volt: MM.DD.YYYY
Y = Year, M = Month, D = Day.
Default time zone:
100V — Japan Standard Time
110V — Greenwich Mean Time
220V — Central European Time
Language
The language in which messages are displayed can be
changed.
Choices:
English
French
German
Italian
Portuguese
Spanish
Czech
Japanese
Default:
English
Configuring your Printer via the
Printer Control Panel Menus
EDNord - Istedgade 37A - 9000 Aalborg - telefon 96333500
249
System Default/Energy Saver
SYS DEFAULT
ENERGY SAVER
SLEEP MODE
SLEEP
TIMER
DEEP SLEEP
MENU
DEEP SLEEP
LIGHT SLEEP
STANDBY
MODE
OFF
15 MINUTES
30 MINUTES
1 HOUR
3 HOURS
00:00-24:00
18:00-06:00
20:00-06:00
22:00-06:00
24:00-06:00
Energy Saver
If a print job is not received or no operation is performed for
a given time, the printer enters sleep mode. This menu sets
the details of sleep mode.
Options:
250
Sleep Mode
Sleep Timer
Deep Sleep Menu
Configuring your Printer via the
Printer Control Panel Menus
EDNord - Istedgade 37A - 9000 Aalborg - telefon 96333500
Sleep Mode
Choices:
Deep Sleep: This is displayed only
when Deep Sleep Mode is On. When
set to Disable, the printer waits in light
sleep mode without entering deep sleep
mode. When set to Enable, the printer
enters deep sleep mode after light sleep
mode. If a time slot is specified and the
sleep timeout expires during the time
slot, the printer enters deep sleep mode
directly without entering light sleep
mode. The printer and control panel are
disabled, but the control panel’s Energy
Saver LED is lit which means the
Energy Saver button is active to enable
the printer to “wake up.”
Light Sleep: To save energy and extend
the life of the fuser, the printer goes into
an Energy Saver mode. The printer may
receive and process data, and the control panel is fully functional.
Standby Mode: This preheating mode
keeps the fuser warm and ready to
print.
Off: when set to Off, the printer is ready
for operation at all times.
Default:
Off
Sleep Timer
Choices:
15 Minutes
30 Minutes
1 Hour
3 Hours
30 Minutes
Deep Sleep
Menu
Choices:
Default:
Default:
00:00-24:00
18:00-06:00
20:00-06:00
22:00-06:00
24:00-06:00
00:00–24:00
Configuring your Printer via the
Printer Control Panel Menus
EDNord - Istedgade 37A - 9000 Aalborg - telefon 96333500
251
System Default/Buzzer Control
SYS DEFAULT
BUZZER CONTROL
ERROR BEEP
YES
Buzzer Control
NO
Options:
KEY CLICK
NO
YES
Error Beep: Set whether to sound a
buzzer when errors occur.
Choices:
Yes
No
Default:
Yes
Key Click: Set whether to generate
key-touch sounds.
252
Choices:
Yes
No
Default:
Yes
Configuring your Printer via the
Printer Control Panel Menus
EDNord - Istedgade 37A - 9000 Aalborg - telefon 96333500
System Default/PostScript
SYS DEFAULT
POSTSCRIPT
JOB TIMEOUT
WAIT TIMEOUT
ERROR
REPORT
0 SECOND
1 SECOND
2 SECONDS
.
.
300 SECONDS
0 SECOND
1 SECOND
2 SECONDS
.
.
300 SECONDS
YES
PostScript
Job Timeout
NO
Options: Job Timeout
Wait Timeout
Error Report
Set the maximum amount of time the printer processes a
print job before it ends the job.
(0 Seconds corresponds to no timeout.)
Range: 0–300 Seconds
Default: 0 Seconds
Wait Timeout
Set the maximum amount of time during which there is no
data exchange before the printer ends the job.
(0 Seconds corresponds to no timeout.)
Range: 0–300 Seconds
Default: 0 Seconds
Error Report
Specify whether to print a report when a PostScript error
occurs.
Choices: Yes
No
Default: Yes
Configuring your Printer via the
Printer Control Panel Menus
EDNord - Istedgade 37A - 9000 Aalborg - telefon 96333500
253
System Default/Change Password
SYS DEFAULT
CHANGE PASSWORD
Change
Password
Set or change the password.
The password specified here is required when entering the
Interface menu and Sys Default menu.
Range:
0000–9999 to AAAA–ZZZZ (up to 4
digits or characters in any combination)
Default:
0000
Password = 0000 denotes “no password.”
"# This is the password set on the control panel for the
printer, and is different than the Admin Password for
PageScope Light.
254
Configuring your Printer via the
Printer Control Panel Menus
EDNord - Istedgade 37A - 9000 Aalborg - telefon 96333500
System Default/HDD Format
SYS DEFAULT
HDD FORMAT
USER AREA ONLY
"#
ALL
HDD Format only appears if the optional hard disk is installed.
HDD Format
Format the hard disk drive.
Options:
User Area Only
All
Default:
No default given
"# Displayed only when the optional hard disk drive is
installed.
User Area
Only
Format user area of hard disk drive, including delete fonts,
overlays, and profiles.
All
Format entire hard disk drive, including delete all system
files.
Notes:
The printer will automatically reboot after the user confirms
the change and clicks OK.
Configuring your Printer via the
Printer Control Panel Menus
EDNord - Istedgade 37A - 9000 Aalborg - telefon 96333500
255
System Default/Clock
SYS DEFAULT
CLOCK
Clock
Set the date/time.
Notes:
Date conventions set at the factory:
220 volt: DD.MM.YYYY
100 volt: YYYY.MM.DD
110 volt: MM.DD.YYYY
Y = Year, M = Month, D = Day.
Default time zone:
100V — Japan Standard Time
110V — Greenwich Mean Time
220V — Central European Time
256
Configuring your Printer via the
Printer Control Panel Menus
EDNord - Istedgade 37A - 9000 Aalborg - telefon 96333500
System Default/Autocontinue
SYS DEFAULT
AUTOCONTINUE
YES
Autocontinue
NO
Auto continue determines tray/paper size selection (page
policy). With Autocontinue=YES, the printer selects tray/
paper size which has a same or nearest paper size among
selected trays. Print image is automatically scaled to fit to
selected size.
With Autocontinue=NO, the printer selects tray/paper size
which has exactly the same paper size among selected
trays. Print image is not scaled, and a paper size mismatch
error may occur.
Choices:
Yes
No
Default:
Yes
System Default/Start Page
SYS DEFAULT
START PAGE
NO
YES
Start Page
A start page prints after power on.
Choices:
Yes—a start page prints after power on.
No—a start page does not automatically
print after power on.
Default:
Yes
Configuring your Printer via the
Printer Control Panel Menus
EDNord - Istedgade 37A - 9000 Aalborg - telefon 96333500
257
System Default/Restore Default
SYS DEFAULT
RESTORE DEFAULT
RESTORE I/F
Restore Default
RESTORE PRINTER
Options:
RESTORE ALL
Restore I/F
Restore Printer
Restore All
Default: No default given.
Restore I/F
Restore the interface settings (except for the PageScope
Light).
Restore Printer
Restore all settings in PAPER/QUALITY/SYS DEFAULT.
Restore All
Restore all settings.
Service Menu
The Service Menu is password protected. It allows a service technician to
handle maintenance and service procedures.
258
Show Version
Display the controller firmware, engine firmware, and boot
firmware versions.
Page Count
Display the total page counter value (8 digits).
Factory Setting
Set the software DIP switches (32 switches).
Configuring your Printer via the
Printer Control Panel Menus
EDNord - Istedgade 37A - 9000 Aalborg - telefon 96333500
Configuring your Printer via the Printer
Drivers
The printer driver will override all control panel selections.
Accessing Windows Me/98 Printer Driver Configuration
There are two methods of accessing the printer driver configuration items in
Windows Me/98:
1... via the printer device
2... via your application’s
Gives you access to all printer
settings.
Gives you access to Paper, Page
Layout, Image, Device Option,
and About tabs.
properties
printer setup
Lets you assign the default printer Lets you assigns the printer setsettings for all print jobs.
tings for only the current print job.
Retains your settings until
changed again via properties.
Temporarily overrides the existing
default settings.
How To:
How To:
1 From the Windows Start
menu choose
Settings, and then choose
Printers.
1 From the application’s File
menu choose Print (or, in
some cases, Print Setup or
Page Setup).
2 Select your printer.
2 In the Print, Print Setup, or
Page Setup dialog box,
choose your printer.
3 From the File menu, choose
Properties.
4 Choose the Details tab, and
then select Setup.
5 Make your selections, and
then select OK to save your
changes.
6 Close the Printers window.
"#
3 Select the Properties button.
4 Make your selections, and
then select OK to save your
changes.
5 Select OK from the Print
Setup window.
You should configure your printer driver settings via the printer device
properties method for your typical print jobs and use your application’s
printer setup method for print jobs that require special, less frequently
needed printer settings.
Configuring your Printer via the
Printer Drivers
EDNord - Istedgade 37A - 9000 Aalborg - telefon 96333500
259
Standard Printer Driver Tabs in Windows Me/98
The configuration items of KONICA MINOLTA PostScript drivers are arranged
on tabs in combination with the branches and tabs that are provided by the
Windows operating system. Each tab or branch represents a functional part
of a print job. See your operating system documentation and the printer
driver’s online help for complete information.
The standard Windows tabs and a summary of the options found on each are
as follows:
! General—Allows you attach comments, use a separator page, and print a
test page. See your
Windows documentation.
! Details—Allows you to set interface connection details. See your
Windows documentation.
–
Setup Button—This button on the Details tab leads to the Printer
Configuration tabs that are also accessible from your application’s
printer setup properties.
! Sharing—Allows you to set up the printer so others on the network can
use it. See your Windows documentation.
! Color Management—Allows you to select the color profile associated
with your printer or allow the operating system to make the selection for
you.
Driver Configuration Tabs
! Layout Tab—Contains configuration controls for setting page orientation,
duplex options, staple options, and pages per sheet.
! Paper Tab—Contains media configuration items. These items allow you
to select the media and control how the media is processed by the printer.
–
Advanced Paper Handling—You can configure page header, first
page, trailer page, and media selection options.
! Features Tab—Contains links to color, graphics, and postscript dialogs,
and provides resolution and quick color configuration options.
–
Color Options—Allow you to fine-tune color printing settings.
However, in most cases, the color optimization provided in the Quick
Color Configuration drop-down list box is the easiest way to produce
the best color output possible.
% Configure ICC and CRD Color Matching Dialogs—Opened by
selecting the configure buttons on the Color Options dialog.
–
260
Graphics Options—Contains configuration items used to control the
placement of the image on the page.
Configuring your Printer via the
Printer Drivers
EDNord - Istedgade 37A - 9000 Aalborg - telefon 96333500
–
PostScript Options—Allows you to control headers, job timeouts and
additional PostScript printing options.
! Overlays Tab—Contains the controls you need to configure and
customize watermarks.
–
Watermarks—Accessible from the Overlays tab, the Watermarks
dialog allows you add new watermarks and edit existing watermarks.
! Fonts Tab—Contains the configuration items that allow you to specify
which fonts are used or substituted for, during printing.
! Consumables Tab—Allows you to monitor your printer’s consumables
and maintenance schedule. This information is available if the printer’s IP
Address is entered in the IP Name/Address text box on the Settings tab.
The bars show the amount of planes or faces that are left before
replacement or maintenance must occur.
! Settings Tab—Allows you to customize the printer driver for your printer
configuration.
! About Tab—Displays the printer driver identification, gives you a link to
our Internet website, and allows you to reset all of the driver’s
configuration items to their original values.
Accessing Windows XP/2000/NT4 Printer Driver
Configuration
There are three methods you can use to configure the printer driver designed
for Windows XP/2000/NT4. However, these three methods don’t all have the
same options or control.
1... via the printer device
properties
Gives you access to the General,
Ports, Scheduling (Windows
NT4) or Advanced (Windows XP/
2000), Sharing, Security, and
About tabs
Lets you assign the printer
settings for all print jobs
Retains your settings until
changed again via properties
2... via your application’s
printer setup
Gives you access to the Paper,
Page Layout, Image, Device
Options, and About tabs
Lets you assigns the printer
settings only for the current
print job
Temporarily overrides the
existing default document
settings
Configuring your Printer via the
Printer Drivers
EDNord - Istedgade 37A - 9000 Aalborg - telefon 96333500
261
1... via the printer device
properties
How To:
1 From the Windows Start
menu choose Settings.
2 Choose Printers.
3 Choose your printer.
4 From the File menu, choose
Properties.
5 Make your selections, and
then select OK to save your
changes.
6 Close the Printers window.
2... via your application’s
printer setup
How To:
1 From the application’s File
menu choose Print (or, in
some cases, Print Setup or
Page Setup).
2 In the Print, Print Setup, or
Page Setup dialog box,
choose your printer.
3 Select the Properties button.
4 Make your selections, and
then select OK to save your
changes.
5 Select OK from the Print
Setup window.
3
... via document defaults (Windows NT4) or
via printing preferences (Windows XP/2000)
Gives you access to the Paper, Page Layout, Image, Device
Options, and About tabs
Lets you assign the default printer settings for all print jobs
Retains your settings until changed again via properties
How To:
1 From the Windows Start menu choose Settings.
2 Choose Printers.
3 Select your printer.
4 From the File menu, choose Default Document Properties
(Windows NT4) or choose Printing Preferences (Windows XP/
2000).
5 Make your selections, and then select OK to save your changes.
6 Close the Printers window.
"#
262
You should configure your printer driver settings via the printer device
properties and document defaults properties for your typical print jobs
and use your application’s printer setup method for print jobs that
require special, less frequently needed printer settings.
Configuring your Printer via the
Printer Drivers
EDNord - Istedgade 37A - 9000 Aalborg - telefon 96333500
"#
Because Windows NT remembers the configuration changes you
make to the driver, reinstalling the driver does not restore the factory
default configuration.
Printer Device Properties in Windows XP/2000/NT4
The configuration items of KONICA MINOLTA PostScript drivers are arranged
on tabs in combination with the branches and tabs that are provided by the
Windows operating system. Each tab or branch represents a functional part
of a print job. See your operating system documentation and the printer
driver’s online help for complete information.
The following are tabs that appear when the printer device properties has
been chosen. The tabs and a summary of the options found on each are as
follows:
! General (Windows XP, Windows 2000, and Windows NT4)—Allows
you to name the printer, specify a location, specify a driver to be used,
install a new or updated printer driver, use a separator page between
documents, specify a specialized print processor/data type, and print a
test page. See your Windows documentation.
! Ports (Windows XP, Windows 2000, and Windows NT4)—Lists the
available ports (under Ports), the associated port monitor (under
Description), and a comma-delimited list of printers that use the port
(under Printer). Allows you to add, delete, or configure ports. It also allows
the printer to get setting and status information from other printing
devices, and enables printer pooling (printing to two or more identical
printing devices through one logical printer). See your Windows
documentation.
! Device Settings (Windows XP, Windows 2000, and Windows NT4)—
Allows you to configure tray assignments, memory, output protocol and
job timeout.
! Settings (Windows XP, Windows 2000, and Windows NT4)—Allows
you to customize the printer driver for your printer configuration.
! Consumables (Windows XP, Windows 2000, and Windows NT4)—
Allows you to monitor your printer’s consumables and maintenance
schedule. This information is available if the printer’s IP Address is
entered in the IP Name/Address text box on the Settings tab. The bars
show the amount of planes or faces that are left before replacement or
maintenance must occur.
! Color Management (Windows XP and Windows 2000)—Allows you to
select the color profile associated with your printer or allow the operating
system to make the selection for you. See your Windows documentation.
! Advanced (Windows XP and Windows 2000), or Scheduling
(Windows NT4)—Allows you to configure the printer for availability, set
Configuring your Printer via the
Printer Drivers
EDNord - Istedgade 37A - 9000 Aalborg - telefon 96333500
263
spooling information, and define default document printing priority. See
your Windows documentation.
! Sharing (Windows XP, Windows 2000, and Windows NT4)—Allows
you to share the printer and install alternate drivers. See your Windows
documentation.
! Security (Windows 2000 and Windows NT4)—Allows you to modify the
permissions to limit access on the printer, view or set auditing information,
or view or take ownership of the selected item(s). See your Windows
documentation.
The About, Consumables, Features, Fonts, Layout, Paper/Quality, and
Overlay tab—accessible from your application’s printer setup and from
document default properties are explained next.
Printing Preferences/Document Default Properties in
Windows 2000/NT4
! Paper/Quality Tab (Windows XP and Windows 2000), or Page Setup
(Windows NT4)—Contains media configuration items and color printing
selection.
! Layout Tab (Windows XP and Windows 2000)—Contains controls for
setting orientation, duplexing, page order, and pages per sheet.
! Features Tab (Windows XP, Windows 2000, and Windows NT4)—
Allows you to choose printing resolution, quick color settings, and user
default settings. From this tab you can also access additional choices for
the following dialogs.
–
Graphics Options—Contains configuration items used to control the
placement of the image on the page.
–
Color Options—Contains configuration items that allow you to
fine-tune color printing settings. However, in most cases, the color
optimization provided in the Quick Color Configuration drop-down list
box is the easiest way to produce the best color output possible.
% Configure ICC Color Matching—The ICC Color Matching and
CRD Color Matching dialogs are opened by selecting the configure
buttons on the Color tab.
% PostScript Options—Allows you to control headers, job timeouts
and additional PostScript printing options.
% Document Options (Windows XP and Windows 2000)—Allows
you to setup configuration items to control collation, copy count,
and E-mail notification.
! Overlays Tab (Windows XP, Windows 2000, and Windows NT4)—
Allows you to configure and customize watermarks.
264
Configuring your Printer via the
Printer Drivers
EDNord - Istedgade 37A - 9000 Aalborg - telefon 96333500
–
Watermarks Dialog—Accessible from the Overlays tab, the
Watermarks dialog allows you add new watermarks and edit existing
watermarks.
! About Tab (Windows XP, Windows 2000, and Windows NT4)—
Displays the printer driver identification, gives you a link to our Internet
website, and allows you to reset all of the driver’s configuration items to
their original values.
Printer Driver Configuration Items
For information about printer controls and features, refer to the printer driver’s
online help.
"#
Not all options described in online help are available on all models of
KONICA MINOLTA printers. Refer to your printer documentation to
determine which options apply to your printer.
Configuring your Printer via the
Printer Drivers
EDNord - Istedgade 37A - 9000 Aalborg - telefon 96333500
265
EDNord - Istedgade 37A - 9000 Aalborg - telefon 96333500
Accounting
5.4
EDNord - Istedgade 37A - 9000 Aalborg - telefon 96333500
Printer-based Accounting
Your printer can capture and save details about each print job your printer
processes. The captured information is stored in an accounting file on the
printer’s internal hard disk and can be retrieved using PageScope Light . This
chapter describes how to retrieve and interpret the accounting information
stored in the accounting file.
"#
You can also use PageScope Net Care to perform advanced
accounting tasks. It can gather accounting information for an
individual printer or it can combine accounting data for multiple
printers on the same network into a single database. See the
PageScope Net Care online help or check the user manual on the
Software Utilities CD-ROM or from the KONICA MINOLTA website at
www.konicaminolta.net/printer/.
Retrieving Accounting Information
Using PageScope Light
You can retrieve accounting data from your printer using the printer’s internal
web page interface (PageScope Light).
"#
1
2
3
4
268
If Administration security is enabled from the Configuration/Security
window, changing accounting parameters requires an administrator
password.
Open the PageScope Light interface associated with the printer
containing a hard disk and the accounting data you want to retrieve.
Select the Account tab.
The Account tab
opens.
Choose the Number of
the Record to Retrieve
in the User Window.
Click Display.
Choose how and
where the accounting
information is to be
retrieved from the
Display Information list
box.
Printer-based Accounting
EDNord - Istedgade 37A - 9000 Aalborg - telefon 96333500
Job Accounting Data Display Example
Accounting File Format
CSV File Format
The printer stores accounting data in a CSV (Comma Separated Values) file
format. CSV is an ASCII (plain text) representation of spreadsheet data. The
values are separated by commas to indicate the separating points for
columns.
"#
The character code format for the CSV data is UTF-8.
Data Order
The first line of the file is used for describing each field name. This line is
created when each accounting function is activated. Lines following the first
line are used for storing actual accounting information.
"#
New information is always attached to the bottom line of the file.
Accounting File Format
EDNord - Istedgade 37A - 9000 Aalborg - telefon 96333500
269
Log Accounting/Job Data Example
Log Accounting Fields
Field
Format
Activation
Choices: ON
OFF
Default: ON
Button: Apply
Description This field displays the information identifying that the Job
Accounting has been turned on or off.
Field
Format
Reset
Choices: ON
OFF
Default: ON
Button: Reset
Description In environments where PageScope Net Care is used and
the mail settings have been specified for PageScope Net
Care and PageScope Light, pressing this button resets the
job accounting log.
270
Log Accounting Fields
EDNord - Istedgade 37A - 9000 Aalborg - telefon 96333500
Field
Format
Number of record to display in the User
Window
Choices: 50, 100, 250, 500, or ALL
Default: 50
Button: Display
Description This field displays the information identifying the number of
the record to display in the User Window.
Field
Format
Number of record to retrieve as a file
Choices: 50, 100, 250, 500, or ALL
Default: 50
Button: Get
Description This field displays the information identifying the number of
the record to retrieve as a file.
Field Definitions
This section identifies and defines the Log Accounting/Job fields that are
used in the Accounting file.
As each print job is completed, the information describing the print job is
saved in the accounting file. This information allows you to analyze
consumable usage, media usage, operator usage, and the history of printer
activities.
Field Definitions
EDNord - Istedgade 37A - 9000 Aalborg - telefon 96333500
271
Job Accounting Fields
Field
Function
Format <Numeric (1 digit)><Space><String (1–32 characters)>
Description This field identifies the printer function that was completed.
Example: 2 Print Job.
Field
Job ID
Format <Numeric (1–65536 digits)>
Description This number is used to uniquely identify print jobs sent to
the printer. The Job ID is an incremental counter (1-65536)
and counts all print jobs received by the printer. After the
counter reaches 65536, it restarts the count from 1.
The Job ID is assigned when the printer recognizes the
data it is receiving as a job.
Notes The current count remains in memory even after the printer
is turned off.
Field
Division ID
Notes Not supported on the magicolor 7300.
Field
Charge No
Format <Numeric (1– 8 digits)>
Description This field displays information identifying the group to be
charged for the job.
Notes The value of this field corresponds to the PJL command
@PJL SET CHARGENUMBER.
Field
Host
Format <String (1–16 characters)>
Description This field displays the information identifying the host that
submitted the job.
Notes The value of this field corresponds to the PJL command
@PJL SET HOST.
272
Job Accounting Fields
EDNord - Istedgade 37A - 9000 Aalborg - telefon 96333500
Field
Owner
Format <String (1–64 characters)>
Description This field displays the information identifying the owner of
the job.
Notes The value of this field corresponds to the PJL command
@PJL SET USERNAME.
Field
Receive Time
Format <YYYY/MM/DD><Space><HH:MM:SS>
Description This field displays the date and time when the printer
received the job.
Example: 2003/03/05 16:48:30
Notes This format is supported by MS Excel.
Field
Finish Time
Format <YYYY/MM/DD><Space><HH:MM:SS>
Description This field displays the time when the final page of the job
was delivered to the output bin.
Example: 2003/03/05 16:48:35
Notes This format is supported by Microsoft Excel.
Field
Job Type
Format <Numeric (1–2 digits)><Space><String (1–16 characters)>
Description This field categorizes the type of job received by the printer.
Examples: 20 Normal — General printing job.
21 IPP Print — Normal jobs received via IPP
protocol.
29 Report Print — Internally created job.
Field
Title
Format <String (1–32 characters)>
Description This field displays the title of the document, if known.
Notes The value of this field corresponds to the PJL command
@PJL JOB NAME.
Job Accounting Fields
EDNord - Istedgade 37A - 9000 Aalborg - telefon 96333500
273
Field
Document Pages
Format <Numeric (1–999)>
Description This field displays the number of pages in the job.
Example: 5 pages x 4 copies x simplex = the value is 5.
Field
Copies
Format <Numeric (1–999)>
Description This field displays the number of copies in the job.
Example: 5 pages x 4 copies x simplex = the value is 4.
Field
Faces
Format <Numeric (1–9,999)>
Description This field displays the number of faces printed in the job.
Example: 5 faces x 4 copies x simplex = the value is 20.
Field
Sheets
Format <Numeric (1–999)
Description This field displays the number of physical sheets of paper
in the job.
Example: 5 pages x 4 copies x simplex/(duplex) = the
value is 20/(10).
Field
Image Type
Format <Numeric (1 digit)><Space><String (1–16 characters)>
Description The image type in the color mode.
Examples: 2 Color (including monochrome color and full
color) and 4 Grayscale.
Field
Format
Format <Numeric (1–2 digits)><Space><String (1–16 characters)>
274
Job Accounting Fields
EDNord - Istedgade 37A - 9000 Aalborg - telefon 96333500
Description This field displays the file format or language of the job.
Examples: 8 PDF and 10 PostScript.
Field
Data Size
Notes Not supported on the magicolor 7300.
Field
Destination
Format <String (1–32 characters)>
Description This field displays the media output tray.
Notes The magicolor 7300 supports only one output tray.
Field
Finishing
Notes Not supported on the magicolor 7300.
Field
Duplex
Format <Numeric (1 digit)><Space><String (1–8 characters)
Description This field displays the duplex printing mode.
Examples: 1 On and 2 Off.
Field
Cyan Coverage
Notes Not supported on the magicolor 7300.
Field
Magenta Coverage
Notes Not supported on the magicolor 7300.
Field
Yellow Coverage
Notes Not supported on the magicolor 7300.
Field
Black Coverage
Notes Not supported on the magicolor 7300.
Job Accounting Fields
EDNord - Istedgade 37A - 9000 Aalborg - telefon 96333500
275
Field
Status
Format <Numeric (1–2 digits)><Space><String (1–16 characters)>
Description This displays the completion status of the page.
Examples: 0 Unknown, 30 OK, 33 Canceled.
Field
Details (Status)
Notes Not supported on the magicolor 7300.
Field
Connection
Format <String (1–16 characters)>
Description This field displays the type of printer connection.
Examples: Ethernet, USB, IEEE1284, and Internal.
Field
Paper Size
Format <Numeric (1–3 digits)><Space><String (1–8 characters)>
Description This field displays the paper size used by the job.
Examples: 31 11x17 and 39 letter.
Field
Media Type
Format <Numeric (1–2 digits)><Space><String (1–16 characters)>
Description This field displays the media type used by the job.
Examples: 210 Plain Paper and 230 Transparency.
Field
Resolution
Format <String (1–16 characters)>
Description This field displays the resolution (DPI) of the job.
Examples: 600*600*1 and 600*600*4 (4-bit contone).
276
Job Accounting Fields
EDNord - Istedgade 37A - 9000 Aalborg - telefon 96333500
PJL Commands
In this Section...
! Chapter 6.1 — “Introduction”
Describes PJL, features, and an overview of
the commands available for your printer.
! Chapter 6.2 — “Conventions”
Describes the typographical and context
conventions that must be used when working
with the PJL command set and information
about variables and language configuration.
! Chapter 6.3 — “Issuing PJL Commands”
Identifies the methods that can be used to
send PJL commands to your printer.
! Chapter 6.4 — “PJL Commands”
Identifies the PJL commands supported by
your printer.
! Chapter 6.5 — “Status Codes”
Describes the status codes that are returned
following the transmission of @PJL INFO
STATUS and USTATUS commands to the
printer.
! Chapter 6.6 — “DOC Matrix”
Identifies the methods that can be used to
make the transition from DOC Commands to
PJL commands.
EDNord - Istedgade 37A - 9000 Aalborg - telefon 96333500
Chapter Location
Chapter
Title
Begins on
page...
6.1
“Introduction”
279
6.2
“Conventions”
283
6.3
“Issuing PJL Commands”
289
6.4
“PJL Commands”
293
6.5
“Status Codes”
307
6.6
“DOC Matrix”
311
EDNord - Istedgade 37A - 9000 Aalborg - telefon 96333500
Introduction
6.1
EDNord - Istedgade 37A - 9000 Aalborg - telefon 96333500
About PJL
Printer Job Language (PJL) enables technical support and software
application developers to send commands to the printer and receive printer
status. This allows you to control the printer’s configuration for a print job and
to establish two-way communications with the printer. In addition, PJL
commands can be used to change the printer’s control panel settings and to
change the printing language from within applications.
In This Section
This PJL Reference Section contains information about the PJL commands
that are supported by your printer. Section 6.1 provides a general introduction
to PJL. Section 6.3 contains the full list of PJL commands supported by your
printer and describes the function of each command. If you have experience
using PJL commands, you can skip the remainder of this section and begin
with Section 6.2.
Overview of PJL
Using PJL to configure or to communicate with your printer requires the use
of PJL commands, which may include the use of PJL environmental
variables, modifiers, and parameter values to define the commands given.
Supported PJL Command Set
The following lists identify the PJL commands that are supported by your
KONICA MINOLTA printer.
"#
Additional information about each command is given in Section 6.4.
Kernel Commands
UEL
ENTER
PJL
280
About PJL
EDNord - Istedgade 37A - 9000 Aalborg - telefon 96333500
Job Control Commands
JOB
EOJ
Special Commands
UPDATE
FILE
TEST
Environmental Commands
DEFAULT
INITIALIZE
RESET
SET
Environmental Variables
Environmental variables are used with the PJL commands to provide
printer-specific controls and additional communication tools your printer can
understand.
The following lists identify the common PJL environmental variables that are
supported by your KONICA MINOLTA printer.
"#
The full list of PJL variables, with additional information about each
variable, is given in Section 6.4.
AUTOCONT
BINDING
COPIES
DUPLEX
MEDIASOURCE
MEDIATYPE
NUP
OUTPUT
PAPER
QTY
Supported PJL Command
Set
EDNord - Istedgade 37A - 9000 Aalborg - telefon 96333500
281
RESOLUTION
TIMEOUT
PERSONALITY
282
Supported PJL Command
Set
EDNord - Istedgade 37A - 9000 Aalborg - telefon 96333500
Conventions
6.2
EDNord - Istedgade 37A - 9000 Aalborg - telefon 96333500
Introduction
Conventions denotes two meanings: 1) How this manual uses character and
document formatting to define the PJL commands and variables (see
Document Conventions), and 2) How you should enter PJL command text in
your application to ensure the printer recognizes the commands correctly
(see “PJL Command Syntax” on page 285).
Document Conventions
The text describing the available PJL commands and variables in Section 6.4
appear in tables like the one shown below.
Command
or Variable
Command (or variable) Name
Syntax Command Syntax
Response Response Syntax
Syntax
Description Command description
Notes Notes about the command or its usage.
+ The first row identifies the PJL command or environmental variable
defined in the table.
+ The Syntax row displays the correct method of entering the command
and any required or optional arguments that are or can be associated
with the command. Unless otherwise noted, all of the text appearing in
this row must be entered on the same line of the PJL job. See the PJL
Command Syntax section for additional information.
+ Response Syntax identifies the syntax that the printer uses in its
responses to queries.
+ The Description row defines the command’s function.
+ Notes contains any additional information, tips, or cautions that may
help you when applying the defined command or its arguments.
284
Introduction
EDNord - Istedgade 37A - 9000 Aalborg - telefon 96333500
PJL Command Syntax
The characters and symbols used when identifying the syntax of PJL
commands is defined in the following table:
[]
Square brackets enclose any optional arguments that
can be used in conjunction with the command. If you
use optional arguments, don’t type the brackets.
<>
Angled brackets enclose control characters. When
these appear in the Syntax, enter the control code
only (don’t type the <> characters). See the next
section for control character definitions.
|
Vertical bar appear in command syntax to indicate
that there are multiple optional parameters.
CAPS
The complete @PJL command must be in uppercase.
Control Character Definitions
This table defines the control characters used in PJL command syntax.
Control
Character
Character
Description
Hex
Code
ASCII
Code
<CR>
Carriage Return
0x0D
13
<ESC>
Escape
0x1B
27
<FF>
Form Feed
OxOC
12
<HT>
Horizontal Tab
0x09
9
<LF>
Line Feed
0x0A
10
<SP>
Space
0x20
32
<UEL>
Universal Exit
Language
0x1B 25 2D 31 32 33 34 35 58
<WS>
White Space
Ox09 or Ox20
PJL Command Syntax
EDNord - Istedgade 37A - 9000 Aalborg - telefon 96333500
9, 32
285
Universal Exit Language (<UEL>) Usage
The <UEL> Kernel Command signals to the printer that a PJL job needs to be
processed or has completed processing. This allows the printer to switch
between PJL and its default printing language (for example, PostScript). The
following bullets identify the rules you should follow when using the <UEL>
Command:
! Always start and end all PJL jobs with the <UEL> Command. The Syntax
for this command is
<ESC>%-12345X
! The <UEL> Command at the beginning of the PJL job must be
immediately followed by the @PJL prefix. No spaces or other characters
can be placed between the <UEL> and the @PJL characters. For
example,
<ESC>%-12345X@PJL
"#
Following the text shown in the above example, you can continue with
a <CR> <LF> to begin another PJL command on the next line, or you
can use the @PJL on this line to start another PJL Command.
! No text can follow the <UEL> placed at the end of the PJL job.
Additional Syntax Rules
! The <LF> (Line Feed) control code must be used at the end of each PJL
command to terminate the line.
"#
The only exception to this rule is the <UEL> command, which does
not require the <LF> control code.
! The <CR> control character is optional, but can be useful when spacing is
needed between command lines (no blank lines are allowed in PJL jobs).
Always place the optional <CR> before the <LF>, which is used to
terminate the line.
! A space (ASCII 32, Hex 0x20) or tab (ASCII 9) is required between the
@PJL prefix and the PJL command name.
! A space (ASCII 32, Hex 0x20) is required between the PJL command
name and command arguments.
286
Universal Exit Language
(<UEL>) Usage
EDNord - Istedgade 37A - 9000 Aalborg - telefon 96333500
Variables and Values
Many PJL commands require the use of variables to assign values to the
command parameters. PJL commands support the use of alphanumeric
variable characters when the following rules are applied:
Alpha characters
! All variables must begin with an alpha character.
! Do not use spaces in variables.
! Alpha characters must be Roman-8 uppercase (characters 65-90).
Numeric characters
! Do not begin variables with a numeric character.
! If a decimal is used in a numeric value, a number must precede the
decimal point, and only one decimal point is allowed in a value.
! Do not use commas in numeric values.
! Numeric characters must be Roman-8 numbers 0-9 (characters 48-57).
Strings
! Strings are not used in variables but may be used as values.
! Strings can use any combination of the alpha and numeric characters that
follow the guidelines described above.
! Strings must be placed within double quotation marks.
! Quotation marks cannot be used as part of the string.
! Control characters are not allowed in strings.
Language Configuration
In order for the printer to correctly interpret the PJL commands that are sent
to it, the printer must recognize or be told which language to use to process
the job. Three methods of language switching can be used.
! Explicit Language Selection—This is the recommended method of
switching languages and involves the use of the ENTER LANGUAGE
command to notify the printer of the language to be used.
Language Configuration
EDNord - Istedgade 37A - 9000 Aalborg - telefon 96333500
287
! Implicit Language Selection—If the ENTER LANGUAGE command is
not used, the printer uses the language set as the default language. This
method works fine as long as the default language is the same language
as the job sent to the printer. If the PERSONALITY variable is set to
AUTO, and no ENTER command is received, Context Language
Selection (described next) is used instead of Implicit Language Selection.
! Context Language Selection—When the printer is configured to
automatically select the language of incoming jobs and the ENTER
LANGUAGE command is not used to identify the job language, the printer
samples the incoming data and chooses a language based on its
interpretation of the sampled data.
288
Language Configuration
EDNord - Istedgade 37A - 9000 Aalborg - telefon 96333500
Issuing PJL
Commands
6.3
EDNord - Istedgade 37A - 9000 Aalborg - telefon 96333500
Introduction
The following chapters in this guide describe the PJL commands, their
variables, and their functions. This chapter looks at the common methods of
sending the PJL command jobs to the printer and receiving readback
responses from the printer.
Sending PJL Commands to the Printer
The three most common methods used to send PJL commands to the printer
are
! Creating an ASCII file containing the PJL commands and copying this file
to your printer. Use this method if you want to send configuration changes
to the printer and don’t require readback responses from the printer.
"#
You can also modify your Autoexec.bat file to copy the ASCII file to
the printer each time you boot your workstation.
! Embedding PJL commands in an application during development. This
method allows application developers to take advantage of the
commands and readback status of the printer to customize application
functions that interact with the printer.
"#
Due to the extensive variations in application development, this
method is not documented in detail in this Guide.
! Using a utility software application that handles the bidirectional
communication necessary to send and receive information from the
printer.
Copying ASCII Files to the Printer
This section describes one method of creating and sending an ASCII file
containing PJL commands to your printer from a workstation running a
Windows Operating System.
1
2
3
From the Start menu, choose Run.
Type edit and then select OK.
The MS-DOS Editor opens.
Enter the following on the first line of the new file you are creating.
<ESC>%-12345X@PJL
To create the <ESC> character, hold down the CTRL key and select the P
key, and then press the Esc key.
290
Introduction
EDNord - Istedgade 37A - 9000 Aalborg - telefon 96333500
4
5
6
7
On the following lines, enter the PJL commands you want to send to the
printer. See the additional chapters in this guide for information about the
PJL commands supported.
On the last line of your file, enter
<ESC>%-12345X
Save the file.
Copy the file you just saved to the printer using the DOS copy/b
command.
Including PJL Commands in Applications
By including PJL commands in the application that you’re developing, you
can take control of most printing configuration settings and retrieve printer
information without having to call on another application. Refer to the
Hewlett-Packard Printer Job Language Technical Reference Manual for
additional information.
Using Utility Software
Some utility software allows you to communicate with your printer, including
sending PJL commands and receiving status readback. Depending on your
utility application, you may be able to perform one or more functions using the
utility’s built-in tools rather than directly entering PJL commands.
Example: KONICA MINOLTA Status Monitor
This utility, which comes with the printer on CD-ROM, uses the PJL readback
commands to monitor and display the printer’s current status. This utility
provides additional features but serves as a good example of practical use of
PJL commands in an application.
Sending PJL Commands to
the Printer
EDNord - Istedgade 37A - 9000 Aalborg - telefon 96333500
291
EDNord - Istedgade 37A - 9000 Aalborg - telefon 96333500
PJL Commands
6.4
EDNord - Istedgade 37A - 9000 Aalborg - telefon 96333500
Introduction
The PJL commands supported by your printer are identified and described in
this chapter. PJL commands are identified first and then followed by the
definition of environmental variables.
The commands and variables in the following sections are listed by name and
in alphabetical order.
Commands
Command
DEFAULT
Syntax @PJL DEFAULT [LPARM : personality | IPARM :
port] variable = value [<CR>]<LF>
Description This command can be used to change the User Default
Settings of the printer. DEFAULT is used with
environmental variables to set the user default value of a
printer parameter. See the “Environmental Variables” on
page 301 for a listing of variables that are available for your
printer.
Notes The User Default Settings are also configurable from the
printer’s control panel. Using the DEFAULT command does
not affect the Factory Default Settings of the printer.
Changes to the Default Settings are not activated until a
RESET command has been executed. See the RESET
command on page 299 for more information.
294
Introduction
EDNord - Istedgade 37A - 9000 Aalborg - telefon 96333500
Command
ENTER
Syntax @PJL ENTER LANGUAGE = personality
[<CR>]<LF>
Description This kernel command is used when setting the printer language for the language used in the current print job.
Personality is the language of the print job, such as Lineprinter, PCL, or PostScript.
Notes Immediately following the <LF> code on the ENTER
command line, the printer assumes the language specified
by the personality to process the current print job. The
printer will continue to treat the job in the new language
until another ENTER command or an <UEL> command is
found.
If the PERSONALITY variable is set to AUTO and no
ENTER command is received, the printer uses the default
language or the language that best fits the format of the
data being received. It’s recommended that you use the
ENTER command to set the appropriate language if you
know it.
Command
EOJ
Syntax @PJL EOJ [NAME = "job name"] [<CR>]<LF>
Description This command indicates the end of the current print job.
The optional Name variable should be used if the JOB
command used this option to name the print job.
Notes This command must be used in conjunction with the JOB
command. Don’t use the JOB or the EOJ command
separately.
295
Commands
EDNord - Istedgade 37A - 9000 Aalborg - telefon 96333500
Command
FILE
Syntax @PJL FILE [DRIVE = "number"] [NAME = "file
name"] [PASSWORD = "string"][<CR>]<LF>
Description This command prints a PCL or PostScript file.
Notes The ranges and default settings for the optional parameters
shown in the Syntax are:
DRIVE
Range: 0–3
Default: 0
PASSWORD
Range: ASCII 33-255,<SP>,<HT>
Default: None
NAME
Range: ASCII 33-255,<SP>,<HT> (Maximum 80
characters)
Default: None
Command
INITIALIZE
Syntax @PJL INITIALIZE [<CR>]<LF>
Description This command is used to reset the PJL variables to their
Factory Default Settings.
Notes To reset the PJL variables to the User Default values, use
the DEFAULT command instead of the INITIALIZE
command.
296
Commands
EDNord - Istedgade 37A - 9000 Aalborg - telefon 96333500
Command
JOB
Syntax @PJL JOB [NAME = "job name"][START = first
page][END = last page][PASSWORD =
number][<CR>]<LF>
Description The JOB command signifies the beginning of a new PJL
job to the printer. This command should be used with the
EOJ command to frame the PJL job to prevent multiple PJL
jobs from being treated as one job.
Notes The ranges and default settings for the optional parameters
shown in the Syntax are:
NAME
Range: ASCII 33-255,<SP>,<HT> (80 characters
maximum)
Default: N/A
START
Range: 1-2,147,483,647
Default: 1
END
Range: 1-2,147,483,647
Default: All
PASSWORD
Range: 0–65,535
Default: 0
The use of these parameters is optional.
Always use the JOB command with the EOJ command.
Command
PJL
Syntax @PJL
Description This command signals the printer to use its PJL parser to
interpret the following command lines.
Notes This command must always immediately follow the <UEL>
command (with no white space between these two
commands).
297
Commands
EDNord - Istedgade 37A - 9000 Aalborg - telefon 96333500
Command
SET
Syntax @PJL SET [LPARM : Personality | IPARM :
port] variable = value [<CR>]<LF>
Description This command sets the command settings to the user
default settings.
Notes The SET and RESET commands affect only the current
job.
Command
SET
Syntax @PJL SET [parameter][value][<CR>]<LF>
Description This command sets accounting information.
Notes The functions and ranges for the optional parameters
shown in the Syntax are:
CHARGENUMBER
Function: Sets the job-specific charge number for
accounting purposes.
Range: "string" (Maximum of 8 characters)
HOST
Function: Sets the job-specific level host name for
accounting purposes.
Range: "string" (Maximum of 16 characters)
USERNAME
Function: Assigns a user name.
Range: "string" (Maximum of 64 characters)
NOTIFY
Function: Sets the point in job processing for email
notification.
Range: "JOBEND"
EMAILADDRESS
Function: Sets the email address.
Range: "string" (maximum of 128 characters)
298
Commands
EDNord - Istedgade 37A - 9000 Aalborg - telefon 96333500
Command
RESET
Syntax @PJL RESET [<CR>]<LF>
Description This command resets the command settings to the user
default settings.
Notes The SET and RESET commands affect only the current
job.
Command
TEST
Syntax @PJL TEST [PRINT = "number"][<CR>]<LF>
Description This command prints a test file.
Notes The ranges for the optional parameters shown in the
Syntax are:
PRINT
Range: 0 (Statistics Page)
1 (Configuration Page)
2 (Font List)
3 (Demo Page)
4 (Registration Page)
5 (Menu Map)
6 (Directory List)
Command
UEL
Syntax <ESC>%-12345X
Description Universal Exit Language (UEL) signals the printer to exit
the current printer language and begin PJL dialog.
Notes See “Universal Exit Language (<UEL>) Usage” in chapter
6.2 for more information.
299
Commands
EDNord - Istedgade 37A - 9000 Aalborg - telefon 96333500
Command
UPDATE
Syntax @PJL UPDATE [KIND = "number"][ADRS =
"hex-string"][LEN = "hex-string"][SUM =
"hex-string"][ADRS2 = "hex-string"][LEN2 =
"hex-string"][SUM2 = "hex-string"]
[<CR>]<LF> <Firmware Data>
Description This command updates the printer firmware.
Notes The ranges and default settings for the optional parameters
shown in the Syntax are:
KIND
Range: 1 (Mechanical control firmware),
2 (Boot firmware),
3 (Controller firmware)
Default: None
ADRS (Required only with KIND = 2)
Range: N/A (Maximum of 8 characters)
Default: None
LEN
Range: N/A (Maximum of 8 characters)
Default: None
SUM
Range: N/A (Maximum of 8 characters)
Default: None
ADRS2 (Required only with KIND = 2)
Range: N/A (Maximum of 8 characters)
Default: None
LEN2 (Required only with KIND = 2)
Range: N/A (Maximum of 8 characters)
Default: None
SUM2 (Required only with KIND = 2)
Range: N/A (Maximum of 8 characters)
Default: None
<Firmware Data>
Range: Firmware data
Default: None
300
Commands
EDNord - Istedgade 37A - 9000 Aalborg - telefon 96333500
Environmental Variables
Environmental variables are used in conjunction with other PJL commands to
control printer configuration and to retrieve specific information from the
printer. See the previous section for a description of the PJL commands that
your printer supports.
Changing Printer Environment Parameters
The printing environment is defined as the current printer configuration.
Environmental variables are used to configure the printer’s parameters in the
printing environment. There are 4 types of printing environments that you will
be working with when using PJL commands:
! Modified—This environment is established when the ENTER LANGUAGE
command is sent to the printer to change the printer language.
! PJL—This environment consists of the configuration changes established
by the parameters sent in the PJL command lines for the current job.
! User Default—User default configurations occur when one or more of the
Factory default configuration settings are changed and saved as the
default printer configuration. These changes can be made and saved via
the printer’s controls panel, using a printer management utility application
(for example, PageScope Light), or by using the DEFAULT command.
Typically, the User default environment is configured to benefit the
majority of users in a network to prevent making repetitive changes.
! Factory Default—This environment consists of the configuration settings
that are set by the printer manufacturer. Factory default settings are
permanent and can be applied at any time using the INITIALIZE
command.
The following pages contain the Environmental Variables that are supported
by your printer. For additional information about Environmental Variables, or
for information about PJL variables not supported by your printer, consult the
Hewlett-Packard Printer Job Language Technical Reference Manual.
Variable
AUTOCONT
Choices/ OFF
Range ON
Description Returns the autocontinue configuration.
Environmental Variables
EDNord - Istedgade 37A - 9000 Aalborg - telefon 96333500
301
Variable
BINDING
Choices/ LONGEDGE
Range SHORTEDGE
Description Controls the duplex settings that are available. Use this
variable with the Duplex variable.
Variable
COPIES
Choices/ 1-999
Range
Description Controls the number of uncollated copies that are printed.
Use the QTY variable for collated copies.
Variable
DUPLEX
Choices/ OFF
Range ON
Description Controls the duplex settings that are available. When set to
ON, duplex printing is enabled. Use this variable with the
BINDING variable.
Variable
MEDIASOURCE
Choices/ TRAY1
Range TRAY2
TRAY3
TRAY4
MANUALFEED
Description Controls the tray selection for the current job.
302
Environmental Variables
EDNord - Istedgade 37A - 9000 Aalborg - telefon 96333500
Variable
MEDIATYPE
Choices/ LABEL
Range PAPER
THICKSTOCK
TRANSPARENCY
Description Sets the default media type for the current job.
Variable
NUP
Choices/ 1
Range 2
4
6
9
16
Description Sets the number of pages printed on each sheet of media.
Variable
OUTPUT
Choices/ UPPER
Range
Description Sets the default output bin.
Environmental Variables
EDNord - Istedgade 37A - 9000 Aalborg - telefon 96333500
303
Variable
PAPER
Choices/ A3
Range A4
A5
B4
B5
B5JIS
B5ISO
C5
C6
CHOKEI3 (CHOU #3)
CHOKEI4 (CHOU #4)
COM10
CUSTOM
DL
EXECUTIVE
FOLIO
GOVLEGAL
GOVTLETTER
JPOST
KAI 8 (CHINESE8K)
KAI 16 (CHINESE16K)
KAI 32 (CHINESE32K)
LEGAL
LETTER
MONARCH
OVERSIZED
SPFOLIO
STATEMENT
8 x 10
11 x 17
12 x 18
Description Sets media size.
304
Environmental Variables
EDNord - Istedgade 37A - 9000 Aalborg - telefon 96333500
Variable
PERSONALITY
Choices/ AUTO
Range PDF
POSTSCRIPT
Description This variable identifies the personality for implicit switching.
Implicit switching changes the current personality without
using the @PJL ENTER command.
"# Selecting AUTO allows the printer to search for
context clues in the job to decide which personality to
assume.
Variable
QTY
Choices/ 1-999
Range
Description Identifies the number of collated copies for the current job.
Use the COPY variable for uncollated copies.
Variable
RESOLUTION
Choices/ 600 x 600 (6x6x1 dpi standard)
Range 9600 x 600 (6x6x4 class dpi high)
Description Sets the printing resolution in dots per inch (dpi) for the
current job.
Environmental Variables
EDNord - Istedgade 37A - 9000 Aalborg - telefon 96333500
305
Variable
TIMEOUT
Choices/ 0-999 (seconds)
Range
Description Sets the time interval that the printer waits to receive data
for the current print job. If the wait time exceeds the value
set, the job ends and the printer is ready to accept other
jobs.
306
Environmental Variables
EDNord - Istedgade 37A - 9000 Aalborg - telefon 96333500
Status Codes
6.5
EDNord - Istedgade 37A - 9000 Aalborg - telefon 96333500
Introduction
This chapter describes the status codes that are returned following the
transmission of @PJL INFO STATUS and USTATUS commands to the
printer.
Status Codes
Category
Keypad Message
Status Code
Standard
CALIBRATING
10031
CANCELING JOB
10007
EXECUTING
10023
LIGHT SLEEP
40000
PROCESSING
10023
READY
10001
STANDBY MODE
35078
UPDATING
None
WAIT
None
WARMING UP
10003
ADJUST MANL FEED
40026
ADJUST TRAYS
40026
ADJUST Y
40026
ARE YOU SURE?
None
COVER OPEN
CHECK Y
40021
FUSER LOW
40050
FUSER MISSING
CHECK UNIT
40050
MANL FEED ERROR
REMOVE MEDIA
40119
MEDIA EMPTY
ADD X
41xxx
MEDIA JAM
DUPLEX 1
40093
Warning
308
Introduction
EDNord - Istedgade 37A - 9000 Aalborg - telefon 96333500
Category
Keypad Message
Status Code
Warning
MEDIA JAM
DUPLEX 2
40022
MEDIA JAM
FUSER EXIT
40022
MEDIA JAM
MANUAL TRAY
40022
MEDIA JAM
SECOND TRANS
40022
MEDIA JAM
TRAY1
40022
MEDIA JAM
TRAY2
40022
MEDIA JAM
TRAY3
40022
MEDIA JAM
TRAY4
40022
MEDIA JAM
VERTICAL TRANS
40022
MEDIA JAM
Y
40022
MEDIA SIZE ERR
ADD Y
40096, 40146
MEDIA SIZE ERROR
40096, 40146
MEMORY FULL
PRESS CONTINUE
None
NO MANUAL FEED
40026
NO MANUAL FEED
CHECK UNIT
40026
NO TRAY n
40026
OUTPUT FULL
REMOVE MEDIA
None
PRINT UNIT END
REPLACE KCMY
40038
PRINT UNIT ERROR
REPLACE KCMY
40038
P-UNIT DETECT
40038
(Continued)
Status Codes
EDNord - Istedgade 37A - 9000 Aalborg - telefon 96333500
309
Category
Keypad Message
Status Code
Warning
P-UNIT LOW KCMY
40038
P-UNIT MISSING
CHECK KCMY
40038
TONER EMPTY
REPLACE KCMY
40038
TONER LOW KCMY
40038
TRANS. BELT LOW
40131
TRAYX EMPTY
41xxx
WASTE NEAR FULL
40141
WASTE TONER ERR
REPLACE BOX
40141
WASTE TONER FULL
REPLACE BOX
40141
Y EMPTY
ADD X
41xxx
SERVICE CALL
N X
50xxx
(Continued)
Service
Call
310
Status Codes
EDNord - Istedgade 37A - 9000 Aalborg - telefon 96333500
DOC Matrix
6.6
EDNord - Istedgade 37A - 9000 Aalborg - telefon 96333500
Introduction
This chapter is for users making the transition from DOC commands to PJL
commands. In this chapter you’ll find common DOC commands and their
nearest equivalent in PJL commands. For information on PJL commands referenced in this chapter, see “PJL Commands” on page 293.
DOC/PJL Command Matrix
"#
"#
312
Not all DOC commands have an equivalent PJL command, and not all
PJL commands are supported by your printer. If there is no equivalent
PJL command, Unsupported appears in the PJL column. In cases
where a custom PJL command has been developed for the DOC
equivalent, Custom appears in the PJL column. If there is a PJL
equivalent but the command isn’t supported by your printer, Unsupported appears in the magicolor 7300 column.
Unless otherwise noted, start all PJL command lines with @PJL (for
example, @PJL SET CHARGENUMBER).
Introduction
EDNord - Istedgade 37A - 9000 Aalborg - telefon 96333500
Header/Trailer Page Commands
DOC
PJL
magicolor 7300
%%IncludeFeature:header
Unsupported
%%IncludeFeature:trailer
Unsupported
Header/Trailer Information Commands
DOC
PJL
magicolor 7300
%%Charge Number
SET CHARGENUMBER Supported
%%Creator
Unsupported
%%CreationDate
Unsupported
%%Date
Unsupported
%%For
SET USERNAME
Supported
%%Host
SET HOST
Supported
%%Title
JOB NAME
Supported
Unsupported
%%Version
Document Control Commands
DOC
PJL
magicolor 7300
%%IncludeFeature
@PJL
Use @PJL by itself on
a command line.
%%Pages
Unsupported
%%EndComments
Unsupported
%%EndOfDocument
EOJ
Supported
<ESC>%-12345X
<ESC>%-12345X
Supported
%%Sessions
JOB
Supported
%%Notify
SET NOTIFY=JOBEND Supported
SET EMAILADDRESS
Document Formatting Commands
DOC
PJL
magicolor 7300
%%IncludeFeature:binding
SET BINDING
Supported
Unsupported
%%IncludeFeature:booklet
%%IncludeFeature:collate
SET QTY
%%IncludeFeature:colormodel
Supported
Unsupported
DOC/PJL Command Matrix
EDNord - Istedgade 37A - 9000 Aalborg - telefon 96333500
313
Document Formatting Commands
DOC
PJL
magicolor 7300
%%IncludeFeature:copies
SET COPIES
Supported
%%IncludeFeature:duplex
SET DUPLEX
Supported
%%IncludeFeature:emulation
ENTER LANGUAGE
Supported
%%IncludeFeature:input
SET MEDIASOURCE
Supported
%%IncludeFeature:mediatype
SET MEDIATYPE
Supported
%%IncludeFeature:newlayout
JOB
Supported
Unsupported
%%IncludeFeature:offset
Unsupported
%%IncludeFeature:orientation
%%IncludeFeature:output
SET OUTPUT
Supported
%%IncludeFeature:pagegrid
SET NUP
Supported
%%IncludeFeature:pageoffsets
Unsupported
%%IncludeFeature:
pageorientation
Unsupported
%%IncludeFeature:pagerange
JOB START=# END=#
%%IncludeFeature:pagescaling
%%IncludeFeature:pagesize
Unsupported
SET PAPER
Supported
Unsupported
%%IncludeFeature:quality
%%IncludeFeature:resolution
Supported
SET RESOLUTION
Supported
Unsupported
%%IncludeFeature:staple
HP PCL Commands
DOC
PJL
magicolor 7300
%%IncludeFeature:criscrlf
Unsupported
%%IncludeFeature:font
Unsupported
%%IncludeFeature:install
Unsupported—use
Download Manager
%%IncludeFeature:lfiscrlf
Unsupported
%%IncludeFeature:pointsize
Unsupported
%%IncludeFeature:remove
Unsupported—use
Download Manager
%%IncludeFeature:symbolset
Unsupported
314
DOC/PJL Command Matrix
EDNord - Istedgade 37A - 9000 Aalborg - telefon 96333500
Lineprinter Commands
DOC
PJL
magicolor 7300
%%IncludeFeature:autowrap
Unsupported
%%IncludeFeature:criscrlf
Unsupported
%%IncludeFeature:ffiscrlf
Unsupported
%%IncludeFeature:font
Unsupported
%%IncludeFeature:linesperpage
Unsupported
%%IncludeFeature:lpmargins
Unsupported
%%IncludeFeature:lporientation
Unsupported
%%IncludeFeature:lsiscrlf
Unsupported
%%IncludeFeature:map
Unsupported
%%IncludeFeature:number
Unsupported
%%IncludeFeature:pointsize
Unsupported
%%IncludeFeature:tabs
Unsupported
CALS Commands
DOC
PJL
magicolor 7300
%%IncludeFeature:autorotation
Unsupported
%%IncludeFeature:autorotation
Unsupported
%%IncludeFeature:autoscaling
Unsupported
TIFF Commands
DOC
PJL
magicolor 7300
%%IncludeFeature:autoscaling
Unsupported
%%IncludeFeature:sheetsel
Unsupported
%%IncludeFeature:tag
Unsupported
DOC/PJL Command Matrix
EDNord - Istedgade 37A - 9000 Aalborg - telefon 96333500
315
EDNord - Istedgade 37A - 9000 Aalborg - telefon 96333500
Symbols
<CR> 285
<ESC> 285
<FF> 285
<HT> 285
<LF> 285
<SP> 285
<UEL> 285
<WS> 285
Add New Hardware Wizard 6
Additional Syntax Rules 286
Alpha characters 287
Apply button 205
ASCII 290
Auto Continue 194, 218
Autoexec.bat 290
Automatic Jam Recovery 189
Available Options
list 30, 40, 49, 57
A
B
About PJL 280
Accessing Windows Me/98/95
Printer Driver
Configuration 259
Accessing Windows XP/2000/
NT4 Printer Driver
Configuration 261
Accounting 193
Back button 205
Bi-directional
communication 40, 49, 57
Bidirectional communication 30
BINDING 301, 302
Bitmap 183
Brackets 285
Broker 144
Browse button 205
Advanced 268
Field definitions 271
File formats 269
Job 193
Job accounting 272
PageScope Light 268
PageScope Net Care 268
Printer Error 194
Retrieving information 268
317
EDNord - Istedgade 37A - 9000 Aalborg - telefon 96333500
C
UEL 299
CAPS 285
Carriage Return character 285
Changing Printer Environment
Parameters 301
CIE 164
CIE LAB model 168
Clear button 205
CMM 168
CMYK 169
Color
Additive Colors 162
CIE 164
CIE LAB model 168
Color Management Module 168
Color Model 165
Destination ICC profile 169
ICC profiles 168
Out-of-gamut colors 169
Pantone tables 175
Pigments 163
RGB Source ICC profile 169
RGB values 164
Simulation profile 169
Subtractive Colors 163
Visual perception 162
Color Management 162
Color Profiles 168
Command Syntax 285
Commands 294
DEFAULT 294
ENTER 295
EOJ 295
INITIALIZE 296
JOB 297
PJL 297
RESET 299
Configuring your Printer 198
Connections
EtherTalk 17
LPR 17
Macintosh 16
PC 4
Consumables
Monitoring use 116
OPC 184
Toner 184
Consumables usage
See "Replacing Consumables" in
the User’s Guide 116
Context Language Selection 288
Control Character
Definitions 285
Control characters
Carriage Return 285
Escape 285
Form Feed 285
Horizontal Tab 285
Line Feed 285
Space 285
Universal Exit Language 285
White Space 285
Conventions
Document 284
PJL Command Syntax 285
COPIES 302
Copying ASCII Files to the
Printer 290
Creating a Broker 145
CTRL key 290
Current status 203
Customizing Driver Settings 39, 56
318
EDNord - Istedgade 37A - 9000 Aalborg - telefon 96333500
D
Date conventions 249, 256
DEFAULT 294
Delete button 205
Destination Profile 169
Device Settings 30, 41, 58
Display button 205
DOC
%%Charge Number 313
%%CreationDate 313
%%Creator 313
%%Date 313
%%EndComments 313
%%EndOfDocument 313
%%For 313
%%Host 313
%%IncludeFeature 313
autorotation 315
autoscaling 315
autowrap 315
binding 313
booklet 313
collate 313
colormodel 313
copies 314
criscrlf 314, 315
duplex 314
emulation 314
ffiscrlf 315
font 314, 315
header 313
input 314
install 314
lfiscrlf 314
linesperpage 315
lpmargins 315
lporientation 315
lsiscrlf 315
map 315
mediatype 314
newlayout 314
number 315
offset 314
orientation 314
output 314
pagegrid 314
pageoffsets 314
pageorientation 314
pagerange 314
pagescaling 314
pagesize 314
pointsize 314, 315
quality 314
remove 314
resolution 314
sheetsel 315
staple 314
symbolset 314
tabs 315
tag 315
trailer 313
%%Notify 313
%%Pages 313
%%Sessions 313
%%Title 313
%%Version 313
%-12345X 313
CALS Commands 315
Document Control Commands 313
Document Formatting
Commands 313
Header/Trailer Information
Commands 313
Header/Trailer Page
Commands 313
HP PCL Commands 314
319
EDNord - Istedgade 37A - 9000 Aalborg - telefon 96333500
Lineprinter Commands 315
TIFF Commands 315
DOC/PJL Command
Matrix 308, 312
Document Conventions 284
Response Syntax 284
Syntax 284
DOS copy/b command 291
Download Manager 98
Installing 122
Using 126
Downloading
Printer Driver 24
Drivers
PostScript, Windows 2000 34
PostScript, Windows Me/98/95
44
PostScript, Windows NT4 52
PostScript, Windows XP 24
DUPLEX 302
E
Electronic Document
Collation 190
Embedding PJL commands 290
Energy Saver 216
ENTER 295
ENTER LANGUAGE 288
Environment
Factory Default 301
Modified 301
PJL 301
User Default 301
Environmental Variables 301
EOJ 295
Error messages 117
Escape character 285
Explicit Language Selection 287
F
Factory Default 301
Firmware Updates 22
Form Feed character 285
Format button 205
Fuser Unit 185
G
Get button 205
H
Hewlett® Packard Printer Job
Language Technical Reference
Manual 291
Horizontal Tab character 285
I
ICC Profiles 168
Implicit Language Selection 288
In This Guide 280
Information pages 182
Configuration page 182
Demo page 182
Directory list 182
Font List 182
320
EDNord - Istedgade 37A - 9000 Aalborg - telefon 96333500
Menu map 182
Registration 182
Statistics Page 182
INITIALIZE 296
Installed Options 207
Installer application 24
K
Kernel Command
ENTER 295
UEL 286
Keypad Language 215
Installing
Download Manager 122
Linux 76
PageScope Net Care 131
Pantone tables 175
Printer Utilities 99
Status Monitor 109
Installing Driver
Windows 2000 35
Windows Me/98/95 45
Windows NT4 54
Windows XP 26
Interface Menu 245
International Color
Consortium 168
Internet browser 199
Internet Explorer 203
Interpretation 183
IP Address 230
J
L
LAN Settings button 203
Language Configuration 287
Context Language Selection 288
Explicit Language Selection 287
Implicit Language Selection 288
Language switching 287
Laser Unit 184
Line Feed character 285
Linux
CUPS printing 75
Installing printer 75, 76
PDQ printing 74
Printing from applications 79
XPDQ printing 75
XPP printing 75
Local Connections 4
Login button 205
Logout button 205
LPD/LPR 142
Job
Accounting 193
Retention Options 194
JOBS 297
M
Macintosh
OS 8/9 Connections 16
Main Menu 242
Manager 144
MEDIASOURCE 302
321
EDNord - Istedgade 37A - 9000 Aalborg - telefon 96333500
MEDIATYPE 303
Menu
Interface 245
Main 242
Paper 243
Print 242
Quality 245
System Defaults
Service 258
MINOLTA-QMS
NDPS Gateway 142
NDPS Snap-in Controls 154
MINOLTA-QMS Status
Monitor 291
Modified 301
MS-DOS Editor 290
N
Numeric characters 287
NUP 303
O
OK button 205
OPC 184
Operating System 22, 182
OUTBIN 303
Out-of-gamut 169
Overlay controls
Disk 191
File 191
Placement 191
Overlay Printing 191
Overview 280
P
NDPS
Accessing the Controls 155
Configuring 144
Gateways 98
Printer Control Dialog 156
Printers 144
Setup using Add Printer 151
NDPS Gateways
MINOLTA-QMS 142
NDPS Manager, Creating 146
NDPS Printer Setup
NetWare Print Manager 153
Netscape Navigator 202
NetWare
Print Manager 144
Printer Interface Setup 89
Setup 88
No proxy 200
PageScope Light 99, 199
/Save button 205
Accounting 268
Administrator Mode 211
Account tab 212
Network tab 212
Print tab 212
System tab 212
Apply button 205
Back button 205
Browse button 205
Clear button 205
Configuration Page
Configuration/Paper Handling
Auto continue 218
Keypad language 215
322
EDNord - Istedgade 37A - 9000 Aalborg - telefon 96333500
Startup Options & Resets
Energy saver 216
Current status 203
Delete button 205
Display button 205
Format button 205
Get button 205
Home Page
Printer name/status 206
Summary
Installed options 207
Printer name/status 211
Interfaces Page
Ethernet TCP/IP
IP address 230
Subnet mask 231
Login button 205
Logout button 205
Navigating the program 198, 203
OK button 205
Print button 205
Reset button 205
Restore button 205
User Mode 206
Job tab 207
Print tab 207
System tab 207
PageScope Net Care 98
Accounting 268
Client 133
Installing 130, 131
Print server configuration 91
Server 132
Server Console Tool 136
Shutting down the server 136
Uninstalling 139
Upgrading 138
Pantone tables 175
PAPER 304
Paper Menu 243
Parallel 4
PC Connections
Ethernet 7
Parallel 4
TCP/IP 7
USB 6
PERSONALITY 288, 305
Ping 11
PJL 297, 301
PJL Command Syntax 285
Brackets 285
Caps 285
Control Character Definitions 285
PJL Commands in
Applications 291
Port
Configuring 104
PostScript Drivers 24, 34, 44, 52
Windows 2000 34
Windows Me/98/95 44
Windows NT4 52
Print button 205
Print Menu 242
Print Monitor 98
Printable Areas 184
Printer
Operating System,
Firmware 22, 182
Printer Agent 144
Creating 148
Printer configuration 198
Printer configuration, PageScope
Light 199
Printer Control dialog, NDPS 155
Printer Device Properties,
Windows XP/2000/NT4 263
323
EDNord - Istedgade 37A - 9000 Aalborg - telefon 96333500
Printer Driver Configuration
Windows Me/98/95 259
Windows XP/2000/NT4 261
Printer Name 198, 201
Printer Name/Status 206, 211
Printer Utilities 98
Download Manager 126
PageScope Net Care 130
Status Monitor 108
Printer Web Page 198, 200
Printer Wizard 144
Printer-based Accounting 193
Printing Preferences/Document
Default Properties, Windows
2000/NT4 264
Printing segment, Print Engine
184
Proxy Settings 203
S
Save button 205
Sending PJL commands 290
Serverless Printing 188
Service Menu 258
Settings 30, 40
Simulation Profile 169
Software Utilities CD-ROM 24
Space character 285
Spooling 183
Standard Printer Driver Tabs,
Windows Me/98/95 260
Status Monitor 99, 108
Alerts 117
Installing 109
Operation 111
Strings 287
Subnet Mask 231
Supported PJL Command Set 280
Q
QTY 305
Quality Menu 245
R
Rasterization 183
RESET 299
Reset button 205
RESOLUTION 305
Restore button 205
RGB Source ICC profile 169
RGB values 164
T
TIMEOUT 306
Toner 184
Transfer Belt Unit 185
Tray Chaining 194
U
UEL 299
Universal Exit Language
character 285
USB 4
USB Interface 6
324
EDNord - Istedgade 37A - 9000 Aalborg - telefon 96333500
User Default 301
Using PageScope Light 199
Utilities
Download Manager 98
Installing 99
NDPS Gateways 98
Overview 98
PageScope Light 99
PageScope Net Care 98
Print Monitor 98
Status Monitor 99
Utility Software 291
Utility software 290
W
Warning status message
Waste near full 310
White Space character 285
Windows 2000
Installing Driver 35
PostScript Drivers 34
Windows Me/98/95
Installing Driver 45
PostScript Drivers 44
Windows NT4
Installing Driver 54
PostScript Drivers 52
Windows XP
V
Installing Driver 25
Variable
BINDING 301, 302
COPIES 302
DUPLEX 302
MEDIASOURCE 302
MEDIATYPE 303
NUP 303
OUTBIN 303
PAPER 304
PERSONALITY 305
QTY 305
RESOLUTION 305
TIMEOUT 306
Variables and Values 287
Visual perception 162
325
EDNord - Istedgade 37A - 9000 Aalborg - telefon 96333500
EDNord - Istedgade 37A - 9000 Aalborg - telefon 96333500