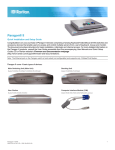
1
` This page intentionally left blank Copyright © 2002 Raritan Computer, Inc. UMTx-0C-E September 2002 Raritan Computer Inc. 400 Cottontail Lane Somerset, NJ 08873 USA Tel. 1-732-764-8886 Fax. 1-732-764-8887 E-mail: [email protected] http://www.raritan.com Raritan Computer Europe, B.V. P.O. Box 566 2900 AN Capelle aan den IJssel The Netherlands Tel. 31-10-284-4040 Fax. 31-10-284-4049 E-mail: [email protected] http://www.raritan.com Raritan Computer Japan, Inc. Kuga Building 7F 11-6, Kuramae 4-chome Taitoo-ku, Tokyo 111-0051, Japan Tel. 81-3-5833-6360 Fax. 81-3-5833-6336 E-mail: [email protected] http://www.raritan.co.jp Raritan Computer Taiwan, Inc. 5F, 121, Lane 235, Pao-Chiao Rd., Hsin Tien Taipei Hsien, Taiwan, ROC Tel. 886-2-8919-1333 Fax. 886-2-8919-1338 E-mail: [email protected] http://www.raritan.com.tw This page intentionally left blank FCC INFORMATION FCC INFORMATION This equipment has been tested and found to comply with the limits for a Class A digital device, pursuant to Part 15 of the FCC Rules. These limits are designed to provide reasonable protection against harmful interference in a commercial installation. This equipment generates, uses, and can radiate radio frequency energy and if not installed and used in accordance with the instructions, may cause harmful interference to radio communications. Operation of this equipment in a residential environment may cause harmful interference. Product names mentioned in this document are trademarks or registered trademarks of their respective companies. Z-Series, Paragon, MasterConsole MX4, MasterConsole MXU2, MasterConsole II, MasterConsole SMX, ConsoleSwitch and their respective logos are registered trademarks of Raritan Computer, Inc. PS/2, RS/6000, and PC/AT are registered trademarks of International Business Machines Corporation. Sun is a registered trademark of Sun Microsystems. All other marks are the property of their respective owners. JAPANESE APPROVALS This page intentionally left blank TABLE OF CONTENTS I TABLE OF CONTENTS CHAPTER 1: INTRODUCTION 1 PARAGON FEATURES AND ADVANTAGES _____________________________________________ 1 PARAGON SYSTEM COMPONENTS __________________________________________________ 2 PARAGON CABLE INFORMATION ____________________________________________________ 4 CHAPTER 2: INSTALLATION 7 QUICK START _________________________________________________________________ 7 ADMINISTRATOR USER NAME AND PASSWORD DEFAULTS _________________________________ 9 CONFIGURATION OPTIONS ________________________________________________________ 9 BASIC INSTALLATION ___________________________________________________________ 12 MULTI-TIER INSTALLATION _______________________________________________________ 18 INSTALLING A PARAGON SWITCH _______________________________________________ 19 CONNECTING TIERED RARITAN KVM SWITCHES TO A BASE PARAGON SWITCH______________ 20 Connecting a Paragon Switch as a Second Tier or Third Tier Unit ________________ 20 GUIDELINES FOR PARAGON SYSTEM CONFIGURATION ________________________________ 21 CONNECTING Z-SERIES Z4200U Z-CIMS AS A TIER _________________________________ 22 Connecting a MasterConsole MX4 as a Tier__________________________________ 28 Connecting a MasterConsole MXU2 as a Tier ________________________________ 30 Connecting a MasterConsole II (Model MCC only) as a Tier _____________________ 33 Connecting a MasterConsole P as a Tier____________________________________ 35 EXPANDED INSTALLATION OPTIONS ________________________________________________ 37 HUBPAC _________________________________________________________________ 37 CIMPAC _________________________________________________________________ 40 RACK MOUNT BRACKETS – RUMT AND RUST _______________________________________ 43 CHAPTER 3: OPERATING PARAGON 47 LOGIN ______________________________________________________________________ SELECTING A COMPUTER ________________________________________________________ PUBLIC VIEW MODE ___________________________________________________________ USER CUSTOMIZATION _________________________________________________________ ON-SCREEN USER INTERFACE (OSUI) FUNCTIONS _____________________________________ PARAGON SWITCH FRONT PANEL DISPLAY AND CONTROLS ______________________________ 47 48 51 52 55 56 CHAPTER 4: USER STATION (UST1) DIRECT MODE 61 CHAPTER 5: ADMINISTRATIVE FUNCTIONS 63 ADMINISTRATION ______________________________________________________________ SYSTEM CONFIGURATION _______________________________________________________ USER CONFIGURATION _________________________________________________________ CHANNEL CONFIGURATION ______________________________________________________ 63 64 66 68 TABLE OF CONTENTS II USER STATION PROFILE_________________________________________________________ 70 REFRESH CONFIGURATIONS ______________________________________________________ 71 CHAPTER 6: OVERVIEW SOFTWARE 73 HARDWARE REQUIREMENTS ______________________________________________________ 73 DOWNLOADING OVERVIEW _______________________________________________________ 73 CONNECTING A PC TO UST1 __________________________________________________ 73 OPERATING OVERVIEW SOFTWARE_________________________________________________ 74 EDITING USER PROFILES _____________________________________________________ 76 EDITING DEVICE PROFILES ____________________________________________________ 77 SAVING A COPY OF THE CONFIGURATION FILE TO A PC DISK FILE _______________________ 77 UPLOADING A CONFIGURATION FILE TO YOUR SYSTEM _______________________________ 78 DOWNLOADING A CONFIGURATION FILE FROM UST1 _________________________________ 78 OPENING A SAVED CONFIGURATION FILE FROM A PC DISK FILE _________________________ 78 TROUBLESHOOTING ____________________________________________________________ 79 CHAPTER 7: PARAGON SECURITY: GROUP ID SETTINGS 81 RECOMMENDATIONS ___________________________________________________________ 82 CHAPTER 8: PERSONAL COMPUTER ACCESS VIA Z-CIM 83 CHAPTER 9: SPECIFICATIONS 85 CIM INSTALLATION: CONNECTING CIM AND SERVER ___________________________________ 87 CONNECTING UTP CABLES ______________________________________________________ 89 CHAPTER 10: TROUBLESHOOTING 91 SYMPTOMS AND SOLUTIONS ______________________________________________________ 91 MULTI-TIER INSTALLATION _______________________________________________________ 92 UTP CABLING FAQS___________________________________________________________ 93 CHAPTER 11: GLOSSARY APPENDICES 97 103 APPENDIX A: PARAGON UPDATE – FIRMWARE UPGRADE _______________________________ 103 UPDATE USER STATION(S)___________________________________________________ 105 UPDATE PARAGON MATRIX SWITCHING UNIT(S) ___________________________________ 106 APPENDIX B: IBM X330 _______________________________________________________ 107 CHAPTER 1: INTRODUCTION CHAPTER 1: INTRODUCTION Paragon Features and Advantages • • • • • • • • • • • • • • • • • • • • • • • 2U design supports 16 users, 64 computers (model UMT1664) 1U design supports 8 users, 32 computers (model UMT8) 1U design supports 4 users, 42 computers (model UMT442) 1U design supports 2 users, 42 computers (model UMT242) 1U design supports 2 users, 42 computers (model UMT2161) Expands to 32 users with Raritan’s UKVMP2 or CIMPAC8 Expands to 64 users with Raritan’s HUBPAC8 Locates users and computers up to 1,000 feet apart Supports high-resolution video – up to 1600 x 1200 Supports up to 127 customized user profiles Adds remote access over IP or modem with Raritan’s TeleReach™ Expands to 10,000 servers with Cascade Matrix Switching Units Enclosed 19” rack mounts with included brackets Simple plug-and-play auto-configure installation Hot-swappable components with no impact on server operation Platform-specific CIMs for PS/2, Sun, USB, ASCII/serial devices Powerful, intuitive on-screen user interface for simple operation Flexible, multi-level security for authorized computer access Three system operation modes - private, public, and share Flash firmware upgrades PC Windows program to maintain Paragon database offline OSUI support for IBM x330 with C2T technology Seamless compatibility with Raritan’s MasterConsole MXU2 and Z-Series 4200U 1 2 PARAGON ADMINISTRATOR’S INSTALLATION AND OPERATION GUIDE Paragon System Components Paragon consists of three components: the Paragon Matrix Switching unit, the Computer Interface Module (CIM), and the User Station (UST1), connected with Category 5e UTP cable. Figure 1 Paragon Matrix Switching Unit Figure 2 Computer Interface Module (CIM) • • • Located at each computer Contains transmitter for Category 5e signals and programmable ID memory for auto-configuration Please refer to “Specifications” on page 85 for a complete description of Computer Interface Modules (CIMs) Figure 3 UST1 User Station • • • Local user console Connections for User Console keyboard, monitor, and mouse RJ45 connection to Paragon Matrix Switch CHAPTER 1: INTRODUCTION 3 A complete Paragon setup may be configured as shown: Up to 32 PCs CIMs Cat5E Cable UMT8 Switch ESC FUNC ENT Cat5E Cable UST1s 8 User Consoles Figure 4 Example of Basic Paragon Configuration (UMT8) Each Paragon switch (UMT2161, UMT242, UMT442, UMT8, or UMT1664) ships with: • • • • • • Two 30 foot Category5e UTP test cables (Part # UCC030) Administrator’s Installation and Operation Guide Quick Setup and Installation Guide AC Power Cord Admin cable Video terminator (Part # VT100) (with models UMT8 and UMT1664 only) Each Paragon User Station (UST1) ships with: • • • User Manual AC Power cord Monitor AC power extension cord 4 PARAGON ADMINISTRATOR’S INSTALLATION AND OPERATION GUIDE Paragon Cable Information Paragon will work with any Category 5e UTP, Category 6 UTP, and Category 7 UTP cable products. However, Raritan has extensively tested and recommends the following Category 5e UTP, Category 6 UTP, and Category 7 UTP cable products for optimal results: Category 5e UTP Cables: Belden DataTwist 350 UTP #1700A Solid Belden DataTwist 350 patch #1752A Stranded Category 6 UTP Cable: Belden MediaTwist #1872A Solid Category 7 UTP Cable: Uninet #7702 When using certified cable, users can transmit video signals at distances up to 1,000 feet at 1024x768 @75Hz; and up to 600 feet at 1600x1200 @75Hz. Use of non-certified cabling can result in video and data degradations that users may find unsatisfactory. Certified Raritan cable products listed above are widely available and competitively priced. Note: Raritan does not have any marketing relationship with Belden, nor does Raritan receive any financial incentive for recommending Belden products. Please refer to “UTP Cabling FAQs” on page 93 for more information on Raritan certified cables. CHAPTER 1: INTRODUCTION 5 Category 5e Unshielded Twisted Pair (UTP) Cable Mod Plug Requirements for use with Raritan Category 5e UTP Products T568A T568B Mod Plug Positions White/Green R J 4 5 Cat 5e Cable C O N N E C T O R Mod Plug Positions 1 Green 2 White/Orange 3 Blue 4 R J 4 5 Cat 5e Cable White/Blue 5 Orange 6 White/Brown 7 Brown 8 C O N N E C T O R Figure 5 Cable Pin-out Requirements White/Orange 1 Orange 2 White/Green 3 Blue 4 White/Blue 5 Green 6 White/Brown 7 Brown 8 6 PARAGON ADMINISTRATOR’S INSTALLATION AND OPERATION GUIDE CHAPTER 2: INSTALLATION CHAPTER 2: INSTALLATION Quick Start Important: All computers and Paragon components must be powered OFF prior to installation. Physical Connections: 1. Connect power cord to the Paragon Switch and power ON the unit. Note: Step 2 applies to models UMT8 and UMT1664 only. When working with other units, please skip directly to step 3. 2. Connect VT100 Terminator into top Expansion Port on back of the switch. 3. Connect one end of a Category 5e UTP cable to User Port # 1 on back of the Paragon switch. 4. Connect the other end of cable to RJ45 Cat5 Port on back of User Station (UST1). 5. Connect power cord to User Station (UST1). 6. Power ON UST1. 7. Connect a PS/2 keyboard, mouse and VGA monitor to UST1. 8. Power ON monitor. 9. Connect one end of a Category 5e UTP cable to Channel Port #1 on back of Paragon Switch. 10. Connect the other end of cable to RJ45 port on a Computer Interface Module (CIM). 11. Connect CIM to server’s keyboard, video, and mouse ports. 12. Power ON Server. 7 8 PARAGON ADMINISTRATOR’S INSTALLATION AND OPERATION GUIDE Administrative Setup: 1. At the Login Menu, displayed at the User Console attached to the UST1, type “admin” (all lowercase) in the User Name field and press <Enter>. 2. Type “raritan” (all lowercase) in the Password field and press <Enter>. The monitor displays an On-Screen User Interface (OSUI) Selection Menu with the connected computer displayed in green. 3. Use the <!> or <"> keys to highlight the channel highlighted in green and press <Enter>. 4. Normal computer access and operation indicates a successful connection. Important: The above steps for a Quick Start can be repeated with all UST1 and CIM units. For more detailed installation instructions, please refer to the rest of this chapter. Note: A video gain adjustment is available to focus the video image, which may be necessary when using LCD flat panel monitors. Activate the OSUI by rapidly hitting the default Hot Key activator (the <Scroll Lock> key) twice and use the numeric keypad “+” and “-” keys to adjust the video image until it appears in focus. CHAPTER 2: INSTALLATION 9 Administrator User Name and Password Defaults DEFAULT ADMINISTRATOR’S USER NAME: DEFAULT ADMINISTRATOR’S PASSWORD: admin raritan (lowercase) User Names: If user names have not been assigned, the default names are “user01” through “user07” for users, and “admin” for the administrator. User names are not case sensitive. Passwords: If a password is necessary, you will be prompted to enter one. The administrator’s password is “raritan” typed in lowercase. Passwords are case sensitive. Configuration Options Basic Installation: Depending on the Raritan model you are working with, you can configure your system for a specific number of users to access up to a specific number of computers: MODEL #: USERS: ACCESS: UMT2161 2 users 16 computers UMT242 2 users 42 computers UMT442 4 users 42 computers UMT8 8 users 32 computers UMT1664 16 users 64 computers Multi-Tier Installation: For expanded access, tier multiple Raritan Paragon switches with other Raritan KVM switches for expanded access. Your system can be set up with one base and up to two tier levels. Installation requires basic operation of Paragon’s On-Screen User Interface (OSUI) menus. Activate the OSUI by rapidly hitting the default Hot Key activator (the <Scroll Lock> key) twice. 10 PARAGON ADMINISTRATOR’S INSTALLATION AND OPERATION GUIDE Each OSUI menu contains the following sections: Menu Title â OSUI Main Body ã ….. Scrolling Messages Banner….. ä ScrlLock | Scan | Skip | NCSH å æ ç è Figure 6 OSUI Display 1. Title Line 2. Menu/Screen Body (for text and fields) 3. Scrolling Messages Banner 4. Status Line, which displays: 5. Current OSUI (On Screen User Interface) hot key activator – in this case, the <Scroll Lock> key pressed twice rapidly will call the OSUI menu 6. Scan/Skip status - if highlighted in yellow, option is on, if highlighted in white, option is off. 7. <Num Lock> (N), <Caps Lock> (C), and <Scroll Lock> (S) status indicator, followed by Paragon Communication Speed Indicator for low (L) or high (H). The Paragon Communication Speed Indicator displays the communication speed between a User Station (UST1) and a Paragon Switch (UMT2161, UMT242, UMT442, UMT8, or UMT1664). Communication will be at low speed, indicated by the letter L, or at high speed, indicated by the letter H. Speed can depend upon the versions of your Paragon components. CHAPTER 2: INSTALLATION 11 Function Keys: <F1>, <F2>, <F4>, and <F8> are used to switch among first-level menus. Pressing <F1> while OSUI is active invokes the Help Screen, which details all available options. Whenever the OSUI is invoked, the user console keyboard’s <Scroll Lock> LED indicator blinks repeatedly. Help F1 Help / ESC Exit F2 Channel Selection / Name - F12 Sort by Channel F4 User Profile F5 Administrative Functions F6 Toggle Scan On/Off F7 Toggle Skip On/Off F8 Information Screen F9 Logout - Shft+F9 Release Channel F10 Toggle Disp All Ch. On/Off ….. Scrolling Messages Banner….. ScrlLock | Scan | Skip | NCSL Figure 7 Help Menu Please refer to “Operating Paragon” on page 47 for a more information on Paragon’s OSUI. 12 PARAGON ADMINISTRATOR’S INSTALLATION AND OPERATION GUIDE Basic Installation A predetermined number of users can access up to a certain number of computers through the following Raritan models: USERS: COMPUTERS: MODEL #: 2 users 16 computers UMT2161 2 users 42 computers UMT242 4 users 42 computers UMT442 8 users 32 computers UMT8 16 users 64 computers UMT1664 Please use the steps that follow to perform a Basic Installation of a single tier system: Important: Power OFF all computers and Paragon components prior to installation. 1. Initialize Paragon Switch (UMT2161, UMT242, UMT442, UMT8, or UMT1664). a. Connect power cord to the Paragon Switch and power ON switch. Note: Step (b) applies to models UMT8 and UMT1664 only. When working with other units, please skip directly to step (c). b. Connect VT100 Terminator into top Expansion Port on back of the Paragon Matrix Switch. Note: Installing the VT100 adapter into the top Expansion Port on the back panel of the Paragon Matrix Switch will improve video quality. A VT100 adapter should be installed on each UMT8 and UMT1664 switch in your configuration. UMT2161, UMT242, and UMT442 models do not require installation of the VT100 adapter. c. Wait for self-testing (visible on the front panel LCD of the switch) to complete. Unit is ready when first line of LCD on front of switch circulates the message shown below. “/1” refers to the UMT8 switch main unit. Raritan Computer Paragon: UMT8 Switch HWII/1Ready User 1 Chan. 1 Figure 8 LCD Normal Display (UMT8 model) CHAPTER 2: INSTALLATION 13 Note: The Paragon Matrix Switching Unit’s Expansion Ports reserve a location for the future implementation of Raritan Banking Technology, an improved KVM configuration design that conceivably banks or links Matrix Switching Units directly to each other. UMT2161, UMT242, and UMT442 models do not include Expansion Ports. Important: Step 2, below, is optional when installing a UMT2161 unit. The UMT2161 can be connected to a UST1 OR directly to a keyboard, a monitor, and a mouse OR both a UST1 and directly to a keyboard, a monitor, and a mouse. If you are connecting the UMT 2161 to a UST1, please follow step 2. If you are not installing a UST1, but instead are connecting the UMT2161 directly to a keyboard, a monitor, and a mouse, please skip to step 3. 2. Connect User Station (UST1). a. b. c. d. Connect one end of a Category 5e UTP cable to User Port # 1 on the back of the switch. Connect the other end of cable to RJ45 Cat5 Port on back of UST1. Connect power cord to User Station (UST1) and power ON UST1. Connect a PS/2 keyboard, mouse, and VGA monitor to UST1 and power ON monitor. Figure 9 UMT8 Switch Back Panel Figure 10 UST1 Back Panel 14 3. PARAGON ADMINISTRATOR’S INSTALLATION AND OPERATION GUIDE Perform UST1 Administrative Setup. a. UST1 will establish communication with the Paragon Switch. b. A Login Menu appears on user console monitor. The <Scroll Lock> LED on the keyboard blinks to indicate Hot Key mode is operational, which enables keyboard’s communication with the Paragon OSUI for performing login, computer selection, and administrative functions. Please Login Paragon Device ID : UMT8 Switch HWII User Port : 1 User Name : Password : ….. Scrolling Messages Banner….. Figure 11 Login Menu c. Type “admin” in the User Name field and press <Enter>. d. Type the default password “raritan” (all lowercase) in the Password field and press <Enter>. e. The monitor displays the OSUI Selection Menu, indicating correct installation of UST1. Selection Menu UMT8 Switch HWII 1/4 No Ch. ID --- --------------- 1 01 2 02 3 4 5 6 7 8 03 04 05 06 07 08 Page Name Scn -------------------------------------------------- ---------- 03 03 NT4.0 Mail Wins95.Bob ! Wins98.Jack MX4-Wing.2 NT4.0-Fax MC2-16.Reg1 UMT8 Switch-Wing.4 ….. Scrolling Messages Banner….. ScrlLock | Scan | Skip Figure 12 OSUI Selection Menu | 03 03 -03 --- NCSL CHAPTER 2: INSTALLATION 15 Note: If user console monitor displays a message “...No Connection to Paragon… ,” UST1 is not properly connected to the switch. Check for loose connections and use only the recommended UTP cables (see “UTP Cabling FAQs” on page 93 for further information). 4. Repeat steps 2 and 3 for each UST1 to be connected to the Paragon Switch user ports. 5. Connect CIM / Computer. a. Connect CIM to server’s keyboard, video, and mouse ports (using part # APSAT for AT-style PCs if needed) and power ON computer. The blinking green LED on CIM indicates proper functioning. b. Connect one end of a Category 5e UTP cable to Channel Port #1 on back of switch. c. Connect the other end of cable to RJ45 port on a Computer Interface Module (CIM). d. Power ON server. Figure 13 APSAT – Converts AT style Keyboard and Mouse to PS/2 Note: Please refer to “Specifications” on page 85 for available CIM types, functions, and any special installation instructions that apply for each CIM unit. 16 6. PARAGON ADMINISTRATOR’S INSTALLATION AND OPERATION GUIDE Perform Administrative Setup for CIMS and connected computers. The monitor connected to the UST1 displays an On-Screen User Interface (OSUI) Selection Menu with the connected computer displayed in green. Use the <!> or <"> keys on your keyboard to highlight the computer you wish to set up, then press the <Enter> key. Normal computer access and operation indicates a successful connection. a. Assign a meaningful name for each channel (computer) by pressing <F5> to bring up the Administration Menu. Administration Menu Choose Admin Function ---------------------------------------------------------1 System Configuration 2 User Configuration 3 Channel Configuration 4 Keyboard Type -- English 5 Refresh Configurations ….. Scrolling Messages Banner….. ScrlLock | Scan | Skip | NCSL Figure 14 Administration Menu b. Use the <!> or <"> keys to highlight the Channel Configuration submenu and press <Enter> to open the menu. Channel Configuration ¾ UMT8 Switch HWII Scn Page: Ch ID Name ---------- ------------------------------------------ ---------1 03 2 NT4.0 Mail 03 3 Wins95.Bob 03 4 Wins98.Jack 03 5 MX4-Wing.2 -6 NT4.0-Fax 03 7 MC2-16.Reg1 -8 UMT8 Switch-Wing.4 -….. Scrolling Messages Banner….. ScrlLock | Scan | Skip | Figure 15 Channel Configuration Menu # Device ---------CPU CPU CPU CPU CPU NCSL CHAPTER 2: INSTALLATION c. d. e. f. 7. 17 Use the <!> or <"> keys to highlight the Name field that corresponds with the Channel ID (Ch ID) where the CIM / Computer was just installed, then press <Enter> - the yellow highlight will turn light blue. Edit name and press <Enter> when finished - the highlight will turn green as you begin to type. Press <S> to save the new name. Press <F2> to return to the Selection Menu and verify that the new name appears on the Selection Menu in green. Repeat steps 5 and 6 for each CIM / Computer. 18 PARAGON ADMINISTRATOR’S INSTALLATION AND OPERATION GUIDE Multi-Tier Installation Paragon’s channel capacity can easily be expanded with a tiered installation. Up to three tiers are possible: a base plus a maximum of two levels of tiered KVM switches. When setting up two tiers, the base unit must be a Paragon switch and the second tier can be any of the Raritan KVM Switches listed below. In a three-tier configuration, both the base unit and the second tier must be Paragon Switches; the third tier can be any of the Raritan KVM Switches listed below. Raritan KVM switches that can be tiered off of a Paragon Switch unit include: other Paragon Switches, Z-Series Z4200U, MasterConsole MX4, MasterConsole MXU2, and MasterConsole II (Model MCC). Up to 2,048 computers can be accommodated with a multi-tier installation. Only computers may be connected to channel ports of the final tier KVM switches. Figure 16 Example of a Multi-Tier Configuration Important: In multi-tier configurations, the order of powering ON is critical to proper function. • Last tier switches must be powered ON before the intermediate level of tier • Intermediate tier switches must be powered ON before the base Paragon switch can be powered ON. • User Stations (UST1s) can be powered ON and OFF at any time as needed. • There is a five-second ON/OFF down time in the UST1 or Paragon power cycle. CHAPTER 2: INSTALLATION 19 Installing a Paragon Switch Follow the Basic Installation steps starting on page 12 to set up the base Paragon Switch, making certain to reserve sequential channels on the Paragon Switch for cascading second-tier KVM or Paragon Switches. Please use the following guidelines for reserving sequential channels: FOR EACH: RESERVE: Tiered UMT8 Switch Up to 8 channels Tiered UMT442 Switch Up to 4 channels Tiered UMT242 Switch Up to 2 channels Tiered UMT2161 Switch 1 channel Tiered Z-Series Z4200U OR MasterConsole II OR MasterConsole P 1 channel Tiered MasterConsole MX4 Up to 4 channels Tiered MasterConsole MXU2 Up to 2 channels 20 PARAGON ADMINISTRATOR’S INSTALLATION AND OPERATION GUIDE Connecting Tiered Raritan KVM Switches to a Base Paragon Switch Connecting a Paragon Switch as a Second Tier or Third Tier Unit 1. Connect one end of Category 5e UTP cable to the User Port of the second-tier Paragon Switch. 2. Connect other end of cable to a Channel Port on the base Paragon Switch. 3. Repeat steps 1 and 2 to connect remaining user ports on second-tier Paragon Switch to channel ports reserved on base Paragon Switch. 4. Follow the same procedure to add a third tier Paragon Switch to a second tier Paragon Switch. A base unit Paragon Switch will automatically recognize a second-tier and a third-tier level unit and will update its configuration as needed. Note: The Paragon Matrix Switching Unit’s Expansion Ports reserve a location for the future implementation of Raritan Banking Technology, a potentially improved KVM configuration design that conceivably banks or links Matrix Switching Units directly to each other. UMT2161, UMT242, and UMT442 models do not include Expansion Ports. Perform Channel Configuration: 1. At a User Station Login Menu, type “admin” in the User Name field and press <Enter>. 2. Type the password “raritan” (all lowercase) in the Password field and press <Enter>. 3. Press <F5> to activate the Administration Menu. 4. Use the <!> and <"> keys to highlight the Channel Configuration menu and press <Enter>. 5. Use the <!> and <"> or <Page Up> and <Page Down> keys to go to the Paragon switch tier path to be named and press <Enter> - the yellow highlight will turn blue. 6. Type the desired name for this tier path and press <Enter> - the blue highlight will revert to yellow. 7. Press <S> to save the name. All tier paths will be automatically named. 8. Press <Esc> to return to the Administration Menu. Verify and Save Changes: 1. Press <F2> at the Selection Menu to validate that the second-tier Paragon switch is properly established (all Paragon switch paths should be displayed in purple). 2. Press <F5> to go to the Administration Menu and select the Channel Configuration submenu. Select a channel that has been configured for the Paragon Switch. 3. Press <G> to bring up the Channel Configuration menu to edit computer names. 4. Press <S> to save the new configuration. 5. Press <F2> to go to the Selection Menu to validate that second-tier Paragon Switch is properly configured. Select one Paragon Switch channel and press <Enter> to go to selection menu. Select one Paragon Switch channel and press <Enter> to verify proper access to selected computer. CHAPTER 2: INSTALLATION 21 Guidelines for Paragon System Configuration 1. Only one user should attempt to modify/update the System Administration Menu at a time (this is especially important when changing the User Configuration and Channel Configuration options). 2. Z-Series chains should be added one at a time. The message banner should read that the DB has been completely updated before administrator adds a new Z-chain. 3. If using a HUB-PAC, the UMT must be powered ON before the HUB-PAC is powered ON. 4. If system updating is necessary at install, all users must be logged off. 22 PARAGON ADMINISTRATOR’S INSTALLATION AND OPERATION GUIDE Connecting Z-Series Z4200U Z-CIMs as a Tier Important: Tiering a Z4200U chain requires User Station (UST1) firmware version 4L2 or higher and Paragon switch firmware versions 1P0 (UMT2161), 2C2 (UMT242, UMT442, and UMT8), or 3A2 (UMT1664). The following diagram shows the final setup when connecting Z-Series Z4200U Z-CIMs as a tier: Cat 5e Cat 5e UKVMSPD UKVMSPD UKVMSPD UKVMSPD Ca t5 e Cat 5e Z-CIMs Cat 5e Z-CIM Terminator Last Z-CIM IN OUT PC UKVMSC Z-CIMs Up to 42 Z-CIM Servers Up to 42 Back of UMT8 Figure 17 Connecting a Z-Series Z4200U as a Tier to Paragon Note: All Paragon switches shipped from Raritan after January 1, 2002, are hardware and firmware enabled to support connection to a chain of Z4200U Z-CIMs. Important: Z-Series installation requires that each computer be assigned a channel name as it is added to the Z4200U Z-CIM chain. Computer channels are organized alphabetically by assigned name (or the default name, which is the Z-CIM’s serial number), rather than in the order of their placement within the Z4200U Z-CIM chain. It is recommended that installers assign channel names before connecting all computers to eliminate any difficulty in locating the respective channel for each computer. CHAPTER 2: INSTALLATION 23 Note: When following the installation and configuration instructions below, sort the Selection Menu by Channel ID Number, not by Name. Display the menu by pressing < F2> and change the sorting method by pressing <F12>. Important: All Paragon components must be powered ON prior to Z-Series tier installation. All computers in the Z-chain and all Z4200U components must be powered OFF prior to installation. Connect Z-Series Z4200U Z-CIMs as a Tier: 1. Connect a Category 5e UTP cable to the channel port on the Paragon switch reserved for the ZCIM chain. 2. Connect the other end of this Category 5e UTP cable to the UTP OUT port on a Z-CIM, which will be the first Z-CIM in the chain. 3. Connect a computer to the first Z-CIM. For UKVMSPD Z-CIM: a. Connect the 6-pin mini-DIN keyboard and mouse and HD15 video connectors on the UKVMSPD Z-CIM to computer’s keyboard, mouse, and video ports. b. Place the Z-CIM Terminator in the Z-CIM’s UTP IN port. c. Power ON computer. Figure 18 Z-CIM UKVMSPD For UKVMSC Z-CIM with local port: Connect DB25 male end of CCPnn cable to DB25 female port on back of a Z-CIM (UKVMSC). Connect other end to computer’s keyboard, video, and mouse ports. Place the Z-CIM Terminator in the Z-CIM’s UTP IN port. Power ON computer. a. b. c. d. Figure 19 Z-CIM UKVMSC with Local Port 24 PARAGON ADMINISTRATOR’S INSTALLATION AND OPERATION GUIDE e. Optional: Connect a local user console to the UKVMSC Z-CIM. Front of UKVMSC Figure 20 Connecting a Local User Console to UKVMSC Z-CIM Perform Channel Configuration: 1. At a User Station Login Menu, type “admin” in the User Name field and press <Enter>. 2. Type “raritan” (all lowercase) in the Password field and press <Enter>. 3. Press <F5> to go the Administration Menu and select the Channel Configuration submenu. 4. Use the <!> and <"> or the <Page Up> and <Page Down> keys to highlight the Paragon channel where the Z-CIM was just added. 5. Ensure that the Device field reads “Zseries.” 6. If Zseries does not appear in the Device field: a. Press <Tab> until the Device field is active, them press <Enter> - the highlight will turn green. b. Use the <!> and <"> keys to change device type to Z-Series and press <Enter> - the green highlight will return to yellow. c. Press <S> to save the change, or press <Esc> to exit without saving. 7. If a more descriptive name is desired: a. Hold the <Shift> key and press <Tab> to go back to the Name column, then press <Enter> - the highlight will turn blue. b. Edit the default name and press <Enter> - the highlight will turn green as you begin to type. c. Press <S> to save the change, or press <Esc> to exit without saving. 8. Press <F2> to go to the Selection Menu to validate that the second-tier Z4200U Z-CIM is properly configured. Select the tiered Z4200U Z-CIM device and press <Enter>. CHAPTER 2: INSTALLATION 25 Name the Computer Channel on the Z4200U tiered Selection Menu: 1. When viewing the Paragon Selection Menu or any OSUI menu, press <F5> to go to the Administration Menu. 2. Select the Channel Configuration submenu. 3. Select the Z4200U device channel. 4. Press <G> to bring up a Channel Configuration menu for the Z4200U chain. 5. Use the <!> and <"> keys to highlight the Name field of the computer just connected via Z4200U Z-CIM. The channel for this computer is displayed in green, and the highlight will turn yellow when it is selected. 6. Press <Enter> - the highlight will turn blue. 7. Type the desired computer name - the highlight will turn green as you begin to type. 8. Press <Enter> - the highlight will turn yellow. 9. Press <S> to save the new name. Verify and Save Changes: 1. Press <F2> to return to the Selection Menu. 2. The Selection Menu will display with the new computer name highlighted in white. 3. Press <Enter> to switch to this selected computer. 4. Normal computer access and operation indicates a successful connection. 26 PARAGON ADMINISTRATOR’S INSTALLATION AND OPERATION GUIDE Important: Repeat the steps on the previous pages: !Connect Z-Series Z4200U Z-CIMs as a Tier !Perform Channel Configuration !Name the Computer Channel on the Z4200U tiered Selection Menu !Verify and Save Changes for each server to be added to the chain. Name and test each computer as it is added. Follow the steps below to build the rest of the Z4200U chain of servers. Attach Z4200U Z-CIM to Computer to be Added: For UKVMSPD Z-CIM: 1. Connect the 6-pin mini-DIN keyboard and mouse and HD15 video connectors on the UKVMSP Z-CIM to computer’s keyboard, mouse, and video ports. Figure 21 Z-CIM UKVMSPD For UKVMSC Z-CIM with local port: 1. Connect CCPnn cable’s 6-pin mini-DIN and HD15 connectors to computer’s keyboard, mouse, and video ports. 2. Connect DB25 male end of CCPnn cable to DB25 female port on back of Z-CIM (UKVMSC). Figure 22 Z-CIM UKVMSC with Local Port Attach new Z-CIM to the existing Z4200U chain: 1. Remove Z-CIM Terminator from the last Z-CIM’s UTP IN port and set aside. 2. Connect a Category 5e UTP cable to UTP IN port on the Z-CIM that is currently last in the chain. 3. Connect the other end of this Category 5e UTP cable to the UTP OUT port on the next ZCIM/computer currently being added to the chain. 4. Place the Z-CIM Terminator in the added Z-CIM’s UTP IN port. 5. Power ON computer. CHAPTER 2: INSTALLATION 6. 27 Optional: Connect a local user console to the UKVMSC Z-CIM. Front of UKVMSC Figure 23 Connecting a Local User Console to UKVMSC Z-CIM Name Computer: 1. At the Selection Menu, press <F5> to go to the Administration Menu. 2. Select the Channel Configuration submenu. 3. Select the Z4200U device channel. 4. Press <G> to bring up a Channel Configuration menu of the Z4200U chain. 5. Use the <!> and <"> keys to highlight the Name field of the computer just connected via ZCIM. The channel for this computer is displayed in green, and the highlight will turn yellow as you select it. 6. Press <Enter> - the highlight will turn blue. 7. Type the desired computer name - the highlight will turn green as you begin to type. 8. Press <Enter> - the highlight will turn yellow. 9. Press <S> to save the new name. Verify and Save Changes: 1. Press <F2> to return to the Selection Menu. 2. The Selection Menu will display with the new computer name highlighted in white. 3. Press <Enter> to switch to this selected computer. 4. Normal computer access and operation indicates a successful connection. 28 PARAGON ADMINISTRATOR’S INSTALLATION AND OPERATION GUIDE Connecting a MasterConsole MX4 as a Tier Set MX4 User Port as a Second Tier Port: 1. Hold the MX4’s front panel [FUNC] button down when powering ON the MX4. This will cause the MX4 unit to reset to factory defaults. 2. From the MX4 front panel, press [FUNC] to invoke the Function Menu. 3. Use the <!> and <"> keys to go to the Set Tier function, then press <Enter> 4. Use the <!> and <"> keys to select the proper User Port number. 5. Press <$> to set user port as a second-tier port (T), then press <Enter> 6. Repeat above steps for all User Ports to be connected to the base Paragon Switch. Connect an MX4 Tiered User Port to a Base Paragon Switch: If using CIM UKVMC: 1. Use a cascade cable (CCPnnE) and connect DB25 connector (female) into one of the user ports designated to be the tier. 2. Connect the cable’s other DB25 (male) into the DB25 connector on the UKVMC. 3. Repeat above steps to connect remaining tier MX4 user ports to channels reserved on base Paragon switch. If using CIM UKVMP: 1. Connect the UKVMP keyboard, monitor, and mouse cables into the MX4 CCPnnF user cable. 2. Connect a Category 5e UTP cable between the CIM and one of the 4 channels reserved for MX4 on base Paragon switch. 3. Repeat above steps to connect remaining tier MX4 user ports to channels reserved on base Paragon switch. Perform Channel Configuration: 1. At a User Station Login Menu type “admin” in the User Name field and press <Enter>. 2. Type “raritan” (all lowercase) in the Password field and press <Enter>. 3. Press <F5> to activate the Administration Menu. 4. Use the <!> and <"> keys to select Channel Configuration and press <Enter>. 5. Use the <!> and <"> or <Page Up> and <Page Down> keys to go to channels in which MX4 paths are connected. 6. Use the <Tab> key to move to the Device Column. 7. Press <Enter> - the highlighted area turns green. 8. Use the <!> and <"> keys to set to MX4, MX4-8, MX4-16, or MX4-32 and press <Enter> to save the change. 9. Hold the <Shift> key and press <Tab> to return to the Name column. 10. Press <Enter> and edit the default name. 11. Press <Enter> to retain change. CHAPTER 2: INSTALLATION 29 12. Repeat these channel configuration steps for each path. You must name all MX4 paths with the same name. This will notify Paragon that these paths are connected to the same MX4. 13. Press <S> to save the new configuration. Verify and Save Changes: 1. Press <F2> to go the Selection Menu to validate that the second-tier MX4 is properly established. All MX4 paths should be displayed in purple. 2. Press <F5> to go to the Administration Menu and select the Channel Configuration submenu. Select a channel that has been configured for MX4. Press <G> to bring up a Channel Configuration menu for the MX4. Edit the computer names. 3. Press <S> to save the new configuration. 4. Press <F2> to go to the Selection Menu to validate that second-tier MX4 is properly configured. Select one MX4 channel, then press <Enter> to go to MX4 selection menu. Select one MX4 channel and press <Enter>. Verify proper access to selected computer. 30 PARAGON ADMINISTRATOR’S INSTALLATION AND OPERATION GUIDE Connecting a MasterConsole MXU2 as a Tier Figure 24 Connecting a MasterConsole MXU2 as a Paragon Second Tier – Sample Configurations Configure the MasterConsole MXU2 Unit as a Second Tier Device: 1. Attach a user console to the MXU2 unit that will be used as a second tier unit. a. Connect user console to appropriate ports on back of MXU2 keyboard to port labeled “Keyboard” (6-pin mini-DIN Female), mouse to port labeled “Mouse” (6-pin mini-DIN Female), and monitor to port labeled “Monitor” (HD15 Female). b. Plug in monitor power cord and turn on monitor. 2. Power on the MXU2 and login. a. b. c. d. e. Connect power cord to back of MXU2 unit and AC power outlet. Power ON the MXU2 via the power switch on the back of the unit. The Login Menu will appear on the monitor. Type “admin” in the User Name field of the Login Menu and press <Enter>. Type “raritan” (all lowercase) in the Password field, and press <Enter>. The Selection Menu will appear. CHAPTER 2: INSTALLATION 3. 31 Set up the MXU2 as a second tier unit. a. At the Selection Menu, press <F5> to access the Administration Menu. b. Highlight selection number 1. System Configuration and press <Enter> to access the System Configuration Menu. System Configuration ----- ----------------------------------------------------- Device ID: UMT8 Switch Display All Computers: Logoff Timeout: Off HWII No 05 Minutes Operation Mode: Private P-View Admin Silent: No PC Share Timeout: 01 Sec Login Blank: Off 05 Minutes Allow Blank Password: No Default Login Name Blank: Yes ….. Scrolling Messages Banner….. ScrlLock | Scan | Skip | NCSL Figure 25 System Configuration Menu c. To set each second tier User Port to Yes, press the <Tab> key or hold the <Shift> key and press <Tab> to navigate to the User 1-2 Tier: field. The First Entry in this field applies to User Port 1 and the second entry applies to User Port 2. d. Press <Enter> to edit each user tier field - the highlighted area turns green. e. Use the <!>, <">, <$>, and <#> keys to select Yes for each User Port that will be connected as a second tier. f. Press <Enter> when finished - the field turns yellow. g. Press <S> to save the changes. The MXU2 is now programmed for second tier use. h. Power off the MXU2 via the power switch in the back of the unit. i. Disconnect the user console from this MXU2 second tier unit. Connect MasterConsole MXU2 to the Paragon Switch. 1. Connect a Category 5e UTP cable to each of the channels reserved for the MXU2 on the base Paragon switch. 2. Connect the other end of this Category 5e UTP cable to the second tier MXU2 user port(s). For MXU2 User 1 (Local User Console Port): a. Connect the other end of the Category 5e UTP cable to UKVMP’s RJ45 port. b. Connect the UKVMP’s 6-pin mini-DIN and HD-15 connectors to the appropriate keyboard, monitor and mouse ports of the MXU2 User 1 port. 32 PARAGON ADMINISTRATOR’S INSTALLATION AND OPERATION GUIDE For MXU2 User 2 (Remote Category 5e UTP Port): a. Connect the other end of the Category 5e UTP cable to the RJ45 User 2 port on the back of the MXU2. Perform Channel Configuration: 1. At the User Station Login Menu, type “admin” in the User Name field and press <Enter>. 2. Type “raritan” (all lowercase) in the Password field and press <Enter>. 3. Press <F5> to go the Administration Menu and select the Channel Configuration submenu. 4. Use the <!> and <"> or the <Page Up> and <Page Down> keys to select the channel where MasterConsole MXU2 is connected. 5. Press the <Tab> key to advance to the Device field, then press <Enter> - the highlight turns green. 6. Use the <!> and <"> keys to change the device type to a MasterConsole MXU2 (MXU28 or MXU216). 7. Hold the <Shift> key and press <Tab> to go back to the Name column. 8. Press <Enter> and edit the default name. 9. Press <S> to save the new configuration. Verify and Save Changes: 1. Press <F2> to go to the Selection Menu to validate that second-tier MasterConsole MXU2 is properly configured. Select and switch to one of the MasterConsole MXU2 channels to ensure proper switching. 2. Press <F5> to go to Administration Menu. Select Channel Configuration submenu. Select the MasterConsole MXU2 channel. Press <G> to bring up a Channel Configuration menu of the MasterConsole MXU2. Edit names. 3. Press <S> to save the new configuration. CHAPTER 2: INSTALLATION 33 Connecting a MasterConsole II (Model MCC only) as a Tier Set MasterConsole II as a Tier Device: 1. When powering ON, press and hold the Channel # 2 button on the front panel of MasterConsole II for three seconds. This sets the MasterConsole II as a second-tier device. 2. The LED on the far right of the unit’s front panel (second from right for MasterConsole C models) will be lit steadily. Connect MasterConsole II to the Paragon Switch: If using a CIM UKVMC: 1. Use a CCPnn cable to connect keyboard, monitor, and mouse connectors to user ports on MasterConsole II. 2. 3. Connect DB25 connector to UKVM. If using the user port of a MasterConsole X model for second-tier connection: a. Connect a RKVM module to the MasterConsole X model with a CVnn cable. b. Connect a CIM cable to keyboard, monitor, and mouse ports of RKVM module. 4. Connect a Category 5e UTP cable to the CIM. 5. Connect the other end of the Category 5e UTP cable to the channel port reserved on the base Paragon switch. If using a CIM UKVMP: 1. Connect keyboard, monitor, and mouse cables to MasterConsole II user port. 2. If using the user port of a MasterConsole X model for second-tier connection: a. Connect a RKVM module to the MasterConsole X model with a CVnn cable. b. Connect a CIM cable to keyboard, monitor, and mouse ports of RKVM module. 3. Connect a Category 5e UTP cable to the CIM. 4. Connect the other end of the Category 5e UTP cable to the channel port reserved on the base Paragon switch. Perform Channel Configuration: 1. At a User Station Login Menu, type “admin” in the User Name field and press <Enter>. 2. Type “raritan” (all lowercase) in the Password field and press <Enter>. 3. Press <F5> to go to the Administration Menu, then select the Channel Configuration submenu. 4. Use the <!> and <"> or the <Page Up>and <Page Down> keys to select the channel in which MasterConsole II is connected. 5. Use the <Tab> key to advance to the Device field and change the device type to a MasterConsole II (MasterConsole II-4, MasterConsole II-8, MasterConsole II-16). 6. Hold the <Shift> key and press <Tab> to go back to the Name column. 7. Press <Enter> and edit the default name. 8. Press <S> to save the new configuration. 34 PARAGON ADMINISTRATOR’S INSTALLATION AND OPERATION GUIDE Verify and Save Changes: 1. Press <F2> to go the Selection Menu to validate that the second-tier MasterConsole II is properly configured. Select and switch to one of the MasterConsole II channels to ensure proper switching. 2. Press <F5> to go to the Administration Menu and select the Channel Configuration submenu. Select the MasterConsole II channel. Press <G> to bring up a Channel Configuration menu of the MasterConsole II. Edit names. 3. Press <S> to save the new configuration. CHAPTER 2: INSTALLATION Connecting a MasterConsole P as a Tier Note: All tier MasterConsole P models must be MasterView ready. To determine whether your MasterConsole P model is MasterView ready, check the white label on the bottom of the unit. Locate unit’s firmware version: MDSP-nnn. If firmware version is MCSP–1AC or higher (e.g., MDSP-1AD), the unit is MasterView ready. Some MasterConsole P models that are not MasterView ready can be upgraded to MasterView Ready. Please contact Raritan Technical Support for details and pricing. Important: Connecting a MasterConsole P as a Tier is Not Recommended. This connection should be verified as to the level of user satisfaction prior to continuing. Note: As a tier device to Paragon, MasterConsole P model can be single bank only. Connect MasterConsole P to a Base Paragon Switch: If using a CIM UKVMC: 1. Use a CCPnn cable to connect keyboard, monitor, and mouse connectors of cable into keyboard, monitor, and mouse ports of MasterConsole P unit. 2. Connect DB25 connector into UKVMC. If using a CIM UKVMP: 1. Connect keyboard, monitor, and mouse cables to MasterConsole P user port. 2. Connect Category 5e UTP cable to RJ45 port on UKVMP. 3. Connect other end of Category 5e UTP cable to channel port reserved on base Paragon switch. Perform Channel Configuration: 1. At the User Station Login Menu type “admin” in the User Name field and press <Enter>. 2. Type “raritan” (all lowercase) in the Password field and press <Enter>. 3. Press <F5> to go to the Administration Menu, then select the Channel Configuration submenu. 4. Use the <!> and <"> or <Page Up> and <Page Down> keys to select a channel in which MasterConsole P is connected. 5. Press <Tab> to advance to the Device field and change the Device Type to the specific MasterConsole P model. 6. Hold the <Shift> key and press <Tab> to go back to the Name column. 7. Press <Enter> and edit the Name field. 8. Press <S> to save new configuration. 35 36 PARAGON ADMINISTRATOR’S INSTALLATION AND OPERATION GUIDE Verify and Save Changes: 1. Press <F2> to go to the Selection Menu to validate that second-tier MasterConsole P is properly configured. Select and switch to one of the MasterConsole P channels to ensure proper switching. 2. Press <F5> to go to the Administration Menu and select the Channel Configuration submenu. Select the MasterConsole P channel and press <G> to bring up a Channel Configuration menu for MasterConsole P. Edit name fields. 3. Press <S> to save the new configuration. CHAPTER 2: INSTALLATION 37 Expanded Installation Options HubPac The Paragon HubPac, part number HUBPAC8-RK, expands user access capability to a maximum of 32 users. Each HubPac is capable of connecting 8 servers to 4 Paragon Matrix Switch units. CIM models capable of connecting to a HubPac include: • UKVMC • UKVMP • UKVMPD • USKVMC • USKVMP • USKVMPD Figure 26 Paragon HubPac Installing a HubPac The Basic Installation instructions that follow will assist you in creating a 32 user Paragon Matrix Switching configuration. Connecting A Paragon UMT8 to a Hub-Pac On Off Back of Hub Pac Server UKVMP Cat 5e Cable Cat 5e Cable UMT8 ESC FUN C ENT ESC EN T FUN C ESC EN T FUNC ESC EN T FUN C Cat 5e Cable USTI (1-8) (1-8) (1-8) (1-8) (Users 1-8) (Users 9-16) (Users 17-24) (Users 25-32) Up to 32 Users Per Server Figure 27 Diagram of Sample Installation for HubPac 38 PARAGON ADMINISTRATOR’S INSTALLATION AND OPERATION GUIDE Important: Prior to installation, all Paragon switch units and HubPac units must be powered OFF. Computers and User Stations (UST1s) to be connected can be powered ON. Connect one HubPac to a Paragon Switch model UMT8, creating a 32 user by 8 server configuration: 1. Attach server(s), via CIM, to HubPac. a. Connect CIM to server. Please refer to “Specifics for Installation of CIM” on page 87 for more information. b. Connect one end of a Category 5e UTP cable to RJ45 port on CIM. c. Connect the other end of cable to the RJ45 1-IN port on back of HubPac. d. Power ON server. e. Repeat above steps to connect the remaining servers, connecting the Category 5e UTP cable to the HubPac at the RJ45 2-IN, 3-IN, 4-IN, 5-IN, 6-IN, 7-IN, and 8-IN port for each consecutive server (2 through 8) added. Note: Up to 8 servers can be connected to one HubPac. Each 5-port cluster on the HubPac represents one server connection, with four associated HubPac user ports. When each HubPac user port in a cluster is attached to a separate Paragon switch, 32 users (4 HubPac user ports x 8 users per Paragon switch) can have access to each server. 2. Connect HubPac to each Paragon Matrix Switch by repeating all of the following steps for each 5port cluster on HubPac: a. Connect one end of a Category 5e UTP cable to the RJ45 X-1 port on back of HubPac. b. Connect the other end of the cable to channel port # X on the back of Paragon Matrix Switch number 1. c. Connect one end of a Category 5e UTP cable to the RJ45 X-2 port on back of HubPac. d. Connect the other end of the cable to channel port # X on the back of Paragon Matrix Switch number 2. e. Connect one end of a Category 5e UTP cable to the RJ45 X-3 port on back of HubPac. f. Connect the other end of the cable to channel port # X on the back of Paragon Matrix Switch number 3. g. Connect one end of a Category 5e UTP cable to the RJ45 X-4 port on back of HubPac. h. Connect the other end of the cable to channel port # X on the back of Paragon Matrix Switch number 4. Note: There are 8 five port clusters on the HubPac. For each cluster the number in front of the RJ45 IN port represents the cluster number. For example, cluster 1’s first RJ45 port is 1 IN, cluster 2’s is 2 IN, etc. In the instructions below, “X” represents the cluster number (1 through 8). 3. Connect power cord to back of HubPac and power ON HubPac 4. A HubPac represents 8 servers, and utilizes 8 channels on Paragon Matrix Switch connected. Since 32 channels are available on Paragon Matrix Switch model UMT8, up to 3 more HubPacs can be added for a full 32 user by 32 server configuration. Follow Steps 1, step 2, and step 3 above for each additional HubPac to be added. 5. Power ON each of the Paragon Matrix Switches. CHAPTER 2: INSTALLATION 39 Perform Channel Configuration: Paragon recognizes a HubPac as an extension of a CIM, rather than as a device. As a result, each server connected to the HubPac is configured as a directly connected server would be. 1. On the Selection Menu (by channel ID number) each green line indicates an active channel (CIM/computer). Highlight the CIM/server to be selected by using the <!> and <"> or the <Page Up> and <Page Down> keys, then press <Enter>. 2. Normal computer access indicates successful connection. If necessary, adjust the computer’s video quality by keying on <+> or <–> while in Hot Key mode. 3. Enter a meaningful name for each server (channel). a. Press <F5> for the Administration Menu and select the Channel Configuration submenu. b. On the Channel Configuration Menu, press the <!> or <"> keys to highlight the Name field c. d. e. f. 4. for channel ID where CIM/computer was just installed. Press <Enter> - the highlight will turn blue. Edit Name and press <Enter> when finished - the highlight will turn green as you begin to type. Press <S> to save the new name. Press <F2> to return to the Selection Menu and verify that the new name appears on the Selection Menu in green. Repeat for each CIM/server desired (up to 32). 40 PARAGON ADMINISTRATOR’S INSTALLATION AND OPERATION GUIDE CIMPac The Paragon CIMPac, part number CIMPAC8-RK, expands user access capability to a maximum of 32 users. Figure 28 Paragon CIMPac Installing a CIMPac These Basic Installation instructions will assist you in creating two Paragon model UMT8 Matrix Switching configurations with eight users (UST1s) each. Connecting A Paragon UMT8 to a CIM-PAC 5 7 1 2 Ca t 5 Port 8 3 Ca t 5 Port Ca t 5 Port 4 Ca t 5 Port Back of CIM Pac DB25F Server CCPnn RJ45 1 Cat 5 Port Cat 5e Cable UMT8 ES C EN T FUNC ESC EN T FUNC Cat 5e Cable UST1 (1-8) (1-8) (Users 1-8) (Users 9-16) Up to 16 Users Per Server Figure 29 Diagram of Sample Installation for a CIMPac CHAPTER 2: INSTALLATION 41 Important: Prior to installation all Paragon Matrix Switch units and CIMPac units must be powered OFF. Computers and User Stations (UST1s) to be connected can be powered ON. Create a Paragon Switch model UMT8 configuration with 8 users (UST1s): 1. Attach server(s) to CIMPac. a. Connect one end of a CCPnn cable to server, attaching the male HD15 video leg and the male 6-pin mini-DIN keyboard and mouse legs to appropriate video, keyboard, and mouse ports on server. b. Connect the other end of the CCPnn cable to the CIMPac, attaching the male DB25 end of the cable to female DB25 port 1 on the CIMPac. c. Power ON server. d. Repeat above steps to connect the remaining servers, connecting the CCPnn cable to the CIMPac at the DB25 2, 3, 4, 5, 6, 7, and 8 port for each consecutive server (2 through 8) added. Note: Up to 8 servers can be connected to one CIMPac. Each 3-port cluster on the CIMPac represents one DB25 server connection with two associated Cat 5 CIMPac user ports. When each CIMPac user port in a cluster is attached to a separate Paragon UMT8 Matrix Switch, 16 users (2 CIMPac user ports x 8 users per UMT8 Switch) can have access to each server. 2. Connect the CIMPac to each Paragon UMT8 Switch by repeating all of the following steps for each 3-port cluster on the CIMPac: a. Connect one end of a Category 5e UTP cable to the RJ45 Cat 5 Port immediately to the right of DB25 port X. b. Connect the other end of the cable to channel port # X on the back of UMT8 Switch number 1. c. Connect one end of a Category 5e UTP cable to the second RJ45 Cat 5 Port to the right of DB25 port X. d. Connect the other end of the cable to channel port # X on the back of UMT8 Switch number 2. Note: There are 8 three port clusters on the CIMPac. For each cluster, the number under the DB25 port represents the cluster number. In the instructions above, “X” represents the cluster number 1 through 8. 3. Connect power cord to back of CIMPac and power ON CIMPac. 4. A CIMPac represents 8 servers and utilizes 8 channels on each UMT8 Switch. Because there are 32 channels available on each UMT8 Switch, up to 3 more CIMPacs can be added for a full 16 user by 32 server configuration. Repeat Step 1 and Step 2 above for each additional CIMPac to be added. 5. Power ON each of the Paragon Matrix Switches. 42 PARAGON ADMINISTRATOR’S INSTALLATION AND OPERATION GUIDE Perform Channel Configuration: Paragon recognizes a CIMPac as an extension of a CIM, rather than as a device. As a result, each server connected to the CIMPac can be configured as a directly connected server would be. 1. On the Selection Menu, viewed in Channel ID number, each green line indicates an active channel (CIM/computer). Highlight the CIM/server to be selected by using the <!>, <">, or <Page Up>, <Page Down> keys and press <Enter>. 2. Normal computer access indicates successful connection. If necessary, adjust the computer’s video quality by keying on <+> or <–> while in Hot Key mode. 3. Enter a meaningful name for each server (channel): a. Press <F5> for Administration Menu and select the Channel Configuration submenu. b. On the Channel Configuration Menu, press the <!> or <"> keys to highlight the Name c. d. e. f. 4. field for channel ID where CIM/computer was just installed. Press <Enter> - the highlighted area turns light blue. Edit the server name - highlight turns green as you begin to type - and press <Enter> when finished. Press <S> to save the new name. Press <F2> to return to the Selection Menu and verify that the new name appears on the Selection Menu in green. Repeat for each CIM/server desired (up to 32). CHAPTER 2: INSTALLATION 43 Rack Mount Brackets – RUMT and RUST Mounting brackets for Paragon components – Paragon Matrix Switch or User Station (UST1) – can be purchased separately for convenient rack mount installation. PART NUMBER: DESCRIPTION: RUMT-1U 19” Rack Mount Bracket for Paragon Matrix Switch (1U) [for serial numbers that begin with CP] RUST-1U 19” Rack Mount Brackets for UST1 (1U) Each of these rack mount brackets can be mounted as either a forward mount or a reverse mount. Forward mount offers access to the front panel of the unit. Reverse mount offers access to the back panel ports of the unit, where cables are connected. 44 PARAGON ADMINISTRATOR’S INSTALLATION AND OPERATION GUIDE Forward Mount Installation 5. 1. 1. 3. 4. 3. 2. U M T8 4. Figure 30 Forward Mount of Paragon Matrix Switch – Rack p/n RUMT-1U 5. 1. 1. 3. 3. 4. 2. UST1 4. Figure 31 Forward Mount of Paragon User Station (UST1) Switch – Rack p/n RUST-1U Forward Mount Installation: 1. Secure cable support bar to the rear of each side bracket, opposite from the rack mount tabs. 2. Slide Paragon Matrix Switch or User Station (UST1) between the two side brackets, at the front end near the rack mount tabs. The front of the Paragon Matrix Switch or User Station (UST1) should be flush with the front of the side brackets at the rack mount tabs. 3. Secure the Paragon Matrix Switch or User Station (UST1) to side rack mount brackets with three screws on each side. 4. Secure the entire assembly to the rack at rack mount tabs. 5. Drape cables over the cable support bar. CHAPTER 2: INSTALLATION 45 Reverse Mount Installation 2. 3. UMT8 3. 1. 4. 1. 4. 5. Figure 32 Reverse Mount of Paragon Matrix Switch – Rack p/n RUMT-1U 3. 2. UST1 3. 1. 4. 1. 5. 4. Figure 33 Reverse Mount of User Station (UST1) – Rack p/n RUST-1U Reverse Mount Installation: 1. Secure cable support bar to the front of each side bracket near the rack mount tabs. 2. Slide the Paragon Matrix Switch or User Station (UST1) between the two side brackets at the rear end, opposite the rack mount tabs. The front of the Paragon Matrix Switch or User Station (UST1) should be flush with the back of the side brackets. 3. Secure the Paragon Matrix Switch or User Station (UST1) to the side rack mount brackets with three screws on each side. 4. Secure the entire assembly to the rack at the rack mount tabs. 5. Drape cables over the cable support bar. 46 PARAGON ADMINISTRATOR’S INSTALLATION AND OPERATION GUIDE CHAPTER 3: OPERATING PARAGON 47 CHAPTER 3: OPERATING PARAGON Login Login is required to access computers and devices connected to Paragon. The Login Menu will display automatically on user stations after Paragon initially powers ON. Press <F9> at the OSUI to display the Login Menu on a user station monitor. Activate the OSUI by rapidly hitting the default Hot Key activator (the <Scroll Lock> key) twice. The name of the Paragon Switch is Device ID. The User Port number is the number of the Paragon Switch User Port (1 through 8) to which this user station is connected. Note: If the user station monitor displays message “…No Connection to Paragon…”, then the user station (UST1) is not connected properly to the Paragon switch unit, the Paragon switch unit is not functioning properly, or the Paragon switch is powered off. Check the Paragon switch LCD for proper operational display. Check Category 5e UTP cable to ensure it is secured properly into connectors. Try to recycle AC power on user station (UST1) to ensure it is properly powered. Device ID User Port Please Login Paragon : UMT8 Switch HWII : 1 User Name : Password : ….. Scrolling Messages Banner….. Figure 34 Login Menu 1. Enter a user name assigned by the System Administrator and press <Enter>. If user names have not been assigned, the default names are “user01” through “user07” for users; “admin” for the administrator (user names are not case sensitive). 2. If a password is necessary, prompting will occur. Type the password and press <Enter>. The default password for user “admin” is “raritan,” typed in lowercase (passwords are case sensitive). Please refer to “Changing Password within User Profile Menu” on page 53 for more details. 48 PARAGON ADMINISTRATOR’S INSTALLATION AND OPERATION GUIDE 3. The Selection Menu will appear. To navigate to other menus, use the function keys. (Please refer to “On-Screen User Interface (OSUI) Functions” on page 55 for more information). 4. Log out of the Paragon system by pressing <F9> when the OSUI is displayed. Selecting a Computer Immediately following user login, Paragon’s OSUI displays the Selection Menu. Users who are already logged in should press <F2> while viewing Paragon’s OSUI to bring up the Selection Menu. Activate the OSUI by rapidly hitting the default Hot Key activator (the <Scroll Lock> key) twice. The Selection Menu lists devices sorted either by channel ID number or alphabetically by device or computer name. Press <F12> to toggle these views. Default sorting is by channel ID number but will reflect the last sorting method used unless the system is re-initialized. Selection Menu Fields: The Selection Menu displays up to eight channels per page. • • • • No lists the number of the channel being scanned Ch. ID indicates physical channel to which each device or computer is connected. Name lists connected device or computer name. Scn (visible when menu is sorted by Ch ID) displays each channel’s specific scan rate in seconds. Selection Menu UMT8 Switch HWII 1/4 No Ch. ID --- --------------- 1 01 2 3 02 03 4 5 6 7 8 04 05 06 07 08 Page Name Scn -------------------------------------------------- ---------- 03 NT4.0 Mail Wins95.Bob 03 03 ! Wins98.Jack MX4-Wing.2 NT4.0-Fax MC2-16.Reg1 UMT8 Switch-Wing.4 ….. Scrolling Messages Banner….. ScrlLock | Scan | Skip | 03 -03 --- NCSL Figure 35 Selection Menu by Channel ID Number CHAPTER 3: OPERATING PARAGON 49 Selection Menu by Name Page Ch. ID Name -- ---------------------------------------------------- ! 1/4 -------------------------------- MC2-16.Reg1 07 MX4-Wing.2 NT4.0-Mail 05 02 NT4.0-Fax UMT8 Switch-Wing.4 Win95.Bob Wins98.Jack 06 08 03 04 01 ….. Scrolling Messages Banner….. ScrlLock | Scan | Skip | NCSL Figure 36 Selection Menu by Name Note: The <F10> key toggles between showing and not showing all channels on user OSUI menu . Pressing <F10> will operate only if the Selection Menu is sorted by Channel ID or if the System Administrator has set the System Configuration Menu option for “Display All Computers” to Yes. When all channels are visible, the channel’s scan rate is followed by a red “S,” indicating a group security conflict and making that computer non-accessible to the user. 1. Press the <!> and <"> or <Page Up> and <Page Down> keys to highlight a channel for a device or computer and press <Enter> to select. When the Selection Menu is sorted by Channel ID number: User can press desired computer’s key number (1-8), listed in the left-hand column under No (Number), and press <Enter> to quickly jump to that channel. When Selection Menu is sorted alphabetically by Name: User can type the first character(s) of the desired device name to jump to the device name that most closely matches the characters typed, and press <Enter>. Note: A small red triangle on the left of a channel name indicates to which channel user is currently connected. a. If channel represents a computer, the user automatically goes to normal computer operation and leaves OSUI. b. If channel represents a connected MasterConsole device (Two-Tier Configuration), an additional OSUI Selection Menu for that device is displayed. c. To return to the base Paragon Selection Menu from any other level of Selection Menu, press the <Home> key. 2. Channel switching can be repeated by returning to the OSUI Selection Menu, or by pressing the Previous Channel key twice rapidly to return to the previously selected channel without seeing the OSUI. 50 PARAGON ADMINISTRATOR’S INSTALLATION AND OPERATION GUIDE Each channel’s availability is visually indicated on the Selection Menu by color: COLOR: CHANNEL AVAILABILITY: Black No computer connected or computer is powered down. Green Channel is active and available. However, another user may currently be accessing the computer if system is configured in PC Share Mode (see “Operation Mode” on page 65). Red Unavailable; system is currently being accessed by another user. System is configured in Private Mode (see “Operation Mode” on page 65). Yellow Unavailable because another user is connected, but video is available to view. System is configured in Public View Mode (see “Operation Mode” on page 65). Please refer to “Public View Mode” on page 51 for more information. Purple Channel is connected to a second-tier Paragon switch, Z-Series Z4200U, MasterConsole MX4, MasterConsole MXU2, or MasterConsole II (model MCC only). White Current status unknown. CHAPTER 3: OPERATING PARAGON 51 Public View Mode OSUI Displays in Public View Mode Public View Mode enables viewing of another computer’s video, but will not allow making changes to the video being viewed. Selecting another computer’s video to view when in Public View Mode will display a viewing message. This message remains on the screen as long as another’s video is being viewed and cannot be removed. Press the <Esc> key to return to Selection Menu. P-VIEW WIN95.BOB Figure 37 PublicView Only Message If another user views your computer’s video in Public View Mode, a message on your screen displays the viewing user’s name on your monitor. The message will disappear after 3 seconds. P-VIEW ACTIVE – JAYSON Figure 38 PublicView Sign On When the user stops viewing your video - by selecting another channel to view or by logging out of the system - another message alerts you. P-VIEW OFF - JAYSON Figure 39 PublicView Sign Off 52 PARAGON ADMINISTRATOR’S INSTALLATION AND OPERATION GUIDE User Customization The User Profile Menu displays Paragon configuration and allows for setting or changing preferred operating parameters. Press <F4> while viewing the OSUI to bring up the User Profile Menu. Activate the OSUI by rapidly hitting the default Hot Key activator (the <Scroll Lock> key) twice. User Connected: User: Susan Profile UMT8 Switch HWII User Port: 1 Admin: No Group: 45 Scan Mode: Global Global Scan Rate: 03 Seconds ID Display: On 03 Seconds Green Mode: Off 05 Minutes Hotkey: Scroll Lock Display Position: Menu ID Previous Channel Key: NumLck Help: Single Line LocalPC: Off ….. Scrolling Messages Banner….. ScrlLock | Scan | Skip | NCSL Figure 40 User Profile Menu User Profile Menu Fields: • Connected field displays name and Channel ID number of selected device or computer, if user is currently connected to a channel. • User field displays user name entered at login. • User Port field displays Paragon switch user port to which user is connected. • Admin field displays user’s administrator privileges, if any. • Group field displays user’s group ID(s). 1. Press the <!> and <"> or <Page Up> and <Page Down> keys to highlight a channel for a device or computer and press <Enter> to select. 2. Please refer to the section “User Profile Menu Options” that follows for instructions on interpreting and editing the menu components. 3. When editing is complete, press <Enter> - the highlight will turn yellow. 4. Press <S> to save changes, or <Esc> to cancel changes. CHAPTER 3: OPERATING PARAGON 53 Changing Passwords within User Profile Menu: 1. To add, delete, or change a password, press <P> while viewing the User Profile Menu. 2. Type the old password at the prompt. 3. Type a new password of up to eight characters at the next prompt. 4. Press <Enter> and confirm the new password by re-entering it. 5. Press <Enter> to retain change or press <Esc> to cancel changes. Note: If <Esc> or any of the function keys are pressed accidentally, the system prompts the user with an opportunity to save any changes before exiting. User Profile Menu Options: 1. Scan Mode: Use the <!> and <"> or <$> and <#> keys to toggle between Global and Individual. Global Scan Mode scans each channel for the same amount of time, indicated by the Global Scan Rate. Individual Scan Mode scans each channel for the specified time as shown in Selection Menu. Default setting is Global. (Setting the channel’s individual scan rate is an administrator function). 2. Global Scan Rate: Type a number from 01 to 24, or use <!> and <"> keys to change the rate number. Default setting is 03 seconds. 3. ID Display: The ID Display is a small window that shows computer name and Channel ID number when switching or scanning between channels. Default setting is On/03 seconds. The two fields of control are: • • 4. On/Off: Use the <!> and <"> or <$> and <#> keys to toggle between On and Off. Time: Type a number from 01 to 24 or use the <!> and <"> keys to change the number. When a time beyond 24 is chosen, a dash “—“ will be displayed, indicating the ID window will be shown all the time. Green Mode (PowerSave Mode): Blanks screen if user console is idle for a pre-specified amount of time. Default setting is Off/05 minutes. The two fields of control are: • • On/Off: Use the <!> and <"> or <$> and <#> keys to toggle between On and Off. Time: Type a number from 01 to 99 or use the <!> and <"> keys to change the number. 5. Hot Key: Pressing the selected Hot Key twice rapidly activates Paragon’s On-Screen User Interface (OSUI). Use the <!> and <"> or <$> and <#> keys to select <Scroll Lock>, <Caps Lock>, or <Num Lock>. Default setting is <Scroll Lock>. 6. Display Position: Set the positioning of the On-Screen Menu and ID Display Window using the <!>, <">, <$> and <#> keys to physically position the selected window. Note: The Hot Key and the Previous Channel Key cannot be the same key (see item 5, above, and item 7, below). 7. Previous Channel Key: Pressing the selected Previous Channel key twice rapidly enables user to go back to previously selected device without going through the OSUI, provided that device is still accessible to user. Use the <!>, <">, <$>, or <#> keys to select <Scroll Lock>, <Caps Lock>, <Num Lock>, or <None>. Default setting is <Num Lock >. 54 PARAGON ADMINISTRATOR’S INSTALLATION AND OPERATION GUIDE 8. Help: Set the help message at the bottom of each On-Screen User Interface (OSUI) menu. Use the <!>, <">, <$>, and <#> keys to select Single Line (scrolling message banner) or Circ Left (static message banner). Default setting is Single Line. 9. LocalPC: Used to set UST1 in Person Computer Access Mode. Default setting is Off. Please refer to “Personal Computer Access Via Z-CIM” on page 83. CHAPTER 3: OPERATING PARAGON 55 On-Screen User Interface (OSUI) Functions Use the following function keys to access Paragon OSUI functions: PRESS: WHEN YOU WANT TO: <F1> View the Help Menu <F2> View the Selection Menu for a list of channels, group IDs, or scan rates; or to select a channel <F4> View the User Profile Menu to view and change user-specific operating parameters <F5> View the Administration Menu (for users with administrator privileges) <F6> Toggle On/Off AutoScan (for users with administrator privileges) <F7> Toggle On/Off AutoSkip (for users with administrator privileges) <F8> View Information Menu, which displays firmware and hardware version numbers, number of accessible KVM switches, and total number of accessible channels (PCs) <F9> Logout of Paragon; logs user out and displays the login screen <Shift-F9> Disconnects user from active channel without logging out when any OSUI is displayed <F10> Toggle menu to Display all Channels On/Off. Operational if Selection Menu is sorted by Channel ID and if Display All Computers is set to Yes <F12> Toggle selection menu to sort by Name or by Channel ID <Esc> Exit the OSUI; returns user to selection menu or login screen when no channel is selected Note: If a user does not have administrator privileges, then functions <F5>, <F6>, and <F7> are displayed in red, indicating these functions are is not available to user. If the System Administrator has configured the system by setting Display All Computers to No, then <F10> will be displayed in red, indicating this function is not available to user. 56 PARAGON ADMINISTRATOR’S INSTALLATION AND OPERATION GUIDE Paragon Switch Front Panel Display and Controls The control buttons and LCD display on the Paragon switch provide systems management and technical support functions. For most situations, there is no need to use the front panel beyond viewing status. Figure 41 Paragon Switch Front Panel A B ESC FUNC C D F G H ENT E Figure 42 Paragon Switch Front Panel Buttons Front Panel Components and Functions: 1. [ESC] button (A) is used for canceling displayed function and returning system to normal state. 2. [FUNC] button (B) is used to select various functions. 3. LCD (C) shows status of system and indicates functions that can be selected by pressing front panel control buttons. 4. ["], [#], [$], and [!] buttons (D), (E), (F), and (G) are used for selecting or setting various options, depending on function being performed. 5. [ENT] button (H) is used for confirming and executing selected function. Start-Up Display: When Paragon switch is powered on, it performs a start-up test. It checks each channel and user port to ensure proper operation. CHAPTER 3: OPERATING PARAGON 57 Normal Display: After start-up test, LCD panel displays two lines of messages: 1. Line 1: Running message: “Raritan Computer Paragon: UMT8 Switch/1 Ready” For a Paragon switch model UMT8, “UMT8 Switch” is the default name of the Matrix Switching Unit (this name may be changed through the System Configuration Menu). “/1” is the UMT8 Switch’s banked expansion unit ID. In this example, it is the main unit. All expansion units will have the same device name as the main unit, but will have different unit ID numbers. Note: Banking exemplifies Raritan’s dedication to future development. Banking Technology, a potentially improved KVM configuration design that conceivably banks or links Matrix Switching Units directly to each other, is currently nonfunctional. As a result, all banked expansion unit IDs will be represented by “/1.” 2. Line 2: User port status message: “A/N User (1, 2, 3 …) → None” User port status displays a scrolling status of all user ports, one user port per second. The User’s active channel, 1 through 256, is displayed after the user port number. Raritan Computer Paragon: UMT8 Switch HWII/1 Ready A User (1, 2, 3 … 8) → None A=Active User # 1-8 OR Raritan Computer Paragon: UMT8 Switch HWII/1 Ready N User (1, 2, 3, … 8) → None N=Non-Active User # 1-8 Figure 43 LCD Normal Display Power Up Option: If you hold down the [FUNC] button on the front panel of the Paragon Switch during Power Up, the Paragon Switch will clear its database and reset to factory defaults. Confirm functions by pressing the [ENT] button on the front panel. Clear Database Hit Ent/ESC? Figure 44 Power Up Clear Database 58 PARAGON ADMINISTRATOR’S INSTALLATION AND OPERATION GUIDE Function Selection Screen: Several administrative functions can be performed on the Function Selection Screen on the Paragon switch’s front panel. Set LCD Contrast Display Ver./SN Test User UST1 Test Chan. UKVM Set Bank ID Re-Configure Reset UMT8 Switch Figure 45 LCD Functions Selecting a Function: Press the [FUNC] button on the front panel of the Paragon Switch to enter Function Selection mode and use the [$] and [#] buttons to scroll through the Function List. Press the [ENT] button on the front panel to select displayed function and use the instructions below for each specified function. Press the [ESC] button on the front panel at any time to return to Normal Display. FUNCTION MENU DISPLAY VER./SN Figure 46 Function Selection 1. Set LCD Contrast: Modifies contrast level of front panel LCD Display. Press the [$] or [#] button to increase or decrease contrast, and press the [ESC] button to return to normal display. SET LCD CONTRAST USE UP/DOWN KEYS Figure 47 Set LCD Contrast Note: LCD contrast can also be adjusted by holding the ["] button and pressing the [$] or [#] button at any time. CHAPTER 3: OPERATING PARAGON 2. 59 Display Ver./SN (Firmware Version and Serial Number): Displays current version of firmware and unit’s serial number. FIRMWARE: 2C1 SN: CPB80347 Figure 48 Display Ver. and SN 3. Test User UST1 (User Station): Used by administrator to check if user stations (UST1s) are functioning properly. Press the [$] or [#] button to change user port number. Display will read “OK”, “None”, or “Failed. Press [ESC] to return to normal display. If a “failed” condition is detected, make sure Category 5e UTP cable is installed properly and secured, or try using another UST1 to see if UST1 under test has become defective. TEST USER UST1 UST1: 3 OK Figure 49 User Station Test 4. Test Channel UKVM (CIM UKVM): Used by administrator to check if Computer Interface Module (CIM) is functioning properly. Press the [$] or [#] button to change channel number. Display will read “OK”, “None”, or “Failed”. Press [ESC] to return to normal display. If a “failed” condition is detected, make sure Category 5e UTP cable is installed properly and secured, or try using another CIM (UKVM) to see if CIM under test has become defective. TEST CHAN. UKVM UKVM: 60 OK Figure 50 Channel CIM (UKVM) Test 5. Set Bank ID: Press the [$] or [#] button to ensure that Bank ID is set at “1”. Press [ESC] to return to normal display. SET BANK ID 1 BANK: Figure 51 Set Bank ID 60 PARAGON ADMINISTRATOR’S INSTALLATION AND OPERATION GUIDE Note: Banking exemplifies Raritan’s dedication to future development. Banking Technology, a potentially improved KVM configuration design that conceivably banks or links Matrix Switching Units directly to each other, is currently nonfunctional. As a result, all Bank IDs should be set to 1. 6. Re-Configure: Paragon will automatically configure the system as computers or devices are added or removed. However, the system administrator can use this function to scan and reconfigure the system manually. When complete, it will return to normal display. RE-CONFIGURE SEARCHING NOW… Figure 52 Auto Configure 7. Reset UMT8 Switch (Paragon Unit Switch): Enables restart of Paragon switch unit as if unit’s power had been physically turned off and back on again. However, the Paragon switch will not perform start-up test unless ENT button is held down during restart. With Paragon switch firmware 2B1 and User Station (UST1) firmware 2K10 or higher, either a power reset or a factory “function” reset can be performed from the front panel of the Paragon switch using shortcut button combinations. Power Reset: Hold the [$] and [#] buttons on the front panel of the Paragon switch simultaneously for approximately three seconds. When the front panel stops scrolling, release the buttons. Factory “Function” Reset: Hold the [$] and [#] buttons on the front panel of the Paragon switch simultaneously while pressing the [FUNC] button. When the front panel stops scrolling, release the [$] and [#] buttons, wait an additional three seconds, then release the [FUNC] button. CHAPTER 4: USER STATION (UST1) DIRECT MODE 61 CHAPTER 4: USER STATION (UST1) DIRECT MODE User Stations (UST1s) set in Direct Mode can be connected directly to a Paragon CIM for emergency “crash cart access,” without having to connect through a Paragon Matrix Switching Unit. Direct Mode requires User Station (UST1) firmware version 4L2 and Paragon switch firmware versions 1P0 (UMT2161), 2C2 (UMT242, UMT442, and UMT8), or 3A2 (UMT1664). Figure 53 UST1 Direct Mode 62 PARAGON ADMINISTRATOR’S INSTALLATION AND OPERATION GUIDE CIM models capable of accepting a UST1 Direct Mode connection include: • • • • • • • • • UKVMC UKVMP UKVMPD UKVMP2 USKVMC USKVMP USKVMPD USKVMPA UUSBPD Setting a UST1 to Direct Mode: 1. Power OFF the UST1. 2. Connect desired CIM directly to the UST1 via Category 5e UTP cable. 3. At the user console connected to the UST1, simultaneously hold down the <Ctrl> and <Alt> keys. 4. Continue to hold the <Ctrl> and <Alt> keys and power ON UST1. 5. Continue to hold the <Ctrl> and <Alt> keys. There will be two beeps. At the second beep, a message on the user console monitor will appear: “DIRECT Mode: CIM connected.” 6. Release the <Ctrl> and <Alt> keys. 7. The “DIRECT Mode: CIM connected” message will disappear after 10 seconds. 8. The UST1 is now set in Direct Mode. Note: If the Category 5e UTP cable is disconnected from either the CIM or the UST1 in the Direct Mode connection for a time period greater than three to four seconds, Direct Mode will be cancelled. To re-establish Direct Mode on the UST1, follow the steps above. Returning a UST1 to Normal Paragon Mode: 1. Power OFF UST1. 2. Disconnect the Category 5e UTP cable from the CIM. 3. Connect the Category 5e UTP cable from the UST1 to a Paragon switch. 4. Connect the Paragon switch to the CIM via Category 5e UTP cable. 5. Power ON UST1. CHAPTER 5: ADMINISTRATIVE FUNCTIONS 63 CHAPTER 5: ADMINISTRATIVE FUNCTIONS Administrative functions enable System Administrators to control the computers connected to the Paragon system and how users access devices. These functions can be performed from a set of Administration Menus. Administration The Administration Menu1 is used for setting security classes, maintaining user names and privileges, and managing the system configuration, which enables the administrator to control user access to Paragon and all connected devices. 1. Login to the system as “admin” (or your user name if you have administrator privileges). 2. When the Selection Menu appears, press <F5> to display the Administration Menu, which lists submenu options. Note: The default password for the login “admin” is “raritan” (all lowercase). Administration Menu ---1 2 3 4 5 Choose Admin Function ------------------------------------------------------System Configuration User Configuration Channel Configuration User Station Profile Refresh Configurations ….. Scrolling Messages Banner….. ScrlLock | Scan | Skip | NCSL Figure 54 Administration Menu 3. 1 Use the <!> and <"> keys or the numbers 1 through 5 to highlight the desired submenu, and press <Enter> to select it. Administrative User IDs that have the group ID “00” have complete access to all submenus. Other administrative users have limited access in that they cannot select the top two submenus. 64 PARAGON ADMINISTRATOR’S INSTALLATION AND OPERATION GUIDE System Configuration The System Configuration Menu is used for setting global parameters. 1. Press the <!> and <"> or <Page Up> and <Page Down> keys to highlight a channel for a device or computer and press <Enter> to select. 2. Please refer to the following section “System Configuration Menu Options” for instructions on interpreting and editing the menu components. 3. When editing is complete, press <Enter> - the highlight will turn yellow. 4. Press <S> to save changes, or <Esc> to cancel changes. System Configuration ---- ----------------------------------------------------- Device ID: UMT8 Switch Display All Computers: Logoff Timeout: Off HWII No 05 Minutes Operation Mode: Private P-View Admin Silent: No PC Share Timeout: 01 Sec Login Blank: Off 05 Minutes Allow Blank Password: No Default Login Name Blank: Yes ….. Scrolling Messages Banner….. ScrlLock | Scan | Skip | NCSL Figure 55 System Configuration Menu System Configuration Menu Options: 1. Device ID: Type desired name of device. This gives device a unique and meaningful name, which is important with multiple Paragon units. The default name for a Paragon switch model UMT8 is UMT8 Switch HWII. 2. Display All Computers: By setting this option, the system administrator can allow or prevent users to view all devices on the OSUI, whether or not the user has the security privileges to access them. Default setting is No. 3. Logoff Time Out: Amount of time in minutes before an inactive user is logged out of the Paragon system. Default setting is Off/05 minutes. The two fields of control are: • • On/Off: Use <!> and <"> keys to toggle On and Off. Time: Type a number from 01 to 99, or use <!> and <"> keys to change the number. CHAPTER 5: ADMINISTRATIVE FUNCTIONS 4. Operation Mode: There are three modes: Use <!> and <"> keys to select “Private,” “Public View,” or ““PC Share.” Default setting is Private. • • • 5. 65 Private: A computer can be accessed exclusively by one user at a time. Public View: While one user is accessing a computer, another user can select and view that user’s video. Status messages appear on user’s monitors when the Public View mode is being exercised. PC Share: A computer can be selected and accessed by more than one user, but only one user can be in control at any one time. If the user in control is idle for duration specified in the PC Share Timeout field, another user can take control of the PC. View Admin Silent: When Public View Mode is exercised, the user in control of a computer is notified when someone else views the user’s video. However, when P-View Admin Silent is set to Yes, System Administrators can view other users’ videos without prompting a notification message. Use the <!> and <"> keys to toggle Yes or No. Default setting is No. P-VIEW ACTIVE - JAYSON P-VIEW OFF - JAYSON Figure 56 Public View Messages 6. PC Share Timeout: If the Operation Mode is set to PC Share, and more than one user has selected a computer, the first user to operate the console (keyboard or mouse) will have control of the computer. However, another user can gain control of the computer after it has been idle for a duration exceeding the Timeout limit. Default setting is 01 seconds. 7. Login Blank: Blanks the Login screen to protect the monitor after user console is idle for a specified amount of time in minutes. When this screen is blanked, press any key to bring back the Login screen. Default setting is Off/05 minutes. The two fields of control are: • • 8. On/Off: Use the <!> and <"> keys to toggle On or Off. Time: Type a number from 01 to 99 or use the <!> and <"> keys to change the number. Allow Blank Password: This field controls whether a user may specify a blank password. Use the <!> and <"> keys to toggle Yes or No. Default setting is No. Note: If this field is set to No, a user may not set a blank password. A newly created user has no password by default, unless the user or the administrator sets one. 9. Default Login Name Blank: This field controls whether the default login name appears in the user name field of the Login Menu. Use the <!> and <"> keys to toggle Yes or No. Default setting is Yes (login name will not appear). 66 PARAGON ADMINISTRATOR’S INSTALLATION AND OPERATION GUIDE User Configuration The User Configuration Menu enables an administrator to add, delete, or edit user names and security rights, and also displays the current connection status for each user. 1. Press the <!> and <"> or <Page Up> and <Page Down> keys to highlight a channel for a device or computer and press <Enter> to select. 2. Please refer to the following section “User Configuration Menu Options” for instructions on interpreting and editing the menu components. 3. When editing is complete, press <Enter> - the highlight will turn yellow. 4. Press <S> to save changes, or <Esc> to cancel changes. USER CONFIGURATION User: Name --------ADMIN User01 User02 User03 User04 User05 User06 User07 ADMIN Adm Group ----------Yes 00 --No 00 --No 00 --No 00 --No 00 --No 00 --No 00 --No 00 --- 1/1 Page: ---------- # ---------- ….. Scrolling Messages Banner….. ScrlLock | Scan | Skip | NCSL Figure 57 User Configuration Menu User Configuration Menu Options: 1. User: Login user name. 2. Name: Displays and edits system user names (not case sensitive). Type up to 8 characters to change a name. Important: The preset user name admin cannot be changed. 3. Group: Displays group IDs of user. Please refer to “Paragon Security: Group ID Settings” on page 81 for more information. 4. Adm: Indicates whether user has administrator privileges. Use the <!> and <"> keys to toggle Yes or No. Default setting is No. CHAPTER 5: ADMINISTRATIVE FUNCTIONS 67 Note: Press the <Tab> or the <#> key to move to the far right of the User Configuration Menu menu and view Connection information. 5. Connection: The Connection column shows status of each user and displays the channel to which any active user is currently connected. Adding or Deleting Users: To Add a User: Press the <Insert> key, and when the new default user name is visible, change the default name to the desired user name. The maximum number of users is 127. To Delete a User: Move highlight bar to any user line, and press the <Delete> key. The highlighted user will be removed from system. Login As A New User: Press <L> while viewing the User Configuration Menu. The User ID will appear on the login menu, prompting login. USER CONFIGURATION User: John Page: 1/1 ← Name Connection ------------------------------------------------------------------ADMIN None Jayson Fax-Server Usera None Userb None Userc None Susan WinsNT-east John None ….. Scrolling Messages Banner….. ScrlLock | Scan | Skip | NCSL Figure 58 Connection Information In User Configuration Menu (Far Right of User Configuration Menu) 68 PARAGON ADMINISTRATOR’S INSTALLATION AND OPERATION GUIDE Channel Configuration The Channel Configuration Menu enables an administrator to edit or initialize a CIM. An Administrator can change device names, individual computer scan rates, device type, and group IDs associated with each computer or device. When Channel Configuration changes are saved, Paragon updates each CIM as necessary. 1. Press the <!> and <"> or <Page Up> and <Page Down> keys to highlight a channel for a device or computer and press <Enter> to select. 2. Please refer to the following section “Channel Configuration Menu Options” for instructions on interpreting and editing the menu components. 3. When editing is complete, press <Enter> - the highlight will turn yellow. 4. Press <S> to save changes, or <Esc> to cancel changes. CHANNEL CONFIGURATION 3/4 UMT8 Switch HWII Scn Page: Ch ID Name ---------- ----------------------------------------------1 03 2 NT4.0 Mail 03 3 Wins95.Bob 03 4 Wins98.Jack 03 5 MX4-Wing.2 -6 NT4.0-Fax 03 7 MC2-16.Reg1 -8 UMT8 Switch-Wing.4 -….. Scrolling Messages Banner….. ScrlLock | Scan | Skip | # Device ---------CPU CPU CPU CPU CPU NCSL Figure 59 Channel Configuration Menu Channel Configuration Menu Options: 1. Ch. ID: Channel ID number. 2. Name: Displays and enables editing of device name. Device names are case sensitive and may contain up to 12 characters. 3. Scn: Displays device’s individual scan rate. Type a number from 01 to 24, or use the <!> and <"> keys to change the number. Default setting is 03 seconds. 4. Device: Displays type of connected device. Use the <!> and <"> keys to edit a device type. If a type other than the computer type (CPU) is selected, it is assumed that a Raritan KVM switch has been connected to the channel according to the installation procedure for Multi-Tier Installation. A default device name is created when a KVM switch is selected. It is highly recommended that you change the name to something meaningful, as the name will be programmed to the CIM associated with the device. CHAPTER 5: ADMINISTRATIVE FUNCTIONS 69 Note: Pressing the <Tab> or the <#> key to move to the far right of the Channel Configuration Menu and view Ch ID and Group information. 5. Ch. ID: Channel ID number. 6. Group: Displays security groups that device is associated with. Please refer to “Paragon Security: Group ID Settings” on page 81 for more information. Note: Many Raritan KVM Switches are Paragon ReadyTM, and as a result require no configuration when connected as a tiered device to Paragon, including second or third tier switch units. CHANNEL CONFIGURATION 3/4 UMT8 Switch HWII Page: Ch ID Group ---------- -------------------------------------------------1 -- -- -- -- -- -- -- -2 00 - - - - - - - - - - - - - 3 -- -- -- -- -- -- -- -4 -- -- -- -- -- -- -- -5 -- -- -- -- -- -- -- -6 00 - - - - - - - - - - - - - 7 - - - - - - 45 - - 62 - - - 8 - - 23 - - - - - - - - - - - ….. Scrolling Messages Banner….. ScrlLock | Scan | Skip | $ NCSL Figure 60 Ch ID and Group Information in Channel Configuration Menu (Far Right of Channel Configuration Menu) Important: If you have more than one path connecting to MX4, all channels should have the same name to ensure that Paragon will configure the tier channels properly. 70 PARAGON ADMINISTRATOR’S INSTALLATION AND OPERATION GUIDE User Station Profile The User Station Profile screen enables an administrator to select a keyboard mapped for a different language and to set the elapsed time of video delay when switching channels. 1. Press the <!> and <"> or <Page Up> and <Page Down> keys to highlight the desired field and press <Enter> - the yellow highlight will turn green. 2. Please refer to the sections below for instructions on editing the menu items. 3. When editing is complete, press <Enter> - the highlight will revert to yellow. 4. Press <S> to save changes, or <Esc> to cancel changes. User Station Profile Keyboard Type Setting: English Video delay -- switching: 00 Sec ….. Scrolling Messages Banner….. ScrlLock | Scan | Skip | NCSL Figure 61 User Station Profile screen Keyboard Type Setting The Paragon OSUI supports English, French, or German keyboard mapping. To select a keyboard type: 1. Press the <!> and <"> keys and select the desired keyboard type. 2. Press <Enter> to register the change, then <S> to save, or press <Esc> to exit without saving. Note: When changing keyboard type, the change is applied only to the User Station where this selection has been made. Video Delay -- Switching Use this field to adjust the amount of delay time (in seconds) when switching from channel to channel. The delay can be programmed to last from 0 to 30 seconds; during the delay, the screen will be blank. To adjust Video delay: 1. Press the <!> and <"> keys to increase or decrease the number of seconds, or use the number keys to type in the amount of time desired for video delay, to a maximum of 30 seconds. 2. Press <Enter> to register the change, then <S> to save, or press <Esc> to exit without saving. CHAPTER 5: ADMINISTRATIVE FUNCTIONS 71 Refresh Configurations Select item 5 - Refresh Configurations on the Administration Menu to refresh the database of all user stations from the Paragon switch database. Administration Menu ---1 2 3 4 5 Choose Admin Function ------------------------------------------------------System Configuration User Configuration Channel Configuration User Station Profile Refresh Configurations ….. Scrolling Messages Banner….. ScrlLock | Scan | Skip Figure 62 Administration Menu | NCSL 72 PARAGON ADMINISTRATOR’S INSTALLATION AND OPERATION GUIDE CHAPTER 6: OVERVIEW SOFTWARE 73 CHAPTER 6: OVERVIEW SOFTWARE Paragon Overview is a PC Windows-based program that provides an interface with Paragon, enabling administrators to: • Maintain and change configuration data and OSUI settings offline • Back-up (save) a copy of the configuration data offline Hardware Requirements System Administrators can install and run the Overview program from any PC loaded with Internet Explorer. Downloading Overview Download Overview from Raritan’s Web Site to a Floppy Diskette: 1. Open Internet Explorer and go to Raritan’s Web Site, http://www.raritan.com. 2. Click the menu bar link to Tech Support. 3. Select Firmware Upgrades. 4. When the new page opens, click on the hyperlink Firmware Upgrades. 5. Locate the execution file for Paragon Overview and click on the corresponding hyperlink. 6. Save the file to a floppy diskette. Connecting a PC to UST1 1. Using a standard DB9 serial cable, plug DB9(F) into one of the Com ports on the PC. 2. Plug the other end of the DB9 cable, DB9(M), into the Admin port of any UST1 connected to a base Paragon Switch. AC Power 115V/230V 60Hz/50Hz On PS/2 SUN Mouse K/M PS/2 VGA Off AC IN (0.5A/0.25A) Admin. Keyboard Monitor Cat5 Port Figure 63 UST1 Back Panel – DB9 Admin Port Important: All users should be logged out of the Paragon System when configuration data is being changed. 74 PARAGON ADMINISTRATOR’S INSTALLATION AND OPERATION GUIDE Operating Overview Software Start Program: 1. Insert Overview software diskette into floppy disk drive. 2. Using Windows Explorer, locate and double-click on the Overview.exe file on the diskette. 3. The Overview program window will open. Figure 64 Overview Program Window and Communication Control Panel Activate PC Communication and Login: 1. Click on the Activate Port button on the Communication Control Panel. 2. Select the COM port to which the DB9 serial cable is installed (default is COM1). 3. The program initiates communication with UST1. CHAPTER 6: OVERVIEW SOFTWARE 75 Perform Administrator Login: This step requires administrator authorization to access UST1. 1. At the Login window, enter Administrator User Name and Password. 2. Click on the OK button. Figure 65 Overview Administrator Login Window Connect to UST1 and Download Configuration: This step downloads UST1’s configuration file for offline editing at the PC. 1. The Serial Number from the UST1 unit will be retrieved and displayed in an information window. Click on the OK button to continue. 2. A copy of the configuration file will be downloaded from the UST1 to the PC. Maintenance functions can now be performed. A status window displaying the message “Loading data from Paragon” will display during download, and user station keyboard and mouse operation will be temporarily suspended. 76 PARAGON ADMINISTRATOR’S INSTALLATION AND OPERATION GUIDE Editing User Profiles Edit a User’s Profile: 1. Click User Profiles on left side of the Overview program window to display a User List. 2. Double-click the user name that you wish to edit from the User List that appears. 3. When the Edit window appears, modify the profile as required. 4. Click on the OK button to save changes and close the window. Figure 66 User Information Editor Window Note: Overview provides the ability to edit only existing user profiles. User profiles may not be added or deleted through Overview. You must add or delete user profiles at the UST1. CHAPTER 6: OVERVIEW SOFTWARE 77 Editing Device Profiles This feature is used to change computer names and profiles on a base Paragon, a tier Paragon, or second tier Master Console. Edit a Device Profile: 1. Open the device list by clinking the plus sign inside the small square to the left of the Paragon Switch name on the left side of the Overview program window. 2. Double-click on a computer or second tier device from the list. 3. Make changes to the device profile in the PC Information Editor window that appears. 4. Click on the OK button to save changes and close the window. Figure 67 PC Information Editor Window Note: Overview provides the ability to edit only existing device profiles. Device profiles may not be added or deleted through Overview. You must add or delete device profiles at the UST1. Saving a Copy of the Configuration File to a PC Disk File You can save a backup copy of the current configuration file to a PC disk file. The saved configuration can be opened and uploaded to the system, if necessary. • Select Save or Save As from the File menu in the Overview program window and backup the active configuration file to a PC disk file. 78 PARAGON ADMINISTRATOR’S INSTALLATION AND OPERATION GUIDE Uploading a Configuration File to Your System After any user profile, computer, and/or other device has been modified, the new configuration file must be uploaded to the UST1 to reconfigure the system. Before uploading to the UST1, save a copy in a PC disk file for later reference. • Click on the Send File to Paragon button in the Communication Control Panel. The program will upload the new configuration file to the UST1 unit. During this upload, the unit’s operation will be temporary suspended. • To configure other UST1s, use Refresh Configurations (Item 5 on the Administration Menu). Downloading a Configuration File from UST1 This feature allows you to update the configuration file on the PC if maintenance has been performed on the system from a user station. • Click on the Reload Configuration File from Paragon button in the Communication Control Panel to download a copy of the configuration file from the UST1. This will override any currently stored configuration file on the PC. Opening a Saved Configuration File from a PC Disk File • • Select Open from the File menu in the Overview program window to open a copy of a previously saved configuration file from a PC disk file. Click on the Send File to Paragon button in the Communication Control Panel to upload this copy of the configuration file to the connected UST1 unit. CHAPTER 6: OVERVIEW SOFTWARE 79 Troubleshooting SYMPTOM: Program begins. After clicking on the Activate Port button, a message appears “UMT8 Switch device is not responding.” After a period of trouble free software operation, clicking on the Send to Paragon button causes the Windows status bar to remain on the screen. PC has only a DB25 serial port, not DB9. POSSIBLE CAUSE: • Make sure DB9 cable is plugged in to PC DB9 serial port properly. • Make sure a proper Comm port number is selected. • Recycle UST1 AC power. This will not affect computers connected to the Paragon Matrix Switch. • Check serial port on PC; it may be defective. • Check for loose cable connection between PC and UST1. • Make sure serial communication between PC and UST1 is not broken. !Press <Ctrl>+<Alt>+<Del> to bring up the Close Program window. !Select “Paragon System Administration Utilities” entry. If status is “Not responding” click on the End task button to terminate the program. !Restart the program from the Start Menu. An alternative status indicates the program is waiting for a slow PC to perform. • Convert a DB25 to DB9 using a standard adapter 80 PARAGON ADMINISTRATOR’S INSTALLATION AND OPERATION GUIDE CHAPTER 7: PARAGON SECURITY: GROUP ID SETTINGS 81 CHAPTER 7: PARAGON SECURITY: GROUP ID SETTINGS The default group ID setting for all connected users and computers is a Group ID of “00”. These IDs are called Group IDs because each user ID number can have one or more users belonging to it, and each computer ID number can have one or many computers belonging to it. Paragon’s system security features enable assignment of group IDs from 00 to 99 to both users and computers to limit access throughout the system. Available Group IDs for Assignment Maximum Number of Group IDs Which Can Be Assigned USER GROUPS: COMPUTER GROUPS: 00 – 99 00 – 99 5 8 Users and computers communicate according to the following Group ID access rules: GROUP ID FOR USERS: CAN ACCESS COMPUTERS WITH GROUP IDS: 00 00 through 99 (all computers) For IDs 01 through 09: 0X through 0X 00, 0X; and X0, X1, X2, X3, X4, X5, X6, X7, X8, and X9 For example: 05 00, 05; and 50, 51, 52, 53, 54, 55, 56, 57, 58, and 59 For IDs 10 through 99: X0 through X9 00, 0X, and exact same computer ID# as the user’s ID# For example: 98 00, 09 and 98 82 PARAGON ADMINISTRATOR’S INSTALLATION AND OPERATION GUIDE GROUP ID FOR COMPUTERS: CAN BE ACCESSED BY USERS WITH GROUP IDs: 00 00 through 99 (all users) For IDs 01 through 09: 0X through 0X 00, 0X; and X0, X1, X2, X3, X4, X5, X6, X7, X8, and X9 For example: 08 00, 08; and 80,81, 82, 83, 84, 85, 86, 87, 88, and 89 For IDs 10 through 99: X0 through X9 00, 0X, and exact same user ID# as the computer’s ID# For example: 12 00, 01, and 12 Recommendations Systems Requiring High Security: Raritan Computer recommends assigning IDs of 10 through 99 to computers requiring high protection. This will make them less accessible than computers with IDs of 00 or 01 through 09. Main System Administrator and Assistant Administrators: Although any user may be assigned Administrative Privileges, we recommend the user ID “00” for the Main System Administrator, and user IDs 01 through 09 for Assistant Administrators. These IDs provide a broader scope of access. CHAPTER 8: PERSONAL COMPUTER ACCESS VIA Z-CIM 83 CHAPTER 8: PERSONAL COMPUTER ACCESS VIA ZCIM Paragon switch firmware versions 1P0 (UMT2161), 2C2 (UMT242, UMT442, and UMT8), or 3A2 (UMT1664) and UST1 firmware 4L2 or higher supports access to a personal computer via a Z-CIM UKVMSPD or UKVMSC. This feature gives the User Station and attached User Console control of the local user’s PC, in addition to the Paragon matrix. Figure 68 Personal Computer Access via Z-CIM Important: Z-series chains should be added one at a time. The message banner on the screen should read that the DB has been “completely updated” before an administrator adds a new Z-chain. Installing a Z-CIM for Personal Computer Access: 1. Set up Paragon following the “Basic Installation” instructions starting on page 12. 2. Choose the UST1 and user console that will access both a local Personal Computer and the Paragon matrix. 84 PARAGON ADMINISTRATOR’S INSTALLATION AND OPERATION GUIDE 3. Trace the Category 5e UTP cable from the chosen UST1 to the Paragon Switch and disconnect this cable from the Paragon Switch user port. Reserve this user port for connection from the Z-CIM. 4. Add the Z-CIM (UKVMSPD or UKVMSC) between the chosen User Station (UST1) and the Paragon Switch. a. Connect the Category 5e UTP cable from the chosen UST1 to the UTP OUT port on the ZCIM. b. Connect another Category 5e UTP cable to the UTP IN port on the Z-CIM c. Connect the other end of this UTP cable to the reserved user port on the Paragon Switch. 5. Connect the Personal Computer to the Z-CIM. UKVMSPD: a. Attach the CIM to the computer via its 15-pin male video port, connecting it to the 15-pin female video port on the computer. b. Connect keyboard and mouse cable legs from the UKVMSPD to appropriate 6-pin mini-DIN mouse and keyboard ports on computer. UKVMSC: a. Connect DB25 male end of CCP06 cable to DB25 female port on UKVMSC Z-CIM. b. Connect the other end of the CCP06 cable to appropriate 6-pin mini-DIN mouse and keyboard ports, and the HD15 video port on the Personal Computer. 6. Power ON Personal Computer. Activate Local PC Mode on UST1: 1. Login from the chosen User Station, which will have access to both a local Personal Computer and the Paragon Switch. 2. Press <F4> to display the User Profile Menu. 3. Use the <!> or <"> keys to go to the Local PC field and press <Enter> - the yellow highlight will turn green. 4. Use the <!> or <"> keys to select On and press <Enter> - the highlight will turn yellow. 5. Press <S> to save the change and return to the User Profile Menu, or press <Esc> to return to the User Profile Menu without saving this change. Operating Local Personal Computer Access: 1. Press the <Home> key twice to access the local personal computer quickly while viewing any OSUI menu. You will automatically be switched to the local or “home” PC. 2. To return to Paragon switching, bring up Paragon’s OSUI by rapidly pressing the hot key activator twice. Then press <F2> to bring up the Selection Menu, which shows all servers and devices connected to Paragon. Note: If you changed the Hot Key activator, remember to use your new Hot Key assignation to activate the OSUI. CHAPTER 9: SPECIFICATIONS 85 CHAPTER 9: SPECIFICATIONS ITEM DIMENSIONS (WXDXH) PARAGON SWITCH 17.2” (W) X 10.4” (D) X 1.75” (H) WEIGHT POWER 7.9LBS. (3.59KG) 100V/240V 437MM (W) X 265MM (D) X 44 MM (H) OPERATIN G TEMP. 0-40 C 47/63HZ, 0.6A 32-104 F UMT2161 UMT242 17.2” (W) X 10.4” (D) X 1.75” (H) 437MM (W) X 265MM (D) X 44 MM (H) 8.35LBS. (3.8KG) 100V/240V 47/63HZ, 0.6A 0-40 C 32-104 F UMT442 17.2” (W) X 10.4” (D) X 1.75” (H) 437MM (W) X 265MM (D) X 44 MM (H) 8.45LBS. (3.82KG) 100V/240V 47/63HZ, 0.6A 0-40 C 32-104 F UMT8 17.2” (W) X 10.4” (D) X 1.75” (H) 437MM (W) X 265MM (D) X 44 MM (H) 8.15LBS. (3.7KG) 100V/240V 47/63HZ, 0.6A 0-40 C 32-104 F UMT1664 17.25” (W) X 10.75” (D) X 3.5” (H) 438MM (W) X 273MM (D) X 89 MM (H) 12.0LBS. (5.44KG) 100V/240V 47/63HZ, 0.6A 0-40 C 32-104 F USER STATION 11.4” (W) X 10.1” (D) X 1.75” (H) 100V/240V UST1 4.3LBS. (1.9KG.) 290MM (W) X 255MM (D) X 44 MM (H) 0-40 C 50/60HZ, 0.5A 32-104 F 6VDC 0-40 C 32-104 F CIMS FOR PCS UKVMC CONNECT ONE PC WITH KVM PORTS 4.3” (W) X 3.6” (D) X 1.0” (H) 108MM (W) X 91MM (D) X 23MM (H) 0.7LBS. (0.3KG.) FOR LOCAL ACCESS UKVMP CONNECT ONE PC UKVMP2 CONNECT ONE PC EXPAND TO 16 USERS UKVMPD CONNECT ONE PC - 2.0” (W) X 3.125” (D) X 1.125” (H) 51MM (W) X 79MM (D) X 29MM (H) NONE 0.4LBS. (0.16KG.) 2.44” (W) X 3.5” (D) X 1.0” (H) 62MM (W) X 89MM (D) X 27MM (H) 0-40 C 32-104 F NONE 0.4LBS. (0.16KG.) 1.68” (W) X 3.5” (D) X 0.75” (H) 43MM (W) X 89MM (D) X 19MM (H) 40 C 32-104 F NONE WITH “DIRECTCONNECT” TECHNOLOGY 0-40 C 32-104 F 0.4LBS. (0.16KG.) 86 PARAGON ADMINISTRATOR’S INSTALLATION AND OPERATION GUIDE ITEM DIMENSIONS (WXDXH) WEIGHT POWER 4.3” (W) X 3.6” (D) X 1.0” (H) 108MM (W) X 91MM (D) X 23MM (H) 0.7LBS. (0.3KG.) 6VDC OPERATIN G TEMP. CIMS FOR SUN USKVMC CONNECT ONE SUN COMPUTER - WITH KVM PORT FOR 0-40 C 32-104 F LOCAL ACCESS USKVMP CONNECT ONE SUN COMPUTER - WITH HD15 VIDEO USKVMPD CONNECT ONE SUN COMPUTER - WITH “DIRECTCONNECT” TECHNOLOGY USKVMPA CONNECT ONE SUN COMPUTER - WITH 13W3/COMPOSITE SYNC VIDEO USKVMP + ADAPTER 2.0” (W) X 3.125” (D) X 1.125” (H) 51MM (W) X 79MM (D) X 29MM (H) NONE 0-40 C 32-104 F 0.4LBS. (0.16KG.) 1.68” (W) X 3.5” (D) X 0.75” (H) 43MM (W) X 89MM (D) X 19MM (H) NONE 0-40 C 32-104 F 0.4LBS. (0.16KG.) 2.0” (W) X 3.125” (D) X 1.125” (H) 51MM (W) X 79MM (D) X 29MM (H) (X 2 UNITS — USKVMP + ADAPTER) NONE 0-40 C 32-104 F 0.7LBS. (0.3KG.) CIMS FOR ASCII DEVICES AUATC CONNECT ONE ASCII DEVICE - WITH KV 4.3” (W) X 3.6” (D) X 1.0” (H) 108MM (W) X 91MM (D) X 23MM (H) 0.7LBS. (0.3KG.) 6VDC 0-40 C 32-104 F 4.3” (W) X 3.6” (D) X 1.0” (H) 108MM (W) X 91MM (D) X 23MM (H) 0.7LBS. (0.3KG.) 6VDC 0-40 C 32-104 F NONE 0-40 C 32-104 F PORTS FOR LOCAL ACCESS CIMS FOR USB AUPUSBC CONNECT ONE USB WITH KVM PORTS FOR LOCAL ACCESS UUSBP CONNECT ONE USB COMPUTER UUSBPD CONNECT ONE USB COMPUTER - WITH “DIRECTCONNECT” TECHNOLOGY 2.0” (W) X 3.125” (D) X 1.125” (H) 51MM (W) X 79MM (D) X 29MM (H) 0.4LBS. (0.16KG.) 1.68” (W) X 3.5” (D) X 0.75” (H) 43MM (W) X 89MM (D) X 19MM (H) NONE 0.4LBS. (0.16KG.) 0-40 C 32-104 F CHAPTER 9: SPECIFICATIONS 87 CIM Installation: Connecting CIM and Server CIM MODEL: UKVMC UKVMP and UKVMP2 UKVMPD USKVMC USKVMP USKVMPD USKVMPA AUATC CONNECTION INSTRUCTIONS: • Connect DB25 male end of provided CCPnn cable to DB25 female port on UKVMC. • Connect other end of cable to 6-pin mini DIN keyboard and mouse ports and female 15-pin video port on the computer. • Connect keyboard, monitor, and mouse cable legs attached to UKVMP or UKVMP2 to appropriate 15-pin female video port and 6-pin miniDIN mouse and keyboard ports on the computer. • Attach the CIM to the computer via its 15-pin male video port, connecting it to the15-pin female video port on the computer. • Connect keyboard, and mouse cable legs attached to UKVMPD to appropriate and 6-pin mini-DIN keyboard and mouse ports on the computer. • Connect DB25 male end of CCSnn cable to DB25 female port on USKVMC. • Connect other end of cable to 8-pin mini DIN keyboard/mouse port and 13W3-pin video port on the Sun. • Connect keyboard, and mouse cable legs attached to USKVMP to appropriate 15-pin female video port and 8-pin mini DIN keyboard/mouse port on the Sun. • Attach the CIM to the computer via its 15-pin male video port, connecting it to the15-pin female video port on the computer. • Connect keyboard, and mouse cable legs attached to USKVMPD to appropriate and 8-pin mini-DIN keyboard/mouse port on the Sun. • The USKVMPA CIM, for Sun Computers with 13W3/composite sync video, consists of a USKVMP CIM plus an AVGACS Adapter. • Take the AVGACS adapter and connect its 13W3 video connector to the 13W3 video port on the Sun. • Connect the AVGACS’s 8-pin mini-DIN male keyboard/mouse leg to the female keyboard/mouse port on the Sun. • Connect the AVGACS’s 8-pin mini-DIN female keyboard/mouse leg to the male 8-pin mini-DIN keyboard/mouse leg on the USKVMP. • Connect the USKVMP’s male HD15 video connector to the female HD15 port on the AVGACS. • Connect DB25 male end of provided null modem cable to DB25 female port on AUATC. • Connect other end of cable to the serial port on the computer. • Connect DC6500U power adapter to DC power port on AUATC and plug into AC power supply. 88 CIM MODEL: AUPUSBC UUSBP UUSBPD PARAGON ADMINISTRATOR’S INSTALLATION AND OPERATION GUIDE CONNECTION INSTRUCTIONS: • Connect DB25 male end of CCUSBnn cable to DB25 female port on AUPUSB. • Connect other end of cable to one of the USB ports and 15-pin video port on the computer. • Connect HD15 video leg attached to UUSBP appropriate 15-pin female video port on the computer. • Connect the UUSBP’s USB leg to appropriate USB port on computer. • Attach the CIM to the computer via its 15-pin male video port, connecting it to the15-pin female video port on the computer. • Connect the UUSBPD’s USB leg to appropriate USB port on computer. CHAPTER 9: SPECIFICATIONS 89 Connecting UTP Cables Recommended UTP cables: Category 5e UTP Cables: Belden DataTwist 350 UTP #1700A Solid Belden DataTwist 350 patch #1752A Stranded Category 6 UTP Cable: Belden MediaTwist #1872A Solid Category 7 UTP Cable: Uninet #7702 Pin-out specifications for RJ45 connectors to Category 5e UTP cable: • Paragon supports only T568A or T568B pin-outs T568A T568B Mod Plug Positions White/Green R J 4 5 Cat 5e Cable C O N N E C T O R Mod Plug Positions 1 Green 2 White/Orange 3 Blue 4 R J 4 5 Cat 5e Cable White/Blue 5 Orange 6 White/Brown 7 Brown 8 C O N N E C T O R White/Orange 1 Orange 2 White/Green 3 Blue 4 White/Blue 5 Green 6 White/Brown 7 Brown 8 Figure 69 Paragon Category 5e UTP Cable Pin-out Requirements Important: Maximum distance from user console to computer is 1,000 feet. When using certified cable, users can transmit video signals at distances up to 1,000 feet at 1024x768 @75Hz; and up to 600 feet at 1600x1200 @75Hz. Please see “UTP Cabling FAQs” on page 93 for more information. 90 PARAGON ADMINISTRATOR’S INSTALLATION AND OPERATION GUIDE CIM Cable Kits (For UKVMC): Additional cables available for desired distances longer than those enabled by the standard length cables are provided with each CIM unit ordered. Universal Cable Kits for connecting computer to CIM: PART NO.: LENGTH: CONNECTORS: CCP20 6.5’ (2 M) DB25(M) TO HD15(M), 2x mini-DIN6(M) CCP40 13’ (4 M) DB25(M) TO HD15(M), 2x mini-DIN6(M) CCP60 20’ (6 M) DB25(M) TO HD15(M), 2x mini-DIN6(M) CCP90 30’ (9 M) DB25(M) TO HD15(M), 2x mini-DIN6(M) Universal Cable Kit adapters for AT-style keyboard and serial mouse: (1) DIN 6F to DIN 5M and (1) DIN 6F to DB9F can be ordered for any CCPdd cable (part number: APSAT). Accessories: PART: DESCRIPTION: RPAR1U 19” Rack Mount Bracket (for UMT8 Switch) - 1U [for S/N beginning with CM] RUMT-1U 19” Rack Mount Bracket (for UMT2161, UMT8, UMT442, UMT242 Switch) 1U [for S/N beginning with CP] RUMT-2U 19” Rack Mount Bracket (for UMT1664 Switch) - 2U RUST-1U 19” Rack Mount Bracket (for UST1) - 1U ASOGVGA Sync on green converter for HP9000 or SGI with HD15 video ASGIVGA Sync on green converter for SGI with 13W3 video ARSVGA Sync on green converter for RS/6000 with 13W3 video CHAPTER 10: TROUBLESHOOTING 91 CHAPTER 10: TROUBLESHOOTING Symptoms and Solutions SYMPTOM: No Power. All computers have no video display. Monitor video display for some connected computers is distorted. Keyboard non-functional, even though there is no keyboard error at power up. Cannot input to any computer. Repeated “Keyboard ERROR” at computer power-up. Keyboard suddenly locks-up when a particular computer is selected, but works normally when other computers are selected. Repeated “MOUSE INSTALLATION FAILURE” at computer power-up. PROBABLE CAUSE: • Loose Power Cord. • Power switch is off. • Paragon Matrix Switch or User Station (UST1) surge protection invoked during a power recycling process. Power off unit, wait 20 seconds, then power unit on. • Loose Category 5e UTP cable • Loose monitor connection • UST1 is connected and functioning properly if <Num Lock> key lights keyboard’s Num Lock LED. • Monitor type does not match video output designation from computer. • • • Loose keyboard connection to UST1. Loose Category 5e UTP cable Keyboard broken. Hot-swap with a new keyboard • • • Loose cable from computer to CIM Loose Category 5e UTP cable Paragon components may be out of order. Verify that computer works with a keyboard directly connected. Contact Raritan Technical support for assistance. Loose keyboard cable connection Voltage spike (increase) or brown out (decrease) in power supply to connected Paragon Matrix Switch unit. Power down Switch, wait 20 seconds, then power on unit. Powering Switch from a UPS avoids variation in power supply to Switch. • • • • • Loose mouse cable from computer to CIM Loose Category 5e UTP cable If error occurs only with new computers being added to system, contact Raritan Technical Support for assistance – mouse emulation firmware may need to be upgraded for compatibility with newer computers. 92 PARAGON ADMINISTRATOR’S INSTALLATION AND OPERATION GUIDE SYMPTOM: Mouse suddenly locks up when a particular computer is selected, but works normally when other computers are selected. On-Screen User Interface (OSUI) non-functional. Video is “fuzzy” or out of focus. PROBABLE CAUSE: • Loose cable from computer to CIM • Loose Category 5e UTP cable • Paragon components may be out of order. Verify that computer works with a mouse directly connected. Contact Raritan Technical support for assistance. • Replace keyboard. OSUI works only with PS/2 or extended AT-style keyboards. • Video Gain Adjustment is required (especially needed with LCD flat panel monitors). Activate OSUI (by hitting <Scroll Lock> key twice rapidly. Use numeric keypad “+” and “-“ keys to adjust video image until in focus. • • Multi-Tier Installation In a multi-tier configuration, the order of powering ON is critical to proper function. • Last tier switches must be powered ON before the intermediate level of tier • Intermediate tier switches must be powered ON before the base Paragon switch can be powered ON. • User Stations (UST1s) can be powered ON and OFF at any time as needed. • There is a five-second ON/OFF down time in the UST1 or Paragon power cycle. CHAPTER 10: TROUBLESHOOTING 93 UTP Cabling FAQs Cat5 / Cat5e / Cat6 Cabling FAQs: QUESTION: ANSWER: What UTP cable does Raritan recommend for use with Paragon, Paragon ReadyTM, and Cat5 ReachTM products? Raritan certifies the following Category 5e UTP and Category 6 UTP cable products for use with its family of industry-leading data center solutions: Certified Cables for Use with Raritan Products: Category 5e UTP Cables: Belden DataTwist 350 UTP #1700A Solid Belden DataTwist 350 patch #1752A Stranded Category 6 UTP Cable: Belden MediaTwist #1872A Solid Category 7 UTP Cable: Uninet #7702 Use of non-certified cabling may result in video and data degradations that users may find unsatisfactory. When using certified cable, users can transmit video signals at distances up to 1,000 feet at 1024x768 @75Hz; and up to 600 feet at 1600x1200 @75Hz. Please note that Raritan does not have any marketing relationship with Belden, nor does Raritan receive any financial incentive for recommending Belden products. Can I use plain Cat 5 cable, instead of Cat 5e? Yes, however, you may not get the same performance as you would with Raritan certified Category 5e UTP or Category 6 UTP cables. Standard Category 5 UTP cable may not have the necessary characteristics for transmitting high-quality video over long distances. Can I use standard Ethernet (10BASE-T) cable? No, because standard Ethernet cable does not have the necessary bandwidth characteristics for transmitting highquality video over long distances. 94 PARAGON ADMINISTRATOR’S INSTALLATION AND OPERATION GUIDE QUESTION: ANSWER: Can I use non-certified Cat 5e cable? Yes, however, you may not get the same performance as you would with Raritan certified Category 5e UTP or Category 6 UTP cables. Using non-certified Category 5e UTP cable with Raritan products results in degraded video performance ranging from mildly irritating to severely unusable. The only occasion when a non-certified cable may be used with Raritan products without negative effects on system usability is when the total cable distance between any user console and any connected device is less than 300 feet. Because cable products certified by Raritan do not cost more than competing cable offerings, Raritan strongly recommends that users utilize Raritan certified cables for maximum performance with Raritan product applications. Can I use Cat 6 cable? Yes. Currently only one Category 6 UTP cable product is Raritan certified for use with Raritan products. Raritan continues to test new Category 6 UTP cabling products as they are released to the market. What happens if I do not use Raritan certified cable? Cable products that are not specifically certified by Raritan may cause your video to look blurry; in particular if the video signal is of high-resolution, or if the video signal must be transmitted over long distances. Furthermore, LCD monitors can become unusable CHAPTER 10: TROUBLESHOOTING 95 QUESTION: ANSWER: Cat 5e is standardized. Why can’t I simply use any Cat 5e cable with Raritan products? Because the intended application of UTP cabling is the transmission of digital data, cable specifications are optimized for that application. However, because video data is by its very nature analog, Raritan’s exclusive technology – which enables such high-bandwidth video information to be transmitted over relatively thinly-shielded Category 5 UTP and Category 6 UTP cables – requires even stricter tolerances for certain cable properties. One particular UTP cable characteristic has a large impact on how well your Raritan system performs: delay skew. UTP cabling consists of four “twisted pairs” of wire, each carrying one set of data. In order to minimize cross-interference between the pairs, each pair must be twisted at slightly different rates (twists/foot). Over long lengths of cable, however, slight differences in twist rates results in measurably different rates of data transmission among each twisted pair. The arrival time delta is called “delay skew.” How does this affect your Raritan solution? Raritan products send red, green, and blue video information each over a different twisted pair; if that information does not arrive at the same time, observed video will be blurry. Raritan’s unique algorithms correct for this behavior, but physical limitations create upper limits to the success of any algorithm. The TIA/EIA specification for delay skew tolerance is 45 nanoseconds for Category 5 UTP and Category 5e UTP cable. However, in analog video applications, a delay skew longer than 15 nanoseconds usually results in inadequate video performance at high resolutions (XGA and higher). Raritan-certified cable products happen to surpass the acceptable tolerances of the TIA/EIA’s specification for delay skew, and hence are best suited for connecting Raritan components. 96 PARAGON ADMINISTRATOR’S INSTALLATION AND OPERATION GUIDE QUESTION: ANSWER: Are there special pin out requirements that I must use? Yes, please refer to diagram below. Figure 70 Cable Pin-out Requirements CHAPTER 11: GLOSSARY 97 CHAPTER 11: GLOSSARY TERM: DEFINITION: Active Channel A channel is active when a connected device is powered on. See also Channel. Administration Menu For installing and configuring access to the Paragon. This menu is restricted to those with administrator privileges. AutoScan When activated, UST1 automatically cycles through channels, displaying each computer’s video for a specified time interval. AutoSkip When activated, channel selection is restricted to active channels. Base Unit The Paragon Matrix Switch units to which computers and/or other MasterConsole units are connected in a two-tier configuration. Channel The RJ45 connector with which a device is connected to Paragon Matrix Switch. There are 32 channels on model UMT8 Switch units. See also Active Channel and Inactive Channel. Channel Configuration Menu For editing computer and device names, changing security classes, and assigning channel-specific scan rates. Channel ID Number The specific channel number to which a device is connected. Channel-Specific (Individual) Scan Rate Scan rate specified for each channel when Scan Mode field in User Profile is set to Individual. Channel-specific scan rates are set in the Channel Configuration submenu of the Administration Menu. See also Scan Rate. CIM Acronym for Computer Interface Module Class Security Code Refers to the entire security code. See also Security Code. Computer Name (Channel Name) A label of up to 12 characters assigned by an administrator for a device connected to a Paragon channel. Configuration See One-Tier Configuration and Two-Tier Configuration. Device A computer, or Paragon Matrix Switch, or any MasterConsole Switch unit that is connected to a Paragon Matrix Switch channel. Function Selection Screen For accessing front panel control functions. 98 PARAGON ADMINISTRATOR’S INSTALLATION AND OPERATION GUIDE TERM: DEFINITION: Global Scan Rate Scan rate used for all channels when Scan Mode field in User Profile is set to Global. See also Scan Rate. Green Mode A field in User Profile Menu for toggling PowerSave feature on and off. Group Security Code Refers to how many belong to a code. See also Security Code Hot Key For activating On-Screen User Interface (OSUI). To activate the OSUI, press the Hot Key -default <Scroll Lock> - twice rapidly. ID Display A single-line display shown on monitor to identify selected channel. Inactive Channel A channel is inactive if no device is connected to it or if connected device is powered off. See also Channel. Key Number Located in left-hand column of Selection Menu. To quickly select a channel, press its corresponding key number on keyboard when Selection Menu is displayed. LCD Display Liquid-crystal display screen on Paragon Matrix Switch’s front panel for displaying statuses and controlling administrative functions. Local Console Keyboard, monitor, and mouse (user console) plugged into local CIM port. Login Entering a user name to gain access to the Paragon system. Login Screen For Login to system as a user or administrator. Logout Disconnects a user from system. Menu A Paragon On-Screen User Interface (OSUI) display. Menu F Keys Function keys for On Screen User Interface (OSUI) menus. Normal Display Displayed on LCD. Shows operating status of the Paragon Matrix Switch. One-Tier Configuration Only computers are connected directly to a base Paragon Matrix Switch unit. OSUI Acronym for On-Screen User Interface Password Used in conjunction with user name to gain access to Paragon. CHAPTER 11: GLOSSARY 99 TERM: DEFINITION: PowerSave Allows a properly equipped monitor to operate in energy save mode. See also Green Mode. Public View Feature that controls video sharing of a computer that is being selected and operated by another user. Reserved Channels In a two-tier configuration, channels on base Paragon Matrix Switch units allocated to connect second-tier non-computer devices. S Model MasterConsole II models MasterConsole S-4 and MasterConsole S-8. Scan On-Screen User Interface (OSUI) function for activating AutoScan. Scan Mode Field in User Profile. Can be set to either Global or Individual. Scan Rate Time interval in seconds that a channel’s computer is to remain displayed on monitor when AutoScan is activated. See also Global Scan Rate and Channel Specific (Individual) Scan Rate. Security Code Number set assigned to each user and computer to establish useraccess rights. See also Class Security Code, and Group Security Code. Selection Menu For selecting and accessing a computer or device. Set LCD Contrast Screen For adjusting contrast of LCD on a Paragon Matrix Switch front panel. Set-Password Screen Enables administrator to password protect functions on the LCD. Set Tier Screen For connecting second-tier user ports to first-tier channels. 100 PARAGON ADMINISTRATOR’S INSTALLATION AND OPERATION GUIDE TERM: DEFINITION: Sort Order of channels listed in the Selection Menu – either by channel ID or by name. Pressing <F12> toggles the sort criterion when a Selection Menu is displayed. Start-Up Display Displayed on LCD when the Paragon Matrix Switch is powered on – system checks for the status of computers and user connections. After this start-up test, system goes to normal display. System Configuration For allowing and disallowing blank passwords, turning Time Out on and off, changing Time Out interval, turning Login Screen on and off, and changing Login interval. Time Out Length of time that a user port can remain idle – that is, since the previous keyboard/mouse or front panel operation – before connected console is automatically logged out. User must enter an authorized user name to re-establish access after Time Out. Two-Tier Configuration A mix of devices – computers, other units and MasterConsole units - are connected to base Paragon Matrix Switch units. User Configuration Used by administrator for adding, deleting, and changing user names, security codes, and administrator privileges. User Console Keyboard, monitor, and mouse plugged into a user port on UST1 back panel. User Name Name a user types to login to the system. User Port The RJ45 connector by which a user station (UST1) is connected to a Paragon Matrix Switch. CHAPTER 11: GLOSSARY 101 TERM: DEFINITION: User Profile For setting and changing user passwords and preferences. UST1 Acronym for User Station X Model MasterConsole II models MasterConsole X-4, MasterConsole X-8, and MasterConsole X-16. 102 PARAGON ADMINISTRATOR’S INSTALLATION AND OPERATION GUIDE APPENDICES 103 APPENDICES Appendix A: Paragon Update – Firmware Upgrade The Paragon Update Utility is a Win32-based program that facilitates the transfer of firmware to Paragon units – the Matrix Switching Unit and the User Station (UST1). The Paragon Update Utility and the latest versions of firmware can be downloaded from Raritan’s web site: http://www.raritan.com. Figure 71 Paragon Update Window Important: Before performing a firmware upgrade, be certain to read the release notes that are included with the firmware distribution on Raritan’s website. Note: All Paragon components and connected servers can remain powered ON during a firmware upgrade. Paragon’s modular redundant design ensures that these devices will not be affected during the update process. 104 PARAGON ADMINISTRATOR’S INSTALLATION AND OPERATION GUIDE Paragon Configuration Backup: Paragon Update is designed to execute the firmware uploading process without disturbing Paragon configuration data files. However, as an added precaution, many users prefer to backup these configuration files, which contain user profile and server name information. 1. Download the Paragon Overview program from Raritan’s Web site. a. b. c. d. e. f. Open Internet Explorer and go to Raritan’s Web Site: http://www.raritan.com. Click on the menu bar link to Tech Support. Select Firmware Downloads. When the new page opens, click on the hyperlink Firmware Downloads. Locate the execution file for the Paragon Overview download and click on the corresponding hyperlink. Save the file to a floppy diskette. 2. Log into Paragon on any active Paragon User Station (p/n UST1) and press <F12> to display the Selection Menu by Name. 3. When the Paragon User Station displays the Selection Menu by Name, connect one end of a straight-through serial cable to the port labeled “Admin” on the back of the User Station (DB9F). 4. Connect the other end of the cable to the serial port of any computer with Paragon Overview installed. Important: To ensure reliable communication, use as short a serial cable as possible. Do not use a serial cable longer than 50 feet in length. Be sure to use a straight-through serial cable, and not a null modem cable. 5. On the attached computer, double-click on the Paragon Overview icon to launch Overview. 6. Select the correct serial port (COM1 through COM4), and click on the Activate Port button to the right on the Overview program window to initiate communication with Paragon. 7. After the Paragon database is downloaded, a prompt will appear for an administrator’s User Name and Password. Enter the administrator User Name and Password. 8. Select Save from the File menu, and save the Paragon Configuration database to the hard disk. 9. Select Exit from the File menu to exit the Paragon Overview program. Paragon Firmware Update Instructions: 1. Download the Paragon Firmware distribution file, ParagonFirmware.zip from Raritan’s Web site. a. b. c. d. e. f. 2. Open Internet Explorer and go to Raritan’s Web Site: http://www.raritan.com. Click the menu bar link to Tech Support. Select Firmware Downloads. When the new page opens, click on the hyperlink Firmware Downloads. Locate the appropriate version of the Paragon Firmware.zip download and click on the corresponding hyperlink. Save the file to a floppy diskette. Unzip the downloaded file, and read the release notes for any additional or updated instructions. APPENDICES 105 Update User Station(s) 1. On any active Paragon User Station (p/n UST1), log into Paragon, and press <F12> to display the Selection Menu by Name. 2. When the Paragon User Station displays Selection Menu by Name, connect one end of a straightthrough serial cable to the port labeled Admin (DB9F) on the back of the User Station and connect the other end of the cable to the serial port of any computer with Paragon Update installed. Important: To ensure reliable communication, use as short a serial cable as possible. Do not use a serial cable longer than 50 feet in length. Be sure to use a straight-through serial cable, and not a null modem cable. 3. Launch the Paragon Update on the attached computer by double clicking the icon. 4. Select the correct serial port (COM1 through COM4), and click on the Activate Port button on the right on the Overview program window to initiate communication with Paragon. 5. Click on the Load Hex File button and select the User Station firmware contained in the Paragon Firmware distribution file, e.g., UST1-####, where #### is a hexadecimal version number. The upper button in the “Upgrade Information” section of the Paragon Update window will read Paragon User Station. 6. Click on the Test Hex File button to ensure file integrity. 7. Click on the Check Device Information button to confirm successful communication with the Paragon User Station and to confirm that the firmware upgrade is applicable. 8. Click on the Paragon User Station button to begin uploading the firmware. Note: During the firmware uploading process, the User Station and the computer must be powered ON, and the serial cable must remain firmly connected. 9. Click on the Disable Port button, then exit Paragon Update. 10. After successfully receiving the new firmware, the User Station will reset automatically and a beep will signal the reset. Note: If automatic reset of the User Station does not occur, then recycling power to the User Station will manually reset the unit. No loss of data will occur by resetting power to the user station. 11. Repeat steps 3 through 12 for each User Station to be updated, clicking on the Disable Port button and exiting the Paragon Update each time you have updated a User Station. 106 PARAGON ADMINISTRATOR’S INSTALLATION AND OPERATION GUIDE Update Paragon Matrix Switching Unit(s) 1. Connect one end of a straight-through serial cable to the port labeled Admin (DB9F) on the back of the Paragon Matrix Switching Unit to be updated and connect the other end of the cable to the serial port of any computer with Paragon Update installed. Note: To ensure reliable communication, use as short a serial cable as possible. Do not use a serial cable longer than 50 feet in length. Be sure to use a straight-through serial cable, and not a null modem cable. 2. Launch Paragon Update on the attached computer by double-clicking on the icon. 3. Select the correct serial port (COM1 through COM4), and click on the Activate Port button to initiate communication with Paragon. 4. Click on the Load Hex File button and select the Matrix Switch firmware contained in the Paragon Firmware distribution file, e.g., UMT8 Switch-####, where #### is a hexadecimal version number. The upper button in the “Upgrade Information” section of the ParagonUpdate window will read Send to Paragon. 5. Click on the Test Hex File button to ensure file integrity. 6. Click on the Check Device Information button to confirm successful communication with the Paragon Matrix Switching unit, and to confirm that the firmware upgrade is applicable. 7. Click on the Send to Paragon button to begin uploading the firmware. Note: During the firmware uploading process, the User Station and the computer must be powered ON, and the serial cable must remain firmly connected. 8. Click on the Disable Port button, then exit Paragon Update. 9. Use the power switch on the back of the unit to recycle power to the Paragon Matrix Switching unit. The front LCD screen will display the latest firmware version number. 10. Repeat steps 2 through 9 for each Paragon Matrix Switching unit to be updated, clicking on the Disable Port button and exiting Paragon Update each time you have updated a Matrix Switching unit. APPENDICES 107 Appendix B: IBM x330 Paragon switch firmware versions 1P0 (UMT2161), 2C2 (UMT242, UMT442, and UMT8), or 3A2 (UMT1664) and User Station (UST1) firmware 4L2 or higher supports an IBM x330 chain of computers as a second tier by utilizing IBM’s Cable Chaining Technology (C2T) and Raritan Computer Interface Modules (CIMs), UKVMP-x330 or UKVMC-x330. An IBM x330 rack of up to 42 servers can be accommodated for each Paragon Matrix Switch channel port. This Paragon feature lets users name each x330 server in the rack and see that name in a Paragon Selection Menu, instead of utilizing blind x330 shortcut key switching techniques. PCs IBM Break Out Cable CIMs Cat 5e Cable UMT8 ES C FU NC EN T Cat 5e Cable UST1s Up to 8 User Consoles Figure 72 IBM x330 Tiered from a Paragon Matrix Switch 108 PARAGON ADMINISTRATOR’S INSTALLATION AND OPERATION GUIDE Install an IBM x330 Rack of Servers as a Tier to Paragon: 1. Set up Paragon following “Basic Installation” instructions starting on page 12, but reserve one channel port for each rack of IBM x330 servers to be connected. 2. Connect a Category 5e UTP cable to the reserved channel port on the back of the Paragon Switch. 3. Connect the other end of the category 5e UTP cable to the RJ45 port on a Raritan CIM UKVMP-x330 or UKVMC-x330. 4. Attach the CIM to IBM Break Out Cable from the x330 rack. UKVMP-x330: a. Connect keyboard, monitor, and mouse cable legs attached to CIM to appropriate 15-pin female video port and 6-pin mini-DIN mouse and keyboard ports on IBM Break Out Cable. UKVMC-x330: a. Connect DB25 male end of CCPnn cable to DB25 female port on UKVMC-x330. b. Connect the other end of the CCPnn cable to appropriate 6-pin mini-DIN mouse and keyboard ports, and HD15 video port on IBM Break Out Cable. Set the IBM x330 Rack as a Second Tier Device: 1. From a User Station, login as admin, or use your user name if you have administrator privileges, and enter your password. 2. Press the <F5> key to go the Administration Menu, then select Channel Configuration submenu. 3. Use the <!> and <"> or the <Page Up> and <Page Down> keys to select the channel to which the IBM x330 rack is connected. 4. Press the <Tab> key to advance to the Device field - the highlighted area will be yellow. 5. Press the <Enter> key - the highlighted area turns green. 6. Use the <!> and <"> keys to change device type to IBM x330, then press the <Enter> key - the highlighted area turns yellow. 7. Hold the <Shift> key and press the <Tab> key to go back to the Name column. 8. Press the <Enter> key and edit the default name. 9. Press the <S> key to save the new configuration. Save and Verify Changes: 1. Press <F2> to go Selection Menu to validate that second-tier IBM x330 rack is properly configured. Select and switch to one of the IBM x330 channels. Normal computer access and operation indicates a successful connection. 2. Press <F5> to go to Administration Menu. Select Channel Configuration submenu. Select the IBM x330 channel. Press <G> to bring up a Channel Configuration menu of the IBM x330. Edit names for each IBM x330 server in the rack. 3. Press <S> to save the new configuration. 255-30-5004