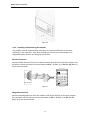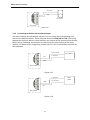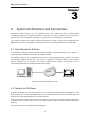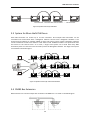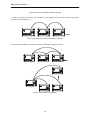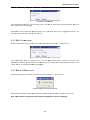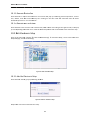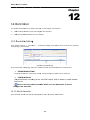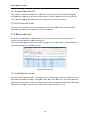
1
Volume 2 User Manual NAV IP Access Controller EFC302 EFC304 EFC306 EFC308 EVERFOCUS ELECTRONICS CORPORATION EFC302 EFC304 EFC306 EFC308 User Manual 2009~2011 EverFocus Electronics Corp All rights reserved. No part of the contents of this manual may be reproduced or transmitted in any form or by any means without written permission of the EverFocus Electronics Corporation. NAV IP Access controller Contents 1. Introduction ...................................................................................................................... 1 1.1 Features ......................................................................................................................... 2 1.2 Overview ...................................................................................................................... 3 1.3 Specification ................................................................................................................. 4 1.4 Packing List ...................................................................................................................... 6 1.5 Optional Device ............................................................................................................... 6 1.6 Definitions of Terminal Block and LEDs .......................................................................... 7 2. 1.6.1 Terminal Block and LEDs on Main Module ..................................................................................... 7 1.6.2 Terminal Block and LEDs on Alarm Module .................................................................................... 8 1.6.3 Terminal Block and LEDs on Door Module ...................................................................................... 9 Installation ...................................................................................................................... 11 2.1 Installation Preparation ............................................................................................. 11 2.1.1 Obtain a Floor Plan ........................................................................................................................ 11 2.1.2 Determine the Hardware and Location ........................................................................................ 12 2.1.3 Determine the Number of Controllers/ Modules According to System Structure ............................ 13 2.2 Hardware Installation ................................................................................................. 13 2.2.1 2.2.2 2.2.3 2.2.4 2.2.5 2.2.6 2.2.7 Mounting the Enclosure (Optional) and Controller ...................................................................... 13 Installing and Connecting the Readers .......................................................................................... 17 Connecting to the Door Lock, Sensor and Open Button ............................................................... 18 Connecting to the Fire Alarm/ Alarm Input................................................................................... 20 Connecting to the Fire Alarm/ Alarm Output ................................................................................ 21 Connecting to the Computer through the Network ..................................................................... 22 Mounting a Backup Battery in the Enclosure (Optional) .............................................................. 22 3. System Architecture and Connections ............................................................................ 23 3.1 Small System for 8 Doors ............................................................................................. 23 3.2 System for 256 Doors ................................................................................................... 23 3.3 System for More theN 256 Doors ................................................................................ 24 3.4 RS485 Bus Extension .................................................................................................... 24 4. Starting Up the Controller ........................................................................................... 26 4.1 Connecting to Power .................................................................................................... 26 4.2 Restoring the Controller ............................................................................................... 26 4.3 Before First Use ............................................................................................................. 27 5. Controller Configuration and Operation ......................................................................... 28 5.1 General Operation Guideline ........................................................................................ 28 5.2 Home Screen ................................................................................................................. 28 5.3 Direct Operations from Keypad .................................................................................... 29 5.3.1 Enter System Configuration .............................................................................................................. 29 5.3.2 Enter Arm/Disarm Menu .................................................................................................................. 29 I NAV IP Access controller 5.3.3 Display Firmware Version ................................................................................................................. 29 5.3.4 Display the Number of Installed Modules ........................................................................................ 30 5.3.5 Display the Current Card and Event Number ................................................................................... 30 5.3.6 Display the Controller IP Address ..................................................................................................... 30 5.4 Level One System Configuration Items ......................................................................... 30 5.5 System Setting .............................................................................................................. 31 5.5.1 Enter System Setting Menu .............................................................................................................. 31 5.5.2 Set Date Format ................................................................................................................................ 31 5.5.3 Set Date ............................................................................................................................................ 31 5.5.4 Set Time ............................................................................................................................................ 32 5.5.5 Auto Daylight Saving Time ................................................................................................................ 32 5.5.6 Set System PIN .................................................................................................................................. 32 5.5.7 Set Arm PIN ...................................................................................................................................... 33 5.5.8 Set Language .................................................................................................................................... 33 5.5.9 Backlight Setting ............................................................................................................................... 33 5.5.10 System Maintanence ...................................................................................................................... 33 5.5.11 Erase All Events .............................................................................................................................. 35 5.5.12 Load Factory Default ...................................................................................................................... 35 5.6 Card Setting ................................................................................................................... 35 5.6.1 Enter Card Setting Menu .................................................................................................................. 35 5.6.2 Add Cards ......................................................................................................................................... 36 5.6.3 Delete Cards ..................................................................................................................................... 36 5.6.4 Set Card Properties ........................................................................................................................... 37 5.6.5 Show Card Number .......................................................................................................................... 40 5.7 Door Setting .................................................................................................................. 40 5.7.1 Enter Door Setting Menu .................................................................................................................. 40 5.7.2 Schedule Switch Setting ................................................................................................................... 40 5.7.3 Door Access Mode ............................................................................................................................ 41 5.7.4 Open Time Setting ............................................................................................................................ 42 5.7.5 Over TimeSetting .............................................................................................................................. 42 5.8 Reader Setting ............................................................................................................... 43 5.8.1 Enter Reader Setting Menu .............................................................................................................. 43 5.8.2 System Reader Setting ...................................................................................................................... 43 5.8.3 Keypad Setting .................................................................................................................................. 43 5.8.4 Reader to Door Allocation ................................................................................................................ 44 5.8.5 Reader Backlight Setting ................................................................................................................... 44 5.8.6 Set Reader LED or LCD format .......................................................................................................... 44 5.8.7 Set Card Format ................................................................................................................................ 45 5.9 Alarm Setting ................................................................................................................ 45 5.9.1 Components for Alarm ..................................................................................................................... 46 5.9.2 Alarm Configuration Basics ............................................................................................................... 46 5.9.3 Enter Alarm Setting Menu ................................................................................................................ 46 5.9.4 Alarm Setting Menu Structure .......................................................................................................... 47 5.9.5 Alarm Input Setting .......................................................................................................................... 47 5.9.6 ALarm Event Setting ......................................................................................................................... 51 5.10 Network Setting .......................................................................................................... 56 5.10.1 DHCP Setting................................................................................................................................... 56 5.10.2 Set IP Address ................................................................................................................................. 57 5.11 Address Setting ........................................................................................................... 57 5.12 Arm/Disarm ................................................................................................................. 58 5.12.1 Arm the Systemusing the Controller Keypad ................................................................................. 58 II NAV IP Access controller 5.12.2 Disarm the Systemusing the Controller Keypad ............................................................................. 58 5.12.3 Reset Alarm .................................................................................................................................... 59 5.12.4 Arm/Disarm the Systemusing aKeypad Reader .............................................................................. 59 5.12.5 Arm/Disarm the Systemusing aLCDReader .................................................................................... 60 5.13 Use Reader as Keypad ................................................................................................. 60 6. Software Introduction ................................................................................................... 62 6.1 Main Feature ................................................................................................................. 62 6.2 Hightlight Performance Overview ................................................................................ 62 6.3 Baseon TCP/IP Access Conttrol System Architecture ................................................... 63 7. Start to Use ..................................................................................................................... 64 7.1 Quick Start..................................................................................................................... 64 7.1.1 Add and Configure Controller ........................................................................................................... 64 Set Access Rule .......................................................................................................................................... 64 7.1.3 A Varietyof WaystoAdd Cards .......................................................................................................... 66 7.1.4 Setup Departemnt and Cardholder .................................................................................................. 67 7.1.5 Configuration and Attendance ......................................................................................................... 67 7.1.6 Real‐time Monitoring ....................................................................................................................... 68 7.1.7 Export Function ................................................................................................................................ 68 7.1.8 Print Function ................................................................................................................................... 70 7.2 Login .............................................................................................................................. 70 7.3 Familiar with the Browser Page .................................................................................... 71 8. 7.3.1 Main Page Introduction .................................................................................................................... 71 7.3.2 Menus ............................................................................................................................................... 72 7.3.3 Control Pannel .................................................................................................................................. 72 7.3.4 Real‐time Monitoring ....................................................................................................................... 74 7.3.5 System Event Record ........................................................................................................................ 74 Basic Setting ................................................................................................................... 77 8.1 Change Password .......................................................................................................... 77 8.2 Set User Group and User .............................................................................................. 78 8.3 User Group .................................................................................................................... 80 8.3.1 Add A Group ..................................................................................................................................... 80 8.3.2 Edit A Group ..................................................................................................................................... 80 8.3.3 Delete A Group ................................................................................................................................. 80 8.4 User Setting ................................................................................................................... 81 8.4.1 Add A User ........................................................................................................................................ 81 8.4.2 EditA User ......................................................................................................................................... 82 8.4.3 Delete A User .................................................................................................................................... 82 8.4.4 Export Users ..................................................................................................................................... 82 8.4.5 Print Users ........................................................................................................................................ 82 8.4.6 Search Users ..................................................................................................................................... 83 8.5 Local Server ................................................................................................................... 83 8.6 System Upgrade ............................................................................................................ 84 9. 8.6.1 Upgrade Online ................................................................................................................................ 84 8.6.2 Upgrade Local ................................................................................................................................... 84 Cardholder ...................................................................................................................... 85 9.1 Department Setting ...................................................................................................... 85 III NAV IP Access controller 9.1.1 Add A Department ............................................................................................................................ 85 9.1.2 Edit A Department ............................................................................................................................ 86 9.1.3 Delete A Department ....................................................................................................................... 86 9.2 Cardholder Setting ........................................................................................................ 87 9.2.1 Add ACardholder .............................................................................................................................. 87 9.2.2 EditA Cardholder .............................................................................................................................. 91 9.2.3 Delete A Cardholder ......................................................................................................................... 92 9.2.4 Export CardHolders .......................................................................................................................... 92 9.2.5 PrintCardHolders .............................................................................................................................. 92 9.2.6 Search CardHolders .......................................................................................................................... 92 9.3 ImportCardholders ........................................................................................................ 92 10. Real‐time Monitoring .................................................................................................. 94 10.1 Real‐time Event ........................................................................................................... 94 10.1.1 Remote Controller .......................................................................................................................... 95 10.1.2 Remote Dvr and View ..................................................................................................................... 95 10.2 Edit Electronic Map ..................................................................................................... 95 10.2.1 Add An Electronic Map ................................................................................................................... 95 10.2.2 Edit An Electronic Map ................................................................................................................... 96 10.2.3 Delete An Electronic Map ............................................................................................................... 97 10.3 Report ......................................................................................................................... 97 10.3.1 Search Cardholders ........................................................................................................................ 97 10.3.2 Export Cardholders ......................................................................................................................... 97 10.3.3 Print Cardholders ............................................................................................................................ 98 11. Maintenance ............................................................................................................... 99 11.1 Backup ......................................................................................................................... 99 11.1.1 Manual Backup ............................................................................................................................... 99 11.1.2 Auto Backup ................................................................................................................................. 100 11.2 Restore ...................................................................................................................... 101 11.2.1 Restore from a FTP Server ............................................................................................................ 101 11.2.2 Restore from Local Computer ...................................................................................................... 101 11.3 PurgeOut‐of‐date Data ............................................................................................. 102 12. Controller ................................................................................................................... 103 12.1 Controller Setting ...................................................................................................... 103 12.1.1 Add A Controller ........................................................................................................................... 103 12.1.2 Edit A Controller ........................................................................................................................... 104 12.1.3 Delete A Controller ....................................................................................................................... 105 12.1.4 Refresh ......................................................................................................................................... 105 12.1.5 Setting .......................................................................................................................................... 105 12.1.6 Export Controllers ......................................................................................................................... 113 12.1.7 Print Controllers ........................................................................................................................... 114 12.1.8 Download Data to Controller ....................................................................................................... 114 13. Access Rule ................................................................................................................ 115 13.1 Date Type .................................................................................................................. 115 13.1.1 AddA Date .................................................................................................................................... 115 13.1.2 Delete A Date ............................................................................................................................... 116 13.2 Group Schedule ......................................................................................................... 116 13.2.1 Add A Group Schedule .................................................................................................................. 117 IV NAV IP Access controller 13.2.2 Delete A Group Schedule ............................................................................................................. 117 13.2.3 Edit A Group Schedule .................................................................................................................. 117 13.2.4 Save As A New Schedule ............................................................................................................... 119 13.3 Access Group ............................................................................................................ 119 13.3.1 Add A Access Group ..................................................................................................................... 119 13.3.2 Delete A Access Group ................................................................................................................. 120 13.4 Door Schedule ........................................................................................................... 120 13.4.1 Add A Door Schedule .................................................................................................................... 120 13.4.2 Delete A Door Schedule ................................................................................................................ 121 13.4.3 Edit A Door Schedule .................................................................................................................... 121 13.4.4 Save As A New Schedule ............................................................................................................... 122 13.5 Access Door ............................................................................................................... 122 14. Card ........................................................................................................................... 123 14.1 Card Type Setting ...................................................................................................... 123 14.2 Card Setting ............................................................................................................... 124 14.2.1 AddA (Batch) Card ........................................................................................................................ 124 14.2.2 EditA (Batch) Card ........................................................................................................................ 126 14.2.3 Delete A (Batch) Card ................................................................................................................... 126 14.2.4 Export Cards ................................................................................................................................. 126 14.2.5 Print Cards .................................................................................................................................... 126 14.2.6 Search Cards ................................................................................................................................. 127 14.3 Import Cards ............................................................................................................. 127 15. Report ........................................................................................................................ 129 15.1 CardReport ................................................................................................................ 129 15.1.1 Search Cards ................................................................................................................................. 129 15.1.2 Export Cards ................................................................................................................................. 129 15.1.3 Print Cards .................................................................................................................................... 129 15.2 Card‐dependent Event .............................................................................................. 130 15.2.1 Search Events ............................................................................................................................... 130 15.2.2 Export Events ................................................................................................................................ 130 15.2.3 Print Events .................................................................................................................................. 130 15.3 Card‐independent Event ........................................................................................... 130 15.3.1 Search Events ............................................................................................................................... 131 15.3.2 Export Events ................................................................................................................................ 131 15.3.3 Print Events .................................................................................................................................. 131 16. Attendance Basic Setting ........................................................................................... 132 16.1 Attendance Time ....................................................................................................... 132 16.1.1 Edit Attendance Time ................................................................................................................... 133 16.1.2 Search Attendance Time .............................................................................................................. 133 16.1.3 Export Attendance Time ............................................................................................................... 133 16.1.4 PrintAttendance Time .................................................................................................................. 133 16.2 Week Holiday Setting ................................................................................................ 134 16.2.1 Edit AWeek Holiday ...................................................................................................................... 134 16.2.2 SearchWeek Holidays ................................................................................................................... 134 16.2.3 Export Week Holidays .................................................................................................................. 135 16.2.4 Print Week Holidays ..................................................................................................................... 135 16.3 Special Holiday Setting .............................................................................................. 135 V NAV IP Access controller 16.3.1 Add A SpecialHoliday .................................................................................................................... 135 16.3.2 EditA SpecialHoliday ..................................................................................................................... 136 16.3.3 RemoveA SpecialHoliday .............................................................................................................. 136 16.3.4 SearchSpecialHolidays .................................................................................................................. 136 16.3.5 ExportSpecialHolidays .................................................................................................................. 136 16.3.6 PrintSpecialHolidays ..................................................................................................................... 137 17. Attendance Exception ............................................................................................... 138 17.1 No‐Access‐Attendance .............................................................................................. 138 17.1.1 AddA No‐Access‐Attendance ........................................................................................................ 138 17.1.2 EditA No‐Access‐Attendance ........................................................................................................ 139 17.1.3 DeleteA No‐Access‐Attendance ................................................................................................... 139 17.1.4 SearchNo‐Access‐Attendance ...................................................................................................... 139 17.1.5 ExportNo‐Access‐Attendance ....................................................................................................... 140 17.1.6 PrintNo‐Access‐Attendance ......................................................................................................... 140 17.2 Time‐off Enroll .......................................................................................................... 140 17.2.1 AddTime‐off Enroll ....................................................................................................................... 141 17.2.2 EditTime‐off Enroll ........................................................................................................................ 141 17.2.3 DeleteTime‐off Enroll ................................................................................................................... 142 17.2.4 Search Time‐off Enroll .................................................................................................................. 142 17.2.5 ExportTime‐off Enroll ................................................................................................................... 143 17.2.6 PrintTime‐off Enroll ...................................................................................................................... 143 17.3 Overtime Enroll ......................................................................................................... 143 17.3.1 Add Overtime Enroll ..................................................................................................................... 143 17.3.2 Edit Overtime Enroll ..................................................................................................................... 144 17.3.3 DeleteOvertime Enroll .................................................................................................................. 145 17.3.4 SearchOvertime Enroll .................................................................................................................. 145 17.3.5 ExportOvertime Enroll .................................................................................................................. 145 17.3.6 PrintOvertime Enroll ..................................................................................................................... 145 VI NAV IP Access controller Federal Communication Commission Interference Statement This equipment has been tested and found to comply with the limits for a Class B digital device, pursuant to Part 15 of the FCC Rules. These limits are designed to provide reasonable protection against harmful interference in a residential installation. This equipment generates, uses and can radiate radio frequency energy and, if not installed and used in accordance with the instructions, may cause harmful interference to radio communications. However, there is no guarantee that interference will not occur in a particular installation. If this equipment does cause harmful interference to radio or television reception, which can be determined by turning the equipment off and on, the user is encouraged to try to correct the interference by one of the following measures: ‐ Reorient or relocate the receiving antenna. ‐ Increase the separation between the equipment and receiver. ‐ Connect the equipment into an outlet on a circuit different from that to which the receiver is connected. ‐ Consult the dealer or an experienced radio/TV technician for help. FCC Caution: Any changes or modifications not expressly approved by the party responsible for compliance could void the user's authority to operate this equipment. This device complies with Part 15 of the FCC Rules. Operation is subject to the following two conditions: (1) This device may not cause harmful interference, and (2) this device must accept any interference received, including interference that may cause undesired operation. NAV IP Access controller Chapter 1 1. Introduction The NAV IP access controller is a powerful Linux‐based controller with modular design. You can add up to 4 door modules to the NAV controller for expanding the control scale of up to 8 doors / readers. Or you can add one alarm module to the NAV controller to manage up to 10 alarm inputs and 18 alarm outputs. Moreover, each NAV controller can connect up to 31 EverFocus’ Flex series controllers to expand the control scale of up to 256 doors / readers. You can connect to the NAV controller via network to remotely review, monitor all the events on NAV and Flex controllers and configure all 31 Flex series controllers from the same built‐in browser‐based management software. Furthermore, you can optionally install multiple NAV controllers for a larger scale access control system. By doing so, you will need the enterprise level Navigation software installed as a central server to manage the large access control system. Figure 1‐1 The following table lists the models of NAV IP access controllers along with the supported number of doors, readers and alarm inputs / outputs. A description for the supported modules and devices is also provided below. 1 NAV IP Access controller NAV IP Access Controllers Model Name Description EFC302 Supports 2 doors, 2 readers Supports 2 alarm inputs, 4 alarm outputs EFC304 Supports 4 doors, 4 readers Supports 4 alarm inputs, 6 alarm outputs EFC306 Supports 6 doors, 6 readers Supports 6 alarm inputs, 8 alarm outputs EFC308 Supports 8 doors, 8 readers Supports 8 alarm inputs, 10 alarm outputs Optional Devices / Modules Name Description Each NAV controller can add up to 4 door modules. Each door module Door Module controls up to 2 readers, 2 relays for door locks, 2 relays for alarm outputs, other door control peripherals, and event signals to the main d l Each NAV controller can add only one alarm module. The alarm module Alarm Module can connect up to 8 alarm inputs and 8 alarm outputs. Flex Series Controller Each NAV controller can connect up to 31 Flex series controllers. Each Flex series can connect up to 8 doors and 8 readers. 1.1 Features Embedded Linux operating system Built‐in database engine Built‐in 512M large‐capacity memory Modular design for easy expansion of the system, and auto‐detection on expansion modules Manage up to 31 EverFocus’ Flex Series controllers Secure access through the Web browser is guaranteed by SSL (Secure Socket Layer) Network automatic backup and upgrade USB2.0 automatic backup and controller firmware upgrade Remote setting, control and management; no software needed to be installed Manage up to 100,000 cards and 1,000,000 event records Supports 2,048 management groups Supports 2,048 access schedule Supports 12 kinds of access pattern Supports card / group mode to access the door 2 NAV IP Access controller Supports 4 x 4 lock level, achieves 4 teams x 4 multi cards access setting on each door Each door supports 10 different independent day setting (Sunday to Monday, and 3 kinds of custom day setting). Each day can take 10 time zones with minimum 1 minute duration Supports comprehensive access features including interlock, area‐based anti passback, multi‐card / multi‐level access control, panic open, remote door control, system arm / disarm, multiple door verification mode, and first card, etc. Multiple languages support: English, Chinese and Russian 1.2 Overview The diagram below illustrates the controller along with its main components and functions. Figure 1‐2 Main Module The main module controls the fundamental functions of the controller, including the built‐in browser‐based software, the system management, the power supply, event records, built‐in Ethernet port, and communication via RS‐485 port, two alarm inputs and two alarm outputs. The main module also controls the door modules and alarm module. No. Name Description 3 NAV IP Access controller 1 NetworkPort Connects to the network. 2 LCD Screen Displays the current status of the controller and the menu. 3 4 Keypad USB2.0 Port Provides an interface to operate the controller. For database backup / restore and firmware upgrade. 5 Terminal Block Connects to power, alarm input / output devices, etc. Please refer to 1.6.1 Terminal Block and LEDs on Main Module. 6 LEDs Indicates the controller status. Please refer to 1.6.1 Terminal Block and LEDs on Main Module. Alarm Module The alarm module is used to extend the controller’s alarm function, adding up to 8 alarm inputs and 8 alarm outputs. Each controller can only add one alarm module. No. Name 7 LEDs 8 Terminal Block Description Indicates the alarm status. Please refer to 1.6.2 Terminal Block and LEDs on Alarm Module. Connects to alarm input / output devices. Please refer to 1.6.2 Terminal Block and LEDs on Alarm Module. Door Module The door module is used to control up to 2 readers, 2 relays for door locks, 2 relays for alarm outputs, other door control peripherals, and event signals to the main module. Each controller can add up to 4 door modules. No. Name 9 10 LEDs Terminal Block Description Indicates the door module status. Please refer to 1.6.3 Terminal Block and LEDs on Door Module. Connects to door sensors, door locks, request‐to‐exit devices and alarm outputs. Please refer to 1.6.3 Terminal Block and LEDs on Door Module. 1.3 Specification System Operating System Database Memory Management Software Linux embedded Built‐in 512M Built‐in browser‐based software, EFS2000, ENS2000 4 NAV IP Access controller Built‐in Software Operation Maximum Card Amount Maximum Even Records Supporting Readers Supporting Door Control Max. Flex Controllers Connected via RS‐485 Reader Communication Format Card / System PIN Alarm PIN Alarm Input Alarm Output Network Interface Baud Rate Programmable Duration Programmable Date Access Group Access Schedule Door Access Verification Other Functions Support Supports system management, device configuration, live event list view and map view, CCTV integration 100,000 1,000,000 2 (expandable up to 8) 2 (expandable up to 8) Up to 31 controllers Wiegand26 / RS‐232 8 digits 8 digits 2 (expandable to 10, each alarm input can be set as firmware alarm or regular alarm.) 2 alarm outputs on main module, 2 alarm outputs on each door module and 8 alarm outputs on alarm d l 100M adaptive Ethernet interface 9600 bps Maximum 10 per day with minimum duration of 1 min. Sunday to Saturday and 3 customized date types on each individual door. 2,048 2,048 12 modes Supports multiple doors interlock, card expiration, anti‐passback, backup battery connection, backup battery charger, real‐time clock and 4 x 4 lock level (achieves 4 teams x 4 multi cards access setting on Mechanical LCD Display Screen Buzzer Keypad 2 × 9(for Chinese / Russian characters), 2 x 18(for English characters) Built‐in 4 x 4 key General Current for Door Control Relay Current for Alarm Relay Power Supply Maximum Current Dimension (L x W x H) 5A (Max.) 2A (Max.) DC11V ~ 16V (DC 15V when backup battery is 2A 300 × 216 × 33 mm / 11.8 x 8.5 x 1.3 in 5 NAV IP Access controller Temperature Humidity Weight 14°F~122°F <90% 1.2 kg / 2.65 lbs 1.4 Packing List Please check that there is no missing item in the package before installing. NAV Controller x 1 (EFC302) Supporting Frames (left and right) x 2 Mounting Template x 1 3 x 6 mm screw x 2 (for mounting the controller to the frame) User’s Manual x 1 Note: Contact the shipper if any items appear to have been damaged in the shipping process. If any items are missing, notify your EverFocus Electronics Corp. Sales Representative or Customer Service Branch. Please also keep the shipping carton for possible future use. 1.5 Optional Device Optional device can expand your controller’s capabilities and versatility. Please contact your dealer for more information. EverFocus mental enclosure (EPN‐871‐B) EverFocus USB reader (ERU871) EverFocus proximity readers (ERR‐871, ERK‐871, ERM‐871) 6 NAV IP Access controller 1.6 Definitions of Terminal Block and LEDs 1.6.1 Terminal Block and LEDs on Main Module Figure 1‐3 Terminal Block Definitions No Terminal Name Function No. Terminal Name Function 1 Alarm In 0 General alarm input 0 10 RS485_A Signal A of RS‐485 bus 2 GND Alarm input GND 11 COMM_GND GND of RS‐485 3 FireIn Fire alarm input 12 RS485_B Signal B of RS‐485 bus 4 AUXAlarmOutNo Normally open pin of auxiliary alarm output 13 Power Power input 5 AUXAlarmOutCom Common pin of auxiliary alarm output 14 GND Power GND 6 AUXAlarmOutNC Normally close pin of auxiliary alarm output 15 BATT+ Battery positive pin 7 AUXAlarmOutNo Normally open pin of main alarm output 16 BATT‐ Battery negative pin 8 AUXAlarmOutCom Common pin of main alarm output 17 USB USB port 9 AUXAlarmOutNC Normally close pin of main alarm output 18 Ethernet Ethernet port Figure 1‐4 7 NAV IP Access controller LED Definitions No Description No The power is on when the light 1 3 is on. The fire alarm is triggered 2 4 when the light is on. Description The data is received when the light is on. The data is transmitted when the light is on. 1.6.2 Terminal Block and LEDs on Alarm Module Figure 1‐5 No Terminal Name Function No . Terminal Name Function 1 Alarm1_In Alarm signal input 1 19 Alarm5_In Alarm signal input 5 2 GND GND 20 GND GND 3 Alarm2_In Alarm signal input 2 21 Alarm6_In Alarm signal input 6 4 Alarm3_In Alarm signal input 3 22 Alarm7_In Alarm signal input 7 5 GND GND 23 GND GND 6 Alarm4_In Alarm signal input 4 24 Alarm8_In Alarm signal input 8 7 Alarm1_NO 25 Alarm5_NO 8 Alarm1_COM Alarm 1 output for NO Alarm 1 output in common 26 Alarm5_COM Alarm 5 output for NO Alarm 5 output in common 9 Alarm1_NC Alarm 1 output for NC 27 Alarm5_NC Alarm 5 output for normally‐close 10 Alarm2_ NO Alarm 2 output for NO 28 Alarm6_ NO Alarm 6 output for NO 11 Alarm2_ COM Alarm 2 output in common 29 Alarm6_ COM Alarm 6 output in common 12 Alarm2_ NC Alarm 2 output for NC 30 Alarm6_ NC Alarm 6 output for NC 13 Alarm3_ NO Alarm 3 output for NO 31 Alarm7_ NO Alarm 7 output for NO 14 Alarm3_ COM Alarm 3 output in common 32 Alarm7_ COM Alarm 7 output in common 15 Alarm3_ NC Alarm 3 output for NC 33 Alarm7_ NC Alarm 7 output for NC 16 Alarm4_ NO Alarm 4 output for NO 34 Alarm8_ NO Alarm 8 output for NO 8 NAV IP Access controller 17 Alarm4_ COM Alarm 4 output in common 35 Alarm8_ COM Alarm 8 output in common 18 Alarm4_ NC Alarm 4 output for NC 36 Alarm8_ NC Alarm 8 output for NC Figure 1‐6 LED Definitions No 1 2 3 4 Description Alarm 1 Alarm 2 Alarm 3 Alarm 4 No 5 6 7 8 Description Alarm 5 Alarm 6 Alarm 7 Alarm 8 1.6.3 Terminal Block and LEDs on Door Module Figure 1‐7 No Terminal Name Function No. Terminal Name Function 1 Reader1_Data0 Reader 1 Wiegand Data 0 17 Reader2_Data0 Reader 2 Wiegand Data 0 2 Reader1_Data1 18 Reader2_Data1 3 Reader1_DC Reader 1 Wiegand Data 1 Power supply for reader 1 19 Reader2_DC Reader 2 Wiegand Data 1 Power supply for Reader 4 Reader1_GND GND for the Reader 1 20 Reader2_GND GND for the Reader 2 5 Reader1_Ctrl Reader2_Ctrl 6 RX_1 7 TX_1 Control line for reader 1 21 Port to TX signal to reader 22 1 Port to RX signal from 23 reader 1 Control line for Reader 2 Port to TX signal to Reader 2 Port to RX signal from Rader 2 9 RX_2 TX_2 NAV IP Access controller 8 Door1_ Button 9 Door1_GND 10 Door1_ Sensor 11 Door1_NO 12 Door1_COM 13 The request‐to‐exit button for Door 1 The request‐to‐exit button for Door 2 24 Door2_ Button 25 Door2_GND 26 Door2_ Sensor 27 Door2_NO Common pin for door control relay 1 28 Door2_COM Common pin for door control relay 2 Door1_NC Normally close pin for door control relay 1 29 Door2_NC Normally close pin for door control relay 2 14 Alarm1_NO Normally open pin for alarm output relay 1 30 Alarm2_NO Normally open pin for alarm output relay 2 15 Alarm1_COM Common pin for alarm output relay 1 31 Alarm2_COM Common pin for alarm output relay 2 16 Alarm1_NC Normally close pin for alarm output relay 1 32 Alarm2_NC Normally close pin for alarm output relay 2 GND for terminal 8 & 10 Door sensor input for Door 1 Normally open pin for door control relay 1 GND for terminal 24 & 26 Door sensor input for Door 2 Normally open pin for door control relay 2 Figure 1‐8 LED Definitions No Description Indicates the alarm relay #2 is 1 energized. 2 Indicates the reader #2 is connected. Indicates the door sensor #2 is off 3 (the door’s open). Indicates the door control relay #2 is 4 energized. No 5 6 7 8 10 Description Indicates the alarm relay #1 is energized. Indicates the reader #1 is connected. Indicates the door sensor #1 is off (the door’s open). Indicates the door control relay #1 is energized. NAV IP Access controller Chapter 2 2. Installation The Installation has three procedures described as below. Each procedure will be introduced in the following sections in detail. Step 1: Installation Preparation Obtain a floor plan Determine the hardware and location Determine the number of controllers according to system structure Step 2: Hardware Installation Installing the controller Connecting to the door lock / open button / sensor / bell Connecting to the alarm input / output Connecting to the card reader Connecting to the computer through the networkMount a backup battery in the enclosure Step 3: Software Setup / Configuration Log in controller built‐in software through IE on computer Set user account for user software Set controller and other equipment Set holidays, shifts and door control rules Log in card and set card attributes 2.1 Installation Preparation Before installation, users are advised to collect information properly which will make the installation more smoothly and helps to reduce time and energy cost. For professional constructors, the information below will be of great use. 2.1.1 Obtain a Floor Plan Obtain a floor plan of the building in which the access control system is to be installed. 11 NAV IP Access controller Obtaining a floor plan helps the installer determine what components need to be installed, and where. It also is essential in determining the length of cable needed to connect readers to the controller. A floor plan can be a blue print of the building, a design, or simply a drawing of the facility. Any document showing the footprint of the building can be used. The dimensions are important to note, especially when determining cable lengths. A floor plan may be obtained from your local city hall. 2.1.2 Determine the Hardware and Location Determine which hardware to use and where it will be installed. This is the most crucial step in the preparation stage. First, determine how many access points, or doors, need to be managed by the access control system. These access points will control the security of the facility, and can limit the entry and exit to and from any given area of the building. After deciding which doors need to be controlled, the user must also determine the level of security needed at each door. There are many ways to manage each door, using different resources. These resources include, but are not limited to: proximity readers, mag strip readers, relays, and request to exits. A few common door configurations are described below: One Set of NAV Controller+ One Reader – The Basic Door Entry Control The most basic configuration involves one NAV controller, a reader and an electric strike. In this configuration, a person presents a card to the reader, and is either granted or denied access. The electric strike unlocks if the system grants access. Another variation of this scenario involves setting the system up to monitor whether the door is open, which allows the system to protect against propped open doors, or doors being held open for too long. One Set of NAV Controller+ One Reader + One Door Open Button – Control of Exit Adding a door open button to the above scenario allows the system to control when to allow people to exit through a door. The door open button equipment includes a button which has to be pressed when a card holder exits, or a door sensor. The equipment should be arranged on the secure side of the door. Figure 2‐1 12 NAV IP Access controller One Set of NAV Controller+ Two Readers – Control of both Entry and Exit When the security grade is relatively high or the administrator requires the card holders to get in or out at fixed time or date through specific door, two sets of EFC301 are needed. Additional installation of one set of EFC301 on the side of the door requires the card holders to swipe the card when exiting and entering. This rule has more reliable security regarding who can enter and who can exit and the administrator canal so master the entry and exit time of card holders. 2.1.3 Determine the Number of Controllers/ Modules According to System Structure Determine how many controllers / modules and network interface are required. 1. Each NAV controller can accommodate up to 8 readers. If the system to be installed requires more than 8 readers, additional controllers are necessary. E.g. Flex series controllers. 2. If one or more controllers are installed at a different location, then the system computer is to be installed, and an Ethernet interface is required to connect over the internet. An Ethernet interface may also be used in locations at which the controllers are installed a long distance away from the system computer. Software is required to manage these NAV controllers. 2.2 Hardware Installation After the preparation work is finished, user can start installation. This chapter mainly introduces how to install the hardware part, which is divided into six steps: 1. Mounting the enclosure (optional) and controller. 2. Installing and connecting the readers. 3. Connecting to door lock, sensor and open button. 4. Connecting to the alarm input / output. 5. Connecting to the computer. 6. Mounting a backup battery in the enclosure (optional). 2.2.1 Mounting the Enclosure (Optional) and Controller The NAV controller should be installed in an easily‐accessible position. However, it should be noticed that the controller is the core part of the entire system and can be used to change database. After the installation site is selected, a relative secure clean position in which the administrator is easy to operate should be selected. Due to the controller is an essential part of the access control system. It is recommended to mount the NAV controller in a metal enclosure (EPN‐871‐B). If you are using the enclosure, additional AC power supply is required. The enclosure uses a 24V AC power supply with a built‐in 15V DC converter. If the system requires additional door or alarm modules, install them in the controller before mounting the controller in the enclosure or on the wall. 13 NAV IP Access controller Note: If the screw holes of the controller do not line up properly with the enclosure, some filling may be required for adjustment. 1. Use the supplied mounting template to position the holes for the support frames and then mount the two support frames on a wall. Figure 2‐2 Note: If using the metal enclosure, use the four pre‐drilled holes on the back wall of the enclosure and then mount the two support frames on the interior of the enclosure. 2. Mount the controller base board to the support frames. Figure 2‐3 a. Place the controller base board on the support frames. Line up the four latches on the support frames with the holes on the controller base board. Once lined up, slide the controller base board down to secure it in place. b. Secure the controller base board to the support frames using the supplied two screws. 14 NAV IP Access controller 3. Install and mount additional door modules or the alarm module. Note: The controller can hook up to 4 door modules and only 1 alarm module. Each door module is cascaded to its left side module till the main module. The door modules and the alarm module can be placed in any sequence. a. Connect the pins on the lower right corner of the new module to the connector on the bottom left corner of the installed module. Make sure that the pins fit snugly into the receiving module. Figure 2‐4 b. Secure the module to the controller base board using the three screws provided in the module package. Figure 2‐5 The Reader / Door Index Conversion 15 NAV IP Access controller The index conversion of readers is displayed as below. The readers / doors are counted 1 to 8 from right to left. Figure 2‐6 4. Placing back the cover of controller. a. The cover has two latches on the interior of the top horizontal edge. Place these latches in the corresponding holes on the top horizontal edge of the controller base board. Figure 2‐7 b. Once the latches are in place, the bottom portion of the cover will fit easily over the rest of the controller base board. c. Secure the cover to the controller base board along the exterior of the horizontal bottom edge. 16 NAV IP Access controller Figure 2‐8 2.2.2 Installing and Connecting the Readers The readers must be mounted near each door and connected directly to the door module(s) in the controller. Each door module can control up to two readers. The supported reader formats are Wiegand and RS‐232. RS‐232 Connection Connect the RS‐232 wires from the reader to the terminal block on the door module. You can either connect the wires from the reader to Pin 3 ~ 7 (Door 1) or Pin 19 ~ 23 (Door 2) on the terminal block. 19 20 21 22 23 3 4 5 6 7 +12V GND Reader Ctrl RX TX Red Black Yellow Blue Gray Door module 1 2 ABC 3 DEF 4 GHI 5 JKL 6 MNO 7 PQRS 8 TUV 9 WXYZ * 0 # EverAccess Figure 2‐7 Wiegand Connection Connect the Wiegand wires from the reader to the terminal block on the door module. You can either connect the wires from the reader to Pin 1 ~ 5 (Door 1) or Pin 17 ~ 21 (Door 2) on the terminal block. 17 NAV IP Access controller Reader_Data0 17 18 19 20 21 1 2 3 4 5 Reader_Data1 +12V GND Reader Ctrl Green Brown Red Black Yellow 1 2 ABC 3 DEF 4 GHI 5 JKL 6 MNO 7 PQRS 8 TUV 9 WXYZ * 0 # Ever Access Door module Figure 2‐8 Each door module can provide +12V voltage for two readers. Twisted cable is recommended to connect the controller and readers. The maximum transmission distance between the reader and controller depends on the gauge of the cable and the specification of the reader. Please read the reader user manual carefully before installing the cable for the readers. Note: It is strongly recommended to use one connection format in a multi‐reader system, i.e. all the readers are connected to the door modules through RS‐232 or Wiegand connection. Multiple connection formats could cause compatibility problems to the system. 2.2.3 Connecting to the Door Lock, Sensor and Open Button Connecting to the Door Lock The Electric strikes and magnetic locks are used to keep doors locked unless the system grants access or the user sets the doors to remain unlocked. One strike or magnetic lock is required for each door. These locks must be powered separately from the readers. The mounting instructions for strikes and magnetic locks vary depending on the manufacturer and type of lock. Please consult the instructions included with the door hardware when installing. Once the locks are installed, follow the instructions below to connect them to the controller. Electric Strike Connect the wires from the electric strike to the terminal block on the door module. You can either connect the wires to Pin 11 and 12 (Door 1) or Pin 27 and 28 (Door 2) on the terminal block. 18 NAV IP Access controller 27 28 N.O. 11 12 COM Door module V- V+ Figure 2‐9 Magnetic Lock Connect the wires from the magnetic lock to the terminal block on the door module. You can either connect the wires to Pin 12 and 13 (Door 1) or Pin 28 and 29 (Door 2) on the terminal block. V- V+ COM 28 29 12 13 N.C. Door module Figure 2‐10 Note: 1. The maximum current output of the door lock relay is 5A. If the current of the door lock is over this value, an external power relay will be required. 2. When using a DC power source to power the lock, connect the positive lead to V+. When using an AC power source, the leads are interchangeable. Connecting to the Door Sensor Connect the wires from the door sensor to the terminal block on the door module. You can either connect the wires to Pin 9 and 10 (Door 1) or Pin 25 and 26 (Door 2) on the terminal block. GND Input Signal 25 26 Door sensor 9 10 Door module 19 NAV IP Access controller Figure 2‐11 Connecting to the Door Open Button Connect the wires from the door open button to the terminal block on the door module. You can either connect the wires to Pin 8 and 9 (Door 1) or Pin 24 and 25 (Door 2) on the terminal block. Input Signal 24 25 EXIT 8 9 GND Door module Figure 2‐12 2.2.4 Connecting to the Fire Alarm/ Alarm Input You can either connect the alarm inputs to the main module or the alarm module. On the Main Module The main module provides two general alarm inputs, connecting to Pin 1 and 2 or Pin 2 and 3 on the terminal block. The GND terminal is shared by these two input signals. Both inputs can be configured as either fire alarm input or general alarm input. Figure 2‐13 On the Alarm Module The alarm modules provide 8 alarm inputs. The alarm input pins provided by the alarm module includes Pin 1, 3, 4, 6, 19, 21, 22, 24. For details on pin assignment, please refer to 1.6.2 Terminal Block and LEDs on Alarm Module. Following is an example on connecting the alarm input to the alarm module. 20 NAV IP Access controller Alarm input GND 1 2 Alarm sensor Alarm module Figure 2‐14 2.2.5 Connecting to the Fire Alarm/ Alarm Output The alarm modules provide 8 alarm outputs. You can assign the corresponding relay status to the different events. There are three terminals: COM, NO and NC. The wiring depends on the alarm device. Please read the user manual of the external alarm devices before wiring. Following are examples on connecting the alarm output to the alarm module. For details on pin assignment, please refer to 1.6.2 Terminal Block and LEDs on Alarm Module. N.O. terminal Alarm Device 7 8 N.O. C. terminal COM Alarm module Figure 2‐15 C. terminal COM 8 9 Alarm Device N.C. terminal N.C. Alarm module Figure 2‐16 21 NAV IP Access controller 2.2.6 Connecting to the Computer through the Network User can carry out basic setting through the keypad on the EFC301 controller or connection with the computer via TCP/IP. User can carry complicated system administration by accessing the embedded system in the controller through various browsers. EverAccess TCP/IP F le x I I A cc es s C o n tr o ller 1 2 ABC 3 DEF 4 GHI 5 J KL 6 MNO 7 PQR S 8 TUV 9 WXYZ CLR 0 ENT ARM SYS Nav Controller Figure 2‐17 2.2.7 Mounting a Backup Battery in the Enclosure (Optional) You can optionally connect a backup battery in the enclosure to provide backup power to the controller. Once the battery is installed, it will charge off the external power until it is needed, at which time it will automatically be used to power the system. Connecting to the Backup Battery Connect the wires from the backup battery to the terminal block on the main module. Connect the positive lead to Pin 15 and negative lead to Pin 16 on the terminal block of the main module. Figure 2‐18 If a backup battery is connected, the controller will automatically switch to backup power in the event that the external power is lost. The backup battery will charge while external power is being supplied. In general, the larger the battery capacity, the longer it can support the controller. A 12AH battery can provide 4 hours of energy for a controller containing 4 door modules, one alarm module and 8 readers. 22 NAV IP Access controller Chapter 3 3. System Architecture and Connections EverAccess® NAV Controller runs the embedded Linux and includes the built‐in browser‐based management software. No dedicated computer needs to be running to capture and store the events. Users can access and manage the controller or the system from any computer on the network. This chapter introduces the 3 types of system architectures in order of system scale. Additionally, the RS485 Bus extension is introduced for extending more door controls with EverAccess Flex controllers. 3.1 Small System for 8 Doors As introduced in chapter 1, NAV Controller provides a flexible, modulated installation up to 8 doors or readers directly. No additional controller or computer needed. The network settings can be configured directly from the LCD and keypad on the controller. As long as the network settings are correct, users can access it by typing the controller IP address in the browser from a computer on the network. The built‐in browser based software will provide the full comprehensive functions to manage and monitor the system. TCP/IP EverAccess F le x I I A cc es s C o n tr o ller 1 2 ABC 3 DEF 4 GHI 5 J KL 6 MNO 7 PQR S 8 TUV 9 WXYZ CLR 0 ENT ARM SYS Nav Controller Figure 3‐1 Connecting the Controller to a PC 3.2 System for 256 Doors Each NAV Controller can connect and control up to 31 EverAccess Flex controllers via RS485 bus. Each Flex controller can hook up to 8 doors/readers, so total 256 doors/readers can be controlled under the architecture of one NAV Controller plus 31 Flex controllers. Users can connect to the NAV Controller via a computer to remotely review, and monitor all the events on NAV and Flex controllers. Users can also all 31 Flex controllers from the browser‐based management software. The system structure is illustrated in the below figure: 23 NAV IP Access controller EverAccess EverAccess EverAccess EverAccess EverAccess F le x I I A cc es s C o n tr o ll er ARM ARM 2 ABC 3 DEF 1 2 ABC 3 DEF 1 2 ABC 3 DEF 5 J KL 6 MNO 4 GHI 5 J KL 6 MNO 4 G HI 5 J KL 6 MNO 4 G HI 5 JKL 6 MNO 7 PQR S 8 TUV 9 WXYZ 7 PQRS 8 TUV 9 WXYZ 7 PQR S 8 TUV 9 WXYZ 7 PQR S 8 TUV 9 WXYZ CLR 0 ENT CLR 0 ENT CLR 0 ENT CLR 0 ENT SYS Nav Controller 1 SYS 2 ABC 3 DEF ARM 1 4 GHI SYS ARM 1 SYS 2 ABC 3 DEF 4 GHI 5 J KL 6 MNO 7 PQRS 8 TUV 9 WXYZ C LR 0 EN T ARM SYS Flex Controller Flex Controller Flex Controller …… Flex Controller Figure 3‐2 System Structure for 256 doors 3.3 System for More theN 256 Doors Each NAV Controller can control up to 31 Flex controllers. And multiple NAV Controllers can be controlled and communicate with a Navigation software central server. Navigation software is the enterprise level software to manage middle to large scale access control system. Navigation software can be installed as central server mode or node server mode. All NAV Controllers can synchronize data and events to the central server. As a result, a larger scale system can be built with many NAV Controllers (each can control 31 Flex controllers) under the Navigation software. This large scale system is illustrated in the below figure: EverAccess EverAccess EverAccess E verAccess EverAccess F le x I I A cc es s Co n tr o ller 1 2 ABC 3 DEF 4 GHI 5 JKL 6 MNO 7 PQRS 8 TUV 9 WXYZ CLR 0 ENT ARM SYS Nav Controller 1 2 ABC 4 GHI 5 J KL 7 PQRS 8 TUV 9 WXYZ CLR 0 ENT 3 DEF ARM 6 MNO SYS 2 ABC 3 DEF 5 J KL 6 MN O 7 PQRS 8 TUV 9 WXYZ CLR 0 ENT ARM 1 SYS 2 ABC 3 DEF 4 GHI 5 JKL 7 PQRS 8 TUV 9 WXYZ CLR 0 ENT ARM 1 2 ABC 3 DEF 4 GHI 5 J KL 6 MNO 7 PQRS 8 TUV 9 WXYZ SYS C LR 0 ENT 6 MNO ARM SYS Flex Controller…Flex Controller TCP/IP EverAccess EverAccess EverAccess EverAccess EverAccess F le x II Ac ce s s C o nt ro lle r 1 2 ABC 3 DEF 4 GHI 5 J KL 6 MNO 7 PQRS 8 TUV 9 WXYZ C LR 0 ENT ARM 1 2 AB C 4 GH I 5 JKL 7 PQRS 8 TUV 9 WXYZ SYS CLR 0 ENT Nav Controller Navigation Software Central Server 1 4 GHI EverAccess EverAccess 3 DEF ARM 6 MNO SYS 1 2 ABC 3 DEF 4 GHI 5 JKL 6 MNO 7 PQRS 8 TUV 9 WXYZ CLR 0 ENT ARM 1 SYS 2 ABC 3 DEF 4 GHI 5 JKL 7 PQRS 8 TUV 9 WXYZ CLR 0 ENT ARM 1 2 ABC 3 DEF 4 GHI 5 J KL 6 MNO 7 PQRS 8 TUV 9 WXYZ SYS CLR 0 ENT 6 MNO Flex Controller…Flex Controller EverAccess EverAccess EverAccess F le x I I A cc es s Co n tr o ller 1 2 ABC 3 DEF 4 GHI 5 JKL 6 MNO 7 PQRS 8 TUV 9 WXYZ CLR 0 ENT ARM 1 4 GHI 5 JKL 6 MNO 7 PQRS 8 TUV 9 WXYZ SYS CLR 0 ENT Nav Controller 2 ABC 3 DEF ARM SYS 1 2 ABC 3 DEF 4 GHI 5 JKL 6 MNO 7 PQRS 8 TUV 9 WXYZ CLR 0 ENT ARM SYS 1 2 ABC 3 DEF 4 GHI 5 J KL 7 PQRS 8 TUV 9 WXYZ CLR 0 ENT ARM 1 6 MNO SYS 2 ABC 3 DEF 4 GHI 5 JKL 6 MNO 7 PQRS 8 TUV 9 WXYZ CLR 0 ENT ARM SYS Flex Controller…Flex Controller Figure 3‐3 System Structure for more than 256 doors 3.4 RS485 Bus Extension NAV Controller can connect multiple Flex controllers via RS485 bus. It is shown in the below figure: 24 ARM SYS NAV IP Access controller Figure 3‐4 Connections to Multiple Controllers via RS485 In order to correctly transfer data, the controllers on the RS485 bus must be connected in a daisy chain format, as shown in Figure 3.5. EverAccess EverAccess 1 2 3 AB C 4 G HI EverAccess 2 1 ARM D EF 5 6 JK L MNO 3 A BC 6 MNO 8 9 7 8 9 TUV WXYZ PQRS TU V WXYZ CLR 0 ENT CLR 0 ENT SYS 2 1 ARM DEF 5 J KL 4 GHI 7 PQRS AB C 5 4 GHI SYS JK L 3 ARM DEF 6 MN O 7 8 PQRS TUV WXYZ CLR 0 ENT 9 SYS Figure 3‐5 The Daisy Chain Connection Controller to Controller Two common INCORRECT connection methods are displayed in Figure3‐6 as well. EverAccess EverAccess 1 2 A BC 3 EverAccess 1 ARM DEF 2 3 AB C 5 6 4 5 6 J KL MNO GHI JKL MNO 7 8 9 7 8 9 PQRS TU V WXYZ PQRS TUV WXYZ CLR 0 ENT CLR 0 ENT SYS 3 2 1 ARM D EF 4 GHI A BC ARM DEF 5 6 J KL MNO 4 GHI 7 8 PQRS TU V WXYZ CLR 0 ENT SYS 9 SYS EverAccess 1 2 ABC 4 GHI 3 ARM DEF 5 6 JKL MNO 7 8 PQRS TU V WXYZ CLR 0 ENT 9 SYS 3 ARM EverAccess 1 2 ABC 4 GHI 3 ARM DEF 5 6 J KL MNO 7 8 9 PQRS TU V WXYZ CLR 0 ENT SYS EverAccess EverAccess 1 2 ABC 3 ARM 1 DEF 4 5 6 G HI JKL M NO 7 8 9 PQRS TUV WXYZ CLR 0 ENT 2 AB C 4 GHI SYS DEF 5 6 JKL MNO 7 8 9 PQRS TUV WXYZ CLR 0 ENT SYS Figure 3‐6 Two INCORRECT Connections 25 NAV IP Access controller Chapter 4 4. Starting Up the Controller 4.1 Connecting to Power You can power the NAV controller by connecting the power source to Pin 13 and 14 on the terminal block on the main module. Figure 3‐1 The voltage range of the NAV controller is between DC 11V and 16V. The maximum current is 500mA. If the backup battery is connected to the controller, a power supply with DC 15V is required. The power supply in the enclosure is DC 15V. In addition, the controller provides a 12V power supply for the readers. It should be noted that if a controller powers multiple readers, the current draw will be increased. The total current draw can be calculated as below: Current (controller) = 500 + Current (reader) x Number of Readers Important Tips: 1. The voltage supply should be located no more than 2 meters from the controller. 2. The electric locks and alarm devices must be powered separately. The controller’s power supply can power the controller with the mounted modules and the readers only, but not the locking hardware nor the alarm devices. 4.2 Restoring the Controller To restore the controller to the factory default settings, switch the power on while holding the Reset button on the main module. 26 NAV IP Access controller Reset Button Figure 4‐2 4.3 Before First Use Before first use, please follow the instructions below: 1. Set up the IP address, date and time of the controller. 2. Set up the controller network settings. 3. Configure reader properties. 4. Configure alarm settings. 5. Configure door settings. 6. Configure date types and schedules. 27 NAV V IP Access controller c Cha apter 5 5. Contrroller C Configu uration n and O Operattion This chaapter introducces system fu unctions and their corresp ponding operrations. Mostt basic operattions can be perfo ormed on EvverAccess® NAV N Controller keypad. Some S advancced functionss require the e built‐in browserr‐based manaagement softtware. Please refer to the later chapterrs for more details. 5.1 General O Operation n Guidelin ne Thee Controller’ss 4x4 Keypad is shown abo ove: Preess to en nter to the syystem menu Preess to arrm or disarm the system, and reset the e alarm Preess and Preess to m move the digitt input positio on to left when inputting numbers Preess to caancel or exitss back to the higher level m menu Preess to co onfirm the op peration to togggle between the same levvel menu 5.2 Home Screeen After the system insttallation is co omplete, the controller LC CD will displaay the curren nt date and tiime. This display iis the home sscreen (also ccalled defaultt screen in this manual), aand will be dissplayed until the user logs in to o the system configuratio on by enteringg a password. 2010-06-18 FRI 09:38 After on ne minute of inactivity, th he controller will automattically log thee user out, and back to the home screen. 28 NAV IP Access A contrroller 5.3 Direct Opeerations from Keyypad This secction introdu uces the fun nctions that can be acce essed directlyy from the keypad on the t NAV Controllers. 5.3.1 EEnter System Configguration Press on the keeypad will bring up a prom mpt to enter aa password, aas shown below: Input t SYS Passwor rd: _____ ____ Input th he system passsword and p press .If an incorrect password is entered threee times succcessively, the conttroller will alaarm automatically and locck the keypad d for one minute, shown aas following: Input t SYS Passwor rd keypa ad is locked! ! The facttory default password is 000000. Wheen Logging in nto the systeem, pressing the menu leevel will log th he user out. keyy in each Notte: It is highlyy recommend ded to securee the controlller, change th he default PIN N after the first login, and keep the passwo ord in a safe p place. 5.3.2 EEnter Arm m/Disarm M Menu Press button u under the deffault date/tim me screen, the below screeen will pop u up to promptt users to input the arm PIN: Input t ARM Passwor rd: _____ ____ After en ntering the arm a PIN, presss to confirm and input i the AR RM menu. Th he default arrm PIN is 0000000 00. If an in ncorrect arm m PIN is enttered three times successively, thee system will alarm automattically and locck the keypad d for a period d of one minu ute, shown ass the below ssample windo ow: Input t ARM Passwor rd keypa ad is locked! ! Notte: It is highlyy recommend ded to securee the controlller, change th he default PIN N after the first login, and keep the passwo ord in a safe p place. 5.3.3 D Display Firrmware Veersion Press below: to show the version information of the curre ently installed d firmware. A An example is shown 29 NAV IP Access controller Version: 1.0.0-0 5.3.4 Display the Number of Installed Modules Press to show the number of installed door modules and alarm modules. For example, 4 door modules and 1 alarm module are installed in the controller. The example window is shown below: 04-Door Modules 01-Alarm Modules 5.3.5 Display the Current Card and Event Number Press to show the number of currently enrolled card and currently stored events. For example, right now the controller stored 100 cards and 36,555 events. The example window is shown below: Cards: Events: 00100 36555 5.3.6 Display the Controller IP Address Press to show the IP address, MAC address of the controller. An example window is shown below: 192.168.0.96 00:aa:bb:cc:dd:01 5.4 Level One System Configuration Items The first level menus are displayed after entering the system menu. Use between menu options. The first level menu items are shown below: System Setting System Setting Menu Card Setting Card Setting Menu Door Setting Door Setting Menu Reader Setting Reader Setting Menu Alarm Setting Alarm Setting Menu Network Setting Network Setting Menu Address Setting Address Setting Menu 30 and to toggle NAV IP Access controller Once the desired item is displayed, press to enter into the corresponding menu. And press the corresponding menu to return the level one menu. in 5.5 System Setting In the System Setting menu, the user can set basic functions, including date format, system date, time, password, auto daylight saving, system PIN, arm PIN, language, backlight, event erasing and load factory default. 5.5.1 Enter System Setting Menu The following window appears after entering the system menu: System Setting Press to enter System Setting menu. Use and to choose from different menu options. All menu options in the System Setting Menu are introduced below. 5.5.2 Set Date Format The user can choose between two date formats: ‘MM‐DD‐YYYY’ or ‘YYY‐MM‐DD’. To change this option, use the arrow keys to display “Set Date Format”, and press once the window below is displayed. Set Date Format The current date format used will appear. Press to toggle between two formats. Press The selected format is the one shown on window when exiting. YYYY-MM-DD [ENT] to Toggle MM-DD-YYYY [ENT] to Toggle to exit. 5.5.3 Set Date Press at the window below to set the date. Set Date The LCD will display the following menu. Use the numerical keys to input the current date as a six‐digit number: (MM‐DD‐20YY). The year must be in the range 2000‐2038. Press to confirm the new date. SetDate(MM-dd-YYYY) __-__-20__ The date and time can be set either at the controller or from the built‐in management software remotely. 31 NAV IP Access controller 5.5.4 Set Time Press at the below window to set the time. Set Time The LCD will display the following menu. Use the numerical keys to input the current time as a six‐digit number (HH: MM: SS). The time must be in the range 00:00:00‐‐23:59:59. After entering the time, press to confirm. Set Time __:__:__ 5.5.5 Auto Daylight Saving Time Press at the below window to adjust the settings for Auto Daylight Savings: Auto Daylight Saving Press to toggle the setting between Enabled/Disabled, Press DaylightSaving: Yes [ENT] to toggle to exit DaylightSaving: No [ENT] to toggle When auto daylight savings is turned on, set the auto daylight start/end time from the built‐in management software remotely. 5.5.6 Set System PIN A System PIN must be entered before the user can make management changes via the controller keypad. The factory default System PIN is 00000000. It is recommended that the password is changed after the initial log‐in for maximum security. Be sure to secure the new password; if lost, the system can only be accessed after purging all stored data using the reset button on the main board. Press at the below window to set system PIN. Set SYS Password The LCD will display the following menu. Input SYS Password ________ Enter a new system PIN. Enter it a second time to confirm. Press to set the new system PIN. Pressing at any time will exit the menu without changing the system PIN. 32 NAV IP Access controller 5.5.7 Set Arm PIN Arm PIN must be entered before the controller can be armed or disarmed via controller keypad. The factory default arm PIN is 00000000. Press at the window below to set arm PIN. Set ARM Password The LCD will display the following menu. Input ARM Password ________ Enter a new arm PIN. Enter it a second time to confirm. Press at any time will exit the menu without changing the arm PIN. to set the new arm PIN. Pressing 5.5.8 Set Language Press at the below window to adjust the language setting: Set Language Press to toggle among Chinese, English and Russian, Press the one shown on window when exiting. to exit. The selected language is English [ENT] to toggle 简体中文 按[ENT]切换 5.5.9 Backlight Setting Press at the below window to change the backlight setting Backlight Setting Press to toggle between enabling and disabling backlight. Press Backlight: ON [ENT] to toggle to exit Backlight: OFF [ENT] to toggle 5.5.10 System Maintanence NAV Controller supports two ways to update firmware, backup and restore database: via USB drive or FTP. This section introduces how to use system maintenance with a USB drive. Press at the below window to enter to the system maintenance menu. 33 NAV IP Access controller System Maintanence 5.6.4.1 Firmware update Plug the USB drive that contains the firmware file into the USB port of the controller. Press below screen of system maintenance menu to start the firmware updating process. at the Update system The controller will show the below screen if no valid firmware is found from the plugged USB drive. No system update file find 5.6.4.2 Database restore Plug the USB drive that has the previous backup database file into the USB port of the controller. Press at the below screen to start database storing process. Restore database If no valid database data available, the controller shows the below information: No valid backup filefind 5.6.4.3 Database backup Plug the USB drive into the USB port of the controller. Press database to the USB drive: under the below screen to backup the Backup database If no USB drive presented when the menu item is selected. No usbstorage found 5.6.4.4 Unmount USB storage USB drive can be hot swapped, but sometime the data will be loss caused by pulling out directly. It is safer that removed from the controller. Press under the below screen to unmount the USB drive when finishing backup and restoring the database from the backup file on USB drive: Umount usb storage If no USB drive presented when the menu item is selected. No usbstorage found 34 NAV IP Access controller 5.5.11 Erase All Events The controller will record all events that occur, beginning immediately upon powering on. These events can be purged by following the instructions below. The old records will be automatically overwritten when storage space is full (1,000,000 events max.). Press at the window below to erase all events. Erase All Events LCD will prompt the user to confirm the action: Are you sure? [ENT] to continue Pressing will result in all events being permanently erased. Caution: this operation will permanently delete ALL events from the controller database. This operation is NOT undoable. 5.5.12 Load Factory Default This function is used to reset all settings to factory set default values. Press at the window below to reset all settings. Restore Factory Settings The LCD will prompt the user to confirm the action. Press to confirm and perform the reset action. Caution: this operation will recover all the settings to the factory default. This operation is NOT undoable. 5.6 Card Setting Card setting can be configured using either the controller or the built‐in management software. Using the built‐in management software is the easiest way to enroll cards. However, enrolling at the controller can be useful if the controller is offline. The process is described below. 5.6.1 Enter Card Setting Menu Under the System Menu, press once to bring up the following window: 35 NAV IP Access controller Card Setting Press to enter to the Card Setting menu. Use and to choose from different menu options. All menu options under the Card Setting menu are introduced below: 5.6.2 Add Cards When a new card is added, the controller will automatically assign an index number in the order of enrollment. The index number here is not related to the card number in the software. Users do not need to take care of this number. Under the Card Setting menu, press at the window below to add a card: Add Cards Press and enter a serial number on the card, as shown below: Input Card Serial card#:___________ User input card serial number, or swipe card via system reader, system reader will automatically read the card serial number to the controller. Input Card Serial card#:000005398787 Press to confirm and the system will add the card to the controller database. The user can also present the card at the system reader at this time, which will automatically acquire the index number of the new card, show the card number and add it to the controller. It will show “card exists already” if the same card number is in the database already. 5.6.3 Delete Cards The user can directly delete an individual card with a specific index or card number from the controller, or delete all cards at once. Under the Card Setting menu, press once to bring up the following window: Delete Cards Press 5.6.4.5 to enter to the submenu for the following two methods of deleting cards. Delete a Card The controller can delete a card according to its serial number, which is printed on the face of each card. At the following window: Delete a Card 36 NAV IP Access controller Press and the system will prompt the user to enter a card serial number, as shown below: Input Card Serial card#:___________ After entering the serial number, press confirm again like the below screen: to delete this card. The system will prompt users to Are you sure to Delete000005398787 Press to confirm or press to exit from the “delete card” menu. 5.6.4.6 Delete All Cards All cards can be deleted at once. At the following window: Delete All Cards Press and system will prompt the user to confirm deletion: Are You Sure ? [ENT] to Confirm Press again to delete all cards. Caution: this operation will permanently delete ALL cards from the controller database. This operation is NOT undoable. 5.6.4 Set Card Properties Under the Card Setting menu, press twice to bring up the following window: Set Card Properties Press and system will prompt the user to enter serial number, as shown below: Input Card Serial card#:___________ After entering the serial number, press to enter to the submenu for setting card properties. Each card has 6 properties that can be modified. Use and to choose desired properties. 5.6.4.7 Status Setting A card can be set as enabled or disabled at the following submenu: Status Setting 37 NAV IP Access controller Press and system will show the status of current card as the figure below. Press to toggle between the two statuses. Press to exit. The selected value is the one shown on window when exiting. Card Disabled [ENT] to Toggle Card Enabled [ENT] to Toggle 5.6.4.8 First Card Setting A card can be set as either first card or not from the below submenu: 1st-person-in Setting Note: First card property indicates if the card can trigger the scheduled door verification rules. For example, even when the doors are configured as always open during the office hour, but it will still remain locked if NO card with enabled “First card” property yet presented and gained the access to the doors in the office hour. For each day, the door verification schedule will be triggered (in this example, become to unlocked in office hour) only after a card with enabled “first card” presented and gained the access. Press and system will show the “First card” setting of the card as the figure below. Press toggle between ON/OFF status of the first card setting. 1st-person enabled [ENT] to toggle 5.6.4.9 to 1st-person disable [ENT] to toggle Anti-Passback (APB) setting NAV Controller features the Anti‐Passback (APB) function on each card. If APB is enabled, cardholder must pass the door in the alternating enter/exit. That is, if the card is swiped to access the door, then next time the card can only be allowed to exit that door. If cardholder attempts to access the same door again without first swipe the card to exit the door, access is denied and the door will not open. At the following submenu, press to enter Anti Passback setting: APB Setting The APB status of the current card is enabled or disabled, will be displayed as shown below. Press to toggle between two statuses. Press to exit. APB enabled [ENT] to toggle APB diabled [ENT] to toggle Note: Anti‐Passback (APB) is an access control function whereby a cardholder is prevented from “passing back” his card to another person to gain entry into the same area twice, without leaving. Facilities are typically fitted with both Entry and Exit readers when Anti‐Passback is implemented. A cardholder must alternate usage between entry and exit readers. If the cardholder attempts to pass through an entry reader twice consecutively, his access will be denied and the system will generate an illegal event when the cardholder’s card is configured as APB enabled. Be careful to enable this function in the system with only single side readers installed somewhere. 38 NAV IP Access controller 5.6.4.10 Card PIN Setting Each card in the NAV Controller is associated with an 8‐digit PIN. The PIN status can be set as enabled or disabled and if enabled, A cardholder is required to input the PIN every time when enters/exit the door if the reader is a keypad reader. At the following submenu, press to enter PIN setting: PIN Setting The PIN status of the current card, i.e., enabled or disabled, will be displayed as shown below. Press to toggle between two statuses. Press to exit. PIN enabled [ENT] to Toggle PIN disabled [ENT] to Toggle 5.6.4.11 Change Card Serial Number Each card in the NAV Controller has a unique serial number, it can be modify. Usually if the cardholder lost the card and doesn’t want to add a new one again, it can be modified from the old serial number to the new one. At the following submenu, press to change card ID: Modify ID The below screen will be shown to prompt users to input new ID. Input new ID: ________ The user can either swipe the card through a system reader to get a new ID, or input it manually. Press to confirm the input of new ID. If input ID already exists, the system will prompt: Card already existed Otherwise, system will show the below information: Card Property Updated Successfully 5.6.4.12 Modify card pin Each card in the NAV Controller system is associated with an 8‐digit PIN. Card PIN can be modified from the below screen. At the following submenu, press enter to Modify Card PIN. Modify PIN 39 NAV IP Access controller Press to prompt to input new PIN, press to repeat new PIN. Input new PIN: ________ Repeat: ________ If repeat PIN is different from first time input, it will prompt, Password mismatch, please retry After modify, it will prompt, Password updated successfully 5.6.5 Show Card Number This function can be used to show the serial number of a card when it is swiped on the system reader. Under Card Setting menu, press three times to bring up the following window: Show Card Number Press and swipe the card on the system reader. The serial number of the card will be displayed as shown below. Press to exit. Registed: No Card#:000006703392 5.7 Door Setting Every door module controls two door relays. NAV Controller can control up to 8 doors in total, defined as door 1 to 8 from right to left. According to reader setting above, users can allocate multiple readers to one single door. User can directly set door unlock time, door held open time and the door control at fire alarm on the controller. 5.7.1 Enter Door Setting Menu Under System menu, press three times to bring up the following window: Door Setting Press to enter Door Setting menu. Use and menu options under Door Setting are introduced below. to choose from different menu options. All 5.7.2 Schedule Switch Setting Door verification indicates the access mode when a cardholder enrolls the card on the reader in order to enter/exit the door, for example, a dual security method could require both card and PIN, or both card and fingerprint. 40 NAV IP Access controller NAV Controller supports a comprehensive door verification schedule on each door. The door verification can be defined individually on a schedule with 10 types of date, 6 time zones on each type of date. If the user just wants to have a consistent access mode all the time every day, schedule switch can be set as OFF to have only one door verification mode, defined in the next section. At the following submenu, press to enter to the setting for door verification schedule: ScheduleSwitch Setting Press to toggle between enable/disable door verification schedules. Press Schedule Enabled [ENT] to toggle to exit. Schedule Disabled [ENT] to toggle 5.7.3 Door Access Mode As described in previous section, NAV Controller will use the controller door access mode if the schedule switch is turned off. NAV Controller supports 13 types of door access modes, for example: always open, card only, fingerprint only and so on. At the following submenu, press to set the controller door access mode: Door Access Mode Before setting the door verification mode, users first have to select the door to be set, refer to the below window: InputDoor Index: _ After the door number is entered, press to toggle among all available door verification modes. The modes followed with a star “*” mark is the currently selected mode. All the door verification modes are listed below: Card Only *Yes Fingerprint Only Card + PIN Card + Fingerprint Fingerprint + PIN Card + PIN + Fingerprint Card or PIN or Fingerprint 41 NAV IP Access controller Fingerprint or Card (Card + PIN) or Fingerprint (Fingerprint or PIN)+ Card (Card or PIN) + Fingerprint (Fingerprint or Card) + PIN Always Unlocked Forbid Access 5.7.4 Open Time Setting This sets the door open time when the card is swiped or request‐to‐exit button is pushed. The default time is 3 seconds. The maximum door open time supported by the controller is 999 minutes and 59 seconds. The door remains open as long as the request‐to‐exit button is pushed down. The door open time does not count until the button is released. In the following submenu: Open Time Setting Press to enter door Open Time setting. Use Door-1 OpenTime 000Min 03 Sec and to choose from different door. Input the desired door open time: enter minutes as a 3‐digit number 0~999, and enter seconds as a 2‐ digit number 0~59. Press to confirm. Press to exit without effecting any change. 5.7.5 Over TimeSetting Door sensor monitors the open/close status of a door. If normally open is not set by the system (door is normally considered closed), then door should close after opening for a while. It is considered abnormal if controller does not receive the door close signal from door sensor in a reasonable amount of time after the door is opened. This time period is called door hold open time or door over time. According to this setting, NAV Controller will determine whether to generate an alarm or not after the door sensor timeouts. The default value of door hold open time is 5 seconds. The maximal door hold open time supported by the controller is 999 minutes and 59 seconds. At the following submenu: Over Time Setting 42 NAV IP Access controller Press to enter Over Time setting. Use and Door-1Over Time 000Min 05 Sec to choose from different door. Input the desired door hold open time in the Open Time field: enter minutes as a 3‐digit number 0~999, and enter seconds as a 2‐digit number 0~59. Press to confirm. Press to exit without effecting any change. 5.8 Reader Setting Card reader properties can be directly set on the controller, including whether the reader is keypad reader, the allocation of readers to doors, and system reader etc. 5.8.1 Enter Reader Setting Menu Under System menu, press twice to bring up the following window: Reader Setting Press to enter Reader Setting menu. Use and to choose from different menu options. All menu options under Reader Setting are introduced below: 5.8.2 System Reader Setting System reader can be used to acquire the card’s serial number when controller configures the card. User can set any reader that connects to the controller as the system reader. At the following submenu: System Reader Setting Press to enter System Reader setting. System will show current status of all readers as shown below. Y means the reader is the system reader, N means it’s not. By default, no reader is set as the system reader. Users have to set it manually. 12345678 NNNNNNNN Press any of the 1‐8 numeric keys to change the system reader setting of corresponding readers. Press to exit. 5.8.3 Keypad Setting Keypad Setting defines whether the reader is a keypad reader. For a keypad reader, if the PIN property of the card is set as enabled, and the access rights of the door are set as card plus PIN, then the user is asked to enter password when the card is swiped on the keypad reader. At the following submenu: Keypad Setting Press to enter keypad setting. System will show keypad setting status of all installed readers. Y means the reader is a keypad reader, and N means the reader is a non‐keypad reader. By default, every 43 NAV IP Access controller reader is set as a non‐keypad reader. Flex controller will display the door number according to the number of installed door modules. In the following example, 4 door modules (8 readers) have been installed on the controller. 12345678 NNNNNNNN Press numeric keys to toggle the keypad setting of corresponding reader. Press to exit without effecting any change. to confirm. Press 5.8.4 Reader to Door Allocation NAV Controller can be flexibly configured. Readers can be allocated to different doors, and can be set as ENTER only or EXIT only. By default, each reader is allocated as ENTER only to the door with the reader’s number. At the following submenu: Reader to Door Allocation Press to enter Reader to Door Allocation setting. System will show the allocation of the first reader to door as following: Reader-1 Door-1-IN Press any of the 1‐8 numeric keys to allocate the current reader to corresponding doors. (This depends on the actual door modules installed on the controller) Press the same numeric key to toggle between ENTER only (IN) and EXIT only (OUT). Press the or to select the different readers. Press to exit. 5.8.5 Reader Backlight Setting At the following submenu: Reader Backlight Setting Press to enter Reader Backlight Setting. As shown below, the system will show if the backlight setting of all readers are turned on or off. Y indicates ON, N indicates OFF. The default setting of backlight is OFF. Note this feature only applies the reader released after Q3, 2010. 12345678 NNNNNNNN Press any of the 1‐8 numeric keys to change the backlight setting of each reader. Press 5.8.6 Set Reader LED or LCD format At the following submenu: 44 to exit. NAV IP Access A contrroller Set Reader R LED or r LCD Format F Press to enter Reader LED/LCD format. As shown below, b the system will display if the showing of all readerss are LCD or LED. Y indicaates LED, N indicates LCD D. The defaultt setting is LC CD. Note format o this featture only app plies the reader released aafter Q3, 2010 0. Reader LED/LCD Se et NNNNN NNNN Press an ny of the 1‐8 n numeric keyss to change th he format settting of each reader. Presss to exiit. NOTTE: LCD form mat will dissplay more information,, include current time, card serial number, employe ee full name (if value is sset), success or failure of current acce ess verificatio on. The scree en of the reader m must be an LC CD, shown ass following: 2010-06-18 FRI 09 9:38 000005398787 Kelly y Verif fy Succeed! If the sccreen of the rreader is LCD, but set the format is LED D, it is shown n as followingg: OPEN 5.8.7 SSet Card FFormat At the fo ollowing subm menu: Set Card C Format Press to enter Card Formatt Setting. As shown below w, the system m will show w what the read ding card n of all readers is. The default d setting of card forrmat is N. Note: this featture only applies the direction reader rreleased afterr Q3, 2010. CardF Format Settin ng NNNNN NNNN Press an ny of the 1‐8 n numeric keyss to change th he format settting of each reader. Presss to exiit. NOTTE: Users do not need to o take care off what is the e detail of thiis reading dirrection. The user just choosess the correctt format when the card serial numb ber shown on o the LCD sscreen matching the numberr printed on tthe card self. 5.9 Alarm Settting NAV Con ntroller is equipped with powerful alaarm functionss. With alarm m modules an nd door modules fully installed d, the controlller can accom mmodate up to 10 alarm inputs and 18 8 alarm outputs. In the meantime, the conttroller also provides a verry flexible con nfiguration. A Any event can be arbitrarrily allocated to single 45 NAV IP Access controller or multiple alarm outputs. Alarm components, configuration basics, and menu settings are introduced below. 5.9.1 Components for Alarm NAV Controller consists of two basic components: one main module and one door module. Users can additionally install three more door modules and one alarm module. These three types of modules are all equipped with alarm function. The main module has 2 alarm inputs and 2 alarm outputs, called Main Alarm Output and Auxiliary Alarm Output respectively. Each door module has 2 alarm outputs, which usually react to alarm events on the corresponding door. However, it can be set to react to other alarm events as well. Alarm outputs on the door module can connect up to 5A external alarm devices. The alarm module has 8 alarm inputs and 8 alarm outputs. 8 alarm inputs can connect to external alarm input devices, such as PIR motion sensor, glass sensor and etc. 8 alarm outputs can connect up to 2A external alarm devices. The above mentioned are physical devices providing alarm functions User can freely define the allocation of any input to any output. The following section outlines basic concepts for events, alarm and configuration. 5.9.2 Alarm Configuration Basics NAV Controller keeps track of all events in the access control system, either legal or illegal, either normal or abnormal. For example, access granted, access denied and so on. Some events are critical which must trigger the alarm output, like the firm alarm input, the zone alarm input and etc. But some events are not that important to trigger the alarm output, like the denied access due to the invalid time. These settings all depend on the users’ requirements. NAV Controller collects all events that might trigger the alarm output and provides the full capacity to enable or disable the alarm output on these events. Sometimes user wants to allocate a particular event to a particular alarm output, or allocate alarm inputs in certain area to multiple alarm outputs. NAV Controller delivers all the function and flexibility user need. User can define whether certain event will trigger an alarm, and can further specify to which alarm output that event is allocated. All events that might trigger an alarm are listed below: Alarm input 0~9, unknown card, expired card, invalid card, invalid door, invalid time, card anti‐pass back fail, card PIN fail, SYS PIN fail, ARM PIN fail, door forced open, door held open, reader lost, and remote alarm. All these events can be allocated to any alarm relay output on main module, door module, and alarm module. The detailed configuration method is introduced in the following section. 5.9.3 Enter Alarm Setting Menu Under System menu, press four times to bring up the following window: 46 NAV IP Access controller Alarm Setting Press to enter Alarm Setting menu. Use and All menu options under Alarm Setting are introduced below: to choose from different menu options. 5.9.4 Alarm Setting Menu Structure There are two submenus under Alarm Setting, as shown below: Alarm Setting Alarm Input Setting Select an alarm input Alarm Input Mode Setting Alarm Output Mode Setting Fire Alarm Setting Alarm Action Setting Alarm Act Setting on Main Module Alarm Act Setting on Door Module Alarm Act Setting on Extern Module Door Action Setting on Fire ArmDelay Time Setting Alarm out Time Setting Event Alarm Setting EventAlarm Time Setting SYS PIN Fail, ARM PIN Fail, … EventAlarm Action Setting SYS PIN Fail, ARM PIN Fail, … Alarm input setting menu is used to configure the settings of the physical alarm inputs on main module and alarm module, including input mode, output mode, fire alarm input, alarm output actions, door behavior under fire alarm, arm delay time, and alarm output duration. Event alarm setting menu is used to configure alarm outputs and output duration for all events on main module and door module. 5.9.5 Alarm Input Setting From the Alarm Setting menu, go to the below window: Alarm Input Setting 47 NAV IP Access controller Press to enter to the alarm input setting, the system will first prompt users to select an alarm input, like the below window. Total 10 alarm inputs (0‐9) available in NAV Controller. Alarm Input ---1 Setting 5.6.4.13 Alarm Input Mode At the above window, press input mode submenu, use to enter to the setting for alarm input #1. The 1st submenu is the alarm and to switch to other submenus. Alarm Input Mode Three alarm input modes are available: N.O., N.C, and Invalid. Press modes. Alarm Input Mode Normally Open mode Alarm Input Mode Normally Close Mode to toggle among the three Alarm Input Mode Invalid N.O. mode indicates the normal status (no alarm input signal) of circuit is disconnected. It will be alarmed if the alarm input is active and the circuit will be closure. N.C. mode is the inversed case of N.O. It means the normal status of circuit is closure. It will be alarmed if the alarm input is active and the circuit will be disconnected. Invalid input indicates the related alarm input is disabled. 5.6.4.14 Alarm Output Mode At the following window, press to configure the alarm output mode Alarm Output Mode There are two alarm output modes: latched mode and transparent mode. Press to toggle between the two modes. Alarm Output Mode Latched Alarm Output Mode Transparent Transparent mode indicates the alarm output will present as long as the alarm input is valid, and alarm output will disappear when the alarm input is invalid. The duration of alarm output is purely controlled by the duration of valid alarm input, not related with the timeout configuration. Latched mode indicates that alarm output can only be triggered by the valid alarm input after the arm delay duration. And the alarm output will be last for the specified alarm timeout duration. 48 NAV IP Access controller 5.6.4.15 Fire Alarm Setting Under the below window, press to configure the fire alarm feature of an alarm input: Fire Alarm Setting Fire alarm setting is used to configure other alarm inputs as the fire alarm input. Fire alarm input does not follow the arm delay time, it has the highest priority. It is triggered as long as the alarm input defined as fire alarm is configured. All 10 alarm inputs can be defined fire alarm input. Fire Alarm Fire alarm input 5.6.4.16 Fire Alarm Other alarm input Alarm Action Setting Alarm Action Setting is used to configure the allocation between the physical alarm input and the output on main module, door module and alarm module. Press to configure alarm action setting when the following window appears. Alarm Action Setting NAV Controller provides total 18 alarm outputs: 2 alarm outputs on main module, 8 alarm outputs on door module, 8 alarm outputs on alarm module. They are allocated in 3 submenus, shown as the below windows: Alarm Act Setting on Main Moudle Alarm Act Setting on Door Moudle Alarm Act Setting on Extern Moudle The first menu is “Alarm Act Setting on Main Module”. Press to enter to the setting, LCD screen shows the current status of the alarm output. Y indicates the alarm output is enabled; N indicates the alarm output is disabled. Alarm act on main YN The main module provides two alarm outputs, press key “1” and “2” to toggle the alarm output 1, 2 ON and OFF Press to switch to “Alarm Act Setting on Door Module” submenu. Press to enter to the setting, LCD screen shows the current status of the alarm relay outputs on the door module. Alarm act on door NNNNNNNN Up to 4 door modules can be installed on the NAV Controller. 2 alarm outputs are available on each door module. As a result, up to 8 alarm outputs can be available if 4 door modules are installed. Press numeric key 1~8 to toggle the alarm output on door module between ON and OFF. 49 NAV IP Access controller Press to switch to “Alarm Act Setting on Extern Module” submenu. Press setting, LCD screen shows the current status of the alarm outputs on alarm module. Alarm act on alarm NNNNNNNN to enter to the One alarm module can be installed on the NAV Controller. 8 alarm outputs are available on alarm module. Press numeric key 1~8 to toggle the alarm output on alarm module between ON and OFF. Note the “Alarm Output on Alarm Module” is only shown when alarm module is installed on the controller. 5.6.4.17 Door Act Setting On Fire The controller allows the user to choose one of two behaviors to occur when a fire alarm is triggered: fail‐safe or fail‐secure. Door fail‐safe at fire alarm means the door will be kept unlocked when there is a fire alarm input. Door fail‐secure at fire alarm means the door will be locked when the fire alarm comes in. In submenu list of “Alarm Input Setting”, press the door behavior at fire alarm: and Door Act Setting on Fire to navigate to the below submenu to set Press to enter to the setting, LCD screen shows the current setting status of the door action when firm alarm is triggered. Door act onfire: NNNNNNNN In the menu shown above, press numeric key 1~8 to toggle the door action between fail‐safe and fail‐ secure. (The numbers correspond to the number of door modules installed in the controller) “Y” indicates fail‐safe; “N” indicates fail‐secure. The default setting for door control at fire alarm is all the doors are fail‐safe, i.e. all the doors will be unlocked during a fire alarm. 5.6.4.18 Arm Delay Time Setting When an arm operation is executed, all active arm zones will enter ARM enabled status only after a certain time delay, which is called ARM delay time. When a card with ARM enabled is swiped to pass a door, system will not generate an alarm within the arm delay period so that cardholder has time to disarm the system. The details to set ARM delay time is as following. And the alarm delay time can be set to different durations. In submenu list of “Alarm Input Setting”, press and to navigate to the below submenu to set the arm delay time: Press to set ARM delay time at the following window: Arm Delay Time Setting 50 NAV IP Access controller System will display the current delay time as shown below. Use numeric keys to input the desired ARM delay time. Enter minutes as a 3‐digit number 0~999 and seconds as a 2‐digit number 0~59. The default value of ARM delay time is 30 seconds. Arm Delay Time 000Min 30Sec Press to confirm. Press to exit without effecting any change. 5.6.4.19 Alarm Out Time Setting As described in alarm input mode, alarm timeout defines the duration of alarm output being presented (alarm relay energized), when triggered by the specified alarm input and if the alarm output mode is configured as “Latched” mode. After the alarm timeout duration, the alarm output will be reset to normal. The default alarm timeout duration is 60 seconds. Note fire alarm has to be manually reset. It does not limited by the alarm timeout duration. alarm time 001Min 00Sec 5.9.6 ALarm Event Setting The physical alarm inputs can trigger alarm outputs. As described in previous section, the logic events, for example, unknown card, invalid card, expired card, invalid door and etc., can trigger the alarm outputs as well. Press at the below window to configure the event alarm setting. Event Alarm Setting Two submenus are included in event alarm setting: event alarm time setting and event alarm action setting, explained in the following sections. The screens of the two settings are shown below: EventAlarm time Setting EventAlarm action Setting 5.6.4.20 Event Alarm Time Setting Press at the screen of “Event Alarm Time Setting” to configure event alarm time setting. As introduced earlier, NAV Controller allows a logical event to trigger an alarm output. The duration of the alarm output can be specified per event type. Different event types can generate the different duration of the alarm output. The default value of event alarm time is 1 minute. The following windows show the event alarm time setting on different events. All events will be explained one by one. SYS PIN Fail 51 NAV IP Access controller Please refer to section “Gain Access to System Configuration” in this chapter. A SYS PIN Fail event will be generated when user enters the PIN to enter system setting and a wrong PIN is entered three times consecutively. The time setting for system PIN failure event is shown in the below figure: SYS Password Fail 000Min 10Sec Press the numeric keys to input the specified alarm time for system password failure. Press confirm and press to discard the change just made. to ARM PIN Fail User is required to enter PIN when pressing ARM key to arm or disarm the system. An ARM PIN Fail event will be generated when a wrong PIN is entered three times consecutively. Please refer to the section “ARM/DISARM”. The time setting for ARM PIN failure event is shown in the below figure: ARM Password Fail 000Min 10Sec Press numeric keys to input the specified alarm time for event of ARM PIN failure Press and press to discard the change just made. to confirm Remote Alarm System administrator can directly generate alarm signal using the Control Software when he observes abnormal condition through surveillance system such as CCTV. This is defined as a Remote Alarm event. The time setting for remote alarm event is shown in the below figure: Remote Alarm 000Min 10Sec Press numeric keys to input the specified alarm time for event of remote alarm. Press and press to discard the change just made. to confirm Unknown Card Unknown card refers to a card that hasn’t been registered in the system. An Unknown Card event will be generated when an unknown card is swiped on the reader. The time setting for unknown card event is shown in the below figure: Unknown Card 000Min 10Sec Press numeric keys to input the specified alarm time for event of unknown card. Press and press to discard the change just made. to confirm Expired Card Any card in the system is usually assigned a valid date. After the valid date has passed, the controller will automatically set the card as an expired card. An expired card cannot gain access to the system. At the same time, an Expired Card event will be generated when an expired card is swiped on the reader. The time setting for expired card event is shown in the below figure: Expired Card 000Min 10Sec 52 NAV IP Access controller Press numeric keys to input the specified alarm time for event of expired card. Press and press to discard the change just made. to confirm Invalid Card To disable a card, user can directly set the card as invalid card. An invalid card cannot gain access to the system. At the same time, an Invalid Card event will be generated when an invalid card is swiped on the reader. The time setting for invalid card event is shown in the below figure: Invalid Card 000Min 10Sec Press numeric keys to input the specified alarm time for event of Invalid Card. Press and press to discard the change just made. to confirm Invalid Door Each door on the controller can be set its own access schedule, when a card is swiped on the reader. An Invalid Door event will be generated when a card is swiped at any door it can’t gain access to system by the access schedule. The time setting for invalid door event is shown in the below figure: Invalid Door 000Min 10Sec Press numeric keys to input the specified alarm time for the event. Press to discard the change just made. to confirm and press Invalid Time Section Each card belongs to an access group. Each group has its own allowed doors and time zones. That is, cards in the group have rights to pass which door at which time. An Invalid Time event will be generated when a card is swiped at any time it does not have right to pass. The time setting for invalid time event is shown in the below figure: Invalid Time 000Min 10Sec Press numeric keys to input the specified alarm time for the event. Press to discard the change just made. to confirm and press Card Anti‐Passback Fail For more info on Anti‐Passback, please refer to section Anti‐Passback (APB) setting in this chapter. A Card Anti‐Passback Fail event will be generated when the APB property of a card is set as enabled and that card is swiped twice consecutively on any enter‐door reader or exit‐door reader. The time setting for card APB fail event is shown in the below figure: APB Failed 000Min 10Sec Press numeric keys to input the specified alarm time for the event. Press to discard the change just made. 53 to confirm and press NAV IP Access controller Card PIN Fail For password setting, please refer to section “Set Card PIN Setting” in this chapter. A Card PIN Fail event will be generated when the card is swiped at the reader and PIN is required to gain access but the cardholder enters wrong PIN three times consecutively. The time setting for card PIN fail event is shown in the below figure: Card PIN Failed 000Min 10Sec Press numeric keys to input the specified alarm time for the event. Press to discard the change just made. to confirm and press Door Forced Open A Door Forced Open event will be generated when controller detects that a door is opened from the door sensor without any legitimate swipe card or door open button push operation taking place. The time setting for door forced open event is shown in the below figure: Door Forced Open 000Min 10Sec Press numeric keys to input the specified alarm time for the event. Press to discard the change just made. to confirm and press Door Held Open A Door Held Open event will be generated when a door is opened by legitimate swipe card or door open button push operation but is still not closed after the “over time” in door setting has elapsed. The time setting for door held open event is shown in the below figure: Door Held Open 000Min 10Sec Press numeric keys to input the specified alarm time for the event. Press to discard the change just made. to confirm and press Reader Lost A Reader Lost event will be generated when controller detects that the reader has no signal. The time setting for reader lost event is shown in the below figure: Reader Lost 000Min 10Sec Press numeric keys to input the specified alarm time for the event. Press to discard the change just made. Panic Open 54 to confirm and press NAV IP Access controller Panic Open alarms are designed to allow users who are forced to enter a building under duress to silently trigger an alarm. When the door’s access schedule is configured as PIN needed, for example: “Card or PIN” or “Card plus PIN”, cardholders can type in their panic PIN to trigger a panic open event in the system. The panic PIN is the cardholder’s original PIN plus any two digits. For example, Sam’s PIN is 12345678. He can type in any two more digits following“12345678” as the panic PIN, such as “1234567800”.The time setting for panic open event is shown in the below figure: Panic Open 000Min 10Sec Press numeric keys to input the specified alarm time for the event. Press to discard the change just made. to confirm and press 5.6.4.21 Press Event Alarm Action Setting at the below screen to configure event alarm action setting. EventAlarm action Setting The event alarm action defines which alarm output can be triggered by the event. As we explained before, NAV Controller can take main modules, up to 4 door modules and 1 alarm module, total 18 alarm output. Users will be able to configure the event to trigger any one or multiple outputs from those 18 alarm outputs. The event alarm action setting includes three submenus, shown in below. Event Alarm action on Main Module Event Alarm action on Door Module Event Alarm action on Alarm Module The alarm output setting on these three screens are the similar. For example, the fire alarm event actions on door module will look like: Door Forced Open YNRNNNN The top line indicates the event to be configured. The bottom line is the setting of alarm outputs on 4 door modules. Y indicates there is alarm output (relay energized) and N indicates there is no alarm output (relay not energized). R refers specifically to alarm output on the door module, indicating that alarm output will be generated only if the event occurs on the corresponding door. The above example means the alarm output relay at door 1 will be energized if door forced open event happens on any door, the alarm output relay at door 2 does not respond to any door forced open event, and same as door 4 to 8. Door 3 indicates the alarm output relay on door 3 will be energized if and only if the door 3 got a forced open event. Note “R” option for alarm output does not apply to alarm module and main module, since they don’t naturally correspond to a door control. In the above menu, press numeric key 1~8 to toggle the alarm output actions of this event on the door module among Y, N, and R (only for door module). Press and to navigate to other alarm action settings. 55 NAV IP Access controller The default setting of all the event alarm actions on main module, door module and alarm modules are all disabled. The event alarm actions for main module and door modules are listed below. Default settings for event alarm actions on alarm module are same as door module, not listed here. Main module Door module SYS Password Fail NN SYS Password Fail NNNNNNN ARM Password Fail NN ARM Password Fail NNNNNNN Remote Alarm NN Remote Alarm NNNNNNN Unknown Card NN Unknown Card NNNNNNN Expired Card NN Expired Card NNNNNNN Inavid Card NN Invalid Card NNNNNNN Invalid Door NN Invalid Door NNNNNNN Invalid Time NN Invalid Time NNNNNNN APB Failed NN APB Failed NNNNNNN Card PIN Failed NN Card PIN Failed NNNNNNN Door Forced Open NN Door Forced Open NNNNNNN Door Held Open NN Door Held Open NNNNNNN Reader Lost NN Reader Lost NNNNNNN Panic Open NN Panic Open NNNNNNN 5.10 Network Setting Correct network settings are needed for NAV Controller to get online and be accessible remotely. Network setting includes DHCP setting, IP address setting. Press five times from main menu items to view the below screen: Network Setting In the above screen, press to enter the network setting submenus. 5.10.1 DHCP Setting DHCP setting is the first submenu under network setting. Press DHCP setting. 56 from the below screen to configure NAV IP Access controller DHCP Setting The below screen will be shown in the DHCP setting submenu. Press key to toggle between DHCP (DHCP enabled) and static IP (DHCP disabled). The default DHCP setting is disabled by default. DHCP Enabled [ENT] to toggle When DHCP is enabled, press to exit and NAV Controller will update the IP address from DHCP server and show the below screen, indicating the controller is getting IP address: Getting IP... After the IP address has been obtained, controller shows the IP address in the below window: IP Address: 192:168:000:106 At this window, press to update the IP address again. Press to exit to “DHCP Setting” window. 5.10.2 Set IP Address For a static IP setting, users need to manually set an IP address. Press Network Setting to set IP address: IP Address: ___:___:___:___ Input the desired IP address and press under the below submenu of to confirm. The default IP address is 192.168.1.200 When using static IP (DHCP disabled), NAV Controller will require the subnet mask and gateway setting automatically after the IP address is set here. Subnet Mask: ___:___:___:___ Input the desired subnet mask and press to confirm. Gateway: ___:___:___:___ Input the desired gateway IP address and press to confirm. 5.11 Address Setting NAV Controller is connected to network for remote accessibility by IP Address, but it must have a unique address for the purpose of communications and control by the Management Software when there is more than one controller. Press six times from main menu items to view the below screen: 57 NAV IP Access controller Address Setting Press to enter to the address setting menu, as shown below: Address Setting 0000 5.12 Arm/Disarm After an alarm module is installed, it defines 10 arm zones for its 10 alarm inputs (including the 2 alarm inputs on main module). NAV Controller can treat alarm inputs in 10 arm zones in a very flexible manner. These 10 arm zones can be armed or disarmed on the controller as described below. 5.12.1 Arm the Systemusing the Controller Keypad User must have the ARM PIN in order to utilize this function. Please refer to the section “Set ARM PIN” in this chapter for instructions on how to set ARM PIN. After system installation, the date and time information will be displayed on the LCD, as shown below: 2009-06-18 THU 09:38 When below: on the keypad is pressed, the system prompts the user to enter a password, as shown Password ______ After entering the password, press to confirm. The default password is 00000000. Once the password is verified, the current system ARM status will be displayed as shown below: System Disarmed [ENT] to Arm Press to arm all active arm zones. The following message is displayed: System Armed [ENT] to Disarm Press to exit. The controller will wait for the period of time defined as “alarm delay” and then arm all active arm zones. 5.12.2 Disarm the Systemusing the Controller Keypad In order to utilize this function, the user must have the ARM PIN and the card must be logged in as ARM enabled. Assuming the system is in armed status, the user swipes the card to access the door. The controller will disarm all active arm zones in arm delay time. For example, if the system is in armed status and a card is presented, the controller will disarm all active arm zones for the amount of time 58 NAV IP Access controller assigned as the arm delay. During this time, no alarm outputs will be generated even if an alarm input is triggered. Similar to the procedure to arm the system, press on the keypad. Input the ARM password and press to confirm. After the password is verified the current system ARM status will be displayed as shown below: System Armed [ENT] to Disarm Press to disarm all active arm zones. The following message is displayed: System Disarmed [ENT] to Arm Press to exit. 5.12.3 Reset Alarm When system is generating an active, ongoing alarm output, follow the procedure below to reset the alarm. At the window showing the system time, press on the keypad. Input the ARM password and press to confirm. After password is verified the following menu window appears: Reset Alarm? [ENT] to Reset Press to clear the alarm. If system is currently armed user will be prompted to disarm the system first. Please refer to previous section for how to disarm the system. 5.12.4 Arm/Disarm the Systemusing aKeypad Reader The whole system can also be armed and disarmed using a keypad reader. (The reader must have an integrated keypad, and the keypad and system reader settings must be enabled on the controller in order to utilize this feature. Please refer to subsection “Reader Setting” for instructions on enabling these features.) The part number for the EverAccess keypad reader is ERK‐871. The user must first enter a command to get into the arm operation mode. (The command is introduced in step 1 below.) In the arm operation mode, the yellow LED on the ERK‐871 will show the four different system modes outlined below: Yellow LED Status OFF ON Flashing Slowly Flashing Quickly System ARM Status Indicates that the system is disarmed Indicates that the system is armed Indicates that the system is in arm delay period Indicates that the system is armed and some alarm input has triggered the alarm output. The steps to arm or disarm the system at a keypad reader are as followed: 59 NAV IP Access controller 1. Press“*” key on the keypad and input 8 digits ARM password, then press “#” key to arm/disarm the system. 2. If the system is in disarmed mode (the yellow LED is OFF), press“#” to arm the system. The system will enter the arm delay period (the yellow LED will slowly flash). If the system is in armed mode (the yellow LED is ON) or in the arm delay period (the yellow LED is flashing slowly), press “#” to disarm the system. Then the system will enter the disarmed mode (the yellow LED will be off). 3. In any system mode, press “*” to exit the arm operation. If no key is pressed for 20 seconds, the reader will automatically log out of the arm operation mode. 5.12.5 Arm/Disarm the Systemusing aLCDReader New model of readers, ERL‐871 in EverAccess series was released to provide a more intuitive user interface to interact with the system. ERL‐871 provides a large LCD to show more information from controller. The steps to arm/disarm system with ERL‐871 are explained below: 1. Press “*” on keypad, input 8 digits ARM password and press “#” to confirm. 2009-02-01 09:38 Input Password: ________ 2. After entered the ARM menu, press “#” key to arm/disarm the system. Press “*” to exit the system. 2009-02-01 09:38 System disarmed [ENT] to toggle 5.13 Use Reader as Keypad Access control system provides a keypad to control a door and approve or deny an access request. NAV Controller provides the same function with the correct setting. To use PIN only to access a door, set the door verification mode as “Card or PIN or fingerprint”, and set the keypad reader with the enabled keypad property. When these setting are all configured right, users can key in the valid card PIN at the keypad reader and press # to gain the access. If the PIN matches the records in the system and the door verification mode allows, the controller will unlock the door. Take the operation on ERL871 LCD keypad reader as example, the steps to use PIN only to access are listed below: 1. Press any numeric key on ERL871 keypad, the below screen will show and the first inputted key will be stored there already: 60 NAV IP Access controller 2009-02-01 09:38 Input password: *_______ 2. Press “#” key to confirm the inputted PIN. If the PIN is verified OK, the below screen will be shown. If PIN retry failed 3 times, system will show “ERR” on screen and return to the main page of ERL871. 2009-02-01 09:38 ******** Access Granted 61 NAV IP Access controller Chapter 6. Software Introduction 6 6.1 Main Feature EverAccess® NAV Controller not only can do basic setting configurations on it, but also can login through the browser (Here and later referred to as “Software”) for system setting configurations. NAV Controller can manage EverAccess Flex I/II/Fingerprint series controller, and also store and maintain the system data. It provides the basic attendance function based on the stored data. In the browser, the user can configure EverAccess CCTV products, to achieve access control and monitor linkage function. The Software interface contains clearly defined functional modules. Windows‐based structure design facilitates effective management. The main interface provides an over view of operation options and graphical toolbar allows a more intuitive operation. The Software offers different levels of operation authority to prevent unauthorized access. User name and password is required to login to the Software. The system database is encrypted. User setting is designed to distinguish users with different operation authorities. Users belonging to different authority groups have different operating privileges in the Software. In addition, endures PIN access and multi‐card access enhances the efficacy as well as the security of the access control system. 6.2 Hightlight Performance Overview Manage different Series Controllers Support ELA890, Flex I, Flex II Access controllers. Supports accessory Hardware Support Desktop reader, USB card reader, fingerprint scanner etc. Support multiple operating system platforms Compatible with Windows2000 operating system or higher. Good user interface design, easy to operate Vista‐style user interface New icon design Database Management Support for FTP, the local database backup, restore function 62 NAV IP Access controller Supports Multiple Language Mode Support Chinese, English, Russian Software Features Real‐time monitoring of controllers, doors, arm zones, alarm input/output and fire alarm on electrical maps, allowing operators to directly monitor system status and responds accordingly. Support remote control of controllers, doors, arm zones and alarms. Support endures PIN access and multi‐card access. Size of operating windows and panels can be adjusted. Simple and practical attendance management. 6.3 Baseon TCP/IP Access Conttrol System Architecture Figure0‐1System Architecture Diagram 63 NAV IP Access controller Chapter 7 7. Start to Use This chapter introduces how to quickly setting EverAccess® NAV Controller as a super administrator and use the controller to control doors and collect attendance records and CCTV linkage function through browser. Please follow the steps to get familiar with the software. For a more comprehensive understanding of each function, refer chapters on related topics. 7.1 Quick Start 7.1.1 Add and Configure Controller In the main interface, click “Access Control” “Controller” “Controller Setting” enter to controller setting page. The steps to add a controller shown as following (the detail refers to 12.1.1). Steps: 1) Click the “Add” button, input controller mode number, location and address. 2) Click the “Save” button. Set Access Rule 7.1.2.1 Set Date Click on the menu bar “Access Control” “Access Rule” “Date Type”, enter to date type page. Below is how to add a date type (Detail setting see 13.1.1) Steps: 1) 2) 3) 4) 5) Select recurrent type. Select the date in calendar. Select date type Input the date remark. Click the “Save” button. 64 NAV IP Access controller 7.1.2.2 Set door schedule Please set door schedule before distribute different schedules to each door. Click on the menu bar “Access Control” “Access Rule” “Door Schedule”, enter to the door schedule setting page. Below is how to set a door schedule (Detail setting sees 13.4.1). Steps: 1) Click the “Add” button. 2) Input the name of new schedule in the text box. 3) Click modify schedule, in the pop‐up dialog box to set time and the door area authentication, save and then close the dialog box. 4) Click “Save” and save the completed plan. 7.1.2.3 Set Access Door Click on the menu bar “Access Control” “Access Rule” “Access Door”, enter Access Door Setting page. (Detail please sees 13.5) Steps: 1) Select a door schedule for each door location of controller. 2) Completed setting of door schedule for each door, click the “Save” button and system will prompt a pop‐up window “modified successfully”. 3) Click the “Confirm” to finish the setting for Door Access. 7.1.2.4 Set Group Schedule Click on the menu bar “Access Control” “Access Rule” “Group Schedule”, enter Group Schedule Setting page. Bellow is how to add a group schedule (Detail setting please sees 13.2.1). Steps: 1) In the “Schedule Name” text box, input the new schedule name. 2) Click the time period under the “Day setting”, pop‐up dialog box where the user can modify the schedule and entry mode. 3) After modify schedules, click the “Save” button and the new schedule will be added to the access group schedule list. 7.1.2.5 Set access group Click on the menu bar “Access Control” “Access Rule” “Access Group”, enter Access Group Setting page. Bellow is how to add an access group (Detail please sees 13.3.1). Steps: 1) In the access group text box, input the name of new group. 2) Select different door location of different controller, lock level and door access schedule. 3) After completed all the setting of each controller, click the “Save” button. 65 NAV IP Access controller 7.1.3 A Varietyof WaystoAdd Cards Software provides a variety ways to add the card to the system. Users can choose any way to achieve this functionality. The follow describes how to add a separate card and the allocation of the corresponding control groups. Access group’s default is “Full Granted”; default password is “000000”. First select the card format users want to add. 7.1.3.1Quick add card When the user has logged in software, swipes card on the controller, then swiped card recording shown in the system event log, this time can through copying. (Detail sees 7.3.5.1). Steps: 1) Add new card through the reader. 2) Log in software, in the system event records (Records of Normal card access and illegal card access); it will show card number, copy the card number. 3) Select the correct card format. 4) Go to “Cardholder” page to add a new card. Click “Save”. 7.1.3.2 Card Setting Interface Click on the menu bar “Access Control” “Card” “Card Setting”, enter to cards setting. Below is how to add a card and the allocation of access groups. (Detail sees 14.2.1). Steps: 1) In “Card Type Setting” page, select the card format. 2) Click the “Add” button and enter to the Card Setting Page. 3) Fill out all properties of card. 4) If a cardholder name has been added, the card can be assigned to the cardholder. 5) Select an access group for the card. 6) Select card private schedule. When the card applies the private schedule, it will follow private schedule to verify enter and exit. 7) Click the “save” button and setting completed. 7.1.3.3 Import Cards Using Excel File In Excel, edit the card data (no quantitative restrictions), save as CSV file to import the card through software features to complete the registration card to the controller (whether registered to the controller of this card depends on the access group setting, if there is no choice access group options, they are given the default access group “Full Granted”). Click on the menu bar “Access Control” “Card”“Import Card” Steps: 1) Click the “Browse” button, select the Excel file to be imported, click the “Next”. 66 NAV IP Access controller 2) Select the relevant column name corresponds to the value. 3) Click “Import” button and add completed. 7.1.4 Setup Departemnt and Cardholder 7.1.4.1 Set Department Click on the menu bar “System” “Cardholder” “Department Setting”, enter to Department Setting page. Here’s how to add a new department (Detail sees 9.1.1 Add department). Steps: 1) Click the “Add” button. 2) Fill out department name 3) Select the parent department 4) Click “save” and setting completed. 7.1.4.2 Add Card Holder Click on the menu bar “System” “Cardholder” “Cardholder Setting”, enter to Cardholder Setting page. Here’s how to add a cardholder (Detail sees 9.2.1). Step: 1) Click the “Add” button, pop‐up a page to add cardholder. 2) Fill out employee number, name, department, and other information, upload photos. 3) Here can add a new card to the cardholder. 4) Click “Save” button and completed. 7.1.5 Configuration and Attendance 7.1.5.1 Set Attendance Time Click on the menu bar “Attendance” “Basic Setting”. Select a menu for different attendance day type. Bellow is how to edit a day type (Detail setting please sees 16.1). Steps: 1) Select a day type menu, enter to the page. 2) Select a department and edit. 3) Click the “Save” button. 7.1.5.2 No-Access-Attendance Click on the menu bar “Attendance” “Attendance Exception” “No‐Access‐Attendance”. Below is how to add a no‐access‐attendance enrollment for a cardholder (Detail please sees 17.1.1). 67 NAV IP Access controller Steps: 1) Click the “Add” button. 2) Select a cardholder form the list, select the time and other information. 3) Click the “Save” button. 7.1.5.3 Time-off Enroll Click on the menu bar “Attendance” “Attendance Exception” “Time‐off Enroll”, enter to time‐off page. Here’s how to add a time‐off enrollment for a cardholder (Detail setting please sees 17.2.1) Steps: 1) Click the “Add” button. 2) Select a cardholder form the list, select the time and other information. 3) Click the “Save” button. 7.1.5.4 Overtime Enroll Click on the menu bar “Attendance” “Attendance Exception” “Overtime Enroll”, enter to Overtime page. Here’s how to add an overtime enrollment for a cardholder (Detail please sees 17.3.1). Steps: 1) Click the “Add” button. 2) Select a cardholder form the list, select the time and other information. 3) Click the “Save” button. 7.1.6 Real‐time Monitoring Click on the menu bar “System” “Real‐time monitoring” “Real‐time Event”, enter to the Real‐time Event page. The upper page displays current the real‐time status of the electronic map. User can select different map in the map list on the left hand side of the page. On the bottom page, it displays current real‐time status. User can click to check the detail. 7.1.7 Export Function Most of the system function modules are provided “Export” feature on the page, click the “Export” button, pop‐up dialog box to save the document, the page information in CSV format for export, shown as following: 68 NAV IP Access A contrroller F Figure7‐1Expor rt Click thee “Save” button; select a p path to save tthe exported document, sshown as follo owing: Figure7‐2Savee Select th he path and cclick “Save” b button, exporrt CSV formatt file to complete. !N Note: If the excel file conttains Chinese e, you need tto convert the file, if open n the file dire ectly, the Chinese e characters are garbled display. Eacch file conve ersions of the import/exxport functio on in the system please refer tto the follow wing method,, and it will n not repeat. eps: Ste 1) Right‐clickk the saved CSV file, seelect “Edit” in the drop p‐down men nu. 2) The system default, use Notepaad to open tthe file, clickk “file” in th he menu baar and wn as follow wing: click “Save As”, show Figure 7‐3 Convert the Exxported File 3) In the dialog box, sellect Save ass type “All Files”, selectt encoding ““UTF‐8”. 69 NAV V IP Access controller c 4) Click the ““Save” buttton, the con nversion is ccompleted. 5) Open the converted file via Exceel, the Chinese displayss properly. 7.1.8 P Print Funcction Most of f the system ffunction mod dules are pro ovided “Print”” feature on the page, clicck the “Print”” button, o the printingg page (Figuree 7‐4). The system on the e operation o of printing feeatures are th he same, enter to will not repeat . Figure7‐5 5Print Users’ Inf nformation 7.2 Lo ogin Open a browser and type IP addrress in the ad ddress bar, if setting of co ontroller is still factory settting, the 92.168.1.200 0. According tto the page yyou are prom mpted, input tthe login default controller IP address is 19 password and d verification code, and then click “Logiin” button, sh hown in Figurre 7‐6: name, p Fig gure 7‐7Login P Page Upper riight corner o of the page caan choose to the language e, NAV Controller supportt Chinese, English and Russian.. 70 NAV IP Access A contrroller Thee default lo ogin setting shown as fo ollowing: User Name: admin Passsword: admin Notte: admin is aa special “sup per administrrator”, it is used for systeem installation and recove ery setup for main n purpose, itss possession aall the rights does not chaange. The useer cannot be deleted and just only change the password d. Please loggin first to maake amendm ment and rem member the p passwords in order to ensure tthe security. Modify the super ad dministrator password through the menu m “System m” “Basic Setting” “Change word. Super Administrato A or through th he menu “Baasic Setting” “User Passworrd” to changge the passw Setting” “Add” to o create users and changee the new user’s group. Iff other users have been rremoved, nistrator’s password is lost, will not be able to login n the softwaree. also the super‐admin ogin page, enter a user name and passsword, choose e whether “ccentral serverr user login” aand then In the lo click “Lo ogin” button, enter to the NAV Controller’s browserr page. If the usser name or p password inputs in error, it will promptt pop up “illeggally logged””, shown as fo ollowing Figu ure7‐8Illegal Lo ogin 7.3 Faamiliar w with the B Browser Page 7.3.1 M Main Pagee Introducction Using hu umanized dessign concept to ensure th hat users get started. Enteer to the hom me page. Pleasse see as following: 71 NAV V IP Access controller c Menu Loginn info P Pannel M Map Electronics map reealE tiime display device Systeem event display Fig gure 7‐9Main P Page 7.3.2 M Menus There are a 4 main menus m in thee software, including System, Accesss Control, Atttendance and CCTV (Figure7 7‐11). Click on n each main m menu will sho ow its sub‐menu options. Click on each h sub‐menu w will open a corresponding funcction, the speecific featuress in later chapter for detail. F Figure7‐10Men nu If the loggged‐on userr does not have access to a module fun nction, then tthe feature does not appe ear in the menu baar. 7.3.3 C Control Paannel Click thee “Control Paanel” and “Deevice List” are hidden (Figgure 7‐9). Wh hen the user click the buttton area or double‐click the hidden area, itt will show th he control panel and devicce list on the main interface. 72 NAV IP Access A contrroller Click the butto on to display the list. l F Figure 7‐11Hide e the Left Side of Control Pan nel 7.3.3.1 1 Electronic Map lis st This areea shows the complete seetting of elecctronic map sstructure in tthe software (Figure 7‐10 0). Please refer to 10.2 for detaail of adding, deleting and revising of electronic map. Figuree 7‐12Electroniic Map 7.3.3.2 2 Device List L This areea displays effective e devvices which have been configured c b the softw by ware (Figure 7‐11). If controlleer have been n added or deeleted or revissed, it will be e showed in this area. 73 NAV IP Access controller Figure 7‐13Device List 7.3.4 Real‐time Monitoring This feature displays real‐time electronic map status, the user can click on “Electronic list” to switch different electronics maps and keep track system state. For more detail about adding, revising and deleting of electronic map, please refer to 10.2) 7.3.5 System Event Record This area displays system in the region records of all incidents, including access granted, access denied, operation record, alarm record, other record. There is a bar on the top of the record panel, use this bar to adjust the size of the panel. Adjust the Size of the Records Panel Figure 7‐14 Adjust the Size of Panel 7.3.5.1 Access Granted This type is including: normal access record, access by card’s password and access by APB Violation. Each record is including: event time, cardholder, door location, entry/exit, controller and card number. Select one record, the cardholder information will be shown on right hand side panel. Figure 7‐15 Access Granted 74 NAV IP Access controller 7.3.5.2 Access Denied This type is including: Unknown card, Expired card, Invalid card, Password retry failed, Enter with panic PIN, Insufficient multi‐card access, Invalid time,. Invalid door, APB fails, No PIN inputted, Man trap violation, Access denied due to unknown card PIN. Each record is including: event time, cardholder, door location, entry/exit, controller, card number and description. Figure7‐16 Access Denied 7.3.5.3 Operation Record User remote control, Armed/disarm, reset alarm, press button open, interlock etc. Operation control record is including: event time, location, controller and event. Figure 7‐17 Operation Record 7.3.5.4 Alarm Record The type include: zone alarm, fire alarm, system password error, zone password error, tamper alarm, remote alarm, forced open door, panic open door, open door overtime and reader lose Alarm event record is including: event time, location, controller and event. Figure 7‐18Alarm Record 7.3.5.5 Other Record In the system, other records which related to the controller setting, including: event loss, power‐down, add reader, controller on line, controller off line and controller power‐up. System setting record is including: event time, location, controller and event. 75 NAV IP Access controller Figure 7‐19Other Record 76 NAV IP Access controller Chapter 8 8. Basic Setting This chapter will introduce basic setting of EverAccess® NAV Controller. It is including change password, user groups setting, user setting, local server configuration, system upgrade and center server configuration. Change Password: revise login password. User Groups setting: add, delete and modify the software and permission groups. No limit on their number, the user can add permissions groups as needed. User setting: add, delete and modify the users operate the software. The default administrator is admin. It has all operating privileges, only modify the password of super administrator. Local sever configuration:Configure IP type, address, gateway, date, time and so on. System Update: upgrade online and upgrade local. Center server configuration: center server configuration refers to the “ENS2000 NAV series WEB Network Access Control Management software” (not the built‐in software) address and password configuration etc. The configured controller can be used as a sub‐station to be connected and managed to the ENS2000 software. 8.1 Change Password Here Password is for the current user logging to NAV Controller built‐in browser software, it just only modify its login password. First of all, the user must input the old password, then enter and repeat the new password. Click the “Save” button to save. If the input is wrong, user can use the “Reset” button to refill. Figure 8‐1Change Password 77 NAV V IP Access controller c 8.2 Seet User G Group and User In this syystem, a userr means a person to operaate the softw ware, becausee of permissio ons used for different pages w will be differen nt. Each userr is defined byy the four kin nds of attribu utes: name, lo ogin name, password, user gro oup. “Name” means userr’s real namee. “Login Naame” is the user login to o the system m is required d to type pe a passworrd. “User Gro oup” will intrroduce in identity.. “Password”” is the system login is required to typ the follo owing. Notte: The “user” and “Card dholder” are different. Cardholder is the person accesses the e control systemss (such as th he company’’s normal sttaff). User iss the person n through op perating softtware to monitorr or configure e the access ccontrol syste em. The useers in the saame group operate o the software resstricted levell. Different ggroup have different restrictio on on the sofftware operation. Click on the menu b bar “System” “Basic seetting” “User Group”, enter to user group settiing page. oups setting p please see 8.3 3. User gro First entter to the “Usser Groups” p page. The sysstem has thre ee initial groups. Default 3 kinds of grroups are sysstem adminisstrator, manaager, commo on user. Therre is no user limit for oup. each gro System administrato or: Users can n use all featu ures of this so oftware systeem, includingg: basic manaagement, personn nel management, access control, attendance managgement, dataabase manageement etc. Manage er:Users can n use all featu ures of this so oftware syste em except baasic setting. Common user:Useers can use all a features of o this softwaare system except e basic setting and database d management. The following table lists the specific functio on of each group; g “√” indicates that the functtions are availablee in the group. Fun nction System Ch hange Passw word Useer Groups seetting User Settin ng Local Serveer S System Upd ate Center Servver Dep partment Seetting Cardholder Seetting Import Cardho older R Real‐time Ev vent Edit Electronicc Map Cardholder Reeport Data Backu up system aadministrattor √ √ √ √ √ √ √ √ √ √ √ √ √ 78 manager common user √ √ √ √ √ √ √ √ √ √ √ √ NAV IP Access A contrroller Acccess Data Recoveery D Pu urge Out‐of‐‐date Data Co ontroller Setting Dataa Download d to the Controller Daate Type Settting Acccess Door Seetting Door Schedule SSetting √ √ √ √ √ √ √ √ √ √ √ √ √ √ Access Grou A up Setting Group Schedule Setting Card Type Setting Card Seetting Import Card Card Reeport Card‐dependent Even nt Card‐indep pendent Even nt Workingg Day Weekeend Speciall Day No‐Acccess‐ Attendance Time‐off f Enroll Overtimee Enroll Atte endance Original A Access Reco ord R Report By Ca ardholder Statisticcs by Cardho older Statisticcs by Departm ment DVR Seetting View Seetting C CCTV Multi‐View w Setting Linkage Mo onitoring √ √ √ √ √ √ √ √ √ √ √ √ √ √ √ √ √ √ √ √ √ √ √ √ √ √ √ √ √ √ √ √ √ √ √ √ √ √ √ √ √ √ √ √ √ √ √ √ √ √ √ √ √ √ √ Figure8‐1FFeature List of EEach Group The e group “systtem administtrator” canno ot be edited or deleted. The other tw wo group gro oups can be edite ed or deleted d. 79 NAV V IP Access controller c 8.3 User Grou up User gro oups setting page, on thee left shows tthe current u user group lisst (Figure 8‐2 2). If the userr has the authoritty to set the u user group seetting, then caan create, mo odify, and deelete any grou up. Figu ure 8‐2User Gro oups 8.3.1 A Add A Gro oup Click thee “New” buttton on the to op of the settting page. Inp put the new ggroup name in the “Group Name” box. Check the operation detail of the user group’s authority, editin ng is compleeted, click the “Save” button. 8.3.2 EEdit A Gro oup Select a user group tto modify on n the left han nd side of the e setting pagee. The user ccan edit the aauthority group naame and opeeration details. After edit ffinished, clickk the “Save” b button. 8.3.3 D Delete A G Group Users caan select the permissions group to delete on the permission gro oup list. Clickk the “delete”” button, system w will ask confirm the deletee (Figure 8‐4)). After click ““OK”, Deletio on is completeed. NO OTE: A user group usingg by users ccannot be d deleted. 80 NAV IP Access A contrroller Figure 8‐3 C Confirm to Dellete a Group 8.4 User Setting Users seetting means create, modify and delette users, speccify the user group. The u user is actually talking about heere refers to the softwaree can log on aand use the account, and d different from m the employyee. User is includ ding login nam me, password d, user group p, user names and other information. Default supe er‐user is “admin””, and belonggs to “system administrato or”. Super‐use er cannot be deleted. Click thee menu “Sysstem” “Baasic Setting” “User Se etting”, enteer to the useers setting, shown s as following: Eddit Area Users Info Figu ure8‐4User Settting 8.4.1 A Add A Useer Click on “Add” butto on, pop‐up Ad dd User pagee (Figure 8‐6). Enter login name, user name, and password. he group nam me, click the ““Save” button n, a new userr is added to tthe user list. Select th Fig gure8‐5Add a U User Login naame: the nam me for user lo ogin and use tthe software that can be m made by num mbers, letterss, spaces, Chinese characters aand characterrs can be disp played any co ombination o of up to a maaximum 20‐biits, every bit. Login nam me are case‐sensitive lette ers. It cannot be same as the existing o ones and characteer counts 1 b not be eempty. If the user enters o one already eexisted, the syystem will be prompted. User name: user real name, it is u used to facilittate system m management,, must be filleed. 81 NAV V IP Access controller c Passworrd: can be nu umbers, letteers, spaces, Chinese characters and oth her characterrs can be disp plays any combinaation of up to o 20‐bits, every character counts to1 bit. The letter is case‐sensittive password. Repeat: password must m be entered with the same content, if two‐tim mes input aree inconsisten nt will be o not match””. prompteed “Input thee password do User gro oup: the grou up that the u user belongs. The user can n be assigned d a new user to any group p, system administter group can n operate all functional module. 8.4.2 EEditA Userr Select a user to be m modified, clicck the “Edit” button, pop‐‐up Edit user box (Figure 8‐7). The use er’s login name, user u name, password, p and d user group ps can be mo odified. If useer wants to rreset the use er’s login passworrd, check thee “reset” buttton and editt. After edit finished, clicck the “Save”” button, the e system returns “Operation successfully” box. If no chaanges to makke, click “Canccel” button to o return to th he “users setting” page. Fig gure8‐6Edit a U User 8.4.3 D Delete A U User Select a user to be d deleted, click the “Delete”” button, the system will pop‐up a boxx to confirm “Are you sure to d delete?”, click “OK” mean ns delete, deleete operation n is completee. No ote: The deffault user ““admin” can nnot be deleted. 8.4.4 EExport Useers Click thee “Export” bu utton, system m will pop‐up p a save box, all users’ in nformation in n order to exxport the CSV form mat, select th he path to savve the docum ment, click “OK” to confirm m. Please refeer to 7.1.7 forr detail. 8.4.5 P Print Userrs Click thee “Print” buttton, enter to the printed p page. Please rrefer to 7.1.8 8 for detail. 82 NAV IP Access A contrroller 8.4.6 SSearch Users Type the conditions of the correesponding co ontent into th he search bo ox, and click the “Search”” button, such as system has meet the reequirements of informatio on will be displayed in th he bottom of the list (Figure 8 8‐8). When th he search is ccompleted, click “All” to go o back to thee users settingg page. Note: “Search h” means prrecise queriies. Figu ure 8‐7Search U Users 8.5 Lo ocal Servver The locaal server conffiguration can n be set to the controller ccurrently loggged IP, time, date and tim me zone. In system m main menu u, click “Systeem” “Basicc Setting”“LLocal Server”, shown as fo ollowing: Figu ure8‐8Local Seerver Select th he static or d dynamic IP tyype, input thee IP, subnet m mask and gatteway, click tthe “Save” button, as below picture. Continue to click “OK K”, according to the reviseed IP address to log back ccontroller. Click “Reeset” button will display the network ssetting on the e page input box. Click “Lo ocal time” bu utton and make controllerr time and loccal time syncchronization. Users can alsso set up the timee as needed. Click “Set” bu utton to savee users’ time ssetting. 83 NAV V IP Access controller c Choose time zone, click the “Set” button to co omplete the time zone settting. 8.6 Syystem Up pgrade The firm mware of conttroller and built‐in softwaare can be up pgraded to th he latest version as the usser needs by the o operation. Theere are two w ways includin ng remote on‐‐line system update and lo ocal update. Click sysstem main m menu “System m” →“Basic Setting” →“Syystem Upgrade”, enter to o the system upgrade page, ass following (Figure 8‐10), tthe default en ntry is online upgrade pagge. Figurre8‐9Online Up pgrade 8.6.1 U Upgrade O Online Upgradee by inputtingg the IP addrress and acco ount of remo ote FTP or HTTTP server an nd account. Input the accuratee address and d account number. Click th he “Update” button. After finished, pleease log in aggain. 8.6.2 U Upgrade LLocal Using th he upgrade paackage provid ded by the seervice to do lo ocal upgrade. Click the “Browse” butto on, select the packkage, and clicck the “upload” button. Affter complete ed, please logg in again. Figurre8‐10Local Up pgrade 84 NAV IP Access A contrroller Cha apter 9 9. Cardho C older This chaapter introdu uces EverAcceess® NAV Co ontroller’s carrdholder management, in ncluding: dep partment setting, cardholder setting and im mport cardholder. ment setting:: Set the depaartment inforrmation. Departm Cardholder setting: Set employeee number, full name, department d a other baasic informattion, and and or more cardss, set its prop perties etc. employeees can be asssigned one o Import ccardholder: tthe edited CSSV (Excel) form mat file to im mport into thee controller. 9.1 Departmeent Settin ng Click on n the menu bar b “System”” “Cardho older” “De epartment Setting”, enteer to the dep partment setting p page, shown as following: Figure9 9‐1Departmentt Setting The left side panel is a tree show wing the com mpany’s organizational structure (all d departments)). On the de of page show all the ch hild departmeents of the se elected node in the tree. User can add d, modify right sid and deleete a departm ment on the rright side. Aftter completed d, system will automatically save. Set the department’’ detail inforrmation. Orgaanizational sttructure is divided d into tthree layers, the first layer is ccompany, thee second layeer is department and the tthird layer is ggroup. 9.1.1 A Add A Dep partment Click “Ad dd” button, ssystem will po op‐up a window, shown as following: 85 NAV V IP Access controller c Figure9 9‐2Add a Depa artment Input th he departmen nt name, click the “High level” input b box to select the parent d department. SSave and back to department ssetting page. Departm ment names cannot be reepeated if they are in the e same level and it is sugggestion thatt not use existing name in the other level fo or the new one. 9.1.2 EEdit A Dep partment Select a department and click “Ed dit” and modiify department informatio on,see Figure 9‐3: Figure9 9‐3Edit a Depa artment Enter department name n in thee input box, click the department d w which is parent of currrent edit departm ment, and through modify the parent d department to change currrent edit dep partment’s le evel. Click “Save” aand return to o the departm ment setting p page. 9.1.3 D Delete A D Department Select th he department that need to be delete,, and click “Delete”,see Figure 9‐4: Figure9‐4Conf nfirm to Delete a Departmentt Click thee “OK” button n, it will be deeleted and itss corresponding node willl be deleted ffrom the tree e. Note: Caannot delete e a department with lowe er level deparrtments, show wn as follow wing: 86 NAV IP Access A contrroller F Figure9‐5 A Dep partment with Lower Level D Departments ca annot be Deleteed 9.2 Caardholdeer Settingg Click on the menu bar “System” “Basic settting” “Caardholder” “Cardholdeer Basic Inforrmation”, o the cardhold der informatiion page, sho own as follow wing: enter to Figure9 9‐6 Cardholderr Setting The upp per of the pagge is query area, the middle is operatin ng area and th he lower is th he detail. At the top t right sidee of the opeerating area, users can se et the quanttity of cardho olders per page. The system d default valuee is 20 record ds. In addition n, flip button, jump button will help ussers quickly rreach the page theey want. Pleaase see Figuree 9‐7 Figurre9‐7 Operation n Area 9.2.1 A Add ACard dholder Click thee “Add” butto on, system po op‐up new caardholder’s detail page, sh hown as following: 87 NAV V IP Access controller c Figuree9‐8Add a Card dholder 1) Cardholder In nformation Area: This aarea is setting cardhold der’s basic iinformation n. Employeee number: can be any printable ch haracter, it iss a unique number n for aa cardholderr. If new memberr joined, the new number cannot be ssame as existting number.. System will prompt “Faiil to save the emp ployee”. Figure9‐9FFail to save thee employee Name: cardho older’s real name. Sexx: the system default ssetting is “M Male”. Department: cclick to choose the dep partment th hat new employee will belong to. on date: when click thee input box, will pop‐up p the calend dar box. Cho oose Join/Demissio the datte. Figure 9‐10 0Pop‐up the Ca alendar Box 88 NAV IP Access A contrroller Photo: Click th he “Browse” button, po op‐up the w window to cchoose the uploading p photo, select o one and clicck the “Uplo oad” button n to upload to the systeem. eps: Ste 1) Select a p picture uplo oad: Click th he “Browse”” button, lo ocate the ph hoto to be uploaded d, make sure the size m must be not more than 2M. 2) Upload fiiles: After a photo is seelected, click the “Uplo oad file” buttton. has been up ploaded, the file name will be liste ed 3) Photo naame: When the photo h there. ! Note: Emplo oyee numbe er and name e is require ed, the othe er is not, bu ut it is sugge estion mpleted the detail in orrder to que ery more inttuitive disp play of inforrmation. that the user com n is assigningg one or mo ore cards fo or the emplo oyee, 2) Card informattion area:This region d set the reelevant prop perties of th he cards. and The areaa is associating current eemployees wiith the cardss. Input the aassociated cards’ serial nu umber (a string off number or ssymbols printed on the m most cards), o or connect ER RU Series USB B desktop reaader (see ERU seriies hardwaree manual) and d fill the card serial numbe er by swipingg card automaatically. Card forrmat: There aare three carrd formats in n the system, decimal, hexxadecimal an nd NNN‐NNN NN. Users need to choose the correct card form mat before adding thee card in the menu “Access “Card type”.. Control””“Cards” Add a Card: Input the serial number and clickk the “Save Card” button, it will be savved. A cardho older can one or more ccards. If the number is saame as existin ng one in thee system, it w will prompt ““The card assign o was beeen assigned to o others, mod dify it?” show wn as followin ng: Fig gure 9‐11Assig gned to other ccardholder’s Ca ard Delete aan assigned C Card: Select one first, click the “Remove e Card” butto on, the card w will be removved. Notte: This operaation is real‐ttime processsing. All the properties of a card arre showing as followingg, check thee check boxx of the item m to enable and unchecck to disable: eck the check box to en nable the caard. Card vaalid: whetheer the regisstered card is valid. Che The oth her card pro operties will work onlyy if the card is enabled. Swiping a ccard that is not registered with the controllerr generates an “unknow wn card” reecord. Swiping a card that is registered but disaabled generrates an “invalid card” record. First Caard: whetheer the card iis a “first‐caard” that can trigger un nlock in doo or setting (refer to door seetting) and ““first‐card‐iin” function n in controller setting (refer to system settingg). For 89 NAV V IP Access controller c examplle, suppose door 1 und der controller 0001 is sset to “unlocck” in time zone 9:00‐1 11:00. During this time period, swiping a first‐card enabled d card unloccks the doo or. In additio on, if “first‐caard‐in” funcction is enabled for con ntroller 000 01, only afteer a first‐carrd enabled card has beeen presenteed to a read der under co ontroller 00 001, will oth her first‐card d disabled ccards be ablee to unlock tthe door, evven though those first‐‐card disablled cards saatisfy all oth her conditions to unlo ock the doorr holder has tthe right to arm/disarm m the system m on a keyp pad Arm vaalid: whetheer the cardh reader.. When an aarm enabled d card is preesented to the reader, the system m will be disarmed for a tim me period sso that the ccardholder can enter/e exit the arm m zone without triggeriing an alarm. This time period is deffined by arm m delay time e in the systtem. APB Vaalid: whetheer anti‐passsback (APB) is enabled for the card d. If APB_EN N is enabled d for a card, an nd the conttroller APB ffunction is eenabled, the APB settin ng is in effeect for the card. Refer to o Anti‐Passback (APB) setting for details Passwo ord status: C Cardholder can set up an 8‐digit d door passwo ord for NAV V Controllerr. To enable//disable, usse functionss in door settting, access authority setting or ccard schedu ule setting. Notte: if need to o use passworrd feature, th he reader mu ust to be a ke eypad readerr. Panic Piin: it is used when the cardholder wass under duresss and only w work when th he door zone e is set to passworrd required. It is 2‐digit numbers. When uses Paniic pin, input tthe normal ffirst 6‐digit password, and then n input 2‐digiit panic pin. A Alarm will occcur when it confirm, also d door open. Expire date: whether the card d has an expiration datte. If Card EExpiration iss checked, tthe card within the eexpiration date. An exp pired card caannot gain aaccess to th he can onlly be used w system and an “exxpired card”” event will be generated if an exp pired card iss swiped on n a reader.. The time sset in the exxpiration daate is the en nd of the expiration datte. It can be e accuratte to minutee. Card Scchedule: reffers to the vverification mode for ccardholderss to enter/exit doors. C Card schedu ule setting iss shared witth access grroup schedu ule setting. To select a special card d schedu ule for a card d, user need ds to add a new schedule in “acceess group scchedule settting” and theen apply thee schedule ffor the card d in “card scchedule”. If "card schedule" is enaabled, the system will follow the carrd schedule. In this situ uation, doorr verification control w will not be applied to this card. 90 NAV IP Access A contrroller Figure9‐1 12Card Schedu ule Setting Select different acceess schedule for different door zone. D Different acccess schedulee will specify the card which haas one kind eentry rule for each door zo one. Notte: All cards iin one group can be assigned to differrent access grroup in differrent controller. When finished all thee detail inform mation of thee card, click o on “OK”, the o operation is ccompleted. Access Group: The c G card can be aassigned to 2 2048 kinds off access grou ups, differentt groups will be set a different access ruless. 9.2.2 EEditA Card dholder Select a cardholder in the cardho older list to be edited, click the “Edit”” button. Entter to the caardholder edit pagge, shown as ffollowing. Figure 9‐13Edit a Carrdholder 91 NAV V IP Access controller c Edit a cardholder’s c information is similar to adding a caardholder. Affter edition is complete, click the “Save” b button to savve the changee. 9.2.3 D Delete A C Cardholder Select a cardholder in n the cardholder list to bee deleted, clicck the “Deletee” button, op p‐up as below w: Figure 9‐14Co onfirm to Delette a Cardholderr Click thee “OK” button n to confirm. Press on n the keyboaard “Shift” keey to select the cardholde ers to be deleeted, click th he “Delete” b button to confirm if delete all tthe selected ccardholders. Click the “OK K” button to d delete all the selected. 9.2.4 EExport CarrdHolders Click thee “Export” button, pop‐u up download file box, all cardholders will be expo orted to CSV V format, select a path to save the file. Clickk “OK” to con nfirm. Please see 7.1.7 Exp port function. 9.2.5 P PrintCardH Holders Click thee “Print” buttton to enter to the prin nting page, the specific operation o meethod see 7.1.8 Print function n 9.2.6 SSearch CardHolderss Figure9‐‐15 Search Carrdholders Select a search field and input the search criteeria in the “kkeyword” textt box, click th he “Search” b button to holders match hing, they willl be shown in n the cardholder list. Clickk “Search start seaarching. If theere are cardh All” buttton, back to tthe all cardho older list. 9.3 Im mportCarrdholderss Select System menu bar “System m” “Cardho older” “Im mport Cardho olders”, and tthen enter to import hown as follow wing: page, sh 92 NAV IP Access A contrroller Figure9 9‐16 Update Exxcel File Steps: e” button, aand locate the file wantt to 1) Upload EExcel formatt file, click the “Browse upload. Imported file must be C CSV format (Excel 97‐2 2003), and leess than 1M M. 2) Click the “Next” button to enteer to the ope eration pagge, shown ass following:: Figure9 9‐17Import Carrdholders 3) Click the drop‐down n menu of attributes, and select th he correspo onding attrib bute categoriees, and checck the attrib bute box on n the top of column. 4) Click on ““Import”, syystem startss to import the cardho olders. d after the ccompletion of “xxx reccords have b been imported.” 5) Displayed 6) Click “Back” button, go back the import caardholders p page. ust be in CV VS format, sselect the paath to Note: All data imported to the system mu import the docum ment, click O OK to finish. 93 NAV V IP Access controller c Cha apter 10 10. Real‐ttime M Monitorring 10.1 R Real‐timee Event Click on system men nu bar “Systeem” “Live Monitoring”” “Live Eveents”, and en nter to the R Real‐time page; see figu ure below: events p Fig gure10‐1Live Evvent As show wn in the abovve figure, thee real‐time evvent monitoriing page is divided into three basic are eas. Map listt and device list located on the left side, s it shown all the map list, contro ollers and do oors, arm zones, D DVR, CAM and d View. The u users can easily remote co ontrol open/cclose, set alarrm etc. Electron nic map is loccated in the ttop of the middle. Each de evice’s real‐tiime status is displayed byy its icon. Such as door is opened or closed, control is armed or disarmed etc. t bottom of o page. Theey are listed in order of receiving The real‐time event records are located in the or scrolling an nd displaying in real time. automattically listing each now evvent at the top allowing fo Cardhold der informattion of each record is positioned in the right botttom corner o of the page, which is used to display the ccardholder detail. When each differen nt real‐time eevent is received, this secction will der’s detail, ssuch as cardh holder’s photo, name, gen nder, departm ment etc. If th he record display eeach cardhold is not reelated to the ccardholder, tthe related co ontents in this column will be blank. ! Note: substaation only caches some e real‐time event reco ords. When the user en nters the reaal‐time even nt record paage at the ffirst time, itt only displaays some reeal‐time evvent record of the statiion. If the u user inquire es the old re ecords, nee eds to go to o card accesss inquiryy page to se earch. 94 NAV IP Access A contrroller 10.1.1 1 Remote C Controllerr Click thee node in maap list and deevice list and a menu will pop‐up contaaining remote operationss, such as arm, dissarm, reset alarm a and ad dd map etc. Clicking on the door node will show w the menu to t select between n “Open Door” and “Closee Door”. 10.1.2 2 Remote D Dvr and V View Click thee node in the resource treee contains DVR, CAM or V View. According to the typ pe of node, itt will pop up correesponding fun nctional menu. Click the n node will prevview and can be added to the electronic map. 10.2 EEdit Electtronic Map Click on the menu baar “System” “Real‐timee Monitoring”” “Electronic Map”, en nter to the Ele ectronics wn as followin ng: Map ediit page, show Figure10‐2Edit Electro onic Map 10.2.1 1 Add An EElectronic Map Click thee “Add” butto on, pop‐up fo ollowing wind dow: Figure10‐‐3Add an Electtronic Map Map nam me: name forr a new electronic map. 95 NAV V IP Access controller c Back Image: click thee “Back Imagee” button, to o pop‐up a paage to add a local map. Th hen click the “upload” button aand upload th he map to thee server. Click the “Back” button to gett back to the main page. 10.2.2 2 Edit An EElectronic Map Select th he map imagee by a single click and click “Edit” butto on, enter to tthe edit page. See figure b below: Figure10‐‐4 Edit an Electtronic Map There are 5 operatin ng buttons in n the edit areea: back imagge, save, deleete, cancel and return. Se ee figure below: Figure 1 10‐5 Operating g Button 5.6.4.2 22 10..2.2.1 Back Image Setting S Click thee “Back Imagee” button, an nd the followiing box will p pop‐up: Figure10‐6Back Imagee Setting Click “Brrowse” butto on to select an n image and upload to the e server. 5.6.4.2 23 Ad dd Device Icon Click thee node in thee device tree on the left siide of main p page, the devvice icon will show on the e left side corner in n electronic m map, use the mouse to mo ove or drag aand drop the device to thee desired placce on the map, Click the “Save”” button to saave. 96 NAV IP Access A contrroller Savve: De elete: Cancel: Return: Savve the electrronic map. Delete the current electro onic map ed dited. Can ncel the opeerations on the electro onic map. Bacck to main p page. 10.2.3 3 Delete An Electron nic Map Select th he map which need to deelete on the m map list, clickk the “deletee” button, a p pop‐up a con nfirm box will appeear saying “are you sure tto delete”, click “Ok” to co onfirm, otherrwise cancel tthe delete feaature. 10.3 R Report 10.3.1 1 Search Cardholderrs Click on system men nu “System” “Reports” “Cardhold der”, the systtem enters eemployee info ormation query paage, see figurre below: Figure10‐7Search Carrdholders Input the employee n number or naame to do precise queriess. mber, name. Input the keyyword in the box, click the e “Search” Search ccondition is divided into employee num button, will show all the related rresults with kkeyword. Clickk “All” button n, to get backk to the all cardholder will fully match h the keyworrd. list. The query is exacct and the ressults listed w ardholders and their em mployee num mber are “ef‐001” and “e ef‐002”,if For example: There have two ca nt to search “ef‐001” as the result, in nput the keyy word “ef‐00 01” into the search box and a click just wan search. TThe absence of any one character will be unable to o query the caardholder. 10.3.2 2 Export Caardholderrs Click thee “Export” bu utton, and thee download ffile box will p pop‐up. All cardholders’ in nformation will export to the C CSV format, select the patth to save thee document. Click “OK” to o confirm. Please see 7.1..7 Export function n. 97 NAV IP Access controller 10.3.3 Print Cardholders Click the “Print” button to enter to the cardholder printed page, for the specific operation methods see 7.1.8 Print function. 98 NAV IP Access A contrroller Cha apter 11 11. Mainttenancce 11.1 B Backup Click thee menu “System” “Maintenance” “Backup” to o enter the baackup page; sshown below w: Fiigure11‐1Backkup 11.1.1 1 Manual B Backup Manual backup refers to backingg up the systtem data. Se elect “manual backup” an nd click the “Backup” “ od of time, a ssystem windo ow will be sh hown to selecct a file path ffor saving the e data to button. After a perio the local computer. 99 NAV V IP Access controller c Figuree11‐2Manual B Backup 11.1.2 2 Auto Bacckup There are two ways to backup the data, man nual and auttomatic. The automatic backup page is shown below: Figu ure11‐3Auto Ba ackup Ste eps: 1 Click the “Auto Backup” tab and 1) d check the option to aautomatically backup. 2 Select thee backup daate and starrt time. 2) 3) Enter the user namee, password,, URL, port, and file path of the FTTP server to o save the file. (FTP servver is a remo ote server) 4 Select to delete the eexpired bacckup file. 4) 5) Click the “Save” buttton to comp plete the au uto backup ssettings. 100 NAV IP Access A contrroller 11.2 R Restore Click “Syystem”→ “M Maintenance” → “Restoree” to enter th he page to restore data. The system provides two metthods: Restorre the databaase from a FTTP server, or ffrom the locaal computer. 11.2.1 1 Restore ffrom a FTP P Server Figu ure11‐4 Restorre the Databasefrom a FTP Seerver Ste eps: 1) Fill in the username aand passwo ord to log in n to the FTP P server. 2) Input the FTP server’’s URL, portt, and file paath (e.g.: ab bcd/nav_08 808183801). 3) Click the ““Save” buttton. 11.2.2 2 Restore ffrom Local Computeer Figure11‐5 Resstore the Databasefrom Loca al Ste eps: 1) Click the “Browse” b button and select the d database filee to restoree. button to begin the resstoration. 2) Click the “Restore” b 101 NAV IP Access controller 3) The system will display “restore the database succeeded.” when completed. 11.3 PurgeOut‐of‐date Data Click on the menu bar “System” “Maintenance” “Purge Out‐of‐date Data”, to enter the purge page. 102 NAV IP Access A contrroller Cha apter 12 12.Contro C oller This chapter describees how to sett up controlleer. In this chapter you will learn: w to add and d delete userss, and configu ure the controller. How How w users down nload data from the contrroller. 12.1 C Controlleer Settingg Click “Acccess Control” → “Contro oller” → “Con ntroller settin ng” from thee menu bar to o enter the controller settings page, shown n below: Figure1 12‐1Controllerr Setting On the ccontroller settting page, th he top is operration button list and the b bottom is con ntroller list. OPERATIION BUTTO ONS Including the bu uttons to add, edit, refresh h, setting (configure), deleete, export an nd print. CONTRO OLLER LIST Thee controllerr list is show wing all the controllers detail. Such h as address, model nu umber, loccation etc. Note: It ccan only sett the contro oller which is on line. O Otherwise, it cannot conffigure the ccontroller. 12.1.1 1 Add A Co ontroller Click thee “Add” butto on, will pop‐u up a dialog bo ox to add a co ontroller, sho own below: 103 NAV V IP Access controller c Figuree12‐2Add a Con ntroller Steps: 1) Select a m model number in the sselection bo ox. Such as NAV‐1.0 (EFFC301, EFC3 302) etc. 2) Input location, address (4 digitss). 3) Click the “Save” button, then itt will search h the contro oller on the network. If the controlleer is on line, the system m will add it and displayy in the controller list. Otherwisse, it will po op‐up a dialo og box, it sh hown as following: Notte: if the controller is on lline, it canno ot be added b by the system m software. P Please make sure the controller is online b before add it.. Figure 12‐‐3 Fail to Add a aController 12.1.2 2 Edit A Co ontroller Select the controller to be editted in the controller listt. Click the “Edit” “ button n, it will pop p‐up the odify dialog box. It shown below: Add/Mo Figuree12‐4Edit a Con ntroller Steps: 1) Edit modeel number, location and d address. 2) Click the ““Save” butto on to save tthe settings. 3) Click the ““Cancel” to cancel. 104 NAV IP Access A contrroller 12.1.3 3 Delete A Controlleer Select th he controller to be deleted from the lisst, click the se ection box, th he row’s backkground will be green, then clicck the “deletee” button to delete. 12.1.4 4 Refresh Choose a controller in the list, clicck the “Refresh” button, itt will get its cconfiguration from the con ntroller. Figure12 2‐5Refresh a C Controller Click thee “ok” button n to confirm. 12.1.5 5 Setting Select a a controller to t be configu ured, then cllick the “Settting” button, enter the ssettings page e, shown below: Figure1 12‐6Controllerr Setting In the controller c settting page, users can con nfigure all the e features su uch as door, reader, alarrm input, alarm acction, alarm ttime, APB areea and other settings. The following will explain thee settings. 12.1.5.1 Door Including door location, door unlo ocks time and d door held o open time. 105 NAV IP Access controller Door Location: Description of the door location. Door Unlock Time: Set the door open time when a valid card is swiped or the Request‐ to‐Exit button is pressed. The door remains open as long as the RTX button is pressed down. The door open time does not count until the button is released. If two cards are swiped successively, the door open time does not count until the second card has been swiped. The default time is 3 seconds. The maximal door open time is 59999 seconds. Door Held Open Time: Door sensor monitors the open/close status of a door. If “unlock” is not set by the system (door is normally considered closed), then door should close after opening. It is considered abnormal if controller does not receive the door close signal from door sensor for a reasonable amount of time after the door is opened. This time period is call door held open time or door over time. According to this setting, the controller will determine whether to generate an alarm or not after the door sensor timeouts. The default value of door held open time is 5seconds. The maximal door held open time is 59999 seconds. Steps: 1) Select the door page. 2) Click the door which needs to be set. 3) Input door information including: door location, unlock duration, held open duration, interlock etc. If two or more doors are interlocked, they cannot be opened the same time. If one of the interlocked doors is open, the other doors cannot be opened until the first door is closed. In short, there can be only one door open at any time point among interlocked doors. User can set interlock function when an interlock compatible controller controls two or more doors. This setting is particularly suitable to environment that requires high‐level security, such as banks and prisons. 4) Click the “Save” button to save your changes. 12.1.5.2 Reader Settings page for the reader number, name, door location, keypad reader, system reader, input time for keypad, in/out type, source and destination area etc. 106 NAV IP Access A contrroller Fiigure12‐7Read der he selected reader Readerr No.: the number of th Door lo ocation: desscription off the actual location of f the door to o which thee reader is installed. The deffault settingg is that eacch reader iss installed to o the door w with the sam me numberr. Readerr name: nam me of the reeader. Keypad d reader: whether the current reaader is a keyypad readerr. For a keyp pad reader, if a card PIN is enabled d and the verification llevel is “carrd plus PIN”, one must enter card PIN using th he keypad tto gain acceess to the do oor. System m reader: wh hether the current reader is a systtem reader. A system rreader can transmit a card nu umber to the controllerr to enroll ccards to the controller. Any readerr conneccted to the ccontroller ccan be set as a system rreader. Input time: when the verificaation needs to input a p password, tthe max waiting time fo or inputtin ng the password input. If more than the time e, the controller displayy will go back to main sccreen. In/Out type: whetther the reaader is an en ntry reader or an exit rreader. Source area and D Destination area: Thesee settings are for APB ffunction. Reefer to Anti‐ Passback (APB) page for details. Ste eps: 1) Click the reader tab page. 2) Select the reader wh hich needs tto be set. 3) Input reaader information includ ding: readerr name, doo or location, input time,, keypad reader, systeem reader, source areaa, destinatio on area etc. 4) Click the “Save” button to save your changges. 12.1.5.3 Alarm Input Including name, wheether fire alaarm input, in nput mode, output o modee, delay timee, alarm outp put time, door behavior underr fire alarm. 107 NAV V IP Access controller c Figu ure12‐8Alarm IInput Alarm IInput Name e: rename tthe alarm in nput Fire Alaarm: “Yes” means the alarm is a fiire alarm, “No” means it is not a ffire alarm. TThe first alarm input is defaault as a firee alarm and d cannot be modified. Alarm IInput Mode e: “Invalid” means the current alaarm input is disabled. “Normally O Open” means the circuit d disconnectss in the normal condition (i.e. with hout input) and an alarrm will be trigggered if circcuit connectts with inpu uts. “Normaally close” iss the opposiite. Alarm O Output Mo ode: “Lock” mode mean ns an alarm m output is triggered if tthere is an aalarm input. O Once triggered, the alaarm output remains tilll the alarm output timee has elapse ed or being reset manuaally. If the alarm input signal lasts longer than n the alarm output tim me, anew aalarm outpu ut will be triggered. “Diirect” mode e means theere will be aan alarm output as long as there is an active inpu ut signal; the alarm outtputs stops when the input signal stops. Alarm D Delay Time e (s): in the rrange of 1‐5 59999 seconds Alarm O Output Tim me (s): in thee range of 1 1‐59999 secconds Alarm O Output: thee terminal(ss) of the alarm output Door M Module Output: the terrminal(s) off the door m module for tthe alarm output Door behavior under fire alarm: when d doors are op pen during ffire alarm. Ste eps: 1) Click the “alarm Input” tab page. 2) Select the input which needs to o be set. 3) Input alarm input information iincluding: alarm input name, whether fire alaarm put mode, o output mod de, alarm de elay time, alarm output time, door input, inp module o output, doo or behavior under fire aalarm etc. 4) Click the “Save” button to save your changges. 12.1.5.4 Alarm Action A On the alarm action settings pagge, users can n configure th he alarm outtput, includin ng: the main modules output, door modulee output and alarm modulle output etc. 108 NAV IP Access A contrroller Figure12‐9Alarm A Action omponents: the main m module and d the door m module. A NAV controller cconsists of ttwo basic co User caan install up p to 4 door m modules an nd 1 alarm m module. Theese three tyypes of mod dule are all equiipped with alarm functtion. Main m module has 2 alarm inp puts (figure 12.9 fire‐1 aand Zone‐1), they resp ponse for firre alarm and tam mper alarm. It also hass2 alarm outtputs, corre esponding to main alarrm output and auxiliarry alarm outtput. Each do oor modulee has 2 alarm m outputs, w which usually react to alarm even nts on the corresp ponding doo or. However, it can be set to reactt to other alarm eventss as well. Allarm outputss on the door module can connecct up to 5A e external alaarm devices. Alarm m module has 8 inputs and 8 8 alarm outputs, 8 alarm inputs can b be connected to an extern nal alarm input deevices, such aas PIR motion n sensor, glass break sensors, etc. 8 aalarm output can be conn nected to the maxximum curren nt 2A (amps) and external alarm device e. NAV con ntrollers keep tracking all events in the access co ontrol system m, whether allowed or dissallowed, normal o or abnormal. For examplee, all granted access eventts and all den nied access evvents are reco orded. Some evvents are crittical which m must trigger the alarm outtput, like the firm alarm input, the zone alarm input, ettc. But some events are not importantt and should not trigger an alarm outp put, like denie ed access due to aan invalid tim me. These setttings all dep pend on the u users’ requireements. The controller co ollects all events tthat might triigger the alarrm output an nd provides tthe full capaccity to enablee or disable the alarm output b based on thesse events. Sometim mes a user may wish to allocate a partticular event to a particulaar alarm outp put, or allocaate alarm inputs in certain arrea to multip ple alarm ou utputs. The Flex controller delivers all the functtion and whether certaain event willl trigger an alarm, and can further flexibility needed to do so. Users can define w specify tto which alarm output thaat event is allocated. An alarm m can be trigggered by evvents such ass fire alarm, zone alarm 1~8, 1 unknow wn card, expirred card, invalid ccard, invalid d door, invalid time, card APB fail, card PIN fail, SYS P PIN fail, ARM M PIN fail, doo or forced open, do oor held open, reader lostt, alarm inputt 0, and remo ote alarm. 109 NAV IP Access controller All these events can be allocated to any alarm relay output on main module, door module and alarm module. Alarm output setting interface is given in a table format and every column represents an alarm output source. The alarm output is shown in a drop‐down menu. If there are two options in the drop‐down menu, it means the alarm output is not related to door. “Yes” indicates there is alarm output (relay energized), “No” indicates there is no alarm output (relay not energized). If there are three options in the drop‐down menu, it means the alarm output is related to door. “Y” indicates there is an alarm output (relay energized), “N” indicates there is no alarm output (relay not energized), “R” refers specifically to alarm output relay on the door module, indicating that alarm output will be generated only if the events occurs on the corresponding door module. Zone Alarm: The zone alarm reacts to 8 alarm inputs on the alarm module. Any events in the arm zone may trigger a zone alarm event. The controller generates an alarm output according on the setting in the “Zone Alarm” column. Fire Alarm: A fire alarm event is generated when there is a fire alarm input. The controller generates an alarm output according on the setting in the “Fire Alarm” column. System PIN Fail: User is required to enter system PIN to enter to the system setting menu. If an incorrect system PIN is entered three times consecutively, the system will generate a “system PIN fail” event. The controller generates alarm output(s) according to the setting in the “system PIN fail” column. ARM PIN Fail: User is required to enter ARM PIN when pressing the “ARM” key on the controller to arm/disarm the system. If an incorrect ARM PIN is entered three times consecutively, the system will generate an “ARM PIN fail” event. The controller generates alarm output(s) according to the setting in the “ARM PIN fail” column. Tamper Alarm: A tamper alarm event will be generated if there is a temper alarm input. The controller generates alarm output(s) according to the setting in the “Tamper Alarm” column. Remote Alarm: A system administrator can directly generate alarm signals using the control software when he observes an abnormal condition through a surveillance system. This is defined as a Remote Alarm event. The controller generates alarm output(s) according to the setting in the “Remote Alarm” column. Unknown Card: unknown card refers to a card that is never enrolled in the system. An unknown card event will be generated when an unknown card is presented to any reader. The controller generates alarm output(s) according to the setting in the “Unknown Card” column. Expired Card: any card in the system is usually assigned a valid date. After the valid date passes, the controller will automatically set the card as an expired card. An expired card cannot gain access to the system. An expired card event will be generated if an expired card is swiped on the reader. The controller generates alarm output(s) according to the setting in the “Expired Card” column. Invalid Card: User can directly set a card as an invalid card to disable the card. An invalid card cannot gain access to the system. An invalid card event will be generated if an invalid card is swiped on the reader. The controller generates alarm output(s) according to the setting in the “Invalid Card” column. Invalid Door: Each card belongs to an access group. For each group, the system can assign access rights to certain doors for certain time zones. An Invalid Door event will be generated 110 NAV IP Access controller when a card is swiped at any door at which it does not have the right to pass. The controller generates alarm output(s) according to the setting in the “Invalid Door” column. Invalid Time: Each card belongs to an access group. For each group, the system can assign access rights to certain doors for certain time zones. An invalid time event will be generated if a card is swiped during a time period in which it does not have the right to pass. The controller generates alarm output(s) according to the setting in the “Invalid Time” column. APB Fail: If the card APB property is enabled, and door behavior under APB is set to “unlock”. A cardholder will be able to enter/exit any doors by swiping the card. The system generates an APB fail event if an APB event is triggered. The controller generates alarm output(s) according to the setting in the “APB Fail” column. Card PIN Fail: A card PIN fail event is generated when a PIN‐enabled card is presented at a reader and an incorrect PIN is entered three times consecutively. The controller generates alarm output(s) according to the setting in the “Card PIN Fail” column. Door Forced Open: A door forced open event is generated when the door sensor indicates to the controller that a door is opened, but no legitimate card has been presented and a Request‐to‐Exit button has not been pressed. The controller generates alarm output(s) according to the setting in the “Door Forced Open”. In practice, a door forced open event will be generated if a door is kicked open. Door endures Open: A door endures open event is generated if a cardholder enters endures PIN to unlock a door when under endures. The controller generates alarm output(s) according to the setting in the “Door endures Open”. Door Held Open/Overtime: the system keeps tracking of the door status when a card is presented to a reader or Request‐to‐Exit button is pressed. A door held open/overtime event occurs when a door is held open for longer than the allowed door held open time. The controller generates alarm output(s) according to the setting in the “Door Held Open” column. Reader Lost: A reader lost event is generated when the controller detects that the card reader appears to have been disconnected from the system. The controller generates alarm output(s) according to the setting in the “Reader Lost” column. Panic door: When an access denied appears and request open did not implement, however, door magnetic sensor is displayed the door have been opened, it will lead a “panic door” event. The controller generates alarm output(s) according to the setting in the “Panic Door” column. Steps: 1) Click the “Alarm Action” tab page 2) Select an alarm to be set in alarm list. 3) In the corresponding, click the position to show drop‐down menu of alarm output, select the output value: R, Y, N. 4) Click the “Save” button to save your changes. 12.1.5.5 Alarm Time On the alarm time setting page, users can set the alarm time for the specified controller. 111 NAV V IP Access controller c Figu ure12‐10Alarm Time Ste eps: 1) Click the “Alarm Tim me” tab pagee 2) Select an n alarm to be set in alarrm list. 3) Input alarm time. 4) Click the “Save” button to save the change e. 12.1.5.6 APB Arrea On the A APB Area pagge, users can configure thee APB area, including: areea name, Enable or not, op pen door when AP PB check fail or not. Figu ure12‐11 APB A Area APB areea setting iss to edit arm m zone nam me for the se elected con ntroller. When placing m mouse on top of an arm zzone in an eelectrical maap, the nam me of the arm zone willl be shown. Ste eps: 1) Click the “APB area”” tab page. 2) Select an n area to be set. 112 NAV IP Access A contrroller 3) Input areea information. 4) Click the “Save” button and savve the changes. 12.1.5.7 Other Setting S In otheer setting paage, it is for the overall setting of tthe controlller. The settting is including first‐card‐In, time synchronizaation server, date form mat, daylight saving tim me etc. Figurre12‐12Other SSetting First‐card‐‐IN: choose ffrom enabled d or disabled.. When first‐card‐in is enaabled, in a door zone of which tthe schedule is set as “normally open””, only after aa first‐card en nabled card h has been presented d to the readeer, will other cards be able e to unlock th he door. Time syncchronization server: indicates whether the contrroller is the time synchro onization server in tthe system. A All controllerrs in the syste em will automatically adjust its date aand time setting to o match thatt of the tim me synchroniization serveer. There can be only one o time synchronizzation serverr in the systeem and the last assigned d time synchronization se erver will replace an ny previous seetting. If the controller is connected to o a PC installeed with Flex ssoftware, the softwaare will autom matically mod dify the controller date an nd time to match the PC ssetting. If the contro oller date and d time are fou und to be inccorrect, checkk the date and time on the e control PC. Date form mat: the systtem offers tw wo date form mat: “YYYY‐M MM‐DD” and “MM‐DD‐YYYYY” and users can choose the d desired formaat. Daylight ssaving time: W Whether autto Daylight Saaving Time (D DST) is enableed. When auto DST is enabled, u user need deefine the starrt and end daates of DST, including mo onth, week, d date, and time, forw ward or backw ward. When aauto DST is enabled, the ccontroller will automatically adjust DST one h hour forward from 1:59:59 9am to3:00:0 00am on the first Sunday in April, and adjust it backward one hour fro om1:59:59am m to 1:00:00am m on the lastt Sunday in October. Steps: 1) Click the “Other” tab b page. 2) Select an nd change th he setting. 3) Click the “Save” button to save the change es. 12.1.6 6 Export Co ontrollers Click thee “Export” bu utton, pop‐up p download file box, all controllers will be exported to CSV formaat, select a path to o save the filee. Click “OK” to confirm. P Please see 7.1 1.7 Export fun nction. 113 NAV V IP Access controller c 12.1.7 7 Print Con ntrollers Click thee “Print” buttton to enter to the prin nting page, the specific operation o meethod see 7.1.8 Print function n. 12.1.8 8 Downloaad Data to Controlleer Click on n the menu bar b “Access Control” C → “Controller” “ → “Downloaad Data to C Controller”, shown s as following: Figure12‐13 D Download Data a to Controllerr The page is divided in nto left and rright columnss. Left is data options list aand right is co ontroller list. Data opttion list: Inccludes card data, access rule, day ssetting and controller configuraation. Controlle er list: Displlay all the current conttrollers. Do ownload Daata: Downlo oad data of card, accesss schedule,, day settin ng and controller configu uration to the specified d controllerr. Ste eps: 1) Select thee data from the list to b be downloaaded to the controller. 2) Select thee controllers from the ccontroller liist. 3) Click the ““Download”” button, co ompletely o operated. 4) The “Dow wnload” buttton, compleetely operate. 114 NAV IP Access A contrroller Chap pter 13 13. Access Rule 13.1 D Date Typ pe Click “Acccess Controll” “Access Rule” “Daate Type”, enter to the date type page,, shown as fo ollowing: Fig gure13‐1Date TType 13.1.1 1 AddA Date In tthe date typ pe page, click the “Add d” button an nd will pop‐‐up below sscreen: Figu ure13‐2Add a D Date Controller sup pports 10 daate types, in ncluding: Su unday to Saturday (7 tyypes), custo om 1‐3. Sundayy to Saturdaay is automaatically set b based on th he calendar. Users can customize accordiing to their own needss custom 1‐3 3. In this maanual, custo om 1‐3 are holidays. Ho oliday setting is these 3 h holiday typee. The NAV controller ssupports up p to 255 holiday settingg. nt type Recurren Sofftware allow ws set the h holiday flexiibility in acccordance with the stan ndard set of f three differen nt Holiday. There threee types of cycles are ass following: 115 NAV V IP Access controller c One‐time holiday: A o one‐time ho oliday is a holiday that will occur o once, and w will not recur in subsequ uent years. A An examplee is a compaany organizeed travel evvent during Oct. 10, 20 008 to Oct. 1 15. Date Holid day A d date holidayy is a recurrrent holidayy that occurrs on the sam me date every year. Fo or instancce, the New w Year holidaay, which occcurs on Jan nuary 1, is aa date holid day Day of we eek Holiday Day of week h holiday is an nother recurrent holidaay type. It d defines a certain day off a certain week, in a certain weeek of a mon nth. Thanksggiving is an example off a Day of W Week holidayy, falling on the 4th Thu ursday of November ! N Note: These holidays se etting should be comp plete when controller ffirst time to o be used, aand re‐checked at the beginning o of each year. eps: Ste 1) Select daay of recurreent type. 2) Select the date in caalendar. 3) In the day of type, select the tyype day. 4) Input thee day of nottes content (optional) 5) Click “Savve”, new daate will savee it to the syystem. 13.1.2 2 Delete A Date Ste eps: 1) Select the holiday w which need tto delete in the settingg page. 2) Click the “Delete” bu utton and cconfirm if su ure to delete. 3) Click “Okk” to delete.. No ote: after ad dded and de elete operaations, the ssystem will automaticc save the re evised information. 13.2 G Group Scchedule Clicck on the m menu bar, seelect “Accesss Control” → “Access Rule” → “G Group Sched dule”, for the Group Scheedule page,, shown as ffollows: Figure13 3‐3User Group Schedule 116 NAV IP Access A contrroller 13.2.1 1 Add A Grroup Schedule In the group sch hedule settingg page, click tthe “Add” button to add aa new schedu ule. Figure13‐4Add a Group p Schedule Steps: 1) Enter a n new name o on the box. 2) Click on o one cell in tthe column “Day settin ng”, pop‐up a box wherre can set th he time sections and entry/eexit mode, sshown as Fiigure13‐5. 3) After com mpleted, click the “savee” button and the new w group scheedule have been created. 13.2.2 2 Delete A Group Schedule Steps: 1) In the gro oup schedu ule setting p page, select one or morre schedulee to be deletted. 2) Click the “Delete” bu utton. 3) Confirm tto delete. 4) Click the “Ok” butto on. 13.2.3 3 Edit A Grroup Sched dule Sellect a group p schedule aand click thee “Edit” buttton, enter to the grou up schedule setting page, shown as following: 117 NAV V IP Access controller c Figure13 3‐6Edit a Group p Schedule Thee default en ntry/exit mo ode is “Card d only”, if need to set tthe mode in n different ttime section ns, click the time bar, enter to the “Modify Scchedule” page, shown aas followingg: Figure1 13‐7Modify a SSchedule put the start and end tiime, select the entry/e exit mode fo or current time section n, and Inp click the “Apply” aand “Save” b button. Clicck “Return” back to gro oup schedulle setting paage. oup schedule have been n saved, sho own as Aftter back to tthe page, cllick “Save” button, gro following: Figuree13‐8Data Upd dating Aftter the current date type is set, th he user want to be set tthe other date as same e, just need to o click the ““copy” butto on to copy tthe perviou us setting in the “Operaation” colum mn of the firsst one, and tthen click th he “paste” b button for tthe second one, the seetting will be e applied d to the seco ond one. 118 NAV IP Access A contrroller 13.2.4 4 Save As A A New Sch hedule A ggroup sched dule can be edited and it can be saaved as a neew schedule. This feature is used to o add a simiilar setting ffor other grroup schedu ules. Ste eps: 1) Edit the sschedule naame on the box or not.. 2) Click “Savve as” to create a new schedule. 13.3 A Access G Group Clicck the menu “Access C Control” → “Access Rule” → “Acceess Group”,, to enter th he access group setting page, shown as follo owing: Figurre13‐9Access G Group 13.3.1 1 Add A Acccess Grou up In “Access Gro oup” page, click the “A Add” button, the group setting screeen pop‐up p. Figure13 3‐10Add a Acceess Group Steps: 1) Enter a n new group n name. 2) Select eaach door’s u unlock level,, group sche edule (or fo ollowing doo or’s schedule). 3) Click “Savve” and return to the ssetting page e. 119 NAV V IP Access controller c 13.3.2 2 Delete A Access Grroup Ste eps: 1) Select on ne or more aaccess grou up to be deleted. 2) Click the “Delete” bu utton. 3) Confirm tto delete. 4) Click “OK K”. 13.4 D Door Sch hedule Clicck on the m menu bar “A Access Contrrol” → “Acccess Rule” → → “Door Schedule”, to o enter the doo or schedulee setting pagge, shown aas followingg: Figuree13‐11Door Scchedule 13.4.1 1 Add A Do oor Schedule On the door scchedule settting page, cclick the “Ad dd” button to enter to the setting page. Figure13‐12Add a Doorr Schedule Ste eps: 1) Input a new schedulle name in tthe text boxx. one cell in tthe column “Day settin ng”, pop‐up a box wherre can set th he time 2) Click on o sections and entry/eexit mode, m multi‐card ffor each door, shown aas Figure13‐‐13. 3) After com mpleted, click the “savee” button and the new w door sched dule have b been created. 120 NAV IP Access A contrroller 13.4.2 2 Delete A Door Schedule Ste eps: 1) In the do oor schedulee setting paage, select o one or moree schedule tto be delete ed. 2) Click the “Delete” bu utton. 3) Confirm tto delete. 4) Click the “Ok” butto on. 13.4.3 3 Edit A Do oor Schedule Sellect a door schedule an nd click the “Edit” buttton, enter to o the door sschedule se etting page, shown as following: Figure13‐‐13 Edit a Doorr Schedule Thee default en ntry/exit mo ode is “Card d only”, if need to set tthe mode in n different ttime section ns, click the time bar, enter to the “Modify Scchedule” page, shown aas followingg: Figure1 13‐14Modify SSchedule Inp put the start and end tiime, select the entry/e exit mode fo or current time section n, set the lock level for the door if u using the multi‐card access, and cllick the “Ap pply” and “SSave” button. Click “Retu urn” back to o group sch hedule settin ng page. Aftter back to tthe page, cllick “Save” button, doo or schedule have been saved, shown as following: 121 NAV V IP Access controller c Figuree13‐15Data Up pdating Aftter the current date type is set, th he user want to be set tthe other date as same e, just need to o click the ““copy” butto on to copy tthe perviou us setting in the “Operaation” colum mn of the firsst one, and tthen click th he “paste” b button for tthe second one, the seetting will be e applied d to the seco ond one. 13.4.4 4 Save As A A New Sch hedule A d door schedu ule can be eedited and it can be savved as a new w schedule. This feature is used to o add a simiilar setting ffor other do oor schedules. Ste eps: 1) Edit the sschedule naame on the box or not.. 2) Click “Savve as” to create a new schedule. 13.5 A Access D Door Clicck on the m menu bar “A Access Contrrol” → “Acccess Rule” → → “Access D Door”, for the access door settings page, shown as follo owing: Figurre 13‐16Accesss Door Steps: 1) Select a d door schedu ule for each h door 2) After com mpleted, click the “Save” button. IIt will displaay a “Modiffy successfu ully” message when completed. nfirm the daata update.. 3) Click the “Ok” to con Thee user can aalso use thee function “copy” and ““paste” between differrent doors, the two doors will be used the saame door scchedule. 122 NAV IP Access A contrroller Chap pter 14 4 14. Card This secttion describees how to add d, edit cards, through this section you w will learn: Card Type Seetting How to add, delete and eedit one or m more cards. Import cardss to the contrroller 14.1 C Card Type Settingg Click on the menu baar “Access Co ontrol” → “C Card” → “Carrd Type Setting”, enter to o the card typ pesetting page, sh hown as follow wing: Figure1 14‐1Card Typee Setting Card typ pe means thee serial numb ber’s format o of the cards added or to be added to the controlle er will be shown to the user tyype through the software. There are three types: deecimal, hexad decimal, nnn‐‐nnnnn. Decimal: indicates an n 8‐digit deccimal card n number with each d represents a d decimal orm is a con ntinuous 8‐d digit decimaal number. An example e of this number off 0‐9. The fo type is "00 0492423". mal: indicattes a 6‐digit hexadecim mal card num mber with eeach one Hexadecim representss a hexadeccimal number of 0‐9, A A‐F. The form m is a contin nuous 6‐ digithexad decimal num mber. Examples of this type are "4 44EA5B" and “256871””. nnn‐nnnnn: indicatess an 8‐digit decimal carrd number w with each d d representss a decimal nu umber of 0‐‐9. The form m is divided into two paarts with th he first part of a3‐ digit decim mal numberr (high), and d the latter part of a 5‐digit decimal number (low).The two parts aare spaced b by symbol "‐" or a spacce. Examplees of this typ pe are "07509039 9 " and “154 4‐58742”. Select th he card type in the drop d down menu, aand click the “Setting” buttton. 123 NAV V IP Access controller c Figure14‐2Setting Succcessfully 14.2 C Card Settting Click on n the menu bar b “Access Control” C → “Card” → “C Card Setting””, enter to th he card setting page, shown aas following: Figu ure14‐3Card Seetting In the caard setting paage, the top is query area and operatio on button listt, the below iss card list. Query Op peration Arrea: Sellect a search field and input the seearch criterria in the “keyword” text box, clickk the “Seearch” button to start searching. IIf there are cards matcching, they w will be show wn in thee card list. Operatio on Button Liist: nd print butttons, used to operatee the card. Inccluding add,, edit, delette, export an Card List: Sho own all the card inform mation inclu uding: card number, em mployee number, cardholder name, access group and its properties etc. 14.2.1 1 AddA (Baatch) Card d In the caard setting paage, click the “Add” button and pop‐up p a window, sshown as following: 124 NAV IP Access A contrroller Figure1 14‐4Add a (battch) Card eps: Ste 1) In the window, inpu ut the card n number, if u users want tto add moree than one card that its seerial numbeer is conseccutive, pleasse check thee “Mass Carrds” first, an nd then input thee batch num mber, the inputted seriaal number w will be as th he start num mber. 2) Set the card’s propeerties includ ding valid, first card, arm/disarm, A APB, passw word status an nd use the eexpiration etc. then inp put the passsword and fforce PIN , sselect the accesss group, if using the caard’s schedule, please check the ““Private Sch hedule” first. 3) Assign on ne or more cards to on ne cardholde er, after inp putted the eemployee n number, the matcched name w will automaatically pop‐‐up, click to o select it. Empathy the e user can also input emplo oyee name first. 4) Click the “Save” button, the carrd will be ad dded to thee list. e details abo out added, modified aand deleted d operations please reffer to Note: The 5.2.19. Card nu umber: Inputt the number, the softwaare supportss three kindss of card typ pe. Each type e will be converteed to accord ding format. Use 10 decimal to be a sample, if its length is shorter than n 10, the softwaree will add “0”” at the begin nning of the n number. ID card is Wiegand‐2 26 format, wh hich means 2 26 bits. Discarded the first 2 and last 2 2 parity numbers, the ng 24 digit will be convertted to 10 decimal. remainin Users can read the nu umber printting on the card. Swipes thee card on th he reader, then user caan find the ccard numbeer in the acccess denied reccord list on monitoringg event page e of the software. The card ccan be addeed to the controller by the system reader in the controlle er’s menu. If th he added caards’ quantiity is more o one which n number is ccontinual, in nput the staarting num mber and quantities to o batch add.. 125 NAV V IP Access controller c 14.2.2 2 EditA (Baatch) Card Edit a Card: In the card setting p page, click thee card which needs to be edited, pop‐‐up a window w, shown as follow wing: Figu ure14‐5Edit a C Card Modify the relevant properties of o the card, select s and click the “Savee” button, when the proggress bar button to closse the window w. becomees 100%, clickk the “Back” b Edit battch Card: Press the Shift kkey to select more than o one cards, clicck the “Edit” button and p pop‐up a window to modify th he relevant aattributes. Click the “Save e” button afteer edit. Click the “Back” b button to close thee window. 14.2.3 3 Delete A (Batch) Card Ste eps: 1) In the card setting p page, select the cards w which need to be deleted. 2) Click the “Delete” bu utton. 3) Confirm tto delete. 4) Click “OK K” to finish. 14.2.4 4 Export Caards Click thee “Export” bu utton, pop‐up download file box, all ccards will be exported to CSV format,, select a path to save the file. Click “OK” to o confirm. Pleease see 7.1.7 7 Export funcction. 14.2.5 5 Print Carrds Click thee “Print” buttton to enter to the prin nting page, the specific operation o meethod see 7.1.8 Print function n 126 NAV IP Access A contrroller 14.2.6 6 Search Cards Figurre 14‐6 Search Cards Select a search field and input the search criteeria in the “kkeyword” textt box, click th he “Search” b button to start seaarching. If theere are cardss matching, th hey will be sh hown in the ccard list. Clickk “Search All”” button, back to tthe all card liist. 14.3 IImport C Cards Select System menu bar “Access Control” ““Cardholder”” “Import Cards”, and then enter to import hown as follow wing: page, sh Figure1 14‐76 Update EExcel File Steps: 1) Upload EExcel formatt file, click the “Browse e” button, aand locate the file wantt to upload. Imported file must be C CSV format (Excel 97‐2 2003), and leess than 1M M. eration pagge, shown ass following:: 2) Click the “Next” button to enteer to the ope 127 NAV V IP Access controller c Figurre14‐8 Import Cards 1) Click the drop‐down n menu of attributes, and select th he correspo onding attrib bute bute box on n the top of column. categoriees, and checck the attrib 2) Click on ““Import”, syystem startss to import the cardho olders. 3) Displayed d after the ccompletion of “xxx reccords have b been imported.” Figure 14‐7Card Impo ort Error 4) Click “Back” button, go back the import caards page. Note: All data imported to the system mu ust be in CV VS format, sselect the paath to import the docum ment, click O OK to finish. 128 NAV IP Access A contrroller Chap pter 15 5 15.Report R t This chapter describees how to queery, print thee cards, and aaccess eventss. 15.1 C CardRepo ort Click on the menu baar “Access Co ontrol” “Reeport” “Caard Report” aand enter to the card repo ort page. Shown aas follow: Figu ure15‐1 Card Reeport 15.1.1 1 Search Cards Ste eps: 1) In the seaarch drop‐d down menu, select a fie eld, includin ng card num mber, emplo oyee number, and cardho older name,, access gro oup. 2) Input thee search critteria in the “keyword” text box. matching caards will be shown in card list. 3) Click the “Search” button, the m he controlleer, click the “Search All”” 4) If the useer wants to view all thee cards in th button. 15.1.2 2 Export Caards Click thee “Export” bu utton, pop‐up download file box, all ccards will be exported to CSV format,, select a path to save the file. Click “OK” to o confirm. Pleease see 7.1.7 7 Export funcction. 15.1.3 3 Print Carrds Click thee “Print” buttton to enter to the prin nting page, the specific operation o meethod see 7.1.8 Print function n. 129 NAV V IP Access controller c 15.2 C Card‐dep pendent Event Click on the menu b bar “Access” → “Report” → “Card‐dependent Eveent”, enter to o the card‐de ependent event ho ome page, sh hown as follow wing: Figure15‐‐2Card‐depend dent Event 15.2.1 1 Search Evvents Ste eps: 1) In the seaarch drop‐d down menu, select a fie eld, includin ng card num mber, emplo oyee number, and cardho older name,, event type e. 2) Input thee search critteria in the “keyword” text box. 3) Click the “Search” button, the m matching caards will be shown in card list. 4) If the useer wants to view all thee cards in th he controlleer, click the “Search All”” button. 15.2.2 2 Export Evvents Click thee “Export” bu utton, pop‐up download file box, all ccards will be exported to CSV format,, select a path to save the file. Click “OK” to o confirm. Pleease see 7.1.7 7 Export funcction. 15.2.3 3 Print Eveents Click thee “Print” buttton to enter to the prin nting page, the specific operation o meethod see 7.1.8 Print function n. 15.3 C Card‐independen nt Event Click on “Access Con ntrol” → “Reeport” → “Caard‐independ dent Event” to t enter to tthe card‐inde ependent event paage. 130 NAV IP Access A contrroller Figure15‐3 3 Card‐indepen ndentEvent 15.3.1 1 Search Evvents Ste eps: 1) Select the field “eveent type”. 2) Input thee search critteria in the “keyword” text box. 3) Click the “Search” button, the m matching caards will be shown in card list. 4) If the useer wants to view all thee cards in th he controlleer, click the “Search All”” button. 15.3.2 2 Export Evvents Click thee “Export” bu utton, pop‐up download file box, all ccards will be exported to CSV format,, select a path to save the file. Click “OK” to o confirm. Pleease see 7.1.7 7 Export funcction. 15.3.3 3 Print Eveents Click thee “Print” buttton to enter to the prin nting page, the specific operation o meethod see 7.1.8 Print function n. 131 NAV V IP Access controller c Chap pter 16 6 16.Attend A dance B Basic SSettingg There aare two holiiday settingg in the software: the first one is to set workd days and we eekend during each week for every department (week holid day), and th he second o one is to set special holidayys for every departmen nt (special h holiday). The e second on ne (special h holiday settting) has higgher priorityy than the fiirst one (weeek holiday setting).For example, if Thursday, April 2nd is sset as a worrkday in thee first one and a holiday in the seccond one, it is treated aas a holidayy. Holidayy setting priiority: group p> departm ment > comp pany. The holiday setting in the co ompany is the o overall settin ng. If the seetting is diffferent for a departmen nt, the depaartment settting is used fo or attendance managem ment. In the aabove figuree, the comp pany set Mo onday to Friiday as workdays, Satu urday and Su unday as weekend. Threee departmeents: Researrch and Devvelopment, Production Group A an nd orkday. Based on the rule “departtment > com mpany”, Producction Group B set Saturrday as a wo for Research and D Development, Production Group A A and Produ uction Grou up B, Mondaay to Saturdaay are workkdays. All otther departments follow the comp pany’s setting in which h Mondaay to Friday are workdaays. 16.1 A Attendan nce Timee Click on “Attendancee” “Basic SSetting” “A Attendance Time”, and enter to the atttendance tim me setting, shown aas following: Figure1 16‐1 Attendance Time The list will be show wing the atten ndance time setting for all departmen nts. In the deepartment drop‐down ment. Click thee “Search” bu utton to view w the departm ment’s settingg. list, seleect a departm There iss no any defaault setting in n the system,, just mark by “/” in the list. The user must set the e correct attendance time if w wants to get th he attendancce report. 132 NAV IP Access A contrroller 16.1.1 1 Edit Attendance Tiime First tim me set or reset a departmeent’s attendance time. Select a record to bee set in the lisst, click the “EEdit” button tto enter to th he detail setting page. After set up o back to the list, and the atteendance timee, click the “SSave” button to save. Clicck the “Returrn” button to the operration is succcessful. Fig gure16‐2Edit a Department’ss Attendance Ti Time 16.1.2 2 Search A Attendancee Time Select a a departmentt in the drop p‐down list, and click the e “search” button b to sho ow the depaartment’s attendance time settting, shown aas following. Figu ure16‐3Search a Departmentt’s Attendance Time 16.1.3 3 Export Atttendancee Time Click thee “Export” bu utton, pop‐up download file box, all ccards will be exported to CSV format,, select a path to save the file. Click “OK” to o confirm. Pleease see 7.1.7 7 Export funcction. 16.1.4 4 PrintAtteendance Time Click thee “Print” buttton to enter to the prin nting page, the specific operation o meethod see 7.1.8 Print function n. 133 NAV V IP Access controller c 16.2 W Week Ho oliday Settting Click “Atttendance” “Basic Settting” “Weeek Holiday Se etting”, enterr to the weekk holiday settiing page, shown aas following: Figure16 6‐4WeekHolida ay Setting The list will be showing the weekk holiday settting for all de epartments. In the departtment drop‐d down list, n to view the department’’s setting. select a department.. Click the “Seearch” button n the system,, just mark by “/” in the list. The user must set the e correct There iss no any defaault setting in week ho oliday settingg if wants to gget the attend dance report. 16.2.1 1 Edit AWeeek Holidaay First tim me set or reset a departmeent’s week ho oliday. Select a record to bee set in the lisst, click the “EEdit” button tto enter to th he detail setting page. After set up, click thee “Save” buttton to save. Click the “Return” buttton to back to the list, aand the ope eration is successfful. Figure16‐5Edit a WeekHoliday 16.2.2 2 SearchW Week Holidays Select a department in the drop‐d down list, and click the “search” butto on to show th he departmen nt’s week holiday setting, show wn as followin ng. 134 NAV IP Access A contrroller Figure 16 6‐6Search Week Holidays 16.2.3 3 Export W Week Holid days Click thee “Export” bu utton, pop‐up download file box, all ccards will be exported to CSV format,, select a path to save the file. Click “OK” to o confirm. Pleease see 7.1.7 7 Export funcction. 16.2.4 4 Print Week Holidayys Click thee “Print” buttton to enter to the prin nting page, the specific operation o meethod see 7.1.8 Print function n. 16.3 SSpecial H Holiday Setting Click on “Attendancee” “Basic Setting” “Special “ Holiday Setting”,, and enter tto the special holiday setting, shown as following: Figure16‐‐7Special Holid day Setting 16.3.1 1 Add A Sp pecialHolid day Click thee “Add” butto on, after addiing the speciaal holiday, click the “Save”” button to saave. Click the e “Return” button tto back to thee list, and thee operation iss successful. 135 NAV V IP Access controller c Figure16 6‐8Add a Specia al Holiday 16.3.2 2 EditA SpeecialHoliday Select a a record to be b set in the list, click the “Edit” buttton to enter to the detail setting pagge. After modify tthe special holiday, click tthe “Save” bu utton to save e. Click the “R Return” butto on to back to o the list, and the operation is successful. 16.3.3 3 RemoveA A SpecialH Holiday Select a special holid day to be rem moved in thee list. Click th he “delete” b button, and cclick “OK” to confirm. mpt message indicating thaat the deleteed successfully. The systtem returns ““delete succeessfully” prom 16.3.4 4 SearchSp pecialHolid days Select a department in the drop‐d down list, theen select a staart and end d date, and click the “search h” button w the departm ment’s speciall holiday setting, shown ass following. to show Figure16‐9Search Special Days 16.3.5 5 ExportSp pecialHolid days Click thee “Export” bu utton, pop‐up download file box, all ccards will be exported to CSV format,, select a path to save the file. Click “OK” to o confirm. Pleease see 7.1.7 7 Export funcction. 136 NAV IP Access controller 16.3.6 PrintSpecialHolidays Click the “Print” button to enter to the printing page, the specific operation method see 7.1.8 Print function. 137 NAV V IP Access controller c Chap pter 17 17. Attend dance Excep ption 17.1 N No‐Accesss‐Attend dance If a stafff member fforgets to b bring or swip pe their carrd, a“no‐acccess‐attendance” sh hould be reco orded to refflect their actual attend dance. Click on menu optio ons: Attendan nce Attend dance ExcepttionNo‐Acccess‐Attendan nce, to enterr the no‐ access‐aattendance paage shown on Figure 17‐1 1: Fiigure 17‐1 No‐‐Access‐Attend dance Enrollmeent 17.1.1 1 AddA No o‐Access‐A Attendancee Click thee “Add” button to enter tthe “no‐acceess‐attendancce enrollment” detail pagge. Select a re ecord on the list and set emp ployee numb ber, employee name, enrrollment datee, time and d description. Click the button to app ply those setttings. Click the “Back” buttton to return n to the list sh hown on Figure 17‐2: “Save” b Figure17‐2Add a No o‐Access‐Atte endance Enro ollment 138 NAV IP Access A contrroller If it is n not inconvenient to seaarch througgh the staff list, you can n manually input the employyee numberr or name o of the staff m member in tthe “Add No‐Access‐Atttendance” section. The sysstem will au utomaticallyy apply the additional information n needed. 17.1.2 2 EditA No‐Access‐A Attendancee Select a record that n needs editingg and click thee “Edit” butto on. Figu ure17‐3 Edit a N No‐Access‐Atteendance Enrollm ment Examplle: Reset a sstaff member’s enrollm ment inform mation, such h as enroll time. Once tthe time ch hange is con nfirmed, clicck the “Savee” button and the systeem will prompt “Edit successsful”. Then click the “reeturn” butto on to go back to the lisst, were you u can see th he enroll ttime has been modified d. 17.1.3 3 DeleteA No‐Accesss‐Attendance If theree is an invaliid No‐Accesss‐Attendan nce record, users can d delete it. Select aa no‐accesss‐attendance record to be deleted d and click th he “Delete”” button. A prompt dialog b box will app pear asking to ensure tthe deletion n request. TTo proceed, click the “o ok” button and the sysstem will display a confirmation o of the deletion request being succe essful. 4 SearchNo o‐Access‐A Attendancce 17.1.4 Users ccan search N No‐Access‐A Attendance. The sysstem will go o to No‐Acceess‐Attendaance of the present mo onth. Users can search by applyin ng date rangge, employeee ID and sttaff member name. Clicck “search” button and d if there aare no‐accesss‐attendan nce enrollments matching, they will be displaayed in the llist as shown on Figure17 7‐4: 139 NAV V IP Access controller c Figurre17‐4Search N No‐Access‐Atteendance Enrollm ments 17.1.5 5 ExportNo o‐Access‐A Attendancce Click “eexport” buttton to transsfer all No‐A Access‐Attendance records in a CSSV format. A A dialog box will appear so o a path for a document can be givven. Choosee a location for the file and click “O Ok”. Detailed operation nal procedu ures are in section 7.1.7 7, Export Fu unction. 17.1.6 6 PrintNo‐A Access‐Atttendance Click th he “Print” button to enter a print rrequest of the No‐Acceess‐Attendance recordss. Detailed operation n procedurees are in secction7.1.8, P Print Functiion. 17.2 TTime‐off Enroll Functio on: If a stafff member asks for a leaave of absen nce, it is necessary to aadd a “Time e‐off Enroll” record to eensure statistical validitty of work aattendance. Click th he followingg menu optiions to enteer the page as shown o on Figure17‐‐5: Attendance > Attendance Exception > Timee‐off Enroll. Figuree17‐5 Time‐offf Enroll 140 NAV IP Access A contrroller 17.2.1 1 AddTimee‐off Enroll Click thee “Add” buttton to enter tthe time‐off enroll detail page. Selectt a record on n the list, and d set the employeee number, eemployee nam me, start tim me, end time, time‐off type, time‐off hours and desscription. Click thee “Save” buttton after the required info ormation hass been filled. Click the “Baack” button tto return to the lisst, shown on Figure 17‐6: Figure17‐6Add Time‐o off Enroll not inconvenient to seaarch througgh the staff list, you can n manually input the If it is n employyee numberr or name o of the staff m member in tthe “Add Time‐off Enro oll” section. The system will autom matically app ply the additional information neeeded 17.2.2 2 EditTimee‐off Enroll Users ccan edit Tim me‐off Enroll records. Choosee a record in n the list of “Time‐off EEnroll” and click “edit” button as sshown on Figure1 17‐7: Figure17‐7 SSelecta Time‐offf Enrollment Edit the time‐off enro ollment’s dettail information, as shown n on Figure17 7‐8: 141 NAV V IP Access controller c Figure17‐8Edit a Time‐off ff Enrollment he change is confirmed d, click the ““Save” buttton and the system will prompt “EEdit Once th successsful”. Then click the “reeturn” butto on to go back to the lisst, were you u can see th he enroll ttime has been modified d. 17.2.3 3 DeleteTim me‐off Enroll If theree is an invaliid Time‐off Enroll record, users caan delete it. Select aa Time‐off EEnroll record to be deleeted and cliick the “Delete” button n. A promptt dialog box will appear asking to ensu ure the deleetion reque est. To proceeed, click th he “ok” buttton and the system will dissplay a conffirmation off the deletio on request b being succeessful. Figuree17‐9Delete Co onfirmation off Time‐off Enrollment 17.2.4 4 Search Time‐off En nroll Users ccan search TTime‐off Enroll. The sysstem will go o to Time‐offf Enroll of tthe presentt month. Users can search by applying a date raange, emplo oyee ID and staff memb ber name. C Click “search h” button aand if there are Time‐off enrollments matchin ng, they will be displayyed in the lisst. 142 NAV IP Access A contrroller 17.2.5 5 ExportTim me‐off Enroll Click “eexport” buttton to transsfer all Timee‐off Enroll records in aa CSV formaat. A dialog box will app pear so a paath for a document can n be given. Choose a lo ocation for tthe file and click “Ok”. D Detailed opeerational prrocedures are in section7.1.7, Export Function. 17.2.6 6 PrintTime‐off Enro oll Click th he “Print” button to enter a print rrequest of the Time‐offf Enroll reco ords. Detaile ed operatiion procedu ures are in ssection 7.1.8, Print Fun nction. 17.3 O Overtimee Enroll Functio on: If a stafff member w works overtime, it is necessary to aadd “Overtime Enroll” to ensure statistical vvalidity of w work attendance. Click th he followingg menu optiions to enteer the page as shown o on Figure17‐‐10: Attend dance > Attendance Exception > Overrtime Enroll. Figuree17‐10Overtimee Enroll 17.3.1 1 Add Overtime Enro oll Click th he “Add” bu utton to entter the Oveertime enroll detail pagge. Select a record on the list, and sett the emplo oyee number, employeee name, sttart time, eend time, time‐off type e, time‐ off hou urs and description. Cliick the “Savve” button after the reequired info ormation haas been filled. C Click the “Baack” button n to return tto the list, shown on Figure 17‐11: 143 NAV V IP Access controller c Figure17‐3 Add d Overtime En nroll If it is n not inconvenient to seaarch througgh the staff list, you can n manually input the employyee numberr or name o of the staff m member in tthe “Add Ovvertime Enrroll” section n. The system will autom matically app ply the additional information neeeded. 17.3.2 2 Edit Overrtime Enro oll Users ccan edit Oveertime Enro oll records. Choose a a record in the “Overtime Enrroll” list and clicck “edit” button as shown on n Figure 17‐12: Figure17‐4Seelecta Overtim me Enrollment Edit the Overtime en nrollment’s deetail informattion, as show wn on Figure 1 17‐13: 144 NAV IP Access A contrroller Figure17‐5EEdit a Overtimee Enrollment he change is confirmed d, click the ““Save” buttton and the system will prompt “EEdit Once th successsful”. Then click the “reeturn” butto on to go back to the lisst, were you u can see th he overtim me record has been mo odified. 17.3.3 3 DeleteOvvertime En nroll If theree is an invaliid Overtimee Enroll reco ord, users can delete itt. Select aan Overtimee Enroll record to be deleted and click the “D Delete” buttton. A prom mpt dialog b box will app pear asking to ensure tthe deletion n request. TTo proceed, click the “o ok” button and the sysstem will display a confirmation o of the deletion request being succe essful. 17.3.4 4 SearchOvvertime En nroll Users ccan search O Overtime En nroll. The sysstem will go o to Overtim me Enroll of the presen nt month. Users can seaarch by app plying a date raange, emplo oyee ID and staff memb ber name. C Click the “seearch” butto on and if th here are Overtim me enrollmeents matching, they will be displayed in the list. 17.3.5 5 ExportOvvertime En nroll Click “eexport” buttton to transsfer all Overrtime Enroll records in a CSV form mat. A dialogg box will app pear so a paath for a document can n be given. Choose a lo ocation for tthe file and click “Ok”. D Detailed opeerational prrocedures are in section 7.1.7, Exp port Functio on. 17.3.6 6 PrintOvertime Enroll Click th he “Print” button to enter a print rrequest of the Overtim me Enroll reccords. Detailed operatiion procedu ures are in ssection 7.1.8, Print Fun nction. 145 NAV V IP Access controller c Chap pter 18 18.Attend A dance R Reportt 18.1 O Original A Access Record To revieew the Origginal Accesss Record Secction, Click the followin ng menu op ptions to en nter the page ass shown on Figure 18‐1 1: Attendan nce > Attend dance Repo ort >Original Access Reccord. Figure18‐‐1 Original Acceess Record 18.1.1 1 Search O Original Access Reco ords If userss wish to seaarch an employee origginal access records, the employeee’s ID numb ber is requireed in the “Em mployee NO O” section. If users wissh to search h all employyee records under a speciffic departm ment, simplyy select a deepartment in the “Depaartment” drop‐down liist. Steps: 1) Choose thee department in the “D Departmentt” drop dow wn or input tthe employyee’s ID number in the “Emplo oyee NO” seection. 2) Input start date and end date. 3) Click the “SSearch” buttton. The reccords match hing will be shown in th he list. 18.1.2 2 ExportOrriginal Acccess Recorrds Click “eexport” buttton to transsfer all Original Access Records in a CSV form mat. A dialogg box will app pear so a paath for a document can n be given. Choose a lo ocation for tthe file and click “Ok”. D Detailed opeerational prrocedures are in section 7.1.7, Exp port Functio on. 18.1.3 3 PrintOrigginal Accesss Recordss Click th he “Print” button to enter a print rrequest of the Original Access Records. Detailed operatiion procedu ures are in ssection 7.1.8, Print Fun nction. 146 NAV IP Access A contrroller 18.2 R Report by Cardho older To revieew the Repo ort by Cardho older Section n, Click the following f meenu options tto enter the page as shown o on Figure 18‐2 2: Attendancce Attendan nce Report Report by Caardholder. Figure 18 8‐2Report by C Cardholder The Report by Cardholder secction reflectts employee e number, n name, depaartment, wo orking date, w work time, o off time, latee time, early time, absence time, work hourss, overtime hours, time‐offf hours and d descriptio on. 18.2.1 1 GenerateeReport byy Cardhold der Steps: 1) Input the employee number in tthe “Employee NO” bo ox. 2) Input the start and eend time. utton 3) Click the ““Search” bu ords will be shown in th he list. The maatching reco 18.2.2 2 Export Reeport by C Cardholdeer Click “eexport” buttton to transsfer all Repo ort by Cardh holder Reco ords in a CSV V format. A A dialog box will appear so o a path for a document can be givven. Choosee a location for the file and Ok”. Detailed operation nal procedu ures are in section 7.1.7 7, Export Fu unction. click “O 18.2.3 3 Print Rep port by Cardholder Click th he “Print” button to enter a print rrequest of the Report b by Cardhold der records. Detailed operation n procedurees are in secction 7.1.8, Print Functtion. 18.3 SStatisticss by Cardholder To revieew the Stattistics by Cardholder Seection, Clickk the follow wing menu o options to enter the pagge as shown n on Figure 18‐3: Atten ndance > Attendance R Report>Statistics by Cardho older. 147 NAV V IP Access controller c Figure18‐3 3 Statistics by C Cardholder 18.3.1 1 GenerateeStatistics by Cardholder Rep port Steps: 1) Input the employee number in tthe “Employee NO” bo ox. 2) Input the start and eend time. utton, the m matching reccords will be shown in the list. 3) Click the ““Search” bu 18.3.2 2 Export Sttatistics byy Cardhold der Reporrt Click “eexport” buttton to transsfer all Statiistics by Carrdholder Reecords in a C CSV format.. A dialog b box will app pear so a paath for a document can n be given. C Choose a lo ocation for tthe file and clicck “Ok”. Detailed operaational proccedures are e in section 7.1.7, Export Function. 18.3.3 3 Print Stattistics by C Cardholdeer Report Click th he “Print” button to enter a print rrequest of the Statistics by Cardho older record ds. Detailed operation n procedurees are in secction 7.1.8, Print Functtion. 18.4 SStatisticss By Depaartment To revieew the Stattistics by Deepartment SSection, Clicck the follow wing menu options to e enter the pagge as shown n on Figure 18‐4:Attend dance > Atttendance Reeport>Statisstics by Department. Figure 18‐4 4 Report by a D Department The repo ort can be geenerated in tw wo ways: Rep port by Deparrtment and Sttatistics by Department. 148 NAV IP Access A contrroller Figure 18‐5 Statistics by a Department 18.4.1 1 Generatee Statisticss by Department Re eport Steps: department in the depaartment boxx. 1) Select a d o generate tthe report. 2) Select thee method to 3) Input starrt and end ttime. 4) Click the ““Search” bu utton, the m matching reccords will be shown in the list. 18.4.2 2 Export Sttatistics byy Departm ment Repo ort Click “eexport” buttton to transsfer all Statiistics by Department R Records in a CSV format. A dialog b box will app pear so a paath for a document can n be given. C Choose a lo ocation for tthe file and clicck “Ok”. Detailed operaational proccedures are e in section 7.1.7, Export Function. 18.4.3 3 Print Stattistics by D Departmeent Reportt Click th he “Print” button to enter a print rrequest of the Statistics by Departtment recorrds. Detailed operation n procedurees are in secction 7.1.8, Print Functtion. 149 EverFocus Electronics Corp. Head Office 12F, No.79 Sec.1 Shin‐Tai Wu Road, Hsi‐Chi, Taipei, Taiwan Tel : + 886‐2‐2698‐2334 Fax : + 886‐2‐2698‐2380 USA Office 1801 Highland Ave, Duarte, Building CA 91010 ,U.S.A Tel : + 1‐626‐844‐8888 Fax : + 1‐626‐844‐8838 Japan Office 1809 WBG Marive East 18F, 2‐6 Nakase, Mihama‐ku, Chiba city 261‐7118, Japan Tel : + 81‐43‐212‐8188 Fax : + 81‐43‐297‐0081 European Office Albert‐Einstein‐Strasse 1, D‐46446 Emmerich, German Tel : + 49‐2822‐9394‐0 Fax : + 49‐2822‐939495 Beijing Office Room 609, KEMAO Building, Shangdi, Haidian, Beijing, China Tel : + 86‐10‐6297‐3336 Fax : + 86‐10‐6297‐1423 Shenzhen Office 4F, No.2, D4 Building, Wanyelong Industrial Park, Tangtou Road, Shiyan, Baoan, Shenzhen, Guangdong, China Tel: +86‐755‐ 27651313 Fax: +86‐755‐27650337 4605PNC302X020A V 2.0