1
™
• N’essayez pas de recharger une batterie à moins que la batterie soit
spécifiquement marqué « rechargeable ».
• Ne vous débarassez jamais des batteries dans un feu.
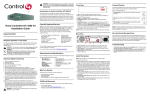
System Remote
Control SR-250
Setup Guide
Use and Features
Control4 System Remote Control SR-250 (Model C4-SR250B-Z-B) is intended for
use in a Control4® system with OS 2.0 and later. It is included with the purchase
of select Control4 Controllers, but may also be purchased separately. This System
Remote Control can be used to:
VORSICHT! Das Batteriekurzschluß, -durchsickern oder -abbruch
verhindern:
• Benutzen Sie AA alkalische Batterien nur im Schalter.
• Mischen Sie nicht Batteriearten, wie alkalische und nachladbare NiMH
Batterien.
• Versuchen Sie nicht, eine Batterie neuzuladen, es sei denn die Batterie
ist spezifisch gekennzeichnetes „nachladbares.“
• Entledigen Sie nie sich Batterien in einem Feuer.
Configure the Remote Control
1
Start Composer and connect to a Director.
2
In the System Design view (selected by default), select the room where the
System Remote Control will reside.
3
In the My Drivers tab, locate the SR-250 under the User Interface section.
• Navigate system menus and access media databases on a television or
monitor
• Navigate system menus and access media databases in its own display
window
• Control system devices
This System Remote Control goes beyond a typical “universal” remote that simply
learns IR codes from TVs, VCRs, CD players, and DVD players. This device features:
•
•
•
•
•
•
•
•
•
•
Bi-directional communication with system components
ZigBee wireless mesh networking
Full access to system components
Back-lighting on keys and display for ease of use in dark rooms
Ambient light sensor for efficient control of backlighting
Quick-access buttons to select recently used audio and video devices
Programmable buttons
Paging functionality
Standard control features for: Digital Satellite Systems (DSS), cable boxes, TV tuners,
Digital Video Recorders (DVR), DVD changers/players, CD changers/players, MP3
players, VCRs, or TVs.
Powered by four (4) AA batteries (included)
Install and Maintain the Batteries
Install the Batteries
Install the four (4) AA batteries (included) into the back of the SR-250. Insert them
according to the diagram provided in the battery compartment (with the + and -
The properties include:
• Display Brightness—Set the light level (brightness) of the screen backlight.
Choose a percentage from 0 (Off) to 100 (full brightness).
• Keypad Brightness—Set the light level (brightness) of the keypad backlight.
Choose a percentage from 0 (Off) to 100 (full brightness).
• Sleep Mode—Set how long the System Remote Control stays awake after
no activityThe default setting is 15 seconds, but can be extended up to 60
seconds or can be reduced down to 0 to conserve battery life.
• Battery Level—Displays the current strength of the batteries.
• Channel—Displays the ZigBee channel set for the SR-250, which should
match the ZigBee channel for the Controller.
• Gateway—Displays the MAC address of the Zigbee Server (usually your
Controller unless you specify differently).
• MAC—Displays the System Remote Control’s own MAC address.
• Firmware Version—Displays the current firmware version.
7
4
Double-click SR-250 to add the device to the project tree.
5
Identify the SR-250:
•
•
•
•
terminals aligned correctly).
Battery Use and Care Tips
• Keep the battery contacts and compartment clean.
• Remove the batteries from the product if it is not going to be used for
several months.
• Extreme temperatures reduce battery performance. Avoid putting the SR-250
in very warm places.
Program the Programmable Buttons
On the System Remote Control SR-250, you can program six (6) soft buttons (Red,
Green, Yellow, Blue, *, and #) to perform programmed activities.
These buttons can be programmed to execute any of the AV device’s macros or IR
codes. Program these options using the AV device properties page.
Battery Replacement Safety Rules
WARNING! To prevent a battery short, leakage or rupture:
• Use typical AA Alkaline batteries only.
• Do not mix battery types, such as Alkaline and rechargeable
NiMH batteries.
• Do not attempt to recharge a battery unless the battery is specifically
marked “rechargeable.”
• Never dispose of batteries in a fire.
ATTENTION! Pour empêcher court-circuiter, fuite ou rupture de batterie:
Utilisez les accumulateurs alcalins typiques d’AA seulement.
• Ne mélangez pas les types de batterie, tels que les batteries alkalines
et rechargeables de NiMH.
Note: To complete the identification process, the System Remote Control
must be on the same ZigBee channel as the Controller; the Controller
must have Zserver enabled. If you need to change the ZigBee channel on
the System Remote Control, see Step 7.
• When the MAC address appears in the window, click Close.
6
View or change the System Remote Control properties as needed in
Composer: In the System Design view in the project tree, select the System
Remote Control SR-250 object to display the device’s properties.
1
want to program, and then choose a code or macro from the drop-down list,
edit the Help text as needed, and then choose Set.
Note: Help text describes custom programming to end-users under the
House option in any of the Navigators.
For example:
(1) In System Design view, select Disc Changer.
(2) Under Red button, choose Code.
(3) From the drop-down list, choose Subtitle.
(4) Choose the Set button to create a Subtitle button.
Check or change the ZigBee Channel: If you need to change the ZigBee
channel to match the Controller’s channel (which is sometimes changed to
improve reception), do the following at the SR-250:
• Press the List button, and then select Info > Config.
• Press buttons 2, 4, 8, 6, #, *, List (in that order) to get into Edit mode.
• On-menu List, Info, and Config:
-Display Brightness
-Keypad Brightness
-Motion Detect
-Battery Level
-Factory Default
-About
• Press the up or down arrows to change the ZigBee channel.
• Press List to exit Edit mode and save the changes.
In the Connections view, click the Network tab.
Select System Remote Control SR-250 in the center pane.
Click Identify (or right-click and choose Identify).
When prompted to do so, press the red 4 button four (4) times to have the
device identify to the Control4 system.
Based on AV Device (Pictured):
• Select the System Design view.
• Select an AV device to display the device’s Properties page.
• On the device’s Properties page, choose Code or Macro for the button you
Start Composer and connect to a Director.
2
Ensure the System Design view is selected.
3
Ensure that you have the following devices in your project:
•
•
•
4
Controller
System Remote Control SR-250
An AV device to be controlled
Select the Connections view.
5
On the Network tab, ensure the Controller and the System Remote Control
are both network identified (have a network address).
6
Program the programmable buttons (Red, Green, Yellow, Blue, *, or #) either
based on the selected AV device or the selected room.
Based on Room:
• Select the Programming view.
• Select a room in the Device Events pane.
• Select the Commands radio button in the [Room] Events pane.
• Use the drop-down menu to select a command or button (such as “Blue
•
•
Button”).
Build the script using items from the Actions pane to program the actions
desired in the selected room when you select the command or button.
For more information about programming, see the Composer Pro User Guide.
Program System Remote Control Paging
You can configure the Beep paging feature of the SR-250 through programming.
This feature can be used to page a lost System Remote Control. A keypad or
custom button can be programmed to cause the System Remote Control to beep
when pressed. This lets the user find the lost System Remote Control.
To program the paging feature for this System Remote Control:
1
Start Composer and connect to a Director.
2
Select the Programming view.
3
Select the Event that you want to use to start the page. For example, to
select a keypad button press, first select the keypad under the Device Event
section (on the left), and then select the button under Events.
4
In the Actions list (on the right), select System Remote Control SR-250.
5
In the Commands list, choose an action for the System Remote Control, and
then double-click the green arrow to add the action to the Script pane.