1
3. Access to Web-based Interface
Now, your Compex WPE54AG acts as a DHCP Server which can
assign IP address to your PC/clients.
Compex has developed a powerful uConfig utility which provides
you hassle-free access to the web-based configuration page. To do so,
simply
1.
2.
3.
5. WLAN Basic Setup for Compex WPE54AG
Insert your Product CD into your CD-ROM drive. Go to
Utilities section and select uConfig to run the program.
1.
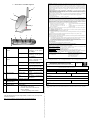
The following screen shot will appear. Select NetPassage
WPE54AG and click on OpenWeb button to access to the
authentication page.
To configure your Compex WPE54AG for your wireless user,
go to WLAN Basic Setup from the CONFIGURATION
section.
2.
From your Access Point Setup window, key in the ESSID that
you intend to use for your wireless network.
3.
You may leave the frequency channel as SmartSelect. This
allows your access point to select the channel automatically.
4.
Leave the remaining settings as default and click Apply button
to update the changes.
The password is pre-configured as password in the field
provided. Click on Log On! button to access to the main page.
6. TCP/IP Configuration for wireless clients
Generally, automatic IP addressing should be configured for your
wireless client PCs or notebooks. You may configure the TCP/IP
settings of Microsoft windows XP as follows:
After accessing to the main page of your Compex WPE54AG, you
can start doing your configuration
4. Basic Configuration for Compex WPE54AG
1.
To handle automatic IP addressing, go to Management Port
under CONFIGURATION section.
2.
Go to DHCP Server option and select Enable radio button.
Click on Apply button to update the changes.
1.
From your desktop, right click on My Network Places and
select Properties.
2.
Next, right click on your Ethernet Adapter go to Properties.