1
Note: All electrical installation connections for loudspeaker lines are subject to all applicable governmental
building and fire codes. The selection of appropriate electrical hardware to interface with the Distributed
Design Series loudspeaker lies solely with the installation professional. Community recommends that an
appropriately licensed engineer, electrician, or other professional identify and select the appropriate conduit,
fittings, wire, etc. for the installation.
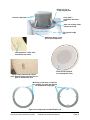
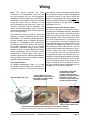
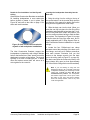
Internal wiring between
terminal block and plug-in
connector to loudspeaker
(factory wired). Red arrows
point to the jumpers between
the pairs of (+) and (-) terminals
in the highlighted area of this
image.
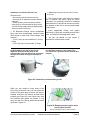
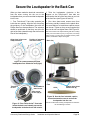
View of 6.5" loudspeaker
showing the location of the
socket for the wiring connector Close-up view of socket for the
wiring connector from the back
from the back can.
can.
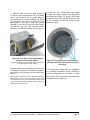
Connect the plug from the can
(or from the conduit wiring, see
Figure 22) to this socket on the
loudspeaker assembly.
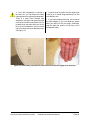
The loudspeaker is now
connected to the wires from
the can and is ready to mount
in the can.
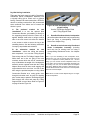
Note: It should be obvious that
in these photos the loudspeaker
and can are not in place in a
ceiling, but instead are arranged
for photographic convenience.
Figure 21. Internal wiring between can terminal block and loudspeaker
Community Distributed Design Series
Installation and Operation Manual Page 21