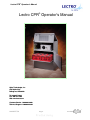
1
Lectro CPR® Operator’s Manual
®
Lectro CPR Operator’s Manual
Alpha Technologies, Inc.
3767 Alpha Way
Bellingham, WA 98226
Tel: 360-647-2360
Fax: 360-671-4936
Web: www.lectro.com
Customer Service: 1-800-863-3930
Technical Support: 1-800-863-3364
164201257 C0
Page 1
Preliminary
6/13/2003
®
Lectro CPR® Operator’s Manual
Table of Contents
TABLE OF CONTENTS ........................................................................................................................................ 2
LIST OF TABLES & FIGURES............................................................................................................................. 3
IMPORTANT SAFETY INSTRUCTIONS .............................................................................................................. 4
1: CABINET INSTALLATION ............................................................................................................................... 6
1.1
POLE MOUNTING ....................................................................................................................................... 6
1.2
GROUND MOUNTING .................................................................................................................................. 7
1.3
ELECTRICAL CONNECTIONS...................................................................................................................... 11
2 : POWER SUPPLY........................................................................................................................................... 13
2.1
INSTALLATION .......................................................................................................................................... 13
2.2
OPERATION ............................................................................................................................................. 18
2.3
MAINTENANCE ......................................................................................................................................... 19
2.4
TROUBLESHOOTING ................................................................................................................................. 22
2.5
SPECIFICATIONS ...................................................................................................................................... 24
3: BATTERIES .................................................................................................................................................... 25
3.1
SAFETY ................................................................................................................................................... 26
3.2
BATTERY INSTALLATION ........................................................................................................................... 26
3.3
BATTERY REMOVAL .................................................................................................................................. 27
3.4
ADDITIONAL BATTERY STRING .................................................................................................................. 28
3.5
MAINTENANCE ......................................................................................................................................... 29
4: STATUS MONITOR ........................................................................................................................................ 31
4.1
INSTALLATION .......................................................................................................................................... 31
4.2
OPERATION ............................................................................................................................................. 32
4.3
CONFIGURATION ...................................................................................................................................... 33
4.4
MAINTENANCE ......................................................................................................................................... 35
4.5
TROUBLESHOOTING ................................................................................................................................. 36
164201257 C0
Page 2
Preliminary
6/13/2003
Lectro CPR® Operator’s Manual
List of tables & figures
FIGURE 1.1-1:
POLE MOUNT INSTALLATION ........................................................................................................... 7
FIGURE 1.2-1:
GROUND MOUNT PROFILE (CONCRETE OR CONCRETE COMPOSITE PAD) ........................................... 9
FIGURE 1.2-2:
GROUND MOUNT (FRONT VIEW OF 4 BATTERY CABINET WITH GROUND SKIRT) ................................... 9
FIGURE 1.2-3:
POLE MOUNT (FRONT VIEW OF 8 BATTERY CABINET)...................................................................... 10
FIGURE 1.2-4:
POLE MOUNT (REAR VIEW OF CABINET)......................................................................................... 10
FIGURE 1.2-5:
COAX “FEED THRU” ADAPTER LOCATION (BOTTOM SHELF) ............................................................ 11
FIGURE 2.1-1:
CPR CABINET COMPLETELY WIRED .............................................................................................. 13
FIGURE 2.1-2:
CPR MODULE FRONT AND SIDE VIEWS ......................................................................................... 16
FIGURE 2.1-3:
BATTERY SENSING AND TEMPERATURE PROBE CONNECTION – PARALLEL STRINGS ........................ 17
FIGURE 2.1-4:
BATTERY SENSING AND TEMPERATURE PROBE CONNECTION – SINGLE STRING .............................. 17
FIGURE 2.2-1
FRONT PANEL DISPLAY ................................................................................................................. 18
FIGURE 2.3-1:
MAINTENANCE LOG SHEET ............................................................................................................ 21
TABLE 2.4-1:
TROUBLESHOOTING GUIDE ............................................................................................................ 22
TABLE 2.5-1:
SPECIFICATIONS ........................................................................................................................... 24
FIGURE 3.3-1:
BATTERY CONNECTIONS – SINGLE STRING ..................................................................................... 27
FIGURE 3.4-1:
BATTERY CONNECTIONS – PARALLEL STRINGS .............................................................................. 29
FIGURE 4.1-1:
THE CPR COMMUNICATOR ........................................................................................................... 31
FIGURE 4.3-1:
FRONT OF CPR COMMUNICATOR
MODULE (LEVEL ONE)............................................................. 33
FIGURE 4.3-2:
FRONT OF CPR COMMUNICATOR
MODULE (LEVEL TWO) ............................................................ 34
FIGURE 4.3-3:
FRONT OF CPR COMMUNICATOR
MODULE (LEVEL THREE) ......................................................... 34
TABLE 4.5-1:
TROUBLESHOOTING ...................................................................................................................... 36
164201257 C0
Page 3
Preliminary
6/13/2003
Lectro CPR® Operator’s Manual
IMPORTANT SAFETY INSTRUCTIONS
SAVE THESE INSTRUCTIONS
This manual contains important instructions for the Lectro CPR® Uninterruptible Power Supply
(UPS). These instructions should be followed during installation and maintenance of the
power supply, batteries, cabinet, status monitor and any options and/or ancillary equipment.
CAUTION: RISK OF ELECTRIC SHOCK. Hazardous electrical live parts inside the power supply are
energized from the batteries even when the input AC power is disconnected.
CAUTION: An agency-approved service disconnect switch is required at installation and shall be
connected between the utility power source and the CPR power supply. The service disconnect and
service disconnect installation is subject to local electrical codes and should be approved for application in a NEMA 3R enclosure, rated 120/240V, with a non-interrupted neutral termination.
For 120 VAC 60 Hz units, the service disconnect shall be a high-magnetic type circuit breaker
rated for 20 amperes in the line lead only.
For 240 VAC units, the service disconnect shall be a 2 pole, high-magnetic type circuit breaker
rated for 20 amperes.
For 220 VAC 60Hz and 230 VAC 50 Hz units, the service disconnect shall be a high-magnetic
type circuit breaker rated for 16 amperes in the line lead only.
CAUTION:
For 120 VAC 60 Hz units, use #12 AWG (minimum) copper, 75°C, for all utility input wiring.
For 240 VAC 60 Hz units, use #12 AWG (minimum) copper, 75°C, for all utility input wiring.
2
For 230 VAC 50 Hz units, use a minimum of 1.5 mm (#16 AWG copper, 75°C, for all mains input
wiring).
CAUTION: The Lectro CPR UPS is a 48Vdc system designed for use with either a single or dual
string of four 12Vdc batteries. Please refer to Section 3 of this manual for more details on proper battery installation, maintenance, storage, and replacement procedures
CAUTION: Over current protection and disconnecting means for the AC output are to be supplied by
the electrical installer as required by local electrical codes.
®
CAUTION: The operating temperature range for the Lectro CPR UPS is –40°C to +55°C for air at
the intake of the CPR module.
CAUTION: CPR UPS installations involving third-party cabinets, not supplied by Lectro, require ade®
quate ventilation, airflow and spacing to insure that the CPR power supply operates within a temperature range of -40°C to +55°C. Failure to provide an operating thermal environment per published
specifications will void the warranty.
164201257 C0
Page 4
Preliminary
6/13/2003
Lectro CPR® Operator’s Manual
EC DECLARATION OF CONFORMITY
Units that are labeled with a CE mark comply with the following EU directives:
73/23/EEC Council Directive on equipment designed for use within certain voltage limits.
93/68/EEC Amending Directive 72/23/EEC.
89/336/EEC Council Directive relating to electromagnetic compatibility.
The EC Declaration of conformity is available upon request for products with a CE mark. For
copies of the EC Declaration of Conformity, contact:
Alpha Technologies
3767 Alpha Way
Bellingham, WA 98226
Phone: 360-647-2360
Fax: 360-671-4936
164201257 C0
Page 5
Preliminary
6/13/2003
Lectro CPR® Operator’s Manual
1: Cabinet Installation
1.1 Pole Mounting
NOTE: Pole mounting the cabinet should be done in accordance with the local agreement
between the cable operator and the utility company.
NOTE: A bucket truck and other suitable equipment, such as spikes and safety harness,
should be used during installation or service of pole-mounted cabinets. To mount the Lectro
CPR® UPS to a utility pole perform the following steps:
1.1.1
Install an appropriate disconnect box between the AC power source and the CPR
cabinet mounting point. Wire to power line in accordance with local codes.
NOTE: The disconnect box should have a high magnetic type circuit breaker, capable of
passing short duration inrush currents, and have a minimum rating as shown below.
For 120 VAC 60 Hz units, the service disconnect shall be a high-magnetic type circuit breaker
rated for 20 amperes in the line lead only.
For 240 VAC units, the service disconnect shall be a 2 pole, high-magnetic type circuit breaker
rated for 20 amperes.
For 220VAC 60Hz and 230 VAC 50 Hz units, the service disconnect shall be a high-magnetic type
circuit breaker rated for 16 amperes in the line lead only.
1.1.2
1.1.3
Remove the U-shaped bracket from the cabinet rear panel (refer to Figure 1.1-1).
Use the bracket as a template to mark mounting holes at the desired mounting location. If possible, position the cabinet so that the front panel and the external
LED's are easily visible.
NOTE:
If attaching to a concrete pole additional mounting hardware will be required for the
installation. Lectro does not provide the metal bands required to mount to a concrete pole. This hardware can be obtained from a CATV hardware supplier.
1.1.4
1.1.5
Drill 11/16" (17.5mm) holes in the pole at the marked locations.
Attach the bracket to the pole using 5/8" (M16-2.0) hardware (not provided). Make
sure that the head of the bolt is next to the pole bracket and the nut is at the rear of
the pole. Tighten securely.
Raise the cabinet and set into place on the bracket already attached to the pole.
The slots on the pole bracket should be pointing downward so that the cabinet will
slide onto the bolts on the pole-mounting bracket. Attach the cabinet using the
hardware provided. Tighten ALL the bolts securely.
Confirm the availability of a suitable ground rod at the base of the pole. If required,
drive a ground rod according to local codes.
1.1.6
1.1.7
164201257 C0
Page 6
Preliminary
6/13/2003
Lectro CPR® Operator’s Manual
1.1.8
Refer to Section 1.3 for Electrical Connections.
Figure 1.1-1: Pole Mount Installation
1.2 Ground Mounting
Although ground mounting the CPR cabinet can be accomplished by several methods, the
following procedure is recommended:
1.2.1
1.2.2
Select an appropriate site. Check with other local utilities for buried plant before site
location is finalized. Remove the turf and level an area of approximately 4" greater
than the foot print of the CPR cabinet. Refer to Figure 1.2-1 for details.
In accordance with local codes, install the disconnect box near the AC power
source.
NOTE: The disconnect box should have a high magnetic type circuit breaker, capable of
passing short duration inrush currents, and have a minimum rating as shown below.
For 120 VAC 60 Hz units, the service disconnect shall be a high-magnetic type circuit breaker
rated for 20 amperes in the line lead only.
For 240 VAC units, the service disconnect shall be a 2 pole, high-magnetic type circuit breaker
rated for 20 amperes.
For 220VAC, 60Hz and 230 VAC 50 Hz units, the service disconnect shall be a high-magnetic
type circuit breaker rated for 16 amperes in the line lead only.
164201257 C0
Page 7
Preliminary
6/13/2003
Lectro CPR® Operator’s Manual
1.2.3
1.2.4
1.2.5
1.2.6
1.2.7
1.2.8
1.2.9
1.2.10
1.2.11
1.2.12
From the disconnect box, install conduit to the power supply site and turn a stub up
to extend above grade level. Drive a suitable ground rod according to local codes
(refer to Figure 1.2-1).
Install appropriate size conduit for the output connections and turn a stub up to extend 1" above the pad surface cast into the concrete. Make sure to match conduit
locations with the appropriate cabinet locations; these locations are indicated in
Figure 1.2-1.
Using appropriately sized lumber, construct a form for the cement pad (refer to
Figure 1.2-1 for dimensions). Anchor the form securely to the ground. If a preformed pad is utilized for the mounting of the CPR cabinet, check the bolt patterns
for proper alignment before anchoring the pad to the ground.
Attach the ground mounting brackets from the supplied hardware to the ground
skirt using the 5/16-18 X .75 screws and 5/16-18 nuts. Tighten securely.
Make a template from sheet metal or wood indicating the position of the groundmounting bracket mounting holes.
Drill out the two holes in the template and insert two 5/8" X 4" (M16-2.0 x 100mm)
bolts (not supplied). The heads of the bolts will be embedded into the concrete pad
when installation is complete. Leave sufficient thread above the pad for securing
the ground skirt.
Center the template (with holes in position) over the form. Be sure the conduit stubups for the AC input, ground rod, and AC output are positioned at the desired locations just outside the ground skirt. Optional: The conduit stub-ups may pass
through the cement pad as shown in Figure 1.2-1 below.
Pour, level, and finish concrete to the bottom of the template. Allow a curing time of
24 hours.
Attach ground skirt to power supply cabinet. Align skirt inside bottom lip of the
cabinet and secure using 10-32 X 3/8" screws from the parts kit
Attach the power supply cabinet to the concrete pad using 5/8" (M16-2.0) nuts (not
provided) through the ground mounting brackets. Tighten all hardware securely.
164201257 C0
Page 8
Preliminary
6/13/2003
Lectro CPR® Operator’s Manual
Electrical Supply Conduit
for Direct wiring installa-
M16-2.0
tion. 1” (2.5 cm) Conduit
79 cm
21.6 cm
Minimum.
21.6 cm
66 cm
13.7cm
92 cm
63 cm
10 cm
Figure 1.2-1: Ground Mount Profile (Concrete or Concrete composite pad)
External
Indicator
Lamps
Padlock
Hasp
Optional
Ground
Coastal
Skirt
Locks
Figure 1.2-2: Ground Mount (Front View of 4 battery cabinet with ground skirt)
164201257 C0
Page 9
Preliminary
6/13/2003
Lectro CPR® Operator’s Manual
Figure 1.2-3: Pole Mount (Front View of 8 battery cabinet)
Optional
Location
for “Feed-
AC Input
Thru”
Conduit
Adaptor
Connection
Pole Mount-
Ground Lug
ing Bracket
Figure 1.2-4: Pole Mount (Rear View of cabinet)
164201257 C0
Page 10
Preliminary
6/13/2003
Lectro CPR® Operator’s Manual
Typical Placement of Disconnect Breaker
on Rear of Cabinet
Coax
“Feed Thru”
Seizure
Adaptor at Rear
Clamp
of Bottom Shelf
“Snap in”
Connector (to
power supply
output)
Figure 1.2-5: Coax “Feed Thru” Adapter Normal Location (Bottom Shelf)
1.3 Electrical Connections
WARNING: Be sure the utility (mains) disconnect is off and that no conductors are energized before proceeding.
To connect wiring, perform the following steps:
1.3.1
Open the cabinet doors.
1.3.2
Install liquid tight conduit to the fitting on the cabinet rear panel and pull the AC
primary into the cabinet housing.
164201257 C0
Page 11
Preliminary
6/13/2003
Lectro CPR® Operator’s Manual
1.3.3
1.3.4
1.3.5
1.3.6
1.3.7
1.3.8
Using the receptacle (if provided), connect the AC high input (black) to the copper
receptacle terminal, the AC neutral (white)to the silver receptacle terminal, and the
utility protective ground (green) to the green receptacle terminal. The screw tighten
torque is 20 lb-in.
Position all wiring neatly in the receptacle box and install the receptacle and then
the receptacle cover. NOTE: Some cabinets do not have receptacles. In this case,
the appropriate receptacle must be supplied by the installer.
Using the output wire harness (green and yellow wires with “snap-in” connectors, a
seizure clamp, and O-ring) and cable “feed through” adapter from the parts kit, install the cable adapter and ground wire. Insert the cable adapter from outside the
cabinet into the paint-masked hole. The adapter may be mounted on the back of
the cabinet, (Figure 1.2-4), or in one of the holes in the bottom battery shelf (typical
for ground mounting, see Figure 1.2-5). Use the lock nut to secure the adapter and
the large O-ring to the cabinet. Tighten securely. Repeat this procedure for units
with dual outputs (24 amp model).
Install your choice of coax cable in the adapter. A 90° adapter may be required for
some installations. Connect the yellow output wire to the center pin of the cable by
sliding the seizure clamp into place and tightening securely. Cut the center pin of
the cable to allow about 1/4" of the pin to extend beyond the end of the clamp.
Slide the protective boot over the connector center pin and seizure clamp.
Connect an unbroken 6 AWG soft-drawn copper ground wire between the ground
lug provided on the back of the cabinet and the ground rod for transient voltage
protection. Note: Keep the ground wire as straight as possible. Use a ground rod
clamp of the proper type, above or below grade.
Proceed with the CPR Power Module installation as described in Section 2.
164201257 C0
Page 12
Preliminary
6/13/2003
Lectro CPR® Operator’s Manual
2 : Power Supply
2.1
Installation
Refer to Section 1 for installation of the pole mount or ground mount enclosure.
NOTE: The CPR module weighs 56 lbs/25 kg. (65 lbs./30 kg for the 24 amp model), and the
center of gravity is offset to the right. The unit may be lifted using both of the lifting handles
on the front of the module.
CAUTION: When pulling the unit forward from a shelf, be sure to support the right hand rear
corner.
Figure 2.1-1: CPR Cabinet-Completely Wired
2.1.1 Verify the battery breaker on the front panel of the CPR is open.
2.1.2 Connect the green and yellow output harness on the CPR UPS to the mating
connector on the harness that is installed in the cabinet. Verify the wire colors
and connector
colors match.
164201257 C0
Page 13
Preliminary
6/13/2003
Lectro CPR® Operator’s Manual
2.1.3 Connect the green ground wire from the CPR UPS to the back of the mounting
bolt that holds the exterior ground clamp to the wall of the enclosure. Use the
#10 hardware provided.
2.1.4 For those power supplies with IEC power cords, plug the cord into the receptacle on the left side of the power supply. Use only an HAR-approved power cord
for 50 Hz installations. Tighten the screw on the clamp until the power cord is
secure.
2.1.5 If the batteries are not installed, install them at this time per the instructions in
Section 3. Connect the battery sensing wire harness to the appropriate battery terminals as shown in Figure 2.1-3. Use appropriate flat washers when
connecting this harness to small battery terminals. Plug the connector from the
battery sensing harness into the mating connector on the CPR Communicator Module at the front of the power supply module.
2.1.6 Locate the wire harness that connects to the LEDs on the exterior of the CPR
outdoor enclosure. Plug this harness into the mating connector on the CPR
Communicator Module at the front of the power supply module.
2.1.7 If a Tamper Switch is installed in the cabinet, plug it’s wire harness into the
mating connector on the CPR Communicator Module at the front of the power
supply module.
2.1.8 If the optional Battery Temperature Probe is used, connect the sensor plate
containing the small PC board to the most negative battery terminal (the same
terminal where the negative [black] wire from the CPR module is connected,
see Figure 2.1-3). Plug in the modular phone type connector into the RJ-11 port
on the left side of the CPR module.
2.1.9 Confirm that the battery breaker on the front of the CPR module is open. Connect the ring lugs at the other end of this harness to the positive and negative
terminals of the battery as described in Section 3. Use appropriate flat washers
when connecting this harness to smaller battery terminals. Plug the large gray
battery power plug into the receptacle on the left side of the CPR module.
2.1.10 Select the appropriate output voltage for the network that this UPS is powering.
This is accomplished by plugging in the short yellow wire(s) on the left side of
the CPR module into the receptacle labeled “48 V,” “60 V,” 75 V,” or “87 V.”
This setting determines the voltage that will be present at the green and yellow
connector on the output harness (or the coaxial fitting) when the CPR unit is
operating.
CAUTION: If the unit is set for 75 or 87 VAC, make SURE that the network components (actives and passives) are rated to handle these higher voltages before energizing the CPR power supply.
2.1.11 Confirm that the external AC disconnect is OFF.
2.1.12 Plug the AC input cord into the receptacle at the left rear of the outdoor enclosure.
164201257 C0
Page 14
Preliminary
6/13/2003
Lectro CPR® Operator’s Manual
THE CPR SYSTEM IS NOW READY TO BE ENERGIZED. FOLLOW THE OPERATING
PROCEDURE IN SECTION 2.2.
60 Hz Units (15 amp)
A AC Output Cable
B Output Voltage Select
C Battery Power Cable
D AC Input
Temp.
Probe
Fig. 2.1-2 Input/Output Voltage, Temp. Probe Connection points
50 Hz Units
A AC Output Fitting
D
(Green and Yellow cable
may be used for output
A
connection)
B Output Voltage Select
B
C Battery Power Cable
D AC Input
C
Temp.
Probe
Fig. 2.1-3 Input/Output Voltage, Temp. Probe Connection points
164201257 C0
Page 15
Preliminary
6/13/2003
Lectro CPR® Operator’s Manual
D
60 Hz Units (24 amp)
A
A AC Output Cables (2)
B Output Voltage Select
C Battery Power Cable
B
D AC Input
C
Temp.
Probe
Fig. 2.1-4 Input/Output Voltage, Temp. Probe Connection points
Front Panel (All Units)
E Weak Battery LEDs
F Battery Breaker
G Test Points
H LED Display
J CPR Communicator
Module
K Inverter “ON” LED
L Output “ON” LED
Figure 2.1-5
164201257 C0
CPR Module Front and Side Views
Page 16
Preliminary
6/13/2003
Lectro CPR® Operator’s Manual
BATTERY INPUT
TEMPERATURE PROBE
RED
BLACK
Upper Shelf
Negative:
(Black)
Middle:
(Orange)
Positive: (Red)
Lower Shelf
TEMP PROBE INPUT
Middle: Longer lead
(Orange)
FRONT OF ENCLOSURE
Figure 2.1-6: Battery Sensing and Temperature Probe Connection – Parallel Strings
BATTERY INPUT
TEMPERATURE PROBE
RED
Upper
Shelf
BLACK
Negative:
(Black)
Middle:
(Orange)
Positive:
(Red)
TEMP PROBE INPUT
Middle: Longer lead
(Orange)
If not used, tuck connection out of the way.
FRONT OF ENCLOSURE
Figure 2.1-7: Battery Sensing and Temperature Probe Connection – Single String
164201257 C0
Page 17
Preliminary
6/13/2003
Lectro CPR® Operator’s Manual
2.2
Operation
CPR UPS STARTUP AND INVERTER TEST
2.2.1 Verify that all connections to the CPR have been made correctly as described in
Section 2.1.
2.2.2 Verify that the desired output voltage has been selected (48V, 60V, 75V, or
87V) via the connection at the left side of the CPR module. Check to see that
the AC input cord and Battery power cables are plugged in.
2.2.3 Turn on the external disconnect breaker (supplied by the installer), then close
the battery breaker on the front of the CPR module. There should be only green
LEDs lit on the display. If red LEDs are illuminated, see Section 2.4, Troubleshooting.
2.2.4 Verify that the “Output Voltage” green LED is lit on the front display. The CPR
System should now be providing power to your network. Verify with a voltmeter
at the point where the coax exits the cabinet.
2.2.5 The front panel display includes “bar graph” indicators to describe input voltage
levels, battery voltage levels, and output load levels. See Figure 2.2-1 for more
information.
Inverter
ON
(Red)
[flashing]
UPS
Communicating
[solid - handshake]
[flashing – data]
Weak Battery
(Red)
[solid]
Figure 2.2-1: Front Panel Display
164201257 C0
Page 18
Preliminary
6/13/2003
Lectro CPR® Operator’s Manual
2.2.6 Check the front panel test points with a true RMS voltmeter.
CABLE AC OUT should read within 3-5% (maximum range is tap dependent) of the
configured output voltage (48, 60, 75, or 87 V). BATTERY should read between 45
and 56 Vdc, depending on the age, temperature, and state-of charge of the batteries.
2.2.7 Verify that the external LEDs on the CPR outdoor cabinet are functioning. In
normal operation, the green external LED will be ON solid, (not flashing). The
green LED flashes when the CPR system is on battery, and the red LED
flashes when there is a system alarm or failure.
2.2.8 INVERTER TEST: This test will verify proper operation of the system inverter.
Push the front panel button labeled “Inverter Test.” The red “inverter” LED
should flash on the front panel, and the fan will run. Check the CABLE AC OUT
test points for proper voltage. The inverter test lasts from 1.0 to 2.0 minutes,
and will automatically return to normal mode at the conclusion of the test. If the
inverter fails to start, check for an open battery breaker or a loose battery terminal connection.
2.2.9 Once the unit has returned to normal operation, after the inverter test, the system startup is complete.
NOTE: The CPR UPS can also be “hot started” on battery power when utility power is not
present. To hot start the CPR, close the battery breaker on the front panel, and press and
hold the “output on” button. The inverter will start within 3 seconds. The unit will operate until
the battery capacity is depleted.
CPR SHUTDOWN PROCEDURE
To shut down the CPR power supply, open the battery breaker, and unplug the AC power
cord.
WARNING: RISK OF ELECTRIC SHOCK. Hazardous electrical live parts inside the power
supply are energized from the batteries even when the input AC power is disconnected.
2.3 Maintenance
Note: It is important that secure mechanical and electrical connections be maintained on this
equipment. Secure connections will help prevent outages and equipment damage. Refer to
Figure 2.3-1 for a sample of a maintenance log sheet.
2.3.1 Inspect the external ground connections for mechanical integrity and good physical
condition. Check the cabinet for damage and check the mounting hardware for mechanical
integrity.
164201257 C0
Page 19
Preliminary
6/13/2003
Lectro CPR® Operator’s Manual
2.3.2 Open the cabinet. Check tightness of all battery, internal ground, and output connections. Observe condition of batteries. If the cabinet shows signs of excessive dust or moisture, check for lost vent screens. Repair as required, and note any unusual conditions for future reference.
2.3.3 Inspect the input surge suppressor (if installed) for obvious damage. If it appears intact,
check its operation with a megger or a similar device to ensure that it is functioning. Note that
a failed surge suppressor may appear visually to be OK, yet allow damaging transients and
surges to enter the power supply, and possibly the coax network. It is very important to test
the surge suppressor with a megger to make sure it is actually protecting the power supply.
2.3.4 On the maintenance log sheet (Figure 2.3-1), mark which LEDs are illuminated on the
front panel of the CPR UPS. The presence of any red LED indicates an alarm or failure which
will require immediate attention. See Section 2.4 for troubleshooting information.
2.3.5 The CPR system will automatically and periodically load test the batteries. If a failing
battery is detected, the battery LED (red) on the front panel will illuminate. If the battery LED
is illuminated, replace the affected battery (or string of batteries) and press the “battery LED
reset” button on the front panel. See Section 3.2 for more details on how the CPR senses a
weak battery, and the proper procedures for replacement.
2.3.6 Use a true RMS meter to record AC output voltage and battery voltage at the front
panel test points. If available, use a clamp-on current probe to record AC output current at the
cable adapter.
2.3.7 Turn the battery circuit breaker off (down). Record the voltage for each battery (well
matched batteries should differ by no more than 0.2 Vdc). If the battery has a date code on
the label, record it on the maintenance log sheet.
2.3.8 Using a battery load tester, check the performance of each battery. Note that the CPR
UPS performs battery load testing automatically, so this step may be omitted if desired.
2.3.9 Close the battery circuit breaker on the front panel.
2.3.10 Force the unit into standby operation by pressing the “inverter test” button on the front
panel. Verify that the red inverter LED illuminates and that the output voltage remains within
+/- 3-5% of the nominal voltage (48, 60, 75 or 87 VAC). Verify the unit returns automatically
to normal operation after 1 to 2 minutes.
2.3.11 Confirm that only GREEN LEDs are illuminated, remove all tools and meters, and
close and lock the cabinet. This completes routine maintenance of the CPR power supply.
164201257 C0
Page 20
Preliminary
6/13/2003
Lectro CPR® Operator’s Manual
Lectro CPR Power Supply Maintenance Log Sheet
For use with the maintenance procedures in the Operator’s Manual.
Cable Company:___________________________________________________
Inspection Date:________________
Location:_________________________
Technician:____________________
Model/Serial#:____________________
Visual
Inspection
Problem and Fix:__________________________________
Comments:_______________________________________
Battery Weak LEDs:
String1: ON / OFF
String 2: ON / OFF
LED Display: Mark the illuminated LEDs on the diagram below:
Input
Inverter
Battery
Load
Battery Comm
Output ON
DVM (RMS Voltmeter) Readings
Cable Output Voltage:________ Battery Voltage:________ AC Amps:________
Test Points
Press “Inverter Test” button.
Standby AC voltage:_______
Test Points
Fan Running?
Y
Clamp on Probe
N
Remove Dust and Moisture from Cabinet:______OK
Comments:_______________________________________________________
________________________________________________________________
________________________________________________________________
________________________________________________________________
________________________________________________________________
Figure 2.3-1: Maintenance Log Sheet
164201257 C0
Page 21
Preliminary
6/13/2003
Lectro CPR® Operator’s Manual
2.4 Troubleshooting
Table 2.4-1: Troubleshooting guide
Symptom
No AC output to coax cable
Possible Cause
What To Do
Utility failure
Notify local Power Co..
External input breaker open or tripped
Re-close breaker. Verify
breaker is HIGH MAGNETIC
type.
AC power cord loose/unplugged
Re-insert plug into receptacle.
Utility voltage or frequency (or generator output) is out of range. AC input to power supply
must be within the following limits:
Voltage: 96V to 156 V (or 192V-276V for
240V nominal units, or 161V-299V for 230V
nominal units, or154V-286V for 220V nominal
units) RMS
Frequency: 57 to 63 Hz
AC output harness is disconnected or loose
Inverter does not run, or
module does not transfer
to “standby” either during
a power failure or an “inverter test”
Inverter failure
Measure the AC source voltage and frequency. If out of
limits, notify Power Co. or, if a
generator is used, either adjust
its output, or select a larger
generator.
Verify all connections from the
AC output (green and yellow)
connector to the coax fitting.
If the “Battery” LED is “off” on
the front panel, then the inverter may have failed, and the
CPR module should be replaced.
Battery breaker open
Close battery breaker on front
panel.
Battery too weak to support inverter. Front
panel “battery” LED should be illuminated.
CPR module fails to transfer from “standby” back to
“normal” mode after a utility outage
Utility (or generator) out of limits on voltage or
frequency. See “No AC output” above.
Test Batteries with a load
tester. Replace any that fail the
test.
Measure the AC source voltage and frequency. If out of
limits, notify Power Co. or, if a
generator is used, either adjust
its output, or select a larger
generator.
External input breaker open or tripped
Input Relay Failure
Re-close breaker. Verify
breaker is HIGH MAGNETIC
type.
Replace CPR module.
164201257 C0
Page 22
Preliminary
6/13/2003
Lectro CPR® Operator’s Manual
AC Input “High” red LED is
lit
AC input voltage is above 156 (or 299 for
230V nominal units, or 276 for 240V nominal
units, or 286V for 220V nominal units) VAC—
unit will be in Standby mode, running on battery
AC Input “Low” red LED is
lit.
AC input voltage is below 96 (or 161 for 230v
nominal units, or 192 for 240V nominal units,
or 154V for 220V nominal units)VAC—unit
will be in Standby mode, running on battery
Load “>100%” red LED is
lit.
CPR unit is loaded >100%. If the overload is
>110% The output will turn off after 30 seconds, and then attempt to restart every 30
seconds for 3 hours. If the overload is not
removed after 3 hours, the module will shut
down and must be manually reset by pressing the “Output ON” button.
“Inverter” red LED is lit
Inverter is operating. This is normal if Utility
power has failed.
Output voltage reads zero
or nearly zero at the front
panel test points
Coax network is shorted
Output has been disabled due to overload
timeout.
164201257 C0
Page 23
Preliminary
Measure AC input voltage with
a true RMS voltmeter. If above
156V (or 265, or 276), notify
local Power Company of the
significant overvoltage at the
power supply location. Operate
the CPR from an alternate AC
source (generator) until the
overvoltage is corrected.
Measure AC input voltage with
a true RMS voltmeter. If below
96V (or 184, or192V), notify
local Power Company of the
significant undervoltage at the
power supply location. Operate
the CPR from an alternate AC
source (generator) until the
undervoltage is corrected.
Reduce the overload in the
coax network.
Measure AC input voltage with
a true RMS voltmeter. If power
is present, verify Utility voltage
and frequency is within the limits shown above in this table.
Measure AC output current
with a clamp-on probe. If it is >
rated output amps, check the
network for a short circuit, or
“bucking power” and correct.
Press “output ON” button. The
“Output Voltage” LED should
come on. Check network for
overloads.
6/13/2003
Lectro CPR® Operator’s Manual
2.5 Specifications
Table 2.5-1: Specifications
164201257 C0
Page 24
Preliminary
6/13/2003
Lectro CPR® Operator’s Manual
120V Extd Range
220V International
230V International
230V Euro (CE)
240V (24 A)
Nominal Input Voltage
Input Voltage Range in %
Input Voltage Range
120V
[+30%to -20%]
96V to 156V
220V
[+30%to -30%]
154V to 286V
230V
[+30%to -30%]
161V to 299V
230V
[+15%to -20%]
184V to 265V
240V
[+15%to -20%]
192V to 276V
Nominal Input Current (Rest Mode)
Input Frequency
13A
60 Hz, +/- 3Hz
7A
60 Hz, +/- 3Hz
7A
50 Hz, +/- 3Hz
8A
50 Hz, +/- 3Hz
11A
60 Hz, +/- 3Hz
Output Regulation 87 Volt Tap
Output Regulation 75 Volt Tap
Output Regulation 60 Volt Tap
Output Regulation 48 Volt Tap
Rated Output Current
Ouptut Frequency(Inverter Mode)
87/75/60 Vrms
(FieldSelectable)
[+/- 3%]
[+/- 4%]
[+/- 4%]
N/A
15A
60Hz, +/- 1Hz
87/75/60 Vrms
(FieldSelectable)
[+/- 3%]
[+/- 4%]
[+/- 4%]
N/A
15A
60Hz, +/- 1Hz
87/75/60 Vrms
(FieldSelectable)
[+/- 3%]
[+/- 4%]
[+/- 4%]
N/A
15A
50Hz, +/- 1Hz
60/48 Vrms
(FieldSelectable)
N/A
N/A
[+/-3%]
[+/-3%]
15A
50Hz, +/- 1Hz
87/75/60 Vrms
(FieldSelectable)
[+/- 3%]
[+/- 4%]
[+/- 4%]
N/A
24A
60Hz, +/- 1Hz
Waveform
Slew Rate
Crest Ratio (Peak: RMS)
Quasi Squarewave
< 100 Volts/ms
1.3:1
Quasi Squarewave
< 100 Volts/ms
1.3:1
Quasi Squarewave
< 100 Volts/ms
1.3:1
Quasi Squarewave
< 100 Volts/ms
1.3:1
Quasi Squarewave
< 100 Volts/ms
1.3:1
91%
90%
89%
85%
91%
91%
89%
85%
91%
91%
89%
84%
91%
90%
88%
85%
91%
91%
89%
85%
88%
87%
86%
81%
86%
87%
86%
81%
86%
87%
86%
81%
87%
87%
87%
83%
88%
87%
86%
81%
22A
20A
19A
19A
21A
27A
21A
24A
27A
N/A
N/A
21A
32A
29A
36A
150%
155%
180%
150%
180%
210%
150%
160%
180%
N/A
N/A
150%
165%
192%
234%
>16.5A
>16.5A
>16.5A
>16.5A
N/A
>21A
>21A
>21 A
>21 A
27.25A
60 lbs (27kg)
59 lbs (27 kg)
66 lbs (30kg)
55 lbs (25 kg)
69.5 lbs (32 kg)
Unit Name
Output Voltage
Efficiency @87Vrms On-Line Rest Mode
@100 %Load
@80 %Load
@60 %Load
@40 %Load
Efficiency @87Vrms Inverter Mode 48VDC
@100 %Load
@80 %Load
@60 %Load
@40 %Load
Foldback
(Near Short Circuit Current)
87 Volt Tap
75 Volt Tap
60 Volt Tap
(Max Knee Current (Start-Up Power)
87 Volt Tap %Rated Current
75 Volt Tap %Rated Current
60 Volt Tap %Rated Current
>110%(3 hour Cyclic Operation)
30 Sec. On, 30 Sec Off
Severe Overload (3 hour Cyclic Operation)
6 Sec. On, 26 Sec. Off
Unit Weight
DC Battery Breaker
Enviornmental
Operating Range
Humidity
Elevation
-40 degrees C to +55 degrees C at front air inlet of power supply
0 to 95%(non condensing)
0 to 10,000 feet (3000 meters) above sea level
DCElectrical
DC Input Voltage
Constant Current
Constant Voltage
DC Charge Current
Low Battery Cutoff
48 VDC
High rate charge, threshold at 2.35 VPC
2.35 VPC (Maximum48 hours)
6-12A Maximum, depending on load
<1.75 VPC
3: Batteries
164201257 C0
Page 25
Preliminary
6/13/2003
Lectro CPR® Operator’s Manual
3.1 Safety
CAUTION: Short circuit danger: Do not rest tools or equipment on top of batteries. Do not
allow batteries to become shorted as an explosion may occur causing severe injury. Do not
open or mutilate batteries. Released electrolyte is extremely harmful to skin and eyes. Do not
dispose of batteries in fire as an explosion may occur.
CAUTION: Government regulations may require that batteries be recycled. See your battery
distributor for details on recycling (third-party batteries) or contact Alpha Technologies for recycling CPR battery products.
CAUTION: Batteries shall be 12 Vdc with the same amp-hour rating. Do not mix old and
new batteries; replace batteries as a set using UL recognized batteries.
CAUTION: Servicing of batteries shall be performed or supervised by personnel knowledgeable of batteries and the required precautions. Keep unauthorized personnel away
from batteries.
CAUTION: The following precautions shall be observed when working with batteries:
Follow approved OSHA (or appropriate other) regulations for handling batteries.
Always wear eye protection and a protective vest when working near batteries.
Batteries produce explosive gases. Keep away all sparks and flames.
Remove watches, rings or other metal objects.
Use tools with insulated handles.
Wear rubber gloves and boots.
3.2 Battery installation
Tools required:
3.2.1
10mm Metric socket
Inch-pound torque wrench
Multimeter
Place the batteries in the bottom of the cabinet, negative terminals (-) at the rear
of the cabinet. Refer to Figure 3.3-1 for details.
164201257 C0
Page 26
Preliminary
6/13/2003
Lectro CPR® Operator’s Manual
3.2.2
3.2.3
3.2.4
3.2.5
3.2.6
Connect the red battery cable which comes from the gray connector on the CPR
module to the positive (+) terminal of the left battery. Refer to Figure 3.3-1 for details. Torque all connections to 60 inch-pounds (6.8 Newton-meters).
Connect the three (3) battery interconnection jumpers as shown in Figure 3.3-1.
Torque all connections to 60 inch-pounds (6.8 Newton-meters).
Confirm that the CPR DC circuit breaker is off (down). Connect the black battery
cable which comes from the gray connector on the CPR module to the negative (-)
terminal of the right battery. Torque connection to 60 inch-pounds (6.8 Newtonmeters).
Measure the DC voltage to ensure proper installation of all battery wiring. Open
circuit DC voltage should measure between 45 volts and 51 volts.
Verify that the gray Anderson connector is properly attached to the left side of the
CPR module.
3.3 Battery Removal
3.3.1
Turn the DC circuit breaker off (down) and observe all precautions for handling
batteries as outlined in Section 3.1.
3.3.2
Remove all batteries in the reverse order of installation.
RED
BLACK
FRONT OF CABINET
Figure 3.3-1: Battery Connections – single string
164201257 C0
Page 27
Preliminary
6/13/2003
Lectro CPR® Operator’s Manual
3.4 Additional Battery String
Tools required:
10mm Metric socket
Inch-pound torque wrench
Multimeter
NOTE: This procedure assumes that the additional battery string is being installed in a
Lectro brand cabinet.
3.4.1 Confirm that the CPR DC circuit breaker is off (down).
3.4.2 Place the batteries in the bottom of the cabinet with the negative terminals (-) at the
rear of the cabinet. Refer to Figure 3.4-1 for details
3.4.3 Connect the red battery lead from the lower shelf at the positive (+) terminal of the left
battery. Torque connection to 60 inch-pounds (6.8 Newton-meters).
3.4.4 Disconnect the red battery lead cable from the upper shelf at the positive (+) terminal
of the left battery. Reconnect this lead with the red lead of the inter-shelf connection
cable. Refer to Figure 3.4-1. For details.
3.4.5 Connect the three (3) battery interconnection jumpers as shown in Figure 3.4-1.
Torque all connections to 60 inch-pounds (6.8 Newton-meters).
3.4.6 Disconnect the black battery lead cable from the upper shelf at the negative (-) terminal of the right battery. Reconnect this lead with the black lead of the inter-shelf connection cable. Refer to Figure 3.4-1 for details. Torque connection to 60 inch-pounds
(6.8 Newton-meters).
3.4.7 Measure the DC voltage to ensure proper installation of all battery wiring. Open circuit
DC voltage should measure at least 48 volts across both parallel strings.
3.4.8 Verify that the gray Anderson connector is properly attached to the left side of the
CPR module.
164201257 C0
Page 28
Preliminary
6/13/2003
Lectro CPR® Operator’s Manual
RED
BLACK
Upper Shelf
Lower Shelf
FRONT OF CABINET
Figure 3.4-1: Battery Connections – Parallel Strings
3.5 Maintenance
3.5.1 WHILE IN STORAGE
Always make sure a battery is fully charged before placing it into storage.
Never charge batteries in a gas-tight container.
Always store batteries in a cool, dry location. Optimum temperature is 25°C (77°F).
Always monitor battery, open-circuit voltage at least once every 12 months.
Always provide a refreshing charge if the open circuit voltage drops below 12.2 volts.
3.5.2 PROPER USEAGE
Always make sure a battery is fully charged prior to placing it into service.
Never mix batteries that are at different states of charge. (Refer to battery date codes)
Make sure that the open circuit voltage for each battery in a string is greater than 12.8 volts.
Never mix battery types or batteries that are at different states of charge.
164201257 C0
Page 29
Preliminary
6/13/2003
Lectro CPR® Operator’s Manual
A different state of charge condition likely exists if the open circuit voltage for any battery in a
string deviates from its neighbor by more than ± 0.25 volts.
Never leave a battery in a discharged state for any length of time.
3.5.3 PERIODIC MAINTENANCE
Never forget to periodically check batteries for proper terminal attachment torque every 12
months.
*******
164201257 C0
Page 30
Preliminary
6/13/2003
Lectro CPR® Operator’s Manual
4: Status Monitor
4.1 Installation
The communication module installs in the same basic manner for all three levels of
status monitoring. The external connections will be different as defined in Section 4.3.
4.1.1
4.1.2
4.1.3
4.1.4
4.1.5
Turn off the CPR Unit, and remove AC Power.
Remove the communication module cover plate (if applicable).
Locate and pull out the ribbon cable with the connector, inside of the CPR Communicator module slot.
Plug in the ribbon cable connector into the PC board connector on the CPR Communicator module.
Insert the CPR Communicator module into the open slot on the CPR and secure
with the two mounting screws. Use caution when inserting so as not to “pinch” the
ribbon cable between the slot and the module. Refer to figure 4.1-1.
Mounting
Screws for CPR
Communicator
Battery LED
Reset Button
Figure 4.1-1: CPR Unit, Showing Communicator Location
164201257 C0
Page 31
Preliminary
6/13/2003
Lectro CPR® Operator’s Manual
4.2 Operation
The operation of the status monitor is automatic and carries out its functions without
the direct intervention of the operator. The purpose of the status monitor is to indicate
the operating conditions of the CPR power supply. There are three levels of status
monitoring:
LEVEL ONE is used to indicate locally (at the power supply) only (see Figure 4.3-1). This
can be a combination of the external cabinet LED indicators and/or the LED’s on the CPR
power supply. This level is NOT compatible with transponder devices. The information available in addition to the information displayed on the front of the CPR power supply is as follows: A)Weak battery string indicators (located on the Communicator module - refer to Figure
4.3-1); B) Normal operation, Standby operation, and Alarm condition indicators (with the external cabinet LED’s). The weak battery indicators can be reset by pushing the Battery LED
Reset button, located on the front of the CPR power supply. Refer to Figure 4.1-1
LEVEL TWO allows for remote status monitoring with access to additional, more detailed information (see Figure 4.3-2). Level Two is essentially the same as Level One with the addition of a DB-9 connector located on the front of the communication module. The DB-9 connector is used to indicate remotely via a third party transponder device. The data available is
in RS-232 format. Additionally, information can be obtained through the DB-9 connector with
the use of a PC using a software program called FailSafe, available from Alpha Technologies. A customer-supplied PDA device may also be connected to this port using application
and instructions available from Alpha Technologies. A telephony modem may also be connected to the RS-232 port. Be sure to disable “hardware handshaking” for proper operation
of the modem in this application.
LEVEL THREE allows for remote status monitoring similar to Level One and Two with the
DB-9 connector replaced by an F-81 style, 75-ohm, RF connector (see Figure 4.3-3)*. Level
Three is used to indicate remotely via an internal (inside the communicator module) RF
transponder. The F-81 connector is used to make the connection between the transponder
and the CATV Network.
*Contact Alpha Technologies for information on compatibility with other popular status monitoring systems.
Note: All three levels have the ability to provide local indications. Each level uses a different
communication module, mounted on the left side of the CPR module (see Figure 4.1-1).
164201257 C0
Page 32
Preliminary
6/13/2003
Lectro CPR® Operator’s Manual
4.3 Configuration
Level One – Refer to Figure 4.3-1
Level Two – Refer to Figure 4.3-2
Level Three – Refer to Figure 4.3-3
Weak Battery LEDs
(One for each string)
Battery Sensing Harness (connects
to battery terminals)
Wiring to External Cabinet
LEDs
Figure 4.3-1: Front of CPR Communicator
164201257 C0
Page 33
Preliminary
Module (Level One)
6/13/2003
Lectro CPR® Operator’s Manual
Weak Battery LEDs
(One for each string)
RS-232 DB-9 Port for connection to
Transponder, Modem, Laptop PC or
customer-supplied PDA.
Battery Sensing Harness (connects
to battery terminals)
Wiring to External Cabinet
LEDs
Door Tamper Switch connector
(shown with shorting jumper)
Figure 4.3-2: Front of CPR Communicator
Module (Level Two)
Battery Sensing Harness (connects to battery terminals)
Wiring to External Cabinet
LEDs
Door Tamper Switch connector
(shown with shorting jumper)
F81 Connector for RF Output
Direct to Coax
Transmit and Receive Frequency
Label
Figure 4.3-3: Front of CPR Communicator
164201257 C0
Page 34
Preliminary
Module (Level Three)
6/13/2003
Lectro CPR® Operator’s Manual
4.4 Maintenance
4.4-1 Test the CPR Communicator for the correct signals by monitoring the specific CPR
module at the headend.
4.4-2 Simulate the “General Alarm” signal by removing the plug (or shorting jumper) on the
front of the CPR module. Verify this alarm is received at the headend.
4.4-3 Check all wiring connections. Refer to Section 2.1.
The CPR Communicator Module should be tested and the connections checked on a
regular basis. This should be performed at least once a year. Other than the two simple steps, described above, there is no routine maintenance required for the CPR
Communicator module.
164201257 C0
Page 35
Preliminary
6/13/2003
Lectro CPR® Operator’s Manual
4.5 Troubleshooting
Because it is impossible to account for every possible symptom and solution in a
CATV Network, the following troubleshooting suggestions should be used as a general guideline. Refer to Figure 4.5-1
Table 4.5-1: Troubleshooting
E x t e r n a l c a b in e t L E D 's n o t o p e r a t in g ( o n e o r b o t h )
W e a k b a t t e r y s t r in g L E D 's n o t
o p e r a t in g
B a d o r lo o s e c o n n e c t io n a t t h e
c o m m u n ic a t io n m o d u le
C h e c k c o n n e c t io n s o n t h e f r o n t
a n d r e a r o f t h e c o m m u n ic a t io n
m o d u le a n d s e c u r e a p p r o p r ia t e ly
D e f e c t iv e c o m m u n ic a t io n m o d u le
R e p la c e t h e c o m m u n ic a t io n
m o d u le
D e f e c t iv e L E D o r L E D 's
R e p la c e t h e b a d L E D o r L E D 's
B a d o r lo o s e c o n n e c t io n s a t t h e
c o m m u n ic a t io n m o d u le
C h e c k f o r p r o p e r c o n n e c t io n s a t
t h e c o m m u n ic a t io n m o d u le a n d
t ig h t e n a s n e c e s s a r y
C h e c k f o r p r o p e r c o n n e c t io n s a t
t h e b a t t e r ie s a n d t ig h t e n
B a d o r lo o s e c o n n e c t io n s a t t h e
b a t t e r ie s
R e m o t e r e p o r t e d le v e ls a r e n o t
a c c u r a te
N o t r e c e iv in g a n y in f o r m a t io n a t
th e H e a d - E n d , N O C o r e tc …
164201257 C0
B a d o r lo o s e c o n n e c t io n s
C h e c k a n d t ig h t e n a ll c o n n e c t io n s
D e f e c t iv e c o m m u n ic a t io n m o d u le
R e p la c e c o m m u n ic a t io n m o d u le
S o f t w a r e c o n f lic t s
T a k e r e a d in g s o n - s it e w it h a
tr u e -R M S m e te r a n d c o m p a r e
D e f e c t iv e t r a n s p o n d e r
R e p la c e t r a n s p o n d e r
B a d o r lo o s e c o n n e c t io n b e t w e e n
th e tra n s p o n d e r a n d th e c o m m u n ic a t io n m o d u le ( L e v e l T w o )
C h e c k a n d t ig h t e n a ll c o n n e c t io n s
B a d o r lo o s e c o n n e c t io n b e t w e e n
t h e c o m m u n ic a t io n m o d u le a n d
t h e C P R p o w e r s u p p ly
C h e c k a n d t ig h t e n a ll c o n n e c t io n s
T x a n d R x F r e q u e n c ie s o f t h e
C o m m u n ic a t o r M o d u le a n d t h e
H e a d e n d c o n t r o lle r d o n o t m a t c h
R e p la c e C o m m u n ic a t o r M o d u le
W it h o n e t h a t h a s t h e s a m e
T x a n d R x F r e q u e n c ie s a s t h e
R e s t o f th e s y s te m .
I n t e r f e r e n c e in f o r w a r d o r
re v e rs e p a th c a u s e d b y
in g r e s s , s h e a t h c u r r e n t s , p o o r
g r o u n d in g , e t c .
V e r if y c o m m u n ic a t o r m o d u le w o r k s
b y c o n n e c t in g t o it s R S - 2 3 2 p o r t .
I n v e s t ig a t e s ig n a l p a t h s a n d n o is e
le v e ls .
Page 36
Preliminary
6/13/2003