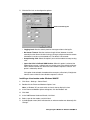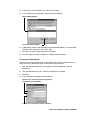
1
Diva Mobile V.90 PC Card
Reference Guide
www.eicon.com
Third Edition (October 2001)
206-258-03
Eicon, the Eicon logo, Diva, and Diva ISDN are either trademarks or registered trademarks of Eicon
Networks Corporation.
IBM and PC AT are registered trademarks of International Business Machines Corporation.
UltraPort is a registered trademark of TDK Systems, Inc.
Adobe and Acrobat are either trademarks or registered trademarks of Adobe Systems Incorporated.
CompuServe is a registered trademark of CompuServe Incorporated.
PCMCIA is a registered trademark of Personal Computer Memory Card International Association.
Microsoft, Windows, and Windows NT are registered trademarks of Microsoft Corporation.
Hayes is a registered trademark of Hayes Microcomputer Products, Inc.
BVRP Software, the BVRP logo, and PhoneTools are trademarks of BVRP Software S.A..
All other brand and product names are trademarks or registered trademarks of their respective
owners.
Changes are periodically made to the information herein; these changes will be incorporated into
new editions of the publication. Eicon Networks may make improvements and/or changes in the
products and/or programs described in this publication at any time.
Eicon Networks may use or distribute whatever information you supply in any way it believes
appropriate without incurring any obligations to you.
Copyright © 1998-2001 Eicon Networks Corporation. All rights reserved, including those to
reproduce this publication or parts thereof in any form without permission in writing from Eicon
Networks Corporation.
Contents
About This Guide..................................................................................................... 5
How to use this online guide ..............................................................................................5
Structure of this guide ........................................................................................................5
Technical Specifications ......................................................................................... 7
Configuring Diva Mobile for Windows 98/Me ........................................................ 9
Connecting to the Internet under Windows 98/Me .............................................................9
Modifying your Diva Mobile configuration ........................................................................11
Configuring Diva Mobile for Windows 2000 ........................................................ 14
Connecting to the Internet under Windows 2000 .............................................................14
Modifying your Diva Mobile configuration ........................................................................17
Configuring Diva Mobile for Windows XP ........................................................... 20
Creating a connection to your Internet service provider ..................................................20
Modifying your Diva Mobile configuration ........................................................................23
Installing Diva Mobile for Windows NT................................................................ 26
Configuring Windows NT Networking ..............................................................................26
Installing the Diva Mobile V.90 PC Card ..........................................................................28
Installing the Diva Mobile for Windows NT software ........................................................30
Connecting to the Internet under Windows NT ................................................................35
Monitoring your ISDN Connection ....................................................................... 40
Using Analogue Applications............................................................................... 41
Selecting a modem ..........................................................................................................41
Dialing out through a Private Branch Exchange (PBX) ....................................................41
UltraPort® technology ......................................................................................................42
Sending and Receiving Faxes .............................................................................. 43
Selecting a modem ..........................................................................................................43
Sending faxes ..................................................................................................................43
Receiving faxes ................................................................................................................45
Travelling to a New Location ................................................................................ 46
Specifying your location ...................................................................................................46
Changing your switch type, ISDN numbers, and SPIDs ..................................................46
Troubleshooting..................................................................................................... 49
Solutions to possible problems ........................................................................................49
Diagnosing problems .......................................................................................................54
Removing Diva Mobile........................................................................................... 55
Under Windows 98/Me/2000/XP ......................................................................................55
Under Windows NT ..........................................................................................................55
Customer Services ................................................................................................ 56
AT Commands and Result Codes ........................................................................ 57
AT commands ..................................................................................................................57
Error correction commands .............................................................................................62
Caller ID commands .......................................................................................................62
S-Register summary ........................................................................................................63
Result codes ....................................................................................................................65
International Regulatory Information................................................................... 68
Diva Mobile V.90 PC Card Reference Guide ◆ Page 4
CHAPTER
1
About This Guide
This guide supplements the information contained in the printed Diva Mobile QuickStart
included with your Diva Mobile V.90 PC Card. The contents of this guide are described
below.
How to use this online guide
• To view a section, click the corresponding bookmark located on the left.
• To view a topic that contains further information, click on the corresponding blue
underlined phrase.
Structure of this guide
This guide is structured as follows:
Chapter
Contents
About This Guide
The section you are reading now that describes how to use this
online guide.
Technical Specifications
Lists the technical (hardware) specifications for Diva Mobile.
Configuring Diva Mobile for
Windows 98/Me
For users of Windows 98/Me, describes how to set up a
connection to the Internet, change your configuration
parameters, and add virtual modems.
Configuring Diva Mobile for
Windows 2000
For users of Windows 2000, describes how to set up a
connection to the Internet, change your configuration
parameters, and add virtual modems.
Configuring Diva Mobile for
Windows XP
For users of Windows XP, describes how to set up a connection
to the Internet, change your configuration parameters, and add
virtual modems.
Installing Diva Mobile for Windows Describes how to install Diva Mobile for Windows NT, how to
set up a connection to the Internet, change your configuration
NT
parameters and hardware resources, and add virtual modems.
Monitoring your ISDN Connection Provides a brief description of the Line Monitor and Diva
Assistant.
Using Analogue Applications
Describes issues related to analogue applications.
Sending and Receiving Faxes
Describes how to use the BVRP PhoneTools software to send
and receive faxes.
Travelling to a New Location
Explains the configuration changes you must make to your Diva
Mobile when you travel to a new location.
Troubleshooting
Describes solutions to various problems, and describes utilities
you can use to diagnose problems.
About This Guide ◆ 5
Chapter
Contents
Removing Diva Mobile
Describes how to uninstall Diva Mobile.
Customer Services
Tells you where you can obtain technical support for your Diva
Mobile V.90 PC Card.
AT Commands and Result Codes Lists the AT commands you can use to control the analogue
V.90 modem.
International Regulatory
Information
Contains regulatory information. You should read the
regulatory information for your country before you install Diva
Mobile.
About This Guide ◆ 6
CHAPTER
2
Technical Specifications
Technical Data
• UART Rates: 300 to 115,200 bps
• Signal Output: -10±1 dBm
• Receiver Range: -10 dBm to -43 dBm
• PCMCIA Rel. 2.1 Type II (68 Pin)
• Non-volatile memory for four 35-digit phone numbers
• Digital line/PBX over-voltage protection
External Interface
• ISDN RJ-45 cable
• ISDN dongle for connecting the RJ-45 cable to the Diva Mobile
• Modem RJ-11 cable
ISDN Performance
• ISDN Basic Rate Interface (up to 2 bearer channels @ 64 kbps each, and one data
channel @ 16 kbps)
V.90 Modem Data Performance
• Asynchronous, full-duplex
• Hayes-compatible AT command set with EIA-578 fax extensions
• Automatic dialing and answering
• Serial DTE-to-modem port rates up to 230,400 bps when using UltraportTM
• Automatic rate translation
• Full-duplex asynchronous modem operating modes: ITU V.90, V.34, V.32 bis, V.32, V.22
bis, V.22, V.23, V.21, Bell 212A, 103J, and Rockwell V.FC, supporting transmission
speeds from 300 to 56,000 bps
V.90 Modem Voice Features
• Caller ID
Technical Specifications ◆ 7
V.90 Modem Fax Features
• Class 1, Group 3, half-duplex synchronous fax modes: ITU V.17, V.29, V.27ter, and
V.21, supporting transmission speeds from 300 to 14,400 bps
• Fax classifications EIA 578, Class 1
Special Features
• MNP 2 to 4 error correction
• ITU V.42· LAP-M· error correction
• MNP 5 data compression
• ITU V.42 bis· data compression
Typical Power Requirements
Power consumption @ 5 V dc (typical):
• ISDN with S/T interface active: 62 mA
• Modem active: 264 mA
• Modem over ISDN active: 322 mA
• Auto sleep mode: 56 mA
Environmental Requirements
• Operating temperature: 0°C to 55°C
• Storage temperature: -40°C to 70°C
• Operating humidity: 0 to 90% (non-condensing)
• Barometric operating pressure: 86 to 106 kPascals
Technical Specifications ◆ 8
CHAPTER
3
Configuring Diva Mobile
for Windows 98/Me
This section includes information on the following:
• Connecting to the Internet under Windows 98/Me
• Modifying your Diva Mobile configuration
Connecting to the Internet under Windows 98/Me
Create a shortcut for the connection
You need to create a shortcut for the connection only one time.
1. Open Dial-Up Networking as follows:
In Windows 98, on the Desktop, double-click ‘My Computer’ and then double-click
‘Dial-Up Networking’.
In Windows Me, click ‘Start > Settings > Dial-Up Networking’.
2. If this is your first connection, you will be prompted to enter your location information.
Enter the information, click ‘Close’, and then the ‘Make New Connection’ wizard will
start. Click ‘Next’.
If this is not your first connection, double-click ‘Make New Connection’.
3. In the ‘Make New Connection’ wizard, type a name for the connection. For example,
type the name of your Internet service provider.
4. Under ‘Select a device’, select the appropriate modem:
For:
Select:
ISDN connections
Eicon channel 0
Analogue connections
Eicon Diva Mobile V.90 Modem
5. Click ‘Next’.
6. In ‘Telephone number’, enter the dial-up number of your Internet service provider. If
necessary, modify the other fields in this screen.
Note: Some Internet service providers provide different dial-up numbers for analogue
modem access and ISDN access. Make sure you enter the appropriate number.
7. Click ‘Next’.
8. Click ‘Finish’. An icon for this connection is added to ‘Dial-Up Networking’.
Configuring Diva Mobile for Windows 98/Me ◆ 9
Configure the connection
1. In Dial-up Networking, open the properties dialog box for your connection: right-click
the icon you just created for your connection, then click ‘Properties’.
2. Verify that the settings in the properties dialog box match those provided by your ISP
(or network administrator).
3. Click ‘OK’ to close the dialog box for your connection.
Configure Multilink PPP (optional)
(For ISDN connections only) If your Internet service provider or the remote server supports
Multilink PPP, you can use both B-channels to attain a connection speed of 128 kbps.
Since Multilink PPP uses both B-channels, the cost of your connection will increase.
1. In the properties dialog box for your connection, click the ‘Multilink’ tab, click ‘Use
additional devices’, and then click ‘Add’.
2. In the ‘Edit Extra Device’ dialog box, do the following:
Select ‘Eicon Channel 1’.
Then, enter the phone number that you want the second B-channel to dial.
3. Click ‘OK’.
4. In the dialog box for your connection, click ‘OK’.
To connect to the Internet:
1. Open Dial-Up Networking as follows:
In Windows 98, on the Desktop, double-click ‘My Computer’ and then double-click
‘Dial-Up Networking’.
In Windows Me, click ‘Start > Settings > Dial-Up Networking’.
2. Double-click the icon for the connection you created.
3. In the ‘Connect To’ dialog box, Enter your user name and password. By default, your
Windows logon user name is entered.
4. Click ‘Connect’. When the connection is established, the ‘Connected to’ dialog box
appears. You can now browse the Internet, check your email, etc.
To disconnect:
To disconnect, click ‘Disconnect’ in the ‘Connected to’ dialog box. If the ‘Connected to’
dialog box is minimized, double-click its icon from the system tray.
Configuring Diva Mobile for Windows 98/Me ◆ 10
Modifying your Diva Mobile configuration
In general, after you have installed the Diva Mobile hardware and software, and configured
a connection to the Internet, you do not need to further configure Diva Mobile except in
the following cases:
• if you are located in North America or Japan, you will need to modify the switch type
and enter a service profile identifier (SPID), or;
• if you want to change any Diva Mobile settings, such as the ISDN phone numbers, after
you have installed the card.
Configuring Diva Mobile for Windows 98/Me ◆ 11
Changing the switch type or phone numbers, or installing a virtual modem
To change the switch type or phone numbers, or to install a virtual modem, you use the
Diva Mobile setup wizard.
1. On the Windows taskbar, click Start, point to Programs, point to Diva, and click Setup
Wizard.
2. Follow the instructions presented on your screen. The setup wizard consists of a series
of dialog boxes that allow you to modify settings and install the virtual modems you
require. Click ‘Next’ to display the next dialog box in the series.
The table below describes the options provided by the Diva Mobile setup wizard.
Item
Description
Switch Type (or ISDN
D-channel Protocol)
Specify the type of ISDN network used in your country. The
default value is chosen based on the regional settings that were
specified when Windows 98/Me was installed on your
notebook.
ISDN/SPID Numbers
Specify your ISDN phone numbers and, in North America, your
SPID numbers. Enter the phone numbers without spaces or
hyphens. Do not enter the area code.
Note: If you do not plan to receive calls (that is, if you plan to
make outgoing calls only), then you do not have to enter ISDN
phone numbers.
Eicon ISDN V.90 Modem
Use this modem in conjunction with the Diva Mobile V.90 PC
Card.
Eicon ISDN V.120 Modem
Use this modem in conjunction with certain asynchronous
terminal applications
Eicon ISDN Analog Modem
Use this modem for analog V.34 (33.6 kbps) data
communications to analog (non-digital) modems, over the
ISDN network.
Eicon ISDN Fax Modem
Use this modem, in conjunction with a third-party faxing
software, to send and receive Group III faxes directly from your
computer (not from a separate fax machine). This modem
provides fax capability for fax applications that cannot use
CAPI.
Eicon ISDN BTX modem
Install this virtual modem if you need to use banking
applications — such as Microsoft Money and Amaris — in
Germany.
Eicon ISDN X.75 modem
Install this virtual modem to connect to certain ISDN bulletin
board systems in Europe.
Eicon ISDN Digital Modem
Install this virtual modem, in conjunction with certain PPP
applications, to connect to the Internet or to a corporate intranet
router.
Eicon ISDN V.110 Modem
Install this virtual modem for use with some asynchronous
terminal applications, such as Home Banking.
CAPI 2.0
Enables you to use ISDN applications that require a CAPI
driver, such as BVRP Phonetools.
The final dialog box displays a configuration summary based on the options you
selected.
Configuring Diva Mobile for Windows 98/Me ◆ 12
3. Click ‘Finish’. The setup program copies files to your notebook.
4. If you are prompted for the ‘Software’ disk: Click ‘OK’. Make sure the Diva Mobile
Software Suite CD is in your computer’s CD-ROM drive and then, in the ‘Copying files’
dialog box, type:
D:\WIN_9X\INSTALL\ENGLISH
(where D is your CD-ROM drive letter).
Click ‘OK’.
5. If you are prompted for the ‘Protocol driver’ disk: Click ‘OK’. Make sure the Diva Mobile
Software Suite CD is in your CD-ROM drive and then, in the ‘Copying files’ dialog box,
type:
D:\WIN_9X\INSTALL\ENGLISH
(where D is your CD-ROM drive letter).
Click ‘OK’.
6. If you are prompted for your Windows 98/Me CD or a specific Windows 98/Me diskette:
Insert your Windows 98/Me CD or the diskette into an appropriate drive. Click ‘OK’.
If the ‘Copying files’ dialog box appears, enter the path to the CD or diskette, and click
‘OK’.
7. When prompted, restart your computer to complete the installation.
To specify your location
1. Start the Country Selector: click Start, point to Programs, point to Diva, and click
Country Selector for the analog modem.
2. In the ‘Country Selector’ dialog box, select the country where you are located.
The Country Selector lists all the
countries where Diva Mobile is
certified for use.
3. Click ‘OK’.
Configuring Diva Mobile for Windows 98/Me ◆ 13
CHAPTER
4
Configuring Diva Mobile
for Windows 2000
This section includes information on the following:
• Connecting to the Internet under Windows 2000
• Modifying your Diva Mobile configuration
Connecting to the Internet under Windows 2000
Create a connection to your Internet service provider
1. Click ‘Start > Settings > Network and Dial-up Connections > Make New Connection’.
2. In the ‘Network Connection Wizard’, click ‘Next’ to begin.
Note: If this is your first connection, you will be prompted to enter your location
information. When you have finished entering your location information, the ‘Network
Connection Wizard’ will continue.
3. In the displayed screen, do the following:
Click ‘Dial-up to the Internet’.
Click ‘Next’.
Configuring Diva Mobile for Windows 2000 ◆ 14
4. In the ‘Internet Connection Wizard’, do the following:
Click ‘I want to set up my Internet connection manually,
or I want to connect through a local area network (LAN)’.
Click ‘Next’.
5. Click ‘I connect through a phone line and a modem’, then click ‘Next’.
6. Select the appropriate modem:
For:
Select:
ISDN connections
Eicon channel 0
Analogue connections
Eicon Diva Mobile V.90 Modem
7. Click ‘Next’.
8. Enter the dial-up number of your Internet service provider. Also, select your
‘Country/region name and code’ and, if required, select ‘Use area code and dialing
rules’.
9. If your Internet service provider requires you to enter a specific IP address and/or
DNS server addresses:
• Click ‘Advanced’.
• In the ‘Advanced Connection Properties’ dialog box, click the ‘Addresses’ tab, then
enter the addresses.
• Click ‘OK’ to close the dialog box.
10. Click ‘Next’.
11. Enter your user name and password. Note that your password is case-sensitive.
12. Click ‘Next’.
13. Type a name for the connection. For example, you can type the name of your Internet
service provider.
Configuring Diva Mobile for Windows 2000 ◆ 15
14. Click ‘Next’.
15. If you want to set up an email account, click ‘Yes’, click ‘Next’, then follow the on-screen
instructions.
If you do not want to set up an email account, click ‘No’, then click ‘Next’.
16. When you have finished configuring your connection, click ‘Finish’ to close the ‘Internet
Connection Wizard’. You now have a shortcut to connect to the Internet.
Note: If your Internet service provider requires you to configure additional properties,
follow the instructions specified by your provider.
Configure Multilink PPP (optional)
(For ISDN connections only) If your Internet service provider supports Multilink PPP, you
can use both B-channels to attain a connection speed of 128 kbps. Since Multilink PPP
connections use both B-channels, the cost of your connection will increase.
1. Click ‘Start > Settings > Network and Dial-up Connections’. Right-click the entry for
your Internet connection, and then select ‘Properties’.
2. In the ‘Properties’ dialog box, click the ‘General’ tab.
3. From ‘Connect using’, make sure that both ISDN channels for the Diva Mobile are
selected.
4. If both of your B-channels must call the same number (for the connection), select ‘All
devices call the same numbers’.
If the second B-channel dials a dshifferent ISDN number, type the ISDN number in
‘Phone number’.
5. Click the ‘Options’ tab and, under ‘Multiple devices’, select one of these options:
• ‘Dial all devices’: Select this option if you always want to use both of your B-channels
for the connection.
• ‘Dial devices only as needed’: Select this option if you want to use both of your
B-channels only when required. To configure additional settings for this option, click
‘Configure’ (refer to the Windows 2000 online help for descriptions of the options
in the displayed dialog box).
Note: This option can be used only if it is supported by your ISP.
• ‘Dial only the first available device’: Select this option if you want to use the first
available B-channel.
6. Click ‘OK’ to close the ‘Properties’ dialog box for your connection.
To connect to the Internet:
After you have set up the connection to your Internet service provider as described
previously, you can connect to the Internet.
1. To connect to the Internet, launch your Web browser or email application. A dialog
box appears that prompts you to connect.
Note: If you want to automatically connect to the Internet each time you start your
Web browser or email application, select ‘Connect automatically’.
Configuring Diva Mobile for Windows 2000 ◆ 16
2. Click ‘Connect’. When the connection is established the ‘Status’ dialog box appears.
You can browse the Internet or check your email using any Web browser or email
application.
To disconnect:
To terminate the connection, click ‘Start > Settings > Network and Dial-up Connections’.
Right-click the entry for your Internet connection, then select ‘Disconnect’.
Modifying your Diva Mobile configuration
In general, after you have installed the Diva Mobile hardware and software, you do not
need to further configure Diva Mobile except in the following cases:
• if you are located in North America or Japan, you will need to modify the switch type
and enter a service profile identifier (SPID), or;
• if you want to change any Diva Mobile settings, such as the ISDN phone numbers, or
install a virtual modem, after you have installed the card.
To change switch type, phone numbers, or ISDN properties
1. From the desktop, right-click ‘My Computer’, and then click ‘Manage’.
2. In the ‘Tree’ tab, under ‘System Tools’, select ‘Device Manager’ and then, in the right
pane, expand ‘Network Adapters’.
3. Right-click the modem that you want to modify and then, on the shortcut menu that
appears, click ‘Properties’.
4. In the Diva Mobile Properties dialog box, click the ‘ISDN’ tab and select your switch
type or D-channel protocol.
Select your switch type or
D-channel protocol, and then
click ‘Configure’.
5. Click ‘Configure’ and enter the appropriate information. For example, you may need
to enter new ISDN phone numbers or, in North America, a new SPID.
6. Click ‘OK’.
Configuring Diva Mobile for Windows 2000 ◆ 17
7. Click the ‘Diva’ tab, and configure the options.
Click to view the log file
• Logging Level: Sets the severity level for messages written to the log file.
• No Answer Timeout: Sets the maximum length of time (between 2 and 20
seconds) that the driver waits after issuing a call to get a response from the remote
side before it cancels an unanswered call. The default is 20 seconds.
• Accept Analog Calls: Select this option if you want the modem to accept analog
calls.
• Ignore the Caller’s Callback ISDN Number: When this option is selected, the
modem driver accepts a callback from any number, even if the callback originates
from a different number than the one that was dialed to request a callback. This
option is selected by default.
If this option is not selected, the modem driver accepts a callback only if it originates
from the same number that was dialed to request a callback.
Installing a virtual modem under Windows 2000/XP
1. Click 'Start > Settings > Control Panel'.
2. Double-click the 'Phone and Modems Options' icon.
Note: In Windows XP, you must switch to classic view to display this icon.
3. In the 'Phone and Modem Options' dialog box, click the 'Modems' tab.
4. Click 'Add'
5. In the 'Add/Remove Hardware Wizard', click 'Next'.
6. Select a port for the modem, and click 'Next'.
7. In the displayed screen (which indicates that an unknown modem was detected), click
'Change'.
Configuring Diva Mobile for Windows 2000 ◆ 18
8. In the 'Install New Modem' dialog box, select the virtual modem you want to install,
then click 'OK'.
9. In the 'Add/Remove Hardware Wizard', click 'Next'.
10. Select the same port you selected in step 6, then click 'Next'.
11. If the 'Digital Signature Not Found' screen appears, click 'Yes' to proceed with the
installation
12. When your modem is installed, click 'Finish' in the 'Add/Remove Hardware Wizard'.
The 'Phone and Modem Options' dialog box displays the virtual modem you installed.
13. Click 'OK' to close the 'Phone and Modem Options' dialog box.
After you install a virtual modem, you can select it from within the communications software
that will be using the modem.
Configuring Diva Mobile for Windows 2000 ◆ 19
CHAPTER
5
Configuring Diva Mobile
for Windows XP
This section includes information on the following:
• Creating a connection to your Internet service provider
• Modifying your Diva Mobile configuration
Creating a connection to your Internet service provider
1. Click ‘Start > Connect To > Show all connections’.
2. Double-click ‘Make New Connection’.
3. In the ‘New Connection Wizard’ click ‘Next’ to begin.
Note: If this is your first connection, you will be prompted to enter your location
information. When you have finished entering your location information, the ‘New
Connection Wizard’ will continue.
4. In the displayed screen, do the following:
Click ‘Connect to the Internet’.
Click ‘Next’.
Configuring Diva Mobile for Windows XP ◆ 20
5. In the displayed screen, do the following:
Click ‘Set up my connection manually’.
Click ‘Next’.
6. Click ‘Connect using a dial-up modem’, then click ‘Next’.
7. Select the appropriate modem:
For:
Select:
ISDN connections
Eicon channel 0
Analogue connections
Eicon Diva Mobile V.90 Modem
8. Click ‘Next’.
9. Type a name for the connection. For example, you can type the name of your Internet
service provider.
10. Click ‘Next’.
11. Enter the dial-up number of your Internet service provider. Also, select your
‘Country/region name and code’ and, if required, select ‘Use area code and dialing
rules’.
12. Enter your user name and password. Note that your password is case-sensitive.
13. Click ‘Next’.
14. When you have finished configuring your connection, click ‘Finish’ to close the ‘Internet
Connection Wizard’. You now have a shortcut to connect to the Internet.
Note: If your Internet service provider requires you to configure additional properties,
follow the instructions specified by your provider.
Configuring Diva Mobile for Windows XP ◆ 21
Configure Multilink PPP (optional)
(For ISDN connections only) If your Internet service provider supports Multilink PPP, you
can use both B-channels to attain a connection speed of 128 kbps. Since Multilink PPP
connections use both B-channels, the cost of your connection will increase.
1. Click ‘Start > Connect To > Show all connections’. Right-click the entry for your Internet
connection, and then select ‘Properties’.
2. In the ‘Properties’ dialog box, click the ‘General’ tab.
3. From ‘Connect using’, make sure that both ISDN channels for the Diva Mobile are
selected.
4. If both of your B-channels must call the same number (for the connection), select ‘All
devices call the same numbers’.
If the second B-channel dials a different ISDN number, type the ISDN number in
‘Phone number’.
5. Click the ‘Options’ tab and, under ‘Multiple devices’, select one of these options:
• ‘Dial all devices’: Select this option if you always want to use both of your B-channels
for the connection.
• ‘Dial devices only as needed’: Select this option if you want to use both of your
B-channels only when required. To configure additional settings for this option, click
‘Configure’ (refer to the Windows XP online help for descriptions of the options in
the displayed dialog box).
Note: This option can be used only if it is supported by your ISP.
• ‘Dial only the first available device’: Select this option if you want to use the first
available B-channel.
6. Click ‘OK’ to close the ‘Properties’ dialog box for your connection.
To connect to the Internet:
After you have set up the connection to your Internet service provider as described
previously, you can to connect to the Internet.
1. To connect to the Internet, launch your Web browser or email application. A dialog
box appears that prompts you to connect.
Note: If you want to automatically connect to the Internet each time you start your
Web browser or email application, select ‘Connect automatically’.
2. Click ‘Connect’. When the connection is established the ‘Status’ dialog box appears.
You can browse the Internet or check your email using any Web browser or email
application.
3. To terminate the connection, click ‘Start > Connect To > Show all connections.
Right-click the entry for your Internet connection, then select ‘Disconnect’.
Configuring Diva Mobile for Windows XP ◆ 22
Modifying your Diva Mobile configuration
In general, after you have installed the Diva Mobile hardware and software, you do not
need to further configure Diva Mobile except in the following cases:
• if you are located in North America or Japan, you will need to modify the switch type
and enter a service profile identifier (SPID), or;
• if you want to change any Diva Mobile settings, such as the ISDN phone numbers, or
install a virtual modem, after you have installed the card.
To change switch type, phone numbers, or ISDN properties
1. From the desktop, right-click ‘My Computer’, and then click ‘Manage’.
2. In the ‘Tree’ tab, under ‘System Tools’, select ‘Device Manager’ and then, in the right
pane, expand ‘Network Adapters’.
3. Right-click the modem that you want to modify and then, on the shortcut menu that
appears, click ‘Properties’.
4. In the Diva Mobile Properties dialog box, click the ‘ISDN’ tab and select your switch
type or D-channel protocol.
Select your switch type or
D-channel protocol, and then
click ‘Configure’.
5. Click ‘Configure’ and enter the appropriate information. For example, you may need
to enter new ISDN phone numbers or, in North America, a new SPID.
6. Click ‘OK’.
Configuring Diva Mobile for Windows XP ◆ 23
7. Click the ‘Diva’ tab, and configure the options.
Click to view the log file
• Logging Level: Sets the severity level for messages written to the log file.
• No Answer Timeout: Sets the maximum length of time (between 2 and 20
seconds) that the driver waits after issuing a call to get a response from the remote
side before it cancels an unanswered call. The default is 20 seconds.
• Accept Analog Calls: Select this option if you want the modem to accept analog
calls.
• Ignore the Caller’s Callback ISDN Number: When this option is selected, the
modem driver accepts a callback from any number, even if the callback originates
from a different number than the one that was dialed to request a callback. This
option is selected by default.
If this option is not selected, the modem driver accepts a callback only if it originates
from the same number that was dialed to request a callback.
Installing a virtual modem under Windows XP
1. Click 'Start > Settings > Control Panel'.
2. Double-click the 'Phone and Modems Options' icon.
Note: In Windows XP, you must switch to classic view to display this icon.
3. In the 'Phone and Modem Options' dialog box, click the 'Modems' tab.
4. Click 'Add'
5. In the 'Add/Remove Hardware Wizard', click 'Next'.
6. Select a port for the modem, and click 'Next'.
7. In the displayed screen (which indicates that an unknown modem was detected), click
'Change'.
Configuring Diva Mobile for Windows XP ◆ 24
8. In the 'Install New Modem' dialog box, select the virtual modem you want to install,
then click 'OK'.
9. In the 'Add/Remove Hardware Wizard', click 'Next'.
10. Select the same port you selected in step 6, then click 'Next'.
11. If the 'Digital Signature Not Found' screen appears, click 'Yes' to proceed with the
installation
12. When your modem is installed, click 'Finish' in the 'Add/Remove Hardware Wizard'.
The 'Phone and Modem Options' dialog box displays the virtual modem you installed.
13. Click 'OK' to close the 'Phone and Modem Options' dialog box.
After you install a virtual modem, you can select it from within the communications software
that will be using the modem.
Configuring Diva Mobile for Windows XP ◆ 25
CHAPTER
6
Installing Diva Mobile for Windows NT
This section includes information on the following:
• Configuring Windows NT Networking
• Installing the Diva Mobile V.90 PC Card
• Installing the Diva Mobile for Windows NT software
• Connecting to the Internet under Windows NT
Configuring Windows NT Networking
Before you install Diva Mobile for Windows NT, make sure that Windows NT Networking
and the protocols specified by your Internet Service Provider (ISP) or by your network
administrator are installed on your notebook.
Note: A protocol is a ‘language’ computers can use to communicate. Computers that
need to communicate with each other must use the same protocol.
In general:
• If you will be connecting to a Windows NT RAS server, you need one or more of the
following protocols: NetBEUI, TCP/IP, or IPX. You must use protocols that are
supported by the RAS server.
• If you will be connecting to an ISP or to a TCP/IP router, you need the TCP/IP protocol.
To determine if Windows NT Networking is installed
• Click ‘Start > Settings > Control Panel’. Double-click the ‘Network’ icon.
If the ‘Network’ dialog box appears, then Windows NT Networking is installed. Continue
with To install and configure protocols specified by your ISP or network administrator.
If the following message box appears, then you must install Windows NT Networking
before proceeding. Make sure you have your Windows NT CD-ROM or diskettes
available.
Click ‘Yes’ to install
Windows NT Networking.
For more information, see your Windows NT documentation. During the Windows NT
Networking setup, you are prompted to select an adapter; if you do not have a network
interface card, select the MS Loopback adapter.
Installing Diva Mobile for Windows NT ◆ 26
To install and configure protocols specified by your ISP or network administrator
(A) Install the protocols
1. Open the ‘Network’ dialog box: click ‘Start > Settings > Control Panel’. Double-click
the ‘Network’ icon.
2. In the ‘Network’ dialog box, click the ‘Protocols’ tab.
3. If all the required protocols appear in the ‘Network Protocols’ list, then they are
installed. Continue with ‘Configure the protocols’ below.
4. If a required protocol does not appear in the ‘Network Protocols’ list, install it. To install
a protocol:
• In the ‘Network’ dialog box, click ‘Add’.
• In the ‘Select Network Protocol’ dialog box, select the required protocol, then click
‘OK’.
• Follow the on-screen instructions. If prompted, reboot your notebook.
(B) Configure the protocols
You must configure each protocol with the values specified by your ISP or by your network
administrator.
1. If the ‘Network’ dialog box is not open, open it: click ‘Start > Settings > Control Panel’.
Double-click ‘Network’.
2. In the ‘Network’ dialog box, click the ‘Protocols’ tab.
3. From the ‘Network Protocols’ list, double-click a protocol you need to configure.
For example, if you plan to connect to the Internet or to a TCP/IP network, double-click
this item:
4. In the displayed dialog box, use the various tabs to enter the properties specified by
your ISP or by your network administrator (see ‘Internet and Remote Access (ISDN
or analogue)’ in ‘Requirements’ on page 11).
When you are done, click ‘OK’ to close the dialog box.
5. Click ‘OK’ again to close the ‘Network’ dialog box.
6. If you are prompted for your Windows NT CD-ROM or a specific Windows NT diskette:
Insert your Windows NT CD-ROM or the appropriate diskette into a suitable drive. In
the ‘Windows NT Setup’ dialog box, type the path to the CD-ROM or diskette, then
click ‘Continue’.
7. If prompted, reboot your notebook.
8. Repeat this procedure if you need to configure more protocols.
Installing Diva Mobile for Windows NT ◆ 27
Installing the Diva Mobile V.90 PC Card
If you are not using card and socket services
1. Shut down your notebook; otherwise, your adapter will not be detected.
2. Plug the ISDN dongle into the adapter (see the illustration in ‘To install Diva Mobile
under Windows 98/Me/2000/XP’ on page 3).
3. Insert the adapter into an available PCMCIA TYPE II slot.
If you are using card and socket services
You must install your adapter and configure the services as described in the appropriate
section (see the table below). The instructions in these sections are specific to Windows
NT 4.0.
Card and Socket Services Software:
Go to:
Award™ CardWare®, Unicore®
CardWare, and Phoenix® CardWare
To install and configure your adapter with Award
CardWare, Unicore CardWare, and Phoenix
Cardware’ on page 4
SystemSoft® CardWizard™ 4.x or 5.x To install and configure your adapter with
SystemSoft CardWizard 4.x or 5.x’ on page 4
Softex™ PC Card Controller or
Phoenix® CardExecutive™
To install and configure your adapter with Softex
PC Card Controller and Phoenix CardExecutive’
on page 4
About card and socket services software
Most new notebooks that are preconfigured with Windows NT 4.0 include card and socket
services software. Card and socket services software extends the basic functionality of
Windows NT 4.0 to include hot swapping and, with some software, power management.
Hot swapping allows you to insert and remove a PC card while the notebook is on. If you
do not have ‘hot-swapping’ functionality, you must shut down your notebook whenever you
want to insert or remove a PC card; otherwise, Windows NT does not detect the change.
The following card and socket services software supports hot swapping: Award CardWare,
Unicore CardWare, Phoenix CardWare, SystemSoft CardWizard 5.x, Softex PC Card
Controller, and Phoenix CardExecutive.
Power management prolongs the life of your notebook’s battery by ensuring that the
battery is used efficiently. It allows you to operate your notebook in suspend or standby
mode. Power management is supported with the following power management software:
Softex Power Management™ Controller and SystemSoft PowerProfiler®.
Note: Power management works only in combination with card and socket services that
support hot swapping.
Installing Diva Mobile for Windows NT ◆ 28
To install and configure your adapter with
Award CardWare, Unicore CardWare, and Phoenix Cardware
1. Install CardWare as described in the manufacturer’s documentation.
2. Restart your notebook.
3. Plug the ISDN dongle into the adapter (see the illustration in ‘To install Diva Mobile
under Windows 98/Me/2000/XP’ on page 3).
4. After you logon to Windows NT, insert your adapter into an available PCMCIA TYPE
II slot.
5. In the displayed warning message box, click ‘Cancel’.
6. From the Windows NT system tray, click the ‘PC Card’ icon. Select ‘Edit’, then select
your adapter.
7. In the ‘Edit PC Card Associations’ dialog box, double-click ‘[Do Not Config]’ from
‘Defined’. Click ‘OK’.
8. Install the Diva Client software as described in ‘Installing Diva Mobile for Windows
NT’ on page 7.
To install and configure your adapter with SystemSoft CardWizard 4.x or 5.x
(Hot swapping is supported only with CardWizard 5.x)
1. Install SystemSoft CardWizard as described in the CardWizard documentation.
2. Restart your notebook.
3. Plug the ISDN dongle into the adapter (see the illustration in ‘To install Diva Mobile
under Windows 98/Me/2000/XP’ on page 3).
4. After you logon to Windows NT, insert your adapter into an available PCMCIA TYPE
II slot.
5. The following message is displayed: ‘A successful card insertion event has been
detected in a slot. This card is hot-swappable.’
6. Click ‘OK’.
7. Install the Diva Client software as described in ‘Installing Diva Mobile for Windows
NT’ on page 7.
To install and configure your adapter with
Softex PC Card Controller and Phoenix CardExecutive
Diva Mobile for Windows NT supports only Softex PC Card Controller version 2.34 or
higher (for information on how to verify the version number, see the Softex PC Card
Controller user's guide).
If you have an older version of Softex PC Card Controller, contact Softex to get the
necessary update:
e-mail: [email protected]
phone: +1-512-452-8836
fax:+1-512-795-8702
Installing Diva Mobile for Windows NT ◆ 29
1. Install the card and socket services software as described in the manufacturer’s
documentation.
2. Restart your notebook.
3. When the ‘Diagnostics’ wizard appears, click ‘Next’, click ‘Next’ again, then click
‘Finish’.
4. Restart your notebook again.
5. Plug the ISDN dongle into your adapter (see the illustration in ‘To install Diva Mobile
under Windows 98/Me/2000/XP’ on page 3).
6. After you logon to Windows NT, insert your adapter into an available PCMCIA TYPE
II slot.
7. When a ‘PCMCIA Card Insertion’ dialog box appears, select ‘Manually install the driver
for this card’, then click ‘OK’.
8. In the ‘Select OEM Option’ dialog box, click ‘Network Adapter’, then click ‘OK’.
9. Install the Diva Mobile for Windows NT software as described below.
Installing the Diva Mobile for Windows NT software
Important: The following procedures assume that Windows NT Networking is already
installed and configured on your notebook. If it is not, see Configuring Windows NT
Networking on page 26.
Determine the hardware resources assigned to Diva Mobile
1. After you have installed Diva Mobile as described in Installing the Diva Mobile V.90
PC Card, turn on your notebook (if it is not already on).
2. At the Windows NT console, logon as Administrator or equivalent.
3. Open the ‘PC Card (PCMCIA) Devices’ dialog box: click ‘Start > Settings > Control
Panel’, and then double-click the ‘PC Card (PCMCIA)’ icon.
4. In the ‘PC Card (PCMCIA) Devices’ dialog box, click the ‘Socket Status’ tab.
5. Select ‘Eicon Diva Mobile V.90’, then click ‘Properties’.
Installing Diva Mobile for Windows NT ◆ 30
6. In the ‘Eicon Diva Mobile V.90 Properties’ dialog box, do the following:
Click the ‘Resources’ tab.
Write down the setting or range for each ‘Resource Type’. You will need to
specify these settings later when you configure Diva Mobile for Windows NT.
7. Click ‘OK’.
8. Click ‘OK’ to close the ‘PC Card (PCMCIA) Devices’ dialog box.
Install the drivers and configure Diva Mobile for Windows NT
1. Insert the Diva Mobile Software Suite CD into your CD-ROM drive.
2. Click ‘Start > Run’.
3. In the ‘Run’ dialog box, type D:\CDSETUP.EXE (where D is your CD-ROM drive letter)
and then click ‘OK’.
4. In the Diva Mobile Software Suite Welcome screen, click ‘Getting Started’.
5. If required, select ‘Windows NT 4.0’ under ‘Select an operating system’.
6. Click ‘Install Diva Software’. The setup program copies files to your computer.
7. In the ‘Select OEM Option’ dialog box, do the following:
Select ‘Eicon DIVA Mobile ISDN-V.90 combo card’.
Click ‘OK’.
8. In the Diva Mobile for Windows NT wizard, click ‘Next’.
Installing Diva Mobile for Windows NT ◆ 31
9. Select the hardware resources assigned to Diva Mobile. You noted these settings
before you began the installation.
• Interrupt Number: Specify the interrupt number you noted (even if an asterisk
indicates that it is already in use; it is being used by Diva Mobile).
• I/O Port Base Address: Keep the default value.
• I/O Port Base Address (modem): Specify the value you noted (even if an asterisk
indicates that it is already in use; it is being used by Diva Mobile).
• Memory Address: Keep the default value.
Note: If your notebook uses card-and-socket services, you may not be able to select
hardware resources as described in this step. If this is the case, refer to the manual
included with your notebook for more information on installing PC cards. If your
notebook uses card-and-socket services, a corresponding icon is shown in the system
tray.
10. Click ‘Next’.
11. Select the appropriate ISDN ‘Switch Type’, then click ‘Next’.
12. North America only: Enter your ISDN telephone numbers (excluding the area code)
specified by your ISDN service provider. Enter the numbers without spaces or
hyphens.
Enter the corresponding SPIDs (Service Profile Identifiers) specified by your ISDN
service provider. Enter the numbers without spaces or hyphens. Depending on your
switch type, you have to enter either one or two SPID numbers for your ISDN line.
13. Click ‘Next’.
14. Select the ISDN modems you want to use with Diva Mobile:
Modem
Description
V.120 modem*
Use this modem in conjunction with certain asynchronous terminal
applications.
X.75 modem*
Use this modem to connect to certain ISDN bulletin board systems in
Europe.
BTX modem
Use this modem in conjunction with banking applications in Germany, such
as Amaris or Microsoft Money.
*For the V.120 and the X.75 modems, you must choose the modem that corresponds
to the required connection speed — 56 or 64 kbps. Note that when connecting to
certain locations, some switches do not support 64 kbps connections and you must
limit the speed to 56 kbps. If you are not sure which connection speed is required,
install both modems for the required type.
Note: The V.90 analogue modem is automatically installed.
15. Click ‘Next’.
16. Click ‘Finish’. The setup program copies files to your notebook.
Note: The WAN-Miniport driver is automatically installed. The WAN-Miniport driver allows
you to use Dial-Up Networking over ISDN.
Installing Diva Mobile for Windows NT ◆ 32
Install and configure Remote Access Service (RAS)
1. In the displayed message box, click ‘Yes’ to install RAS (if it is not installed) and
configure it.
Note: If you install RAS, you must reinstall Windows NT Service Pack 3 (or higher)
after completing this installation.
2. If the ‘Eicon WAN-Miniport Driver Setup’ dialog box appears: Insert your Windows NT
CD-ROM or Setup diskette into an appropriate drive, and do the following:
Type D:\I386 (where D corresponds to the drive that contains the
Windows NT CD or setup diskette).
3. Click ‘Continue’.
4. If the ‘Remote Access Setup’ dialog box appears: In the ‘Remote Access Setup’ dialog
box, do the following:
Click ‘Add’.
5. In the ‘Add RAS Device’ dialog box, do the following:
Select ‘ISDN1-DIWAN’, then click ‘OK’. This adds the first ISDN port.
6. In the ‘Remote Access Setup’ dialog box, select ‘ISDN1 DIWAN’, then click
‘Configure’.
Installing Diva Mobile for Windows NT ◆ 33
7. In the ‘Configure Port Usage’ dialog box, select ‘Dial out only’, then click ‘OK’.
8. In the ‘Remote Access Setup’ dialog box, click ‘Clone’ to add a second port with the
same configuration as the first port.
9. In the ‘Remote Access Setup’ dialog box, click ‘Add’.
10. In the ‘Add RAS Device’ dialog box, select ‘COMx-Eicon Diva Mobile V.90 Modem’
(where x depends on your system).
11. Click ‘OK’. This adds an analogue modem port.
12. In the ‘Remote Access Setup’ dialog box, select ‘COMx-Eicon Diva Mobile V.90
Modem’, then click ‘Configure’.
13. In the ‘Configure Port Usage’ dialog box, select ‘Dial out only’, then click ‘OK’.
14. In the ‘Remote Access Setup’ dialog box, click ‘Network’.
15. In the ‘Network Configuration’ dialog box, select the dial-out protocols you need to
use. To connect to the Internet, select only ‘TCP/IP’. Deselect all other protocols.
16. Click ‘OK’. The ‘Remote Access Setup’ dialog box appears. It should look similar to
the one shown below:
17. Click ‘Continue’. The setup program copies files to your notebook.
Note: CAPI 2.0 is automatically installed. CAPI allows you to use applications that are
based on the Common ISDN application programming interface.
Complete the installation
1. In the displayed message box, click ‘OK’ to launch the ‘Network Control Panel’.
2. In the ‘Network Control Panel’, click ‘OK’.
3. When prompted, restart your notebook to complete the installation.
Installing Diva Mobile for Windows NT ◆ 34
Specify your location
1. Start the Country Selector: click ‘Start > Programs > Eicon ISDN Tools (Common) >
Diva Mobile Country Selector’.
2. In the ‘Country Selector’ dialog box, do the following:
Select the country where you are located. The Country Selector
lists all the countries where Diva Mobile is certified for use.
3. Click ‘OK’.
Connecting to the Internet under Windows NT
1. From the desktop, double-click ‘My Computer’, and then double-click ‘Dial-Up
Networking’.
• If this is the first time you open Dial-Up Networking, a message box prompts you
to add an entry to the phonebook. Click ‘OK’.
Note: You may be prompted to enter your location information.
• If this is not the first time you open Dial-Up Networking, click ‘New’.
2. If the ‘New Phonebook Entry’ wizard appears, select ‘I know all about phonebook
entries and would rather edit the properties directly’. Click ‘Finish’.
This opens the ‘New Phonebook Entry’ dialog box that allows you to configure more
parameters than the wizard does.
Installing Diva Mobile for Windows NT ◆ 35
3. Click the ‘Basic’ tab. Do the following:
Enter a name for the connection, and then enter the dial-up number specified by
your Internet service provider. Enter the number without spaces or hyphens.
For ‘Dial using’, select one of the following:
- For ISDN connections, select ‘DIWAN (ISDN1)’.
- For analogue connections, select ‘Eicon Diva Mobile V.90 Modem’.
Note: Some Internet service providers provide different dial-up numbers for analogue
modem access and ISDN access. Make sure you enter the appropriate dial-up
number.
If you need to append any strings or symbols to the ‘Phone number’ (see the following
points), do not insert any spaces between the number and the strings or the symbols.
• If the number includes a subaddress, separate it with a pipe symbol ‘|’.
• If you are connecting to an Internet service provider or to a TCP/IP router that uses
the V.120 protocol, append the string ^V.120 to the ‘Phone number’.
• If you have to connect at a data rate of 56 kbps over ISDN, append the string ^56k
to the ‘Phone number’. (In North America, many ISDN lines use a data rate of 56
kbps).
Installing Diva Mobile for Windows NT ◆ 36
4. Click the ‘Server’ tab. Do the following:
Select ‘PPP: Windows NT, Windows 95 Plus, Internet’.
Make sure only
‘TCP/IP’ is selected.
If you have not done so already, click ‘TCP/IP Settings’ and enter the
TCP/IP properties specified by your Internet service provider.
Note: If you must configure additional properties, follow the instructions specified by
your Internet service provider or network administrator.
5. Click ‘OK’ to close the ‘New Phonebook Entry’ dialog box.
Configure Multilink PPP (optional)
(For ISDN connections only) If your Internet service provider supports Multilink PPP, you
can use both B-channels to attain a connection speed of 128 kbps. Since Multilink PPP
uses both B-channels, the cost of your connection will increase.
1. From the desktop, double-click the ‘My Computer’ icon, then double-click ‘Dial-Up
Networking’.
2. In the ‘Dial-Up Networking’ dialog box, do the following:
Select the connection you created, then click ‘More’, and
select ‘Edit entry and modem properties’.
3. In the ‘Edit Phonebook Entry’ dialog box, click the ‘General’ tab.
Installing Diva Mobile for Windows NT ◆ 37
4. In ‘Dial using’, select ‘Multiple lines’, then click ‘Configure’.
5. In the ‘Multiple Line Configuration’ dialog box, do the following:
Select ‘DIWAN (ISDN2)’.
Then, click ‘Phone numbers’.
6. In ‘New phone number’, enter the phone number for DIWAN (ISDN2). This is the phone
number of your second B-channel. Click ‘Add’.
7. Click ‘OK’ to close the ‘Phone Numbers’ dialog box.
8. Click ‘OK’ again to close the ‘Multiple Line Configuration’ dialog box.
To connect to the Internet:
After you have set up the connection as described in the previous procedures, you are
ready to connect. Follow these steps each time you want to connect.
1. From the desktop, double-click ‘My Computer’ and then double-click ‘Dial-Up
Networking’.
2. From ‘Phonebook entry to dial’, select the connection you created.
3. Click ‘Dial’.
4. In the ‘Connect to’ dialog box, do the following:
Enter the user name and password specified by
your Internet service provider.
In some cases, you must also enter a domain.
Installing Diva Mobile for Windows NT ◆ 38
5. Click ‘OK’. When the connection is established, the ‘Connection Complete’ dialog box
appears. You can now browse the Internet, check your email, etc.
To disconnect:
To disconnect, right-click the ‘Dial-Up Networking Monitor’ located on the taskbar.
Installing Diva Mobile for Windows NT ◆ 39
CHAPTER
7
Monitoring your ISDN Connection
Using the Line Monitor
The ‘Line Monitor’ shows the status of both B-channels at any time. The ‘Line Monitor’
appears as an icon in the system tray, as shown below.
Line Monitor
System tray
The two lights on the icon represent the status of your B-channels, as described in the
table below.
Color
Status of the corresponding B-channel
Green
Not connected.
Red
Connected.
- An up arrow indicates an outgoing call.
- A down arrow indicates an incoming call.
Depending on your connection, ISDN charges might apply.
Grey
Inactive. Diva Mobile is not plugged into your computer or there is a configuration error
in the Diva software.
You can also view the status of the B-channels by placing the mouse cursor over the ‘Line
Monitor’ icon for a few seconds. A tooltip displays the status of both B-channels.
The ‘Line Monitor’ is automatically loaded each time you start your computer.
Launching Diva Assistant
From the ‘Line Monitor’ icon, you can also launch the Diva tools described in the table
below. To launch a tool, right-click the ‘Line Monitor’ icon, then click the required tool.
Tool
Description
Diagnostic Log
The Diagnostic Log displays error and information messages that detail the
events of Diva Mobile. You can review the messages in the Diagnostic Log to
try to determine the cause of a problem, or to monitor the status of your Diva
Mobile at any time.
Call Log
The Call Log displays all the calls made and received by Diva Mobile. The Call
Log also includes detailed information about each call.
For more information, refer to the online help for the tool. An additional tool, Call Guard,
is available in the Diva Assistant program group on the Start Menu. Call Guard integrates
security features that protect your ISDN line from misuse.
Monitoring your ISDN Connection ◆ 40
CHAPTER
8
Using Analogue Applications
Selecting a modem
For all analogue data or fax applications, use the Eicon Diva Mobile V.90 Modem.
Dialing out through a Private Branch Exchange (PBX)
If your Diva Mobile is connected to the analogue network through a PBX, you need to
change the default dial-out properties.
Under Windows 98/Me
1. Open the ‘Modems Properties’ dialog box: click ‘Start > Settings > Control Panel’, and
then double-click ‘Modems’.
2. In the ‘Modems Properties’ dialog box, select ‘Eicon Diva Mobile V.90 Modem’, then
click ‘Properties’.
• In the ‘Eicon Diva Mobile V.90 Modem Properties’ dialog box, select the
‘Connection’ tab.
• From ‘Call Preferences’, clear the ‘Wait for dial tone before dialing’ check box.
• Click ‘OK’.
3. In the ‘Modems Properties’ dialog box, click ‘Dialing Properties’.
• From the ‘Dialing Properties’ dialog box, specify the number you need to dial to
access an external line from ‘To access an outside line’.
• Click ‘OK’.
4. In the ‘Modems Properties’ dialog box, click ‘Close’ or ‘OK’.
Under Windows 2000/XP
1. Open the ‘Phone and Modem Options’ dialog box: click ‘Start > Settings > Control
Panel’, and then double-click ‘Phone and Modem Options’.
2. In the ‘Phone and Modem Options’ dialog box, click the ‘Modems’ tab.
3. Select ‘Eicon Diva Mobile V.90 Modem’, then click ‘Properties’.
• In the ‘Eicon Diva Mobile V.90 Modem Properties’ dialog box, under ‘Dial Control’,
clear the ‘Wait for dial tone before dialing’ check box.
• Click ‘OK’.
Using Analogue Applications ◆ 41
4. In the ‘Phone and Modem Options’ dialog box, click the ‘Dialing Rules’ tab.
• Select the location you want to edit, and click ‘Edit’.
• Under ‘Dialing Rules’, specify the number you need to dial to access an external
line.
• Click ‘OK’.
5. In the ‘Phone and Modem Options’ dialog box, click ‘OK’.
UltraPort® technology
UltraPort technology can double the throughput of Diva Mobile. When the
computer-to-modem (DTE) speed is set to 115,200 bps in your communications program,
UltraPort automatically transmits at up to 230,400 bps with average 8:1 compression
(using LAPM and V.42bis). However, overall throughput is limited by phone-line quality
and the performance capabilities of the remote modem.
Note: Your computer might not be fast enough to handle the incoming data. This is
probably the case if you are disconnected often, or if you see many file transmission errors
(excessive errors can abort a file transfer). If this occurs, see Troubleshooting on page 49.
Using Analogue Applications ◆ 42
CHAPTER
9
Sending and Receiving Faxes
With Diva Mobile, you can use any third-party faxing application to send and receive faxes
from your computer. When prompted to select your modem in the faxing application, select
‘Eicon ISDN Fax Modem’.
This section describes how to send and receive faxes using BVRP Software’s PhoneTools,
which you can install from the Diva Mobile Software Suite CD-ROM.
Selecting a modem
Before you can send and receive faxes, specify the modem you want to use.
To select a modem
1. When you run PhoneTools for the first time, the ‘Modems’ dialog box opens.
2. Select the ‘EICON Diva Mobile V.90 Modem’, then click ‘OK’.
Sending faxes
You can send faxes from the application you used to create the fax document.
To send a fax
1. Load the application you used to create the fax document, then open the required
document.
2. From the menu bar, select ‘File > Print’.
3. Choose ‘CAPTURE FAX BVRP’ as the required printer (note that you might have to
open ‘Print Setup’ to select this printer). Click ‘OK’ or ‘Print’.
4. In the ‘Send Fax’ dialog box, do the following:
• Enter the recipient’s properties or select a recipient from the Phonebook.
• Select the transmission options:
Cover page includes a cover page with the fax.
HQ mode sends the fax in high-resolution mode.
Credit card charges fees to your telephone credit card.
To select a property, make sure its button is depressed (upper-right corner is green).
Sending and Receiving Faxes ◆ 43
• If you are including a cover page, select the cover page properties (see To set up
a cover page below).
Recipient’s
Properties
Phonebook
Transmission
Options
List of
recipients
Cover Page
Properties
For detailed information on any of these options, click Help.
5. To start the transmission, click ‘Send’.
To set up a cover page
You can set up your cover page directly from the ‘Send Fax’ dialog box.
1. In the ‘Send Fax’ dialog box, select the ‘Cover page’ transmission option.
2. In the ‘Cover Page’ area, specify the properties for your cover page:
Select a style for the cover page:
Standard, Simple, or Urgent.
Click to display the ‘Logo
Management’ dialog box,
where you can import a logo
for your cover page.
In the ‘Logo Management’
dialog box, click ‘Import’ to
import a logo.
Click ‘Preview’ to see how your
cover page and fax will appear.
Enter the text that you want to appear in
the ‘Message’ area on the cover page.
Sending and Receiving Faxes ◆ 44
Receiving faxes
To receive faxes:
• your computer must be turned on;
• you must be connected either to the analogue or to the ISDN network (see ‘Connect
to the ISDN and to the analogue networks’ in the printed Diva Mobile QuickStart); and,
• PhoneTools must be open.
If the above conditions apply, PhoneTools automatically answers fax calls and stores
received faxes.
To view a received fax
1. In the ‘PhoneTools’ window, double-click ‘New’
The ‘New’ button blinks if you received new items.
It stops blinking after you view or print the items.
2. From the upper-right pane of the ‘Inbox’, double-click the fax you want to view.
For more information on PhoneTools features, such as the phonebook, see the
PhoneTools online help.
Sending and Receiving Faxes ◆ 45
CHAPTER
10
Travelling to a New Location
You can use your Diva Mobile from almost any location. However, each time you travel to
a new location, you have to do the following:
1. If you travelled to a country where you want to use analogue connections, you have
to specify the country where you are located. See Specifying your location below.
2. You might have to change your switch type, ISDN numbers, and SPIDs (North America
only). If you are not sure whether you have to change these items, ask your network
administrator or your ISDN service provider. See Changing your switch type, ISDN
numbers, and SPIDs below.
3. You might have to update your Windows Dial-Up Networking configuration to reflect
your new location and to modify the dial-up number properties. For more information
on how to configure Dial-Up Networking, consult the Windows online help.
4. You have to connect to the required network(s). See ‘Connecting to the ISDN and to
the analogue networks’ in the printed QuickStart included with your adapter.
Specifying your location
Use the Country Selector to specify your location.
1. Start the Country Selector:
• Under Windows 98/Me, click ‘Start > Programs > Diva > Country Selector for the
analog modem’.
• Under Windows NT, click ‘Start > Programs > Eicon ISDN Tools (Common) > Diva
Mobile Country Selector’.
2. In the ‘Country Selector’ dialog box, select the country where you are located.
3. Click ‘OK’.
Changing your switch type, ISDN numbers, and SPIDs
Use the setup wizard if you need to change your switch type, ISDN numbers, and SPIDs.
Under Windows 98/Me
1. Open the Setup Wizard: click ‘Start > Programs > Diva > Setup Wizard’.
2. In the Setup Wizard, click ‘Start’.
Travelling to a New Location ◆ 46
3. Select the ‘Switch Type’ specified by your ISDN service provider (some ISDN service
providers refer to the switch type as ‘ISDN D-channel protocol’).
In general:
• In Europe, select ‘DSS1 - EuroISDN’ (commonly referred to as ETSI standard).
• In North America, select ‘North America Auto-detect’.
Click ‘Next’.
4. Enter the ISDN phone numbers (excluding the area code) specified by your ISDN
service provider. Enter each number directly, without spaces or hyphens.
Note: If you do not plan to receive calls (that is, if you plan to make outgoing calls
only), then you do not have to enter ISDN phone numbers.
5. North America only: Enter the corresponding SPIDs (Service Profile Identifier)
specified by your ISDN service provider. Enter each number directly, without spaces
or hyphens. Depending on your switch type, you have to enter either one or two SPIDs
for your ISDN line.
6. Click ‘Next’.
7. Keep the existing settings in all additional screens.
8. Restart your computer to effect your changes.
Under Windows 2000/XP
1. From the desktop, right-click ‘My Computer’.
2. In the ‘Computer Management’ dialog box, click ‘Manage’.
3. In the ‘Tree’ tab, under ‘System Tools’, select ‘Device Manager’ and then, in the right
pane, expand ‘Network Adapters’ and select the modem that you want to modify.
4. In the Diva Mobile Properties dialog box, click the ‘ISDN’ tab and select your switch
type or D-channel protocol.
5. Click ‘Configure’ and enter the appropriate information. For example, in North
America, you may need to enter new ISDN phone numbers or a new SPID.
6. Click ‘OK’.
7. Click ‘OK’ to close the properties dialog box.
Under Windows NT
1. Open the ‘Network’ dialog box: click ‘Start > Settings > Control Panel’. Double-click
the ‘Network’ icon.
2. In the ‘Network’ dialog box, click the ‘Adapters’ tab.
3. Select ‘Eicon Diva Mobile ISDN-V.90 combo card’, then click ‘Properties’.
4. In the Diva Mobile for Windows NT setup wizard, click ‘Next’.
5. Do not change any hardware resources in the displayed screen.
Click ‘Next’.
Travelling to a New Location ◆ 47
6. Select the switch type provided to you by your ISDN service provider (some ISDN
service providers refer to the switch type as ‘ISDN D-channel protocol’).
In general, if you are in Europe, select ‘Europe and other countries, Euro-ISDN
(E-DSS1)’ (commonly referred to as ETSI standard).
Click ‘Next’.
7. North America only: Enter the ISDN phone numbers (excluding the area code)
specified by your ISDN service provider. Enter each number directly, without spaces
or hyphens.
Also, enter the corresponding SPIDs (Service Profile Identifier) specified by your ISDN
service provider. Enter each number directly, without spaces or hyphens. Depending
on your switch type, you have to enter either one or two SPIDs for your ISDN line.
Click ‘Next’.
8. Click ‘Finish’.
9. Restart your computer to effect the changes.
Travelling to a New Location ◆ 48
CHAPTER
11
Troubleshooting
If you are having problems with your Diva Mobile or with the corresponding software, the
following suggestions can help you diagnose and solve the problems.
Before you try to solve any problem, consult the readme.txt file included in the
\MOBILE\WIN_9X\IINSTALL\ENGLISH or the \MOBILE\WIN_NT\INSTALL\ENGLISH
folder on the Diva Mobile Software Suite CD-ROM. The readme file contains the most
up-to-date information which did not make it into the manuals.
Solutions to possible problems
This section describes various problems that can occur with your Diva Mobile, and the
corresponding solutions.
Important: These problems and solutions apply to the Windows 98/Me/2000/XP
operating systems only.
If your problem is not listed here, see Diagnosing problems on page 54 for instructions on
how to use the included utilities to diagnose your problem.
Frequent disconnections or file transmission errors
Your notebook is not fast enough to handle incoming data. You must disable the UltraPort.
(UltraPort technology can double the throughput of Diva Mobile when the
computer-to-modem (DTE) speed is set to 115,200 bps in your communications program.)
To disable the UltraPort under Windows 98/Me
1. Open the ‘Modems Properties’ dialog box: click ‘Start > Settings > Control Panel’, and
then double-click ‘Modems’.
2. In the ‘Modems Properties’ dialog box, select ‘EICON Diva Mobile V.90 Modem’, then
click ‘Properties’.
3. In the ‘EICON Diva Mobile V.90 Modem Properties’ dialog box, click the ‘Connection’
tab.
4. Click ‘Advanced’ and in ‘Extra Settings’, type AT*TJ0.
5. Click ‘OK’.
UltraPort remains disabled until you:
• re-enable it by entering AT*TJ1
• reset the modem by entering AT&F
• remove and reinsert Diva Mobile.
Note that TAPI-applications do not require you to enter the AT commands directly in the
application.
Troubleshooting ◆ 49
To disable the UltraPort under Windows 2000/XP
1. Open the ‘Phone and Modem Options’ dialog box: click ‘Start > Settings > Control
Panel’, and then double-click ‘Phone and Modem Options’.
2. In the ‘Phone and Modem Options’ dialog box, click the ‘Modems’ tab.
3. Select ‘EICON Diva Mobile V.90 Modem’, then click ‘Properties’.
4. In the ‘EICON Diva Mobile V.90 Modem Properties’ dialog box, click the ‘Advanced’
tab.
5. Under ‘Extra Settings’, type AT*TJ0.
6. Click ‘OK’.
UltraPort remains disabled until you:
• re-enable it by entering AT*TJ1
• reset the modem by entering AT&F
• remove and reinsert Diva Mobile.
Note that TAPI-applications do not require you to enter the AT commands directly in the
application.
Diva Mobile is not detected automatically
Card and Socket Services (which are installed by default) might not be installed properly.
To check the installation of Card and Socket Services
1. Open the ‘System Properties’ dialog box: click ‘Start > Settings > Control Panel’ and
then double-click ‘System’.
2. In the ‘System Properties’ dialog box do the following:
Under Windows 98/Me
Click the ‘Device Manager’ tab.
Under Windows 2000/XP
Click the ‘Hardware’ tab, and then click ‘Device Manager’.
3. If a ‘+’ sign appears on the left of ‘PCMCIA socket’, click it to expand the list.
4. Select the PCMCIA controller, then click ‘Properties’.
If the ‘Device status’ area in the ‘General tab’ indicates that this device is not ready
for operation or if it is marked with a yellow exclamation mark, then the services are
not installed properly. Check your Windows installation or contact the supplier of your
notebook.
Troubleshooting ◆ 50
Cannot install Diva Client for Windows properly
If the software installation stops abruptly (after installing Eicon Diva Mobile V.90 Modem)
without any error messages, there is a hardware resource conflict. In other words,
resources that are being used by other hardware devices are assigned to Diva Mobile.
To resolve a hardware resource conflict
1. Open the ‘System Properties’ dialog box: click ‘Start > Settings > Control Panel’ and
then double-click ‘System’.
2. In the ‘System Properties’ dialog box do the following:
Under Windows 98/Me
Click the ‘Device Manager’ tab.
Under Windows 2000/XP
Click the ‘Hardware’ tab, and then click ‘Device Manager’.
3. If a ‘+’ sign appears on the left of ‘Multi-function adapters’, click it to expand the list.
4. Click ‘Eicon Diva Mobile ISDN-V.90 combo card’, then select ‘Properties’.
5. In the ‘Eicon Diva Mobile ISDN-V.90 combo card Properties’ dialog box, click the
‘Resources’ tab. The ‘Conflicting device list’ identifies the conflicting resource.
6. Select the conflicting ‘Resource type’, then click ‘Change Setting’. In the displayed
dialog box, change the value of the resource.
When the hardware resource conflict is resolved, the installation restarts automatically.
Hardware and software installs properly, but Diva Mobile
does not function properly after your computer restarts
There is a hardware resource conflict. Resources that are being used by other hardware
devices are assigned to Diva Mobile. Follow the steps above to resolve a hardware
resource conflict.
Troubleshooting ◆ 51
After a restart, or removal and re-insertion, of Diva Mobile
the notebook freezes for a few minutes and then functions
properly
The reason for this error is unknown. You can solve it by changing the Diva Mobile
resources assigned to the COM Port.
To change the Diva Mobile resources assigned to the COM Port
1. Open the ‘System Properties’ dialog box: click ‘Start > Settings > Control Panel’ and
then double-click ‘System’.
2. In the ‘System Properties’ dialog box do the following:
Under Windows 98/Me
Click the ‘Device Manager’ tab.
Under Windows 2000/XP
Click the ‘Hardware’ tab, and then click ‘Device Manager’.
3. If a ‘+’ sign appears on the left of ‘Multi-function adapters’, click it to expand the list.
4. Click ‘Eicon Diva Mobile ISDN-V.90 combo card’, then select ‘Properties’.
5. In the ‘Eicon Diva Mobile ISDN-V.90 combo card Properties’ dialog box, click the
‘Resources’ tab.
6. Select ‘Input/Output Range’, then click ‘Change Setting’.
7. In the ‘Edit Input/Output Range’ dialog box, change the ‘Value’ of the setting. Click
‘OK’.
Diva Mobile is detected automatically, but the notebook
freezes or displays a black or blue screen when installing
the software.
This problem is usually caused by two factors: a shared interrupt and a PC hardware
(BIOS) error. It can also occur if the Card and Socket Service drivers are old or not correct.
To solve the problem, you must assign a unique interrupt to Diva Mobile.
To assign a unique interrupt to Diva Mobile
1. Uninstall any hardware devices you do not use. To do so, refer to the documentation
supplied with the hardware.
2. Reinstall Diva Mobile.
If you still have problems and you are sure that no other devices are using the interrupt
assigned to Diva Mobile, contact the supplier of your notebook for a BIOS update and
current drivers.
Troubleshooting ◆ 52
Cannot remove and reinsert Diva Mobile while the notebook
is on
In general, you can remove and reinsert Diva Mobile while your notebook is on. Some
applications, however, do not support “hot swapping”; problems can occur if you do not
‘stop’ Diva Mobile before removing it.
To remove Diva Mobile when the notebook is on
1. Close all applications that use Diva Mobile.
2. Open the ‘PC Card (PCMCIA) Properties’ dialog box: click ‘Start > Settings > Control
Panel’.
3. Double-click the ‘PC Card PCMCIA’ icon.
4. In the ‘PC Card (PCMCIA) Properties’ dialog box, click the ‘Socket Status’ tab. Select
‘EICON Diva Mobile ISDN-V.90 combo card’, then click ‘Stop’.
5. From the displayed message box, click ‘OK’.
6. Click ‘OK’ to close the ‘PC Card (PCMCIA) Properties’ dialog box.
7. Remove Diva Mobile from your notebook.
If Diva Mobile is not detected automatically when you reinsert it into the PC Card slot,
reboot your system.
Diva Mobile is installed, and a connection to an Internet
Service Provider is set up, but you cannot connect to the
Internet over ISDN
Make sure that the cable is properly connected to the ISDN network. Also, check that you
have dialed the correct number.
If you have checked these items and you still cannot connect, then your Internet Service
Provider (ISP) probably supports V.120 ISDN connections (not 64 K PPP connections).
If this is the case, use ‘Eicon ISDN V.120 modem’ instead of ‘Eicon channel 0’.
To select the ‘Eicon ISDN V.120 modem’ under Windows 98/Me
1. From the desktop, double-click the ‘My Computer’ icon.
2. Double-click ‘Dial-Up Networking’.
3. Right-click the connection you made to your ISP, then select ‘Properties’.
4. In the dialog box for the connection, click the ‘General’ tab.
5. From ‘Connect using’, select ‘Eicon ISDN V.120 modem’.
6. Click ‘OK’.
To select the ‘Eicon ISDN V.120 modem’ under Windows 2000/XP
1. Click ‘Start > Settings > Network and Dial-up Connections’, right-click the connection
you made to your ISP, and click ‘Properties’.
2. Under ‘Connect using’, select ‘Eicon ISDN V.120 modem’, and click OK.
Troubleshooting ◆ 53
Diagnosing problems
Using the Line Check utility
The Line Check utility performs a quick check of your adapter, cabling, and ISDN
connection.
To use the Line Check utility
1. Open the Line Check utility:
• Under Windows 98/Me/2000/XP, click ‘Start > Programs > Diva > Line Check’.
• Under Windows NT, click ‘Start > Programs > Eicon ISDN Tools (Common) > Line
Check’.
2. In the ‘Diva Line Check’ window, click ‘Start’.
3. If the Line Check returns an error, check the following items:
• cabling;
• configuration (ISDN numbers, SPIDs, and switch type); and,
• hardware resources.
Note: Take note of the error code returned by the Line Check utility. This error code
can help your ISDN service provider diagnose the problem.
4. If the Line Check does not return an error, and you cannot get your adapter to work
properly, there is probably a problem in the configuration of the application you are
using with Diva Mobile (such as Dial-Up Networking or faxing software). Contact your
software vendor for further assistance.
Using DiTrace
DiTrace records and logs Diva Mobile events in a text file known as a ‘trace’. If you cannot
diagnose and solve your problem, follow this procedure to generate a trace. The generated
trace can help Customer Services diagnose and solve your problem.
To generate a trace
1. Restart your computer to make sure you record only the significant events.
2. Perform the task that causes the problem. (Do this only one time to avoid recording
repeated events.)
3. Run DiTrace.
• Under Windows 98/Me/2000/XP: Click ‘Start > Programs > Diva > Diagnosis
(DiTrace)’.
• Under Windows NT: Click ‘Start > Programs > Eicon ISDN Tools (Common) >
DITRACE All Events’.
The trace is displayed in your default text editor or further instructions appear in a
DOS box.
4. Save the trace file.
Troubleshooting ◆ 54
CHAPTER
11
Removing Diva Mobile
To remove Diva Mobile, you must uninstall the software and then remove the card from
your notebook.
Under Windows 98/Me/2000/XP
1. Disconnect the cables from the ISDN and the analogue networks.
2. Open the ‘PC Card (PCMCIA) Properties’ dialog box: click ‘Start > Settings > Control
Panel’ and double-click the ‘PC Card (PCMCIA)’ icon.
3. In the ‘PC Card (PCMCIA) Properties’ dialog box, click the ‘Socket Status’ tab, select
‘EICON Diva Mobile ISDN-V.90 combo card’, then click ‘Stop’. A message box
appears, indicating that you can safely remove Diva Mobile. Click ‘OK’.
4. Click ‘OK’ to close the ‘PC Card (PCMCIA) Properties’ dialog box.
5. Click ‘Start > Programs > Diva > Uninstall’.
6. In the Uninstaller, click ‘Uninstall’.
7. Click ‘Done’.
8. Remove the Diva Mobile card, then restart your notebook.
Under Windows NT
1. Disconnect the cables from the ISDN and the analogue networks.
2. Click ‘Start > Programs > Eicon ISDN Tools (Common) > Uninstall’.
3. In the displayed message box, click ‘Yes’ to confirm you want to remove the software.
4. When the installation is complete, click ‘OK’ in the displayed message box.
5. To confirm the new network settings, click ‘OK’ in the displayed message box.
6. Remove the Diva Mobile card, then restart your notebook.
Removing Diva Mobile ◆ 55
CHAPTER
12
Customer Services
Eicon Networks Customer Services personnel are committed to providing the best
possible technical support to all Eicon Networks customers. For customer services,
contact your Eicon Networks supplier.
If you experience problems with your Diva adapter and software, it is strongly
recommended that you try the suggestions listed on the Eicon Help Web before you call
Customer Services. The Help Web is located at:
http://www.eicon.com/support/ema
ISDN Zone
For information on many aspects of ISDN, visit the ISDN Zone Web site at:
http://www.isdnzone.com
Comments
If you want to make comments about your Diva adapter or the corresponding software,
address them by e-mail to:
[email protected]
Customer Services ◆ 56
APPENDIX A
AT Commands and Result Codes
This appendix describes the following:
• AT commands
• Error correction commands
• Caller ID commands
• S-Register summary
• Result codes
You can use AT commands to control the analogue V.90 modem. You can enter these
commands in your communication software’s terminal mode. To restore the Factory default
settings, reboot your computer.
Note: Options you must specify are indicated by <n> or <x>.
AT commands
Command
Function
Default
+++
Escape - Switches the modem from data mode to command mode.
—
A/
Repeats the previous command.
—
AT A
Answer - Accepts an incoming call that was indicated by a RING.
—
AT B<n>
Selects Bell or CCITT protocol for low-speed connections.
n=1
n=0: Selects CCITT protocol.
n=1: Selects Bell protocol (common in United States).
AT D<number>
Dial - Dials the number and switches to data mode after the connection is
successfully established.
—
AT E<n>
Echo Mode - In echo mode, all commands sent to the modem are echoed back to n=1
the terminal.
n=1: Sets Echo Mode to ON.
n=0: Sets Echo Mode to OFF.
AT H<n>
On/off-hook - Causes the modem to hang up or pick up.
—
n=0: Goes on hook (hang up).
n=1: Goes off hook (pick up).
AT Commands and Result Codes ◆ 57
Command
AT I<n>
Function
Default
Identification commands - Requests product information from the modem.
—
n=0: Returns product identification code.
n=1: Computes the firmware ROM checksum and returns the three-digit result.
n=2: Computes the firmware ROM checksum and returns ERROR if this value
does not match the checksum stored in memory.
n=3: Returns the firmware revision.
n=4: Returns identifier string in Hayes-compatible binary.
n=5: Returns the country code.
n=6: Returns modem data pump model and internal code revision.
AT M<n>
Speaker - Sets speaker control.
n=1
n=0: Speaker always OFF.
n=1: Speaker ON until carrier is detected.
n=2: Speaker always ON.
n=3: Speaker goes ON after last digit is dialed, and speaker goes OFF after carrier
is detected.
AT N<n>
Automode detection - Enables or disables automode detection.
n=1
n=0: Disables automode detection.
n=1: Enables automode detection.
AT O<n>
Online - Switches the modem from the command mode to data mode.
—
n=0: Switches the modem to data mode.
n=1: Switches the modem to data mode and requests a retrain sequence.
AT P
Pulse dialing.
—
AT Q<n>
Result codes - Sets whether the modem driver returns or suppresses result codes. n=0
n=0: Returns result codes.
n=1: Suppresses result codes.
AT S<n>=<x>
Set S-Register - Sets register <n> to decimal value <x>.
—
n can be a value from 0-27.
x can be a value from 0-255.
AT S<n>?
Query S-Register - Queries the value of the S-register <n>.
—
AT T
Tone (DTMF) dialing.
—
AT V<n>
Result codes format - Sets whether results codes are returned as numbers or as n=1
words.
n=0: Returns numeric result codes.
n=1: Returns plain text result codes.
AT W<n>
Selects extended result codes.
n=0
n=0: Upon connection, the modem returns the DTE speed.
n=1: Upon connection, the modem returns the line speed, the error control
protocol, and the DTE speed, respectively.
n=2: Upon connection, the modem returns the DCE speed.
AT Commands and Result Codes ◆ 58
Command
AT X<n>
Function
Default
Result-code reporting options - Sets normal or extended result-code reporting.
n=4
n=0: Enables result codes 0-4 only.
n=1: Disables dial-tone detection and busy-detection result codes.
n=2: Disables busy-detection result code.
n=3: Disables dial-tone detection result code.
n=4: Enables all result codes.
AT Y<n>
Long space disconnect - Enables or disables long-space disconnect.
n=0
n=0: Long-space disconnect disabled.
n=1: Long-space disconnect enabled.
AT Z<n>
AT &C<n>
Reset modem - Resets the modem and restores the predefined modem
configuration profile n (where n is either 0 or 1).
—
Sets carrier detect state.
n=1
n=0: Sets carrier detect to ON.
n=1: Sets carrier detect to ON only when there is a valid carrier signal.
AT &D<n>
Sets how the modem uses the Data Terminal Ready (DTR) signal.
n=2
n=0: Modem ignores DTR.
n=1: Modem assumes the command state when DTR switches from ON to OFF.
n=2: Modem goes off-hook (hangs up) and assumes the command state when
DTR switches from ON to OFF.
n=3: Modem is reset when DTR switches from ON to OFF, and loads the stored
configuration profile selected by the AT &Y<n> command.
AT &F<n>
Returns all settings to factory default <n>.
—
n=0: Restores factory configuration 0.
n=1: Restores factory configuration 1.
AT &G<n>
Guard tone ON/OFF - Generates the specified guard tone.
n=0
n=0: Disables guard tone. (Default for North American models).
n=1: Disables guard tone.
n=2: Selects 1800 Hz guard tone.
AT &K<n>
Flow control settings - Defines the DTE/DCE (terminal/modem) flow-control
mechanism.
n=3
n=0: Disables flow control.
n=3: Enables RTS/CTS flow control (default for data modem modes).
n=4: Enables XON/XOFF flow control.
n=5: Enables transparent XON/XOFF flow control.
n=6: Enables both RTS/CTS and XON/XOFF flow control.
AT &Q<n>
Sync/Async mode - Controls the connection modes.
n=5
n=0: Selects direct asynchronous operation.
n=4: Selects autosynchronous operation.
n=5: The modem attempts to negotiate an error-corrected link.
n=6: Selects asynchronous operation in normal mode (speed buffering).
AT Commands and Result Codes ◆ 59
Command
AT &T<n>
Function
Default
Diagnostic test control - Selects the test mode.
n=5
n=0: Terminates any test in progress.
n=1: Initiates Local Analog Loopback test.
n=3: Initiates Local Digital Loopback test.
n=4: Grants all requests for a Remote Digital Loopback test.
n=5: Denies all requests for a Remote Digital Loopback test.
n=6: Initiates Remote Digital Loopback test.
n=7: Initiates Remote Digital Loopback Self-test.
n=8: Initiates Local Analog Loopback Self-test.
AT &V
Reports the current configuration, the stored (user) profiles, and the first four stored —
telephone numbers.
AT &W<n>
Stores the current configuration profile in the modem’s non-volatile memory.
—
n=0: Stores the current configuration profile as profile 0.
n=1: Stores the current configuration profile as profile 1.
AT &Y<n>
Selects the default user profile.
n=0
n=0: Selects profile 0 as the default user profile.
n=1: Selects profile 1 as the default user profile.
AT &Z<n>=<x>
Stores telephone number x to location n. x can have up to 34 characters.
n=1
AT %E<n>
Controls line-quality monitor and auto-retrain.
n=2
n=0: Disables line-quality monitor and auto-retrain.
n=1: Enables line-quality monitor and auto-retrain.
n=2: Enables line-quality monitor and fallback/fall forward.
AT %L
Returns the received line-signal level.
—
AT %Q
Returns the line-signal quality.
—
AT \K<n>
Controls how the modem interprets and transmits BREAK instructions, as follows: n=5
From Remote - From DTE(Reliable Mode) - From DTE(Normal Mode)
n=0: Now/Dump - Command - Break/Command
n=1: Now/Dump - Now/Dump - Send
n=2: Now/Save - Command - Break/Command
n=3: Now/Save - Now/Save - Send
n=4: Data/Break - Command - Break/Command
n=5: Data/Break - Data/Break - Send
AT \N<n>
Selects the error-correction mode.
n=3
n=0: Normal mode (includes speed buffering).
n=1: Direct mode (without speed buffering).
n=2: V.42 reliable mode with fallback to MNP - V.42 or MNP only.
n=3: Autoreliable mode - V.42, MNP or normal.
n=4: V.42 reliable mode - V.42 only.
n=5: MNP reliable mode - MNP only.
AT Commands and Result Codes ◆ 60
Command
Function
Default
AT \V<n>
Connect message format control - Only single-line connect messages are
supported.
n=0
n=0: Connect messages are controlled by the command settings X, W, and S95.
n=1: Connect messages will be in a single-line format, as described below, but still
subject to the B and Q commands.
Format: CONNECT<DTE SPEED></Modulation></Protocol></Compression>
</Line Speed>
AT +MS
Selects the modulation and, optionally, enables or disables automode, specifies —
the lowest and highest connection rates, selects m-Law or A-Law codec type, and
enables or disables robbed bit signaling generation (server modem) or detection
(client modem). The command format is:
+MS= <mod> [,[<automode>][,[<min_rate>][,[<max_rate>][,[<x_law>]
[,[< rb_signaling>]]]]]]<CR>
AT Commands and Result Codes ◆ 61
Error correction commands
Command
Function
Default
AT %C<n>
Enables or disables data compression.
n=3
n=0: Disables data compression.
n=1: Enables MNP5 data compression.
n=2: Enables V.42 bis data compression.
n=3: Enables V.42 bis and MNP5 data compression depending on the type of error
correction.
AT \A<n>
Sets maximum block size.
n=1
n=0: 64 characters.
n=1: 128 characters.
n=2: 192 characters.
n=3: 256 characters.
AT \B<n>
Sends break of duration <n> x 100 ms.
—
AT *H<n>
Selects MNP 10 link negotiation.
n=0
n=0: Link negotiation occurs at the highest supported speed.
n=1: Link negotiation occurs at 1200 bps.
n=2: Link negotiation occurs at 4800 bps.
AT -K<n>
Enables or disables MNP 10 extended services.
n=0
n=0: Disables V.42 LAPM to MNP 10 conversion.
n=1: Enables V.42 LAPM to MNP 10 conversion.
n=2: Enables V.42 LAPM to MNP 10 conversion; inhibits MNP Extended Services
initiation during V.42 LAPM answer mode detection phase.
AT -Q<n>
Falls back to V.22 bis/V.22.
n=1
n=0: Disables fallback from a V.34, V.32 bis, or V.32 MNP reliable connection to an
MNP reliable 2400 or 1200 bps connection.
n=1: Enables fallback from a V.34, V.32 bis, or V.32 MNP reliable connection to an
MNP reliable 2400 or 1200 bps connection.
AT -SEC=<n>
Enables or disables MNP10-EC.
n=0
AT @M<n>
Selects initial transmit level.
n=0
AT :E<n>
Enables or disables the compromise equalizer.
n=1
Caller ID commands
Command
Function
Default
AT #CID=<n>
Enables or disables Caller ID and format.
n=0
n=0: Disables caller ID.
n=1: Enables caller ID with formatted presentation to the DTE.
n=2: Enables caller ID with unformatted presentation to the DTE.
AT Commands and Result Codes ◆ 62
S-Register summary
Register
Function
Range
Default
(decimal)
AT S0
Rings to Auto-Answer
0
AT S1
Ring Counter
0
AT S2
Escape Character
0-255, ASCII decimal
43
AT S3
Carriage Return Character
0-127, ASCII decimal
13
AT S4
Line Feed Character
0-127, ASCII decimal
10
AT S5
Backspace Character
0-32, ASCII decimal
8
AT S6
Wait Time for Dial Tone
2-255 seconds
2
AT S7
Wait Time for Carrier
1-255 seconds
50
AT S8
Pause Time for Dial Delay Modifier
0-255 seconds
2
AT S9
Carrier Detect Response Time
1-255 tenths of a second
6
AT S10
Carrier Loss Disconnect Time
1-255 tenths of a second
14
AT S11
DTMF Tone Duration
50-255 milliseconds
95
AT S12
Escape Prompt Delay
0-255 1/50ths of a second
50
AT S14
General Bit-Mapped Options Status
—
138 (8Ah)
AT S16
Test Mode Bit-Mapped Options Status (&T)
—
0
AT S18
Test Timer
0-255 seconds
0
AT S19
AutoSync Options
—
0
AT S20
AutoSync HDLC Address or BSC Sync Character 0-255 seconds
0
AT S21
V.24/General Bit-Mapped Options Status
—
52 (34h)
AT S22
Speaker/Results Bit-Mapped Options Status
—
117 (75h)
AT S23
General Bit-Mapped Options Status
—
62 (36h)
AT S24
Sleep Inactivity Timer
0-255 seconds
10
AT S25
Delay to DTR Off
0-255 seconds
5
AT S26
RTS-to-CTS Delay
0-255 hundredths of a second 1
AT S27
General Bit-Mapped Options Status
—
73 (49h)
AT S28
General Bit-Mapped Options Status
—
0
AT S30
Disconnect Inactivity Timer
0-255 tenths of seconds
0
AT S31
General Bit-Mapped Options Status
—
194
AT S32
XON Character
0-255, ASCII decimal
17 (11h)
AT S33
XOFF Character
0-255, ASCII decimal
19 (13h)
AT S36
LAPM Failure Control
—
7
AT S37
Line Connection Speed
—
0
AT S38
Delay Before Forced Hangup
0-255 seconds
20
AT Commands and Result Codes ◆ 63
Register
Function
Range
Default
(decimal)
AT S39
Flow Control Bit-Mapped Options Status
—
3
AT S40
General Bit-Mapped Options Status
—
104 (68h)
AT S41
General Bit-Mapped Options Status
—
195
AT S46
Data Compression Control
136, 138
138
AT S48
V.42 Negotiation Control
—
7
AT S82
LAPM Break Control
—
128(40h)
AT S86
Call Failure Reason Code
0, 4, 5, 9, 12, 13, 14
—
AT S91
PSTN Transmit Attenuation Level
0-15 dBm
10
AT S92
Fax Transmit Attenuation Level
0-15 dBm
10
AT S95
Result Code Messages Control
—
0
AT Commands and Result Codes ◆ 64
Result codes
Code
Long Form
Meaning
0
OK
Command executed OK.
1
CONNECT
Connection at 0 to 300 bps.
2
RING
Ringing detected.
3
NO CARRIER
Carrier lost or not detected.
4
ERROR
Improper command or checksum.
5
CONNECT 1200
Connection at 1200 bps.
6
NO DIALTONE
No dial tone detected.
7
BUSY
Busy signal detected.
8
NO ANSWER
Period of silence not detected.
9
CONNECT 0600
Connection at 600 bps.
10
CONNECT 2400
Connection at 2400 bps.
11
CONNECT 4800
Connection at 4800 bps.
12
CONNECT 9600
Connection at 9600 bps.
13
CONNECT 7200
Connection at 7200 bps.
14
CONNECT 12000
Connection at 12,000 bps.
15
CONNECT 14400
Connection at 14,400 bps.
16
CONNECT 19200
Connection at 19,200 bps.
17
CONNECT 38400
Connection at 38,400 bps.
18
CONNECT 57600
Connection at 57,600 bps.
19
CONNECT 115200
Connection at 115,200 bps.
33
FAX
Fax connection established.
35
DATA
Data connection established in fax mode.
40
CARRIER 300
0-300 bps data rate detected.
46
CARRIER 1200
1200 bps data rate detected.
47
CARRIER 2400
2400 bps data rate detected.
48
CARRIER 4800
4800 bps data rate detected.
49
CARRIER 7200
7200 bps data rate detected.
50
CARRIER 9600
9600 bps data rate detected.
51
CARRIER 12000
12,000 bps data rate detected.
52
CARRIER 14400
14,400 bps data rate detected.
53
CARRIER 16800
16,800 bps data rate detected.
54
CARRIER 19200
19,200 bps data rate detected.
55
CARRIER 21600
21,600 bps data rate detected.
56
CARRIER 24000
24,000 bps data rate detected.
AT Commands and Result Codes ◆ 65
Code
Long Form
Meaning
57
CARRIER 26400
26,400 bps data rate detected.
58
CARRIER 28800
28,800 bps data rate detected.
59
CONNECT 16800
Connection at 16,800 bps.
61
CONNECT 21600
Connection at 21,600 bps.
62
CONNECT 24000
Connection at 24,000 bps.
63
CONNECT 26400
Connection at 26,400 bps.
64
CONNECT 28800
Connection at 28,800 bps.
66
COMPRESSION:
CLASS 5
Connection using MNP Class 5 compression.
67
COMPRESSION:
V.42 bis
Connection using V.42 bis compression.
69
COMPRESSION: NONE
Connection without compression.
70
PROTOCOL: NONE
Connection without error correction.
77
PROTOCOL: LAPM
Connection in V.42 LAPM error correction mode.
78
CARRIER 31200
31,200 bps data rate detected.
79
CARRIER 33600
33,600 bps data rate detected.
80
PROTOCOL: ALT
Connection in MNP error correction mode.
84
CONNECT 33600
Connection at 33,600 bps.
91
CONNECT 31200
Connection at 31,200 bps.
102
DIGITAL LINE
Over-current condition during attempted call or answer. Modem aborted
call and is in “safe” state.
150
CARRIER 32000
32,000 bps data rate detected.
151
CARRIER 34000
34,000 bps data rate detected.
152
CARRIER 36000
36,000 bps data rate detected.
153
CARRIER 38000
38,000 bps data rate detected.
154
CARRIER 40000
40,000 bps data rate detected.
155
CARRIER 42000
42,000 bps data rate detected.
156
CARRIER 44000
44,000 bps data rate detected.
157
CARRIER 46000
46,000 bps data rate detected.
158
CARRIER 48000
48,000 bps data rate detected.
159
CARRIER 50000
50,000 bps data rate detected.
160
CARRIER 52000
52,000 bps data rate detected.
161
CARRIER 54000
54,000 bps data rate detected.
162
CARRIER 56000
56,000 bps data rate detected.
165
CONNECT 32000
Connection at 32,000 bps.
166
CONNECT 34000
Connection at 34,000 bps.
167
CONNECT 36000
Connection at 36,000 bps.
AT Commands and Result Codes ◆ 66
Code
Long Form
Meaning
168
CONNECT 38000
Connection at 38,000 bps.
169
CONNECT 40000
Connection at 40,000 bps.
170
CONNECT 42000
Connection at 42,000 bps.
171
CONNECT 44000
Connection at 44,000 bps.
172
CONNECT 46000
Connection at 46,000 bps.
173
CONNECT 48000
Connection at 48,000 bps.
174
CONNECT 50000
Connection at 50,000 bps.
175
CONNECT 52000
Connection at 52,000 bps.
176
CONNECT 54000
Connection at 54,000 bps.
177
CONNECT 56000
Connection at 56,000 bps.
178
CONNECT 230400
Connection at 230400 bps.
180
CARRIER 28000
28,000 bps data rate detected.
181
CARRIER 29333
29,333 bps data rate detected.
182
CARRIER 30667
30,667 bps data rate detected.
183
CARRIER 33333
33,333 bps data rate detected.
184
CARRIER 34667
34,667 bps data rate detected.
185
CARRIER 37333
37,333 bps data rate detected.
186
CARRIER 38667
38,667 bps data rate detected.
187
CARRIER 41333
41,333 bps data rate detected.
188
CARRIER 42667
42,667 bps data rate detected.
189
CARRIER 45333
45,333 bps data rate detected.
190
CARRIER 46667
46,667 bps data rate detected.
191
CARRIER 49333
49,333 bps data rate detected.
192
CARRIER 50667
50,667 bps data rate detected.
193
CARRIER 53333
53,333 bps data rate detected.
194
CARRIER 54667
54,667 bps data rate detected.
AT Commands and Result Codes ◆ 67
APPENDIX B
International Regulatory Information
This appendix contains the following:
• Regulatory Information for the USA
• Regulatory Information for Canada
• Regulatory Information for Europe
• Regulatory Information for France
• Notice regarding the use of the analogue modem in the Federal Republic of Germany
• Regulatory Information for Australia
• Regulatory Information for the United Kingdom
Regulatory Information for the USA
FCC Warning
Declaration of Conformity
We:
Eicon Networks Inc.
2155 Chenault Drive
Suite 503
Carrollton, Texas
USA 75006
1-800-80-EICON
(972) 417-5515
Fax: (972) 417-5610
Declare under our sole legal responsibility that the product listed below to which this declaration
relates, are in conformity with Part 15 of the FCC Rules. Operation is subject to the following two
conditions:
(1) This device may not cause harmful interference, and
(2) this device must accept any interference received, including interference that may cause
undesired operation.
International Regulatory Information ◆ 68
FCC Part 15 Notice
The Eicon Networks Diva Mobile PC Card is classified by the Federal Communications Commission
(FCC) as Class B computing device. However, the inclusion of certain options changes the rating
of some configurations to Class A. To determine which classification applies to your equipment,
examine all FCC registration labels located on the underside of your equipment. If any one of the
labels carries a Class A rating, your entire system is considered to be a Class A computing device.
If all labels carry the Class B rating, your system is considered a Class B computing device.
Class B
This equipment generates and uses radio-frequency energy and, if not installed and used properly,
that is, in strict accordance with the manufacturer's instructions, may cause interference to radio
and television reception. It has been type tested and found to comply with the limits for a Class B
computing device in accordance with the specifications of Part 15 of FCC Rules, which are designed
to provide reasonable protection against such interference in a residential installation. However,
there is no guarantee that interference will not occur in a particular installation.
If this equipment does cause interference to radio or television reception, which can be determined
by turning the equipment off and on, the user is encouraged to try to correct the interference by one
or more of the following measures:
•
Reorient the receiving antenna
•
Relocate the computer with respect to the receiver
•
Move the computer away from the receiver
•
Plug the computer into a different outlet so that computer and receiver are on different branch
circuits.
If necessary, the user should consult the dealer or an experienced radio/television technician for
additional suggestions. Any changes made by the user not approved by Eicon Networks can void
the user's authority to operate the equipment. The user may find the following booklet prepared by
the Federal Communications Commission helpful: How to Identify and Resolve Radio-TV
Interference Problems, available from the U.S. Government Printing Office, Washington, DC 20402,
Stock No. 004-000-00345-4.
FCC Part 68 Notice Modem Requirements
This equipment operates in compliance with Part 68 of the FCC Rules. In accordance with this
regulation, the following requirements should be observed:
Type of Service. Your Eicon Networks Diva Mobile PC Card is designed to be used on standard
device telephone lines. The modem connects to the telephone line by means of a standard jack
called the USOC RJ-11C. Connection to a telephone-company-provided coin service
(central-office-implemented systems) is prohibited. Connection to party-line service is subject to
state tariffs.
Telephone Company Procedures. The goal of the telephone company is to provide you with the
best service it can. To this end, the company may need to occasionally make changes in its
equipment, operations, or procedures. If these changes might affect your service or the operation
of your equipment, the telephone company will give you notice, in writing, to allow you to make any
changes necessary to maintain uninterrupted service.
If you have any questions about your telephone line, such as how many pieces of equipment you
can connect to it, the telephone company will provide this information. In certain circumstances, the
telephone company may request information concerning the equipment you have connected to your
telephone line. If they do, provide the FCC registration number and the ringer equivalence number
International Regulatory Information ◆ 69
(REN) of the equipment connected to your line; this information is listed on the equipment label.
The sum of all the REN’s on your telephone line should be less than five to ensure proper service
from the telephone company.
ISDN Interface
S/T
Facility
Interface code
Digital Reg.
code
Service Order
code
USOC Jack
Type
02IS5
XD
6.0P
N/A
The Telephone Consumer Protection Act of 1991 makes it unlawful for any person to use a computer
or other electronic device to send any message via a telephone facsimile machine unless such
message clearly contains, in a margin at the top or bottom of each transmitted page or on the first
page of the transmission, the date and time it is sent and an identification of the business, other
entity, or individual sending the message and the telephone number of the sending machine or such
business, other entity, or individual.
To program this information into your facsimile, refer to the instructions in your facsimile software
manual.
If Problems Arise
If your telephone equipment is not operating properly, immediately remove it from the telephone
line, as it may harm the telephone network. If the telephone company notes a problem, it may
temporarily discontinue service. When practical, it will notify you in advance of this disconnection.
If advance notice is not feasible, you will be notified as soon as possible. When you are notified, you
will be given the opportunity to correct the problem and informed of your right to file a complaint with
the FCC.
If repairs are needed on your Diva Mobile PC Card they should be performed by Eicon Networks.
For information, contact Eicon Networks at the address or phone number listed in Declaration of
Conformity on page 68.
Installation
The Eicon Networks products provide all the connections necessary for proper operation.
Connection to the telephone network should be made with standard RJ-11C modular cords that
connect to the jacks or the product. Please see the instructions in the installation section for your
system (see the printed Diva Mobile QuickStart).
Regulatory Information for Canada
NOTICE: The Industry Canada label identifies certified equipment. This certification means that the
equipment meets certain telecommunications network protective, operational and safety
requirements. Industry Canada does not guarantee the equipment will operate to the user’s
satisfaction.
Before installing this equipment, users should ensure that it is permissible to be connected to the
facilities of the local telecommunications company. The equipment must also be installed using an
acceptable method of connection. In some cases, the company’s inside wiring associated with a
single line individual service may be extended by means of certified connector assembly (telephone
extension cord). The customer should be aware that compliance with the above conditions may not
prevent degradation of service in some situations.
International Regulatory Information ◆ 70
Repairs to certified equipment should be made by an authorized Canadian maintenance facility
designated by the supplier. Any repairs or alterations made by the user to this equipment, or
equipment malfunctions, may give the telecommunications company cause to request the user
disconnect the equipment.
For their own protection, users should ensure that any electrical ground connections of the power
utility, telephone lines and internal metallic water pipe system are connected together. This
precaution is particularly important in rural areas.
Caution: Users should not attempt to make such connections themselves, but should contact
the appropriate electric inspection authority, or electrician, as appropriate. This digital apparatus
does not exceed the Class B limits for radio noise emissions from digital apparatus set out in the
Radio Interference Regulations of the Canadian Department of Communications.
Le présent appareil numérique n’émet pas de bruits radioélectriques dépassant les limites
applicables aux appareils numériques de la classe B prescrites dans le Réglement sur le brouillage
radioélectrique édicté par le ministére des Communications du Canada.
Canadian Modem Requirements
The Industry Canada label identifies certified equipment. This certification means that the equipment
meets certain telecommunications network protective, operational, and safety requirements. The
Industry Canada does not guarantee the equipment will operate to the user's satisfaction.
Before installing this equipment, users should ensure that it is permissible to be connected to the
facilities of the local telecommunications company. The equipment must also be installed using an
acceptable method of connection. In some cases, the company's inside wiring associated with a
single-line individual service may be extended by means of a certified connector assembly
(telephone extension cord). The customer should be aware that compliance with the above
conditions may not prevent degradation of service in some situations.
Repairs to certified equipment should be made by a representative designated by the supplier. Any
repairs or alterations made by the user to this equipment, or equipment malfunctions, may give the
telecommunications company cause to request that the user disconnect the equipment.
Users should ensure for their own protection that the electrical ground connections of the power
utility, telephone lines and internal metallic water pipe system, if present, are connected together.
This precaution may be particularly important in rural areas.
Caution: Users should not attempt to make connections themselves, but should contact the
appropriate electric inspection authority, or electrician, as appropriate.
NOTICE: The Ringer Equivalence Number (REN) assigned to each terminal device provides an
indication of the maximum number of terminals allowed to be connected to a telephone interface.
The termination on an interface may consist of any combination of devices subject only to the
requirement that the sum of the Ringer Equivalence Number of all the devices does not exceed 5.
The REN for the Diva Mobile PC Card is 0.4
The authorized maintenance facility in Canada is:
Eicon Networks Corporation
9800 Cavendish
Montreal, Quebec
Canada H4M 2V9
Regulatory Information for Europe
International Regulatory Information ◆ 71
EU Declaration of Conformity
EN:Eicon Networks Corporation declares that this equipment is in compliance with the
essential requirements and other relevant provisions of Directive1999/5/EC.
DE:Eicon Networks Corporation erklärt, daß diese Telekommunikations-endeinrichtung den
grundlegenden Anforderungen und anderen relevanten Bestimmungen der Richtlinie 1999/5/EG
entspricht.
DK:Eicon Networks Corporation erklærer, at dette udstyr er i overensstemmelse med vigtige krav
og andre relevante provisioner i Direktiv 1999/5/EC.
ES:Eicon Networks Corporation declara que este equipo cumple con los requisitos esenciales y
otras disposiciones pertinentes de la Directiva 1999/5/EC.
FI:Eicon Networks Corporation takaa, että tämä laite on 1999/5/EC-direktiivin olennaisten
vaatimusten ja muiden lausekkeiden mukainen.
FR:Eicon Networks Corporation déclare que cet équipement répond aux exigences essentielles et
autres dispositions pertinentes de la directive 1999/5/EC.
GR:Eicon Networks Corporation ÒÔ‚·flÌÂÈ ÛÙÁÌ ·Ì·ÍÔflÌ˘ÛÁ ¸ÙÈ ·ıÙ‹ Ù· ÏÁ˜·ÌfiÏ·Ù· ›˜ÔıÌ ÙÈÚ
‚·ÛÈÍ›Ú ··ÈÙÔ˝ÏÂÌÂÚ Òԉȷ„Ò·ˆ›Ú Í·È ı¸ÍÂÈÌÙ·È ÛÙÈÚ ı¸ÎÔÈÂÚ Û˜ÂÙÈÍ›Ú ‰È·Ù‹ÓÂÈÚ ÙÁÚ
œ‰Á„ÁÙÈÍfiÚ 1999/5/EC.
IC:Eicon Networks Corporation lýsir hér með yfir að þetta tæki uppfyllir grunnkröfur og tengd ákvæði
ESB tilskipunar nr. 1999/5/EC.
IT:La Eicon Networks Corporation certifica che la presente apparecchiatura è conforme ai requisiti
di legge stabiliti nella direttiva 1999/5/EC.
NL:Eicon Networks Corporation verklaart, dat deze uitrusting in overeenstemming is met de
essentiële vereisten en andere relevante bepalingen van Richtlijn 1999/5/EC.
NO:Eicon Networks Corporation erklærer herved at dette utstyret oppfyller de vesentligste krav og
relevante bestemmelser i direktiv 1999/5/EF om radio- og teleterminalutstyr.
PT:A Eicon Networks Corporation declara que este equipamento está de acordo com os requisitos
básicos e outras provisões relevantes da Directiva 1999/5/EC.
SE:Eicon Networks Corporation förklarar att denna utrustning överensstämmer med de väsentliga
krav och regler som finns i direktivet 1999/5/EG.
Detailed R&TTE Declaration
To receive a detailed R&TTE Declaration for this product please send a request specifying the
product name to the following e-mail address: [email protected].
Safety Status: SELV
No voltages within this equipment exceed SELV voltages. All interconnection points and ports are
SELV.
International Regulatory Information ◆ 72
Power Consumption
Check that power supply will not be overloaded. Maximum power consumption of the board is
stated in Typical Power Requirements on page 16. The user should check that the total power
drawn by the host computer, the Diva Mobile, and any other peripherals, must not exceed the
capability of the host Power Supply Unit.
The Diva Mobile does not draw power from the ISDN network.
Regulatory Information for France
This equipment is fully compliant with the following French ISDN delta requirements to I-CTR3 :
CSE P 10-21 and ETS 300 104 (layer 3) as recorded in ITAAB advisory note no.54.
Notice regarding the use of the analogue modem in the Federal
Republic of Germany
The analogue modem has been approved by the responsible agency of the Federal Republic of
Germany, BAPT, as only terminal equipment. Thus, it may be used as the only analogue terminal
equipment at an analogue circuit switched connection. The connection of the analogue modem of
the Diva Mobile PC Card is only allowed via the F coded socket of the telephone socket, so you
have to unplug your telephone in order to plug the modem teleadapter in. If you use the N coded
socket for your modem, the functionality of your telephone may not be guaranteed.
Regulatory Information for Australia
PC Card (PCMCIA) Models
•
This customer equipment may only be installed in conjunction with ACA permitted customer
equipment or Data Terminal Equipment that is exempted from ACA’s permit requirements.
•
This customer equipment must only be used with the Eicon DAA cable, Part No. 810-038.
•
Only line cord set(s) which are ACA permitted or made from ACA certified components shall be
used as replacements with this customer equipment.
•
Diva Mobile’s analogue interface is designed to be connected to telecommunication network
voltage (TNV) circuits, which can have dangerous voltages.
For your safety: Before you connect the cables to the ISDN and to the analogue networks, install
the Diva Mobile card in your computer. This ensures proper grounding.
•
Similarly, before you remove Diva Mobile from your computer, disconnect the cables from the
ISDN and the analogue networks.
•
Before you open the host equipment for any reason, disconnect the cables from the ISDN and
the analogue networks.
International Regulatory Information ◆ 73
Regulatory Information for the United Kingdom
•
It is essential that the PC Card is inserted only into a compatible slot designed for PC
Cards/PCMCIA cards, which contain only Safety Extra Low Voltages (SELV). Under normal
conditions, the SELV limit is 42.4V peak a.c. or 60V d.c. If you have any doubt, seek advice from
a competent engineer before installing the card.
•
Diva Mobile’s analogue interface is designed to be connected to telecommunication network
voltage (TNV) circuits, which can have dangerous voltages.
For your safety: Before you connect the cables to the ISDN and to the analogue networks, install
the Diva Mobile card in your computer. This ensures proper grounding.
•
Similarly, before you remove Diva Mobile from your computer, disconnect the cables from the
ISDN and the analogue networks.
•
Before you open the host equipment for any reason, disconnect the cables from the ISDN and
the analogue networks.
International Regulatory Information ◆ 74