1
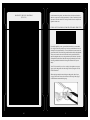
Note: To set crossovers, first remove the two 1/16” Allen screws holding
down the security cover using the Allen key provided. When reinstalling
the cover be careful not to overtighten the screws. Damage to the cover
may result.
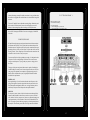
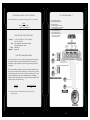
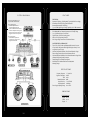
As seen in the above drawing, the function of the RCA inputs, outputs,
and feature buttons are as follows:
CH 1/2 INPUT
The RCA cables from your source unit should be inserted here.
-12dB BUTTON: CH 1/2
To the right of the CH 1/2 INPUT RCAs you will find the -12dB button.
Pushing this button: “IN” allows your amplifier to accept signal voltages as
high as 12VRMS. Pushing this button “OUT” configures the amplifier to
accept signal voltages up to 6VRMS.
-12dB BUTTON: CH 3/4
Works the same as above, but for the CH 3/4 INPUT RCAs.
CH 3/4 INPUT
Additional RCA cables from your source unit should be inserted here.
CH 3/4 INPUT SELECT
Pushing this button “IN” allows signals from CH 1/2 to be sent to both
CH 1/2 and CH 3/4 INPUTS allowing use of a single pair of RCA cables
(see block diagram page 16) for channels 1 thru 4.
-12dB BUTTON: CH5/6
Works the same as above but for the CH 5/6 INPUT RCAs.
CROSSOVER CONTROLS: CH 1/2, CH 3/4, CH 5/6
As seen in the above drawing, the function of the crossover controls (from
left to right) are as follows:
GAIN
This control matches the output voltage of the source unit or processor to the
amplifier inputs. Rotating this control to the “MIN” mark (counterclockwise)
configures your D7 amplifier to accept input voltages as high as 12V RMS with
the -12dB button pushed “IN” (see “RCA INPUT” drawing on page 12). This
control should be set as low as possible. The basic procedure for setting
input gains is as follows:
1.
Adjust all amplifier gain controls to just above the minimum setting
(fully counterclockwise). If your source unit output voltage is less than
6 Volts RMS, push the –12dB button for the selected channel pair to the
“OUT” position. If the available signal voltage is more than 6 Volts
RMS, push the -12dB button to the “IN” position.
2.
Using the highest quality source (usually CD) play some music and
slowly turn up the source unit until you can hear distortion. Now turn
down the volume until the distortion stops. This is your maximum
source unit level.
3.
Turn up the amplifier gain until audible distortion starts. Turn down
the gain to the point JUST BELOW the start of the distortion.
4.
Repeat step 3 for all amplifiers in your system.
CH 5/6 INPUT
Additional RCA cables from your source unit should be inserted here.
CH 5/6 INPUT SELECT
Pushing this button “IN” sums the signals from CH 1/2 and CH 3/4 to the
CH 5/6 INPUTS (all inputs are in parallel). All six channels will receive
signal from a single left/right RCA pair. Example: When using an D7056
amplifier for separate tweeters, midrange, and midbass drivers on the front
RCA outputs of a source unit, this button sums the signals from CH 1/2 and
CH 3/4. Pushing this button “IN” will provide “non-fading” bass if CH 5/6
are used Lowpass for subwoofers.
Pushing this button to the “OUT” position allows an additional pair of RCA
signal cables to drive channels 5 and 6 directly. Example: If your source unit
has subwoofer RCA outputs, they can go here to allow your source unit to
control the subwoofer level.
12
Please refer to the Diamond Audio Level Setting Technical Brief available from
the Tech Department for a comprehensive level setting procedure.
9