1
Setting Up the Instrument
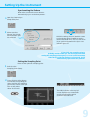
Synchronizing the Pattern
Now make sure that the error detector
automatically syncs to the data pattern:
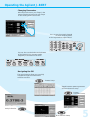
1 Open the Pattern Sync
Setup dialog box.
2
Make sure that
Normal Sync Mode
and Automatic Sync
are selected.
With this setting, the error detector starts
synchronizing when the BER exceeds a
certain threshold value. You can see when
it has synchronized when the Sync Loss
indicator goes off.
If sync fails, the sampling point is
probably outside of the eye. You should proceed with
setting the sampling point anyway. As soon as the instrument
finds the eye, with the settings we just made, it will
automatically synchronize the patterns.
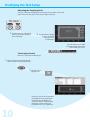
Setting the Sampling Point
Now set the optimum sampling point:
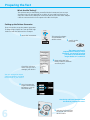
1
Switch to the
Sampling Point Setup.
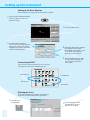
2
Press the Auto Align button
to measure the eye diagram
and to position the sampling
point at the center of the eye.
This usually takes
about 10 seconds.
The BER indicator in the top left
corner displays the current BER
at this sampling point which
should be 0 for this test.
9