1
INSTALLATION
Step 2 --
Inspect unit for transportation dmnage. If &_mage is found,
file claim with transportation agency.
Step 1 --
Provide
Unit Support
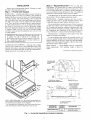
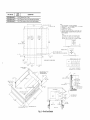
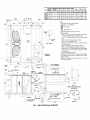
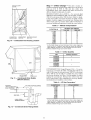
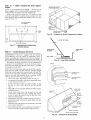
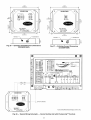
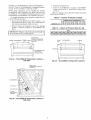
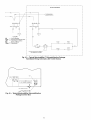
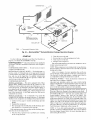
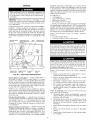
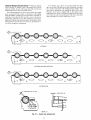
ROOF CURB -- Assemble and install accessory roof curb or
horizont_d a&tpter roof curb in accordance with instructions
shipped with this accessory. See Fig. 1 and 2. Install insulation,
cant strips, roofing, and counter flashing as shown. Ductwork
can be installed to roof curb or horizontal adapter roof curb before unit is set in place. Curb or a&tpter roof curb should be
level. This is necessary to permit unit drain to function properly. Unit leveling tolerance is + l/l(_ in. per linear fl in any direction. Refer to Accessory Roof Curb or Horizontal A&_pter
Roof Curb Installation Instructions for additional information
as required. When accessory roof curb or horizontal adapter
roof curb is used, unit may be installed on class A, B, or C roof
covering material.
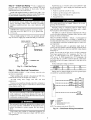
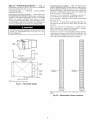
IMPORTANT: The gasketing of the unit to the roof curb
or adapter roof curb is critical for a watertight se_d.
Inst_fll gasket with the roof curb or adapter as shown in
Fig. 2. Improperly applied gasket can _dso result in air
leaks and poor unit performance.
ALTERNATE UNIT SUPPORT -- When the curb or adapter
cannot be used, install unit on a noncombustible
surface. Support unit with sleepers, using unit curb support area. If sleepers
cannot be used, support long sides of unit with a minimum of 3
equally spaced 4-in. x 4-in. pads on each side.
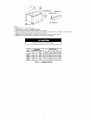
Rig and Place Unit --
Do not diop unit;
keep upright. Use spreader bras over unit to prevent sling or
cable &image. Rollers may be used to move unit across a roof.
Level by using unit frame as a refelence; leveling tolerance is
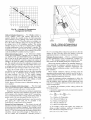
_+1/1_in. per linear fl in any direction. See Fig. 3 for additiomfl
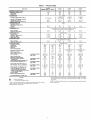
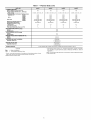
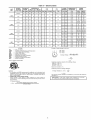
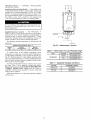
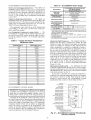
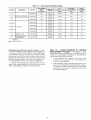
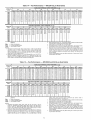
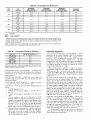
information. Unit operating weight is shown in Table 1.
Four lifting holes are provided in ends of unit base rails as
shown in Fig. 3. Refer to rigging instructions on unit.
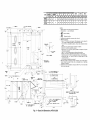
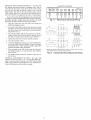
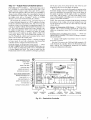
POSITIONINGMaintain
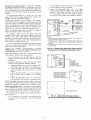
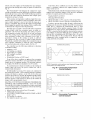
clearance, per Fig. 4 and 5,
around and above unit to provide minimum distance from
combustible materials, proper airflow, and service access.
Do not install unit in an indoor location. Do not locate unit
air inlets near exhaust vents or other sources of contmninated
all: For proper unit operation, adequate combustion and ventilation air must be provided in accordance with Section 5.3 (Air
for Combustion and Ventilation) of the National Fuel Gas
Code, ANSI Z223.1 (American National Stan&_rds Institute).
Although unit is weatherproof,
higher level runoff and overhangs.
guard against
water from
Ix)cate mechanical diaft system flue assembly at least 4 ft
from any opening through which combustion products could
enter the building, and at least 4 ft from any adjacent building.
When unit is located adjacent to public walkways, flue assembly must be at least 7 ft above grade.
ROOF MOUNT-bution requirements.
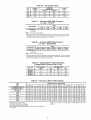
Table 1.
Check building codes for weight distriUnit operating weight is shown in
hlstructions
continued
on page 9.
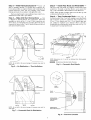
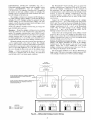
25% VENT AIR//
ECONOMIZER
HOOD
BLOCK-OFFJ___
PAN
i
I
A,R
OUT
HORIZONTALSUPPLY/
CURB
TRANSITION
DUCT
(CRRFCURB013A00)
FULLY INSULATED
SUPPLY PLENUM
14-3/4_
1 1/2 # DENSITY,
STICK PINNED & GLUED
NOTE: CRRFCURB013A00
is a fully factory preassembled horizontal adapter and includes an insulated transition duct. The pressure drop through the adapter curb is negligible.
For horizontal return applications: The power exhaust and barometric relief dampers must be installed in the return air duct.
12" WIDE STANDING-SEAM PANELS
ACCESSORY
PACKAGE NO.
CRRFCURB013A00
Fig. 1 -- Horizontal Supply/Return
CURB
HEIGHT
1'-11"
(584
Adapter Installation
DESCRIPTION
Pre-Assembled, Roof Curb,
Horizontal Adapter