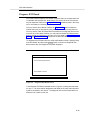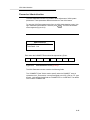
1
585-350-812
Issue 1
October, 1993
Table of Contents
Conversant VIS
Adjunct Switch Application
Interface
Graphics ©
Blank Page
Contents
1
Table of Contents
i
ASAI Overview
1-1
■
2
1-1
ASAI Voice Response Applications
1-2
Routing Applications
1-4
Data Screen Delivery Applications
1-5
Advantages Using the VIS ASAI Feature
1-8
ASAI Application Planning and Design
2-1
■
ASAI Application Planning and Design Overview
2-1
■
ASAI Application Planning and Design
2-1
VIS Script Design
2-2
■
■
■
■
3
Overview of the Adjunct/Switch
Ap plication Interface Feature
ASAI Voice Script Design
2-3
Routing Script Design
2-5
Monitoring Script Design
2-7
VIS-to-Agent Transfers
2-9
Agent-to-Agent Transfers
2-11
Blind Transfer
2-13
Consult Transfer
2-15
Host Ap plication Planning and Design
2-18
ASAI Voice Response Ap plication Considerations
2-19
Routing Application Considerations
2-19
Data Screen Delivery Application Considerations
2-20
■
Communications System Planning
2-22
■
Call Center Operations Planning
2-23
ASAI Installation
■
Installation Overview
3-1
3-1
Issue 1 October 1993
iii
Contents
4
■
Prerequisites for ASAI Installation
3-2
■
ASAI Hardware Architecture
3-3
■
Installing ASAI Hardware
3-4
■
Installing ASAI Software
3-6
■
Removing the ASAI Software
3-8
ASAI Administration
■
ASAI Administration Overview
4-1
■
Channel Administration
4-5
Add Channel Entry
4-8
Change Channel Entry
4-9
Remove Channel Entry
4-10
Virtual Channel Administration
4-10
■
Diagnose IPCI Board
4-13
■
Domain Administration
4-14
Add Domain Entry
4-18
Change Domain Entry
4-19
Remove Domain Entry
4-19
■
Initialize IPCI Board
4-20
■
Parameter Administration
4-21
■
Show ASAI Software Version
4-24
■
Show Status ASAI Link
4-25
Take IPCI Board Off-line
4-27
■
5
iv
4-1
Administering ASAI
5-1
■
ASAI Administration Overview
5-1
■
Administering the Lines
5-2
■
Administering the VIS ACD Split Domain
5-2
■
Administering the VIS Agent Lines
5-4
Issue 1 October 1993
Contents
6
ASAI Script Builder Actions
■
A
6-2
Defining A_Event
6-4
Defining A_RouteSel
6-11
Defining A_Tran
6-14
Sample Scripts Overview
A-1
A-1
Sample ASAI Voice Script
A-2
Sample Routing Script
A-4
Sample Monitoring Script
A-6
Sample Scripts
■
6-1
Defining A_Callinfo
Sample Scripts
■
B
ASAI Script Builder Actions Overview
6-1
ASAI Performance Performance Overview
C-1
C-1
Voice Response Integration
C-2
Data Screen Delivery
C-2
Routing Applications
C-2
Issue 1 October 1993
v
Contents
vi
Issue 1 October 1993
ASAI Overview
1
Overview of the Adjunct/Switch
Application Interface Feature
The AT&T Adjunct/Switch Application Interface (ASAI) is an optional package that
may be installed on top of the standard CONVERSANT Voice Information System
software. Instructions for installing the Adjunct/Switch Application Interface are
provided in Chapter 3, "ASAI Installation".
The AT&T Adjunct/Switch Application Interface provides an Integrated Services
Digital Network (ISDN)-based interface between AT&T PBX’s and adjunct processors.The VIS ASAI feature supports this application interface for communications
with the AT&T DEFINITY Communications System, Generic 3i (hereafter referred
to as DEFINITY Generic 3i).This digital signaling interface allows the VIS to monitor and route calls on the DEFINITY Generic 3i switch. When used in conjunction
with standard Tip/Ring (T/R) or Line Side T1 (LST1) interfaces, the ASAI interface
allows the VIS to monitor and control calls delivered to a T/R or LST1 channel on
the VIS.
Access to ASAI capabilities is provided through the Script Builder application generation language. Access to ASAI capabilities at the Script Builder level minimizes the effort required to implement ASAI-based applications. For example,
there is no need to receive, parse, and process individual, lower-level ASAI messages. Additional Script Builder actions give the script designer high-level access
to ASAI capabilities. These ASAI capabilities can be used to design the following
types of applications.
These types of applications are discussed later in this chapter.
■
ASAI Voice Response Applications
■
Routing Applications
■
Data Screen Delivery Applications
1-1
ASAI Overview
These types of applications can run simultaneously on a VIS. This implies that a
VIS ASAI system provides co-resident voice response and PBX-to-host gateway
capabilities. A single call, for instance, may first be routed by the VIS, handled
with a voice response application on the same VIS, and then be monitored by the
same VIS as the call is ultimately delivered to a live agent.Furthermore, integration of the voice response and monitoring capabilities allows screens delivered by
the host to agents receiving calls to be based on data collected in a voice
response script.
ASAI Voice Response Applications
In ASAI voice response applications, incoming calls are routed to the VIS over T/
R or LST1 channels which are configured as an Automatic Call Distribution (ACD)
split on the DEFINITY Generic 3i switch as depicted in Figure 1-1.
System Monitor - Voice Channels
Channel
0
1
2
3
4
5
HELP
Calls
Today
Voice
Service
Service
Status
1
1
3
1
0
10
appl2
appl4
appl7
appl3
Talking
Collect
Transfer
DB
1-2
Dialed
Digits
8509
5312
7328
*MANOOS
Talking
PREV-PAGENEXTPAGE PREV-FRM
Figure 1-1.
Caller
Input
NEXT-FRM
CANCEL CMD-MENU CHG-KEYS
ASAI Voice Response Applications
ASAI Overview
As a call is delivered to the VIS, the VIS receives ASAI information related to the
call. The ASAI feature allows the VIS to recognize the dialed (called) number of
an incoming call to a line. This feature is sometimes referred to as Dialed Number
Information Service (DNIS). In addition, the ASAI feature allows a service the
ability to retrieve the calling party’s number. This feature is sometimes referred to
as Automatic Number Identification (ANI). This information is used to control
which voice application is used for the call. The ASAI information related to the
call is also made available to the specific voice application which interacts with the
caller. In addition, the call control capabilities of ASAI can be used to transfer the
call away from the VIS if the caller needs to speak to a live agent. The following
capabilities are therefore provided for ASAI voice response applications:
■
DNIS Service (T/R or LST1 Channel Sharing) —- The DNIS information
associated with the incoming call is used to select a particular Script
Builder script to service the call. This allows a T/R or LST1 channel to be
shared across many applications. Prior to this capability, T/R or LST1
channels were dedicated to specific Script Builder Applications. With channel sharing, the same number of channels can handle more calls while
maintaining the same grade of service. Alternatively, the same number of
calls can be handled at a higher grade of service.
■
Call Information — Once the call is answered by the VIS, the ASAI information related to the call such as ANI and DNIS can be retrieved for use in the
voice script handling the call.
■
Enhanced Transfer — The use of ASAI call control capabilities allows the
transfer to be faster, quieter (from the caller’s perspective), and more reliable. In addition, the DEFINITY Generic 3i ASAI direct agent calling feature can be used to transfer the call to a direct agent. This allows the call to
be delivered to a specific agent while maintaining accurate ACD split statistics. Calls placed to specific agents without the direct agent calling feature
do not count as ACD calls in calculating and reporting ACD split statistics.
Finally, data captured in the voice script can be saved and associated with
the transferred call. This enables a host application to deliver to agents
data screens which are based on data collected by the voice script which
previously serviced the caller.
The availability of ANI within the voice script permits the design of unique voice
response applications. Examples include:
■
Locator Service — A local or host database could be used to determine the
closest car dealers, Automatic Transaction Machines, stores, etc.
■
Weather Reports — Provide a weather report for the callers area.
■
Pay-Per-View — A cable company could use ANI to automate customer
selection of pay-per-view programs.
1-3
ASAI Overview
■
Caller Dependent Transfers — The full ten-digit ANI could be used to identify callers and determine where they should be transferred if they need to
speak to a live agent. This would be desirable if, for instance, the caller is
a preferred customer or is usually handled by a specific agent.
■
Geographically-Based Call Transfers — The area code and/or exchange
could be used to determine where callers should be transferred if they
need to speak to a live agent. This would be desirable if, for instance,
agents handle calls from specific geographic regions.
Routing Applications
In routing applications, the VIS is used as a routing server to support the routing
capabilities of ASAI and the call vectoring feature on the DEFINITY Generic 3i.
However, on receiving a routing request, as depicted in Figure 1-2, a routing
application on the VIS receives and responds to call routing requests sent by the
DEFINITY Generic 3i.
Note that you are not always required to have the T/R or LST1 lines on the VIS for
routing applications. However, T/R or LST1 lines are required to route the call to
the VIS agents.
Figure 1-2.
1-4
ASAI Routing Application route.pic
ASAI Overview
These call routing requests are generated by the DEFINITY Generic 3i when a
call is processed by specific call vectors on the DEFINITY Generic 3i.
Information as to where calls should be routed may reside on the VIS in a local
database or may be provided by a host to which the VIS is connected. Call routing
would typically be based on ANI or call prompting data collected by the DEFINITY
Generic 3i.
The use of routing capabilities can significantly improve the efficiency of a call
center environment. Examples of routing uses include:
■
Priority Service — Important or “priority” callers such as large clients can
be given priority treatment. A priority caller can be routed to a common
agent group but queued at a higher priority so that they are serviced faster.
Alternatively, the priority caller can be routed to a specific agent which normally handles their transactions.
■
Call Redirection — Callers dialing into a particular call center application
can be redirected to other call center applications. For example, callers
who have delinquent accounts can be redirected to a collections department when they call a sales department.
■
Call Screening - Fraudulent callers can be disconnected without being connected to an agent so that no network costs are incurred.
■
Geographically Based Service - In cases where service is provided on are
regional basis, callers can be routed to the agent group responsible for
their region.
Data Screen Delivery Applications
In data screen delivery applications, a host application delivers a data screen that
is specific to a caller or dialed number to an agent at the same time a voice call is
delivered to the agent’s telephone. This reduces both the agent time and network
time required to service the caller. The reduction in per-call service time translates directly into cost savings. Data screen delivery applications are also known
as “coordinated voice/data screen delivery” or “screen pop” applications. A data
screen delivery application is depicted in Figure 1-3.
1-5
ASAI Overview
Figure 1-3.
Data Screen Delivery Applications gateway.pic
Note that the delivery of data screens is not a function of the VIS itself. A special
host application is developed by your company or a third party to perform this
function. The VIS acts as a communications gateway between the DEFINITY
Generic 3i and the host computer. A monitoring application on the VIS provides
the ability to track the status of calls on the DEFINITY Generic 3i. This monitoring
application receives information about calls delivered to live agents and forwards
this information to the host application. The host application in turn uses this information to deliver a data screen to the agent receiving the call.
The information made available to the host includes which agent receives a particular call and the ASAI information associated with the call such as ANI, DNIS, and
any DEFINITY Generic 3i call prompting information collected from the caller. In
addition, the call may have been serviced by a VIS voice script and then transferred to a live agent. In this case, information collected in the voice script can be
saved and then passed to the host at the time the call is delivered to the agent.
Monitoring applications on the VIS can therefore be used to support data screen
delivery for three different call flow scenarios as described below:
■
1-6
VIS-to-Agent Transfers — In this call flow scenario, calls are initially delivered to the VIS and then transferred from the VIS to a live agent. Data
screens delivered to agents in this scenario can be based on information
collected in a voice script in addition to ASAI information such as ANI,
DNIS, and call prompting information collected by the DEFINITY Generic
3i.
ASAI Overview
■
Incoming Call Delivered Directly to Agent by ACD — In this call flow scenario, incoming trunk calls are delivered directly to live agents. Here, data
screens delivered to agents would be based primarily on ANI, DNIS, and/or
call prompting information. Data screens would not be based on data collected in a voice script since a VIS voice script is not used to collect data
from the caller.
■
Agent-to-Agent Transfers - In this call flow scenario, calls are transferred
between live agents. Here, for example, “screening” agents may be used
to collect information from the caller and handle simple transactions. The
call may subsequently be transferred to “specialized” agents who can handle more complex or detailed transactions. In these scenarios data
screens can be based on information keyed in to the host application by
live agents. The host application can save data collected and entered by a
screening agent and then use this data as the basis for data screens delivered to more specialized agents who may receive the call. Note that the
information available for the other two call flow scenarios (that is, ANI,
DNIS, call prompting information, and voice script data) is available in this
scenario as well. This information may be used in conjunction with data
entered by a live agent to provide the basis for data screens.
The VIS-to-agent transfer scenario described previously is supported by using the
enhanced transfer capability provided for ASAI voice response applications. The
enhanced transfer capability allows data collected in the voice script to be saved
and associated with the transferred call. Data saved in this fashion can be
included in the call event information passed to the host at the time the transferred
call is delivered to an agent.
This ability to save voice script data may be used for many reasons. A voice script
can be used to collect a variety of information such as account number, social
security number, personal identification number, desired service, etc. In many
cases, this type of information is more meaningful and useful than ASAI information such as ANI to the host application and the live agents handling calls. Also,
the voice response application might be the primary application providing, for
example, an automated banking application. Here, live agents are used only as a
backup to answer questions beyond the scope of the voice response application.
The ability to save voice script data with the enhanced transfer capability provides
a very useful bridge between voice response and data screen delivery applications. This capability provides true integration (in addition to co-residency) of the
voice response and PBX-to-host gateway capabilities offered with the VIS ASAI
feature. This mechanism for embedding voice script data in call event information
for the transferred call can significantly reduce the complexity of the host application. Without this mechanism, the host application is typically required to associate information from two different physical interfaces (one interface from the voice
response unit to receive data collected from the caller and another interface from
the monitoring device over which call events are received). Also, the host application is typically required to track and associate multiple events for multiple calls
1-7
ASAI Overview
(the initial incoming call to the voice response unit and the second, transferred call
which is delivered to an agent). With the VIS ASAI feature, a single message to
the host over a single interface provides all the information needed to deliver a
data screen based on data collected in a voice script.
Advantages Using the VIS ASAI Feature
The VIS ASAI feature can greatly improve the operations in your call center environment. The capabilities that this feature offers provide the following benefits to
any company that receives customer calls:
■
Enhanced Customer Service
Caller-dependent and region-dependent treatment for incoming calls is
possible in routing and voice response applications. In addition, the direct
agent calling feature available with these applications allows calls to be
delivered to specific agents while maintaining accurate split measurements. These capabilities help to insure that calls are quickly and reliably
directed to the call center resource best suited to handle them. This minimizes the number of transfers a caller experiences and allows callers to be
serviced in a rapid, consistent, and personalized fashion and thereby
improves customer satisfaction.
In data screen delivery applications, information associated with a given
call is available to each agent receiving the call. This reduces customer
frustration at having to repeat information to each agent. For example, a
caller may be directed initially to a VIS T/R or LST1 channel where the
caller is prompted through an automated voice response application. At
some point the caller may request to be transferred to a live agent to discuss a topic in more detail. With the VIS ASAI feature, the identity of the
caller and additional information collected from the caller by the voice
response application is not lost. Pertinent information from the voice
response application can be saved and presented in a data screen to the
live agent receiving the transferred call, thereby eliminating the need for
the customer to repeat information already collected. This reduces call
holding time as well as reduces customer frustration. This benefit holds
true even when calls are transferred multiple times or are transferred
between live agents.
■
Improved Price/Performance
The co-residency of voice response and PBX-to-host gateway applications
greatly improves the price/performance of the VIS ASAI feature over prior
and competitive offerings. The VIS ASAI feature eliminates the need for
multiple boxes with multiple interfaces to the host computer, thereby simplifying host application development. Access to ASAI capabilities using
Script Builder minimizes the effort required to implement the VIS piece of
1-8
ASAI Overview
the overall VIS/host application. In addition, the use of DNIS in voice
response applications to enable T/R or LST1 channel sharing means that
more calls can be serviced with the same number of VIS channels.
■
Reduced Cost of Doing Business
The use of data screen delivery applications reduces the time needed to
service calls. This is because the host screen application is ready to provide or accept information at the same time the agent begins to speak with
the caller. The reduction in per-call service time translates directly into
reduced network costs and reduced agent costs. 800 network charges are
lower because calls are shorter. The same number of agents can handle
an increase in call volume since per-call service time is reduced. Also, certain calls can be eliminated entirely via the use of routing applications (for
example, call screening for the identification of fraudulent calls). In this
case, no network costs are incurred for the call and no agent time is wasted
on the call.
1-9
ASAI Overview
1-10
ASAI Application Planning and
Design
2
ASAI Application Planning and
Design Overview
This chapter contains information on planning and designing an application that
will be used with the AT&T Adjunct/Switch Application Interface (ASAI) feature on
the CONVERSANT Voice Information System (VIS).
ASAI Application Planning and
Design
Access to ASAI capabilities is provided through the high-level Script Builder application generation language. Subsets of the Notification, Third Party Call Control,
and Routing capabilities of ASAI have been integrated into Script Builder for use
in ASAI applications. The ASAI feature does not provide access to the Set Value,
Value Query, Request Feature, and Third Party Domain Control capabilities of
ASAI. The Request Feature capability, however, is used internally by the ASAI
feature to log T/R or LST1 channels in and out of an Automatic Call Distribution
(ACD) split on the DEFINITY Generic 3i.
The ASAI capabilities supported by the ASAI feature are used to support three
classes of applications as follows:
■
ASAI Voice Response Applications - The Notification capability of ASAI is
used to monitor calls delivered to a VIS T/R or LST1 channel. The ASAI
information related to these calls is used to control which voice script is
used for the call. ASAI information related to calls is also available to the
specific voice scripts which service calls. Refer to Chapter 6, "ASAI Script
Builder Actions", for additional information on the A_Callinfo action.The
Third Party Call Control capability of ASAI is used when calls need to be
transferred away from the VIS.
2-1
ASAI Application Planning and Design
■
Routing Applications - The Routing capability of ASAI and DEFINITY
Generic 3i call vectoring is used to allow the VIS to act as a routing server.
A “routing” script on the VIS receives, processes, and responds to call routing requests sent by the DEFINITY Generic 3i system. Refer to Chapter 6,
"ASAI Script Builder Actions" for additional information on the A_Event and
A_RouteSel actions.
■
Data Screen Delivery Applications - The Notification capability of ASAI is
used to allow the VIS to monitor calls delivered to ACD agents. A “monitoring” script on the VIS receives information concerning the status of non-T/R
or LST1 calls and passes this information to a host for use in presenting
data screens to agents receiving calls. Refer to Chapter 6, "ASAI Script
Builder Actions" for additional information on the A_Event action.
These three classes of applications can run simultaneously on a VIS. The planning and design considerations for these applications are provided later in this
chapter.
The routing and data screen delivery applications are collectively referred to elsewhere in this book as “data” or “data-only” applications. This is to differentiate
these types of applications from voice response applications. Similarly, the routing and monitoring scripts used to support these applications are collectively
referred to as “data” or “data-only” scripts.
VIS Script Design
Four additional Script Builder actions are provided with the ASAI feature and are
used to access ASAI capabilities. These actions are discussed in detail in Chapter 6, "ASAI Script Builder Actions". A brief summary of these actions is provided
below for the discussions here.
2-2
■
A_Callinfo — Used within a voice response script to retrieve ASAI information about a call delivered to a T/R or LST1 channel (for example, calling
party number (ANI) and called party number (DNIS) for the call). This
action therefore provides access to the Notification capability of ASAI for
calls delivered to the VIS.
■
A_Event — Used within routing scripts to receive information about call
routing requests sent by the DEFINITY Generic 3i system. This action is
also used in monitoring scripts to receive information about calls delivered
to an ACD agent. This action therefore serves a dual role by providing
access to both the Routing and Notification capabilities of ASAI for non-T/R
or LST1 calls.
■
A_RouteSel — Used within routing scripts to respond to call routing
requests previously received via the use of the A_Event action. This action
therefore provides access to the Routing capability of ASAI and allows the
VIS to send ASAI call routing information to the switch.
ASAI Application Planning and Design
■
A_Tran — Used within a voice response script to transfer a call away from
a T/R or LST1 channel on the VIS. This action makes use of the Third
Party Call Control capability of ASAI to effect the transfer.
ASAI Voice Script Design
ASAI voice response applications are designed using the A_Callinfo and
A_Transactions within voice response scripts. Other standard Script Builder
actions are also used in the voice script to answer the call, greet the caller, collect
data, etc. an example of a voice script making use of the A_Callinfo and A_Tran
events is included in Appendix A, “Sample Scripts.”
The A_Callinfo and A_Tran actions are used only in voice scripts which handle
calls delivered to a VIS T/R or LST1 channel. These two actions are not used in
routing and monitoring scripts where, in contrast to voice scripts, a call is not
present at a VIS T/R or LST1 channel.
For ASAI voice response applications, incoming calls are routed to the VIS over T/
R or LST1 channels configured as an ACD split on the DEFINITY Generic 3i system. The Notification capability of ASAI is used by the VIS to monitor this split. As
a call is offered to this split, the VIS receives ASAI event reports indicating the status of the call (for example call offered, queued, alerting, and connected event
reports). The VIS uses the information contained in these event reports to provide
the following capabilities:
■
DNIS Service - The Dialed Number Information Service (DNIS) information
associated with the incoming call is used to select a particular Script
Builder script to service the call. A unique dialed number can be provided
for each unique voice response application. Each dialed number would
typically be represented by a unique Vector Directory Number (VDN) on
the DEFINITY Generic 3i switch. Calls to these different VDN’s can be
routed to the same VIS split. The DNIS information associated with an
incoming call is then used to select a particular application. An administrative screen on the VIS allows the different dialed numbers to be associated
with a specific voice response application. This allows T/R or LST1 channels to be shared across many applications. Prior to this capability, channels had to be dedicated to specific Script Builder Applications.
■
Call Information - Once the call is answered by the VIS, the ASAI information related to the call can be retrieved for use in the voice script handling
the call. In particular, the A_Callinfo action can be used to ANI, DNIS,
switch collected user data (call prompting digits), call ID, and incoming
trunk group ID if ANI is not available.
A user designing a voice script need not be concerned with processing the individual, lower-level ASAI event reports for incoming calls to the VIS. Rather, special
software is provided as part of the ASAI feature. This software processes the
event reports and stores the information contained in these event reports on a
2-3
ASAI Application Planning and Design
per-call basis. The DNIS information associated with a call is used to start a specific voice script on the channel receiving the call. The A_Callinfo action can then
be used within the script to retrieve this information and use it in subsequent
Script Builder actions.
A subset of the Third Party Call Control capability of ASAI is also supported for
ASAI voice response applications. In particular, the A_Tran action uses Third
Party Call Control to transfer a call away from the T/R or LST1 channel.
The use of the A_Tran action within a voice response script invokes the Third
Party Call Control operations of third party take control, third party hold, third party
make call, and third party merge. This sequence of ASAI operations invoked with
A_Tran effects a transfer of the incoming T/R or LST1 call to the destination specified with the Destination Number field in A_Tran. Hence, the script designer is not
required to program many individual ASAI operations. The use of a single action
effects the transfer.
Standard flash transfers are still possible when the ASAI feature is used. The use
of A_Tran, however, provides three significant enhancements over existing transfer mechanisms:
■
Transfers are faster, quieter (from the caller’s perspective), and more reliable since third party call control is used rather than the standard switchhook flash mechanism.
■
The transfer can be completed using direct agent calling. This is done by
setting the Destination Number field in A_Tran to the desired agent extension and by setting the Split Extension field to the ACD split logged into by
the agent. Direct agent calling allows the transfer to be completed to a specific agent while maintaining accurate ACD split measurements. The
DEFINITY Generic 3i direct agent calling feature can only be invoked via
ASAI and is therefore not possible via the standard flash transfer mechanism.
■
Information captured in the voice script can be saved for subsequent use in
a data screen delivery application. Information assigned to the VIS Data
field of A_Tran is saved by the VIS even after the voice script terminates.
The VIS associates this data with the transferred call and makes this data
available in call events passed to the monitoring script which monitors the
transferred call.
The third benefit mentioned previously is very useful for data screen delivery
applications where the screens delivered to agents are based on data collected by
the VIS. Since data collected in a voice script can be saved and is included in call
events made available to the monitoring script, the host application is simplified.For instance, a CONNECT event (described later) made available to the monitoring script contains both the extension of the agent receiving the transferred call
and the VIS data saved from the voice script which previously serviced the caller.
2-4
ASAI Application Planning and Design
This single event is then passed to the host, thereby providing all information
needed by the host application in a single message.
Routing Script Design
Routing applications make use of the routing capability supported by ASAI and
the call vectoring feature on the DEFINITY Generic 3i system. In routing scenarios, calls are not physically delivered to T/R or LST1 channels on the VIS. Instead,
incoming calls to the DEFINITY Generic 3i are directed to a vector containing an
“adjunct route” step. The adjunct route step causes a “route request” message to
be sent to the VIS. The route request message contains information pertaining to
the call (for example, ANI). This information is used by the VIS to determine
where to route the call.
After the VIS determines where to route the call, a “route select” message is sent
back to the DEFINITY Generic 3i system. The route select message contains a
destination address provided by the VIS which the DEFINITY Generic 3i uses to
further direct the call. In routing scenarios, the VIS may be viewed as a routing
server which the DEFINITY Generic 3i calls upon to route calls processed with a
routing vector.
Note that, as a result of routing, the call may be directed to a VIS T/R or LST1 split
to collect more information from the caller. This would be the case, for example, if
the information contained in the route request was not sufficient to identify the
caller (for example, ANI not recognized).
Routing applications on the VIS are supported through the use of routing scripts
which are designed using the A_Event and A_RouteSel actions. The A_Event
action is used to bring information contained in a route request message sent by
the DEFINITY Generic 3i system up to the script level. The A_Event action returns
a ROUTE REQUEST event when the DEFINITY Generic 3i system has sent such
a message. If no route request messages have been sent, the A_Event action
waits until one is received. When a ROUTE REQUEST event is made available to
the script, it reflects information in an ASAI route request message sent by the
DEFINITY Generic 3i system. Note that the A_Event action is also used within
monitoring scripts to retrieve other types of events as discussed later.
Once a ROUTE REQUEST event is received in a script and the script determines
where the call should be routed, the A_RouteSel action is used to cause a route
select message to be passed back to the DEFINITY Generic 3i system. This in
turn causes the call to be routed to the desired destination. Unlike voice response
scripts, routing scripts are not associated with a particular call. A single routing
script handles route requests for many calls. A routing script is designed to
receive and process ROUTE REQUEST events which can arrive at any point in
time as controlled by vector processing on the DEFINITY Generic 3i system.
Hence, the primary difference between routing scripts and voice response scripts
2-5
ASAI Application Planning and Design
is that, once activated, routing scripts run continuously. Routing scripts, therefore,
have the following general structure:
1. An A_Event action to wait for and retrieve a ROUTE REQUEST event from
lower-level ASAI software on the VIS. Once the A_Event action retrieves a
ROUTE REQUEST event, subsequent actions below are executed.
2. Other standard Script Builder actions which make use of the data made
available in the ROUTE REQUEST event to determine where the call
should be routed. Examples include read table and get/send host screen
actions to retrieve routing information from a local or host database.
3. An A_RouteSel action to pass the routing information (that is, desired destination) from the script to lower-level ASAI software on the VIS. This
causes an ASAI route select message containing the routing information to
be sent to the DEFINITY Generic 3i system.
Steps 1 through 3 above are repeated by using additional Script Builder steps to
create an infinite loop (that is, script labels and Goto actions). A sample routing
script is provided in Appendix A, “Sample Scripts.”
A routing script may not contain any Script Builder actions which pertain to voice
response capabilities (Announce, Prompt and Collect, etc.). A routing script is
assigned by using the “RTE” type designation as described in Chapter 4, "ASAI
Administration".
A routing script may use any of the information returned in the ROUTE REQUEST
event as detailed in Chapter 6, "ASAI Script Builder Actions" to route the call.
Examples include the called party number (for example DNIS), calling party number (for example ANI), and switch data (that is, call prompting information). Any
one or combination of the data items returned in a ROUTE REQUEST event can
be used as the basis for a routing decision.
The call is routed to the destination supplied in the Destination Number field of
A_RouteSel. The destination can be on-switch (for example, station, ACD split, or
VDN) or off-switch (for example, Direct Distance Dialing number). Also, the call
may be routed to a specific agent within an ACD split (direct agent routing). This is
done by setting the Destination Number field in A_RouteSel to the desired agent
extension and by setting the Split Extension field to the split logged into by the
agent. Direct agent routing is the preferred way to route calls to specific ACD
agents since direct agent calls are included in the calculations for ACD split statistics (for example, average speed of answer).
2-6
ASAI Application Planning and Design
Monitoring Script Design
Monitoring scripts on the VIS are used to support data screen delivery applications. The Notification capability of ASAI is used to track the progress of calls that
are delivered to agents. A monitoring script on the VIS receives information about
these calls and forwards this information to a host application. The host application in turn uses the information to format a data screen presented to agents
receiving calls. Note, therefore, that the delivery of data screens is not a function
of the VIS itself.
In data screen delivery applications, calls are not physically delivered to a T/R or
LST1 channel on the VIS. Rather, calls are delivered to ACD agents on the
DEFINITY Generic 3i system. Note, however, that a call may have previously
been delivered to a VIS T/R or LST1 channel to collect information from the caller.
A monitoring script is designed using the A_Event action. When used in monitoring scripts, the A_Event action returns the following types of call events:
■
CONNECT Event - indicates that a monitored call is being delivered to an
agent.
■
ABANDON Event - indicates that a monitored call has been abandoned.
■
ABANDON events are passed to a script whenever a caller hangs up
before being connected to an agent.
■
END Event - indicates that a monitored call has ended normally (that is, not
abandoned).
Detailed information about the data made available in these events is discussed in
Chapter 6, "ASAI Script Builder Actions". The three call event types passed to a
monitoring script reflect information contained in ASAI event reports for the call.
Unlike voice response scripts, monitoring scripts are not associated with a particular call. A single monitoring script handles call events for all the calls delivered to
a particular domain. A monitoring script is designed to receive and process call
events which can arrive at any point in time as determined by how and when calls
progress on the DEFINITY Generic 3i system. Hence, the primary difference
between monitoring scripts and voice response scripts is that, once activated,
monitoring scripts run continuously. Monitoring scripts, therefore, have the following general structure:
1. An A_Event action to wait for and retrieve a call event from lower-level
ASAI software on the VIS. Once the A_Event action retrieves a call event,
subsequent actions below are executed.
2. Other Script Builder actions used to pass data in the event to a host. Examples include get/send host screen actions to send the data to an IBM host
via the standard 3270 interface and a custom external function to pass the
data to a custom DIP supporting an asynchronous interface.
2-7
ASAI Application Planning and Design
Steps 1 and 2 above are repeated by using additional Script Builder steps to create an infinite loop (that is, script labels and Goto actions). A sample monitoring
script is provided in Appendix A, “Sample Scripts.”
A monitoring script may not contain any Script Builder actions which pertain to
voice response capabilities (Announce, Prompt and Collect, etc.). A monitoring
script is assigned by using the “VDN”, “ACD”, or “CTL” type designation as
described in Chapter 4, "ASAI Administration".
A monitoring script may pass any combination of the three call event types to a
host. In addition, any combination of the data elements returned in a specific call
event may be passed to a host. Examples include the called party number (DNIS
for example), calling party number (ANI for example), and switch data (call
prompting information).
Monitoring scripts on the VIS can be used to support data screen delivery for
three different call flow scenarios as described below:
2-8
■
VIS-to-Agent Transfers — In this call flow scenario, calls are initially delivered to the VIS and then transferred from the VIS to a live agent. The
transferred call can be monitored with a VDN or ACD type monitoring script
if the call is transferred to a monitored VDN or ACD split domain. The
transferred call can also be monitored with a CTL type monitoring script
allowing the call to be transferred to a non-monitored domain or individual
station. If the VIS Data field of A_Tran was used to save voice script data,
then this data is made available in the VIS Data field of call events sent to
the monitoring script. Hence, data screens delivered to agents in this scenario can be based on information collected in a voice script in addition to
ASAI information such as ANI, DNIS, and call prompting information collected by the DEFINITY Generic 3i system. Refer to the information on
planning for VIS-to-Agent Transfers in this chapter for additional design
considerations.
■
Incoming Call Directly to Agent — In this call flow scenario, incoming trunk
calls are delivered directly to live agents via monitored VDN’s or ACD
splits. Here, call events are passed to a VDN or ACD type monitoring
script and contain only ASAI related information such as ANI, DNIS, and/or
call prompting information. Data screens would not be based on data collected in a voice script since a VIS voice script is not used to collect data
from the caller. Since the VIS does not service calls in this scenario, no
data is present in the VIS Data field of call events.
■
Agent-to-Agent Transfers — In this call flow scenario, calls are transferred
between live agents. Here, for example, “screening” agents may be used
to collect information from the caller and handle simple transactions. The
call may subsequently be transferred to “specialized” agents which can
handle more complex or detailed transactions. In these scenarios data
screens can be based on information keyed in to the host application by
live agents. The host application can save data collected and entered by a
ASAI Application Planning and Design
screening agent and then use this data as the basis for data screens delivered to other, specialized agents which may receive the call. The agent-toagent transfer can be placed to a monitored domain or to an individual station and is monitored with a VDN or ACD type monitoring script. Note that
the call may first have been delivered to the VIS and then transferred to an
agent prior to the live agent to live agent transfer. Hence, call events
passed to the monitoring script in this scenario can contain the same information available for the other two call flow scenarios. ASAI related information such as ANI, DNIS, and call prompting information and VIS Data
can be present in call events. This information may be used in conjunction
with live agent entered data to provide the basis for data screens. Refer to
the information on planning for Agent-to-Agent Transfers in this chapter for
additional design considerations.
VIS-to-Agent Transfers
VIS-to-agent transfers are accomplished by using the A_Tran action within a
voice script servicing a caller. The use of A_Tran invokes ASAI Third Party Call
Control operations to transfer a call away from the T/R or LST1 channel to which
the caller is connected. The caller is transferred to the destination identified in the
Destination Number field of the A_Tran action.
The transferred call can be monitored by a monitoring script so that data screen
delivery applications can be supported for VIS-to-agent transfers. The transferred
call can be monitored in two different ways as follows:
■
The call may be transferred to a VDN or ACD split domain monitored by the
VIS with a monitoring script. Call events for the transferred call are passed
to the script monitoring the domain to which the call is transferred.
■
The call may be monitored using a CTL type monitoring script as described
Chapter 4, "ASAI Administration". In this case, the call can be transferred
to non-monitored domains and individual stations. Here, only call events for
calls transferred from the VIS to agents are passed to monitoring scripts.
Other direct calls to an ACD split, for example, are not monitored therefore
no call events for the direct calls are passed to monitoring scripts.
A combination of the above two monitoring mechanisms may be used on the
same VIS. Rules for which monitoring script receives call events when these two
mechanisms are combined is discussed in Chapter 4, "ASAI Administration".
In addition to monitoring the transferred call, the application designer has the ability to save data collected in the voice script for subsequent use in the data screen
delivery application. This is done by using the VIS Data field of A_Tran. Any data
saved in this field when the transfer is initiated from the voice script is presented in
call events passed to the monitoring script which monitors the transferred call.
The VIS Data field provides twenty characters worth of storage. Note that multiple
data items could be stored in this field. A social security number and PIN number,
2-9
ASAI Application Planning and Design
for example, could be collected in the voice script, concatenated together, and
then saved in the VIS Data field. The monitoring script which receives this data in
call events could then unbundle the information for use in data screen delivery
when the transferred call is delivered to an agent.
The following is a typical call flow for a VIS-to-agent transfer:
1. A call arrives at a T/R or LST1 channel on the VIS. The caller is prompted
through a voice response script.
2. The caller decides to speak to a live agent after entering an account number. The voice script transfers the call to a live agent group using the
A_Tran action. The account number the caller input is saved by using the
VIS Data of A_Tran. The voice script terminates after the transfer is complete and the T/R or LST1 channel is free to handle another call.
3. The transferred call is queued for an available agent. When the call is
eventually delivered to an agent, a monitoring script on the VIS receives a
CONNECT event for the call. The VIS Data field of this CONNECT event
contains the account number previously saved by the voice script. The
monitoring script passes the account number along with the connected
agent information from the CONNECT event to the host.
4. The host application uses the account number to format a data screen concerning the caller and presents this data screen to the agent receiving the
call.The host application does not need to associate multiple calls since all
the necessary information is provided in a single CONNECT event for the
transferred call.
One CONNECT event is generated for the entire scenario. This is the CONNECT
event for the transferred call as it is delivered to the live agent. This CONNECT
event contains the VIS Data information in addition to ASAI information related to
the original call to the VIS. The ANI and DNIS for the original call prior to the
transfer, for example, is reported in this CONNECT event. Also, the Other Call ID
field contains the call ID of the call originally delivered to the VIS T/R or LST1
channel. Call events for calls to T/R or LST1 channels on the VIS are not passed
to monitoring scripts. Also, one END event is generated when the call eventually
terminates. As with the CONNECT event, the END event contains data pertinent
to the original call. Refer to Appendix B, “Call Flow Examples” for a detailed call
flow example.
Additional considerations for VIS-to-agent transfers are as follows:
■
2-10
In some cases, you may want to collect more data in a voice script than
can be stored in the VIS Data field. The recommended method for handling this is to save the data collected by the voice script in the host application. Use A_Callinfo to retrieve the call ID of the call that is delivered to
the T/R or LST1 channel. Pass the call ID along with the data to the host
from the voice script itself. The host application must buffer the data until
ASAI Application Planning and Design
the CONNECT event for the transferred call is received.The call ID in the
Other Call ID field of the CONNECT event can be used to correlate the two
calls.
■
The call may again be transferred after having been serviced by the live
agent. In this case, an END event is not reported until all transferring is
completed and the call terminates normally. As in the single transfer case,
the END event contains information pertinent to the original call. Rules for
how subsequent call events are reported is discussed under planning for
Agent-to-Agent Transfers in this chapter.
■
The discussions on blind and consult transfers, discussed next under planning for Agent-to-Agent Transfers, do not apply to VIS-to-agent transfers
completed using the A_Tran action. Also, the delay needed for agent-toagent transfers discussed later does not apply to VIS-to-agent transfers
completed using the A_Tran action.
■
Transfers away from the VIS may still be accomplished by using standard
flash transfer mechanisms. The use of this type of transfer, however, precludes the ability to use the VIS Data field of A_Tran to save voice script
data for later use in data screen delivery applications. Also, the host application must view this type of transfer as an agent-to-agent transfer as discussed next. Hence, the discussions on blind versus consult transfer and
the need to introduce delay for blind transfers from the VIS will apply.
Agent-to-Agent Transfers
There are two options for call transfer in an agent-to-agent transfer scenario: blind
transfer and consult transfer. These two options differ as to when the screening
agent (the agent transferring the call) completes the transfer to the specialized
agent (the agent receiving the transferred call) by pressing the Transfer button a
second time.
■
With a blind transfer, the screening agent presses the Transfer button a
second time immediately after dialing. The screening agent does not talk to
the specialized agent before completing the transfer. In addition, a delay is
built into call handling so that the call is distributed to a specialized agent
after the screening agent presses the Transfer button the second time.
■
With a consult transfer, the screening agent waits until the specialized
agent answers before pressing the Transfer button a second time.This
allows the screening agent to talk to the specialized agent before completing the transfer.
Both of these call-transfer options are described in more detail later.To set up
either a blind transfer or a consult transfer, it is important to understand two key
concepts of how transferred calls are handled on the DEFINITY Generic 3i system.
2-11
ASAI Application Planning and Design
The first concept to understand is call monitoring in transfer scenarios. VDN or
ACD split domains are monitored by the VIS by assigning monitoring scripts as
described in Chapter 4, "ASAI Administration". A call becomes monitored once it
enters one of these monitored domains. All domains to which this call may be
directed must also be monitored by the VIS. Once monitored, therefore, a call
remains monitored for the duration of the call even though it may be transferred
several times. Once a call becomes monitored, call events are passed to the monitoring script assigned to the domain the call has entered. A CONNECT event, for
example, is passed to a monitoring script when a specific agent is selected to
receive the call. The screening agent may transfer calls to other monitored VDN’s
and ACD splits or to individual stations. The original call to the screening agent
must be monitored and therefore delivered to the screening agent via a monitored
VDN or ACD split.
The second concept to understand is how call ID’s are managed in transfer scenarios. The DEFINITY Generic 3i assigns a call ID to each call. The call ID is provided in the Call ID field of call events for the call. In agent-to-agent transfer
scenarios there are multiple calls and, therefore, multiple call ID’s as described in
the following transfer scenario:
1. The original call is delivered to an agent and is assigned a unique call ID.
The agent talks with the caller and decides that the call needs to be transferred to another agent.
2. The first press of a Transfer button places the original call on hold and
allows another call to be placed from the transferring phone.
3. A second call, temporarily independent of the first call, is placed from the
transferring phone. This call is assigned a call ID which is different than
that of the original call. If this second call is placed to a monitored domain,
the call immediately becomes monitored by the VIS and call events may be
passed to a monitoring script. If this second call is placed to an individual
station, the call does not become monitored until the transfer is completed
as described in Step 4 below.
4. The second press of the Transfer button “merges” the original call which is
on hold with the second call and drops the transferring phone from the
resultant call.
The VIS is informed about the completed transfer immediately after the merge
which occurs in Step 4. It is only after this merge, therefore, that the VIS has the
ability to associate the two calls.
With a blind transfer, this merge takes place before the merged call is delivered to
the second, specialized agent. Hence, with blind transfer calls, the VIS can
include information in the CONNECT event for the merged call which relates to
the original call. In particular, the call ID of the original call is retained by the VIS
and reported in the Other Call ID of call events for the transferred call. This mechanism allows the host application to use call ID’s to associate the transferred call
with the original call.
2-12
ASAI Application Planning and Design
With a consult transfer, the merge takes place after the second call is delivered to
the second, specialized agent. In this case, the original call is still on hold at the
first agent’s phone when the second call is delivered to the second agent. Hence,
for consult transfers, the VIS can only provide information related to the second
call in the CONNECT event for the second call. In particular, the call ID of the
original call is not reported in the Other Call ID field of the CONNECT event for the
second call. The host application must use a mechanism other than call ID’s to
associate the original call with the second call. The alternate mechanism is the
Calling Party Number information as discussed later.
Blind Transfer
With a blind transfer, the screening agent does not talk to the specialized agent
before completing the transfer. With this type of transfer, the VIS retains the call
ID of the original call and reports it in the Other Call ID field of call events for the
transferred call. Also, other ASAI information such as ANI and DNIS related to the
original call is reported in the call events for the transferred call. A typical call flow
for blind transfers is described below. In this call flow, Agent 1 is a live agent in a
screening split who transfers calls to specialized agents. Agent 2 is a specialized
agent that can receive calls via a monitored VDN or ACD split or can be a regular
extension. Calls to Agent 1 in the screening split must be delivered via a monitored VDN or ACD split.
1. A call arrives for Agent 1.
2. Agent 1 answers the call and enters pertinent information about the calling
customer.
3. Agent 1 transfers the call to Agent 2. This is done by pressing the transfer
button, dialing the VDN, split, or individual extension and pressing the
transfer button again.
4. Agent 1 is finished with the call.
5. The host application uses call ID information reported in CONNECT events
to determine which data to display on Agent 2’s data-terminal screen. The
call ID from the Call ID field of the CONNECT event for the original call
matches the call ID provided in the Other Call ID field of the CONNECT
event for the transferred call.
Two CONNECT events are passed to monitoring scripts for the entire scenario,
that is, one for the original call to the screening agent and one for the transfer to
the specialized agent. One END event is generated when the call eventually terminates. Refer to Appendix B, “Call Flow Examples” for detailed call flow examples which include complete descriptions of call flows and call event contents.
The persons responsible for administration and application development must
thoroughly understand the call flow described previously. In addition, note the following:
2-13
ASAI Application Planning and Design
■
The domain receiving the original call and any domains receiving the transferred call must be monitored.
■
In call-center operations that use blind transfer, the host application may
tag current call data by call ID. The call ID allows the application to determine which data is associated with the call as the call is transferred to a
monitored domain or station.
■
Calls can be transferred either to a monitored domain or to a station. For a
blind transfer to a monitored domain, the following must be considered:
— The agent must complete the transfer immediately after initiating it
by pressing the Transfer button a second time.
— A delay must be built into the flow of the transfer so that the completion of the transfer can be recognized by the communications system before the receiving agent is selected for the call. You can
create this built-in delay by transferring calls to a VDN. This VDN is
associated with a vector which has a “wait” step in it. The vector
would then direct the call to the desired split with a “route to” or
“queue to” step.
For blind transfer to a station, the following must be considered:
— When an agent in a monitored domain completes a transfer to a station rather than to a split, a CONNECT event is passed to a monitoring script. The agent must initiate and complete the transfer by
pressing the Transfer button a second time in order for the CONNECT event to be passed to the script. The CONNECT event therefore only becomes available to the host application when the
Transfer button is pushed the second time.
2-14
■
If for some reason calls are transferred to non-monitored domains, unexpected operation can result. When the call placed by Agent 1 is not initially
monitored, the VIS assumes that a transfer to a station is taking place.
Hence, two CONNECT events for the transferred call would be generated.
One CONNECT event would be generated when the transfer is completed
by Agent 1 and another would be generated when the call is actually delivered to Agent 2. Also, the Connected Party Number field of the first CONNECT event for the transferred call would identify the ACD split or VDN
extension dialed by Agent 1. This is as opposed to identifying the extension
of Agent 2. Note that the Connected Party Number field of the second
CONNECT event for the transferred call would identify the extension of
Agent 2.
■
The END event that is reported for the transferred call contains information
pertinent to the original call. For example, the original ANI for the caller is
reported in the Calling Party Number field and the call ID for the original call
is reported in the Other Call ID field. Also, an END event is reported for a
call only when the call ultimately terminates. An END event is not reported
when a call is transferred.
ASAI Application Planning and Design
■
The call may again be transferred after having been serviced by Agent 2.In
this case, an END event is not reported until all transferring is completed
and the call terminates normally. As in the single transfer case, the END
event contains information pertinent to the original call. Rules for how subsequent CONNECT events are reported are as described in this chapter
and depend on whether the call is transferred to a monitored domain or to a
station and whether consult or blind transfer operation is used.
Consult Transfer
With a consult transfer, the screening agent talks to the specialized agent before
completing the transfer. With this type of transfer, the call ID for the original call is
not retained by the VIS and reported in the Other Call ID field of call events for the
transferred call.
A typical call flow for consult transfers is described below.In this call flow, Agent 1
is a live agent in a screening split who transfers calls to specialized agents. Agent
2 is a specialized agent that can receive calls via a monitored VDN or ACD split or
via an individual station. Calls to Agent 1 in the screening split must be delivered
via a monitored VDN or ACD split.
1. A call arrives for Agent 1.
2. Agent 1 answers the call and enters pertinent information about the caller.
3. Agent 1 presses the Transfer button.
4. Agent 1 dials the extension of the monitored domain or station to which the
call will be transferred.
5. Agent 1 waits for Agent 2 to answer.
6. Agent 1 and Agent 2 consult privately about the caller.
7. Agent 1 presses the Transfer button again to complete the transfer.
8. Agent 1 is finished with the call.
9. The host application uses calling party information to determine which data
to display on Agent 2’s data-terminal screen. The extension for Agent 1 is
reported in the Calling Party Number field of the CONNECT event for the
second call.
Two CONNECT events are passed to monitoring scripts for the entire scenario
one for the original call to the screening agent and one for the call to the specialized agent. One END event is generated when the call eventually terminates.
Refer to Appendix B, “Call Flow Examples” for detailed call flow examples which
include complete descriptions of call flows and call event contents.
2-15
ASAI Application Planning and Design
The persons responsible for administration and application development must
thoroughly understand the call flow described previously. In addition, note the following:
■
With a consult transfer, Agent 1 and Agent 2 generally both view the call
data in a private consultation while the caller is on soft hold.
■
Calls can be transferred either to a monitored domain or to an individual
station. For a consult transfer to a monitored domain, the following must be
considered:
— When Agent 2 is selected to receive the call from Agent 1, a CONNECT event is made available to a monitoring script. Since Agent 1
stays on the line until Agent 2 answers, the two calls have not yet
have been merged. This implies that the CONNECT event for the
second call does not contain information pertinent to the first call.
The Other Call ID field for the second CONNECT event, for example, is NULL and does not contain the call ID of the first call. Also,
for example, the Calling Party Number field contains the extension
for Agent 1 and not the ANI for the caller. This is because the second call is viewed as a new, direct call to Agent 2 from Agent 1. The
VIS cannot assume that the two calls will eventually be merged
since, in some cases, they may not be merged. Hence, the two calls
cannot be correlated by using call ID’s from CONNECT events.
— In this case, the Calling Party Number field of the second CONNECT event should be used to correlate the two calls. This field
contains the extension for Agent 1.The host application can assume
that Agent 1 is performing a consult transfer. The host application
could then retrieve the appropriate data from Agent 1’s data-terminal screen and deliver it to Agent 2’s data-terminal screen. After the
two agents consult, Agent 1 can complete the transfer by pressing
the Transfer button a second time. No additional CONNECT event is
passed to a monitoring script when the transfer is completed.
For consult transfer to a station, the following must be considered:
— A CONNECT event for the second call is passed to a monitoring
script only after the transfer is completed when the Transfer button
is pressed the second time by Agent 1. This means that when Agent
1 and Agent 2 are talking privately, the host application will not have
been notified about the second call to Agent 2. This is because the
second call is placed to a station and not to a monitored domain.
The VIS, therefore, does not receive events for the second call until
the two calls are merged. The host application can be programmed
to allow the receiving station to query for the data. After the transfer
is complete, a CONNECT event is passed to a monitoring script.
This CONNECT event contains information pertinent to the first call.
The Other Call ID field of this CONNECT event, for example, con-
2-16
ASAI Application Planning and Design
tains the call ID of the original call delivered to Agent 1. Also, for
example, the Calling Party Number field of this CONNECT event
contains the ANI of the original caller.
■
If for some reason calls are transferred to non-monitored domains, unexpected operation can result. When the call to Agent 2 from Agent 1 is not
initially monitored, the VIS assumes that a transfer to a station is taking
place. Hence, the Connected Party Number field of the CONNECT event
generated when the transfer is completed by Agent 1 would identify the
ACD split or VDN extension dialed by Agent 1.This is as opposed to identifying the extension of Agent 2.
■
The END event that is reported for the transferred call contains information
pertinent to the original call. For example, the original ANI for the caller is
reported in the Calling Party Number field and the call ID for the original call
is reported in the Other Call ID field. This is true even though the second
CONNECT event for consult transfers to monitored domains does not contain information pertinent to the original call. This is because the END
event is reported after consult transfers to monitored domains are completed (that is, after the two calls are merged and can be associated by the
internal software on the VIS). Also, an END event is reported for a call only
when the call ultimately terminates (that is, an END event is not reported
when a call is transferred).These properties for END events allow the host
application to consistently use the Other Call ID field of END events to
identify when and which calls have left the DEFINITY Generic 3i entirely.
■
The call may again be transferred after having been serviced by Agent 2. In
this case, an END event is not reported until all transferring is completed
and the call terminates normally. As in the single transfer case, the END
event contains information pertinent to the original call. Rules for how subsequent CONNECT events are reported are as described in this chapter
and depend on whether the call is transferred to a monitored domain or to a
station and whether consult or blind transfer operation is used.
2-17
ASAI Application Planning and Design
Host Application Planning and Design
In certain call center environments, the VIS ASAI system is integrated with a host
computer. As discussed previously, you must provide or obtain the host software
application that works with the VIS ASAI system. This host software application is
not part of the VIS ASAI product. The host application can use the information it
receives from the VIS ASAI system to do certain functions such as display call
information on agent screens or route calls. The host application may also be
called upon to provide the basis for an automated voice response application.
In some cases, particularly for voice response applications, the VIS ASAI system
integrates well with an embedded application and hence no changes are required.
For routing and data screen delivery applications, however, an existing application
will most likely need to be modified to accommodate new functionality.
You may have several options for providing this host application. For example,
you can develop your own application or modify an existing application to work
with the VIS ASAI system. This is typically done by the company’s data-processing or information-systems department. Alternatively, you can purchase a thirdparty software vendor application that is designed and developed to work with the
VIS ASAI system.
Application development may require significant planning and coordination
between different organizations within your company. The telecommunications,
call-center operations, and data-processing organizations are all typically involved
in the planning process. Schedules for application development or customization
must be coordinated closely with plans to implement the VIS ASAI system, Integrated Services Digital Network (ISDN) services, and any additional communications system ACD features.
The voice response, routing, and data screen delivery applications enabled by a
VIS ASAI system can all potentially make use of ANI information delivered by the
network. The use of ANI generates several considerations.
2-18
■
You should allow for the possibility that the same caller will call from different phone numbers. The same person, for example, might sometimes call
from home and sometimes call from the office. The same database record
should be used in both cases. Calls generated from a private branch
exchange (PBX) will likely have more than one ANI assignment, based on
the different trunk groups used to generate the call and the fact that individual trunk circuits sometimes carry different ANI identities.
■
You should allow for situations when ANI information is not delivered for a
call. In voice response applications, the voice script should provide some
sort of default call handling for cases where no ANI is available. In routing
applications, the caller could be routed to a VIS T/R or LST1 split so that
additional information can be collected. In data screen delivery applications, an agent can ask the caller for this information.
ASAI Application Planning and Design
■
You may want to write an ANI learning module to automatically associate
new ANI information with existing customer records. Agents and voice
response scripts can verify ANI information passed by the DEFINITY
Generic 3i to the VIS.
■
You should allow for situations where a single ANI is associated with multiple calling customers. More than one customer, for example, can call from
the same PBX. Examples of how to handle such situations include bringing
up a menu from which the agent can choose the appropriate customer and
switching to traditional methods for bringing up customer data.
ASAI Voice Response Application
Considerations
■
Voice response applications can make use of direct agent calling. Calls
can be transferred to specific agents within ACD splits after being serviced
by a voice response script. In this case, your database must maintain the
ACD split extensions that agents are logged into as well as the extensions
for the agents themselves.
■
If your voice response applications involves transfers to live agents, refer to
the information on planning for VIS-to-Agent Transfers in this chapter for
additional design considerations.
Routing Application Considerations
■
Unlike data screen delivery applications, routing applications make use of
the host application in an “inquiry/response” fashion. This implies that the
addition of a VIS ASAI routing application to your call center may have little
or no impact on the high-level operation of the application. The most significant change to the host application will likely be the information stored in
the database. Information as to how calls should be routed must be added
to the database if it is not already present. An example is ANI-to-agent
and/or ACD split mappings. If feasible, consider using a local VIS database to store routing information.
■
Routing applications can make use of direct agent calling. Calls can be
routed to specific agents within ACD splits. In this case, your database
must maintain the ACD split extensions that agents are logged into as well
as the extensions for the agents themselves.
2-19
ASAI Application Planning and Design
Data Screen Delivery Application Considerations
■
Prior to the use of data screen delivery applications, a host application typically waits for input from agents before performing an operation. Thus, the
agent’s input generally controls the application. With data screen delivery
applications, a new input to the application is provided. While this input
enables agents to work more quickly, it means that the host application
must be modified. In particular, the call events provided by a monitoring
script on the VIS must be used by the host to drive the screens on agent’s
terminals. The interface to the VIS serves as a “control” link while the interface to the agent operates traditionally as an “inquiry/response” link. The
interactions between these two properties of the application must be considered carefully.
Suppose, for example, that a call arrives for an agent before that agent has
finished entering data from the previous call. This scenario can be handled
in one of two ways:
— Agents can be trained to use Aux Work or After Call Work feature
buttons on their phones to make themselves unavailable for calls
until they have finished entering data from the previous call.
— There is typically a point in the application’s sequence of operations
(for example, base transaction screen) where the agent is waiting
for a new call and begins interaction with the application. The application could look for information from the VIS only at this point. The
agent’s phone will alert the agent to the new call, and the agent can
quickly finish work on the previous call. You may wish to provide a
quick way for the agent to move to this place in the interactions with
the application.
■
In data screen delivery applications, phone extensions are used to identify
agents receiving calls. The host application must therefore be able to associate extensions with particular data terminals.Three possible ways of
doing this are:
— The agent can be queried for the phone extension when the application is started. This is the most flexible arrangement and handles the
situation where data terminals and terminal ID’s are not permanently
associated with the same phone. Agents do make mistakes in providing the phone extension to the system. You should plan for these
occasional mistakes and make sure agents understand what must
be done to properly use the system. Discuss this issue with the person responsible for the company’s agent operations.
— If an agent is always assigned to the same work position and hence
extension, the extension information could be added to an agent
profile.
2-20
ASAI Application Planning and Design
— If the relationship between data terminals, terminal ID’s, and telephones is relatively stable, administration of the host application can
maintain a fixed mapping between phones and terminals.
■
The agent screen application should be able to operate even if the VIS is
not delivering call events. If call information is not being delivered, the
appropriate person or the application itself should notify agents that there is
a problem and that they should operate in manual mode. The DEFINITY
Generic 3i continues to deliver calls to agents even if the ASAI link to the
VIS is down.
■
If your call center application involves data screen delivery for VIS-to-agent
transfers, refer to the information on planning for VIS-to-Agent Transfers in
this chapter for additional design considerations.
■
If your call center application involves data screen delivery for agent-toagent transfers, refer to the information on planning for Agent-to-Agent
Transfers in this chapter for additional design considerations.
■
Your application should be able to accommodate cases where there are
multiple CONNECT events received for the same call. This can occur, for
example, in cases where direct agent calling is used. A call may first ring
at the initial agent’s phone and then at the phone of a covering agent if the
call is not answered by the initial agent. In this case, two CONNECT events
are sent to a monitoring script when CONNECT events are triggered on an
ASAI alerting event report.
■
Your application should be able to accommodate cases where the connected party identified in call events is not a known ACD agent. Depending
on switch administration and the design of call vectors, calls can be redirected to domains (VDNs or ACD splits) other than the domain to which the
call is originally offered. If calls cover or are redirected from a live agent
split to an AUDIX split, for example, call events can identify an AUDIX
channel extension as the connected party.
2-21
ASAI Application Planning and Design
Communications System Planning
Communication system planning involves defining what changes must be made
to your company’s communications system software configuration and ACD environment to support the planned applications. The following is a list of items that
should be considered when planning for the changes to the communications system.
2-22
■
A DEFINITY Generic 3i system with ASAI software is required to implement VIS ASAI applications.
■
Call vectoring is strongly recommended for use in implementing all VIS
ASAI applications. This is especially true for data screen delivery applications which involve agent-to-agent transfers or DNIS service and voice
response applications which make use of DNIS service.
■
Call vectoring is mandatory for routing applications. Call vectoring is also
mandatory for data screen delivery applications which make use of call
prompting information. Note that the call prompting capability of vectoring
is an additional, optional feature over and above the optional call vectoring
feature.
■
If feasible, you may wish to aggregate agents currently in multiple splits
into a single split. This minimizes the number of domains that are monitored by the VIS and allows agents to be used more efficiently. Since DNIS
is available in call events, you can have a single split of agents handle several applications. The host application can use DNIS to provide information
screens that tell agents how to answer and handle calls.
■
You must plan your call flows carefully if multiple ASAI adjuncts will be
used with the same DEFINITY Generic 3i system. Once a call becomes
monitored by a particular VIS, the call cannot be redirected or transferred
to a domain monitored by another VIS or ASAI adjunct. This is a consideration primarily for data screen delivery applications. For example, if you
have agent-to-agent transfers for data screen delivery applications, agents
must restrict transfers to domains monitored by the same VIS that monitors
calls delivered to them. Also, for example, you may have VIS-to-agent
transfers to support data screen delivery based on VIS collected data. In
this case, multiple VIS systems should be configured to “front end” mutually exclusive sets of live agents. These considerations do not apply if only
one VIS ASAI system is used and it is the only ASAI adjunct.
■
If ANI is needed for an application, you must provision an ISDN Primary
Rate Interface (PRI) in order to receive ANI from the network. Make sure
ISDN service is available in your area when needed.
ASAI Application Planning and Design
Call Center Operations Planning
The persons responsible for call center or customer service operations should
plan for the changes that occur in those operations when the VIS ASAI system is
added to the call center. In particular, the use of automated voice response applications reduces the volume of calls handled by live agents. In addition, the use of
routing and data screen delivery applications can make the call center even more
efficient by reducing the amount of time required to service those calls that are
handled by live agents. This should reduce the amount of time that customer calls
are in queue thereby increasing the productivity of agents and reducing the use of
trunk facilities. You can take advantage of these benefits in one of two ways:
■
You can improve customer service by keeping the same number of agents
and reducing the average speed of answer (ASA). ASA is the average
time, computed by Call Management System (CMS) or Basic Call Management System (BCMS), that callers wait in queue before connecting to an
agent.
■
You can save money by reducing the number of agents and keeping
approximately the same ASA.
Efficient agent operation is the key to realizing the improvements the VIS ASAI
system can provide. Specific agent tasks may change when a VIS ASAI application such as data screen delivery is added to the call center. You should determine what agent training is needed before the new service begins. Agents should
be trained on what new information will appear on their data-terminal screens and
how to use that information to interact with calling customers. Before implementing a data screen delivery application with the entire agent population, conduct a
trial to compare old call center operations with the new call center operations
using a data screen delivery application. Benefits of the application should be
explained so that agents can take advantage of them.
If data screen delivery is performed for agent-to-agent transfers, carefully read the
information on planning for Agent-to-Agent Transfers in this chapter. Agents must
be trained to perform transfers properly so that the desired call events are passed
to the host application. More specifically, for blind transfers, agents must transfer
calls as follows:
1. Place the original call on hold by hitting the Transfer button once. This also
causes a new call appearance to become active (dial tone is heard on this
call appearance).
2. Dial the desired extension while hearing dial tone on the new, active call
appearance.
3. Immediately press the Transfer button again after dialing the desired extension to complete the transfer.
In consult transfer scenarios, the agent may wait to talk to the second agent
before completing the transfer. In consult transfer scenarios, however, the agent
2-23
ASAI Application Planning and Design
must make sure that the original call is on “transfer” hold before completing the
transfer. A call is said to be on transfer hold when the call was placed on hold by
hitting the Transfer button. This is as opposed to “regular” hold where the call is
placed on hold by hitting the Hold button.
For example, the agent may decide to return to the original caller before completing the transfer (for example to say, “please wait while I transfer you to Bill who
can handle your question”). When the agent returns to the original caller, the original caller is no longer on transfer hold. The agent must be sure to place the original call on transfer hold (not regular hold) before completing the transfer.
The following procedure should be followed for consult transfer situations where
the screening agent wants to go back and talk to the original caller before completing the transfer. In this procedure, Agent 1 is the screening agent who
receives the original call from the calling customer. Agent 2 is the specialized
agent who receives the transferred call. Although this procedure may seem cumbersome initially, it is the most natural set of steps to take in consult transfer scenarios were the screening agent wants to announce the transfer to the original
caller after having talked to the specialized agent. This procedure also insures
that the VIS can properly identify the original call when the two calls are merged.
If agents do not follow this procedure, inaccurate call events are reported to the
host application.
1. Agent 1 places the call to Agent 2 on regular hold by hitting the Hold button
while the call to Agent 2 is still the active call.
2. Agent 1 returns to the original caller by pressing the call appearance for
the original call. This makes the original call active once again. Agent 1
may now talk to the original caller.
3. After talking to the original caller for the second time, Agent 1 places the
original caller on transfer hold again by pressing the Transfer button again.
This is the second time Agent 1 has pressed the Transfer button. This
causes a third, as yet unused, call appearance to become active (dial tone
is heard on this call appearance but this call appearance is not used for
anything - go to the next step and ignore the dial tone).
4. Make the call to Agent 2, which is currently on regular hold, the active call
by pressing the call appearance for this call. At this point Agent 1 and
Agent 2 are connected again and Agent 1 can inform Agent 2 that the
transfer is about to be completed.
5. Agent 1 completes the transfer by hitting the Transfer button again. This is
the third time Agent 1 has pressed the Transfer button.
2-24
ASAI Installation
3
Installation Overview
This chapter contains information on installation and setup procedures for the
CONVERSANT Voice Information System (VIS) Adjunct/Switch Application Interface (ASAI) software package. ASAI-specific installation processes are discussed
in this chapter. Refer to Chapter 2, “Installing The Base System Software” in
CONVERSANT VIS Software Installation, 585-350-111 for additional information
on general voice system installation procedures.
3-1
ASAI Installation
Prerequisites for ASAI Installation
To install the Adjunct/Switch Application Interface feature on the CONVERSANT
Voice Information System (VIS) Version 3.1, you need the following:
■
One or more Tip/Ring cards (IVP4, IVP6, or a VRS6) with Signal Processor
installed
OR
one or more T1 cards (AYC11 or AYC3B) with Signal Processor installed
■
Network Support Utilities (1.2) Version 2.0
■
One ISDN PC Interface (IPCI) card
■
The Adjunct/Switch Application Interface feature package
■
Configurator program output
For information on installing the VIS software and hardware, refer to the CONVERSANT Voice Information System Software Installation and Upgrade and the
hardware installation and upgrade book for your platform.
NOTE:
Confirm that Adjunct/Switch Application Interface is installed and available
on the switch you are using. Refer to the DEFINITY Communications System Generic 1 and Generic 3i Installation and Test Manual , 555-230-104.
3-2
ASAI Installation
ASAI Hardware Architecture
The VIS is designed to operate with the DEFINITY Generic 3i. The IPCI card
must be installed on the VIS. The ISDN Line Circuit Pack, TN556, must be
installed on the DEFINITY Generic 3i. For information on the TN556 refer to the
DEFINITY Communications System Generic 1 and Generic 3i System Description, 555-230-200 . Refer also to the DEFINITY Generic 1 and Generic 3i Wiring
Manual, 555-204-111, Issue 2 .
To support the ASAI capability, the VIS must be connected, via a point-to-point
ISDN Basic Rate Interface (BRI), to the DEFINITY Generic 3i. The VIS (T/R or
LST1) lines which need to access ASAI capabilities must be configured as members of an Automatic Call Distribution (ACD) split of the PBX. The IPCI card supports the BRI D-channel interface from the switch. One ASAI link per VIS is
supported.
A typical VIS and DEFINITY Generic 3i configuration is displayed in Figure 3-1.
ASAI Link
(BRI (D))
Public
Network
DEFINITY
Generic 3i
Live
ACD
CONVERSANT
VIS
VIS
ACD
Host
(optional)
VIS Agents
(T/R Lines)
Live
Agent
Figure 3-1.
Live
Agent
Typical Hardware Architecture
3-3
ASAI Installation
Installing ASAI Hardware
Prior to installation, you should run the configurator program. For information on
running the configurator program, refer to Chapter 3, “Allocating System
Resources” in the hardware installation and upgrade book for your platform.
Referring to the output from the show_config command and Figure 3-3, set the
Base RAM address selection switches on the IPCI card. Figure 3-2 shows the
location of the Base RAM address location switches. Figure 3-3 shows the various
switch settings for the Base RAM selection switches.
Red LED
HEADSET
RAM
PHONE
LINE
Base RAM Address Selection Switches
Figure 3-2.
3-4
IPCI Card
ASAI Installation
Base Address
Set These Switches
1
2
3
0c8000h
ON
OFF
OFF
ON
0cc000h
OFF
OFF
OFF
ON
0d0000h
ON
ON
ON
OFF
0d4000h
OFF
ON
ON
OFF
0d8000h
ON
OFF
ON
OFF
0dc000h
OFF
OFF
ON
OFF
Figure 3-3.
4
IPCI Switch Settings
For information on installing the IPCI Card in the system, refer to Chapter 5,
“Installing Circuit Cards” in the hardware installation and upgrade book for your
platform.
Figure 3-4 shows a typical wiring architecture for the ASAI link.
Note that you must connect the AT&T 440A4 8-pin terminating resistor (or equivalent) to the LINE connector of the IPCI Card using the provided DW8 cable. Use
the other DW8 cable to connect from the connecting block to the terminating
resistor.
! CAUTION:
Total cable length from the DEFINITY Generic 3i system to the VIS should
not exceed 1900 feet.
3-5
ASAI Installation
CONVERSANT VIS
(Version 3.1)
ISDN PC INTERFACE BOARD
HEADSET
MAXIMUM 1900 FEET
DEFINITY
Generic 3i
TN556
ISDN/BRI
PHONE
X CONN
BLOCK
103 TYPE
CONN BLOCK
LINE
TRANS TRANS +
REC +
REC -
26
1
27
2
}
(
TYPICALLY
66 OR 110
TYPE
)
8
7
6
5
4
3
2
1
D8W CABLE
()
AUXILLIARY POWER
()
TRANRECREC+
TRAN+
NC
NC
}
D8W CABLE
AT&T 440A4 8-PIN
TERMINATING RESISTOR
CUSTOMER PREMISE EQUIPMENT
Figure 3-4.
Typical Wiring for ASAI Link wiring.ps
Installing ASAI Software
The VIS ASAI software package is contained on high-density 3.5” floppy disks.
Use the following procedures to install the software package.
6. Log in to the VIS as root.
7. Type installpkg at the UNIX system prompt.
8. Insert the floppy disk labeled “Adjunct/Switch Application Interface Library”
into the disk drive and press ENTER .
An Install in progress message appears on the screen.
9. The package prompts you for the number of IPCI cards installed on the
system. Type 1 and then press ENTER . Currently only one (1) link issupported per VIS.
3-6
ASAI Installation
10. Next, the package prompts you for the Interrupt Vector Number (IVN) of the
IPCI card. Refer to the output of the configuration program to determine
what interrupt number to use. Type in the number you have selected and
then press ENTER . If you wish to cancel the software installation process at
this time, you may type q to abort installation.
11. You are now prompted to enter the Memory Address of the card. Refer to
the information under “RAMADDR” from the output of the configuration program for this setting for the IPCI card.
12. The UNIX system will now be rebuilt. This takes approximately 2 minutes
to complete.
13. When prompted, remove the disk from the drive.
14. Press
ENTER
to shutdown the system.
15. When prompted, reboot the system. While holding down CONTROL and
ALT press and release DELETE on the numeric keypad, then release
CONTROL and ALT .
16. Log in to the system as root.
17. Type installpkg at the UNIX system prompt.
18. Insert the floppy disk labeled “CONVERSANT ASAI Package Version 3.1”
and press ENTER .
19. Remove the floppy disk when prompted, and load the remaining floppies
into the disk drive when directed to do so. Press ENTER .
20. If the Voice System is running, the system asks you whether you wish to
stop the voice system. Type y and then press ENTER to stop the voice
system.
21. A message appears stating that the installation of the ASAI package is now
complete.
22. A message appears asking you if you wish to restart the voice system.Type
y and then press ENTER if you wish to start the voice system at this
time.Type n if you do not wish to start the voice system at this time (that
is, if you have other software packages to load).
You have now completed loading the ASAI software. Refer to Chapter 4, "ASAI
Administration" to begin work with the various ASAI features and capabilities.
3-7
ASAI Installation
Removing the ASAI Software
To remove the ASAI software, refer to the following procedure:
NOTE:
The ASAI feature package software must be removed before the ASAI
Library package software.
1. Before you remove the ASAI feature package software or the ASAI library
package software, you will need to stop the voice system. This may be
done by using either the System Control screen or, from the UNIX system
command line, by using the stop_vs command. Refer to Chapter 5,
“Configuration Management” in CONVERSANT Voice Information System
Operations for information on stopping the voice system.
2. From the system prompt, type removepkg . The numbered list of installed
packages is displayed.
3. Select the number associated with the ASAI package.
4. When the prompt is returned, the ASAI software package has been
removed.
3-8
ASAI Administration
4
This chapter describes the administrative screens that are provided with the ASAI
feature package. For a step-by-step description of a typical voice-response application involving a VIS ACD and VIS agents, refer to Chapter 5, "Administering
ASAI".
ASAI Administration Overview
NOTE:
The ASAI feature uses a menu-driven user interface. Refer to Chapter 1,
“User Interface” of the CONVERSANT VIS Version 4.0 Operations, 585350-703, for a general description of the VIS user interface. The ASAI link
must be administered on the DEFINITY Generic 3i. Refer to the DEFINITY
Communications System Generic 3i Implementation, 555-230-650, for
additional information.
4-1
ASAI Administration
After you have logged into the VIS, the CONVERSANT VIS Version 4.0 screen
should appear. If the CONVERSANT VIS Version 4.0 screen does not appear,
type cvis_mainmenu at the system prompt to display the CONVERSANT VIS
Version 4.0 screen. From this screen, use the arrow keys to highlight “Voice System Administration”, then press ENTER . The Voice System Administration screen
appears in Figure 4-1.
Voice System Administration
Application Package Administration
Configuration Management
Feature Packages
Reports
Script Builder Applications
Switch Interfaces
System Monitor
Highlight an item and press ENTER.
HELP
Figure 4-1.
4-2
PREV-FRM
NEXT-FRM CANCEL CMD-MENU CHG-KEYS
Voice System Administration Screen
ASAI Administration
From the Voice System Administration screen, highlight “Feature Packages” and
press ENTER to open the Feature Packages screen (Figure 4-2).
Feature Packages
ASAI Administration
Select a feature package and press Enter
HELP
Figure 4-2.
PREV-FRM NEXT-FRM CANCEL CMD-MENU CHG-KEYS
Feature Packages Screen
To access ASAI administration from the Feature Packages screen, highlight
“ASAI Administration”, then press ENTER to display the ASAI Administration
screen (Figure 4-3).
4-3
ASAI Administration
ASAI Administration
Channel Administration
Diagnose IPCI Board
Domain Administration
Initialize IPCI Board
Parameter Administration
Show ASAI Software Version
Show Status of ASAI Link
Take IPCI Board Off-line
Please highlight the item you want and press Enter
HELP
Figure 4-3.
CANCEL
CHG-KEYS
ASAI Administration Screen
The ASAI Administration screen enables you to access the following administrative features associated with ASAI:
4-4
■
Channel Administration
■
Diagnose ISDN PC Interface (IPCI) Board
■
Domain Administration
■
Initialize IPCI Board
■
ASAI Parameters
■
Show ASAI Software Version
■
Show Status of ASAI Link
■
Take IPCI Board Off-line
ASAI Administration
Channel Administration
The Channel Administration screen provides one entry for each T/R or LST1
channel (VIS agent) that is administered as a member of the VIS ACD split. It provides a mapping between the VIS channels and the PBX extension numbers.
Refer to Figure 4-1 for a diagram of a typical application.
To open the Channel Administration screen from the ASAI Administration menu,
highlight “Channel Administration” and then press ENTER . The Channel Administration screen appears. Figure 4-4 shows an example of the Channel Administration screen with channel information displayed.
Change A Channel Entry
Channel: _________
Extension: _________
Please enter the new PBX extension number
HELP
CHOICES
Figure 4-4.
SAVE
CANCEL
CHG-KEYS
Channel Administration Screen
4-5
ASAI Administration
The Channel Administration screen contains the following fields:
■
The “CHANNEL” field indicates the T/R or LST1 channel number on the
VIS.
■
The “EXTENSION” field indicates the Private Branch Exchange (PBX)
extension number assigned for the channel.
■
The “LOGIN” field indicates whether or not the channel is intended to be
logged in to the ACD split. This field can be either YES or NO. If the channel is not logged in, the ACD does not deliver any calls to it.
■
The “STATUS” field indicates the channel status. The status can be either
broken, foos, hwoos, logout, manoos, netoos, nonex, or LOGIN. LOGIN
status indicates that the T/R or LST1 channel is ready to receive calls from
the ACD.
The following is a list of the various channel states. Refer to Appendix D, “Troubleshooting ASAI” for additional information on channel states:
4-6
■
broken (broken) — Possible malfunction detected on line
■
foos (facility out of service) — The line is not functional
■
hwoos (hardware out of service) — Channel cannot be logged in because
ASAI digital link is not operating
■
logout (logged out) — Channel has not been administered to be logged in
■
manoos (manual out of service) — Channel has not been placed into service
■
netoos (network out of service) — ASAI link is up, but attempts to log in the
channel are failing
■
nonex (nonexistent) — Channel does not exist
■
LOGIN — Channel is ready to receive calls from the ACD
ASAI Administration
The Channel Administration screen with the standard function keys is displayed in
Figure 4-4. Note that you need to use CHG-KEYS to switch the function key display from the standard to the screen-specific set of commands, or vice versa. The
screen-specific function keys in the Channel Administration screen perform the
following functions:
■
ADD — Add a channel entry. Refer to Figure 4-5 and accompanying text
for additional information.
■
CHANGE — Change the PBX extension assigned to the channel. The
channel must be logged out before it may be changed. Refer to Figure 4-6
and accompanying text for additional information.
■
REMOVE — Remove a channel entry. The channel must be logged out
before it may be removed.
■
LOGIN — Login a channel as an agent of the ACD split. You must log in
the channel in order to receive calls from the ACD.
■
LOGOUT — Logout a channel from the ACD split. You may use the
LOGOUT key to prevent the ACD from delivering calls to the channel.
Press CANCEL to return to the ASAI Administration screen (Figure 4-3).
NOTE:
Once the T/R or LST1 channels are administered and logged in, no manual
intervention is required to log the channels back in during recovery (for
example, switch or VIS reboot) or upon restarting the voice system.
NOTE:
If the ASAI link goes down after a channel is logged in, the channel STATUS displays ‘hwoos’ even though the channel remains in a logged in
state. The VIS relies on the messages sent over the ASAI link to login and
logout channels. If channels are logged in, and the ASAI link abruptly goes
down (for example, the cable becomes disconnected), the VIS is not able
to logout the channels. (The PBX does NOT automatically logout the channels). This means that calls placed to the VIS ACD split are still directed to
Tip/Ring lines on the VIS, but because the ASAI link is down, DNIS is not
available for the call. In addition, the A_Callinfo and A_Tran actions do not
function. To prepare for such a link outage, you should assign a ‘backup’
script to DNIS ‘ANY’ (which does not rely on A_Callinfo or A_Tran). The
standard Transfer Call action may be used instead.
4-7
ASAI Administration
Add Channel Entry
The Add A Channel Entry screen may be used to assign a Tip/Ring channel as a
VIS agent.
While the Channel Administration screen is active, press ADD to open the Add A
Channel Entry screen (Figure 4-5).
Figure 4-5.
Add Channel Entry Screen achannel.ps
The Add A Channel Entry screen contains the following fields:
■
The “Channel” field indicates the Tip/Ring channel number on the VIS that
you wish to add. The channel number must be unique.
■
The “Extension” field indicates the extension number assigned to the application. The extension number must be unique.
Press SAVE to add the new channel entry or press CANCEL to exit the Add A
Channel Entry screen and return to the Channel Administration screen.
4-8
ASAI Administration
Change Channel Entry
The Change A Channel Entry screen is used to change the extension of a VIS
agent.
NOTE:
The channel must be logged out before it may be changed.
While the Channel Administration screen is active, press CHANGE to open the
Change A Channel Entry screen (Figure 4-6).
Change A Channel Entry
Channel: _________
Extension: _________
Please enter the new PBX extension number
HELP
CHOICES
Figure 4-6.
SAVE
CANCEL
CHG-KEYS
Change Channel Entry Screen
The Change A Channel Entry screen contains the following fields:
■
The “Channel” field indicates the T/R or LST1 channel number on the VIS
that you chose to change. The Channel field cannot be changed in this
screen.
■
The “Extension” field indicates the PBX extension number assigned to the
channel. The extension number must be unique.
Press SAVE to activate the channel entry changes or press CANCEL to quit and
return to the Channel Administration screen.
4-9
ASAI Administration
Remove Channel Entry
While the Channel Administration screen is active, press REMOVE to unassign a
Tip/Ring channel as a VIS agent. You will receive a confirmation screen asking
you if you wish to REMOVE the selected item.
Press
ENTER
to continue or CANCEL to abort the removal procedure.
NOTE:
The channel must be logged out before it may be removed.
Virtual Channel Administration
From the Voice System Administration screen (Figure 4-1), highlight “System
Monitor”, then press ENTER . The Voice Channel Monitor screen appears (Figure
4-7)
System Monitor - Voice Channels
Channel
0
1
2
3
4v
5v
HELP
Figure 4-7.
Calls
Today
Voice
Service
Service
Status
1
1
3
1
1
10
appl2
appl4
appl7
appl3
virtual1
virtual2
Talking
Collect
Transfer
DB
PREV-PAGENEXTPAGE
Caller
Input
Dialed
Digits
8509
5312
7328
CANCEL
CHG-KEYS
Voice Channel Monitor Screen
Routing and data screen delivery applications available with the ASAI application
are data-only applications. Unlike voice response applications, such applications
do not require the allocation of network or speech processing resources.For these
applications, one or more “virtual channels” are allocated by the ASAI system,
making all regular channels available for use by script applications that need the
system resources allocated to them. At a minimum, one virtual channel is required
4-10
ASAI Administration
for each domain running a data-only script. A maximum of 32 virtual channels
may be administered on the VIS.
4-11
ASAI Administration
The non-voice script that is assigned to a domain is started on the virtual channel
when you use the ENABLE key in the Domain Administration screen to place the
domain into service (inserv). Note that if the domain changes from inserv to any
other state, the non-voice response script running on the virtual channel is
aborted.
NOTE:
As traffic increases on any one domain, the ASAI process spawns the
assigned data-only script to accommodate the increased load.
Virtual channels are assigned a range of channel numbers above the maximum
number of regular channels allocated on the system and activity on these channels is displayed in the Voice Channel Monitor screen. Following is a discussion
of the fields in this screen as they relate to virtual channels used by the ASAI
application. Refer to Chapter 6, “System Monitor” of the CONVERSANT Voice
Information System Operations for additional information.
The “Channel” field lists the existing channels on the VIS. “Virtual channels” have
the character ‘v’ appended to the channel number in this field. In Figure 4-7
voice.vir.ps] channels 4 and 5 are virtual channels.
The “Calls Today” field provides data on the number of calls made to a particular
channel within the system. Calls are monitored for a 24-hour period, on any day
beginning at midnight (12 a.m.). For virtual channels, the value in this field is the
number of times the channel was used to run a data-only script. In Figure 4-7
channels 4 and 5 are running the virtual1 and virtual2 data-only scripts, respectively.
The “Voice Service” field provides the name of the service currently running on
the corresponding voice channel. In Figure 4-7 channel 4 is running the virtual1
service and channel 5 is running the virtual2 service. For virtual channels, this
field is blank when no script is running.
The “Service Status” field lists the various status states of each channel in the
VIS. The Service Status field is blank for virtual channels except when a script
with a Data Interface Process (DIP) is running, in which case this field indicates
the name of the DIP.
The “Caller Input” field provides the last set of digits entered by the caller. The
Caller Input field is always blank for virtual channels.
The “Dialed Digits” field provides the last set of digits dialed by the VIS during the
transfer process. The Dialed Digits field is always blank for virtual channels.
4-12
ASAI Administration
Diagnose IPCI Board
You should use the Diagnose IPCI Board command when you suspect that there
is a problem with the ASAI link. Note that the IPCI card must be on-line before it
may be diagnosed. Refer to the Initialize IPCI Board procedures later in this chapter for information on initializing the IPCI card.
You may use the Show Status of ASAI Link (Figure 4-15)screen to determine
whether the link is on-line (actively using the link) or off-line (not using the link).
You may use the Take IPCI Board Off-line procedure to change the card from an
on-line to an off-line state. Likewise, you may use the Initialize IPCI Board procedure to change the card from an off-line to an on-line state.The Take IPCI Board
Off-line and Initialize IPCI Board procedures are discussed later in this chapter.
To diagnose the IPCI Board from the ASAI Administration screen, highlight “Diagnose IPCI Board” and then press ENTER Figure 4-8 shows the Diagnose IPCI
Board screen with IPCI diagnosis information displayed.
Diagnose IPCI Board
The IPCI Board passed all tests.
Press ENTER to continue.
PREVPAGE NEXTPAGE
Figure 4-8.
CANCEL
CHG-KEYS
Diagnose IPCI Board Screen
In the Diagnose IPCI Board example shown in Figure 4-8, testing was executed
on card 1. If for some reason diagnostics had failed on the card, that information
would be contained in this screen. The diagnose IPCI card command does not
affect the link or traffic on the link.
4-13
ASAI Administration
Domain Administration
The Domain Administration screen is used to instruct the VIS adjunct on how to
handle a call that was offered to a specific domain. For voice-response applications, there may be only one entry of type ACD to which the VIS service is
assigned.
Other domain types that may be administered through the Domain Administration
screen and assigned only non-voice response (data only) services include the following:
■
ACD — A domain type which processes information from the PBX associated with calls distributed on an ACD split on the switch.
■
VDN — A domain type which processes information from the PBX associated with a call processing vector (VDN) on the switch.
■
RTE — A domain type which processes route requests from the switch.
■
CTL — A domain type which processes information from the PBX for calls
transferred from the VIS (using the A_Tran action) to an extension which is
not associated with an ACD or VDN domain already monitored by the VIS.
To open the Domain Administration screen from the ASAI Administration screen,
highlight “Domain Administration” and then press ENTER .The Domain Administration screen appears. Figure 4-9 shows an example of the Domain Administration
screen with domain information displayed.
Domain Administration
NAME
TYPE
EXT
SERVICE
STATUS
ACD001
VDN001
CTL001
RTE001
ACD002
ACD
VDN
CTL
RTE
ACD
3982
4002
ANY
4005
7392
VIS
vdn-serv
ctl-serv
rte-serv
acd-serv
inserv
manoos
inserv
inserv
inserv
Please highlight the item you want and press a function key.
HELP
Figure 4-9.
4-14
CANCEL
Domain Administration Screen domain.ps
CHG-KEYS
ASAI Administration
By default, the VIS updates the Domain Administration screen every 2 seconds.
The Domain Administration screen contains the following fields:
■
The “NAME” field indicates the domain name. You may choose any name
for the domain name.
■
The “TYPE” field indicates the VIS domain type. The domain TYPE can be
one of the following:
— ACD — Domain on the VIS which monitors calls to the corresponding split (domain) on the PBX.
— VDN — Domain on the VIS which monitors calls to the corresponding VDN (domain) on the PBX.
— CTL — Defines a domain on the VIS which monitors calls transferred away from the VIS (by a voice script using the A_Tran action)
to destinations on the PBX that are not monitored by an ACD or
VDN domain (for example, monitor calls transferred using A_Tran to
miscellaneous extensions). CTL domains are defined by only the
VIS and do not correspond to any domain on the PBX.
— RTE — Defines a domain on the VIS which accepts Route Requests
from the PBX. RTE domains are defined by only the VIS and do not
correspond to any domain on the PBX.
The meaning of the “EXT” field depends on the type of domain. The EXT can be
one of the following:
■
ACD type domains — EXT field should contain the corresponding ACD
split PBX extension that is being monitored.
■
VDN type domains — EXT field should contain the corresponding VDN
PBX extension that is being monitored.
■
CTL type domains — EXT field designates an extension (which does not
correspond to an ACD or VDN extension) for which calls are being transferred by a VIS channel using the A_Tran action. Calls transferred to the
specified extension are processed by the CTL domain. The extension field
can also contain “ANY,” in which case, calls transferred to any destination
not already monitored by another domain are processed. Note that if a
specific extension is used in this field, it must correspond to an extension
used in the Destination field of the A_Tran action used by a script assigned
to an ASAI channel.
■
RTE type domains — EXT field limits the processing of route requests
based on the extension that was dialed. This field can contain a specific
extension or the word “ANY.” If an extension is specified, only route
requests for the specified (called) extension are processed. If “ANY” is
specified in the field, then all route requests not processed by any other
administered domain are processed.
4-15
ASAI Administration
The “SERVICE” field indicates how the calls offered to the domain are handled by
the VIS. The SERVICE field is used to specify a script which services the domain.
NOTE:
To make sure that the latest version of a script is picked up, the corresponding domain should be disabled and enabled each time the script is
verified and installed via Script Builder.
A script can be assigned to any type of domain (ACD, VDN, etc.). If the application or the ACD directs calls to the VIS T/R or LST1 line, the special service “VIS”
must be used here. The SERVICE can be one of the following:
■
ACD type domains — The SERVICE can be either a monitoring script
(refer to Chapter 2, "ASAI Application Planning and Design", for a description of a monitoring script) or the special word “VIS.” If the agents on the
ACD split are Tip/Ring channels on the VIS (that is, channels administered
in the Channel Administration screen described in Chapter 2, "ASAI Application Planning and Design"), then you should specify “VIS” as the service
for the domain. “VIS” service provides the ability to start voice scripts on
the Tip/Ring channels based on the DNIS. It also provides the ability for
those voice scripts to use the A_Callinfo action.
NOTE:
VIS can be assigned to only one ACD domain. Consequently, all
Tip/Ring channels that are administered for ASAI must be an agent
that belongs to this ACD domain.
For ACD type domains that do not have agents on the VIS, a monitoring
script should be assigned in this field.
■
VDN and CTL type domains — The SERVICE must be a monitoring script.
(refer to Chapter 2, "ASAI Application Planning and Design" for a description of a monitoring script).
■
RTE type domains — The SERVICE must be a routing script. (Refer to
Chapter 2, "ASAI Application Planning and Design" for a description of a
routing script).
The VIS T/R or LST1 channels (agents) are used to support voice response applications. All T/R or LST1 channels used for ASAI capability must be administered
into one ACD split on the PBX. Calls offered to the VIS domain are handled by the
Script Builder script associated with the DNIS information. Refer to Chapter 3,
“Configuration Management” in CONVERSANT Voice Information System Operations for information on how to administer scripts to dialed numbers.
4-16
ASAI Administration
The “STATUS” field indicates whether the domain is ready to receive call information. The domain STATUS can be one of the following. Refer to Appendix D,
“Troubleshooting ASAI” for additional information.
■
broken (broken) — A virtual channel could not be allocated for the service
assigned to this domain.
■
foos (facility out of service) — The ASAI digital link is not operating.
■
initing (initializing) — The service assigned to the domain is failing initialization.
■
inserv (in service) — The domain is ready to receive call information from
the switch.
■
manoos (manual out of service) —The domain has not been placed into
service.
■
netoos (network out of service) — The ASAI link is up, but attempts to
receive call information from the switch are failing.
The Domain Administration screen with the standard function keys is displayed in
Figure 4-9. Note that you need to use CHG-KEYS to switch the function key display from the standard to the screen-specific set of commands, or vice versa. The
screen-specific function keys in the Domain Administration screen perform the following functions:
■
ADD — Add a domain entry. Refer to Figure 4-10 and accompanying text
for additional information.
■
CHANGE — Change a domain entry. The domain must be disabled before
it can be changed. Refer to Figure 4-11 and accompanying text for additional information.
■
REMOVE — Remove a domain entry. The domain must be disabled
before it can be removed.
■
ENABLE — Place domain into service. When enabled, the domain is monitored and the VIS receives events for the domain. If the enable request is
successful, the domain status becomes inserv. The domain must be disabled before it can be enabled.
■
DISABLE — Take domain out of service. If the disable request is successful, the domain status becomes manoos.
Press CANCEL to return to the ASAI Administration screen (Figure 4-3). Once the
T/R or LST1 channels are administered and logged in, no manual intervention is
required to log the channels back in during recovery (for example, switch or VIS
reboot) or on restarting the voice system.
4-17
ASAI Administration
Once the domain is administered and made inserv, no manual intervention is
required to bring the domain back into service during recovery (for example,
switch or VIS reboot) or upon restarting the voice system.
If a VIS domain with a script assigned to it is in any state but inserv, the default
script is invoked. Note that if the domain for the VIS agent (T/R or LST1) line is
disabled, the VIS still takes calls on these lines.
Add Domain Entry
While the Domain Administration screen is active, press ADD to open the Add A
Domain Entry screen (Figure 4-10).
Add A Domain Entry
Name: _________
Type: _________
Ext :_________
Service: _________
Please enter the domain name
HELP
CHOICES
Figure 4-10.
SAVE
CANCEL
CHG-KEYS
Add Domain Entry Screen
The Add A Domain Entry screen contains the following fields.Refer to Figure 4-9
and accompanying discussion for more information on each of these fields.
■
The “Name” field indicates the name of the domain you wish to add.
■
The “Type” field indicates the domain type.
■
The “Ext” field indicates the extension number assigned to the application.
■
The “Service” field indicates how the calls offered to the domain are handled by the VIS.
Press SAVE to add the new domain entry or press CANCEL to exit the Add A
Domain Entry screen and return to the Domain Administration screen.
4-18
ASAI Administration
Change Domain Entry
While the Domain Administration screen is active, press CHANGE to open the
Change A Domain Entry screen (Figure 4-11).
NOTE:
The domain must be disabled before it can be changed.
Change A Domain Entry
Name: _________
Type: _________
Ext :_________
Service: _________
Please enter the domain type: ACD, VDN, CTL, or RTE.
HELP
CHOICES
Figure 4-11.
SAVE
CANCEL
CHG-KEYS
Change Domain Entry Screen
The Change A Domain Entry screen contains the following fields:
■
The “Name” field indicates the name of the domain you wish to change.
■
The “Type” field indicates the domain type.
■
The “Ext” field indicates the extension number assigned to the ACD split
which uniquely identifies the domain in the switch.
■
The “Service” field indicates how the calls offered to the domain are handled by the VIS.
Press SAVE to activate the domain changes or press CANCEL to quit and return
to the Domain Administration screen.
Remove Domain Entry
While the Domain Administration screen is active, press REMOVE. You will
receive a confirmation screen asking you if you wish to REMOVE the selected
item.Press ENTER to continue or CANCEL to abort the removal procedure.
4-19
ASAI Administration
NOTE:
The domain must be disabled before it can be removed.
Initialize IPCI Board
The IPCI Board must be initialized when it is taken off-line. The Initialize IPCI
Board procedure downloads the driver software onto the card and puts the card
on-line. The IPCI card is now actively using the link.
! WARNING:
The “Initialize IPCI Board” command should be used only as an error
recovery procedure for the card. You do not need to initialize the IPCI card
each time that you diagnose the card.
NOTE:
If the IPCI card is already initialized and on-line, the card must first be
taken off-line before it can be re-initialized.
The Initialize IPCI Board screen contains information on what occurred during initialization of the IPCI card. The Initialize IPCI Board screen displays information
as to whether the initialization was a success or failure and the reason for the failure. Figure 4-12 displays an example of the Initialize IPCI Board screen with IPCI
card initialization information displayed.
To initialize the IPCI card from the ASAI Administration screen, highlight “Initialize
IPCI Board”, then press ENTER .
Initialize IPCI Board
IPCI Board Initialization completed successfully.
Press ENTER to continue.
PREVPAGE NEXTPAGE
Figure 4-12.
4-20
Initialize IPCI Board Screen
CANCEL
CHG-KEYS
ASAI Administration
Parameter Administration
The ASAI Parameters screen is provided to allow adjustment of ASAI system
parameters. These parameters affect the behavior of the ASAI feature.
To open the ASAI Parameters screen from the ASAI Administration screen, highlight “Parameter Administration” and then press ENTER . The ASAI Parameters
screen appears (Figure 4-13).
ASAI Parameters
CONNECT Event: CONNECTED
Trace Detail: Low
Enter when the CONNECT Event should be reported to A_Event
HELP
CHOICES
Figure 4-13.
SAVE
CANCEL
CHG-KEYS
ASAI Parameters Screen param.ps
The ASAI Parameters screen contains the following fields:
The “CONNECT Event” field is used to specify when the CONNECT event is
reported to the A_Event action in a script assigned to an ACD, VDN, or CTL type
domain. Valid entries for this field are ‘CONNECTED’ or ‘ALERTING’. The default
for this field is CONNECTED.
4-21
ASAI Administration
If you select CONNECTED in the CONNECT Event field, the CONNECT event is
reported when the ASAI CONNECTED message is received from the PBX.Typically, this corresponds to when the call is answered. If you select CONNECTED,
VIS Data is transferred to subsequent CONNECT event reports when a call is
transferred from one live agent to another (provided the transfer is a blind transfer). Refer to the discussion of the VIS Data field in the A_Tran and A_Event
actions in Chapter 6, "ASAI Script Builder Actions" for additional information. Note
that VIS Data is always transferred when the A_Tran action transfers the call from
a Tip/Ring line on the VIS to another number, regardless of whether CONNECTED or ALERTING is chosen for this field.
If you select ALERTING in the CONNECT Event field, the CONNECT event is
reported when the call starts to ring at the destination number. This corresponds
to the receipt of the ASAI ALERTING message from the PBX. In cases where a
CONNECTED message is received from the PBX (the call is answered) and an
ALERTING message was not received previously, the CONNECT event is
reported to A_Event upon receipt of the CONNECTED message. This can happen when the call is routed to an ISDN trunk. An advantage of choosing ALERTING is that if your application performs data screen delivery to agents, the screen
can be displayed before the agent answers the call. This gives the host computer
and agent more time to process the data before conversing with the customer.
NOTE:
Typically, neither a CONNECTED nor ALERTING message is received
from the PBX when calls are placed to non-ISDN trunks, thus a CONNECT
event is not reported to A_Event for the call. However, an END event is
reported when the call ends.
NOTE:
The CONNECT event parameter is a system parameter and, thus, affects
all scripts using the A_Event action.
The “Trace Level” field controls the amount of detail that is displayed when you
use the trace dip7 command to monitor messages and events being processed by
the ASAI system. The trace feature facilitates the debugging of new applications
and is an optional feature that is not required for normal system operation.
Valid entries for this field are ‘Low’, ‘Normal’, and ‘High’.The Trace Level default
setting is Low. This default setting displays only ASAI error and warning conditions and should be used when there is live traffic to minimize processing overhead from the trace feature. Refer to Table 4-1 for information on Trace detail
display.
4-22
ASAI Administration
The Normal setting can be used for simple debugging of application scripts which
use the A_Callinfo, A_Event, A_RouteSel, and A_Tran actions. Normal detail
causes trace to display Low detail information as well as information pertaining to
the processing of the A_Callinfo, A_Event, and A_RouteSel, and A_Tran script
actions. This information may be useful when debugging a new application
script.The format is specific to each ASAI action being processed.
The High setting gives additional information on ASAI messages that are sent and
received between the VIS and the DEFINITY Generic 3i system. High detail
causes trace to display Low and Normal detail as well as ASAI messages (call
events) and routing messages. ASAI messages received from the PBX which
contain information about a call on a domain.This information may be useful when
debugging an application script which is monitoring the progress of calls on the
PBX. S to Appendix D, “Troubleshooting ASAI” for additional information.
Table 4-1.
Trace Detail Display
Trace Detail
Trace Display
Low
— ASAI error and warning condition
Normal
— Information displayed by Low
setting
— ASAI script action (that is,
A_Callinfo, A_Tran,
A_Event, and A_RouteSel)
processing information
High
— Information displayed by Low
and Normal Settings
— ASAI messages (call
events) received from the
PBX which contains information about a call on a domain
4-23
ASAI Administration
Show ASAI Software Version
The Show ASAI Software Version screen is a text screen which contains information on the software versions loaded onto the VIS. To show the ASAI Software
Version from the ASAI Administration screen, highlight “Show ASAI Software Version”, then press ENTER . Figure 4-14 displays an example of the Show ASAI Software Version screen with software version information displayed.
Figure 4-14.
4-24
Show ASAI Software Version Screen version.ps
ASAI Administration
Show Status ASAI Link
The Show Status of ASAI Link screen provides information on the current status
of the ASAI link to the VIS. To show the status of the ASAI link from the ASAI
Administration screen, highlight “Show Status of ASAI Link”, then press ENTER to
display link status information. Figure 4-15 displays the Show Status of ASAI Link
screen for an IPCI card and ASAI link which are functioning normally.
Show Status of ASAI Link
The IPCI Board is on-line.
Physical Layer (L1) is UP, Link Layer (L2) is UP.
Press ENTER to continue.
PREVPAGENEXTPAGE
Figure 4-15.
CANCEL
CHG-KEYS
Show Status ASAI Link Screen
The Show Status of ASAI Link screen displays one of the messages listed in
Table 4-2 if the link is experiencing problems. For each of the displays in the
Show Status of ASAI Link screen listed below, a meaning is provided which corresponds to the first column of Table D-3. Refer to Appendix D, “Troubleshooting
ASAI” for possible remedies for each problem.
4-25
ASAI Administration
Table 4-2.
Show Status ASAI Link Displays
Show Status of ASAI Link
4-26
Meaning
The IPCI Board is on-line.
Physical layer (L1) is DOWN, Link Layer (L2) is DOWN
L1 DOWN, L2 DOWN
The IPCI Board is on-line.
Physical layer (L1) is UP, Link Layer (L2) is DOWN
L1 UP, L2 DOW
The IPCI Board may be faulty or non-existent.
Make sure the card and the ASAI Library package have
been installed with the correct options.
FAULTY HARDWARE
or
UNKNOWN
or
UNDETERMINED
The IPCI Board is currently OFFLINE.
The Board must be initialized before service can begin.
OFFLINE
The IPCI Board is currently being initialized.
PUMPING
The IPCI Board is currently being taken OFFLINE
AWAITING
GOING OFFLINE
ASAI Administration
Take IPCI Board Off-line
The Take IPCI Board Off-Line procedure takes the IPCI card off-line and effectively disables the link between the IPCI card and the driver software.If you suspect that there might be problems with the ASAI communications and you would
like to reinitialize the IPCI card, you must take the card off-line by executing the
following command before you may execute the Initialize the IPCI card command.
! WARNING:
Do not take the card off-line while the ASAI application is running. This
command should not be used in normal operation situations. It should be
used in conjunction with the “Initialize IPCI Board” command as an error
recovery procedure for the card.
From the ASAI Administration screen, highlight “Take IPCI Board Off-line”, then
press ENTER to execute the IPCI card off-line procedure. Figure 4-16 shows an
example of the Take IPCI Board Off-Line screen when the card is successfully
taken off-line.
Take IPCI Board Off-line
IPCI Board has been taken off-Line.
Press ENTER to continue.
PREVPAGE NEXTPAGE
Figure 4-16.
CANCEL
CHG-KEYS
Take IPCI Board Off-line Screen
The Take IPCI Board Off-line screen contains information on whether the IPCI
card has been successfully taken off-line.
4-27
ASAI Administration
4-28
Administering ASAI
5
ASAI Administration Overview
Administration of the ASAI feature is a three-step procedure performed through
the VIS menu system. The following administration procedures assume you are
installing a voice response application with a configuration in which calls placed to
an Automatic Call Distributor (ACD) on the Private Branch Exchange (PBX) are
directed to (agent) lines on the VIS. The VIS is to select a service for the incoming
call based on the dialed number (DNIS). The service requests the dialed number
and calling number (ANI) from the ASAI and uses this information as part of the
service being provided to the caller. The steps to be performed on the switch and
the adjunct are as follows:
5. Administer the T/R or LST1 telephone lines.
6. Administer the VIS ACD domain
7. Administer the lines as agents on the ACD split and log in the lines.
Once these steps have been completed, you can assign services to called numbers. Refer to Chapter 3, “Configuration Management” of the CONVERSANT
Voice Information System Operations for information on performing this procedure.
NOTE:
The following assumes that you have completed the necessary administration on the PBX. Please refer to the DEFINITY Communications System
Generic 3i Implementation, 555-230-650 for additional information.
5-1
Administering ASAI
Administering the Lines
The lines (T/R or LST1) are administered as described in Chapter 5, “Switch Interface Administration” of CONVERSANT VIS Version 4.0 Operations, 585-350-703.
To be certain that you select options that are compatible with the DEFINITY
Generic 3i (only certain versions) system, select “AT&T System 75” item in the
PBX Defaults screen. AT&T System 75 is the default setting. Consequently, if you
are administering a new system, the lines are configured correctly by default.
Place all the lines into service. To do so, refer to the information on changing
maintenance state in the operations book, Chapter 3, “Configuration Management”. Do not proceed until the lines have been placed in the inserv state. These
lines or channels are referred to in the following text as VIS Agent lines.
Administering the VIS ACD Split
Domain
In order for the VIS to receive information on calls placed to its agent lines, the
ASAI feature must be administered to monitor the ACD hunt group Extension. In
other words, you must administer the ASAI feature on the VIS so that it requests
call events (information) from a domain on the PBX. In this case, the domain is the
ACD hunt group or split, which is composed of the VIS agent lines. This domain is
referred to as the VIS ACD domain. You may administer only one VIS ACD split
domain on the system. Therefore, all VIS agent lines must be part of a single
ACD split. Refer to Figure 3-1 for a diagram showing this configuration. The following steps outline the administration of this Domain.
1. From the Voice System Administration menu (Figure 4-1), highlight “Feature Packages” and then press ENTER . A menu of installed feature packages should be displayed in the Feature Packages screen as shown in
Figure 4-2.
2. From the Feature Packages menu, highlight “ASAI Administration” and
then press ENTER to display the ASAI Administration screen (Figure 4-3).
3. From the ASAI Administration menu, highlight “Domain Administration” and
then press ENTER to display the Domain Administration screen. This
screen is similar to that shown in Figure 4-9 except that there no domain
entries.
4. Press CHG-KEYS to display the alternate set of function keys and then
press ADD to create a new domain. The Add A Domain Entry form is displayed (Figure 4-10).
5-2
Administering ASAI
5. Select any name you choose and enter it into the “Name” field. Although it
is not necessary, you may want to choose the same name given to the split
on the PBX. To display the PBX name for the split, type list hunt at the
DEFINITY Generic 3i system console. Find the hunt group with the group
extension corresponding to your VIS ACD extension. Use the name (if
any) shown for that group.
6. Enter ACD in the “Type” field.
7. Enter the group extension of the VIS ACD split in the “Ext” field.
8. Enter VIS in the “Service” field. By choosing VIS as the service, you have
designated this ACD split domain as the VIS ACD split domain.This
instructs the ASAI to send call information it receives from this domain to
the voice response service(s) that service the VIS Agent lines.
9. Press SAVE to save the domain and its parameters. The Domain Administration screen should be redisplayed, similar to that shown in Figure 4-9,
but now showing the domain that you have just entered.
10. Press the cursor keys until the domain is highlighted. Press ENABLE to
bring the domain into service. Once you have pressed ENABLE, the VIS
automatically enables the domain should the voice system be restarted
after a system shutdown or power loss. You do not need to use the
ENABLE key again to enable the domain unless you have disabled the
domain by pressing the DISABLE key. The STATUS field should change
to inserv.
11. If the STATUS field shows inserv, proceed to the information Administering
the VIS Agent Lines in this chapter. If the STATUS field does not show
inserv, refer to Appendix D, “Troubleshooting ASAI” for information on troubleshooting a domain.
5-3
Administering ASAI
Administering the VIS Agent Lines
After creating and bringing the VIS ACD split domain into service, you must next
administer and log in the lines as VIS agent lines. This is required if your service is
going to use DNIS or the A_Callinfo or the A_Tran actions described in Chapter 6,
"ASAI Script Builder Actions". If an agent line is not logged in, the PBX ACD does
not route any calls to it. (Note that you can still dial the agent line directly, but no
call information is available to the service that answers the call. In other words, the
A_Callinfo action does not return any information for a call that is not routed to the
VIS by the ACD.) The following steps outline the procedure to administer and log
in lines as VIS agent lines.
1. From the ASAI Administration menu (Figure 4-3), highlight “Channel
Administration” and then press ENTER to display the Channel Administration screen. The Channel Administration screen should be displayed as
shown in Figure 4-4, but without any entries.
2. Press CHG-KEYS to display another set of function keys.Press ADD to
display the Add a Channel Entry form (Figure 4-5).
3. Enter the channel number of one of the agent lines in the “Channel” field.
4. Enter the corresponding PBX extension number of the agent line in the
“Extension” field.
5. Press SAVE to save the parameters.The Channel Administration screen
should be redisplayed with the parameters you have just entered. The
LOGIN field should show NO and the STATUS field should show logout.
6. Repeat the previous steps for each of the VIS Agent lines.
7. In the Channel Administration screen (Figure 4-4), press CHG-KEYS to
display the other set of function keys. Press the cursor keys to highlight the
first channel. Press LOGIN to log in the VIS agent line. Once you have
pressed the LOGIN key, the VIS remembers this and automatically logs in
the channel should the voice system be restarted after a system shutdown
or power loss. You do not need to use the LOGIN key again to log in the
channel unless you have logged out the channel by pressing the LOGOUT
key. The LOGIN field should change from NO to YES, and the STATUS
field should change from logout to LOGIN.
8. If the LOGIN field shows YES and the STATUS field shows LOGIN, the
channel is ready to receive calls from the ACD. If the LOGIN field still
shows NO, try pressing the LOGIN key again. If the LOGIN field shows
YES but the STATUS field does not show LOGIN, refer to Appendix D,
“Troubleshooting ASAI” for information on troubleshooting a VIS agent line.
9. Repeat the previous procedures to log in the remaining channels.
5-4
Administering ASAI
Once all the channels have been logged in, you are ready to run applications. If
you have not done so already, you may now assign DNIS service to channels
using the Assign Service To Voice Channels screen and Assign Services to
Called Numbers screen as described in CONVERSANT VIS Version 4.0 Operations, 585-350-703, Chapter 3, “Configuration Management.”
5-5
Administering ASAI
5-6
ASAI Script Builder Actions
6
For more information on defining a transaction and other Script Builder actions,
refer to Chapter 4, “Defining the Transaction” in the CONVERSANT VIS Script
Builder, 585-350-704. For additional information on actions, refer to Chapter 10,
“Using Advanced Features” of the Script Builder book.
ASAI Script Builder Actions Overview
This chapter contains information on the actions used to access the AT&T
Adjunct/Switch Application Interface (ASAI) capabilities from the Script Builder
environment.
The following actions are listed in alphabetical order:
■
A_Callinfo — Used to access call information obtained from ASAI for a call
on a VIS Agent line.
■
A_Event — Retrieves information related to a call being monitored by an
ASAI domain.
■
A_RouteSel — Used to send an ASAI route select message to the Private
Branch Exchange (PBX).
■
A_Tran — Used by voice scripts running on VIS Agent (T/R or LST1) lines
to transfer a call to a live ACD, live agent, or other station on the PBX.
6-1
ASAI Script Builder Actions
Defining A_Callinfo
The A_Callinfo action is used to access call information obtained from ASAI for a
call on a VIS Agent line. The A_Callinfo action returns the Calling Party Number
and Called Party Number associated with an incoming call to the transaction
script environment. The A_Callinfo action also returns a Call ID which identifies
the call. In addition, if touch-tone digits entered by the caller have been collected
by the switch, A_Callinfo returns these digits. If the call was delivered to a switch
through a trunk and Automatic Number Identification (ANI) information for the call
is not available, the Trunk Group Id is returned instead of the Calling Party Number.
To add A_Callinfo to a transaction while defining an application in Script Builder,
press ADD. The Action Choices screen opens. In the Action Choices screen,
highlight “A_Callinfo”, then press ENTER . Press CANCEL to exit from the Action
Choices screen. You must now define the A_Callinfo step further. In the Define
Transaction screen, highlight “External Action: A_Callinfo,” then press DEFINE.
The Define A_Callinfo screen opens.
Figure 6-1.
Define A_Callinfo Form Screen def_acall.ps
Each of the fields in the Define A_Callinfo screen must contain a field name which
returns the following information. Refer to Table 6-1 for a summary of the information in each of these fields.
! CAUTION:
You should specify only ‘num’ field types for those fields in the Define
A_Callinfo screen that return numbers, that is, specify ‘num’ fields or constants for those fields that are of type ‘num.’
The “Calling Party Number” field stores the calling party number. The value
returned in the Calling Party Number field can be up to 20 characters in length. If
the A_Callinfo action is successful, this field contains the calling party number. If
the calling party number is not known or the call was routed from a non-ISDN
trunk, a string of length 0 (null value) is returned.
6-2
ASAI Script Builder Actions
The “Called Party Number” field stores the called party number. The value
returned in the Called Party Number field can be up to 20 characters in length. If
the Called Party Number is not known, a string of length 0 (null value) is returned.
The “Switch Data” field stores up to 16 characters. If the switch prompts the caller
for touch-tone digits, the digits are returned in the Switch Data field. If no digits
are collected by the switch, a string of length 0 (null value) is returned.
The “Trunk Group Id” field indicates whether the incoming call was routed from a
non-ISDN trunk on the switch. If the call was not placed through a trunk, the value
returned is 0.
The “Call Id” field stores the Call Id (assigned by the switch) that identifies the
incoming call. If the Call Id is not known, the value returned is 0.
The “Cause Value” field returns an error cause if the request for call information is
not successful. Note that the error cause is returned if the Return Field contains a
value of -3. Refer to VIS value column in Table D-6 in Appendix D, “Troubleshooting ASAI” for a complete listing of cause values.
The “Return Field” holds the return status of the A_Callinfo action. If the
A_Callinfo action is successful, it returns a number greater than or equal to zero.
If A_Callinfo is unsuccessful, it returns one of the following negative values:
■
-3 — ASAI could not process the request for information. Check the Cause
Value field for information on why the request failed.
■
-1 — A_Callinfo could not send the request for call information. Check the
Message Log Report for system errors. Refer to Chapter 4, “Reports
Administration” in the CONVERSANT Voice Information System Operations for additional information.
■
-2 — A_Callinfo did not receive a response from the ASAI for the request
for information. Check to see if the ASAI system is running.
■
-4 — ASAI link is down and call information cannot be received from the
switch. Refer to Appendix D, “Troubleshooting ASAI” for information on
troubleshooting the ASAI digital link.
■
-5 — Illegal request. The call is not being monitored so no call information
is available. Make certain that A_Callinfo is only being used in a script
assigned to a VIS agent line and that the domain with which the call is
associated is being monitored by the VIS. Refer to Chapter 4, "ASAI
Administration" for information on Channel Administration and Domain
Administration, including how to monitor a channel.
■
-6 — Switch did not respond with the call information.
After the user-defined entries for the Define A_Callinfo screen are completed,
press CLOSE to update the “External Action: A_Callinfo” action step in the
Define Transaction list.
6-3
ASAI Script Builder Actions
Table 6-1.
A_Callinfo Fields
Field
Input/Output
Required?
Field Type
Field Size
Calling Party Number
ouput
required
char
20
Called Party Number
output
required
char
20
Switch Data
output
required
char
16
Trunk Group ID
output
required
num
–
Call Id
output
required
num
–
Cause Value
output
required
num
–
Return Value
output
optional
num
–
Defining A_Event
The A_Event action retrieves information related to a call being monitored by an
ASAI domain. This action must be used with all scripts assigned to a domain.
(Refer to Chapter 4, "ASAI Administration" for information on administering a
domain). The A_Event action can return the following types of events:
■
Abandon Events — a monitored call is dropped or caller hung up
■
Connect Events — a monitored call is being delivered to an agent
■
End Events — a monitored call has ended normally (that is, not abandoned)
■
Route Request Events — a switch has requested routing for a particular
call
■
Abnormal Route End Events — the switch is reporting that the routing
failed due to some reason specified in the Cause Value field.
! CAUTION:
The A_Event action should not be used in a script assigned to a voice channel.
To add A_Event to a transaction while defining an application in Script Builder,
press ADD. The Action Choices screen opens. Highlight “A_Event,” then press
ENTER . Press CANCEL to exit from the Action Choices screen.
6-4
ASAI Script Builder Actions
You must now define the A_Event step further. In the Define Transaction screen,
highlight “External Action: A_Event,” then press DEFINE. The Define A_Event
screen opens.
Define A_Event
Connected
Party Number:
____________________
Phone number:
_________
Calling Party Number: ____________________
Called Party Number: ____________________
Switch Data: ____________________
Trunk Group Id: ____________________
Call Id: ____________________
Other Call Id: ____________________
LAI Display Info: ____________________
VIS Data: ____________________
Cause Value: ____________________
Cause Value: ____________________
Return Field: ____________________
Enter a field name to store the connected party number.
HELP
Figure 6-2.
CHOICES
CLOSE
REDRAW
CANCEL
Define A_Event From Screen
Each of the fields in the Define A_Event screen must contain a field name which
returns the following information. Refer to Table 6-4 for a summary of the information in each of these fields.
! CAUTION:
You should specify only ‘num’ field types for those fields in the Define
A_Event screen that return numbers, that is, specify ‘num’ fields or constants
for those fields that are of type ‘num.’
The “Connected Party Number” field returns a number or extension, depending on
the event being reported. For the ‘C’ (Connect) event, the field returns the alerted
extension (answering extension) if the ‘C’ event is triggered on the alerting or connect message from the switch. If A_Event indicates the call has ended (the
Return Field returns a value of ‘E’), the Connected Party Number field contains
the number of the last connected or alerted party. If A_Event indicates the call is
abandoned (the Return Field returns a value of ‘A’), the Connected Party Number
field returns an alerted agent extension or a string of length 0 (null value) depending on when the call was abandoned. If the call was abandoned before agent
selection, the Connected Party Number field returns a string of length 0 (null
value). If the call was abandoned after agent selection, the Connected Party
Number field returns the extension of the agent that was alerted for the call prior
to the abandon. If the connected party number is not known, a string of length 0
6-5
ASAI Script Builder Actions
(null string) is returned. If A_Event is reporting a route request (the Return Field
returns a value of ‘R’), a string of length 0 (null value) is returned. The value
returned can be up to 20 characters in length.
The “Calling Party Number” field stores up to 20 characters. If the A_Event action
is successful, this field contains the calling party number. If the calling party number is not known or the call was routed from a non-ISDN trunk, a string of length 0
(null value) is returned. If the value returned from the Other Call Id field is not 0,
then the Calling Party Number returns the number of the original calling party.
The “Called Party Number” field stores the called party number. The value
returned in the Called Party Number field can be up to 20 characters in length. If
the Called Party Number is not known, a string of length 0 (null value) is returned.
If the value returned from the Other Call Id field is not 0, then the Called Party
Number returns the number that was originally dialed.
The “Switch Data” field stores up to 16 characters. If the switch prompts the caller
for touch-tone digits, the digits are returned in the Switch Data field. If no digits
are collected by the switch, a string of ength 0 (null value) is returned.
The “Trunk Group Id” field indicates whether the incoming call was routed from a
non-ISDN trunk on the switch. If the call was not placed through a trunk the value
returned is 0.
The “Call Id” field stores the Call Id (assigned by the switch) that identifies the
incoming call. If the Call Id is not known, the value returned is 0. The “Other Call
Id” field returns a number (assigned by the switch) that identifies the original call
that was transferred. The script developer may use this field to associate subsequent events that occur from a previous call. If the field is 0, then A_Event cannot
relate this event with any other call. If the call is a new incoming call to a monitored domain, then the field is always 0. If it is a transfer call, the field value
depends on the type of transfer that was completed. A consult transfer returns a
non-zero value only when the transfer call is directed to a non-monitored domain.
A blind transfer always returns a non-zero value. Refer to the information on
agent-to-agent transfers in Chapter 2, "ASAI Application Planning and Design" for
additional information.
The “LAI Display Info” field returns the Look Ahead Interflow (LAI) display information for the call. The value returned in this field depends on the call flow and
whether or not the LAI feature (a PBX feature) is used. When the LAI feature is
used to connect calls from one call center to another, this information can be used
to determine which call center application was handling the caller on the originating switch. The originating switch can be administered such that the LAI Display
Info field will contain the originally dialed number the caller used at the originating
switch. If the LAI feature is not used to connect calls from one switch to another,
then a string of length 0 (null value) is returned.
6-6
ASAI Script Builder Actions
The “VIS Data” field returns a value previously saved in the VIS Data field of the
A_Tran action in a voice script. If the call was not previously transferred using
A_Tran, then a string of length 0 (null value) is returned. For example, a voice
script which responds to an incoming call to the VIS (on a channel administered
for ASAI) collects information from the caller and saves information in the VIS
Data field of the A_Tran action and then uses A_Tran to transfer the call to a
domain administered on the VIS. When A_Event reports the Abandon, Connect,
or End events (Return Field contains ‘A’, ‘C’, or ‘E’) for that call, this field returns
the saved information.
The “Routing ID” field contains a unique number that identifies the route request if
A_Event is indicating a route request (that is, the Return Field contains an ‘R’).
This number is needed if the A_RouteSel action is used to respond to the route
request. If the Routing ID is not known, the value returned is 0.
The “Cause Value” field returns an error cause from the switch if the request to
route the call is not successful. Note that the error cause is returned if the Return
Field contains a value of “r” or 114 (indicating an ABNORMAL ROUTE END
event). Possible error causes include the following:
■
“0” — The Destination Number provided in the A_RouteSel action is invalid
and does not exist on the switch.
■
“1” — The switch is unable to route the call to the Destination Number
because the destination is busy (that is, the destination currently has an
active call).
■
“8” — The call dropped while waiting for a routing response. The caller
probably hung up before the call has been routed.
■
“12” — The vector processing on the switch encountered steps other than
wait, announcement, goto, or stop after the adjunct routing command.
■
“13” — Upon routing to the Destination Number (for direct agent call), the
Destination Number is not logged in to the specified Split Extension.
■
“14” — The Destination Number (for direct agent call) is not a member of
the specified Split Extension in the A_RouteSel action.
The “Return Field” contains a return code indicating what type of event (if any) is
being reported. If the A_Event action is successful, it returns a number greater
than or equal to zero. Refer to Table 6-4 for additional information. If A_Event is
unsuccessful, it returns one of the following values.
■
-1 — A_Event could not send the request for call information. Check the
Message Log Report for system errors. Refer to Chapter 4, “Reports
Administration” in the CONVERSANT Voice Information System Operations for additional information.
■
-2 — A_Event did not receive a response from the ASAI for the request for
information. Check to see if the ASAI system is running.
6-7
ASAI Script Builder Actions
■
-4 — ASAI link is down and call information cannot be received from the
switch. Refer to Appendix D, “Troubleshooting ASAI” for information on
troubleshooting the ASAI digital link.
■
-5 — Illegal request. The channel requesting the information is not a channel assigned by an ASAI domain to receive event messages. Make certain
that you are using A_Event only in a non-voice script. Refer to Chapter 4,
"ASAI Administration" for information.
When developing a program using Script Builder, A_Event returns an integer
value in the Return Field to indicate the type of event (ABANDON, END, CONNECT, ROUTE REQUEST, or ABNORMAL ROUTE END) that is being reported.
The possible values 65, 67, 69, 82, or 114 correspond to the ASCII representation
of the first letter for each type of message.
For example, if an ABANDON is being reported, you may use the following evaluate statement:
Evaluate:
if ReturnCode = “‘A’”
is the same as
if ReturnCode = 65
65 = “‘A’” — ABANDON
67 = “‘C’” — CONNECT
69 = “‘E’” — END
82 = “‘R’” — ROUTE REQUEST
114 = “‘r’” — ABNORMAL ROUTE END
6-8
ASAI Script Builder Actions
Table 6-2.
A_Event Return Field Value Meaning
Return Value
Meaning
Explanation
65
ABANDON
The caller abandoned the call before the agent
answered it.
67
CONNECT
If CONNECT is sent on alerting message,then
this indicates that the agent specified in the
Connected Number field has been alerted. If
CONNECT is sent on connect message, then
this indicates that the agent specified in the
Connected Number field has answered the
call.
69
END
The call ended. The caller has been disconnected or has hung up after the call was
answered by an agent.
82
ROUTE
REQUEST
The switch is requesting that the call be routed
by the VIS. The number to be routed is in the
Called Number field. The Routing ID field contains an identifier which must be used in the
corresponding Routing ID field of the
A_RouteSel action.
114
ABNORMAL
ROUTE END
The switch indicates that the routing was
unsuccessful. Either the Destination Number
or the Split Extension specified in the
A_RouteSel action is invalid or the call was
abandoned before a route selection was made
or vector processing was administered incorrectly. Check the Cause Value field for the
specific reason.
Each ABANDON, CONNECT, END, ROUTE REQUEST, and ABNORMAL
ROUTE END event returns information pertaining to the event. Table 6-3 indicates what fields the A_Event action returns for each event.
6-9
ASAI Script Builder Actions
Table 6-3.
Fields Returned by A_Event for Each Event
Event
A_Event Field
CONNECT
ABANDON
END
ROUTE
REQUEST
ABNORMAL
ROUTE END
Connected Party Number
X
Calling Party Number
X
X
X
Called Party Number
X
X
X
Switch Data
X
X
X
Trunk Group Number
X
X
X
Call Id
X
X
X
Other Call Id
X
X
LAI Display
X
X
VIS Data
X
Routing ID
†
† The Routing ID field returns the ASAI cluster Id of the domain which reported these events.
6-10
ASAI Script Builder Actions
Table 6-4.
A_Event Fields
Field
Input/Output
Required?
Field Type
Field Size
Connected Number
output
required
char
20
Calling Party Number
output
required
char
20
Called Party Number
output
required
char
20
Switch Data
output
required
char
16
Trunk Group Id
output
required
num
–
Call Id
output
required
num
–
Other Call Id
output
required
num
–
LAI Display Info
ouput
required
char
15
VIS Data
output
required
char
20
Routing Id
output
reuired
num
–
Cause Value
output
required
num
–
Return Field
ouput
optional
num
–
Defining A_RouteSel
The A_RouteSel action is used to send an ASAI route message to the PBX. The
A_RouteSel action is used in conjunction with the A_Event action and may be
used to construct scripts assigned to RTE type domains. Note that the
A_RouteSel action should not be used in scripts assigned to Control (CTL), Automatic Call Distribution (ACD), and Vector Directory Number (VDN) type domains
and may not be used in voice scripts.
To add A_RouteSel to a transaction while defining an application in Script Builder,
press ADD. The Action Choices screen opens. Highlight “A_RouteSel,” then
press ENTER . Press CANCEL to exit from the Action Choices screen.
You must now define the A_RouteSel step further. In the Define Transaction
screen, highlight “External Action: A_RouteSel,” then press DEFINE. The Define
A_RouteSel screen opens.
6-11
ASAI Script Builder Actions
Figure 6-3.
Define A_RouteSel Form Screen def_route.ps
Each of the fields in the Define A_RouteSel screen must contain a field name or
constant which returns the following information. Refer to Table 6-5 for a summary
of the information in each of these fields.
! CAUTION:
You should specify only ‘num’ field types for those fields in the Define
A_RouteSel screen that return numbers, that is, specify ‘num’ fields or constants for those fields that are of type ‘num.’
The “Destination Number” field contains either a number or the name of a field
which contains a number indicating where the call is to be routed. The Destination Number must be a valid extension number (for example, ACD hunt group
extension, VDN, or station) or external address (for example, Direct Distance Dialing Number). The Destination Number may be up to 20 digits in length. If calls are
routed to a number that is not on the switch, the Destination Number may contain
a Trunk Access Code or Automatic Alternate Routing/Automatic Route Selection
prefix digit.
NOTE:
A route request may be rejected by setting the field identified by the “Destination Number” field to the null string. In this case, the call will not be
adjunct routed. Subsequent treatment for the call depends on what type of
default vector processing has been administered on the switch.
6-12
ASAI Script Builder Actions
The “Split Extension” field is used only for direct agent calls. This field contains
either a number or the name of a field which contains a number identifying a valid
ACD split. The Split Extension may be up to 5 digits in length. If the Split Extension field is used, the call is treated as a direct agent call and routed to the agent
identified in the Destination Number field via the split identified in the Split Extension field. If the Split Extension field contains no digits (null value), then the call is
treated as a normal call rather than a direct agent call. An empty split extension is
entered by leaving the field blank as opposed to entering “ “.
The “Priority Call” field indicates whether the call is to be delivered as a regular or
priority call. This field must contain either “Yes” or “No” or a field name which may
contain either of these two values. Enter “Yes” if you want the call delivered as a
priority call. Enter “No” if you want the call delivered as a regular call. If “Yes” is
not specified in this field, the call is delivered as a regular call.
The “Routing ID” field contains a unique number which identifies the call being
routed. The Routing ID must match the Routing ID previously retrieved in the
A_Event action.
The “Cause Value” field returns an error cause if the route select is not successful.
Note that the error cause is returned if the Return Field contains a value of -3.
Refer to VIS column in Table D-6 in Appendix D, “Troubleshooting ASAI” for a
complete listing of values.
The “Return Field” contains a return code indicating whether the action was successful. If the A_RouteSel action is successful, it returns a number greater than
or equal to zero. If A_RouteSel is unsuccessful, it returns one of the following values:
■
-1 — A_RouteSel could not send the request to route the call to ASAI.
Check the Message Log Report for system errors. Refer to Chapter 4,
“Reports Administration” in the CONVERSANT Voice Information System
Operations for information.
■
-2 — A_RouteSel did not receive a response from the ASAI for the request
to route the call. Check to see if the ASAI system is running.
■
-4 — ASAI Link is down and route select information cannot be received
from the switch. Refer to Appendix D, “Troubleshooting ASAI” for information on troubleshooting the ASAI digital link.
■
-5 — Illegal request. The channel using A_RouteSel is not for a RTE
domain. A_RouteSel is being used in a script that has not been assigned
to an RTE domain. Refer to Chapter 4, "ASAI Administration" for information on assigning A_RouteSel to a domain.
■
-6 — Switch did not respond after receiving the route select information.
■
“53” — Bad Routing ID. The Routing ID specified in A_RouteSel is invalid.
Check to make sure that the same Routing ID received from ROUTE
REQUEST Event is used in the A_RouteSel action.
6-13
ASAI Script Builder Actions
Table 6-5.
■
-3 — The ASAI system could not route the call. Check the Cause Value
field for information on why the call could not be routed.
■
-11 — Destination Number exceeds 20 characters.
■
-13 — Split Extension exceeds 5 characters.
■
-15 — Routing Id is 0 or less.
A_RouteSel Fields
Field
Input/Output
Required?
Field Type
Field Size
Destination Number
input
required
char
20
Split Extension
input
optional
char
5
Priority Call?
input
required
char
3
Routing ID
input
required
num
–
Cause Value
output
required
num
–
Return Field
output
optional
num
–
Defining A_Tran
The A_Tran action is used by voice scripts running on VIS agent (T/R or LST1)
lines to transfer a call to a live ACD, live agent, or other station on the PBX. To do
so, the A_Tran action takes control of the incoming call, puts the call on hold,
places a call to the Destination Number and, if the call is not busy or denied,
merges the original call with the call to the Destination Number. If the call is busy
or denied, A_Tran drops the call to the Destination Number, reconnects to the
original caller, and relinquishes control of the original incoming call.
NOTE:
This note is important when using A_Tran to transfer to VDNs/vectors.
A_Tran merges the original incoming call with the second call only after
determining that the second call has been placed successfully. The second call is considered to have been placed successfully if it becomes
queued or alerts at an agent’s telephone. Before the two calls are merged
to complete the transfer, the original caller remains on hold. In some
cases, you may wish to expose the caller to additional vector processing
after the call is transferred (for example, play announcements or perform
call prompting operations).
6-14
ASAI Script Builder Actions
To insure that the original caller is exposed to such operations, you must
construct your vectors so that the transfer is forced to complete before
such operations are performed. Examples include queuing the call to the
agent split before playing announcements and queuing the call to a dummy
split before performing call prompting operations. No ports or stations
need be dedicated to establish a dummy split. To insure that a “queue to”
step will cause calls to be queued to a dummy split, however, the dummy
split should be made vector controlled and queue slots should be assigned
to it.
To add A_Tran to a transaction while defining an application in Script Builder,
press ADD. The Action Choices screen opens. Highlight “A_Tran,” then press
ENTER . Press CANCEL to exit from the Action Choices screen. You must now
define the A_Tran step further. In the Define Transaction screen, highlight “External Action: A_Tran,” then press DEFINE. The Define A_Tran form screen opens
(Figure 6-4).
Figure 6-4.
Deind A_Tran Form Screen def_tran.ps
6-15
ASAI Script Builder Actions
Each of the fields in the Define A_Tran screen must contain a field name or constant which returns the following information. Refer to Table 6-6 for a summary of
the information in each of these fields.
! CAUTION:
You should specify only ‘num’ field types for those fields in the Define
A_Tran screen that return numbers, that is, specify ‘num’ fields or constants
for those fields that are of type ‘num.’
The “Destination Number” field contains either a number or the name of a field
which contains a number indicating where the call is to be transferred. The Destination Number must be a valid extension number (for example, ACD hunt group
extension, VDN, or station) or external address (for example, Direct Distance Dialing Number). The Destination Number may be up to 20 digits in length. If calls
will be transferred to a number that is not on the switch, the Destination Number
may contain a Trunk Access Code or Automatic Alternate Routing/Automatic
Route Selection.
The “Split Extension” field is used only for direct agent calls. This field contains
either a number or the name of a field which contains a number identifying a valid
ACD split. The Split Extension may be up to 5 digits in length. If the Split Extension field is used, the call is treated as a direct agent call and transferred to the
agent identified in the Destination Number field via the split identified in the Split
Extension field. If the Split Extension field contains no digits (null value), then the
call is treated as a normal call rather than a direct agent call. An empty split
extension is entered by leaving the field blank as opposed to entering “ “.
The “Priority Call” field indicates whether the call is to be delivered as a regular or
priority call. This field must contain either “Yes” or “No” or a field name which may
contain either of these two values. Enter “Yes” if you want the call delivered as a
priority call. Enter “No” if you want the call delivered as a regular call. If “Yes” is
not specified in this field, the call is delivered as a regular call.
The “VIS Data” field contains up to 20 characters of any type of information that is
saved and later used by the A_Event action. The data provided in this field is sent
in the VIS Data field that appears in all messages received by the A_Event action
for the transferred call, provided that the call is reported on either a CTL, VDN, or
ACD type domain for the non-voice application.
6-16
ASAI Script Builder Actions
The “Call State” field stores the status of the call. If a call transfer was attempted,
the Call State field will have one of the following values:
■
0 — Call State information not available.
■
1 — Destination Number is ringing (alerting).
■
4 — Transfer was denied. Check the Cause Value field for additional information.
■
5 — Call to Destination Number is queued until a line becomes available.
■
7 — Destination Number is busy.
■
8 — The destination address seized a non-ISDN trunk (trunk seizure).
■
9 — The destination address is interworking with a non-ISDN trunk (cutthrough).
NOTE:
The Call State field contains the status of the call when A_Tran
returns 0, -53, -60, -61, and -62 in “Return Field”.
The “Cause Value” field returns an error cause if the transfer is not successful.
Note that the “Cause Value” field contains the reason for the failure if A_Tran
returns -16, -17, -18, -19, or -20 in the Return Field. Otherwise, if A_Tran is successful, the Cause Value is set to -1. Refer to the VIS Value column in Table D-6
in Appendix D, “Troubleshooting ASAI” for a complete listing of Cause Values.
The “Return Field” returns a code indicating whether A_Tran was successful.
A_Tran attempts to complete (merge) the transfer if the call is not busy or denied.
If the A_Tran action is successful, it returns a number greater than or equal to
zero. Otherwise A_Tran reconnects back to the original caller if necessary and
returns one of the following negative values:
■
-4 — ASAI link is down and transfer information cannot be performed.
Refer to Appendix D, “Troubleshooting ASAI” for information on troubleshooting the ASAI digital link.
■
-5 — Illegal request. The call is not being monitored so no transfer information is available. Refer to Chapter 4, "ASAI Administration" for information
on Channel Administration and Domain Administration.
■
-6 — Switch did not respond with the transfer information.
■
-16 — A_Tran received an error from the ASAI system when trying to take
control of the original call. Check the Cause Value field for information on
why the request failed.
■
-1 — A_Tran could not send the request to take control of the original call.
Check the Message Log Report for system errors. Refer to Chapter 4,
“Reports Administration” in the CONVERSANT Voice Information System
Operations for information.
6-17
ASAI Script Builder Actions
Table 6-6.
■
-2 — A_Tran did not receive a response from the ASAI for the request to
take control of the original call. Check to see if the ASAI system is running.
■
-17 — A_Tran received an error from the ASAI system when trying to put
the original call on hold. Check the Cause Value field for information on
why the request failed.
■
-18 — A_Tran received an error from the ASAI system when trying to place
the call to the Destination Number. Check the Cause Value field for information on why the request failed.
■
-20 — A_Tran dialed out to the destination number but the call was busy or
denied. Check the Call State and Cause Value fields for the reason why
the request failed.
■
-19 — A_Tran received an error from the ASAI system when trying to complete (merge) the transfer. Check the Cause Value field for information on
why the request failed.
■
-11 — Destination Number exceeds 20 characters.
■
-12 — Destination Number cannot be empty (0 characters in length).
■
-13 — Split Extension exceeds 5 characters.
■
-14 — VIS Data exceeds 20 characters.
A_Tran Fields
Field
Input/Output
Required?
Field Type
Field Size
Destination Number
input
required
char
20
Split Extension
input
optional
char
5
Priority Call?
input
required
char
4
VIS Data
input
required
char
20
Call State
output
required
num
–
Cause Value
output
required
num
–
Return Field
output
option
num
–
6-18
Sample Scripts
A
Sample Scripts Overview
This chapter provides examples of scripts developed using the AT&T Adjunct/
Switch Application Interface (ASAI) feature on the CONVERSANT Voice Information System (VIS). Included in this chapter is an ASAI voice script developed with
the A_Callinfo and A_Tran actions, a routing script developed with the A_Event
and A_RouteSel actions, and a monitoring script developed with the A_Event
action.
A-1
Sample ASAI Voice Script
Following is an example of an ASAI voice script that has been developed with the
A_Callinfo and A_Tran actions.
4.
5.
A-2
start:
# This is a sample voice script making use of the A_Tran action.
# This script would be used to handle calls at a T/R channel.
#
# In steps 1 through 3, standard Script Builder actions
# can be used to greet the caller, collect information, etc. In
# particular, it is assumed that a Prompt and Collect is used to
# collect an account number which is stored in account_num.
# A local database is read in an attempt to match the account
# number the caller provided and the ANI supplied with A_Callinfo.
# If a match is found, the table provides
# an agent extension and a split extension which are used to route the
# call to a specific agent within a split (direct agent routing).
# If no match is found, the call is routed to a default live agent
# split.
#
# Fields dest_num (agent extension) and split_num (split extension) for
# direct agent routing are returned from the table when a match is
# found.
#
External Action: A_Callinfo
calling: calling_num
called: called_num
switchdata: switch_data
trunkid: trunk_num
callid: call_id
cause: callinfo_cause
Return Field: callinfo_return
Read Table
Table Name: account_db Search From Beginning
Field: account = account_num
Field: ani = calling_num
#
# Set defaults in case no match is found in the table: dest_num is set
# to the default live agent split (split 5678). split_num is set to
# NULL so that direct agent calling is not invoked.
6.
7.
8.
9.
#
Evaluate
If $MATCH_FOUND = 0
Set Field Value
Field: dest_num = “5678”
Field: split_num = ““
End Evaluate
#
# Transfer the call. Place the account number (account_num) in the
# visdata field. The ASAI DIP on the VIS saves this data and
# associates it with the transferred call. A subsequent CONNECT event
# reported for the transferred call will contain this data.
#
External Action: A_Tran
destination: dest_num
split: split_num
priority: No
visdata: account_num
state: call_state
cause: tran_cause
Return Field: tran_return
#
# Note that the CONNECT event is not received in this voice script.
# Rather, a monitoring script is used to monitor the transferred
# call and receive the CONNECT event when the transferred
# call is delivered to an agent. This allows the T/R channel to service
# other calls while the first, transferred call is queued for an
# available agent.
#
Quit
A-3
Sample Routing Script
Following is an example of an ASAI routing script that has been developed with
the A_Event and A_RouteSel actions.
1.
2.
3.
A-4
start:
# This is a sample routing script making use of the A_Event action.
# This script would be given, via administration, a “RTE” type
# designation and therefore would receive only route requests (that is,
# no CONNECT, ABANDON, or END messages would be received or
# processed by this script). A local database is used to route the call based
# on ANI. A local database is read in an attempt to match the ANI
# for the call. If a match is found, the table provides an agent
# extension and a split extension which are used to route the call
# to a specific agent within a split (direct agent routing). If no
# match is found, the call is routed to a default split (for example,
# to a VIS T/R split to collect additional information).
#
# Fields dest_num (agent extension) and split_num (split extension) for
# direct agent routing are returned from the table when a match is
# found.
#
begin_loop:
#
External Action: A_Event
connected: connect_num
calling: calling_num
called: called_num
switchdata: switch_data
trunkid: trunk_num
callid: call_id
otherid: other_id
laidisplay: lai_info
visdata: vis_data
routingid: routing_id
cause value: cause
Return Field: event_return
#
# Check to make sure a ROUTE REQUEST was received.
# If a ROUTE REQUEST was not received, go back and get the next event.
#
Evaluate
If event_return != R
Evaluate
If event_return = r
4.
Modify Table
Table Name : rtg_err Operation: Add
Field: clg_num = calling_num
Field: cld_num = called_num
Field: err_cause = cause
Field callid_value = call_id
#
#
#
#
Else
5.
6.
7.
8.
9.
10.
Goto begin_loop
End Evaluate
End Evaluate
Read Table
Table Name: ani_db Search From Beginning
Field: ani = calling_num
#
# Set defaults in case no match is found in the table: dest_num is set
# to the default destination (split 1234). split_num is set to NULL
# so that direct agent calling is not invoked.
#
Evaluate
If $MATCH_FOUND = 0
Set Field Value
Field: dest_num = “1234”
Field: split_num = ““
End Evaluate
External Action: A_Routesel
destination: dest_num
split: split_num
priority: No
routingid: routing_id
cause: cause
Return Field: route_return
#
# Repeat the process - go back and get the next event.
#
Goto begin_loop
A-5
Sample Monitoring Script
Following is an example of an ASAI monitoring script that has been developed
with the A_Event action.
start:
# This is a sample monitoring script making use of the A_Event action.
# This script would be given, via administration, a “VDN”,
# “ACD”, or “CTL” type designation. This script would be used to
# receive information about monitored calls and pass this
# information to a host. In this type of scenario, the A_Event
# action can be used to receive CONNECT, ABANDON, and END events
# (no ROUTE REQUEST events are received). In this example, a subset of
# the information available in CONNECT events is passed to a host
# via the 3270 interface.
#
# It is assumed here that the Transaction Base Screen for the
# host application is called “connect_data”. This screen is assumed
# to contain fields that are used for transmitting data obtained
# through A_Event. When the host receives the filled screen, it
# responds by sending a different screen, conveniently named
# the “verify” screen. The “verify” screen is then sent back
# with the key, PF3, to obtain the Transaction Base Screen,
# “connect_data”, again.
#
begin_loop:
#
HOST_UP:
Event_start:
1. External Action: A_Event
Connected_Number: connect_num
Calling_Party_Number: calling_num
Called_Party_Number: called_num
Switch_Data: switch_data
Trunk_Group_Id: trunk_id
Call_Id: call_id
Other_Call_Id: ocall_id
LAI_Display_Info: lai_info
VIS_Data: vis_data
Routing_ID: route_id
Return Field: event_ret
#
# Check to make sure a CONNECT was received since we don’t care about
# ABANDON’s and END’s in this example application. If a CONNECT
# was not received, go back and get the next event.
#
A-6
2.
3.
8.
9.
10.
11.
12.
13.
Evaluate
If event_ret != “‘C’”
Goto Event_start
End Evaluate
#
# Send data to the host. Only connected agent, ANI, DNIS, and
# VIS data are used in this example application.
#
# It is assumed that Aid Key for sending the data to the host is
# PF3. Note that you have to investigate what Aid Key is
# appropriate for your host environment.
#
Send Host Screen
Send Screen Name: connect_data Use Aid Key: PF3
Field: connect_number = connect_num
Field: ani = calling_num
Field: dnis = called_num
voice_data = vis_data
Get Host Screen
For Screen Name: verify
End Get Host Screen
Send Host Screen
Send Screen Name: verify Use Aid Key: PF3
Get Host Screen
For Screen Name: connect_data
End Get Host Screen
#
# Repeat the process - go back and get the next event.
#
Goto Event_start
HOST_DOWN:
Goto start
A-7
A-8
Sample Scripts
C
ASAI Performance Performance
Overview
This chapter contains performance information to be used with the AT&T Adjunct/
Switch Application Interface feature. The topics included in this chapter are:
■
Voice response integration performance
■
Data screen delivery performance
■
Routing application performance
For general information concerning performance of the CONVERSANT Voice
Information System (VIS), refer to the Appendix E, “Performance Information” in
CONVERSANT VIS Version 4.0 Operations, 585-350-703.
Each VIS can support one ASAI link. Up to eight VIS machines can be connected
to the ISDN BRI Line Circuit Pack installed on the DEFINITY Generic 3i. The following gives the call volume capacities that each VIS can support based on the
type of application. Note that the values vary depending upon whether you are
using the local database or the remote database (accessed via the 3270 link), the
number of records in the database, duration of the script being played, etc.
C-1
Voice Response Integration
Up to 2,500 busy hour calls are supported by the VIS. Voice Response Integration involves calls offered to VIS T/R or LST1 lines and transferred to an agent
with data screen delivery.
Data Screen Delivery
Up to 10,000 busy hour calls are supported by the VIS. Data Screen Delivery
involves calls offered directly to a monitored live agent split with either the VIS or
the host delivering a data screen to the agent terminal. Note that this call limit
assumes that the VIS delivers the screens.
Routing Applications
Up to 5,000 busy hour calls can be supported and 256 simultaneous Routing
Requests can be handled by the VIS. Note that these call and request limits
assume that the routing database is on the VIS machine.
In addition, note that a maximum of 48 channels can be administered on the VIS
and a maximum of 32 domains (ACD & VDNs) can be monitored.
Note that each domain requires one virtual channel for running the script that is
associated with it. With an increase in load, however, there might be a need for
more virtual channels per script. Consequently, it is recommended that at least 2
virtual channels be reserved per script so as to insure reliable service.
As load increases on a domain, more instances of the script that is assigned to
that domain are spawned off on the virtual channel. When the load is reduced,
these virtual channels are released. However, at any time there is at least one
script running per virtual channel. The number of virtual channels is set to 32 by
the ASAI installation package.
It is recommended that you disable any unused domains so that the virtual channels associated with the domains may be used for other applications. Refer to
Chapter 4, "ASAI Administration" for information on disabling the domain through
the Domain Administration screen.
C-2