1
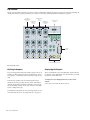
To toggle between Custom Groups and Mix/Edit Groups:
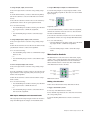
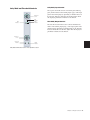
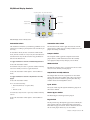
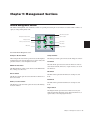
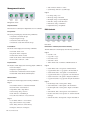
Bank/Cycle Switch
Press the Bank/Cycle switch repeatedly until the appropriate mode is displayed in the Focus Channel display (Custom
or Groups).
◆ While in Custom Groups or Mix/Edit Groups mode, the
Bank/Cycle switch is used to bank faders within the Custom
Fader channels, if there are more channels than can be displayed at one time.
■
Tracks Switch
The Tracks switch invokes Track Type mode, which lets you
bring all Pro Tools tracks of a certain type (Audio tracks, Auxiliary Inputs, MIDI tracks, Instrument tracks, or Master Faders)
to the Custom Fader channels.
◆ While in Custom Fader Plug-in mode, the Bank/Cycle
switch cycles through the plug-ins on the focused channel,
displaying their controls on the Custom Fader channels.
◆ When no Custom Fader mode is active, the Bank/Cycle
switch cycles through the plug-ins on the focused channel,
displaying their names in the Custom Faders display.
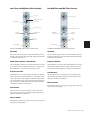
Plug-in Switch
The Plug-in switch invokes Plug-in mode, which lets you
bring the plug-in controls from the first insert of the currently
focused channel to the Custom Fader channels.
To cycle through the available inserts:
In Plug-in mode, press the Bank/Cycle switch repeatedly
until the desired insert is brought into the Custom Fader
channels.
■
Map Switch
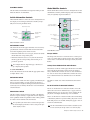
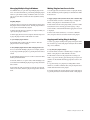
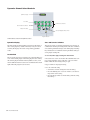
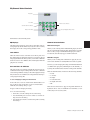
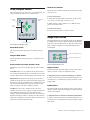
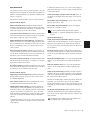
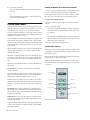
Automation Mode Controls
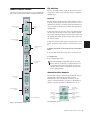
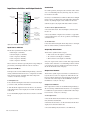
The Automation Mode controls are used to display and set automation modes. These switches light to indicate that at least
one channel is in that automation mode. If multiple channels
are selected and set to different automation modes, all applicable mode switches are lit.
These Automation Mode controls let you change automation
modes during playback, and mirror the function of the
on-screen Automation Mode selector for each track.
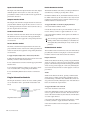
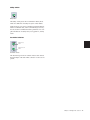
The Map switch works with Custom Groups mode, Mix/Edit
Groups mode, and Plug-in mode. While in these modes, the
Map switch lets you further customize the control layout by
mapping individual rotary encoder controls to faders within
the Custom Fader channels.
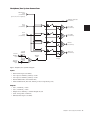
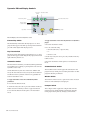
Automation Touch
Mode switch
The Map switch has no effect on other D-Command channels
in Normal mode.
Automation Latch
Mode switch
Auto Mode
Automation Trim
Mode switch
Automation Write
Mode switch
Write
Trim
Automation Read
Mode switch
Touch
Read
Automation Off
switch
Latch
Off
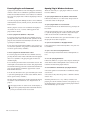
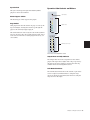
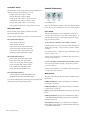
Lock Switch
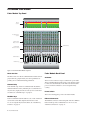
Automation Mode controls
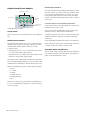
The Lock switch applies to Custom Fader Plug-in mode only.
This switch locks the plug-in that is currently displayed in the
Focus Channel display, so that it does not change when you
focus a different channel in the duplicate Focus Channel strip.
The Lock switch lights when the plug-in is locked.
To set the automation mode of one or more channels:
When Custom Fader Plug-in mode is active, the locked
plug-in appears in the Custom Fader channels, so you can focus a different channel in the Focus Channel section and keep
the locked plug-in in the Custom Fader channels.
◆
When Custom Fader Plug-in mode is not active, the locked
plug-in appears in the Focus Channel display, so you can focus
a different channel on the duplicate Focus Channel Strip and
keep the locked plug-in in the Focus Channel section. (When
you enter Custom Fader Plug-in mode, the locked plug-in will
be displayed on the Custom Fader channels.)
◆
1 Hold an Automation Mode switch (Write, Touch, Latch,
Trim, Read, or Off).
2 Press the Select switches on the channels whose automation
mode you want to set.
To set the automation mode of one or more selected channels:
1 Press the Do To Selected switch.
2 Press the Select switches on the channels whose automation
mode you want to set.
3 Press an Automation Mode switch.
4 Press the flashing Do To Selected switch.
To set the automation mode on all channels:
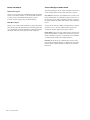
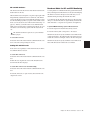
Window Switch
The Window switch opens and closes the plug-in window
on-screen for any plug-in whose name is displayed in the Custom Faders display.
40 D-Command Guide
1 Press the Do To All switch.
2 Press an Automation Mode switch.
3 Press the flashing Do To All switch.