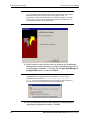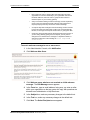
1
Email Continuity
Administrator Guide
For Microsoft Exchange® Environments
Licensed Customer Confidential
Licensed Customer Confidential
Legal Notices
Copyright© 1998-2009 Dell MessageOne, Inc. All Rights Reserved.
Information in this document is subject to change without notice. All names of
companies, organizations, persons, or other entities, and all sample data used in
content and examples is fictitious and not meant to represent any real company,
organization, person, or actual data.
No part of this publication may be reproduced, modified, or transmitted in any form
or by any means, electronic, mechanical, photocopying, recording, or otherwise
without the prior written permission of Dell MessageOne, Inc. Reproduction
prohibitions do not extend to distribution among the employees of licensed
customers or for use in activities conducted by Dell MessageOne partners in the
course of sales, marketing, training, or support.
MessageOne is a registered trademark and “Business Continuity that makes
Business Sense,” EMS, SyncManager, RedirectorSink, RedirectorController,
RecoveryManager, and OneSwitch are trademarks of Dell MessageOne, Inc.
AlertFind® is a registered trademark of Dell MessageOne, Inc.
MessageLabs® and the MessageLabs logo are trademarks of MessageLabs Ltd.
Research in Motion, RIM, and BlackBerry are trademarks/registered trademarks
of Research in Motion Limited.
All other trademarks are the property of their respective owners.
This product uses certain third-party software. Relevant licensing information is
provided in the MESSAGEONE LICENSE file in the installation directory.
Dell MessageOne® EMS Email Continuity, offered by MessageLabs as Email
Continuity is the sole intellectual property of Dell MessageOne, Inc., and includes
proprietary technology for which Dell MessageOne, Inc., has applied for one or
more U.S. patents.
Email Continuity Administrator Guide version 6.5 (1st ed.)
i
Licensed Customer Confidential
ii
Email Continuity Administrator Guide version 6.5 (1st ed.)
Licensed Customer Confidential
Table of Contents
Task Reference ......................................................................................................................... vii
About This Book ........................................................................................................................ xi
Intended Audience.......................................................................................................................... xi
Viewing the Document.................................................................................................................... xi
Conventions................................................................................................................................... xii
Product Documentation .................................................................................................................xiii
1
About the Service ................................................................................................................. 1
About Email Continuity .................................................................................................................... 1
About Windows Authentication ........................................................................................................ 4
About Wireless Continuity for BlackBerry ........................................................................................ 5
About the Outlook Extension ........................................................................................................... 7
About Historical Mail and Email Archive .......................................................................................... 9
About AlertFind Integration ............................................................................................................ 10
Interaction of Components............................................................................................................. 11
2
Preinstallation ..................................................................................................................... 13
Communications Requirements..................................................................................................... 13
Networking Requirements.......................................................................................................13
Firewall Requirements ............................................................................................................ 14
Proxy Requirements................................................................................................................ 14
SMTP Message Gateway Requirements ................................................................................ 14
Gateway Requirements...........................................................................................................14
Mail Routing Inbound—Store and Forward ............................................................................. 15
Mail Routing—Outbound During Activation............................................................................. 16
Historical Mail Routing Requirements ..................................................................................... 16
SMTP Connector .............................................................................................................. 17
Hardware Requirements................................................................................................................ 17
Software Requirements ................................................................................................................. 18
Service Software ..................................................................................................................... 18
Supported Operating Systems ................................................................................................ 19
Supported Messaging Software ..............................................................................................19
Server Software Requirements ............................................................................................... 20
Exchange 5.5 Environments............................................................................................. 20
Exchange 2000/2003 Environments................................................................................. 20
Exchange 2007 Environments.......................................................................................... 21
Coexistence Exchange Environments (2000/2003/2007) ................................................ 22
Account Requirements............................................................................................................ 23
Exchange 5.5 Account Requirements .............................................................................. 23
Exchange 2000/2003 Account Requirements .................................................................. 24
Exchange 2007 Account Requirements ........................................................................... 25
Coexistence Environments Account Requirements ......................................................... 26
Virtualization .................................................................................................................................. 26
Windows Authentication Requirements ......................................................................................... 27
Windows Authentication Limitations........................................................................................ 28
Wireless Continuity for BlackBerry Requirements ......................................................................... 28
Wireless Continuity for BlackBerry Installation Prerequisites.................................................. 29
Adding the Email Continuity Service Root Account to the Local Administrator Group ..... 30
Enabling TCP and Name Pipes to Access the BES Database......................................... 30
Verifying that Mobile Data Services are Installed and Configured .................................. 31
Wireless Continuity for BlackBerry Supported Configurations ................................................ 32
Wireless Continuity for BlackBerry Limitations........................................................................ 32
Email Continuity Administrator Guide version 6.5 (1st ed.)
iii
Licensed Customer Confidential
Outlook® Extension Requirements................................................................................................ 33
Outlook Extension Limitations.................................................................................................34
Planning RedirectorSink/RedirectorController Placement ............................................................. 35
RedirectorSink Placement....................................................................................................... 35
RedirectorController Placement ..............................................................................................36
Historical Mail Requirements ......................................................................................................... 39
AlertFind Integration Requirements ............................................................................................... 40
AlertFind Integration Limitations .................................................................................................... 40
3
Installation and Configuration ........................................................................................... 43
Installing Service Software ............................................................................................................ 43
Configuring the SyncManager ....................................................................................................... 49
Configuring RedirectorManager..................................................................................................... 57
Installing RedirectorManager on a Standalone Server ........................................................... 58
Upgrading RedirectorManager................................................................................................ 59
Installing RedirectorSink on Clustered Exchange Servers ............................................................ 59
Installing the RedirectorAgent........................................................................................................ 60
Provisioning Wireless Continuity for BlackBerry ........................................................................... 62
Synchronizing RIM Data ......................................................................................................... 62
Distributing the Client Agent.................................................................................................... 63
Distribution Over-the-Air for BES 4.x................................................................................ 64
Distribution Over-the-Air for BES 5.x................................................................................ 67
Sending the Agent to Users by Email............................................................................... 71
Installing the Outlook® Extension.................................................................................................. 72
Enabling User Authentication Through the Command Line ....................................................75
Manual Installation .................................................................................................................. 76
Installation Using Group Policy ..............................................................................................77
Installation Using Systems Management Software (SMS)...................................................... 79
Troubleshooting Installation of the Outlook Extension ............................................................ 82
Installing Historical Mail/Email Archive .......................................................................................... 83
Configuring VaultBoxes ................................................................................................................. 86
Changing Settings in the VaultBox Console ........................................................................... 86
Monitoring VaultBoxes ............................................................................................................ 88
4
Administration..................................................................................................................... 93
Logging Into the Administration Console ....................................................................................... 93
Administration Console Home ....................................................................................................... 94
Readiness Checks .................................................................................................................. 96
Authentication Manager Status ............................................................................................... 98
RedirectorController/RedirectorSink/RedirectorAgent Status ................................................. 98
Historical Mail Administration......................................................................................................... 99
Retention Policies ................................................................................................................... 99
Membership-based (Current Membership) Policies ......................................................... 99
Retention Policy Best Practices......................................................................................100
Creating Retention Policies ............................................................................................101
Storage Reports ....................................................................................................................104
Replication Zones .................................................................................................................105
User Administration .....................................................................................................................106
Searching User Information ..................................................................................................106
Resetting User Passwords....................................................................................................107
Resetting an Individual User’s Password .......................................................................107
Resetting Multiple Passwords By Template ...................................................................108
Resetting Multiple Passwords by CSV Import ...............................................................110
Changing Status for Multiple Users.......................................................................................112
Updating a User’s Contact Information .................................................................................114
Defining User Sets ................................................................................................................114
iv
Email Continuity Administrator Guide version 6.5 (1st ed.)
Licensed Customer Confidential
Assigning Super Administrator Privileges .............................................................................115
Assigning Email Continuity Administrator Privileges .............................................................118
Assigning Help Desk Privileges ............................................................................................119
Reviewing Login Status.........................................................................................................120
Exporting Users’ Contact Information ...................................................................................122
Excluded Users .....................................................................................................................124
Resolving User ID Conflicts Manually ...................................................................................125
Enabling BlackBerry Forwarding .................................................................................................127
Configuring a BlackBerry for Use with BlackBerry Forwarding .............................................128
Wireless Continuity for BlackBerry Administration.......................................................................129
Managing Users and Devices ...............................................................................................129
Using Device Menu Options in Standard Display Mode.................................................131
Using Device Menu Options in Advanced Display Mode ...............................................131
Viewing Device Advanced Display Information ..............................................................132
Outlook® Extension Administration .............................................................................................132
Mailboxes and Aliases .................................................................................................................133
Adding Mailboxes (Users) Manually......................................................................................133
Creating Aliases ....................................................................................................................134
Mailing Lists .................................................................................................................................134
Notification ...................................................................................................................................135
Welcoming New Users..........................................................................................................135
Sending Reminders...............................................................................................................138
Managing Fault Alerts ...........................................................................................................140
Managing Transition Alerts ...................................................................................................140
Sending Custom Notifications ...............................................................................................141
Viewing Audit Reports ................................................................................................................142
Activation Reports .................................................................................................................142
Test Reports..........................................................................................................................143
Modifying System Settings ..........................................................................................................143
Changing User Attributes Imported from Active Directory ...................................................143
Displaying Global Address List (GAL) Attributes...................................................................144
Configuring Email Routing ....................................................................................................145
Routing for Forwarded Mail ............................................................................................146
Routing for Outbound Mail During an Activation ............................................................146
Changing the Email Disclaimer .............................................................................................146
AlertFind Mapping .................................................................................................................147
Resolving User ID Conflicts Automatically ............................................................................148
Sync Notify Settings ..............................................................................................................149
Customizing the Home Page ...............................................................................................150
Customizing the Welcome Process ......................................................................................151
Changing Your Account Settings.................................................................................................152
Accessing Your Mailbox........................................................................................................152
Viewing Undeliverable Mail in the Dropbox...........................................................................152
Changing Your Password .....................................................................................................152
Testing Email Continuity ..............................................................................................................153
5
Activation........................................................................................................................... 155
Activating Email Continuity ..........................................................................................................155
6
Recovery............................................................................................................................ 159
Starting Recovery from an Activation ..........................................................................................159
Restoring Mail to Users’ Mailboxes .............................................................................................161
Completing Recovery from an Activation.....................................................................................171
Index......................................................................................................................................... 173
Email Continuity Administrator Guide version 6.5 (1st ed.)
v
Licensed Customer Confidential
vi
Email Continuity Administrator Guide version 6.5 (1st ed.)
Licensed Customer Confidential
Task Reference
To grant service account permissions for Exchange 5.5:.......................................................................... 23
To grant Exchange administrator permissions for Exchange 2000/2003: ................................................. 24
To grant Send As and Receive As permissions: ....................................................................................... 25
To add the Email Continuity account to the local administrator group of the BES group: ......................... 30
To enable TCP and Name Pipes to have access to the BES database:................................................... 30
To verify that the MDS server is a push server and has an appropriate listening port configured: ........... 31
To set IT policies: ...................................................................................................................................... 32
To install service software: ........................................................................................................................ 43
To launch the SyncManager Setup Wizard manually:............................................................................... 50
To configure the SyncManager: ................................................................................................................ 50
To configure distributed synchronization with SyncManager: ................................................................... 57
To install RedirectorManager: ................................................................................................................... 58
To install RedirectorSink on clustered Exchange servers: ........................................................................ 59
To install the RedirectorAgent: .................................................................................................................. 61
To remove the RedirectorAgent: ............................................................................................................... 61
To synchronize RIM data:.......................................................................................................................... 62
To download the client agent:.................................................................................................................... 64
To configure the agent:.............................................................................................................................. 65
To assign software applications to users:.................................................................................................. 66
To remove the Blackberry agent for all users:........................................................................................... 66
To remove the Blackberry agent for one user: .......................................................................................... 67
To prepare the shared application directory: ............................................................................................. 67
To update your IT policies: ........................................................................................................................ 69
To download the client agent:.................................................................................................................... 69
To add the client application to BAS:......................................................................................................... 69
To create and populate application policies: ............................................................................................. 70
To create and populate the software configuration: .................................................................................. 70
To create a BlackBerry client user group: ................................................................................................. 71
To assign the software configuration to the BlackBerry client user group:................................................ 71
To send installation instructions to device users: ...................................................................................... 71
To authenticate users through the command line (prior to Outlook Extension deployment): .................... 76
To install the Outlook Extension manually using setup.exe: ..................................................................... 76
To remove the Outlook Extension manually:............................................................................................. 77
To install the Outlook Extension using Group Policy:................................................................................ 77
To upgrade the Outlook Extension using Group Policy:............................................................................ 78
To remove the Outlook Extension using Group Policy: ............................................................................. 78
To install the Outlook Extension using SMS:............................................................................................. 79
To upgrade the Outlook Extension using SMS:......................................................................................... 79
To remove the Outlook Extension using SMS:.......................................................................................... 81
To install the Historical Mail software on a VaultBox system: ................................................................... 83
To change data transfer settings: .............................................................................................................. 87
To log into the Administration Console:..................................................................................................... 94
To create a retention policy: .................................................................................................................... 102
To add users to a retention policy: .......................................................................................................... 102
To prioritize retention policies:................................................................................................................. 103
To view storage reports: .......................................................................................................................... 104
To assign servers to replication zones: ................................................................................................... 105
To search user information:..................................................................................................................... 106
To reset a user’s password: .................................................................................................................... 107
To change multiple users’ passwords: .................................................................................................... 108
Email Continuity Administrator Guide version 6.5 (1st ed.)
vii
Licensed Customer Confidential
To create a password import CSV file: ....................................................................................................
To import passwords by CSV file: ...........................................................................................................
To change status flags for users: ............................................................................................................
To edit a user’s contact information:........................................................................................................
To create a user set:................................................................................................................................
To create a super administrator:..............................................................................................................
To remove super administrator privileges: ..............................................................................................
To assign administrative privileges to an account: ..................................................................................
To remove administrative privileges from an account: ............................................................................
To grant a user Help Desk privileges: .....................................................................................................
To remove Help Desk privileges from an account:..................................................................................
To review login status:.............................................................................................................................
To generate a CSV spreadsheet of emergency contact data for all users: .............................................
To exclude a user: ...................................................................................................................................
To remove individual users from the Excluded list (reinstate them in the system):.................................
To remove multiple users from the Excluded list (reinstate them in the system): ...................................
To resolve multiple user ID conflicts using CSV upload: .........................................................................
To resolve user ID conflicts individually:..................................................................................................
To set up a BlackBerry device:................................................................................................................
To manage BlackBerry user information in the Administration Console: ................................................
To view information about a device using the interface installed with the device agent:.........................
To enable or disable the Extension: ........................................................................................................
To export the list of users: .......................................................................................................................
To add a mailbox (user) to Email Continuity:...........................................................................................
To create an alias: ...................................................................................................................................
To view mailing lists and members of each list: ......................................................................................
To send a welcome message to one or more users:...............................................................................
To automatically send welcome messages to new users:.......................................................................
To send a reminder: ................................................................................................................................
To add a user to the fault alerts list: ........................................................................................................
To remove a user from the fault alerts list: ..............................................................................................
To add users to the transition alerts list:..................................................................................................
To remove a user from the transition alerts list: ......................................................................................
To send a custom message: ...................................................................................................................
To view an Activation report: ...................................................................................................................
To view a Test report:..............................................................................................................................
To change the attributes imported from Active Directory: .......................................................................
To change the attributes displayed in Global Address List:.....................................................................
To restore an attribute that has been removed: ......................................................................................
To configure the path for forwarded mail:................................................................................................
To configure the path for outbound mail during an activation:.................................................................
To add disclaimer text to the end of each message sent by the service: ................................................
To configure AlertFind mapping: .............................................................................................................
To configure the method by which user ID conflicts are resolved: ..........................................................
To configure the user/mailing list deletion percentage at which a warning message is sent: .................
To hide the Preferences section of the Home page: ...............................................................................
To enable individual links in the Preferences section of the Home page: ...............................................
To change the text displayed to end users in each state of Email Continuity: ........................................
To select pages to include in the welcome wizard: .................................................................................
To access your webmail account during an activation: ...........................................................................
To view undeliverable mail during an activation: .....................................................................................
To change your password: ......................................................................................................................
To start a test of Email Continuity:...........................................................................................................
To start recovery from a test:...................................................................................................................
viii
110
111
113
114
114
116
117
118
118
119
119
120
124
124
124
125
126
126
128
129
130
133
133
133
134
134
137
138
139
140
140
141
141
141
143
143
144
145
145
146
146
146
147
149
149
150
150
151
151
152
152
152
153
154
Email Continuity Administrator Guide version 6.5 (1st ed.)
Licensed Customer Confidential
To activate Email Continuity: ...................................................................................................................
To initiate recovery: .................................................................................................................................
To recover email from an activation or from a recovery archive:.............................................................
To complete recovery from an activation:................................................................................................
Email Continuity Administrator Guide version 6.5 (1st ed.)
155
159
161
172
ix
Licensed Customer Confidential
x
Email Continuity Administrator Guide version 6.5 (1st ed.)
Licensed Customer Confidential
Intended Audience
About This Book
Intended Audience
This book describes actions reserved for those with administrative privileges. Its
content assumes that you are an administrator for the product and have a strong
general knowledge of system and network administration. Depending on how the
product is configured for your organization, some features described in the
documentation may not be available to you.
Viewing the Document
This document is provided as an Adobe Portable Document Format (PDF) file.
For best results, use Adobe Acrobat Reader software, v6.0 or later, for viewing
this document. You can download the latest version of this application at no cost
from Adobe Systems, Inc. (www.adobe.com).
Within the document, cross-references and web site addresses are active
hyperlinks. These links display as blue, underscored text. Click the text of any
cross-reference to go to the referenced location within the document. To return to
the previous location, use the Back button in the PDF reader interface.
Click any web link to launch your default web browser and go to the indicated web
site location.
Email Continuity Administrator Guide version 6.5 (1st ed.)
xi
Conventions
Licensed Customer Confidential
Conventions
The documentation uses certain typographical conventions to make references to
product elements easier to recognize and understand. These are described in the
following table.
Table A-1
Typographical Conventions
Display Format
Definition
Examples
blue, underscore
A hyperlink to either another
location within the document or to
a web site.
For more information, see "Viewing the
Document" on page xi.
bold
Name of a screen, section, pane,
box, or option in the user
interface.
On the Select Permissions page, locate the
Access Info pane of the User Account
panel.
The name of an executable file.
To begin the installation, double-click
setup.exe.
Bold italic
The name of a menu, button, or
tab.
From the Start menu, select Programs.
serif
An entry you must type manually.
At the command prompt, type cmd.
A value you type in a box or select
from a list.
From the Filter drop-down list, select Starts
with.
A field value that appears in the
user interface.
The Source field now reads Imported from
File.
Information that applies only to
the Outlook Extension, an
optional feature.
Information that applies only to
Wireless Continuity for
BlackBerry, an optional feature.
Information that applies only to
Historical Mail, an optional
feature.
xii
Email Continuity Administrator Guide version 6.5 (1st ed.)
Licensed Customer Confidential
Product Documentation
Product Documentation
The following documentation is available for Email Continuity:
•
Email Continuity Administrator Guide
This book is a comprehensive document for installing, configuring, and
administering Email Continuity.
•
Email Continuity Online Help
This material explains to users how to configure and update their user
profiles, and use the webmail interface to read and send email.
•
Location-Specific Network Settings
This document provides IP addresses and Message Transfer Agent (MTA)
information based on the location of the MessageLabs data center.
For the latest version of any document, contact Support.
The following documentation is available for AlertFind:
•
Online help is available based on your role. To view the online help, click
the Help button at the top of the page.
•
AlertFind Administrator Guide
This book discusses how to import and manually create users, how to
manage users and company settings, and how to create and use
broadcast groups, escalation groups, and teams.
•
AlertFind Team Leader Guide
This book contains information about how to create and manage teams,
including how to manage user settings and permissions.
•
AlertFind User Guide
This book contains information about receiving and responding to
notifications and updating device and personal escalation information. If
your organization allows it, users may also update their own device and
personal escalation information.
For the latest version of any document, contact Support.
Email Continuity Administrator Guide version 6.5 (1st ed.)
xiii
Product Documentation
xiv
Licensed Customer Confidential
Email Continuity Administrator Guide version 6.5 (1st ed.)
Licensed Customer Confidential
1
About Email Continuity
About the Service
About Email Continuity
Email Continuity is an alternative email service that takes the place of your
primary email system during an outage. When the service is activated, users can
access their email through an easy-to-use web-mail interface.
If the Outlook® Extension has been installed on end-user’s desktops, they can
continue to access their email using Outlook® in cached mode.
Email Continuity consists of the following components:
Table 1-1
Components
Component
Description
Location
Email Continuity
A hosted, backup email system.
The process of switching users to
the backup system is called
activation or activating the service.
Hosted at the MessageLabs data
center
SyncManager™
Software that synchronizes
directory, calendar and contact
information.
Installed in customer’s
environment.
RecoveryManager™
Software that, when run, restores
mail into the primary mail system
after activation. This process is
called recovery.
Installed in customer’s
environment.
RedirectorSink™
An SMTP Event Sink that enables
dynamic rerouting of messages,
allowing some users to remain on
the primary mail system while
others use Email Continuity—a
process called Partial Activation.
Also transfers copies of mail to the
VaultBox for users of Historical
Mail.
Installed on one or more of
customer’s Exchange servers. Note
that RedirectorSinks are the only
components supported on
Windows 2000 servers.
RedirectorAgent
A custom transport agent that
performs functions similar to the
RedirectorSinks to support the
partial activation feature for Email
Continuity in Exchange 2007
environments.
Installed on all customer’s
Exchange 2007 Hub Transport
servers. The RedirectorAgent is not
supported on Exchange 2007 Edge
servers.
Email Continuity Administrator Guide version 6.5 (1st ed.)
1
About Email Continuity
Table 1-1
Components
Component
2
Licensed Customer Confidential
Description
Location
RedirectorController™
(also called the ESS
Controller)
Software that communicates to the
data center and provides updates
to the RedirectorSinks and
RedirectorAgents.
Installed in customer’s
environment.
RedirectorManager™
A centralized console to install,
upgrade and maintain
RedirectorSinks on standalone
Exchange servers.
Installed in customer’s
environment.
Authentication Manager
Allows end users to log in to the
Email Continuity portal using their
Windows user name and password.
Installed in customer’s
environment. For Windows
Authentication only.
RIM Agent
A light-weight, java-based agent.
Installed on each BlackBerry
device. For Wireless Continuity for
BlackBerry service only.
VaultBox™
Software responsible for accepting
mail from customer’s Exchange
servers, encrypting, compressing,
and transferring it to the data
center. Used for Historical Mail/
Email Archive.
Installed in customer’s
environment. Must be installed on a
dedicated server; this can be the
same server on which the
SyncManager and
RecoveryManager are installed, or
a separate dedicated server.
Outlook® Extension
Software that provides access to
certain Email Security Services
features through a user’s Outlook
application.
Installed on end-user desktops.
AlertFind Integration
Allows organizations to
synchronize data between Email
Security Services and AlertFind.
Hosted at the MessageLabs data
center.
Email Continuity Administrator Guide version 6.5 (1st ed.)
Licensed Customer Confidential
About Email Continuity
Data transfer between your organization’s email system and the Data Center is
shown in Figure 1-1.
ESS Server
Figure 1-1
Email Continuity Data Transfer
Once the necessary components have been installed, use of the service is simple.
Prior to an activation of the service, the SyncManager sends directory information
to the data center. During an activation, users can send and receive their email
online through the webmail interface. After the primary email system has been
restored, the RecoveryManager imports the email messages sent and received
Email Continuity Administrator Guide version 6.5 (1st ed.)
3
About Windows Authentication
Licensed Customer Confidential
during the activation period into the primary mail system. Email Continuity is
always in one of three states: READY, ACTIVE, or RECOVERY. These are shown
in Figure 1-2.
Figure 1-2
Email Continuity States
To change the text that appears to users on the web-mail Home Page in each of
the three states, see "Customizing the Home Page" on page 150.
About Windows Authentication
The Windows Authentication feature allows your users to log in to the Email
Continuity portal using their regular network passwords. To accomplish this, an
Authentication Manager installed on a local machine in your environment
validates a user’s credentials with the local Windows subsystem using New
Technology LAN Manager (NTLM). If the user’s credentials are correct according
to the local Windows subsystem, the Authentication Manager reports this to the
data center, and the user is allowed to log in to the Email Continuity portal.
MessageLabs does not synchronize users’ passwords from Active Directory.
If the Windows subsystem determines the login credentials are invalid, Email
Continuity (and Windows, if applicable) increments the failed login count by one,
and access to Email Continuity is denied.
4
Email Continuity Administrator Guide version 6.5 (1st ed.)
Licensed Customer Confidential
About Wireless Continuity for BlackBerry
If the Windows subsystem cannot determine if the login credentials are valid or
invalid, the validation request is passed to a different Authentication Manager. The
request is discarded if none of the Windows Subsystems can determine if the
credentials are valid or invalid, or if two minutes elapse, whichever comes first.
For more information, see:
•
"Windows Authentication Requirements" on page 27
•
"Windows Authentication Limitations" on page 28
•
"Authentication Manager Status" on page 98
About Wireless Continuity for BlackBerry
The Wireless Continuity for BlackBerry feature ensures messages are delivered
to BlackBerry users when Email Continuity is active. BlackBerry agents version
6.2 and higher can also deliver messages to BlackBerry users if the BES fails
along with the primary email system.
The SyncManager collects data about the BlackBerry users from the BES, then
the RIM Agent installed on each BlackBerry device provides seamless email
delivery and retrieval during outages.
•
Prior to an activation, SyncManager software collects RIM® data, just as it
collects other data related to your email system. Using remote calls, it
retrieves required information from the database used for BlackBerry
Enterprise Server (BES) management. You must have these databases
configured prior to installing Wireless Continuity for BlackBerry.
•
A MessageLabs agent is installed on each BlackBerry device. This agent
can be deployed by way of the policy management features of BES 4.0+
(deployment over-the-air) or can be manually downloaded to the device
through a hyperlink sent to the user through the Administration Console.
•
The RedirectorController acts as a RIM data relay for posting push
messages to the specified BES. The RedirectorController must be able to
post HTTP requests to each configured BES, which must have functional
Email Continuity Administrator Guide version 6.5 (1st ed.)
5
About Wireless Continuity for BlackBerry
Licensed Customer Confidential
network connectivity to communicate with the BlackBerry handheld
device. The Redirector Controller and BES must be online when an agent
is first authenticated.
MessageLabs
Agent
MessageLabs
Email Continuity
MessageLabs API
Figure 1-3
NOTE
Wireless Continuity for BlackBerry Process
BES-Independent Wireless Continuity for BlackBerry
The ESS version 6.5 data center implements a BES-independent continuity
model that allows BlackBerry users to compose, send, and receive email on
their BlackBerry devices even if the BES has failed. This BES-independent
continuity option works for any user who can establish a secure (HTTPS)
internet connection from their BlackBerry device. This feature works only for
organizations using the version 6.5 data center and the version 6.2 BlackBerry
agent. Organizations using previous versions of the data center or agent
software will notice no change to their Wireless Continuity for BlackBerry
implementations.
Wireless Continuity for BlackBerry supports:
•
6
Viewing text from Word, PDF, and HTML attachments. Formatting and
images are not displayed.
Email Continuity Administrator Guide version 6.5 (1st ed.)
Licensed Customer Confidential
About the Outlook Extension
•
Viewing messages no larger than 64 KB in size (due to restrictions in the
device software). If you receive larger messages, or messages that have
attachments, Wireless Continuity for BlackBerry adds information to the
end of the message stating that the entire message and/or attachment can
be accessed by logging in to your Email Continuity web-mail account.
•
Partial activation of Email Continuity, if your organization has purchased
that feature.
NOTE
BlackBerry Forwarding vs. Wireless Continuity for BlackBerry
The BlackBerry Forwarding option can be turned on for Email Continuity
customers by Support. Wireless Continuity for BlackBerry, described here, is a
separate product. To prevent receiving duplicate messages on the device during
activation, your organization should be provisioned for only one of these
services. For information on BlackBerry Forwarding, contact Support.
For more information, see:
•
"Wireless Continuity for BlackBerry Requirements" on page 28
•
"Wireless Continuity for BlackBerry Supported Configurations" on page 32
•
"Wireless Continuity for BlackBerry Limitations" on page 32
•
"Provisioning Wireless Continuity for BlackBerry" on page 62
•
"Wireless Continuity for BlackBerry Administration" on page 129
About the Outlook Extension
When the Outlook Extension is installed on the end user’s machine, and the end
user has been authenticated (logged in/registered with Email Security Services),
the Extension periodically polls the data center to see if Email Continuity has been
activated. If so, then Outlook® goes into offline mode, and remains offline for the
duration of the activation. While the service is active, MessageLabs delivers
messages to the user’s Outlook Inbox through Email Continuity.
When the activation period is over, messages sent and received during the
activation using the Outlook® Extension are resynced by Exchange when
Outlook® returns from offline mode. These messages are included in the
Recovery archive, but are not restored during normal Recovery unless you direct
the RecoveryManager to do so.
After an activation, Outlook returns to the same state it was before the activation
occurred. For example, if Exchange was Offline before the activation, it will
appear as Offline after the activation. Users can right-click the Offline button and
reconnect to Exchange.
Email Continuity Administrator Guide version 6.5 (1st ed.)
7
About the Outlook Extension
NOTE
Licensed Customer Confidential
Proxy Servers
If your organization uses proxy servers, the Outlook Extension provides basic
proxy authentication. The Outlook Extension provides a dialog box for a user to
enter proxy server credentials (user name and password) to gain access to their
email during an activation of Email Continuity.
NOTE
When Email Continuity is active, only one instance of Outlook with the
Extension installed can be open per user mailbox
If Outlook, with the Extension installed, is open on multiple machines pointing to
the same mailbox, it is likely that each instance of Outlook will only receive a
subset of the messages received during an activation.
Outlook, with the Extension installed, is similar to configuring a POP3 profile and
deselecting the option to leave a copy of the message on the server; Each
message is downloaded only by the first Outlook Extension instance running
that polls for the message.
Table 1-2 compares the features/functionality available to users through Email
Continuity web-mail and the Outlook Extension. A 3 means that the feature or
function is available. A dash (—) means the feature or function is not available. To
see known limitations for the Outlook Extension, see "Outlook Extension
Limitations" on page 34.
Table 1-2
Outlook Extension/Email Continuity Webmail Feature Comparison
Web-mail
Outlook
Extension
Send/receive email
3
3
View calendars
3
3
Modify calendars
—
3
View contacts
3
3
Modify contacts
—
3
View Global Address List
3
3
View tasks
—
3
Modify tasks
—
3
Categories
—
3
Folder management
Not applicable
3
Message importance
3
3
Message sensitivity
—
3
Not applicable
3
Outlook Functionality
Access to PST folders
8
Email Continuity Administrator Guide version 6.5 (1st ed.)
Licensed Customer Confidential
Table 1-2
About Historical Mail and Email Archive
Outlook Extension/Email Continuity Webmail Feature Comparison
Web-mail
Outlook
Extension
Reminders window
—
3
Send appointments
—
3
Receive appointments
3
3
Access to free/busy information
—
—
Client-side rules (filters)
—
3
Server-side rules and Out-of-Office
—
—
Delegate access (view others’ mailboxes)
—
—
Delivery options
—
—
Support of HTML mail
3
3
Outlook Functionality
For more information, see:
•
"Outlook® Extension Requirements" on page 33
•
"Outlook Extension Limitations" on page 34
•
"Installing the Outlook® Extension" on page 72
•
"Outlook® Extension Administration" on page 132
About Historical Mail and Email Archive
Historical Mail (also called ActiveMailbox) allows users to review designated
historical email during an activation of Email Continuity using a searchable, webbased interface.
The maximum message size that can be fully indexed in the data center archive is
50 MB. Message bodies or individual attachments that are larger than 50 MB are
partially indexed using their available header fields and metadata.
Historical Mail/Email Archive requires that you install VaultBox software on a
dedicated server. This dedicated server can be the same one on which
SyncManager, RecoveryManager, and other Email Security Services software is
installed. VaultBox software captures, compresses, and transfers historical email
to the data center. VaultBox components are described in Table 1-3.
Email Continuity Administrator Guide version 6.5 (1st ed.)
9
About AlertFind Integration
Table 1-3
Licensed Customer Confidential
VaultBox Components
Component
Description
Store Driver
A plug-in for Microsoft's SMTP Service that takes messages
received by SMTP, compresses them, and writes them to the
Compression Directory on the VaultBox.
Compression Directory
Storage location for all message that are pending transfer to the
data center.
Transfer Service
Transfers the mail in the compression directory to the data center
through SFTP (SSH) on port 22.
VaultBox Monitor
A service that gathers health information from the other services,
reports it to the data center for display in the Administration
Console, and logs it locally on the VaultBox. The VaultBox Monitor
also restarts the Transfer Service if it has stopped or is
unresponsive.
VaultBox Console
A graphical tool that is used to configure and monitor tasks and
services on the VaultBox, including the Transfer Service, the MAPI
and Exchange configurations, and the VaultBox Monitor.
Data transfer using the VaultBox is shown in Figure 1-4.
Figure 1-4
Data Transfer for Historical Mail
About AlertFind Integration
If your organization uses AlertFind, you can take advantage of the regular
synchronization with Active Directory to extend the data collected to the AlertFind
service. Directory syncs from Active Directory to the data center take place
according to the schedule established in the SyncManager. In a separate process
run each day in the data center, MessageLabs migrates Active Directory data
10
Email Continuity Administrator Guide version 6.5 (1st ed.)
Licensed Customer Confidential
Interaction of Components
you’ve selected to the AlertFind application. AlertFind Integration allows you to
update your directory data as often as once per day, instead of the once per week
or once per month roster update schedule provided with non-integrated AlertFind.
For more information, see:
•
"AlertFind Integration Requirements" on page 40
•
"AlertFind Integration Limitations" on page 40
•
"AlertFind Mapping" on page 147
Interaction of Components
The interaction of components with Exchange 2000/2003 and the data center are
shown in Figure 1-5. Port numbers are shown in parentheses.
Figure 1-5
Communications Protocols and Port Numbers, Exchange 2000/2003
The interaction of components with Exchange 2007 and the data center are
shown in Figure 1-6. Port numbers are shown in parentheses.
Email Continuity Administrator Guide version 6.5 (1st ed.)
11
Interaction of Components
NOTE
Licensed Customer Confidential
For Exchange 2007 Only
To support the partial activation feature of Email Continuity, the system uses a
custom transport agent (RedirectorAgent) installed on each Hub Transport
server, instead of the RedirectorSinks used with Exchange 2000/2003. For more
information, see "Installing the RedirectorAgent" on page 60.
Figure 1-6
12
Communications Protocols and Port Numbers, Exchange 2007
Email Continuity Administrator Guide version 6.5 (1st ed.)
Licensed Customer Confidential
2
Communications Requirements
Preinstallation
Before you install service software, make sure that your servers meet the
installation requirements and that you have all the tools and information described
in this chapter.
Communications Requirements
This section outlines the networking, firewall, proxy, and email gateway
requirements.
NOTE
Location-specific Settings
Communication requirements involve settings specific to a data center, such as
Internet Protocol (IP) addresses and Message Transfer Agents (MTAs). When
any of the following sections refer to location-specific settings, refer to the
Network Settings document provided to you by Support.
CAUTION
MX Record Configuration
MessageLabs does not configure or maintain your MX records. Ensure that
your MX records are correctly configured so that messages are correctly routed
through the Email Continuity service during an outage of your primary mail
system. If your MX records are incorrectly configured, mail could be
delayed or lost during an activation.
Your Support representative can assist you in setting up and testing your MX
record configurations. Inform your Support representative immediately if there
have been any changes in your system environment that could impact mail flow
to and from the Email Continuity service.
Support recommends that you run a test activation of the Email Continuity
service quarterly to validate your MX record configurations and mail routing
results.
Networking Requirements
The networking requirements are:
1
The machine on which you install the SyncManager (called the primary
controller or ESS server) must have internet access through secure
hypertext transfer protocol (HTTPS), using port 443 outbound.
2
Connection to the internet and Microsoft Internet Explorer (v6 or 7) for
performing functions in the Administration Console. If you are installing on
a newly provisioned machine, run the Microsoft Internet Connectivity
Wizard before you install service software.
Email Continuity Administrator Guide version 6.5 (1st ed.)
13
Communications Requirements
3
Licensed Customer Confidential
For end users accessing the web-mail interface, supported browsers are
Internet Explorer (v6 or 7) or Firefox.
Firewall Requirements
Most organizations’ networks include a firewall that restricts both outbound and
inbound traffic based on specific rules. Make any necessary adjustments to your
firewall’s configuration to ensure that it allows outbound traffic for the ESS server
to the location-specific IP addresses on port 443.
Proxy Requirements
If you use a proxy server, set the proxy server rules to allow communication from
the ESS server to the location-specific IP addresses provided by Support.
SMTP Message Gateway Requirements
If you use an SMTP gateway server, ensure its configuration accepts inbound
messages from the location-specific IP addresses provided by Support. If your
gateway server blocks all inbound messages that use one of your domains in the
From: field, add an exception to this rule to accept messages originating from the
location-specific IP addresses. For example, if your domain is company.com and
you block all inbound mail with an SMTP address of [email protected] as
spam, the exclusion list for this policy should include the location-specific IP
addresses.
Gateway Requirements
Configure your gateway to failover automatically to the location-specific message
transfer agent (MTA).
Configure your corporate mailhost to:
14
1
Accept inbound SMTP connections from the IP addresses provided by
Support.
2
Allow the IP addresses provided by Support to be valid sending IP
addresses.
Email Continuity Administrator Guide version 6.5 (1st ed.)
Licensed Customer Confidential
Communications Requirements
Be sure that you provide the hostname or IP address of your mailhost(s) to
Support so that the data center can be configured to send email directly to your
organization.
1. Configure MessageLabs to send mail to Email Continuity when the primary mailhost is down by listing the
Email Continuity MTA as a backup mail record within the MessageLabs configuration.
2. Configure Email Continuity to send mail directly to the primary mailhost instead of through the MX record (to
prevent mail looping).
3. Configure the firewall to allow inbound SMTP traffic (port 25) for the Email Continuity servers. This rule is the
same as the firewall rule that allows inbound mail from MessageLabs.
Figure 2-1
Mail Routing with MessageLabs
Mail Routing Inbound—Store and Forward
If your primary mail system has gone down, and your organization has not
activated Email Continuity, MessageLabs performs a store and forward service
and attempts to deliver your mail.
Similarly, if your organization performs a partial activation, this feature allows you
to designate hostnames to use to deliver mail to users who are not active on Email
Continuity.
To configure email routing for inbound mail, see "Routing for Forwarded Mail" on
page 146
Figure 2-2
Routing for Inbound (Forwarded) Mail
Email Continuity Administrator Guide version 6.5 (1st ed.)
15
Communications Requirements
Licensed Customer Confidential
Mail Routing—Outbound During Activation
When Email Continuity is active, by default it uses the MX records of mail
recipients to deliver outgoing mail. However, if your organization uses
MessageLabs for outbound services, or you have a need to route outgoing mail
through a different host, you can configure the system to use a designated series
of hostnames or IP addresses (hops) to determine the path your outgoing email
takes while Email Continuity is active. To configure the series of hosts, see "Mail
Routing—Outbound During Activation" on page 16.
Email
Continuity
1. By default, Email Continuity attempts to use MessageLabs’ MX records to deliver mail during an activation, OR
2. You can configure Email Continuity to send through a series of designated hosts during an activation, instead.
Figure 2-3
Outbound Mail Routing During Activation
Historical Mail Routing Requirements
Work closely with Support to determine the routing requirements for your
organization. Because of the number of variables involved and the uniqueness of
each network, it is not possible to provide a static requirements list.
Determining the routing requirements for your organization’s Historical Mail
implementation requires an understanding of your organization’s Exchange
routing topology and advanced knowledge of Exchange functionality. An analysis
of the variables involved leads to the identification of your organization’s preferred
routing topology, which requires configuration of:
•
Historical Mail replication zones, which include the primary and secondary
VaultBox systems to which each particular Exchange server routes mail.
You must assign Exchange servers to the replication zones.
•
DNS zones and zones created in your internal DNS configuration
•
Historical Mail MX records created in your internal DNS configuration
Correct implementation of the preferred routing topology not only allows for proper
operation of the Historical Mail feature, but it limits the impact of Historical Mail
deployment on your organization’s environment. Variables considered in making
this determination include, but are not limited to:
•
16
General network topology
Email Continuity Administrator Guide version 6.5 (1st ed.)
Licensed Customer Confidential
Hardware Requirements
•
Exchange routing groups
•
Connections between locations, including bandwidth and latency
•
Number of users at each location
•
Number of and which users at each location will enable the Historical Mail
feature
•
Location of internet access points
Smaller organizations may have only one preferred routing topology; large
organizations may have one or more per data center.
SMTP Connector
If you use an SMTP connector for sending outbound internet mail, and it is
configured to use a smart host and not DNS, then you must create an additional
SMTP connector for the Historical Mail address space that uses internal DNS for
address resolution.
In this configuration, if the additional SMTP connector is not created for the
Historical Mail address space, then the Exchange servers may route the mail that
should go to the VaultBox systems out to the internet through the SMTP connector
for internet mail.
For additional information on SMTP connector configuration for the Historical Mail
feature, contact Support.
Hardware Requirements
Verify that the server you plan to use as the primary controller (the ESS server)
has the following minimum hardware:
Table 2-1
Minimum Hardware Requirements
Component
Minimum Required
Processor
Pentium® III, 500 MHz
Memory
256 MB RAM (512 MB recommended)
Disk Space
Up to one-half gigabyte, depending on the number of users
Email Continuity typically does not require a dedicated server.
If you plan to install Historical Mail, the VaultBox must have a dedicated server.
You can use the same server on which SyncManager and RecoveryManager are
installed, or you can dedicate a second, separate server to the VaultBox software.
If you plan to install the RedirectorController, ensure that its server meets the
requirements as well.
Email Continuity Administrator Guide version 6.5 (1st ed.)
17
Software Requirements
Licensed Customer Confidential
The recommended minimum hardware requirements for any machine designated
as a VaultBox system are:
Table 2-2
Minimum Hardware Requirements, VaultBox
Component
Minimum Requirement
Processor
2.4 GHz Pentium 4-type
Memory
1 GB RAM
Disk Space
RAID 1, with adequate storage for seven times the estimated mail
volume for Historical Mail users. A formula that may help you calculate
the recommended storage is:
N = (Tf / 30) * 7
where N is the RAID size in GB and Tf is 30 days of mail traffic (total
internal and external traffic).
If you have questions about whether or not a machine meets VaultBox
requirements, contact Support.
Software Requirements
Before you begin an installation, you must install each required software
component on the ESS server. Which components are required depends on the
email environment you use, and which features your organization uses. A Support
representative will provide an appropriate software package, and walk you
through the actual installation process when the preinstallation requirements have
been met.
Service Software
1
Service software—Download the install package from the location
provided by Support.
For full use of Historical Mail features, your implementation must be
running version 6.0 or later of the service software. To see which version
you are running of a component, such as the Recovery Manager, select
Start > All Programs > MessageLabs > Recovery Manager. The
software launches, and the version number appears on the opening
screen.
For full use of Wireless Continuity for BlackBerry features, your
implementation must be running version 5.5 or later of the service
software. To see which version you are running of a component, such as
the SyncManager, select Start > All Programs > MessageLabs >
SyncManager. The software launches, and the version number appears
on the opening screen.
18
Email Continuity Administrator Guide version 6.5 (1st ed.)
Licensed Customer Confidential
2
Software Requirements
Service root account username and password—You must use the
service root account or a valid super administrator account (created by
your organization’s service root account) for authentication of the
SyncManager with the data center servers. If you do not have the service
root account username and password, contact Support.
Supported Operating Systems
The ESS server must use one of the operating systems described in Table 2-3.
Table 2-3
Supported Operating Systems
Server
Operating System
Notes
Email Security
Services Server
Windows Server 2003/
Windows Server 2008
64-bit is only supported for Windows
Server 2008
One or more VaultBox
systems
Windows Server 2003 SP1/
Windows Server 2008
SP1 is required by Microsoft
SQL Server 2005 Express
Edition
Supported Messaging Software
Email Continuity works with the following versions of Microsoft Exchange Server:
Table 2-4
•
Microsoft Exchange Server 5.5, Service Pack 4 or later
•
Microsoft Exchange Server 2000, Service Pack 3 or later
•
Microsoft Exchange Server 2003
•
Microsoft Exchange Server 2007
Supported Features/Exchange Configurations
Coexistence
(2000, 2003,
2007)
Exchange 5.5
Exchange
2000/2003
Email Continuity—full activation
Supported
Supported
Supported a
Supported
Email Continuity—partial activation
Not Supported
Supported
Supported
Supported
Historical Mail
Not Supported
Supported
Supported
Supported
Outlook Extension
Not Supported
Supported
Supported
Supported
Windows Authentication
Not Supported
Supported
Supported
Supported
Supported
Supported
Supported
Features
Wireless Continuity for BlackBerry
Exchange
2007
a. Continuous Cluster Replication is supported for full and partial activations in Exchange 2007.
Email Continuity Administrator Guide version 6.5 (1st ed.)
19
Software Requirements
Licensed Customer Confidential
Exchange 2000/2003: If your organization uses active/active hardware clustering,
be aware of the following:
•
Email Continuity is supported for global activations.
•
Partial activations of Email Continuity are not supported.
Server Software Requirements
Exchange 5.5 Environments
Table 2-5
Software Requirements for Exchange 5.5
Software
Notes
ESS Server
.NET Framework v. 2.0
If not already present on the ESS server, the installation package
provided by Support includes this software. After installation, you
may need to reboot the computer before you can proceed with the
SyncManager Wizard.
Microsoft Data Access
Components (MDAC) 2.7 or later
If not already installed, the service software installation package
includes this application. After its installation, you must reboot the
computer before you can proceed with the service software
installation.
Microsoft Outlook messaging and
Collaboration client must NOT be
installed.
MAPI/CDO (Latest version)
Download from Microsoft
Exchange 2000/2003 Environments
Table 2-6
Software Requirements for Exchange 2000/2003 Environments
Software
Notes
Email Security Services Server
.NET Framework v. 3.5 SP1
If not already present on the ESS server, the installation
package provided by Support includes this software. After
installation, you may need to reboot the computer before
you can proceed with the SyncManager Wizard.
Microsoft Data Access
Components (MDAC) 2.7 or
later
If not already installed, the service software installation
package includes this application. After its installation, you
must reboot the computer before you can proceed with the
service software installation.
20
Email Continuity Administrator Guide version 6.5 (1st ed.)
Licensed Customer Confidential
Table 2-6
Software Requirements
Software Requirements for Exchange 2000/2003 Environments (Continued)
Software
Exchange System
Management
Notes
For Exchange 2000, Exchange 2000 System Manager,
Service Pack 3 or later
For Exchange 2003, Exchange 2003 System Manager
Microsoft Internet Information
Server (IIS) and simple mail
transfer protocol (SMTP)
For the RedirectorManager to function properly, you must
install, but can then disable, IIS services, including SMTP.
Microsoft SQL Server 2005
Express
To use Historical Mail, you must have SQL Server 2005
Express. Though it is provided in the service software
package, installation of this software can take 30 minutes
or more; Support recommends that you install it prior to
scheduling your service call.
To use Historical Mail, you must have IIS services,
including SMTP, enabled.
Microsoft Outlook messaging
and Collaboration client must
NOT be installed.
Exchange 2000/2003 Server
Microsoft Distributed
Component Object Model
(DCOM)
To use the RedirectorManager for remote RedirectorSink
installation, you must allow communications using DCOM
from the ESS Server to the Exchange Servers. If you
cannot use DCOM, other installation methods are
available; contact Support.
Exchange 2007 Environments
Table 2-7
Software Requirements for Exchange 2007 Environments
Software
Notes
Email Security Services Server
.NET Framework v. 3.5 SP1
If not already present on the ESS server, the installation
package provided by Support includes this software. After
installation, you may need to reboot the computer before
you can proceed with the SyncManager Wizard.
Microsoft Data Access
Components (MDAC) 2.7 or
later
If not already present on the ESS server, the service
software installation package includes this application.
After its installation, you must reboot the computer before
you can proceed with the service software installation.
MAPI/CDO (Latest version)
Download from Microsoft
Email Continuity Administrator Guide version 6.5 (1st ed.)
21
Software Requirements
Table 2-7
Licensed Customer Confidential
Software Requirements for Exchange 2007 Environments (Continued)
Software
Notes
Microsoft Internet Information
Server (IIS) and simple mail
transfer protocol (SMTP)
For the RedirectorManager to function properly, you must
install, but can then disable, IIS services, including SMTP.
Microsoft SQL Server 2005
Express
To use Historical Mail, you must have SQL Server 2005
Express. Though it is provided in the service software
package, installation of this software can take 30 minutes
or more; Support recommends that you install it prior to
scheduling your service call.
To use Historical Mail, you must have IIS services,
including SMTP, enabled.
Microsoft Outlook messaging
and Collaboration client must
NOT be installed.
Exchange 2007 Servers
If the Exchange 2007 server
was not installed with support
for pre-Outlook 2007 clients,
you must create a Public
Folder store
1 Launch the Exchange Management Console.
2 Expand the Server Configuration node, and select the
Mailbox node and server on which you want to create
the Public Folder store.
3 In the Storage Management tab, select the storage
group you want to contain the public folder database.
4 In the Actions pane, click New Public Folder database.
Name the database, assign a path, then click New.
5 Stop, then restart, the MSExchangeIS service.
Configure Offline Address
Book for Outlook 2003 and
earlier clients.
Coexistence Exchange Environments (2000/2003/2007)
Table 2-8
Software Requirements for Coexistence Environments (2000/2003/2007)
Software
Notes
ESS Server
.NET Framework v. 2.0
22
If not already present on the ESS server, the installation package
provided by Support includes this software. After installation, you may
need to reboot the computer before you can proceed with the
SyncManager Wizard.
Email Continuity Administrator Guide version 6.5 (1st ed.)
Licensed Customer Confidential
Table 2-8
Software Requirements
Software Requirements for Coexistence Environments (2000/2003/2007) (Continued)
Software
Notes
Microsoft Data Access
Components (MDAC) 2.7
or later
If not already installed, the service software installation package
includes this application. After its installation, you must reboot the
computer before you can proceed with the service software installation.
Exchange System
Management
Exchange 2000 System Manager, Service Pack 3 or later, 2003
System Manager, MAPI/CDO (Latest version)
Download from Microsoft
Microsoft Internet
Information Server (IIS)
and simple mail transfer
protocol (SMTP)
For the RedirectorManager to function properly, you must install, but
can then disable, IIS services, including SMTP
Microsoft Distributed
Component Object Model
(DCOM)
To use the RedirectorManager for remote RedirectorSink installation,
you must allow communications using DCOM from the ESS Server to
the Exchange Servers. If you cannot use DCOM, other installation
methods are available; contact Support.
Microsoft Outlook
messaging and
Collaboration client must
NOT be installed.
Account Requirements
Exchange 5.5 Account Requirements
Table 2-9
Account Requirements, Exchange 5.5
Account
Notes
ESS Service Account
A service account, under which all service processes
run, must be created on the ESS server. This group must
be a member of the domain and the local administrator
group on the ESS server.
Service Account Administrator
Permissions
Administrator permissions required for the service
account on the Organization, Site, and Configuration
containers.
To grant service account permissions for Exchange 5.5:
1
In the Exchange 5.5 Administration Console, select Organization from
the top of the left tree.
2
From the File menu, select Properties. The Properties dialog displays.
Email Continuity Administrator Guide version 6.5 (1st ed.)
23
Software Requirements
Licensed Customer Confidential
3
Select the Permissions tab. Then, to select the account for use by the
Email Continuity service, click Add.
4
From the Roles drop-down list, select Service Account Admin. Click
OK.
5
Repeat for each of the Site and Configuration containers.
Exchange 2000/2003 Account Requirements
Table 2-10 Account Requirements, Exchange 2000/2003
Account
Notes
ESS Server
ESS Service Account
A service account, under which all service processes run, must
be created on the ESS server. This group must be a member
of the domain and the local administrator group on the ESS
server.
Service Account Administrator
Permission
ESS requires Exchange Admin permissions at the
Organization level, as well as Send As and Receive As
permissions on each mailbox store.
Exchange Servers
Local Administrator Permissions
on Exchange Servers
For remote deployment of RedirectorSinks using the
RedirectorManager. You could also deploy RedirectorSinks
using a different account that has local administrator
permissions.
To grant Exchange administrator permissions for Exchange 2000/2003:
24
1
In the Exchange System Manager, right-click the Organization name (top
level) and, from the pop-up menu, select Delegate Control. Click Next.
2
Click Add and then Browse. Select the account ESS will use. Then, for
Role select Exchange Administrator.
3
Right-click Administrative Group and, from the pop-up menu, select
Delegate Control. Click Next.
4
Verify that the ESS service account displays as being inherited. If, after
15–20 minutes, this is still not displayed, add the ESS account to each
administrative group.
Email Continuity Administrator Guide version 6.5 (1st ed.)
Licensed Customer Confidential
Software Requirements
To grant Send As and Receive As permissions:
1
NOTE
In the Exchange System Manager, expand the left tree until all expanded
storage groups display. For each mailbox store, go to Properties and
select the Security tab.
Public Folder Stores
You do not need to modify permissions on public folder stores.
2
Click Add. Select the account that ESS will use. Click OK. Verify selection
of the account and that Send As and Receive As permission options
show as selected (black check box).
3
Repeat for each mailbox store on each Exchange 2000/2003 server.
Exchange 2007 Account Requirements
Table 2-11 Account Requirements, Exchange 2007
Account
Notes
ESS Server
ESS Service Account
A service account, under which all service processes
run, must be created on the ESS server. This user
must be a member of the domain and the local
administrator group on the ESS server.
Exchange 2007 Servers
Send As permissions for the
Service Account on 2007
Exchange Servers
Link to instructions
Get-Mailboxdatabase | Add-ADPermission
-User [service account] -ExtendedRight
“send as”
[service account]=display name
Plan at least two hours for permissions to propagate.
Receive As permissions for the
Service Account on 2007
Exchange Servers
Link to Instructions
Get-Mailboxdatabase | Add-ADPermission
-User [service account] -ExtendedRight
“receive as”
[service account]=display name
Plan at least two hours for permissions to propagate.
Email Continuity Administrator Guide version 6.5 (1st ed.)
25
Virtualization
Licensed Customer Confidential
Coexistence Environments Account Requirements
Table 2-12 Account Requirements, Coexistence Environments
Account
Notes
ESS Server
ESS Service Account
A service account, under which all service processes run,
must be created for use on the ESS server. This user must be
a member of the domain and the local administrator group on
the ESS server.
Service Account
Administrator Permission
Email Continuity service requires Exchange Admin
permissions at the Organization level, as well as Send As
and Receive As permissions on each mailbox store.
Exchange 2000/2003 Servers
Local Administrator
Permissions on
Exchange Servers
For remote deployment of RedirectorSinks using the
RedirectorManager. You could also deploy RedirectorSinks
using a different account that has local administrator
permissions.
Exchange 2007 Servers
Send As permissions for
the Service Account on
2007 Exchange Servers
Link to instructions
Get-Mailboxdatabase | Add-ADPermission -User
[service account] -ExtendedRight “send as”
[service account]=display name
Plan at least two hours for permissions to propagate.
Receive As permissions
for the Service Account
on 2007 Exchange
Servers
Link to Instructions
Get-Mailboxdatabase | Add-ADPermission -User
[service account] -ExtendedRight “receive as”
[service account]=display name
Plan at least two hours for permissions to propagate.
Virtualization
Email Security Services can be virtualized under the following conditions:
26
1
Email Continuity is supported on the VMware Infrastructure virtualization
platform. Other platforms may function properly but are not supported.
2
Your virtual environment must adhere to the same requirements as a nonvirtual environment, as defined in the following sections:
•
"Communications Requirements" on page 13
•
"Hardware Requirements" on page 17
Email Continuity Administrator Guide version 6.5 (1st ed.)
Licensed Customer Confidential
•
3
4
Windows Authentication Requirements
"Software Requirements" on page 18
When you build each virtual machine (VM), you must use the following
configurations:
•
Under Network Type, choose Bridged Networking.
•
Under Specify Disk Capacity, check Allocate All Disk Space Now.
After your VM is built, adjust its memory allocation to reflect the
requirements specified under "Hardware Requirements" on page 17.
Windows Authentication Requirements
The following are required to use Windows Authentication:
•
Exchange 2000 or Exchange 2003. Windows Authentication does not work
with Exchange 5.5 or Lotus Notes.
•
At least two Authentication Managers must be installed, each in a different
geographic region. More Authentication Managers provide redundancy
and shorter login times.
•
Any machine housing an Authentication Manager must be able to access a
Domain Controller capable of authenticating a given user.
•
Sites housing Authentication Managers must have dedicated internet
connections to provide redundancy in case of a site failure.
When Support configures Windows Authentication in the data center, they set the
parameters described in Table 2-13. To change any of the default values, contact
Support.
Table 2-13 Windows Authentication Configuration Parameters
Parameter
Description
Default
Cache Windows
Password
The number of hours a password is
stored to speed subsequent logins
48 hours
Max Password
Attempts
The number of failed login attempts
after which the user is locked out.
Typically set to one fewer than your
organization’s network lockout policy,
so that a user cannot be locked out of
the network because of failed Email
Continuity login attempts.
Attempt Count Reset
The number of minutes the system
stores a failed attempt and counts it
against the number of Max Password
Attempts.
30 minutes
Lockout Period
The number of hours an account
remains locked
72 hours
Email Continuity Administrator Guide version 6.5 (1st ed.)
27
Wireless Continuity for BlackBerry Requirements
Licensed Customer Confidential
Windows Authentication Limitations
The following are known limitations for Windows Authentication:
•
Disabled Active Directory accounts cannot log in.
•
Windows NT login IDs cannot be used; there is no way to ensure that an
NT ID is globally unique. The SMTP address is a unique identifier.
•
In multi-domain forests, sufficient trusts must be in place between
accessible domain controllers between domains to authenticate users.
•
By design, if an Active Directory account is locked, the user’s logon will fail
for Email Continuity even if they have not exceeded the Max Password
Attempts count.
•
If a user changes his Active Directory password after having logged in and
cached his password in Email Continuity, the cached password remains
the Email Continuity password until the Cached Windows Password timeout expires.
Wireless Continuity for BlackBerry Requirements
To use Wireless Continuity for BlackBerry, the following requirements must be
met:
28
•
Blackberry device software versions 4.1 or greater must be installed;
earlier versions of device software are not supported.
•
BES 4.1 and later.
•
The MDS service is running on all BES servers.
•
The SyncManager software has network access to the BES databases by
Window NT authentication.
•
If using MSDE, the service account needs read permissions for the
directory where the BESMgmnt_data.mdf and Besmgmnt_log.mdf
reside.
•
The RedirectorController software must be able to post HTTP requests to
the BES systems that have push capability.
•
Each user’s display name must match the name on the host where his
BlackBerry device is cradled. If a user’s name changes, the MAPI profile
on the host must be changed as well.
•
It is possible to have multiple instances of the MSDE/SQL installed on any
one host. However, if your environment includes only one database
instance on one host and provides for auto-detection, the installation
process auto-detects the correct instance. If your environment does not
provide for auto-detection, you must set this manually.
Email Continuity Administrator Guide version 6.5 (1st ed.)
Licensed Customer Confidential
Wireless Continuity for BlackBerry Requirements
Wireless Continuity for BlackBerry Installation Prerequisites
These instructions are based on the following software versions:
•
Email Continuity version 6.0.3 and higher
•
BES version 4.1.3
•
SQL version MSDE
There are several prerequisites you must have in place before accessing the BES
database. The list below gives you a quick overview, and the rest of this section
explains how to perform these tasks.
1
Add the Email Continuity service account to the Local Administrator Group
(see "Adding the Email Continuity Service Root Account to the Local
Administrator Group" on page 30.
2
Enable TCP and Names Pipes Access to the BES database (see
"Enabling TCP and Name Pipes to Access the BES Database" on
page 30).
3
4
5
•
Run SVRNETCN.exe
•
Stop and Restart SQL services
Verify that Mobile Data Services (MDS) is installed and configured for
Wireless Continuity for BlackBerry (see "Verifying that Mobile Data
Services are Installed and Configured" on page 31).
•
Configure MDS to act as a push server
•
Configure MDS to a valid port
•
Stop and Restart the MDS services
Verify IT Policy settings (see "Verifying that Mobile Data Services are
Installed and Configured" on page 31).
•
Allow third-party application downloads
•
Allow internal connections
•
Allow external connections
Grant db_datareader and public access to the BES SQL database.
Email Continuity Administrator Guide version 6.5 (1st ed.)
29
Wireless Continuity for BlackBerry Requirements
Licensed Customer Confidential
Adding the Email Continuity Service Root Account to the Local
Administrator Group
You must add the service root account (or the valid super administrator account
that is running Email Continuity services for your organization) as a local
administrator of the BES group.
To add the Email Continuity account to the local administrator group of the
BES group:
1
Log in using the BES administrator user name and password.
2
Right-click My Computer on the desktop, and select Manage from the
drop-down list. The Computer Management window appears.
3
Open System Tools, then open Local Users and Groups. In the Groups
folder, select and right-click Administrators in the list. Select Add to
Group. The Administrators Properties pane appears.
4
Click Add. The Select Users, Computers, or Groups pane appears.
5
Type the name of your Email Continuity service root or valid super
administrator account in the Enter the object names to select box. Click
Check Names. The complete email address appears in the box.
6
Click OK. The Administrators Properties panel appears again, with the
Email Continuity administrator user added to the list.
Enabling TCP and Name Pipes to Access the BES Database
NOTE
Instructions for BES version 4 and version 5
The following instructions are written for BES version 4. For a BES 5 server,
configure TCP using the Microsoft SQL configuration tools, such as Start > All
Programs > Microsoft SQL Server 2005 > Configuration Tools > SQL
Server Configuration Manager.
Set the TCP/IP protocol for BlackBerry to Enabled.
Do not enable IP Addresses IP1 or IP2.
Set the TCP Port for IPALL to 1433.
To enable TCP and Name Pipes to have access to the BES database:
30
1
Navigate to the SVRNETCN.exe file. This file is typically located in
C:\Program Files\Microsoft SQL Server\80\Tools\Binn.
2
Run SVRNETCN.exe. The SQL Server Network Utility window appears.
3
Under the General tab, locate Disabled protocols.
4
Select Named Pipes and click Enable to move it to the Enabled
protocols box. Do the same with TCP/IP.
Email Continuity Administrator Guide version 6.5 (1st ed.)
Licensed Customer Confidential
Wireless Continuity for BlackBerry Requirements
5
Click OK. The SQL Server Network Utility displays a message informing
you that changes are made when saved, but do not take effect until the
SQL Server service is stopped and restarted.
6
Click OK to save your changes.
7
To stop the MSSQLServer, right-click its icon in the notification area. This
pops up the MSSQL menu. Select MSSQL Server Stop. You are asked to
confirm that you want to stop the MSSQLSERVER service on the selected
server. Click Yes to stop the service.
8
Next, restart the service by right-clicking on the icon. Select
MSSQLServer Start.
Verifying that Mobile Data Services are Installed and Configured
NOTE
Instructions for BES version 4 and version 5
The following instructions are written for BES version 4. For a BES 5 server,
MDS is a core component and is set to push by default. You can skip this
section for a BES 5 server.
Verifying that MDS is installed and configured for Wireless Continuity for
BlackBerry is a multi-step procedure. You must verify that the MDS server is a
push server and is listening on an available port. You must then set the IT policies.
To verify that the MDS server is a push server and has an appropriate
listening port configured:
1
From the Start button, select BlackBerry Enterprise Server, then
BlackBerry Manager. The BlackBerry Manager splash screen appears.
2
After the BlackBerry Manager has started up, click the Global tab.
3
Expand BlackBerry Domain so that Servers is displayed. Expand
Servers to display a list of servers. Select the server for which you want to
verify settings.
4
When you select a server, settings for that server appear in the
Connection Service panel.
5
MDS must be a push server. To set it as such, locate Tasks on the right
side of the panel. Click Set as Push Server. The page refreshes and Is
push server: is now set to True.
6
Click Edit Properties above Tasks.
7
The BlackBerry MDS Connection Service panel appears. Verify that the
Web Service Listen Port is an available port (usually 8080).
8
Stop and restart the service using the buttons in the Task panel.
Email Continuity Administrator Guide version 6.5 (1st ed.)
31
Wireless Continuity for BlackBerry Requirements
Licensed Customer Confidential
To set IT policies:
1
From the BlackBerry Manager main page, click the Global tab.
2
Click the ellipsis (...) in the right side of the IT Policies field. The Global
Properties panel appears.
3
In the Global Properties panel, locate IT Policies and select it. The IT
Policy Administration panel appears.
4
Double-click IT Policies. The IT Policies panel appears with one default
policy. Select this policy. When you select the policy, new options appear.
Select Properties. The list of properties associated with this policy
appears.
5
Locate Security Policy Group and select it. The bullet beside Locate
Security Policy Group becomes an arrow.
6
Locate Disallow Third Party Application Download. Use the drop-down
list to set this to False.
7
Locate Allow Internal Connections. Use the drop-down list to set this to
True.
8
Locate Allow External Connections. Use the drop-down list to set this to
True.
9
When you have made these changes, click Apply, then click OK. The IT
Policy Administration panel appears again. Click OK on this panel. The
BlackBerry Manager main page appears.
Wireless Continuity for BlackBerry Supported Configurations
The service supports:
•
All configurations of 4.1 BES and later supported by RIM.
•
All devices later than 4.1, as long as they are supported by the installed
BES. The device.xml file must have an updated list of all devices when
using the over-the-air deployment method.
Wireless Continuity for BlackBerry Limitations
Limitations for Wireless Continuity for BlackBerry are described below.
32
•
On some platforms and with some carriers, the unread device message
counter does not increment correctly when Email Continuity is active. The
counter increments twice for each received mail, but decrements only
once when a message is read. This is a known RIM issue. To reset the
counter, from the Agent menu, select Reset Unread Msg Counter. When
asked Allow device to restart?, select YES.
•
The BES-independent model that allows BlackBerry users to compose,
send, and receive email on their BlackBerry devices even if the BES has
failed works only for organizations using the version 6.5 (or later) data
Email Continuity Administrator Guide version 6.5 (1st ed.)
Licensed Customer Confidential
Outlook® Extension Requirements
center and the version 6.2 (or later) BlackBerry agent. Organizations using
previous versions of the data center or agent software will notice no
change to their Wireless Continuity for BlackBerry implementations.
•
Messages received during an activation cannot be forwarded or replied to
after the activation is complete (that is, when EMS has been returned to
the READY state). Users should send the message, receive the error
message, then resend the message. The initial message failure allows the
device to obtain the message body from Exchange through the BES.
•
While Email Continuity is active, users cannot send attachments with
messages composed on their BlackBerry devices. They can attach files,
but message recipients will only receive the body of the message.
•
Forwarded messages and replies do not include original attachments, but
do provide a text rendering of them up to the device limit (32Kb).
Outlook® Extension Requirements
The following are required to use the Outlook® Extension:
•
Windows XP or Windows Vista
•
Outlook® 2003 SP 2, or Outlook 2007 SP 1 (when available). Outlook must
be in cached mode to use Email Continuity features.
NOTE
Required Microsoft Hotfix for Email Continuity Features
The following hotfix is required in order for recurring appointments to perform
correctly when using the Outlook Extension.
Outlook 2003: KB # 935411
If you do not install this hotfix, then users will experience problems when
responding to recurring calendar requests. The reply to the sender does not
indicate that the meeting was declined, and Outlook does not update the
tracking status of the invitation.
•
Users must have administrative permissions to install the Extension.
Email Continuity Administrator Guide version 6.5 (1st ed.)
33
Outlook® Extension Requirements
Licensed Customer Confidential
Outlook Extension Limitations
Table 2-14 describes known limitations with the Outlook Extension. To compare
Outlook Extension features with those of Email Continuity web-mail, see "About
the Outlook Extension" on page 7.
Table 2-14 Outlook Extension Limitations
Limitation
Status
During an activation, read/delivery receipts do not function
typically.
During an activation, read receipts are
generated and sent when the user
clicks the Send/Receive button. If the
user does not click Send/Receive, the
receipts are delivered after recovery.
During an activation, the New Mail icon does not display in the
task bar.
Under investigation for future release
Because of the way Microsoft encodes new lines in the
Description field, meetings created using the Extension
sometimes display n characters in the text when they are
restored by the RecoveryManager. For example, instead of
“Meeting Request for Monday 4/23 - 11:00 -11:30”, the
invitation reads “\nMeeting Request for Monday 4/23 - 11:00 11:30\n”.
Under investigation for future release
When creating meeting invitations, you can choose conference
rooms as recipients (required or optional) but cannot assign
them as resources until Outlook is back online.
Outlook cannot process resource
requests while offline.
The data center validates email addresses when attempting to
send a message. If the address is invalid per RFC-822
specifications, the data center fails to send the message, and it
remains in the Outlook outbox during an activation. Exchange
would attempt to send the message even if the address did not
conform to RFC-822.
Expected difference in behavior
between the Extension and
Exchange, based on data center
processes.
If a client-side rule is based on an Exchange address (such as,
“move a message from a user on Exchange to a folder”) the
rule may not be processed consistently. Rules based on SMTP
addresses and other conditions behave as expected.
Under investigation for future release
To address performance issues in earlier versions, Outlook
Extension no longer supports context menu functionality in
Outlook 2003. Features previously accessible through the
context menu are available through the ESS drop-down menu
on the toolbar.
Use the ESS drop-down menu on the
toolbar for these features.
34
Email Continuity Administrator Guide version 6.5 (1st ed.)
Licensed Customer Confidential
Planning RedirectorSink/RedirectorController Placement
Planning RedirectorSink/RedirectorController
Placement
RedirectorSinks are required to use the partial activation feature in Exchange
2000/2003 environments. Installed on Exchange servers, RedirectorSinks are
SMTP event sinks that redirect messages in your Exchange environment for
active Email Continuity users to the data center. RedirectorSinks receive this
routing information from the RedirectorControllers.
NOTE
Partial Activation in Exchange 2007 Environments
The partial activation feature is supported for Exchange 2007. Instead of using
RedirectorSinks, the service uses a custom Transport Agent installed on the
Hub Transport Server. For more information, see "Installing the
RedirectorAgent" on page 60.
RedirectorSink Placement
An Exchange server without RedirectorSinks and RedirectorControllers cannot
redirect mail for active Email Continuity users. For this reason, Support
recommends that you install a RedirectorSink on all Microsoft Exchange 2000/
2003 servers in your environment.
This configuration allows for the greatest level of flexibility and coverage in the
event of an outage. By deploying the RedirectorSinks to all Exchange servers in
the environment, not only can the servers redirect messages at the first possible
hop, but redirection is possible for partial server outages.
When planning for RedirectorSinks, consider the following:
•
Bridgehead and SMTP gateway servers—Installation on bridgehead and
SMTP gateway servers is critical for redirection. By installing
RedirectorSinks on SMTP gateway servers, inbound SMTP mail for active
users is redirected at the first hop, minimizing network traffic and providing
maximum flexibility in the event of an outage.
Bridgehead servers act as concentrators for message traffic. Even if no
mailboxes are on the bridgehead servers themselves, because messages
in transit to an active recipient may pass through these, it is important that
they include installed RedirectorSinks.
•
Mailbox servers—Installation of a RedirectorSink on each mailbox server
in your environment allows for redirection of mail between routing group
peers, as well as redirection of intraserver message traffic. This protects
against failure of a single server in a routing group, as well as in the event
of a single database or storage group failure.
•
Public folder servers—Typically, dedicated public folder servers do not
have messages destined for mailbox recipients transiting them. So, while
deploying a RedirectorSink on this type of server may not be essential, it is
still considered a best practice.
Email Continuity Administrator Guide version 6.5 (1st ed.)
35
Planning RedirectorSink/RedirectorController Placement
Licensed Customer Confidential
RedirectorController Placement
Proper placement of RedirectorController instances (controllers) in your
messaging environment is essential for high-availability failover. Much like the
domain name service (DNS), the controllers provide routing information to the
Exchange servers for active users. Without access to RedirectorControllers, the
RedirectorSinks cannot redirect messages for active users. Similarly, without
access to the data center, RedirectorControllers cannot obtain updated routing
information for transmission to the RedirectorSinks.
Figure 2-4
36
RedirectorController
Email Continuity Administrator Guide version 6.5 (1st ed.)
Licensed Customer Confidential
Planning RedirectorSink/RedirectorController Placement
As part of your installation, Support helps you install a single RedirectorController
in your environment. You can install additional controllers by running setup and
choosing the secondary controller option.
When planning for secondary controllers, consider the following:
Geographic diversity—If Exchange servers are available in multiple locations,
placing controllers in multiple locations helps protect against catastrophic failure
or power outage in a single location.
Figure 2-5
RedirectorControllers in Multiple Locations
WAN topology—Where loss of wide-area network (WAN) links, firewalls, or dialon-demand links may isolate servers from available controllers, strategic
placement of secondary controllers allows RedirectorSinks to obtain updated
routing information.
Email Continuity Administrator Guide version 6.5 (1st ed.)
37
Planning RedirectorSink/RedirectorController Placement
Figure 2-6
Licensed Customer Confidential
RedirectorControllers in WAN
Geographic redundancy—If your environment includes multiple servers located in
a single data center, this magnifies the risks associated with a single controller
failure. Consider placing multiple controllers in a single data center.
Figure 2-7
38
Redundant RedirectorControllers
Email Continuity Administrator Guide version 6.5 (1st ed.)
Licensed Customer Confidential
Historical Mail Requirements
In the event of an outage where normally functioning Exchange servers are
unable to communicate with a controller (or the controller is unable to
communicate with the data center), you may need to activate the service for users
on these functioning servers in order to communicate with users affected by the
outage. As a result, Support strongly encourages that you critically evaluate the
placement of controllers and WAN/internet connectivity and, where appropriate,
add additional controllers, network links, or both to provide the highest possible
levels of redundancy.
Historical Mail Requirements
CAUTION
Read Before Installing!
Before you begin Historical Mail implementation, be familiar with all
requirements and work with your Support representative to identify your
organization’s preferred routing topology.
Before you can install software for any VaultBox implementations and enable the
Historical Mail feature, you must do the following:
1
Allow port 22 (TCP) as outbound for SSH through the firewall from all
VaultBox machines. See the network settings document provided by
Support for specific address information.
2
Ensure that all Exchange servers that use SMTP can communicate with
any identified VaultBox systems using port 25 (TCP).
3
In Exchange, increase the maximum recipients limit to a number at least
as large as [the number of recipients on your largest mailing list * 2] + 1.
For example, if your largest mailing list has 2000 users, increase the
maximum recipients limit to at least 4001 ([2000 * 2] + 1).
4
Identify routing requirements for use with the Historical Mail feature and, in
the DNS zones file, create additional zones (at least one per preferred
routing topology, with a maximum of eight) named consecutively (for
actual names of the DNS zones for your Historical Mail implementation,
see the network settings document provided by Support).
5
Assign MX records for VaultBox systems. Contact Support for specific
instructions on how to do this for your organization.
6
Gather the following information for each machine that will be used as a
VaultBox system:
•
Its name
•
The drive on which you will install the software
•
The location of the cache directory where email messages arrive by
SMTP before transmission to the data center
Email Continuity Administrator Guide version 6.5 (1st ed.)
39
AlertFind Integration Requirements
CAUTION
Licensed Customer Confidential
Required Drive Space
Be sure you identify a drive with enough space for seven times the expected
volume of daily mail. If you fail to install the Historical Mail software on a drive
with enough space, the feature will not work properly.
AlertFind Integration Requirements
The following are required to support AlertFind Integration:
•
One-to-one mailbox-to-user correspondence between products.
This feature is available only to customers whose Email Continuity and
AlertFind products are exactly matched; that is, all of the mailboxes in
Email Continuity are also users in AlertFind. This feature does not work for
customers who have all of their users in Email Continuity and a subset of
users in AlertFind, or the reverse. There must be a one-to-one correlation
between users in AlertFind and Email Continuity.
•
Active Directory data must be formatted correctly for the AlertFind import to
function. For example:
•
Only one phone number per device field is allowed.
•
North American phone numbers must contain 10 digits, beginning with
the area code. Do not include text.
•
International phone numbers must begin with the country code, then
provide the area/city code and phone number. Do not use in-country
long distance numbers. For example, a number in the UK must be
formatted 44 20 7333 4444, instead of 44 (0) 20 7333 4444.
•
Email address entries must have a valid alias (must contain an @
symbol) and can contain only one address. Two addresses separated
by a semi-colon, for example, is not acceptable.
AlertFind Integration Limitations
The following are known imitations of AlertFind integration with Email Security
Services.
40
•
Although you can synchronize custom data fields from Active Directory,
and use them as AlertFind groups, PINs and Time Zone data are not
mapped to AlertFind. Users can create their own PINS and set time zone
data through the AlertFind user interface.
•
Custom data fields collected from Active Directory and synced to AlertFind
are not available for use in other features of Email Security Services.
Email Continuity Administrator Guide version 6.5 (1st ed.)
Licensed Customer Confidential
AlertFind Integration Limitations
•
When users are disabled or deleted from Email Continuity they are also
deleted from AlertFind. Any data provided by these end users is also
removed.
•
There is currently no mechanism to automatically use AlertFind to notify
users of an activation of Email Continuity.
Email Continuity Administrator Guide version 6.5 (1st ed.)
41
AlertFind Integration Limitations
42
Licensed Customer Confidential
Email Continuity Administrator Guide version 6.5 (1st ed.)
Licensed Customer Confidential
3
Installing Service Software
Installation and Configuration
Installing Service Software
To install the software, you must log in as the service root account (assigned by
Support), or as a super administrator account (created by your organization’s
service root account). If you do not have the root account login and password
information, contact Support.
The software uses an InstallShield Wizard. The wizard installs:
•
.NET v. 2.0 SP1, if not already installed
•
SyncManager
•
RecoveryManager, RedirectorController, RedirectorManager, and the
Directory Configuration wizard. This Primary Controller default install
package is applicable to Windows 2000/2003/2007.
•
Windows Authentication, if enabled
The appropriate software package for your installation is provided to you by
Support.
WARNING
Upgrading to 6.0 or later versions
If you are upgrading to 6.0 or 6.1 from any 5.x version of the software, you must
first remove (uninstall) all Email Continuity and Historical Mail (ActiveMailbox)
software prior to installing the 6.x version.
For more information, or assistance with the upgrade, call Support.
To install service software:
1
On the ESS server, log in using the service account you created to meet
preinstallation requirements.
2
Open the installation software folder, and double-click the setup.exe file.
3
If the .NET Framework software needs to be installed, the Microsoft .NET
Framework Setup Wizard appears.
a. In the Welcome dialog box, click Next.
b. In the End-User License Agreement dialog box, review the software
license for the .NET Framework application. To agree to the license
terms and continue with installation, select the I accept the terms of
the License Agreement check box, and then click Install.
c. In the Setup Complete dialog box, click Finish.
Email Continuity Administrator Guide version 6.5 (1st ed.)
43
Installing Service Software
Licensed Customer Confidential
d. Reboot the computer if the installation requires it. After the reboot, the
installation process automatically restarts.
4
The InstallShield Wizard Welcome window appears. Click Next.
5
In the Application Root Username and Password window, log in with
the user name and password of the service root account or a valid super
administrator account, then click Next.
6
In the Select Features window, choose the component you want to install.
a. For a typical installation, click Primary Controller. This installs the
SyncManager, RecoveryManager, RedirectorController, and
RedirectorManager.
b. For installation of only a secondary RedirectorController, click
Secondary Controller.
c. To install only the RecoveryManager, click Recovery Tools.
44
Email Continuity Administrator Guide version 6.5 (1st ed.)
Licensed Customer Confidential
Installing Service Software
d. To customize your selection of components, click Custom (advanced
users only). For custom installations, an additional window displays in
which you identify which of the available components you want to
install. Click Next.
7
In the Service Credentials dialog box, identify the service account that
accesses your primary email environment, and assign the account proper
domain permissions. Because you logged in with this account, the
installation process automatically populates the Domain and Username
fields with the current domain account information. To complete the login
process and set necessary domain permissions:
a. Verify the information in the Domain box or, to log in under a different
account, enter the appropriate domain information. MessageLabs
strongly recommends that you do not use a different account.
b. Verify the information in the Username box or, if needed, change it to
correspond with the information in the Domain box.
c. In the Password box, enter the password for the account.
d. Click Next.
8
In the Destination Folder dialog box, set the destination folder for
installation files. To accept the default install location, click Next. To install
the product in a different location, click Browse, select an alternate
location, and then click Next in the Destination folder dialog box.
Email Continuity Administrator Guide version 6.5 (1st ed.)
45
Installing Service Software
9
Licensed Customer Confidential
In the Start Copying Files dialog box, click Next.
The Setup Status window displays installation progress.
10 Provide RedirectorController registration information.
46
Email Continuity Administrator Guide version 6.5 (1st ed.)
Licensed Customer Confidential
Installing Service Software
To configure the RedirectorController, the software must register the
component so that it can communicate with the Exchange server or
servers by name for transmission of RedirectorSink objects. To register the
RedirectorController:
a. Provide the Fully Qualified Domain Name for the RedirectorController.
NOTE
Fully Qualified Domain Name
The Fully Qualified Domain name does not need to resolve externally.
b. Provide the Machine Name of the machine on which you want the
RedirectorController installed.
c. Retain the default Port number (10709) or, if necessary, enter a new
port number. If you enter a new port number, be sure you identify a port
not used by any other application.
d. Click Next. A window displays confirming registration of the
RedirectorController.
e. Click Next.
Email Continuity Administrator Guide version 6.5 (1st ed.)
47
Installing Service Software
NOTE
Licensed Customer Confidential
Terminal Services and Controller Registration
If you are installing using terminal services, after you click Next in the Controller
Registration Information window, the process may appear to stall. If a
processing icon (such as an hour-glass icon) continues to display for more than
a minute or two, click once on the desktop and then click the window again. The
process should continue without further delay.
11 Email Continuity cannot function until you configure the SyncManager.
MessageLabs recommends that you configure SyncManager as soon as
you complete the installation. To do this, click the Start SyncManager to
configure ESS check box, then click Finish.
NOTE
Run With Full Access
If a Run As dialog box appears after you click Finish, you must uncheck
(deselect) the box that reads Run this program with restricted
access. If you do not uncheck this box, the program will not launch properly. If
this occurs, relaunch the program manually from the Start menu.
12 If the SyncManager has never been run before, a prompt appears
requesting your approval to continue. Click OK.
48
Email Continuity Administrator Guide version 6.5 (1st ed.)
Licensed Customer Confidential
Configuring the SyncManager
13 At this point, the installer might ask you to reboot the system. If the
Configure SyncManager Wizard does not appear immediately after
rebooting, you can launch it manually, as described on page 50.
Configuring the SyncManager
A SyncManager Setup Wizard guides you through the configuration process, in
which you describe your email environment and determine how often the service
should synchronize data with your email system. The configuration process
performs an initial synchronization. After this process completes, Email Continuity
is ready for activation in the event of an outage.
SyncManager synchronizes Directory information, as well as Contacts and
Calendar data if it is stored on the email server. For calendar data, all activities
scheduled for the future are synchronized (including future instances of recurring
meetings), as well as any activities that occurred during the past seven days. If
you need to have a longer period of historical calendar data synchronized, the
number of days is configurable. Also, personal distribution lists can be
synchronized, if the system has been enabled to do so. Contact Support for more
information.
NOTE
Personal Distribution Lists
If a Personal Distribution list is created or edited in Outlook, the contents can be
synced to the data center if this feature has been enabled by Support. If a
Personal Distribution List is created or edited using Outlook Web Access
(OWA), the contents are not synced.
While performing a sync, the system also checks for ID conflicts based on a user’s
primary email address. If more than one instance of an email address is detected,
a conflict is reported. (Note that the system does not use other criteria for
detecting conflicts, such as aliases or X400 or X500 addresses.) The system
provides means to resolve conflicts automatically or manually; see "Resolving
User ID Conflicts Automatically" on page 148 and "Resolving User ID Conflicts
Manually" on page 125.
Q Why is conflict detection necessary?
A Email Security Services uses the Exchange LegacyDN as a unique identifier
when storing mail for a user. When the user changes Administrative Groups or
Exchange Organizations, the LegacyDN value changes, the old mailbox is
deleted, and a new one is created. To make sure that all mail collected for a
user under the old LegacyDN is subsequently associated for the user under
the new LegacyDN, SyncManager detects potential conflicts and allows
administrators to resolve them by indicating that the two users are the same
person.
You can configure the SyncManager either when prompted, at the completion of
product installation, or by launching the SyncManager Setup Wizard manually.
Email Continuity Administrator Guide version 6.5 (1st ed.)
49
Configuring the SyncManager
Licensed Customer Confidential
To launch the SyncManager Setup Wizard manually:
1
From the Start menu, select Programs > MessageLabs >
SyncManager.
2
The splash screen for the SyncManager displays. A SyncManager dialog
box also displays. Click OK.
To configure the SyncManager:
1
50
Log in to the SyncManager Setup Wizard. You must use the user name
and password for the service root account or a valid super administrator
account.
Email Continuity Administrator Guide version 6.5 (1st ed.)
Licensed Customer Confidential
2
Configuring the SyncManager
Identify your version of Microsoft Exchange software.
a. Select the appropriate email Platform and complete the information in
the Settings portion of the window.
•
If you use Exchange 2000/2003/2007, the wizard automatically
detects the Active Directory global catalog or catalogs available for
use. From the Server list, select the global catalog server that is
physically closest to the machine on which you installed the
SyncManager.
Click the Advanced button to see Advanced settings for the Global
Catalog Server.
Email Continuity Administrator Guide version 6.5 (1st ed.)
51
Configuring the SyncManager
Licensed Customer Confidential
•
If you use Exchange 5.5, type the name of the appropriate
Exchange server in the Directory Server box.
If this Exchange server is also a Windows 2000 domain controller
server, click Advanced and, for the LDAP Connection
information, provide information about the port on which Exchange
listens for LDAP transmissions (389 is the default), and click OK.
b. Leave the Synchronize Mailing Lists and Synchronize Personal
Mailing Lists check boxes checked to allow these lists to be
synchronized. Uncheck these boxes to turn off synchronization of
these lists.
c. Click the Next arrow.
3
52
The Setup Wizard registers the SyncManager instance with the Email
Continuity server. Click Next.
Email Continuity Administrator Guide version 6.5 (1st ed.)
Licensed Customer Confidential
4
Configuring the SyncManager
Schedule directory synchronization.
The Directory Schedule Information window allows you to determine
how often the SyncManager synchronizes (or ‘syncs') directory data with
the data center.
NOTE
Actual Synchronization Start Time
When you schedule synchronization processes the actual process runs
sometime within the Start Hour you specify.
TIP
Imported Active Directory Attributes are Configurable
Email Continuity allows you to identify which user attributes are synched from
Active Directory.
a. MessageLabs recommends that you run directory syncs on a regularly
scheduled basis. If you do not want your selections for the directory
sync process to run regularly, clear the Run Scheduled? check box.
b. Select a Frequency, including Day and Start Hour. Indicate whether
the start hour is AM or PM. (Remember, noon is 12:00 PM and
midnight is 12:00 AM.)
c. Click the Next arrow.
Email Continuity Administrator Guide version 6.5 (1st ed.)
53
Configuring the SyncManager
5
Licensed Customer Confidential
Set a MAPI profile for contact and calendar syncs.
For SyncManager to successfully synchronize data, you must select an
appropriate messaging application programming interface (MAPI) profile.
The product automatically detects available MAPI profiles. Either:
•
Select a MAPI Profile from the drop-down list, or
•
If an appropriate MAPI profile doesn’t exist, the wizard helps you
create one. Click Edit.
(1) A MAPI Profile dialog box displays. To create a profile, click Yes. If
you click No, you can provide the appropriate profile name and
then click Yes.
(2) A Microsoft Exchange Server dialog box displays. The contents of
this dialog reflect the settings for the new MAPI profile. When the
process completes, click OK.
(3) Click the Next arrow.
54
Email Continuity Administrator Guide version 6.5 (1st ed.)
Licensed Customer Confidential
NOTE
Configuring the SyncManager
Specific Mailbox Required
The Microsoft Exchange Server dialog box must reflect a specified mailbox that
the configuration process can successfully resolve. To ensure this, click Check
Name in the dialog. If the check fails, you may need to provide a fully qualified
domain name for the mail server.
6
In the Contacts Schedule Information dialog box, schedule the
synchronization of users’ contact data. Because this process is more
intensive than the directory synchronization, you should schedule it for
non-peak-load times and, preferably, weekly frequency. The process does
not modify any of the data.
a. Select a Frequency, including Day and Start Hour. Indicate whether
the start hour is AM or PM. (Remember, noon is 12:00 PM and
midnight is 12:00 AM.)
b. Click Next.
NOTE
Avoid Sync Process Overlap
Schedule directory, contact, and calendar synchronization processes so that
they do not overlap. Allow sufficient time for one to complete before the next
begins.
Email Continuity Administrator Guide version 6.5 (1st ed.)
55
Configuring the SyncManager
7
Licensed Customer Confidential
In the Calendar Schedule Information dialog box, schedule the
synchronization of users’ calendar data. Because this process is more
intensive than the directory synchronization process, schedule it for nonpeak-load times and, preferably, weekly frequency.
a. Select a Frequency, including Day and Start Hour. Ensure that you
indicate whether the start hour is AM or PM.
b. Click the Next arrow.
8
To perform the initial Directory data synchronization between
SyncManager and the data center, click the Next arrow.
9
A Directory Sync Status dialog box provides information about the
progress of the initial synchronization. Depending on the size of your user
base, the process may take a few minutes
When the synchronization completes, SyncManager creates a user
account for each current user in your primary email system. The final
window’s Status message displays the number of accounts created, as
well as additional information. Note the total number of accounts created.
This should be approximately equal to the total number of mailboxes in the
supported system or systems. If there is a difference that is more than you
expected, you may need to exclude mailboxes that are for resources (such
as conference rooms) rather than for people. For information on excluding
mailboxes, see "Excluded Users" on page 124.
Click the Next arrow.
56
Email Continuity Administrator Guide version 6.5 (1st ed.)
Licensed Customer Confidential
Configuring RedirectorManager
10 The SyncManager is ready for use. Click the Next arrow to launch the
SyncManager summary screen.
If other synchronizations are available to you, you can run them at this time. After
you have configured the SyncManager, you should set a deletion threshold
percentage so that a fault alert message is sent when the set percentage of users
or distribution lists is exceeded. See "Sync Notify Settings" on page 149 for more
information.
If you are using several Exchange servers and Email Continuity controllers, you
can configure SyncManager to specify which Exchange servers are synched by
which Email Continuity controller. This is called distributed synchronization.
To configure distributed synchronization with SyncManager:
1
On the server that is your primary controller, open SyncManager. From
the Start menu, select Programs > MessageLabs > SyncManager.
2
Click the Configure button. The Edit Sync Properties window appears.
3
Click the Distributed tab.
4
Use the Add and Remove buttons to move Exchange servers from the
Server List to the Included Servers list. Servers in the Included Servers
list will be synchronized by this controller.
5
Click Save.
6
Repeat this process for the secondary controllers in your configuration.
Configuring RedirectorManager
The RedirectorManager is a centralized console interface through which
administrators install, upgrade, and maintain RedirectorSink objects. In the event
of a partial disruption of the primary mail system, the RedirectorSinks route email
messages destined for affected users to their Email Continuity mailboxes. The
Email Continuity Administrator Guide version 6.5 (1st ed.)
57
Configuring RedirectorManager
Licensed Customer Confidential
RedirectorSinks receive configuration and routing updates from
RedirectorControllers and perform the required routing changes within minutes.
After configuring the RedirectorManager, the partial activation feature is available
in the event of a disruption to your primary mail system that affects a single server
or a single location.
Installing RedirectorManager on a Standalone Server
Before you can configure the RedirectorManager, you must have administrative
privileges on the server that runs the RedirectorManager software, as well as
administrative privileges on the Exchange servers.
To install RedirectorManager:
1
Log in to the RedirectorManager software (Start > Programs >
MessageLabs > RedirectorManager). This verifies the email platform
and gathers information from each Exchange server. The account you use
depends on the synchronization status.
a. If data has been synced, you can log in as an administrator.
b. If an initial sync has not yet been performed, you must login using the
service root account or a valid super administrator account.
2
Select servers for RedirectorSink installation.
Along the top of the main RedirectorManager page are buttons for various
functions, as well as a list of your environment’s Exchange routing group.
These are organized by name, with server name listings below. To perform
a remote install of RedirectorSinks:
a. Click Install.
b. Click Next. The installation process begins
c. On the Select Servers for RedirectorSinks page, select the
appropriate routing group or groups, server or servers (left pane).
d. Click Add. Your selections move to the right pane.
e. Verify that your selections are correct. Click Next.
3
Restart Exchange services and deploy RedirectorSinks.
a. Select Restart Services.
b. Click Next.
NOTE
Installing Without Stopping Services
You can install RedirectorSinks without stopping and restarting Exchange
services; however, if you do this, all deployed RedirectorSinks remain inactive.
58
Email Continuity Administrator Guide version 6.5 (1st ed.)
Licensed Customer Confidential
4
Installing RedirectorSink on Clustered Exchange Servers
Confirm actions.
a. Confirm that the action or actions are correct. If so, click Next.
This begins the process of copying files, registering the
RedirectorSinks with the Exchange environment, setting up registry
entries, providing the RedirectorSinks with information about the
RedirectorControllers, and stopping and restarting the IIS SMTP
service.
NOTE
Save the Log
To save the log, click Save. The RedirectorManager software queries the
Exchange servers and retrieves information regarding their configuration. A
RedirectorSink does not initialize after the IIS SMTP restart until it processes the
first piece of mail. Therefore, it may take several minutes for the main page to
reflect the running version and correct installation status of the event sink.
b. Click Done.
TIP
Force Load of RedirectorSinks
If the RedirectorManager or Administration Console do not show the
RedirectorSinks as installed on a server, send an email message to any user on
that server. This causes Exchange to load the RedirectorSink. While not
typically an issue on production servers under load, this can occur in test
environments.
Upgrading RedirectorManager
The installation process can be used to install an upgrade; however, you must
stop and start IIS before the upgrade takes effect. The upgrade installs any new
files, but does not change any existing registry entries.
Each time you add a new Exchange server to your environment, or when you
reinstall an existing Exchange server, you must repeat the RedirectorSink
installation process to install the RedirectorSink on the new or reinstalled server.
When reinstallation is necessary, the Administration Console displays an alert
message.
Installing RedirectorSink on Clustered Exchange
Servers
To install RedirectorSink on clustered Exchange servers:
1
Copy the RedirectorSink folder over to the passive node of the Exchange
Server.
2
Launch setup.exe, follow the prompts, and allow the install to complete.
3
Restart the SMTP service on the passive node.
Email Continuity Administrator Guide version 6.5 (1st ed.)
59
Installing the RedirectorAgent
Licensed Customer Confidential
4
Fail over the active node to the passive node.
5
Allow a piece of mail to pass through the server and wait about 90
seconds for the event sync to initialize.
6
Verify the RedirectorSink is connected by logging into the web-based
Administration console and in the Readiness check section, under
Redirector Sinks, click the Details link.
7
Repeat these steps for each additional node in the cluster.
NOTE
RedirectorSinks and SMTP Virtual Servers
The RedirectorSink is designed to bind to only a single SMTP virtual server
instance. On a standalone Exchange server, multiple SMTP virtual server
instances must be consolidated into a single virtual server instance before
installing the RedirectorSink. Multiple SMTP virtual server instances are only
supported on Active/Passive or N+1 clusters where the number of virtual
servers corresponds to the Exchange nodes present in the cluster. Additional
Exchange nodes installed after the RedirectorSink require that you manually
register the event sink. Contact Support for assistance.
Installing the RedirectorAgent
To use the partial activation feature of Email Continuity in Exchange 2007
environments, you must install a custom transport agent (the RedirectorAgent) on
all Hub Transport servers. The RedirectorAgent is not supported on Edge servers.
This agent performs functions similar to the RedirectorSinks used in Exchange
2000/2003 environments. The agent is provided by Support in a ZIP file
(RedirectorAgent.zip) in the service software directory. Unzip the file on the Hub
Transport server (to C:\RedirectorAgent) and install the agent using Exchange
Management Shell. To run the script, you must provide the NetBIOS name and
Fully Qualified Domain name of the machine running the RedirectorController.
CAUTION
Exchange Transport Service Restart Required
As part of the installation process, the Microsoft Exchange Transport service
stops and restarts automatically. Make sure that you install the agent at a time
when a stop in this service is not disruptive to your organization.
CAUTION
Installation Required on all Hub Transport Servers
To ensure reliable mail delivery during an activation of Email Continuity, the
agent must be installed on all Hub Transport servers. Remember to install the
agent each time you configure a new Hub Transport server, or modify a server
to perform the Hub Transport role.
60
Email Continuity Administrator Guide version 6.5 (1st ed.)
Licensed Customer Confidential
Installing the RedirectorAgent
To install the RedirectorAgent:
1
Extract the RedirectorAgent.zip files to C:\RedirectorAgent on the Hub
Transport Server.
2
Launch Exchange Management Shell.
3
Change directory to the one where the script is installed.
4
Type:
.\ManageRedirector.ps1 install “NetBIOS_name,FQDN”
where NetBIOS_name and FQDN are the Netbios and FQDN of the
server running the Email Security Services software. Do not enter the
values for your Exchange server.
For example, if the name of the server in your environment running ESS is
Server1, and your DNS suffix is company.local, then this value would be
“server1,server1.company.local”. The quotes are required.
NOTE
Providing the ESS Server Name
You can either enter the fully qualified name as a parameter, as shown above, or
wait for the install script to prompt you for it. If you enter it initially, you must use
quotes around the name. If you wait for the prompt, the quotes are not required.
5
NOTE
Exit the Exchange Management Shell to complete the installation.
Set RedirectorAgent to Lowest Priority
If you are running other transport agents (such as anti-spam or anti-virus
agents) on your Exchange servers, you must set the RedirectorAgent to the
lowest priority, otherwise you may impede mail flow.
To remove the RedirectorAgent:
1
Launch Exchange Management Shell.
2
Change directory to the one where the script is installed.
3
Type:
.\ManageRedirector.ps1 uninstall
4
Exit Exchange Management Shell. The agent is removed from the server.
The log file is retained for analysis purposes.
Email Continuity Administrator Guide version 6.5 (1st ed.)
61
Provisioning Wireless Continuity for BlackBerry
Licensed Customer Confidential
Provisioning Wireless Continuity for BlackBerry
When Wireless Continuity for BlackBerry is provisioned in the data center,
Support sets the following configuration parameters:
•
Device checkin interval—The amount of time (in minutes) between each
attempt a device makes to contact Email Continuity for messages. Contact
attempts occur only when the user’s Email Continuity account is active.
The default setting is 5 minutes; however, the actual interval varies by
device according to variables such as battery life and recent activity.
•
Store mail setting—The number of days Email Continuity retains
BlackBerry email it receives but is unable to deliver (for example, when a
user’s device is turned off or is out of range) after an activation is
complete. The default is 10 days.
•
Push timeout interval—The time (in minutes) that Email Continuity waits
before reattempting contact with a device after a previous contact attempt
failed. Email Continuity executes as many reattempts as possible until the
next device checkin interval. The default is four minutes. This setting
applies only to device agent version 6.1 and earlier.
Synchronizing RIM Data
You must have installed the SyncManager and RedirectorController to implement
Wireless Continuity for BlackBerry. After you have installed this software, you
must synchronize data from your environment to the datacenter.
To synchronize RIM data:
1
Launch the SyncManager for Email Continuity. On the Windows desktop,
select Start > Programs > MessageLabs > SyncManager. The
SyncManager screen appears.
2
In the BlackBerry Sync panel, click Configure. The BlackBerry Config
window appears.
NOTE
If the BlackBerry Sync Panel Does Not Appear
If Support enabled the Wireless Continuity for BlackBerry feature and the
SyncManager interface does not include a BlackBerry Sync panel, exit the
SyncManager and relaunch it. If this panel is still not available, contact Support.
62
3
In the Server Name field, type the fully qualified server name. (Using the
NetBIOS name or IP address is not supported.)
4
In most cases, the software auto-detects and fills needed information in
the Database Instance Name, and Database Name columns. If it does not,
type Default in the Instance Name field, click the Database field and
enter the name of the database (for example, BESMgmt).
Email Continuity Administrator Guide version 6.5 (1st ed.)
Licensed Customer Confidential
NOTE
Provisioning Wireless Continuity for BlackBerry
SQL Security May Prevent Autodetection
If the SyncManager does not detect a database instance automatically, it’s likely
that the security settings for SQL are preventing the autodetection feature. In
this case, type the name of the instance and database instead of selecting them.
5
Click Add.
6
Repeat the preceding steps for each BES database.
7
After you add all necessary information, click Verify Configuration. The
software returns information on each entry in the BlackBerry Config
window.
8
Based on this information, add items to or remove items from the Sync
Settings table.
NOTE
Modifying BlackBerry Configuration Information
You cannot modify entries in the BlackBerry Config window. Instead, you must
Remove any incorrect entry and then Add the correct information.
9
Click Save and close the BlackBerry Config window.
10 In the RIM Data Sync panel of the SyncManager interface, click Sync
Now. When the RIM data sync completes successfully, you can send
users the instructions for Wireless Continuity for BlackBerry feature, and
view information about devices using the Wireless Continuity for
BlackBerry feature. For information on each of these, see "Wireless
Continuity for BlackBerry Administration" on page 129.
Distributing the Client Agent
There are two methods for distributing the client agent. It can be deployed through
the policy management features of BES 4.0+ (deployment over-the-air) or can be
manually downloaded to the device through a hyperlink sent to the user through
the Administration Console.
NOTE
Complete All Preliminaries Before Proceeding
Be sure that you have completed all installation preliminaries listed under
"Verifying that Mobile Data Services are Installed and Configured" on page 31,
especially the steps for setting IT policies. If you have not completed these steps
before you distribute the client agent, your deployment will fail.
You can push the Wireless Continuity for BlackBerry client agent software over
the air to BlackBerry devices that have never had the agent installed before (new
installations, not upgrades). After distribution is performed as described below, the
client software is pushed to the device at the next application push default interval.
The default interval is four hours.
Email Continuity Administrator Guide version 6.5 (1st ed.)
63
Provisioning Wireless Continuity for BlackBerry
Licensed Customer Confidential
Distribution Over-the-Air for BES 4.x
The procedures provided in this section are for BlackBerry Enterprise Server
version 4.1.3. BlackBerry devices must be version 4.1 or later.
To perform an over-the-air deployment, you must complete the following tasks:
•
Download the agent and prepare the shared application directory.
•
Index the agent.
•
Prepare the software configuration (including creating application policies).
•
Assign software applications to users.
To download the client agent:
1
Contact Support to obtain the URL from which you can download the
agent.
2
When prompted to Save or Open the file, select Save to your desktop.
When you unzip the file, you have three files: EMSBlackBerryClient.alx,
EMSBlackBerryClient.cod, and EMSBlackBerryClient.jad.
3
Copy these three files.
4
Navigate to C:\Program Files\Common Files\Research in
Motion. Add a new folder to the Research in Motion folder. Name this
folder Shared.
5
Create a new folder inside Shared and name it Applications.
6
Create a new folder inside Applications and name it MessageLabs.
7
Paste the three files you copied earlier into the MessageLabs folder.
8
Navigate up the folder tree to the Common Files folder. Right-click the
Research in Motion folder. Select Sharing and Security from the
drop-down list. The Research in Motion Properties panel appears.
9
On the Research in Motion Properties panel click the Sharing tab.
Then:
•
Select Share this folder.
•
Name the Share Research in Motion.
•
Set the User Limit to Maximum allowed.
10 Click Permissions. The Permissions for Research in Motion panel
appears. Set permissions for everyone to allow Read-only. It is not
necessary to check the other boxes. Click OK until the Research in
Motion panel closes.
64
Email Continuity Administrator Guide version 6.5 (1st ed.)
Licensed Customer Confidential
Provisioning Wireless Continuity for BlackBerry
11 Open a DOS prompt and navigate to this location:
C:\Program Files\Common Files\Research in
Motion\AppLoader
Run the following command:
loader /reindex
This creates two new files in the MessageOne folder you created earlier.
To configure the agent:
1
From the BlackBerry agent main page, select the Software
Configurations tab.
2
In the Tasks section of the page, click Add New Configuration. The
Device Software Configuration panel appears.
3
In the Configuration Name field, type Email Continuity Agent.
4
In the Configuration Description field, type MessageLabs Email
Continuity Agent.
5
For the Device Software Location field, click Change. The Device
Software Share Location pane appears. Either type the path to the
software share location or browse to it, then click OK.
6
On the Device Software Configuration panel, you now have an entry for
Application Software. Expand this entry. You should see a check
box and Email Continuity Agent, with a version and delivery method.
7
Click the check box beside Email Continuity Agent. The Delivery field
now contains a drop-down list. Select Wireless.
8
Next, click Policies. The Application Control Policies panel appears.
9
Click New. The Application Control Policy panel appears. You will
create two policies: Global Push and Global Remove.
10 To create the Global Push policy, complete the following settings:
•
In the Name field, type Global Push.
•
In the External Domains field, type *.messageone.com. Click OK.
•
Verify that the Disposition field is set to Required.
•
Verify that Internal Network Connections is set to Allowed.
•
Verify that External Network Connections is set to Allowed.
•
Click Apply.
11 To create the Global Remove policy, complete the following settings:
•
In the Name field, type Global Removal.
•
In the External Domains field, type *.messageone.com. Click OK.
•
Set the Disposition field to Disallowed.
Email Continuity Administrator Guide version 6.5 (1st ed.)
65
Provisioning Wireless Continuity for BlackBerry
•
Licensed Customer Confidential
Click Apply.
12 Click OK. This returns you to the Application Control Policies panel.
You should see Global Push and Global Remove in this list. Click OK.
You return to the Device Software Configuration panel.
13 Verify that Email Continuity Agent is present, that the version number is
correct, that delivery is set to Wireless, and that policy is set to Global
Push. If everything is in order, click OK.
The BlackBerry Manager-Security Administrator Authority page
appears. When you click the Software Configurations tab, you should
see Email Continuity Agent with a description and a source path.
To assign software applications to users:
1
From the BlackBerry agent main page, select the All Users tab. A list of
users appears.
2
Right-click the name of the user or group of users with which you want to
work. From the drop-down list that appears, select Deploy Application.
3
Click Edit Properties. The Select a software configuration panel
appears.
4
Select Email Continuity Agent and click OK. You are returned to the
BlackBerry Manager-Security Administrator Authority page, and the
user’s information is updated. Scroll to the bottom of the user information
panel to confirm that the configuration status is ok, the system status is upto-date, and the application status is up-to-date.
Alternatively, the application poll interval runs at the next BES check-in
window. This can take up to four hours, depending on your configuration.
You can also remove the agent from users’ handheld devices using the over-theair method.
To remove the Blackberry agent for all users:
66
1
From the Blackberry Manager main page, select the Software
Configuration tab.
2
Select the Email Continuity Agent. The Device Software Configuration
panel appears.
3
In the Policy column, use the drop-down list to select Global Remove.
4
Click OK.
5
The application poll interval runs at the next BES check-in window. This
can be up to four hours, depending on your configuration.
Email Continuity Administrator Guide version 6.5 (1st ed.)
Licensed Customer Confidential
Provisioning Wireless Continuity for BlackBerry
To remove the Blackberry agent for one user:
1
From the Blackberry Manager main page, select the All Users tab.
2
Right-click the name of the user for whom you want to disable the
Blackberry agent. Select Assign Software Configuration. Change this to
None.
3
The application poll interval runs at the next BES check-in window. This
can be up to four hours, depending on your configuration.
After the application has been removed, the Blackberry requests that you
reset it. After reset is complete, you must delete the application from the
Blackberry.
Distribution Over-the-Air for BES 5.x
The procedures provided in this section are for BlackBerry Administration Service
version 5.0. BlackBerry devices must be version 4.1 or later.
To perform an over-the-air deployment for BES 5.x, you must complete the
following tasks:
1
Prepare the shared application directory. See "To prepare the shared
application directory:" on page 67.
2
Update your IT policies. See "To update your IT policies:" on page 69.
3
Download the client agent. See "To download the client agent:" on
page 69.
4
Add the client application to the BlackBerry Administration Service. See
"To add the client application to BAS:" on page 69.
5
Create and populate application policies. See "To create and populate
application policies:" on page 70.
6
Create and populate the software configuration. See "To create and
populate the software configuration:" on page 70.
7
Create a user group to hold all users who will receive the BlackBerry
client. See "To create a BlackBerry client user group:" on page 71.
8
Assign the software configuration to the BlackBerry client user group. See
"To assign the software configuration to the BlackBerry client user group:"
on page 71.
To prepare the shared application directory:
1
On your BES server or network, create a folder to hold the shared
application files, for example, C:\rimshare\Shared\Applications.
Important! Do not use the older BES path (C:\Program
Files\Common Files\Research In Motion\).
Email Continuity Administrator Guide version 6.5 (1st ed.)
67
Provisioning Wireless Continuity for BlackBerry
2
Licensed Customer Confidential
Set sharing and permissions for the folder you created.
a. Right-click the folder you just created and select Properties.
b. In the Properties dialog box, click the Sharing tab and check (enable)
Share this folder.
c. Click the Permissions button.
d. Click the Add button and enter the information for the BES Admin
service account.
e. Grant the BES Admin service account Full control over this
directory.
NOTE
Restrict Modifications to the Shared Application Directory
This shared application directory should be used only by the BlackBerry
Administration Service for BES 5. Do not manually place files into this directory
or modify any files you find there.
3
Log into the BlackBerry Administration Service for BES 5.
4
From the BAS navigation menu, under Servers and components,
choose BlackBerry Solution topology. Navigate to the BlackBerry
domain in use for the BlackBerry client and choose Component View.
The Components page appears.
5
On the Components page, click the BlackBerry Administration Service
link listed under the Component column.
The Components page for the BAS appears. The breadcrumbs at the top
of the page should be in the form: BlackBerry Solution topology >
BlackBerry Domain > Component view > View (BlackBerry
Administration Service).
68
6
Scroll to the bottom of the Components page and click the Edit
component link. The Components page becomes editable, and the
breadcrumbs at the top of the page should appear in this form:
BlackBerry Solution topology > BlackBerry Domain >
Component view > Edit (BlackBerry Administration
Service).
7
On the Component Information tab of the Components page, in the
Software management section, enter the UNC of the shared application
directory you created into the BlackBerry Administration Service
application shared network drive field. For example, if you created the
directory C:\rimshare\Shared\Applications\, then you would
enter \\machinename\rimshare\Shared\Applications.
Email Continuity Administrator Guide version 6.5 (1st ed.)
Licensed Customer Confidential
8
Provisioning Wireless Continuity for BlackBerry
Scroll to the bottom of the page and click the Save All link.
To update your IT policies:
Perform the following updates to all of your existing BES IT policies so that users
are not prompted to either configure or confirm their local device firewall settings.
If you do not set the following, users will be prompted to configure their own
devices.
Note: It is strongly recommended that you notify your users in advance that their
IT policies will be changing. When you make the changes below, the BES server
will send a one-time pop-up notice to all associated BlackBerry devices alerting
them that the IT policy has been updated and requiring them to reboot their
devices. Inform your users in advance to expect this policy notification and
reboot.
1
Within the BAS Admin console, click BlackBerry Solution
management > Policy > Manage IT policies > Manage IT policies.
2
One at a time, perform the following steps for each policy currently in use:
a. Click Edit policy.
b. Click the Security tab.
c. Set Disallow Third Party Application Downloads to No.
d. Set Allow Internal Connections to Yes.
e. Set Allow External Connections to Yes.
3
Repeat these steps for all policies in use.
To download the client agent:
1
Contact Support to obtain the URL from which you can download the ZIP
file containing the BES 5 client agent files.
2
Download and save the ZIP file to a location on your local machine or
network.
To add the client application to BAS:
1
Log into the BlackBerry Administration Service for BES 5.
2
From the BAS navigation menu, under the BlackBerry solution
management section, click Software > Applications > Add or update
applications. The Add or update applications page appears.
3
Browse to the location on your local machine or network drive where you
saved the ZIP file containing the client agent files. Click Next.
4
Choose Publish application.
Email Continuity Administrator Guide version 6.5 (1st ed.)
69
Provisioning Wireless Continuity for BlackBerry
Licensed Customer Confidential
To create and populate application policies:
1
From the BAS navigation menu, under the BlackBerry solution
management section, click Software > Applications > Manage default
application control policies. The Manage default application control
policies page appears.
2
Click the Standard Required application control policy, or the policy in use
your BlackBerry client application. On the page that appears, scroll to the
bottom and click Edit application control policy.
3
Click the Access settings tab and set the following required settings:
•
Are internal network connections allowed: allowed
•
Are external network connections allowed: allowed
•
List of internal domains: *.messageone.com
•
List of external domains: *.messageone.com
The following setting is not required but is recommended unless Support
tells you to use alternate settings:
•
Is access to the phone API allowed: allowed
To create and populate the software configuration:
70
1
From the BAS navigation menu, under the BlackBerry solution
management section, click Software > Create a software
configuration. The Create a software configuration page appears.
2
Enter a Name for the BlackBerry client application, such as BBC Agent.
All other values can be left at their defaults.
3
Scroll to the bottom of the page and click Save. You are returned to the
Create a software configuration page, with the new configuration listed.
4
Click the name of the configuration you just created. The Manage
software configurations page appears.
5
Scroll to the bottom of the page and click Edit software configuration.
The Manage software configurations page becomes editable.
6
Choose the Applications tab. Scroll to the bottom of the page and click
the Add applications to software configuration link.
7
Use the BAS search features to find the BlackBerry client application,
usually named Email Continuity Agent (daemon). This application
was added when you unzipped the ZIP file containing the application files.
8
Click the check box next to Email Continuity Agent (daemon),
then scroll to the bottom of the page and click Add to software
configuration. The application appears on the Applications tab of the
Manage software configurations page.
9
Accept all defaults, then scroll to the bottom of the page and click Save All
to save the configuration.
Email Continuity Administrator Guide version 6.5 (1st ed.)
Licensed Customer Confidential
Provisioning Wireless Continuity for BlackBerry
To create a BlackBerry client user group:
1
From the BAS navigation menu, under the BlackBerry solution
management section, click Group > Create a group. The Create a
group page appears.
2
Enter a Name for the group, then click Save. The new group is listed on
the Create a group page.
3
Click the name of the group. The Manage groups page appears.
4
Scroll to the bottom of the page and click Add users to group
membership.
5
Use the BAS search features to find all users who will use the BlackBerry
client, or import them from a file using the BAS import feature.
6
When the user list is complete, click Add to group membership.
NOTE
Removing the BlackBerry Client for Users
To remove (uninstall) the BlackBerry client for a user, remove those user from
the BlackBerry client user group.
To assign the software configuration to the BlackBerry client user group:
1
From the BAS navigation menu, under the BlackBerry solution
management section, click Group > Manage groups. The Manage
groups page appears.
2
Click the name of the BlackBerry client user group you created. When the
group information appears, click the Software configuration tab.
3
Scroll to the bottom of the page and click Edit group. The available
software configurations appear.
4
Move the BlackBerry client software configuration you created from the list
of Available software configurations to the list of Current software
configurations. Scroll to the bottom of the page and click Save All.
Sending the Agent to Users by Email
You can notify device users of the Wireless Continuity for BlackBerry feature and
provide instructions on how to use it by email. However, this deployment method
is not recommended as it will deploy the basic software with none of the
configurations described in the previous sections. As a result, you will have to
provide users with the information required to manually configure their local
device firewalls and network access in order for the agent to function properly.
To send installation instructions to device users:
1
Log in to Email Continuity as an administrator.
2
In the navigation menu, click BlackBerry Administration. The
BlackBerry Device Information page appears.
Email Continuity Administrator Guide version 6.5 (1st ed.)
71
Installing the Outlook® Extension
Licensed Customer Confidential
3
Click Send Installation Instructions. The Edit Message page appears.
4
Edit the default message as necessary. Note that any message you use
must include the variable %__rimAgentUrl%. When the message is
distributed to users, the variable inserts the URL from which the client
software can be downloaded. When you have finished editing the
message, click Next. The Select Recipients page appears.
5
In the pane on the right of the Select Recipients page, select the users
who should receive the installation instructions.
6
Click Add. This moves the selections to the Send notification to these
users’ devices list. Repeat this for each tab view, as needed, until your
recipient list is complete. For initial implementation purposes, you should
select all users.
NOTE
Only Users With Devices are Added
As you add recipients, the software expands any category selections you made
to list individual users in the selected category and only adds users who have
BlackBerry devices; that is, all users are initially added, but the agent is only
sent to users who have BlackBerry devices.
7
When you finish adding all desired recipients, click Next. The Verify
Recipients page appears. The page lists:
•
Current BlackBerry software versions installed by your users.
•
The number of devices for each listed software version.
•
Any warnings associated with use of the listed software versions
installed.
8
Select the appropriate BlackBerry software versions and click Next. The
Confirm page appears.
9
Review the message information. If needed, go Back to any previous
page to make changes.
10 When you complete all selections, click Send.
Installing the Outlook® Extension
The Outlook® Extension is provided to you by Support as an MSI file designed to
be compatible with standard distribution methods. The Outlook Extension
conforms to Microsoft-approved Outlook Integration APIs and uses Extended
MAPI and Outlook Object Model to interact with Outlook.
Guidelines for installing the Outlook Extension:
•
72
MessageLabs recommends that Outlook not be running during the
installation process.
Email Continuity Administrator Guide version 6.5 (1st ed.)
Licensed Customer Confidential
Installing the Outlook® Extension
•
You must use the setup.exe for manual installation, and installations when
users are logged in to Outlook. Use the MSI for automated installation
(such as with GPO or SMS), when users are not logged in to Outlook.
•
Select one method of installation (GPO, SMS, or manual), then use it
consistently. Do not combine methods of install/uninstall. For example, if a
user installs the Outlook Extension through setup.exe, the application
cannot be reinstalled or updated through GPO, unless the user first
uninstalls the Extension manually. Similarly, if the software has been
installed using GPO, it cannot be removed using the Add/Remove
Programs function.
•
Outlook Extension can support multiple users running on the same
machine in an enterprise environment. However, to enable this feature, the
installation must be done using local administrator privileges, and the GPO
method must be used. See "Installation Using Group Policy" on page 77.
•
After the Outlook Extension has been installed, its directory location can
never be changed. You cannot uninstall the software, then reinstall it in a
different location.
The installer follows this process:
1
The installer runs the necessary prerequisite checks.
2
The installer creates the INSTALL directory.
3
The installer copies the following to the INSTALL directory.
•
m1ext.ECF
•
m1ext.dll
•
m1resource.dll
•
m1command.dll
•
m1common.dll
•
Branding.ini
4
The installer sets up the registry entries.
5
A system search locates the ADDINS in InstallShield.
6
The M1EXT.DLL is marked as self-registering. The regsvr32 is called to
register and unregistered the DLL.
7
InstallShield modifies the m1ext.ecf file; the PATH is set to the ADDINS
directory cited above.
The Outlook Extension sets the Registry Keys described in Table 3-1.
The installer writes out to HKLM key, which becomes default (read-only values).
When Outlook® starts and the Extension runs, it updates the HKCU key (based on
HKLM and user preferences).
Email Continuity Administrator Guide version 6.5 (1st ed.)
73
Installing the Outlook® Extension
Table 3-1
Licensed Customer Confidential
Outlook Extension Registry Keys
Location
Key
HKEY_LOCAL_MACHINE\Software\MessageOne\EMS\Install
Working Directory “[INSTALLDIR]”
HKEY_LOCAL_MACHINE\Software\MessageOne\EMS\
LogSettings
• FlushUpdate
• SeverityLevel
• LogFilePath
• FlushAll
• TruncateAfter
HKEY_LOCAL_MACHINE\Software\MessageOne\EMS\
WebRequests
• HostName
• MsgFileSizeKB
• EMailDir
• authToken
• Username
HKEY_LOCAL_MACHINE\Software\MessageOne\EMS\
Timers
• LoginStatusTimer
• InitTimer
• EnableControls
• CheckStateTimer
• PollTimer
• RetrieveTimer
• SwitchToOfflineTimer
• LoginResetTimer
• StartSMTImer
HKEY_LOCAL_MACHINE\Software\MessageOne\EMS\
Persistent
HKEY_LOCAL_MACHINE\Software\MessageOne\EMS\Help
Outlook® Extension uses an authentication token stored at
HKEY_CURRENT_USER\Software\MessageOne\EMS\Profile
Info\Outlook\AuthToken to allow a user to use the Extension features without
having to log in to Email Security Services. The token can be created by a user
logging in with a password, or the administrator can run a command line tool to
create authentication tokens for one or more users. (See Enabling User
Authentication Through the Command Line.) After the authentication token is set
the user will not need to log in again during an activation or while using other
Extension features.
74
Email Continuity Administrator Guide version 6.5 (1st ed.)
Licensed Customer Confidential
Installing the Outlook® Extension
Enabling User Authentication Through the Command Line
You can use the command line tool PrepareOutlookAuth to authenticate
(register) users automatically. This allows authenticated (registered) users to use
Extension features without providing a password. The tool is installed with the
SyncManager on the primary controller. You must complete a directory sync
before running this tool. When you run the tool using the -all argument, it walks
through all user mailboxes and writes an authentication token to a hidden
message if a token is not there already. The message is stored in the associated
Contents table of the IPM_SUBTREE folder. If you have developer tools such as
MFCMapi or Outlook Spy, you can look at the Associated Contents table of the
IPM_SUBTREE folder for the message with the subject Authentication.
NOTE
SyncManager
MessageLabs recommends you upgrade the SyncManager software to version
6.0 or later prior to installing the Extension. If your organization uses distributed
SyncManager, the PrepareOutlookAuth tool should only be run on the primary
SyncManager server.
TIP
Run PrepareOutlookAuth prior to deploying the Outlook Extension
For best results, run this command a day or two before deploying the Outlook
Extension, so that the SyncManager has time to complete a sync before the
software is installed for users. Otherwise, users must restart Outlook again after
the next directory sync.
The following arguments are available. You must use either -user<mailboxDN>
or -all. Other arguments are optional.
Table 3-2
PrepareOutlookAuth Arguments
Argument
Definition
-all
Updates authentication for all users
-rewrite
Writes authentication tokens to all mailboxes (even if a token is already
present)
-user <mailboxDN>
Writes an authentication token for a specific user only (even if a token is
already present). The Mailbox DN value comes from the Active Directory value
legacyExchangeDN. Use ADSI Edit to find this value. The value must be
entered in lower case, in quotes (for example: “/o=first organization/ou=first
administrative group/cn=recipients/cn=testuser”
-verbose
Enables verbose output
-help
Displays usage information
Email Continuity Administrator Guide version 6.5 (1st ed.)
75
Installing the Outlook® Extension
Licensed Customer Confidential
To authenticate users through the command line (prior to Outlook Extension
deployment):
1
Open a command-line prompt on the server on which SyncManager is
installed.
2
Go to the following directory: C:\Program Files\MessageLabs\ESS.
3
Enter either:
•
-prepareoutlookauth.exe -user “mailboxdn”
•
-prepareoutlookauth.exe -all
4
Wait for the new mailbox properties to take effect, approximately an hour.
5
Install Outlook Extension using one of the documented processes. When
a user starts Outlook, the Extension toolbar appears, and the user has
access to Extension features without entering his password.
Manual Installation
To install the Outlook Extension manually using setup.exe:
76
1
Exit the Outlook® application, if it is open.
2
Double-click the setup.exe provided to you by Support to launch the
InstallShield Wizard.
3
Click Next.
4
The default installation location is C:\Program Files\MessageLabs\Outlook
Extension. To change the location, click Change, browse to a new
location, and click OK. To accept the default location (Recommended),
click Next.
5
Click Install. Installation may take a few minutes.
6
Click Finish.
Email Continuity Administrator Guide version 6.5 (1st ed.)
Licensed Customer Confidential
7
Installing the Outlook® Extension
Launch Outlook®. The Outlook Extension toolbar displays and the Tools >
Options screen includes a tab for MessageLabs Email Continuity.
To remove the Outlook Extension manually:
1
Exit Outlook, if the application is open.
2
Select Start > Control Panel > Add or Remove Programs.
3
In the Currently installed programs: field, scroll to Email Continuity
Outlook Extension, and click it.
4
Click Remove.
5
In the confirmation dialog box, click Yes.
Installation Using Group Policy
NOTE
GPO Administration Experience Required
These instructions presume familiarity with creating and distributing software
using GPO. Not all steps in the process are documented here, as each
organization’s environment is unique, and distribution practices may vary.
The Outlook Extension can be distributed through group policy; this method was
tested, and is supported, under the following conditions and using the following
process.
•
The Group Policy Object Editor provides configuration settings at the
Computer and User levels. Outlook Extension packages should be
assigned using the Computer Configuration hierarchy.
•
The Group Policy Object Editor does not display full version numbers.
Consequently, MessageLabs recommends using the complete version
number in the package name (for example, Outlook Extension 6-1-08015).
WARNING
Use the same method for installation and removal of the Extension
If you install the Outlook Extension through Group Policy, you must remove it
using Group Policy.
To install the Outlook Extension using Group Policy:
1
Create a new GPO package using the Outlook Extension MSI.
2
Open the package in the GPO editor.
3
Expand Computer Configuration.
4
Expand Software Settings.
5
Right-click Software Installation and select New > Package.
6
Browse for the Outlook Extension MSI, select it, and click Open.
Email Continuity Administrator Guide version 6.5 (1st ed.)
77
Installing the Outlook® Extension
Licensed Customer Confidential
7
In the Deploy Software dialog, select Assigned, then click OK.
8
Link the GPO to the Organizational Unit (OU) that contains the target
computers.
a. Right-click the OU and select Link an Existing GPO.
b. In the Group Policy objects: field, click the GPO.
c. Click OK.
To upgrade the Outlook Extension using Group Policy:
Add the new Outlook Extension MSI to the existing policy.
1
Open the package in the GPO editor.
2
Expand Computer Configuration.
3
Expand Software Settings.
4
Right-click Software installation and select New > Package.
5
Browse for the Outlook Extension MSI, select it, and click Open.
6
In the left pane, click Software Installation. In the right pane, right-click
the Outlook Extension package and select Properties.
7
Click Upgrades. In the Upgrades tab, Add Packages this package will
update field, click Add.
8
In the Add Upgrade Package dialog, click Current Group Policy.
9
In the Package to Upgrade field, select Uninstall the existing package,
then install the upgrade package. Click OK.
10 Restart the machines.
To remove the Outlook Extension using Group Policy:
78
1
Edit the Group Policy Object.
2
Expand Computer Configuration.
3
Expand Software Settings.
4
Click Software installation. In the right panel, right-click the package and
select All Tasks > Remove.
5
Select the immediate removal method, and click OK.
Email Continuity Administrator Guide version 6.5 (1st ed.)
Licensed Customer Confidential
Installing the Outlook® Extension
Installation Using Systems Management Software (SMS)
The Outlook Extension MSI can be distributed by SMS; this method was tested,
and is supported, using SMS2003 SP2 and the following process.
NOTE
SMS Administration Experience Required
These instructions presume familiarity with creating and distributing software
using SMS. Not all steps in the process are documented here, as each
organization’s environment is unique, and distribution practices may vary.
To install the Outlook Extension using SMS:
1
NOTE
Using the SMS Create Package from Definition wizard, build an SMS
package using the EMS Outlook Extension MSI.
Per-system unattended vs. Per-system attended Installation
If your users are logged in to Outlook, install the Extension using the EXE and
the Per-system attended function. If your users are not logged in to Outlook, use
the MSI and the Per-system unattended function. You may want to use the
install only when no user is logged in option when distributing by
MSI.
2
In the Site Database menu tree, expand Packages.
3
Expand the Outlook Extension package and click Programs.
4
In the right pane, right-click Per-system unattended > All Tasks >
Distribute Software. The Distribute Program Wizard launches.
5
Complete the Wizard.
6
Advertise the package to the target collection, according to your
organization’s established process.
To upgrade the Outlook Extension using SMS:
1
Verify that the SMS package created with the previous version of the MSI
still exists; if not, recreate it.
2
Define a Collection of hosts with the prior version of the MSI installed. To
do this:
a. In the Site Database menu tree, select Collections > New >
Collection.
b. In the Collection Properties window, General tab, name the
Collection.
c. Click the Membership Rules tab.
d. Click the Query Rule Properties icon.
e. In the General tab, name the Query.
f.
In the Resource Class field, select System Resource.
Email Continuity Administrator Guide version 6.5 (1st ed.)
79
Installing the Outlook® Extension
Licensed Customer Confidential
g. Click Edit Query Statement. The Query Statement Properties
screen appears.
h. Click the Criteria tab.
i.
Click the New Criteria icon.
j.
In the Criterion type field, select Simple value.
k. Click Select.
(1) In the Select Attribute window, set the Attribute class to Add/
Remove Programs.
(2) Set the Alias field to <no alias>.
(3) Set the Attribute field to Version.
(4) Click OK.
l.
In the Criterion Properties box, set the Operator field to is equal
to, and click Values.
m. Choose the earlier version of the Extension and click OK.
n. Click OK to exit Query Statement Properties.
o. Click OK to exit Query Rule Properties.
p. Click OK to exit Collection Properties.
3
Using the SMS Create Package from Definition wizard, build an SMS
package using the EMS Outlook Extension MSI.
4
In the Site Database menu tree, expand Packages.
5
Expand the Outlook Extension package and click Programs.
6
In the right pane, right-click Per-system unattended, and select
Properties.
7
Click Advanced. In the Advanced tab:
a. Select the Run another program first check box.
b. In the Package drop-down list, select the package containing the
previous version of the Outlook Extension MSI.
80
Email Continuity Administrator Guide version 6.5 (1st ed.)
Licensed Customer Confidential
Installing the Outlook® Extension
c. In the Program drop-down list, select Per-system uninstall.
d. Click Apply, then OK.
8
Use the Distribute Software Wizard to advertise the package.
a. In the Programs: field, select Per-system unattended.
b.
In the Advertisement Target screen, click the Advertise this
program to an existing collection: button.
c. Click Browse, and select the Collection you defined above. Click OK.
d. Complete the Wizard according to your organization’s established
practices.
To remove the Outlook Extension using SMS:
1
In the Site Database menu tree, expand Packages.
2
Expand the package containing the Outlook Extension.
3
Click Programs.
4
In the right pane, right-click Per system uninstall, and select All Tasks >
Distribute Software.
5
Complete the Distribute Program Wizard to advertise the package to the
target collection, according to your organization’s established process.
Email Continuity Administrator Guide version 6.5 (1st ed.)
81
Installing the Outlook® Extension
Licensed Customer Confidential
Troubleshooting Installation of the Outlook Extension
If the Extension toolbar does not appear in the Outlook application:
1
Exit Outlook and restart it.
2
Verify the Extension-related files are present; C:Program
Files\MessageLabs\Outlook Extension and the registry keys listed in
Table 3-1 on page 74.
If the files are not present, the install did not finish correctly. Uninstall,
using the same method you used to install, and try again.
3
If the files are present, but the toolbar does not appear:
Outlook 2003: Open Outlook > Tools > Options > Other > Advanced
Options > Add-in Manager.
Outlook 2007: Open Help > Privacy Options > Add-ins > Manage:
drop-down, select Exchange Client Extensions, and click Go.
If the Outlook Extension is in the add-in list and checked, go to step 4.
a. If the Extension is in the list, but not checked, check the box.
b. If the Extension is not in the list:
(1) Close Outlook, and verify the process is gone from Task Manager.
(2) Open C:\Documents and Settings\[username]\Local
Settings\Application Data\Microsoft\Outlook and delete
extend.dat.
(3) Open Outlook. The Extension appears in the Add-in Manager list,
and is checked.
82
Email Continuity Administrator Guide version 6.5 (1st ed.)
Licensed Customer Confidential
4
Installing Historical Mail/Email Archive
Right-click the Outlook toolbar area. Verify the Extension appears,
checked, in the list of applications.
a. In the toolbar menu, select Help > About Microsoft Office Outlook >
Disabled Items.
b. If the Extension is there, select it, and click Enable.
Installing Historical Mail/Email Archive
Before you can install the Historical Mail/Email Archive software you need to
prepare all the computers that will become VaultBox systems. To do this, you
need to know the following information about each VaultBox system:
•
Its name
•
The drive on which you will install the software
•
The location of the cache directory where email messages arrive by SMTP
before transmission to the data center
CAUTION
Required Drive Space
Be sure you identify a drive with enough space for seven times the expected
volume of daily mail. If you fail to install the Historical Mail software on a drive
with enough space, the feature will not work properly.
NOTE
Enable SMTP Logging
Verify that the following logs have been enabled for Email Archive audit tracking:
•
On the Exchange server, confirm that logging through the SMTP virtual
server is enabled and configure sufficient log file space to hold 7 days
of logging.
•
On the VaultBox, enable SMTP logging of the Transfer service and
configure sufficient log file space to hold 7 days of logging.
To install the Historical Mail software on a VaultBox system:
1
Access your Historical Mail (ActiveMailbox) installation package provided
by Support. Locate and double-click setup.exe.
2
If you don’t already have SQL installed, the wizard installs Microsoft SQL
Server 2005 Express.
Email Continuity Administrator Guide version 6.5 (1st ed.)
83
Installing Historical Mail/Email Archive
84
Licensed Customer Confidential
3
The InstallShield Wizard launches and guides you through the installation
process.
4
In the Root Username and Password window, enter the user name and
password for the service root account or a valid super administrator
account. If you don’t have this information, contact Support.
5
Click Next.
6
The Available Components window tells you which components are
available to install. Click Next.
7
Select the components that you want to install, then click Next.
8
When prompted to allow the install to stop any IIS-related service, click
Yes.
9
The Destination Folder populates by default. Click Next to accept the
installation location, or click Browse to set a new location.
Email Continuity Administrator Guide version 6.5 (1st ed.)
Licensed Customer Confidential
Installing Historical Mail/Email Archive
10 In the ESS ActiveMailbox Vault Box window, enter the address for the
specific VaultBox system.
11 In the ESS ActiveMailbox Service Credentials window, enter the
requested domain, username, and password for the account. Click OK.
Email Continuity Administrator Guide version 6.5 (1st ed.)
85
Configuring VaultBoxes
Licensed Customer Confidential
12 In the Choose Destination Location windows, separate screens prompt
for destinations for the ActiveMailbox files and the directory for mail
storage prior to transfer (compression directory). Whenever possible,
accept the default location and respond Yes when prompted to create the
directory.
13 Click Next. The Start Copying Files window lists the components to
install.
14 Click Next. The Setup Status window displays installation progress.
15 When the installer completes, click Finish.
Configuring VaultBoxes
In order for the Historical Mail feature to function, you must configure settings on
each VaultBox system in your environment.
Changing Settings in the VaultBox Console
The VaultBox coordinates the transfer of data from your organization’s Exchange
servers to the data center. You can view VaultBox status and set parameters
governing data transfer using the VaultBox Console.
To launch the VaultBox Console, select Start > Programs > MessageLabs >
VaultBox Console on the machine on which it is installed. The VaultBox Console
appears.
86
Email Continuity Administrator Guide version 6.5 (1st ed.)
Licensed Customer Confidential
Configuring VaultBoxes
From the VaultBox Console you can:
•
View Transfer Service Status fields.
The Transfer Service Status fields display the following parameters:
•
Queue—The number of messages to be transferred to the data center
•
Rate—The transfer speed, in messages/second and KB/second
•
Free Space—The amount of space remaining on the VaultBox
To change data transfer settings:
1
In the VaultBox pane, click Configuration.
2
Click the VaultBox tab to display data transfer settings.
The Outbound Bandwidth pane controls data transfer between the
Transfer Service and the data center.
3
In the Number of connections field, use the up/down arrows to alter the
number of connections (threads) used by the process.
4
In the Bandwidth Utilization limit field, change the amount of bandwidth
used for data transfer. (A setting of 0 in this field allows unlimited usage).
Email Continuity Administrator Guide version 6.5 (1st ed.)
87
Configuring VaultBoxes
Licensed Customer Confidential
5
The Free Space Margin pane configures the VaultBox to send a warning
message to the server when free space on the VaultBox machine falls
below the set margin. In the Minimum available space field, set the
threshold below which the storage management task should send a
warning.
6
Click OK.
Monitoring VaultBoxes
Typically, you monitor VaultBox status through the VaultBox Console and
Administration Console. However, if your organization uses a third party
monitoring tool, Support recommends that you also monitor the data described in
the table below.
NOTE
Hostname for data centers
Several of the troubleshooting suggestions below require you to telnet to the
[hostname] of the data center used by your organization. To find the appropriate
hostname, refer to the Network Settings document provided by Support.
88
Email Continuity Administrator Guide version 6.5 (1st ed.)
Licensed Customer Confidential
Table 3-3
Configuring VaultBoxes
VaultBox Monitoring
Data Type
Free space
on each
designated
VaultBox
system
Description
Alert When
Ensure that adequate free
space remains on both the C
drive of the VaultBox system
(where IIS puts intermediate
files), the drive location of the
VaultBox cache directory, and
the Compression Directory.
Data drive is
10% full
Troubleshooting Suggestions
1 Clean up disk space outside of
[Data
Drive}:\activemailbox\compressiondir
*.*
2 If used disk space still exceeds
10%, verify the Vaultbox can
connect to the data center, as
follows:
• telnet [hostname]22
• If you do not get an OpenSSH
response, the port is likely blocked;
check the firewall.
3 If the connection is good, shut
down, then restart the transfer
service.
4 Wait one hour. If the disk space has
not reduced, collect the
SRTransferService.log files, and
contact Support.
Number of
files in a
directory
[Data Drive}:\activemailbox\
compressiondir*.*
More than
1000 files are
present
1 Verify the Vaultbox can connect to
the data center, as follows:
• telnet [hostname]22
• If you do not get an OpenSSH
response, the port is likely blocked;
check the firewall.
2 If the connection is good, shut
down, then restart the transfer
service.
3 Wait one hour. If the number of files
has not reduced, collect the
SRTransferService.log files, and
contact Support.
Email Continuity Administrator Guide version 6.5 (1st ed.)
89
Configuring VaultBoxes
Table 3-3
Licensed Customer Confidential
VaultBox Monitoring
Data Type
Timestamp of
files in a
directory
Description
[Data Drive}:\activemailbox\
compressiondir*.*
Alert When
Troubleshooting Suggestions
Oldest file is
older than 60
minutes
1 Verify the Vaultbox can connect to
the data center, as follows:
• telnet [hostname]22
• If you do not get an OpenSSH
response, the port is likely blocked;
check the firewall.
2 If the connection is good, shut
down, then restart the transfer
service.
3 Wait one hour. If newer timestamps
do not appear, collect the
SRTransferService.log files, and
contact Support.
CPU
utilization
Using the Windows
Performance Monitor, verify
that the Total instance of
the% Processor Time counter
of the Processor
performance counter object
is less than 80 percent.
Performance
counters
The Message queue size
counter of the Transfer
Service object should be less
than 10,000. Other counters
under the Transfer Service
are also useful for
determining daily message
volume.
90
Email Continuity Administrator Guide version 6.5 (1st ed.)
Licensed Customer Confidential
Table 3-3
Configuring VaultBoxes
VaultBox Monitoring
Data Type
Services
Description
If you are using a separate
monitoring tool, include the
following services for your
VaultBox system:
Alert When
Selective
Replication
Transfer
Service stops
• SMTPSVC, which displays
as Simple Mail Transfer
Protocol (SMTP)
Troubleshooting Suggestions
1 Restart transfer service
2 Examine general system logs for
other service failures or system
errors
3 If service fails to restart, or fails
again within a 24-hour period,
contact Support
• srtransfersvc, which
displays as Selective
Replication Transfer
Service
Store driver
and IIS
SMTP
service
Mail is not reaching the
Vaultbox, or is not being
transferred to the data center
1 Verify the SMTP service on the
Vaultbox is running.
2 Verify that the POP3 service on the
Vaultbox is NOT running.
3 Verify the Store Driver is connected
to the SMTP Service (the
Administration Console Readiness
check will indicate an error).
Email Continuity Administrator Guide version 6.5 (1st ed.)
91
Configuring VaultBoxes
92
Licensed Customer Confidential
Email Continuity Administrator Guide version 6.5 (1st ed.)
Licensed Customer Confidential
4
Logging Into the Administration Console
Administration
This chapter covers the following topics:
•
"Logging Into the Administration Console" on page 93
•
"Administration Console Home" on page 94
•
"Historical Mail Administration" on page 99
•
"User Administration" on page 106
•
"Enabling BlackBerry Forwarding" on page 127
•
"Wireless Continuity for BlackBerry Administration" on page 129
•
"Outlook® Extension Administration" on page 132
•
"Mailboxes and Aliases" on page 133
•
"Mailing Lists" on page 134
•
"Notification" on page 135
•
"Viewing Audit Reports" on page 142
•
"Modifying System Settings" on page 143
•
"Changing Your Account Settings" on page 152
•
"Testing Email Continuity" on page 153
Logging Into the Administration Console
The Administration Console is available through a web-based application. The
web address (URL) for the Administration Console is provided to you by Support.
You can log into the Administration Console with the following types of Email
Continuity privileges:
•
Email Continuity Service Root —There is only one service root account.
The user name and password for this account are provided to you by
Support.
•
Super Administrator—Users with service root permissions or super
administrator permissions can create super administrator accounts. Users
with super administrator permissions can perform the same Email
Continuity functions as the service root account. See "Assigning Super
Administrator Privileges" on page 115.
•
Email Continuity Administrator—Users with service root permissions or
super administrator permissions can create Email Continuity administrator
accounts. Email Continuity administrators can perform all of the functions
in the Administration Console except those reserved for super
administrators and the service root account. See "Assigning Email
Continuity Administrator Privileges" on page 118.
Email Continuity Administrator Guide version 6.5 (1st ed.)
93
Administration Console Home
CAUTION
Licensed Customer Confidential
Protect the Service Root Account
The Administration Console keeps detailed log entries that record the
usernames of individuals who initiate critical activities. For this reason, Support
strongly recommends that you use the Administration Console to grant Super
Administrator privileges and Email Continuity Administrator privileges to
appropriate accounts rather than sharing the service root account.
To log into the Administration Console:
1
Launch a supported web browser and go to the URL provided by Support.
The Log In page displays.
2
Enter the Email Continuity account Username.
3
Enter the Email Continuity account Password.
4
Click Login.
NOTE
Some Described Features May Not Appear
Email Security Services configurations vary widely. Depending on the features
selected by your organization, some of the functionality described in this chapter
may not be visible to you. For more information about obtaining a documented
feature, contact Support or your account representative.
Administration Console Home
The Administration Console provides status and readiness information about the
environment, enables activation in the event of an outage or for testing purposes,
and provides for creation of an email archive to restore email after failback to the
primary mail system.
94
Email Continuity Administrator Guide version 6.5 (1st ed.)
Licensed Customer Confidential
Administration Console Home
The left column of the Administration Console contains a navigation menu, from
which you access all the administrative features of the service.
The buttons in the navigation menu vary according to which products and features
your organization has selected and according to the level of access your user
account is granted. Some features described in this manual may not appear.
The Administration Console home page displays the sections described in
Table 4-1.
Table 4-1
Administration Console Home Page Sections
Section Name
Description
Readiness Check
The service monitors the operational readiness of critical components and
automatically sends notifications to designated administrators if their
components are not working properly. This section includes a detailed status
list for critical components.
User Statistics
This section provides data on the number of mailboxes, calendar entries, and
contacts discovered by SyncManager, and provides statistics on the number of
users that have been welcomed.
Current State
This section contains controls that activate and recover Email Continuity. When
the service is active, this section displays the status of affected users, servers,
or both users and servers.
Current Tests
This section contains controls that initiate and complete tests of Email
Continuity. When a test is active, it displays the status of affected users,
servers, or both users and servers.
Activity Log
This section displays the status of tasks that are currently running, as well as
tasks that completed within the last 24-hour period. Examples include sending
notification messages, updating mail routing configuration, or purging old
messages from the webmail system after a completed recovery process.
Email Continuity Administrator Guide version 6.5 (1st ed.)
95
Administration Console Home
Licensed Customer Confidential
Readiness Checks
TIP
Readiness Check Information Display
If all entries in the readiness checklist are positive, the list automatically
collapses. However, if any element requires attention, it automatically expands.
Click Show to expand the list or Hide to collapse the list.
Email Security Services readiness tests monitor the system at all times. When any
of the readiness checks marked with an asterisk (*) fails, an email is automatically
sent to all email addresses listed in the fault notifications list. (See "Managing
Fault Alerts" on page 140 for information on fault notifications.) Readiness checks
are described in the following table.
Table 4-2
Readiness Checks
Readiness Check
Descriptions
*Default contacts synchronization
Reports the last time a Contacts synchronization completed
successfully. If a scheduled synchronization is more than 12 hours
overdue, or if a synchronization reported as failed, this status
check fails. The SyncManagerService.log file on the server
running the SyncManager in your environment may contain
information that is useful for debugging failures.
*Default calendar synchronization
Reports the last time a Calendar synchronization completed
successfully. If a scheduled synchronization is more than 12 hours
overdue, or if a synchronization reported as failed, this check fails.
The SyncManagerService.log file on the server running the
SyncManager in your environment may contain information that is
useful for debugging failures.
*Default directory
synchronizations
Reports the last time a Directory synchronization completed
successfully. If a scheduled synchronization is more than 12 hours
overdue, or if a synchronization reported as failed, this check fails.
The SyncManagerService.log file on the server running the
SyncManager in your environment may contain information that is
useful for debugging failures.
*MX Record (per domain)
If you have chosen to have Email Continuity mail transfer agents
(MTAs) listed as an MX record in your public DNS, this readiness
check verifies the appropriate DNS entries exist for each domain. If
this check fails, verify the appropriate DNS entries exist on all
public DNS servers for the domain(s).
Default RIM Synchronization
(for Wireless Continuity for
BlackBerry only)
Reports the last time a RIM synchronization completed
successfully. If a scheduled synchronization is more than 12 hours
overdue or if a synchronization reported as failed, the status check
will report as failed. The SyncManagerService.log file on the
server running SyncManager in your environment may contain
information that is useful for debugging failures.
96
Email Continuity Administrator Guide version 6.5 (1st ed.)
Licensed Customer Confidential
Table 4-2
Administration Console Home
Readiness Checks
Readiness Check
Descriptions
Authentication Manager (per
server)
(for Windows Authentication only)
Reports the last time a particular Authentication Manager
connected to the data center. If an Authentication Manager is
unable to connect to the data center, verify that the Authentication
Manager service is running on the specified computer and that it
can access the data center over port 443.
Controller Status (per server)
Reports the last time a particular RedirectorController connected to
the data center. If a RedirectorController is unable to connect to
the data center, verify that the Controller service is running on the
specified computer and that it can access the data center over port
443.
RedirectorSink Status
(for Exchange environments only)
Reports any Exchange servers that do not have a RedirectorSink
installed, as well as any servers that have a RedirectorSink
installed, but are not currently in communication with at least one
RedirectorController. The best practice recommendation is that all
Exchange 2000/2003 servers have the RedirectorSink installed, all
Exchange 2007 Hub Transport servers have the RedirectorAgent
installed, and that these be in communication with at least two
RedirectorControllers.
*User Directory Status
(for Exchange environments only)
Reports user ID conflicts detected by the SyncManager using
primary email address.
VaultBox
(for Email Archive only)
Reports the last time a VaultBox connected to the data center. If a
VaultBox is not connected, verify that the Simple Mail Transfer
Protocol (SMTP) service, Selective Replication Transfer Service,
and VaultBox monitor are started. Additional information for
debugging can be found in the SRTransferService.log files
on the associated VaultBox.
Server Assigned to Replication
Zone
(for Email Archive only)
Reports any servers that are currently not assigned to a replication
zone. All servers must be assigned to a replication zone.
NOTE
RedirectorSink Communication
Support recommends that all servers be able to communicate with all
RedirectorSinks for correct redirection of mail if an outage affects some
RedirectorControllers and not others.
TIP
Partial Activation and RedirectorSink Updates
After a partial activation, status updates of RedirectorSinks can take up to 90
seconds and it can take up to three minutes for these updates to display in the
Administration Console. During this waiting period, Updating Mail Routing
Configuration appears as a pending task in the Activity Log section.
Email Continuity Administrator Guide version 6.5 (1st ed.)
97
Administration Console Home
Licensed Customer Confidential
Authentication Manager Status
The Authentication Manager allows end users to log in to the Email Continuity
portal using their Windows username and password.
To access the Authentication Manager status screen click the Details link in the
Email Security Services Authentication Manager readiness check entry.
Table 4-3
Authentication Manager Status icons
Icon
Definition
The Authentication Manager is connected to the Email Security
Services server.
The Authentication Manager is not connected to the Email Security
Services server.
The Authentication Manager is connected to the Email Security
Services server, but cannot authenticate users.
RedirectorController/RedirectorSink/RedirectorAgent Status
The RedirectorController is software that communicates with the data center and
provides updates to the RedirectorSinks and RedirectorAgents. The
RedirectorSink is An SMTP Event Sink that enables dynamic rerouting of
messages, allowing some users to remain on the primary mail system while
others use Email Continuity—a process called Partial Activation. Also transfers
copies of mail to the VaultBox for users of Historical Mail. The RedirectorAgent is
a custom transport agent that performs functions similar to the RedirectorSinks to
support the partial activation feature for Email Continuity in Exchange 2007
environments.
To access the Email Security Services RedirectorController/RedirectorSink status
screen click the Details link in the Email Security Services RedirectorSink
readiness check entry.
Table 4-4
Icon
Redirector Status Icons
Definition
Connected to the Email Security Services server.
Disconnected from the Email Security Services server.
98
Email Continuity Administrator Guide version 6.5 (1st ed.)
Licensed Customer Confidential
Table 4-4
Historical Mail Administration
Redirector Status Icons (Continued)
Icon
Definition
Component not installed
Status reporting disabled
The server has users who are active on Email Continuity
The server has no users active on Email Continuity
Historical Mail Administration
The Historical Mail feature of Email Continuity allows users to access stored email
during an activation of Email Continuity using a searchable web-based interface.
You identify email to be stored by including it in a policy.
Retention Policies
A retention policy defines the amount of time email messages are stored in the
system. If no policy is applied to a message, a default policy of 30 days is used.
NOTE
Mail Purging
A retention policy determines when a message is eligible to be purged from the
data center, not the actual date the message will be purged. Purging is
performed in the data center; you may notice a delay between the date a
message no longer must be kept according to the governing policy, and the date
it disappears from the server. Purging does not occur while the Email Continuity
service is active.
Membership-based (Current Membership) Policies
For membership-based policies, a message is retained based on whether the
sender or recipient is a member of the policy. The message is retained only as
long as the user remains a member of the group to which the policy applies. When
a user is no longer part of the policy group the message is eligible for purging.
Updates to membership-based policies occur after a directory syncronization or
when an administrator modifies the policy.
Example 1: For example, a user is initially a member of the Sales Group, which
has a membership-based retention period of 50 days. When the user separates
from the sales organization and becomes part of the Assistant Group, a new
Email Continuity Administrator Guide version 6.5 (1st ed.)
99
Historical Mail Administration
Licensed Customer Confidential
membership-based policy applies. The new retention period is 20 days. On the
first day that the user is a member of the Assistant Group, mail collected
during days 21-50 is eligible for purging.
Example 2: A user is a member of the Marketing Group retention policy,
whihc has a 30 day retention period. The last 30 days of mail is routinely retained.
One day, the user leaves the company and his mailbox is disabled, hidden, or
deleted. The next day, because the user is no longer part of the membershipbased policy, the user's last 30 days of retained mail is eligible to be purged.
Example 3: A user is initially a member of the All Employees retention policy,
which has a 30 day retention period. An administrator increases the All
Employees retention period to 45 days. The user’s mail will now be retained for
45 days.
Example 4: A user is a member of the VP retention policy, which has a 365 day
retention period. An administrator decreases the retention period for the VP policy
to 90 days. The next day, the user's mail for days 91-365 is eligible for purging.
Retention Policy Best Practices
Retention policies should be carefully constructed and implemented so as to
achieve your organizational objectives. The following best practices well help you
avoid unintended consequences.
•
Determine your business requirements before setting up a retention
policy.
Retention policies should reflect your organization's overall records
retention and compliance objectives. Before setting up any retention
policies, determine what you are trying to achieve, under what constraints
your organization works (such as financial, organizational, statutory), and
rank the types of retention you want to achieve from most to least
important. Planning for your needs in advance can save the time and
frustration from having to change retention policies after implementation.
•
Historical Mail settings do not override Exchange settings.
It is up to you to determine that your retention policies mesh smoothly with
those on your Exchange server, and vice versa. For example, don’t set
your retention policy for 14 days when your Exchange server purges all
messages after 30 days.
•
Higher priority policies always override lower priority polices, even
when of shorter duration.
Retention policies with a higher priority will always override those of a
lower priority, even when the lower priority policy has a longer duration.
For example, if an Executive retention policy specifies a retention
duration of three years and is ranked higher than a Legal retention policy
that specifies a retention of five years, then a CEO who was a member of
both groups would only have his messages retained for three years.
100
Email Continuity Administrator Guide version 6.5 (1st ed.)
Licensed Customer Confidential
•
Historical Mail Administration
Set the default retention duration to at least 30 days.
Make sure your retention policy is sufficient to achieve all organization
objectives. Older messages can always be purged when necessary, but
they cannot be reconstructed after purging if they are suddenly needed
later.
•
Avoid using membership-based policies, where possible.
Membership-based policies are appropriate for retaining messages for
continuity activations or for legal holds. They are not an adequate
substitute for capture-based policies.
Creating Retention Policies
Retention policies allow you to store email for periods of time other than the 30day default. To create a retention policy, you must:
1
Create a retention policy (give it a name and determine the number of
days mail retained under this policy should be kept).
2
Decide the type: membership-based, capture-based, or a user-classified
policy.
3
Decide who it applies to (determine its scope). The scope of the policy
determines to which users the policy applies. The scope can be assigned
based on lists, servers, and individuals. Group membership (based on lists
or servers) is updated automatically when SyncManager is run.
4
Decide what should happen when users are deleted from the system:
either keep their mail for the length of time set in the policy, or delete the
mail.
5
Prioritize the policy. If a message is subject to more than one policy, the
keep or delete decision is made based on the priority of the retention
policy. You assign priority by rearranging the policies in the user interface,
so that the most important ones appear higher in the list.
Then, at designated intervals, the system’s purge function evaluates each
message to determine:
1
Which policies apply to this email? Each message can be subject to
multiple policies. If none of your organization’s policies apply, then the 30
day default policy is used.
2
Is Email Continuity active for the user? Mail will not be purged during an
activation. When the activation is over and the system returns to a Ready
state, retention policies will be applied.
3
Of the retention policies that apply to this email, which one is highest in the
priority list?
4
Based on the highest priority policy, should this message be kept or
marked eligible for purging?
Email Continuity Administrator Guide version 6.5 (1st ed.)
101
Historical Mail Administration
Licensed Customer Confidential
Then the system marks the message as eligible to be purged, or allows it to
remain in the archive.
WARNING
Highest Priority Policy Takes Precedence over Duration Period
A policy’s priority determines whether a message should be retained or purged.
If a message is subject to a highest priority policy with a retention period of 90
days, as well as a lower priority policy with a retention period of 180 days, the
message will be deleted after 90 days.
WARNING
Changes to Policies are Recorded
Any changes you make to a policy are logged. To see a policy’s history, click
Edit and scroll to the Change History section at the bottom of the page.
Policy deletions are recorded in the data center. To obtain information about
deleted retention policies, contact Support.
To create a retention policy:
1
From the Administration Console, click Historical Mail.
2
Click Retention Policies. The Retention Policies page displays.
3
Click Create a new retention policy. The Retention Policies Details
page displays.
4
In the Name box, type a unique name for the new profile.
5
In the Retain Mail for box, type the number of days for the retention
period.
6
Click Submit. This returns you to the retention policy page. Note that it
now includes information on the new policy. Repeat this process until you
create all retention policies needed.
To add users to a retention policy:
1
Select a retention policy and click Select Users. The Select Users page
appears.
2
Identify the users you want to add to the policy. You can locate and select
users to add based on several criteria. For example:
a. To add all administrators to a retention policy, click the User Sets tab,
select All Administrators, and click Add.
b. To add all users that are part of a specific mailing list or lists, click the
Mailing Lists tab. Search for the correct mailing list or lists (you can
use % as a wildcard). When search results display, select the ones you
want and click Add.
102
Email Continuity Administrator Guide version 6.5 (1st ed.)
Licensed Customer Confidential
NOTE
Historical Mail Administration
Lists are Dynamically Updated
You don’t have to manually add users to a list, or delete users when
membership changes. The list is updated whenever the SyncManager runs, and
whenever you change the policy.
NOTE
Deletion of Distribution Lists Used in Retention Policies
If a distribution list used by a retention policy is deleted (that is, fails to sync to
the data center during scheduled data transfer operations), the distribution list is
scheduled to be purged after 30 days, and a fault alert notice is sent to each
member of the fault alerts notifications list.
c. To add all users with mailboxes on one or more email servers, click the
Servers tab. Select the appropriate server listings and click Add.
d. To add users individually, click the Users tab. Search for the
appropriate user or users. When search results display, select the one
or ones you want and click Add.
3
Click Add to move the selected users to the Add users to the profile:
field on the right.
4
When you added all appropriate users to the retention policy, click Next.
The Confirm page displays.
5
Examine the contents of the Confirm page, which lists all changes you are
making to the retention policy. If the data is correct, click Submit.
To prioritize retention policies:
1
From the Administration Console, click Historical Mail.
WARNING
Retention Policy Changes Go Into Effect Immediately Upon Saving
Reprioritize policies with care.
2
Click Retention Policies.
3
Click Reorder/Reprioritize Retention Policies. The user interface
changes so that DRAG appears next to each retention policy.
4
Drag and drop a policy to a new location; the higher up in the list, the
greater its priority.
5
When you’re satisfied with the list, click Save New Ordering.
Q What happens to stored mail when a user is moved from one Exchange
Organization or Administration Group to another?
A The system allows you to associate the mail collected when a user was in one
group and moves to another. The system detects a user ID conflict when more
than one instance of an email address is captured in a sync. The conflict is
reported, and can be resolved by Administrative action. After the conflict is
resolved (that is, the multiple instances of the email address are determined to
Email Continuity Administrator Guide version 6.5 (1st ed.)
103
Historical Mail Administration
Licensed Customer Confidential
be the same user), mail stored with the first instance becomes associated with
the second instance.
For more information about resolving user ID conflicts, see "Resolving User ID
Conflicts Automatically" on page 148 and "Resolving User ID Conflicts Manually"
on page 125.
Storage Reports
The service reports on the amount of data stored in the archive under retention
policies.
NOTE
Storage Usage Data
1
You may notice inconsistencies between the numbers in policy
statistics reports versus the number of mailboxes synchronized. The
inconsistencies will resolve after the statistics are recalculated.
2
Because a message or attachment can be subject to multiple retention policies,
there may be a discrepancy between the sum of all the policy data and the
aggregate storage data. In these situations, the Aggregate Statistics entry reflects
the correct value.
3
The default policy (30 days) will cause a number of additional messages that are
not held for an explicit policy to be visible in the totals. This occurs when users are
deleted or removed from a membership-based policy
These reports are updated daily. The following information is provided.
Table 4-5
Storage Reports Data
Category
Field
Description
Retention Policies—General Information
Type
Category of retention policy. Only Current Membership is
available for Historical Mail.
Policy Name
The name of the retention policy
Retention
The length of time the messages governed by the policy are
kept.
Retention Policies—Statistics
Users
The number of users included in the scope of the policy.
To view storage reports:
104
1
From the Administration Console, click Historical Mail.
2
Click Storage Report. The Storage Report screen appears.
Email Continuity Administrator Guide version 6.5 (1st ed.)
Licensed Customer Confidential
Historical Mail Administration
Replication Zones
Replication Zones allow you to associate specific Exchange servers with a
preferred series of VaultBoxes within your environment. For smaller
environments, there may only be a single Replication Zone and all Exchange
servers are members of this zone. Administrators of larger environments can
create multiple zones to segment and load balance replication traffic to specific
VaultBoxes. After Replication Zones have been created and all servers have been
assigned to a zone, a corresponding DNS Forward Lookup Zone should be
created in the environment for each Replication Zone defined within ESS. Within
that Forward Lookup Zone, MX records should be created using the fully qualified
domain name of the VaultBoxes using appropriate weighting of records to create
the preferred routing topology.
NOTE
Replication Zones Apply to Servers, not to Users
Replication Zone routing corresponds to the server that bifurcates the message
(typically the first Exchange Server to touch a message), not the server on
which a particular user resides.
To assign servers to replication zones:
1
From the Administration Console, select Historical Mail.
2
Click Replication Zones. The Zones page displays, containing a list of
Exchange Servers.
3
Click Add new zone….
4
In the text box that displays:
a. Enter the name of the zone you want to add and click Submit. The
newly added zone displays above the Add new zone... button.
b. In the bottom section of the Zones page, for each server you want
added to the new zone, click the appropriate Add to zone... link.
5
Repeat for each zone, as needed.
Email Continuity Administrator Guide version 6.5 (1st ed.)
105
User Administration
Licensed Customer Confidential
User Administration
Email Continuity users are created by importing existing company information into
the system (most commonly with SyncManager) or by manually creating Email
Continuity mailboxes. This section describes the functions available to
Administrators using the Administrator Console for users that have already been
added to the system through one of these methods.
Searching User Information
Search for specific user accounts by using a whole or partial name or email
address. In the search results, the Status column indicates the user’s readiness
for activation. The Action column provides access to the user’s account details
and allows you to change the user’s password or contact information.
NOTE
Password Change Option Not Available for Customers with Windows
Authentication
Because the Windows Authentication feature does not require separate Email
Continuity passwords, this feature does not apply to organizations using
Windows Authentication.
To search user information:
TIP
1
From the Administration Console, click User Administration.
2
Click User Information. The User Account Information screen appears.
3
In the Search Users field, enter the name or email address; you can use %
as a wildcard.
4
Click the radio button to select search By Name or By Email address.
User Search
Below the search box, you can choose to search By Email address or By
Name. Often, full names are not represented in the SMTP email address,
making searching By Name more useful. For example, to find Amy Andrews’
email address ([email protected]), using amy as the search
string for a By Email search would not locate the correct account.
In any search box, you can use a part of the search term, with % as a wildcard.
106
Email Continuity Administrator Guide version 6.5 (1st ed.)
Licensed Customer Confidential
5
User Administration
Click Search. Results appear in the section below the search field.
•
The State column indicates the user’s readiness for activation.
•
The Action column provides access to the user’s account details and
allows you to change the user’s password or update contact
information.
•
To view a user’s account information, click Details. User account
information includes the server on which the account resides, the
mailbox store, readiness state, and the user’s last login date.
Resetting User Passwords
Email Continuity automatically generates initial passwords for users when you
send the Welcome message. There are three methods for resetting a user’s
password, each covered in its own section:
•
"Resetting an Individual User’s Password" on page 107
•
"Resetting Multiple Passwords By Template" on page 108
•
"Resetting Multiple Passwords by CSV Import" on page 110
Resetting an Individual User’s Password
NOTE
Password Change Option not Available for Customers with Windows
Authentication
Because the Windows Authentication feature does not require separate Email
Continuity passwords, this feature does not apply to organizations using
Windows Authentication.
To reset a user’s password:
1
From the User Information screen, search for the appropriate user
account and locate it in the search results list. On the same line as the
user account listing, click Change Password.
2
The Change Password page displays.
Email Continuity Administrator Guide version 6.5 (1st ed.)
107
User Administration
Licensed Customer Confidential
3
In the New Password box, type a new password.
4
In the Confirm Password box, retype the new password.
5
Click Submit.
Resetting Multiple Passwords By Template
If enabled by Support, Email Continuity allows you to change passwords for many
users at once using a password template based on the users’ first and last names
or any custom text you provide.
WARNING
Potential Security Risk
The multiple password reset feature uses passwords that may be easily
guessed.
WARNING
Not for Use with Windows Authentication
This feature is not available if your organization uses the Windows
Authentication feature.
To change multiple users’ passwords:
1
From the Administration Console, click User Administration.
2
Click User Information. The User Account Information screen appears.
3
Click Bulk update passwords. The Select Users page appears.
4
Identify users who need new passwords.
a. Use the User Sets, Mailing Lists, Servers, and or Users tabs to
select users.
b. When you find a user or user set, click the check box to select the user
or group and click Add. The selected user or group moves to the list of
users who will get new passwords.
5
Click Next. The Enter Password Pattern page appears.
6
Choose the password template pattern to apply for all selected users. This
pattern determines what the new password will be for each user.
a. To use the recommended pattern, choose Recommended. This
resets the passwords for all selected users to the following form:
!Emailaddress_Mmm-YYYY%
where emailaddress is the portion of the user’s email address that
precedes the @ sign (first letter capitalized and the rest in lower case),
Mmm is the 3-digit abbreviation for the current month (first letter
capitalized and the rest in lower case), and YYYY is the 4-digit year.
For example:
108
Email Continuity Administrator Guide version 6.5 (1st ed.)
Licensed Customer Confidential
User Administration
•
If you applied this pattern in July 2009 for user
[email protected], the resulting new password would
be !John_doe_Jul-2009%.
•
If you applied this pattern in August 2010 for user
[email protected], the resulting new password
would be !Lilajones_Aug-2010%.
•
If you applied this pattern in November 2009 for user
[email protected], the resulting new password
would be !Samuels.jk_Nov-2009%.
b. Choose Email Username to reset the passwords for all selected users
to the portion of the user’s email address that precedes the @ sign (all
lower case). For example:
•
If you applied this pattern for user [email protected],
the resulting new password would be john_doe.
•
If you applied this pattern for user
[email protected], the resulting new password
would be lilajones.
•
If you applied this pattern for user
[email protected], the resulting new password
would be samuels.jk.
c. Choose Username to reset the passwords for all selected users to
each user’s ESS user name.
When you choose this option, the Default Password field appears.
You must enter a default password that can be used for any users that
do not have user name for ESS that differs from their primary email
address.
d. Choose Specify Password to reset the passwords for all selected
users to the value you provide.
When you choose this option, the Password field appears. You must
enter the password to be used for all selected users.
e. Choose Custom to enter a custom password template. Follow the
instructions provided in the Example Template section that appears.
Use the See Attribute Reference and See Transformation
Reference links for additional information.
7
After you choose the password pattern, click Next. The Edit Notification
Message page appears.
8
Choose either:
•
Send notification message to the selected users and compose a
message in the field provided.
•
Don’t send a notification message.
Email Continuity Administrator Guide version 6.5 (1st ed.)
109
User Administration
Licensed Customer Confidential
9
Click Next. The Confirm page appears.
a. You can click Show Affected Users to view a list of users whose
passwords will be reset.
b. You can click the Download New Passwords link to download a CSV
file containing the email address and new password for each user
whose password will be reset.
10 Click OK to reset the passwords for the selected users.
Resetting Multiple Passwords by CSV Import
You can use the Administration Console to import passwords in bulk using a CSV
(comma separated values) file. This feature works only for users already in the
system. You cannot create users using this import file.
To create a password import CSV file:
Two reference files are provided for you to help create your CSV file. To locate
them:
Table 4-6
1
From the Administration Console, click User Administration.
2
From the User Account Information page, click Upload passwords.
3
To view a help page that describes how to create the file, click File Format
Reference.
4
To download a CSV template file that you can use to start your own CSV
file, click Download Template.
Example Password Import CSV File
A
B
C
1
Primary Email
Password
Welcomed
2
[email protected]
user1-p4ssw0rd
Y
3
[email protected]
user2-p4ssw0rd
N
4
[email protected]
user3-p4ssw0rd
5
[email protected]
user4-p4ssw0rd
D
Notification
[email protected]
[email protected]
Y
The CSV import file must contain the following:
1
110
The first row must contain the import file header typed exactly as it
appears below:
•
Cell A1: Primary Email
•
Cell B1: Password
•
Cell C1: Welcomed
•
Cell D1: Notification
Email Continuity Administrator Guide version 6.5 (1st ed.)
Licensed Customer Confidential
2
User Administration
Each additional row must contain the following information for exactly one
user:
•
Primary Email—This address must match the user’s existing email
address in the system. You cannot create new users or addresses
using this file. If your file contains an unrecognized email address, the
validation step will inform you that the user is invalid.
•
Password—The password to import for the user. During the import
step, you can choose to enforce your organization’s password policy
when importing these passwords or to ignore it. To leave a user’s
existing password as it is, leave this column blank.
•
Welcomed flag—A flag indicating whether the user has already been
welcomed to the system.
•
•
To indicate that the user has already been welcomed, set to Y.
•
To indicate that the user must be welcomed the next time they log
in, set to N.
•
To leave the user’s existing flag as it is, leave this column blank.
Notification address—An optional notification address for the user.
•
To set the notification address to the same value as the user’s
primary address, set this column to Y.
•
To set an alternate address, type the email address in this column.
•
To leave the user’s existing notification address, leave this field
blank.
Save your import file as a CSV file.
To import passwords by CSV file:
1
From the Administration Console, click User Administration.
2
From the User Account Information page, click Upload passwords.
3
On the Import Passwords page, click Browse to locate the CSV file you
want to import. Locate the file, then click Open.
NOTE
About the CSV Import File
The CSV file you import must be correctly formatted. Refer to "To create a
password import CSV file:" on page 110.
The CSV file must be located on your local machine or in a network-accessible
location.
4
Under the Import Options section, select the options to apply to this
import:
•
Overwrite permanent passwords—Check this box to overwrite any
existing permanent passwords with those in the upload file. Leave this
box blank (unchecked) to leave any existing permanent passwords
Email Continuity Administrator Guide version 6.5 (1st ed.)
111
User Administration
Licensed Customer Confidential
alone. A permanent password is one that the user is not required to
change upon logging in. A temporary password must be changed the
next time the user logs in.
5
6
•
Validate passwords—Check this box to validate the passwords you
are uploading against the criteria listed. If this box is checked, all
passwords in the file must meet the listed criteria, or the import will fail.
Uncheck this box to upload all passwords in the file without applying
any validation criteria. This box appears only when your organization
has an available password policy.
•
Require users to change password at next login—Check this box
to upload the passwords as temporary passwords that users must
change immediately when they next log in. Uncheck this box to upload
the passwords as permanent passwords that can be used until they
meet any expiration criteria defined by your organization.
Click Next. The Validation Results page displays the total number of
users found in the file, the number of users that will be imported or
skipped, and any other important information. From this page, you can:
•
Download the validation results file. Click Download Validation
Results to download a CSV file that shows any users that are skipped
or whose information contains errors. You can use the information in
this file to revise your import file, if necessary. Commented
(informational) rows in the file begin with the # character. To find users
whose information contains errors, look for rows that do not begin with
the # character.
•
Go back to the previous page to choose another import file or change
import options. Click Back.
•
Cancel the import and start over. Click Cancel.
To continue with the import, click Submit. The Import Results page
appears. You can click Download Validation Results to view or save a
CSV file containing the results of the import.
Changing Status for Multiple Users
The system tracks several types of user status by setting and clearing indicator
flags that reflect a user’s condition. You can change the status of multiple users at
once by setting or clearing these flags. The following types of status settings can
be changed in this way:
•
112
Users who have been sent a welcome message. Welcomed users have
been sent a welcome message or have been assigned a permanent
password. Setting this flag indicates the users have been welcomed.
Clearing this flag adds them to the list of users who have not been
welcomed, and allows them to receive welcome messages.
Email Continuity Administrator Guide version 6.5 (1st ed.)
Licensed Customer Confidential
User Administration
•
Users who have been excluded from the system. See "Excluded Users" on
page 124. Excluded users do not appear in any welcome or login reports,
and cannot be sent messages. Setting the flag excludes the users.
Clearing the flag includes (reinstates) the users.
•
Users who have opted out of providing notification data. Users who have
opted out chose not to provide notification data in the Welcome Wizard.
They cannot be notified during an activation. Setting this flag changes the
users' status to Opted out, but does not remove any notification
information already in the system. Clearing the flag changes the users’
status to has not responded to the welcome message.
To change status flags for users:
1
From the Administration Console, click User Administration.
2
Click User Information. The User Account Information screen appears.
3
Click Bulk Reset Flags. The Select Users screen appears.
4
Click the appropriate tab to identify the users to change status for. You can
select by:
•
Predefined User Sets:
•
All Users
•
Users who have never logged in
•
Users not yet welcomed
•
Users who have been sent a welcome message
•
Excluded users
•
Users who have opted out of providing notification data
Click the button next to the appropriate set.
•
Mailing Lists—Search by Email or by Name, using % as a wildcard.
•
Servers—Click the check box by the appropriate server.
•
Individual Users—Search by Email or by Name, using % as a wildcard.
5
Click the check box to select a user or group from the left list.
6
Click Add. The selected users move to the Change status of these
users list.
7
Click Next.
8
For each of the status settings, select one:
9
•
Do not change (Default)
•
Set flag
•
Clear flag
Click Next.
Email Continuity Administrator Guide version 6.5 (1st ed.)
113
User Administration
Licensed Customer Confidential
10 To see a list of all users affected by the change, click Show Affected
Users. If the list is incomplete, or you want to make other changes, click
Back. If you are satisfied with the list of users, click Submit.
Updating a User’s Contact Information
NOTE
Integration with AlertFind
If your Email Continuity application is integrated with AlertFind, changes to
user’s notification options must be managed from within AlertFind.
Consequently, some of the functionality described in this chapter may not
appear in your Administration Console.
Normally, each user enters personal emergency contact information after
receiving the initial Welcome message and logging in to Email Continuity.
However, a user with appropriate administrative privileges can edit this
information when needed.
To edit a user’s contact information:
1
From the User Information screen, search for the appropriate user
account and locate it in the search results list. On the same line as the
user account listing, click Edit. The Edit User Contact page displays.
2
Update any information as necessary. When finished, click Submit.
Defining User Sets
Administrators can define groups of mailboxes called user sets. User sets allow
you to send notification messages, activate Email Continuity, or apply other
features to a designated group of users. For example, if you anticipate certain
groups of users are likely to be activated separately (such as system
administrators for tests), you can define a user set for them. Defining user sets
specifically for testing allows for performance of regular system tests without
activating all users and without taking down primary services.
To create a user set:
114
1
From the Administration Console, click User Administration.
2
Click User Sets. The User Sets page displays.
3
Click Create User Set. The User Set Details screen appears.
4
In the Name box, type the name for the user set.
5
To build the user set manually, click the appropriate tab to select users for
inclusion in the set by Servers, Mailing List, or individually by User.
•
If you select the Mailing List or User tab, in the Search box type an
email address or name and search for the results. Then click the listed
mailing list or user to select.
•
If you select the Server tab, click a server to select it.
Email Continuity Administrator Guide version 6.5 (1st ed.)
Licensed Customer Confidential
•
6
User Administration
Repeat until all desired servers, mailing lists, or users display in the
Users in the Set listing.
To upload a CSV file containing user sets, click the Upload tab, browse to
the file location, select the upload file, and click Open.
The CSV import file must contain the following:
Table 4-7
Example User Set Upload CSV File
A
B
1
Email Address
2
[email protected]
3
[email protected]
4
[email protected]
5
[email protected]
a. The first row must contain the import file header Email Address.
b. Each additional row must contain the email address for exactly one
user.
7
When all the users are selected or the upload file is listed, click Add.
8
Click Submit.
Assigning Super Administrator Privileges
A super administrator is a user account that is given the Super Administrator role
within Email Continuity. User accounts with Super Administrator permissions can
perform the same Administrator Console functions as the service root account.
Creating Super Administrator accounts helps you track actions taken in the
system.
Email Continuity Super Administrators can perform more actions than regular
Email Continuity Administrators. The table below summarizes functions available
to Super Administrators and the service root account that are not available to
regular Email Continuity Administrators.
Table 4-8
Features Limited to Super Administrators or Service Root Account
Feature
See Also
Creating Super Administrators
This section
Creating Email Continuity
Administrators
"Assigning Email Continuity Administrator Privileges" on
page 118
Creating Help Desk Users
"Assigning Help Desk Privileges" on page 119
Email Continuity Administrator Guide version 6.5 (1st ed.)
115
User Administration
Table 4-8
Licensed Customer Confidential
Features Limited to Super Administrators or Service Root Account
Feature
See Also
Changing the user attributes imported
from Active Directory
"Changing User Attributes Imported from Active Directory"
on page 143
Changing the Global Address List
attributes displayed in the webmail
interface
"Displaying Global Address List (GAL) Attributes" on
page 144
Configuring email routing
"Configuring Email Routing" on page 145
Modifying the organization’s email
disclaimer
"Changing the Email Disclaimer" on page 146
Changing AlertFind mapping settings
"AlertFind Mapping" on page 147
Configuring automatic resolution of
conflicting user IDs
"Resolving User ID Conflicts Automatically" on page 148
Setting user deletion notification
thresholds for SyncManager
"Sync Notify Settings" on page 149
Customizing the Home Page
"Customizing the Home Page" on page 150
Customizing the Welcome Wizard
"Customizing the Welcome Process" on page 151
Changing the root account password
"Changing Your Password" on page 152
Installing RedirectorSinks using the
RedirectorManager
"Configuring RedirectorManager" on page 57
To create a super administrator:
1
NOTE
Log into the Administration Console using an existing super administrator
account or the service root account provided by Support. See "Logging
Into the Administration Console" on page 93 for more information.
Log in Using a Super Admin or Service Root Account
You can only access the Super Admin features by logging into the
Administration Console with the service root account or another super
administrator account.
116
2
From the Administration Console, click User Administration.
3
Under the User Administration menu, click Super Admins.
Email Continuity Administrator Guide version 6.5 (1st ed.)
Licensed Customer Confidential
4
User Administration
In the lower part of the page, search for the user account to which you
want to assign the Super Admin role. You can assign this role to any
existing Email Continuity account. If you need to create a new account,
see "Adding Mailboxes (Users) Manually" on page 133 or contact Support.
a. In the Search field, enter the user name or email address. You can
use % as a wildcard.
b. Click the radio button to indicate a search By Name or By Email
Address.
c. Click Search. A list of users matching your search parameters
appears.
5
To give a user super administrator privileges, check the check box for that
user under the Add column, then click Add. The user is added to the list of
super administrators at the top section of the page.
To remove super administrator privileges:
1
NOTE
Log into the Administration Console using an existing super administrator
account or the service root account provided by Support. See "Logging
Into the Administration Console" on page 93 for more information.
Log in Using a Super Admin or Service Root Account
You can only access the Super Admin features by logging into the
Administration Console with the service root account or another super
administrator account.
2
From the Administration Console, click User Administration.
3
Under the User Administration menu, click Super Admins.
4
In the upper part of the page, locate the user account from which you want
to remove super administrator privileges.
5
Check the check box for that user under the Remove column, then click
Remove. The user is removed from the list of super administrators at the
top section of the page. The user account remains in the system, but has
only basic Email Continuity user privileges.
Email Continuity Administrator Guide version 6.5 (1st ed.)
117
User Administration
Licensed Customer Confidential
Assigning Email Continuity Administrator Privileges
Email Continuity Administrators can use all the features of the Administration
Console except those explicitly limited to Super Administrators and the service
root account. (These exceptions are listed under "Assigning Super Administrator
Privileges" on page 115.) Creating Email Continuity administrators helps you track
actions taken in the system more accurately.
To assign administrative privileges to an account:
1
Log into the Administration Console using an existing super administrator
account or the service root account provided by Support. See "Logging
Into the Administration Console" on page 93 for more information.
2
From the Administration Console, click User Administration.
3
Click Administrators. The Administrators page displays.
4
In the Search box, type the email address or name of the appropriate
user. Click Search.
5
In the search results, locate the appropriate user and click the check box
next to the name. Click Add.
6
The Administrators page refreshes and the name of the new
administrator displays near the top of the page.
To remove administrative privileges from an account:
1
Log into the Administration Console using an existing super administrator
account or the service root account provided by Support. See "Logging
Into the Administration Console" on page 93 for more information.
2
Click Administrators. The Administrators page displays.
3
Click the Remove check box next to the appropriate administrator’s name.
4
Click Remove.
NOTE
Super Administrators Can Demote Their Own Accounts
Super administrators can remove the super administrator privileges from their
own accounts. Upon their next login, these administrators will no longer have
super administrator rights.
118
Email Continuity Administrator Guide version 6.5 (1st ed.)
Licensed Customer Confidential
User Administration
Assigning Help Desk Privileges
Help Desk users are user accounts with a limited set of administrator privileges.
Help Desk users can view user information and reset users’ passwords, but they
cannot activate Email Continuity or perform any other administrator tasks.
NOTE
Passwords with Windows Authentication
If Windows Authentication is installed, Help Desk Users cannot reset users’
passwords.
Help Desk privileges can be assigned to existing Email Continuity users by Super
Administrators or by the service root account. Email Continuity Administrators can
view the list of Help Desk users, but cannot grant or remove Help Desk privileges.
To grant a user Help Desk privileges:
1
Log into the Administration Console using an existing super administrator
account or the service root account provided by Support. See "Logging
Into the Administration Console" on page 93 for more information.
2
Click User Administration.
3
Click Help Desk Users. The Help Desk Users page displays.
4
In the Search box, type the email address or name of the appropriate
user. Click Search.
5
In the search results, locate the appropriate user and click the check box
next to the name. Click Add.
6
The Help Desk Users page refreshes and the name of the new help desk
user displays near the top of the page. When the Help Desk user logs in to
the service during an activation, a help desk icon displays along with a link
to the User Information screen in the Administration Console. From the
User Information screen, the Help Desk user can reset users’ passwords.
To remove Help Desk privileges from an account:
1
Log into the Administration Console using an existing super administrator
account or the service root account provided by Support. See "Logging
Into the Administration Console" on page 93 for more information.
2
Click Help Desk Users. The Help Desk Users page displays.
3
Locate the appropriate user and click the Remove check box next to the
name. Click Remove.
Email Continuity Administrator Guide version 6.5 (1st ed.)
119
User Administration
Licensed Customer Confidential
Reviewing Login Status
The Login Status screen provides quick access to login history. It also provides
current activation status, and logon history from past activations.
To review login status:
1
From the Administration Console, click User Administration.
2
Click Login Status. The Login Status screen appears.
The Login History section shows how many users are in the system.
NOTE
Login Status Includes webmail Login Only
If the Outlook® Extension has been installed, users may be using Outlook
during the activation.
120
Email Continuity Administrator Guide version 6.5 (1st ed.)
Licensed Customer Confidential
User Administration
3
To see the login status for a user, click Show last login. The Login
Report screen appears.
4
To find the most recent login for a particular user:
a. In the Search for Users field, type the name or email address (or part
of it with the % wildcard).
b. Click Search. Results appear in the window below.
5
To export a CSV file of the login report data, click Export to file.
6
To exclude a user from the system, click the Exclude button.
7
From the Login Report screen, use your browser’s Back button to return
to the Login Status screen.
8
To find the most recent login for active users, in the Login Status screen,
click Show last login for users in the active state. The Login Report
screen appears showing only active users.
9
To see login information from a past activation:
a. In the Login Status screen Previous Activations section, select a
past activation from the drop-down list.
b. Click Show last logon. The Login Report screen appears, from
which you can search an individual user’s login information during the
activation.
The Login Status screen also provides links to reminder functionality. By clicking
the links, you can:
•
Remind users who have never logged in.
•
Remind users in the active state who have not logged in, but who have
notification options.
Email Continuity Administrator Guide version 6.5 (1st ed.)
121
User Administration
Licensed Customer Confidential
Exporting Users’ Contact Information
Data maintained by the service can be exported to a CSV file. If present in the
system, export files contain data described in Table 4-9‚ "Exported User Data".
Note that the last data column (Custom Data) consists of custom user attributes
synchronized from Active Directory, so the entries will be different for each
organization. For more information on collecting custom attributes from Active
Directory, see "Changing User Attributes Imported from Active Directory" on
page 143.
Table 4-9
Exported User Data
Category
User Account
Data
Primary Email
Display Name
System ID
Last Login
Welcome Message Sent status
Excluded (status)
Has permanent password (status)
Opted Out of Notifications (status)
Contact Information
Street Line 1
Street Line 2
City
State/Province
Zip/Postal Code
Country
Home Number
Work Number
Notification Email Addresses
Cell Number
Wireless Forwarding Address
Email Address 1
Email Address 2
Email Address 3
122
Email Continuity Administrator Guide version 6.5 (1st ed.)
Licensed Customer Confidential
Table 4-9
User Administration
Exported User Data (Continued)
Category
Emergency Contacts
Data
Full Name 1
Relationship 1
Email Address 1
Phone Number 1
Full Name 2
Relationship 2
Email Address 2
Phone Number 2
Full Name 3
Relationship 3
Email Address 3
Phone Number 3
Custom Data
Street Address
Comment
Company
Fax Number
Home Phone Number
Cell Phone Number
Phone Number
Title
Street Address
Zip Code
State
City
Last Name
First Name
Pager
Country/Region
Office
Department
Email Continuity Administrator Guide version 6.5 (1st ed.)
123
User Administration
Licensed Customer Confidential
To generate a CSV spreadsheet of emergency contact data for all users:
1
From the Administration Console, click User Administration.
2
Click Export. The Export User Information screen appears.
3
Click Export to download a CSV file containing the current data for all
users.
Excluded Users
You can exclude from Email Continuity mailboxes that are not associated with
users, such as resource mailboxes. Excluded users are not included in notification
reports or login status reports. You can exclude users by user sets, mailing lists,
servers, and individual users.
NOTE
Resetting Excluded Status for Multiple Users
In addition to the procedures provided below, you can also use the Reset status
feature to change the Excluded status for many users at once. See "Changing
Status for Multiple Users" on page 112.
To exclude a user:
1
From the Administration Console, click User Administration.
2
Click Excluded Users. The Excluded Users screen appears.
3
Click Exclude users.
4
Identify users (mailboxes) to exclude. Click the appropriate tab to identify
users by Server, Mailing List, or individually by User.
a. If you select the Mailing List or User tab, in the Search box type an
email address or name and search for the results. Then click the listed
mailing list or user to select.
b. If you select the Server tab, click a server to select it.
5
Click Add. Repeat until all users to be excluded appear in the right list.
6
Click Next. The Confirm screen appears. To see the list of excluded
users, click Show Affected Users.
7
Click Submit.
To remove individual users from the Excluded list (reinstate them in the
system):
124
1
From the Administration Console, click User Administration.
2
Click Excluded Users. The Excluded Users screen appears.
3
In the Search for Users field, type the name (or partial name using % as a
wildcard) and click Search. The results appear in the table below.
4
Click the Remove button next to the user’s name.
Email Continuity Administrator Guide version 6.5 (1st ed.)
Licensed Customer Confidential
User Administration
To remove multiple users from the Excluded list (reinstate them in the
system):
1
From the Administration Console, click User Administration.
2
Click Excluded Users. The Excluded Users screen appears.
3
Click Remove Users from the excluded list. Identify users (mailboxes)
to exclude. Click the appropriate tab to identify users by Server, Mailing
List, or individually by User.
a. If you select the Mailing List or User tab, in the Search box type an
email address or name and search for the results. Then click the listed
mailing list or user to select.
b. If you select the Server tab, click a server to select it.
4
Click Add. Repeat until all are listed in the right list.
5
Click Next. The Confirm screen appears. To see the list of reinstated
users, click Show Affected Users.
6
Click Submit.
Resolving User ID Conflicts Manually
During a Directory sync, the SyncManager looks for potential user ID conflicts
using primary email addresses. When SyncManager encounters more than one
instance of a primary email address, the system sends out a notification to
persons on the fault notifications list, and adds the potential conflict to the list
displayed on the User ID Conflict Resolution screen. In most cases, the
instances of the primary email address refer to the same, single end user, and by
resolving the conflict, you ensure that mail collected for the first instance is
associated with the second instance. The system offers multiple ways to resolve
such conflicts. Root-level administrators can configure the system to resolve them
automatically using certain criteria (see "Resolving User ID Conflicts
Automatically" on page 148) and Super Administrators and Email Continuity
Administrators can resolve conflicts manually using the processes described here.
Q What if the conflict is genuine; that is, the same primary email address
actually belongs to two different users?
A For example: You had a user Joe Smith ([email protected]) for whom
you had retained mail. Joe Smith left the organization, but his mail was still
subject to retention policies. A year later, you hired Jill Smith, and assigned
the email address [email protected]. SyncManager would detect the
conflict, but you would not want to resolve it using the methods described
Email Continuity Administrator Guide version 6.5 (1st ed.)
125
User Administration
Licensed Customer Confidential
here, as that would associate Joe’s retained mail with Jill’s new mail. Instead,
you must assign a new primary email address to either Joe or to Jill.
To resolve multiple user ID conflicts using CSV upload:
If you are doing a planned migration of users, and anticipate many user ID
conflicts, you can prepare a spreadsheet identifying the users and upload it to the
system. When the spreadsheet is uploaded, the conflicts are resolved after the
next Directory sync.
1
Prepare a CSV file in the format displayed in Table 4-10
2
From the Administration Console, click User Administration.
3
Click User Conflicts.
4
In the Upload user resolution information section, click Browse, then
select the CSV file.
5
Click Submit.
NOTE
Manual Directory Sync May Be Required
Changes uploaded by CSV go into effect after the next directory sync. You may
want to perform a manual sync to have the changes take place as soon as
possible.
Table 4-10 Sample Conflict Resolution CSV
Primary Email Address
[email protected]
New Exchange Legacy DN
/o=E2K7-Lab104/ou=Exchange Administrative Group
(FYDIBOHF23SPDLT)/cn=Recipients/cn=suzy
To resolve user ID conflicts individually:
Each instance of duplicate primary address information encountered by the
SyncManager is provided. For each instance in the list, you can determine
whether the email addresses belong to the same user, and if so, resolve them.
1
In the Resolving User ID Conflicts Individually section, identify a user
and, in the Resolve User column, click Details.
Both instances of the primary email address are provided, along with the
Exchange Legacy DN value.
2
126
For the user, select one of the following:
•
I am unsure whether these are the same user. Keep these addresses
in a conflict state until I find more information.
•
These addresses belong to the same user. Resolve the conflict, and
store all mail together for this user in the system.
Email Continuity Administrator Guide version 6.5 (1st ed.)
Licensed Customer Confidential
Enabling BlackBerry Forwarding
•
These addresses belong to different users. The first instance will be
deleted, and only mail for the second instance will be retained as of the
next directory sync.
•
These addresses belong to different users. I must create a new
primary email address for one of the users. Remove this conflict from
the list, but do not create new directory information until the next sync.
3
Click Submit.
4
If you chose to resolve the conflict, the user appears in the Users
Resolvedsection. To delete the user from the list, click Remove.
Enabling BlackBerry Forwarding
If configured to do so by Support, Email Continuity can forward mail to users’
BlackBerry devices during an activation. RIM allows BlackBerry device owners to
enable a capability on the device called the BlackBerry Internet Service (BIS). BIS
includes a carrier BlackBerry Access Plan. If your organization is currently using
BlackBerry Enterprise Server capability, you have a BlackBerry Access Plan.
NOTE
BlackBerry Forwarding vs. Wireless Continuity for BlackBerry
The BlackBerry Forwarding option, described here, can be turned on for Email
Continuity customers by Support. Wireless Continuity for BlackBerry is a
separate product. For information on Wireless Continuity for BlackBerry, contact
your account manager.
In the event the BES is unavailable, Email Continuity uses the BIS as an alternate
path to route messages directly to the BlackBerry device. The software routes
inbound messages to the alternate address of the BlackBerry device and forwards
messages by way of SMTP to the RIM Hosted Server. The RIM Hosted Server
then delivers the messages through the carrier's wireless gateways and on to your
wireless device.
Messages that are received while active on Email Continuity are forwarded from
Email Continuity to the BlackBerry device; those messages will be recovered
automatically during the recovery process. The messages that are sent from the
BlackBerry device while active on Email Continuity and using the BlackBerry
Internet Service are not automatically recovered during the recovery process. If it
is important for these messages to be recovered to the primary system after an
activation, the user can configure the Auto BCC function (described below) to
send a copy of each sent message back to the account.
After the user’s BlackBerry is configured to use the BIS, the user doesn’t need to
do anything else to receive messages on it during an activation. However, in order
to send messages from a BlackBerry, the user must switch message services, as
described below.
Email Continuity Administrator Guide version 6.5 (1st ed.)
127
Enabling BlackBerry Forwarding
Licensed Customer Confidential
Configuring a BlackBerry for Use with BlackBerry Forwarding
Before you can enable forwarding for a BlackBerry device, you need three pieces
of information.
•
The name of the wireless carrier (for example, Cingular, Verizon, T-Mobile,
Nextel, Sprint.)
•
The PIN number for the BlackBerry device. (For most devices, this is
located beneath the battery. If not, consult the manual that came with the
device.)
•
The IMEI or ESN number for the BlackBerry device. (For most devices, this
is located beneath the battery. If not, consult the manual that came with
the device.)
To set up a BlackBerry device:
1
Follow the account setup process for your carrier.
a. Log in to www.blackberry.com, and click Support.
b. Select Product Support > BlackBerry Internet Service. Scroll to the
bottom of the support page.
c. Select your carrier from the list, and follow the login process. During
the process, you are provided with a new email address for your
device. Write this address down.
2
When you have accessed your account, you must make two changes to
the account data:
a. In the Reply-to address field, enter your complete business email
address. This ensures that messages you send from your BlackBerry
during an activation are sent by Email Continuity.
b. In the Auto BCC field, enter your complete email address. This
ensures that messages you send from your BlackBerry during an
activation are recovered by Email Continuity.
c. Save the changes.
3
Set up your Email Continuity account to forward messages to your
BlackBerry device's new wireless, backup email address.
a. Log in to your webmail account.
b. Click the Notification Options icon.
c. Under the Personal Email section, add the new email address you
obtained during the setup process for your carrier. Click Add, then
click Submit.
d. Return to the Email Continuity page and enter this email address in the
Email address box of the Email Forwarding section.
128
Email Continuity Administrator Guide version 6.5 (1st ed.)
Licensed Customer Confidential
NOTE
Wireless Continuity for BlackBerry Administration
No Email Forwarding Section
If the Notification Options page of your account does not include an Email
Forwarding section, contact Support to make sure Forwarding is enabled.
4
During an activation, you must change Message Services to be able to
send email from your BlackBerry. To change message services:
a. From the device, select Options > Message Service > Change
Option.
b. Change from the Desktop Service to the BIS Account Service
configured above.
c. When the primary email system is restored, return the Message
Service to the Desktop Service option.
NOTE
Using the Reply To: Function During an Activation
You cannot use the Reply To: function on messages that were received prior to
the activation. If you try to reply to a message received before the activation, the
BlackBerry attempts to use the Desktop service book, which relies on the BES,
and it will fail. You can use the Reply To: function on messages received after
the activation.
Wireless Continuity for BlackBerry Administration
After you have synchronized BlackBerry data to the data center, and distributed
the client software to users’ devices, you can use the Administration Console to
manage the Wireless Continuity for BlackBerry feature. There is also a data
logging interface installed on the handheld device as part of the agent. The agentinstalled interface allows you to send diagnostic information to Support.
Managing Users and Devices
To manage BlackBerry user information in the Administration Console:
1
From the Administration Console, click BlackBerry Administration. The
BlackBerry Administration page appears. For each device user, the
page provides an overview of the account.
2
For more information, choose a device and click Details. The Mailbox
information page appears. Data fields are described in Table 4-11.
You can export device information for all BlackBerry users synced with
your Email Continuity environment. The export process provides a
comma-separated values (CSV) file and includes all information shown on
the Mailbox Information page, except for Login History data.
3
If a device misses a device check-in interval or experiences other issues,
the reset process pushes all contact information to the device. To reset a
device, click Reset.
Email Continuity Administrator Guide version 6.5 (1st ed.)
129
Wireless Continuity for BlackBerry Administration
4
Licensed Customer Confidential
For any version 6.2 or higher agent listed on the BlackBerry Device
Information page, you can send diagnostic information directly to Support
by clicking the Upload Diags button displayed next to each version agent.
This button does not display for version 6.1 and older agents.
Table 4-11 Mailbox Information Page
Field
Description
Name
The user name.
Email Address
The mail address associated with the device.
Server
The server associated with the device.
Mailbox Store
The mailbox store associated with the device.
State
The user’s current continuity state: Active, Ready, or Recovery.
Last Login
The time the device last connected with the data center.
Outlook Extension Version
The Outlook Extension version the user has installed, if any.
Outlook Version
The Outlook version installed, if known.
BlackBerry PIN
The device PIN.
BlackBerry Enterprise Server
The BES to which the device is attached.
Email Continuity BlackBerry
Agent Version
The version of the BlackBerry Continuity agent software installed
on the device.
BlackBerry Handheld Software
Version
The BlackBerry Handheld Software Version the user has installed,
if known.
BlackBerry Platform Version
The firmware version on the device, if known.
BlackBerry Model
The model number of the user’s BlackBerry device.
BlackBerry Carrier
The user’s wireless service provider. This data can only be
displayed when it is provided by the user’s wireless service
provider. Otherwise, this field is blank.
Phone Number
The phone number of the user’s BlackBerry device. (Displayed
only for device versions 6.2 and higher.)
Pending Signal Request
The last pending signal request for this user, if any. (Displayed only
for device versions 6.2 and higher.)
Last Contact from BlackBerry
The time and date from the last contact with the device.
Login History
The time, status, and IP address from the last Login.
To view information about a device using the interface installed with the
device agent:
130
1
The BlackBerry must be on and the agent must be installed.
2
Select the Wireless Continuity for BlackBerry icon
BlackBerry main menu.
3
Click the scroll button on the device. The agent message appears at the
top of the screen.
4
Basic information about the device appears on the screen. This
information includes:
on the
Email Continuity Administrator Guide version 6.5 (1st ed.)
Licensed Customer Confidential
Wireless Continuity for BlackBerry Administration
•
The state of the agent (Running or Stopped).
•
The state of the device—Initial, if the agent is installed but has not
been registered with the data center, then either Ready or Active,
when Email Continuity is activated.
•
Number of sent messages since the last activation.
•
Number of received messages since the last activation.
Using Device Menu Options in Standard Display Mode
Access the menu options by clicking the scroll button. Menu options that appear
on the Standard Display are:
Table 4-12 Standard Display Menu Options
Option
Description
Select
Provides access to Copy and Cancel Selection options.
Advanced Display
Provides the Advanced Display view, which provides more detailed
information about the agent and the BlackBerry device.
Send Diags to Support
Sends a message to Support that contains a log file.
Stop Agent
Stops the agent.
Close Menu
Closes the pop-up menu of options and returns you to the agent
display screen.
Close
Closes the agent interface and returns you to the BlackBerry main
menu. (Applies only to agents version 6.1 and earlier.)
Using Device Menu Options in Advanced Display Mode
Access the menu options by clicking the scroll button. Menu options that appear
on the Advanced Display are:
Table 4-13 Advanced Display Menu Options
Option
Description
Select
Provides access to Copy and Cancel Selection options.
Standard Display
Provides the Standard Display view.
Send Diags to Support
Sends a message to Support that contains a log file.
Stop Agent
Stops the agent.
Clear Statistics
Clears all statistics stored on this BlackBerry.
Copy Diagnostics
Copies diagnostic information so that you can email it. Preferred
method is to use Send Diags to Support.
Normal/Verbose Logging
Toggles between normal logging and more detailed (verbose) logging.
Verbose logging logs additional information for use by Support.
Email Continuity Administrator Guide version 6.5 (1st ed.)
131
Outlook® Extension Administration
Licensed Customer Confidential
Table 4-13 Advanced Display Menu Options
Option
Description
Close menu
Closes the pop-up menu of options and returns you to the agent
display screen.
Close
Closes the agent interface and returns you to the BlackBerry main
menu.
Viewing Device Advanced Display Information
The Advanced Display shows read-only information about the agent and the
BlackBerry on which it is running. When you are viewing the Advanced Display,
the pop-up menu displays an option to return to the Standard Display.
Table 4-14 Advanced Display Read-only Information
Field
Description
Agent
Whether the agent is Running or Stopped.
State
Ready or Active.
Sent Email
The number of messages sent since the last activation.
Received Email
The number of messages received since the last activation.
Push Messages
The number of push messages received (push messages are sent
from Email Continuity to the BlackBerry device).
Backend
The data center Email Continuity is running on.
PIN
The PIN number for this BlackBerry device
Agent version
The version of the agent running on this BlackBerry device.
JDE compatibility
The version of the Java Development Environment (JDE) with which
this BlackBerry device is compatible.
Inbox
The inbox associated with this BlackBerry device.
BES
The address of the BES with which this BlackBerry device is
associated.
Outlook® Extension Administration
The Outlook® Extension allows users to interface with various service features
directly from their Outlook Inbox. (For information on how to use the features, refer
to the online help provided with the Extension.) After the Outlook Extension has
been enabled by Support, log into the Administration Console and click Outlook
Extension. The Outlook Client Information screen appears.
The Outlook Client Information screen provides a list of users, and indicates
whether they have installed the extension and polled the data center. You can
search for a specific user, then click the Details button to display:
132
Email Continuity Administrator Guide version 6.5 (1st ed.)
Licensed Customer Confidential
Mailboxes and Aliases
•
The user’s login history, including which versions of the extension and
Outlook® are installed.
•
A list of policies that apply to the user.
To enable or disable the Extension:
1
To disable an individual user so that the Extension cannot be used, click
the Disable button adjacent to the user’s name.
2
To enable or disable Outlook Extension features for all users:
a. On the Outlook Client Information screen, click Manage Features.
b. Use the check boxes to select features to activate; a check mark
means the feature is active. Changes won’t be effective until the user
restarts Outlook.
c. Click OK.
To export the list of users:
1
Click Export. The File Download screen appears.
2
Select either:
3
•
Open, to open the file in Excel
•
Save, to save the file to your computer, or
•
Cancel
Click OK.
Mailboxes and Aliases
The SyncManager automatically creates an account for each mailbox in the
primary mail system, whether the mailbox is associated with an individual person
(end user) or is a collection box for certain types of email (such as status notices
that are sent to a designated address). Administrators can manually create new
mailboxes to add other users, and create aliases that map incoming email
messages to existing mailboxes.
Adding Mailboxes (Users) Manually
To add a mailbox (user) to Email Continuity:
1
From the Administration Console, click Mailboxes and Aliases. The
Additional Mailboxes and Aliases screen appears.
2
Click Create Mailbox. The Create Mailbox screen displays
3
In the Display Name field, type a name.
4
In the Email Address field, type an email address.
5
Click OK to create, or Cancel to cancel.
Email Continuity Administrator Guide version 6.5 (1st ed.)
133
Mailing Lists
Licensed Customer Confidential
Predefined distribution lists synced from the primary mail system can be used for
quick communication with specific groups of users.
Creating Aliases
To create an alias:
1
From the Administration Console, click Mailboxes and Aliases. The
Additional Mailboxes and Aliases screen appears.
2
Click Create Alias. The Create Alias screen appears.
3
In the Destination Address field, type the destination address (the
preexisting address that will gain a second name).
4
In the Alias field, type an alias (the new email address).
5
Click OK to create or Cancel to cancel.
Mailing Lists
Email Continuity synchronizes your existing mailing lists from the primary mail
system so that, in the event of a disruption, users can continue to send email to
and receive email messages from their usual mailing lists. You can also use
mailing lists as activation or recovery units. For example, it might be best to
activate the members of a building-specific mailing list or to recover a small set of
users before a full-scale recovery.
Mailing lists can contain both internal email addresses (users with Email
Continuity accounts) and external email addresses.
To view mailing lists and members of each list:
134
1
In the Administration Console, click Mailing Lists.
2
To locate a specific mailing list, in the Search box type the email address
or name and click Search.
3
To view the individual members of a mailing list, in the List Name column
click the name of the list. The listing expands to include all members.
Account members display with full names; external members display with
only email addresses.
Email Continuity Administrator Guide version 6.5 (1st ed.)
Licensed Customer Confidential
Notification
Notification
The Notification screens in Email Continuity allow you to introduce the service to
users through the welcome process, send reminders about the service, send
custom messages, and manage fault and transition alerts.
Welcoming New Users
Though it is possible to implement and activate Email Continuity without
introducing it to users through the welcome process, welcoming users is strongly
encouraged because:
•
Introducing users to the service before an emergency helps them
understand that system usage is a shared responsibility. It can also be
reassuring for users to know that safeguards are in place for them should
they ever be needed.
•
Capturing notification information prior to Email Continuity activation allows
the system to handle notification of users automatically. This is especially
beneficial during a disaster because it frees the IT staff to recover the
primary mail system. Similarly, the information captured by the service is
often needed by Human Resources during an emergency, and, depending
on the type of disaster, it may not be readily available.
•
Manually setting users’ passwords is tedious work. The Welcome Wizard
provides temporary passwords automatically so that at the time of
activation the IT staff can focus on recovery of the primary mail system.
Note that separate Email Continuity passwords are not required if the
Windows Authentication feature is enabled.
•
Capturing notification information prior to activation allows the system to
handle notification of users automatically when the primary mail system
has been recovered. Even if they have not used the webmail system, the
automatic notification alerts them to the fact that their primary system is
again available.
•
Providing a notification address during the registration process allows
users to take advantage of the forgot password link if they ever need it.
The welcome message:
•
Informs users about Email Continuity.
•
Provides users with their username and a temporary password.
•
Includes a link that, if so configured, starts a welcome wizard that can be
configured to collect notification options, home address, and emergency
contact information from the user.
To configure which user information is collected using the welcome wizard,
see "Customizing the Welcome Process" on page 151.
•
Can be sent automatically once a week to any users who have not yet
been sent one.
Email Continuity Administrator Guide version 6.5 (1st ed.)
135
Notification
Licensed Customer Confidential
The service tracks different categories of users so that you can send the welcome
message to users who:
•
Have not yet been sent a welcome message.
•
Have been welcomed, but did not respond to the message. A user has
responded when he has logged in to the service and either provided
notification data or stated he has no alternate means of communication
(opted out).
•
Do not yet have a permanent password for the service. These users either
have not been sent a welcome message, or have not yet changed the
temporary password provided in the welcome message.
•
Have responded, but did not provide notification data (have opted out).
NOTE
Status for Users Can Be Reset
If you need to reset the status for multiple users in the system, use the Reset
flags for multiple users feature. See "Changing Status for Multiple Users" on
page 112.
The service provides default text for the welcome message. As you customize the
message, note that it uses variables that are filled in when the message is sent:
•
%__username% — the recipient's Email Continuity username
•
%__tempPassword% — temporary password generated by Email
Continuity for the recipient
•
%__autologinUrl% — the URL to access Email Continuity (with the
username and password embedded)
NOTE
%_tempPassword% and %autologinUrl% Not Applicable to Windows
Authentication
Because separate Email Continuity passwords are not required for Windows
Authentication customers, these variables are not included.
136
Email Continuity Administrator Guide version 6.5 (1st ed.)
Licensed Customer Confidential
TIP
Notification
Best Practices for Welcoming Users
•
Plan to welcome users in stages, rather than welcoming the entire
organization at one time. Particularly if your organization has several
thousand mailboxes, welcome users in groups of 500 or fewer to
minimize impact on your incoming gateway.
•
A day or two before sending a welcome message, send an explanatory
memo to the users introducing Email Continuity and urging them to
respond promptly when they receive the welcome message.
•
A couple of days after sending the welcome message, send a reminder
to users who have been welcomed, but who have not responded. By
this time, an average user response is about 50%; a good goal is 80%.
•
Continue to send reminders until the target response goal is reached. If
you are having difficulty getting users to respond, you may want to
change the From address in the message to a department leader, or
change the subject line of the message to Action required or
Second Notice.
To send a welcome message to one or more users:
1
In the Administration Console, click Notification.
2
Click Welcome New Users.
3
Click Welcome users who have not received an initial welcome
message. The Edit Message screen appears.
4
In the From box, type an email address, being sure you enter an alias
within your organization so that any users who reply with questions are
directed to an administrator or Help Desk user.
5
In the Subject box, make any necessary changes to the default text.
6
In the Text box, make any necessary changes to the default text.
7
Click Next. The Select Recipient screen appears.
Email Continuity Administrator Guide version 6.5 (1st ed.)
137
Notification
Licensed Customer Confidential
8
Click the appropriate tab to identify recipients by User Set, Server, Mailing
List, or individually by User.
a. If you select the Mailing List or User tab, in the Search box type an
email address or name (or part using the % as a wildcard) and search
for the results. Then click the listed mailing list or user to select.
b. If you select the Server tab, click a server to select it.
9
Click Add. Repeat until all intended recipients are listed in the right list.
10 Click Next. The Confirm screen appears.
11 To see a list of recipients, click Show Affected Users. Review the
message text.
12 Click Send.
To automatically send welcome messages to new users:
1
In the Administration Console, click Notification.
2
Click Welcome New Users.
3
Click Automatically welcome new users.
4
Click Enable automated welcome message.
5
Click Submit.
When the majority of your users have responded to the welcome message, you
may need to review the lists of users who have not responded, do not yet have a
permanent password, or who have opted out (have not provided contact
information). (Note that the data provided about users’ responses is an estimate is
some cases; these are marked with an asterisk [*].) The service lets you send
welcome messages to these categories of users; click the link and follow the
process described for welcoming new users, except that the recipient list is
already created for you.
In some cases, you may need to exclude certain users/mailboxes from which you
don’t expect a response. The Show Users links in the Welcome New Users
screen display lists of users in these categories and a button to Exclude individual
mailboxes.
Sending Reminders
The Reminders screen allows you to send reminders to different categories of
users:
138
•
Those who have not responded to the welcome message.
•
Those who have responded, but have indicated they have no alternate
notification options (they have opted out).
•
Those who have responded and provided information, but need to be
reminded to keep the information current.
Email Continuity Administrator Guide version 6.5 (1st ed.)
Licensed Customer Confidential
Notification
By default, reminders contain a link to the service website, the recipient’s
username, and a link to the forgot password feature. (The Reminders message
does not contain the temporary password or login URLs. If you need to assign a
temporary password, or provide the login URL, send a Welcome Message
instead.) You can customize any portion of the reminder message.
To send a reminder:
1
In the Administration Console, click Notification.
2
Click Reminders. The Reminders screen appears.
3
Select the reminder to send by clicking one of the following:
•
Send a reminder to welcomed users who have not responded,
•
Send a reminder to users who chose not to provide notification
options, or
•
Send a reminder to users to keep notification information current.
The Edit Message screen appears.
4
In the From box, type an email address, being sure you enter an alias
within your organization so that any users who reply with questions are
directed to an administrator or Help Desk user.
5
In the Subject box, make any necessary changes to the default text.
6
In the Text box, make any necessary changes to the default text.
7
Click Next. The Select Recipient screen appears. Note that for each type
of reminder, an appropriate user set appears in the User Sets tab.
8
Either:
•
Click the radio button for the particular user set, or
•
Click the appropriate tab to identify recipients by Server, Mailing List, or
individually by User.
•
If you select the Mailing List or User tab, in the Search box type
an email address or name and search for the results. Then click
the listed mailing list or user to select.
•
If you select the Server tab, click a server to select it.
Email Continuity Administrator Guide version 6.5 (1st ed.)
139
Notification
Licensed Customer Confidential
9
Click Add. Repeat until all recipients are listed in the right list.
10 Click Next. The Confirm screen appears.
11 To see a list of recipients, click Show Affected Users. Review the
message text.
12 Click Send.
Managing Fault Alerts
The fault alerts list includes users who should receive notifications of problems
identified by the system. Fault alerts are emailed to these users when:
•
Certain data center readiness checks fail (See "Readiness Checks" on
page 96);
•
Distribution lists used in retention policies have been deleted (See
"Retention Policies" on page 99);
•
The percentage of users or mailing list members exceeds the configured
threshold. (See "Sync Notify Settings" on page 149)
To add a user to the fault alerts list:
1
In the Administration Console, click Notification.
2
Click Fault Alerts. The Fault Notification page displays.
3
In the Search box, type the email address or name of the user. Click
Search.
4
In the search results, locate the listing for the user. Select the check box
next to the name.
5
Click Add. The Fault Notification page refreshes and the newly added
user listing displays near the top of the page.
To remove a user from the fault alerts list:
1
In the Administration Console, click Notification.
2
Click Fault Alerts. The Fault Notification page displays.
3
Locate the listing for the appropriate user and select the Remove check
box next to the name.
4
Click Remove.
Managing Transition Alerts
The transition alert list identifies users who should automatically receive
notifications whenever Email Continuity changes state— that is, whenever it is
activated, put into test mode, or returned to READY state. You can use this
140
Email Continuity Administrator Guide version 6.5 (1st ed.)
Licensed Customer Confidential
Notification
function to inform appropriate users when there is an activation of Email
Continuity for an actual outage or a test. To see reports on state transitions, see
"Viewing Audit Reports" on page 142.
To add users to the transition alerts list:
1
In the Administration Console, click Notification.
2
Click Transition Alerts. The Transition Notification page displays.
3
In the Search box, type the email address or name of the user. Click
Search.
4
In the search results, locate the listing for the user. Select the check box
next to the name.
5
Click Add. The Transition Notification page refreshes and the newly
added user listing displays near the top of the page.
To remove a user from the transition alerts list:
1
In the Administration Console, click Notification.
2
Click Transition Alerts. The Transition Notification page displays.
3
Locate the listing for the appropriate user and select the Remove check
box next to the name.
4
Click Remove.
Sending Custom Notifications
Administrators can use the service to send email messages to users even when
Email Continuity has not been activated. You can send custom notifications to
both primary email addresses and/or alternate email addresses.
To send a custom message:
1
In the Administration Console, click Notification.
2
Click Custom Notification.
3
Click Send a custom message. The Edit Message page displays.
4
In the From box, type an email address, being sure you enter an alias
within your organization so that any users who reply with questions are
directed to an administrator or Help Desk user.
5
In the Subject box, type a subject for the message.
6
In the Text box, type the body of the message.
7
Click Next. The Select Recipients screen appears.
Email Continuity Administrator Guide version 6.5 (1st ed.)
141
Viewing Audit Reports
Licensed Customer Confidential
8
Click the appropriate tab to identify recipients by Server, Mailing List, or
individually by User.
a. If you select the Mailing List or User tab, in the Search box type an
email address or name and search for the results. Then click the listed
mailing list or user to select.
b. If you select the Server tab, click a server to select it.
9
Click Add. Repeat until all recipients are listed in the right list.
10 Click Next. The Select Recipient Options screen appears.
11 Select the addresses to use for the custom notification:
•
Primary addresses in your mail environment
•
Notification addresses (addresses users have provided as alternate
contact information)
•
Both Primary and notification addresses
Click Next.
12 To see a list of recipients, click Show Affected Users. Review the
message text.
13 Click Send.
Viewing Audit Reports
The service provides an audit trail of actions taken within the system. You can
review six months’ history for activations and tests. All audit reports can be
exported to a CSV file. The user initiating each state transition is provided along
with the time and date of the transition. Users’ logon status during an activation is
also collected. If a recovery archive has been generated, the name and size of the
archive are displayed. See the following sections for more information:
•
"Activation Reports" on page 142
•
"Test Reports" on page 143
Activation Reports
TIP
Activation History Records
For an easy way to provide disaster recovery/business continuity auditors with
data proving that your organization conducts regular tests, use the Tests page in
the Activation History section for a concise record of Email Continuity tests over
the last six months.
142
Email Continuity Administrator Guide version 6.5 (1st ed.)
Licensed Customer Confidential
Modifying System Settings
To view an Activation report:
1
From the Administration Console, click Audit Reports.
2
Click Activations. The Activation History report appears.
3
From this screen, you can:
•
Click the State Transitions arrow for an activation to display the date,
time, and responsible party.
•
Click View logon records during this activation to see active users,
and identify who has logged in to the service. (See also "Reviewing
Login Status" on page 120.)
•
Click Export to obtain a copy of the report in CSV format.
Test Reports
To view a Test report:
1
From the Administration Console, click Audit Reports.
2
Click Tests. The Test History report appears.
3
From this screen, you can:
•
Click the State Transitions arrow for an activation to display the date,
time, and responsible party.
•
Click Export to obtain a copy of the report in CSV format.
Modifying System Settings
NOTE
System Settings Are Only Available to the Root Administrator Account
The System Settings menu and its options are only available to administrators
logged in using the root account.
Changing User Attributes Imported from Active Directory
Administrators using the root account can change which data fields are
synchronized from Active Directory. Certain attributes are required; these are
listed in Table 4-15.
Table 4-15 Required Attributes
Attribute Name
Attribute Display Value
cn
Display Name
rdn
Display Name
mailnickname
User ID
Email Continuity Administrator Guide version 6.5 (1st ed.)
143
Modifying System Settings
Licensed Customer Confidential
Table 4-15 Required Attributes
Attribute Name
Attribute Display Value
displayName
Display Name
legacyexchangedn
Mailbox ID
mail
Email Address
proxyaddresses
Other Email Addresses
sAMAccountName
User Name
othermailbox
Other Mailbox
uid
User Id
distinguishedname
Not displayed in user interface
userAccountControl
Not displayed in user interface
msExchHideFromAddressLists
Not displayed in user interface
msExchMasterAccountSid
Not displayed in user interface
To change the attributes imported from Active Directory:
1
From the Administration Console, click System Settings.
2
Click User Import. The Available User Attributes screen appears.
3
To remove an attribute, so that it is not imported from Active Directory,
select the attribute’s check box and click Remove.
4
Active Directory contains many attributes, and your organization may also
have custom attributes. Note that custom attributes imported by
SyncManager are not available for use within Email Continuity, but can be
used for integrated AlertFind applications. To add an attribute to the list
that SyncManager captures:
a. In the search field, type the attribute’s name.
b. Select the By Display Name or By Attribute Name radio button.
c. Click Search. Results appear in the section below.
d. Select the check box and click Add.
Displaying Global Address List (GAL) Attributes
During an activation, Global Address List attributes (synced from Active Directory)
are displayed in the webmail interface. (To see them: from within the webmail
interface, click Contacts. Select Global Address List in the drop-down list,
then click a user in the Display Name column. The user’s GAL attributes appear
in the user’s profile screen.) Administrators logged in under the root account can
144
Email Continuity Administrator Guide version 6.5 (1st ed.)
Licensed Customer Confidential
Modifying System Settings
change the attributes that are displayed. There is a limited set of attributes
available. You can only remove attributes from this list; you cannot add new
attributes (such as custom attributes) to it.
To change the attributes displayed in Global Address List:
1
From the Administration Console, click System Settings.
2
Click Address List Display. The Global Address List Display screen
appears.
3
To remove an attribute, so that it is not displayed in the Global Address
List, select the attribute’s check box and click Remove.
To restore an attribute that has been removed:
1
In the Additional Properties section, click the check box next to the
attribute.
2
Click Add.
Configuring Email Routing
The system allows you to designate a series of next hops for inbound (forwarded)
mail destined for your organization’s mail system, and outbound email during an
activation of Email Continuity. Before changing these settings, see the sections
"Mail Routing Inbound—Store and Forward" on page 15, and "Mail Routing—
Outbound During Activation" on page 16. Note that an audit trail is provided for all
changes made to email routing, including event, actor and day/time information.
The default behavior is to use MX records for these functions. If you decide to
provide a list of alternate hosts, the system uses them in the order you provide
them. If your organization uses a third-party vendor to handle incoming mail, you
must identify a list of hosts using the Administration Console. In order to prevent
mail looping, mail for the organization will be queued by Email Continuity until the
hosts are specified.
NOTE
Allow Time for Changes to Take Effect
When you configure the system to use hostnames instead of MX records, it can
take up to 10 minutes for the changes to take effect.
TIP
Use Hostnames instead of IP Addresses for Alternative Routing
Though the routing features accept both IP addresses and hostnames,
hostnames provide greater flexibility and are preferred.
CAUTION
Testing Recommended
After making changes to routing for inbound or outbound mail routing or delivery,
verify the changes by performing a test activation. Incorrect or invalid settings
can result in delayed, bounced or lost messages.
Email Continuity Administrator Guide version 6.5 (1st ed.)
145
Modifying System Settings
Licensed Customer Confidential
Routing for Forwarded Mail
To configure the path for forwarded mail:
1
From the Administration Console, click System Settings.
2
Click Email Routing. The Email Routing Rules page appears. The
Forwarding of Inbound Email to Your Mail System section displays the
current forwarding setting.
3
To change the routing:
a. Click Edit.
b. In the Routing Rules section, enter the host name in the field and click
Add. The hostname appears in the Hosts in priority order field
above. Repeat to add all required hostnames.
c. Click Submit. The new setting appears in the Forwarding of Inbound
Email to Your Mail System section.
Routing for Outbound Mail During an Activation
To configure the path for outbound mail during an activation:
1
From the Administration Console, click System Settings.
2
Click Email Routing. The Sending Outbound Email to External
Recipients During an Activation section displays the current setting.
3
To change the routing:
a. Click Edit.
b. In the Routing Rules section, select either:
•
According to MX records (default) or
•
Send via specific hosts. A dialog box appears.
c. If you selected specific hosts, enter the host name in the field and click
Add. The hostname appears in the Hosts in priority order field
above. Repeat to add all required hostnames.
d. Click Submit. The new setting appears in the Outbound Email to
External Recipients During an Activation section.
Changing the Email Disclaimer
Only administrators logged in using the root account can change the email
disclaimer.
To add disclaimer text to the end of each message sent by the service:
146
1
From the Administration Console, click System Settings.
2
Click Email Disclaimer. The Email Disclaimer screen appears.
Email Continuity Administrator Guide version 6.5 (1st ed.)
Licensed Customer Confidential
Modifying System Settings
3
In the Disclaimer Text field, type the organization’s disclaimer.
4
Click OK.
AlertFind Mapping
Using the AlertFind mapping feature, you can:
•
Choose to identify users by First name, Last name rather than the Active
Directory display name, which often contains more information than the
person’s name, or is formatted Last name, First name. When using the
voice messaging features of AlertFind, a First name, Last name
designation is often preferable.
•
Add more devices to AlertFind by taking advantage of those stored in
Active Directory
•
Select attributes to be captured from Active Directory and displayed in the
AlertFind Description field, and
•
Automatically create AlertFind groups using Active Directory Attributes
NOTE
AlertFind Data Synchronization Schedule
Synchronization of data to AlertFind takes place once per day. Depending on
your SyncManager processing schedule, you may experience a delay of 48
hours or more before new or changed Active Directory information available in
Email Continuity appears in AlertFind.
NOTE
Full AlertFind Integration Required
This feature is available only to customers whose Email Continuity and AlertFind
products are fully integrated; that is, all of the mailboxes in Email Continuity are
also users in AlertFind. This feature does not work for customers who have all of
their users in Email Continuity and a subset of users in AlertFind. There must be
a one-to-one correlation between users in both Email Continuity and AlertFind.
To configure AlertFind mapping:
1
From the Administration Console, click System Settings.
2
Click AlertFind Mapping.
3
In the Display Name section, select the identification method by clicking
either:
•
Use display name
•
Use first and last name
Email Continuity Administrator Guide version 6.5 (1st ed.)
147
Modifying System Settings
4
Licensed Customer Confidential
In the Device Synchronization section, identify which data for additional
devices you want to import from Active Directory to AlertFind.
a. From the Device Type drop-down list, select Phone, Email, SMS, or
Fax.
b. From the Select Attribute drop-down list, choose the attribute to
synchronize.
NOTE
Use Only Appropriate Attributes for the Device Type
The interface allows you to pair any attribute with any device type. Setting
inappropriate attributes (such as Display name for a phone, for example) can
cause errors in the import process. Select attributes with care.
c. Click Add. The Device type and attribute appear in the Attributes
mapped to devices field.
5
NOTE
In the Description Mapping section, select Active Directory attributes to
be imported to the description field in AlertFind.
Data Size Limitation
Because of an AlertFind limitation, data displayed in these attributes is limited to
128 characters. Longer data strings will be truncated.
a. In the Select Attribute drop-down list, select an attribute.
b. Click Add. The attribute appears in the Attributes mapped to the
description field field.
6
Automatically create AlertFind groups using Active Directory attributes.
You can also use topology attributes (such as servers, sites and stores) to
identify groups. You can create as many groups as you need.
a. From the Select Attribute drop-down list, select an attribute.
b. Click Add. The attribute appears in the Attributes used to create
AlertFind groups field.
7
Click Submit.
Resolving User ID Conflicts Automatically
In some situations, such as when you are transitioning from Exchange 2003 to
2007, where only one Administrator category is permitted, SyncManager may
detect high numbers of user ID conflicts. (See "Configuring the SyncManager" on
page 49 for more information.) You can choose to have administrators resolve
148
Email Continuity Administrator Guide version 6.5 (1st ed.)
Licensed Customer Confidential
Modifying System Settings
conflicts manually, or you can configure the system to handle them automatically
using various criteria. There are four separate options for resolving user ID
conflicts:
•
Manual resolution. This is the default setting, and requires that all user ID
conflicts must be resolved manually by an Administrator. See "Resolving
User ID Conflicts Manually" on page 125 for more information.
•
Primary email address. If the primary email address is the same, the
users are determined to be the same person, and the conflict is resolved.
•
All Emails. All aliases in the mailbox of first instance of the user ID are
also present in the second instance of the user ID. The second instance
can have additional aliases associated with it, but all of the first instance
ones must be there. If only some or most are present, the action fails and
an administrator must resolve the conflict manually.
•
Active Directory Attribute. Choose a custom or default attribute from
Active Directory to confirm that the users identified as having IDs in conflict
are the same person. Examples are User ID, phone number, or cell phone
number.
To configure the method by which user ID conflicts are resolved:
1
From the Administration Console, click System Settings.
2
Click User ID Resolution.
3
In the User Resolution Type field, select the resolution method from the
drop-down list.
4
If you selected the Active Directory Attribute method, select the
attribute from the Active Directory Attribute drop-down list.
5
Click Submit.
Sync Notify Settings
During a Directory Sync, user and mailing list information is transferred to the data
center. Users and mailing lists are deleted from the system if their information is
not provided during the sync. This feature sends an email warning to Fault Alert
list members if the percentage of users or lists deleted during a sync exceeds the
threshold amount. See also "Managing Fault Alerts" on page 140.
To configure the user/mailing list deletion percentage at which a warning
message is sent:
1
From the Administration Console, click System Settings.
2
Click Sync Notify Settings.
3
In the Sync Notification Settings section, Deletion Threshold field,
enter the percentage of deleted users or distribution lists above which you
the system should send a warning email.
4
Click Submit.
Email Continuity Administrator Guide version 6.5 (1st ed.)
149
Modifying System Settings
Licensed Customer Confidential
Customizing the Home Page
The system allows you to control the information that appears to end users on the
Email Security Services home page.
You can select which links appear in the Preferences section at the bottom of the
home page, or hide the Preferences section entirely. Information about the link
settings is provided in Table 4-16.
Table 4-16 Home Page Preferences Links
Link Name
(Administration
Console)
Link Name (displayed on
Home Page)
Function
Notification Options
Notification Options
Collects basic contact information about
users, such as alternate email accounts or cell
phone numbers.
Home Address
Home Address
Collects end user home address information.
Contacts
Emergency Contacts
Collects emergency contact information from
end users.
Change Password
Change Password
Allows end users to change their service
password. Not available for organizations
using Windows Authentication.
Help
Help
Displays online help for end users.
AlertFind Integration
Additional Notification
Options; Setting User Details
(AlertFind Integration only)
Allows end users to provide information
required by AlertFind.
Wireless Settings
Enabling Wireless
Forwarding
Allows end users to provide information used
by the BlackBerry Forwarding service.
To hide the Preferences section of the Home page:
1
In the Administration Console, click System Settings.
2
Click Home Page Settings.
3
In the Preferences Section Settings section, deselect the Enable user
preference check box.
4
Click the Submit button at the bottom of the page.
To enable individual links in the Preferences section of the Home page:
150
1
In the Administration Console, click System Settings.
2
Click Home Page Settings.
Email Continuity Administrator Guide version 6.5 (1st ed.)
Licensed Customer Confidential
Modifying System Settings
3
In the Preferences Section Settings section, click the check box next to
each item you want to display to end users. Depending on which services
your organization uses, all items in the list may not apply.
4
Click the Submit button at the bottom of the page.
If Email Continuity is enabled for your organization, you can modify the message
displayed to users when they log in during each of the Email Continuity states.
(For information about Email Continuity states, see "About Email Continuity" on
page 1.)
If you want to include images or links in your message, you can do so using
Bulletin Board (BB) code. For example, to add an image, include a link to the
image between [IMG]link to image[/IMG]. To add a link, include the link between
[URL]link[/URL].
To change the text displayed to end users in each state of Email Continuity:
1
In the Administration Console, click System Settings.
2
Click Home Page Settings.
3
In the Custom Text Settings Active state text section enter appropriate
text for your organization when Email Continuity is in an active state.
4
Click the Preview button beneath the section to see how the text would
appear to end users.
5
Repeat for the Ready and Recovery states.
6
Click the Submit button at the bottom of the page.
Customizing the Welcome Process
The welcome wizard leads new users through a series of pages that collect
information your organization may need. You can choose which pages of the
welcome wizard are included:
•
Notification Options page
•
Home Address page
•
Emergency Contacts page
For more information on the welcome process and sending a welcome message
to new users, see "Welcoming New Users" on page 135.
To select pages to include in the welcome wizard:
1
In the Administration Console, click System Settings.
2
Click Welcome Settings. The Welcome Process Settings page appears.
3
In the Welcome Process Page Settings section, click the check box next
to each welcome wizard page you want to include.
4
Click Submit.
Email Continuity Administrator Guide version 6.5 (1st ed.)
151
Changing Your Account Settings
Licensed Customer Confidential
Changing Your Account Settings
Accessing Your Mailbox
When Email Continuity is active, you can access your webmail account directly
from the Administration Console. Note that if you’re logged in using the root
account, the email account for emsroot is accessed. If you’re logged in as an
administrator with a personal Email Continuity account, your personal account is
displayed.
To access your webmail account during an activation:
1
From the Administration Console Home, click Your Account.
2
Click Access Your Mailbox. The webmail account appears.
Viewing Undeliverable Mail in the Dropbox
If configured to do so, during an activation, Email Continuity places mail it cannot
deliver (because it cannot resolve an address, or for some other reason) into a
dropbox, where it is held until recovery. Administrators logged in using the root
account can view undeliverable messages from the Administration Console.
To view undeliverable mail during an activation:
1
From the Administration Console Home, click Your Account.
2
Click Access Email Continuity Dropbox. The webmail inbox for the
Dropbox appears.
Changing Your Password
You can change your password directly from the Administration Console. If you
are logged in as an administrator, this feature allows you to change your personal
administrator password. If you are logged in as a root administrator, this feature
changes the root-level password.
CAUTION
Changing Root Account Password
If you are logged in using the root account, you are changing the root password,
which may be used by other people in your organization. Make sure you
communicate changes to the root account password to others who must use it.
To change your password:
152
1
From the Administration Console Home, click Your Account.
2
Click Change Password. The Change Password screen appears.
3
In the New Password field, type the new password.
4
In the Confirm Password field, retype the new password.
Email Continuity Administrator Guide version 6.5 (1st ed.)
Licensed Customer Confidential
5
Testing Email Continuity
Click OK.
Testing Email Continuity
To prepare for Email Continuity testing, determine an appropriate procedure for
your organization. A Test Wizard walks you through the standard process.
To start a test of Email Continuity:
1
In the Administration Console Current Tests section, click Start Test to
launch the test wizard.
2
Identify the mailboxes to include in the test.
a. Select the tab that indicates how you will identify mailboxes: User
Sets, Mailing Lists, Servers, or Users.
b. If you select either the Mailing Lists or Users tab, search, locate, and
select appropriate listings. If you select the User Sets or Servers,
select the appropriate user sets or servers.
c. Click Add. Repeat until all appropriate selections display in the Start
test for these users list box.
3
TIP
Click Next.
User Sets Make Testing Easier and More Reliable
The easiest and most repeatable process includes maintenance of lists of users
in testing User Sets. Select a test group from the Saved User Sets tab and click
Add the group to the Start Test list. Click Next. Support recommends that you
run tests with different groups of users.
When testing the service, you can edit the notification message to indicate
that the activation is a test (recommended), use the default notification
message, or bypass the notification message entirely.
4
Click Next. The message composition page containing the default
message displays. Either:
•
Edit the Subject or Text of the message as needed, or
•
To bypass the notification message and continue with the test process,
select Don’t send a notification message.
5
Click Next. The Confirmation page provides information on the actions to
be performed in the test.
6
Carefully review the contents of the Confirmation page and verify that
these are the test parameters you want.
7
Click Start Test.
Email Continuity Administrator Guide version 6.5 (1st ed.)
153
Testing Email Continuity
Licensed Customer Confidential
Upon activation, the service sends any requested notification message to the
addresses you selected. (See "Managing Transition Alerts" on page 140.) During
the test, Email Continuity activates all mailboxes for users you identified, allowing
them to log in using the webmail interface.
When the test is underway, a Current Tests section displays in the Administration
Console. Mail sent to users included in the test goes to their Email Continuity
mailboxes.
In the list of users, those you included in the test display as In Test and those
receiving email through the primary mail system display as Ready.
During the test, all affected users should log in to the webmail interface and use
as many features as possible. When ready, the administrator can end the test and
start the recovery process.
To start recovery from a test:
TIP
1
In the Current Tests section of the Administration Console, click Start
Recovery.
2
Select the recovery type and click Next. A notification message
composition page displays. As with the activation notification message,
you can edit the message, use the default message, or bypass the
message.
3
In the Archive Name box, type a name for the archive. This name
displays when you use the RecoveryManager to restore messages to the
primary mail system.
4
Click Next.
5
Click Start Recovery.
Partial Activation Test Workaround
If the partial activation option is unavailable (Exchange 5.5 and Lotus platforms)
a simple addressing standard has been implemented to facilitate the sending
and receiving of email by users included in a test and using the webmail
interface.
To use this standard, append a suffix available from Support (for example,
emrs.company.com) to the ordinary email address. This forces the message to
route to Email Continuity. For example, a test user with the email address
[email protected] could receive email through the webmail interface
through the email address [email protected].
154
Email Continuity Administrator Guide version 6.5 (1st ed.)
Licensed Customer Confidential
5
Activating Email Continuity
Activation
When your primary mail system experiences a disruption of service, you can
activate Email Continuity and allow end users to access their email through the
webmail interface.
If the Outlook® Extension has been deployed, end users can choose to continue
to send and receive their email using Outlook. See the online help provided with
the extension for more information. To compare Email Continuity webmail features
with Outlook Extension features, see "About the Outlook Extension" on page 7.
Once the regular email system is functional, follow the recovery process to restore
users’ email data to the primary mail system.
Activating Email Continuity
When preparing for an activation, ensure that none of the internet gateway mail
servers has a higher priority than the MTA hostname for Email Continuity (see the
network settings document provided by Support). When the service is given
highest priority, mail destined for the domain is routed to the Email Continuity MX
record and users receive email via the service.
To activate Email Continuity:
1
Log in to the Administration Console (you must use an administrator
account or the root account).
2
Ensure that all components are functioning properly; that is, that a green
check mark precedes all items in the Readiness Check panel. If there are
problems, contact Support for assistance.
3
In the Current ESS State panel, click Activate.
NOTE
Deleted Users In the Ready State Are Not Activated
Users that are deleted but in the Ready state will not transition to Active during
an activation. Deleted users in the Active or Recovery states will transition
during an activation or recovery like all other users. This may cause user
statistics to appear out of sync in the SyncManager summary.
If your implementation includes the partial activation feature, the Selecting
the Scope of the Activation page displays.
Email Continuity Administrator Guide version 6.5 (1st ed.)
155
Activating Email Continuity
4
Licensed Customer Confidential
To activate your whole environment, select Activate for the Whole
Email Environment. To activate for a subset of users, select
Activate Email Continuity for a subset of users, and
choose the users to activate:
a. To select one or more predefined User Sets.
(1) Click the User Sets tab.
(2) Select a set and click Add.
(3) Repeat until all the sets you want appear in the Activate list.
b. To select one or more servers or server groups:
(1) Click the Servers tab.
(2) Select a server or server group and click Add.
(3) Repeat until all the servers and groups you want appear in the
Activate list.
c. To select one or more users:
(1) Click the Users tab. The list of available users displays as empty.
(2) In the Search box, type a name or email address, (or part of the
name or address plus % as a wildcard) and click Search. All users
that meet the entered search criteria appear.
(3) Select a user and click Add.
(4) Repeat until all the users you want appear in the Activate list.
d. Click Next.
Notify users that Email Continuity is being activated. Notification
messages are sent to the contact addresses listed in Email Continuity user
profiles. When users receive this notification message, they can log in to
the webmail interface to send and receive email.
5
156
Click Next. The message composition page containing the default
message displays. Either:
•
Edit the Subject or Text of the message as needed, or
•
Select Don’t send a notification message .
Email Continuity Administrator Guide version 6.5 (1st ed.)
Licensed Customer Confidential
TIP
Activating Email Continuity
Inform Users About Webmail Limitations
In your notification message, you should inform users that from within the
webmail interface, they can:
•
Send and receive email, attaching up to 12MB of data files to each
message.
•
View calendar information but not edit it.
•
Use contact information, but not edit or add new contacts.
Note that the size of a message when it is displayed in webmail may be different
from the message’s displayed size when it is recovered. This is because
webmail and Outlook use different storage formats, which calculate message
size differently.
Setting clear expectations for the webmail interface will help limit the number of
calls made to the Help Desk during an activation.
6
Click Next. The Confirmation page displays
7
Review the summary of the activation steps, then click Activate.
Note that the Administration Console now shows the state of the service as active.
In the ACTIVE state, the service functions as the mail system for your
environment. This state continues until your primary mail servers are back online
and you choose to move to the RECOVERY state.
Email Continuity Administrator Guide version 6.5 (1st ed.)
157
Activating Email Continuity
158
Licensed Customer Confidential
Email Continuity Administrator Guide version 6.5 (1st ed.)
Licensed Customer Confidential
6
Starting Recovery from an Activation
Recovery
The recovery process reintegrates archived messages into your primary email
system.
Recovery Archives can contain:
•
Messages sent or received by active users during an activation of Email
Continuity. You can use Recovery Manager to bring these messages into
your primary email system after the activation has ended.
•
Messages sent or received during the time leading up to an activation of
Email Continuity. You can use Recovery Manager to patch a data loss
window between your last good backup and a failure of your email server.
See the following sections for procedures relevant to Recovery Archives:
•
"Starting Recovery from an Activation" on page 159
•
"Restoring Mail to Users’ Mailboxes" on page 161
•
"Completing Recovery from an Activation" on page 171
Starting Recovery from an Activation
The recovery process typically begins after restoration and testing of the primary
mail system. The recovery process allows you to migrate users from Email
Continuity back to the primary mail system.
For partial activations, recovery can be done on a server-by-server, group-bygroup, or mailbox-by-mailbox basis.
To initiate recovery:
1
Log in to the Administration Console.
2
In the Current ESS State panel, click Start Recovery.
3
If you want to recover your entire environment, select Start Recovery
for All Users. Otherwise, select Start recovery for some
users, leave others in the Active state, and identify the
users to recover, as follows:
a. Select the appropriate tab (User Sets, Mailing Lists, Servers, or
Users), and select an item on the list.
b. Click Add. The selected item moves to the Start recovery for these
users list.
Email Continuity Administrator Guide version 6.5 (1st ed.)
159
Starting Recovery from an Activation
Licensed Customer Confidential
c. Repeat until all the users you want to recover appear in the list.
d. Click Next.
Notify users entering the recovery process that the service is no longer
active—they can resume using the primary mail system, and that the email
data they sent and received during the activation period will be restored to
their primary email. Notification messages are sent upon deactivation of a
user’s Email Continuity mailbox.
TIP
Remind Users to Run Custom Rules on Restored Mail
After Recovery, users must manually run any custom rules that they have for
filtering mail; you may want to remind them in the notification message.
4
Click Next. The message composition page containing the default
message displays.
5
Edit the Subject or Text of the message as needed.
6
Click Next. The Confirmation page displays.
7
Click Next.
The RecoveryManager uses the recovery archive to deliver to end users’
mailboxes the email data sent or received during the activation period.
Give the archive any name that helps you identify it.
8
In the Archive Name box, type a name for the archive file (for example,
Archive_10_12_06).
9
Click Next. The Administration Console displays a summary of all
recovery steps to be taken.
10 Review the recovery steps summary.
11 Click Start Recovery. The recovery process begins.
The Administration Console displays status information on the recovery process.
How long the recovery process takes depends on the quantity and size of email
data sent and received during the activation period.
160
Email Continuity Administrator Guide version 6.5 (1st ed.)
Licensed Customer Confidential
Restoring Mail to Users’ Mailboxes
Restoring Mail to Users’ Mailboxes
Use the RecoveryManager to restore email that was sent and received during the
activation to end users’ mailboxes, or to restore the contents of a recovery
archive. If you are recovering from an activation, make sure you have created a
recovery archive (during the initial recovery process) before launching the
RecoveryManager.
NOTE
Recovery and Blackberry Devices
If you subscribe to the Wireless Continuity for BlackBerry service,
messages sent during an activation are accessible by Blackberry devices as
well as the Email Continuity web interface (webmail). During recovery, those
messages are recovered back into users’ mailboxes from the Email Continuity
service. Because those messages were also delivered to Blackberry devices
during the activation, users can continue accessing them on Blackberry devices
after recovery.
If you do not subscribe to the Wireless Continuity for BlackBerry service,
messages sent during an activation are available only through the Email
Continuity web interface (webmail). During recovery, those messages are
recovered back into users’ mailboxes from the Email Continuity service.
Because the messages were never accessible to Blackberry devices during the
activation, they are not accessible on Blackberry devices after recovery.
To recover email from an activation or from a recovery archive:
1
On the ESS server, from the Windows Start menu select Programs >
MessageLabs > RecoveryManager.
2
Log in to the RecoveryManager.
Email Continuity Administrator Guide version 6.5 (1st ed.)
161
Restoring Mail to Users’ Mailboxes
3
Click Start Recovery.
4
Select a working directory for RecoveryManager to use as a temporary
data store during the import process. You can either:
5
162
Licensed Customer Confidential
•
Use the default directory
•
Click Browse and locate and select any directory with plenty of space,
or
•
Type the path into the Working Directory field.
Either:
•
Select the Activation Recovery radio button if you are recovering
from a typical activation of Email Continuity, or
•
Select the Active Recovery radio button if you are recovering mail
from a Discovery archive, Time-based recovery archive, or Activationbased recovery archive.
Email Continuity Administrator Guide version 6.5 (1st ed.)
Licensed Customer Confidential
6
Restoring Mail to Users’ Mailboxes
Select the appropriate archive from the list and click Continue.
This downloads metadata about the archive into the working directory.
Actual mail data is downloaded for each user later in the process.
7
Configure mail settings. Information displayed here reflects settings from
the SyncManager. Any changes made here affect the SyncManager, if it
runs on the same server. Typically, these settings are not changed during
recovery.
For Exchange 2000/20003/2007 platforms:
a. From the Platform drop-down list, select Exchange 2000/2003/
2007.
b. In the Directory Settings Global Catalog Server box, select or enter
the name of the global catalog server
c. For Mailbox Access Settings, select a MAPI profile from the dropdown list.
d. During a typical recovery, directory information is compiled as part of
the process, which can be a time-consuming step in large
environments. If SyncManager is installed, and if the most recent
Directory sync was successful, RecoveryManager can use the cached
results from the Directory sync for the recovery process. To use this
cached data, select the Skip detailed analysis check box.
e. Click Continue.
For Exchange 5.5 platforms:
a. From the Platform drop-down list, select Exchange 5.5.
b. In the Directory Settings box, enter the name of the Exchange server.
Email Continuity Administrator Guide version 6.5 (1st ed.)
163
Restoring Mail to Users’ Mailboxes
Licensed Customer Confidential
c. For Mailbox Access Settings, select a MAPI profile from the dropdown list.
d. Typically, during a recovery, directory information is compiled as part of
the process. In large environments, this step can be time-consuming. If
SyncManager is installed, and if the most recent Directory sync was
successful, RecoveryManager can use the cached results from the
Directory sync for the recovery process. To use this cached data,
select the Skip detailed analysis check box.
e. Click Continue.
NOTE
8
Advanced Settings
•
LDAP Port—The default port is 389. If the server listens on another
port, change this to the port the server uses. If Exchange 5.5 is
installed on a Windows 2000/2003 global catalog server, this setting
must be changed; Exchange 5.5 traditionally runs on port 389 so, by
default, the LDAP port will be different.
•
LDAP Max Results—Exchange 5.5 has a default setting of 100 results
returned, but Exchange 2000 has a default setting of 1000 results
returned. If this value has been changed on the Exchange server,
change the value here to correspond.
Email Continuity analyzes the archive to match up mailboxes in the
archive to users’ mailboxes in the primary mail system. This process can
take several minutes. When it completes, click Continue.
The Select Users page controls the scope of the user set. Status
indicators display in the left column of the page.
•
164
Recovery Progress—Displays the total number of mailboxes and the
number recovered.
Email Continuity Administrator Guide version 6.5 (1st ed.)
Licensed Customer Confidential
9
Restoring Mail to Users’ Mailboxes
•
User Status—Displays the status of each individual user. The display
includes user names per server, user accounts with email data for
recovery, and user accounts that cannot be matched to an account on
the primary mail system.
•
Analysis results—Displays how many user accounts can and cannot
be matched to an account on the primary mail system. This also
provides an option for reanalysis of the archive.
If your organization uses a third-party journaling product, you can
configure RecoveryManager to place copies of recovered email into a
mailbox for the journaling product. To do this:
a. Click Configure Journaling.
b. Usually, the identity of the recipient of a BCC email is not exposed
when mail is recovered to a journaling mailbox. You can configure the
service to append the recipient’s email address to the BCC field in
BCC mail recovered to the journaling product. If you’re recovering the
mail to an alternate mailbox, the alternate mailbox’s address will be
Email Continuity Administrator Guide version 6.5 (1st ed.)
165
Restoring Mail to Users’ Mailboxes
Licensed Customer Confidential
appended as well. To do this, select the Use BCC Journaling check
box. Figure 6-1 shows the results of recovery with and without the
BCC Journaling feature selected.
Original Mail
To:
BCC: User A, User B
Recovery Without BCC Journaling
User A Mail Recovered to User A Mailbox
Recovery With BCC Journaling
User A Mail Recovered to User A Mailbox
To:
To: Undisclosed
BCC:
BCC:
User A Mail Recovered to Journal Mailbox for A
User A Mail Recovered to Journal Mailbox for A
To:
To: Undisclosed
BCC:
BCC: User A
User A Mail Recovered to Alternate Mailbox X
To:
BCC:
User A Mail Recovered to Alternate Mailbox X
To: Undisclosed
BCC:
User A Mail Recovered to Journal
for Alternate Mailbox X
User A Mail Recovered to Journal
for Alternate Mailbox X
To:
To: Undisclosed
BCC:
BCC: User A, User X
User B Mail Recovered to User B Mailbox
User B Mail Recovered to User B Mailbox
To:
To: Undisclosed
BCC:
BCC:
User B Mail Recovered to Journal Mailbox for B
User B Mail Recovered to Journal Mailbox for B
To:
To: Undisclosed
BCC:
BCC: User B
User B Mail Recovered to Alternate Mailbox X
To:
BCC:
User B Mail Recovered to Alternate Mailbox X
To: Undisclosed
BCC:
User B Mail Recovered to Journal
for Alternate Mailbox X
User B Mail Recovered to Journal
for Alternate Mailbox X
To:
To: Undisclosed
BCC:
BCC: User B, User X
Figure 6-1
BCC Journaling Results
c. Highlight the group, server or store you want to configure.
166
Email Continuity Administrator Guide version 6.5 (1st ed.)
Licensed Customer Confidential
Restoring Mail to Users’ Mailboxes
d. Click Change.
e. Using the radio buttons, select whether to:
f.
•
Use the same setting as parent items
•
Do not save a copy of recovered messages, or
•
Store a copy of all recovered messages to the selected mailbox,
and, using the drop-down lists, select the server and mailbox for
the recovered mail.
Click OK. The RecoveryManager User Selection screen reappears.
10 Select the set of users for recovery from the right column.
•
All Users—The All Users option imports email data for all users who
were activated during the outage, used the webmail interface, and for
which data has not yet been recovered.
•
Users on a Specific Server—The Users on a Specific Server option
recovers email data for users on a selected message store, server, or
group of servers. If you select this option, you must also:
(1) Check any combination of individual mail stores, servers, or server
groups for recovery. (Servers without users that need recovery are
greyed out.)
(2) Click Continue.
•
One or More Select Users—The One or More Select Users option
recovers the mailbox of one user or the mailboxes of selected users by
name. If you select this option:
(1) The page displays a list of the first 300 users, including users with
email data for recovery and users who cannot be matched to any
account on the primary mail system. If your organization has more
than 300 users, search by name to find users not listed.
(2) Select the users to recover, then click Add.
(3) When you finish adding users to the list for recovery, click
Continue.
Email Continuity Administrator Guide version 6.5 (1st ed.)
167
Restoring Mail to Users’ Mailboxes
TIP
Licensed Customer Confidential
Viewing User Properties and Overriding User Recovery Destinations
To view information about a specific user, click a user’s name and then click
Properties. Information that displays includes which server hosts the user’s
mailbox and the number and size of messages in the user’s Email Continuity
mailbox. The Properties page also allows you to override the destination of the
user’s restored email data.
•
Group of Users—The Group of Users option recovers users based on
Exchange distribution list membership. When selected, the display lists
all distribution lists with members who have email that needs recovery.
If you select this option:
(1) Select a group of users and then click Add.
(2) Click Continue.
•
Email Continuity Drop Box—The Email Continuity Drop Box option
provides a repository for email data received by Email Continuity for
any recipients in your organization domains that it is unable to resolve.
If there is no drop box, this option is unavailable. If you select this
option:
(1) Select a mailbox to which all drop box content will be imported.
(2) In the primary mail system, log in to the selected mailbox, sort
through the mail data, and manually forward each item to the
appropriate recipient
The summary screen displays the users identified for recovery.
11 Identify the mail to recover from the Outlook Recovery Mode drop-down
list:
a. Choose Not Retrieved by Outlook Extension to recover only
email processed by the webmail interface.
b. Choose Retrieved by Outlook Extension to recover only email
processed by the Extension.
c. Choose All messages to recover email from both the Extension and
webmail.
168
Email Continuity Administrator Guide version 6.5 (1st ed.)
Licensed Customer Confidential
Restoring Mail to Users’ Mailboxes
12 Choose how to restore the mail.
a. To recover all mail from the activation to a designated folder within
users’ mailboxes, click the Recover to alternate folder check box and
type a name for the folder in the field.
After Recovery is completed, messages will appear in users’
mailboxes like this:
For Discovery archives, the messages are imported into the folder you
specified, with a subfolder labeled with the user name of the user who
created the archive, with additional subfolders Inbox and Sent Items.
b. To recover all messages from the activation to a single mailbox (such
as an administrator mailbox, for troubleshooting purposes), click
Recover all messages to single mailbox and, in the dialog that
appears, select the mailbox.
Email Continuity Administrator Guide version 6.5 (1st ed.)
169
Restoring Mail to Users’ Mailboxes
Licensed Customer Confidential
After Recovery is completed, messages will appear in the designated
mailbox like this:
c. To recover all messages to a single mailbox but place them in a
designated folder, complete both the Recover to alternate folder and
Recover all messages to single mailbox options.
After Recovery is completed, messages will appear in the designated
mailbox like this:
13 During the recovery process, if RecoveryManager encounters any
unmatched mailboxes, you can:
170
Email Continuity Administrator Guide version 6.5 (1st ed.)
Licensed Customer Confidential
Completing Recovery from an Activation
a. Click Prompt to Manually Match a Mailbox to select the correct
server and mailbox for each user’s account not automatically matched.
If this option is chosen, whenever a mailbox cannot be matched, the
following screen appears for you to select a mailbox.
b. Click Skip Users to reroute unmatched mailboxes later.
14 Click Start Recovery to begin importing data for selected users.
15 The RecoveryManager downloads email data from the ESS server and
imports it to the appropriate mailbox and mailbox folders. The Progress
page displays the number of items that successfully imported, failed to
import, or were skipped. To see the recovery status for each mailbox, click
View Log.
16 When the mail for all selected users has completed recovery, click
Continue.
17 If you need to recover additional mail, click Select another archive to
recover to return to the RecoveryManager main screen. If not, select Exit
ESS RecoveryManager.
NOTE
Email Continuity Does Not Import Mail Twice
Even if users or mailboxes belong to more than one group, their data is only
imported once; the RecoveryManager skips already recovered user accounts,
even if they are members of other distribution lists or groups.
Completing Recovery from an Activation
After successful restoration of all email data to users’ mailboxes, return to the
Administration Console and finalize the recovery process. This returns mailboxes
to the READY state. Returning mailboxes to the READY state deletes email from
the webmail interface.
WARNING
Verify Mail Import was Successful Before Ending Recovery.
Ending recovery permanently deletes activation email data from the webmail
interface. Ensure that all email data is successfully imported into the primary
mail system before completing this process. All recovery archives can be
downloaded for a period of 30 days after initial creation; however, after you end
recovery in the Administration Console, the recovery archive no longer exists.
Email Continuity Administrator Guide version 6.5 (1st ed.)
171
Completing Recovery from an Activation
Licensed Customer Confidential
To complete recovery from an activation:
172
1
In the Administration Console Current ESS State panel, click End
Recovery, which launches the Recovery Wizard.
2
Using the radio button, select the scope of the recovery. Click Next.
3
On the Confirmation page, click End Recovery. This purges the email
archive from the data center and returns all activated mailboxes to the
READY state.
Email Continuity Administrator Guide version 6.5 (1st ed.)
Licensed Customer Confidential
Index
Symbols
.NET Framework 20
A
account requirements
coexistence environments 26
Exchange 2000/2003 24
Exchange 2007 25
Exchange 5.5 23
See also permissions
Activation (Email Continuity)
defined 1
customizing message on log in screen 151
overview 155
partial 1
reports 142
starting 155
starting recovery from 159
Administration Console 94
AlertFind
importing data to 147
integration limitations 40
integration requirements 40
users’ contact information and 114
aliases, creating 134
audit 142
audit trail
for email routing configuration 145
viewing 142
Authentication Manager, See Windows Authentication Manager
B
BCC Journaling 165
browsers, supported
for administration 13
for users 14
C
coexistence environments
account requirements 26
server software requirements 22
supported features 19
D
DCOM
See Microsoft Distributed Component Object
Model
Email Continuity Administrator Guide version 6.5 (1st ed.)
Discovery Archives
active recovery 162
message import 169
dropbox 152
E
Email Archive
current membership retention policies 99
See also Historical Mail
Email Continuity
defined 1
activating 155
changing message to users during each state
151
completing recovery 171
partial activation 1, 156
restoring mail to user mailboxes 161
starting recovery 159
states of 4
testing 153
welcoming users 135
Exchange 2000/2003
account requirements 24
interaction with service components 11
server software requirements 20
supported features 19
Exchange 2007
account requirements 25
interaction with service components 11
server software requirements 21
supported features 19
transport agent 60
Exchange 5.5
account requirements 23
server software requirements 20
supported features 19
excluded users
changing status for multiple users 112
creating 124
F
fault alerts
adding users to notification list 140
for user deletion during sync 149
for user ID conflicts 125
readiness checks that trigger 96
firewall requirements 14
G
gateway requirements 14
Global Address List 144
173
Licensed Customer Confidential
H
MX Record
during activation 155
for replication zones 105
used for forwarding mail 146
used for sending outbound mail during activation 146
hardware
clustering (active/active) 20
requirements 17
requirements for Historical Mail 17
help desk users 119
Historical Mail
defined 9
configuring VaultBoxes for 86
hardware requirements 17
installing (software) 83
replication zones 105
retention policies 99
routing requirements 16
storage reports 104
home page 150
HTTPS 13
N
networking requirements 13
next hop routing
inbound, configuring 145, 146
inbound, described 15
outbound during activation, configuring 146
outbound during activation, described 16
O
I
internet browsers. See browsers
L
LDAP
connection 52
max results 164
port 164
logging in
to Email Continuity via a welcome message
135
to the administration console 93
using Windows Authentication 4
login status of users 120
operating systems
supported 19
Outlook Extension
defined 7
authentication of users for 74, 75
enabling and disabling 133
exporting list of users 133
feature comparison with webmail 8
including mail in recovery mode 168
installing 72
limitations 34
registry keys updated for 74
requirements 33
users active with 132
using during activation 155
P
M
MAPI 163
MAPI/CDO 20
MDAC
See Microsoft Data Access Components
message transfer agent
See MTA
messages
adding disclaimer to 146
maximum size imported to archive 9
undeliverable placed in dropbox 152
Microsoft Data Access Components (MDAC) 20
Microsoft Distributed Component Object Model
(DCOM) 21
Microsoft Internet Connectivity Wizard 13
Microsoft Internet Information Server (IIS) 21
Microsoft SQL Server 21
Mozilla Firefox
See browsers
MTA 14, 155
174
Partial Activation
defined 1
passwords
changing administrator 152
Email Continuity 107
resetting multiple users’ 108
root account 43
Windows Authentication of 4
permissions
Exchange, See account requirements
help desk user 119
policies
retention
creating 102
current membership 99
prioritizing 103
preferences, editing home page 150
proxy requirements 14
proxy servers 8
Email Continuity Administrator Guide version 6.5 (1st ed.)
Licensed Customer Confidential
R
readiness checks
overview 96
sending fault alerts when failed 140
Recovery
defined 1
completing 171
restoring mail to user mailboxes 161
starting (from an activation) 159
Recovery Archives
restoring mail from 161
RecoveryManager
defined 1
installation 43
See also Recovery
RedirectorAgent
defined 1
installing 60
RedirectorController
defined 2
installation 43
planning placement 36
status screen 98
RedirectorManager
defined 2
configuring 57
installation 43
upgrading 59
RedirectorSink
defined 1
installing
on clustered Exchange servers 59
standalone 58
planning 35
planning placement 35
status screen 98
upgrading RedirectorManager 59
reminders, sending 138
replication zones 105
reports
activation 142
audit 142
of users in the welcome process 138
Outlook Extension 132
storage 104
test 143
requirements
account 23
communications 13
firewall 14
gateway 14
hardware 17
hardware for Historical Mail 17
messaging software 19
Email Continuity Administrator Guide version 6.5 (1st ed.)
networking 13
operating systems 19
proxy 14
routing for historical mail 16
server software 20
service software 18
SMTP connector for Historical Mail 17
RFC-822 34
root account
logging in using 94
S
SMTP
connector for Historical Mail 17
gateway servers 35
message gateway 14
used in Windows Authentication 28
Storage Management
reports 104
store and forward mail routing 15
SyncManager
defined 1
configuring 49
configuring user deletion to trigger alert 149
installation 43
port used 13
setting schedules for 49
synchronizing RIM data 62
T
test
Email Continuity 153
reports 143
transition alerts 140
transition reports 142
U
undeliverable mail 152
user ID conflict
global settings for resolving 148
identified by SyncManager 49
resolving manually 125
users
activating Email Continuity for 155
adding manually to Email Continuity 133
attributes
displayed in Global Address List 144
imported from Active Directory 143
changing status in the system 112
changing status of those who have opted out
112
creating aliases for 134
defining sets of 114
175
Licensed Customer Confidential
deletion during sync, configuring warnings 149
excluding from the service 112, 124
granting administrative privileges to 118
help desk 119
keeping stored mail for when new mailbox is
created 49, 125, 148
login status of 120
passwords for 107
restoring mail to after an activation 161
retaining mail for 99
searching information 106
sending reminders to 138
updating contact information 114
uploading sets of 114
welcoming to the service 135
V
VaultBox
defined 2
communications with data center 11, 12
components
for Historical Mail 10
configuring
for Historical Mail 86
console 86
hardware requirements 17
installing 83
preinstallation requirements 39
replication zones for 105
W
Warnings, See Fault Alerts
welcome process
about 135
changing status for multiple users 112
including pages in welcome wizard 151
Windows Authentication
defined 4
and changing users’ passwords 107
limitations 28
requirements 27
Windows Authentication Manager
defined 2
status screen 98
Wireless Continuity for BlackBerry
defined 5
administration 129
limitations 32
managing users and devices 129
provisioning 62
requirements 28
sending instructions to users 71
synchronizing RIM data 62
176
Email Continuity Administrator Guide version 6.5 (1st ed.)