1
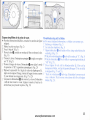
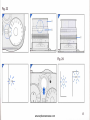
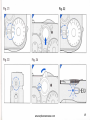
Attaching
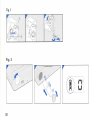
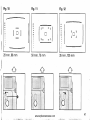
the lens (Fig. 3)
^
l/ Hold the main body section of the lens (€), match the indices on
the lens (red dot) with the lens indices on the camera @. press
the lens on gently and then turn clockwise until you hear a click.
Then turn until the lens stops.
* Before attaching a lens, remove the lens's rear cap and the
g l m e r a ' sb o d y c a p .
* If the lens will not go on the camera,or if the index is out of line
and the lens is on, the lens cannot lock in place.
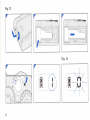
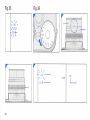
a rens(Fig.4)
lemovins
the lens by the main body section,pressthe removal
f
button
{old
@ on rhe camera. and turn the lens counterclockwise until it
stgpq.Then remove it by pulling it forward.
* The lens will come off when the lens and camerabody indices
are matched.
* After removing.the lens,-don't forget to protect ,!:
the lens by attaching the lens cap and the rear cap ro :-"-q::
the lens ll9
and
the body cap to the camera.
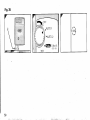
3.Operatingthe main switch lever
operating the main switch lever @ turns the .o..t1
o.l
1lq
o{31d allows switching-to consecutive photography!9y,"_t
(Fig 6) and
selfLimer photography (Fig. 34).
* Operate_
the camera after turning the lever stopping at the position
where the click sound is heard.
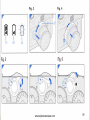
(Fig.5)
Powgr,gnan! off
.L:_..d,,
Jurning
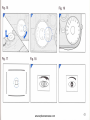
, v Turn rnuin switch Iever@ set the index to position
"S'^(oneframe photography) and camera power will be on. Normat
operation of the camera is in this position.
* After taking pictures, or when the camera is not going to be
used for a long time after taking pictures,turn power off so that
the shutter will not be releasedaccidentally.
* When power is turned ofTonly the battery mark will be lit in the
display panel. Red mark can no longer be seen.
Operations
photography
during
consecutive
(Fiq. 6)
7 itrnthe main switch lever so that the index is on ,,C". press and
consecutiverv'
l:il:,i",T:.,fi!"ff"tTt:,xPo;;ffiiJrtJ.'res
* Maximum piciure-frahe speeil is three frames per second.
However, frime speedwill .hung" depending on shutter speed,
sensitivity of the film being used and batterylevel.
4. Display
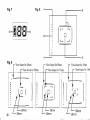
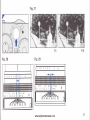
Panel (Fig. 7)
The-Suti"r'
diagram shows all crystil displays in the ..on,,stare.
power
Symboi
@,
6 Fii; counrer
Liquid Grystal Display
rrtt.'.u-".u
uses rhe liquid crysral in the Display panel.
* iri" r-co display daikens uihigh t"-p..atures, and the responss
is slower at lbw'temperatures.
* ine I_Cp returns totorrect operating characteristics at normal
temperatures.
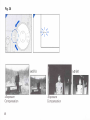
5. Using the viewfinder (Fig.8)
ir'rJ,ii.u,o, insiclerhc rinderlights up when power goesoN and
;h;;'i;.
shu*er retease.,utton ffii fi#;';#;;'rf;""1"'oy
oo*n
* rheredmark
inp6wer
gN.Iut".,..,
@canbeseen
inthe
,h- ::JHff:n?ljfll[;1x..tiTlil"g,:'.#t]j,3ffij:i,:?:1,,1:
* when power is on' the film counter and the battery morL
mark in
i;;i;rr
inside
panel
@ will be lighted
_ display
'
ro the positionshown
i z iid;;iff;;;#;;;;'"r
the.power
witl
be off. Stopthe lever *n"r irt?r'i; ff3tlTl
!
Posttton'
I
I
the finder will go off. when the shutter button is
..r;.rr., n--..^,r
;r.,,:,
r:^r^+
partiallv
pressed'
it
will -re-light'
* Thecliagram
showsall da?ain lightedstate'
53
i
ff
rf