1
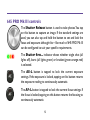
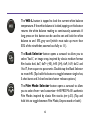
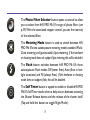
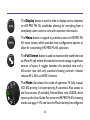
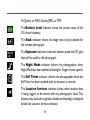
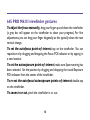
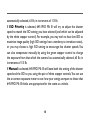
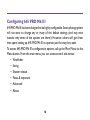
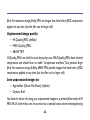
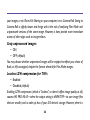
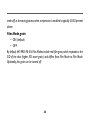
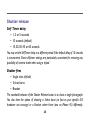
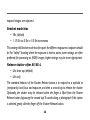
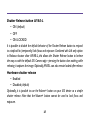
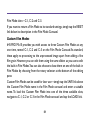
645PRO
Mk III
by
1
Welcome to 645 PRO Mk III
645 PRO Mk III provides the iOS photographer with unprecedented control
and unparalleled image quality.
Jag.gr is dedicated to producing iOS camera software for serious photographers.
645 PRO Mk III is its flagship product. It combines top-quality, print-ready filmlook output influenced by classic medium format cameras with the option to
save a completely unfiltered image for later processing.
While 645 PRO Mk III has a rich set of sophisticated tools for the photographer,
it is designed with a simple, elegant, easy-to-use interface. It is also designed to
be highly configurable, so you can tailor the way it behaves to suit the way you
like to take photographs.
If you have any questions regarding the app, please contact Jag.gr’s technical
support via the website (http://jag.gr/645pro/support/) or by sending
an e-mail to [email protected]
2
Contents
Getting started.......................................................4
645 PRO Mk III controls.......................................5
645 PRO Mk III viewfinder elements.............. 10
645 PRO Mk III viewfinder gestures............... 13
645 PRO Mk III shooting Modes..................... 14
Configuring 645 PRO Mk III............................. 16
Viewfinder............................................................ 17
Saving..................................................................... 21
Shutter release..................................................... 25
Focus & exposure............................................... 28
Artist & copyright............................................... 35
Advanced.............................................................. 37
About..................................................................... 47
645 PRO Mk III’s Film Modes........................... 48
645 PRO Mk III’s Photo Filters......................... 52
Managing your photographs............................. 53
Troubleshooting 645 PRO Mk III..................... 57
License information............................................ 58
3
Getting started
645 PRO Mk III is designed to be easy-to-use. You can get started simply by
pointing the viewfinder at your subject of choice and tapping the shutter release
button. However, it may help to familiarize yourself with the elements of the
user interface first. This is slightly different depending on whether you are using:
• Modern iPhone or iPod touch with a wide display
• iPhone 4S
• iPad (including iPad mini)
However—with one minor exception for iPhone 4S—the elements on the user
interface are the same (and serve exactly the same purpose) on all platforms; it
is simply their position that may vary slightly.
4
645 PRO Mk III controls
The Shutter Release button is used to take photos. You tap
on this button to capture an image. If the standard settings are
used, you can also tap and hold the button to set and lock the
focus and exposure although this—like much of 645 PRO Mk III
can be configured to suit your specific requirements.
The Shutter fires... indicator shows whether single shot (all
lights off), burst (all lights green) or bracket (green-orange-red)
is selected.
The AE-L button is tapped to lock the current exposure
settings. If the exposure is locked, tapping on this button returns
the exposure reading to continuously automatic.
The AF-L button is tapped to lock the current focus settings. If
the focus is locked, tapping on this button returns the focusing to
continuously automatic.
5
The WB-L button is tapped to lock the current white balance
temperature. If the white balance is locked, tapping on this button
returns the white balance reading to continuously automatic. A
long press on this button can be used to set and lock the white
balance to and 18% grey card (which must take up more than
50% of the viewfinder, zoomed out fully to 1:1).
The Back Selector button opens a carousel to allow you to
select “back”, or image crop, inspired by classic medium format
film backs: 6x6, 6x7, 6x7+ (4:5), 645 (3:4), 6x9, 16:9, 6x12 and
16x17, from square to panoramic. Double-tap the Back Selector
to reset 645. (Tap-hold this button to toggle between single shot,
3-shot burst and 3-shot bracket shutter release options.)
The Film Mode Selector button opens a carousel to allow
you to select from—and customize—645 PRO Mk III’s authentic
Film Modes inspired by classic film stocks (see p.35). (Tap and
hold this to toggle between Film Mode, Unprocessed or both.)
6
The Photo Filter Selector button opens a carousel to allow
you to select from 645 PRO Mk III’s range of photo filters (see
p.39). With the associated stepper control, you set the intensity
of the selected filter.
The Metering Mode button is used to switch between 645
PRO Mk III’s two autoexposure metering modes: standard MultiZone metering and (positionable) Spot metering. If the hardware
or shooting mode does not support Spot metering, this will be disabled.
The Flash button switches between 645 PRO Mk III’s three
autoexposure Flash modes: Off (never fires), Auto (fires in lowlight situations) and Fill (always fires). If the hardware or shooting
mode does not support flash, this will be disabled.
The Self Timer button is tapped to enable or disable 645 PRO
Mk III’s Self Timer mode, where a delay occurs between activating
the Shutter Release button and the release of the shutter itself.
(Tap and hold this button to toggle Night Mode.)
7
The Display button is used to hide or display various elements
on 645 PRO Mk III’s viewfinder, allowing for everything from a
completely clear screen to one with extensive information.
The Menu button is tapped to provide access to 645 PRO Mk
III’s menu system, which provides many configuration options to
allow for customizing 645 PRO Mk III’s operation.
The Full Screen button is used to maximize the viewfinder size
on iPhone 4S only where the standard controls occupy a significant
amount of space. It toggles between the standard view and a
full-screen view with only essential shooting controls—shutter
release, AF-L, AE-L and WB-L buttons.
The Mode dial selects the mode of operation. M: fully manual,
ISO: ISO-priority, S: shutter-priority, A: automatic. Also access to
the front camera (if available), Review/Share view, GUIDE, which
opens up this User Guide. For more on 645 PRO Mk III’s shooting
modes, see page 14.To see how the Mode dial may be configured,
8
see page 42. (TIPS: double-tapping the Mode dial provides a quick
shortcut to the Review/Share view; a long press locks it.)
9
645 PRO Mk III viewfinder elements
The White Balance indicator informs the photographer of the
current White Balance setting: auto (AWB), locked, or locked to a
specific setting. To learn about the menu settings, see page 28.
The Metering Mode indicator informs the photographer of
the current metering mode: Multi-Zone or Spot.
The Flash indicator informs the photographer of the current
flash mode: Off, Auto or Fill.
The GPS indicator informs the photographer of the current
location information that will be written to the EXIF data.
The Unprocessed Quality indicator shows the current
image quality setting for unprocessed images: HI-Quality or
MAX-Quality JPEG, or dRAW TIFF.
The Film Mode indicator shows the current film mode, and the
current image quality setting for Film Mode processed images:
10
HI-Quality or MAX-Quality JPEG, or TIFF.
The Battery Level indicator shows the current status of the
iOS device’s battery.
The Back indicator shows the image ratio (crop) selected for
the current photograph.
The Exposure indicator shows the shutter speed and ISO gain
that will be used for the photograph.
The Night Mode indicator informs the photographer when
Night Mode has been enabled, allowing for longer shutter speeds.
The Self Timer indicator informs the photographer when the
Self Timer has been enabled, with its duration in seconds
The Location Services indicator shows when location data
is being logged, to be stored with any photographs taken. This
location data (latitude, longitude, altitude and heading) is displayed
beside the Location Services indicator.
11
The Exposure POI indicator shows the exposure point-ofinterest (Spot metering only).
The Focus POI indicator shows the focus point-of-interest,
when not in the default (central) location.
The Exposure Meter informs you if your current exposure
setting is under- or over-exposed, compared to the system’s
metering of the scene. It shows under- and over-exposure of ±3
Ev, in increments of 1/3 Ev.
Steppers are used to adjust various parameters in 645 PRO
Mk III.
12
645 PRO Mk III viewfinder gestures
To adjust the focus manually, drag your finger up and down the viewfinder
(a grey bar will appear on the viewfinder to show your progress). For fine
adjustments, you can drag your finger diagonally, as this typically slows the rate
vertical change.
To set the autofocus point-of-interest, tap on the viewfinder. You can
reposition it by dragging and dropping the Focus POI indicator or by tapping in
a new location.
To set the autoexposure point-of-interest, make sure Spot metering has
been selected. Set the position by dragging and dropping the round Exposure
POI indicator from the center of the viewfinder.
To re-set the autofocus/autoexposure points-of-interest, double-tap
on the viewfinder.
To zoom in or out, pinch the viewfinder in or out.
13
645 PRO Mk III shooting Modes
645 PRO Mk III has a range of shooting modes providing different ways of
controlling the exposure of a scene. As all iOS devices have a fixed aperture that
cannot be adjusted, these operate slightly differently to those of typical digital
cameras
If Autoxposure is selected, 645 PRO Mk III will try to work out a sensible
exposure for the scene automatically. If you want to expose for a particular
part of a scene, then you can select Spot metering and drag the Exposure
POI indicator to the relevant spot on the viewfinder. You can also compensate
manually, by using the green stepper control to change the exposure from that
which the camera has automatically selected, ±3 Ev, in increments of 1/3 Ev.
If Shutter Priority is selected, 645 PRO Mk III will try to adjust the ISO gain
to match the shutter speed you have selected (and which can be adjusted by
the white stepper control). For example, you may wish to have a fast shutter
to capture action more crisply. You can also compensate manually, by using the
green stepper control to change the exposure from that which the camera has
14
automatically selected, ±3 Ev, in increments of 1/3 Ev.
If ISO Priority is selected, 645 PRO Mk III will try to adjust the shutter
speed to match the ISO setting you have selected (and which can be adjusted
by the white stepper control). For example, you may wish to have low ISO to
maximise image quality (high ISO settings have a tendency to introduce noise).,
or you may choose a high ISO setting to encourage fast shutter speeds. You
can also compensate manually, by using the green stepper control to change
the exposure from that which the camera has automatically selected, ±3 Ev, in
increments of 1/3 Ev.
If Manual is selected, 645 PRO Mk III will leave both the setting of the shutter
speed and the ISO to you, using the pair of white stepper controls.You can use
the on-screen exposure meter to see how your settigs compare to those that
645 PRO Mk III thinks are appropriate for the scene as a whole.
15
Configuring 645 PRO Mk III
645 PRO Mk III has been designed to be highly configurable. Some photographers
will not want to change any or many of the default settings (and may even
wonder why some of the options are there!). However, others will gain from
time spent setting up 645 PRO Mk III to operate just the way they want.
To access 645 PRO Mk III’s configuration options, call up the Main Menu via the
Menu button. From the main menu, you can access several sub-menus:
• Viewfinder
•Saving
• Shutter release
• Focus & exposure
•Advanced
•About
16
Viewfinder
Grid
• OFF (default)
• Rule of Thirds
•Architectural
• Golden Ratio
A grid overlaid on the viewfinder can be a handy compositional aid. Choose between a
classic architectural grid, the mathematical purity of the Rule of Thirds or the conceptual
elegance of the Golden Ratio.
Grid visibility
• Standard (default)
• Bold
In bright light, the standard grids may be hard to see—switching to bold grids can help
greatly with this problem.
17
Artificial horizon
• Standard (default)
•Large
The standard artificial horizon is in the center of the viewfinder; for bright conditions,
the very prominent Large option may be preferred.
Live Film Mode preview
•Off
• On (default)
When shooting with 645 PRO Mk III’s Film Modes, you have the option of the standard
viewfinder or a live preview of the composition with the Film Mode applied.
Histogram
•None (default)
• Y-only (total luminance)
• RGB
18
• Y-RGB
• Exploded Y-RGB
Choose between four different on-screen histograms: 1) total luminance—Y—of the
red, green and blue channels 2) red, green and blue channels 3) red, green and blue
channels plus total luminance 4) red, green, blue and total luminance “exploded” .
Manual focus peaking
•High (default)
•Low
• Disabled
When enabled, this aids manual focusing by highlighting (in white) those areas that
are in sharpest focus. Not recommended for older/slower hardware. This is best used
in combination with manual focus zoom (see below).
Manual focus zoom
• Enabled
• Disabled (default)
19
This aids manual focusing by zooming in for the period of setting focus. The zoom is
only activated if the viewfinder has an current zoom level of less than 2.0.
Exposure peaking
•Highlights
•Shadows
• Highlights + shadows
• Disabled (default)
When enabled, this provides a strong visual warning whenever there is a risk of “blown”
highlights (zebra stripes) or “crushed” shadows (yellow).
Digital zoom
• Enabled (default)
• Disabled
645 PRO Mk III provides a 6X digital zoom, activated by pinching the screen.This may
be disabled to prevent accidental activation such as when setting the focus or exposure
point-of-interest.
20
Saving
Images to save
• Film Mode only (default)
• Unprocessed only
• Film Mode + Unprocessed
You have the option to save images that have been processed with 645 PRO Mk III’s
Film Modes, completely unprocessed images, or both at the same time. Note that
when Unprocessed only is selected, some elements of 645 PRO Mk III’s interface—such as the Film Mode Selector—are inactive.
Film Mode image quality
• HI-Quality JPEG (default)
• MAX-Quality JPEG
•TIFF
HI-Quality JPEGs are ideal for most day-to-day uses. MAX-Quality JPEGs have minimal
compression and should have no visible “compression artefacts” (but produce larger
21
files). For maximum image fidelity,TIFFs are images that have had no JPEG compression
applied at any time (but the files can be larger still).
Unprocessed image quality
• HI-Quality JPEG (default)
• MAX-Quality JPEG
• dRAW TIFF
HI-Quality JPEGs are ideal for most day-to-day uses. MAX-Quality JPEGs have minimal
compression and should have no visible “compression artefacts” (but produce larger
files). For maximum image fidelity, dRAW TIFFs provide images that have had no JPEG
compression applied at any time (but the files can be larger still).
Save unprocessed images to:
• App folder (iTunes File Share) (default)
• Camera Roll
You have the choice of saving your unprocessed images to a private folder within 645
PRO Mk III (where they can be accessed via a special button when reviewing/sharing
22
your images, or via iTunes File Sharing on your computer) or to Camera Roll. Saving to
Camera Roll is slightly slower and brings with it the risk of confusing Film Mode and
unprocessed versions of the same image. However, it does provide more immediate
access of other apps such as image editors.
Crop unprocessed images:
•ON
•OFF (default)
You may choose whether unprocessed images will be cropped to reflect your choice of
Back, or left uncropped, despite the format selected for Film Mode images.
Lossless LZW compression for TIFFs
• Enabled
• Disabled (default)
Enabling LZW compression (which is “lossless”, so doesn’t affect image quality at all),
causes 645 PRO Mk III—when the output setting is dRAW TIFF—to save image files
that are smaller, and so take up less of your iOS device’s storage. However, there’s a
23
trade-off, as the saving process when compression is enabled is typically 30-50 percent
slower.
Film Mode grain
•ON (default)
•OFF
By default, 645 PRO Mk III’s Film Modes include real film grain, which responds to the
ISO of the shot (higher ISO: more grain), and differs from Film Mode to Film Mode.
Optionally, this grain can be turned off.
24
Shutter release
Self Timer delay
• 1, 2 or 5 seconds
• 10 seconds (default)
• 15, 20, 30, 45 or 60 seconds
You may set the Self Timer delay to a different period if the default delay of 10 seconds
is inconvenient. Short self-timer settings are particularly convenient for removing any
possibility of camera shake when using a tripod.
Shutter fires
• Single shot (default)
• 3-shot burst
• Bracket
The standard behavior of the Shutter Release button is to shoot a single photograph.
You also have the option of shooting a 3-shot burst (as fast as your specific iOS
hardware can manage) or a Bracket where three (two on iPhone 4S) differently25
exposed images are captured.
Bracket mode bias
• 1Ev (default)
• 1 1/3 Ev to 3 Ev in 1/3 Ev increments
This setting tells Bracket mode how far apart the different exposures it captures should
be. For “safety” shooting where the exposure is hard to assess, lower settings are often
preferred; for processing as (HDR) images, higher settings may be more appropriate.
Release shutter after AF/AE-L
• Lift, then tap (default)
• Lift only
The standard behavior of the Shutter Release button is to respond to a tap-hold to
(temporarily) lock focus and exposure, and then a second tap to release the shutter.
Optionally, the shutter may be released when the finger is lifted from the Shutter
Release button, bypassing the second tap. To avoid taking a photograph if this option
is selected, gently slide the finger off the Shutter Release button.
26
Shutter Release button AF/AE-L
•ON (default)
•OFF
• ON-LOCKED
It is possible to disable the default behavior of the Shutter Release button to respond
to a tap-hold to (temporarily) lock focus and exposure. Combined with Lift only option
in Release shutter after AF/AE-L, this allows the Shutter Release button to behave
the way as with the default iOS Camera app—pressing the button does nothing, while
releasing it captures the image. Optionally, AF/AE-L can also remain locked after release.
Hardware shutter release
• Enabled
• Disabled (default)
Optionally, it is possible to use the Volume+ button on your iOS device as a simple
shutter release. Note that the Volume+ button cannot be used to lock focus and
exposure.
27
Focus & exposure
White balance
• AWB (default)
• Daylight (~5200K)
• Shade (~7000K)
• Cloudy (~6000K)
• Tungsten (~3200K)
• Flourescent (~4000K)
•Custom
By default, 645 PRO Mk III continually adjusts to compensate for different color
temperatures caused by different forms of light—without such compensation the color
white can appear anything from yellow to blue, which is why this process is known
as setting the “white balance”. Optionally, you may lock the white balance to one of
several standard color temperatures, that represent commonly-enountered situations,
or even a completely custom setting (see below).
28
Set custom white balance
If you have very specific needs regarding white balance, you can set a custom
temperarture and tint, and chose Custom from the white balance menu above.
AE low light
This sub-menu contains various parameters for optimizing autoexposure performance
in low-light situations.
Night Mode
•ON
•OFF (default)
Activating Night Mode allows for long shutter speeds of up to 1 sec (dependent on the particular
iOS device being used).
Night Mode exposure limit (if supported)
• 1 sec (default)
• 1/2 sec, 1/4 sec, 1/8 sec
Optionally, Night Mode’s “ceiling” can be reduced, which can make the camera more controllable
in some circumstances (subject to device and iOS version support).
29
High ISO support (if supported)
• Enabled (default)
• Disabled
Some iOS devices allow for the ISO to be artificially raised in low-light situations. As this is done
by “pixel binning” (combining four pixels into one and then up-sampling the resulting quartersized image), the resulting image may be unacceptably grainy. Optionally, this facility may be
turned off.
Session-to-session flash mode persistence
• Enabled
• Disabled (default)
By default, the flash is reset to OFF when the app moves into the background or is closed, or
the device goes to sleep or is shut down. By enabling session-to-session persistence, the app will
remember the previous flash mode.
30
AE/semi-auto flash
• Fill-flash
• Auto-expose (default)
When Fill-flash is selected, the flash will be fired to provide additional light to that for
which a meter reading has been taken—ideal for filling in backlit subjects which would
otherwise be silhouettes.When Auto-expose is selected, and the exposure is not locked,
the exposure will be readand set with a pre-flash activated and then that reading will
be used for the shot.
AF Assist Lamp
• Enabled
• Disabled (default)
Optionally, it is possible to use your iOS device’s “torch” (if flash hardware is available)
to speed up the finding and locking of focus when shooting in lower light situations and
using the Shutter Release button to set and lock focus and exposure temporarily. This
option works best on subjects that are relatively close to the camera lens.
31
AF/AE-L persistence
• Unlock when point-of-interest is moved (default)
• Re-lock when point-of-interest is moved
If you have focus and/or exposure locked, the standard behavior is to unlock either
one when its point-of-interest is moved. Optionally, the movement can trigger the
reacquisition and locking of focus or exposure at the new point-of-interest.
Tap-to-Focus
• Set focus point-of-interest (default)
• Set and lock focus
When you tap the viewfinder to set the focus point-of-interest, the standard behavior is
simply to set the point-of-interest, while leaving continuous auto-focus active. Optionally,
the gesture can trigger the acquisition and locking of focus.
32
Autofocus bias (if supported)
• Full-range (default)
• Close-up
• Distance
By default, your iOS device auto-focus operates across the full focal range of the lens
equally. You can opt for it to have a greater bias towards objects that are near or far
away, this improving auto-focus performance in certain circumstances.
AE min. shutter speed (if supported)
• 1/15 sec (default)
• 1/20 sec, 1/25 sec, 1/30 sec
You can set the slowest shutter speed to which your device will drop when autoexposing, subject to the hardware and iOS version supporting the selected setting.
33
Advanced exposure information
•Off (default)
• Ev100 (ISO 100, fixed)
• Dynamic Ev (responsive to ISO)
• Luminance (cd/m2)
• Illuminance (lux)
645 PRO Mk II allows for the display of exposure information in addition to the shutter
speed and the ISO gain, which may be useful in advanced shooting situations such
as when using an iOS device in conjunction with other film or digital cameras, or with
external light meters, or shooting using the “zone” system.
Ev100 gives the standard Exposure Value based on an (artificial) fixed ISO of 100.
Dynamic Ev provides an Exposure Value reflecting the actual ISO of the exposure.
Alternatively, the luminance (in candelas per square meter) or illuminance (in lux) of the
scene may be displayed, for compatibility with some specialized lighting-measurement
systems.
For more on Exposure Value, see http://en.wikipedia.org/wiki/Exposure_value.
34
Artist & copyright
Artist name
You may enter text that will be used in the images’ EXIF metadata as the Artist Name,
and also for any copyright metadata, where required.
Copyright
•None (default)
• [Year]
• [Year] [Artist Name]
Optionally, you may add copyright metadata to your photographs.This can either take
the form of the year, or the year followed by the Artist Name as entered above.
License
•None (default)
• All Rights Reserved
• Public Domain
35
• Creative Commons
• Creative Commons BY
• Creative Commons BY-SA
• Creative Commons BY-ND
• Creative Commons BY-NC
• Creative Commons BY-NC-SA
• Creative Commons BY-NC-ND
Optionally, you may add license term. You have the option of choosing a simple All
Rights Reserved, of placing the image in the Public Domain (which removes any other
copyright data entered above) or one of various Creative Commons “copyleft” licenses.
For more details on the differences between the different Creative Commons licenses,
see http://creativecommons.org/licenses/.
IPTC contact details
You may enter various contact details conforming to the IPTC specifications. For more
details, see http://www.iptc.org/cms/site/index.html?channel=CH0089.
36
Advanced
External hardware
This sub-menu contains setting relating to third-party hardware that can be used in
conjunction with 645 PRO Mk III.
HiLO™ Lens support
• Disabled (default)
• Sleep/Wake button orientation
• 90° orientation
If you use the HiLO™ Lens (http://shop.hilolens.com), its prism causes the image orientation
to alter. 645 PRO Mk III can correct for that, whether the lens is pointing in the direction of the
Sleep/Wake button, or outwards at 90º.
snappgrip support
• Disabled (default)
• Enabled
If you use the snappgrip accessory (providing physical buttons and a standard tripod mount for
iPhones) you can get full support from 645 PRO Mk III. A half-press of the shutter button will set
37
and lock focus and exposure, while a full press will capture the image. The zoom buttons work
with 645 PRO MK III’s digital zoom and the jog-wheel can be used to move between the app’s
various backs, from 6x6 to 6x17.
iblazr support
• Disabled (default)
• Enabled
If you use the iblazr flash, which plugs into the audio jack socket of your iOS device, you can get
full 645 PRO Mk III support. Note that 645 PRO Mk III cannot tell if iblazr is asleep or not, only
if it is connected—the activation status must be handled manually.
Nova support
• Disabled (default)
• Enabled
If you use the Nova off-camera flash, you can get full 645 PRO Mk III support. Up to two Nova
flash units may be used at once.
38
Nova preset
• Bright (default)
•Warm
•Neutral
•Gentle
If you use Nova off-camera flashes, you can choose which preset to use, from Bright (all warm
and all cool LEDs at full power) to Gentle (substantially reduced power).
GRIP&SHOOT support
• Disabled (default)
• Enabled
If you use the GRIP&SHOOT accessory (providing a physical shutter release and zoom buttons)
you can get full support from 645 PRO Mk III. Note that GRIP&SHOOT’s shutter release does
not provide a “half press” option.
Image flip for DSLR lens mount
• Enabled
• Disabled (default)
Some iPhoneographers choose to use special mounts that allow the use of additional lenses
39
originally designed for DSLR cameras. When fitted, these lenses cause the image on the iOS
device to appear upside-down. Enabling this option reverses that behaviour.
Artist & copyright
This sub-menu allows you to set certain parameters that affect how the ownership of
your images are represented in their metadata.
Artist name
You may enter text that will be used in the images’ EXIF metadata as the Artist Name, and also
for any copyright metadata, where required.
Copyright
•None (default)
• [Year]
• [Year] [Artist Name]
Optionally, you may add copyright metadata to your photographs.This can either take the form
of the year, or the year followed by the Artist Name as entered above.
License
•None (default)
40
• All Rights Reserved
• Public Domain
• Creative Commons
• Creative Commons BY
• Creative Commons BY-SA
• Creative Commons BY-ND
• Creative Commons BY-NC
• Creative Commons BY-NC-SA
• Creative Commons BY-NC-ND
Optionally, you may add license term.You have the option of choosing a simple All Rights Reserved,
of placing the image in the Public Domain (which removes any other copyright data entered above)
or one of various Creative Commons “copyleft” licenses. For details on the differences between
different Creative Commons licenses, see http://creativecommons.org/licenses/.
IPTC contact details
You may enter various contact details conforming to the IPTC specifications. For more details,
see http://www.iptc.org/cms/site/index.html?channel=CH0089.
41
Mode dial
• Standard dial (default)
• Tap for carousel
You may choose to change the behaviour of the Mode dial so that tapping it will open
up a carousel, from which you can select your Mode, rather than rotating the dial
directly. with your fingertip.
Anti-Shake notification
• Disabled (default)
• Enabled
You may choose to be notified via an on-screen icon if there is any vibration
(camera shake) that is likely to affect the photograph you are taking.
42
Anti-Shake action
• On-screen warning only (default)
• Warn and delay shutter release until stable
If you have enabled Anti-Shake notification (above) you have a choice between receiving
a simple warning that there is vibration, while being able to take a photograph that
might suffer from camera shake, or—on pressing the Shutter Release button—to have
645 PRO Mk III wait until any vibration has ended before taking the photograph.
Anti-Shake sensitivity
•Low
•Normal (default)
•High
The standard sensitivity for the Anti-Shake system is ideal for most users and most iOS
devices. However, there may be situations in which you wish to increase or reduce it.
43
Rotation lock
• Disabled (default)
•Standard
• Rotated 180º
In normal operation, 645 PRO Mk III can rotate 180º to reflect the orientation of
your device.You can disable this behavior, locking the orientation in either the standard
position (with the device’s Home button to the right) or rotated 180º.
Audio feedback for controls
• Enabled (default)
• Disabled
Optionally, you may disable the sounds made when 645 PRO Mk III’s controls are used.
44
System Standby
• Enabled (default)
• Disabled
Optionally, you may disable the system standby and thus prevent the display from
dimming and the device locking after the standard period. Note that this may result in
greater battery consumption.
Location data display
• Enabled (default)
• Disabled
Optionally, you may disable the display of latitude, longitude, altitude and heading.
Location tagging of photographs
• Enabled (default)
• Disabled
Optionally, you may disable the adding of location (GPS) co-ordinates to your photographs.
45
Input buffer format
• RGB (default)
• Y’CbCr
Choosing Y’CbCr creates an RGB image from a combination of luma and chroma
data, while RGB uses straight pixel-by-pixel data; both are provided as “native” by the
camera module. Using a Y’CbCr-to-RGB conversion can remove some chroma artefacts
that may be present in the straight RGB buffer (although, if present, these are only
likely to make themselves visible with extreme post-processing).
Reset ALL settings to defaults
Selecting this will reset all settings to their default status. It will not delete saved data
such as custom Film Modes.
46
About
Current version
This displays the current version number of 645 PRO Mk III. Please quote this when
seeking technical support form Jag.gr.
Website
The URL (address) of the 645 PRO Mk III website is displayed here. Selecting this will
open up the 645 PRO Mk III website in Safari
e-mail
The e-mail address to use when contacting Jag.gr regarding 645 PRO Mk III is displayed
here. Selecting this will open up the Mail app, ready to compose an e-mail to this
address.
47
645 PRO Mk III’s Film Modes
645 PRO Mk III comes with a range of built-in Film Modes inspired by classic
film stocks. These can be edited to produce custom effects, and there are also
three Custom Film Mode slots which you can use for personalized settings.
These Custom Film Modes can be saved to a database and loaded up again when
you want them.
You select the Film Mode you want to use by tapping the Film Mode Selector
button and scrolling through the carousel that appears in the viewfinder.
B&W Film Modes
•F4
•T3
•H5
•A2
• X1
• O+
48
F4 produces subtle, fine-grain monochrome images and is ideal for portraiture.T3 has
more contrast and a somewhat heavier grain—it is reminiscent of much classic press
photography. H5 produces high-contrast output, and is perfect for street photography.
A2 has rich, deep shadows. X1 is inspired by chromogenic monochrome film stocks
(those designed to be developed in a standard color C41 lab) and has a very slight
sepia tint. O+ is our orthochromatic, technical stock, ideal for photographing documents
(or getting different effects!).
Color Film Modes
•P41 (default)
• E64
•V50
• K25
• KII
•A80
• X32
49
P41 has subtle colors and contrast, making it ideal for skin tones. E64 is like a cool
and classy transparency film. V50 is big and vibrant, with extra saturation to make
landscapes come to life. K25 has warmth and deep, rich blacks. KII takes us back to
the 1950s with a cozy, vintage quality. A80 is warm and summery. X32 has a modern,
crisp, neutral-toned, slightly-desaturated feel.
Editing Film Modes
In the Film Mode carousel you have the option to edit each Film Mode, by
tapping on the EDIT link below each Film Mode’s description. You then get the
option to adjust, using sliders:
•Contrast
• Exposure
•Saturation (disabled for B&W Film Modes)
• Color temperature
•Sharpness
A real-time preview shows you the effect of these changes.You can then choose
to accept or reject the edits, or to save them across to one of the three Custom
50
Film Mode slots—C-1, C-2 and C-3.
If you want to return a Film Mode to its standard settings, simply tap the RESET
link below its description in the Film Mode Carousel.
Custom Film Modes
645 PRO Mk III provides you with access to three Custom Film Modes at any
one time, named C-1, C-2 and C-3 on the Film Mode Carousel.As standard,
these apply no processing to the unprocessed image apart from adding a fine
film grain. However, you can edit them using the same sliders as you use to edit
the built-in Film Modes.You can also choose to base them on one of the built-in
Film Modes by choosing from the rotary selector at the bottom of the editing
pane.
Custom Film Modes can be saved for later use—simply tap the SAVE link above
the Custom Film Mode name in the Film Mode carousel and enter a suitable
name. To load this Custom Film Mode into one of the three available slots,
navigate to C-1, C-2 or C-3 in the Film Mode carousel and tap the LOAD link.
51
645 PRO Mk III’s Photo Filters
645 PRO Mk III comes with digital Photo Filters that can be used to adjust its Film
Modes in much the same way that glass filters are used on film cameras. They
are selected from the Photo Filter carousel, which appears in the viewfinder
when you tap the Photo Filter Selector button and their intensity is adjusted
with the stepper control that is displayed with the carousel.
The warm and cool filters are primarily designed to be used with Color Film
Modes, as a way of tweaking the color temperature.
The named color filters are mainly for use with B&W Film Modes, where they
can adjust the way different colors are translated into shades of grey.
The neutral and colored graduated filters are mostly intended to add drama to
skies, where a “correct” exposure for the foreground would make the sky too
pale or bland, and exposing for the sky would make the foreground too dark.
However, there are no rules—wonderful creative effects are possible by using
Photo Filters in ways they were never “intended” to be used!
52
Managing your photographs
You enter 645 PRO Mk III’s Review/Share mode to see the photographs you
have taken, to share them via e-mail or on social media platforms, to open them
up in other image editing apps, and to manage any unprocessed files you have
saved to 645 PRO Mk III’s custom App folder.
Depending on your settings, images that you see include all the images in your
Camera Roll—645 PRO Mk III saves its processed images (and, optionally, its
unprocessed images) to the same location as the built-in Camera app—or just
images captured by 645 PRO, including earlier versions. Images can be deleted
by tapping the trash can.
For an image picker containing all available images, tap the Camera Roll
button.
For comprehensive information regarding an image (including EXIF
metadata) tap the Info button.
To return to the camera, press the Camera button.
53
Viewing gestures
The pinch gesture can be used to zoom images.
For a quick zoom in or out, double-tap an image.
Sharing images
Tap once on any selected image and you will see several icons appear, overlaying
the two sides of the image.You can share the image via:
• e-mail
• The “open in” action sheet
Tap on the “open in” icon and an action sheet slides in to your device’s display,
showing apps in which the specific image format (JPEG or TIFF, depending on the
image) can be opened, and also social media platforms to which it can be shared.
Note: this facility relies upon the apps in question advertising the fact that they can
open such files to the operating system. Some apps don’t do this, so they don’t appear
on the list. If a favorite app is missing, take the matter up with the app developer!
Many of these apps are image editors, although other services—such as
54
Dropbox—can appear, depending on the apps you have installed.
Managing unprocessed images
Although you can opt to save unprocessed images to Camera Roll (see above, in
the description of the Saving menu’s options), their default location is 645 PRO
Mk III’s private App folder.There are two methods for getting them out of there
for later use or processing on your computer or your iOS device.
The first is to use iTunes File Sharing.
To do this, connect your iOS device to your computer and open iTunes. Find
your device in the left hand column, select it, and then select the Apps tab at
the top of the iTunes window. Scroll down that section and you will see an area
headed File Sharing.
Select 645 PRO Mk III from the list of apps in the left-hand pane, and you will
see the unprocessed files you have saved appear in the right-hand pane.You can
then save these to your computer’s hard disk. To delete files, select the images
you wish to remove and press the Delete key on your computer keyboard.
Alternatively, you can use 645 PRO Mk III’s built-in file management tools. If
55
you have unprocessed files saved to the private App folder, you will
see an additional button on the top-left of your display after you have
entered the Review/Share view. Tapping this gives you access to your
unprocessed files. These files are named with a datestamp with millisecond
precision (YYYYMMDDhhmmssuu) followed by the file extension (TIFF or
JPEG). From the initial list of files you can choose to delete images by swiping
the row with the image name in it and pressing the Delete button that appears,
or by pressing the Edit button and selecting the image to delete.
You can also select an image by tapping on its name. This allows you to:
• Delete the image
• View the image’s metadata
• Save the image to Camera Roll
• Send the image to the “open in” action sheet
Again, this last option gives you access to any apps installed on your iOS device
that advertise their ability to open the file format in question, from image editors
to tools such as Dropbox.
56
Troubleshooting 645 PRO Mk III
Having problems finding or viewing images, perhaps with a message saying you
have denied access? Take a look here:
http://jag.gr/2012/09/21/photos-privacy-ios-6/
General performance or stability issues? Take a look here:
http://jag.gr/2013/08/26/fixing-ios-apps/
Anything else? Contact us for a prompt response via:
[email protected], or
http://jag.gr/645pro/contact/
57
License information
Copyright © 2011-2014 Jag.gr. All rights reserved.
THE SOFTWARE IS PROVIDED “AS IS”, WITHOUT WARRANTY OF ANY
KIND, EXPRESS OR IMPLIED, INCLUDING BUT NOT LIMITED TO THE
WARRANTIES OF MERCHANTABILITY, FITNESS FOR A PARTICULAR
PURPOSE AND NONINFRINGEMENT. IN NO EVENT SHALL THE AUTHORS
OR COPYRIGHT HOLDERS BE LIABLE FOR ANY CLAIM, DAMAGES OR
OTHER LIABILITY, WHETHER IN AN ACTION OF CONTRACT, TORT OR
OTHERWISE, ARISING FROM, OUT OF OR IN CONNECTION WITH THE
SOFTWARE OR THE USE OR OTHER DEALINGS IN THE SOFTWARE
fmdb
Copyright (c) 2008 Flying Meat Inc.
Permission is hereby granted, free of charge, to any person obtaining a copy of
this software and associated documentation files (the “Software”), to deal in the
Software without restriction, including without limitation the rights to use, copy,
58
modify, merge, publish, distribute, sublicense, and/or sell copies of the Software,
and to permit persons to whom the Software is furnished to do so, subject to
the following conditions:
The above copyright notice and this permission notice shall be included in all
copies or substantial portions of the Software.
iCarousel
Copyright © 2011 Charcoal Design
InAppSettings
Copyright © David Keegan 2009-2010
InAppSettings is open source as described by the MIT license:
Permission is hereby granted, free of charge, to any person obtaining a copy of
this software and associated documentation files (the “Software”), to deal in the
59
Software without restriction, including without limitation the rights to use, copy,
modify, merge, publish, distribute, sublicense, and/or sell copies of the Software,
and to permit persons to whom the Software is furnished to do so, subject to
the following conditions:
The above copyright notice and this permission notice shall be included in all
copies or substantial portions of the Software.
MHRotaryKnob
Copyright © 2010-2012 Matthijs Hollemans
With contributions from Tim Kemp (slider-style tracking).
Permission is hereby granted, free of charge, to any person obtaining a copy of
this software and associated documentation files (the “Software”), to deal in
the Software without restriction, including without limitation the rights to use,
copy, modify, merge, publish, distribute, sublicense, and/or sell copies of the
Software, and to permit persons to whom the Software is furnished to do so,
subject to the following conditions:
60
The above copyright notice and this permission notice shall be included in all
copies or substantial portions of the Software.
VFR Reader
Copyright © 2011-2012 Julius Oklamcak. All rights reserved.
Permission is hereby granted, free of charge, to any person obtaining a copy of
this software and associated documentation files (the “Software”), to deal in the
Software without restriction, including without limitation the rights to use, copy,
modify, merge, publish, distribute, sublicense, and/or sell copies of the Software,
and to permit persons to whom the Software is furnished to do so, subject to
the following conditions:
The above copyright notice and this permission notice shall be included in all
copies or substantial portions of the Software.
61
iOS, iPad, iPhone, iPod touch are registered trademarks of Apple Inc.All other trademarks
and service marks are the properties of their respective owners.
Release 4.15 04/15
62