1
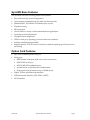
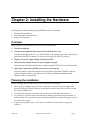
SysLINK Hardware Manual SYSTECH C O R P O R A T I O N Document number 80-001114 Revision A Created 2012, and Protected Under the U.S. Copyright Act of 1976. Copyright © 2012, SYSTECH Corporation All Rights Reserved This document is subject to change without notice. Table of Contents OVERVIEW ................................................................................................................. 4 SysLINK Base Features .................................................................................................. 5 Option Card Features ..................................................................................................... 5 Description of SysLINK Models ..................................................................................... 6 Using the SysLINK .......................................................................................................... 6 CHAPTER 2: INSTALLING THE HARDWARE .......................................................... 7 Overview .......................................................................................................................... 7 Planning the installation ................................................................................................. 7 Connecting Devices to the SysLINK ............................................................................ 11 POS Terminal Port Option Card ................................................................................. 11 RS-232 Serial Port Option Card.................................................................................. 11 SysLINK DCE RS-232 Operation ...........................................................................................11 RS-232/485/422 Serial Port Option Card .................................................................... 13 Zigbee or Z-Wave Option Card ................................................................................... 13 Wi-Fi Interface ............................................................................................................ 13 Cellular Interface ........................................................................................................ 14 Ethernet LAN .............................................................................................................. 15 USB Ports .................................................................................................................. 15 TBDAntennas ............................................................................................................. 15 SIM Card .................................................................................................................... 16 Starting the SysLINK .................................................................................................. 16 CHAPTER 3: TROUBLESHOOTING ....................................................................... 17 Status LED ..................................................................................................................... 17 USB/Serial/Terminal/Modem Port LEDs ...................................................................... 18 Ethernet LEDs ............................................................................................................... 18 Cellular LEDs................................................................................................................. 18 CHAPTER 4: MOUNTING OPTIONS ....................................................................... 21 APPENDIX: SPECIFICATIONS................................................................................ 22 SysLINK Base Hardware Specifications ...................................................................... 22 SysLINK MiniPCIe Card Specifications ....................................................................... 22 SysLINK Systech Option Card Specifications ............................................................ 22 Environmental Specifications ...................................................................................... 23 Product Dimensions ..................................................................................................... 23 Cellular specifications .................................................................................................. 23 Ethernet cabling specifications ................................................................................... 23 80-001114 SysLINK Hardware Manual Page 3 Overview Systech SysLINK Gateways convert dial-up payment transactions to high-speed IP transactions at the merchant location and re-route them over any public or private IP connection. The SysLINK family connects to the high speed network via a Cellular network. The gateways connect POS payment terminals, POS systems, check readers, and ATMs to payment processing networks over the public Internet using secure IP/SSL transactions. Merchants preferring private IP networks can use the Systech solutions to re-route dial-up transactions through existing satellite, frame, or other wide-area links. Merchants benefit from higher-speed payment transactions, and recurring cost savings from the elimination of dedicated dial-up or lease lines. Any Payment Type POS Terminal Dial IP Public Internet/ Private Network POS System Any Processor Secure IP Host ATM Terminal WEB Diagnostics 80-001114 SysLINK Hardware Manual Page 4 SysLINK Base Features The SysLINK offers the following features and benefits: Easy web-based set up and configuration Open systems communications for multi-site data networks Standard RJ-45, 10/100 Base-TX Ethernet port or ports IP packet routing SSL encryption Can be used in a variety of data communications applications Operating system independent Complete remote diagnostics LEDs for each port, signaling port status and error conditions Industry standard interoperability Supports generic TCP/IP access to serial ports without requiring special protocols or processing Option Card Features RJ-11 POS Terminal (phone line) port Serial ports DB25-Female serial port (with screw-down connectors) RS-232 DCE serial port RS-232/485/422 combination port Asynchronous or Synchronous communication High-speed serial connections (up to 230.4K baud) Zigbee, Z-Wave and Bluetooth interfaces Cellular network interface (LTE, EVDO, 1xRTT) Wi-Fi interface 80-001114 SysLINK Hardware Manual Page 5 Description of SysLINK Models The SysLINK series is available with a number of different model families. These products are functionally equivalent except for the types of ports. Model Ethernet Ports USB Ports SysCard Options MiniPCIe Options SL-1000 1 1 None Up to 1 SL-2000 2 2 Up to 1 Up to 1 SL-3000 3 2 Up to 2 Up to 2 SL-4000 4 2 Up to 4 Up to 2 Available SysCard Options: Analog Dial (POTS) Analog Backup (Modem) RS-232 Serial RS-232/485/422 Synchronous Serial Zigbee Z-Wave GPIO Available MiniPCIe Option Cards: 2G Cellular 3G Cellular 4G Cellular (LTE) Wi-Fi b/g/n Wi-Fi with Bluetooth Using the SysLINK Using the SysLINK requires three steps: 1. Hardware installation 2. Configuration 3. Operation Hardware installation is documented in this manual. Refer to the SysLINK Administrator's Guide for configuration and operation. 80-001114 SysLINK Hardware Manual Page 6 Chapter 2: Installing the Hardware This chapter describes installing the SysLINK hardware, including: Planning the installation Checking cables and connectors Sample configurations Overview Installing the SysLINK hardware includes the following steps: 1. Plan the installation 2. Connect your peripheral device(s) to the SysLINK device server Attach each peripheral device (e.g., POS terminal, cash register, card reader, modem) to a phone line port (RJ-11 connector on the front) or serial port (DB-25 connector). 3. Plug the AC power supply adapter into the SysLINK 4. Orient the unit and the antenna to get best signal strength Orient the unit and cable until the most “signal strength” LEDs are lit on the front panel. 5. Optionally connect the SysLINK port server to your network The most common connection method is through the 10/100 Base-TX RJ-45 connector (which is labeled LAN) to your Ethernet LAN, using a standard straight-through Ethernet cable to a hub/switch. Planning the installation Before installing the SysLINK device server, consider the following: How will you configure your network—what types of devices will you connect and where will they be located? Identify the distances at which each device will be located from the SysLINK server. Verify that the locations selected for devices do not exceed cable specifications. To conform to UL safety rules, the unit may be tabletop mounted or wall mounted. If wall mounted, the front and rear connector plates should be oriented facing up or down, not to the left or right. Is there an acceptable source of AC power available near each device’s proposed location? 80-001114 SysLINK Hardware Manual Page 7 SysLINK Front and Rear Panels The front panel of the SysLINK has LEDs that show the status of the unit and the various ports and options. The rear panel has power, buttons, and connectors. The following figures show the LED locations and connectors for the SysLINK models. SysLINK 4000 Front Panel LEDs SysLINK 4000 Rear Panel Connectors SysLINK 3000 Front Panel LEDs SysLINK 3000 Rear Panel Connectors 80-001114 SysLINK Hardware Manual Page 8 SysLINK 2000 Front Panel LEDs SysLINK 2000 Rear Panel Connectors TBD SysLINK 1000 Front Panel LEDs TBD SysLINK 1000 Rear Panel Connectors LED Indicators The Unit Status LED indicates the overall status of the device. The Ethernet LEDs – use and activity The USB LEDs - use and activity The Option Card LEDs indicate the status and activity of the port(s) on the option card The Cellular Mode LEDs indicate the status and type of connection The Cellular Signal Strength LEDs show signal strength For information on interpreting the LED color and pattern displays, see Troubleshooting. The “Join” button is used when pairing wireless devices with the SysLINK. The reset button can be used to reboot the unit or to restore the factory default configuration on the unit. 80-001114 SysLINK Hardware Manual Page 9 Depressing and releasing the button will reboot the unit. Depressing and holding the "Reset" button in for about 5 seconds will restore the default (factory) configuration to the unit and then reboot the unit. 80-001114 SysLINK Hardware Manual Page 10 Connecting Devices to the SysLINK POS Terminal Port Option Card The POS Terminal port is a phone line designed to function just like a standard wall-jack analog phone line. It is designed primarily to connect POS (Point Of Sale) terminals, with an internal modem, to the SysLINK, which then routes data from the devices over the network. The SysLINK mimics the phone company, answering incoming calls and routing them to an internal modem attached to each phone line, or generating calls from an internal modem to an attached device. The terminal lines and internal modems communicate up to 2400 baud and support the following standards: Bell 212A ITU-T V.22 ITU-T V.22bis V.22 FastConnect (Hypercom) RS-232 Serial Port Option Card In the RS-232 definition, a pair of devices, one a terminal (Data Terminal Equipment or DTE) and one a modem (Data Communication Equipment or DCE), are designed to plug directly into each other. The SysLINK RS-232 serial port operates in DCE (modem) mode. The following sections describe the pinouts and cabling options associated with this mode. SysLINK DCE RS-232 Operation Data Communication Equipment (DCE) mode is generally used to communicate with a terminal device. This includes terminals, PC serial ports, printers and, generally, most devices other than modems. When in DCE mode, the SysLINK port server family uses the following pinouts: 80-001114 SysLINK Hardware Manual Page 11 DB-25 Pin Number RS-232 Name Direction Signal Function 2 TX I Serial data in, from remote device to SysLINK 3 RX O Serial data out, from SysLINK to remote device 4 RTS I Flow control, to enable SysLINK to send data 5 CTS O Flow control, to enable remote device to send data 6 DSR O Signals remote device that the SysLINK is attached and powered on 7 GND 8 DCD O Signals remote device that SysLINK has a valid connection 20 DTR I Signals SysLINK that the remote device is attached and powered on 22 RI O Ring Indicator Signal ground Table 2-1: EIA-232 DB-25 DCE Pinouts Figure 2-2 shows a cable to connect most devices to the SysLINK. DB-25 Pin (DCE) DB-25 Pin (DTE) Number/Signal Number/Signal 2 TX 2 TX 3 RX 3 RX 4 RTS 4 RTS 5 CTS 5 CTS 6 DSR 6 DSR 7 GND 7 GND 8 DCD 8 DCD 20 DTR 20 DTR 22 RI 22 RI Figure 2-2: DB-25 to DB-25 Full Cable The SysLINK does not require the use of all 9 wires. Only the RX, TX, and GND signals are essential. DTR/DSR and RTS/CTS are only necessary for flow control. DCD is used to indicate a connection and RI is only required for connections that need a ring indicator. 80-001114 SysLINK Hardware Manual Page 12 Figure 2-3 shows a minimal 3-wire cable using only RX (pin 2, data in), TX (pin 3, data out), and GND (pin 5, ground). DB-25 Pin (DCE) DB-25 Pin (DTE) Number/Signal Number/Signal 2 TX 2 TX 3 RX 3 RX 7 GND 7 GND Figure 2-3: DB-25 to DB-25 3-wire Cable To connect the SysLINK in DCE mode to a standard PC COM port, use a standard modem cable as shown in Figure 2-4. DB-9 Pin Number DB-25 Pin Number/Signal 1 DCD 8 DCD 2 RX 3 RX 3 TX 2 TX 4 DTR 20 DTR 5 GND 7 GND 6 DSR 6 DSR 7 RTS 4 RTS 8 CTS 5 CTS 9 RI 22 RI Figure 2-4: DB-25 (DCE) to DB-9 Terminal Cable RS-232/485/422 Serial Port Option Card TBD Zigbee or Z-Wave Option Card TBD Wi-Fi Interface TBD 80-001114 SysLINK Hardware Manual Page 13 Cellular Interface The SysLINK automatically makes a data-only connection to an available cellular network for the carrier the SysLINK is provisioned and activated on. The cellular interface is typically enabled by default and the SysLINK immediately attempts to connect to the cellular network on power up. This cellular interface is typically used to connect to the public Internet or a privately managed network. The Cellular port mode LEDs indicate the status of the cellular interface. The signal strength indicators indicate how well the unit is receiving a signal. 80-001114 SysLINK Hardware Manual Page 14 Ethernet LAN The SysLINK may also be connected to your LAN using the Ethernet ports. The Cellular interface is typically the primary network connection but the local connection may also be used to connect local Ethernet devices, or configure or diagnose operation on the SysLINK. The Ethernet port(s) on the SysLINK are standard 10/100 Base-TX RJ-45 jacks. They can be connected to an Ethernet device or switch via a standard, straight-through Ethernet cable. Server or Workstation Devic es Devic es POSSeria l STATUS Server or Workstation POSSeria l 1 2 POSTerminal 1 STATUS 1 2 POSTerminal 2 1 IPG 2 IPG Router Internet/ Private Net Router Rem ote Server POSSeria l STATUS 1 2 POSTerminal 1 2 Rem ote IPG USB Ports TBD 80-001114 SysLINK Hardware Manual Page 15 Antennas Cellular - TBD Wi-Fi - TBD SIM Card TBD Starting the SysLINK When the SysLINK is powered up, the LEDs indicate the status of the unit and its ports. The following LED colors and patterns will be displayed during normal startup, if no errors are detected. Status LED – initially this LED will be yellow, but will quickly turn green. If the status LED is solid green, then the SysLINK doesn’t have a permanent IP address and is trying to obtain one from a DHCP server. If the LED is blinking green, it means the SysLINK has obtained an IP address and is ready to use. Red indicates a fatal error. Cellular mode LEDs – these LEDs will normally be either off or green. Green LEDs mean that the cellular interface is in use. The LEDs will blink green to show activity. Signal Strength – these LEDs only operate if the Cellular interface is in use. Ethernet LED – these LEDs will normally be either off or green. A green LED means that a good Ethernet link has been established and the unit is on the network. The LED will blink green to show network activity. Option Card LEDs – these LEDs will normally be either off or green. Off indicates a port that is not in use. Green indicates a port that is in use. The green LED will blink when data is transmitted or received. It will blink 2 times per second when data is continuously transmitted or received. If any of the LEDs turn red, an error condition was detected. For a full description of the LED patterns, see Troubleshooting. 80-001114 SysLINK Hardware Manual Page 16 Chapter 3: Troubleshooting The SysLINK has several LED indicators: Unit Status, Ports (serial, POS terminal or modem), Cellular and Ethernet. The LEDs use red, yellow, and green blinking combinations to indicate the status of each of the SysLINK’s major components. Status LED The status LED indicates the overall status of the SysLINK. See Table 3-1. Status LED Condition Meaning Solid Green The unit is running, but it needs an IP address. It is trying to obtain one from DHCP/BOOTP. Blinking Green The unit has an IP address and is operating normally. Alternating Green/Red If the “reset” button is being held in, this LED sequence means that the factory default configuration is about to be restored. If you do not want to restore the factory default, release the button before the sequence changes to Green/Yellow. Otherwise this means a serious system error occurred. See the system log for more details. Alternating Green/Yellow If the “reset” button is being held in, this LED sequence means that the factory default configuration will be restored. You may release the button. Otherwise, this means that the current configuration is corrupt and that the factory default configuration is being used. Blinking Yellow The unit is booting. Solid Red There is a fatal error. Off No power or the unit is inoperative. Table 3-1: Status LED Conditions Troubleshooting 17 USB/Serial/Terminal/Modem Port LEDs Each port has a Port LED that describes port activity. Table 3-2 describes the various Port LED states. Port LED Condition Meaning Off Port is closed or no power. Solid Green Port is open, but idle. Blinking Green Port is open, and data is being transmitted or received. When data is being continuously transferred, this LED will blink approximately 2 times per second. Red Blinks Data errors will cause periodic red blinks. Persistent red blinks may imply a configuration problem (incorrect baud rate, parity settings, etc.). Solid Red Port hardware has failed. Table 3-2: Port LED Conditions Ethernet LEDs The Ethernet port LED describes the state of the network connection on that port. Table 3-3 describes the various Ethernet LED states. Ethernet LED Condition Meaning Solid Green Ethernet link is good. Green Blink Network traffic was detected. Red There is an Ethernet error. Off The Ethernet cable is bad or not connected. Table 3-3: Ethernet LED Conditions Cellular LEDs The Celluar mode LEDs describe both mode and state of the cellular connection. The number of LEDs that are lit indicates the mode. The behavior of the LEDs indicates the status. Table 3-4 describes the modes that the port is in. Table 3-5 Table 3-5: Cellular LED describes the various LED states. 80-001114 SysLINK Hardware Manual Page 18 Cellular LED Mode Meaning O O O Not in use O O O TBD O O O TBD O O O TBD O O O TBD O O O TBD O O O TBD O O O TBD Table 3-4: Cellular LED Modes Cellular LED Status Meaning Solid Green Connection is in use Green Blink Connection traffic Off Connection is not in use Table 3-5: Cellular LED Status TBD Troubleshooting 19 Chapter 4: Mounting Options TBD Troubleshooting 21 Appendix: Specifications SysLINK Base Hardware Specifications ARM9 300MHz CPU 256 Mbytes in-circuit boot flash and program memory 256 Mbytes DDR2 RAM One to four 10/100 Mbps Ethernet connections over 10/100 Base-TX physical lines One to two High Speed USB 2.0 connections External 110 or 240 VAC power supply provides +5V DC regulated to SysLINK Status LEDs for each port SysLINK MiniPCIe Card Specifications LTE, CDMA or 1xRTT Cellular interface with one or more SMA female antenna interfaces Wi-Fi b/g/n SysLINK Systech Option Card Specifications Optional asynchronous RS232 serial port with modem control and surge suppression Asynchronous port data rates of up to 230.4 Kbps DCE serial port with DB-25 female connector Optional phone line (labeled “POS Terminal”) with internal modem. Support for phone and modem standards: Bell 212A ITU-T V.22 ITU-T V.22bis V.22 FastConnect (Hypercom) Zigbee Z-Wave 22 Index Environmental Specifications Operating temperature range: 0 to 50°C Storage temperature range: -10 to 70°C Humidity range: 10% to 90% noncondensing Product Dimensions The SysLINK models measure: SL-1000 - 5 inches x 4.75 inches x 1.25 inches (X mm x Y mm x Z mm) SL-2000 - 7 inches x 4.75 inches x 1.25 inches (X mm x Y mm x Z mm) SL-3000 - 9 inches x 4.75 inches x 1.25 inches (X mm x Y mm x Z mm) SL-4000 - 12 inches x 4.75 inches x 1.25 inches (X mm x Y mm x Z mm) Cellular specifications TBD TBD Ethernet cabling specifications This section describes guidelines for using 10/100 Base-TX twisted-pair cabling: Recommended cable is category 5 (CAT5 or CAT5E) unshielded solid copper twisted pair Ethernet cable pairs must be properly twisted: pins 1 and 2 must be a twisted pair, and pins 3 and 6 must be a twisted pair Maximum distance of a segment—from concentrator to node—is 100 meters (328 feet) Maximum of 5 segments between any two nodes Index 23 Index 1 front panel, diagram, 8 I 10/100 Base-TX, cabling specifications, 23 3 installation, hardware, 7 L 3-wire diagram, 12 A antenna, 7, 22 asynch port specifications, 22 LAN connecting SysLINK to, 15 LED overview, 17 start up, 16 P C cable diagram terminal, DB-9 to DB-25, 12 cabling, specifications, 23 CDMA, 22 Cellular specifications, 23 configuration planning, 7 panel, diagram, 8 R red LED, 16 restoring default configuration, 10 S D DB-25 to DB-25 3-wire terminal cable diagram, 13 DB-9 to DB-25 terminal cable diagram, 12 default configuration, 10 E ethernet network cabling specifications, 23 F factory default configuration, 10 24 Index signal strength, 7, 14 specifications, 22 start up, 16 T terminal, cable diagram, DB-9 to DB-25, 12 troubleshooting LED indicators, 17 twisted-pair, cabling specifications, 23