1
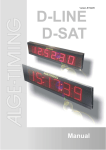
Manual
D-LINE
Manual
D-LINE
Table of Content
1
1.1
General ....................................................................................................................................... 3
Parameterlist................................................................................................................................ 3
1.1.1
Set daytime hours [P0].................................................................................................... 3
1.1.2
Set daytime minute [P1].................................................................................................. 3
1.1.3
Set daytime seconds [P2] ............................................................................................... 3
1.1.4
Set the day of the date [P3] ............................................................................................ 3
1.1.5
Set the month of the date [P4] ........................................................................................ 3
1.1.6
Set the year of the date [P5] ........................................................................................... 3
1.1.7
Display time for daytime [P6] .......................................................................................... 3
1.1.8
Display time for date [P7]................................................................................................ 3
1.1.9
Display time for temperature [P8] ................................................................................... 4
1.1.10
Area settings for temperature and time .......................................................................... 4
1.1.11
Brightness [A0] (b) .......................................................................................................... 5
1.1.12
Serial interface setting [A1], (S) ...................................................................................... 6
1.1.13
Time-out for daytime [A2]................................................................................................ 7
1.1.14
Address-Setting [A3] (A) ................................................................................................. 7
1.1.15
1.2
2
2.1
2.1.1
2.1.2
3
4
Alarm-function (in the standard model not included) ...................................................... 7
Extended Datamode.................................................................................................................... 9
Special Functions.................................................................................................................... 10
Stopwatch, Countdown and Counter......................................................................................... 10
Stopwatch-Countdown .......................................................................................................... 10
Counter .................................................................................................................................. 10
Technical Data ......................................................................................................................... 11
Comments ................................................................................................................................ 12
[Parameter list of old Models]
(Parameter list for 3-digit Models)
Copyright by:
Seite 2
ALGE-TIMING GmbH & Co
Rotkreuzstrasse 39
A-6890 Lustenau
Telefon: +43 5577-85966
Fax: +43 5577-85966-4
e-Mail: [email protected]
Internet: http://www.alge-timing.com
Manual E-050711
Manual
D-LINE
1 General
The D-LINE Scoreboards are very flexible in their use.
The difference between indoor and outdoor models is only the brightness of the LED´s.
ATTENTION! Since 3-digit-displays doesn’t have the full capability of all the below described
functions there is a different menu for these displays.
You can find these parameters in () behind the normal parameters! Non described
parameters are not available on such displays!
1.1
Parameterlist
The parameterlist shall be in a way that the user can already see by the name of the
parameter that he is adjusting the parameter he would like to adjust. On the side there shall
be also a sticker with a short explanation.
ATTENTION! Old D-LINE models have different parameters. These old parameters are
always in [xx]. Some of the settings are identically and some others are not available.
1.1.1
Set daytime hours [P0]
This parameter is to adjust the hours of the daytime
1.1.2
Set daytime minute [P1]
This parameter is to adjust the minutes of the daytime.
1.1.3
Set daytime seconds [P2]
This parameter is to adjust the minutes of the daytime.
1.1.4
Set the day of the date [P3]
This parameter is to adjust the day of the date.
1.1.5
Set the month of the date [P4]
This parameter is to adjust the month of the date.
1.1.6
Set the year of the date [P5]
This parameter is to adjust the year of the date.
1.1.7
Display time for daytime [P6]
Display time to show the daytime.
To switch off the daytime on the display, set the value to 00.
1.1.8
Display time for date [P7]
Display time to show the date.
To switch off the date on the display, set the value to 00.
Manual E-050711
Seite 3
Manual
D-LINE
1.1.9
Display time for temperature [P8]
Display time to show the temperature.
To switch off the temperature on the display, set the value to 00.
If no temperature-sensor is connected, this setting is internally always 00!
1.1.10
Area settings for temperature and time
Area parameter in order to adjust the diplaymode for time and temperature.
Following settings are possible.
The first digit in the setting is for the summertime changing, the second one is for the display
mode.
1.1.10.1
Summertime switching [P9]
The first digit of the area-setting is responsible for the internal switching between summer
and winter time.
1.1.10.1.1
Summertime switching [0x]
No internal switching, used for DCF-controlled clocks.
1.1.10.1.2
European summertime [1x]
Summertime changing for Europe, used with internal clock, GPS and NTP-synchronization.
1.1.10.1.3
USA summertime [2x]
Summertime changing for USA, used with internal clock, GPS and NTP-synchronization.
1.1.10.1.4
Australian summertime [3x]
Summertime changing for Australia, used with internal clock, GPS and NTP-synchronization.
1.1.10.2
Time and Temperature Setting
The second digit of the Area-Setting is used for the display mode of the time and
temperature.
12h, 24h, Celsius or Fahrenheit.
1.1.10.2.1
Celsius and 24h [x0]
Time in 24h mode and temperature in Celsius.
1.1.10.2.2
Celsius and 12h [x1]
Time in 12h mode and temperature in Celsius
1.1.10.2.3
Fahrenheit and 24h [x2]
Time in 24h mode and temperature in Fahrenheit
1.1.10.2.4
Fahrenheit and 12h [x3]
Time in 12h mode and temperature in Fahrenheit
Seite 4
Manual E-050711
Manual
D-LINE
1.1.11
Brightness [A0] (b)
This Parameter is for the brightness settings and effects.
The first digit in the setting is for the appearance, the second for the brightness.
1.1.11.1
First digit of setting
The first digit is defining the type of changing between time and temperature.
Fade-in will changeover with brightness effect from time to temperature.
1.1.11.1.1
Fade-in off
Fading is not activated.
1.1.11.1.2
Fade-in on
Fading is activated.
1.1.11.2
Second Digit of Setting
This setting is defining the brightness-mode of the display.
1.1.11.2.1
Manual setting
The second digit of the brightness setting can be adjusted from 0 to 9 for manual brightness.
Value 0 is minimum brightness, value 9 is maximum brightness.
This adjustment you can also set by using the menu of your TdC8001 or Timy.
1.1.11.2.2
Daytime-depending brightness [x3]
Brightness is set automatically, depending on the daytime.
1.1.11.2.3
Light sensor depending brightness [x4]
With this setting, the brightness is depending on the light-sensor.
If the light sensor is not connected, it will be always maximum brightness.
Manual E-050711
Seite 5
Manual
D-LINE
1.1.12
Serial interface setting [A1], (S)
This setting is for the Interface-Parameters.
The first digit in the setting is for the display mode, the second for the Interface-Speed.
1.1.12.1
Diplaymode and Special-Functions
Here you can adjust the different display modes and special functions for your displayboard.
1.1.12.1.1
hh:mm:ss [0x]
1.1.12.1.2
mm:ss:zh [1x]
1.1.12.1.3
BIB RK [2x]
1.1.12.1.4
Points [3x]
With this setting it will display the points in equestrian from the TdC800x. If the points are
sent from the Timer S4, the display must be adjusted manually as described at point 1.2.
1.1.12.1.5
Extended Mode [4x]
This is an advanced mode where you can configure the complete scoreboard by yourself.
You can define, which byte shall be shown on which position of the display board.
If the serial setting is on this mode, you have some more parameters to adjust the mode.
These parameters are
,
,
,
,…[A5, A6,…B0, B1,…]
For the detailed description how to adjust these parameters, see point 1.2
1.1.12.1.6
Slave/Master communication [5x]
1.1.12.1.7
PC communication [6x]
1.1.12.1.8
Game console wired [7x]
1.1.12.1.9
Game console wire-less [8x]
Seite 6
Manual E-050711
Manual
D-LINE
1.1.12.2
Transfer speed
The second digit of the setting is responsible for the transfer speed of the serial interface.
1.1.12.2.1
2400,N,8,1 ALGE-Standard [x0]
1.1.12.2.2
4800,N,8,1 ALGE [x1]
1.1.12.2.3
9600,N8,1 ALGE [x2]
1.1.12.2.4
19200,N,8,1 ALGE [x3]
1.1.12.2.5
Special mode
1.1.12.2.6
Old devices like the S3 or SF2 [x4]
1.1.13
Time-out for daytime [A2]
This setting defines the time after the display board switchs from serial display mode back to
day-temp mode.
If this setting is on 00, the parameter described from point 1.1.1 to point 1.1.10.2.4 are not
visible anymore.
1.1.14
Address-Setting [A3] (A)
To use more than 1 D-LINE on an addressed protocol, you have to define the address of
each display board. Normally the first line will be address one, second line address 2,….
Depending on the sport, this setting can be important to have the serial data of your timingdevice displayed correctly. Please also refer to the manual of your timing-device concerning
the setting for the display board for your sport.
1.1.15
Alarm-function (in the standard model not included)
Parameter C1-C6: Alert configurations-mode is optionally and only have got
effects if parameter A4 is not „0“.
Attention at nine-digit display boards - these parameters will be adjusted from C3 to C8.
Two alert types are programmed: Alert type 0 and alert type 1. Every of these alerts are producing an
output signal, which is directly connected to a horn. For each alert, you can indicate the quantity of
impulses, the impulse periods and the breaks between the impulses.
Don’t mix up the types of alerts and the alert programs! The alert program decides about triggering
off the alert to which daytime while the types of alerts defines the sound.
Two alert programs can be stored. Each program can store up to 50 alert times.
Manual E-050711
Seite 7
Manual
D-LINE
1.1.15.1
C1
Quantity of impulses for alert-type 0
1.1.15.2
C2
Duration of impulses in 1/10 sec. for alert-type 0
1.1.15.3
C3
Break between two impulses in 1/10 sec. for alert-type 0
1.1.15.4
C4-C6
Same as C1-C3, but for alert-type 1
Subsequently 50 alert times are following for the at the moment active alert program.
00, 01, t: alert time 1, 00=HH, 01=MM, t = alert type 0 or 1
02, 03, t: alert time 2, 00=HH, 01=MM, t = alert type 0 or 1
.
.
.
98, 99, t: alert time 50, 00=HH, 01=MM, t= alert type, 0 or 1
If you indicate „25“ in the hours-position, it means that this alert is activated every hour of the
programmed minute.
If you indicate „29“ in the hours-position, it means that this is the end of the list.
The current value or adjustment is shown beside the parameter. The figure which blinks can be
adjusted. Is e.g. “A0” blinking and you push the button, you will automatically switch to the next higher
parameter (“A1”). But if you would like to change the adjustments at “A0”, please wait until the figure
beside the parameter will blink. Now you can indicate your adjustments. If you have typed wrong, just
wait until the figure, which indicates the parameter, is blinking.
After adjusting the parameters, the display will show the adjusted time. The run time will beginn, if you
push once again the button or if the first impulse will be received by the serial channel. This is
necessary to allow a precise clock adjustment.
Out of that reason you should calculate that time which you need for these adjustments bevor the run
time starts. The time adjustment will always be made in 0-23 hour-mode (independend of “hour-modeparameters”!)
Seite 8
Manual E-050711
Manual
D-LINE
1.2
Extended Datamode
In this mode you can assign each digit one byte out of the datastring.
It is for example possible to program it so that you can see on one 6-digit scoreboard the BIB on the
first 2 digits and the time in m:ss on the last 3 digits.
In some sports like equestrian (with the Timer S4) you have to program the display for the points in
this mode.
Example: Configuration of a 6-digit display in order to show the points, sent by a Timer S4
(equestrian) in the middle of the display.
The datapackage of the Timer S4 looks as desribed below:
1 2 3 4 5 6 7 8 9 10 11 12 13 14 15 16 17 18 19 20 21 22 23 24
PZ PE
.
H H : M M : S S . z
Pz Pe CR
PZ PE
H H : M M : S S . z h t Pz Pe CR
The parameters should be adjusted like this:
Extended protocol, 2400bps [A1-40] (S-E2)
Device adress 00 [A3 00] (A-00)
First digit is always inactive [A5-00]
Dot or double-dot after first digit is always inactive [A6-00]
Second digit will display points PZ [A7-01]
dot or double-dot after second digit is always inactive [A8-00]
Third digit will display points PE [A9-02]
Will show the dot which is sent after the full second [B0-17]
Fourth Digit will show points Pz [B1-21]
Dot or double-dot after fourth digit is always inactive [B2-00]
Fifth digit will show points Pe [B3-22]
Dot or double-dot after fifth digit is always inactive [B4-00]
Sixth digit is always inactive [B5-00]
In the older Models of the D-LINE, the first digit is A5 and then it is continuing with A6-A9, after
A9 it starts with B0….
Manual E-050711
Seite 9
Manual
D-LINE
2 Special Functions
You can use the D-LINE scoreboards also as stand-alone Stopwatch, Countdown clock or
Counter.
2.1
Stopwatch, Countdown and Counter
To use one of these modes, you need to connect a manual button 023-xx at the green and
red bananaplug of the D-LINE scoreboard.
The D-LINE is storing the last used function, so whenever you connect a manual button and
press one, it will jump to the last used program.
To adjust the mode stopwatch, countdown or counter you have to change the parameter
as described below.
2.1.1 Stopwatch-Countdown
To change between the mode Stopwatch and Countdown, you have to press the manual
button as long as the display will switch to the other mode (10 seconds).
On the display, you can see the difference between these 2 modes by following detail.
Stopwatch will display 00:00.00 and Countdown will display a time where the first digit is
blinking.
2.1.1.1
hh:mm:ss [A1-0x]
Timeformat for Stopwatch and Countdown!
2.1.1.2
mm:ss:zh [A1-1x]
Timeformat for Stopwatch and Countdown!
2.1.1.3 Adjusting the Countdown time
After you have reached the Countdown mode by pressing the manual button for
approximately 10 seconds, the first digit is now blinking!
Whenever you press and release the button, it will increase the countdown time on this
position. After you have reached the correct value for this position, press the button as long
as the blinking position is moving to the next digit.
After adjusting the last digit, it will show the total countdown time without any blinking.
2.1.2 Counter
To change between the mode Count-up and Count-down, you have to press the manual
button as long as the display will switch to the other mode (10 seconds).
On the display you can see the difference between these 2 modes by following detail.
Stopwatch will display a 0 on the last position. Countdown will display a number, where the
first digit is blinking.
2.1.2.1
Counter
Enables the Counter mode.
Depending on the counting-direction, a short impulse with the button count up (down) and
pressing the button for 2 seconds counts down (up)
Seite 10
Manual E-050711
Manual
D-LINE
2.1.2.2 Adjusting the Counter
After you have reached the Count-down mode by pressing the manual button for
approximately 10 seconds, the first digit is now blinking!
Whenever you press and release the button, it will increase the Count-down on this position.
After you have reached the correct value for this position, press the button as long as the
blinking position is moving to the next digit.
After adjusting the last digit, it will show the total count-down without any blinking.
Pressing the manual button will now decrease the counter. Pressing the button for
approximately 2 seconds will count-up, pressing for approximately 5 seconds will reset the
counter to the start-value.
3 Technical Data
Type
Amount
of digits
D-LINE57-I-3-E0
D-LINE57-I-4-E0
D-LINE57-I-6-E0
D-LINE100-I-4-E0
D-LINE100-I-6-E0
D-LINE150-I-3-E0
D-LINE150-I-4-E0
D-LINE150-I-5-E0
D-LINE150-I-6-E0
D-LINE250-I-3-E0
D-LINE250-I-4-E0
D-LINE250-I-5-E0
D-LINE250-I-6-E0
D-LINE450-I-4-E0
D-LINE450-I-6-E0
D-LINE600-I-4-E0
D-LINE600-I-6-E0
3
4
6
4
6
3
4
5
6
3
4
5
6
4
6
4
6
Manual E-050711
Figure
Height
57
57
57
100
100
150
150
150
150
250
250
250
250
450
450
600
600
Height
130
130
130
180
180
250
250
250
250
350
350
350
350
600
600
800
800
Width
400
400
500
600
800
600
730
956
956
850
1100
1493
1493
1900
2490
2490
3400
Deep Hangers
60
60
60
60
60
60
60
60
60
60
60
60
60
60
60
60
60
200
200
200
400
500
300
430
556
556
450
700
1093
1093
1500
2090
2090
3000
max.
Dist.
Power
(W)
25m
25m
25m
50m
50m
75m
75m
75m
75m
125m
125m
125m
125m
225m
225m
270m
270m
10
11
13
10
13
8
10
11
13
24
29
35
41
45
63
59
83
Seite 11
Manual
D-LINE
4 Comments
Seite 12
Manual E-050711