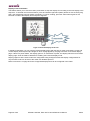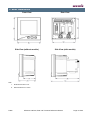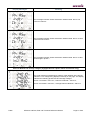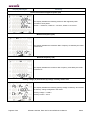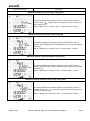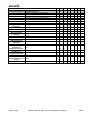
1
Elite 440 Multi-line Digital Display Panel Meter Technical Reference Manual BGX501-728-R04 Copyright © 2010-2013, SIHPL Elite® is a registered trade name of Secure Meters Ltd. Other product names are trademarks or registered trademarks of their respective owners. Page 2 of 80 BGX501-728-R04, Elite 440 Technical Reference Manual Public Table of Contents 1 1.1 Introduction ................................................................................................................................. 5 Reference Documents ................................................................................................................................... 5 2 Precautions and Safety Practices .............................................................................................. 5 3 Overview ...................................................................................................................................... 6 4 Features and Applications.......................................................................................................... 6 4.1 Operational Features ..................................................................................................................................... 6 4.2 Physical and Functional Features ................................................................................................................. 7 4.3 4.4 5 4.2.1 Front Panel ..................................................................................................................................... 7 4.2.2 Rear Panel ...................................................................................................................................... 9 Functional Specifications ............................................................................................................................. 11 4.3.1 Main Energy Registers ................................................................................................................. 11 4.3.2 Maximum Demand Registers ....................................................................................................... 12 4.3.3 Energy Snapshots ........................................................................................................................ 13 4.3.4 Load Profile ................................................................................................................................... 13 4.3.5 Billing Dates .................................................................................................................................. 15 4.3.6 Daylight Saving Time (DST) Definition ......................................................................................... 15 4.3.7 Maxima and Minima ...................................................................................................................... 16 4.3.8 Metrological LED .......................................................................................................................... 16 Optional Plug-in Modules ............................................................................................................................ 16 Meter Operation......................................................................................................................... 19 5.1 Changing the Meter Display Mode .............................................................................................................. 19 5.2 Favourite Display Mode ............................................................................................................................... 19 5.2.1 5.3 5.4 6 Setting Favourite Display On or Off .............................................................................................. 20 Using the Setup Mode ................................................................................................................................. 20 5.3.1 Password Entry ............................................................................................................................. 21 5.3.2 Page Navigation within the Setup Mode ....................................................................................... 22 Configurations from the Meter’s Setup Menu .............................................................................................. 23 5.4.1 MD Reset ...................................................................................................................................... 23 5.4.2 Meter Type and CT-VT Commissioning ....................................................................................... 24 5.4.3 Input-Output Module configuration ............................................................................................... 26 5.4.4 MODBUS Communication Configuration ..................................................................................... 27 5.4.5 Maximum Demand Configuration ................................................................................................. 29 5.4.6 Load Profile Configuration ............................................................................................................ 30 5.4.7 Poles Configuration ...................................................................................................................... 31 5.4.8 Metrological LED Configuration .................................................................................................... 32 5.4.9 Changing the Setup Mode Password ........................................................................................... 33 5.4.10 Exit Setup Mode............................................................................................................................ 34 Meter Displays ........................................................................................................................... 35 Public BGX501-728-R04, Elite 440 Technical Reference Manual Page 3 of 80 6.1 Normal Displays .......................................................................................................................................... 35 6.2 Fault Condition Displays .............................................................................................................................. 37 7 Communication ......................................................................................................................... 40 8 Technical Specification ............................................................................................................ 42 9 List of Configurable Features and Parameters ....................................................................... 43 10 Meter Dimensions ..................................................................................................................... 45 11 Installation and Commissioning .............................................................................................. 46 11.1 Connection Diagram .................................................................................................................................... 46 11.2 Mounting the Meter on the Panel ................................................................................................................ 47 11.3 Attaching External I/O Module ..................................................................................................................... 47 11.4 Detaching Modules ...................................................................................................................................... 48 12 Frequently Asked Questions (FAQs) ....................................................................................... 48 Annexure I: Meter Displays ............................................................................................................ 50 Annexure II: Supported Features and Parameters in Elite Variants ............................................ 71 Glossary of Energy Types .............................................................................................................. 77 Page 4 of 80 BGX501-728-R04, Elite 440 Technical Reference Manual Public 1 Introduction This manual is intended for understanding the various functions of Elite 440 series of meters and how to use its available features. The manual covers the various application and features of Elite 440 series of meters, the configuration process both from the meter’s Setup Mode (push buttons) and using the ConfigView Suite, the various displays and their meanings, installation process and the list of supporting parameters corresponding to each Elite 440 variant. 1.1 Reference Documents For configuring certain parameters in the meter with the help of configuration tool, the user may find the ConfigView User Manual useful in addition to this manual. 2 Precautions and Safety Practices o This product must be installed and serviced only by trained personnel. We strongly recommend reading the “Elite 440 Quick Start Guide” thoroughly before installing the product. o Do not exceed the specified voltage and current ratings. o Check the auxiliary supply voltage and / or polarity before making connection. o Make sure that all connectors are correctly seated and firmly in place. Prior to any work with the product, isolate the voltage inputs and auxiliary power supply and short-circuit the secondary winding of all current transformers. o Under no circumstances, the CT connections to the meter should be disconnected while current is flowing in the primary circuit of the external CT. The CT connector is provided with retaining screws to reduce the possibility of accidental disconnection. o Make sure that there are no loose connections, stray wires or exposed conductors. o Shielded cable should be used for RS-485 connections. Connect the shield to signal ground (SG) at meter-end only. o Do not use solvents or abrasive materials to clean the unit, use only a slightly damp cloth and isolate the unit from the supply before cleaning it. o To avoid accidents disconnect the auxiliary power supply before fixing or removing external plug-in Modules from the rear of the meter. o Care must be exercised during the installation of Elite 440 meter due to presence of mains voltages. Various points at the rear side operate at hazardous voltages. The organization is committed to continuous improvement in our products and upgrading the feature set. While we will endeavour to integrate new features seamlessly, there could be instances when the enhancement is not backward compatible. Please check with the company representative for compatibility check before upgrade on an existing product. Damage Preventing Measures: Before installation, carryout the following checks and note the maximum voltage and current across the input terminals (Please refer the decal pasted on the product): o The voltage of the auxiliary power should be in the range of 80-300 V AC/DC or 24-60 V DC. o The frequency of the distribution system should be 50/60 Hz ± 5%; o The maximum voltage across the voltage-input terminals (V1, V2, V3 and VN) is 300 V AC phase-toneutral. o A maximum current i.e I max on the current-input terminals (I1, I2 and I3) is 10 A Failure to comply with the above safety measures could cause serious injuries. If the meter is used in a manner not specified by the manufacturer, the protection provided by connections may be impaired. The manufacturer shall not be held responsible for failure to comply with the instructions in this manual. Public BGX501-728-R04, Elite 440 Technical Reference Manual Page 5 of 80 3 Overview Elite 440 series are multi-function panel meters with multi-line digital displays. These are panel mounted (96*96) meters capable of measuring and monitoring various electrical quantities as well as detecting fault conditions in LV/HV networks. These meters are an ideal replacement for analogue ammeter/voltmeter combinations and are suitable for sub-metering of distribution system in Industrial and Commercial applications. A single Elite 440 meter can replace several single-function panel meters thereby saving the time and cost of installation. Elite 440 meters are configurable for HV 3-phase 3-wire, HV 3-phase 4-wire or LV 3-phase 4-wire and have accuracy class of 1.0, 0.5s and 0.2s. Module Enclosure Elite 440 Meter Mounting Clamps Module Socket Plug Figure 1: Elite 440 Meter Parts These meters support external attachment of Modules to enhance their existing functionality or add extra features in to the meter. The Modules are replaceable and configurable at installation site and gives Elite 440 variants the flexibility to meet a broad range of applications. These Modules are optional and can be procured separately. The meter’s front panel has a large green backlit LCD (Liquid Crystal Display). When powered, the LCD is capable of displaying a group of related electrical parameter values together on a single page. For example, 3-phase voltage and average voltage can be displayed simultaneously on a single display page. The push buttons provided on the front panel can be used to navigate through various displays, switching to a different display mode or to perform specific actions at the meter-end such as MD reset. Elite 440 series of meters are pre-configured at the factory-end. Certain configurations can be modified at the installation site with the help of ConfigView Suite and/or the meter push buttons. Configurations done using ConfigView are saved in a configuration file with ‘.zip’ extension that can be downloaded in the meter locally via the RS-485 connector port. For this, it is important to know the Modbus ID and baud rate configured in the meter so that a communication link can be established between the computer and the meter. The meter has external detachable parts at the rear as shown in the above figure. These are described in the ‘Rear Panel’ section. 4 Features and Applications 4.1 Operational Features Elite 440 meters have the following operational features: o Measures and monitors instantaneous electrical parameters o Displays energy and instantaneous electrical parameter values o Configurable Favourite display sequence from ConfigView o Programmable CT-VT ratio Page 6 of 80 BGX501-728-R04, Elite 440 Technical Reference Manual Public o Connection check and self diagnostic facilities o Optional Modules to add extra features o MODBUS communication capability o Backlit LCD o Configurable calibration LED o Full scale accuracy: Class 0.2s, 0.5s, 1.0 o Panel mounted (96*96) These meters are useful for the following applications: o HV, MV and LV switch gear panels o Control and relay panels o Power Control Centre panels o Motor Control Centre panels o Energy management for buildings and industry o Sub-metering 4.2 4.2.1 Physical and Functional Features Front Panel The front face of Elite 440 has a large digital liquid crystal display (LCD), three push buttons and an LED at the front as shown in the following figure and described below: Figure 2: Elite 440 Front View th 1. Digital Display (LCD): The LCD is a 7-segment 7-digit four line display with the 4 position from left on st the 1 line being a 9-segment display (see the figure below). The LCD is green backlit with a large viewing area of 65 x 60 mm which when powered can display various measured basic electrical parameters such as voltage, current, frequency, power factor, phase angle, load and configured energy values. In addition, inside borders are reserved to display measuring units, display identifier, indicators, energy quadrant and percentage current bar graph as shown in the following figure. Public BGX501-728-R04, Elite 440 Technical Reference Manual Page 7 of 80 Figure 3: Elite 440 Display Details The display identifier at the top left-hand corner shows the parameter being displayed on the LCD at any point of time. The display identifiers signify the following: Display Identifiers Parameter U Voltage (V) L Line Current (A) I Active/Reactive Current (A) PF Power Factor P Active Power (kW) Q Reactive Power (kVAr) S Apparent Power (kVA) E Energy d Demand Table 1: Elite 440 Display Identifiers 2. Push Button Functions: The meter has three push buttons on the front, aligned in a row below the LCD. Each button has the following specific use in various operating modes: In Auto-Display In Manual or Favourite Mode Display Mode Press twice for switching to manual display mode. Navigate to next page In Setup Mode During Configuration Process Move selection arrow to next line Move cursor to next digit or value Press and hold for 5 seconds (long push) to freeze a display page i.e to stop the display from scrolling. Press the same button again for 5 seconds to unlock scrolling. Press twice for switching to manual display mode. Page 8 of 80 Navigate to previous page Move selection arrow to previous line Enter digits or values BGX501-728-R04, Elite 440 Technical Reference Manual Public In Auto-Display In Manual or Favourite Mode Display Mode In Setup Mode During Configuration Process Press and hold for 5 seconds (long push) to continuously lit the LCD backlight. Press the same button again for 5 seconds to light the LCD backlight with a timeout. If the LCD backlight remains lit constantly in auto-display mode, then press the ‘up’ or ‘down’ button once for switching to manual display mode. Access Setup Mode Access Setup Mode Select current option Confirm or save the entered digit or value Table 2: Push Button Functions 3. Calibration LED: Also referred to as Metrological LED, is the accuracy indicator on the meter front panel that can be configured to flash in proportion to the assigned energy. A single energy can be assigned to this LED. If no energy is configured (as in variant 441), then the LED will remain lit when the meter is powered up. 4.2.2 Rear Panel On the rear panel, these meters have voltage terminals, current terminals, an auxiliary power supply socket, an RS-485 communication socket and four mounting clamps as shown in the following figure. In addition, there are three separate sockets for fitting external Modules. Figure 4: Elite 440 Rear View 1. 6-pin Current Input Connector Socket Primary current range: Maximum 15000 A Secondary current range: 1 A to 5 A in steps of 1 The above current range is applicable for both HV and LV meters. 2. 4-pin Voltage Input Connector Socket V nominal for HV meters: 63.5 V phase to neutral and 110 V phase to phase V nominal for LV meters: 240 V Voltage range (-30% to +20%) Public BGX501-728-R04, Elite 440 Technical Reference Manual Page 9 of 80 3. Type A Module connected to Input-Output Module Socket The 14-pin female socket below the voltage input terminal is provided for attaching external I/O Modules. These Modules are optional and can be used to enhance or change the meter functionality. There are two I/O modules available each having different functions: o Two digital pulse outputs and two digital pulse inputs o Four 4-20 mA analogue outputs Pin Layout and connection details for two digital pulse inputs are shown below. Pin Layout and connection details for two digital pulse outputs are shown below. Pin Layout and connection details for four analogue outputs are shown below. Attaching or detaching these modules should be done only after disconnecting the auxiliary power supply. The replaced Module should be reconfigured for the meter to automatically detect the new module at the next power up. A knurled head screw provided with each module holds it with the meter base. 4. Module Socket Plug The socket plugs made of polycarbonate plastic are used to seal module sockets when not in use. Before attaching a module, remove these plugs with the help of a screw-driver. Please refer the instruction to remove the plug as embossed on the plug. Page 10 of 80 BGX501-728-R04, Elite 440 Technical Reference Manual Public 5. Auxiliary Power Supply Socket This 2-pin auxiliary power supply socket integrated at the rear panel is used for powering up the meter. There are two separate variants of Elite 440, each supporting different power supply voltage range: Voltage range: 80-300 V AC/DC or 24-60 V DC Frequency range for AC supply: 50/60 Hz ± 5% 6. Meter Communication Socket This is an RS-485 connector port used for communication with the meter over MODBUS protocol. Its baud rate is set to 9600 bps as the default speed of communication, for data transfer and configuration download, and can be configured up to 38400 bps from the meter’s Setup Mode (push buttons). 7. Mounting Clamps Four numbers mounting clamps on four corners are provided to hold the meter with the panel. These clamps slide in and out of the channels easily (see Figure 1 on page 6). 4.3 Functional Specifications Elite 440 series of meters are pre-configured at the factory-end. Certain configurations can be modified using the ConfigView Suite and/or with the help of meter push buttons. See Annexure-II on page 71 for configurable features. 4.3.1 Main Energy Registers Elite 440 variants measures, records and displays metered energy values for each configured main energy. The meter maintains current and historical energy registers separately for each assigned energy type. The following energy types are supported by these meters from which a combination of maximum 12 or 14 energy types can be assigned to the meter using ConfigView: Active Total Import Reactive Import when Active Import Active Total Export Reactive Export when Active Import Active Fundamental Import Reactive Import when Active Export Active Fundamental Export Apparent Import Reactive Export when Active Export and Apparent Export Or Active Forwarded Reactive Import Apparent Forwarded Reactive Export Reactive Lag Forwarded Reactive Lead Forwarded Table 3: Main Energy List Changing any of the main energy registers triggers a billing activity i.e. a snapshot of metered energy value for each of the configured energies will be stored in their respective historical registers. Configuration of main energy registers is not possible from the push buttons. Configuration of main energies using ConfigView In ConfigView window, select the meter name and then in Configuration sub-folder click Energy Definition. The list of configurable energies that the meter supports will appear as shown below: Public BGX501-728-R04, Elite 440 Technical Reference Manual Page 11 of 80 Figure 5: Configuring Energies with ConfigView 4.3.2 Maximum Demand Registers Elite 440 variants can maintain MD (Maximum Demand) registers for supported energy channels. Energy demands are monitored periodically at each configured DIP (Demand Integration Period) to record the maximum demand value of each energy type. DIP can be set to 15, 30 or 60 minutes. It supports fixed-window and sliding-window type demand computation. The meter maintains current and historical registers separately for each MD energy type, changing the MD energy registers triggers the meter to store the current MD value in historical MD register. Configuration of MD energy registers as well as selection of supporting parameters can be done using ConfigView. The meter’s Setup Mode can only be used to select MD parameters. The meter maintains two types of MD registers for each energy type: o Cumulative MD registers – stores historical information which is the summation of all MD values recorded up to previous day. The meter maintains separate cumulative MD registers for each MD energy type. o Universal MD registers – stores the maximum of daily (0-24 hrs) demand values recorded at each DIP. The meter maintains separate universal MD registers for each MD energy type. Configuration of MD energies using ConfigView In ConfigView window, select the meter name and then in Configuration sub-folder click Maximum Demand. You can select MD energy registers from the main energy list populated as shown below: Page 12 of 80 BGX501-728-R04, Elite 440 Technical Reference Manual Public Figure 6: Maximum Demand Configuration with ConfigView 4.3.3 Energy Snapshots Elite 440 records daily cumulative energy values at a predefined time as configured in the meter. Each energy type configured for daily energy snapshot will have separate cumulative registers that will hold data only from the previous day. With the help of ConfigView Suite, these energies can be selected from the configured main energies. In addition, you can select the time when the meter will take the energy snapshot. This feature is not configurable from the push buttons. Configuration of energy snapshots using ConfigView In ConfigView window, select the meter name and then in Configuration sub-folder click Energy Snapshots. You can select energy channels for snapshots from the main energy list populated as shown below: Figure 7: Energy Snapshot Configuration with ConfigView 4.3.4 Load Profile Load profile data comprises load consumption and instantaneous parameter values recorded by the meter at fixed intervals for predefined number of days. The number of days of load profile data that the meter can record depends on the SIP (Survey Integration Period) as well as the number of energies and instantaneous parameters configured in the meter. For example, Elite 440 meters can be configured to store 40 days of load profile data at 30 minutes SIP for a maximum of 6 parameters. The table below shows the number of days of Public BGX501-728-R04, Elite 440 Technical Reference Manual Page 13 of 80 load profile data that the meter can record for the various combination of logging interval and number of parameters. Number of logging channels Logging interval (min) 1 2 3 4 5 6 7 8 9 10 ............. 28 15 120 60 40 30 24 20 17 15 13 12 4 30 240 120 80 60 48 40 34 30 27 24 9 60 480 240 160 120 96 80 69 60 53 48 17 Load profile data stored for each instantaneous parameter is the average over a SIP. Load profile data logging energies, instantaneous parameters and SIP as desired by customers can be configured using ConfigView. It supports fixed-window and sliding-window type load profile. The meter’s Setup Mode (push buttons) can only be used to select load profile parameters such as survey window type and SIP. Load profile data logging energies can be selected from the main energies configured in the meter. In addition, the following instantaneous parameters can be selected for fixed load survey logging: o Phase-wise and average voltage o Phase-wise and average current o Phase-wise power factor o Frequency Additionally, two pulse count inputs can be assigned for load profile. In case of HV 3-phase 3-wire, phase 2 related instantaneous parameters will not be available for load profile logging. Configuration of load survey parameters using ConfigView In ConfigView window, select the meter name and then in the Configuration sub-folder click Load Profile. You can select energy channels for load profile from the main energy list populated as shown below: Figure 8: Load Profile Configuration with ConfigView Page 14 of 80 BGX501-728-R04, Elite 440 Technical Reference Manual Public 4.3.5 Billing Dates Elite 440 records snapshot of the measured energies on predefined billing dates. You can select a maximum of 12 billing dates. These dates are defined using ConfigView which can be loaded either at the factory-end or at the installation site through configuration file but cannot be downloaded into the meter over Modbus protocol. Snapshot of each energy type will have a separate billing register. Billing dates are not configurable from the meter’s Setup Mode (push buttons). Configuration of billing dates using ConfigView In ConfigView window, select the meter name and then in the Configuration sub-folder click Billing Dates. Figure 9: Bill Dates Configuration with ConfigView 4.3.6 Daylight Saving Time (DST) Definition Internal clock in Elite 440 meter variants are configured to display standard base time (GMT). These meters have DST feature that can be used to move the meter clock forward or backward by half-an hour or more to adjust the meter time where applicable. The date and time of change along with the offset time can be defined using ConfigView. You can set a maximum of 30 DSTs in the meter, 15 forward and 15 backward out of which st only the 1 two can be sent to the meter over Modbus protocol. DSTs are not configurable from the meter’s Setup Mode (push buttons) but are configurable from ConfigView. Configuration of DST definitions using ConfigView In ConfigView window, select the meter name and then in the Configuration sub-folder click DST Definitions. Figure 10: DST Configuration with ConfigView Public BGX501-728-R04, Elite 440 Technical Reference Manual Page 15 of 80 4.3.7 Maxima and Minima Elite 440 meter variants measure the following instantaneous parameters every second and record the maximum and minimum value for each. o Phase-wise voltage o Phase-wise current o Phase-wise absolute active power (kW) o Phase-wise absolute reactive power (kVAr) o Phase-wise absolute apparent power (kVA) o Frequency o Minimum power factor (Lead and Lag) All the above recorded values are configured to display on the meter LCD. The meter resets these recorded values daily. 4.3.8 Metrological LED Elite 440 variants have got one Metrological LED that can be set to flash at a rate proportion to the rate of consumption of the assigned energy. The energy can be assigned using ConfigView Suite or from the meter’s Setup Mode (Push buttons). You can assign a single energy by using the either method. The number of flashes over a period corresponds to the amount of energy registered by the meter. Configuration of Metrological LED using ConfigView In ConfigView window, select the meter name and then in the Configuration sub-folder click Metrological LED. Figure 11: Metrological LED Configuration with ConfigView Note: Energy must be defined before configuring Maximum Demand, Energy Snapshots, Load Survey and Metrological-LED. 4.4 Optional Plug-in Modules Elite 440 meter variants have an Input-Output Module socket (also referred as Slot 0) at the rear to which you can attach Type A Modules. This socket is located below the voltage terminals. There are two different I/O Modules available. Any authorised personnel can remove or replace these Modules at the installation site. Replacing a Module should be done only after disconnecting the auxiliary power supply. After attaching the Module when the power supply is switched on, the meter will automatically detect the attached Module. A replaced Module should be configured which can be done using ConfigView or from the meter’s Setup Mode. The Setup Mode may not support configuration of all the parameters of some of the Modules in which case these can be done using ConfigView. Page 16 of 80 BGX501-728-R04, Elite 440 Technical Reference Manual Public Figure 12: I/O Module 1. Two digital Pulse Inputs and Two digital Pulse Outputs Pulse inputs supports voltage range between 8-40 V DC. Minimum pulse input duration is 5 ms for I/P 1 and 40 ms for I/P 2. Pulse outputs are normally open type, have voltage rating of 230 V AC and current rating of 100 mA. Pulse output width is 80 ms or 240 ms. Configuration of 2 Pulse Inputs and 2 Pulse Outputs Module using ConfigView In ConfigView window, select the meter name and then in the Configuration sub-folder click Modules. Figure 13: 2 Pulse Input and 2 Pulse Output Module Configuration with ConfigView Note: • Energy must be defined before configuring pulse outputs. • When a module is replaced in a meter variant, it may be necessary to reconfigure certain parameters which can be done from the meter’s Setup Mode (push buttons) by an authorised user. 2. Four 4-20 mA Analogue Outputs This module is used as transducer where voltage, current and other instantaneous electrical parameters will be converted to industry standard of 4-20 mA. The module has 4 ports and a connector for external power supply that supports voltage rating of 24 V @ 200 mA. Maximum loop impedance is 750 ohms. The outputs are configurable using the ConfigView configuration tool and also from the meter’s Setup Mode. However, the percentage limits are configurable only using ConfigView. The following table elaborates the various parameters along with the supported range for each output: Public BGX501-728-R04, Elite 440 Technical Reference Manual Page 17 of 80 Instantaneous Parameters Supported Range Phase-wise Voltage 70 to 130% of V nominal Phase-wise Line Current 0 to 200% of I basic Powers (active, reactive and apparent) 0 to 250% of P nominal (where, P nominal = sqrt(3) x V nominal x I basic V nominal = Primary Line Voltage I basic = Primary Line Current (CT primary current)) Frequency 90 to 110% of 50 Hz / 60 Hz Power Factor 0.0 Lag - Unity - 0.0 Lead Average Voltage 70 to 130% of V nominal Average Line Current 0 to 200% of I basic Table 4: Range for Output Parameters If the output parameter is configured using meter’s Setup Mode (push button) then the percentage limits will be set to default values. The following table elaborates the various parameters along with the default upper and lower limits for each output: Instantaneous Parameters 4 mA Output 20 mA Output Phase-wise Voltage 90% of V nominal 110% of V nominal Phase-wise Line Current 50% of I basic 100% of I basic Powers (active, reactive and apparent) 50% of P nominal 110% of P nominal (where, P nominal = sqrt(3) x V nominal x I basic V nominal = Primary Line Voltage I basic = Primary Line Current (CT primary current)) Frequency 90% of 50 Hz / 60 Hz 110% of 50 Hz / 60 Hz Power Factor 0.5 Lag 0.5 Lead Average Voltage 90% of V nominal 110% of V nominal Average Line Current 50% of I basic 100% of I basic Table 5: Default Upper and Lower Limits for Output Parameters Page 18 of 80 BGX501-728-R04, Elite 440 Technical Reference Manual Public Configuration of Four Analogue Outputs Module using ConfigView In ConfigView window, select the meter name and then in the Configuration sub-folder click Modules. Figure 14: Analogue Output Module Configuration with ConfigView Note: When a module is replaced in a meter variant, it may be necessary to reconfigure certain parameters which can be done from the meter Setup Mode by an authorised user. 5 Meter Operation Operating the meter is necessary for the following purpose: a. Changing the meter display mode and navigating through the display pages in Manual and Favourite display mode. b. Updating configuration or changing password from the Setup Mode (push buttons). c. Resetting Maximum Demand. d. Activating the Manual or Favourite display scroll-lock feature. 5.1 Changing the Meter Display Mode By default, the meter display is configured to cycle through a sequence of preset Auto-cycle display pages at predefined intervals (5 seconds to 2 minutes as configured in the meter using ConfigView). This default mode can be switched to the Manual display mode in which you can navigate through the pages by using the ‘up or ‘down’ push buttons. The Manual display mode is the alternative active mode which you can replace with Favourite display mode by selecting ‘Fav On’ from the Setup Mode. 5.2 Favourite Display Mode Favourite mode is a special display mode in which the desired display pages are selected and grouped together for quick viewing. In this mode you can select a maximum of 20 display pages and configure their display sequence using ConfigView, which can be sent to the meter either through configuration file or over Modbus Public BGX501-728-R04, Elite 440 Technical Reference Manual Page 19 of 80 protocol. The favourite mode display sequence will be maintained only if it downloaded into the meter through configuration file. Displays in Favourite mode can be customised in ConfigView but the same cannot be done using the meter push buttons. The meter push buttons can be used only to switch between the Favourite display ‘On’ or ‘Off’ mode. When Favourite display is turned off, the Manual display becomes the alternative active display mode. As in Manual mode you can also navigate through the various Favourite mode displays by using the ‘up or ‘down’ push buttons. Display from the Auto-cycle mode can be switched to the Manual or Favourite (whichever is active) mode by pressing either the ‘up or ‘down’ push buttons twice. 5.2.1 Setting Favourite Display On or Off From the default display mode press to access the Setup Mode, then use button to move to ‘Fav On’ or ‘Fav Off’. When selection bar ‘ ’ is on ‘Fav On’ or ‘Fav Off’ menu as shown in the figure press to select it. This will trigger the favourite display mode to either On or Off depending upon the current display in operation. If favourite display is Off then select ‘Fav On’ to set it On and if it is On then select ‘Fav Off’ to set it Off, this is a toggle option. 5.3 Using the Setup Mode The Setup Mode can be used to configure the following parameters with the help of push buttons: o MD Reset o Setting the meter type as 3-phase 3-wire or 3-phase 4-wire o CT-VT commissioning o Input-Output Modules o MODBUS ID and MODBUS baud rate o Maximum Demand o Load Profile o Number of Poles on motor for RPM measurement o Metrological LED o Changing the password to access the Setup mode All the above configurations are also possible using ConfigView Suite. The Setup Mode is password protected which can be accessed only by users authorized to change the above configurations. Page 20 of 80 BGX501-728-R04, Elite 440 Technical Reference Manual Public 5.3.1 Password Entry The following steps will guide you to access the Setup Menu: 1. From the default display mode, simply press button once to access the following Setup Mode page. ’ is on the ‘Set Up’ option, press button to 2. In the above display page, when the selection bar ‘ confirm the selection of Setup Menu. This will give access to the following password entry prompt screen: 3. At the password prompt enter the 4-digit password (default password is ‘1234’) using and buttons. st After completing the entry, press button to confirm. Correct password gives access to the 1 page of configuration mode, see figure (i). An incorrect password will display ‘Incorrect’ message as shown in figure (ii). (i) Display after correct password entry (ii) Display after incorrect password entry In case you have entered incorrect password, the display will automatically return to the Setup Mode page (as shown in step 1) in 5 seconds or alternatively, press button to return to Setup Mode immediately. Note: After seven unsuccessful attempts, you won’t be able to try again until the next day. If you forget the password, contact concerned sales person or Secure technical team for resetting the password. Public BGX501-728-R04, Elite 440 Technical Reference Manual Page 21 of 80 5.3.2 Page Navigation within the Setup Mode The Setup Mode has the following sequence of configurable menus through which you can navigate using the push buttons: Glossary - Setup Mode Configuration Headers MD Reset Commissioning I/O Module Communication Demand Load Profile Poles Metrological LED Change Password Quit Setup Mode Menu Table 6: Meter Setup Mode Menu Use button for navigation through the above display sequence and button to select a configuration ’ will appear on the selected configuration menu. menu, a selection bar ‘ When you select ‘Quit’ from any of the configuration page, the display returns to its immediate parent page. For st example, when you select ‘Quit’ from the ‘Commissioning’ configuration page, the display returns to the 1 page of Setup Menu as shown below: When you select ‘Quit’ from the Setup Menu, the display returns to the main Setup Mode as shown below: Page 22 of 80 BGX501-728-R04, Elite 440 Technical Reference Manual Public 5.4 Configurations from the Meter’s Setup Menu Note: No footer displays (shown in any of the displays) will appear during the configuration process. To configure available parameters from the Setup Menu, use the three push buttons as specified below: To move the selection arrow to next line or move the cursor to the right while entering a digit or value. To move the selection bar to previous line or to enter a digit or value at the cursor position. To select the option at the cursor position or confirm and save the entered value. No push button activity within 120 seconds (2 minutes) during the configuration process will exit the Setup Mode to resume the default auto-cycle display mode. During configuration from Setup menu the following confirmation messages will appear for 5 seconds before returning to their parent menu: Save done No action No change Favourite On success Favourite Off success MD Reset done 5.4.1 MD Reset Maximum demand resets automatically on changing certain configurations or on preset billing dates. It can also be reset manually by authorised users either from the Meter Setup Mode (push buttons) or through Modbus commands such as raising a billing request. MD resets automatically due to one of the following reasons: o on predefined billing dates o on changing certain configurations in the meter such as energy or MD registers, DIP, demand window type, commissioning. o on tariff download o on meter type change The following changes takes place with each MD reset: o The universal MD register that records each day’s maximum demand, is added to cumulative MD register o Historical data is generated – current values of each assigned energy registers and MD registers are copied in the meter’s historical register and thereafter the current value of MD register is added to the cumulative MD register before the MD value resets. The meter maintains a record of 6 recent historical data for each energy register and supports up to 12 billing dates. Manual resetting of MD from the Meter’s Setup Mode st st This is the 1 option on the 1 page of Setup Menu. To select it, press . When the selection bar is on ‘MD Reset’, press to reset the MD. To return back to the first page of Setup Menu, move the selection bar on ‘Quit’ and press . Public BGX501-728-R04, Elite 440 Technical Reference Manual Page 23 of 80 The ‘MD Reset done’ message confirms that all maximum demand register values are successfully reset to zero. Press or wait for 5 seconds to return to the previous display. 5.4.2 Meter Type and CT-VT Commissioning nd st This is the 2 option on the 1 page of Setup Menu. The commissioning option can be used to configure the following parameter values: a. Meter type selection - HV3, HV4, LV4 b. Primary Voltage and Current rating c. Secondary Voltage and Current rating To select this option, move selection bar on ‘Commissioning’ option and then press will appear: . The following display Meter Type Configuration – HV3, HV4, LV4 st This is the 1 option on ‘Commissioning’ page. To select it, press The following display page will appear: . With the help of left/right button select the meter type and then press to confirm the selection. Primary Voltage Configuration nd This is the 2 option on ‘Commissioning’ page. To select it, move the selection bar on ‘Pt Primary’ option and then press . The display page shown on the left appears. Enter the desired value from the following to confirm and save the selection. permissible range and then press Applicable range : 100 V to 765 kV (not applicable for LV meters) Page 24 of 80 BGX501-728-R04, Elite 440 Technical Reference Manual Public Primary Current Configuration rd This is the 3 option on ‘Commissioning’ page. To select it, move the selection bar on ‘Ct Primary’ option and then press . The display page shown on the left appears. Enter the desired value from the following to confirm and save the selection. permissible range and then press Applicable range : 1 A to 15000 A Secondary Voltage Configuration This is the 4th option on ‘Commissioning’ page. To select it, move the selection bar on ‘Pt Secondary’ option and then press . The display page shown on the left appears. Enter the desired value from the to confirm and save the following permissible range and then press selection. Applicable range for HV meters: 100 V to 130 V (Phase to Phase) Applicable range for LV meters: 210 V to 250 V (-30% to +20%) (Phase to Neutral) Secondary Current Configuration This is the 5th option on ‘Commissioning’ page. To select it, move the selection bar on ‘Ct Secondary’ option and then press . The display page shown on the left appears. Enter the desired value from the to confirm and save the following permissible range and then press selection. Applicable range: 1 A to 5 A in steps of 1 Once all necessary configurations are updated, select the ‘Save’ option and press . This activates the new configuration in the meter. The ‘Save done’ message indicates that the activation is successful. However, ‘No Change’ message will appear if the changes are not implemented in the meter. To return to the ‘Commissioning’ page, press again or wait for 5 seconds. To exit the Commissioning page and return to the Setup menu, move the selection bar over ‘Quit’ as shown on the left and then press button. Public BGX501-728-R04, Elite 440 Technical Reference Manual Page 25 of 80 5.4.3 Input-Output Module configuration rd st This is the 3 option on the 1 page of Setup Menu. The ‘I-O Module’ option can be used to configure parameter values of the I/O Module attached to the meter. To select it, move selection bar to ‘I-O Module’ option and then press . The following display will appear: No I/O Module connected If no I/O module is attached to ‘Type A’ module socket of the meter then the display shown on the left will appear which indicates ‘Input-Output Module’ socket is empty. 2 Pulse Output and 2 Pulse Input Module Configuration The page shown on the left displays the configurable parameters for two digital pulse outputs and two digital pulse inputs module. Move the selection button. The display bar to the parameter to be configured and press headers implies the following: “P1 Energy”: Assign ‘Energy’ for pulse output 1 “P1 Weight”: Assign ‘Weight’ for pulse output 1 “P1 Width”: Assign ‘Pulse Width’ for pulse output 1 “P2 Energy”: Assign ‘Energy’ for pulse output 2 “P2 Weight”: Assign ‘Weight’ for pulse output 2 “P2 Width”: Assign ‘Pulse Width’ for pulse output 2 “P1 Input”: Assign ‘Pulse Input 1’ start type “P2 Input”: Assign ‘Pulse Input 2’ start type Energy for pulse outputs P1 and P2 can be configured from the range of energies supported by the meter; See Glossary of Energy Types for display representation of all the energy types Configuration range for pulse outputs P1 and P2 Weight depends on the CTPT ratio commissioned in the meter; Configuration range for pulse outputs P1 and P2 Width is 80 ms or 240 ms Pulse inputs P1 and P2 start type can be configured as either ‘Start from zero’ or ‘Start from current state’. To exit the ‘I-O Module’ page and return to the Setup menu, move the selection bar over the ‘Quit’ option as shown in the figure on the left and button. then press Page 26 of 80 BGX501-728-R04, Elite 440 Technical Reference Manual Public At the end of configuration updates, select the ‘Save’ option to activate the above new configurations in the meter. To return to the ‘I-O Module’ page, press or wait for 5 seconds. Four 4-20 mA Analogue Output Module The page shown on the left displays the four configurable Analogue Output channels. Each channel can be assigned with any of the following parameters: o o o o o o o Phase-wise voltage Phase-wise Line current Powers (active, reactive and apparent) Frequency Power Factor Average Voltage Average Line Current To assign a parameter to a channel, move the selection bar on the channel button. and then press To exit the ‘I-O Module’ page and return to the Setup menu, move the selection bar over the ‘Quit’ option as shown in the figure on the left and then press button. At the end of configuration updates, select the ‘Save’ option to activate the above new configurations in the meter. To return to the ‘I-O Module’ page, press 5.4.4 or wait for 5 seconds. MODBUS Communication Configuration th st This is the 4 option on the 1 page of Setup Menu. The ‘Communication’ option can be used to configure the baud rate and the MODBUS identification number. To select it, move selection bar to ‘COMM’ option and then press . The page shown in the following figure will appear: Public BGX501-728-R04, Elite 440 Technical Reference Manual Page 27 of 80 Baud Rate st This is the 1 option on ‘Communication’ page. When the selection arrow is on ‘BD RATE’, press to access the next page for entering the baud rate. To exit the ‘COMM’ page and return to the Setup menu, move the selection bar over the ‘Quit’ option and then press button. With the help of left/right button select the baud rate from the below specified range and then press to confirm the selection. Configurable baud rates: 1200, 2400, 4800, 9600, 19200, 38400 bps MODBUS ID nd This is the 2 option on ‘Communication’ page. To select it, move the selection arrow on ‘MODBUS ID’ option and then press . The display page shown on the left appears. Enter the desired ID from the following to confirm and save the selection. permissible range and then press Configurable MODBUS ID range is 1 to 247. At the end of configuration updates, select the ‘Save’ option to activate the above new configurations in the meter. To return to the previous page, press Page 28 of 80 or wait for 5 seconds. BGX501-728-R04, Elite 440 Technical Reference Manual Public 5.4.5 Maximum Demand Configuration st This can be configured using the ‘demand’ option which is the 1 option on the 2 ‘demand’ option can be used to configure the following parameters: a. Demand Integration Period b. Demand window type c. Demand width nd page of Setup Menu. The To select the ‘demand’ option, move selection bar to ‘demand’ option and then press the following figure will appear: . The page shown in DIP (Demand Integration Period) st This is the 1 option on ‘demand’ page. When the selection arrow is on ‘DIP’, press to access the next page for entering the DIP value. To exit the ‘demand’ page and return to the Setup menu, move the selection arrow over the ‘Quit’ option and then press button. With the help of left/right button select a demand integration period from the below specified range and then press to confirm the selection. Configurable DIP range: 15, 30, 60 minutes Demand Window Type – Fixed or Sliding nd This is the 2 option on ‘demand’ page. To select it, move the selection arrow on ‘Sliding Width’ option and then press . The display page shown on the left appears with two window type options – ‘Sliding’ and ‘blocked’. For Sliding window type, enter the Sliding width from the following permissible range and then press to confirm and save the selection. Sliding width for DIP value 15 is 5 Sliding width range for DIP value 30 = 05, 10, 15 Sliding width range for DIP value 60 = 05, 10, 15, 20, 30 Public BGX501-728-R04, Elite 440 Technical Reference Manual Page 29 of 80 At the end of configuration updates, select the ‘Save’ option to activate the above new configurations in the meter. To return to the previous page, press 5.4.6 or wait for 5 seconds. Load Profile Configuration nd This can be configured using the ‘Profile’ option which is the 2 option on the 2 ‘Profile’ option can be used to configure the following parameters: a. Survey Integration Period b. Survey window type c. Survey width nd page of Setup Menu. The To select the ‘Profile’ option, move selection bar to ‘Profile’ option and then press following figure will appear: . The page shown in the SIP (Survey Integration Period) st This is the 1 option on ‘Profile’ page. When the selection arrow is on ‘SIP’, press to access the next page for entering SIP value. To exit the ‘Profile’ page and return to the Setup menu, move the selection arrow over the ‘Quit’ option and then press button. With the help of left/right button select a survey integration period from the below specified range and then press to confirm the selection. Configurable SIP range: 15, 30, 60 minutes Page 30 of 80 BGX501-728-R04, Elite 440 Technical Reference Manual Public Survey Window Type – Fixed or Sliding nd This is the 2 option on ‘Profile’ page. To select it, move the selection arrow on ‘Sliding Width’ option and then press . The display page shown on the left appears with two window type options – ‘Sliding’ and ‘blocked’. For Sliding window type, enter the Sliding width from the following permissible range and then press to confirm and save the selection. Sliding width for DIP value 15 is 5; Sliding width range for DIP value 30 = 05, 10, 15; Sliding width range for DIP value 60 = 05, 10, 15, 20, 30. At the end of configuration updates, select the ‘Save’ option to activate the above new configurations in the meter. or wait for 5 seconds. To return to the previous page, press 5.4.7 Poles Configuration rd nd st rd This is the 3 option on the 2 page of Setup Menu or the 1 option on the 3 page of Setup Menu. The option ‘POLES’ can be used to configure the number of poles for measuring RPM of the motor. This depends on the frequency of the supply. To select it, move selection bar to ‘POLES’ option and then press . The page shown in the following figure will appear: When the selection arrow is on ‘POLES’, press for entering the pole number. to access the next page To return back to the first page of Setup Menu, move the selection arrow on ‘Quit’ and then press . Public BGX501-728-R04, Elite 440 Technical Reference Manual Page 31 of 80 With the help of left and right buttons select a number from the following specified range and then press to confirm the selection. Use the left button to enter the digit at the cursor position, use the right button to move the cursor to the next position on the right. This number will be used to calculate the RPM of the motor. Configurable number range: 2 to 48 (in steps of 2) At the end of configuration updates, select the ‘Save’ option to activate the above new configurations in the meter. To return to the previous page, press 5.4.8 or wait for 5 seconds. Metrological LED Configuration th nd nd This can be configured using the ‘M-LED’ option which is the 4 option on the 2 page of Setup Menu or the 2 rd option on the 3 page of Setup Menu (see page 20). The ‘M-LED’ option is used to assign a single energy for Metrological LED flashing, at a rate proportional to the rate of consumption. The number of flashes over a period corresponds to the amount of energy registered by the meter. To select it move selection bar to ‘M-LED’ option . The page shown in the following figure will appear: and then press Metrological LED When the selection arrow is on ‘M-LED’, press for assigning energy. to access the next page To return back to the first page of Setup Menu, move the selection arrow on ‘Quit’ and then press . Page 32 of 80 BGX501-728-R04, Elite 440 Technical Reference Manual Public Use the left/right button to scroll through the main energies configured in the meter. Press to select the energy. See Glossary of Energy Types for display representation of all the energy types. After assigning the energy select the ‘Save’ option to activate new configurations in the meter. To return to the previous page, press 5.4.9 or wait for 5 seconds. Changing the Setup Mode Password The Setup Mode password is a 4-digit integer ranging from 0000 to 9999. The default factory setting is ‘1234’ that can be reprogrammed from the setup mode using the meter push buttons. The password can be changed rd rd using the ‘CHNG PAS’ option which is the 3 option on the 3 page of Setup Menu (see page 20). To select it, move selection bar to ‘CHNG PAS’ option and then press . The following display page will appear: When the selection arrow is on ‘CHNG PAS’, press page for entering a new password. to access the next To return back to the first page of Setup Menu, move the selection arrow on ‘Quit’ and then press . Public BGX501-728-R04, Elite 440 Technical Reference Manual Page 33 of 80 Use the left button to enter a digit at the cursor position, use the right button to move the cursor to the next position on the right. Repeat this until you to save the new have entered all the four digits and then press password. The message ‘CHG-PAS SUCCESS’ will appear if the password change is successful. To return to the previous page, press . Important: It is a good practice to note down the new password in a safe and secured place to access the set up mode next time as the default password becomes invalid after it has been reprogrammed. In configuration mode, the ‘No Action’ message on the display indicates that a parameter is not available for configuration. In configuration mode, the ‘No Change’ message on the display indicates that the new configurations are not activated in the meter yet. 5.4.10 Exit Setup Mode The meter display will automatically exit the Setup mode and resume the default auto-cycle display mode if no buttons are pressed within 120 seconds (2 minutes). Alternatively, you can select ‘Quit’ from the Setup Mode as shown below: Page 34 of 80 BGX501-728-R04, Elite 440 Technical Reference Manual Public 6 Meter Displays 6.1 Normal Displays A powered meter displays logically grouped multiple parameter information in four separate lines on its multi-line backlit LCD. In addition, the footer on display pages indicates the status of active energy quadrants, % current graph with respect to I max and phase-wise line currents as shown below: Figure 15: Elite 440 Footer Displays The meter has three display modes - Auto, Manual, and Favourite. By default, Auto-cycle and Manual display modes are active. Auto-cycle display pages advance sequentially to the next page in every 5 seconds to 2 minutes (as configured in the meter). After completing one full cycle through the sequence, there will be a delay of 5 seconds to 2 minutes (as configured in the meter) before the display resumes from the beginning. These timeout periods are configurable either at the factory-end or at the installation site through configuration file. To switch to the Manual Mode, press the ‘up’ or ‘down’ button twice. In Manual display mode you can use the ‘up’ or ‘down’ push buttons to navigate through the pages. The Manual display mode can be replaced with Favourite display mode from the Setup mode (see section 5.2.1 on page 20 for setting Favourite display mode On). No push button activity for 5 seconds to 2 minutes (as configured in the meter) in Manual or Favourite display mode returns the display to Auto-cycle mode. The footer displays shown in the figure above are mandatory information that will be available on every display page as per the load condition except in Setup Mode and fault condition displays when these footer displays will appear greyed out. To continuously lit the LCD backlight, press and hold the left-hand (up) button for five seconds (long push), the LCD backlight will now remain lit constantly. To light the LCD backlight with a timeout, press the same button again for five seconds. If the LCD backlight remains lit constantly in auto-cycle mode then press the ‘up’ or ‘down’ button once to switch to the Manual mode. The manual display pages have the scroll lock feature that gives the flexibility to freeze a display page i.e. to stop the display from scrolling. Public BGX501-728-R04, Elite 440 Technical Reference Manual Page 35 of 80 Display scroll-lock feature This feature allows you to use the meter’s push button to stop the display from scrolling to the next display in the sequence. To activate the scroll-lock feature, press and hold the right-hand (down) button for five seconds (long push), the locked page will now appear constantly. To unlock scrolling, press the same button again for five seconds or until the first display of the sequence appears. Figure 16: Elite 440 Display Scroll-lock In display locked state, you can view the manual display pages with the help of meter push buttons. At the end of each display timeout period (the length for which a page appears), the page will return to its locked display page. If there is a power failure, the display goes off; on restoration of power, the display will return to its locked display page. Scroll lock will be disabled on enabling the Favourite display mode. Display pages for all the three modes are configurable using ConfigView Suite but display configurations for only favourite mode can be sent to the meter over Modbus protocol. Refer to Annexure-I on page 50 for list of supported displays that can be configured in the meter. Page 36 of 80 BGX501-728-R04, Elite 440 Technical Reference Manual Public Configuration of LCD Displays using ConfigView In ConfigView window, select the meter name and then in the Configuration sub-folder click Display. Figure 17: Meter Display Configuration with ConfigView 6.2 Fault Condition Displays Elite 440 continuously monitor voltage, current and phase angle for each phase. When the meter is powered, a ‘test pattern’ will appear as the first display to verify that all display segments are working properly. It is then followed by the default auto-displays configured in the meter. Any faults detected during the meter’s normal operation will appear instantly on its LCD. The fault message if not rectified or acknowledged (by using the meter push buttons) within 5 minutes will resume the display to its default auto-display cycle. If multiple faults occur simultaneously or within 5 minutes of another fault then the latest fault event message will be displayed. The default auto-display cycle can be resumed by acknowledging only the currently displayed message. The meter can detect the following types of fault: o phase-wise missing voltage o phase-wise reverse current o invalid, low or over voltage o low power factor o over or under load o voltage unbalance o current imbalance o configured module card unplugged o invalid phase association The various fault condition messages are described below as they appear on the meter LCD in the event of such faults. Public BGX501-728-R04, Elite 440 Technical Reference Manual Page 37 of 80 Missing potential is detected if phase voltage is below the threshold percentage of nominal voltage where the respective line current is above the threshold percentage of I basic . Potential missing in phase 1 and 2. This message indicates that the voltage in phase 1 and 2 are lower than their threshold limit. Reverse current is detected if CT is connected with incorrect polarity (current direction) in any of the 3 phases. This test is not performed if the current is below 5% of the rated value. In case of import-export meter (variants from 445 to 448), CT reversal will not be logged if all the CTs are reversed. If a CT reversal already exists in the meter then it will be restored if all the CTs are reversed. But in case of import only meter (variants from 442 to 444), CT reversal will be logged if all the CTs are reversed. The display message indicates that the CT in phase 1 and 2 is connected with incorrect polarity. Invalid voltage order is detected if the phase angle between any two 0 connected phases is outside ±10 limits or phase angle incorrect if all phase voltages are more than 60% of nominal values. The display message indicates invalid voltage order. Invalid phase association is detected if the phase sequence of current and voltage is not the same. The display message indicates invalid phase association. Low power factor is detected if the average power factor is less than 0.5. The display message indicates low power factor. Page 38 of 80 BGX501-728-R04, Elite 440 Technical Reference Manual Public Over voltage is detected if any of the connected voltages exceeds 110% of the nominal value (V nominal ). The display message indicates over voltage. Low voltage is detected if any of the connected voltages is less than 70% of the nominal value (V nominal ). The display message indicates low voltage. Over load is detected if power (kVA) consumption exceeds the configured power (kVA) rating. The display message indicates over load. Under load is detected if power (kVA) consumption is less than the configured power (kVA) rating. The display message indicates under load. Voltage unbalance is detected if the difference between any phase voltage and three phase average voltage is above a specified threshold percentage of average voltage. The display message indicates voltage unbalance. Public BGX501-728-R04, Elite 440 Technical Reference Manual Page 39 of 80 Current unbalance is detected if the difference between any phase line current and maximum line current out of all three phases is above a specified threshold percentage of I basic . The display message indicates current imbalance. An event is logged during next power up either when a configured module card is unplugged from the meter or when a configured module card is not attached to the meter. The display message indicates the configured module card is unplugged from the meter. 7 Communication Elite 440 meter variants can be interrogated over Modbus protocol for collecting energy and instantaneous electrical parameter values via ConfigView. In addition, certain configurations can be updated in the meter using ConfigView. For this purpose an RS-485 port is provided on the rear panel of these meters which can be used to communicate with the computer COM port and ConfigView via any RS-232 to RS-485 converter. Up to 32 meters can be connected in a RS485 network. The default communication speed is 9600 bps which can be set to 38400 bps for faster communication. Each Elite 440 meter will have a separate Modbus ID which is used by the software for communication and identification. The communication port can be used for performing the following tasks: a. Reading and updating meter Configuration b. Reading meter information c. Reading basic electrical parameters d. Reading current and historical energy values e. Changing CT-VT ratio in the meter f. Adjusting meter time g. Resetting MD (Maximum Demand) Figure 18: Meter Communication via RS232-RS485 Converter To setup the communication link from ConfigView, use the ‘Communication Settings’ button as shown below: Page 40 of 80 BGX501-728-R04, Elite 440 Technical Reference Manual Public Figure 19: Meter Connection Setting Window in ConfigView For establishing connection with the meter using ConfigView, it is important to know the Modbus ID and baud rate of the meter you are connecting to. The meter Modbus ID is also configurable using ConfigView. ConfigView for Configuring Meter Modbus Id In ConfigView window, select the meter name and then in the Actions sub-folder click Modbus Communication. Figure 19: Modbus Communication Configuration with ConfigView After establishing link with the meter, the following information and parameter values can be read from the meter: o Meter type o Phase-wise and average power factors o Program name o Phase-wise and total active powers o Meter Sr. No. o Phase-wise and total reactive powers o Meter time and date o Phase-wise and total apparent powers o Phase-to-phase, phase-to-neutral and average voltages o Frequency o Phase Angles (Phase-to-Phase) o Phase-wise and neutral line currents o Cumulative MD historical values o Phase-wise active currents o All supported energy values o Phase-wise reactive currents Public BGX501-728-R04, Elite 440 Technical Reference Manual Page 41 of 80 o All supported historical energy values o Cumulative load on-off time histories o Historical values (billing) generation dates o Previous day’s energy snapshot for all selected energies o MD values with date and time stamp for all supported energies o Load profile o Current and last occurred events o MD historical values with date and time stamp for all supported energies o Maximum and Minimum parameter values o Cumulative power on-off time o Metrological LED pulse rate o Cumulative load on-off time o Percentage total harmonic distortion in o Cumulative power on-off time histories st each phase (up to 31 harmonics) 8 Technical Specification Electrical Wiring configuration Common product for 3-phase 3-wire and 3-phase 4-wire application Voltage range Measurement voltage range* 57.7-300 V AC (L-N) Aux power supply range 80-300 V AC/DC or 24-60 V DC Current range Basic current (I basic ) 1 to 5 A in steps of 1 Maximum current (I max ) 200% of I basic Short Time Over Current 20% of I max for 0.5 sec Frequency 50/60 Hz ± 5% Accuracy Class** 0.2s, 0.5s, 1 Burden Auxiliary power supply** 1.5 W and 3.5 VA (without module) Max 4 W and 8 VA (with module) Current circuit 1 VA Voltage circuit 0.5 W and 1 VA Approvals Standard IEC61010-1, IS14697, IEC62053 Mechanical 96 x 96 x 70 mm (without module) Dimension (W x H x D) 96 x 96 x 115 mm (with module) Cut-out size 92 x 92 mm + 0.5 mm LCD size 65 x 60 mm Weight (without module) 0.4 kg ± 0.1 kg I/O Module Weight 0.05 kg Page 42 of 80 BGX501-728-R04, Elite 440 Technical Reference Manual Public Enclosure Polycarbonate Module attachment Using knurled screws by applying torque of 1.2 Nm Terminals Combicon connector Conductor size 2 to 2.5 mm 2 Environmental Ingress protection IP52 (front fascia); IP20 (at terminals) Insulation 4 kV RMS 50 Hz Impulse withstand 6 kV 0 0 0 0 -20 C to + 60 C (operating) Temperature -25 C to + 80 C (storage) Humidity 95% non-condensing Communication Communication Port RS485, 3 wires, half duplex Communication link Modbus RTU, data response time 1 sec Baud rate 1200 bps to 38400 bps Data pattern Word length 8, Parity Null, Stop bits 1 Optional External Plug-in Module voltage rating 230 V AC Two digital Pulse Input Two digital Pulse Output current rating 100 mA input voltage range 8-40 V DC voltage rating 20-40 V DC Four 4-20 mA Analogue Output current rating 200 mA @ 24 V DC maximum loop impedance 750 ohms *With respect to reference voltage V nominal **According to variant 9 List of Configurable Features and Parameters Elite 440 meters offer the flexibility to change certain configuration in the meter at client’s end to suit their requirement. Although the meter comes with all pre-set default parameter values, it may be necessary to change certain configurable parameters to match the installation type and meet customer’s requirements. Configuration of various features or parameters supported in Elite 440 meters can be modified using the following three methods: o With meter push buttons from the Setup mode (refer to section 5.4 on page 23) o Modbus commands o Using the ConfigView Suite The following table gives a list of configurable features and parameters along with the possible options that can be used to change a configuration: Public BGX501-728-R04, Elite 440 Technical Reference Manual Page 43 of 80 Modbus Configuration Command file (ConfigView (ConfigView Suite) Suite) Factory Configuration Meter Push Buttons MD Reset Yes Yes Yes Yes (if related parameter is changed) 3-phase 3-wire or 3-phase 4-wire selection Yes Yes Yes Yes CT-VT Commissioning Yes Yes Yes Yes Modbus ID No Yes Yes No Modbus baud rate No Yes No No MD register Yes No Yes Yes Demand Integration Period Yes Yes Yes Yes Sliding or Blocked window selection for demand logging Yes Yes Yes Yes Pulse output parameter selection Yes Yes Yes Yes Pulse input selection Yes Yes Yes Yes Pulse output width and weight selection Yes Yes Yes Yes 4-20 mA analogue output parameter selection Yes Yes Yes Yes 4-20 mA analogue output parameter limit selection Yes No Yes Yes Load profile parameter selection Yes No Yes Yes Load profile integration period selection No Yes Yes Yes Billing Dates selection Yes No No Yes Display pages selection Yes No Yes Yes Favourite pages selection Yes No Yes Yes Metrological LED Energy configuration Yes Yes Yes Yes Selection of Main energy registers Yes No Selecting parameters for daily energy snapshots Yes No Yes Yes Daily energy snapshot time Yes No Yes Yes Daylight Saving Time Yes No Yes Yes Configurable Features and Parameters Page 44 of 80 Yes (limited Yes (limited as as per factory per factory configuration) configuration) BGX501-728-R04, Elite 440 Technical Reference Manual Public 10 Meter Dimensions Front View Rear View Side View (without module) Side View (with module) Note: 1. All dimensions are in mm 2. General tolerance ±1.0 mm Public BGX501-728-R04, Elite 440 Technical Reference Manual Page 45 of 80 11 Installation and Commissioning The meter should be installed by trained personnel. In addition to the safety precautions recommended in this manual, local best practice and regulatory stipulations should be always followed during the installation and commissioning process. 11.1 Connection Diagram By default, Elite 440 meter is configured as a 3-phase 4-wire application, it can also be configured as a 3-phase 3-wire application. Things to check for, when Elite 440 meter is used as a 3-phase 3-wire application: 1. Connection for 3-phase 3-wire should be done as directed on the decal pasted on the top of the meter or Quick Start Guide. 2. Select appropriate Meter Type from meter’s Setup Mode. Note: One side of the CT secondary wiring should be earthed. The diagram shows ‘S1’ side earthed, but it is permissible to ground the ‘S2’ side instead, according to local practice. Page 46 of 80 BGX501-728-R04, Elite 440 Technical Reference Manual Public 11.2 Mounting the Meter on the Panel Prepare Panel, remove four clamps from the rear of the meter and then insert the meter in the panel. 11.3 Attaching External I/O Module External I/O Module can be easily fitted in the I/O Module socket (Type A Module socket) present at the rear of the meter below the voltage terminal. Simply plug-in a module in the socket and turn the knurled screw provided with the module to hold it with the meter. Before attaching or detaching a module ensure to switch off auxiliary power supply to the meter. Step 1: Each Module comes with a knurled screw that is used to secure the module with the meter. To attach a module, remove the screw from the module by turning it anti-clockwise and then pull it out as shown in the following figure. Public BGX501-728-R04, Elite 440 Technical Reference Manual Page 47 of 80 Step 2: Insert the module in the Type A Module socket at the rear of the meter as shown in the figure below. After inserting the module, slide-in the screw in the slot provided in the module as shown in the figure. Tighten the screw by turning it clockwise so that the module is fixed in place with the meter. 11.4 Detaching Modules Important: Before detaching a module ensure to disconnect the auxiliary power supply. Once the auxiliary power supply is disconnected, remove the screw from the attached module and simply pull the module out of the socket. 12 Frequently Asked Questions (FAQs) Q Meter does not power up after supplying power to the measurement circuit. Answer: Auxiliary supply is mandatory to power up the meter. Please refer the decal pasted on the meter for auxiliary supply type and range. Q How to stop the display from scrolling? Answer: First, navigate to the display page you want to lock. Second, press and hold the right-hand (down) button for five seconds (long push), the locked page will now appear constantly. Q How to light the LCD backlight continuously? Answer: To continuously light the LCD backlight, press and hold the left-hand (up) button for five seconds (long push), the LCD backlight will now remain lit constantly. Q Meter is not showing correct values of instantaneous parameters? Answer: The following things should be verified:- Verify that the correct CT/VT commissioning values are selected in set up mode of the meter. Page 48 of 80 BGX501-728-R04, Elite 440 Technical Reference Manual Public Verify that the connection is done as directed on the decal pasted on the top of the meter. Q Meter is not communicating with the PC? Answer: The following things should be verified:- Verify the communication settings (i.e. Baud rate and Modbus ID) in the setup mode of meter. Verify the connection between PC and the meter is done using standard RS485 communication cable and RS232/485 converter (i.e. all wires are connected properly D+, D- and SG). Proper communication settings at the software end. Q How to access the Favourite mode display in the meter? Answer: bar ‘ Q Press to access the Setup Mode, then use ’ is on ‘Fav On’ menu, press to select it. button to move to ‘Fav On’. When selection Some parameters in the Setup mode cannot be configured and shows “No Action” message. Answer: In configuration mode, the ‘No Action’ message on the display indicates that a parameter is not available for configuration. The parameter you are trying to configure may not be supported for that particular variant. Q Why the instantaneous parameter values are not shown on Modbus/ConfigView? Answer: Public The parameters may not be supported for that particular variant. BGX501-728-R04, Elite 440 Technical Reference Manual Page 49 of 80 Annexure I: Meter Displays Display Messages Meaning Date and Time The display indicates current ‘TIME 12:11:10’ in HH:MM:SS format and Today’s ‘DATE 04:08:10’ in DD:MM:YY format. Invalid Phase Association and Condition Checks If the connection is correct the message ‘Phase Association Correct’ will appear. If the connection is incorrect the message ‘Phase Association Incorrect’ will appear. This message will be followed by one of the below messages: The message indicates ‘Phase Association Indeterminate’ due to ‘low voltage in Phase 1’. Page 50 of 80 BGX501-728-R04, Elite 440 Technical Reference Manual Public Display Messages Meaning The message indicates ‘Phase Association Indeterminate’ due to ‘low current in Phase 2’. The message indicates ‘Phase Association Indeterminate’ due to ‘reverse current flow in Phase 3’. The message indicates ‘Phase Association Indeterminate’ due to ‘Invalid phase angle in phase 1’. Phase-to-Neutral and average voltages (V) [applicable for 3-phase 4-wire connections only] The meter measures instantaneous voltage. Page identifier at the top left indicates ’U’ for voltage being displayed currently on the page. The display indicates the following phase-wise and average voltages: Phase 1-to-Neutral = 240.10 V ; Phase 2-to-Neutral = 240.20 V ; Phase 3-to-Neutral = 240.30 V ; Average Phase-to-Neutral = 240.20 V. Public BGX501-728-R04, Elite 440 Technical Reference Manual Page 51 of 80 Display Messages Meaning Phase-to-Phase and average voltages (V) The meter measures instantaneous voltage. The display indicates the following phase-wise and average voltages: Phase 1-to-Phase 2 = 240.10 V ; Phase 2-to-Phase 3 = 240.20 V ; Phase 3-to-Phase 1 = 240.30 V ; Average Phase-to-Phase = 240.20 V. Three-phase line currents (A) The meter measures instantaneous line current. Page identifier at the top left indicates ’L’ for line current being displayed currently on the page. The st th 1 three display lines indicate line current in each phase and the 4 line indicates neutral current. Line current in Phase 1 = 100 A ; Line current in Phase 2 = 100 A ; Line current in Phase 3 = 100 A ; Neutral current ‘N’ = 100 A Three-phase active currents (A) The meter measures instantaneous active current. Page identifier at the top left indicates ’l’ for current being displayed currently on the page. The display indicates the following ‘Active Current’ in each phase. Active current in Phase 1 = 86.23 A; Active current in Phase 2 = 82.14 A; Active current in Phase 3 = 67.93 A In addition, the display on the left indicates import ‘ 3. ’in phase 1, 2 and Three-phase reactive currents (A) The meter measures instantaneous reactive current. The display indicates the following ‘Reactive Current’ in each phase. Reactive current in Phase 1 = 60 A; Reactive current in Phase 2 = 60 A; Reactive current in Phase 3 = 60 A In addition, the display on the left indicates load is inductive/lag ‘ ’ in phase 3, phase 1 and 2 but capacitive ‘ Page 52 of 80 BGX501-728-R04, Elite 440 Technical Reference Manual ’ in Public Display Messages Meaning Frequency (Hz) The meter measures the frequency. Page identifier at the top left indicates ’F’ for frequency being displayed currently on the page. The display indicates frequency = 50.000 Hz. Three phase and average power factor The meter measures the power factor. Page identifier at the top left indicates ’PF’ for power factor being displayed currently on the page. The display indicates the following power factor in each phase and the average power factor: PF in phase 1 = 0.800; PF in phase 2 = 0.800; PF in phase 3 = 0.800; PF AVG = 0.800 In addition, the display on the left indicates load is inductive/lag ‘ ’ in phase 2. phase 1 and 3 but capacitive ‘ ’ in Three phase and total active power (kW) The meter measures active power. Page identifier at the top left indicates ’P’ for active power being displayed currently on the page and ‘k’ at the top right indicates the values are in kilo. The display indicates the following active power in each phase and the total active power: Active Power in phase 1 = 2.40 kW ; Active Power in phase 2 = 2.50 kW ; Active Power in phase 3 = 2.10 kW ; Total Active Power = 5.00 kW In addition, the display on the left indicates import ‘ and total. ’in all three phases Three phase and total reactive power (kVAr) The meter measures reactive power. Page identifier at the top left indicates ’Q’ for reactive power being displayed currently on the page and ‘k’ at the top right indicates the values are in kilo. The display indicates the following reactive power in each phase and the total reactive power: Reactive Power in phase 1 = 2.40 kVAr ; Reactive Power in phase 2 = 2.50 kVAr ; Reactive Power in phase 3 = 2.10 kVAr ; Total Reactive Power = 5.00 kVAr In addition, the display on the left indicates reactive power is inductive/lag ‘ ’ in all three phases and total. Public BGX501-728-R04, Elite 440 Technical Reference Manual Page 53 of 80 Display Messages Meaning Three phase and total apparent power (kVA) The meter measures apparent power. Page identifier at the top left indicates ’S’ for apparent power being displayed currently on the page and ‘k’ at the top right indicates the values are in kilo. The display indicates the following apparent power in each phase and the total apparent power: Apparent Power in phase 1 = 2.40 kVA ; Apparent Power in phase 2 = 2.40 kVA ; Apparent Power in phase 3 = 2.40 kVA ; Total Apparent Power = 7.20 kVA Active total import and export energies (kWh) The meter measures import and export of energy. Page identifier at the top left indicates ’E’ for energy being displayed currently on the page and ‘k’ at the top right indicates the values are in kilo. The display indicates the following active total import ‘ ’ energies: ‘ ’ and export Active Total import = 98762 kWh Active Total export = 235 kWh Active fundamental import and export energies (kWh) The display indicates the following active fundamental import ‘ ’ energies: export ‘ ’ and Active Fundamental import = 98762 kWh Active Fundamental export = 235 kWh Reactive import/export when active import/export energies (kVArh) The display indicates the following: Reactive import energy when active import = 99999 kVArh; Reactive export energy when active import = 99999 kVArh; Reactive import energy when active export = 99999 kVArh; Reactive export energy when active export = 99999 kVArh. Page 54 of 80 BGX501-728-R04, Elite 440 Technical Reference Manual Public Display Messages Meaning Reactive import and export energies (kVArh) The display indicates the following reactive import ‘ energy values: ’ and export ‘ ’ Reactive import = 99875 kVArh Reactive export = 343 kVArh Apparent import and export energies (kVAh) – current values The display indicates the following apparent import ‘ energy values: ’ and export ‘ Apparent import = 98732 kVAh Apparent export = 357 kVAh Active (kWh) and apparent (kVAh) forwarded energies The display indicates the following active and apparent forwarded energy values: Active forwarded = 99875 kWh Apparent forwarded = 98875 kVAh Reactive lag and lead forwarded energies (kVArh) The display indicates reactive forwarded energy value as 98785 kVArh ’ and 98885 kVArh when the load is when the load is inductive/lag ‘ ’. capacitive/lead ‘ Public BGX501-728-R04, Elite 440 Technical Reference Manual Page 55 of 80 ’ Display Messages Meaning Reactive Import and Export energies (kVArh) The display indicates reactive import ‘ ’ energy value as 1.13 kVArh ’ energy value as 0.00 kVArh and reactive export ‘ Phase angles The display indicates the following phase angle in each phase: Phase 1-to-Phase 2 = 120.0 degree Phase 2-to-Phase 3 = 120.0 degree Phase 3-to-Phase 1 = 119.9 degree Power Interruption Count The display ‘Power Interruption Count’ indicates that power interruption has occurred 13 times from the date of manufacturing. Load On-Off hours The display indicates the number of hours for which load was on and off. The message displays ‘Load On hours’ as 34 and ‘Load Off hours’ as 45. Page 56 of 80 BGX501-728-R04, Elite 440 Technical Reference Manual Public Display Messages Meaning Power On-Off hours The display indicates the number of hours for which power was on and off from the date of manufacturing. The message displays ‘Power On hours’ as 85 and ‘Power Off hours’ as 45. Phase-wise maximum instantaneous voltage (V) The display indicates the following maximum ‘Max’ instantaneous voltage recorded in each phase: Phase 1 = 240.12 V ; Phase 2 = 240.13 V ; Phase 3 = 240.14 V Phase-wise minimum instantaneous voltage (V) The display indicates the following minimum ‘Min’ instantaneous voltage recorded in each phase: Phase 1 = 239.12 V ; Phase 2 = 239.13 V ; Phase 3 = 239.14 V Phase-wise maximum instantaneous current (A) The display indicates the following maximum ‘Max’ instantaneous current recorded in each phase: Phase 1 = 9.90 A ; Phase 2 = 9.92 A ; Phase 3 = 9.93 A Public BGX501-728-R04, Elite 440 Technical Reference Manual Page 57 of 80 Display Messages Meaning Phase-wise minimum instantaneous current (A) The display indicates the following minimum ‘Min’ instantaneous current recorded in each phase: Phase 1 = 9.81 A ; Phase 2 = 9.75 A ; Phase 3 = 9.25 A Phase-wise minimum power factor lag The display indicates the following minimum ‘Min’ instantaneous power factor lag recorded in each phase: Phase 1 = 0.890 ; Phase 2 = 0.895 ; Phase 3 = 0.890 Phase-wise minimum power factor lead The display indicates the following minimum ‘Min’ instantaneous power factor lead recorded in each phase: Phase 1 = 0.780 ; Phase 2 = 0.782 ; Phase 3 = 0.782 Phase-wise maximum active power (W) The display indicates the following maximum ‘Max’ active power recorded in each phase: Phase 1 = 19.80 kW ; Phase 2 = 19.50 kW ; Phase 3 = 18.50 kW In addition, the display on the left indicates import ‘ phases. Page 58 of 80 BGX501-728-R04, Elite 440 Technical Reference Manual ’ in all three Public Display Messages Meaning Phase-wise minimum active power (W) The display indicates the following minimum ‘Min’ active power recorded in each phase: Phase 1 = 18.25 kW ; Phase 2 = 17.50 kW ; Phase 3 = 16.25 kW In addition, the display on the left indicates import ‘ phases. ’ in all three Phase-wise maximum reactive power (VAr) The display indicates the following maximum ‘Max’ reactive power recorded in each phase: Phase 1 = 0.08 kVAr ; Phase 2 = 0.07 kVAr ; Phase 3 = 0.06 kVAr In addition, the display on the left indicates reactive power is inductive/lag ’ in all three phases ‘ Phase-wise minimum reactive power (VAr) The display indicates the following minimum ‘Min’ reactive power recorded in each phase: Phase 1 = 0.03 kVAr ; Phase 2 = 0.01 kVAr ; Phase 3 = 0.02 kVAr In addition, the display on the left indicates reactive power is inductive/lag ’ in all three phases. ‘ Phase-wise maximum apparent power (VA) The display indicates the following maximum ‘Max’ apparent power recorded in each phase: Phase 1 = 2.29 kVA ; Phase 2 = 2.28 kVA ; Phase 3 = 2.30 kVA Public BGX501-728-R04, Elite 440 Technical Reference Manual Page 59 of 80 Display Messages Meaning Phase-wise minimum apparent power (VA) The display indicates the following minimum ‘Min’ apparent power recorded in each phase: Phase 1 = 2.28 kVA ; Phase 2 = 2.27 kVA ; Phase 3 = 2.29 kVA Maximum frequency (Hz) The display indicates the maximum ‘Max’ frequency recorded by the meter is 50.219 Hz Minimum frequency (Hz) The display indicates the minimum ‘Min’ frequency recorded by the meter is 49.393 Hz Primary voltage (V) and current (A) ratings - Primary VT-CT ratio The display indicates the following primary voltage ‘Pt Primary’ and current ‘Ct Primary’ ratings configured in the meter: Primary voltage = 11000 V Primary current = 100 A Page 60 of 80 BGX501-728-R04, Elite 440 Technical Reference Manual Public Display Messages Meaning Secondary voltage (V) and current (A) ratings - Secondary VT-CT ratio The display indicates the following secondary voltage ‘Pt Secondary’ and current ‘Ct Secondary’ ratings configured in the meter: Secondary voltage = 240 V Secondary current = 5 A Maximum demand of active fundamental import energy (W) Page identifier at the top left indicates ’d’ for demand being displayed currently on the page. The display indicates the following maximum ‘Max’ ’ energy with the demand value of active fundamental import ‘ recorded time (in hh:mm:ss) and date (in dd:mm:yy): MD for a billing cycle = 16130 W; Time = 19:30:00; Date = 12:12:10 Note: The display can be configured for all supported MD energy types Maximum demand of active fundamental export energy (W) The display indicates the following maximum ‘Max’ demand value of active ’ energy with the recorded time (in hh:mm:ss) fundamental export ‘ and date (in dd:mm:yy): MD for a billing cycle = 22 W; Time = 19:30:00; Date = 12:12:10 Maximum demand of active total import energy (W) The display indicates the following maximum ‘Max’ demand value of active ’ energy with the recorded time (in hh:mm:ss) and date (in total import ‘ dd:mm:yy): MD for a billing cycle = 6270 W; Time = 19:30:00; Date = 12:10:11 Public BGX501-728-R04, Elite 440 Technical Reference Manual Page 61 of 80 Display Messages Meaning Maximum demand of active total export energy (W) The display indicates the following maximum ‘Max’ demand value of active ’ energy with the recorded time (in hh:mm:ss) and date total export ‘ (in dd:mm:yy): MD for a billing cycle = 70 W; Time = 19:30:00; Date = 12:10:11 Maximum demand of reactive lag ‘ ’ while active import energy (VAr) The display indicates the following maximum ‘Max’ demand value of ’ while active import ‘ ’ energy with the recorded time reactive lag ‘ (in hh:mm:ss) and date (in dd:mm:yy): MD for a billing cycle = 42 VAr; Time = 19:30:00; Date = 12:08:11 Maximum demand of reactive lead ‘ ’ while active import energy (VAr) The display indicates the following maximum ‘Max’ demand value of ’ while active import ‘ ’ energy with the recorded time reactive lead ‘ (in hh:mm:ss) and date (in dd:mm:yy): MD for a billing cycle = 42 VAr; Time = 19:30:00; Date = 12:08:11 Maximum demand of reactive lag ‘ ’ while active export energy (VAr) The display indicates the following maximum ‘Max’ demand value of ’ while active export ‘ ’ energy with the recorded time reactive lag ‘ (in hh:mm:ss) and date (in dd:mm:yy): MD for a billing cycle = 4 VAr; Time = 19:30:00; Date = 12:12:10 Page 62 of 80 BGX501-728-R04, Elite 440 Technical Reference Manual Public Display Messages Meaning Maximum demand of reactive lead ‘ ’ while active export energy (VAr) The display indicates the following maximum ‘Max’ demand value of ’ while active export ‘ ’ energy with the recorded reactive lead ‘ time (in hh:mm:ss) and date (in dd:mm:yy): MD for a billing cycle = 22 VAr; Time = 19:30:00; Date = 12:08:11 Maximum demand of apparent import energy (VA) The display indicates the following maximum ‘Max’ demand value of ’ energy with the recorded time (in hh:mm:ss) and apparent import ‘ date (in dd:mm:yy): MD for a billing cycle = 344 VA; Time = 19:30:00; Date = 12:08:11 Maximum demand of apparent export energy (VA) The display indicates the following maximum ‘Max’ demand value of ’ energy with the recorded time (in hh:mm:ss) and apparent export ‘ date (in dd:mm:yy): MD for a billing cycle = 28 VA Time = 19:30:00; Date = 12:08:11 Maximum demand of reactive import energy (VAr) The display indicates the following maximum ‘Max’ demand value of ’ energy with the recorded time (in hh:mm:ss) and reactive import ‘ date (in dd:mm:yy): MD for a billing cycle = 544 VAr; Time = 19:30:00; Date = 12:08:11 Public BGX501-728-R04, Elite 440 Technical Reference Manual Page 63 of 80 Display Messages Meaning Maximum demand of reactive export energy (VAr) The display indicates the following maximum ‘Max’ demand value of ’ energy with the recorded time (in hh:mm:ss) and reactive export ‘ date (in dd:mm:yy): MD for a billing cycle = 544 VAr; Time = 19:30:00; Date = 12:08:11 Maximum demand of absolute active energy (W) The display indicates the following maximum ‘Max’ demand value of absolute active energy with the recorded time (in hh:mm:ss) and date (in dd:mm:yy): MD for a billing cycle = 6270 W; Time = 19:30:00; Date = 12:08:11 Maximum demand of absolute apparent energy (VA) The display indicates the following maximum ‘Max’ demand value of absolute apparent energy with the recorded time (in hh:mm:ss) and date (in dd:mm:yy): MD for a billing cycle = 6280 VA; Time = 19:30:00; Date = 12:08:11 Maximum demand of absolute reactive lag energy (VAr) The display indicates the following maximum ‘Max’ demand value of ’ energy with the recorded time (in hh:mm:ss) absolute reactive lag ‘ and date (in dd:mm:yy): MD for a billing cycle = 1580 VAr; Time = 19:30:00; Date = 12:08:11 Page 64 of 80 BGX501-728-R04, Elite 440 Technical Reference Manual Public Display Messages Meaning Maximum demand of absolute reactive lead energy (VAr) The display indicates the following maximum ‘Max’ demand value of ’ energy with the recorded time (in hh:mm:ss) absolute reactive lead ‘ and date (in dd:mm:yy): MD for a billing cycle = 080 VAr; Time = 19:30:00; Date = 12:08:11 Pulse rate The display indicates the ‘PULSE RATE’ of metrological LED, configured in the meter is 4000 impulses/kWh. Note : ‘k’ indicates pulse rate per kWh; ‘M’ indicates pulse rate per MWh; ‘G’ indicates pulse rate per GWh; Active total power, average voltage, average line current, frequency In this message, the above said instantaneous parameter values are displayed together. In this case, the unit symbol (‘k’ for kilo, ‘M’ for mega or ‘G’ for giga) at the top right corner of the screen will be applicable only for the first line. Display in each line indicates the following measured values: st 1 line: active total power is 0.99 MW; nd 2 line: average voltage (which is the average of instantaneous voltages for all the phases) is 10.97 kV; symbol represents k for kilo. rd 3 line: average line current (which is the average of instantaneous line currents for all the phases) is 62.86 A; th 4 line: frequency is 50.131 Hz. Note: Voltage measured for HV (3-phase 3-wire) is L-L; L-L and L-N for HV (3-phase 4-wire) or LV (3-phase 4-wire) in different displays. Apparent power, average voltage, average line current, frequency In this message, the above said instantaneous parameter values are displayed together. In this case, the unit symbol (‘k’ for kilo, ‘M’ for mega or ‘G’ for giga) at the top right corner of the screen will be applicable only for the first line. Display in each line indicates the following measured values: st 1 line: apparent power is 9999 kVA; nd 2 line: average voltage is 200 V; rd 3 line: average line current is 0.5 A; th 4 line: frequency is 50 Hz. Note: Voltage measured for HV (3-phase 3-wire) is L-L; L-L and L-N for HV (3-phase 4-wire) or LV (3-phase 4-wire) in different displays. Public BGX501-728-R04, Elite 440 Technical Reference Manual Page 65 of 80 Display Messages Meaning Reactive power, average voltage, average line current, frequency In this message, the above said instantaneous parameter values are displayed together. In this case, the unit symbol (‘k’ for kilo, ‘M’ for mega or ‘G’ for giga) at the top right corner of the screen will be applicable only for the first line. Display in each line indicates the following measured values: st 1 line: reactive power is 1500 kVAr; nd 2 line: average voltage is 128 V; rd 3 line: average line current is 0.5 A; th 4 line: frequency is 50 Hz. Note: Voltage measured for HV (3-phase 3-wire) is L-L; L-L and L-N for HV (3-phase 4-wire) or LV (3-phase 4-wire) in different displays. Average voltage, average line current, average power factor, frequency In this message, the above said instantaneous parameter values are displayed together. In this case, the unit symbol (‘k’ for kilo, ‘M’ for mega or ‘G’ for giga) at the top right corner of the screen will be applicable only for the first line. Display in each line indicates the following measured values: st 1 line: average voltage is 230 kV; nd 2 line: average line current is 1 A; rd 3 line: average power factor is 0.998; th 4 line: frequency is 50 Hz. Note: Voltage measured for HV (3-phase 3-wire) is L-L; L-L and L-N for HV (3-phase 4-wire) or LV (3-phase 4-wire) in different displays. Voltage unbalance, current balance, RPM (of the motor), frequency The message in each line indicates the following: st 1 line: voltage is unbalance; nd 2 line: current is balance; rd 3 line: RPM of the motor is 0; th 4 line: frequency is 50 Hz. Page 66 of 80 BGX501-728-R04, Elite 440 Technical Reference Manual Public Display Messages Meaning All import energies Page identifier at the top left indicates ’E’ for energies being displayed currently on the page. In this case, the unit symbol (‘k’ for kilo, ‘M’ for mega or ‘G’ for giga) at the top right corner of the screen will be applicable for all the lines. The message in each line indicates the following: st 1 line: active total import ‘ nd 2 line: apparent import ‘ ’ energy is 5595 kWh; ’ energy is 895 kVAh; rd ’ energy (inductive ‘ ’) is 5000 kVArh; th ’ energy (capacitive ‘ ’) is 900 kVArh. 3 line: reactive import ‘ 4 line: reactive import ‘ All export energies Page identifier at the top left indicates ’E’ for energies being displayed currently on the page. In this case, the unit symbol (‘k’ for kilo, ‘M’ for mega or ‘G’ for giga) at the top right corner of the screen will be applicable for all the lines. The message in each line indicates the following: st 1 line: active total export ‘ nd 2 line: apparent export ‘ ’ energy is 5595 KWh; ’ energy is 895 kVAh; rd ’ energy (inductive ‘ ’) is 5000 kVArh; th ’ energy (capacitive ‘ ’) is 900 kVArh. 3 line: reactive export ‘ 4 line: reactive export ‘ Total Harmonic Distortion (THD) – Current Page identifier at the top left indicates ‘I’ for current being displayed currently on the page. The message indicates the total harmonic distortion percentage of ‘Current’ in all the three phases is 100%. Total Harmonic Distortion (THD) – Voltage Page identifier at the top left indicates ‘U’ for voltage being displayed currently on the page. The message indicates the total harmonic distortion percentage of ‘Voltage’ in all the three phases is 100%. Public BGX501-728-R04, Elite 440 Technical Reference Manual Page 67 of 80 Display Messages Meaning Total Harmonic Distortion (THD) – Power Page identifier at the top left indicates ‘P’ for power being displayed currently on the page. The message indicates the total harmonic distortion percentage of ‘Power’ in all the three phases is 100%. Input / Output card type connected The message indicates the card type connected in I/O slot is ‘2 pulse input and 2 pulse output’ and no cards are connected in the other two slots. The message indicates the card type attached in I/O slot is ‘4 analogue output’ and no cards are connected in the other two slots. The meter records pulse counter values for 2 pulse input pins. In this message the display indicates the value of ‘pulse counter 1’ is currently ‘90’ and that of ‘pulse counter 2’ is ‘80’. Page 68 of 80 BGX501-728-R04, Elite 440 Technical Reference Manual Public Display Messages Meaning DST time and date In this message the display indicates the current daylight saving time (DST) time is 10:20:34 (in hh:mm:ss) and current DST date is 10:10:10(in dd:mm:yy). Pulse Width (in milliseconds) for pulse output pins In this message the display indicates the following pulse width is selected for 2 pulse output pin: Pulse width for ‘pulse output pin 1’ is ’80 ms’ and for ‘pulse output pin 2’ is ’80 ms’. Pulse Width not selected In this message the display ‘none’ indicates no pulse width is selected for the output pins. Meter firmware and Program name In this message the first two lines indicates that the ‘Meter Firmware’ loaded in the meter is ’48001C’ and the last two lines indicates the ‘Program Name’ is ‘M3X1G01’. Public BGX501-728-R04, Elite 440 Technical Reference Manual Page 69 of 80 Display Messages Meaning Meter Serial Number This message indicates the meter serial number is ‘XA520981’. MD reset acknowledgement This ‘MD Reset’ message is an acknowledgement from the meter that the MD has been reset recently. Percentage bar for phase-wise line current The footer display indicates phase-wise instantaneous line current percentage graph. The % graph for phase 1 line current shows 80% of I max . The percentage graph will always appear in the footer along with other displays and will cycle between phase 1 line current, phase 2 line current and phase 3 line current. The bar stands for 20%, 40%, 60%, 80%, 100% and 120% of I max . Page 70 of 80 BGX501-728-R04, Elite 440 Technical Reference Manual Public Annexure II: Supported Features and Parameters in Elite Variants Elite 440- 441 Configurable Features Main Energy 442 443 444 445 446 447 448 Available Parameters Active energy, import, net Active energy, export, net Active energy, import, fundamental Active energy, export, fundamental Apparent energy, while active import Apparent energy, while active export Absolute net active energy Absolute apparent energy Absolute reactive lagging energy Absolute reactive leading energy Reactive energy, import while active import Reactive energy, import while active export Reactive energy, export while active import Reactive energy, export while active export Reactive energy, import Reactive energy, export Maximum Demand Energy Active energy, import, net Active energy, export, net Active energy, import, fundamental Active energy, export, fundamental Apparent energy, while active import Apparent energy, while active export Absolute net active energy Absolute apparent energy Absolute reactive lagging energy Absolute reactive leading energy Reactive energy, import while active import Reactive energy, import while active export Reactive energy, export while active import Reactive energy, export while active export Reactive energy, import Reactive energy, export DIP (15, 30, 60 min.) DIP WIDTH (5, 10, 15, 20, 30) Energy Snapshots Energy Active energy, import, net Active energy, export, net Active energy, import, fundamental Active energy, export, fundamental Apparent energy, while active import Apparent energy, while active export Absolute net active energy Public BGX501-728-R04, Elite 440 Technical Reference Manual Page 71 of 80 Elite 440- 441 Configurable Features Available Parameters Absolute apparent energy Absolute reactive lagging energy Absolute reactive leading energy Reactive energy, import while active import Reactive energy, import while active export Reactive energy, export while active import Reactive energy, export while active export Reactive energy, import Reactive energy, export Snapshot Time (in Steps of 30 min.) Energy Active energy, import, net Active energy, export, net Active energy, import, fundamental Active energy, export, fundamental Apparent energy, while active import Apparent energy, while active export Absolute net active energy Absolute apparent energy Absolute reactive lagging energy Absolute reactive leading energy Reactive energy, import while active import Reactive energy, import while active export Reactive energy, export while active import Reactive energy, export while active export Reactive energy, import Reactive energy, export Inst Parameters R Phase Voltage Y Phase Voltage B Phase Voltage Frequency R Phase Power Factor Y Phase Power Factor B Phase Power Factor R Phase Line Current Y Phase Line Current B Phase Line Current Mean Measured Voltage Mean Measured Current Pulse Counters Counter Input 1 Counter Input 2 SIP (15, 30, 60 min) SIP WIDTH (5, 10, 15, 20, 30) Billing Dates DST Dates Metro LED 444 445 446 447 448 Active energy, import, net Active energy, export, net Page 72 of 80 Max 12 Billing Dates Max 20 DST Dates 443 Load Survey 442 BGX501-728-R04, Elite 440 Technical Reference Manual Public Elite 440- 441 Configurable Features Available Parameters Active energy, import, fundamental Active energy, export, fundamental Apparent energy, while active import Apparent energy, while active export Absolute net active energy Absolute apparent energy Absolute reactive lagging energy Absolute reactive leading energy Reactive energy, import while active import Reactive energy, import while active export Reactive energy, export while active import Reactive energy, export while active export Reactive energy, import Reactive energy, export Active energy, import and export, net Active energy, import and export, fundamental Reactive energy, import and export 442 443 444 445 446 447 448 Displays Max Total Displays Supported Max Auto Display Supported Max Manual Display Supported Max Favourite Display Supported Instantaneous Displays Voltage Phase to Phase (R, Y, B, Average) Voltage Phase to Neutral(R-Y, Y-B, B-R, Average) Phase wise Line Current (R, Y, B) Phase wise Active Current (R, Y, B) Phase wise Reactive Current (R, Y, B) Phase wise Power Factor (R, Y, B, Average) Phase wise Apparent Power (R, Y, B, Total) Phase wise Active Power (R, Y, B, Total) Phase wise Reactive Power (R, Y, B, Total) System Frequency Phase Angle (R-Y, Y-B, B-R) Avg Voltage(L-L),Avg Current,Power Factor,Frequency(HV-3, HV-4) Avg Voltage(L-N), Avg Current,Power Factor, Frequency (LV-4) P(Active Total),Avg Voltage(L-L), Avg Current, Frequency(HV-3, HV-4) P(Active Total), Avg Voltage(L-N), Avg Current,Frequency(LV-4) P(Reactive Total), Avg Voltage(L-L), Avg Current, Frequency (HV-3, HV-4) P(Reactive Total),Avg Voltage(L-N),Avg Current,Frequency(LV-4) P(App Total),Avg Voltage(L-L),Avg Current,Frequency(HV-3, HV-4) P(Apparent Total), Avg Voltage(L-N), Avg Current, Frequency (LV-4) Total Harmonic Distortion(THD%) Voltage (R,Y,B) Total Harmonic Distortion(THD%) Current (R,Y,B) Total Harmonic Distortion (THD%) Power (R,Y,B) Energy Display Active Import Total, Active Export Total Public BGX501-728-R04, Elite 440 Technical Reference Manual Page 73 of 80 Elite 440- 441 Configurable Features Available Parameters Active Import Fundamental, Active Export Fundamental Reactive Q1, Reactive Q2, Reactive Q3, Reactive Q4 Reactive Import, Reactive Export Apparent while Active Import, Apparent while Active Export Active Absolute, Apparent Absolute Reactive Lag Absolute, Reactive Lead Absolute Active total Import,Apparent Import,Reactive Import-inductive, Reactive Import-Capacitive Active total Export,Apparent Export ,Reactive Export-inductive, Reactive Export-Capacitive 442 443 444 445 446 447 448 Page 74 of 80 Min/Max Display Max Voltage (R, Y, B) Min Voltage (R, Y, B) Max Line Current (R, Y, B) Min Line Current (R, Y, B) Min Lag Power Factor (R, Y, B) Min Lead Power Factor (R, Y, B) Max Active Power (R, Y, B) Min Active Power (R, Y, B) Max Reactive Power (R, Y, B) Min Reactive Power (R, Y, B) Max Apparent Power (R, Y, B) Min Apparent Power (R, Y, B) Max Frequency Min Frequency Miscellaneous Display All segments on No Display Date and Time Load On-Off hours Power On-Off hours Power Interruption Count Connection Check including Phase Association MD Display (with Date and Time Stamp) Active Import Total Active Export Total Active Import Fundamental Active Export Fundamental Reactive Import while Active Import Reactive Export while Active Import Reactive Import while Active Export Reactive Export while Active Export Apparent while Active Import Apparent while Active Export Reactive Import Reactive Export Active Absolute Apparent Absolute Reactive Lag Absolute Reactive Lead Absolute Max Favourite Display Supported BGX501-728-R04, Elite 440 Technical Reference Manual Public Elite 440- 441 Configurable Features Modbus Communication Available Parameters Voltage balance-unbalance, Current balanceunbalance, Rpm, Frequency Counter-1 Value and Counter-2 Value Input / Output Card information VT Primary and CT Primary Ratio VT Secondary and CT Secondary Ratio Meter Serial number Mask Version number, CLEM Version number Seasonal Date and Time (DST) Modbus baud rate (1200, 2400, 4800, 9600, 38400) 442 443 444 445 446 447 448 Modules No Card 2 Pulse Input 2 Pulse Output 4 Analogue Output R Phase Voltage Y Phase Voltage B Phase Voltage R Phase Line Current Y Phase Line Current B Phase Line Current Active Power Import Reactive Power Import Apparent Power Import Active Power Export Reactive Power Export Apparent Power Export Frequency Power Factor Average Voltage Average Line Current Commissioning Meter Type HV 3 Phase 4 Wires HV 3 Phase 3 Wires LV 3 Phase 4 Wires MD Reset Time Set Meter Information Instantaneous All Parameters Min-Max Values Per Phase Current Maximum Per Phase Current Minimum Per Phase Voltage Maximum Per Phase Voltage Minimum Per Phase Active Power Maximum Per Phase Active Power Minimum Per Phase Reactive Power Maximum Per Phase Reactive Power Minimum Public BGX501-728-R04, Elite 440 Technical Reference Manual Page 75 of 80 Elite 440- 441 Configurable Features 442 443 444 445 446 447 448 Available Parameters Per Phase Apparent Power Maximum Per Phase Apparent Power Minimum Per Phase Power Factor Lag Minimum Per Phase Power Factor Lead Minimum Frequency Maximum Frequency Minimum Energy of Supported Parameter Recent Hist 1 to 6 MD of Supported Parameter Recent Hist 1 to 6 CMD of Supported Parameter Daily Energy Snapshots of Supported Parameter Hist 1 to 6 Last Load Survey of Supported Parameter On-Off Parameters (Power On-Off & Load On-Off) Recent Hist 1 to 6 Page 76 of 80 BGX501-728-R04, Elite 440 Technical Reference Manual Public Glossary of Energy Types Active Total Import Consumed (imported) kWh, including harmonics, metered in quadrants 1 Energy and 4. Active Total Export Generated (exported) kWh, including harmonics, metered in quadrants 2 Energy and 3. Active Fundamental Import Energy Active Fundamental Export Energy Public Consumed (imported) kWh, excluding harmonics, metered in quadrants 1 and 4. The meter tracks the fundamental frequency and disregards all other harmonic components. Generated (exported) kWh, excluding harmonics, metered in quadrants 2 and 3. The meter tracks the fundamental frequency and disregards all other harmonic components. Apparent Import Consumed (imported) KVAh, including harmonics, metered in quadrants Energy 1 and 4. Apparent Export Generated (exported) KVAh, including harmonics, metered in quadrants Energy 2 and 3. Reactive Import Consumed (imported) kVArh, including harmonics, metered in quadrants Energy 1 and 2. Reactive Export Generated (exported) kVArh, including harmonics, metered in quadrants Energy 3 and 4. Reactive Import when Consumed (imported) kVArh, when consumed (imported) kWh, metered Active Import in quadrants 1. Reactive Export when Generated (exported) kVArh, when consumed (imported) kWh, metered Active Import in quadrants 4. Reactive Import when Consumed (imported) kVArh, when generated (exported) kWh, metered Active Export in quadrants 2. Reactive Export when Generated (exported) kVArh, when generated (exported) kWh, metered Active Export in quadrants 3. BGX501-728-R04, Elite 440 Technical Reference Manual Page 77 of 80 Forwarded energy Active Forwarded Energy increment in forward direction irrespective of any CT reversal. It is the absolute sum of the three-phase energy. Energy Apparent Forwarded Energy Reactive Lag Forwarded Energy Reactive Lead Forwarded Energy Note: Energy Quadrant as per relevant IS/IEC standard. Page 78 of 80 BGX501-728-R04, Elite 440 Technical Reference Manual Public Notes: Public BGX501-728-R04, Elite 440 Technical Reference Manual Page 79 of 80 Secure Meters Ltd Secure Meters (UK) Ltd Pratapnagar Industrial Area Secure House, Moorside Road Udaipur 313 003 Winchester, Hampshire SO23 7RX India United Kingdom p: + 91 294 2492300 p: +44 1962 840048 f: +91 294 2492310 f: +44 1962 841046 Secure Australasia Pty Ltd Cewe Instrument AB 258 Darebin Road SE 611 29 Fairfield VIC 3078 Box 1006, Nyköping Australia Sweden p: +61 3 9485 6000 p: +46 155 775 00 f: +61 3 9485 6099 f: +46 155 775 97 Secure Controls (UK) Ltd South Bristol Business Park Advanced Energy Monitoring Systems Ltd Roman Farm Road South Bristol Business Park Bristol BS4 1UP Roman Farm Road United Kingdom Bristol BS4 1UP p: +44 117 9788700 United Kingdom f: +44 117 9788701 p: +44 117 9788786 f: +44 117 9788701