1
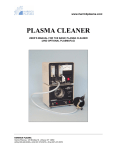
www.harrickplasma.com
PLASMA CLEANER
USER’S MANUAL FOR THE EXPANDED PLASMA CLEANER
PDC-002 (230V)
(AND OPTIONAL PLASMAFLO)
HARRICK PLASMA
Harrick Plasma • 120 Brindley St. • Ithaca, NY 14850
(USA) 800-640-6380 • (Intl) 607-272-5070 • (Fax) 607-272-5076
DECLARATION OF CONFORMITY
Harrick Plasma, Inc. hereby declares that the product listed is in conformity with the requirements
and provisions of the following European Union CE directives and their respective standards.
-------------------------------------------------------------------
EMC Directive:
Generic Emissions Standard:
Product Specific Emissions:
89/336/EEC
EN 61000-6-4:2001
EN 55011 Group 2 Class A
Generic Immunity Standard:
Immunity:
EN 61000-6-2: 2001
EN 61000-4-2
EN 61000-4-3
EN 61000-4-4
EN 61000-4-5
EN 61000-4-6
Low Voltage Directive:
Standard:
98/68/EEC
EN 60950
Electrostatic Discharge
Radiated Susceptibility
Electrical Fast Transient/Burst
Surge
Conducted Susceptibility
Safety of Information
Technology Equipment
-------------------------------------------------------------------
Manufacturer’s Name:
Manufacturer’s Address:
Harrick Plasma
120 Brindley St.
Ithaca, NY 14850
USA
Products:
Model Numbers:
Expanded Plasma Cleaner / PlasmaFlo
PDC-002 / PDC-FMG-2
-------------------------------------------------------------------
Declaration of Conformity Issued: December 20th, 2006
Signature:
_____________________
Heather Harrick
President
Harrick Plasma, Inc.
120 Brindley St.
Ithaca, NY 14850
USA
Phone: (607) 272-5070
Fax: (607) 272-5076
For further information, please contact Harrick Plasma or its authorized distributors:
See www.harrickplasma.com or e-mail [email protected].
ENVIRONMENTAL STATEMENT
Harrick Plasma, Inc. asserts the following statement regarding European Union directives
governing disposal and restriction of hazardous substances in relation to the listed products.
-------------------------------------------------------------------
Waste Electrical and Electronic Equipment (WEEE) Directive:
2002/96/EC
The products specified below comply with the WEEE Directive (2002/96/EC) marking
requirement (shown above). The affixed product label indicates that you must not discard this
electrical/electronic product in domestic household waste. To return unwanted products, please
contact Harrick Plasma, Inc. With reference to the equipment categories in the WEEE directive
Annex 1, Harrick Plasma has classified these products as “Monitoring and Control Instruments.”
Restriction of Hazardous Substances (RoHS) Directive:
2002/95/EC
Harrick Plasma has classified the products specified below as “Monitoring and Control
Instruments,” an equipment category currently outside the scope of the RoHS Directive
(2002/95/EC). Harrick Plasma is actively working toward transitioning to RoHS-compliant
substances in future product iterations.
Environmental Statement Issued: December 20th, 2006
-------------------------------------------------------------------
Manufacturer’s Name:
Manufacturer’s Address:
Harrick Plasma
120 Brindley St.
Ithaca, NY 14850
USA
Ph. (607) 272-5070
Fx. (607) 272-5076
Products:
Model Numbers:
Expanded Plasma Cleaner / PlasmaFlo
PDC-002 / PDC-FMG-2
-------------------------------------------------------------------
For further information, please contact Harrick Plasma or its authorized distributors:
See www.harrickplasma.com or e-mail [email protected].
TABLE OF CONTENTS
General Information
Safety Information and Unpacking .............................................................................................
Technical Support and Feedback ...............................................................................................
1
2
About the Plasma Cleaner
Principle of Operation .................................................................................................................
Getting Started ............................................................................................................................
3
7
About the Vacuum Pump
Setting Up a Vacuum Pump from Harrick Plasma ...................................................................... 8
Setting Up Your Own Vacuum Pump ......................................................................................... 11
Processing with Room Air
Setup .......................................................................................................................................... 12
Operation .................................................................................................................................... 15
Processing with Gas
Setup .......................................................................................................................................... 17
Operation .................................................................................................................................... 20
Using the Optional PlasmaFlo
Getting Ready ............................................................................................................................. 23
Setup .......................................................................................................................................... 25
Operation .................................................................................................................................... 30
Configuration Options
Purging with Inert Gas ................................................................................................................ 34
Maintenance
Maintenance Requirements ........................................................................................................
Cleaning the Chamber ................................................................................................................
Replacing the Chamber ..............................................................................................................
Cleaning the Plasma Cleaner Front Door and O-Ring ...............................................................
Replacing the Window and Window O-Ring ..............................................................................
Checking and Replacing the Fuses ............................................................................................
37
37
37
39
40
41
Troubleshooting .................................................................................................................... 42
Warranty Information
Disclaimer and Warranty ............................................................................................................ 44
Repair Returns and New Equipment Returns ............................................................................ 45
Appendix A
Flowrate Table for PlasmaFlo Flowmeter 1 (032-15) ................................................................. 46
Flowrate Table for PlasmaFlo Flowmeter 2 (022-13) ................................................................. 47
Appendix B
Optional and Replacement Parts ................................................................................................ 48
Appendix C
Specifications .............................................................................................................................. 49
PDC002CE-M-10
LIST OF FIGURES
Figure 1 • Expanded Plasma Cleaner (230V) ............................................................................
7
Figure 2 • Example of Vacuum Pump and Accessories ............................................................
9
Figure 3 • Setting Up the Vacuum Pump ................................................................................... 10
Figure 4 • Connecting the Needle Valve/3-Way Valve to the Plasma Cleaner Front Door ....... 13
Figure 5 • Setup for Operating with Room Air ........................................................................... 14
Figure 6 • Setup for Operating with Process Gas ...................................................................... 19
Figure 7 • PlasmaFlo (230V) ...................................................................................................... 23
Figure 8 • PlasmaFlo and Accessories ...................................................................................... 24
Figure 9 • Final Configuration of the Needle Valve, 3-Way Valve, and TC Vacuum Gauge
on the Plasma Cleaner Front Door When Using the Optional PlasmaFlo ............... 28
Figure 10 • Setup for Operating with Processing Gas and PlasmaFlo ...................................... 29
Figure 11 • A Possible Configuration for Inert Gas Purge in the Plasma System ..................... 36
Figure 12 • Replacing the Plasma Chamber .............................................................................. 38
Figure 13 • Removing the O-Ring on the Plasma Cleaner Front Door ..................................... 39
Figure 14 • Replacing the Window on the Plasma Cleaner Front Door .................................... 40
PDC002CE-M-10
GENERAL INFORMATION
SAFETY INFORMATION
The Plasma Cleaner is designed for safe and efficient
operation when used properly and in accordance with this
manual. Failure to observe the following precautions could
result in serious personal injury:
The Plasma Cleaner is an electrical instrument; to
avoid electric shock, please observe all standard
precautions, such as not operating the device near
water and operating the device at appropriate line
voltage and frequency.
Do not remove cover plates or housing, except by a
certified electronics technician.
Do not open the Plasma Cleaner front cover when the
chamber is under vacuum.
Do not use the Plasma Cleaner near flammable
materials.
Do not plug vacuum pumps whose input electrical
current requirement exceeds 7 Amps into the Plasma
Cleaner rear vacuum pump outlet.
With respect to vacuum pumps, please refer to the
pump user’s manual for specific precautions.
If oxygen is used as the process gas in concentrations
near or above its flammability threshold, an oxygen
service pump must be used.
If corrosive gases are used, make sure the seals and
gas connection materials are compatible with the gas.
Use a suitable vacuum pump to service corrosive
gases.
If toxic gases or gases that ionize to toxic products or
intermediates are used, the gases must be properly
purged from the chamber prior to venting and the pump
exhaust must be properly vented. For safe gas
handling procedures specific to your process gas,
contact your process gas supplier.
UNPACKING
Before installing the Plasma Cleaner make sure all the parts
on the included check-off list are present. If any parts are
missing or damaged, contact Harrick Plasma immediately.
1 of 50
GENERAL INFORMATION
For additional information please contact us between 9 a.m.
and 5 p.m. EST:
(USA) 800-640-6380
(Intl) 607-272-5070
or e-mail your questions to:
[email protected]
TECHNICAL SUPPORT
TU
FEEDBACK
UT
Your comments and suggestions are welcome. Please
send them to:
Harrick Plasma
120 Brindley St.
Ithaca, NY 14850
(USA) 800-640-6380
(Intl) 607-272-5070
(Fax) 607-272-5076
[email protected]
2 of 50
ABOUT THE PLASMA CLEANER
PRINCIPLE OF OPERATION
NATURE OF PLASMA
Plasma, the fourth state of matter, is a distinct processing
medium for the treatment and modification of surfaces.
•
•
•
PLASMA FORMATION
•
•
•
PLASMA-SURFACE INTERACTION
•
•
•
Plasma is a partially ionized gas consisting of
electrons, ions and neutral atoms or molecules.
The plasma electrons are at a much higher
temperature than the neutral gas species, typically
around 104 K, although the plasma gas as a whole is
at near ambient temperature.
The plasma electron density is typically around 1010
cm-3.
A radio frequency (RF) oscillating electric field is
generated in the gas region through magnetic
induction.
At sufficiently low pressures the combined effect of
the electric field acceleration of electrons and elastic
scattering of the electrons with neutral atoms or field
lines leads to heating of the electrons.
When electrons gain kinetic energy in excess of the
first ionization threshold in the neutral gas species,
electron-neutral collisions lead to further ionization,
yielding additional free electrons that are heated in
turn.
The energy of plasma electrons and ions is
sufficient to ionize neutral atoms, break molecules
apart to form reactive radical species, generate
excited states in atoms or molecules, and locally
heat the surface.
Depending on the process gases and parameters,
plasmas are capable of both mechanical work,
through the ablative effect of kinetic transfer of
electrons and ions with the surface, and chemical
work, through the interaction of reactive radical
species with the surface.
In general, plasmas can interact with and modify a
surface through several mechanisms: ablation,
chemical etching, activation, deposition, and crosslinking.
3 of 50
ABOUT THE PLASMA CLEANER
TYPES OF PLASMA-SURFACE
INTERACTIONS
ABLATION
• Plasma ablation involves the mechanical removal of
surface contaminants by energetic electron and ion
bombardment.
• Surface contamination layers (e.g. cutting oils, skin
oils, mold releases) are typically comprised of weak
C-H bonds.
• Ablation breaks down weak covalent bonds in
polymeric contaminants through mechanical
bombardment.
• Surface contaminants undergo repetitive chain
scission until their molecular weight is sufficiently
low for them to boil away in the vacuum.
• Ablation affects only the contaminant layers and the
outermost molecular layers of the substrate
material.
• Argon is often used for its high ablation efficiency
and chemical inertness with the surface material.
CHEMICAL ETCHING
• Chemical etching involves the chemical reaction of
surface organic contaminants with highly reactive
free radicals in the plasma to form volatile
byproducts that are released from the sample
surface.
• By proper selection of the gas chemistry and
mixture, various types of materials can be
chemically etched. In addition, the material can be
selectively etched with minimal etching of other
materials on the sample surface.
• Chemical etching involves minimal physical damage
or roughening of the sample surface.
• O2 is often used for chemical etching of organic
contaminants from sample surfaces.
4 of 50
ABOUT THE PLASMA CLEANER
TYPES OF PLASMA-SURFACE
INTERACTIONS
ACTIVATION
• Plasma surface activation involves the creation of
surface chemical functional groups through the use
of plasma gases - such as oxygen, hydrogen,
nitrogen and ammonia - which dissociate and react
with the surface.
• In the case of polymers, surface activation involves
the replacement of surface polymer groups with
chemical groups from the plasma gas.
• The plasma breaks down weak surface bonds in the
polymer and replaces them with highly reactive
carbonyl, carboxyl, and hydroxyl groups.
• Such activation alters the chemical activity and
characteristics of the surface, such as wetting and
adhesion, yielding greatly enhanced adhesive
strength and permanency.
DEPOSITION
• Plasma deposition involves the formation of a thin
polymer coating at the substrate surface through
polymerization of the process gas.
• The deposited thin coatings can possess various
properties or physical characteristics, depending on
the specific gas and process parameters selected.
• Such coatings exhibit a higher degree of crosslinking and much stronger adherence to the
substrate in comparison to films derived from
conventional polymerization.
CROSS-LINKING
• Cross-linking is the covalent bonding of polymer
chains to form dense molecular networks.
• Plasma processing with inert gases can be used to
cross-link polymers and produce a stronger and
harder substrate surface.
• Under certain circumstances, cross-linking through
plasma treatment can also lend additional wear or
chemical resistance to a material.
5 of 50
ABOUT THE PLASMA CLEANER
PLASMA PROCESSING
In general, plasma processing proceeds as follows:
• The sample is placed in the reaction chamber and
the chamber is evacuated.
• Process gas(es) are flowed into the chamber to
sustain pressures from 300 to 1500 mTorr.
• The process gas is subjected to a MHz-range RF
electromagnetic field, creating plasma at near
ambient temperature.
• The type of interaction between the plasma and the
sample surface depends on parameters such as the
intensity and frequency of the RF power used to
excite the plasma, the type of gas(es) that are
ionized, the pressure and flow rate of the gas(es),
the sample surface material, and the duration of the
plasma process.
• Detailed guidance on plasma processing may be
found in the subsequent PLASMA PROCESSING
sections of this manual.
6 of 50
ABOUT THE PLASMA CLEANER
Before starting, take a few moments to familiarize
yourself with the Plasma Cleaner unit (Figure 1).
GETTING STARTED
(A) • Front view
Needle Valve
RF Power
Level Switch
Plasma
Cleaner Door
3-Way Valve
Main Power
Indicator
Window
Plasma Cleaner
Main Power
Switch
(B) • Back view
Cooling
Fan
Retaining Ring for
Plasma Chamber
Plasma Chamber
Outlet
Plasma Cleaner
Power Inlet
Plasma
Cleaner Fuse
Figure 1 • Expanded Plasma Cleaner (230V)
NOTE:
The expanded Plasma Cleaner PDC-002 is rated
for 230V at 50Hz can accept line voltages of 220240V at 50-60Hz.
7 of 50
ABOUT THE VACUUM PUMP
Use a vacuum pump with a minimum pumping speed of
1.4 m3/h and an ultimate total pressure of 200 mTorr or
less.
SETTING UP A VACUUM
PUMP FROM HARRICK
PLASMA
If you have purchased a vacuum pump from Harrick
Plasma, your pump should be accompanied by pump
oil/fluid (if applicable), as well as a length of 1/2” inner
diameter (ID) vacuum hose, hose clamps, inlet port
adaptor, swing clamp, and centering ring to connect the
pump to the Plasma Cleaner (Figure 2).
To set up the vacuum pump for use with the Plasma
Cleaner (an Edwards XDS-5 dry pump is used as an
example pump below):
• If applicable, fill the vacuum pump with the
appropriate pump oil or fluid. Refer to the pump
manual for instructions and oil/fluid capacity.
Note that Fomblin-prepared pumps for oxygen
service require Fomblin fluid, not pump oil.
• Place the centering ring on top of the inlet port of
the vacuum pump (Figure 3A).
• Place the inlet port adaptor on top of the
centering ring (Figure 3B).
• Wrap the swing clamp around the inlet port
adaptor and centering ring. Tighten the swing
clamp using the wing nut (Figure 3C).
• Connect the vacuum hose to the inlet port
adaptor on the pump. Tighten a hose clamp over
the end of the hose (Figure 3D).
• We recommend that the pump exhaust from the
outlet port be properly vented, either by
conducting the pump outlet exhaust to an
exhaust hood through a vacuum hose or
attaching an oil mist filter to the outlet port.
8 of 50
ABOUT THE VACUUM PUMP
Swing
Clamp
Centering
Ring
Inlet Port
Hose
Adaptor Clamp (2)
1/2” ID
Vacuum
Hose
Figure 2 • Example of Vacuum Pump and Accessories
9 of 50
ABOUT THE VACUUM PUMP
(A) • Centering ring on the inlet port
(B) • Adaptor on the inlet port
(C) • Swing clamp around inlet port adaptor
(D) • Attach vacuum hose
Figure 3 • Setting Up the Vacuum Pump
10 of 50
ABOUT THE VACUUM PUMP
SETTING UP YOUR OWN
VACUUM PUMP
If you are using your own vacuum pump, refer to your
pump manufacturer for appropriate parts and accessories
required for connecting the pump to the Plasma Cleaner.
Below are guidelines to set up the vacuum pump for use
with the Plasma Cleaner (see also the previous section
SETTING UP A VACUUM PUMP FROM HARRICK
PLASMA as an example):
• If applicable, make sure the vacuum pump is
filled with the appropriate pump oil or fluid. Refer
to the pump manual for instructions and oil/fluid
capacity.
• To connect the vacuum pump to the plasma
chamber outlet at the back of the Plasma
Cleaner, use 1/2” inner diameter (ID) flexible
vacuum hose with hose clamps tightened at both
ends.
• To connect the vacuum hose to the inlet port of
your vacuum pump, use a 1/2” outer diameter
(OD) inlet port adaptor with the appropriate
centering ring and swing clamp to tighten and
seal to the inlet port.
• We recommend that the pump exhaust from the
outlet port be properly vented, by either
conducting the pump outlet exhaust to an
exhaust hood through a vacuum hose or
attaching an oil mist filter to the outlet port.
11 of 50
PROCESSING WITH ROOM AIR
See ABOUT THE VACUUM PUMP for instructions to set
up the vacuum pump for use with the Plasma Cleaner.
SETUP
NOTE:
When connecting NPT tapered threads, always wrap the
thread with PTFE (Teflon) tape to ensure a good seal and
lubrication. Remove any debris or residual tape on the
internal and external threads before wrapping with new
tape and reconnecting. Wrap the tape in the direction
counter to the screw direction. TIGHTEN ALL
THREADED CONNECTIONS WITH A WRENCH.
In preparation for setting up the Plasma Cleaner for
operating with room air, refer to Figure 1 for identification
of parts of the Plasma Cleaner, Figure 4 for valve
assembly installation and Figure 5 for a schematic of the
assembled system:
• Connect the needle valve/3-way valve to the
Plasma Cleaner front door (Figure 4).
• Connect the plasma chamber outlet at the back
of the Plasma Cleaner (Figure 1B) to the vacuum
pump using 1/2’’ ID vacuum hose. Tighten hose
clamps over the hose at each end.
• Plug one end of the Plasma Cleaner power cord
into the power inlet on the back of the Plasma
Cleaner and the other end into an electrical
outlet.
• Plug the vacuum pump power cord into an
electrical outlet.
12 of 50
PROCESSING WITH ROOM AIR
Figure 4 • Connecting the Needle Valve/3-Way Valve to the Plasma Cleaner Front Door
13 of 50
PROCESSING WITH ROOM AIR
(A) • To process gas (air)
Plasma
Cleaner
Vacuum
Pump
Vent (closed)
(open) Air
Needle
Valve
3-Way
Valve
Lever
(pointing left)
3-Way
Valve
(B) • To vent
Plasma
Cleaner
Vacuum
Pump
Vent (open)
(closed) Air
Needle
3-Way
Valve 3-Way
Valve
Valve
Lever
(pointing right)
(C) • 3-way valve closed
Plasma
Cleaner
Vacuum
Pump
Vent (closed)
(closed) Air
Needle
Valve
3-Way
3-Way
Valve
Valve
Lever
(pointing vertical)
Figure 5 • Setup for Operating with Room Air
14 of 50
PROCESSING WITH ROOM AIR
OPERATION
CAUTION:
Following completion of processing, the Plasma Cleaner main power should be turned off
in order to prevent overheating and possible damage to the Plasma Cleaner.
NOTE:
If the Plasma Cleaner is intended to be repeatedly used
with no change to the process settings (as in the case of
a single user), it is recommended for process
repeatability to leave the needle valve open and fixed to
the desired setting. Instead, use only the 3-way valve to
switch between bleeding in air, isolating the plasma
chamber, and venting (Figure 5).
If the process settings of the Plasma Cleaner may vary
with each use (as in the case of multiple users), it is
recommended to close the needle valve at the end of
each use as the default setting.
EVACUATING THE CHAMBER
•
•
•
•
BLEEDING IN AIR
•
•
GENERATING PLASMA
•
•
•
•
Put the sample in the Plasma Cleaner chamber.
Check that the 3-way valve is closed (lever is in
the vertical position, Figure 5C).
Closed the front door and hold the door against
the plasma chamber.
Turn on the vacuum pump. The vacuum will hold
the front door closed. It will take a few minutes to
evacuate the air in the chamber.
Open the 3-way valve to room air (lever points to
the needle valve, Figure 5A).
Slightly open the needle valve (1/8 of a turn or
less) and allow the air to enter the Plasma
Cleaner chamber.
Turn on the Plasma Cleaner main power.
Select the appropriate RF power level (refer to
the following NOTE on the next page).
Look through the window of the Plasma Cleaner
and wait until a glow is observed. For air, the
plasma glow discharge should be purple-pink in
color.
Adjust the needle valve slightly until the plasma
intensity is visibly maximized. This broadly
corresponds to optimal plasma generation
conditions.
15 of 50
PROCESSING WITH ROOM AIR
NOTE:
By selecting the process pressure, plasma energy (RF
power), and processing duration, the nature and extent of
the surface interactions can be tailored for your
application.
For optimal plasma uniformity, the RF power level should
be set to MED or HI. Process pressures of 1000-1300
mTorr and process times of 1-3 minutes are good
process parameter initial values. Optimal process
parameter values will depend on the sample material and
intended application. Some experimentation may be
required to determine these optimal values.
PLASMA PROCESSING
•
•
•
VENTING THE CHAMBER
•
•
•
•
•
Process the sample for the desired duration.
At the end of the process, set the RF power level
to OFF.
Turn off the Plasma Cleaner main power.
Turn off the vacuum pump.
Slowly open the 3-way valve to vent (lever points
to vent flow, Figure 5B).
Once atmospheric pressure is reached, open the
front door.
Close the 3-way valve (lever is in the vertical
position, Figure 5C).
Take out the sample.
CAUTION:
If the Plasma Cleaner is not vented immediately, oil may backstream from the vacuum
pump and contaminate the system. We recommend the use of a vacuum pump with an
anti suck back feature, such as that optionally provided by Harrick Plasma. Do not open
the front door when the chamber is under vacuum since this will damage the glass
chamber.
16 of 50
PROCESSING WITH GAS
SETUP
See ABOUT THE VACUUM PUMP for instructions to set
up the vacuum pump for use with the Plasma Cleaner.
PURGE GAS LINE(S) PRIOR TO
INSTALLATION
All gas lines to be connected to the Plasma Cleaner
should be purged of any dust or residual contamination
prior to installation.
NOTE:
When connecting NPT tapered threads, always wrap the
thread with PTFE (Teflon) tape to ensure a good seal and
lubrication. Remove any debris or residual tape on the
internal and external threads before wrapping with new
tape and reconnecting. Wrap the tape in the direction
counter to the screw direction. TIGHTEN ALL
THREADED CONNECTIONS WITH A WRENCH.
In preparation for setting up the Plasma Cleaner for
operating with process gas, refer to Figure 1 for
identification of parts of the Plasma Cleaner, Figure 4 for
valve assembly installation and Figure 6 for a schematic
of the assembled system:
• Connect the needle valve/3-way valve to the front
door (Figure 4).
• Attach an appropriate pressure regulator to the
process gas cylinder. Use a regulator that is
compatible with the process gas and that has the
same connection size as on the gas cylinder. We
recommend using regulated pressures of 5-10
psig. For added safety, include an isolation valve
at the regulator output.
• Wrap the threads on the open end of the needle
valve with Teflon tape. Connect the pressure
regulator output to the needle valve through
appropriate adaptors and tubing. The needle
valve has 1/8” NPT fittings.
• Connect the plasma chamber outlet at the back
of the Plasma Cleaner (Figure 1B) to the vacuum
pump using 1/2" ID vacuum hose. Tighten hose
clamps over the hose at each end.
• Plug one end of the Plasma Cleaner power cord
into the power inlet on the back of the Plasma
Cleaner and the other end into an electrical
outlet.
• Plug the vacuum pump power cord into an
electrical outlet.
NOTE:
To more precisely control the process gas flowrate and
monitor pressure, we recommend using the optional
PlasmaFlo (Figure 7).
17 of 50
PROCESSING WITH GAS
CAUTION:
For processing with pure oxygen, make sure that you use an oxygen compatible vacuum
pump. The optional Harrick Plasma oil-based vacuum pumps are NOT oxygen compatible.
The hydrocarbon pump oil mist can react with the concentrated oxygen to produce a
potentially explosive combination. We do offer oxygen service pumps for use with oxygen
process gas; please inquire with Harrick Plasma.
CAUTION:
If you are working with highly reactive or corrosive gases, be sure that the seals and gas
connection materials of the Plasma Cleaner and vacuum pump are compatible with the
gas(es). Use a suitable vacuum pump to service corrosive gases. It may be necessary to
use different materials to avoid reaction with the process gas. Please contact Harrick
Plasma to determine materials compatibility with your process gas(es).
18 of 50
PROCESSING WITH GAS
(A) • To process gas
Plasma
Cleaner
Vacuum
Pump
Vent (closed)
(open) Process Gas
Needle
Valve
3-Way
Valve
Lever
(pointing left)
3-Way
Valve
(B) • To vent
Plasma
Cleaner
Vacuum
Pump
Vent (open)
(closed) Process Gas
Needle
3-Way
Valve 3-Way
Valve
Valve
Lever
(pointing right)
(C) • 3-way valve closed
Plasma
Cleaner
Vacuum
Pump
Vent (closed)
(closed) Process Gas
Needle
Valve
3-Way
3-Way
Valve
Valve
Lever
(pointing vertical)
Figure 6 • Setup for Operating with Process Gas
19 of 50
PROCESSING WITH GAS
OPERATION
CAUTION:
Following completion of processing, the Plasma Cleaner main power should be turned off
in order to prevent overheating and possible damage to the Plasma Cleaner.
CAUTION:
If you are working with toxic or highly reactive gases, the gases must be handled with
extreme caution. To avoid releasing toxic or highly reactive gases into the ambient
environment, it is recommended to run several purge cycles (flood the chamber with an
inert gas (e.g. N2 or Ar) and allow it to pump out) to ensure the toxic and highly reactive
gases are properly evacuated from the gas line and chamber prior to venting. The pump
exhaust must also be properly vented.
See CONFIGURATION OPTIONS: PURGING WITH INERT GAS for general guidelines to
set up the Plasma Cleaner to purge with inert gas. For safe gas handling procedures
specific to your process gas, contact your process gas supplier.
NOTE:
If the Plasma Cleaner is intended to be repeatedly used
with no change to the process settings (as in the case of
a single user), it is recommended for process
repeatability to leave the needle valve open and fixed to
the desired setting. Instead, use only the 3-way valve to
switch between bleeding in gas, isolating the plasma
chamber, and venting (Figure 6).
If the process settings of the Plasma Cleaner may vary
with each use (as in the case of multiple users), it is
recommended to close the needle valve at the end of
each use as the default setting.
EVACUATING THE CHAMBER
•
•
•
•
Put the sample in the Plasma Cleaner chamber.
Check that the 3-way valve is closed (lever is in
the vertical position, Figure 6C).
Closed the front door and hold the door against
the plasma chamber.
Turn on the vacuum pump. The vacuum will hold
the front door closed. It will take a few minutes to
evacuate the air in the chamber.
20 of 50
PROCESSING WITH GAS
BLEEDING IN PROCESS GAS
•
•
•
•
•
GENERATING PLASMA
•
•
NOTE:
Open the process gas cylinder valve (and
isolation valve at regulator output) and adjust the
regulator pressure to 5-10 psig.
Open the 3-way valve to process gas (lever
points to the needle valve, Figure 6A).
Slightly open the needle valve (1/8 of a turn or
less) and allow the gas to flow for 30-60 seconds.
Turn on the Plasma Cleaner main power.
Select the appropriate RF power level (refer to
the following NOTE below).
Look through the window of the Plasma Cleaner
and wait until a glow is observed. This indicates
that plasma has been generated.
Adjust the needle valve slightly until the plasma
intensity is visibly maximized. This broadly
corresponds to optimal plasma generation
conditions.
By selecting the process gas (or gas mixture), process
pressure, plasma energy (RF power), and processing
duration, the nature and extent of the surface interactions
can be tailored for your application.
For optimal plasma uniformity, the RF power level should
be set to MED or HI. Process pressures of 1000-1300
mTorr and process times of 1-3 minutes are good
process parameter initial values. Optimal process
parameter values will depend on the sample material and
intended application. Some experimentation may be
required to determine these optimal values.
PLASMA PROCESSING
•
•
•
•
•
•
•
Process the sample for the desired duration.
At the end of the process, set the RF power level
to OFF.
Turn off the Plasma Cleaner main power.
Close the process gas cylinder valve (and
isolation valve at regulator output).
Allow 1-3 minutes for the vacuum pump to pump
out any residual process gas from the chamber.
Close the needle valve.
Close the 3-way valve (lever is in the vertical
position, Figure 6C).
21 of 50
PROCESSING WITH GAS
CAUTION:
If you are working with toxic or highly reactive gases, the gases must be handled with
extreme caution. To avoid releasing toxic or highly reactive gases into the ambient
environment, it is recommended to run several purge cycles (flood the chamber with an
inert gas (e.g. N2 or Ar) and allow it to pump out) to ensure the toxic or highly reactive
gases are properly evacuated from the gas line and chamber prior to venting. The pump
exhaust must also be properly vented.
See CONFIGURATION OPTIONS: PURGING WITH INERT GAS for general guidelines to
set up the Plasma Cleaner to purge with inert gas. For safe gas handling procedures
specific to your process gas, contact your process gas supplier.
VENTING THE CHAMBER
•
•
•
•
•
Turn off the vacuum pump.
Slowly open the 3-way valve to vent (lever points
to the vent flow, Figure 6B).
Once atmospheric pressure is reached, open the
front door.
Close the 3-way valve (lever is in the vertical
position, Figure 6C).
Take out the sample.
CAUTION:
If the Plasma Cleaner is not vented immediately, oil may backstream from the vacuum
pump and contaminate the system. We recommend the use of a vacuum pump with an
anti suck back feature, such as that optionally provided by Harrick Plasma. Do not open
the front door when the chamber is under vacuum since this will damage the glass
chamber.
22 of 50
USING THE OPTIONAL PLASMAFLO
Before starting, take a few moments to familiarize
yourself with the PlasmaFlo (Figure 7) and PlasmaFlo
accessories (Figure 8).
GETTING READY
(A) • Front view
Flowmeter 2
(022-13)
Flowmeter 1
(032-15)
Digital Vacuum
Gauge Meter
Thermocouple (TC)
Vacuum Gauge
Power Inlet
Gas Output
Main Power
Switch
Gas Input (2)
(B) • Back view
Fuse (2)
Power
Inlet
Figure 7 • PlasmaFlo (230V)
NOTE:
The PlasmaFlo PDC-FMG-2 is rated for 230V at 50Hz
but can accept line voltages of 220-240V at 50-60Hz.
23 of 50
USING THE OPTIONAL PLASMAFLO
1/4” ID
Flexible
Tubing
Swagelok
Hose
Adaptor (3)
Hose
Clamp
(2)
NPT
Hose
Adaptor
Thermocouple (TC)
Vacuum Gauge
Assembly
Figure 8 • PlasmaFlo and Accessories
24 of 50
Vacuum
Gauge
Cable
USING THE OPTIONAL PLASMAFLO
SETUP
See ABOUT THE VACUUM PUMP for instructions to set
up the vacuum pump for use with the Plasma Cleaner.
PRESSURE REGULATOR
SELECTION
Use a pressure regulator that is compatible with the
process gas and that has the same connection size as on
the gas cylinder. For added safety, include an isolation
valve at the regulator output.
A two-stage regulator is able to provide more stable
regulated pressures under conditions where downstream
pressures (at the plasma chamber) may fluctuate and is
recommended over a single-stage regulator.
For process gas delivery, we recommend using regulated
pressures of 10 psig to enable use of the correlated
flowrate tables provided for each flowmeter in
APPENDIX A. If other regulated pressures are desired,
please inquire with Harrick Plasma.
PURGE GAS LINE(S) PRIOR TO
INSTALLATION
All gas lines to be connected to the flowmeter(s) should be
purged of any dust or residual contamination prior to
installation. All flowmeters have a built-in filter at the inlet.
To prevent the float from potentially getting stuck along the
flowtube of the flowmeter(s), use only dry, clean gas.
NOTE:
When connecting NPT tapered threads, always wrap the
thread with PTFE (Teflon) tape to ensure a good seal and
lubrication. Remove any debris or residual tape on the
internal and external threads before wrapping with new
tape and reconnecting. Wrap the tape in the direction
counter to the screw direction. TIGHTEN ALL
THREADED CONNECTIONS WITH A WRENCH.
In preparation for setting up the Plasma Cleaner and
PlasmaFlo for operating with process gas(es), refer to
Figure 1 for identification of parts of the Plasma Cleaner,
Figure 7 and 8 for identification of the PlasmaFlo and
accessories, Figure 9 for valve/TC vacuum gauge
configuration on the front door and Figure 10 for a
schematic of the assembled system:
• Connect the needle valve/3-way valve assembly
to the thermocouple (TC) vacuum gauge
assembly. Tighten with a wrench.
• Connect the needle valve/3-way valve/TC vacuum
gauge assembly to the Plasma Cleaner front door.
Tighten with a wrench. The final configuration of
the valves and TC vacuum gauge assembly on
the front door is shown in Figure 9.
25 of 50
USING THE OPTIONAL PLASMAFLO
SETUP (continued)
•
•
•
•
•
•
•
•
To connect the PlasmaFlo gas output to the
needle valve using the supplied hose adaptors
and 1/4” ID flexible tubing: connect the Swagelok
hose adaptor to the PlasmaFlo gas output (tighten
with a wrench). Attach one end of the flexible
tubing to the PlasmaFlo gas output and the other
end of the tubing to the NPT hose adaptor on the
needle valve. Tighten hose clamps over each end
of the tubing.
OR
Alternatively, you may use other types of tubing
and adaptors of your choice to connect the
PlasmaFlo gas output to the needle valve. The
needle valve has 1/8” NPT fittings and the
PlasmaFlo gas output has 1/4” Swagelok fittings.
Attach appropriate pressure regulator(s) to the
process gas cylinder(s). See PRESSURE
REGULATOR SELECTION above.
To connect the gas cylinder pressure regulator to
the PlasmaFlo gas input(s) using the supplied
Swagelok hose adaptors: connect the two (2)
Swagelok hose adaptors to the PlasmaFlo gas
input(s) (tighten with a wrench). Use appropriate
hose adaptors and 1/4” ID flexible tubing to
connect the pressure regulator output to the
PlasmaFlo gas input. Tighten hose clamps over
each end of the tubing.
OR
Alternatively, you may use other types of tubing
and adaptors of your choice to connect the
pressure regulator output(s) to the PlasmaFlo gas
input(s). The PlasmaFlo gas inputs have 1/4”
Swagelok fittings.
Connect the supplied vacuum gauge cable
between the TC vacuum gauge and the
thermocouple vacuum gauge power inlet (TC) on
the PlasmaFlo front panel.
Connect the plasma chamber outlet at the back of
the Plasma Cleaner (Figure 1B) to the vacuum
pump using 1/2" ID vacuum hose. Tighten hose
clamps over the hose at each end.
Plug the vacuum pump power cord into an
electrical outlet.
Plug one end of the Plasma Cleaner power cord
into the power inlet on the back of the Plasma
Cleaner and the other end into an electrical outlet.
Plug one end of the PlasmaFlo power cord into
the power inlet on the back of the PlasmaFlo and
the other end into an electrical outlet.
26 of 50
USING THE OPTIONAL PLASMAFLO
CAUTION:
For processing with pure oxygen, make sure that you use an oxygen compatible vacuum
pump. The optional Harrick Plasma oil-based vacuum pumps are NOT oxygen compatible.
The hydrocarbon pump oil mist can react with the concentrated oxygen to produce a
potentially explosive combination. We do offer oxygen service pumps for use with oxygen
process gas; please inquire with Harrick Plasma.
CAUTION:
If you are working with highly reactive or corrosive gases, be sure that the seals and gas
connection materials of the Plasma Cleaner and vacuum pump are compatible with the
gas(es). Use a suitable vacuum pump to service corrosive gases. It may be necessary to
use different materials to avoid reaction with the process gas. Please contact Harrick
Plasma to determine materials compatibility with your process gas(es).
27 of 50
USING THE OPTIONAL PLASMAFLO
Figure 9 • Final Configuration of the Needle Valve, 3-Way Valve, and TC Vacuum Gauge on
the Plasma Cleaner Front Door When Using the Optional PlasmaFlo
28 of 50
USING THE OPTIONAL PLASMAFLO
(A) • To process gas
PlasmaFlo
Plasma
Cleaner
Vacuum
Pump
TC Vacuum
Gauge
Input 1 Input 2
Gas Output
(open)
Vent (closed)
Needle
Valve
(open)
3-Way
Valve
3-Way
Valve
Lever
(pointing left)
(B) • To vent
PlasmaFlo
Plasma
Cleaner
Vacuum
Pump
TC Vacuum
Gauge
Input 1 Input 2
Gas Output
(closed)
Vent (open)
Needle
Valve
3-Way
Valve
Lever
(pointing right)
3-Way
Valve
(C) • 3-way valve closed
PlasmaFlo
Plasma
Cleaner
Vacuum
Pump
TC Vacuum
Gauge
Input 1 Input 2
Gas Output
(closed)
Vent (closed)
Needle
Valve
3-Way
3-Way
Valve
Valve
Lever
(pointing vertical)
Figure 10 • Setup for Operating with Process Gas and PlasmaFlo
29 of 50
USING THE OPTIONAL PLASMAFLO
OPERATION
CAUTION:
Following completion of processing, the Plasma Cleaner main power should be turned off
in order to prevent overheating and possible damage to the Plasma Cleaner.
USING THE FLOWMETERS
Flowmeters with a 65mm reference scale, rather than a
direct-read scale, are provided to enable use with a broad
range of gases.
Correlated flowrate tables that convert the millimeter
(mm) scale reading to an actual flowrate (mL/min) are
available for the most common process gases used with
the Plasma Cleaner (air, Ar, N2, O2), metered at a
regulated pressure of 10 psig. Please note that
Flowmeter 1 (032-15) and Flowmeter 2 (022-13) have
different flow capacities. See APPENDIX A for flowrate
tables for each flowmeter.
Correlated flowrate tables for other process gases or
other regulated pressures can be made available. Please
inquire with Harrick Plasma.
Before opening the gas cylinder valve and isolation valve
to introduce process gas into the plasma system, make
sure the flowmeter valves are closed to avoid the sudden
rise of the float and having the float hit the top of the
flowtube.
WHEN CLOSING THE FLOWMETER(S), DO NOT
OVERTIGHTEN THE FLOWMETER VALVES.
CAUTION:
If you are working with toxic or highly reactive gases, the gases must be handled with
extreme caution. To avoid releasing toxic or highly reactive gases into the ambient
environment, it is recommended to run several purge cycles (flood the chamber with an
inert gas (e.g. N2 or Ar) and allow it to pump out) to ensure the toxic or highly reactive
gases are properly evacuated from the gas line and chamber prior to venting. The pump
exhaust must also be properly vented.
See CONFIGURATION OPTIONS: PURGING WITH INERT GAS for general guidelines to
set up the Plasma Cleaner to purge with inert gas. For safe gas handling procedures
specific to your process gas, contact your process gas supplier.
30 of 50
USING THE OPTIONAL PLASMAFLO
EVACUATING THE CHAMBER
•
•
•
•
•
•
•
BLEEDING IN PROCESS GAS(ES)
•
•
•
•
GENERATING PLASMA
•
•
•
Put the sample in the Plasma Cleaner chamber.
Turn on the PlasmaFlo main power.
Check that the 3-way valve is closed (lever is in
the vertical position, Figure 10C).
On the PlasmaFlo, check that the flowmeter
valves are closed.
Close the Plasma Cleaner front door and hold the
door against the plasma chamber.
Turn on the vacuum pump. The vacuum pump
will hold the front door closed. The pressure, as
indicated by the vacuum gauge meter, should
begin to decrease.
Pump down the chamber to ~200 mTorr (or to
the desired base pressure) and allow the
pressure to equilibrate prior to flowing in process
gas(es).
Open the 3-way valve to process gas (lever
points to the needle valve, Figure 10A).
Open the needle valve. The vacuum pressure will
initially increase but will gradually decrease
towards the starting base pressure as the
residual air in the gas line is evacuated.
Open the process gas cylinder valve(s) and
adjust the regulator pressure to 10 psig. Slowly
open the regulator isolation valve. The floats in
the flowmeter flowtube may rise slightly due to
the sudden pressure increase upon opening the
regulator isolation valve.
Slowly open the flowmeter valve(s) and set the
desired flowrate or set the flow level to obtain the
desired pressure. Read off the millimeter (mm)
reference scale reading, located on the flowtube,
from the center of the float. See APPENDIX A to
convert the mm scale reading to the actual
flowrate (mL/min). The float position may deviate
slightly after setting the flow level due to
relaxation of the flowmeter valve as it equilibrates
to its new position. Allow a few minutes for the
pressure to stabilize after setting the gas
flowrate.
Turn on the Plasma Cleaner main power.
Select the appropriate RF power level (refer to
the following NOTE on the next page).
Look through the window of the Plasma Cleaner
and wait until a glow discharge is observed. This
indicates that plasma has been generated.
Plasma that is visibly maximized broadly
corresponds to optimal plasma generation
conditions.
31 of 50
USING THE OPTIONAL PLASMAFLO
NOTE:
By selecting the process gas (or gas mixture), process
pressure, plasma energy (RF power), and processing
duration, the nature and extent of the surface interactions
can be tailored for your application.
For optimal plasma uniformity, the RF power level should
be set to MED or HI. Process pressures of 1000-1300
mTorr and process times of 1-3 minutes are good
process parameter initial values. Optimal process
parameter values will depend on the sample material and
intended application. Some experimentation may be
required to determine these optimal values.
PLASMA PROCESSING
•
•
•
•
•
•
•
Process the sample for the desired duration.
At the end of the process, set the RF power level
to OFF.
Turn off the Plasma Cleaner main power.
Close the process gas cylinder valve(s) and
isolation valve(s).
Allow 1-3 minutes for the system to pump out any
residual process gas(es) from the chamber.
Close the flowmeter valve(s).
Close the needle valve and 3-way valve (lever is
in the vertical position, Figure 10C).
CAUTION:
If you are working with toxic or highly reactive gases, the gases must be handled with
extreme caution. To avoid releasing toxic or highly reactive gases into the ambient
environment, it is recommended to run several purge cycles (flood the chamber with an
inert gas (e.g. N2 or Ar) and allow it to pump out) to ensure the toxic or highly reactive
gases are properly evacuated from the gas line and chamber prior to venting. The pump
exhaust must also be properly vented.
See CONFIGURATION OPTIONS: PURGING WITH INERT GAS for general guidelines to
set up the Plasma Cleaner to purge with inert gas. For safe gas handling procedures
specific to your process gas, contact your process gas supplier.
32 of 50
USING THE OPTIONAL PLASMAFLO
VENTING THE CHAMBER
•
•
•
•
•
•
Turn off the vacuum pump.
Slowly open the 3-way valve to vent (lever points
to the vent flow, Figure 10B).
Once atmospheric pressure is reached, open the
front door.
Close the 3-way valve (lever is in the vertical
position, Figure 10C).
Turn off the PlasmaFlo main power.
Remove the sample.
CAUTION:
If the Plasma Cleaner is not vented immediately, oil may backstream from the vacuum
pump and contaminate the system. We recommend the use of a vacuum pump with an
anti suck back feature, such as that optionally provided by Harrick Plasma. Do not open
the front door when the chamber is under vacuum since this will damage the glass
chamber.
33 of 50
CONFIGURATION OPTIONS
PURGING WITH INERT GAS
If you are working with toxic or highly reactive gases, the
gases must be handled with extreme caution. To avoid
releasing toxic or highly reactive gases into the ambient
environment, it is recommended to run several purge
cycles (flood the chamber with an inert gas (e.g. N2, Ar)
and allow it to pump out) prior to venting to ensure the
toxic or highly reactive gases are properly evacuated
from the chamber. The pump exhaust must also be
properly vented.
Note that the procedures outlined below are general
guidelines for purging the plasma system with inert gas.
For safe gas handling procedures specific to your
process gas, please consult with your process gas
supplier.
SETUP
The inert gas line should be connected immediately after
the process gas regulator output to flush out as much of
the process gas line as possible. A possible configuration
for connecting the inert gas line to the process gas line in
conjunction with the plasma system is shown in Figure 11
as an example. For safe gas handling equipment and
procedures specific to your process gas, please further
consult with your process gas supplier.
• Attach an appropriate pressure regulator
(preferably one with an isolation valve at the
regulator output) to the inert gas cylinder.
• Use appropriate tubing and adaptors to connect
the inert gas regulator output to the process gas
line as close to the process gas regulator as
possible.
PURGING WITH INERT GAS
AFTER PLASMA PROCESSING
To purge the gas line and plasma chamber with inert gas
after following the procedures in PLASMA PROCESSING
(page 21 or page 32):
• Check that the process gas cylinder valve and
isolation valve are closed.
• Check that the 3-way valve is in the closed
position (lever is in the vertical direction, Figure
6C or 10C).
• If using the optional PlasmaFlo, check that the
flowmeter valves are closed.
• Open the needle valve.
• Open the inert gas cylinder valve. Adjust the inert
gas pressure regulator to 10 psig. Slowly open
the regulator isolation valve.
• If using optional the PlasmaFlo, slowly open the
flowmeter valve that is connected to the inert gas
line to the highest flow capacity.
34 of 50
CONFIGURATION OPTIONS
PURGING WITH INERT GAS
AFTER PLASMA PROCESSING
(continued)
•
•
•
•
•
•
•
•
•
•
•
•
•
•
Partially open the 3-way valve to inert gas (lever
is intermediate to needle valve and vertical
position, Figure 11). If using the optional
PlasmaFlo, the pressure should quickly increase.
Close the 3-way valve (lever is in the vertical
position, Figure 6C or 10C). These steps should
be performed quickly to avoid disturbing the
sample or overloading the vacuum pump. If
using the optional PlasmaFlo, the pressure
should decrease back to a lower pressure.
Repeat the previous 2 steps of quickly opening
and closing the 3-way valve to inert gas flow.
Repeat a third time. At the end of this procedure,
the 3-way valve should be closed (lever is in the
vertical position, Figure 6C or 10C).
Close the inert gas cylinder valve and regulator
isolation valve.
Allow 1-3 minutes for the vacuum pump to
evacuate any residual gas from the chamber.
Close the flowmeter valve.
If necessary, repeat the above steps with the
second process gas.
Close the needle valve.
Turn off the vacuum pump.
Slowly open the 3-way valve to vent (lever points
to the vent flow, Figure 6B or 10B).
Once atmospheric pressure is reached, open the
front door.
Close the 3-way valve (lever is in the vertical
position, Figure 6C or 10C).
Turn off the Plasma Cleaner main power and
optional PlasmaFlo main power.
Remove the sample.
35 of 50
CONFIGURATION OPTIONS
(A) • Inert Gas Purge with Plasma Cleaner
Pressure Isolation
Regulator Valve
Plasma
Cleaner
Vacuum
Pump
Inert Gas
(open)
Process Gas
(closed)
Vent (closed)
Pressure Isolation
Regulator Valve
Needle
Valve
3-Way
3-Way
Valve
Valve
Lever
(between needle valve
and vertical position)
3-way valve partially open
to inert gas
(B) • Inert Gas Purge with Plasma Cleaner and Optional PlasmaFlo
Pressure Isolation
Regulator Valve
PlasmaFlo
Plasma
Cleaner
Inert Gas
(open)
Process Gas
Input 1 Input 2
(closed)
Pressure Isolation
Gas Output
Regulator Valve
(open)
Vacuum
Pump
TC Vacuum
Gauge
Vent (closed)
Needle
Valve
3-Way
3-Way
Valve
Valve
Lever
(between needle valve
and vertical position)
3-way valve partially open
to inert gas
Figure 11 • A Possible Configuration for Inert Gas Purge in the Plasma System
36 of 50
MAINTENANCE
MAINTENANCE
REQUIREMENTS
For most plasma cleaning and plasma processing
applications, the Plasma Cleaner requires little or no
maintenance. The vacuum pump does require routine
servicing. Please review the pump manual to determine
the maintenance requirements for the vacuum pump.
CLEANING THE CHAMBER
Some combinations of process gas(es) and sample
materials may generate particulates and contaminants
that can accumulate on the chamber wall. Over time,
these contaminants may affect the plasma power and
effectiveness of the plasma process. If a change to the
plasma process or plasma intensity is detected, the
chamber may require cleaning to remove these
contaminants.
CAUTION:
Please take all safety precautions and use the appropriate personal protection equipment
(e.g. gloves, goggles, etc.) when cleaning the plasma chamber with solvents or hazardous
chemicals.
The plasma chamber is made of borosilicate glass
(Pyrex) and may be cleaned using similar cleaning
methods for standard laboratory glassware, such as:
• Soaking or wiping the plasma chamber surface
with acetone or isopropyl alcohol.
• Cleaning the plasma chamber using a standard
laboratory glassware cleaner (e.g. Alconox).
REPLACING THE CHAMBER
If standard laboratory glassware cleaning methods do not
remove the contaminants and the contaminants are
affecting the plasma process, the chamber may require
replacement. See APPENDIX B: OPTIONAL AND
REPLACEMENT PARTS to find the appropriate part
number.
To replace the Plasma Cleaner chamber (Figure 12):
• Disconnect the vacuum hose on the plasma
chamber outlet at the back of the Plasma
Cleaner (Figure 12A).
• Loosen the thumbscrew of the retaining ring on
the plasma chamber outlet (Figure 12B).
Remove the retaining ring.
• Slide the old chamber out (Figure 12C).
• Slide the new chamber in.
• Slide the retaining ring onto the plasma chamber
outlet and hand-tighten the thumbscrew.
• Reconnect the vacuum hose to the plasma
chamber outlet. Tighten the hose clamp around
the end of the tubing.
37 of 50
MAINTENANCE
(A) • Disconnect the vacuum hose from the plasma chamber outlet
(B) • Loosen the thumbscrew of the retaining ring
(C) • Slide the old chamber out
Figure 12 • Replacing the Plasma Chamber
38 of 50
MAINTENANCE
CLEANING THE PLASMA
CLEANER FRONT DOOR
AND O-RING
To clean the Plasma Cleaner door and o-ring:
• Remove the o-ring from the Plasma Cleaner door
(Figure 13).
• Wipe the interior of the Plasma Cleaner door with
isopropyl alcohol.
• Visually inspect the o-ring. If the o-ring shows
signs of degradation (e.g. surface is cracked or
worn), replace the o-ring (see APPENDIX B:
OPTIONAL AND REPLACEMENT PARTS to find
the appropriate part number). If the o-ring
appears in good condition, wipe the o-ring with
isopropyl alcohol to remove any debris or
contaminants on the surface.
• Reinsert the o-ring into the circular groove on the
Plasma Cleaner door. Make sure the o-ring is
properly seated in the groove.
Figure 13 • Removing the O-Ring on the Plasma Cleaner Front Door
39 of 50
MAINTENANCE
REPLACING THE WINDOW
AND WINDOW O-RING
To replace the Plasma Cleaner window (Figure 14):
• Remove the three (3) screws securing the
Plasma Cleaner window (Figure 14A).
• Remove the retaining ring in front of the window
(Figure 14B).
• Remove the window (Figure 14C).
• Remove the o-ring (Figure 14D) and visually
inspect it. If the o-ring shows signs of
degradation (e.g. surface is cracked or worn),
replace the o-ring (see APPENDIX B: OPTIONAL
AND REPLACEMENT PARTS to find the
appropriate part number). If the o-ring appears in
good condition, wipe the o-ring with isopropyl
alcohol to remove any debris on the surface.
• Reinsert the o-ring into the circular groove. Make
sure the o-ring is properly seated in the groove.
• Insert the new window.
• Reinsert the retaining ring.
• Secure the retaining ring with the three (3)
screws. Tighten with a wrench.
(A) • Remove the three (3) screws
(B) • Remove the retaining ring
(C) • Remove the window
(D) • Remove the o-ring
Figure 14 • Replacing the Window on the Plasma Cleaner Front Door
40 of 50
MAINTENANCE
CHECKING AND
REPLACING THE FUSES
•
•
•
•
Remove the fuse holder on the back of the
Plasma Cleaner (Figure 1B).
Check the fuse either visually or using a digital
multimeter:
If the fuse is in working condition, the metal wire
inside the fuse should be intact and the digital
multimeter should indicate an electrical short
across the fuse (resistance of 1 ohm or less).
If the fuse is blown, the metal wire inside the fuse
may be broken and the digital multimeter should
indicate an electrical open across the fuse
(resistance overload (OL)).
Replace the blown fuse(s). Refer to the back of
the Plasma Cleaner (Figure 1B) or APPENDIX B:
OPTIONAL AND REPLACEMENT PARTS for
specifications on the replacement fuse(s).
Reinsert the fuse holder into the back of the
Plasma Cleaner.
41 of 50
TROUBLESHOOTING
MALFUNCTION
POSSIBLE CAUSES
Plasma fails to form in
the chamber.
The electronics fails to
deliver power to RF
coil.
CORRECTIVE ACTIONS
Check the fuses in the back of the unit.
Replace any blown fuses (refer to
MAINTENANCE: CHECKING AND
REPLACING THE FUSES).
If plasma still does not form, test the electronics
with the fluorescent bulb. Place the miniature
fluorescent bulb supplied with the Plasma
Cleaner into the chamber. Leave the door open
and turn the RF power level to its three (3)
settings, successively. If the bulb glows on all
three RF power settings, the electronic system
is functioning properly; proceed to the test of the
vacuum system below. If the electronics test
fails, contact Harrick Plasma.
The vacuum system
fails to sufficiently
evacuate the
chamber.
If you are using a vacuum pump not supplied by
Harrick Plasma, make sure that your vacuum
pump is capable of reaching an ultimate total
pressure of 200 mTorr or less. Then check that
the vacuum hose is properly attached, all hose
clamps and gas line connections are properly
tightened, the Plasma Cleaner door is properly
seated, and the door o-ring is in place. The oring should be clean and free of defects.
If you are still unable to form plasma following
these test and corrective procedures, contact
Harrick Plasma.
Plasma degrades in
effectiveness of
surface treatment.
Contaminants from
previous use have
deposited on the
plasma chamber walls
and door interior.
Plasma chamber and/or door requires cleaning.
See MAINTENANCE: CLEANING THE
CHAMBER and MAINTENANCE: CLEANING
THE PLASMA CLEANER DOOR AND O-RING.
42 of 50
TROUBLESHOOTING
MALFUNCTION
Float becomes stuck
along the flowtube of
one of the PlasmaFlo
flowmeters.
POSSIBLE CAUSES
Dust/particulates or
condensation in the
flowtube is causing
the float to stick.
CORRECTIVE ACTIONS
The clearance (spacing) between the float and
inner wall of the flowtube is very small (less than
0.5 mm) to achieve such low flowrates. Any
dust, particulates, or condensation that may
have formed from temperature fluctuations
during shipping can cause the float to stick.
To free the float: disconnect the gas lines at the
PlasmaFlo gas input and output. Open the
flowmeter valve fully, Blow clean, dry
compressed air or inert gas through the
PlasmaFlo gas input until the float moves freely
along the flowtube.
To prevent dust or condensation from
accumulating in the flowtubes, use only dry,
clean gas with the PlasmaFlo.
If the float continues to stick, contact Harrick
Plasma.
43 of 50
WARRANTY INFORMATION
DISCLAIMER
The Plasma Cleaner is designed for safe and efficient
operation when used properly and in accordance with the
instructions. Failure to observe the following precautions
could result in serious personal injury: The Plasma
Cleaner is an electrical instrument; to avoid electric
shock, please observe all standard precautions, such as
not operating the device near water and operating the
device at appropriate line voltage and frequency. Do not
remove cover plates or housing, except by certified
electronics technician. Do not open the Plasma Cleaner
door when the chamber is under vacuum. Do not use the
Plasma Cleaner near flammable materials. Do not plug
vacuum pumps whose input electrical current
requirement exceeds 7 Amps into the Plasma Cleaner.
With respect to vacuum pumps, please refer to the pump
user’s manual for specific precautions. In general, for
oxygen process gas, an oxygen compatible pump should
be used; in case of using toxic gases or gases that ionize
to toxic products, an efficient pump exhaust filter should
be used. Harrick Plasma shall not be held liable for any
damages: indirect or consequential related to this product
including loss of revenue. Furthermore, Harrick Plasma’s
liability shall not exceed the cost of the product.
Operational instructions should be followed at all times.
WARRANTY
All products manufactured by Harrick Plasma come with
a 1 year limited warranty. Any product failure that results
from use in accordance with manufacturers guidelines is
covered under the warranty. Any failure resulting from
misuse of the product or resulting from actions such a
dropping the unit or damage in poor storage conditions,
for example, will not be repaired or replaced under
warranty. Furthermore, products that have been
intentionally damaged cannot be replaced or repaired
under warranty. Products out of warranty or not subject to
these conditions may be repaired by the manufacturer as
a billed service at the manufacturer’s discretion. With the
exception of this exclusive warranty, Harrick Plasma
makes no warranties, explicit or implied. We also
disclaim any implied warranties of merchantability or
fitness for a particular purpose.
44 of 50
WARRANTY INFORMATION
REPAIR RETURNS
Owners of products manufactured by Harrick Plasma in
need of service or repair should contact Harrick Plasma
prior to return of equipment, regardless of warranty
coverage status. Products out of warranty may be
repaired by the manufacturer as a billed service at the
manufacturer’s discretion. Any potentially hazardous
substances must be removed from the plasma chamber
and front cover interior if these items are to be returned
with the product. Products to be repaired out of warranty
will be initially evaluated and a formal repair estimate will
be prepared for approval prior to any repairs being
carried out. Any product returned for repair must be
accompanied by a repair return document providing
contact information, return shipping address and a
description of product problems at issue and any
measures taken.
NEW EQUIPMENT RETURNS
Recently purchased products manufactured by Harrick
Plasma may be returned within 30 days of receipt.
Products must be returned in unused, resalable
condition, in original packing materials, and are subject to
a 15% restocking fee. Vacuum pumps and accessories
must be returned within 15 days of receipt in unused,
resalable condition, in original packing materials, and are
also subject to a 15% restocking fee. Purchasers
wishing to return products should contact Harrick Plasma
prior to returning.
45 of 50
APPENDIX A
FLOWRATE TABLE FOR PLASMAFLO FLOWMETER 1 (032-15)
•
Flowmeters with a 65mm reference scale, rather than a direct-read scale, are provided to
enable use with a broad range of gases.
Use the flowrate table below for the specified process gas to convert the millimeter (mm)
scale reading on Flowmeter 1 (032-15) to an actual flowrate (mL/min).
Please note that Flowmeter 1 and Flowmeter 2 have different flow capacities. For flowrates
for Flowmeter 2 (022-13), please see the next page.
•
•
To determine the flowrate:
• Read the position on the millimeter (mm) reference scale that corresponds to the center of
the float. Read the float position with the float at eye level.
• Use the correlation table below to convert the float position (mm) to an actual flowrate
(mL/min). For example, if argon (Ar) gas, metered at 10 psig regulated pressure, is inputted
into Flowmeter 1 to raise the float to 35 mm on the reference scale, the corresponding Ar
flowrate is 25 mL/min.
• The float position may deviate slightly after setting the flow level due to relaxation and
equilibration of the flowmeter valve to its new position. Allow a few minutes for the flowrate to
equilibrate and the pressure to stabilize.
Flowtube
Float Material
Gas Temperature
Gas Metering Pressure
032-15
Glass
70 °F (21 °C)
Atmospheric pressure (0 psig) and 10 psig for Air; 10 psig for all
other gases
Take readings at the center of the float
Scale
Reading
(mm)
65
60
55
50
45
40
35
30
25
20
15
10
5
Air
0 psig
Flow (mL/min)
48.7
43.8
38.1
32.7
27.9
22.9
19.0
15.5
12.6
9.94
7.27
5.41
3.66
Air
10 psig
Flow (mL/min)
77.1
68.3
59.0
51.5
44.8
38.9
30.7
25.7
20.4
16.2
12.3
9.2
5.7
Argon (Ar)
10 psig
Flow (mL/min)
67.3
58.3
50.9
43.4
37.4
31.5
25.0
20.4
16.6
13.2
9.5
7.3
4.1
46 of 50
Nitrogen (N2)
10 psig
Flow (mL/min)
72.3
66.3
60.0
51.5
43.7
35.0
28.6
23.1
18.3
13.2
9.7
6.3
4.1
Oxygen (O2)
10 psig
Flow (mL/min)
71.7
63.5
54.8
47.0
40.3
34.2
27.0
22.5
18.3
14.1
10.6
7.9
5.1
APPENDIX A
FLOWRATE TABLE FOR PLASMAFLO FLOWMETER 2 (022-13)
•
Flowmeters with a 65mm reference scale, rather than a direct-read scale, are provided to
enable use with a broad range of gases.
Use the flowrate table below for the specified process gas to convert the millimeter (mm)
scale reading on Flowmeter 2 (022-13) to an actual flowrate (mL/min).
Please note that Flowmeter 1 and Flowmeter 2 have different flow capacities. For flowrates
for Flowmeter 1 (032-15), please see the previous page.
•
•
To determine the flowrate:
• Read the position on the millimeter (mm) reference scale that corresponds to the center of
the float. Read the float position with the float at eye level.
• Use the correlation table below to convert the float position (mm) to an actual flowrate
(mL/min). For example, if argon (Ar) gas, metered at 10 psig regulated pressure, is inputted
into Flowmeter 2 to raise the float to 35 mm on the reference scale, the corresponding Ar
flowrate is 57 mL/min.
• The float position may deviate slightly after setting the flow level due to relaxation and
equilibration of the flowmeter valve to its new position. Allow a few minutes for the flowrate to
equilibrate and the pressure to stabilize.
Flowtube
Float Material
Gas Temperature
Gas Metering Pressure
022-13
Glass
70 °F (21 °C)
Atmospheric pressure (0 psig) and 10 psig for Air; 10 psig for all
other gases
Take readings at the center of the float
Scale
Reading
(mm)
65
60
55
50
45
40
35
30
25
20
15
10
5
Air
0 psig
Flow (mL/min)
104
91.5
79.5
69.0
59.2
49.5
41.7
34.2
27.7
22.0
17.5
13.4
10.0
Air
10 psig
Flow (mL/min)
173.3
151.8
130.4
111.2
95.6
81.8
69.8
58.3
49.1
39.7
32.0
25.1
19.5
Argon (Ar)
10 psig
Flow (mL/min)
147.4
122.2
107.5
89.3
76.9
67.5
57.0
48.7
39.4
32.4
26.2
20.5
16.6
47 of 50
Nitrogen (N2)
10 psig
Flow (mL/min)
173.5
152.7
130.1
112.4
98.6
84.6
69.5
61.6
49.2
39.6
33.8
26.0
20.7
Oxygen (O2)
10 psig
Flow (mL/min)
171.7
137.9
116.3
101.4
86.6
73.6
63.0
52.2
43.7
36.9
29.8
21.4
18.5
APPENDIX B
OPTIONAL AND REPLACEMENT PARTS
OPTIONAL PARTS
Premium Vacuum Pump, 230V ...............................................................................
Premium Vacuum Pump Oil ....................................................................................
Basic Vacuum Pump, 230V .....................................................................................
Basic Vacuum Pump Oil ..........................................................................................
Fomblin-Based Vacuum Pump, 230V (for Oxygen Service) ....................................
Fomblin Fluid for Fomblin-Based Vacuum Pump.....................................................
Dry Scroll Vacuum Pump, 230V (for Oxygen Service).............................................
PlasmaFlo, 230V .....................................................................................................
Quartz Plasma Chamber .........................................................................................
Quartz Sample Tray (5.5” x 6.5”)..............................................................................
PDC-VP-2
PDC-VP-OIL
PDC-VPE-2
PDC-VPE-OIL
PDC-OPF-2
PDC-FMB
PDC-OPD-2
PDC-FMG-2
PDC-00Q
PDC-00T
REPLACEMENT PARTS
Pyrex Vacuum Chamber .........................................................................................
Front Door O-ring, Viton ..........................................................................................
Inset Window O-ring, Viton ......................................................................................
Window, Glass .........................................................................................................
Fluorescent Bulb ......................................................................................................
REPLACEMENT FUSES
Plasma Cleaner
PlasmaFlo
PDC-002 (230V)
2 Amp, slow-blow (2)
0.5 Amp, fast acting (2)
48 of 50
PDC-191-420
ORV-438
ORV-032
001-505
PDC-FLB
APPENDIX C
SPECIFICATIONS
PLASMA CLEANER (PDC-002)
Chamber Dimensions ..................................................................
Chamber Material ........................................................................
Input Power ..................................................................................
RF Frequency ..............................................................................
Inlet ..............................................................................................
Outlet ...........................................................................................
Weight ..........................................................................................
Dimensions ..................................................................................
6” diameter x 6.5” length
Pyrex
200 W
MHz range
1/8” NPT needle valve
1/2” OD Pyrex tubing
45 lbs
11” H x 18” W x 9” D
POWER APPLIED TO RF COIL
Low Setting ................................................................................ 7.2 W
Medium Setting .......................................................................... 10.2 W
High Setting ................................................................................ 29.6 W
OPTIONAL PLASMAFLO (PDC-FMG-2)
Vacuum Pressure Transducer...................................................... Thermocouple vacuum gauge
Pressure Reading ...................................................................... Digital meter
Pressure Range ......................................................................... 1 to 1999 mTorr
Number of Gas Inputs ................................................................. 2
Flowmeter 1 ................................................................................ 65 mm reference scale;
49 mL/min maximum flowrate
for atmospheric Air (0 psig) *
Flowmeter 2 ................................................................................ 65 mm reference scale;
104 mL/min maximum flowrate
for atmospheric Air (0 psig) *
Flowmeter Accuracy .................................................................. ±2% of full scale
Flowmeter Maximum Operating Pressure / Temperature ......... 200 psig / 250 °F (121 °C)
Gas Input Connection................................................................... 1/4” Swagelok to 1/4” OD
stainless steel hose adaptor
Gas Output Connection ............................................................... 1/4” Swagelok to 1/4” OD
stainless steel hose adaptor
Output Connection to Plasma Cleaner ........................................ 2-ft. length 1/4” ID flexible
tubing with two (2) hose clamps
Weight .......................................................................................... 7 lbs
Dimensions .................................................................................. 8.5” H x 10” W x 8” D
* Maximum flowrate varies with the process gas and regulated pressure. See APPENDIX A for flowrate
tables for the most common process gases used with our Plasma Cleaner (Air, Ar, N2, O2). Flowrate
tables with other process gases and regulated pressures can be made available.
49 of 50
APPENDIX C
SPECIFICATIONS
UTILITIES REQUIRED
Vacuum Pump ............................................................................. minimum pumping speed of
1.4 m3/hr and an ultimate total
pressure of 200 mTorr or less
P
P
P
OPTIONAL VACUUM PUMPS
Premium Vacuum Pump (PDC-VP and PDC-VP-2)
Pumping speed 50/60 Hz .............................................................
Ultimate total pressure (gas ballast closed) .................................
Ultimate total pressure (gas ballast open) ....................................
Motor power 50/60 Hz ..................................................................
Weight ...........................................................................................
Dimensions ...................................................................................
3.2/3.6 m3/hr
1.5 mTorr
23 mTorr
250/300 W
34 lbs
9” H x 15” W x 5” D
P
P
P
Basic Vacuum Pump (PDC-VPE and PDC-VPE-2)
Pumping speed 50/60 Hz .............................................................
Ultimate total pressure (gas ballast closed) .................................
Ultimate total pressure (gas ballast open) ....................................
Motor power 50/60 Hz ..................................................................
Weight ...........................................................................................
Dimensions ...................................................................................
5.1 m3/hr
7.5 mTorr
150 mTorr
373 W
27 lbs
9.75” H x 14” W x 5.5” D
P
P
P
Fomblin-Based Vacuum Pump for Oxygen Service (PDC-OPF and PDC-OPF-2)
Pumping speed 50/60 Hz .............................................................
Ultimate total pressure (gas ballast closed) .................................
Ultimate total pressure (gas ballast open) ....................................
Motor power 50/60 Hz ..................................................................
Weight ...........................................................................................
Dimensions ...................................................................................
3.3/3.9 m3/hr
1.5 mTorr
90 mTorr
250/300 W
48 lbs
9” H x 17” W x 6.5” D
P
P
P
P
Dry Scroll Vacuum Pump for Oxygen Service (PDC-OPD and PDC-OPD-2)
Pumping speed 50/60 Hz .............................................................
Ultimate total pressure (gas ballast closed; 50/60 Hz) .................
Ultimate total pressure (gas ballast open; 50/60 Hz) ...................
Motor power 50/60 Hz ..................................................................
Weight ...........................................................................................
Dimensions ...................................................................................
50 of 50
4.8/6 m3/hr
53/45 mTorr
263/225 mTorr
250/300 W
51 lbs
11.5” H x 17” W x 10” D
P
P
P
P
Manual Part No. PDC002CE-M-10
©2010 Harrick Plasma