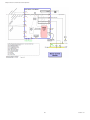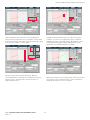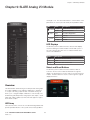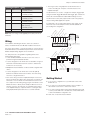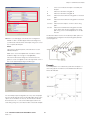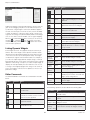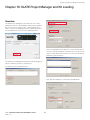
1
SLATE ™ Integrated Combustion Management System R8001 Series USER GUIDE Congratulations on selecting SLATE. SLATE is a revolutionary new combustion system that combines configurable combustion safety with programmable logic in one single platform. SLATE can easily be customized for almost any requirement or application- offering virtually limitless development opportunities with a far less complexity. SLATE streamlines and simplifies the product development process, allowing customers to bring unique solutions to market in a matter of weeks instead of months. This User’s Guide is designed to guide you through designing and implementing a SLATE system. Scan for more information Contents Chapter 1: Getting to know SLATE • 1 Chapter 2: Using the Honeywell SLATE AX Tool • 9 Chapter 3: SLATE Text Configuration and Network Visibility • 23 Chapter 4: SLATE Base Module Setup and Configuration • 31 Chapter 5: SLATE Burner Control Module and Configuration • 35 Chapter 6: SLATE Flame Amp Modules • 63 Chapter 7: SLATE Fuel Air Control Module and Commissioning • 65 Chapter 8: SLATE Limit Module and Configuration • 83 Chapter 9: SLATE Analog I/O Module • 93 Chapter 10 : SLATE Digital Module • 97 Chapter 11: SLATE Annunciator Module • 101 Chapter 12: SLATE Sub-Base • 111 Chapter 13: SLATE Display • 113 Chapter 14: SLATE Wiring Basics • 115 Chapter 15: SLATE Web Editor • 121 Chapter 16: SLATE Project Manager and Kit Loading • 127 SLATE™ INTEGRATED COMBUSTION MANAGEMENT SYSTEM R8001 Series iii iv32-00014—01 Chapter 1: Getting to Know SLATE Chapter 1: Getting to Know SLATE Introduction SLATE is a modular control that integrates configurable safety devices with user-programmable logic, inputs and outputs. Its purpose is to allow equipment manufacturers to create a customized controller by selecting modules and I/O specifically for that equipment and then designing a customized control program to make them work together. The SLATE modules mount on a DIN rail via a sub-base and each includes side by side plugs and jacks to interconnect adjacent modules. The SLATE Base Module provides communication and user-programmable logic, and non-safety digital and analog I/O modules provide inputs and outputs for that logic. The programmable logic can be used to create any non-safety features needed by the equipment that the SLATE device is controlling. This allows a SLATE application designer to implement customized and differentiating features in their controller. The accompany this, SLATE also includes a completely configurable touch screen display. In previous conventional control systems, a control panel often contains a PLC combined with separate safety devices such as burner controls. In this case, the safety devices are separately responsible for the operation and safety of critical equipment. This is maintained also in the SLATE design: safety modules operate as discrete and self contained safety controls. In the previous conventional control systems, the data produced by the safety modules is connected to what the control is doing. Or if the control includes communication, then the programmable logic may capture and interpret this using specialized customer software. In SLATE all safety module status data and all non-safety control of safety modules (such as burner control call-for-hear signal) is fully integrated into the programmable logic. It is one system, even though the safety modules are independent. SLATE™ INTEGRATED COMBUSTION MANAGEMENT SYSTEM R8001 Series The configurable SLATE Safety Modules are: • Burner Control Module • Flame Amp Modules • Fuel Air Ratio Control Module • Limit Module The programmable SLATE modules are: • Digital I/O Module • Analog I/O Module • Annunciator Module 1 Chapter 1: Getting to Know SLATE SLATE Modules and Accessories The following are the SLATE part numbers. Honeywell OS Number SLATE Description R8001A1001 Base Module R8001B2001 Burner Control Module includes wiring terminals R8001C6001 Fuel Air Ratio Control Module includes wiring terminals R8001L8001 Limit Module includes wiring terminals R8001N7001 Annunciator Module includes wiring terminals R8001D4001 Digital I/O Module includes wiring terminals R8001U3001 Analog I/O Module includes wiring terminals R8001V1031 Rectification Flame Amp Module with Amplicheck includes wiring terminals R8001S1071 UV Flame Amp Module with Ampli-check includes wiring terminals R8001S1051 UV Flame Amp Module with Shutter- check includes wiring terminals R8001F1091 UV/Visible Flame Amp Module with Amplicheck includes wiring terminals R8001F1041 Infrared Flame Amp Module with Ampli-check includes wiring terminals purchase Maxon Dura Step actuators, please contact your Maxon sales representative. Installation When Installing This Product 1. Read these instructions carefully. Failure to follow them could damage the product or cause a hazardous condition. 2. Check the ratings given in the instructions and on the product to make sure the product is suitable for your application. 3. Installer must be trained and experienced flame safeguard service technician. 4. After installation is complete, check out the product operation as provided in the instructions. WARNING Fire or Explosion Hazard Can cause severe injury, death, or property damage. To prevent possible hazardous burner operation, verify safety requirements each time a control is installed on a burner. WARNING R8001 S9001* Sub-base assembly for all SLATE modules Electrical Shock Hazard Can cause serious injury or death. R8001M1050 SLATE 50 in/lb actuator with NEMA 1 enclosure Disconnect the power supply before beginning installation. More than one power supply disconnect may be required. R8001M4010 SLATE 150 in/lb actuator with NEMA 1 enclosure R8001M1150 SLATE 50 in/lb actuator with NEMA 4 enclosure R8001M4150 SLATE 150 in/lb actuator with NEMA 4 enclosure R8001K5001 7” Color Touch Screen Display does not include power transformer or connectors. Please refer to those OS numbers SLATE AX TOOL PC tool for programming, configuring and designing the SLATE system 32006131-001 SLATE Display Power Transformer 32008001-002 Connector bag assembly for sub-base and power connector for SLATE display. Connectors for sub-base can be used for remote start and remote flame amp. 50096820-001 Umbilical cord to allow continuation of a SLATE system while attached to a single power supply to additional DIN rail * Needed for all SLATE modules other than the Base for communications and assembling on the DIN Rail. Maxon’s Dura Step 300 and 900 in/lb actuators can be used with the SLATE system and need to be configured for SLATE. To Approvals Underwriters Laboratories Inc. Listed, File: MP268 Factory Mutual IRI Acceptable Federal Communications Commission: Part 15, Class A Must be mounted inside a grounded metal enclosure. This document provides installation instructions. Other applicable publications are: Publication Number Product 32-00005 R80001A1001 SLATE Base Module Installation Instructions 32-00006 R8001C6001 SLATE Fuel Air Module Installation Instructions 32-00007 R8001L8001 SLATE Limit Module Installation Instructions 32-00008 R8001D4001 SLATE Digital Module Installation Instructions 32-00009 R8001U3001 SLATE Analog Module Installation Instructions 232-00014—01 Chapter 1: Getting to Know SLATE Publication Number SLATE Base Module R8001A1001/U Product 32-00010 R8001B2001 SLATE Burner Control Module Installation Instructions 32-00012 R8001N7001 SLATE Annunciator Module Installation Instructions 32-00013 R8001K5001 SLATE Color Touch Screen Display Installation Instructions 32-00019 R8001S1071 SLATE UV Flame Amp Module with Ampli-Check Installation Instructions 32-00020 R8001S1051 SLATE UV Flame Amp Module with Shutter-Check Installation Instructions 32-00021 R8001F1041 SLATE IR Flame Amp Module with Ampli-Check Installation Instructions 32-00023 R8001F1091 SLATE UV/Visible Flame Amp Module with Ampli-Check Installation Instructions 32-00024 R8001V1031 SLATE Rectification Flame Amp Module with Ampli-Check Installation Instructions 32-00025 R8001S9001 SLATE Sub-Base Installation Instructions 32M-06009 SLATE Low Torque Actuator Series Technical Catalog 02-00062 SLATE Product Brochure A SLATE Base Module is always the leftmost module on the DIN rail. There can only be one base per rail. All other module types may occur more than once. The SLATE Base Module provides: • Power for all of the modules • External communication (if any; it is not required) either via a 10BASE-T connector for Ethernet-based protocols and/or via a RS-485 3 wire connector for Modbus or BACNet/MSTP protocols and web services. • Storage of data for device configuration and initialization. • Real time clock and event logging. • The SLATE control program. Most of the SLATE modules are passive; the primary active component in a SLATE system is the control program in the SLATE Base Module, which is typically responsible for making everything else operate. SLATE modules may contain complex behaviors but they wait for something outside of themselves to trigger the process of doing something useful. • An I/O module will measure and condition its input signals, but it needs to be told what to do and it doesn’t use the results, it provides them for some other module or external device to use. • An I/O module will drive its outputs, but only if something else tells it what output signal to produce. SLATE Modules • A burner control module knows how to start up and operate a burner, but only if something else requests this via a call-for-heat. A SLATE system is an array of modules mounted together on one DIN rail that work together to implement a control device for specific equipment. The minimum number of modules that can be used is two and the maximum is twelve, depending on the types of modules and their demand for power. The basic categories of modules are: • A fuel-air control will modulate, but only if something else indicates the desired firing rate. SLATE™ INTEGRATED COMBUSTION MANAGEMENT SYSTEM R8001 Series The primary active component is the control program, which responds to stimuli and tells other SLATE modules what to do by writing to the registers that control them. 3 Chapter 1: Getting to Know SLATE Configurable Safety Modules The safety modules in a SLATE control are: SLATE Burner Control Module R8001B2001/U The SLATE Burner Control provides flame safeguard controls for a variety of applications within the SLATE system. It can be configured as a primary or programmer, semi-automatic, or fully automatic. The Burner Control Module provides 24 VDC to 24 VAC to 240 VAC flame safeguard, valve proving, parameters, and behaviors that emulate the 7800 and Sola series flame safeguard, and dual fuel capability. SLATE Flame Amplifier Modules • R8001V1031/U Rectification with Dynamic Ampli-Check • R8001F1041/U Infrared with Dynamic Ampli-Check • The response to flame failure such as lockout, recycle, or recycle with a delay. The inputs and outputs on a safety module are available to the control parameters and status registers that are available to the control program. Each of these also has a dedicated purpose. A few examples, for a burner control: • Parameter: the call for heat request (a non-safety signal which typically would come from the control program) • Status: the current burner state (e.g. Standby, Prepurge, Ignition, Firing) • Status: the elapsed time of the current state Programmable Logic A SLATE system also provides configurable I/O modules that provide inputs and outputs for use by the control program. Those modules are: • R8001S1071/U Ultra Violet with Dynamic Ampli-Check • R8001S1051/U Ultra Violet with Shutter- Check SLATE Analog Module R8001U3001/U • R8001F1091/U Ultra Violet/Visible Light with Ampli-Check The SLATE Analog Module provides a variety of different combinations of analog input and output types; 0-10 VDC inputs or outputs, 4-20 mA inputs or outputs, Thermocouples type J and K, RTD, 3 wire NTC, Pulse Width Modulation, and Tachometer. The Flame Sensor modules for a burner control belong to and are operated by the parent safety module to implement some of its safety-related inputs and outputs. These Flame Amp modules are configured as part of the parent’s safety modules configuration. Flame amp modules can be mounted on the DIN rail or can be mounted remotely, such as to put a flame module close to its flame sensor. SLATE Fuel Air Ratio Control R8001C6001 and Actuators (R8001M1050- 50 in/lb NEMA 1, R8001M1150- 150 in/lb NEMA 1, R8001M4050- 50 in/lb NEMA 4, and R8001M4150 NEMA 4 Durastep actuators in 300 in/lb and 900 in/lb may also be used.) The SLATE Fuel Air Ratio Control Module controls the relationship between fuel, airflow, and flue gas recirculation on a power burner. It provides control for up to 4 SLATE actuators and/or 2 Variable Frequency Drives (VFD). SLATE Limit Module R8001L8001/U The SLATE Limit Control Module provides the ability to utilize any type of analog signal and create safety limits on pressure or temperature or both. SLATE safety modules cannot be programmed; only the SLATE Base provides this feature. The basic behavior of each safety module is fixed but can be adapted to various purposes by changing configuration parameters. The SLATE Burner Control will have 70 parameters to tune and select behaviors. Examples of these parameters include: • Timings such as prepurge, ignition, and postpurge times. • The type of ignition such as pilot or direct. SLATE Digital Module R8001D4001/U The SLATE Digital module provides 14 opto inputs or 6 relay outputs. SLATE Annunciator Module R8001N7001/U The SLATE Annunciator module is designed to monitor the status of a series string of limit, control, and interlock contacts for a commercial or industrial burner. The Annunciator Module acts as a system monitor and enhances fault and status messages of the SLATE Burner Control Module. A SLATE control program resides and is executed with the SLATE Base Module. To create a control program the user utilizes a “wire sheet” (part of the Honeywell SLATE tool) that resides on a computer. The programming is performed by dragging-anddropping function blocks onto an editing screen, dragging lines between the blocks to interconnect them, and opening a block’s properties to setup its behavior. When a wire sheet input block is used, the user can attach it either to the data from an input terminal of any SLATE module, or to a source of data from internal logic such as the burner status information provided by a burner control. When a wire sheet output block is used, the user can attach it either to control an output terminal of a SLATE I/O module, or to send data to the internal logic of another module such as the call for heat request for a burner control. More information on programming using the Honeywell SLATE Tool is located in Chapter 2. 432-00014—01 Chapter 1: Getting to Know SLATE Communication appear to be a single device that operates that piece of equipment. From the external protocol’s viewpoint, all of the points in the SLATE device reside at a single address. The SLATE Base Module can provide communication with a display, some other device or a building management or industrial control system, or all of these simultaneously. Support is provided for the following protocols: • BACnet/IP via 802.3i 10BASE-T Blocks placed on the wire sheet provide “points” within the SLATE device that are accessible via the connected external communication protocol. Thus the control program can operate according to inputs from the outside world or provide outputs to the outside world. • BACnet/ MSTP via RS-485 • Modbus RTU/IP via 802.3i 10BASE-T • Modbus RTU/485 vis RS-485 • Web browser access (httpd) via 802.3i 10BASE-T Although SLATE is assembled from modules, when finished and installed on a particular piece of equipment the SLATE modules The illustration below shows three SLATE devices: Fig. 1. 3 examples of SLATE devices. Design Life-Cycle Overview The SLATE Designer This section provides a summary of how the Honeywell SLATE Tools and other tools are used in the process of creating a new SLATE device. In the descriptions below, a user setting up a SLATE device for a particular purpose is called the designer. Typically the designer will be an engineer who works for an OEM or Systems Integrator and is using SLATE to create a control for some equipment. The wire sheet program the designer creates is called the SLATE Control Program. Honeywell SLATE Tool The SLATE systems will use a profiled version of the Niagara AX software as its primary PC-based programming tool for the user. The profiled version provides an environment that is relevant to the SLATE needs; the wire sheet. SLATE™ INTEGRATED COMBUSTION MANAGEMENT SYSTEM R8001 Series Skills Needed Setting up a control program for a SLATE device will inevitably require an understanding of SLATE-related concepts and details. 5 Chapter 1: Getting to Know SLATE Mastering these concepts will require at least a good tutorial and some hours of training. Below is a partial list of topics. • The behavior and configuration of SLATE Safety modules • The I/O that is available on various SLATE modules • How a SLATE Control Program is developed, which includes: –– An understanding of the “wire sheet” design techniques –– Familiarity with all of the wire sheet blocks • How to connect wire sheet logic to: –– Physical inputs and outputs –– Other internal data in a SLATE module • How to provide external network connections to the outside world • How to export the design into a PC file or “kit” • How to load the design into a SLATE device for testing • How to use kits and the SLATE Loader in a production environment Select the Modules The designer thoroughly understands the equipment that SLATE will control: the switches, blowers, dampers, sensors, burner, etc. All of these and also the procedures for how these should operate are in the designer’s domain. With this background and also with knowledge of what each kind of SLATE module can do, the designer selects modules to be used and determines how each of them will be connected to the equipment. In the illustration below, the background schematic represents that equipment, and the screw terminals and lines indicate the designer has chosen SLATE modules based on the types of electrical devices that need to be monitored or controlled in that equipment. For an actual design the designer might use a schematic diagram, a list, or a form to record the choices. Fig. 2. SLATE usage examples. Implement the Design The wire sheet program editing environment is used to create the control program for the equipment. Blocks representing inputs, outputs, and behavior are dragged-and-dropped onto it and then interconnected by dragging “wires” (lines) between them. That step is represented in Fig. 3 along with a list of some of the types of blocks that are available. The other task performed within the tool is setting up the configuration data for non-programmable devices, such as the SLATE Burner Control Module. This consists of a set of dialog boxes that present choices via drop-down lists, fill-in the blanks, check boxes and other similar techniques. The results are one block of Program Data (see Fig. 3) that describes the Control Program and blocks of Configuration Data 632-00014—01 Chapter 1: Getting to Know SLATE for each of the safety modules that contain the configuration settings. Fig. 3. SLATE program data block. Other Design-Related Actions Fig. 4 shows other activities performed by the designer as part of creating a SLATE device. Fig. 4. SLATE other design tasks. SLATE™ INTEGRATED COMBUSTION MANAGEMENT SYSTEM R8001 Series 7 Chapter 1: Getting to Know SLATE Binding Internal and External I/O Binding is the process of defining the actual screw terminals or registers in the SLATE modules that will be used by the program logic. It is done within the wire sheet programming environment. It may be done as-you-go, or as a separate step. It is shown separately above. An example of this is a canned program that is downloaded from the SLATE web site that is modified, if needed, and then bound to the actual I/O needed by the equipment. Text Translation The text used by SLATE modules to label and describe parameters and their values can be translated into some other language. This is optional. When this is done, the Honeywell-standard English language text is still preserved and available as an option, for use by Honeywell support personnel. Network Visibility Simply using any SLATE module will create many network-visible inputs and outputs in a SLATE device and the designer can create others via wire sheet programming. All of these network inputs and outputs (or “points”) can be filtered to make them hidden and remove them from visibility to the communication protocols. For example, of the hundreds of points that are available, a particular application design may prefer to reveal only a dozen or so as items that represent the equipment and that are useful to the site where the equipment is installed. Each point that is potentially writable can be set to a Read-Only condition, or a password can be applied, and/or range limits can be set. These choices are made via a form that is available in the Honeywell SLATE Tool as part of creating a control program. Display Screens The display screens installed in a SLATE device are web pages and the SLATE Base Module implements a web server to provide these pages to the SLATE display or any web browser, such a browser in a PC or smart device. Honeywell provides a set of display screens for each of the modules that a designer can use as-is or adapt or replace using a different design. The designer also creates screens for the wire sheet programmable logic to represent the status of the controlled equipment. Export the Results All of the data created by the designer is exported along with mandatory data provided by Honeywell to create a SLATE Kit File. A Kit File is a single file implemented as a .zip file, containing a folder structure with files in a specific form that is compatible with the SLATE device. The name of the kit is chosen to reflect the purpose of the design; for example it might be named for a particular model of boiler, furnace, air handler, or whatever the design is intended to control. Verification of Safety Data for Each Module An important part of a SLATE design is the verification process for safety configuration data. Whenever safety data is changed for any reason, a safety device will enter a “risks addressed” (i.e. shutdown) state until that change has been verified. Verification consists of reviewing each data item without changing it and then, instead of sending a “read” or a “write” command to the module, a “verifying” message is sent. That is, SLATE safety devices recognize those as distinct messages. The process of verification includes pressing the “Select” button on the module; confirming that the one being verified is the intended module within the intended device, because a SLATE display can be connected to different SLATE devices and a SLATE device can contain multiple safety modules. Verification requires a SLATE password. After an entire design is verified, it is possible to save the verification status and load it with the kit (see below) so that an OEM or Systems Integrator does not have to re-verify the same design over and over again each time the design is replicated. Load the SLATE Device When loading the Kit into a SLATE Device: 1. Assemble all required modules on the DIN rail. 2. Apply power to the SLATE control. 3. Connect a PC that is running the SLATE Loader program to the SLATE Base Module using a standard Ethernet cable. 4. Select the desired Kit from a drop-down menu (after the first time it will remain selected and this must be done only if it needs to be changed). 5. Click Select to send the Kit to the SLATE control. The kit is then loaded into the SLATE modules and when this succeeds a “Pass” indication is provided, or if it fails then the reason is logged. 832-00014—01 Chapter 2: Using the Honeywell SLATE AX Tool Chapter 2: Using the Honeywell SLATE AX Tool Overview Installing the Software The SLATE AX Tool is the software application to configure SLATE configurable modules, program application logic using function block programming and design application screens for your graphical display. 1. Download the file to a folder or your PC desktop. There will be a SLATE _AX_XX_XX (depending on the current version level) Setup.exe icon (or file if you selected a folder.) Obtaining the Software 1. Go to the SLATE Website (combustion.honeywell.com/SLATE) to the Resources section. Click on Resources. See figure below: 2. Double click on the above icon and allow the setup to install on your computer. This may take several seconds before the install program starts. The following screen is displayed that will begin the SLATE AX installation. 2. You will be prompted to enter a user name and password. If you are a user of customer.honeywell.com you will be able to enter those credentials into the system. You will need to utilize a Chrome browser. 3. Once you are logged in the select the Resources the following web page is displayed. Click on the software section and download. 3. Press the Next button to begin the installation. The following screen will be displayed and you will be asked if you agree to SLATE™ INTEGRATED COMBUSTION MANAGEMENT SYSTEM R8001 Series 9 Chapter 2: Using the Honeywell SLATE AX Tool the terms of the Licensing Agreement and the Terms of Use. Please click the “I agree” button to both of these requests. 4. When you see the following screen, please press the Next button to continue installing the tool. 5. Click Next to continue. The SLATE AX Tool will start installing. You should see the following screen: You will then see the following screen: 1032-00014—01 Chapter 2: Using the Honeywell SLATE AX Tool 6. Do not change the destination folder location or uncheck any items. Please click Next 8. When you see this screen please do not change anything. Press Finish. 9. You will then see the following screen that will contain your host ID you will need for licensing. Please send the host ID (WinXXXX-XXXX-XXXX) information for licensing as previously noted above. If your computer doesn’t have Java or an older version the installation program will install a new version onto your computer. If you see this screen please press Next to install. 7. Again, do not change anything on the screen and click Next. The setup program will being installing the SLATE AX software. When this screen appears, do not change any settings and click Install to continue. SLATE™ INTEGRATED COMBUSTION MANAGEMENT SYSTEM R8001 Series 11 Chapter 2: Using the Honeywell SLATE AX Tool The SLATE AX Tool has been successfully installed. Please press Finish to close the installation program. The SLATE AX Tool utilizes the Chrome browser. If you don’t have Chrome, please open your web browser and type the following address: www.google.com/chrome. When the web page load, locate the “Download now” button and follow the instructions. Please wait while the installation of Java is complete. While trying to download Chrome, you may see the following screen. Please press Run to continue to installing the browser. 10.When installation is complete, this screen will be displayed. Please press Close to continue. The Chrome installer should be displayed indicating that the installation progress. Once Chrome is installed the following screen will be displayed. You can close this window without entering any information if you prefer. 1232-00014—01 Chapter 2: Using the Honeywell SLATE AX Tool At this point you have successfully installed all of the software components required for the SLATE AX Tool. At this point, DO NOT FOLLOW THESE INSTRUCTIONS! Submit the host ID to Honeywell Customer Care for licensing. You will see the following icon on your desktop to start using the tool. Please always use this icon to start the SLATE tool in the future. As mentioned the SLATE AX Tool requires a license to operate. Once you have received your license, you can only use it on this computer, since the license is tied to the computer hardware. Once you have received your license in your e-mail copy the license file onto your desktop. 11.Please double click on the SLATE Tool icon to start the program. You should see the following screen. The file will be Win-XXXX-XXXX-XXXX-.zip You will need to right click and extract the files inside to a folder on your desktop. 12.Click on Open SLATE AX Tool button. The following screen is displayed. SLATE™ INTEGRATED COMBUSTION MANAGEMENT SYSTEM R8001 Series 13 Chapter 2: Using the Honeywell SLATE AX Tool Inside the folder will be one or two license files. These files must be copied to the following location C:\Slate Tools\Niagara\ Niagara-3.8.38 \licenses. Note the license version may be different than highlighted based on updates. Once the licenses are copied in the correct location, the SLATE AX Tool software is ready to use. Locate the following icon and double click it to start the SLATE tools. The very first time that the SLATE AX Tool is started you will need to accept the End User Software Agreement. This agreement is always available for viewing by pressing the About in the SLATE Tool Program start page. The SLATE Tool software will show the startup screen. 13.Press the Open SLATE AX Tool button. This screen is shown at the startup of the tool. If you see the above screen you have successfully installed all the components needed to use the SLATE Tool to create a design and web pages for your SLATE device. 1432-00014—01 Chapter 2: Using the Honeywell SLATE AX Tool 14.Next you need to check if the SLATE Web Editor is properly installed. To do this return to the SLATE AX Tool Main page and select Open SLATE Web Editor Tool. This screen is displayed to start the SLATE AX Tool. Confirm that the Chrome browser opens with the text below. If you do not see any of these screens nor cannot launch the SLATE AX Tool please contact the Honeywell Technical Assistance Line at 1-888-516-9282. 15.Double click on the State Tool icon to start the SLATE tool program. The SLATE AX Tool requires a licensed to operate. Once you receive a license, you can only use it on this computer, since the license it tied to the computer hardware. If you do not have a license a screen will be displayed to prompt you to obtain a license. This screen will be displayed first when starting the SLATE tool program. 16.Click on the Open SLATE AX Tool button. Note: Instead of requesting a license from Niagara, you must obtain the license from the Honeywell SLATE support team. E-mail the Host ID information Win-XXXX-XXXX-XXXX-XXXX to your Honeywell Customer Care representative and he/she will send you your official license. SLATE™ INTEGRATED COMBUSTION MANAGEMENT SYSTEM R8001 Series 15 Chapter 2: Using the Honeywell SLATE AX Tool Once you receive your license in your e-mail. Copy the license file onto your desktop. 17.The file will be Win-XXXX-XXXX-XXXX-XXXX.zip. Right click and extract the files inside to a folder on your desktop. Once the licenses are copied in the correct location, the SLATE AX Tools software is ready to use. Locate the following Icon and double click it to start the SLATE tools. The SLATE tool software will show the startup screen. Inside the folder will be one or two license files. Press the Open SLATE AX Tool button These files must be copied to the following location: C:\SlateTools\ Niagara\Niagara-3.8.38\licenses 1632-00014—01 Chapter 2: Using the Honeywell SLATE AX Tool The very first time that the SLATE AX Tool is started you will need to accept the End User Software Agreement. This agreement is always available for viewing from by pressing the “About “ in the Slate Tool Program Start Page. • Web Page- A human interface to the SLATE control. The web page may contain controls, readings, graphics, etc. Created using the SLATE Web Editor tool • Macro- Within a wire sheet the user can create a macro which is a sub-routine (more logic) that may be commonly used in many applications. The macro does not contain links to the “outside” world or bindings. Once created it can be stored in a library and drug into the wire sheet as if it were another function block • Application- An application is like a macro, but may contain links to the outside world and will require bindings. • Cloud- Referring to network; pc, internet, intranet, or displays The SLATE AX Tool Software To begin using the SLATE AX Software find the SLATE icon on your desktop and double click it to launch the program. This screen is shown at startup of the SLATE AX Tool. If you see the above screen you have successfully installed all the components needed to use the SLATE Tools to create a design and web pages for your SLATE device. At this point follow the instructions on how to use the SLATE AX Tool. Getting to know the SLATE AX Tool To understand how SLATE AX Tool works it’s important to understand a few terms. • Platform- where you work, or your laptop or computer. Hosts the SLATE AX software • Station- a method to group your work. You open a station and connect to it using credentials Honeywell will update the SLATE AX Tool periodically when new features are released. It is important to know what version you have installed and that information can be found in the upper left hand corner of the software. • Device- is within a station, you can save your SLATE device: a design for a SLATE control • Wire Sheet- The logic you create for you application using function blocks. A term that is interchanged with Logic. 1. To begin working on a project, click on Open SLATE AX Tool. • Function Block- Basic unit of programming SLATE logic where blocks represent behavior are placed on the wire sheet and connected with lines that indicate the flow of data. • Block Configuration- Defining certain properties of a particular function block • Binding- Assigning a wire sheet input or output to a SLATE register or physical terminal on a SLATE module • Link- Connecting function blocks with lines that represent data flow • Kit- Once the wire sheet is complete it must be compiled and loaded into the SLATE Base Module. The file loaded into the base is called the “kit” SLATE™ INTEGRATED COMBUSTION MANAGEMENT SYSTEM R8001 Series 17 Chapter 2: Using the Honeywell SLATE AX Tool You need to create a Station. Click the New Station button to create the station. A dialog box appears that allows you to name the station. When naming a station do not use any special characters or spaces. Once the is created you will need to start the Station with the Start Station button that will start any existing changes and access any device within that station. selections Station Connection and Station SSL Connection. Please select Station Connection. The Station will need authentication. The username is user and the password is SLATE. Please use these credentials. It is useful to select the “Remember these credentials”. Username: user Password: SLATE Once you have logged in, expand the My Host item by clicking the +SLATE AX Tool. Expand the Station by clicking it’s + symbol. See fig. below. My Host Creating a new station prompts you to name the station and then will ask if you would like to open the station you just created. If the station was already created and you would like to access it, simply click on the “Start Station” button and select the station you would like to open. When you have created or selected your station you will also be prompted to open it and the following dialog box appears with a drop down box. This drop down box includes two Station 1832-00014—01 Chapter 2: Using the Honeywell SLATE AX Tool Expand the Config+ and expand devices+. This is where you will put SLATE devices. If this is your first device, the devices folder will be empty. the Palette to the device folder in the Navigation pane until it is highlighted. Then drop it. See figure below. Config Devices You will need to create a new device and put it in the devices folder. For the SLATE system you will see in the SLATE AX Tool Palette SLATEdevice. Click and drag the SLATEdevice from This will be the look after you have moved the SLATEdevice folder into the devices folder. SLATEdevice The SLATE AX Tool will require you to create a name for the new SLATE device within the devices folder. You can name the device SLATE™ INTEGRATED COMBUSTION MANAGEMENT SYSTEM R8001 Series 19 Chapter 2: Using the Honeywell SLATE AX Tool anything you would like. Avoid spaced in the device name because it will become the basis for your file name. See the example figure below. just named, The SLATE AX Tool will display options for additional functionality through the following display. See figure below. By clicking on the Module Selection tab you can begin adding the modules. Module Selection The next step to take is to define or select the modules you will be using in your project. By double clicking the SLATE device you The Module Selection section of SLATE AX Tool let’s you add SLATE modules. The top half lists all available modules. Clicking the Add Module button moves the highlighted module to the Selected List section below. The order in which the modules are selected does not have to match the order in which the modules are physically mounted to the DIN rail. However, the SLATE Base will always be module one on the left side of the DIN rail. 2032-00014—01 Chapter 2: Using the Honeywell SLATE AX Tool Expand the content of the function block folders to expose the different function blocks available. To use them, simply select one and drag it onto the wire sheet. The flow of this editor moves from left to right. You will want to place input blocks on the left, logic in the middle and outputs toward the right to make the logic easier to follow. The tool will also allow you to remove or modify any selected modules. Name the block with an appropriate name for the function of the block, for example “InterlockControl”. Note do not use spaces when naming blocks in SLATE AX Tool. Once the block is named you can reposition it anywhere on the work space and you have the ability to increase or reduce the block size by placing the cursor over the dots on the block and expanding and reducing as needed. For more information regarding SLATE AX Tool and the Wire Sheet functionality, particularly all function blocks please refer to the Function Block (Spyder) Library located on the SLATE website at combustion.honeywell.com. When all modules are configured, you can continue by accessing the wire sheet where you will set up your SLATE devices and can begin programming your logic. Click the “Wire Sheet” button to begin. SLATE™ INTEGRATED COMBUSTION MANAGEMENT SYSTEM R8001 Series 21 Chapter 2: Using the Honeywell SLATE AX Tool 2232-00014—01 Chapter 3: SLATE Text Configuration and Network Visibility Chapter 3: SLATE Text Configuration and Network Visibility selection for the Profile Language is only compatible with English at print time. Other selections, French and Spanish will be completed in the next software release of SLATE. SLATE Text Configuration The SLATE Text Configuration feature allows you to edit text strings to provide better descriptions and translate text to other languages to suit your needs. Type the desired text in the Modified Text section to replace the Default Text. The Default Text is permanently stored in SLATE and will be used whenever no other text option is available. You can export and import text as needed by using the “Import Text” and “Export Text” buttons. When finished, click the “Save” and “Close” buttons. To access the Text Configuration tool launch SLATE AX Tool as shown below: Click the “Build All Text Profiles” to incorporate the changes into your SLATE Device. SLATE Network Visibility The Text Edit feature allows you to change any text based on the SLATE modules as highlighted above. Select a module, as in the example the Base, and select Modify Module Text. The drop down SLATE™ INTEGRATED COMBUSTION MANAGEMENT SYSTEM R8001 Series The SLATE Network Visibility feature allows you to hide registers to make them inaccessible to the outside world, set register security 23 Chapter 3: SLATE Text Configuration and Network Visibility levels, and Configure BACnet objects and Modbus registers. Click on the “Network Visibility” button. Expand each register drop down list individually to hide the register or leave blank to make the register information available. Click the “Multiple Select Mode” box to select multiple registers at once or use the “Hide All” or “Unhide All” buttons at the bottom of the window to set all registers. Insure the “Protect Mode” box is unchecked to edit. When finished, click the “Save” and “Close” buttons. You can begin by setting Network Visibility. Click “Configure Network Visibility”. This is where we hide/unhide registers (external use-BACnet/Modbus) and select levels of security (read only, password protection). In order to see register information, a SLATE Wire Sheet device must have been previously created and built. Another method to protect data in a register from being overwritten is by assigning it a security level. This is done in the “Password” column. Click the arrow in the register you want to protect and select the level of security you wish to assign to that register. Insure the “Protect Mode” box is unchecked! When finished, click the “Save” and “Close” buttons. In order to edit values on this page, insure the “Protect Mode” box is unchecked. The Resource column identifies a SLATE module and register within that module. SLATE internal communication is based on module number and register number (“mr” value). The Description column provides a short default description for the register. The Hidden column shows the register will be visible (available) for communication with external devices via BACnet and Modbus. Hidden registers can still be seen if used in a web page. When setting the security levels, please note the following: 2432-00014—01 Chapter 3: SLATE Text Configuration and Network Visibility SLATE BACnet Configuration • Designer: Highest level of access: adjust safety parameters, build F/A curves, build kits, change set points, as well as software updates To enable communication via BACnet, click on the “Configure BACnet Objects” to make modifications as necessary. • Installer: Next level of access: adjust safety parameters, build F/A curves, build kits, change set points, etc. • Operator: Lowest level of access: change non-safety set points… allowed basic access (such as temp/pressure control and other basic items that keep the equipment running). To access areas of SLATE including, fuel air commissioning, installing kits, and updating software the following are the passwords used with the different levels of users. Default passwords: • Designer: SlateDesignerPassword • Installer: SlateInstallerPassword • Operator: SlateOperatorPassword The register minimum and maximum values are shown for all registers in the “Range Minimum” and “Range Maximum” columns. The register minimum and maximum values can be edited as long as the new values are not less than the “Range Minimum” value or greater than the “Range Maximum” value (outside the existing range). When finished, click “Save” and “Close Buttons” You can renumber the BACnet Object ID and Object Name. Uncheck to exit the Protect Mode and enter your changes in the appropriate rows. Note: If you have not constructed a SLATE Wire Sheet with network inputs, network outputs and registers, your register page will be blank. Modbus Configuration To enable communications via Modbus, click the “Configure Modbus Registers” to make modifications as necessary. SLATE™ INTEGRATED COMBUSTION MANAGEMENT SYSTEM R8001 Series 25 Chapter 3: SLATE Text Configuration and Network Visibility Build System The SLATE Device Information screen provides information about the SLATE Device, both the SLATE Wire Sheet and the Web pages. Edits can be made from this screen. The same rule applies to Modbus registers as BACnet registers, a SLATE Wire Sheet with network inputs, network outputs, and registers must exist to show the registers on the configuration page. This view allows you to renumber the Register value (external) and edit the Register Name. Uncheck to exit the Protect Mode and enter your changes in the appropriate rows. SLATE Device Information, Reports and SLATE Reports SLATE generates reports on all aspects of functionality including generated errors. Click on the “Reports” button for detailed information about your SLATE device. 2632-00014—01 Chapter 3: SLATE Text Configuration and Network Visibility The “Wiresheet I/O Block Resource Report” gives general usage details. Click the “Wiresheet I/O Block Resource Report “button. The Wiresheet I/O Block Report summarizes the I/O created in the wire sheet by way of block name, block type, resource or “mr” value, feature type, and feature name. This list can be saved for the project documentation by clicking on the “Save to Excel Spreadsheet” button. When you are finished click “Close” to return to the report selection window. Reports can be generated identifying configurations an I/O usage, build errors, and communication interface for BACnet and Modbus. Click the “Build System Error Report” when build failures occur. The report will indicate the build failure reason, giving you an opportunity to make corrections to the wire sheet and to build again. Note: You need a wiresheet for this report to work. A BACnet object report can be generated for the project records or given to the end user for their records. Click the “BACnet Interface Report” button. SLATE™ INTEGRATED COMBUSTION MANAGEMENT SYSTEM R8001 Series 27 Chapter 3: SLATE Text Configuration and Network Visibility Same rule does apply to the Modbus Interface Report as the BACnet interface report. You will need a SLATE wire sheet with networking inputs, networking outputs and setpoints for this report to work. Highlight the portion of the list that is of interest and copy or use the “Save to Excel Spreadsheet” button to copy the entire Modbus register list. Either highlight the portion of the list that is of interest and copy or use the “Save to Excel Spreadsheet” button to copy the entire BACnet object list. As noted before, you will need to have in your wiresheet network inputs, network outputs, and setpoints for BACnet registers. When finished click the Close button to return to the report selection window. When you are finished click the Close button to return to the SLATE device. When you are finished click the “Close” button to return to the report selection window. A Modbus register report can be generated for the project records or to be given to the end user for their records. Click the “Modbus Interface Report” button. The “Build System” button is used to compile the wire sheet. This process makes sure that there are no duplicate or erroneous configurations. Any errors will generate a “Build System Error Report” which can be found in the Reports section. 2832-00014—01 Chapter 3: SLATE Text Configuration and Network Visibility The SLATE Web Editor section is located in Chapter 14. SLATE™ INTEGRATED COMBUSTION MANAGEMENT SYSTEM R8001 Series 29 Chapter 3: SLATE Text Configuration and Network Visibility 3032-00014—01 Chapter 4: SLATE Base Module Setup and Configuration Chapter 4: SLATE Base Module Setup and Configuration Specifications Electrical Ratings: Input Voltage and Frequency: 24 VDC (± 15%) 24 VAC (± 15%) 85-264 VAC, 50/60 Hz Output Voltage and Frequency: 18 VDC (± 1 VDC) Power Dissipation: 38W max @ 24V (approx. 12 modules) 45W max @ 85-264V (approx. 14 modules) Fusing Total Connected Modules: 5A, slow type, non-replaceable Terminal Ratings are below: Overview The R8001A1001 SLATE Base Module provides communications and power supply for the SLATE system, configurable safety for the Burner Control, Flame Amps, Fuel Air Ratio, and Limit modules. It also provides programmable logic for the Digital and Analog I/O, and Annunciation. Within the SLATE system, the Base Module provides: • Power to all modules with multiple voltage options a • External communication protocols: Modbus/TCP, BACNet MSTP or IP and web services Description Rating E100-1 L1 - line voltage hot --- E100-2 L2 - line voltage common --- E100-3 PE - Earth Ground --- E200-1 Alarm (dry contacts) 120 / 240 VAC, 1A pilot duty E200-2 Alarm (dry contacts) 120 / 240 VAC, 1A pilot duty E200-3 Unused --- E200-4 A (BACnet MS/TP) --- E200-5 B (BACnet MS/TP) --- E200-6 GND (BACnet MS/TP) --- E200-7 VAUX + 3.3-24 VDC output, 250mA max E200-8 VAUX - a 3.3-24 VDC output, 250mA max Do not connect to earth ground. Environmental Ratings Ambient Temperature: Operating: -20°F to +150°F (-29°C to +66°C). LCD Operating: 32°F to +150°F (0°C to +66°C). Shipping: -40°F to +150°F (-40°C to +66°C) • Overall health of the system • The ability to do remote troubleshooting • Network identification of the system as a single device • Web-based pages (both Honeywell provided and designer customized) for Web browser access to the system Humidity: 95% continuous, noncondensing. Vibration: 0.5G environment • Module identification for the system Approvals: Underwriters Laboratories Inc. Listed, File: MP268. IRI acceptable. Federal Communications Commission: Part 15, Class A Emissions. Must be mounted inside a grounded metal enclosure. • Event log storage for user lockouts, fault history, and user requested events • Trend logging for user specified data SLATE™ INTEGRATED COMBUSTION MANAGEMENT SYSTEM R8001 Series Terminal 31 Chapter 4: SLATE Base Module Setup and Configuration LED Array Wiring There are three LEDs on the front of the base module that provide quick identification of system status and problems. This status is broadcast to other modules on the platform bus in case they are affected by the inoperable module(s). 1. Disconnect the power supply before beginning installation to prevent electrical shock and equipment damage. More than one power supply disconnect can be involved LED Color Description Power No light Green CPU Fault System does not have power 2. Wiring must comply with all applicable codes, ordinances and regulations. Note: MS/TP must be wired in a straight line without spurs—no star wiring. System has power Red No wire sheet or problem with the wire sheet Green Running Red Fault No light Running Status Main Power There are three LEDs on the front of the Base Module that provide quick identification of system status and problems. This status is broadcast to other modules on the platform bus in case they are affected by the inoperable module(s). LCD Screen USB ETHERNET DIP SWITCHES OK Menu REMOVEABLE SD CARD INTERNAL SD CARD INTERNAL CLOCK BATTERY The Base Module LCD screen will show information about various modules and other parts of the combustion system. By using the arrow keys to navigate the items on the LCD screen, then press OK to select one. The figure below shows Burner6 is in lockout. For additional information, navigate to that menu item and press OK. BACnet AND PROGRAMMABLE POWER SUPPLY Light Sensor > > Slate _____________________________ _ _ _ _ Application: Running _ _ _ m6 Burner6: Lockout >_ _ 1FM-VU-Achk Running m1 Base: Running m2 Burner: Hold > _____________________________ scroll 8:07 am OK:select INPUT POWER Power CPU Fault L1 L2(N) ALARM A BG M35391 Status Main Power 3. Wiring must comply with NEC Class 1 (Line Voltage) wiring. OK 4. The Base Module should not interfere with proper safety operation of the controls, limits, and interlocks it is monitoring. After installation, check each control, limit and interlock to ensure that it is operating properly. DO NOT PLACE JUMPER WIRES ACROSS THE INSTALLATION CONTROLS, LIMITS, AND INTERLOCKS. Menu Application Line voltage terminals M35422 Recommended Wire Size Recommended Part Numbers 14, 16, or 18 AWG copper conductor, 600 volt insulation, moistureresistant wire. TTW60C, THW75C, THHN90C 3232-00014—01 Chapter 4: SLATE Base Module Setup and Configuration Recommended Wire Size Recommended Part Numbers Communication linesa 22 AWG two-wire twisted pair with ground, or five-wire. Belden 8723 shielded cable or equivalent. Other terminals 18 AWG wire insulated for voltages and temperatures for given application. TTW60C, THW75C, THHN90C Application BACnet MS/TP connections must be wired in daisy chain configuration, 1 (a)-1(a), 2(b)-2(b), 3(c)-3(c). The order of interconnection of all the devices is not important. Be aware that the termination DIP switch (number 3) must be used if the SLATE system is at the end of connections over 100 feet. 1. After selecting Module Configuration you will be presented with the SLATE Module Configuration screen. Select Base. Recommended Grounding Practices Use an Earth ground or a signal ground as described below. Earth ground 1. Use to provide a connection between the base and the control panel of the equipment. Earth ground must be capable of conducting enough current to blow the breaker in the event of an internal short circuit. 2. Use wide straps or brackets to provide minimum length, maximum surface area ground conductors. If a leadwire is required, use 14 AWG copper wire. 3. Make sure that mechanically tightened joints along the ground path are free of nonconductive coatings and protected against corrosion on mating surfaces. Signal ground Note the 18V system ground is not electrically connected to earth ground. Follow local codes and appliance recommendations to determine if this should be connected to earth ground. Recommended wire routing of leadwires 2. Select Configure Selected Module. • Do not run high voltage ignition transformer wires in the same conduit with the flame detector or data lines. 3. All registers containing information related to the Base are made available for editing. Use the Previous or Next buttons to maneuver through the Base registers. Editing these registers is possible only when the “Protect Mode” check box is unchecked. • Do not route flame detector or data lines in conduit with line voltage circuits. • Enclose flame detector leadwires without armor cable in metal cable or conduit. • Follow directions in flame detector instructions. Be sure loads do not exceed the terminal ratings. Base Configuration with SLATE AX Tool The SLATE AX Tool is used to configure all modules within the SLATE family. To configure the Base Module you will use the SLATE AX Tool Module Configuration selection. SLATE™ INTEGRATED COMBUSTION MANAGEMENT SYSTEM R8001 Series 33 Chapter 4: SLATE Base Module Setup and Configuration 4. Help files are available to describe the register details. Clicking in the Help column and register will reveal information about the register. 5. After you have completed setting the registers, you will need to click the Save button. You will be asked to confirm that you want to save the changes. Simply click Yes. SLATE Base HMI Screen 3432-00014—01 Chapter 5: Burner Control Module and Configuration Chapter 5: Burner Control Module and Configuration The SLATE AX Tool is used to configure the Burner Control Module parameters. For enhanced diagnostics, the SLATE Annunciator Module can be used. The Annunciator Module monitors the status of individual components in a series wiring of limits, control and/or interlock contacts wired to the Burner Control Module. Refer to Chapter 13 for further information on the Annunciator Module. Status LEDs There are 4 LEDs on the front of the Burner Control Module that provide quick identification of system status and problems. This status is broadcast to other modules on the platform bus in case they are affected by the inoperable module(s). See the table below for descriptions of the four status LEDs. LED Color Power No light Green CPU Fault Flame Description System does not have power System has power Red No valid configuration Green Running Red Fault No light No fault Yellow Flame is detected No light No flame is detected There are also 17 separate LEDs for each of the Burner Control Module terminals. See the table below for module terminal LED descriptions. Overview The R8001B2001/U Burner Control Module is a configurable flame safequard control that can sequence a commercial or industrial burner. Applications include automated fired gas, oil or combination fuel single burners. It may be configured as a primary or programmer, automatic or semi-automatic with many selectable options. Description Terminal is ON or is Normal Red Fault No light Terminal is OFF or Not in use LED Display All SLATE system modules have a seven-segment, three-position LED display for indicating the assigned module number of the SLATE system. Select and Reset Buttons As well, the SLATE Burner Control Module may be configured to emulate various Honeywell 7800 SERIES flame safeguard controls such as RM7800L, RM7800G, RM7800M, RM7800E, RM7838A, RM7838 and EC7850 and many other models. Emulation of the 7800 SERIES controls via canned configurations is completed at the Base Module level, where the entire configuration kit is stored. SLATE™ INTEGRATED COMBUSTION MANAGEMENT SYSTEM R8001 Series Color Green All SLATE system modules have Select and Reset buttons located on the front of the module and beneath the segment display. The Reset button is used to clear a lockout and reset the module. The Select button is used to scroll through the segment display information. 35 Chapter 5: Burner Control Module and Configuration 1 BURNER CONTROL MODULE 2 6 RELAYS 15 OPTO-INPUTS UNUSED 3 4 5 BLR, HSI OR WIRE SHEET 6 PVH 7 M05 8 PPP Understanding the Terminals 9 10 LPP The SLATE Burner Control Module contains 22 wired terminals. All terminals are 24VDC or 24-240VAC and automatically adapt to the applied system voltage. The LCI (limit and control input) terminals 12 and 13 for fuel 2 and 1 provide connection to limits and operating controls. They must be closed before burner startup is allowed. If they are open during Run mode, it causes the burner to shut down. The LCI terminals can optionally generate a call-for-heat when they are closed. When the dual fuel option is enabled, the LCI/F2 or LCI/F1 LED indicates the selected fuel. The Burner Control Module wiring terminal descriptions can be found in the table below. MV2 11 MV1 12 LCI FUEL2 13 LCI FUEL1 14 PII PV 15 16 IAS IGN 17 18 VPS SAFETY RELAY 19 Note: Only one voltage can be applied per module (same at all terminals). ILK 20 BIAS REMOTE BUS IS ON SUBBASE 21 VREF 22 M35387 Label mA/V Terminal 1 2 Description Not used Not used Rating - Information - - 3 4 Not used BLR, HSI or Wire Sheet, K1 relay dry contacts Pilot valve hold 9.8 FLA, 58.8 LRA @120VAC, 20A inrush @240VAC 24VDC (0.5 mA), 24240VAC (0.2 mA) Dry contacts for burner, fan, blower or HSI (hot surface ignition) or used by SLATE wire sheet K1 5 PVH 6 MOS 7 Manual open switch PPP 8 MV2 9 Purge position proven) Main valve 2 LPP 10 Lightoff position proven Manually operated during Run to relight the pilot and then turn off the main burner, until PVH is turned off again, which relights the main burner. Used when a main valve must be opened normally before lighting the burner. The switch closes when the manual valve is fully open. A PPP switch (or High Fire Switch) is used for mechanical throttle systems. It closes when airflow is sufficient to purging. 4A (0.5 PF) @120VAC, Second main fuel valve in a double block system. May be used 2.0A inrush @240VAC, for delayed main (2nd stage) valve or VPS (valve proving se2A continuous, 10A quence). inrush @ 24VDC 24VDC (0.5 mA), 24An LPP switch (or Low Fire Switch) is used for mechanical 240VAC (0.2 mA) throttle systems. It closes when the throttle position is correct for lightoff. 3632-00014—01 Chapter 5: Burner Control Module and Configuration Label MV1 Terminal 11 Description Main valve 1 LCI/F2 12 LCI/F1 13 Limit and control input, Fuel 2 Limit and control input, Fuel 1 PII 14 PV 15 IAS 16 IGN 17 VPS 18 Valve Proving Switch (VPS) ILK Vref+ 19 20 Lockout Interlocks Reference voltage + Vref- 21 22 Not used Reference voltage - Pre-ignition interlocks Pilot Valve Interrupted Airflow Switch/ Lockout input Ignition Rating 4A (0.5 PF) @120VAC, 2.0A inrush @240VAC, 2A continuous, 10A inrush @ 24VDC 24VDC (0.5 mA), 24240VAC (0.2 mA) 4A (0.5 PF) @120VAC, 20A inrush @240VAC, 1A continuous, 5A inrush @ 24VDC 24VDC (0.5 mA), 24240VAC (0.2 mA) 4A (0.5 PF) @120VAC, 20A inrush @240VAC, 1A continuous, 5A inrush @ 24VDC 24VDC (0.5 mA), 24240VAC (0.2 mA) 24VDC (0.1 mA), 24VAC (0.1 mA) 85-264VAC (0.2 mA) 24VDC (0.1 mA), 24VAC (0.1 mA) 85-264VAC (0.2 mA) Information First main fuel valve in a double block system. May be used to power both main valves or for VPS (valve proving sequence). Provide connection to limits and operating controls. It must be closed before burner startup is allowed. If it is open during Run, it causes burner shutdown. It can optionally generate a call-forheat when it closes. When the dual fuel option is enabled, the LCI/F2 or LCI/F1 LED indicates the selected fuel. Interlock connection required to be closed before ignition sequence begins. Typically POC (proof of closure switch). Pilot valve connection point. Airflow proving switch input or lockout input for EU. Ignition transformer connection point. Valve proving sequence (VPS) switch input. Provided from a pressure switch which is mounted between the two main gas shutoff valves (MV1 and MV2). It is used to perform the systematic gross leakage test. Lockout interlock input string connection point. Voltage reference circuit. Voltage reference circuit It is important to lie out and understand the wiring to and from the Burner Control Module as well as the full system wiring before proceeding with configuration. Wiring For installation and wiring information, refer to document 3200010, the SLATE Burner Control Module Installation Instructions. Examples of single and dual fuel wiring with the SLATE Burner Control Module are shown below. The SLATE AX Tool is used to configure the 128 available Burner Control Module parameters which are relative to the type of burner and terminals used. SLATE™ INTEGRATED COMBUSTION MANAGEMENT SYSTEM R8001 Series 37 Chapter 5: Burner Control Module and Configuration 3832-00014—01 Chapter 5: Burner Control Module and Configuration Getting Started 1. To access the configuration tool you will need to launch the SLATE AX Tool 2. If you have not created a Station please refer to Chapter 2 of this manual to learn how to create a new station. 3. If you have created a Station open up the Navigation pane until to reach your SLATE Device. Double-click on the SLATE device to launch the Module Configuration Tool. 4. Select “Burner Control” from the module list as shown below, then click on “Configure Selected Module.” SLATE™ INTEGRATED COMBUSTION MANAGEMENT SYSTEM R8001 Series 39 Chapter 5: Burner Control Module and Configuration 5. You should be taken to a set of screens that allow you to setup the burner control parameters. This is how the SLATE Burner Control Module is configured for use. The settings are selected by utilizing the pull-down menus. There are 128 parameters that will need to be configured. Note: Help files are available to describe the parameter / register details. For further information on a specific parameter/register, select the Help button on the far right of the screen. 6. Before proceeding, you must uncheck the “Protect Mode” box to allow editing of the configuration. Use the “Next” and “Previous” buttons to move through the Burner Control Module configuration pages. After you have configured all of the parameters you will need to click the Save button. Once you are done with all of the SLATE programming and configuration it will be stored as a kit file as explained in “Load the SLATE Device” on page 8. 7. There are 128 configurable registers/parameters in the SLATE Burner Control Module. Not all available parameters must be used since fuel air and limit module interactions are included. There are 10 categories of setup parameters; module, rate, ignition, flame module, timings, interlocks, failure response, recycle, valve proving and limit socket. These are shown in the table below. 4032-00014—01 Chapter 5: Burner Control Module and Configuration RegisCategory ter # Module Setup Name Description Default Value Range r1 Module number Assigned module number in SLATE rack - 2-99 r6 Alert display level Enable/disable alert output 0 0 Disable >0 Alert context level r7 Install date Date when this module was installed in the system - - r16 Module short name For Base Module use Burner - r17 Module name For Base Module use Burner Control - r110 Soft lockout enable Master enable for soft lockouts. If this parameter value is Disable, then all soft lockouts become hard lockouts. 1 1 Disable 2 Enable r111 Soft lockout power cycle action Action to follow when the control power cycles and it is in a soft lockout condition. 1 1 Preserved through power cycle 2 Cleared by power cycle r112 Hard lockout power cycle action Action to follow when the control power cycles and it is in a hard lockout condition. 1 1 Preserved through power cycle 2 Cleared by power cycle r113 Soft lockout delay time Length of time to delay after a lockout occurs before automatically clearing the lockout and resuming 60 0-60 seconds r114 Register demand sources Identifies the registers used to request burner demand. 1 1 Do not use registers for demand 2 Demand 1 Register 3 Demand 2 Register 4 Demand 1 OR Demand 2 Register r115 Forced recycle time Maximum time length that the burner can continuously run before it is automatically recycled. 0 0-24 hours 0=Disabled r116 K1 relay usage Specifies how the K1 relay will be used. 1 If wire sheet is chosen, the relay is not used by the burner control and may be controlled by wire sheet logic. 2 If Hot surface igniter (HSI) is chosen, the relay is closed during the pre-ignition state and throughout the Direct Burner Ignition (DBI) state or Pilot Flame Establishing Period (PFEP), whichever is enabled. Turning on the HSI option disables the IGN output; it remains off. 3 If Blower is chosen, the relay is closed at the start of prepurge and it remains closed up through the end of postpurge. 1 1 Wire sheet 2 Hot surface igniter 3 Blower r119 Fuel air control module number Assigned Fuel/Air Module number in SLATE rack 0 0, 2-99 0=Disabled SLATE™ INTEGRATED COMBUSTION MANAGEMENT SYSTEM R8001 Series 41 Chapter 5: Burner Control Module and Configuration RegisCategory ter # Name Description Default Value Rate Setup r120 Prepurge rate (RPM) Range The rate used for prepurge when this rate is a direct RPM value provided by the Burner Control. Wire sheet logic may read this value to operate the rate output control. When rate proving is via RPM feedback, the value provided here is the value that is tested vs. the feedback 0 - r121 Prepurge rate proving Determines whether and how the modulation rate is proven during prepurge. 1 Disabled 2 If PPP switch is chosen, the purge position proven switch is used. 3 If Fuel air control is chosen, the modulation rate is proven by data sent from the fuel air ratio control. 4 If Fan RPM is chosen, the modulation rate is proven by the RPM feedback via the tachometer input. For options 2, 3 and 4, failure to prove lightoff rate follows the configured response (r154). Related registers: r124 Rate proving delay r152 Early purge proving delay r154 Purge rate proving failure response 1 1 Disable 2 PPP switch 3 Fuel air control 4 Fan RPM r122 Lightoff rate (RPM) The rate used for lightoff when this rate is a direct RPM value provided by the burner control. Wire sheet logic may read this value to operate the rate output control. When lightoff rate proving is via RPM feedback, the value provided here is the value that is tested vs. the feedback. Related register: r123 Lightoff rate proving 0 - r123 Lightoff rate proving Determines whether and how the modulation is proven during lightoff. 1 1 Disable 2 LPP switch 3 Fuel air control 4 Fan RPM 1 Disabled 2 If LPP switch is chosen, the lightoff position proven switch is used. 3 If Fuel air control is chosen, the modulation rate is proven by data sent from the fuel air ratio control. 4 If Fan RPM is chosen, the modulation rate is proven by the RPM feedback via the tachometer input. For options 2, 3 and 4, failure to prove lightoff rate follows the configured response (r155). Related registers: r124 Rate proving delay r153 Early lightoff proving delay r155 Lightoff rate proving failure response r124 Rate proving delay Identifies how long to wait for the modulation rate to be proven before giving up and taking the configured response (r154, r155). Includes Prepurge and Lightoff. Related registers: r121 Prepurge rate proving r123 Lightoff rate proving r154 Purge rate proving failure response r155 Lightoff rate proving failure response 0 0-300 seconds (0-5 minutes) 0=Must be proven immediately r125 Fan speed tolerance When prepurge and/or lightoff proving is configured to occur depending on measured fan RPM and when the measured speed differs from the specified speed by less than the value of this parameter and it has been in this range for 3 seconds, then fan speed is considered to be proven. It then remains proven as long as the speed remains within the tolerance band of this parameter. 0 0-100% 4232-00014—01 Chapter 5: Burner Control Module and Configuration RegisCategory ter # Ignition Setup Flame Module Setup Default Value Name Description r126 Igniter duration Specifies how long a spark igniter (IGM output, T17) should be turned on during ignition. 1 If a Hot Surface Igniter (HSI) is enabled (r116), this parameter must be disabled. 2 Normal duration provides IGN power throughout the Pilot Flame Establishing Period (PFEP) or Direct Burner Ignition (DBI) time, whichever is enabled. 3 Early spark termination turns the IGN output off halfway through the PFEP period or one second prior to the end of DBI time. 1 1 Disabled, use HSI 2 Normal duration 3 Early spark termination r127 Ignition type Type of ignition system used. 1 1 Intermittent pilot 2 Interrupted pilot 3 Direct burner ignition r128 Flame sensing system type Describes the number of flame sensors and how they are compared to determine whether successful flame is present. 2 Two flame sensors with OR logic: flame detection is true if either sensor detects flame 3 Two flame sensors with AND logic: flame detection is true only if both sensors detect flame 4 Two flame sensors DELAYED: the first sensor must detect flame within the normal tim, then a second sensor must also detect flame after a delay time expires. 5 Four flame sensors-DELAYED OR logic: same as previous case, except each sensor is now paired with another sensor and within those pairs OR logic is used; a pair detects that flame is present if either sensor detects flame. 6 Four flame sensors-DELAYED AND logic: same as previous case, except each sensor in the pair uses AND logic with its partner; each pair detects flame only if both sensors in the pair are sensing flame. For DELAYED options, the delay time (see Secondary Flame Sensing Time, r129) may be set to 0 to mean “no delay” which causes the evaluation to be done immediately. Doing this makes some of the options above equivalent. 1 1 Single flame sensor 2 Two flame sensors -OR 3 Two flame sensors -AND 4 Two flame sensors-DELAYED 5 Four flame sensors-DELAYED OR 6 Four flame sensors-DELAYED AND r129 Secondary flame sensing time Time until the second flame sensor must report a flame when a DELAYED flame detection option is used. The delay time starts at the same time that the non-delayed sensor’s time starts, and it is subject to the same pilot test hold. 0 0-30 seconds r130 Flame failure response time Maximum time length between a loss of the sensed flame and the turn-off of power to the main fuel valve(s). 1 1 Unknown 2 0.8 seconds 3 1 second 4 2 seconds 5 3 seconds SLATE™ INTEGRATED COMBUSTION MANAGEMENT SYSTEM R8001 Series 43 Range Chapter 5: Burner Control Module and Configuration RegisCategory ter # Name Description Default Value Ignition Setup r131 Pilot valve hold enable Identifies whether Pilot Valve Hold (PVH) behavior is enable or not 1 1 Disable 2 Enable r132 Pilot valve hold transition time Timing used to establish the Pilot Valve Hold condition. 5 5-60 seconds r133 Manual open switch enable Specifies if a manual open switch is to be used. 1 1 Disable 2 Enable with MFEP hold for MOS closure 3 Enable with immediate MFEP r134 Auto ignition enable Allows a Limit Module to provide indication that the combustion chamber is at or above an auto ignition temperature (typically 1400°F/760°C minimum) and in this case the flame signal from the flame amplifier can be ignored. For this feature to become active one of the limit sockets (r600-r645) in the Burner Control must be configured to accept auto ignition status, and this status must actually be received. Related registers: r600-648 Socket limit 1-8 1 1 Disable 2 Enable r135 Delayed main valve 2 enable If enabled, the MV2 is turned on after flame has been established via MV1 (upon entry to Run). Note: It is a configuration fault to enable this feature for a fuel that is also enabled for valve proving (see r186). 1 1 Disable 2 Enable always 3 Enable for fuel F1 4 Enable for fuel F2 Note: It is a configuration fault if this input and also Direct Burner Ignition (DBI) is enabled (r127); this feature must be used with a pilot system. 2 When enabled with MFEP hold for MOS closure: a hold occurs at the MFEP start if this input is off. There is no limit to the hold time. During the hold the pilot remains on as normal, and all normal flame monitoring and input monitoring performed during MFEP still occur. However, the MFEP timer is held and during this hold the Main Valve outputs are commanded off and monitored to ensure they are off. As soon as the MOS input is detected as on, then a normal MFEP state occurs: normal MFEP timing begins and proceeds without monitoring of the MOS input. 3 When enabled with immediate MFEP: no hold occurs and MFEP proceeds normally as if MOS were not used at all. In both cases 2 and 3, when MOS is enabled: at the end of MFEP and throughout subsequent states while the main valve is commanded on (e.g. Run Stabilization, Run), a MOS fault configured response occurs if the MOS input is detected as off (r173). Related register: r173 Manual open switch off response Range 4432-00014—01 Chapter 5: Burner Control Module and Configuration RegisCategory ter # Timings Setup Default Value Name Description r136 Prepurge time Time length to prepurge the burner to clear out any possible leftover fuel or products of combustion. 0 0-65535 0=Disable r137 Preignition time During the preignition state the igniter is on but neither main valve(s) nor pilot are powered. Time period typically used either to prove that flame is not simulated by spark, since no flame signal is allowed during preignition, or it is used as pre-heat time for a Hot Surface Igniter (HIS) 0 0-120 seconds 0=Disable r138 Pilot fame establishing time Time length allowed before requiring a flame to be present during ignition, when a pilot is used. Ignored if Direct Burner Ignition (DBI) is enabled (r127). 0 0-30 r139 Fuel 1 main flame establishing time Time length that an interrupted pilot is on along with the main valve(s) for Fuel 1. At the end of this time an interrupted pilot is turned off and only the main flame provides proof of combustion. Notes: - This parameter is ignored for an Intermittent pilot because there is no MFEP, and for Direct Burner Ignition (DBI) because DBI time is a separate parameter (r127, r140). - Fuel 2 main flame establishing time is register r190 0 0-30 r140 Direct burner ignition time Time length main valve may be on before flame must be proven when Direct Burner Ignition (DBI) is used. Note: This parameter is ignored for other ignition types (r127). 0 0-4 seconds r141 Postpurge time Time length to wait for the burner to clear excess fuel and products of combustion after it has been running or attempted to ignite. 0 0-65535 seconds 0=No postpurge SLATE™ INTEGRATED COMBUSTION MANAGEMENT SYSTEM R8001 Series 45 Range Chapter 5: Burner Control Module and Configuration RegisCategory ter # Interlocks Setup Default Value Name Description r142 Fuel selection setup 1 When NA-No fuel air module is selected, the Burner Control does not use fuel air communication. Note: If the Fuel air control module number (r119) is non-zero, a configuration fault exists and a lockout occurs. A configuration fault lockout also occurs if this parameter has any other value but the Fuel air control module (r119) is zero 2/3 If a single fuel is selected via Always use Fuel 1/2 the reported fuel selection sent to a Fuel Air Ratio Control Module will be according to that selection, no matter how the LCI/F1 and LCI/F2 input are used (or not used) 4 If Use Limits LCI/F1 (T13) and LCI/F2 (T12) to select the fuel is chosen, it is a dual fuel application and both LCI/F1 and LCI/F2 must be configured for Limit functions (r143, r145). This condition both may be off or one may be on, but a configured response (r167) occurs if both are on at the same time (except for a brief transition tolerance of 1 second). Note: It is a configuration fault lockout if LCI/F1 and LCI/ F2 are not configured for Limit functions (r143, r145). 1 Range 1 N/A-No fuel air module 2 Always use Fuel 1 3 Always use Fuel 2 4 Use Limit LCI/ F1 and LCI/F2 to select the fuel r143 LCI/F1 enable 1 r144 LCI/F2 enable 1 Disabled = the input is disabled and ignored. 2 When used as demand, the input acts as a demand input and call for heat is true when it is on. A call for heat is present when the input is energized and when it is off (and also there is no other source for a call for heat) , then the system returns to an idle condition in Standby with no call for heat and no hold condition. This return to Standby may include going through postpurge if the burner was igniting or firing, but eventually it becomes idle 3 When used as a limit, the input acts as a run-permissive input. The call for heat comes from some other source and this input must turn on before startup will proceed. During the time demand is present but LCI is open, a hold is annunciated, describing the reason. An LCI input configured as a limit must remain on throughout the prepurge, ignition and run states; if it opens during these states the startup or run condition is aborted abnormally and a configured response occurs (r160). Note: This selection is required for dual fuel applications. 1 Disable 2 Use as demand 3 Use as limit (dual fuels) r145 Demand hold limit time Maximum time to wait in a Standby hold condition when demand is present. If it fails to resolve for this amount of time, a configured response occurs (r161). 0 0-65535 0=no limit, wait forever 4632-00014—01 Chapter 5: Burner Control Module and Configuration RegisCategory ter # Interlocks Setup Default Value Name Description r146 Preignition interlock enable 1 Disabled = the PII input (T14) is disabled and ignored. 2 When enabled with no dynamic check is selected, the PII input is not monitored for any condition. The PII input is tested to ensure that it’s energized whenever the main valve(s) should be off. Whenever the main valve status changes from one or both valves on, to both valves off, 5 seconds is allowed before checking if the energized state has resumed to allow time to fully close their proof of closure switches. Normal PII open response followed via configured response (r162). 3 When enabled with dynamic check, the PII input is monitored for both On and Off conditions during specific burner sequences. During the Run state, the PII input must be de-energized and during the Standby state, the PII must be energized. If any test reveals that the PII is not in its mandated position, a configured response occurs (r166). 1 1 Disable 2 Enable with no dynamic check 3 Enable with dynamic check r147 ILK start check enable Selects whether the interlock input (ILK, T19) must be off at startup as a check that proves it is possible for it to signal the off condition. 1 Disable=start check not performed. Normal ILK open response followed via a configured response (r163). 2 If ILK is on during the start check, the control waits for it to turn off before startup is allowed. If it fails to turn off for 4 minutes, then a configured response occurs (r165). 1 1 Disable 2 Enable r148 IAS start check enable Selects whether the interrupted airflow switch (IAS, T16) must be off at startup as a check that proves it is possible for it to signal the off condition. 1 Disable=start check not performed. Normal IAS open response followed via a configured response (r164). 2 If IAS is on during the start check, the control waits for it to turn off before startup is allowed. If it fails to turn off for 4 minutes, then a configured response occurs (r165). 1 1 Disable 2 Enable r149 IAS/LOI monitoring The T16 input can be configured as either an Interrupted Airflow Switch (IAS) or a Lockout Input (LOI). The LOI is primarily used in EU applications. 1 Disable=no airflow switch in system. 2/3 When monitored as an IAS input during prepurge, it is not a fault for this input to be off until the IAS proving maximum wait time has elapsed (r151). The measured purge timing does not begin until the IAS is energized 4 If configured as a LOI input, it must be energized at all times, with the only exception being during initialization when it is given time to turn on. If the T16 input is in an incorrect state, a configured response occurs (r164). 1 1 Disable 2 IAS: Prepurge only 3 IAS: Prepurge/ Ignition 4 LOI: At all times including Standby r150 ILK monitoring Selects when the Interlock string (ILK, T19) is monitored by the Burner Control. 1 Use this input as a lockout input (LOI). It must be energized at all times, with the only exception being during initialization when it is given time to turn on. Typically used in EU applications. 2 Use the input as a normal interlock input. During prepurge, it is not a fault for this input to be off until the IAS proving maximum wait time has elapsed (r151). The measured purge timing does not begin until the ILK is energized. If the T19 input is in an incorrect state, a configured response occurs (r163). 1 1 LOI: At all times including standby 2 During Prepurge, Ignition and Run SLATE™ INTEGRATED COMBUSTION MANAGEMENT SYSTEM R8001 Series 47 Range Chapter 5: Burner Control Module and Configuration RegisCategory ter # Timings Setup Failure Response Setup Default Value Range Time that a de-energized ILK or IAS (whichever is configured) is tolerated from the start of the prepurge state. If this time is exceeded without establishing the input as energized, a configured response occurs (r163 or r164??) Note: In previous Honeywell controls this time was fixed. In this system it is programmable to accommodate VFDs which take a longer time to provide optimum airflow. 0 0-60 seconds Early purge proving delay If purge proving is enabled (r121) and it is proven immediately upon entry to the prepurge state, an extra delay occurs that lasts for the duration defined by this parameter. Related register: r121 Prepurge rate proving 30 0-65535 0=accept the proven condition with no delay r153 Early lightoff proving delay If lightoff proving is enabled (r123) and it is proven immediately upon entry to the drive to lightoff state, an extra delay occurs that lasts for the duration defined by this parameter. Related register: r123 Lightoff rate proving 30 0-65535 0=accept the proven condition with no delay r154 Purge rate proving failure response The action taken upon a failure to achieve the target firing rate during purge within the time provided by the Rate proving delay parameter (r124). Related register: r124 Rate proving delay 1 1 Unknown 2 Recycle 1 3 Recycle 2 4 Recycle 3 5 Soft lockout 6 Hard lockout r155 Lightoff rate proving failure response The action taken upon a failure to achieve the target firing rate during lightoff within the time provided by the Rate proving delay parameter (r124). Related register: r124 Rate proving delay 1 1 Unknown 2 Recycle 1 3 Recycle 2 4 Recycle 3 5 Soft lockout 6 Hard lockout r156 Valve proving failure response The action taken upon a failure to prove the valve is functioning properly during the valve proving test. 1 1 Unknown 2 Recycle 1 3 Recycle 2 4 Recycle 3 5 Soft lockout 6 Hard lockout r157 Pilot ignition failure response The action taken when the pilot fails to light. 1 1 Unknown 2 Recycle 1 3 Recycle 2 4 Recycle 3 5 Soft lockout 6 Hard lockout r158 Main ignition failure response The action taken when a satisfactory main flame is not established during ignition. This response is used for flame failure during DBI (direct burner ignition), MFEP (main flame establishing period) and during the first 10 seconds of the Run state. 1 1 Unknown 2 Recycle 1 3 Recycle 2 4 Recycle 3 5 Soft lockout 6 Hard lockout r159 Run flame failure response The action taken upon loss of satisfactory flame after the burner has been in the Run state over 10 seconds. Prior to this, during DBI, MFEP or the first 10 seconds of Run, the Ignition flame failure response (r158) is used. 1 1 Unknown 2 Recycle 1 3 Recycle 2 4 Recycle 3 5 Soft lockout 6 Hard lockout Name Description r151 ILK/IAS proving maximum wait time r152 4832-00014—01 Chapter 5: Burner Control Module and Configuration RegisCategory ter # Failure Response Setup Default Value Name Description r160 LCI open response Action taken when the LCI (T12, T13) opens abnormally while it should be closed during the burner sequence. Note: Only applies when LCI/F1 or LCI/F2 is defined as a Limit input (r143, r144). It does not apply if LCI/F1 or LCI/F2 is defined as a Demand input because its opening during a sequence is a normal indication of the end of demand. Related registers: r143 LCI/F1 enable r144 LCI/F2 enable 1 1 Unknown 2 Recycle 1 3 Recycle 2 4 Recycle 3 5 Soft lockout 6 Hard lockout r161 Demand hold limit response Action taken when the Demand hold limit time is exceeded (r145). Related register: r145 Demand hold limit time 1 1 Unknown 2 Recycle 1 3 Recycle 2 4 Recycle 3 5 Soft lockout 6 Hard lockout r162 PII open response Action taken if the PII is open when it should be closed during the burner sequence. Related register: r146 Preignition interlock enable 1 1 Unknown 2 Recycle 1 3 Recycle 2 4 Recycle 3 5 Soft lockout 6 Hard lockout r163 ILK open response Action taken if the ILK is open when it should be closed during the burner sequence. Related registers: r147 Preignition interlock enable r151 ILK/IAS proving maximum wait time 1 1 Unknown 2 Recycle 1 3 Recycle 2 4 Recycle 3 5 Soft lockout 6 Hard lockout r164 IAS/LOI open response Action taken if the Interrupted Airflow Switch (IAS) is open when it should be closed during the burner sequence. Related registers: r148 IAS start check enable r150 ILK monitoring r151 ILK/IAS proving maximum wait time 1 1 Unknown 2 Recycle 1 3 Recycle 2 4 Recycle 3 5 Soft lockout 6 Hard lockout r165 ILK/IAS start check failure response Action taken if a start check failure occurs of the ILK and/ or IAS inputs. Related registers: r147 ILK start check enable r148 IAS start check enable 1 1 Unknown 2 Recycle 1 3 Recycle 2 4 Recycle 3 5 Soft lockout 6 Hard lockout r166 PII dynamic check failure response Action taken if a dynamic check failure occurs of the PII input. Related register: r146 Preignition interlock enable 1 1 Unknown 2 Recycle 1 3 Recycle 2 4 Recycle 3 5 Soft lockout 6 Hard lockout r167 Dual fuel fault response Action taken if both the LCI/F1(T13) and LCI/F2 (T12) are energized when dual fuel is enabled (this is an invalid condition). Related register: r142 Fuel selection setup 1 1 Unknown 2 Recycle 1 3 Recycle 2 4 Recycle 3 5 Soft lockout 6 Hard lockout r168 Flam amplifier fault response Action taken for a failure in the flame detector system. 1 1 Unknown 2 Recycle 1 3 Recycle 2 4 Recycle 3 5 Soft lockout 6 Hard lockout SLATE™ INTEGRATED COMBUSTION MANAGEMENT SYSTEM R8001 Series 49 Range Chapter 5: Burner Control Module and Configuration RegisCategory ter # Failure Response Setup Default Value Name Description r169 MV PV IGN on should be off response Action taken if the MV, PV or IGN outputs are on when they should be off (T9, T11, T15, T17). An example might be shorted power. 1 Range 1 Unknown 2 Recycle 1 3 Recycle 2 4 Recycle 3 5 Soft lockout 6 Hard lockout r170 MV PV IGN should be on response Action taken if the MV, PV or IGN outputs are off when they should be on (T9, T11, T15, T17). 1 1 Unknown 2 Recycle 1 3 Recycle 2 4 Recycle 3 5 Soft lockout 6 Hard lockout r171 Safety relay fault response Action taken if the Burner Control safety relay is in the wrong state (internal fault). 1 1 Unknown 2 Recycle 1 3 Recycle 2 4 Recycle 3 5 Soft lockout 6 Hard lockout r172 Flame on should be off response Action taken if flame is detected when it should not be. 1 1 Unknown 2 Recycle 1 3 Recycle 2 4 Recycle 3 5 Soft lockout 6 Hard lockout r173 Manual open switch off response Action to take if the Manual Open Switch (MOS) is off when it should be on (during MFEP and Run). Related register: r133 Manual open switch enable 1 1 Unknown 2 Recycle 1 3 Recycle 2 4 Recycle 3 5 Soft lockout 6 Hard lockout r174 Fuel air communication fault response Action to take if the Fuel Air Ratio Control does not have reliable communication with the Burner Control. Related register: r119 Fuel air control module number 1 1 Unknown 2 Recycle 1 3 Recycle 2 4 Recycle 3 5 Soft lockout 6 Hard lockout r175 Limit communication fault response Action to take if a Limit Module does not have reliable communication with the Burner Control. Related registers: r600 Socket 1 limit module number r606 Socket 2 limit module number r612 Socket 3 limit module number r618 Socket 4 limit module number r624 Socket 5 limit module number r630 Socket 6 limit module number r636 Socket 7 limit module number r642 Socket 8 limit module number 1 1 Unknown 2 Recycle 1 3 Recycle 2 4 Recycle 3 5 Soft lockout 6 Hard lockout r176 Stuck reset switch response Action taken if the reset push button is stuck 1 1 Unknown 2 Recycle 1 3 Recycle 2 4 Recycle 3 5 Soft lockout 6 Hard lockout 5032-00014—01 Chapter 5: Burner Control Module and Configuration RegisCategory ter # Name Description Default Value Recycle Setup r177 Recycle 1 delay time Range Delay time that must take place while in Standby before retrying the burner sequence for the 1st recycle handler. The 5 second minimum ensures the recycle reason has time to be displayed. Related registers: r154-r176 Failure Response Setup 5 5-65535 seconds r178 Recycle 1 retry limit count Maximum number of recycle tries before giving up for the 1st recycle handler. Retry counting is cleared when the burner reaches the Run state or when the call for heat disappears Related registers: r154-r176 Failure Response Setup r 179 Recycle 1 retry limit response 3 0-65535 seconds r179 Recycle 1 retry limit response Action taken if the number of recycles hits the retry limit count for the 1st recycle handler. When the response is None, the recycles continue indefinitely until successful or the call for heat is lost. Related registers: r154-r176 Failure Response Setup r 178 Recycle 1 retry limit count 1 1 None 2 Soft lockout 3 Hard lockout r180 Recycle 2 delay time Delay time that must take place while in Standby before retrying the burner sequence for the 2nd recycle handler. The 5 second minimum ensures the recycle reason has time to be displayed. Related registers: r154-r176 Failure Response Setup 5 5-65535 seconds r181 Recycle 2 retry limit count Maximum number of recycle tries before giving up for the 2nd recycle handler. Retry counting is cleared when the burner reaches the Run state or when the call for heat disappears Related registers: r154-r176 Failure Response Setup r 182 Recycle 2 retry limit response 3 0-65535 seconds r182 Recycle 2 retry limit response Action taken if the number of recycles hits the retry limit count for the 2nd recycle handler. When the response is None, the recycles continue indefinitely until successful or the call for heat is lost. Related registers: r154-r176 Failure Response Setup r 181 Recycle 2 retry limit count 1 1 None 2 Soft lockout 3 Hard lockout r183 Recycle 3 delay time Delay time that must take place while in Standby before retrying the burner sequence for the 3rd recycle handler. The 5 second minimum ensures the recycle reason has time to be displayed. Related registers: r154-r176 Failure Response Setup 5 5-65535 seconds r184 Recycle 3 retry limit count Maximum number of recycle tries before giving up for the 3rd recycle handler. Retry counting is cleared when the burner reaches the Run state or when the call for heat disappears Related registers: r154-r176 Failure Response Setup r 185 Recycle 3 retry limit response 3 0-65535 seconds r185 Recycle 3 retry limit response Action taken if the number of recycles hits the retry limit count for the 1st recycle handler. When the response is None, the recycles continue indefinitely until successful or the call for heat is lost. Related registers: r154-r176 Failure Response Setup r 184 Recycle 3 retry limit count 1 1 None 2 Soft lockout 3 Hard lockout SLATE™ INTEGRATED COMBUSTION MANAGEMENT SYSTEM R8001 Series 51 Chapter 5: Burner Control Module and Configuration RegisCategory ter # Valve Proving Setup Timings Setup Default Value Name Description r186 Valve proving enable If enabled, valve proving is performed when the configured fuel is selected. Note: It is a configuration fault to enable this feature for a fuel that is also enabled to use a delayed main valve (see r135). 2 Enable always causes valve proving to be performed always, either for a single fuel or for both fuels in a dual fuel system. 3/4 Enable for dual fuel selected by LCI/F1 and Enable for dual fuel selected by LCI/F2 are allowed only if the Fuel selection setup parameter (r142) enables dual fuels; otherwise a configuration fault occurs. Related registers: r142 Fuel selection setup 1 Range 1 Disable 2 Enable always 3 Enable for dual fuel selected by LCI/F1 4 Enable for dual fuel selected by LCI/F2 r187 Valve proving occurrence Determines when valve proving occurs if enabled. VPS includes two tests; one where the short pipe between the two shutoff valves is pressurized (high pressure test) and one where it is depressurized (low pressure test). VPS Before Run occurs simultaneously with prepurge and will delay lightoff if it lasts longer. VPS After Run occurs simultaneously with postpurge (if any) and will delay re-entry into Standby until completed. 1 Both pressure tests BEFORE entering the Run state 2 Both pressure tests AFTER in the Run state 3 Both pressure tests BEFORE and AFTER entering the Run state 4 High pressure test BEFORE Run and low pressure test AFTER Run. 1 1 Before Run 2 After Run 3 Both before and after Run 4 Split r188 Valve proving open time How long one valve is commanded open to pressurize or depressurize the pipe between the two shutoff valves. A typical value is t seconds for a slow valve. Shorter times may be used for faster valves. 5 0-60 seconds r189 Valve proving time Test time used for valve proving leakage test. 0 0-65535 seconds r190 Fuel 2 main flame establishing time Time length that an interrupted pilot is on along with the main valve(s) for Fuel 2. At the end of this time an interrupted pilot is turned off and only the main flame provides proof of combustion. Notes: - This parameter is ignored for an Intermittent pilot because there is no MFEP, and for Direct Burner Ignition (DBI) because DBI time is a separate parameter (r127, r140). - Fuel 1 main flame establishing time is register r139 0 0-30 5232-00014—01 Chapter 5: Burner Control Module and Configuration RegisCategory ter # Name Description Default Value Limit Socket r600 Socket 1 limit module number Assigned Limit 1 Module number in SLATE rack 0 0-99 0=Disabled r601 Socket 1 limit name Name for Socket 1 limit. String up to 12 characters. Note: All sockets in the Burner Control must have unique names. Data packets exchanged between modules must have the correct number and name otherwise data is ignored. - 12 character string maximum r602 Socket 1 limit response Response to valid limit status as defined by Socket 1 limit response trigger register (r603). 2/3/4 If Recycle 1, Recycle 2 or Recycle 3 are chosen, whenever the limit status is not “Limit OK”, a recycle and hold occurs until the status reverts to “Limit OK”. 5/6 If Soft lockout or Hard lockout is chosen, whenever the limit status is not “Limit OK”, the appropriate type of lockout occurs. 7 If Auto-ignition active is chosen, whenever the limit status is “Auto ignition threshold exceeded”, the Burner Control will act as defined by the Auto ignition enable parameter (r134). For the Auto ignition active response, the Socket 1 limit response trigger parameter (r603) is ignored. Related registers: r603 Socket 1 limit response trigger r177-179 Recycle 1 delay time / retry limit count / retry limit response r180-182 Recycle 2 delay time / retry limit count / retry limit response r183-185 Recycle 3 delay time / retry limit count / retry limit response r134 Auto ignition enable 1 1 Unknown 2 Recycle 1 3 Recycle 2 4 Recycle 3 5 Soft lockout 6 Hard lockout 7 Auto-ignition active r603 Socket 1 limit response trigger Determines when the Burner Control responds to the Limit Module. It also provides a master disable for the limit socket. 1 Disabled-Ignore limit: This limit socket is inactive 2 Always: This limit socket is active without regard to the Burner Control state 3 Prepurge, Ignition and Run: This limit socket is active during the named states and their sub-states. 4 Ignition and Run: This limit socket is active during the named states and their sub-states. 5 Flame is on: This limit socket is active whenever flame is required to be on. 6 Run: This limit socket is active during the Burner Control Run state only. Related register: r602 Socket 1 limit response 1 1 Disabled-Ignore limit 2 Always 3 Prepurge, Ignition and Run 4 Ignition and Run 5 Flame is on 6 Run r606 Socket 2 limit module number Assigned Limit 2 Module number in SLATE rack 0 0-99 0=Disabled r607 Socket 2 limit name Name for Socket 2 limit. String up to 12 characters. Note: All sockets in the Burner Control must have unique names. Data packets exchanged between modules must have the correct number and name otherwise data is ignored. - 12 character string maximum SLATE™ INTEGRATED COMBUSTION MANAGEMENT SYSTEM R8001 Series 53 Range Chapter 5: Burner Control Module and Configuration RegisCategory ter # Name Description Default Value Limit Socket r608 Socket 2 limit response Response to valid limit status as defined by Socket 2 limit response trigger register (r609). 2/3/4 If Recycle 1, Recycle 2 or Recycle 3 are chosen, whenever the limit status is not “Limit OK”, a recycle and hold occurs until the status reverts to “Limit OK”. 5/6 If Soft lockout or Hard lockout is chosen, whenever the limit status is not “Limit OK”, the appropriate type of lockout occurs. 7 If Auto-ignition active is chosen, whenever the limit status is “Auto ignition threshold exceeded”, the Burner Control will act as defined by the Auto ignition enable parameter (r134). For the Auto ignition active response, the Socket 2 limit response trigger parameter (r603) is ignored. Related registers: r609 Socket 2 limit response trigger r177-179 Recycle 1 delay time / retry limit count / retry limit response r180-182 Recycle 2 delay time / retry limit count / retry limit response r183-185 Recycle 3 delay time / retry limit count / retry limit response r134 Auto ignition enable 1 1 Unknown 2 Recycle 1 3 Recycle 2 4 Recycle 3 5 Soft lockout 6 Hard lockout 7 Auto-ignition active r609 Socket 2 limit response trigger Determines when the Burner Control responds to the Limit Module. It also provides a master disable for the limit socket. 1 Disabled-Ignore limit: This limit socket is inactive 2 Always: This limit socket is active without regard to the Burner Control state 3 Prepurge, Ignition and Run: This limit socket is active during the named states and their sub-states. 4 Ignition and Run: This limit socket is active during the named states and their sub-states. 5 Flame is on: This limit socket is active whenever flame is required to be on. 6 Run: This limit socket is active during the Burner Control Run state only. Related register: r608 Socket 2 limit response 1 1 Disabled-Ignore limit 2 Always 3 Prepurge, Ignition and Run 4 Ignition and Run 5 Flame is on 6 Run r612 Socket 3 limit module number Assigned Limit 3 Module number in SLATE rack 0 0-99 0=Disabled r613 Socket 3 limit name Name for Socket 3 limit. String up to 12 characters. Note: All sockets in the Burner Control must have unique names. Data packets exchanged between modules must have the correct number and name otherwise data is ignored. - 12 character string maximum Range 5432-00014—01 Chapter 5: Burner Control Module and Configuration RegisCategory ter # Name Description Limit Socket r614 Socket 3 limit response Response to valid limit status as defined by Socket 3 limit response trigger register (r615). 2/3/4 If Recycle 1, Recycle 2 or Recycle 3 are chosen, whenever the limit status is not “Limit OK”, a recycle and hold occurs until the status reverts to “Limit OK”. 5/6 If Soft lockout or Hard lockout is chosen, whenever the limit status is not “Limit OK”, the appropriate type of lockout occurs. 7 If Auto-ignition active is chosen, whenever the limit status is “Auto ignition threshold exceeded”, the Burner Control will act as defined by the Auto ignition enable parameter (r134). For the Auto ignition active response, the Socket 3 limit response trigger parameter (r615) is ignored. Related registers: r615 Socket 3 limit response trigger r177-179 Recycle 1 delay time / retry limit count / retry limit response r180-182 Recycle 2 delay time / retry limit count / retry limit response r183-185 Recycle 3 delay time / retry limit count / retry limit response r134 Auto ignition enable 1 1 Unknown 2 Recycle 1 3 Recycle 2 4 Recycle 3 5 Soft lockout 6 Hard lockout 7 Auto-ignition active r615 Socket 3 limit response trigger Determines when the Burner Control responds to the Limit Module. It also provides a master disable for the limit socket. 1 Disabled-Ignore limit: This limit socket is inactive 2 Always: This limit socket is active without regard to the Burner Control state 3 Prepurge, Ignition and Run: This limit socket is active during the named states and their sub-states. 4 Ignition and Run: This limit socket is active during the named states and their sub-states. 5 Flame is on: This limit socket is active whenever flame is required to be on. 6 Run: This limit socket is active during the Burner Control Run state only. Related register: r614 Socket 3 limit response 1 1 Disabled-Ignore limit 2 Always 3 Prepurge, Ignition and Run 4 Ignition and Run 5 Flame is on 6 Run r618 Socket 4 limit module number Assigned Limit 4 Module number in SLATE rack 0 0-99 0=Disabled r619 Socket 4 limit name Name for Socket 4 limit. String up to 12 characters. Note: All sockets in the Burner Control must have unique names. Data packets exchanged between modules must have the correct number and name otherwise data is ignored. - 12 character string maximum SLATE™ INTEGRATED COMBUSTION MANAGEMENT SYSTEM R8001 Series Default Value 55 Range Chapter 5: Burner Control Module and Configuration RegisCategory ter # Name Description Default Value Limit Socket r620 Socket 4 limit response Response to valid limit status as defined by Socket 4 limit response trigger register (r621). 2/3/4 If Recycle 1, Recycle 2 or Recycle 3 are chosen, whenever the limit status is not “Limit OK”, a recycle and hold occurs until the status reverts to “Limit OK”. 5/6 If Soft lockout or Hard lockout is chosen, whenever the limit status is not “Limit OK”, the appropriate type of lockout occurs. 7 If Auto-ignition active is chosen, whenever the limit status is “Auto ignition threshold exceeded”, the Burner Control will act as defined by the Auto ignition enable parameter (r134). For the Auto ignition active response, the Socket 4 limit response trigger parameter (r621) is ignored. Related registers: r621 Socket 4 limit response trigger r177-179 Recycle 1 delay time / retry limit count / retry limit response r180-182 Recycle 2 delay time / retry limit count / retry limit response r183-185 Recycle 3 delay time / retry limit count / retry limit response r134 Auto ignition enable 1 1 Unknown 2 Recycle 1 3 Recycle 2 4 Recycle 3 5 Soft lockout 6 Hard lockout 7 Auto-ignition active r621 Socket 4 limit response trigger Determines when the Burner Control responds to the Limit Module. It also provides a master disable for the limit socket. 1 Disabled-Ignore limit: This limit socket is inactive 2 Always: This limit socket is active without regard to the Burner Control state 3 Prepurge, Ignition and Run: This limit socket is active during the named states and their sub-states. 4 Ignition and Run: This limit socket is active during the named states and their sub-states. 5 Flame is on: This limit socket is active whenever flame is required to be on. 6 Run: This limit socket is active during the Burner Control Run state only. Related register: r620 Socket 4 limit response 1 1 Disabled-Ignore limit 2 Always 3 Prepurge, Ignition and Run 4 Ignition and Run 5 Flame is on 6 Run r624 Socket 5 limit module number Assigned Limit 5 Module number in SLATE rack 0 0-99 0=Disabled r625 Socket 5 limit name Name for Socket 5 limit. String up to 12 characters. Note: All sockets in the Burner Control must have unique names. Data packets exchanged between modules must have the correct number and name otherwise data is ignored. - 12 character string maximum Range 5632-00014—01 Chapter 5: Burner Control Module and Configuration RegisCategory ter # Name Description Limit Socket r626 Socket 5 limit response Response to valid limit status as defined by Socket 5 limit response trigger register (r627). 2/3/4 If Recycle 1, Recycle 2 or Recycle 3 are chosen, whenever the limit status is not “Limit OK”, a recycle and hold occurs until the status reverts to “Limit OK”. 5/6 If Soft lockout or Hard lockout is chosen, whenever the limit status is not “Limit OK”, the appropriate type of lockout occurs. 7 If Auto-ignition active is chosen, whenever the limit status is “Auto ignition threshold exceeded”, the Burner Control will act as defined by the Auto ignition enable parameter (r134). For the Auto ignition active response, the Socket 5 limit response trigger parameter (r627) is ignored. Related registers: r627 Socket 5 limit response trigger r177-179 Recycle 1 delay time / retry limit count / retry limit response r180-182 Recycle 2 delay time / retry limit count / retry limit response r183-185 Recycle 3 delay time / retry limit count / retry limit response r134 Auto ignition enable 1 1 Unknown 2 Recycle 1 3 Recycle 2 4 Recycle 3 5 Soft lockout 6 Hard lockout 7 Auto-ignition active r627 Socket 5 limit response trigger Determines when the Burner Control responds to the Limit Module. It also provides a master disable for the limit socket. 1 Disabled-Ignore limit: This limit socket is inactive 2 Always: This limit socket is active without regard to the Burner Control state 3 Prepurge, Ignition and Run: This limit socket is active during the named states and their sub-states. 4 Ignition and Run: This limit socket is active during the named states and their sub-states. 5 Flame is on: This limit socket is active whenever flame is required to be on. 6 Run: This limit socket is active during the Burner Control Run state only. Related register: r626 Socket 5 limit response 1 1 Disabled-Ignore limit 2 Always 3 Prepurge, Ignition and Run 4 Ignition and Run 5 Flame is on 6 Run r630 Socket 6 limit module number Assigned Limit 6 Module number in SLATE rack 0 0-99 0=Disabled r631 Socket 6 limit name Name for Socket 6 limit. String up to 12 characters. Note: All sockets in the Burner Control must have unique names. Data packets exchanged between modules must have the correct number and name otherwise data is ignored. - 12 character string maximum SLATE™ INTEGRATED COMBUSTION MANAGEMENT SYSTEM R8001 Series Default Value 57 Range Chapter 5: Burner Control Module and Configuration RegisCategory ter # Name Description Default Value Limit Socket r632 Socket 6 limit response Response to valid limit status as defined by Socket 6 limit response trigger register (r633). 2/3/4 If Recycle 1, Recycle 2 or Recycle 3 are chosen, whenever the limit status is not “Limit OK”, a recycle and hold occurs until the status reverts to “Limit OK”. 5/6 If Soft lockout or Hard lockout is chosen, whenever the limit status is not “Limit OK”, the appropriate type of lockout occurs. 7 If Auto-ignition active is chosen, whenever the limit status is “Auto ignition threshold exceeded”, the Burner Control will act as defined by the Auto ignition enable parameter (r134). For the Auto ignition active response, the Socket 6 limit response trigger parameter (r633) is ignored. Related registers: r633 Socket 6 limit response trigger r177-179 Recycle 1 delay time / retry limit count / retry limit response r180-182 Recycle 2 delay time / retry limit count / retry limit response r183-185 Recycle 3 delay time / retry limit count / retry limit response r134 Auto ignition enable 1 1 Unknown 2 Recycle 1 3 Recycle 2 4 Recycle 3 5 Soft lockout 6 Hard lockout 7 Auto-ignition active r633 Socket 6 limit response trigger Determines when the Burner Control responds to the Limit Module. It also provides a master disable for the limit socket. 1 Disabled-Ignore limit: This limit socket is inactive 2 Always: This limit socket is active without regard to the Burner Control state 3 Prepurge, Ignition and Run: This limit socket is active during the named states and their sub-states. 4 Ignition and Run: This limit socket is active during the named states and their sub-states. 5 Flame is on: This limit socket is active whenever flame is required to be on. 6 Run: This limit socket is active during the Burner Control Run state only. Related register: r632 Socket 6 limit response 1 1 Disabled-Ignore limit 2 Always 3 Prepurge, Ignition and Run 4 Ignition and Run 5 Flame is on 6 Run r636 Socket 7 limit module number Assigned Limit 7 Module number in SLATE rack 0 0-99 0=Disabled r637 Socket 7 limit name Name for Socket 7 limit. String up to 12 characters. Note: All sockets in the Burner Control must have unique names. Data packets exchanged between modules must have the correct number and name otherwise data is ignored. - 12 character string maximum Range 5832-00014—01 Chapter 5: Burner Control Module and Configuration RegisCategory ter # Name Description Limit Socket r638 Socket 7 limit response Response to valid limit status as defined by Socket 7 limit response trigger register (r639). 2/3/4 If Recycle 1, Recycle 2 or Recycle 3 are chosen, whenever the limit status is not “Limit OK”, a recycle and hold occurs until the status reverts to “Limit OK”. 5/6 If Soft lockout or Hard lockout is chosen, whenever the limit status is not “Limit OK”, the appropriate type of lockout occurs. 7 If Auto-ignition active is chosen, whenever the limit status is “Auto ignition threshold exceeded”, the Burner Control will act as defined by the Auto ignition enable parameter (r134). For the Auto ignition active response, the Socket 7 limit response trigger parameter (r639) is ignored. Related registers: r639 Socket 7 limit response trigger r177-179 Recycle 1 delay time / retry limit count / retry limit response r180-182 Recycle 2 delay time / retry limit count / retry limit response r183-185 Recycle 3 delay time / retry limit count / retry limit response r134 Auto ignition enable 1 1 Unknown 2 Recycle 1 3 Recycle 2 4 Recycle 3 5 Soft lockout 6 Hard lockout 7 Auto-ignition active r639 Socket 7 limit response trigger Determines when the Burner Control responds to the Limit Module. It also provides a master disable for the limit socket. 1 Disabled-Ignore limit: This limit socket is inactive 2 Always: This limit socket is active without regard to the Burner Control state 3 Prepurge, Ignition and Run: This limit socket is active during the named states and their sub-states. 4 Ignition and Run: This limit socket is active during the named states and their sub-states. 5 Flame is on: This limit socket is active whenever flame is required to be on. 6 Run: This limit socket is active during the Burner Control Run state only. Related register: r638 Socket 7 limit response 1 1 Disabled-Ignore limit 2 Always 3 Prepurge, Ignition and Run 4 Ignition and Run 5 Flame is on 6 Run r642 Socket 8 limit module number Assigned Limit 8 Module number in SLATE rack 0 0-99 0=Disabled r643 Socket 8 limit name Name for Socket 8 limit. String up to 12 characters. Note: All sockets in the Burner Control must have unique names. Data packets exchanged between modules must have the correct number and name otherwise data is ignored. - 12 character string maximum SLATE™ INTEGRATED COMBUSTION MANAGEMENT SYSTEM R8001 Series Default Value 59 Range Chapter 5: Burner Control Module and Configuration RegisCategory ter # Name Description Limit Socket r644 Socket 8 limit response Response to valid limit status as defined by Socket 8 limit response trigger register (r645). 2/3/4 If Recycle 1, Recycle 2 or Recycle 3 are chosen, whenever the limit status is not “Limit OK”, a recycle and hold occurs until the status reverts to “Limit OK”. 5/6 If Soft lockout or Hard lockout is chosen, whenever the limit status is not “Limit OK”, the appropriate type of lockout occurs. 7 If Auto-ignition active is chosen, whenever the limit status is “Auto ignition threshold exceeded”, the Burner Control will act as defined by the Auto ignition enable parameter (r134). For the Auto ignition active response, the Socket 8 limit response trigger parameter (r645) is ignored. Related registers: r645 Socket 8 limit response trigger r177-179 Recycle 1 delay time / retry limit count / retry limit response r180-182 Recycle 2 delay time / retry limit count / retry limit response r183-185 Recycle 3 delay time / retry limit count / retry limit response r134 Auto ignition enable 1 1 Unknown 2 Recycle 1 3 Recycle 2 4 Recycle 3 5 Soft lockout 6 Hard lockout 7 Auto-ignition active r645 Socket 8 limit response trigger Determines when the Burner Control responds to the Limit Module. It also provides a master disable for the limit socket. 1 Disabled-Ignore limit: This limit socket is inactive 2 Always: This limit socket is active without regard to the Burner Control state 3 Prepurge, Ignition and Run: This limit socket is active during the named states and their sub-states. 4 Ignition and Run: This limit socket is active during the named states and their sub-states. 5 Flame is on: This limit socket is active whenever flame is required to be on. 6 Run: This limit socket is active during the Burner Control Run state only. Related register: r644 Socket 8 limit response 1 1 Disabled-Ignore limit 2 Always 3 Prepurge, Ignition and Run 4 Ignition and Run 5 Flame is on 6 Run r648 Flame amplifier 1 required type 1 None: Unused for setup is needed. 2 UV Ampli-Check: Ultraviolet Minipeeper detector used (C7027/C7035) 3 UV Shutter-Check: Ultraviolet Purple Peeper detector used (C7061) 4 IR Ampli-Check: Infrared (lead sulfide) detector used (C7915) 5 UV/Visible Ampli-Check: Ultraviolet solid state (C7927) or visible light detector used (C7962) 6 Rectification Ampli-Check: Flame rod (C7000x) or UV dag tube Purple Peeper (C7012A/C) detector with shutter is used. 1 1 None 2 UV Ampli-Check 3 UV Shutter-Check 4 IR Ampli-Check 5 UV/Visible Ampli-Check 6 Rectification Ampli-Check r649 Flame amplifier 1 flame threshold Minimum acceptable flame signal that must be present otherwise a lockout occurs. 0.8 ??-?? r650 Flame amplifier 1 weak flame threshold Flame signal to trigger a weak flame warning condition. 1.2 ??-?? Flame Module Setup Default Value Range 6032-00014—01 Chapter 5: Burner Control Module and Configuration RegisCategory ter # Flame Module Setup Default Value Name Description r655 Flame amplifier 2 required type 1 None: Unused for setup is needed. 2 UV Ampli-Check: Ultraviolet Minipeeper detector used (C7027/C7035) 3 UV Shutter-Check: Ultraviolet Purple Peeper detector used (C7061) 4 IR Ampli-Check: Infrared (lead sulfide) detector used (C7915) 5 UV/Visible Ampli-Check: Ultraviolet solid state (C7927) or visible light detector used (C7962) 6 Rectification Ampli-Check: Flame rod (C7000x) or UV dag tube Purple Peeper (C7012A/C) detector with shutter is used. 1 Range 1 None 2 UV Ampli-Check 3 UV Shutter-Check 4 IR Ampli-Check 5 UV/Visible Ampli-Check 6 Rectification Ampli-Check r656 Flame amplifier 2 flame threshold Minimum acceptable flame signal that must be present otherwise a lockout occurs. 0.8 ??-?? r657 Flame amplifier 2 weak flame threshold Flame signal to trigger a weak flame warning condition. 1.2 ??-?? r662 Flame amplifier 3 required type 1 None: Unused for setup is needed. 2 UV Ampli-Check: Ultraviolet Minipeeper detector used (C7027/C7035) 3 UV Shutter-Check: Ultraviolet Purple Peeper detector used (C7061) 4 IR Ampli-Check: Infrared (lead sulfide) detector used (C7915) 5 UV/Visible Ampli-Check: Ultraviolet solid state (C7927) or visible light detector used (C7962) 6 Rectification Ampli-Check: Flame rod (C7000x) or UV dag tube Purple Peeper (C7012A/C) detector with shutter is used. 1 1 None 2 UV Ampli-Check 3 UV Shutter-Check 4 IR Ampli-Check 5 UV/Visible Ampli-Check 6 Rectification Ampli-Check r663 Flame amplifier 3 flame threshold Minimum acceptable flame signal that must be present otherwise a lockout occurs. 0.8 ??-?? r664 Flame amplifier 3 weak flame threshold Flame signal to trigger a weak flame warning condition. 1.2 ??-?? r669 Flame amplifier 4 required type 1 None: Unused for setup is needed. 2 UV Ampli-Check: Ultraviolet Minipeeper detector used (C7027/C7035) 3 UV Shutter-Check: Ultraviolet Purple Peeper detector used (C7061) 4 IR Ampli-Check: Infrared (lead sulfide) detector used (C7915) 5 UV/Visible Ampli-Check: Ultraviolet solid state (C7927) or visible light detector used (C7962) 6 Rectification Ampli-Check: Flame rod (C7000x) or UV dag tube Purple Peeper (C7012A/C) detector with shutter is used. 1 1 None 2 UV Ampli-Check 3 UV Shutter-Check 4 IR Ampli-Check 5 UV/Visible Ampli-Check 6 Rectification Ampli-Check r670 Flame amplifier 4 flame threshold Minimum acceptable flame signal that must be present otherwise a lockout occurs. 0.8 ??-?? r671 Flame amplifier 4 weak flame threshold Flame signal to trigger a weak flame warning condition. 1.2 ??-?? 8. When finished with the final Burner Control Module configuration, click the “Save” button. Click “Yes” when prompted to save the changes. SLATE™ INTEGRATED COMBUSTION MANAGEMENT SYSTEM R8001 Series 61 Chapter 5: Burner Control Module and Configuration Click the “Close” button to go back to the SLATE Module Configuration page. 9. The Burner Control Module is now part of your kit file. You may proceed to configuration of the next module. If you are finished with all of the SLATE modules programming and configuration, you may load the kit file. Refer to “Load the SLATE Device” on page 8. 6232-00014—01 Chapter 6: SLATE Flame Amp Modules Chapter 6: SLATE Flame Amp Modules 7. For all optical detectors, clean the detector viewing window, lens, and inside of the sight pipe as applicable. Installing Flame Detectors with the SLATE System 8. With the burner running, check the temperature at the detector. If it exceeds the detector maximum rated temperature Proper flame detector installation is the basis of a safe and reliable flame safeguard installation. Refer to the instructions packed with the flame detector and the equipment manufacturer instructions. a. Add a heat block to stop conducted heat traveling up the sight pipe. b. Add a shield or screen to reflect radiated heat. c. Add cooling (refer to sight pipe ventilation in the detector Instructions). 4. Make sure that the flame adjustment is not too lean Keep the flame signal leadwires as short as possible from the flame detector to the SLATE system. Capacitance increases with leadwire length, reducing the signal strength. The maximum permissible leadwire length depends on the type of flame detector, leadwire and conduit. However, the ultimate limiting factor for the flame detector leadwire length is the flame signal. 5. Make sure the optical detector is properly sighting the flame 6. If necessary, resight or reposition the detector If the flame amplifier is mounted on the DIN rail, it must be placed immediately to the right of the SLATE Burner Control Module that it is communicating with. 7. If you cannot obtain proper operation, replace the plug-in amplifier 8. If you cannot yet obtain proper operations, replace the flame detector If the flame amplifier is not placed immediately to the right of the SLATE Burner Control Module, then it must be externally wired to it via the remote bus communications. LED Array Preliminary Inspection There are four LEDs on the front of the UV/Visible Ampli-Check Flame Amp modules that provide quick identification of the system status and any other problems that might occur. The status is broadcast to other modules on the platform bus in case they are affected by the inoperable modules. Make certain that: 1. Wiring connections are correct and all terminals screws and electrical connections are tight. 2. Proper flame failure response time is selected. 3. Amplifier is securely mounted on the DIN Rail and bus LED 4. Detectors are properly positioned and cleaned according to Detector Instructions. Power No light Green 5. Correct combination of amplifier and flame detector is used. Note: R7842C, Series 2 or greater, pulse shutter when signal of 1.5VDC is sensed. Display readings of 0.7 to 2.4 Vdc are common. CPU The flame signal for the pilot alone, the main burner flame alone, and both together must be steady and a minimum of 0.8 V. If the flame signal is unsteady, or less than the minimum acceptable voltage, check the detector installation and circuitry in the following procedure. 1. Check the supply voltages. Make sure the master switch is closed, connections are correct, and the power supply is of the correct voltage and frequency and is sinusoidal. Fault Flame Description System does not have power System has power Red No wire sheet or problem with the wire sheet Green Running Red SLATE Burner Control Module has detected a fault No light Running Yellow Weak flame is detected No light No flame is detected LED Display 2. Check the detector for the defects including: The SLATE system modules have a seven-segment, three position LED display used for indicating flame strength. It is also used to identify the module of the SLATE system. a. Incorrect connections b. Wrong type of wire c. Deteriorated sire d. Open circuits e. Short circuits f. Leakage paths caused by moisture, soot or accumulated dirt. SLATE™ INTEGRATED COMBUSTION MANAGEMENT SYSTEM R8001 Series Color Color Terminal T2 63 Description Chapter 6: SLATE Flame Amp Modules Color Description Green Communicating with burner Red Communication fault Terminal T8 Green Flame Off No flame Select and Reset Buttons The SLATE system modules have Select and Reset buttons located on the front of the module beneath the segment display. The Reset button is used to clear a lockout and reset the module. The Select button is used to scroll through the segment display information. Understanding the Terminals 1 a FLAME AMP MODULE 2 b REMOTE BUS 3 c 4 V+ 5 V– 6 G FLAME SIGNAL INPUT/OUTPUT 7 8 F Electrical Ratings: Base Voltage and Frequency 24 VDC (± 15%), 24 VAC (± 15%), 50/60 Hz, 85–264 VAC, 50/60 Hz Approvals cULus (UL) Listed, File: MP268 IRI Acceptable FM Approved Federal Communications Commission: Part 15, Class A SIL-3 pending CE pending Overview of the SLATE Flame Amplifier Modules The R8001F1091 UV Visible Ampli-Check Flame Amplifier module responds to an ultraviolet/visible light signal from an UV/visible light type flame detector to indicate the presence of flame. The flame amplifier is used with the C7927 (UV), C7962 (Visible) detector series. The R8001V1031 Rectification Ampli-Check Flame Amplifier module responds to a rectified signal from a rectification type flame detector to indicate the presence of flame. This flame amp is used with the C7000X detector series. The R8001F1041 IR Ampli-Check Flame Amplifier module responds to an infrared signal from an infrared type flame detector to indicate the presence of flame. This flame amplifier is used with the C7915 detector series. The R8001S1051 UV Shutter-Check module responds to an ultraviolet signal from an ultraviolet type flame detector to indicate the presence of flame. This flame amplifier is used with the C7061 detector series. The R8001S1071 UV Ampli-Check module responds to an ultraviolet signal from an ultraviolet type flame detector to indicate the presence of flame. This flame amplifier is used with the C7027 and C7035 detector series. SECOND REMOTE BUS IS ON SUBBASE MXXXXX 6432-00014—01 Chapter 7: SLATE Fuel Air Control Module and Commissioning Chapter 7: SLATE Fuel Air Control Module and Commissioning • RS-485 Modbus communications to communicate to the actuators and receive feedback • SLATE actuator torque sizes: –– R8001M1050 50 in/lb in NEMA 1 –– R8001M1150 150 in/lb NEMA 1 –– R8001M4050 50 in/lb NEMA 4 –– R8001M4150 150 in/lb NEMA 4 • Up to 24 points on the curve • Field configurable • Automated actuator endpoint seeking process • UL Listed, FM and NFPA acceptable • Password protected • Fault information • Status of four actuator channels • Unused VFD terminals can be used as analog cells for general purpose I/O configuration • Flue gas recirculation (FGR) • Trim • Dual Fuel • Seasonality or recipe curves Safety Features • Class C operating software system • Fail-safe feedback • Curve verification algorithms • Password protected • Built in self test • No slope constraints that would limit the steepness of the curve • Component anti-swap protection • Off curve checking algorithm LED Array Overview There are three LEDs on the front of the Fuel Air Ratio module that provide quick identification of the system status and any problems that might occur. The status is broadcast to other modules on the platform bus in case they are affected by the inoperable modules. The R8001C6001 SLATE Fuel Air Ratio module uses the latest technology to control up to 4 SLATE actuators and or 2 Variable Frequency Drives. The Fuel Air Control module controls the relationship between fuel, airflow and flue gas recirculation on a power burner. LED Within the SLATE system, the fuel air ratio module provides: • Air fuel ratio control for up to 4 actuators • Drive 2 Variable Frequency Drives (VFDs) SLATE™ INTEGRATED COMBUSTION MANAGEMENT SYSTEM R8001 Series Color Power No light Green 65 Description System does not have power System has power Chapter 7: SLATE Fuel Air Control Module and Commissioning LED CPU Fault Color Description Red No valid configuration Green Running Red Fault No light No fault FUEL AIR MODULE 4 ACTUATORS 2 VFD (OR LOW V INPUT/OUTPUT) UNIVERSAL LOW VOLTAGE CELL Green Terminal is ON or is Normal Red Fault No light Terminal is OFF or Not in use 3 5 VFD2 UNIVERSAL LOW VOLTAGE CELL The Fuel Air Ratio module has three-character LED display used for indicating the number it is in the SLATE system. It also has a threeposition LED colors to indicate the states as shown below. Description 2 + _ 4 LED Display Color 1 VFD1 6 + _ 7 8 A ACTUATOR 1 RS-485 9 B 10 C 11 A ACTUATOR 2 RS-485 12 B 13 C 14 A Select and Resent Buttons ACTUATOR 3 RS-485 The Fuel Air Ratio module have Select and Reset buttons located on the front module and beneath the segment display. The Reset button is used to clear a lockout and reset the module. The Select button is used to scroll through the segment display information. 15 B 16 C 17 A ACTUATOR 4 RS-485 18 B 19 C 20 M35284 Terminal Functions and Configurations Terminal Functions T1 Voltage In Fig. 1. Fuel Air Ratio Control LED Display Understanding the Terminals Outc The SLATE Fuel Air Ratio Control Modules contains 20 wired terminals. Current In Min Typical Max Units 0.0 - 15.0 VDC Rin=1MOhm Resolution - 2.43 - mV DC Null -25.0 - 25.0 mV DC Accuracy -25.0 - 25.0 mV DC -1.0 - 1.0 % Whichever is greater 0.0 10KOhm load Range Range - 15.0 VDC Resolution - 4.0 - mV DC Null 100.0 - 100.0 mV DC Accuracy -50.0 - 50.0 mV DC -1.5 - 1.5 % 0.0 Range Whichever is greater - 25.0 mA DC Resolution - 7.4 - uA DC Null -0.5 - 0.5 mA DC Accuracy -1.5 - 1.5 % 0 to 25 mA - 25.0 mA DC 4.0 - mA Ω Max Load = 500 Ω - 0.5 mA DC 0.0 Outb,c Range Resolution - a Null -0.5 Accuracy -300.0 - 300.0 uA DC 0 to 25 mA -50 50 4 to 20 mA - uA DC 6632-00014—01 Chapter 7: SLATE Fuel Air Control Module and Commissioning Terminal Functions T2 T3 Voltage In Voltage In Current In Min Typical Max Units Amplitude 0.0 - 15.0 VDC Trip Point - 3.0 - VDC Hysteresis - 0.25 - VDC Comparator Only Resolution - 0.37 - mV DC Null -25.0 - 25.0 mV DC Accuracy -25.0 - 25.0 mV DC Range 0.0 - 15.0 VDC Resolution - 0.37 - mV DC Null -25.0 - 25.0 mV DC Accuracy -25.0 - 25.0 mV DC Range 0.2 - 25.0 mA DC Resolution - 3.7 - uA DC Null -0.5 - 0.5 mA DC Accuracy -1.5 - 1.5 % T1T3, Type K Range 0 to 25 mA -200.0 T1 - °C Accuracy -5.0 - 5.0 °C Range -150.0 - Resolution Accuracy -5.0 RTD 0.1 Type PT1000 Range Accuracy -2.0 T1T3, Type 10K T1T4 T1T3, T1T4 Type 12K Range - 2.0 °C -25 °C to 50 °C -1.0 - 1.0 °C 50 °C to 135 °C -1.5 - 1.5 % -3.0 - 3.0 °C 135 °C to 150 °C Typical Max Units - VDC Amplitude 5.0 Frequency 100.0 - 1000.0 Hz Duty Cycle 2.0 - 98.0 %DC 0-100% output allowed Resolution - 1.0 - % Accuracy -0.5 - 0.5 %DC 10V amplitude T2T4 Amplitude 5.0 10.0 15.0 VDC Range 2.0 - 1000.0 Hz Min. “on” pulse width (low %DC) - 50.0 - usec 10V amplitude Min. “off” pulse width (high %DC) - 130.0 - usec 10V amplitude Duty Cycle 2.0 - 98.0 %DC 10V amplitude 10V amplitude 2 – 100 Hz 10.0 Low output state = 0V - 85.0 %DC 1.0 - Hz - Accuracy -5.0 - 0.0 % -1.0 - 0.0 Hz Amplitudea 5.0 10.0 15.0 VDC Frequency 125.0 - 500.0 Hz Min. “on” pulse width (low %DC) - 50.0 - usec 10V amplitude Min. “off” pulse width (high %DC) - 130.0 - usec 10V amplitude Duty Cycle 5.0 - 90.0 %DC 10V amplitude 5.0 1000 Hz 5.0 °C °C °C - °C 2.0 °C 250.0 °C T2T4 3 wire, 100 Ω 3 wire, 1000 Ω °C - 2.0 Whichever is greater PWM In 250.0 °C - 175.0 °C Resolution - 0.1 - °C Accuracyc -2.0 - 2.0 °C -40 °C to 25 °C -1.0 - 1.0 °C 25 °C to 125 °C -1.5 - 1.5 % -3.0 - 3.0 °C 125 °C to 175 °C -20.0 - 125.0 °C T4 rated to 0 °C Resolution - 0.1 - °C Accuracyc -2.0 - 2.0 °C -20 °C to 30 °C -1.0 - 1.0 °C 30 °C to 120 °C -1.5 - 1.5 % -3.0 - 3.0 °C Range -40.0b Accuracyc -2.0 T4 rated to 0 °C - 0.5 NTC °C Resolution -135.0 - Resolution - 1000.0 °C - T2 & Type PT100a Range -135.0 T3 & Resolution 0.5 T4 Accuracy -2.0 - 0.1 Frequency In 1025.0 °C 0.1 °C Resolution - PWM Out Units Resolution - 150.0 Frequency / PWM Functions Min Thermocouple T2 & Type J T3 Units - Shielded cable required for reliable operation in noisy environment. b NTC on terminal T4 is rated down to 0 °C. c Temperatures refer to sense range. Specifications based on worst case over ambient temperatures. Typical Max Typical Max -25.0 Range a T1 input terminal is held at constant 2.5VDC over allowable current range. b Accuracy specification given is for 100 Ω load. Resolution specification can be converted to mA by dividing out load. c Imax=25mA for Vout<10V Imax=20mA for 10V<Vout<15V Min Min Type 20K T1T4 a Complex Functions Complex Functions Resolution T4 rated to 0 °C - 1.0 %DC Accuracy 125 Hz -1.5 - 1.5 %DC 10V amplitude 500 Hz -7.5 - 7.5 %DC 10V amplitude Trip points = 3.0V +/- 0.25V Hysteresis Voltage = 0.5V a Configuration 120 °C to 125 °C SLATE™ INTEGRATED COMBUSTION MANAGEMENT SYSTEM R8001 Series 125 – 500 Hz 67 Min Optimum Range for Performance Max Thermocouple J -50°C 1025°C ± 4 °C K -50°C 1000°C ± 4 °C RTD -135°C 250°C ± 2 °C NTC 25°C 125°C ± 1°C Current Out 4 mA 20 mA ± .05 mA Voltage: In / Out 2V 10 V 0.3 %, typical Chapter 7: SLATE Fuel Air Control Module and Commissioning Recommended Wire Size Recommended Part Numbers Communication Lines 22 AWG two-wire twisted pair with ground, or five-wire. Belden 8723 shielded cable or equivalent. Other terminals 18 AWG wire insulated for voltages and temperatures for given application. TTW60C, THW75C, THHN90C Application When all registers have been configured, click the Save button. Click the Close button to go back to the SLATE Module Configuration page. Fuel Air Ratio Configuration Getting Started 1. To access the configuration tool you will need to launch the SLATE AX Tool. 2. If you have not created a Station please refer to Chapter 2 of this manual to learn how to create a new station. 3. If you have created a Station open up the Navigation pane until to reach your SLATE Device. Double-click on the SLATE device to launch the Module Configuration Tool. 4. Select the Fuel/Air ratio control, then click Configure Selected Module. SLATE Fuel Air Commissioning Fuel Air Commissioning begins at the SLATE Generic Web Pages provided. For better commissioning you can connect your laptop to the SLATE Base and connect via Ethernet. You will need to setup you IP address as previously noted in this User Guide under Network Setup section. When you are connected to begin you will need to make sure you are logged in as an Installer or Designer. See figure below. The log in is located in the upper right hand corner. Select the Log In. You will then see the log in screen. To log in as an Installer the password is SlateInstallerPassword. When you log in as a designer the password will be SlateDesignerPassword. After entering the password you will need to select Request RIN. This is an indication to SLATE to provide you with a 6 digit number. The SLATE Base Display will provide a 6 digit number. You will need to enter those numbers in along with the dash. Then you will be connected to the system for commissioning. When configuring, you will need to uncheck the “Protect Mode” box. As you move through the registers you will use the Next and Previous buttons to move to the next page or back to the previous page. Curve configuration and preset setup (positions for purge, ignition, etc) are configured using the Honeywell built in web pages as part of the installation. Clicking on the Fuel Air Commissioning screen takes you to the Fuel Air Status screen. Here you will see any faults that may occur since the SLATE Burner Control is linked to the Fuel Air Ratio Module and any other important information. To move to commissioning you will select Module Setup and Commissioning. 6832-00014—01 Chapter 7: SLATE Fuel Air Control Module and Commissioning The VFD Command and Error Tolerance selection allows users to set small and large error tolerances with the VFD. To begin the Fuel Air Commissioning process Click the Commissioning Dashboard. General setup allows you to set up information about the SLATE Burner Control and Fuel Air Ratio device environment. If you have configured the SLATE Fuel Air Ratio using the SLATE AX Tool that information will be displayed on this page. The Fuel Air Commissioning provides an area that shows the current state of the Fuel Air Ratio system. This is for placing the fuel air commissioning into a desired mode via a drop down list. The current view shown is Enable Commissioning. Deadband and Timing is used to set the throttle deadband, move step size and light off-curve tolerance time. The light off curve tolerance time is important because it’s the time allotted for the actuators to reach the curve after light off, when the light off is not on the curve. The Error Tolerance defines the large and small errors, position wise. It also defines how much time you will be in the large error or small error zone before an error occurs. SLATE™ INTEGRATED COMBUSTION MANAGEMENT SYSTEM R8001 Series Within Commissioning, the Commissioning Status, as highlighted below allows you to select either Setup or Curve Edit. Once you make your selection, you will need to confirm your decision with the next selection box. 69 Chapter 7: SLATE Fuel Air Control Module and Commissioning section will provides help information that will walk through the process. The General Setup has been completed using the SLATE AX Tool so you can begin (if you configured it) with the Actuator Setup. Click Actuator Setup. The Details section shows you the current state of your system. It is a good tool to use to understand what item is holding up the commissioning. Begin with the Actuator Selection as highlighted below. Notice the Position Command Section. This section will allow you to enter a value to drive the motor to that position. You can use this to determine the minimum and maximum positions located in the middle of this screen. Clicking Details will provide more detailed information as shown below. The SLATE Fuel Air Ratio system will also automatically provided the unique ID for those actuators and will we be found in the highlighted area above. This is the information found on the label of the actuator. If this is unavailable at the time of designing, SLATE will automatically get it from the motor at commissioning time. The Commissioning Section will be used to setup the actuators, the VFD, and do the curve edit. The gray area to the right of this After the actuators are setup, you will need to run a safety verification test. Safety verification is required each time a safety parameter is changed. You will need to perform this multiple timed during the start up/configuration process, especially in the Fuel/Air Control Module. To begin the safety verification process, click the Safety Verification button. 7032-00014—01 Chapter 7: SLATE Fuel Air Control Module and Commissioning After the Safety Verification steps you will need to push the Reset button located on the Fuel Air Ratio module to complete the verification process. At this point you can go back to the Dashboard. You can see two blue circles with checks to indicate that this step has been completed and verified. Now you can move to the next step, enabling the edit curve. The Safety Verification screen will allow users to start the verification process. Click Start Verification button. You will be alerted to a warning that you will need to accept. Press Accept. Next select and confirm “Curve Edit” mode as highlighted below. Now start the Verification. The Curve Edit feature allows you to begin building your curve for Fuel Air Ratio. You will begin to set a Pre-Purge Preset. Use the drop-down to set a larger left-right motion of 20%, then click the >> button several times to move the throttle cursor over to the 80% position. SLATE™ INTEGRATED COMBUSTION MANAGEMENT SYSTEM R8001 Series 71 Chapter 7: SLATE Fuel Air Control Module and Commissioning In a similar way, you will now need to set the estimated Lightoff position. First move the throttle cursor over to about 25% (use the small and large movement selectors and buttons) Select the Air actuators using the radio button, set the large up/ down motion to 20%, and use the double-up-arrow button to move it up to around 80% (on the Y axis). Next use the curve select and the up/down movement selectors and buttons to move the air actuator to about 20%, and the fuel actuator to about 25% (on the Y axis). Select the Pre-purge Preset from the drop down list then click the Define Prepurge button. Note that the label “Pre” now shows next to the air and fuel positions. You will now need to define the Lightoff Preset by selecting “Lightoff” and clicking “Define Lightoff”. Note that L appears next to these positions (below “None” has been chosen for the curve select to hide the selector box and show this more clearly). 7232-00014—01 Chapter 7: SLATE Fuel Air Control Module and Commissioning You will need to fix any problems and clear (press Reset) any lockouts in the SLATE Burner Control, and then give it a demand signal in a way that it is configured to accept a call for heat. The Presets that are shown determine by the Show/Hide Presets dialog box. Click the button (at arrow). Turning off those off not currently in use will help clean up your screen. Also note the abbreviations. When the demand is on, the SLATE Burner Control will go through Initiate (10 sec.), Standby and Safe Start Check (briefly) and then request the SLATE Fuel Air to go to Prepurge. The amber LED is next to “Confirm Prepurge” button indicating that it is required, but the button is grayed out because the SLATE Fuel Air is not at that position. You are now ready to start the Burner. The SLATE Fuel Air reports to the SLATE Burner Control that is linked to it, but you must select it to show its status (if there is only one SLATE Burner Control it will be connected automatically). SLATE™ INTEGRATED COMBUSTION MANAGEMENT SYSTEM R8001 Series 73 Chapter 7: SLATE Fuel Air Control Module and Commissioning To send the SLATE Burner Control to the Prepurge position, select Prepurge in the drop down list and then click the “Go to Prepurge” button. The commanded position will move, and the actuators will move to the Prepurge position. When the actuators have stopped the “Confirm Prepurge” button will become enabled. During commissioning, none of the steps occur automatically, the installer is always in control. Click the Confirm Prepurge button. When Prepurge is confirmed, the SLATE Fuel Air Ratio reports that it is “At Prepurge” and this causes the SLATE Burner to measure the prepurge time. When Prepurge is done the SLATE Burner Control will then request the Lightoff position. The yellow light is on next to the Confirm Lightoff button, but again it is gray because the actuators are not in position. 7432-00014—01 Chapter 7: SLATE Fuel Air Control Module and Commissioning Select “Lightoff” from the drop-down list and click the Go to Lightoff button to move the actuators to the lightoff position. As an example, start by moving the throttled down to about 20%, select and move the air up to above the Fuel a bit to just make it different. (Normally this is done while watching a combustion analyzer.) Once the Lightoff position has been reached, the Confirm Lightoff button will become enabled. Click it to confirm that you want the SLATE Burner Control to light the burner. NOTE: You may have just a few seconds to get the flame turned on at just the right time, after clicking this button. When done, click the Create button to create a point. After Pilot and Main flame establishing periods have been completed, the SLATE Burner Control will be in the Run condition and will request modulation from the SLATE Fuel Air Ratio Control. It is now time to start building the Fuel/Air Curve. Point 1 now exits. (It is also selected because the throttle is close to the point, as shown by the box around the number. SLATE™ INTEGRATED COMBUSTION MANAGEMENT SYSTEM R8001 Series 75 Chapter 7: SLATE Fuel Air Control Module and Commissioning Move the commanded throttle over to around 50% (x axis). Note that the actuators do not change the position (y axis) because there is no curve to follow yet. Select the Air and move it up to about 45% (y axis). Select the fuel and move it up to about 50%, above the air. Not that the throttle is locked (padlock icon) and the stopped actuator icons are circles instead of dots, indicating an off-curve condition. When done, click Create to create a second point. Point 2 now exists (and is selected). The curve segment between the points is pink colored because it has not been verified yet: there are ratios of fuel and air within the region that have not been visited and confirmed as OK. The throttle is unlocked because the actuators are now on-curve. It is possible to move a selected point. Choose the “Point” radio button and move point 2 around to the left and right. Leave it at the 55% position. 7632-00014—01 Chapter 7: SLATE Fuel Air Control Module and Commissioning Jump up the throttle left by another 20% and note that as the actuators cross point 2, the segment turns green. It has been verified because all of it has been “visited”. Normally this is done slowly while watching a gas analyzer, making any necessary adjustments, and creating new points as needed. Create a third point. Select “Throttle” for the left-right button function and move the throttle over to around 90% (x axis). Select and move the Fuel up to about 90% (y axis) and the air up to about 75%. Then click “Create” to create a point. Now that a curve exists, actuators will follow it. Move the commanded throttle to the left by 20% and watch the actuators follow the curve to the new position. They are shown as “+” symbols while in motion. SLATE™ INTEGRATED COMBUSTION MANAGEMENT SYSTEM R8001 Series Adjust point 2. Select the second point, which means the actuators must stop very close to the point. There is a Go to Point button that allows the actuator to move to the point. 77 Chapter 7: SLATE Fuel Air Control Module and Commissioning Select the fuel and move it up 5%. Not that the throttle gets locked and the fuel position is shown as an open circle when it stops. Both of these indicate it is off curve. Also not that Update is enabled. Click it to update point 2. The Point Table shows the same information as the chart; including • The value of each point • The Throttle position (triangular arrow) and a lock icon if it is locked. • The Point that is selected indicated by a box around the number. • Pink and green shading for verification status It also shows the exact Measured and the Commanded positions of the throttle and each actuator, and if the actuator is selected, it is shaded (example of the red shaded area at 53% above) The bottom line shows whichever Preset is the top most selected item in the Show/Hide Presets dialog, so you can see one at a time. Right now the Prepurge (“Pre”) values are shown. When the point changed, the adjacent segments become invalid and turn pink again, the ratios have changed. You can also switch the table between showing percent values and actual values. For angular actuators this reads in degrees. Example: an actuator configured to be closed at (0%) at 10 degrees and open (100%) and 70 degrees would show 40 degrees at its 50% position. For a VFD it would typically show RPM (or whatever units are configured), which 0% corresponding to minimum RPM and 100% to maximum RPM. Throttle is always a percentage value. SLATE Fuel Air Ratio commissioning also provides a Point Table. This table is another source of information and is more precise. To access the Point Table Click the tab. In the case above, the actuator is above the curve. Note that at point 2 the Fuel position is 53% but the actuator has been commanded to go to and has achieved the position of 55%. It is above the curve and stopped (open circle) and the throttle is locked. Trim Function Because Tim is enabled, every point also has: • Trim Limits - Contains the maximum movement of the actuator 7832-00014—01 Chapter 7: SLATE Fuel Air Control Module and Commissioning • Trim Setpoint - The desired operating condition (e.g. a percent of O2) full 3% deviation that is allowed. If it asked for -50.0 (-50%) the actuator would move to its 42.5% position (44% minus half of 3%, or 1.5%). Two different used of percent are occurring: maximum actuator deviation is in percent of actuator travel and is a safety limit. Trim requests are a pure number between minus 100% and plus 100% and are non-safety requests. Click the Trim tab to show the Trim Control Panel The controls shown below move the Trimmed actuator. The drop-down selectors are actually just a repeat of those you have already used. The normal up/down buttons that you have used can be used to move any selected actuator. However, the four up/ down buttons shown above are unique. As the text describes they always move the Trimmed actuator, no matter what actuator is selected. A table shows the status of the Trimmed actuator, Air in this case. The table automatically fills in and shows values on one side or the other, depending on whether the actuator is Below or Above the curve. Points are again shown on the left, with a selected point shown by a box around the number. Trim settings must be performed when a point is selected: the buttons are gray and disabled otherwise. Below, nothing has been entered yet. At each point, there must be a Setpoint value. There are two ways to provide them. 1. Enter a number into the top box and click the “Set SP Manually” button 2. If SLATE AX Tool Wire Sheet logic exists to read one or more sensors and provide a measurement then it will be shown in the bottom box and can be entered using the “Set SP from Wiresheet” button. There are two ways to enter trim limit Min and Max values: 1. Enter numbers into the boxes and click the Set Min and/or Set Max buttons 2. Click the “Set Min/Max Using Measured” button. At each point, there must be a Min and a Max actuator deviation. These provide safety limits as a percent of actuator travel (e.g. the maximum amount it is allowed to deviate such as 5% or 2%. Both Min and Max are positive numbers. They are the magnitude of offset that is allowed) The latter button uses the measured value and it knows which to set. If the actuator is Below the curve it sets the Min value, and if it is Above the curve it sets Max. Normally Trim limits are set while watching a gas analyzer and making small adjustments to determine how far an actuator can deviate and still remain safe. The Min limit is mapped to a -100.0 (negative 100%) trim request coming from the SLATE AX Tool Wire Sheet and the Max is mapped to +100.0 (positive 100%). For example, assume that Min for point 2 is set to 3% and as-shown, the curve says 44.0% is the on-curve value for the trimmed actuator at point 2. Trim also must be verified before the Fuel Air Ratio can be set for normal operation. Each limit extreme must be “visited” to turn the boxes from pink to green. Use the “<<Goto Point” button to move point 1. Wait for the actuators to get there and the point to be selected. Your graph segment may stay pink or turn green; either is OK. If the Wire Sheet then asked for maximum negative (-100.0) the actuator would move to its 41% position, which is 44% minus the SLATE™ INTEGRATED COMBUSTION MANAGEMENT SYSTEM R8001 Series 79 Chapter 7: SLATE Fuel Air Control Module and Commissioning Manually enter a Trim Setpoint example of 3.0 and click “Set SP Manually”. Manually enter a Min of 4 and a Max of 5 and click “Set Min” and “Set Max”. Use “Goto Point>>” to move the throttle to point 2. Again, normally this would be done slowly and one step at a time, while watching a gas analyzer. Next visit these two limits by using the trimmed actuator controls. Move the trimmed actuator up to Above limit (32 plus 5=37) and down the Below limit (32 minus 4 = 28). You’ll have to stop right on the limiting value. The boxes should turn green. Tip! After visiting the second extreme (either below or above) to the actuator back to the curve quickly: In the selector at the top, select the trimmed actuator (Air in this case). This will enable the “to Curve” button in the top section. Click that button to send the actuator back to the curve and unlock the throttle. If the segment between points 1 and 2 was pink before, it should now be green since all positions between 1 and 2 have been visited. Set the Trim Setpoint to 2.0 by editing the box and clicking “Set SP Manually”. This time, set the Min value using the other method. First move the trimmed actuator down until it’s 2% below the curve, then click “Set Min/Max Using Measured”. Notice that it turns green right away because it’s already there. 8032-00014—01 Chapter 7: SLATE Fuel Air Control Module and Commissioning Finally, move to point 3. Set the final trim setpoint to 5.8, the Min to 1.5% and the Max to 7.3%, using any technique you prefer. Visit the trim limits. Make sure everything is green. Return the actuator to the curve. Click on the top left button in the title bar to go back to the dashboard. Set the Max value in the same way. Move the actuator up until it’s 4% above the curve then click the “Set Min/Max Using Measured” button. When done, click “to Curve” to go back to the curve and unlock the throttle. Note: You don’t have to wait for the actuator to finish moving before advancing its commanded position again. Note that all of the blue check mark circles are complete. The final step is to select the “Enable normal operation” in the Current Fuel Air Mode dropdown. Red lights will occur and the system will shut down. This is normal. Click the “Details” button and you will see that Verification is needed. Proceed with Verification and you will find just one parameter that needs verifying. It will be one that says the system is now ready to operate. Verify it. Then press the reset button to clear the fault on the SLATE Fuel Air Ratio Module and SLATE Burner Control Module. The system should now start up, purge, ignite, and run, follow the curve for modulation and also trim according to trim commands. Built-in screens let you monitor and control these, even if you don’t have SLATE AX Tool Wire Sheets controlling the set up yet. SLATE™ INTEGRATED COMBUSTION MANAGEMENT SYSTEM R8001 Series 81 8232-00014—01 Chapter 8: SLATE Limit Module and Configuration Chapter 8: SLATE Limit Module and Configuration LED Array There are three LEDs on the front of the SLATE Limit Control Module that provide quick identification of the system status and any problems that might have occurred. The status is broadcast to other modules on the platform bus in case they are affected by the inoperable module. LED Color Power No light Green CPU Fault Description System does not have power System has power Red No valid configuration Green Running Red Fault No light No fault LED Display The SLATE system modules have three-character LED displays used for indicating the module number of the SLATE system. They also have three-position LED colors to indicate the terminal states as shown below. Description Terminal is ON or is Normal Red Fault No light Terminal is OFF or Not in use Select and Resent Buttons Overview The SLATE system modules have Select and Reset buttons located on the front of the modules and beneath the segment display. The Reset button is used to clear a lockout and reset the module. The Select button is used to scroll through the segment display information. The R8001L8001 SLATE Limit Control Module is part of the SLATE Combustion System. The SLATE Limit Control Module provides the ability to bring in any type of analog signal and create limits on either pressure or temperature. The R8001L8001 provides up to 12 limit blocks with each block monitoring any sensor or pair of sensors. One limit module can be used for multiple SLATE Burner Controls. SLATE™ INTEGRATED COMBUSTION MANAGEMENT SYSTEM R8001 Series Color Green 83 Chapter 8: SLATE Limit Module and Configuration Understanding the Terminals Terminal Functions The SLATE Limit Module contains 22 wired terminals. All terminals are 24VDC or 24-240VAC and automatically adapt to the applied system voltage. The Limit Module wiring terminal descriptions can be found below. TF1 Voltage In Out LIMIT MODULE 4 SENSORS 12 LIMIT BLOCKS 2 DUAL LIMITS SAFETY RELAY A UNIVERSAL LOW VOLTAGE CELL + _ + _ + _ 25.0 mV DC Accuracy -25.0 - 25.0 mV DC -1.0 - 1.0 % 0.0 mV DC 2 - 100.0 mV DC Accuracy -50.0 - 50.0 mV DC -1.5 - 1.5 % 0.0 3 Current In 6 Outb Range Range TF2 Voltage In 11 14 15 TF3 Voltage In FROM POWER Current In 19 TO LOADS 20 VREF+ 21 Whichever is greater Whichever is greater - 25.0 mA DC Resolution - 7.4 - uA DC Null -0.5 - 0.5 mA DC Accuracy -1.5 - 1.5 % 0 to 25 mA Range 0.0 - 25.0 mA DC Resolution - 4.0 - mA Ω Max Load = 500 Ω Null -0.5 - 0.5 mA DC Accuracy -300.0 - 300.0 uA DC 0 to 25 mA -50 - 50 uA DC 4 to 20 mA Amplitude 0.0 - 15.0 VDC Trip Point - 3.0 - VDC Hysteresis - 0.25 - VDC Comparator Only Resolution - 0.37 - mV DC Null -25.0 - 25.0 mV DC Accuracy -25.0 - 25.0 mV DC Range 0.0 - 15.0 VDC Resolution - 0.37 - mV DC Null -25.0 - 25.0 mV DC Accuracy -25.0 - 25.0 mV DC Range 0.2 - 25.0 mA DC Resolution - 3.7 - uA DC Null -0.5 - 0.5 mA DC Accuracy -1.5 - 1.5 % 10 18 BIAS - 100.0 17 LOAD RELAY -25.0 Null 16 SAFETY RELAY mV DC Null VDC 13 UNIVERSAL LOW VOLTAGE CELL - - 12 D 2.43 15.0 9 + _ VDC Resolution - 4.0 8 UNIVERSAL LOW VOLTAGE CELL 15.0 - 7 C Units - Resolution - 5 UNIVERSAL LOW VOLTAGE CELL Typical Max 0.0 1 4 B Min Range a 0 to 25 mA TF1 input terminal is held at constant 2.5VDC over allowable current range. a 22 VREF– M35285 Accuracy specification given is for 100 Ω load. Resolution specification can be converted to mA by dividing out load. b 8432-00014—01 Chapter 8: SLATE Limit Module and Configuration Complex Functions Min Typical Max Units Configuration Thermocouple TF2 & TF3 Type J Range Type K -200.0 0.1 - °C Accuracy -5.0 - 5.0 Range -150.0 - ± 2 °C 1000.0 °C NTC 25°C 125°C ± 1°C Current Out 4 mA 20 mA ± .05 mA Voltage: In / Out 2V 10 V 0.3 %, typical Accuracy - 5.0 °C -135.0 Type PT100a Range Resolution 0.5 -2.0 - -135.0 - Resolution Accuracy Range 250.0 °C - °C 2.0 °C 250.0 °C 0.5 -2.0 NTC Type 10K 250°C °C Type PT1000 Range TF3 & TF4 °C - Accuracy -40.0b 1000°C ± 4 °C -135°C 0.1 RTD TF3 & TF4 K -50°C RTD Resolution -5.0 Optimum Range for Performance Max 1025°C ± 4 °C 1025.0 °C Resolution - Min Thermocouple J -50°C - 2.0 3 wire, 100 Ω Table 1. Suggested Sensor Selection based on Application. Recommended Wire Size Recommended Part Numbers Line voltage terminals 14, 16, or 18 AWG copper conductor, 600 volt insulation, moistureresistant wire. TTW60C, THW75C, THHN90C Other terminals 18 AWG wire insulated for voltages and temperatures for given application. TTW60C, THW75C, THHN90C 3 wire, 1000 Ω °C Application °C - 175.0 °C Resolution - 0.1 - °C T4 rated to 0 °C Accuracyc -2.0 - 2.0 °C -40 °C to 25 °C -1.0 - 1.0 °C 25 °C to 125 °C -1.5 - 1.5 % -3.0 - 3.0 °C 125 °C to 175 °C Shielded cable required for reliable operation in noisy environment. a b NTC on terminal T4 is rated down to 0 °C. c Temperatures refer to sense range. Frequency / PWM Functions Min Typical Max Units - VDC Understanding the SLATE Limit Capabilities PWM Out TF1 Amplitude 5.0 Frequency 100.0 - 10.0 1000.0 Hz Low output state = 0V Duty Cycle 2.0 - 98.0 %DC 0-100% output allowed Resolution - 1.0 - % Accuracy -0.5 - 0.5 %DC 10V amplitude Amplitude 5.0 10.0 15.0 VDC Range 2.0 - 1000.0 Hz Min. “on” pulse width (low %DC) - 50.0 - usec 10V amplitude Min. “off” pulse width (high %DC) - 130.0 - usec 10V amplitude Duty Cycle 2.0 - 98.0 %DC 10V amplitude 10V amplitude Frequency In TF2 2 – 100 Hz - 85.0 %DC Resolution 1000 Hz 5.0 - 1.0 - Hz Accuracy -5.0 - 0.0 % -1.0 - 0.0 Hz Amplitude 5.0 10.0 15.0 VDC Frequency 125.0 - 500.0 Hz Min. “on” pulse width (low %DC) - 50.0 - usec 10V amplitude • Each can be a high limit, low limit or dual track limit Min. “off” pulse width (high %DC) - 130.0 - usec 10V amplitude • Each block can monitor any sensor or a pair of sensors Duty Cycle 5.0 - 90.0 %DC 10V amplitude Whichever is greater PWM In TF2 125 – 500 Hz Resolution • There are 12 limit blocks - 1.0 %DC Accuracy 125 Hz -1.5 - 1.5 %DC 10V amplitude 500 Hz -7.5 - 7.5 %DC 10V amplitude SLATE™ INTEGRATED COMBUSTION MANAGEMENT SYSTEM R8001 Series • Each block can be assigned to one particular SLATE Burner Control. This is optional. Instead a blocky may cause a Limit lockout directly, or it may simply provide a non-safety notification status • When the SLATE Limit notifies the SLATE Burner Control of an event, the Burner Control must acknowledge this notification, otherwise the Limit locks out 85 Chapter 8: SLATE Limit Module and Configuration • The SLATE Burner Control must acknowledge, but the details how the SLATE Burner Control handles each limit event is a safety configuration parameter in the Burner Control. Limit Block Concepts • Limit blocks have names such as “Outlet High Temp” or “Low Gas Press”. To acknowledge notification, a limit event handler in the SLATE Burner Control must have a matching name. Both names are part of the safety data in each device • Thus for a Limit lockout to be effective in the case of an acknowledgment failure, all SLATE Burner Controls using the limit for safety must get the power for their outputs via the SLATE Limit module. Getting Started 1. To access the configuration tool you will need to launch the SLATE AX Tool. 2. If you have not created a Station please refer to Chapter 2 of this manual to learn how to create a new station. 3. If you have created a Station open up the Navigation pane until to reach your SLATE Device. Double-click on the SLATE device to launch the Module Configuration Tool. 4. Select Limit Control A Limit Block is programmable logic inside the SLATE Limit Module. A SLATE Limit Module contains 12 limit blocks. They are all identical. Each can monitor one cell or two cells. A block may be configured to perform a simple function: • High Limit- Compare the sensor reading vs. a threshold, react if it is too high • Low Limit- Compare the sensor reading vs. a threshold, react if it is too low • Dual Track Limit- Compare two sensors, react if the difference exceeds a threshold Limit Block Configuration Enable • Block name- The name is a reminder of the purpose and is also used for the SLATE Burner Control notification • Disable- A block that is not needed is disabled • Status Only- A block may be used to provide only a status value • Limit Lockout- The block will react by causing a lockout of Limit module • SLATE Burner Control Notification- The block will react notifying a particular SLATE Burner Control • Auto-ignition Burner Control Notification- The block will react by notifying a particular burner that the auto-ignition temperature has been reached (typically 1400°F) Assignment • A,B,C,D – The block may be assigned to cell A, B, C or D 5. Configure the parameters in the configuration section based on the outcomes you need for your application. • AB closest, AB average, CD closest, CD average, Dual Track AB, Dual Track CD- It can use the closest sensor to the threshold or can average two of them or it can compare them to each other Threshold- This is the high limit, low limit or maximum difference for Dual Track Hysteresis- Hysteresis currently is not used Detection time- The threshold must be exceeded for this amount of time, before the block will react 8632-00014—01 Chapter 8: SLATE Limit Module and Configuration Burner Control Notification SLATE™ INTEGRATED COMBUSTION MANAGEMENT SYSTEM R8001 Series 87 Chapter 8: SLATE Limit Module and Configuration Setting up a Limit Input Cell only using the configuration wizard 8832-00014—01 Chapter 8: SLATE Limit Module and Configuration SLATE™ INTEGRATED COMBUSTION MANAGEMENT SYSTEM R8001 Series 89 Chapter 8: SLATE Limit Module and Configuration 9032-00014—01 Chapter 8: SLATE Limit Module and Configuration SLATE™ INTEGRATED COMBUSTION MANAGEMENT SYSTEM R8001 Series 91 Chapter 8: SLATE Limit Module and Configuration SLATE Limit Standard Screens 9232-00014—01 Chapter 9: SLATE Analog I/O Module Chapter 9: SLATE Analog I/O Module that might occur. The status is broadcast to other modules on the platform bus in case they are affected by the inoperable modules. LED Color Power No light Green CPU Fault Description System does not have power System has power Red No valid configuration Green Running Red Fault No light No fault LED Displays The SLATE system modules have three-character LED displays used for indicating the module number of the SLATE system. It also has a three position LED colors to indicate terminal states shown in the table below. Color Description Green Terminal is ON or is Normal Red Fault No light Terminal is OFF or Not in use Select and Reset Buttons The SLATE system modules have Select and Reset buttons located on the front of the module and beneath the segment display. The Reset button is used to clear a lockout and reset the module. The Select button is used to scroll through the segment display information. Overview The R8001U3001 SLATE Analog I/O module provides analog input and output capability for all combustion applications. SLATE has a concept of an analog cell per module. The SLATE analog sell allows you to configure multiple combinations of functionality. The SLATE Analog Module provides voltage inputs and outputs, current inputs and outputs, PWM, tach, RTD, NTD and support for type J and K thermocouples. LED Array There are three LEDs on the front of the SLATE Analog Module that provide quick identification of the system status and any problems SLATE™ INTEGRATED COMBUSTION MANAGEMENT SYSTEM R8001 Series 93 Chapter 9: SLATE Analog I/O Module Understanding the Terminals Terminal Functions and Configurations The SLATE Analog I/O module contains 16 wired terminals. ANALOG INPUT OUTPUT MODULE 4 CELLS A UNIVERSAL LOW VOLTAGE CELL + _ Terminal Description Rating 1 1 Cell A (TF1) See Tables Table 4-Table 7 for configuration options 2 2 Cell A (TF2) See Tables Table 4-Table 7 for configuration options 3 Cell A (TF3) See Tables Table 4-Table 7 for configuration options 4 Cell A (TF4) See Tables Table 4-Table 7 for configuration options 5 Cell B (TF1) See Tables Table 4-Table 7 for configuration options 6 Cell B (TF2) See Tables Table 4-Table 7 for configuration options 7 Cell B (TF3) See Tables Table 4-Table 7 for configuration options 8 Cell B (TF4) See Tables Table 4-Table 7 for configuration options 9 Cell C (TF1) See Tables Table 4-Table 7 for configuration options 10 Cell C (TF2) See Tables Table 4-Table 7 for configuration options 11 Cell C (TF3) See Tables Table 4-Table 7 for configuration options 12 Cell C (TF4) See Tables Table 4-Table 7 for configuration options 13 Cell D (TF1) See Tables Table 4-Table 7 for configuration options 14 Cell D (TF2) See Tables Table 4-Table 7 for configuration options 15 Cell D (TF3) See Tables Table 4-Table 7 for configuration options 16 Cell D (TF4) See Tables Table 4-Table 7 for configuration options 17 Unused --- 18 Unused --- 19 Unused --- 20 Unused --- 21 Unused --- 22 Unused --- 3 4 5 B UNIVERSAL LOW VOLTAGE CELL + _ 6 7 8 9 C UNIVERSAL LOW VOLTAGE CELL + _ 10 11 12 13 D UNIVERSAL LOW VOLTAGE CELL + _ 14 15 16 M35287 Specifications based on worst case over ambient temperatures. 9432-00014—01 Chapter 9: SLATE Analog I/O Module Terminal Functions T1 Voltage In Outc Current In Typical Max Units 0.0 - 15.0 VDC Rin=1MOhm Resolution - 2.43 - mV DC Null -25.0 - 25.0 mV DC Accuracy -25.0 - 25.0 mV DC -1.0 - 1.0 % Whichever is greater 0.0 10KOhm load Range - 15.0 VDC Resolution - 4.0 - mV DC Null 100.0 - 100.0 mV DC Accuracy -50.0 - 50.0 mV DC -1.5 - 1.5 % 0.0 Range T3 Voltage In Voltage In Current In 25.0 mA DC 7.4 - uA DC Null -0.5 - 0.5 mA DC Accuracy -1.5 - 1.5 % 0 to 25 mA - 25.0 mA DC 4.0 - mA Ω Max Load = 500 Ω - 0.5 mA DC -300.0 - 300.0 uA DC 0 to 25 mA -50 - 50 uA DC 4 to 20 mA Amplitude 0.0 - 15.0 VDC Trip Point - 3.0 - VDC Hysteresis - 0.25 - VDC Comparator Only Resolution - 0.37 - mV DC Null -25.0 - 25.0 mV DC Accuracy -25.0 - 25.0 mV DC Range 0.0 - 15.0 VDC Resolution - 0.37 - mV DC Null -25.0 - 25.0 mV DC Accuracy -25.0 - 25.0 mV DC Range 0.2 mA DC - uA DC Null -0.5 - 0.5 mA DC Accuracy -1.5 - 1.5 % -200.0 Units 1025.0 °C 0.1 - °C Accuracy -5.0 - 5.0 °C Range -150.0 0.1 - °C Accuracy - 5.0 °C -5.0 -135.0 - Accuracy Type 10K T1T4 T1T3, Type 12K T1T4 Range T1T4 0 to 25 mA T1 input terminal is held at constant 2.5VDC over allowable current range. b Accuracy specification given is for 100 Ω load. Resolution specification can be converted to mA by dividing out load. c Imax=25mA for Vout<10V Imax=20mA for 10V<Vout<15V Type 20K °C - °C 2.0 °C 250.0 °C -2.0 3 wire, 1000 Ω °C - 2.0 °C - 175.0 °C 0.1 - °C Accuracyc -2.0 - 2.0 °C -40 °C to 25 °C -1.0 - 1.0 °C 25 °C to 125 °C -1.5 - 1.5 % -3.0 - 3.0 °C 125 °C to 175 °C -20.0 - 125.0 °C T4 rated to 0 °C Resolution - 0.1 - °C Accuracyc -2.0 - 2.0 °C -20 °C to 30 °C -1.0 - 1.0 °C 30 °C to 120 °C -1.5 - 1.5 % -3.0 - 3.0 °C 120 °C to 125 °C -25.0 - 150.0 °C T4 rated to 0 °C Resolution - 0.1 - °C Accuracyc -2.0 - 2.0 °C -25 °C to 50 °C -1.0 - 1.0 °C 50 °C to 135 °C -1.5 - 1.5 % -3.0 - 3.0 °C Range Range -40.0b 3 wire, 100 Ω Resolution - T1T3, 250.0 0.5 NTC T1T3, 1000.0 °C Resolution - T2 & Type PT100a Range -135.0 T3 & Resolution 0.5 T4 Accuracy -2.0 - a SLATE™ INTEGRATED COMBUSTION MANAGEMENT SYSTEM R8001 Series Typical Max Resolution - Resolution Accuracy 25.0 Range Type PT1000 Range -0.5 3.7 Type K a Null - T2 & Type J T3 Whichever is greater - Resolution - Min Thermocouple RTD Resolution - 0.0 Outb,c Range Resolution - T2 Complex Functions Min Range T4 rated to 0 °C 135 °C to 150 °C Shielded cable required for reliable operation in noisy environment. b NTC on terminal T4 is rated down to 0 °C. c Temperatures refer to sense range. a 95 Chapter 9: SLATE Analog I/O Module Frequency / PWM Functions Min Typical Max Units - VDC Configuration PWM Out T1 Amplitude 5.0 Frequency 100.0 - 10.0 1000.0 Hz Duty Cycle 2.0 - 98.0 %DC 0-100% output allowed Resolution - 1.0 - % Accuracy -0.5 - 0.5 %DC 10V amplitude T2T4 Amplitude 5.0 10.0 15.0 VDC Range 2.0 - 1000.0 Hz Min. “on” pulse width (low %DC) - 50.0 - usec 10V amplitude Min. “off” pulse width (high %DC) - 130.0 - usec 10V amplitude Duty Cycle 2.0 - 98.0 %DC 10V amplitude 10V amplitude 2 – 100 Hz - 85.0 %DC Resolution 1000 Hz 5.0 - 1.0 - Hz Accuracy -5.0 - 0.0 % -1.0 - 0.0 Hz Amplitudea 5.0 10.0 15.0 VDC Frequency 125.0 - 500.0 Hz Min. “on” pulse width (low %DC) - 50.0 - usec 10V amplitude Min. “off” pulse width (high %DC) - 130.0 - usec 10V amplitude Duty Cycle 5.0 - 90.0 %DC 10V amplitude Optimum Range for Performance Max 1025°C ± 4 °C K -50°C 1000°C ± 4 °C Low output state = 0V Frequency In Min Thermocouple J -50°C RTD -135°C 250°C ± 2 °C NTC 25°C 125°C ± 1°C Current Out 4 mA 20 mA ± .05 mA Voltage: In / Out 2V 10 V 0.3 %, typical Application Analog Cell terminals Recommended Wire Size Recommended Part Numbers 18 AWG wire insulated for voltages and temperatures for given application. TTW60C, THW75C, THHN90C Whichever is greater PWM In T2T4 125 – 500 Hz Resolution - 1.0 %DC Accuracy 125 Hz -1.5 - 1.5 %DC 10V amplitude 500 Hz -7.5 - 7.5 %DC 10V amplitude Trip points = 3.0V +/- 0.25V Hysteresis Voltage = 0.5V a 9632-00014—01 Chapter 10: SLATE Digital I/O Module Chapter 10: SLATE Digital I/O Module LED Color Power No light Green CPU Fault Description System does not have power System has power Red No wire sheet or problem with the wire sheet Green Running Red Fault No light Running There are 16 separate LEDs for each of the Digital Module terminals. Refer to the table below for module LED descriptions Color Description Green Terminal is on Red Fault No light Not in use LED Display All SLATE system modules have seven-segment, three positioned LED display for indicating the assigned module number of the SLATE System. See figure below. Select and Reset Buttons All SLATE system modules have Select and Reset buttons located on the front of the module and beneath the segment display. The Reset button is used to clear a lockout and reset the module. The Select button is used to scroll through the segment the segment display information. Overview The R8001D4001 SLATE Digital I/O module offers universal 14 opto inputs or 6 relays for a wide variety of combustion applications. It automatically adapts to 24 VDC or 24VAC to 240 VAC (one voltage per module). Status LEDs There are 3 LEDs on the front of the Digital Module provides quick identification of system status and problems. This status is broadcast to other modules on the platform bus in case they are affected by the inoperable module. SLATE™ INTEGRATED COMBUSTION MANAGEMENT SYSTEM R8001 Series 97 Chapter 10: SLATE Digital I/O Module Understanding the Terminals The SLATE Digital Module contains 18 wired terminals. Refer to the diagram below. All digital terminals are 24 VDC or 24 -240 VAC and automatically adapt to the applied system voltage. 1 DIGITAL INPUT/OUTPUT MODULE 9 2 6 RELAYS 14 OPTO-INPUTS Terminal Description 8 K2 Relay Dry Contacts or Input 3 10 4 K1 5 6 7 11 8 K2 9 10 K3 11 12 12 13 14 13 14 K4 15 16 K5 17 18 K6 19 15 16 20 VREF+ BIAS 21 22 VREF– 17 M35286 18 Wiring The following table highlights the wiring for the SLATE Digital I/O Module. Terminal 1 2 3 4 5 6 7 Description Unused Unused Unused K1 Relay Dry Contacts Rating ------9.8 FLA, 58.8 LRA @ 120VAC, 4A (0.5 PF), 20A inrush @ 240VAC, 2A cont, 10A inrush @ 24VDC K1 Relay Dry (see Terminal 4 above) Contacts Input 24VDC (0.5mA), 24-240VAC (0.2mA) Input 24VDC (0.5mA), 24-240VAC (0.2mA) 19 20 21 22 Rating Relay: 9.8 FLA, 58.8 LRA @ 120VAC, 4A (0.5 PF), 20A inrush @ 240VAC, 2A cont, 10A inrush @ 24VDC Input: 24VDC (0.5mA), 24-240VAC (0.2mA) K2 Relay Dry (see Terminal 8 above) Contacts or Input K3 Relay Dry Relay: 9.8 FLA, 58.8 LRA @ 120VAC, Contacts or 4A (0.5 PF), 20A inrush @ 240VAC, Input 2A cont, 10A inrush @ 24VDC Input: 24VDC (0.5mA), 24-240VAC (0.2mA) K3 Relay Dry (see Terminal 10 above) Contacts or Input Input 24VDC (0.5mA), 24-240VAC (0.2mA) Input 24VDC (0.5mA), 24-240VAC (0.2mA) K4 Relay Dry Relay: 9.8 FLA, 58.8 LRA @ 120VAC, Contacts or 4A (0.5 PF), 20A inrush @ 240VAC, Input 2A cont, 10A inrush @ 24VDC Input: 24VDC (0.5mA), 24-240VAC (0.2mA) K4 Relay Dry (see Terminal 14 above) Contacts or Input K5 Relay Dry Relay: 9.8 FLA, 58.8 LRA @ 120VAC, Contacts or 4A (0.5 PF), 20A inrush @ 240VAC, Input 2A cont, 10A inrush @ 24VDC Input: 24VDC (0.5mA), 24-240VAC (0.2mA) K5 Relay Dry (see Terminal 16 above) Contacts or Input K6 Relay Dry Relay: 9.8 FLA, 58.8 LRA @ 120VAC, Contacts or 4A (0.5 PF), 20A inrush @ 240VAC, Input 2A cont, 10A inrush @ 24VDC Input: 24VDC (0.5mA), 24-240VAC (0.2mA) K6 Relay Dry (see Terminal 18 above) Contacts or Input Vref+ 24VDC (0.1mA), 24VAC (0.1mA), 85–264VAC (0.2mA) Unused --Vref(see Terminal 20 above) Note: Only one voltage can be used per module. Recommended Wire Size Application Line voltage terminals Recommended Wire Size Recommended Part Numbers 14, 16 or 18 AWG copper conductor, 600 volt insulation, moisture-resistant wire. TTW60C, THW75C, THHN90C 9832-00014—01 Chapter 10: SLATE Digital I/O Module Recommended Wire Size Recommended Part Numbers Communication Lines 22 AWG two-wire twisted pair with ground, or five-wire. Belden 8723 shielded cable or equivalent. Other terminals 18 AWG wire insulated for voltages and temperatures for given application. TTW60C, THW75C, THHN90C Application SLATE™ INTEGRATED COMBUSTION MANAGEMENT SYSTEM R8001 Series 99 Chapter 10: SLATE Digital I/O Module 10032-00014—01 Chapter 11: SLATE Annunciator Module Chapter 11: SLATE Annunciator Module added to further enhance diagnostic user information. All modified annunciator terminal labels and additional diagnostic text will be reflected on the Annunciator Module HMI screen. The SLATE Annunciator Module also contains one programmable relay output, which can be configured from the wire sheet. Status LEDs There are 3 LEDs on the front of the Annunciator Module that provide quick identification of system status and problems. This status is broadcast to other modules on the platform bus in case they are affected by the inoperable module(s). LED Power CPU Overview Fault The R8001N7001/U Annunciator Module is designed to monitor the status of individual components in a series wiring of limits, control and/or interlock contacts wired to the SLATE Burner Control Module on a commercial or industrial burner. Description No light System does not have power. Green System has power. Red No Wiresheet (SLATE) loaded. Remove Limit System Status). Green Running Red Fault No light Running There are also 16 separate LEDs for each of the Annunciator Module terminals. The Annunciator Module acts as a system monitor, providing firstout annunciation of individual components for effective burner and system troubleshooting. In the SLATE AX Tool, the 14 available annunciator terminal labels may be renamed to reflect the actual connected device. Additionally, extra diagnostic text may be SLATE™ INTEGRATED COMBUSTION MANAGEMENT SYSTEM R8001 Series Color 101 Color Description Green Terminal is on Red Fault No light Not in use Chapter 11: SLATE Annunciator Module LED Display All SLATE system modules have a seven-segment, three-position LED display for indicating the assigned module number of the SLATE system. 1 DIGITAL ANNUNCIATOR MODULE 2 14 OPTO-INPUTS 1 RELAY 3 4 K1 5 Select and Reset Buttons 6 All SLATE system modules have Select and Reset buttons located on the front of the module and beneath the segment display. The Reset button is used to clear a lockout and reset the module. The Select button is used to scroll through the segment display information. 7 8 9 10 11 12 13 14 15 16 17 18 19 20 VREF+ BIAS 21 22 VREF– M35388 Understanding the Terminals The SLATE Annunciator Module contains 18 wired terminals. All annunciator terminals are 24VDC or 24-240VAC and automatically adapt to the applied system voltage. Terminal 1 2 3 4 Description Unused Unused Unused K1 Relay Dry Contacts 5 6 K1 Relay Dry Contacts Input 7 Input 8 Input 9 Input 10 Input 11 Input 12 Input 13 Input 14 Input 15 Input Rating ------9.8 FLA, 58.8 LRA @ 120VAC, 4A (0.5 PF), 20A inrush @ 240VAC, 2A cont, 10A inrush @ 24VDC (see above) 24VDC (0.5mA), 24-240VAC (0.2mA) 24VDC (0.5mA), 24-240VAC (0.2mA) 24VDC (0.5mA), 24-240VAC (0.2mA) 24VDC (0.5mA), 24-240VAC (0.2mA) 24VDC (0.5mA), 24-240VAC (0.2mA) 24VDC (0.5mA), 24-240VAC (0.2mA) 24VDC (0.5mA), 24-240VAC (0.2mA) 24VDC (0.5mA), 24-240VAC (0.2mA) 24VDC (0.5mA), 24-240VAC (0.2mA) 24VDC (0.5mA), 24-240VAC (0.2mA) 10232-00014—01 Chapter 11: SLATE Annunciator Module 18 Input 19 Input 20 Vref+ 21 22 Unused Vref- The SLATE AX Tool is used to configure the Analyzer (trigger) input string, the SLATE Trigger Module, Module Trigger Type, rename the Annunciator terminal labels and add additional diagnostic text. The Annunciator safety relay output can be used for any purpose, thus the wiring will be application specific. It is important to lie out and understand the series string circuits which are to be monitored by the Annunciator Module before proceeding with configuration. BO I LE R Note: Only one voltage can be applied per module (same at all terminals) RO OM W AI AT R HI ER GH GA S LO PR W ES GA SU S RE RO PR LL ES OU SU T RE AI RF LO W Input BURNER CONTROL W 17 • The longest series string input that can be monitored is 15 contacts including the 14 inputs on the Annunciator & the Implied Final input. Rating 24VDC (0.5mA), 24-240VAC (0.2mA) 24VDC (0.5mA), 24-240VAC (0.2mA) 24VDC (0.5mA), 24-240VAC (0.2mA) 24VDC (0.5mA), 24-240VAC (0.2mA) 24VDC (0.1mA), 24VAC (0.1mA), 85-264VAC (0.2mA) --(see Vref+ above) LO Terminal Description 16 Input POWER ILK COMM. EVENT Wiring For installation and wiring information, refer to document 3200012, the SLATE Annunciator Module Installation Instructions. Any series string of limits, control and/or interlock contacts wired to the SLATE Burner Control Module may be wired to the Annunciator Module. Sample wiring diagrams are shown below. T8 T9 T10 IMPLIED ANNUNCIATOR FINAL COMM. LO W R ILE BO O POWER O/G O BURNER CONTROL ILK O/G G O/G H W LO G G (FINAL INPUT) AS AS G G RE RE SU ES SU ES PR PR FUEL SELECT • Multiple Annunciator Modules can be used with a single SLATE device. O O O/G HI • A series string input to the Annunciator should utilize contiguous Annunciator terminals because that is easiest to understand, however it is not necessary. SELECT OIL – USE O INPUTS FOR ANNUNCIATION SELECT GAS – USE G INPUTS FOR ANNUNCIATION M3XXXX • A series string input to the Annunciator cannot be split up between two different Annunciator modules. The entire string must fit on a single Annunciator. • Each series string can have an Implied Final input. It is the last item in the Annunciator input series string and is not wired to the Annunciator. It is not wired to the Annunciator because it’s the last component in the wiring string going into the Burner Control Module and thus is directly monitored by the Burner Control; if all other contacts in the string are closed and powered, then it is the Implied Final (last) component which is causing the fault. Using Implied Final inputs allows the use of fewer terminals. Getting Started 1. To access the configuration tool you will need to launch the SLATE AX Tool. 2. If you have not created a Station please refer to Chapter 2 of this manual to learn how to create a new station. 3. If you have created a Station open up the Navigation pane until to reach your SLATE Device. Double-click on the SLATE device to launch the Module Configuration Tool. 4. Next click on “Use Annunciator Wizard” SLATE™ INTEGRATED COMBUSTION MANAGEMENT SYSTEM R8001 Series • CURRENT STATUS • FIRST-OUT STATUS RO For clarity, there are some guidelines regarding Annunciator terminal wiring and usage: • Lower numbered terminals must be closer to the source of power than higher numbered terminals T7 OM W A AT ER IR HI GH OI L LO PR W ES OI SU L RE PR HI ES GH SU OI RE L TE LO M W PE OI RA L TE TU RO M RE PE LL RA OU T T AI UR RF E LO W T6 103 Chapter 11: SLATE Annunciator Module 5. You should be taken to the Annunciator Configuration Wizard, which allows you to set up the Annunciator Module input terminals. This is how the SLATE Annunciator Module is configured for use. There are 14 Annunciator terminal inputs that will need to be configured (T6-T19). After you have configured all of the terminals you will need to click the Save button. Once you are done with all of the SLATE programming and configuration it will be stored as a kit file as explained in Chapter 15 and Loading a SLATE Kit. 6. Each separate input string to the Burner Control Module is considered an Analyzer (trigger). Examples of Analyzer (trigger) input strings are the burner control interlock, airflow switch/ lockout input, pre-ignition interlock, limit control inputs for fuel 1 or fuel 2, limit module LCI input or other wire sheet user-defined triggers. Define your input string to the Annunciator Module by selecting the Analyzer (trigger) from the drop-down menu. Type in a descriptive Analyzer Name as desired. Up to 6 Analyzers are available. 7. Next select how the Annunciator will handle the input string via the Enable drop-down menu. The options are: Disable: All configuration and setup values can be edited but no action is taken at run time until the Analyzer (trigger) is enabled. Enable with First out event logging: Whenever a firstout trigger is detected, a time-stamped event log record is generated, describing the result of the first-out analysis. Enable with no event logging: All of the first-out actions are still generated, however, the Annunciator does not generate any event log records. It shows live status only. 8. The Analyzer Trigger Configuration attaches the Analyzer to a trigger source. Next select the Trigger Module for this particular Analyzer (trigger). The options are: • None • m1 - Base • m2 - Burner Control • m3 - Fuel/Air ratio control • m4 - Limit control • m5 - Annunciator 10432-00014—01 Chapter 11: SLATE Annunciator Module • m6 - Analog I/O Limit LCI input • m7 - Digital I/O Limit Module load control input (T18 on Limit Module) Wire sheet annunciator Wire sheet user-defined triggers trigger 1-6 Since the Limit Module contacts might be connected downstream of other contacts, it has a separate trigger for its safety relay input. Note: Each Analyzer (trigger) will have its own: • Enable • Trigger Module • Trigger Type • Analyzer Input Configuration 9. The next step is to select the Trigger Type for the previously selected Trigger Module. There are 5 specific Burner Control Module triggers, 1 specific Limit Module trigger and 6 generic wire sheet triggers. The 6 generic wire sheet triggers allow the annunciator to monitor a series string that the SLATE designer creates for some purpose related to the SLATE Control Program (i.e. wire sheet) on the Base Module. For any of the 6 generic annunciator triggers, a standard wire sheet Modulating Output block may be bound to the corresponding generic annunciator trigger register. The trigger value is sent whenever the wire sheet changes its value, thus no special action is needed to cause the trigger to be sent. 10.After completing setup of your various Analyzers (triggers), you can begin to define the input string on each Analyzer. This includes: Explanations of the available Trigger Types are shown below. Burner control: ILK Interlock string (T19 on Burner Module) Burner control: IAS/LOI Interrupted airflow switch / lockout input (T16 on Burner Module) Burner control: PII Pre-ignition interlock (proof of closure switch) (T14 on Burner Module) Select the specific Analyzer you wish to edit. To name the inputs, click on the Edit Annunciator Text button. Burner control: LCI/F1 Limit control input for fuel 1 (T13 on Burner Module) Burner control: LCI/F2 Limit control input for fuel 2 (T12 on Burner Module) The following pages will utilize the example shown below, which illustrates a dual string path (dual fuel system). SLATE™ INTEGRATED COMBUSTION MANAGEMENT SYSTEM R8001 Series Naming the contacts in the input string – this is a global feature (optional) Defining their location in each string – this is Analyzer specific 105 Chapter 11: SLATE Annunciator Module Notes: It may be more efficient to complete this task after completing step 12 in which the location of each contact in the specific Analyzer input string is identified. For the dual path (fuel) example above, T14 is the junction point of path A and B, monitoring the Low Oil Temperature in path A and the Low Gas Pressure in path B. Thus in the Annunciator Diagnostic Text section, the two monitoring points are separately identified. Annunciator Diagnostic Text can be individually assigned to the Implied Final input for each Analyzer (trigger) in order to provide diagnostic indications. The Implied Final input is the last connection (the wire) between the Annunciator and the Analyzer (trigger) which is not wired to the Annunciator. It is not wired to the Annunciator because it is the last component in the wiring string going into the Burner Control Module and thus is directly monitored by the Burner Control; if all other contacts in the string are closed and powered, then it is the Implied Final (last) component which is causing the fault. For example, if the Implied Final input (last terminal in the string) is closed yet the Analyzer (trigger) is showing 0.0V, then the issue could be a broken wire or an unmonitored contact on that wire. In this case, the Analyzer Diagnostic Text might show “broken wire or an unmonitored contact on that wire”. Refer to the SLATE AX Tool page below and the image above. Descriptions of the available field in the Annunciator Diagnostic Text section are shown below. 11.Under Annunciator Input Text, type in the desired name of each Analyzer Input string contact (T6-T19) in all of the strings used (refer to your application-specific wiring diagram). This function is not Analyzer specific; it’s done at the Annunciator level so names can be written for all Analyzers (triggers) in this window. The following steps illustrate the dual path example provided in the image above. Note: On the screen shown below, T8 and T12 are both named “Low water”. The duplication occurs because an input is needed on either side of fuel changeover switch for the dual fuel example shown above to allow the analyzer to discern the position of the switch. In this case, both T8 and T12 annunciate the set of contacts that directly proceed them in the series string; the Low Water. Under Annunciator Diagnostic Text, type in the desired description for the input string location item. Refer to the extended descriptions below, step 12. and the image above for elaboration on input string locations. This function is Analyzer specific; it must be done for each individual Analyzer. The Analyzer is chosen on the previous page. Junction A Used when the last terminal in string path A of a dual path (fuel) string causes an event. Junction B Used when the last terminal in string path B of a dual path (fuel) string causes an event. Implied Final Used when the last connection between the Annunciator and the Analyzer (trigger) is the event cause. When all are on Used when the Analyzer detects that nothing is interrupting power to the terminal. When unknown Used when some anomalous condition prevents the analyzer from making sense of the inputs that it is receiving. When inactive Used when the first out or hold status registers contain no values. This may be an empty string, a “-“ or any other preferred value. Configuration error Used when some error in setup prevents the annunciator from working. After you are finished on this screen, click the Save button. 10632-00014—01 Chapter 11: SLATE Annunciator Module x Lower case x indicates the input is unused by this Analyzer A Indicates a terminal in string path A B Indicates a terminal in string path B FirstA Indicates the first terminal in string path A of the dual paths FirstB Indicates the first terminal in string path B of the dual paths Common Indicates that the input is common to both string paths Junction Indicates the terminal where string paths A and B rejoin. Annunciates the last terminal in each string path. In Fig. 5 it is Low Oil Temperature or Low Gas Pressure. The illustration below shows how the above possible options for the Analyzer Input Configuration in a dual string path (dual fuel system) might look. 12.Return to the main page of the Annunciator Configuration Wizard. In order to facilitate proper Annunciator diagnostics, you will need to indicate where in the input string each contact lies for a particular Analyzer. Notes: This function is Analyzer specific; it must be done for each individual Analyzer. Make sure to check the Implied Final check box in order to enable the diagnostic message for it (if applicable). Note that the Annunciator Diagnostic Text entered on the previous screen now appears in the lower right-hand corner of this screen under Analyzer Diagnostic Messages. Example The example below is for a dual fuel system with 3 Analyzers or series string input to the Burner Control Module that utilizes the Annunciator Module. For each Analyzer Input Configuration (T6-T19), select the proper item from the drop-down menu. The possible input string location options are shown below. In all cases, the Annunciator terminal annunciates the set of contacts which directly precede it in the series wiring string. The screen above reflects a dual fuel example. SLATE™ INTEGRATED COMBUSTION MANAGEMENT SYSTEM R8001 Series 107 Chapter 11: SLATE Annunciator Module Annunciator Terminals Path Designations Analyzer Trigger Components 1: ILK Burner control: ILK Path A: ILK1, ILK2, Fuel Selector, ILK5, ILK6, ILK7 6, 7, 10, 11, 12 Path B: ILK1, ILK2, Fuel Selector, ILK3, ILK4, ILK6, ILK7 6, 7, 8, 9, 11, 12 T6 = ILK1 (Common) T7 = ILK2 (Common) T10 = Fuel Selector (FirstA) T11 = ILK5 (Junction A) and ILK4 (Junction B) T8 = Fuel Selector (FirstB) T9 = ILK3 (B) T12 = ILK6 (Common) Implied Final = ILK7 2: LCI/F2 Burner control: LCI/F2 Limit1, Limit2, Fuel Selector, Limit5 13,14, 15, Implied Final T13 = Limit1 (A) T14 = Limit2 (A) T15 = Fuel Selector (A) Implied Final = Limit5 3: LCI/F1 Burner control: LCI/F1 Limit1, Limit2, Fuel Selector, Limit3, Limit4 13, 14, 16, 17, Implied Final T13 = Limit1 (A) T14 = Limit2 (A) T15 = x (not used) T16 = Fuel Selector (A) T17 = Limit3 (A) Implied Final = Limit4 Below are the completed Annunciator Configuration Wizard pages for each Analyzer in the example. 10832-00014—01 Chapter 11: SLATE Annunciator Module 1: ILK Analyzer 2: LCI/F2 Analyzer 3: LCI/F1 Analyzer SLATE™ INTEGRATED COMBUSTION MANAGEMENT SYSTEM R8001 Series 109 11032-00014—01 Chapter 12: SLATE Sub-Base Chapter 12: SLATE Sub-Base Understanding the Sub-Base Terminal Description Rating 1 18 V Power 2.5 A max including modules 2 18 V Ground --- 3 Remote Reset (Burner Control and Limit modules only) Connect to Terminal 2 (18 V Ground) via external pushbutton 4 B (Remote Bus RS485) Used for Remote mounted flame amplifiers 5 A (Remote Bus RS485) Used for Remote mounted flame amplifiers Overview 1 2 3 4 5 The R8001S9001 SLATE Sub-Base Module provides the ability for the SLATE system to be mounted via DIN Rail in a panel. All SLATE modules need this sub-base except for the SLATE Base Module. TERMINAL 1 2 3 4 5 DESCRIPTION 18V POWER 18V GROUND REMOTE RESET (BURNER CONTROL AND LIMIT MODULES ONLY) B (REMOTE BUS RS485) A (REMOTE BUS RS485) M35430 SLATE™ INTEGRATED COMBUSTION MANAGEMENT SYSTEM R8001 Series 111 Chapter 12: SLATE Sub-Base Mounting 3. Slide sub-base on the DIN rail and lock into place. 1. The sub-base module can be mounted on type C 20 DIN Rail 4. When securing subsequent sub-base modules make sure communication ports are aligned and locked into place. 2. Mount the sub-base module first. The sub-base has locking mechanisms on both sides of the module. Pull to unlock position. UNLOCKED FROM DIN RAIL 5. After securing the sub-base module, snap the SLATE module into place and secure the module to the sub-base using screws which are included with SLATE. LOCKED ONTO DIN RAIL M35378 11232-00014—01 Chapter 13: SLATE Display Chapter 13: SLATE Display Cutout and Mounting 35/64 (14) 8-17/64 (210) 4-51/64 (122) M35367 Dimensions in in. (mm). Overview 7-41/64 (194) The R8001K5001 SLATE Color Touch Screen Display provides users with the ability to create vivid application displays using web technology. The screen is web enabled and with the SLATE Web Editor tool creating screens is simple and easy. 6-1/32 (153) 3-25/64 (86) 4-11/64 (106) Power Plug Recommendations The SLATE Color Touch Screen display does not come with a power plug or power plug connector. You have the option of purchasing the SLATE Display connector kit and transformer (Honeywell OS 32008001-002) or source through your own vendors. The following are recommendations for the power connection. M35342 Mounting dimensions of color touch screen display in in. (mm). • 24VAC Wall Plug-in Transformer (Input Voltage: 120VAC, 60HZ – Output Voltage: 24VAC ±5%). Honeywell p/n 32006131 or equivalent. • 18AWG wire • Plug-in connectors (or equivalent): –– Phoenix - p/n 1757019 –– EBY Electro - p/n EB1508-02-500 –– Dinkle – p/n 2ESDV-02P –– Molex – p/n 0395300002 M35340 SLATE™ INTEGRATED COMBUSTION MANAGEMENT SYSTEM R8001 Series 113 Chapter 13: SLATE Display Principle Technical Features The R8001K5001 color touch screen display provides a webbased user interface for viewing system status, and viewing, creating, or modifying configurations. Communication and Networking The R8001K5001 color touch screen display interfaces directly with the SLATE system using a standard Ethernet connection, and can connect directly to the Base module or via an Ethernet switch. The R8001K5001 color touch screen display locates all base modules on an IP subnet using a subnet broadcast message, and once located allows users to select one to initiate a connection to that SLATE system. User Interface and Technology The R8001K5001 color touch screen display is based on Google Chrome browser and supports HTML5. A double tap on any web screen activates then Home, Back, and Help buttons, URL address bar, plus other controls that are normally hidden from view. Double tapping again activates these controls. 11432-00014—01 Chapter 14: SLATE Wiring Basics Chapter 14: SLATE Wiring Basics SLATE System Ground: The ground for the 18V system power supply. Overview This overview is intended to aid the SLATE system integrator in choosing the best method for ground and power connections. Every installation is different, but following these recommendations will greatly reduce potential for damaged equipment and incorrect I/O readings. Single Point Ground (SPG): This term refers to a wiring point which provides little or no voltage differential between connections. A metal bar or a barrier terminal block with shorting bars between terminals is the most common type of implementation. Wiring which uses “daisy chain” connections is not considered to be a SPG and should be avoided. The figure below shows the different connections possible on the assembled Slate system. Digital Reference: Terminals labeled “Vref+” and “Vref-“used on the Limit, Burner, Digital, and Annunciator modules. The “Vref“term should not be confused with the V+ or V- on the flame amplifiers. These references are electrically isolated from each other have different purposes. Base Module Power Input Provides the main power interface for the Base module and modules on the DIN rail. Base Module I/O Supplies the auxiliary power output, and the BACnet interface and alarm relay contacts. Sub Base The sub base provides I/O module mounting. Sub Base I/O The I/O on this connector provides access to the system power supply (18VDC) and the flame safety bus if a flame amp is mounted. General Description of the SLATE Power and Ground Module Interface Connector Connects the I/O module signal to the main system interface. System Interface Contains the module power1 (18VDC) and the inter module communication lines. The SLATE system power supply (18VDC output) is isolated from the system power input (i.e. not internally connected to Earth ground). Module I/O The standard 22 terminal connector for most I/O modules. Flame Amplifier Module I/O The 11 terminal connector for the flame amplifier modules. Unless application specifics preclude it, it is advisable to reference the SLATE system power supply to Earth ground by attaching a wire from terminal 2 on the sub-base I/O connector of any module to Earth ground, or alternatively to terminal 6 on the Base Module I/O connector or the G terminal on the flame amp. Information only, not intended for user interface. General Terminology 1 Analog Modules (Analog I/O, Limit, Fuel/Air) The analog cell terminals within these modules are not isolated; they are all referenced to the SLATE system ground. Slate Connector Definitions An externally powered sensor (such as voltage, current or PWM input) to an analog cell must come from a power supply that is ground referenced to the Slate system ground. Failure to do so may result in inaccurate sensor readings and possible damage to the analog cell or sensor. The power supply generating the voltage or current input should have its ground/common connected to terminal 2 of the sub-base I/O connector of the module utilizing the analog function. None of the four terminals of an analog cell are intended for grounding external equipment. The image below shows proper ground connections. SLATE™ INTEGRATED COMBUSTION MANAGEMENT SYSTEM R8001 Series 115 Chapter 14: SLATE Wiring Basics Analog I/O Module Thermocouple EGND 24 VDC + _ Alternate Grounding Method ❻ + 4 To 20 mA _ External Sensor (Sub Base) ❺ Dual NTC 24 VAC + 0 To 10 VDC _ External Sensor L1 ❸ ❷ (Sub Base) N EGND Grounding bar or system single point ground ❶ ❹ EGND 1. Recommended unless application specifics preclude this. 2. Applications using external power supplies to power external sensors must have their ground reference terminal(s) in common with the SLATE system ground. 3. Shields for sensor cabling should be tied to SLATE system ground (terminal 2 of the sub base I/O connector) or the single point ground. 4. Add this connection when external supplies are present (2) or when tying shields directly to single point ground. 5. Shielded cable recommended for applications where electrical noise exists. 6. Thermocouples must be isolated from SLATE system ground, Earth ground or any conductive path. 11632-00014—01 Chapter 14: SLATE Wiring Basics Flame Rectification Amplifier Modules The Rectification Flame Amplifier module requires the SLATE system ground be connected to the burner ground (typically Earth ground). Drawing A below shows best practice for a SLATE system that does not have any other points tied to earth ground. If the SLATE system ground is already connected to burner (Earth) ground, the wire from terminal G to earth ground is not required (see drawing B). Rectification Flame Amp Module 1 a 1 a 2 b 2 b 3 c 3 c 4 + 5 - ❸ Rectification Flame Amp Module 4 + V ❸ 6 G V 6 G 8 F 8 F ❶ 5 - Close Proximity (Sub Base) (Sub Base) A ❷ B 1. The connection from the flame rod return (G lead wire) should use the shortest direct path back to the Flame Amplifier Module. For best practice, the flame rod return (G lead wire) should be in close proximity with the F lead wire. Proper connections are shown in the image below. It is not permissible to make any connections the terminal 21. ❷ I/O Module 2. Grounding bar or system single point ground. 3. The Rectification Flame Rod. Digital Reference Terminals ❹ The terminals labeled “Vref+” and “Vref-“ (found on the Limit, Burner, Digital, and Annunciator modules) are electrically isolated from the Slate system power supply and the Slate system ground. These terminals are used only to configure the digital (relay) inputs of a module for operation at various voltage levels (24VDC, 24 VAC or line voltages). ❸ The digital reference terminals have no impact on analog cell functionality. Any device providing voltage to the digital inputs or receiving voltage from the relay outputs of these modules must be referenced to the Vref- terminal. The voltage must be the same phase and magnitude of the Vref+ reference voltage. Failure to comply may result in erroneous terminal readings or possible damage to the Slate module or connected device. Voltage Source 21 22 VREF❶ (Sub Base) 1. Do not make any connections to this terminal. 2. Typical application shown. The Vref terminals on a module are unique to that specific module. Different modules may use different Vref voltages. SLATE™ INTEGRATED COMBUSTION MANAGEMENT SYSTEM R8001 Series 20 VREF+ + _ 3. Voltage source may be 240 / 120 VAC, 24 VAC. or 24 VDC. 4. The voltage being sensed at the module I/O connector must originate from the same voltage source at the VREF terminals. 117 Chapter 14: SLATE Wiring Basics Shielded cables It is strongly advised that the shielded cable be used for analog signals that are sensitive to electrical noise and for digital or line voltage signals that can radiate electrical noise. The RS-485 cables to the actuator can be an electrical noise radiator and should be grounded at one end of the cable. The actuator interface provides a terminal for grounding the shield(s). If this connection at the actuator is not made, or a different actuator used, then the cable shield should be tied to Earth ground at module using terminal 2 on the sub base I/O connector. Do not ground both ends of the cable shield as a possible loop current may occur producing offsets in the analog signals. Thermocouple and RTD signals are susceptible to electrical noise and it is recommended that shielded cabling be used with the shield tied to system or Earth ground (preferred). The connection point of the shield should be made at the SLATE end of the cable. All analog signals should be separated from VFD (if present) cabling. Avoid running analog wires parallel to VFD wires (especially line voltage). The analog wires should never be placed in conduit with line voltage or VFD wires. Thermocouples The thermocouple circuit in the SLATE module uses a biasing voltage that is present on the wire sensing junction. Although the analog cell’s input is heavily protected against static and short term over voltages, it still possible to damage the input if care is not exercised in placement of the sense point (junction). The thermocouple sense point (junction) is required to be isolated from ground and other conductive paths. Failure to isolate the sense point may also result in additional electrical noise pickup on the thermocouple signals or offset readings. 11832-00014—01 Chapter 14: SLATE Wiring Basics SLATE™ INTEGRATED COMBUSTION MANAGEMENT SYSTEM R8001 Series 119 12032-00014—01 Chapter 15: SLATE Web Editor Chapter 15: SLATE Web Editor The SLATE Web Editor is an environment within the SLATE AX Tool to configure and design HMI (Human Machine Interface) screens for your application. This editor is installed at the time of the SLATE AX installation. Create a New Project you will be prompted to name that project through the following wizard. You will enter a new Project Name and Project ID. (Caveat we need to know what Project ID is). When the project is saved in the list, simply click on the project to take you to the Web Editor Designer. The Web Editor can be accessed through the SLATE Tools Start Page. In version 1.17 there are two ways to access the Web Editor. If you do not have any SLATE projects available you can use the Open SLATE Web Editor (Standalone) button to launch the Web Editor to work on screens without attaching them to a project. Using the Editor If you have projects have been built and you want to associate them with your Web Editor screens you can also select the Open SLATE Web Editor button after you highlight the SLATE project as shown above. A Click on either button. B C The page is divided three sections: Section A contains the information about edited file, project and buttons for widget operations. Section B contains the structured list of available widgets. Section C is the main editor area, where you will place desired widgets for your application When you expand selections in section B, you open another environment that allows you to customize widgets by setting their individual properties. It can be enlarged by clicking on the arrow in the upper left corner. You will be taken to the My Projects section of the Web Editor Tool. This page is designed to organize your projects. When you select SLATE™ INTEGRATED COMBUSTION MANAGEMENT SYSTEM R8001 Series 121 Chapter 15: SLATE Web Editor Adding new widgets is performed by making a selection from the given set and dragging it anywhere on the Editor Area (Section C). Whenever a single widget is selected, its attributes appear to the side of the work space. From this section you have the ability to “bind” the widget to a specific module, specific category and register. Some changes may be immediately visible on the widget, such as color, while some are invisible, such as register mapping. When you are satisfied with the editor content you can save it via the Save or or Save As . You can preview your work in simulation mode by clicking Preview or symbol. You need to save the work to preview it. Linking Dynamic Widgets Some widgets are static. They appear exactly the same way at all times. Bust some widgets can be dynamic and reflect values obtained from the SLATE Base Module (in the production mode) or from the local server (in the development mode). The widget can be linked to registers in the SLATE modules. For example, if you select an output widget (Numeric Output, Gauge, or Vertical Bar) it periodically asks for the value of the register and accordingly updates its value, image or shape. If you select an input widget, it displays the value provided by the server and if the user chooses to change it, the widget propagates this change to the server. As long as the widget is selected, it is not updated, so the user can perform the change. Editor Commands The SLATE Web Editor Commands are summarized in the table below. Button Shortcut Effect New Clears the editor content and file name. Open Loads the content of the chosen file into the editor area. Save Ctrl+S Saves the editor content into the previously chosen file, or asks for a file name if none was specified. Save As Asks for a file name and saves the editor content into this file. Preview Opens a new tab with the saved page in the simulation mode. Button Shortcut Effect Undo Ctrl+Z Reverts the last action. Redo Ctrl+Y Re-performs the last reverted action. Copy Ctrl+C Copies selected widget(s) into the editor clipboard. Cut Ctrl+X Copies selected widget(s) into the editor clipboard and removes the widget(s). Paste Ctrl+V Pastes the widget(s) from the editor clipboard to the editor area. Ctrl+A Selects all widgets. Up Alt+U Shifts the selected widget(s) to the front (above all other widgets). Down Alt+D Shifts the selected widget(s) to the bottom (below all other widgets). Align Buttons Alt+Num Arrows Aligning all selected widgets in the particular direction: 2 is down, 6 is right, 8 is up, 4 is left. Vertical Align Alt+V Align widgets by their center vertically Horizontal Alt+H Align Align widgets by their center horizontally Vertical Distribute Evenly distribute widgets vertically Alt+B Horizontal Alt+J Distribute Evenly distribute widgets horizontally In Grid Options Alt+Q Increase grid (for snapping when shift is held while dragging) In Grid Options Alt+A Decrease grid In Settings When designing page different from the default project resolution, the width and height can be changed here. Exit Project Navigates the browser back to the welcome page. Delete Del Deletes the selected widgets. The remaining operations are described in the following table. Operation Effect Right Click Invokes the context menu (on the widget or on the editor area). Ctrl + Left Click Toggles selection for the widget that has been clicked. Left Click widget + Drag If a widget was selected in the editor area, this widget is moved. Left Click resizing handle + Drag If the right or bottom bound or right bottom corner arrow is clicked, the widget is resized. 12232-00014—01 Chapter 15: SLATE Web Editor Operation Effect • Less than Left Click to open area + Drag A rectangle is shown, which can be used to select all widgets contained in or touched by the rectangle. • Greater than or equal to Left Click to open area + Drag + Ctrl With the control key the selection rectangle behavior is modified to select only those widgets that are completely contained within the rectangle. Right Click anywhere + Drag By using a right-click, only a selection rectangle occurs, that is if a widget happens to be at the position of the mouse-down it does not move, whereas a left click would select and move that widget. A rectangle is shown, which can be used to select all widgets contained in or touched by the rectangle. Right Click anywhere + Drag + Ctrl With the control key the selection rectangle behavior is modified to select only those widgets that are completely contained within the rectangle. Ctrl + Arrows Moves the selected widget(s) by one pixel. Alt Removes handles for resizing (to enable dragging of small widgets) and borders (to get a better idea about the final look of the page) Ctrl + Drag “Snap to object” feature is active while dragging (can be changed in Grid Options) Shift + Drag “Snap to grid” feature is active while dragging (can be changed in Grid Options) • Greater than • Equal to • Not equal to Boolean Section The Boolean section contains the following widgets: • Switch: a dynamic read/write widget working with two states on or off. • Binary Image: dynamic read only version of the Switch widget. It operates only with an On value. If On value is read from a register it shows an On state. • Button: a widget that represents a button commonly used in HMI applications. The functionality can be specified by the designer • Command: dynamic write only widget which sends specified values to a specified register when clicked Numeric Section • Link button: static widget acting as a link. When clicked, the user is navigated to a specific page Text Section The numeric section contains “widgets” that will work with numerical values. These widgets will display values from particular registers, slider bars that will allow you to change a numerical value to a particular register, gauges that will display values of registers using a gauge and a horizontal bar. The Output Image would allow you to display a specific image according to the numeric value of a register. It can compare the value to the stored conditions and display the image of a satisfied condition. It is possible to change the form of the conditions. The allowed operators are: • Less than or equal to SLATE™ INTEGRATED COMBUSTION MANAGEMENT SYSTEM R8001 Series The text section contains tools to create text on your display screens. • Text selection: provides rich formatted text. • Text Input: provides dynamic read/write widgets allowing you to change the text values of a particular register • Text Output: provides read only which displays the text value of a particular register 123 Chapter 15: SLATE Web Editor • Enum Text Output: dynamic read only widget which works with enumeration values of the register • Enum Select Input: dynamic read/write widget which works with enumeration values as a enumerated text output but it also allows you to change the value • Tooltip: allows you to create tool tips when hovering mouse over a specific area • Conditional Text: dynamic read-only variant of the output image widget with the ability to handle texts instead of images Container Section This section is dedicated to fuel air commissioning. • Graph: displays the curves, points, throttle positions, presets, status of the throttle, validity of the segments and curve selection • Table: all fuel air widgets are designed in a way that the form a table. Always displays all available curves in columns • Command Buttons: widgets representing buttons sending a fixed value to a fixed register of a module defined by Fuel Air Module selector widget • Movement Buttons: widgets that simply send the movement commands to the server • Movement Control: widgets having impact on movement • Trim: widgets dedicated to fuel air trimming Media Section This group contains widgets, into which other widgets can be placed. • Pane: static widget which can be used for inheritance or styling reason • Tab: static widget useful for diving the content into tabs that can be added and removed • Disabling Pane: widget that reads a given register value and compare it with a given value • Hyperlink Area: widget that allows you to define areas that when clicked takes you to a specified location • Model Dialog Box: tightly linked to the Open Dialog Button widget. Allows you to create custom modal dialog windows and buttons to invoke them. • Rectangle: widgets representing rectangles with a wide variety of options for styling • Line: widgets representing lines with a wide variety of options for styling and placement • Image: a widget representing an image that can be given a link • Audio: allows you to play audio with audio files • Video: allows you to play videos with video files Special Section • Open Dialog Button: the only widget that can invoke Modal Dialog windows Fuel Air Commissioning Section • Module: widgets having impact on inheritance • Register: widgets having impact on inheritance • Resolution Redirect: special widget that can be sued to react to different browser resolutions • Authentication: widgets contained in this section are tightly related to the user authentication, logging in and out, password management and widgets to the logged user 12432-00014—01 Chapter 15: SLATE Web Editor Icon SLATE™ INTEGRATED COMBUSTION MANAGEMENT SYSTEM R8001 Series This section provides a library of widgets for use that are indicative of commercial or industrial equipment. 125 12632-00014—01 Chapter 16: SLATE Project Manager and Kit Loading Chapter 16: SLATE Project Manager and Kit Loading Overview The SLATE Project Manager function allows the user to tie the SLATE AX wire sheet to the Web Editor and transfer the required files as necessary. It is the first step to creating a SLATE Kit. In order to use the Project Manager function, a SLATE device must exist in SLATE AX Tool. Click the “Project Manager” button. Click the “Find Station Device” button to locate the SLATE device we want to add. The SLATE AX Tool Station list shows all created stations and the SLATE AX Tool Device List shows all created and built devices with that station. The SLATE Project Manager window will show all existing projects. Click the “Add Project” button to add a project. You will enter a wire sheet project name. Next, name the web portion of the kit. See example below. SLATE™ INTEGRATED COMBUSTION MANAGEMENT SYSTEM R8001 Series 127 Chapter 16: SLATE Project Manager and Kit Loading You can select the screen size for which your web pages will be designed. This will limit the size of the Web Editor work space to that available on a screen with the selected resolution. You will need to define what elements the kit will contain. Click the “OK” button when you are finished. Now that you have a SLATE project identified and named you can highlight it and build a kit. Click on the “Open Kit Generator.” You are also given the option to lock kits down. Locking the kit insures that no one will have access to make any changes to the SLATE Base without the key certificate. Certificates are a way of protecting the kit. The screen shots below allows you to create access and locks the base down only allowing you to create kits for that specific base. 12832-00014—01 Chapter 16: SLATE Project Manager and Kit Loading The next step to loading the kit once it is saved to a thumb drive is to open up your Chrome browser and accessing the SLATE Base via the PC on the network or to go to the generic menu on the 7” display on the network. Default URL: 192.168.92.10 When you have selected the kit type, click the “Build SLATE Kit File” button and save the kit to your preferred location. The kit is installed into the SLATE base via a thumb drive. SLATE™ INTEGRATED COMBUSTION MANAGEMENT SYSTEM R8001 Series Click the System Tools 129 Chapter 16: SLATE Project Manager and Kit Loading Click the “DESIGNER KIT” button The default Password for the Designer ID is “SlateDesignerPassword” or “SlateInstallerPassword”. Capitalize the password as written. Once you have selected “Designer” for the User ID and typed in the password, click the “Request RIN” button and check the SLATE base display for a six digit number. Type in the number in the RIN field and include the dash! You have 3 minutes before the system times out. If the system times out, you can re-initiate a log-in procedure from the top. The SLATE system forces a local presence at the SLATE base in order to log in (and load a kit or carry on any other function requiring log-in. At this point, the user must have either Designer or Installer access in order to load a kit into the SLATE base. Logging in with the appropriate credentials is required. At this point you are given the option of changing the password. At this time do not change the password. Click the “OK” button to proceed to the log-in window. Select the credential level from the “User ID” drop down menu. Select “Designer” or “Installer” 13032-00014—01 Chapter 16: SLATE Project Manager and Kit Loading Find your project in the “File” field and click the “Install Designer Kit” button. Allow the kit to load. This process may take a few minutes so be patient! At the end of a successful load you will see “Kit Loaded Successfully.” Click on the “X” to close the log-in window. You will be logged in as either Designer or Installer. But the screen shot above indicates Designer as an example. You are now returned to the Designer Kit page. SLATE™ INTEGRATED COMBUSTION MANAGEMENT SYSTEM R8001 Series 131 32-00014-01 Automation and Control Solutions Honeywell International Inc. ® U.S. Registered Trademark. 1985 Douglas Drive North © 2015 Honeywell International Inc. Golden Valley, MN 55422 32-00014—01 M.S. 09-15 customer.honeywell.com Printed in U.S.A.