1
MASTER’S THESIS SUBMISSION FORM
Type of Document
Author
Author’s e-mail
Thesis Title
Degree
Subject
Keywords
Committee Members
Date of Defense
Availability
Abstract
M. S. Thesis
AVROM PANCER
The Study of Video Game Design and the
Implementation of a Game Using 3DGameStudio
Master of Science
Computer Science
“3D Game Design” 3DGameStudio Gaming
1. Prof.
2. Prof.
3. Prof.
4. Prof.
This thesis will explain how to design and program a
game using 3DGameStudio. It will include topics on
how to design the level using a three dimensional
level editor and how to program the game using a cbased scripting language. It discusses the basic
artificial intelligence and special effects required for
a high-quality three dimensional game.
Signature_________________________
Date:___________________
CSIS THESIS/DISSERTATION USE AND ELECTRONIC
PUBLICATION CONSENT FORM
I, AVROM PANCER, (the “Author”) herby grant to Pace University the right to display
on Pace’s Web site my thesis titled “The Study of Video Game Design and the
Implementation of a Game Using 3DGameStudio” (the “Materials”) alone or in
combination with other thesis papers for use by researchers, students and faculty in any
and all formats and by means of technology now known or hereafter to become known,
and to reserve copies in its libraries in hard copy or electronic form.
Pace University shall give the Author credit in connection with the use of the Materials
by identifying Author in a prominent manner.
Signature_________________________
Date:___________________
Pace University
Date:
Student’s Name: Avrom Pancer
Date of Graduation: Spring 2005
Title of Thesis: The Study of Video Game Design and the Implementation of a Game
Using 3DGameStudio
This will certify that the above thesis has been approved in fulfillment of the thesis option
for the Degree of Master of Science in Computer Science.
Student’s Signature
______________________________
Thesis Advisor
______________________________
Committee Member
______________________________
Committee Member
______________________________
Committee Member
______________________________
Department Chair
______________________________
Dean
______________________________
Date
______________________________
THE STUDY OF VIDEO GAME DESIGN AND THE
IMPLEMENTATION OF A GAME USING
3DGAMESTUDIO
by
Avrom Pancer
A thesis submitted in partial fulfillment of the
requirements for the degree of
Masters of Computer Science
Pace University
School of Computer Science and Information Systems
Professor Mehdi Badii – Thesis Advisor
Fall 2004 – Spring 2005
PACE UNIVERSITY
ABSTRACT
THE STUDY OF VIDEO GAME DESIGN AND THE
IMPLEMETATION OF A GAME USING
3DGAMESTUDIO
by Avrom Pancer
Chairperson of the Supervisory Committee: Professor Murthy
Department of Computer Science
This thesis will explain how to design and program a game using 3DGameStudio. It will
include topics on how to design the level using a three dimensional level editor and how
to program the game using a c-based scripting language. It discusses the basic artificial
intelligence and special effects required for a high-quality three dimensional game.
TABLE OF CONTENTS
Introduction........................................................................................................................7
Chapter 1
The Basics .....................................................................................................9
Chapter 2
Level Editor................................................................................................14
Chapter 3
Script Editor...............................................................................................34
Chapter 4
Entity Movement .......................................................................................38
Chapter 5
Special Effect and Basic AI.......................................................................44
Chapter 6
Developing a First Person Shooter Game................................................51
Chapter 7
Developing a 3D Flying Game ..................................................................54
Chapter 8
Path Finding ...............................................................................................62
Glossary ............................................................................................................................68
Appendix A The Ackermann Function in C-Script.....................................................69
Appendix B Entity Movement Using C-Script............................................................71
Appendix C Entity Movement implementing Collision Detection ............................73
Appendix D Entity Rotations and Camera angles ......................................................75
Appendix E
A 3D Game Implementing Entity Animations and Effects..................77
Appendix F A 3D Game Implementing Advanced AI and Effects...........................85
References .......................................................................................................................124
Introduction to 3DGameStudio
7
Introduction
To create a 3D game we need three components: levels, models to put into the
levels, and some sort of programming language to make everything run. 3DGameStudio
has all of these components.
3DGameStudio, which is based on the Acknex game engine, is comprised of three
programs: a model editor called MED, a level editor called WED, and a script editor
called SED. By using all these three components together you will be able to create
almost any kind of 3D game.
If you prefer to program in C++ instead of using the script editor 3DGameStudio
allows you to manipulate almost anything in your game using their C++ SDK. This
allows an experienced programmer the ultimate flexibility to create the perfect game.
3DGameStudio allows you to import levels, models, sprites, and maps from
numerous other programs; this allows game designers to use programs that they are
already familiar with.
Like C++ and Java, 3DGameStudio is based on an object oriented methodology.
Each entity, block, or group of blocks is considered an object. These objects can be used
over again and over again by simply copying and pasting them. So if you have a hallway
or room that you want to duplicate you simply copy it instead of rebuilding it from
scratch.
The game engine is the core of the development system. It generates the 3D
images and controls the behavior of the virtual world. Due to its combined BSP-Tree and
terrain renderer, 3DGameStudio's engine handles indoor and outdoor sceneries equally
well. It has a lighting engine that supports true shadows and moving light sources. The
threefold culling algorithm renders huge worlds of 100,000s of polygons with over 70 fps
even on old hardware. Programmers can use the plug-ins for adding new effects and
features.
3D Engine1
• Six degrees of freedom, multiple cameras and render views
• Supports DirectX 9, DirectPlay, DirectShow, DirectSound
• Window or full screen mode
• BSP/PVS, Portal and frustrum culling
• Geometric LOD and trilinear mip mapping
• Static and dynamic point, spot, and directional light sources
• Static and dynamic shadows
• Colored fog areas
• Portals and mirrors
• Vertex and pixel shaders, HLSL/Cg and asm shader languages
• Bump and environment mapping
• Multitexturing (up to 8 textures), light maps, detail textures
• Material properties for static and dynamic objects
• Animated 3D sprites and decals
• Seamless indoor and outdoor support with deformable multitexture terrain
1
Specs for 3DGameStudio was obtained from http://conitec.com/a4info.htm
Introduction to 3DGameStudio
•
•
•
•
•
•
8
Models with mesh deformation, bones and vertex animation, animation blending
Programmable particle and beam generators
Sky system with animated layers and backdrop bitmaps
2D renderer for still images, 2D sprites, panels, buttons, sliders, overlays, True
type and bitmap fonts, screenshots and movies
3D views and movies can be rendered to curved surfaces, for distortion or fisheye
effects
Programmable 2D and 3D effects like lens flares, bullet holes, cartoon
rendering etc.
Game Engine
• Polygon level collision detection
• Physics engine supports gravity, damping, elasticity, friction, and hinge, ball,
wheel, and slider joints
• 3D sound sources (WAV and OGG) with Doppler effect
• Slow motion / quick motion effect
• Arbitrary axis rotations for space and flight simulators
• Path tracking for camera, actors or vehicles
• Mouse picking and manipulating of 3D objects
• Save / Load system for resuming games at arbitrary positions
• Multi-player client/server mode for LAN and Internet (TCP/IP, UDP)
• Multizone/multiserver support for massive online multiplayer games
• Expandable through DLL plug-in interface
We will be going through the functions of each of the three programs in this
package. This will give you an idea of what each program does and how each function
works. With the information obtained from this thesis you will be able to produce
commercial games using this software package.
Before you start creating your 3D game you must first plan out exactly what the
object of the game will be and how you want it to look.
After you figure out what your game is about, in most cases you will want to start
with the level editor, WED. With this program you will design the levels for your game.
You will create rooms, hallways, doors, etc. After you created the level you will then go
to the model editor program, MED. With this program you will create the characters and
moving objects of the game. You will then go to the scripting program, SED. With this
program you will write a program to control everything in the game. Finally, after
everything is complete you go back to the WED place everything that you created in
MED in the proper places in the level, assign the programming code from SED to all the
different parts of the level, then you compile the program and run it.
The above scenario usually doesn’t happen; in most instances you will be
switching from program to program tweaking code, editing models, and adding and
changing levels.
To create a good fully functional 3D game takes a lot of time, patience, and
creativity.
Chapter 1 / The Basics
9
Chapter 1
The Basics
Introduction
In this chapter we will go through the basic steps to create a game. You will get a
feel of how each part of 3DGameStudio functions.
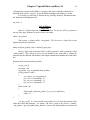
First Program
I have included a folder called “The Basics”; this is just to get you started. In
Chapter 2 we will go through how to create a new level from scratch. Inside the folder
there are a few files, double click on the one called .TheBasics.wmp”, this should open
the WED program. Your screen should look like this:
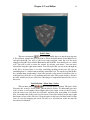
The file “TheBasics.wmp” is a file that I created, all it has right now is a hollow
cube that has a stone texture. This will be the room for our small project. Now we will
add a table; click on “Object” which is on the icon bar and then click on “Add Prefab”,
this will open the “Add Prefab” browser. On the left side of the browser click on
“FURNITUR”, on the right side there will be a list of different furniture that you can add
to your level, click on “TABLE4” and click “OK”. You will now see a small red table in
middle of your screen. On the icon bar click on the “Lock Selection”
on the “Scale”
button and then
button. Now click on the red table in the top view and drag the cursor
Chapter 1 / The Basics
10
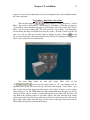
and make the table bigger; then in the back view do the same thing. Try to make your
table look like this:
Now click the “Move”
button and in the back view drag the table to the lower
right and corner and line it up to the floor like this:
Chapter 1 / The Basics
Now on the icon bar click “Build”,
11
click “OK” and then after the level is built
click “OK” again. Click “Run” and then “OK”. You should see a room with a wooden
table in it. You can move around using the mouse and the arrow keys. After you are
finished moving around the level hot the “Esc” key to exit.
Now we will put a stool model into the room. First let’s open the model editor,
MED; we will not be creating any models we will just get the feeling of the program.
Click on “File”, “Open”, and in “TheBasics” folder double click on “stool”. This layout
looks almost the same as the WED layout. Model editing is its own component of game
design and we will not be going into it with much depth. Also the MED editor is not a
very powerful program and most model designers will use other programs such as
3DStudioMax to create models. Once the model is created it can be imported into MED
and be converted into an .mdl file so it can be used with 3DGameStudio. Another
problem with MED is its skin editor; click on “View” and then “Skins”, this is the skin
editor. You will notice that the skin looks wavy; this is because it’s a 2D representation
of a 3D object. For this reason most model designers use graphic programs such as
PaintShop Pro to create skins for their models. Close the MED and do not save any
changes.
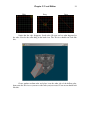
Back in WED click on “Object” then “Load Entity” and then double click on
“stool”. You should now see a small red stool in the center of the room. Now click on
“Scale” and in the back view drag the stool and make it bigger, then click on the “Move”
button and move the stool to the table. Try to make it look like this:
Build and run the level again, as expected you see a table and a stool, now exit the
level.
Now for the fun part, we will write a script to move the stool. Click on “File”,
“Map Properties”, “New Script”
button, select “Empty Script”, click “OK”, and then
close the Map Properties box. On the left side of the screen you will see the Project
Toolbar click on the right arrow until you see the Resources tab, then click on it.
Click on the “+” next to “script files” and then double click on
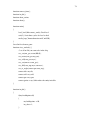
“THEBAS~1.wdl”, this will open the C-Script Editor, SED. Copy and paste the code
below into SED.
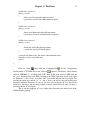
Chapter 1 / The Basics
var video_mode = 8; // sets screen size 1024x768
var video_depth = 32; // sets colors to 32bit (16.7 million)
var video_screen = 1; //full screen
function main()
{
level_load("TheBas~1.wmb"); // loads new WMB level
wait(3); //wait for level to load
}
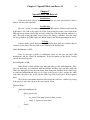
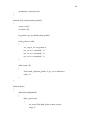
action stool
{
//my is the current entity; in this case it is the stool.
my.narrow = on; // next three lines is used for collision control
my.fat = on;
c_setminmax(my);
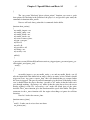
while(1)
{
//if up arrow key is pressed
if(key_cuu == on){
//move stool up with collision control
c_move(my,vector(0,0,2*time),nullvector,glide);
}
//if down arrow key is pressed
if(key_cud == on)
{
//move stool down with collision control
c_move(my,vector(0,0,-2*time),nullvector,glide);
}
//if right arrow key is pressed
if(key_cur == on)
{
//move stool to the right with collision control
c_move(my,vector(0,2*time,0),nullvector,glide);
}
//if left arrow key is pressed
if(key_cul == on)
{
//move stool to the left with collision control
c_move(my,vector(0,-2*time,0),nullvector,glide);
}
12
Chapter 1 / The Basics
13
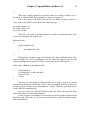
//if the a key is pressed
if(key_a == on)
{
//move stool foward with collision control
c_move(my,vector(2*time,0,0),nullvector,glide);
}
//if the z key is pressed
if(key_z == on)
{
//move stool backward with collision control
c_move(my,vector(-2*time,0,0),nullvector,glide);
}
//if the r key is pressed
if(key_r == on)
{
//rotate the stool with collision control
c_rotate(my,vector(0,2*time,0),glide);
}
// wait for one frame cycle, this allows other function to run.
//must be used in every while-loop
wait(1);
}
}
Click on “Save”
, then click on “Configuration”
. In the Configuration
window under “CSC/WDL file to run” click on
, then in “The Basics” folder double
click on “THEBAS~1”, and then click “OK”. Back in the main screen of SED click on
the “save” button and close the SED. Go back to the WED, right click on the stool, click
on “Behavior”, select “stool”, and click “OK”. Now build and run your level again. Try
pressing the arrow keys and the “a”, “z”, and “r” keys; you will see the stool moving and
rotating in different directions. (If you are too close you can hit the “0” key and use the
arrow keys, the mouse and the mouse buttons to move around the level; once you have a
good view hit the”0” key again.)
This is our first program; it is very simple but it introduces the major parts of the
3DGameStudio package.
Chapter 2 / Level Editor
14
Chapter 2
World Editor / Level Editor
WED
Introduction
WED is the editor used to create a level or levels for your game. With this editor
you create the actual level and add the models created in MED and scripts created in
SED. WED compiles and generate the BSP tree for the Acknex game engine.
•
•
•
•
•
•
•
•
•
•
•
•
•
•
WED has the following features:
Object oriented grouping and scoping
Object move, rotate and scale manipulations
Prefabricated block objects
Block vertex, edge and face manipulations
Block hollowing and subtraction
Undo operations
Entity property editing
Wire frame / Solid Polygons / Texture previews
Easy map navigating interface
Texture bookmarks
Texture move, rotate and scale manipulations
Multiple texture files manager
Compiling WMB files and running the engine from within the program
Publishing the game or application (not available in the academic version)
We will go through all of these features and explain each one and how to use
them to create a great looking game level(s).
Basic Theory of Level Editing in 3DGameStudio
There are two kinds of objects that can be placed in the level either a block or an
entity. A block is pretty simple to explain, as by its name it’s a basic building block
consisting of six sides. An entity on the other hand is a little more complicated. It can be
a terrain, model, map or sprite. A short explanation of each is as follows. A terrain is
textured rectangular grid of height values; this is used as a landscape. A model is an
animated 3D object, such as a person, monster, etc. Both of these are created in MED. A
map is a 3D object made up of many blocks; this can be used to create doors, elevators,
etc. This is created in WED. A sprite is a 2D object; it can be a picture on a wall, used for
lights, explosions, etc. It is not important right now that you fully understand what each
item is it will be explained in greater depth as we cover each topic.
Chapter 2 / Level Editor
15
User Interface
We will now start going through the WED’s user interface and each of its
function will be explained. We will start by opening up the WED program. You should
see a plain grey screen. Make sure to maximize the screen by clicking the maximize
button on the upper right had corner of the window. This way you will be able to use as
much room as possible for editing.
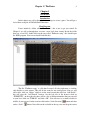
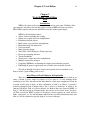
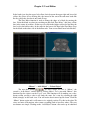
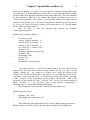
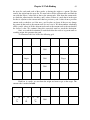
Click File on the menu bar and select New. Your screen should now look like
this.
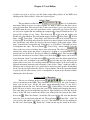
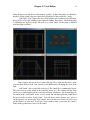
Views
The four boxes on the screen each show you a different view of the level. The
three black boxes with the grids are 2D, each showing a different side of the level, top,
back, and side. The grey box is a 3D view of the level. You can add as many views as
you like by clicking View on the menu bar and selecting Add View. In the beginning you
will find it a little difficult to place objects precisely where you want them. After you
learn how the four views display the objects you should have no problems.
Project Toolbar
On the left side of the screen there is a white box, this box is called the Project
Toolbar. It has four tabs Objects, Views, Textures, and Resources. This toolbar keeps
track of all the different components used in the game design. We will be using this
toolbar throughout the game design and all its functions will be explained.
Chapter 2 / Level Editor
16
Icon Bar
We will now go through the buttons on the icon bar. Most buttons that are on the
icon bar have a keyboard shortcut. You can view them by clicking on File on the menu
bar, click on Preferences, and then select the Key tab. You will see a list of Commands in
the Command List box. By clicking on the command you will see the current shortcut
and then you can assign a new shortcut. For example, when you click on undo you will
see that the current shortcut is Ctrl+Z, so whenever you press Ctrl and then Z together in
WED it will undo the last action that you did. If you don’t like the current shortcut you
can change it by clicking in the New Shortcut box and typing in the shortcut that you
prefer. As we go through the different commands I will add in parentheses the default
shortcut for that command.
There are many ways of doing each command, as we go through the commands I
will be using different methods for the same commands and you can pick which ones
work best for you.
New – Open – Save
The first three buttons,
are simple, they are the same as many
programs. The first creates a new empty level, the second opens an existing level from a
file, and the third saves the current level. Click Save and give your project a name and
save it. Before you start each step you should save your project so if you do something
wrong and you can’t reverse it you can just close the project without saving and then
reopen it to the last saved spot.
Copy – Paste – Undo
The next three are also standard in most windows programs.
The first
copies whatever is currently selected and places it into the clipboard (Ctrl+C), the second
pastes whatever is in the clipboard (Shift+Insert), and the third undoes the last action.
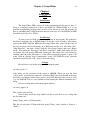
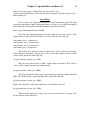
You should already have an empty new project opened (if you didn’t, click on the
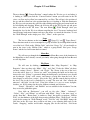
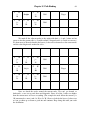
first button of the icon bar). We will start by adding a hollow cube. Click on Object place
the mouse over Add Hollow Cube and then select Large. You will notice in the Project
Toolbar that a group was added. Click on the + sign next to Group. Your screen should
look like this:
Chapter 2 / Level Editor
17
You will notice that in the Project Toolbar under group there are six blocks. This
is because a hollow cube consists of six sides. Each block is a side of a cube and the
group is the complete cube. Now look at the four views. The three 2D views show the
different sides of the cube and the 3D view shows the cube in 3D. Click anywhere in any
of the views outside of the cube. You will notice that the cube will turn white. This is
because the cube is not selected anymore. When an object is selected it will be red
otherwise it will be white. You can select multiple objects and apply single command to
all of them. We now have a plain untextured cube in our level. We must add a texture to
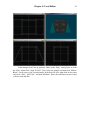
the cube in order to compile a level. Click on View and select Textured (F7), this allows
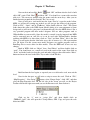
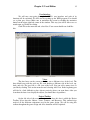
the 3D view to display a textured picture. Now click on Textures tab in the Project
Toolbar. You will notice under default.wad a basic brick texture. Select the cube and
double click on brick texture. Now unselect the cube. In the 3D view you will see the
cube look like this:
Chapter 2 / Level Editor
18
Build – Run
The next two buttons,
the first button builds the level and the next one runs
it. We will now compile the level and run it. Select the build button, Select Build Level,
and then click OK; you will see the level being compiled. After the level has been
compiled click OK. Next click the Run button and click OK. You should now see a brick
wall. You will be able to rotate the camera by moving your mouse. You can move
forward by using the right mouse button. You will notice that you can move through the
walls, this is because there is no script controlling anything in the level. All you are
controlling now is a default camera moving around the level. To exit the level hit the Esc
key. Another thing worth noting is that if we inserted a cube instead of a hollow cube we
would not have been able to see anything inside the cube. The reason for this is because
the cube would have been a solid mass consisting of a single block instead of the six we
have now.
Lock Selection – Select None – Select
The next three buttons
has to do with object selection. The first is Lock
Selection, the second is Select None, and the third is Select. To understand how they
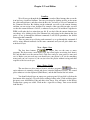
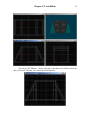
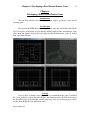
work we have to add another object. Right click in the center of any of the 2D views,
place the curser over add, then over add cube, and then click on medium. You should
now see another cube in the center of your screen. Now click and hold on the upper right
hand corner of any of the 2D views. Drag the curser to the lower left hand corner of that
view. As you start dragging the cursor you will see a selection box, make sure that the
box encloses both cubes.
Chapter 2 / Level Editor
19
If you are having trouble selecting both cubes you can move around the view by
right clicking and holding anywhere in the view then drag the cursor. After both cubes
are selected click on Lock Selection. Now try clicking anywhere on any of the views.
You will notice that the two cubes always stay selected; this is because Lock Selection is
enabled. This feature is useful when manipulating a group of objects, if you accidentally
click somewhere on the screen you wont loose the selection. To continue we first must
disable the Lock Selection. Now click on the Select None button, as you would expect it
deselects both cubes. This button works even if Lock Selection is enabled. Next button,
Select, changes the mode to Selection Mode, it is used to make selecting object easier.
Click on Select; now click in the center of any of the 2D views. You will see that the
hollow block is selected, click again and the solid cube will be selected. Each time you
click it will cycle through the cubes that are under the cursor. This is a standard feature
that can be used in any mode. Click on Select None, and then click on the center of any
of the 2D views. The hollow cube will be selected. Hold down Ctrl and click on the
center of the view again, now both cubes are selected. This feature is used when you want
to select multiple objects that are at different places in the world.
Move – Rotate – Scale
The next three buttons,
, have to do with object manipulation. The first
is “Move”, the second is “Rotate”, and the third is “Scale”. We will start with “Move”;
this function moves any object that is on the WED. Select the medium cube and then
click “Move”; this will set the program to “Move Mode”. In the top view click and hold
the cube, drag in to the right, and line it up with the side of the hollow cube. While you
are moving the cube watch the 3D view and see what you are doing. Since you are
moving the cube in the top view, when you move it up and down you will see in the 3D
Chapter 2 / Level Editor
20
view that you are really moving it right to left. Now click on the medium cube in the back
view and drag it down to be level with the hollow cube.
The next function “Rotate” rotates any object in the WED. Click on “Rotate”, this
will set the program into “Rotate Mode”. In the top view click and hold the hollow cube,
drag the cursor either right or left while watching the 3D view. Do the same for the other
two 2D views and the other cube. You will see that each view rotates the cube on a
different axis. After you finished with the rotations and have a basic feeling how it
functions make sure that you place the cubes back to the way they were.
Save your project before continuing. The next function “Scale”, scales any object
in the WED. This function is limited to scaling at 2D at a time; this limitation limits
confusion while scaling. Click on “Scale”, this will set the program to “Scale Mode”.
Click on a cube in any of the 2D views, and drag the cursor. Depending on which way
you drag it that is how the cube will be expand or retract. As in the rotations try it in all
the 2D views while watching the 3D view. You should also note that the width of the
walls in the hollow cube change when you scale the cube. This will be important later on
when we make doorways between rooms. If you hold down Ctrl while scaling it will
scale proportional; this means the original ratio of all six sides will be kept. Try to make
the cubes back to the way they were. If you can’t, close the project without saving and
Chapter 2 / Level Editor
21
reopen it; if you saved it right before you started scaling the cubes, they should be back in
the correct positions.
Vertex Move – Edge Move – Face Move
The next three buttons,
, actually changes a block. The first is “Vertex
Move”, the second is “Edge Move”, and the third is “Face Move”. With the exception of
“Vertex Move” these function only apply to solid blocks. (We will see later that “Vertex
Move” can also be used with paths.) We will start with “Vertex Move”; this function is
used to change the shape of a block by moving the vertices. To start we will set up the 3D
view so we can see what we are doing when we change the cube. Click on
(we did
not cover this button yet) and rotate the cube in the 3D view by clicking and dragging the
cursor. Try to make the view look like this:
One more thing before we start with Vertex Move click on the
“W”
on the icon bar until it turns to “D”, this function will be
explained later. In any 2D view select the solid cube and click on “Vertex Move”; you
will see four yellow dots appear on each corners of the cube. To move a vertex simple
click and drag a dot. The WED limits the cube manipulation that the cubes can not be
concaved. If you concave a cube a warning will appear; if you click “OK” the cube will
snap back to the original position, if you click “Ignore” the cube will stay in its current
concaved form but you can end up with errors in the level. In the top view click on the
upper right corner of the cube and drag it in the center of the upper left corner and the
lower right corner thereby creating and triangle.
Chapter 2 / Level Editor
Click
Drag
22
Drop
Notice that the edge disappears. Look at the 3D view and see what happened to
the cube. Now do the same thing in the back view. The 3D view should now look like
this:
Create another medium cube and place it on the other side of the hollow cube;
then rotate the 3D view so you can see the cube you just created. Your screen should look
like this:
Chapter 2 / Level Editor
23
The Move Edge function is used to change the shape of a block by moving the
edges. If the new cube is not selected select it now and then press “Edge Move”; this
place yellow dot at the center of each edge. If you look in the 2D view it looks like the
corners of the cube have a yellow dot on them; but if you look in the 3D view you can see
that these are really on the edge of the side going down.
Chapter 2 / Level Editor
24
In the back view drag the upper left yellow dot in between the upper right and lower left
yellow dots. Since we are moving the edge instead of the vertex the cube now looks like
the first solid cube does but it only took on step.
The Face Move function is used to change the shape of a block by moving the
face. Select the block we where just working on and click “Face Move”; this place yellow
dots in the center of each face. In the top view click in the highest yellow dot and drag the
face level to the hollow cube; do the same for the lowest dot. Repeat the Face Move steps
for the block on the other side of the hollow cube. Your screen should now look like this:
“Mirror” – “Add Object” – “Delete Object”
The next three buttons,
, are fairly simple; the first is “Mirror”, the
second is “Add Object”, and the third is “Delete Object”. Let’s start with “Mirror”; this
function flips the vertices on the X or Y axis. This function will do nothing on a cube,
because when you flip a cube it still looks the same. Let’s start by selecting the right
block (triangle) on the back view. You will notice that it turned upside down. Click the
“Mirror” button again and it will return to its original position. Try this in the other 2D
views and note each rotation; after return everything back to how they where. The next
two buttons are simple. Clicking on the “Add Object” button a list comes up of what kind
Chapter 2 / Level Editor
25
of object you want to add (we saw this before when adding objects to the WED) and
clicking on the “Delete Object” deletes the selected object.
Object “Snap”
The next buttons on the icon bar,
, have to do with object
movement. When we move two cubes together we want to make sure that there are no
spaces between them. The reason for this is that even if there is just a one pixel space in
the WED when the user plays the game there can be a noticeable gap. Also if the cubes
are very close together but not touching the compiler takes longer to build the level. To
prevent this spacing we use “Snap”. The check box
on the icon bar enables and
disables the snap function. The next button toggles between “Delta Snap”, “World
Snap”, and “Local Snap”. “Delta Snap” only allows the object to be moved relative to
its own origin, World Snap only allows the object to be moved relative to the level origin,
and “Local Snap” only allows the object to be moved relative to the group origin. “Delta
Snap” should also be used when using “Edge Move” or “Face Move”, this makes it easier
to manipulate the cubes. The next button,
“Vertex Snap”, when enabled snaps the
object to the next vertex of another object in the same group. The slider bar
controls how many quants the object is snapped to. A quant is a measurement used to
measure the size of the level. The level is limited to 100,000 quants. The last button
restricts the movement of an object. When set to the default
an object can be moved
you can only move the object right and left
in any direction, when set to right and left
relative to the view, and when set up and down you can only move the object up and
down relative to the view. Try moving around the different objects in the level using the
different movement functions and restrictions. Some of the “Snaps” might not make a
difference, this is because the level is small and we don’t have many groups. If something
doesn’t line up just right adjust the slider to a lower number. The move restriction button
is great if you just want to move, resize, or manipulate an object in one direction without
affecting the other direction.
Camera and Eye Movement
The next set of button on the icon bar
has to do with camera
and eye movement in the WED. These functions are used to give the game designer a
better view of the level. All the 2D views when manipulated move as one and is
“Camera Move” has two functions.
independent from the 3D view. The first button,
In the 2D views it allows you to move the view by left clicking and dragging the mouse.
The same thing can be accomplished any time by right clicking in a view and drag the
mouse. In the 3D view it rotates the whole view around with you being in the center.
Next is the
“Move Eye button”; in both the 2D views and the 3D view this function
moves the level up and down right and left. The next button
“Rotate Eye”, in the 3D
view it rotates the whole level on the x or y axis. This function does not do anything in
the 2D views. Next button,
“Zoom Eye”, zooms in and out, this works in all views.
Chapter 2 / Level Editor
26
The next button,
“Camera Position”, controls where the 3D view eye is and where it
is looking at. When you click the “Camera Position” button you will notice in the 2D
views a red box and a yellow box connected by a red line. The red box is the position of
the eye and the yellow box is the position then the eye is looking at. With this function in
the 3D view you can rotate the world by right clicking and dragging and zoom in and out
by left clicking and dragging. When you are doing this in the 3D view the red and green
“Walk Through” takes you
boxes will move in the 2D views. The next button,
through the level in the 3D view without compiling the level. You move backward and
forward using both mouse buttons and move the mouse to control the direction. To exit
the “Walk Through” mode simple press “Esc”, “Enter”, or the space bar.
Scope
The last two buttons on the icon bar are
“Scope Up” and
”Scope Down”.
These functions make it easier to manipulate a group of blocks by isolating them from the
rest of the level. Click on the “Hollow Cube” and select “Scope Up”, all you should see
now in the views is the “Hollow Cube”, which is a group blocks. Now press “Scope
Down” and the level will return back to normal.
Menu Bar
We will now go through the functions on the Menu Bar, most of the functions in
the Menu Bar we have already covered previously when going through the Icon Bar and
we will skip them.
File Menu
We will start by clicking on “File” and then “Map Properties”, in “Map
Properties” there are three tabs “Main”, “Fog”, and “Sun”. Under the “Main” tab there
are three settings “Nexus”, “Palette”, and “Script”. The “Nexus is the size of the level;
leave this unless there is a “Nexus too small” error during the build and in that case
increase the size. “Palette” is generated during the build process and in most cases should
not be changed. “Script” adds, creates, and removes c-script files from the level. (In a
later chapter we will cover c-script.). Next is the “Fog” tab this controls the fog colors in
the level. Fog in the level is controlled by c-script. The next tab “Sun” controls the
universal “sun light” for the level. Using this feature it is easy to create skylights,
shadows, etc. It has settings for the color, ambient, azimuth, and elevation.
“Starter”, “Resources”, and “Publish” are not available in the Academic Version;
they are used to publish the game.
Next click on “Preferences”, you will see five tabs, “Main”, “Advanced”,
“Colors”, “Key”, and “Editors” we will start with “Main”. “Snap” is the same “snap” as
on the “Icon Bar”. “Rotate Snap” is similar to “Snap” but applies to rotations. “Hollow
Wall” sets the thickness of the wall when creating a hollow object. “Walk Speed” sets the
speed for the camera in “Walk-Through” mode. “Grid Lo” and “Grid High” change the
grid lines in the 2D views; these work in real time so try adjusting them and see the
results. “Snapping” enables and disables snapping (like on the icon bar). “Grid Auto
Chapter 2 / Level Editor
27
Size” automatically changes the grid when you zoom in and out. “Invert Mouse” inverts
the controls for the 3D view during the “Walk Through”. “Show Entities” toggles
whether or not to display the entities in the WED. “Group Sub Pieces” automatically
groups blocks together that where broken up by “CSG Subtraction” (we will explain this
later). “Startup Recent” automatically loads the last level when the WED is started.
“Duplicated Offset” sets the amount duplicated blocks are moved from the original
block’s origin. “Video Out” is the video settings used in the 2D and 3D views in the
WED. These should be set to “gxl2dx8a.dll”, if you are having display problems with
your views you can change it to “GXL_BASE” but you will have problems when it
comes to lights and paths.
Next click on the “Advanced” tab. “Unsaved Query” if checked you will be
prompted to save changes to your project before closing it. “Bound Box During Changes”
when moving an entity in the WED should the entity look like the entity or the bounded
box of the entity(this is useful because if the bounded box is in a wall the entity will not
be able to move if collision detection is on). “Save In Win Position” saves the WED
layout with the level. “Animated Textures” enables animation in textures. “Auto Default
Layout” The WED goes back to its default layout after the views are scaled on if it went
into full screen mode. “Texture Mipmaping” turns Mipmaping on in the 3D view.
“Attach Action To View” attaches the last action performed in a view to that view, so
when you go back to that view it defaults to the last action. “Display Entity Shape” shows
the entity shape instead of squares. “Auto Center” when scoping down it automatically
centers the group. “Sky Cube” if enabled shows the “Sky Cube” in the 3D view. “Auto
Move Mode”, if enabled, when adding a block automatically sets the mode to “Move”.
“Reload of externally modified files” checks to see if a script attached to the current
project is changed and if so whether or not to load the changes. Next under the “Color”
tab this controls all the user interface colors of the WED. Under the “Key” this controls
the key shortcuts for the WED. Finally under the “Editors” tab this controls what
program is executed when a file is double clicked on under the “Resource” tab of the
Project Toolbar. This completes the “File” menu.
Edit Menu
In the “Edit” menu we will start with “Realign To Grid” all the other functions
before this were already covered. “Realign To Grid” aligns the current selection to the
grid in the 2D views. “Hollow Block” hollows out any solid cube, this is usually used to
create rooms (like the one we have in our current project). Once you hollow out cube you
can not undo it so make sure to save your work before using it. Next is “CSG Subtract”
this function is very important so we will spend a little time on it. “CSG Subtract” cuts
holes in to a block(s) using selected block(s) as cutters. I will now demonstrate how this
works. In the back 2D view “Scale” and “Move” the two triangles to look like this:
Chapter 2 / Level Editor
28
If the triangles don’t line up perfectly either set the “Snap” setting lower or under
the “Edit” menu click “Align To Grid”. Next select one triangle and then click “Hollow
Block”; do the same to the second triangle. In the back 2D view right click in the center
and select “Add”, “Add Cube”, and then “Medium”. Move the cube that you just created
so that it looks like this:
Chapter 2 / Level Editor
29
Now click “CSG Subtract”. Do the same this to the other side and then delete the
cube you created. The back view should now look like this:
Chapter 2 / Level Editor
30
Now we have to apply a texture to the triangles; select every thing in the level.
Click on the “Texture” tab in the “Project Toolbar” and then double click on the brick
texture under the “default.wad”. Now compile and run the level. Look what we did;
originally we had a single room now we have two doorways and two triangle shape
rooms. We did this by adding two triangles, hollowed them out, and then created a
doorway to connect them to the original hollow cube.
Now we will continue with the rest of the “Edit” menu. Next is “Object Mode”;
under this drop-down list you can restrict which objects in the WED that can be edited
(default is “All Objects”). The last function in the “Edit” menu is “Find Object” using
this you can find any block or entity in the level.
“Mode” Menu
We will skip the “Mode” menu because all of the functions were already covered
in the “Icon Bar”.
“Object” Menu
The first function under the “Object” menu is “Group”. You use the “Group”
functions to group and ungroup sets of blocks. This makes it easier to manipulate sets of
blocks, such as a room. Let’s start by selecting one triangle and then click on “Group”.
You will see three functions “Add To”, “Finish”, and “Ungroup”; click on “Add To”.
The triangle should now be light brown. Do the same thing to the other triangle and then
click on “Finish”, the triangle are now one group. If you move or resize them they are
manipulated like one block. Now click on “Group” again and you will see that you can
either select “Add To”, in which case you can make the group bigger, or you can select
“Ungroup” which ungroups the two triangles, click “Ungroup”. If you select one of the
triangles or the hollow block and click ungroup each side of the item that was ungrouped
turns into a separate item, thereby making it very hard to move the whole item (and is not
recommended).
The rest of the “Object” menu adds different items to the level. Everything that
starts with “Add” can also be accessed by right clicking in any view and is listed under
the “Add” menu there. “Add Cube”, “Add Hollow Cube”, and “Add Primitive” all add
different blocks to the level. “Hollow Cube” adds a group of blocks to create a single
hollow cube and the rest add a single block in a specific shape.
“Add Prefab” opens the “Add Prefab” browser. Inside the browser you will see
multiple categories; in each category there is a list of level files (.wmp). These level files
can be added to the current level thereby adding a group(s) of blocks that create
something. For example, click on “Bridges”, click on “BRIDGE02.WMP”, and then click
“OK”. You will now see a bridge on you level,; it consists of “BRIDGE02” that is made
up of three groups and these groups are made up by multiple blocks. Any level can be a
prefab; for example if we wanted to use the room that we created as a prefab we open a
new level click “Object”, “Load Prefab”, select “TheBasics.wmp” (the file that we are
working on), and then click “OK”. The room that we are working with will now show up
in the new level as a group called “TheBasics”. You can add, remove and rearrange the
“Add Prefab” browser by using the Windows Explorer and opening the “GStudio6”
Chapter 2 / Level Editor
31
folder. In there you will find a folder named “prefabs” in that folder there are subfolders
that have all the prefab categories and in these subfolder are the prefab files (.wmp).
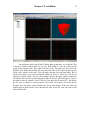
“Add Light” adds a light to the level. The light has two variables color and range;
these can be set by right clicking on the light and clicking “Properties”. The default range
is 300 which are displayed in the 2D views as a yellow circle. Set the range to 400 and
place the light as follows:
Now compile and run the level. Notice that one side is light and the other is dark,
also note how shadows look. Now go back to the WED and try changing the color of the
light.
“Add Sound” adds a sound file to the level. The sound file is continuously looped.
The closer you are to the origin of the sound the louder it is. The volume and the range
can be set by right clicking on the sound and selecting “Properties”. By default there are
no sounds in the “Add Sound” menu; to add a sound you can either place the sound file in
the project folder or select “Load Sound”. You will find a sound “beamer.wav”, place it
on the opposite side of the light. Now compile the level and run it. Notice the closer you
get the louder it is. Also note, if you have stereo speakers, that as you rotate the sound is
louder in the speaker that is closer to the sound.
Chapter 2 / Level Editor
32
“Add Position” adds a map position that can be accessed in the c-script program.
If there are no player entities placed in the level the first position is a camera view.
“Add Map entity” is similar to “Add Prefab” that it adds any level file from the
current project folder into the level but it converts it into an entity instead of keeping it as
separate blocks. This is useful for doors, elevators, etc. that are simple squares and can
easily be created in the WED that have to move like entities. Since they are loaded in as
entities they cannot be edited only scaled. The level files (.wmp) must be placed into the
project folder for them to be loaded.
“Add Model” adds a model entity (.mdl) from the current project folder into the
level. These entities are usually the player, enemies, and objects that have to move or
have great detail. These models can be animated and can be created in the MED or
imported from another graphics program.
“Add Terrain” adds a terrain map (.hmp) to the level. The terrain map can be
created in the MED or imported from another graphics program into the level.
“Add Sprite” adds a sprite entity (.pcx) from the current project folder into the
level. These entities are used for fixed 2D objects, such as flowers, pictures, and fake
windows. The sprites can be created in graphic programs and imported into the level.
“Add Path” adds a path node to the level. The path can then be attached to an
entity (e.g. an enemy) and in the c-script you can program the entity follow the path. To
add more nodes to the path click in the “Vertex Move” icon and click on different points
in the level where you want the additional nodes. To connect the last node to the first
node, hold down the “Ctrl” key while dragging the last node the first.
The next three items on the menu, “Load Entity”, “Load Sound”, and “Load
Prefab” do the same as their “Add” counterparts but these let you browse your computer
for the file wanted and then automatically imports them to your project folder and adds
them to your level.
The last function “Save Prefab” saves the selected blocks as a .wmp file so it can
be used in other levels.
“Texture” Menu
The texture menu controls the textures for the WED. Textures are applied to
blocks to give them a visible surface. For example, if you want a wood floor in the room
you are creating you apply a wood floor texture to the block that is the floor to the room.
In order for the level to compile every block must have a texture.
The texture menu works together with Texture tab in the Project toolbar. We will
start first with “Texture Manager”. Open the Texture Manager and in there you will see a
number of buttons. The first on “New WAD” creates a new WAD file that holds textures
in it. “Add WAD” adds an existing WAD file to the Project Toolbar. “Add Folder” adds
all the textures of a given folder into a WAD. Texture can be either .bmp or .pcx. “Save
WAD saves the current WAD if it has been changed. Build WAD creates a new WAD
with all the textures that are used in the current level. Finally, “Remove WAD” removes
the selected WAD form the WED.
Now we will go back to the first item in the menu. “Apply to Object” applies the
selected texture in the Project Toolbar to the selected blocks.
Chapter 2 / Level Editor
33
“Texture Lock” is used to keep the texture map in place when it is copied and
pasted within the same level.
“Texture Bookmarks” is used to store your favorite textures.
“View” Menu
“GXL Properties” controls the properties of the 2D and 3D views. In most cases
you will never have to change these properties.
“Toolbar” lets you choose which toolbars should be displayed in the WED. For
most of the level design you will want all the toolbars opened unless you need more
room.
“Add View” adds another view in addition to the four views that are currently
defaulted in the WED.
“Wire Frame” changes the rendering of the 3D view to a wire frame.
“Solid” changes the rendering of the 3D view to solid blocks.
“Textured” changes the rendering of the 3D view to full texture. For most of the
level design you will want to leave it on this setting.
“Goto Center” centers the selected view to the middle of the level.
“Lock Views” if enabled keeps the three 2D views together. If you move around
the level in a 2D view the other adjust as well.
“Lock 3D View” if enabled locks the 3D view to the 2D views.
“Decrease View Depth” and “Increase View Depth” changes how far you can see
in the views. This helps in editing, for example if you have multiple street blocks and you
want to only work on one block at a time you set the view depth just enough to see one
block.
“Default Layout” sets the layout of the WED back to its default.
“Help” Menu
“Contents” opens up the user manual of the 3DGameStudio. The manual is a very
useful tool to learn the program.
“Updates” opens a web browser and take you to Conitec’s to check for program
updates.
“Community” opens a web browser and takes you to Conitec’s online forum. This
is very useful if you have questions that the manual doesn’t address.
“About WED” gives you the license information about the WED.
Chapter 3 / Script Editor
34
Chapter 3
Script Editor
SED
Introduction
The Script Editor, SED is where all of the programming for the game is done. CScript is a language produced by Conitec specifically for 3DGameStudio. It is a very
powerful programming language that can be used for almost all your 3D programs. If
there is something that C-Script cannot do and you want to use C++ the SED has an SDK
that allows you to use C++ .dll files.
Level Design
To start we need a blank page to see the results of our program. The problem is
that there is no blank page in 3DGameStudio. To fix this is that we make a large hollow
square in the WED. Open the WED and add a large hollow cube, place it in the center of
the level and place a dark solid texture on it. Build and save the level. Next click “File”,
“Map Properties”, and under “Script” click the “New Script” button, and select “Empty
Script”. Next under the “Resources” tab under “script files” double click on the file you
just created, this will open the SED with a blank page. This editor is the very similar to a
standard editor the major difference is, is that when you run the program it opens a 3D
world. Click on “Options” then “Configuration”, in the “CSC/WDL file to run” select the
current file and then click “OK”. Now we will start coding.
C-Script
First we have to set up the screen for displaying the game.
var video_mode = 7;
video_mode sets the resolution of the screen to 800x600. When you type the word
“video_mode” you will notice under the “Command Help” tab on the bottom of the page
that it has a description of what video_mode is and all the different values it can be set to
(e.g. 6 is 640x480). This is a very valuable tool for learning the different commands in CScript.
Next we set how many colors the program displays.
var video_depth = 32;
This sets the color to 32 bit.
Next we have to tell the script which level file to load. First we set a string with
the files name in it.
string CScript_wmb = <CScript.wmb>;
This line of code places CScript.wmb into string CScript _wmb (similar to “String a =
“Hello”;).
Chapter 3 / Script Editor
35
Next we set up a main function that starts and runs the program.
function main()
{
level_load (CScript_wmb);
}
The main function should always be on the bottom of your code or you should
declare all the functions before the main function.
If you run the program now you will see a blank wall, this is the inside of the
hollow cube. Hit “Esc” and you will exit.
Next let’s set some variables. C-Script does not have char, int, float, etc. all it has
is var.
var a = 0;
var b = 0;
var c = 0;
Next we have to set up something to display the text. C-Script has a text function
and in it you set the parameters for the text.
text box
{
pos_x = 10;
pos_y = 10;
string = "a = \nb = \nc = ";
flags = visible;
}
This code creates a textbox called box, it sets its x position from the top left
corner to 10 pixels and the y position to 10 pixels. Then it types out the string a=, b= c,
each on different line (\n), and then sets it to visible. There are many flags and attributes
that can be set in the text functions but for now this is enough. Run the program and see
what we created so far.
Next we need something to display the variables.
C-Script has a function called panel. A panel is used to display variables and pictures.
panel display_pan
{
pos_x = 0;
pos_y = 0;
digits = 35, 10, 3, _a4font, 1, a;
digits = 35, 19, 3, _a4font, 1, b;
digits = 35, 28, 3, _a4font, 1, c;
flags = overlay, refresh, visible;
}
Chapter 3 / Script Editor
36
The position of the panel is 0,0. Digits sets the x, y position of each digit, then it
sets the length(3), next it sets the font, next it set the factor that the variable should be
multiplied by(1), finally it sets the variable. Flags set the properties of the panel itself.
Now we are ready for some basic coding.
The game must run in a while loop so,
function main()
{
level_load (CScript_wmb);
while (1)
{
c = a - b;
wait (1);
}
}
Every while loop must have a wait at the end of it to let other programs execute
between each run of the while loop. We have c=a-b; this is simple subtraction. Set var a
=5 and var b=2, now run the program. You should see a = 5, b=2, and c=3. You can
change the variables while the program is running by pressing “tab” and then “a=10;” this
changes a to 10 and updates c to 8.
Recursion in C-Script
Let’s try some complex code. C-Script supports recursion so we will try the
Ackermann function.
function ack(a,b){
if(a==0){
return (b+1);
}
if(b==0 && a!=0){
return (ack(a-1,1));
}
else{
return (ack(a-1,ack(a,b-1)));
}
}
Next change the code in the while loop to: c=ack(a,b); and change var a to 1 and
var b to2.(if these get set high it will crash the Acknex game engine) Now run the
program. You should see the two variables and c is the answer to the function.
Now we will just make it look a little better let’s set “c” to “Ackerman”,
In the text box change string to:
string = "a = \nb = \nackermann = ";
Chapter 3 / Script Editor
37
If you run the program now you will not be able to see the value of c because it’s
being covered over by the work “Ackermann”. So change the x position of the c variable
in the panel to 80, so: digits = 80, 28, 3, _a4font, 1, c;
We finished writing our first program.
See appendix A for the complete program.
Chapter 4 / Entity Movement
38
Chapter 4
Entity Movement
Introduction
In this chapter we will discuss how to move entities in 3DGameStudio. We will
start with simple movements and then advance to animated movements such as walking
and jumping.
Level Design
In the WED create a new project. Add a large hollow cube and expand it so it is
huge. Apply any kind of texture to the room. Next place a camera (“Add Position”) to the
side of the room facing the center. Now we will add an entity to move. Look the
movement folder and load the ship entity. Make sure that the ship is in the middle of the
room and the camera is facing it. Now compile and run the level; you should see a room
with a ship in the middle. This is going to be our room for the movements.
C_Script
Next add an empty script to the project and open the SED. We will start with
setting up the SED for a standard program.
var video_mode = 7; // 800x600 pixels
var video_depth = 32; // 32 bit mode
var video_screen = 1; //full screen
string Movement_wmb = <Movement.wmb>; //string with level name to load level
function main()
{
level_load (Movement _wmb); //load level
wait(3); //wait three cycles for level to load
}
Next we will add an action to attach to the entity. Since most of the functions of the ship
have to be in a while loop we will add that first.
action ship
{
while(1)
{
wait(1); //allow other programs to run once per cycle
}
}
Set the “file to run” to the current project file and run the level. You will see the
same thing like you saw in the WED. If you want to the camera around you first must
press “0”. Next go back to the WED and right click on the ship, select behavior and select
Chapter 4 / Entity Movement
39
ship. This applies the ship action in the SED code to the ship in the WED. Now back to
the SED for the coding.
Every entity has x, y ,z, pan, tilt, and roll function built in. So if we say ship.x =
ship .x+1 it moves the ship one space forward on it x axis. To do this in C-Script is very
easy; it goes as follows:
my.x = my.x+1;
“my” is the way of saying this entity that I am programming with this action.
We want to move the ship along the x axis while we are pressing “w”, so we place the
following in the ship’s while loop:
if(key_w == on) //if the w key is pressed
{
my.x = my.x+1; //move ship along the x axis
}
Now run the level and press “w”; you will see the ship move forward. Now do the
same for backward, right, left, up, and down, pan, tilt, and roll. For pan, tilt, and roll
instead of using x, y, z use pan, tilt, roll. (See Appendix B for the code.)
You might have notice that the ship can go right through the wall. The reason for
this is that there is no collision detection setup in the script movement. To move an entity
with collision detection we use a function call c_move. The c_move function replaces
my.x = my.x+1. It works as follows: c_move(my, nullvector, vector(1,0,0), glide). “my”
is the entity that is being moved. “nullvector” is saying do nothing, this parameter
controls the ships x, y, and z coordinates based on the ship; meaning if the ship is facing
down and you call a c_move with vector(1,0,0) the ship will move down. “vector(1,0,0)”
is saying move along the x axis in relative to the world; so no matter what direction the
ship is facing it will always move in the same direction. Finally, “glide” is saying what to
do upon impact with an object. There are many commands that can be activated upon
impact but this is just one of them. For most game we will want the ship to move based
on the ships coordinates so change the c_move command to c_move(my,vector(1,0,0),
nullvector,glide); do this for all the x, y, and z commands. Now when you crash into a
wall you stop; the problem is that if you rotate you still can go through the wall. To fix
this we use a function called c_rotate. So to convert my.tilt = my.tilt+1 to collision
detection we do as follows c_rotate(my,vector(0,1,0),glide). “my” is the entity that is
being moved, “vector(0,1,0)” is the angle that is being changed, and glide is what
happens when a collision occurs. Replace the pan, tilt, and roll with c_rotate. You now
have complete control of the ship with collision detection.
The problem with this is that what happens if you run the game on a slower or
faster computer then what the game was designed for; your player will move at different
speeds. To fix this we have to multiply the movements my a function called “time”.
Depending on your computer you have to adjust the speed of the movement, on mine I
changed it to five. The c_move function now looks like this:
c_move(my,vector(5*time,0,0), nullvector, glide). Change all the code using “time”. (See
the complete ship action code in Appendix C.)
Chapter 4 / Entity Movement
40
Here is the problem we have with the ships movement. You will notice that if you
make a few rotation in different directions the controls get awkward. This is because
c_move adjusts the angle based on the world not the ship. To fix this we need some math
to keep track on the angles. Luckily C-Script has a lot of math built in so here we go.
vec_set(temp.pan,vector(0,0,0));
This line of code is simple it sets temp to 0. This is used because each cycle of the while
loop we want to reset the pan of the ship. Temp is a built in variable and does not have to
be declared. Next is:
temp.pan += 5 * (key_j - key_l) * time;
temp.roll += 5 * (key_n - key_m) *time;
temp.tilt += 5 * (key_k - key_i) * time;
Over here we are setting the pan, roll, and tilt of the temp. I also shortened the
code instead of writing if(key_j == on) I simply wrote key_j. The reason why this works
is that key_j when pressed returns 1. So when it’s pressed it is multiplied my 5 which is 5
and then added to the pan of temp. When “l” is pressed it also returns 1 but since it has a
“-“ before it multiplies 5 by -1 which is -5 thereby decreasing the pan of temp by 5. The
same applies for roll and tilt. So far nothing too hard; next is:
vec_to_angle(temp.pan,nullvector);
This sets the temp.pan angle to “0”; this is because we will take the pan of the
ship and place it in the temp. Next is:
ang_add(temp.pan,my.pan);
This function adds the current pan of the ship to the temp. Next is:
vec_diff(temp.pan,temp.pan,my.pan);
This function gets the difference of the last two angles and places it into the first
vector; thereby giving the direction from the first angle to the second. So in our case it
calculates the direction from the current ship angle to the desired temp angle and stores it
in temp. Next is:
c_rotate(my,temp.pan,glide)
This rotates the ship with collision detection using the temp angle.
Camera
If you want to be a player in the ship we must setup the camera to view from the
ship. First we need to set up two array variables that store the position and angle of the
camera. On top of the page before any of the functions type:
var cam_pos[3];
var cam_ang[3];
Chapter 4 / Entity Movement
41
This creates each variable array with three locations. Next we create a function
called view_ship. In side this function type:
vec_set(cam_pos,vector(-100,0,25));
This copies the vector into the variable, cam_pos. This vector sets where the
camera will be relative to the ship, so it will be back 100 quants and raised 25 quants.
vec_rotate(cam_pos,my.pan);
This function rotates the angle around the origin; thereby during a rotation it
keeps the camera angle on the ship.
vec_add(cam_pos,my.x);
This function adds both positions and stores the result in the first position.;
thereby storing the location of my.x in variable cam_pos.
vec_set(camera.x,cam_pos);
This now copies the cam_pos to the camera.x thereby moving the camera into
position.
vec_diff(cam_ang,my.x,camera.x);
It now gets the difference between my.x and camera.x thereby getting the
direction from camera.x to my.x and storing it in cam_ang.
vec_to_angle(camera.pan,cam_ang);
Now it rotate the camera pan to the one stored in cam_ang.
camera.tilt = my.tilt;
camera.roll = my.roll;
camera.pan = my.pan;
These last three lines keep the camera line up with the ship. If you run the
program now you will see the ship in front of you just like an arcade game.
If you want to be in the ship instead of looking at it from the outside set the vector
to vector(0,0,0) or nullvector. This places the camera at the center of the ship. Next in the
camera’s code type:
camera.genius = my;
This makes what ever is calling this function invisible. The reason for this is that
since we are going to be in the ship we do not want to see the ship itself.
Now in the action of the ship call this function right before the wait(1) in the
while loop. This way the camera will be updated once a cycle.
(See Appendix D for complete code)
Character Animation Movement
Now we will start movement with characters. Characters are harder to move since
they need to be animated while try are moving. For example if we have a character walk
across the room the must move their hands and feet. To start we must have an entity that
has animation properties already set in their file. Start the MED and find the warlock.mdl
file that is in the work file in GStudio6 folder. This model is included with
Chapter 4 / Entity Movement
42
3DGameStudio. Click on the animate button that is on the bottom of the screen. Now
click on the right arrow, you will cycle through all the Warlock’s animations; stand,
walk, run, duck, crawl, jump, swim, attack, and death. These animations where made in
the MED or some other modeling program and saved in the file. We are able to access
these animations in the SED to be used in our game.
In the WED delete the camera or you can start a new project. Add the Warlock
into the level and place him on the floor opposite the camera. In the SED delete
everything from the while loop in the ship action. Change the name of the action from
ship to warlock and the view_ship function to view_warlock. Run the script and exit. Go
to the WED and apply the warlock action to the warlock model and compile the level.
Back in the SED we will now start coding the warlock’s movements.
We need two variables to control the animations.
var anim_cycle;
var anim_speed=2;
“anim_cycle” keeps the animation from going over or under its set cycle and
anim_speed controls the speed of the animation.
Inside the Warlock’s while loop we set up the stand animation. This animation is
run when the warlock is standing still.
if(key_any == off) //if no keys are pressed
{
ent_animate(my,"stand",anim_cycle,anm_cycle);
anim_cycle += anim_speed * time;
anim_cycle %= 100;
}
This code says if no keys are presses execute the stand animation cycle.
“ent_animate” animates the entity my executing the entities internal animations. The first
parameter (my) is the entity that is going to be animated, the second is a string (stand)
that has the model’s name of the animation to be executed, the third (anim_cycle) is the
percentage of the animation the should be executed, and the final parameter (anm_cycle)
tells the engine that the cycle is cyclical (i.e. walking, standing). The next line
“anim_cycle += anim_speed * time” this sets how fast the percentage of the animation
should be ran through. “anim_cycle %= 100;” makes sure that the animation cycle
doesn’t go over 100%.
If you execute the program now you will see the Warlock breathing in and out.
Now we will work on the walk animation.
if(key_w == on)
{
ent_animate(my,"walk",anim_cycle,anm_cycle);
anim_cycle += anim_speed * time;
anim_cycle %= 100;
c_move(my,vector(4*time,0,0), nullvector,glide);
Chapter 4 / Entity Movement
43
}
If the “w” key is pressed execute the walk animation with c_move. This
movement code is the same as the ship’s movement code except that it has the animation
code. The rest of the controls are the same as the ship except since a person doesn’t rotate
like a ship you can leave the unnecessary ones out. You can also add the camera function
to the Warlock the same way we did to the ship. To make the warlock run increase the
c_move speed and execute the “run” animation. Just a note if the Warlock’s walk
animation doesn’t look smooth this is because he has a limp.
Chapter 5 / Special Effects and Basic AI
44
Chapter 5
Special Effects and Basic AI
Introduction
So far we created a player and can move it. Now we want special effects, such as
bullets, missiles, and explosions.
Level Design
First let’s create an enemy to kill. In the WED add the Witch model from the
work folder. Set it off to the right side of the room facing the center. Now back in the
SED add a new action called witch and add a while loop with the condition while(my !=
null). This will execute the while loop as long as the entity is still there. Save the script
file and go back to the WED. Apply the Witch action to the Witch and compile the level.
C-Script
Now we define a skill. Each entity has 100 skills; these skills are variables that are
exclusive to the entity. The first skill we are defining is the health points.
define healthpoints = skill1;
Now we can refer to skill1 as healthpoints. Now we will give the player 100
healthpoints and the Witch 30 healthpoints. In the beginning of the player’s action
outside the while loop add:
my.healthpoints = 100;
In the Witch’s action add the same thing but only give her 30 healthpoints. Since
these are skills they are considered different variables and they won’t interfere with each
other even though they have the same name. Now change the condition in the while loops
to while(my.healthpoints>0) this says as long as the player is alive execute the while
loop. Once the player dies it will exit the while loop and we will put a death sequence
there.
We will now add another function called shoot this will have a while loop saying
if the player is alive and you press the space button, shoot.
function shoot()
{
while(my.healthpoints>0)
{
if(key_space==on)
{
ent_create("blue.bmp",player.x,shoot_action);
sleep(.3); //pause between shots
}
wait(1);
}
Chapter 5 / Special Effects and Basic AI
45
}
The “ent_create("blue.bmp",player.x,shoot_action)” function says create a sprite
from picture file blue.bmp in the position of the player’s x and give this sprite entity the
commands in function shoot_action.
Now we will code shoot_action this is commands for the bullet.
function shoot_action()
{
my.enable_impact = on;
my.enable_entity = on;
my.enable_block = on;
my.enable_stuck = on;
my.event = remove_func;
my.pan = you.pan;
my.tilt = 0;
my.roll = 0;
my.passable = off;
my.facing = on;
my.overlay = on;
while(1)
{
c_move(my,vector(10*time,0,0),nullvector,activate_trigger+ignore_passents+ignore_pas
sable+ignore_me+ignore_you);
wait(1);
}
}
my.enable_impact = on, my.enable_entity = on, and my.enable_block = on all
tells the engine that if this bullet hits an entity, is hit by an entity, or hits a block it should
trigger an event. “my.event = remove_func” this is the function that gets executed when
the event is triggered. The pan, tilt, and roll commands give the direct of the bullet; in this
case it should follow the player direction. “passable = off” makes it that the bullet can’t
pass through anything. “my.facing = on” makes it that the sprite always faces the screen
thereby making it look 3D. “my.overlay = on” makes the black parts of the sprite
invisible. The c_move function gives the direction and the speed of the bullet. The ignore
statements in the c_move function tells the engine what things to ignore for collision
detection.
Now let’s look at the remove_func.
function remove_func()
{
wait(1); // make sure it exist at least one frame
ent_remove(me);
Chapter 5 / Special Effects and Basic AI
46
}
This code is simple enough. It says remove what ever is calling it. In this case it’s
the bullet; so when the bullet hits something it is going to be removed.
OK so now we have the bullet; but how does the Witch die? First we have to
create events it the Witch’s action. Before the while loop type:
my.enable_impact = on;
my.enable_entity = on;
my.event = im_hit;
This code is the same as the bullet function so I will not explain them here. Now
we have to program the im_hit function.
function im_hit()
{
if(my.healthpoints>0)
{
my.healthpoints -=10;
}
}
This function says that as long as the Witch is alive deduct 10 health points. Now
once the Witch loses all her healthpoints she dies when this happens she exits her
while(my.healthpoint>0) loop now we have to enter code for her death sequence.
while(temp < 100 && my.healthpoints<=0)
{
my.passable=on;
ent_animate(my,"death",temp,null);
temp+=3*time;
wait(1);
}
This code says that make the Witch passable and as long as temp is less then 0
play the death animation of the Witch. “temp” is then incremented by three it is then used
to increase the percentage of the animation that is played. When the percentage player
reaches 100% the animation ends.
Now run your level. Turn the Warlock toward the Witch and shoot her three
times. You will now see the death animation.
If your program is not running correctly make sure that you either declared all the
function on top of the code or you wrote any function that is called in another function
before that function.
Chapter 5 / Special Effects and Basic AI
47
Basic AI
This game would be pretty boring if the Witch didn’t shoot back so let’s give the
Witch some basic AI code. Let’s say as follows, when the Warlock shoots the Witch the
Witch turns toward the Warlock and shoots back.
First we have to add code that allows the Warlock to get hit my bullets, so in the
Warlock’s action before the while loop add:
my.enable_impact = on;
my.enable_entity = on;
my.event = im_hit;
This code and the next is the same as the Witch’s. Next we have to add the death
animation to the Warlock’s action. After the main while loop add:
temp=0;
while(temp < 75 && my.healthpoints<=0)
{
ent_animate(my,"death",temp,0);
temp+=2*time;
wait(1);
}
Now we have to program the Witch to turn to the player and shoot. First we need
the set a variable to check if the Witch was hit by a bullet. So on top of the page add:
var im_shot=0;
In the Witch’s action add:
if(im_shot==1 && player.healthpoints > 0)
{
vec_set(temp,player.x);
vec_sub(temp,my.x);
vec_to_angle(my.pan,temp);
ent_create("red.bmp",my.x,shoot_action);
sleep(1);
}
If I am shot and the player is alive execute the following code.
“vec_set(temp,player.x)” copies the player.x to temp. “vec_sub(temp,my.x)”
subtracts witch’s x from the player’s x and stores it in temp.
“vec_to_angle(my.pan,temp)” copies the pan and tilt from the temp vector and places
them into the my.pan thereby turning the Witch toward the Warlock.
“ent_create("red.bmp",my.x,shoot_action)” this creates a sprite from the picture file
Chapter 5 / Special Effects and Basic AI
48
red.bmp in the position of the Witch’s x and gives this sprite entity the commands in
function shoot_action. “sleep(1)” keeps the Witch shooting at one bullet per second.
Last we have to add code to activate the im_shot flag. In the im_hit function after
the deduction of healthpoints add:
im_shot = 1;
Special Effects
Explosions
Now let’s add an explosion when the bullet hits. To start we will set a pointer at
the top of the page. Pointers are used to refer to an entity.
entity* ent_pointer;
This creates a pointer called “ent_pointer”. We also need a .bmp file for the
particle map for the explosions.
bmap explosion_particle_map = <fireball_sprite.pcx>;
Next we will create a function called “small_explosion” with a parameter called
“entity_handle”. This will be used to pass the handle to the entity that is calling the
function into the function. The handle is the unique identification number that each entity
has.
function small_explosion(entity_handle)
{
var pos_vec[3];
var count = 10;
ent_pointer = ptr_for_handle(entity_handle);
if (ent_pointer != null)
{
vec_set(pos_vec, ent_pointer.x);
pos_vec.x += (random(6) - 3);
pos_vec.y += (random(6) - 3);
pos_vec.z += (random(6) - 3);
}
while (count > 0)
{
effect(small_explosion_particle, 2, pos_vec.x, nullvector);
count -= 1;
}
}
“var pos_vec[3]” is a local variable array of three used to store the position of the
entity that called this function. “var count = 10” this is going to be used as a counter.
“ent_pointer = ptr_for_handle(entity_handle)” converts the entity handle to an entity and
Chapter 5 / Special Effects and Basic AI
49
stores it in ent_pointer. “vec_set(pos_vec, ent_pointer.x)” copies the position of the entity
to variable pos_vec. It then randomly generates the x, y, and z values around the original
position. It then calls the effects function ten times in the while loop. The effects function
has four parameters. The first is the function that controls the effect in our case it’s
“small_explosion_particle”; the second is an integer that controls how many particles
should be created in our case “2”; the third is the position it should be created in our case
it’s “pos_vec.x” and the last is the velocity of the particles here its “0” (we will change
this in “small_explosion_particle”).
Now we have to write the function that controls the particles,
“small_explosion_particle”.
function small_explosion_particle
{
var velocity_vec[3];
velocity_vec[0] = random(4) - 2;
velocity_vec[1] = random(4) - 2;
velocity_vec[2] = random(4) - 2;
vec_set(my.vel_x, velocity_vec.x);
my.move = on;
my.bmap = explosion_particle_map;
my.alpha = 80;
my.lifespan = 100;
my.size = 10;
my.flare = 1;
my.function = explosion_fade;
}
“var velocity_vec[3]” is a local array variable used to store the velocity of the
particles. The next three lines generate random numbers for the x, y, and z for the
variable “velocity_vec”. “vec_set(my.vel_x, velocity_vec.x)” copies the velocity of the
variable to the velocity of the particles. “my.move = on” sets it that the particles move.
“my.bmap = explosion_particle_map” is the picture file used for the particles. “my.alpha
= 80” is used to set the transparency of the particles. “my.lifespan = 100” is the
expectancy of the particles in “ticks”. “my.size = 10” sets the size of the particles in
quants. “my.flare = 1” sets the flare effect to the particles. “my.function =
explosion_fade” is a function that controls this function.
The last function “explosion_fade” controls how the particles fade.
function explosion_fade()
{
my.alpha -= 20 * time;
if(my.alpha < 0) { my.lifespan = 0; }
}
This deducts the alpha effect until 0. Once it reaches 0 the particle gets removed.
Finally you have to call the “small_explosion” function right before the bullet gets
Chapter 5 / Special Effects and Basic AI
50
removed. In “func_remove” right before “ent_remove(me)” add
“small_explosion(handle(my))” this calls the “small_explosion” function and passes the
bullets handle to it.
Sound Effects
Now we have cool explosions but how do we add sound to the game? We want
explosion sounds, bullet sounds, background music etc. First we will add the background
music. Place the following line in the main function right after the wait(3);
media_loop("hauntedmansion.mid",null,50);
This plays the "hauntedmansion.mid” midi sound file the entire game at 50%
volume. Next we will add four sound files to the level. On top of the code add:
sound wham_wav = <wham.wav>;
sound beamer_wav = <beamer.wav>;
sound scream_wav = <scream.wav>;
sound witch_wav = <witch.wav>;
This imports the sound files and gives them names. Now we have to place these
sounds where we want them. “beamer_wav” will we used when a bullet is fired, so in the
“shoot_action” before the while loop add:
ent_playsound(my, beamer_wav, 100);
This plays the sound beamer at 100% volume when each shot is fired. Next in
“remove_func” right before the sleep command add:
ent_playsound(my, wham_wav, 1000);
This plays the wham sound using a special function to make it sound louder then
100%. Next in the Witch’s action right before the death while loop add:
ent_playsound(my, scream_wav, 1000);
Finally in the Warlock’s while loop right before its death while loop add:
ent_playsound(my, scream_wav, 1000);
OK now all the sounds are set up we are ready to convert this to a real game. (See
the next chapter for the final code.)
Chapter 6 / Developing a First Person Shooter Game
51
Chapter 6
Developing a First Person Shooter Game
Introduction
We will now take the code from the previous chapter and create a first person
shooting game.
Level Design
First go into the WED and create a huge hollow cube; this will be the room for the
level. Next place solid blocks all over thereby making smaller rooms and hallways. Now
place about ten witches all over the level and place the Warlock in the center. It should
look some thing like this:
C-Script
Next we have to change some of the code to accommodate the game. I included
the “view_warlock” code in Appendix E place this function before the wait at the end of
the first while loop. Next delete the second while loop; since we are first player we don’t
see the death. Right after the while loop write:
my.passable=on;
Chapter 6 / Developing a First Person Shooter Game
52
This way any bullets will go through the Warlock after he dies. Next we will
make the game a little harder. The Warlock can only shoot if he is not moving. To do
this, remove the call to the shoot function and place:
if(key_space==on)
{
ent_create("blue.bmp",player.x,shoot_action);
sleep(.3);
}
Inside the Warlock’s while loop. Next in the Witch’s action we have to change
the if statement that is used for the attack. As of now if I attack one Witch they all start
shooting even if they don’t see the Warlock. To fix this we add to the if statement “&&
trace(my.x,player.x)==0”. The “trace” function says if it can draw a line from one point
to another without hitting anything it will return 0. So if it can draw a line from the
Witch’s x to the Warlock’s x then it can see it, then shoot. Now if you want in the
beginning of the code you can change “if_shot” to 1 and the shooting will start when the
first Witch sees the Warlock.
Now we will create a panel that displays the Warlock’s remaining life:
panel health_panel // displays Warlocks life
{
pos_x = 0;
pos_y = 470;
digits = 30, 30, 4, _a4font, 1, Player.healthpoints;
layer = 1;
flags = refresh, visible,overlay;
}
We already discussed panels but I will explain the features that where not yet
discussed. The digit that is being displayed is the Warlock’s healthpoints. “Layer” just
sets the layer of the panel since it’s the only panel it doesn’t make a difference. “Flags”
sets different functions to the panel. “Refresh” updates the panel every cycle. “Visible”
makes it visible. “Overlay” makes any block see through.
Last thing we want to know when we won the game. That happens when all the
Witches die. To do this we will set a counter every time a witch dies it gets decremented.
When all the witches are dead the counter equals 0 and the screen displays “YOU WON”.
I have six witches so my code has on top:
var witch_counter =6;
Next I created a panel to display that I won. This panel starts as not being visible.
panel won_panel
{
Chapter 6 / Developing a First Person Shooter Game
53
bmap = won_bmp;
pos_x = 400;
pos_y = 400;
layer = 1;
flags = refresh, overlay;
}
It displays the “won_bmp” so on top of the page I have:
bmap won_bmp = <won.bmp>;
Next I created a function to check if I won:
function count_witches()
{
while(1)
{
if(witch_counter==0)
{
won_panel.visible=on;
}
wait(1);
}
}
Next we call this function after the wait(3) in the main function. (See Appendix E
for the complete code)
Now you have a complete first person shooter game!!!
Chapter 7 / Developing a 3D Flying Game
54
Chapter 7
Developing a 3D Flying Game
Introduction
Now we will work on creating a 3D flying game. This game will of a spaceship
inside caverns of an alien world. The goal will be to destroy all the alien ships. Even
though first person shooter games and 3D flying games are very different we can use a lot
of the code from the previous game for this game.
Level Design
Start in the WED and create a full level with multiple rooms and hallways. Next
place enemy ships and the ship in the starting points. Set up a path with multiple nodes
for the enemy ships to use as a patrol. This path will only be used for a patrol not for path
finding.
C-Script
Player’s Action
We will start by programming the player’s ship. The player ship will slowly
accelerate when “a” is pressed and decelerate when released. The same applies for
reverse and all of the rotations. To start we will set a few local variables that control the
action.
var ACCELERATION_SPEED = .4;
var DECELERATION_SPEED = .4;
var PAN_ACCELERATION_SPEED = .3;
pans/tilts/roll
var PAN_DECELERATION_SPEED = .2;
pans/tilts/roll
var TOP_SPEED = 5;
var TOP_ROTATION_SPEED = 1.5;
// Speed factor that ship accelerates
// Speed factor that ship decelerates
// Speed factor that ship accelerates
//
Speed
factor
that
ship
decelerates
// Top speed of ship
// Limits pan/tilt/and roll speeds
Since the ship slowly decelerates by multiplying it will never reach 0 so the ship
will constantly drift. To fix this we will set a local variable that controls when the ship
reaches a certain speed stop.
var SHIP_CALM = .05;
var SHIP_CALM_PAN = .05;
Next we add a local variable that is used as a flag to keep missiles from firing
more then one per key press.
var fire_key_clear = 1;
Next we will set up the events; this will control what is called an event.
my.enable_impact = on;
my.enable_entity = on;
Chapter 7 / Developing a 3D Flying Game
55
my.enable_block = on;
When the player gets hit the following line launches the function im_hit_player.
This function checks what hit the player and if it is a bullet it deducts points.
my.event = im_hit_player;
The next line of code is used to identify the player ship during an event.
my._TYPE = PLAYER_TYPE;
The next line sets the player attributes.
player = me;
player.healthpoints = 100;
This says this entity is the player and it has 100 healthpoints. The next three line
are used for the collision detection.
my.narrow = on; //used for collision detection
my.fat = on;
c_setminmax(my);
The next line “space_fire();” is a function that us used for bullet fire. This
function is similar to the function in the previous program.
Next we have the main while loop for the player. The condition in the while loop
is “player.healthpoints > 0”; basically if the player is alive run the loop.
Now inside the loop we will start with the controls.
if (key_a) { my._FORCE_X += time * ACCELERATION_SPEED; }
if (key_z) { my._FORCE_X -= time * ACCELERATION_SPEED; }
if (key_end) { my._FORCE_Y += time * ACCELERATION_SPEED; }
if (key_pgdn) { my._FORCE_Y -= time * ACCELERATION_SPEED; }
This code says that while one of the buttons are pressed add the current speed
stored in a entity variable to the “ACCELERATION_SPEED”; so as long as the button is
pressed the ship will accelerate.
The next lines of code deals with the deceleration when the key is released.
if ((key_a == off) && (key_z == off) && (abs(my._FORCE_X) > SHIP_CALM))
{
my._FORCE_X -= (sign(my._FORCE_X) * time * DECELERATION_SPEED);
if (abs(my._FORCE_X) < SHIP_CALM)
{
my._FORCE_X = 0;
Chapter 7 / Developing a 3D Flying Game
56
}
}
if ((key_end == off) && (key_pgdn == off) && (abs(my._FORCE_Y) > SHIP_CALM))
{
my._FORCE_Y -= (sign(my._FORCE_Y) * time * DECELERATION_SPEED);
if (abs(my._FORCE_Y) < SHIP_CALM)
{
my._FORCE_Y = 0;
}
}
The code says that if the keys are released and the movement is greater then the
lowest speed allowed then decreases the speed.
The next lines of code keep the ship from going over the top speed.
my._FORCE_X = clamp(my._FORCE_X, -1 * TOP_SPEED, TOP_SPEED);
my._FORCE_Y = clamp(my._FORCE_Y, -1 * TOP_SPEED, TOP_SPEED);
my._FORCE_Z = clamp(my._FORCE_Z, -1 * TOP_SPEED, TOP_SPEED);
The “clamp” function works by keeping the first parameter (which is the speed)
between the second two parameters.
The rotation code is almost the same as the forward backward movement so we
won’t go over it. (See Appendix for code)
The next line of code is the actual command for the ship to move.
c_move(my, vector(my._FORCE_X, my._FORCE_Y, my._FORCE_Z), nullvector,
glide+ignore_sprites);
The “c_move” command moves the ship based on entity variables. When it hits
something it glides and ignores sprites. The reason it has to ignore sprites is that it keeps
the bullets of the ship from hitting itself.
The major difference between c_move and c_rotate is that in c_move you can
move relative to the entity c_rotate doesn’t have that. In order to rotate relative to the ship
we have to add the following code.
vec_set(temp.x,my._FORCE_PAN);
vec_to_angle(temp.pan,nullvector);
ang_add(temp.pan,my.pan);
vec_diff(temp.pan,temp.pan,my.pan);
The code takes my._FORCE_PAN and converts it relative to the ship and passes
the result in temp.pan.
c_rotate(my,temp.pan,ignore_passents);
Now we take temp.pan and rotate the ship. Next we will code the missile fire.
Chapter 7 / Developing a 3D Flying Game
57
if (fire_key_clear == on)
{
if(key_ctrl == on)
{
ent_create (rocket_mdl, player.x, rocket_action);
snd_play (rocket_wav, 50, 0);
fire_key_clear = 0;
}
}
if (key_ctrl == off)
{
fire_key_clear = 1;
}
This fires a rocket and plays a rocket sound. The “if” statements keep more then
one rocket from firing per key press.
The next statement “view_ship();” controls the camera of the ship. Finally
wait(1); is the wait required at the end of every loop. This completes the while of the
player while it’s alive. The next code deals with the player’s death.
cd_pause();
Turns off the back ground CD music; the music is started in the main function at
the beginning of the game.
Next we have “if(my.healthpoints<=0)” or if player is dead inside this if statement
we have the death roll.
while(my.skill20<500)
{
c_rotate(my,vector(1,1,1),IGNORE_YOU & IGNORE_PASSABLE + IGNORE_PUSH
+ ACTIVATE_TRIGGER + GLIDE);
my.skill20 = my.skill20+1;
view_ship();
if(player.healthpoints<0)
{
player.healthpoints=0;
}
wait(1);
}
media_play("explo.wav",null,1000);
The while loop uses one of the skills as a counter for the death roll; the death roll
works by using “c_rotate” and increasing the pan, tilt, and roll by one each cycle. The
nested if statement keeps the healthpoints from going to go below “0” if it is hit after
death. At the end of the cycle an explosion sound if played.
Chapter 7 / Developing a 3D Flying Game
58
Enemy’s Action
Now we will code the enemy’s action, we will call it patrol_path. We will be
adding a lot of AI in this chapter but the path finding will save for chapter 8.
We will start with:
my._TYPE = ENEMY_TYPE;
This is the same as the player’s. It sets the type of this entity as an
“ENEMY_TYPE”; this is used to identify the type of entity for events such as collisions.
The next three lines of code are to define what sets off the event function.
my.enable_impact = on;
my.enable_entity = on;
my.enable_scan = on;
The event function is:
my.event = enemy_event;
The “enemy_event” function checks to see if the event was triggered by a scan or
some other function like an impact. If it was scanned the function knows that a homing
missile was fired by the player and is close enough for it to home in on. It then turns the
rocket to the enemy; this controls the missile. If the event wasn’t cause by a scan it
checks to see if the bullet or ship collision was caused by another enemy ship or the
player ship. If it was the player ship, deduct healthpoints else if it was an enemy bullet do
nothing, else if it was an enemy ship move away. The reason to move is that in path
finding it lets one ship pass another.
The next line sets the life of the enemy to 30.
my.healthpoints = 30;
Next we will set some local variables for the enemy.
var RELOAD_TIME = 20;
var sleep_counter;
This is used to set the time between shots. The “RELOAD_TIME” is the time it
takes to reload and “sleep_counter” is used in the counter to count the time.
Next we run the “radar()” function. This function displays the current position of
the enemy on the player’s screen.
Next we will use the path that was created in the WED as a patrol path. It will not
be used for path finding. First we have to set three local variables to store the position and
information about the path.
var node_pos[3];
Chapter 7 / Developing a 3D Flying Game
59
var node;
var dist;
The first line of code attaches the enemy entity to the path.
node = path_scan(me, my.x, my.pan, vector(360,180,1000));
The function “path_scan” scans the area around the “my.x” around “my.pan”
using a vector as a guide and uses “me” as the entity that it attaches.. In our case it will
look in all directions up to 1000 quants to find the path and returns one if a path is found.
Next we have to find the first node.
path_getnode(my,node,node_pos.x,null);
“path_getnode” finds the node number and places the position in “node_pos” the
null is used to manipulate skills (which we are not implementing). Next we have to check
if we reached the next node.
dist = vec_dist(node_pos.x,my.x);
This checks the distance between the next node’s position and the enemy’s
position and returns the distance to “dist”. The enemy almost never reaches the node
exactly so we have the following code when the player is near the destination node.
if (dist < 25)
{
node = path_nextnode(my,node,1);
path_getnode(my,node,node_pos.x,NULL);
}
This says if the ship is within 25 quants set the “node” variable to the next node
using the first edge and then run “path_getnode” again.
Now we will program what happens when the player comes into contact with the
enemy.
trace_mode = IGNORE_ME + IGNORE_PASSABLE + ACTIVATE_TRIGGER +
use_box;
trace(my.x,player.x);
“trace_mode” sets the parameters for the trace; what things should be ignored for
the trace. “trace” traces a path between two points (in our case it’s between the player and
enemy). If it hits something it return >0 else it returns 0. It also sets the “you” to the
entity that was scanned.
Now we have an if statement to see if the player was scanned and if it was to
rotate to the player and attack.
Chapter 7 / Developing a 3D Flying Game
60
if (player.healthpoints > 0 && (you == player))
{
draw_text("JAMMED",1400/2,1068/2,vector(255,100,100));
vec_set(temp, player.x);
vec_sub(temp, my.x);
vec_to_angle(my.skill2, temp); //store angle in skill 2, 3
while(abs(ang(my.skill2)-ang(my.pan))>1 || abs(ang(my.skill3)-ang(my.tilt))>1)
{
draw_text("JAMMED",1450/2,1068/2,vector(255,100,100));
vec_set(temp, player.x);
vec_sub(temp, my.x);
vec_to_angle(my.skill2, temp);
my.pan -= ang(my.pan-my.skill2)*0.5*time;
my.tilt -= ang(my.tilt-my.skill3)*0.5*time;
wait(1);
}
ent_create(bullet_red,my.x,shoot_action);
sleep_counter = 0;
while((sleep_counter < RELOAD_TIME) && (my.healthpoints > 0))
{
sleep_counter += time;
wait(1);
}
}
This code says if the player is alive and the “you” entity is the player attack.
During the attack the player will not see the enemy on the radar and the radar will display
“JAMMED”. Next it will rotate towards the player and when it is facing it will fire a
bullet. It then goes through a while loop as a counter to pause in between shots.
If the player is not spotted continue patrolling.
else
{
vec_set(temp, node_pos.x);
vec_sub(temp, my.x);
vec_to_angle(my.skill10, temp);
my.pan = my.skill10.pan;
my.tilt = my.skill11.tilt;
temp.x = 5 * time;
temp.y = 0;
temp.z = 0;
c_move (my, temp, nullvector, IGNORE_YOU + IGNORE_PASSABLE +
IGNORE_PUSH + ACTIVATE_TRIGGER + GLIDE);
}
Chapter 7 / Developing a 3D Flying Game
61
Next we need death code for the enemy.
if(my.healthpoints <= 0)
{
media_play("explo.wav",null,1000);
explosion(handle(my));
small_explosion(handle(my));
my.invisible = 1;
my.passable = 1;
sleep(2);
ent_remove(me);
}
If enemy is dead play an explosion sound, launch the explosion effect, and the
small_explsosion effect. Next we can’t remove the entity yet because the explosion sound
and the explosions are not yet finished so set the ship passable, invisible, and wait two
seconds, then remove it.
This chapter explains the code for the enemy and the player. For the code of the
supporting functions see the Appendix
Chapter 8 / Path Finding
62
Chapter 8
Path Finding
Introduction
We will now discuss how to implement path finding into 3DGameStudio using cscript. For almost all path finding algorithm we need some kind of grid or nodes with
fixed positions to calculate the route.
There are numerous ways to create a grid in 3DGameStudio. One way is to create
a terrain and use the Vertices that makeup the terrain as nodes. This would be great if the
game was on flat ground but once you are in a 3D world that you can move on the X, Y,
and Z axis now you have to calculate the height of distances; because of the amount of
nodes it can use a lot of computing power.
The second option is to use entity nodes, which are regular entities (like a player)
but have a set place, do not move, and are invisible. This is a great option because for
most games the problem is getting the enemy into the same room as the player. Once it is
in the same room there is usually another AI code for the attack and path finding is not
needed. The great thing about the entity nodes is that as long as each node is with in the
line of site of the next node you have a path; this keeps the total count of nodes low
thereby using a low amount of resources. The major problem with this method is that the
level designer has to manually place each node making sure that they all line up. Once all
the entity nodes are placed in the WED we implement a path finding algorithm so the
enemy can find the player.
A* Algorithm
A* is a classic path finding algorithm used in AI, it is used to find the optimal
path between two points using a minimal amount of computing power. The function is:
f(n) = g(n) + h(n)
where:
f(n) is the function of the distance of every node in the path
g(n) is the cost of the path between the initial node and the current node.
h(n) is a heuristic expressing the cheapest cost path from the current node
to the destination node
We look for the lowest value of f(n) and follow that route. Since h(n) is estimated
it is not always the shortest route.
The way A* Algorithm works is that each node has two values, g and h, we add
these values and get f. We calculate g by adding the cost of the movement from the origin
to the current node. For example, the cost to move to a forward node is 5 and then cost to
move to a diagonal node is 8; if we move five forward the g value will be 25. We
calculate h by calculating how far the current node is from the destination. For example,
if from the current node the shortest path (this includes going through obstacles) to the
destination is ten nodes, the h value is fifty.
We start by adding the origin to the open list, the open list is nodes that must be
considered as a possible path. We then look at all adjacent nodes that can be used as a
path, (walls for example will not be considered) calculate the g and h values, add them to
Chapter 8 / Path Finding
63
the open list, and mark each of these nodes as having the origin as a parent. We then
remove the origin from the open list. We now look at all the adjacent nodes and find the
one with the lowest f value and set that as the current node. Next from the current node
we check the adjacent nodes for their g and h values. If there is a node that is in the open
list that is adjacent to the current node that has previous g and h values from a previous
current node we check to see if the new g and h values are lower; if they are we change
the parent of that node to the current node else we leave it. We then continue calculating
all the g and h values of all the adjacent nodes and set the current node to the one that has
the lowest f value. We continue doing this recursively until we reach the destination.
Once we reach the destination we track back from the node to its parent until we
reach the origin; this generates the path.
To demonstrate this lets look at the following grid.
Wall
Origin
Wall
Target
Wall
Each box is a node; we start from the origin and want to get to the target. The
current node is marked in bold.
8
30
↓→
38
5
25
↓
30
8
20
↓←
28
Wall
Chapter 8 / Path Finding
5
8
25
5
→
30
Origin
30
↑→
38
5
25
15
Wall
←
20
8
↑
30
64
20
↑←
28
Target
Wall
We mark all the adjacent nodes to the origin with their g, h, and f values and an
arrow to who the parent node is. (I could not find a diagonal arrow so I used two arrows.)
We then move to the node that has the lowest f value and set that node as the current node
and close the Origin node, marked in italics.
8
30
↓→
38
5
8
5
25
8
↓
30
25
20
↓←
28
5
→
30
Origin
30
↑→
38
5
25
↑
30
15
←
20
8
Wall
20
↑←
28
Wall
Target
Wall
Now we check the nodes around the current node. We can’t go forward or
backwards, so we test up and down and diagonals. Since all of the f values are higher
then the current ones we leave everything. (For example the node below the current g is
10 (current node + move) and h is 20 so f is 30.) Next we look for the lowest f value; now
we can go either up or down so pick one and continue. Keep doing this until you reach
the destination.
Chapter 8 / Path Finding
65
Since this algorithm works with estimations it does not always produce a perfect
path. For example, if the wall was one node higher the algorithm can choose up instead of
down and it will take a little longer.
Once you reach the target we trace back using the arrows to create the shortest
path. The reason we have to trace back is that not every node that was a current node will
be part of the path. For example, the first move we moved was forward; since we did not
change any of the parent pointers (to point to this node) we did not use this node for the
path.
Let’s say we do not know where the destination is, how do we search for it? The
solution is to set the h value to 0 thereby expanding out from the origin equally in all
directions until we find the destination; this is Dijkstra's Algorithm. This algorithm uses
up much more computing power then A* because it searches more nodes then A*; but it
has its applications. For example, if we don’t know where the destination is or there are
multiple possible destinations, instead of running A* multiple time we can run Dijkstra's
Algorithm once.
3DGameStudio A* Implementation
Level Design
To implement this into 3DGameStudio we will use the entity node method for the
nodes. First create a level in the WED; next we place entities (they can be simple
squares) through out the WED making sure that every spot in the level can see an entity
and every entity can see another entity. (These entities will now be referred to as nodes.)
This way the enemy can find the player no matter where the player is in the level.
C-Script
Now we have to change the enemy’s code to implement the path finding
algorithm. First we will add a local variable that will be used as a flag.
var player_spotted = 0;
This variable is set to 1 when the enemy traces the player or when the enemy
loses healthpoints. Once this variable is set to 1 the enemy will use path finding to track
down the player.
Next in the continue patrol code we have to add an if else statement.
if ((! player_spotted))
{
vec_set(temp, node_pos.x);
vec_sub(temp, my.x);
vec_to_angle(my.skill10, temp);
my.pan = my.skill10.pan;
my.tilt = my.skill11.tilt;
temp.x = 5 * time;
temp.y = 0;
Chapter 8 / Path Finding
66
temp.z = 0;
c_move (my, temp, nullvector, IGNORE_YOU + IGNORE_PASSABLE +
IGNORE_PUSH + ACTIVATE_TRIGGER + GLIDE);
}
Now if the “player_spotted” flag was not triggered continue patrolling, else path
find.
else
{
dst_ent = player;
if ( pf_to_ent(my, dst_ent) )
{
turn_speed = 15 * time;
direction_vec.pan = my._PF_PAN_TO_TARGET;
direction_vec.tilt = my._PF_TILT_TO_TARGET;
direction_vec.roll = my._PF_ROLL_TO_TARGET;
if (PATH_SMOOTHING)
{
pf_smooth_turn(my,VECTOR(my._PF_PAN_TO_TARGET,
my._PF_TILT_TO_TARGET,my._PF_ROLL_TO_TARGET),
turn_speed);
}
else
{
vec_set(my.pan, direction_vec.pan);
}
if(my._PF_REACHED_TARGET == 0)
{
move_mode = IGNORE_PASSABLE + GLIDE;
ent_move(vector(time * 15,0,0), nullvector);
}
}
}
This is the heart of the path finding for the game. This is how it works. “dst_ent =
player” places the player entity into “dst_ent”. Next “pf_to_ent(my, dst_ent)” sends two
parameters to “pf_to_ent”. The first parameter is the starting position (the enemy) and the
second parameter is the destination (the player). “pf_to_ent” works by doing a trace
directly to the target. If there is no collisions it knows that the player is in sight and exits
else in records the distance. It then searches for the nodes near the origin and searches for
one that is closer then the current node to the destination. It also calculates the distance
between the current node and the next node. It takes these two numbers and adds them
Chapter 8 / Path Finding
67
together to find the neighbor node with the lowest number. It keeps on calculating the
nodes until it reaches the node closest to the player and then it has a path.
All the nodes are linked together in the beginning of the game using the
“pf_init_nodes()” function. It traces each node to the next and records the position and
the total number of neighbors and sorts them by distance. It then stores all the nodes
using bubble sort so they can be retrieved when “pf_to_ent is called.
Alternate Path Finding
There is another interesting way to implement path finding. Instead of calculating
the path each time the player moves to a different node we can calculate the distances
between all the nodes before the game. This cuts down the calculation time
tremendously. The problem with this method is that if the level changes, lets say a door
closes, we will have a problem calculating a new route. For that reason we used the
traditional A* path finding.
68
GLOSSARY
Bump Mapping
BSP Tree
This is used to create a scene that has different depths (such as a rocky
wall) without actually creating it. The way this works is that the
different depths are stored into a texture and then applied to the
surface of the level.
BSP stands for binary space partitioning, this tree partitions space by dividing
it using a splitting plane. The tree can be built for a two or three dimensional
level. 3DGameStudio always builds a three dimensional tree. This tree was
introduced by Fuchs (1980).
Geometric LOD
LOD stands for levels of detail. This method is usually used in wide
open areas (for example a large landscape), it lowers the level of detail
on objects that are far and as they get closer the detail improves. This
allows the view to have many objects in it with a minimum amount of
rendering.
HLSL/Cg
is a c based language that is used for vertex and pixel shading.
MIP Map
MIP stands for multum in parvo which is Latin for “much in little”. This
method changes the detail of textures as they get farther away from the player.
Player
The term “Player” when referred to in this document and in 3DGameStudio is
the entity model that the user controls.
Portal
Is a view that is mapped onto a surface of the level map.
Portal and Frustum Culling removes scenes from being rendered. This keeps the rendering
to only the current view.
PVS
stands for potential visible sets. This method is used to choose which faces
from the BSP tree should be rendered for the current view.
Quant
is a measurement used in 3DGameStudio.
Sky Cube
Sprite
Is a six sided cube that surrounds a level, created from six different
images to simulate a sky.
is a two dimensional image that is either placed on a wall (a decal) or can be set
to always face the camera thereby simulating a three dimensional object.
Viewing Frustum
Is the visible part of the level at the exact time that the user is playing
the game. In a standard three dimensional game this is usually a virtual
cone shape.
69
APPENDIX A
The Ackermann Function in C-Script
Appendix A is the Ackermann function written in C-Script. The purpose of this
program is to display the basic layout of C-Script.
To run this program you need a dark texture for the background.
// CScript.wdl
var video_mode = 7; // 800x600 pixels
var video_depth = 32; // 32 bit mode
var a = 1;
var b = 2;
var c = 0;
string CScript_wmb = <CScript.wmb>;
text box
{
pos_x = 10;
pos_y = 10;
string = "a = \nb = \nackermann = ";
flags = visible;
}
panel display_pan
{
pos_x = 0;
pos_y = 0;
digits = 35, 10, 3, _a4font, 1, a;
digits = 35, 19, 3, _a4font, 1, b;
digits = 80, 28, 3, _a4font, 1, c;
flags = overlay, refresh, visible;
}
function ack(a,b){
if(a==0){
return (b+1);
}
if(b==0 && a!=0){
return (ack(a-1,1));
}
else{
return (ack(a-1,ack(a,b-1)));
70
}
}
function main()
{
level_load (CScript_wmb);
while (1)
{
c=ack(a,b);
wait (1);
}
}
71
APPENDIX B
Entity Movement Using C-Script
Appendix B demonstrates how to move entities in a level using C-Script.
To run this program you need the code from Chapter 4 and replace the action with
this appendix. You also need any texture for the level and one entity for the movements,
preferable some kind of spaceship or hovercraft.
action ship
{
while(1)
{
if(key_w == on)
{
my.x = my.x+1;
}
if(key_s == on)
{
my.x = my.x-1;
}
if(key_a == on)
{
my.y = my.y+1;
}
if(key_d == on)
{
my.y = my.y-1;
}
if(key_z == on)
{
my.z = my.z+1;
}
if(key_x == on)
72
{
my.z = my.z-1;
}
if(key_i == on)
{
my.tilt = my.tilt+1;
}
if(key_k == on)
{
my.tilt = my.tilt-1;
}
if(key_j == on)
{
my.pan = my.pan+1;
}
if(key_l == on)
{
my.pan = my.pan-1;
}
if(key_m == on)
{
my.roll = my.roll+1;
}
if(key_n == on)
{
my.roll = my.roll-1;
}
wait(1);
}
}
73
APPENDIX C
Entity Movement Implementing Collision Detection
Appendix C demonstrates how to move an entity in C-Script using collision
detection.
To run this program you need the program from Chapter 4 and replace the action
with this appendix. You also need any texture for the level and one entity for the
movements, preferable some kind of spaceship or hovercraft.
action ship
{
while(1)
{
if(key_w == on)
{
c_move(my,vector(5*time,0,0), nullvector,glide);
}
if(key_s == on)
{
c_move(my,vector(-5*time,0,0), nullvector,glide);
}
if(key_a == on)
{
c_move(my,vector(0,5*time,0), nullvector,glide);
}
if(key_d == on)
{
c_move(my,vector(0,-5*time,0), nullvector,glide);
}
if(key_z == on)
{
c_move(my,vector(0,0,5*time), nullvector,glide);
}
74
if(key_x == on)
{
c_move(my,vector(0,0,-5*time), nullvector,glide);
}
if(key_i == on)
{
c_rotate(my,vector(0,5*time,0),glide);
}
if(key_k == on)
{
c_rotate(my,vector(0,-5*time,0),glide);
}
if(key_j == on)
{
c_rotate(my,vector(5*time,0,0),glide);
}
if(key_l == on)
{
c_rotate(my,vector(-5*time,0,0),glide);
}
if(key_m == on)
{
c_rotate(my,vector(0,0,5*time),glide);
}
if(key_n == on)
{
c_rotate(my,vector(0,0,-5*time),glide);
}
wait(1);
}
}
75
APPENDIX D
Entity Rotations and Camera angles
Appendix D demonstrates how to rotate an entity with the rotation based on the
entity instead of the level. This is very useful for flying games which require the user to
fly some kind of ship. This also demonstrates how to set up a camera in a certain angle
and move it along with an entity using C-Script.
To run this program you need any texture for the level and one entity for
the movements, preferable some kind of spaceship or hovercraft.
// Movement.wdl
var video_mode = 7; // 800x600 pixels
var video_depth = 32; // 32 bit mode
var video_screen = 1;
var cam_pos[3];
var cam_ang[3];
string Movement_wmb = <Movement.wmb>; //string with level name to load level
function view_ship() {
// set all to 0 if you want to be in the ship
vec_set(cam_pos,vector(-100,0,25));
vec_rotate(cam_pos,my.pan);
vec_add(cam_pos,my.x);
vec_set(camera.x,cam_pos);
vec_diff(cam_ang,my.x,camera.x);
vec_to_angle(camera.pan,cam_ang);
camera.tilt = my.tilt;
camera.roll = my.roll;
camera.pan = my.pan;
//camera.genius = my; //this makes the ship invisible
76
}
action ship
{
while(1)
{
temp.x +=15 * (key_w - key_s)*time;
temp.y +=15 * (key_a - key_d)*time;
temp.z +=15 * (key_z - key_x)*time;
c_move(my,vector(temp.x,temp.y,temp.z),nullvector,glide);
vec_set(temp.pan,vector(0,0,0));
temp.pan += 5 * (key_j - key_l) * time;
temp.roll += 5 * (key_n - key_m) *time;
temp.tilt += 5 * (key_k - key_i) * time;
vec_to_angle(temp.pan,nullvector);
ang_add(temp.pan,my.pan);
vec_diff(temp.pan,temp.pan,my.pan);
c_rotate(my,temp.pan,glide);
view_ship();
wait(1);
}
}
function main()
{
level_load (Movement _wmb); //load level
wait(3); //wait three cycles for level to load
}
77
APPENDIX E
3D Game Implementing Entity Animations and Effects
This is a basic first person shooter game. It demonstrates how to how to move an
entity with animations, player sound files, and implement special effects. This program
requires a texture for the level, two entities one used for the bad guys and one used for
the player, five sound files and three picture file for the special effects.
// Movement.wdl
var video_mode = 7; // 800x600 pixels
var video_depth = 32; // 32 bit mode
var video_screen = 1;
var cam_pos[3];
var cam_ang[3];
var anim_cycle;
var anim_speed=2; //animation speed
var im_shot=0; //flag if Witch was shot
sound wham_wav = <wham.wav>;
sound beamer_wav = <beamer.wav>;
sound scream_wav = <scream.wav>;
sound witch_wav = <witch.wav>;
define healthpoints = skill1;
entity* ent_pointer;
// used in effects routines
bmap explosion_particle_map = <fireball_sprite.pcx>;
string Movement_wmb = <Movement.wmb>; //string with level name to load level
78
function remove_func();
function im_hit();
function shoot_action;
function shoot();
function main()
{
level_load (Movement _wmb); //load level
wait(3); //wait three cycles for level to load
media_loop("hauntedmansion.mid",null,50);
}
//used in first shooter game
function view_warlock() {
// set all to 0 if you want to be in the ship
vec_set(cam_pos,vector(0,0,0));
vec_rotate(cam_pos,my.pan);
vec_add(cam_pos,my.x);
vec_set(camera.x,cam_pos);
vec_diff(cam_ang,my.x,camera.x);
vec_to_angle(camera.pan,cam_ang);
camera.tilt = my.tilt;
camera.roll = my.roll;
camera.pan = my.pan;
camera.genius = my; //this makes the entity invisible
}
function im_hit()
{
if(my.healthpoints>0)
{
my.healthpoints -=10;
im_shot = 1;
}
79
}
function remove_func()
{
wait(1); // make sure it exist at least one frame
small_explosion(handle(my));
my.invisible=on;
my.passable=on;
ent_playsound(my, wham_wav, 1000);
sleep(.5);
ent_remove(me);
}
function explosion_fade()
{
my.alpha -= 20 * time;
if(my.alpha < 0) { my.lifespan = 0; }
}
function small_explosion_particle
{
var velocity_vec[3];
velocity_vec[0] = random(4) - 2;
velocity_vec[1] = random(4) - 2;
velocity_vec[2] = random(4) - 2;
vec_set(my.vel_x, velocity_vec.x);
my.move = on;
my.bmap = explosion_particle_map;
my.alpha = 80;
my.lifespan = 100;
my.size = 10;
my.flare = 1;
80
my.function = explosion_fade;
}
function small_explosion(entity_handle)
{
var pos_vec[3];
var count = 10;
ent_pointer = ptr_for_handle(entity_handle);
if (ent_pointer != null)
{
vec_set(pos_vec, ent_pointer.x);
pos_vec.x += (random(6) - 3);
pos_vec.y += (random(6) - 3);
pos_vec.z += (random(6) - 3);
}
while (count > 0)
{
effect(small_explosion_particle, 2, pos_vec.x, nullvector);
count -= 1;
}
}
function shoot()
{
while(my.healthpoints>0)
{
if(key_space==on)
{
ent_create("blue.bmp",player.x,shoot_action);
sleep(.3);
81
}
wait(1);
}
}
function shoot_action()
{
my.enable_impact = on;
my.enable_entity = on;
my.enable_block = on;
my.enable_stuck = on;
my.event = remove_func;
my.pan = you.pan;
my.tilt = 0;
my.roll = 0;
my.passable = off;
my.facing = on;
my.overlay = on;
ent_playsound(my, beamer_wav, 100);
while(1)
{
c_move(my,vector(10*time,0,0),nullvector,activate_trigger+ignore_passents+ignore_pas
sable+ignore_me+ignore_you);
wait(1);
}
}
action warlock
{
player = me;
82
my.enable_impact = on;
my.enable_entity = on;
my.event = im_hit;
my.healthpoints=100;
shoot();
while(my.healthpoints>0)
{
var move_x=0;
var move_y=0;
var rotate;
if(key_any == off)
{
ent_animate(my,"stand",anim_cycle,anm_cycle);
anim_cycle += anim_speed * time;
anim_cycle %= 100;
}
if(key_w==on || key_s==on || key_z==on || key_x==on)
{
move_x += 5*(key_w - key_s)*time;
move_y += 5*(key_z - key_x)*time;
ent_animate(my,"walk",anim_cycle,anm_cycle);
anim_cycle += anim_speed * time;
anim_cycle %= 100;
}
c_move(my,vector(move_x,move_y,0),nullvector,IGNORE_YOU +
IGNORE_PASSABLE + IGNORE_PUSH + ACTIVATE_TRIGGER + GLIDE);
if(key_a==on || key_d==on)
{
rotate += 5*(key_a - key_d)*time;
ent_animate(my,"walk",anim_cycle,anm_cycle);
anim_cycle += anim_speed * time;
anim_cycle %= 100;
83
}
c_rotate(my,vector(rotate,0,0),activate_trigger+ignore_passents+ignore_passable
+ignore_me+ignore_you+ignore_sprites+glide);
wait(1);
}
ent_playsound(my,witch_wav,1000);
temp=0;
while(temp < 75 && my.healthpoints<=0)
{
ent_animate(my,"death",temp,0);
temp+=2*time;
wait(1);
}
}
action witch
{
my.enable_impact = on;
my.enable_entity = on;
my.event = im_hit;
my.healthpoints = 30;
while(my.healthpoints>0)
{
ent_animate(my,"stand",anim_cycle,anm_cycle);
anim_cycle += anim_speed * time;
anim_cycle %= 100;
//if I was shot and the Wizard is alive kill him
if(im_shot==1 && player.healthpoints > 0)
{
vec_set(temp,player.x);
84
vec_sub(temp,my.x);
vec_to_angle(my.pan,temp);
ent_create("red.bmp",my.x,shoot_action);
sleep(1);
}
wait(1);
}
temp=0;
ent_playsound(my, scream_wav, 1000);
while(temp <= 100 && my.healthpoints<=0)
{
my.passable=on;
ent_animate(my,"death",temp,0);
temp+= 2*time;
wait(1);
}
}
85
APPENDIX F
A 3D Game Implementing Advanced AI and Effects
This program contains all the code needed to create the core of a full functioning
game. To complete this program and create a commercial game it requires menus,
multiple levels, and a final goal for the player to complete.
The sound files can be created using any program that can create wav, mid, ogg,
CD, mp3, avi, and mpg. These files can either be created on a computer using a digital
synthesizer, recorded from a microphone, or ripped from a CD.
Models implemented in this program can be created in any 3D modeling program
this includes Maya, Truespace, and 3D Studio Max. Conitec offers a free plugin for Maya
and 3D Studio Max so the models can be imported seamlessly.
Textures can be created by using any kind of graphic program that can create bmp
files. These programs include Microsoft Paint which is free with any version of MS
Windows and is a very basic graphic program to programs like Adobe PhotoShop which
is an advanced image editing software package.
The path finding code is implemented by importing a dll file into the game
engine. This file was created using VC++ and the SDK plugin for 3DGameStudio. The
plugin can be downloaded from http://conitec.com/a4update.htm. By using VC++ you
have the full power of C++ programming to produce your game. The reason why the path
finding code is implemented using C++ is that in C-Script you can not have different
classes thereby making it impossible to define a node class. C++ on the other hand
allowed the node class to be created thereby making the path finding code much easier to
write and much more efficient.
// Project.wdl
//
// command line parameters
//
// -d no_enemy_fire
Enemies no longer fire weapons. Good for testing!
//
var video_mode = 7;
//1024x768 screen
var video_depth = 16; //16 bit
var video_screen = 1; //full screen
// DLL Handles
86
var pathfind_handle;
// Other global variables
var temp_vec;
//for ship movement
var cam_pos[3];
//for view_ship
var cam_ang[3];
var i=0;
//for patrol_path
entity* bad_guy;
entity* ent_pointer;
// used in effects routines
entity* src_ent;
// used in pathfinding routines
entity* dst_ent;
// used in pathfinding routines
string tmp_string;
// for diagnostic messages
string bullet_blue = <blue.bmp>; //for player's bullet
string bullet_red = <red.bmp>; //for enemy's bullet
string bullet_hole = <bullet_hole.bmp>;
bmap crosshair_bmp = <crossHair.bmp>;
bmap ptrail_map = <ptrail.pcx>; //for rocket
bmap explosion_particle_map = <fireball_sprite.pcx>;
string rocket_mdl = <rocket.mdl>;
sound rocket_wav = <rocket.wav>;
sound destroyed_wav = <destroyed.wav>;
sound beamer_wav = <beamer.wav>;
sound wham_wav = <wham.wav>;
87
define number_of_edges, 10;
//=============Code for .dll file======================
// this code lists all the functions imported from the dll file
DEFINE _PF_NEXT_NODE_X, skill91;
DEFINE _PF_NEXT_NODE_Y, skill92;
DEFINE _PF_NEXT_NODE_Z, skill93;
DEFINE _PF_REACHED_TARGET, skill94;
DEFINE _PF_TARGET_IN_SIGHT, skill95;
DEFINE _PF_PAN_TO_TARGET, skill96;
DEFINE _PF_TILT_TO_TARGET, skill97;
DEFINE _PF_ROLL_TO_TARGET, skill97;
DEFINE _NODE_LOCKED, skill99;
DEFINE _PATH_BLOCKED, skill100;
dllfunction pf_initialized();
dllfunction pf_init_nodes();
dllfunction pf_first_node();
dllfunction pf_to_ent(src_ent, dst_ent);
dllfunction pf_use_los(flag);
dllfunction pf_set_ent_collision_distance(dist);
dllfunction pf_set_max_path(dist);
dllfunction pf_set_node_collision_distance(dist);
dllfunction pf_set_diag(flag);
dllfunction pf_smooth_tilt(flag);
dllfunction pf_smooth_roll(flag);
88
dllfunction pf_diag_node(ent_pointer);
dllfunction pf_next_node(src_ent_ptr, dst_ent_ptr);
dllfunction pf_smooth_turn(actor_ent_ptr, pan_vec, speed);
bind <pathfind.dll>;
// =========== DEFINES ===========================================
// Create constants for the player's ship's skills
//used for player's movement
define _FORCE_X, skill20;
define _FORCE_Y, skill21;
define _FORCE_Z, skill22;
//used for player's rotation
define _FORCE_PAN, skill23;
define _FORCE_TILT, skill24;
define _FORCE_ROLL, skill25;
define healthpoints = skill1;
define _TYPE, skill4;
defines.
define _DAMAGE, skill5;
bullet
define _TARGET_LOCKED, skill6;
on target
// Define entity types
define PLAYER_TYPE, 1;
define ENEMY_TYPE, 2;
// just another name for skill1
// Type of entity. See below for type
// Damage done by missile or
// Flag for heat seeking missiles. 1= locked
89
define PLAYER_BULLET_TYPE, 3;
define PLAYER_ROCKET_TYPE, 4;
define ENEMY_BULLET_TYPE, 5;
define SPACE_DEBRIS_TYPE, 6;
define DEBRIS_LIFETIME, 15;
explodes
// How long it takes until debris
define PATH_SMOOTHING, 1;
smooth out pathfinding turns
// Decide wether or not to
define SOUND_ALARM, 0;
enemy ships to begin hunting the player
// Setting this causes all
// =========== FUNCTION PROTOTYPES
===========================================
function rocket_action();
// function remove_rocket();
function particle_trail();
function fade_trail();
function view_ship();
function enemy_event();
function im_hit_player();
function radar();
function shoot_action();
function shoot_action_player();
function space_fire();
// =========== CODE ===========================================
function main() {
90
pathfind_handle
= dll_open("pathfind.dll");
wait(3);
warn_level = 0; // This is necessary for the .dll to work
fps_max = 60;
clip_size =0;
level_load("Project.wmb");
wait(3);
cd_play(4,4);
// Set the node collision distance to 40.
//Make it smaller if pf_smooth_turn is not in use
pf_set_node_collision_distance(40);
// Allow pf_smooth_turn to modify tilt and roll parameters:
pf_smooth_tilt(on);
pf_smooth_roll(on);
// Initialized pathfinding nodes. Do this after the level loads. The
// .dll function pf_initialized() returns 1 when the pathfinding has completed
// initialization.
pf_init_nodes();
wait(1);
}
91
//keeps camera in the center of an entity
function view_ship()
{
vec_set(cam_pos,vector(0,0,0)); //the vector can be changed to change the view
vec_rotate(cam_pos,my.pan);
vec_add(cam_pos,my.x);
vec_set(camera.x,cam_pos);
vec_diff(cam_ang,my.x,camera.x);
vec_to_angle(camera.pan,cam_ang);
camera.tilt = my.tilt;
camera.roll = my.roll;
camera.pan = my.pan;
camera.genius = my; //make ship invisible
}
string tmp_str;
function rocket_event()
{
var remove_rocket = 0;
// If the rocket hit an entity, and that entity was an enemy, then
// reduce the enemy's health points and remove the rocket.
if (EVENT_TYPE == EVENT_ENTITY)
{
if ((my._TYPE == PLAYER_ROCKET_TYPE) && (you._TYPE ==
ENEMY_TYPE))
{
you.healthpoints -= my._DAMAGE;
remove_rocket = 1;
92
}
if ((my._TYPE == PLAYER_ROCKET_TYPE) && (you._TYPE ==
PLAYER_ROCKET_TYPE))
{
remove_rocket = 1;
}
}
// If the rocket his part of the level, the remove the rocket.
if (EVENT_TYPE == EVENT_BLOCK)
{
remove_rocket = 1;
}
if (remove_rocket)
{
ent_playsound(my, destroyed_wav, 1000); // play the explosion sound
small_explosion(handle(my));
my.event = null;
my.invisible = on; // hide the rocket
my.passable = on;
sleep(1); //keep ent_playsound playing for one second
ent_remove(me); // now remove it
}
wait(1);
}
function bullet_event()
93
{
var explode_flag = 0;
if (EVENT_TYPE == EVENT_ENTITY)
{
if ((my._TYPE == PLAYER_BULLET_TYPE) && (you._TYPE ==
ENEMY_TYPE))
{
you.healthpoints -= my._DAMAGE;
}
if ((my._TYPE == ENEMY_BULLET_TYPE) && (you._TYPE ==
PLAYER_TYPE))
{
you.healthpoints -= my._DAMAGE;
}
}
// Ignore space debris, other bullets, and the player
if (EVENT_TYPE == EVENT_ENTITY)
{
if (my._TYPE == PLAYER_BULLET_TYPE)
{
if ((you._TYPE == SPACE_DEBRIS_TYPE) ||
(you._TYPE == PLAYER_BULLET_TYPE) ||
(you._TYPE == ENEMY_BULLET_TYPE) ||
(you._TYPE == PLAYER_ROCKET_TYPE) ||
(you._TYPE == PLAYER_TYPE))
{
return;
}
94
}
}
// If the player moves into the bullet, then ignore it
if (EVENT_TYPE == Event_impact)
{
if (you._TYPE == PLAYER_TYPE)
{
return;
}
}
snd_play (wham_wav, 50,0);
small_explosion(handle(my));
wait(1);
ent_remove(me);
}
function enemy_event()
{
if (EVENT_TYPE == EVENT_SCAN)
{
// Enemy got scanned by a rocket
if (you._TYPE == PLAYER_ROCKET_TYPE)
{
if (my.invisible == off)
{
vec_set (temp.x, my.x);
vec_sub (temp.x, you.x);
95
vec_to_angle (you.pan, temp.x);
// rotate the missile
towards me
you._TARGET_LOCKED = on;
// lock
on heat seeking missile
}
}
}
// Enemy moved into a rocket.
if (EVENT_TYPE == EVENT_ENTITY)
{
if (you._TYPE == PLAYER_ROCKET_TYPE)
{
diag("\nWARNING - enemy moved into a rocket.");
}
}
// If the enemy ship was run into by another enemy ship, then get pushed by
// the ship that was moving.
if (EVENT_TYPE == EVENT_IMPACT)
{
if (you._TYPE == ENEMY_TYPE)
{
move_mode = IGNORE_PASSABLE + GLIDE;
// Get pushed
ent_move(nullvector, normal);
// Also move forward a little to make room.
96
ent_move(VECTOR(10 * time, 0,0), nullvector);
// Also move forward a little to make room.
ent_move(VECTOR(0,0, 10 * time), nullvector);
}
}
}
function im_hit_player()
{
var abs_force_vec[3];
var rel_force_vec[3];
if (EVENT_TYPE == EVENT_BLOCK)
{
return;
}
wait(1);
}
function remove_func()
{
if(event_type == event_block)
{
ent_create(bullet_hole,my.x,null);
}
wait(1); // make sure it exist at least one frame
ent_remove(me); //remove it
}
function shoot_action()
{
97
// Set up events
my.enable_impact = on;
my.enable_entity = on;
my.enable_block = on;
my.enable_stuck = on;
my.event = bullet_event;
// Turn to face in the same direction as the entity who fired me
my.pan = you.pan;
my.tilt = you.tilt;
my.roll = you.roll;
my.passable = off;
my.facing = on;
my.overlay = on;
my._DAMAGE = 10;
this bullet does
// Set the amount of damage
my._TYPE = ENEMY_BULLET_TYPE; // Set the type of entity, used in event
routine
ent_playsound(my,beamer_wav,100);
while(my != null)
{
temp.x = 20 * time;
temp.y = 0;
temp.z = 0;
result =
c_move(my,temp,nullvector,activate_trigger+ignore_passents+ignore_passable+ignore_
me+ignore_you+ignore_sprites);
wait(1);
98
}
}
// This routine is called when the player hits the space bar. It fires a bullet
// in the form of a sprite directly ahead.
function shoot_action_player()
{
my.enable_impact = on;
my.enable_entity = on;
my.enable_block = on;
my.enable_stuck = on;
my.event = bullet_event;
my.pan = player.pan;
my.tilt = player.tilt;
my.roll = player.roll;
my.passable = off;
my.facing = on;
my.overlay = on;
my._TYPE = PLAYER_BULLET_TYPE;
event routine
my._DAMAGE = 10;
damage done by this bullet
ent_playsound(my,beamer_wav,50);
while(my != NULL)
{
// Set the entity type, used in
// Set the
99
temp.x = 20 * time;
temp.y = 0;
temp.z = 0;
result =
c_move(my,temp,nullvector,activate_trigger+ignore_passents+ignore_passable+ignore_
me+ignore_you);
my.roll= my.roll + 100;
wait(1);
}
wait(1);
}
function space_fire()
{
while(player.healthpoints > 0)
{
if(key_space == on)
{
ent_create(bullet_blue,player.x,shoot_action_player);
sleep(.5);
}
wait(1);
}
wait(1);
}
100
function rocket_action
{
my.enable_entity = on;
my.enable_block = on;
my.event = rocket_event;
my.pan = you.pan;
my.tilt = you.tilt;
my.roll = you.roll;
my.skill95 = 0;
my.skill91 = 20;
my.skill92 = 0;
my.skill93 = 0;
my.skill91 *= time;
my.skill90 = 0;
my._TARGET_LOCKED = off;
my._TYPE = PLAYER_ROCKET_TYPE;
my._DAMAGE = 10;
while (my.skill95 < 500)
{
if (my == null) {return;}
if (my.invisible == off)
{
temp.x = 360; // horizontal scanning angle
temp.y = 60; // vertical scanning angle
temp.z = 1000; // scanning range
101
if ((my._TARGET_LOCKED == off) && (vec_dist (my.x,
player.x) > 100))
{
scan_entity(my.x, temp);
}
my.skill95 += 1 * time;
//used to keep the player from getting hit by its own missle
you = player;
// Move the rocket.
result = c_move(my, my.skill91, nullvector, ignore_me +
ignore_you + ignore_passable);
temp.x = my.x - 6 * cos(my.pan);
temp.y = my.y - 6 * sin(my.pan);
temp.z = my.z;
effect(particle_trail, 10, temp, normal);
}
wait(1);
}
// Remove rocket
ent_playsound(my, destroyed_wav, 1000); // play the explosion sound
small_explosion(handle(my));
my.event = null;
my.invisible = on; // hide the rocket
102
my.passable = on;
sleep(1); //keep ent_playsound playing for one second
ent_remove(me); // now remove it
}
function particle_trail()
{
temp.x = random(2) - 1;
temp.y = random(2) - 1;
temp.z = random(2) - 1;
vec_rotate (temp, my.pan);
vec_normalize (temp, 3);
vec_add (my.vel_x, temp);
my.alpha = 40 + random(30);
my.bmap = ptrail_map;
my.size = random(2) + 5;
my.flare = on;
my.bright = on;
my.beam = on;
my.move = on;
my.lifespan = 20;
my.function = fade_trail;
}
function fade_trail()
{
my.alpha -= 10 * time;
if (my.alpha < 0) {my.lifespan = 0;}
}
103
action ship
{
// Wait for pathfinding nodes to get initialized
while(! pf_initialized())
{
wait(1);
}
// fire_key_clear will act as a flag that shows the status of the fire key.
// It's used to make sure code is only run once when the fire key is pressed.
var fire_key_clear = 1;
// The following constants control the speed of the ship
var ACCELERATION_SPEED = .4;
accelerates
// Speed factor that ship
var DECELERATION_SPEED = .4;
decelerates
// Speed factor that ship
var PAN_ACCELERATION_SPEED = .3;
accelerates pans/tilts/roll
// Speed factor that ship
var PAN_DECELERATION_SPEED = .2;
decelerates pans/tilts/roll
// Speed factor that ship
var TOP_SPEED = 5;
var TOP_ROTATION_SPEED = 1.5;
roll speeds
// SHIP_CALM is the minimum speed that the ship has
// to move to be considered moving.
var SHIP_CALM = .05;
// Top speed of ship
// Limits pan/tilt/and
104
var SHIP_CALM_PAN = .05;
// Set up events
my.enable_impact = on;
// Player was hit by another entity
my.enable_entity = on;
// Player hit another entity
my.enable_block = on;
// Player hit a level block
my.event = im_hit_player;
// Set type to PLAYER_TYPE. This is an identifier that's used in the events code
// to help specify what actions should be taken during, say, an event_entity.
my._TYPE = PLAYER_TYPE;
// Set player entity's attributes
player = me;
player.healthpoints = 100;
//my.invisible = on;
my.narrow = on; //used for collision detection
my.fat = on;
c_setminmax(my);
space_fire();
while(player.healthpoints > 0)
{
// Poll the movement keys. If any of the movement keys are pressed, then
apply
// force to the ship. Three of the ship's skill slots will be used to store
105
// a vector representing the relative forces on the ship: x, y, z = relative
// to the ship's facing.
//
// The forces will be stored in the following slots:
// my._FORCE_X;
// my._FORCE_Y;
// my._FORCE_Z;
if (key_a) { my._FORCE_X += time * ACCELERATION_SPEED; }
if (key_z) { my._FORCE_X -= time * ACCELERATION_SPEED; }
if (key_end) { my._FORCE_Y += time * ACCELERATION_SPEED; }
if (key_pgdn) { my._FORCE_Y -= time * ACCELERATION_SPEED; }
// Decelerate if keys are not pressed
if ((key_a == off) && (key_z == off) && (abs(my._FORCE_X) >
SHIP_CALM))
{
my._FORCE_X -= (sign(my._FORCE_X) * time *
DECELERATION_SPEED);
if (abs(my._FORCE_X) < SHIP_CALM)
{
my._FORCE_X = 0;
}
}
if ((key_end == off) && (key_pgdn == off) && (abs(my._FORCE_Y) >
SHIP_CALM))
{
my._FORCE_Y -= (sign(my._FORCE_Y) * time *
DECELERATION_SPEED);
if (abs(my._FORCE_Y) < SHIP_CALM)
106
{
my._FORCE_Y = 0;
}
}
// Ensure that the ship doesn't go over the top speed.
my._FORCE_X = clamp(my._FORCE_X, -1 * TOP_SPEED,
TOP_SPEED);
my._FORCE_Y = clamp(my._FORCE_Y, -1 * TOP_SPEED,
TOP_SPEED);
my._FORCE_Z = clamp(my._FORCE_Z, -1 * TOP_SPEED,
TOP_SPEED);
// Now handle pan/tile/and roll controls. These will be very similar to the
// movement controls. The forces will be stored in the following slots:
// my._FORCE_PAN, my._FORCE_TILT, my._FORCE_ROLL
// Add forces to PAN
if (key_cul) { my._FORCE_PAN += time *
PAN_ACCELERATION_SPEED; }
if (key_cur) { my._FORCE_PAN -= time *
PAN_ACCELERATION_SPEED; }
// Add forces to TILT
if (key_cud) { my._FORCE_TILT += time *
PAN_ACCELERATION_SPEED; }
if (key_cuu) { my._FORCE_TILT -= time *
PAN_ACCELERATION_SPEED; }
// Add forces to ROLL
107
if (key_pgup) { my._FORCE_ROLL += time *
PAN_ACCELERATION_SPEED; }
if (key_home) { my._FORCE_ROLL -= time *
PAN_ACCELERATION_SPEED; }
// Decelerate if keys are not pressed.
if ((key_cul == off) && (key_cur == off) && (abs(my._FORCE_PAN) >
SHIP_CALM_PAN))
{
my._FORCE_PAN -= (sign(my._FORCE_PAN) * time *
PAN_DECELERATION_SPEED);
// Zero out the pan if it's a very small number. This keeps the ship
from
// slowly turning if the pan is near zero but not zero.
if (abs(my._FORCE_PAN) < SHIP_CALM_PAN)
{
my._FORCE_PAN = 0;
}
}
if ((key_cud == off) && (key_cuu == off) && (abs(my._FORCE_TILT)
> SHIP_CALM_PAN))
{
my._FORCE_TILT -= (sign(my._FORCE_TILT) * time *
PAN_DECELERATION_SPEED);
if (abs(my._FORCE_TILT) < SHIP_CALM_PAN)
{
my._FORCE_TILT = 0;
}
108
}
if ((key_pgup == off) && (key_home == off) &&
(abs(my._FORCE_ROLL) > SHIP_CALM_PAN))
{
my._FORCE_ROLL -= (sign(my._FORCE_ROLL) * time *
PAN_DECELERATION_SPEED);
if (abs(my._FORCE_ROLL) < SHIP_CALM_PAN)
{
my._FORCE_ROLL = 0;
}
}
// Restrict the roll forces to maximum values
my._FORCE_PAN = clamp(my._FORCE_PAN, -1 *
TOP_ROTATION_SPEED, TOP_ROTATION_SPEED);
my._FORCE_TILT = clamp(my._FORCE_TILT, -1 *
TOP_ROTATION_SPEED, TOP_ROTATION_SPEED);
my._FORCE_ROLL = clamp(my._FORCE_ROLL, -1 *
TOP_ROTATION_SPEED, TOP_ROTATION_SPEED);
//Used for the rotation
vec_set(temp.x,my._FORCE_PAN);
vec_to_angle(temp.pan,nullvector);
ang_add(temp.pan,my.pan);
vec_diff(temp.pan,temp.pan,my.pan);
// Apply the pan/tilt/roll forces to the player's ship
c_rotate(my,temp.pan,ignore_passents);
109
// Move the ship
c_move(my, vector(my._FORCE_X, my._FORCE_Y, my._FORCE_Z),
nullvector, glide+ignore_sprites);
// Check for the fire key and fire missiles if it's pressed.
if (fire_key_clear == on)
{
if(key_ctrl == on)
{
ent_create (rocket_mdl, player.x, rocket_action);
snd_play (rocket_wav, 50, 0);
fire_key_clear = 0;
}
}
if (key_ctrl == off)
{
fire_key_clear = 1;
}
view_ship(); // move camera along with ship entity
wait(1);
}
//if player dies execute a death roll
cd_pause();
if(my.healthpoints<=0)
{
while(my.skill20<500)
{
c_rotate(my,vector(1,1,1),IGNORE_YOU &
IGNORE_PASSABLE + IGNORE_PUSH + ACTIVATE_TRIGGER + GLIDE);
110
my.skill20 = my.skill20+1;
view_ship();
//don't allow the healthpoint to go below 0
if(player.healthpoints<0)
{
player.healthpoints=0;
}
wait(1);
}
media_play("explo.wav",null,1000);
}
}
font panel_font = "Arial",1,20;
//displays the life of the player
panel health_panel
{
pos_x = 0;
pos_y = 470;
digits = 30, 30, 4, panel_font, 1, Player.healthpoints;
layer = 1;
flags = refresh, visible,overlay;
}
panel crosshair_panel
{
pos_x = 363;
pos_y=267;
bmap = crosshair_bmp;
layer=1;
flags = refresh, overlay, visible, transparent;
}
111
function radar()
{
if(player != NULL)
{
vec_diff(temp.x,my.x,player.x);
temp.y=-temp.y;
vec_rotate(temp.x,vector(player.pan-90,0,0));
vec_scale(temp.x,0.1);
if(vec_length(temp.x)<128)
{
draw_text("*",temp.x+1524/2,temp.y+1068/2,vector(0,255,0));
draw_text("*",1524/2,1068/2,vector(0,0,255));
}
}
}
function debris_action
{
var velocity_vec[3];
var vel_vec_normalized[3];
var spin_vec[3];
var count;
my._TYPE = SPACE_DEBRIS_TYPE;
count = random(DEBRIS_LIFETIME) + 10;
velocity_vec.x = (random(2) - 1);
velocity_vec.y = (random(2) - 1);
velocity_vec.z = (random(2) - 1);
spin_vec.x = random(10);
spin_vec.y = random(10);
112
spin_vec.z = random(10);
my.passable = 1;
while(count > 0)
{
vec_add(my.pan, spin_vec);
move_mode = IGNORE_YOU + IGNORE_PASSABLE +
IGNORE_PUSH + GLIDE;
vec_set(vel_vec_normalized, velocity_vec);
vec_normalize(vel_vec_normalized, time);
ent_move(nullvector, vel_vec_normalized);
count -= time;
wait(1);
}
small_explosion(handle(my));
wait(1);
ent_remove(my);
wait(1);
}
function explosion_fade()
{
my.alpha -= 20 * time;
if(my.alpha < 0)
{
my.lifespan = 0;
113
}
}
function small_explosion_particle
{
var velocity_vec[3];
velocity_vec[0] = random(4) - 2;
velocity_vec[1] = random(4) - 2;
velocity_vec[2] = random(4) - 2;
vec_set(my.vel_x, velocity_vec.x);
my.move = on;
my.bmap = explosion_particle_map;
my.alpha = 80;
my.lifespan = 100;
my.size = 10;
my.flare = 1;
my.function = explosion_fade;
}
function explosion_particle
{
var velocity_vec[3];
velocity_vec[0] = random(14) - 7;
114
velocity_vec[1] = random(14) - 7;
velocity_vec[2] = random(14) - 7;
vec_set(my.vel_x, velocity_vec.x);
my.move = on;
my.bmap = explosion_particle_map;
my.alpha = 80;
my.lifespan = 100;
my.size = 45;
my.flare = 1;
my.function = explosion_fade;
}
function explosion(entity_handle)
{
var pos_vec[3];
var count = 20;
ent_pointer = ptr_for_handle(entity_handle);
if (ent_pointer != null)
{
vec_set(pos_vec, ent_pointer.x);
pos_vec.x += (random(12) - 6);
pos_vec.y += (random(12) - 6);
pos_vec.z += (random(12) - 6);
115
}
while (count > 0)
{
effect(explosion_particle, 2, pos_vec.x, nullvector);
count -= 1;
}
// set debris count
count = 5;
while (count > 0)
{
ent_create("debris1.mdl", ent_pointer.x, debris_action);
count -= 1;
}
wait(1);
}
function small_explosion(entity_handle)
{
var pos_vec[3];
var count = 10;
ent_pointer = ptr_for_handle(entity_handle);
if (ent_pointer != null)
{
vec_set(pos_vec, ent_pointer.x);
116
pos_vec.x += (random(6) - 3);
pos_vec.y += (random(6) - 3);
pos_vec.z += (random(6) - 3);
}
while (count > 0)
{
effect(small_explosion_particle, 2, pos_vec.x, nullvector);
count -= 1;
}
}
action patrol_path
{
//
AI for the enemy ship
// 1. The ship will patrol until the player is spotted
// 2. Once the player is spotted, the ship will stop patrolling
//
and attack the player.
// 3. Anytime the player is out of view after they've been spotted,
//
the enemy ship will use path finding to move toward the player.
// Set the _TYPE. This is an identifier that's used in the events code
// to help specify what actions should be taken during, say, and event_entity.
my._TYPE = ENEMY_TYPE;
my.enable_impact = on;
my.enable_entity = on;
my.enable_scan = on;
my.event = enemy_event;
my.healthpoints = 30; // and I have 30 health points
117
// The new player_spotted flag will indicate wether the player has been detected
// by the enemy. If not, the enemy will patrol until the player is spotted. If
// the player has been spotted, then instead of patrolling, the enemy will use
// the pathfinding algorithm to navigate toward the player.
var player_spotted = 0;
// Turn speed with be the turning radius of the enemy ship while it's using
// pathfinding.
var turn_speed;
/*
my.narrow = on;
my.fat = on;
c_setminmax(my);
*/
var RELOAD_TIME = 20;
// Time between shots
var sleep_counter;
var node_pos[3];
// temp storage for node position in AI
var node;
// current node
var dist;
// distance to node
var direction_vec[3];
// Used to prepare arguments to pf_smooth_turn()
while(player == null)
{
wait(1); //used to keep from getting a null pointer to player
}
118
//Patrol path for the enemy ship
// attach entity to nearest path
node = path_scan(me, my.x, my.pan, vector(360,180,1000));
if (node == 0)
{ // no path found
beep(); //for debuging
return;
}
// find first waypoint
path_getnode(my,node,node_pos.x,null);
while (my != NULL)
{
//if enemy lost health even if it did not trace the player
//activate player_spotted
if(my.healthpoints<30)
{
player_spotted = 1;
}
//continue patroling until player is spotted
//or sound_alarm is activated
if ((! player_spotted) && (! SOUND_ALARM))
{
// find distance
dist = vec_dist(node_pos.x,my.x);
// near target? Find next waypoint of the path
if (dist < 25)
{
119
node = path_nextnode(my,node,1);
path_getnode(my,node,node_pos.x,NULL);
}
}
radar(); //this is used to display a radar in the player's ship
//this sets the you to the player if visible.
trace_mode = IGNORE_ME + IGNORE_PASSABLE +
ACTIVATE_TRIGGER + use_box;
trace(my.x,player.x);
//if player is close to me and player is alive
if (player.healthpoints > 0 && (you == player))
{
//it will now start pathfinding to find the player
player_spotted = 1;
//this jams the players radar so the enemy can't be seen
draw_text("JAMMED",1400/2,1068/2,vector(255,100,100));
//initial rotate values to rotate toward the player
vec_set(temp, player.x);
vec_sub(temp, my.x);
vec_to_angle(my.skill2, temp); //store angle in skill 2, 3
//while I am not facing at player, turn toward player
while(abs(ang(my.skill2)-ang(my.pan))>1 || abs(ang(my.skill3)ang(my.tilt))>1)
{
draw_text("JAMMED",1450/2,1068/2,vector(255,100,100));
120
vec_set(temp, player.x);
vec_sub(temp, my.x);
vec_to_angle(my.skill2, temp); //store angle in skill 2, 3
my.pan -= ang(my.pan-my.skill2)*0.5*time; //0.5 = speed
my.tilt -= ang(my.tilt-my.skill3)*0.5*time; //0.5 = speed
//
c_rotate(my,temp,ignore_passents);
wait(1);
}
//used for testing
//if started with command line parameter
//"-d no_enemy_fire" enemies don't fire
ifndef no_enemy_fire;
ent_create(bullet_red,my.x,shoot_action); //fire at player
endif;
//used to pause in between shots
sleep_counter = 0;
while((sleep_counter < RELOAD_TIME) && (my.healthpoints >
0))
{
sleep_counter += time;
wait(1);
}
}
//continue patrol
else
{
if ((! player_spotted) && (! SOUND_ALARM))
{
121
// Patrol...
vec_set(temp, node_pos.x);
vec_sub(temp, my.x);
vec_to_angle(my.skill10, temp);
my.pan = my.skill10.pan;
my.tilt = my.skill11.tilt;
temp.x = 5 * time;
temp.y = 0;
temp.z = 0;
c_move (my, temp, nullvector, IGNORE_YOU +
IGNORE_PASSABLE + IGNORE_PUSH + ACTIVATE_TRIGGER + GLIDE);
}
else
{
// Pathfind...
dst_ent = player;
//the two arguments are the two points that the pathfinding
algorithm uses
//as a start and end point
if ( pf_to_ent(my, dst_ent) )
{
//Turn toward the next node
turn_speed = 15 * time;
direction_vec.pan = my._PF_PAN_TO_TARGET;
direction_vec.tilt = my._PF_TILT_TO_TARGET;
122
direction_vec.roll = my._PF_ROLL_TO_TARGET;
//if "PATH_SMOOTHING" is enabled
if (PATH_SMOOTHING)
{ //smooth path
pf_smooth_turn(my,
VECTOR(my._PF_PAN_TO_TARGET, my._PF_TILT_TO_TARGET,
my._PF_ROLL_TO_TARGET), turn_speed);
}
else
{ //use a rough turn
vec_set(my.pan, direction_vec.pan);
}
// If the entity has NOT reached the target entity,
then move toward it.
if(my._PF_REACHED_TARGET == 0)
{
//ignore the entity nodes
move_mode = IGNORE_PASSABLE +
GLIDE;
ent_move(vector(time * 15,0,0), nullvector);
}
}
}
}
//if I am dead
if(my.healthpoints <= 0)
{
123
media_play("explo.wav",null,1000);
explosion(handle(my));
small_explosion(handle(my));
my.invisible = 1;
my.passable = 1;
sleep(2);
ent_remove(me);
}
wait(1);
}
}
124
REFERENCES
1.
AI Game Programming Wisdom, by Steve Rabin (Editor)
Publisher: Charles River Media
2.
Beginning 3D Game Programming, by Tom Miller
Publisher: SAMS
3.
3D Games; Real-Time Rendering and Software Technology, by Alan Watt and
Fabio Policarpo, Volume One
Publisher: Addison-Wesley
4.
3D Games Animation and Advanced Real-Time Rendering, by Alan Watt and
Fabio Policarpo, Volume Two
Publisher: Addison -Wesley
5.
Gimber’s 3DGS Document Site: http://s91902847.onlinehome.us
6.
Conitec DATASYSTEMS: http://conitec.com
7.
MSN 3DGS Users Group: http://groups.msn.com/3DGSusers