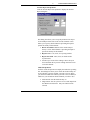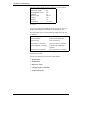
1
MedelecSynergy
Multimedia EMG
Notebook, Tower and Suite
User Manual
035W001B Vs8.0
Oxford Instruments Medical Ltd
Manor Way, Old Woking
Surrey, GU22 9JU, UK
Tel: +44 (0)1483 770331
Fax: +44 (0)1483 727193
E-Mail: [email protected]
!
www.oxford-instruments.com
Copyright
All rights reserved. This manual contains proprietary information, which is protected by copyright
and may not be copied in whole or in part except with the prior written permission of Oxford
Instruments Medical Ltd. The copyright and the foregoing restrictions on the copyright use extend
to all media in which this information may be preserved.
This copy of the User Manual shall be used only in accordance with the conditions of sale of Oxford
Instruments Medical Ltd or its distributors.
Oxford Instruments Medical Ltd makes no representations or warranties of any kind whatsoever
with respect to this document. Oxford Instruments Medical Ltd disclaims all liabilities for loss or
damage arising out of the possession, sale or use of this document.
Medelec and TECA are registered trademarks of Oxford Instruments Medical Ltd in the UK and
other countries.
This product complies with the provisions of the Medical Device Directive (93/42/EEC)
FRANCE
Oxford Instruments SARL
Domaine Technologique de Saclay
Bátiment Ariane
4 rue René Razel
91892 SACLAY Cedex
Tel: +33 (1) 69 85 25 00
Fax:+33 (1) 69 85 25 09
E-Mail: [email protected]
GERMANY
Oxford Instruments Medical GmbH
Otto-von-Guericke-Ring 10
65205 Wiesbaden
Postfach 4509, D-65035 Wiesbaden
Tel: +49 (0)6122 937-0
Fax: +49 (0)6122 937-100
E-Mail: [email protected]
NETHERLANDS
Oxford Instruments Medical NV
Avelingen West 1
4202 MS Gorinchem
Tel: + 31 (0) 183 692111
Fax: + 31 (0) 183 6 92119
E-Mail: [email protected]
ITALY
Oxford Instruments Medical Spa
Via Leone Tolstoi, 86
20098 San Giuliano Milanese
Milano
Tel: +39 (0)2 982 531
Fax:+39 (0)2 982 41407
E-Mail: [email protected]
SPAIN
Oxford Instruments Medical SA
Avda. Mata Pinõnera 2
28700 San Sebastian de los Reyes
Madrid
Tel: +34 (91) 653 8198/ 8387/ 8398
Fax: +34 (91) 654 6794
E-Mail: [email protected]
BELGIUM
Oxford Instruments Medical NV
Molenberglei 21
B-2627 Schelle
Tel: + 32 (0) 3 880 82 80
Fax: + 32 (0) 3 844 78 42
E-Mail: [email protected]
TECASynergy
Multimedia EMG
Notebook, Tower and Suite
User Manual
035W001B Vs8.0
Oxford Instruments Medical Inc.
12 Skyline Drive, Hawthorne,
New York 10532-2133, USA
Oxford Instruments Medical Ltd
Manor Way, Old Woking,
Surrey, GU22 9JU, UK
Tel: +1 914 593 7100
1-800 438-8322
Fax: +1 914 593 7290
E-Mail: [email protected]
Tel: +44 (0)1483 770331
Fax: +44 (0)1483 727193
E-Mail: [email protected]
www.oxford-instruments.com
Copyright
All rights reserved. This manual contains proprietary information, which is protected by
copyright and may not be copied in whole or in part except with the prior written permission
of Oxford Instruments Medical Ltd. The copyright and the foregoing restrictions on the
copyright use extend to all media in which this information may be preserved.
This copy of the User Manual shall be used only in accordance with the conditions of sale of
Oxford Instruments Medical Ltd or its distributors.
Oxford Instruments Medical Ltd makes no representations or warranties of any kind
whatsoever with respect to this document. Oxford Instruments Medical Ltd disclaims all
liabilities for loss or damage arising out of the possession, sale or use of this document.
Medelec and TECA are registered trademarks of Oxford Instruments Medical Ltd in the USA.
Caution:
Federal law restricts this device to sale by, or on the order of a physician
SYNERGY USER MANUAL
Contents
Using this Manual ...................................................................viii
Safety and symbols....................................................................ix
Safety considerations...........................................................................ix
Caution and warnings....................................................................................x
Responsibility of the manufacturer ...............................................................x
Disposal of equipment..................................................................................xi
Electrical interference suppression...............................................................xi
Sources of artefact.......................................................................................xii
Symbols and their definition ............................................................ xiii
Information.................................................................................................xiii
Connections.................................................................................................xv
Switches ....................................................................................................xvii
Warning Symbols......................................................................................xvii
1: Overview of the system.......................................................... 1
The System and its parts.......................................................................1
Components of the Synergy Notebook .........................................................4
Components of the Synergy Tower...............................................................6
Components of the Synergy Suite.................................................................8
The Patient Interface Unit .............................................................................9
Footswitch...................................................................................................11
Deluxe Stimulator Probe.............................................................................12
Using Synergy.....................................................................................14
Logging onto the system .............................................................................14
Components of the GUI ..............................................................................15
Opening and closing folders........................................................................16
Using Electronic Mail .................................................................................16
Getting support............................................................................................16
Synergy Reader Software ...................................................................17
Configuring the System ......................................................................18
The Patient Database .........................................................................19
The Tests .............................................................................................20
Generating Reports.............................................................................21
2: Handling Patient Information ............................................ 23
Entering and saving patient information...........................................23
Entering and saving a new patient...............................................................24
Entering and saving visit details..................................................................25
Retrieving existing patient information .............................................27
ii
INTRODUCTION
Recalling a patient.......................................................................................27
Deleting a patient ........................................................................................27
Transferring patient information between Synergy systems.............28
Transferring patient data between host and satellite....................................28
Using Transfer to transfer patient data between systems ............................28
Using Copy to transfer patient data between systems .................................29
Completing the Transfer..............................................................................30
Reviewing results and reports for an existing patient .......................31
Recalling an existing patient .......................................................................31
Opening the Test Catalog ............................................................................31
Recalling results using the Test Catalog .....................................................33
Viewing results in the Test Catalog.............................................................33
Deleting results............................................................................................33
Searching for patient information .....................................................35
Searching on patient details.........................................................................35
Clearing the Search Criteria dialog box ......................................................35
Cancelling a search......................................................................................35
Saving and loading patient and report data to file ............................36
Saving patient and report data to file...........................................................36
Loading patient and report data from File ...................................................37
3: Generating reports .............................................................. 39
Overview..............................................................................................39
Obtaining a report online ...................................................................40
Selecting an online report............................................................................41
Viewing a report..........................................................................................41
Adding comments .......................................................................................41
Recompiling a report...................................................................................41
Recalling a report ...............................................................................43
Opening a report in Microsoft Word ...........................................................43
Opening a report in MedPad .......................................................................43
Editing and saving a report using MedPad..................................................43
Customising the report layout ............................................................44
Selecting and defining a header file ............................................................45
Selecting and defining a signature file ........................................................46
Defining the report sequence and inserting page breaks .............................47
Defining Test Report settings......................................................................47
Printing a report .................................................................................48
4: Configuring the system ....................................................... 49
System configuration ..........................................................................49
Defining the host and satellite............................................................50
Defining a system as a host .........................................................................50
iii
SYNERGY USER MANUAL
Defining a system as a satellite ...................................................................50
Configuring an E-mail program ..................................................................51
Selecting a Notch Filter Setting ..................................................................51
Configuring Patient Demographics.............................................................52
Setting up a new user ..................................................................................52
Editing a user's set-up .................................................................................53
Deleting a user ............................................................................................54
User Configuration.............................................................................55
Changing your User Set-up .........................................................................55
Changing a password ..................................................................................56
Changing paths............................................................................................56
Defining a muscle list..................................................................................57
Network Configuration ......................................................................58
Setting up a shared network database..........................................................59
Setting up configuration information ..........................................................59
Setting up users to share data ......................................................................59
Sharing existing data on a local drive .........................................................60
5: Configuring protocols.......................................................... 61
Introduction ........................................................................................61
On-line configuration.........................................................................61
Change trace sensitivity ..............................................................................62
Change trace duration .................................................................................62
Protocol Configuration Wizard..........................................................63
Entering the Protocol Configuration Wizard...............................................63
Editing an existing protocol ........................................................................64
Creating a new protocol ..............................................................................64
Acquisition set-up .......................................................................................65
Electrical Stimulator Set-up ........................................................................69
Protocol Table set-up ..................................................................................70
Channel Mapping and Trace Depth set-up..................................................71
6: The tests ................................................................................ 73
Using the tests .....................................................................................73
The typical test procedure ...........................................................................74
Selecting the test .................................................................................75
Selecting a protocol ............................................................................75
Motor NCS Test ..................................................................................76
Clinical Overview .......................................................................................76
Running the Motor NCS test.......................................................................76
Sensory NCS Test ...............................................................................83
Clinical Overview .......................................................................................83
Running the Sensory NCS test ....................................................................83
iv
INTRODUCTION
F-Wave Test ........................................................................................89
Clinical Overview .......................................................................................89
Running the F-Wave test.............................................................................89
H-Reflex Test ......................................................................................94
Clinical Overview .......................................................................................94
Running the H-Reflex test...........................................................................94
Needle EMG Test................................................................................97
Clinical Overview .......................................................................................97
Running the Needle EMG test.....................................................................97
Repetitive Nerve Stimulation Test ....................................................104
Clinical Overview .....................................................................................104
Running the Repetitive Nerve Stim test ....................................................104
Blink Reflex Test ..............................................................................110
Clinical Overview .....................................................................................110
Running the Blink Reflex test ...................................................................110
Sympathetic Skin Response Test ......................................................114
Running the Sympathetic Skin Response Test ..........................................114
Interference Pattern Analysis Test...................................................115
Clinical Overview .....................................................................................115
Running the Interference Pattern Analysis test .........................................117
Multi-MUP Analysis Test .................................................................120
Clinical Overview .....................................................................................120
Running the Multi-MUP Analysis Test.....................................................122
Single Fibre Jitter Test .....................................................................126
Clinical Overview .....................................................................................126
Running the SFJ Test (Volitional).............................................................126
Running the SFJ Test (Stimulated) ...........................................................131
Fibre Density Analysis Test..............................................................137
Clinical Overview .....................................................................................137
Running the Fibre Density Analysis Test..................................................137
Macro EMG Test ..............................................................................140
Clinical Overview .....................................................................................140
Running the Macro EMG Test ..................................................................140
Trace analysis and display................................................................144
Selecting traces..........................................................................................144
Moving traces............................................................................................145
Superimposing traces ................................................................................145
Automatic marker placement ....................................................................145
Manual marking of traces..........................................................................146
Change trace sensitivity.............................................................................147
Change trace duration................................................................................147
Compare ....................................................................................................147
v
SYNERGY USER MANUAL
Trace arithmetic ........................................................................................148
Split sensitivity..........................................................................................149
Using the full trace area ............................................................................149
Trace area setup ........................................................................................149
Configuring and displaying results..................................................151
Results Table.............................................................................................151
Result Mode ..............................................................................................151
Reference Values ......................................................................................152
Configuring the Results Table ..................................................................153
Setting up custom results ..........................................................................155
Temperature probe ....................................................................................156
Displaying the full Results Screen ............................................................156
Appendix A Installation & Maintenance ................................ 1
Installation............................................................................................1
WARNING ...................................................................................................1
Checks...........................................................................................................1
Environment..................................................................................................1
Power supply connections.............................................................................2
Connecting the equipment.............................................................................7
Cables............................................................................................................7
Connecting other electrical equipment..........................................................8
Switching on ...............................................................................................19
Switching off...............................................................................................19
Special instructions for use .........................................................................20
Electrical stimulating electrodes .................................................................21
Stimulators ..................................................................................................22
Footswitch...................................................................................................23
Printer..........................................................................................................23
Maintenance .......................................................................................24
After-sales service support..........................................................................24
Maintenance of the instrument....................................................................24
Cleaning ......................................................................................................24
Electrodes............................................................................................25
Electrode kit supplied by the Synergy manufacturer ..................................25
Appendix B Interface Connections........................................... 1
Signal Cable ..................................................................................................1
Connectors on Notebook PC and PC Tower .................................................1
Connectors on PIU ........................................................................................1
Appendix C Technical Specifications....................................... 1
Amplifiers and Filters ...................................................................................1
Data Acquisition and Display .......................................................................1
Electrical Stimulator .....................................................................................1
Dimensions (Patient Interface Unit)..............................................................2
Power Requirements .....................................................................................2
vi
INTRODUCTION
ISO800 Mains Isolating Transformer............................................................2
Safety Standards............................................................................................3
EMC Standard...............................................................................................3
Quality Standards ..........................................................................................3
Appendix D Assembling the Notebook Stand ......................... 1
Assembly instructions ...........................................................................1
Appendix E Cable management for the Tower....................... 1
vii
SYNERGY USER MANUAL
Using this Manual
This user manual is intended to be read by anyone who is to use
Synergy Notebook, Synergy Tower or Synergy Suite.
Immediately after this section are notes on safety considerations
and a list of the symbols used in Synergy. Then the manual is
structured in chapters as follows:
Chapter 1 Overview of the system illustrates and describes the
Synergy and its parts; explains briefly how basically to use the
system; outlines the basic features of the system.
Chapter 2 Handling patient information describes how to
enter, save and retrieve patient details, review patient results and
reports and search for patient information, and how to transfer
patient information between the Synergy systems
Chapter 3 Generating reports describes how to obtain reports
on-line, recall reports and print them, and customising the report
layout.
Chapter 4 Configuring the system describes how to configure
such elements as database paths, user set-up and muscle lists.
Some information in this chapter is for administrators only.
Chapter 5 Configuring protocols describes how to configure
on-line, and how to use the Protocol Configuration Wizard.
Chapter 6 The tests describes all the tests in detail and how to
run them; selecting and marking traces; configuring and
displaying results.
The Appendices cover installation and maintenance of the
system; interface connections and full technical specification of
the system.
viii
INTRODUCTION
Safety and symbols
Safety considerations
Synergy complies with EN 60601-1, the European standard for
safety for medical electrical equipment:
For type of protection against electrical shock: Class 1
For degree of protection against electrical shock: Type BF
For degree of protection against harmful ingress of liquid:
Ordinary (no protection)
For the mode of operation: Continuous
For the degree of safety of application in the presence of a
flammable anaesthetic mixture with air or with oxygen or nitrous
oxide: Not suitable
Synergy also complies with:
UL2601-1, the American standard for safety for medical
electrical equipment
CAN/CSA22.2 No.601.1, the Canadian standard for safety for
medical electrical equipment
EN60601-1-1, the European standard for safety for medical
electrical systems
EN 60601-1-2, the European standard for electromagnetic
compatibility requirements for medical electrical equipment
EN60601-2-40, the European standard specifying particular
safety requirements for electromyographs and evoked response
equipment
_____________________
Synergy bears the CE Mark - to show compliance with the
European Medical Device Directive (93/42/EEC).
Synergy is designed and manufactured under approved Quality
Management Systems:
EN 29001/ISO 9001:1994, Quality System Standard
ix
SYNERGY USER MANUAL
EN 46001:1994, Quality System Standard application to
manufacture medical devices
Caution and warnings
1. U.S. Federal law restricts this device to sale by or on the
order of a physician, or other licensed practitioner.
2. It should be noted that it is the responsibility of the user to
ensure that conformance to the Type BF patient isolation
requirements of EN60601-1, UL2601-1 and CAN/CSA22.2
No.601.1 is maintained when patient connected equipment or
accessories not supplied by Oxford Instruments Medical Ltd
are used with Oxford Instruments Medical Ltd equipment.
3. If any mains powered equipment, for example printers, video
monitors or other medical equipment, is to be connected to
Synergy to form a medical electrical system then the
requirements of standard EN60601-1-1 (Medical Electrical
Equipment, Part 1. General requirements for safety, Section
1.1 Collateral standard: Safety requirements for medical
electrical systems) must be complied with to ensure patient
and operator safety is maintained.
4. There are no user serviceable parts inside the instrument.
Only appropriately trained and qualified personnel should
adjust, maintain or repair the instrument when it is connected
to the electricity supply. The instrument must be
disconnected from the electricity supply first, before any
cover is removed.
Responsibility of the manufacturer
Oxford Instruments Medical Ltd and our distributors consider
themselves responsible for the effects on safety, reliability and
performance of the equipment only if:
• assembly operations, extensions, readjustments,
modifications, or repairs are carried out by persons
authorised by them
• the electrical installation of the relevant room complies with
the appropriate requirements
• the equipment is used in accordance with the instructions for
use
Full compliance of this product cannot be ensured unless all
components (leads etc.) are provided by Oxford Instruments
Medical Limited.
x
INTRODUCTION
Disposal of equipment
When the equipment comes to the end of its operating life, it
should be disposed of in accordance with local waste disposal
regulations. Advice on this can usually be obtained from the local
waste regulation authority which is typically to be found within
the local government office.
Electrical interference suppression
These notes are intended as a guide to the location and
suppression of electrical interference. This may affect apparatus
involving the detection and analysis of signals of a few microvolts
in the frequency range DC to 20kHz, such as for
Electroencephalographs (EEG) or Electromyographs (EMG) and
Evoked Potential (EP) Recording Systems.
1. 50Hz/60Hz magnetic field from power transformers,
induction motors etc.
The only practical protection from this type of interference is the
avoidance of loops in the pick-up circuits of the EEG or EMG/EP,
since the magnitude of the interfering voltages is directly
proportional to the area enclosed by any such loop.
2. Magnetic field from staff location systems using inductive
loops
This type of interference is of an intermittent character and may
be serious where the inductive loop runs alongside the wall of the
examination room and where the transmitted frequencies fall
within the pass band of the EEG or EMG/EP.
Most modern staff location systems now use frequencies above
20kHz and should, therefore, cause minimum interference unless
the loop is very close to the EEG or EMG/EP.
3. 50Hz/60Hz electrostatic field from unshielded conductors,
lamps etc.
This type of interference is possibly the simplest to locate and
correct. Any conductor of supply frequency not covered by an
earthed metal screen is a potential source of interference. Obvious
sources are flexible cables to desk lamps and X-ray viewing
boxes, unshielded fluorescent tubes and filament lamps.
It is important that all encasing metalwork of electrical equipment
be securely bonded electrically to the local circuit earth.
xi
SYNERGY USER MANUAL
4. HF interference from short-wave diathermy, radio
ambulances, television and sound broadcasting
This class of interference is the most difficult to track down to its
source and by far the most difficult to eliminate.
Short-wave diathermy is easily the most frequent source of HF
interference, particularly in or near a physical medicine
department or operating theatre.
The interference may reach the EEG or EMG/EP via a number of
paths falling into two main categories: (1) Conducted and (2)
Radiated.
Conducted HF interference is found on the mains supply. This
kind of interference on modern equipment is eliminated by
efficient mains filtering.
Radiated interference is transmitted through the air and emitted
either from poorly screened electrical equipment or other sources
such as radio and TV transmitters and hospital paging systems.
In severe cases of this kind, a screened enclosure is essential.
Sources of artefact
The following list shows some of the more usual causes of
corruption of the signal that Synergy has to process.
Audio feedback
Broken electrode lead wire including ground electrode wire
Diathermy
Dirty electrodes
Electrode lead wire movement
Electronic dimmers
Excessive low or high power-line voltage
Fluorescent lights
Ignition noise
Incorrect electrode connection to apparatus
Intermittent power-line load
Microphony
Multiple grounds in the screened room
Pick-up from monitor screens
Poor apparatus ground
Poor ground electrode location
Poorly shielded printers
Power cables near patient not unplugged at wall socket
Radio and TV
Ungrounded observers
Ungrounded wheelchair or table
xii
INTRODUCTION
Symbols and their definition
Note:
Some symbols are used only on Synergy Tower or only on
Synergy Notebook. Some symbols will not appear on your unit if they are
replaced by text in your own language.
Information
!
!
"
Refer to the appropriate pages of this manual for
information
Warning that the unit contains high voltage parts
inside
Preamplifier
#
Stimulus
$
Stimulus duration
#/s
Stimulus repetition rate
%
&
Audio signal
Display Sensitivity
'
Sweep Duration
Fn
Function
xiii
SYNERGY USER MANUAL
+
-
Trigger - falling edge
"
Equipotential earth terminal
#
Isolating transformer
M(
Next store
M+
Acquire
"
Double arrow head – continuous (Acquire)
#
Single arrow head – momentary (Acquire)
M-
Erase stores
)
Direct current (dc)
*+
Alternating current (ac)
$
Risk of explosion – do not use in the presence of
inflammable anaesthetics
"
Stimulus duration increase/decrease
"
xiv
Trigger - rising edge
Rotate clockwise to increase
INTRODUCTION
Connections
,+
The Type BF symbol is placed adjacent to
connectors used for Type BF floating patient
applied parts
-
Input
.
Output
$
%
&/!
'
External printer interface
Footswitch
External keyboard / Mouse
Patient ground
(
Stimulus Probe
)
Universal Serial Bus
*
Communications Port
xv
SYNERGY USER MANUAL
+
,
xvi
Temperature Probe
External Monitor
INTRODUCTION
Switches
/
OFF (Mains supply)
0
ON (Mains supply)
-
Amplifier OFF
.
Amplifier ON
Warning Symbols
The symbol
! with a letter adjacent to it is used to refer to
one of the specific warnings listed below. These symbols will
not appear on your unit if the warning is written in full in your
own language.
"
"
"
"
CAUTION: TO REDUCE THE RISK OF
ELECTRIC SHOCK DO NOT REMOVE
COVER. REFER SERVICING TO
QUALIFIED SERVICE PERSONNEL.
BEFORE CONNECTING REFER TO
SYNERGY USER MANUAL.
CAUTION: DO NOT OBSTRUCT
COOLING VENTS.
NO USER SERVICEABLE PARTS INSIDE.
xvii
SYNERGY USER MANUAL
"
"
"
xviii
REFER TO CAUTIONS AND WARNINGS
ON THE USE OF STIMULATORS.
BEFORE CONNECTING ENSURE THAT
MAINS VOLTAGES AND FUSE RATINGS
ARE CORRECT.
THE PATIENT INTERFACE UNIT MUST
ONLY BE POWERED FROM THE
SYNERGY POWER SUPPLY - 035C005
1:
OVERVIEW OF THE SYSTEM
1: Overview of the system
The System and its parts
Synergy Notebook and Synergy Tower are 2-channel
electromyographs which provide facilities for EMG testing for a
range of clinical applications.
Synergy Suite is a 2 channel electromyograph which provides
facilities for EMG testing for a range of clinical applications.
This system comprises a single Patient Interface Unit with both a
Tower PC and a Notebook PC. The PIU may be used with either
PC for acquiring raw patient data. Network cards are fitted to
both the Tower PC and the Notebook PC and a cable supplied to
allow direct transfer of patient data between them.
Synergy is designed to enable reliable recording, display and
documentation of electrophysiological information from the
human nervous and muscular system in a clinical environment.
The Synergy Notebook comprises the following main items:
" Multimedia Notebook PC
" Patient Interface Unit with integral 2-channel amplifier and
electrical stimulator
" Power supply module, medical grade
" Footswitch
" Desk mount for PIU
Optional items for Notebook include:
" Deluxe Stimulator Probe
" Temperature probe
" Arm and Stand
" Arm and Clamp
" Printer
" External loudspeakers
" Network card
1
SYNERGY USER MANUAL
" Network cable
" Mouse
The Synergy Tower comprises the following main items:
" Multimedia Tower PC
" Keyboard and mouse
" CRT monitor or LCD monitor
" Patient Interface Unit with integral 2-channel amplifier and
electrical stimulator
" Deluxe Stimulator Probe
" Power supply module, medical grade
" Footswitch
" Mains isolating transformer module
" Trolley and Arm
" Desk mount for PIU
Optional items for Tower include:
" Temperature probe
" Printer
" Network card
" Network cable
The Synergy Suite comprises the following main items:
" Multimedia Notebook PC including network card
" Multimedia Tower PC including network card
" Keyboard and mouse
" CRT monitor or LCD monitor
" Patient Interface Unit with integral 2-channel amplifier and
electrical stimulator
" Deluxe Stimulator Probe
" Power supply module, medical grade
" Footswitch
" Mains isolating transformer module
" Network cable to link Tower PC and Notebook PC
" Trolley and Arm
" Desk mount for PIU
2
1:
OVERVIEW OF THE SYSTEM
Optional items for Suite include:
" Temperature probe
" Printer
" Arm and Stand (Notebook)
MS Office is supplied as standard.
As an option to the Synergy application software and the
standard range of tests, EMG analysis software and SFJ tests can
also be supplied under special licence.
Oxford Instruments Medical Ltd has a policy of continual
product improvement; hence, the specifications of instruments in
the range are subject to change without notice.
Note:
A full range of electrodes and accessories is available. Contact
the manufacturer or your local distributor for details.
3
SYNERGY USER MANUAL
Components of the Synergy Notebook
Arm
Deluxe
Stimulator Probe
Patient
Patient
Interface Unit
Interface
Unit
Stand
Footswitch
Printer
Multimedia Notebook PC
The Synergy Notebook has an internal flat panel, multi-sync
colour SVGA monitor. Synergy supports an additional standard
multi-synch colour SVGA or higher monitor and can drive two
displays simultaneously.
Patient Interface Unit (see page 9)
Power supplies
Footswitch (see page 11)
Desk mount for PIU
The desk mount provides flexible mounting for the PIU and
electrical stimulator. Optionally, a mounting can be fitted at the
PIU end for a Deluxe Stimulator probe.
4
1:
OVERVIEW OF THE SYSTEM
Deluxe Stimulator Probe (see page 12)
Temperature Probe
When supplied, the thermistor probe for monitoring temperature
is plugged into the PIU.
Notes
" The test Toolbar may include a temperature display. Press the
icon alongside the display to attach the temperature to the
result table.
" If you have configured Reference Values, they may be
corrected for temperature.
Stand
An optional accessory with mounting or storage provided for the
system and its components and accessories.
Arm
An optional accessory that provides flexible and heightadjustable mounting for the PIU and electrical stimulator.
Optionally, a mounting can be fitted at the PIU end for a Deluxe
Stimulator Probe. The arm can be mounted on either side of a
stand.
Clamp
An optional accessory that provides flexible mounting for the
PIU and electrical stimulator. Optionally, a mounting can be
fitted at the PIU end for a Deluxe Stimulator Probe.
Printer
Synergy supports a recommended range of printers. Ask Oxford
Instruments for information.
External loudspeakers
If used, these must be powered by battery, and must not be used
with an external mains adapter.
When not in use, switch off these speakers to maximise the life
of their batteries.
Network card and cables
This is a compatible PCMCIA network card with a foil shielded
crossover network cable CAT5.
5
SYNERGY USER MANUAL
Components of the Synergy Tower
Patient
interface
Unit
Multimedia Tower PC
The Tower PC has CDROM and floppy disk drives, and is
supplied with a CRT or LCD monitor, keyboard and mouse.
Patient Interface Unit (see page 9)
Isolated power supply
Footswitch (see page 11)
Trolley and arm with clamp(see page 7)
Desk mount for PIU (see page 7)
The desk mount provides flexible mounting for the PIU and
electrical stimulator. Optionally, a mounting can be fitted at the
PIU end for a Deluxe Stimulator probe.
Deluxe Stimulator Probe (see page 12)
Temperature Probe
When supplied, the thermistor probe for monitoring temperature
is plugged into the PIU.
6
1:
OVERVIEW OF THE SYSTEM
Notes
" The test Toolbar may include a temperature display. Press the
icon alongside the display to attach the temperature to the
result table.
" Results in the result table may be corrected for temperature
" If you have configured Reference Values, these may also be
corrected for temperature.
Trolley
A standard accessory with mounting or storage provided for the
system and its components and accessories.
Arm
A standard accessory that provides flexible and height-adjustable
mounting for the PIU and electrical stimulator. Optionally, a
mounting can be fitted at the PIU end for a Deluxe Stimulator
Probe. The arm can be mounted on either side of a trolley.
Desk Mount
An optional accessory that provides flexible mounting for the
PIU and electrical stimulator. Optionally, a mounting can be
fitted at the PIU end for a Deluxe Stimulator Probe.
Printer
Synergy supports a recommended range of printers. Ask Oxford
Instruments for information.
Network card and cables
When supplied, the network card for the Synergy Tower is a PCI
or ISA card with a UTP connector. The cable is a foil shielded
crossover network cable CAT5.
7
SYNERGY USER MANUAL
Components of the Synergy Suite
The Synergy Suite combines the components of the Notebook
and Tower systems. A Suite system typically comprises a
Tower PC and one or more Notebooks, all of which include
network cards as standard, to enable them to be networked
together and to allow direct transfer of data between systems.
8
1:
OVERVIEW OF THE SYSTEM
The Patient Interface Unit
The Patient Interface Unit (PIU) provides single control
operation for setting essential parameters during a patient
examination. There may be one or two PIUs, depending on the
Synergy system combination being used.
Socket for Deluxe
Stimulator Probe
Socket for
Footswitch
Sensitivity
Volume
Fn
Sweep
Duration
Next
Stim
+/Erase
Stim
Duration
Acquire ON
Acquire
Single
Stim Intensity
On/Off switch
List of controls
Acquire ON switch
Press this switch to set acquire ON.
Press it again to set Acquire OFF.
Acquire Single switch
Press once to deliver a stimulus and
acquire a response. If you hold down
this switch for more than 1 second,
Acquisition is locked on. Press again
to stop Acquisition.
Erase switch
Press this switch to erase the selected
trace or traces. This enables you to
collect a fresh set of data in the same
9
SYNERGY USER MANUAL
store.
Fn
Programmable via the Display menu
to control Marker,Trigger or Cursor.
Next switch
Press this switch to move to the next
site in NCS and EMG tests.
Sensitivity switch
Rotate this switch to adjust the
display sensitivity of the selected
trace or traces. If no trace is selected
(to deselect a trace click away from
it), the sensitivity of all the traces in
the current test is changed.
Stim switch
This switch toggles Stimulus ON and
OFF. If Acquire is ON, pressing this
switch has no effect.
Stim Duration switch
Rotate this switch to adjust the
duration (pulse width) of the stimulus.
Stim Intensity switch
Use this switch to adjust the
amplitude of the stimulus. Stim
Intensity is displayed in the Toolbar.
Sweep Duration switch
Rotate this switch to adjust the
acquisition sweep duration for the
active trace(s). Once data has been
acquired you can also increase or
decrease the sweep duration for
selected traces.
Rotate this switch to change the level
of the audio output of the input signal.
Set it to zero for no audio output.
The +/- switch is associated with the
Trigger switch. It toggles the trigger
edge polarity between positive and
negative. The setting takes effect
when you select trigger signal mode.
Volume switch
+ / - switch (Trigger
Rising / Falling Edge)
10
1:
OVERVIEW OF THE SYSTEM
Patient Interface Unit End Panels
Ground
DIN 1
DIN 2
Inputs
Ventilation grille
Footswitch
Cable
Deluxe
Stimulator
Probe
Footswitch
Press once to deliver a stimulus and acquire a response. If you
hold down this switch for more than one second Acquisition is
locked on. Press again to stop acquisition.
11
SYNERGY USER MANUAL
Deluxe Stimulator Probe
Your system will have one or two stimulators. One stimulator is
internal with an output on the PIU. The optional second
stimulator is the Deluxe Stimulator Probe.
The Deluxe Stimulator Probe enables you to control the
following:
Press this switch to deliver a stimulus
Stim ON / OFF
without acquiring data. This switch turns
the stimulus ON and OFF. If all stimuli
are OFF when you press the switch,
stimulus is set ON. If Acquire is ON,
pressing this switch has no effect.
Press to move to the next site and start a
Next switch
new acquisition.
Press this switch to change the polarity of
Stimulus
the stimulus: the positive probe tip
Polarity
changes to negative and the negative
probe tip changes to positive. Note that
the positive probe tip has its LED lit.
Rotate this switch to adjust the amplitude
Stim Intensity /
of the stimulus. Stim Intensity is displayed
Acquire
in the Toolbar.
Push this switch to deliver the stimulus
and acquire the data.
Press the up or down button to increase or
Stim Duration
decrease the duration (pulse width) of the
Up / Down
stimulus.
The head of the Deluxe Stimulator Probe may be removed
allowing access to 2 x 1.5mm Touchproof connectors.
You can also modify the head of the Deluxe Stimulator Probe for
paediatric use:
1. Unscrew the probe tip T (next to the locking button).
2. Check that there is no grub screw in position P
3. If a grub screw is present, remove it using an allen key
12
1:
OVERVIEW OF THE SYSTEM
4. Screw the probe tip into position P.
Position P
Locking
button
Tip T
Note:
Do not force the probe tips when you move them. Always slide
down on the locking button before you attempt to release them.
13
SYNERGY USER MANUAL
Using Synergy
Synergy has a fast, intuitive and flexible graphical user interface
(GUI) that conforms to Windows 98. The GUI provides:
" A means of adjusting or activating all the Synergy settings
and controls.
" Multiple ways in which you can carry out a task. For
example you can select an item from a menu using the mouse
or the keyboard or open an item by double-clicking on an
icon.
" Single-stroke keyboard function keys for key tasks carried
out during a patient examination.
" Alternative methods of control for novice and experienced
users.
In addition to using the GUI, key tasks can be carried out via
control switches on the Patient Interface Unit, Deluxe Stimulator
Probe and Footswitch.
See also
⇒ Logging onto the system
⇒ The System and its parts
⇒ Components of the GUI
⇒ Opening and closing folders
⇒ Using Electronic Mail
⇒ Getting support
Logging onto the system
The Synergy program starts automatically when you switch on
the notebook. If your system is not a single user system, you will
be prompted for a login name and password. If you exit from
Synergy at any time, you can restart it by double-clicking on the
Synergy icon.
14
1:
OVERVIEW OF THE SYSTEM
Components of the GUI
The Title Bar
The Title Bar is displayed at the top of the screen and contains
the name of the current application.
The Menu Bar
The Menu Bar is displayed across the top of the screen directly
below the Title Bar. It provides access to all of Synergy’s
functionality, depending on the screen that is displayed. Each
Menu Bar title provides access to a drop-down list of menu
items. These items are accessed using either the mouse or
keyboard in the standard Windows way. Keyboard shortcuts for
menu items are displayed alongside the menu items, where
available.
The Function Key Bar
The Function Key Bar appears at the bottom of the Test screen.
It contains ten softkeys, F1 to F10, for tasks or parameters that
you need to access or adjust quickly. These can be activated
using the mouse or keyboard function keys F1 to F10.
The Toolbar
The Toolbar appears under the Menu Bar and contains icons for
frequently used commands. The name of each Toolbar icon is
displayed by pointing to an icon with the mouse. To open an
icon, click on it with the mouse.
15
SYNERGY USER MANUAL
Opening and closing folders
The Test Navigator and Test History screens contain folders that
you can use to recall a test or test result:
" In Test Navigator, clicking on a folder takes you to the test.
The Test Navigator on-screen window displays and allows
you to select all the tests in the currently selected folder.
" In Test History, clicking on a folder displays the result of the
test. The Test History on-screen window displays all the tests
that have been performed on the current patient.
Using Electronic Mail
Select E-Mail from the System menu to start the electronic mail
program.
Getting support
The manufacturers of the Synergy and the distributors provide a
comprehensive after-sales service support. For details, please
contact the manufacturers or your local distributor.
16
1:
OVERVIEW OF THE SYSTEM
Synergy Reader Software
The optional Synergy Reader software allows you to analyse and
review data, and recompile reports, away from the acquisition
system. This means that you can prepare reports in your own
office, using data acquired on a Synergy machine.
The Synergy Reader looks identical to the Synergy program used
on an acquisition system. However, since the Synergy Reader
does not have the dedicated electronics that are available on an
acquisition system, you cannot use it to stimulate or acquire data.
You may use the EMG LivePlay feature, which means that your
notebook is perfect as a demonstration tool in lectures,
conferences and classroom situations.
The Synergy Reader is usually connected to an acquisition
system via a network. This allows you to access data on other
machines as if it were on the Synergy Reader system. (Note,
however, that it is not possible to access data remotely on an
acquisition system until that data has been saved, so you cannot
access information about the current patient until the visit is
complete).
A special version of Synergy Reader software starts up
automatically if, when you start up your Notebook or Tower, the
PIU is not connected. This may be only used to review the tests
that are licensed on the system.
If a fully licensed version of Reader software has been purchased
this may be opened from the Notebook desktop screen. This will
give you the full facilities of Reader software.
If you do not have a network connection, it is still possible to use
the Save and Load from File options to exchange data via floppy
disk (or other transportable medium). You Save to File data from
the acquisition system, and then Load from File onto the
Synergy Reader system.
See Also
⇒ Exporting and importing patient and report data in chapter
2
⇒ Transferring patient information between Synergy systems
in chapter 2
⇒ Configuring Synergy on a Network, in chapter 4
17
SYNERGY USER MANUAL
Configuring the System
A key feature of Synergy is its high degree of configurability.
This enables you to configure many settings to suit your own
requirements. Settings can be configured at a system level or at
user level. System settings apply to a whole system or to a
number of systems across a network. User-level settings can be
either global settings that affect a user’s set-up or settings that
apply to a particular test. User level settings are invoked when a
user logs onto Synergy.
All configuration options are accessed from the System menu,
depending on your level of access.
Users with the default User level access can configure:
" Muscle lists
" Report Set-up
" User Set-up
" Protocol Settings
Note
Test Protocol Specific Settings can also be changed and saved
from within a test by using the Save Settings option in the
System menu.
Users with Administrator access can:
" Configure Patient Demographics
" Create, modify and delete users
" Configure their own muscle lists
" Edit database paths
See also
⇒ System Configuration, in chapter 4
⇒ User Configuration, in chapter 4
18
1:
OVERVIEW OF THE SYSTEM
The Patient Database
The Patient Database is central to the entire Synergy system. It
contains Patient Demographics and links to Test Catalogs that
contain a patient’s results, reports and visit information. Each
patient in the database is uniquely identified by a Patient ID.
Using the Patient Database you can:
" Enter and save new patients
" Retrieve results and reports for existing patients
" Search for a patient or a group of patients
This functionality applies to both standalone and networked
systems.
A large degree of flexibility is built into the database. For
example you can:
" Configure the fields in Patient Demographics to meet your
local requirements.
" Access the Test Catalogs in different ways and obtain
different views of them.
You can also transfer patient details in both directions between
the Tower and Notebook systems, giving you flexibility in
handling data both in the office and on patient visits.
Access to the database is restricted to authorised users thereby
safeguarding security.
See also
⇒ Handling Patient Information, chapter 2
19
SYNERGY USER MANUAL
The Tests
You can configure new tests from a set of default Test Types.
These provide shortcuts to defining complex sets of results and
graphs. Utilities are also provided for setting protocols and
optimising results.
Online test configuration enables you to select settings for results
tables and graphs.
See also
⇒ Configuring protocols, chapter 5
⇒ The tests, chapter 6
20
1:
OVERVIEW OF THE SYSTEM
Generating Reports
Synergy provides a comprehensive reporting facility which
enables you to compile a report as you carry out a patient
examination. With Synergy you can:
" Optionally include tables, graphs and traces in your reports.
" Define the structure of your report tables specifically for use
in your reports.
" Optionally indicate results that are outside reference ranges.
" Enter comments in the report as you carry out the
examination.
" Configure custom headers and signature files for your
reports.
" Generate a Microsoft Word compatible report.
If you decide to modify the test results after you have finished
the examination, for example you may want to move an
incorrectly placed marker or review and analyse traces and
results, you can recall the results and recompile a report.
See also
⇒ Generating reports, chapter 3
21
2.
HANDLING PATIENT INFORMATION
2: Handling Patient
Information
Entering and saving patient information
For each patient you can enter the following information:
" Patient demographics the personal details about a patient
such as their Family Name, First Name, Patient ID, Date of
Birth and Address.
" Visit details the details relating to each patient's visit such as
the Name of the Referring Physician, the Name of the
Examining Physician, the Date of the Visit and any clinical
notes about the patient.
Patient details are entered in the Current Patient dialog box and
visit details are entered in the Visit Details dialog box. Visit
details are specific to each visit made by a patient. Both dialog
boxes are accessed from the main Synergy screen.
The Test Menu screen displays all the folders of tests for the
current user. You can open folders and select tests by either
double-clicking a folder or test with the mouse or using function
keys.
You can use the function keys F1 to F8 to access the first eight
tests in a folder.
" F1 to F8 open the first eight tests in a folder.
" F9 displays any additional tests in the folder.
" F10 selects the next folder.
Notes
" Since Synergy offers a high degree of flexibility and can be
configured to meet local requirements, some of the field
names in the Current Patient dialog box in your system may
be re-configured or switched off. For more information see
Configuring Patient Demographics, in chapter 4.
23
SYNERGY USER MANUAL
" None of these fields are mandatory. However, you must enter
a Family Name and Patient ID fields in the Current Patient
dialog box if you intend saving patient information.
See also
⇒ Entering and saving a new patient
⇒ Entering and saving visit details
⇒ Configuring Patient Demographics, chapter 4
Entering and saving a new patient
1. Start up Synergy. The main Synergy application window
appears on the screen.
2. Click the New Patient button or select New Patient in the
File menu. If a patient already exists this clears the Current
Patient dialog box ready for you to enter information for a
new patient. Also, if Patient Results have not been saved you
are prompted to save them before you can proceed.
3. Enter patient demographics in the fields in the Current
Patient dialog box. Press Enter or Tab to move between the
fields. Use the scroll bar on the right-hand side of the dialog
box to scroll down. You must enter a Patient ID and Family
Name. The other fields are optional. Note: The field names
may be different in your system.
Patient ID
Family
Name
First Name
Initial
Address 1 to
Address 4
Phone
Sex
Height
24
Enter a unique identifier for the patient
using a maximum of 25 characters.
Enter the patient’s family name using a
maximum of 25 characters.
Enter the patient’s first name using a
maximum of 25 characters.
Enter the patient’s initials using a
maximum of 3 characters.
Enter the patient’s address using a
maximum of 25 characters in each line.
Enter the patient’s telephone number
using a maximum of 50 characters.
Select either Male or Female from the
drop-down list box.
Enter the patient’s height in the format
shown in the field using a maximum of 20
characters. You should enter a patient’s
height if you intend using height
2.
HANDLING PATIENT INFORMATION
correction for your Reference Values.
Note
Weight
Date of Birth
User 1 to
User 4.
Notes
Height format is defined under the option
User Set-up in the System menu.
Enter the patient’s weight in kilograms
(Kg) in the field using a maximum of 20
characters.
Enter the patient's date of birth in the
format shown in the field. You should
enter a patient’s date of birth if you intend
using age correction for any of your
Reference Values.
These fields may be defined to meet local
requirements using the System
Configuration option in the System
menu.
Enter any additional notes about the
patient.
4. Now either click the Save button or select Save Patient in
the File menu to save the patient or proceed to the Test
Navigator.
Note
" It is not mandatory to enter any patient information to
perform a test. However, you must enter a Family Name and
Patient ID if you intend saving patient information.
" You can proceed to the Test Menu without saving patient
information. The patient details are saved automatically when
any Test data is saved either manually or using Automatic
Save. Alternatively, you are prompted to save patient details
either when you click the New Patient button again or you
close Synergy.
Entering and saving visit details
1. Start up Synergy. The main Synergy application window
appears on the screen.
2. Click on the Visit Details button to display the Visit Details
dialog box.
3. Enter information in the following fields:
Enter the name of the physician
Examining
carrying out the test(s) using a
Physician
maximum of 50 characters.
25
SYNERGY USER MANUAL
Referring
Physician
Referral
Diagnostic Code
Diagnostic Code
Referral Letter
Current Height
Enter the name of the physician who
referred the patient for testing using a
maximum of 50 characters.
Enter the appropriate referral
diagnostic code using a maximum of
50 characters.
Enter the appropriate diagnostic code
using a maximum of 50 characters.
Enter the full pathname for the letter of
referral or click the Browse button and
select the pathname. The View Letter
button is enabled; Click the View
Letter button to view the letter in MS
Word.
Enter the current height of the patient
in the format shown in the field using
a maximum of 20 characters. This
must be entered if reference values
include a height factor.
Note
Note 1
Note 2
Height format is defined under the
option User Set-up in the System
menu.
Enter any additional information about
the patient, for example the patient’s
clinical history or notes arising from a
physical examination.
Enter any additional information about
the patient, for example the patient’s
clinical history or notes arising from a
physical examination.
Note
If you entered the patient’s date of birth in the Current
Patient dialog box, the age of the patient in years is
displayed automatically in the Patient Age On Visit Date
field.
4. Click Done to save the visit details for this patient. You are
returned to the main Synergy window.
Note
Visit information is specific to each visit made by the patient.
26
2.
HANDLING PATIENT INFORMATION
Retrieving existing patient information
You can recall an existing patient from the Patient Database to
change their details and review test results and reports. You can
also delete a patient from the Patient Database.
The Patient List is a list of all the patients in the Patient
Database. There are columns for the Family Name, First Name,
Initial, Patient ID and Date of Birth for each patient. Use the
vertical and horizontal scroll bars or the Tab key to view all the
columns.
See also
⇒ Reviewing results and reports for an existing patient
⇒ Searching for patient information
⇒ Transferring patient information between Synergy systems
Recalling a patient
1. Click the Patient List button or press Alt + T in the main
Synergy screen to list all the patients in the Patient Database
or use the Search utility to find a patient.
2. Use the vertical scroll bar or up/down arrow keys to scroll
down the fields to the patient you want. To load the patient
highlight the patient name and click the Load Patient button
or press Enter.
Note
Loading a patient replaces the current patient and you may be
prompted to save the current patient before you can proceed.
See also
⇒ Searching for patient information
Deleting a patient
1. Highlight the patient you want to delete in the Patient List.
2. Select Delete Patient in the File menu. You are prompted to
confirm the deletion. The patient is deleted from the Patient
Database.
27
SYNERGY USER MANUAL
Transferring patient information
between Synergy systems
One of the principal features of the Synergy Suite system is the
ability to transfer patient data between systems, giving you the
flexibility to handle the data both in the office and out on patient
visits.
The system used to hold the main patient database is defined as
the host system. The host may be connected via a direct network
connection to up to ten other systems that are defined as
satellites. The host is typically a Synergy Tower and the
satellites are typically Synergy Notebooks, but any combination
of systems loaded with Synergy Application or Reader software
may be used.
You define the host and satellite set up as part of machine
configuration.
See also
⇒ Defining the host and satellite in chapter 4
Transferring patient data between host and
satellite
There are two methods of transferring data between host and
satellite:
" Transfer removes all data, results and reports from one
database and transfers the information to the other database.
The data on the original database is erased.
" Copy makes a copy of all the data, results and reports from
one database and transfers the copy to the other database. The
data in the original database is not erased and so all
information is retained.
These methods can be used for transferring data in either
direction, host to satellite or satellite to host. In either case, if
you use Transfer, the data in the database you transfer from,
whether host or satellite, will be erased.
Patient files can be transferred singly or several at a time.
Using Transfer to transfer patient data between
systems
28
2.
HANDLING PATIENT INFORMATION
1. Click the Patient List button or press Alt + T in the main
Synergy screen to list all the patients in the Patient Database
or use the Search utility to find a patient.
2. Highlight the patient or patients whose details you want to
transfer.
3. Select Save Patient for Transfer in the File menu, or rightclick and select Save Patient for Transfer from the dropdown menu.
Notes
" To highlight a block of several patients from the list, hold
down the Shift key and click on the top and bottom names in
the list.
" To highlight selected patients from the list, hold down the
Ctrl key and click on the names required.
The selected patients will be erased from the patient list and
saved in an export file. The export file is located in C:\Program
Files\Medelec\Synergy\Transfer Data.
Using Copy to transfer patient data between
systems
1. Click the Patient List button or press Alt + T in the main
Synergy screen to list all the patients in the Patient Database
or use the Search utility to find a patient.
2. Highlight the patient or patients whose details you want to
transfer.
3. Select Save Patient for Copy in the File menu, or right-click
and select Save Patient for Copy from the drop-down menu.
29
SYNERGY USER MANUAL
Note
" To highlight a block of several patients from the list, hold
down the Shift key and click on the top and bottom names in
the list.
" To highlight selected patients from the list, hold down the
Ctrl key and click on the names required.
The selected patients are saved in an export file ready for
transfer to the other system. The export file is located in
C:\Program Files\Medelec\Synergy\Transfer Data.
Completing the Transfer
To complete the transfer, the host and satellite systems must be
connected using the network connection and both systems must
be running. Using the destination system, transfer the data as
follows:
1. Open the Patient List.
2. Select Complete Transfer in the File menu. A dialog box is
displayed with a message that there is data available for
transfer.
3. Click Yes to display a dialog box listing the patients that are
available for transfer in the export file.
4. Select those patients whose files you want to import. If the
patient data is already on the database, you are prompted to
replace the file or add new visit details to it. The options are:
" Append New Visits is the default and adds any new
visits details to the existing patient data without changing
the existing details.
30
2.
HANDLING PATIENT INFORMATION
" Replace overwrites the existing file with the new one.
" Apply to all replaces all existing files with new ones.
5. The selected data is imported into the database.
Reviewing results and reports for an
existing patient
You can recall and review the test results and reports for an
existing patient via the Test Catalog.
Recalling an existing patient
An existing patient is a patient that has been entered in the
Patient Database. The Patient List is a list of all the patients in
the Patient Database. To recall a patient from the Patient List,
see Recalling a patient.
Opening the Test Catalog
The Test Catalog contains the results, reports and visit
information for each visit for a patient, including the current
visit. The most recent visit is listed at the top of the Catalog.
A result entry in the Test Catalog is composed of a Test Name
and Anatomy and depends on the type of test as follows:
" For NCS tests the test result entry is composed of Test Name
+ Nerve + Side
" For EMG tests the test result entry is composed of Test Name
+ Muscle
31
SYNERGY USER MANUAL
Results are grouped either by Test Name or by Anatomy. You
can switch between these two views. See Viewing results in the
Test Catalog.
Notes
" The Test Catalog also allows you to view the tests performed
on the current patient during the current visit.
You can open the Test Catalog from a number of locations and
in a number of ways:
" By clicking the Catalog button on the left hand side of the
screen when patient demographics are displayed in the
Current Patient dialog box for the currently loaded patient.
This allows you to review the results from a previous visit
and to redisplay and review the results during the current
visit.
See Opening the Test Catalog from the Current Patient
dialog box.
" From the Patient List for a patient that you have highlighted
in the Patient List. This allows you to review the Catalog for
any patient in the Patient List without recalling the patient. If
you recall any results to display, review or analyse, the
patient is loaded and overwrites any existing patient. You
will be prompted to save any changes for an existing patient
before you can proceed.
See Opening the Test Catalog from the Patient List.
" From the File menu. This is useful if you are in the Test
Menu screen.
See Opening the Test Catalog from the File menu.
" From the Catalog menu item. This allows you to quickly redisplay the results for the current patient during an
examination.
See Opening the Test Catalog from the menu bar.
Opening the Test Catalog from the Current
Patient dialog box
" Click the Catalog button below the Current Patient dialog
box in the main Synergy screen or press Alt + C. The Test
Catalog for the currently loaded patient appears in the righthand side of the screen.
Opening the Test Catalog from the Patient List
1. Click the Patient List button in the main Synergy screen.
The Patient List appears in the right-hand side of the screen.
32
2.
HANDLING PATIENT INFORMATION
2. Highlight the patient you want in the Patient List.
3. Click the Catalog button below the Patient List or press Alt
+ C. The Test Catalog appears in the right-hand side of the
screen.
Opening the Test Catalog from the File menu
" Select Catalog in the File menu.
Opening the Test Catalog from the menu bar
" Select the menu item Catalog from the menu bar. The Test
Catalog for the current patient is displayed in the middle of
the main Synergy screen.
Note
This selection is only available when you are performing a test.
See also
⇒ Deleting results
Recalling results using the Test Catalog
" Double-click a Result folder in the Test Catalog. The test
results are displayed in the Test Screen.
" Double-click a Visit Information folder to display visit
details. The Visit Details are displayed.
" Double-click a Report folder to display the report generated
for the patient’s test(s).
Viewing results in the Test Catalog
Results can be grouped by test name or by anatomy. You can
view the results in either view. The default is by test name.
" Click the Order by Anatomy button to view the results by
anatomy.
" Click the Order by Test Name button to view the results by
test name.
Deleting results
33
SYNERGY USER MANUAL
Test results and associated data are deleted from the Patient
Database via the Test Catalog. Note that you must have
Administrator rights to delete any data from the Test Catalog.
1. Highlight either a single Result entry to delete a single result,
or a Visit Date and Time entry to delete all results for that
visit, in the Test Catalog.
2. Click Delete Result in the File menu. You are prompted to
confirm the deletion.
34
2.
HANDLING PATIENT INFORMATION
Searching for patient information
You can use the Search utility to search for a single existing
patient using criteria such as Family Name or Patient ID.
Searching on patient details
1. Click the Search button in the Synergy screen to display the
Search Criteria dialog box.
2. Edit the fields in the dialog box to specify your search
criteria. Use the vertical scroll bar to scroll down the fields.
3. Click the Search button below the dialog box to activate the
search.
4. The Patient List is updated with the patient(s) that match the
search criteria. The number is shown in the Patients Found
field.
Clearing the Search Criteria dialog box
Click the Clear button below the Search Criteria dialog box to
clear the search fields.
Cancelling a search
Click the Cancel button below the Search Criteria dialog box
to cancel a search.
35
SYNERGY USER MANUAL
Saving and loading patient and report
data to file
Saving patient and report data to file
1. From the Patient List, select one or more patients whose data
you want to Save to File
2. From the File menu, choose Save Patient to File
3. Specify where you want to save the data, the type of data you
want to save, and the file name to save it under:
By default, the file includes patient demographics, visits and test
results. You also have the option to include reports or LivePlay
data - since they take up a lot of disk space, they may be too
large to fit on a floppy disk. However, you should include them
if you intend to import the patient's data back on to this machine
at a later date (see the Tips, below)
If you have the WinZip utility installed and configured on your
system, then you have the option of compressing the file before
it is saved, so that the file takes up less disk space. The WinZip
path must be setup in Machine Configuration under the system
menu. If you have WinZip installed, the Compress output file
option is available; if WinZip is not installed, the option is
greyed out. If you choose to compress a file, you should save it
with the file extension .zip.
Note:
You cannot Save to File the patient you are currently working on
until all the data has been saved. Choose New Patient before
trying to Save to File the current patient's data.
Saving patient information always includes the patient
demographics, visits and test results. It is not possible to Save
partial information (such as a single visit).
If you intend to import a patient's data back on to this machine at
a later date, you must include all data that you want to retain.
This is because importing data onto a system overwrites the data
on the system with the data that is imported. For example, you
may want to Save to File a patient's data from an acquisition
system so that you can perform analysis on a Synergy Reader
system. If you do not Save the patient's reports, then if you
import the data back onto this system after analysing the data on
36
2.
HANDLING PATIENT INFORMATION
the Synergy Reader system, the reports on this system will be
overwritten.
See also
⇒ Synergy Reader Software in chapter 1
Loading patient and report data from File
If you Load data from File for a patient who is currently on the
system, the imported data overwrites the data on the system.
1. Display the Patient List
2. From the File menu, choose Load Patients from File
3. Select the file containing the data to import (by default, the
system displays files with the extension .mps)
4. A list of the patient details in the file is displayed. Select the
patient file to be loaded, and click on the Load button. Note
that you can import more than one patient at once, by using
multiple select
5. The patient details are imported onto the system. If a patient
already exists on the system, Synergy asks if you want to
replace the data on the system with the imported data.
37
3.
GENERATING REPORTS
3: Generating reports
Overview
Synergy provides a comprehensive reporting facility which
enables you to compile a report as you carry out a patient
examination. With Synergy you can:
" Optionally include tables, graphs and traces in your reports.
" Define the structure of your report tables specifically for use
in your reports.
" Optionally indicate results that are outside reference ranges.
" Enter comments in the report as you carry out the
examination.
" Configure custom headers and signature files for your
reports.
" Generate a Microsoft Word compatible report.
If you decide to modify the test results after you have finished
the examination, for example you may want to move an
incorrectly placed marker or review and analyse traces and
results, you can recall the test data and recompile the report.
See also
⇒ Obtaining a report online
⇒ Recompiling a report
⇒ Recalling a report
⇒ Customising the report layout
⇒ Printing a report
39
SYNERGY USER MANUAL
Obtaining a report online
Synergy enables you to compile a Word-compatible report
online whilst you carry out a patient examination.
The report is updated automatically when you select a new
nerve, new muscle or a new test. The results are appended to the
report in the following way:
" Results from the same test are appended to the same results
table in the report.
" Results from a new test are appended to a new results table in
the report.
You can also enter comments in the report during the
examination. You can enter comments either directly in the
report or you can configure them using the Comments utility so
that they appear in a report after the relevant results table.
You can quickly view the report during an examination with a
single keystroke using the Report function key or via the results
menu.
Result data is transferred automatically, depending on the report
configuration, until you select a New Patient.
If you later modify the traces and results you can recompile the
report to ensure that it is up to date before you review the results
or print the report.
See also
⇒ Selecting an online report
⇒ Viewing a report
⇒ Adding comments
⇒ Recompiling a report
⇒ Editing and saving a report using MedPad
⇒ Recalling a report
⇒ Customising the report layout
⇒ Printing a report
40
3.
GENERATING REPORTS
Selecting an online report
1. Select Report Set-up from the System menu.
2. Click the General tab in the Report Set-up dialog box.
3. Click the Generate Report On-line checkbox.
Note
This selection will generate reports online for all patients. If you
do not want to use the online report facility, set Generate
Report On-line to off.
Viewing a report
1. Click the function key to view the report online in the
MedPad application. The report will contain the latest test
results.
2. Click the icon in the MedPad toolbar or select Main
Application from the MedPad View menu to return to the
Test Screen.
Adding comments
1. Select Comments from the Results menu. A blank
Comments text box is displayed.
2. Enter your comments.
3. Click on OK.
Recompiling a report
1. Display the Patient Catalogue.
2. Select Report One.
3. Select Re-compile Report from the File menu. There is a
short pause and you are returned to the main Synergy screen.
Notes
" You cannot recompile Report One during a patient
examination, since it is automatically compiled by Synergy
during the examination.
" You can click on Report One with the right mouse button to
display a menu where you can choose to re-compile the
41
SYNERGY USER MANUAL
report. You may find this quicker than selecting Re-compile
Report from the File menu.
1. Display the Test Catalog.
2. Highlight either a Report entry or a Visit Information entry.
3. Select either the Recall Report or Re-compile Report. If
you have highlighted a Visit Information entry, you can
select either Recall Visit or Recompile Report. If you recall
a report it is displayed on screen. If you recompile a report
there is a short pause and you are returned to the main
Synergy screen.
Note
You cannot make these selections during a patient examination.
42
3.
GENERATING REPORTS
Recalling a report
You can open a report on screen after a patient’s visit to edit it
and add any comments or conclusions, using either Microsoft
Word or Medpad. If you have modified the result data since the
patient’s visit, the results will not be updated automatically in the
report. In this case, use the Re-compile Report option to update
the report before you open it.
See also
⇒ Recompiling a report
Opening a report in Microsoft Word
1. Run the Microsoft Word program.
2. Open the report from the File menu.
Opening a report in MedPad
1. Click the Patient List button in the main Synergy screen to
display a list of all the patients.
2. Highlight the patient whose report you want to view.
3. Click the Catalog button to display the patient’s Test
Catalog.
4. Double-click the Report Information folder for the
appropriate visit date to open the patient’s report in the
MedPad application.
Editing and saving a report using MedPad
A report is edited and saved using the standard functionality of
Medpad which is a WordPad derivative.
" To edit a table in MedPad, double-click on the table.
" To add text, click and type anywhere in the report.
" To save your work, select Save from the File menu or press
CTRL + S.
Note: It is not possible to edit graphs and traces. However, these
can be moved or deleted.
43
SYNERGY USER MANUAL
Customising the report layout
A Report can be made up of some or all of the following
components:
" Header file This file typically contains a letterhead, perhaps
including a graphic. For example, the file may contain the
name, address and logo of a hospital.
" Signature file This file typically contains the name and
qualifications of the examining physician.
" Patient Table This contains patient demographics and visit
information retrieved from the Patient Database.
" Result Tables
" Graphs
" Waveforms
" Comments Text entered into a report either directly or via
the Comment utility. This enables you to configure your
comments and have them placed automatically after the
relevant results table in a report.
The first two components are defined using the Report Set-up
utility. This enables you to retrieve existing header and signature
files for use in your reports or define new ones. You can also
define the sequence of the components within your report,
including the results sequence. Results from the same test are
appended to the same result table. Tables of results from
different tests of the same Test Type are grouped together. The
order in which these are placed is defined in Report Set-up. You
can also specify where you want page breaks. Nerve protocols
are reported in the order they are defined in the protocol list for
each Test. This may be modified using the Test Configuration
dialog from the System menu. Finally, you can select to generate
reports online. Once you have defined a report layout, it can be
used for all your reports.
The remaining components are test-specific and settings for
these are accessed via Test Report Settings in the Results
menu.
See also
⇒ Configuring patient demographics, chapter 4
⇒ Adding comments
⇒ Selecting an online report
44
3.
GENERATING REPORTS
Selecting and defining a header file
1. Select Report Set-up from the System menu.
2. Click the Header tab in the Report Set-up dialog box.
3. You can either use an existing header file that has been
created using WordPad or Word and saved with a .rtf
extension or you can define a simple header file. Click one of
the following options and follow the steps:
Use an existing header file
Define a header file
Note
You can only make changes using Report Set-up when there is
no report currently active.
Use an existing header file
1. Click the Browse button.
2. Using the drive and directory folders, navigate to the file you
want to use and click Open.
Note: The file must have been created using WordPad and
must have a .rtf extension. If you have graphics in your file,
check that they are inserted using Insert/Picture, not
Insert/Object, otherwise they will not be visible in MedPad.
3. Click OK
Define a header file
1. Click the Define button.
2. Enter the text for the header using a maximum of 5 lines.
3. Position the text using the Right, Left or Centre buttons.
4. Click Save.
5. In File name type the name of the header file. Save it as type
RTF and either use the default path (C:\Synergy\Reports\Headers)
or choose a folder in which to save it.
6. Click Save.
7. Click OK.
45
SYNERGY USER MANUAL
Selecting and defining a signature file
1. Select Report Set-up from the System menu.
2. Click the Signature tab in the Report Set-up dialog box.
3. You can either use an existing signature file that has been
created using WordPad and saved with a .rtf extension or you
can define a simple signature file. Click one of the following
options and follow the steps:
Use an existing signature file
Define a signature file
Note
You can only make changes using Report Set-up when there is
no report currently active.
Use an existing signature file
1. Click the Browse button.
2. Using the drive and directory folders, navigate to the file you
want to use and click on Open.
Note: The file must have been created using WordPad and
must have a .rtf extension. If you have graphics in your file,
check that they are inserted using Insert/Picture, not
Insert/Object, otherwise they will not be visible in MedPad.
3. Click OK
Define a signature file
1. Click the Define button.
2. Enter the text for the signature using a maximum of 5 lines.
3. Position the text using the Right, Left or Centre buttons.
4. Click Save.
5. In File name type the name of the signature file. Save it as
type RTF and either use the default path
(C:\Synergy\Reports\Signats) or choose a folder in which to save
it.
6. Click Save.
7. Click OK.
46
3.
GENERATING REPORTS
Defining the report sequence and inserting
page breaks
1. Select Report Set-up from the System menu.
2. Click the Sequence tab in the Report Set-up dialog box. A
list of icons, each of which represents a report component,
appears. Use the scroll bar to scroll up and down.
3. Use the mouse to re-order the sequence of the components.
Click on a component and drag it to a new location in the list
box.
4. Click in the tick box to the left of a component to insert a
page break in the report AFTER the component.
5. Click OK.
Defining Test Report settings
1. Select Test Report Options from the Results menu from
within a test. The Report Settings dialog box appears.
2. Choose the type of tables to use in the report. Click one of
the following options and follow the steps:
Use Tables As Test Screen
Define Custom Tables
3. Click the Graph check box to display results in a graphical
form in the report.
4. Click the Display reference check box to include Reference
Values in the report. These are values that are in the normal
range for a test. You can choose to have results that are
outside the range of reference values flagged in your reports.
5. Click the Check reference values check box to highlight
results that are outside the normal range.
6. Optionally select trace format(s) (Stores and/or Cascades) to
include in the report.
7. Click OK
Tables as Test Screen
1. Click As Test Screen to use the same table contents for the
report as defined for the test. All the result columns that have
been selected to appear in the test screen will appear in the
47
SYNERGY USER MANUAL
report. If you want a different set of results to appear in the
report use the option Define Custom Tables.
2. Click OK.
Define Custom Tables
1. Click Custom Tables to use table contents for the report that
are different to those defined for the test.
2. Click the Define custom tables button. The Result Options
dialog box appears.
3. Click the buttons to select the result options you want in your
report. You can set up to fifteen columns on. Smaller fonts
are used in the report if you use a large number of columns.
4. Click OK.
Printing a report
You can print a report from within MedPad (a WordPad
derivative) using the Print function.
48
4.
CONFIGURING THE SYSTEM
4: Configuring the system
System configuration
System configuration covers the following activities:
" Defining the set up of the system with host and satellite(s)
" Defining a path for the electronic mail program.
" Defining the Notch Filter Setting.
" Configuring Patient Demographics.
" Adding, modifying and deleting users.
Synergy has three levels of access: User, Administrator and
Service Engineer. These confer different rights to access parts of
the system to users. Access levels are defined by a user with
Administrator rights. New systems are pre-configured with a
default Administrator user.
Only users with Administrator level of access can carry out
system configuration activities.
Note
A system delivered from the factory is pre-configured with a
default Administrator user. This user name cannot be renamed or
deleted, though the associated full name can be. However, a user
with Administrator access can change the password.
See also
⇒ Defining the host and satellite
⇒ Configuring an E-mail program
⇒ Selecting a Notch Filter setting
⇒ Configuring Patient Demographics
⇒ Setting up a new user
⇒ Editing a user’s set-up
⇒ Deleting a user
49
SYNERGY USER MANUAL
Defining the host and satellite
In the Synergy Suite, the system used to hold the main patient
database is defined as the host system, and the other (one or
more, up to ten) systems to which it may be connected are
defined as satellites. The host is typically a Synergy Tower and
the satellites are typically Synergy Notebooks, but any
combination of systems may be used.
Defining a system as a host
1. Logon as Administrator.
2. Select Machine Configuration from the System menu. The
Machine Configuration dialog box is displayed.
3. Click the Configure button. The Suite Configuration dialog
box is displayed.
4. Select Host and then click the Add button to add the network
path name for each satellite system that is to be connected to
it.
5. Click OK and then tick the Use as part of a Suite check box.
Defining a system as a satellite
1. Logon as Administrator.
2. Select Machine Configuration from the System menu. The
Machine Configuration dialog box is displayed.
Click the Configure button. The Suite Configuration dialog box
is displayed.
50
4.
CONFIGURING THE SYSTEM
3. Select Satellite and then click the Add button to add the
network path name for the host system that it is to be
connected to.
4. Click OK and then tick the Use as part of a Suite check box.
Configuring an E-mail program
1. Logon as Administrator.
2. Select System Configuration from the System menu. The
System Configuration dialog box is displayed.
3. To change the default E-mail program
(c:\windows\winpopup.exe) either type the new path and
program directly in the E-mail Program field or click the
Browse button to display the Select E-mail program to launch
screen. Select the program you want and double-click on it to
load it.
4. Click OK to save your changes and close the System
Configuration dialog box.
Selecting a Notch Filter Setting
1. Logon as Administrator.
2. Select System Configuration from the System menu. The
System Configuration dialog box is displayed.
3. To select a Notch Filter Setting click on either the 50Hz or
60Hz button.
51
SYNERGY USER MANUAL
4. Click OK to save your changes and close the System
Configuration dialog box.
Configuring Patient Demographics
1. Logon as Administrator.
2. Select System Configuration from the System menu. The
System Configuration dialog box is displayed.
3. Click the Patient Demographics button to display the
Patient Demographics Configuration dialog box. This shows
the current and default settings for each patient demographic
field. The dialog box allows you to modify the fields and
select fields on and off for entering patient demographics and
displaying patient demographics in reports. Press Enter or
Tab to scroll down the fields.
4. You can enter a maximum of 16 characters in each field or
leave a field blank.
Note
You can edit any of the fields but you must not change the
meaning of the following fields since they each have a
specific role in Synergy: Patient ID, Family Name, First
Name, Initial, Sex, Date of Birth, Age, Height, Weight.
5. If you de-select a Show check box, the corresponding current
and default fields and the Report check box are disabled and
the field will not be displayed in the Patient Demographics
dialog box.
6. De-select the Report check box if you do not want a field to
appear as a column in the Patient Table in a report.
7. Click OK when you have finished configuring Patient
Demographics.
Setting up a new user
1. Logon as Administrator.
2. Select Set-up User from the System menu in the main
Synergy screen. The User Manager screen is displayed
showing all the known users.
3. Click the New User button. The User Set-up dialog box is
displayed.
4. Complete the following fields:
User Name
52
This field is mandatory. Enter a logon
name for the user using a maximum of
4.
Full Name
Clinic Name
Password
CONFIGURING THE SYSTEM
14 characters.
Enter the user's full name using a
maximum of 40 characters. This is the
name that will be used for display and
report purposes.
Enter the name of the user's clinic using
a maximum of 40 characters.
Enter a password for the user using a
maximum of 14 characters.
Note
Confirm
Password
Access Level
The password is not displayed on screen.
Re-type the user's password.
Note
The password is not displayed on screen.
Select an access level for the user from
the drop-down list box.
5. Select the Temperature Scale, either Celsius or Fahrenheit.
6. Select the Height Format, either Metric or Imperial.
7. To change the user’s default paths for storing results and
paths or to define the user’s muscle list, click one of the
following options and follow the instructions:
Changing Paths
Defining a Muscle List
8. When you have completed all the fields, click OK to save
your changes and close the dialog box.
⇒ Changing paths
⇒ Defining a muscle list
Editing a user's set-up
1. Logon as Administrator.
2. Select Set-up User from the System menu in the main
Synergy screen. The User Manager screen is displayed
showing all the known users.
3. Highlight the user whose set-up you want to change and click
the Edit User button. The User Set-up dialog box is displayed
showing the information for the user. Note that the user’s
password is not displayed.
53
SYNERGY USER MANUAL
4. You can edit the following fields:
User Name
Full Name
Clinic Name
Password
Access Level
5. You can also change the user’s paths and muscle list. Click
one of the following options and follow the instructions:
Changing Paths
Defining a Muscle List
6. When you have finished editing the user’s set-up, click OK to
save your changes and close the dialog box.
Notes
" If the User Name is Administrator this field will be greyed
out and you cannot edit it.
" If you change the user’s password, you must retype it in the
Confirm Password field.
⇒ Changing paths
⇒ Defining a muscle list
Deleting a user
1. Logon as Administrator.
2. Select Set-up User from the System menu in the main
Synergy screen. The User Manager screen is displayed
showing all the known users.
3. Highlight the user that you want to delete and click the
Delete User button.
Note
You cannot delete the built-in Administrator user.
4. A warning is given that all configuration information for that
user will be deleted. Click Yes to confirm that you wish to
delete the user.
5. Click the Exit button to leave the User Manager screen.
54
4.
CONFIGURING THE SYSTEM
User Configuration
Users with the default user level of access can configure the
following aspects of Synergy:
User Set-up
Users can change their User Set-up with the exception of
changing their logon name, full name and access rights. These
are set by the Administrator. Aspects of User Set-up that users
can change include their password, clinic name, default
temperature display scale, default height format and paths where
results and reports are stored.
Muscle Lists
Users can define their own muscle lists from a Master Muscle
List.
Report Set-up
Users define the components and layout of their online reports.
Tests
Users can configure test and protocol settings.
See also
⇒ Customising the report layout, chapter 3
⇒ Configuring protocols, chapter 5
Changing your User Set-up
1. Select Set-up User from the System menu. The User Set-up
dialog is displayed. The User Name and Full Name dialog
boxes are for display only. You cannot change these fields.
2. You can edit the Clinic Name field.
3. Select whether you want the default temperature display in
Celsius or Fahrenheit.
4. Select whether you want height entered and displayed in
metric (metres and centimetres) or imperial (feet and inches)
units.
5. To change your password or the paths for storing results and
reports, click one of the following options and follow the
55
SYNERGY USER MANUAL
instructions:
Changing a password
Changing paths
6. Click OK to return to the main Synergy screen.
Changing a password
1. Click the Change Password button in the User Set-up dialog
box. The Change Password dialog box is displayed.
2. Complete the following fields:
Old Password
New Password
Confirm New
Password
Enter your current password
Enter a new password using a
maximum of 14 characters. The
password is not displayed on screen.
Retype your new password. The
password is not displayed on screen.
3. Click OK to save your changes and return to the User Set-up
dialog box.
Changing paths
1. Click the Paths button in the User Set-up dialog box. The
Paths dialog box is displayed.
2. Click the Browse button next to the field showing the path
you want to change. A file dialog box is displayed from
which you can select the path you want. Alternatively, you
can edit the field directly using up to 255 characters.
Note
You are strongly recommended to specify a local path for
result data. If you use a remote path and the network
becomes unavailable for some reason, your result data will be
lost.
The default paths are:
Acquisition Results: c:\synergy\patients
Acquisition Reports Path: c:\synergy\reports
Archive Results: m:\synergy\archive\patients
Archive Reports Path: m:\synergy\archive\reports
3. Click OK to save your changes and return to the User Set-up
dialog box.
56
4.
CONFIGURING THE SYSTEM
Defining a muscle list
1. Select Muscle Configuration from the System menu. The
User Muscle Selection dialog box is displayed.
2. You can create your own User Muscle List. Click one of the
following options and follow the instructions:
Add muscles to your Muscle List
Remove muscles from your Muscle List
Reorder your Muscle List
3. Click OK to save your changes and return to the main
Synergy screen.
Add muscles to the User Muscle List
Highlight one or more muscles in the Master Muscle List and
click the Add>> button to add them to the User Muscle List.
Remove muscles from the User Muscle List
Highlight one or more muscles in the User Muscle List and click
the <<Remove button to remove them to the Master Muscle List.
Reorder the User Muscle List
Highlight one muscle only in the User Muscle List and click
either the Move Up or Move Down button to move the selected
muscle either up or down one position in the list.
57
SYNERGY USER MANUAL
Network Configuration
If you have a network, you can configure Synergy to share data
across the network. This is particularly useful if you have more
than one Synergy acquisition system, or if you have the optional
Synergy Reader software. When Synergy is set up to share data,
all users of Synergy and the Synergy Reader can access patient
data and reports as if they were held locally.
It is strongly advised that the acquisition system stores its
information on its local hard disk, which is shared and accessible
to other users over the network. This allows a Synergy
acquisition system to operate independently of the network. The
alternative is to save all data to a central server, but this makes
the acquisition system dependent on the stability of the network if there are problems with the network during data acquisition,
Synergy will be unable to acquire data.
To configure Synergy on a network, you need to do the
following:
" Set up access to the shared database.
The Synergy data sources for each machine must refer to the
shared database. By default, these refer to the local system
" Ensure that the pointers written to the database are correct.
When Synergy saves data, it creates a path name in the database
that includes the name of the drive containing the data.
Therefore, all machines must map the drive name to the same
drive in order to be able to access the data. For this reason, UNC
names are preferable - if you map shared drives, all machines
that access shared data must map the shared drive to the same
letter (for example, all machines could map the shared drive to
K:).
You need to set up global configuration information, and also
information on a per-user basis.
" If you network an existing Synergy system with data stored
locally, you must set up the other machines to be able to
access the existing data.
58
4.
CONFIGURING THE SYSTEM
Setting up a shared network database
1. Set up the Synergy database on a shared drive
2. From Windows Control Panel, choose 32bit ODBC. This
displays the three data sources that are used by Synergy:
" MedLocalConfig
" MedLocalPatients
" MedLocalResults
3. Select a data source, then click on the Configure button. This
shows the currently-configured path (by default, this points to
the local system)
4. In the Database section, click on the Select button, and in the
dialog set the path to the shared database
Setting up configuration information
1. From the System menu, choose System Configuration
2. In the Local Configuration Path, enter the name of the shared
drive or global UNC of the drive that holds configuration
information
Note:
Since the configuration path is system-wide, a warning is
displayed - changing the configuration path on this machine
changes it for all networked machines. Thus, a UNC is better
than the name of a shared drive, since it means the same on all
machines
Changing the local configuration path changes all database
entries from this point on. It does not change any data that has
already been saved - if such data exists, you need to set up
machines to be able to see it.
Setting up users to share data
Reports and patients are saved on a per-user basis. Therefore,
you need to ensure that all users on the system are set up
correctly to share data.
1. Login as a user with administrator access rights
2. From the System menu, choose Setup User...
59
SYNERGY USER MANUAL
3. Select a user from the list, and click on the Edit User button
4. From the screen that is displayed, click on the Paths... button
5. On the screen that is displayed, modify the following paths:
" Acquisition Results Path to point to patient data created
by this user
" Acquisition Reports Path to point to report data created
by this user
If you want to use a local drive to store this user's data, it is best
to set it up as a UNC drive, and use the UNC name here.
Sharing existing data on a local drive
If you have an existing Synergy acquisition system, that until
now has been used standalone, you need to set up the other
machines on the network so that they can access the existing data
on the acquisition system.
Set up the Synergy acquisition system
Set up the drive containing the data as a shared drive.
Set up the other machines on the network
On each machine that needs access to the existing data on the
Synergy acquisition system:
1. Map the Synergy acquisition system's shared drive
2. From the System menu, choose System Configuration
3. Tick the alternate drive box, and select the mapped drive that
corresponds to the acquisition system's shared drive.
For example, data may have been held on the acquisition
system's machine's C: drive. Map it on this machine (say to drive
F:), and choose drive F: as the alternate drive box. When this
machine attempts to access old data on the acquisition system
(where the database refers to files on drive C:), before reporting
failure it attempts to access the data on the alternate drive (in this
case drive F:).
60
5.
CONFIGURING PROTOCOLS
5: Configuring protocols
Introduction
Some protocols can be configured on line while you are using
them.
⇒ Online configuration
In some tests the Protocol Configuration Wizard allows you to
set defaults for the protocols.
⇒ Protocol configuration wizard
On-line configuration
Some protocols can be configured on line while you are using
them. Several set-up screens are available through the menus,
depending on which test you are doing.
The settings you alter revert to the default settings for the next
test you perform, unless you use the option Save Settings from
the System menu before you leave the test.
Display menu
⇒ Change Trace Sensitivity below
⇒ Change Trace Duration below
Acquisition menu
⇒ Acquisition Set-up in the Protocol Configuration Wizard
section below
⇒ Audio Set-up in the Protocol Configuration Wizard section
below
61
SYNERGY USER MANUAL
Stimulus menu
⇒ Electrical Stimulator set-up in the Protocol Configuration
Wizard section below
Results menu
Results options may be set up from within individual tests. Table
and graph options are available.
⇒ The tests, chapter 6
Change trace sensitivity
Rotate the Sensitivity Switch on the PIU to adjust the display
sensitivity of the selected trace or traces. If no trace is selected
(to deselect a trace click away from it), the sensitivity of all the
traces in the current test is changed
Alternatively, you can access a dialog box by selecting Change
Trace Sensitivity from the Display menu.
1. Select the trace
2. Click on Trace Area Sensitivity from the Display menu
3. Use the drop down list to select a new sensitivity value
Change trace duration
Rotate the Sweep Duration switch on the PIU to adjust the
acquisition sweep duration for the selected trace(s). Once data
has been acquired you can also increase or decrease the sweep
duration for selected traces. If you deselect a trace, all traces are
affected.
Alternatively, you can access a dialog box by selecting Change
Trace Duration from the Display menu.
1. Select the trace
2. Click on Change Trace Duration from the Display menu
3. Use the drop down list to select a new duration value
62
5.
CONFIGURING PROTOCOLS
Protocol Configuration Wizard
In some tests the Protocol Configuration Wizard allows you to
set up the protocols.
Essentially, protocols concern the settings for Acquisition,
Electrical Stimulus, Site Labels and Reference Values.
This Wizard leads you step-by-step through the process of
configuring a new protocol, or of editing an existing protocol.
Entering the Protocol Configuration Wizard
Select Test Configuration from the System menu to display the
Test Configuration screen:
Your options at this point will depend on which of the icons on
display you select. Click on a folder icon to open it to display the
test(s) it contains, and click on a test icon to display the
protocol(s) available with that test.
" If a folder icon is selected, buttons available allow you to
create a new folder.
" If a test icon is selected, buttons available allow you to create
a new protocol for the selected test.
" If a protocol icon is selected, buttons available allow you to
create a new protocol, or to edit an existing protocol.
63
SYNERGY USER MANUAL
Editing an existing protocol
1. From the Test Configuration dialog box select the icon for
the protocol you want to modify.
2. Click on the Edit Protocol button, and then click on the Next
button in the Protocol Configuration Wizard welcome dialog
box.
3. The Wizard takes you to the Acquisition Set-up dialog box,
where you can modify the settings. (See Acquisition set-up
below). Then click on the Next button.
4. The Wizard takes you to the Electrical Stimulator Set-up
dialog box, where you can modify these settings. (See
Electrical Stimulator set-up below).
Then click on the Next button.
5. The Wizard takes to the Protocol Table dialog box, where
you can modify these settings, and also enter the Reference
Values that you want to be used with this protocol. (See
Protocol Table set-up below)
6. The Wizard takes you to the Channel Mapping and Trace
Depth dialog box, where you can define how traces are
displayed in simple and complex areas. (See Channel
Mapping and Trace Depth set-up below)
Click on the Next button to exit from the Configuration Wizard.
Creating a new protocol
1. From the Test Configuration dialog box select either a test
icon or a protocol icon.
2. Click on the New Protocol button
3. From the Base Anatomy dialog box, select the appropriate
Nerve Name.
4. Enter the name that you wish to give to the new protocol, and
click on the Next button.
5. The Wizard takes you to the Acquisition Set-up dialog box,
where you can modify the settings. (See Acquisition set-up
below)
Then click on the Next button.
6. The Wizard takes you to the Electrical Stimulator Set-up
dialog box where you can modify these settings. (See
Electrical Stimulator set-up below). Then click on the Next
button.
64
5.
CONFIGURING PROTOCOLS
7. The Wizard takes to the Protocol Table dialog box, where
you can modify these settings, and also enter the Reference
Values that you want to be used with this protocol. (See
Protocol Table set-up below)
Click on the Next button to exit from the Configuration Wizard.
Acquisition set-up
Acquisition Set-up allows you to set up global parameters for the
acquisition process, and also to set up Filter settings, Sensitivity
settings etc. for each Channel. Click on Set-up. from the
Acquisition menu to access the Acquisition Set-up dialog box:
Global settings
Run Select Stim Triggered to lock the signal to a stimulus or
trigger. Select Free Running for continuous data acquisition.
Average checkbox Check to average data.
Notch Filter checkbox Check to filter out mains frequency
noise from the signal.
Channel specific settings
By clicking on the appropriate Channel tab, you can set
parameters for specific channels
Channel On checkbox Indicates whether this channel is on or
off.
Rectify On/Off checkbox Indicates whether this channel is
rectified or not.
Algorithm On/Off Indicates whether the algorithm appropriate
to the test being conducted is on or off for this channel.
65
SYNERGY USER MANUAL
Amplifier Gain Select the appropriate range from the list.
For example: 2.5 mV for sensory nerve conduction and cortical
evoked potentials; 100 mV for Motor NCS, F-Wave and EMG.
This is the input range for the amplifier and tells Synergy the
amplitude range of the patient signal. It does not alter the
amplitude of the trace on the screen.
Sweep Duration Can range from 5 milliseconds up to 10
seconds.
Delay (Div) Sets the starting point of the sweep in relation to
the stim. Can be set to begin before or after the stim point by
entering minus or plus values in milliseconds.
LongTrace Defines the length of the LongTrace as a multiple
of the sweep duration.
Low Filter setting Can range from DC to a maximum of 2kHz.
High Filter Setting Can range from OFF to a maximum of
20kHz.
Monitor Sensitivity Can range from 10 nanovolts up to 100
millivolts.
Stores Sensitivity Can range from 10 nanovolts up to 100
millivolts.
Cascades Sensitivity Can range 10 nanovolts up to 100
millivolts.
LongTrace Sensitivity Can range from 10 nanovolts up to 100
millivolts.
Buttons
Average Options button
Clicking on the Average Options button in the Acquisition Setup dialog box brings you to the Average Options dialog box,
where you can set up parameters relating to the Average.
" Type Selects from the list the type of average you want
to use: Mean or Exponential
" Display Mode Selects the display mode you want to use.
" Sweep Limit Enter the number of sweeps you want to
make up your store, to be used in the averaging process.
66
5.
CONFIGURING PROTOCOLS
Artefact Reject Set-up button
Click the Artefact Reject Set-up button to display the Artefact
Reject dialogbox:
This dialog box allows you to set up the parameters for Reject
Level and Reject Start Time on the various Channels. It also
allows you to specify which channel is providing the input to
operate the facility on this channel.
" Detect on Channel Indicates if the Artefact Reject
facility is off or which channel is providing the input to
operate the facility for this channel.
" Reject Level Level, in mV, for rejecting artefacts.
" Reject Start Time Time, in mS, at which artefact
rejection starts.
" Artefact reject occurs if the reading is above the reject
level and within the reject time settings which have been
set for this channel.
Audio Set-up button
Click the Audio Set-up button to display the Audio Set-up dialog
box. This dialog box allows you to switch the Audio facility On
or Off, and also to specify whether you want to receive Single
(you can then indicate the Channel you want to use) or Multi (in
which case you can indicate which Channels you want to use).
" Audio On/Off Sets the Audio facility on.
" Single button Sets the system to receive audio input from
the channel selected below. Only one channel can be
selected.
67
SYNERGY USER MANUAL
" Multi button Sets the system to receive audio input from
the channels selected. The signal received is the average
of the signals from the selected channels.
" Channel buttons Selects the channel for audio input.
View All button
Click the View All button to display the View All dialog box:
This dialog box gives you an opportunity to review all the
settings that are currently in force for your Acquisition Set-up.
You will not be able to make any changes on this screen, but you
can use the context sensitive help facility (click on the question
mark, and then click on any of the fields displayed) to find out
more about a particular field, and also how to change the entry if
you want to.
It is also possible to print out a table of the current settings on all
your channels.
68
5.
CONFIGURING PROTOCOLS
Electrical Stimulator Set-up
This allows you to modify stimulus settings for the test.
Click on Electrical Stim Set-up . . . from the Stimulus menu to
access the Electrical Stimulator dialog box in order to set up
parameters for the Electrical Stimulator:
Settings
Stimulator Stim A is the PIU internal electrical stimulator.
Stim B is the optional external Deluxe Stimulator Probe.
Output
" Current Selects constant current output
" Voltage Selects constant voltage output
Range
" Low Selects low range, (appropriate to somato-sensory
responses)
" High Selects high range, appropriate for standard Nerve
Conduction studies
69
SYNERGY USER MANUAL
" Limit You are not obliged to accept the maximum values
specified for low or high range; in either case you can set
a limit below the default limit offered
Stim Options button
Click the Stim Options button to display the Stimulus Options
dialog. This dialog box allows you to specify whether you want
the stimulus to continue to be delivered after Acquisition has
stopped.
Protocol Table set-up
This dialog box allows you to set up parameters for the Protocol
Tables, and also to set the Reference Values.
Reference Values
For each relevant result in each test reference values may be
entered. For each result, the reference values will be defined
using the following equations:
Upper Limit = Constant + Age Factor (Patient Age - Reference
Age) + Height Factor (Patient Height - Reference Height) +
Distance Factor (Distance - Reference Distance) + Temperature
Factor (Temperature - Reference Temperature) + ( n * s.d. )
Lower Limit = Constant + Age Factor (Patient Age - Reference
Age) + Height Factor (Patient Height - Reference Height) +
Distance Factor (Distance - Reference Distance) + Temperature
Factor (Temperature - Reference Temperature) - ( n * s.d. )
70
5.
CONFIGURING PROTOCOLS
You can use a Constant value by setting all other values to zero.
Alternatively it is possible to correct reference values for age,
height, distance and temperature by entering the appropriate
correction factor.
Channel Mapping and Trace Depth set-up
Simple area
You can set the number of traces displayed on screen when any
of the simple trace types is displayed.
Complex areas
For each area, you can define the number of traces displayed.
Also, if you are acquiring from more than one channel, you can
define which sub-area displays traces from each channel.
71
6.
THE TESTS
6: The tests
Using the tests
You can run the following tests using Synergy Notebook,
Synergy Tower or Synergy Suite:
" Motor NCS
" Sensory NCS
" F-Wave
" H-Reflex
" Needle EMG
" Repetitive Nerve Stimulation
" Blink Reflex
" Sympathetic Skin Response
Optionally, the following tests are available under special
licence:
" EMG analysis software
Interference Pattern, Multi MUP, and FFT
" Single Fibre Jitter tests
Single Fibre Jitter, Fibre Density Analysis and Macro EMG
See the individual test descriptions below for details that are
specific to that test. Each description gives:
" Clinical overview of the test
" Outline of how to run the test
" Description of placing the electrodes
" Description of acquiring the data
" Notes on trace analysis and display
" Details of results that can be obtained
73
SYNERGY USER MANUAL
General information that is common to all the tests is given first
in the following sections.
The typical test procedure
The typical procedure for using the tests is as follows. Some
procedures are common to all tests, but note that others are either
different or not used at all in some tests:
1. Select the test (see Selecting the test)
From the entry screen, select the test you want from the
appropriate folder.
2. Select a protocol (see Selecting a protocol)
From the Select protocol dialog box, select the protocol that
you want to use for this test. Not used for EMG tests.
3. Connect the electrodes (see Connecting the electrodes)
Attach the electrodes as described for the individual tests.
4. Acquire the data
Data is acquired by the instrument, stored in memory and
displayed on the screen when Acquire is ON.
5. Calculate the velocity
The distances between electrode sites must be entered before
the conduction velocity results can be calculated and
displayed on the screen. Not used for Blink Reflex, H-Reflex,
Repetitive Nerve Stim or EMG tests.
6. Selecting traces for analysis and display
Traces may be selected for marking or trace analysis.
Synergy offers comprehensive and powerful ways of
configuring the Trace Area.
7. Configuring and displaying results
Synergy offers you considerable flexibility in configuring
and displaying the results of your test.
Detailed procedures are given in the description of each test. For
general information about trace analysis and results see:
⇒ Trace analysis and display
⇒ Configuring and displaying results
You also need to understand about:
Configuring protocol settings
This allows you to set up global parameters for the acquisition
process, and to set up Filter settings, Sensitivity settings etc. for
each Channel and to modify stimulus settings for the test.
⇒ Configuring protocols, chapter 5
74
6.
THE TESTS
Selecting the test
Tests are automatically allocated to function keys by Synergy:
" If the folder containing the test you want is already open, and
the test is displayed on the Function Key Bar, simply press
the appropriate function key on the keyboard.
" If the folder containing the test you want is already open, but
the test is not displayed on the Function Key Bar, press the
F9 function key. This allocates other tests in the folder to the
Function Key Bar, so the test you want should now be
displayed on the Function Key Bar: press the appropriate
function key to select the test.
" If the folder containing the test you want is not already open,
press the F10 function key to open other folders. When the
correct folder is open, select the test as described above.
Selecting a protocol
Not used for Needle EMG Test.
1. Select the nerve/muscle using the up arrow or down arrow
keys.
2. To select the left side, press the left arrow key; to select the
right side press the right arrow key; to select both side, use
the pointer to click on the Both button.
3. Press Enter.
The protocol defines:
" The default Acquisition and Stimulus settings
" Site labels
" Reference values, if entered.
Note:
To use the same protocol for ALL nerves, from the Display
menu choose Test Options, and select Don't Display
Nerve/Muscle List. The first protocol in the list is then used for
all nerves.
75
SYNERGY USER MANUAL
Motor NCS Test
Motor NCS Test Screen
Clinical Overview
The purpose of the test is:
1. To investigate the conduction velocity along the nerve
2. To assess functional continuity along the nerve (conduction
block)
3. To assess degeneration and wasting in innervated muscles
due to the compromise of the nerve
Running the Motor NCS test
Select the test
From the entry screen, select the test you want from the
appropriate folder.
76
6.
THE TESTS
Select a protocol
From the Select protocol dialog box, select the protocol that you
want to use for this test.
Connect the electrodes
The following stimulating electrodes are recommended:
" Large bipolar stimulating electrode
" Deluxe Stimulator Probe
16893T
031K025
Usage
" The active recording electrode is placed over the end-plate
zone of a muscle innervated by the tested nerve.
" The reference electrode is placed nearby in an electrically
“quiet” area.
" The ground electrode is usually placed between the
stimulating and recording electrodes.
" Using electrolytic gel between the skin and recording
electrode improves the “electrical contact” and reduces noise.
" When recording from a deep muscle, one may use a
concentric or monopolar needle for recording.
77
SYNERGY USER MANUAL
Note:
The recording electrode is placed on a muscle, even though we
are interested in the conduction along the nerve.
The nerve is stimulated using surface electrodes at two or more
sites where the nerve is located superficially. The stimulator is
oriented so that the cathode of the stimulator faces the active
recording electrode.
Acquire the data
Turn on the amplifier and observe the monitor trace at the lower
right of the screen to ensure that it is noise free. If it is not, check
electrode connections and cables.
1. Position the stimulator at the appropriate site, and begin
stimulation (for recurrent stimulation press the Acquire On
button; for a single stimulus press the Acquire Single button).
Stimulator settings are indicated on the toolbar.
2. Increase the stimulus intensity and duration as necessary to
record the compound muscle action potential (CMAP).
During acquisition, the response is marked automatically (1:
Onset, 2: negative peak, 3: baseline crossing, 4: positive
peak, 5: End).
3. When an acceptable response is observed using recurrent
stimulation, switch off the stimulus by pressing the Acquire
On button.
4. Assess the validity of the automatic markings, changing the
sensitivity if necessary. If one or more marked positions is
not correct:
" Select the marker to change by pressing the Fn button the selected marker is displayed red and double height
(note that marker 1 is automatically selected after
acquisition).
" Rotate the Fn button to move the position of the selected
marker. When you are happy with its position, press the
Fn button to move to the next marker.
" If Synergy has not placed automatic markers, but you are
happy with the trace, you can place the markers yourself.
Press the Fn button to place marker 1 at its default
position, rotate the Fn button to move the marker to the
correct position, then press the Fn button again to position
the marker. Continue placing the other markers in the
same way.
78
6.
THE TESTS
" If you accidentally move beyond the marker you want to
move or place, you must use the mouse pointer to select
it. You can then position it using the Fn button.
5. To record from another site, press the Next button on the
PIU. A blank trace is displayed on the screen: repeat the
procedure as for the first site.
Calculate the velocity
" Distances may be entered after each site has been acquired,
or all distances may be entered after all sites have been
acquired.
" Enter distances in cm to 1 decimal place (e.g. 23.5 cm)
" The distance entered will be displayed in the active distance
field.
" Press Enter to accept the distance and to calculate the
conduction velocity.
Note 1
" If you enter distances after each site the active distance field
will refer to the active store unless you change it by clicking
the mouse or using the tab, Enter or up and down arrow keys.
" If you enter distances after you have acquired all sites the
active distance field will remain at the second site, allowing
you to enter all distances in sequence.
79
SYNERGY USER MANUAL
Note 2
" It is possible to enter Default Distances using the protocol
table:
" Conduction Velocities will then be automatically calculated.
Trace analysis and display
Traces may be selected for marking or trace analysis. Synergy
offers comprehensive and powerful ways of configuring the trace
area. See the following sections later in this chapter:
⇒ Selecting traces
⇒ Moving traces
⇒ Superimposing traces
⇒ Automatic marker placement
⇒ Manual marking of traces
⇒ Changing trace sensitivity
⇒ Changing trace duration
⇒ Compare results
⇒ Trace arithmetic
and also
⇒ Trace area set-up, in chapter 5
80
6.
THE TESTS
You can use the full screen to examine and process your trace if
you wish. Select Full Trace Area ON from the Display menu.
Sorting results
If responses have not been acquired in order (distal to proximal),
select Sort from the Analysis Menu to automatically sort
responses in order of ascending latency.
Note:
" This facility will only be available if you have just one
channel active.
" All responses acquired for the current nerve study will be
rearranged, with the distal response placed first and the most
proximal response last.
" If segment distances have been entered and are no longer
valid, they will be erased and you will need to re-enter them.
" Reference Values may be deleted following a sort.
Results for Motor NCS tests
Results can be seen on screen immediately, as you acquire data.
If columns on the table are not on view you can either scroll the
table or click on results screen from the Display menu to see the
Table and Graphs full screen.
Available results ~ Motor NCS
You can display any 15 of the following results:
Peak Latency
Total Area
Take off Latency
Distance
Delta Peak Latency
Temperature
Delta take off Latency
Recording Site Label
Peak Amplitude
Stimulus Intensity
Peak to Peak Amplitude
Stimulus Duration
Peak Duration
Take off Velocity
Total Duration
Peak Velocity
-ve peak Area
Path Velocity
+ve peak Area
Click on Result Options from the Results menu to select the
results that you want.
Units Used
81
SYNERGY USER MANUAL
The units used to display absolute results are fixed as follows:
Result
Units
All Latency results
ms
All Amplitude results
mV
Duration
ms
All Area types
mV ms
Velocity
m/s
Distance
cm
Temperature
° C or ° F
Graphs
Up to two graphs can be displayed on the test screen. Up to six
graphs can be displayed in the full screen RESULTS view.
You can display any six of the following Graphs (bar type or Y
vs X plots)
Peak Latency
Peak Amplitude
Peak Velocity
Peak Latency v Distance
Peak Amplitude v Distance
Peak Velocity v Distance
Take off Latency
Peak-to-Peak Amplitude
Take off Velocity
Take off Latency v Distance
Peak-to-Peak Amplitude v
Distance
Take off Velocity v Distance
Click on Graph Options from the Results menu to select the
results that you want.
See also the following sections later in this chapter:
⇒ Results Table
⇒ Result Mode
⇒ Reference values
⇒ Configuring the results table
⇒ Temperature probe
82
6.
THE TESTS
Sensory NCS Test
Clinical Overview
The purpose of the Sensory NCS test is:
1. To investigate the conduction in sensory nerves
(demyelination)
2. To assess loss of sensory axons
Running the Sensory NCS test
Select the test
From the entry screen, select the test you want from the
appropriate folder.
Select a protocol
From the Select protocol dialog box, select the protocol that you
want to use for this test.
Connect the electrodes
83
SYNERGY USER MANUAL
Usage
1. Prepare the area over the nerve to be stimulated by cleaning
the skin with dry gauze.
2. Surface disk or ring electrodes are placed over the skin where
the tested nerve is superficially located. The following
electrodes are recommended:
" Large bipolar stimulating electrode 16893T
" Digital ring electrodes
16639T
3. Apply the stimulating electrodes using a conductive electrode
gel. The nerve is stimulated at sites where it is superficially
located.
4. The cathode of the stimulator is oriented towards the active
recording electrode.
Acquire the data
Turn on the amplifier and observe the monitor trace at the lower
right of the screen to ensure that it is noise free. If it is not, check
electrode connections and cables.
1. Position the stimulator at the appropriate site, and begin
stimulation (for recurrent stimulation press the Acquire On
button; for a single stimulus press the Acquire Single button).
Stimulator settings are indicated on the toolbar.
2. Increase the stimulus intensity and duration as necessary to
record the sensory nerve action potential (SNAP). During
acquisition, the response is marked automatically (1: Onset,
2: negative peak, 3: positive peak, 4: End).
3. When an acceptable response is observed using recurrent
stimulation, switch off the stimulus by pressing the Acquire
On button.
4. Assess the validity of the automatic markings, changing the
sensitivity if necessary. If one or more marked positions is
not correct:
" Select the marker to change by pressing the Fn button the selected marker is displayed red and double height
(note that marker 1 is automatically selected after
acquisition).
" Rotate the Fn button to move the position of the selected
marker. When you are happy with its position, press the
Fn button to move to the next marker.
84
6.
THE TESTS
" If Synergy has not placed automatic markers, but you are
happy with the trace, you can place the markers yourself.
Press the Fn button to place marker 1 at its default
position, rotate the Fn button to move the marker to the
correct position, then press the Fn button again to position
the marker. Continue placing the other markers in the
same way.
" If you accidentally move beyond the marker you want to
move or place, you must use the mouse pointer to select
it. You can then position it using the Fn button.
5. To record from another site, press the Next button on the
PIU. A blank trace is displayed on the screen: repeat the
procedure as for the first site.
Calculate the velocity
" Distances may be entered after each site has been acquired,
or all distances may be entered after all sites have been
acquired.
" Enter distances in cm to 1 decimal place (e.g. 23.5 cm)
" The distance entered will be displayed in the active distance
field.
" Press Enter to accept the distance and to calculate the
conduction velocity.
Note 1
" If you enter distances after each site the active distance field
will refer to the active store unless you change it by clicking
the mouse or using the tab, Enter or up and down arrow keys.
" If you enter distances after you have acquired all sites the
active distance field will remain at the second site, allowing
you to enter all distances in sequence.
85
SYNERGY USER MANUAL
Note 2
" It is possible to enter Default Distances using the protocol
table:
" Conduction Velocities will then be automatically calculated.
Trace analysis and display
Traces may be selected for marking or trace analysis. Synergy
offers comprehensive and powerful ways of configuring the trace
area. See the following sections later in this chapter:
⇒ Selecting traces
⇒ Moving traces
⇒ Superimposing traces
⇒ Automatic marker placement
⇒ Manual marking of traces
⇒ Changing trace sensitivity
⇒ Changing trace duration
⇒ Compare results
⇒ Trace arithmetic
and also
⇒ Trace area set-up, in chapter 5
86
6.
THE TESTS
You can use the full screen to examine and process your trace if
you wish. Select Full Trace Area ON from the Display menu.
Sorting results
If responses have not been acquired in order (distal to proximal),
select Sort from the Analysis Menu to automatically sort
responses in order of ascending latency.
Note:
" This facility will only be available if you have just one
channel active.
" All responses acquired for the current nerve study will be
rearranged, with the distal response placed first and the most
proximal response last.
" If segment distances have been entered and are no longer
valid, they will be erased and you will need to re-enter them.
" Reference Values may be deleted following a sort.
Results for the Sensory NCS test
Results can be seen on screen immediately, as you acquire data.
If columns on the table are not on view you can either scroll the
table or click on results screen from the Display menu to see the
Table and Graphs full screen.
Available results ~ Sensory NCS
You can display any 15 of the following results:
Peak Latency
Total Area
Take off Latency
Distance
Delta Peak Latency
Temperature
Delta take off Latency
Recording Site Label
Peak Amplitude
Stimulus Intensity
Peak to Peak Amplitude
Stimulus Duration
Peak Duration
Take off Velocity
Total Duration
Peak Velocity
-ve peak Area
Path Velocity
+ve peak Area
Click on Result Options from the Results menu to select the
results that you want.
87
SYNERGY USER MANUAL
Units Used
The units used to display absolute results are fixed as follows:
Result
Units
All Latency results
ms
All Amplitude results
uV
Duration
ms
All Area types
uV ms
Velocity
m/s
Distance
cm
Graphs
Up to two graphs can be displayed on the test screen. Up to six
graphs can be displayed in the full screen RESULTS view.
You can display any five of the following Graphs:
Peak Latency
Peak Amplitude
Peak Velocity
Peak Latency v Distance
Peak Amplitude v Distance
Peak Velocity v Distance
Take off Latency
Peak-to-Peak Amplitude
Take off Velocity
Take off Latency v Distance
Peak-to-Peak Amplitude v
Distance
Take off Velocity v Distance
Click on Graph Options from the Results menu to select the
results that you want.
See also the following sections later in this chapter:
⇒ Results Table
⇒ Result Mode
⇒ Reference values
⇒ Configuring the results table
88
6.
THE TESTS
F-Wave Test
Clinical Overview
The purpose of the F-Wave Test is:
1. To investigate the conduction in proximal nerve segments
that are not assessed by the nerve conduction study
2. To assess excitability of motor neurons
3. To assess loss of motor axons
Running the F-Wave test
Select the test
From the entry screen, select the test you want from the
appropriate folder.
Select a protocol
From the Select protocol dialog box, select the protocol that you
want to use for this test.
89
SYNERGY USER MANUAL
Connect the electrodes
Usage
1. The active recording electrode is placed over the end-plate
zone of a muscle innervated by the tested nerve.
2. The reference electrode is placed nearby in an electrically
“quiet” area.
3. The ground electrode is usually placed between the
stimulating and recording electrodes.
4. Using electrolytic gel between the skin and recording
electrode improves the electrical contact and reduces noise.
5. When recording from a deep muscle, one may use a
concentric or monopolar needle for recording.
Note:
The stimulation sites are the same as in Motor NCS. Usually, the
F Wave recordings are by stimulation at the distal site only using
one of the following:
" Large bipolar stimulating electrode
16893T
" Deluxe Stimulator Probe
031K025
One may reverse the polarity of the stimulator pins, i.e. the
anode of stimulator is closer to the active recording electrode to
prevent anodal block.
90
6.
THE TESTS
Acquire the data
Turn on the amplifier and observe the monitor trace at the lower
right of the screen to ensure it is noise free. If it is not, check
electrode connections and cables. The monitor trace also allows
you to assess whether the patient is relaxed.
1. Position the Stimulator at the appropriate site.
2. Begin stimulation (for recurrent stimulation, press the
Acquire On button; for a single stimulus press the Acquire
Single button), and adjust the stim intensity, if necessary, to
acquire a supramaximal compound muscle action potential
(CMAP). If using recurrent stimulation, acquisition stops
automatically after acquiring 10 traces.
3. Traces are displayed on the screen using split
sensitivity, with the CMAP displayed to the left of the Fmin
cursor, and the F Wave displayed to the right. If any of the
traces were acquired at submaximal intensity, press the Erase
button twice to delete all traces. Press the Acquire On or
Acquire Single button to acquire new traces.
Measure and record the minimum F latency
Rotate the Fn button to position the cursor at the onset of the
earliest F wave. Note the latency value, which is displayed in the
Vertical Cursors table. Record the minimum F latency in the
result table by pressing the Fn button.
Calculate the velocity
Velocity is calculated using the formula:
(2 x segment distance)
Velocity =
(Min F-M latency - 1 ms)
Trace analysis and display
Traces may be selected for marking or trace analysis. Synergy
offers comprehensive and powerful ways of configuring the trace
area. See the following sections later in this chapter:
⇒ Selecting traces
⇒ Moving traces
91
SYNERGY USER MANUAL
⇒ Superimposing traces
⇒ Automatic marker placement
⇒ Manual marking of traces
⇒ Split sensitivity
⇒ Changing trace sensitivity
⇒ Changing trace duration
and also
⇒ Trace area set-up, in chapter 5
You can use the full screen to examine and process your trace if
you wish. Select Full Trace Area ON from the Display menu.
Results for F-Wave tests
Results can be seen on screen immediately, as you acquire data.
If columns on the table are not on view you can either scroll the
table or click on results screen from the Display menu to see the
Table and Graphs full screen.
Available results ~ F-Wave
You can display any of the following results:
F Latency
F Velocity
F-M Latency
F Ratio
F Amplitude
A Latency
F / M Amplitude
Distance
M Latency
Temperature
M Amplitude
Patient Height
%F
Click on Result Options from the Results menu to select the
results that you want.
Units Used
The units used to display results are fixed as follows:
Result
Unit
All Latency results
ms
All Amplitude results
mV
%F
%
Temperature
° C or ° F
F Velocity
m/s
F Ratio
%
Distance
cm
Patient Height
m
92
6.
THE TESTS
See also the following sections later in this chapter:
⇒ Results Table
⇒ Reference values
⇒ Configuring the results table
⇒ Temperature probe
93
SYNERGY USER MANUAL
H-Reflex Test
Clinical Overview
The purpose of the H-Reflex Test is to investigate conduction in
the proximal segments of the tibial nerve.
Running the H-Reflex test
Select the test
From the entry screen, select the test you want from the
appropriate folder.
Select a protocol
From the Select protocol dialog box, select the protocol that you
want to use for this test.
Connect the electrodes
1. The active surface recording electrode is placed on the
Gastrocnemius or Soleus muscle
2. The reference electrode is placed on the back of the leg, just
above the foot
3. The ground electrode is placed between the active recording
electrode and the stimulating electrode.
4. The following stimulating electrodes are recommended:
" Large bipolar stimulating electrode 16893T
" Deluxe Stimulator Probe
031K025
The tibial nerve is stimulated in popliteal fossa with anode
facing the active recording surface.
Acquire the data
Turn on the amplifier and observe the monitor trace at the lower
right of the screen to ensure it is noise free. If it is not, check
electrode connections and cables. The monitor trace also allows
you to assess whether the patient is relaxed.
1. Position the stimulator at the appropriate site.
94
6.
THE TESTS
2. Press the Stim key to switch on the stimulus without
acquiring data.
3. Press the Acquire Single Key to stimulate and Acquire a
single response. Press the Acquire ON Key to perform
continuous Acquisition. The data acquired will automatically
fill each cascade.
4. Gradually increase the stimulus intensity.
5. To stop acquisition press either Acquire Key again.
Measure and record the minimum H latency
Rotate the Fn button to position the cursor at the onset of the
largest amplitude H response. Note the latency value, which is
displayed in the Vertical Cursors table. Record the minimum H
latency in the result table by pressing the Fn button.
Autocompare
If you have already performed this test on the opposite side,
press the F9 function key to display results from both sides, so
that you can compare them. When you have finished, press F9
again to return to the normal display.
Trace analysis and display
Traces may be selected for marking or trace analysis. Synergy
offers comprehensive and powerful ways of configuring the trace
area. See the following sections later in this chapter:
⇒ Selecting traces
⇒ Moving traces
⇒ Superimposing traces
⇒ Automatic marker placement
⇒ Manual marking of traces
⇒ Split sensitivity
⇒ Changing trace sensitivity
⇒ Changing trace duration
⇒ Compare results
⇒ Trace arithmetic
and also
95
SYNERGY USER MANUAL
⇒ Trace area set-up, in chapter 5
You can use the full screen to examine and process your trace if
you wish. Select Full Trace Area ON from the Display menu.
Results for H-Reflex tests
Results can be seen on screen immediately, as you acquire data.
If columns on the table are not on view you can either scroll the
table or click on results screen from the Display menu to see the
Table and Graphs full screen.
Available results ~ H-Reflex
You can display any of the following results:
M Latency
H-M Latency
M Amplitude peak
Max M Ampl / Max H
Ampl
M Amplitude peak-peak
Temperature
H Latency
F Latency
H Amplitude peak
Facilitation
H Amplitude peak-peak
Response Number
Click on Result Options from the Results menu to select the
results that you want.
Units Used
The units used to display results are fixed as follows:
Result
Unit
All Latency results
ms
All Amplitude results
mV
Max M Ampl / Max H
%
Ampl
Temperature
degrees C or F
See also the following sections later in this chapter:
⇒ Results Table
⇒ Reference values
⇒ Configuring the results table
⇒ Temperature probe
96
6.
THE TESTS
Needle EMG Test
Clinical Overview
The purpose of the Needle EMG Test is:
1. To assess the excitability of the muscle Fibres:
" Insertional activity
" Spontaneous activity
2. To assess the morphological changes in the motor unit:
" Motor Unit potential analysis
3. To assess the number of motor units and their recruitment
pattern:
" Inference / Recruitment Pattern Analysis
Running the Needle EMG test
Select the test
From the entry screen, select the test you want from the
appropriate folder.
Select a muscle
On entering the test, a muscle selection window is displayed.
1. Select the muscle you are about to record from and press the
ADD key.
2. Select the side and then press the Acquire button.
Any data you store and any findings you report in the EMG
summary table will be associated with this muscle.
Note:
If you do not wish to annotate which muscle you are recording
from you can turn off this selection window by selecting Don’t
Display Muscle List from Test Options in the Display menu.
97
SYNERGY USER MANUAL
If you select more than one muscle, you can report findings for
more than one muscle at the same time. This saves time,
especially if all the findings are normal. However, if more than
one muscle is selected it is not possible to acquire data.
Connect the electrodes
Usage
The needle is inserted in the tested muscle, preferably away from
the end-plate zone. For a monopolar needle, the reference
electrode is placed in an electrically “quiet” area. The ground
electrode is also placed in the vicinity of the tested muscle.
Acquire the data
Turn on the amplifier and observe the monitor trace at the lower
right of the screen to ensure that it is noise free. If it is not, check
electrode connections and cables.
1. Change the sensitivity and sweep duration as necessary.
2. Press the Fn button on the PIU to turn on the amplitude
trigger. Rotate the Fn button to adjust the amplitude level.
3. Select a display format by pressing the relevant function key:
" Monitor gives a free-running full screen EMG display
" Complex 1 shows the monitor signal on the left of the
screen and the rastered signal on the right. This display
format is useful for assessing motor unit potential
waveform, and the firing rate.
" Complex 2 shows the signal at normal speed (10 ms/div)
on the left of the screen, and at slow speed (50 ms/div) on
the right. This display format is useful for assessing
spontaneous activity and the interference pattern at
maximal effort.
Note:
When using the Complex 1 or Complex 2 display format, signals
must be acquired before they are displayed on the right half of
the screen.
98
6.
THE TESTS
4. Acquire signals by pressing the Acquire On button on the
PIU.
5. Select the next muscle. Ensure that EMG acquisition is
turned off, and press the F1 function key to select a new
muscle. Repeat the procedure given above.
Automatic MUAP Analysis
It is possible to Average and automark triggered MUAPs
" The Marking Algorithm is turned ON/OFF in the Acquisition
Setup dialog box (select Setup from the Acquisition menu)
" Turn the Averager ON (again, from the Acquisition menu)
At Acquire OFF the MUAP will be automarked and the MUAP
result table updated.
LongTrace™
LongTrace is a special display format for traces in EMG tests,
that allows you to display a long run of data on the screen. The
data is displayed in a compressed format, but there is no loss of
resolution since the uncompressed version of the trace is also
displayed.
Setting up LongTrace
1. Choose Setup from the Acquisition menu.
2. In the dialog box that is displayed, set the LongTrace
duration in the box labelled LongTrace. The duration is a
multiplication factor of the sweep duration. For example,
with a sweep duration of 100 ms and a LongTrace factor of
100, 10 seconds of data are displayed on the screen.
99
SYNERGY USER MANUAL
Using LongTrace
With LongTrace set, acquire data as normal. When you stop
acquiring data, two traces are displayed with a review bar
between them:
" The top trace is the long (compressed) trace.
" The bottom trace is an uncompressed portion of the long
trace, as defined by the review bar.
" The review bar defines a section of the LongTrace to display
in the bottom trace.
You can move the review bar under any part of the LongTrace
display, and can vary its length so that the bottom trace displays
the portion of the trace you are interested in:
" To move the review bar, click in its centre and drag it to the
new position.
" To change the length of the review bar, click on either end
and drag.
LivePlay™ mode
LivePlay is included as standard.
LivePlay allows you to replay up to 20 s of EMG data with
Audio. Re-played data can be re-analysed - e.g. re-triggered, etc.
If LivePlay is set to ON in the Acquisition Set-up dialog box
(under Options), the last 20 seconds of acquired data is held in a
buffer allowing it to be replayed with Audio, re-analysed or
saved to disk.
When LivePlay is selected the system goes into LivePlay mode.
The system starts playing the signal in the 20 s buffer starting at
0 sec. A dialog box is displayed indicating the current position of
the signal being replayed; you can change this by dragging the
bar with a mouse.
100
6.
THE TESTS
Four buttons are displayed:
Starts and stops replay from the LivePlay buffer
Play/Stop
Allows you to recall previously saved LivePlay
Load
files. A selection of samples files are available
in C:\My documents\Resources\LivePlay
Examples. These can be used for training.
Note: Files MUST have been named with the
extension .MRL
Save
Allows you to save the current contents of the
LivePlay buffer under the Patient name in the
Catalog. If no patient name has been entered in
the Patient Demographics then this option is not
available.
Note: LivePlay files contain raw data including
audio and are large. A file containing 20 sec of
data will be about 2 Mbytes. Files MUST be
named with the extension .MRL.
Save As
Allows you to save the current contents of the
LivePlay buffer if no patient name has been
entered in the Patient Demographics
Note: LivePlay files contain raw data including
audio and are large. A file containing 20 sec of
data will be about 2 Mbytes. Files MUST be
named with the extension .MRL.
Close
Takes you out of LivePlay and back to normal
data Acquisition.
Trace analysis and display
Traces may be selected for marking or trace analysis. Synergy
offers comprehensive and powerful ways of configuring the trace
area. See the following sections later in this chapter:
⇒ Selecting traces
⇒ Moving traces
⇒ Superimposing traces
⇒ Automatic marker placement
⇒ Manual marking of traces
⇒ Changing trace sensitivity
101
SYNERGY USER MANUAL
⇒ Changing trace duration
and also
⇒ Trace area set-up, in chapter 5
You can use the full screen to examine and process your trace if
you wish. Select Full Trace Area ON from the Display menu.
Creating an EMG report
There are two ways of creating an EMG Summary Report, using
the Summary Toolbar, or using the New Muscle function.
Using the Summary Toolbar
1. Select the Summary Toolbar, if necessary, by pressing the
F10 function key. When the toolbar is selected, its top line
appears in blue.
2. Press Enter to display settings for the selected EMG
characteristic.
3. Use the left and right arrow keys to select the desired EMG
characteristic (such as Fib or PSW).
4. Use the up and down arrow keys to select the correct setting
for the characteristic.
5. When you have finished entering the characteristics, press
Enter.
Using the New Muscle function
Report on one or more muscles by selecting a muscle and side
and pressing ADD. Then select the Report button.
For each Heading select the appropriate findings and press OK.
Select EMG Summary to display the current Summary Table.
Results for Needle EMG tests
Results can be seen on screen immediately, as you acquire data.
If columns on the table are not on view you can either scroll the
table or click on results screen from the Display menu to see the
Table and Graphs full screen.
Available results ~ Needle EMG
You can display any of the following results:
102
6.
Phases
Turns
Sweep Count
THE TESTS
Duration
Area
Amplitude
Click on Result Options from the Results menu to select the
results that you want.
Units Used
The units used to display results are fixed as follows:
Result
Unit
Phases, Turns, Sweep
No unit
Count and Firing Rate
Duration
ms
Area
mVms
Amplitude
mV
See also the following sections later in this chapter:
⇒ Results Table
⇒ Reference values
⇒ Configuring the results table
⇒ Temperature probe
103
SYNERGY USER MANUAL
Repetitive Nerve Stimulation Test
Clinical Overview
The purpose of the Repetitive Nerve Stim Test is:
1. To diagnose diseases of the neuromuscular junction (NMJ),
i.e. Myasthenia Gravis, Eaton-Lambert Syndrome, Botulinum
intoxication, etc.
2. The results of this test may also be abnormal in other diseases
due to the secondary involvement of the NMJ.
3. Although it can be performed in any muscle that is used for
nerve conduction studies, it is often performed in proximal
muscles (e.g. Nasalis, Trapizius, Deltoid, Anconius, etc) that
tend to be more sensitive in diagnosing Myasthenia Gravis.
4. In many laboratories, the ADM muscle used for Ulnar nerve
conduction study is also tested.
Running the Repetitive Nerve Stim test
Select the test
From the entry screen, select the test you want from the
appropriate folder.
Select a protocol
From the Select protocol dialog box, select the protocol that you
want to use for this test.
104
6.
THE TESTS
Connect the electrodes
Usage
1. First, the electrodes are placed on the tested muscle,
preferably over the end-plate area.
2. The stimulator is placed on the appropriate nerve using one
of the following:
" Large bipolar stimulating electrode 16893T
" Deluxe Stimulator Probe
031K025
Acquire the data
The Repetitive Nerve Stim test has three Acquisition/Stim
modes. The mode is selected via the Acquisition menu.
" Stim Set-up Mode allows you to stimulate and obtain a
supramaximal response without acquiring data
" Rep Stim Mode is used to deliver a stimulation train and
acquire the data (up to 20 stims)
Stim Set-up Mode
1. When the test is first entered it will be in Stim Set-up Mode.
2. This mode is used to establish supramaximal stimulation.
105
SYNERGY USER MANUAL
3. Press Acquire ON to lock acquisition ON.
4. Adjust the stimulus intensity until a supramaximal response
is obtained. Each cascade will update in turn.
5. Exit Stim Set-up Mode either by pressing Next or selecting
RepStim Mode.
Notes:
" No data is kept when Stim Set-up is exited.
" A specific Stim Set-up Rep Rate may be set up.
" The Stim Set-up Rep Rate is set up in the Electrical Stim
Set-up dialog. Select Stim Options from this dialog to
change these settings.
Rep Stim Mode
Having established the appropriate stimulation level, select the
REPSTIM mode of operation. This erases all traces and results
on the screen. The system is now ready to acquire a train of up
to 20 responses.
" The Train Length (number of responses acquired) can be set
to between 2 and 20 in the Electrical Stim Set-up dialog
box, accessed via the Stimulus menu.
" The Rep. Rate used is set up in the Electrical Stim Set-up
dialog box, accessed via the Stimulus menu.
" Pressing Acquire begins stimulation and Acquisition. Traces
are automatically marked during acquisition.
" When the Train Length limit has been reached, Acquire is
turned off automatically.
" Results are updated based on the sweeps used for Decrement
Response.
" The first sweep is shown in a specific colour (colour1). The
Decrement sweeps used for result calculations are also seen
in a different colour. Other sweep colours are standard.
Pressing Next allows you to acquire another train.
It is possible to set an automatic sequence for this test. This is
setup in the Rep Stim Table dialog found in Change Train
Label under the Results menu. Enter the Pause period which
should follow each run.
106
6.
THE TESTS
To set acquisition into an automatic sequence:
" Select Continuous Sequences from the Acquisition menu
" Then press the Acquisition button on the control panel
" The Pause period set is the time before the next acquisition
commences
" Acquisition will continue until it is turned off
Trace analysis and display
Traces may be selected for marking or trace analysis. Synergy
offers comprehensive and powerful ways of configuring the trace
area. See the following sections later in this chapter:
⇒ Selecting traces
⇒ Moving traces
⇒ Superimposing traces
⇒ Automatic marker placement
⇒ Manual marking of traces
⇒ Changing trace sensitivity
⇒ Changing trace duration
⇒ Compare results
107
SYNERGY USER MANUAL
⇒ Trace arithmetic
and also
⇒ Trace area set-up, in chapter 5
You can use the full screen to examine and process your trace if
you wish. Select Full Trace Area ON from the Display menu.
Results for Repetitive Nerve Stim tests
Results can be seen on screen immediately, as you acquire data.
If columns on the table are not on view you can either scroll the
table or click on results screen from the Display menu to see the
Table and Graphs full screen.
Available results ~ Repetitive Nerve
Stim
You can display any of the following results:
Amplitude
Facilitation Area
Area
Facilitation Amplitude
Delta Amplitude 1
Rate
Delta Amplitude 2
Delta Response 1
Delta Area 1
Delta Response 2
Delta Area 1
Temperature
Click on Table Options from the Results menu to select the
results that you want.
Units Used
The units used to display results are fixed as follows:
Result
Unit
All Area results
mVms
All Amplitude results
mV
All Delta Amplitude and
%
Area results
Temperature
degrees C
Rate
pps
Decrement Response
You can define up to two sweeps that are used to calculate a
Decrement value. The responses selected are used for
Amplitude and Area ratios with respect to the first response.
See also the following sections later in this chapter:
⇒ Results Table
108
6.
THE TESTS
⇒ Result mode
⇒ Reference values
⇒ Configuring the results table
⇒ Temperature probe
109
SYNERGY USER MANUAL
Blink Reflex Test
Clinical Overview
Blink reflex is a special motor nerve conduction procedure to
assess the facial nerves function, e.g. in Bell's Palsy. It is
performed on only the left and right supra-orbital nerve while
recording responses bilaterally. The stimulation can be in the
form of electrical pulses or mechanical excitation using a reflex
hammer.
The response contains two waves; R1 and R2. The R1 is seen
only on the ipsilateral side (i.e. same side of stimulation). The
ipsi and contralateral sides have an R2 response.
Running the Blink Reflex test
Select the test
From the entry screen, select the test you want from the
appropriate folder.
Select a protocol
From the Select protocol dialog box, select the protocol that you
want to use for this test.
Connect the electrodes
Signals are recorded from 2 channels
The default set-up is:
Channel 1
Records Left side
Channel 2
Records Right side
The recording electrodes are placed over the appropriate area.
Usually electrical stimulation is used to excite the nerve near the
frontal notch. Recommended electrodes are:
" Large bipolar stimulating electrode
" Deluxe Stimulator Probe
110
16893T
031K025
6.
THE TESTS
Acquire the data
Turn on the amplifier and observe the monitor trace at the lower
right of the screen to ensure that it is noise free. If it is not, check
electrode connections and cables. Ask the patient to wink one
eye at a time, and check that the EMG activity is on the expected
channel (channel 1 for the left eye, channel 2 for the right eye).
1. Stimulate in the supraorbital notch (for recurrent stimulation,
press the Acquire On button; for a single stimulus press the
Acquire Single button). Perform four trials, since the
waveform changes on successive stimuli.
2. If traces are not acceptable, press the Erase button on the PIU
to clear the trace area.
3. If using recurrent stimulation, press the Acquire On button to
stop stimulation. When you stop acquisition, both of the most
recently acquired traces are selected.
4. Measure the latencies on the first channel set. Press the up
arrow key to ensure that only a trace from the first channel
set is selected (highlighted in yellow), then if necessary press
the Fn button to select the R1 cursor (displayed in red).
Rotate the Fn button to position the cursor at the onset of R1
(if R1 is not expected, position the R1 cursor at the extreme
left of the display): the latencies are displayed in the Vertical
Cursors table. Press the F7 function key to record the
latencies in the results table.
5. Press the Fn button to select the R2 cursor, position the
cursor at the onset of R2, and record the latencies in the
results table as for R1.
6. Press the down arrow key until a trace from the second
channel set is selected (highlighted in yellow), then position
the R1 and R2 cursors, and record the latencies, as for the
first channel set.
7. Set up Synergy to record from the other side by pressing the
Next button on the PIU. This clears the trace area. Repeat the
stimulation process as described above.
Review
If you want to review the trials from both sides, press the F10
function key to select the complex 1 display mode.
111
SYNERGY USER MANUAL
In complex 1 display mode, the display is split in half. To move
from one half to the other, press the F11 function key. To return
to the default display, press the F9 function key.
Left half
The left half of the display shows four traces:
" The top two represent the last trial for the first side used in
stimulation.
" The bottom two represent the last trial for the second side
used in stimulation.
The selected side is highlighted by a yellow square to the left of
the traces. Use the up and down arrow keys to select the other
side for review.
Right half
The right half of the display shows all four trials for the selected
side in the left half of the display.
Trace analysis and display
The default protocol assumes stimulation on the left side first,
then on the right side. If you stimulated the right side first, you
need to change the labels manually, as follows:
1. Press the F5 function key to display the Results menu.
2. Press S to select Change Site Label, then click the mouse
pointer on the labels and change them as necessary.
3. Press Enter to return to the acquisition screen.
See also the following sections later in this chapter:
⇒ Selecting traces
⇒ Moving traces
⇒ Superimposing traces
⇒ Manual marking of traces
⇒ Changing trace sensitivity
⇒ Changing trace duration
⇒ Compare results
⇒ Trace arithmetic
and also
⇒ Trace area set-up, in chapter 5
112
6.
THE TESTS
You can use the full screen to examine and process your trace if
you wish. Select Full Trace Area ON from the Display menu.
Results for Blink Reflex tests
Results can be seen on screen immediately, as you acquire data.
If columns on the table are not on view you can either scroll the
table or click on results screen from the Display menu to see the
Table and Graphs full screen.
Use the custom results set-up to create the Blink Reflex results.
See also the following sections later in this chapter:
⇒ Results Table
⇒ Result Mode
⇒ Reference values
⇒ Configuring the results table
⇒ Sorting results
⇒ Temperature probe
113
SYNERGY USER MANUAL
Sympathetic Skin Response Test
Running the Sympathetic Skin Response Test
Select the test
From the entry screen, select the test you want from the
appropriate folder
Select a protocol
From the Select protocol dialog box, select the protocol that you
want to use for this test.
Connect the electrodes
The following stimulating electrodes are recommended:
" Large bipolar stimulating electrodes
" Digital ring electrodes
16893T
16639T
Acquire the data
Turn on the amplifier and observe the monitor trace at the lower
right of the screen to ensure that it is noise free. If it is not, check
electrode connections and cables.
1. Set the stimulus intensity and duration so that the subject can
feel the stimulus (this is usually guessed from the intensity
levels used in earlier nerve conduction studies).
2. Wait until the subject is relaxed and there is a stable baseline,
then stimulate and acquire the response by pressing the
Acquire Single button on the PIU.
3. Position the vertical cursor at the onset of the response by
rotating the Fn button.
Note the latency, which is displayed in the Vertical Cursors
table. To record the latency press the F7 function key.
4. To record the response from another site, press the Next
button on the PIU. A blank trace is displayed, where you can
repeat the above procedure.
Note:
" Subsequent responses may diminish in amplitude (or
disappear altogether) because of habituation.
114
6.
THE TESTS
Interference Pattern Analysis Test
Clinical Overview
At minimal force of contraction, the EMG signal contains
discharges of only a few motor units (Mus). One may recognise
individual motor unit potentials (MUPs) by visual assessment.
When the force of contraction is increased, more MUs are
recruited and they also discharge at higher rates. The EMG
signal becomes complex in which individual MUPs may not be
recognised. This signal, called the Interference Pattern or the
recruitment pattern, contains information about the number and
size of MUPs at higher force levels.
The IP (Interference Pattern) signal can be quantified using a
variety of features. In the “Turns & Amplitude (TA)” technique,
a “turn” occurs at a peak of the EMG signal. If a turn occurs on a
positive going peak, the preceding and following turns occur on
a negative going peak, and vice versa. Finally, to exclude peaks
generated by noise, the signal amplitude must change by at least
100 uV between successive turns. The number of turns/sec (NT)
and the mean amplitude change between successive turns (MA)
are measured. EMG signals are recorded at different force levels
ranging from minimal to maximum at each of the 6-10 tested
sites. A plot of MA versus NT is constructed. Superimposed on
the plot is an area, called the “normal cloud” which contains
more than 95% of data points in normal muscles. In neuropathy,
the data points are outside and on the upper side of the normal
cloud. In myopathy, the data points are below the normal cloud.
In Expert’s Quantitative IP (Equip) analysis, the signals are
quantified using three features. The “activity” measures the
fullness of the pattern. It has a value between 1 and 1000 msec
which corresponds to the number of milliseconds from a one
second IP signal that contained the spiky components of the
MUPs. The amplitude is measured from the signal “envelope”.
The “number of small segments (NSS)” quantify the short
duration spikes that correspond to the high frequency component
heard on the audio monitor. The data are acquired and analysed
as in TA technique from two plots: Envelope versus activity,
NSS versus activity. In neuropathy, the activity values are
reduced along with increased envelope amplitude and reduced
NSS. In myopathy, the activity values at maximum force are
115
SYNERGY USER MANUAL
normal. The envelope amplitude is reduced and the NSS is
increased.
An EMG signal can be expressed as a sum of harmonically
related sinusoids of different amplitudes. This calculation is
usually performed using the so-called “Fast Fourier Transform”
algorithm. Special window functions may be applied to the
signal before computing the FFT. This reduces the effect of
digitizing the EMG signals. A plot of the power in each sinusoid,
computed as a square of the amplitude, against the frequency is
called the power spectrum. The median frequency divides the
spectrum divided in two halves. The mean frequency is
computed by summating the product of frequency and power,
and dividing the sum by the power. The power is also related to
the root mean square value of the signal amplitude. The power
spectrum quantifies the sound of the EMG. In myopathy, the IP
has a high pitch sound that corresponds to increased mean or
median frequency. Changes in amplitude are reflected in the
RMS value. The FFT analysis is also useful to assess changes in
muscle due to fatigue.
Technique
Insert the needle into the tested muscle. Adjust the electrode
position to record signals with “crisp” sound. This ensures that
we are close to the MUs of the tested muscle. Instruct the patient
to give minimal contraction and maintain it. Press the Acquire
button or the foot switch. By default a 500 msec epoch will be
acquired analysed. The result table and graphs will be updated.
For the basic TA/Equip analysis, the results are available almost
instantaneously. Perform similar analysis at moderate and
maximum force level. Repeat the process at 6-10 different sites
using 2-4 different needle insertions. If available, superimpose
the normal cloud on the data to assess the abnormality.
With practice, this quantitative study can be finished within 3-5
minutes.
References
Nandedkar et al : Muscle & Nerve, 9:431-439, 9:491-500, 1986.
Stalberg et al : EEG & Clinical Neurophysiology, 56:672-681,
1983.
116
6.
THE TESTS
Running the Interference Pattern Analysis test
Select the test
Enter the IP test and select the tested muscle and side.
Select a muscle
On entering the test, a muscle selection window is displayed.
1. Select the muscle you are about to record from and press the
ADD key.
2. Select the side, and then click on the Acquire button.
3. Any data you store and any findings you report in the EMG
summary table will be associated with this muscle.
Notes:
" If you do not wish to annotate which muscle you are
recording from it is possible to turn this selection window off
by selecting Don’t Display Muscle List from Test Options in
the Display menu.
" If you select more than one muscle, it is possible to report
findings for more than one muscle at the same time. This
saves time, especially if all the findings are normal.
However, if more than one muscle is selected, it will not be
possible to acquire data.
Select a “Normal cloud”
If normal clouds for the tested muscle are known, these can be
programmed into the system. Choose IP Clouds from the
System Configuration menu.
Press the Normal Cloud function key. From the pop up list,
select the desired cloud. The display of cloud can be turned
ON/OFF or a different cloud may be selected using the same
interface.
Acquire the data
1. Adjust the needle position to record sharp and crisp signals.
2. Instruct the subject to exert the desired force of contraction
and maintain it.
117
SYNERGY USER MANUAL
3. Press the Acquire key.
The system will acquire 5 sweeps, i.e. 500 msec epoch.
4. Acquisition will stop automatically and analysis initiated.
Analyse the data
The analysis time depends upon the measurements and graphs
used for display.
" If only the TA/Equip analysis is selected, the results are
available instantaneously.
" Computation of the FFT takes slightly longer.
" Plotting a 3D plot of spectrum is more time consuming and
may require several seconds.
" The numerical data is shown in the result table.
" It is also shown graphically on the plots:
Editing the data
" If the results are unsatisfactory, delete the current results by
pressing the Erase key on the front panel or by pressing the
Delete Site function key.
" You may press the Next key to advance to the next site.
However, this is not necessary. When acquisition starts, the
system automatically does this task for you.
" For more data, go back to the Acquire the Data step above.
Reviewing the results
1. Press the Results function key to see the summary table.
This will display all measurements configured for the test,
some of which may not displayed in acquisition screen. Press
the same key to return to the acquisition screen.
2. Click on the site label in the result table to review the traces
from an earlier acquisition. The current site label is shown in
blue.
3. Press the Print key to obtain a hard copy of the results.
118
6.
THE TESTS
Exit
" Press the Test Menu function key to exit the test.
" You may also press the New Muscle key to perform IP
analysis in another muscle.
" Upon exiting the analysis in the current muscle, the data are
automatically transferred to the report generator.
119
SYNERGY USER MANUAL
Multi-MUP Analysis Test
Clinical Overview
Rationale
A motor unit potential (MUP) is a sum of the extracellular action
potentials (APs) of all muscle Fibres belonging to one motor unit
(MU). The shape of the MUP depends upon the MU architecture,
i.e. number and size of muscle fibres, terminal innervation, etc.
In pathology changes of the MU architecture due to disease
processes will be seen as changes in the MUP waveforms. This
forms the basis for MUP analysis. In quantitative analysis, 20 or
more MUPs are recorded at minimal force of contraction. For
each MUP its peak-peak amplitude, duration and number of
phases are measured. A MUP is called polyphasic if it has more
than 4 phases. The mean amplitude, mean duration and
percentage of polyphasic MUPs are computed and compared
against appropriate reference values. The latter are affected by
the type of needle, force of contraction and patient age among
other factors. In patients with myopathy, the polyphasic MUPs
should be excluded from the calculation of mean duration to
increase the diagnostic yield.
The MUPs can be identified manually by reviewing free running
EMG traces. Use of a triggered delay line and averager
facilitates MUP extraction. However, this approach is biased
towards the large amplitude MUPs. Regardless, acquisition and
analysis of 20 MUPs is quite time consuming.
The multi-MUP analysis (MMA) is a computer aided technique
of extracting and analysing the MUP. It decomposes the signal
into discharges of the constituent MUPs. The emphasis of the
technique is to extract good quality MUPs that can be used for
measuring amplitude, duration and phases. Hence, the algorithm
does not bother to resolve each and every MUP discharge when
different MUPs superimpose. It is developed to analyse
recordings made at minimal force of contraction and not the
interference pattern generated at moderate force levels. Thus the
results of analysis supplement the visual MUP assessment. The
technique is developed to run almost “On Line”, i.e. the results
are available within a few seconds. Finally, it can identify up to 6
different MUPs from a single EMG recording. The system works
best when the signal contains discharge of 3-4 MUPs. The
signals are acquired in a free running mode just as in the routine
needle EMG examination. It does not require manipulation of
120
6.
THE TESTS
other devices such as the trigger and averager, etc. By analysing
multiple MUPs one is less likely to record from the same motor
unit twice. The time required to acquire and analyze 20 different
MUPs is also reduced to just a few minutes.
The MMA algorithm is ideally suited to perform quantitative
analysis in a fast and efficient manner. In the routine EMG
examination, it can be used to quickly capture examples of
abnormal MUPs, i.e. the “outliers”. A printout from this test will
supplement the subjective assessment and make it more
objective.
Technique
EMG signals are recorded at minimal force of contraction using
a monopolar or a concentric needle electrode. By default, a ten
second epoch containing discharges of 3-4 motor units (MU) is
analysed. The MU activity is identified based on a rapid change
of voltage, i.e. short rise time and/or high amplitude. The
discharges of individual MUs are identified and used to extract
the motor unit potential (MUP). Each MUP is quantified by
measuring features such as amplitude, duration, phases, turns,
area/amplitude ratio and firing rate. The stability of the MUPs
can also be indicated as YES or NO. The duration, phase and
turns measurements can be changed manually. The area and
area/amplitude ratio are automatically recomputed when the
duration markers are changed. The mean values of the MUP
features and the percentage of polyphasic MUPs are tabulated.
The mean values are also computed for the simple MUPs only.
The summary results can be presented in a tabulated fashion or
by plotting the MUP waveforms.
The signals can be re-viewed post-acquisition. After practice, 2030 MUPs can be acquired within 5-10 minutes.
References
Nandedkar et al : Muscle & Nerve, 18:1155-1166 1995
Barkhaus et al : Muscle Nerve 1990; 13:247-253
Bischoff et al : Muscle Nerve 1994; 17:842-851
Buchthal and Kamieniecka : Muscle Nerve 1982;5:265-290
McGill and Dorfman : Computer-Aided Electromyography and
Expert Systems, New York, Elsevier, 1989, pp 91-101
Nandedkar and Sanders : Med Biol Comput 1989;27:556-571
Stalberg et al : J Clin Neurophysiol 1986;3;313-348
121
SYNERGY USER MANUAL
Stalberg et al : Muscle Nerve 1994;17:392-399
Stewart et al : Muscle Nerve 1989;12:141-148
Running the Multi-MUP Analysis Test
Select the test
From the Test Manager on the right of the entry screen, select
the test you want from the appropriate folder.
Select a muscle
On entering the test, a muscle selection window is displayed.
1. Select the muscle you are about to record from and press the
ADD key.
2. Select the side, and then click on the Acquire button.
3. Any data you store and any findings you report in the EMG
summary table will be associated with this muscle.
Notes:
" If you do not wish to annotate which muscle you are
recording from it is possible to turn this selection window off
by selecting Don’t Display Muscle List from Test Options in
the Display menu.
" If you select more than one muscle, it is possible to report
findings for more than one muscle at the same time. This
saves time, especially if all the findings are normal.
However, if more than one muscle is selected, it will not be
possible to acquire data.
" You can select a muscle by double clicking on its name in the
muscle selection window.
Acquire the data
Manipulate the needle position to record “crisp” EMG signals.
The force of contraction should be minimal. Ideally, the EMG
should contain discharges of 3-4 MUPs.
Begin acquisition. You may change the display mode to
Complex 1 to view cascades or Complex 2 to view the long
trace.
122
6.
THE TESTS
Cascade display
Long trace display
When the 10 second epoch is acquired, the acquisition will stop
automatically and initiate the analysis.
" You can stop acquisition manually and begin analysis by
pressing the Analysis function key.
" To suspend and resume signal acquisition, press the Acquire
ON key.
" To delete all traces acquired during the current recording,
press the Erase key. To return to a state where you can
acquire a new set of data, press the Next key (or the middle
footswitch).
" To analyse the data later (for example, after the patient has
left), press the Next key (or the middle footswitch) to save
the traces to the hard disk. You can then acquire another set
of traces.
123
SYNERGY USER MANUAL
Analyse the data
Analysis of a 10 second epoch requires a few seconds. Up to 6
MUPs may be extracted.
For each MUP, the system displays the averaged signal
superimposed on the individual MUP discharges. This makes it
easy to assess the validity of the automated decomposition.
Above the MUP the amplitude, duration, phases and turns are
listed. The beginning and end of the MUP are indicated by the
markers. The discharge pattern is shown in the bottom right
corner. The horizontal bar represents the duration of epoch. Each
vertical tick mark represents one discharge of the MUP. The
result table shows the measurements from individual MUPs and
also the summary statistics. You may review these results as
described in the Review of current analysis section or press the
Next button/function key for the next acquisition.
All results can be reviewed and corrected post-acquisition.
Review of current analysis
1. Use the sensitivity and sweep duration controls to change
these settings. Change the marker positions if necessary. The
phases, turns and stability settings can be changed by
clicking in to these fields in the result table.
2. The Edit Screen: To edit and review, click on the MUP. Press
the Edit MUP function key. The averaged MUP and the
individual discharges are shown. Review the discharges
using the scroll bar and/or Page up/down keys. Use the
Superimpose function key to assess the validity of the
decomposition and to view the stability of the MUP. Use the
function keys to delete or accept a MUP for analysis. A
deleted MUP is indicated in grey colour. Press the Edit MUP
key to exit this mode.
3. To combine two MUPs that represent discharges of the same
MU, press the Combine function key. In the dialog box,
select the MUPs to be combined. These will be shown in the
superimposed mode. Click the OK button to proceed with
this task. Press the Cancel button to abort this function.
4. Press the Review EMG function key to see the raw EMG
traces. One can assess the validity of automated
decomposition by identifying the MUPs in the EMG signals.
This is usually not necessary, but can be a powerful teaching
tool. Press the Analysis key to return to the analysis mode.
5. Press the Reject Site function key to delete or re-accept all
MUPs acquired at that site.
124
6.
THE TESTS
Review of all results
1. Press the Results function key to view the full result table.
This will allow one to assess other MUP parameters that may
not seen in the acquisition screen.
2. Press the All MUPs function key to view MUP traces. Up to
25 MUPs can be shown on the display area. If more MUPs
were analysed they can be viewed using the scroll bar. A
calibration bar is provided to assess the amplitude and
duration of the MUPs. Use the sensitivity and sweep duration
knobs to change the MUP display, if necessary. In this mode,
one can also change the duration markers of the MUP. To
review a specific MUP, select it by clicking with the mouse.
Press the Edit MUP function key. The details of the review
are described under Review of current analysis above.
3. To review results from an earlier acquired site, click on the
site label in the result table. The label for the current site is
indicated in blue.
4. Press the Print function key at any time to obtain a hard copy
of the results.
125
SYNERGY USER MANUAL
Single Fibre Jitter Test
Clinical Overview
The purpose of the Single Fibre EMG Jitter (SFJ) test is to assess
the efficacy of neuromuscular transmission.
Running the SFJ Test (Volitional)
Select the test
From the Test Manager on the right of the entry screen, select
the test you want from the appropriate folder.
Select a muscle
On entering the test, a muscle selection window is displayed.
1. Select the muscle you are about to record from and press the
ADD key.
2. Select the side and then press the Acquire button.
Any data you store and any findings you report in the EMG
summary table will be associated with this muscle.
Notes:
" If you do not wish to annotate which muscle you are
recording from you can turn off this selection window by
selecting Don’t Display Muscle List from Test Options in the
Display menu.
" If you select more than one muscle, you can report findings
for more than one muscle at the same time. This saves time,
especially if all the findings are normal. However, if more
than one muscle is selected it is not possible to acquire data.
" You can select a muscle by double clicking on its name in the
muscle selection window.
Connect the electrodes
" Use an SFEMG needle as the active recording electrode. The
active recording surface is located in a side port on the
opposite side to the bevel.
126
6.
THE TESTS
" The cannula acts as a reference electrode, and is
automatically connected to the pre-amplifier by the cable.
" Place the ground electrode close to the tested muscle.
Inserting the needle
The SFEMG electrode has a very small uptake area, so locating a
pair of action potentials (APs) from the same motor unit (MU)
can be difficult. Furthermore, a slight movement of the needle
can significantly reduce the AP amplitude. This makes it difficult
to maintain a stable trigger. The following technique helps to
reduce problems.
1. Insert the needle at an angle of between 20° and 30° to the
surface of the skin, instead of nearly perpendicular (as
performed in concentric or monopolar needle EMG studies).
When the needle moves, the angular insertion produces far
less displacement in a radial direction, giving more stable AP
amplitudes.
2. Insert the needle all the way to the hub and then retract it
partially. The muscle tends to grab the needle and holds it
better in one place during retraction.
Rotate the needle to investigate fibres in all directions.
Orienting the active electrode
The SFEMG needle has a special holder and cable; a dent on the
hub of the holder is on the same side as the recording surface.
This makes it easier to orient the needle or to rotate it while
optimising the signal recordings.
Acquire data
Ask the patient to perform a minimal contraction of the tested
muscle. Adjust the needle position and the trigger level so that
only one muscle unit (MU) triggers the sweeps. The recording
should contain at least two time-locked APs that are separated
by, ideally, 400 - 4000 µS.
When the signals are suitable for analysis, press the Acquire ON
key (or footswitch) to stimulate and acquire responses.
" To suspend and resume signal acquisition, press the Acquire
ON key.
" To delete all traces acquired during the current recording,
press the Erase key. To return to a state where you can
127
SYNERGY USER MANUAL
acquire a new set of data, press the Next key (or the middle
footswitch).
" To analyse the data later (for example, after the patient has
left), press the Next key (or the middle footswitch) to save
the traces to the hard disk. You can then acquire another set
of traces.
Analyse the data
When the system reaches the Cascade sweep limit, it
automatically stops acquisition and automatically analyses the
data. If you stop acquisition manually before the sweep limit is
reached, press the Analyse key to make Synergy analyse the
data.
The top portion of the trace area shows all acquired sweeps
superimposed on each other. Two windows, called SFJ
Window1 and SFJ Window2, are displayed as horizontal bars
over the sweeps in this area. When the EMG signal crosses a
window, an AP is detected, and is used for computing the interpotential interval (IPI):
" The occurrence of AP can be detected from its rising edge or
the falling edge. By default, the rising edge is used, to change
to the falling edge, from the menu bar select Analysis then
SFJ Window Setup.
" If a signal crosses a window at more than one point, its first
crossing is used to compute the IPI.
" Traces are colour-coded to represent the following
conditions:
Colour
White
Red
Blue
Condition
Sweeps used for calculations of jitter
Sweeps with blocks
Sweeps with IPI outside the limits defined
by cursors
By default, SFJ Window1 is centred at the trigger point of the
trace and has a duration of 500 µs. SFJ Window2 begins 500 µs
later, and has a duration of 4 ms. It is set at 50% amplitude level
of the trigger point. These settings may need adjustment,
depending on the configuration of the signal.
Moving and resizing SFJ Window1 and SFJ
Window2
You can move either window using either the mouse or the
arrow keys on the keyboard:
128
6.
THE TESTS
" To move a window using the mouse, click in the horizontal
part of the bar and drag the window to its new position.
" To move the active window using the keyboard, use the Up,
Down, Left and Right arrow keys to move the window to its
new position.
You can resize either window using the mouse:
" To resize a window, click on one of the vertical ends, and
drag to resize.
Multiple pairs from the same recording
When recording the data for a volitional SFJ test, it is possible to
record three or more time-locked APs. In this case, you can
analyse the additional combinations of APs:
1. Press the New Pair (F2) key.
2. Adjust the positions of SFJ Window1 and SFJ Window2 so
they are over the new pair of APs. The system recalculates
the results using the new window positions, and displays
them as a new line in the results table.
Up to 8 separate pairs can be analysed from a single recording.
Sorting traces by firing rate
To display the traces sorted by firing rate, right click on the
screen, and from the popup choose Sort traces. The traces are
displayed in increasing order of firing rate, and the sequential IPI
plot is replaced by a plot of IPI versus IDI.
Results
The system automatically computes the mean inter-potential
interval (MIPI), mean consecutive difference (MCD), mean
sorted difference (MSD) and the number of blocked potentials,
and displays the values in the results table. The jitter is set equal
to the lower of the MCD or MSD values.
Viewing results
The sweeps used in computing the results are shown
superimposed in the lower half of the trace display window. The
IPI data and traces are colour-coded to represent the following
conditions:
129
SYNERGY USER MANUAL
Colour
White
Red
Blue
Condition
Sweeps used for calculations of jitter
Sweeps with blocks
Sweeps with IPI outside the limits
defined by cursors
The sequential IPI plot is shown under the result table, with the
vertical scale of this plot set so that the MIPI value is
approximately at the centre. A yellow band is displayed on this
plot, which represents ±3 standard deviations from the MIPI. IPI
values within these limits are used to compute jitter.
The sequential plot of IPIs is extremely useful to detect traces
that were acquired due to technical problems in recording (e.g.
triggering from two MUs). It is much easier to exclude them by
adjusting the IPI limits rather than by excluding them
individually during trace review. The ±3 standard deviation limit
will automatically exclude some of the potentials. To exclude
others, use the mouse to reduce the height of the yellow band.
To manually include or exclude sweeps from analysis:
1. Press the Review key. This displays the first 5 sweeps in the
lower half of the trace area.
2. To change the status of an individual sweep (from included
to excluded, or vice versa) click on it with the mouse.
3. To include or exclude all of the displayed traces, right click
on the trace area; from the popup that is displayed, choose
Include displayed or Exclude displayed.
4. To include or exclude all traces, right click on the trace area;
from the popup that is displayed, choose Include all or
Exclude all.
To accept the calculations and move on to the next recording,
press the Next key (or the middle footswitch).
If you move a window, or change between rising and falling
edge, the system automatically recalculates these values.
Blockings generated by mis-triggers are automatically discarded.
Results are shown numerically in the result table at the right
hand side of the display.
Overriding automatic results
By default, the jitter value is set to the lower of the MCD or
MSD values. To use the other value, press the F5 key.
If the algorithm finds blocking, the number of blocks is
indicated.. If you believe these are technical artefacts, you can
130
6.
THE TESTS
exclude them by pressing the Block (F4) key. The number of
blocks is replaced by the symbol —, and the number of
discharges analysed changes. To restore the number of blocks,
press the Block (F4) key again.
To reject the current pair, press the Delete (F9) key. The entries
in the result table are indicated by —. Press the F9 key again to
re-accept the results.
To delete all pairs acquired during the current recording, press
the Erase key.
Running the SFJ Test (Stimulated)
Select the test
From the Test Manager on the right of the entry screen, select
the test you want from the appropriate folder.
Select a muscle
On entering the test, a muscle selection window is displayed.
1. Select the muscle you are about to record from and press the
ADD key.
2. Select the side and then press the Acquire button.
Any data you store and any findings you report in the EMG
summary table will be associated with this muscle.
Notes:
" If you do not wish to annotate which muscle you are
recording from you can turn off this selection window by
selecting Don’t Display Muscle List from Test Options in the
Display menu.
" If you select more than one muscle, you can report findings
for more than one muscle at the same time. This saves time,
especially if all the findings are normal. However, if more
than one muscle is selected it is not possible to acquire data.
" You can select a muscle by double clicking on its name in the
muscle selection window.
131
SYNERGY USER MANUAL
Connect the electrodes and stimulator
Connecting the stimulator
" Use an SFEMG needle as the active recording electrode. The
active recording surface is located in a side port on the
opposite side to the bevel.
" The cannula acts as a reference electrode, and is
automatically connected to the pre-amplifier by the cable.
" Place the ground electrode close to the tested muscle.
Inserting the needle
The SFEMG electrode has a very small uptake area, so locating a
pair of action potentials (APs) from the same motor unit (MU)
can be difficult. Furthermore, a slight movement of the needle
can significantly reduce the AP amplitude. This makes it difficult
to maintain a stable trigger. The following technique helps to
reduce problems.
1. Insert the needle at an angle of between 20° and 30° to the
surface of the skin, instead of nearly perpendicular (as
performed in concentric or monopolar needle EMG studies).
When the needle moves, the angular insertion produces far
less displacement in a radial direction, giving more stable AP
amplitudes.
2. Insert the needle all the way to the hub and then retract it
partially. The muscle tends to grab the needle and holds it
better in one place during retraction.
Rotate the needle to investigate fibres in all directions.
Orienting the active electrode
The SFEMG needle has a special holder and cable; a dent on the
hub of the holder is on the same side as the recording surface.
This makes it easier to orient the needle or to rotate it while
optimising the signal recordings.
Connecting the stimulator
" Use an intramuscular monopolar needle as the cathode
" Place a surface electrode nearby to use as the anode
Since the stimulation is “near nerve”, set the stimulus intensity to
the low range. This is set via the Stim Setup dialog (from the
Stimulus menu, choose Stim Setup).
132
6.
THE TESTS
Press the STIM key on the front panel to begin stimulation.
Adjust the stimulus intensity and the intramuscular cathode
position so that a faint twitch of the tested muscle can be seen.
You may wish to fix the stimulator with tape.
Acquire data
Press the STIM button to begin stimulation. If necessary, adjust
the following until you see APs from a single or more muscle
fibres:
" The position of the stimulator cathode
" Stimulus intensity
" SFEMG needle position
When the signals are suitable for analysis, press the Acquire ON
key (or the footswitch) to begin acquisition.
" To suspend and resume signal acquisition, press the Acquire
ON key.
" To delete all traces acquired during the current recording,
press the Erase key. To return to a state where you can
acquire a new set of data, press the Next key (or the middle
footswitch).
" To analyse the data later (for example, after the patient has
left), press the Next key (or the middle footswitch) to save
the traces to the hard disk. You can then acquire another set
of traces.
Note:
At the threshold of a muscle’s stimulation, there may appear to
be high jitter, even in normal muscle fibres. Therefore, if you see
jitter, you should increase the stimulus intensity to ensure that
the abnormalities of jitter are not artefact caused by inadequate
stimulation.
Analyse data
When the system reaches the Cascade sweep limit, it
automatically stops acquisition and automatically analyses the
data. If you stop acquisition manually before the sweep limit is
reached, press the Analyse key to make Synergy analyse the
data.
The top portion of the trace area shows all acquired sweeps
superimposed on each other. A window, called SFJ Window2, is
displayed as a horizontal bar over the sweeps in this area. When
133
SYNERGY USER MANUAL
the EMG signal crosses the window, an AP is detected, and is
used for computing the inter-potential interval (IPI):
" The IPI is measured with respect to the onset of the sweep.
" The occurrence of AP can be detected from its rising edge or
the falling edge. By default, the rising edge is used, to change
to the falling edge, from the menu bar select Analysis then
SFJ Window Setup.
" If a signal crosses the window at more than one point, its first
crossing is used to compute the IPI.
" Traces are colour-coded to represent the following
conditions:
Colour
White
Red
Blue
Condition
Sweeps used for calculations of jitter
Sweeps with blocks
Sweeps with IPI outside the limits defined
by cursors
Moving and resizing SFJ Window2
You can move the window using either the mouse or the arrow
keys on the keyboard:
" Using the mouse, click in the horizontal part of the bar and
drag the window to its new position.
" On the keyboard, use the Up, Down, Left and Right arrow
keys to move the window to its new position.
You can resize the window using the mouse:
" Click on one of the vertical ends, and drag to resize.
Multiple pairs from the same recording
When recording the data for a stimulated SFJ test, it is possible
to record two or more time-locked APs. In this case, you can
analyse the additional combinations of APs:
1. Press the New Pair (F2) key.
2. Adjust the position of SFJ Window2 so that it is over the new
APs. The system recalculates the results using the new
window positions, and displays them as a new line in the
results table.
Up to 8 computations can be performed from a single recording.
134
6.
THE TESTS
Sorting traces by firing rate
To display the traces sorted by firing rate, right click on the
screen, and from the popup choose Sort traces. The traces are
displayed in increasing order of firing rate, and the sequential IPI
plot is replaced by a plot of IPI versus IDI.
Results
The system automatically computes the mean inter-potential
interval (MIPI), mean consecutive difference (MCD), mean
sorted difference (MSD) and the number of blocked potentials,
and displays the values in the results table. The jitter is set equal
to the lower of the MCD or MSD values.
Viewing results
The sweeps used in computing the results are shown
superimposed in the lower half of the trace display window. The
IPI data and traces are colour-coded to represent the following
conditions:
Colour
White
Red
Blue
Condition
Sweeps used for calculations of jitter
Sweeps with blocks
Sweeps with IPI outside the limits defined
by cursors
The sequential IPI plot is shown under the result table, with the
vertical scale of this plot set so that the MIPI value is
approximately at the centre. A yellow band is displayed on this
plot, which represents ±3 standard deviations from the MIPI. IPI
values within these limits are used to compute jitter.
The sequential plot of IPIs is extremely useful to detect traces
that were acquired due to technical problems in recording (e.g.
triggering from two MUs). It is much easier to exclude them by
adjusting the IPI limits rather than by excluding them
individually during trace review. The ±3 standard deviation limit
will automatically exclude some of the potentials. To exclude
others, use the mouse to reduce the height of the yellow band.
To manually include or exclude sweeps from analysis:
1. Press the Review key. This displays the first 5 sweeps in the
lower half of the trace area.
135
SYNERGY USER MANUAL
2. To change the status of an individual sweep (from included
to excluded, or vice versa) click on it with the mouse.
3. To include or exclude all of the displayed traces, right click
on the trace area; from the popup that is displayed, choose
Include displayed or Exclude displayed.
4. To include or exclude all traces, right click on the trace area;
from the popup that is displayed, choose Include all or
Exclude all.
To accept the calculations and move on to the next recording,
press the Next key (or the middle footswitch).
If you move a window, or change between rising and falling
edge, the system automatically recalculates these values.
Blockings generated by mis-triggers are automatically discarded.
Results are shown numerically in the result table at the right
hand side of the display.
Overriding automatic results
By default, the jitter value is set to the lower of the MCD or
MSD values. To use the other value, press the F5 key.
If the algorithm finds blocking, the number of blocks is
indicated.. If you believe these are technical artefacts, you can
exclude them by pressing the Block (F4) key. The number of
blocks is replaced by the symbol —, and the number of
discharges analysed changes. To restore the number of blocks,
press the Block (F4) key again.
To reject the current pair, press the Delete (F9) key. The entries
in the result table are indicated by —. Press the F9 key again to
re-accept the results.
To delete all pairs acquired during the current recording, press
the Erase key.
136
6.
THE TESTS
Fibre Density Analysis Test
Clinical Overview
The purpose of this test is to assess the grouping of muscle fibres
belonging to the same motor unit (MU).
Running the Fibre Density Analysis Test
Select the test
From the Test Manager on the right of the entry screen, select
the test you want from the appropriate folder.
Select a muscle
On entering the test, a muscle selection window is displayed.
1. Select the muscle you are about to record from and press the
ADD key.
2. Select the side and then press the Acquire button.
Any data you store and any findings you report in the EMG
summary table will be associated with this muscle.
Note:
" If you do not wish to annotate which muscle you are
recording from you can turn off this selection window by
selecting Don’t Display Muscle List from Test Options in the
Display menu.
" If you select more than one muscle, you can report findings
for more than one muscle at the same time. This saves time,
especially if all the findings are normal. However, if more
than one muscle is selected it is not possible to acquire data.
" You can select a muscle by double clicking on its name in the
muscle selection window.
Connect the electrodes
" Use an SFEMG needle as the active recording electrode. The
active recording surface is located in a side port on the
opposite side to the bevel.
137
SYNERGY USER MANUAL
" The cannula acts as a reference electrode, and is
automatically connected to the pre-amplifier by the cable.
" Place the ground electrode close to the tested muscle.
Inserting the needle
The SFEMG electrode has a very small uptake area, so locating a
pair of action potentials (APs) from the same motor unit (MU)
can be difficult. Furthermore, a slight movement of the needle
can significantly reduce the AP amplitude. This makes it difficult
to maintain a stable trigger. The following technique helps to
reduce problems.
1. Insert the needle at an angle of between 20° and 30° to the
surface of the skin, instead of nearly perpendicular (as
performed in concentric or monopolar needle EMG studies).
When the needle moves, the angular insertion produces far
less displacement in a radial direction, giving more stable AP
amplitudes.
2. Insert the needle all the way to the hub and then retract it
partially. The muscle tends to grab the needle and holds it
better in one place during retraction.
Rotate the needle to investigate fibres in all directions.
Orienting the active electrode
The SFEMG needle has a special holder and cable; a dent on the
hub of the holder is on the same side as the recording surface.
This makes it easier to orient the needle or to rotate it while
optimising the signal recordings.
View sweeps
Ask the patient to perform a minimal contraction of the tested
muscle.
Adjust the needle position and the trigger level so that only one
MU triggers the sweeps. Maximise the amplitude of the
triggering AP by rotating or moving the needle.
If you want to store the sweeps, press the Acquire ON key.
138
6.
THE TESTS
Enter data
Observe and count APs and enter them into the table.
1. Type the number of APs into the yellow highlighted box and
press the Enter key.
2. A list of options for signal stability is displayed, with Normal
selected as the default. Use the Up and Down arrow keys to
highlight the correct signal stability, and press the Enter key.
Note that the last option (a blank line) allows you to enter
your own text to describe the signal stability.
3. Press the Next key (or the middle footswitch) to advance to
the next site. The yellow highlight moves to the next line in
the table. A maximum of 20 sites is allowed in the table.
Based on the values you enter, Synergy calculates the mean
value and standard deviation, and displays them at the bottom of
the table.
Notes:
" You can change data for any site in the table, by clicking on
the appropriate row.
" Count APs with peak-to-peak amplitude greater than 200 µV
and rise time less than 300 µs. If the APs superimpose on
each other, you can modify the criteria, to an amplitude
greater than 100 µV, or a formation of a notch in the
rising/falling edge of the first AP.
139
SYNERGY USER MANUAL
Macro EMG Test
Clinical Overview
The main purpose of this test is to assess the size of motor units
(MUs).
In addition, it can also be used to measure fibre density, and to
make subjective assessment of jitter.
Running the Macro EMG Test
Select the test
From the Test Manager on the right of the entry screen, select
the test you want from the appropriate folder.
Select a muscle
On entering the test, a muscle selection window is displayed.
1. Select the muscle you are about to record from and press the
ADD key.
2. Select the side and then press the Acquire button.
Any data you store and any findings you report in the EMG
summary table will be associated with this muscle.
Notes:
" If you do not wish to annotate which muscle you are
recording from you can turn off this selection window by
selecting Don’t Display Muscle List from Test Options in the
Display menu.
" If you select more than one muscle, you can report findings
for more than one muscle at the same time. This saves time,
especially if all the findings are normal. However, if more
than one muscle is selected it is not possible to acquire data.
" You can select a muscle by double clicking on its name in the
muscle selection window.
140
6.
THE TESTS
Connect the electrodes
The electrode used in the Macro EMG test is a modified SFEMG
needle, insulated except for the distal 15mm. Using this needle,
it is possible to record a single fibre channel and a macro channel
simultaneously.
" The active recording surface for the single fibre channel
(channel 1) is located in a side port at the centre of the
exposed cannula, on the opposite side to the bevel
" The cannula acts as a reference electrode for channel 1, and
is automatically connected to the pre-amplifier by the cable
" Use a surface electrode or monopolar needle as the reference
electrode on the macro channel (channel 2)
" Place the ground electrode close to the tested muscle
Setting up the PIU
1. Connect the macro EMG cable to channel 1
2. Connect a jumper lead between the red plug of channel 1 and
the black plug of channel 2. This connects the reference
electrode of channel 1 to the active input of channel 2
Inserting the needle
Unlike single fibre tests, the needle for the Macro EMG test
should be inserted perpendicular to the skin surface, so that the
macro MUP amplitude gives better correlation with the MU size.
Since the single fibre electrode has a very small uptake area,
even a slight movement of the needle can significantly reduce
the AP amplitude. This makes it difficult to maintain a stable
trigger. To stabilise the needle, insert the needle deep into the
muscle, and then retract it partially: the muscle tends to grab the
needle and hold it better in place during retraction. When you
can recognise individual APs, rotate the needle to further
optimise the signal amplitude.
Orienting the active electrode
The needle has a special holder and cable; a dent on the hub of
the holder indicates the location of the side port on the needle.
This makes it easier to orient the needle or to rotate it while
optimising the signal recordings.
141
SYNERGY USER MANUAL
Acquire data
Ask the patient to perform a minimal contraction of the tested
muscle. Adjust the needle position and the trigger level so that
only one muscle unit (MU) triggers the sweeps. Begin
acquisition.
The upper window of the trace area displays the monitor traces
from the two channels, with the trace from the single fibre
channel at the top, and the trace from the macro channel below
it. Note that the sweep duration, sensitivity, and filter settings for
the two channels are quite different. The lower window of the
trace area displays the average of the signals from the second
channel.
" While averaging, assess the number of APs time locked to
the triggering potential (the fibre density), and enter it in the
yellow highlighted box using the keyboard.
" If there are two or more time-locked APs, visually assess the
jitter. When assessing jitter, you may want to select the
Complex 2 display, to see a cascaded display of single fibre
signals.
" Next to the number of APs is a list of options for signal
stability, with Normal selected as the default. Use the Up and
Down arrow keys to highlight the correct signal stability, and
press the Enter key. Note that the last option (a blank line)
allows you to enter your own text to describe the signal
stability.
" When the averaged MUP is acceptable, stop acquisition.
" Press the Next key (or the middle footswitch) to advance to
the next site. The yellow highlight moves to the next line in
the table. A maximum of 20 sites is allowed in the table.
Note:
Count APs with peak-to-peak amplitude greater than 200 µV and
rise time less than 300 µs. If the APs superimpose on each other,
you can modify the criteria, to an amplitude greater than 100 µV,
or a formation of a notch in the rising/falling edge of the first
AP.
Analyse data / Results
The averaged MUP is marked automatically. You can move the
markers manually - if you do, the results are automatically
updated.
The results table shows the mean fibre density and the median
macro MUP amplitude. Displaying the results full screen also
142
6.
THE TESTS
displays the histograms of fibre density and macro amplitude,
and a plot of area vs amplitude. You can enter a comment to
summarise your findings.
The numerical data and graphs are automatically transferred to
the report, along with any comments.
Notes:
" If the MUP is very small in amplitude, the automatic marking
algorithm may fail. Use the marker tool bar to place the
markers manually: marker 1 should be used to mark the
beginning of the MUP, and marker 2 used to mark the end.
" It is possible to record the same macro MUP by using two
different triggering potentials If you suspect that a macro
MUP is repeated, you can delete it by selecting it and
pressing the Erase key. This allows you to initiate a new
acquisition using the same store.
" Switching the display mode to stores displays the macro
MUPs in groups of ten.
143
SYNERGY USER MANUAL
Trace analysis and display
Traces may be selected for marking or trace analysis.
You can do the following:
" Select a trace
" Move a trace
" Superimpose traces
" Use automatic marker placement
" Mark traces manually
" Change the trace sensitivity and duration
" Compare test results on screen manually or automatically
(except for Needle EMG or F-Wave tests)
" Use trace arithmetic to add up to 10 traces together, or to
subtract them (except for Needle EMG or F-Wave tests)
You can use the full screen to examine and process your trace if
you wish - select Full Trace Area ON from the Display menu.
Revert to a normal screen layout by selecting Full Trace Area
OFF from the same menu
Synergy offers comprehensive and powerful ways of configuring
the Trace Area. Use the Trace area setup dialog box to set up
trace area parameters that you want to be global for the test.
Selecting traces
To set Synergy Notebook so that you can select traces
individually (for example, for changing sensitivity or sweep
duration), from the Display menu choose Test Options. You can
then:
" Select a single trace by pointing and clicking
" Select non-contiguous traces by holding down the Ctrl key
while you click on the traces concerned
144
6.
THE TESTS
Moving traces
Click on the trace, and drag it up or down to the new position.
You might need to do this to counter a DC offset.
Superimposing traces
" To superimpose traces choose Superimpose ON from the
Analysis menu.
" To specify how channels are superimposed, choose
Superimpose setup from the Analysis menu:
" By channel: traces will be superimposed in groups
according to channel
" All: all the captured traces will be superimposed
" Use Superimpose OFF from the Analysis menu to have all
the traces revert to their original positions on the screen
Automatic marker placement
If automarking is used:
" When you switch Acquire ON, markers are automatically
placed on the traces and the result table updated as you
acquire data.
" It is possible to change marker positions manually; click on
the marker concerned, and drag it to the new position.
An algorithm controls the placement of the markers.
145
SYNERGY USER MANUAL
Manual marking of traces
By default, in some tests Synergy places markers on the trace
automatically. It is possible to turn this facility off - select
Automarking OFF from the Acquisition set-up dialog box.
All markers (whether placed manually or automatically) can be
moved by clicking and dragging.
To place markers manually on a selected trace, select Marker
Toolbar from the Analysis menu. This brings up the marker
toolbar:
To place markers:
" Click on a Marker button, and then click on the appropriate
place on the trace. The selected marker is placed there.
" Alternatively, click on Fast Mark on the toolbar; then
clicking at various places on the trace places the markers in
order along the trace.
Note that you can specify the First in the Marker set-up
dialog box (see below).
Clicking on the trace to the right of a marker already in
position places the next consecutive marker; clicking to the
left places the immediately preceding marker.
The Clear button on the Marker toolbar clears the currently
selected marker
The Clear All button on the Marker toolbar clears all the
markers from the currently selected trace
Marker set-up
Access the Marker set-up dialog box by clicking on Marker
set-up on the Analysis menu. This dialog box allows you to
" Define up to a 4 character label for each marker label, to
replace the defaults M1, M2 etc.
" Turn the auto-marking facility OFF or ON
" Specify which marker you wish to be considered as the
“First” marker when using Fast Mark
146
6.
THE TESTS
Change trace sensitivity
Rotate the Sensitivity Switch on the PIU to adjust the display
sensitivity of the selected trace or traces. If no trace is selected
(to deselect a trace click away from it), the sensitivity of all the
traces in the current test is changed
Alternatively, you can access a dialog box by selecting Change
Trace Sensitivity from the Display menu.
1. Select the trace
2. Click on Trace Area Sensitivity from the Display menu
3. Use the drop down list to select a new sensitivity value
Change trace duration
Rotate the Sweep Duration switch on the PIU to adjust the
acquisition sweep duration for the selected trace(s). Once data
has been acquired you can also increase or decrease the sweep
duration for selected traces. If you deselect a trace, all traces are
affected.
Alternatively, you can access a dialog box by selecting Change
Trace Duration from the Display menu.
1. Select the trace
2. Click on Change Trace Duration from the Display menu
3. Use the drop down list to select a new duration value
Compare
Note: not used for Needle EMG or F-Wave tests.
Synergy allows you to compare test results on screen:
" Manually or automatically compare results obtained during
the current test (for example, compare left and right side
results).
" Manually compare the results of the current test with the
results of a previous test held in the Patient Database.
With manual comparison, you can decide how the results are
displayed (for example, next to each other or on top of each
other). With automatic comparison, results are always displayed
next to each other.
147
SYNERGY USER MANUAL
Manual Comparison
1. From the Display menu, choose Compare Setup.
2. In the dialog box that is displayed, determine how the data
will be displayed.
3. Acquire the data, then choose a test to compare it with:
" In the Patient Catalogue, select the test then click on the
compare button.
" In the Test History window, right-click on the test and
choose Compare.
Auto-compare
If auto-compare is set, Synergy lets you compare the left and
right side results while you perform the test, by displaying the
results next to each other.
1. From the Display menu, choose Auto-compare.
2. Acquire data for the first side.
3. When you choose to acquire the other side, the side you have
just acquired remains displayed beside the new data.
Trace arithmetic
Note: not used for Needle EMG or F-Wave tests.
Trace arithmetic allows you to add up to 10 traces together, or to
subtract them. For example, this lets you acquire sweeps singly
into store, then add them together for averaging.
To add traces
1. Acquire the traces.
2. From the Analysis menu, choose Add.
3. In the dialog box that is displayed, specify the numbers of the
traces to add together, with + signs between them. Clicking
on the arrow shows the available trace numbers and the +
sign.
4. The result of the trace addition is put into the next empty
store.
148
6.
THE TESTS
To subtract traces
1. Acquire the traces.
2. From the Analysis menu, choose Subtract.
3. In the dialog box that is displayed, specify the numbers of the
traces to add together, with - signs between them. Clicking
on the arrow shows the available trace numbers and the sign.
4. The result of the trace subtraction is put into the next empty
store.
Split sensitivity
Note: this is applicable to F-Wave and H-Reflex only.
Split Sensitivity allows the Left and right hand sides of the trace
area to be displayed at different sensitivities. This allows both
the M and the F responses to be seen.
Click on Split Sensitivity Set-up on the Display menu to access
the dialog box and select the appropriate set-up parameter:
• On / OFF
• Split sensitivity
" Split position
Using the full trace area
" To change to full screen layout, select Full Trace Area ON
from the Display menu.
" To revert to normal screen layout, select Full Trace Area
OFF from the Display menu
Trace area setup
Use this dialog box to set up trace area parameters that you want
to be global for the test.
1. Select the required Default Trace Type from the list.
2. Check the Trace Area Grid On checkbox to display a grid
on your trace areas.
3. Select either the Full or Edge radio button to modify the
appearance of your grid.
149
SYNERGY USER MANUAL
4. Check the Indicate Amplifier Off checkbox to display a
label to remind you when the amplifier is switched off.
See also:
⇒ Trace area set-up, in chapter 5
150
6.
THE TESTS
Configuring and displaying results
Synergy offers you considerable flexibility in configuring and
displaying the results of your test.
Results can be seen on screen immediately as you acquire data.
If columns on the table are not on view you can either scroll the
table or click on Results screen from the Display menu to see
the Table and Graphs screen in full.
Results Table
The Results Table displays results on screen for the current nerve
/ muscle. You may set up the Results Table to display only those
parameters you wish to include.
Note: Displaying Extra Results
If you have selected to include more results than can fit on the
screen, these can be displayed using the scroll bars, or by
clicking on Results Screen from the Display menu to display
the full Results Screen.
Result Mode
The results in a table may be displayed in a number of formats,
determined by the Result Mode. The Result Mode may be
altered by the user from the Results menu item, or by using the
Results Table Pop-Up Menu. The following Result Modes are
provided:
Absolute: The absolute values of each result are displayed in
the table.
Z-score: The Results are converted to z-scores and displayed.
The display of Z-scores will require the relevant reference values
to have been entered. Results are expressed as a number of
Standard deviations from the reference mean value.
Difference: This Mode can only be selectable when more than
one Site has been recorded (in Site based tests), or when more
than one Run has been recorded.
Using a second level menu from the Result Mode pop-up, you
will be able to select one Site or Run as the “base” - the Site or
Run to which all others are referred (Site 1, or Run 1 will be the
151
SYNERGY USER MANUAL
default). The sub-menu contains a list of the available Sites or
Runs.
The base Site or Run is displayed as Standard (absolute) values,
all other Results are expressed as the difference from this base.
Selection of the base is performed via the Results Table pop-up:
selecting “Difference” or “Percent Difference” causes a child
menu containing a list of Sites or Runs (1 is selected by default)
to be displayed.
Percent Difference:
Identical to “Difference”, other than that the results are
expressed as a percentage of the base.
Reference Values
For each relevant result in each test reference values may be
entered.
For each result, the reference values will be defined using the
following equations:
Upper Limit = Constant + Age Factor (Patient Age - Reference
Age) + Height Factor (Patient Height - Reference Height) +
Distance Factor (Distance - Reference Distance) + Temperature
Factor (Temperature - Reference Temperature) + ( n * s.d. )
Lower Limit = Constant + Age Factor (Patient Age - Reference
Age) + Height Factor (Patient Height - Reference Height) +
Distance Factor (Distance - Reference Distance) + Temperature
Factor (Temperature - Reference Temperature) - ( n * s.d. )
It is possible to use a Constant value by setting all other values to
zero.
Alternatively it is possible to correct reference values for age,
height, distance and temperature by entering the appropriate
correction factor.
To display Reference Values, select Table options from the
Results menu, and then click on the Reference Values checkbox
to see the reference values displayed below the measured values
in the Result Table.
152
6.
THE TESTS
Configuring the Results Table
Click on Table Options... from the Results menu to access the
Table Configuration dialog box:
This lists the results that are currently being displayed on your
Results Table, and will allow you to add or remove items from
the list, or to create customised results for display.
A maximum of 16 results can be displayed on the Results Table.
Use this dialog box to specify which results you want to appear
in the Result section of the Test screen. A maximum of 15
results can be selected from the list.
To select a result for display
1. Click on the arrow head to the right of an empty text box.
2. Select the required result from the list screen displayed.
To remove a result from the Test screen display
1. Click on the arrow head to the right of the result.
153
SYNERGY USER MANUAL
2. Select the Off option in the top left from the list screen
displayed.
To change a result heading on the test screen
Edit or over-type the displayed heading, as shown in the text
boxes to the right of the arrow heads on the Result Options
dialog box.
To configure a custom result
1. Click on the right arrow head to the right of an empty text
box.
2. From the list screen displayed, click on the Custom button to
display the Custom result configuration dialog box.
Display Reference Values checkbox
Select this checkbox if you want the reference values displayed
on the test screen
Check Reference Values checkbox
Select this checkbox if you want readings that are outside the
range specified by the reference values to be shown enhanced
Click on the Display Reference Values checkbox if you want
the reference values to be displayed on the Results Table in
addition to the test values.
To add an item to the Results Table
1. Click on Table Options from the Results menu.
2. On the Table Configuration dialog box, click on a right
arrow beside a blank Description panel.
3. From the Test List pop-up, select the item that you want
4. Click on the OK button
To remove an item from the Results Table
1. Click on Table Options from the Results menu.
2. On the Table Configuration dialog box, click on the right
arrow beside the item you want to remove.
3. From the Test List pop-up, click on Off at the top of the popup list.
154
6.
THE TESTS
4. Click on the OK button.
To create a custom result for display on the
Results Table
1. Click on Table Options from the Results menu.
2. On the Table Configuration dialog box, click on a right
arrow beside a blank Description panel.
3. From the Test List pop-up, click on the Custom button at the
foot of the pop-up list.
This will take you to the Custom result configuration
dialog box.
4. From the list, select the Result type and the Unit you wish to
use, if a choice is offered.
5. Select the From Marker (and, if applicable to the test you
select, the To Marker and Channel details).
6. Click on the OK button.
7. Your customised test appears on the Test Configuration
dialog box. Note that the label panel will be blank - enter an
appropriate label.
8. Click on the OK button to add this custom result to the
Results Table.
To change the result label
You can change the result label for any result appearing on your
Results Table.
1. Click on Table Options from the Results menu.
2. On the Table Configuration dialog box, overwrite the
existing label for any item with the text you want to use.
3. Click on the OK button.
Setting up custom results
Custom results allow you to define your own amplitude and
latency results for each of up to 10 markers. To set up a custom
result:
1. Click on the right arrow head to the right of an empty text
box.
155
SYNERGY USER MANUAL
2. From the list screen displayed, click on Custom to display the
Custom result configuration dialog box. The customised
result is inserted in the Result Options dialog box, and
appears in the Results area on the test screen.
Temperature probe
When supplied, a thermistor probe for monitoring temperature is
plugged into the PIU. You can configure the test toolbar to
include a temperature display. Press the icon alongside the
display to attach the temperature to the result table. If you have
configured Reference Values, they may be corrected for
temperature.
Displaying the full Results Screen
1. To display the Results Screen in full, select Full Results
Screen from the Results menu.
2. To return to the test screen, select Full Results Screen from
the Results menu again.
156
APPENDICES
Appendix A
Installation & Maintenance
Installation
WARNING
Ensure that this section is read and understood before the
instrument is switched on.
The function or safety of the instrument could be impaired if it
has been subjected to unfavourable conditions in storage or in
transit. If at any time the function or safety is thought to be
impaired, the instrument should be made inoperable and secured
against unintended use.
Checks
Remove the equipment from the packing case(s) and check with
the parts list that all ordered items have been received.
Assembly instructions for accessories may be found in their
packing cases. It is suggested that these instructions are filed
with this manual.
Check for signs of damage due to unfavourable conditions
during transit or storage. If any damage is found do not use the
instrument; contact your distributor.
Environment
The instrument is designed to operate within the following
ranges:
Temperature
+10°C to +35°C
Relative humidity
20% to 80% (non-condensing)
A-1
SYNERGY USER MANUAL
Atmospheric pressure
700mB to 1060mB
When in store or during transport, the following ranges are
tolerated:
Temperature
-20°C to +50°C
Relative humidity
10% to 80%
Atmospheric pressure
500mB to 1060mB
Do not obstruct the cooling slots.
Position the instrument so that air flows freely from the cooling
slots.
Power supply connections
Warning
There are no user serviceable parts inside the instrument.
Only appropriately trained and qualified personnel should
adjust, maintain or repair the instrument. The instrument
must be disconnected from the electricity supply first, before
any cover is removed.
Power connections
Instruments supplied to the United Kingdom and to the USA and
Canada have a mains lead, connector and mains power plug (3pin for the UK; hospital grade for the USA and Canada).
Instruments supplied to other countries have a mains lead and
connector but may not have a mains power plug.
A-2
APPENDICES
The wires of the mains lead are colour-coded as follows:
COLOUR
CONNECTION
brown
live
blue
neutral
green/yellow
protective earth
When a mains plug needs to be fitted, ensure that the correct
connections are made.
The protective earth wire (green/yellow) must be connected
to the protective earth conductor.
For instruments supplied to the UK and the to USA and Canada,
the protective earth connection is automatic when the appropriate
and correctly wired socket is used.
When the mains plug is designed to hold a fuse fit the following:
Synergy Notebook :
3A rated fuse
Synergy Tower :
7A rated fuse
The mains lead and connector which is supplied with the
instrument, or a lead and connector of equivalent standard,
should be used with the instrument. Do not use adaptor plugs or
extension leads.
Synergy Notebook System Power Requirements:
For the Synergy power supply 035C005
Rated input voltage range
100-240 V
Rated supply frequency
50/60 Hz
No adjustment is required to connect to mains voltages within
the rated range.
Max peak power consumption:
Approximately 70VA
For power requirements of the Synergy Notebook refer to the PC
user manual.
A-3
SYNERGY USER MANUAL
SynergyTower PC System Power Requirements:
All parts of the Synergy Tower system must be powered
from the outlets of the ISO800 Mains Isolating Transformer.
Before switching on the system check the following:
" The ISO800 is marked with the correct input voltage for your
local mains supply. The ISO800 is factory set to:
either 230V input/230V output
or 115Vinput/115V output
" The input voltages of the PC Tower, the monitor and the
optional printer are all set to match the output voltage of the
ISO800 Isolating Transformer. Refer to the rating labels and
user manuals of this equipment to check if adjustment is
necessary and for information on how to carry out any
required adjustments.
Rated input voltages: 115V/230V
Rated supply frequency: 50/60Hz
Maximum peak power consumption: 840VA
" The ISO800 Isolating Transformer has fuses in both Line and
Neutral connections. These two fuses, F3 and F4, are
situated in the mains inlet module. These must have the
values shown below:
Supply Voltage
115V
230V
A-4
F3 and F4
T10A L 250V
T6.3A L 250V
APPENDICES
Synergy Notebook System Connections
For key to item numbers used below please refer to page 18.
4
3
12#
8
11#
5
10
21
19
9
8
1*
2*
6
7
20
Multiple portable socket outlets must not be used.
#
Refer to notebook PC user manual to determine the position of the input / output
connectors.
*
The Patient Interface Unit (PIU) must only be powered from the Synergy Power
Supply 035C005. The PIU must not be connected to any other power supply.
Note that only PCMCIA cards approved by Oxford Instruments Medical Limited may be
fitted into the Synergy Notebook.
A-5
SYNERGY USER MANUAL
Synergy Tower System Connections
For key to item numbers used below please refer to page 18.
30
24
8
#
23
22
39
29
27
39
8
31
26
32
#
28
8
8
39
35
39
7
6
10
25
9
8
21
5
2*
34
33
1*
20
The maximum permitted load for the ISO800 Mains Isolating Transformer is 840VA.
The ISO800 Mains Isolating Transformer must not be placed on the floor. It should only be
mounted in the cradle provided on the lower shelf of the system trolley.
The non-medical equipment supplied as part of the Synergy Tower system – the Tower PC,
the monitor and the optional printer must only be powered from the outlets of the ISO800
mains isolating transformer. If non-medical equipment supplied as part of the system were to
be connected directly to a wall socket outlet then there may be a risk of allowable leakage
currents being exceeded.
Note that only PC cards and drives approved by Oxford Instruments Medical Limited may be
fitted into the Tower PC.
A-6
APPENDICES
Synergy Patient Interface Unit (PIU) Connections
1
2
3
1. Deluxe Stimulator Probe
2. DC Power and Data Cable (captive)
3. Foot Switch
4. Internal Stimulator
5. Channel 1 (DIN 1)
6. Temperature probe
7. Channel 1 (DIN 2)
4
5
6
7
Connecting the equipment
Important: Connect the Patient Interface Unit and
Stimulator Probe (if used) and any other
peripheral equipment before switching on.
Cables
Position the equipment so that cables are not stretched and
cannot be pulled or cause a trip hazard. Cable management
facilities are provided on the Notebook stand and the Tower
trolley.
Always disconnect cables by holding the connector - do not pull
on the cables.
Wires within a cable may be damaged if the cable is stretched or
improperly disconnected; this damage may cause a failure in the
supply of power or acquisition of data.
It is recommended that cables and connectors are visually
inspected each day for signs of wear (for example, cracks and
breaks). If necessary, do not use the cable but have it removed
for service.
A-7
SYNERGY USER MANUAL
Full compliance of this product cannot be ensured unless all
components (leads etc.) are provided by Oxford Instruments
Medical Limited.
Connecting other electrical equipment
(For example, printers, monitors etc.)
Precautions must be taken to ensure the safety of medical
electrical equipment such as Synergy is not adversely affected by
the connection of other electrical equipment to it.
Standard EN60601-1-1:1993 (Collateral Standard: Safety
requirements for medical electrical systems) stipulates the
necessary action(s) to be taken to ensure that medical electrical
equipment continues to comply with EN60601-1:1990 (General
requirements for safety) when other electrical equipment is
connected to medical electrical equipment.
Any non-medical equipment connected to a medical electrical
system must comply with an appropriate safety standard, for
example EN60950, UL1950, CAN/CSA 22.2 No.950.
If other electrical equipment, powered from a mains wall socket
outlet, is to be connected to Synergy then standard EN60601-11:1993 should be consulted to determine the appropriate actions
necessary to ensure safety for a particular installation.
Several examples of medical electrical systems meeting
EN60601-1-1 requirements are shown on the following pages.
However, it must be emphasised that these are only examples
and every installation must be individually checked for
compliance with EN60601-1-1 and the appropriate actions taken
to ensure patient and user safety is maintained. For the examples
shown on the following pages all parts of the systems may be
within the patient environment.
Note that for Synergy Tower and Synergy Suite the outlets of the
ISO800 Mains Isolating Transformer must only be used to power
equipment approved by Oxford Instruments Medical Ltd. No
other equipment may be powered from these outlets as there may
be a risk of exceeding the power rating of the ISO800 Mains
Isolating Transformer.
A-8
APPENDICES
Example “A” Synergy Notebook System Connections To Other Non-Medical Equipment of
Class I Protectively Earthed
For key to item numbers used below please refer to page 18.
13
8
35
3
12 #
11 #
14
7
4
15 #
8
.
5
10
6
9
19
1*
.
7
2*
8
To permit the direct connection of Class I non-medical equipment to the Synergy Notebook
the Class I non-medical equipment must have an earth leakage current of less than 400µA
(200µA in the United States) at 110% of the highest rated supply voltage.
A-9
SYNERGY USER MANUAL
(Refer to Example B for connection of Class I non-medical equipment which exceeds the
above earth leakage current figures.)
Multiple portable socket outlets must not be used.
#
Refer to Notebook PC user manual to determine the position of the input / output
connectors.
*
The Patient Interface Unit (PIU) must only be powered from the Synergy Power
Supply 035C005. The PIU must not be connected to any other power supply.
•
Separate fixed mains socket outlets must be used
A-10
APPENDICES
Example “B” Synergy Notebook System Connections To Other Non-Medical Equipment of
Class I Protectively Earthed
For key to item numbers used below please refer to page 18.
13
8
36
8
16
3
38
12 #
11#
14
15 #
4
8
7
.
5
10
9
6
19
1*
7
.
8
2*
If the other Class I non-medical equipment has an earth leakage current of greater than
400µA (greater than 200µA in the United States) at 110% of the highest rated supply voltage
it must be powered from a suitable mains isolation transformer with a floating secondary
winding, to reduce the earth leakage current below 400µA (200µA in the United States).
A-11
SYNERGY USER MANUAL
Multiple portable socket outlets must not be used.
#
Refer to Notebook PC user manual to determine the position of the input / output
connectors.
*
The Patient Interface Unit (PIU) must only be powered from the Synergy Power
Supply 035C005. The PIU must not be connected to any other power supply.
Separate fixed mains socket outlets must be used
•
A-12
APPENDICES
Example “C” Synergy Notebook System Connections To Other Non-Medical Equipment of
Class II Double Insulated
For key to item numbers used below please refer to page 18.
18
8
36
8
3
38
16
12#
37
11#
14
7
15#
.
8
5
4
10
9
6
1 *
7
.
35
2 *
8
In this situation, when other non-medical equipment of Class II is to be connected to Synergy
Notebook, the system (that is Synergy notebook and the other Class II non-medical
equipment together) must not exceed the enclosure leakage current limit of 100µA.
A-13
SYNERGY USER MANUAL
To meet this requirement a suitable mains isolating transformer with a floating secondary
winding will be required to power the non-medical equipment including the Notebook PC.
This transformer must have an enclosure leakage current of less than 75µA, that is the current
measured between the floating secondary winding of the isolation transformer and earth must
not exceed 75µA. (The reduction from 100µA to 75µA makes allowance for the enclosure
leakage current of the Synergy Notebook itself). If two or more non-medical equipments of
Class II are to be connected simultaneously to Synergy Notebook then all the items of nonmedical equipment must be powered from a single mains isolating transformer to ensure that
the enclosure leakage currents do not add and exceed the limit.
Multiple portable socket outlets must not be used.
#
Refer to Notebook PC user manual to determine the position of the input / output
connectors.
*
The Patient Interface Unit (PIU) must only be powered from the Synergy Power
Supply 035C005. The PIU must not be connected to any other power supply.
Separate fixed mains socket outlets must be used
•
A-14
APPENDICES
Example “D” Synergy Tower System Connections To Other Non-Medical Equipment of
Class I Protectively Earthed With Earth Leakage Current Of Less Than 500µA
For key to item numbers used below please refer to page 18.
13
6
.
7
35
8
14
30
23
24
8
#
6
22
39
29
8
39
27
31
26
32
#
28
8
8
39
35
39
10
25
9
8
21
5
.
7
2*
34
33
1*
20
To permit the direct connection of Class I non-medical equipment to the Synergy Tower
system the Class I non-medical equipment must have an earth leakage current of less than
500µA (300µA in the United States) at 110% of the highest rated supply voltage.
(Refer to Example E for connection of Class I non-medical equipment which exceeds the
above earth leakage current figures.)
Multiple portable socket outlets must not be used.
A-15
SYNERGY USER MANUAL
#
Refer to PC Tower user manual to determine the position of the input / output
connectors.
*
The Patient Interface Unit (PIU) must only be powered from the Synergy Power
Supply 035C005. The PIU must not be connected to any other power supply.
•
Separate fixed mains socket outlets must be used
A-16
APPENDICES
Example “E” Synergy Tower System Connections To Other Non-Medical Equipment of
Class I Protectively Earthed
For key to item numbers used below please refer to page 18.
13
16
39
8
14
38
8
6
.
7
30
23
24
8
#
6
22
39
29
8
39
27
31
26
32
#
28
8
8
39
35
39
10
25
9
8
21
5
.
7
2*
34
33
1*
20
If the other Class I non-medical equipment has an earth leakage current of greater than
500µA (greater than 300µA in the United States) at 110% of the highest rated supply voltage
it must be powered from a suitable mains isolation transformer with a floating secondary
winding, to reduce the earth leakage current below 500µA (300µA in the United States).
Multiple portable socket outlets must not be used.
#
Refer to PC Tower user manual to determine the position of the input / output
connectors.
*
•
The Patient Interface Unit (PIU) must only be powered from the Synergy Power
Supply 035C005. The PIU must not be connected to any other power supply.
Separate fixed mains socket outlets must be used
A-17
SYNERGY USER MANUAL
Key to Numbers used on the System Connection Drawings and on Examples A to E
1
2
3
4
5
6
7
8
9
10
11
12
13
14
15
16
17
18
19
20
21
22
23
24
25
26
27
28
29
30
31
32
33
34
35
36
37
38
39
40
41
42
43
A-18
Patient Interface Unit (PIU)
Synergy power supply
Notebook PC
Notebook PC power supply
Junction box
Wall of room
Separate fixed mains socket outlets
Mains inlet
DC power to PIU
USB cable
To PC USB port
DC power to Notebook PC
Other non-medical equipment (Class I protectively earthed)
Signal cable
To appropriate PC connector
Isolation transformer
Isolated mains
Other non-medical equipment (Class II double insulated)
“Y” junction mains cable
Deluxe Stimulator Probe (optional)
Footswitch (optional)
Signal to printer
Oxford Instruments approved printer
Oxford Instruments approved monitor
Mouse
Microphone signal
Audio output
Keyboard
SVGA signal to monitor
Oxford Instruments approved Tower PC
Isolated mains outlets
ISO-800 Isolation Transformer
Internal stimulator output connectors
Amplifier input connectors
IEC socket to local mains connector (3 core 16AWG )
Suitable cable to connect isolation transformer to other non-medical equipment
Suitable cable to connect isolation transformer to Notebook PC power supply
Suitable cable connecting local mains connector to input of isolation transformer
IEC plug to IEC socket (connects isolated mains)
Network direct connection – CAT5 shielded (STP) patch cable - crossover type with
RJ45 connectors
Alternative printer connection
Network card (PCMCIA- Ethernet)
Media coupler for network
APPENDICES
Switching on
Warning: Switch ON before connecting patient electrodes.
Caution: All peripheral equipment (including the preamplifier
and any external printer or keyboard) must be connected to the
Synergy before the Synergy is switched ON.
Identify the plug on the mains lead which fits the connector on
the instrument and push it firmly into its socket on the rear panel.
Then connect the mains power plug to the mains electricity
supply and switch ON at the mains power plug.
The mains power ON/OFF switch for the instrument is a rocker
switch sited to the lower left hand side of the front of the unit.
Push the switch to the ON position:
The instrument is now ON and the screen displays a message
indicating that Windows 98 is starting. Once loaded the Test
Menu will appear.
Switching off
Warning: Before switching OFF, disconnect all patient
electrodes.
Before switching OFF the instrument it is essential that the
Synergy application and Windows 98 are closed down.
Failure to do this may result in loss of data and operating
problems the next time the instrument is switched on.
Close down Synergy by selecting Exit Windows from the FILE
menu. Wait until the system has closed down before switching
off the power plug.
If the instrument is to be switched OFF and ON again, wait
approximately 5 seconds before switching OFF and ON.
A-19
SYNERGY USER MANUAL
Special instructions for use
Switch ON the instrument before connecting patient electrodes
Disconnect all patient electrodes before switching OFF
Do NOT use electrical stimulators for the direct stimulation of
exposed nerves unless the stimulator output has been set to the
Low range.
A patient with an implanted electronic device, for example a
cardiac pacemaker, should not be subjected to electrical
stimulation unless specialist medical opinion has first been
obtained.
Accidental contact between electrodes connected to the amplifier
and stimulator connectors, but not applied to the patient, and
other conductive parts including protectively earthed parts
should be avoided.
A-20
APPENDICES
Electrical stimulating electrodes
Electrical stimulators must be used only by appropriately
medically trained and qualified personnel.
Electrodes must never be positioned so that electrical current
flows across the heart (trans-thoracic stimulation), i.e. never
apply a positive electrode to one limb and a negative electrode to
any other limb. Keep the positive and negative stimulating
electrode sites in close proximity.
When stimulating for long periods there may be a risk of damage
to tissue under the stimulating electrodes due to the dc
component in the stimulator output.
Surface electrodes must make good electrical contact with the
skin surface.
WARNING! Connection of a patient to high frequency
electrosurgical equipment and to Synergy simultaneously may
result in burns at the sites of stimulating and recording
electrodes. Damage may also occur to the electrical stimulator
and amplifiers, however Synergy includes protection
components to reduce the risk of this happening.
WARNING! Operation of Synergy in close proximity (for
example 1 metre) to shortwave or microwave therapy equipment
may produce instability in the electrical stimulator output.
NOTE: Current densities for any electrodes exceeding 2mA
r.m.s./cm2 may require the special attention of the operator.
Note: Electrical stimulating electrodes supplied by the
manufacturer can operate at the maximum output of the
Synergy.
A-21
SYNERGY USER MANUAL
Electrical stimulus output of Synergy
Max intensity:
300V constant voltage (pulsed)
or
100mA constant current (pulsed)
High range:
0 - 300V or 0 - 100mA
Low range:
0 - 75V or 0 - 25mA
Max duration:
1ms per pulse
Max repetition rate:
10 pulses/second at ≤ 1ms
Stimulators
The Stimulator can be either the internal one in the PIU, or an
external Deluxe Stimulator Probe. The internal stimulator has
1.5mm touchproof plugs at the side of the PIU. The Deluxe
Stimulator probe also has 1.5mm touchproof plugs or can be
fitted with the special probe head with built-in electrodes. The
probe plugs into the back of the Patient Interface Unit via a
2.4m/8ft lead.
To connect Deluxe Stimulator Probe to
Synergy Notebook
Correctly align the plug with the socket on the PIU.
Firmly push home the plug and tighten the screws on either side
of the plug.
To disconnect the Deluxe Stimulator
Probe
Unscrew the screws either side of the plug and pull firmly to
separate the connection.
A-22
APPENDICES
Footswitch
The foot control is attached via a socket on the PIU.
To connect to the Synergy
Correctly align the plug with the socket on the PIU.
Firmly push home the plug and tighten the screws on either side
of the plug.
To disconnect
Unscrew the screws either side of the plug and pull firmly to
separate the connection.
Printer
To connect the interface connectors
Firmly push home the connectors of the parallel port and then
secure them in place.
To disconnect the interface connectors
Release the securing mechanism (spring clips or screws) before
pulling apart the connections.
(Details of pin connections are found in Appendix B.)
Synergy should only be used with printers recommended by
Oxford Instruments.
For more information about installing your printer, see the
manual which is provided with the printer.
Signal Cable
A high quality screened cable must be used when connecting a
printer to Synergy Notebook to ensure compliance with EMC
regulations. Braid screened or double screened (braid plus foil)
cables are the preferred types. The cable screen should make a
360° connection to the screening shells of the connectors on each
end of the cable. Cables described as ‘IEEE 1284 compliant’ are
likely to be suitable.
A-23
SYNERGY USER MANUAL
Maintenance
After-sales service support
The manufacturer of the Synergy and the distributors provide a
comprehensive after-sales service support. For details, please
contact the manufacturer or your local distributor.
Service contracts are available.
A workshop manual is available for purchase containing all the
information necessary to enable appropriately qualified technical
personnel to carry out repair and calibration of those parts of the
equipment that are repairable.
Maintenance of the instrument
The instrument is inherently reliable; it contains many solid-state
electronic components which need no maintenance and no parts
need regular replacement.
Cleaning
Warning: Switch OFF and unplug the instrument before
cleaning with liquid.
The casing, panels and screen may be cleaned using a cloth
moistened with water and detergent. Do not allow any liquid to
enter the case of the instrument.
The instrument may also be cleaned using a low-pressure air-line
or a vacuum cleaner with an appropriate attachment.
Do not use propanone (acetone) on any part of the instrument.
The instrument must not be autoclaved or sterilised by any
means.
A-24
APPENDICES
Electrodes
An integral electrical stimulator and/or a remote electrical
stimulator is provided with the instrument.
Oxford Instruments offer a comprehensive range of
neurodiagnostic accessories. Instructions for use Please request
our Neurodiagnostic Accessories Catalogue for full details.
Electrode kit supplied by the Synergy
manufacturer
Stimulating electrodes
The stimulating electrodes in the EMG Electrode Kit are
designed to deliver the maximum stimulus current available from
the Synergy.
Usage and cleaning
Electrodes supplied by Oxford Instruments are accompanied by
instructions for use and these include recommendations for
cleaning and sterilisation.
A-25
APPENDICES
Appendix B
Interface Connections
This information may be useful to some users of the instrument.
Full technical specifications are provided in the workshop manual which is
available for purchase.
Signal Cable
High quality screened cables must be used when connecting to the interface
connectors of Synergy to ensure compliance with EMC regulations. Braid
screened or double screened (braid plus foil) cables are the preferred types. The
cable screen should make a 360° connection to the screening shells of the
connectors on each end of the cable.
Connectors on Notebook PC and PC Tower
Refer to the user manuals for the Notebook PC and PC Tower.
Connectors on PIU
,#.
Stim A - Internal
2 x Touchproof Sockets
Pin No.
Red
Black
Service
Stim +
Stim -
B-1
SYNERGY USER MANUAL
(
Pin No.
1
2
3
4
5
6
7
8
9
%
Pin No.
1
2
3
4
5
6
7
8
9
B-2
Stim B – Ext Deluxe
Stimulator Probe
9 way D type socket
Service
+12V
RS232 to STIM 1
RS232 from STIM 1
EMG positive trigger
0V
0V
EMG negative trigger
Stim OK
Sync.
Footswitch
9 way D type socket
Service
N/C
N/C
Acquire
N/C
0V
N/C
N/C
N/C
N/C
APPENDICES
Appendix C
Technical Specifications
Amplifiers and Filters
Input Impedance
CMRR
Noise
Low Frequency
High Frequency
Notch Filter
1000MΩ, < 30pF
>110dB
< 0.7µV r.m.s (0.1 - 10kHz bandwidth, inputs
short circuited)
( -6dB/octave)
0.1, 1, 3, 10, 20, 100, 500Hz
(-12dB/Octave)
100, 200, 500Hz
1, 2, 3, 5, 10KHz
50Hz or 60Hz or OFF
Data Acquisition and Display
A-D Conversion
Sweep Duration
LongTrace™ facility
Averager mode
Artefact Rejection
Display Sensitivity
16 Bit ADC
10ms to 10s per channel (independent control
per channel)
Continuous acquisition of up to 100 x sweep
duration (1000s)
Mean
Configurable per channel
0.01µV to 100mV/div
Electrical Stimulator
Switchable constant voltage or constant current with a low or high range.
Repetition Rates
0.5 to 10 pps. Fine and random control
Stimulus Duration
0.05, 0.1, 0.2, 0.5, 1.0ms
Output Type
Constant Current or Constant Voltage
Range
High : 0 – 100mA, or 0 - 300V
C-1
SYNERGY USER MANUAL
Low range: 0 - 25mA, 0 - 75V
+ 0 to 9 screen divisions
Delay
Dimensions (Patient Interface Unit)
Size
156 x 55 x 241mm (6.2” x 2.2” x 9.5”)
Weight
1 kg / 2.2lbs
Power Requirements
Synergy power supply 035C005
Input
100-240 V *
Approx.
50-60Hz
70VA max
ISO800 Mains Isolating Transformer
Input
115V/230V *
50-60Hz
840VA max
C-2
APPENDICES
Safety Standards
EN 60601-1:1990 inc. A1,A11,A12:1993;A2:1995 & A13:1996 UL2601-1 2nd
edition 1997 CAN/CSA22.2 No.601.1M90 inc S1-94 EN 60601-1-1:1993
inc.A1:1996
EN60601-2-40:1998
EMC Standard
EN60601-1-2 :1993
Quality Standards
CE marked product in compliance with the Medical Devices Directive
(93/42/EEC)
Manufactured under approved Quality Management Systems - ISO 9001:1994,
EN 46001:1993 and BS EN 46001:1994.
TickIT approved procedures for software development.
Oxford Instruments Medical Ltd
Manor Way, Old Woking, Surrey, GU22 9JU, U.K.
Tel +44 01483 770331 Fax: +44 01483 727193
WEB: http://www.oxfordinstruments.com
Oxford Instruments Medical Inc.,
12 Skyline Drive, Hawthorne, New York10532-2133 USA
Tel: +1 914 593 7100 Fax: +1 914 593 7290
1-800-GET-TECA (438-8322)
WEB: http://www. oxfordinstruments.com
*Optional Features
Oxford Instruments Medical Ltd reserves the right to change product
specification without notice, in line with our policy of constant product
improvement. EMG LivePlay™ and LongTrace™ are trademarks of
Oxford Instruments Medical Ltd.
Microsoft Office and Windows are registered trademarks of Microsoft
Corporation.
Intel Pentium is a registered trademark of INTEL Corporation.
C-3
APPENDICES
Appendix D
Assembling the Notebook
Stand
Assembly instructions
Attach the PC tray assembly to the pole using 3 black
countersunk screws supplied
The PC tray can be attached so that the arm, when mounted, is
positioned on either the left or right.
Arm to left
Arm to right
D-1
SYNERGY USER MANUAL
Attach the metal plate and cable clips
Turn the pole upside down and attach the plate for the power
supplies and cable clips.
D-2
APPENDICES
Attach the base to the pole using the large black bolt
supplied
Attach the pole to the base, weights, and optionally the printer
tray.
If you are attaching the printer tray, position it so that its rubber
feet rest on the tops of two of the legs of the base. The printer
tray can be mounted at the front, side, or back of the stand.
When you have finished attaching these items, turn the stand
assembly upright again.
D-3
SYNERGY USER MANUAL
Attach the arm to the pole
Note
Before moving the stand between rooms, ensure that the arm is
locked into position using the locking nuts.
Attach the Deluxe Stimulator Probe holder to the arm
(optional) using 2 countersunk screws provided
Attach the power supplies to the stand
The power supplies incorporate a Velcro type pad for easy
attachment and removal. They can be fitted to the metal plate on
the pole. Clean the plate using alcohol, remove the self-adhesive
backing from the pad, and press the pad firmly into position.
Cables may then be routed up through the cable clips.
If you have the optional printer tray attached, there may be room
to mount the power supply at the back of it instead, if you prefer.
Attach the PIU to the plate at the end of the arm using the
three thumbscrews
Position Synergy Notebook on the top of the stand
D-4
APPENDICES
Put the Synergy Notebook on top of the PC tray, clean the
corners of the tray using alcohol, and attach the L-shaped selfadhesive rubber feet at the corners to secure it in place.
Connect cabling to the cable clips
See separate cabling diagram in Appendix A for system
connections.
Excess cabling can be tucked onto the shelf under the PC.
D-5
APPENDICES
Appendix E
Cable management for the
Tower (Refer to page E-7 for a pull-out Key to the numbers)
1
Securing the isolated power supply
25
24
28
30
32
32
X4
X4
X1
E-1
SYNERGY USER MANUAL
2
Cable management for
PIU, Deluxe stim probe
and power supply
1
20
30
21
9 & 10
32
9 & 10
9
11
35
10
5
39
30
2
32
E-2
39
APPENDICES
Management of monitor cables
3
29
8
27
26
30
27
26
29
39
E-3
SYNERGY USER MANUAL
4
Mouse and key board connections
25
28
8
30
39
9 & 10
E-4
39
28 25
APPENDICES
Connecting the Printer to the Tower
23
5
30
39
22
8
39
E-5
APPENDICES
E-7
SYNERGY USER MANUAL
Key to Numbers used on the System Connection Drawings and on Examples A to E
1
2
3
4
5
6
7
8
9
10
11
12
13
14
15
16
17
18
19
20
21
22
23
24
25
26
27
28
29
30
31
32
33
34
35
36
37
38
39
40
41
42
43
E-8
Patient Interface Unit (PIU)
Synergy power supply
Notebook PC
Notebook PC power supply
Junction box
Wall of room
Separate fixed mains socket outlets
Mains inlet
DC power to PIU
USB cable
To PC USB port
DC power to Notebook PC
Other non-medical equipment (Class I protectively earthed)
Signal cable
To appropriate PC connector
Isolation transformer
Isolated mains
Other non-medical equipment (Class II double insulated)
“Y” junction mains cable
Deluxe Stimulator Probe (optional)
Footswitch (optional)
Signal to printer
Oxford Instruments approved printer
Oxford Instruments approved monitor
Mouse
Microphone signal
Audio output
Keyboard
SVGA signal to monitor
Oxford Instruments approved Tower PC
Isolated mains outlets
ISO-800 Isolation Transformer
Internal stimulator output connectors
Amplifier input connectors
IEC socket to local mains connector (3 core 16AWG )
Suitable cable to connect isolation transformer to other non-medical equipment
Suitable cable to connect isolation transformer to Notebook PC power supply
Suitable cable connecting local mains connector to input of isolation transformer
IEC plug to IEC socket (connects isolated mains)
Network direct connection – CAT5 shielded (STP) patch cable - crossover type with
RJ45 connectors
Alternative printer connection
Network card (PCMCIA- Ethernet)
Media coupler for network
INDEX
Index
+ / - switch (Trigger Rising / Falling
Edge).................................................10
Access levels.........................................18
Acquire ON switch .................................9
Acquire Single switch .............................9
Acquiring the data
Blink reflex test...............................109
Motor NCS test ........................... 76, 82
Repetitive Nerve Stim test ..............103
Acquisition setup ..................................63
Adding comments .................................39
After-sales service support (App A) .....24
After-sales support................................16
Artefact Reject setup.............................65
Audio setup ...........................................65
Automatic marker placement ..............143
Blink Reflex test .................................108
Cable management for the Tower (App E)
............................................................1
Cables (App A) .......................................7
Cancelling a search ...............................34
Change trace duration ................... 60, 145
Change trace sensitivity ................ 60, 145
Changing a password ............................54
Changing paths .....................................54
Changing your User setup.....................53
Channel settings ....................................63
Cleaning (App A)..................................24
Clinical overview
Blink reflex test...............................108
Fibre Density Analysis test .............135
F-Wave test .......................................87
H-Reflex test .....................................92
Interference Pattern Analysis test....113
Macro EMG test..............................138
Motor NCS test .................................74
Multi-MUP Analysis test ................118
Needle EMG test...............................95
Repetitive Nerve Stim test ..............102
Sensory NCS test ..............................81
Single Fibre Jitter test .....................124
Comments .............................................42
Comments utility...................................38
Comments, adding................................ 39
Compare ............................................. 145
Comparing results................................ See
Components............................................ 1
Components of the GUI ....................... 15
Components of the Synergy Suite .......... 8
Components of the Synergy Tower ........ 6
Configuring and displaying results..... 149
Configuring protocols........................... 59
Configuring tests .................................. 20
Configuring the network ...................... 56
Configuring the protocols..................... 61
Configuring the Results Table............ 151
Configuring the system ........................ 47
Configuring the System........................ 18
Connecting the electrodes
Blink reflex test .............................. 108
Fibre Density Analysis test............. 135
F-Wave test ...................................... 88
H-Reflex test .................................... 92
Macro EMG test ............................. 139
Motor NCS test................................. 75
Needle EMG test .............................. 96
Repetitive Nerve Stim test.............. 103
SFJ test ....................................124, 130
Connecting the equipment (App A) ....... 7
Creating a new protocol ....................... 62
Custom result...................................... 152
Custom Tables...................................... 46
Customising the report layout .............. 42
Database ............................................... 19
Defining a muscle list........................... 55
Defining host and satellite .................... 48
Defining the report sequence................ 45
Deleting a patient.................................. 27
Deleting a user...................................... 52
Deleting results..................................... 33
Disposal of equipment........................... xi
Editing a protocol ................................. 62
Editing a user's setup ............................ 51
Editing and saving a report................... 41
Electrical interference suppression........ xi
Index 1
SYNERGY USER MANUAL
Electrical stimulating electrodes (App A)
..........................................................21
Electrical Stimulator setup ....................67
Electrodes (App A) .........................21, 25
Electronic Mail......................................16
E-mail....................................................16
E-mail program
Configuring .......................................49
Entering patient information .................23
Erase switch ............................................9
Exporting patient and report data..........35
Fibre Density Analysis test .................135
Filter settings setup ...............................63
Footswitch.......................................11, 23
Connecting (App A)..........................23
Function Key Bar..................................15
Function keys ........................................15
F-Wave test ...........................................87
Generating reports.................................37
Generating Reports ...............................21
Getting support .....................................16
Graphs....................................... 42, 80, 86
GUI .......................................................15
Handling patient information ................23
Header file.............................................42
Selecting and defining.......................43
Host and satellite
configuring........................................48
H-Reflex test .........................................92
Importing patient and report data..........36
Inserting page breaks ............................45
Installation and maintenance (App A) ....1
Interface connections (App B) ................1
Interference Pattern Analysis test........113
List of controls ........................................9
Logging on............................................14
Macro EMG test..................................138
Maintenance (App A) ...........................24
Manual marking of traces ...................144
Marker placement ...............................143
Marker setup .......................................144
Marker toolbar ....................................144
MedPad ...........................................39, 46
Menu Bar ..............................................15
Motor NCS Test....................................74
Moving a trace ....................................143
Multi-MUP Analysis test ....................118
Muscle configuration ............................55
Muscle list, definition ...........................55
Index 2
Needle EMG test .................................. 95
Network configuration.......................... 56
Next switch........................................... 10
Notch filter setting................................ 49
Obtaining a report online...................... 38
On-line configuration ........................... 59
Online report ........................................ 39
Online reporting ................................... 38
Opening a report................................... 41
Opening and closing folders................. 16
Opening the Test Catalog ..................... 31
Overview of the system .......................... 1
Page breaks........................................... 45
Parts of the system.................................. 1
Password
Changing .......................................... 54
Paths
Changing .......................................... 54
Patient
Deleting details................................. 27
Entering and saving details............... 24
Recalling..................................... 27, 31
Reviewing results and reports .......... 31
transferring data between systems .... 28
Patient data
exporting........................................... 35
Patient Database ................................... 19
Patient demographics
Configuring ...................................... 50
Patient details ....................................... 23
Searching on ..................................... 34
Patient information ............................... 23
Entering ............................................ 23
Retrieving ......................................... 27
Saving............................................... 23
Searching for .................................... 34
Patient Interface Unit.............................. 9
Patient List............................................ 27
Patient Table......................................... 42
Power supply connections (App A)........ 2
Printer
Connecting (App A) ......................... 23
Printing a report.................................... 46
Protocol
Creating ............................................ 62
Editing .............................................. 62
Protocol Configuration Wizard ............ 61
Protocol Table setup....................... 68, 69
Protocols
INDEX
On-line configuration........................59
Selecting............................................73
Protocols configuration.........................59
QEMG tests................................. 113, 118
Recalling a patient........................... 27, 31
Recalling a report..................................41
Recalling results....................................33
Recompiling a report ............................39
Reference values ........................... 68, 150
Repetitive Nerve Stimulation test .......102
Report
Editing and saving.............................41
Opening.............................................41
Recalling ...........................................41
Recompiling......................................39
Viewing....................................... 38, 39
Report data
exporting ...........................................35
Report layout, customising ...................42
Report sequence, defining.....................45
Report Setup ................................... 39, 42
Reporting ..............................................21
Reports............................................ 21, 37
Printing..............................................46
Result Mode........................................149
Result Tables.........................................42
Results...................................................38
Configuring .....................................149
Deleting.............................................33
Displaying.......................................149
Recalling ...........................................33
Sorting......................................... 79, 85
Viewing.............................................33
Results available . 79, 85, 90, 94, 100, 106
Results information...............................31
Results Table............................... 149, 151
Retrieving patient information ..............27
Reviewing results for a patient..............31
Safety .....................................................ix
Saving patient information....................23
Search, cancelling .................................34
Searching for patient information .........34
Selecting a notch filter setting...............49
Selecting a protocol ..............................73
Selecting a trace ..................................142
Selecting an online report .....................39
Selecting the test ...................................73
Sensitivity settings setup.......................63
Sensitivity switch ..................................10
Sensory NCS test.................................. 81
Setting up a new user............................ 50
SFJ test ............................................... 124
SFJ tests...............................124, 135, 138
Signature file ........................................ 42
Selecting and defining ...................... 44
Single Fibre Jitter test......................... 124
Softkeys................................................ 15
Sorting results..................................79, 85
Sources of artefact ................................ xii
Specifications (App C) ........................... 1
Stim Duration switch............................ 10
Stim Intensity switch ............................ 10
Stim switch........................................... 10
Stimulators (App A) ............................. 22
Support ................................................. 16
Sweep Duration switch......................... 10
Switching off the system (App A)........ 19
Switching on the system (App A) ........ 19
Symbols.......................................... ix, xiv
Sympathetic Skin Response test......... 112
Synergy................................................... 1
Synergy Reader software...................... 17
Synergy Suite ......................................... 8
Synergy Tower ....................................... 6
Synergy, using...................................... 14
System configuration............................ 47
System overview .................................... 1
Technical specifications (App C) ........... 1
Temperature probe ......................5, 6, 154
Test Navigator / Test History screens.. 16
Test Catalog.....................................31, 40
Test Menu screen.................................. 23
Test Report settings .............................. 45
Test Report Settings ............................. 42
Tests ................................................20, 71
Blink reflex..................................... 108
Fibre Density Analysis ................... 135
F-Wave ............................................. 87
H-Reflex ........................................... 92
Interference Pattern Analysis ......... 113
Macro EMG.................................... 138
Motor NCS ....................................... 74
Multi-MUP Analysis ...................... 118
Needle EMG..................................... 95
Repetitive Nerve Stimulation ......... 102
Selecting ........................................... 73
Sensory NCS .................................... 81
SFJ.................................................. 124
Index 3
SYNERGY USER MANUAL
Single Fibre Jitter ............................124
Sympathetic skin response ..............112
Typical procedure .............................72
Using.................................................71
The tests ................................................71
Title Bar ................................................15
Toolbar..................................................15
Trace analysis and display ..................142
Trace arithmetic ..................................146
Trace duration ...............................60, 145
Trace sensitivity ............................60, 145
Traces
Manual marking ..............................144
Moving............................................143
Transferring patient information ...........28
Units used ........... 80, 86, 90, 94, 101, 106
Index 4
User Configuration ............................... 53
User interface ....................................... 15
User setup ....................................... 50, 53
Changing .......................................... 53
User setup, editing................................ 51
User, deletion ....................................... 52
Using Synergy ...................................... 14
Using the patient database .................... 19
Using the tests ...................................... 71
View All button .................................... 66
Viewing a report................................... 39
Visit details..................................... 23, 25
Entering and saving .......................... 25
Volume switch...................................... 10
Wizards ................................................ 61