Download User Manual of Cross Camera
Transcript
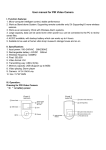
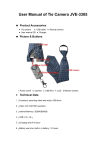
User Manual of Cross Camera Product Accessories ● Cross camera ● Chain ● USB cable ● User manual CD ● A clip ● Charger Picture & Buttons 1. Power on/off/record/photo 2. Indicator light 4. Switch button (left: take photo; right: record video) 6. Camera 3. Reset 5. MIC 7. USB port Technical Data 1) Main functions: recording video and audio at the same time, taking photos, USB drive, Cross chain 2) Video format: AVI, 640*480 resolution 3) Photo format: JPEG, 1280*1024 resolution 4) Internal memory:2GB-8GB 5) USB: 2.0(Hs) 6) Charging time: 2-3 hours 7) Using time: Built Li-chargeable battery: can work for 2 hours continuously 8) Recommend player software: Storm, KMplayer, Mplayer etc 9) Operation systems: Windows ME/2000/XP/Vista no need driver(windows98 is excepted) Operation directions Recording video and audio 1) Under power off mode, push the switch button to the position of “V”, and press the power on/off/record/photo button for several seconds. The yellow light turns on, seconds later becomes blue light then keeps on, which indicates that the device is recording video and audio. 2) Press the power on/off/record/photo once, the blue light becomes yellow then keeps on, indicating that recorded video is saved and camera returns to standby mode. Attention: 1) Data saving time is related to the file volume, that is to say, the bigger the size of the video is, the longer the preparing time of saving data will be. 2) The device will save the video file every 50 minutes, then continue recording automatically. Switch models 1) Under standby mode and recording mode, push the switch button to the position of “P”, the camera comes to photo mode; 2) Push the switch button to the position of “V”, the camera enters the recording mode; and begin to record video and audio immediately. Attention: When switching the recording mode to taking photo mode, the system will save the recording data automatically first then enter the taking photo mode. Taking photos Under taking photo mode, the blue light keeps on. Press power on/off/record/photo button once, the yellow light blinks once, indicating one photo is taken and saved, and the system also is in the taking photo mode. Switch off 1) Under any mode, press the power on/off/record/photo button for several seconds, all the lights are off indicating the device is power off. Attention: Under recording mode, press the power on/off button for several seconds, the system will save the data automatically. 2) Press the reset button with a clip softly, all the lights are off, which indicates the device is power off. Attention: when shut down the camera by pressing the reset button, the recording data will not be saved. Reset With an incorrect operation or a certain reason, the device may stop working. At this time, insert a clip into the reset hole to reset it and the device will power off. Attention: please reset the camera with moderate strength; otherwise the components will be harmed. Charging Please charge the camera with adapter, when charging, both red light and green light of the adapter keep on; when the green light is off indicating the camera is fully charged. Attention: As the device has built-in high-capacity polymer lithium battery, it has a memory function. So we advise at the first 5 times of usage, please charge the battery fully after the battery is out of use, so that the battery can work with its max working hours perfectly. Playback video Connect the device to your computer via USB cable, click the removable disk and find the video then you can play the video. Please make sure that you have installed related software before playing the video. Setting time When using the device for the first time or the time is incorrect, you can reset the time through the following way: 1) Connect the camera to the computer. 2) Insert the user manual CD to the computer. 3) Click the setting time tool of the manual CD which names “Setting Time Tool V2.0”. 4) Then the time of the camera will be synchronized with the computer. 5) Revise the time of the computer then you can get the time you want. Attention 1) Under standby mode, the camera will shut down itself if without any operation within 1 minute. 2) When recording, the camera will save the data first then shut down if lacking of power. 3) When last recording, the system of the camera will create a new video file after every operation. 4) It needs some time to save the data, please don’t do any operation during the process of light switching; otherwise the data may be lost. 5) Under a bright environment, keep camera vertical, stable and keep certain distance from the scene you want to record in order to achieve a best effect 6) The time for computer with different system configuration to identify the hardware is slightly different. During this period, please wait for a moment. If computer can’t recognize the device, please make sure your operating system, drivers and USB interface cable in are good working order, and then connect it again.


