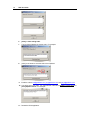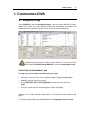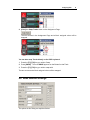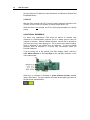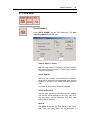
1
Operators Manual DiVA Editor & Controller Interactive Help Manual Revised on 18 March, 2014 V1.1x80 > Copyright © 2014 Editware Inc. All rights reserved The software in this product contains proprietary information; it is provided under a license agreement containing restrictions on use and disclosure, and is also protected by copyright law. Reverse engineering of the software is prohibited. Due to continued product development, the accuracy of the information in this document may change without notice. Images and prompts specific to Microsoft Windows 7® may appear slightly different than they appear in your system. The information and intellectual property contained herein is confidential between Editware and the client and remains the exclusive property of Editware. If you encounter any errors or omissions in this documentation, please report them to us in writing at the e-mail address listed below. Editware does not warrant that this document is error-free. Manual Version DiVA V1.1x80 Revision Date: Mar 17, 2014 Editware Inc. 200 Litton Drive Suite 308 Grass Valley CA 95945 USA Telephone 530.477.4300 Fax 530.477.4304 E-Mail: [email protected] Website: http://www.editware.com This Page intentionally left blank. i Table of Contents 1. Conventions Used in this Manual 1 2. Contents & Specifications 3 2.1. The Basic DiVA Software Bundle consists of the Following: ........................................... 3 2.2. Customer Supplied System Recommendations: ............................................................... 3 2.3. DiVA Hardware Options ....................................................................................................... 3 2.4. Editware Supplied DiVA Hardware Specifications............................................................. 4 3. Connecting the System 5 3.1. Connections ......................................................................................................................... 5 Power .................................................................................................................................... 5 Mouse and Keyboard ............................................................................................................ 5 Jogger Panel ......................................................................................................................... 5 USB Software Security Key (Dongle) .................................................................................... 6 Monitor(s) .............................................................................................................................. 6 Ethernet ................................................................................................................................. 6 Sync ...................................................................................................................................... 6 Video Display Input ................................................................................................................ 7 Video Output ......................................................................................................................... 7 GPI Output ............................................................................................................................ 7 RS-422 Break-out Panel ........................................................................................................ 8 DIVA DATA TRAP ................................................................................................................. 8 3.2. Start-Up and Shut-Down Sequence .................................................................................... 9 Turning On the DiVA System ................................................................................................. 9 Logging On .......................................................................................................................... 10 Starting DiVA ....................................................................................................................... 10 Installing Software Updates ................................................................................................. 10 How to upgrade a DiVA Dongle in the field. ......................................................................... 11 Loading Configuration Files ................................................................................................. 13 Exit DiVA ............................................................................................................................. 13 Windows keys á … ............................................................................................................ 13 Shutting Off the Computer ................................................................................................... 14 Your DiVA Port & Device Assignment Table........................................................................ 15 4. Configuring DiVA 17 4.1. Assignment Page ............................................................................................................... 17 Navigating the Assignment Page ......................................................................................... 17 4.2. Assigning Devices to Tracks ............................................................................................. 18 Track ................................................................................................................................... 18 On ....................................................................................................................................... 18 Device Name ....................................................................................................................... 18 Class ................................................................................................................................... 18 Device ................................................................................................................................. 18 Auto ..................................................................................................................................... 19 Port ...................................................................................................................................... 19 Pool ..................................................................................................................................... 19 Video Switcher..................................................................................................................... 19 ii Contents Audio Mixer ......................................................................................................................... 19 Color .................................................................................................................................... 20 4.3. Assignment Settings .......................................................................................................... 20 Swap Tracks ........................................................................................................................ 20 4.4. Video Switcher Settings..................................................................................................... 21 Enabled (Communications Enabled) ................................................................................... 22 Default M/E .......................................................................................................................... 22 Device File........................................................................................................................... 22 Port ...................................................................................................................................... 23 Status .................................................................................................................................. 23 Transition Delay................................................................................................................... 23 MEM Delay .......................................................................................................................... 23 PEG Delay ........................................................................................................................... 23 Set Forward ......................................................................................................................... 23 Send Commands ................................................................................................................. 23 Enabled M/Es ...................................................................................................................... 24 4.5. Audio Mixer Settings .......................................................................................................... 24 Audio Mixer Settings Enabled (Communications Enabled) .................................................. 24 Device File, Mixer ................................................................................................................ 24 Port, Mixer ........................................................................................................................... 25 Status .................................................................................................................................. 25 Transition Delay................................................................................................................... 25 MEM Delay .......................................................................................................................... 25 Send Commands ................................................................................................................. 25 4.6. Preview Settings................................................................................................................. 25 Preview settings Enabled (Communications Enabled) ........................................................ 26 Video Preview...................................................................................................................... 26 E-E (VTRS only) .......................................................................................................... 26 Use Aux Bus ................................................................................................................ 26 PGM Reentry (PGM XPT) ............................................................................................ 26 Timing Delay ................................................................................................................ 26 Enabled ....................................................................................................................... 27 Separate Preview Switcher.................................................................................................. 27 Device File ................................................................................................................... 27 Port .............................................................................................................................. 27 RVTR ........................................................................................................................... 27 PGM ............................................................................................................................ 27 Timing Delay ................................................................................................................ 27 F1-F2 ........................................................................................................................... 28 Audio Preview...................................................................................................................... 28 E-E (VTRs only) ........................................................................................................... 28 Use Mixer..................................................................................................................... 28 Record Confidence ...................................................................................................... 28 Timing Delay ................................................................................................................ 28 Enabled ....................................................................................................................... 28 5. Menu Bar 29 5.1. File ....................................................................................................................................... 29 New Timeline ....................................................................................................................... 29 Open Timeline ..................................................................................................................... 29 Save Timeline ...................................................................................................................... 30 Save Timeline As … ............................................................................................................ 30 Save Configuration .............................................................................................................. 31 Exit DiVA ............................................................................................................................. 31 5.2. Settings ............................................................................................................................... 32 ‘Display’ Options… .............................................................................................................. 32 Global Settings .................................................................................................................... 34 Jogger… .............................................................................................................................. 37 Contents iii Pre/Post Roll… .................................................................................................................... 39 Time Settings… ................................................................................................................... 40 Assignment Page ................................................................................................................ 41 Device Properties ................................................................................................................ 41 5.3. Edit Mode ............................................................................................................................ 43 Edit Mode On ...................................................................................................................... 43 Default Edit Mode (VTRs only) ............................................................................................ 43 PreRead (Read Before Write) .............................................................................................. 44 Auto Pickup After Edit .......................................................................................................... 44 Pickup Match to In ............................................................................................................... 44 Clear Tracks at Pickup ........................................................................................................ 45 Auto Select Record Track .................................................................................................... 45 Lock TLG to Edit Track ........................................................................................................ 45 Keep Outpoint...................................................................................................................... 45 Use Source Duration ........................................................................................................... 45 Record Off (Dummy Edit, Paper Edit) .................................................................................. 45 5.4. Modules............................................................................................................................... 46 Add Small or Large Module ................................................................................................. 46 Audio/Video Modules ................................................................................................... 46 Device Control Modules ............................................................................................... 46 Edit Modules ................................................................................................................ 47 Events .......................................................................................................................... 47 Keypad Modules .......................................................................................................... 47 Macros Modules .......................................................................................................... 47 Match Modules ............................................................................................................ 47 Search Modes Modules ............................................................................................... 48 Server Control Modules ............................................................................................... 48 Save Module Configuration ................................................................................................. 48 Load Module Configuration.................................................................................................. 48 5.5. Special................................................................................................................................. 49 Multi Cam ............................................................................................................................ 49 Auto Multi ............................................................................................................................ 49 Record Lock ........................................................................................................................ 50 Allow CC for K2 Edit (Closed Captions for K2/Summit Servers Only) .................................. 51 Allow Omneon Reference CLIPS (Omneon/Spectrum Servers Only) .................................. 51 Lock CPI .............................................................................................................................. 52 No External Reference ........................................................................................................ 52 5.6. Help ..................................................................................................................................... 53 Search… ............................................................................................................................. 53 DiVA Ops Manual ................................................................................................................ 53 Keyboard help ..................................................................................................................... 53 Turn Off Hover Messages.................................................................................................... 53 About ................................................................................................................................... 53 6. Tracks 55 Assigning a Track ................................................................................................................ 55 Selecting a Track ................................................................................................................. 55 Choosing Track Pages ........................................................................................................ 55 Second Page Data Warning ................................................................................................ 55 Track Status Display ............................................................................................................ 56 Track Button ........................................................................................................................ 56 The Timecode Display ......................................................................................................... 56 Active Track Status LEDs .................................................................................................... 57 6.1. Track Properties ................................................................................................................. 58 Participate ON-AIR Play/Rec ............................................................................................... 58 Participate On-Air Audio/Video ............................................................................................ 58 Control Enabled ................................................................................................................... 59 Record Slave (Omneon / Spectrum only) ............................................................................ 59 iv Contents Track Frame Rate................................................................................................................ 60 Allow TC Jump .................................................................................................................... 60 Hold Lock ............................................................................................................................ 60 Lock Window ....................................................................................................................... 60 Timer ................................................................................................................................... 61 Timecode LTC ..................................................................................................................... 61 DF (Drop Frame) ................................................................................................................. 61 More about NTSC Timecode. .............................................................................................. 61 Frames Offset ...................................................................................................................... 62 Preset .................................................................................................................................. 62 Color .................................................................................................................................... 62 6.2. Swap Tracks ....................................................................................................................... 62 Swap Tracks on the DiVA Keyboard.................................................................................... 62 Swap Tracks in the Assignment Page ................................................................................. 62 7. Events 65 7.1. Events Explained................................................................................................................ 65 Transition Type .................................................................................................................... 65 Transition Rate .................................................................................................................... 65 Speed .................................................................................................................................. 66 Audio Transition................................................................................................................... 66 Audio sub-Tracks................................................................................................................. 66 Reel ID / Clip Name & Path ................................................................................................. 66 Video Server Internal Transition .......................................................................................... 66 Video Server Internal Transition Rate .................................................................................. 66 Video sub-Track .................................................................................................................. 66 Audio sub-Tracks................................................................................................................. 67 Event OUT-time ................................................................................................................... 67 Disabled Audio sub-Track.................................................................................................... 67 Note ..................................................................................................................................... 68 Event IN-time ....................................................................................................................... 68 Hot Event(s) ........................................................................................................................ 68 Selected Event(s) ................................................................................................................ 68 7.2. Event Cursors ..................................................................................................................... 69 7.3. Record Events .................................................................................................................... 69 Loading a Clip on a Server Track ........................................................................................ 70 ‘Load Live’ for Omneon & Spectrum Servers ....................................................................... 71 Search the Clip List ............................................................................................................. 72 Loading a Clip on a VTR Track ............................................................................................ 72 Creating a Key, DVE, or other Crosspoint Event ................................................................. 73 8. Edit Mode 75 The VTR Black Track .......................................................................................................... 75 The Server Black Track ....................................................................................................... 75 The Record Event................................................................................................................ 75 Recorded Edits .................................................................................................................... 76 Directory Path & Clip Name / Reel ID .................................................................................. 77 Event IN-time ....................................................................................................................... 77 Event Out Time / Event duration .......................................................................................... 77 Status Icons ......................................................................................................................... 77 9. Keyboard Functions 79 9.1. Black Keys .......................................................................................................................... 79 ESC (Escape) ...................................................................................................................... 79 EXIT .................................................................................................................................... 79 Contents v MACRO ............................................................................................................................... 79 Learn ........................................................................................................................... 80 AutoMac....................................................................................................................... 80 Clear All ....................................................................................................................... 80 Load............................................................................................................................. 80 RUN X2 ............................................................................................................................... 85 PAGE UP ............................................................................................................................ 85 ARROW UP ......................................................................................................................... 85 PAGE DOWN ...................................................................................................................... 85 ARROW DOWN .................................................................................................................. 85 ARROW LEFT (Points Of Interest, POI) .............................................................................. 86 DEC (Decrement) ................................................................................................................ 86 ARROW RIGHT (Points Of Interest, POI) ............................................................................ 86 INC (Increment) ................................................................................................................... 86 9.2. White Keys .......................................................................................................................... 87 FASTLOG ............................................................................................................................ 87 FASTLOG SEARCH ............................................................................................................ 87 FASTLOG ADD ................................................................................................................... 87 FASTLOG MOD .................................................................................................................. 87 TL MARK ............................................................................................................................. 87 NOTE .................................................................................................................................. 89 UNDO .................................................................................................................................. 89 REDO .................................................................................................................................. 89 9.3. Magenta Keys ..................................................................................................................... 90 MATCH EDIT TRACK.......................................................................................................... 90 MATCH ALL ........................................................................................................................ 90 MATCH SOURCE ............................................................................................................... 91 TAKE ................................................................................................................................... 91 MATCH MENU .................................................................................................................... 91 Match to Device Position ............................................................................................. 92 Match to Device IN Time .............................................................................................. 92 OUT = Matched Event OUT ......................................................................................... 92 OUT = Original Rec OUT ............................................................................................. 92 Use Matched Event Duration ....................................................................................... 92 Use default Event Duration .......................................................................................... 92 Open Ended to Rec Reel Out ...................................................................................... 92 9.4. Light Green Keys................................................................................................................ 94 CUT ..................................................................................................................................... 94 DISSOLVE .......................................................................................................................... 94 Video Effects................................................................................................................ 95 M/E Drop Down Menu .................................................................................................. 95 Bkgd A ......................................................................................................................... 95 Wipe # ......................................................................................................................... 95 Reverse ....................................................................................................................... 96 Auto N-R ...................................................................................................................... 96 Key Bus ....................................................................................................................... 96 Key Priority .................................................................................................................. 96 Key Options ................................................................................................................. 96 Transition IN ................................................................................................................ 96 Transition Out .............................................................................................................. 96 Cut Out ........................................................................................................................ 97 Out Same As In ........................................................................................................... 97 Audio Follows Video .................................................................................................... 97 MEM ............................................................................................................................ 97 Learn ........................................................................................................................... 97 Recall ........................................................................................................................... 97 Add Effect .................................................................................................................... 98 User Select .................................................................................................................. 98 Force Trans ................................................................................................................. 98 vi Contents Force Run .................................................................................................................... 98 Set Forward ................................................................................................................. 98 SRVR (Server Transitions) .................................................................................................. 98 WIPE, ................................................................................................................................ 100 Set Forward ............................................................................................................... 100 Show/Hide Wipes....................................................................................................... 101 Fire Wipe ................................................................................................................... 101 KEY ................................................................................................................................... 101 Manual Select ............................................................................................................ 101 Fill Bus ....................................................................................................................... 102 Matte .......................................................................................................................... 102 Manual Select ............................................................................................................ 102 Fill Bus ....................................................................................................................... 102 Auto Select ................................................................................................................ 102 Source Bus ................................................................................................................ 102 Set As Default ............................................................................................................ 103 MEM .......................................................................................................................... 103 Add Effect .................................................................................................................. 103 User Select ................................................................................................................ 104 Force Trans ............................................................................................................... 104 Force Run .................................................................................................................. 104 Recall ......................................................................................................................... 104 Learn ......................................................................................................................... 104 9.5. Light Blue Keys ................................................................................................................ 105 GPI - General Purpose Interface ....................................................................................... 105 GPI 1 - GPI 8 ............................................................................................................. 105 Pulse Width................................................................................................................ 106 Offset ......................................................................................................................... 106 Remove All GPI ......................................................................................................... 106 Enable all GPI ............................................................................................................ 106 Show Lines ................................................................................................................ 106 Fire Now .................................................................................................................... 106 Setting a GPI Trigger on the Timeline ........................................................................ 106 Record Tally ............................................................................................................... 107 Moving a GPI ............................................................................................................. 107 Properties... ............................................................................................................... 107 Delete Marker! ........................................................................................................... 108 Delete All TL Markers! ............................................................................................... 108 Select All Markers ...................................................................................................... 108 Deleting GPIs............................................................................................................. 108 Ripple GPIs................................................................................................................ 108 Select GPI Range ...................................................................................................... 108 PEGS ................................................................................................................................ 109 Add ............................................................................................................................ 109 Delete ........................................................................................................................ 109 Pressing Delete deletes the currently selected PEG. ................................................. 109 Set Time .................................................................................................................... 109 Tracking ..................................................................................................................... 109 Fire ............................................................................................................................ 110 On .............................................................................................................................. 110 Command .................................................................................................................. 110 Time ........................................................................................................................... 111 Ref ............................................................................................................................. 111 Note ........................................................................................................................... 111 Adding Commands to the Command List ................................................................... 111 Removing Commands from the Command List.......................................................... 112 Properties .................................................................................................................. 112 Delete TL PEG ........................................................................................................... 112 Delete All TL PEGS ................................................................................................... 112 Contents vii Select All TL PEGS .................................................................................................... 112 Examples of Valid PEGS Commands ........................................................................ 113 PEGS Strings Commands.......................................................................................... 113 To fire a String PEG: .................................................................................................. 114 More About PEGS ..................................................................................................... 115 ASSIGN ............................................................................................................................. 115 HELP ................................................................................................................................. 116 WW REW ........................................................................................................................... 116 W REW ............................................................................................................................. 116 FF XX............................................................................................................................... 116 FF X .................................................................................................................................. 116 PLAY X ............................................................................................................................. 116 W PLAY ............................................................................................................................. 117 STOP................................................................................................................................. 117 W SRCH ............................................................................................................................ 117 SRCH X ............................................................................................................................ 117 SPEED .............................................................................................................................. 118 Speed Ramps or Cuts................................................................................................ 120 Using the Speed Dialog ............................................................................................. 120 Set/Add ...................................................................................................................... 120 Get Value ................................................................................................................... 120 Ramp ......................................................................................................................... 120 Lock Source Position ................................................................................................. 120 Use TSO .................................................................................................................... 120 Auto Fill ...................................................................................................................... 121 Control Points Move with Source Time ...................................................................... 121 Copy .......................................................................................................................... 121 Paste ......................................................................................................................... 121 All Points .................................................................................................................... 121 Clear All ..................................................................................................................... 121 Clear Quick Speed Entries ......................................................................................... 121 FILL (Fit & Fill .................................................................................................................... 121 9.6. Light Purple ...................................................................................................................... 123 CLIP LIST .......................................................................................................................... 123 DELAY............................................................................................................................... 123 NL INS ............................................................................................................................... 123 RIPPL (NL INS) ................................................................................................................. 123 NL DELETE ....................................................................................................................... 124 RIPPL (NL DEL) ................................................................................................................ 124 MOVIE (Make Movie) ........................................................................................................ 124 OPTIMIZE ......................................................................................................................... 124 9.7. Orange Keys ..................................................................................................................... 125 SEP EVENTS .................................................................................................................... 125 ADD EVENT ...................................................................................................................... 125 GAPS (Fill Gaps) ............................................................................................................... 126 DELETE EVENT................................................................................................................ 126 Delete a Group of Events on a Track ......................................................................... 126 Delete All Events on All Tracks .................................................................................. 126 DELETE TRACK ............................................................................................................... 127 KEEP TRACK .................................................................................................................... 127 TOGGLE EVENT............................................................................................................... 127 TRIM IN ............................................................................................................................. 127 Trimming Events Using the Mouse ............................................................................ 128 Slip an Event .............................................................................................................. 128 Slide Events ............................................................................................................... 128 MOD IN (Trim IN) .............................................................................................................. 128 TRIM OUT ......................................................................................................................... 129 Trimming Events Using the Mouse ............................................................................ 129 Slip an Event .............................................................................................................. 129 viii Contents Slide Events ............................................................................................................... 129 MOD OUT (Trim OUT)....................................................................................................... 130 OPEN END ........................................................................................................................ 130 ALL (OPEN END) .............................................................................................................. 130 TRANSFER TC ................................................................................................................. 130 TC/CTL .............................................................................................................................. 131 DURATION ........................................................................................................................ 131 Backtiming Event Durations ....................................................................................... 131 MOVE EVENT IN-point TO THE TLG ................................................................................ 131 CUE THE CPI TO THE TLG .............................................................................................. 132 CUE ALL DEVICES CPI TO THE TLG .............................................................................. 133 MOVE EVENT ................................................................................................................... 133 Move an Event by a specific amount:......................................................................... 133 Move an Event using the Mouse ................................................................................ 133 MOVE TLG ........................................................................................................................ 133 Move the TLG to a Specific Timeline Location ........................................................... 133 Move the TLG on the Timeline by a Specific Amount................................................. 133 9.8. Light Orange Keys ........................................................................................................... 135 LOCK................................................................................................................................. 135 LOCK (partially) ................................................................................................................. 135 Participate OnAir Play/Record ................................................................................... 135 Participate OnAir Audio/Video .................................................................................... 136 Control Enabled ......................................................................................................... 136 GANG ................................................................................................................................ 136 LINK .................................................................................................................................. 136 TAG ................................................................................................................................... 137 ALIGN................................................................................................................................ 138 9.9. Yellow Keys ...................................................................................................................... 140 SET IN ............................................................................................................................... 140 MOD IN (set IN) ................................................................................................................. 140 SET OUT ........................................................................................................................... 140 MOD OUT (Set OUT) ........................................................................................................ 140 MARK IN ........................................................................................................................... 141 MOD IN (Mark IN).............................................................................................................. 141 MARK OUT ....................................................................................................................... 141 MOD OUT (Mark OUT) ...................................................................................................... 141 MARK IN TL ...................................................................................................................... 141 MOD IN (Mark IN TL) ........................................................................................................ 142 MARK OUT TL .................................................................................................................. 142 9.10. Red Key ........................................................................................................................... 143 RECORD ........................................................................................................................... 143 MANUAL (Record) ............................................................................................................. 146 VTR Crash Record ................................................................................................. 146 9.11. Pink Keys ........................................................................................................................ 147 AUTO ASSEMBLE ............................................................................................................ 147 Remove Other TL Events .......................................................................................... 147 Ignore R-Marks .......................................................................................................... 147 Select All EDL Edits ................................................................................................... 147 Mode A ...................................................................................................................... 147 Mode B ...................................................................................................................... 148 Assemble ................................................................................................................... 148 Cancel ....................................................................................................................... 148 Save Settings............................................................................................................. 148 From .......................................................................................................................... 148 Thru ........................................................................................................................... 148 Shortcut Keys .................................................................................................................... 148 Set and Clear R-Marks ...................................................................................................... 149 Set ............................................................................................................................. 149 Clear .......................................................................................................................... 149 Contents ix All Edits ...................................................................................................................... 149 From .......................................................................................................................... 150 Thru ........................................................................................................................... 150 Shortcut Keys ............................................................................................................ 150 The Auto Assembly Track.................................................................................................. 150 R-MARK ............................................................................................................................ 150 REPLAY ............................................................................................................................ 151 RECALL ............................................................................................................................ 151 PREVIEW .......................................................................................................................... 151 PREVIEW TL ..................................................................................................................... 151 9.12. Blue Keys ........................................................................................................................ 152 AUDIO-ONLY EVENT ....................................................................................................... 152 VIDEO-ONLY EVENT ....................................................................................................... 152 AUDIO SUB-TRACKS ....................................................................................................... 152 LEVEL ............................................................................................................................... 152 ADDITIVE .......................................................................................................................... 153 SPLIT ................................................................................................................................ 153 Creating a Split Event ................................................................................................ 153 The Split Dialog ......................................................................................................... 155 Select ......................................................................................................................... 155 Reset ......................................................................................................................... 155 Global ........................................................................................................................ 156 Keyframe ................................................................................................................... 156 TBC CONTROL (VTRs only) ............................................................................................. 157 SWITCHER OFF ............................................................................................................... 158 MIXER OFF ....................................................................................................................... 158 9.13. Green Keys ..................................................................................................................... 159 EDIT TRACK ..................................................................................................................... 159 T1-T12 (optionally T2.1-T2.12) .......................................................................................... 159 SWAP TRACKS ................................................................................................................ 159 10. Edit Mode 161 10.1. The Edit Record Track ................................................................................................... 161 Assigning the Server Edit Record Track ............................................................................ 161 Assigning the VTR Edit Record Track ............................................................................... 161 10.2. Reel ID (VTRs Only) ........................................................................................................ 175 Assigning a Reel ID ........................................................................................................... 175 Recalling a Reel ID ............................................................................................................ 175 Show Reel ID .................................................................................................................... 175 11. FastLog Database 177 11.1. FastLog Table View ........................................................................................................ 177 Media ID ............................................................................................................................ 178 Clip Name .......................................................................................................................... 178 Shot ................................................................................................................................... 178 Description ........................................................................................................................ 178 Keywords........................................................................................................................... 178 A/V .................................................................................................................................... 178 TC In.................................................................................................................................. 178 Duration ............................................................................................................................. 179 TL Time ............................................................................................................................. 179 Rate ................................................................................................................................... 179 TC Type............................................................................................................................. 179 Dev Name ......................................................................................................................... 179 Class ................................................................................................................................. 179 Device ............................................................................................................................... 179 x Contents IP Address ......................................................................................................................... 179 Media Format .................................................................................................................... 179 Shot Date .......................................................................................................................... 179 Import Date ........................................................................................................................ 179 Imported By ....................................................................................................................... 179 Project ............................................................................................................................... 179 ShowName ........................................................................................................................ 180 Bin ..................................................................................................................................... 180 Client ................................................................................................................................. 180 Producer ............................................................................................................................ 180 Director .............................................................................................................................. 180 Location ............................................................................................................................. 180 Camera.............................................................................................................................. 180 Record ID .......................................................................................................................... 180 TC Out ............................................................................................................................... 180 Project ID........................................................................................................................... 180 Tenant ID........................................................................................................................... 180 Group Num ........................................................................................................................ 180 11.2. The Search Function ...................................................................................................... 180 11.3. The Mount Function ....................................................................................................... 181 11.4. The FastLog Data Entry Dialog ..................................................................................... 182 11.5. The FastLog Modify Dialog ............................................................................................ 182 12. Omneon/Spectrum Server TechNote 183 12.1. Omneon / Spectrum Server Intro .................................................................................. 183 12.2. DiVA Setup ...................................................................................................................... 183 12.3. Spectrum Directories ..................................................................................................... 184 12.4. Playback and Record Timing ........................................................................................ 187 12.5. Protecting and recovering your work ........................................................................... 193 12.6. Record Slaves................................................................................................................. 193 13. K2/Summit Server TechNote 197 13.1. K2 & Summit Server Intro .............................................................................................. 197 1 1. CONVENTIONS USED IN THIS MANUAL Single keystrokes shown in the body of the text will be shown in uppercase, bold, and in brackets. For example: [ASSGN]. All keystrokes are understood to be specific to the DiVA keyboard unless otherwise marked. Shifted keystrokes shown in the body of the text will be shown in uppercase, bold, in brackets and Italicized. The [SHIFT] key is to be held down while a second key is pressed. When so, it is always shown before the second key to be pressed. For example: [SHIFT][ASSGN]. All keystrokes are understood to be specific to the DiVA keyboard unless otherwise marked. Mouse clicks shown in the body of the text are for use on the DiVA GUI, and will be shown in brackets preceded by [Click] for a left click, [Right Click] for a right click or [Click][Click] for a double left click. For example: [Click][ASSGN]. All mouse clicks are understood to be specific to the DiVA GUI unless otherwise marked. Instructions shown in mixed Upper and Lower Case text contained within {Braces} are specific to the DiVA Menu Bar. For example, to open a file you would click on: {Menu Bar/File/Open}. When keys are to be pressed in sequence they are separated by a comma. For example: [SET IN],[2],[0],[00],[ENTER]. Some commands require a keystroke to be pressed twice in a row in fast succession. These keystrokes are shown without commas. For example: [PLAY][PLAY] (pressing [PLAY] twice quickly) or [SHIFT][PLAY][PLAY] (holding [SHIFT] and pressing [PLAY] twice quickly). The word Event, when preceded with an initial capital letter, refers to an editing Event, a Clip or other Source that has been placed on the DiVA Timeline. The term Current Event refers to the Hot Event (with red border) on the current Track. The term Selected Event refers to an Event that has been [clicked] on with the mouse. When an Event is selected, it will have a yellow border. The term Ghosted is used to describe a text field or status area within DiVA that has been ghosted or turned light gray to show that it has been disabled or is for information display only. The term At-rest describes the DiVA application when it is not in the Preview or Record Modes, and no devices are currently playing. The Timeline Guide is described graphically as TL, and refers to the alignment of Events or actions that happen at the Timeline Guide position. Revised on 18 March, 2014 2 Contents This Page intentionally left blank. Contents & Specifications 3 2. CONTENTS & SPECIFICATIONS 2.1. The Basic DiVA Software Bundle consists of the Following: This Editware "DiVA Editing System" Manual. The DiVA software supplied on CD or USB drive. USB Dongle (Security key for software options). A Microsoft Intelli-mouse (or equivalent). A QWERTY keyboard. 2.2. Customer Supplied System Recommendations: Windows 7 OS 32-bit or 64-bit (We use 64). Windows XP will work. Multi Core Processor (Core 2 Duo, Quad, dual core Xeon or better). 4 Gig of memory (minimum). Graphics Adapter to handle 1680x1050 or 1920x1080 resolution HDD: 128GB SSD or Larger HDD. Graphics Card: PCIe, 16-Lane nVidia or FirePro - dual monitor. 1 PCI 16 Lane for the Graphics card (We use ATI Radeon, but any PCIe dual monitor card would work). 1 PCI 4-lane or better for the AJA Corvid card. 1 PCI 32-bit 5V - The key in the slot must be at the far end from the connectors, toward the middle of the Motherboard. If a serial port card is used that works with a 3.3V PCI slot, then the 5V slot is not needed. However, some serial 422 cards do not come with cables or breakout connector panels that are compatible with SMPTE RS422 pinouts. Ethernet 100 or 1Gb USB ports for Keyboard, Mouse, and Dongle. 2.3. DiVA Hardware Options DiVA rack mount chassis and Motherboard (DHW-TK) AJA Sync/Reference video capture card (DHW-C1) with Multi-format SD/HD-SD window for on-screen monitoring. AJA Sync/Reference video capture card (DHW-C2) with Multi-format SD/HD-SD window for on-screen monitoring and built-in frame-accurate Preview Switching. Fastrack or DiVA Jogger Panel (DHW-JOG). USB GPI. 8 output; 5V source (DHW-GPI). . 8 serial I/O ports, 8 ports per card, (1m) connecting cables and a 19” 1- RU breakout panel per card (DHW-8P). 4 DiVA User's Guide 2.4. Editware Supplied DiVA Hardware Specifications Intel Core 2 Quad processor (or greater). 4GB of DDR RAM (or greater). 500GB (or greater) High Speed SATA hard disk. CD/DVD-RW Drive. 256MB (or greater) graphic acceleration card. 100Mb/1GB Base-TX, 32-bit auto configuring Ethernet. 400W, 110VAC or 220VAC auto-switching power supply. Editware reserves the right to substitute parts and components that meet or exceed those listed. Connecting the System 5 3. CONNECTING THE SYSTEM If you purchased your DiVA with the DiVA chassis, determine whether the editor is to be mounted in an equipment rack or placed on a console or tabletop. The DiVA chassis and optional Breakout Panel are both 19" rack mount ready. The following ‘Connections’ section is for connecting an Editware supplied hardware package. Width: 19 in. 48.26 cm Depth: 19 in. 48.26 cm Height: 5.25in. (3 RU) 13.33 cm Air is pulled from the front and expelled through the rear of the chassis. There are no sides, top, or bottom air vents. 3.1. Connections POWER Some chassis have two power switches; one switch on the back of the chassis, and the computer power-on switch on the front of the chassis behind the right side door. If your chassis has a rear power switch, and the switch is not ON, the computer power-on switch will not work. In normal operation, the front power-on switch is used to turn the computer on and off, and the rear power supply switch is left ON. MOUSE AND KEYBOARD Connect your keyboard and mouse in the corresponding ports on the rear of the chassis. A KVM type switch can be used if required. If you are using the DiVA USB control keyboard, a USB or wireless mouse can be connected directly into either side of the keyboard. The DiVA keyboard is considered a ‘USB hub’, and might not work well with some types of KVM switches. JOGGER PANEL Connect the serial Jogger into one of the available serial ports (DHW-8P & DSW-8P are required for serial control). To assign the RS-422 Jogger Port, on the Menu Bar [click] {Settings/Jogger…/Jogger Port Nbr} and enter the number of the Port 1-8 that the Jogger is plugged into. If available on your Motherboard, an RS-232 COM port can be used using a RS422 to RS232 converter. To assign a COM Port as the Jogger Port, on the Menu Bar [click] {Settings/Jogger…/Jogger Port Nbr} and enter -1 (minus one) if using COM 1, or enter -2 (minus two) if using COM 2. 6 DiVA User's Guide Before plugging in your Jogger Panel, assure that the supplied power supply matches your countries voltage! USB SOFTWARE SECURITY KEY (DONGLE) On the rear of the chassis are several USB ports. Install the supplied USB Software Security Key in one of these ports. Failure to install the Key will disable the DiVA software. Your DiVA chassis may have additional USB ports on the front, which should not be used for the Dongle unless absolutely necessary MONITOR(S) There are 2 (two) DVIports on the video card. Connect accordingly to the display monitors. The DiVA is configured to operate on monitors capable of 1920x1080 or 1680x1050 resolutions. ETHERNET If a connection to a LAN is desired, connect it to the RJ-45 Ethernet connector on the rear of the DiVA chassis. There is a setup required in order for Windows to recognize the Ethernet connection. Please refer to the Microsoft Windows instructions for network setup. SYNC If you are using one of the optional AJA Video Capture Cards, connect a color black reference or Tri Level Sync to the top BNC connector on the video capture card. The reference type will be auto-detected. See diagram below. When sync or reference is detected by the system, a green reference present indicator lamp is illuminated. The Sync indicator is located at the upper-right corner of the edit screen (shown below). For server only applications, DiVA does not require an external sync reference, but it is always good to have. DiVA is defaulted to use external sync for reference. To use Connecting the System 7 the internal computer clock as reference in a ‘server only’ environment, on the Menu Bar [click] {Special/No External Reference}. Even with servers, there is no guarantee of frame accuracy without an external reference. VIDEO DISPLAY INPUT SD or HD video output from your switcher, video server or VTR connects to the middle BNC input on the optional video capture card. VIDEO OUTPUT This function is not implemented at the time of this printing. GPI OUTPUT The optional USB-1024LS (DHW-GPI) has a physical capacity of 24 GPI I/O ports. 8 ports are available to be assigned as outputs for control by DiVA. designated B0 through B7 and correspond to pins 32 through 39. They are A GPI triggered by DiVA causes a momentary contact closure between the associated port and ground. Any of the GND pins 9, 12, 15, 17, 19, 29, 32 and 40 can be used. Pin 30, +5V, is not used. See GPI - GENERAL PURPOSE INTERFACE, Page 105 for additional information on GPIs. Pin Signal Name Pin Signal Name 1 Port C0 21 Port A0 2 Port C1 22 Port A1 3 Port C2 23 Port A2 4 Port C3 24 Port A3 5 Port C4 25 Port A4 8 DiVA User's Guide 6 Port C5 26 Port A5 7 Port C6 27 Port A6 8 Port C7 28 Port A7 9 GND 29 GND 10 n/c 30 PC+5V 11 n/c 31 GND 12 GND 32 Port B0 13 n/c 33 Port B1 14 n/c 34 Port B2 15 GND 35 Port B3 16 n/c 36 Port B4 17 GND 37 Port B5 18 n/c 38 Port B6 19 GND 39 Port B7 20 CTR 40 GND RS-422 BREAK-OUT PANEL Each Break-out Panel provides 8 serial ports for device control. These control ports use the RS-422 standard. These ports must be configured (assigned) before they will work. See Assignment Page - Page 17. Connect the Break-out Panel to the Chassis using the provided 62-pin cable, which attaches to the serial card on the rear of the chassis. The interconnect cable from the chassis 62-pin connector attaches to the Optional Serial Port Breakout Panel. All serially controlled devices then connect directly to the Breakout Panel. Not all devices are controlled serially. DiVA controls many devices via USB, over a network and via Ethernet. Check the DiVA or Fastrack Peripheral Setup Guide or the specific device’s manual for additional control information. DIVA DATA TRAP The Fastrack “Data Trap” has been made available to the user to better help you and us diagnose problems with the serial ports if and when they arise. The settings for the Data Trap can be found under the heading [Debug] in the FTConfig.ini file (C:\Diva\Runtime). If all the items mentioned are not present, you may add them as shown in the example below. [Debug] DataTrapPort=none Connecting the System 9 OmitTimeCodeTraffic=1 Logging=1 LogFilename=C:\Diva\Runtime\Log.txt ShowStatus=1 DataTrapPort= Replace "none" with the port you want to monitor, such as P1 or P5. You can only monitor 1 port at a time. "none" turns the data logger OFF. The Data Logger should be left off when not needed, as it does consume resources. OmitTimeCodeTraffic=1 Set this to =1 to make the Data Trap ignore timecode and status traffic, which is very prolific. Set this to =0 to make the Data Trap include timecode and status traffic, which is very prolific. You may leave this item ON, even if you are not actively trapping data. Logging=0 Set this to =1 if you want to log the data to a file for a hard copy. You can then email it to Editware if requested or keep for your files. You must first define a file name using LogFilename (next item). The file created is shareable, and you can open it to see what is there at any time. Note that the copy you open will not get updated with new data. To refresh the data, you will need to dismiss the open copy and open it again. This item should be set to 0 when not in use, as it does consume resources. LogFilename If you wish to log the trapped data to a file, specify a file name, including a full path, such as: LogFilename= C:\Diva\Runtime\datalog1.txt. Note: You do not need to change this setting to turn off logging. Turn off logging by setting Logging=0 above. ShowStatus If you set ShowStatus=1, then all status messages displayed in the Message Window will go into the log if ‘logging’ is enabled, even if no DataTrapPort=n is defined. This is a background task. 3.2. Start-Up and Shut-Down Sequence This section will give you information on how to start-up your DiVA system, load its software, and shut-down the system. TURNING ON THE DIVA SYSTEM After all connections are made to the DiVA chassis, turn on the power to your equipment in the following order: 10 DiVA User's Guide 1st: All controlled devices such as video servers, video switchers, audio mixers, VTR, etc. 2nd: Video and computer monitors including the monitor(s) for the DiVA. 3rd: The editor chassis. 4th: There may be two (model dependent) power switches on the editor chassis. First, turn on the power at the rear of the chassis, and then turn on the power on the front panel of the chassis. When the DiVA starts up, a typical BIOS boot process will be displayed on the monitor and the RAM test will be run. Do not interrupt this process. When the boot process is complete, Windows should go directly to the Windows Desktop or wait for you to enter your password. LOGGING ON A single account has been set up at the factory for the Administrator. User name: Administrator Password: <none> Log-in using the Administrator account. The system will initialize and display the Administrator's desktop. As with all Windows systems, the administrator should set up all necessary user accounts and desktops. STARTING DIVA On the desktop, you will find the DiVA icon. DiVA comes with 12-Tracks per page. This version of software is designed to be used with monitors whose native resolution is 1920 x 1080 or 1680 x 1050. The executable file will be installed automatically in the C:/Diva/Runtime folder when performing a full install of the DiVA software. [Double Click] on this icon to start the DiVA Application. If you double-click the icon more times than necessary before the application has loaded, you may receive this message: “DiVA may only run once at a time”. Please ignore it. INSTALLING SOFTWARE UPDATES Editware uploads revised software updates to our FTP site on a regular basis. These software updates are recognized by the ‘X’ in the title; for example, Divav1.1X15. The ‘X’ denotes that the file is an update and an executable file, and does not need to be installed, just copied to the Runtime directory. Connecting the System 11 Once downloaded and available at your DiVA computer, simply… 1 Drag the executable file into the C:/Diva/Runtime folder. 2 In the Runtime folder, create a ‘Shortcut’ to this software. 3 Drag or send the new shortcut to the Desktop. To be able to utilize prior Configuration Files, see Loading Configuration Files below. HOW TO UPGRADE A DIVA DONGLE IN THE FIELD. The DiVA ‘Dongle’ is a USB mini-drive that must be plugged into DiVA for DiVA to function. The Dongle specifies what options are enabled in your DiVA system. If you purchase a new feature, we must send you a new dongle with the new feature enabled, or we can modify your current dongle with a new code. Here is the procedure for retrieving and installing a new code to your current dongle: 1 Press [SHIFT][ALT][CTRL][D] simultaneously to see which features are currently enabled & disabled in your current dongle. The list of features will appear in the Message Window. 2 Press [Windows Key][E] to open Windows Explorer. 3 Navigate to C:/DiVA. 4 Open the Dongle Folder. You will find the following files: 5 [Double click] on the DiVA Upgrade.exe file. The Field Exchange Utility will open: 12 DiVA User's Guide 6 [Click] on Get Locking Code. 7 The top field will display the current code. For example: 8 [Click] on the button to save the code to the Clipboard. 9 Email the code to [email protected]; [email protected]; and [email protected]. 10 You will be sent a new code. Cut and paste this code into the Update License field and [click] Update License. For example: 11 Restart the DiVA Application. Connecting the System 13 LOADING CONFIGURATION FILES Upon start-up, the DiVA Screen will be displayed automatically and full screen. If you have created a Configuration File and wish to run it, you will have to modify the Properties of the default shortcut. To have the DiVA icon open and display the directory where Configuration files (<name>.ini) are stored: 12 On the Windows Desktop, [right click] on the DiVA icon. 13 Select “Properties”. The following window will open: 14 On the “Target” line, at the end of the path, add a space and then /d (space, forward slash, letter d) 15 Press [APPLY] then [OK]. Now, whenever the DiVA icon launches the Application, you will be presented with the directory of Config files to choose from. See Save Configuration, Page 31 for more information on Configuration Files. EXIT DIVA Press [EXIT] to close the DiVA Application and return to the Windows Desktop. To return to the Windows Desktop without closing DiVA, Hold down the Windows key á located on both the lower left and lower right of the DiVA keyboard, and press [D]. WINDOWS KEYS á … Hold down the Windows key á located on both the lower left and lower right of the keyboard between the [CTRL] and [ALT] keys and press… Windows key á [D] to go directly to the Desktop Windows key á [B] to bring up the Taskbar Windows key á [E] to open Windows Explorer 14 DiVA User's Guide Windows key á to open the Start Menu SHUTTING OFF THE COMPUTER If you wish to shut down the computer, after you have closed the DiVA Application, perform the following: 1 [Click] the Start menu located in the lower left corner of your screen. 2 [Click] Turn Off Computer... In the prompt that appears, [click] Turn Off. The Windows operating system will close itself down, and then automatically turn off the computer safely. Connecting the System 15 YOUR DIVA PORT & DEVICE ASSIGNMENT TABLE Use this Table to document your Assignments and Crosspoints. DEVICE MXR SWR JOG T1 T2 T3 T4 T5 T6 T7 T8 T9 T10 T11 T12 T2.1 T2.2 T2.3 T2.4 T2.5 T2.6 T2.7 T2.8 T2.9 T2.10 T2.11 T2.12 AUX PGM MODEL PORT V-XPT A-XPT COUNT COLOR 16 DiVA User's Guide Configuring DiVA 17 4. CONFIGURING DIVA 4.1. Assignment Page Press [ASSGN] to open the Assignment Page. Here you assign devices to Tracks, assign audio mixer and video switcher drivers and crosspoints, and enable and disable the device controllers of each Track, as well as other related items. Detailed setup information for many specific devices is found in the DiVA and Fastrack Peripheral Setup Manuals or online at www.editware.com. NAVIGATING THE ASSIGNMENT PAGE As long as you do not have a text field open, you may: Move your cursor up, down, left, or right by using the respective arrow keys. [Click] in any field using your mouse. Press [SHIFT][PG UP] or [SHIFT][PG DN] to select the next or previous Page. Use your mouse wheel to scroll through the Tracks and Pages. Settings for the Video Switcher, Audio Mixer, A/V Preview are also found on this page. The sections of this Dialog are explained below in Assigning Devices to Tracks. 18 DiVA User's Guide 4.2. Assigning Devices to Tracks Following is an explanation of the Assignment Page headings. Track This number corresponds to the Track number to which you are assigning a device or crosspoint. On When selected, enables control of the device assigned to this Track. With this box not selected, DiVA will not control the assigned device or its crosspoints. It is recommended that you have your ports assigned for a device before enabling this control. Device Name Enter a descriptive name for the device assigned to this Track. This name will be displayed in the Track's Status Display, and if the Menu Bar {Settings/Display Options…/Button Label} is enabled, the first 3 letters of this name will be displayed in a larger font on the associated Track button. Spaces and special characters are allowed here. Class Select the type of device you are assigning, such as a VTR, video server channel, CG, etc. [Click] on the right side of this field for a drop-down menu of currently available classes. If you are only assigning a crosspoint on a video switcher or audio mixer, select XPNT. To clear all selections on this Track, select none. All Panasonic VTRs should be assigned as Sony. Device Select the specific device you are assigning. For example, if the CLASS was SONY, the DEVICE might be a DVW-M2000, HDWD1800, etc. [Click] on the right side of this field for a drop-down menu of available devices in the selected Class. Some devices do not have their own drivers, and may use drivers designed for other devices. Configuring DiVA 19 Auto If this item is selected, DiVA will query an assigned Sony or Panasonic VTR, and if the device responds with a valid Sony code, DiVA will auto-select the correct driver. Note that this ability is not supported by all VTRs. Port [Click] on the right side of this field for the Port drop-down menu. If a device is assigned that is controlled through a serial connection, a list of all available serial ports is displayed. If the device assigned is a networked device, a list of hosts and their Channels may be displayed. If not displayed, you can [double click] in the field and manually enter the address of the networked device, paying close attention to the proper syntax and nomenclature for the device. Pool Devices of the same kind should be assigned the same Pool name. For example, all VTRs may be given the Pool name of VTR even though one might be a Sony DVW-500 and the other a Panasonic AJ-D950. One purpose for the "Pool" assignment is to prevent a device of one type, such as a VTR, from being improperly treated as another type of device, such as a server channel. Video Switcher Assign video crosspoints based upon the inputs to your video switcher. Audio Mixer Audio Mixer crosspoints are assigned based on the type of Mixer selected in the Audio Mixer Settings Dialog. For a digital audio mixer using Extended ESAM 2 protocol, enter the crosspoint number in the Start column as defined in the mixer. Other mixers might require you to define both the crosspoint number a device starts at and the number of faders to control for that device. 20 DiVA User's Guide For example, if you have the first four channels of audio on Track 1 and two channels on Track 2 you would enter: Track 1 - Start =1, Count = 4 Track 2 - Start =5, Count = 2 If you are using a Graham-Patten D/ESAM IV Mixer, see your mixer manual for more specific details on logical and virtual assignments. Color Here you can assign colors to the Track Buttons to better help quickly associate Tracks, groups of devices, etc. This ability can also be found in Track Properties, Page 58 4.3. Assignment Settings At the bottom portion of the Assignment Page are the Assignment Dialogs, where Audio Mixer, Video Switcher, and A/V Preview Switching each have their own Settings section. SWAP TRACKS You can exchange (swap) Source Assignments for an entire Track automatically. 1 Press [ASSGN] to open the Assignment Page. 2 On the Edit Screen Select the Track you wish to exchange with. In the following example we selected Track T2, Device Name B2. 3 In the Assignment Page, select the Track number you wish to exchange. In the following example we selected Track 3, Device Name C3. Configuring DiVA 4 21 [Click] the Swap Tracks button on the Assignment Page. The two sources in the Assignment Page and all their assigned values will be swapped. You can also swap Tracks directly on the DiVA keyboard. 1 Press the [T1]-[T12] key you wish to Swap. 2 Press [SWAP]. The word SWAP appears on the Button for that Track. 3 Press the [T1]-[T12] key you wish to swap with. The two sources and all their assigned values will be swapped. 4.4. Video Switcher Settings The options in this Dialog are explained below: 22 DiVA User's Guide Enabled (Communications Enabled) Selecting Enabled enables serial control over the video switcher. With this item not selected, there will be no communication to the video switcher. Default M/E The M/E selected in the Default ME drop-down menu will be the default control M/E for all Events placed on the DiVA Timeline. Alternatively, any Event can be programmed to trigger an effect on any M/E. This can be defined at the Event level in the Effects Dialog after an Event has been placed on the Timeline. To assign a different M/E to be affected by an Event command on the Timeline: 1 Select the Event you wish to be addressed by an M/E other than the Default M/E. 2 Press [CUT] or [DISS] or [KEY] or [WIPE] to open the Video Effects Dialog. 3 From the drop-down menu select the M/E you wish to use to control the selected Event. In this way, every Event can be controlled by a different M/E. See Video Effects, Page 95 for more information on the Effects Dialog. Device File This drop-down menu is used to select the appropriate .SWI (switcher driver) file for your switcher. For any new switcher protocol to properly load with the expected M/E's assigned (per the M/E mask in the .swi file), you must follow this procedure: 1 [Click] OFF Switcher Enabled. 2 Select your new Switcher Device File from the drop-down menu. 3 [Click] ON Switcher Enabled. OR Press [SHIFT][RESET] after you have selected the desired Device File from the drop-down menu and closed the Assignment Page. The Message area will show which ports were refreshed. Configuring DiVA 23 Port Select the serial port from the drop-down menu to be used to connect and control your switcher. Status Selecting Switcher Off disables crosspoint control over the video switcher while still allowing MEM, PEGS and Preview command data to pass from and to the switcher. This is the same as pressing [SWITCHER] on the DiVA Keyboard. Transition Delay Use this setting to adjust when the transition command is sent to the switcher. Enter a lower number to send the command later, or enter a higher number to send the command earlier. MEM Delay For switchers with memory capability, use this setting to adjust when the memory recall command is sent to the switcher. Enter a lower number to send the command later, or enter a higher number to send the command earlier. PEG Delay Use this setting to adjust when the PEGS command is sent to the switcher. Enter a lower number to send the command earlier, or enter a higher number to send the command later. See GPI - GENERAL PURPOSE INTERFACE, Page 105 for additional information on PEGS. Set Forward Pressing this button will add the transition type of the current Event to all following Events on the Timeline. For example, if the current Event is a :20 frame dissolve, pressing this button will make all Events later than the current Event on any Track become :20 frame dissolves. Send Commands Use this setting to define on which field commands are sent to the switcher. 24 DiVA User's Guide Enabled M/Es As many DiVA users may be sharing the resources of their switchers with control rooms or additional edit bays, the Enabled MEs section of the Video Switcher dialog gives the user the ability to enable which control area of the current switcher, as defined in the switchers’ .swi file, will be enabled for use by this DiVA. No command will be sent to any control area of the current switcher if disabled here first. In the image to the left, the DSK bus has been enabled for use by DiVA. M/E1 is available for use, but has been disabled, so no commands will be sent to that M/E. M/E2 through M/E7 are not defined in this switcher’s .swi file, so they are unavailable and ghosted. 4.5. Audio Mixer Settings The options of this Dialog are explained below: Audio Mixer Settings Enabled (Communications Enabled) Selecting Enabled enables serial control over the audio mixer. With this item not selected, there will be no communication with the audio mixer. Device File, Mixer This drop-down menu is used to select the appropriate .MIX (mixer driver) file for your mixer. For any new mixer protocol to properly load you must follow this procedure: 1 [Click] OFF Enabled. 2 Select your new Mixer Device File from the drop-down menu. 3 [Click] ON Mixer Enabled. Configuring DiVA 25 OR Press [SHIFT][RESET] after you have selected the desired Device File from the drop-down menu and closed the Assignment Page. The Message area will show which ports were refreshed. (RS-422 controlled devices only). Port, Mixer Select the serial port from the drop-down menu to be used to control your mixer. If control is via USB, select None. Status Selecting Mixer Off disables crosspoint control over the audio mixer while still allowing MEM and Preview command data to pass from and to the mixer. This is the same as pressing [MIXER] on the DiVA Keyboard. Transition Delay Use this setting to adjust when the transition command is sent to the mixer. Enter a lower number to send the command later, or enter a higher number to send the command earlier. MEM Delay For mixers with memory capability, use this setting to adjust when the memory recall command is sent to the mixer. Enter a lower number to send the command later, or enter a higher number to send the command earlier. Send Commands Use this setting to define on which field commands are sent to the mixer. 4.6. Preview Settings 26 DiVA User's Guide The options of this Dialog are explained below: PREVIEW SETTINGS ENABLED (Communications Enabled) Selecting Enabled enables serial control over the Preview device. With this item not selected, there will be no communication with the Preview device. VIDEO PREVIEW E-E (VTRS only) With EE Audio selected, the Record device (usually a VTR) will be used to monitor the preview and recording of audio via E-E switching circuitry in the VTR. By monitoring the Record device “Audio Out”, you should hear the record device in PB during the pre-roll, switch E-E to hear the device “Audio In” (usually the mixer program out), then switch back to the record device in PB at the edit OUT-point. E-E Audio can be used when video is being previewed on an Aux Bus, and E-E Video can be used when audio is being previewed in the Mixer. Use Aux Bus With Use Aux Bus and Enabled selected, Video Preview Switching is performed on a video switcher Aux Bus. In the Use Aux Bus text field, enter the desired Aux Bus number to be used as the Preview Switcher when the Edit Mode is enabled. When monitoring the assigned Aux Bus Out, the crosspoint for the record device should be selected during the pre-roll, the Aux Bus should switch to the Program Re-entry crosspoint (PGM XPT) at the edit IN-point (usually the on-air M/E) and see the output of the switcher, then the Aux Bus should switch back to the record device crosspoint at the edit OUT-point. PGM Reentry (PGM XPT) Enter the crosspoint on the Aux Bus where the Program Out appears (usually the on-air M/E). If this crosspoint number is not available for your particular switcher, patch or route the video switcher PGM OUT to an accessible crosspoint. Depending on the switcher, this re-routing may result in a frame delay. Timing Delay Enter the amount of delay, if any, needed for the switch between RVTR and PGM to be frame accurate. Enter a lower number to send the command later, or enter a higher number to send the command earlier. Configuring DiVA 27 Enabled Enables and disables preview switching on the Aux Bus. SEPARATE PREVIEW SWITCHER If you select a device from the Separate Preview Switcher Dialog and disable Use Aux Bus, an external switcher or router can be used as the preview switcher. 1 From the Device File drop-down menu, select the device you will use as a Preview Switcher. 2 From the Port drop-down menu, select the serial Port you have this device connected to. 3 In the RVTR field, enter the video crosspoint assigned to the Record device. This section may vary slightly in appearance depending on the preview switcher selected. 4 In the PGM field, enter the video crosspoint assigned to the Program Output of your switcher. This section may vary slightly in appearance depending on the preview device selected. When monitoring the preview switcher, you should see the RVTR during the pre-roll. At the edit In-point the preview switcher should switch to the PGM crosspoint, and switch back to the RVTR at the edit Out-point. Device File Select a device from the pull-down menu to be used as an external preview switcher. Port Select the port connected to the external preview switcher. RVTR Enter the crosspoint assigned to the R-VTR on the Preview Switcher. PGM Enter the crosspoint assigned to the PGM OUT on the Preview Switcher. Timing Delay Enter the amount of delay, if any, needed for the switch between RVTR and PGM to be frame accurate. Enter a lower number to send the command later, or enter a higher number to send the command earlier. 28 DiVA User's Guide F1-F2 Select the field in which the command to switch will be sent to the external preview switcher. AUDIO PREVIEW E-E (VTRs only) With EE Audio selected, the Record device (usually a VTR) will be used to monitor the preview and recording of audio via E-E switching circuitry in the VTR. By monitoring the Record device “Audio Out”, you should hear the record device in PB during the pre-roll, switch E-E to hear the device “Audio In” (usually the mixer program out), then switch back to the record device in PB at the edit OUT-point. E-E AUDIO can be used when video is being previewed on an Aux Bus, and E-E Video can be used when audio is being previewed in the Mixer. Use Mixer With Use Mixer and Enabled selected, Audio Preview Switching is performed through the audio mixer. When monitoring mixer out, you should hear the record device during the pre-roll, the PGM or mixer out at the edit IN-point, then switch back to the record device at the edit OUTpoint. Record Confidence With this item selected, the record output, rather than the PGM out, will continue to be monitored in the audio mixer during a recording. Timing Delay Enter the amount of delay, if any, needed for the switch between RVTR and PGM to be frame accurate. Enter a lower number to send the command later, or enter a higher number to send the command earlier. Enabled Enables and disables preview switching in the audio mixer. Menu Bar 29 5. MENU BAR The Menu Bar found at the top of the DiVA GUI, allows access to many system functions, features, settings and menus. 5.1. File [Click] {File} to open the File dropdown Menu. NEW TIMELINE Opening a new Timeline will delete the current Timeline, clear the screen, and reset the Timeline Guide to the time defined in the Menu Bar {Settings/Time Settings…/Timeline Guide Start}. You will be offered the following option: [Click] Yes to save current Timeline as an .L2D file before deleting it. [Click] No to load a fresh Timeline without saving the current Timeline. Press [UNDO] to reverse this action. [Click] Cancel to cancel this operation. OPEN TIMELINE This will allow you to load a previously saved L2D Timeline file. Opening an existing Timeline will remove the current Timeline and load the selected Timeline, but will not reset the Timeline Guide time. You will be offered the following option: 30 DiVA User's Guide 1 Select an L2D file from the list of files. 2 [Click] Open to replace the current Timeline with the new L2D file. SAVE TIMELINE This will allow you to Save the current Timeline. If you have not already saved a Timeline during the current session, you will be presented with the following option: 1 Enter a File name for this Timeline. 2 [Click] Save to save the current Timeline to the system drive as an L2D file. Once you have saved a Timeline with a File Name, each successive [click] on {File/Save Timeline} will save the current Timeline and overwrite the previous version with this same name without verification. The result of this action will be displayed in the Message window. For example: Saved C:\Users\User\Documents\Segment 2.L2D To save a new Timeline with a new name, see Save Timeline As … SAVE TIMELINE AS … This will allow you to save the current Timeline as an L2D file with a new File Name. This selection will always present you with the following option: Menu Bar 1 Enter a File Name for this Timeline. 2 [Click] Save. 31 The result of this action will be displayed in the Message window. For example: Saved C:\Users\User\Documents\Segment 2.L2D SAVE CONFIGURATION This allows you to save your current configuration to the system drive. A Configuration File is a copy of all current user settings and parameters. Save a Configuration File 1 [Click] {File/Save Configuration}. The "Save Configuration" Dialog box will open, allowing you to save the current configuration with any file name you choose. Spaces are not allowed in the name. The .ini extension will be added automatically. Modify or update an existing Configuration File 2 Make any changes to the current configuration. 3 On the Menu Bar [click] {File/Save Configuration} and Save the new configuration with the same name. The old settings will be overwritten by the new settings. It is recommended that after configuring DiVA to your specifications, you save a separate Configuration File as a back-up. EXIT DIVA [Click] to Exit the DiVA Application and return to the Windows Desktop. This is the same as pressing [EXIT] on the DiVA Keyboard. 32 DiVA User's Guide 5.2. Settings [Click] {Settings} to open the Settings dropdown Menu. ‘Display’ Options… Button Label Select this item to display the first three characters of the Device Name on the Track Button. The new labels will be larger and easier to read. A good way to utilize this function is to name the Device Name in the Assignment Page as in the example below: VT1 VTR 1 In this way the full name of the device is visible on screen, but the Track Label will display only VT1. Menu Bar 33 Display Duration (Instead of OUT-time) Display OUT-time (Instead of Duration) The displayed IN-point of an Event is always the IN-point, but the OUT-point of an Event can be displayed with the OUT-point timecode or with the Duration of the Event. When selected, Durations will be displayed for all Events. When not selected, OUT-times will be displayed for all Events. TL Mark Line Pressing [TL MARK] on the DiVA Keyboard will add a ‘marker’ to the Timeline. This marker can be used to mark a location to return to, and allows you to add a message at the marker point. Selecting this item will display a vertical yellow line coming down from the marker to more easily identify its location. Enabling the Edit Mark Line will have no effect on the performance of DiVA. See TL MARK, Page 87 for more information on TL Markers. EDL (Edit Decision List – Edit Mode Only!) Select this item to open the EDL Bins Window. See EDL Bin Soft Keys, Page 164 for additional information on EDL Bins. GPI Line Selecting this item will display a vertical yellow line coming down from the GPI marker(s) to more easily identify its location. Enabling the GPI Line will have no effect on the performance of DiVA. Reel ID (Instead of Device Name) Device Name (Instead of Reel ID) Selecting this item will display the Reel ID assigned to a device in the Event Dialog rather than the Device Name as defined in the Assignment Page. Timeline Guide Line Selecting this item will display a vertical yellow line coming down from the Timeline Guide (TLG) to more easily identify its location. Enabling the Timeline Guide Line will have no effect on the 34 DiVA User's Guide performance of DiVA. Show Video Display This will open the Video Capture Display Settings Window when the optional Video Capture Card is installed. This video window can be displayed in multi SD/HD formats. To change the format of the video display: 1 [Double Click] on the video display. You will be presented with the following option: 2 From the Drop-Down Menu select the desired format. 3 [Click] Set Format. Global Settings Menu Bar 35 Ask Before Over-Recoding (VDCP Only) VDCP protocol (Video Disc Control Protocol) does not permit two files with the same name to share a directory, nor does it allow writing over an existing file. Select this item If you create a new file with the same name as one that already exists in the server directory, and you wish the system to prompt you for your permission before it deletes the existing file. If this item is not selected, the original file will be deleted and replaced without a warning. Auto Search With this item selected, When you [click] on the beginning of an Event to the beginning of the Event. , the CPI cues When you [click] on the end of an Event the end of the Event. When you [TRIM IN] an Event, the Event is trimmed and the CPI cues to the new IN-point of the Event. When you [TRIM OUT] an Event, the Event is trimmed and the CPI cues to the new OUT-point of the Event. When you [SET IN] an Event, the time is entered and the CPI cues to the new IN-point of the Event. When you [SET OUT] an Event, the time is entered and the CPI cues to the new OUT-point of the Event. the CPI cues to See W SRCH, Page 117 for more information on Search. Live Commercial Playback With this item selected, the Live Venue Commercial Playout feature is enabled. This application is designed to facilitate the playout of commercials during a live event, where it is not known when the commercial playout will begin, or when they will need to return to the live feed. 1 Enable Live Commercial Playback. 2 Select a Track to assign as the REMOTE source. 3 Assign the REMOTE Track as Class XPT. 4 Assign the appropriate audio and video crosspoints for the REMOTE. 5 On the server Track to be used for commercial playback, mount the commercials back-to-back. 36 DiVA User's Guide DiVA selects a remote feed on a router or switcher (such as a sporting event remote truck), and at the command of the director, the operator will press the [PVW] key that will switch the router from the remote crosspoint to the commercial crosspoint(s), and automatically and simultaneously play out a string of commercials in a pre-defined order from a video server(s). At any time during the playout of the commercials, the director can call for a return to the remote location, and at the push of the [AllSTOP] key on the DiVA keyboard, the DiVA will, at the end of the currently airing spot, automatically select the remote crosspoint on the router or switcher and stop the commercial playout. The operator can then rearrange commercial spots on the DiVA timeline or just rearm the system and wait for the next command to begin the next sequence playout. Safeguards are built into the application to keep the DiVA operator from accidentally changing a crosspoint during the airing of the commercials, or changing a crosspoint while prepping the next sequence of commercials. Pre-Read Auto Off When the Record Event is in the ‘PRE-READ’ mode, you have the choice of remaining in this mode after an edit is completed or to have this mode return to the default mode for this Track. When selected, the Pre-Read mode will be turned OFF after each edit. What is Pre-Read? Pre-Read is a feature of some videotape recorders and video servers, that play back the video and/or audio signal off of the tape or clip before it reaches the record heads. The signal is then sent to an external switcher for modification, and then the modified signal is sent back to the record heads so that it can be re-recorded onto the tape in its original position. This basically allows you to transition from or to the Record Track, or add titles or effects directly onto the video on the Record Event. Ripple The Ripple function allows for the moving or deleting of any portion of an edit or Timeline, without leaving a gap and without disrupting the sequence and relationship of all following Events on the Timeline. With this item selected, Ripple will be enabled and RIPPLE ON will be displayed in the status area at the top of the DiVA screen. In the following example, the second Event in a sequence of four Menu Bar 37 Events has been deleted. Ripple is OFF, so a gap is left and all subsequent Events are left as they were. In the following example, the second Event has been deleted again, only now Ripple is ON, so no gap is left and all subsequent Events are “pulled-up” while still maintaining their prior relationship to each other. Ripple does not apply to Events that have been ‘cut’, only to Events that have been ‘deleted’.. Ripple Selected Events Manually Even with the Ripple function turned OFF, Events can be rippled if they are Selected. A Selected Event is one that has been [Clicked] and has a yellow border. When you drag a Selected Event, all other Selected Events are moved accordingly. To select multiple Events, see Selected Event(s), Page 68 for more information on Selecting multiple Events. Ripple Auto Off With Ripple Auto Off selected, the Ripple feature will be turned OFF as soon as the mouse is released after each use. Double Allstop With this item selected, in order to stop any playout or recording, DiVA will require that [ALLSTOP] be pressed twice and in quick succession; that is, [ALLSTOP][ALLSTOP]. JOGGER… Here is where your Jogger settings and assignments are found. You will be presented with the following options: 38 DiVA User's Guide Disable Jogger Record Disables the RECORD feature from being initiated at the Jogger Panel. This prevents the accidental sending of a Record command to a device while jogging or shuttling. Jogger Port Number (Serial control only) To assign the RS-422 Jogger Port, enter the number of the Port 1-8 that the Jogger is plugged into. If available on your Motherboard, an RS-232 COM port can be used using a RS422 to RS232 converter. To assign a COM Port as the Jogger Port, enter -1 (minus one) if using COM 1, or enter -2 (minus two) if using COM 2. Jogger Sensitivity User definable setting for the Jogger. Enter a lower number for less frames per revolution, enter a higher number for more frames per revolution. Values are relative, and do not represent a defined amount of fields or frames. Shuttle Sensitivity User definable setting for Shuttle speed. Enter a lower number for less frames per revolution, enter a higher number for more frames per revolution. Values are relative, and do not represent a defined amount of fields or frames. See WW REW, Page 116, for more shuttle options. Variable Sensitivity User definable setting for Variable speed. Enter a lower number for less frames per revolution, enter a higher number for more frames per Menu Bar 39 revolution. Many devices have a maximum allowed speed for Variable. Values are relative, and do not represent a defined amount of fields or frames. PRE/POST ROLL… Server Pre-roll Enter a time to be used as preroll for your Server channels. Enter ‘0’ for the minimal 3-5 frame pre-roll. This setting does not affect VTRs. VTR Pre-roll Enter a time to be used as the preroll for your VTRs. This setting does not affect servers. Enter [0] to use the default Preroll defined for this device in its .dev file. Enter <SS:FF> to specify a higher (longer) preroll than the one defined for this device in its .dev file. VTR Post-roll Enter a time to be used as the postroll for your VTRs. This setting does not affect servers. 40 DiVA User's Guide TIME SETTINGS… Frames/Sec This setting establishes the system or Timeline frame rate with these values. You will be presented with the following options: 24 = 24 fps 25 = PAL 29.97 = NTSC Drop Frame 30 = NTSC Non-drop Frame A restart of the DiVA application is required for changes to take effect. Countdown Timer The count-down timer counts backwards during the edit preview or record Preroll, showing the time remaining until the IN-point. At the INpoint, the count reverses, showing how much time has passed since the IN-point. You will be presented with the following options: Select Seconds to only display seconds SS: Select Frames to display seconds and frames SS:FF. Menu Bar 41 Auto Save Interval This setting defines how often, in seconds, the system will automatically save the current Timeline. The saved file is called Autosave.L2D, and its default location is C:\Diva\Runtime\EDL\. Each time the Timeline is Auto saved, it writes the current Timeline condition over the previously saved Autosave.L2D file. Auto Save is a background task, and only saves after changes have been made to the current Timeline. If the value is 0, Auto Save will be turned off. Timeline Guide Start The time entered here in hh:mm:ss:ff, defines the default location of the Timeline Guide at the start of the DiVA application, or whenever a new Timeline is created. To create a new Timeline, see New Timeline, Page 29. Event Duration (default) The time entered here in hh:mm:ss:ff, becomes the default duration of a new XPNT or VTR Event placed on the Timeline as a result of pressing [MARK IN]. VTR Record Start If a VTR is used as the Recorder in the Edit Mode, the timecode start time you wish to use as a default for that recorder will be entered here. ASSIGNMENT PAGE Opens the Assignment Page. See Assignment Page, Page 17 for more information on the Assignment Page. DEVICE PROPERTIES Select this item to change the properties of a device driver. The following Dialog will open: 42 DiVA User's Guide 1 Select the device driver that you wish to modify. 2 [Click] Modify. The following Dialog will open: 3 [Double Click] in the Value field that you wish to modify. 4 Make the desired change and press [ENTER] on the Keyboard. 5 [Click] Save to save the modified file with the same name as the original file, and automatically change the original file name to <original file>.bak… OR [Click] Save As to save the modified file with a new name (recommended). Menu Bar 43 5.3. Edit Mode [Click] {Edit Mode} to open the Edit Mode dropdown Menu. EDIT MODE ON Selecting this item changes Track 1 to be the Edit Track. When enabled, the Edit Track becomes the Editing Record Track for both linear and NLE editing. DEFAULT EDIT MODE (VTRS ONLY) When this item is not selected, the default record mode for a VTR Record Track will be INSERT. When in the Insert mode, the Record Event color will become RED. When this item is selected, the default record mode for a Record Track will be ASSEMBLE. When in the Assemble mode, the Record Event color will become MAGENTA. An INSERT edit edits audio and video only, recording onto an existing track or base already containing timecode and Control Track. Insert edits should be frame accurate and enter and exit cleanly on a vertical interval. An ASSEMBLE edit is different in that it edits audio, video, timecode and Control Track, recording onto either a virgin piece of tape or overwriting existing material. Assemble edits should be frame accurate and enter cleanly on a vertical interval, but will exit dirty, destroying several frames of Control Track. Most VTRs require that while performing Assemble edits, in order to ‘jam” the timecode and keep it continuous, the VTRs timecode settings be set to INTERNAL and REGEN. With video servers, there is no difference between Insert and Assemble mode, as all edits, linear or non-linear, will be performed as if they were in the Insert Mode. 44 DiVA User's Guide PREREAD (Read Before Write) Pre-Read is a feature of most digital videotape recorders that play back the video or audio signal off of the tape before it reaches the record heads, sends the signal to the switcher and mixer for processing, and then allows selection of the already recorded material as a source on the PGM out. When in the pre-read mode, the Record Event will be displayed ORANGE, and the word ‘Pre-read’ will be displayed in the Status area at the top of the screen. Some notes about pre-read: A pre-read edit on a VTR cannot be ‘un-done’. Depending on the server being used, when editing with DiVA and a server, a pre-read edit is almost always non-destructive. Unless you are using an aux bus for previewing, during a pre-read edit the Line monitor will display what was on the Record Event prior to the edit, and the results of the edit will not be visible until the edit is replayed. AUTO PICKUP AFTER EDIT A "pickup" point is the point at the end of an edit where the record device is terminated by pressing [RECORD] during the edit or by reaching a predetermined OUT-point. With Auto Pickup selected, at the termination of an edit DiVA will automatically perform an Auto Match to all "on-air" Events. When not selected, all sources are left "as is" at the termination of an edit, whether by defined OUT-point or by "bumping out" with the [RECORD] key. With Auto Pickup enabled, the update action on all sources at the termination of an edit will be determined by another Edit Mode item, Pickup Match to IN. PICKUP MATCH TO IN When this item is selected, and if Auto Pickup After Edit is also selected, at the termination of an edit by bump-out or by reaching the defined edit OUT-point, sources involved in the edit will update with the Source Event(s) In-points lining up with the new Record Event In-point, and with all Events open-ended. When not selected, and if Auto Pickup After Edit is selected, at the termination of an edit by bump-out or by reaching the defined edit OUTpoint, sources involved in the edit will update with the Source Event(s) OUTpoints lining up with the new Record Event IN-point Menu Bar 45 CLEAR TRACKS AT PICKUP With this item selected, and if Auto Pickup After Edit and Pickup Match to In are not selected, then all Tracks other than the Record Track will be cleared at the end of an edit. AUTO SELECT RECORD TRACK With this item selected, the Edit Record Track will always be selected at the initiation of a Preview or Record. When not selected, the currently selected Track will remain selected. LOCK TLG TO EDIT TRACK When this item is selected, when a device is put in any motion mode, the playhead (CPI) will remain married to the TLG and the Timeline will move with the CPI. When not selected, the CPI is allowed to play off the screen. KEEP OUTPOINT With this item selected, when an edit is ended by pressing [RECORD] before it reaches its defined out-point, the out-time will remain the same and only the In-time is updated. USE SOURCE DURATION When selected, the latest source outpoint on the Timeline without a gap will define the edit duration. When PREVIEW or RECORD is pressed, the Record Event Out-point will be automatically aligned to the latest sources out-point. When not selected, the Record Event will define the Edit duration. RECORD OFF (Dummy Edit, Paper Edit) When selected, edits will not be performed to tape or server, but will only be sent to the EDL. When checked, pressing [RECORD] sends a “paper edit” or "dummy edit" to the EDL. This function only applies to the Edit Mode. There will not be an R-Mark associated with this edit in the EDL, as it is a ‘Dummy Edit’. When an edit is performed with Record Off, the Record Track will display the edit in pink to distinguish it from an edit that has actually been performed. 46 DiVA User's Guide 5.4. Modules [Click] {Modules} to open the Modules dropdown Menu. ADD SMALL OR LARGE MODULE Add Command Modules (Key Modules) to the GUI for use with a mouse or touch screen. These widows are populated with related graphical function keys that perform the same functions as their keyboard counterparts, and can be used instead of, or in concert with, the DiVA keyboard. These windows are available in small and larger sizes. Some items found in the large modules may not be present in the small modules. In both cases you will be presented with the following options: Audio/Video Modules Device Control Modules Menu Bar Edit Modules Events Keypad Modules Macros Modules Match Modules 47 48 DiVA User's Guide Search Modes Modules Server Control Modules SAVE MODULE CONFIGURATION Selecting Save Modules will allow you to save the configuration of currently displayed Modules and their positions. You will be presented with the following: LOAD MODULE CONFIGURATION Selecting Load Modules will allow you to recall saved configurations of currently displayed Modules and their positions. You will be presented with the following: Select None to clear all modules from the screen. Menu Bar 49 5.5. Special [Click] {Special} to open the Special dropdown Menu. MULTI CAM MultiCam is a feature that allows the user to roll multiple devices in sync, usually "iso" reels, and switch the switcher via the Track select keys ([T1] [T12]) on the DiVA Keyboard rather than manually at the switcher. Each time a new Track is selected during a Preview or Record that has an Event currently involved in the Edit, that Event is separated. This allows the user to return to this point to perform a "fix", "slide" the Event(s) or otherwise modify what was previously performed, do a "pick-up", or even Auto-assemble the entire Timeline. In the following example, each press of a Track select key created a separation in the Event mounted on that particular Track. When active, the word MultiCam will be displayed in the status area at the top of the DiVA screen. You must turn this feature OFF before returning to normal linear or non-linear editing. AUTO MULTI When this item is selected, the Auto Multi feature will be activated. The word Auto Multi will be displayed in the status area of the screen. 50 DiVA User's Guide This feature works the same as MultiCam, but when the MultiCam process is ended; all overlaps will be automatically removed. Compare the following images: Without Auto Multi With Auto Multi Fast Cut FastCut allows the user to have multiple Tracks populated with server clips or VTR Events, and when Record or Preview is initiated, all Tracks except the Record Track and the selected Track are disabled for the edit. When this feature is enabled, the word ‘FastCut’ will be displayed in the Status area at the top of the screen. RECORD LOCK When enabled, this feature automatically disables control over all Record Tracks during a Recording, allowing the user to move to other Tracks and cue and play source devices without affecting the recordings. DiVA must be in the Edit Mode with Track 1 assigned as the primary recorder. 1 Enable Record Lock. When enabled, RecLock is displayed in the display area at the top of the DiVA screen to show that you are in the Record Lock Mode. 2 Mount as many secondary Record Events as desired on other Tracks 3 Select a PB Source Track and press [SHIFT][LOCK] to open the Track Settings Dialog. 4 De-select the option ‘Participate OnAir Play/Rec’. 5a. Repeat for each PB Source Track that will be controlled manually during Menu Bar 51 the edit. The Following icon should appear to the left of each Source Track: Notice that the lock is white and only partially closed. 5b. Press [RECORD] to start Recording. The following icon should appear to the left of each Record Track: Notice that the lock is black and is completely closed. 5c. Press [RECORD] to bump-out of the edit, send the edit to the EDL, and automatically re-enable the Record Tracks. 5d. Press [SHIFT][ALLSTOP] to abort the edit. 6 To be able to MATCH to a source that has been manually rolled into the show, once the source has been played and before ending the edit, with the Source Track selected press [MARK IN]. This is the TC number that will be placed in the EDL. Repeat for each source manually played. Sources used in the edit that are not partially disabled (see #4 & 5 above), will not be accessible for play-out during an edit, but their edit information will still go to the EDL. ALLOW CC FOR K2 EDIT (Closed Captions for K2/Summit Servers Only) With this item selected, Closed Captioning data will be allowed to pass through to the K2 Record channel. When not selected, CC Data is inhibited. ALLOW OMNEON REFERENCE CLIPS (Omneon/Spectrum Servers Only) Select this item if you wish DiVA to be able to create Reference Movies with Harmonic servers. Movies are new ‘clips’ created from a DiVA Record Track or from multiple clips placed back-to-back on a Source Track. There are three types of Movies that can be created with Harmonic Servers; Reference, Discrete and Embedded. A Reference Movie is the quickest Movie to make. It consists of just pointers to the original material or ‘Essence’ as Harmonic calls it. If you delete a Reference movie using a Spectrum Application such as ClipTool or ProDrive, the underlying media or essence used to create it will also be deleted. To delete a Reference Movie or clip without deleting the original essence, use Windows Explorer or consult your Spectrum documentation. 52 DiVA User's Guide See the Harmonic TechNote for more information on Reference, Discrete and Embedded Movies. LOCK CPI With this item selected, the CPI (Current Position Indicator) is locked to the Timeline, so the current CPI position is always located at the TLG. When this item is not selected, the CPI is running free and able to run off the screen. NO EXTERNAL REFERENCE For server only applications, DiVA does not require an external sync reference for synchronization purposes, but it is always good to have for reasons of accuracy. Without external reference, servers can be plus/minus one frame out of sync when playing out. This is not an issue when recording. DiVA is defaulted to use external sync for reference. To use the internal computer clock as reference in a ‘server only’ environment, select ‘No External Reference’. If you are using one of the optional AJA Video Capture Cards, connect a color black reference or Tri Level Sync to the top BNC connector on the video capture card. When sync or reference is detected, a green reference present indicator lamp is illuminated. The Sync indicator is located at the upper-right corner of the edit screen (shown below). Menu Bar 53 5.6. Help [Click] {Help} to open the Help dropdown Menu. SEARCH… Press Search… to search the internal Manual for a specific item. Coming soon! DIVA OPS MANUAL An interactive PDF of the DiVA Manual is available at the push of a button. Press [HELP] or {Help/DiVA Ops Manual} to select and open the DiVA Help Manual. You can download continuously updated versions of this file from our website using the following URL: http://www.editware.com/Diva_Ops_Manual-2014.pdf Once downloaded, place the “DiVAOpsManual.pdf” file in the C:/Diva/Runtime directory. KEYBOARD HELP Get Help for a KEY function on the DiVA keyboard. Coming soon! TURN OFF HOVER MESSAGES When this function is enabled, placing your cursor over a key on a Module or an item in the drop-down menu, will display a short informative about that particular item. For example: ABOUT Displays the software version number and other data regarding the loaded version of software. 54 DiVA User's Guide Tracks 55 6. TRACKS Each Track is assigned its own device or crosspoint. Events on a Track represent and display metadata related to that assigned device. ASSIGNING A TRACK See Assigning Devices to Tracks, Page 18. SELECTING A TRACK A Track can be selected in several different ways: Pressing the appropriate [T1]-]T12] Track key. [T1] will select Track 1, [T2] will select Track 2, etc. Note that Tracks 9-12 are [SHIFT] functions. [Click] on the Track [T1]-]T12] you wish to select. Press [ ] or [] to move up or down between [T1]-[T12]. Use the mouse-wheel to travel between [T1]-[T12], and optionally [T2.1][T2.12], When selected, the background color of the Track changes to a lighter shade and the Track button is highlighted. CHOOSING TRACK PAGES The Tracks on which you will work appear in groups of twelve. Each group of twelve Tracks is called a Page. To change from Page 1 to Page 2, press [Pg Up] or [Pg Dn]. DiVA comes standard with 12 Tracks on 1 Page. DiVA is optionally available in configurations of 24 Tracks on 2 Pages. The first Page is Page 1 and its Tracks are labeled 1 through 12. The second Page is Page 2 and its Tracks are labeled 2.1 through 2.12. You may also use the mouse wheel to scroll between pages. SECOND PAGE DATA WARNING If you have the optional second Tracks Page, an illuminated arrow at the top-left of the screen will let you know if there is data (Events) on the Page not currently being displayed. If you are on Page 1 and there is data on Page 2, you will see: 56 DiVA User's Guide If you are on Page 2 and there is data on Page 1, you will see: TRACK STATUS DISPLAY To the left of each Track is its Track Status Display. Timecode or Timer status from the device assigned to this Track is displayed here, as well as its Track number, current motion status, speed, and device name. TRACK BUTTON The number on the Button on the left end of the Track Status Display is the Track Number. The green [T1] - [T12] Source select keys on the keyboard correspond to these numbers. The Track number and its background will change colors depending on the situations below: If the Track “button” is surrounded by a white border, this indicates that this Track is selected. If the Track 1 “button” is red and has the letters EDIT (Edit Record Track) on it, the Track is assigned as the Edit Track. To change a Track from an Edit Track to a regular Track, on the Menu Bar [click] {Edit Mode/Edit Mode On} If the Track “button” is Black, Brown, Blue, Green, Magenta, Orange, Red, White or Yellow, these Tracks have been ‘branded’ with a distinct color for easier recognition. If there are three characters displayed on the Track Button, this means that Menu Bar item {Settings/Button Label} is selected. See Error! Reference source not found., Page Error! Bookmark not defined. for more on Colored Buttons. THE TIMECODE DISPLAY The Timecode display indicates more than just the current timecode of the device. The data displayed here is actual ‘status’ provided directly from the assigned device. Shows a 200% (2X) play speed. Tracks 57 Shows that the device is in the Jog mode. Shows that the device is in the Still mode. Shows that the device is in the Stop mode. Timecode is shown as HH:MM:SS:FF, where HH is hours, MM is minutes, SS is seconds, and FF is frames. A lower case play indicates a VTR is playing but not yet servo-locked. A Play with an initial capital letter indicates that the VTR is servo-locked. A PLAY with all capital letter indicates that the VTR is servo-locked and that Color Frame is enabled in the VTR (analog only). Video Servers will always display PLAY. Shows a 50% (.5x) play speed. The selected device has no, or improper, reference. There is no connection to the selected device. The VTR standby (head) is turned off. Device is in local control. ACTIVE TRACK STATUS LEDS Below the Timecode display are two LEDs, one is green and the other is red. Whenever a source device on this Track is involved in an Edit or Preview, the green LED is lit. Whenever a device on this Track is in record, the red LEDs lit. This red Active Track Status LED is high only when the device reports it is actually recording. When a yellow CTL is displayed, the source assigned to this Track is in Timer or Control Track mode. When CTL is not displayed, timecode of the current source is displayed. 58 DiVA User's Guide 6.1. Track Properties Pressing [SHIFT][LOCK] displays the Track Properties Dialog for the selected Track. You may also obtain this Dialog by [Right Clicking] anywhere on the Track outside of an Event and selecting Track Properties. The options for this Dialog are explained below: Participate ON-AIR Play/Rec If this item is not selected, the Track ID area will be ghosted, and the device assigned to this Track will not play or record during the preview, playout, or recording of the current Timeline edit. The Events on this Track will still control any audio or video crosspoints assigned to the device on this Track. The following icon will be displayed to the left of the Track button to show it is only partially enabled/disabled: Participate On-Air Audio/Video If this item is not selected, the device crosspoints assigned to this Track will not be selected on the audio mixer and video switcher during a preview, playout, or recording of the current Timeline edit. The following icon will be displayed to the left of the Track button to show it is only partially enabled/disabled: Tracks 59 Control Enabled Uncheck Control Enabled to disable a Track from being controlled. The following icon will be displayed to the left of the Track button to show it is completely disabled: To open the Track Properties Dialog and select partial enable/disabling of Tracks, press [SHIFT][LOCK]. To toggle complete enable/disabling of Tracks without opening the Track INIT Dialog, select a Track and press [LOCK]. Record Slave (Omneon / Spectrum only) This feature is designed to allow you to create and name a Record Clip on one or more server channels, start and stop the recording, and automatically have new Record Clips created using the same original names, but with incremental numeration*. For example; Original Record Clip Name=BOB. Subsequent Clip Name=BOB1. Next Clip Name=BOB2, and so forth. 1 Select the Omneon Track you wish to Record to. 2 Press [SHIFT][LOCK]. The Track Properties Dialog for that Track will open. 3 Check the Record Slave box. 4 Repeat for each Omneon Track you wish to Record to. dismiss the Track Properties Dialog. 5 Select a Track to mount a Record Clip. 6 Press [CLIP LIST] to open the Clip Browser. 7 Enter a name for the record clip in the New text field. 8 Check the Auto Name box. 9 Set your chosen suffix number in the spin box field. When done, 10 Enter your desired default Record Event duration in the Dur field. It is 60 DiVA User's Guide wise to make this duration longer than needed. For an explanation, see #19 below. 11 With the cursor in the Dur: field, press the [New] button on the right and the Record Event will be placed on the Track at the TLG. 12 Repeat on other enabled Tracks as desired. There is no need to close the Track INIT Dialog each time. DiVA will remember your desired name, suffix and duration for each additional Track. When done, dismiss the browser dialog. 13 Record when ready. To end the recording and create an auto pickup with the next Record Events: Press the [RECORD] button to terminate the edit before reaching the end of the Record Events. If the recording ends, or if you press [ALLSTOP], DiVA default behavior will occur. That is; the recording will end and no new Record Event will be created. When you “bump out”, DiVA will turn your old Record Events into Play Events, and automatically place new Record Events at the end of the old Record Events. The Timeline Guide will be automatically positioned at the new record in-point. Press [RECORD] again to repeat the process. Track Frame Rate These radio buttons define the Track frame rate and override the system setting for this Track. 30 - 30fps (NTSC) 25 - 25fps (PAL) 24 - 24fps (Film Rate / 24P HD) 60- 720p 60 TC fields ps (device dependent) DiVA must be restarted for this change to take effect. When this setting is different from the system setting in the Menu Bar {Settings/Global Settings/Frame Rate}, the Reel ID in the Track Status Area will be displayed in BOLD yellow. Allow TC Jump Select this item if your source timecode contains timecode jumps within the scope of an Event. Hold Lock If this item is selected, the frame accuracy of the device on this Track will be defined according to the Lock Window setting. Lock Window This value specifies the frame accuracy of the device on this Track. The value reflects how accurate, in frames, the synchronization tolerance is set. Tracks 61 For example, 0 is frame accurate; 1 is plus or minus one frame; etc. Timer With this item selected, DiVA will control this device by reading the Timer of the device rather than timecode. The Track Status Display will display a yellow CTL in the Status Area when in this mode. You may also toggle this ON and OFF by pressing [TC/CTL]. Timecode LTC Defaults the TC setting for this Track to be Longitudinal Time Code (LTC). Note that some video servers do not support recorded timecode. DF (Drop Frame) When this item is checked, the system has identified a Drop Frame Timecode flag from this device (NTSC only). When this item is not checked, the system has identified a Non-Drop Timecode flag from this device (NTSC only). More about NTSC Timecode. An absolute time used to identify a specific frame or address in a clip or VTR. Timecode is measured in hours, minutes, seconds, and frames, and in NTSC can be Drop Frame or Non-Drop Frame. An hour of NTSC video has 107,892 frames of video. 1-hour of timecode (NDF) has 108,000 frames. That is 108 frames longer than a real-time hour. In order to compensate for this difference, and to make a 1-hour show be a true 1-hour length and not 01:00:03:18, drop-frame timecode is used. Drop-frame timecode drops 2-frames (;00 and ;01) every minute except for the tenth minutes (1:10:00;00, 1:20:00;00, 1:30:00;00, etc.) for a total of 108 frames per hour (3;18). Note that Drop-frame timecode only drops the numbers that refer to the frames, and not the actual frames. Non-drop-frame timecode is displayed with a ( : ) colon between the seconds and frames. For example, 01:08:20:15. Drop-frame timecode is displayed with a ( ; ) semi-colon between the seconds and frames. For example, 01:08:20;15. 62 DiVA User's Guide Frames Offset This is used to compensate for frame delay through digital devices such as DVEs. Preset Some device types allow timecode and CTL to be set to a specific value. 1 In the Track Settings Dialog, select Timer. 2 Enter the desired timecode into the Preset field then [Click] the Preset button. The Preset Time will be sent to Timer 1 of the VTR. Presetting Timecode on a VDCP Record Event 1 Create a Record Event on a Track assigned to a VDCP encoder (Record) channel. 2 Type the desired time in HH:MM:SS:FF format. It will appear in the Numeric display field. 3 Press [SET IN]. The time will be transfered into the timecode area of the Record Event (Device Dependent). Color Here you can assign colors to the Track Buttons to better help quickly associate Tracks, groups of devices, etc. This ability can also be found in Track Properties, Page 58 6.2. Swap Tracks You can exchange (swap) Source Assignments for an entire Track automatically. Swap Tracks on the DiVA Keyboard 1 Press the [T1]-[T12] key you wish to Swap. 2 Press [SWAP]. The word SWAP appears on the Button for that Track. 3 Press the [T1]-[T12] key you wish to swap with. The two sources and all their assigned values will be swapped. Swap Tracks in the Assignment Page 1 Press [ASSGN] to open the Assignment Page. Tracks 63 2 On the Edit Screen Select the Track you wish to exchange with. In the example below, Track T2, Device Name B2. 3 In the Assignment Page, select the Track number you wish to exchange. In the example below Track 3 is selected. 4 [Click] the Swap Tracks button on the Assignment Page. The two sources in the Assignment Page and all their assigned values will be swapped. 64 DiVA User's Guide Events 65 7. EVENTS Clips are loaded based on the type of device assigned to a Track. When a clip is placed on the Track, it becomes an Event. 7.1. Events Explained When a clip from a server, VTR, or other source is placed on a Track, it becomes an Event. Each Event displays video and audio sub-Tracks, as well as related metadata and icons. Transition Type The Transition icon defines what type of transition will be performed by an external Mixer & Switcher when transitioning TO this Event. An means that the Event will be transitioned TO with a CUT. An means that the Event will be transitioned TO with a DISSOLVE. An means that the Event will be transitioned TO with a WIPE. If the Black portion of the transition icon is replaced by magenta, a video KEY will be transitioned. For example: , , . No Transition icon means that you have selected MANUAL for this Event In this case, no transition will be performed, allowing the user to manually transition. See CUT, Page 94 for additional information on Transitions. Transition Rate This is the rate at which an A/V transition will be performed by an external Audio Mixer & Video Switcher when transitioning TO this Event. The rate is displayed in SS:FF. 66 DiVA User's Guide Speed If an Event has a speed applied to it, the speed, in percentage of play speed, will be displayed here. If multiple speeds are applied to this Event, only the first speed will be displayed here. For example: a speed of 0.20 is 20% or 1/5 of 100% play speed. See SPEED, Page 118 for additional information on Speed. Audio Transition By default, when you program a transition, it is applied to both audio and video. If you program the audio transition rate or transition location to be different than the video, this icon is displayed to show that the audio and video are not in their default configuration. See DISSOLVE, Page 94 for additional information on A/V Transitions. Audio sub-Tracks This grouping of numbers reflects the audio sub-Tracks defined in the system .dev file for this device. When [A1-A12] are selected on the keyboard or GUI, the result is also applied to the current Event in two ways; 1) the audio sub-Track selected will toggle between green and grey, as shown in 12 of the Event graphic, and 2) the audio sub-Track number will be toggled on and off respectively as shown in 5 of the Event graphic. Reel ID / Clip Name & Path The Reed ID identifies either a name given to a reel mounted on a VTR device, or the clip name and path of a clip from a video server. See Assigning a Reel ID, Page 175 for additional information on assigning a Reel ID to a VTR, Video Server Internal Transition This is the type of video transition that will be performed by a Video Switcher internal to a GV Summit video server, when transitioning FROM this Event. See SRVR (SERVER TRANSITIONS), Page 98 for more information on Server Transitions. Video Server Internal Transition Rate This is the rate at which an A or V transition will be performed by an Audio Mixer & Video Switcher internal to a GV Summit video server, when transitioning FROM this Event. The rate is displayed in SS:FF. Video sub-Track This is the Video sub-Track. Press [VIDEO] to toggle this sub-Track ON and Events 67 OFF. When the video sub-Track is yellow, it is enabled. When enabled, the video XPT assigned to this Track will be switched during a Preview or Record. When the video sub-Track is grey, it is disabled. When disabled, the video XPT assigned to this Track will not be switched during a Preview or Record. Audio sub-Tracks These are Audio sub-Tracks. When an Event is a Player Source Event, each audio sub-Track is green and represents an audio input from the assigned source. In the previous example there are 4 audio sub-Tracks. Source Event sub-Tracks only affect the system output; that is, the mixer out, the switcher out, the source outs, etc. Press [A1-A12] to toggle the respective audio sub-Track ON or OFF. Press [SHIFT][AUDIO] to toggle between currently enabled sub-Tracks and no sub-Tracks. When an audio sub-Track is green, it is enabled. When enabled, the audio fader assigned to this sub-Track will be open during a Preview or Record. When an audio sub-Track is grey, it is disabled. When disabled, the audio fader assigned to this sub-Track will be closed during a Preview or Record. The amount of audio sub-Tracks within an Event is defined in the .dev file for the assigned device. For example: Diva/Runtime/Dev/SRW-5000.dev Event OUT-time This is the OUT-time of the current Event. This can be changed to show the duration of an Event by selecting on the Menu Bar {Settings/’Display’ Options/Duration}. The OUT- time of the Event can be changed by the [MARK OUT], [SET OUT] or [TRIM OUT] functions. Disabled Audio sub-Track This is an audio sub-Track that has been turned off or disabled. In this state, the audio fader assigned to this sub-Track will be closed during a Preview or Record. 68 DiVA User's Guide Note This is a note that can be attached to an Event. displayed with the edit in the EDL. The note will also be Event IN-time This is the IN-time of the current Event. The IN-time of an Event can be changed by the [MARK IN], [SET IN] or [TRIM IN] functions. HOT EVENT(S) A Hot Event is the current Event on a Track, and it is displayed with a red border. When commands such as Play, Stop, Trim In, or Trim Out are executed, they are directed to the Hot Event on the selected Track. An Event becomes a Hot Event by either [Clicking] on it, which also makes it the Selected Event, or by using the arrow keys to move to the beginning of the Event on the active Track. There can only be one Hot Event per Track, so if multiple Events are on the same Track, the Hot Event has the focus, and all keystroke commands will be directed to it. Each populated Track will have a Hot Event. SELECTED EVENT(S) A Selected Event is an Event that has been [Clicked] on. When an Event is selected, it is displayed with a yellow border. Selected Event(s) will additionally respond to functions such as Cut, Delete, Copy, or Paste. You may select multiple Events by holding down [CTRL] as you [Click] the Events. If one Event is already selected, you may select a range of Events by holding [SHIFT] as you [Click] the last Event you want selected; all Events in between will be selected. Performing these procedures again will de-select Events. Events 69 7.2. Event Cursors When dealing with Events, there are four locations on an Event where the cursor will change shape and function: When you ‘hover’ on an Event and see this cursor, it means that you are in the body of the Event. This allows you to ‘click & drag’ the Event to the left or right until it comes in contact with another Event. Dragging an Event will only change the location of the Event, and not any times. Pressing [UNDO] will reverse this action. When you ‘hover’ on an Event and see this cursor, it means that you are within the boundaries of the Event IN-point. This allows you to ‘click & drag’ the Event IN to the left or right until it comes in contact with itself or another Event. Dragging the Event IN will change the location of the Event IN, and the Event duration, but will not affect the IN-Time. Pressing [UNDO] will reverse this action. When you ‘hover’ on an Event and see this cursor, it means that you are within the boundaries of the Event OUT-point. This allows you to ‘drag’ the Event OUT to the left or right until it comes in contact with itself or another Event. Dragging the Event OUT will change the location of the Event OUT, and the Event duration, but will not affect the IN-Time. Pressing [UNDO] will reverse this action. When you ‘hover’ between adjoining Events and see this cursor, it means that you are on the ‘slip’ boundary of the Event. This allows you to ‘drag’ the mouse left or right and change the respective IN and OUT-points of both Events, where the cut will occur, while still keeping the Event relationships the same. Pressing [UNDO] will reverse this action. 7.3. Record Events When an Event is a Record Event, the sub-Tracks still represent video and audio, but they are different colors depending on the type of recording; Insert - The Event is RED. Assemble - The Event is MAGENTA. Pre-Read - The Event is ORANGE. Record Events can be created at any time on any Track. Once a clip is placed on a Track: 70 DiVA User's Guide Press [TOGGL EVENT]. Each successive toggle will change the Event from a GREEN PLAY Event, to a RED INSERT Event, to a MAGENTA ASSEMBLE Event, to an ORANGE PRE-READ Event. Note that on a video server, there is no difference between an Insert edit and an Assemble edit. LOADING A CLIP ON A SERVER TRACK 1 Select [T1] - [T12] to select the server Track where you will load your Clip. 2 Press [CLIP LIST] to display the Server Clip List. 3 [Click] the directory list button to select the desired directory (if your server supports more than one directory). The Directory list will display. 4 [Click] on the desired directory in the Directory. The selected directory and its Clip list will display. [Double Click] on the desired Clip… OR Events 71 …use the [UP ARROW] and [DOWN ARROW] keys and press [ENTER]. The entire Clip will load as an Event on the current Track aligned with the Timeline Guide. ‘LOAD LIVE’ FOR OMNEON & SPECTRUM SERVERS The ‘Load Live’ function allows you to mount and play clips that are currently being recorded onto other channels, and allows the clip(s) to play past the point that they were loaded; that is, the PB clip is automatically given a duration of 2 hours. 1 Press [ASSGN] to open the Server Clip Directory. Four new buttons have been added: Refresh – Refreshes the current directory. Before you load a PB clip that is currently recording, you must first refresh the directory for the clip to be visible and available in the clip list. Load Live – Loads the selected clip with a 2-hour duration, even if the clip is still recording. This clip will continue to play for the full 2 hours unless manually stopped. Load – Loads the selected clip with its actual duration. Close – Closes the dialog. 2 Click [Refresh] to refresh the current directory. 3 From the list of Clips, select the clip that you wish to load and play while it is still recording. 4 Click [Load Live]. The selected clip will be loaded on the selected Track. If you load a clip by mistake by [double-clicking] or by pressing [ENTER] rather than ‘Load Live’, select the PB Track and press [DEL]. Note that DiVA automatically disables ‘Participate OnAir Play/Rec’ and ‘Participate OnAir Audio/Video’. Notes about the ‘LOAD LIVE’ feature: X You can copy a clip that was loaded live and paste it to another Track, eliminating having to refresh the second Track. 72 DiVA User's Guide X Once devices have been put into RECORD and their Tracks disabled, the only way to delete an Event on a PB Track is to select the Track and press [DEL]. Search the Clip List 1 Type the name of the desired Clip in the Search text field. As you type in the name, clip names that match will be auto selected in the list. 2 Press [ENTER] to place the highlighted Clip on the Timeline at the TLG. Once selected and placed on the Timeline, the Clip name as you entered it will be stored in a saved history list. To access this list and load a Clip already in the list: 1 [Click] on the Search field Menu button. The drop down menu of previously loaded Clips is displayed. 2 Select the desired Clip and press [ENTER] to place the Clip on the Timeline at the Timeline Guide. LOADING A CLIP ON A VTR TRACK 1 Select [T1] - [T12] to select the VTR Track where you will load your first Clip. 2 Press [MARK IN] and an Event will appear on the Track. This Event represents information from the VTR. The default length of this new Event is the value set in the Menu Bar {Settings/Time Settings/Event Dur (default)}. See ‘Event Duration (default)’, Page 41 You may now edit this Event as you would edit any other Event. Events 73 CREATING A KEY, DVE, OR OTHER CROSSPOINT EVENT Character Generators With a Character Generator assigned to a Track, as in the example below, an Event for a CG may be placed on the Track, even if you are not controlling it through DiVA, and even if it is not a Deko. Pressing [MARK IN] with this Track selected will place an Event at the TLG representing your CG. Set the duration of this CG Event as you would for any Event. By default, CG Events will be a Key, and will have audio sub-Tracks turned OFF. With certain Character Generators, serial control is available. For additional information, see your Character Generator's TechNote in the DiVA Peripheral Setup Manual. Switcher and Mixer Crosspoints If you wish to call up a video switcher crosspoint, assign it in the Assignment Page as Class XPNT, and assign the desired crosspoint number. In this example the Track is named Bars & Tone, but any name is acceptable. Pressing [MARK IN] with this Track selected will place a Switcher crosspoint Event at the TLG. Set the duration of this Event as you would for any Event. 74 DiVA User's Guide Edit Mode 75 8. EDIT MODE The EDIT MODE is a special mode within DiVA that allows you to perform linear and non-linear editing with both VTRs and/or servers, onto a virtual ‘Black Track’, representing the boundaries of a theoretical reel of tape. THE VTR BLACK TRACK The Black Track is a black overlay on Track 1 when in the Edit Mode. This ‘Record Track’ represents a "videotape", and defines the start and end boundaries of that tape as defined by the user in the dialog that opens when you press [ASSGN] with the Edit Track selected, and when a VTR is assigned to the Track. This Black Track overlay is automatically created when mounting the media, and cannot be moved or removed except by redefining its parameters. Like a real record tape, throughout your edit session the black areas will represent un-recorded portions of your show. See Assigning the VTR Edit Record TRACK, Page 161. THE SERVER BLACK TRACK The Black Track is a black overlay on Track 1 when in the Edit Mode. This ‘Record Track’ represents a "Record Clip", and defines the start and end boundaries of that Clip. This Black Track overlay is automatically created when mounting the Record Clip, and cannot be moved or removed except by re-defining its parameters. Throughout your edit session the black areas will represent un-recorded portions of your show. Each Model of Server has its own requirement for what can be used as the Record Event. Please see the Editware TechNote related to your server model. THE RECORD EVENT The Record Event or Current Edit, is the dark red Event defining the IN and OUT-points of the next edit to be performed. When first mounted, the Record Event is "open ended", and completely covers the Black Track. The Record Track is comprised of four main components; the Black Track, the Record Event, EDL Events, and Edit lines. 76 DiVA User's Guide Note the following about the Record Track. The following numbered items refer to the numbers in the above graphic: A 2-channel, audio & video edit. This Event is displayed with the standard colors of a PB Event, yellow, representing the video sub-Track and green representing the audio sub-Tracks, which on the Edit Record Track denotes that an edit with these boundaries is in the EDL, has RMarks associated with it, and has probably already been recorded to tape or server. A 2-channel, audio & video edit. This Event is displayed in light pink, and on the Edit Record Track denotes that an edit with these boundaries is in the EDL, it is a ‘dummy’ edit recorded with ‘Record Off’, and therefor does not have R-Marks associated with it in the EDL. An already recorded video only edit, with channels 1 & 2 of audio not recorded. An already recorded channels 1 & 2 audio only edit, video not recorded. The current Record Event. A separator line of a previous edit under the Record Event. A portion of your tape (the Black Track) that is still unrecorded. Note the following about the Record Event: The In and OUT-points of your first edit are defined by… …pressing [MARK IN] and [MARK OUT]. …specifying new IN or OUT-times using the [SET IN] or [SET OUT] functions. …modifying the current IN or OUT-times using the [TRIM IN] or [TRIM OUT] functions. …recalling an Edit from the EDL. The Record Event displays the Record Reel ID, the IN-point and OUTpoint or duration of the edit to be performed, and a Note if one has been added. It can also display a Transition icon if the Record Event is the FROM or TO source in a Pre-read edit. The Record Event is TAGged automatically when mounted. This allows the Record Event to be “dragged” along the Track, while maintaining its timecode relationship to the Black Track and the Timeline. This cannot be turned off on the Record Event. Pressing [OPEN END] will open-end the Record Event by extending its OUT-point to the end of the Black Track. RECORDED EDITS The Recorded Edits, #1, #3, and #4 in the previous graphic, are Edits already performed (recorded). Note the following about the Recorded edits: Edit Mode 77 Recorded Edits are displayed with the standard "yellow & green" colors of a PB Event, but cannot be moved. They can only be removed by deleting their edits from the EDL. The blue vertical lines are separators to help define the boundaries and A/V components of each individual edit. If the Record Event is placed over a separator line, it will not cover the separator line. The data used to create these Recorded Edits and "edit marks" comes from the EDL. If you delete an edit from the EDL, the Recorded Edit marker representing that edit is removed from the Record Track. If you select the Record Track, each Recorded Edit is a POI (Point Of Interest). If you select any Track other than the Record Track, Recorded Edits are not treated as POIs. When you [Click] on any recorded portion of the Record Track, the corresponding Edit in the EDL will be found and highlighted. When you [Click] on any Edit Line in the EDL, the representative portion of the Record Track will be brought to the TLG. Record Events only affect the Record device, and define which subcomponents of audio and video will be enabled for recording. DIRECTORY PATH & CLIP NAME / REEL ID When an Event is on a server Track, the entire directory path and name of the assigned clip will be displayed on the video sub-Track. When an Event is on a VTR Track, the clip's Reel ID is displayed on the video sub-Track. EVENT IN-TIME The timecode on the left end of the audio sub-Tracks is the Event's In-time. This timecode is related to the assigned clip, not the Timeline Display. EVENT OUT TIME / EVENT DURATION Depending on the selection made in Menu Bar {Settings/ ‘Display’ Options/Duration}, the timecode on the right end of the audio sub-Tracks is either the Event's OUT-time or the Event's duration. Again, this timecode is related to the assigned clip, not the Timeline Display. If the Event has a separate audio transition rate applied to its audio subTrack, a green and black audio transition icon will appear. The rate of the audio transition is available in the [SPLIT] Dialog. . If your server has an internal mixer or switcher, the transition type and rate is displayed on the far right of the Event. Both internal and external mixers and switchers can be used simultaneously. STATUS ICONS Various status icons appear on the Video sub-Track depending on which status elements have been applied to the Event. The following is a list of status icons and their meanings: 78 DiVA User's Guide The Event has been tagged. See TAG, Page 137 The Event has had its audio altered. See SPLIT, Page 153 The Additive function has been applied to this Event. See ADDITIVE, Page 153 The Event has had its speed altered. See SPEED, Page 118 The Event has a memory option enabled in the Effects Dialog. See DISSOLVE, Page 94 The Event has had its video levels adjusted from within the VTR TBC Dialog. See TBC CONTROL (VTRS ONLY), Page157 The device attached to this Event has a loop applied. Keyboard Functions 79 9. KEYBOARD FUNCTIONS 9.1. Black Keys ESC (Escape) Press [Esc] to close any open dialog. EXIT Press [SHIFT][EXIT] to close the DiVA application and return to the Windows Desktop. You can also press [WINDOWS][D] to get to the Windows Desktop without closing the DiVA application. MACRO Macros allow the users to program multiple keystrokes into a single key press. DiVA Macros can be edited, saved, recalled, nested, have defined loops, and can be executed from within PEGS and during an edit. Press [SHIFT][MAC 1]-[MAC 4] to open the ‘Program Macro’ Dialog. 80 DiVA User's Guide Macro Name A name for the current Macro is displayed in the Macro Name field, and the list of the keystrokes in that macro, the Command List, is displayed immediately below. The Macro Name can be changed by typing a new name in the Macro Name field. Learn Press [Learn] to enable learning of new Macro keystrokes commands or to add new keystroke commands to an existing Macro. As keys are pressed on the DiVA Keyboard, the commands are entered into the Macro Command List below the Macro Name field, but are not executed. While in the Learn mode, ‘Learning Macro’ is displayed in the Status area at the top of the screen, and both the Learn and AutoMac key legends change to Stop Learn. AutoMac Press [AutoMac] to enable learning of new Macro keystrokes commands or to add new keystroke commands to an existing Macro. As keys are pressed on the DiVA Keyboard, the commands are executed as they are entered into the Macro Command List. While in the AutoMac mode the title bar displays ‘Learning Macro’. The status display at the top of the DiVA screen also displays in red letters. Both the AutoMac and Learn key legends change to Stop Learn. Clear All Press [Clear All] to remove all commands currently in the command list. Load Press [Load] to recall to the Command List a previously saved Macro from the system hard drive. Keyboard Functions 81 The selected Macro replaces the current Macro and the new Macro Name is displayed in the Macro Name box. Run Press [Run] to execute the current Macro Command List. The current Macro can be run even if it has not been saved to the hard drive or assigned to an F-Key. When a Macro is Run, the status area of the DiVA displays ‘Executing Macro’. Save Press [Save] to save the current Macro to the system hard drive. The Macro is always saved to the current Diva/Runtime/Macro directory. The .mac extension is added automatically. The DiVA Message window verifies the name and the path of the file that was saved. Undo Press [Undo] to reverse the last operation performed in the Macro Command List. Cancel Press [Cancel] to exit the Macro Dialog and discard any changes. Done Press [Done] to assign the current Macro Command List to the corresponding Macro 1-4. 82 DiVA User's Guide FILE MENU The two drop down File Menu items Open and Save are the same as the Load and Save keys respectively as described above. All items in the Edit Menu only affect selected items in the Macro Command List. Undo Reverses the last operation performed to the Macro Command List. Once selected, the item changes to Redo, and selecting it again restores the original state of the Macro Command List. This item is ghosted if no previous operation has occurred. Cut Removes the highlighted keystrokes from the Macro Command List and puts them into the paste buffer. This item is ghosted if there are no keystrokes currently in the List. Copy Copies the highlighted keystrokes from the Macro Command List into the paste buffer, but does not remove them. This item is ghosted if there are no keystrokes in the List. Paste Pastes the keystrokes that are in the paste buffer (either cut or copied) below the highlighted keystroke. This item is ghosted if the paste buffer is empty. Delete Deletes the highlighted keystrokes from the Macro Command List, but does not put them into the paste buffer. This item is ghosted if there are no keystrokes in the List. Help Menu Selecting this item will access the Macro Help PDF file. Keyboard Functions 83 LOOP The loop function is comprised of a Start Loop, the number of times to execute the loop, and the end of the loop. 1 When specifying the loop, first type the Loop Number into the Loop numeric entry field. This is the number of times to execute this loop - 5 times in the example below. 2 In the Macro Command List, highlight the first keystroke of the loop and [click] From. 3 In the Macro Command List, highlight the last keystroke in the loop and [click] Thru. Note that the keystrokes will execute 1 time more than the loop number. For example, the keystrokes in Loop A will execute 6 times… once normally, and then loop 5 more times. Each macro can have 99 loops. There are no restrictions on how loops are made. For example; one loop can be completely inside of another loop, partially inside of another loop, or completely outside of another loop The following diagram below shows Loop B entirely inside loop A. Nesting Macros Nesting is when one Macro calls another Macro from within itself. Calls to other Macros may even be within a loop. In the example below, each time the keystroke ‘M2’ is encountered, this Macro will halt and the Macro assigned to Macro 2 will execute. After Macro 2 finishes, Macro 1 will continue where it left off. 84 DiVA User's Guide Delay Macros Some operations may require a time delay between keystrokes. For example, a Macro that opens a dialog and enters in some data will usually require some delay. To specify a delay, 1 Type the amount of delay in the Delay (ms) window 2 Highlight the keystroke from where the delay is to begin and [click] Set. The delay is specified in milliseconds (1/1000 of a second). For example, 100ms is 1/10 of a second. 33ms is approximately 1 frame. Immediate Macro A Macro dialog opened that has no data, Macro Name or title displayed can be used to preview a Macro without assigning it to a Key, or to save a new Macro to the hard drive without assigning it to a Key. All functions of this dialog work the same as explained previously for individual Keys. Macros in PEGS DiVA Macros can also be executed from within PEGS. Execution of the Macro begins accurately, but because of the inherent multiple frame delays in keystrokes, it should not be considered as ‘frame accurate’ in the normal sense. To enter a Macro PEG, 1 Press [PEGS] to open the PEGS Dialog. 2 [Click] Add. 3 Select Macro from the drop-down list of commands. Immediately following the word Macro, type the Macro number 1 through 4 as displayed on the Keys. Keyboard Functions 85 The Fire function is not available for Macro PEGS. However, the macro can be fired in the normal way by pressing the Macro Key. Some additional notes on Macros: X2 Pressing [RUN ] triggers Macros 1-4 respectively. When pressed, the System Status area displays ‘Executing Macro’.. Individual DiVA Macros are stored on the system hard drive in the directory: C:\Diva\Runtime\macros\. The number of DiVA Macros is limited only by the amount of available memory on the system hard drive. Any 4 macros can be assigned to the Macro Keys at one time. The names of the Macros assigned to a Macro Key are displayed when the mouse cursor is hovered over the respective Macro Module key. RUN X2 X2 Press [RUN ] to run or execute the Macro programmed in the corresponding MAC1-MAC4 keys. PAGE UP Press [PG UP] to jump from DiVA page 2 to DiVA page 1. ARROW UP Press [UP ARROW] to jump to the previous Track. PAGE DOWN Press [PG DN] to jump from DiVA page 1 to DiVA page 2. ARROW DOWN Press [DN ARROW] to jump to the next Track. 86 DiVA User's Guide ARROW LEFT (Points Of Interest, POI) Press to jump the Timeline Guide to the previous POI on the Timeline. A Point of Interest (POI) in DiVA is any of the following: The beginning of an Event The end of an Event A CPI's location on the selected Track Any marker on the Timeline. DEC (Decrement) Press to move the current device to the left (earlier) frame-byframe. Hold the key depressed to auto-jog the selected device. ARROW RIGHT (Points Of Interest, POI) Press to jump the Timeline Guide to the next POI on the Timeline. A Point of Interest (POI) in DiVA is any of the following: The beginning of an Event The end of an Event A CPI's location on the selected Track Any marker on the Timeline. INC (Increment) Press to move the current device to the right (later) frame-byframe. Hold the key depressed to auto-jog the selected device. Keyboard Functions 87 9.2. White Keys FASTLOG Press [FastLog] to open the FastLog Database. FASTLOG SEARCH Press [FastLog Search] to open the SEARCH Dialog to search for items in the FastLog database. FASTLOG ADD Press [FastLog ADD] to open the ADD Dialog to add items to the FastLog database. FASTLOG MOD Press [FastLog MOD] to open the MODIFY Dialog to modify items in the FastLog database. TL MARK Press [TL MARK] to add a TL marker to the Timeline. TL Markers are used to identify Points of interest on the Timeline and to give the user a visual numeric countdown (in seconds) to any point on the Timeline. Press [TL MARK] and a TL Marker will be added at the location of the Timeline Guide. When in PVW or RECORD, with the Timeline moving, each Marker will display a countdown from its current location to the Timeline Guide. 88 DiVA User's Guide With at least two Edit Markers you may measure the time between them. An Edit Marker appears on the Timeline as a yellow triangle with a label at its side. Pressing [TL MARK] places an Edit Marker on the Timeline at the TLG. Pressing [TL MARK] while over an existing Edit Marker brings up the TL Marker Dialog. You may check Show Lines to superimpose lines over the Tracks that indicate the position of the Edit Marker(s). Deleting Edit Markers To delete an Edit Marker, perform the following: [Right Click] on the Edit Marker's yellow triangle… …and select Delete Marker! from the drop-down menu. Renaming an Edit Marker To rename an Edit Marker, perform the following: Keyboard Functions 89 1 Place the Timeline Guide at the Edit Marker you wish to rename. 2 Press [TL MARK] to open the Edit Marker Dialog. 3 Enter the new name of the Edit Marker in the Name field. When you change the name of an Edit Marker to one that already exists, the existing Edit Marker is removed. Edit Marker names are case-sensitive. Moving a TL Marker There are two ways to move a TL Marker: Create a new Edit Marker and assign it the name of an existing Edit Marker by performing the following: 1 Place the Timeline Guide where you wish to move an Edit Marker. 2 Press [TL MARK] to open the Edit Marker Dialog. 3 Enter the name of the Edit Marker you wish to move in the Name field. When you change the name of an Edit Marker to one that already exists, the existing Edit Marker is removed, and therefore "moved" to the new location on the Timeline. OR Place the mouse pointer over the triangle symbol of the Edit Marker and drag it to a new location. NOTE Press [NOTE] to add a note to the current Event on the Timeline. The note will appear at the bottom of the current Event, and is limited to 71 characters. UNDO Press [UNDO] to undo the previous action that affected the Timeline. Each successive press will undo the previous action until you arrive at the point where the DiVA application was first executed. REDO Press [REDO] to undo the previous UNDO that affected the Timeline. Each successive press will REDO the previous action until you arrive at the point where you first pressed [UNDO]. 90 DiVA User's Guide 9.3. Magenta Keys To ‘match’ is to establish a timecode relationship between the Primary Recorder and the Source(s) involved in a previous edit. The edit matched to must be in the EDL. Match functions only work if the Edit Mode option is installed and enabled. For example: If the original Record IN-time of an edit was 00:10:00:00, and the original Source IN-time of that edit was 00:20:00:00, and the new IN-time of the Record Event is 00:09:12:15, then the ‘match’ for that Source would be 00:19:12:15. Note that the offset between the original times and the ‘matched’ times are the same. MATCH EDIT TRACK Press [MATCH LRT] to perform an immediate timecode Match to the current position of the CPI on the Record Track. The Record Event In-point will relocate to the CPI position and all the Sources involved in the highlighted edit of the EDL at this R-VTR timecode will be automatically recalled to the Timeline. The OUT-time for the matched edit is specified in the Match Menu, explained later in this section. An LRT Match searches the current EDL for an edit that contains a Record Event that has the same Reel name and the the same A/V components as the current Record Event, and includes the same timecode located at the Record Event CPI on the Edit Track. The search begins at the bottom of the current EDL. If a Match to these criteria is not found, “Match not found” will be displayed in the Message Area. MATCH ALL Press [MATCH ALL] to initiate a search of the current EDL to find the last performed edit in the EDL that contains a Record Event that has the same Reel name as the current Record Event, and that includes the timecode located at the Record Event CPI on the Edit Record Track. Unlike Match LRT, Match ALL does not look at the A/V components of the Record Event. The search begins at the bottom of the current EDL, and when found, the EDL will highlight the matched edit, but the Match is not yet performed. When you press [MATCH ALL] again, the previous match in the EDL will be found, and this is repeated until there are no more matched to find. When the desired match is found Keyboard Functions 91 (highlighted in the EDL)… 1 Press [TAKE] to perform the Match. The OUT-time for the matched edit is specified in the Match Menu, explained later in this section. When a match is not found, “Match not found” will be displayed in the Message Area. MATCH SOURCE 1 Press [MATCH SRC]. Source Match initiates a search of the current EDL to find the last edit in the EDL that contains a Source Event that has the same Reel name and the defined Match point of the Source Event on the current Track. Source Match does not look at the A/V components of the Record Event. The search begins at the bottom of the current EDL, and when found, the EDL will highlight the matched edit, but the Match is not yet performed. If you press [MATCH SRC] again, the previous match in the EDL will be found, and this is repeated until there are no more matches to find. When the desired match is found (highlighted in the EDL)… 2 Press [TAKE] to perform the Match. The OUT-time for the matched edit is specified in the Match Menu, explained later in this section. When a match is not found, “Match not found” will be displayed in the Message Area. TAKE Both MATCH ALL and MATCH SRC find matches to all relevant edits in the EDL. Each successive press of these Match keys will find the next relevant edit until No More Matches Found is displayed in the Message Area of the Edit Screen. At this point, the Matches will recycle again. When the desired Match is found, Press [TAKE] to perform the Match. MATCH MENU When a Match is calculated, it is calculated based on a new Inpoint. In this Menu you can define whether you wish the new In-point to be defined by the Event In-point or the position of the CPI. Once the new In-point is calculated, you can define what Outpoint will be used when you press [TAKE]. 92 DiVA User's Guide Match to Device Position With this option selected, the CPI of the Match Event will be used as the Match point. (Recommended) Match to Device IN Time With this option selected, the IN-point of the Record Event will be used as the Match point. OUT = Matched Event OUT With this option selected, the Matched Events OUTtime will be set as the new Record OUT-point. OUT = Original Rec OUT With this option selected, the OUT-point as it was before the Match will be left as the Record OUT-point. Use Matched Event Duration With this option selected, the matched Events Duration will be used as the new Record Duration. Use default Event Duration With this option selected, the Default Event Duration will be used as the new Record Duration. Open Ended to Rec Reel Out With this option selected, the Record Event will openend to the end of the Black Track (Recommended). Keyboard Functions 93 If you [Click] on a recorded area of the Edit Record Track, the EDL will scroll and display the last edit that occurred at that location. If you click on any part of an edit in the EDL, the Timeline Guide will position itself at that point. 94 DiVA User's Guide 9.4. Light Green Keys These light green keys are the various transition effects that can be programmed using your video switcher, audio Mixer, and in some cases, a DVE. The symbols for these transitions are displayed on the top, far left of the Event, on the video subTrack. They are as follows: This is the symbol for a CUT. This is the symbol for a DISSOLVE. This is the symbol for a WIPE. This is the symbol for a separate AUDIO TRANSITION. If the symbols are located to the far right of the video sub-Track, then they apply to the Grass Valley Summit server’s internal mixer and switcher. It is possible to have symbol for both devices displayed at the same time CUT To perform a CUT edit or to change the current transition to a cut, select the source Event and press [CUT]. The transition icon on the Event will reflect a CUT transition. Press [SHIFT][CUT] to remove all transition icons from the Event. This will allow the user to perform a manual transition. DISSOLVE To perform a DISSOLVE edit or to change the transition to a dissolve, select the DISSOLVE TO source Event and press [DISS]. The transition icon on the Event will reflect a dissolve transition and the Effects Dialog will open with Mix selected. This Dialog may differ with different switchers. Keyboard Functions 95 Video Effects M/E Drop Down Menu The default primary M/E to be controlled is selected in the Video Switcher Settings Dialog DiVA allows you to override this on a ‘Track-by-Track’ basis. For example, using a switcher with four M/Es, each Track can be selected to perform a different switcher effect on a different M/E in the same edit. See Default M/E, Page 22. Bkgd A If you wish to program a key "over" the background video, ensure that the "Bkgd A" check box is OFF. If selected, the key image will be taken full. Wipe # Here is where you enter the Wipe number you wish to select when performing a Wipe effect. This number can be entered manually, or it will be entered automatically when you [click] on the wipe graphic from the dialog that is displayed when the [WIPE] key is pressed. 96 DiVA User's Guide Note that the pattern and pattern numbers will be different for each switcher driver. Reverse Select this item when you wish to reverse the direction of the selected Wipe. Auto N-R Select this item when you wish to alternate the direction of the selected wipe. Key Bus Some video switchers have multiple Key Buses. See your switcher manual for more information on Key Buses. Key Priority Some video switchers allow you to control the key priority. This is where you can define which of multiple keys will be keyed over others. See your switcher manual for more information on Key Priority. Key Options Some video switchers allow additional control capability over their keyers. When not available, this item will be ghosted. When available and selected, you will be presented with the Key Options Dialog. See Key Options later in this same section. Transition IN Here is where you enter the Transition Rate for the transition you have chosen (Mix, Wipe or DVE). With the item ‘Out Same As In’ selected, the Transition OUT field will also automatically populate with this rate. Transition Out By default, this field is filled in automatically when you enter a Transition In time. However, if the item ‘Out Same As In’ is not selected, you can enter a different rate for the Transition Out. Keyboard Functions 97 Cut Out By default, the Transition Out for an Event is the same effect used as the Transition In. However, select this item if you wish to perform a Wipe or Mix effect for the Transition In and a CUT for the Transition Out. Out Same As In By default, this field is filled in automatically when you enter a Transition In time. However, if the item is not selected, you can enter a different rate for the Transition Out. Audio Follows Video With this item selected, Transitions applied to the video switcher will also be applied to the audio mixer. With this item not selected, you can press [SPLIT] to program different transition rates for the audio mixer. When different transition rates are applied to the audio mixer, the Event will have the following icon added. MEM Most modern video switchers have some sort of memory or ‘snapshot’ feature, where switcher settings can be saved and recalled. For most of these switchers, DiVA has the ability to do this from the editor interface. Learn In the ‘Register’ section of the Effects Dialog, 1 Select MEM. Immediately below… 2 …enter a valid register number for your switcher. 3 Press the LEARN button. The switcher data will be stored in the selected register of the switcher. Recall As long as the MEM data resides in the switcher register, it can be manually recalled by re-entering the register number and pressing the RECALL button. MEMs can also be recalled frame accurately in PEGS. 98 DiVA User's Guide Add Effect See your video switcher manual for more information on this item. Not all switchers support this function. Nomenclature may differ between models. User Select See your video switcher manual for more information on this item. Not all switchers support this function. Nomenclature may differ between models. Force Trans See your video switcher manual for more information on this item. Not all switchers support this function. Nomenclature may differ between models. Force Run See your video switcher manual for more information on this item. Not all switchers support this function. Nomenclature may differ between models. Set Forward When an Event transition is changed, for example; you change a CUT to a DISSOLVE, you may wish to apply this change to all following Events on the Timeline. Press Set Forward to accomplish this. SRVR (Server Transitions) DiVA can control the internal A/V M/E of the GV Summit Server. No specific DiVA settings changes are required for this control, and an external switcher and mixer can still be controlled simultaneously. To perform a dissolve or fade transition using the internal mixer & switcher in the Grass Valley Summit server, press [SHIFT][SRVR]. The SERVER Effects Dialog will open. Keyboard Functions 99 1 Assign back to back clips on a Summit Track with appropriate tail and head handles, as the Summit M/E performs CENTER-CUT DISSOLVES. 2 Select Effect type accordingly. Notice in the Events shown below… …that the transition icons are displayed at the end of the Events rather than at the beginning. This is because the Summit M/E effect is associated with the END of the selected Event; that is, the transition command is placed on the FROM Event rather than the TO Event. Transition icons at the beginning of the Event still reflect the transitions of any external mixer & switcher. = Audio Only = Video Only = Audio & Video The following transition types are supported: Transition between 2 (two) Summit clips directly (dissolve clip-to-clip) Transition through a matte background (dissolve clip to background to clip) Transition through black (dissolve clip to black to clip) Fade from black (fade from black to clip) Fade to black (fade from clip to black) The Summit M/E works with Clips on the same Track. Transitions between Clips on separate Tracks would be performed by an external switcher. 100 DiVA User's Guide WIPE, All functionality shown in the DISS section also applies to WIPES. Additional items shown in this section are specific to Wipe Effects. 1 Press the [WIPE] key to open the Video Effects Dialog with the Wipe field highlighted. Type the wipe pattern number desired, or… …with the mouse, find and [click] on the desired pattern from the Wipe Patterns diagrams. 2 Enter a transition rate into the Transition In field. 3 Press [ENTER] when done. Notice that the Transition Icon in the corner of the Event will change to the Wipe symbol followed by the rate entered. Set Forward When an Event transition is changed, for example; you change a CUT to a WIPE, you may wish to apply this change to all following Events on the Timeline. Press Set Forward to accomplish this. Keyboard Functions 101 Show/Hide Wipes Toggle the display of wipe patterns On and Off. Fire Wipe With a wipe pattern selected in the Wipe Patterns Window, press [FIRE WIPE] to preview the wipe pattern. KEY Press [KEY] to open the Video Effects Dialog. In the Keyers section you can select which Key(s) you wish to enable, Key Busses, and Key Priority. These features are switcher dependent, as some switchers have only one Key Bus and as few as one Keyer. Key Options Some switcher drivers enable the Key Options functions. These allow for additional switcher key functions. 1 Press Key Options in the Effects Dialog. If not greyed out like shown above, the following Key Options menu will open: KEY FILL Defines where the Key Fill will come from. Manual Select With this item selected, no changes will be made to the 102 DiVA User's Guide current selection for the Key Source. Fill Bus With this item selected, the currently assigned crosspoint for this Track will be selected on the M/E Fill Bus, and FILL BUS will be selected as the KEY FILL for this Keyer. Matte With this item selected, no changes will be made to the current selection for the Key Fill, and MATTE will be selected as the KEY FILL for this Keyer. KEY SOURCE Defines what will be used to cut the Key. Manual Select With this item selected, no automatic changes will be made to the current selection for the Key Source. Fill Bus With this item selected, the currently assigned crosspoint for this Track will be selected on the Fill Bus, and FILL BUS will be selected as the KEY SOURCE for this Keyer. Auto Select With this item selected, the Key Source selection will come from the AUTO SELECT settings for this keyer. Source Bus With this item selected, the currently assigned crosspoint for this Track will be selected on the M/E Source Bus, and SOURCE BUS will be selected as the KEY FILL for this Keyer. Note that pressing [PREVIEW] or [RECORD] turns OFF all enabled keyers on M/Es enabled in the Switcher Dialog. Note that if you wish to have the key "over" background video, ensure that the "Bkgd A" check box is OFF. If ON, the key image will be taken full. Keyboard Functions 103 Set As Default Sets the current selections in this Dialog as the default key settings. A “(D)” will appear after the item is set as the default. MEM LEARN AND RECALL Some video switchers have the ability to learn and recall memory settings from the Video Effects Dialog. MEM Select MEM to enable MEMory options for this Event. In the field below this selection, enter the memory register number to be learned or recalled. Because some switcher Memory functions allow you to store a transition with the Memory register, there is a checkbox here to include or exclude a programmed transition on the DiVA. Add Effect When Add Effect is selected, both the MEM icon and the transition icon on the Event are displayed and are active. When Add Effect is not selected, then the transition icon on the Event is suppressed, and only the MEM will be recalled as shown in the following example. This feature is device dependent. 104 DiVA User's Guide User Select This function varies with the switcher protocol selected. Please see the specific video switcher DiVA TechNote or your switcher manual for this information. Force Trans With Force Trans selected, the saved transition type will also be triggered when recalled. With Force Trans not selected, the saved transition type will not be triggered when recalled. Force Run If there are switcher timelines associated with a MEM, selecting Force Run will force the timeline to run. This feature is device dependent. Recall When Recall is pressed, the memory register specified in the register window will recall from switcher memory to the switcher panel. This feature is device dependent. Learn When Learn is pressed, the memory register specified in the register window will be saved from the switcher panel to the switcher memory. This feature is device dependent. Keyboard Functions 105 9.5. Light Blue Keys GPI - General Purpose Interface Eight GPI triggers are available through the optional USB GPI. GPIs are momentary triggers for external devices, usually used to connect to and trigger devices without serial control. Press [GPI] to open the GPI Dialog, or … … press a number [1]-[8] and then press [SHIFT][GPI] to immediately add that GPI trigger to the Timeline. GPI 1 - GPI 8 The GPI 1 - GPI 8 checkboxes relate to the 8 GPI output triggers available for use. A checked box means that the GPI is enabled; an unchecked box means that the GPI is disabled. You may enter a custom name for each GPI in the GPI 1 - GPI 8 fields. The name of the GPI appears next to the GPI marker in the Timeline display. 106 DiVA User's Guide Pulse Width The duration of each GPI's relay closure may be set in the Pulse Width field. The entry is in frames. Offset If you enter a negative frame value into the Offset field for a related GPI, that GPI command will be sent earlier by the specified amount of frames. If you enter a positive frame value into the Offset field, that GPI command will be sent later by the specified amount of frames. Remove All GPI Pressing the Remove All GPI button will remove every GPI trigger from the Timeline. Enable all GPI When Enable all GPI is unchecked, all GPIs will be disabled (grayed), but not removed. Show Lines When Show Lines is checked, reference lines are displayed on the Timeline at each GPI marker. Fire Now Pressing the Fire Now button allows you to test the GPI relays that are checked . Setting a GPI Trigger on the Timeline To attach a GPI Trigger to the Timeline, perform the following: 1 Position the TLG where you wish the GPI to be placed. 2 Press the desired GPI number [1] - [8]. 3 Press [SHIFT][GPI]. The GPI is placed on the Timeline at the TLG. A green triangular GPI marker and GPI name will appear at the location of the Timeline Guide as seen in the following illustration. Keyboard Functions 107 Record Tally When Record Tally is selected, the GPI number entered as the Record Tally GPI will trigger at the Edit IN-point of an edit and trigger again at the Edit OUT-point of the edit. Note in the diagram below that the selected GPI #2 is greyed out and not available for general use. Note the following about GPI triggers attached to the Timeline: Triggers attached to the Timeline remain at their location on the Timeline unless selected. GPIs do not Ripple, even if Ripple is ON, unless they are selected. GPIs are considered Points of Interest, just as Edit Markers are. Moving a GPI A GPI may be moved by dragging it with the mouse. Timeline GPI Menu [Right Clicking] a GPI marker will drop down the Timeline Marker Menu. Properties... Selecting Properties... will open the GPI Dialog for that GPI. 108 DiVA User's Guide Delete Marker! Selecting Delete Marker! will remove the GPI marker from the Timeline display. Delete All TL Markers! Selecting Delete All TL Markers! will remove all GPI markers from the Timeline display. Select All Markers Selecting Select All Markers will select (highlight) all Timeline Markers, including Edit Markers. Deleting GPIs There are two ways to delete a GPI marker. [Right Click] a GPI marker and select Delete Marker!. With the Timeline Guide at a GPI, press [GPI] and uncheck the appropriate GPI 1 - GPI 8 checkbox. Ripple GPIs To Ripple a GPI when Ripple is OFF, [Click] the GPI triangle to highlight it. With the GPI highlighted, GPI markers will move with the Event. Select GPI Range You may select different ranges of Timeline GPIs for the purpose of rippling or deleting. To select a consecutive group of GPIs, [click] on the first Timeline GPI you want selected, then [SHIFT][click] the final GPI you want selected. All GPIs in-between will also be selected. To select a specific group of GPIs, hold [CTRL] and [click] the GPIs you wish to select. The selected GPIs do not need to be in sequence. More About GPIs GPIs are considered Points of Interest. Multiple GPIs can be selected in the Dialog and placed at the same location on the Timeline. Any change made to a GPI setting may be undone using the [UNDO] key, once the GPI Dialog has Keyboard Functions 109 been closed. See GPI Output, Page 7 for additional information on GPIs. PEGS PEGS are serial commands sent to a video switcher from DiVA through an RS-422 connection. These commands can set and trigger functions on the switcher based on Event timecode, CPI position, or Timeline time. The following picture is an example of a Timeline PEG. Press [PEGS] to open the PEGS Dialog. Add Pressing the Add button adds a blank PEG entry to the current PEGS Dialog. Each successive press adds another blank PEG entry. Delete Pressing Delete deletes the currently selected PEG. Set Time For a Timeline PEG, pressing Set Time marks in the current Timeline Guide position as the start for the PEG. For an Event PEG, pressing Set Time marks the current CPI position as the start for the PEG. Tracking When Tracking is checked, the Timeline "tracks" or 110 DiVA User's Guide follows the selection of the PEG entries. Select a PEG entry in the PEGS Dialog and the Timeline moves to that location. If not checked, no tracking of PEGS markers occurs. Fire Pressing Fire immediately executes the currently selected PEG. On Selecting On enables the selected PEG. De-selecting On disables the selected PEG. Command [Click] on the right side of the Command field to display a drop-down menu of available PEG commands. After selecting a command, the qualifier information must be typed in immediately following the command. In the following example, the command selected is Trans (transition), and the qualifier for that command is the Trans rate, which has been set to 30. Therefore, the complete command entered is Trans30. Note that there are no spaces in between the command and the qualifier. If you select MEM (memory) with a qualifier of 10, the complete command in the Command field would be MEM10. More examples of commands can be found at Examples of Valid PEGS Commands, Page 113. One of three possible icons will appear to the left of the Command field, depending on the status of the Command: - A red X means that a Command has not yet been added, or that the Command added is invalid or the syntax is defined incorrectly. - A video switcher icon means that the Command entered is a valid command. - A GPI icon means that the Command entered is for a GPI trigger (GPI 1-8), and that the Command entered is valid. If an M/E is not specified in the Command field, the Command will be sent to the M/E defined as the current M/E. Keyboard Functions 111 Time The Time field displays either the Absolute or Relative time that the PEG will be executed (depends on the state of the Ref selected). Ref [Click] this icon to toggle this value between Absolute time and Relative time. Note [Double Click] the Note field to input a note. Absolute The Time displayed is the timecode or timer time for Event PEGS, or the Timeline Time for Timeline PEGS. The PEGs stay fixed at that absolute location regardless of whether the Events are moved or if the Start of Program changes. Relative The Time displayed is relative to the Start of Program, which is the Timeline time at the IN-point of the first Event on the Timeline. If the first Event is moved, the PEG will also move, maintaining the relative offset. Adding Commands to the Command List User created Commands can be added to the dropdown list by [Right Clicking] on a PEG command line. For example, if you created command Trans30 and want to use it frequently, just [Right Click] and answer Yes to the question dialog that opens and Trans30 will be added to the Command field dropdown list. 112 DiVA User's Guide Removing Commands from the Command List User created Commands can be deleted from the dropdown menu by [Right Clicking] on the entry in the drop-down menu. For example, if you created command Trans30 and want to delete it, just [Right Click] on it and answer Yes to the question dialog that opens and Trans30 will be deleted from the list. Properties Opens the TL PEGS dialog Delete TL PEG Deletes the selected TL PEG Delete All TL PEGS Deletes all TL PEGS Select All TL PEGS Selects all TL PEGS Some switchers will not accept multiple commands to the same M/E at the same time. When multiple Command entries are made in the PEGS Dialog, each relates to its own PEG marker. For example, in the following example switcher MEM10 is recalled at 1:00:11;18 of the current device, a trigger of XPEG 512 at 16;28 into the current Event, and a 30 frame transition at 1:00:04;23 of the current device are programmed. Keyboard Functions 113 Examples of Valid PEGS Commands Command Description Example ME1, ME2, ME3, ME4 Specifies the M/E bus to be addressed. ME1 Trans30 PGM or PP Specifies the Pgm/Pst bus as the bus to be address PGM MEM1 Rate Sets the transition rate. Rate30 Diss Sets the transition to Mix, selects Background, and Diss pushes the Auto-trans button. Diss<time> Sets the transition to Mix, selects Background, sets the Diss60 rate to <time>, and pushes the Auto-trans Trans Pushes the Auto-trans Button. Trans<time> Sets the rate to <time> and pushes the Auto-trans Trans30 button. Cut Selects Background, sets the rate to 0, and pushes the Cut Auto-trans button. Track<Track #> Selects the crosspoint currently assigned to the Track5 specified Track. MEM<MEM #> Recalls the specified MEM. MEM1 MEMX<MEM #> Recalls and runs the specified MEM. MEMX1 GPI<GPI #> Triggers the specified GPI. GPI2 Sound Plays a sound file (more to come) N/A <clear> Clears all Commands from the Command field. Trans PEGS Strings Commands The String command allows the user to send a Hex command string out any functional port on the DiVA. To create a String PEG: 1 In C:/Diva/Runtime, open the Dev folder. 2 Find and open the String.dev file. It will look similar to the following: 114 DiVA User's Guide 3 Add the new PEG command to the [PEGS] section of the file. For example, the below modification to the file will add the Hex command 03E0C61F that will trigger the Fade To Black on the Ross Vision 1 Switcher. Do not include spaces between the pairs. The command name size, in this case FTB, is variable but it is recommended you keep it short for faster execution. It can be uppercase or lowercase, as the code changes everything into uppercase. You may add as many new command entries as you like, but, the * (asterisk) must be present after the last command entry. To fire a String PEG: In the Assignment Page, assign the String as a device to a Track and give it a port number just like any device. In this example, the Ross Vision 1 switcher is connected to Port 5 of the DiVA. 1 Place an Event on the Track, in the above example Track 12. 2 Select the Event and open the [PEGS] Dialog. 3 From the drop-down command menu, select PEGS. 4 After the word PEGS, add a space and then type the command name you created in the String.dev file; in our example FTB. 5 To add this command to your drop-down menu, [right-click] on the command name in the PEGS Keyboard Functions 115 Dialog, in this case PEGS FTB, and you will be asked to add the command to the list. More About PEGS The PEGS Dialog window is adjustable in size and can be repositioned on the screen. [Click] on the restore button to toggle the dialog from its default position to its alternate position. You can sort PEGS by [Clicking] any of the columns in the PEGS Dialog. PEGS can be triggered before or after an edit, as long as the PEG falls within the limits of the pre-roll or post-roll. PEGS are a POI (Point Of Interest). After being added to the Timeline from the PEGS Dialog, PEGS can be modified on the Timeline in the following ways: [Clicking] on a Timeline PEG selects it, allowing it to move (ripple) when an Event below is moved. You may move PEG markers on the Timeline by [Clicking] and dragging them. Press and hold [SHIFT] to move the PEG with finer control. Press and hold [CTRL] while selecting Timeline PEGS to select multiple PEGs, allowing them to be moved as a group. You can trim a PEG by positioning the PEG marker under the TLG, and pressing [SHIFT][TRIM IN], [(+or-)], [(number)], then [ENTER]. If you Trim a Timeline PEG and the dialog is open and Tracking is checked, the Timeline Guide will move to the new PEG position. After altering PEGS, the PEGS times in the PEGS Dialog are updated. ASSIGN Press [ASSGN] to open the Assignment Page. 116 DiVA User's Guide See “Assignment Page”, Page 17 for information on the Assignment Page. HELP Press [HELP] to access the interactive version of this Manual. WW REW Press [REW] to rewind or shuttle the current device backwards at full shuttle speed. W REW Press [SHIFT][REW] to rewind or shuttle the current device backwards at half shuttle speed. FF XX Press [FF] to Fast Forward or shuttle the current device forwards at full shuttle speed. FF X Press [SHIFT][FF] to Fast Forward or shuttle the current device forwards at half shuttle speed. PLAY X Pressing [PLAYX] will send a PLAY command to the device assigned to the current Track, and in turn play the current Hot Event from the location of the red CPI (Current Position Indicator). Most video servers require a clip to be loaded before motion commands can have any effect, but VTRs need only to be connected. The CPI will scroll across the Event as the video plays. Note that the [PLAYX] key plays the current Hot Event and does not preview the Timeline. PLAY is also used with the following functions: PLAY ALL GANGED EVENTS - [PLAYX] will play all Keyboard Functions 117 Ganged Events, but will not keep them in sync. PLAY THE EVENT AT DOUBLE SPEED [PLAYX][PLAYX] will play the Event at double speed. PLAY THE EVENT IN REVERSE - [SHIFT][WPLAY] will play the Event in reverse. PLAY THE EVENT IN REVERSE AT DOUBLE SPEED [SHIFT][WPLAY][WPLAY] will play the Event in reverse at double speed. This feature is device dependent. - W PLAY Pressing [WPLAY] will send a REVERSE PLAY command to the device assigned to the current Track, and in turn play the current Hot Event backwards from the location of the red CPI (Current Position Indicator). Most video servers require a clip to be loaded before motion commands can have any effect, but VTRs need only to be connected. The CPI will scroll backwards across the Event as the video plays. [WPLAY] is also used with the following functions: PLAY ALL GANGED EVENTS- [W PLAY] will play all Ganged Events in reverse, but will not keep them in sync. PLAY THE EVENT AT 2X SPEED - [WPLAY][WPLAY] will play the Event in reverse at double speed. This feature is device dependent. STOP Pressing [STOP] stops the selected device. The Event's CPI and the timecode in the Track Status Display will also stop. Alternately, you may also use [ALLSTOP] (SPACEBAR) to stop all enabled sources. W SRCH Pressing [W SRCH] will cue the CPI to the Hot Event's INpoint. On a server Track this will be immediate. On a VTR Track, the VTR will shuttle to the IN-time. To cue to a specific timecode in an Event, enter a timecode into the Numeric Entry field and press [SRCH] to cue the Hot Event's CPI to that timecode. SRCH X Pressing [SRCH X] will cue the CPI to the Hot Event's OUTpoint. On a server Track this will be immediate. On a VTR Track, the VTR will shuttle to the IN-time. 118 DiVA User's Guide SPEED To define a single speed for the current Event, 1 Type the desired speed with the Numeric Keypad. 2 Press [SPEED]. The defined speed will be applied to the current Event for the entire Event. When a speed has been applied to an Event, the Speed icon is displayed on the Event with the speed percentage displayed alongside. For example: You can also enter a real-time Speed by first putting the device into Variable and then pressing [SPEED]. The current Variable speed will be entered at the beginning of the current Event regardless of the CPI position. To remove the speed from an Event, Press [1],[0],[0],[SPEED] Pressing [SPEED] first opens the Speed Dialog and graphical interface. Here you may program speed changes as either cuts (instantaneous speed change) or ramps (gradual speed change). With the Speed Dialog open, press the [Set/Add] button to place a speed control point (keyframe) at the CPI. Speed keyframes appear as white circles on the black line in the graphical interface. The keyframe will be placed at the Event's red CPI. Keyboard Functions 119 When a speed has been set in an Event, the Speed icon is displayed on the Event with the speed percentage displayed alongside. In the previous examples, Speed is set at 0.50%: If multiple speeds are set for an Event, only the first speed is displayed on the Event. In the following example there are four motion control points, or keyframes. In the graphical interface, time is displayed horizontally, while speed percentage is displayed vertically. In the previous example: The Event starts at 0, so the first point is labeled 0, and represents the start of the motion control sequence. The motion control Event begins at 100% speed and continues for 1:00, where it cuts to 50% speed. At 1:00 into the Event, the speed ramps for the next 1:00 back to 100% speed again. Had this change been a cut rather than a ramp, the source position would have been 1:15. The device continues for 1:00 at 100% speed and then cuts to 125% speed. Had this change been a ramp rather than a cut, the source position would have been 2:25. The speed adjustment graphical interface also holds information about the speed and position at the Timeline Guide: TL Pos - This time is the real time or record time into the Event as if there had been no speed changes. Src Pos - This time is the actual timecode position of the source at the Timeline Guide. 120 DiVA User's Guide Speed - This value is the programmed speed for the source at the Timeline Guide. Speed Ramps or Cuts When changing speeds, you may define whether the speed change is instantaneous, defined as a cut, or gradual, defined as a ramp. To make a speed change a cut, press [CUT] or uncheck Ramp in the Speed Dialog while the Timeline Guide is positioned at a keyframe. To change a cut into a ramp, press [DISS] or check Ramp in the Speed Dialog while the Timeline Guide is positioned at a keyframe. Using the Speed Dialog Set/Add After entering a value in the Speed Control Point Entry field, pressing the Set/Add button will set the speed to that of the entered value. Speed values can be entered in .10% increments, and the ability to perform the entered speeds is device dependent. Get Value A speed point value may be copied using the Get Value button. This places the current value under the Timeline Guide in the Speed Control Point Entry field. Ramp Checking Ramp enables a ramp (speed transition) between the current keyframe and the previous keyframe Lock Source Position This function only works when Ramp is also checked. Check Lock Source Position to lock the current keyframe to the current source position. If the speed leading into a "locked" source position is changed, and ramp is also selected, the control point will move its position on the Timeline in order to maintain its relationship with the source. Use TSO Some VTRs have a Program Play function that corrects the pitch of audio when the device is played Keyboard Functions 121 off-speed. Check Use TSO to enable this feature. Auto Fill With Auto Fill checked, you can change the length (duration) of an Event while still maintaining the integrity of the Event's already defined IN and OUT-points. An icon is placed on the Event to show that a speed change has been added to the Event. Control Points Move with Source Time If Control Points Move with Source Time is checked, the points you have set will be locked to the source time and will move with these times even if the Event is trimmed. Copy Pressing the Copy button copies the value of the current keyframe at the Timeline Guide. Paste Pressing the Paste button pastes the value copied in the previous Copy operation to another location or Event. All Points When All Points is checked, every keyframe position and value in the Current Event are copied. In this case, a Paste operation places all of these values and positions into the Event into which they are pasted. Clear All Pressing Clear All will clear all of the motion control points. To clear out individual motion control points, use the arrow keys to move to the point to be deleted and press [BACKSPACE]. Clear Quick Speed Entries Press [1],[0],[0],[SPEED] to clear all speeds within the selected Event without opening the Speed Dialog. FILL (Fit & Fill [FILL] performs an automatic speed calculation to lengthen or shorten an Event as required to fill a specified time, or to fill a gap between Events. The IN and OUT-points of the Source 122 DiVA User's Guide Event remain unaffected. In the following example, we want the Event on the left to “fill” or extend to the Timeline Guide Line or the beginning of the adjoining Event. Perform the following: 1 Place the Timeline Guide where you wish the Fill to reach. 2 Make the Event to be modified a Hot Event. 3 Press [FILL]. The Event will extend to the TLG, but the OUT-time (15) icon in the upper left corner of the remains the same. An Event shows that this Event will be off-speed. The calculated speed is displayed in the Speed Dialog. Keyboard Functions 123 9.6. Light Purple CLIP LIST Press [CLIP LIST] to open the current server directory containing the clips for the video server assigned to the current Track. DELAY Press [DELAY] to open the Delay dialog where you can set the play and record delays for the video server channel assigned to the current Track. NL INS Press [NL INSERT] to non-linearly insert by CUT the Event located below, but within, the Record Event boundaries. A video-only or audio-only insert will take longer to perform than an audio/video insert. See the DiVA TechNote for your specific server. RIPPL (NL INS) Press [RIPPL] to ripple (adjust) the Timeline to accommodate the inserted material without overwriting the existing material already on the Timeline. 124 DiVA User's Guide NL DELETE Press [NL DEL] to non-linearly remove the material located within the Record Event on the Edit Track and replace it with BLACK. A video-only or audio-only delete will take longer to perform than an Audio/video delete. See the DiVA TechNote for your specific server. RIPPL (NL DEL) Press [RIPPL] to ripple (adjust) the Timeline to accommodate the deleted material. The material on either side of the deleted portion will be ‘pulled up’, and the Black Track will be shortened by the length of the deleted material. MOVIE (Make Movie) Press [MOVIE] to make a Movie (new clip) of either the Edit Track or material on a source Track. See the DiVA TechNote for your specific server. OPTIMIZE Coming Soon! Keyboard Functions 125 9.7. Orange Keys SEP EVENTS Press [SEP EVENTS] to split a single Event into two Events. The Event will split at the CPI. If an Event with a transition is separated, the new Event is set to CUT , and any speeds or audio ramps are set to unity. ADD EVENT Pressing [ADD EVENT] extends the current Event that is positioned to the left of the Timeline Guide by adding another matching Event of the same length, A/V components, and contiguous timecode. To add to an Event, perform the following: 1 Place the Timeline Guide at the end of the Event you wish to add to, or at an empty location of the Track. 2 Press [ADD EVENT]. A new Event is added at the location of the TLG (Timeline Guide). The following conditions apply to added Events created with [ADD EVENT]: The enabled/disabled status of the audio and video subTracks of the previous Event is carried over to the new 126 DiVA User's Guide Event. Audio and Speed Ramps of the previous Event are set to unity in the new Event. The new Event transition is a CUT . GAPS (Fill Gaps) Press [GAPS] to fill gaps between Events by extending the Out-point of the previous Event. This will not modify the speed of either Event. DELETE EVENT Press [DEL EVENT] to delete the selected Event from the selected Track. The deleted Event is not available to be pasted. When an Event is deleted, all rules pertaining to Ripple will apply. Press [UNDO] to reverse the action. Delete a Group of Events on a Track 1 First select a consecutive group of Events, [Click] on the first Event you want selected, then [SHIFT][Click] the final Event you want Selected. All Events in-between will also become Selected. To Select a specific group of Events, hold [CTRL] and individually [Click] the Events you wish Selected. 2 Press [DEL EVENT]. All Selected Events will be deleted. The deleted Events are not available to be pasted. When Events are deleted, all rules pertaining to Ripple will apply. You may also delete all selected Events on a Track by [Right Clicking] the desired Track, then selecting ‘Delete Event’ from the menu. Press [UNDO] to reverse the action. Delete All Events on All Tracks On the MENU BAR, select {File/New Timeline}. This will delete all Events on the Timeline and will reset the default Timeline time to the value set in the Menu Bar {Settings/Global Settings/Time Settings/Timeline Guide Start}. After a new Timeline has been created, there is only one level of undo available. Keyboard Functions 127 DELETE TRACK Press [DEL TRACK] to delete all Events from the selected Track. When an Event or group of Events is deleted, all rules pertaining to Ripple will apply. You may also delete all Events on a Track by [Right Clicking] the desired Track, then selecting ‘Clear Track!’ from the menu. Press [UNDO] to reverse the action. KEEP TRACK When in the Edit Mode, you may wish to delete all Tracks except one. 1 Select the Track to wish not to delete. 2 Press [KEEP TRACK]. All Tracks, except the selected Track and the Edit Record Track, will be deleted. If the Edit Track is selected, than all Tracks but the Edit Track will be deleted. TOGGLE EVENT There are four conditions for an Event; Play, Record in Assemble, Record in Insert, and Record in Pre-read. To toggle an Event through these four modes: Press [TOGGL EVENT]. Each successive toggle will change the Event from a GREEN PLAY Event, to a RED INSERT Event, to a MAGENTA ASSEMBLE Event, to an ORANGE PRE-READ Event. TRIM IN To TRIM IN an Event is to add or remove time from the INpoint rather than entering or marking an absolute time or position. Enter the amount of time to Trim and then press [TRIM IN]. OR Press [TRIM IN] followed by the amount of trim, then press [ENTER]. 128 DiVA User's Guide Trimming Events Using the Mouse Placing the cursor over an Event will produce three different cursor shapes depending upon where the cursor is placed within the Event. Drag the IN-point to Trim the Event length accordingly. The IN-time will not change, only the duration will change. Drag the OUT-point to Trim the Event length accordingly. The IN-Time will not change, only the duration will change. Dragging in the center of the Event will move the entire Event. This is covered in the section Event Cursors, Page 69 Slip an Event To ‘slip’ an Event is to ‘click & drag’ the video within an Event without moving the Event itself. 1 Place the mouse cursor over the Event. The cursor will change to 2 . Press [SHIFT] while ‘dragging’ an Event. You will see the IN and OUT-times of the Event change while the Event itself remains in its original position. Slide Events To ‘slide’ Events is to ‘click & drag’ the cut-point between two Event on the Timeline, changing the OUTpoint of the first Event (Event to the left) and the INpoint of the second Event (Event to the right). MOD IN (TRIM IN) Press [MOD IN] to trim the current Event by the defined time without changing the position or duration of the Event. For example, to trim in an Event by ten frames without changing the duration of the Event: [TRIM IN],[1],[0],[MOD IN]. Keyboard Functions 129 TRIM OUT To TRIM OUT an Event is to add or remove time from the OUT-point rather than entering or marking an absolute time or position. Enter the amount of time to Trim and then press [TRIM OUT]. OR Press [TRIM OUT] followed by the amount of trim, then press [ENTER]. Trimming Events Using the Mouse Placing the cursor over an Event will produce three different cursor shapes depending upon where the cursor is placed within the Event. Drag the IN-point to Trim the Event length accordingly. The IN-time will not change, only the duration will change. Drag the OUT-point to Trim the Event length accordingly. The IN-Time will not change, only the duration will change. Dragging in the center of the Event will move the entire Event. This is covered in the section Event Cursors, Page 69 Slip an Event To ‘slip’ an Event is to ‘click & drag’ the video within an Event without moving the Event itself. 1 Place the mouse cursor over the Event. The cursor will change to 2 . Press [SHIFT] while ‘dragging’ an Event. You will see the In and Out times of the Event change while the Event itself remains in its original position. Slide Events To ‘slide’ Events is to ‘click & drag’ the cut-point between two Event on the Timeline, changing the Inpoint of the first Event (Event to the left) and the Out- 130 DiVA User's Guide point of the second Event (Event to the right). Add Graphic MOD OUT (TRIM OUT) Press [MOD OUT] to trim the current Event by the defined time without changing the position or duration of the Event. For example, to trim in an Event by ten frames without changing the duration of the Event: [TRIM IN],[1],[0],[MOD OUT]. OPEN END To “open end” an Event in the Edit Mode, is to extend Event(s) to the next encountered Event or to the end of the Record Track, whichever is encountered first. There are two levels of Open End: Press [OPEN END] to open-end the Hot Event on the selected Track. The Hot Event will be extended to the beginning of the next Event encountered on the Track. If there is just one Event on the Track, then it will open-end to the end of the Record Track. If Ripple is enabled, the open-end command will be ignored. ALL (OPEN END) Press [SHIFT][OPEN END] to open-end all Hot Events on all enabled Tracks. The Hot Events will be extended to the beginning of the next Event encountered on each Track. If the Hot Event is the only Event on a Track, then that Track will open-end to the end of the Record Track. If Ripple is enabled, the open-end command will be ignored. TRANSFER TC To transfer or copy the In-point, Out-point, or duration from one Event to another: 1 Select the Event to copy from. 2 Press [XFER TC][SET IN], [XFER TC][SET OUT], [XFER TC][DUR]. The respective timecode or duration of the from Event is placed in the numeric display. 3 Select the Event to copy the displayed timecode or duration to. 4 Press [SET IN], [SET OUT] or [DUR] to transfer the captured number to its respective destination. Keyboard Functions 131 TC/CTL Press [TC/CTL] to toggle the device on the current Track between reading and displaying TC (Timecode) and CTL (Control Track) from the currently selected device. DURATION These actions apply to the Hot Event on the selected Track. Notice in the following example that the duration is 9:07 (12:27 minus 3:20). 1 On the numeric keypad, enter the desired duration in seconds and frames, for example [5],[0],[0] for five seconds. 2 Press [DUR]. Notice that the duration of the Hot Event is now 5:00 seconds. Backtiming Event Durations Setting a negative duration changes the IN-time but leaves the duration unchanged. For example, 1 Select an Event 2 Press [-],[2],[0],[0],[DUR]. This changes the IN-time two seconds earlier and leaves the duration as it was. MOVE EVENT IN-POINT TO THE TLG If you wish to close a gap between two Events as in the example below: 132 DiVA User's Guide 1 Press an [ARROW KEY] to position the end of the previous Event to the Timeline Guide; planes-music in the previous example. 2 [Click] on the Event you wish to move backwards. In the previous illustration this would be the Event labeled sailboatdusk. This will make that Event the Hot Event. 3 Press (TimeLine IN). The timecode display at the beginning of the moved Event will not have changed. Notice in the following illustration that the IN-time remains 1:18, the OUT-time remains 8:20, and the gap is removed. MOVE EVENT OUT-POINT TO THE TLG 1 [Click] on the Event you wish to move. This will make that Event the Hot Event. 2 Press (TimeLine OUT). The timecode display at the beginning of the moved Event will not have changed. Notice in the following illustration that the IN-time remains 1:18, the OUT-time remains 8:20, and the Event OUT is now positioned at the TLG. CUE THE CPI TO THE TLG Pressing TLG. will cue the CPI of the current Event to the Keyboard Functions 133 CUE ALL DEVICES CPI TO THE TLG Pressing will cue all devices CPI to the TLG. MOVE EVENT Move Event to a Specific Location 1 Using the keypad, enter the Timeline time where you wish to move the Event 2 Press . Move an Event by a specific amount: 1 Press [TRIM IN]. 2 Enter the amount you wish to move the Event later on the Timeline. Use the [-] to move the Event earlier by the specified amount. 3 Press . Move an Event using the Mouse To move an Event left or right on its Track, perform the following: 1 Place the mouse cursor over the middle of the Event; the cursor will become a connected left and right arrow. 2 [Click] and drag the Event left or right. MOVE TLG Move the TLG to a Specific Timeline Location 1 Using the keypad, enter the Timeline time where you wish to move the TLG. 2 Press . Move the TLG on the Timeline by a Specific Amount 1 Using the keypad, enter the time that you wish to move the TLG later on the Timeline. Use the [-] key 134 DiVA User's Guide to move it earlier. 2 Press . Keyboard Functions 135 9.8. Light Orange Keys LOCK Select a Track and press [LOCK] to disable the Track from DiVA control. If an Event on the locked Track is playing or recording at the time it is locked, it will remain playing or recording until the lock is removed and the device stopped. When locked, the black on orange LOCK symbol is displayed to the left of the Track button. LOCK (PARTIALLY) Select a Track and press [LOCK] to disable portions of the Track from DiVA control. The Track Settings Dialog will open. Participate OnAir Play/Record When not selected, Events on this Track will not play or record during a preview or edit, even though audio mixer and video switcher commands will be enabled. When partially locked, the white on orange LOCK symbol is displayed to the left of the Track button. 136 DiVA User's Guide Participate OnAir Audio/Video When not selected, Events on this Track will play or record during a preview or edit, but audio mixer and video switcher commands will not be enabled. When partially locked, the white on orange LOCK symbol is displayed to the left of the Track button. Control Enabled When not selected, Events on this Track will not play or record during a preview or edit, and audio mixer and video switcher commands will not be enabled. This is basically the same as pressing [LOCK]. When not selected, the black on orange LOCK symbol is displayed to the left of the Track button. GANG Press [GANG] to enable and disable Linked Tracks. See LINK below for additional information on GANG. LINK Link is used to define which Tracks are to be included in a GANG. To GANG Tracks is to tie the Hot Events on each ganged Track together so that commands sent by DiVA to a source on a ganged Track affects the Hot Events on all ganged Tracks. To GANG Tracks, they must first be Linked. 1 Select the Track you wish to be Ganged. 2 Press [SHIFT][LINK]. 3 Repeat for each Track to be ganged. The green GANG symbol ‘G’ appears to the left of each Track Linked. Keyboard Functions 137 In the previous image, Track 2 and Track 3 show Gang indications (a green ‘G’ icon to the left of the Track number) and will roll together when any of the following commands are invoked: PLAY, 2X PLAY, REVERSE PLAY, 2X REVERSE PLAY, JOG, REWIND, REWIND VARIABLE, FAST FORWARD, FAST FORWARD VARIABLE, STOP, CUE, SEARCH, GOTO TLG. For example, if you have Track 1, Track 2, and Track 3 Linked and Ganged, pressing [PLAY] will play the Hot Events on Track 1, Track 2, and Track 3 simultaneously. Events on ganged Tracks will also all participate when the following commands are sent: MARK IN, MARK OUT, SET IN, SET OUT, TRIM IN, TRIM OUT, SET DURATION. For example, if you have Track 1, Track 2, and Track 3 Linked and Ganged, pressing [TRIM IN],[3],[0],[ENTER] will trim the Hot Events on Track 1, Track 2, and Track 3 all by 30 frames. To remove a Track from a gang, select the Track and press [SHIFT][LINK]. TAG Tagging an Event locks its current position to the Timeline. If you drag or otherwise move a tagged Event, or even change the IN and OUT-points, the Event's sync relationship to the Timeline remains in place. Use this to keep an audio cue in one Event lined up with a visual point in an Event on another Track. Press [TAG] to tag the Hot Event. A status icon appears in the upper left corner of the Event, showing the Event has successfully been tagged. In the illustration below, Event Clip #18 has been tagged. Note the In and Out times. 138 DiVA User's Guide In the illustration below, the tagged Event has now been moved to the right and the IN and OUT-times have been autoadjusted. Because the Event was tagged, the frame that was under the Timeline Guide is still the same frame. The sync relationship of the Event to the Timeline has not changed. Note that the Edit Record Event is always tagged. This cannot be turned off. ALIGN This function is used to align two or more Points of Interest on different Tracks. In the following example, the upper Event (Clip #17) has an audio cue of a door slam at the CPI. This is lined up under the TLG. The Event below it (Clip #22) has the visual action of the door closing at the CPI. The intent is to bring the visual of the door in alignment with the audio of the door slam. 1 Select Track 1. 2 Jog the Event to the point of interest (in this example, the door slam audio). At this point you have the situation shown in the previous example. 3 Select Track 2. 4 Jog the Event to the visual cue (in this example, the door closing visual). 5 Press [ALIGN]. The second Event will shift to align the current Event's CPI to the TLG. Keyboard Functions 139 140 DiVA User's Guide 9.9. Yellow Keys SET IN To SET IN a number is to specify a new IN-time timecode address for the current Event on the current Track. 1 Type a timecode number on the numeric keypad. 2 Press [SET IN]. The number entered will be set into the Event as the new IN-time, and the Event duration will be adjusted accordingly. MOD IN (SET IN) To MOD IN a SET IN number, is to Set In a new IN-time timecode address for the current Event on the current Track without changing the duration of the Event. 1 Type a timecode number on the numeric keypad. 2 Press [SHIFT][MOD IN]. The number entered will be set into the Event as the new INtime, and the duration of the Event will not be changed. SET OUT To SET OUT a number is to specify a new OUT-time timecode address for the current Event on the current Track. 1 Type a timecode number on the numeric keypad. 2 Press [SET OUT]. The number entered will be set into the Event as the new OUTtime, and the Event duration will be adjusted accordingly. MOD OUT (SET OUT) To MOD OUT a number is to specify a new OUT-time timecode address for the current Event on the current Track without changing the duration of the Event. Keyboard Functions 1 Type a timecode number on the numeric keypad. 2 Press [SHIFT][MOD OUT] 141 The number entered will be set into the Event as the new OUTtime, and the duration of the Event will not be changed. MARK IN Press [MARK IN] to enter the current position of the selected device as the In-point for the current Event. MOD IN (MARK IN) To MOD IN a MARK IN number, is to mark the current position of the selected device as the In-point for the Event without changing the Events duration. Press [SHIFT][MOD IN]. The devices current position will be the new IN-time, and the duration of the Event will not be changed. MARK OUT Press [MARK OUT] to enter the current position of the selected device as the Out-point for the current Event. MOD OUT (MARK OUT) To MOD OUT a MARK OUT number, is to mark the current position of the selected device as the Out-point for the Event without changing the Events duration. Press [SHIFT][MOD OUT]. The devices current position will be the new Out-time, and the duration of the Event will not be changed. MARK IN TL In the Edit Mode, when you MARK IN an Event on the Timeline, the new In-time is marked and the Event is repositioned to align with the beginning of the Record Event. Should you wish to MARK IN a new time, but position the Event at the TLG, press [MARK IN TL]. The devices current position will be the new In-time, and the Event will be positioned at the TLG. 142 DiVA User's Guide MOD IN (MARK IN TL) In the Edit Mode, when you ‘MARK IN TL’ an Event on the Timeline, the new In-time is marked, the Event is repositioned to align with the TLG, and the duration of the Event is changed accordingly. Should you wish to ‘MARK IN TL’, but you do not wish to change the duration of the Event, position the Event at the TLG, press [SHIFT][MOD IN]. The devices current position will be the new In-time, and the duration of the Event will not be changed. MARK OUT TL In the Edit Mode, when you MARK OUT an Event on the Timeline, the new In-time is marked and the Event is repositioned to align with the beginning of the Record Event. Should you wish to MARK OUT a new time, but position the Event at the TLG, press [MARK OUT TL]. The devices current position will be the new Out-time, and the Event will be positioned at the TLG. RESET Press [SHIFT][RESET] to reset communications between DiVA and all devices serially connected via RS-422. The reset devices and respective ports will be listed in the Message Window. Keyboard Functions 143 9.10. Red Key RECORD Insert Edit In the Edit Mode, an Insert Edit is an edit that is performed over existing Control Track on videotape or on a server clip. When Insert is selected as the Edit Mode, the Record Event will be red. An Insert Edit edits only audio and video, leaving the control track and timecode untouched. Both the Inpoint and Out-point of an Insert Edit will be ‘clean’; that is, that neither the In or Out edits will cause a disruption in the control track. An Insert Edit differs from an Assemble Edit in that Assemble Edits record controls track, timecode, audio and video. While the In-point of an Assemble Edit will be ‘clean’, the Out-point of the edit will have anywhere from a 4 to 8 frame disruption in the control track. Assemble Edit In the Edit Mode, an Assemble Edit is an edit that is generally performed over blank videotape. With a video server as the Record Event, there is no difference between Insert Mode and Assemble Mode. When Assemble is selected as the Edit Mode, the Record Event will be magenta. An Assemble Edit differs from an Insert Edit in that Assemble Edits record controls track, timecode, audio and video. While the In-point of an Assemble Edit on videotape will be ‘clean’, the Out-point of the edit will have anywhere from a 4 to 8 frame disruption in the control track. Bump Out When recording to a VTR, an edit will terminate automatically when the OUT-point of the Record Event is reached, or when the user presses the [RECORD] key before reaching the programmed OUT-point. This 144 DiVA User's Guide action is called "bumping out" of an edit. When you ‘bump-out’ of an edit when in the Edit Mode, the Timeline will update according to your settings, and the edit, as performed, will be sent to the EDL. When a VTR edit terminates frame accurately at the defined OUT-point of an edit, it is because the edit-out command is sent 4 to 8 frames earlier based on the device’s protocol. Because of this latency, if you bump-out “onthe-fly” (terminate the edit using the [RECORD] key), the VTR will continue to record for an additional 4 to 8 frames. VTR Crash Record To Crash Record to a VTR: 1 Position the videotape where you want it to commence recording. 2 Press [SHIFT][RECORD][RECORD]. The VTR will record its current audio and video inputs, and will record timecode depending on the TC settings and routing of the VTR. VTR First Edit To crash record on a VTR starting with a specific timecode, 1 Position the videotape where you want it to commence recording. 2 On the numeric keypad type the desired starting timecode. 3 Press [SHIFT][RECORD][RECORD]. The VTR will record its current audio and video inputs, and will record the specified timecode depending on the TC settings and routing of the VTR. VTR Insert Record (Virtual Edit) To perform an Insert edit on a VTR while not in the Edit Mode, perform the following: 1 Set the IN and OUT-points for the Record Event. 2 Press [TOGGL] until the Event turns red. Press [RECORD]. The VTR will cleanly edit IN and OUT as defined. Keyboard Functions 145 Note that there will be no record of this edit in the EDL. In order to save EDL data, you must be in the Edit Mode. VTR Assemble To perform an Assemble edit on a VTR while not in the Edit Mode, perform the following: 1 Set the IN and OUT-points for the Event. 2 Press [TOGGL] until the Event turns magenta. 3 Press [RECORD]. The VTR will cleanly edit IN, but the OUT-point will have a 4 to 8 frame break in the control Track. Server Record (VDCP) To record on a VDCP controlled video server, perform the following: 1 Select the Track assigned to a record channel of your video server. 2 Press [ASGN]. The server clip directory will open. 3 In the New field enter the name for the new Clip. 4 Select AutoName to automatically increment the Clip file names if two or more Clips will be created with the same name. 5 In the Dur: field enter the duration for the new Clip. 6 With the Dur: field highlighted, press [ENTER]. A red record Event will be created at the Timeline Guide on the selected Track. 7 Press [RECORD] to initiate recording. To stop a Record operation on the server press [STOP] or [ALLSTOP] (SPACEBAR). 146 DiVA User's Guide MANUAL (RECORD) VTR Crash Record To Crash Record to a VTR: 1 Position the videotape where you want it to commence recording. 2 Press [SHIFT][RECORD][RECORD]. The VTR will record its current audio and video inputs, and will record timecode depending on the TC settings and routing of the VTR. VTR First Edit To crash record on a VTR starting with a specific timecode, 1 Position the videotape where you want it to commence recording. 2 On the numeric keypad type the desired starting timecode. 3 Press [SHIFT][RECORD][RECORD]. The VTR will record its current audio and video inputs, and will record the specified timecode depending on the TC settings and routing of the VTR. Keyboard Functions 147 9.11. Pink Keys AUTO ASSEMBLE Press [AUTO ASMBL] on the DiVA keyboard. The Auto Assembly Options Dialog will open. Remove Other TL Events With this item checked, recalling an edit from the EDL will remove Events currently on Tracks where recalled Events will be placed. Ignore R-Marks With this item checked, the selected Auto Assembly Mode will be performed on all applicable edits, ignoring whether or not there is an R-Mark associated with the Edit. If unchecked, edits with an R-Mark are skipped. Select All EDL Edits With this item selected, the first and last edit numbers from the EDL will be entered into the “From” and “Thru” text entry fields, and the “Beginning” and “End” radio buttons will be selected. Mode A With Mode A selected, the Edits defined in the “From” and “Thru” text entry fields will be performed in 148 DiVA User's Guide consecutive order as they appear in the current EDL, prompting you to Mount a new reel when necessary. An R-Mark will be added to each edit in the EDL after it is performed. Mode B With Mode B selected, the Edits defined in the “From” and “Thru” text entry fields will be performed in consecutive order as long as the Edit’s required Reel is mounted. If the Reel is not currently mounted, the Edit will be skipped. An R-Mark will be added to each edit in the EDL after it is performed. Assemble Press the Assemble button to begin the Auto Assembly process. Cancel Press the Cancel button or [ALLSTOP] to stop the Auto Assembly process. Save Settings Press the Save Settings button to save the current Auto Assembly dialog choices. From You may enter the desired starting Edit of the sequence, select Beginning to define the first Edit in the EDL, or select Current to specify the highlighted Edit in the EDL. Thru You may enter the desired last Edit of the sequence, select End to define the last Edit in the EDL, or select Current to define the highlighted Edit in the EDL. SHORTCUT KEYS The following “shortcut” keys may also be used in conjunction with the Auto Assemble feature: [AUTO ASMBL],[A] = Auto Assemble All Edits [AUTO ASMBL],[B] = Auto Assemble Beginning Edit [AUTO ASMBL],[E] = Auto Assemble End Edit [AUTO ASMBL],[C] = Auto Assemble Current Keyboard Functions 149 [AUTO ASMBL],[R] = Resume Edit sequence [AUTO ASMBL],[AUTO ASMBL] = Auto Assemble current EDL Edit. Set and Clear R-Marks An R-Mark (Record Mark) is automatically displayed in the REC column to let the user and the system know if a specific Edit in the EDL has or has not already been recorded. Unless the "Ignore R-Marks" setting is selected in the Auto Assembly Dialog, the Auto Assemble process will perform all of the Edits defined in the From & Thru text fields that do not have R-Marks associated with them in the EDL. You may manually Set R-Marks to Edits to prevent them from being Auto Assembled, or Clear them from Edits to enable them to be Auto Assembled. Press [SHIFT][ASMBL] on the DiVA keyboard. The R-Marks Dialog will open. Set With this item selected, R-Marks will be Set or added to the range of Edits defined in the “From” and “Thru” text entry fields. Clear With this item selected, R-Marks will be cleared or deleted from the range of Edits defined in the “From” and “Thru” text entry fields. All Edits With this item selected, R-Marks will be Set or Cleared from all Edits in the EDL. 150 DiVA User's Guide From You may enter the desired starting Edit using the numeric keypad, select Beginning to define the first Edit in the EDL, or select Current to define the highlighted Edit in the EDL. Thru You may enter the desired last Edit using the numeric keypad, select End to define the last Edit in the EDL, or select Current to define the highlighted Edit in the EDL. Shortcut Keys The following shortcut keys may also be used when entering Edit numbers in the From and Thru text entry fields: [A] = All Edits [B] = Beginning Edit [E] = End Edit [C] = Current Edit The Auto Assembly Track When an EDL is loaded into the current EDL Bin, it is automatically displayed on the Timeline with blue “edit line” separators at each edit point. Edits with R-Marks associated with them are green to show that they have been recorded. Edits without R-Marks are displayed pink to show they have yet to be recorded. When the Auto Assembly process is initiated by pressing the Assemble button in the Auto Assemble Dialog, the next Edit is recalled to the Timeline, and the Record Event is displayed red for an Insert Edit, orange for a Pre-read Edit, or magenta for an Assemble Edit. Once the Edit has been performed, the Record Event is displayed green to show that it has now been recorded, and an R-Mark is placed to the right of the Edit in the EDL. R-MARK Press [R MARK] to open the ‘R’ Mark Dialog. See “Set and Clear R-Marks”, Page 149. Keyboard Functions 151 REPLAY Press [RPLAY] to replay the Record Event just performed. Any edit in the EDL can be replayed by selecting the edit in the EDL and pressing [RPLAY]. RECALL Press [RECALL] to recall the currently highlighted edit in the EDL to the Timeline. PREVIEW Press the [PVW] key to preview the current edit. All Events on Tracks that are set to "participate on air" will play out, together with all programmed switcher and mixer transition effects. Regardless of where the Timeline is currently positioned, the preview will start from the beginning of the Record Event, and continue until it reaches the end of the Record Event or until you press [ALLSTOP]. PREVIEW TL If you wish to preview a section of the current edit from a location other than the beginning of the Record Event, position the TLG at that location and press [PVW TL]. At the start of an edit, if several Events are encountered on the Timeline with the same Timeline start and the same A/V components enabled, DiVA will select the highlighted Track on the video switcher as the first Event on the Timeline. If an inactive Track is selected that is not part of the current edit, the topmost of the Events will be the first Event on the Timeline selected on the video switcher. 152 DiVA User's Guide 9.12. Blue Keys AUDIO-ONLY EVENT To change the Selected Event to be an Audio Only Event, press [VIDEO]. This toggles the Video Track ON/OFF. VIDEO-ONLY EVENT To change the Selected Event to be a VIDEO Only Event, press [AUDIO]. This toggles all the enabled audio sub-Tracks ON/OFF. You may also toggle each audio sub-Track independently by pressing [A1] - [A8] and [A9] - [A12]. AUDIO SUB-TRACKS To select or deselect audio sub-Tracks of the first eight channels of the Selected Event, press the corresponding [A1] [A8] keys. On a Record Event with 8-12 audio channels, press [SHIFT][A9] - [A12] to select or deselect channels A9 - A12. Selecting and de-selecting audio sub-Tracks on a Source Event affects the channel(s) that will be opened on the audio mixer during a preview or recording. Selecting and deselecting audio sub-Track on a Record Event affects which channels of the record device will be armed during a recording. Twelve Channel Audio DiVA supports 12-channel audio record control for VTRs that have that capability; for example the Sony SRW-5000. When enabled, all 12 sub-Tracks are shown in the Event display. LEVEL Press [LEVEL] to capture the current level settings of the audio mixer. This feature is device dependent and does not work for all audio mixers Keyboard Functions 153 ADDITIVE In the previous Dialog, you see that A7 and A8 have been checked under the Additive heading. With this setting, when the current Event's audio channels are enabled in a Preview or Recording, channels A7 and A8 of the previous Event will be left open. Pressing [SHIFT][ADD] will toggle the current Event ‘Additive’ without the need to enter the SPLIT Dialog. To differentiate Additive from other audio modifications, its icon will change to a white box with a red . This section will only appear when a driver that supports this function is installed. SPLIT A Split Event or split edit is an Event where either the video or audio channel(s) are delayed. That is, at least one A/V component of the Event starts before the other. The simplest way to perform a split edit, is to separate an Event by pressing [SEP EVENT] at the desired split point, identified by the position of the CPI or TLG, and change the A/V components of an Event as shown in the following example: In the previous example, the edit starts with video and 8 channels of audio enabled. At the SEP EVENT point at 4:10 into the original Event, audio channels 1-4 are turned off, and the edit continues with video and audio channels 5-8 enabled. Split edits can also be performed by using the Split Dialog. Creating a Split Event To make these Split Edits, press [SPLIT]. The following dialog is opened. 154 DiVA User's Guide 1 Place the CPI at the desired split point. 2 Check Split Video and/or one or more of the A1 – A12 Audio Channels check boxes in the Select section of the dialog. 3 Press the [MARK IN] key. The sub-Tracks on the Event will display the results. In the following example of a simple split Event, audio channels 1-4 are present at the beginning of the Event. Video is introduced later in the Event. In the following example of a complex split Event, these Events happen in sequence: 1 Audio channels 3-4 are present. 2 Video is introduced. 3 Audio channel 2 is introduced. 4 Audio channel 1 is introduced. 5 Video is removed. 6 Audio channel 4 is removed. 7 Audio channel 3 is removed. 8 Audio channel 2 is removed. The Event ends with only audio channel 1 active. Keyboard Functions 155 The Split Dialog Pressing [SPLIT] opens the Split Dialog, below. Select The Select section of the dialog contains options for the split operation: ALL - Checking All will select all audio sub-Tracks to be affected by the split. A1 – A12 - Checking A1 – A12 will select audio sub-Tracks 1 - 12 to be affected by the action. SPLIT VIDEO - Checking Split Video will select the video sub-Track to be affected by the split operation. RAMPS - When Ramps is checked, audio levels will transition smoothly from one keyframe to the next. SHOW GRAPH - Checking Show Graph turns on the graphic display of the current Event's audio channels. Reset The Reset section of the Dialog contains options for resetting audio levels back to their original level. A1-A8 - will reset any level changes, split points, and ramps for the selected audio channelRESET ALL - will reset all level changes, split points, and ramps for all active audio channels. ALL LEVELS- will reset any level changes made to all Select channels. ALL IN - will reset all SPLIT IN points, regardless of Select status. 156 DiVA User's Guide ALL OUT - will reset all SPLIT OUT points, regardless of Select status. Global Select Global, press [SHIFT] and turn the Jog wheel to change the overall global level for the Selected audio sub-Tracks of the current Event. Keyframe Select Keyframe, press [SHIFT] and turn the Jog wheel to change the level for the keyframe at the TLG. When the Split Dialog is open, pressing [LEFT ARROW] or [RIGHT ARROW] will jump to the previous or next speed keyframe for all audio channels that are selected. Audio Transition Rates When setting up a video transition rate, the audio will, by default, transition at the same rate as the video. If you wish the audio to cut or to transition at a different time or rate than the video, perform the following: 1 Press [DISS] to open the Effects Dialog. 2 Uncheck Audio Follows Video. In the following example, the video will dissolve at a rate of 1:15 but the audio will transition as defined in the Split Dialog. 3 Press [SPLIT] to open the Split Dialog and select the audio channel you wish to change. In the following example, only audio channel A1 is selected. 4 Assuming that you wish an audio transition rate of 15 frames for audio channel A1, press [1],[5],[DISS]. Keyboard Functions 157 Since only audio channel A1 was selected in the Split Dialog, the rate for this channel is seen as different from audio channel A2. Setting Different Transition Rates for Each Audio Channel Using the same method as described previously, you may set different transition rates (audio mixer dependent) for each audio channel. 1 Press [SPLIT] to open the Split Dialog. 2 Check the appropriate audio channel(s) in the Split Dialog and set its rate. 3 Repeat for each channel. The following example shows different transition rates for each channel: TBC CONTROL (VTRs only) To activate VTR TBC Control, press [TBC]. The TBC Settings Dialog will open. 158 DiVA User's Guide More about DiVA TBC control: This feature is only available for Sony or Panasonic VTRs that enable TBC control over the RS422 control port. The TBC dialog may remain open during a Preview or Recording. A TBC setting becomes part of the Event. TBC settings can be saved and recalled to an .L2D file, but not from and to the EDL. When Active is checked, it means that the TBC setting stored in an Event will be activated when that Event is Selected or encountered during a Preview or Recording. When All Events Active is checked, it means that the TBC settings stored in all Events are active, and will be activated when they are Selected or encountered during a Preview or Recording. If this feature doesn’t work with your particular VTR, and you feel that it should, contact Editware: [email protected]. Be sure to include the make and model of the VTR. SWITCHER OFF Press [SWR OFF] to disable DiVA control of the video switcher. MIXER OFF Press [SWR OFF] to disable DiVA control of the video switcher. Keyboard Functions 159 9.13. Green Keys EDIT TRACK This Track (T1) is the Only Track thyat can be used for the Edit Mode Record Track. When the Edit Mode is not enabled, this Track follows the same rules as all other Tracks. T1-T12 (optionally T2.1-T2.12) Press [T1]-[T12] to select the respective Track. When selected, the Track will become a darker shade, and the Track button will become highlighted. SWAP TRACKS Press [SWAP] to exchange the contents and assignments of one Track with another. 1 Press the [T1]-[T12] key you wish to Swap. Press [SWAP]. The word SWAP appears on the Button for that Track. 2 Press the [T1]-[T12] key you wish to swap with. The two sources and all their assigned values will be swapped. See “Swap Tracks”, Page 20 for Swapping Tracks while in the Assignment Page. 160 DiVA User's Guide Edit Mode 161 10. EDIT MODE The Edit Mode adds a more traditional linear editing style and look to DiVA. The primary features of the Edit Mode are the Record Track, the Settings, the EDL BINs, Matches, and Auto Assembly. This section will discuss these and other features that are directly related to linear and non-linear editing functionality on the DiVA. Please note that the Edit Mode is an option to the system. If you have not ordered your DiVA with the Edit Mode option, it will not be active. 10.1. The Edit Record Track The Edit Record Track is the Timeline representation of the videotape or clip that you will use as your record master. Like videotape, the Record Track or ‘Black Track’, will have a beginning and an end, a specified length, and it will display recorded Events, Events yet to be recorded, the currently programmed record Event, and black where there is nothing yet recorded. Note that the Edit Record Track is always Track 1. Assigning the Server Edit Record Track In the above image, the Track 1 button has turned red. This shows that the edit Mode has been enabled. Also, below the Track ID number are displayed the letters EDIT. Assigning the VTR Edit Record Track Different devices have different ways of mounting the Edit Record Track. This example is for VTRs. 1 Select the Edit Record Track. 2 Press [MARK IN]. The EDIT RECORD TRACK MEDIA MOUNT Dialog will open to allow you to define the parameters of the Edit Record Track or the "R-VTR". 3 Press Mount to mount the record tape. Press Cancel to abort the Dialog. 162 DiVA User's Guide The options for this Dialog are explained below: Reel ID This field displays the currently assigned Reel ID for the Primary Recorder. If you change the Reel ID in this dialog, the change will also be reflected in the Track Settings Dialog. The drop-down menu for this field contains any previously assigned Reel IDs. Selecting one of them will automatically change the currently assigned Reel ID for the tape currently mounted, or about to be mounted, on the Edit Record Track. Folder The Folder menu is for future expansion. Shot This field allows you to enter a descriptive name for this recording. The default is Clip1. This Name will be used for the entire show, unless you change it in the Event Dialog to mark a segment change, a revision number, a new show number, etc. Rec In This field defines the start time of the Record tape and the beginning of the “Black Track”. Initially, this number comes from the INIT Page Values under the LinearMode section, DefRecStart. You can: Leave this value. [Double click] in the field and enter a new In-time for this Record tape. [Double click] in the field and press the [IN] key to enter the current TC position of the VTR assigned to the Record Track. Out This field defines the end time of the Record tape Record tape and the end of the “Black Track”. The OUT-point field is auto-calculated based Edit Mode 163 on the IN-point and Duration. You can: Leave this value. [Double click] in the field and enter a new OUT-time for this Record tape. Dur This field defines the duration of the Record tape. The Duration field is auto-calculated based on the IN-point and OUT-point. You can: Leave this value. [Double click] in the field and enter a new Duration for this Record tape. The OUT-point will auto-calculate. Dropframe This check box allows the user to set the Record tape timecode to DF or NDF (NTSC). If the videotape is already mounted, this will be selected automatically. You can: Select to set the Record Tape to Drop-Frame TC. De-select to set the Record Tape to Non Drop-Frame TC. TL In This check box allows the user to set the Timeline Guide time to match the Record timecode. Select TL TIME=IN to ENABLE this feature. De-select TL TIME=IN to DISABLE this feature.. 164 DiVA User's Guide EDL Bin The EDL Bins are only active in the Edit Mode. The EDL Bin displays the results of an edit after the user presses [RECORD] to terminate the edit manually, or when an edit is completed by reaching the pre-defined OUTpoint. The results of the edit are automatically placed in the EDL with an R-MARK displayed alongside the Record Event under the REC column, to show that this edit has been recorded to tape. If an edit in the EDL does not have an RMark, the R-Mark has either been manually removed or the edit was created in the Record OFF Mode. See record off mode There are 10 EDL Bins, and each Bin can have its own EDL. Press the desired BIN tab to open that Bin. EDL Bin Soft Keys The functionality of each of the EDL Soft Keys is described below. Save [Click] Save to save the current EDL from the current BIN. The Save File Dialog is opened allowing the user to name the file and select the directory to which it will be saved. The file is saved to the hard drive as an .fbe file (Fastrack Binary EDL). The .fbe file is proprietary to DiVA, and must be exported in a GVG format EDL to be of use outside of the Fastrack and DiVA systems. Load [Click] Load to load an existing .fbe file from the system hard drive. This Timeline will be your working file and file name. Edit Mode 165 Export [Click] Export to output the current EDL Bin .fbe file in GVG/Editware .edl format. Import [Click] Import to input a GVG/Editware .edl format EDL into the current EDL Bin as an .fbe file. The EDL Import Dialog will open, and offer you the opportunity to save the current EDL first. Load [Click] Load to select and import a GVG format EDL into the current EDL Bin. It will auto-translate automatically to .fbe format. Append [Click] Append to select and import a GVG format EDL and add it to the end of the current EDL in the current EDL Bin. It will auto-translate automatically to .fbe format. Default M/E From the pull-down menu, select the M/E to be assigned to the edits in the EDL being imported. 166 DiVA User's Guide CLEAR ALL [Click] Clear All to delete all edits from all EDL Bins. CLEAR [Click] Clear to delete all edits from the current EDL Bin. RECALL [Click] Recall to recall the selected edit in the EDL. All other Events on the Timeline will be removed. The Event may then be executed or modified and replaced into the EDL. When an Event is recalled to the Timeline, it is not removed from the EDL. The EDL remains intact and all related data and metadata such as speeds, stored TBC and MEM data and PEGS are copied with the Events to the Timeline. To undo the result of an unwanted recall, press [UNDO]. DiVA checks to see if the reel numbers involved in the recalled edit are currently mounted. If an Event with a REEL ID not currently assigned is recalled, the system prompts which Reel needs to be assigned. Assign the Reel by pressing the appropriate [T1]-[T12] key or by [clicking] on its Track. Changes are not a requirement of a RECALL operation. If an event is recalled, it does not have to be replaced into the EDL and regular editing may be resumed. If a change is made to the event, it may be re-recorded as it is now programmed on the Timeline. Recording the event places it into the EDL as a new edit. Replace [Click] Replace to replace a recalled edit back into the EDL. After an EDL edit has been recalled and modified, you can now replace the modified edit back in the EDL. Only recalled edits can be replaced. Trying to replace an event not recalled with the Recall feature results in a REPLACE ERROR message. Edit Mode 167 Delete [Click] Delete to delete the highlighted edit and all of its components. Cut [Click] Cut to open the EDL Management Dialog, and cut (remove) edits from the EDL. From BEGINNING – Select Beginning as the first edit in a group to cut from the EDL. CURRENT – Select Current the first edit in a group to cut from the EDL. TEXT FIELD – Select the Text Field and type the edit number to be the first edit in a GROUP to cut from the EDL. Thru END – Select End as the last edit in a group to cut from the EDL. CURRENT – Select Current the last edit in a group to cut from the EDL. TEXT FIELD – Select the Text Field and type the edit number to be the last edit in a group to cut 168 DiVA User's Guide from the EDL. ALL EDITS IN A BLOCK – All edits that physically fall within the From and Thru range defined will be cut from the EDL. BY EDIT NUMBER IN A BLOCK – All edits whose edit numbers fall within the From and Thru range defined will be cut from the block of edits defined. BY EDIT NUMBERS, WHOLE LIST – All edits whose edit numbers fall within the From and Thru range defined will be cut from wherever they are found in the EDL. RIPPLE AFTERWARDS – All edits following the last edit in the Cut group, will have their Record times adjusted accordingly so as not to leave a gap in the EDL. Copy From BEGINNING – Select Beginning as the first edit in a group to copy from the EDL. CURRENT – Select Current the first edit in a group to copy from the EDL. TEXT FIELD – Select the Text Field and type the edit number to be the first edit in a GROUP to cut from the EDL. Thru END – Select End as the last edit in a group to copy from the EDL. Edit Mode 169 CURRENT – Select Current the last edit in a group to copy from the EDL. TEXT FIELD – Select the Text Field and type the edit number to be the last edit in a group to copy from the EDL. ALL EDITS IN A BLOCK – All edits that physically fall within the From and Thru range defined will be copied from the EDL. BY EDIT NUMBER IN A BLOCK – All edits whose edit numbers fall within the From and Thru range defined will be copied from the block of edits defined. BY EDIT NUMBERS, WHOLE LIST – All edits whose edit numbers fall within the From and Thru range defined will be copied from wherever they are found in the EDL. RIPPLE AFTERWARDS – All edits following the last edit in the copied group, will have their Record times adjusted accordingly so as not to leave a gap in the EDL. After END – Select End to paste the copied group of edits at the end of the EDL. CURRENT – Select Current to paste the copied group of edits after the current (highlighted) edit in the EDL. TEXT FIELD – Select the Text Field and type the edit number after which you will paste the copied group of edits. 170 DiVA User's Guide ALL EDITS IN A BLOCK – All edits in the EDL that physically fall within the defined From and Thru range will be copied. BY EDIT NUMBER IN A BLOCK – All edits whose edit numbers fall within the defined From and Thru range will be copied. BY EDIT NUMBERS, WHOLE LIST – All edits whose edit numbers fall within the defined From and Thru range will be copied from wherever they are found in the EDL. RIPPLE AFTERWARDS – All edits following the last edit in the pasted group will have their Record times adjusted accordingly so the pasted edits do not overlap other edits in the EDL Paste [Click] Paste to open the EDL Management Dialog and paste edits copied from the EDL to another location in the EDL or to another EDL Bin. After END – Select End to paste the copied group of edits at the end of the EDL. CURRENT – Select Current to paste the copied group of edits after the current (highlighted) edit in the EDL. TEXT FIELD – Select the Text Field and type the edit number after which you will paste the copied group of edits. RIPPLE AFTER – All edits following the last edit in the pasted group will have their Record times adjusted accordingly so the pasted edits do not overlap other edits in the EDL. Ripple [Click] Ripple to open the EDL Management Dialog and Edit Mode 171 Ripple the Record times in the EDL. Ripple and its effects on the EDL are very important. After an event is added, deleted, or moved, rippling the EDL adjusts the record times of a specified group of events. The specified events themselves remain where they are in the EDL. Ripple automatically changes the record times of any event with an equal or later record IN- time, regardless of where it appears in the EDL. For example, when a new event is inserted into the EDL, all events with Record IN-times later than or equal to the Record IN-time of the inserted event would have their record times adjusted by the amount of the inserted Event's duration. Source times are not affected. All rippled events lose their RMarks, since they are unrecorded in their current form. From BEGINNING – Select Beginning as the first edit in a group to ripple in the EDL. CURRENT – Select Current the first edit in a group to ripple in the EDL. TEXT FIELD – Select the Text Field and type the edit number to be the first edit in a group to ripple in the EDL. Thru END – Select End as the last edit in a group to ripple in the EDL. CURRENT – Select Current the last edit in a group to ripple in the EDL. TEXT FIELD – Select the Text Field and type the edit number to be the last edit in a group to ripple in the EDL. 172 DiVA User's Guide ALL EDITS IN A BLOCK – All edits that physically fall within the From and Thru range defined will be rippled in the EDL. BY EDIT NUMBER IN A BLOCK – All edits whose edit numbers fall within the From and Thru range defined in the block of edits will be rippled. BY EDIT NUMBERS, WHOLE LIST – All edits whose edit numbers fall within the From and Thru range defined will be rippled wherever they are found in the EDL. R Marks [Click] R Mrks to open the EDL Management Dialog and clear, set or toggle R Marks from an edit or group of edits in the EDL. From BEGINNING – Select Beginning as the first edit in a group of edits to clear, set or toggle R Marks in the EDL. CURRENT – Select Current as the first edit in a group of edits to clear, set or toggle R Marks in the EDL. TEXT FIELD – Select the Text Field and type the edit number to be the first edit in a group of edits to clear, set or toggle R Marks in the EDL. Thru END – Select End as the last edit in a group of edits to clear, set or toggle R Marks in the EDL. Edit Mode 173 CURRENT – Select Current the last edit in a group of edits to clear, set or toggle R Marks in the EDL. TEXT FIELD – Select the Text Field and type the edit number to be the last edit in a group of edits to clear, set or toggle R Marks in the EDL. ALL EDITS IN A BLOCK – All edits in the EDL that physically fall within the defined From and Thru range will have their R Marks cleared, set or toggled. BY EDIT NUMBER IN A BLOCK – All edits whose edit numbers fall within the defined From and Thru range will have their R Marks cleared, set or toggled. BY EDIT NUMBERS, WHOLE LIST – All edits whose edit numbers fall within the defined From and Thru range will have their R Marks cleared, set or toggled from wherever they are found in the EDL. REEL ID [Click] Reel ID to open the EDL Management Dialog and edit or change one or more Reel ID in the EDL. From BEGINNING – Select Beginning as the first edit in a group of edits in the EDL to change the Reel ID. CURRENT – Select Current as the first edit in a group of edits in the EDL to change the Reel ID. TEXT FIELD – Select the Text Field and type the edit number to be the first edit in a group of edits in the EDL to change the Reel ID. 174 DiVA User's Guide Thru END – Select End as the last edit in a group of edits to of edits in the EDL to change the Reel ID. CURRENT – Select Current the last edit in a group of edits in the EDL to change the Reel ID. TEXT FIELD – Select the Text Field and type the edit number to be the last edit in a group of edits in the EDL to change the Reel ID. ALL EDITS IN A BLOCK – All edits in the EDL that physically fall within the defined From and Thru range will have their Reel ID changed. BY EDIT NUMBER IN A BLOCK – All edits whose edit numbers fall within the defined From and Thru range will have their Reel ID changed. BY EDIT NUMBERS, WHOLE LIST – All edits whose edit numbers fall within the defined From and Thru range will have their will have their Reel ID changed wherever they are found in the EDL. Note [Click] Note to open the Note Dialog to allow the addition of a text note to the selected Edit Line. Title [Click] Title to open the Title Dialog to allow the addition of a Title or name to the current EDL Bin. Clean N/A. Reel ID (VTRs Only). See Reel ID (VTRs Only), Page 175 Edit Mode 175 10.2. Reel ID (VTRs Only) Each VTR Event on a Timeline can have its own Reel ID. A Reel ID is the name of the tape that is currently mounted on a current VTR. If you have not assigned a Reel ID to a mounted Reel, DiVA uses the Device Name of the VTR as the default Reel ID. ASSIGNING A REEL ID To assign a Reel ID to a mounted VTR Reel: 1 Press [SHIFT][LOCK]. The Track Settings Dialog will open for the current Track. The Mounted Reel ID field will display the currently assigned Reel ID. To change the Reel ID, 2 Enter a new name in this field and press [ESC] to close dialog. RECALLING A REEL ID If you attempt to recall an edit from the EDL with a Reel ID that has not been mounted, you will be prompted with the following Dialog: Select the Track where you wish this Reel mounted and [Click] OK. SHOW REEL ID The name displayed on the DiVA screen to the right of the Track number can either be the Device Name as assigned in the Assignment Page, or the Reel ID as assigned in the Track Properties Dialog. See Track Properties, Page 176 DiVA User's Guide 58. The Auto Assemble function works in conjunction with the current EDL. This feature allows you to automatically reproduce or repeat edits in the current EDL individually, in a group, or by the presence or absence of an ‘R’ Mark. See SET AND CLEAR R-MARKS, Page 149. To use the Auto Assembly feature, your DiVA system must have the Edit Mode option installed and enabled in the Assignment Page. DiVA will Auto Assemble imported GVG.EDL lists or its own native .L2D files that have been generated in a DiVA or Fastrack. FastLog Database 177 11. FASTLOG DATABASE FastLog is an optional Media Management application within DiVA, which may be activated during an editing session. FastLog can be used in a standalone mode, or in tandem with the MediaDB Asset Management System from ReelData. The FastLog database can be queried and updated during a session, and data related to a particular Event can be recalled and placed on the edit Timeline. Tape-based Events are treated as they would be during normal editing: If the tape is currently mounted, the Event is ready to use, otherwise a prompt is issued to the operator to mount the tape. Serverbased Events are loaded on a Server channel, ready to use. Clips can be loaded, trimmed if desired, and full path name and related information can be logged to the database while editing. 11.1. FastLog Table View If the feature is enabled on the DiVA, press the [FastLog] key to open the table view of the FastLog database. 178 DiVA User's Guide MEDIA ID Identifies a unique clip or sub-clip which could be anything from a still image to an entire tape or clip. Media ID is also used in MediaDB to relate FastLog data to Library, Shot Log, Transcript, and Clip Vault data. In FastLog, database Events on Omneon and Spectrum Tracks have a default Media ID set to the clip name (without the path). Data entered from other device Tracks may leave the Media ID blank for the user to fill in. CLIP NAME Identifies the clip name and path. To load the complete clip (including IN and OUT times, this record can be used at any future time to restore the Event exactly as originally created, as long as the media still resides on the server. SHOT Identifies a sub-clip by a short descriptive name. DESCRIPTION Detailed descriptive media information. KEYWORDS Like Description, but used to pre-define a list of exact words to facilitate searching. A/V Specifies Audio sub-Tracks and Video channel. TC IN Time code of the In-time of the Event. In the format hh:mm:ss:ff. For dropframe time code, the last punctuation between ss; and ;ff is a semi-colon. FastLog Database 179 DURATION Time code representation of the clip length. TL TIME Time code representation of the position on the DiVA Timeline where the Event was positioned when it was saved to the FastLog table. RATE Frame rate of media; 24, 25, 29.97, 30, 59.94 or 60 fps. TC TYPE DF or NDF DEV NAME This is the Device Name assigned to the Track from which the Event was saved. CLASS This is the Class assigned to the Track from which the Event was saved. DEVICE This is the Device assigned to the Track from which the Event was saved. IP ADDRESS This is the IP Address assigned to the Track from which the Event was saved. MEDIA FORMAT Specifies type of media, such as MPEG, DVC, etc. SHOT DATE SQL data element with date and time of shot. FastLog record is saved from DiVA. Entered manually when a IMPORT DATE Date the FastLog record was saved to the FastLog table. Entered automatically, but may be edited. IMPORTED BY Name or initials of person doing the FastLog logging. PROJECT Set automatically by DiVA in a special Project dialog. 180 DiVA User's Guide SHOWNAME Name of the show this media is part of. Entered manually on DiVA BIN Entered on MediaDB system if relevant CLIENT Entered manually on DiVA. Last Value entered is filled in as the default. PRODUCER Entered manually on DiVA. Last Value entered is filled in as the default. DIRECTOR Entered manually on DiVA. Last Value entered is filled in as the default. LOCATION Entered manually on DiVA. Last Value entered is filled in as the default. CAMERA Entered manually on DiVA. Last Value entered is filled in as the default. RECORD ID Assigned by SQL database internally. FastLog record. Sequential integer, unique to each TC OUT Entered manually on DiVA. Last Value entered is filled in as the default. PROJECT ID Entered manually on MediaDB. TENANT ID Entered manually on MediaDB. GROUP NUM Entered manually on MediaDB. 11.2. The Search Function Press [FastLog SRCH] on the keyboard or click on the [Search] button at the top of the table to launch the Search Dialog. The Search Dialog will appear at the lower FastLog Database 181 right of the DiVA screen. The Search dialog allows the user to enter data values or partial data values to retrieve all matching records. Complex queries can be created by entering values in multiple fields and selecting OR or AND logic. The drop down list at each field displays the ten most recent entries in each field. Each time the Search dialog is used, the fields contain the values used in the last search as default values. Data Entry Fields Each field has a label and a data entry area. The field can be selected with a mouse click or by using the [Tab] key to move from one to the next. The down arrow key displays the most recent entries for that field. A “%” sign is a wildcard entry. For example, using the search value “%blue sky%” in the Description field will find all records that have that exact phrase anywhere in the Description. Using AND/OR Click on this button to toggle between using OR and using AND. The button reflects the current state, so [clicking] on OR changes the search logic to AND. OR logic causes a record to be found if any of the search criteria is met. AND logic finds records for which all search criteria are met. Clear All - This button clears all entries in the search fields. Cancel - Closes the Search dialog. Search - Starts the search currently specified in the dialog. 11.3. The Mount Function [Click] Mount to load the clip or Event associated with the selected FastLog record onto a Track. Server clips are loaded on the server’s playout channel assigned to that Track. 182 DiVA User's Guide 11.4. The FastLog Data Entry Dialog The Data Entry dialog is similar to the Search dialog. To start the Data Entry Dialog, Click on an Event on the DiVA Timeline, then press [Shift][F6]. Note that some of the fields are already filled in by DiVA with data related to the Track, clip and Event. Other fields are filled with the last value entered, and the drop down menu at each field contains a list of the last values entered. Enter or modify information in any of the fields with white backgrounds, except the Show and Logged By fields. Those are preset in DiVA and are not changeable here, but can be modified in the Modify function. The drop-down menu for each field allows you to select from recently entered values for that field. When all information is entered, click on Save to FastLog. 11.5. The FastLog Modify Dialog Press the Modify button to open the Modify dialog, where most Fastlog fields can be changed as desired. This dialog is almost the same as the data entry dialog, and works similarly. Omneon/Spectrum Server TechNote 183 12. OMNEON/SPECTRUM SERVER TECHNOTE 12.1. Omneon / Spectrum Server Intro DiVA (V1.1 Release or higher) can perform linear and non-linear editing with Harmonic Spectrum (Omneon) servers. All ‘edits’ are 100% non-destructive, as the ‘Edited Master’ is a Playlist that resides on the server. Throughout this document, for reasons of description and instruction, we call the DiVA Edit Track and the Spectrum Playlist the ‘Edited Master’. This document does not cover the Setup or Operations of the Editware ‘QuickEdit’™ NLE Proxy Editor for the Spectrum Servers. Note the following about the OmNet Application: The “Recorder” requires the use of two (2) channels; one to record and one to preview/playback the recording (Edited Master). Before editing with DiVA and your server, you MUST first record a black clip and call it DIVA_BLACK. DO NOT make this clip a Reference clip. This clip will be the Record Clip for all future edit sessions. This clip must reside in the current directory for the Edit Track (usually /fs0/clip.dir). [Clicking] on New in the clip list dialog will mount this clip automatically. It is recommended that this clip be at least the length of the longest show you plan to edit. Audio edits are comprised of all assigned audio channels. OmNet and Spectrum do not break down audio edits into individual channels when editing to the Spectrum. DiVA OMNET control of the Spectrum Servers(s) is over a TCP/IP network. Please have the connection between DiVA and Spectrum verified and the IP address noted before continuing. To assign and use Spectrum channels, a ‘Player’ must be created for each channel on the server through the Spectrum ‘System Manager’. For information on creating Spectrum Player(s), see Harmonic documentation. 12.2. DiVA Setup 1. Press [ASSGN] to open the DiVA Assignment Page. 1a. For SD/1080i operation, Make the following assignments for the OmNet Track(s): 184 DiVA User's Guide 1.1 1.2 1.3 1.4 1.5 1.6 Any Device Name can be given to this Track. Select OMNET as the Class. Select Rec for the Primary Record Device on the Edit Track (Track 1). Select auto for PB sources. De-select Auto column checkmark. Skip 1b and jump to #2: Assign Ports to OmNet Tracks. 1b. For 720p operation, make the following assignments for the OmNet Track(s): 1.7 Any Device Name can be given to an OmNet Track. 1.8 Select OMNET as the Class. 1.9 Select Rec_720p as the Primary Record Device on the Edit Track (Track 1). 1.10 Select 720p for PB sources. 1.11 De-select Auto column checkmark. 1.12 Continue with #2: Assign Ports to OmNet Tracks. 2. Assign Ports to OmNet Tracks: For the Edit Track Recorder Port (Track 1): IP_address:Spectrum_Preview_Player_name/IP_address:Spectrum_Recorder_Playe r_name. Example: 192.168.1.94:P3/192.168.1.94:RP1 (where ‘P3’ is the preview Player name and ‘RP1’ is the Record Player name). For the Source(s) Port(s): IP_address:Spectrum_Player_name. Example: 192.168.1.94:P1 source channel). (where ‘P1’ is the name of a Player associated with a Note the following about enabling Tracks and server channels: When enabling a server channel for the first time, the status area will display the word ‘free’. At this time DiVA is connecting to the server and retrieving the clip list. The length of time it takes for this action depends on the number of clips in the directory… the more clips, the more time it takes. When the retrieval of the clips is complete, the word free changes to STOP or STILL. 12.3. Spectrum Directories DiVA, by default, only has visibility of the current server directory. The ‘current’ directory is the directory where the clip mounted on the Edit Track resides. The factory default Current Directory for OmNet is /fs0/clip.dir. We recommend that you retain this as your ‘Current Directory’ so that all other directories will be ‘under’ this directory, giving you access to all clips and Movies as sources for new Movies. For the DiVA editor to see and have access to other primary directories in the server, add these directory names to the directory list in the DiVA FTConfig.ini file. Omneon/Spectrum Server TechNote 185 To add directory names to the list, 1. On the DiVA, open Windows Explorer. 2. Navigate to C:/DiVA/Runtime/FTConfig.ini 3. Open the FTConfig.ini file. If asked, open it in Notepad. 4. Find the [Om-NetDirs] section. Following the format shown in the example below, add any other server directories or sub-directories you wish to browse or access from DiVA. When done, save the file and restart DiVA. Certain directories and sub-directories may be displayed in the browser that are not found in this list. These directories are used to store Clips and Movies created by DiVA, and are added automatically when DiVA is run. /Watch/ = This folder is where Discrete and Embedded Movies are automatically placed when created by DiVA. /Watch/CAUTION/CanDeleteOriginals/ = This folder is where Reference Movies and .BAK files are automatically placed when created. /FtRec.dir/ = This folder is where real-time edit recordings are automatically placed when created. /CAUTION/CanDeleteOriginals/ = This folder is where Reference Clips are automatically placed when created. MAKE A SUB-DIRECTORY DIRECTORY ON SPECTRUM SERVER FROM DIVA You can create a new sub-directory of any directory that has a clip called DIVA_BLACK in it. 1. Enter a name for the new directory and click ‘New dir’. In the example below, ‘gary’. 186 DiVA User's Guide There is no command in the API to create a new directory on Spectrum, but if you move an existing clip from one directory to a directory that doesn’t exist, then Spectrum will create that directory. When you ‘Add a new Directory’, we copy 1 frame of DIVA_BLACK to the new directory and rename it ‘dummy’. Note the following about Movie Directories: Reference, Discrete or Embedded Movies can be used as sources for new edits. They can reside in, and be loaded from, any currently accessible Spectrum directory when used as a source in a linear edit. For Movies to be used as sources in a non-linear edit or in a new Movie, the Movies must reside in the Current Directory or a sub-directory of the Current Directory. As a reminder, the ‘Current Directory’ is the same directory where the currently mounted clip on the Edit Track resides. LOADING THE RECORD EVENT (EDIT MASTER) ON THE EDIT TRACK 1. Select the Edit Track 1. (This should only be done for the Edit Track and not the source Tracks.) 2. Press [ALT TC] to make the Edit Track Track CTL. The letters CTL will be displayed in yellow in the Status area to the left of the Record Track. This will assure that the Timeline ‘timecode’ will be sequential and consecutive. 3. Press [ASSIGN] to open the Assign Dialog (Clip Browser). Omneon/Spectrum Server TechNote 187 4. Select and [double click] the DiVA_BLACK Clip from the list of clips or click New Clip. DIVA_BLACK will then be mounted on the Edit Track with its underlying ‘Black Track’. If DIVA_BLACK does not exist in the current directory for the Edit Track, create it on the server. Make sure that the DiVA_BLACK clip is long enough to contain your entire program. This clip will be a ‘place-holder’ for the timeline, and the original DiVA_BLACK clip will not be changed in any way, as this process is completely non-destructive. 12.4. Playback and Record Timing If the CPI (Current Position Indicator - red, inverted triangle) and the TLG are not aligned, they might look like the following example. If so, the accuracy of the edits and the starting source position may not be frame accurate. WRONG ALIGNMENT OF CPI’S AND TLG To align the CPI to the TLG: 1. Select each OmNet Track and press [INIT]. Assure that the OFFSET field for each OmNet Track is set to ‘0’. 2. Mount a clip on the Edit Track. 3. Mount a clip on a Source Track. 4. Perform a Preview. If the CPI and the TLG are aligned continue with #7. (It may be easier to see the relationship between the CPI and the TLG if the screen scaling is set to its maximum.) If the alignment is off between the CPI and the TLG like the previous graphic: 5. Select the Source Track and press [SHIFT][DELAY] to open the Server Delay Dialog. 188 DiVA User's Guide 6. Adjust the Play Delay by incrementing or decrementing the value in the Play Delay field so that the CPI lines up with the TLG when doing a preview. The CPI’s should be lined up correctly in both Record and Preview and the edit should be correct. The adjusted Timeline should look like the following example: CORRECT ALIGNMENT OF CPI’S AND TLG 7. Perform a short edit with an identifiable frame on the PB source. 8. Check the edit and see that the first frame of the edit was the correct source frame. If so, save your Configuration File and move on to WHAT GETS RECORDED. If not, press [SHIFT][DELAY] to open the Server Delay Dialog again and adjust the Record Delay by incrementing or decrementing the value in the Record Delay field. Repeat # 7-8 until the correct source frame is the first recorded frame. WHAT GETS RECORDED Whether the source(s) is a server clip, a VTR or a switcher crosspoint, only the material placed directly below the Record Event will be recorded, regardless of whether the edit is performed linearly or non-linearly. Also remember that the duration of the edit is ALWAYS defined by the duration of the Record Event. 1 2 In EXAMPLE 2 above… If this edit is performed linearly where there is a video switcher, there will be a DISSOLVE between the two Events, because of the way it was programmed. If this edit is performed non-linearly, there will be a CUT between the two Events, regardless of whether there is a video switcher or the way it was programmed. NLE edits are always performed as CUTs. Omneon/Spectrum Server TechNote 189 PERFORMING A LINEAR EDIT WITH OMNET When you perform a ‘linear edit’ with the Harmonic server, all Events and effects programmed within the IN and OUT-points of the Record Event are performed and recorded in real-time. The newly recorded segment is stored in the ‘/FtRec.dir/’ and then placed on the Timeline. All other operations are the same as with a standard Linear Edit. See DiVA Manual for additional information. To add a Pre-roll for your server channels, press [SHIFT][INIT] and in the INIT item Server Pre-roll, enter the desired pre-roll time. The pre-roll time entered here will be applied to all OmNet channels globally. This can be set to 0 if no pre-roll is desired, but this may result in audio ‘clicks’ at the edit points. Note that if you attempt to record a new linear edit before the previous linear edit has completed updating, the CPI’s may not align properly with the TLG. To correct this, press [ALLSTOP] and try the recording again. PERFORMING NON-LINEAR EDITS WITH OMNET (NLE) Non-linear edits can also be performed with the OmNet Application. This allows the user to insert Spectrum server clips residing on the current server, and loaded under the Record Event, to be placed on the Timeline in much faster than real-time. This includes multiple clips placed back-to-back or on separate Tracks. Any effects (varispeed, keys, DVE moves, etc.) included in the edit will be ignored when inserting a NLE. You can insert new media into an existing ‘Edit Master’, and either overwrite the old material resulting in no length change to the Black Track, or you can insert the new material and ripple the existing material to follow at the end of the newly inserted material, resulting in the Black Track becoming longer in length by the duration of the inserted material. Likewise, you can delete a section of media from an existing Edit Master, and either overwrite the old material with black or ‘pull-up’ the remaining segments. It is important to remember that the duration of the edit is ALWAYS defined by the duration of the Record Event on the Edit Track. The only exception to this rule is when you are using UseSrcDur, which automatically changes the Record Event duration to match the PB Track(s). A. Press [INSERT] to INSERT the material from the selected Track and over-write the existing material. A-only, V-only & A/V edits are allowed. (See #2 in the following graphic) B. Press [SHIFT][INSERT][RIPPL] to INSERT the material from the Track(s) and ripple the existing material following the edit on the Timeline. Only A/V edits are allowed. (See #3 in the following graphic) C. Press [DELETE] to DELETE the portion of the Timeline under the Record Event, and replace it with BLACK and silence. A-only, V-only & A/V edits are allowed. (See #4 in the following graphic) 190 DiVA User's Guide D. Press [SHIFT][DELETE][ RIPPL] to DELETE the portion of the Timeline under the Record Event, and ripple the remaining material following the edit on the Timeline. Only A/V edits are allowed. (See #5 in the following graphic) Regardless of whether the edit is performed linearly or non-linearly, server Events can be placed back-to-back on the same Track, on different Tracks, and they can be from different clips. A-ONLY / V-ONLY EDITS Audio only and video only edits can also be performed linearly and non-linearly. When performed linearly, they are recorded in real-time. When performed nonlinearly, they can be created as Reference clips (Fast) or Discrete clips (Not as fast). Reference clips are pointers to the original material and Discrete clips are pointers to newly created copies of the original material. You will find that when performing A-only or V-only NLE edits, the post-edit update takes longer that an A/V edit. This is due to the manner in which these new clips need to be re-assembled internally. If you delete A-only and V-only Reference clips using a Spectrum Application such as ClipTool or ProDrive, the underlying media or essence will be deleted. To delete a Reference Movie or clip, use Windows Explorer or refer to your Spectrum ducumentation. To disable the ability to create A-only and V-only Reference clips, press [SHIFT][INIT] to open the Initialization Page, and set INIT item # 71, ‘Enable Omneon Reference Clips’ to NO. Note the following about non-linear edits: Omneon/Spectrum Server TechNote 191 Non-linear inserts and deletions are cuts-only. Non-linear inserts with Ripple and non-linear deletions with Ripple are always audio AND video. Audio only and Video only non-linear edits cannot be Rippled. The DiVA Ripple indicator has no effect on whether non-linear edits are rippled or not. MAKING MOVIES After editing a show using the OmNet application, in order to export the Timeline or use it as a new source, it must first be made into a Movie; that is, the various clips and segments used to create the Timeline must be turned into a single clip. This is done faster than real-time, and your choices of three different types of Movies are made available in different wrappers. 1. Press [MOVIE] to open the Make Movie Dialog. 2. Name: Enter a name for the Movie you are going to create. See the Harmonic manual for any rules governing the naming of clips. 3. <Extension Field>: Select between .mov and .mxf wrappers. 4. Time Code Start: Enter the starting Time Code value to be applied to the new Movie. 5. Offset: Enter an offset for the starting timecode. In the example above, the user wants the show to start at 1:00:00:00, but the show doesn’t start on the clip for one second and six frames. With a 1:06 offset, the actual start time of the timecode at the beginning of the movie will be 59:58:24 (NTSC). 6. Type: Select the type of Movie to create. Reference: This is the quickest Movie to make. It consists of just pointers to the original material. 192 DiVA User's Guide If you delete a Reference movie using a Spectrum Application such as ClipTool or ProDrive, the underlying media or essence will also be deleted. To delete a Reference Movie or clip without deleting the original essence, use Windows Explorer or consult your Spectrum documentation. Discrete: This movie copies just the required essence included in the Timeline. If you delete this Movie, only the copied material will be deleted. Embedded: This movie copies the required essence included in the Timeline and embeds this essence into a self-contained clip. If you delete this Movie, only the copied material will be deleted. 7. Overwrite: You can overwrite Discrete or Embedded Movies with the same name without affecting the original essence. Overwriting a Reference Movie is not allowed by DiVA, as it would delete original essence. 8. Use Record Duration: When a Movie is created of the DiVA Timeline, the whole Record Timeline is included in the Movie. However, if you wish to make a Movie of a specific portion of the Record Timeline, select Use Record Duration. With this item selected, all portions of the program that fall within the current boundaries of the Record Event on the Edit Track will be used in the making of the Movie. In the example above, only the portion of the Timeline between 8;07 and 15;11 will be used in the making of this Record Duration Movie. 9. OK: Sends the command to create the Movie. While the Movie is being created, the Edit Track Track is locked-out, protecting against accidental interference … … and the progress is shown in the Message Window . Note the following about Movies: Reference Movies are automatically stored in /Watch/CAUTION/CanDeleteOriginals/. Omneon/Spectrum Server TechNote 193 Discrete and Embedded Movies are automatically stored in /Watch/ Reference, Discrete or Embedded Movies can be used as sources for new edits. They can reside in, and be loaded from, any currently accessible Spectrum directory when used as a source in a linear edit. For Movies to be used as sources in a non-linear edit, the Movies must reside in the Current Directory, a sub-directory of the Current Directory, or in the path below the Current Directory. As a reminder, the ‘Current Directory’ is the same directory where the currently mounted clip on the Edit Track resides. 12.5. Protecting and recovering your work Once the DiVA Application is running and you already have a server clip mounted on the Edit Track, if you try to load a new clip or delete the current clip, you will be asked if you want to make a backup copy of the clips on the Spectrum timeline. If you answer Yes, a backup movie will be made on the Spectrum. Then the Spectrum timeline will be deleted and the new clip loaded onto DiVA. If you answer No, the Edit Track will be deleted and no additional action will be taken. This backup file is stored in /CAUTION/CanDeleteOriginals/. To recover and use the backup clip, you will need to move it to the Current Directory you are currently working in. See your Harmonic documentation on how to move clips between directories. 12.6. Record Slaves This feature is designed to allow you to create and name a Record Clip on one or more Omneon channels, start and stop the recording, and immediately have new Record Clips created automatically using the same original names, but with incremental numeration. For example; Original Record Clip name=BOB. Subsequent Clip Name=BOB-1. Next Clip Name=BOB-2, and so forth. 1. Select the Spectrum Track to which you wish to apply this feature. 2. [Right click] on the selected Track and select Track Properties from the menu. 194 DiVA User's Guide The Track Properties Dialog for that Track will open. 3. Check the Record Slave box. 4. Repeat for each OmNet Track you wish to apply this feature. When done, dismiss the Dialog. RECORD SLAVE OPERATION 5. Select a server Track to mount a Record Clip. The Edit Track need not be enabled for this operation. 6. Press [CLIP LIST] to open the Clip Browser. 7. Enter a name for the record clip in the New: text field. 8. Check the Auto Name box. Omneon/Spectrum Server TechNote 195 9. Set your chosen suffix number in the spin box field. 10. Enter your desired default Record Event duration in the Dur field. It is wise to make this duration longer than needed. 11. With the cursor in the Dur: text field, press [ENTER] and the Record Event will be placed on the Track at the TLG. 12. Repeat on other enabled Tracks as desired. There is no need to close the Track Properties Dialog each time. DiVA will remember your desired name, suffix and duration for each additional Track. When done, dismiss the browser dialog. 13. Record when ready. To end the recording and create an auto pickup with the next Record Events, press the [RECORD] key to terminate the edit before reaching the end of the Record Events. If the recording ends or if you press [ALLSTOP], DiVA default behavior will occur. That is; the recording will end and no new Record Event will be created. When you “bump out”, DiVA will turn your old Record Events into Play Events, and automatically place new Record Events at the end of the old Record Events. The TLG will be automatically positioned at the new record in-point. Press [RECORD] again to repeat the process. 196 DiVA User's Guide K2/Summit Server TechNote 197 13. K2/SUMMIT SERVER TECHNOTE 13.1. K2 & Summit Server Intro The Editware K2-Hybrid Application is a multi-function tool designed as both a controller and a full function on-line and off-line, linear and non-linear editor for use with the Grass Valley K2 and Summit Series of video servers in conjunction with the Editware DiVA Hybrid Edit Controller. Control of the server(s) is via Ethernet network using Grass Valley .Net and AMP native protocols. DiVA AS A CONTROLLER DiVA can frame accurately control as many as 24 (twenty four) K2 server channels simultaneously, stand-alone or SAN, encoder, decoder or codec. DiVA can also simultaneously control up to 8 (eight) VTRs or other supported serial devices via RS-422 serial ports, with a maximum combined total of 24 channels and serial devices. Additional devices can be controlled via USB. K2 Clips are loaded onto DiVA “Tracks” directly from the Clip List Browser located on the DiVA GUI. This browser displays the Clip Name, whether the clip is write enabled or read only, whether it is a simple Clip or a Clip comprised of multiple Clips, the duration of the Clip, the date the clip was created, the time-code associated with the Clip, the Start-of-Message, and whether ‘Marks’ have been added to the Clip on the K2 App Center. When DiVA connects to the K2, it automatically “grabs” all the K2 directories and Clips and stores them in DiVA memory. This cache is automatically updated with any Clip changes, additions or deletions of Clips at the K2 AppCenter. When DiVA displays the K2 Clip list, it gives you access to all the Clips currently in the cache. Once a K2 Clip is selected and loaded onto a Track, that Clip can be individually shortened, lengthened, copied, pasted, added to, deleted, slipped, slid, enabled, disabled, linked, ganged, split, separated and joined. Clips can be placed back-to-back and played out sequentially and frame accurately or optionally placed on separate Tracks with external mixer & switcher transitions applied between them. Clips can also be placed back-to-back and played out sequentially and frame accurately with 198 DiVA User's Guide transitions applied between them by the Internal M/E built into the K2 Summit server. For even added flexibility and power, DiVA can control both internal and external mixer and switcher effects and transitions simultaneously. DiVA AS AN EDITOR There are three types of edits that can be performed with the DiVA K2-H application and the Grass Valley K2 server as a recorder; Linear, Virtual and Optimized. The resulting “edit master” is referred to by the K2 as a “Program”, and this Clip can be viewed, imported and exported by most other applications such as Aurora Edit and Fairlight. Linear Edits Linear edits recorded directly to the K2 that include mixer and switcher transitions, audio or video pre-read, vari-speeds, audio or video key-framing, any keys or other switcher effects, are performed in real-time as they are encountered on the Timeline. Sources can be all K2 or a mixture of K2, VTR, other supported peripheral devices and switcher crosspoints. There is no additional rendering required for VTR, peripheral devices or cross-point sources. Virtual Edits Virtual Edits are cuts-only by definition, and are inserted directly and instantly from the DiVA Timeline into the Record Event with a single keystroke. Once the edit is performed, that edit is an integral part of the “program”, and no further preparation is required to play, transfer or archive this Master Clip. Optimized Virtual Edits Optimized Virtual Edits start out as Virtual edits; that is, all K2 material defined in the edit is first inserted virtually into the Program. DiVA then records only the occurrences of mixer and switcher transitions, audio or video pre-read, vari-speeds, audio or video key-framing, and any keys or other switcher effects with user defined handles, and then inserts them virtually into the program. For example, if you are adding a 30 frame dissolve between two 1:00:00 segments, the first 59:15 of the first clip and the last 59:15 of the second clip are immediately inserted into the Program. The DiVA then records the 30 frame transition by itself, and then inserts it into the Program. Editing with the K2-H application is substantially the same as standard linear editing with the DiVA, with the following exception; A K2 assigned as a Linear Recorder requires 2 (two) K2 channels; one for Record and one for Playback. On the DiVA assignment page, when you assign a channel for the Recorder, the channel for the Player is automatically assigned the same digit as the recorder. For example; if the Record channel is assigned as R1 (Recorder 1), the playback channel is automatically assigned to P1 (Player 1) by DiVA. Editing in the Linear or Virtual Mode When an “insert edit” recording takes place with the K2, a Clip of the K2 Input is created and placed in the “Default” folder. At this time it does not yet appear on the record timeline. The act of sending the Clip to be added to the record timeline is called “flushing”. This happens at 30:00 second intervals during an edit, and again at the end of each edit. During an edit, this operation is a background task invisible to the editor except for the notification in the DiVA message window. At the end of an edit, this process happens in real time. If you stop an edit with [ALLSTOP], the screen and EDL will not be updated, but if the recording lasted longer than 30:00 before stopping, the system will have been flushed one or more times and will have been added to the program. No action is required on your part to reinitiate the original recording other than to press [RECORD] again. After the K2 has flushed the current edit, you can jog, play and otherwise control the Record K2/Summit Server TechNote 199 Event. When you are playing the Recorder, you are actually controlling and seeing a playback of the Program using Playback Channel C2. Once flushed, the edit (Temp File recording) is automatically placed in the K2 Default directory, and is by default hidden by DiVA prefixing a “~” to the name in the K2. The K2 routinely deletes these temp files if they are not being used by any other file. However, some users need to be able to see these temp files and not have them deleted. They may wish to use them at a later time and delete them manually. So DiVA has an easy and quick way to enable or disable the hiding of these temp files by editing the K2host.ini. Optimized Virtual Edits allow the user to perform virtual insert edits including any programmed transitions and effects. This is accomplished by DiVA first inserting the programmed K2 source material into the Program “cuts-only”, and then automatically recording only those specific portions of the Timeline that are subject to transitions, keys, or vari-speed Events. When completed, these new clips of the recorded transitions and effects are then automatically inserted virtually into the Program. This feature can take a 10 minute edit and reduce it to the time it takes to record a transition. Optimize any effected source material from Track(s), and then Virtually insert the new material into the Program. For example, in the Timeline below there are two K2 clips with a transition between them. An Optimized Virtual Edit will first virtually insert the non-effected potions of the clips into the program,… [This edit inserted virtually] …and then automatically create individual record Events for each effected segment and then insert them into the Program. [This edit inserted in real-time] INSERT and DELETE with & without Ripple DiVA can insert (device dependent) new media into an existing K2 clip and either overwrite the old material, resulting in no length change to the original clip, or you can insert the new material and ripple the existing material to follow at the end of the newly inserted material, resulting in a clip longer in length by the duration of the inserted material. Likewise, you can now delete a section of media from an existing K2 clip, and either overwrite the old material with black, or pull-up the remaining segments. 200 DiVA User's Guide 1a. Press [CTRL][INSERT] ([GANG]) to INSERT the material from the selected Track and over-write the existing material, regardless of the state of the Ripple indicator - Image 2 above. 1b. Press [ALT][INSERT] ([GANG]) to INSERT the material from the selected Track and ripple the existing material, regardless of the state of the Ripple indicator - Image 3 above. 1c. Press [CTRL][DELETE] ([CONST]) to DELETE the material from the Record Event, and replace it with BLACK video and silence, regardless of the state of the Ripple indicator - Image 4 above. 1d. Press [ALT][DELETE] ([CONST]) to DELETE the material from the Record Event, and ripple the remaining material, regardless of the state of the Ripple indicator Image 5 above. To create a Virtual Edit, The results of a Virtual edit are placed in the EDL. If more than one Track and Event(s) are involved in an edit, and all the Events are identical in position and A/V components as in the following example…: K2/Summit Server TechNote 201 … then the topmost Event is the Event that will be inserted into the Program. Fit & Fill can be utilized to force a specified clip to automatically “Fit” within a specified time frame or fill gaps in the Timeline. The DiVA K2-H can be fully controlled locally or remotely, and comes with unlimited PEGS© to frame accurately trigger external devices and events. PEGS include the ability to program and send any user-defined protocol “strings” out through any designated serial port. Controlling the Summit Internal M/E DiVA can control the internal A/V M/E of the GV Summit Server. No specific DiVA settings changes are required for this control, and an external switcher and mixer can still be controlled simultaneously. Assign back to back clips on a Summit Track with appropriate heads and tails. The head and tail handles are required because the Summit M/E performs CENTER-CUT DISSOLVES. This means that you need handles on the end of the FROM clip and the head of the TO clip, or freeze frames equal to half the transitionrate will be visible on either side of the transition. Notice in the Events shown above that the transition icons are at the end of the Events rather than at the beginning. This is because the Summit M/E effect is associated with the END of the selected Event; that is, the transition command is placed on the FROM Event rather than the TO Event. This is a Summit requirement. Transition icons at the beginning of the Event still reflect the transitions of any external mixer & switcher. = Audio Only = Video Only = Audio & Video 202 DiVA User's Guide Select the FROM clip and press [SHIFT][SRVR]. The following Summit M/E Dialog will open. The following transition types are supported: Transition between 2 (two) K2 clips directly (dissolve clip-to-clip) Transition through a matte background (dissolve clip, background, clip) Transition through black (dissolve clip, black, clip) Fade from black (fade black, clip) Fade to black (fade clip, black) The Summit M/E works between Clips on the same Track. Transitions between Clips on separate Tracks would be performed by an external switcher. L2D files created with previous DiVA software versions will not be compatible with this software. Save As New This feature allows the user to condense all the K2 clips on a specific Track into a single clip with a new name. This new clip can be used like any other K2 clip, even as a source. When you create a clip in this manner, effects and transitions will be treated as cuts. To create a New Clip: 1. Select the Track you wish to use. 2. Press [ASGN]. The Assign Dialog will open. 3. In the New: text field, enter the name of the new clip that you will be creating. All conventions relating to naming K2 clips will be applied. 4. [Click] or press [F5] SaveAsNew . If you selected the Linear Record Track, a copy of the current show as it now exists will be made, through the end of the Black Track. K2/Summit Server TechNote 203 If you selected a K2 source Track, a New Clip will be created of all K2 material falling within the currently defined boundaries of the Record Event. K2-Mon Tracks The only change to the standard edit screen is that when a Track is assigned as K2Mon, the Track button changes to Blue as an alert to the user that there are specific rules that pertain to this Track. Note in the above graphic, that some source buttons are blue. This denotes that these K2 channels are assigned as K2Mon channels in the DiVA Assignment Page. In this special mode, Clips loaded into a Playlist can be manually rolled at the K2 App Center and [MARKed IN] prior to or during a recording so as to be added to the edit and EDL. In the K2 mode, these buttons remain Gray. Playback and Record Timing If the CPI (red, inverted pyramid) and the CTI (blue or red line down the center of the screen) are not aligned, they might look like the following example. [WRONG ALLIGNMENT OF CPI AND CTI] In the K2Host.ini file, you can adjust the RecDelay setting for the Record Track. The adjusted timeline should look like the following example: [CORRECT ALLIGNMENT OF CPI AND CTI] SOME DIVA FEATURES relate directly to K2 servers. For example: Add CC - If this item is set to Yes, Closed Caption data from the K2 source will be inserted to the K2 Program when an edit is made. 204 DiVA User's Guide If there is no CC data, or if you do not want the data to be a part of the edit, you can defeat this by setting this item to No. Server Pre-roll - The time entered here will be applied to all K2 channels as the preroll time. This can be set to 0 if no pre-roll is desired. Double Allstop OnAir (D-Pop) - When this item is set to Yes, the [ALLSTOP] key must be pressed twice in rapid succession to abort an Edit or Preview. This adds added protection against accidental stoppage when the K2 is being used to edit live on-air. The action of pressing a key twice in rapid succession is called a “D-Pop” (double-pop). [TAG] Lock sync to the record Track. Pressing [TAG] will place a “T” on an Event on the selected Track, and will cause the Event to always maintain the current sync relationship to the Timeline. This is useful if you need to drag a manually rolled Clip to an earlier position on a Track and maintain sync. All Events “marked” onto a K2Mon Track when in record will automatically be tagged. K2/Summit Server TechNote Index .ini Files, 13 1080x768, 10 1680x1050, 10 1920x1080, 10 24 fps, 40 25 fps, 40 29.97 fps, 40 29.97 fps, 61 30 fps, 40 A A1-A12, 152 Add, Audio, 153 Add, Events, 125 Additive, 153 Administrator, 10 AJA Card, 52 AJA Card, 6 ALIGN, 138 Allow CC for K2 Edit, 51 Allow Omneon Reference CLIPS, 51 Allstop, Double Tap, 37 Arrow Down, 85 Arrow Left, 86 Arrow Right, 86 Arrow Up, 85 Ask Before Recording (VDCP), 35 Assemble Edit, 143 Assemble, Edit, 43 ASSIGN, 115 ASSIGN PORT, 19 Assign, Jogger Port, 38 Assignment Page, 41 Assignment Page, 17 Assignment Settings, 20 At-rest, 1 Audio, 153 AUDIO, 152 Audio Mixer Settings, 20 Audio Mixer, Count, 19 Audio Mixer, Crosspoints, 19 Audio Mixer, Device File, 24 Audio Mixer, Port, 25 Audio Mixer, Settings, 24 Audio Mixer, Start, 19 Audio Only, 152 Audio, 12 Channel, 152 Audio, Additive, 153 Audio, Confidence Monitoring, 28 AUDIO, DISABLE SUB-TRACK, 67 Audio, E-E Preview, 28 Audio, Follow, 156 Audio, Global, 156 Audio, Ramp, 155 Audio, Record Confidence, 28 Audio, SPLIT, 153 AUDIO, SUB-TRACK, 67 AUDIO, SUB-TRACKS, 66 Audio, Sub-Tracks, 152 Audio, Sub-Tracks, 154 Audio, Transition Icon, 77 Audio, Transition Rates, 156, 157 AUDIO, TRASITIONS, 66 Audio/Video, Modules, 46 Auto Assembe, Mode-A, 147 Auto Assemble, 147 AUTO ASSEMBLE TRACK, 150 Auto Assemble, EDL, 147 Auto Assemble, Mode-B, 148 Auto Assemble, Shortcut Keys, 148 Auto Assembly, Ignore R-Marks, 147 Auto Fill, 121 Auto Macro, 80 Auto Multi, 49 AUTO MULTICAM, 49 Auto Off, Ripple, 37 Auto Save, 41 Auto Search, 35 Auto, Pickup, 44 Auto, Select Record Track, 45 AutoMac, 80 Aux Bus Preview, 20 Aux Bus, Delay,, 26, 27 Aux Bus, Preview, 26 B Backtime, 131 Bios, 10 Black Burst, 6 Black Keys, 79 Black Keys, Arrow Left, 86 Black Keys, Arrow Right, 86 Black Keys, Arrow Up, 85 Black Keys, Decrement, 86 Black Keys, Escape, 79 Black Keys, Exit, 79 Black Keys, Increment, 86 Black Keys, Macros, 79 Black Keys, Page Down, 85 Black Keys, Page Up, 85 Black Keys, POI, 86 205 206 DiVA User's Guide Black Keys, RUN, 85 Black Track, 75 Blue Keys, 152 Blue Keys, A1-A12, 152 Blue Keys, Add, 153 Blue Keys, Audio, 152 Blue Keys, MIX Off, 158 Blue Keys, Split, 153 Blue Keys, SWR Off, 158 Blue Keys, TBC, 157 Blue Keys, Video, 152 Boot System, 9 Border, Red, 68 Border, Yellow, 68 Break-Out Panel, 8 Browser, 70 Bump Out, 143 Button, 56 Button Label, 32 BUTTON, COLOR, 20, 62 C Character Generator Keys, 73 CLASS, 18 Clear all Macros, 80 Clear Tracks at Pickup, 45 Clip List, 70, 123 Clip List, Search, 72 CLIP NAME, 66 ClipTool, 51 Colon, 61 COLOR, 20, 62 Configuration File, Modify, 31 Configuration Files, 13 Configuration Files, View, 13 Configuration, Save, 31 Configure DiVA, 17 Connection, GPI, 7 CONNECTION, MONITORS, 6 Connection, Sync, 6 Connections, 5 Connections, Dongle, 6 Connections, Ethernet, 6 CONNECTIONS, JOGGER PANEL, 5 CONNECTIONS, KEYBOARD, 5 CONNECTIONS, MOUSE, 5 CONNECTIONS, POWER, 5 Connections, Reference, 6 Connections, RS-422, 8 Connections, Video Capture, 6 Connections, Video Display, 7 Connetions, 5 Contact Editware, 3 CONTROL ENABLE, 59 Control Track, 131 Control Track, 57 Control, Disable, 136 Conventions Used in this Manual, 1 Corvid Card, 52 Corvid Card, 6 Count, Audio Mixer, 19 Countdown Timer, 40 CPI, Cue All, 133 CPI, CUE CURRENT, 132 CPI, Lock, 52 Crash Record, 146 Crash Record, 144 Crosspoint, Mixer, 19 Crosspoint, Switcher, 19 Crosspoints, 73 crosspoints, Audio Mixer, 19 CTL, 131 CTL, 57 CTL, 61 Current Event, 1 Cursors, 69 Cursors, Drag Event, 69 Cursors, Drag IN, 69 Cursors, Drag OUT, 69 Cursors, Slip, 69 Cut, 94 D Data Base, 87 Data Trap, 8 Database, 177 Debug, Serial Ports, 8 DECREMENT FRAME, 86 Default Event Duration, 41 DEFAULT, M/E, 22 DEL Event, 126 Del, Trk, 127 Delay, Aux Bus, 26, 27 Delay, E-E, 28 Delay, Macro, 84 Delay, PEGS, 23 Delay, Server, 123 DELAY, SWITCHER MEM, 23 DELAY, SWITCHER TRANSITION, 23 Delete, Event, 126 Delete, Event Groups, 126 Delete, GPI, 108 Delete, TL Mark, 88 Delete, Track, 127 DEV FILE, 67 Dev File, 22 K2/Summit Server TechNote Device Control Modules, 46 Device File, Audio Mixer, 24 Device File, Preview Switcher, 27 DEVICE FILE, VIDEO SWITCHER, 22 DEVICE, CLASS, 18 Device, Modify, 41 DEVICE, NAME, 18, 33 Device, Properties, 41 DEVICE, TYPE, 18 DF, 61 Diagram, Add Event, 125 Diagram, AJA Card, 6 Diagram, Align, 138 Diagram, Assignment Page, 17 Diagram, Assignment Settings, 20 Diagram, Assignment Table, 15 Diagram, Black Keys, 79 Diagram, Blue Keys, 152 Diagram, Clip List, 59 Diagram, Cursors, 69 Diagram, Dev File, 67 Diagram, Device Properties, 42 Diagram, Display Options, 32 Diagram, DiVA Icon, 10 Diagram, Duration, 131 Diagram, Effects Dialog, 95 Diagram, Enabled M/E’s, 24 Diagram, Events Explai9ned, 65 Diagram, File Menu Bar, 29 Diagram, Fill, 122 Diagram, Frame Rates, 40 Diagram, Gang, 137 Diagram, Global Settings, 34 Diagram, GPI Menu, 105 Diagram, GPI Record Tally, 107 Diagram, Green Keys, 159 Diagram, Hot Event, 68 Diagram, Icons, 77 Diagram, Jogger Settings, 38 Diagram, Key Options, 101 Diagram, Keys, 101 Diagram, Light Blue Keys, 105 Diagram, Light Green Keys, 94 Diagram, Light Orange Keys, 135 Diagram, Light Purple Keys, 123 Diagram, Lock, 51, 59 Diagram, Lock, 135 Diagram, Macro Dialog, 79 Diagram, Macro Loop, 83 Diagram, Macro Nest, 83 Diagram, Magenta Keys, 90 Diagram, Match Menu, 92 Diagram, Mem, 103 Diagram, Menu Bar Edit Mode, 43 Diagram, Menu Bar Help, 53 Diagram, Menu Bar Modules, 46 Diagram, Menu Bar Special, 49 Diagram, Mixer Settings, 24 Diagram, Move Event, 131 Diagram, Multi Cam, 49 Diagram, Orange Keys, 125 Diagram, Page Data Warning, 56 Diagram, PEGS, 112 Diagram, PEGS, 84, 109 Diagram, PEGS Strings, 113 Diagram, Pink Keys, 147 Diagram, Pre/Post-roll, 39 Diagram, Preview Settings, 25 Diagram, Record Track, 76 Diagram, Red Key, 143 Diagram, Ripple, 37 Diagram, Search Clip List, 72 Diagram, Secondary M/E Control, 22 Diagram, Selected Event, 68 Diagram, Server Delay Dialog, 123 Diagram, Server Directories, 70 Diagram, Server Transitions, 98 Diagram, Settings Menu Bar, 32 Diagram, Shortcut Properties, 13 Diagram, Slip & Slide, 128 Diagram, Speed Dialog, 118 Diagram, Speed Graph, 119 Diagram, Swap, 20 Diagram, Switcher Settings, 21 Diagram, Tag, 137 Diagram, TBC Control, 158 Diagram, Time Settings, 40 Diagram, TL Marker, 88 Diagram, TL Marker Dialog, 88 Diagram, TL Marker Menu, 88 Diagram, Track Properties, 50, 58 Diagram, Track Status, 61 Diagram, Track Status Display, 56 Diagram, Transition Icons, 94 Diagram, USB GPI, 7 Diagram, Valid PEGS Commands, 113 Diagram, Video Capture Settings, 34 Diagram, White Keys, 87 Diagram, Wipe Patterns, 96 Diagram, Yellow Keys, 140 Dimensions, Chassis, 5 Directories, 13 Disable, Control, 136 DISABLE, EVENTS, 135 Disable, Jogger, 37 Disable, Jogger Record, 38 Disable, Mixer, 25 Disable, Switcher, 23 207 208 DiVA User's Guide Disable, Track, 18 DISABLE, TRACKS, 135 DISABLED AUDIO SUB-TRACK, 67 Display, Duration, 33 Display, Duration, 77 Display, Options, 32 Display, OUT-Time, 33 Display, Reel ID, 175 Display, Status Lamps, 57 Display, Timecode, 56 Display, Track Status, 57 Display, Track, Status, 56 Display, Video, 34 Display, Video Capture Card, 52 Dissolve, 94 DiVA Icon, 10 Dongle, 6 Dongle, Update, 11 Double Allstop, 37 Download, Manual, 53 Drag Event, 69 Drag IN, 69 Drag OUT, 69 Drop Frame, 61 Drop Frame Timecode, 61 Dummy Edit, 45 DUR, 131 Duration, 131 Duration, Backtime, 131 Duration, Edit, 163 Duration, Use Record, 45 Duration, Use Source, 45 DVI, 6 E Edit Mode, 43 Edit Mode, 161 Edit Mode, Assemble, 43 Edit Mode, Insert, 43 Edit Mode, On/Off, 43 Edit Modules, 47 Edit Record Event, 75 Edit Record Track, 161 Edit Record Track, Reel ID, 162 Edit Track, 75 Edit Track Selection, 159 Edit, Duration, 163 Edit, Pre-read, 44 Edit, SPLIT, 155 Editware, Contact, 3 EDL, 164 EDL, Append, 165 EDL, Auto Assemble, 147 EDL, Bin, 164 EDL, Clear, 166 EDL, Clear All, 166 EDL, Clear All Bins, 166 EDL, Clear Current Bin, 166 EDL, Copy, 168 EDL, Cut, 167 EDL, Default M/E, 165 EDL, Delete, 167 EDL, Dummy Edit, 45 EDL, Function Keys, 164 EDL, Import, 165 EDL, Load, 165 EDL, M/E, 165 EDL, Note, 174 EDL, Open, 33 EDL, Paper Edit, 45 EDL, Paste, 170 EDL, Recall, 166 EDL, RECALL EDIT, 151 EDL, Record Off, 45 EDL, Reel ID, 173, 174 EDL, Replace, 166 EDL, REPLAY EDIT, 151 EDL, Ripple, 170 EDL, R-Mark, 45 EDL, R-Marks, 172 EDL, Title, 174 E-E Preview, 20 E-E, Delay,, 28 E-E, Preview Video, 26 ENABLE CONTROL, 59 Enable, Jogger, 37 Enable, Jogger Record, 38 Enable, Mixer Preview, 28 Enable, Track, 18 ENABLED M/ES, 24 ESCAPE, 79 Ethernet, 4, 6 Event, Change M/E, 95 Event, Cursors, 69 Event, Default Duration, 41 Event, Drag, 69 Event, Drag IN, 69 Event, Drag OUT, 69 Event, Duration, 77 Event, Edit Record, 75 Event, Hot, 68 EVENT, IN-TIME, 68 Event, In-Time, 77 Event, Linear Record, 75 Event, MARK IN, 141 Event, MARK OUT, 141 Event, Mark Out TL, 142 K2/Summit Server TechNote EVENT, MOVE, 133 EVENT, MOVE, 131 EVENT, OPEN END, 130 EVENT, OUT-TIME, 67 Event, Out-Time, 77 Event, Pink, 76 Event, Record, 69 Event, Selected, 68 Event, Set Forward, 98, 100 Event, SET OUT, 140 Event, Slide, 128, 129 Event, Slip, 128, 129 Event, Slip, 69 Event, SPLIT, 153 Event, Toggle, 127 Event, Trim In, 127 Event, Trim OUT, 129 Events, 1 Events, 65 Events, Add, 125 EVENTS, ALIGN, 138 Events, Delete, 126 Events, Delete Group, 126 EVENTS, DISABLE, 135 Events, Explained, 65 Events, Extend, 126 EVENTS, GANG, 136 EVENTS, LINK, 136 Events, Log, 177 Events, Ripple, 37 Events, Ripple, 36 Events, Selected, 126 Events, Separate, 125 Events, SET IN, 140 Events, Tag, 137 Events, Trim, 128, 129 Execute Macro, 85 Exit, 79 Exit DiVA, 31 Exit DiVA, 13 Extend Events, 126 External Reference, 7 F Fast Cut, 50 FAST FORWARD, 116 FAST FORWARD, HALF, 116 FastLog, 87 FastLog, 177 FastLog Add, 87 FastLog Modify, 87 FastLog Search, 87 FastLog, Data Entry, 182 FastLog, Modify, 182 FastLog, Search, 180 FastLog, Table View, 177 File, Dev, 22, 67 File, Menu Bar, 29 File, Save Configuration, 31 Files, Configuration, 13 Fill, 121 Fill, GAPS, 126 Fit & Fill, 121 FRAME OFFSET, 62 FRAME RATE, 60 Frames Per Second, 40 G GANG, 136 Gang, Play, 116 GAPS, 126 General Purpose Interface, 7, 105 Genlock, 52 Ghosted, 1 Global Settings, 34 GPI, 105 GPI, Connection, 7, 109 GPI, Delete, 108 GPI, Delete All Markers, 108 GPI, Delete Marker, 108 GPI, Enable All, 106 GPI, Fire, 106 GPI, Line, 33 GPI, Move, 107 GPI, Offset, 106 GPI, Pin Outs, 7 GPI, Properties, 107 GPI, Properties, 107 GPI, Pulse Width, 106 GPI, Record Tally, 107 GPI, Remove, 106 GPI, Ripple, 108 GPI, Rules, 108 GPI, Select, 105 GPI, Select Markers, 108 GPI, Show Lines, 106 GPI, Timeline Menu, 107 GPI, Timeline Triggers, 106 Green Keys, 159 Green Keys, Edit, 159 Green Keys, Swap, 159 Green Keys, T1-T12, 159 209 210 DiVA User's Guide H Hardware Requirements, 3 Hardware Specs, 4 Help, 53 HELP, 116 HOLD LOCK, 60 Hot Event, 68 Hover, Messages, 53 I Icon, Audio Transition, 77 Icons, 65 Icons, 77 Icons, Keys, 65 Icons, Status, 77 ICONS, TRANSITIONS, 65 Icons, Transitions, 94 Increment Frame, 86 Insert Edit, 143 Insert, Edit, 43 INTERNAL Reference, 52 In-Time, 77 J Jam Timecode, 43 JOGGER PANEL, 5 Jogger, Disable, 37 Jogger, Disable Record, 38 Jogger, Enable, 37 Jogger, Enable Record, 38 Jogger, Port Assign, 38 Jogger, Sensitivity, 38 Jogger, Settings, 37 K K2, Allow CC for Edit, 51 Keep Out-point, 45 Keep Track, 127 Key, Fill, 101 Key, Key Bus, 96 Key, Key Fill (Fill Bus), 102 Key, Key Fill (Manual Select), 101 Key, Key Fill (Matte), 102 Key, Key Source, 102 Key, Key Source (Auto Select), 102 Key, Key Source (Fill Bus), 102 Key, Key Source (Manual Select), 102 Key, Key Source (Source Bus), 102 Key, Options, 96 Key, Priority, 96 Key, Set Default Key Option, 103 Keys, 101 Keys, 73 Keys, CG, 73 Keys, Icons, 101 Keys, Options, 101 L L2D File, 29 L2D File, Save, 30 L2D File, Save As…, 30 Learn, Macro, 80 Light Blue Keys, 105 Light Blue Keys, Assgn, 115 Light Blue Keys, Fast Forward, 116 Light Blue Keys, Fast Forward 1/2, 116 Light Blue Keys, Fill, 121 Light Blue Keys, GPI, 105 Light Blue Keys, Help, 116 Light Blue Keys, PEGS, 109 Light Blue Keys, Play, 116 Light Blue Keys, Play Reverse, 117 Light Blue Keys, Rewind, 116 Light Blue Keys, Rewind 1/2, 116 Light Blue Keys, Search IN, 117 Light Blue Keys, Search OUT, 117 Light Blue Keys, Speed, 118 Light Blue Keys, Stop, 117 Light Green Keys, 94 Light Green Keys, Cut, 94 Light Green Keys, Dissolve, 94 Light Green Keys, Keys, 101 Light Green Keys, Server Transitions, 98 Light Green Keys, Video Effects, 95 Light Green Keys, Wipe, 100 Light Orange Keys, 135 Light Orange Keys, Align, 138 Light Orange Keys, Gang, 136 Light Orange Keys, Link, 136 Light Orange Keys, Lock, 135 Light Orange Keys, Lock (partial), 135, 136 LIGHT ORANGE KEYS, TAG, 137 Light Purple Keys, 123 Light Purple Keys, 123 Light Purple Keys, Clip List, 123 Light Purple Keys, Delay, 123 Light Purple Keys, Movie, 124 Light Purple Keys, NL Del Ripple, 124 Light Purple Keys, NL Delete, 124 Light Purple Keys, NL INS Ripple, 123 Light Purple Keys, NL Insert, 123 K2/Summit Server TechNote Light Purple Keys, Optimize, 124 Line , TL Mark, 33 Line, GPI, 33 Line, TLG, 33 Lines, GPI, 106 Lines, Recorded Edits, 77 LINK, 136 Live Com’l Playback, 35 Load, Macro, 80 Load, Server Clip, 70 Load, VTR Clip, 72 LOCK, 135 Lock TLG to Edit Track, 45 Lock, CPI, 52 Lock, Full, 59 LOCK, HOLD, 60 LOCK, PARTIAL, 58, 135 LOCK, PARTIAL, 51 LOCK, WINDOW, 60 Log Events, 177 Log On, 10 M M/E, DEFAULT, 22 M/E, ENABLE, 24 Macro, 79 Macro 1-4, 79 Macro Modules, 47 Macro, Auto, 80 Macro, Cancel, 81 Macro, Clear All, 80 Macro, Copy, 82 Macro, Cut, 82 Macro, Delay, 84 Macro, Delete, 82 Macro, Edit Menu, 82 Macro, Execute, 85 Macro, Immediate, 84 Macro, Learn, 80 Macro, Load, 80 Macro, Loop, 83 Macro, Name, 80 Macro, Nest, 83 Macro, Paste, 82 Macro, PEGS, 84 Macro, Run, 85 Macro, Run, 81 Macro, Save, 81 Macro, Undo, 81 Magenta Keys, 90 Magenta Keys, Match ALL, 90 Magenta Keys, Match LRT, 90 Magenta Keys, Match Menu, 91 Magenta Keys, Match Source, 91 Magenta Keys, Match Take, 91 Make Movie, Server, 124 Manual, 53 Manual Version, 3 Manual, Download, 53 MARK IN, 141 MARK IN TL, 141 MARK IN TL, Mod In, 142 MARK IN, Mod In, 141 MARK OUT, 141 MARK OUT TL, 142 MARK OUT, Mod OUT, 141 Markers, GPI, 108 Match, 90 Match All, 90 Match Menu, 91 Match Modules, 47 Match Source, 91 Match Src, 91 Match, Device In Time, 92 Match, Device Position, 92 Match, Edit Track, 90 Match, LRT, 90 Match, Not Found, 90 Match, Take, 91 Mem, Add Effect, 103 Mem, Add Effectl, 98 Mem, Enable/Disable, 103 Mem, Force Run, 98 Mem, Force Run, 104 Mem, Force Trans, 98 Mem, Force Trans, 104 Mem, Learn, 97 Mem, Learn, 104 Mem, Recall, 97 Mem, Recall, 104 MEM, SWITCHER, 103 Mem, User Select, 98 Mem, User Select, 104 Mem, Video Switcher, 97 Menu Bar, 1, 29 Menu Bar, Edit Mode, 43 Menu Bar, Edit Mode On/Off, 43 Menu Bar, File, 29 Menu Bar, Global Settings, 34 Menu Bar, Help, 53 Menu Bar, Modules, 46 Menu Bar, New Timeline, 29 Menu Bar, Open Timeline, 29 Menu Bar, Save Configuration, 31 Menu Bar, Save Timeline, 30 Menu Bar, Save Timeline As…, 30 Menu Bar, Settings, 32 211 212 DiVA User's Guide Menu Bar, Special, 49 Menu Bar, Time Settings, 40 MIX OFF, 158 MIXER OFF, 158 Mixer, Crosspoint, 19 Mixer, Disable, 158 Mixer, ENable, 158 Mod In, 140 Mod In, MARK IN, 141 Mod In, MARK IN TL, 142 MOD IN, SET IN, 140 Mod IN, Trim IN, 128 Mod Out, 140 Mod OUT, MARK OUT, 141 Mod Out, SET OUT, 140 Mod OUT, Trim OUT, 130 Mode-A, Auto Assemble, 147 Mode-B, Auto Assemble, 148 Modify, Configuration File, 31 Modify, Default Pre-roll, 41 Modify, Device Properties, 41 Modules, 46 Modules, Audio/Video, 46 Modules, Device Control, 46 Modules, Edit, 47 Modules, Load, 48 Modules, Macro, 47 Modules, Match, 47 Modules, Numeric Keypad, 47 Modules, Save, 48 Modules, Search Modes, 48 Modules, Server Control, 48 Modules, Tracks & Events, 47 Monitors, Connection, 6 Monitors, Resolution, 6 Motion Control, 119 MOUSE, 5 MOV, 133 MOVE, 131 MOVE EVENT, 131 MOVE IN, 131 MOVE OUT, 132 MOVE, EVENT, 133 Move, GPI, 107 MOVE, TL, 133 Move, TL Mark, 89 Movies, Reference, 51 Multi Cam, 49 MULTICAM, 49 MULTICAM, AUTO, 49 New Timeline, 29 NL Delete, Ripple, 124 NL Delete, Server, 124 NL Insert, Ripple, 123 NL Insert, Server, 123 NL, Optimize, 124 No External Reference, 7 Non Drop Frame Timecode, 61 NOTE, 68 Note, 89 NTSC, Drop Frame, 40 NTSC, Non-Drop Frame, 40 Numeric Keypad Modules, 47 N Page Down, 85 Page Up, 85 NAME, DEVICE, 18 O OFFSET FRAMES, 62 Omneon, Allow Reference CLIPS, 51 OPEN END, 130 Open End, All, 130 Open Timeline, 29 Ops Manual, 53 Optimize, Server, 124 Orange Keys, 125 Orange Keys, Add Event, 125 Orange Keys, Cue All CPI, 133 Orange Keys, Cue CPI, 132 Orange Keys, Del Event, 126 Orange Keys, Del Track, 127 Orange Keys, Duration, 131 Orange Keys, Gaps, 126 Orange Keys, Keep Track, 127 Orange Keys, Move Event, 133 Orange Keys, Move Event In to TLG, 131 Orange Keys, Move Event Out to TLG, 132 Orange Keys, Move TL, 133 ORANGE KEYS, OPEN END, 130 Orange Keys, Open End All, 130 Orange Keys, Sep Events, 125 Orange Keys, TC/CTL, 131 Orange Keys, Toggle Event, 127 Orange Keys, Trim In, 127 Orange Keys, Trim In Mod In, 128 Orange Keys, Trim Out, 129 Orange Keys, Trim Out Mod Out, 130 Orange Keys, Xfer TC, 130 OUT Time, 77 P K2/Summit Server TechNote PAL, 40 Paper Edit, 45 Participate On Air, Audio/Video, 136 PARTICIPATE ON AIR, PLAY/RECORD, 58 Participate On Air, Play/Record, 135 PARTICIPATE ON-AIR, AUDIO/VIDEO, 58 PARTICIPATE, ON AIR PLAY/RECD, 50 Password, 10 PEGS, 109 PEGS, Absolute Time, 111 PEGS, Absolute/Relative, 111 PEGS, Add Command, 109, 111 PEGS, Delay, 23 PEGS, Delete Command, 109 PEGS, Enable/Disable, 110 PEGS, Fire, 110 PEGS, Icons, 110 PEGS, Macro, 84 PEGS, New Commands, 110 PEGS, Note, 111 PEGS, Relative Time, 111 PEGS, Set Time, 109 PEGS, Strings, 113 PEGS, Tracking, 109 PEGS, Valid Commands, 113 PGM Reentry, 26 Pickup Edit, 44 Pickup Match, 44 Pickup, Clear Tracks, 45 Pink Event, 76 Pink Keys, 147 Pink Keys, Auto Assemble, 147 PLAY, 116 PLAY REVERSE, 117 Play, Double Speed, 117 PLAY, GANGED EVENTS, 117 PLAY, REVERSE X2, 117 POI, 86 POI, 77, 86 Point of Interest, 86 Point of Interest, 77 Points of Interest, 86 Pool, 19 Port & Device Assignments, 15 PORT, ASSIGN, 19 Port, Audio Mixer, 25 Port, Jogger, 38 Port, Preview Switcher, 27 PORT, VIDEO SWITCHER, 23 Ports, RS-422, 8 PostRoll, VTR, 39 Power, 5 213 Power, Caution, 6 Pre-Read, 36, 44 Pre-Read, Auto Off, 36 Pre-roll, 39 PRESET TIMECODE, 62 PREVIEW, 151 Preview Audio, E-E, 28 Preview Audio, Use Mixer, 28 Preview Settings, 20 Preview Switcher, Device File, 27 Preview Switcher, Port, 27 PREVIEW TIMELINE, 151 PREVIEW TL, 151 Preview, Aux Bus, 20 Preview, Aux Bus, 26 Preview, E-E, 20 Preview, PGM Reentry, 26 PREVIEW, SEPARATE SWITCHER,, 27 Preview, Settings, 25 Preview, Video, 26 ProDrive, 51 Program Reentry, 26 PVW, 151 R Ramp, Speed, 120 Read Before Write, 44 RECALL, 151 RECALL EDIT, 151 Record, 143 Record Confidence, 28 Record Event, 69 Record Lock, 50 Record Off, 45 Record Tally GPI, 107 Record Track, 75 Record Track, Auto Select, 45 Record, Assemble Edit, 145 Record, Assemble Edit, 143 Record, Auto Assemble, 147 Record, Crash, 144 Record, Crash, 146 Record, Insert Edit, 143 Record, Pre-Read, 36 Record, Server, 145 RECORD, SLAVE, 59 Record, VDCP, 145 Record, Virtual Edit, 144 Recorded Edits, 76 Red Border, 68 RED KEY, 143 RED KEY, Record, 143 Redo, 89 214 DiVA User's Guide REEL ID, 66 Reel ID, 33 Reel ID, 77 Reel ID, Assignment (VTR), 175 Reel ID, Change, 173 Reel ID, Display, 175 Reel ID, Edit Record Track, 162 Reel ID, Recall, 175 Reel ID, VTRs Only, 175 Reference, 6 Reference Movies, 51 Reference, Black Burst, 52 Reference, External, 52 Reference, Indicator, 52 Reference, Internal, 52 Reference, System, 52 Reference, Tri Level, 52 Rename TL Mark, 88 REPLAY EDIT, 151 RESET, 142 Reset RS422 Ports, 142 RESOLUTION, 6, 10 REWIND, FULL, 116 REWIND, HALF, 116 Ripple, 36 Ripple, Auto Off, 37 Ripple, GPI, 108 Ripple, NL Delete, 124 Ripple, NL Insert, 123 Ripple, Selected Events, 37 R-Mark, 45 R-MARK, 150 R-Marks, 147, 149 R-MARKS, CLEAR, 149 R-Marks, Clear, 149 R-Marks, EDL, 172 R-MARKS, SET, 149 R-Marks, Set, 149 R-Marks, Shortcut Keys, 150 RS-422 Connection, 8 Run Macro, 85 Run Macro, 81 S Save Timeline, 30 Save Timeline As…, 30 Save, L2D File, 30 Save, Macro, 81 Save, Modules, 48 SEARCH, 117 Search Modes Modules, 48 Search, Auto, 35 Search, Clip List, 72 Selected Event, 68 Semi-colon, 61 Sensitivity, Jogger, 38 Sensitivity, Shuttle, 38 Sensitivity, Variable, 38 Sep, 125, 153 Separate, 153 SEPARATE PREVIEW SWITCHER,, 27 Separate, Events, 125 Serial Ports, Debug, 8 Server Modules, 48 SERVER TRANSITIONS, 66 Server, Clip ID, 77 Server, Clip List, 123 Server, Delay, 123 Server, Make Movie, 124 Server, NL Delete, 124 Server, NL Insert, 123 Server, PostRoll, 39 Server, Record, 145 SERVER, TRANSITION RATE, 66 SERVER, TRANSITIONS, 98 SET FORWARD, 23, 98, 100 SET IN, 140 SET IN, MOD IN, 140 SET OUT, 140 SET OUT,Mod Out, 140 Settings, Audio Mixer, 20, 24 Settings, Jogger, 37 Settings, Menu Bar, 32 Settings, Preview, 20 Settings, Video Switcher, 20, 21 Shifted Keystrokes, 1 Shortcut, Properties, 13 Shut down, 14 Shut-down, 9 Shuttle, Sensitivity, 38 Slide, Event, 128, 129 Slip Events, 69 Slip, Event, 128, 129 SLO-MO, 66 Software Rev Number, 53 Software, Update, 10 Source Track Selection, 159 Special, 49 Specifications, 3 Spectrum, Allow Reference CLIPS, 51 SPEED, 66 Speed, 119 SPEED, 118 Speed, All Points, 121 Speed, Auto Fill, 121 Speed, Clear, 118, 121 Speed, Clear All, 121 K2/Summit Server TechNote Speed, Control Points, 121 Speed, Copy, 121 Speed, Dialog, 120 Speed, Fit & Fill, 121 Speed, Get Value, 120 Speed, Graph, 119 Speed, Keyframes, 121 Speed, Lock Source Position, 120 Speed, Paste, 121 Speed, Ramp, 120 Speed, Ramp, 120 Speed, Set/Add, 120 Speed, Shortcut, 118 Speed, TSO, 121 SPLIT, 153 Split Dialog, 155 SPLIT Edit, 153, 155 Split, Global, 156 Split, Graph, 155 Split, Keyframe, 156 Split, Reset, 155 SRCH IN, 117 SRCH OUT, 117 Start, Audio Mixer, 19 Starting DiVA, 10 Start-up, 9 Status Lamps, 57 STOP, 117 SUB-TRACK, AUDIO, 67 SUB-TRACK, VIDEO, 66 Sub-Tracks, 155 sub-Tracks, Audio, 152 SUB-TRACKS, AUDIO, 66 Swap, 62 Swap, 20 Swap, 159 Swap Source Assignments, 62 Swap Tracks, 20, 62 Swap, Assignment Page, 21 Swap, Keyboard, 21 Swap, Tracks, 159 Switcher M/E, 21 Switcher Crosspoint, 19 Switcher Mem, 97 SWITCHER, Disable, 158 SWITCHER, ENable, 158 SWITCHER, OFF, 158 SWR OFF, 158 Sync, 6 Sync, Black Burst, 52 Sync, Black Burst, 6 Sync, Connections, 6 Sync, Indicator, 6 Sync, Tri Level, 52 Sync, Tri Level, 6 System Specs, 3 System, Boot, 9 System, Configure, 17 System, Connections, 5 System, Dimensions, 5 System, Frame Rate, 40 SYSTEM, FRAME RATE, 60 System, M/E Select, 21 System, Reference, 52 System, Shut-down, 9 System, Start-up, 9 T Table of Contents, i Tag, 76 Tag, 137 Take Match, 91 TBC Control, 157 TC/CTL, 61, 131 TechNote, K2/Summit, 197 TechNote, Omneon/Spectrum, 183 Time Settings, 40 Timecode, 29.97, 61 TIMECODE, ALLOW JUMP, 60 Timecode, CTL, 131 Timecode, Drop Frame, 61 Timecode, Drop Frame, 61 Timecode, Jam, 43 Timecode, MARK IN, 141 Timecode, MARK OUT, 141 Timecode, Non Drop Frame, 61 TIMECODE, PRESET, 62 Timecode, SET IN, 140 Timecode, SET OUT, 140 TIMECODE, TRANSFER, 130 Timecode, VDCP, 62 Timeline Guide, 1 Timeline Guide Start, 41 Timeline Mark, 87 Timeline, GPI, 106 TIMELINE, IN, 131 Timeline, Mark In, 141 Timeline, Mark Out, 142 TIMELINE, MOVE, 133 TIMELINE, OUT, 132 TIMELINE, PREVIEW, 151 TIMER, 61, 62 TL Mark, 87 TL Mark, 33 TL Mark, Delete, 88 TL Mark, Line, 33 TL Mark, Move, 89 215 216 DiVA User's Guide TL Mark, Rename, 88 TL, PREVIEW, 151 TLG, 1 TLG, Default Start, 41 TLG, Line, 33 TLG, Lock to Edit Track, 45 Toggle, Event, 127 Track Pages, 55 Track Status, 57 TRACK, AUTO ASSEMBLE, 150 Track, Black, 75 Track, Button, 56 Track, Data Warning, 55 Track, Delete, 127 Track, Edit, 75 Track, Edit, 159 Track, Edit Record, 161 Track, Keep, 127 Track, M/E Select, 22 Track, Pages, 55 Track, Properties, 58 Track, Second Page, 55 Track, Selection, 55 Track, Status Display, 56 Track, Status Lamps, 57 Tracks, 55 Tracks & Events Modules, 47 Tracks, Assign, 55 Tracks, Delete All Events, 126 Tracks, Delete Entire Track, 126 TRACKS, DISABLE, 135 Tracks, Swap, 159 Tracks, Swap, 62 Tracks, Swap, 20 Tracks, Timecode Status, 56 TRANSFER TIMECODE, 130 Transition Delay, 23 Transition, AFV, 97 Transition, Background, 95 Transition, Cut Out, 97 Transition, Delay, 27 Transition, In, 96 Transition, Out, 96 Transition, Out Same as In, 97 Transitions, 94 TRANSITIONS, ICONS, 65 TRANSITIONS, RATE, 65 TRANSITIONS, SERVER, 66 TRANSITIONS, SERVER RATE, 66 TRANSITIONS, SERVERS, 98 TRASITIONS, AUDIO, 66 Tri Level Sync, 6, 52 Trim In, 127 Trim In, Mod In, 128 Trim OUT, 129 Trim OUT, Mod OUT, 130 TSO, 121 U Undo, 89 Undo Macro, 81 Update Dongle, 11 Update, Software, 10 Use Source Duration, 45 User Manual, 53 User Name, 10 V VARI SPEED, 66 Variable, Sensitivity, 38 VDCP, 145 VDCP, Ask Before Recording, 35 VIDEO, 152 Video Capture, 34 Video Capture Card, 52 Video Display, 34 Video Effects, 95 Video Input, 7 Video Only, 152 Video Preview, 26 Video Switcher Settings, 20, 21 VIDEO SWITCHER, DEVICE FILE, 22 VIDEO SWITCHER, MEM, 103 VIDEO SWITCHER, PORT, 23 Video, Preview E-E, 26 VIDEO, SUB-TRACK, 66 View Configuration Files, 13 Virtual Edit, 144 VTR, Assemble Edit, 145 VTR, Default Rec. Start, 41 VTR, PostRoll, 39 VTR, PreRoll, 39 VTR, Record Start, 41 W White Keys, 87 White Keys, FastLog, 87 White Keys, FastLog Add, 87 White Keys, FastLog Mod, 87 White Keys, FastLog SRCH, 87 White Keys, Note, 89 White Keys, Redo, 89 White Keys, TL Mark, 87 White Keys, Undo, 89 K2/Summit Server TechNote Windows Key, 13 Windows Shortcuts, 13 Wipe, 100 Wipe, Auto N-R, 96 Wipe, Patterns, 95 Wipe, Reverse, 96 X XFER TC, 130 Y Yellow Border, 68 Yellow Keys, 140 Yellow Keys, Mark In, 141 Yellow Keys, Mark In Mod In, 141 Yellow Keys, Mark In TL, 141 Yellow Keys, Mark In TL Mod In, 142 Yellow Keys, Mark Out, 141 Yellow Keys, Mark Out Mod Out, 141 Yellow Keys, Mark Out TL, 142 Yellow Keys, Set In, 140 Yellow Keys, Set In Mod In, 140 Yellow Keys, Set Out, 140 Yellow Keys, Set Out Mod Out, 140 217