1
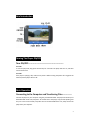
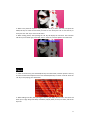
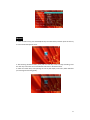
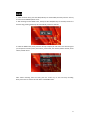
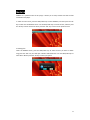
MP4 PLAYER
USER MANUAL
1
Contents
Main Function--------------------------------------------------------------------------------------03
Notice -----------------------------------------------------------------------------------------------04
Brief Introduction-----------------------------------------------------------------------------------05
Basic Operation-------------------------------------------------------------------------------------05
Menu Explanation --------------------------------------------------------------------------------06
System Menu----------------------------------------------------------------------------------------07
Music-------------------------------------------------------------------------------------------------08
V ideo------------------------------------------------------------------------------------------------------10
Photo-------------------------------------------------------------------------------------------------------10
E-book------------------------------------------------------------------------------------------------------11
Record-----------------------------------------------------------------------------------------------------12
Radio----------------------------------------------------------------------------------------------------------------------13
MediaLib--------------------------------------------------------------------------------------------------14
Other Functions---------------------------------------------------------------------------------------------15
USB Storage and Charge Function -------------------------------------------------------------------------------15
FA Q - - - - - - - - - - - - - - - - - - - - - - - - - - - - - - - - - - - - - - - - - - - - - - - - - - - - - - - - - - - - - - - - - - - - - - - - - - - - - 1 6
Technical Specifications------------------------------------------------------------------------------------17
2
Main Function
●
●
●
●
●
●
●
●
●
●
●
●
●
●
●
3.0” QVGA TFT Screen, 400*240
Supports music formats: MP3, WMA, FLAC, APE, and AAC. Supports PLAY FX sound effects .
Supports a TF card, memory ranging from 128MB - 8GB
Supports video formats: MPEG4 (AVI) , RM, and RMVB in 400*240 resolution
Supports photo formats: JPEG, BMP, and GIF
Audio recording capabilities
Economy settings; Adjustable brightness and Automatic Power-Off settings
Various sound effects
Supports various languages
PC and MAC compatible
High-speed USB 2.0
Supports E-book browsing and tag function
Removable Disk function
Supports firmware updates
Multitasking capabilities; while playing music you can also read text
3
Notice
This manual includes important security measures and information for
correct usage. To avoid damaging the product, please read the manual
before operation.
1. Do not use the player in extreme temperatures, as well as dusty or moist conditions
2. Avoid heavy impact with the player. Any damages caused by mistreatment or misuse of the
player will void any warrantee.
3. Battery life will not be the same with all players, different environments allow for different
battery life.
4. Please charge the player when: the battery power icon shows no power; the system turns off
automatically while the player is ON; or the operation keys are not responding.
5. Do not disconnect the player while formatting or transferring files, this may cause files to be
lost or damaged.
6. Do not disassemble or modify the player.
7. The player may feel warmer during charging times, this is normal and will not cause damage
to files or the player.
4
Brief introduction
Turning The Player ON/OFF
Turn ON/OFF---------------------------------------------------Turn ON:
To turn the player ON, long-press the PLAY key for 2 seconds. The player will turn on, and enter
into the main menu.
Turn OFF:
If the player is playing a file, make sure to pause it before turning the power off. Long-press the
PLAY key and the player will turn off.
Basic Operation
Connecting to the Computer and Transferring Files-------------Connect the player to your computer using the provided USB cable. The player will show up as a
Removable Disk under “My Computer.” To transfer files to the player, copy the files (making sure
they are in the correct format) and paste them to the Removable Disk. Last, safely remove the
player from your computer.
5
Volume Adjust--------------------------------------------------------------During audio and video playback, press the VOL key and the volume control will appear. Use the
NEXT/LAST keys to adjust the volume to the desired level. Press the VOL key again to exit volume
control.
Fast-Forward / Rewind----------------------------------------------------During audio and video playback, long-press the NEXT/LAST keys to fast-forward or rewind the
current file.
Next / Previous File
During audio and video playback, short-press the NEXT/LAST keys to change to the next or
previous file.
Main Menu
View of the main menu
While in the main menu, use the LAST/NEXT keys to select your option, then press the “M” key to
confirm your selection. Under the “Setting” and “MediaLib” menus, short-press the “M” key to
enter into the selected function, catalog or menu. Press the ESC key to return to the previous
menu.
6
System Settings
In the main menu, select Settings, then press M to confirm your selection. Use the
NEXT/LAST keys to navigate through the sub-menu.
System Settings Menu
Display
Under the setting menu, select Display, and press “M” to enter.
1. Backlight time : Select either 5 sec, 10 sec, 15 sec, 20 sec, or 30 sec
2. Brightness : Select a level 1-5
System
Under the setting menu, select System, and press “M” to enter.
There are two items under the System menu: Firmware update and system return
1. Firmware update: This option allows you to update the firmware of the player, if
available.
2. System return: This option allows you to restore the player to the default settings.
Desktop
Under the setting menu, select Desktop, and press “M” to enter. Select the Desktop
appearance you would like and press “M” to enter that selection.
Language
Under the setting menu, select Language, and press “M” to enter. Choose your preferred
7
language and press “M” to select.
Information
Under the setting menu, select Information, and press “M” to enter. There you can see the
company information, product number, flash memory, software version, and card memory.
Auto Turn OFF
Under the setting menu, select Time Auto Turn OFF, and press “M” to enter. Use the
NEXT/LAST keys to select either 3 / 5 / 10 / 15 / 20 minutes, or DO NOT Auto Turn OFF. Press
“M” to confirm.
Playing Music
1. Under the main menu, select MUSIC and press “M” to enter into music mode. The
interface will show: Now playing, All Music, Artist, Album, Title, My Favorite, Record, Dir
list, and MediaLib update. Select your file using the NEXT/LAST keys. Press “M” to start
playing the file.
8
2. During audio playback, short-press “M” to access the sub-menu, which includes: Repeat
Mode, Play Mode, MSEQ, EQ SeL, User EQ Setup, and Display. (Shown below)
1. Repeat Mode
A. Once – After the files have played, the player will stop.
B. Repeat—Repeat the selected file.
C. All- Repeats all the files in the current folder
D. All Repeat—Repeats all the files on the player
E. Intro ---Plays the first 10 seconds of each file
2. Play Mode
Choose between normal and shuffle playback.
3. MSEQ
The user can select either 3D or Bass IEQ .
4 EQ Sel
The user can select: Normal, MSEQ, Rock, Pop, Classic, Bass, Jazz, or User EQ.
5 User EQ setup
Select the wave band by using the NEXT/LAST keys. Then press “VOL” to adjust the
selected wave band. Use the NEXT/LAST keys to adjust, and press “VOL” to confirm.
Press the “M” key to exit.
6
Display
The user can set the Lyric, Freq Chart and Close.
Note: You can download lyrics from the website www.51lrc.com.
9
Video Play
1. Under the main menu, select VIDEO to enter the video menu. Use the NEXT/LAST keys to
select a video file, then press the “M” key to start playing the selected file.
2. To adjust the volume during video playback, short press the VOL key. This will enter the volume
control mode. Press the NEXT/LAST keys to adjust volume, and press the VOL key again to exit
volume control mode.
3. During video playback, short-press the NEXT/LAST keys to switch files. Long-pressing the
NEXT/LAST keys will rewind and fast-forward your file.
Note 1: The RM/RMVB formatted videos only support video files which are below
720*576 resolution. The larger the file size, the longer it will take for the video to
begin.
Note 2: AVI formatted videos only support video files which are below 800*480
resolution. The larger the file size, the longer it will take for the video to begin.
Browsing Photos
1. Under the main menu, press the NEXT/LAST keys to select PHOTOS, and press the “M” key to
enter into the photo file explorer menu. Press the NEXT/LAST keys to select a photo. Press the
“M” key to view your selected file.
10
2. While in the photo file explorer menu, press the “M” key to enter into a file, and press the
NEXT/LAST keys to select the file which you want to view. Short-press “M” to view the file, or
short-press the “ESC” key to return to last menu.
3. While viewing photos, short-pressing the “M” key will display the sub-menu. The sub-menu
will allow you to: Rotate right, rotate left, zoom in, zoom out, and view pictures as a slide show.
E-book
1. Under the main menu, press the NEXT/LAST keys to select E-book, and then press the “M” key
to enter into the E-book explorer menu. Press the NEXT/LAST keys to select a text file. Press the
“M” key to start playing your selected file.
2. While reading a text file, short-pressing the “M” key will display the sub-menu. This menu will
allow you to: Page Jump, Save Mark, Load Mark, Del(ete) Mark, Set Font, Set Color, and set the
Flip Time.
11
Record v
1. Under the main menu, press the NEXT/LAST keys to select Record, and then press the “M” key
to enter into Record explorer menu.
2. After entering into Record menu, short-press the PLAY key to start and stop recording. Press
the “ESC” key to save the current recorded file and return to the Record menu.
3. Under the record menu, short-pressing the “M” key will display a sub-menu, which will allow
you to change the recording quality.
12
RADIO
1. Under the main menu, press the NEXT/LAST keys to select RADIO, and then press the “M” key
to enter into the RADIO explorer menu.
2. After entering into the RADIO menu, short-press the LAST/NEXT keys to manually search for a
channel. Long-pressing those keys will automatically search for channels.
3. Under the RADIO menu, short-press the “M” key to display the sub-menu. This sub-menu gives
you the options: search by hand, auto search, preset mode, save channel, delete channel, stereo
switch, and FM record.
Note: When recording from the radio, push the “PLAY” key to start and stop recording.
Short-press “ESC” to save the file and return to the RADIO menu.
13
Media Lib
MediaLib is a special function of this player, it allows you to easily browse and view the files
contained on the player.
1. Under the main menu, press the NEXT/LAST keys to select MediaLib, and then press the “M”
key to enter into the MediaLib menu. Use the NEXT/LAST keys to search for files, and then press
the “M” key to enter into the file. Short-press the “ESC” key to return to the previous menu.
2. Deleting files
Under the MediaLib menu, press the NEXT/LAST keys to select file that you want to delete.
Long-press the “VOL” key. This will open a delete confirmation box. Use the NEXT/LAST keys to
select YES or NO and press the “M” key to select your option.
14
Other Functions
Stopwatch function: Press the “M” key to enter into the stopwatch mode. Short-press the LAST
key to start and pause the timer. Press the NEXT key to clear the timer. Press the “ESC” key to
exit.
Calendar function: Press the “M” key to enter into the calendar. Press the NEXT/LAST keys to
select year, month, or day. Press the “M” key to select the items which need to change. Press the
“ESC” key to exit.
USB and Charging the Player
USB display
The player is high-speed USB 2.0. After connecting with the PC, the player will display the USB
icon. Go to “My Computer”, then “Removable Disk” to access your player. Copy the files you
would like on your player to the Removable Disk. Do not disconnect the player while transferring
is in progress. Make sure to safely remove the player before disconnecting the USB cable.
Charge
You can charge your player by either using the included charger, or you may connect the player to
your computer using the USB cable. Your charge progress will be displayed on the player. A full
charge time usually takes about 4 hours.
15
FAQ
♦ The player does not power on.
-Check the battery and see if it runs out of power.
-Check again after connecting the player to the power supply adapter.
-If the player still does not power on after charging, please contact our service center
♦ No sound comes out from the headphones.
-Check the volume and make sure it is not on Level 0
-Check the headphone connection
♦ The keys do not work.
-Make sure the keys are unlocked.
♦ The player has serious noise.
-Check the headphone connection. Improper connections may cause unwanted noise.
-Check and see if the music file has been damaged. Damaged files may cause serious noise.
♦ Radio reception is poor
-Adjust the position of the earphones and the player.
-The earphones can be used as an antenna
-Shut off all close electronic devices.
♦ The screen displays unwanted code.
-Check and see if the player is in the correct language.
-Language setup: “Setup”—“General Setup”—“Language”.
♦ The player can not download files.
-Make sure that the player is correctly connected to the computer.
-Make sure there is remaining storage space.
-Check the USB cable.
16
Technical Specifications
SCREEN
2.6 inch TFT screen 420*240
CONNECTION SPEED
High-speed USB 2.0
BUILT-IN MEMORY
high speed flash memory:1G/2GB/4GB/8G(optional)
POWER SUPPLY
RECORD
AUDIO FILES
polymer lithium battery 700mAh
Shut off the screen and play MP3 up to 21 hours
Sampling
Frequency
8KHz/16KHz
Record Format
WMA(32kbps,64 kbps)
Record Time
64hours(1GB)
Earphone’s Max
Output
(L)10mW+(R)10mW(32Ohm)
MP3 Bit Rate
64K bps – 320K bps
WMA Bit Rate
64K bps – 384K bps
FR
20Hz~20KHz
SNR
Degree
Distortion
RADIO
More than 90dB
of
0.03%
Frequency Range
76MHz–90MHz/87.5MHz– 108MHz
Preservation No.
30
Earphone’s Max
Output
(L)5mW+(R)5mW(32Ohm)
SNR
45dB
MUSIC FORMATS
MP3、WMA、WAV、FLAC、APE
SERVICE TEMPERATURE
-5 ~40
LANGUAGE
English, Spanish, Chinese, and more
SYSTEM REQUIREMENT
Windows 98 / SE / ME / 2K / XP / Vista
17