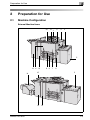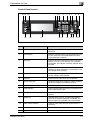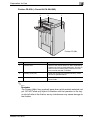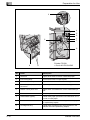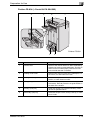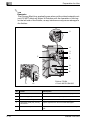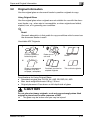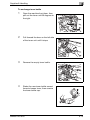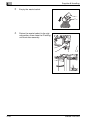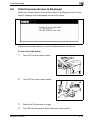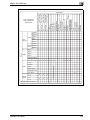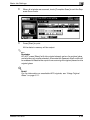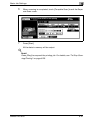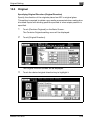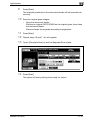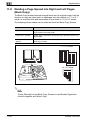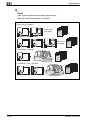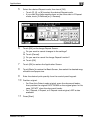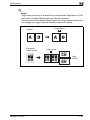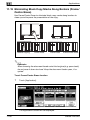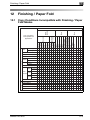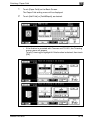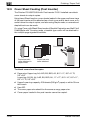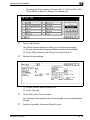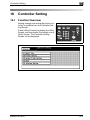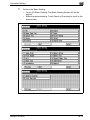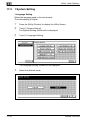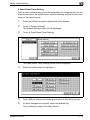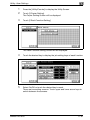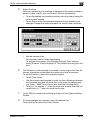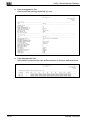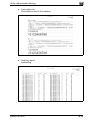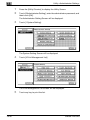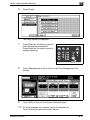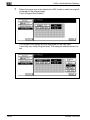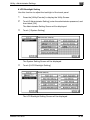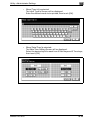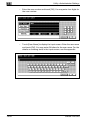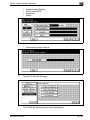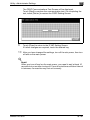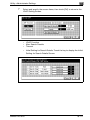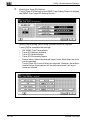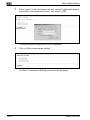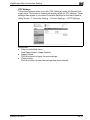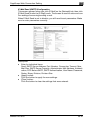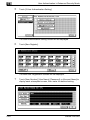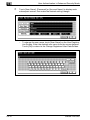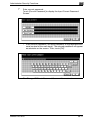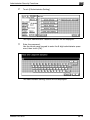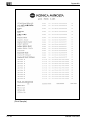
1
920
User Manual
• Copier
• POD Administrator
• Security
.
x
Introduction
Introduction
Thank you very much for your purchase of this machine.
This guide deals with making copies, correct handling of the machine, and
precautions for safety. Please read before copying.
In order to maintain a satisfactory copying performance, please keep this
guide readily available for reference in the rear pocket of the machine.
ENERGY STAR® Program
The ENERGY STAR Program has been established to encourage the widespread
and voluntary use of energy-efficient technologies that reduce energy consumption
and prevent pollution. As an ENERGY
STAR Partner, we have determined that
this product meets the ENERGY STAR
guidelines for energy efficiency, based on the following features.
Low Power
This function conserves energy by lowering the set temperature of the fixing
unit. In the standard setting, Low Power operates automatically when 15
minutes have elapsed after completion of the last copy, with the copier remaining in the ready to copy state during that time.
The time period for the Low Power function can be set for 5 minutes, 10 minutes, 15 minutes, 30 minutes, 60 minutes, 90 minutes, 120 minutes, or 240
minutes.
Sleep
This function achieves further energy conservation by partially turning the
power supply OFF, thereby reducing energy consumption to 8.9 W or less.
In the standard setting, Sleep follows Low Power, operating automatically
when 90 minutes have elapsed after completion of the last copy, with the
copier remaining in the ready to copy state during that time.
The time period for the Sleep function can be set for 30 minutes, 60 minutes,
90 minutes, 120 minutes or 240 minutes.
Automatic Duplex Copying
To reduce paper consumption, use this function to make double-sided (duplex) copies, automatically.
We recommend that you utilize the Low Power function, Sleep function, and
Automatic Duplex Copying function.
bizhub PRO 920
x-3
The Control Software version is as follows
(This software consists of Image control program and Controller control program.)
Image control program (Image Control l1) version: 10-0000, 20-0000 or later
Controller control program (IP Control P) version: 10-0000, 20-0000 or later
About the Firmware version display function
The bizhub PRO 920 Control Software (Image control program / Controller
control program) version mentioned above can be confirmed by using the
service representative (CE) service mode firmware version display function.
When you display the firmware version, the Image control program and Controller control program versions will be displayed as follows.
Image control program (Image Control l1) version:
2 digits + 4 zeros following the hyphen (Ex: 10-0000)
Controller control program (IP Control P) version:
2 digits + 4 zeros following the hyphen (Ex: 10-0000)
Please keep this in mind when checking the software version.
ACKNOWLEDGEMENTS:
KONICA MINOLTA, KONICA MINOLTA Logo, and The essentials of imaging
are registered trademarks or trademarks of KONICA MINOLTA HOLDINGS,
INC.
PageScope and bizhub PRO are registered trademarks or trademarks of
KONICA MINOLTA BUSINESS TECHNOLOGIES, INC.
Copyright © 2005 KONICA MINOLTA BUSINESS TECHNOLOGIES, Inc.
EXEMPTION
- No part of this manual may be used or duplicated without permission.
- Manufacturer and Sales Company will have no liability for any influences
caused by using the printing system and this User’s Guide.
- The information written in this User’s Guide is subject to change without
prior notice.
x-4
bizhub PRO 920
Contents
1
2
Precautions for Installation and Use
1.1
Safety Information ............................................................................ 1-3
Warning and Precaution Symbols .................................................. 1-3
Meaning of Symbols ...................................................................... 1-3
1.2
Regulation Notices ........................................................................... 1-9
Laser Safety ................................................................................... 1-9
- For Denmark Users ...................................................................... 1-9
- For Norway Users ........................................................................ 1-9
- For Finland, Sweden Users ......................................................... 1-9
Ozone Release ............................................................................. 1-10
Electromagnetic Interference ....................................................... 1-10
For European Users ..................................................................... 1-10
For German Users ........................................................................ 1-10
1.3
Caution Labels and Indicators ...................................................... 1-11
1.4
Installation Space ........................................................................... 1-13
1.5
Operation Precautions ................................................................... 1-15
Plug Socket .................................................................................. 1-15
Operating Environment ................................................................ 1-15
Paper ............................................................................................ 1-15
For EU member states only ......................................................... 1-15
Preparation for Use
2.1
Machine Configuration ..................................................................... 2-3
External Machine Items .................................................................. 2-3
Internal Machine Items ................................................................... 2-5
Standard/Optional Equipment ....................................................... 2-6
Control Panel Layout ..................................................................... 2-7
Basic Screen .................................................................................. 2-9
Finisher FS-509 (+ Punch Kit PK-504/505) .................................. 2-11
Finisher FS-604 (+ Punch Kit PK-504/505) .................................. 2-13
Post Inserter PI-501 ..................................................................... 2-16
Large Capacity Unit LU-403/LU-404 ........................................... 2-17
Z Folding Unit ZU-601/602 .......................................................... 2-19
Trimmer Unit TU-501 ................................................................... 2-20
2.2
Turning On/Off the Power Switch ................................................. 2-22
To turn on the power .................................................................... 2-22
To turn off the power ................................................................... 2-24
bizhub PRO 920
x-5
3
4
x-6
2.3
To Use Machine When Power Save LED Lights ...........................2-25
Low Power ....................................................................................2-26
Sleep .............................................................................................2-26
Using Power Save Manually .........................................................2-27
When Weekly Timer Is Activated ..................................................2-28
2.4
Making Authentication ....................................................................2-30
To make authentication ................................................................2-31
Paper and Original Information
3.1
Paper Information ..............................................................................3-3
Paper Weight ..................................................................................3-4
Tray/ Exit Tray Capacity ..................................................................3-5
Paper Size .......................................................................................3-8
Special Paper in Multi-Sheet Bypass Tray ...................................3-10
To Store Copy Paper ....................................................................3-10
3.2
Original Information ........................................................................3-11
Using Original Glass .....................................................................3-11
ADF Originals ................................................................................3-12
Supplies & Handling
4.1
Loading Paper ....................................................................................4-3
Loading Paper in Tray 1, 2, and 3 ...................................................4-5
Loading Paper in Multi-Sheet Bypass Tray ....................................4-7
Loading Paper in LCU (LU-403/LU-404) ........................................4-8
4.2
Loading Tabbed Sheets in Tray .....................................................4-10
Loading Tabbed Sheets in Tray 1, 2, and 3 ..................................4-10
Loading Tabbed Sheets in LCU (LU-403/LU-404) ........................4-12
Loading Tabbed Sheets in Multi-Sheet Bypass Tray ...................4-13
4.3
Adding Toner ...................................................................................4-14
To exchange toner bottle ..............................................................4-15
4.4
Inserting a New Staple Cartridge into Finisher FS-509 ................4-17
To add staples ..............................................................................4-17
4.5
Inserting a New Staple Cartridge into Finisher FS-604 ................4-21
To add staples ..............................................................................4-21
4.6
Empty Waste Basket of Punch Kit PK-504/505 ............................4-25
To empty waste basket .................................................................4-25
4.7
Empty Waste Basket of Z Folding Unit ZU-601/602 .....................4-27
To empty waste basket .................................................................4-27
4.8
Empty Waste Basket of Trimmer Unit TU-501 ..............................4-29
To empty waste basket .................................................................4-29
bizhub PRO 920
5
6
Troubleshooting
5.1
If “Please Call Service” Message Is Displayed .............................. 5-3
To contact service representative .................................................. 5-3
Limited Use of the Copier in Trouble ............................................. 5-4
5.2
Clearing Mishandled Paper ............................................................. 5-5
To remove mishandled paper ........................................................ 5-5
5.3
If [Job List] Changes to [Mishandled Paper] or [No Paper] ......... 5-7
If [Job List] Changes to [Mishandled Paper] .................................. 5-7
If [Job List] Changes to [No Paper] ................................................ 5-7
To change the tray selection .......................................................... 5-8
To supply the empty tray with paper ........................................... 5-10
5.4
If Memory Full Message Is Displayed (Memory Overflow) ......... 5-11
5.5
If Power Off/On Screen Is Displayed ............................................ 5-12
To turn off/on the power .............................................................. 5-12
5.6
If No Response Screen Is Displayed ............................................. 5-13
To turn off/on the power .............................................................. 5-13
5.7
Troubleshooting Tips ..................................................................... 5-14
Main Body .................................................................................... 5-14
ADF .............................................................................................. 5-15
Finisher (with Punch Kit) ............................................................... 5-15
Z Folding Unit ............................................................................... 5-15
Trimmer Unit ................................................................................ 5-16
Maintenance
6.1
Cleaning Image Scanning Section .................................................. 6-3
Cleaning the ADF Scanning Glass ................................................. 6-3
Cleaning the Original Glass ............................................................ 6-3
Cleaning the ADF Guide Cover ...................................................... 6-4
6.2
Checking Copy Count ...................................................................... 6-5
To check and print the counter list ................................................ 6-5
6.3
Preventive Maintenance ................................................................... 6-7
bizhub PRO 920
x-7
7
8
x-8
Specifications
7.1
Main Body Specifications .................................................................7-3
Main Body .......................................................................................7-3
ADF .................................................................................................7-4
7.2
Option Specifications ........................................................................7-5
Finisher FS-509 ...............................................................................7-5
Finisher FS-604 ...............................................................................7-6
Punch Kit PK-504/505 ....................................................................7-7
Post Inserter PI-501 ........................................................................7-7
Large Capacity Unit LU-403 ...........................................................7-8
Large Capacity Unit LU-404 ...........................................................7-8
Z Folding Unit ZU-601/602 .............................................................7-8
Trimmer Unit TU-501 ......................................................................7-9
Before Making Copies
8.1
Features of the bizhub PRO 920 ......................................................8-3
8.2
How to Make a Basic Copy ..............................................................8-8
To make a basic copy .....................................................................8-8
8.3
Positioning Originals .......................................................................8-11
Positioning Originals in ADF .........................................................8-11
To position originals in Normal mode ...........................................8-11
To position originals in Mixed Original mode ................................8-12
To position originals in Z-Folded mode ........................................8-14
Positioning Original on Original Glass ..........................................8-15
To position original on original glass ............................................8-15
8.4
Setting Print Quantity ......................................................................8-16
To set print quantity ......................................................................8-16
To change print quantity ...............................................................8-17
8.5
Setting Job During Warmup ...........................................................8-18
To set job during warmup .............................................................8-18
8.6
To Stop Scanning/Printing .............................................................8-20
To stop scanning or printing job ...................................................8-20
bizhub PRO 920
9
Basic Job Settings
9.1
Copy Conditions Incompatible with Basic Settings ...................... 9-3
9.2
Selecting Exposure Level and Adjusting
Background Whiteness .................................................................... 9-7
To adjust exposure level and background whiteness .................... 9-8
9.3
Paper Tray Setting .......................................................................... 9-10
Paper size .................................................................................... 9-10
Paper condition ............................................................................ 9-10
To Select Paper Size Automatically (Auto Paper Select) ............. 9-11
To set Auto Paper Select ............................................................. 9-12
To Specify Desired Paper Size (Auto Zoom) ................................ 9-14
To set Auto Zoom ........................................................................ 9-14
Copying Using Special Paper (Bypass Tray Setting) ................... 9-16
To use Multi-sheet bypass tray .................................................... 9-17
9.4
Zoom ................................................................................................ 9-24
Copying in Full Size Mode ........................................................... 9-24
Changing Magnification Ratio ...................................................... 9-25
To set zoom mode ....................................................................... 9-25
9.5
Simplex/Duplex ............................................................................... 9-30
Making Double-Sided Copies Using ADF .................................... 9-30
Making Double-Sided Copies Using Original Glass .................... 9-33
Making Single-Sided Copies from Double-Sided Originals ......... 9-36
9.6
Separate Scan Mode ...................................................................... 9-39
To set Separate Scan mode ........................................................ 9-39
9.7
Reserve Job Setting ....................................................................... 9-42
To set reserve job ........................................................................ 9-42
10 Original Setting
10.1
Copy Conditions Incompatible with Original Settings ................ 10-3
10.2
Combine Originals .......................................................................... 10-7
Lay Out Several Pages onto One Sheet (Combine Pages) .......... 10-7
10.3
Original ............................................................................................ 10-9
Specifying Original Direction (Original Direction) ......................... 10-9
Selecting Binding Direction of Originals (Bind) .......................... 10-11
Copying Mixed Size Originals (Mixed Original) .......................... 10-13
Copying Z-Folded Originals (Z-Folded) ..................................... 10-15
Feeding Single Original from ADF (Single Feed) ........................ 10-17
Procedure in normal Single Feed mode .................................... 10-17
Procedure in Auto Start mode ................................................... 10-19
Copying Non-Standard Size Originals
(Custom Size / Tab Paper) ......................................................... 10-21
bizhub PRO 920
x-9
10.4
Original Image Type ......................................................................10-23
Making Copy Quality Closer to Originals (Original Type) ............10-23
To specify Original Type .............................................................10-24
11 Applications
11.1
Copy Conditions Incompatible with Applications ........................11-3
11.2
Application Screen ..........................................................................11-7
To set Application function ...........................................................11-7
11.3
Inserting Sheets and Covers (Insert Sheet) ..................................11-9
To set Insert Sheet function ........................................................11-10
11.4
Locating Title Pages on the Front Side (Chapters) ....................11-15
To set Chapters function ............................................................11-15
11.5
Inserting Images into Printed Sets (Insert Image) ......................11-18
To set Insert Image function .......................................................11-18
11.6
Copying onto Transparent Films (OHP Interleave) .....................11-22
To set OHP Interleave function ...................................................11-22
11.7
Programming Different Settings for an Output Job
(Program Job) ................................................................................11-25
To set Program Job function ......................................................11-25
11.8
Dividing a Page Spread into Right and Left Pages
(Book Copy) ....................................................................................11-28
To set Book Copy function .........................................................11-29
11.9
Repeating Selected Image Area
(Image Repeat: Size Manual Input) ..............................................11-33
To set Size Manual Input mode of Image Repeat .......................11-33
11.10 Repeating Automatically or Select Repeating Times
(Image Repeat: Size Auto Detect / Repeat) ................................11-36
To set Size Auto Detect and Repeat modes of Image Repeat ...11-37
11.11 Making Multiple Page Signature Booklet
(Booklet Pagination) ......................................................................11-41
To set Booklet Pagination function .............................................11-42
11.12 Reversing Colour in Black and White Image
(Neg-/Positive Reverse) ................................................................11-45
To set Neg-/Positive Reverse function .......................................11-45
11.13 Adjusting Position of Copy Image
(Page Margin: Shift Mode) ............................................................11-47
To set Shift mode of Page Margin ..............................................11-48
x-10
bizhub PRO 920
11.14 Reducing Images to Create Binding Margin
(Page Margin: Reduce & Shift Mode) .......................................... 11-53
To set Reduce & Shift mode of Page Margin ............................. 11-54
11.15 Eliminating Black Copy Marks Along Borders
(Frame/Centre Erase) ................................................................... 11-56
To set Frame/Centre Erase function .......................................... 11-56
11.16 Erasing Outside of Original (Non-Image Area Erase) ................ 11-59
To set Non-Image Area Erase function ...................................... 11-59
11.17 Copying Image in the Centre of Copy Paper
(Image Centring) ........................................................................... 11-62
To set Image Centring function .................................................. 11-62
11.18 Printing Images Fully to the Edges (Full Scan) .......................... 11-65
To set Full Scan function ........................................................... 11-65
11.19 Copying without Image Rotation (No Rotate) ............................ 11-67
To set No Rotate function .......................................................... 11-67
11.20 Printing Stamp, Distribution Number, Page Number,
Date/Time onto Copies (Stamp) .................................................. 11-69
To set Stamp function ................................................................ 11-69
11.21 Printing Watermark onto Copies (Watermark) ........................... 11-79
To set Watermark function ......................................................... 11-79
11.22 Printing Words, Date/Time, Annotation Number
onto Copies (Annotation) ............................................................. 11-84
To set Annotation function ......................................................... 11-84
11.23 Overlay an Image onto Each Page Copied in the Job
(Image Overlay) ............................................................................. 11-88
Specifications for Image Overlay ............................................... 11-88
11.24 Storing Image on HDD / Overlaying Stored Image
(Program Image Overlay) ............................................................. 11-91
Specifications for Program Image Overlay ................................ 11-91
12 Finishing / Paper Fold
12.1
Copy Conditions Incompatible with
Finishing / Paper Fold Modes ........................................................ 12-3
12.2
Setting Binding Direction for Duplex Copies ............................... 12-7
To set binding direction for duplex copies .................................. 12-7
12.3
Setting Output Face and Order ................................................... 12-10
To set output face and order ..................................................... 12-10
12.4
Sorting / Stapling Copies ............................................................. 12-12
To set finishing mode ................................................................. 12-14
bizhub PRO 920
x-11
12.5
Making Folded Booklet (Half Fold / Fold&Staple / Trimming) ...12-18
To make folded booklet ..............................................................12-18
12.6
Folding Copies in Three (Letter Fold In / Letter Fold Out) .........12-21
To fold copies in three ................................................................12-21
12.7
Output Z-Folded Copies (Z-Fold) .................................................12-23
To make Z-folded copies ............................................................12-23
12.8
Punching File Holes in Copies (Punch) ........................................12-25
To punch file holes in copies ......................................................12-25
12.9
Cover Sheet Feeding (Post Inserter) ............................................12-28
To attach cover sheet to copies .................................................12-28
12.10 Using Finisher Manually ................................................................12-30
To use finisher manually .............................................................12-31
12.11 Using Two Copiers in Tandem .....................................................12-33
To use two copiers in tandem ....................................................12-34
To Stop Scanning/Printing ..........................................................12-39
To cancel the tandem copying job .............................................12-39
To cancel the job on the tandem machine only ..........................12-40
Troubleshooting ..........................................................................12-41
Copying with the Distribution recovery mode ............................12-41
When a paper jam, SC-code (E-code, F-code) trouble or
unloaded paper occurs on either the master or
tandem machine .........................................................................12-41
When memory overflow occurs on either the
master or tandem machine .........................................................12-41
When the power is turned off on either the master or
tandem machine .........................................................................12-41
13 Job Management
x-12
13.1
Overview of Job List Screen ...........................................................13-3
To display Job List Screen ...........................................................13-3
13.2
Job Operation on Job List Screen .................................................13-4
To Check/Control Reserved Jobs ................................................13-4
Job operation for reserved jobs ....................................................13-4
Displaying Output History .............................................................13-6
To display output history ..............................................................13-6
Displaying Send History ................................................................13-7
To display send history .................................................................13-7
Checking Incomplete Jobs ...........................................................13-8
To check incomplete jobs .............................................................13-8
To Check/Operate Suspended Jobs ............................................13-9
bizhub PRO 920
Job operation for suspended jobs ............................................... 13-9
To Check/Control Spool Jobs ................................................... 13-11
Job operation for spool jobs ...................................................... 13-11
14 Advanced Information
14.1
Checking Feature Selections by Proof Copying .......................... 14-3
To make a proof copy .................................................................. 14-3
14.2
Checking Feature Selections Before Copying (Check Mode) .... 14-5
To use Check mode ..................................................................... 14-5
14.3
Interrupt Copying ............................................................................ 14-9
To use Interrupt mode .................................................................. 14-9
14.4
Storing and Recalling Job Conditions (Mode Memory) ............ 14-11
Storing Job Conditions .............................................................. 14-11
To store job conditions .............................................................. 14-11
Recalling Stored Job Settings ................................................... 14-14
To recall stored job settings ....................................................... 14-14
Recalling Previous Job Settings ................................................ 14-16
To recall previous job settings ................................................... 14-16
14.5
Displaying Screen for Operation Guide (Help Mode) ................ 14-18
To display Help Screen .............................................................. 14-18
14.6
Adjusting Response Time of Touch Keys (Accessibility) .......... 14-20
To adjust response time ............................................................. 14-20
14.7
Adjusting Touch Panel Contrast (Contrast) ............................... 14-21
To Adjust Contrast ..................................................................... 14-21
14.8
Controlling Copier from Browser (Remote Panel) ..................... 14-22
To control copier from browser ................................................. 14-22
15 Paper Setting
15.1
Paper Setting Outlines ................................................................... 15-3
15.1.1
Setting Items in Paper Setting ..................................................... 15-3
15.1.2
Paper Type Specifications ........................................................... 15-4
Paper Type and Weight ............................................................... 15-5
15.1.3
Recommended Setting of Tray .................................................... 15-6
Recommended Setting Procedure .............................................. 15-6
15.2
Change Tray Setting ....................................................................... 15-7
15.3
Change Size Setting ..................................................................... 15-12
bizhub PRO 920
x-13
16 Controller Setting
16.1
Function Overview ...........................................................................16-3
16.2
01 Report Type .................................................................................16-9
16.3
02 Printer Setting ...........................................................................16-11
16.4
03 Select Printer Setting ...............................................................16-18
16.5
04 Spool ..........................................................................................16-20
16.6
05 Interface Setting .......................................................................16-21
17 Utility <User Setting>
x-14
17.1
User Setting Outlines ......................................................................17-3
17.2
List of the User Setting ...................................................................17-4
17.3
1 System Setting ............................................................................17-10
1 Language Setting .....................................................................17-10
2 Buzzer Setting>1 Buzzer On/Off, Volume Setting ...................17-12
2 Buzzer Setting>2 Buzzer for Job Stop Setting ........................17-14
3 1 SHOT Indication Time ...........................................................17-16
4 Panel Reset Timer Setting .......................................................17-17
5 Sub Area Display On/Off ..........................................................17-18
6 Key Response Time .................................................................17-19
7 Change User Password ...........................................................17-20
8 Warm Up Screen On/Off ..........................................................17-24
17.4
2 Function Setting .........................................................................17-25
1 Feed Tray Setting>1 Feed Tray Auto Selection .......................17-25
1 Feed Tray Setting>2 ATS Permission ......................................17-27
1 Feed Tray Setting>3 Auto Paper Type Selection .....................17-29
2 Each Function Setting>Fine Adjust Margin .............................17-31
2 Each Function Setting>Print Prohibit Timer ............................17-32
3 Density Setting>1 Density Shift for Original Image Type .........17-33
3 Density Setting>2 User Density Setting ...................................17-35
3 Density Setting>3 Photo Mode Density Setting ......................17-38
3 Density Setting>4 Image Density Selection .............................17-40
4 Preset Zoom ............................................................................17-42
5 Tandem Setting>1 Tandem Sub Machine
One Time Data Read ...................................................................17-44
5 Tandem Setting>2 Tandem Sub Machine Wait/Proof .............17-46
5 Tandem Setting>3 Tandem Sub Machine
Shift Data Setting ........................................................................17-48
5 Tandem Setting>4Tandem Selection after
JOB Completion .........................................................................17-50
5 Tandem Setting>5 Distribution Recovery ................................17-52
bizhub PRO 920
17.5
3 Copier Setting ............................................................................ 17-54
1 Reset Setting>1 Initial Setting ................................................. 17-54
1 Reset Setting>2 Reset Function Setting ................................. 17-56
1 Reset Setting>3 Initial by Key Counter Insert ......................... 17-58
2 Each Function Setting ............................................................. 17-60
17.6
4 Scanner Setting ......................................................................... 17-63
1 Default Address Setting .......................................................... 17-63
2 Each Function Setting ............................................................. 17-65
17.7
5 Touch Panel Adjust ................................................................... 17-67
18 Utility <Administrator Setting>
18.1
Administrator Setting Outlines ...................................................... 18-3
How to access the Administrator Setting Menu .......................... 18-3
18.2
List of the Administrator Setting ................................................... 18-6
18.3
1 System Setting ........................................................................... 18-13
1 Power Save Setting ................................................................. 18-13
2 Date/Time Setting ................................................................... 18-16
3 Weekly Timer Setting .............................................................. 18-18
3 Weekly Timer Setting>1 Weekly Timer On/Off Setting ........... 18-19
3 Weekly Timer Setting>2 Time Setting ..................................... 18-21
3 Weekly Timer Setting>3 Date Setting ..................................... 18-25
3 Weekly Timer Setting>4 Select Time for Power Save ............ 18-27
3 Weekly Timer Setting>5 Password for
Non-Business Hours Setting ...................................................... 18-30
4 Print Management List ............................................................ 18-33
5 Prohibit User Operation .......................................................... 18-38
6 Expert Adjustment>Non Image Area Erase Setting ................ 18-42
6 Expert Adjustment>ADF Frame Erasure Setting ..................... 18-45
6 Expert Adjustment>Finisher Adjust ......................................... 18-47
6 Expert Adjustment>Timing Adjustment .................................. 18-51
6 Expert Adjustment>Centring Adjustment ............................... 18-54
7 Size Setting ............................................................................. 18-57
8 Paper Setting>1 Tray Setting .................................................. 18-60
8 Paper Setting>2 PI Setting ...................................................... 18-60
9 LCD Backlight Setting ............................................................. 18-63
10 Annotation Setting ................................................................ 18-65
18.4
2 Administrator/Machine Register .............................................. 18-74
1 Administrator Registration ...................................................... 18-74
bizhub PRO 920
x-15
x-16
18.5
3 User Authentication/Account Track .........................................18-76
1 General Settings>1 User Authentication .................................18-76
1 General Settings>2 Account Track ..........................................18-79
2 Account Track Setting .............................................................18-82
3 User Authentication Setting .....................................................18-92
4 Non Register/Output Setting .................................................18-103
18.6
4 Network Setting ........................................................................18-105
1 Machine NIC Setting ..............................................................18-105
List of IP NIC Setting ................................................................18-107
2 IP NIC Setting>1 TCP/IP ........................................................18-122
2 IP NIC Setting>2 NetWare .....................................................18-126
2 IP NIC Setting>3 IPP ..............................................................18-130
2 IP NIC Setting>4 FTP .............................................................18-133
2 IP NIC Setting>5 SNMP .........................................................18-136
2 IP NIC Setting>6 SMB ...........................................................18-138
2 IP NIC Setting>7 AppleTalk ...................................................18-141
2 IP NIC Setting>8 E-Mail .........................................................18-143
2 IP NIC Setting>9 HDD ...........................................................18-151
2 IP NIC Setting>10 Alert Mail ..................................................18-153
2 IP NIC Setting>11 CSRC .......................................................18-156
2 IP NIC Setting>12 AP I/F .......................................................18-162
2 IP NIC Setting>13 PSWC .......................................................18-165
2 IP NIC Setting>14 Network Setting Clear ..............................18-167
2 IP NIC Setting>15 LDAP ........................................................18-169
2 IP NIC Setting>16 SNMP Trap ..............................................18-175
18.7
5 Copier/Printer Setting ..............................................................18-180
Job Offset Mode .......................................................................18-180
Continuous Print (Print) .............................................................18-182
Change Page Number Print Pos (Booklet) ................................18-184
Fixing Prerotation Set ...............................................................18-185
Auto Image Rotation .................................................................18-187
Suspend Interruption ................................................................18-189
Reserve Copy Function ............................................................18-191
Suspend Scanning when Tray is pulled ....................................18-193
Continuous Print (Copy) ............................................................18-195
Face Up/Down for 1 Sheet .......................................................18-196
Single Feed Auto Setting ..........................................................18-197
18.8
6 System Connection ..................................................................18-198
6 System Connection>1 Call Service Centre ...........................18-198
bizhub PRO 920
18.9
7 Security Setting ........................................................................ 18-200
1 Administrator Password ........................................................ 18-200
2 HDD Manage Setting>1 Details/Delete ................................. 18-203
2 HDD Manage Setting>2 Data Auto Delete ............................ 18-207
2 HDD Manage Setting>3 HDD Lock Password Changing ..... 18-209
3 Enhance Security Mode ........................................................ 18-213
18.10 8 Scanner Destination Storage ................................................. 18-215
1 Destination Address Change/Delete ..................................... 18-215
19 Web Utilities Setting
19.1
Web Utilities Outlines ..................................................................... 19-3
19.2
Setting Account Track Data .......................................................... 19-5
19.2.1
Adding Account Track ................................................................. 19-6
19.2.2
Editing Account Track Data ......................................................... 19-9
19.3
Remote Panel Setting ................................................................... 19-20
19.4
Setting Scan Transmission Function .......................................... 19-23
19.5
Transmitting Machine Setting File .............................................. 19-29
Specifications for Each Machine Setting File Type .................... 19-35
20 PageScope Web Connection Setting
20.1
PageScope Web Connection Outlines .......................................... 20-3
System Requirements .................................................................. 20-3
20.2
Access ............................................................................................. 20-5
Operation ..................................................................................... 20-5
20.3
Screen Configuration ..................................................................... 20-6
20.3.1
20.4
Logging in Using Administrator Mode ......................................... 20-8
Administrator Mode ...................................................................... 20-10
20.4.1
System Tab ................................................................................ 20-10
Administrator Password ............................................................. 20-10
Device Information ..................................................................... 20-11
ROM Version .............................................................................. 20-12
Online Assistance ....................................................................... 20-12
Import/Export ............................................................................. 20-14
Maintenance ............................................................................... 20-15
Alert Mail .................................................................................... 20-17
20.4.2
Print Tab ..................................................................................... 20-18
Port Settings .............................................................................. 20-18
Default Settings .......................................................................... 20-19
bizhub PRO 920
x-17
20.4.3
Scan Tab .....................................................................................20-22
Subject Registration ...................................................................20-22
To Enter / Edit Subjects ..............................................................20-23
To Delete Subjects ......................................................................20-24
Body Registration .......................................................................20-25
To Enter / Edit Body ....................................................................20-25
To Delete Bodies ........................................................................20-26
20.4.4
Network Tab ...............................................................................20-27
TCP/IP .........................................................................................20-27
Netware .......................................................................................20-29
IPP ..............................................................................................20-31
FTP ..............................................................................................20-32
SNMP ..........................................................................................20-34
SMB ............................................................................................20-35
AppleTalk ....................................................................................20-37
LDAP ...........................................................................................20-38
To check LDAP Setting: ..............................................................20-39
E-Mail ..........................................................................................20-40
SSL/TLS ......................................................................................20-42
If a certificate is not installed –
Creating a self-signed certificate ................................................20-42
If a certificate is not installed –
Requesting a certificate to instal ................................................20-44
If a certificate has been installed Requesting a certificate to switch information ...........................20-48
Changing mode settings –
Changing encryption strength setting ........................................20-51
Changing mode using SSL/TLS .................................................20-53
Removing a certificate ................................................................20-55
Authentication .............................................................................20-57
AP I/F ..........................................................................................20-58
21 Security Functions
Normal mode ................................................................................21-3
Enhanced Security mode ..............................................................21-3
Environments in which Enhanced Security mode
is recommended ...........................................................................21-3
Creating a secure environment .....................................................21-4
x-18
bizhub PRO 920
22 Enhanced Security Mode
22.1
Description of Enhanced Security mode ...................................... 22-3
22.2
Data protected by Enhanced Security mode ............................... 22-5
Data that is not protected in Enhanced Security mode ............... 22-5
To turn Enhanced Security mode ON/OFF .................................. 22-5
22.3
Display when Enhanced Security mode is ON ............................. 22-6
23 Protect and Delete Data After Use
24 User Authentication in Enhanced Security Mode
24.1
Description of user authentication ............................................... 24-3
24.2
To register a new user ................................................................... 24-4
24.3
To change a user data .................................................................... 24-9
24.4
To delete a user ............................................................................ 24-14
24.5
To change password by user ...................................................... 24-18
25 HDD Store Function in Enhanced Security Mode
25.1
Store the data in a Box while Copying .......................................... 25-4
25.2
Store scanned data in a Box .......................................................... 25-9
25.3
Recall/Delete data in a Box ......................................................... 25-14
25.4
Output data in the Secure Box .................................................... 25-20
Secure printing using a PC ........................................................ 25-20
Outputting secure printing using a PC –
printing on the machine ............................................................. 25-20
26 Administrator Security Functions
26.1
Turn Enhanced Security mode ON/OFF ....................................... 26-4
26.2
HDD lock password ........................................................................ 26-7
26.3
Print audit log ................................................................................ 26-14
26.4
Analyze audit log .......................................................................... 26-18
Audit Log Information ................................................................ 26-18
26.5
Table of items saved in audit log ................................................ 26-19
Specify unauthorized actions – password authentication ......... 26-20
Specify unauthorized actions – actions other than password
authentication under security ..................................................... 26-20
bizhub PRO 920
x-19
27 Appendix
27.1
How to Input Characters ................................................................27-3
About keys on the character input screen ....................................27-3
About character input ...................................................................27-4
27.2
Setting Data for Import/Export .......................................................27-5
[1] System .....................................................................................27-5
[2] Print ..........................................................................................27-6
[3] Network ....................................................................................27-7
27.3
Configuration Setting ....................................................................27-10
27.4
Demo Page .....................................................................................27-14
27.5
PCL Font List .................................................................................27-22
27.6
Symbol Set .....................................................................................27-25
27.7
Glossary ..........................................................................................27-31
28 Index
x-20
bizhub PRO 920
1
Precautions for
Installation and Use
Precautions for Installation and Use
1
1
Precautions for Installation and Use
1.1
Safety Information
This section contains detailed instructions on the operation and maintenance
of this machine. To achieve optimum utility of this device, all operators
should carefully read and follow the instructions in this manual.
Please read the following section before connecting the machine to the supply. It contains important information related to user safety and preventing
equipment problems.
Please keep this manual in a handy place near the machine.
Make sure you observe all of the precautions appear in each section of this
manual.
2
Note
Some parts of the contents of this section may not correspond with the
purchased product.
Warning and Precaution Symbols
The following indicators are used on the warning labels or in this manual to
categorize the level of safety warnings.
WARNING
Ignoring this warning could cause serious injury or even
death.
CAUTION
Ignoring this caution could cause injury or damage to property.
Meaning of Symbols
A triangle indicates a danger against which you should take precaution.
This symbol warns against cause burns.
A diagonal line indicates a prohibited course of action.
This symbol warns against dismantling the device.
A solid circle indicates an imperative course of action.
This symbol indicates you must unplug the device.
bizhub PRO 920
1-3
Precautions for Installation and Use
1
Disassemble and modification
WARNING
• Do not attempt to remove the covers and panels which have
been fixed to the product. Some products have a high-voltage part or a laser beam source inside that could cause an
electrical shock or blindness.
• Do not modify this product, as a fire, electrical shock, or
breakdown could result. If the product employs a laser, the
laser beam source could cause blindness.
Power cord
WARNING
• Do not scratch, abrade, place a heavy object on, heat, twist,
bend, pull on, or damage the power cord. Use of a damaged
power cord (exposed core wire, broken wire, etc.) could result in a fire or breakdown.
Should any of these conditions be found, immediately turn
OFF the power switch, unplug the power cord from the power outlet, and then call your authorized service representative.
Power source
WARNING
• Use only the specified power source voltage. Failure to do
that could result in a fire or electrical shock.
• Connect power plug directly into wall outlet having the same
configuration as the plug. Use of an adapter leads to the
product connecting to inadequate power supply (voltage,
current capacity, grounding), and may result in fire or shock.
If proper wall outlet is not available, the customer shall ask
qualified electrician for the installation.
• Do not use a multiple outlet adapter nor an extension cord in
principle. Use of an adapter or an extension cord could cause
a fire or electrical shock.
Contact your authorized service representative if an extension cord is required.
1-4
bizhub PRO 920
Precautions for Installation and Use
1
Power source
• Consult your authorized service representative before connecting other equipment on the same wall outlet. Overload
could result in a fire.
CAUTION
• The outlet must be near the equipment and easily accessible.
Otherwise you can not pull out the power plug when an emergency occurs.
Power plug
WARNING
• Do not unplug and plug in the power cord with a wet hand,
as an electrical shock could result.
• Plug the power cord all the way into the power outlet. Failure
to do this could result in a fire or electrical shock.
CAUTION
• Do not tug the power cord when unplugging. Pulling on the
power cord could damage the cord, resulting in a fire or electrical shock.
• Remove the power plug from the outlet more than one time a
year and clean the area between the plug terminals. Dust that
accumulates between the plug terminals may cause a fire.
Grounding
WARNING
• Connect the power cord to an electrical outlet that is
equipped with a grounding terminal.
bizhub PRO 920
1-5
Precautions for Installation and Use
1
Installation
WARNING
• Do not place a flower vase or other container that contains
water, or metal clips or other small metallic objects on this
product. Spilled water or metallic objects dropped inside the
product could result in a fire, electrical shock, or breakdown.
Should a piece of metal, water, or any other similar foreign
matter get inside the product, immediately turn OFF the power switch, unplug the power cord from the power outlet, and
then call your authorized service representative.
CAUTION
• After installing this product, mount it on a secure base. If the
unit moves or falls, it may cause personal injury.
• Do not place the product in a dusty place, or a site exposed
to soot or steam, near a kitchen table, bath, or a humidifier.
A fire, electrical shock, or breakdown could result.
• Do not place this product on an unstable or tilted bench, or
in a location subject to a lot of vibration and shock. It could
drop or fall, causing personal injury or mechanical breakdown.
• Do not let any object plug the ventilation holes of this product. Heat could accumulate inside the product, resulting in a
fire or malfunction.
• Do not use flammable sprays, liquids, or gases near this
product, as a fire could result.
Ventilation
CAUTION
• Always use this product in a well ventilated location. Operating the product in a poorly ventilated room for an extended
period of time could injure your health. Ventilate the room at
regular intervals.
1-6
bizhub PRO 920
Precautions for Installation and Use
1
Actions in response to troubles
WARNING
• Do not keep using this product, if this product becomes inordinately hot or emits smoke, or unusual odour or noise. Immediately turn OFF the power switch, unplug the power cord
from the power outlet, and then call your authorized service
representative. If you keep on using it as is, a fire or electrical
shock could result.
• Do not keep using this product, if this product has been
dropped or its cover damaged. Immediately turn OFF the
power switch, unplug the power cord from the power outlet,
and then call your authorized service representative. If you
keep on using it as is, a fire or electrical shock could result.
CAUTION
• The inside of this product has areas subject to high temperature, which may cause burns.
When checking the inside of the unit for malfunctions such as
a paper misfeed, do not touch the locations (around the fusing unit, etc.) which are indicated by a “Caution HOT” caution
label.
Consumables
WARNING
• Do not throw the toner cartridge or toner into an open flame.
The hot toner may scatter and cause burns or other damage.
CAUTION
• Do not leave a toner unit or drum unit in a place within easy
reach of children. Licking or ingesting any of these things
could injure your health.
• Do not store toner units and PC drum units near a floppy disk
or watch that are susceptible to magnetism. They could
cause these products to malfunction.
bizhub PRO 920
1-7
Precautions for Installation and Use
1
When moving the machine
CAUTION
• Whenever moving this product, be sure to disconnect the
power cord and other cables. Failure to do this could damage
the cord or cable, resulting in a fire, electrical shock, or
breakdown.
• When moving this product, always hold it by the locations
specified in the User’s Guide or other documents. If the unit
falls it may cause severe personal injury. The product may
also be damaged or malfunction.
Before successive holidays
CAUTION
• Unplug the product when you will not use the product for
long periods of time.
1-8
bizhub PRO 920
Precautions for Installation and Use
1.2
1
Regulation Notices
Laser Safety
This product employs a Class 3B laser diode having maximum power of 15
mW and wavelength of 775 - 800 nm.
This product is certified as a Class 1 laser product. Since the laser beam is
concealed by protective housings, the product does not emit hazardous laser radiation as long as the product is operated according to the instructions
in this manual.
- For Denmark Users
ADVARSEL
Usynlig laserstråling ved åbning, når sikkerhedsafbrydere er ude af funktion.
Undgå udsættelse for sråling.
Klasse 1 laser produkt der opfylder IEC 60825-1 sikkerheds kravene.
Dansk: Dette er en halvlederlaser. Laserdiodens højeste styrke er 15 mW og
bølgelængden er 775 - 800 nm.
- For Norway Users
ADVARSEL
Dersom apparatet brukes på annen måte enn spesifisert I denne bruksanvisning, kan brukeren utsettes for usynlig laserstråling som overskrider
grensen for laser klass 1.
Dette en halvleder laser. Maksimal effekt till laserdiode er 15 mW og bøkgelengde er 775 - 800 nm.
- For Finland, Sweden Users
LUOKAN 1 LASERLAITE
KLASS 1 LASER APPARAT
VAROITUS!
Laitteen käyttäminen muulla kuin tässä käyttöohjeessa mainitulla tavalla
saattaa altistaa käyttäjän turvallisuusluokan 1 ylittävälle näkymättömälle lasersäteilylle.
Tämä on puolijohdelaser. Laserdiodin suurin teho on 15 mW ja aallonpituus
on 775 - 800 nm.
VARNING!
Om apparaten används på annat sätt än I denna bruksanvisning specificerats, kan användaren utsättas för osynlig laserstrålning, som överskrider
gränsen för laserklass 1.
Det här är en halvledarlaser. Den maximala effekten för laserdioden är 15 mW
och våglängden är 775 - 800 nm.
bizhub PRO 920
1-9
Precautions for Installation and Use
1
Ozone Release
During print operation, a small quantity of ozone is released. This amount is
not large enough to harm anyone adversely. However, be sure the room
where the machine is being used has adequate ventilation, especially if you
are printing a high volume of materials, or if the machine is being used continuously over a long period.
Electromagnetic Interference
This product must be used with a shielded network cable and shielded USB
interface cable.
The use of non-shield cables is likely to result in interference with radio communications and is prohibited under CISPR 22 and local rules.
For European Users
This product complies with the following EU directives:
89/336/EEC, 73/23/EEC and 93/68/EEC
This declaration is valid for the areas of the European Union (EU) or EFTA only.
This device must be used with a shielded network cable and shielded USB
interface cable. The use of non-shielded cables is likely to result in interference with radio communications and is prohibited under 89/336/EEC rules.
For German Users
Maschinenlärminformations -Verordnung - 3. GSGV, 18.01.1991:
Der arbeitsplatzbezogene Immisionswert betraegt 70 dB(A) oder weniger
nach ISO 7779.
1-10
bizhub PRO 920
Precautions for Installation and Use
1.3
1
Caution Labels and Indicators
The caution labels and indicators are attached to the machine areas, as
shown below, where you are advised to pay special attention to avoid any
dangerous situations or serious injury.
(Entrance of the reversal output unit)
(Top surface and right/left side
of the fixing unit)
DO NOT INSERT
your finger into
the two ADF
hinge portions;
otherwise you
may be injured.
DO NOT put your hand
between the main
body and developing
fixing unit; otherwise
you may be injured.
The fixing unit is
very hot.
To avoid getting
burned DO NOT
TOUCH.
This product employs a
Class IIIb Laser Diode that
emits an invisible laser
beam. The cover should
not be opened under any
circumstances.
bizhub PRO 920
DO NOT put your hand
between the main body
and developing fixing
unit; otherwise you may
be injured.
1-11
1
Precautions for Installation and Use
CAUTION
To avoid injury, DO NOT put your hand
on top of the printed sheets. Be sure to
hold both sides of the printed sheets when
removing them, and DO NOT leave your
hand on the printed sheets while
the primary (main) tray goes up.
1-12
bizhub PRO 920
Precautions for Installation and Use
1.4
1
Installation Space
Allow sufficient space for facilitating copy operation, changing parts, and periodic inspection. Leave an adequate space behind the machine to let hot air
out from the rear fan.
Main body + DF-606 + FS-604 + LU-403 (Front)
Main body (Right side)
bizhub PRO 920
1-13
Precautions for Installation and Use
1
Main body + DF-606 + FS-604 + PI-501 + ZU-601/602 +
LU-404 + MK-707 + TU-501 (Front)
!
Detail
The whole machine may weigh approx. 510 kg at maximum, depending
on the combination of options. Be sure to choose a level and solid floor
for the installation place.
2
Reminder
Finisher tray of Finisher FS-509/FS-604 gradually goes down while printed materials output. DO NOT allow any object to interfere with the operation of the tray on the left side of the finisher, as any interference may
cause damage to the finisher.
1-14
bizhub PRO 920
Precautions for Installation and Use
1.5
1
Operation Precautions
To ensure the optimum performance of this machine, observe the precautions described below.
Plug Socket
A plug socket is limited in capacity. Use only a power source with the correct
rating for the machine; otherwise, hazardous situations such as smoking or
overheating may occur. See the following list to match the power supply and
power consumption:
- 230V / 50Hz: More than 15A
Operating Environment
Avoid any environment that is outside the range shown below:
- Temperature: 10°C (50°F) to 30°C (86°F)
- Humidity: 10% to 80%
Paper
Check paper to be sure it conforms to the specifications outlined in Section
3.
- Do not use paper with staples or paper that conducts electricity (silver,
carbon, etc.), otherwise an accident may occur as a result of fire.
- To avoid machine trouble, do not use heat-sensitive paper, coloured
OHP transparencies, or paper specifically designed for ink-jet printer,
such as photo-paper.
For EU member states only
This symbol means: Do not dispose of this
product together with your household
waste!
Please refer to the information of your local
community or contact our dealers regrading the proper handling of end-of-life electric and electronic equipments. Recycling
of this product will help to conserve natural
resources and prevent potential negative
consequences for the environment and
human health caused by inappropriate
waste handling.
bizhub PRO 920
1-15
1
1-16
Precautions for Installation and Use
bizhub PRO 920
2
Preparation for Use
Preparation for Use
2
2
Preparation for Use
2.1
Machine Configuration
External Machine Items
16
2
17 1
3
4
5
13 11 10
14
15
13
bizhub PRO 920
9 8
7
6
5
12
2-3
Preparation for Use
2
2-4
No.
Item
Description
1
ADF (Automatic Document Feeder)
Automatically feeds multiple originals one at a time
to the original glass for copying.
2
Sub power switch
Turns machine power on/off when pressed.
3
Work table
Provides a convenient workspace for documents
both before and after copying.
4
Multi-sheet bypass tray
Used for small quantity copying onto plain paper of
other size or type than that loaded in main body
trays, or copying onto special paper.
5
Tray 4 (Large capacity unit LU403/ LU-404) (option)
Holds 4,000 sheets (LU-403) / 4,000 sheets (LU404) of 80 g/m2 paper.
6
Right side door
Opens to allow removal of mishandled paper.
7
Tray 3 (universal tray)
Holds 1,000 sheets (80 g/m2 paper) from A3 to A5.
8
Tray 2 (universal tray)
Holds 500 sheets (80 g/m2 paper) from A3 to A5.
9
Tray 1 (universal tray)
Holds 500 sheets (80 g/m2 paper) from A3 to A5.
10
Left side door
Opens to turn the main power switch on/off, or
opens together with front door to allow removal of
mishandled paper.
11
Front door
Opens to allow toner supply or removal of mishandled paper.
12
Z folding unit ZU-601/602 (option)
Punches file holes and/or z-folds the output copies.
13
Finisher FS-509/FS-604 (option)
Sorts and/or staples copies into finished sets, and
FS-604 also folds or folds & staples copies into
bookletstyled sets.
With optional Punch kit PK-504/505 installed,
Punch mode is also available.
14
Trimmer unit TU-501 (option)
Trims the end of booklet.
15
Post inserter PI-501 (option)
Used together with FS-509/FS-604, loads cover
sheet paper to feed it as cover, and enables to use
Finisher manually.
16
Touch panel
Displays interactive operation screens.
17
Control panel
Controls copier operations and displays messages
as required.
bizhub PRO 920
Preparation for Use
2
Internal Machine Items
1
6
5
4
3
2
No.
Item
Description
1
Total counter
Indicates the total number of copies and prints
made.
2
Conveyance fixing unit
Passes the paper through the drum unit, fuses the
toner onto the copy paper, and is to be withdrawn
for removal of mishandled paper.
3
Conveyance fixing unit lever
Can be opened rightward to withdraw the conveyance fixing unit for removal of mishandled paper.
4
Drum unit
Forms the copy image.
5
Fixing unit
Fuses the toner onto the copy paper.
6
Main power switch
Used only by service representative turns machine
power on/off when pressed.
7 CAUTION
The internal fixing unit is very hot.
%
To avoid getting burned, DO NOT TOUCH.
bizhub PRO 920
2-5
Preparation for Use
2
Standard/Optional Equipment
Punch kit PK-504/505
Post inserter PI-501
Image controller
IC-203
PostScript kit PS-503
Expanded memory
unit EM-701
Finisher FS-509
bizhub PRO 920 main body
Large capacity
unit LU-403
Finisher FS-604
Large capacity
unit LU-404
Mount kit MK-707
Z folding unit
ZU-601/602
Trimmer unit TU-501
2-6
bizhub PRO 920
Preparation for Use
2
Control Panel Layout
19
18
4
5
16 15
14
1 2 3
20 21 22
17
6 7
8
9
13 12 11 10
No.
Name
Description
1
[Mode Memory] key
Displays screens for selecting job store/job recall
functions.
2
[Access] key
Sets the machine to allow copying/scanning/printing only when the User Authentication/Account
Track password is entered.
3
[Box] key
Press to store the image data in HDD of the main
body or on a PC over a network, or to recall the
stored data. The indicator of the key will light when
pressed.
4
[Scan] key
Press to scan the original images, or to specify the
address for data transmission. The indicator of the
key will light when pressed.
5
[Copy] key
Press to operate copying functions. The indicator of
the key will light when pressed.
6
Keypad
Enters numeric value such as print quantity.
7
[Proof Copy] key
Outputs a single set of copies to confirm whether
the current settings are selected properly.
8
[Reset] key
Restores copier to the initial settings.
9
[Interrupt] key
Stops copying/scanning/printing in progress to allow a simple copying job.
10
[Stop] key
Ceases the copying sequence; deletes the stored
memory.
11
[Start] key
Activates each function. The Start LED lights in
green when machine operation is available, and
turns orange if any operation cannot be started.
12
Main Power indicator
Lights in green when the main power switch is
turned on.
13
Data indicator
Flashes while receiving print data.
14
[C] (clear) key
Allows resetting of print quantity.
bizhub PRO 920
2-7
Preparation for Use
2
No.
Name
Description
15
[Utility/Counter] key
Displays the Utility Screen or Counter Screen.
16
[Mode Check] key
Displays a screen showing all settings that are selected for the current job.
17
Touch panel
Displays machine and copying status, help information, interactive screens, and touch keys for selecting all functions.
18
[Accessibility] key
Adjusts the response time when touch panel keys or
control panel keys are pressed.
19
Contrast adjustment dial
Can be turned to adjust the brightness of the touch
panel.
20
Power Save LED
Lights when any power-saving mode is activated, or
machine power is off due to the timer function.
21
[Power Save] key
Enables temporary use of the machine when the
Power Save LED is lit, or activates power-saving
mode for times when the copier is inactive.
22
[Help] key
Displays a screen with help for the currently selected function.
7 CAUTION
The touch panel of the control panel is covered with glass.
%
Do not drop heavy objects on the glass, or put excess weight or pressure on it; otherwise the glass may break or scratched and you may be
injured.
7 CAUTION
If the Service Call Screen is displayed, copier operations cannot be continued any more.
%
Stop the operation to prevent any unexpected accident. Write down
the report code, then switch off the machine and disconnect from the
power socket. Contact your service representative and inform them of
the report code.
2-8
bizhub PRO 920
Preparation for Use
2
Basic Screen
1
3
2
4
6
5
7
8
9
20
10
19
18
No.
17 16
15 14
13 12
11
Name
Description
1
[Job List] key
Touched to display the Job List Screen.
2
Date and time indicator
Displays the present date and time, and changes to
the timer indication 5 minutes before the Weekly
Timer functions if activated.
3
Message area
Displays messages concerning toner supply, preventive maintenance, and printing job.
4
[Basic] tab
Touched to specify the basic copy settings.
5
[Combine Originals] tab
Touched to use the combination function, and to
specify the condition of originals to be scanned.
6
[Original Image Type] tab
Touched to specify the original image type.
7
[Application] tab
Touched to select various application functions.
8
Memory indicator
Indicates the remaining memory available for the
next operation.
9
Set quantity indicator
Indicates the print quantity entered from the control
panel keypad.
10
[Simplex/Duplex] key
Touched to select the copy mode (1-1, 1-2, 2-1, or
2-2).
11
Image area
Displays an icon indicating the position of staple(s),
punch holes when specified in the finishing mode,
etc.
12
[Zoom] key
Touched to select the preset zoom, user-set zoom,
or XY zoom mode.
13
[Finishing] key
Touched to specify the desired finishing mode other than the paper fold modes specified below.
bizhub PRO 920
2-9
Preparation for Use
2
2-10
No.
Name
Description
14
[Paper] key
Touched to select the desired paper size or Auto
Paper Select function, and also to specify the paper
type and size of the paper loaded in the Multi-sheet
bypass tray.
15
[Paper Fold] key
Touched to use Half Fold, Fold&Staple, Trimming,
Z-Fold, Letter Fold In, or Letter Fold Out function.
16
[Density] key
Touched to specify the desired exposure level, to
activate the automatic exposure function, to select
the preset density, or to specify the background
density.
17
[Box] key
Touched to store the scanned image data on HDD,
or to recall the stored data from HDD for printing.
18
[Separate Scan] key
Touched to store scanned images into memory.
19
Machine status icons
Indicate the current machine status.
20
Setting image area
Illustrates various settings during the operation.
bizhub PRO 920
Preparation for Use
2
Finisher FS-509 (+ Punch Kit PK-504/505)
2
3
1
Finisher FS-509
No.
Name
Description
1
Finisher door
Opens to the internal finisher to allow replenishing
staples and clearing mishandled paper, and also to
allow removal of waste paper punched out when
Punch kit PK-504/505 is installed.
2
Primary (main) tray
Holds sets output in the selected finishing mode
other than specified above.
3
Secondary (sub) tray
Holds sets output in Sort, Group, Face Up, or Face
Down mode.
2
Reminder
The Primary (Main) tray gradually goes down while printed materials output. DO NOT allow any object to interfere with the operation of the tray
on the left side of the finisher, as any interference may cause damage to
the finisher.
bizhub PRO 920
2-11
Preparation for Use
2
2
4
3
2
1
7
5
6
8
2-12
Finisher FS-509
+ Punch Kit PK-504/505
9
No.
Name
Description
1
Inlet lever
Opens downward to remove mishandled paper.
2
Punch kit (option)
Punches file holes in output copies.
3
Cover sheet conveyance lever
Opens leftward to remove mishandled paper.
4
Secondary (Sub) tray conveyance lever
Opens rightward to remove mishandled paper.
5
Stacker conveyance lever
Opens down and leftward to remove mishandled paper.
6
Stacker unit
Holds stapler.
7
Waste basket (option)
Holds waste paper punched out and withdrawn for removal of waste paper.
8
Stacker unit handle
Withdraws the unit to allow clearing mishandled paper
or replenishing staples.
9
Cartridge housing
Holds staple cartridge and to be removed from the
stacker unit when replenishing staples.
bizhub PRO 920
Preparation for Use
2
Finisher FS-604 (+ Punch Kit PK-504/505)
4
5
1
6
Finisher FS-604
3
2
No.
Name
Description
1
Finisher door
Opens to the internal finisher to allow replenishing
staples and clearing mishandled paper, and also to
allow removal of waste paper punched out when
Punch kit PK-504/505 is installed.
2
Folding mode outlet
Delivers sets output in Half Fold, Fold&Staple, Letter Fold In, or Letter Fold Out mode.
3
Folding mode tray
Holds sets output in Half Fold, Fold&Staple, Letter
Fold In, or Letter Fold Out mode.
4
Exit paper guide
Used to hold paper to prevent it from being curled
excessively. Normally stored in the guide holder on
the back of the finisher.
5
Primary (main) tray
Holds sets output in the selected finishing mode
other than specified above.
6
Secondary (sub) tray
Holds sets output in Sort, Group, Face Up, or Face
Down mode.
bizhub PRO 920
2-13
Preparation for Use
2
2
Reminder
The Primary (Main) tray gradually goes down while printed materials output. DO NOT allow any object to interfere with the operation of the tray
on the left side of the finisher, as any interference may cause damage to
the finisher.
2
4
3
2
5
1
9
8
7
6
11
2-14
Finisher FS-604
+ Punch Kit PK-504/505
10
No.
Name
Description
1
Inlet lever
Opens downward to remove mishandled paper.
2
Punch kit (option)
Punches file holes in output copies.
3
Cover sheet conveyance lever
Opens leftward to remove mishandled paper.
4
Secondary (Sub) tray conveyance lever
Opens rightward to remove mishandled paper.
5
Stacker conveyance lever
Opens down and leftward to remove mishandled paper.
bizhub PRO 920
Preparation for Use
2
No.
Name
Description
6
Lower lever
Opens leftward after withdrawing the stacker unit, in
order to remove mishandled paper.
7
Knob
Can be turned to ease removal of mishandled paper.
8
Stacker unit
Holds stapler, and also holds the device to provide
Half Fold, Fold&Staple, Letter Fold In and Letter Fold
Out modes.
9
Waste basket (option)
Holds waste paper punched out and withdrawn for removal of waste paper.
10
Stacker unit handle
Withdraws the unit to allow clearing mishandled paper
or replenishing staples.
11
Cartridge housing
Holds staple cartridge and to be removed from the
stacker unit when replenishing staples.
bizhub PRO 920
2-15
Preparation for Use
2
Post Inserter PI-501
5
4
3
2
6
2-16
1
No.
Name
Description
1
Manual finishing operation panel
Operates when using finisher manually.
2
Upper unit release lever
Opens upward to slide the upper unit leftward when
removing mishandled paper.
3
Upper tray paper guides
Hold cover sheets to fix the position.
4
Cover sheet feeder (upper)
Holds cover sheets.
5
Cover sheet feeder (lower)
Holds cover sheets to be used for manual operation.
6
Lower tray paper guides
Hold cover sheets to fix the position.
bizhub PRO 920
Preparation for Use
2
Large Capacity Unit LU-403/LU-404
2
1
2
1
3
3
6
4
4
6
7
7
5
5
Large Capacity Unit LU-403
Large Capacity Unit LU-404
No.
Name
Description
1
Top door
Opens to allow paper loading or removal of mishandled paper.
2
Left side door
Opens to allow removal of mishandled paper.
3
Relay lever
Can be moved downward to ease removal of mishandled paper.
4
Paper guides
Hold copy paper to fix the position.
5
Paper loading button
Pressed to lower the bottom plate to allow paper
loading.
bizhub PRO 920
2-17
Preparation for Use
2
2-18
No.
Name
Description
6
Bottom plate
Goes up automatically when paper supply becomes
low, and goes down when the paper loading button
is pressed.
7
Rear stopper
Fixes the rear end of copy paper.
bizhub PRO 920
Preparation for Use
2
Z Folding Unit ZU-601/602
4
5
1
3
2
6
No.
Name
Description
1
Z folding unit front door
Opens to allow removal of mishandled paper or
waste paper punched out.
2
Inlet lever
Opens to allow removal of mishandled paper.
3
Knob
Turned to ease removal of mishandled paper.
4
Handle
Can be withdrawn to allow removal of mishandled
paper.
5
Outlet lever
Opens to allow removal of mishandled paper.
6
Waste basket
Holds waste paper punched out and withdrawn for
removal of waste paper.
bizhub PRO 920
2-19
Preparation for Use
2
Trimmer Unit TU-501
6
5
4
2
3
No.
Name
1
Description
1
Front-right cover
Opens to allow removal of mishandled paper.
2
Front door
Opens to allow removal of mishandled paper or
waste paper.
3
Trimmer stacker
Holds sets output in Trimming mode.
4
Trimmer unit tray
Slides to the left side each time a trimmed booklet
is delivered.
5
Trimmer stacker cover
Opens to allow you to take out the finished sets.
6
Finisher FS-604
Available for the Trimmer unit to be installed.
2
Reminder
DO NOT place heavy objects on the trimmer stacker or apply any weight
on it. Excessive weight applied to the inside or outside of the trimmer
stacker will damage the equipment.
DO NOT use the stacker for storage. The tray inside the stacker slides to
the left while finished sets are delivered; impeding the movement may
cause an unexpected trouble.
2-20
bizhub PRO 920
Preparation for Use
2
1
3
2
No.
Name
Description
1
Trimmer unit knob
Can be turned to ease removal of mishandled paper.
2
Waste basket
Holds waste paper cut off from the booklets and
withdrawn for removal of waste paper.
3
Trimmer pressure release lever
Opens to allow removal of mishandled paper.
bizhub PRO 920
2-21
Preparation for Use
2
2.2
Turning On/Off the Power Switch
This machine has two power switches, namely, main power switch and sub
power switch.
The main power switch should normally be kept turned on. Be sure not to use
it in usual operation.
To turn on the power
1
Turn ON the main power switch.
–
2
Turn ON the sub power switch.
–
3
2-22
The main power switch is located
inside the machine. Open the
front door and left door to reach
it.
When the main power switch is
turned on, the Main Power indicator on the control panel will
light in green.
The sub power switch is located
on the right side of the control
panel.
The Wake-up Screen and Basic Screen will be displayed.
bizhub PRO 920
Preparation for Use
2
Warmup takes approx. 5.5 minutes.
During warmup, the message “Ready to copy reserve” will be displayed in the message area of the Basic Screen.
When printing job becomes available, the message “Ready to copy”
will be displayed.
2
Note
If the initial settings are changed by the administrator, the modified conditions will be displayed on the Basic Screen.
If a key counter or copy card is required, follow the instruction on the
screen.
!
Detail
While the machine is warming up, you can select copy conditions and
start scanning so that the machine may start printing immediately the
machine engine is ready. See “Setting Job During Warmup” on
page 8-18 for details.
User Authentication or Account Authentication may be required to operate the machine. See “Making Authentication” on page 2-30 for details.
Administrator can set the machine to display seven types of warmup
screen during warmup. For details, refer to “8 Warm Up Screen On/Off”
on page 17-24.
bizhub PRO 920
2-23
Preparation for Use
2
To turn off the power
1
Turn OFF the sub power switch.
–
2
The sub power switch is located
on the right side of the control
panel.
The touch panel and all the LEDs
on the control panel other than
the Main Power indicator will go
out.
Turn OFF the main power switch.
–
The main power switch is located
inside the machine. Open the
front door and left door to reach
it.
2
Reminder
If the machine is under control of the Weekly Timer function, turning off
the power will deactivate the function.
Be sure not to turn off the main power switch in usual operation.
When turning the main power switch off then on, be sure to wait 10 seconds or longer before turning it on again; otherwise the machine may not
operate properly.
2-24
bizhub PRO 920
Preparation for Use
2.3
2
To Use Machine When Power Save LED Lights
If you find the Power Save LED lit on the control panel, the machine cannot
be operated due to the Power Save or Weekly Timer function.
Press [Power Save] on the control panel.
If Power Save has been activated, the machine will become available for copying
operation.
!
Detail
Power Save function has two modes;
Low Power and Sleep. See the following description for details.
This function can also be activated manually. See “Using Power Save
Manually” on page 2-27 for details.
If Weekly Timer has been activated, the Basic Screen will appear with the
message “Timer interrupt mode / Please input password” displayed in the
message area, and the machine operation will be available temporarily by the
Timer Interrupt function. See “When Weekly Timer Is Activated” on
page 2-28 for details.
bizhub PRO 920
2-25
Preparation for Use
2
Low Power
This function conserves energy by lowering the power consumption to
228.6W or less in standby mode.
Low Power activates automatically after a specified period (initially 15 minutes) of copier inactivity with the Power Save LED lit, touch panel gone off,
and all other LEDs except Start LED on the control panel turned off. The Start
LED will turn orange, while the Main Power indicator keeps green.
To start a copying job, press any key on the control panel or touch panel.
!
Detail
The Low Power function can be set to 5 minutes/ 10 minutes/ 15 minutes/
30 minutes/ 60 minutes/ 120 minutes/ 240 minutes. For details, refer to
“1 Power Save Setting” on page 18-13.
2
Note
If the Sleep function activates at the same time, the power will be turned
off.
The touch panel will not go off during a duplex copying job or when the
Jam Position Screen is displayed.
Sleep
This function achieves further energy conservation by reducing power consumption to 8.9W or less in standby mode.
In the initial setting, Sleep follows Low Power after a specified period (initially
90 minutes) of copier inactivity, with the Power Save LED lit and all other
LEDs on the control panel and touch panel turned off. The Main Power indicator keeps green.
To start a copying job, press [Power Save]. The copying operation will become available.
!
Detail
The Sleep can be set for 30 minutes/ 60 minutes/ 90 minutes/ 120 minutes/ 240 minutes, or can be deactivated. For details, refer to “1 Power
Save Setting” on page 18-13.
2-26
bizhub PRO 920
Preparation for Use
2
Using Power Save Manually
Follow the procedure below to operate Power Save function (Low Power or
Sleep) manually.
1
Press [Power Save] for one second
or longer, then release it.
The following message will be displayed.
Using Sleep:
Entry Sleep mode, after 10 second
Press key/screen to cancel
Using Low Power:
Entry Low Power mode, after 10 second
Press key/screen to cancel
2
Power Save will be activated.
The [Power Save] LED will be lit and the touch panel will be turned off.
!
Detail
Be sure to press [Power Save] for one second or longer, otherwise the
following message will be displayed and the Sleep (Low Power) mode will
not be activated.
Press Power Save more than one second,
then release it for sleep mode
Press Power Save continuously more
than one second for low power mode
!
Detail
The machine is initially set to activate the Sleep function manually. To use
Low Power instead, refer to “1 Power Save Setting” on page 18-13.
bizhub PRO 920
2-27
Preparation for Use
2
When Weekly Timer Is Activated
The Weekly Timer function turns a copier on and off at the time specified by
the administrator.
When a machine is in OFF condition under control of Weekly Timer, the
[Power Save] LED is lit and machine operation is unavailable.
However, the following procedure temporarily enables the machine operation. (Timer Interrupt)
Prerequisites:
0 The Timer Interrupt password is to be specified in the administrator setting. Ask your administrator for the password.
0 The machine power will be turned off automatically if 5 minutes have
passed without entering a password.
0 Entering a number smaller than 5 will set the minute at 5. A number larger
than 60 is also unavailable.
1
Press [Power Save] on the control panel.
The Basic Screen will be displayed along with the following message:
Timer interrupt mode
Please input password
Does the message read "Input copy time / 0 hour(s) 05 minute(s)"?
% Password is not required to be entered. Proceed to step 3.
?
2
Enter the Timer Interrupt password, then press [Start].
–
Enter a 4-digit Timer Interrupt password using the control panel
keypad.
Timer interrupt mode
Please input password ####
Press [Start].
?
%
2-28
Is the entered password invalid?
Continue by entering the valid 4-digit password.
bizhub PRO 920
Preparation for Use
3
2
Set the hour for the interrupt use, then press [Start].
–
Enter a 1-digit hour (ex. 3 for 3 hours) using the control panel keypad. (0 ~ 9)
Input copy time
3 hour(s) 05 minute(s)
Press [Start].
4
Set the minute for the interrupt use, then press [Start].
–
Enter a 2-digit minute (ex. 07 for 7 minutes) using the control panel
keypad. (00 ~ 59)
Input copy time
3 hour(s) 07 minute(s)
Press [Start].
Copying is available until the set time is up.
5
When the machine operation is finished, press [Power Save] for one
second or longer, then release it.
The machine returns to OFF condition.
!
Detail
For various settings of the Weekly Timer function, refer to “3 Weekly Timer Setting>1 Weekly Timer On/Off Setting” on page 18-19.
bizhub PRO 920
2-29
Preparation for Use
2
2.4
Making Authentication
This machine can prohibit its operation until the user name, user password,
account name, and/or account password specified by the administrator are
verified.
Copy quantity limit for each account can also be set.
When the machine is turned on, one of the following Authentication Screen
will be displayed according to the authentication setting.
Copying will be available by the following procedure.
2-30
bizhub PRO 920
Preparation for Use
2
To make authentication
1
Enter the user name, user password, account name, and/or account
password, as required.
–
2
Touch the desired item key to display the keypad screen.
Enter your user name (Max. 64 characters), user password (Max. 64
characters), account name (Max. 8 characters) and/or 8-digit account password.
Touch [OK].
Check that the screen message changes to “Ready to copy.”
3
Start machine operation.
Normal copying/printing/scanning job is available on the machine.
4
When machine operation is completed, press [Access].
The initial state will be restored, with the User Authentication Screen
displayed on the touch panel.
!
Detail
Contact your administrator if the message “Copy limit reached” is displayed and machine operation becomes unavailable.
bizhub PRO 920
2-31
2
2-32
Preparation for Use
bizhub PRO 920
3
Paper and Original
Information
Paper and Original Information
3
Paper and Original Information
3.1
Paper Information
3
This machine is equipped with the following trays for loading copy paper.
- Trays 1, 2, and 3 (Main body trays)
- Tray 4 (Large capacity unit LU-403/404)
- Multi-sheet bypass tray
Also, the following equipment is provided for conveying/processing/delivering copies.
- ADU (Automatic Duplex Unit)
- Finisher (FS-509/FS-604)
- Post inserter (PI-501)
- Punch kit (PK-504/505)
- Z folding unit (ZU-601/602)
- Trimmer unit (TU-501)
bizhub PRO 920
3-3
Paper and Original Information
3
Paper Weight
Paper trays
Weight
Tray 1, 2, and 3 (Main body trays)
61 to 90 g/m2
Thick 1: 91 to 170 g/m2
Thick 2: 171 to 200 g/m2
Thin: 50 to 60 g/m2
Tab paper: 91 to 130 g/m2
Large capacity unit LU-403/404
Multi-sheet bypass tray
Equipment
Weight
ADU
61 to 200 g/m2
Finisher FS-509
50 to 200 g/m2
Finisher FS-604
60 to 105 g/m2 + 200 g/m2
81 to 105 g/m2 + 200 g/m2 (for Fold&Staple mode only)
Post inserter PI-501
50 to 200 g/m2
Punch kit PK-504/505
50 to 128 g/m2
Z folding unit ZU-601/602
60 to 90 g/m2
Trimmer unit TU-501
60 to 105 g/m2 + 200 g/m2
!
Detail
The paper type setting for trays 1 to 4 is described in “Paper Setting” on
page 15-3.
The paper type setting for Multi-sheet bypass tray is described in “Copying Using Special Paper (Bypass Tray Setting)” on page 9-16.
See “Loading Tabbed Sheets in Tray” on page 4-10 for loading tabbed
sheets in main body trays and Multi-sheet bypass tray.
2
Reminder
The tray specified as Tab paper cannot be used in duplex copying.
Be sure to load only the paper type specified for that tray such as Thick,
Thin, or Tab paper.
3-4
bizhub PRO 920
Paper and Original Information
3
Tray/ Exit Tray Capacity
Paper trays
Capacity
Tray 1 and 2 (Main body trays)
500 sheets (80 g/m2)
Tray 3 (Main body tray)
1,000 sheets (80 g/m2)
Tray 4 (Large capacity unit LU-403)
4,000 sheets (80 g/m2)
Tray 4 (Large capacity unit LU-404)
4,000 sheets (80 g/m2)
Multi-sheet bypass tray
150 sheets (80 g/m2)
1 sheet each for OHP transparencies
Equipment
Capacity
ADU
Unlimited
Finisher FS-509
Finisher FS-604
Secondary
(sub) tray
200 sheets
Primary
(main) tray
500 sheets (A5, A5R, 5.5”×8.5”, 5.5”×8.5”R)
3,000 sheets (A4, A4R, B5, B5R, 8.5”×11”, 8.5”×11”R)
1,500 sheets (A3, B4, 11”×17”, 8.5”×14”)
* See the table below for Staple and Z-Fold mode.
Secondary
(sub) tray
200 sheets
Primary
(main) tray
500 sheets (A5, A5R, 5.5”×8.5”, 5.5”×8.5”R)
2,500 sheets (A4, A4R, B5, B5R, 8.5”×11”, 8.5”×11”R)
1,500 sheets (A3, B4, 11”×17”, 8.5”×14”)
* See the table below for Staple and Z-Fold mode.
Fold&Staple
tray
Approx. 100 sheets
Half Fold: 33 sets for 3-sheet-folded booklet (99 sheets,
396 pages) (25 sets for A4R, 8.5”×11”R)
Fold&Staple: 20 sets for 5-sheet-folded booklet (100
sheets, 400 pages) (15 sets for A4R, 8.5”×11”R), or
5 sets for 20-sheet-folded booklet (100 sheets, 400 pages)
* Maximum number of folded sheet is 3 for Half Fold, and
20 for Fold&Staple mode.
Post inserter PI-501
Approx. 200 sheets (200 g/m2) or within 30 mm thick
Z folding unit ZU-601/602
Punch: Unlimited
Z-Fold: 1 sheet only
Trimmer unit TU-501
Approx. 512 sheets
100 sets max. for 2~5-sheet-folded booklet
50 sets max. for 6~10-sheet-folded booklet
32 sets max. for 11~16-sheet-folded booklet
* Maximum number of folded sheet is 3 for Half Fold and
Trimming, and 16 for Fold&Staple and Trimming.
2
Note
See the following tables for Tray capacity for Staple and Z-Fold with Staple modes.
bizhub PRO 920
3-5
Paper and Original Information
3
Primary (main) tray capacity for Staple mode using Finisher FS-604:
Paper size /
Number of stapled
sheets
B4/B4W, A4/A4W, A4R/A4WR, B5/B5W,
A5/A5W (8.5"×14", 8.5"×11"/8.5"×11"W,
8.5"×11"R/8.5"×11"WR, 5.5"×8.5"/
5.5"×8.5"W)
A3/A3W (11"×17"/
11"×17"W)
2~9
100 sets
50 sets
10 ~ 20
50
50
21 ~ 30
30
30
31 ~ 40
25
25
41 ~ 50
20
20
Primary (main) tray capacity for Staple and Z-Fold modes using Finisher
FS-509/604:
Capacity for one stapled set
3-6
Primary (Main) tray capacity
Number of Z-folded sheets
Number of regular sheets
1 sheet
1 ~ 40 sheets
20 stapled sets
2 sheets
0 ~ 30
10
3
0 ~ 20
4
4
0 ~ 10
3
5
0
2
6 or more
Staple is unavailable with Z-Fold.
bizhub PRO 920
Paper and Original Information
3
2
Note
Finisher FS-509 is provided with two types of staple cartridge. Using 50sheet-staple cartridge, up to 50 sheets can be stapled. Using 100-sheetstaple cartridge, up to 100 sheets can be stapled.Primary (main) tray capacity depends on the paper size and number of stapled sheets. Heed
the limits by referring to the table below.
Paper size /
Number of stapled
sheets
B4, A4, A4R, B5, A5, 8.5"×14", 8.5"×11",
8.5"×11"R, 5.5"×8.5"
A3, 11""×17"
2~9
150 sets
50 sets
10 ~ 20
50
50
21 ~ 30
30
30
31 ~ 40
25
25
41 ~ 50
20
20
51 ~ 60*
15
-
61 ~ 100*
10
-
* Available with 100-sheet-staple cartridge only
bizhub PRO 920
3-7
Paper and Original Information
3
Paper Size
3-8
Paper trays
Available sizes
Tray 1, 2, and 3 (Main body trays)
• Standard: A3, B4, A4, A4R, B5, B5R, A5*, 11”×17”,
8.5”×14”, 8.5”×11”, 8.5”×11”R, 5.5”×8.5”
*: Portrait orientation only
• Original Size Detection: Detects 8.5”×11”R instead of
A4R, 5.5”×8.5” instead of A5, and 8”×13”/8.12”×13.2”/
8.25”×13”/8.5”×13” instead of 8.5”×14.
• Custom: Max. 314 × 445 mm ~ min. 182 × 140 mm
• Wide Paper: A3W, B4W, A4W, A4WR, B5W, A5W,
11”×17”W, 8.5”×11”W, 8.5”×11”WR, 5.5”×8.5”W
Tray 4 (Large capacity unit LU-403)
A4 fixed (can be changed to the following sizes)
• Standard: B5, 8.5”×11”
• Custom: Max. 314 × 223 mm ~ min. 257 × 182 mm
• Wide Paper: A4W, B5W, 8.5”×11”W
Tray 4 (Large capacity unit LU-404)
A3 fixed (can be changed to the following sizes)
• Standard: B4, A4, A4R, 11”×17”, 8.5”×14”, 8.5”×11”,
8.5”×11”R
• Custom: Max. 314 × 460 mm ~ min. 257 × 182 mm
• Wide Paper: A3W, B4W, F4W, A4W, A4WR, 11”×17”W,
8.5”×11”W, 8.5”×11”WR
Multi-sheet bypass tray
• Standard: A3, B4, A4, A4R, B5, B5R, A5, 11”×17”,
8.5”×14”, 8.5”×11”, 8.5”×11”R, 5.5”×8.5”
• Original Size Detection: Detects 8.5”×11”R instead of
A4R, 5.5”×8.5” instead of A5, and 8”×13”/8.12”×13.2”/
8.25”×13”/8.5”×13” instead of 8.5”×14.
• Custom: Max. 314 × 460 mm ~ min. 100 × 148 mm
• Wide Paper: A3W, B4W, A4W, A4WR, B5W, B5WR,
A5W, A5WR, 11”×17”W, 8.5”×11”W, 8.5”×11”WR,
5.5”×8.5”W, 5.5”×8.5WR
Equipment
Available sizes
ADU
• Standard/Original Size Detection: A3/11”×17” to A5*/
5.5”×8.5”*
*: Portrait orientation only
• Custom: Unavailable
• Wide Paper: A3W/11”×17”W to A5W*/5.5”×8.5”W*
*: Portrait orientation only
Finisher FS-509
Max. 314 × 458 mm ~ min. 100 × 148 mm
Finisher FS-604
Max. 314 × 460 mm ~ min. 100 × 148 mm
(A3, B4, A4R, 8.5”×11” only in Half Fold and Fold&Staple
modes)
Post inserter PI-501
Max. 314 × 460 mm ~ A5
• Upper tray detection size: A4, B5, B5R, 8.5”×11”,
8.5”×11”R, 5.5”×8.5”
Detects 8.5”×11”R instead of A4R, 5.5”×8.5” instead of
A5
• Lower tray detection size: A3, B4, A4, B5, B5R,
11”×17”, 8.5”×14”, 8.5”×11”, 8.5”×11”R, 5.5”×8.5”
Detects 8.5”×11”R instead of A4R, 5.5”×8.5” instead of
A5, and 8”×13”/8.12”×13.2”/8.25”×13”/8.5”×13” instead of 8.5”×14.
bizhub PRO 920
Paper and Original Information
3
Equipment
Available sizes
Z folding unit ZU-601
Punch mode: A3, B4
Z-fold mode: A3 (z-fold), B4 (double-fold)
All other paper sizes will be output without z-fold/doublefold.
Z folding unit ZU-602
Punch mode: A3, B4, A4, A4R, B5, B5R, A5, A5R
Z-fold mode: A3 (z-fold), B4 (double-fold)
All other paper sizes will be output without z-fold/doublefold.
Trimmer unit TU-501
A3, B4, A4R, 11”×17”, 8.5”×14”, 8.5”×11”R and those
wide sizes
2
Reminder
Be sure to use paper only of the size specified for the tray, especially
when specified as one of the sizes in Original Size Detection, Custom, or
Wide Paper.
2
Note
If any size other than A4 (LU-403)/ A3 (LU-404) is desired, contact your
service representative.
Detailed information of paper sizes are:
F4: 203 × 330 mm
A3: 297 × 420 mm
B4: 257 × 364 mm
A4: 210 × 297 mm
B5: 182 × 257 mm
A5: 148 × 210 mm
!
Detail
When setting wide size to the Multi-sheet bypass tray, be sure to specify
the precise dimensions of paper to be used. See “Copying Using Special
Paper (Bypass Tray Setting)” on page 9-16 for details.
bizhub PRO 920
3-9
Paper and Original Information
3
Special Paper in Multi-Sheet Bypass Tray
Multi-sheet bypass tray accepts the following special paper type that cannot
be loaded in the main body trays.
OHP transparencies, tracing paper
2
Note
When using special paper type other than the above mentioned, select
User as paper type in the Bypass tray setting.
7 CAUTION
Do not use paper with staples or paper that conducts electricity (silver,
carbon, etc.)
%
An accident may occur as a result of fire.
2
Reminder
To avoid machine trouble, do not use heat-sensitive paper, coloured
OHP transparencies, or paper specifically designed for ink-jet printer,
such as photo-paper.
To Store Copy Paper
Heed the following precautions when storing copy paper.
- Store paper in a cool, dry area. Using damp copy paper may cause a paper misfeed.
Keep partially used packages tightly wrapped during storage.
- Do not place paper packages vertically to store.
Paper curl due to the vertical storage may cause a paper misfeed.
3-10
bizhub PRO 920
Paper and Original Information
3.2
3
Original Information
Use the original glass or document feeder to position originals to copy.
Using Original Glass
Use the original glass when originals are not suitable for use with the document feeder, e.g., when size is incompatible, or when originals are folded,
stapled, torn, or in generally poor condition.
!
Detail
See each description in this guide for copy conditions which cannot use
the document feeder to scan.
Unsuitable ADF Originals:
Curled, creased or
folded originals
Glossy or transparent
originals, OHP film,
art paper, cellophane
Paste-ups or
cut-outs
Doubled, punched or
stapled originals
Books
Thin or thick originals
Specifications for Using Original Glass:
- Detectable original size: A3, B4, A4, A4R, B5, B5R, A5, A5R
- Max. book weight/thickness: 6.8 kg / 30 mm
- Original placement: Face down on left depth side of glass
7 CAUTION
Do not place too heavy originals, or do not press strongly when thick
original is placed and is under pressure of ADF
%
The glass may be broken and you may be injured.
bizhub PRO 920
3-11
Paper and Original Information
3
!
Detail
Administrator can set the machine to detect B6R, 5.5”×8.5”R, 8.5"×11",
or A4 instead of A5R. For details, refer to “7 Size Setting” on page 18-57.
Detectable paper size can be changed from Metric to Inch, Metric A Size
Paper, or Full Size by the administrator. For details, refer to “7 Size Setting” on page 18-57.
ADF Originals
Following four modes are provided when using the document feeder (ADF)
to scan originals.
- Normal mode
- Mixed Original mode
- Z-Folded mode
- Single Feed mode
Specifications for each mode are described as follows.
Normal mode:
- Sizes available to be fed: Max. 297 × 431.8 mm ~ 128 × 139.7 mm
- Detectable original size: A3, B4, A4, A4R, B5, B5R, A5, A5R, B6R,
11"×17", 8.5"×11", 8.5"×13"
- Original weight: 50 ~ 130 g/m2 (no special stock)
- Curling tolerance: 10 mm or less
- Max. feeder capacity: 100 sheets (80 g/m2)
- Feeding tolerance: 5 times or less (single-sided) / 3 times or less (doublesided)
3-12
bizhub PRO 920
Paper and Original Information
3
Mixed Original mode:
Use Mixed Original mode to copy mixed size originals.
- Original size: Three types of size combination are determined by the ADF
guide width.
– A3, B4, A4, A4R, B5 and A5 mixed
– B4, A4R, B5, B5R, and A5 mixed
– A4R, B5R and A5 mixed
- Original weight: 50 ~ 130 g/m2 (no special stock)
- Curling tolerance: 10 mm or less
- Max. feeder capacity: 100 sheets (80 g/m2)
- Feeding tolerance: 5 times or less (single-sided) / 3 times or less (doublesided)
See below for the guide width of each combination.
Guide width
A4
A3
Guide width
B5
A4R
B4
!
Detail
Detectable paper size can be changed from Metric to Inch, Metric A Size
Paper, or Full Size by the administrator. For details, refer to “7 Size Setting” on page 18-57.
When loading 8.5"×11"R in the Multi-sheet bypass tray and specifying
the size in Bypass tray setting, the machine will detect A4R original as
8.5"×11"R. For details of Bypass tray setting, see “Copying Using Special Paper (Bypass Tray Setting)” on page 9-16.
bizhub PRO 920
3-13
3
Paper and Original Information
Z-Folded mode:
Use Z-Folded mode to scan folded originals without using the size detection
sensor of the ADF.
- Sizes available to be fed: 297 × 431.8 mm ~ 128 × 139.7 mm
- Detectable original size: A3, B4, A4, A4R, B5, B5R, A5, A5R, B6R,
11"×17", 8.5"×11", 8.5"×13"
- Original weight: 50 ~ 130 g/m2 (no special stock)
- Curling tolerance: 10 mm or less
- Max. feeder capacity: 100 sheets (80 g/m2)
- Feeding tolerance: 5 times or less (single-sided) / 3 times or less (doublesided)
Single Feed mode:
Use Single Feed mode to copy thick originals to be fed one sheet at a time
in the document feeder.
- Sizes available to be fed: Max. 297 × 431.8 mm ~ 128 × 139.7 mm
- Detectable original size: A3, B4, A4, B5, B5R, B6R, 11"×17", 8.5"×11"
- Original weight: 50 ~ 200 g/m2 (single-sided) / 50 ~ 130 g/m2 (double-sided)
- Curling tolerance: 10 mm or less
- Max. feeder capacity: 1 sheet at a time
- Feeding tolerance: 5 times or less (single-sided) / 3 times or less (doublesided)
3-14
bizhub PRO 920
4
Supplies & Handling
Supplies & Handling
4
Supplies & Handling
4.1
Loading Paper
4
If paper in a tray becomes empty while printing job is in progress, the Machine Status Screen will be displayed on the touch panel.
The paper size to be supplied is indicated in the message area, and paper
indicator "
" appears in the tray information area of the screen.
The Paper setting menu or Machine Status Screen also allows you to check
the current paper level of the tray before it runs out.
To display the Paper setting menu, touch [Paper] on the Basic Screen.
To display the Machine Status Screen, touch [Job List] on the Basic Screen,
then touch [Machine] on the Job List Screen.
The paper level is indicated by the five indicator
types:
Follow the procedure below to supply the empty
tray with copy paper.
bizhub PRO 920
4-3
Supplies & Handling
4
2
Reminder
Be sure to load the paper specified for the tray; otherwise mishandled paper may occur. To use paper other than the specified type, enter the Utility Menu to change the Tray Setting.
To avoid machine trouble, do not use heat-sensitive paper, paper that
conducts electricity (silver, carbon, etc.), coloured OHP transparencies,
or paper specifically designed for ink-jet printer, such as photo-paper.
!
Detail
Printing job can be continued using paper in another tray even if the Machine Status Screen is displayed due to the emptied tray. Refer to “To
change the tray selection” on page 5-8 for details.
4-4
bizhub PRO 920
Supplies & Handling
4
Loading Paper in Tray 1, 2, and 3
The main body trays are universal and paper size can be readily changed
when supplying paper.
0 Be sure that the machine is powered ON before withdrawing the tray.
0 Only one tray can be withdrawn at a time.
1
Withdraw the tray to be supplied with
paper.
–
Be sure to withdraw the tray
completely until it stops.
2
Open the paper feed roller.
3
Place paper on the tray with any curl
turning up, then move the side guide
plates and rear guide to the edge of
the paper.
–
Load paper aligning it to the paper feed roller side of the tray.
Press the release knob of the
front side guide plate to move the
side guide plates, and also move the rear guide to the edge of the
paper.
4
When paper is seated properly, close the paper feed roller.
5
Push in the tray until it locks into place.
bizhub PRO 920
4-5
Supplies & Handling
4
2
Reminder
Be sure to fan paper before loading; it may improve feeding ability of the
machine.
Do not load above the limit level indicated on the side guide plate.
Be sure that the side guide plates and rear guide are securely aligned to
the paper; otherwise the machine cannot detect the correct paper size,
or machine trouble may occur.
Do not bump the tray into the main body; otherwise machine trouble may
be caused.
!
Detail
Changing paper size of the main body tray does not require any specific
setting change, if standard size has been specified for that tray. if not, enter the Utility Screen to change the size setting. Refer to “Paper Setting”
on page 15-3.
4-6
bizhub PRO 920
Supplies & Handling
4
Loading Paper in Multi-Sheet Bypass Tray
The Multi-sheet bypass tray accepts special paper type or size that cannot
be loaded in the main body tray or in the large capacity unit.
0 Load OHP transparencies, thick paper or tracing paper one sheet at a
time, or stack regular paper up to 150 sheets (80 g/m2 paper).
1
Open the Multi-sheet bypass tray.
–
When loading large paper, withdraw the right edge of the Multisheet bypass tray to extend it.
2
Load copy paper, and adjust the paper guides to the paper size.
3
When copying is completed, close the Multi-sheet bypass tray.
!
Detail
The special paper type and size should be specified when loading it in the
Multi-sheet bypass tray. See “Copying Using Special Paper (Bypass Tray
Setting)” on page 9-16 for details.
bizhub PRO 920
4-7
Supplies & Handling
4
Loading Paper in LCU (LU-403/LU-404)
The Large capacity unit can be loaded with only the paper size previously
specified.
0 Be sure that the machine is powered on before loading paper in the LCU.
Without the power turned on, the LCU bottom plate will not function.
1
Open the LCU top door.
2
Press the paper loading button to
lower the LCU bottom plate.
LU-403
LU-404
4-8
bizhub PRO 920
Supplies & Handling
3
Fan the unwrapped paper, then load
it into the LCU with the paper curl
turning downward.
4
LU-403
LU-404
4
Repeat the steps 2 and 3 until the bottom plate will not go down any
more.
5
Close the LCU top door.
2
Reminder
Be sure to fan paper before loading; it may improve feeding ability of the
machine.
Do not load above the limit line on the side guide plates.
Be sure that the rear stopper is correctly positioned according to the paper size to be loaded; otherwise machine trouble may occur.
bizhub PRO 920
4-9
Supplies & Handling
4
4.2
Loading Tabbed Sheets in Tray
Tabbed sheets can be used if “Tabbed” is indicated in the tray information
area of the Machine Status Screen.
!
Detail
To use tabbed sheets for copying, enter the Utility menu to specify the
tray paper type. For details, refer to “Paper Setting” on page 15-3.
Loading Tabbed Sheets in Tray 1, 2, and 3
0 The tab extension width should be 12.5 mm or less.
0 Be sure that the machine is powered ON before withdrawing the tray.
Example: 3 tabbed sheets loaded in position for one finished set
Rear
Front
1st TAB
1st TAB
Printed
side
2nd TAB
3rd TAB
2nd TAB
3rd TAB
ONE FINISHED SET
Example: 9 tabbed sheets loaded in position for 3 finished sets
Rear
1st TAB 2nd TAB
Front
1st TABs
Printed
side
2nd TABs
3rd TABs
1
Withdraw the tray specified as tabbed sheets.
–
4-10
3rd TAB
3 FINISHED SETS
Be sure to withdraw the tray completely until it stops.
2
Open the paper feed roller.
3
Place the tabbed sheets on the tray as illustrated above.
bizhub PRO 920
Supplies & Handling
4
4
Move the side guide plates and rear guide to the edge of the paper.
5
Close the paper feed roller, then push in the tray until it locks into place.
bizhub PRO 920
4-11
Supplies & Handling
4
Loading Tabbed Sheets in LCU (LU-403/LU-404)
0 The tab extension width should be 12.5 mm or less.
0 Be sure that the machine is powered on before loading paper in the LCU.
Without the power turned on, the LCU bottom plate will not function.
Example: 3 tabbed sheets loaded in position for one finished set
Rear
1st TAB
1st TAB
Printed
side
2nd TAB
2nd TAB
Front
3rd TAB
3rd TAB
ONE FINISHED SET
Example: 9 tabbed sheets loaded in position for 3 finished sets
Rear
1st TAB
1st TAB
2nd TAB
2nd TAB
Printed
side
Front
3rd TAB
3rd TAB
3 FINISHED SETS
1
Open the LCU top door.
2
Press the paper loading button to lower the LCU bottom plate.
3
Load the tabbed sheets into the LCU as illustrated above.
4
Close the LCU top door.
!
Detail
To load the tabbed sheets into LCU, contact your service representative
to position the rear stopper for the paper size to be loaded.
4-12
bizhub PRO 920
Supplies & Handling
4
Loading Tabbed Sheets in Multi-Sheet Bypass Tray
0 The tab extension width should be 12.5 mm or less.
Example: 3 tabbed sheets loaded in position for one finished set
1st TAB
1st TAB
Rear
2nd TAB
2nd TAB
Printed
side
3rd TAB
3rd TAB
Front
ONE FINISHED SET
Example: 9 tabbed sheets loaded in position for 3 finished sets
Rear
Front
1st TAB
1st TAB
2nd TAB
2nd TAB
Printed
side
3rd TAB
3rd TAB
3 FINISHED SETS
1
Open the Multi-sheet bypass tray.
2
Load tabbed sheets as illustrated above.
3
Adjust the paper guides to the paper size.
4
Specify the paper type for the Multi-sheet bypass tray.
!
Detail
See “Copying Using Special Paper (Bypass Tray Setting)” on page 9-16
for specifying the paper type of the Multi-sheet bypass tray.
bizhub PRO 920
4-13
Supplies & Handling
4
4.3
Adding Toner
When toner supply becomes low, the message “Please add toner” appears
on the Basic Screen, and the toner supply icon (
) keeps prompting you
till the toner bottle is replaced.
2
Reminder
Use the same number toner bottle as described on the label applied on
the front of the toner unit. Otherwise, machine trouble may occur.
7 CAUTION
Keep the toner bottle away from the children.
%
The toner is non-toxic; however if you inhale or contact with eyes by
accident, flush with water and seek medical advice.
7 WARNING
Do not throw the empty toner bottle into a fire.
%
If it is thrown into a fire, the toner may ignite and cause a dangerous
situation.
4-14
bizhub PRO 920
Supplies & Handling
4
To exchange toner bottle
1
Open the machine front door, then
pull out the toner unit 90 degrees to
the right.
2
Pull forward the lever on the left side
of the toner unit until it stops.
3
Remove the empty toner bottle.
4
Shake the new toner bottle several
times to loosen toner, then remove
the toner bottle cap.
bizhub PRO 920
4-15
Supplies & Handling
4
5
Set the new toner bottle into the toner unit, positioning the hollow part of
the toner bottle on the top.
–
4-16
Be sure to set the hollow part of
the toner bottle upward, otherwise the machine trouble may
occur.
6
Push the lever backward until it
stops.
7
Return the toner unit to its original
position, then close the machine
front door securely.
bizhub PRO 920
Supplies & Handling
4.4
4
Inserting a New Staple Cartridge into Finisher FS-509
When the staple cartridge of the Finisher FS-509 becomes empty, the Basic
Screen displays the message “Open the Finisher door / Please add staples.”
Follow the procedure below to add staples.
2
Reminder
When inserting the new staple cartridge, do not remove the staples remaining inside the housing; otherwise the first sheet output after the replenishment will not be stapled.
To add staples
1
Open the Finisher door.
bizhub PRO 920
4-17
Supplies & Handling
4
2
Pull out the stacker unit slowly by
holding the stacker unit handle until it
stops.
3
Remove the cartridge housing.
–
Pull up the knob of the cartridge
housing, then remove it while
pulling it forward.
1
2
4
4-18
Open the bottom of the cartridge
housing while pressing two locks on
both sides, then remove the empty
cartidge from the cartridge housing.
bizhub PRO 920
Supplies & Handling
5
Insert the new staple cartridge into
the cartridge housing.
–
6
7
4
Firmly insert the cartridge into the
housing while aligning the arrow
indication on the cartridge appears as shown below.
Remove the lock tape from the cartridge, then close the bottom of the
housing.
2
1
Insert the cartridge housing while
sliding it along the stapler rail, then
push down and in to secure it in
place.
2
1
8
Return the stacker unit to its original
position.
bizhub PRO 920
4-19
Supplies & Handling
4
9
4-20
Close the Finisher door.
bizhub PRO 920
Supplies & Handling
4.5
4
Inserting a New Staple Cartridge into Finisher FS-604
When the staple cartridge of the Finisher FS-604 becomes empty, the Basic
Screen displays the message “Open the Finisher door / Please add staples.”
Follow the procedure below to add staples.
2
Reminder
When inserting the new staple cartridge, do not remove the staples remaining inside the housing; otherwise the first sheet output after the replenishment will not be stapled.
To add staples
1
Open the Finisher door.
bizhub PRO 920
4-21
Supplies & Handling
4
2
Pull out the stacker unit slowly by
holding the stacker unit handle until it
stops.
3
Remove the cartridge housing.
–
4
4-22
Pull up the knob of the cartridge
housing, then remove it while
sliding it along the stapler rail.
Remove the empty cartridge from
the cartridge housing.
bizhub PRO 920
Supplies & Handling
5
4
Insert the new staple cartridge into
the cartridge housing.
–
Firmly insert the cartridge into the
housing while aligning the arrow
sides of both cartridge and housing, then remove the lock tape
from the cartridge.
6
Insert the cartridge housing while
sliding it along the stapler rail, then
push down and in to secure it in
place.
7
Return the stacker unit to its original
position.
bizhub PRO 920
4-23
Supplies & Handling
4
8
4-24
Close the Finisher door.
bizhub PRO 920
Supplies & Handling
4.6
4
Empty Waste Basket of Punch Kit PK-504/505
Punch kit PK-504/505 is installed in Finisher FS-509/FS-604.
If the waste basket of the punch kit becomes full, “Waste basket of Punch kit
is full / Please empty waste basket” message will be displayed on the touch
panel, and the finished set will be output without being punched even if
Punch mode has been specified.
Before setting punch mode, be sure to check the waste paper inside the
waste basket, and empty the waste basket if needed.
To empty waste basket
1
Open the Finisher door.
2
Withdraw the waste basket.
bizhub PRO 920
4-25
Supplies & Handling
4
4-26
3
Empty the waste basket.
4
Return the waste basket to its original position, then close the Finisher
door securely.
bizhub PRO 920
Supplies & Handling
4.7
4
Empty Waste Basket of Z Folding Unit ZU-601/602
Z folding unit ZU-602 is installed on the right side of Finisher FS-509/FS-604.
If the waste basket of the Z folding unit becomes full, “Waste basket of
Punch unit is full / Please empty waste basket” message will be displayed on
the touch panel, and the finished set will be output without being punched
even if Punch mode has been specified.
Before setting Punch mode, be sure to check the waste paper inside the
waste basket, and empty the waste basket if needed.
To empty waste basket
1
Open the Z folding unit front door
with the Finisher door handle.
2
Withdraw the waste basket.
bizhub PRO 920
4-27
Supplies & Handling
4
4-28
3
Empty the waste basket.
4
Return the waste basket to its original position, then close the Z folding
unit front door securely.
bizhub PRO 920
Supplies & Handling
4.8
4
Empty Waste Basket of Trimmer Unit TU-501
When the waste basket of Trimmer unit becomes full, “Waste basket of Trimmer is full / Please empty waste basket” message will be displayed on the
touch panel, and the finished set will be output without being trimmed even
if Trimming mode has been specified.
Before setting Trimming mode, be sure to check the waste paper inside the
waste basket, and empty the waste basket if needed.
To empty waste basket
1
Open the Trimmer unit front door.
2
Withdraw the waste basket.
bizhub PRO 920
4-29
Supplies & Handling
4
4-30
3
Empty the waste basket.
4
Return the waste basket to its original position, then close the Trimmer
unit front door securely.
bizhub PRO 920
5
Troubleshooting
Troubleshooting
5
Troubleshooting
5.1
If “Please Call Service” Message Is Displayed
5
A “Please call service” message indicates a machine condition that requires
the attention of your service representative.
The Call for Service Screen usually displays the telephone and facsimile
numbers of your service representative.
7 CAUTION
The Call for Service Screen is displayed.
%
Be sure to contact your service representative immediately by following the procedure below.
To contact service representative
1
Make note of the report code number indicated in the right side area of
the screen.
2
Turn OFF the sub power switch and main power switch.
3
Unplug the machine.
4
Contact your service representative and report the condition and report
code number.
bizhub PRO 920
5-3
Troubleshooting
5
!
Detail
The administrator can call for service using the Utility setting (6 Administrator Setting>6 System Connection>1 Call Service Centre). Refer to “7
Security Setting” on page 18-200.
In this case, you don’t have to make a call for the report code, because
your machine has been monitored automatically by your service representative.
After calling for service using the Utility setting, be sure to turn OFF the
power immediately, then unplug the machine as described here.
Limited Use of the Copier in Trouble
If the message shown below is displayed on the Call for Service Screen, you
may continue operating the copier on a limited function basis and utilize the
trays and ADU that are not affected by the trouble. To obtain this limited
functionality of the copier, consult your service representative.
Be sure to utilize the limited function only temporarily, and arrange for machine repair immediately.
1
If the limited use of the copier is available, the following message is displayed in the message area instead of the report code.
ex.
2
-- Tray 2 failure -- Press Help
to disengage this tray
Press [Reset].
Please switch Off/On
E 18-2
3
Turn OFF then ON the sub power switch.
A copying job can continue without using the troubled portion of the
machine (ex. Tray 2).
7 CAUTION
Limited use of the copier is completed.
%
BE SURE TO CONTACT YOUR SERVICE REPRESENTATIVE IMMEDIATELY.
5-4
bizhub PRO 920
Troubleshooting
5.2
5
Clearing Mishandled Paper
When a paper misfeed occurs, the machine stops making copies and the
Jam Position Screen displays to indicate misfeed area(s).
The Start LED turns orange on the control panel, and copying operation cannot be continued until all the misfeed locations are cleared.
All the misfeed locations will be indicated by flashing/lighting numbers and
arrows on this screen. Flashing number and arrow indicate the jammed position of the highest priority.
Action to remove mishandled paper is displayed in the message area, and
touching [Illustration] will display subsequent screens for the disposal action.
Follow the procedure below to remove mishandled paper.
2
Reminder
Before performing the clearing procedure, see “Caution Labels and Indicators” on page 1-11 for the caution label locations inside the machine.
To remove mishandled paper
1
Touch [Illustration] on the screen.
The screen illustrating the method for the disposal action will be displayed.
bizhub PRO 920
5-5
Troubleshooting
5
2
Follow the procedure on the screen to remove misfed paper.
–
–
3
Touch the arrow key to go to the next page of a series of illustrations, if provided.
Touch [JAM Position] to return to the Jam Position Screen.
When completed, the Machine Status Screen will be restored.
–
If any misfeed location is left, the Jam Position Screen will be restored with the next disposal procedure in the message area and
the location number in the jam position display. Repeat steps 1 to
2 until all the locations are cleared.
2
Reminder
When removing mishandled paper, be sure to leave no torn paper inside
the machine.
Do not touch or damage the drum surface.
7 CAUTION
The internal fixing unit is very hot.
%
To avoid getting burned, DO NOT TOUCH.
Be especially careful not to put your hand into the fixing unit area when
withdrawing the fixing conveyance unit to remove mishandled paper.
7 CAUTION
When removing stuck staples
%
Be careful of removing staples stuck inside the machine so as not to
get injured.
5-6
bizhub PRO 920
Troubleshooting
5.3
5
If [Job List] Changes to [Mishandled Paper] or [No Paper]
If any trouble occurs in the machine, the [Job List] key on the Basic Screen
will change to the following indication.
[Mishandled Paper]: A misfeed has occurred with the print job in progress.
[No Paper]: Paper supply for a print job in progress has become depleted.
Touch the key, and follow the instruction on the screen.
If [Job List] Changes to [Mishandled Paper]
A paper misfeed has occurred with the print/scan job in progress while you
are setting a reserve job.
Touch [Mishandled Paper] to display the Jam Position Screen, then follow
the procedure on page 5-5 to remove mishandled paper.
If [Job List] Changes to [No Paper]
The selected tray has become empty.
bizhub PRO 920
5-7
Troubleshooting
5
Follow the procedure below to change the tray selection for the current job,
or supply the empty tray with copy paper.
To change the tray selection
1
Touch [No Paper].
The Machine Status Screen will be displayed.
2
Touch [Details].
The tray selection will be available on the Machine Status Screen.
3
Touch the desired tray key, then touch [OK].
The Machine Status Screen will be restored.
5-8
bizhub PRO 920
Troubleshooting
4
5
Press [Start] on the control panel.
Copy paper will be delivered from newly selected tray to continue the
printing operation.
bizhub PRO 920
5-9
Troubleshooting
5
To supply the empty tray with paper
1
Touch [No Paper].
The Machine Status Screen will be displayed.
2
Check the empty tray number, then load paper.
3
Touch [Close] to restore the Basic Screen.
4
Press [Start] on the control panel.
Printing operation will resume using the tray supplied with paper.
!
Detail
For details of loading paper, see “Loading Paper” on page 4-3.
5-10
bizhub PRO 920
Troubleshooting
5.4
5
If Memory Full Message Is Displayed (Memory Overflow)
In certain modes, this machine uses memory to make operations convenient
and smooth flowing.
Occasional memory overflow may occur if the installed memory is inadequate for the copy conditions selected, and the machine will stop its operation with the following popup screen displayed.
Touch [Stop].
All the scanned data will be cleared to terminate the job.
bizhub PRO 920
5-11
Troubleshooting
5
5.5
If Power Off/On Screen Is Displayed
When any trouble affects the electrical signal of the copier, “Please turn the
copier OFF” message will be displayed on the touch panel.
Follow the procedure below to turn the machine power off then on.
To turn off/on the power
5-12
1
Turn OFF the sub power switch.
2
Turn OFF the main power switch.
3
Wait about 10 seconds or longer.
4
Turn ON the main power switch and sub power switch.
bizhub PRO 920
Troubleshooting
5.6
5
If No Response Screen Is Displayed
When any trouble occurs on the printer board, “No Response from Printer
Board” message will be displayed on the touch panel.
Follow the procedure below to turn the machine power off then on.
To turn off/on the power
1
Turn OFF the sub power switch.
2
Turn OFF the main power switch.
3
Wait about 10 seconds or longer.
4
Turn ON the main power switch and sub power switch.
bizhub PRO 920
5-13
Troubleshooting
5
5.7
Troubleshooting Tips
Main Body
Case
Checkpoint
Remedy
The machine does not
operate even if the main
power switch and sub
power switch are on.
Is the power plug firmly inserted in wall socket?
Firmly insert the power plug in wall
socket.
Is the Power Save LED on?
The machine cannot be turned on
due to the Weekly Timer function.
See page 2-28 to operate Timer Interrupt, or consult your administrator.
Copying does not begin after pressing
[Start].
Is front door or left side door
of the machine open?
Securely close the front door and left
side door of the machine.
Is there appropriate paper
size in a tray?
Load the paper size selected for the
original.
Is the print quantity entered
properly?
Enter an appropriate number for print
quantity.
Is the Finisher door open?
Securely close the Finisher door.
Is the Trimmer unit front door
or Trimmer stacker cover
open?
Securely close the Trimmer unit front
door and Trimmer stacker cover.
Is the original glass clean?
Wipe the glass, if necessary.
Is the original document
clean?
Erase spots on the original, if any.
Is the copy density adjusted
properly?
Manually specify copy density to select the appropriate exposure level.
If further adjustment is required, see
p. 15-3.
Is the copy density adjusted
properly?
Manually specify copy density to select the appropriate exposure level.
If further adjustment is required, see
p. 15-3.
Is the message “Please add
toner” displayed?
Add toner.
Copy quality is poor.
Is copy paper damp?
Replace the paper, if necessary.
Consult your service representative.
Magnification cannot
be changed.
Is Reduce&Shift function selected?
Release Reduce&Shift mode.
Copying does not
resume after mishandled paper is removed.
Is any mishandled paper left?
Check copier diagram on touch panel
for additional indications of mishandled paper.
Duplex modes cannot
be selected.
Is ADF open?
Fully close ADF.
Using user authentication, copies cannot be
made after password is
entered.
Is the message “Copy limit
reached” displayed?
Contact your administrator.
Copy image is not
clean or shows spots.
Copy image is too light.
5-14
bizhub PRO 920
Troubleshooting
5
ADF
Case
Checkpoint
Remedy
ADF cannot be used after [Reset] is pressed.
Is ADF slightly open?
Fully close the ADF.
Is ADF selected in the initial
setting?
Set to use ADF in the initial setting.
See p. 15-3.
Original paper cannot be
fed.
Is ADF slightly open?
Fully close the ADF.
Does the original type conform to the specifications?
Change the original paper to any of
the recommended size and weight.
Are originals correctly loaded?
Position originals properly in the
ADF.
Finisher (with Punch Kit)
Case
Checkpoint
Remedy
Finisher does not operate.
Is any mishandled paper left
inside the Finisher?
Check for a paper misfeed and remove it, as required.
Is Finisher door slightly open?
Securely close the Finisher door.
Staples are incorrectly
positioned (rotated by 90
degrees) in copies.
Is Rotation function activated?
Reload copy paper in appropriate
direction. (See page 11-67.)
Copies skew in the output sets and cannot be
stapled or punched in
position.
Is copy paper excessively
curled?
Reload the paper upside down into
the tray.
Is there any gap found between side guide plates (or
paper guides when using
Multi-sheet bypass tray) and
copy paper in the selected
tray?
Make sure the side guide plates (or
paper guides) are securely aligned
to the copy paper in the tray to be
used.
Using Punch mode, copies cannot be punched.
Is the message “Waste basket of Punch kit is full” displayed?
Empty the waste basket.
Case
Checkpoint
Remedy
Copies skew in the output sets and cannot be
punched in position.
Is copy paper excessively
curled?
Reload the paper upside down into
the tray.
Is there any gap found between side guide plates (or
paper guides when using
Multi-sheet bypass tray) and
copy paper in the selected
tray?
Make sure the side guide plates (or
paper guides) are securely aligned
to the copy paper in the tray to be
used.
Z Folding Unit
bizhub PRO 920
5-15
Troubleshooting
5
Case
Checkpoint
Remedy
Using Punch mode, copies cannot be punched.
Is the message “Waste basket of Punch unit is full” displayed?
Empty the waste basket.
Case
Checkpoint
Remedy
Using Trimming mode,
copies cannot be
trimmed.
Is the message “Waste basket of Trimmer is full” displayed?
Empty the waste basket.
Trimmer Unit
2
Reminder
If remedies mentioned above do not work, contact your service representative.
5-16
bizhub PRO 920
6
Maintenance
Maintenance
6
Maintenance
6.1
Cleaning Image Scanning Section
6
In order to maintain optimum copy quality, always keep the following areas
clean.
Cleaning the ADF Scanning Glass
Keep the ADF scanning glass clean; otherwise soil marks may be copied, resulting in
dark lines on the copies.
Raise the document feeder, then clean the
glass with a clean soft cloth.
2
Reminder
Never use paint solvents, such as benzene or thinners, to clean the ADF scanning glass.
Cleaning the Original Glass
Raise the document feeder, then clean the
original glass with a clean soft cloth.
The glass may also clean with a soft cloth
dampened slightly with water, if it is difficult to clean.
bizhub PRO 920
6-3
Maintenance
6
Cleaning the ADF Guide Cover
The ADF guide cover should be kept clean;
otherwise soil marks may be copied or the
original size cannot be detected correctly.
Raise the document feeder, then clean the
ADF guide cover with a clean soft cloth.
2
Reminder
Never use paint solvents, such as benzene or thinners, to clean the original glass and ADF guide cover.
6-4
bizhub PRO 920
Maintenance
6.2
6
Checking Copy Count
The Utility Screen allows you to view the current indication of the following
items as a list.
List items:
- Total count
- Feed paper count
- Output paper count
- Printer total count
- Copier total count
- Scanner total count
- PM count, cycle, counter start date
- Developer count, cycle counter start date
- Drum count, cycle counter start date
Check the list, then print it, if desired.
To check and print the counter list
1
Press [Utility/Counter] on the control
panel.
The Utility Screen will be displayed.
bizhub PRO 920
6-5
Maintenance
6
?
%
2
Do you want to exit Utility mode and return to the previous screen?
Touch [Exit].
Touch [Details].
The PM count, Developer count, and Drum count will be displayed.
3
Print the counter list, if desired.
–
–
Touch [Copy]. The Basic Screen will be displayed.
Select the desired copy mode, then press [Start].
After the counter list is printed out, touch [Counter Output] to return to
the previous screen.
!
Detail
The Developer count and Drum count can be selected to indicate either
the cycle count or runtime count. Contact your service representative, if
desired.
6-6
bizhub PRO 920
Maintenance
6.3
6
Preventive Maintenance
After a set number of copies (500,000 copies) have been made on your machine, Preventive Maintenance (PM) will be required for maintaining optimal
performance.
When preventive maintenance is due, a message and the PM icon (
prompt you to contact your service representative for maintenance.
) will
!
Detail
The administrator can call for service using the Utility setting (6 administrator Setting>6 System Connection>1 Call Service Centre). Refer to “7
Security Setting” on page 18-200.
In this case, you don’t have to make a call for preventive maintenance,
because your machine has been monitored automatically by your service
representative.
bizhub PRO 920
6-7
6
6-8
Maintenance
bizhub PRO 920
7
Specifications
Specifications
7
7
Specifications
7.1
Main Body Specifications
Main Body
Specifications
Name
bizhub PRO 920
Type
Console type
Copying system
Laser electrostatic transfer method (dual beam)
Original glass
Stationary
Photoconductor
OPC
Light source
Xenon lamp
Developing method
Dry-type dual-component reverse magnetic brush developing
Fixing method
Heat roller
Density adjustment
Automatic and manual (9 levels), user-set density (2 types)
Magnification ratio
1:1 ± 1.0% or less
Enlargement: ×1.154 (145.4%), ×1.224 (122.4%), ×1.414
(141.4%), ×2.000 (200.0%)
Reduction: ×0.866 (86.6%), ×0.818 (81.8%), ×0.707 (70.7%),
×0.500 (50.0%)
Minimal: ×0.930 (93.0%) (fixed)
XY Zoom (interlocked and individual): 0.250 to 4.000 (25.0% ~
400.0%) (in 0.001 increments)
User-set zoom ratio: 3
Resolution
600 dpi
Copy paper
Plain paper: 61 to 90 g/m2
Thick paper: 91 to 200 g/m2
Thin paper: 50 to 60 g/m2
Special paper: OHP transparencies, labels
* Ink-jet paper is unavailable.
Copying speed
92 copies/min. (A4), 73 copies/min. (A4R), 92 copies/min.
(B5), 81 copies/min. (B5R), 55 copies/min. (A3), 62 copies/
min. (B4)
Set quantity
1 to 9999 sheets or 1 to 9999 sets
Memory
256 MB (RAM) + 10 GB (HDD)
Original document
Type: Sheets/ books (using original glass)
Size: 303 mm × 460 mm at maximum
Copy size
Max. 314 × 460 mm ~ Min. 100 × 148 mm
Image loss: leading and trailing edges 2.0 mm ± 2.0 mm, front
and rear 1.5 mm ± 1.5 mm
bizhub PRO 920
7-3
Specifications
7
Specifications
Tray capacity
Multi-sheet bypass tray: 150 sheets (80 g/m2 paper)
Main body trays 1 and 2 (universal tray): 500 sheets (80 g/m2
paper)
Main body trays 3 (universal tray): 1,000 sheets (80 g/m2 paper)
Warm-up time
Approx. 5.5 minutes
First-page copy time
Approx. 3.1 seconds (A4)
Sound power level
Main body: 78 dB (operating) / 58 dB (standby)
Power requirements
AC230V, 15A, 50Hz
Power consumption
3.45 KW or less (with full options)
Weight
Approx. 280 kg (Main body + ADF)
Dimensions
887 (W) × 780 (D) × 1,203 (H) mm (Main body + ADF)
3,180 (W) × 780 (D) × 1,203 (H) mm (Main body + ADF + LU404 + FS-604 + TU-501)
3,372 (W) × 780 (D) × 1,203 (H) mm (Main body + ADF + LU404 + FS-604 + ZU-601/602 + TU-501)
Space requirements
200 mm or more on the back
100 mm or more on both sides
ADF
Specifications
Name
DF-606
Feeding speed
Single-sided: 92 sheets/min. (A4)
Double-sided: 65 sheets/min. (A4)
Document types
Plain paper, 50 to 130 g/m2
(50 to 200 g/m2 using SDF mode for single-sided original)
Document sizes
Max. 297 mm × 431.8 mm ~ min. 128 mm × 139.7 mm
Detectable sizes for Auto Paper Select mode: A3, B4, A4,
A4R, B5, B5R, A5, A5R, B6R, 11"×17", 8.5"×11", 8.5"×13"
Available to scan mixed originals of AB sizes and inch sizes
Feeder capacity
Max. 100 sheets (80 g/m2)
Document insertion
Automatic feed
Weight
Approx. 22 kg
Dimensions
650 (W) × 570 (D) × 170 (H) mm
Power source
Supplied from main body
These specifications are subject to change without notice.
7-4
bizhub PRO 920
Specifications
7.2
7
Option Specifications
Finisher FS-509
Specifications
Type
Stapler finisher
Mountable options: Z folding unit, Punch kit, Post inserter
Exit trays
Primary (main) tray
Secondary (sub) tray (for Straight delivery only)
Function
Straight delivery: Output sorted/grouped sets normally to the
Primary (main) trayor Secondary (sub) tray.
Offset delivery: Output sorted/grouped sets to the Primary
(main) tray, having each set offset by approx. 30 mm upon exit, having each set offset by approx. 30 mm upon exit.
Staple delivery: Output stapled sets to the Primary (main) tray
Paper types
Plain paper: 61 to 90 g/m2
Thick paper: 91 to 200 g/m2
Thin paper: 50 to 60 g/m2
Special paper: OHP transparencies, labels
Paper sizes
A3, B4, A4, A4R, B5, B5R, A5, B6, 11"×17", 8.5"×14",
8.5"×11", 8.5"×11"R, 5.5"×8.5", 5.5"×8.5"R
Non-standard sizes can be delivered to the Secondary (sub)
tray only.
Stapler capacity
50-sheet staple or 100-sheet staple selectable
50 sheets max. (80 g/m2 paper) / 100 sheets max. (80 g/m2
paper)
Staples in cartridge
5,000 staples
Dimensions
410 (W)* × 656 (D) × 990 (H) mm
Weight
Approx. 60 kg
Power source
Supplied from main body
*: Effective size (width including Primary (main) tray) will be 675 mm / 791 mm
(with the tray edge extended).
bizhub PRO 920
7-5
Specifications
7
Finisher FS-604
Specifications
Type
Stapler finisher with folding function
Mountable options: Z folding unit, Punch kit, Post inserter,
Trimmer unit
Exit trays
Primary (Main) tray (for finished output)
Secondary (Sub) tray (for unfinished output)
Folding mode tray (for finished output)
Function
Straight delivery: Output unfinished sets normally to the Primary (main) tray
Offset delivery: Output sorted/grouped sets to the Primary
(main) tray, having each set offset by approx. 30 mm upon exit.
Sub tray delivery: Output unfinished sets normally to the Secondary (sub) tray
Staple delivery: Output stapled sets to the Primary (main) tray
Fold&Staple delivery: Output stapled (2 positions in the centre) and folded sets to the Folding mode tray
Half Fold delivery: Output folded sets to the Folding mode tray
Letter Fold delivery: Output trifold (up to 3 sheets) sets to the
Folding mode tray
Paper types
Plain paper: 61 to 90 g/m2
Thick paper: 91 to 200 g/m2
Thin paper: 50 to 60 g/m2
Special paper: OHP transparencies, labels
Paper sizes
A3, B4, A4, A4R, B5, B5R, A5, 11"×17", 8.5"×14", 8.5"×11",
8.5"×11"R, 5.5"×8.5", 5.5"×8.5"R
Non-standard sizes can be delivered to the Secondary (Sub)
tray only.
Stapler capacity
50 sheets max. (80 g/m2 paper) or 5.5 mm thick or less
Staples in cartridge
5,000 staples
Dimensions
410 (W)* × 656 (D) × 990 (H) mm
Weight
Approx. 68 kg
Power source
Supplied from main body
*: Effective size (width including Primary (main) tray) will be 675 mm / 791 mm
(with the tray edge extended).
7-6
bizhub PRO 920
Specifications
7
Punch Kit PK-504/505
Specifications
Function
Punching file holes in copies
Number of punch holes
PK-504: 4 holes (Swedish type)
PK-505: 2 holes or 4 holes
Hole diameter
PK-504: 6.5 ± 0.5 mm
PK-505: 6.5 ± 0.15 mm
Hole pitch
PK-504: 21 ± 0.5 mm / 70 ± 0.5 mm / 21 ± 0.5 mm
PK-505: 80 ± 0.5 mm
Paper types
Plain paper: 61 to 90 g/m2
Thick paper: 91 to 128 g/m2
Thin paper: 50 to 60 g/m2
Special paper: OHP transparencies, labels
Paper sizes
PK-504: A3, B4, A4, B5, 11"×17", 8.5"×11"
PK-505: 2 holes A3, B4, A4, A4R, B5, B5R, A5, A5R, 11"×17",
8.5"×14", 8.5"×11", 8.5"×11"R, 5.5"×8.5", 5.5"×8.5"R
4 holes: A3, B4, A4, B5, 11"×17", 8.5"×11"
Dimensions
PK-504: 130 (W) × 470 (D) × 115 (H) mm
PK-505: 148 (W) × 509 (D) × 122 (H) mm
Weight
Approx. 3 kg
Power source
Supplied from finisher
Post Inserter PI-501
Specifications
Function
Cover sheet feeding into Finisher FS-509/FS-604
Structure
Double paper feeding unit (upper and lower)
Cover sheet types
Plain/Recycled paper: 61 to 90 g/m2
Thick paper: 91 to 200 g/m2
Thin paper: 50 to 60 g/m2
Cover sheet sizes
A3, B4, A4, A4R, B5, B5R, A5, 11"×17", 8.5"×14", 8.5"×11",
8.5"×11"R, 5.5"×8.5"
Stack capacity
200 sheets max. or 30 mm thick or less
Dimensions
511 mm (W) × 620 mm (D) × 220 mm (H)
Weight
Approx. 10.5 kg
Power source
Supplied from finisher
bizhub PRO 920
7-7
Specifications
7
Large Capacity Unit LU-403
Specifications
Function
Paper feeding into main body
Paper capacity
4,000 sheets (80 g/m2 paper)
Paper sizes
A4, B5, 8.5"×11", Wide sizes (max. 314 × 223 mm)
Paper types
Plain/Recycled paper: 61 to 90 g/m2
Thick paper: 91 to 200 g/m2
Thin paper: 50 to 60 g/m2
Dimensions
430 (W) × 639 (D) × 690 (H) mm
Weight
Approx. 30 kg
Power source
Supplied from main body
Large Capacity Unit LU-404
Specifications
Function
Paper feeding into main body
Paper capacity
4,000 sheets (80 g/m2 paper)
Paper sizes
A3, B4, A4, A4R, 11"×17", 8.5"×14", 8.5"×11", 8.5"×11"R,
Wide sizes (max. 314 × 460 mm)
Paper types
Plain/Recycled paper: 61 to 90 g/m2
Thick paper: 91 to 200 g/m2
Thin paper: 50 to 60 g/m2
Dimensions
670 (W) × 639 (D) × 695 (H) mm
Weight
Approx. 42 kg
Power source
Supplied from main body
Z Folding Unit ZU-601/602
Specifications
7-8
Function
Punching file holes and Z-folding the output copies
Number of punch holes
ZU-601: 4 holes (Swedish type)
ZU-602: 2 or 4 holes
Hole diameter
8.0 ± 0.5 mm
Hole pitch
ZU-601: 21 ± 0.5 mm / 70 ± 0.5 mm / 21 ± 0.5 mm
ZU-602: 80 ± 0.5 mm
Paper types in Punch mode
Plain paper: 61 to 90 g/m2
Thick paper: 91 to 170 g/m2
Thin paper: 50 to 60 g/m2
Paper sizes in Punch mode
ZU-601: A3, B4
ZU-602: A3, B4, A4, A4R, B5, B5R, A5, A5R, 11"×17",
8.5"×14", 8.5"×11", 8.5"×11"R, 5.5"×8.5", 5.5"×8.5"R
bizhub PRO 920
Specifications
7
Specifications
Fold types
Z-fold, Half fold (8.5"×14" only)
Fold position (width from the
edge to the first fold)
A3: 209 mm or less
B4: 181 mm or less
11 ×17": 215 mm or less
8.5"×14": 241.7 mm or less
Paper type in Z-Fold mode
Plain paper: 60 to 90 g/m2
Paper sizes in Z-Fold mode
ZU-601: A3, B4
ZU-602: A3, B4, 11"×17", 8.5"×14"
Paper sizes other than listed above will be output without any
fold.
Dimensions
169 (W) × 660 (D) × 930 (H) mm
Weight
Approx. 38 kg
Power source
Supplied from an outlet
Trimmer Unit TU-501
Specifications
Function
Trimming the end of booklet
Trimming width
10 mm or less
Number of trimmed sheets
40 sheets max. (80 g/m2 paper) in Fold&Staple mode (20sheet-folded booklet or 19-sheet-folded booklet with 200 g/
m2 paper cover)
6 sheets max. (80 g/m2 paper) in Half Fold mode (3-sheetfolded booklet)
Paper types
Plain/Recycled paper: 60 to 90 g/m2
Paper sizes
A3, B4, A4R, 11"×17", 8.5"×14", 8.5"×11"R, Wide sizes (max.
314 × 460 mm)
Dimensions
1,144 (W) × 604 (D) × 562 (H) mm
Weight
Approx. 68 kg
Power source
Supplied from an outlet
Accessories:
- Expanded Memory Unit EM-701
- Image Controller IC-203
- PostScript Kit PS-503
- Mount Kit MK-707
These specifications are subject to change without notice.
bizhub PRO 920
7-9
7
7-10
Specifications
bizhub PRO 920
8
Before Making Copies
Before Making Copies
8
Before Making Copies
8.1
Features of the bizhub PRO 920
8
Basic Functions
-
-
-
-
-
-
AE - Automatic Exposure
Automatically adjusts exposure to compensate for quality of the original.
Density
Manually selects up to 9 density levels each for copy image and background.
Automatic Paper Selection
Automatically selects copy paper size to match the original documents.
Auto Zoom
Automatically selects an appropriate magnification ratio when paper size
is selected manually. Automatically selected when [Auto Zoom] is
touched.
Multi-Sheet Bypass Tray
Feeds special paper type or size that cannot be loaded in main body
trays.
Zoom
Selects magnification ratios for copies. Vertical and horizontal dimensions can be reduced or enlarged independently.
Simplex/Duplex
Selects the desired simplex mode (1-1 or 2-1); or duplex mode (1-2 or 22).
Reserve
Scans in subsequent copy jobs while the machine is busy printing or copying.
Combine Originals
-
-
-
-
Combine Pages
Copies a fixed number (2, 4, or 8) of pages onto one sheet of copy paper
to create a draft copy of a multi-page report at the same time as saving
paper.
Bind
Makes normal copies from double-sided originals being upside-down on
the reverse side.
Mixed Original
Copies mixed size originals from the document feeder in Auto Paper Select or Auto Zoom mode.
Z-Folded
Sets the ADF to accept Z-folded originals.
bizhub PRO 920
8-3
Before Making Copies
8
-
-
-
Single Feed
Sets the ADF to accept thick originals or paste-ups to be fed one sheet
at a time.
Custom Size for Original
Identifies the special original size which the machine cannot detect, in order to select the optimal paper size for copying or printing.
Tab Paper
Copies onto tabbed sheets from tabbed originals, allowing the image on
the tab part of the original to be printed on the same part of the tabbed
copy paper.
Original Image Type
-
Original Image Type
Enhances photo image in Photo mode, regular image in Text/Photo
mode, text image in Text mode, lighter image in Dot Matrix mode.
Applications
-
-
-
-
-
-
-
-
8-4
Insert Sheet
Insert up to 30 blank or copied sheets from any tray, or inserts blank or
copied front and back covers from any tray to enhance the presentation
of multi-page documents.
Chapters
Starts chapter pages on the right side (front pages) of the finished document. Only duplex mode (1-2) is compatible with this feature.
Insert Image
Stores pages in memory from the original glass, and inserts the pages
into a document copied from the document feeder.
OHP Interleave
Copies onto OHP transparencies and interleave blank or copied paper for
each original copied.
Program Job
Scans documents into memory while designating different copy conditions for each original, then prints all the documents collectively.
Book Copy
Copies both pages of an open book or book-size sheet separately onto
two sheets in 1-1 mode or separately onto each side of one sheet in 1-2
mode. You can use the Book Copy mode with the Front or Front/Back
cover mode. The cover page(s) will be scanned and copied normally before image division is performed on the other pages.
Image Repeat
Selects the horizontal image area across the page, and repeats it down
the page as many times as the repeat width setting (10 ~ 150 mm) permits in manual or auto.
Booklet Pagination
Creates a multiple page signature booklet copied on both sides of paper
in 1-2 or 2-2 copy mode.
bizhub PRO 920
Before Making Copies
-
-
-
-
-
-
-
-
-
-
8
Neg-/Positive Reverse
Reverses the image from black-on-white to white-on-black or vice versa.
Page Margin
Creates or removes a binding margin at the top, bottom, right and left
edges (shift amount from 0 ~ 250 mm, in 1 mm increments); reduces image to prevent image loss (reduce & shift amount from 0 ~ 250 mm, in 1
mm increments).
Frame/Centre Erase
Erases border and/or centre image area using Frame (1 - 300 mm), Centre (1 - 99 mm), or Frame & Centre.
Non-Image Area Erase
When copying from the original glass when the document cover is open,
copies only the image area and not the exposed area of glass, which
would otherwise copy as black.
Image Centring
The original image on the original glass or in the document feeder is copied and centred on a sheet.
Full Scan
Makes copies printed completely to the edges of the paper to avoid image loss.
No Rotate
Deactivates the Rotation function that automatically rotates the image
before copying when the portrait/landscape orientation of the original is
different from the orientation of the copy paper.
Stamp
Prints watermark, regular stamp, date/time, page number, and numbering onto the output copies to enhance the presentation and usefulness of
the copies.
Annotation
Allows you to register words, current date/time, and annotation number
as a set and to print it onto output copies at the location designated on
the screen.
Image Overlay
Scans an original image and overlays it on the pages of another document. For example, you may want to incorporate a page heading, graphic
design or logo into the pages of your document.
Program Image Overlay
Same as for “Overlay” except the overlay image is stored in memory.
bizhub PRO 920
8-5
Before Making Copies
8
Finishing
-
-
-
-
-
Duplex Bind
Makes double-sided copies upside down on the reverse side from normal originals.
Output for Machine with Finisher FS-509/FS-604 Installed:
Sort, Group, Offset and Staple modes using the Primary (main) tray
Sort and Group modes using the Secondary (sub) tray
Selects an output tray and output mode on the Finishing popup menu.
Half Fold, Fold&Staple, Trimming (FS-604 with Trimmer Unit TU-501)
Folds output copies in the centre to make a booklet. Use Fold&Staple to
staple in the centre, and/or use Trimming to trim the end of booklets.
Punch (Punch Kit PK-504/505, Z Folding Unit ZU-601/602)
Makes file holes in output copies.
Z-Fold, Letter Fold In, Letter Fold Out (Finisher FS-604, Z Folding Unit
ZU-601/602)
Makes zigzag-folded copies (Z-Fold), or folds copied set in three (Letter
Fold In, Letter Fold Out).
Cover Sheet Feeding (Finisher FS-509/FS-604 with Post Inserter PI-501)
Attaches thick covers or insertions to output copies.
Manual Finishing (Finisher FS-509/FS-604 with Post Inserter PI-501)
Manually staples/punches/folds paper sets without printing.
Tandem Mode
Works in tandem to distribute a large copying job in half the time of nontandem mode.
Job List
-
Job List
Displays the Job List Screen to view the output/send history, check the
incomplete/suspended jobs, or to manage current and reserve jobs.
Advanced Information
-
-
-
-
8-6
Proof Copy
To ensure correct output before running multiple copies, run a proof copy
by pressing [Proof Copy] on the control panel or touching [Proof Copy]
on the Check Screen.
Check Mode
To check the job settings before running multiple copies, press [Mode
Check] on the control panel to display the Check Screen.
Interrupt Copying
Interrupts copying-in-progress to perform an urgent copy, using any of
the copier features for the interrupt job.
Mode Memory
Programs up to 30 jobs and recalls each job by job number, as needed.
Pre-Job Recall
Recalls the settings of the previous output job.
bizhub PRO 920
Before Making Copies
-
-
8
Help
Provides you with the information about machine functions, job setting
procedure, and various machine operations on the Help Screen.
Accessibility
Sets the response time of the touch keys.
Others
-
-
-
-
Low Power
Automatically lowers the power after a specified period of copier inactivity.
Sleep
Automatically shuts off the power after a specified period of copier inactivity.
Power Save
Automatically turns off all but nominal power supply after a specified period of copier inactivity, for optimal efficiency. Power is returned after a
brief warm up period by pressing [Power Save] on the control panel.
Weekly Timer
Can be set according to the needs of each work environment. Turns main
body power Off/On daily or weekly, during lunch time, on holidays, and
also enables the Timer Interrupt mode, which allows temporary use of the
machine even when the machine is in the daily, weekly, or holiday Off
mode.
bizhub PRO 920
8-7
Before Making Copies
8
8.2
How to Make a Basic Copy
Follow the procedure below to make a basic copy.
2
Note
The following procedure is basic and not always applicable to the operation of selected copy conditions. When using a specific function, be
sure to follow the procedure described in each section.
To make a basic copy
1
Display the Basic Screen.
Initially the Basic Screen appears on the touch panel.
2
Set copy conditions as desired.
–
8-8
The following settings are available from the Basic Screen.
Basic (See page 9-3.)
Combine Originals (See page 10-7.)
Original Image Type (See page 10-23.)
Application (See page 11-3.)
Finishing (See page 12-3.)
Paper Fold (See page 12-3.)
bizhub PRO 920
Before Making Copies
3
8
Enter the desired print quantity from the control panel keypad.
Entered quantity will be displayed on the touch panel.
For detailed information on setting print quantity, see “Setting Print
Quantity” on page 8-16.
4
Position originals FACE UP in the
document feeder, or FACE DOWN
on the original glass.
For detailed information on positioning originals, see “Positioning Originals” on page 8-11.
bizhub PRO 920
8-9
Before Making Copies
8
5
Press [Start] on the control panel.
–
–
–
6
When the machine starts scanning originals, the Basic Screen
will be displayed to allow you the
reserve job setting. See
page 9-42 for details.
On the right side of the screen,
the scanned original count, set
print count, and current output
count will be displayed until the copying job is completed.
Setting change in Density is available while scanning originals, and
will be reflected right after the change has been made.
When the copy job is completed, the normal Basic Screen will be restored.
!
Detail
The Job List Screen is provided to change the operation order of reserve
jobs or cancel the reserve job. See “Overview of Job List Screen” on
page 13-3 for details.
8-10
bizhub PRO 920
Before Making Copies
8.3
8
Positioning Originals
Positioning Originals in ADF
The document feeder (ADF) automatically feeds up to 100 originals directly
to the original glass area, starting with the top sheet. The ADF should only be
used for unstapled, smooth, flat originals.
!
Detail
For original sizes available in the ADF, see “ADF Originals” on page 3-12.
Set originals in the same direction as that of the original set direction icon
on the screen; otherwise the copy result may not be satisfactory, especially when using duplex mode, Staple, Half Fold, and Booklet Pagination. See “Specifying Original Direction (Original Direction)” on page 10-9
for details.
Be sure not to use unsuitable ADF originals. See “Using Original Glass”
on page 3-11 for details.
To position originals in Normal mode
0 Before placing originals in the tray, be sure the document feeder is closed
fully.
1
Arrange originals in order.
2
Position original(s) FACE UP in the
document feeder tray, according to
the original set direction icon on the
Basic Screen.
–
bizhub PRO 920
Place two-sided originals with
page one FACE UP. Up to 100
originals can be set at a time.
8-11
Before Making Copies
8
3
Adjust paper guides.
2
Reminder
Do not set more than 100 originals or over the limit line indicated on the
paper guides; otherwise a paper misfeed will occur.
Once closed, do not open the document feeder, otherwise the selected
copy conditions may be altered automatically.
To position originals in Mixed Original mode
Mixed size originals can be copied together from the document feeder.
0 Before placing originals in the tray, be sure the document feeder is closed
fully.
1
Arrange originals in order.
–
2
Position mixed originals FACE UP, aligned with the left rear side of the
document feedre tray.
–
8-12
Arrange the mixed size originals
as illustrated below.
Place two-sided originals with page one FACE UP. Up to 100 originals can be set at a time.
bizhub PRO 920
Before Making Copies
3
8
Adjust paper guides.
2
Reminder
Do not set more than 100 originals or over the limit line indicated on the
paper guides; otherwise a paper misfeed will occur.
Once closed, do not open the document feeder, otherwise the selected
copy conditions may be altered automatically.
!
Detail
To use the Mixed Original mode, see procedure on page 10-13.
For available combinations of mixed originals, see “ADF Originals” on
page 3-12.
bizhub PRO 920
8-13
Before Making Copies
8
To position originals in Z-Folded mode
Z-Folded original mode detects the folded original size without using the size
detection sensor of the ADF.
0 Before placing originals in the tray, be sure the document feeder is closed
fully.
1
Arrange originals in order.
2
Position original(s) FACE UP in the document feeder tray.
–
3
Place two-sided originals with page one FACE UP. Up to 100 originals can be set at a time.
Adjust paper guides.
2
Reminder
Do not set more than 100 originals or over the limit line indicated on the
paper guides; otherwise a paper misfeed will occur.
Once closed, do not open the document feeder, otherwise the selected
copy conditions may be altered automatically.
!
Detail
To use the Z-Folded mode, see procedure on page 10-15.
For available original sizes in Z-Folded mode, see “ADF Originals” on
page 3-12.
8-14
bizhub PRO 920
Before Making Copies
8
Positioning Original on Original Glass
Use the original glass when originals are not suitable for use with the document feeder, e.g., when size is incompatible, or when originals are folded,
stapled, torn, or in generally poor condition.
!
Detail
For details of unsuitable ADF originals, see “Using Original Glass” on
page 3-11.
Be sure to position original in the correct direction; otherwise the copy result may not be satisfactory, especially when using duplex mode, Staple,
Half Fold, and Booklet Pagination. See “Specifying Original Direction
(Original Direction)” on page 10-9 for details.
To position original on original glass
1
Raise the document feeder.
2
Position original FACE DOWN in the
left rear corner, aligning the edge
with the left measuring guide.
–
3
The direction of the original
should conform to the Original direction icon displayed on the Basic Screen.
Gently close the document feeder to prevent the original from shifting
on the glass.
2
Reminder
When Book Copy, AUTO mode in Image Repeat, or Image Centring is selected, the document feeder should not be closed while scanning.
7 CAUTION
Do not place too heavy originals, or do not press strongly when thick
original is placed and is under pressure of ADF.
%
The glass may be broken and you may be injured.
bizhub PRO 920
8-15
Before Making Copies
8
8.4
Setting Print Quantity
This section describes how to set or change print quantity.
To set print quantity
The copier is initially set to copy the original set in amounts determined by
the print quantity setting, then outputs sorted sets.
1
Enter the desired print quantity from
the control panel keypad.
Entered quantity will be displayed on the touch panel.
8-16
bizhub PRO 920
Before Making Copies
8
To change print quantity
Follow the procedure below to change the print quantity that has been already entered.
1
Press [C] (clear quantity).
The quantity displayed on the touch panel will return to 1.
2
Enter the correct quantity.
Entered quantity will be displayed on the touch panel.
bizhub PRO 920
8-17
Before Making Copies
8
8.5
Setting Job During Warmup
While the copier is warming up after power is turned on, select copy conditions and start scanning so that the copier may start printing immediately the
copier engine is ready.
To set job during warmup
1
Turn on the main power switch and sub power switch of the machine.
2
On the Basic Screen, check that the message “Ready to copy reserve”
is displayed in the message area.
3
Set the desired copy conditions, enter the print quantity, then position
original(s) FACE UP in the ADF or FACE DOWN on the original glass.
4
Press [Start] to start scanning.
–
8-18
When scanning is completed, the message “Ready to reserve JOB”
and [Job Reserve] key will be displayed on the screen.
bizhub PRO 920
Before Making Copies
8
5
Touch [Job Reserve], and repeat steps 3 and 4 to make another reserve
job setting.
6
Copying on the reserve job will start automatically after completing the
warmup.
!
Detail
To stop printing, press [Stop]. See the following subsection.
The Job List Screen allows you to alter the output order of the reserve
jobs or to delete the job. See “To Check/Control Reserved Jobs” on
page 13-4 for details.
bizhub PRO 920
8-19
Before Making Copies
8
8.6
To Stop Scanning/Printing
Follow the procedure below to stop scanning or printing.
2
Note
This procedure is effective only for the job in progress.
To stop scanning for reserve job, stop the printing job first, then operate
for the reserve job.
!
Detail
To stop the reserved job on standby, operate on the Job List Screen. See
“To Check/Control Reserved Jobs” on page 13-4 for details.
To stop scanning or printing job
1
Press [Stop] while the current job is
in progress.
The current machine operation of the
selected job will be suspended, and
the popup menu will be displayed on
the Basic Screen.
8-20
bizhub PRO 920
Before Making Copies
2
8
Touch [Stop Job].
The data scanned for current job will be cleared to completely cancel
the job.
Do you want to complete the suspended job?
% Touch [Continue].
?
bizhub PRO 920
8-21
8
8-22
Before Making Copies
bizhub PRO 920
9
Basic Job Settings
Basic Job Settings
9
9
Basic Job Settings
9.1
Copy Conditions Incompatible with Basic Settings
User Zoom
Individual Zoom
Zoom
Preset Zoom
Zoom
x 1.0
Minimal
Auto Paper Select
Auto Zoom Select
Bypass Setting
Tray 3
Tray 4
Tray 1
Tray 2
Lighter
Standard Background
Removal
Darker
Pre 1
Pre 2
Auto
Standard
Darker
Lighter
Density
Copy Conditions
Incompatible with
Applications
Paper
Density,
Background
Basic
Lighter
Density
Density,
Background
Standard
Darker
Auto
Pre 1
X X X
Pre 2
Lighter
-- --
Background
Standard
Removal
Darker
-- --
X X X
Basic
Tray 1
Tray 2
Paper
Tray 3
Tray 4
Bypass Setting
Auto Paper Selects
Auto Zoom Select
X 1.0
Zoom
Minimal
Zoom
Preset Zoom
Individual Zoom
User Zoom
1>1
Simplex/ 1 > 2
Duplex
2>1
2>2
Separate Scan Mode Key
bizhub PRO 920
9-3
9-4
Simplex/
Duplex
-- -- -Text
Photo
Original
Combine Originals
Dot Matrix
Text/Photo
Tab Paper
Custom Size (w/Full Area)
Custom Size
Standard Size
Single Feed
Z-Fold
Mixed Original
Normal
Top Bind
Numbering
Direction
Combine
Pages
Basic
Right & Left Bind
Right
Upside Down
Left
Normal
Vertical
Horizontal
8 in 1
4 in 1
2 in 1
Separate Scan Mode Key
2>2
2>1
1>2
1>1
9
Basic Job Settings
Quality
--
-- --
-- --
N N
N N
*1
*1
bizhub PRO 920
Basic Job Settings
9
Copy Conditions
Incompatible with
Applications
Main Body
Insert Sheet
(Front Cover)
PI
Main Body
Insert Sheet
(Back Cover)
PI
Main Body
Insert Sheet
(Insert Paper)
PI
Chapters
Insert Image
OHP Interleave
Program Job
Neg/Pos Reverse
Book Copy
Size Manual Input
Size Auto Detect
2 Repeat
4 Repeat
Image
8 Repeat
Repeat
2 Repeat (R-Reverse)
2 Repeat (L-Reverse)
Shift
Reduce & Shift
Image Centring
Full Scan
No Rotate
Application
Lighter
Density
Density,
Background
Standard
Darker
Auto
Pre 1
Pre 2
Lighter
Background
Standard
Removal
Darker
Basic
Tray 1
Tray 2
Paper
Tray 3
Tray 4
Bypass Setting
Auto Paper Selects -- -- -- -- -- -- *2 -- -- -Auto Zoom Select X X X X X X *2 X X X
X 1.0
Zoom
-- -- -- -- -- -- -- --
X
Minimal
Zoom
X
X
X
Preset Zoom
Individual Zoom
User Zoom
1>1
Simplex/ 1 > 2
Duplex
2>1
2>2
Separate Scan Mode Key
bizhub PRO 920
--
-- -- -- X X X X X
X
P
P
P --
P
P
P --
--
---
--
--
9-5
-- --
-- --
9-6
Corner
2 Position
2-Hole
4-Hole
Position Setting
Right & Left Bind
Bind
Top Bind
Face Up
Face
Face Down
1 to N
Order
N to 1
Tandem
Half Fold
Fold & Staple
Letter Fold In
Letter Fold Out
Z-Fold
-- --
--
--
None:
Compatible
x:
Grayed out (no response when touched)
--:
Automatically released
Order
Direction
Application
Punch
Staple
Booklet Pagination
Adhesive Binding
Frame/Centre Erase
Non-image area erase
Built-in Stamp
Set Numbering
Page No.
Date,Time
Watermark
Watermark Numbering
Annotation
Image Overlay
Main Tray
Tray
Sub Tray
Sort
Group
Offset
9
Basic Job Settings
Finishing
Paper Fold
---
N N
N N
X
X
N:
Selectable but inefficient
P:
Operation cannot be started
*1:
Prohibited to start the job operation withz the message “Comination of this
modes unavailable” displayed.
*2:
Compatible only when Print Insertion is selected.
bizhub PRO 920
Basic Job Settings
9.2
9
Selecting Exposure Level and Adjusting Background
Whiteness
Automatic Exposure (AE) operates with the default settings. It detects the
density of the original image and automatically selects the appropriate exposure for the copy.
Select manual copy density to adjust exposure (density) when originals are
too light or too dark.
Adjust also the background whiteness when copying newspaper or recycled
paper originals.
Light original
Normal
Dark original
!
Detail
User Density programs the desired density selected among 16 exposure
levels divided from the darkest level to normal level, and normal level to
the lightest level, respectively.
This setting can be made by the administrator. For details, refer to “3
Density Setting>2 User Density Setting” on page 17-35.
To recall the programmed density, follow the procedure below.
Density Shift can shift each of nine density levels described below to
three levels lighter or three levels darker.
This function can be set by the administrator to use in combination with
each of four Original Type modes. For details, refer to “3 Density Setting>3 Photo Mode Density Setting” on page 17-38.
bizhub PRO 920
9-7
Basic Job Settings
9
!
Detail
Image Density Selection changes the range of the density level between
the darkest and lightest, so that users can obtain the optimum print result
according to the originals or print object without degrading image quality.
This setting can be made by the administrator, and will also be applied to
Density Shift for Enhance Mode. For details, refer to “3 Density Setting>4
Image Density Selection” on page 17-40.
Photo Mode Density Setting specifies the exposure level to be selected
by AE in Photo mode.
This setting can be made by the administrator. For details, refer to “3
Density Setting>4 Image Density Selection” on page 17-40.
To adjust exposure level and background whiteness
1
Touch [Density] on the Basic Screen.
The Density/Background adjustment menu will be displayed.
2
9-8
Touch [Darker] to darken, or [Lighter] to lighten the copy image.
–
–
–
Highlight the desired exposure level indicator.
Touch [Std.] to select the middle density level.
When resuming AE, touch [Auto].
–
To use preset density, touch [Pre 1] or [Pre 2].
bizhub PRO 920
Basic Job Settings
3
Select the desired background adjustment level.
–
4
9
Touch [Darker] or [Lighter] in the Background Removal area to
move the highlighted indication to the desired adjustment level. Or,
touch [Std.] to resume the standard level.
Touch [OK] on the Density/Background adjustment menu.
The Basic Screen will be restored, with the specified exposure level indicated on the [Density] key.
2
Note
If no other settings are required, you don’t have to touch [OK] to restore
the Basic Screen. Position originals, then press [Start] to start the printing
job.
bizhub PRO 920
9-9
Basic Job Settings
9
9.3
Paper Tray Setting
Each paper tray has been preset with paper size and condition by administrator.
Paper size
The administrator has been set each tray to detect the standard paper size
when loaded or exclusively to accommodate a specific size. (non-standard
size, wide size, or tabbed paper size)
The tray specified as standard size or tabbed paper size allows Auto Paper
Select, Auto Zoom, and Rotation to function, and the tray specified as wide
size allow Auto Zoom and Rotation.
To make a copy using other size than specified for main body trays and LCU,
use Multi-sheet bypass tray and specify the size for it.
Paper condition
The administrator specifies various paper conditions (paper type, colour,
hole-punch, both-sides adjustment) for each tray.
To make a copy using other size than specified for main body trays and LCU,
use Multi-sheet bypass tray and specify the size for it.
The following describes how to use Auto Paper Select and Auto Zoom functions, and how to specify special paper size/type for using Multi-sheet bypass tray.
!
Detail
Rotation can be deactivated manually. See “Copying without Image Rotation (No Rotate)” on page 11-67 for details.
9-10
bizhub PRO 920
Basic Job Settings
9
To Select Paper Size Automatically (Auto Paper Select)
Auto Paper Select detects the original size placed on the ADF or original
glass and automatically selects and feeds copy paper of the same size, or
selects an appropriate size according to the magnification ratio selected.
2
Note
If “Auto Paper Select” appears on the [Paper] key of the Basic Screen,
the function is already activated. You can start copying without performing the following procedure.
!
Detail
The original sizes to be detected from the ADF or original glass are previously determined. See “Using Original Glass” on page 3-11 for details.
The original sizes to be detected from the ADF or original glass can be
changed by the administrator. Refer to “Utility <Administrator Setting>”
on page 18-3.
The administrator can designate the tray or paper condition incompatible
with Auto Paper Select. Refer to “Paper Setting” on page 15-3.
The administrator can deactivate Auto Paper Select when original is set
in the ADF or on the original glass. Refer to “2 Each Function Setting” on
page 17-60.
bizhub PRO 920
9-11
Basic Job Settings
9
To set Auto Paper Select
0 Auto Paper Select is incompatible with Auto Zoom, however, Rotation is
available.
0 Auto Paper Select will not select the tray of the size specified as nonstandard or wide size.
1
Touch [Paper] on the Basic Screen.
The Paper setting menu will be displayed.
2
Touch [Auto Paper Select].
3
Touch [OK] on the Paper setting menu.
The Basic Screen will be restored.
Do you want to start copying immediately?
% You don’t have to touch [OK] to restore the Basic Screen. Position
original(s) directly, then press [Start].
?
4
Select additional copy conditions as desired.
5
Position original(s), then press [Start].
Scanned image will be printed on the paper size automatically selected.
If the appropriate copy paper is not loaded in any tray, no copying will
be performed, and a message will prompt you to load the appropriate
paper.
9-12
bizhub PRO 920
Basic Job Settings
9
2
Reminder
Auto Paper Select may not function for the tray of the selected size due
to the paper type/weight specified for that tray. Contact your administrator.
See the table below for the relation of original size, magnification ratio and
copy paper size.
0.250 - 0.433
0.434 - 0.500
0.501 - 0.578
0.579 - 0.612
0.613 - 0.707
0.708 - 0.816
0.817 - 0.866
0.867 - 1.000
1.001 - 1.154
1.155 - 1.156
1.157 - 1.224
1.225 - 1.414
1.415 - 1.634
1.635 - 1.731
1.732 - 2.000
2.001 - 4.000
bizhub PRO 920
Original size
B5
B5R
A3
B4
A4
A4R
B6R
B6R
B6R
B6R
A5R(A5)
B6R
B6R
B5R A5R(A5) A5
(B5) B5R (A5R)
A5
A4R(A4) (B5)
A5R(A5) (A5R)
A5R(A5)
A4R(A4) B5R
B5
B4
(B5) (B5R) B5R
B5
B4
A4R(A4) A4(A4R) (B5) (B5R)
A4(A4R)
A4R(A4)
B4
B4
A3
A3
A3
A3
A3
A3
Paper size
A5
A5R
B6R
B6R
A5
(A5R)
A5R(A5)
B5R
B5
(B5) (B5R)
A4R(A4) A4(A4R)
B4
A3
A3
B6R
0.250 - 0.433
0.434 - 0.500
0.501 - 0.578
0.579 - 0.612
B6R
0.613 - 0.707
0.708 - 0.816
0.817 - 0.866
0.867 - 1.000
A5R 1.001 - 1.154
(A5) 1.155 - 1.156
B5R 1.157 - 1.224
(B5) 1.225 - 1.414
A4R(A4) 1.415 - 1.634
1.635 - 1.731
B4
1.732 - 2.000
A3 2.001 - 4.000
Magnification
Magnification
Paper size
9-13
Basic Job Settings
9
To Specify Desired Paper Size (Auto Zoom)
When a paper size is specified on the touch panel, an appropriate reduction
or enlargement ratio will be selected automatically according to the original
size detected from the ADF or the original glass.
!
Detail
Auto Zoom can also be activated by touching [Auto Zoom] on the Zoom
setting menu. In this case, the paper size specified for the tray of top priority will be selected automatically. See “Changing Magnification Ratio”
on page 9-25 for details.
To copy in full size (×1.000) mode using selected paper size, see “Copying in Full Size Mode” on page 9-24.
To set Auto Zoom
0 Auto Zoom is incompatible with Auto Paper Select, however, Rotation is
available.
0 Auto Zoom will not function if selected tray is specified as non-standard
size.
1
Touch [Paper] on the Basic Screen.
The Paper setting menu will be displayed.
2
Touch a tray key on the menu to select the desired paper size.
3
Touch [OK] on the Paper setting menu.
The Basic Screen will be restored.
Do you want to start copying immediately?
% You don’t have to touch [OK] to restore the Basic Screen. Position
original(s) directly, then press [Start].
?
9-14
bizhub PRO 920
Basic Job Settings
4
9
Position original(s), then press [Start].
Scanned image will be printed on the specified paper size in the magnification ratio automatically selected.
See the table below for the original size, copy paper size, and magnification
ratio automatically selected.
Paper size
Original size
A3
B4
A4R
A4
B5R
B5
A5R
A5
B6R
A3
1.000
1.154
1.414
1.000
1.632
1.156
2.000
1.414
2.308
B4
0.865
1.000
1.224
0.865
1.412
1.000
1.733
1.224
2.000
A4R
0.707
0.816
1.000
0.707
1.154
0.817
1.414
1.000
1.632
A4
0.500
0.577
0.707
1.000
0.817
1.154
1.000
1.414
1.154
B5R
0.612
0.706
0.865
0.613
1.000
0.708
1.224
0.867
1.412
B5
0.433
0.500
0.613
0.865
0.708
1.000
0.867
1.224
1.000
A5R
0.498
0.576
0.705
0.498
0.813
0.576
1.000
0.705
1.154
A5
0.352
0.407
0.498
0.705
0.576
0.813
0.705
1.000
0.813
B6R
0.431
0.498
0.610
0.431
0.703
0.498
0.865
0.610
1.000
bizhub PRO 920
9-15
Basic Job Settings
9
Copying Using Special Paper (Bypass Tray Setting)
Use the Multi-sheet bypass tray to copy using the special paper type or size.
The following settings are provided:
- Paper type: - (blank), Normal, Thick, Thin Paper, OHP Paper, Trace, User
- Original Size Detection: Sets the machine to detect a specific paper size
instead of the size normally to be detected; namely, 5.5"×8.5" instead of
A5, 8.5"×11"R instead of A4R, 8"×13"/8.12"×13.2"/8.25"×13"/8.5"×13"
instead of 8.5"×14", and B6R/5.5"×8.5"R instead of A5R.
- Paper size: Standard, Custom, Wide Paper, Tab Paper
!
Detail
Special paper can also be loaded in the main body tray or in the LCU to
use on a regular basis. Refer to “Paper Setting” on page 15-3.
For specifications of special paper to be loaded in the Multi-sheet bypass
tray, see “Special Paper in Multi-Sheet Bypass Tray” on page 3-10.
For details on loading paper in the Multi-sheet bypass tray, see “Loading
Paper in Multi-Sheet Bypass Tray” on page 4-7.
2
Reminder
When setting wide size, be sure to specify the precise dimensions of paper to be used. The dimensions of the wide size selected on the Wide
Size Paper Screen are not correctly set in the initial setting.
9-16
bizhub PRO 920
Basic Job Settings
9
To use Multi-sheet bypass tray
1
Open the Multi-sheet bypass tray,
and load the copy paper.
2
Touch [Paper] on the Basic Screen.
The Paper setting menu will be displayed.
3
Touch the bypass tray key.
The [Bypass Setting] key will appear on the menu.
bizhub PRO 920
9-17
Basic Job Settings
9
4
Touch [Bypass Setting].
Change Bypass Tray Setting Screen will be displayed.
5
Specify the paper type.
–
9-18
Touch and highlight the desired paper type key from the seven
types provided on the screen.
bizhub PRO 920
Basic Job Settings
6
9
Specify the paper size.
–
–
bizhub PRO 920
Selecting [Standard]:
Normally this key is selected. Proceed to the next step.
To set Original Size Detection:
Touch [Original Size Detection] to display the Original Size Detection Screen.
Touch [Next] or [Back] to display the desired size key, then select
the size to be detected as a standard size.
Touch [OK] to complete the setting and return to the Change Bypass Setting Screen.
9-19
Basic Job Settings
9
–
To specify a custom size:
Touch [Custom] to display the Custom Size Setting Screen.
Touch [X] or [Y] to highlight it, then use the control panel keypad to
enter the desired horizontal or vertical size, respectively. Entered
size should fall within 100 mm × 148 mm ~ 314 mm × 460 mm.
Touch [Lead Edge], [Rear Edge], or [Centre] to specify the desired
image position.
When all settings are completed, touch [OK] to return to the Change
Bypass Tray Setting Screen.
–
To specify a wide size:
Touch [Wide Paper] to display the Wide Size Paper Setting Screen.
Touch the desired wide size to highlight it, then touch [Lead Edge],
[Rear Edge], or [Centre] to specify the desired image position.
Touch [Input Size] to display the Size Input Screen.
Touch [X] to highlight it, then use the control panel keypad to enter
the desired horizontal size. Entered size should fall within the range
from the horizontal size of the standard size corresponding to the
selected wide size, to a maximum of 460 mm.
9-20
bizhub PRO 920
Basic Job Settings
9
Similarly, touch [Y] to highlight it, then enter the desired vertical
size. Entered size should fall within the range from the vertical size
of the standard size corresponding to the selected wide size, to a
maximum of 314 mm.
When all settings are completed, touch [OK] to return to the Change
Bypass Tray Setting Screen.
bizhub PRO 920
9-21
Basic Job Settings
9
–
To specify a tabbed paper size:
Touch [Tab Paper] to display the Tab Paper Setting Screen, then
touch the desired tabbed paper size to highlight it.
Touch [Number of Tabs], then use the control panel keypad to enter
the number of tabs. Setting range is from 1 to 15.
If setting the custom tabbed paper size, touch [Input Size] to display the Size Setting Screen.
Touch [X]/[Y]/[Z] which indicates horizontal/vertical/index size to
highlight it, then enter the desired size for each. Entered size should
fall within 100 mm × 148 mm ~ 314 mm × 460 mm, and 0 ~ 99 mm
for tab extension.
When all settings are completed, touch [OK] to return to the Change
Bypass Tray Setting Screen.
9-22
bizhub PRO 920
Basic Job Settings
7
9
Touch [OK] to restore the Paper setting menu.
The specified paper condition will be displayed on the bypass tray key.
8
Touch [OK] on the Paper setting menu.
The Basic Screen will be restored.
Do you want to start copying immediately?
% You don’t have to touch [OK] to restore the Basic Screen. Position
original(s) directly, then press [Start].
?
9
Select additional copy conditions, as required.
“Auto” will be displayed on the Zoom key to show its activity.
10
Position original(s), then press [Start].
!
Detail
For details of Auto Zoom function, see “To Specify Desired Paper Size
(Auto Zoom)” on page 9-14.
To copy the original of the same size as that specified in the Original Size
Detection setting, Original Size Setting is also required. See “Copying
Non-Standard Size Originals (Custom Size / Tab Paper)” on page 10-21
for details.
To copy the image on the tab part of the original onto the tabbed copy
paper, Original Size Setting is also required. See page 10-21 for details.
To copy onto OHP transparencies, Application setting is required. See
“Copying onto Transparent Films (OHP Interleave)” on page 11-22 for
details.
bizhub PRO 920
9-23
Basic Job Settings
9
9.4
Zoom
In the initial settings on the Basic Screen, the magnification is automatically
set at “×1.000” (full size).
This section describes how to change the magnification ratio.
!
Detail
The initial settings may be altered by the administrator. For details, refer
to “3 Copier Setting” on page 17-54
Copying in Full Size Mode
Follow this procedure to make a 100% copy of the original image, irrespective of the selected paper size.
1
Close the ADF securely, then press [Reset].
The initial settings are restored. Check that “×1.000” is displayed on
the [Zoom] key to indicate that the full size mode is selected.
2
Select additional copy conditions, as desired.
Specifying paper size will release 1.000 magnification and set Auto
Zoom automatically. In this case, touch [Zoom] on the Basic Screen to
display the Zoom setting menu, then touch [×1.0] to highlight it.
Do you want to start copying immediately?
% You don’t have to touch [OK] to restore the Basic Screen. Position
original(s) directly, then press [Start].
?
9-24
bizhub PRO 920
Basic Job Settings
9
Changing Magnification Ratio
The following six modes are provided:
- Enlarge/Reduce: Select from the eight ratios (0.500, 0.707, 0.816, 0.866,
1.154, 1.224, 1.414, 2.000) provided on the screen.
- XY Zoom (proportional): Specify 0.250 to 4.000 in 0.001 (0.1%) increments
- XY Zoom (Individual): Vertical and horizontal dimensions can be specified
individually from 0.250 to 4.000 in 0.001 (0.1%) increments.
- Preset Zoom: Select from the three ratios previously programmed.
- Minimal: Set reduction ratio slightly smaller than full size (0.930) in order
to prevent image loss when copying original image that reaches the page
margin.
- Auto Zoom: Automatically set appropriate magnification ratio according
to the original size and selected paper size.
!
Detail
For details on the preset zoom ratio setting, refer to “4 Preset Zoom” on
page 17-42.
To set zoom mode
1
Touch [Zoom] on the Basic Screen.
The Zoom setting menu will be displayed.
bizhub PRO 920
9-25
Basic Job Settings
9
2
9-26
Specify the desired magnification ratio.
–
Enlarge/Reduce:
Touch the desired key in the Enlarge/Reduce area.
–
Manual Zoom (proportional):
Touch [–] or [+] to change the magnification ratio in 0.001 (0.1%)
steps.
Or, touch [XY Zoom] to display the XY Zoom Screen, touch and
highlight the key in “Zoom with Constant X and Y Ratio” area, then
use the control panel keypad to enter the desired magnification ratio. The entered ratio will be displayed on the touch panel.
Touch [OK] to return to the Zoom setting menu.
bizhub PRO 920
Basic Job Settings
9
–
Manual Zoom (individual):
Touch [XY Zoom] to display the XY Zoom Screen. Touch and highlight [X] or [Y] in “Set Individual Zoom” area, then use the control
panel keypad to enter the desired magnification ratio. The entered
ratio will be displayed on the touch panel.
Touch [OK] to return to the Zoom setting menu.
–
Preset Zoom:
Touch the desired preset zoom key under the Set Zoom indication.
bizhub PRO 920
9-27
Basic Job Settings
9
–
Minimal:
Touch [Minimal] to highlight it.
–
Auto Zoom:
Touch [Auto Zoom] to highlight it. The machine will automatically
select the appropriate magnification ratio for paper size loaded in
the tray of top priority.
?
%
Did you enter a wrong number using keypad?
Continue by entering the correct number.
Do you want to restore the previous setting?
% Touch [Cancel].
?
9-28
bizhub PRO 920
Basic Job Settings
3
9
Touch [OK] on the Zoom setting menu.
The Basic Screen will be restored.
Do you want to start copying immediately?
% You don’t have to touch [OK] to restore the Basic Screen. Position
original(s) directly, then press [Start].
?
!
Detail
To copy on paper loaded in any tray but the one of top priority using Auto
Zoom function, see “To Specify Desired Paper Size (Auto Zoom)” on
page 9-14.
bizhub PRO 920
9-29
Basic Job Settings
9
9.5
Simplex/Duplex
The Basic Screen is initially set to 1-1 copy mode to make single-sided copies from single-sided originals.
Follow the procedure below to make double-sided copies from the originals
scanned from the document feeder or from the original glass, and also to
make single-sided copies from double-sided originals.
!
Detail
The machine is set to match the original binding direction and copy binding direction automatically. For details, refer to “2 Each Function Setting”
on page 17-60.
If copy result is not as expected, this setting might be altered by the administrator. In this case, specify the copy binding direction manually. See
“Setting Binding Direction for Duplex Copies” on page 12-7 for details.
Making Double-Sided Copies Using ADF
Select the copy mode according to the original type (single-sided or doublesided).
0 Position originals according to the original direction icon on the Basic
Screen.
0 The normal double-sided copies (having the same edge as page top) can
be made from double-sided originals printed upside down on the back
pages.
2-2 Copying
1-2 Copying
9-30
bizhub PRO 920
Basic Job Settings
1
9
Touch [Simplex/Duplex] on the Basic Screen.
The Simplex/Duplex setting menu will be displayed.
2
Touch [1-2] or [2-2] to highlight it.
3
Touch [OK] on the Simplex/Duplex setting menu.
The Basic Screen will be restored.
?
%
4
Do you want to start copying immediately?
You don’t have to touch [OK] to restore the Basic Screen. Position
original(s) directly, then press [Start].
Specify the original set direction and binding direction.
–
Touch [Combine Originals] to display the Combine Originals setting
menu.
bizhub PRO 920
9-31
Basic Job Settings
9
–
Touch [Original Direction] to display the Original Direction Screen,
then touch the desired original direction key to highlight it. Touch
[OK] to return to the Combine Originals setting menu.
–
To make normal double-sided copies (having the same edge as
page top) from double-sided originals printed upside down on the
back pages, touch [Bind] to display the Original Binding Direction
Screen, then touch [Top Bind].
Touch [OK] to return to the Combine Originals setting menu.
5
Select additional copy conditions, as desired.
6
Position originals FACE UP in the document feeder.
–
7
9-32
Set originals according to the original direction icon displayed on
the Basic Screen.
Press [Start] to print.
bizhub PRO 920
Basic Job Settings
9
Making Double-Sided Copies Using Original Glass
Use the original glass to scan originals unsuitable for the document feeder.
0 Use the Separate Scan mode.
0 Position originals according to the original direction icon on the Basic
Screen.
0 If Book Copy, Non-Image Area Erase, Size Auto Detect mode of Image
Repeat, or Image Centring is selected, keep the ADF open throughout the
scanning procedure.
1
Specify the original set direction and binding direction.
–
Touch [Combine Originals] to display the Combine Originals setting
menu.
–
Touch [Original Direction] to display the Original Direction Screen,
then touch the desired original direction key to highlight it. Touch
[OK] to return to the Combine Originals setting menu.
bizhub PRO 920
9-33
Basic Job Settings
9
2
Position original FACE DOWN on the original glass.
–
3
Open the ADF. Position original FACE DOWN according to the original direction icon displayed on the Basic Screen, then close the
ADF.
Be sure to start from the first page.
Touch [Simplex/Duplex] on the Basic Screen.
The Simplex/Duplex setting menu will be displayed.
4
Touch [1-2] to highlight it, then touch [OK].
The Basic Screen will be restored, with the [Separate Scan] key automatically highlighted.
5
Select additional copy conditions, as desired.
6
Press [Start] to scan.
The front side image of the double-sided copy will be scanned into
memory.
Do you want to stop scanning?
% Press [Stop]. The scanned image will be cleared.
?
7
9-34
Replace the original on the original glass with the back side image original, then press [Start].
bizhub PRO 920
Basic Job Settings
9
8
When all originals are scanned, touch [Complete Scan] to exit the Separate Scan mode.
9
Press [Start] to print.
All the data in memory will be output.
2
Reminder
DO NOT press [Reset] with the original already set on the original glass
and duplex copy mode selected, otherwise the Separate Scan mode will
be released to disable the copier from scanning the original placed on the
original glass.
!
Detail
For the information on unsuitable ADF originals, see “Using Original
Glass” on page 3-11.
bizhub PRO 920
9-35
Basic Job Settings
9
Making Single-Sided Copies from Double-Sided Originals
Use ADF and select 2-1 copy mode to make single-sided copies from double-sided originals.
0 Position originals according to the original direction icon on the Basic
Screen.
0 The normal single-sided copies (having the same edge as page top) can
be made from double-sided originals printed upside down on the back
pages.
2-1 Copying
1
Touch [Simplex/Duplex] on the Basic Screen.
The Simplex/Duplex setting menu will be displayed.
2
Touch [2-1] to highlight it.
3
Touch [OK] on the Simplex/Duplex setting menu.
The Basic Screen will be restored.
Do you want to start copying immediately?
% You don’t have to touch [OK] to restore the Basic Screen. Position
original(s) directly, then press [Start].
?
9-36
bizhub PRO 920
Basic Job Settings
4
9
Specify the original set direction and binding direction.
–
Touch [Combine Originals] to display the Combine Originals setting
menu.
–
Touch [Original Direction] to display the Original Direction Screen,
then touch the desired original direction key to highlight it. Touch
[OK] to return to the Combine Originals setting menu.
bizhub PRO 920
9-37
Basic Job Settings
9
–
To make normal single-sided copies (having the same edge as
page top) from double-sided originals printed upside down on the
back pages, touch [Bind] to display the Original Binding Direction
Screen, then touch [Top Bind].
Touch [OK] to return to the Combine Originals setting menu.
5
Select additional copy conditions, as desired.
6
Position originals FACE UP in the document feeder.
–
7
9-38
Set originals according to the original direction icon displayed on
the Basic Screen.
Press [Start] to print.
bizhub PRO 920
Basic Job Settings
9.6
9
Separate Scan Mode
Use Separate Scan mode to scan more than 100 originals into memory then
to start a continuous printing job, or to combine images scanned from ADF
and original glass.
To set Separate Scan mode
0 Separate Scan mode is necessarily used in the following functions: Making double-sided copies using original glass, Insert Image, Book Copy,
Program Job, Storing image in Program Image Overlay
1
Make copying selections, as desired.
2
Touch [Separate Scan] on the Basic Screen to highlight it.
The Separate Scan mode will be activated. Separate Scan may already
be highlighted depending on the selected copy conditions.
3
Position original(s), then press [Start].
–
Using original glass:
Place original FACE DOWN. Start scanning from the first page.
Repeat this step for all originals.
– Using ADF:
Position originals FACE UP.
If the number of originals exceeds 100, divide them into blocks not
exceeding 100 sheets and load them from the block with the first
page.
When scanning job is started, the Basic Screen will slightly change to
provide some other information.
bizhub PRO 920
9-39
Basic Job Settings
9
4
Setting change is available during scanning procedure, if required.
–
5
Touch [Change] on the Basic Screen to restore the normal Basic
Screen, then change selections or print quantity, as desired.
To resume scanning, position original(s), then press [Start].
Memory indicator at the upper right corner of the touch panel allows
you to check the remaining memory.
Do you want to stop scanning?
% Press [Stop]. All the scanned image will be cleared.
?
9-40
bizhub PRO 920
Basic Job Settings
9
6
When scanning is completed, touch [Complete Scan] to exit the Separate Scan mode.
7
Press [Start].
All the data in memory will be output.
!
Detail
Press [Stop] to suspend the printing job. For details, see “To Stop Scanning/Printing” on page 8-20.
bizhub PRO 920
9-41
Basic Job Settings
9
9.7
Reserve Job Setting
The Reserve function allows you to set up a new job while a current job is in
process. When the current job is finished, the Reserve job starts printing immediately.
To set reserve job
0 Job settings: Max. 100
0 The reserve job setting will be available after the copier starts to scan the
current job, and also available anytime while printing the current job.
1
Press [Start] to scan/print the current job.
The Basic Screen displays the message “Touch [Job Reserve] to set
reserve Job.”
2
Touch [Job Reserve].
The normal Basic Screen will be restored.
9-42
bizhub PRO 920
Basic Job Settings
3
9
Select copy conditions for the reserve job as desired, position original(s), then press [Start].
–
4
Repeat steps 1 and 2. Up to 100 reserve jobs can be entered.
Printing of the reserve job will automatically start.
!
Detail
To check and operate the reserve jobs, touch [Job List] to display the Job
List Screen. See “To Check/Control Reserved Jobs” on page 13-4 for details.
bizhub PRO 920
9-43
9
9-44
Basic Job Settings
bizhub PRO 920
10
Original Setting
Original Setting
10
10
Original Setting
10.1
Copy Conditions Incompatible with Original Settings
Combine Originals
2 in 1
Combine
4 in 1
Pages
8 in 1
Numbering Horizontal
Direction Vertical
User Zoom
Individual Zoom
Zoom
Preset Zoom
Zoom
x 1.0
Minimal
Auto Paper Select
Auto Zoom Select
Bypass Setting
Tray 3
Tray 4
Tray 1
Tray 2
Lighter
Standard Background
Removal
Darker
Pre 1
Pre 2
Auto
Standard
Darker
Lighter
Density
Copy Conditions
Incompatible with
Applications
Paper
Density,
Background
Basic
X
X
X
Normal
Left
Upside Down
Right & Left Bind
Top Bind
Original
Normal
Mixed Origina
Z-Fold
Single Feed
Quality
Custom Size
Custom Size
(w/Full Area)
X X
Tab Paper
X X
Text/Photo
Dot Matrix
Photo
Text
bizhub PRO 920
10-3
10-4
*1 *1
Simplex/
Duplex
X
X
X
X
X
X
X
X
X
X
X
X
X
X
X
X
X
X
X
X
X
X
X
X
X
X
X
X
X
X
X
X
X
X
X
Text
Photo
Original
Combine Originals
Dot Matrix
Text/Photo
Custom Size
Standard Size
Single Feed
Z-Fold
Tab Paper
X
Custom Size (w/Full Area)
Mixed Original
Normal
Top Bind
Numbering
Direction
Combine
Pages
Basic
Right & Left Bind
Right
Upside Down
Left
Normal
Vertical
Horizontal
8 in 1
4 in 1
2 in 1
Separate Scan Mode Key
2>2
2>1
1>2
1>1
10
Original Setting
Quality
bizhub PRO 920
Original Setting
10
Copy Conditions
Incompatible with
Applications
*3
*3
*4
X X X X
X X X X X X X X
X
*3
*3
*4
X X X X
X X X X X X X X
X
*3
*3
*4
X X X X
X X X X X X X X
X
Normal
Mixed Original *3
*3
*4
X X X X
X X X X X X X X
X X
X X X X X X X
X X
X
2 in 1
Combine
4 in 1
Pages
8 in 1
Numbering Horizontal
Direction Vertical
Combine Originals
Main Body
Insert Sheet
(Front Cover)
PI
Main Body
Insert Sheet
(Back Cover)
PI
Main Body
Insert Sheet
(Insert Paper)
PI
Chapters
Insert Image
OHP Interleave
Program Job
Neg/Pos Reverse
Book Copy
Size Manual Input
Size Auto Detect
2 Repeat
4 Repeat
Image
8 Repeat
Repeat
2 Repeat (R-Reverse)
2 Repeat (L-Reverse)
Shift
Reduce & Shift
Image Centring
Full Scan
No Rotate
Application
Normal
Left
Upside Down
Right & Left Bind
Top Bind
Original
Z-Fold
Single Feed
*3
*3
*4
X X
*3
*3
*4
X X X
X
Custom Size
Custom Size
(w/Full Area)
Quality
Tab Paper
X
X X
X
X
Text/Photo
Dot Matrix
Photo
Text
bizhub PRO 920
10-5
Original Setting
10
X X
X
X
X
X X
X
X
X
X X
X
X
X
X
Order
Direction
Punch
Paper Fold
Corner
2 Position
2-Hole
4-Hole
Position Setting
Right & Left Bind
Bind
Top Bind
Face Up
Face
Face Down
1 to N
Order
N to 1
Tandem
Half Fold
Fold & Staple
Letter Fold In
Letter Fold Out
Z-Fold
Staple
Finishing
Booklet Pagination
Adhesive Binding
Frame/Centre Erase
Non-image area erase
Built-in Stamp
Set Numbering
Page No.
Date,Time
Watermark
Watermark Numbering
Annotation
Image Overlay
Main Tray
Tray
Sub Tray
Sort
Group
Offset
Application
X
X X
X
X
X X X X
X
10-6
X X
X
X X
X X
X
X
X
None:
Compatible
x:
Grayed out (no response when touched)
*1:
Prohibited to start the job operation withz the message “Comination of this
modes unavailable” displayed.
*2:
Application function previously selected will be released with the key grayed
out.
*3:
PI setting menu will appear when any cover mode key is selected. Selecting
main body tray will be unavailable.
*4:
All main body tray keys will be grayed out on the setting screen for in sertin
sheets.
bizhub PRO 920
Original Setting
10.2
10
Combine Originals
Lay Out Several Pages onto One Sheet (Combine Pages)
Use this function to lay out and copy a fixed number (2, 4, or 8) of pages onto
one sheet of copy paper (2 in 1, 4 in 1, or 8 in 1).
0 Use ADF.
0 Auto Zoom is automatically selected. Normally the magnification ratio is
determined according to the paper size fixed for the tray of top priority.
Original
1
2 in 1
4 in 1
8 in 1
Touch [Combine Originals] on the Basic Screen.
The Combine Originals setting menu will be displayed.
2
Touch [2 in 1], [4 in 1] or [8 in 1] under Combine Pages to highlight it.
–
Selecting 4 in 1 or 8 in 1, the menu will additionally display two numbering direction keys.
Touch either [Horizontal] or [Vertical] to specify numbering order of
original layout.
Auto Zoom is automatically selected to make a copy using paper size
loaded in the tray of top priority.
bizhub PRO 920
10-7
Original Setting
10
?
%
3
4
10-8
Do you want to change the paper size?
Select the desired paper size from the Basic Screen.
Specify the original set direction.
–
Touch [Original Direction] on the Combine Originals setting menu to
display the Original Direction Screen. Touch the desired original direction key to highlight it, then touch [OK].
?
%
Do you want to select additional copy conditions?
Touch [Basic] or any other tab key to continue job settings.
Enter the desired print quantity, position originals FACE UP in the document feeder, then press [Start].
bizhub PRO 920
Original Setting
10.3
10
Original
Specifying Original Direction (Original Direction)
Specify the direction of the originals placed on ADF or original glass.
This setting is required to obtain copy results as expected when making double-sided copies with binding position specified or when staple position is
specified.
1
Touch [Combine Originals] on the Basic Screen.
The Combine Originals setting menu will be displayed.
2
Touch [Original Direction].
The Original Direction Screen will be displayed.
3
Touch the desired original direction key to highlight it.
bizhub PRO 920
10-9
Original Setting
10
4
Touch [OK] on the Original Direction Screen.
The Combine Originals setting menu will be restored.
Do you want to restore the previous setting?
% Touch [Cancel].
?
?
%
5
Do you want to select additional copy conditions?
Touch [Basic] or any other tab key to continue job settings.
Enter the desired print quantity, position original(s), then press [Start].
2
Note
Specified original direction will be displayed as an icon on the Basic
Screen when restored.
!
Detail
See “Setting Binding Direction for Duplex Copies” on page 12-7 and “Selecting Binding Direction of Originals (Bind)” on page 10-11 for reference.
10-10
bizhub PRO 920
Original Setting
10
Selecting Binding Direction of Originals (Bind)
When copying double-sided originals in 2-1 or 2-2 mode, the copied sets will
be exactly the same in page arrangement as the originals.
Use this function to obtain the single- or double-sided copies having the
same edge as page top, from double-sided originals printed upside down on
the reverse side.
0 Top Bind is available only in 2-1 or 2-2 copy mode.
0 If the machine restores the initial setting, this function will be reset to
Right & Left Bind.
Single-sided copies
Double-sided originals
Double-sided copies
1
Touch [Combine Originals] on the Basic Screen.
The Combine Originals setting menu will be displayed.
2
Touch [Bind].
The Binding Direction Screen will be displayed.
bizhub PRO 920
10-11
Original Setting
10
3
Touch [Top Bind] to highlight it.
4
Touch [OK] on the Binding Direction Screen.
The Combine Originals setting menu will be restored.
?
%
Do you want to restore the previous setting?
Touch [Cancel].
Do you want to select additional copy conditions?
% Touch [Basic] or any other tab key to continue job settings.
?
5
Enter the desired print quantity, position originals FACE UP in the document feeder, then press [Start].
2
Note
Specified binding direction will be displayed as an icon on the Basic
Screen when restored.
!
Detail
See “Setting Binding Direction for Duplex Copies” on page 12-7 to make
double-sided copies upside down on the reverse side, using the originals
having the same edge as page top.
The machine is set to match the original binding direction and copy binding direction automatically. For details, refer to “2 Each Function Setting”
on page 17-60.
10-12
bizhub PRO 920
Original Setting
10
Copying Mixed Size Originals (Mixed Original)
Use the Mixed original mode with the document feeder to copy mixed size
originals.
Each original in the mixed set will be copied to paper of the same size (Auto
Paper Select mode) or to paper of desired size with appropriate ratio automatically selected (Auto Zoom mode).
0 Use ADF.
0 Combination of original sizes to be mixed depends on the width of the
ADF original guides. See “ADF Originals” on page 3-12 for details.
Auto Paper Select mode
Mixed size originals
1
Auto Zoom mode
Touch [Combine Originals] on the Basic Screen.
The Combine Originals setting menu will be displayed.
2
Touch [Special Original].
The Special Original Screen will be displayed.
bizhub PRO 920
10-13
Original Setting
10
3
Touch [Mixed Original] to highlight it.
4
Touch [OK] on the Special Original Screen.
The Combine Originals setting menu will be restored.
Do you want to restore the previous setting?
% Touch [Cancel].
?
Do you want to select additional copy conditions?
% Touch [Basic] or any other tab key to continue job settings.
?
5
Enter the desired print quantity, position originals FACE UP in the document feeder, then press [Start].
–
Arrange the mixed size originals aligning the left and rear sides.
!
Detail
See “To position originals in Mixed Original mode” on page 8-12 for details on positioning mixed originals.
10-14
bizhub PRO 920
Original Setting
10
Copying Z-Folded Originals (Z-Folded)
Use the Z-Folded mode with the document feeder to copy Z-folded originals.
Otherwise, the size detection sensor of the ADF may function incorrectly.
0 Use ADF.
0 This mode requires more scanning time to detect the original size.
Z-folded original
1
Touch [Combine Originals] on the Basic Screen.
The Combine Originals setting menu will be displayed.
2
Touch [Special Original].
The Special Original Screen will be displayed.
bizhub PRO 920
10-15
Original Setting
10
3
Touch [Z-Folded] to highlight it.
4
Touch [OK] on the Special Original Screen.
The Combine Originals setting menu will be restored.
Do you want to restore the previous setting?
% Touch [Cancel].
?
Do you want to select additional copy conditions?
% Touch [Basic] or any other tab key to continue job settings.
?
5
Enter the desired print quantity, position originals FACE UP in the document feeder, then press [Start].
–
Normal originals can be set together with the Z-folded original.
!
Detail
See “To position originals in Z-Folded mode” on page 8-14 for details on
positioning Z-folded originals.
10-16
bizhub PRO 920
Original Setting
10
Feeding Single Original from ADF (Single Feed)
Use the Single Feed mode to copy thick originals or paste-ups to be fed one
sheet at a time in the document feeder.
Copying usually starts after the [Start] key is pressed, however, the administrator can set the machine to automatically feed the original one second after
placing the original in the document feeder (Auto Start). This function is useful when copying more than one sheet of original.
Procedure in normal Single Feed mode
0 Use ADF. Set one sheet at a time.
0 Auto Start mode is different from the normal Single Feed mode in procedure. Contact your administrator to check the current setting.
1
Touch [Combine Originals] on the Basic Screen.
The Combine Originals setting menu will be displayed.
2
Touch [Special Original].
The Special Original Screen will be displayed.
bizhub PRO 920
10-17
Original Setting
10
3
Touch [Single Feed] to highlight it.
4
Touch [OK] on the Special Original Screen.
The Combine Originals setting menu will be restored.
Do you want to restore the previous setting?
% Touch [Cancel].
?
Do you want to select additional copy conditions?
% Touch [Basic] or any other tab key to continue job settings.
?
5
Position Single Feed original FACE
UP in the document feeder.
–
6
Position a sheet of original in the
document feeder, then align the
paper guides to the original.
Press [Start].
The original will be fed and scanned, then the printing job will start in
succession when the machine becomes ready for output.
2
Reminder
Never set more than one thick original or paste up, otherwise machine
trouble may be caused.
10-18
bizhub PRO 920
Original Setting
10
Procedure in Auto Start mode
0 Use ADF. Set one sheet at a time.
1
Touch [Combine Originals] on the Basic Screen.
The Combine Originals setting menu will be displayed.
2
Touch [Special Original].
The Special Original Screen will be displayed.
3
Touch [Single Feed] to highlight it.
4
Touch [OK] on the Special Original Screen.
The Combine Originals setting menu will be restored.
Do you want to restore the previous setting?
% Touch [Cancel].
?
Do you want to select additional copy conditions?
% Touch [Basic] or any other tab key to continue job settings.
?
bizhub PRO 920
10-19
Original Setting
10
5
Touch [Basic] to return to the Basic Screen, then touch [Separate
Scan].
6
Adjust the ADF paper guides.
–
7
Without setting the original, adjust the ADF paper guides according to the original size to be
set.
Position a sheet of original FACE UP
in the document feeder.
The set original will be automatically
fed and scanned.
8
Touch [Complete Scan] to deselect it and exit the Separate Scan
mode, then press [Start].
The printing job will start.
2
Reminder
Never set more than one original, otherwise machine trouble may be
caused.
10-20
bizhub PRO 920
Original Setting
10
Copying Non-Standard Size Originals (Custom Size / Tab Paper)
The copier usually detects the standard size of originals fed through ADF or
positioned on the original glass (Standard Size mode).
Use Custom Size mode to specify the scanning area manually for copying or
printing special size originals. Use Tab Paper mode to copy a tabbed original, including the image of the tab part, onto tabbed copy paper.
0 Use Full Area on the Custom Size Screen for small originals that cannot
be copied in Standard Size mode.
0 Tab extension width for tabbed originals: 12.5 mm or less
Tabbed copy paper size and tab extension width can be specified in paper type/size setting.
1
Touch [Combine Originals] on the Basic Screen.
The Combine Originals setting menu will be displayed.
2
Touch [Original Size].
The Original Size Screen will be displayed.
3
Touch [Custom Size] or [Tab Paper].
The Custom Size Screen or Tab Paper Screen will be displayed.
bizhub PRO 920
10-21
Original Setting
10
4
Touch the desired size key.
5
Touch [OK].
The Original Size Screen will be restored.
6
Touch [OK] on the Original Size Screen.
The Combine Originals setting menu will be restored.
Do you want to restore the previous setting?
% Touch [Cancel].
?
?
%
7
10-22
Do you want to select additional copy conditions?
Touch [Basic] or any other tab key to continue job settings.
Enter the desired print quantity, position original(s), then press [Start].
bizhub PRO 920
Original Setting
10.4
10
Original Image Type
Making Copy Quality Closer to Originals (Original Type)
Use this function to enhance the reproducibility of half tones so that the copy
quality more closely matches to that of the original.
Four modes of Original Type:
- Text: Use the Text mode when copying a text original. In this mode, text
is improved in comparison to using the general mode.
- Text/Photo: Use this mode to copy an original including both text and
photo image.
- Photo: Use the Photo mode to reproduce a half-tone photo image. The
copy will closely represent the half-tones of the original image.
- Dot Matrix: Select Dot Matrix to darken lightly printed images (e.g., pencil) without changing background exposure.
!
Detail
Density Shift can shift each of nine density levels described on the preceding pages to three levels lighter or three levels darker.
This function can be set by the administrator to use in combination with
each of four Original Type modes. (Utility Screen>2 Function Setting>3
Density Setting>1 Density Shift for Enhance Mode)
For details, refer to “3 Density Setting>1 Density Shift for Original Image
Type” on page 17-33.
Original
Text/Photo
Photo
Original
Original
bizhub PRO 920
Text/Photo
Text/Photo Dot Matrix
Text
10-23
Original Setting
10
To specify Original Type
1
Touch [Orig. Image Type] on the Basic Screen.
The Special Image popup menu will be displayed.
2
Touch the desired mode key to highlight it.
3
Enter the desired print quantity, position original(s), then press [Start].
Do you want to select additional copy conditions?
% Touch [Basic] or any other tab key to continue job settings.
?
10-24
bizhub PRO 920
11
Applications
Applications
11
11
Applications
11.1
Copy Conditions Incompatible with Applications
X
Insert Sheet Main Body
(Back Cover) PI
Insert Sheet Main Body
(Insert Paper) PI
X
Chapters
*1
Insert Image
OHP Interleave
X
User Zoom
Individual Zoom
Preset Zoom
Zoom
Zoom
Insert Sheet Main Body
(Front Cover) PI
x 1.0
Minimal
Auto Paper Select
Auto Zoom Select
Bypass Setting
Tray 3
Tray 4
Tray 1
Tray 2
Lighter
Background
Standard
Removal
Darker
Pre 1
Pre 2
Auto
Standard
Darker
Lighter
Density
Copy Conditions
Incompatible with
Applications
Paper
Density,
Background
Basic
X
Program Job
Application
Neg/Pos Reverse
Book Copy
Size Manual Input
X X
Size Auto Detect
X X
X
2 Repeat
4 Repeat
Image Repeat 8 Repeat
2 Repeat
(R-Reverse)
2 Repeat
(L-Reverse)
X X
X
X
X
X
Shift
Reduce & Shift
Image Centring
X
X X X X X X
X X
Full Scan
No Rotate
Booklet Pagination
Adhesive Binding
Frame/Centre Erase
Non-Image area erase
X
X
X X
Built-in Stamp
Set Numbering
Page No.
Date,Time
Watermark
Watermark Numbering
Annotation
Image Overlay
bizhub PRO 920
11-3
11-4
X
X
X
X
X
X
X
X
X
X
X
X
X
X
X
X
X
X
X
X
X
X
X
X
X
X
X
X
X
X
X
X
X
X
X
X
X
X
X
Simplex/
Duplex
4 in 1
8 in 1
X
X
X
X
X
X
X
X
X
X
X
X
X
X
X
X
X
X
X
X
X
X
X
X
X
X
X
X
X
X
X
X
X
X
X
X
X
X
X
X
X
X
X
X
X
X
X
X
X
X
X
X
X
X
X
X
X
X
X
X
X
X
X
X
X
X
X
X
X
X
X
X
X
X
X
X
X
X
X
X
X
X
X
X
X
Text
Photo
Original
Combine Originals
Dot Matrix
Text/Photo
Tab Paper
Custom Size (w/Full Area)
Custom Size
Standard Size
Single Feed
Z-Fold
Mixed Original
Normal
Top Bind
Numbering
Direction
Combine
Pages
Basic
Right & Left Bind
Right
Upside Down
Left
Normal
Vertical
Horizontal
2 in 1
Separate Scan Mode Key
2>2
2>1
1>2
1>1
11
Applications
Quality
X
X
X
X
X
X
bizhub PRO 920
Applications
11
Copy Conditions
Incompatible with
Applications
Main Body
Insert Sheet
(Front Cover)
PI
Main Body
Insert Sheet
(Back Cover)
PI
Main Body
Insert Sheet
(Insert Paper)
PI
Chapters
Insert Image
OHP Interleave
Program Job
Neg/Pos Reverse
Book Copy
Size Manual Input
Size Auto Detect
2 Repeat
4 Repeat
Image
8 Repeat
Repeat
2 Repeat (R-Reverse)
2 Repeat (L-Reverse)
Shift
Reduce & Shift
Image Centring
Full Scan
No Rotate
Application
Insert Sheet Main Body
(Front Cover) PI
X X X
X
X
Insert Sheet Main Body
(Back Cover) PI
Insert Sheet Main Body
(Insert Paper) PI
X X X
X
X
X X X
X
X
X X X
X X X
Chapters
X X X
X X X X X X X
X X
X X X X X X X X
X
X X X X X X X
Insert Image
OHP Interleave
*2
Program Job
*2
*2
X X X
X X X X X X X X
*2
X X X X X
Application
X X X X X X X
X X X X X X X
Book Copy
Size Manual Input
*2
*2
X X
*2
*2
X X X X X
X X
Size Auto Detect
*2
*2
X X X X X
X X
X
X
X
X X X X X
X
Neg/Pos Reverse
X
X
X
X
X X
X
X X X X
2 Repeat
X X X X X X
X X
X
4 Repeat
X X X X X X
X
Image Repeat 8 Repeat
X X X X X X
X X
X X
X X X X X X
X X
X
X X X X X X
X X
X
2 Repeat
(R-Reverse)
2 Repeat
(L-Reverse)
Shift
Reduce & Shift
Image Centring
*2
*2
X X
X X X X X X X X
X X X X X X X X X
X
Full Scan
X
X
X
X
No Rotate
Booklet Pagination
Adhesive Binding
Frame/Centre Erase
Non-image area erase
Built-in Stamp
Set Numbering
Page No.
Date,Time
Watermark
Watermark Numbering
Annotation
Image Overlay
None:
*2
*2
X X
X X
X X X X X X X
*2
*2
X X
X X
X X X X X X X
X X X X X X X
*2
*2
*2
*2
X X X X
X X
X X X
X
X
X
X
X
X
X
X
X
X
X
X
X
X
X
X
X
X X
X
X
X
X
X
X
X X X X X X X X
X X
Compatible
x:
Grayed out (no response when touched)
+:
Release the one previously selected
bizhub PRO 920
X X X X X
X
11-5
Applications
11
X X
X
X
X
X X
X
X
X
X X
X
X
X
X X
X
X
X
X
X
X
X X
X X
X
X X
X
Order
Direction
Punch
Paper Fold
Corner
2 Position
2-Hole
4-Hole
Position Setting
Right & Left Bind
Bind
Top Bind
Face Up
Face
Face Down
1 to N
Order
N to 1
Tandem
Half Fold
Fold & Staple
Letter Fold In
Letter Fold Out
Z-Fold
Staple
Finishing
Booklet Pagination
Adhesive Binding
Frame/Centre Erase
Non-image area erase
Built-in Stamp
Set Numbering
Page No.
Date,Time
Watermark
Watermark Numbering
Annotation
Image Overlay
Main Tray
Tray
Sub Tray
Sort
Group
Offset
Application
X
X
X
X X X X X X X
X
X X X X X X X
*4 X
X
X
X X X
X
X
X
X
X X X X X X
X
X
X X X X X
X X X X
X X X X
*3 *3 X X
X X X X X X X X X X
X X X X
X X X X X X X X X X
X
X
X
X X X X X X X X X X
X
X
X X X X
X
X
X X X X
X
X
X
X X
X X
X
X
X
X
X X
c
c
c
c c
11-6
c
c
c
c
c
c
c
c c
*1:
Unavailable with Print Insertion selected
*2:
PI setting menu will appear when any cover mode is selected. Selecting main
body tray will be unavailable.
*3
Available only when Booklet Pagination (Adhesive Binding) is selected
*4
Available only Grayed out when Booklet (Adhesive Binding) [Front/Back Cover + Spread] is selected
bizhub PRO 920
Applications
11.2
11
Application Screen
Follow the procedure below to display the Application Screen and select the
desired copying features.
2
Note
When a function key is touched, another screen or two will display to enable you to enter the appropriate settings.
If one function on the menu is incompatible with another, it will appear
dimmed.
Touch [Bookmark] on the subsequent screen, if desired, so that the
screen may be directly accessed from the Check Screen to change the
setting you made. For details, refer to “Checking Feature Selections Before Copying (Check Mode)” on page 14-5.
To set Application function
1
Touch [Application] tab on the touch panel.
The Application Screen will be displayed.
bizhub PRO 920
11-7
Applications
11
2
Select the desired Application function, make required settings on the
subsequent screen, then touch [OK].
Application Screen
Insert Sheet Screen
The Application Screen will be restored.
Do you want to cancel the function with the current setting remained?
% Touch [Off].
?
Do you want to clear all selections made for the function?
% Touch [Clear All].
?
Do you want to cancel all the selected functions on Application
Screen with the setting made for each remained?
% Touch [Default Setting].
?
Do you want to resume the initial setting?
% Press [Reset] on the control panel.
?
Do you want to start copying immediately?
% You don’t have to touch [Basic] to restore the Basic Screen. Position original(s) directly, then press [Start].
?
3
11-8
Enter the desired print quantity, position original(s), then press [Start].
bizhub PRO 920
Applications
11.3
11
Inserting Sheets and Covers (Insert Sheet)
Use Insert Sheet in print mode or blank mode to insert chapter sheets or separator sheets into the finished set, as well as front and back covers.
The covers and insertions can be specified as copied or blank, and fed from
different tray source for each. Post inserter is also available as tray source if
Post inserter PI-501 option is installed.
Front cover printed
Front cover blank
Back cover printed
Back cover blank
Printed sheet insertion
Blank sheet insertion
Combination samples:
Front&Back covers printed, and
printed sheet insertion
bizhub PRO 920
Front&Back covers blank, and
blank sheet insertion
11-9
Applications
11
To set Insert Sheet function
0 Use ADF to scan originals. (Original glass can also be used with Separate
Scan mode selected.)
0 Trays for copy paper, front/back covers, and insertions should have the
same paper size loaded. Auto Zoom is automatically selected.
0 Max. insert sheets: 30 locations, including front and back covers.
0 Front/Back covers or insertions can be fed from post inserter (yet cannot
be printed). Used together with main body trays, front cover fed from
post inserter will be the first page, and the back cover will be the last
page.
0 The page numbers entered at random will be sorted automatically.
0 Entering “0” will be ignored on the screen.
0 When a page number entered is larger than the total original page count,
it will be ignored.
1
Load regular sheets into any tray, and insertion sheets and covers into
each tray source to be designated on the Insert Sheet Screen.
–
2
When using post inserter, load cover/insertion sheets into the cover
sheet feeder of post inserter.
Touch [Application].
The Application Screen will be displayed.
3
Touch [Sheet/Cover/Chapter Insert].
The Sheet/Cover/Chapter Insert Screen will be displayed.
11-10
bizhub PRO 920
Applications
4
11
Touch [Insert Sheet].
The Insert Sheet Screen will be displayed.
5
Select the desired mode.
–
–
–
bizhub PRO 920
To insert a front cover: Touch [Front Cover], then proceed to the
next step.
To insert a back cover: Touch [Back Cover], then proceed to step 7.
To insert the insertion sheets: Touch [Insert Paper], then proceed to
step 8.
11-11
Applications
11
6
On the Front Cover Setting Screen, select the desired mode (Print/
Blank), copy mode (Simplex/Duplex), and tray paper to be used.
–
To use covers loaded in the post inserter, touch [Post Inserter Paper] to display the Post Inserter Paper Setting Screen, touch [Cover], and select the tray to be used.
Touch [OK] to complete the setting and return to the previous screen.
7
11-12
On the Back Cover Setting Screen, select the desired mode (Print/
Blank), copy mode (Simplex/Duplex), and tray paper to be used.
bizhub PRO 920
Applications
11
–
To use covers loaded in the post inserter, touch [Post Inserter Paper] to display the Post Inserter Paper Setting Screen, touch [Cover], and select the tray to be used.
Touch [OK] to complete the setting and return to the previous screen.
8
On the Insert Sheet Setting Screen, enter the desired insertion type setting.
bizhub PRO 920
11-13
Applications
11
–
On the screen, the [Set 01] key is active to be ready for the first insertion type setting. Select the desired mode (Print/Blank), copy
mode (Simplex/Duplex), and tray paper to be used.
To enter the page number, touch [Page Setting] to display the popup screen keypad. Enter the page number of insertion location, using “, (comma)” between pages or “- (hyphen)” for consecutive
pages. Up to 20 digits (including comma and hyphen) can be entered for one operation.
For example, if page 4 is entered in blank mode, a blank sheet will
be inserted between page 4 and page 5; in print mode, a printed
sheet is inserted at page 4.
Do you want to delete the last entered number?
% Touch [Del].
?
?
%
Do you want to clear all the page entry?
Touch [Clear].
Do you want to complete the page entry?
% Touch [Fix]. The Set 01 setting is fixed and the [Set 02] key will be
active.
?
Do you want to change the insertion type?
% To change the insertion type, set the new one and enter the page
number. Up to 30 insertion type settings can be stored.
If the same page number has been entered in Set 02 and Set 03 for
example, the setting of larger number (Set 03) will take priority.
?
11-14
9
When all settings are completed, touch [OK] repeatedly till the Application Screen is restored.
10
Enter the desired print quantity, position originals in the document
feeder, then press [Start].
bizhub PRO 920
Applications
11.4
11
Locating Title Pages on the Front Side (Chapters)
This function is used with ADF in 1-2 mode for the purpose of locating title
pages on the front side, rather than reverse side, of a duplex copy to improve
the presentation of double-sided copies.
To effectively locate the title page on the front, a blank page will be automatically created on the reverse side of a sheet, if required.
Single-sided originals
Title pages
Copies in Chapters mode
Title pages
2
Note
Touch [Booklet Pagination] on the Chapters Screen to use this function
together with Chapters.
Use Stamp together with this function to print chapter number onto
chapter page in addition to page number.
To set Chapters function
0 Use ADF to scan originals.
0 Max. title pages: 30 locations
0 Entering “0” or the same page number twice will be ignored on the
screen.
0 Chapter insertions occur in sequence even if original page numbers are
entered out of sequence.
0 The chapter page can be copied on the sheet from another tray source.
(Print Insertion)
bizhub PRO 920
11-15
Applications
11
1
Touch [Application].
The Application Screen will be displayed.
2
Touch [Sheet/Cover/Chapter Insert].
The Sheet/Cover/Chapter Insert Screen will be displayed.
3
Touch [Chapters].
The Chapters Screen will be displayed.
11-16
bizhub PRO 920
Applications
4
11
Use control panel keypad to enter the page number of each title page.
–
–
–
–
5
Touch [Set] after each entry to move to the next key.
To set more than 12 locations, touch the arrow key to move to the
next page.
To clear an incorrect entry, touch [Del]. The entered number will be
deleted.
To change the selection of paper tray for copying title pages, touch
[Print Insertion] on the screen.
In this case, you can touch [Insertion Tray] to change the currently
selected paper tray displayed on the screen.
When all entries are made, touch [OK] repeatedly till the Application
Screen is restored.
Do you want to cancel changes to the settings?
% Touch [Cancel].
?
Do you want to cancel the Chapters function?
% Touch [Off].
?
6
Enter the desired print quantity, position originals in the document
feeder, then press [Start].
bizhub PRO 920
11-17
Applications
11
11.5
Inserting Images into Printed Sets (Insert Image)
Use the Insert Image mode to combine images scanned from the original
glass, such as photos, paste-ups, newspaper articles, graphs, etc., with images scanned from the document feeder. Then, output the combined images
as a finished set.
The selected copy paper size is determined by the size of originals loaded in
the document feeder.
Single-sided originals
placed on ADF
Double-sided
originals
placed on
ADF
Insertion originals
on original glass
2
Note
Touch [Booklet Pagination] on the Insert Image Screen to use this function together with Insert Image.
To set Insert Image function
0 Max. insertion location: 30 locations, from page 1 to page 999
0 When a page number is larger than the total original count, a sheet is inserted as the last page.
0 Insertions occur in sequence, even if page numbers are entered out of
sequence.
0 Entering the same page number twice will insert two sheets at that location.
11-18
bizhub PRO 920
Applications
1
11
Touch [Application].
The Application Screen will be displayed.
2
Touch [Sheet/Cover/Chapter Insert].
The Sheet/Cover/Chapter Insert Screen will be displayed.
3
Touch [Insert Image].
The Insert Image Screen will be displayed.
bizhub PRO 920
11-19
Applications
11
4
Use the control panel keypad to enter the page number.
For example, if insertion locations are “2/2/6”, scanned images will be
inserted as follows:
The first scanned image will be inserted after page 2.
The second scanned image will be inserted directly after the first
scanned image insertion.
The third scanned image will be inserted after page 6.
–
–
Touch [Set] after each entry to move to the next key.
To set more than 12 locations, touch the arrow key to move to the
next page.
– To clear an incorrect entry, touch [Del]. The entered number will be
deleted.
Do you want to cancel changes to the settings?
% Touch [Cancel].
?
Do you want to cancel the Insert Image function?
% Touch [Off].
?
5
When all page number entries are made, touch [OK] repeatedly till the
Application Screen is restored.
6
Touch [Basic] to restore the Basic Screen.
The [Separate Scan] key on the Basic Screen appears highlighted to
show that the Separate Scan mode is automatically selected.
7
Enter the desired print quantity from the control panel keypad.
8
Scan the document feeder images.
–
11-20
Position originals FACE UP in the document feeder.
If the number of originals exceeds 100, divide them into blocks not
exceeding 100 sheets and load them from the block with the first
page.
bizhub PRO 920
Applications
9
11
Press [Start].
The originals positioned in the document feeder will be scanned into
memory.
10
Scan the original glass images.
–
Open the document feeder.
Position an original FACE DOWN on the original glass, then close
the document feeder.
Place and scan the originals according to pagination.
11
Press [Start].
12
Repeat steps 10 and 11 for all originals.
13
Touch [Complete Scan] to exit the Separate Scan mode.
14
Press [Start].
The copier will start printing when ready for output.
bizhub PRO 920
11-21
Applications
11
11.6
Copying onto Transparent Films (OHP Interleave)
Use the OHP Interleave function in 1-1 or 2-1 mode to copy onto overhead
projection transparent films, and output a blank or copied interleaf sheet with
each copied transparent film.
In the Interleave Blank mode, a blank interleaf sheet is output with each
transparent film to keep the film material from sticking together.
In the Interleave Copy mode, a copied interleaf sheet is output with each
transparent film to provide reference during a presentation, a medium for
photocopying, and a set for filing or inserting into a binder.
Blank interleaf sheets
Transparent films
Interleave Blank
Copied interleaf sheets
Transparent films
Interleave Copy
To set OHP Interleave function
0 OHP transparent film source: Multi-sheet bypass tray
0 Print quantity is set to 1 automatically and cannot be altered.
0 Auto Zoom is automatically selected. To release Auto Zoom, select the
desired magnification.
0 Bypass tray setting is automatically set to OHP.
11-22
1
Set transparent films into the Multi-sheet bypass tray.
2
When interleaf sheet is needed, load copy paper in any other tray to
match the size of transparent films.
bizhub PRO 920
Applications
3
11
Touch [Application].
The Application Screen will be displayed.
4
Touch [Sheet/Cover/Chapter Insert].
The Sheet/Cover/Chapter Insert Screen will be displayed.
5
Touch [OHP Interleave].
The OHP Interleave Screen will be displayed.
bizhub PRO 920
11-23
Applications
11
6
Select the desired OHP Interleave mode, then touch [OK] repeatedly till
the Application Screen is restored.
?
%
Do you want to cancel changes to the settings?
Touch [Cancel].
Do you want to cancel the OHP Interleave function?
% Touch [Off].
?
7
11-24
Position original(s), then press [Start].
bizhub PRO 920
Applications
11.7
11
Programming Different Settings for an Output Job
(Program Job)
In the ordinary Separate Scan mode, the combined features selected for the
job are applied to all originals to be scanned.
In the Program Job mode, you may scan multiple sets of originals and apply
different settings on each set (referred to as JOB), then output them all as a
complete set.
Original A
Original B
Original C
Output using
Program Job
To set Program Job function
0 Max. 100 JOBs can be programmed for an output job.
0 Once specified, paper size and the paper type/size setting cannot be
changed for another JOB.
0 Finishing mode and print quantity setting cannot be specified for each
JOB. The last setting made will be applied to all JOBs.
0 Program Job settings cannot be stored in Mode Memory.
1
Touch [Application].
bizhub PRO 920
11-25
Applications
11
The Application Screen will be displayed.
2
Touch [Sheet/Cover/Chapter Insert].
The Sheet/Cover/Chapter Insert Screen will be displayed.
3
Touch [Program Job].
The key will be highlighted.
4
Touch [OK] to restore the Application Screen.
5
Touch [Basic] to restore the Basic Screen.
The [Separate Scan] key on the Basic Screen appears highlighted to
show that the Separate Scan mode is automatically selected.
6
11-26
Select the desired copy conditions.
bizhub PRO 920
Applications
7
11
Position originals FACE UP in the document feeder or FACE DOWN on
the original glass.
–
8
If the number of document feeder originals exceeds 100, divide
them into blocks not exceeding 100 sheets and load them from the
block with the first page.
Press [Start].
When scanning for the current JOB is competed, the popup menu will
be displayed in the Basic Screen.
9
Touch [Fix].
The current JOB images will be stored.
The paper size determined at this time will be applied to all subsequent
JOBs.
Do you want to delete the images?
% Touch [Cancel].
?
10
Repeat steps 6 to 9 until all JOB originals are scanned.
–
Place and scan each original set in the correct order of pagination.
11
Touch [Separate Scan] to deselect it and exit the Separate Scan mode.
12
Select the desired Finishing mode and enter the print quantity from the
control panel keypad.
13
Press [Start].
bizhub PRO 920
11-27
Applications
11
11.8
Dividing a Page Spread into Right and Left Pages
(Book Copy)
The Book Copy mode performs image division on the original image. Use the
function to copy an open book or catalogue onto two sheets in 1-1 or 2-1
mode, or onto the front and back sides of one sheet in 1-2 or 2-2 mode.
The following three modes can be selected from the Book Copy Screen.
Mode
Description
Spread
Image division starts from the first scan. Separated pages are printed in the document page order.
Front Cover + Spread
Image division starts from the second scan, after the first scan copies normally.
Front/Back Cover +
Spread
Image division starts from the third scan, after the first and second
scan copy normally.
1-1 / 2-1 mode
1-2 / 2-2 mode
2
Note
Touch [Booklet] on the Book Copy Screen to use Booklet Pagination
function together with Book Copy.
11-28
bizhub PRO 920
Applications
11
To set Book Copy function
0 Separate Scan mode is automatically selected.
0 Available paper size: A4, B5, 8.5"×11"
0 Auto Paper Select and Auto Zoom are released and 1.000 magnification
is selected automatically. Change the magnification manually, if desired.
0 When using original glass, Non-Image Area Erase and Image Centring are
automatically selected. Do not close the document feeder when scanning
the original on the original glass.
1
Touch [Application].
The Application Screen will be displayed.
2
Touch [Book Copy/Poster/Repeat].
bizhub PRO 920
11-29
Applications
11
3
Touch [Book Copy].
The Book Copy Screen will be displayed.
4
Select the desired Book Copy mode.
–
5
Touch to highlight the desired mode key.
Touch [Left Bind] or [RIght Bind] to select the output order according
to the original pagination.
?
%
Do you want to cancel changes to the settings?
Touch [Cancel].
Do you want to cancel the Book Copy function?
% Touch [Off].
?
6
Touch [OK] repeatedly till the Application Screen is restored.
7
Touch [Basic] to restore the Basic Screen.
Auto Paper Select and Auto Zoom are automatically released, and the
[Separate Scan] key appears highlighted to show that the Separate
Scan mode is automatically selected.
11-30
bizhub PRO 920
Applications
8
11
Select the desired copy mode and magnification.
–
–
–
Available paper sizes are A4, B5, and 8.5"×11".
When selecting Spread mode and scanning from the original glass,
select 1-1 or 1-2 copy mode.
Magnification is automatically set to 1.000. Change the magnification manually, if desired.
9
Enter the desired print quantity from the control panel keypad.
10
Position original(s).
–
–
–
When using original glass to scan, position the first page FACE
DOWN with document feeder kept open.
When using document feeder, position original(s) FACE UP.
For details on scanning originals in Front Cover + Spread and Front/
Back Cover+ Spread modes, see the description on the following
page.
11
Press [Start] to scan.
12
Repeat steps 10 to 11 for all originals.
13
Touch [Separate Scan] to deselect it and exit the Separate Scan mode.
14
Press [Start].
The copier will start printing when ready for output.
bizhub PRO 920
11-31
Applications
11
!
Detail
Use original glass for scanning original cover.
See the illustrations below for details.
Front Cover + Spread
Scan from
first page
Front/Back Cover + Spread
Scan from
first page
Front Cover + Spread
Scan body text
Front/Back Cover + Spread
Scan body text
11-32
bizhub PRO 920
Applications
11.9
11
Repeating Selected Image Area (Image Repeat: Size
Manual Input)
Use this function to repeat the selected image area of 10 mm to 150 mm in
both vertical and horizontal widths measured from the rear left corner of the
A3 original area indicated on the left edge of the original glass.
Horizontal width
Image Repeat copy
Vertical
width
To set Size Manual Input mode of Image Repeat
0 Use the original glass. Document feeder cannot be used.
0 Auto Paper Select and Auto Zoom are released and 1.000 magnification
is selected automatically. Change the magnification manually, if desired.
0 Copy mode is automatically set to 1-1. When selecting 1-2 mode, Separate Scan mode will function automatically.
1
Touch [Application].
The Application Screen will be displayed.
bizhub PRO 920
11-33
Applications
11
2
Touch [Book Copy/Poster/Repeat].
3
Touch [Image Repeat].
The Image Repeat Screen will be displayed.
4
Touch [Size Manual Input], then specify the vertical and horizontal
widths of the scanning area.
–
11-34
Touch [Hori] or [Vert] to highlight it, then use the screen keypad to
enter the width from 10 to 150 mm in 1 mm increments.
bizhub PRO 920
Applications
5
11
Touch [OK] to restore the Image Repeat Screen.
Do you want to cancel changes to the settings?
% Touch [Cancel].
?
?
%
Do you want to cancel the Image Repeat function?
Touch [Off].
6
Touch [OK] to restore the Application Screen.
7
Touch [Basic] to restore the Basic Screen, then select the desired magnification and paper size.
8
Enter the desired print quantity from the control panel keypad.
9
Position original FACE DOWN on the original glass, as shown in the illustration at the top of this section.
10
Press [Start].
bizhub PRO 920
11-35
Applications
11
11.10 Repeating Automatically or Select Repeating Times
(Image Repeat: Size Auto Detect / Repeat)
Size Auto Detect mode will automatically set the equal repeat area to the size
of the original placed onto the original glass by activating Non-Image Area
Erase. Repeat mode will scan the image area specified by the selected paper
size and mode (2 Repeat, 4 Repeat, or 8 Repeat), then arrange the image by
specified times in one copy sheet. Use 2 Repeat in designated order mode
to have the same cut side when cutting copied sheets in two.
Size Auto Detect mode
Repeat mode
2 Repeat
4 Repeat
8 Repeat
11-36
bizhub PRO 920
Applications
11
To set Size Auto Detect and Repeat modes of Image Repeat
0 Use the original glass for Size Auto Detect mode. Document feeder cannot be used.
0 ADF is available with Repeat mode.
0 Auto Paper Select and Auto Zoom are released and 1.000 magnification
is selected automatically.
0 When 2 Repeat, 4 Repeat, or 8 Repeat is selected, the scanning area will
be a portion of the selected paper size equally divided according to the
selected mode. In this case, magnification ratio will be fixed to 1.000 (100
%).
0 Copy mode is automatically set to 1-1. When selecting 1-2 mode, Separate Scan mode will function automatically.
0 When Size Auto Detect mode is selected, Non-Image Area Erase functions automatically. Do not close the document feeder when scanning the
original on the original glass.
1
Touch [Application].
The Application Screen will be displayed.
2
Touch [Book Copy/Poster/Repeat].
bizhub PRO 920
11-37
Applications
11
3
Touch [Image Repeat].
The Image Repeat Screen will be displayed.
4
Touch the desired mode key.
–
–
11-38
To select Size Auto Detect mode, touch [Size Auto Detect], then
proceed to step 6.
To select 2 Repeat, 4 Repeat, or 8 Repeat, touch [Repeat] to display
the Repeat Mode Screen.
bizhub PRO 920
Applications
5
11
Select the desired Repeat mode, then touch [OK].
–
–
6
Touch [2], [4], or [8] to select the desired Repeat mode.
If you want the image upside down on the other side in 2 Repeat
mode, touch [R-Reverse] or [L-Reverse].
Touch [OK] on the Image Repeat Screen.
Do you want to cancel changes to the settings?
% Touch [Cancel].
?
Do you want to cancel the Image Repeat function?
% Touch [Off].
?
7
Touch [OK] to restore the Application Screen.
8
Touch [Basic] to restore the Basic Screen, then select the desired magnification and paper size.
9
Enter the desired print quantity from the control panel keypad.
10
Position original.
–
–
11
For Size Auto Detect mode original, open the document feeder,
then position the original FACE DOWN on the original glass. In this
case, DO NOT close the document feeder.
For 2 Repeat, 4 Repeat, or 8 Repeat mode original, ADF is also
available.
Press [Start].
bizhub PRO 920
11-39
Applications
11
!
Detail
The Size Auto Detect mode may not operate properly if the lighting in the
work place is directly over the original glass. In this case, consult your
service representative about an appropriate place for installation.
11-40
bizhub PRO 920
Applications
11
11.11 Making Multiple Page Signature Booklet (Booklet
Pagination)
Use the Booklet Pagination function to make a multiple page signature booklet on both sides of paper. Original images are scanned into memory and automatically arranged in booklet format in correct order.
In the machine equipped with FS-604 option, Magazine binding in Half Fold
or Fold&Staple is available, while Adhesive binding can be selected with Half
Fold mode.
Trimming mode is also available in combination with Half Fold or Fold&Staple mode, if Trimmer unit TU-501 is installed.
Single-sided
originals
Magazine binding
Adhesive binding
Double-sided
docoment
!
Detail
The Utility Screen provides the setting to position the page numbers automatically on the outside edges of the copy when using Booklet Pagination with Page Numbering in Stamp.
bizhub PRO 920
11-41
Applications
11
To set Booklet Pagination function
0 Use ADF to scan originals. (Original glass can also be used with Separate
Scan mode selected.)
0 Original pages should be a multiple of 4 in 1-2 mode or a multiple of 2 in
2-2 mode; otherwise blank pages are automatically inserted to the last.
0 Trays for copy paper and front/back covers should have the same paper
size loaded.
0 Auto Zoom mode is automatically selected. Select the desired paper
size.
1
Load the desired copy paper size in a tray.
–
2
When selecting cover sheet mode (Cover With Copy Sheet or Cover
With Blank Sheet), load the same size cover paper in any other tray
unless it is specified as Thick or Tab Paper.
Touch [Application].
The Application Screen will be displayed.
3
11-42
Touch [Booklet Pagination].
bizhub PRO 920
Applications
4
11
Touch to highlight the desired Booklet Pagination mode key.
–
–
5
When a cover sheet is required, touch [Cover Tray Select] to select
the cover sheet tray source.
Touch [Left Bind] or [Right Bind] if you want to change the output
order.
Touch [OK].
The Application Screen will be restored.
Do you want to cancel changes to the settings?
% Touch [Cancel].
?
Do you want to cancel the Booklet Pagination function?
% Touch [Off].
?
6
Touch [Basic] to restore the Basic Screen, then select the tray in which
you loaded copy paper in step 1.
–
Auto Zoom is automatically selected. To release Auto Zoom, select
the desired magnification, then select paper size.
7
Select 1-2 or 2-2 copy mode.
8
Enter the desired print quantity from the control panel keypad.
9
Position originals FACE UP in the document feeder, then press [Start].
bizhub PRO 920
11-43
Applications
11
2
Reminder
Original pages should be a multiple of 4 in 1-2 mode or a multiple of 2 in
2-2 mode; otherwise blank pages are automatically inserted to the last.
2
Reminder
When making folded /folded & stapled and trimmed booklet the outer
pages and inner pages may be different in the amount of outer margin.
In such a case, use the page interval function and creep function in Shift
mode of Page Margin. See page “Adjusting Position of Copy Image (Page
Margin: Shift Mode)” on page 11-47 for details.
11-44
bizhub PRO 920
Applications
11
11.12 Reversing Colour in Black and White Image (Neg-/
Positive Reverse)
Use Neg-/Positive Reverse function to reverse the image from black-onwhite to white-on-black, and vice versa. This is very good for copying whiteon-black originals and reversing them to fax.
Original
Neg-/Positive Reverse copying
To set Neg-/Positive Reverse function
1
Touch [Application].
The Application Screen will be displayed.
bizhub PRO 920
11-45
Applications
11
2
Touch [Neg-/Positive Reverse] to highlight it.
Do you want to cancel the “Neg-/Positive Reverse” function?
% Touch [Neg-/Positive Reverse] again.
?
11-46
3
Enter the desired print quantity from the control panel keypad.
4
Position original(s), then press [Start].
bizhub PRO 920
Applications
11
11.13 Adjusting Position of Copy Image (Page Margin: Shift
Mode)
Use Shift mode of Page Margin to adjust the position of copy images, e.g.
for the purpose of creating a new binding margin on originals to make it easier for filing purposes.
Using Booklet Pagination or 2 Repeat mode of Image Repeat in combination,
desired amount of blank space between the two images can also be made.
Right
Up
Down
Right
Left
Up
Original
Down
Left
!
Detail
If image loss is likely, select Reduce & Shift mode instead of Shift mode.
See “Reducing Images to Create Binding Margin (Page Margin: Reduce
& Shift Mode)” on page 11-53.
bizhub PRO 920
11-47
Applications
11
To set Shift mode of Page Margin
0 Shift amount: 0 to 250 mm in 1 mm increments
0 Creep: 0 to 50 mm in 1 mm increments
0 Setting in 0.1 mm increments using up/down arrow key is also available.
This setting change can be made on the Utility Screen.
1
Touch [Application].
The Application Screen will be displayed.
2
Touch [Page Margin].
The Page Margin Screen will be displayed.
11-48
bizhub PRO 920
Applications
11
3
Touch [Shift].
4
Select the page to be adjusted with image position.
–
5
Touch [Front] or [Back] to specify the shift direction and amount individually; or touch [2-Sided] to specify collectively. The [Back] and
[2-Sided] keys function only for duplex copying.
Specify the shift direction and amount.
–
–
bizhub PRO 920
Touch and highlight the desired shift direction key on the left side
of touch panel keypad, then use keypad or up/down arrow key to
enter the desired shift amount, from 0 to 250 mm in 1 mm increments.
The image display on the screen allows you to view the shift direction and amount to be created on the printed sheets.
If Booklet Pagination or 2 Repeat mode of Image Repeat has been
already selected, the [Page Interval] key appears clear on the
screen to show its availability.
If desired, touch [Page Interval] to highlight it, then enter the desired
amount using the touch panel keypad or up/down arrow key.
11-49
Applications
11
–
6
If Booklet Pagination (except Adhesive Binding mode) has been already selected, the [Creep] key appears clear to show its availability. Touch [Creep] to highlight it, then enter the desired offset
amount from 0 to 50 mm in 1 mm increments.
Touch [OK].
The Application Screen will be restored.
Do you want to cancel changes to the settings?
% Touch [Cancel].
?
Do you want to cancel the Page Margin function?
% Touch [Off].
?
7
Touch [Basic] to restore the Basic Screen.
Do you want to start copying immediately?
% You don’t have to touch [OK] to restore the Basic Screen. Position
original(s) directly, then press [Start].
?
11-50
8
Select the additional copy conditions, as desired.
9
Enter the desired print quantity, position original(s), then press [Start].
bizhub PRO 920
Applications
11
!
Detail
Page Interval function is available only when Booklet Pagination or 2 Repeat mode of Image Repeat has been already selected.
Use this function to make the desired amount of blank space between the
two images on a page. See the illustration below for details.
Booklet
2 Repeat in
Image Repeat
Page interval
Page interval
Page
interval
bizhub PRO 920
11-51
Applications
11
!
Detail
Creep function is available only when Booklet Pagination (except Adhesive Binding mode) has been already selected.
Use this function in combination with Page Interval to make space between the two images widening gradually from the inner pages to the outer pages in a folded/folded&stapled and trimmed booklet, so that the
outer margin should be uniform on all pages through.
Enter the creep amount of the images on the outermost page, while entering the page interval amount of the images on the innermost page.
Centre
Creep
11-52
Creep
Centre
Page interval
bizhub PRO 920
Applications
11
11.14 Reducing Images to Create Binding Margin (Page
Margin: Reduce & Shift Mode)
Use Reduce & Shift mode instead of Shift mode to prevent image loss when
creating a binding margin.
Left binding margin
Left
Right
Up
Down
Originals
Front
Right binding margin
Right
Left
Up
Down
Top binding margin
Back
Left
Right
Down
bizhub PRO 920
Left
Right
Up
11-53
Applications
11
To set Reduce & Shift mode of Page Margin
0 Auto Zoom is automatically selected and cannot be released.
The magnification ratio will be determined according to the shift amount
specified for the front page, and the shift amount and magnification ratio
determined for the front page will be automatically applied to the back
page.
0 Shift amount: 0 to 250 mm in 1 mm increments
0 Setting in 0.1 mm increments using up/down arrow key is also available.
This setting change can be made on the Utility Screen.
1
Touch [Application].
The Application Screen will be displayed.
2
Touch [Page Margin].
The Page Margin Screen will be displayed.
11-54
bizhub PRO 920
Applications
3
11
Touch [Reduce & Shift], then specify the shift direction and amount.
–
–
–
4
Touch [Front] or [Back]. In Reduce & Shift mode, the [2-Sided] key
appears dimmed to show inactivity.
Touch and highlight the desired shift direction key on the left side
of touch panel keypad, then use keypad or up/down arrow key to
enter the desired shift amount, from 0 to 250 mm in 1 mm increments.
The image display on the screen allows you to view the shift direction and amount to be created on the printed sheets.
If any positioning adjustment is required for the back page, touch
[Back] and make direction and amount change.
Touch [OK].
The Application Screen will be restored.
Do you want to cancel changes to the settings?
% Touch [Cancel].
?
Do you want to cancel the Page Margin function?
% Touch [Off].
?
5
Touch [Basic] to restore the Basic Screen.
Do you want to start copying immediately?
% You don’t have to touch [OK] to restore the Basic Screen. Position
original(s) directly, then press [Start].
?
6
Select the additional copy conditions, as desired.
7
Enter the desired print quantity, position original(s), then press [Start].
bizhub PRO 920
11-55
Applications
11
11.15 Eliminating Black Copy Marks Along Borders (Frame/
Centre Erase)
Use Frame/Centre Erase to eliminate black copy marks along borders to
clean up and improve the presentation of the copy.
Specify erasure amount
General copying
Centre Erase
Frame Erase
Frame/Centre Erase
2
Reminder
When lowering the document feeder onto thick original (e.g. open book),
do not press it down too hard. Keep the document feeder open, if required.
To set Frame/Centre Erase function
1
Touch [Application].
The Application Screen will be displayed.
11-56
bizhub PRO 920
Applications
2
11
Touch [Erase].
The Erase Screen will be displayed.
3
Touch [Frame/Centre Erase].
The Frame/Centre Erase Screen will be displayed.
4
Touch the desired mode key.
bizhub PRO 920
11-57
Applications
11
–
5
Specify the erasure amount in the selected mode.
–
–
–
6
Touch [Frame Erase/All Sides], [Frame Erase/Each Side], or [Centre
Erase] to highlight it. Either of Frame Erase mode and Centre Erase
mode can be selected in combination.
To specify “Frame Erase/All Sides” amount, use the touch panel
keypad or up/down arrow key to enter the desired erasure amount
of the Top, Right, Left, and Bottom sides collectively, from 1 to 300
mm in 1 mm increments.
To specify “Frame Erase/Each Side” amount, touch [Top], [Right],
[Left], or [Bottom] to highlight the key and current amount indicated
in the illustration area.
Use the touch panel keypad or up/down arrow key to enter the desired erasure amount, from 1 to 300 mm in 1 mm increments.
To specify “Centre Erase” amount, use the touch panel keypad or
up/down arrow key to enter the desired erasure mount, from 1 to
99 mm in 1 mm increments.
Touch [OK] repeatedly till the Application Screen is restored.
Do you want to cancel changes to the settings?
% Touch [Cancel].
?
Do you want to cancel the Frame/Centre Erase function?
% Touch [Off].
?
7
11-58
Enter the desired print quantity, position original(s), then press [Start].
bizhub PRO 920
Applications
11
11.16 Erasing Outside of Original (Non-Image Area Erase)
The Non-Image Area Erase mode is used to copy non standard or special
originals, such as books, magazines, paste-ups, graphs, thick or thin materials, etc. from the original glass. The exposed glass area outside the borders
of the original will not be copied.
General copying
Non-Image Area Erase
2
Note
This function may not operate properly if the lighting in the work place is
directly over the original glass. In this case, consult your service representative about an appropriate place for installation.
To set Non-Image Area Erase function
0
0
0
0
Use the original glass only. Keep ADF open throughout the procedure.
Original size should be larger than 10 mm × 10 mm.
Auto Zoom and Auto Paper Select are automatically released.
Copy mode is automatically set to 1-1. When selecting 1-2 mode, Separate Scan mode will function automatically.
bizhub PRO 920
11-59
Applications
11
1
Touch [Application].
The Application Screen will be displayed.
2
Touch [Erase].
The Erase Screen will be displayed.
3
11-60
Touch [Non-Image Area Erase] to highlight it.
bizhub PRO 920
Applications
11
?
%
Do you want to cancel the “Non-Image Area Erase” function?
Touch [Non-Image Area Erase] again.
4
Touch [OK] to restore the Application Screen.
5
Enter the desired print quantity, position original, then press [Start].
2
Reminder
Do not close the document feeder while scanning the original.
!
Detail
The Non-Image Area Erase has two modes; Rectangle erase mode and
Oblique erase mode. The machine is initially set to select the either mode
appropriate for the original placed on the original glass (AUTO mode).
If desired, display the Utility Screen to specify either mode and the original density level manually so that the Non-Image Area Erase functions
without fail.
Oblique erase mode
bizhub PRO 920
Rectangle erase mode
11-61
Applications
11
11.17 Copying Image in the Centre of Copy Paper (Image
Centring)
Use this function to detect the image area of the original and centre the
whole image on the copy paper making it easy to copy small pieces of paper.
Image Centring
2
Note
This function may not operate properly if the lighting in the work place is
directly over the original glass. In this case, consult your service representative about an appropriate place for installation.
To set Image Centring function
0 Non-Image Area Erase is automatically selected. Release it manually
when using ADF to scan originals.
0 When using Book Copy with this function, the original smaller than the
selected paper size will be printed in the centre of the copy paper without
image division performed.
0 Auto Zoom and Auto Paper Select are automatically released, and 1.000
(100 %) is selected as a magnification ratio.
0 Copy mode is automatically set to 1-1. When selecting 1-2 mode, Separate Scan mode will function automatically.
11-62
bizhub PRO 920
Applications
1
11
Touch [Application].
The Application Screen will be displayed.
2
Touch [Image Adjustment].
The Image Adjustment Screen will be displayed.
3
Touch [Image Centring] to highlight it.
bizhub PRO 920
11-63
Applications
11
?
%
11-64
Do you want to cancel the “Image Centring” function?
Touch [Image Centring] again.
4
Touch [OK] to restore the Application Screen.
5
Select magnification and paper size, as desired.
6
Enter the desired print quantity, position original, then press [Start].
bizhub PRO 920
Applications
11
11.18 Printing Images Fully to the Edges (Full Scan)
Use this function to make copies printed completely to the edges.
Original
Normal copy
Full Scan
To set Full Scan function
1
Touch [Application].
The Application Screen will be displayed.
bizhub PRO 920
11-65
Applications
11
2
Touch [Image Adjustment].
The Image Adjustment Screen will be displayed.
3
Touch [Full Scan] to highlight it.
Do you want to cancel the “Full Scan” function?
% Touch [Full Scan] again.
?
11-66
4
Touch [OK] to restore the Application Screen.
5
Enter the desired print quantity, position original(s), then press [Start].
bizhub PRO 920
Applications
11
11.19 Copying without Image Rotation (No Rotate)
Rotation function allows you to utilize Auto Zoom or Auto Paper Select and
copy the original documents onto size A4 or B5, irrespective of the copy paper feeding direction.
The machine is initially set to activate the Rotation function automatically.
Follow the procedure below to release/resume this function.
To set No Rotate function
0 If [Reset] on the control panel is pressed or Auto Reset functions, Rotation function will be activated automatically.
1
Touch [Application].
The Application Screen will be displayed.
2
Touch [Image Adjustment].
The Image Adjustment Screen will be displayed.
bizhub PRO 920
11-67
Applications
11
3
Touch [No Rotate] to highlight it.
When Rotation is released, the Rotation icon at the lower left corner of
the screen will disappear to indicate that this function is cancelled.
4
Touch [OK] to restore the Application Screen.
!
Detail
The administrator can set this function to active always, only when Auto
Zoom or Auto Paper Select is ativated, or only when Auto Zoom, Auto Paper Select or reduce is activated. For details, refer to “Suspend Interruption” on page 18-189.
11-68
bizhub PRO 920
Applications
11
11.20 Printing Stamp, Distribution Number, Page Number,
Date/Time onto Copies (Stamp)
This function allows you to print onto output copies the desired type of
stamp, distribution number, page number, and date/time at the location designated on the screen.
The four stamp types and two watermark types (described in the next section) provided on the Stamp/Image Overlay Screen can be used individually
or in multiple combinations.
Top Left
Up Mid
Up Rig.
Mid Left
Centre
Right
Low Mid
Low Rig.
Built-in Stamp
Set Numbering
Page No.
Date/Time
Low Left
Printing positions
To set Stamp function
1
Touch [Application].
The Application Screen will be displayed.
bizhub PRO 920
11-69
Applications
11
2
Touch [Stamp/Image Overlay].
The Stamp/Image Overlay Screen will be displayed.
3
Touch to select the desired key in the Stamp area.
The subsequent screen will be displayed to allow you to specify the selected stamp type.
11-70
bizhub PRO 920
Applications
4
11
When selecting [Built-in Stamp]: Specify the stamp type, printing position, character size and print page.
–
Touch [Stamp Type], then select the desired stamp type on the
subsequent screen. Touch [OK] to restore the previous screen.
–
Touch the desired printing position in the printing position area. If
fine adjustment is needed, touch [Fine Adjustment] to display the
Fine Adjustment Screen. See “Printing Stamp, Distribution
Number, Page Number, Date/Time onto Copies (Stamp)” on
page 11-69 for details.
Touch [Character Size] to select Bigger or Smaller.
Touch [Print Page] to designate whether to print the selected stamp
on the cover only or on all pages.
–
–
bizhub PRO 920
11-71
Applications
11
5
When selecting [Set Numbering]: Specify the numbering type, printing
position, character size, print page and start number.
–
Touch [Set Numbering Type], then select the desired numbering
type on the subsequent screen. Touch [OK] to restore the previous
screen.
–
Touch the desired printing position in the printing position area. If
fine adjustment is needed, touch [Fine Adjustment] to display the
Fine Adjustment Screen. See “Printing Stamp, Distribution
Number, Page Number, Date/Time onto Copies (Stamp)” on
page 11-69 for details.
Touch [Character Size] to select 20 point or 36 point.
Touch [Print Page] to designate whether to print the selected stamp
on the cover only or on all pages.
–
–
11-72
bizhub PRO 920
Applications
11
–
Touch [Start Number] to designate the starting number, if required.
Use the touch panel keypad or up/down arrow key to enter the desired starting number, then touch [OK] to return to the previous
screen.
6
When selecting [Page No.]: Specify the page number type, printing position, character size and type, printed page and start number.
bizhub PRO 920
11-73
Applications
11
–
Touch [Page Type], then select the desired page number type on
the subsequent screen. Touch [OK] to return to the previous
screen.
–
Touch the desired printing position in the printing position area. If
fine adjustment is needed, touch [Fine Adjustment] to display the
Fine Adjustment Screen. See “Printing Stamp, Distribution
Number, Page Number, Date/Time onto Copies (Stamp)” on
page 11-69 for details.
Touch [Change Character] to select the desired character size (8,
10, 12, 14 point) and type (Gothic or Ming) on the subsequent
screen. Touch [OK] to complete the setting and return to the previous screen.
–
11-74
bizhub PRO 920
Applications
11
–
If Cover/Print mode and insertions of Insert Sheet function are already specified, touch [Print Page] to designate whether to print the
selected stamp on the front/back cover or insertions. Touch [OK] to
complete the setting and return to the previous screen.
–
Touch [Start Number] to designate the starting number, if required.
If Chapters is already selected on the Application Screen, the chapter start number can also be specified on the Start Number Screen.
To enter the starting number, touch [Start Number] to highlight it,
then use the touch panel keypad or up/down arrow key to enter the
desired start number for each.
Also touch [Start Page] or [Start Chapter] to highlight it, and enter
the desired start page number or chapter number.
Touch [OK] to complete the setting and return to the previous
screen.
bizhub PRO 920
11-75
Applications
11
7
11-76
When selecting [Date/Time]: Specify the date/time type, printing position, character size and type, and print page.
–
Touch [Change], then select the desired date and time types on the
subsequent screen. Touch [OK] to restore the previous screen.
–
Touch the desired printing position in the printing position area. If
fine adjustment is needed, touch [Fine Adjustment] to display the
Fine Adjustment Screen. See “Printing Stamp, Distribution
Number, Page Number, Date/Time onto Copies (Stamp)” on
page 11-69 for details.
bizhub PRO 920
Applications
11
–
Touch [Change Character] to select the desired character size (8,
10, 12, 14 point) and type (Gothic or Ming) on the subsequent
screen. Touch [OK] to complete the setting and return to the previous screen.
–
Touch [Print Page] to designate whether to print the selected stamp
on the cover only or on all pages.
Touch [Date & Time] to change the current date and time to a specific date and time to be printed. Touch [Setting Time], then use the
control panel keypad to enter the desired year, month, day, hour,
and minute. Touch [OK] to complete the setting and return to the
previous screen.
–
8
Touch [OK] repeatedly till the Application Screen is restored.
Do you want to cancel changes to the settings?
% Touch [Cancel].
?
?
%
bizhub PRO 920
To cancel the Stamp function
Touch [Off].
11-77
Applications
11
9
Enter the desired print quantity, position original(s), then press [Start].
!
Detail
When [Fine Adjustment] is touched, the Fine Adjustment Setting Screen
will be displayed.
Touch [Top], [Left], [Right], or [Bottom] to specify the direction, then use
the touch panel keypad or up/down arrow key to enter the desired
amount, from 0 to 50 mm.
Touch [OK] to return to the previous screen.
11-78
bizhub PRO 920
Applications
11
11.21 Printing Watermark onto Copies (Watermark)
Use this function to print the desired letter type obliquely in the centre of the
page (Watermark), or the numbers in the specified form repeatedly over the
scanned image (Set Numbering).
Watermark
Set Numbering
To set Watermark function
1
Touch [Application].
The Application Screen will be displayed.
bizhub PRO 920
11-79
Applications
11
2
Touch [Stamp/Image Overlay].
The Stamp/Image Overlay Screen will be displayed.
3
Touch to select the desired key in the Watermark area.
The subsequent screen will be displayed to allow you to specify the selected watermark type.
4
11-80
When selecting [Watermark]: Specify the watermark type and density.
bizhub PRO 920
Applications
11
–
Touch [Watermark Type], then select the desired watermark type
on the subsequent screen.
Touch [OK] to restore the previous screen.
–
Touch the desired density key in the Text Density area.
If fine adjustment is needed, touch [Fine Adjustment] to display the
Fine Adjustment Screen. Touch and highlight the desired direction
key, then use the touch panel keypad or up/down arrow key to enter the desired amount, from 0 to 50 mm.
Touch [OK] to return to the previous screen.
bizhub PRO 920
11-81
Applications
11
5
When selecting [Set Numbering]: Specify the numbering type, density,
character size, and start number.
–
11-82
Touch [Set Numbering Type], then select the desired numbering
type on the subsequent screen. Touch [OK] to restore the previous
screen.
bizhub PRO 920
Applications
11
–
–
–
Touch [Character Size] to select 20 point or 36 point.
Touch the desired density key in the Text Density area.
Touch [Start Number] to designate the starting number, if required.
Use the touch panel keypad or up/down arrow key to enter the desired starting number, then touch [OK] to return to the previous
screen.
6
Touch [OK] repeatedly till the Application Screen is restored.
Do you want to cancel changes to the settings?
% Touch [Cancel].
?
Do you want to cancel the Watermark function?
% Touch [Off].
?
7
Enter the desired print quantity, position original(s), then press [Start].
bizhub PRO 920
11-83
Applications
11
11.22 Printing Words, Date/Time, Annotation Number onto
Copies (Annotation)
This function allows you to register words, current date/time, and annotation
number as a set and to print it onto output copies at the location designated
on the screen.
The setting previously made for annotation number in the Utility setting can
be changed temporarily on the Annotation Screen. (Temporary Number Setting)
Annotation can be used with the four stamp types and two watermark types
provided on the Stamp/Overlay Selection Screen in multiple combinations.
3 sets
BC
BC
Originals
Annotation stamp
ABCDE 1234
11/30/'05
Annotation stamp
ABCDE 1234
11/30/'05
Annotation stamp
ABCDE 1234
11/30/'05
Upper
Left
Upper
Middle
Upper
Right
Annotation stamp
ABCDE 1234
11/30/'05
Annotation stamp
ABCDE 1234
11/30/'05
Annotation stamp
ABCDE 1234
11/30/'05
ABCDE 0001
ABCDE 0002
ABCDE 0003
Copies
Ex. Lower Right
Date/time
Annotation number
Type in
BC
ABCDE 0001
ABCDE 0002
ABCDE 0003
BC
ABCDE 0001
ABCDE 0002
ABCDE 0003
Middle
Left
Lower
Left
Annotation stamp
ABCDE 1234
11/30/'05
Middle
Right
Middle
Lower
Middle
Lower
Right
Annotation stamp
ABCDE 1234
11/30/'05
Annotation stamp
ABCDE 1234
11/30/'05
Printing position
To set Annotation function
0 Up to 40 combinations of words, date/time, and annotation number can
be registered. Administrator can change the indicating order of words,
date/time and annotation number and select whether to print for each in
the Utility mode.
0 The date/time is determined when the machine starts scanning originals,
and will be printed according to the type specified on the machine.
0 The annotation number is counted for each scanned original in scanning
order, and will continue to the next job even if the machine power is
turned off then on. However, the serial count will be suspended if this
function is deselected or Temporary Number Setting is specified.
0 Printing position can be selected from 9 positions, and fine adjustment is
available within ± 0 to 50 mm both in up/down and right/left directions.
11-84
bizhub PRO 920
Applications
1
11
Touch [Application].
The Application Screen will be displayed.
2
Touch [Stamp/Image Overlay].
The Stamp/Image Overlay Screen will be displayed.
3
Touch [Annotation].
The Annotation Screen will be displayed.
bizhub PRO 920
11-85
Applications
11
4
Select the desired Annotation type, then specify its printing position.
–
–
–
5
To change the annotation number setting temporarily, touch [Temp.
No. Set].
The Temporary Number Setting Screen will be displayed.
–
11-86
Touch [Next] or [Back] to display the desired Annotation setting key
on the screen, then touch to highlight it. Up to 40 setting keys are
available on the screen.
The setting registered on that key will be recalled and on the
screen.
To change the printing position, touch [Printing Position] to display
the Printing Position Screen.
Touch the desired printing position in the printing position area. If
fine adjustment is needed, touch [Fine Adjustment] to display the
Fine Adjustment Screen.
If [Temp. No. Set] key appears on the screen, the annotation
number setting has been changed temporarily. See the next step.
Touch the alphanumerical screen keys to enter the desired number
or word. Up to 12 alphanumerical characters can be entered.
With this setting specified, the entered number or word will be printed on all pages and the annotation number will not be counted in
the former setting.
bizhub PRO 920
Applications
11
–
6
If the annotation number setting has not been made for the key selected in step 4, the [Temp. No. Set] key will be dimmed to show
inactivity on the screen.
Touch [OK] to complete the setting and return to the Annotation
Screen.
Touch [OK] repeatedly till the Application Screen is restored.
?
%
Do you want to cancel changes to the settings?
Touch [Cancel].
Do you want to cancel the Watermark function?
% Touch [Off].
?
7
Enter the desired print quantity, position original(s), then press [Start].
!
Detail
The following settings can be made in Annotation Setting of Utility mode.
See “10 Annotation Setting” on page 18-65 for details.
Printing order of words, date/time, and annotation number, print contents, and print combination
Words to type in (up to 40 alphanumerical characters)
Date type (5 types provided)
Time type (3 types provided)
Words to type in before annotation number (up to 20 alphanumerical
characters)
Start number of the annotation number
Printing form of the annotation number (2 types provided)
Temporary number (up to 12 alphanumerical characters)
Font type (Gothic/Ming)
Character size (8/10/12/14 point)
bizhub PRO 920
11-87
Applications
11
11.23 Overlay an Image onto Each Page Copied in the Job
(Image Overlay)
Use this function to scan an image, then overlay the image onto each page
copied in the job.
1st scanned original
Originals scanned 2nd
and later
Copies in Overlay mode
Specifications for Image Overlay
0 Separate Scan mode is automatically selected.
0 Auto Zoom and Auto Paper Select are automatically released, and 1.000
(100 %) is selected as a magnification ratio.
1
Touch [Application].
The Application Screen will be displayed.
11-88
bizhub PRO 920
Applications
2
11
Touch [Stamp/Image Overlay].
The Stamp/Image Overlay Screen will be displayed.
3
Touch [Image Overlay] to highlight it.
Do you want to cancel the “Image Overlay” function?
% Touch [Image Overlay] again.
?
4
Touch [OK] to restore the Application Screen.
5
Touch [Basic] to restore the Basic Screen.
6
Select the desired paper size and magnification on the Basic Screen.
7
Enter the desired print quantity from the control panel keypad.
8
Position the overlaying original.
–
9
Position the original FACE up in the document feeder or FACE
DOWN on the original glass.
Press [Start] to scan.
bizhub PRO 920
11-89
Applications
11
The original image will be scanned into memory.
10
Position the original(s) to be overlaid.
–
Position the original FACE up in the document feeder or FACE
DOWN on the original glass.
11
Press [Start] to scan.
12
Repeat steps 10 and 11 for all originals.
13
Touch [Complete Scan] to exit the Separate Scan mode.
14
Press [Start].
The copier will start printing when ready for output.
11-90
bizhub PRO 920
Applications
11
11.24 Storing Image on HDD / Overlaying Stored Image
(Program Image Overlay)
Use this function to scan and store several images on HDD, then recall the
desired image from the HDD to overlay onto each page copied in the job.
Image Store
Store
Overlaying image
Output
Recall overlaying image
Output
Recalled image
Overlay originals
Copies in Overlay Memory mode
Specifications for Program Image Overlay
0 Use original glass to scan overlaying image.
0 Separate Scan mode is automatically selected.
0 Auto Zoom and Auto Paper Select are automatically released, and 1.000
(100 %) is selected as a magnification ratio.
bizhub PRO 920
11-91
Applications
11
1
Touch [Application].
The Application Screen will be displayed.
2
Touch [Stamp/Image Overlay].
The Stamp/Image Overlay Screen will be displayed.
3
Touch [Program Image Overlay].
The Overlaying Image Selection Screen will be displayed.
11-92
bizhub PRO 920
Applications
11
?
%
Do you want to recall image previously stored?
Proceed to step 9.
4
Touch [Store] to display the Image Name Entry Screen.
5
Enter the desired image name.
–
–
6
Use the touch panel keypad to enter the desired name up to 8 characters. The date when you made this entry will be stored automatically.
To correct an entry, touch [Delete] repeatedly to delete each character, then enter the correct name.
If the image name is correct, touch [OK].
The Basic Screen to store the overlaying image will be displayed. Select the desired copy conditions.
What if the entered image name has been already used?
% See Note at the bottom of this section.
?
7
Position the overlaying original on the original glass.
bizhub PRO 920
11-93
Applications
11
8
Press [Start] to scan.
The Store Image Screen will be displayed.
The machine automatically starts to store the overlaying image data in
the HDD. The Overlaying Image Selection Screen will resume when the
storing function is completed.
Do you want to stop scanning?
% Touch [Cancel].
?
Do you want to continue to store the overlaying image data?
% Return to step 4.
?
9
Select the desired overlaying image data on the screen, then touch
[OK].
The Stamp/Image Overlay Screen will be restored.
10
Touch [OK] to restore the Application Screen.
11
Touch [Basic] to restore the Basic Screen.
–
12
The Separate Scan mode is automatically selected, and Auto Zoom
and Auto Paper Select are released.
Set the desired copy conditions.
Position the original(s) to be overlaid.
–
Position the original FACE up in the document feeder or FACE
DOWN on the original glass.
13
Press [Start] to scan.
14
Enter the desired print quantity from the control panel keypad.
15
Press [Start].
The copier will start printing when ready for output.
11-94
bizhub PRO 920
Applications
11
2
Note
If the popup menu with [OK] key is displayed after entering the image
name, the entered name is duplicated.
Touch [OK] to enter a new name.
Administrator can set the machine to display the [Delete] key on the Overlaying Image Selection Screen in order to delete the registered image.
Select the image key to be deleted, then touch [Delete].
The popup menu with [Yes] and [No] keys will be displayed.
Touch [Yes] to delete.
bizhub PRO 920
11-95
11
11-96
Applications
bizhub PRO 920
12
Finishing / Paper Fold
Finishing / Paper Fold
12
Finishing / Paper Fold
12.1
Copy Conditions Incompatible with Finishing / Paper
Fold Modes
Tray
User Zoom
Individual Zoom
Zoom
Preset Zoom
Zoom
x 1.0
Minimal
Auto Paper Select
Auto Zoom Select
Bypass Setting
Tray 3
Tray 4
Tray 1
Tray 2
Lighter
Standard Background
Removal
Darker
Pre 1
Pre 2
Auto
Standard
Darker
Lighter
Density
Copy Conditions
Incompatible with
Applications
Paper
Density,
Background
12
Main Tray
Sub Tray
Sort
Group
Offset
Finishing
Staple
Punch
Corner
2 Position
2-Hole
4-Hole
Position Setting
Paper Fold
Bind
Right &
Left Bind
Top Bind
Face Up
Order
Face
Direction
Face Down
1 to N
Order
N to 1
Tandem
Half Fold
Fold & Staple
Letter Fold In
Letter Fold Out
Z-Fold
bizhub PRO 920
12-3
12-4
N
N
X
Simplex/
Duplex
4 in 1
8 in 1
X
X
X
Text
Photo
Original
Combine Originals
Dot Matrix
Text/Photo
Tab Paper
Custom Size (w/Full Area)
Custom Size
Standard Size
Single Feed
Z-Fold
Mixed Original
Normal
Top Bind
Numbering
Direction
Combine
Pages
Basic
Right & Left Bind
Right
Upside Down
Left
Normal
Vertical
Horizontal
2 in 1
Separate Scan Mode Key
2>2
2>1
1>2
1>1
12
Finishing / Paper Fold
Quality
X
N
N
X
X
X
X
X
bizhub PRO 920
Finishing / Paper Fold
12
Copy Conditions
Incompatible with
Applications
Tray
Main Body
Insert Sheet
(Front Cover)
PI
Main Body
Insert Sheet
(Back Cover)
PI
Main Body
Insert Sheet
(Insert Paper)
PI
Chapters
Insert Image
OHP Interleave
Program Job
Neg/Pos Reverse
Book Copy
Size Manual Input
Size Auto Detect
2 Repeat
4 Repeat
Image
8 Repeat
Repeat
2 Repeat (R-Reverse)
2 Repeat (L-Reverse)
Shift
Reduce & Shift
Image Centring
Full Scan
No Rotate
Application
Main Tray
Sub Tray
Sort
Group
Offset
X X X X
X
Corner
2 Position
X
2-Hole
X
4-Hole
Position Setting
X
Punch
Bind
Paper Fold
X
X
X
Staple
Finishing
X
Right &
Left Bind
Top Bind
Face Up
Order
Face
Direction
Face Down
1 to N
Order
N to 1
Tandem
Half Fold
Fold & Staple
Letter Fold In
Letter Fold Out
Z-Fold
bizhub PRO 920
X X X X X X X
X
X
X
X X
X
X X X X
X X X X
X X X X
X X X X
X
12-5
X
12-6
Corner
2 Position
2-Hole
4-Hole
Position Setting
Right & Left Bind
Bind
Top Bind
Face Up
Face
Face Down
1 to N
Order
N to 1
Tandem
Half Fold
Fold & Staple
Letter Fold In
Letter Fold Out
Z-Fold
None:
Compatible
x:
Grayed out (no response when touched)
N:
Selectable but inefficient
Order
Direction
Application
Punch
Staple
Booklet Pagination
Adhesive Binding
Frame/Centre Erase
Non-image area erase
Built-in Stamp
Set Numbering
Page No.
Date,Time
Watermark
Watermark Numbering
Annotation
Image Overlay
Main Tray
Tray
Sub Tray
Sort
Group
Offset
12
Finishing / Paper Fold
Finishing
Paper Fold
X X
X
bizhub PRO 920
Finishing / Paper Fold
12.2
12
Setting Binding Direction for Duplex Copies
When setting duplex mode (1-2 / 2-2), a binding direction must be selected.
It should be set when making top-bound duplex copies (front and back sides
have the opposite side up) from right&left-bound simplex or duplex originals
(front and back sides have the same side up).
!
Detail
If you want to make right&left-bound duplex copies (front and back sides
have the same side up) from top-bound duplex originals (front and back
sides have the opposite side up), settings for duplex originals and binding
direction are needed. See “Selecting Binding Direction of Originals
(Bind)” on page 10-11 for details.
To set binding direction for duplex copies
0 Top bind for duplex printing functions properly only when duplex mode
is selected.
0 If the machine is reset, the binding mode will go back to R&L bind.
1
Touch [Finishing] on the Basic Screen.
The Finishing setting menu will be displayed.
bizhub PRO 920
12-7
Finishing / Paper Fold
12
2
Touch [Order Direction].
The popup menu for setting output styles will appear.
12-8
3
Touch [Top] to highlight it.
4
Touch [OK].
5
Touch [OK] on the Finishing setting menu.
bizhub PRO 920
Finishing / Paper Fold
12
6
Touch [Simplex/Duplex] on the Basic Screen, then touch [1-2] or [2-2]
to highlight it.
7
Touch [OK].
The Basic Screen will be restored.
2
Note
If no other settings are required, you don’t have to touch [OK] to restore
the Basic Screen. Position originals, then press [Start] to start the printing
job.
bizhub PRO 920
12-9
Finishing / Paper Fold
12
12.3
Setting Output Face and Order
This machine initially delivers printed sheets face down in the same page order as originals (1 to N).
This section describes the function and setting procedure of the following
two modes.
- Face Up: Outputs printed side of simplex copies and odd numbered duplex copies upward on the tray.
- N to 1: Outputs copies in reverse order of original pagination.
To set output face and order
1
Touch [Finishing] on the Basic Screen.
The Finishing setting menu will be displayed.
2
Touch [Order Direction].
The popup menu for setting output styles will appear.
12-10
bizhub PRO 920
Finishing / Paper Fold
3
Select the desired output face and order.
4
Touch [OK].
5
Touch [OK] on the Finishing setting menu.
12
The Basic Screen will be restored.
2
Note
If no other settings are required, you don’t have to touch [OK] to restore
the Basic Screen. Position originals, then press [Start] to start the printing
job.
bizhub PRO 920
12-11
Finishing / Paper Fold
12
12.4
Sorting / Stapling Copies
The FS-509/FS-604 Finisher has a primary (main) tray and a secondary (sub)
tray, each of which has the basic output modes as described below.
Output to the primary (main) tray:
- Sort: Outputs multiple copies of the original set.
- Group: Groups together multiple copies of each original.
- Offset: Outputs each sorted/grouped set offset by approx. 30 mm upon
exit.
- Staple: Staples each sorted/grouped set with one staple at the corner or
two staples along the edge.
Example:
Make 3 copied sets
from 4 original sheets
Sort
Offset
Staple
Sort
Group
Group
Offset by 30 mm
Offset by 30 mm
2
Reminder
If large sized paper (e.g. A3 or 11”×17”) or paper specified as “Exclusive
K” delivered to the primary (main) tray shows excessive curl, perform the
setting described below. (For Finisher FS-604 only)
(1) Take out the paper guide from the guide holder which is located on
the rear side of Finisher FS-604, then install it to the primary (main) tray.
(2) When copying job is completed, remove the paper guide from the primary (main) tray, and return it to its original position.
12-12
bizhub PRO 920
Finishing / Paper Fold
12
!
Detail
Finisher FS-509 is provided with two types of staple cartridge; 50-sheetstaple cartridge and 100-sheet-staple cartridge. Staple capacity depends on the cartridge type set in the finisher. Be sure to check the cartridge type before making copies.
Output to the secondary (sub) tray:
- Sort: Outputs multiple copies of the original set. No offset output is available.
- Group: Groups together multiple copies of each original. No offset output
is available.
Combined with the output modes above, you can also choose to output face
up or face down, and output front to back (1 to N) or back to front (N to 1).
Example:
Make 3 copied sets
Sort &
Face Down
Group &
Face Down
Sort &
Face Up
Group &
Face Up
2
Note
Binding direction, output face, and output order settings are available.
bizhub PRO 920
12-13
Finishing / Paper Fold
12
To set finishing mode
0 A machine with Finisher installed is set to output to the primary (main) tray
in Sort mode by default.
0 Setting copy conditions restricted to use secondary (sub) tray or Folding
mode tray will switch the tray selection automatically.
1
Touch [Finishing] on the Basic Screen.
The Finishing setting menu will be displayed.
2
Specify the output tray.
–
3
Select Sort or Group, and set Offset to use offset output.
–
–
–
12-14
Touch [Main Tray] or [Sub Tray] to highlight it.
To set Sort mode, touch [Sort] to highlight it.
To set Group mode, touch [Group] to highlight it.
To use Offset mode in combination with Sort or Group mode, touch
[Offset] to highlight it.
bizhub PRO 920
Finishing / Paper Fold
4
12
Set Staple mode, if desired.
–
Touch [Corner] or [2 Position] to highlight it. The staple position currently selected will be displayed on the left side of the screen.
bizhub PRO 920
12-15
Finishing / Paper Fold
12
–
To change the staple position, touch [Pos. Set] to select the desired
staple position.
–
Touch [OK]. The Finishing setting menu will be restored.
Do you want to restore the previous setting?
% Touch [Cancel].
?
How does the [Off] key function?
% Touching [Off] will release the Finishing function without cancelling
newly specified information.
?
5
Touch [OK] on the Finishing setting menu.
The Basic Screen will be restored.
12-16
bizhub PRO 920
Finishing / Paper Fold
12
2
Note
If no other settings are required, you don’t have to touch [OK] to restore
the Basic Screen. Position originals, then press [Start] to start the printing
job.
If the Finisher FS-509 is mounted with 100-sheet-staple cartridges and
[Stop] is pressed to cease the printing job in Staple mode, the number of
printed sheets in the last sorted/grouped set determines to staple or not
to staple the unfinished set(s).
50 sheets or less: Unfinished set(s) will not be stapled upon exit.
51 sheets or more: Unfinished set(s) will be stapled upon exit.
2
Reminder
The primary (main) tray gradually goes down while printed materials output. DO NOT allow any object to interfere with the operation of the tray
on the left side of the finisher, as any interference may cause damage to
the finisher.
bizhub PRO 920
12-17
Finishing / Paper Fold
12
12.5
Making Folded Booklet (Half Fold / Fold&Staple /
Trimming)
The machine with Finisher FS-604 installed can use Half Fold or Fold&Staple
mode to make a folded or folded&stapled booklet in combination with Booklet Pagination feature in Application settings.
Also, Trimming mode is available using Finisher FS-604 with Trimmer unit
TU-501 installed to trim the edge that opens folded or folded&stapled booklet.
!
Detail
For specifications of copy paper to be used, see page 3-4.
Half Fold
Fold&Staple
Trimming
To make folded booklet
0
0
0
0
Use ADF.
Paper size: A3, B4, A4R, 11”×17”, 8.5”×14”, 8.5”×11”R
Paper weight: 60 to 90 g/m2
Max. number of sheets (80 g/m2 paper) in each mode
Half Fold (with or without Trimming): 3 sheets
Fold&Staple: 20 sheets/ 19 sheets when using thick cover paper
Fold&Staple + Trimming: 16 sheets/ 15 sheets when using thick cover
paper
0 Folding mode tray capacity: Approx. 100 sheets at maximum
Half Fold: 33 sets max. of 3-sheet-folded booklet (33 × 3 = 99 sheets)
Fold&Staple: 20 sets max. of 5-sheet-folded booklet (20 × 5 = 100
sheets)
Fold&Staple: 5 sets max. of 20-sheet-folded booklet (5 × 20 = 100
sheets)
0 Trimmer unit tray capacity: Approx. 512 sheets at maximum
100 sets max. of 2 to 5-sheet-folded booklet (500 sheets max.)
50 sets max. of 6 to 10-sheet-folded booklet (500 sheets max.)
32 sets max. of 11 to 16-sheet-folded booklet (512 sheets max.)
12-18
bizhub PRO 920
Finishing / Paper Fold
1
12
Touch [Paper Fold] on the Basic Screen.
The Paper Fold setting menu will be displayed.
2
Touch [Half Fold] or [Fold&Staple], as desired.
–
If the finisher is mounted with Trimmer unit TU-501, the Trimming
popup menu will appear.
Touch [Trimming] to highlight it if this function is desired, then touch
[OK].
bizhub PRO 920
12-19
Finishing / Paper Fold
12
3
Touch [OK] on the Paper Fold setting menu.
The Basic Screen will be restored.
2
Note
If no other settings are required, you don’t have to touch [OK] to restore
the Basic Screen. Position originals, then press [Start] to start the printing
job.
12-20
bizhub PRO 920
Finishing / Paper Fold
12.6
12
Folding Copies in Three (Letter Fold In / Letter Fold
Out)
The Finisher FS-604 can fold A4R or 8.5”×11”R copies in three upon exit.
Choose to print outside the fold (Letter Fold Out) or inside (Letter Fold In).
Letter Fold In
Letter Fold Out
To fold copies in three
0
0
0
0
0
0
0
Number of folded sheet: Max. 3 sheets
Paper size: A4R or 8.5”×11”R
Paper weight: 60 to 80 g/m2
Printed side: Selectable (inside or outside)
Output tray: Folding mode tray
The output order will be set to 1 to N automatically.
Selecting Letter Fold In automatically sets the output face to Face Up,
while Letter Fold Out sets to Face Down.
bizhub PRO 920
12-21
Finishing / Paper Fold
12
1
Touch [Paper Fold] on the Basic Screen.
The Paper Fold setting menu will be displayed.
2
Touch [Letter Fold In] or [Letter Fold Out], as desired.
3
Touch [OK] on the Paper Fold setting menu.
The Basic Screen will be restored.
2
Note
If no other settings are required, you don’t have to touch [OK] to restore
the Basic Screen. Position originals, then press [Start] to start the printing
job.
12-22
bizhub PRO 920
Finishing / Paper Fold
12.7
12
Output Z-Folded Copies (Z-Fold)
The Finisher FS-509/FS-604 with Z folding unit ZU-601/602 installed can zigzag fold A3 or B4 copy paper upon exit.
This mode is available in combination with Punch or Staple mode.
Z-Fold
Z-Fold + Punch
Z-Fold + Staple + Mixed Original
To make Z-folded copies
0
0
0
0
0
0
0
0
0
Number of folded sheet: 1 sheet
Paper size: A3, B4, 11”×17”, 8.5”×14”
Paper weight: 60 to 90 g/m2
Fold type: Z-fold (double-fold 8.5”×14” only)
Fold position (width from the edge to the first fold):
A3: 209 mm or less
B4: 181 mm or less
11”×17”: 215 mm or less
8.5”×14”: 261.6 mm or less
Z-Fold and Staple modes are available in combination for A3 and A4
mixed, while they cannot be used for B4 and B5 mixed.
When using Mixed Original mode with Z-Fold mode, different types (e.g.
A3 and B4) should not be mixed, otherwise the Z-Fold mode may not
function properly.
Some plain paper types may cause fold line to shift.
Copy paper cannot be fed from trays specified as Thick 2, OHP, or Tracing in paper type, or specified as any size other than Standard. (Unavailable for the sizes in Original Size Detection, Custom, Wide Size or Tab
Paper)
bizhub PRO 920
12-23
Finishing / Paper Fold
12
1
Touch [Paper Fold] on the Basic Screen.
The Paper Fold setting menu will be displayed.
2
Touch [Z-Fold] to highlight it.
3
Touch [OK] on the Paper Fold setting menu.
The Basic Screen will be restored.
2
Note
If no other settings are required, you don’t have to touch [OK] to restore
the Basic Screen. Position originals, then press [Start] to start the printing
job.
12-24
bizhub PRO 920
Finishing / Paper Fold
12.8
12
Punching File Holes in Copies (Punch)
The Finisher FS-509/FS-604 with Z folding unit ZU-601/602 or Punch kit
PK-504/505 installed can punch file holes in output copies.
This mode is available in combination with Z-Fold or Staple mode.
2
Reminder
Do not punch special paper type such as OHP transparencies, labels,
tracing paper, etc. Otherwise, machine trouble may occur.
Be sure that the side guide plates of the paper tray are securely aligned
to the paper; otherwise the copies may not be punched in position.
PK-505 or ZU-602 (2 or 4 holes)
80 mm
80 mm
PK-504 or ZU-601
(Swedish type)
21 mm
70 mm
21 mm
To punch file holes in copies
0 Number of holes: 2 or 4
0 Hole diameter: ZU-601/602, PK-504; 6.5 ± 0.5 mm
PK-505; 6.5 ± 0.15 mm
0 Hole pitch: 80 ± 0.5 mm (PK-505/ZU-602); 21 ± 0.5 mm/70 ± 0.5 mm/21
± 0.5 mm (PK-504/ZU-601)
0 Paper size: 2 holes; A3, B4, A4, A4R, B5, B5R, A5, A5R, 11”×17”,
8.5”×14”, 8.5”×11”, 8.5”×11”R, 5.5”×8.5”, 5.5”×8.5”R
4 holes; A3, B4, A4, B5, 11”×17”, 8.5”×11”
0 Paper weight: 61 to 90 g/m2 (80 g/m2 recommended), Thick paper (91 to
128 g/m2 for PK-504/505, 91 to 170 g/m2 for ZU-601/602), Thin paper (50
to 60 g/m2)
0 If the ATS (Automatic Tray Switching) functions while the machine uses
the Punch mode, the punch holes may be slightly off the appropriate positions.
0 Special size paper (sizes in Original Size Detection, Custom, Wide Size or
Tab Paper) cannot be punched.
bizhub PRO 920
12-25
Finishing / Paper Fold
12
1
Touch [Finishing] on the Basic Screen.
The Finishing setting menu will be displayed.
2
Touch [2-Hole] or [4-Hole] to highlight it.
The punch position currently selected will be displayed on the left side
of the screen.
3
Change the punch position, if desired.
–
12-26
To change the punch position, touch [Pos. Set] to display the popup menu, then select the desired punch position.
bizhub PRO 920
Finishing / Paper Fold
12
–
Touch [OK] to return to the Finishing setting menu.
Do you want to restore the previous setting?
% Touch [Cancel].
?
?
%
4
How does the [Off] key function?
Touching [Off] will release the Finishing function without cancelling
newly specified information.
Touch [OK] on the Finishing setting menu.
The Basic Screen will be restored.
2
Note
If no other settings are required, you don’t have to touch [OK] to restore
the Basic Screen. Position originals, then press [Start] to start the printing
job.
2
Reminder
The primary (main) tray gradually goes down while printed materials output. DO NOT allow any object to interfere with the operation of the tray
on the left side of the finisher, as any interference may cause damage to
the finisher.
bizhub PRO 920
12-27
Finishing / Paper Fold
12
12.9
Cover Sheet Feeding (Post Inserter)
The Finisher FS-509/FS-604 with Post inserter PI-501 installed can attach
cover sheets to output copies.
Using Insert Sheet function, cover sheets loaded in the upper and lower trays
of the post inserter will be attached as a front cover and/or back cover or insertion sheet to output copies, and also using Staple mode, a covered and
stapled book can be made.
Or, using Cover with Blank Sheet mode of Booklet Pagination and Half Fold/
Fold&Staple with Trimming mode, a booklet-type cover will be attached to
the multiple page signature booklets.
Cover sheet
Copied set with
cover attached in
staple mode
Copied set with
cover attached
To attach cover sheet to copies
0 Paper size: Upper tray A4, A4R, B5, B5R, A5, 8.5”×11”, 8.5”×11”R,
5.5”×8.5”
Lower tray A3, B4, A4, A4R, B5, B5R, A5, 11”×17”, 8.5”×14”, 8.5”×11”,
8.5”×11”R, 5.5”×8.5”
0 Upper/Lower tray capacity: 200 sheets (200 g/m2 paper) or within 30 mm
thick each
0 Use ADF.
0 The cover paper size should be the same as copy paper size.
0 Cover paper loaded in the post inserter cannot be copied.
12-28
bizhub PRO 920
Finishing / Paper Fold
1
2
Load cover paper into the upper and
lower trays of the post inserter.
12
Upper tray
Lower
tray
Use Insert Sheet or Booklet Pagination function to attach covers to the
output copies.
bizhub PRO 920
12-29
Finishing / Paper Fold
12
12.10 Using Finisher Manually
The Finisher FS-509/FS-604 with Post inserter PI-501 installed can be operated manually, using the operation panel provided on the post inserter.
Place a set of paper into the lower tray. Upper tray cannot be used.
Available finishing modes according to the optional configuration are described below.
- Finisher FS-509 + Post inserter PI-501
– Staple (1 staple / 2 staples)
- Finisher FS-604 + Post inserter PI-501
– Staple (1 staple / 2 staples)
– Fold&Staple
– Letter Fold
- Finisher FS-509 + Post inserter PI-501 + Punch kit PK-504/505
– Staple (1 staple / 2 staples)
– Punch
- Finisher FS-604 + Post inserter PI-501 + Punch kit PK-504/505
– Staple (1 staple / 2 staples)
– Fold&Staple
– Letter Fold
– Punch
2
Reminder
The Z folding unit ZU-601/602 cannot be used for manual punch. To use
Punch mode manually, Punch kit PK-504/505 is necessary.
Start/Stop button
Fold&Staple
1 oblique staple
2 parallel staples
Letter Fold
12-30
Punch
bizhub PRO 920
Finishing / Paper Fold
12
To use finisher manually
0 Paper should be placed only in the lower tray of the post inserter. Upper
tray cannot be used.
0 Staple (1 staple / 2 staples) and Punch can be used in combination.
0 Specifications for Staple (1 staple / 2 staples)
Paper size: A3, B4, A4, A4R, B5, A5, 11"×17”, 8.5”×14”, 8.5”×11”,
8.5”×11”R (50 to 200 g/m2)
Staple capacity: FS-604; 50 sheets or less
FS.509; 50 sheets or less (A3, 11"×17") / 100 sheets or less (B4 to
8.5"×11"R)
Output tray: Primary (main) tray
0 Specifications for Punch
Paper size: A3 to A5 (50 to 170 g/m2)
Tray capacity: 200 sheets or within 30 mm thick
Output tray: Primary (main) tray
0 Specifications for Fold&Staple
Paper size: A3, B4, A4R, 11"×17”, 8.5”×14”, 8.5”×11”R (60 to 200 g/m2)
Fold&Staple capacity: 20 sheets or less (80 g/m2 paper) / 19 sheets or
less (80 g/m2 paper) with a thick cover paper
Output tray: Folding mode tray
0 Specifications for Letter Fold
Paper size: A4R, 8.5”×11”R (60 to 80 g/m2)
Fold capacity: 3 sheets or less
Output tray: Folding mode tray
1
Place a set of paper in the lower tray
of the post inserter.
–
–
–
–
–
bizhub PRO 920
Lower tray
Staple (1 staple / 2 staples): Place
paper face UP.
Punch: Place paper face UP.
Fold&Staple: Place the front of
the finished set UP.
Letter Fold: Place the outside of
the fold UP.
Align the guide plate with the paper.
12-31
Finishing / Paper Fold
12
2
Press Staple mode selection button and Punch button to select the desired mode.
Start/Stop button
Staple mode selection button
Punch button
–
–
3
To select Staple (1 staple / 2 staples), Fold&Staple, or Letter Fold,
press Staple mode selection button to turn on the desired mode
lamp.
To select Punch, press Punch button to turn on the lamp.
To use Staple in combination, turn on the desired Staple mode
lamp.
To select only the Punch mode, turn off all the other mode lamps.
Press Start/Stop button.
Do you want to stop the output operation?
% Press Start/Stop button on the operation panel of post inserter.
?
12-32
bizhub PRO 920
Finishing / Paper Fold
12
12.11 Using Two Copiers in Tandem
Tandem mode enables your primary (master) machine to work in tandem
with the secondary (tandem) machine for the purpose of providing faster
completion of large copying jobs. Two units working in tandem distribute a
job in half the time of non-tandem mode.
The two copiers should be connected in either way described below.
- Connect the two copiers directly using a crossover cable. In this case,
other network functions provided to the copier will be unavailable.
- Connect each of the two copiers to the hub in a network using straightthrough cables.
Use the straight-through or crossover cables of Category 5 or of the later
standard to connect the machines.
Service setting is required to use the tandem mode. Contact your service
representative, if desired.
!
Detail
Auto reset may function while tandem mode is selected.
Initially, the tandem mode will be released automatically if Auto reset is
activated on the master machine; however, administrator can set the machine to activate the tandem mode as initial setting.
Apply this setting to the master machine only, if desired. Setting on both
copiers will deactivate the tandem mode.
To use the User Authentication function on the two copiers in tandem
mode, the same user/account authentication is required on both copiers.
In this case, copying will be available by entering the user/account password in the master machine only. The password will be transmitted to the
tandem machine automatically so as to enable the copying operation.
See “3 User Authentication/Account Track” on page 18-76 for details of
setting User Authentication function.
bizhub PRO 920
12-33
Finishing / Paper Fold
12
To use two copiers in tandem
0 The combination of the two copiers can be either the two bizhub PRO
920 copiers.
0 Two copiers should have the same optional configuration.
0 The copier with the [Tandem] key highlighted on the Basic Screen will be
the master machine, turning both copiers into the tandem mode.
0 Select the copying conditions, scan originals, and press [Start] on the
master machine to operate both copiers in tandem to complete a job.
0 This machine is provided with an Distribution Recovery mode, which
functions when trouble occurs in either the master or tandem machine to
allow the trouble-free copier to complete the job.
0 The image data stored in HDD can be output in tandem mode copying.
0 Tandem mode is unavailable if Enhance Security mode is activated.
1
Turn power on the two copiers.
–
2
Confirm that both copiers are ready to copy with the Basic Screen
displayed.
Touch [Tandem] on the Basic Screen of either copier.
The Tandem Function Setting Screen will be displayed.
12-34
bizhub PRO 920
Finishing / Paper Fold
3
Touch [On] to highlight it, then touch [OK].
–
4
12
The copier with this setting turned on will become the master machine; the other copier will function as the tandem machine. The
Master icon displays on the Basic Screen of the master machine to
indicate that the two units are ready to work in tandem mode.
Select the desired copying conditions on the master machine.
–
–
bizhub PRO 920
Ordinary copying operation is still available on the tandem machine
during the tandem mode setting.
Corresponding tray sizes on the master and tandem machines
should be the same when using multiple trays for a single job.
12-35
Finishing / Paper Fold
12
–
5
Enter print quantity on the master machine, using the keypad.
–
12-36
Touch [Tandem Tray Inf.] to check the tray information of the other
machine working in tandem.
When a print quantity amount of 100 is entered, the master and tandem machines will each copy and output 50 sets.
6
Position original(s) FACE UP in the document feeder or FACE DOWN
on the original glass of the master machine.
7
Press [Start] on the control panel of the master machine.
–
The Sub icon will display on the Machine Status Screen of the tandem machine to indicate that the two copiers will start working in
tandem.
–
The tandem mode will be released automatically when the tandem
mode copying is completed, and the Master and Sub icons will disappear.
bizhub PRO 920
Finishing / Paper Fold
12
2
Note
Entering reserve job during Tandem mode
If scanning of the next reserved job is performed during the tandem mode
copying, that job will also be performed in the tandem mode. Up to 100
jobs including the present job can be reserved.
Interrupt mode during Tandem mode copying
Interrupt copying is available only on the copier with [Interrupt] pressed.
The tandem mode copying on the copier in interrupt mode will be suspended until the interrupt copying is completed.
bizhub PRO 920
12-37
Finishing / Paper Fold
12
2
Note
Tandem mode and Power Save functions
If the tandem mode is selected while the tandem machine is in Auto low
power mode, the power saving mode will be released automatically.
The tandem mode will not be selected when the tandem machine is
turned off by Auto shut-off. Release the Auto shut-off mode by pressing
[Power Save].
If Auto low power is activated on the tandem machine during the tandem
job setting, the power saving mode will be released automatically when
printing job starts.
If Auto shut-off is activated on the tandem machine during the tandem
job setting, the tandem mode will be released automatically.
Selected tandem mode will be released automatically when the master
machine activates Auto low power/Auto shut-off.
Press [Power Save] to release Auto shut-off if required, then select the
tandem mode again to restart the procedure.
2
Reminder
The tandem mode cannot be selected/continued in the cases shown below. The message “Please wait/ Reserve is not available in Tandem machine,” “Tandem machine error/ Please check tandem machine,” or
“Please check tandem machine” will be displayed, as required.
The tandem mode cannot be selected while the tandem machine is in the
off state, due to Auto shut-off. Press [Power Save] to release it.
Selected tandem mode will be released automatically when the tandem
machine activates Auto shut-off. Press [Power Save] to release it, then
select the tandem mode again to restart the procedure.
When any problem occurs in the tandem machine, such as a paper misfeed or lack of paper, the tandem machine will be unavailable for printing;
however, the problem will not cause tandem mode to be released. Take
the appropriate troubleshooting measures to be ready for copying.
Tandem printing job cannot be started if 100 reserve jobs (not in tandem
mode) are entered on the tandem machine. Wait until the reserve jobs are
completed on the tandem machine.
12-38
bizhub PRO 920
Finishing / Paper Fold
12
To Stop Scanning/Printing
To cancel the tandem copying job
1
Press [Stop] on the control panel of the master machine.
The scanning/printing job stops immediately, and the popup menu appears on the Basic Screen of the master machine to ask you whether
to continue or terminate the job. At this time, the tandem mode is not
yet released.
2
Touch [Stop Job] to delete all the scanned data and to release the tandem mode.
However, if the data transmission has already been completed, the tandem job on the tandem machine has to be cancelled separately. Touch
[Job List] on the touch panel of the tandem machine to display the Job
List Screen, then delete the tandem job.
To stop the job cancelling procedure, touch [Continue] on the popup
menu.
bizhub PRO 920
12-39
Finishing / Paper Fold
12
To cancel the job on the tandem machine only
1
Press [Stop] on the control panel of the tandem machine.
The tandem machine stops the current operation immediately, and the
popup menu appears on the Basic Screen of the tandem machine to
ask you whether to continue or cease the operation. At this time, the
tandem mode is not yet released.
2
Touch [Continue] to go on, or [Stop Job] to delete all the data transmitted from the master machine and to release the tandem mode.
The master machine will take over the remaining print quantity and
complete the job.
2
Note
If temporary suspension in the tandem machine takes a long time, the
Distribution recovery mode will activate, enabling the master machine to
handle the remaining print quantity.
Once the Distribution recovery mode is activated and the master machine is already handling the remaining print quantity, the tandem machine cannot continue with the tandem printing job, even when
[Continue] is touched.
12-40
bizhub PRO 920
Finishing / Paper Fold
12
Troubleshooting
Copying with the Distribution recovery mode
The Distribution recovery mode enables you to complete your copying job
even when trouble occurs in either the master or tandem machine, such as
a paper jam. In that case, the copier that is trouble free completes the job.
!
Detail
This function can be deactivated in Tandem Setting of Utility mode. For
details, refer to “5 Tandem Setting>5 Distribution Recovery” on
page 17-52.
When a paper jam, SC-code (E-code, F-code) trouble or unloaded paper
occurs on either the master or tandem machine
The machine that is trouble free handles the remaining print quantity and
completes the job.
When the job is completed, take the appropriate troubleshooting measures
to correct the problem.
When memory overflow occurs on either the master or tandem machine
On the master machine:
The scanning job will stop immediately, and the tandem copying job will be
suspended on both copiers. At this time, the tandem mode is not released.
Take the same measure to be applied for single copier referring to “If Memory Full Message Is Displayed (Memory Overflow)” on page 5-11.
On the tandem machine:
The tandem machine will start the tandem copying job when the memory becomes available after completing some reserve jobs. In this case, the Distribution recovery mode functions to continue the tandem printing job on the
master machine until the tandem machine becomes available for the job.
If the memory of the tandem machine does not become available despite the
elapse of time, the tandem mode will be released on the tandem machine,
and the Distribution recovery mode functions to complete the job on the
master machine.
When the power is turned off on either the master or tandem machine
The tandem mode will be released automatically in either case. Restart the
procedure from the first step.
bizhub PRO 920
12-41
12
12-42
Finishing / Paper Fold
bizhub PRO 920
13
Job Management
Job Management
13
Job Management
13.1
Overview of Job List Screen
13
The Job List Screen allows you to check/operate the following items.
- Reserve
- Output History
- Send History
- Incomplete
- Suspended (The letters on the key turn red if any suspended job remains.)
- Spool
2
Note
The jobs referred here include printer jobs and scanner jobs.
Follow the procedure below to display the Job List Screen.
To display Job List Screen
1
Touch [Job List] on the Basic Screen.
The Job List Screen will be displayed.
2
Touch the desired key on the screen.
See the following pages for details of each subsequent screen.
3
Touch [Close] to exit the Job List Screen.
bizhub PRO 920
13-3
Job Management
13
13.2
Job Operation on Job List Screen
This section describes how to check/operate the jobs on the Job List Screen.
To Check/Control Reserved Jobs
Use this function to display all the reserve jobs as a list.
The list includes following information.
- No.: Consecutive numbers of both copy and print jobs
- Mode: Copy or Printer
- Status: Printing or Reserved (current status of the job)
- No. of Org.: Max. 4-digit page count
- Pages To Go: Max. 5-digit pages to be output (sheets × sets = pages to
go)
- Minute(s): Time required for completing each job (minute)
Follow the procedure below to check the settings, change the output order,
and suspend/delete/stop reserved jobs.
Job operation for reserved jobs
1
Touch [Reserve] on the Job List Screen.
–
–
13-4
Check the status of the reserved jobs.
Touch the lower arrow key to scroll, if 6 or more jobs are entered.
bizhub PRO 920
Job Management
2
13
Select the desired job, then select the job operation.
–
–
–
–
–
bizhub PRO 920
To clear reserve job:
Touch to highlight the desired reserve job key, then touch [Delete].
Touch [Yes] on the popup menu to clear the selected job. All the
data of the selected job will be cleared
To specify the next job to be printed:
Touch to highlight the desired reserve job key, then touch [Increase
Priority]. The highlighted reserve job will be moved just under the
current print job.
This will not function if printing operation has already been started
for the selected job.
To change the order of jobs:
Touch to highlight the desired reserve job key, then touch [Priority].
The highlighted job will be advanced by one in printing order unless
the job preceding the selected one is already in progress.
If printing order cannot be changed for the selected job, a message
will be displayed for information.
To suspend reserve job:
Touch to highlight the desired reserve job key, then touch [Suspended]. Printing operation for the selected job will be suspended
and kept stored in memory.
In this case, “Suspended” will be displayed in the Status area of the
suspended job key to prompt you that a suspended job remains in
the machine. Touch the job key to resume printing operation. See
“To Check/Operate Suspended Jobs” on page 13-9 for details.
To check the settings of reserve job:
Touch to highlight the desired reserve job key, then touch [Details].
Check the settings of the selected job on the screen. Touch [Close]
to return to the Job List Screen.
13-5
Job Management
13
Displaying Output History
Use this function to display output history as a list.
The list includes following information.
- No.: Consecutive numbers of both copy and print jobs
- Mode: Copy or Printer
- No. of Org.: Max. 5-digit page count
- No. of Sets: Max. 4-digit set count
- Result: Complete or Cancel
- Time: Time when output operation was executed
Follow the procedure below to check the settings of output jobs.
To display output history
1
Touch [Output History] on the Job List Screen.
–
–
2
Touch the desired job key, then touch [Details].
–
13-6
Check the status of the output jobs.
Touch the lower arrow key to scroll, if 6 or more jobs are entered.
Detailed settings of the selected job will be displayed. Touch
[Close] to return to the previous screen.
bizhub PRO 920
Job Management
13
Displaying Send History
Use this function to display the send history as a list.
The list includes following information.
- No.: Consecutive numbers of both copy and print jobs
- Mode: E-Mail / FTP / SMB / HDD
- Address: Address to which the data was transmitted
- Result: Complete or Cancel
- Time: Time when data transmission was executed
Follow the procedure below to check the settings of transmitted jobs.
To display send history
1
Touch [Send History] on the Job List Screen.
–
–
2
Check the status of the transmitted jobs.
Touch the lower arrow key to scroll, if 6 or more jobs are entered.
Touch the desired job key, then touch [Details].
–
bizhub PRO 920
Detailed settings of the selected job will be displayed. Touch
[Close] to return to the previous screen.
13-7
Job Management
13
Checking Incomplete Jobs
Use this function to display incomplete jobs as a list.
The list includes following information.
- No.: Consecutive numbers of both copy and print jobs
- Cause: Memory Full, Cancel, etc.(cause for which the job was not completed)
Follow the procedure below to check the settings of incomplete jobs.
To check incomplete jobs
1
Touch [Incomplete] on the Job List Screen.
–
–
2
Touch the desired job key, then touch [Details].
–
13-8
Check the status of the incomplete jobs.
Touch the lower arrow key to scroll, if 6 or more jobs are entered.
Detailed settings of the selected job will be displayed. Touch
[Close] to return to the previous screen.
bizhub PRO 920
Job Management
13
To Check/Operate Suspended Jobs
Use this function to display all suspended jobs as a list.
The list includes following information.
- No.: Consecutive numbers of both copy and print jobs
- Mode: Copy or Printer
- Status: Suspended or Printing (current status of the job)
- No. of Org.: Max. 5-digit page count
- Pages To Go: Max. 4-digit pages to be output (Sheets x Sets = Pages To
Go)
- Minute(s): Time required for completing each job (minute)
Follow the procedure below to check the settings of each job and release/
collectively release the suspended jobs.
Job operation for suspended jobs
1
Touch [Suspended] on the Job List Screen.
“Suspended” will be displayed in the Status area of the suspended job
key to prompt you that a suspended job remains in the machine.
–
–
bizhub PRO 920
Check the status of the suspended jobs.
Touch the lower arrow key to scroll, if 6 or more jobs are entered.
13-9
Job Management
13
2
Select the desired job, then select the job operation.
–
–
–
13-10
To output suspended job:
Touch to highlight the desired job key, then touch [Release].
The selected job will be output according to the current printing order.
To output all suspended jobs:
Touch [All Release].
All suspended jobs will be output according to the current printing
order.
To check the settings of suspended job:
Touch to highlight the desired reserve job key, then touch [Details].
Check the settings of the selected job on the screen. Touch [Close]
to return to the Job List Screen.
bizhub PRO 920
Job Management
13
To Check/Control Spool Jobs
Use this function to display spool jobs as a list.
The list includes following information.
- No.: Consecutive numbers of both copy and print jobs
- Mode: Wait for RIP or Receiving (current status of the spool job)
Follow the procedure below to change the output order or delete the spool
jobs.
Job operation for spool jobs
1
Touch [Spool] on the Job List Screen.
–
–
2
Check the status of the spool jobs.
Touch the lower arrow key to scroll, if 6 or more jobs are entered.
Select the desired job, then select the job operation.
–
–
–
bizhub PRO 920
To clear spool job:
Touch to highlight the desired job key, then touch [Delete].
Touch [Yes] on the popup menu to clear the selected job. All the
data of the selected job will be cleared.
To specify the next job to be printed:
Touch to highlight the desired job key, then touch [Increase Priority]. The highlighted job will be moved just under the current print
job.
This will not function if printing operation has already been started
for the selected job.
To change the order of jobs:
Touch to highlight the desired job key, then touch [Priority]. The
highlighted job will be advanced by one in printing order unless the
job preceding the selected one is already in progress.
If printing order cannot be changed for the selected job, a message
will be displayed for information.
13-11
13
13-12
Job Management
bizhub PRO 920
14
Advanced Information
Advanced Information
14
Advanced Information
14.1
Checking Feature Selections by Proof Copying
14
Use Proof copy to produce a sample of the copied set before making multiple copies. This is a convenient and cost effective way of viewing the results
of the copying selections.
To make a proof copy
0 Proof copy is available when using ADF, or when using Separate Scan
mode for multiple originals or originals to be scanned from original glass.
1
Select the desired copy conditions from the various setting screens,
then position originals in the ADF.
If Separate Scan mode has been used to scan all the originals into
memory, touch [Separate Scan] to exit the Separate Scan mode when
scanning is completed.
2
Press [Proof Copy] on the control
panel.
A sample copy will be output while
scanning originals in the ADF.
If Separate Scan mode has been
used, a sample set will be delivered
immediately.
The screen for checking the job settings will be displayed.
bizhub PRO 920
14-3
Advanced Information
14
3
Check the settings made for the current job.
?
%
4
Do you want to change the settings?
See “Checking Feature Selections Before Copying (Check Mode)”
on page 14-5 for details.
Press [Start].
The machine will start printing.
14-4
bizhub PRO 920
Advanced Information
14.2
14
Checking Feature Selections Before Copying (Check
Mode)
Display the Check Screen to check the feature selections you made, and use
Proof copy to make a sample copy if needed, before making multiple copies.
This is a convenient and cost effective way of viewing the results of the copying selections.
2
Reminder
Do not press [Stop] or [Reset] to change the setting, or all the settings will
restore the initial condition.
To use Check mode
0 Proof copy is available when using ADF, or when using Separate Scan
mode for multiple originals or originals to be scanned from original glass.
0 The following application functions can be released by touching [Clear]:
Program Job, Non-Image Area Erase, Neg. Pos. Reverse, Image Centring, Full Scan, Overlay.
1
Select the desired copy conditions from the various setting screens.
2
Press [Mode Check] on the control
panel.
The Check Screen will be displayed.
bizhub PRO 920
14-5
Advanced Information
14
3
Check the job settings on the screen.
–
Touch the arrow keys to scroll pages.
If Bookmark has been checked on any subsequent screen of Application function, the Check Screen for that function will be displayed
first.
–
To make any setting change from the Check Screen, proceed to the
next step.
To release any application function from the Check Screen, proceed to step 5.
If a sample copy is needed, proceed to step 6.
If settings are OK, proceed to step 8.
–
–
–
4
Change the settings from the Check Screen.
–
–
–
–
14-6
Touch the desired key (Basic/ Combine Originals/ Finishing/ Paper
Fold/ Org. Image Type/ each application function) on the Check
Screen to highlight it, then touch [Change]. The touch panel will display an appropriate screen to change the copying condition selected.
Change the setting as desired, then press [Check] to restore the
Check Screen to return to the checking steps.
If making a set or sample copy, proceed to step 6.
To start printing without proofcopying, proceed to step 8.
bizhub PRO 920
Advanced Information
5
14
Release application functions.
–
Touch the desired application function key on the Check Screen to
highlight it, then touch [Clear]. The confirmation screen will appear
on the Check Screen.
–
Touch [Yes] to cancel the function, or [No] to restore.
–
–
If making a set or sample copy, proceed to the next step.
To start printing without proofcopying, proceed to step 8.
bizhub PRO 920
14-7
Advanced Information
14
6
Make a sample copy.
–
–
–
–
Position originals in the ADF. Or, use Separate Scan mode to scan
all originals.
Press [Proof Copy] on the control panel or touch [Proof Copy] on
the Check Screen. A sample copy will be output.
Press [Stop] to suspend the proof copying. In this case, the
scanned image data will not be deleted from memory.
If any setting change is required, return to step 4, then repeat proof
copying, as required. However, you cannot change or release selections that appeared dimmed after proof copying.
If the copy result is satisfactory, touch [Close] on the Check Screen
to return to the Basic Screen, then proceed to the next step.
7
Change the print quantity, as required.
8
Position originals, then press [Start].
If proof copying has been made, the machine will simply start printing
without scanning originals.
2
Note
If the desired selection cannot be changed, press [Stop] to delete all the
data in memory, then press [Reset] to restart the job setting.
14-8
bizhub PRO 920
Advanced Information
14.3
14
Interrupt Copying
Use the Interrupt mode to interrupt copying in progress to perform a simple
job. When interrupt copying is completed, the settings for the previous job
restore automatically and the Basic Screen displays.
To use Interrupt mode
0 The Interrupt mode cannot be selected with the following conditions:
Machine is not operating printing or scanning job.
Program Image Overlay is in use.
The Call for Service message displays or a paper misfeed occurs.
Already using Interrupt mode.
0 Reserve job cannot be operated in Interrupt mode.
0 Low Power or Sleep will not function during Interrupt mode.
1
Press [Interrupt] on the control panel.
The Interrupt LED starts flashing,
then keeps lighted when machine is
ready for Interrupt mode.
The Basic Screen for Interrupt copying will be displayed.
2
Set copy conditions, as desired.
–
All copy conditions except Reserve mode can be specified.
3
Position original(s), then press [Start] to start the interrupt copying.
4
When Interrupt copying is completed, press [Interrupt] again.
bizhub PRO 920
14-9
Advanced Information
14
The [Interrupt] LED turns out and the Machine Status Screen will be
displayed.
5
Press [Start] to resume copying.
2
Note
To check settings for the previous job before restarting, touch [Close] on
the Machine Status Screen to display the Basic Screen.
Check the settings, then press [Start] to resume copying.
14-10
bizhub PRO 920
Advanced Information
14.4
14
Storing and Recalling Job Conditions (Mode Memory)
Use Mode Memory to store up to 30 frequently used copy job settings, which
can be recalled at any time. The stored jobs can be given alphabetical
names.
Storing Job Conditions
Follow the procedure below to store the copy job setting.
To store job conditions
0 Available settings: Basic, Combine Originals, Original Image Type, Application, Finishing, Paper Fold, print quantity
0 Check Screen allows you to view the settings before storing.
0 Stored job is given a job number (01 ~ 30) and alphabetical name (dispensable).
0 Up to 30 jobs can be stored.
0 Locked job cannot be given any change till released by the administrator.
1
Make the desired job selections from various setting menu.
2
Press [Mode Memory] on the control
panel.
The Mode Memory Screen will be
displayed.
bizhub PRO 920
14-11
Advanced Information
14
3
Touch [Store].
The Check Screen will be displayed.
4
Review the settings to be stored.
–
5
Touch the right and left arrow keys to scroll.
Touch [OK] on the Check Screen.
The Job Store Screen will be displayed.
14-12
bizhub PRO 920
Advanced Information
?
%
6
14
Do you want to correct the job settings?
Touch [Cancel] on the Check Screen to return to the Basic Screen.
Make setting change, then restart the operation from step 2.
Select the desired job key.
–
–
–
–
The job keys numbered from 01 to 10 are displayed on the screen.
Touching [Next] will display the keys from 11 to 20, and 21 to 30.
Touch [Next] or [Back] to display the desired key.
A blank keys without name or lock icon ( ) indicate that no job is
stored under that key, and a named job without a lock icon ( ) displayed can be overwritten.
The key with a lock icon ( ) displayed is locked and cannot be selected.
Touch [OK] to proceed to the Name Input Screen.
7
Enter a job name.
–
–
bizhub PRO 920
Enter a job name in up to 16 characters, using the touch panel keypad.
Use right and left arrow keys to move the cursor, and use [Shift] to
enter upper case letters or symbols.
14-13
Advanced Information
14
8
Touch [OK].
The Mode Memory Screen will be restored. Check that the job name
has been correctly entered.
If you do not wish to enter a name, simply touch [OK]. The key displays
16 asterisks (*) in place of a name.
9
Touch [OK] to complete the setting and return to the Basic Screen.
?
%
Do you want to cancel this operation?
Touch [Cancel].
Recalling Stored Job Settings
Follow the procedure below to recall jobs that are already stored.
To recall stored job settings
0 Check Screen allows you to view the stored settings before recalling.
0 The Mode Memory Screen can be displayed only from the Basic Screen.
If any other screen such as Machine Status Screen is displayed, pressing
[Mode Memory] will be ignored.
0 The recalled settings can be altered on the screen.
1
Display the Basic Screen, then press
[Mode Memory] on the control panel.
The Mode Memory Screen will be
displayed.
2
Touch a job key to select a job you want to recall.
–
14-14
The job keys numbered from 01 to 10 are displayed on the screen.
bizhub PRO 920
Advanced Information
–
3
14
Touching [Next] will display the keys from 11 to 20, and 21 to 30.
Touch [Next] or [Back] to display the desired key.
Touch [Job Check].
The Check Screen displays to allow you to review the settings.
Do you want to start copying without reviewing the settings?
% Touch [OK] instead of Job Check. Proceed to step 6.
?
4
Review the job settings.
Do you want to select another job?
% Touch [Cancel].
?
5
Touch [OK] on the Check Screen.
The settings of the selected job will be recalled on the restored Basic
Screen.
6
Position original(s), then press [Start] to print.
bizhub PRO 920
14-15
Advanced Information
14
Recalling Previous Job Settings
Follow the procedure below to copy with a previous job settings.
To recall previous job settings
0 Only the last-completed output job settings can be recalled as the previous job settings. Non-completed job or reserve job settings cannot be recalled, even if the setting operations have been made last.
0 The previous job settings can be recalled even after the machine power
is turned off then on.
1
Press [Mode Memory] on the control panel.
The Mode Memory Screen will be displayed.
2
Touch [Pre-Job Recall].
The [Job Check] key will appear on the screen.
3
Touch [Job Check] to review the settings.
The Check Screen will be displayed.
14-16
bizhub PRO 920
Advanced Information
4
Check the settings of the previous job on the screen.
5
Touch [OK].
14
The settings of the previous output job will be recalled on the Basic
Screen.
Do you want to cancel this operation?
% Touch [Cancel].
?
6
Position original(s), then press [Start].
bizhub PRO 920
14-17
Advanced Information
14
14.5
Displaying Screen for Operation Guide (Help Mode)
The Help Screen provides you with the information about copy job setting
procedure, toner and paper supply, and control panel and touch panel key
operation.
Help Screen comprises the following menu items.
- Copier Basic provides information on function and operation of the keys
on Basic Screen.
- Copier Appli. provides information on function and operation of the keys
on Application Screen.
- Scan/Box provides information on function and operation to perform
when [Scan] or [Box] key on the control panel is pressed.
- Job List provides information on function and operation of the keys on
Job List Screen.
- Parts Exchange provides information on adding toner, loading paper,
adding staples, and emptying waste basket.
- Hard keys provides information on function and operation of the keys on
the control panel, except [Scan] and [Box].
- Others provides the name and extension number of the administrator
registered in the Utility setting.
2
Note
Copier Basic, Copier Appli, Scan/Box, and Job List information can also
be displayed from each screen by pressing [Help] on the control panel.
To display Help Screen
1
Press [Help] on the control panel.
The Help Screen will be displayed.
14-18
bizhub PRO 920
Advanced Information
2
Touch the desired menu key to display specific information.
3
Touch upper/lower arrow key to scroll, if provided.
4
Touch [Exit].
14
The Basic Screen will be restored.
bizhub PRO 920
14-19
Advanced Information
14
14.6
Adjusting Response Time of Touch Keys
(Accessibility)
This machine can sets the desired interval between touching the screen key
and machine response in advance.
Pressing the [Accessibility] key on the control panel will select this interval,
so that the machine will respond to the touch key operation only when the
key is kept touched for a specified period of time. This function is convenient
for physically handicapped users who have difficulty in touching keys with
accuracy.
!
Detail
For details on how to set the desired response time, refer to “6 Key Response Time” on page 17-19.
To adjust response time
0 Response time can be selected from Normal/ 0.5 second/ 1 second/ 2
seconds/ 3 seconds.
0 If Normal is selected as response time, pressing [Accessibility] will not
make any change in the touch key operation.
1
Press [Accessibility] on the control
panel.
The Accessibility LED lights in green
to indicate that the specified response time is set on the machine.
2
To deactivated this function, press [Accessibility] for one second or
longer.
The Accessibility LED goes off, and normal response time will be restored in touch key operation.
14-20
bizhub PRO 920
Advanced Information
14.7
14
Adjusting Touch Panel Contrast (Contrast)
This function allows you to adjust the contrast of the touch panel.
!
Detail
The brightness of the touch panel can be adjusted by the administrator.
For details, refer to “9 LCD Backlight Setting” on page 18-63.
To Adjust Contrast
1
Turn the Contrast adjustment dial on
the control panel.
–
To increase the contrast, turn the
dial clockwise.
–
To decrease the contrast, turn the dial anticlockwise.
bizhub PRO 920
14-21
Advanced Information
14
14.8
Controlling Copier from Browser (Remote Panel)
When the machine is connected with a PC over a network, the web browser
activated on the PC enables you to operate the machine. This function is
convenient for physically handicapped users who have difficulty in operating
the control/touch panel, and also promotes efficiency in operation using PC
keyboard and mouse.
Remote Panel functions:
- Touch panel screens can be displayed on the web browser and operated
using a mouse.
- Control panel keys can be displayed on the web browser and operated
using a mouse.
- Passwords can be entered using PC keyboard.
The following functions are unavailable:
- Reading the screen performed by subsidiary system
- Turning ON/OFF the machine power (Main power switch/Sub power
switch, Power Save, Weekly Timer)
- Reporting paper misfeed, or displaying counter in real time
!
Detail
The setting procedure for the IP address is provided in “2 IP NIC Setting>1 TCP/IP” on page 18-122.
To specify the IP address of the PC to be used for Remote Panel function,
refer to “Remote Panel Setting” on page 19-20.
To control copier from browser
0 Set the Enhance Security mode OFF on the machine.
0 The machine should be connected with a PC over a network with TCP/IP
enabled.
0 Specify the IP address of the machine.
0 Specify the IP address of the PC to be used for Remote Panel function,
using Web Utilities setting on a PC.
0 One of the following browsers is required on the PC. No other hardware
or application software is necessary.
Microsoft Internet Explorer 6.02 or higher
Netscape Navigator 7.1 or higher
FireFox 1.0 or higher
0 JavaScript must be active.
0 The popup menu such as paper misfeed prompt will not be updated automatically. After a long period of inactivity, click [Reload] at the upper
corner of the screen to display the current status.
14-22
bizhub PRO 920
Advanced Information
1
14
Start the web browser, then enter the IP address of the main body in
the address bar.
The Web Utilities screen will be displayed.
2
Click [Remote Panel] on the Web Utilities screen.
The browser displays control panel and touch panel screen currently
displayed on the machine.
bizhub PRO 920
14-23
Advanced Information
14
3
14-24
Using a mouse and keyboard, perform job operation.
bizhub PRO 920
15
Paper Setting
Paper Setting
15
Paper Setting
15.1
Paper Setting Outlines
15
This machine provides the optimum print result according to each characteristics of copy paper by specifying paper size and paper type for each tray.
The paper size and paper type for each tray can be displayed on the Machine
Status Screen.
This section describes the details of setting and changing paper settings.
!
Detail
For the details of setting the bypass tray, refer to “Paper Tray Setting” on
page 9-10.
15.1.1 Setting Items in Paper Setting
Paper Setting includes two setting items: size setting and tray setting.
Select one of the following four items as size setting.
- Standard Size
- Custom Size
- Wide Size Paper
- Tab Papers
!
Detail
See “Paper Type and Weight” on page 15-5 for details of paper type
specifications and relation between paper type and weight.
Set paper type by specifying the following four items as tray setting.
- Type
Select one of the following 23 types.
- (blank), Normal, Fine, Thick 1, Thick 2, Thin paper, Recycled, Exclusive
A to M, Seal, User, Blank Insert
- Coloured Paper
Select one of the following six types.
- (blank), White, Clear, Yellow, Pink, Blue, Green
- Hole-Punch
Select either condition.
With Punch Hole or No Punch Hole
bizhub PRO 920
15-3
Paper Setting
15
-
Both Sides Adjust
Specify the Vertical zoom, Horizontal zoom, Up/Down shift amount, and
Right/Left shift amount for both front and back pages.
Vertical : -9% to +9% (in 0.1% increments)
Horizontal : -9% to +9% (in 0.05% increments)
Up/Down : -99mm to +99mm (in 0.1mm increments)
Right/Left : -99mm to +99mm (in 0.1mm increments)
15.1.2 Paper Type Specifications
The following four paper types are provided according to the plainness of paper.
Smooth, Fine, Normal, Embossed
Set paper type details as referring to the specifications listed in the table on
the following page. Any paper type other than these four will be require special settings.
Fine
The Fine paper is a non-coated paper generally used for offset printing. The
fine paper has a high degree of whiteness and used for various purposes.
Normal
The Normal paper is used for copying in general and is called “PPC paper”.
The normal paper is usually not a recycled paper.
Embossed
The Embossed paper has a non-smooth surface on which a toner is hard to
be fixed. Fine paper types such as book paper and cotton paper are included
in this category.
Blank Insert
Blank Insert is not a category of the paper type. This is only fed without being
printed. When the Cover With Blank Sheet, Blank Insert, or OHP interleave
blank function is used, specify [Blank Insert] to a tray to which a paper already printed and not copied by this machine is loaded, or a blank paper only
to be fed is loaded.
User
When a paper type other than that of which can be specified on this machine
is used, use this function. For the details, contact your service representative.
OHP
Transparent film cannot be loaded on the main body tray and Large Capacity
Unit. Specify [OHP] to a Bypass tray.
15-4
bizhub PRO 920
Paper Setting
15
Paper Type and Weight
Paper Type
Paper
Main body
tray/Large
capacity
unit tray
Bypass
tray
Copying
speed
- (blank)
PPC paper 72~90g/m²
0
0
1
Normal
PPC paper 72~90g/m²
0
0
1
Fine
Fine paper 72~90g/m²
0
1
Thick 1
PPC paper 91~161g/m²
0
1
Thick 2
PPC paper 162~200g/m²
0
0
2
Thin
PPC paper 50~61g/m²
0
0
1
Recycled
Fine paper 62~71g/m²
0
1
Exclusive A
Smooth paper 62~71g/m²
0
1
Exclusive B
Smooth paper 72~90g/m²
0
1
Exclusive C
Smooth paper 91~161g/m²
0
1
Exclusive D
Smooth paper 162~200g/m²
0
1
Exclusive E
Fine paper 50~61g/m²
0
1
Exclusive F
PPC paper 72~90g/m²
0
1
Exclusive G
Fine paper 91~161g/m²
0
1
Exclusive H
Fine paper 162~200g/m²
0
1
Exclusive I
PPC paper 62~71g/m²
0
1
Exclusive J
Embossed paper 62~71g/m²
0
1
Exclusive K
Embossed paper 72~90g/m²
0
1
Exclusive L
Embossed paper 91~161g/m²
0
2
Exclusive M
Embossed paper 162~200g/m²
0
2
Seal
Plain paper 62~71g/m²
0
OHP
Fine paper 91~162g/m²
Trace
Embossed paper 62~71g/m²
User
*1
0
Blank Insert
Non-printed paper
0
1
0
1
0
1
0
1
1
Copying speed 1: Printing speed is 92 sheets per minute when printing A4/
8.5×11 in the simplex print mode.
Copying speed 2: Printing speed is 59 sheets per minute when printing A4/
8.5×11 in the simplex print mode.
*1: The tray setting is required by your service representative.
bizhub PRO 920
15-5
Paper Setting
15
15.1.3 Recommended Setting of Tray
It is recommended that paper type should be set for each paper to be used,
so that the setting change can be made according to the environment (temperature, humidity, paper condition, etc.) on the basis of settings for each
tray.
Recommended Setting Procedure
1
Specify the paper size and type for each tray.
2
Make setting change on the paper type for each tray, as required, according to the environment and paper condition.
If the changes made are considered to be a new standard, make
change in setting or make it a new setting.
!
Detail
Service representative can make adjustments for all trays at the same
time. Contact your service representative, if desired.
15-6
bizhub PRO 920
Paper Setting
15.2
15
Change Tray Setting
Set this function especially when special paper is used on a regular basis and
is always placed in a specific paper tray.
!
Detail
For the details of how to set the paper size of an upper/lower tray for PI,
see “8 Paper Setting>2 PI Setting” on page 18-60.
See “Paper Type and Weight” on page 15-5 for details of the paper
types.
1
Press the [Utility/Counter] on the
control panel.The Utility Screen will
be displayed.
2
Touch [6 Administrator Setting].
The Password Input Screen will be displayed.
When the Password Input Screen is not displayed, proceed to step 4.
bizhub PRO 920
15-7
Paper Setting
15
3
Enter the eight-digit administrator password, and then touch [OK].
The Administrator Setting Screen will be displayed.
15-8
4
Touch [1 System Setting].
5
Touch [8 Paper Setting].
bizhub PRO 920
Paper Setting
6
15
Touch [1 Tray Setting].
The Tray Setting Screen will be displayed.
7
Touch a desired tray key to highlight it.
8
Touch [Change] to change a tray setting.
The Tray Setting Menu Screen will be displayed.
9
Touch Type.
bizhub PRO 920
15-9
Paper Setting
15
The Change Paper Type Screen will be displayed.
10
Select a desired paper type.
Touch [OK] to complete the setting and return to the Tray Setting Menu
Screen.
11
Touch [Coloured Paper].
The Coloured Paper Setting Screen will be displayed.
12
Select a desired paper colour.
Touch [OK] to complete the setting and return to the Tray Setting Menu
screen.
13
15-10
Touch [Hole-Punch].
The Hole-Punch Setting Screen will be displayed.
bizhub PRO 920
Paper Setting
14
15
Touch [With Punch Hole] or [No Punch Hole].
Touch [OK] to complete the setting and return to the Tray Setting Menu
Screen.
15
Touch [Both Sides Adjust].
The both sides adjust setting screen will be displayed.
16
Enter the adjustment values as follows.
–
–
–
–
Touch [Front] or [Back] to select the printed side.
Select the adjustment item ([Vertical], [Horizontal], [Up/Down], and
[Right/Left]).
Enter the desired adjustment value using the control panel keypad.
Touch [+/-] to adjust the value to be positive or negative.
Touch [OK] to complete the setting and return to the Tray Setting
Screen.
17
Touch [Close] to return to the Paper setting screen.
bizhub PRO 920
15-11
Paper Setting
15
15.3
Change Size Setting
Use this function to change paper settings according to a specified paper
type.
!
Detail
To change the paper size of the Tray 4 (Large Capacity Unit), contact your
service representative.
When setting wide size, be sure to specify the precise dimensions of paper to be used.
1
Press the [Utility/Counter] on the
control panel.
The Utility Screen will be displayed.
2
Touch [6 Administrator Setting].
The Password Input Screen will be displayed.
When the Password Input Screen is not displayed, proceed to step 4.
15-12
bizhub PRO 920
Paper Setting
3
15
Enter the eight-digit administrator password, and then touch [OK].
The Administrator Setting Screen will be displayed.
4
Touch [1 System Setting].
5
Touch [8 Paper Setting].
bizhub PRO 920
15-13
Paper Setting
15
6
Touch [1 Tray Setting].
The tray setting screen will be displayed.
15-14
7
Touch a desired tray key to highlight it.
8
Touch [Size Setting] to change a tray setting.
The Size Setting Screen will be displayed.
9
Touch the desired key to specify the detectable size.
bizhub PRO 920
Paper Setting
10
15
Select Standard size when loading the standard size of paper in the
specified tray.
–
–
Touch [Standard Size] to highlight it.
If selected tray will be loaded with one of the following sizes, touch
[Original Size Detection] to display the Original Size Detection
Screen, and then touch the desired size key.
If 5.5×8.5 is selected on the Original Size Detection Screen, the machine will automatically detect 5.5×8.5 instead of A5. Similarly,
8.5×11R will be detected instead of A4R, 8.5×14 will be detected
instead of 8.5×13.
Touch [OK] to complete the setting and return to the Size Setting
Screen.
11
Select [Custom Size] when setting loading the custom size of paper in
the specified tray.
–
–
Touch Custom Size to display the custom Size Setting Screen.
Touch [X] indicating the horizontal size, then enter the desired size
using the control panel keypad. Similarly, touch [Y] indicating the
vertical size, then enter the desired size. From the minimum size of
140×182 mm to the maximum size of 314×445 mm can be set.
bizhub PRO 920
15-15
Paper Setting
15
–
Touch [Lead Edge], [Rear Edge], or [Centre] to specify the desired
image position.
Touch [OK] to complete the setting and return to the Size Setting
Screen.
12
15-16
Select Wide Size Paper when loading the wide size of paper in the
specified tray.
–
–
–
Touch [Wide Size Paper] to display the Wide Size Selection Screen.
Touch the desired wide size key to highlight it.
Touch [Lead Edge], [Rear Edge], or [Centre] to specify the desired
image position.
–
–
Touch [Input Size] to display the Wide Size Input Screen.
Touch [X] indicating the horizontal size, then enter the desired size
using the control panel keypad. The value should fall within the
range from the horizontal size of the standard wide size paper to a
maximum of 445mm can be set. Similarly, touch [Y] indicating the
vertical size, then enter the desired size. The value should fall within
the range from the vertical size of the standard wide size paper to
a maximum of 314mm.
bizhub PRO 920
Paper Setting
15
When using the LU-403, the maximum size will be 223mm; when
using the LU-404, the maximum size will be 460mm.
– Touch [Select Size] to return to the Select Size Screen.
Touch [OK] to complete the setting and return to the Size Setting
Screen.
13
Select Tab Paper when loading tab paper in the specified tray.
–
–
–
bizhub PRO 920
Touch [Tab Paper] to display Tab Paper Size Selection Screen.
Touch the desired tabbed paper size key to highlight it.
Touch [Number of Tabs], then enter the number of tabs using the
control panel keypad. Setting range is from 1 to 5.
15-17
Paper Setting
15
–
–
Touch [Input Size] to set the desired size.
Touch [X], [Y], or [Z], indicating the vertical, horizontal or index size,
then enter the desired size using the control panel keypad.
–
The value to be specified for X and Y will be the minimum size of
140×182mm to the maximum size of 314×445mm. The value to be
specified for Z will be 0 to 99mm.
– Touch [Select Size] to return to the Select Size Screen.
Touch [OK] to complete the setting and return to the Tray Setting
Screen.
15-18
bizhub PRO 920
16
Controller Setting
Controller Setting
16
Controller Setting
16.1
Function Overview
16
Setting change concerning the printer controller is available from the Controller Setting Screen.
Press [Utility/Counter] to display the Utility
Screen, and then touch [Controller] on the
Utility Screen. The Controller Setting
Screen will be displayed.
bizhub PRO 920
16-3
Controller Setting
16
The menu comprises the following settings.
01 Report Type
Use the function to print out the report type selected from the screen. See
“01 Report Type” on page 16-9.
Menu Items
Description
Setting Options
Configuration Page Print
Print the configuration page to check the
firmware version and network settings.
---
PCL Demo Page Print
Print the PCL demo page.
---
PS Demo Page Print*
Print the PS demo page.
---
PCL Font List
Print the PCL font list.
---
PS Font List*
Print the PS font list.
---
* : Available with option.
16-4
bizhub PRO 920
Controller Setting
16
02 Printer Setting
Various printer settings are available from this screen. See “02 Printer Setting” on page 16-11.
!
Detail
It may not operate properly depending upon the combination of settings
selected.
The following default settings are used unless otherwise specified by the
printer driver.
Menu Items
Description
Default
No.
Specify the default output setting for each
number.
1-6
1
1 PDL
Select the page description language to be initially used.
Auto, PCL, PS, TIFF
Auto
2 Paper Feed Tray
Select the paper feed tray to be initially used.
The selectable items vary depending upon the
configuration of installed options.
Auto, Tray 1, Tray 2, Tray 3, LCT, Bypass
Auto
3 Output Tray
Select the exit tray to be initially used.
Auto, Main Tray, Sub Tray
Auto
4 Duplex
Select to allow double-sided printing.
Off, On
Off
5 Binding
Select the binding position to be initially used.
Top, Left, Right
Left
6 Staple
Select the staple position to be initially used.
Off, 1 Staple (Left), 1 Staple (Right), 2 Staple
Off
7 Punch
Select the punch position to be initially used.
Off, 2 Holes, 3 Holes
Off
8 Fold/ Trimming
Select the initial setting for each function.
Off, Z-fold (A3/B4/11×17/8K), Z-fold (8.5×14),
Fold & Staple, Fold & Staple/Trim, half fold, Letter fold IN, Letter fold OUT
Off
9 Offset
Select to use the offset function.
On, Off
Off
10 Output Order
Select to exit face up or face down in initial
state.
Face Down, Face Up
Face Down
11 Image Order
Select the print page order in initial state.
1 to N, N to 1
1 to N
1 Basic Setting
bizhub PRO 920
16-5
Controller Setting
16
Menu Items
16-6
Description
Default
12 Print Number
Specify the print quantity in initial state.
1 to 9999
1
13 Sort
Select to use the finishing mode.
Collated, Uncollated
Collated
14 Paper Size
Select the paper size to be initially used.
When specifing tabs, select the number of tabs
as well.
A3, B4, A4, B5, A5, B6, 8×13, 8.25×13,
8.125×13, 11×17, 8.5×14, 8.5×13, 8.5×11,
5.5×8.5, A3W, B4W, A4W, B5W, 11×17W,
8.5×14W, 8.5×11W, 5.5×8.5W, 8.5×11Tab,
A4Tab
A4
15 Orientation
Select the orientation of the image printed on
copy paper.
Portrait, Landscape
Portrait
16 Banner Option
Select to print the banner page.
Off, On
Off
17 Banner Tray
Select the paper feed tray for printing banner
page.
The selectable items vary depending upon the
configuration of installed options.
Auto, Tray 1, Tray 2, Tray 3, LCT, Bypass
Auto
18 Convert Paper
Size
Select to change the paper size.
Off, 8.5×11/11×17 to A4/A3, A4/A3 to 8.5×11/
11×17
Off
19 Combination
Specify the desired combination function.
Off, 2 in 1, 2 repeat, 2 repeat-reversal(L), 2 repeat-reversal(R), 2 repeat-reversal(U), 2 repeatreversal(D)
Off
20 Booklet
Select to use the Booklet function.
Off, On
Off
21 Adhesive Binding
Select to use the Adhesive binding mode.
Off, On
Off
22 Print Position
Select the initial print position.
Rear Edge, Centre, Lead Edge
Rear Edge
bizhub PRO 920
Controller Setting
16
Menu Items
Description
Default
1 Font Source
Select the medium of font source.
Internal: Standard font
Disk: Downloaded font
Soft: Software font
Internal, Disk, Soft
Internal
2 Font Number
Specify the area of available font number according to the font source.
0 to 999
0
3 Symbol
SetSpecify the symbol set.*
DESKTOP, ISO4, ISO6, ISO11, ISO15, ISO17,
ISO21, ISO60, ISO69, ISO 8859/Latin 1, ISO
8859/Latin 2, ISO 8859/9 Latin 5, ISO8859/10
Latin 6, ISO 8859/15/Latin 9, Legal, Math-8, MC
Text, Microsoft Publishing, PC-75, PC-8 Code
Page 437, PC-850 Multilingual, PC-852 Latin 2,
PC-858 Multilingual. PC-8 Turkish, PC-8 Danish/Norwegian, PC-1004, PI Font, PS Math, PS
Text, Roman-8, Windows 3.0 Latin 1, Windows
Baltic, Windows 3.1 Latin 1, Windows 3.1 Latin
2, Windows 3.1 Latin 5, PC-866 Ukraine
Roman-8
4 Form lines
Specify the number of lines per page.
5 to 128
64
5 Font point size
Specify the font size by point.
0.44 to 99.75
12.00
6 Font pitch
Specify the font pitch.
0.44 to 99.95
10.00
7 CR/LF Mapping
Select the line feed code.
Off, CR, LF, CRLF
Off
1 Print to PS Error
Select to print the error report when an error occurs while rasterizing PostScript data.
Off, On
On
2 PDF -> PS Conversion error control
Select to print the error pages produced by the
memory overflow when printing a PDF file.
Off, On
Off
1 Auto Paper Select
Select to use APS function.
Off, On
On
2 Image Position
Select the image position to be printed on a
page.
Left, Centre
Left
2 PCL Setting
3 PS Setting (Option)
4 TIFF Setting
* : For the details of the symbol set, see the appendix.
bizhub PRO 920
16-7
Controller Setting
16
03 Select Printer Setting
Select the default port number, and specify the output format for each port.
See “03 Select Printer Setting” on page 16-18.
Menu Items
Description
Default
Default (9100)*1
Select the default port number.
1 to 6
1
Port 2 (9112)*1
Select the number for Port 2.
1 to 6
1
Port 3 (9113)*1
Select the number for Port 3.
1 to 6
1
Port 4 (9114)*1
Select the number for Port 4.
1 to 6
1
Port 5 (9115)*1
Select the number for Port 5.
1 to 6
1
Port 6 (9116)*1
Select the number for Port 6.
1 to 6
1
*1: Port No. (9100, etc.) is the initial setting. To change the setting, see “03
Select Printer Setting” on page 16-18.
04 Spool
Select to spool the job to HDD. See “04 Spool” on page 16-20.
Menu Items
Description
Default
Spool
Select to spool the job to HDD.
Auto, Enable, Disable
Disable
05 Interface Setting
Set the timer to terminate the interface. See “05 Interface Setting” on
page 16-21.
16-8
Menu Items
Description
Default
Parallel Timeout
Set the timer to terminate the parallel
port.
10 to 300 seconds
60
Network Timeout
Set the timer to terminate the network
port.
10 to 300 seconds
60
bizhub PRO 920
Controller Setting
16.2
16
01 Report Type
Use this function to print out the report type selected from the screen.
1
Press the [Utility/Counter] to display the Utility Screen.
2
Touch [Controller].
The Controller Setting Screen will be displayed.
3
Touch [01 Report Type].
The Report Type Selection Screen will be displayed.
4
Touch the desired report type key to select it.
bizhub PRO 920
16-9
Controller Setting
16
16-10
5
Touch [Execute].
The Controller Setting Screen will be restored, and the Data LED on the
control panel blinks to indicate that the printing operation is in
progress.
To return to the previous screen, touch [Return].
6
If further changes are required, touch the desired key.
Touch [Utility] to complete the setting and restore the Utility Screen.
bizhub PRO 920
Controller Setting
16.3
16
02 Printer Setting
Use this function to register the desired output form. Six types can be specified at maximum.
Specify the setting number (1 to 6) first, then specify the following four printer
settings for that number.
- 01 Basic Setting specifies basic settings for printer.
- 02 PCL Setting specifies the settings concerning printer protocol.
- 03 PS Setting allows the machine to output the PS error print.
- 04 TIFF Setting specifies the settings concerning TIFF image.
1
Press the [Utility/Counter] to display the Utility Screen.
2
Touch [Controller].
The Controller Setting Screen will be displayed.
3
Touch [02 Printer Setting].
The Printer Setting Screen will be displayed.
4
Specify the setting number.
bizhub PRO 920
16-11
Controller Setting
16
–
–
16-12
Use the control panel keypad to enter the setting number for your
setting.
Available range is from 1 to 6.
Touch Set to complete the setting. If wrong number is entered,
touch [Reset] to re-enter the correct number.
bizhub PRO 920
Controller Setting
5
16
Perform the Basic Setting.
–
–
bizhub PRO 920
Touch [01 Basic Setting]. The Basic Setting Screen will be displayed.
Make the desired setting. Touch [Next] or [Previous] to scroll to the
desired item.
16-13
Controller Setting
16
6
–
The following settings are used unless otherwise specified by the
printer driver.
01 PDL: Select the page description language to be initially used.
02 Paper Feed Tray: Select the paper feed tray to be initially used.
03 Output Tray: Select the exit tray to be initially used.
04 Duplex: Select to allow double-sided printing.
05 Binding: Select the binding position to be initially used in doublesided printing.
06 Staple: Select the staple position to be initially used.
07 Punch: Select the punch position to be initially used.
08 Fold/Trimming: Select the initial setting for each function.
09 Offset: Select to use the offset function.
10 Output Order: Select to exit face up or face down in initial state.
11 Image Order: Select the print page order in initial state.
12 Print Number: Specify the print quantity in initial state.
13 Sort: Select to use the Sort mode.
14 Paper Size: Select the paper size to be initially used.
15 Orientation: Select the orientation of the image printed on copy
paper.
16 Banner Option: Select to print the banner page.
17 Banner Tray: Select the paper feed tray for printing banner page.
18 Convert Paper Size: Select to change the paper size.
19 Combination: Specify the desired combination function.
20 Booklet: Select to use the Booklet function.
21 Adhesive Binding: Select to use the Adhesive binding mode.
22 Print Position: Select the initial print position.
–
Touch [Return] to complete the setting and restore the Printer Setting Screen.
Perform the PCL Setting.
–
16-14
Touch [02 PCL Setting]. The PCL Setting Screen will be displayed.
bizhub PRO 920
Controller Setting
–
–
bizhub PRO 920
16
Make the desired setting.
01 Font Source: Select the medium of font source.
02 Font Number: Specify the font number available from the font
source.
03 Symbol Set: Specify the symbol set.
04 Form lines: Specify the number of lines per page.
05 Font point size: Specify the font size by point.
06 Font pitch: Specify the font pitch.
07 CR/LF Mapping: Select the line feed code.
Touch [Return] to complete the setting and restore the Printer Setting Screen.
16-15
Controller Setting
16
7
Perform the PS Setting (option).
–
Touch [03 PS Setting]. The PS Setting Screen will be displayed.
–
Make the desired setting.
[01 Print to PS error]: Select [On] to print the error report when an
error occurs while rasterizing PostScreipt data.
[02 PDF -> PS Conversion error control]: Select [On] to stop printing
error pages resulted from the memory overflow.
–
–
16-16
Touch [OK] to complete the setting. The PS Setting Screen will be
restored.
Touch [Return] to complete the setting and restore the Printer Setting Screen.
bizhub PRO 920
Controller Setting
8
16
Perform the TIFF Setting.
–
Touch [04 TIFF Setting]. The TIFF Setting Screen will be displayed.
–
Make the desired setting.
01 Auto Paper Select: Select to use APS function.
02 Image Position: Select the image position to be printed on a
page.
–
–
Touch [OK] to complete the setting. The TIFF Setting Screen will be
restored.
Touch Return to complete the setting and restore the Printer Setting Screen.
9
Touch [Return] on the Printer Setting Screen. The Controller Setting
Screen will be restored.
10
If further changes are required, touch the desired key.
Touch [Utility] to complete the setting and restore the Utility Screen.
bizhub PRO 920
16-17
Controller Setting
16
16.4
03 Select Printer Setting
Select the default port number, and specify the output format for each port.
1
Press the [Utility/Counter] to display the Utility Screen.
2
Touch [Controller].
The Controller Setting Screen will be displayed.
3
Touch [03 Select Printer Setting].
The Select Printer Setting Screen will be displayed.
16-18
bizhub PRO 920
Controller Setting
16
4
Touch the key to be specified.
Touch [Next] or [Previous] to scroll to the desired item. To designate
the port number, enter the number (1-6) already specified in “2 Printer
Setting”, using the control panel keypad.
The “Default” (9100) is the port designated for printing the list.
5
Touch [Set] to complete the setting. If wrong number is entered before
touching Set, touch [Reset] to re-enter the correct number.
6
Touch [Return]. The Controller Setting Screen will be restored.
7
If further changes are required, touch the desired key.
Touch [Utility] to complete the setting and restore the Utility Screen.
bizhub PRO 920
16-19
Controller Setting
16
16.5
04 Spool
Select to enable, disable, or automatically perform the spool function.
1
Press the [Utility/Counter] to display the Utility Screen.
2
Touch [Controller].
The Controller Setting Screen will be displayed.
3
Touch [04 Spool].
The Spool Selection Screen will be displayed.
16-20
4
Touch the desired key to select it.
5
Touch [OK] to complete the setting. The Controller Setting Screen will
be restored.
6
If further changes are required, touch the desired key.
Touch [Utility] to complete the setting and restore the Utility Screen.
bizhub PRO 920
Controller Setting
16.6
16
05 Interface Setting
Set the time for Parallel Timeout and Network Timeout.
1
Press the [Utility/Counter] to display the Utility Screen.
2
Touch [Controller].
The Controller Setting Screen will be displayed.
3
Touch [05 Interface Setting].
The Interface Setting Screen will be displayed.
4
Touch [Parallel Timeout] or [Network Timeout].
bizhub PRO 920
16-21
Controller Setting
16
–
16-22
Use the control panel keypad to enter the time, then touch [Set].
The available range is from 10 to 300. When the time outside this
range is entered as touching Set, the time initially entered is designated.
If the wrong number is entered before touching [Set], touch [Reset]
to re-enter the correct number.
5
Touch [Return]. The Controller Setting Screen will be restored.
6
If further changes are required, touch the desired key.
Touch the [Utility] to complete the setting and restore the Utility Screen.
bizhub PRO 920
17
Utility <User Setting>
Utility <User Setting>
17
Utility <User Setting>
17.1
User Setting Outlines
17
Press the [Utility/Counter] on the control
panel to display the Utility Screen.
The Utility Screen includes two types of setting items: one in which a user
can set and the other in which an administrator is required to enter a password.
This section describes the user setting.
bizhub PRO 920
17-3
Utility <User Setting>
17
17.2
List of the User Setting
Specific setting and Description
Default
1 System Setting
1 Language Setting
Select the language used in the LCD.
English
English
2 Buzzer Setting
17-4
1 Buzzer On/Off, Volume Setting
Set the buzzer sound (the touch key sound) as touching
the screen.
On/Off, High/Low
Off
2 Buzzer for Job Stop Setting
Select the duration of the buzzer sound when the machine stops due to no paper and mishandled paper.
Off/3 seconds/5 seconds/10 seconds
Off
3 1SHOT Indication Time
Select the SHOT indication time to be displayed in the message indication area of the touch panel.
3 seconds/5 seconds
3 seconds
4 Panel Reset Setting
Set the reset interval starting from the completion of a copying job until the machine returns to the initial condition,
without selecting any key on the touch panel or the control
panel.
Off/60 seconds/120 seconds/180 seconds/240 seconds/
300 seconds/360 seconds/420 seconds/480 seconds/540
seconds
60 seconds
5 Sub Area Display On/Off
Select the display on the sub area of the Basic Setting
Screen.
Setting Value/Job List
Setting Value
6 Key Response Time
Select the key response time.
Normal/0.5 seconds/1 seconds/2seconds/3 seconds
Normal
7 Change User Password
Change a user password which the user has registered for
user authentication.
Enter new password
---
8 Warm Up Screen On/Off
Select On/Off to display the Warm Up Screen when the
power switch is turned ON.
On/Off
Off
bizhub PRO 920
Utility <User Setting>
Specific setting and Description
17
Default
2 Function Setting
1 Feed Tray Setting
1 Feed Tray Auto Selection
Select ATS for each tray and the priority of the detection when ATS functions.
ATS/APS Switch (Trays 1 to 4,Bypass Tray): Off, Tray
Priority: Tray4/Tray3/Tray1/Tray2/Bypass Tray
ATS/APS Switch (Trays 1 to
4,Bypass Tray): Off
2 ATS Permission selection
Set ATS On or Off.
On/Off
Off
3 Auto Paper Type
Set the paper type to be selected when ATS functions.
Paper Type ( - )/Coloured
Paper ( - )/Hole-Punch (No
Hole-Punch)
2 Each Function Setting
Fine Adjust Margin
Select On/Off to enter a decimal point for image shift.
Decimal On/Decimal Off
Decimal Off
Printer Prohibit Timer
Select the interval time that printing via PC is prohibited
after touching the touch keys.
Off/15 seconds/30 seconds/60 seconds/90 seconds
30 seconds
3 Density Setting
1 Density Shift for Original Image Type
Select the default density setting for each Original Image Type.
2 User Density Setting
Preset the density level which is frequently used.
Two levels
Preset1: lightest
Preset2: darkest
Two levels
3 Photo Mode Density Setting
Select the density level set in EE (Auto Density Setting)
when the Photo Mode is selected.
Lighter/Standard/Darker
Standard
4 Image Density Selection
Set the image density lighter or set the maximum dark
level darker, without degrading the image quality
+1 - -5 (7 levels)
Standard
4 Preset Zoom
Preset the magnification ratio which is frequently used.
Three types
bizhub PRO 920
6 levels (Text & Photo:+3,
Low Contrast:+4, Photo:+3,
Text:+3)
Set Zoom 1: 4.000
Set Zoom 2: 2.000
Set Zoom 3: 0.500
17-5
Utility <User Setting>
17
Specific setting and Description
Default
5 Tandem Setting
1 Tandem Sub Machine One Time Data Read
Set the sub machine to receive all the data transmitted
from the master machine before starting to print.
On/Off
2 Tandem Sub Machine Wait/Proof
Set the master machine to transmit the data to the sub
machine at the time when the master machine starts
scanning the data for proof copying.
Permit/Prohibit
3 Tandem Sub Machine Shift Data Setting
Set the sub machine to use the same shift value used
on the master machine.
Master Machine Shift data/Sub Machine Shift data
4 Tandem Selection after JOB completion
Select to continue or release the tandem mode after the
current tandem job is completed.
Continue/Release
5 Distribution Recovery
Set the tandem-connected machines to perform the
job distribution again for print quantity remaining on
one machine when the other has already finished with
its assignment.
On/Off
17-6
Off
Permit
Master Machine Shift data
Release
On
bizhub PRO 920
Utility <User Setting>
17
Specific setting and Description
Default
3 Copier Setting
1 Reset Setting
1 Initial Setting
Set the initial setting when the machine is reset.
Current Setting/Factory Default
Factory Default
2 Reset Function Setting
AUTO RESET Key Setting
Set the on-screen indication which is displayed
when pressing [Reset].
The factory default setting is [Full Auto], and the
initial setting is the settings defined in “1 Initial
Setting”.
Full auto/Initial Setting
Full-auto
Finisher Mode by Full-auto
Select the Finisher mode when Full Auto is selected as pressing [Reset].
Group/Sort/Staple/Fold & Staple/Half Fold/Face
UP/Face Down
Sort
3 Initial by Key Counter Insert
Select to reset the copying conditions to the initial setting when inserting the key counter and the copy card.
On/Off
On
2 Each Function Setting
Booklet Copy Auto Select
Set the machine to automatically select the Booklet
mode when Fold & Staple or Half Fold mode is selected.
Auto Select/Not Auto Select
Auto Select
Original Glass AMS
Set the machine to detect the size of the original and
select the appropriate magnification ratio to correspond to the selected paper size.
On/Off
On
ADF AMS
Set the machine to automatically select an appropriate
ratio for copying when detecting the original size
placed on the ADF.
On/Off
On
Original Glass APS
Set the machine to automatically select the same size
of copy paper as the original placed on the original
glass.
On/Off
bizhub PRO 920
On
Auto Detection Orig. Size in ADF
Set the machine to automatically select the same size
of copy paper as the original placed on the ADF.
On/Off
On
Choose Default Tray when APS Off
Select the tray to be automatically selected when APS
is released.
APS Tray/Tray1/Tray2/Tray3/Tray4/Bypass Tray
APS Tray
17-7
Utility <User Setting>
17
Specific setting and Description
Org./Out Bind Direction Set
Set the machine to conform the binding direction of the
originals and printed sets each other.
On/Off
On
Staple Auto Reset
Set the stapling setting On or Off when pressing [Reset].
On/Off
Off
Original Set/Bind Direction
Select to reset or save the original direction setting
made on the Special Original Screen and the bind position setting made on the Output Mode Screen after
completion of each copying job.
Do Not Release/Release Per JOB
Release Per JOB
Status Hold When Auto Reset
When Auto Reset functions, select to reset the Platen/
RADF mode to the initial setting, or save the previous
setting.
Hold/Not Hold
Not Hold
Annotation at JOB completion
Set the machine to automatically select Annotation after a copying job has been made.
Select/Not Select
Original Glass Auto Copy Reserve
Set the machine to automatically display the Job Reserve Screen when the current job has completed
scanning originals from the original glass and started
printing.
On/Off
17-8
Default
Not Select
Off
bizhub PRO 920
Utility <User Setting>
Specific setting and Description
17
Default
4 Scanner Setting
1 Default Address Setting
Select the default destination to be displayed when selecting the Scanner Screen.
E-Mail/HDD/FTP/SMB
E-Mail
2 Each Function Setting
File Form Setting (E-Mail)
Select the default file form when transmitting in E-Mail.
Multi Page PDF/Single Page PDF/Multi Page TIFF/Single Page TIFF
Multi Page PDF
File Form Setting (HDD)
Select the default file form when saving in HDD.
Multi Page PDF/Single Page PDF/Multi Page TIFF/Single Page TIFF
Multi Page PDF
File Form Setting (FTP)
Select the default file form when transmitting to FTP.
Multi Page PDF/Single Page PDF/Multi Page TIFF/Single Page TIFF
Multi Page PDF
File Form Setting (SMB)
Select the default file form when transmitting in SMB.
Multi Page PDF/Single Page PDF/Multi Page TIFF/Single Page TIFF
Multi Page PDF
Default Resolution Setting
Select the default scanning quality
600dpi/400dpi/300dpi/200dpi
400dpi
5 Touch Panel Adjust
Check the touch panel and realign the position of the touch
sensor that may have shifted.
bizhub PRO 920
---
17-9
Utility <User Setting>
17
17.3
1 System Setting
1 Language Setting
Select the language used in the touch panel.
The initial setting is English.
1
Press the [Utility/Counter] to display the Utility Screen.
2
Touch [1 System Setting].
The System Setting Screen will be displayed.
3
Touch [1 Language Setting].
The Language Setting Screen will be displayed.
4
17-10
Select the desired mode.
bizhub PRO 920
Utility <User Setting>
17
5
Touch [OK] to complete the setting and return to the System Setting
Screen.
6
If further changes are required, touch the desired key.
Touch Utility to restore the Utility Screen.
bizhub PRO 920
17-11
Utility <User Setting>
17
2 Buzzer Setting>1 Buzzer On/Off, Volume Setting
Set the buzzer sound (the touch key sound) as touching the screen, and also
select the buzzer volume.
1
Press the [Utility/Counter] to display the Utility Screen.
2
Touch [1 System Setting].
The System Setting Screen will be displayed.
3
Touch [2 Buzzer Setting].
The Buzzer Setting Screen will be displayed.
4
Touch [1 Buzzer On/Off, Volume Setting].
The Buzzer On/Off, Volume Setting Screen will be displayed.
17-12
bizhub PRO 920
Utility <User Setting>
5
17
Touch the desired Key.
Touch [On] to highlight it. Adjust the Buzzer volume, as desired. Touch
[Low] or [High] to regulate the buzzer volume of the touch keys.
Touch [Off] to highlight it. The buzzer will go off.
6
Touch [OK] to complete the setting and return to the Buzzer Setting
Screen.
7
If further changes are required, touch the desired key.
Touch [Utility] to restore the Utility Screen.
bizhub PRO 920
17-13
Utility <User Setting>
17
2 Buzzer Setting>2 Buzzer for Job Stop Setting
Select the duration of the buzzer sound when the machine stops.
1
Press the [Utility/Counter] to display the Utility Screen.
2
Touch [1 System Setting].
The System Setting Screen will be displayed.
3
Touch [2 Buzzer Setting].
The Buzzer Setting Screen will be displayed.
4
Touch [2 Buzzer for Job Stop Setting].
The Buzzer for Job Stop Setting Screen will be displayed.
17-14
bizhub PRO 920
Utility <User Setting>
17
5
Select the desired time to highlight it.
6
Touch [OK] to complete the setting and return to the Buzzer Setting
Screen.
If further changes are required, touch the desired key.
7
Touch [Utility] to restore the Utility Screen.
bizhub PRO 920
17-15
Utility <User Setting>
17
3 1 SHOT Indication Time
Select the SHOT indication time to be displayed in the message indication
area of the touch panel, such as “Original size A4”.
1
Press the [Utility/Counter] to display the Utility Screen.
2
Touch [1 System Setting].
The System Setting Screen will be displayed.
3
Touch [3 1 SHOT Indication Time].
The 1 SHOT Indication Time Screen will be displayed.
17-16
4
Touch [3 seconds] or [5 seconds] to highlight it.
5
Touch [OK] to complete the setting and return to the System Setting
Screen.
6
If further changes are required, touch the desired key.
Touch [Utility] to restore the Utility Screen.
bizhub PRO 920
Utility <User Setting>
17
4 Panel Reset Timer Setting
Set the reset interval starting from the completion of a copying job until the
machine returns to the initial screen, without selecting any key on the touch
panel or the control panel.
1
Press the [Utility/Counter] to display the Utility Screen.
2
Touch [1 System Setting].
The System Setting Screen will be displayed.
3
Touch [4 Panel Reset Timer Setting].
The Panel Reset Timer Setting Screen will be displayed.
4
Select the desired time to highlight it.
5
Touch [OK] to complete the setting and return to the Utility Screen.
6
If further changes are required, touch the desired key.
Touch [Utility] to restore the Utility Screen.
bizhub PRO 920
17-17
Utility <User Setting>
17
5 Sub Area Display On/Off
Select the sub area display in the left side of the initial screen.
Setting options: Setting value/Job list
1
Press the [Utility/Counter] to display the Utility Screen.
2
Touch [1 System Setting].
The System Setting Screen will be displayed.
3
Touch [5 Sub Area Display On/Off].
The Sub Area Display On/Off Screen will be displayed.
17-18
4
Select the desired sub screen to highlight it.
5
Touch [OK] to complete the setting and return to the Utility Screen.
6
If further changes are required, touch the desired key.
Touch [Utility] to restore the Utility Screen.
bizhub PRO 920
Utility <User Setting>
17
6 Key Response Time
Select the response time between touching the key and the machine responses to it.
1
Press the [Utility/Counter] to display the Utility Screen.
2
Touch [1 System Setting].
The System Setting Screen will be displayed.
3
Touch [6 Key Response Time].
The Key Response Time Screen will be displayed.
4
Select the desired time to highlight it.
5
Touch [OK] to complete the setting and return to the Utility Screen.
6
If further changes are required, touch the desired key.
Touch [Utility] to restore the Utility Screen.
bizhub PRO 920
17-19
Utility <User Setting>
17
7 Change User Password
Change a user password which the user has registered for user authentication.
The changed password is reflected to the user authentication setting description.
1
Press the [Utility/Counter] to display the Utility Screen.
2
Touch [1 System Setting].
The System Setting Screen will be displayed.
3
Touch [7 Change User Password].
The User Authentication Screen will be displayed.
4
Enter the user name.
–
17-20
Touch [User Name] to display the Input User Name Screen.
bizhub PRO 920
Utility <User Setting>
–
17
Enter the user name, then touch [OK] to return to the User Authentication Screen.
The entered name will be displayed on the screen.
5
Enter the current password.
–
bizhub PRO 920
Touch [Password] to display the Input User Password Screen.
17-21
Utility <User Setting>
17
–
Enter the current password. The entered password will appear as
asterisks (********) on the screen. Then touch [OK].
The Change User Password Screen will be displayed.
6
17-22
Enter a new user password.
–
Touch [New Password] to display the Input New Password Screen.
–
Enter a new password, the touch [OK].
bizhub PRO 920
Utility <User Setting>
17
–
Touch [Check Input] to display the Re-input New Password Screen.
–
Enter a new password once more for confirmation, then touch [OK].
The Change User Password Screen will be restored.
7
Touch [OK] to complete the setting and return to the Utility Screen.
8
If further changes are required, touch the desired key.
Touch [Utility] to restore the Utility Screen.
bizhub PRO 920
17-23
Utility <User Setting>
17
8 Warm Up Screen On/Off
1
Press the [Utility/Counter] to display the Utility Screen.
2
Touch [1 System Setting].
The System Setting Screen will be displayed.
3
Touch [8 Warm Up Screen On/Off].
The Warm Up Screen On/Off Screen will be displayed.
17-24
4
Select [On] when Warm Up Screen is displayed, and [Off] when Warm
Up Screen is not displayed.
5
Touch [OK] to complete the setting and return to the Utility Screen.
6
If further changes are required, touch the desired key.
Touch [Utility] to restore the Utility Screen.
bizhub PRO 920
Utility <User Setting>
17.4
17
2 Function Setting
1 Feed Tray Setting>1 Feed Tray Auto Selection
Select the tray size setting to be detected when ATS functions. You may also
select the priority of the detection for each tray.
1
Press the [Utility/Counter] to display the Utility Screen.
2
Touch [2 Function Setting].
The Function Setting Screen will be displayed.
3
Touch [1 Feed Tray Setting].
The Feed Tray Setting Screen will be displayed.
4
Touch [1 Feed Tray Auto Selection].
The Feed Tray Auto Selection Screen will be displayed.
bizhub PRO 920
17-25
Utility <User Setting>
17
17-26
5
Touch to highlight the desired tray key under ATS/APS Switch.
The selected tray is automatically detected when ATS functions. The
trays not selected will not be detected even when ATS functions.
The selected tray will be displayed under Tray Priority as the tray key.
6
Touch to highlight the desired tray key under Tray Priority, then change
its priority by using [Up] and [Down].
7
Touch [OK] to complete the setting and return to the Feed Tray Setting
Screen.
8
If further changes are required, touch the desired key.
Touch [Utility] to restore the Utility Screen.
bizhub PRO 920
Utility <User Setting>
17
1 Feed Tray Setting>2 ATS Permission
Set ATS (Automatic Tray Selection) On or Off.
1
Press the [Utility/Counter] to display the Utility Screen.
2
Touch [2 Function Setting].
The Function Setting Screen will be displayed.
3
Touch [1 Feed Tray Setting].
The Feed Tray Setting Screen will be displayed.
4
Touch [2 ATS Permission].
The ATS Permission Screen will be displayed.
bizhub PRO 920
17-27
Utility <User Setting>
17
17-28
5
Select [On] when ATS is used, and [Off] when ATS is not used.
6
Touch [OK] to complete the setting and return to the Feed Tray Setting
Screen.
7
If further changes are required, touch the desired key.
Touch [Utility] to restore the Utility Screen.
bizhub PRO 920
Utility <User Setting>
17
1 Feed Tray Setting>3 Auto Paper Type Selection
Select the paper type setting of the tray which is automatically selected when
ATS functions. When the paper type that is not specified with this function is
designated to the tray that is automatically selected by ATS, the machine indicates the paper type unmatched.
1
Press the [Utility/Counter] to display the Utility Screen.
2
Touch [2 Function Setting].
The Function Setting Screen will be displayed.
3
Touch [1 Feed Tray Setting].
The Feed Tray Setting Screen will be displayed.
4
Touch [3 Auto Paper Type Selection].
The Auto Paper Type Selection Screen will be displayed.
bizhub PRO 920
17-29
Utility <User Setting>
17
17-30
5
Select the paper type of the tray which is automatically selected when
ATS functions.
Touch to highlight the desired type of keys under Paper Type, Weight,
Coloured Paper, and Hole-Punch. You may choose more than one key
for each item.
6
Touch [OK] to complete the setting and return to the Feed Tray Setting
Screen.
7
If further changes are required, touch the desired key.
Touch [Utility] to restore the Utility Screen.
bizhub PRO 920
Utility <User Setting>
17
2 Each Function Setting>Fine Adjust Margin
Select to enter a decimal point for image shift.
1
Press the [Utility/Counter] to display the Utility Screen.
2
Touch [2 Function Setting].
The Function Setting Screen will be displayed.
3
Touch [2 Each Function Setting].
The Each Function Setting Screen will be displayed.
4
Touch [Fine Adjust Margin] to display the selection keys.
5
Touch [Decimal On] or [Decimal Off] to specify image shift in decimal
point or not.
6
If further changes are required, touch the desired key.
Touch [Utility] to restore the Utility Screen.
bizhub PRO 920
17-31
Utility <User Setting>
17
2 Each Function Setting>Print Prohibit Timer
Select the interval time that printing via PC is prohibited after touching a
touch key on the touch panel.
1
Press the [Utility/Counter] to display the Utility Screen.
2
Touch [2 Function Setting].
The Function Setting Screen will be displayed.
3
Touch [2 Each Function Setting].
The Each Function Setting Screen will be displayed.
17-32
4
Touch [Print Prohibit Timer] to display the Print Prohibit Timer Screen.
5
Select the desired interval time key to set the timer, and then touch
[OK] to return to the Each Function Setting Screen.
6
If further changes are required, touch the desired key.
Touch [Utility] to restore the Utility Screen.
bizhub PRO 920
Utility <User Setting>
17
3 Density Setting>1 Density Shift for Original Image Type
Select the desired copy density level manually from nine levels on the Copy
Screen, and also shift each of nine density levels to three levels lighter or
three levels darker.
Density shift can be applied to each Original Image Type: Auto (Text/photo),
Low Contrast, Photo, and Text.
1
Press the [Utility/Counter] to display the Utility Screen.
2
Touch [2 Function Setting].
The Function Setting Screen will be displayed.
3
Touch [3 Density Setting].
The Density Setting Screen will be displayed.
4
Touch [1 Density Shift for Original Image Type].
The Density Shift for Original Image Type Screen will be displayed.
bizhub PRO 920
17-33
Utility <User Setting>
17
17-34
5
Touch [Lighter] or [Darker] to specify the desired Density shift for each
Original Image Type.
6
Touch [OK] to complete the setting and return to the Density Setting
Screen.
7
If further changes are required, touch the desired key.
Touch [Utility] to restore the Utility Screen.
bizhub PRO 920
Utility <User Setting>
17
3 Density Setting>2 User Density Setting
The copy density level is divided into 16 levels between Darker and Normal,
and between Normal and Lighter, respectively. Select and preset two levels
from the 32 levels. The preset density level setting can be recalled from Special Image on the Copy Screen.
1
Press the [Utility/Counter] to display the Utility Screen.
2
Touch [2 Function Setting].
The Function Setting Screen will be displayed.
3
Touch [3 Density Setting].
The Density Setting Screen will be displayed.
4
Touch [2 User Density Setting].
The User Density Setting Screen Menu will be displayed.
bizhub PRO 920
17-35
Utility <User Setting>
17
5
Touch [User Density 1] or [User Density 2].
The Set User Preset Density Level Screen will be displayed.
17-36
6
Touch [Darker] or [Lighter] to select the desired density level to preset
either between the darkest and normal or between normal and the
lightest.
7
Output density level sample sheet.
Select the sample sheet from each sample output level of [1-4], [5-8],
[9-12], and [13-16], and touch [Copy]. Place the original on the original
glass, and press the [Start] on the control panel.
bizhub PRO 920
Utility <User Setting>
17
8
Touch [User Density] on the Basic Screen to restore the Set User Preset Density Level Screen.
9
Repeat step 6 to 8 when outputting more than one sample sheet for
each level.
10
Check the sample sheet and enter the desired density level using the
control panel keypad.
The number entered will be displayed in the box above Set Density.
–
To output the sample sheet of the specified density level, touch [Set
Density] then touch the [Copy]. Place the original on the original
glass, and press the [Start] on the control panel.
11
Touch [OK] to complete the setting and return to the User Density Setting Screen.
12
If further changes are required, touch the desired key.
Touch [Utility] to restore the Utility Screen.
bizhub PRO 920
17-37
Utility <User Setting>
17
3 Density Setting>3 Photo Mode Density Setting
Set the density level of Photo Mode to be specified in AE.
1
Press the [Utility/Counter] to display the Utility Screen.
2
Touch [2 Function Setting].
The Function Setting Screen will be displayed.
3
Touch [3 Density Setting].
The Density Setting Screen will be displayed.
4
Touch [3 Photo Mode Density Setting].
The Photo Mode Density Setting Screen will be displayed.
17-38
bizhub PRO 920
Utility <User Setting>
17
5
Select the desired density key from [Lighter], [Standard] and [Darker].
6
Touch [OK] to complete the setting and return to the Density Setting
Screen.
7
If further changes are required, touch the desired key.
Touch [Utility] to restore the Utility Screen.
bizhub PRO 920
17-39
Utility <User Setting>
17
3 Density Setting>4 Image Density Selection
Change the Image density of the darkest shadow part. Adjust the image density of any dark part of the original to darker (maximum dark) or lighter, just
like offset printing. Similar to printing materials such as books, this feature is
useful to make texts lighter in order to ease the eye strain.
1
Press the [Utility/Counter] to display the Utility Screen.
2
Touch [2 Function Setting].
The Function Setting Screen will be displayed.
3
Touch [3 Density Setting].
The Density Setting Screen will be displayed.
4
Touch [4 Image Density Selection].
The Image Density Selection Screen will be displayed.
17-40
bizhub PRO 920
Utility <User Setting>
17
5
Touch the desired density key to highlight it.
6
Touch [OK] to complete the setting and return to the Density Setting
Screen.
7
If further changes are required, touch the desired key.
Touch [Utility] to restore the Utility Screen.
bizhub PRO 920
17-41
Utility <User Setting>
17
4 Preset Zoom
Set three types of the preset zoom on the Preset Zoom Screen. The initial
setting for Preset Zoom1 is 4.000, Preset Zoom2 is 2.000, and Preset Zoom3
is 0.500.
17-42
1
Press the [Utility/Counter] to display the Utility Screen.
2
Touch [2 Function Setting].
The Function Setting Screen will be displayed.
3
Touch [4 Preset Zoom].
4
Touch the desired preset key (from 1 to 3) and display the desired
zoom ratio on the right side of the keys using the control panel keypad.
bizhub PRO 920
Utility <User Setting>
17
5
Touch [OK] to complete the setting and return to the Function Setting
Screen.
6
If further changes are required, touch the desired key.
Touch [Utility] to restore the Utility Screen.
bizhub PRO 920
17-43
Utility <User Setting>
17
5 Tandem Setting>1 Tandem Sub Machine One Time Data Read
Set the sub machine to receive all the data transmitted from the master machine before starting to print.
!
Detail
By default, the Tandem Setting key is not displayed. Contact your service
representative.
1
Press the [Utility/Counter] to display the Utility Screen.
2
Touch [2 Function Setting].
The Function Setting Screen will be displayed.
3
Touch [5 Tandem Setting].
The Tandem Setting Screen will be displayed.
4
Touch [1 Tandem Sub Machine One Time Data Read].
The Tandem Sub Machine One Time Data Read Screen will be displayed.
17-44
bizhub PRO 920
Utility <User Setting>
5
17
Touch [On] or [Off] to highlight it.
–
–
With [On] selected, the master machine immediately starts printing
with scanning on the run, while the sub machine waits for all the
data to be transmitted then starts printing.
With [Off] selected, printing job starts on both master and sub machines while the master machine continues scanning the originals.
6
Touch [OK] to complete the setting and return to the Tandem Setting
Screen.
7
If further changes are required, touch the desired key.
Touch [Utility] to restore the Utility Screen.
bizhub PRO 920
17-45
Utility <User Setting>
17
5 Tandem Setting>2 Tandem Sub Machine Wait/Proof
Set the master machine to transmit the scanned data to the sub machine for
making a proof copy on both master and sub machines.
!
Detail
By default, the Tandem Setting key is not displayed. Contact your service
representative.
2
Note
[Permit] cannot be selected if the setting [5 Distribution Recovery] is
turned [On].
1
Press the [Utility/Counter] to display the Utility Screen.
2
Touch [2 Function Setting].
The Function Setting Screen will be displayed.
3
Touch [5 Tandem Setting].
The Tandem Setting Screen will be displayed.
17-46
bizhub PRO 920
Utility <User Setting>
4
17
Touch [2 Tandem Sub Machine Wait/Proof].
The Tandem Sub Machine Wait/Proof Screen will be displayed.
5
Touch [Permit] or [Prohibit] to highlight it.
–
–
With [Permit] selected, the master machine transmits the image
data to sub machine and a proof copy will be made on both master
and sub machines.
With [Prohibit] selected, a proof copy can be made on the master
machine only. Sub machine will receive the image data normally at
the time when printing job starts.
6
Touch [OK] to complete the setting and return to the Tandem Setting
Screen.
7
If further changes are required, touch the desired key.
Touch [Utility] to restore the Utility Screen.
bizhub PRO 920
17-47
Utility <User Setting>
17
5 Tandem Setting>3 Tandem Sub Machine Shift Data Setting
Set the sub machine to use the same shift value used on the master machine.
!
Detail
By default, the Tandem Setting key is not displayed. Contact your service
representative.
2
Note
If the setting 2 Tandem Sub Machine Wait/Proof is set to [Prohibit], the
shift value previously specified for the sub machine cannot be used because the transmitted image data already reflect the shift value specified
for the master machine.
1
Press the [Utility/Counter] to display the Utility Screen.
2
Touch [2 Function Setting].
The Function Setting Screen will be displayed.
3
Touch [5 Tandem Setting].
The Tandem Setting Screen will be displayed.
17-48
bizhub PRO 920
Utility <User Setting>
4
17
Touch [3 Tandem Sub Machine Shift Data Setting].
The Tandem Sub Machine Shift Data Setting Screen will be displayed.
5
Touch [Master Machine Shift Data Setting] or [Sub Machine Shift Data
Setting] to highlight it.
–
–
With [Master Machine Shift Data Setting] selected, the shift value
specified for the master machine will be used on the sub machine.
With [Sub Machine Shift Data Setting] selected, the shift value
specified for the sub machine will be used irrespective of the value
of master machine.
6
Touch [OK] to complete the setting and return to the Tandem Setting
Screen.
7
If further changes are required, touch the desired key.
Touch [Utility] to restore the Utility Screen.
bizhub PRO 920
17-49
Utility <User Setting>
17
5 Tandem Setting>4Tandem Selection after JOB Completion
Select to continue or release the tandem mode after the current tandem job
is completed.
!
Detail
By default, the Tandem Setting key is not displayed. Contact your service
representative.
1
Press the [Utility/Counter] to display the Utility Screen.
2
Touch [2 Function Setting].
The Function Setting Screen will be displayed.
3
Touch [5 Tandem Setting].
The Tandem Setting Screen will be displayed.
4
Touch [4 Tandem Selection after JOB completion].
The Tandem Selection after Job Completion Screen will be displayed.
17-50
bizhub PRO 920
Utility <User Setting>
5
17
Touch [On] or [Off] to highlight it.
–
–
With [On] selected, the two machines will continue to work in tandem after completion of the tandem job.
With [Off] selected, the tandem mode will be released after completion of the tandem job.
6
Touch [OK] to complete the setting and return to the Tandem Setting
Screen.
7
If further changes are required, touch the desired key.
Touch [Utility] to restore the Utility Screen.
bizhub PRO 920
17-51
Utility <User Setting>
17
5 Tandem Setting>5 Distribution Recovery
Set the tandem-connected machines to perform the job distribution again for
print quantity remaining on one machine when the other has already finished
with its assignment.
!
Detail
By default, the Tandem Setting key is not displayed. Contact your service
representative.
2
Note
This function cannot be turned On if the setting 2 Tandem Sub Machine
Wait/Proof is set to [Permit].
1
Press the [Utility/Counter] to display the Utility Screen.
2
Touch [2 Function Setting].
The Function Setting Screen will be displayed.
3
Touch [5 Tandem Setting].
The Tandem Setting Screen will be displayed.
17-52
bizhub PRO 920
Utility <User Setting>
4
17
Touch [5 Distribution Recovery].
The Distribution Recovery Screen will be displayed.
5
Touch [On] or [Off] to highlight it.
–
–
With [On] selected, the tandem-connected machines perform the
distribution recovery.
With [Off] selected, each machine completes the tandem job when
finishing its first distributed quantity.
6
Touch [OK] to complete the setting and return to the Tandem Setting
Screen.
7
If further changes are required, touch the desired key.
Touch [Utility] to restore the Utility Screen.
bizhub PRO 920
17-53
Utility <User Setting>
17
17.5
3 Copier Setting
1 Reset Setting>1 Initial Setting
Besides the factory default setting (Full Auto), you may set the copying condition as the initial setting as desired.
Resetting the machine:
- when the power is turned off
- when Panel Reset is on
- when Power Save is on
- when copying becomes available by entering the password when User
Authentication/Account Authentication is on
- when a key counter or a copy card is inserted
- when pressing the [Reset] on the control panel
Full Auto copying condition:
- Basic Setting: Copy set; 0001, Simplex/Duplex; 1>1, ADF; ON, Density;
AE, Zoom; 1.000, Auto Paper Select; ON
- Finishing: Set by “2 Reset Function Setting”
- Combine Original: Combine Originals; OFF, Original Direction; Normal,
Bind; Right & Left Bind, Special Original; Normal, Original Size; Standard
Size
- Orig. Image Type: Text/Photo
- Application: OFF
1
Set the desired copy condition as the initial setting.
2
Press the [Utility/Counter] to display the Utility Screen.
3
Touch [3 Copier Setting].
The Copier Setting Screen will be displayed.
4
Touch [1 Reset Setting].
The Reset Setting Screen will be displayed.
17-54
bizhub PRO 920
Utility <User Setting>
5
17
Touch [1 Initial Setting].
The Initial Setting Screen will be displayed.
6
Touch [Current Setting] to select the copy condition set by step 1 as
the initial setting.
Touch [Factory Default] to return to the full auto setting.
7
Touch [OK] to complete the setting and return to the Reset Setting
Screen.
8
If further changes are required, touch the desired key.
Touch [Utility] to restore the Utility Screen.
bizhub PRO 920
17-55
Utility <User Setting>
17
1 Reset Setting>2 Reset Function Setting
When the machine is reset, select the copying conditions from the factory
default setting (Full Auto), or Initial Set which is set at “3 Copier Setting>1 Reset Setting>1 Initial Setting”.
In addition, alter Finishing of Full Auto as desired.
1
Press the [Utility/Counter] to display the Utility Screen.
2
Touch [3 Copier Setting].
The Copier Setting Screen will be displayed.
3
Touch [1 Reset Setting].
The Reset Setting Screen will be displayed.
4
Touch [2 Reset Function Setting].
The Reset Function Setting Screen will be displayed.
17-56
bizhub PRO 920
Utility <User Setting>
5
17
Select the copying conditions when resetting the machine.
Touch [AUTO RESET Key Setting] to display the job setting keys.
–
–
Touch [Full-auto] to set to the factory default setting.
Touch [Initial Setting] to set as “3 Copier Setting >1 Reset Setting
>1 Initial Setting”.
When [Initial Setting] is selected for [AUTO RESET Key Setting], Each
Reset Setting becomes enabled.
6
Select the finishing conditions when resetting the machine.
Touch [Finisher Mode by Full-auto].
Touch any key on the screen for Full Auto, and then touch [OK].
The Reset Function Setting Screen will be restored.
7
If further changes are required, touch the desired key.
Touch [Utility] to restore the Utility Screen.
bizhub PRO 920
17-57
Utility <User Setting>
17
1 Reset Setting>3 Initial by Key Counter Insert
Select to reset or not when inserting the key counter and the copy card.
1
Press the [Utility/Counter] to display the Utility Screen.
2
Touch [3 Copier Setting].
The Copier Setting Screen will be displayed.
3
Touch [1 Reset Setting].
The Reset Setting Screen will be displayed.
4
Touch [3 Initial by Key Counter Insert].
The Initial by Key Counter Insert Screen will be displayed.
17-58
bizhub PRO 920
Utility <User Setting>
17
5
Touch [On] to reset and [Off] not to reset, when inserting the key counter or the copy card.
6
Touch [OK] to complete the setting and return to the Reset Setting
Screen.
7
If further changes are required, touch the desired key.
Touch [Utility] to restore the Utility Screen.
bizhub PRO 920
17-59
Utility <User Setting>
17
2 Each Function Setting
The following features can be provided by switching the setting.
- Booklet Copy Auto Select
Set the machine with Finisher FS-604 and Trimmer Unit TU-501 mounted
to automatically select the Booklet mode when Fold & Staple or Fold
mode is selected.
- Original Glass AMS
The machine detects the size of the original and selects the appropriate
magnification ratio to correspond to the selected paper size.
- ADF AMS
After detecting the original size placed in the ADF, the copier automatically selects an appropriate ratio for the copy when copy size is selected
manually.
- Original Glass APS
The machine automatically selects the same size of copy paper as the
original placed on the original glass.
- Auto Detect orig. Size in ADF
The machine automatically selects the same size of copy paper as the
original placed in the ADF.
- Choose Default Tray When APS OFF
Select the tray to be automatically selected when APS is released.
- Orig./Out Bind Direction Set
Set the machine to conform to the binding direction of the originals and
printed sets each other.
- Staple Auto Reset
Staple mode is automatically cancelled after a job is completed with Staple sort mode On.
- Original Set/Bind Direction
Select to reset or save the original direction setting made on the Combine
Original Setting Screen and the binding position setting made on the Finishing Mode Screen after completion of each copying job.
- Status Hold When Auto Reset
When Reset functions, select to reset the Original Glass/ADF mode to the
initial setting, or save the previous setting.
- Annotation at JOB Completion
Set the machine to automatically select Annotation after a copying job
has been made.
- Original Glass Auto Copy Reserve
Set the machine to automatically display the Job Reserve Screen when
the current job has completed scanning originals from the original glass
and started printing.
17-60
bizhub PRO 920
Utility <User Setting>
1
Press the [Utility/Counter] to display the Utility Screen.
2
Touch [3 Copier Setting].
The Copier Setting Screen will be displayed.
3
Touch [2 Each Function Setting].
17
The Each Function Setting Screen will be displayed.
4
Touch the desired key to display the job setting keys of each function.
5
Select On/Off or touch the desired key to each.
There are two setting screens. Touch upper and lower arrow keys to
switch between the screens.
bizhub PRO 920
17-61
Utility <User Setting>
17
17-62
6
Touch [Choose Default Tray when APS Off] to display the selection
screen.
Touch the desired tray key, and then touch [OK].
7
If further changes are required, touch the desired key.
Touch [Utility] to restore the Utility Screen.
bizhub PRO 920
Utility <User Setting>
17.6
17
4 Scanner Setting
1 Default Address Setting
Select the default destination of the image scanned when selecting the
Scanner Screen.
Select one from the following four destinations:
- E-Mail (E-Mail address)
- HDD (Box No.)
- FTP (FTP server address)
- SMB (Shared folder)
1
Press the [Utility/Counter] to display the Utility Screen.
2
Touch [4 Scanner Setting].
The Scanner Setting Screen will be displayed.
3
Touch [1 Default Address Setting].
The Default Address Setting Screen will be displayed.
4
Touch the desired key for the destination.
bizhub PRO 920
17-63
Utility <User Setting>
17
17-64
5
Touch [OK] to complete the setting and return to the Scanner Setting
Screen.
6
If further changes are required, touch the desired key.
Touch [Utility] to restore the Utility Screen.
bizhub PRO 920
Utility <User Setting>
17
2 Each Function Setting
Select the default settings for the file form and the resolution when selecting
the Scanner Screen.
- File Form Setting (E-Mail)
Select the data form for transmitting scanned data attached to an e-mail,
from Multi Page PDF, Single Page PDF, Multi Page TIFF, and Single Page
TIFF.
- File Form Setting (HDD)
Select the data form for saving scanned data to HDD from Multi Page
PDF, Single Page PDF, Multi Page TIFF, and Single Page TIFF.
- File Form Setting (FTP)
Select the data form for transmitting scanned data to an FTP server from
Multi Page PDF, Single Page PDF, Multi Page TIFF, and Single Page
TIFF.
- File Form Setting (SMB)
Select the data form for transmitting scanned data to a public folder from
Multi Page PDF, Single Page PDF, Multi Page TIFF, and Single Page
TIFF.
- Default Resolution Setting
Select the default scanning quality from 600dpi, 400dpi, 300dpi, and
200dpi.
1
Press the [Utility/Counter] to display the Utility Screen.
2
Touch [4 Scanner Setting].
The Scanner Setting Screen will be displayed.
3
Touch [2 Each Function Setting].
The Each Function Setting Screen will be displayed.
bizhub PRO 920
17-65
Utility <User Setting>
17
4
Touch the desired key to each item on the left side of the screen.
5
If further changes are required, touch the desired key.
Touch [Utility] to restore the Utility Screen.
!
Detail
When transmitting simultaneously to multiple destinations, the file form
setting cannot be specified individually.
When transmitting simultaneously, the file form setting will be selected in
the following priority:
E-Mail>HDD>FTP>SMB
17-66
bizhub PRO 920
Utility <User Setting>
17.7
17
5 Touch Panel Adjust
Use this function to check the touch screen and realign the position of the
touch sensor that may have shifted.
!
Detail
The Touch Panel Adjust Screen can be displayed on the Utility Screen by
pressing [5] of the control panel keypad.
1
Press the [Utility/Counter] to display the Utility Screen.
2
Touch [5 Touch Panel Adjust].
3
Touch the [+] symbol at the upper right corner, then lower left corner
on the screen. The present coordinates will be displayed in the message area of the screen.
4
Check that the X coordinate and Y coordinate displayed in the first line
of the message area fall within the standard value displayed in the second line.
5
Touch each [Check Button] at the upper left and lower right corners on
the screen to check if the buzzer tone functions normally.
6
If the coordinates fall out of the range of the standard value in step 4,
or the buzzer tone does not sound in step 5, repeat the adjustment procedure from steps 4 to 5 or contact your service representative.
7
Press [1] of the control panel keypad to return to the Utility Screen.
bizhub PRO 920
17-67
17
17-68
Utility <User Setting>
bizhub PRO 920
18
Utility <Administrator
Setting>
Utility <Administrator Setting>
18
Utility <Administrator Setting>
18.1
Administrator Setting Outlines
18
Press the [Utility/Counter] on the control panel to display the Utility Screen.
The Utility Screen includes two types of setting items: one in which a user
can set and the other in which an administrator is required to enter an administrator password.
This section describes the items which the administrator can set in [6 Administrator Setting] on the Utility Screen, and the procedure of setting these
items.
Administrator Password
The administrator setting can be specified with entering the administrator
password.
Please contact your service representative to set up your administrator password.
How to access the Administrator Setting Menu
1
Press the [Utility/Counter] on the
control panel.
The Utility Screen will be displayed.
2
Touch [6 Administrator Setting].
bizhub PRO 920
18-3
Utility <Administrator Setting>
18
The Password Input Screen will be displayed.
When the Password Input Screen is not displayed, proceed to step 4.
3
Enter the eight-digit administrator password, and then touch [OK].
The Administrator Setting Screen will be displayed.
4
18-4
Set each function items.
bizhub PRO 920
Utility <Administrator Setting>
18
!
Detail
[Close], [Exit], and each directory key on the Utility Screen
Touch [Close] to restore the previous screen.
Touch [Exit] to return to the Basic Screen.
Touch the directory key in the left side of the Utility Screen to display
each screen.
bizhub PRO 920
18-5
Utility <Administrator Setting>
18
18.2
List of the Administrator Setting
Specific setting and Description
Default
1 System Setting
1 Power Save
Low Power Mode/Sleep Mode
Set the interval time of Low Power and sleep modes.
Low Power Mode: 5 min. to 240 min.
Sleep Mode: Off to 240 min.
Low Power Mode: 15 min.
Sleep Mode: 90 min.
2 Date/ Time Setting
Time/Summer Time/Time Zone Setting
Set the present time, summer time, and difference in
the time setting.
Setting Time
---
3 Weekly Timer Setting
1 Weekly Timer On/Off Setting
Enable or disable the weekly timer function.
Weekly Timer On/Weekly Timer Off
Weekly Timer Off
2 Time Setting
Set the On/Off times in hours and minutes.
---
3 Date Setting
Set the On/Off condition of the machine for a given
month.
---
4 Select Time for Power Save
Set the machine to turn off and then on during the
lunch break.
On/Off, Settime for Power Save.
Off
5 Password for Non-Business Hours Setting
The password is required to enter when using the machine by interrupting the Weekly Timer mode. Use this
function to set the password.
0000 (4 digits)
0000
4 Print Management List
1 Mode Memory List
Output the list of programmed contents of Mode memory.
2 User Management List
Output the list of contents registered by the user.
3 Use Management List
Output the list of service modes, account values, and
ROM version of the machine.
4 Font Pattern List
Output the list of font patterns used with this machine.
5 Audit Log Report
Output the audit log report of the security mode.
18-6
bizhub PRO 920
Utility <Administrator Setting>
Specific setting and Description
18
Default
5 Prohibit User Operation
Lock/Delete Mode Memory
Lock/unlock or Delete a mode memory that has been
programmed.
Registering and changing Address
Permit/prohibit to enter send address manually on the
Scanner Screen.
Allow/Restrict
Allow
Changing Zoom Ratio
Permit/prohibit to alter already programmed magnification ratio.
Allow/Restrict
Allow
Change Program Overlay
Permit/prohibit to delete or overwrite a title of programmed overlay image.
Allow/Restrict
Restrict
Scanner Function (E-Mail)
Permit/prohibit to transmit scanned data via E-Mail.
Allow/Restrict
Allow
Scanner Function (HDD)
Permit/prohibit to save scanned data in HDD.
Allow/Restrict
Allow
Scanner Function (FTP)
Permit/prohibit to transmit scanned data to FTP
Allow/Restrict
Allow
Scanner Function (SMB)
Permit/prohibit to transmit scanned data in SMB.
Allow/Restrict
Allow
Annotation by Initial Setting
Permit/prohibit to register Annotation function as initial
setting.
Selection Allow/Selection Restrict
Selection Allow
6 Expert Adjustment
bizhub PRO 920
Non Image Area Erase Setting
Set to delete the outside area of the original.
Erase Outside of Original/On - APS/AMS Only/Except
Orig. Glass (1:1)
Erase Mode:Oblique Erase/Rectangle Erase/Auto
Original Density:Five levels/Auto
Erase Outside of Original
Erase Mode:Auto
Original Density:Auto
ADF Frame Erasure Setting
Set to erase the frame when copying in ADF mode.
None/1mm/2mm/3mm/4mm/5mm
3mm
18-7
Utility <Administrator Setting>
18
Specific setting and Description
Default
Finisher Adjust
Make adjustment on Finisher options.
• Fold & Staple Stopper Adjustment
-128 ~ +127 1step=0.1mm
• Half Fold Stopper Adjustment
-128 ~ +127 1step=0.1mm
• Trimming Stopper Adjustment
-128 ~ +127 1step=0.1mm
• Hole-Punch Adjustment
-50 ~ +50 1step=0.1mm
• Z-Fold Position Adjustment
-128 ~ +127 1step=0.1mm
• Letter Fold Adjustment
-128 ~ +127 1step=0.1mm
• 2 Positions Staple Pitch Adjustment
120 ~ 160 1step=1mm
• Fold & Staple Staple Pitch
120 ~ 160 1step=1mm
---
Timing Adjustment
Make adjustment to control the restart timing.
• Printer Top Margin Adjustment
-30 ~ +30 1step=0.1mm
• Printer Regist Loop Adjust
-10 ~ +10 1step=1mm
-5 ~ +5 1step=1mm
• Printer Pre-Regist
ADU : -10 ~ +10 1step=1mm
Tray 1-4 : -5 ~ +5 1step=1mm
• Lead Edge Margin Selection
-20 ~ +40 1step=0.1mm
• Top Image (Original Glass)
-40 ~ +40 1step=0.1mm
• Top Image (ADF)
-50 ~ +50 1step=0.1mm
• Scanner (ADF) Regist Loop Adjust
-10 ~ +10 1step=0.5mm
---
Centring Adjustment
Make adjustment to control the centring
• Printer Left Margin
-64 ~ +63 1step=0.1mm
• Scanner (Orig. Glass) Left Image
-30 ~ +30 1step=0.1mm
• Scanner (ADF) Left Image
-30 ~ +30 1step=0.1mm
---
7 Size Setting
18-8
Original Size Detect
Set the detected paper type of the original.
Metric/Inch/Metric A Size Paper/Full Size
Metric A Size Paper
Orig. Glass Orig. Size Detect (Small)
Set the smallest size when copying by placing the original on the original glass.
A5R/5.5×8.5/B5/A4/8.5×11
A5R
bizhub PRO 920
Utility <Administrator Setting>
Specific setting and Description
18
Default
8 Paper Setting
1 Tray Setting
Change the setting of the papersize/type/coloured paper/hole-punch/both size adjust.
---
2 PI Setting
Change the detected size of Upper/Lower tray.
Upper tray: A5/5.5×8.5; A4R/8.5×11R
Lower tray: A5/5.5×8.5; A4R/8.5×11R; 8.5×14/8×13,
8.12×13.2, 8.25×13, 8.5×13
Upper tray: A5/A4R
Lower tray: A5/A4R/8×13
9 LCD Backlight Setting
Adjust the backlight of the touch panel.
Standard
10 Annotation Setting
Register, edit or delete the Annotation setting.
---
2 Administrator/Machine Setting
1 Administrator Registration
Register the name of the machine manager and the extention number. The registered contents are displayed on the
Counter Screen.
Name Input: 8 digits/Extension
Number Input: 5 digits
---
3 User Authentication/Account Track
1 General Settings
1 User Authentication
Set the authentication method and the number of sections to be managed.
User Authentication, Account Authentication, User/
Account Auth.Connect, Account Name, Password Input Timing, Account Dirstibute Number
User Authentication (Off), Account Authentication (Off),
User/Account Auth.Connect
(Off), Account Name (Off),
Password Input Timing (At
JOB Complete), Account Dirstibute Number (1000)
2 Account Track
Set the section management against each mode and
the machine condition when reaching the copy limit.
Copy/Printer, Scanner, Select Effect of Reaching Copy
Limit (Immediately/After Print/Warning Only)
Copy/Print/Scanner : Not Use
Effect of Reaching Copy Limit
(Immediately)
2 Account Track Setting
Set the volume track setting. Change, Add or Delete is
available.
Account No./Account name/Password/Limit
---
3 User Authentication Setting
Register, Change, Add or Delete the user authentication
when the User Authentication is set in “01>01 Authentication Setting.”
User No./User Name/Password/Account Name/Useable
Function (Copy, Scanner, Store/Recall, Printer)
---
4 Non register/Output Set
Set to count the output of non-registered users and sections
On/Off
On
bizhub PRO 920
18-9
Utility <Administrator Setting>
18
Specific setting and Description
Default
4 Network Setting
1 Machine NIC Setting (See page 18-105.)
Set the NIC settings.
IP Address/Subnet Mask/Gateway Address/IP Address
(Server PC)/Line Speed Setting
2 Controller NIC Setting
1 TCP/IP (See page 18-122.)
Set the TCP/IP settings.
2 NetWare (See page 18-126.)
Set the NetWare settings
3 IPP (See page 18-130.)
Set the IPP settings.
4 FTP (See page 18-133.)
Set the FTP settings.
5 SNMP (See page 18-136.)
Set the SNMP settings.
6 SMB (See page 18-138.)
Set the SMB settings.
7 AppleTalk (See page 18-141.)
Set the AppleTalk settings.
8 E-Mail (See page 18-143.)
9 HDD (See page 18-151.)
Set the duration for which scanned data is stored before automatically deleted.
10 Alert Mail (See page 18-153.)
Specify the alert mail settings.
11 CSRC (See page 18-156.)
Specify the CSRC settings for services used by a customer engineer.
12 AP I/F (See page 18-162.)
Specify the AP I/F settings.
13 PSWC (See page 18-165.)
Set to use PSWC.
14 Network Setting Clear (See page 18-167.)
Restore the network settings to the factory default setting.
15 LDAP (See page 18-169.)
Set the LDAP settings.
16 SNMP Trap (Seepage 18-175.)
Set the SNMP Trap settings.
18-10
bizhub PRO 920
Utility <Administrator Setting>
Specific setting and Description
18
Default
5 Copier/Printer Setting
JOB Offset Mode
Set the machine to offset the copies/printouts of different
jobs.
On/Off
Off
Continuous Print (Print)
Set the machine to output multiple reserve jobs in succession.
On/Off
Off
Change Page Number print Pos. (Booklet)
Set the page number position when using Booklet with
Page Numbering in Stamp.
On (Outside Page Print)/Off
Off
Fixing Prerotation Set
The fixing heat adjustment may be necessary as altering
the paper type and the weight. The machine rotates the fixing roller before printing starts, in order to print at the appropriate temperature for the specific paper type and the
weight.
On/Off
On
Auto Image Rotation
When the trays contain only the paper size different from
the original, rotate the image of the original and adjust to fit
into the copying paper size
On - Always/On - APS/AMS Only/On - APS/AMS/Reduce
Only
On - APS/AMS Only
Suspend Interruption
Set the timing to interrupt the present job when pressing
[Interrupt] while copying.
When Current Set Complete/Stop Immediately
Stop Immediately
Reserve Copy Function
Set the timing for the reserve job either by setting on the
Copy Reserve Confirmation Screen, or by placing the original on the original glass.
Enabled by Operation/Enabled by Set Original
Enabled by Operation
Suspend Scanning When Tray is pulled
Set to stop scanning when pulling out the tray.
On/Off
On
Continuous Print(Copy)
Set the machine to output multiple reserve jobs in succession
On/Off
Off
Face Up/Down for 1 sheet
Set the exit direction when copying one set of the original
on the original glass.
Face Up/Face Down
Face Down
Single Feed Auto Setting
On/Off
Off
bizhub PRO 920
18-11
Utility <Administrator Setting>
18
Specific setting and Description
Default
6 System Connection
1 Call Service Centre
Touch [Start] when calling CSRC.
Start
---
7 Security Setting
1 Administrator Password
Change the machine manager password which is registered in the Service mode menu.
00000000
2 HDD Manage Setting
1 Details/Delete
List the details of the folder box, and delete it.
List and delete the details.
---
2 Data Auto Delete
Set the period of time to keep data so that it will be deleted automatically when specified period has passed.
Not Delete/12 hours/1 day/2 days/3 days/7 days/30
days
Not Delete
3 HDD Lock Password Changing
Change the password when accessing data stored in
HDD.
---
3 Enhance Security Mode
Set the Security Strengthen mode.
On/Off
8 Scanner Destination Storage
Edit or delete the registered scanner address.
18-12
Off
---
bizhub PRO 920
Utility <Administrator Setting>
18.3
18
1 System Setting
1 Power Save Setting
Specify Low Power Mode or Sleep Mode when setting the Power Save mode
manually, and select the interval of time that must elapse before Low Power
Mode and Sleep Mode.
2
Note
The period of time selected for Low Power Mode cannot exceed the
Sleep Mode setting.
If the same period of time as Sleep Mode is selected for Low Power
Mode, Sleep Mode will function instead of Low Power Mode.
If the period of time selected for Sleep Mode is shorter than that of for
Low Power Mode, the period of time for Low Power Mode will be forcibly
reset to the same period of time as Sleep Mode. Low Power Mode will
not function.
1
Press the [Utility/Counter] to display the Utility Screen.
2
Touch [6 Administrator Setting], enter the administrator password, and
then touch [OK].
The Administrator Setting Screen will be displayed.
3
Touch [1 System Setting].
The System Setting Screen will be displayed.
bizhub PRO 920
18-13
Utility <Administrator Setting>
18
4
Touch [1 Power Save].
The Power Save Screen will be displayed.
18-14
5
Specify the Power Save mode to be set manually by pressing the [Power Save] on the control panel, by selecting [Low Power Mode] or [Sleep
Mode].
6
Select the interval of time that must elapse before turning to Low Power
Mode automatically.
Touch the Upper/Lower arrow keys in each area to select a specific
waiting period before activating Low Power Mode.
The initial setting is 15 minutes.
7
Select the interval of time that must elapse before turning to Sleep
mode automatically.
Touch the Upper/Lower arrow keys in each area to select a specific
waiting period before activating Sleep Mode.
The initial setting is 90 minutes.
bizhub PRO 920
Utility <Administrator Setting>
18
8
Touch [OK] to complete the setting and return to the System Setting
Screen.
9
If further changes are required, touch the desired key.
Touch [Utility] to restore the Utility Screen.
bizhub PRO 920
18-15
Utility <Administrator Setting>
18
2 Date/Time Setting
Set the current date and time, the summer time, and also the time difference.
The default setting for the summer time is off.
1
Press the [Utility/Counter] to display the Utility Screen.
2
Touch [6 Administrator Setting], enter the administrator password, and
then touch [OK].
The Administrator Setting Screen will be displayed.
3
Touch [1 System Setting].
The System Setting Screen will be displayed.
4
Touch [2 Date/Time Setting].
The Date/Time Setting Screen will be displayed.
18-16
bizhub PRO 920
Utility <Administrator Setting>
5
Adjust the time.
The time indicated by the machine is displayed in the upper line and ordered by date, month, year, and time (in 24-hour expression).
–
–
–
6
18
Touch the desired key to adjust the time, enter the time by using the
control panel keypad.
Touch Set to move the highlighted section to the number to be
changed. Repeat the same procedure for month, date, and time.
Set the summer time.
The summer time is initially deactivated.
To activate the summer time (Daylight Savings Time) function,
touch [Summer Time] to highlight it. The Present time will gain one
hour.
The Difference in time setting is provided in order to give the time difference information at the same time when an e-mail is received.
To set this function, follow the procedure below.
–
–
–
Touch [Time Zone].
Use the control panel keypad to enter the time difference between
the Universal time and the local time in the machine setting area.
(e.g. Enter “-0600” for six hours later than the Universal time.)
Touch [+/-] to display “+” when the local time is earlier than the Universal time, or “-” when the local time is later.
7
Touch [OK] to complete the setting and return to the System Setting
Screen.
8
If further changes are required, touch the desired key.
Touch [Utility] to restore the Utility Screen
bizhub PRO 920
18-17
Utility <Administrator Setting>
18
3 Weekly Timer Setting
This function can be accessed only by the Administrator.
- The Weekly Timer is a machine management function that shuts down
power to the machine on a daily or hourly basis, and can be programmed
specifically for lunch breaks, weekends and holidays, or any time the
copier is not required.
- In addition, Timer Interrupt can be enabled (with or without a password
requirement) to allow temporary use of the machine during periods when
power is shut down by the Timer function.
If the Weekly Timer needs to be activated on your machine, contact your
service representative.
Conditions required to use the Weekly Timer
- The power plug is inserted into the socket.
- The power switch is turned on.
- The current date and time are correctly set.
18-18
bizhub PRO 920
Utility <Administrator Setting>
18
3 Weekly Timer Setting>1 Weekly Timer On/Off Setting
Enable and disable the Weekly Timer function.
1
Press the [Utility/Counter] to display the Utility Screen.
2
Touch [6 Administrator Setting], enter the administrator password, and
then touch [OK].
The Administrator Setting Screen will be displayed.
3
Touch [1 System Setting].
The System Setting Screen will be displayed.
4
Touch [3 Weekly Timer Setting].
The Weekly Timer Setting Screen will be displayed.
bizhub PRO 920
18-19
Utility <Administrator Setting>
18
5
Touch [1 Weekly Timer On/Off Setting].
The Weekly Timer On/Off Setting Screen will be displayed.
6
Touch [Weekly Timer On] to activate Weekly Timer, or touch [Weekly
Timer Off] to deactivate Weekly Timer. The default setting is Weekly
Timer Off.
The selected key will be highlighted.
18-20
7
Touch [OK] to complete the setting and return to the Weekly Timer Setting Screen.
8
If further changes are required, touch the desired key.
Touch [Utility] to restore the Utility Screen.
bizhub PRO 920
Utility <Administrator Setting>
18
3 Weekly Timer Setting>2 Time Setting
Use this function to set the On/Off times in hours and minutes for each day
of the week or set the collective time for the entire week, i.e., the same On/
Off time for a certain day of the week.
2
Note
If On-time and Off-time are the same, the power will not be turned on.
If the setting is 00:00~00:00, you will not be able to set the machine off/
on condition for specific days.
When setting Sunday Off-time, Monday On-time is highlighted again.
1
Press the [Utility/Counter] to display the Utility Screen.
2
Touch [6 Administrator Setting], enter the administrator password, and
then touch [OK].
The Administrator Setting Screen will be displayed.
3
Touch [1 System Setting].
The System Setting Screen will be displayed.
bizhub PRO 920
18-21
Utility <Administrator Setting>
18
4
Touch [3 Weekly Timer Setting].
The Weekly Timer Setting Screen will be displayed.
5
Touch [2 Time Setting].
The Time Setting Screen will be displayed. When the Time Setting
Screen is displayed, the On-time of Monday is always highlighted.
18-22
bizhub PRO 920
Utility <Administrator Setting>
18
6
Set On-time by entering a two-digit On-hour (ex. 8 a.m. is 08) and a
two-digit On-minute (ex. 7 min. is 07) using the control panel keypad,
and then touch the right arrow key.
7
Set Off-time in the same way. To return to the On-time setting, touch
the left arrow key.
8
To set the On/Off time collectively for more than one day of the week,
touch [Daily Setting].
The Daily Setting Screen is displayed. The On and Off times are always
set at 00:00~00:00.
9
Touch to highlight the day(s) of the week to be set. More than one can
be selected at a time.
10
Enter the On-time and Off-time using the control panel keypad.
11
Touch [OK] to complete the setting and return to the Time Setting
Screen.
bizhub PRO 920
18-23
Utility <Administrator Setting>
18
18-24
12
Touch [OK] to return to the Weekly Timer Setting Screen.
13
If further changes are required, touch the desired key.
Touch [Utility] to restore the Utility Screen.
bizhub PRO 920
Utility <Administrator Setting>
18
3 Weekly Timer Setting>3 Date Setting
Use this function to set the timer On/Off for a given day of a given month. Set
the On-Off condition for specific days individually or collectively for all Mondays through Sundays of the given month.
2
Note
The default setting is collective: On for Mondays through Saturdays, and
Off for Sundays.
1
Press the [Utility/Counter] to display the Utility Screen.
2
Touch [6 Administrator Setting], enter the administrator password, and
then touch [OK].
The Administrator Setting Screen will be displayed.
3
Touch [1 System Setting].
The System Setting Screen will be displayed.
4
Touch [3 Weekly Timer Setting].
bizhub PRO 920
18-25
Utility <Administrator Setting>
18
The Weekly Timer Setting Screen will be displayed.
5
Touch [3 Date Setting].
The Date Setting Screen will be displayed.
18-26
6
Use the - and + keys to scroll to the desired year/month. Touch the key
for the desired day to activate the timer on the calendar displayed on
the centre of the screen.
7
Use the keys under Daily Setting to collectively set the on/off data for
the entire month by the day of the week.
8
If any change is made in the collective setting area, the Date Change
Confirmation popup screen will be displayed.
Touch [Yes] to change the timer action, or touch [No] to cancel.
9
Touch [OK] to return to the Weekly Timer Setting Screen.
10
If further changes are required, touch the desired key.
Touch [Utility] to restore the Utility Screen.
bizhub PRO 920
Utility <Administrator Setting>
18
3 Weekly Timer Setting>4 Select Time for Power Save
The Weekly Timer function turns the machine On and Off once a day. Use the
Select Time for Power Save to shut down the power during the lunch break
and then turn it on again according to the Weekly Timer function setting. Only
one off-time interval can be programmed.
2
Note
The factory default setting is [Off].
1
Press the [Utility/Counter] to display the Utility Screen.
2
Touch [6 Administrator Setting], enter the administrator password, and
then touch [OK].
The Administrator Setting Screen will be displayed.
3
Touch [1 System Setting].
The System Setting Screen will be displayed.
4
Touch [3 Weekly Timer Setting].
bizhub PRO 920
18-27
Utility <Administrator Setting>
18
The Weekly Timer Setting Screen will be displayed.
5
Touch [4 Select Time for Power Save].
The Select Time for Power Save Screen will be displayed.
6
Touch [On].
The Power Save Start Time is highlighted. Set the start time by using
the control panel keypad.
Touch [Power Save End Time], and set the end time using the control
panel keypad.
18-28
bizhub PRO 920
Utility <Administrator Setting>
7
18
Touch [Off].
The Set Time for Power Save setting area will appear grayed out and
cannot be selected.
8
Touch [OK] to return to the Weekly Timer Setting Screen.
9
If further changes are required, touch the desired key.
Touch [Utility] to restore the Utility Screen.
bizhub PRO 920
18-29
Utility <Administrator Setting>
18
3 Weekly Timer Setting>5 Password for Non-Business Hours Setting
Use this password setting mode to establish a four-digit password required
for using the Non-Business Hours Setting function. The default password of
0000 allows the timer function to be disabled without entering the password.
2
Note
When the password setting is 0000, the Non-Business Hours function
can be used simply by turning the machine off, then on. In this case, you
will be asked to enter the duration of use (a period of time to turn the machine power on).
1
Press the [Utility/Counter] to display the Utility Screen.
2
Touch [6 Administrator Setting], enter the administrator password, and
then touch [OK].
The Administrator Setting Screen will be displayed.
3
Touch [1 System Setting].
The System Setting Screen will be displayed.
18-30
bizhub PRO 920
Utility <Administrator Setting>
4
18
Touch [3 Weekly Timer Setting].
The Weekly Timer Setting Screen will be displayed.
5
Touch [5 Password for Non-Business Hours Setting].
The Password for Non-Business Hours Setting Screen will be displayed.
6
Use the control panel keypad to enter a four-digit password.
bizhub PRO 920
18-31
Utility <Administrator Setting>
18
18-32
7
Touch [OK] to return to the Weekly Timer Setting Screen.
8
If further changes are required, touch the desired key.
Touch [Utility] to restore the Utility Screen.
bizhub PRO 920
Utility <Administrator Setting>
18
4 Print Management List
Use this function to print out the list selected from the following items.
- Mode memory list:
Programmed contents of Mode memory
bizhub PRO 920
18-33
Utility <Administrator Setting>
18
18-34
-
User management list:
Home position settings selected by user
-
Use management list:
Information controlled by user authentication or division authentication
bizhub PRO 920
Utility <Administrator Setting>
-
Font pattern list:
Font patterns used in the machine
-
Audit log report:
Audited log
bizhub PRO 920
18
18-35
Utility <Administrator Setting>
18
1
Press the [Utility/Counter] to display the Utility Screen.
2
Touch [6 Administrator Setting], enter the administrator password, and
then touch [OK].
The Administrator Setting Screen will be displayed.
3
Touch [1 System Setting].
The System Setting Screen will be displayed.
4
Touch [4 Print Management List].
The Print Management List Screen will be displayed.
5
18-36
Touch any key to print the list.
bizhub PRO 920
Utility <Administrator Setting>
6
18
Press [Copy].
The Copy Screen is displayed.
7
Press [Start] on the control panel to
start printing the selected list.
Press [Stop] on the control panel to
suspend printing.
8
Touch [Management List] to return to the Print Management List
Screen.
9
Touch [OK] to return to the System Setting Screen.
10
If further changes are required, touch the desired key.
Touch [Utility] to restore the Utility Screen.
bizhub PRO 920
18-37
Utility <Administrator Setting>
18
5 Prohibit User Operation
Use this function to allow or restrict programmed contents of Mode memory.
- Lock/Delete Mode Memory:
Lock/unlock or delete a mode memory that has been programmed. The
settings of a locked mode memory cannot be changed.
- Registering and Changing Address:
Allow/restrict to enter send address manually on the Scanner Screen.
- Changing Zoom Ratio:
Allow/restrict to alter already programmed magnification ratio.
- Change Program Overlay:
Allow/restrict to delete or overwrite a title of programmed overlay image.
- Scanner function (E-Mail):
Allow/restrict to transmit scanned data via E-Mail.
- Scanner function (HDD):
Allow/restrict to save scanned data in HDD.
- Scanner function (FTP):
Allow/restrict to transmit scanned data to an FTP server.
- Scanner function (SMB):
Allow/restrict to transmit scanned data to a public folder.
- Annotation by Initial Setting:
Allow/restrict to register Annotation function as initial setting.
2
Note
Locked Mode memory is deleted and a lock is cancelled. Note that Mode
memory once deleted cannot be recalled.
30 Mode memory can be stored. Use [Next] or [Previous] to display the
desired Mode memory.
18-38
1
Press the [Utility/Counter] to display the Utility Screen.
2
Touch [6 Administrator Setting], enter the administrator password, and
then touch [OK].
The Administrator Setting Screen will be displayed.
bizhub PRO 920
Utility <Administrator Setting>
3
18
Touch [1 System Setting].
The System Setting Screen will be displayed.
4
Touch [5 Prohibit User Operation].
The Prohibit User Operation Screen will be displayed.
bizhub PRO 920
18-39
Utility <Administrator Setting>
18
5
Select to lock or delete the mode memory.
–
Touch [Lock/Delete Mode Memory]. The Lock/Delete Mode Memory Screen is displayed.
–
The programmed name is displayed on the right side of the Mode
memory number, when the setting is already programmed.
Touch the key on the left side of the desired Mode memory number.
Use the arrow keys to scroll to the desired Mode memory number,
if required.
Touching the locked key will clear the locking mark and release
locking.
Touching the key with a name not entered will not lock the key and
will not display the lock mark.
Touch the Mode memory number you want to delete. Use the arrow
keys to scroll to the desired Job number, if required. Touch [Delete].
Selected programs and the name will be deleted from the Mode
memory.
–
Touch [OK] to complete the setting and return to the Prohibit User Operation Screen.
18-40
bizhub PRO 920
Utility <Administrator Setting>
18
6
Touch each item key to display the popup menu on the right side of
screen, then select [Allow] or [Restrict].
7
Touch [OK] to return to the System Setting Screen.
8
If further changes are required, touch the desired key.
Touch [Utility] to restore the Utility Screen.
bizhub PRO 920
18-41
Utility <Administrator Setting>
18
6 Expert Adjustment>Non Image Area Erase Setting
Select to delete or not the outside area of the original from the following three
ways:
- On - Always:
Set the machine any time to delete the outside area of the original.
- On - APS/AMS Only:
Set the machine to delete the outside area of the original only when APS
or AMS is activated.
- Except Orig. Glass (1:1):
Set the machine to delete the outside area of the original except when
copying in real size on the original glass.
2
Note
When [Oblique Erase] or [Rectangle Erase] does not function properly,
touch [Auto Erase].
1
Press the [Utility/Counter] to display the Utility Screen.
2
Touch [6 Administrator Setting], enter the administrator password, and
then touch [OK].
The Administrator Setting Screen will be displayed.
3
Touch [1 System Setting].
The System Setting Screen will be displayed.
18-42
bizhub PRO 920
Utility <Administrator Setting>
4
18
Touch [6 Expert Adjustment].
The Expert Adjustment Screen will be displayed.
5
Touch [Non Image Area Erase Setting].
The Non Image Area Erase Setting Screen is displayed.
bizhub PRO 920
18-43
Utility <Administrator Setting>
18
6
Select the condition for erasing a non image area.
–
–
7
Touch [Mode Set] to select the erase mode and the original density.
–
–
18-44
Touch [Auto Erase].
Select to highlight the desired condition.
Touch [Oblique Erase] or [Rectangle Erase] to select the erase
mode.
Touch [Lighter] or [Darker] to set the density level (five levels).
Touch [Std.] to set the standard density.
8
Touch [OK] to return to the Expert Adjustment Screen.
9
If further changes are required, touch the desired key.
Touch [Utility] to restore the Utility Screen.
bizhub PRO 920
Utility <Administrator Setting>
18
6 Expert Adjustment>ADF Frame Erasure Setting
Set Frame Erasure to function anytime when copying in ADF mode, and set
the amount of the outside area to be deleted.
1
Press the [Utility/Counter] to display the Utility Screen.
2
Touch [6 Administrator Setting], enter the administrator password, and
then touch [OK].
The Administrator Setting Screen will be displayed.
3
Touch [1 System Setting].
The System Setting Screen will be displayed.
4
Touch [6 Expert Adjustment].
The Expert Adjustment Screen will be displayed.
bizhub PRO 920
18-45
Utility <Administrator Setting>
18
5
Touch [ADF Frame Erasure Setting].
The Job Setting Screen of the ADF Frame Erasure Setting is displayed
on the rightside.
18-46
6
Touch [On] if setting the outside area. Enter the desired amount of outside area to be deleted. The amount of outside area to be set is between 1 to 5mm; entering a value above 6 mm is invalid.
Touch [Off] if deleting the outside area is not necessary.
The setting is enabled when it is set.
7
Touch [OK] to return to the Expert Adjustment Screen.
8
If further changes are required, touch the desired key.
Touch [Utility] to restore the Utility Screen.
bizhub PRO 920
Utility <Administrator Setting>
18
6 Expert Adjustment>Finisher Adjust
!
Detail
Selectable items may differ depending upon the configuration of the machine options being installed.
Use this function to set the following items for finisher adjustment.
- Fold & Staple Stopper Adjustment
Adjust the dislocation of the centre position of staples for the Finisher
FS-604.
Available range: -128 (wide) to +127 (narrow), 1 step = 0.1mm
- Half fold Stopper Adjustment
Adjust the dislocation of the half fold position for the Finisher FS-604.
Available range: -128 (wide) to +127 (narrow), 1 step = 0.1mm
- Trimming Stopper Adjustment
Adjust the trim width for the Trimmer Unit TU-501.
Available range: -128 (wide) to +127 (narrow), 1 step = 0.1mm
- Hole-Punch Adjustment
Adjust the dislocation of the punch position for the Punch Kit PK-504/505
and the Z-Fold Unit ZU-601/602.
Punch Kit Vertical Position Adjustment: Available range: -50 (wide) to +50
(narrow), 1 step = 0.1mm
Punch Kit Horizontal Position Adjustment: Available range: -50 (wide) to
+50 (narrow), 1 step = 0.1mm
Punch Unit Vertical Position Adjustment: Available range: -50 (wide) to
+50 (narrow), 1 step = 0.1mm
Punch Unit Horizontal Position Adjustment: Available range: -50 (wide) to
+50 (narrow), 1 step = 0.1mm
- Z-Fold Position Adjustment
Adjust the dislocation of the z-fold position for the Z-Fold Unit ZU-601/
602.
1st Fold Adjustment: Available range: -128 (wide) to +127 (narrow), 1 step
= 0.1mm
2nd Fold Adjustment: Available range: -128 (wide) to +127 (narrow),
1 step = 0.1mm
- Letter Fold Adjustment
Adjust the dislocation of the three-fold position for the Finisher FS-604.
Available range: -128 (wide) to +127 (narrow), 1 step = 0.1mm
- 2 Positions Staple Pitch Adjustment
Adjust the dislocation of the 2 positions stapling pitch for the Finisher
FS-604.
Available range: 120 (wide) to 160 (narrow), 1 step = 1mm
- Fold & Staple Staple Pitch Adjustment
Adjust the centre staple and fold-staple pitch for the Finisher FS-604.
Available range: 120 (wide) to 160 (narrow), 1 step = 1mm
bizhub PRO 920
18-47
Utility <Administrator Setting>
18
1
Press the [Utility/Counter] to display the Utility Screen.
2
Touch [6 Administrator Setting], enter the administrator password, and
then touch [OK].
The Administrator Setting Screen will be displayed.
3
Touch [1 System Setting].
The System Setting Screen will be displayed.
4
Touch [6 Expert Adjustment].
The Expert Adjustment Screen will be displayed.
18-48
bizhub PRO 920
Utility <Administrator Setting>
5
18
Touch [Finisher Adjust].
The Finisher Adjust Screen is displayed.
6
Touch any desired key of adjustment items. The adjustment screen is
displayed.
bizhub PRO 920
18-49
Utility <Administrator Setting>
18
18-50
7
Touch [Next] or [Back] to select a desired paper size and a paper feed
tray.
8
Select + and – by touching the [+--] key on the touch screen keypad,
and touch [Set].
9
Touch [Close] to return to the Finisher Adjust Screen.
10
Touch [Close] to return to the Expert Adjustment Screen.
11
If further changes are required, touch the desired key.
Touch [Utility] to restore the Utility Screen.
bizhub PRO 920
Utility <Administrator Setting>
18
6 Expert Adjustment>Timing Adjustment
!
Detail
By default, the Timing Adjustment key is not displayed. Contact your
service representative.
Use this function to set the following items for timing adjustment when printing or scanning.
- Printer Top Margin Adjustment
Adjust the top margin.
Available range: =30 (wide) to +30 (narrow), 1 step = 0.1mm
- Printer Regist Loop Adjust
Adjust the amount of registered loop based on a paper feed tray (trays 1
to 4), a bypass tray, and ADU.
Available range: -10 (wide) to +10 (narrow), 1 step = 1mm
Tray Side 1: Available range: -5 (wide) to +5 (narrow), 1 step = 1mm
- Printer Pre-Regist
Adjust the amount to pre-register based on a paper tray (trays 1 to 4), a
bypass tray, and ADU.
Available range: -10 (wide) to +10 (narrow), 1 step = 1mm
Tray 1 to 4: Available range: -5 (wide) to +5 (narrow), 1 step = 1mm
- Lead Edge Margin Selection
Adjust the amount of image erase from the edge of the sheet.
Available range: -20 (wide) to +40 (narrow), 1 step = 0.1mm
- Top Image (Original Glass)
Adjust the restart timing in scanning the original with the original glass.
Available range: -40 (fast) to +40 (slow), 1 step = 0.1mm
- Top Image (ADF)
Adjust the restart timing in scanning the original with ADF.
Available range: -50 (fast) to +50 (slow), 1 step = 0.1mm
- Scanner (ADF) Regist Loop Adjust
Adjust the amount of registered loop in scanning the original with ADF.
Available range: -10 (short) to +10 (long), 1 step = 0.5mm
1
Press the [Utility/Counter] to display the Utility Screen.
2
Touch [6 Administrator Setting], enter the administrator password, and
then touch [OK].
The Administrator Setting Screen will be displayed.
bizhub PRO 920
18-51
Utility <Administrator Setting>
18
3
Touch [1 System Setting].
The System Setting Screen will be displayed.
4
Touch [6 Expert Adjustment].
The Expert Adjustment Screen will be displayed.
5
Touch [Timing Adjustment].
The Timing Adjustment Screen is displayed.
18-52
bizhub PRO 920
Utility <Administrator Setting>
18
6
Touch any desired key of adjustment items. The adjustment screen is
displayed.
7
Touch [Next] or [Back] to select a desired paper feed tray and an output
order (face up or face down).
8
Select + and – by touching the [+--] key on the touch screen keypad,
and touch [Set].
9
Touch [Close] to return to the Timing Adjust Screen.
10
Touch [Close] to return to the Expert Adjustment Screen.
11
If further changes are required, touch the desired key.
Touch [Utility] to restore the Utility Screen.
bizhub PRO 920
18-53
Utility <Administrator Setting>
18
6 Expert Adjustment>Centring Adjustment
!
Detail
By default, the Centring Adjustment key is not displayed. Contact your
service representative.
Use this function to set the following items for centring adjustment to the direction of paper feed.
- Printer Left Margin
Adjust to control image centring to the direction of paper feed.
Available range: -64 (forward) to +63 (backward), 1 step = 0.1mm
- Scanner (Orig. Glass) Left Image
Adjust to control scanned image centring with the original glass.
Available range: -30 (forward) to +30 (backward), 1 step = 0.1mm
- Scanner (ADF) Left Image
Adjust to control image centring with ADF.
Available range: -30 (forward) to +30 (backward), 1 step = 0.1mm
1
Press the [Utility/Counter] to display the Utility Screen.
2
Touch [6 Administrator Setting], enter the administrator password, and
then touch [OK].
The Administrator Setting Screen will be displayed.
3
Touch [1 System Setting].
The System Setting Screen will be displayed.
18-54
bizhub PRO 920
Utility <Administrator Setting>
4
18
Touch [6 Expert Adjustment].
The Expert Adjustment Screen will be displayed.
5
Touch [Centring Adjustment].
The Centring Adjustment Screen is displayed.
6
Touch any desired key of adjustment items.
The adjustment screen is displayed.
bizhub PRO 920
18-55
Utility <Administrator Setting>
18
18-56
7
If [Next] and [Back] is displayed, Touch them to select a desired output
order (face up or face down).
8
Select + and – by touching the [+--] key on the touch screen keypad,
and touch [Set].
9
Touch [Close] to return to the Centring Adjustment Screen.
10
Touch [Close] to return to the Expert Adjustment Screen.
11
If further changes are required, touch the desired key.
Touch [Utility] to restore the Utility Screen.
bizhub PRO 920
Utility <Administrator Setting>
18
7 Size Setting
Use this function to select the detected paper type of the original and the
minimum size of the original placed on the original glass.
1
Press the [Utility/Counter] to display the Utility Screen.
2
Touch [6 Administrator Setting], enter the administrator password, and
then touch [OK].
The Administrator Setting Screen will be displayed.
3
Touch [1 System Setting].
The System Setting Screen will be displayed.
4
Touch [7 Size Setting].
The Size Setting Screen will be displayed.
bizhub PRO 920
18-57
Utility <Administrator Setting>
18
5
Select the paper type to be detected in ADF mode or when the original
is placed on the original glass.
Touch [Original Size Detect].
The Original Size popup menu is displayed on the right side.
Touch any key under [Original Size]. The setting is enabled when it is
set.
18-58
bizhub PRO 920
Utility <Administrator Setting>
18
6
Select the minimum size of the original to be detected in APS mode.
Touch [Orig. Glass Orig. Size Detect (Small)].
The Original Glass Original Size Detect/Small Screen is displayed.
Touch the desired key to highlight it.
7
Touch [OK] to return to the Size Setting Screen.
8
If further changes are required, touch the desired key.
Touch [Utility] to restore the Utility Screen.
bizhub PRO 920
18-59
Utility <Administrator Setting>
18
8 Paper Setting>1 Tray Setting
This machine provides the features to adjust a paper feed tray based on the
paper type/weight and a paper size setting based on paper size being used.
See page 15-3 for the detailed information on the tray setting and the size
setting when copying with the paper feed trays and Large Capacity Unit.
8 Paper Setting>2 PI Setting
Use this function to change the paper size for the Post Inserter PI-501.
- Upper Tray Search Size
If 5.5×8.5 is selected, the machine will automatically detect 5.5×8.5 instead of A5. Similarly, if 8.5×11R is selected, 8.5×11R instead of A4R.
- Lower Tray Search Size
If 5.5×8.5 is selected, the machine will automatically detect 5.5×8.5 instead of A5. Similarly, the 8.5×11R will be detected instead of A4R, and
the 8.5×14 will be detected instead of 8.5×13.
1
Press the [Utility/Counter] to display the Utility Screen.
2
Touch [6 Administrator Setting], enter the administrator password, and
then touch [OK].
The Administrator Setting Screen will be displayed.
3
Touch [1 System Setting].
The System Setting Screen will be displayed.
18-60
bizhub PRO 920
Utility <Administrator Setting>
4
18
Touch [8 Paper Setting].
The Paper Setting Screen will be displayed.
5
Touch [2 PI Setting].
The PI Setting Screen is displayed.
6
Set the PI upper tray search size.
Touch [U-Tray Search Size].
bizhub PRO 920
18-61
Utility <Administrator Setting>
18
The U-Tray Search Size Setting Screen is displayed.
Touch any desired key to highlight it.
Touch [OK] to complete the setting to return to the previous screen.
7
Set the PI lower tray search size.
Touch [L-Tray Search Size].
The L-Tray Search Size Setting Screen is displayed.
Touch any desired key to highlight it.
Touch [OK] to complete the setting to return to the previous screen.
8
18-62
Touch [Close] to return to the Paper Setting Screen.
If further changes are required, touch the desired key.
Touch [Utility] to restore the Utility Screen.
bizhub PRO 920
Utility <Administrator Setting>
18
9 LCD Backlight Setting
Use this function to adjust the backlight of the touch panel.
1
Press the [Utility/Counter] to display the Utility Screen.
2
Touch [6 Administrator Setting], enter the administrator password, and
then touch [OK].
The Administrator Setting Screen will be displayed.
3
Touch [1 System Setting].
The System Setting Screen will be displayed.
4
Touch [9 LCD Backlight Setting].
The LCD Backlight Setting Screen will be displayed.
bizhub PRO 920
18-63
Utility <Administrator Setting>
18
18-64
5
Touch [Dimmer] or [Brighter] to set the desired brightness of the touch
panel.
6
Touch [OK] to return to the System Setting Screen.
If further changes are required, touch the desired key.
Touch [Utility] to restore the Utility Screen.
bizhub PRO 920
Utility <Administrator Setting>
18
10 Annotation Setting
Use this function to newly register, edit, or delete annotations.
For setting an annotation, the following items are provided:
- Title
Enter the title of annotation within 12 alphanumerical characters.
- Item 1, 2, and 3
Specify the contents of each item in printing order, from among Type In,
Date/Time, and Annotation No. along with character size and font.
- Type In
When selecting Type In as an item of the annotation, specify the words
to be printed within 40 alphanumerical characters.
- Date/Time
When selecting Date/Time as an item of the annotation, specify the style
to be printed.
Date: 5 styles provided (04/11/23, 11/23/’04, 23/11/’04, Nov 23, 2004, 23
Nov, 2004)
Time: 3 styles provided (No Display, 1:23 PM, 13:23)
- Annotation No.
When selecting Annotation No. as an item of the annotation, specify
words (referred as Type In) within 20 alphanumerical characters and start
number of Annotation Number (numbering) within 9 alphanumerical characters in a row, and select whether to print Type In and Annotation
Number.
When selecting Annotation Number to be printed, also select the print
form between All Digit and Effective Digit.
- Character Set
Specify the character size and font of the item to be printed as annotation.
(Character size: 8/10/12/14 point, Font: Gothic/Ming)
- Combination method for items
Select whether to print the specified items in a line or in three lines.
bizhub PRO 920
18-65
Utility <Administrator Setting>
18
1
Press the [Utility/Counter] to display the Utility Screen.
2
Touch [6 Administrator Setting], enter the administrator password, and
then touch [OK].
The Administrator Setting Screen will be displayed.
3
Touch [1 System Setting].
The System Setting Screen will be displayed.
4
Touch [10 Annotation Setting].
The Annotation Setting Screen will be displayed.
18-66
bizhub PRO 920
Utility <Administrator Setting>
5
18
Register an annotation.
–
Touch a non-registered title key on the Annotation Setting Screen,
then touch [New Register].
The Annotation New Register Screen will be displayed.
If selected title key has already been registered, [New Register] remains dimmed and cannot be touched.
–
bizhub PRO 920
Specify the title of annotation.
Touch [Title] to display the Input Title Screen.
18-67
Utility <Administrator Setting>
18
–
Enter the desired title, then touch [OK].
Without the title specified, the [OK] key on the Annotation Setting
Screen remains dimmed and cannot be touched to complete the
setting.
–
18-68
Touch [Item 1] to specify the first line of the annotation.
Touch one of the key from [Type In], [Date/Time], [Annotation No.],
and [No Print] to select it.
bizhub PRO 920
Utility <Administrator Setting>
18
–
When [Type In] is selected:
The Input Type In Screen will be displayed.
Enter the desired words to be printed, then touch [OK].
–
When [Date/Time] is selected:
The Date/Time Setting Screen will be displayed.
Select the desired style for each from 5 Date keys and 3 Time keys,
then touch [OK].
bizhub PRO 920
18-69
Utility <Administrator Setting>
18
–
When [Annotation No.] is selected:
The Annotation No. Setting Screen will be displayed.
To specify the Type In words, touch [Set] on the right side of Type
In indication to display the Input Type In Screen, enter the desired
words, then touch [OK]. To clear the specified words and leave the
line blank, touch [Clear] next to [Set].
To specify the Annotation Number, touch [Set] on the right side of
Annotation Number indication to display the Input Annotation
Number Screen, enter the start number, then touch [OK].
Touch [All Digit] or [Effective Digit] to select the print form of the serial number.
Touch [OK] on the Annotation Number Setting Screen to complete
the setting.
–
18-70
When [No Print] is selected:
The key will be highlighted, and the Item 1 will not be printed.
bizhub PRO 920
Utility <Administrator Setting>
18
–
When [Character Set] is selected:
Touch [Character Set] to specify the character size and font type of
the Item 1. The Print Character Setting Screen will be displayed.
Select the desired size from 4 Character Size keys, and font type
between the two font keys, then touch [OK].
–
–
Repeat the above step to specify the Item 2 and Item 3.
Touch [3 Lines] or [1 Line] under the Combination method for items
indication to select the desired print style of the annotation.
Touch [OK] to complete the setting, or touch [Cancel] to clear the
setting. The Annotation Setting Screen will be restored.
bizhub PRO 920
18-71
Utility <Administrator Setting>
18
6
Edit an annotation.
–
Touch the registered title key on the Annotation Setting Screen,
then touch [Edit].
The Annotation Edit Screen will be displayed.
Edit the selected annotation, then touch [OK] to complete the setting, or touch [Cancel] to clear the setting.
The Annotation Setting Screen will be restored.
7
Delete an annotation.
–
Touch the registered title key on the Annotation Setting Screen,
then touch [Delete].
A popup menu will be displayed to confirm that the selected register will be deleted.
18-72
bizhub PRO 920
Utility <Administrator Setting>
–
8
18
Touch [Yes] to delete, or [No] to cancel.
Touch [Return] to return to the System Setting Screen.
If further changes are required, touch the desired key.
Touch [Utility] to restore the Utility Screen.
bizhub PRO 920
18-73
Utility <Administrator Setting>
18
18.4
2 Administrator/Machine Register
1 Administrator Registration
Use this function to register the administrator name and the extension
number which are displayed on the left side of the Utility Screen.
1
Press the [Utility/Counter] to display the Utility Screen.
2
Touch [6 Administrator Setting], enter the administrator password, and
then touch [OK].
The Administrator Setting Screen will be displayed.
3
Touch [2 Administrator/Machine Setting].
The Administrator/Machine Setting Screen will be displayed.
4
Touch [1 Administrator Registration].
The Administrator Registration Setting Screen will be displayed.
18-74
bizhub PRO 920
Utility <Administrator Setting>
18
5
Enter an administrator name.
Touch [Name] to display the Administrator Name Input Screen. Use the
touch panel keypad to register the administrator name. The eight characters including a hyphen (-) can be entered.
Touch [OK] to complete the setting to return to the previous screen.
6
Enter the extension number.
Touch [Extension Number] to highlight it and enter the extension
number of the administrator on the right side of Extension Number using the touch panel keypad.
The five-digit numbers including a hyphen (-) can be entered.
When the extension number is below five digits, enter hyphens to make
it five. If the hyphen is entered as the first number, it is displayed as a
space on the Help Screen. The number which is entered will be displayed from the last digit, and it is shifted leftward as a next number is
entered.
7
Touch [OK] to return to the Administrator Registration Setting Screen.
If further changes are required, touch the desired key.
bizhub PRO 920
18-75
Utility <Administrator Setting>
18
18.5
3 User Authentication/Account Track
1 General Settings>1 User Authentication
Establish the authentication settings by combining the following six elements.
- User Authentication:
Enter the user name and the user password.
- Account Authentication:
Enter the account password.
- User/Account Auth. Connect:
When User Authentication and Account Authentication are set to ON and
User/Account Auth. Connect is set to ON, Account Authentication is not
required to enter.
- Account Name:
Enter the account name. (Account Name cannot be selected when Account Authentication is set to Off.)
- Password Input Timing:
Set the timing of entering the password.
- Account Distribute Number:
Enter the number of accounts. The total number of authentication to be
distributed is 1,000 for both a user and an account. The remaining
number from which the number of accounts is subtracted from 1,000 will
be distributed as user authentication.
!
Detail
It is recommended to distribute authentication for both the user and the
account, otherwise either party cannot be assigned authentication if it is
distributed to only one party.
18-76
1
Press the [Utility/Counter] to display the Utility Screen.
2
Touch [6 Administrator Setting], enter the administrator password, and
then touch [OK].
The Administrator Setting Screen will be displayed.
bizhub PRO 920
Utility <Administrator Setting>
3
18
Touch [3 User Authentication/Account Track].
The User Authentication/Account Track Screen will be displayed.
4
Touch [1 General Settings].
The General Settings Screen will be displayed.
5
Touch [1 User Authentication].
The User Authentication Screen is displayed.
bizhub PRO 920
18-77
Utility <Administrator Setting>
18
18-78
6
Select [On] or [Off] on the right side of User Authentication, Account
Authentication, User/Account Auth. Connect, and Account Name.
7
Touch [Password Input Timing] to select [At Panel Reset Timer] or [At
JOB Complete] on the right side of Password Input Timing.
8
Touch the down arrow key and then touch Account Distribute Number
to highlight it.
Enter the number to distribute using the touch panel keypad.
The setting is enabled when it is set.
9
Touch [Close] to return to the General Setting Screen.
If further changes are required, touch the desired key.
Touch [Utility] to restore the Utility Screen.
bizhub PRO 920
Utility <Administrator Setting>
18
1 General Settings>2 Account Track
Use this function to set Copier/Printer or Scanner jobs managed by the account, and select the machine condition in which the machine stops due to
reaching the copy limit.
!
Detail
If Copier/Printer or Scanner is set to Off when Account Authentication is
set to On on the [General Settings] Screen, the account password is not
required to enter for authentication. In this case, job count and copy limit
count will be suspended.
When [Immediately] of Select Effect of Reaching Copy Limit is selected,
the job is immediately suspended as soon as the copy limit is reached. In
this case, copying conditions, output data, and scanned data will not be
hold. In order to continue the job with the same account password,
change the number of the copy limit which is set to the account password
or reset counting.
When [After Print] is selected, the machine stops after completing the job as
reaching the copy limit. The message “Copy limit reached” is displayed, and
the machine stops its operation.
When [Warning Only] is selected, the message “Copy limit reached” is displayed as reaching the copy limit, and the next job can be continuously executed.
1
Press the [Utility/Counter] to display the Utility Screen.
2
Touch [6 Administrator Setting], enter the administrator password, and
then touch [OK].
The Administrator Setting Screen will be displayed.
3
Touch [3 User Authentication/Account Track].
bizhub PRO 920
18-79
Utility <Administrator Setting>
18
The User Authentication/Account Track Screen will be displayed.
4
Touch [1 General Settings].
The General Settings Screen will be displayed.
5
Touch [2 Account Track].
The Account Track Screen is displayed.
18-80
bizhub PRO 920
Utility <Administrator Setting>
18
6
Touch [Copier/Printer] to select [Use] or [Not Use] on the right side of
Copier/Printer.
7
Touch [Scanner] to select [Use] or [Not Use] on the right side of Scanner.
8
Touch [Select Effect of Reaching Copy Limit] to select [Immediately],
[After Print], or [Warning Only] on the right side of Select Effect of
Reaching Copy Limit.
9
Touch [Close] to return to the General Settings Screen.
If further changes are required, touch the desired key.
Touch [Utility] to restore the Utility Screen.
bizhub PRO 920
18-81
Utility <Administrator Setting>
18
2 Account Track Setting
Use this function to assign a number to each account, and set an account
name, password and limit value to each number. The registered account
management setting is listed on the screen. Select the account management
setting from the list, and change, reset or delete the setting.
1
Press the [Utility/Counter] to display the Utility Screen.
2
Touch [6 Administrator Setting], enter the administrator password, and
then touch [OK].
The Administrator Setting Screen will be displayed.
3
Touch [3 User Authentication/Account Track].
The User Authentication/Account Track Screen will be displayed.
4
Touch [2 Account Track Setting].
The Account Track Settings Screen will be displayed.
18-82
bizhub PRO 920
Utility <Administrator Setting>
5
18
Follow the instructions below for registering a new account setting.
–
Touch [New Register] to display the New Account Register Screen.
–
Touch [Account No.] to display the input screen.
bizhub PRO 920
18-83
Utility <Administrator Setting>
18
18-84
–
Enter the account number, then touch [OK]. You may enter four digits for the account number.
–
Touch [Account Name] to display the input screen. Enter the account name and touch [OK]. You may enter eight characters for the
account name. For the details on entering texts in the input screen,
see the appendix.
bizhub PRO 920
Utility <Administrator Setting>
18
–
Touch [Password] to display the input screen. Enter the password
and touch [OK]. You may enter eight digits for the password. For
the details on entering texts in the input screen, see the appendix.
–
Touch [Limit] to display the input screen. Enter the copy limit value
and touch [OK]. You may enter eight digits for the copy limit.
–
Touch [OK] to complete the setting.
The message will be displayed when the changed password or account name is duplicated. Enter another password or account
name.
bizhub PRO 920
18-85
Utility <Administrator Setting>
18
6
18-86
Follow the instructions below for changing an account setting.
–
Touch the up or down arrow key to display the account name to be
changed and touch it to display the Individual Account Counter
Screen.
–
Touch [Change] to display the Change Registered Account Screen.
bizhub PRO 920
Utility <Administrator Setting>
18
–
Touch the desired item to be changed and display the input screen.
–
Enter the new setting. For the details on entering texts in the input
screen, see the appendix. You may enter eight digits for the password, eight characters for the account name.
Touch [Limit] to display the input screen. Enter the copy limit value
and touch [OK]. You may enter eight digits for the copy limit.
–
–
Touch [OK] to complete the setting.
The message will be displayed when the changed password or account name is duplicated. Enter another password or account
name.
bizhub PRO 920
18-87
Utility <Administrator Setting>
18
7
18-88
Follow the instructions below for deleting the account setting.
–
Touch the up or down arrow key to display the account name to be
deleted and touch it to display the Individual Account Counter
Screen.
–
Touch [Delete] to display the Delete Confirmation popup screen.
–
Touch [Yes] to delete, or touch [No] to cancel.
bizhub PRO 920
Utility <Administrator Setting>
8
18
Follow the instructions below for resetting the copy count.
–
Touch the up or down arrow key to display the account name to reset the count and touch it to display the Individual Account Counter
Screen.
–
Touch [Count Reset] to display the Reset Confirmation popup
screen.
bizhub PRO 920
18-89
Utility <Administrator Setting>
18
–
9
18-90
Touch any key to reset. Touch [Cancel] when not resetting.
Follow the instructions below for resetting all count.
–
Touch [Reset All Counters] to display the Reset All Counters Confirmation popup screen.
–
Touch any key to reset. Touch [Cancel] when not resetting.
bizhub PRO 920
Utility <Administrator Setting>
18
10
Touch [Close] to complete the setting and return to the User Authentication/Account Track Screen.
11
Touch [Close] to return to the Administrator Setting Screen.
If further changes are required, touch the desired key.
Touch [Utility] to restore the Utility Screen.
bizhub PRO 920
18-91
Utility <Administrator Setting>
18
3 User Authentication Setting
Use this function to assign a number to each user, and set a user name,
password and limit value to each number. The registered user setting is listed
on the screen. Select the user setting from the list, and change, reset or delete the setting.
!
Detail
When User/Account Auth. Connect is set to On on the General Settings
Screen, Account Name can be specified.
1
Press the [Utility/Counter] to display the Utility Screen.
2
Touch [6 Administrator Setting], enter the administrator password, and
then touch [OK].
The Administrator Setting Screen will be displayed.
3
Touch [3 User Authentication/Account Track].
The User Authentication/Account Track Screen will be displayed.
18-92
bizhub PRO 920
Utility <Administrator Setting>
4
18
Touch [3 User Authentication Setting].
The User Authentication Setting Screen will be displayed.
5
Follow the instructions below for registering a new user setting.
–
Touch [New Register] to display the New User Registration Screen.
–
Touch [User Number] to display the input screen.
bizhub PRO 920
18-93
Utility <Administrator Setting>
18
18-94
–
Enter the user number and touch [OK]. You may enter four digits for
the user number.
–
Touch [User Name] to display the input screen. Enter the user name
and touch [OK]. You may enter 64 letters for the user name. For the
details on entering texts in the input screen, see the appendix.
bizhub PRO 920
Utility <Administrator Setting>
18
–
Touch [Password] to display the input screen. Enter the password
and touch [OK]. You may enter 64 digits for the password. For the
details on entering texts in the input screen, see the appendix.
–
Touch [Account Name] to display the screen to select an account
belong to.
Touch the up or down arrow key to display the desired account
name, then touch [OK].
–
Touch any key on the right side of [Useable Function] to select the
job necessary to authenticate a newly registered user.
bizhub PRO 920
18-95
Utility <Administrator Setting>
18
–
6
18-96
Touch [OK] to complete the setting.
Follow the instructions below for changing a user setting.
–
Touch the up or down arrow key to display the user name to be
changed and touch it to display the Individual User Counter Screen.
–
Touch [Change] to display the Change Registered User Screen.
bizhub PRO 920
Utility <Administrator Setting>
18
–
Touch [User Name] to display the input screen.
–
Enter the user name and touch [OK]. You may enter 64 letters for
the user name. For the details on entering texts in the input screen,
see the appendix.
bizhub PRO 920
18-97
Utility <Administrator Setting>
18
18-98
–
Touch [Password] to display the input screen. Enter the password
and touch [OK]. You may enter 64 digits for the password. For the
details on entering texts in the input screen, see the appendix.
–
Touch [Account Name] to display the screen to select an account
belong to.
–
Touch any key on the right side of [Useable Function] to select the
job necessary to authenticate a newly registered user.
bizhub PRO 920
Utility <Administrator Setting>
–
7
18
Touch [OK] to complete the setting.
Follow the instructions below for deleting the user setting.
–
Touch the up or down arrow key to display the user name to be deleted and touch it to display the Individual User Counter Screen.
–
Touch [Delete] to display the Delete Confirmation popup screen.
bizhub PRO 920
18-99
Utility <Administrator Setting>
18
–
8
Follow the instructions below for resetting the user count.
–
18-100
Touch [Yes] to delete, or touch [No] to cancel.
Touch the up or down arrow key to display the user name to reset
the count and touch it to display the Individual User Counter
Screen.
bizhub PRO 920
Utility <Administrator Setting>
18
–
Touch [Count Reset] to display the Reset Confirmation popup
screen.
–
Touch any key to reset. Touch [Cancel] when not resetting.
bizhub PRO 920
18-101
Utility <Administrator Setting>
18
9
18-102
Follow the instructions below for resetting all counters.
–
Touch [Reset All Counters] to display the All Count Reset Confirmation popup screen.
–
Touch any key to reset. Touch [Cancel] when not resetting.
10
Touch [Close] to complete the setting and return to the User Authentication/Account Track Screen.
11
Touch [Close] to return to the Administrator Setting Screen.
If further changes are required, touch the desired key.
Touch [Utility] to restore the Utility Screen.
bizhub PRO 920
Utility <Administrator Setting>
18
4 Non Register/Output Setting
Use this function to limit the output setting of an unregistered user or account.
When this function is set to On, only the initial output setting can be set to
any job under a condition of which user authentication and/or account authentication is set to Off.
1
Press the [Utility/Counter] to display the Utility Screen.
2
Touch [6 Administrator Setting], enter the administrator password, and
then touch [OK].
The Administrator Setting Screen will be displayed.
3
Touch [3 User Authentication/Account Track].
The User Authentication/Account Track Screen will be displayed.
4
Touch [4 Non Register/Output Setting].
The Non Register/Output Setting Screen will be displayed.
bizhub PRO 920
18-103
Utility <Administrator Setting>
18
18-104
5
Touch [On] activate this function, or touch [Off] to deactivate this function.
6
Touch [OK] to complete the setting and return to the User Authentication/Account Track Screen.
7
Touch [Close] to return to the Administrator Setting Screen.
If further changes are required, touch the desired key.
Touch [Utility] to restore the Utility Screen.
bizhub PRO 920
Utility <Administrator Setting>
18.6
18
4 Network Setting
1 Machine NIC Setting
Control the NIC settings such as the IP address and line speed of the machine.
1
Press the [Utility/Counter] to display the Utility Screen.
2
Touch [6 Administrator Setting], enter the administrator password, and
then touch [OK].
The Administrator Setting Screen will be displayed.
3
Touch [4 Network Setting].
The Network Setting Screen will be displayed.
4
Touch [1 Machine NIC Setting].
The Machine NIC Setting Screen will be displayed.
bizhub PRO 920
18-105
Utility <Administrator Setting>
18
5
Specify the following items.
Enter numeric values using the control panel keypad. After entering a
value, touch [Set]. The next item becomes highlighted for setting. Continue in this manner.
–
–
–
–
–
–
18-106
IP Address
Enter the IP address of the machine.
Subnet Mask
Enter the subnet mask.
Gateway Address
Enter the gateway address.
IP Address (Server PC)
Enter the IP address of the PC on which PageScope Job Editor
Server is installed.
IP Adress (Tandem)
Enter the IP Address of the tandem sub machine working in tandem.
Line Speed Setting
Specify the line speed of the network. Choose from the options provided.
6
Touch [OK] to return to the Network Setting Screen.
7
Touch [Close] to return to the Administrator Setting Screen.
If further changes are required, touch the desired key.
Touch [Utility] to restore the Utility Screen.
bizhub PRO 920
Utility <Administrator Setting>
18
List of IP NIC Setting
Specify the controller settings. Various default settings or network settings
can be customized as required.
List of the Network Settings
Specify the settings for connecting a network printer and network scanner,
and the settings for TCP/IP, RAW port numbers, IP Filter (permission/denial),
and ping.For details, refer to page 18-122.
Specific setting and Description
Default
1 TCP/IP
TCP/IP
Specify enable or disable TCP/IP.
Enable/Disable
Enable
DHCP
Specify enable or disable Dynamic Host Configuration
Protocol (DHCP). If [Enable] is selected, the IP address is
automatically obtained from the DHCP server, in which
case it is not necessary to enter it.
Enable/Disable
Disable
IP Address
Specify the IP address.
0.0.0.0 (0 - 255)
0.0.0.0
Subnet Mask
Specify the subnet mask.
0.0.0.0 (0 - 255)
0.0.0.0
Address Gateway
Specify as required.
0.0.0.0 (0 - 255)
0.0.0.0
DNS Server1 to 3
Specify DNS server addresses.
0.0.0.0 (0 - 255)
0.0.0.0
DNS Host Name
Specify the DNS host name.
**********
Varied from machine to machine.
Max. 63 characters combining symbols and alphanumerics can be used.
---
DNS Domain Name
Specify the DNS domain name.
Max. 63 characters combining symbols and alphanumerics can be used.
---
LPD
When [Enable] is selected, LPD/LPR printing becomes
available.
Enable/Disable
Enable
Line Speed Network
Specify the network transfer rate.
Auto Negotiation/10M Half Duplex/10M Full Duplex/100M
Half Duplex/100M Full Duplex
Auto Negotiation
bizhub PRO 920
18-107
Utility <Administrator Setting>
18
Specific setting and Description
Default
TCP/IP RAW port settings (1 to 6)
Specify RAW port numbers and to be used or not.
Use/Not Use
(Set between 1 - 65535.)
Use
TCP/IP Filter accept settings *1 *2
Specify to use the accept settings or not, and the range in
which to permit connections.
On/Off
0.0.0.0 - 0.0.0.0 (0 - 255)
Off
TCP/IP Filter refuse settings *1 *2
Specify to use the refuse settings or not, and the range in
which to deny connections.
On/Off
0.0.0.0 - 0.0.0.0 (0 - 255)
Off
Network Test Ping Address
Perform ping.
Max. 255 characters combining symbols and alphanumerics can be used.
---
*1: If the range of the permission setting is the same as that of the denial setting, the latter setting
overrides the former.
*2: The functions that are affected by the permission and denial settings are as follows:
HTTP servers (PSWC, IPP), HTTP servers (PSWC with SSL), printing over the network (LPD,
RAW Port, SMB), FTP servers (access to Scan to HDD jobs), SNMP
Specify the settings for connecting network printer, and the NetWare settings. For details, refer to page 18-126.
Specific setting and Description
Default
2 NetWare
NetWare
18-108
NetWare
If [Use] is selected, Novell NetWare (IPX/SPX) is enabled as the print server protocol.
Use/Not Use
Not Use
Frame Type
Select the frame type.
Auto Detect/IEEE802.2/IEEE802.3/Ethernet2/
IEEE802.2SNAP
Auto Detect
Operating Mode
Select the required operation mode.
Pserver/Nprinter/Rprinter
Pserver
bizhub PRO 920
Utility <Administrator Setting>
Specific setting and Description
18
Default
NetWare Pserver Setting
Print Server Name
Enter a print server name.
*********
Varied from machine to machine.
Max. 47 characters combining symbols and alphanumerics can be used.
---
Print Server Password *1
Specify a password for the Novell print server. This
password is shared among all the servers that are allocated to the print server.
Max. 63 characters combining symbols and alphanumerics can be used.
---
Polling Interval
Specify the interval with which to poll.
1 – 65535
1
Bindery Disable
When Novell NetWare 4.x or later is used, specify to
enable the bindery service. If [On] is selected, the
print server does not support other print servers that
are connected to the bindery file server.
On/Off
On
Bindery File Server Name
Specify the bindery file server name.
Max. 47 characters combining symbols and alphanumerics can be used.
---
NDS Context Name
If Novell Directory Service (NDS) is used, specify a
priority NDS context name. It should be specified as
a full context name, and you cannot use “.” (period)
at the beginning of the context pass. It is not necessary to enter the container name (print server name).
Max. 191 characters combining symbols and alphanumerics can be used.
---
NDS Tree Name
If NDS is used, specify the NDS tree name.
Max. 63 characters combining symbols and alphanumerics can be used.
---
NetWare Nprinter / Rprinter, NetWare Status Setting
bizhub PRO 920
Printer Name
Specify the printer name. It is initially set to a particular printer name allocated to the machine.
**********
Varied from machine to machine.
Max. 63 characters combining symbols and alphanumerics can be used.
---
Printer Number
Specify the printer number.
Select between 0 and 255.
---
File Server Name
Specify file server names.
Max. 10 servers can be displayed.
---
18-109
Utility <Administrator Setting>
18
Specific setting and Description
Queue Name
Specify queue names.
Max. 10 queues can be displayed.
Default
---
*1: If NetWare has a password allocated by using PCONSOLE or NWADMIN, the print server
must also have a password. If the bindery mode is used, the print server password can only be
set in capital letters. When a password is entered in the field, it must be the same as the one that
is allocated to NetWare by using PCONSOLE or NWADMIN. The password entered here is
stored in the print server setting memory.
Specify the settings for connecting network printer and the IPP settings. For
details, refer to page 18-130.
Specific setting and Description
Default
3 IPP
IPP
IPP
Specify to use IPP or not.
Use/Not Use
Use
IPP Print Job Accept
Specify to accept IPP print jobs.
Allow/Restrict
Allow
IPP Operation Support Information Setting
Print Job
Specify to enable the function or not.
On/Off
On
Cancel Job
Specify to enable the function or not.
On/Off
On
Open Job
Specify to enable the function or not.
On/Off
On
Valid Job
Specify to enable the function or not.
On/Off
On
Open Job Attributes
Specify to enable the function or not.
On/Off
On
Open Printer Attributes
Specify to enable the function or not.
On/Off
On
IPP Printer Information Setting, Printer URI Setting
Printer Name
Specify the printer name.
Max. 127 characters combining symbols and alphanumerics can be used.
18-110
---
bizhub PRO 920
Utility <Administrator Setting>
Specific setting and Description
18
Default
Printer Establishment Place
Specify the place in which to install the printer.
Max. 127 characters combining symbols and alphanumerics can be used.
---
Printer Information
Specify printer information.
Max. 127 characters combining symbols and alphanumerics can be used.
---
Printer URI
Printer URI’s are set
Max. 8 addresses
---
Specify to use Scan to HDD/Scan to FTP for transmission, the proxy server
setting, and the passive function. For details, refer to page 18-133.
Specific setting and Description
Default
4 FTP
Client *1
Specify to use the machine as a client. If Scan to FTP is
used for transmission to the FTP server, select [Use].
Use/Not Use
Use
Proxy Server Address
Specify the proxy server address.
0.0.0.0
Max. 255 characters combining symbols and alphanumerics can be used.
0.0.0.0
Proxy Server Port No.
Specify the proxy server port number.
1 – 65535
21
Passive Function
Specify to use the passive function.
On/Off
Off
Connection Time Out Time
Specify the time out value.
5 - 300 seconds
60
Port No.
Specify the number of the port that is used to communicate with the FTP server.
2 – 65535
21
Server *2
Specify to use the machine as an FTP server. If a TWAIN
driver is used to access to Scan to HDD jobs, select [Use].
Use/Not Use
Use
*1: By selecting [Not Use], Scan operations are executable, but the transmission from bizhub
PRO 920 to FTP will be disabled.
*2: By selecting [Not Use], access to bizhub PRO 920 (TWAIN, Visual Count) will be prohibited.It
is possible to save Scan to HDD jobs, but clients can no longer obtain them.
bizhub PRO 920
18-111
Utility <Administrator Setting>
18
Specify the SNMP settings. For details, refer to page 18-136.
Specific setting and Description
Default
5 SNMP
SNMP *1
Specify to use SNMP or not.
Use/Not Use
Use
Read Community Name
Specify a Read Community Name.
public
Max. 15 characters combining symbols and alphanumerics can be used.
public
Write Community Name
Specify a Write Community Name.
private
private
Max. 15 characters combining symbols and alphanumerics can be used.
*1: Used when communicating with bizhub PRO 920 using PageScope applications.
Specify the SMB printing setting, and to use Scan to SMB for transmission.
For details, refer to page 18-138.
Specific setting and Description
Default
6 SMB
Scan
Select [Use] when communicating with SMB servers using
Scan to SMB.
Use/Not Use
Use
Print
Specify to use SMB printing functions.
Use/Not Use
Use
Net BIOS Name
Specify a NetBIOS name as required.
*********
Varied from machine to machine.
Max. 15 characters combining symbols and alphanumerics can be used.
---
Print Service Name
Specify a print service name.
Max. 13 characters combining symbols and alphanumerics can be used.
---
Work Group
Specify a work group name.
Max. 15 characters combining symbols and alphanumerics can be used.
---
Specify the settings for connecting network printer and the AppleTalk settings. For details, refer to page 18-141.
18-112
bizhub PRO 920
Utility <Administrator Setting>
Specific setting and Description
18
Default
7 AppleTalk
AppleTalk
Selecting [Use] enables AppleTalk as the print server protocol.
Use/Not Use
Not Use
Printer Name
Specify the name of the printer that is used on the AppleTalk network.
**********
Varied from machine to machine.
Max. 31 characters combining symbols and alphanumerics can be used.
---
Zone Name
Specify a zone. If no zone exists in such a case as when
using a machine on a network that has no seed router,
leave the field blank.
Max. 31 characters combining symbols and alphanumerics can be used.
---
Current Zone
Specify the current zone.
Max. 31 characters combining symbols and alphanumerics can be used.
---
Specify the settings for an e-mail send/receive, division for transmitted data
and authentication, and save the template of titles and bodies frequently
used. For details, refer to page 18-143.
Specific setting and Description
Default
8 E-Mail
E-Mail Send Setting
bizhub PRO 920
E-Mail Send
Specify to use e-mail transmission.
On/Off
On
SMTP Server Address
Specify the address of the server that is used for email transmission.
0.0.0.0
Max. 255 characters combining symbols and alphanumerics can be used.
0.0.0.0
Port No.
Specify the port number.
1 – 65535
25
Connection Time Out Time
Specify the time out duration.
30 - 300 seconds
60
Binary Division
Specify to use binary division for transmitted data.
On/Off
Off
18-113
Utility <Administrator Setting>
18
Specific setting and Description
Default
Binary Division Size
Specify the size by which to divide transmitted data.
2 - 150 (×100 Kb)
5
E-Mail Send Maximum Size
Specify to set the maximum size for e-mail transmission.
0(Off) - 100Mb
0
Auth. Setting
Specify to use the POP before SMTP authentication.
Specify as required in your own environment.
On/Off
Off
POP before SMTP
Specify the duration used for POP before SMTP.
0 - 60 seconds
0
SMTP Authentication User Name
Specify a user name if Authentication Setting [SMTP
Authentication] is set to [On].
Max. 63 characters combining symbols and alphanumerics can be used.
---
Password
Specify a password.
Max. 15 characters combining symbols and alphanumerics can be used.
---
Realm
Specify a realm (domain name). If the SMTP server
with which to communicate supports DIGEST-MD5,
this field must be entered.
Max. 255 characters combining symbols and alphanumerics can be used.
---
Administrator Mail Address
Specify the e-mail address of the Administrator.
Max. 250 characters combining symbols and alphanumerics can be used.
---
E-Mail Receive Setting
18-114
POP Server Address
Specify an address of the POP server that is used to
receive e-mail.
0.0.0.0
Max. 255 characters combining symbols and alphanumerics can be used.
---
User Name
Specify a user name that is used to connect to the
POP server.
Max. 63 characters combining symbols and alphanumerics can be used.
---
bizhub PRO 920
Utility <Administrator Setting>
Specific setting and Description
18
Default
Password
Specify a password that is used to connect to the
POP server.
Max. 15 characters combining symbols and alphanumerics can be used.
---
APOP
Specify to use APOP or not.
Use/Not Use
Not Use
Port No.
Specify the number of port that is used to communicate with the POP server.
1 - 65535
110
Connection Timeout
Specify the time out duration.
30 - 300 seconds
60
Title Setting
Max. 5 e-mail titles can be saved for frequent use.
Max. 64 characters can be used.
---
Sentence Setting
Max. 5 e-mail bodies can be saved for frequent use.
Max. 256 characters can be used.
---
Specify the duration before automatically deleting Scan to HDD data. For details, refer to page 18-151.
Specific setting and Description
Default
9 HDD
HDD Data Auto Delete Period Setting
Specify the duration for which Scan to HDD data are
stored in the printer controller HDD before they are automatically deleted.
Not Delete/12 hours/1 day/2 days/3 days/7 days/30 days
1 day
Specify the Alert Mail settings. For detail, refer to page 18-153.
Specific setting and Description
Default
10 Alert Mail
E-Mail Notification
Specify to use e-mail transmission for alert notification.
On/Off
Off
Notification Address Setting
Inform the e-mail address to which to send alert e-mail.
Max. 250 characters combining symbols and alphanumerics can be used.
---
Information to transmit
Specify items to be included in alert e-mail.
8 items available: Service Call/ JAM/Tray Paper Replenish/
Toner Supply/PM Call/Add Staple/Finisher Tray Full/Hole
Punch Box Full
Clear All
---
bizhub PRO 920
18-115
Utility <Administrator Setting>
18
Specify the CSRC settings. For details, refer to page 18-156.
Specific setting and Description
Default
11 CSRC
CSRC Send Setting
18-116
CSRC Send
Specify to use CSRC Send or not.
On/Off
On
SMTP Server Address
Specify the SMTP server address.
0.0.0.0
Max. 255 characters combining symbols and alphanumerics can be used.
0.0.0.0
Port No.
Specify the port number.
1 - 65535
25
Connection Timeout
Specify the SMTP time out duration.
30 - 300 seconds
60
Administrator From Address
Specify the From address that is used to send e-mail
from Controller NIC.Max. 127 characters combining
symbols and alphanumerics can be used.
---
Auth. Setting
Specify to use the POP before SMTP authentication.
Specify as required in your own environment.
On/Off
Off
POP before SMTP
Specify the duration used for POP before SMTP.
0 - 60 seconds
0
SMTP Authentication User Name
If Authentication Setting [SMTP Authentication] is set
to [On], specify a user name.
Max. 63 characters combining symbols and alphanumerics can be used.
---
Password
Specify a password.Max. 15 characters combining
symbols and alphanumerics can be used.
---
Realm
Specify a realm (domain name). If the SMTP server
with which to communicate requires a realm, this
field must be entered.
Max. 255 characters combining symbols and alphanumerics can be used.
---
bizhub PRO 920
Utility <Administrator Setting>
Specific setting and Description
18
Default
CSRC Receive Setting
CSRC Receive
Specify to use CSRC Receive or not.
On/Off
On
POP Server Address
Specify a POP server address.
0.0.0.0
Max. 255 characters combining symbols and alphanumerics can be used.
0.0.0.0
User Name
Specify a user name to log in to the POP server.
Max. 63 alphanumerics can be used.
---
Password
Specify a password to log in to the POP server.
Max. 15 alphanumerics can be used.
---
APOP
Specify to use the APOP function.
On/Off
Off
Port No.
Specify the POP port number.
1 - 65535
110
Connection Timeout
Specify the POP time out duration.
30 - 300 seconds
60
Auto Check
Specify to check incoming e-mail automatically.
On/Off
On
Auto Check Interval Time
Specify the interval by which to check incoming email automatically.
1 - 60 minutes
15
CSRC Communication Test
Start
bizhub PRO 920
---
18-117
Utility <Administrator Setting>
18
Specify the settings for third party applications. For details, refer to
page 18-162.
Specific setting and Description
Default
12 AP I/F
AP I/F
Specify to use AP I/F.
Use/Not Use
Use
AP I/F Over SSL
If SSL is used for PSWC communication, this setting is enabled.
Use/Not Use
Not Use
AP I/F Authentication
Enable the setting to block access to this I / F.
On/Off
On
AP I/F Login Name
Required if the AP I/F Authentication is set to [On].
Max. 8 characters combining symbols and alphanumerics
can be used.
---
AP I/F Login Password
Required if the AP I/F Authentication is set to [On].
Max. 8 characters combining symbols and alphanumerics
can be used.
---
AP I/F Port No.
If SSL is not used, the port number specified in this field
will be used.
1 - 65535
50001
AP I/F Port Number (SSL)
If SSL is used, the port number specified in this field will be
used.
1 - 65535
50003
Specify the PSWC (Page Scope Web Connection) setting. For details, refer
to page 18-165.
Specific setting and Description
Default
13 PSWC
PSWC
Specify to use the PSWC function.
Use/Not Use
Use
Specify the Network Setting Clear setting. For details, refer to page 18-167.
Specific setting and Description
Default
14 Network Setting Clear
Initialize Set
Restore the initial network settings specified at the time of
shipment.
18-118
---
bizhub PRO 920
Utility <Administrator Setting>
18
Specify the LDAP setting. For details, refer to page 18-169.
Specific setting and Description
Default
15 LDAP
1 LDAP On/Off Setting
LDAP Function
Select to use or not to use LDAP function.
Use/Not Use
Max. Search Results
Specify the maximum number of the address to be
displayed after the search.
5 - 1000
Timeout
Specify the maximum duration waiting for the search
result.
5 - 300
Initial Setting for Search Details
Specify the initial items for making detailed search.
Not Use
100
60
---
2 Setting Up LDAP
Server Address
Specify the LDAP server address.
0.0.0.0
Max. 255 characters combining symbols and alphanumerics can be used.
Search Base
Specify the directory path of LDAP server.
Max. 255 characters combining symbols and alphanumerics can be used.
Enable SSL
Select to use SSL when connecting with LDAP server.
Use/Not Use
Port Number
Specify the port number of LDAP server.
The port number varies depending on the Enable
SSL setting.
1 - 65535
General Settings
Select the authentication type to login the LDAP
server.
Anonymous/Simple/Digest-MD5/GSS-SPNEGO
Login Name
Specify a login name.
Max. 255 characters combining symbols and alphanumerics can be used.
Password
Specify a password.
Max. 128 characters combining symbols and alphanumerics can be used.
bizhub PRO 920
0.0.0.0.
---
Not Use
389: SSL not used
636: SSL used
Anonymous
---
---
18-119
Utility <Administrator Setting>
18
Specific setting and Description
Domain Name
Specify a domain name.
This setting is required if GSS-SPNEGO is selected
as the authentication type.
Max. 64 characters combining symbols and alphanumerics can be used.
Dynamic Authentication
Set the Dynamic authentication.
Enable/Disable
Default
---
Disable
Specify the SNMP Trap setting. For details, refer to page 18-175.
Specific setting and Description
Default
16 SNMP Trap
SNMP Trap Transmission
Specify to transmit SNMP Trap or not.
On/Off
Authentication Failure Trans
Specify to transmit by SNMP in the case that any authentication failure in Read Community Name or Write Community Name of SNMP occurs.
On/Off
Off
Off
Trans Address 1 - 5 Setting
Address SNMP Trap Trans
Specify to transmit the SNMP Trap or not.
On/Off
Off
SNMP Trap Trans Address
Specify the SNMP Trap transmission address.
1 - 255
0.0.0.0
SNMP Trap Trans Port No.
Specify the SNMP Trap transmission port number.
1 - 65535
162
Trans Community Name
Specify the transmission community name.
Max. 15 alphanumerics/symbols can be used.
public
Report Items
Select the desired items. (More than one item can be
selected.)
8 items
Service Call/Jam/Paper Supply/Toner Supply/PM
Call/Staple Cartridge Supply/Finisher Tray Full/Dispose of Trash Basket
Clear All
18-120
---
bizhub PRO 920
Utility <Administrator Setting>
Specific setting and Description
18
Default
Trans IPX Setting
IPX SNMP Trap Transmission
Specify to transmit the IPX SNMP Trap or not.
On/Off
Trap IPX Network Address
Specify the IPX network address.
Alphabets A to F and numbers can be used (12 digits
fixed).
00:00:00:00
Trap IPX Node Address
Specify the IPX node address.
Within 15 alphanumerics/symbols
00:00:00:00:00:00
Trans IPX Community Name
Specify the IPX community name.
Within 15 alphanumerics/symbols
public
Report Items
Select the desired items (More than one item can be
selected.)
8 items
Service Call/Jam/Paper Supply/Toner Supply/PM
Call/Staple Cartridge Supply/Finisher Tray Full/Dispose of Trash Basket
Clear All
bizhub PRO 920
Off
---
18-121
Utility <Administrator Setting>
18
2 IP NIC Setting>1 TCP/IP
Specify the settings for connecting a network printer and network scanner,
and the settings for TCP/IP, RAW port numbers, IP Filter (permission/denial),
and ping.
1
Press the [Utility/Counter] to display the Utility Screen.
2
Touch [6 Administrator Setting], enter the administrator password, and
then touch [OK].
The Administrator Setting Screen will be displayed.
3
Touch [4 Network Setting].
The Network Setting Screen will be displayed.
4
Touch [2 IP NIC Setting].
The IP NIC Setting Screen will be displayed.
18-122
bizhub PRO 920
Utility <Administrator Setting>
5
18
Touch [1 TCP/IP].
The TCP/IP Setting Screen will be displayed.
6
For each item, select or enter a required value. Use [Next] or [Back] as
required.
–
–
–
–
–
–
bizhub PRO 920
TCP/IP
DHCP
IP Address
Subnet Mask
Gateway Address
DNS server 1-3
18-123
Utility <Administrator Setting>
18
18-124
–
–
–
–
DNS Host Name
DNS Domain Name
LPD
Line Speed Setting
–
TCP/IP RAW port settings
–
TCP/IP Filter accept settings
bizhub PRO 920
Utility <Administrator Setting>
–
TCP/IP Filter refuse setting
–
Network Test Ping Address
18
7
Touch [OK] to return to the IP NIC Setting Screen.
If further changes are required, touch the desired key.
8
After you have changed the settings, turn off the sub power, then turn
off and on the main power.
!
Detail
When you turn off and on the main power, you need to wait at least 10
seconds to turn on after turning off. If you do not allow a sufficient interval
in between, the machine may not run correctly.
bizhub PRO 920
18-125
Utility <Administrator Setting>
18
2 IP NIC Setting>2 NetWare
Specify the settings for connecting network printer, and the NetWare settings.
Where Novell NetWare is not used, make sure that [Not Use] is selected.
1
Press the [Utility/Counter] to display the Utility Screen.
2
Touch [6 Administrator Setting], enter the administrator password, and
then touch [OK].
The Administrator Setting Screen will be displayed.
3
Touch [4 Network Setting].
The Network Setting Screen will be displayed.
4
Touch [2 IP NIC Setting].
The IP NIC Setting Screen will be displayed.
18-126
bizhub PRO 920
Utility <Administrator Setting>
5
18
Touch [2 Netware].
The Netware Setting Screen will be displayed.
6
For each item, select or enter a required value. Use [Next] or [Back] as
required.
–
bizhub PRO 920
Netware Setting
18-127
Utility <Administrator Setting>
18
18-128
–
Netware Pserver Setting
–
Netware Nprinter/Rprinter, Netware Status Setting
bizhub PRO 920
Utility <Administrator Setting>
18
7
Touch [OK] to return to the IP NIC Setting Screen.
If further changes are required, touch the desired key.
8
After you have changed the settings, turn off the sub power, then turn
off and on the main power.
!
Detail
When you turn off and on the main power, you need to wait at least 10
seconds to turn on after turning off. If you do not allow a sufficient interval
in between, the machine may not run correctly.
bizhub PRO 920
18-129
Utility <Administrator Setting>
18
2 IP NIC Setting>3 IPP
Specify the settings for connecting network printer and the IPP settings.
1
Press the [Utility/Counter] to display the Utility Screen.
2
Touch [6 Administrator Setting], enter the administrator password, and
then touch [OK].
The Administrator Setting Screen will be displayed.
3
Touch [4 Network Setting].
The Network Setting Screen will be displayed.
4
Touch [2 IP NIC Setting].
The IP NIC Setting Screen will be displayed.
18-130
bizhub PRO 920
Utility <Administrator Setting>
5
18
Touch [3 IPP].
The IPP Setting Screen will be displayed.
6
For each item, select or enter a required value. Use [Next] or [Back] as
required.
–
IPP Setting
–
IPP Operation Support Information Setting
bizhub PRO 920
18-131
Utility <Administrator Setting>
18
–
IPP Printer Information Setting, Printer URI Setting
7
Touch [OK] to return to the IP NIC Setting Screen.
If further changes are required, touch the desired key.
8
After you have changed the settings, turn off the sub power, then turn
off and on the main power.
!
Detail
When you turn off and on the main power, you need to wait at least 10
seconds to turn on after turning off. If you do not allow a sufficient interval
in between, the machine may not run correctly.
18-132
bizhub PRO 920
Utility <Administrator Setting>
18
2 IP NIC Setting>4 FTP
Specify to use Scan to HDD/Scan to FTP for transmission, the proxy server
setting, and the passive function.
1
Press the [Utility/Counter] to display the Utility Screen.
2
Touch [6 Administrator Setting], enter the administrator password, and
then touch [OK].
The Administrator Setting Screen will be displayed.
3
Touch [4 Network Setting].
The Network Setting Screen will be displayed.
4
Touch [2 IP NIC Setting].
The IP NIC Setting Screen will be displayed.
bizhub PRO 920
18-133
Utility <Administrator Setting>
18
5
Touch [4 FTP].
The FTP Setting Screen will be displayed.
6
18-134
For each item, select or enter a required value. Use [Next] or [Back] as
required.
–
–
–
–
Client
Proxy Server Address
Proxy server Port Number
Passive Function
–
–
Connection Time Out Time
Port Number
bizhub PRO 920
Utility <Administrator Setting>
–
18
Server
7
Touch [OK] to return to the IP NIC Setting Screen.
If further changes are required, touch the desired key.
8
After you have changed the settings, turn off the sub power, then turn
off and on the main power.
!
Detail
When you turn off and on the main power, you need to wait at least 10
seconds to turn on after turning off. If you do not allow a sufficient interval
in between, the machine may not run correctly.
bizhub PRO 920
18-135
Utility <Administrator Setting>
18
2 IP NIC Setting>5 SNMP
Specify the SNMP settings.
1
Press the [Utility/Counter] to display the Utility Screen.
2
Touch [6 Administrator Setting], enter the administrator password, and
then touch [OK].
The Administrator Setting Screen will be displayed.
3
Touch [4 Network Setting].
The Network Setting Screen will be displayed.
4
Touch [2 IP NIC Setting].
The IP NIC Setting Screen will be displayed.
18-136
bizhub PRO 920
Utility <Administrator Setting>
5
18
Touch [5 SNMP].
The SNMP Setting Screen will be displayed.
6
For each item, select or enter a required value.
–
–
–
SNMP
Read Community Name
Write Community Name
7
Touch [OK] to return to the IP NIC Setting Screen.
If further changes are required, touch the desired key.
8
After you have changed the settings, turn off the sub power, then turn
off and on the main power.
!
Detail
When you turn off and on the main power, you need to wait at least 10
seconds to turn on after turning off. If you do not allow a sufficient interval
in between, the machine may not run correctly.
bizhub PRO 920
18-137
Utility <Administrator Setting>
18
2 IP NIC Setting>6 SMB
Specify the SMB printing setting, and to use Scan to SMB for transmission.
1
Press the [Utility/Counter] to display the Utility Screen.
2
Touch [6 Administrator Setting], enter the administrator password, and
then touch [OK].
The Administrator Setting Screen will be displayed.
3
Touch [4 Network Setting].
The Network Setting Screen will be displayed.
4
Touch [2 IP NIC Setting].
The IP NIC Setting Screen will be displayed.
18-138
bizhub PRO 920
Utility <Administrator Setting>
5
18
Touch [6 SMB].
The SMB Setting Screen will be displayed.
6
For each item, select or enter a required value.
–
–
–
–
–
bizhub PRO 920
Scan
Print
Net BIOS Name
Print Service Name
Workgroup
18-139
Utility <Administrator Setting>
18
7
Touch [OK] to return to the IP NIC Setting Screen.
If further changes are required, touch the desired key.
8
After you have changed the settings, turn off the sub power, then turn
off and on the main power.
!
Detail
When you turn off and on the main power, you need to wait at least 10
seconds to turn on after turning off. If you do not allow a sufficient interval
in between, the machine may not run correctly.
18-140
bizhub PRO 920
Utility <Administrator Setting>
18
2 IP NIC Setting>7 AppleTalk
Specify the settings for connecting network printer and the AppleTalk settings.
1
Press the [Utility/Counter] to display the Utility Screen.
2
Touch [6 Administrator Setting], enter the administrator password, and
then touch [OK].
The Administrator Setting Screen will be displayed.
3
Touch [4 Network Setting].
The Network Setting Screen will be displayed.
4
Touch [2 IP NIC Setting].
The IP NIC Setting Screen will be displayed.
bizhub PRO 920
18-141
Utility <Administrator Setting>
18
5
Touch [7 AppleTalk].
The AppleTalk Setting Screen will be displayed.
6
For each item, select or enter a required value.
–
–
–
–
Appletalk
Printer Name
Zone Name
Current Zone
7
Touch [OK] to return to the IP NIC Setting Screen.
If further changes are required, touch the desired key.
8
After you have changed the settings, turn off the sub power, then turn
off and on the main power.
!
Detail
When you turn off and on the main power, you need to wait at least 10
seconds to turn on after turning off. If you do not allow a sufficient interval
in between, the machine may not run correctly.
18-142
bizhub PRO 920
Utility <Administrator Setting>
18
2 IP NIC Setting>8 E-Mail
Specify the settings for an e-mail send/receive, division for transmitted data
and authentication, and save the template of titles and bodies frequently
used.
2
Note
The Binary Division function may be unavailable if any virus scanning
software is installed on the mail server. Contact your network administrator for details.
To receive the binary-divided e-mail, an e-mail client software supporting
the mail division function is required.
Note that the divided e-mail may not be combined depending on the software on your PC.
1
Press the [Utility/Counter] to display the Utility Screen.
2
Touch [6 Administrator Setting], enter the administrator password, and
then touch [OK].
The Administrator Setting Screen will be displayed.
3
Touch [4 Network Setting].
The Network Setting Screen will be displayed.
bizhub PRO 920
18-143
Utility <Administrator Setting>
18
4
Touch [2 IP NIC Setting].
The IP NIC Setting Screen will be displayed.
5
Touch [8 E-Mail].
The E-Mail Setting Screen will be displayed.
6
Touch [1 E-Mail TX Setting].
The E-Mail TX Setting Screen will be displayed. Specify the following
18-144
bizhub PRO 920
Utility <Administrator Setting>
18
items, using [Next] or [Back] as required. Touch [OK] to complete the
settings and return to the E-Mail Setting Screen.
bizhub PRO 920
18-145
Utility <Administrator Setting>
18
18-146
–
–
–
–
E-Mail Send
SMTP Server Address
Port Number
Connection Timeout
–
–
–
Binary Division
Binary Division Size
E-Mail Send Maximum Size
bizhub PRO 920
Utility <Administrator Setting>
7
–
–
–
–
Authentication Setting
POP before SMTP
Password
Realm
–
Administrator Mail Address
18
Touch [2 E-Mail RX Setting].
The E-Mail RX Setting Screen will be displayed.
bizhub PRO 920
18-147
Utility <Administrator Setting>
18
Specify the following items. Touch [OK] to complete the settings and
return to the E-Mail Setting Screen.
–
–
–
–
–
–
8
POP Server Address
User Name
Password
APOP
Port Number
Connection Timeout
Touch [3 Title Setting].
The E-Mail Title Setting Screen will be displayed.
Save an e-mail title.
–
–
–
18-148
Select an appropriate Default Select number.
Touch [Input] to display an input screen and enter a title.
After entering the title, touch [OK].
bizhub PRO 920
Utility <Administrator Setting>
–
9
18
Touch [OK] to complete the settings and return to the E-Mail Setting Screen.
Touch [4 Text Setting].
The E-Mail Text Setting Screen will be displayed.
Save an e-mail body.
–
–
–
bizhub PRO 920
Select an appropriate Default Select number.
Touch [Input] to display an input screen and enter a body.
After entering the body, touch [OK].
18-149
Utility <Administrator Setting>
18
–
Touch [OK] to complete the settings and return to the E-Mail Setting Screen.
10
Touch [OK] to return to the IP NIC Setting Screen.
If further changes are required, touch the desired key.
11
After you have changed the settings, turn off the sub power, then turn
off and on the main power.
!
Detail
When you turn off and on the main power, you need to wait at least 10
seconds to turn on after turning off. If you do not allow a sufficient interval
in between, the machine may not run correctly.
18-150
bizhub PRO 920
Utility <Administrator Setting>
18
2 IP NIC Setting>9 HDD
Specify the duration for which Scan to HDD data are stored in the printer
controller HDD before they are automatically deleted.
1
Press the [Utility/Counter] to display the Utility Screen.
2
Touch [6 Administrator Setting], enter the administrator password, and
then touch [OK].
The Administrator Setting Screen will be displayed.
3
Touch [4 Network Setting].
The Network Setting Screen will be displayed.
4
Touch [2 IP NIC Setting].
The IP NIC Setting Screen will be displayed.
bizhub PRO 920
18-151
Utility <Administrator Setting>
18
5
Touch [9 HDD].
The HDD Data Auto Delete Period Setting Screen will be displayed.
6
Touch an appropriate key to specify the duration for which data are
stored in HDD before they are automatically deleted.
7
Touch [OK] to return to the IP NIC Setting Screen.
If further changes are required, touch the desired key.
8
After you have changed the settings, turn off the sub power, then turn
off and on the main power.
!
Detail
When you turn off and on the main power, you need to wait at least 10
seconds to turn on after turning off. If you do not allow a sufficient interval
in between, the machine may not run correctly.
18-152
bizhub PRO 920
Utility <Administrator Setting>
18
2 IP NIC Setting>10 Alert Mail
Specify the settings for e-mail error notification.
1
Press the [Utility/Counter] to display the Utility Screen.
2
Touch [6 Administrator Setting], enter the administrator password, and
then touch [OK].
The Administrator Setting Screen will be displayed.
3
Touch [4 Network Setting].
The Network Setting Screen will be displayed.
4
Touch [2 IP NIC Setting].
The IP NIC Setting Screen will be displayed.
bizhub PRO 920
18-153
Utility <Administrator Setting>
18
5
Touch [10 Alert Mail].
The E-Mail Notification Setting Screen will be displayed.
18-154
6
Specify to use e-mail notification, and a destination address to which
to notify.
Select [On] or [Off] to specify to use e-mail notification.
Touch [Notification Address Setting].
The Alert E-Mail Inform Setting Screen will be displayed. Enter an address, then touch [OK]. The e-mail address can have maximum 250
characters.
7
Touch [Next].
Select required items to be included in alert e-mail.
bizhub PRO 920
Utility <Administrator Setting>
18
If you need no item to be included, touch Clear All.
8
Touch [OK] to return to the IP NIC Setting Screen.
If further changes are required, touch the desired key.
9
After you have changed the settings, turn off the sub power, then turn
off and on the main power.
!
Detail
When you turn off and on the main power, you need to wait at least 10
seconds to turn on after turning off. If you do not allow a sufficient interval
in between, the machine may not run correctly.
bizhub PRO 920
18-155
Utility <Administrator Setting>
18
2 IP NIC Setting>11 CSRC
CS Remote Care includes service tools, which you do not necessarily have
to set. Contact your service representative for details.
1
Press the [Utility/Counter] to display the Utility Screen.
2
Touch [6 Administrator Setting], enter the administrator password, and
then touch [OK].
The Administrator Setting Screen will be displayed.
3
Touch [4 Network Setting].
The Network Setting Screen will be displayed.
4
Touch [2 IP NIC Setting].
The IP NIC Setting Screen will be displayed.
18-156
bizhub PRO 920
Utility <Administrator Setting>
5
18
Touch [Next] and then touch [11 CSRC].
The CSRC Setting Screen will be displayed.
6
Touch [1 CSRC TX Setting] to display the CSRC TX Setting Screen.
Specify the following items, using [Next] or [Back] as required.
Touch [OK] to complete the settings and return to the CSRC Setting
Screen.
bizhub PRO 920
18-157
Utility <Administrator Setting>
18
18-158
–
–
–
–
–
–
CSRC Send
SMTP Server Address
Port Number
Connection Timeout
Administrator From Address
Password
–
–
–
–
–
Authentication Setting
POP Before SMTP
SMTP Authentication User Name
Password
Realm
bizhub PRO 920
Utility <Administrator Setting>
7
18
Touch [2 CSRC RX Setting] to display the CSRC RX Setting Screen.
Specify the following items, using [Next] or [Back] as required.
Touch [OK] to complete the settings and return to the CSRC Setting
Screen.
–
–
–
–
bizhub PRO 920
CSRC Receive
POP Server Address
User Name
Password
18-159
Utility <Administrator Setting>
18
8
18-160
–
–
–
APOP
Port Number
Connection Timeout
–
–
Auto Check
Auto Check Interval Time
Touch [3 CSRC Communications Test].
bizhub PRO 920
Utility <Administrator Setting>
18
The CSRC Communications Test Screen will be displayed.
Touch [Start] to perform the communication test. On completing the
test, touch [Return] to restore the CSRC Setting Screen.
9
Touch [Close] to return to the IP NIC Setting Screen.
If further changes are required, touch the desired key.
10
After you have changed the settings, turn off the sub power, then turn
off and on the main power.
!
Detail
When you turn off and on the main power, you need to wait at least 10
seconds to turn on after turning off. If you do not allow a sufficient interval
in between, the machine may not run correctly.
bizhub PRO 920
18-161
Utility <Administrator Setting>
18
2 IP NIC Setting>12 AP I/F
Specify the settings for AP I/F.
1
Press the [Utility/Counter] to display the Utility Screen.
2
Touch [6 Administrator Setting], enter the administrator password, and
then touch [OK].
The Administrator Setting Screen will be displayed.
3
Touch [4 Network Setting].
The Network Setting Screen will be displayed.
4
Touch [2 IP NIC Setting].
The IP NIC Setting Screen will be displayed.
18-162
bizhub PRO 920
Utility <Administrator Setting>
5
18
Touch [Next] and then touch [12 AP I/F].
The AP I/F Setting Screen will be displayed.
6
For each item, select or enter a required value.
–
–
–
bizhub PRO 920
AP I/F
AP I/F Over SSL
AP I/F Authentication
18-163
Utility <Administrator Setting>
18
–
–
–
–
AP I/F Login Name
AP I/F Password
AP I/F Port Number
AP I/F Port Number(SSL)
7
Touch [OK] to return to the IP NIC Setting Screen.
If further changes are required, touch the desired key.
8
After you have changed the settings, turn off the sub power, then turn
off and on the main power.
!
Detail
When you turn off and on the main power, you need to wait at least 10
seconds to turn on after turning off. If you do not allow a sufficient interval
in between, the machine may not run correctly.
18-164
bizhub PRO 920
Utility <Administrator Setting>
18
2 IP NIC Setting>13 PSWC
Specify to use PageScope Web Connection (PSWC).
1
Press the [Utility/Counter] to display the Utility Screen.
2
Touch [6 Administrator Setting], enter the administrator password, and
then touch [OK].
The Administrator Setting Screen will be displayed.
3
Touch [4 Network Setting].
The Network Setting Screen will be displayed.
4
Touch [2 IP NIC Setting].
The IP NIC Setting Screen will be displayed.
bizhub PRO 920
18-165
Utility <Administrator Setting>
18
5
Touch [Next] and then touch [13 PSWC].
The PSWC Setting Screen will be displayed.
6
Touch [Use] or [Not Use] to specify whether you want to use PSWC or
not.
7
Touch [OK] to return to the IP NIC Setting Screen.
If further changes are required, touch the desired key.
8
After you have changed the settings, turn off the sub power, then turn
off and on the main power.
!
Detail
When you turn off and on the main power, you need to wait at least 10
seconds to turn on after turning off. If you do not allow a sufficient interval
in between, the machine may not run correctly.
18-166
bizhub PRO 920
Utility <Administrator Setting>
18
2 IP NIC Setting>14 Network Setting Clear
Recover the initial network settings specified at the time of shipment.
1
Press the [Utility/Counter] to display the Utility Screen.
2
Touch [6 Administrator Setting], enter the administrator password, and
then touch [OK].
The Administrator Setting Screen will be displayed.
3
Touch [4 Network Setting].
The Network Setting Screen will be displayed.
4
Touch [2 IP NIC Setting].
The IP NIC Setting Screen will be displayed.
bizhub PRO 920
18-167
Utility <Administrator Setting>
18
5
Touch [Next] and then touch [14 Network Setting Clear].
The Initialization for Network Setting Screen will be displayed.
6
Touch [Initialize Set] to recover the initial setting specified at the time of
shipment.
7
Touch [OK] to return to the IP NIC Setting Screen.
If further changes are required, touch the desired key.
8
After you have changed the settings, turn off the sub power, then turn
off and on the main power.
!
Detail
When you turn off and on the main power, you need to wait at least 10
seconds to turn on after turning off. If you do not allow a sufficient interval
in between, the machine may not run correctly.
18-168
bizhub PRO 920
Utility <Administrator Setting>
18
2 IP NIC Setting>15 LDAP
Specify the settings for LDAP.
- Anonymous
Authentication method which does not require a user name and password and cannot enable the Dynamic Authentication.
- Simple
Simplified authentication method which requires a user name and password.
- Digest-MD5 (CRAM-MD5)
Authentication method available on general LDAP server. If authentication fails with Digest-MD5, automatically switches to CRAM-MD5 for retry.
- GSS-SPNEGO
Authentication method available in Windows Active Directory (Kerberos
authentication). A domain name of Active Directory is required.
1
Press the [Utility/Counter] to display the Utility Screen.
2
Touch [6 Administrator Setting], enter the administrator password, and
then touch [OK].
The Administrator Setting Screen will be displayed.
3
Touch [4 Network Setting].
The Network Setting Screen will be displayed.
bizhub PRO 920
18-169
Utility <Administrator Setting>
18
4
Touch [2 IP NIC Setting].
The IP NIC Setting Screen will be displayed.
5
Touch [Next] and then touch [15 LDAP].
The LDAP Setting Screen will be displayed.
6
18-170
Touch [1 LDAP On/Off setting] to display the LDAP On/Off Setting
Screen.
bizhub PRO 920
Utility <Administrator Setting>
7
18
Select and specify the screen items, then touch [OK] to return to the
LDAP Setting Screen.
–
–
–
LDAP Function
Max. Search Results
Timeout
–
Initial Setting for Search Details: Touch the key to display the Initial
Setting for Search Details Screen.
bizhub PRO 920
18-171
Utility <Administrator Setting>
18
–
8
Touch [2 Setting Up LDAP] on the LDAP Setting Screen to display the
Setting Up LDAP Screen. Touch up/down arrow to scroll as required,
then make the following settings.
–
–
18-172
Touch [Condition] on the right side of Search Item to display the
LDAP Search Condition Screen, select the condition for each of five
items, then touch [OK] to restore the previous screen.
Server Address
Search Base
bizhub PRO 920
Utility <Administrator Setting>
–
–
Enable SSL
Port Number
–
–
–
–
General Settings
Login Name
Password
Domain Name
–
Dynamic Authentication
bizhub PRO 920
18
18-173
Utility <Administrator Setting>
18
9
Touch [Connect Confirm] to check that the machine is connected to
the LDAP server.
If connection error occurs, a popup menu will be displayed.
–
–
The [Connect Confirm] key will not be displayed if LDAP Function is
set to [Not Use], or Registering and Changing Address of Prohibit
User Operation is set to [Restrict].
The settings of Setting Up LDAP Screen can be reset to the factory
initial setting.
Touch [Reset All] to display the popup menu for confirmation, then
touch [Yes] to reset all the setting, or touch [No] to cancel.
10
Touch [OK] to complete the setting and return to the LDAP Setting
Screen.
If further changes are required, touch the desired key.
11
After you have changed the settings, turn off the sub power, then turn
off and on the main power.
2
Reminder
When you turn off and on the main power, you need to wait at least 10
seconds to turn on after turning off. If you do not allow a sufficient interval
in between, the machine may not run correctly.
2
Reminder
Be sure to correctly specify the LDAP server setting, otherwise you may
have trouble with the network. This setting should be performed by the
server administrator.
If the port number is improperly changed, you may have trouble with the
network. Be sure not to change the port number unless the network administrator gives instruction to do so.
18-174
bizhub PRO 920
Utility <Administrator Setting>
18
2 IP NIC Setting>16 SNMP Trap
Specify the SNMP Trap settings.
!
Detail
Before setting the SNMP Trap, specify to use SNMP in 4 Network Setting> 2 IP NIC Setting> 5 SNMP.
1
Press the [Utility/Counter] to display the Utility Screen.
2
Touch [6 Administrator Setting], enter the administrator password, and
then touch [OK].
The Administrator Setting Screen will be displayed.
3
Touch [4 Network Setting].
The Network Setting Screen will be displayed.
4
Touch [2 IP NIC Setting].
The IP NIC Setting Screen will be displayed.
bizhub PRO 920
18-175
Utility <Administrator Setting>
18
5
Touch [Next] and then touch [16 SNMP Trap].
The SNMP Trap Setting Screen will be displayed.
6
Specify to use the SNMP Trap transmission and authentication failure
transmission functions.
–
–
18-176
SNMP Trap Transmission
Auth. Failure Transmission: Select [On] or [Off] to transmit by SNMP
in the case that any authentication failure in Read Community
Name or Write Community Name of SNMP occurs.
bizhub PRO 920
Utility <Administrator Setting>
7
18
Specify the Trans Address Setting.
Touch [Trans Address Setting] on the SNMP Trap Setting Screen, then
touch the desired key from 1 to 5 of transmission address setting to
display the SNMP Trap Trans Address Setting Screen.
Specify the following items, using up/down arrow as required.
Touch [OK] to complete the settings.
–
–
–
–
–
Address SNMP Trap Trans
SNMP Trap Trans Address
SNMP Trap Trans Port No.
Trans Community Name
Report Items: Select the desired report items. More than one item
can be selected.
Touch [Clear All] if none of them are required. However, the authentication failure transmission will be performed even if all report
items are cleared.
bizhub PRO 920
18-177
Utility <Administrator Setting>
18
8
Specify the Trans IPX Setting.
Touch [Trans IPX Setting] on the SNMP Trap Setting Screen to display
the SNMP Trap Trans IPX Setting Screen.
Specify the following items, using up/down arrow as required.
Touch [OK] to complete the settings.
–
–
–
–
–
18-178
IPX SNMP Trap Transmission
Trans IPX Network Address
Trans IPX Node Address
Trans IPX Community Name
Report Items: Select the desired report items. More than one item
can be selected.
Touch [Clear All] if none of them are required. However, the authentication failure transmission will be performed even if all report
items are cleared.
bizhub PRO 920
Utility <Administrator Setting>
18
9
Touch [OK] to return to the IP NIC Setting Screen.
If further changes are required, touch the desired key.
10
After you have changed the settings, turn off the sub power, then turn
off and on the main power.
!
Detail
When you turn off and on the main power, you need to wait at least 10
seconds to turn on after turning off. If you do not allow a sufficient interval
in between, the machine may not run correctly.
bizhub PRO 920
18-179
Utility <Administrator Setting>
18
18.7
5 Copier/Printer Setting
Job Offset Mode
Set the machine to offset the copies/printouts of different jobs.
1
Press the [Utility/Counter] to display the Utility Screen.
2
Touch [6 Administrator Setting], enter the administrator password, and
then touch [OK].
The Administrator Setting Screen will be displayed.
3
Touch [5 Copier/Printer Setting].
The Copier/Printer Setting Screen will be displayed.
4
18-180
Touch [Job Offset Mode].
Touch [On] or [Off] to highlight it.
bizhub PRO 920
Utility <Administrator Setting>
18
5
Touch [Close] to complete the setting and return to the Administrator
Setting Screen.
6
If further changes are required, touch the desired key.
Touch [Utility] to restore the Utility Screen.
bizhub PRO 920
18-181
Utility <Administrator Setting>
18
Continuous Print (Print)
Set the machine to output multiple reserved print jobs in succession.
1
Press the [Utility/Counter] to display the Utility Screen.
2
Touch [6 Administrator Setting], enter the administrator password, and
then touch [OK].
The Administrator Setting Screen will be displayed.
3
Touch [5 Copier/Printer Setting].
The Copier/Printer Setting Screen will be displayed.
4
18-182
Touch [Continuous Print (Print)].
Touch [On] or [Off] to highlight it.
bizhub PRO 920
Utility <Administrator Setting>
18
5
Touch [Close] to complete the setting and return to the Administrator
Setting Screen.
6
If further changes are required, touch the desired key.
Touch [Utility] to restore the Utility Screen.
bizhub PRO 920
18-183
Utility <Administrator Setting>
18
Change Page Number Print Pos (Booklet)
Set the machine to position the page numbers automatically on the outside
edges of the copy when using Booklet with Page Numbering in Stamp.
1
Press the [Utility/Counter] to display the Utility Screen.
2
Touch [6 Administrator Setting], enter the administrator password, and
then touch [OK].
The Administrator Setting Screen will be displayed.
3
Touch [5 Copier/Printer Setting].
The Copier/Printer Setting Screen will be displayed.
18-184
4
Touch [Change Page Number Print Pos (Booklet)].
Touch [On (Outside Page Print)] or [Off] to highlight it.
5
Touch [Close] to complete the setting and return to the Administrator
Setting Screen.
6
If further changes are required, touch the desired key.
Touch [Utility] to restore the Utility Screen.
bizhub PRO 920
Utility <Administrator Setting>
18
Fixing Prerotation Set
The fixing heat adjustment may be necessary as altering the paper type and
the weight. The machine rotates the fixing roller before printing starts in order
to print at the appropriate temperature for the specific paper type and the
weight.
1
Press the [Utility/Counter] to display the Utility Screen.
2
Touch [6 Administrator Setting], enter the administrator password, and
then touch [OK].
The Administrator Setting Screen will be displayed.
3
Touch [5 Copier/Printer Setting].
The Copier/Printer Setting Screen will be displayed.
4
Touch [Fixing Prerotation Set].
Touch [On] or [Off] to highlight it.
bizhub PRO 920
18-185
Utility <Administrator Setting>
18
18-186
5
Touch [Close] to complete the setting and return to the Administrator
Setting Screen.
6
If further changes are required, touch the desired key.
Touch [Utility] to restore the Utility Screen.
bizhub PRO 920
Utility <Administrator Setting>
18
Auto Image Rotation
Set this function to activate always, only when APS or AMS is activated, or
only when APS, AMS or reduce is activated.
1
Press the [Utility/Counter] to display the Utility Screen.
2
Touch [6 Administrator Setting], enter the administrator password, and
then touch [OK].
The Administrator Setting Screen will be displayed.
3
Touch [5 Copier/Printer Setting].
The Copier/Printer Setting Screen will be displayed.
4
Touch [Auto Image Rotation].
The select screen will be displayed.
bizhub PRO 920
18-187
Utility <Administrator Setting>
18
18-188
5
Touch [On – Always], [On – APS/AMS Only], or [On – APS/AMS/Reduce
Only] to complete the setting.
6
Touch [OK] to complete the setting and return to the Copier/Printer
Screen.
7
Touch [Close] to complete the setting and return to the Administrator
Setting Screen.
8
If further changes are required, touch the desired key.
Touch [Utility] to restore the Utility Screen.
bizhub PRO 920
Utility <Administrator Setting>
18
Suspend Interruption
Select the timing to stop the job in progress when [Interrupt] is pressed. The
timing can be set either to suspend on completing the job in progress or to
suspend by interrupting the job in progress.
1
Press the [Utility/Counter] to display the Utility Screen.
2
Touch [6 Administrator Setting], enter the administrator password, and
then touch [OK].
The Administrator Setting Screen will be displayed.
3
Touch [5 Copier/Printer Setting].
The Copier/Printer Setting Screen will be displayed.
4
Touch the down arrow key and touch [Suspend Interruption].
Touch [When Current Set Complete] or [Stop Immediately] to highlight
it.
bizhub PRO 920
18-189
Utility <Administrator Setting>
18
18-190
5
Touch [Close] to complete the setting and return to the Administrator
Setting Screen.
6
If further changes are required, touch the desired key.
Touch [Utility] to restore the Utility Screen.
bizhub PRO 920
Utility <Administrator Setting>
18
Reserve Copy Function
Set the timing to reserve a job setting. The timing can be set to either when
specifying on the Copy Reserve Confirmation Screen navigated from the Machine Status Screen, or when displaying the Copy Screen as placing the
original on the original glass.
1
Press the [Utility/Counter] to display the Utility Screen.
2
Touch [6 Administrator Setting], enter the administrator password, and
then touch [OK].
The Administrator Setting Screen will be displayed.
3
Touch [5 Copier/Printer Setting].
The Copier/Printer Setting Screen will be displayed.
4
Touch the down arrow key and touch [Reserve Copy Function].
Touch [Enabled by Operation] or [Enabled by Set Original] to highlight
it.
bizhub PRO 920
18-191
Utility <Administrator Setting>
18
18-192
5
Touch [Close] to complete the setting and return to the Administrator
Setting Screen.
6
If further changes are required, touch the desired key.
Touch [Utility] to restore the Utility Screen.
bizhub PRO 920
Utility <Administrator Setting>
18
Suspend Scanning when Tray is pulled
Select to prohibit scanning when pulling out the tray during scanning the
original.
1
Press the [Utility/Counter] to display the Utility Screen.
2
Touch [6 Administrator Setting], enter the administrator password, and
then touch [OK].
The Administrator Setting Screen will be displayed.
3
Touch [5 Copier/Printer Setting].
The Copier/Printer Setting Screen will be displayed.
4
Touch the down arrow key and touch [Suspend Scanning when Tray is
pulled].
Touch [On] or [Off] to highlight it.
bizhub PRO 920
18-193
Utility <Administrator Setting>
18
18-194
5
Touch [Close] to complete the setting and return to the Administrator
Setting Screen.
6
If further changes are required, touch the desired key.
Touch [Utility] to restore the Utility Screen.
bizhub PRO 920
Utility <Administrator Setting>
18
Continuous Print (Copy)
Select the machine to output multiple reserve jobs in succession.
1
Press the [Utility/Counter] to display the Utility Screen.
2
Touch [6 Administrator Setting], enter the administrator password, and
then touch [OK].
The Administrator Setting Screen will be displayed.
3
Touch [5 Copier/Printer Setting].
The Copier/Printer Setting Screen will be displayed.
4
Touch the down arrow key and touch [Continuous Print (Copy)].
Touch [On] or [Off] to highlight it.
5
Touch [Close] to complete the setting and return to the Administrator
Setting Screen.
6
If further changes are required, touch the desired key.
Touch [Utility] to restore the Utility Screen.
bizhub PRO 920
18-195
Utility <Administrator Setting>
18
Face Up/Down for 1 Sheet
Select to set the exit direction when copying one set of the original placed
on the original glass.
1
Press the [Utility/Counter] to display the Utility Screen.
2
Touch [6 Administrator Setting], enter the administrator password, and
then touch [OK].
The Administrator Setting Screen will be displayed.
3
Touch [5 Copier/Printer Setting].
The Copier/Printer Setting Screen will be displayed.
18-196
4
Touch the down arrow key and touch [Face Up/Down for 1 Sheet].
Touch [Face Up] or [Face Down] to highlight it.
5
Touch [Close] to complete the setting and return to the Administrator
Setting Screen.
6
If further changes are required, touch the desired key.
Touch [Utility] to restore the Utility Screen.
bizhub PRO 920
Utility <Administrator Setting>
18
Single Feed Auto Setting
Set the machine to feed a single document automatically as placing it in the
ADF in the Memory Scan mode, or feed it by pressing [Start].
1
Press the [Utility/Counter] to display the Utility Screen.
2
Touch [6 Administrator Setting], enter the administrator password, and
then touch [OK].
The Administrator Setting Screen will be displayed.
3
Touch [5 Copier/Printer Setting].
The Copier/Printer Setting Screen will be displayed.
4
Touch the down arrow key and touch [Single Feed Auto Setting].
Touch [On] or [Off] to highlight it.
5
Touch [Close] to complete the setting and return to the Administrator
Setting Screen.
6
If further changes are required, touch the desired key.
Touch [Utility] to restore the Utility Screen.
bizhub PRO 920
18-197
Utility <Administrator Setting>
18
18.8
6 System Connection
6 System Connection>1 Call Service Centre
Use this function to call your service representative for maintenance. Your
service representative is monitoring the machine status as needed basis. The
monitored information will be useful for maintenance.
1
Press the [Utility/Counter] to display the Utility Screen.
2
Touch [6 Administrator Setting], enter the administrator password, and
then touch [OK].
The Administrator Setting Screen will be displayed.
3
Touch [6 System Connection].
The System Connection Screen will be displayed.
4
Touch [Call Service Centre].
The Call Service Centre Screen will be displayed.
18-198
bizhub PRO 920
Utility <Administrator Setting>
18
5
Touch [Start].
6
Touch [Return] to return to the previous screen.
7
Touch [Close] to complete the setting and return to the Administrator
Setting Screen.
8
If further changes are required, touch the desired key.
Touch [Utility] to restore the Utility Screen.
bizhub PRO 920
18-199
Utility <Administrator Setting>
18
18.9
7 Security Setting
1 Administrator Password
Set the new administrator password.
!
Detail
You may enter eight characters for the administrator password.
The password is case sensitive.
If a wrong password or a password below eight characters is entered and
touch [OK], the error message will be displayed and any key inputs become invalid for five seconds. Enter a correct administrator password after five seconds pass.
The wrong operation will be recorded in an audit log.
1
Press the [Utility/Counter] to display the Utility Screen.
2
Touch [6 Administrator Setting], enter the administrator password, and
then touch [OK].
The Administrator Setting Screen will be displayed.
3
Touch [7 Security Setting].
The Security Setting Screen will be displayed.
18-200
bizhub PRO 920
Utility <Administrator Setting>
4
18
Touch [1 Administrator Password].
The administrator password input screen will be displayed.
5
Touch [Input Administrator Password].
6
Enter the new eight-character password.
bizhub PRO 920
18-201
Utility <Administrator Setting>
18
18-202
7
Touch [OK] to complete the setting and touch [OK] to return to the Security Setting Screen.
8
Touch [Close] to complete the setting and return to the Administrator
Setting Screen.
9
If further changes are required, touch the desired key.
Touch [Utility] to restore the Utility Screen.
bizhub PRO 920
Utility <Administrator Setting>
18
2 HDD Manage Setting>1 Details/Delete
The user can create a folder or a box when saving images in a personal, public or confidential folder. The administrator can refer to the name, password,
number or creation time of the folder created by the user, and delete the folder or box if necessary.
1
Press the [Utility/Counter] to display the Utility Screen.
2
Touch [6 Administrator Setting], enter the administrator password, and
then touch [OK].
The Administrator Setting Screen will be displayed.
3
Touch [7 Security Setting].
The Security Setting Screen will be displayed.
4
Touch [2 HDD Manage Setting].
The HDD Manage Setting Screen will be displayed.
bizhub PRO 920
18-203
Utility <Administrator Setting>
18
5
Touch [1 Details/Delete].
The Details/Delete Screen will be displayed.
6
Refer the detailed information of the folder and the box.
–
–
–
–
Touch [Personal Folder], [Public Folder], or [Secure] to refer to the
details of the desired folder or box.
Touch the desired folder to highlight it.
When referring to the information, touch to highlight the folder
which contains the box to be referred to.
When the folder or box to be referred to is not displayed, touch the
up or down arrow keys on the right side to highlight it.
Confirm that the name of the desired folder or box is displayed at
the upper area of the screen.
Touch [Details] to display the details.
The Folder Details Screen will be displayed.
18-204
bizhub PRO 920
Utility <Administrator Setting>
–
7
18
Touch [Return] to restore the Details/Delete Screen.
Delete the detailed information of the folder or box.
–
–
Touch [Personal Folder], [Public Folder], or [Secure] to refer to the
details of the desired folder or box.
Touch the desired folder to highlight it.
Confirm that the name of the desired folder or box is displayed at
the upper area of the screen.
Touch [Delete] to display the Delete Confirmation popup screen.
–
Touch [Yes] to delete, or touch [No] to suspend deleting.
–
–
bizhub PRO 920
18-205
Utility <Administrator Setting>
18
–
18-206
Touch [OK].
8
Touch [OK] to complete the setting and return to the HDD Manage Setting Screen.
9
Touch [Close] to complete the setting and return to the Administrator
Setting Screen.
10
If further changes are required, touch the desired key.
Touch [Utility] to restore the Utility Screen.
bizhub PRO 920
Utility <Administrator Setting>
18
2 HDD Manage Setting>2 Data Auto Delete
Specify the period of time (12 hours to 30 days) to keep data stored on internal HDD of the copier so that it will be deleted automatically when specified
period has passed. The initial setting is [Not Delete].
1
Press the [Utility/Counter] to display the Utility Screen.
2
Touch [6 Administrator Setting], enter the administrator password, and
then touch [OK].
The Administrator Setting Screen will be displayed.
3
Touch [7 Security Setting].
The Security Setting Screen will be displayed.
4
Touch [2 HDD Manage Setting].
The HDD Manage Setting Screen will be displayed.
bizhub PRO 920
18-207
Utility <Administrator Setting>
18
5
Touch [2 Data Auto Delete].
The HDD Data Auto Delete Period Setting Screen will be displayed.
18-208
6
Touch the desired period to highlight it.
Touch [Not Delete] to highlight it when not setting the automatically deleting period.
7
Touch [OK] to complete the setting and return to the HDD Manage Setting Screen.
8
Touch [Close] to complete the setting and touch [Close] to return to the
Administrator Setting Screen.
9
If further changes are required, touch the desired key.
Touch [Utility] to restore the Utility Screen.
bizhub PRO 920
Utility <Administrator Setting>
18
2 HDD Manage Setting>3 HDD Lock Password Changing
Change the HDD lock password.
2
Note
The HDD Lock Password cannot be changed unless the Enhanced Security mode is set to ON.
1
Press the [Utility/Counter] to display the Utility Screen.
2
Touch [6 Administrator Setting], enter the administrator password, and
then touch [OK].
The Administrator Setting Screen will be displayed.
3
Touch [7 Security Setting].
The Security Setting Screen will be displayed.
4
Touch [2 HDD Manage Setting].
The HDD Manage Setting Screen will be displayed.
bizhub PRO 920
18-209
Utility <Administrator Setting>
18
5
Touch [3 HDD Lock Password Changing].
6
Touch [Current Password] to display the Password Input Screen.
Enter current password (The first password; 9-digit alphanumeric serial
number of the main body.) The enterd password will appear as asterisks on the screen. Then, touch [OK]
The Change HDD Lock Password Screen will be restored.
18-210
bizhub PRO 920
Utility <Administrator Setting>
7
Touch [New Password] to display the Password Input Screen.
8
Enter the new password and touch [OK].
9
Touch [Check Input] to re-enter the same new password.
bizhub PRO 920
18
18-211
Utility <Administrator Setting>
18
18-212
10
Enter new password once more for confirmation, then touch [OK].
11
Touch [OK] to complete the setting and touch [Close] to return to the
Security Setting Screen.
12
Touch [Close] to complete the setting and return to the Administrator
Setting Screen.
13
If further changes are required, touch the desired key.
Touch [Utility] to restore the Utility Screen.
bizhub PRO 920
Utility <Administrator Setting>
18
3 Enhance Security Mode
Set the enhance security mode to On or Off.
2
Note
In order to set the Enhanced Security mode to On, it is required by your
service representative to set a CE password and a administrator password to your machine.
1
Press the [Utility/Counter] to display the Utility Screen.
2
Touch [6 Administrator Setting], enter the administrator password, and
then touch [OK].
The Administrator Setting Screen will be displayed.
3
Touch [7 Security Setting].
The Security Setting Screen will be displayed.
4
Touch [3 Enhance Security Mode].
bizhub PRO 920
18-213
Utility <Administrator Setting>
18
The Enhance Security Mode Screen will be displayed.
18-214
5
Touch [On] when activating this mode, or touch [Off] when deactivating
this mode.
6
Touch [OK] at the lower right side of the screen to display the Confirmation popup screen.
7
Touch [Yes] to complete the setting. The machine power will be turned
off, then on.
Touch [No] to cancel the setting. Touch [Cancel] at the lower right side
of the screen to the Security Setting Screen.
8
If further changes are required, touch the desired key.
Touch [Utility] to restore the Utility Screen.
bizhub PRO 920
Utility <Administrator Setting>
18
18.10 8 Scanner Destination Storage
1 Destination Address Change/Delete
Change or delete the destination of the scanned image. The following four
addresses can be registered:
- E-Mail (mail address)
- HDD (Box No.)
- FTP (FTP server address)
- SMB (shared folder)
The Group of registered E-Mail addresses can be deleted.
1
Press the [Utility/Counter] to display the Utility Screen.
2
Touch [6 Administrator Setting], enter the administrator password, and
then touch [OK].
The Administrator Setting Screen will be displayed.
3
Touch [8 Scanner Destination Storage].
The Scanner Destination Storage Screen will be displayed.
bizhub PRO 920
18-215
Utility <Administrator Setting>
18
4
Touch [1 Destination Address Change/Delete].
The Scan Destination Address Change/Delete Screen will be displayed.
5
Select the address type to change/delete the E-Mail destination address.
–
Touch [E-Mail].
–
Display the register name of the destination address using the
search key or the up and down arrow keys.
Touch a register name to highlight it.
–
18-216
bizhub PRO 920
Utility <Administrator Setting>
18
–
To change, touch [Change] to display the Scan Destination Address
Change/Delete Screen.
Select the changing item from [Address], [Register Name] and [Reference Name], and change it in the input screen. Touch [Common]
to set it as daily use. Touch [OK].
–
To delete, touch [Delete]. Touch [Yes] on the Delete Confirmation
popup screen. To suspend deleting, touch [No].
bizhub PRO 920
18-217
Utility <Administrator Setting>
18
6
Select the address type to change/delete the HDD destination address.
–
Touch [HDD].
–
Display the register name of the destination address using the
search key or the up and down arrow keys.
Touch the register name to highlight it.
To change, touch [Change] to display the Scan Destination Address
Change/Delete Screen.
Select the changing item from [Register Name], [Reference Name]
and [Password], and change it in the input screen. Touch [Common] to set it as daily use. Touch OK.
–
–
–
18-218
To delete, touch [Delete]. Touch [Yes] on the Delete Confirmation
popup screen. To suspend deleting, touch No.
bizhub PRO 920
Utility <Administrator Setting>
–
7
18
To delete the unregistered box, touch [Non Register Box] and touch
[Delete]. Touch [Yes] on the Delete Confirmation popup screen. To
suspend deleting, touch [No].
Select the address type to change/delete the FTP destination address.
–
Touch [FTP].
–
Display the register name of the destination address using the
search key or the up and down arrow keys.
Touch the register name to highlight it.
–
bizhub PRO 920
18-219
Utility <Administrator Setting>
18
18-220
–
To change, touch [Change] to display the Scan Destination Address
Change/Delete Screen.
Select the changing item from [Profile Name], [Character for
Search], [Password], [Login Name], [Host Address] and [File Path],
and change it in the input screen. Touch [Common] to set it as daily
use. Touch [OK].
–
To delete, touch [Delete]. Touch [Yes] on the Delete Confirmation
popup screen. To suspend deleting, touch [No].
bizhub PRO 920
Utility <Administrator Setting>
8
18
Select the address type to change/delete the SMB destination address.
–
Touch [SMB].
–
Display the register name of the destination address using the
search key or the up and down arrow keys.
Touch the register name to highlight it.
To change, touch [Change] to display the Scan Destination Address
Change/Delete Screen.
Select the changing item from [Profile Name], [Character for
Search], [Password], [Login Name], [Host Address] and [File Path],
and change it in the input screen. Touch [Common] to set it as daily
use. Touch [OK].
–
–
bizhub PRO 920
18-221
Utility <Administrator Setting>
18
–
9
Select the address type to delete Group.
–
Touch [Group].
–
Display the register name of the destination address using the
search key or the up and down arrow keys.
Touch the register name to highlight it.
–
18-222
To delete, touch [Delete]. Touch [Yes] on the Delete Confirmation
popup screen. To suspend deleting, touch [No].
bizhub PRO 920
Utility <Administrator Setting>
–
18
Touch [Delete]. Touch [Yes] on the Delete Confirmation popup
screen. To suspend deleting, touch [No].
10
Touch [Return] to restore the Scanner Destination Storage Screen.
11
Touch [Close] to complete the setting and return to the Administrator
Setting Screen.
12
If further changes are required, touch the desired key.
Touch [Utility] to restore the Utility Screen.
bizhub PRO 920
18-223
18
18-224
Utility <Administrator Setting>
bizhub PRO 920
19
Web Utilities Setting
Web Utilities Setting
19
Web Utilities Setting
19.1
Web Utilities Outlines
19
When the machine is connected with a PC over a network, the web browser
activated on the PC provides the following functions.
- Account Track Setting
Make the account track settings concerning the administrator setting using the web browser on a PC.
- Remote Panel Setting
Make the remote panel settings to control using the web browser on a
PC.
- Scan Transmission Setting
Register the address for the transmission of the scanned image data concerning the administrator using the web browser.
- Setting Data Import/Export
Transmit the setting data from the machine to a PC (export) using the web
browser, then return the data to the machine (import).
Prerequisites
- Browser: Internet Explorer 6.02 / Netscape Navigator 7.1 / FireFox1.0 or
later
- Contact your network manager for details on the network system, the IP
address or host name of the machine.
- The account track setting is available only when the machine is under the
following conditions.
All distribute numbers (1,000) are assigned the account authentication
party.
Account authentication is set ON.
User authentication data is not yet registered.
- The user name “admin” (for accessing to the Administrator Setting Menu)
cannot be changed.
Enter the administrator password previously specified on the machine.
00000000 is initially applied.
Once entered, the user name and password are not necessary to be reentered unless the web browser is restarted.
!
Detail
To clear the text boxes, click on [Reset].
To cancel adding a new account track data, click on [Back] or any Administrator Setting menu item to jump to the desired window.
bizhub PRO 920
19-3
Web Utilities Setting
19
Follow the procedure below to access the Web Utilities of the machine using
the web browser.
1
Turn on the power to the PC connected with the machine over a network.
2
Activate the web browser, then select [Open] from the File menu.
3
Enter the URL (http:// [IP address or host name of the machine]), then
click on [OK].
The Main Page of the Web Utilities will be displayed.
!
Detail
The Web Utilities window is subject to change without notice.
19-4
bizhub PRO 920
Web Utilities Setting
19.2
19
Setting Account Track Data
Make the account track settings concerning the administrator setting using
the web browser on a PC.
!
Detail
To edit the account track data, User Authentication needs to be set to
Off, and Account Authentication set to On.
A duplicate password or name will be rejected with an error message.
However, duplicating a password is possible using the administrator setting.
The Account Name entry box accepts letters, numbers. Any symbols will
be rejected with an error message displayed in the window.
Max. 1,000 account entries can be registered. An error message will be
displayed if the above limit is exceeded.
An error message may be displayed when the data entry has not been
completed due to the machine operation in progress. Please click on [Apply] while the machine is in an idle state.
bizhub PRO 920
19-5
Web Utilities Setting
19
19.2.1 Adding Account Track
Add a new account track data (password, name, and limit value).
1
Open the Web Utilities window.
2
Click on [Machine Manager Setting].
The Enter Network Password dialogue box will be displayed.
3
Enter “admin” in the User Name text box, and an 8-digit administrator
in the password text box, then click on [OK].
The Machine Manager Setting menu will be displayed.
19-6
bizhub PRO 920
Web Utilities Setting
4
19
Click on [Account Track setting].
The Account Track Setting menu will be displayed.
5
Click on [Account Track data add].
The Account Track Data Add window will be displayed.
6
Enter a new account track data.
Account Name: 8 characters max.
Password: 8 digits max.
Limit: 99,999,999 copies max.
bizhub PRO 920
19-7
Web Utilities Setting
19
7
Click on [Apply].
The registered content will be displayed in the window.
The new account track data will be transmitted to the machine immediately so that is valid for the user operations.
8
19-8
Click on [Back] to return to the Account Track Setting menu or any
menu item to jump to the desired window.
bizhub PRO 920
Web Utilities Setting
19
19.2.2 Editing Account Track Data
Change or delete the account track data (password, account name, or limit
value, or reset the counters).
1
Open the Web Utilities window.
2
Click on [Machine Manager Setting].
The Enter Network Password dialogue box will be displayed.
3
Enter “admin” in the User Name text box, and an 8-digit administrator
password in the password text box, then click on [OK].
The Machine Manager Setting menu will be displayed.
4
Click on [Account Track setting].
bizhub PRO 920
19-9
Web Utilities Setting
19
The Account Track Setting menu will be displayed.
5
Click on [Account Track data list].
The Account Track List will be displayed.
6
19-10
Change the Account Name, Password, and Limit Value.
bizhub PRO 920
Web Utilities Setting
19
–
Click on the number of the data to be edited.
–
The Account Track Add Data window will be displayed.
Change the account name, password, or limit value, as desired. For
details in entering procedure, refer to page 19-6.
bizhub PRO 920
19-11
Web Utilities Setting
19
–
–
7
Reset Counter.
–
–
19-12
Click on [Apply].
The edited content will be displayed in the window.
The edited data will be transmitted to the machine immediately so
that is valid for the user operations.
Click on [Back] to return to the Account Track Data List window.
Click on the check box(es) to select the account track data of the
counter to be cleared. If all the counters are to be cleared, click on
[SelectAll].
Click on the radio button (a white circle) heading the “Copy/Printer
Count reset.” or “Scan Count reset.”
bizhub PRO 920
Web Utilities Setting
–
19
Click on [Apply].
The Counter Reset Confirmation window will be displayed.
bizhub PRO 920
19-13
Web Utilities Setting
19
8
–
Click on [Apply] to immediately reset the counters to zero.
–
The message “Setting was changed” will be displayed.
Click on [Back] to return to the Account Track Data List or any menu
item to jump to the desired window.
Delete Counter.
–
–
19-14
Click on the check box(es) to select the account track data to be
deleted. If all the data are to be cleared, click on [SelectAll].
Click on the radio button (a white circle) heading the “Delete (Except for Another user count)”.
bizhub PRO 920
Web Utilities Setting
–
19
Click on [Apply].
The Delete Confirmation window will be displayed.
bizhub PRO 920
19-15
Web Utilities Setting
19
9
19-16
–
Click on [Apply] to immediately delete the data.
–
The message “Setting was deleted” will be displayed.
Click on [Back] to return to the Account Track Data List or any menu
item to jump to the desired window.
Save Counter.
bizhub PRO 920
Web Utilities Setting
–
bizhub PRO 920
19
Click on [Save this table as a file].
19-17
Web Utilities Setting
19
–
Click on [Save].
In the dialogue box, designate the folder for saving the data, then
click on [Save].
19-18
bizhub PRO 920
Web Utilities Setting
19
!
Detail
The account track data will be stored in CSV format.
The data cannot be saved while the machine is in operation. In this case,
try this procedure again after the machine starts idling. Click on [Back] in
the browser window to return to the Account Track Data List for starting
over.
Example: Account track data list stored as a file
The “Another user count” will be stored by the name of “UNKNOWN” in
the last line.
bizhub PRO 920
19-19
Web Utilities Setting
19
19.3
Remote Panel Setting
When the machine is connected with a PC over a network, the web browser
activated on the PC enables you to operate the machine.
Specify the IP address of the PC to be used for Remote Panel function, using
Web Utilities setting on a PC.
Remote Panel functions:
- Touch panel screens can be displayed on the web browser and operated
using a mouse.
- Control panel keys can be displayed on the web browser and operated
using a mouse.
- Passwords can be entered using PC keyboard.
Prerequisites:
- JavaScript must be active.
- The machine should be connected with a PC over a network with TCP/IP
enabled.
- Set the Enhance Security mode OFF on the machine.
1
Open the Web Utilities window.
2
Click on [Machine Manager Setting].
The Enter Network Password dialogue box will be displayed.
19-20
bizhub PRO 920
Web Utilities Setting
3
19
Enter “admin” in the User Name text box, and an 8-digit administrator
password in the password text box, then click on [OK].
The Administrator Setting menu will be displayed.
4
Click on [Remote Panel setting].
The Remote Panel Setting menu will be displayed.
5
Specify the IP address of the PC to be used for Remote Panel function.
Max. 3 IP addresses can be specified.
bizhub PRO 920
19-21
Web Utilities Setting
19
19-22
6
Click on [Registration].
The IP address will be applied to the machine immediately so that is
valid for the user operations.
7
Click on [Administrator Setup Menu] to restore the Administrator Setting menu.
bizhub PRO 920
Web Utilities Setting
19.4
19
Setting Scan Transmission Function
Follow the procedure below to register, change, or delete the address for the
transmission of the scanned image data using the web browser. For details
of the Scan Transmission Setting, contact your service representative.
Prerequisites:
- The Scan Transmission Setting is available in the following condition. The
Image Controller IC-203 is installed in the machine and already initialized.
- The Scan Transmission Setting is not used in the machine.
- Using Scan Transmission Setting in the administrator setting, you cannot
newly register an E-mail/HDD/FTP/SMB address or group the entries.
- The [Scan transmission setting] key appears in the Scan Transmission
Setting window only when the optional Image Controller is installed in the
machine.
- Click on the DAILY USE check box in the E-mail Registration table, if the
data is frequently used.
- The symbols that cannot be displayed in the entry box will be ignored, if
entered.
- The HDD Box No. will be registered as a 9-digit number.
For example, entering [1] will be registered as [000000001].
1
Open the Web Utilities window.
2
Click on [Machine Manager Setting].
The Enter Network Password dialogue box will be displayed.
bizhub PRO 920
19-23
Web Utilities Setting
19
3
Enter “admin” in the User Name text box, and an 8-digit administrator
password in the password text box, then click on [OK].
The Administrator Setting menu will be displayed.
4
Click on [Scan transmission setting].
The Scan Transmission Setting window will be displayed.
19-24
bizhub PRO 920
Web Utilities Setting
5
19
Register the E-Mail, HDD, FTP, and SMB, as required.
bizhub PRO 920
19-25
Web Utilities Setting
19
6
Click on [Registration] to complete the entry.
The registered content will be displayed.
Click on [Back] to return to the Scan Transmission Setting window.
7
Display the Entry List.
Click on [Entry List] of the desired item under the entry box to display
the Entry List.
Click on [Back] to return to the Scan Transmission Setting window.
19-26
bizhub PRO 920
Web Utilities Setting
8
19
Change the registered contents.
Display the Entry List of the desired item as described in step 7.
Click on the entry name to be changed.
The window for changing the selected item will be displayed.
Change the contents as desired, then click on [Registration].
The registered content will be displayed.
Click on [Back] to return to the Scan Transmission Setting window.
bizhub PRO 920
19-27
Web Utilities Setting
19
9
Delete the registered contents.
Display the Entry List of the desired item as described in step 7.
Click on the check box in the Delete column of the item to be deleted,
then click on [Delete]. If all the data are to be cleared, click on [SelectAll].
The window for deleting the selected item will be displayed.
Confirm the registered name to be deleted, then click on [Yes].
Click on [Back] to return to the Entry List window.
Click on [Back] to return to the Scan Transmission Setting window.
19-28
bizhub PRO 920
Web Utilities Setting
19.5
19
Transmitting Machine Setting File
Follow the procedure below to transmit the following setting file from the machine to a PC (export) using the web browser, edit the setting data on the PC,
then return the file to the machine (import).
Account track data (max. 1,000 files)
Four Scan Transmission Setting data (max. 500 files in total)
- E-mail data (E-Mail address)
- HDD (Box No.)
- FTP (FTP server address)
- SMB (shared folder)
Prerequisites:
- The machine setting file can be stored in a PC so that it may be returned
to the machine at any time, and is available for common use if you have
two or more machines.
- The file transmitted to a PC, being converted to a file type for batch
processing, can be edited efficiently and returned to the machine.
- The file transmitted to a PC normally contains the four data types mentioned above, however, each data type can be made into a file and transmitted separately.
- The exported setting file of this machine can be imported to another
model, and vice versa. For details, contact your service representative.
!
Detail
The exported setting file of this machine can be imported to another
model, and vice versa. For details, contact your service representative.
The file name is automatically assigned as described below. Select the
data to be exported, changing the name if desired.
vt_tab.txt (account track data)
ip_email.txt (E-mail data of Scan Transmission Setting data)
ip_hdd.txt (HDD data of Scan Transmission Setting data)
ip_ftp.txt (FTP data of Scan Transmission Setting data)
ip_smb.txt (SMB data of Scan Transmission Setting data)
bizhub PRO 920
19-29
Web Utilities Setting
19
1
Open the Web Utilities window.
2
Click on [Machine Manager Setting].
The Enter Network Password dialogue box will be displayed.
3
Enter “admin” in the User Name text box, and an 8-digit administrator
password in the password text box, then click on [OK].
The Machine Manager Setting menu will be displayed.
4
Click on [Setting data Import/Export].
The Setting Data Import/Export window will be displayed.
19-30
bizhub PRO 920
Web Utilities Setting
5
19
Export the machine setting file.
Select the desired file type from the pull-down menu, then click on [Export….]
bizhub PRO 920
19-31
19
Web Utilities Setting
The File Download dialogue box will be displayed.
Click on [OK].
In the dialogue box, designate the folder for saving the machine setting
file, then click on [Save].
A dialogue box will be displayed when the saving operation is completed.
Click on [Close].
19-32
bizhub PRO 920
Web Utilities Setting
19
6
Edit the machine setting file.
The machine setting file transmitted to a PC is a TAB separated text file
which can be edited using an application software such as Text Editor
or Table Editor. A new setting file can also be created according to the
specifications for each file type. See page 19-35 for details.
7
Import the machine setting file.
Click on [Browse…] to designate the machine setting file to be imported, then click on [Import].
The result message will be displayed when the registration is completed.
bizhub PRO 920
19-33
Web Utilities Setting
19
!
Detail
The file cannot be accessed when the machine is operating. If an error
message is displayed, try again to save the file after the current machine
operation is completed.
!
Detail
If the registration cannot be completed successfully, error messages will
be displayed as follows.
Can’t transfer data (The machine is busy)
Try again to import the data after the machine operation in progress is
completed.
The data cannot be recognized
Confirm that the data is the machine setting file.
Data size is too large
Confirm that the data is the machine setting file.
Check if the file size exceeds 100,000 bytes.
The data cannot be registered
Check if inappropriate description is made in the machine setting file.
Check if the file entries are already over the limit.
To Edit the Machine Setting File
- Save the file as a text.
- Begin the file with a specified tag. (ex. #EKC_TAB)
- A line should be 300 bytes or less.
- The file size should be 100,000 bytes or less.
- The line that begins with “#” is a comment.
ex. Machine setting file of an account track
data
19-34
bizhub PRO 920
Web Utilities Setting
19
Specifications for Each Machine Setting File Type
Account track data setting file:
- Begin the file with #EKC_TAB.
- Max. 1,000 files can be edited.
- A line should include PASSWORD, NAME, and LIMIT, separated by a tab.
- Use up to 8 digits numbers (0 - 9) and alphabets only to specify PASSWORD.
- Use numbers and alphabets only to specify NAME.
- Use up to 8 digits numbers (0 - 9) only to specify LIMIT (0 – 99,999,999).
E-mail data setting file:
- Begin the file with #IP_EMAIL.
- A line should include NAME, ADDRESS, REFERENCE, and DAILY, separated by a tab.
- NAME should be 24 bytes or less.
- ADDRESS should be 250 bytes or less.
- REFERENCE should be 250 bytes or less.
- Mark DAILY USE with “1” or DAILY NOT USE with “0” in each column.
HDD data setting file:
- Begin the file name with #IP_HDD.
- A line should include NAME, NUMBER, REFERENCE, or DAILY, separated by a tab.
- NAME should be 24 bytes or less.
- Use up to 9 digits numbers (0 - 9) only to specify a NUMBER.
- REFERENCE should be 24 bytes or less.
- Mark DAILY USE with “1” or DAILY NOT USE with “0” in each column.
FTP data setting file:
- Begin the file name with #IP_FTP.
- A line should include NAME, ADDRESS, PORT, FILEPATH, LOGINNAME,
PASSWORD, REFERENCE, or DAILY being separated by a tab.
- NAME should be 24 bytes or less.
- ADDRESS should be 63 bytes or less.
- Use up to 5 digits numbers (0 - 9) only to specify PORT (1 – 65,535).
- FILEPATH should be 96 bytes or less.
- LOGINNAME should be 47 bytes or less.
- PASSWORD should be 24 bytes or less.
- REFERENCE should be 24 bytes or less.
- Mark DAILY USE with “1” or DAILY NOT USE with “0” in each column.
bizhub PRO 920
19-35
19
Web Utilities Setting
SMB data setting file:
- Begin the file name with #IP_SMB.
- A line should include NAME, ADDRESS, FILEPATH, LOGINNAME,
PASSWORD, REFERENCE, or DAILY being separated by a tab.
- NAME should be 24 bytes or less.
- ADDRESS should be 63 bytes or less.
- FILEPATH should be 96 bytes or less.
- LOGINNAME should be 47 bytes or less.
- PASSWORD should be 14 bytes or less.
- REFERENCE should be 24 bytes or less.
- Mark DAILY USE with “1” or DAILY NOT USE with “0” in each column.
19-36
bizhub PRO 920
20
PageScope Web
Connection Setting
PageScope Web Connection Setting
20
20
PageScope Web Connection Setting
20.1
PageScope Web Connection Outlines
PageScope Web Connection is a device control utility program provided by
the HTTP server built into the image controller of the KONICA MINOLTA
bizhub PRO 920. This utility can be used with a Web browser to display the
status of the bizhub PRO 920 printer, scanner, and network, and to change
default and network settings.
!
Detail
The PageScope Web Connection cannot be used in the following condition.
The Enhanced Security mode is set on. (See page 18-213)
The PSWC Setting is set in “Not Use” . (See page 18-165)
System Requirements
To fully access all of the features of PageSope Web Connection, the operating computer must meet the following requirements.
Operating System
Web Browser
Windows 98, Me, NT4.0, 2000, XP, Server
2003
Microsoft Internet Explorer 6 (recommended)
Microsoft Internet Explorer 5.x, in which
MSXML3 must be installed (*1)
Netscape Navigator 7.02 or higher
Macintosh Mac OS 8.x, 9.x, X
Netscape Navigator 7.02 or higher
Linux
Netscape Navigator 7.02 or higher
(*1) Download MSXML3.0 from Microsoft Download Centre and install it on
your system.
bizhub PRO 920
20-3
20
PageScope Web Connection Setting
Web Browser Settings
- JavaScript
JavaScript must be active. For setting JavaScript, see the following procedure.
– Internet Explorer
Select [Internet Options] under [Tools]. Select the [Security] tab and then
click [Custom Level]. Scroll down to the item that reads [Active Scripting].
Select the option marked [Enable].
– Netscape Navigator
Select [Preferences] under [Edit]. Click [Advanced] and then click [Scripts
& Plug-ins]. Check [Navigator] under [Enable JavaScript for].
- Cookies
Cookies must be active. For setting cookies, see the following procedure.
– Internet Explorer
Select [Internet Options] under [Tools]. Select the [Privacy] tab and then
move the slider to the [High] privacy setting.
– Netscape Navigator
Select [Preferences] under [Edit]. Click [Privacy & Security] and then click
[Cookies]. Check [Allow cookies based on privacy settings] or [Allow all
cookies] under [Cookie Acceptance Policy].
- Cache
Confirm the following cache setting using the browser.
– nternet Explorer
Select [Internet Options] under [Tools]. Select the [General] tab and then
click [Settings]. Check [Every visit to the page] under [Check for newer
versions of stored pages:].
– Netscape Navigator
Select [Preferences] under [Edit]. Click [Advanced] and then click
[Cache]. Check [Every time I view the page] under [Compare the page in
the cache to the page on the network:].
20-4
bizhub PRO 920
PageScope Web Connection Setting
20.2
20
Access
PageScope Web Connection can be accessed directly from a Web browser.
1
Start the Web browser.
2
In the Address bar, enter the IP address of the image controller as
shown below. Then press the [Enter] key.
http://IP address of the image controller/
(Example)When the IP address of the image controller is 192.168.0.10:
http://192.168.0.10
3
The PageScope Web Connection screen appears.
Operation
PageScope Web Connection operation is identical to Internet Web pages.
You can click a link on the Web page to jump to the link destination.
bizhub PRO 920
20-5
PageScope Web Connection Setting
20
20.3
Screen Configuration
The screen shown below is called the User Mode screen: all users can view
this screen. By clicking [Admin Mode] and entering an appropriate Admin
Password in the User Mode screen, you can enter the Administrator Mode
Screen.
The configuration of the PageScope Web Connection screen is shown below.
!
Detail
If user authentication is set, the user name and password entry screen
will appear.
1
2
3
4
8
7
6
20-6
5
bizhub PRO 920
PageScope Web Connection Setting
20
No.
Item
Description
1
KONICA MINOLTA PageScope
Web Connection Logo
Click the KONICA MINOLTA logo to jump to the
Konica Minolta web site.
http://konicaminolta.jp
Click the PageScope Web Connection logo to jump
to the About Screen, providing the version information and the copyright description.
Click the PageScope Web Connection logo on the
About Screen to jump to the following Web site.
http://pagescope.com
2
Status Display
Icons and text indicate the current status of the
main body's printer and scanner. The message
“Ready” appears when the main body's printer and
scanner are operating normally.
3
Tabs
Select the categories of items to be displayed.
System
Job (User Mode only)
Print
Scan (Administrator Mode only)
Network (Administrator Mode only)
For the details of each tab, see the following sections.
4
Help
If an online manual URL has been set, the online
manual will appear.
5
Information and Setting Details
Displays the details of the selected menu.
6
Menus
Selects the information or setup item to be displayed. The menus that appear vary depending on
the tab selection.
For the details of each menu, see the following sections.
7
Administrator Mode
Logs into Administrator Mode. (For details on the
login procedure for Administrator Mode, see "Logging in Using Administrator Mode" below.)
8
Language
Sets the display language for the browser. [Auto] indicates the same language as the operating system
being userd and the other optinos indicate the same
language as displayed on the control panel.
bizhub PRO 920
20-7
PageScope Web Connection Setting
20
20.3.1 Logging in Using Administrator Mode
By logging into PageScope Web Connection in Administrator Mode, you can
configure or confirm the image controller system.
!
Detail
The default value of the administrator password for PageScope Web
Connection is 00000000.
You can change the administrator password for PageScope Web Connection using the browser in the [System] area of Administrator Mode.
See “Administrator Mode” on page 20-10. You can also change it using
the touch panel of the main body. Contact your service store for details.
In order to ensure the security against data used in Administrator Mode,
set SSL. SSL can be set on the [Network] tab of Administrator Mode. For
the details on the SSL setting, see page 20-42.
20-8
bizhub PRO 920
PageScope Web Connection Setting
20
1
Click the [Admin Mode] button in the upper left corner of the screen.
2
Enter the password for Administrator Mode and click the [Login] button.
3
To log out, click [Logout].
bizhub PRO 920
20-9
PageScope Web Connection Setting
20
20.4
Administrator Mode
By logging into PageScope Web Connection in Administrator Mode, you can
configure or confirm the image controller system.
For the details on the login procedure for Administrator Mode, see “Logging
in Using Administrator Mode” on page 20-8.
20.4.1 System Tab
On the [System] tab, information concerning the system configuration of the
machine and settings is displayed.
Administrator Password
This screen appears when you click [Administrator Password] on the [System] tab. The screen is used to change the administrator password.
Description
- Current Password:
Enter the current administrator password. The password is displayed in
asterisks (*).
- New Password:
Enter a new administrator password. Maximum eight alphanumeric characters can be used. The password is displayed in asterisks (*).
- Retype New Password:
Retype the new password as entered above for confirmation.
- [Apply] button:
Click the button to apply the new settings.
- [Clear] button:
Click the button to clear the settings that were entered or selected.
20-10
bizhub PRO 920
PageScope Web Connection Setting
20
Device Information
This screen appears when you click [Device Information] on the [System] tab.
The screen is used to enter the device name, device place, and the administrator name.
Description
- Device Name:
Enter the name of the device. Maximum 255 alphanumeric characters
can be used. Click [Detail] on the [System] tab of the User Mode Screen
to display this screen.
- Device Place:
Enter the location where the device is set up. Maximum 255 alphanumeric characters can be used. Click [Detail] on the [System] tab of the User
Mode Screen to display this screen.
- Administrator Name:
Enter the device administrator. Maximum 255 alphanumeric characters
can be used. Click [Device Information] on the [System] tab of the User
Mode Screen to display this screen.
- [Apply] button:
Click the button to apply the new settings.
- [Clear] button:
Click the button to clear the settings that were entered.
bizhub PRO 920
20-11
PageScope Web Connection Setting
20
ROM Version
This screen appears when you click [ROM Version] on the [System] tab. It
shows the ROM version of the copier.
Online Assistance
This screen appears when you click [Online Assistance] on the [System] tab.
You can use the screen to enter information concerning product support.
Click [Online Assistance] on the [System] tab of the User Mode Screen to display information entered on this screen.
Description
- Contact Name:
Enter the support contact for the product. Maximum 63 alphanumeric
characters can be used.
- Contact Information:
Enter the phone number of the support contact for the product. (Blank by
default.) Maximum 127 alphanumeric characters can be used.
- Product Help URL:
Enter the URL of the product information Web site. (Blank by default.)
Maximum 127 alphanumeric characters can be used.
- Corporate URL:
The URL of the manufacturer Web site. (Can be changed.) Maximum 127
alphanumeric characters can be used.
20-12
bizhub PRO 920
PageScope Web Connection Setting
-
-
-
20
Supplies and Accessories:
Enter the contact for ordering consumables. Maximum 127 alphanumeric
characters can be used.
Online Help URL:
Enter the online manual URL. Maximum 127 alphanumeric characters
can be used.
There are two choices:
Accessing the manual on the Internet posted on the Konica Minolta website:
Enter http://pagescope.com/download/webconnection/onlinehelp/920/
help.html.
Accessing the manual over the LAN:
Enter http://(IP address for the PC)/pswc_help/****.pswc_help.html.
The administrator must have the online manual to make it available over
the LAN server.
Use a PC on which Microsoft IIS or another Web server is running. The
Web server must be set to have the folder “/pswc_help/” accessible.
Make sure to copy to the Web server the entire pswc_help folder which
is installed using the installer CD.
[Apply] button:
Click the button to apply the new settings.
[Clear] button:
Click the button to clear the settings that were entered or selected.
2
Note
If the online manual URLs are not used, users must save the online help
file on their PCs. In this case, the [Help] button will not function.
bizhub PRO 920
20-13
PageScope Web Connection Setting
20
Import/Export
This screen appears when you click [Import/Export] on the [System] tab. You
can use the screen to import a setting file from a PC to the device, and to
export a setting file from the device to a PC.
!
Detail
See Appendix for “The data for Import/Export”.
Description
- Import:
Enter the name of a file to which the setting value of the device will be
entered (imported).
You can click the [Browse] button and select a setting file to import.
Click the [Import] button to import the setting file from PC to the device.
- Export:
Export the setting value of the device to PC.
Click the [Export] button to display the file download screen.
Click the [Save] button to select a place to save the file.
The download completion screen will appear. Click the [Close] button. A
dat file will be exported from the device. (The file format must be confirmed.)
- [Clear] button:
Click the button to clear the settings that were entered or selected.
20-14
bizhub PRO 920
PageScope Web Connection Setting
20
Maintenance
This screen appears when you click [Maintenance] on the [System] tab. You
can use the screen to operate maintenance of the machine. You can initialize
the network settings (reset to factory default settings) or restart the network
only to enable new parameters.
Network Setting Clear
This screen appears when you click [Network Setting Clear] under the [Maintenance] menu. You can use the screen to initialize the network settings to
factory default.
!
Detail
It may take few minutes for clearing the network settings. After clearing
the settings is completed, you can access the network again. When you
use the network, restart the Web browser.
Description
- Network Setting Clear:
Click the [Clear] button to display the confirmation screen. Click [OK] to
clear.
bizhub PRO 920
20-15
PageScope Web Connection Setting
20
Reset
This screen appears when you click [Reset] under the [Maintenance] menu.
Restart on the network section to enable new parameters. In this case, the
controller will be initialized, however the main body will not.
!
Detail
If you want to initialize the main body after resetting the network, wait until the controller restarts (about 2 minutes) and turn the main power switch
OFF. Wait 10 seconds or longer before turning the device ON again.
It may take few minutes for resetting the network. After resetting the network, you can access the network again. When you use the network, restart the Web browser.
Description
- Reset:
Click the [Reset] button to restart the network only to enable new parameters.
20-16
bizhub PRO 920
PageScope Web Connection Setting
20
Alert Mail
This screen appears when you click [Alert] on the [System] tab. You can use
the screen to set sending notices to the selected e-mail addresses when an
alert occurs to your system. The alert items that are checked their checkboxes will be sent as alert by e-mail.
Description
- E-Mail Notification:
Sets whether or not to enable alert mail notice function.
- Notification E-Mail Address:
Enter the e-mail address to which to send alert mail. Maximum 250 characters can be used.
- Alert:
Choose notification items.
- [Apply] button:
Click the button to apply the new settings.
- [Clear] button:
Click the button to clear the settings that were entered or selected.
bizhub PRO 920
20-17
PageScope Web Connection Setting
20
20.4.2 Print Tab
The [Print] tab is used to configure the image controller.
Interface
This screen appears when you click [Interface] on the [Print] tab. The screen
is used to set information concerning the interface timeout.
Description
- Parallel Timeout: Set parallel port timeout (10-300 seconds).
- Network Timeout: Set receive network timeout (10-300 seconds).
- [Apply] button: Click the button to apply the new settings.
- [Clear] button: Click the button to clear the settings that were entered.
Port Settings
This screen appears when you click [Port Settings] on the [Print] tab. You can
use the screen to see the list of port settings.
Description
- RAW port number
List the RAW port numbers 1 to 6 that are set in [TCP/IP] on the [Network]
tab.
- Status
Show enable or disable of each RAW port.
20-18
bizhub PRO 920
PageScope Web Connection Setting
20
Default Settings
General Settings
This screen appears when you click [General Settings] under the [Default
Settings] menu. The screen is used to set default values for printer settings,
that are not associated with PDL. If there is no command from the driver, this
setting will be applied. These settings also appear if you select Controller
Settings on the touch panel's Utility Screen - 2 Controller Setting - 2 Printer
Settings - 1 Basic Settings.
Description
- Enter for individual items.
PDL, Input Tray, Output Tray, Duplex, Binding, Staple, Punch, Fold/Trimming, Offset, Output Order, Page Order, Print Number, Collate, Paper
Size, Orientation, Resolution, Spool Setting, Banner Option, Banner Page
Tray, Convert Paper Size, 1 Page/Sheet, Booklet, Print Position.
- [Apply] button:
Click the button to apply the new settings.
- [Clear] button:
Click the button to clear the settings that were entered.
bizhub PRO 920
20-19
PageScope Web Connection Setting
20
PCL Settings
This screen appears when you click [PCL Settings] under the [Default Settings] menu. The screen is used to set PCL.
These settings also appear if you select Controller Settings on the touch panel's Utility Screen - 2 Controller Setting - 2 Printer Settings - 3 PCL Settings.
Description
- [Apply] button: Click the button to apply the new settings.
- [Clear] button: Click the button to clear the settings that were entered.
PS Settings (Option)
This screen appears when you click [PS Settings] under the [Default Settings]
menu. The screen is used to set PS.
These settings also appear if you select Controller Settings on the touch panel's Utility Screen - 2 controller Setting - 2 Printer Settings - 3 PS Settings.
Description
- Print To PS Error:
Select whether or not to print the error report when an error occurs while
rasterizing PostScript data.
- [Apply] button: Click the button to apply the new settings.
- [Clear] button: Click the button to clear the settings that were entered.
20-20
bizhub PRO 920
PageScope Web Connection Setting
20
TIFF Settings
This screen appears when you click [TIFF Settings] under the [Default Settings] menu. The screen is used to set default values for TIFF settings. These
settings also appear if you select Controller Settings on the touch panel's
Utility Screen - 2 Controller Setting - 2 Printer Settings - 4 TIFF Settings.
Description
- Enter for individual items.
Auto Paper Select, Image Position.
- [Apply] button:
Click the button to apply the new settings.
- [Clear] button:
Click the button to clear the settings that were entered.
bizhub PRO 920
20-21
PageScope Web Connection Setting
20
20.4.3 Scan Tab
The [Scan] tab is used to enter, edit, or delete subject and body text for email.
Subject Registration
This screen appears when you click [Subject] on the [Scan] tab. You can use
the screen to enter, edit, or delete the subject for e-mail.
Description
- [Apply] button:
Click the button to apply the new settings.
- [Edit] button:
Click the button to open the editing screen.
- [Clear] button:
Click the button to set it to the default before changes were applied.
- [Delete] button:
Click the button to delete a selected subject.
20-22
bizhub PRO 920
PageScope Web Connection Setting
20
To Enter / Edit Subjects
1
Check the number of the subject to enter or edit, and click the [Edit]
button.
2
Enter the subject on the Subject Registration screen, and click the [Apply] button. You can use maximum 64 characters.
3
Click the [OK] button on the Completed screen.
It will take you back to the subject list screen.
bizhub PRO 920
20-23
PageScope Web Connection Setting
20
To Delete Subjects
1
Check the number of the subject to delete, and click the [Delete] button.
2
Click the [OK] button on the Subject Deletion screen.
3
Click the [OK] button on the Completed screen.
It will take you back to the subject list screen.
20-24
bizhub PRO 920
PageScope Web Connection Setting
20
Body Registration
This screen appears when you click [Body] on the [Scan] tab. You can use
the screen to enter, edit, or delete the body text for e-mail.
Description
- [Apply] button:
Click the button to apply the new settings.
- [Edit] button:
Click the button to open the editing screen.
- [Clear] button:
Click the button to set it to the default before changes were applied.
- [Delete] button:
Click the button to delete a selected body text.
To Enter / Edit Body
1
Check the number of the body text to enter or edit, and click the [Edit]
button.
2
Enter the text on the Body Registration screen, and click the [Apply]
button.
You can use maximum 256 characters.
bizhub PRO 920
20-25
PageScope Web Connection Setting
20
3
Click the [OK] button on the Completed screen.
It will take you back to the body text list screen.
To Delete Bodies
1
Check the number of the body text to delete, and click the [Delete] button.
2
Click the [OK] button on the Body Deletion screen.
3
Click the [OK] button on the Completed screen.
It will take you back to the body text list screen.
20-26
bizhub PRO 920
PageScope Web Connection Setting
20
20.4.4 Network Tab
The [Network] tab shows settings concerning the printer controller network.
TCP/IP
TCP/IP
This screen appears when you click [TCP/IP] on the [Network] tab. The
screen is used to set a summary of the image controller interface (TCP/IP
settings).
When TCP/IP is set to disable, you still need to set parameters. Make sure to
enter parameters correctly.
Description
- Enter for individual items.
TCP/IP, Network Speed, Auto IP, IP Address, Subnet Mask, Default
Gateway, RAW Port Number 1-6, Host Name, Domain Name, DNS Server, LPD.
- [Apply] button:
Click the button to apply the new settings.
- [Clear] button:
Click the button to clear the settings that were entered.
bizhub PRO 920
20-27
PageScope Web Connection Setting
20
IP Filtering
This screen appears when you click [IP Filtering] under the [TCP/IP] menu.
The screen is used to specify the host address and restrict access permission. You can also use the screen to enable or disable access permission,
access refusal, and their ranges of TCP/IP filtering. When the same range is
specified for the accept setting and the refuse setting, the refuse setting has
priority over the accept setting.
Description
- Enter for individual items.
Access Permission Addresses and their ranges, Access Refusal Addresses and their ranges.
- [Apply] button:
Click the button to apply the new settings.
- [Clear] button:
Click the button to clear the settings that were selected.
20-28
bizhub PRO 920
PageScope Web Connection Setting
20
Netware
NetWare
This screen appears when you click [NetWare] on the [Network] tab. The
screen is used to enter and confirm various settings concerning NetWare.
When NetWare is set to disable, you still need to set parameters. Make sure
to enter parameters correctly.
Description
- Enter for individual items.
NetWare Print, Frame Type, Mode, Pserver Print Server Name, Print
Server Password, Print Queue Scan Rate, Bindery/NDS Bindery, Preferred File Server, NDS, Preferred NDS Context Name, Preferred NDS
Tree Name, Nprinter/Rprinter, Printer Name, Printer Number
- [Apply] button:
Click the button to apply the new settings.
- [Clear] button:
Click the button to clear the settings that were selected.
bizhub PRO 920
20-29
PageScope Web Connection Setting
20
NetWare Status
This screen appears when you click [NetWare Status] under the [NetWare]
menu on the [Network] tab. This screen is used to confirm NetWare status.
20-30
bizhub PRO 920
PageScope Web Connection Setting
20
IPP
This screen appears when you click [IPP] on the [Network] tab. This screen
is used to enter and confirm settings concerning IPP.
When IPP Print is set to disable, you still need to set parameters. Make sure
to enter parameters correctly.
Description
- Enter for individual items.
IPP Print, Printer Name, Printer Location, Printer Information, Operations
Supported.
- [Apply] button:
Click the button to apply the new settings.
- [Clear] button:
Click the button to clear the settings that were entered.
bizhub PRO 920
20-31
PageScope Web Connection Setting
20
FTP
FTP Client
This screen appears when you click [FTP] on the [Network] tab, then click
[Client] under the [FTP] menu. The screen is used to enter and confirm various settings concerning the FTP client.
When FTP Client is set to disable, you still need to set parameters. Make sure
to enter parameters correctly.
Description
- Enter for individual items.
FTP Client, Proxy Server Address, Proxy Server Port Number, PASV
Mode, Server Timeout, Port Number.
- [Apply] button:
Click the button to apply the new settings.
- [Clear] button:
Click the button to clear the settings that were entered.
20-32
bizhub PRO 920
PageScope Web Connection Setting
20
FTP Server
This screen appears when you click [FTP] on the [Network] tab, then click
[Server] under the [FTP] menu. The screen is used to enter and confirm various settings concerning the FTP server.
Description
- FTP Server: Select enable or disable.
- [Apply] button: Click the button to apply the new settings.
- [Clear] button: Click the button to clear the settings that were entered.
bizhub PRO 920
20-33
PageScope Web Connection Setting
20
SNMP
This screen appears when you click [SNMP] on the [Network] tab. The screen
is used to enter and confirm settings concerning SNMP.
Description
- SNMP: Select enable or disable.
- [Apply] button:
Click the button to apply the new settings.
- [Clear] button:
Click the button to clear the settings that were entered.
20-34
bizhub PRO 920
PageScope Web Connection Setting
20
SMB
SMB Scan
This screen appears when you click [SMB] on the [Network] tab, then click
[Scan] under the [SMB] menu. The screen is used to enter and confirm settings concerning SMB scan.
Description
- SMB Scan:
Select enable or disable.
- [Apply] button:
Click the button to apply the new settings.
- [Clear] button:
Click the button to clear the settings that were entered.
bizhub PRO 920
20-35
PageScope Web Connection Setting
20
Print
This screen appears when you click [Print] under the [SMB] menu. The
screen is used to enter and confirm settings concerning SMB printing.
When SMB Print is set to disable, you still need to set parameters. Make sure
to enter parameters correctly.
Description
- Enter for individual items.
SMB Print, NetBIOS Name, Print Service Name, Work Group.
- [Apply] button:
Click the button to apply the new settings.
- [Clear] button:
Click the button to clear the settings that were entered.
20-36
bizhub PRO 920
PageScope Web Connection Setting
20
AppleTalk
This screen appears when you click [Apple Talk] on the [Network] tab. The
screen is used to enter and confirm settings concerning Apple Talk.
When Apple Talk is set to disable, you still need to set parameters. Make sure
to enter parameters correctly.
Description
- Enter for individual items.
Apple Talk, Printer Name, Zone Name.
- [Apply] button:
Click the button to apply the new settings.
- [Clear] button:
Click the button to clear the settings that were entered.
bizhub PRO 920
20-37
PageScope Web Connection Setting
20
LDAP
This screen appears when you click [LDAP] on the [Network] tab. The screen
is used to enter and confirm settings concerning LDAP.
When LDAP is set to disable, you still need to set parameters. Make sure to
enter parameters correctly.
Description
- Enter for individual items.
LDAP, LDAP Server Address, Port Number, Use SSl, Port Number (SSL),
Search Root, Search Timeout, Max # of LDAP Hits, Authentication Method, User Authentication, Login Name, Password, Domain Name.
- [Check LDAP Setting] button:
Click the button to check the LDAP setting.
- [Apply] button:
Click the button to apply the new settings.
- [Clear] button:
Click the button to clear the settings that were entered.
20-38
bizhub PRO 920
PageScope Web Connection Setting
20
To check LDAP Setting:
1
Enter for individual items.
2
Click the [LDAP Setting] button on the LDAP screen.
3
Click the [OK] button on the Completed screen.
It will take you back to the LDAP screen again.
bizhub PRO 920
20-39
PageScope Web Connection Setting
20
E-Mail
E-Mail Receive (POP) Configuration
This screen appears when you click [E-Mail] on the [Network] tab, then click
[E-Mail Receive] under the [E-Mail] menu. The screen is used to enter and
confirm settings concerning receiving e-mail.
When E-Mail Receive is set to disable, you still need to set parameters. Make
sure to enter parameters correctly.
Description
- Enter for individual items.
Receive, Receiving Server Address, User Name, Password, APOP, Connection Timeout, Port Number.
- [Apply] button:
Click the button to apply the new settings.
- [Clear] button:
Click the button to clear the settings that were entered.
20-40
bizhub PRO 920
PageScope Web Connection Setting
20
E-Mail Send (SMTP) Configuration
This screen appears when you click [E-Mail] on the [Network] tab, then click
[E-Mail Send] under the [E-Mail] menu. The screen is used to enter and confirm settings concerning sending e-mail.
When E-Mail Send is set to disable, you still need to set parameters. Make
sure to enter parameters correctly.
Description
- Enter for individual items.
Send, SMTP Server Address, Port Number, Connection Timeout, Max
Mail Size, SMTP Server Capacity, Administrator Mail Address, Authentication, POP Before SMTP, SMTP Authentication, User Name, Password,
Realm, Binary Division, Division Size.
- [Apply] button:
Click the button to apply the new settings.
- [Clear] button:
Click the button to clear the settings that were entered.
bizhub PRO 920
20-41
PageScope Web Connection Setting
20
SSL/TLS
This screen appears when you click [SSL/TLS] on the [Network] tab. The
screen is used to enter and confirm settings concerning SSL/TLS. You can
configure them separately depending whether or not certificates are installed.
2
Note
Only [Create a Self-Signed Certificate], [Request a Certificate], and [Install a Certificate] can be selected.
If you click [Cancel], it will take you back to the SSL/TLS Setting screen.
If a certificate is not installed – Creating a self-signed certificate
1
Click [Setting].
The SSL/TLS Setting screen appears.
20-42
bizhub PRO 920
PageScope Web Connection Setting
2
20
Check [Create a Self-Signed Certificate] and click [Next].
The Self-Signed Certificate Setting screen appears.
3
Enter settings, and click [Create].
Following the screen indicating that the certificate is being created, another screen appears, saying, “The certificate has been created. SSL/
TLS can now be used.”
4
Click [OK].
It will take you back to the SSL/TLS Information screen of the selfsigned certificate
bizhub PRO 920
20-43
PageScope Web Connection Setting
20
If a certificate is not installed – Requesting a certificate to instal
1
Click [Setting].
The SSL/TLS Setting screen appears.
2
Check [Request a Certificate] and click [Next].
The Request a Certificate screen appears.
20-44
bizhub PRO 920
PageScope Web Connection Setting
3
20
Enter necessary information, and click [Next].
Following the screen indicating that the certificate is being requested,
another screen appears indicating the request has been completed.
4
Click [OK].
The Certificate Signing Request Data screen appears.
5
Click [Save].
The file will be saved.
6
Click [OK].
It will take you back to the SSL/TLS Information screen.
bizhub PRO 920
20-45
PageScope Web Connection Setting
20
7
Click [Setting].
The SSL/TLS Setting screen appears.
8
Check [Install a Certificate], and click [Next].
The certificate installation screen appears.
9
Enter the data of the certificate that you requested.
10
Click [Next].
The Encryption Strength Setting and the Mode using SSL/TLS screen
appears.
11
20-46
Enter discretionary settings, and click [Create].
bizhub PRO 920
PageScope Web Connection Setting
20
Creation results appear.
12
Click [OK].
It will take you back to the SSL/TLS Information screen.
2
Note
Initially [Request a Certificate] is checked.
Remove an already installed certificate first before requesting a new one.
bizhub PRO 920
20-47
PageScope Web Connection Setting
20
If a certificate has been installed - Requesting a certificate to switch information
1
Click [Setting].
The SSL/TLS Setting screen appears.
2
20-48
Click [Next].
bizhub PRO 920
PageScope Web Connection Setting
3
20
Enter necessary information, and click [Next].
Following the screen indicating that the certificate is being requested,
another screen appears indicating the request has been completed.
4
Click [OK].
The Certificate Signing Request Data screen appears.
5
Click [Save].
The file will be saved.
6
Click [OK].
It will take you back to the SSL/TLS Information screen.
bizhub PRO 920
20-49
PageScope Web Connection Setting
20
7
Check [Install a Certificate], and click [Next].
The certificate installation screen appears.
8
Enter the data of the certificate that you requested.
9
Click [Next].
10
The Encryption Strength Setting and the Mode using SSL/TLS screen
appears.
11
Enter discretionary settings, and click [Create].
Creation results appear.
12
20-50
Click [OK].
It will take you back to the SSL/TLS Information screen.
bizhub PRO 920
PageScope Web Connection Setting
20
Changing mode settings – Changing encryption strength setting
1
Click [Settings].
The SSL/TLS Setting screen appears.
2
Check [Set a Encryption Strength], and click [Next].
The Encryption Strength Setting screen appears.
3
Select a discretionary value.
bizhub PRO 920
20-51
PageScope Web Connection Setting
20
4
Click [Create].
The completion screen appears.
5
Click [OK].
It will take you back to the SSL/TLS Information screen.
20-52
bizhub PRO 920
PageScope Web Connection Setting
20
Changing mode using SSL/TLS
1
Click [Settings].
The SSL/TLS Setting screen appears.
2
Check [Mode using SSL/TLS], and click [Next].
The Mode using SSL/TLS screen appears.
bizhub PRO 920
20-53
PageScope Web Connection Setting
20
3
Select a discretionary mode, and click [Create].
The completion screen appears.
4
Click [OK.]
It will take you back to the SSL/TLS Information screen.
20-54
bizhub PRO 920
PageScope Web Connection Setting
20
Removing a certificate
1
Click [Settings].
The SSL/TLS Setting screen appears.
2
Check [Remove a Certificate], and click [Next].
The Remove a Certificate screen appears.
bizhub PRO 920
20-55
PageScope Web Connection Setting
20
3
Click [Remove].
The removal confirmation screen appears.
4
Click [OK].
It will take you back to the SSL/TLS Information screen.
20-56
bizhub PRO 920
PageScope Web Connection Setting
20
Authentication
Auto Logout
This screen appears when you click [Authentication] on the [Network] tab.
The screen is used to enter and confirm settings concerning logout time.Enter for individual items.
Description
- Enter for individual items.
Admin Logout Time, User Logout Time.
- [Apply] button:
Click the button to apply the new settings.
- [Clear] button:
Click the button to clear the settings that were entered.
bizhub PRO 920
20-57
PageScope Web Connection Setting
20
AP I/F
This screen appears when you click [AP I/F] on the [Network] tab. The screen
is used to enter and confirm settings concerning the AP I/F. Enter for individual items.
Description
- Enter for individual items.
Port Number, Use SSL/TLS, Port Number (SSL).
- [Apply] button:
Click the button to apply the new settings.
- [Clear] button:
Click the button to clear the settings that were entered.
20-58
bizhub PRO 920
21
Security Functions
Security Functions
21
21
Security Functions
The bizhub PRO 920 device has two security modes.
Normal mode
Use this mode if the machine is used by a single person and there is a low
possibility of illicit access and operations. This is the default mode when
shipped from the factory. To use regular mode, please see the user’s guide
for each individual machine.
Enhanced Security mode
Use this mode if the machine is connected to a local area network, or to external networks through a telephone line or other means. An Administrator
manages the device according to this user’s guide, so that users can have a
safe operating environment.
Your administrator is the only one who can turn the Enhanced Security mode
ON and OFF, and make other changes, and your service representative will
designate an administrator.
To turn the Enhanced Security mode ON, the service representative should
set a CE authentication password and Administrator password for the device.
If IC-203 is not installed, you cannot set the Enhanced Security Mode to ON.
The Enhanced Security mode cannot be turned ON when the Machine NIC
is activated. Please contact your service representative when using the Enhanced Security mode.
Enhanced Security mode is recommended to prevent data from being accessed or tampered with.
Environments in which Enhanced Security mode is recommended
Description
- The device is connected to an local network, the Internet through a firewall, or the external telephone line for maintenance.
- The device is monitored by a telephone line or a network.
bizhub PRO 920
21-3
Security Functions
21
Creating a secure environment
For security, we recommend that supervisors and an administrator use Enhanced Security mode and establish an environment as follows.
- Where to set up the device
Set up the device in a place where only designated personnel can operate it.
- User training
The administrator must provide training and information to users to maintain the security of the device. Users should keep passwords set up by
the administrator, and a password that they set up on their own in a secure place.
The administrator is supposed to give the instructions for releasing the
authentication function to a user when creating a Box for that user, therefore the user should perform to release the authentication function when
machine operation is completed.
- Qualifications to be an administrator
A supervisor must select a reliable person who has adequate knowledge,
technical ability, and experience as an administrator, to whom to delegate administration of the device.
- Guarantee of service representative (CE)
A supervisor or an administrator can use Enhanced Security mode after
confirming that a service contract was signed with the service representative (CE).
Clearly state in the service contract that the service representative will not
engage in any fraudulent actions.
- Secure LAN
We recommend that you use an apparatus such as WEP code (802.11×)
to prevent tapping during communication when setting up a local area
network.
21-4
bizhub PRO 920
22
Enhanced Security Mode
Enhanced Security Mode
22
Enhanced Security Mode
22.1
Description of Enhanced Security mode
22
The following items will have enhanced security.
- Protect and delete used data in memory and on the HDD
There are two kinds of image data that will be saved in memory and on
the HDD: AHA compressed data and uncompressed data (TIFF and PDF
formats). Memory and HDD areas containing the AHA compressed data
is freed up when data is deleted. However in normal mode data is not
completely deleted so it could be read through illicit means. In the Enhanced Security mode, data will be completely cleared before freeing up
image areas.
Regardless of the data type (compressed or uncompressed), the image
area in memory and on the HDD where the data has been saved will be
freed up after it is completely overwritten by the data disrelated to the image data.
- Enhanced password
The password is made up of 8 to 64 alphanumerical characters (case
sensitive).
If a wrong password is entered, attempts to re-try cannot be made for five
seconds.
- Machine NIC setting
When the Enhanced Security mode is ON, the Machine NIC cannot be
used.
- Access to the Box with a password
Set up a system that requires users to input an enhanced password as
described above, to save data or to print data saved in the Box on the
HDD.
If an enhanced password is set up as above, security will be improved
when saving scanned data in the Box. No one other than the administrator can delete the Box or Personal Folder in which scanned data is saved,
and changing the Box’s attributes requires authentication with the enhanced password. In addition, authentication will be required to use
scanned data saved in the Box.
- External access prohibited
No access is allowed over telephone lines other than CS Remote Care.
- Create, save and analyze an audit log
A history of security function operations will be created and saved. Date
and time, information identifying the person who made the operation, details of the operation, and results of the operation will be saved, enabling
analysis of unauthorized access. This log will be overwritten if the audit
area is depleted.
bizhub PRO 920
22-3
Enhanced Security Mode
22
-
Administrator authentication
A service representative will set up an authentication data for an administrator.
The administrator must input a password to gain authorized access. Only
one authentication string can be registered per machine.
-
Administrator Setting mode
If the Administrator Setting mode has been entered by successful administrator authentication, the setting change of various machine functions
will be available on the machine.
Be sure to exit the Administrator Setting mode if you leave in front of the machine while using the Administrator Setting mode.
22-4
bizhub PRO 920
Enhanced Security Mode
22.2
22
Data protected by Enhanced Security mode
Data protected by Enhanced Security mode (for users) is as follows.
- Data saved in the Personal Folder (with a password)
The following data administered by the administrator will also receive enhanced protection.
- User data
- Data controlling the machine
Data that is not protected in Enhanced Security mode
When the machine is connected to PCs on a local network, passwords input
in PCs are not subject to Enhanced Security mode.
To turn Enhanced Security mode ON/OFF
The administrator can turn Enhanced Security mode ON/OFF.
If Enhanced Security mode is OFF, data can potentially be accessed, so be
careful.
If data is accessed in Enhanced Security mode, the administrator may not
notice until he/she analyzes the audit log. Be careful when the administrator
is absent for a long time.
bizhub PRO 920
22-5
Enhanced Security Mode
22
22.3
Display when Enhanced Security mode is ON
The Administrator can turn Enhanced Security mode ON/OFF.
!
Detail
To turn Enhanced Security mode ON/OFF, see “To turn Enhanced Security mode ON/OFF” on page 22-5.
When Enhanced Security mode is ON, the enhanced security icon [
appear on the Copy/Box/Scanner Basic Screens.
] will
Copy Basic Screen
Box Basic Screen
Scanner Basic Screen
Check the Enhanced Security icon on each Basic Screen to see if Enhanced
Security mode is ON or OFF.
22-6
bizhub PRO 920
23
Protect and Delete Data
After Use
Protect and Delete Data After Use
23
23
Protect and Delete Data After Use
Data from each mode (copy / scan / printer) will be temporarily saved in
memory or on the HDD, and it will be deleted unless it is moved to a Box.
Data is compressed using a special method, so it cannot be decompressed
externally.
When deleting compressed data, a part of it will be destroyed or overwritten
to prevent decompression.
- Data saved temporarily in memory will be overwritten by unavailable data
(NA) when the job is interrupted or ended.
- Data saved in several areas of memory will be overwritten simultaneously.
- Data in the Box will be overwritten when a delete order is issued.
- If data is sent externally, it will be overwritten when the transmission is
complete.
- If the administrator issues a delete order for each Box, it will be overwritten.
bizhub PRO 920
23-3
23
Protect and Delete Data After Use
23-4
bizhub PRO 920
24
User Authentication in
Enhanced Security Mode
User Authentication in Enhanced Security Mode
24
24
User Authentication in Enhanced Security Mode
24.1
Description of user authentication
In Enhanced Security mode, setting up password conditions will be tougher
to improve security. The administrator should set up a user name and password required for user authentication, as this is an administrator operation.
User Name: 1 to 64 alphanumerical characters
Password: 8 to 64 alphanumerical characters (case sensitive)
If a wrong password is entered, attempts to re-try cannot be made for five
seconds.
2
Reminder
Do not use your name, birthday, employee number, etc. for a password
that others can easily figure out.
If a password set in normal mode is fewer than 8 characters or more than 64
characters, you cannot use it in Enhanced Security mode.
If this happens, contact the administrator to turn OFF Enhanced Security
mode, and set a new password following the above conditions.
Even after a successful access has been made, authentication with user
name and password will be required under the following conditions.
- The main power switch is turned off.
- The sub power switch is turned off.
- The [Access] on the control panel is pressed.
- The [Copy]/[Scan]/[Box] on the control panel is pressed, when the User/
Account Authentication Connect is turned on.
- The [Job List] on the touch panel is touched, when the User/Account Authentication Connect is turned on.
- The auto reset function operates.
!
Detail
When a user accesses a Box for which a password has been set in the
HDD, all authentication operations with password will be saved in an audit log.
Initially, the user authentication is not available on the machine. To activate this function, the Account Distribution Number should be changed.
bizhub PRO 920
24-3
User Authentication in Enhanced Security Mode
24
24.2
To register a new user
Follow the procedure below to setup a new user name and password to be
required for user authentication in Enhanced Security mode.
!
Detail
Passwords are case sensitive.
If a wrong password or fewer than 8 alphanumerical characters are entered and the [OK] is touched, the warning message “Password does not
match” will appear, and no key will work for five seconds. Enter the right
password after five seconds.
If authentication fails, the information will be saved in the audit log.
1
Press [Utility/Counter] on the control
panel.
The Utility Screen will be displayed.
2
Touch [6 Administrator Setting].
The Input Administrator Password Screen will be displayed.
24-4
bizhub PRO 920
User Authentication in Enhanced Security Mode
3
24
Enter the password.
Use the touch screen keypad to enter the 8-digit Administrator password, then touch [OK].
The Administrator Setting Screen will be displayed.
4
Touch [3 User Authentication/Account Track].
The User Authentication/Account Track Screen will be displayed.
bizhub PRO 920
24-5
User Authentication in Enhanced Security Mode
24
5
Touch [3 User Authentication Setting].
The User Authentication Setting Screen will be displayed.
6
Touch [New Register].
The New User Registration Screen will be displayed.
7
24-6
Touch [User Number], [User Name], [Password], or [Account Name] to
display each subsequent screen, then make the desired setting.
bizhub PRO 920
User Authentication in Enhanced Security Mode
24
–
To enter the User Number, touch [User Number] on the New User
Registration Screen. Use the screen keypad on the popup menu to
enter the desired user number. Touch [OK] to return to the New
User Registration Screen.
–
To enter the User Name, touch [User Name] on the New User Registration Screen. Enter the desired user name from the screen keypad. Touch [OK] to return to the New User Registration Screen.
bizhub PRO 920
24-7
User Authentication in Enhanced Security Mode
24
–
To enter the Password, touch [Password] on the New User Registration Screen. Enter the desired password from the screen keypad.
Touch [OK] to return to the New User Registration Screen.
–
To enter the account name, touch [Account Name] on the New User
Registration Screen. Touch the desired account name key to highlight it. Touch [OK] to return to the New User Registration Screen.
8
Specify the usable function.
To prohibit a specific function, touch the key on the New User Registration Screen to release the highlight.
9
Touch [OK].
When settings are completed, touch [OK] on the New User Registration
Screen.
The User Authentication Setting Screen will be restored.
24-8
bizhub PRO 920
User Authentication in Enhanced Security Mode
24.3
24
To change a user data
Follow the procedure below to change a user data (user name and password)
once registered.
!
Detail
Passwords are case sensitive.
If a wrong password or fewer than 8 alphanumerical characters are entered and the [OK] is touched, the warning message “Password does not
match” will appear, and no key will work for five seconds. Enter the right
password after five seconds.
The current password cannot be used again.
If authentication fails, the information will be saved in the audit log.
1
Press [Utility/Counter] on the control
panel.
The Utility Screen will be displayed.
2
Touch [6 Administrator Setting].
The Input Administrator Password Screen will be displayed.
bizhub PRO 920
24-9
User Authentication in Enhanced Security Mode
24
3
Enter the password.
Use the touch screen keypad to enter the 8-digit Administrator password, then touch [OK].
The Administrator Setting Screen will be displayed.
4
Touch [3 User Authentication/Account Track].
The User Authentication/Account Track Screen will be displayed.
24-10
bizhub PRO 920
User Authentication in Enhanced Security Mode
5
24
Touch [3 User Authentication Setting].
The User Authentication Setting Screen will be displayed.
6
Touch the user name key to be changed.
The User Count Screen will be displayed.
7
Touch [Change].
The Change Registered User Data Screen will be displayed.
bizhub PRO 920
24-11
User Authentication in Enhanced Security Mode
24
8
Touch [User Name], [Password] or [Account Name] to display each
subsequent screen, then make the desired setting change.
–
24-12
To change the user name, touch [User Name] on the User Registration Screen. Enter the desired user name from the screen keypad.
Touch [OK] to return to the Change Registered User Data Screen.
bizhub PRO 920
User Authentication in Enhanced Security Mode
24
–
To change the Password, touch [Password] on the User Registration Screen. Enter the desired password from the screen keypad.
Touch [OK] to return to the Change Registered User Data Screen.
–
To change the account name, touch [Account Name] on the User
Registration Screen. Touch the desired account key to highlight it.
Touch [OK] to return to the Change Registered User Data Screen.
9
Specify the usable function.
To prohibit a specific function, touch the key on the Change Registration User Data Screen to release the highlight.
10
Touch [OK].
When settings are completed, touch [OK] on the Change Registered
User Data Screen.
The User Authentication Setting Screen will be restored.
bizhub PRO 920
24-13
User Authentication in Enhanced Security Mode
24
24.4
To delete a user
Follow the procedure below to delete a user name, password, and also Personal Folder.
!
Detail
Passwords are case sensitive.
If a wrong password or fewer than 8 alphanumerical characters are entered and the [OK] is touched, the warning message “Password does not
match” will appear, and no key will work for five seconds. Enter the right
password after five seconds.
If authentication fails, the information will be saved in the audit log.
1
Press [Utility/Counter] on the control
panel.
The Utility Screen will be displayed.
2
Touch [6 Administrator Setting].
The Input Administrator Password Screen will be displayed.
24-14
bizhub PRO 920
User Authentication in Enhanced Security Mode
3
24
Enter the password.
Use the touch screen keypad to enter the 8-digit Administrator password, then touch [OK].
The Administrator Setting Screen will be displayed.
4
Touch [3 User Authentication/Account Track].
The User Authentication/Account Track Screen will be displayed.
bizhub PRO 920
24-15
User Authentication in Enhanced Security Mode
24
5
Touch [3 User Authentication Setting].
The User Authentication Setting Screen will be displayed.
6
Touch the user name key to be deleted.
The User Count Screen will be displayed.
7
24-16
Touch [Delete].
bizhub PRO 920
User Authentication in Enhanced Security Mode
24
The popup menu will be displayed to confirm that the selected user will
be deleted.
8
Touch [Yes].
The selected user name and password will be deleted. Also the personal folder that belongs to the user will be deleted together.
bizhub PRO 920
24-17
User Authentication in Enhanced Security Mode
24
24.5
To change password by user
General users can change the password that has already been set for user
authentication.
We recommend that a user himself/herself changes the password assigned
by the administrator for security.
!
Detail
Passwords are case sensitive.
If a wrong password or fewer than 8 alphanumerical characters are entered and the [OK] is touched, the warning message “Password does not
match” will appear, and no key will work for five seconds. Enter the right
password after five seconds.
If authentication fails, the information will be saved in the audit log.
2
Reminder
Do not use your name, birthday, employee number, etc. for a password
that others can easily figure out.
!
Detail
If password setup doesn’t proceed successfully, the information will be
saved in the audit log.
The password currently used cannot be entered as a new password.
1
Press [Utility/Counter] on the control
panel.
The Utility Screen will be displayed.
24-18
bizhub PRO 920
User Authentication in Enhanced Security Mode
2
24
Touch [1 System Setting].
The System Setting Screen will be displayed.
3
Touch [7 Change User Password].
The User Authentication Screen will be displayed.
bizhub PRO 920
24-19
User Authentication in Enhanced Security Mode
24
4
Enter your user name.
–
Touch [User Name] to display the Input User Name Screen.
–
Enter your user name, then touch [OK] to return to the User Authentication Screen.
The entered name will be displayed on the screen.
24-20
bizhub PRO 920
User Authentication in Enhanced Security Mode
5
24
Enter your current password.
–
Touch [Password] to display the Input User Password Screen.
–
Enter your current password. The entered password will appear as
asterisks (********) on the screen. Then touch [OK].
The Change User Password Screen will be displayed.
bizhub PRO 920
24-21
User Authentication in Enhanced Security Mode
24
6
24-22
Enter your new password.
–
Touch [New Password] to display the Input New Password Screen.
–
Enter your new password, then touch [OK].
–
Touch [Check Input] to display the Re-input New Password Screen.
bizhub PRO 920
User Authentication in Enhanced Security Mode
–
24
Enter your new password once more for confirmation, then touch
[OK].
The Change User Password Screen will be restored.
7
Touch [OK].
The System Setting Screen will be restored.
bizhub PRO 920
24-23
24
24-24
User Authentication in Enhanced Security Mode
bizhub PRO 920
25
HDD Store Function in
Enhanced Security Mode
HDD Store Function in Enhanced Security Mode
25
25
HDD Store Function in Enhanced Security Mode
A Box built on the HDD is used to store the scanned data. To prevent the
data from being accessed or tampered with, we recommend using the Box
with a password specified.
Never fail to use the Enhanced Security mode when storing any secret document.
If the Enhanced Security mode is turned off temporarily for some reason, the
administrator should tell that to all users.
!
Detail
For details to store and output the scanned data in a Box, see the User’s
guide of Network Scanner.
bizhub PRO 920
25-3
HDD Store Function in Enhanced Security Mode
25
25.1
Store the data in a Box while Copying
The following is a detailed explanation of how to store the data in a Box and
output in Enhanced Security mode for which a user name and password
have been set.
!
Detail
Passwords are case sensitive.
If a wrong password or fewer than 8 alphanumerical characters are entered and the [OK] is touched, the warning message “Password does not
match” will appear, and no key will work for five seconds. Enter the right
password after five seconds.
If authentication fails, the information will be saved in the audit log.
1
Enter your user name and user password on the User Authentication
Screen.
–
25-4
Touch [User Name] to display the Input User Name Screen.
bizhub PRO 920
HDD Store Function in Enhanced Security Mode
25
–
Enter your user name, then touch [OK] to return to the User Authentication Screen.
–
Touch [Password] to display the Input User Password Screen.
–
Enter your user passwor, then touch [OK] to return to the User Authentication Screen
bizhub PRO 920
25-5
HDD Store Function in Enhanced Security Mode
25
2
Touch [OK] on the User Authentication Screen.
The Copy Basic Screen will be displayed.
3
Touch [Box] on the Copy Basic Screen.
The Store Personal Box Screen will be displayed.
4
Select the desired personal Box, then touch [OK].
–
25-6
Enter the password if selected Box requires one.
bizhub PRO 920
HDD Store Function in Enhanced Security Mode
25
The Personal File Screen will be displayed.
5
Touch [Store].
The Input File Name Screen will be displayed.
6
Enter the file name, then touch [OK].
The Copy Basic Screen will be restored.
7
Press [Start] on the control panel to
scan.
After scanning all the originals, the
machine automatically starts to print
and store the data in a Box.
bizhub PRO 920
25-7
HDD Store Function in Enhanced Security Mode
25
8
When operation is completed, press [Access] on the control panel.
The User Authentication Screen will be displayed to prohibit the machine operation without entering a user name and password.
25-8
bizhub PRO 920
HDD Store Function in Enhanced Security Mode
25.2
25
Store scanned data in a Box
The following is a detailed explanation of how to store scanned data in a Box
in Enhanced Security mode.
!
Detail
Passwords are case sensitive.
If a wrong password or fewer than 8 alphanumerical characters are entered and the [OK] is touched, the warning message “Password does not
match” will appear, and no key will work for five seconds. Enter the right
password after five seconds.
If authentication fails, the information will be saved in the audit log.
1
Press [Box] on the control panel.
The Image Data Store/Recall Screen
will be displayed.
2
Touch [Store].
The User Authentication Screen will be displayed.
bizhub PRO 920
25-9
HDD Store Function in Enhanced Security Mode
25
3
25-10
Enter your user name and user password on the User Authentication
Screen.
–
Touch [User Name] to display the Input User Name Screen.
–
Enter your user name, then touch [OK] to return to the User Authentication Screen.
–
Touch [Password] to display the Input User Password Screen.
bizhub PRO 920
HDD Store Function in Enhanced Security Mode
–
4
25
Enter your user password, then touch [OK] to return to the User Authentication Screen.
Touch [OK] on the User Authentication Screen.
The Image Data Store Site Selection Screen will be displayed.
5
Touch [Scan to HDD].
The Store Personal Box Screen will be displayed.
bizhub PRO 920
25-11
HDD Store Function in Enhanced Security Mode
25
6
Select the desired personal Box, then touch [OK].
– Enter the password if selected Box requires one.
The Store Personal File Screen will be displayed.
7
Touch [Store].
The Input File Name Screen will be displayed.
8
25-12
Enter the file name, then touch [OK].
bizhub PRO 920
HDD Store Function in Enhanced Security Mode
25
The Box Basic Screen will be displayed.
9
Press [Start] on the control panel to
scan and store the image data.
The popup menu to confirm whether
to continue or close it will be displayed.
10
Touch [Yes] or [No].
–
–
11
To continue to store the next image data, touch [Yes]. The Input File
Name Screen will be restored.
To close, touch [No]. The User Authentication Screen will be displayed.
When operation is completed, press [Access] on the control panel.
The User Authentication Screen will be displayed to prohibit the machine operation without entering a user name and password.
bizhub PRO 920
25-13
HDD Store Function in Enhanced Security Mode
25
25.3
Recall/Delete data in a Box
The following is a detailed explanation of how to recall or delete the data
stored in a Box.
!
Detail
Passwords are case sensitive.
If a wrong password or fewer than 8 alphanumerical characters are entered and the [OK] is touched, the warning message “Password does not
match” will appear, and no key will work for five seconds. Enter the right
password after five seconds.
If authentication fails, the information will be saved in the audit log.
1
Press [Box] on the control panel.
The Image Data Store/Recall Screen
will be displayed.
2
Touch [Recall].
The User Authentication Screen will be displayed.
25-14
bizhub PRO 920
HDD Store Function in Enhanced Security Mode
3
25
Enter your user name and user password on the User Authentication
Screen.
–
Touch [User Name] to display the Input User Name Screen.
–
Enter your user name, then touch [OK] to return to the User Authentication Screen.
–
Touch [Password] to display the Input User Password Screen.
bizhub PRO 920
25-15
HDD Store Function in Enhanced Security Mode
25
–
4
Enter your user password, then touch [OK] to return to the User Authentication Screen.
Touch [OK] on the User Authentication Screen.
The Recall Personal Box Screen will be displayed.
5
Select the desired personal Box.
Enter the password if selected Box requires one.
25-16
bizhub PRO 920
HDD Store Function in Enhanced Security Mode
6
25
Touch [OK].
The Recall Personal File Screen will be displayed.
Proceed to step 7 if recalls the image data file.
Proceed to step 8 if deletes the image data file.
7
Recall the image data.
–
Touch the desired file key, then touch [>>>]. To output the image
data, touch [Wait Output], [Proof Output], or [Auto Output], as desired, and then touch [OK].
The Input Print Quantity Screen will be displayed.
–
bizhub PRO 920
Specify the output page.
Touch [Output Page].
25-17
HDD Store Function in Enhanced Security Mode
25
–
–
–
–
25-18
To output one desired page only, touch [Page Select], press the
control panel keypad, then touch [OK].
To output all pages, touch [All Pages], then touch [OK].
Enter the desired print quantity from touch panel keypad on the Input Print Quantity Screen.
After outputting, the popup menu to confirm whether to continue or
close it will be displayed. To continue to recall the next image data,
touch [Yes]. The Recall Personal File Screen will be restored. To
close, touch [No]. The Image Data Store/Recall Screen will be displayed.
bizhub PRO 920
HDD Store Function in Enhanced Security Mode
8
Delete the image data.
–
9
25
Touch the desired file key, then touch [File Delete]. The popup
menu to confirm will be displayed. Touch [Yes] to delete the selected file. Touch [No] to display the Image Data Store/Recall Screen.
When operation is completed, press [Access] on the control panel.
The User Authentication Screen will be displayed to prohibit the machine operation without entering a user name and password.
bizhub PRO 920
25-19
HDD Store Function in Enhanced Security Mode
25
25.4
Output data in the Secure Box
Secure printing using a PC
To set up data output using the secure printing function on PC, a secure folder with a specific password must be prepared. Enter the secure folder name
made up of max. 8 alphanumerical characters.
!
Detail
Passwords are case sensitive.
If a wrong password or fewer than 8 alphanumerical characters are entered and the [OK] is touched, the warning message “Password does not
match” will appear, and no key will work for five seconds. Enter the right
password after five seconds.
If authentication fails, the information will be saved in the audit log.
Outputting secure printing using a PC – printing on the machine
1
Press [Box] on the control panel.
The Image Data Store/Recall Screen
will be displayed.
2
Touch [Recall].
The User Authentication Screen will be displayed.
25-20
bizhub PRO 920
HDD Store Function in Enhanced Security Mode
3
25
Enter your user name and user password on the User Authentication
Screen.
–
Touch [User Name] to display the Input User Name Screen.
–
Enter your user name, then touch [OK] to return to the User Authentication Screen.
–
Touch [Password] to display the Input User Password Screen.
bizhub PRO 920
25-21
HDD Store Function in Enhanced Security Mode
25
–
4
Enter your user password, then touch [OK] to return to the User Authentication Screen.
Touch [OK] on the User Authentication Screen.
The Recall Personal Box Screen will be displayed.
5
25-22
Touch [Secure] to display the Secure Box List Screen.
bizhub PRO 920
HDD Store Function in Enhanced Security Mode
6
Select the desired secure box.
7
Enter the secure password setup in secure printing.
8
Touch [OK].
25
The Secure File List Screen will be displayed.
9
Select the desired secure file.
Touch the desired secure file key, then touch [>>>].
To output the image data, touch [Wait Output], [Proof Output], or [Auto
Output], as desired, and then touch [OK].
The Input Print Quantity Screen will be displayed.
10
Specify the output page.
Touch [Output Page].
bizhub PRO 920
25-23
HDD Store Function in Enhanced Security Mode
25
–
–
11
Enter the desired print quantity from touch panel keypad on the Input
Print Quantity Screen.
–
12
To output one desired page only, touch [Page Select], press the
control panel keypad, then touch [OK].
To output all pages, touch [All Pages], then touch [OK].
After outputting, the popup menu to confirm whether to continue or
close it will be displayed. To continue to recall the next image data,
touch [Yes]. The Recall Personal File Screen will be restored. To
close, touch [No]. The Image Data Store/Recall Screen will be displayed.
When operation is completed, press [Access] on the control panel.
The User Authentication Screen will be displayed to prohibit the machine operation without entering a user name and password.
25-24
bizhub PRO 920
26
Administrator Security
Functions
Administrator Security Functions
26
26
Administrator Security Functions
To do so, an 8-digit CE authentication password and Administrator password must be set for the machine. Ask your authorized service representative to set up an Administrator password. To change this password, the
administrator himself should operate the procedure described in “Utility
<Administrator Setting>” on page 18-3.
To protect data in the machine from access and tampering, it is recommended to designate an administrator and use Enhanced Security mode.
bizhub PRO 920
26-3
Administrator Security Functions
26
26.1
Turn Enhanced Security mode ON/OFF
The following is an explanation of how to turn Enhanced Security mode On/
Off.
!
Detail
Passwords are case sensitive.
If a wrong password or fewer than 8 alphanumerical characters are entered and the [OK] is touched, the warning message “Password does not
match” will appear, and no key will work for five seconds. Enter the right
password after five seconds.
If authentication fails, the information will be saved in the audit log.
1
Press [Utility/Counter] on the control
panel.
The Utility Screen will be displayed.
2
Touch [6 Administrator Setting].
The Input Administrator Password Screen will be displayed.
26-4
bizhub PRO 920
Administrator Security Functions
3
26
Enter the password.
Use the touch panel keypad to enter the 8-digit Administrator password, then touch [OK].
The Administrator Setting Screen will be displayed.
4
Touch [7 Security Setting].
The Security Setting Screen will be displayed.
bizhub PRO 920
26-5
Administrator Security Functions
26
5
Touch [3 Enhance Security Mode].
6
Turn Enhanced Security mode ON or OFF.
If you want to turn Enhanced Security mode ON, touch [On] to highlight
it. If you want to turn it OFF, touch [Off] to highlight it. Touch [OK].
The Restart Confirmation popup screen will appear.
7
Touch [Yes].
The machine will restart and the new setting will be activated.
26-6
bizhub PRO 920
Administrator Security Functions
26.2
26
HDD lock password
While the Enhanced Security mode is turned ON, a lock password (8 to 32
alphanumerical characters, case sensitive) can be set up on the HDD to protect the data stored on it.
If the HDD itself is externally accessed, the data readout will not be available
until the correct lock password is entered.
2
Reminder
Do not use your name, birthday, employee number, etc. for a password
that others can easily figure out.
!
Detail
The HDD lock password functions only when the Enhanced Security
mode is ON. When turned OFF, the message “Please set Enhanced Security mode” will be displayed.
!
Detail
Passwords are case sensitive.
If a wrong password or fewer than 8 alphanumerical characters are entered and the [OK] is touched, the warning message “Password does not
match” will appear, and no key will work for five seconds. Enter the right
password after five seconds.
If authentication fails, the information will be saved in the audit log.
bizhub PRO 920
26-7
Administrator Security Functions
26
!
Detail
The main body serial number will be printed at the upper left on the Utility
Screen and the upper right corner of the audit log. For details, see the
next section “Analyze audit log” on page 26-18 for the sample log.
If authentication is succeeded, touch New Password to enter the new
password. The key will not be active until authentication is succeeded.
If authentication fails, the information will be saved in the audit log.
The current password cannot be used again as a new password.
1
Press [Utility/Counter] on the control
panel.
The Utility Screen will be displayed.
2
Touch [6 Administrator Setting].
The Input Administrator Password Screen will be displayed.
26-8
bizhub PRO 920
Administrator Security Functions
3
26
Enter the password.
Use the touch panel keypad to enter the 8-digit administrator password, then touch [OK].
The Administrator Setting Screen will be displayed.
4
Touch [7 Security Setting].
The Security Setting Screen will be displayed.
bizhub PRO 920
26-9
Administrator Security Functions
26
5
Touch [2 HDD Manage Setting].
The HDD Manage Setting Screen will be displayed.
6
Touch [3 HDD Lock Password Changing].
The HDD Lock Password Changing Screen will be displayed.
26-10
bizhub PRO 920
Administrator Security Functions
7
26
Enter current password.
Touch [Current Password] to display the Input Current Password
Screen.
–
Enter current password (The initial password: 9-digit alphanumeric
serial number of the main body). The entered password will appear
as asterisks on the screen. Then, touch [OK].
The Change HDD Lock Password Screen will be restored.
bizhub PRO 920
26-11
Administrator Security Functions
26
8
26-12
Enter new password.
Touch [New Password] to display the Input New Password Screen.
–
Enter new password. The entered new password will appear as asterisks on the screen. Then, touch[OK].
–
Touch [Check Input] to display the Re-input New Password Screen.
bizhub PRO 920
Administrator Security Functions
–
26
Enter new password once more for confirmation, then touch [OK].
The Change HDD Lock Password Screen will be restored.
bizhub PRO 920
26-13
Administrator Security Functions
26
26.3
Print audit log
An audit log will be automatically created when the data saved in the machine have been accessed.
All the audit log data can be output as follows.
!
Detail
Passwords are case sensitive.
If a wrong password or fewer than 8 alphanumerical characters are entered and the [OK] is touched, the warning message “Password does not
match” will appear, and no key will work for five seconds. Enter the right
password after five seconds.
If authentication fails, the information will be saved in the audit log.
!
Detail
To stop printing, press [Stop] on the control panel, then touch [Cancel] on
the confirmation popup screen.
1
Press [Utility/Counter] on the control
panel.
The Utility Screen will be displayed.
26-14
bizhub PRO 920
Administrator Security Functions
2
26
Touch [6 Administrator Setting].
The Input Administrator Password Screen will be displayed.
3
Enter the password.
Use the touch panel keypad to enter the 8-digit administrator password, then touch [OK].
The Administrator Setting Screen will be displayed.
bizhub PRO 920
26-15
Administrator Security Functions
26
4
Touch [1 System Setting].
The System Setting Screen will be displayed.
5
Touch [4 Print Management List].
The Print Management List Screen will be displayed.
6
Touch [5 Audit Log Report], then touch [Copy].
The Print Management List Screen will be displayed.
26-16
bizhub PRO 920
Administrator Security Functions
26
7
Press [Start] on the control panel.
8
Touch [Management List] to restore the Print Management List Screen.
bizhub PRO 920
26-17
Administrator Security Functions
26
26.4
Analyze audit log
Audit logs need to be analyzed by the administrator regularly (once per
month) or when unauthorized access and tampering of data saved in the machine in Enhanced Security mode is noticed.
The machine is supposed to store up to 750 logs per month.
If more than 750 logs are assumed to be stored in a month, carry out the
analysis in a shorter period before the unanalyzed logs reach that number.
Audit Log Information
The audit log contains the following information.
- date/time: date and time when an operation was made that results in the
creation of a log entry.
- id: the person who made the operation or who is subject to security protection can be specified.
“-1”: Operation by CE (service representative).
“-2”: Operation by the administrator.
“-3”: Operation by the unregistered user.
Other integer: Indicates subjects for security protection, and the following action IDs narrow down the subject for protection.
User ID (1 to 1000 numerical symbols)
Secure User ID (1 to 99999 numerical symbols)
- action: Used to specify the operation.
Check details of operation that action indicates in the following table.
- result: Result of an operation.
For password authentication, success or failure will be indicated as OK
and NG.
For operations without password authentication, all log entries will be indicated as OK.
26-18
bizhub PRO 920
Administrator Security Functions
26.5
26
Table of items saved in audit log
No.
Operation
ID
Stored
action
Result
1
CE authentication
CE ID
01
OK/NG
2
Administrator authentication
Administrator ID
02
OK/NG
3
Set/change Enhanced Security
mode
Administrator ID
03
OK
4
Print audit log
Administrator ID
04
OK
5
Change/register CE password
CE ID
05
OK
6
Change/register Administrator
password
CE ID/ Administrator ID
06
OK
7
Create user by Administrator
User ID
07
OK
8
Change/register user password by
Administrator
User ID
08
OK
9
Delete user by Administrator
User ID
09
OK
10
Change attributes of user by Administrator
User ID
10
OK
11
Password authentication for user
User ID
/ Unregistered user ID
11
OK/NG
12
Change attributes of user by user
(user password, etc.)
User ID
12
OK
13
Access to file (document data readout)
User ID
13
OK
14
Delete file (document data deletion)
User ID
14
OK
16
Password authentication for secure
printing
Secure user ID
/ Unregistered user ID
16
OK/NG
17
Access to secure print file
Secure user ID
17
OK
18
Delete secure print file
Secure user ID
18
OK
19
Change HDD lock password
Administrator ID
19
OK
bizhub PRO 920
26-19
26
Administrator Security Functions
The purpose of analyzing the audit log is to understand the following and implement countermeasures:
Whether or not data was accessed or tampered with
- Subject of attack
- Details of attack
- Results of attack
Specify unauthorized actions – password authentication
If logs have NG as the result of password authentication (action: 01, 02, 11,
16), items protected by passwords may have been attacked.
- Failed password authentication (NG) log entries specify who made the
operation, and show if unauthorized actions were made when password
authentication failed.
- Even if password authentication succeeded (OK), it shows whether a legitimate user created the action. You need to check carefully when successful authentication occurs after series of failures especially during
times other than normal operating hours.
Specify unauthorized actions – actions other than password authentication under security
All operation results other than password authentication will be indicated as
successful (OK), so determine if there were any unauthorized actions by ID
and action.
- Since you cannot specify what was attacked only with an ID, you need to
see the action and the table on the previous page to determine whether
unauthorized actions were made on a personal box or secure box.
- Check the time, and see if the user who operated the specific subject
made any unauthorized actions.
( Example )
If a document saved in a box was printed using fraudulent authorization, the
following audit log entry will be created.
- Password authentication for the box:
Action = 11
ID = Box that authentication was made
Result = OK/NG
- Access to the document in the box:
Action = 13
ID = Box that authentication was made
Check the date and time the above operation occurred, and see if the operation on the document in the personal box or secure box was made by a legitimate box user.
26-20
bizhub PRO 920
Administrator Security Functions
26
Actions to take if unauthorized operations are found
- If it’s found that a password has been leaked after analyzing the audit log,
change the password immediately.
- It’s possible that a password may have been tampered with and legitimate users cannot access a box. The administrator must contact the
user to confirm the situation, and if that’s the case, the administrator
must change the password and delete the data saved in the box.
- If you cannot find documents that should be in a box or if you find a document with changed content, unauthorized actions may have occurred.
Similar countermeasures are needed.
bizhub PRO 920
26-21
26
26-22
Administrator Security Functions
bizhub PRO 920
27
Appendix
Appendix
27
27
Appendix
27.1
How to Input Characters
As you touch the item where you can input characters, the character input
screen appears.
You can input alphabets and signs. Character array is the same with computer keyboards.
About keys on the character input screen
Keys on the character input screen are described here.
Button
Function
/
This key moves a cursor.
Delete
This key deletes the character on the left of the cursor.
OK
This key determines the characters you input, and the character input screen closes.
Cancel
This key cancels the characters you input, and the character input
screen closes.
Shift
This key switches between an upper case letter and a lower case
letter, and between numbers and signs.
bizhub PRO 920
27-3
Appendix
27
About character input
The followings describe basic steps to input characters on the character input screen.
1
Press the corresponding key to input the desired character.
2
Press the [OK] key.
The character input screen closes. The input characters are displayed
on the corresponding column.
27-4
bizhub PRO 920
Appendix
27.2
27
Setting Data for Import/Export
[1] System
Main menus
Sub menus
Target items
Device Information
Device Information
Device Name
Device Place
Administrator Name
Online Assistance
Online Assistance
Contact Name
Contact Information
Product Help URL
Corporate URL
Supplies and Accessories
Online Help URL
AlertMail
AlertMail
E-Mail Notification
Notification Address
Item
Paper Empty
Paper Jam
Maintenance
Staple Empty
Toner Empty
Output Full
Service Call
Remove Punch Waste
bizhub PRO 920
27-5
Appendix
27
[2] Print
27-6
Main menus
Sub menus
Target items
Interface
Interface
Parallel Timeout
Network Timeout
Default Setting
General
PDL
Input Tray
Output Tray
Duplex
Binding
Staple
Punch
Fold/Trimming
Offset
Output Order
Page Order
Print Number
Collate
Paper Size
Orientation
Resolution
Spool setting
Banner Option
Banner Page Tray
Convert Paper Size
1 Page/Sheet
Booklet
Print Position
PCL Settings
Font Name
Symbol Set
Line/Page
Font Point Size
Font Pitch
CR/LF Mapping
PS Settings
Print To PS Error
TIFF Settings
Auto Paper Select
Image Position
bizhub PRO 920
Appendix
27
[3] Network
Main menus
Sub menus
Target items
TCP/IP
TCP/IP
TCP/IP
Network Speed
Auto IP
IP Adress
Subnet Mask
Default Gateway
Host Name
Domain Name
DNS Server
RAW Port Number1
RAW Port Number2
RAW Port Number3
RAW Port Number4
RAW Port Number5
RAW Port Number6
LPD
IP Address Filtering
Access Permission Address
Start address 1 - Ending address 1
Start address 2 - Ending address 2
Start address 3 - Ending address 3
Start address 4 - Ending address 4
Start address 4 - Ending address 5
Access Refusal Address
Start address 1 - Ending address 1
Start address 2 - Ending address 2
Start address 3 - Ending address 3
Start address 4 - Ending address 4
Start address 4 - Ending address 5
Netware
NetWare Print
Frame Type
Mode
PServer
Print Server Name
Print Server Password
Print Queue Scan Rate
Bindery/NDS
Bindery
Preferred File Server
NDS
Preferred NDS Context
Preferred NDS Tree Name
Nprinter/Rprinter
Printer Name
Printer Number
NetWare
bizhub PRO 920
27-7
Appendix
27
27-8
Main menus
Sub menus
Target items
IPP
IPP
IPP Print
Printer Name
Printer Location
Printer Information
Printer URI
Operations Supported
Printer Job
Accepat Print Job
Validate Job
Cancel Job
Get Job Attribute
Get Jobs
Get Printer Attribute
FTP
Client
FTP Client
Proxy Server Address
Proxy Server Port Number
Server Timeout
Port Number
Server
FTP Server
SNMP
SNMP
SNMP
SMB
Scan
SMB Scan
Print
SMB Print
NetBIOS Name
Print Service Name
Work Group
Apple Talk
Apple Talk
Apple Talk
Printer Name
Zone Name
LDAP
LDAP
LDAP Server Address
Port Number
Use SSL
Port Number (SSL)
Search Root
Search Timeout
Max # of LDAP Hits
Authentication Method
User Authentication
Login Name
Password
Domain Name
bizhub PRO 920
Appendix
27
Main menus
Sub menus
Target items
E-Mail
Email-Receive
Receive
Receiving Server Address
User Name
Password
APOP
Connection Timeout
Port Number
Email-Send
Send
SMTP Server Address
Port Number
Connection Timeout
Max Mail Size
SMTP Server Capacity
Administrator Mail Address
Authentication
POP Before SMTP
SMTP Authentication
User Name
Password
Realm
Binary Division
Division Size
SSL/TLS
SSL/TLS Information
Encryption Strength
Validity Period
Organization
Organization Unit
Locality
State/Province
Country
Authentication
Auto Logout
Admin Logout Time
User Logout Time
AP I/F
AP I/F
Port Number
Use SSL/TLS
Port Number (SSL/TLS)
bizhub PRO 920
27-9
Appendix
27
27.3
Configuration Setting
(Print Sample)
27-10
bizhub PRO 920
Appendix
27
(Print Sample)
bizhub PRO 920
27-11
Appendix
27
(Print Sample)
27-12
bizhub PRO 920
Appendix
27
(Print Sample)
bizhub PRO 920
27-13
Appendix
27
27.4
Demo Page
PCL Demo Page Print
(Print Sample)
27-14
bizhub PRO 920
Appendix
27
PS Demo Page Print
(Print Sample)
bizhub PRO 920
27-15
Appendix
27
PCL Font List
(Print Sample)
27-16
bizhub PRO 920
Appendix
27
(Print Sample)
bizhub PRO 920
27-17
Appendix
27
(Print Sample)
27-18
bizhub PRO 920
Appendix
27
PS Font List
(Print Sample)
bizhub PRO 920
27-19
Appendix
27
(Print Sample)
27-20
bizhub PRO 920
Appendix
27
(Print Sample)
bizhub PRO 920
27-21
Appendix
27
27.5
27-22
PCL Font List
bizhub PRO 920
Appendix
bizhub PRO 920
27
27-23
27
27-24
Appendix
bizhub PRO 920
Appendix
27.6
27
Symbol Set
bizhub PRO 920
27-25
27
27-26
Appendix
bizhub PRO 920
Appendix
bizhub PRO 920
27
27-27
27
27-28
Appendix
bizhub PRO 920
Appendix
bizhub PRO 920
27
27-29
27
27-30
Appendix
bizhub PRO 920
Appendix
27.7
27
Glossary
Button
Function
10BASE-T/100BASETX/1000BASE-TX
Types of specifications in compliance with the Ethernet standard.
Cables made of two stranded copper wire rods are used.
Communication speed is 10Mbps with 10Base-T, 100Mbps with
100Base-TX, and 1000Mbps with 1000Base-TX.
APOP
Abbreviation of Authenticated Post Office Protocol. An authentication
method of improved safety by encrypting the password; ordinary
POP uses an unencrypted password which is used to receive Emails.
Client
A computer which uses services provided by servers through the network.
DHCP
Abbreviation of Dynamic Host Configuration Protocol.
A protocol for a client machine on the TCP/IP network to automatically read the setting for the network from a server.
Only by controlling the IP addresses for the DHCP clients collectively
with the DHCP server, a network can be easily constructed avoiding
duplicate addresses.
DNS
Abbreviation of Domain Name System.
A system to allow to acquire an appropriate IP address from the host
name in the network environment. Users can specify the name of the
host instead of the IP address which is difficult to memorize and distinguish and access the other personal computer on the network.
FTP
Abbreviation of File Transfer Protocol. A protocol used to transfer files
on the TCP/IP network such as Internet, Intranet, etc.
Gateway
Hardware or software serving as a point connecting networks. Not
only connecting, it converts the format, address, protocol, etc. of the
data according to the network to be connected.
Hard disk
Mass storage device to save data.
The data is maintained even if the power is turned OFF.
HTTP
Abbreviation of HyperText Transfer Protocol. A protocol used to
transmit or receive data between a web server and client (web browser, etc.). Files of image, voice, animation, etc. correlated with the document can be exchanged including the expression form and other
information.
IP address
A code (address) to identify individual network devices on the Internet. Comprises 4 sets of figures of 3 digits at the maximum such as
192.168.1.10. An IP address is allocated to all computers and other
devices connected to the Internet.
IPP
Abbreviation of Internet Printing Protocol. A protocol to control the
transmission and reception of printing data or printing devices
through the Internet or other TCP/IP networks. Data can be transmitted to a remote printer through the Internet and printed there.
LAN
Abbreviation of Local Area Network. A network connecting computers on the same floor, in the same building, in the buildings nearby,
etc.
LDAP
Abbreviation of Lightweight Directory Access Protocol. A set of protocols used to access database servers over TCP/IP network such as
Internet or Intranet, for the purpose of obtaining information on e-mail
address or environment of network users.
bizhub PRO 920
27-31
Appendix
27
27-32
Button
Function
LPR/LPD
Abbreviation of Line Printer Request/Line Printer Daemon.
A type of printing through a network of the WindowsNT system or
UNIX system. Printing data from Windows or UNIX can be transmitted to a printer on a network using TCP/IP.
Memory
Unit to save data temporarily.
Data in some memory is erased when the power is turned OFF and
not erased in others.
NDS
Abbreviation of Novell Directory Service.
Shared resources such as servers, printers, user information, etc. on
the network or information such access authority of each user to
those resources can be centrally controlled in a hierarchical structure.
NetWare
Network OS developed by Novel.
Uses NetWare IPX/SPX as the communication protocol.
OS
Abbreviation of Operating System. Basic software to control the
computer system. Windows, MacOS, and Unix are examples.
PDF
Abbreviation of Portable Document Format. One of electronic documents (extension; .pdf) in the format based on PostScript which can
be accessed using Adobe Acrobat Reader, software free of charge.
ping
Abbreviation of Packed INternet Groper. A command used to confirm
the communication situation with a distant device under the TCP/IP
network environment.
POP
Abbreviation of Post Office Protocol. A protocol to receive electronic
mails from a mail server. Currently, POP3, version 3 of POP, is mainly
used.
Port number
Number to distinguish each communication port of multiple processes working in the computers on the network. A same port cannot be
used for multiple processes.
PostScript
Representative page description language generally used for printing
requiring specifically high quality, developed by US Adobe.
Printer driver
Software acting as an intermediate between the computer and printer.
Proxy Server
A server provided to act as the connecting point with the outside instead of each client in the connection with Internet and to secure the
security of the whole system efficiently.
Pserver
Print server module under the Netware environment.
Monitors, alters, pauses, resumes or stops the print job.
Resolution
Degree how correctly the details of images or prints can be reproduced.
SMB
Abbreviation of Server Message Block. A protocol used mainly to realize sharing of files or printers through the network between Windows.
SMTP
Abbreviation of Simple Mail Transfer Protocol. A protocol to transmit
or transfer the electronic mails.
SNMP
Abbreviation of Simple Network Management Protocol. A control
protocol using TCP/IP in the network environment.
SSL/TLS
Abbreviation of Secure Socket Layer/Transport Layer Security.
An encryption system to transmit data in safe between an Web server
and browser.
bizhub PRO 920
Appendix
27
Button
Function
TCP/IP
Abbreviation of Transmission Control Protocol/Internet Protocol.
Substantially the standard protocol used for the Internet.
Uses IP address to identify each network device.
TIFF
Abbreviation of Tagged Image File Format.
One of the file formats to save image data (extension; .tif).
Various types of image information can be saved in one image data
with the “tag” representing the data type.
Web browser
Software to access web pages. Internet Explorer, Netscape Navigator, etc. are examples.
bizhub PRO 920
27-33
27
27-34
Appendix
bizhub PRO 920
28
Index
Index
28
28
Index
Numerics
Adhesive binding ..... 11-41, 16-14
1 SHOT Indication Time ....... 17-16
Adjusting Touch Panel
Contrast ............................... 14-21
1 to N ................................... 12-10
1-2 ................................9-31, 9-34
2 in 1 ......................................10-7
2 Positions Staple
Pitch Adjustment .................. 18-47
2 Repeat ............................... 11-36
2-1 ..........................................9-36
2-2 ..........................................9-31
4 in 1 ......................................10-7
Administrator Mode ............. 20-10
Administrator Password ...... 20-10
Administrator Registration ... 18-74
Administrator Security
Functions ............................... 26-3
Administrator
Machine Register ................. 18-74
Administrator
Password ............... 18-200, 20-10
4 Repeat ............................... 11-36
AE ............................................ 9-7
8 in 1 ......................................10-7
Alert Mail ................ 18-153, 20-17
8 Repeat ............................... 11-36
Annotation ........................... 11-84
A
Annotation at JOB
Completion .......................... 17-60
Access key ...............................2-7
Accessibility ......................... 14-20
Accessibility key ....................... 2-8
Account Authentication ........ 18-76
Account Distribute Number . 18-76
Account Name ..................... 18-76
Account Track ...................... 18-79
Account track data
setting file ............................. 19-35
Account Track Setting ......... 18-82
Actions in response to troubles 1-7
Add staples ..................4-17, 4-21
Adding Account Track ...........19-6
Adding Toner .........................4-14
ADF (Automatic Document
Feeder) .............................2-4, 7-4
ADF AMS ............................. 17-60
ADF Frame Erasure Setting . 18-45
bizhub PRO 920
Annotation by Initial Setting 18-38
Annotation Setting ............... 18-65
AP I/F ..................... 18-162, 20-58
AppleTalk ... 18-141, 20-37, 20-38
Application Screen ................ 11-7
Application tab ........................ 2-9
ATS Permission ................... 17-27
Audit log
Analyze .......................... 26-18
Box . 25-4, 25-9, 25-14, 25-20
Change a user data ......... 24-9
Change password .......... 24-18
Delete a user .................. 24-14
Print ............................... 26-14
Audit log report .................... 18-35
Authentication ........... 2-30, 20-57
Auto Detect orig. Size
in ADF .................................. 17-60
Auto Image Rotation .......... 18-187
28-3
Index
28
Auto Logout ......................... 20-57
Caution Labels and Indicators 1-11
Auto Paper Select ...... 9-11, 16-17
Centring Adjustment ............18-54
Auto Paper Type Selection .. 17-29
Auto Start mode .................. 10-19
Change Page Number Print Pos
(Booklet) .............................18-184
Auto Zoom ................... 9-14, 9-25
Change Paper Type Screen .15-10
Automatic Exposure (AE) ......... 9-7
B
Change User Password .......17-20
Background whiteness ............ 9-7
Changing magnification ratio .9-25
Banner Option ...................... 16-14
Changing Zoom Ratio ..........18-38
Banner Tray ......................... 16-14
Chapters ...............................11-15
Basic Screen ............................ 2-9
Check and print the counter list 6-5
Basic Setting ........................ 16-11
Check Mode ...........................14-5
Basic tab .................................. 2-9
Check/Control Reserved Jobs 13-4
Before successive holidays ..... 1-8
Check/Control Spool Jobs ...13-11
Bind ...................................... 10-11
Check/Operate
Suspended Jobs ....................13-9
Binding ................................. 16-14
Binding direction for
duplex copies ....................... 12-7
Blank Insert ............................ 15-4
Book Copy ........................... 11-28
Checking Copy Count ..............6-5
Choose Default Tray
When APS OFF ....................17-60
Booklet ..................... 11-41, 16-14
Cleaning Image Scanning
Section .....................................6-3
Booklet Copy Auto Select ... 17-60
Clearing Mishandled Paper ......5-5
Booklet pagination ............... 11-41
Coloured Paper ......................15-3
Bookmark key ........................ 11-7
Coloured Paper
Setting Screen ......................15-10
Both Sides Adjust .................. 15-4
Both sides adjust
setting screen ...................... 15-11
Box key .......................... 2-7, 2-10
Combination .........................16-14
Combine Originals ..................10-7
Combine Originals tab .............2-9
Buzzer for Job Stop Setting 17-14
Combine Pages ......................10-7
Buzzer On/Off ...................... 17-12
Consumables ...........................1-7
Bypass Tray Setting ............... 9-16
Contact service representative 5-3
C
28-4
Change print quantity .............8-17
Change Program Overlay .....18-38
Continuous Print (Copy) .....18-195
Continuous Print (Print) ......18-182
C (clear) key ............................. 2-7
Contrast ................................14-21
Call for Service Screen ............ 5-3
Contrast adjustment dial ..........2-8
Call Service Centre ............ 18-198
Control Panel Layout ................2-7
Cartridge housing ........ 2-12, 2-15
Controller Setting ...................16-3
bizhub PRO 920
Index
28
Controller Setting Screen .......16-3
Date/Time ............................ 11-69
Controlling Copier
from Browser ....................... 14-22
Default Address Setting ...... 17-63
Date/Time Setting ................ 18-16
Convert Paper Size .............. 16-14
Default Resolution Setting ... 17-65
Conveyance fixing unit ............. 2-5
Default Settings ................... 20-19
Copier Setting ...................... 17-54
Density key .................... 2-10, 9-8
Copier specifications ............... 7-3
Density Shift for Original
Image Type .......................... 17-33
Copier total count .................... 6-5
Copier/Printer Setting ........ 18-180
Copy Conditions Incompatible
with Basic Settings ................. 9-3
Copy Conditions Incompatible
with Applications ....................11-3
Copy Conditions Incompatible
with Finishing / Paper
Fold Modes ............................12-3
Copy Conditions Incompatible
with Original Settings .............10-3
Destination Address
Change/Delete ................... 18-215
Details/Delete .................... 18-203
Detais key ................................ 5-8
Developer count ...................... 6-6
Device Information .............. 20-11
Disassemble and modification 1-4
Distribution Number ............ 11-69
Distribution Recovery .......... 17-52
Copy key .................................. 2-7
Distribution recovery mode . 12-41
Copying in full size mode .......9-24
Dot Matrix mode .................. 10-23
Copying Mixed Size
Originals ............................... 10-13
Drum count .............................. 6-6
Copying Non-Standard Size
Originals ............................... 10-21
Duplex ................................. 16-14
Copying onto transparent
films ...................................... 11-22
Drum unit ................................. 2-5
E
Copying using special paper .9-16
Each Function
Setting ..................... 17-60, 17-65
Copying Z-Folded Originals . 10-15
Editing Account Track Data ... 19-9
Cover Sheet Feeding ........... 12-28
Electromagnetic Interference 1-10
CR/LF Mapping .................... 16-15
E-Mail ................................ 18-143
Creep function ..................... 11-52
E-Mail (mail address) ......... 18-215
CSRC ................................. 18-156
E-mail data .......................... 19-29
Custom Size .............10-21, 15-15
E-mail data setting file ......... 19-35
D
E-Mail Receive (POP)
Configuration ....................... 20-40
Data indicator ........................... 2-7
E-Mail Send (SMTP)
Configuration ....................... 20-41
Date and time indicator ............ 2-9
Embossed ............................. 15-4
Date Setting ......................... 18-25
Empty Waste Basket of Punch Kit
PK-504/505 ........................... 4-25
Data Auto Delete ................ 18-207
bizhub PRO 920
28-5
Index
28
Empty Waste Basket of Trimmer
Unit TU-501 ........................... 4-29
Fine .........................................15-4
Empty Waste Basket of Z Folding
Unit ZU-601/602 .................... 4-27
Finisher Adjust ......................18-47
Enhance Security Mode ..... 18-213
Enhanced security mode
Administrator setting
mode ................................ 22-4
Administrator
authentication .................. 22-4
Audit log ........................... 22-3
Data protected ................. 22-5
Enhanced password ........ 22-3
Enhanced security icon .... 22-6
Environments ................... 21-3
HDD .................................. 25-3
HDD lock password ......... 26-7
HDD store function .......... 25-3
Normal mode ................... 21-3
Protect and delete
used data ............... 22-3, 23-3
Turn ON/OFF .................... 22-5
Fine Adjust Margin ...............17-31
Finisher door ................2-11, 2-13
Finisher FS-509 ......................2-11
Finisher FS-604 ......................2-13
Finishing key ............................2-9
Fixing Prerotation Set .........18-185
Fixing unit .................................2-5
Fold & Staple Staple Pitch
Adjustment ...........................18-47
Fold & Staple Stopper
Adjustment ...........................18-47
Fold&Staple ..........................12-18
Fold/Trimming ......................16-14
Folding Copies in Three .......12-21
Folding mode outlet ...............2-13
Folding mode tray ..................2-13
Font Number ........................16-15
Enlarge/Reduce ..................... 9-25
Font pattern list ....................18-35
Erasing frame/
borders .................... 11-56, 11-59
Font pitch .............................16-15
Except Orig. Glass (1:1) ....... 18-42
Exchange toner bottle ........... 4-15
Exit paper guide ..................... 2-13
Font point size ......................16-15
Font Source ..........................16-15
Form lines .............................16-15
Frame/Centre Erase .............11-56
F
Front door ................................2-4
Face Up ............................... 12-10
FTP .........................18-133, 20-32
Face Up/Down for 1 Sheet 18-196
FTP (FTP server
address) ..................18-215, 19-29
Features of the
bizhub PRO 920 ....................... 8-3
FTP data setting file .............19-35
Feed paper count .................... 6-5
Full Scan ...............................11-65
Feed Tray Auto Selection .... 17-25
G
Feeding Single Original
from ADF .............................. 10-17
Gateway Address ...............18-106
File Form Setting (E-Mail) .... 17-65
File Form Setting (FTP) ........ 17-65
Grounding ................................1-5
Group mode .........................12-12
File Form Setting (HDD) ....... 17-65
File Form Setting (SMB) ....... 17-65
28-6
bizhub PRO 920
Index
28
H
Interrupt key ............................ 2-7
Half Fold ............................... 12-18
IP Address ......................... 18-106
Half fold Stopper Adjustment 18-47
IP Address (Server PC) ...... 18-106
HDD .......................11-91, 18-151
IP Adress (Tandem) ........... 18-106
HDD (Box No.) ........18-215, 19-29
IPP ......................... 18-130, 20-31
HDD data setting file ............ 19-35
IPP Operation Support Information
Setting ............................... 18-131
HDD Lock Password
Changing ............................ 18-209
Help key ................................... 2-8
Help Mode ...........................14-18
Help Screen ......................... 14-18
IPP Printer Information Setting,
Printer URI Setting ............. 18-132
IPP Printer Information
Setting ............................... 18-132
IPP Setting ......................... 18-131
Hole-Punch ............................15-3
Hole-Punch Adjustment ....... 18-47
J
Hole-Punch Setting Screen . 15-10
Jam Position Screen ............... 5-5
I
Job List changes to Mishandled
Paper ....................................... 5-7
If a certificate is not
installed ....................20-42, 20-44
Image (Original Glass) .......... 18-51
Image area ...............................2-9
Image Centring .................... 11-62
Job List changes to No Paper . 5-7
Job List key ............................. 2-9
Job List Screen ..................... 13-3
Job Offset Mode ................ 18-180
Job Reserve key .................... 8-18
Image Density Selection ...... 17-40
Image Overlay ...................... 11-88
K
Image Position ..................... 16-17
Key Response Time ............ 17-19
Image Repeat ...........11-33, 11-36
Keypad .................................... 2-7
Import/Export ....................... 20-14
Incomplete Job ......................13-8
Initial by Key Counter Insert . 17-58
Initial Setting ........................ 17-54
Insert Image ......................... 11-18
Insert Sheet ............................11-9
Inserting a New Staple
Cartridge ......................4-17, 4-21
Installation ................................ 1-6
Installation Space ...................1-13
Interface ............................... 20-18
Interface Setting ................... 16-21
Interrupt Copying ...................14-9
bizhub PRO 920
L
Language Setting ................ 17-10
Large Capacity Unit
LU-403/LU-404 ..................... 2-17
Laser Safety ............................. 1-9
LCD Backlight Setting ......... 18-63
LDAP ................... 18-119, 18-169
Lead Edge Margin Selection 18-51
Left side door .......................... 2-4
Letter Fold Adjustment ........ 18-47
Letter Fold In ....................... 12-21
Letter Fold Out .................... 12-21
28-7
Index
28
Master icon ..........................12-35
Line Speed Setting ............ 18-106
Master machine ....................12-35
List of IP NIC Setting ......... 18-107
Memory Full message ............5-11
Loading Paper ......................... 4-3
Memory indicator .....................2-9
Loading Paper in LCU
(LU-403/LU-404) ...................... 4-8
Memory Overflow ...................5-11
Loading Paper in Multi-Sheet
Bypass Tray ............................. 4-7
Minimal ...................................9-25
Message area ...........................2-9
Mishandled Paper key ..............5-7
Loading Paper in Tray 1, 2,
and 3 ........................................ 4-5
Mixed Original ......................10-13
Loading Tabbed Sheets ........ 4-10
Mode Check key ......................2-8
Lock/Delete Mode Memory . 18-38
Mode Memory ......................14-11
Logging in Using Administrator
Mode ...................................... 20-8
Mode Memory key ...................2-7
Low Power ............................. 2-26
Multi-sheet bypass tray ............2-4
N
M
N to 1 ....................................12-10
Machine Configuration ............ 2-3
Neg-/Positive Reverse ..........11-45
Machine NIC Setting .......... 18-105
Netware ..................18-126, 20-29
Machine status icon ............... 2-10
Netware Nprinter/Rprinter ..18-128
Magazine binding ................ 11-41
Netware Pserver Setting ....18-128
Main Power indicator ............... 2-7
Netware Setting ..................18-127
Main power switch ......... 2-5, 2-22
Netware Status Setting ......18-128
Main unit .................................. 7-3
Network Setting .................18-105
Maintenance ........................ 20-15
Network Setting Clear ........18-167
Make a basic copy ................... 8-8
Network Tab .........................20-27
Making Copy Quality Closer to
Originals ............................... 10-23
No Paper key ............................5-7
Making double-sided copies using
ADF ........................................ 9-30
No Rotate .............................11-67
Making double-sided copies using
original glass .......................... 9-33
No Response Screen .............5-13
Non Image Area Erase
Setting ..................................18-42
Making Folded Booklet ........ 12-18
Non Register/Output
Setting ................................18-103
Making single-sided copies from
double-sided originals ........... 9-36
Non-Image Area Erase .........11-59
Manual finishing operation
panel ...................................... 2-16
28-8
Margin setting ..........11-47, 11-53
Limited Use of the Copier
in Trouble ................................. 5-4
Normal ....................................15-4
bizhub PRO 920
Index
28
O
P
Offset ................................... 16-14
Page Interval function .......... 11-51
Offset mode ......................... 12-12
Page Margin ............ 11-47, 11-53
OHP .......................................15-4
Page Number ...................... 11-69
OHP Interleave ..................... 11-22
PageScope Web Connection
Outlines ................................. 20-3
On - Always .......................... 18-42
On - APS/AMS Only ............. 18-42
Online Assistance ................ 20-12
Operating Environment ..........1-15
Operation Precautions ...........1-15
Order Direction key ................12-8
Orientation ...........................16-14
Orig./Out Bind Direction Set 17-60
Original Direction ...................10-9
Original Glass AMS .............. 17-60
Original Glass APS ............... 17-60
Original Glass Auto
Copy Reserve ...................... 17-60
PageScope Web Connection
Setting ................................... 20-3
Panel Reset Timer Setting ... 17-17
Paper Feed Tray .................. 16-14
Paper Fold key ...................... 2-10
Paper indicator ........................ 4-3
Paper Information .................... 3-3
Paper key .............................. 2-10
Paper loading button ............. 2-17
Paper misfeed ......................... 5-5
Paper Setting ......................... 15-3
Paper Size ................... 3-8, 16-14
Original Image Type ............. 10-23
Paper Tray Setting ................. 9-10
Original Image Type tab ........... 2-9
Paper Weight ........................... 3-4
Original Information ................3-11
Password for Non-Business Hours
Setting ................................. 18-30
Original Set/Bind Direction .. 17-60
Original Size Detection
Screen .................................. 15-15
Original Type ........................ 10-23
Out put
Data in the Secure Box .. 25-20
Password Input Timing ........ 18-76
PCL Setting ......................... 16-11
PDF -> PS Conversion
error control ......................... 16-16
PDL ...................................... 16-14
Output face and order .......... 12-10
Photo mode ......................... 10-23
Output History ........................13-6
Photo Mode Density Setting 17-38
Output Order ........................ 16-14
PI Setting ............................. 18-60
Output paper count .................. 6-5
Please call service message ... 5-3
Output to the Primary (main)
tray ....................................... 12-12
Plug Socket ........................... 1-15
Output to the Secondary (sub)
tray ....................................... 12-13
Output Tray .......................... 16-14
Output Z-Folded Copies ...... 12-23
PM count ................................. 6-6
PM icon ................................... 6-7
Port Settings ........................ 20-18
Position originals in Mixed Original
mode ..................................... 8-12
Ozone Release .......................1-10
bizhub PRO 920
28-9
Index
28
Position originals in Z-Folded
mode ...................................... 8-14
Prohibit User Operation .......18-38
Positioning Original on Original
Glass ...................................... 8-15
Proof Copying ........................14-3
Positioning Originals in ADF .. 8-11
Post Inserter ........................ 12-28
Post Inserter PI-501 ............... 2-16
Power cord .............................. 1-4
Power Off/On Screen ............. 5-12
Power plug ............................... 1-5
Power Save ............................ 2-25
Power Save key ....................... 2-8
Power Save LED ............ 2-8, 2-25
Power Save Setting ............. 18-13
Proof Copy key ........................2-7
PS Setting ............................16-11
PSWC .................................18-165
Punch .......................12-25, 16-14
Punch Kit PK-504/505 .2-11, 2-13
Punching File Holes in
Copies ..................................12-25
R
Recall/Delete
Data in a Box ..................25-14
Register a new user ..........24-4
Power source ........................... 1-4
Recalling Previous Job
Settings ................................14-16
Precautions for Installation
and Use .................................... 1-3
Recalling Stored Job
Settings ................................14-14
Preparation for Use .................. 2-3
Reduce & Shift .....................11-54
Preset Zoom .............. 9-25, 17-42
Preventive Maintenance .......... 6-7
Registering and Changing
Address ................................18-38
Primary (main) tray ....... 2-11, 2-13
Regulation Notices ...................1-9
Print Management List ......... 18-33
Remote Panel .......................14-22
Print Number ........................ 16-14
Remote Panel functions .......19-20
Print Position ....................... 16-14
Remote Panel Setting ..........19-20
Print Prohibit Timer .............. 17-32
Remove mishandled paper ......5-5
Print Tab .............................. 20-18
Removing a certificate .........20-55
Print to PS error ................... 16-16
Report code number ................5-3
Printer Left Margin ............... 18-54
Report Type ............................16-9
Printer Regist Loop Adjust ... 18-51
Requesting a certificate to switch
information ...........................20-48
Printer Setting ...................... 16-11
Printer Top Margin
Adjustment ........................... 18-51
Reserve Copy Function ......18-191
Printer total count .................... 6-5
Reset Function Setting .........17-56
Reserve Job Setting ...............9-42
Printer URI Setting ............. 18-132
Reset key ..................................2-7
Program Image Overlay ....... 11-91
ROM Version ........................20-12
Program Job ........................ 11-25
28-10
bizhub PRO 920
Index
28
S
Single Feed Auto Setting ... 18-197
Safety Information .................... 1-3
Size Setting ............. 15-12, 18-57
Scan key .................................. 2-7
Size Setting Screen ............. 15-14
Scan Tab .............................. 20-22
Sleep ..................................... 2-26
Scanner (ADF) Left Image .... 18-54
SMB
...... 18-138, 18-215, 19-29, 20-35
Scanner (ADF) Regist Loop
Adjust ................................... 18-51
SMB data setting file ........... 19-36
Scanner (Orig. Glass) Left
Image ................................... 18-54
SNMP .................... 18-136, 20-34
Scanner function (E-Mail) ..... 18-38
SNMP Trap ........................ 18-175
Smooth .................................. 15-4
Scanner function (FTP) ........ 18-38
Sort ...................................... 16-14
Scanner function (HDD) ....... 18-38
Sort mode ............................ 12-12
Scanner function (SMB) ....... 18-38
Sorting / Stapling Copies .... 12-12
Scanner Setting ................... 17-63
Scanner total count .................. 6-5
Special Paper in Multi-Sheet Bypass
Tray ........................................ 3-10
Screen Configuration .............20-6
Specifications .......................... 7-3
Secondary (sub) tray ....2-11, 2-13
Specifications for Each Machine
Setting File Type .................. 19-35
Security Setting .................. 18-200
Specify desired paper size .... 9-14
Select paper size
automatically ..........................9-11
Specifying Original Direction . 10-9
Select Printer Setting ........... 16-18
Spool ................................... 16-20
Select Time for Power Save . 18-27
Spool job ............................. 13-11
Selecting Binding Direction of
Originals ............................... 10-11
Stacker unit ........................... 2-15
Send History ..........................13-7
Stamp .................................. 11-69
Separate Scan key .................2-10
Standard size ....................... 15-15
SSL/TLS .............................. 20-42
Separate Scan mode .............9-39
Standard/Optional Equipment . 2-6
Set quantity indicator ............... 2-9
Staple .................................. 16-14
Setting Account Track Data ...19-5
Staple Auto Reset ................ 17-60
Setting image area .................2-10
Staple cartridge ........... 4-19, 4-23
Setting Job During Warmup ..8-18
Staple mode ........................ 12-12
Setting Print Quantity .............8-16
Start key .................................. 2-7
Setting Scan Transmission
Function ............................... 19-23
Status Hold When Auto
Reset ................................... 17-60
Shift mode of Page Margin .. 11-48
Stop Job key ......................... 8-21
Simplex/Duplex ......................9-30
Stop key .................................. 2-7
Simplex/Duplex key ................. 2-9
Stop Scanning/Printing ......... 8-20
Single Feed .......................... 10-17
bizhub PRO 920
28-11
Index
28
Store
Data in a Box while
copying ............................ 25-4
Scanned data in a Box ..... 25-9
User authentication .......... 24-3
Timing Adjustment ...............18-51
Toner bottle ............................4-15
Toner supply icon ...................4-14
Store copy paper ................... 3-10
Toner unit ...............................4-15
Storing Job Conditions ........ 14-11
Top Bind key ........................10-12
Sub Area Display On/Off ..... 17-18
Top Image (ADF) ..................18-51
Sub power switch .......... 2-4, 2-22
Total count ...............................6-5
Subnet Mask ...................... 18-106
Total counter ............................2-5
Suspend Interruption ......... 18-189
Touch Panel Adjust ..............17-67
Suspend Scanning when Tray is
pulled ................................. 18-193
Transmitting Machine Setting
File ........................................19-29
Suspended job ....................... 13-9
Trash basket 2-12, 2-15, 2-19, 221
Symbol Set .......................... 16-15
System Connection ........... 18-198
System Requirements ........... 20-3
System Setting ........ 17-10, 18-13
System Tab .......................... 20-10
T
Tray Setting ................15-7, 18-60
Tray Setting Screen ................15-9
Tray/ Exit Tray Capacity ...........3-5
Trimmer stacker .....................2-20
Trimmer unit tray ....................2-20
Trimmer Unit TU-501 .............2-20
Tab Paper ................ 10-21, 15-17
Trimming ..............................12-18
Tandem machine ................. 12-35
Troubleshooting .......................5-3
Tandem mode ...................... 12-33
Troubleshooting Tips .............5-14
Tandem Selection after JOB
Completion .......................... 17-50
Turn off the power ..................2-24
Tandem Sub Machine One Time
Data Read ............................ 17-44
Type .......................................15-3
Tandem Sub Machine Shift Data
Setting .................................. 17-48
U
Tandem Sub Machine Wait/Proof .
17-46
Use management list ...........18-34
Tandem Sub Machine
Wait/Proof ............................ 17-46
TCP/IP ................... 18-122, 20-27
Text mode ............................ 10-23
Text/Photo mode ................. 10-23
TIFF Setting ......................... 16-11
Time Setting ......................... 18-21
Timer Interrupt ....................... 2-28
28-12
Timer Interrupt password .......2-28
Turn on the power ..................2-22
Unsuitable ADF originals ........3-11
User (paper) ............................15-4
User Authentication ..............18-76
User Authentication Setting .18-92
User Authentication/Account
Track ....................................18-76
User Density Setting ............17-35
User management list ..........18-34
User Setting ...........................17-4
bizhub PRO 920
Index
28
User/Account Auth. Connect 18-76
X
Using Finisher Manually ....... 12-30
XY Zoom (Individual) ............. 9-25
Utility Screen ............................ 6-5
XY Zoom (proportional) ......... 9-25
Utility/Counter key ................... 2-8
V
Z
Z Folding Unit ZU-601/602 .... 2-19
Ventilation ................................ 1-6
Z-Fold .................................. 12-23
Volume Setting ..................... 17-12
Z-Fold Position Adjustment . 18-47
W
Z-Folded .............................. 10-15
Wake-up Screen ....................2-22
Warm Up Screen On/Off ...... 17-24
Zoom ..................................... 9-24
Zoom key ................................. 2-9
Warmup .................................2-23
Warning and Precaution
Symbols ................................... 1-3
Waste basket
..................2-12, 2-15, 2-19, 2-21
Watermark ............................ 11-79
Web Browser Settings ...........20-4
Web Utilities Setting ...............19-3
Weekly Timer .........................2-28
Weekly Timer On/Off Setting 18-19
Weekly Timer Setting ........... 18-18
When moving the machine ...... 1-8
Wide Size Paper ................... 15-16
Work table ................................ 2-4
bizhub PRO 920
28-13
28
28-14
Index
bizhub PRO 920