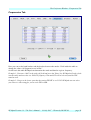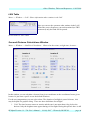
1
RUMped by DL2RUM
Table of contents
General.................................................................................................................................................6
Installation............................................................................................................................................6
Program............................................................................................................................................6
MySQL............................................................................................................................................6
Quick Start.......................................................................................................................................7
The Main Logging Window.................................................................................................................8
Previous QSOs (1)...........................................................................................................................8
Partial Call Check, Similarly Call Check (2)...................................................................................9
Information about DXCC (3).........................................................................................................10
Left Statistic Box (4)......................................................................................................................10
Right Statistic Box (5)...................................................................................................................10
QSO Data Input Fields (6).............................................................................................................11
Mode Buttons (7)...........................................................................................................................11
Contest Summary (7).....................................................................................................................11
Log Table (8).................................................................................................................................12
QSO Summary (9).........................................................................................................................12
Station Information (10)................................................................................................................13
QSO Information (11)....................................................................................................................13
Split Readout (12)..........................................................................................................................13
CW Echo (13)................................................................................................................................13
TX Indicator (14)...........................................................................................................................13
The QSO Editor (not shown).........................................................................................................14
The Menus..........................................................................................................................................14
The RUMped Menu.......................................................................................................................14
About.........................................................................................................................................14
Preferences................................................................................................................................14
Quit RUMped............................................................................................................................14
The File Menu................................................................................................................................14
The Edit Menu...............................................................................................................................14
The Log Menu...............................................................................................................................15
New...........................................................................................................................................15
Open..........................................................................................................................................15
Export........................................................................................................................................15
Import........................................................................................................................................15
Backup Log...............................................................................................................................15
Restore Log...............................................................................................................................15
Clear Masks...............................................................................................................................15
150 up........................................................................................................................................16
150 down...................................................................................................................................16
Log at same time.......................................................................................................................16
Full Multi Check (Switchable)..................................................................................................16
Show all TRCVRs (Switchable)...............................................................................................16
Show prev. QSOs (Switchable).................................................................................................16
Similarly Call Check (Switchable)...........................................................................................16
RX QTC....................................................................................................................................16
TX QTC....................................................................................................................................16
RUMped Version 1.0 - The User's Manual - 10 July 2007 - Written by DL2RUM
page 1
The QSO Menu..............................................................................................................................17
Edit............................................................................................................................................17
Delete........................................................................................................................................17
Note...........................................................................................................................................17
The TRCVR Menu.........................................................................................................................17
Reset TRCVR...........................................................................................................................17
Band up.....................................................................................................................................17
Band down................................................................................................................................17
CW............................................................................................................................................17
RTTY.........................................................................................................................................17
SSB............................................................................................................................................17
Keyboard Mode (Switchable)...................................................................................................18
Tune...........................................................................................................................................18
The CW Menu................................................................................................................................18
Reset Keyer...............................................................................................................................18
CW Speed -2.............................................................................................................................18
CW Speed +2............................................................................................................................18
The RTTY Menu............................................................................................................................18
Reset Modem............................................................................................................................18
Transmit....................................................................................................................................18
Receive......................................................................................................................................18
TX Reverse (Switchable)..........................................................................................................18
RX Reverse (Switchable)..........................................................................................................19
The BPSK Menu............................................................................................................................19
Reset Modem............................................................................................................................19
Transmit....................................................................................................................................19
Receive......................................................................................................................................19
The Window Menu........................................................................................................................19
Close..........................................................................................................................................19
Hide...........................................................................................................................................19
Main Logging............................................................................................................................19
Full Log.....................................................................................................................................19
Rate...........................................................................................................................................19
QTCs.........................................................................................................................................20
Continents.................................................................................................................................20
DXCCs......................................................................................................................................20
Multis........................................................................................................................................20
Calls..........................................................................................................................................20
Notes.........................................................................................................................................20
US-States...................................................................................................................................20
Terminal....................................................................................................................................20
DX Spots...................................................................................................................................20
LAN..........................................................................................................................................20
Sun/Dist. Calculation................................................................................................................20
Sun/Dist. Table..........................................................................................................................21
DXCCs in Grayline...................................................................................................................21
The Memory Menu........................................................................................................................21
The Help Menu..............................................................................................................................21
Help Tags (Switchable).............................................................................................................21
The Preference Window.....................................................................................................................22
RUMped Version 1.0 - The User's Manual - 10 July 2007 - Written by DL2RUM
page 2
General Tab....................................................................................................................................22
TRCVR Tab...................................................................................................................................23
CW Tab..........................................................................................................................................23
RTTY Tab......................................................................................................................................25
Phone Tab......................................................................................................................................25
BPSK and Hell Tab........................................................................................................................27
Frequencies Tab.............................................................................................................................28
DX Cluster Tab..............................................................................................................................29
Network Tab..................................................................................................................................30
Other Windows, Tables and Requesters.............................................................................................31
New Log Requester.......................................................................................................................31
Open Log Requester......................................................................................................................31
Log Export Requester....................................................................................................................32
Cabrillo Export Requester.........................................................................................................33
Stützerbach Export Requester...................................................................................................34
Log Import Requester....................................................................................................................35
Send QTC Window........................................................................................................................36
Receive QTC Window...................................................................................................................36
Add Note To QSO Requester.........................................................................................................37
Full Log Window...........................................................................................................................37
Rate Window.................................................................................................................................38
QTC Log Window.........................................................................................................................39
Continent Table..............................................................................................................................40
DXCC Table..................................................................................................................................40
Multiplier Table.............................................................................................................................41
Callsign Table................................................................................................................................41
Notes Window...............................................................................................................................42
US-States Table..............................................................................................................................42
Terminal Window..........................................................................................................................42
DX Announcement Table..............................................................................................................43
LAN Table.....................................................................................................................................44
Sun and Distance Calculations Window........................................................................................44
Sun and Distances Table................................................................................................................45
DXCCs in Gray Line Table...........................................................................................................46
Using RUMped...................................................................................................................................47
Basic (Phone) Operation ...............................................................................................................47
CW Operation................................................................................................................................47
RTTY Operation............................................................................................................................48
PSK Operation...............................................................................................................................49
Hellschreiber Operation.................................................................................................................49
Transceiver Control.......................................................................................................................49
Contest Operation..........................................................................................................................50
Screen shoots
Screen shoot 1: Window 'New Log'.....................................................................................................7
Screen shoot 2: Previous QSOs............................................................................................................8
Screen shoot 3: Main Logging Window, DX-pedition mode...............................................................9
Screen shoot 4: Partial Call Check.......................................................................................................9
Screen shoot 5: Similarly Call Check...................................................................................................9
RUMped Version 1.0 - The User's Manual - 10 July 2007 - Written by DL2RUM
page 3
Screen shoot 6: DXCC information...................................................................................................10
Screen shoot 7: Left statistic box........................................................................................................10
Screen shoot 8: Right statistic box.....................................................................................................10
Screen shoot 9: QSO Input Fields......................................................................................................11
Screen shoot 10: Mode buttons...........................................................................................................11
Screen shoot 11: Contest Summary....................................................................................................11
Screen shoot 12: Log Table................................................................................................................12
Screen shoot 13: Previous QSOs........................................................................................................12
Screen shoot 14: QSO summary in contest mode (WPX)..................................................................12
Screen shoot 15: QSO Summary in DX-ped. mode...........................................................................12
Screen shoot 16: Station Info.............................................................................................................13
Screen shoot 17: QSO Information....................................................................................................13
Screen shoot 18: Split Readout...........................................................................................................13
Screen shoot 19: CW Echo.................................................................................................................13
Screen shoot 20: TX Indicator............................................................................................................13
Screen shoot 21: QSO Editor.............................................................................................................14
Screen shoot 22: Preferences General Tab.........................................................................................22
Screen shoot 23: Preferences TRCVR Tab.........................................................................................23
Screen shoot 24: Preferences CW Tab................................................................................................24
Screen shoot 25: Preferences RTTY Tab............................................................................................25
Screen shoot 26: Preferences Phone Tab............................................................................................26
Screen shoot 27: Preferences BPSK Tab............................................................................................27
Screen shoot 28: Preferences Frequency Tab.....................................................................................28
Screen shoot 29: Preferences DX Cluster Tab....................................................................................29
Screen shoot 30: Preferences Network Tab........................................................................................30
Screen shoot 31: New Log Requester................................................................................................31
Screen shoot 32: Open Log Requester...............................................................................................32
Screen shoot 33: Log Export Requester.............................................................................................32
Screen shoot 34: Cabrillo Requester..................................................................................................33
Screen shoot 35: Stützerbach Requester.............................................................................................34
Screen shoot 36: Log Import Requester.............................................................................................35
Screen shoot 37: ADIF Import Progress Box.....................................................................................35
Screen shoot 38: Send QTC Window.................................................................................................36
Screen shoot 39: Receive QTC Window............................................................................................36
Screen shoot 40: Add a Note Window...............................................................................................37
Screen shoot 41: Full Log Window....................................................................................................37
Screen shoot 42: QSOs per day Window...........................................................................................38
Screen shoot 43: QSOs per hour Window..........................................................................................39
Screen shoot 44: QTC Window (Photo not taken from a real contest).............................................39
Screen shoot 45: Continent Table.......................................................................................................40
Screen shoot 46: DXCC Table............................................................................................................40
Screen shoot 47: Multiplier Table......................................................................................................41
Screen shoot 48: Call Window...........................................................................................................41
Screen shoot 49: Notes Window.........................................................................................................42
Screen shoot 50: US-States Table.......................................................................................................42
Screen shoot 51: Terminal Window disconnected..............................................................................42
Screen shoot 52: Terminal Window connected..................................................................................43
Screen shoot 53: DX Spot Table.........................................................................................................43
Screen shoot 54: LAN Table..............................................................................................................44
Screen shoot 55: Direction, Distance and Sun Calculations Window................................................44
RUMped Version 1.0 - The User's Manual - 10 July 2007 - Written by DL2RUM
page 4
Screen shoot 56: Distance, Direction and Sun Table..........................................................................45
Screen shoot 57: DXCCs in Gray Line Table.....................................................................................46
Screen shoot 58: RTTY or PSK Output..............................................................................................48
RUMped Version 1.0 - The User's Manual - 10 July 2007 - Written by DL2RUM
page 5
General - General
General
RUMped is logging tool for DX-peditions and contests. It allows real time logging, transceiver
control and interfaces with other hard- and software to allow Phone, CW, RTTY,PSK and
Hellschreiber operations. You can import logs using the ADIF format and export logs as ADIF,
simple text, Cabrillo, Stützerbach (STF) and other formats. To use RUMped you need a MySQL
server. This allows a Multi-Multi operation and you have a very reliable and safe database.
RUMped was made for my requirements, has features I use and supports hardware I own.
Since I haven't a Yaesu transceiver handy, I can not support this TRX, because I can't test it. But
feel free to contact me to report bugs, or when ever you have an idea to improve it. For the latest
new visit: http://www.dl2rum.de/rumsoft
Installation
Program
After unzipping the downloaded file you will get a single folder. Move it where ever you want,
preferred to your application folder. Following files are included and are required to run RUMped.
●
RUMped.app
the program itself
●
DXCC.rsd
database for countries according the DXCC
●
WAE.rsd
database for additional countries used for WAE and WAG contests
●
MasterDat.rsd
database containing active callsigns, used for partial call and similarly
call check
●
US_States.text
text file containing info about US-states and VE-provinces
It is important to keep these files inside the folder!
Following files and folders are included, but these not direct required to to run RUMped:
●
Docs folder
containing documentations about RUMped and and others
●
RUMpedQSL
A separate application for QSL handling and printing
●
EditDXCC
Program to edit the DXCC country list
●
EditWAE
program to edit the additional WAE country list
RUMped will create one file for its own use in the users home directory/Library/Preferences named
'RumDX.plist'. This is a standard Apple .plist file to save most of the user settings.
MySQL
Since I'm not able to program an own database with high performance, I decided to use MySQL.
You can download it here for free:
http://mysql.org/downloads/mysql/5.0.html#downloads
Scroll down the page to the Mac section and choose the right package for you. Only the standard
version is required.
Also you should install a tool to manage your databases and users. I would recommend this:
http://www.mysql.com/products/tools/administrator/index.html
It would be helpful to make you familiar with the basics of MySQL. But don't be worry: When you
RUMped Version 1.0 - The User's Manual - 10 July 2007 - Written by DL2RUM
page 6
Installation - MySQL
have it installed and got it running, you never have to touch it again. MySQL is just a server in the
background. After installation there is one active user only, named 'root' with no password given.
There is one big advantage: You can access your logs from everywhere in the local net or even from
the internet. Also you can run a multi station, only one computer needs the MySQL installation.
For advanced MySQL users just for info: For the users are the following privileges required:
●
●
●
●
●
●
●
Select
Update
Delete
Show Databases
Execute
Insert
Create – only to create a new log
Each log file has its own database in MySQL. When the logged in user has not all the required
privileges set, RUMped may react not in the expected way.
Quick Start
First make sure your MySQL server is running. In your System preferences you can find a MySQL
icon. Here you can check the status and start/stop the server. Let the server start at computer start
up.
When starting the program for the first time, RUMped will complain the missing Preference file and
the preference window opens. Make your entries in the 'General' tab and press the 'Save' button. In
RUMped select from the Menu --> Log --> New... In the new opening window enter following:
Screen shoot 1: Window 'New Log'
RUMped Version 1.0 - The User's Manual - 10 July 2007 - Written by DL2RUM
page 7
Installation - Quick Start
When you have already a MySQL account change the inputs to your requirements.
Host:
localhost (When running on the same computer)
Port:
3306 (default port for MySQL)
User:
root (the only one after a new installation of MySQL)
Password:
let it empty, no password required after a new installation of MySQL
Select a contest from the popup menu. Enter a file name, do not use '-'. Also other special characters
could cause problems. Maybe you want to name your log "TestLog" or something like this. Enter
your callsign and your locator. Depending on the selected contest, other inputs should be required.
(DXCC, zone....)
Press 'Okay' to create the log and to close the window.
When you get an error message, there is no connection to the database or you have not the required
privileges. Refer to the error message.
Go to Menu --> RUMped --> Preferences... The preference window will open, select the first tab
(General) to set at least your time zone (UTC Offset), a station name and the operator name. Press
the 'Save' button to exit. That's all. Now you should be able to log. Just type a callsign into the pink
field and press a 'Enter' key. You have logged your first QSO.
When you are the only one user on your computer and you are not connected to the internet you
don't need to change something in MySQL for your first steps with RUMped. Later on it is strongly
recommended to set a password at least for the user 'root'.
The Main Logging Window
Most of your time you will work with this window. The layout may change slightly, depending on
the contest you are working in.
The Main Logging Window will show up after program start and is always open. You can hide it,
but to close it you have to quit RUMped. The window is named after your MySQL log name, the
host name, where the server is running on and the contest name.
Previous QSOs (1)
1
After entering a callsign and pressing the Tab
key you can see the previous QSOs in an
overview. The date and time for the first found
QSO on each band in the three main modes are Screen shoot 2: Previous QSOs
shown. In the upper left hand corner the related callsign is written. The background can be colour
coded when the option 'Full Multi Check' is set. (Select in Menu --> Log --> Full Multi Check) The
red background indicates that this station would represent a new multiplier on this band/mode.
Green Colour means, multi always worked. This feature is not in all contests available, when it
doesn't make sense. In the DX-pedition mode a DXCC is assumed as multi. In the example above
you see the 11 QSOs with DL7CM and you see that the DXCC DL was not worked on 6m yet. In a
contest this may be helpful to ask a station for QSY.
RUMped Version 1.0 - The User's Manual - 10 July 2007 - Written by DL2RUM
page 8
The Main Logging Window - Previous QSOs (1)
2
1
3
5
4
6
7
9
8
10
12
11
Screen shoot 3: Main Logging Window, DX-pedition mode
13
14
Partial Call Check, Similarly Call Check (2)
2
When you have typed in 3 or more characters in the pink
call field this box shows all callsigns with these
characters included. In this example all found calls with 'DL2'
are shown. It is allowed to insert a '%' as joker!
Red means:
Screen shoot 4: Partial Call Check
Double, found in log and worked this callsign
before on this band and in this mode
Green means: callsign found in the log, but other band/mode.
Black means: callsign not found in log, but in the 'MasterDat.rsd' file.
When the option Menu --> Log --> Similarly Call Check is set
after pressing the 'Space' bar or the 'Tab' key this box will show
callsigns, which are similar with the entered one. The log and the
MasterDat is checked and the output is always in blue. In this
Screen shoot 5: Similarly Call
example 'DL2RUM' was entered.
Check
The partial- and similarly call checks are very powerful tools under hard operating conditions,
when you can get only parts of a callsign. You can double click a call to take it over into the pink
call field.
RUMped Version 1.0 - The User's Manual - 10 July 2007 - Written by DL2RUM
page 9
The Main Logging Window - Information about DXCC (3)
Information about DXCC (3)
When you have typed in 2 or
more characters into the pink
call field, RUMped
determines the DXCC country for
Screen shoot 6: DXCC information
this call. In the upper box you see:
the main prefix, continent, cq (or ITU in some contests) zone, country name, current date and time.
The date is written in the format you have selected as 'Mid' in your computers Preferences program
in the country pane. The time comes from the computer, where the MySQL server is running +/- the
UTC Offset you have selected in the RUMped preferences. Only this computer clock is used to
ensure the log is in chronological order.
3
The lower box shows the distance and heading from your location (WW Locator set in the RUMped
preferences) to this country. Further you see the times for sunrise and sunset for this location.
Left Statistic Box (4)
Row 1:
Total operating time in hours (without breaks) from the
whole log
Row 2:
Cumulated break times in hours from the whole log
4
A break is assumed when the time between two subsequent QSOs is greater
than 10 minutes.
Row 3:
Same as Row 1, but only for the current operator
Row 4:
Same as Row 2, but only for the current operator
Row 5:
Time since the last band/mode change (up to ten hours only)
Row 6:
Shows the band/mode changes in the present hour.
Screen shoot 7:
Left statistic box
The band change statistics are 'contest sensitive'. In some contests in single mode it is allowed to
change the band/mode how often you want to work a new multiplier. These changes will NOT be
counted.
Right Statistic Box (5)
Row 1:
Short term QSO rate (last 10 QSOs) in QSOs per hour
Row 2:
Long term QSO rate (last 100 QSOs) in QSOs per hour
Row 3:
Selected CW speed in words per minute, when a keyer is
connected
Row 4:
Numbers of available QTCs, only visible in WAEDC contest
Bottom:
Logging Mode or Keyboard Mode
5
Screen shoot 8:
Right statistic box
In keyboard mode each pressed key will be send out. Only available in CW, RTTY and PSK
RUMped Version 1.0 - The User's Manual - 10 July 2007 - Written by DL2RUM
page 10
The Main Logging Window - QSO Data Input Fields (6)
QSO Data Input Fields (6)
6
From the left to the right you
see the QSO number, field for
Screen shoot 9: QSO Input Fields
callsign input, popup menu for the
band, popup menu for the mode, field for send rst, field for send control number (only seen in a
contest) field for received rst and field for received control number. With the 'Space' bar you can
toggle between the callsign field and the received number field. Using the 'Tab' key you can circle
through the fields: call --> received number --> received rst --> send rst --> call. You will not go
through the send number field, since it is fixed or automatically incremented. Of course, all the
time you can use the mouse to select any field.
In DX-ped. mode the received control number field can be considered as a cq-zone field.
There are some text commands available, which you have to enter into the call field and confirm
with the 'Enter' key.
●
a number:
when it can be interpreted as a valid frequency (in KHz), the band and mode
in the log will be changed. When a transceiver is connected, these data will be
set to both VFOs
●
'-' (minus)
toggles split on/off
●
'OP:'
followed by a name or callsign etc. for quick operator change, after 'OP:'
lower case letters are enabled
Mode Buttons (7)
DX-pedition mode only
7
Screen shoot 10: Mode buttons
These buttons are to select the mode, which shows up in
the QSO summary in the table(9) below. After logging a QSO the table will be recalculated. When
you have performance problems just select an other mode than you are operating.
When pressing a button your operating mode (log and TRCVR) will not be changed! When you
change your operating mode, the table will also switch to this mode. Except you have selected
'Total'
Contest Summary (7)
Contest mode only
Here you see your QSO points, your number of
multipliers and your total points.
7
Screen shoot 11: Contest Summary
RUMped Version 1.0 - The User's Manual - 10 July 2007 - Written by DL2RUM
page 11
The Main Logging Window - Log Table (8)
Log Table (8)
8
In this table you see the 150
latest QSOs. Please note, that
the most recent QSO stands in the
upper line. You can navigate through
the full log using the Menu --> Log
--> 150 up/150 down
Menu --> Log --> Clear Masks will
bring up the 150 most recent QSOs
Screen shoot 12: Log Table
again.
In Multi/Multi using Menu --> Log
--> Show all TRCVRs you can
select, if you want to see the log
from all transceivers, or only QSOs
from the station you are working
from. You can move the horizontal
scrollbar full to the right to see
which station was making the QSOs.
In the lower left hand corner you see
an info which QSOs are shown.
When you have set the option in
Menu --> Log --> Show prev. QSOs
you get a list with all QSOs from the
station in the call field after pressing Screen shoot 13: Previous QSOs
the 'Space' or the 'Tab' key.
QSO Summary (9)
9
Screen shoot 15: QSO Summary
in DX-ped. mode
Screen shoot 14: QSO summary
in contest mode (WPX)
These table gives you an overview of your QSOs. In the DX-ped. mode only the QSOs in the mode
selected above the table are shown. In the contest mode all QSOs are always shown. The layout will
change with the contest. The active band is shown in green.
RUMped Version 1.0 - The User's Manual - 10 July 2007 - Written by DL2RUM
page 12
The Main Logging Window - Station Information (10)
Station Information (10)
10
In this section you see your callsign. When operating, I'd
like to see the callsign in front of me, that's why it is
Screen shoot 16: Station Info
written in large letters. On the left hand side you see your
station name, for multi transceiver operation. Choose a name what
ever you want, but make sure it is different from others. A good practice could be to name your
stations 'Running station' and 'Multi station', or 'Room 1023' and 'Room 1024' when operating from
a hotel. The name or call from the current operator you see on the right hand side of the screen shot.
The station- and the op name will be saved within each QSO. You can change the used callsign,
station name and operator name in the 'General' tab in the 'Preferences' window. Just for a operator
change type in the pink call field 'OP:' followed by the new op and press the 'Return' or 'Enter' key.
QSO Information (11)
During entering a callsign or pressing 'Space' after
that helpful information will show up in this box.
This text should be self explained always.
11
Screen shoot 17: QSO Information
Split Readout (12)
When you have a transceiver connected, you can find here information
about your split. When split is selected on, the split offset is posted.
This is to prevent an excessive split area or to prevent to run the split
into your own TX frequency.
12
Screen shoot 18:
Split Readout
CW Echo (13)
This scrolling text is a (on time) feedback from your CWkeyer, even when using the paddels. Be sure the 'Echoback'
functions from the 'CW' tab in the preferences are switched on!
13
Screen shoot 19: CW Echo
In RTTY mode, while you are in keyboard mode, you see your typed in
text to allow type ahead.
TX Indicator (14)
When you have a Kenwood TRX connected the green circle will
change to red, when the TRX is in the Transmit state.
14
When you have an ICOM TRX connected, only when the WinKey keyer keys
Screen shoot 20:
the TRX the circle will change to red
TX Indicator
RUMped Version 1.0 - The User's Manual - 10 July 2007 - Written by DL2RUM
page 13
The Main Logging Window - The QSO Editor (not shown)
The QSO Editor (not shown)
This editor will overlay the upper
left hand part of the window during
editing QSOs. Only the most
important fields are editable. You
can not change the QSO id, this is
fixed and for info only! When the
editor is shown, you can select
another QSO in the log table.
Changes will be only saved after
pressing the 'Save' button!
Screen shoot 21: QSO Editor
The Menus
All windows are using the same menu, but most of them are only accessible from the main logging
window.
The RUMped Menu
About...
This menu item brings up some information about the program and the author
Preferences...
Opens the preference window, where you can make all settings
Quit RUMped
This will close RUMped, without any further inquiry. There is no need to save anything before
quitting. The positions and sizes of some of your windows are saved for the next program start to
restore.
The File Menu
This is still empty.
The Edit Menu
This is the Mac standard menu for text operations.
RUMped Version 1.0 - The User's Manual - 10 July 2007 - Written by DL2RUM
page 14
The Menus - The Log Menu
The Log Menu
New...
Opens a requester to create a new empty log file.
Open...
Opens a requester to select and open an existing log file for use.
Export...
This opens the export window. Here you can export your log or a part of it in different formats:
●
Simple Text
●
CSV (comma separated values)
●
ADIF
●
RUMpedQSL (a seperate application for QSL card handling with own file format)
●
Cabrillo
●
DF3CB Logsearch (text file to be used with DF3CBs online log search script)
●
Stützerbach (not in all contests available)
Import...
This opens the import window. You can add QSOs to the present file from an ADIF file or from an
other RUMped file, provided the same contest was used. You can import any RUMped contest files
into a dx-pedition log.
Backup Log
You will backup the log as text file. It is not a MySQL database backup. Select the location where to
write the file in the 'General' tab of the preference window. It is recommended to use an other
location as your MySQL server is running on. Use an USB stick or an other disc/computer in your
local network. Not only the log is written, also the preferences and QTCs in the WAEDC contest are
backed up. It takes less than a second to backup 10.000 QSOs, so you can do it frequently.
Restore Log...
Here you can restore a backed up log file. Select the location where to read the file from in the
opening file requester. To restore the log, first you have to create a new empty log file with the same
contest selected. Let the log empty!
Backup and Restore Log can be used also for a practicable log transfer/copy from one computer to
an other or to double a log. You have not to deal with MySQL.
Clear Masks
Is used to reset the main logging window. The callsign field, the received control number field and
RUMped Version 1.0 - The User's Manual - 10 July 2007 - Written by DL2RUM
page 15
The Menus - The Log Menu
the QSO info box will be cleared and the callsign field gets the focus. Both rst fields are filled with
'59' or '599', depending on the mode. The log table shows the latest 150 QSOs.
150 up
Scrolls the shown QSOs in the main logging window log table 150 QSOs further up.
150 down
Scrolls the shown QSOs in the main logging window log table 150 QSOs further down.
Log at same time
Will show QSOs in the main logging window in an one hour time slot only.
Sometimes I was running a contest or working on a dx-ped and I was asking me. “Which
band/mode I worked yesterday at this time?” Just select this menu item and the log table shows only
QSOs +/- 30 minutes from the current time, but on all dates. Or mark a QSO in the log table and
select this menu item to show all QSOs +/- 30 minutes around this QSO time.
Full Multi Check (Switchable)
When this option is set, the Previous QSO Table will be colour coded to get an overview of the
current worked multiplier on other bands/modes. These is not in all contests available.
Show all TRCVRs (Switchable)
When this option is set, the log table in the main logging window shows all made QSOs from all
stations, otherwise it shows QSOs from your TRCVR only.
Show prev. QSOs (Switchable)
When this option is set, all QSOs with the current worked station only are shown in the log table.
Similarly Call Check (Switchable)
After pressing the 'Space' bar or the 'Tab' key similarly calls are presented when this option is set.
When you are not sure about the typed in call, other possibilities are shown assuming one
letter/number is wrong or missing.
RX QTC..
Opens the window to log received QTCs in the WAEDC contest
TX QTC...
Opens the window to send QTCs in the WAEDC contest
RUMped Version 1.0 - The User's Manual - 10 July 2007 - Written by DL2RUM
page 16
The Menus - The QSO Menu
The QSO Menu
Edit...
The last logged QSO will be opened in the QSO editor. To edit a more previous QSO select it in the
log table and use then this menu item. Once you are are in the Edit mode you can change the
selected QSO.
Delete...
Use this menu item to delete a QSO. You must have a QSO selected in the log table and a requester
will be shown before deleting.
Note...
This allows you to add a free text comment to a QSO which is selected in the log table. When no
QSO is selected the note will be added to the latest QSO.
The TRCVR Menu
Reset TRCVR
Use this item, when the trcvr control is not longer working properly. This will reinitialize the com
port and the transceiver.
Band up
This change your operating frequency (TRX and log) one band up. Your last used frequency on this
band is used. If split is selected on, both VFOs are set to the same frequency!
Band down
This change your operating frequency (TRX and log) one band down. Your last used frequency on
this band is used. If split is selected on, both VFOs are set to the same frequency!
Band up and Band down you can use also without TRX control for log setting only.
CW
Changes your operating mode to CW and initialize your CW keyer
RTTY
Changes your operating mode to RTTY and initialize your RTTY interface.
SSB
Changes your operating mode to SSB.
You can use this kind of mode switching even, when no TRX is connected, just to set the log.
RUMped Version 1.0 - The User's Manual - 10 July 2007 - Written by DL2RUM
page 17
The Menus - The TRCVR Menu
Keyboard Mode (Switchable)
This toggles the log between Logging Mode and Keyboard Mode while operating in CW, RTTY or
PSK. In CW each keystroke will be send out immediately. In RTTY and PSK you can write ahead
and can then use TX/RX from the menu.
Tune
Works only when CW is selected and you have a WinKeyer connected. The TRX will go the TX
state. To cancel just press the 'Escape' key.
The CW Menu
Reset Keyer
This will reinitialize the com port and the keyer, when your keyer is not longer working properly.
CW Speed -2
Decreases the keyer speed by 2 WpM
CW Speed +2
Increases the keyer speed by 2 WpM
As soon as you touch the speed controller on the WinKeyer,this speed will be used.
The RTTY Menu
Reset Modem
This will reinitialize the com port (when one is in use) and the RTTY interface, when it is not longer
working properly.
Transmit
While in Keyboard mode here you set your TRX in the Transmit state and the transmission of the
pre typed text starts.
Receive
While in Keyboard mode here you set your TRX in the Receive state after the pre typed text was
sent out. To switch immediately to Receive, just press the 'Escape' key.
TX Reverse (Switchable)
This will reverse your TX tones
RUMped Version 1.0 - The User's Manual - 10 July 2007 - Written by DL2RUM
page 18
The Menus - The RTTY Menu
RX Reverse (Switchable)
This will reverse your RX tones
These Reverse settings are not saved, to use it permanent select it in the RTTY tab of the Preference
window.
The BPSK Menu
Reset Modem
This will reinitialize the PSK interface, when it is not longer working properly.
Transmit
While in Keyboard mode here you set your TRX in the Transmit state and the transmission of the
pre typed text starts.
Receive
While in Keyboard mode here you set your TRX in the Receive state after the pre typed text was
sent out. To switch immediately to Receive, just press the 'Escape' key.
The Window Menu
Close
Will close the active window, the Main Logging Window can't be close via this menu item.
Hide
Will hide the active window. To show it again select the menu item to open the window.
Main Logging...
Shows up the Main Logging Window when it is hidden.
Full Log...
Opens the Full Log Window. In this window you can view and edit the whole log in a table.
Rate...
Opens the Rate Window. In this you can get a graphical overview about you QSOs per hour and
QSOs per day. You can filter the QSOs to find out for example the best time for contacts on 15m to
North America.
RUMped Version 1.0 - The User's Manual - 10 July 2007 - Written by DL2RUM
page 19
The Menus - The Window Menu
QTCs...
Opens the QTC Window. (WAEDC contest only) Here you can view and edit your sent or received
QTCs.
Continents...
This menu item brings up a table with a statistic about your QSOs to the different continents. The
mode is selectable.
DXCCs...
This opens a table which shows the number of QSOs per DXCC per Band in each mode and the
number of different callsigns per DXCC.
Multis...
This opens a table which shows the number of QSOs per Multiplier per Band. It is only available in
the contest mode
Calls...
Here you get an overview about each QSO for each callsign per band. Further you see the number
of QSOs per call, the number of bands per call, the number of calls with multiple band contacts and
the number of calls with multiple total contacts.
Notes...
This opens a window to view and edit all the notes you added to the QSOs.
US-States...
This opens a window with a table of the US states and provinces of Canada. This is just for
information.
Terminal...
This opens the Terminal Window to get access to a telnet dx cluster
DX Spots...
Reopens the dx announcement table
LAN...
This will open a window with information about other stations in your local network. You can see
the operators name, band, mode and time of the last QSO for each station.
Sun/Dist. Calculation...
This brings up a window, where you can calculate locators, coordinates, distances, directions, times
RUMped Version 1.0 - The User's Manual - 10 July 2007 - Written by DL2RUM
page 20
The Menus - The Window Menu
for sunrise and sunset and duration of twilight.
Sun/Dist. Table...
This brings up a table with information about distances, directions, times of sunrise and sunset and
duration of twilight and daylight for each DXCC and call areas. Further it is possible to show only
DXCCs or call areas located in the grayline. You can select a date/time to pre-calculate the
conditions on a specific time.
DXCCs in Grayline
This brings up a table with all DXCCs and call areas listed which are currently located in the
grayline. This is a real time table and becomes updated frequently. Helpful for low band dxing.
The Memory Menu
I prefer to use the F keys for the memories, only one keystroke is required to send out the text.
Apple recommends to use NOT the F-keys in own applications. In the system preferences keyboard
pane I switched off all short cuts except F9-F12 which I use for Exposé and the Dashboard.
When you have your F-keys in use for other or system wide applications you can use instead this
menu. But now you have to push two keys.
The Help Menu
Help Tags (Switchable)
When this option is set, you will get some help when moving the mouse over the main logging
window.
RUMped Version 1.0 - The User's Manual - 10 July 2007 - Written by DL2RUM
page 21
The Preference Window - The Preference Window
The Preference Window
Nearly all of the user settings are controlled via this window. Few items are saved in the log file,
most of them local on your computer in users home-directory/Library/Preferences/RumDX.plist.
Settings saved in the log file are marked with a red dot. To show this window select Menu -->
RUMped --> Preferences... To close the window without changes press the 'Cancel' button or the
'Escape' key. To close the window, save and use the changes press the 'Save' button or just the
'Enter' key
General Tab
Screen shoot 22: Preferences General Tab
Here you have to fill in some important information, to allow RUMped to work correctly. You
should fill out all fields, even when you not get an error message. Please note, that you can not
change the contest type, This is for your info only and was selected during creation of the log file.
Depending from the contest there may be more input fields visible, which are clear labeled. (for
DXCC, continent, state, zone, and so on) RUMped will try to fill it out for you when entering a
callsign.
●
callsign:
used call during this operation
●
UTC Offset:
difference between the MySQL server time and utc time in houres
●
Station:
a name for this computer or station – important for multi-multi
●
Operator:
name or callsign from the current op
RUMped Version 1.0 - The User's Manual - 10 July 2007 - Written by DL2RUM
page 22
The Preference Window - General Tab
●
Locator:
calculations
WW locator, where the station is located. used for heading and distance
●
Backup Folder: press this button to select the disc/folder for backing up the log
TRCVR Tab
Screen shoot 23: Preferences TRCVR Tab
Here you can select your transceiver and adjust the serial port settings to your requirements. When
you don't have a TRX connected select 'None' from the 'TRCVR' popup menu.
CW Tab
For CW output RUMped supports currently only WinKey by K1EL. See http://k1el.tripod.com/ for
further information and refer to the 'CW Operation' in this document.
In the upper left hand corner you find the settings for the used serial port. If you do not use a keyer
select 'None' in the 'Interface' popup menu. Check the check boxes 'Set RTS Line' and/or 'Check
DTR Line' when your CW keyer get its power from the serial port hand shake lines. All other
settings in the upper part are to program the WinKey chip. See your WinKey documentation for
details.
RUMped Version 1.0 - The User's Manual - 10 July 2007 - Written by DL2RUM
page 23
The Preference Window - CW Tab
Screen shoot 24: Preferences CW Tab
Make sure the 'Serial echoback' check box is marked, otherwise the exchange function using
the '+' key will not work! When you have checked the 'Serial echoback' check box you can
monitor the keyed text in the scrolling text part in the main logging window . With the check box '1>A 9->N 0->T' you can activate abbreviations during sending control numbers.
The lower part of the window contained the eight CW memories. Please use F2 for the 'exchange'
information, F3 for the 'TU' message. This ensures other CW functions of RUMped to work correct.
There are five place holders available, which will be exchanged during transmission:
●
%MYCALL: own callsign
●
%HISCALL: callsign which stands in the pink callsign field, when this is empty the last
logged call is used
●
%RST:
rst found in the TX RST field
●
%TXNUM:
control number found in the TX NUM field
●
%CORRECT: when the logged call differs from the initially sent callsign, the corrected call
will sent
Example for %CORRECT: Normally you put %CORRECT into the TU (F3) message. The TU
message is sent when you log a QSO with the right 'Enter' key, in the numpad. You type 'DL2RU' in
the pink call field and press the '+' key, The keyer will send: 'DL2RU 599' and the station returns
and corrects you to 'DL2RUM' You append the 'M' and press just the right 'Enter' key. This will log
the QSO and the keyer sends: 'DL2RUM TU TX5T UP'. When you have it correct entered the first
time the keyer would only send: 'TU TX5T UP'
The WinKey keyer has a 32 character input buffer, you should avoid longer text memories.
RUMped Version 1.0 - The User's Manual - 10 July 2007 - Written by DL2RUM
page 24
The Preference Window - RTTY Tab
RTTY Tab
Screen shoot 25: Preferences RTTY Tab
For RTTY operation you can use a hardware or a software modem, make your selection in the
popup menu. When using an external modem select the serial settings. No further port settings are
here provided since the PTCplus and the Pakrat PK-232 work fine with the default settings. Only
the baud rate is adjustable. Check the boxes for 'RX Reverse' and 'TX Reverse' to your
requirements, select your tones as well. You can change the font size of the RTTY part in the main
logging window for your convenience.
In the lower part you can find the memory settings. Refer to the CW tab for further details.
Phone Tab
In this tab you can activate a voice keyer. When you have the optional DRU unit in your Kenwood
TRX installed you can use this one. It is not possible to start ICOM's internal voice keyer! Also you
can use your soundcard for voice memories.
RUMped Version 1.0 - The User's Manual - 10 July 2007 - Written by DL2RUM
page 25
The Preference Window - Phone Tab
Screen shoot 26: Preferences Phone Tab
When you want to use your soundcard, you have to assign sound files. Click in the text where the
file path is written (or 'None' stands) to open a file requester. To disable one memory press the
'None' button. There is a button provided to start 'QuickTime', which can record your voice. The
audio file can be in any format which QuickTime can play like mp3, mov, aiff, wav...
RUMped Version 1.0 - The User's Manual - 10 July 2007 - Written by DL2RUM
page 26
The Preference Window - BPSK and Hell Tab
BPSK and Hell Tab
Screen shoot 27: Preferences BPSK Tab
Both tabs are very similar. You can select as interface cocoaModem only. Also the font size for the
BPSK part in the main logging window is adjustable.
For further information about the memories see the CW tab.
RUMped Version 1.0 - The User's Manual - 10 July 2007 - Written by DL2RUM
page 27
The Preference Window - Frequencies Tab
Frequencies Tab
Screen shoot 28: Preferences Frequency Tab
Here you can set the band borders and the borders between the modes. Click inside the table to
change the values. All frequencies are in Khz”
On the basis this table RUMped can determine the mode and band to a given frequency.
Example 1: You enter 14007 in the pink call field and press the 'Enter' key. RUMped will take a look
into this table and sees this is a 20m CW frequency. 20m and CW will be selected, and the TRX
tuned as well.
Example 2: You get a dx cluster spot that the station ZK2CW is on 21295. RUMped can now alert
you when it is interesting for you to work ZK2 in SSB.
RUMped Version 1.0 - The User's Manual - 10 July 2007 - Written by DL2RUM
page 28
The Preference Window - DX Cluster Tab
DX Cluster Tab
Screen shoot 29: Preferences DX Cluster Tab
RUMped allows dx-cluster connection over the internet via telnet. You can find a list of dx-cluster
with log in information here: http://www.ng3k.com/Misc/cluster.html
First you have to add one or more addresses to the list on the right hand side. Press the add button
first and enter the required information in the fields:
●
Name:
you can choose a name what ever you want
●
Address:
the address without the trailing port number, it can be just a TCP/IP number
or a full address like 'db0sue-7.ath.cx'
●
Port:
port, when not found try 8000 which should be the default port
Make sure all three columns in the table are filled out before you press the 'Save' button. To edit the
list, select an entry and modify it in the text fields as required. Use the 'Tab' key to jump to the next
field and the changes can take effect. To delete an entry select it in the table and press the 'Delete'
button.
In the left hand part of the window you can filter the dx-spots. Take care using the mode filter,
because RUMped can determine the mode only by the frequency and you know what happens in a
contests.
If you want spots presented only on 160m in CW from Europe where the spotter is from NA, just
check these four boxes.
RUMped Version 1.0 - The User's Manual - 10 July 2007 - Written by DL2RUM
page 29
The Preference Window - Network Tab
Network Tab
Screen shoot 30: Preferences Network Tab
When running RUMped on more than one computer in a local area network (LAN), each computer
can communicate with each other. This does not work via the internet! When connected, you get a
table of other stations with operating information. Also there is only one dx-cluster connection
required. In the popup menu you can select three operating modes:
●
Off:
Network features are disabled. Several computers can use the same log, but
there is no direct communication between the computers
●
Same Log:
●
Any Station: Every computer can talk to each other, provided the same name and same port
is chosen
Only computers using the same log and same port can talk together
When you have chosen 'Any Station' enter a 'Name' for your network. Stations using the same name
and port will communicate to each other. Port number 9090 is a good choice as default. How ever,
when this port is busy on your system, you can chose another. make sure all stations use the same
port.
There are four check boxes provided on the right hand side:
●
Send DX Spots...:
when this computer has a dx-cluster connection, other stations can use
this connection as well. Works two way.
●
Use DX Spots ...:
when this computer has no own cluster connection, you can reach it
RUMped Version 1.0 - The User's Manual - 10 July 2007 - Written by DL2RUM
page 30
The Preference Window - Network Tab
through another computer in the net
Uncheck both boxes, when all stations want to use own cluster connections.
●
Refresh Log...:
When other stations log a QSO, your log table will be renewed to see
the new QSO. When not checked the log shows new QSOs from others only, after you log a
QSO by yourself or pressing Command W
●
Refresh Statistic...: When other stations log a QSO, your statistic table will be renewed to
see the new numbers of QSOs. When not checked the table shows new QSOs from others
only, after you log a QSO by yourself.
You may switch off the last two options, when you have performance problems or you are
irritated.
Other Windows, Tables and Requesters
I will try to show and explain all other windows you may see during operation, except standard
system requester or message boxes.
New Log Requester
Menu --> Log --> New... Shown when creating a new log file
The upper portion is used for your MySQL
account. In the 'Host' field you can enter a TCP/IP
address '192.168.2.101' or a “text” address like
'www.dl2rum.de' or 'localhost' or a computer
name like 'PowerMac.local'. Via the popup menu
on the right you have quick access to different of
accounts. These are editable in the 'Change Log'
requester only. After selecting a contest, more
input field may appear. Enter a file name, do not
use '-'. Other special characters could cause
problems also. When typing in a callsign, fields
like DXCC or zone may be filled out, otherwise
you have to do it yourself. Enter your locator or
just mouse click the world 'Locater' to get the
default one for this country.
Screen shoot 31: New Log Requester
After pressing 'Okay' the new database will be
created and is ready for use. When threre is
something wrong, you get an error message. Once
a log is created, you are not able to change the
contest!
Open Log Requester
Menu --> Log --> Open... Shown when changing the log file
RUMped Version 1.0 - The User's Manual - 10 July 2007 - Written by DL2RUM
page 31
Other Windows, Tables and Requesters - Open Log Requester
After opening, your current used account
information are used to ask for RUMped log files
on this server. You can change the MySQL access
data and press the 'Search' button to show logs on
another server, or use the popup menu for earlier
saved access information. You can add or delete a
set of access information using the push buttons.
These sets are only saved, when you leave this
requester using the 'Save' button! Select a log file
and press the 'Save' button to use this log and set
it to default. At next program start this file will be
used. If you want to use a log only shortly, just
double click a log name. But at next program
start, the last saved log will be used.
Screen shoot 32: Open Log Requester
Log Export Requester
Menu --> Log --> Export... Used to select the log export format
Select an output format and press the 'Save' button
to go to the next step. When you call this window
from the Log window where you have set filter, you
can save only this filtered QSOs. All export formats
create pure ASCII text files, using a standard file
requester. The STützerbach Format (STF) is not
Screen shoot 33: Log Export Requester
available in all contests. The 'Simple Text' format
you may use to print out your logs. The DF3CB format is used in online log search scripts, see
http://df3cb.com/logsearch.html for further details. RUMpedQSL is a simple QSL handling and
label printing tool and is a part of the RUMped package. ADIF allows the exchange of logs with
most of the logging programs. Cabrillo and Stützerbach are used for contest logs.
RUMped Version 1.0 - The User's Manual - 10 July 2007 - Written by DL2RUM
page 32
Other Windows, Tables and Requesters - Log Export Requester
Cabrillo Export Requester
Menu --> Log --> Export... Used for further details in Cabrillo contest logs
In this form you can enter further information, which are conform with the Cabrillo standard. The
'free text' fields are saved for the next time you use this export function.
Screen shoot 34: Cabrillo Requester
RUMped Version 1.0 - The User's Manual - 10 July 2007 - Written by DL2RUM
page 33
Other Windows, Tables and Requesters - Log Export Requester
Stützerbach Export Requester
Menu --> Log --> Export... Used for further details in Stützerbach contest logs
In this form you can enter further information, which are conform with the Stützerbach standard.
The 'free text' fields are saved for the next time you use this export function.
Screen shoot 35: Stützerbach Requester
RUMped Version 1.0 - The User's Manual - 10 July 2007 - Written by DL2RUM
page 34
Other Windows, Tables and Requesters - Log Import Requester
Log Import Requester
Menu --> Log --> Import... Used to select an import format.
In RUMped you can import ADIF, or other RUMped log files. Import of RUMped files works only,
when in both files the same contest was chosen. In a dx-pedition log you can import any file!
Select the desired format and press the 'Import' button. For
ADIF a standard file requester appears, where you can
navigate to the file. For a RUMped import, an 'Open Log'
requester is shown.
Screen shoot 36: Log Import
Requester
Since the ADIF Import can take some minutes, you can
abort the import pressing 'Command-period' or the 'Escape'
key.
The always imported QSOs will remain in the Log!
Screen shoot 37: ADIF Import
Progress Box
RUMped Version 1.0 - The User's Manual - 10 July 2007 - Written by DL2RUM
page 35
Other Windows, Tables and Requesters - Send QTC Window
Send QTC Window
Menu --> Log --> TX QTC... To show and send QTCs, WAEDC contest only
After opening the correct band, mode, call and QTC
number should be displayed. The cursor is located in the
call field, when this is correct press the 'Tab' key and the
cursor moves to the QTC series number. When it is correct,
press the 'Tab' key again. In CW and RTTY this number
will be sent out. The first row in the QSO list is now
selected. Press a 'Enter' key to send out the selected QTC.
After that the next line will be selected. After sending the
last QTC press the 'Enter' key again to save the QTCs, to
send 73 TU.... and to close the window.
When you close the window using the menu or the close
icon QTCs are not saved!
Use the function keys F1-F5 to repeat parts of a QTC, or
use the 'Arrow' keys or the mouse to select a QTC and
press 'Enter' to send it again.
Screen shoot 38: Send QTC Window
The 'Escape' key will always stop the transmission.
Receive QTC Window
Menu --> Log --> RX QTC... To log QTCs, WAEDC contest only
After opening the correct band, mode and call should be
displayed. Enter the series number. Instead the '/' you can
use a 'Space', the space will be exchanged by the required
'/'. Type time, call and number in the field and press the left
'Enter' key just to log the QTC or use the right 'Enter' key
(on the numpad) to log the QTC and send a 'roger'. For the
following QTCs it is not required to enter the full time,
enter only the changes.
First QTC time is '1254', second is '1257'. Just enter the
'7', RUMped will complete it for you.
Click in the table below twice to edit a QTC or select a line
and press the 'Delete' button to delete a whole QTC.
Pressing the 'Save' button saves the QTCs in your log and
closes the window.
Screen shoot 39: Receive QTC Window
RUMped Version 1.0 - The User's Manual - 10 July 2007 - Written by DL2RUM
page 36
Other Windows, Tables and Requesters - Add Note To QSO Requester
Add Note To QSO Requester
Menu --> QSO --> Note... Used to add a free text comment to a QSO
You can enter free text, which will
be saved with the QSO. To get an
overview of all notes and to edit
them, select Menu --> Windows -> Notes...
Screen shoot 40: Add a Note Window
Full Log Window
Menu --> Window --> Full Log... Used to view and filter the whole log
Screen shoot 41: Full Log Window
Here you see all QSOs in the log. Please note: In this table the first QSOs stands in the most upper
line. As default all QSOs are listed and sorted by date and time. On the bottom are several popup
RUMped Version 1.0 - The User's Manual - 10 July 2007 - Written by DL2RUM
page 37
Other Windows, Tables and Requesters - Full Log Window
menus provided for filtering QSOs and how to sort. In this screen shot only QSO with North
America on 80m in CW are shown. The list is sorted by callsign. It is possible to export only these
shown QSOs using Menu --> Log --> Export... Mark the check box in the Export requester as
required.
When an entry in the table is selected, you can edit the QSO data in the fields below. Press the
'Save' button to save the changes.
Rate Window
Menu --> Window --> Rate... Shows a graphical view of QSOs per day or QSOs per hour
In this window are two tabs selectable. In the QSOs/Day tab 14 subsequent days are illustrated.
Push the small arrows for the next or previous 14 day slot.
In the QSOs/Hour tab you can view each day separately or the QSO sum of all days during one
hour. Mark the check box if you want to see the QSOs in the full log window belong to this graph.
Click the arrows to scroll through the days.
In both views you can filter the presented QSOs by Band, Mode, op, station and continent. If you
select to see QSOs in all modes, you can overlay a second graph in another mode. The horizontal
line represents an average value.
Screen shoot 42: QSOs per day Window
RUMped Version 1.0 - The User's Manual - 10 July 2007 - Written by DL2RUM
page 38
Other Windows, Tables and Requesters - Rate Window
Screen shoot 43: QSOs per hour Window
QTC Log Window
Menu --> Window --> QTCs... To show a table with all received and sent QTCs (WAEDC only)
In this window all QTCs are listed. Select a QTC to edit this entry.
Screen shoot 44: QTC Window (Photo not taken from a real contest)
RUMped Version 1.0 - The User's Manual - 10 July 2007 - Written by DL2RUM
page 39
Other Windows, Tables and Requesters - Continent Table
Continent Table
Menu --> Window --> Continents... Overview of worked continents
You can select tables
to show QSOs in each
mode separately.
Screen shoot 45: Continent Table
DXCC Table
Menu --> Window --> DXCCs... Overview of worked countries
In this table the number of
QSOs per DXCC are listed.
You can select a mode. The
last row in the table shows
the number of different
worked callsigns per DXCC.
Click in the header of the
table to sort.
All QSOs are counted, even
the dupes.
Screen shoot 46: DXCC Table
RUMped Version 1.0 - The User's Manual - 10 July 2007 - Written by DL2RUM
page 40
Other Windows, Tables and Requesters - Multiplier Table
Multiplier Table
Menu --> Window --> Multis... Overview of worked multipliers and QSOs per multiplier
Screen shoot 47: Multiplier Table
Nothing else to explain....
Callsign Table
Menu --> Window --> Calls... Gives an overview of all QSOs per callsign
Screen shoot 48: Call Window
In these tables you get an overview about multiple QSOs per callsign. The letters in the table
indicates the mode. C-CW S-SSB R-RTTY .... Press a header to sort the list.
In the example above JE8CLT has made 14 contacts (without dupes) on 7 bands, 3 stations have
made 10 QSOs and 6 stations made 7-band QSOs. There are 5675 different callsigns in the log.
RUMped Version 1.0 - The User's Manual - 10 July 2007 - Written by DL2RUM
page 41
Other Windows, Tables and Requesters - Notes Window
Notes Window
Menu --> Window --> Notes... Shows all QSOs where a note was added
Double click an
entry to edit. To
delete a note
just delete the
text in it.
Screen shoot 49: Notes Window
US-States Table
Menu --> Window --> US_States...
Table of the US states and provinces of Canada
This is a fixed table just for operators
information. Call areas and
abbreviations of states are shown. This
may be helpful in ARRL contests.
Screen shoot 50: US-States Table
Terminal Window
Menu --> Window --> Terminal... Shows the window used for Telnet dx-cluster connection
Screen shoot 51: Terminal Window disconnected
Select a cluster
from the popup
menu and press the
'Connect' button to
establish the
connection. Set up
the cluster in the
DX Cluster tab in
the preferences
window.
RUMped Version 1.0 - The User's Manual - 10 July 2007 - Written by DL2RUM
page 42
Other Windows, Tables and Requesters - Terminal Window
While connected a
'Disconnect'
button is shown.
Use this one only,
when the normal
'quit' command
does not work.
Screen shoot 52: Terminal Window connected
Use the green field for type in text commands to the dx cluster, while the blue field is used to show
received messages from the cluster.
When you have select the option 'Send dx spots to other' in the Network tab of the preferences
window, other stations see a mirror of your blue output field.
When you 'Use dx spots from other' stations you can not select a dx-cluster yourself and the
'Connect' and the 'Disconnect' buttons are not shown. It is possible to send commands to the cluster
via the LAN.
DX Announcement Table
Menu --> Window --> DX Spots... Shows the dx spots coming from the cluster
The most recent spot stands in the upper line. The background
of the spots may be colour coded, depending of the contest. A
red spot indicates a new multiplier on your current active band,
a yellow background shows a new multiplier on another band.
You can filter out spots using the DX Cluster tab in the
preferences window.
Double click an entry to set your log and TRX to the shown
frequency and mode. The call will be written in the pink call
field.
Screen shoot 53: DX Spot Table
When a new dx spot is coming in and this window is closed, it
will open again. If you don't like to see this window, hide it only
and do not close it.
RUMped Version 1.0 - The User's Manual - 10 July 2007 - Written by DL2RUM
page 43
Other Windows, Tables and Requesters - LAN Table
LAN Table
Menu --> Window --> LAN Shows information other stations in the LAN
Here you can see the operators other stations in the LAN.
When the correct frequency can not determined (no TRX
connected) only the band will be posted.
Screen shoot 54: LAN Table
Sun and Distance Calculations Window
Menu --> Window --> Sun/Dist. Calculation... Shows also directions, twilight time, locators....
Screen shoot 55: Direction, Distance and Sun Calculations Window
In this window you can calculate a locator from given coordinates or the coordinates from a given
locator. Or just enter a prefix to use the default locations.
For the sun computations you can select a date. The duration of twilight is posted in hours, this
may be helpful for grayline dxing. There are three definitions for twilight:
1. Civil: The time between sunset or sunrise and the sun is not more than 6 deg. below the
horizon. Only the brightest stars appear during civil twilight. During this period there is still
RUMped Version 1.0 - The User's Manual - 10 July 2007 - Written by DL2RUM
page 44
Other Windows, Tables and Requesters - Sun and Distance Calculations Window
enough light from the Sun so that in most cases artificial sources of light are not needed to
carry on outdoor activities.
2. Nautical: The time between sunset or sunrise and the sun is not more than 12 deg. below the
horizon. You can see reliable star sights of well known stars. Under good atmospheric
conditions and in the absence of other illumination, general outlines of ground objects may
be distinguishable, but detailed outdoor operations are not possible, and the horizon is
indistinct.
3. Astronomical: The time between sunset or sunrise and the sun is not more than 18 deg.
below the horizon. Below 18deg. most casual observers would consider the entire sky
already fully dark even when astronomical twilight is just beginning in the evening or just
ending in the morning.
Sun calculations are very complex, here is used a less complex algorithm. The results may differ up
to 5 minutes!
Sun and Distances Table
Menu --> Window --> Sun/Dist. Table... Table of all DXCCs and call areas
Screen shoot 56: Distance, Direction and Sun Table
In this table you do not find DXCCs only, you can see call areas, towns etc. you have added in your
'DXCC.rsd' database. Push the header on a row to sort it. The table above shows the DXCCs with
the biggest distances first from my home location.
In the lower left hand side you can enter a prefix, which is used as reference. For the sun
calculations you can select the date and time. The 'Now' button selects current date and time. When
the button 'Gray Line' is selected, only entries in the twilight zone are shown.
Refer to the previous sub chapter for definition of twilight.
RUMped Version 1.0 - The User's Manual - 10 July 2007 - Written by DL2RUM
page 45
Other Windows, Tables and Requesters - DXCCs in Gray Line Table
DXCCs in Gray Line Table
Menu --> Window --> DXCCs in Gray Line...
This is a real time table and is refreshed every
minute. Countries and call areas currently located
in the gray line are presented. The twilight zone
width is selectable.
Press a header to sort the list.
Screen shoot 57: DXCCs in Gray Line Table
RUMped Version 1.0 - The User's Manual - 10 July 2007 - Written by DL2RUM
page 46
Using RUMped - Using RUMped
Using RUMped
It is assumed, you are familiarly with the windows and menus and you have made all the required
settings to RUMped and your connected hardware.
Basic (Phone) Operation
Logging is easy as it is. RUMped is a real time logging tool, there are no features for a post contest
processing provided.
Select a mode and a band from the popup menus or just enter a frequency in Khz and press the
'Enter' key. RUMped will set the appropriate band and mode.
While entering the callsign, information about the DXCC are shown and the partial call check
starts. You can now press a 'Enter' key to log the QSO or the 'Space' bar or the 'Tab' key to input
further data. The 'Space' bar always will toggle the focus between call and rcvd number field, while
the 'Tab' key circles though all fields. The Partial Call Check result is exchanged with the Similarly
Call Check result and previous QSOs are shown in the log table. (When these options are set.)
Change the rst or enter the received control number and press a 'Enter' key to log he QSO.
CW Operation
Currently only WinKey is supported for CW output. See http://k1el.tripod.com/ for details. I use a
home made Winkeyer, but there are some devices to buy, ready to use.
You can use the CW features in the main logging window and the QTC in/out window only. Please
note, that the memories has not the same allocation in these windows.
Pressing the 'Escape' key will always stop the transmission immediately.
Winkey allows callsign type ahead. Callsign type-ahead is pretty well an essential requirement in
contest or DX-pedition logging. It enables the operator to type in and/or correct the callsign as the
CW exchange is being sent. So long as you get the character typed in correctly before the CW
sending catches up to that point, then it gets sent correctly. In RUMped callsign type ahead is used
in conjunction with the '+' key. Pressing this key will start the QSO exchange, which is defined as
callsign + F2 memory (normal: rst + ctrl number). As callsign is used the text in the pink call field.
When this field is empty, the last logged callsign will be used. Type in the prefix and press the '+'
key. While Winkey starts to send the prefix you can enter the suffix. This saves time! You can
correct the callsign, until the character is not sent out yet.
There are two options available for saving the QSO:
1. Using the left 'Enter' key near the middle of your keyboard will just log the QSO
2. Using the right 'Enter' key in the numpad will log the QSO and sent out the TU message.
Make sure you have assigned the exchange message to the F2 memory and the TU message to the
F3 memory. This allows RUMped to work correctly. Assign the other memories for your
convenience.
If you want to send free text, use the keyboard mode. Menu --> TRCVR --> Keyboard Mode While
in keyboard mode each key press will be send out immediately by the WinKeyer.
RUMped Version 1.0 - The User's Manual - 10 July 2007 - Written by DL2RUM
page 47
Using RUMped - RTTY Operation
RTTY Operation
RUMped supports two often used types of hardware controllers and cocoaModem, which is a
software modem. cocoaModem is a very clever application to work in common used digital modes
written by Chen, W7AY.Get it for free: http://homepage.mac.com/chen/ When you have selected
to use the cocoaModem for RTTY operation, RUMped acts as a remote control for cocoaModem
and you can control cocoaModem from its own interface at the same time.
Make sure, you have made the RTTY settings in the preferences, before you change the mode to
RTTY!
When RTTY mode is selected in your log and an interface is chosen, the main logging window
enlarges to show the RTTY interface. On the right hand side is a table located, to list callsigns
which are automatically detected by RUMped. The most recent found callsign stands in the upper
line. In the RTTY output field the detected callsigns and the text itself are colour coded:
●
Red:
Call found in the log on this band. (Double)
●
Green:
Call found in the log on another band
●
White:
Call found in the MasterDat database, or any own sent out text
●
Grey:
Call following a 'de'
●
Yellow: Other received text
Screen shoot 58: RTTY or PSK Output
In the example above please note that UA1AA is recognized only by the word 'de' and W7AY was
not recognized. All found callsigns (except dupes) are listed in the table on the right hand side. Use
the up/down keys (even when the courser is located in the pink call field) to select a callsign in the
list. Press the 'Space' bar just to take over this call or press the '+' key to take over and to send the
exchange message. When you have your mouse handy, you can double click an entry using the left
mouse key to take it over, or double click the right mouse key to send the exchange as well.
You can use the blue text field in a same manner. Double click left on a text to take over and double
click right to send the exchange information.
Instead the right mouse button, you can use the left one, while holding down the 'Control' key on the
keyboard.
When the callsign is scrambled or spaces are missing, move the mouse over the text, containing a
part of the call, while holding down the left mouse button. This selected text will be appear in the
pink call field.
The memories work in the same way, like in CW. Using the '+ will send the exchange message.
Type ahead (like in CW) is not possible in RTTY! Use the right 'Enter' (numpad) to log the QSO
and send the TU message.
While in Keyboard mode, you can pre type your text. To send it out you have to select 'TX' in the
RTTY menu. You can use the memories as well. Selecting 'RX' from the menu, will switch the trcvr
to RX after all text is sent. For an immediately abort, press the 'Escape' key.
RUMped Version 1.0 - The User's Manual - 10 July 2007 - Written by DL2RUM
page 48
Using RUMped - PSK Operation
PSK Operation
For PSK you can choose cocoaModem only. Since it is a digital mode like RTTY,refer to the RTTY
chapter above for details.
Make sure, you have made the BPSK settings in the preferences, before you change the mode to
PSK! Before you can send text, you have to select a frequency in cocoaModem's waterfall display.
Hellschreiber Operation
For Hellschreiber you can choose cocoaModem only. This is a video based communication, so
RUMped can't display incoming traffic. Use the cocoaModem's user interface. It is possible to use
RUMped's memories.
Make sure, you have made the Hellschreiber settings in the preferences, before you change the
mode to HELL!
Transceiver Control
This is a two way communication: Make changes in the log will affect the trcvr, changing band or
mode direct on the trcvr will set the log accordantly. In the preferences you have the choice of one
Kenwood and some Icom trcvrs. Other Kenwood transceivers should be work as well, which I can't
test. Only few control commands are used and should be common for other models. You can also
try other Icom trcvrs. You have to change the CIV address on your trcvr, to match with the default
address from the trcvr you have chosen. In RUMped the addresses are fixed:
IC-7400/IC746PRO: 66h
IC-7000:
70h
IC-706MK2G:
58h
To tune a exact frequency just enter the frequency in Khz into the pink call field and press the
'Enter' key. Both VFOs in the trcvr will be tuned. When you use the band popup menu or the Band
up/Band down menu, the last used frequency on this band will be used.
Entering '-' into the pink call field and pressing 'Enter' will toggle the split on or off. In the main
logging window you find an info about the split status. This works fine on a Kenwood, but is tricky
on an Icom.
ICOM only:
RUMped is not able to determine the used VFO and the status of split, do to the limited CIV
protocol. When you work split using both VFOs on an Icom rig you have to perform following
steps:
1. Make sure split is off. Do not use the buttons on your trcvr, always use the '-' command.
2. Select your TX frequency in any way.
3. Toggle on split using the '-' command.
Both VFOs are set now to the same values and split is switched on. Only this procedure ensures the
correct split read out and the logging of the correct TX frequency. In the log your TX frequency is
saved as VFO B and your RX frequency as VFO A.
RUMped Version 1.0 - The User's Manual - 10 July 2007 - Written by DL2RUM
page 49
Using RUMped - Contest Operation
Contest Operation
Running a contest is the same like logging in dx-ped mode. Contests may be limited to some bands
and/or modes only. You are able to log QSOs on another band (WARC), but these QSOs will not
appear in a statistic and will be counted with zero points.
Take care about the mode. RUMped allows you to log all modes and will count these QSOs as
valid, even when this mode is not allowed in this contest!
When the control number is fixed (state or zone), RUMped tries to determine this number after
pressing the 'Space' bar on the base earlier QSOs.
The latest contest rules are integrated in RUMped. Don't worry after changes: All the calculated
points and multipliers are for your info only, since only the 'Cabrillo' log will be send to the
organizer. He will calculate your result.
When creating a new log, there is a contest named 'Unsupported' selectable. No QSO points and no
multipliers are computed, nor indicated. You can enter as received or sent control number whatever
you want. There is only one option available: When there is a numerical control number, it can be
incremented automatically after each QSO.
RUMped Version 1.0 - The User's Manual - 10 July 2007 - Written by DL2RUM
page 50