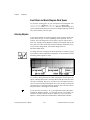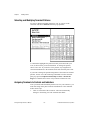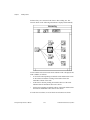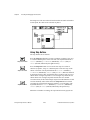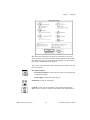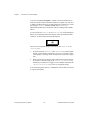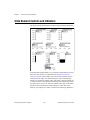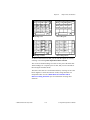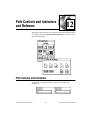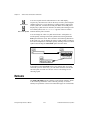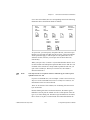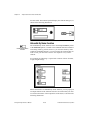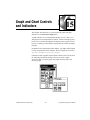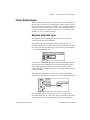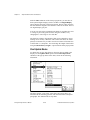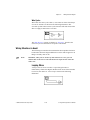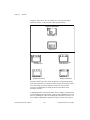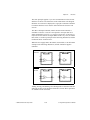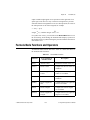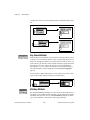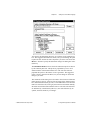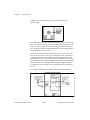
1
G Programming Reference Manual Part Number 321296A-01 October 1996 © Copyright 1992, 1996 National Instruments Corporation. All rights reserved. Internet Support GPIB: [email protected] DAQ: [email protected] LabVIEW: [email protected] BridgeVIEW: [email protected] Lookout: [email protected] E-mail: [email protected] FTP Site: ftp.natinst.com Web Address: http://www.natinst.com Bulletin Board Support BBS United States: (512) 794-5422 or (800) 327-3077 BBS United Kingdom: 01635 551422 BBS France: 01 48 65 15 59 FaxBack Support (512) 418-1111 Telephone Support (U.S.) Tel: (512) 795-8248 Fax: (512) 794-5678 International Offices Australia 03 9879 5166, Austria 0662 45 79 90 0, Belgium 02 757 00 20, Canada (Ontario) 905 785 0085, Canada (Québec) 514 694 8521, Denmark 45 76 26 00, Finland 90 527 2321, France 01 48 14 24 24, Germany 089 741 31 30, Hong Kong 2645 3186, Israel 03 5734815, Italy 02 413091, Japan 03 5472 2970, Korea 02 596 7456, Mexico 95 800 010 0793, Netherlands 0348 433466, Norway 32 84 84 00, Singapore 2265886, Spain 91 640 0085, Sweden 08 730 49 70, Switzerland 056 200 51 51, Taiwan 02 377 1200, U.K. 01635 523545 National Instruments Corporate Headquarters 6504 Bridge Point Parkway Austin, TX 78730-5039 Tel: (512) 794-0100 Important Information Warranty The media on which you receive National Instruments software are warranted not to fail to execute programming instructions, due to defects in materials and workmanship, for a period of 90 days from date of shipment, as evidenced by receipts or other documentation. National Instruments will, at its option, repair or replace software media that do not execute programming instructions if National Instruments receives notice of such defects during the warranty period. National Instruments does not warrant that the operation of the software shall be uninterrupted or error free. A Return Material Authorization (RMA) number must be obtained from the factory and clearly marked on the outside of the package before any equipment will be accepted for warranty work. National Instruments will pay the shipping costs of returning to the owner parts which are covered by warranty. National Instruments believes that the information in this manual is accurate. The document has been carefully reviewed for technical accuracy. In the event that technical or typographical errors exist, National Instruments reserves the right to make changes to subsequent editions of this document without prior notice to holders of this edition. The reader should consult National Instruments if errors are suspected. In no event shall National Instruments be liable for any damages arising out of or related to this document or the information contained in it. EXCEPT AS SPECIFIED HEREIN , N ATIONAL INSTRUMENTS MAKES NO WARRANTIES, EXPRESS OR IMPLIED , AND SPECIFICALLY DISCLAIMS ANY WARRANTY OF MERCHANTABILITY OR FITNESS FOR A PARTICULAR PURPOSE . CUSTOMER’S RIGHT TO RECOVER DAMAGES CAUSED BY FAULT OR NEGLIGENCE ON THE PART OF NATIONAL INSTRUMENTS SHALL BE LIMITED TO THE AMOUNT THERETOFORE PAID BY THE CUSTOMER. N ATIONAL INSTRUMENTS WILL NOT BE LIABLE FOR DAMAGES RESULTING FROM LOSS OF DATA , PROFITS , USE OF PRODUCTS , OR INCIDENTAL OR CONSEQUENTIAL DAMAGES , EVEN IF ADVISED OF THE POSSIBILITY THEREOF. This limitation of the liability of National Instruments will apply regardless of the form of action, whether in contract or tort, including negligence. Any action against National Instruments must be brought within one year after the cause of action accrues. National Instruments shall not be liable for any delay in performance due to causes beyond its reasonable control. The warranty provided herein does not cover damages, defects, malfunctions, or service failures caused by owner’s failure to follow the National Instruments installation, operation, or maintenance instructions; owner’s modification of the product; owner’s abuse, misuse, or negligent acts; and power failure or surges, fire, flood, accident, actions of third parties, or other events outside reasonable control. Copyright Under the copyright laws, this publication may not be reproduced or transmitted in any form, electronic or mechanical, including photocopying, recording, storing in an information retrieval system, or translating, in whole or in part, without the prior written consent of National Instruments Corporation. Trademarks LabVIEW® and BridgeVIEW® are trademarks of National Instruments Corporation. Product and company names listed are trademarks or trade names of their respective companies. WARNING REGARDING MEDICAL AND CLINICAL USE OF NATIONAL INSTRUMENTS PRODUCTS National Instruments products are not designed with components and testing intended to ensure a level of reliability suitable for use in treatment and diagnosis of humans. Applications of National Instruments products involving medical or clinical treatment can create a potential for accidental injury caused by product failure, or by errors on the part of the user or application designer. Any use or application of National Instruments products for or involving medical or clinical treatment must be performed by properly trained and qualified medical personnel, and all traditional medical safeguards, equipment, and procedures that are appropriate in the particular situation to prevent serious injury or death should always continue to be used when National Instruments products are being used. National Instruments products are NOT intended to be a substitute for any form of established process, procedure, or equipment used to monitor or safeguard human health and safety in medical or clinical treatment. Table of Contents About This Manual Organization of This Manual ...........................................................................................xxi Basic G Concepts ..............................................................................................xxi Front Panel Objects ...........................................................................................xxii Block Diagram Programming............................................................................xxii Advanced G Topics ...........................................................................................xxiii Appendices, Glossary, and Index ......................................................................xxiii Conventions Used in This Manual...................................................................................xxiv Related Documentation....................................................................................................xxv Customer Communication ...............................................................................................xxv Basic G Concepts—Chapters 1 through 7 Chapter 1 Introduction to G Programming What Is G? .......................................................................................................................1-1 Components of a VI .........................................................................................................1-1 Front Panel.........................................................................................................1-3 Block Diagram...................................................................................................1-4 Icon and Connector............................................................................................1-6 Help in G..........................................................................................................................1-7 Front Panel Help................................................................................................1-7 Block Diagram Help..........................................................................................1-7 Attribute Node Help............................................................................1-9 Online Reference ...............................................................................................1-9 Creating Your Own Help Files ........................................................................................1-9 © National Instruments Corporation v G Programming Reference Manual Table of Contents Chapter 2 Building VIs G Environment ................................................................................................................ 2- 1 Tools Palette...................................................................................................... 2-4 Menus in G........................................................................................................ 2-6 Pop-Up Menus .................................................................................... 2-6 Editing VIs.................................................................................................................... ... 2-7 Selecting Objects............................................................................................... 2-7 Dragging and Dropping VIs, Pictures, and Text in G....................................... 2-8 Positioning Objects ........................................................................................... 2-9 Aligning Objects ............................................................................................... 2-11 Distributing Objects .......................................................................................... 2-12 Duplicating Objects........................................................................................... 2-12 Deleting Objects................................................................................................ 2-13 Labeling Objects ............................................................................................... 2-14 Free Labels ......................................................................................... 2-14 Text Characteristics ............................................................................ 2-16 Resizing Objects ............................................................................................... 2-23 Labels.................................................................................................. 2-23 Front Panel and Block Diagram Work Space..................................... 2-24 Coloring Objects ............................................................................................... 2-24 Creating Object Descriptions ............................................................................ 2-26 Creating VI Descriptions .................................................................................. 2-27 Saving VIs ..................................................................................................................... .. 2-27 Individual VI Files ............................................................................................ 2-28 VI Libraries (.LLBs) ......................................................................................... 2-29 Creating VI Libraries.......................................................................... 2-30 Saving in Existing VI Libraries .......................................................... 2-30 Editing the Contents of Libraries........................................................ 2-30 Chapter 3 Building SubVIs Hierarchical Design ......................................................................................................... 3-1 Creating SubVIs from VIs............................................................................................... 3-1 Creating the Icon ............................................................................................... 3-2 Defining Connector Terminal Patterns ............................................................. 3-5 Selecting and Modifying Terminal Patterns ..................................................... 3-6 Assigning Terminals to Controls and Indicators............................................... 3-6 Required, Recommended, and Optional Connections for SubVIs.................... 3-8 Deleting Terminal Connections ........................................................................ 3-9 Confirming Terminal Connections ................................................................... 3-10 G Programming Reference Manual vi © National Instruments Corporation Table of Contents Creating SubVIs from VI Selections ...............................................................................3-10 Rules and Recommendations ............................................................................3-11 Number of Connections ......................................................................3-12 Cycles..................................................................................................3-12 Attribute Nodes within Loops ..............................................3-12 Illogical Selections ...............................................................3-13 Locals and Front Panel Terminals within Loops..................3-13 Case Structures Containing Attribute Nodes, Locals, or Front Panel Terminals ...................................................3-13 Using the Hierarchy Window ..........................................................................................3-15 Opening the Hierarchy Window........................................................................3-15 Hierarchy Window Options...............................................................................3-17 View Menu Options ............................................................................3-18 Hierarchy Toolbar Buttons..................................................................3-19 Hierarchy Node Pop-Up Menu ...........................................................3-20 Hierarchy Node Mouse-Click Sequences ...........................................3-21 Finding Hierarchy Node Mechanism ................................................................3-22 Finding VIs, Objects, and Text ........................................................................................3-23 Find Dialog Box ................................................................................................3-24 Finding VIs and Other Objects ...........................................................3-24 Finding Text........................................................................................3-26 Search String Options ...........................................................3-26 Text Search Options .............................................................3-27 Narrowing the Search Scope...............................................................3-27 Search Results Window ......................................................................3-28 Finding Next and Previous Search Items .............................3-29 Find Pop-Up Menu for Global and Local Variables and Attribute Nodes........3-29 Chapter 4 Executing and Debugging VIs and SubVIs Executing VIs ..................................................................................................................4-1 Running VIs.......................................................................................................4-1 Stopping VIs......................................................................................................4-4 Running VIs Repeatedly....................................................................................4-5 Data Logging on the Front Panel.......................................................................4-5 Retrieving Data Programmatically ....................................................................4-7 Accessing Databases ...........................................................................4-7 Retrieving Data Using File I/O Functions ..........................................4-9 © National Instruments Corporation vii G Programming Reference Manual Table of Contents Debugging VIs................................................................................................................. 4-9 Debugging Broken VIs ..................................................................................... 4-9 Interpreting Error Messages ............................................................... 4-11 Correcting Broken VI Range Errors ................................................................. 4-14 Debugging Executable VIs ............................................................................... 4-15 Recognizing Undefined Data.............................................................. 4-17 Understanding Warnings .................................................................... 4-18 Debugging Features .......................................................................................... 4-18 Single-Stepping through VIs .............................................................. 4-18 An Example of Single-Stepping through a VI ..................... 4-19 Using Step Buttons ............................................................................. 4-20 Reading Call Chains ........................................................................... 4-21 Execution Highlighting....................................................................... 4-21 Using the Probe Tool .......................................................................... 4-23 Creating Probes .................................................................... 4-25 Placing Breakpoint Tools ................................................................... 4-26 Suspending Execution ........................................................................ 4-29 Recognizing Automatic Suspension..................................... 4-29 Using Toolbar Buttons When SubVIs Are Suspended ........ 4-30 Viewing Hierarchy Windows During Suspension ............... 4-30 Disabling Debugging Features ........................................................... 4-31 Commenting out Sections of Diagrams ............................................................ 4-31 Chapter 5 Printing VIs Printing in G .................................................................................................................... 5-1 Printing Configuration ...................................................................................... 5-1 PostScript Printing .............................................................................. 5-2 Printing the Active Window ............................................................................. 5-2 Selecting Print Options ..................................................................................... 5-3 Setting Printout Formats ..................................................................... 5-3 Choosing Layout Options ................................................................... 5-4 Creating Custom Print Settings .......................................................... 5-4 Printing Section Headers...................................................... 5-6 Programmatic Printing ...................................................................................... 5-7 Controlling When Printouts Occur ..................................................... 5-7 Enhancing Printouts............................................................................ 5-7 Setting Page Layout............................................................................ 5-8 Using Alternative Printing Methods ................................................................. 5-9 G Programming Reference Manual viii © National Instruments Corporation Table of Contents Chapter 6 Setting up VIs and SubVIs Creating Pop-Up Panels...................................................................................................6-1 VI Setup Options .............................................................................................................6-2 Execution Options .............................................................................................6-2 Documentation Options.....................................................................................6-3 Window Options................................................................................................6-4 SubVI Node Setup Dialog Box........................................................................................6-6 Chapter 7 Customizing Your G Environment Setting G Preferences.......................................................................................................7-1 Preferences Dialog Box Options .......................................................................7-1 Path Preferences..................................................................................7-2 Library, Temporary, and Default Directories .......................7-3 VI Search Path ......................................................................7-5 Performance and Disk Preferences .....................................................7-6 Front Panel Preferences ......................................................................7-9 Block Diagram Preferences ................................................................7-11 Debugging Preferences .......................................................................7-12 Color Preferences ................................................................................7-13 Font Preferences..................................................................................7-14 Printing Preferences ............................................................................7-16 History Preferences .............................................................................7-17 Time and Date Preferences .................................................................7-21 Miscellaneous Preferences ..................................................................7-22 How Preferences Are Stored .............................................................................7-23 Customizing the Controls and Functions Palettes ...........................................................7-25 Adding VIs and Controls to user.lib and instr.lib..............................................7-25 Installing and Changing Views .........................................................................7-26 Palettes Editor....................................................................................................7-26 Creating Subpalettes ...........................................................................7-27 Moving Subpalettes.............................................................................7-29 How Views Work ..............................................................................................7-29 © National Instruments Corporation ix G Programming Reference Manual Table of Contents Front Panel Objects—Chapters 8 through 15 Chapter 8 Introduction to Front Panel Objects Building the Front Panel.................................................................................................. 8-1 Front Panel Control and Indicator Options ....................................................... 8-2 Replacing Controls ............................................................................. 8-4 Key Navigation Option for Controls................................................................. 8-5 Panel Order Option ........................................................................................... 8-8 Customizing Dialog Box Controls .................................................................... 8-9 Customizing Controls Using Imported Graphics ............................................................ 8-10 Chapter 9 Numeric Controls and Indicators Digital Controls and Indicators ....................................................................................... 9-2 Digital Numeric Options................................................................................... 9-3 Displaying Integers in Other Radixes................................................. 9-4 Changing the Representation of Numeric Values .............................. 9-4 Range Options of Numeric Controls and Indicators ......................................... 9-6 Numeric Range Checking................................................................... 9-7 Format and Precision of Digital Displays ......................................................... 9-9 Slide Numeric Controls and Indicators ........................................................................... 9-12 Slide Scale......................................................................................................... 9-14 Scale Markers ..................................................................................... 9-15 Changing Scale Limits ......................................................... 9-16 Selecting Non-Uniform Scale Marker Distribution ............. 9-16 Text Scale ........................................................................................... 9-18 Filled and Multivalued Slides ........................................................................... 9-20 Rotary Numeric Controls and Indicators......................................................................... 9-21 Color Box ........................................................................................................................ 9-24 Color Ramp ..................................................................................................................... 9-25 Unit Types ....................................................................................................................... 9-26 Entering Units ................................................................................................... 9-31 Units and Strict Type Checking ........................................................................ 9-33 Polymorphic Units ............................................................................................ 9-35 G Programming Reference Manual x © National Instruments Corporation Table of Contents Chapter 10 Boolean Controls and Indicators Creating and Operating Boolean Controls and Indicators ...............................................10-1 Configuring Boolean Controls and Indicators .................................................................10-3 Changing Boolean Labels..................................................................................10-3 Stopping on a Boolean Value..............................................................10-4 Boolean Data Range Checking ...........................................................10-4 Configuring the Mechanical Action of Boolean Controls ..................10-4 Customizing Booleans with Imported Pictures .................................................10-6 Chapter 11 String Controls and Indicators Using String Controls and Indicators...............................................................................11-1 String Control and Indicator Options...............................................................................11-2 Scrollbar Option ................................................................................................11-3 Display Types....................................................................................................11-3 Normal Display Option.......................................................................11-3 Backslash (‘\’) Codes Display Option ................................................11-3 Password Display Option....................................................................11-5 Hex Display Option ............................................................................11-5 Limit to Single Line Option ..............................................................................11-6 Tables...............................................................................................................................11-6 Resizing Tables, Rows, and Columns ...............................................................11-6 Entering and Selecting Data Tables ..................................................................11-7 Chapter 12 Path Controls and Indicators and Refnums Path Controls and Indicators............................................................................................12-1 Refnums ...........................................................................................................................12-2 Chapter 13 List and Ring Controls and Indicators Listbox Controls ..............................................................................................................13-1 Creating a List of Options .................................................................................13-2 Selecting Listbox Items .....................................................................................13-2 Listbox Data Types............................................................................................13-3 © National Instruments Corporation xi G Programming Reference Manual Table of Contents Listbox Pop-Up Menu Options ......................................................................... 13-3 Show ................................................................................................... 13-4 Selection Mode ................................................................................... 13-4 Keyboard Mode .................................................................................. 13-6 Creating a Grayed-Out Dividing Line .............................................................. 13-6 Ring Controls................................................................................................................... 13-7 Adding Text Items to Rings .............................................................................. 13-8 Adding Picture Items to Rings .......................................................................... 13-9 Changing the Size and Text of Text & Pict Rings............................................ 13-10 Enumerated Type Controls.............................................................................................. 13-10 Chapter 14 Array and Cluster Controls and Indicators Arrays .............................................................................................................................. 14-1 Creating Array Controls.................................................................................... 14-5 Array Dimensions............................................................................... 14-7 Array Index Display ........................................................................... 14-8 Displaying Arrays in Single-Element or Tabular Form ..................... 14-9 Operating Arrays............................................................................................... 14-11 Default Sizes and Values of Arrays.................................................... 14-11 Array Elements ................................................................................... 14-13 Finding the Size of Arrays.................................................................. 14-13 Moving or Resizing Arrays ................................................................ 14-14 Selecting Array Cells.......................................................................... 14-14 An Example of Selecting Array Cells .................................. 14-14 G Arrays and Arrays in Other Systems............................................................. 14-16 Clusters ............................................................................................................................ 14-19 Creating Clusters............................................................................................... 14-20 Operating and Configuring Cluster Elements ................................................... 14-20 Cluster Elements................................................................................. 14-21 Cluster Default Values........................................................................ 14-21 Cluster Element Order ........................................................................ 14-21 Moving or Resizing Clusters .............................................................. 14-22 Cluster Assembly .............................................................................................. 14-23 Bundle Function ................................................................................. 14-24 Bundle By Name Function ................................................................. 14-24 Array To Cluster Function.................................................................. 14-28 Cluster Disassembly.......................................................................................... 14-29 Unbundle Function ............................................................................. 14-29 Unbundle By Name Function ............................................................. 14-30 Cluster To Array Function.................................................................. 14-32 Replacing Cluster Elements .............................................................................. 14-33 G Programming Reference Manual xii © National Instruments Corporation Table of Contents Chapter 15 Graph and Chart Controls and Indicators Creating Waveform and XY Graphs ...............................................................................15-2 Plotting Single-Plot Graphs...............................................................................15-2 Waveform Graph Data Types .............................................................15-2 XY Graph Data Types.........................................................................15-3 Plotting Multiplot Graphs..................................................................................15-5 Waveform Graph Data Types .............................................................15-5 XY Graph Data Types.........................................................................15-9 Setting Custom Options on a Graph..................................................................15-11 Scale Options ......................................................................................15-12 Marker Spacing.....................................................................15-13 Formatting ............................................................................15-15 Autoscale ..............................................................................15-17 Loose Fit ...............................................................................15-17 Panning and Zooming Options ...........................................................15-17 Legend Options ...................................................................................15-19 Waveform Charts .............................................................................................................15-22 Waveform Chart Data Types.............................................................................15-22 Waveform Chart Options ..................................................................................15-25 Chart Update Modes ...........................................................................15-26 Stacked Versus Overlaid Plots............................................................15-28 Intensity Graphs ...............................................................................................................15-29 Intensity Graph Data Type ................................................................................15-29 Intensity Graph Options ....................................................................................15-29 Graph Cursors ..................................................................................................................15-30 Intensity Charts ................................................................................................................15-36 Intensity Chart Options......................................................................................15-38 Color Mapping ....................................................................................15-40 Block Diagram Programming—Chapters 16 through 21 Chapter 16 Introduction to the Block Diagram Terminals and Nodes .......................................................................................................16-1 Terminals...........................................................................................................16-1 Control and Indicator Terminals .........................................................16-2 Constants.............................................................................................16-3 User-Defined Constants........................................................16-3 Universal Constants ..............................................................16-7 © National Instruments Corporation xiii G Programming Reference Manual Table of Contents Nodes ................................................................................................................ 16-8 Functions ............................................................................................ 16-8 Structures ............................................................................................ 16-11 Replacing and Inserting Block Diagram Objects ............................................................ 16-12 Adding Constants, Controls, and Indicators Automatically............................................ 16-13 Chapter 17 Wiring the Block Diagram Wiring Techniques .......................................................................................................... 17-1 Wire Stretching ................................................................................................. 17-5 Selecting, Moving, and Deleting Wires ............................................................ 17-6 Wiring Off-Screen............................................................................................. 17-10 Solving Wiring Problems.................................................................................. 17-11 Bad Wires ........................................................................................... 17-11 Wire Type, Dimension, Unit, or Element Conflict .............. 17-12 Multiple Wire Sources ......................................................... 17-13 No Wire Source.................................................................... 17-13 Loose Ends ........................................................................... 17-14 Wire Stubs ............................................................................ 17-14 Wire Cycles .......................................................................... 17-15 Wiring Situations to Avoid ............................................................................... 17-15 Looping Wires .................................................................................... 17-15 Hidden Wire Segments ....................................................................... 17-16 Wiring underneath Objects ................................................................. 17-17 Chapter 18 Structures For Loop and While Loop Structures.............................................................................. 18-3 For Loop............................................................................................................ 18-3 While Loop ....................................................................................................... 18-4 Placing Objects inside Structures...................................................................... 18-4 Placing and Sizing Structures on the Block Diagram ....................................... 18-5 Placing Terminals inside Loops........................................................................ 18-6 Auto-Indexing ................................................................................................... 18-7 Auto-Indexing for Setting the For Loop Count .................................. 18-8 Auto-Indexing with While Loops....................................................... 18-9 Executing a For Loop Zero Times .................................................................... 18-9 Shift Registers ................................................................................................... 18-10 G Programming Reference Manual xiv © National Instruments Corporation Table of Contents Case and Sequence Structures .........................................................................................18-13 Case Structures ..................................................................................................18-14 Sequence Structures...........................................................................................18-16 Editing Case and Sequence Structures ..............................................................18-18 Moving between Subdiagrams ..........................................................................18-18 Adding Subdiagrams .........................................................................................18-19 Deleting Subdiagrams .......................................................................................18-20 Reordering Subdiagrams ...................................................................................18-21 Structure Wiring Problems ................................................................................18-22 Assigning More Than One Value to a Sequence Local ......................18-22 Failing to Wire a Tunnel in All Cases of a Case Structure .................18-22 Overlapping Tunnels...........................................................................18-23 Wiring from Multiple Frames of a Sequence Structure ......................18-24 Wiring underneath Rather than through a Structure ...........................18-25 Removing Structures without Deleting Items in a Structure ..............18-26 Chapter 19 Formula Nodes Using Formula Nodes ......................................................................................................19-2 Formula Node Functions and Operators ..........................................................................19-5 Formula Node Syntax ......................................................................................................19-8 Formula Node Errors .......................................................................................................19-9 Chapter 20 Attribute Nodes Creating Attribute Nodes .................................................................................................20-1 Using Attribute Node Help................................................................................20-6 Base Attributes.................................................................................................................20-7 Visible Attribute..................................................................................20-7 Disabled Attribute ...............................................................................20-7 Key Focus Attribute ............................................................................20-8 Blinking Attribute ...............................................................................20-8 Position Attribute ................................................................................20-9 Bounds Attribute (Read Only) ............................................................20-10 Examples of Attributes Specific to Controls or Indicators................................20-10 Changing Plot Color on a Chart..........................................................20-10 Setting the Strings of a Boolean Attribute ..........................................20-11 Setting the Strings of Ring Controls ...................................................20-12 Using a Double-Clicked Listbox Item ................................................20-13 Selectively Presenting Users with Options .........................................20-14 Reading Graph Cursors Programmatically .........................................20-14 © National Instruments Corporation xv G Programming Reference Manual Table of Contents Chapter 21 Global and Local Variables Global Variables.............................................................................................................. 21-1 Local Variables................................................................................................................ 21-3 Advanced Topics—Chapters 22 through 27 Chapter 22 Custom Controls and Type Definitions Custom Controls.............................................................................................................. 22-1 Using the Control Editor ................................................................................... 22-1 Applying Changes from a Custom Control....................................................... 22-3 Valid Custom Controls ....................................................................... 22-3 Saving Custom Controls ................................................................................... 22-4 Using Custom Controls ..................................................................................... 22-4 Making Icons..................................................................................................... 22-5 Independent Instances of Custom Controls ...................................................... 22-5 Customize Mode Option.................................................................................................. 22-5 Independent Parts .............................................................................................. 22-6 Control Editor Parts Window............................................................................ 22-7 Customize Mode Pop-Up Menus for Different Parts........................................ 22-9 Cosmetic Parts................................................................................................... 22-9 Cosmetic Parts with More than One Picture ...................................... 22-11 Cosmetic Parts with Independent Pictures ......................................... 22-12 Text Parts .......................................................................................................... 22-14 Scale Parts ......................................................................................................... 22-15 Controls as Parts................................................................................................ 22-15 Adding Cosmetic Parts to Custom Controls ..................................................... 22-17 Custom Control Caveats ................................................................................... 22-18 Type Definitions.............................................................................................................. 22-19 General Type Definition: Matching Data Types............................................... 22-19 Strict Type Definition: Everything Must Match ............................................... 22-19 Creating Type Definitions................................................................................. 22-20 Using Type Definitions ..................................................................................... 22-20 Updating Type Definitions................................................................................ 22-21 Searching for Type Definitions......................................................................... 22-22 Cluster Type Definitions................................................................................... 22-22 G Programming Reference Manual xvi © National Instruments Corporation Table of Contents Chapter 23 Calling Code from Other Languages Executing Other Applications from within Your VIs......................................................23-1 Using the Call Library Function........................................................................23-2 Using Code Interface Nodes..............................................................................23-2 Call Library Function.......................................................................................................23-3 Calling Conventions (Windows) .......................................................................23-4 Parameter Lists ..................................................................................................23-5 Calling Functions that Expect Other Data Types ..............................................23-7 LabWindows/CVI Function Panel Converter..................................................................23-7 Conversion Process ...........................................................................................23-8 Chapter 24 Understanding the G Execution System Multitasking .....................................................................................................................24-1 Cooperation .......................................................................................................24-2 Task Switching....................................................................................24-2 Synchronous Nodes ...........................................................................................24-3 Prioritizing Tasks of the Same Priority Level ...................................................24-3 Wait Functions for Prioritizing Tasks ...............................................................24-3 VI Setup Priority Setting ...................................................................................24-4 Subroutine Priority Level ..................................................................................24-4 Reentrant Execution ..........................................................................................24-5 Examples in which You Should Use Reentrancy..............................................24-5 Using a VI That Waits ........................................................................24-5 Using a Storage VI Not Meant to Share Its Data ................................24-7 Chapter 25 Managing Your Applications File Arrangement Using VI Libraries ..............................................................................25-1 Backing Up Your Files ....................................................................................................25-2 Distributing VIs ...............................................................................................................25-2 Save with Options Dialog Box ..........................................................................25-3 Designing Applications with Multiple Developers .........................................................25-5 Keeping Master Copies .....................................................................................25-5 VI History Window ...........................................................................................25-5 Revision Numbers...............................................................................25-7 Resetting History Information ............................................................25-8 Printing History Information...............................................................25-9 Setting Related VI Setup & Preference Dialog Box Options .............25-9 © National Instruments Corporation xvii G Programming Reference Manual Table of Contents Chapter 26 Performance Issues Performance Profiling ..................................................................................................... 26-1 Viewing the Results .......................................................................................... 26-3 Timing Information ............................................................................ 26-4 Memory Information .......................................................................... 26-5 Speeding Up Your VIs .................................................................................................... 26-6 Input/Output ...................................................................................................... 26-6 Screen Display .................................................................................................. 26-7 Other Issues....................................................................................................... 26-8 Parallel Diagrams ............................................................................... 26-8 SubVI Overhead ................................................................................. 26-9 Unnecessary Computation in Loops................................................... 26-9 Memory Usage ................................................................................................................ 26-12 Virtual Memory................................................................................................. 26-12 Macintosh Memory ........................................................................................... 26-13 VI Component Memory Management .............................................................. 26-13 Dataflow Programming and Data Buffers ........................................................ 26-14 Monitoring Memory Usage............................................................................... 26-17 Rules for Better Memory Usage ....................................................................... 26-18 Memory Issues in Front Panels .......................................................... 26-19 SubVIs Can Reuse Data Memory....................................................... 26-20 Local Variables Cannot Reuse Data Memory .................................... 26-20 Global Variables Always Keep Copies of Their Data........................ 26-21 Understanding When Memory Is Deallocated ................................... 26-21 Determining When Outputs Can Reuse Input Buffers ....................... 26-22 Consistent Data Types ........................................................................ 26-22 How to Generate Data of the Right Type............................. 26-23 Avoid Constantly Resizing Data .......................................... 26-24 Example 1: Building Arrays................................................. 26-24 Example 2: Searching through Strings................................. 26-27 Developing Efficient Data Structures ............................................................... 26-28 Case Study 1: Avoiding Complicated Data Types............................................ 26-30 Case Study 2: Global Table of Mixed Data Types ........................................... 26-32 Obvious Implementation .................................................................... 26-33 Alternative Implementation 1 ............................................................. 26-33 Alternative Implementation 2 ............................................................. 26-33 Case Study 3: A Static Global Table of Strings................................................ 26-35 G Programming Reference Manual xviii © National Instruments Corporation Table of Contents Chapter 27 Portability Issues Portable and Nonportable VIs..........................................................................................27-1 Porting between Platforms...............................................................................................27-2 Separator Character Differences........................................................................27-2 Resolution and Font Differences .......................................................................27-2 Overlapping Labels ...........................................................................................27-4 Picture Differences ............................................................................................27-4 Appendix A Data Storage Formats Data Formats for Front Panel Controls and Indicators ....................................................A-1 Booleans ............................................................................................................A-1 Numerics............................................................................................................A-1 Extended..............................................................................................A-1 Double.................................................................................................A-2 Single ..................................................................................................A-2 Long Integer........................................................................................A-3 Word Integer .......................................................................................A-3 Byte Integer.........................................................................................A-3 Arrays ................................................................................................................A-3 Strings................................................................................................................A-5 Paths ..................................................................................................................A-5 Clusters ..............................................................................................................A-5 Type Descriptors..............................................................................................................A-7 Data Types.........................................................................................................A-8 Array ...................................................................................................A-11 Cluster .................................................................................................A-11 Flattened Data ..................................................................................................................A-12 Scalars................................................................................................................A-13 Strings, Handles, and Paths ...............................................................................A-13 Arrays ................................................................................................................A-13 Clusters ..............................................................................................................A-14 © National Instruments Corporation xix G Programming Reference Manual Table of Contents Appendix B Common Questions about G Charts and Graphs ........................................................................................................... B-1 Error Messages and Crashes............................................................................................ B-4 Platform Issues and Compatibilities................................................................................ B-6 Printing ............................................................................................................................ B-7 Miscellaneous .................................................................................................................. B-9 Appendix C Customer Communication Glossary Index Tables Table 4-1. Table 4-2. Error Messages ......................................................................................... 4-11 Breakpoint Placement............................................................................... 4-27 Table 9-1. Table 9-2. Table 9-3. Table 9-4. Table 9-5. Table 9-6. Range Options of Floating-Point Numbers .............................................. 9-6 Base Units................................................................................................. 9-28 Derived Units with Special Names .......................................................... 9-28 Additional Units in Use with SI Units...................................................... 9-29 CGS Units................................................................................................. 9-30 Other Units ............................................................................................... 9-30 Table 11-1. G ‘\’ Codes .............................................................................................. 11-4 Table 16-1. G Control and Indicator Terminal Symbols ............................................. 16-2 Table 19-1. Table 19-2. Formula Node Functions .......................................................................... 19-5 Formula Node Errors................................................................................ 19-9 Table A-1. Table A-2. Scalar Numeric Data Types...................................................................... A-8 Non-Numeric Data Types ........................................................................ A-10 G Programming Reference Manual xx © National Instruments Corporation About This Manual The G Programming Reference Manual discusses how to create, edit, and execute virtual instruments (VIs) using the G programming language. This manual explains the front panel and block diagram; numeric, Boolean, string, array and cluster controls and indicators; graphs and charts; and wiring the block diagram. Organization of This Manual This manual covers four subject areas. Chapters 1 through 7 introduce basic G concepts. Chapters 8 through 15 explain how to use front panel objects. Chapters 16 through 21 explain block diagram programming objects and techniques, and Chapters 22 through 27 cover advanced G topics. Basic G Concepts • Chapter 1, Introduction to G Programming, discusses the unique G approach to programming. It also explains how to start using G to develop programs. • Chapter 2, Building VIs, discusses basic features you need to be familiar with so you can build or use VIs, including information about palettes and menus. It also discusses basic tasks you need to learn, such as how to create objects, change tools, and how to open, run, and save VIs. • Chapter 3, Building SubVIs, discusses the concept of hierarchical design in your G applications and explains two methods of creating subVIs. The chapter also describes two utilities—the Hierarchy window, which displays the hierarchy of your VIs, and the Find utility, which finds occurrences of subVIs, as well as other objects or strings of text that you indicate. • Chapter 4, Executing and Debugging VIs and SubVIs, discusses how to operate and debug VIs, and explains how to set up VIs and subVIs for special execution modes. • Chapter 5, Printing VIs, discusses printing issues in G. © National Instruments Corporation xxi G Programming Reference Manual About This Manual • Chapter 6, Setting up VIs and SubVIs, discusses how you can use the VI Setup and SubVI Node Setup dialog boxes to customize the behavior of a subVI. You can use these dialog boxes to create subVIs that show their panels when they are called and to enable and disable features of a panel, such as the scrollbars, the toolbar, and the window resizing capability. • Chapter 7, Customizing Your G Environment, discusses how to customize your G environment by setting preferences, and by changing the contents of the Controls and Functions palettes. Front Panel Objects • Chapter 8, Introduction to Front Panel Objects, introduces the front panel and its two components—controls and indicators. It also explains how to import graphics from other programs to use in your controls. • Chapter 9, Numeric Controls and Indicators, explains how to create, operate, and configure the various styles of numeric controls and indicators. • Chapter 10, Boolean Controls and Indicators, discusses how to create, operate, and configure Boolean controls and indicators. • Chapter 11, String Controls and Indicators, discusses how to use string controls and indicators, and the table. • Chapter 12, Path Controls and Indicators and Refnums, describes how to use file path controls and refnums, which are available from the Controls»Path & Refnum palette. • Chapter 13, List and Ring Controls and Indicators, describes the listbox and ring controls and indicators, which are available from the Controls»List & Ring palette. • Chapter 14, Array and Cluster Controls and Indicators, describes how to use arrays and clusters in the Controls»Array & Cluster pallette. • Chapter 15, Graph and Chart Controls and Indicators, describes how to create and use the graph and chart indicators in the Controls»Graph palette. Block Diagram Programming • G Programming Reference Manual Chapter 16, Introduction to the Block Diagram, describes terminals and nodes—two of the three elements you use to build a block diagram (the third consists of wires). xxii © National Instruments Corporation About This Manual • Chapter 17, Wiring the Block Diagram, explains how to connect terminals on the block diagram by wiring them together. • Chapter 18, Structures, describes how to use the For Loop, While Loop, Case Structure, and Sequence Structure. These structures are in the Functions»Structures palette. • Chapter 19, Formula Nodes, describes how to use the Formula Node to execute mathematical formulas on the block diagram. The Formula Node is available from Functions»Structures. • Chapter 20, Attribute Nodes, describes how to use Attribute Nodes to set and read attributes of front panel controls programmatically. Some useful attributes include display colors, control visibility, menu strings for a ring control, graph or chart plot colors, and graph cursors. • Chapter 21, Global and Local Variables, describes how to define and use global and local variables. You can use global variables to access a particular set of values easily. Local variables serve a similar purpose within a single VI. • Chapter 22, Custom Controls and Type Definitions, introduces custom controls and type definitions. • Chapter 23, Calling Code from Other Languages, explains various methods of calling code written in other languages. • Chapter 24, Understanding the G Execution System, explains VI multitasking and execution. • Chapter 25, Managing Your Applications, contains information about managing your files in G. • Chapter 26, Performance Issues, is divided into three sections. The first section discusses the Performance Profiler, a feature that shows you data about execution time of your VIs. The second section discusses factors that affect run-time speed. The third section discusses factors that affect memory usage. • Chapter 27, Portability Issues, discusses issues related to transporting VIs between platforms. Advanced G Topics Appendices, Glossary, and Index • © National Instruments Corporation Appendix A, Data Storage Formats, discusses the formats in which you can save data. xxiii G Programming Reference Manual About This Manual • Appendix B, Common Questions about G, answers some of the questions commonly asked by G users. • Appendix C, Customer Communication, contains forms to help you gather the information necessary to help National Instruments solve your technical problems and a form you can use to comment on the product documentation. • The Glossary contains an alphabetical list and description of terms used in this manual. • The Index contains an alphabetical list of key terms and topics in this manual, including the page where you can find each one. Conventions Used in This Manual The following conventions are used in this manual: bold Bold text denotes menus, palettes, menu items, or dialog box buttons or options. In addition, bold text denotes VI input and output parameters. italic Italic text denotes emphasis, a cross reference, or an introduction to a key concept. bold italic Bold italic text denotes a note, caution, or warning. monospace Monospace font denotes text or characters that you enter using the keyboard. Sections of code, programming examples, syntax examples, key names, and messages and responses that the computer automatically prints to the screen also appear in this font. italic monospace Italic text in this font denotes that you must supply the appropriate words or values in the place of these items. <> Angle brackets enclose the name of a key on the keyboard—for example, <Shift>. - A hyphen between two or more key names enclosed in angle brackets denotes that you should simultaneously press the named keys—for example, <Shift-Delete>. » The » symbol leads you through nested menu items and dialog box options to a final action. The sequence File»Page Setup»Options»Substitute Fonts directs you to pull down the File menu, select the Page Setup item, select Options, and finally select the Substitute Fonts option from the last dialog box. G Programming Reference Manual xxiv © National Instruments Corporation About This Manual paths Paths in this manual are denoted using backslashes (\) to separate drive names, directories, and files, as in drivename\dir1name\ dir2name\myfile. Warning: This icon to the left of bold italicized text denotes a warning, which alerts you to the possibility of damage to you or your equipment. Caution: This icon to the left of bold italicized text denotes a caution, which alerts you to the possibility of data loss or a system crash. Note: This icon to the left of bold italicized text denotes a note, which alerts you to important information. Abbreviations, acronyms, metric prefixes, mnemonics, symbols, and terms are listed in the Glossary. Related Documentation The following documents contain information that you might find helpful as you read this manual: • BridgeVIEW User Manual • Online Reference, available through the Help menu in LabVIEW or BridgeVIEW • LabVIEW Tutorial Manual • LabVIEW Instrument I/O VI Reference Manual • LabVIEW Code Interface Reference Manual • LabVIEW Communications VI Reference Manual Customer Communication National Instruments wants to receive your comments on our products and manuals. We are interested in the applications you develop with our products, and we want to help if you have problems with them. To make it easy for you to contact us, this manual contains comment and configuration forms for you to complete. These forms are in Appendix C, Customer Communication, at the end of this manual. © National Instruments Corporation xxv G Programming Reference Manual Chapter Introduction to G Programming 1 This chapter discusses the unique G approach to programming. It also explains how to start using G to develop programs. What Is G? G is the programming language that has been at the heart of LabVIEW for several years. Currently, it is integral to two of National Instruments’ application development environments, LabVIEW and BridgeVIEW. G, like C or BASIC, is a general-purpose programming language with extensive libraries of functions for any programming task. G includes libraries for data acquisition, GPIB and serial instrument control, data analysis, data presentation, and data storage. G also includes conventional program debugging tools, so you can set breakpoints, animate the execution to see how data passes through the program, and single-step through the program to make debugging and program development easier. G differs from those programming languages in one important respect. Other programming systems use text-based languages to create lines of code, while G uses a graphical programming language to create programs in block diagram form. Components of a VI G is a general-purpose programming system, but it also includes libraries of functions and development tools designed specifically for data acquisition and instrument control. G programs are called virtual instruments (VIs) because their appearance and operation can imitate actual instruments. However, VIs are similar to the functions of conventional programming languages. A VI consists of an interactive user interface, a dataflow diagram that serves as the source code, and icon connections that set up the VI so that © National Instruments Corporation 1-1 G Programming Reference Manual Chapter 1 Introduction to G Programming it can be called from higher level VIs. More specifically, VIs are structured as follows: • The interactive user interface of a VI is called the front panel, because it simulates the panel of a physical instrument. The front panel can contain knobs, pushbuttons, graphs, and other controls and indicators. You enter data using a mouse and keyboard, and then view the results on the computer screen. • The VI receives instructions from a block diagram, which you construct in G. The block diagram is a pictorial solution to a programming problem. The block diagram is also the source code for the VI. • VIs are hierarchical and modular. You can use them as top-level programs, or as subprograms within other programs or subprograms. A VI within another VI is called a subVI. The icon and connector of a VI work like a graphical parameter list so that other VIs can pass data to a subVI. With these features, G makes the best use of the concept of modular programming. You divide an application into a series of tasks, which you can divide again until a complicated application becomes a series of simple subtasks. You build a VI to accomplish each subtask and then combine those VIs on another block diagram to accomplish the larger task. Finally, your top-level VI contains a collection of subVIs that represent application functions. Because you can execute each subVI by itself, separate from the rest of the application, debugging is much easier. Furthermore, many low-level subVIs often perform tasks common to several applications, so you can develop a specialized set of subVIs well-suited to applications you are likely to construct. The following sections further explain the front panel, block diagram, icon, connector, and other related features. Note: To view examples of different features that G uses for your LabVIEW or BridgeVIEW application, refer to the examples directory, if you are a LabVIEW user. Paths specific to special features appear in corresponding folders under the general directory. You can find these paths for special features in the appropriate chapters of this manual. G Programming Reference Manual 1-2 © National Instruments Corporation Chapter 1 Introduction to G Programming Front Panel The user interface of a VI is like the user interface of a physical instrument—the front panel. A front panel of a VI might look like the following illustration. The front panel of a VI is primarily a combination of controls and indicators. Controls simulate instrument input devices and supply data to the block diagram of the VI. Indicators simulate instrument output devices that display data acquired or generated by the block diagram of the VI. You add controls and indicators to the front panel by selecting them from the floating Controls palette shown in the following illustration. You can switch from the front panel to the block diagram by selecting Windows»Show Diagram from the menu. © National Instruments Corporation 1-3 G Programming Reference Manual Chapter 1 Introduction to G Programming You can change the size, shape, and position of a control or indicator. In addition, each control or indicator has a pop-up menu you can use to change various attributes or select different options. You access this pop-up menu by • (Windows and UNIX) right-clicking on the object with the mouse button. • (Macintosh) <command>-clicking on the mouse button. See Chapter 2, Building VIs, and the Front Panel Objects section of this manual (Chapters 8 through 15) for information about how to build a front panel. Block Diagram The Diagram window holds the block diagram of the VI, which is the graphical source code of a VI. You construct the block diagram by wiring together objects that send or receive data, perform specific functions, and control the flow of execution. The following simple VI computes the sum of and difference between two numbers. The diagram shows several primary block diagram program objects—nodes, terminals, and wires. When you place a control or indicator on the front panel, a corresponding terminal appears on the block diagram. You cannot delete a terminal that belongs to a control or indicator. The terminal disappears only when you delete its control or indicator on the front panel. The Add and Subtract function icons also have terminals. Think of terminals as entry and exit ports. Data that you enter into the controls (a and b) exits the front panel through the control terminals on the block G Programming Reference Manual 1-4 © National Instruments Corporation Chapter 1 Introduction to G Programming diagram. The data then enters the Add and Subtract functions. When the Add and Subtract functions complete their internal calculations, they produce new data values at their exit terminals. The data flows to the indicator terminals and reenters the front panel, where it is displayed. The data exits from a source terminal and enters a destination or sink terminal. Nodes are program execution elements. They are analogous to statements, operators, functions, and subroutines in conventional programming languages. The Add and Subtract functions are one type of node. G has an extensive library of functions for math, comparison, conversion, I/O, and more. Another type of node is a structure. Structures are graphical representations of the loops and case statements of traditional programming languages, by repeating blocks of code or executing them conditionally. G also has special nodes for linking to external text-based code and for evaluating text-based formulas. Wires are the data paths between source and sink terminals. You cannot wire a source terminal to another source, nor can you wire a sink terminal to another sink. However, you can wire one source to several sinks. Each wire has a different style or color, depending on the value that flows through the wire. The previous example shows the wire style for a numeric scalar value—a thin, solid line. Data flow is the principle that governs G program execution. Stated simply, a node executes only when all data inputs have arrived; the node supplies data to all of its output terminals when it finishes executing; the data passes immediately from source to sink terminals. Dataflow programming contrasts with the control flow method of executing a conventional program, in which instructions are executed in the sequence in which they are written. Control flow execution is instruction driven. Dataflow execution is data-driven or data-dependent. You can switch from the front panel to the block diagram by selecting Windows»Show Panel from the menu. See the Block Diagram Programming section of this manual (Chapters 16 through 21) for in-depth information about using block diagram objects to build a program. © National Instruments Corporation 1-5 G Programming Reference Manual Chapter 1 Introduction to G Programming Icon and Connector When an icon of a VI is placed on the diagram of another VI, it becomes a subVI, the G equivalent of a subroutine. The controls and indicators of a subVI receive data from and return data to the diagram of the calling VI. The connector is a set of terminals that correspond to the subVI controls and indicators. The icon is either the pictorial representation of the purpose of the VI, or a textual description of the VI or its terminals. The connector is much like the parameter list of a function call; the connector terminals act like parameters. Each terminal corresponds to a particular control or indicator on the front panel. A connector receives data at its input terminals and passes the data to the subVI code through the subVI controls, or receives the results at its output terminals from the subVI indicators. Every VI has a default icon, which is displayed in the icon pane in the upper right corner of the front panel and block diagram windows. This VI icon is shown in the following illustration. Every VI also has a connector, which you access by choosing Show Connector from the icon pane pop-up menu on the front panel. When you bring up the connector for the first time, you see a connector pattern. You can select a different pattern if you want. The connector generally has one terminal for each control or indicator on the front panel. You can assign up to 28 terminals. If you anticipate future changes to the VI that would require a new input or output, leave some extra terminals unconnected. With the extra terminals, any new inputs or outputs will not affect other VIs that use this VI as a subVI. For more information, see Chapter 3, Building SubVIs. G Programming Reference Manual 1-6 © National Instruments Corporation Chapter 1 Introduction to G Programming Help in G The G Help window contains help information for functions, constants, subVIs, controls and indicators, and dialog box options. To display the window, choose Show Help from the Help menu or press <Ctrl-h> (Windows); <command-h> (Macintosh); <meta-h> (Sun); or <Alt-h> (HP-UX). If your keyboard has a <Help> key, you can press that key instead. Move your cursor onto the icon of a function, a subVI node, or a VI icon (including the icon of the VI you have open, shown at the top right of the VI window) to see the help information. Selecting Help»Lock Help or clicking on the lock icon at the bottom of the window locks the current contents of the Help window. When you have locked it, moving over another function or icon does not change the display in the Help window. Select Lock Help or click on the lock icon again to turn this option off. Front Panel Help When you move the cursor over a control or indicator, the Help window displays the description for that particular control or indicator. It is a good idea to enter descriptions for all controls and indicators when you create a VI. See the Creating Object Descriptions section of Chapter 2, Building VIs, for information. If you hold the cursor on a VI icon in the top right of a front panel for a few moments, the Help window displays help for that VI. Block Diagram Help For functions and subVI nodes, the Help Window also displays the icon, inputs and outputs as well as a description of the functionality of the node. You can display the Help window as either a simple or a complex view by pressing the second button at the bottom of the Help window or by toggling the Help»Simple Help option. The simple view emphasizes the important connections and de-emphasizes the other less critical connections. In this view, labels of required connections are in bold text and recommended connections are in plain text. Wire stubs appear in the place of the optional inputs and outputs that are not displayed to inform you that additional connections © National Instruments Corporation 1-7 G Programming Reference Manual Chapter 1 Introduction to G Programming exist and that choosing the complex view will display them. The following illustration shows the simple view of a File I/O VI. wire stub showing optional input In the complex view, the Help window shows all inputs with wires pointing to the left, and outputs with wires pointing to the right. Labels of optional inputs are in gray text. The following illustration shows the complex view of a File I/O VI. optional input displayed Also, the file path of the location of the path of the node is displayed. If a function input does not need to be wired, the default value is usually indicated in parentheses next to the name. If the function can accept multiple data types, the Help window shows the most common type. The terminal names for subVI nodes are the labels of the corresponding front panel controls and indicators. The default value of a subVI does not automatically appear in the wiring diagram. It is a good idea, however, to include the default value in parentheses in the name of controls when you create a subVI. When you place the Wiring tool over a wire, the Help window displays the data type carried by that wire. Also, when you move the Wiring tool G Programming Reference Manual 1-8 © National Instruments Corporation Chapter 1 Introduction to G Programming over different areas of the VI icon, the corresponding connector terminal is highlighted in the Help window. Attribute Node Help If you do not know the meaning of a particular attribute, you can use the Help window to find out about the meaning of the attribute, its data type, and acceptable values. If the attribute is a more complicated type, such as a cluster, then the Help window displays a hierarchical description of the data structure. The following illustrations show an Attribute Node and the corresponding help information that is displayed as you move the cursor over different attribute names. Online Reference In addition to the Help window, G has more extensive online information available. To access this information, select Help»Online Reference. For most block diagram objects, you can select Online Reference from the pop-up menu of the object to access its online description. You also can access this information by pressing the button shown to the left, which is located at the bottom of the Help window. Creating Your Own Help Files You can create your own online help or reference documents if you have the right development tools. Help documents are based on formatted text documents. You can enter topics in these documents that create connections to your VIs. The source files for all platforms must be in Windows Help format. It is possible to create help documents for multiple platforms. © National Instruments Corporation 1-9 G Programming Reference Manual Chapter 1 Introduction to G Programming When you have created source documents, you use a help compiler to create a help document. If you want help files on multiple platforms, you must use the help compiler for the specific platform on which you intend to use the file. You can use any of the following compilers. The Windows compilers also include tools for creating help documents. • (Windows) RoboHelp from Blue Sky Software, 1-800-677-4946; for international customers (619) 459-6365. • (Windows) Doc-To-Help from WexTech Systems, Inc., 1-800-939-8324. • (Macintosh) QuickView from Altura Software, (408) 655-8005. • (UNIX) HyperHelp from Bristol Technologies, (203) 438-6969. When you have created and compiled your help files, you can link them directly to a VI. Pop up on the VI connector pane of the VI for which you want to link a file and select VI Setup»Documentation. Select the Help Tag box and type the topic you would like to link to in the help file. Choose the help file by clicking on the Browse… button. The path of the file appears in the Help Path box. G Programming Reference Manual 1-10 © National Instruments Corporation Chapter 2 Building VIs This chapter discusses basic features you need to be familiar with so you can build or use VIs, including information about palettes and menus. It also discusses basic tasks you need to learn, such as how to create objects, change tools, and how to open, run, and save VIs. G Environment You use palettes and menus to build VIs. You can choose objects from palettes to position on the front panel of the block diagram. These objects can be moved or modified by the use of menus. Note: If you are a BridgeVIEW user, you must make sure your palettes are changed to Basic G. Select Edit»Select Palette Set. Then, choose the Basic G palette from the palette set menu. You create objects on the front panel and block diagram by selecting them from the floating Controls and Functions palettes. For example, © National Instruments Corporation 2-1 G Programming Reference Manual Chapter 2 Building VIs if you want to create a knob on a front panel, select it from the Numeric palette of the Controls palette, as shown in the following illustration. As you move the selection arrow over an object on the palette, the name of the object appears at the top of the palette. In the preceding illustration, the digital control is selected. At this point, if you click on and move the mouse over the front panel, a digital control appears at the point where you release the mouse. You can resize an object at the same time you create it by clicking on and dragging it as you place it. Note: If you need several functions from the same palette, you can keep it open. To keep a palette open, select the pushpin in the top left corner of the palette. When you have pinned the palette open, it has a titlebar so you can move it around easily. If you save the VI the next time you launch your G development environment, the palettes are opened in the same locations in which you previously closed them. G Programming Reference Manual 2-2 © National Instruments Corporation Chapter 2 Building VIs If you pop up in an empty space in a front panel or block diagram window, a temporary copy of the Controls and Functions palettes appear. If you are using a small monitor, you can close the floating Controls and Functions palettes and create objects with these pop-up palettes instead. You can position the front panel and block diagram side-by-side or above and below one another by selecting the Tile options from the Windows menu. When you create front panel objects, they appear with a blank label ready for you to enter the name of the new object. If you want to give the object a name, type in the name. When you are finished entering the name, end text entry by pressing the <Enter> key on the numeric keypad. If you do not have a keypad, you can press the <Enter> (Windows and HP-UX), or <Return> (Macintosh and Sun) key, click on the Enter button in the toolbar, or click anywhere outside the label. Note: If you do not enter text into the label of a control when you first create it, the label disappears when you click elsewhere. You can show the label again by popping up on the control and selecting Show»Label. The following illustration shows an example of the result of popping up on the control and selecting Show»Label. When you create an object on the front panel, a corresponding terminal is created on the block diagram. You use this terminal if you want to read data from a control or to send data to an indicator. © National Instruments Corporation 2-3 G Programming Reference Manual Chapter 2 Building VIs If you select Windows»Show Diagram, you can see the corresponding block diagram for the front panel. The block diagram contains terminals for all front panel controls and indicators. front panel block diagram Tools Palette A tool is a special operating mode of the mouse cursor. You use tools to perform specific functions. Many of the tools contained in the floating Tools palette are shown in the following illustration. You can move this palette anywhere you want, or you can close it temporarily by clicking on the close box (the small box with an “x” that appears in the top right corner of palettes). Once closed, you can access it again by selecting Windows»Show Tools Palette. You also can bring up a temporary version of the Tools palette at the location of your cursor by clicking while pressing <Ctrl-Shift> (Windows); <command-Shift> (Macintosh); <meta-Shift> (Sun); or <Alt-Shift> (HP-UX). G Programming Reference Manual 2-4 © National Instruments Corporation Chapter 2 Building VIs The tools and their functions/descriptions in the Tools palette are as follows: Operating tool—Places Controls and Functions palette objects on the front panel and block diagram. Positioning tool—Positions, resizes, and selects objects. Labeling tool—Edits text and creates free labels. Wiring tool—Wires objects together in the block diagram. Object Pop-up Menu tool—Pops up on the menu of an object. Scroll tool—Scrolls through the window without using the scroll bars. Breakpoint tool—Sets breakpoints on VIs, functions, loops, sequences, and cases. Probe tool—Creates probes on wires. Color Copy tool—Copies colors for pasting with the Color tool. Color tool—Sets foreground and background colors. Change from one tool to another by doing any of the following while in edit mode: • Click on the tool you want in the Tools palette. • Use the <Tab> key to move through the most commonly used tools in sequence. • Press the spacebar to toggle between the Operating tool and the Positioning tool when the front panel is active, and between the Wiring tool and the Positioning tool when the block diagram is active. © National Instruments Corporation 2-5 G Programming Reference Manual Chapter 2 Building VIs Menus in G G uses menus extensively. The menu bar at the top of a VI window (or at the top of the Macintosh screen) contains several pull-down menus. You can access pull-down menus from a menu bar by clicking on a menu bar item. The pull-down menus are usually general in nature and contain items common to other applications, such as Open, Save, Copy, and Paste, and many others specific to the language G. Some menus also list shortcut key combinations. The menu in G that you use most often is the object pop-up menu. Almost every G object, as well as empty front panel and block diagram space, has a pop-up menu with options and commands. Instructions throughout this manual suggest that you select a command or option from an object pop-up menu. Pop-Up Menus As you learned in the previous section, all G objects have associated pop-up menus. You pop up on an object by clicking on the object with the right mouse button (on the Macintosh, holding down the <command> key while you click on the object with the mouse). By selecting options from the resulting menu, you can access options related to that object and change its look or behavior. G Programming Reference Manual 2-6 © National Instruments Corporation Chapter 2 Building VIs Editing VIs After you are familiar with editing techniques, see the Front Panel Objects section (Chapters 8 through 15) for information on building front panels, and the Block Diagram Programming section of this manual (Chapters 16 through 21) for help in building block diagrams. Selecting Objects Positioning Tool For many editing operations, such as moving, copying, and deleting, you must select an object.To select an object, click on the mouse button while the Positioning tool, shown at the left, is over the object. When you have selected an object, G surrounds it with a moving dashed outline called a marquee. Not selected Selected To select more than one object, <Shift>-click on each additional object. You also can deselect a selected object by <Shift>-clicking on it. Another way to select one or more objects is to drag a selection rectangle around the object(s), as shown in the following illustration. Multiple selection by <Shift>-clicking © National Instruments Corporation 2-7 Multiple selection with selection rectangle G Programming Reference Manual Chapter 2 Building VIs Click on an open area with the Positioning tool and drag diagonally until all the objects you want to select are within or are touched by the selection rectangle. When you release the mouse button, the selection rectangle disappears and a marquee surrounds each selected object. Then you can move, copy, or delete the selected objects. Some objects must be enclosed completely by the rectangle to be selected. Others are selected when they are partially enclosed. By holding down the <Shift> key while dragging the selection rectangle, you can select additional objects or deselect an object enclosed by the rectangle. Clicking on an unselected object or clicking on an open area deselects everything currently selected. <Shift>-clicking on an object selects or deselects it without affecting other selected objects. You cannot select a front panel object and a block diagram object at the same time. However, you can select more than one object on the same front panel or block diagram. Dragging and Dropping VIs, Pictures, and Text in G You can drag VIs from the file system to a block diagram to create a subVI call to that VI. This feature also works for custom controls, type definitions, and globals. In addition, you can drag text and pictures from other applications to copy them to front panels and block diagrams. In Windows 3.1, external drag support is limited to dragging VIs and controls from the File Manager. In Windows 95/NT, which have 32-bit object linking and embedding (OLE) support, you can drag text and pictures from OLE-supporting applications, in addition to dragging from the File Manager/Explorer. On the Macintosh, your system must have the Drag Manager to use external Drag and Drop. The Drag Manager is built into Systems 7.5 and later. It is also available for System 7.0 up to System 7.5 as an extension from Apple. You can use the following Drag and Drop capabilities internally (between various G objects): • Drag front panel controls and indicators to block diagrams to create block diagram constants and vice versa. • Drag a subVI to a path control or constant to drop the full pathname of the VI inside the control or constant. G Programming Reference Manual 2-8 © National Instruments Corporation Chapter 2 Building VIs You can use the following Drag and Drop capabilities externally (from other applications to G objects): • Drag a file into a path control or constant to drop its full pathname. • Drag a datalog file into a Data Log File Refnum to create a cluster containing the data structure in the datalog file. • Drag a graphics file into a Pict Ring, front panel, or block diagram to drop the picture it contains. • Drag a VI file into the block diagram of a VI to drop it as a subVI. • Drag a custom control file into the front panel to drop the custom control stored in that file. • (Windows 95/NT) Drag Text from an OLE source to drop its text into a string control or constant, front panel, block diagram, or label. • (Windows 95/NT) Drag Image from an OLE source to drop its picture into a picture ring, front panel, or block diagram. • (Macintosh) Drag a Text Clipping or text selected from any application to drop that text into a string control or constant, front panel, block diagram, or label. • (Macintosh) Drag an Image clipping or an image selected from another application to drop it into a picture ring, front panel, or block diagram. Note: If you can drop an object successfully, the destination is highlighted. For more information on Drag and Drop features, see your Windows or Macintosh system manual. Positioning Objects You can position an object by clicking on it with the Positioning tool and then dragging it to the location you want. If you hold down the <Shift> key and then drag an object, the action restricts the direction of movement horizontally or vertically, depending on which direction you first move the object. You can move selected objects in small, precise increments by pressing the appropriate arrow key on the keyboard once for each pixel you want the objects to move. Hold down an arrow key to repeat the action. Hold down the <Shift> key along with an arrow key to move the object more rapidly. © National Instruments Corporation 2-9 G Programming Reference Manual Chapter 2 Building VIs If you change your mind about moving an object while you are dragging, continue to drag until the cursor is outside all open windows and the dotted outline disappears, then release the mouse button. This cancels the move operation, and the object remains where it was. If your screen is cluttered, the menu bar is a convenient and safe place to release the mouse button when you want to cancel a move. You also can place objects on top of other objects. There are several commands in the Edit menu to move them relative to each other. For example, assume you have three objects stacked on top of each other. Object 1 is on the bottom of the stack, and object 3 is on top. Move To Front moves the selected object in the stack to the top. If object 1 is selected, object 1 moves to the top of the stack, with object 3 under it, and object 2 on the bottom. If object 2 is selected next, Move To Front changes the order to object 2 on top, object 1 under it, and object 3 on the bottom. Move Forward moves the selected object one position higher in the stack. So starting with the original order of object 1 on the bottom of the stack and object 3 on top, selecting this option for object 1 puts object 2 on the bottom, object 3 on the top, and object 1 in the middle. G Programming Reference Manual 2-10 © National Instruments Corporation Chapter 2 Building VIs Move To Back and Move Backward work similarly to Move To Front and Move Forward except that they move items down the stack rather than up. Aligning Objects Select the objects you want to align and choose the axis along which you want to align them from the Alignment ring, as shown at left. The following illustration shows you how to select objects for alignment and the results of the selection. Selecting objects for alignment by left edges: Results: You can align an object along the vertical axis using its left, center, or right edge. You also can align an object along a horizontal axis using its top, center, or bottom edge. Your selection becomes the current alignment option, which is indicated by a dark border around the item in the palette. © National Instruments Corporation 2-11 G Programming Reference Manual Chapter 2 Building VIs • Top Edges—Aligns all top edges of the selected objects with the topmost object. • Vertical Centers—Aligns the objects at the point halfway between the topmost and bottommost objects. • Bottom Edges—Aligns all bottom edges of the selected objects with the bottommost object. • Left Edges—Aligns all left edges of the selected objects with the object that is farthest to the left. • Right Edges—Aligns the edges of the selected objects with the object that is farthest to the right. • Horizontal Centers—Aligns the objects at the point halfway between the farthest to the left object and the farthest to the right object. Distributing Objects To space objects evenly, or distribute them, select the objects you want to distribute and choose how you want to distribute them from the Distribution ring. In addition to distributing selected objects by making their edges or centers equidistant, four options at the right side of the ring let you add or delete gaps between the objects, horizontally or vertically. Duplicating Objects There are three basic methods for duplicating a G object—by copying and pasting, by cloning, and by dragging and dropping. In all cases, you can create a new copy of the object complete with its associated elements, such as the terminal belonging to a front panel control or the front panel control belonging to a terminal, the label, local variables, and Attribute Nodes. Local variables and Attribute Nodes referring to original controls are copied and switched so they refer to the copied control. To copy and paste within a VI or between VIs, select the object with the Positioning tool and choose Edit»Cut or Edit»Copy. Then, click on the area in which you want to place the duplicate and choose Edit»Paste. You can duplicate several objects at the same time by dragging a selection marquee around the objects before duplicating them. You also can copy text or pictures from other applications and paste them into your front panel or block diagram. G Programming Reference Manual 2-12 © National Instruments Corporation Chapter 2 Building VIs To clone an object, click the Positioning tool on it while pressing the <Ctrl> (Windows); <option> (Macintosh); <meta> (Sun); or <Alt> (HP-UX) key, and drag the copy to its new location. In UNIX, you also can clone objects by clicking on and dragging the middle mouse button without modifier keys. When you clone or copy objects, G labels the copies with the same name as the original object with the word copy appended (or copy 1, copy 2, etc. for copies of copies). On Windows and Macintosh, you can use Drag and Drop capabilities to copy objects between VIs or from other applications. To drag and drop an object, select it with the Positioning tool and drag it to the other panel or diagram to which you want to copy it. For more information, see the Dragging and Dropping VIs, Pictures, and Text in G section in this chapter. Instead of duplicating data types for existing front panel controls, you can copy, clone, or drag and drop them to any diagram to make a corresponding constant. In the same way, you can drag user-defined constants from the block diagram to the front panel to create controls. Deleting Objects To delete an object, select the object and choose Edit»Clear or press the <Backspace> (Windows and HP-UX) key or the <Delete> key (Macintosh and Sun). You only can delete block diagram terminals by deleting the corresponding front panel controls or indicators. Although you can delete most objects, you cannot delete parts of a control or indicator such as labels or digital displays. However, you can hide these components by deselecting Show»Label or Show»Digital Display from the pop-up menu of the object. If you delete a structure such as a While Loop, the contents are deleted as well. If you want to delete only the structure itself but preserve its contents, pop up on the edge of the structure and select Remove While Loop (or other structure name). You delete the structure but not its contents and automatically reconnect any wires that crossed the border of the structure. © National Instruments Corporation 2-13 G Programming Reference Manual Chapter 2 Building VIs Labeling Objects Labels are blocks of text that annotate components of front panels and block diagrams. There are two kinds of labels—owned labels and free labels. Owned labels belong to and move with a particular object and annotate that object only. You can hide these labels, but you cannot copy or delete them independently of their owners. Free labels are not attached to any object, and you can create, move, or dispose of them independently. Use them to annotate your front panels and block diagrams. You use the Labeling tool, whose cursor is the I-beam and box cursor, to create free labels or to edit either type of label. Free Labels To create a free label, select the Labeling tool from the Tools palette and click anywhere on the open space. A small box appears with a text cursor at the left margin ready to accept typed input. Type the text you want to appear in the label. As shown in the following illustration, the Enter button appears on the toolbar to remind you to end text entry by clicking on the Enter button. You also can end text entry by pressing the <Enter> key on the numeric keypad. If you do not have a keypad, you can press the <Enter> (Windows and HP-UX), or <Return> (Macintosh and Sun) key on the keyboard, or click anywhere outside the label. If you do not type any text in the label, the label disappears as soon as you click on any other area. G Programming Reference Manual 2-14 © National Instruments Corporation Chapter 2 Note: Building VIs If you place a label or any other object over (partially covering) a control or indicator, it slows down screen updates and might make the control or indicator flicker. To avoid this problem, do not overlap a front panel object with a label or other object. You can copy the text of a label by selecting it with the Labeling tool. Double-click on the text with the Labeling tool to highlight the section you want. Triple-click on the text to highlight the entire label. You also can drag the Labeling tool across the text to highlight it. When the text is selected, choose Edit»Copy to copy the text onto the Clipboard. Now you can highlight the text of a second label. Select Edit»Paste to replace the highlighted text in the second label with the text from the Clipboard. To create a new label with the text from the Clipboard, click on the screen with the Labeling tool where you want the new label positioned. Then, select Edit»Paste. When you create a control or indicator on the front panel, a blank, owned label accompanies it, waiting for you to type the name of the new control or indicator. The label disappears if you do not enter text into it before clicking on another area with the mouse. You can show the label again by popping up on the control or indicator and selecting Show»Label. Structures and functions come with a default label, which is hidden until you show it. You can edit this label the way you want it to look. © National Instruments Corporation 2-15 G Programming Reference Manual Chapter 2 Building VIs To display a hidden label, pop up on the object and select Show»Label from the pop-up menu, as shown in the following illustration. The label appears, waiting for typed input. The label disappears if you do not enter text into it before clicking outside the label. Note: On the block diagram, subVIs do not have labels that you can edit. The label of a subVI always shows its name. Function labels, on the other hand, can be edited to reflect the use of the function in the block diagram. For example, you can use the label of an Add function to document what quantities are being added, or why they are being added at that point in the block diagram. See the note in the Creating VI Descriptions section in this chapter for related information. Text Characteristics You can change text attributes by using the options from the Font ring on the toolbar, as shown in the illustration that follows. If you select objects or text and make a selection from this ring, the changes apply to everything selected. If nothing is selected, the changes apply to the default font, meaning that labels you create from then on will use the new default font. Changing the default font does not change the font of existing labels; it only affects labels created from that point on. G Programming Reference Manual 2-16 © National Instruments Corporation Chapter 2 Building VIs If you select Font Dialog… from the font window while a front panel is active, the dialog box shown in the following illustration appears. If a block diagram is active instead, the dialog box differs only in the selection of Diagram Default instead of Panel Default in the checkboxes at the bottom of the dialog box. © National Instruments Corporation 2-17 G Programming Reference Manual Chapter 2 Building VIs With either the Panel Default or Diagram Default checkbox selected, the other selections you make in this dialog box are used with new labels on the front panel or block diagram. In the previous illustration, the word Application appears in the Font ring. This ring also contains the System Font, Dialog Font, and Current Font options. The last option in the ring, Current Font, refers to the last font style selected. G uses the Application, System, and Dialog fonts for specific portions of the interface. These fonts are predefined by G so that they map best between platforms. When you take a VI that contains one of these fonts to another platform, G ensures that the font maps are exchanged appropriately. The predefined fonts are as follows: • Application font is the G default font. It is used for the Controls palette, the Functions palette, and text in new controls. • System font is the font used in G for menus. • Dialog font is the font used for text in dialog boxes. If you click the Panel Default and Diagram Default checkboxes, the selected font becomes the current font for the front panel, the block diagram, or both. The current font is used on new labels. You can use the checkboxes to set different fonts for the front panel and block diagram. For example, you can have a small font on the block diagram and a large one on the front panel. For information on portability issues regarding the three types of fonts, see the Resolution and Font Differences section in Chapter 27, Portability Issues. For information on changing the defaults for the three categories of fonts, see the Font Preferences section in Chapter 7, Customizing Your G Environment. The Font ring also has Size, Style, Justify, and Color options, as shown in the following illustration. G Programming Reference Manual 2-18 © National Instruments Corporation Chapter 2 Building VIs Font selections made from any of these submenus apply to objects you select. For example, if you select a new font while you have a knob and a graph selected, the labels, scales, and digital displays all change to the © National Instruments Corporation 2-19 G Programming Reference Manual Chapter 2 Building VIs new font. The following illustration shows a numeric and a Boolean control being changed from the current font to the System font. G Programming Reference Manual 2-20 © National Instruments Corporation Chapter 2 Building VIs G preserves as many font attributes as possible when you make a change. If you change several objects to Courier font, the objects retain their size and styles if possible. In the same way, changing the size of multiple text selections does not cause the selections to have the same font. These rules do not apply if you select one of the predefined fonts, the current font, or when you use the Font dialog box, which changes the selected objects to the selected font and set of attributes. When working with objects like slides, which have multiple pieces of text, remember that text selections affect the objects or text currently selected. For example, if you select the entire slide while selecting Bold, the scale, digital display, and label all change to a bold font. If you select only the label while selecting Bold, only the label changes to bold. If you select text from a scale marker while selecting Bold, all the © National Instruments Corporation 2-21 G Programming Reference Manual Chapter 2 Building VIs markers change to bold. These three types of changes are shown in the following illustration. G Programming Reference Manual 2-22 © National Instruments Corporation Chapter 2 Building VIs Resizing Objects You can change the size of most objects. When you move the Positioning tool over a resizable object, resizing handles appear at the corners of the object, as shown in the following illustration. Resizing cursor When you pass the tool over a resizing handle, the Positioning tool changes to the Resizing cursor. Click on and drag this cursor until the dashed border outlines the size you want, as shown in the following illustration. To cancel a resizing operation, continue dragging the frame corner outside the window until the dotted frame disappears. Then release the mouse button. The object maintains its original size. Some objects can change size only horizontally or vertically, or keep the same proportions when you resize it, such as a knob. The resizing cursor appears the same but the dotted resize outline moves in only one direction. To restrict the growth of any object vertically or horizontally, or to maintain the current proportions of the object, hold down the <Shift> key as you click on the object and drag it. Labels You resize labels as you would other objects, using the resizing cursor. Labels normally autosize; that is, the box automatically resizes to contain the text you enter. Label text remains on one line unless you enter a carriage return or resize the label box. Choose Size to Text from the label pop-up menu to turn autosizing back on. © National Instruments Corporation 2-23 G Programming Reference Manual Chapter 2 Building VIs Front Panel and Block Diagram Work Space To resize the working space to your front panel or block diagram, first <Ctrl-click> (Windows); <option-click> (Macintosh); <meta-click> (Sun); <Alt-click> (HP-UX), and then drag out a region with the Positioning tool. You see a rectangle marked by a dotted line, which defines your new space. Coloring Objects Your G development environment appears on the screen in black and white, shades of gray, or color depending on the capability of your monitor. You can change the color of many G objects, but not all of them. For example, block diagram terminals of front panel objects and wires use color codes for the type and representation of data they carry, so you cannot change them. You cannot change colors in black-and-white mode. To change the color of an object or the background of a window, pop up on it with the Color tool from the Tools palette, as shown at the left. The following palette appears in color. As you move through the palette while pressing the mouse button, the object or background you are coloring redraws with the color the cursor currently is touching. This gives you a preview of the object in the new color. If you release the mouse button on a color, the object retains the selected color. To cancel the coloring operation, move the cursor out of the palette before releasing the mouse button. If you select the box with a T in it, your application makes the object transparent. With this feature, you can layer objects. For example, you can place invisible controls on top of indicators, or you can create numeric controls without the standard three-dimensional container. G Programming Reference Manual 2-24 © National Instruments Corporation Chapter 2 Building VIs Transparency affects only the appearance of an object. The object responds to mouse and key operations as usual. Some objects have both a foreground and a background that you can color separately. The foreground color of a knob, for example, is the main dial area, and the background color is the base color of the raised edge. The display at the bottom of the color selection box indicates if you are coloring the foreground, the background, or both. A black border around a square indicates that you have selected that square. In the default setting, both the foreground and the background are selected. To change between foreground and background, you can press <f> for foreground and <b> for background. Pressing <a> for all selects both foreground and background. Pressing any other key also toggles the selection between foreground and background. The selection does not toggle until you move the Color tool. Selecting the More… option from the Color palette accesses a dialog box with which you can customize the colors. The More Colors dialog box is shown in the following illustration. Each of the three color components, red, green, and blue, describes eight bits of a 24-bit color. Therefore, each component has a range of 0 to 255. To change the value of a color component, you can double-click on the display of that color and enter the new value, or click on the appropriate arrow key to increase or decrease the current value. After entering the new value, press the <Enter> key on the numeric keypad to see the results in the color rectangle. To alter one of the base colors, click on the color rectangle and choose one of the © National Instruments Corporation 2-25 G Programming Reference Manual Chapter 2 Building VIs selections. The component values for the selected color appear in each display. The last color you select from the palette becomes the current color. Clicking on an object with the Color tool sets that object to the current color. You also can copy the color of one object and transfer it to a second object without using the Color palette. Click with the Color Copy tool <Ctrl-click> (Windows); <command-click> (Macintosh); <meta-click> (Sun); or <Alt-click> (HP-UX) with the Color tool on the object whose color you want to duplicate. The Color tool appears as an dropper and takes on the color of the selected object. Now, you can click on another object with the Color tool, and that object becomes the color you have chosen. Creating Object Descriptions If you want to enter a description of a G object, such as a control or indicator, choose Data Operations»Description… from the object’s pop-up menu. You must be in edit mode to edit a description. Enter the description in the dialog box, shown in the following illustration, and click on OK to save it. This description appears when you subsequently choose Description… from the pop-up menu for the object. G Programming Reference Manual 2-26 © National Instruments Corporation Chapter 2 Building VIs The description of the object also appears in the Help window when you place the cursor over the object. The best way to set up help for the VIs you create is to enter descriptions for all your controls and indicators. Note: You cannot edit subVI descriptions from the calling VI diagram. You can edit a VI description through the Windows»Show VI Info… option when the front panel of the VI is open. Function description boxes are blank so that you can describe the action taking place at each occurrence of that function on the block diagram. Creating VI Descriptions Selecting Windows»Show VI Info… displays the information dialog box for the current VI. You can use the information dialog box to perform the following functions. • Enter a description of the VI. The description window has a scrollbar so you can edit or view lengthy descriptions. • Lock or unlock the VI. You can execute but not edit a locked VI. • View the current revision number. • View the path of the VI. • View how much memory the VI uses. The Memory Usage portion of the information box displays the disk and system memory used by the VI. (This figure applies only to the amount of memory the VI is using and does not reflect the memory used by any of its subVIs.) The memory usage is divided into space required for the front panel and the block diagram, VI code, and data space. The memory usage can vary widely, especially as you edit and execute the VI. The block diagram usually requires the most memory. When you are not editing the diagram, save the VI and close the block diagram to free space for more VIs. Saving and closing subVI front panels also frees memory. Saving VIs You can save VIs as individual files, or you can group several VIs together and save them in a VI library. © National Instruments Corporation 2-27 G Programming Reference Manual Chapter 2 Building VIs Individual VI Files Five options in the File menu concern saving your VIs as individual files. Select the Save option to save a new VI, choose a name for the VI, and indicate its destination in the disk hierarchy. Also use this option to save changes to an existing VI in a location previously indicated. If you want to save a VI with a new name, you can use Save As…, Save a Copy As…, or Save with Options… from the File menu. When you select the Save As… option, G saves a copy of the VI in memory to disk with the name you direct. After the save is finished, the VI in memory points to the new version. In addition, all callers to the old VI that are in memory now refer to the new VI. If you enter a new name for the VI, G does not overwrite or delete the disk version of the original VI. When you select the Save A Copy As… option, G saves a copy of the VI in memory to disk with the name you enter. This does not affect the name of the VI in memory. Save with Options… brings up a dialog box in which you can choose to save an entire VI hierarchy to disk, optionally saving VIs without their block diagrams. This option is useful when you are distributing VIs or making backup copies. See Chapter 25, Managing Your Applications, for instructions on how to use this option. Caution: You cannot edit a VI after you save it without a block diagram. Always make a copy of the original VI. You can use the File»Revert… option to return to the last saved version of the VI you are working on. A dialog box appears to confirm whether to discard all changes made to the VI. VIs that have been modified since they were last saved are marked with an asterisk in their titlebars and in the list of open VIs displayed in the Windows menu. When you save a VI, the asterisk disappears until you make a new change. See Chapter 25, Managing Your Applications, for information on saving backup copies. G Programming Reference Manual 2-28 © National Instruments Corporation Chapter 2 Caution: Building VIs Do not save your VIs in the vi.lib directory. National Instruments updates this directory as needed during new version releases of G. Placing VIs in vi.lib risks creating a conflict during future installations. If you want your VIs to show up in the Functions palette, see the Customizing the Controls and Functions Palettes section in Chapter 7, Customizing Your G Environment, for more information. VI Libraries (.LLBs) You can group several VIs together and save them as a VI library. However, unless you have a good reason for saving them as libraries, it is preferable to save them as individual files, organized in directories. Read the following lists before deciding to save VIs in a library. Reasons for you to save VIs as libraries: • If you are using Microsoft Windows 3.1 or plan to transfer your files to Windows 3.1, saving VIs as libraries allows you to use up to 255 characters to name your files. Other operating systems have long filename support (31 characters on the Macintosh, 255 characters on Windows 95/NT, and UNIX systems.) • If you are going to transfer VIs to other platforms, transferring a VI library is easier than transferring multiple individual VIs. • If disk space is an important issue, you can save your files within VI libraries, because they are compressed, slightly reducing disk space requirements for VIs. Reasons for you to save VIs as individual files: • If you store your VIs as individual files, you can use the file system to manage them (copying, moving, renaming, backing up, managing source code). • You cannot have hierarchy within a VI library—VI libraries cannot contain subdirectories or folders. • Loading and saving files are faster from the file system than from VI libraries. Less disk space is required for temporary files during the load and save processes. • Storing VIs and controls in individual files is more robust than storing your entire project in the same file. Keep in mind that many of the VIs shipped with G are shipped in VI libraries so that they are stored in consistent locations on all platforms. © National Instruments Corporation 2-29 G Programming Reference Manual Chapter 2 Building VIs Creating VI Libraries To create a VI library, take the following steps: 1. Select Save, Save as…, or Save a Copy As… from the File menu. 2. (Macintosh) If G is configured through Preferences»Miscellaneous to use native file dialog boxes, click on Use LLBs in the dialog box that appears. 3. In the dialog box that appears after step 1 or step 2, click on the New… or the New VI Library button. 4. In the dialog box that appears, enter the name of the new library and click on the VI Library button. G adds a .llb extension to the name of the library automatically, if you do not. 5. A dialog box appears, ready for you to name your VI if you wish, and save it in the new library. Saving in Existing VI Libraries When you have created a VI library, you can save new VIs in it just as if it were a directory. After selecting one of the Save options from the File menu, the name of your library file, with the .llb extension, appears in the file dialog box. (Macintosh users using the native file dialog box need to press the Use LLBs button first, before being able to select a VI library.) When you double-click on the name of the library file or press Open, the dialog box presents an option so you can save the file in the library. Editing the Contents of Libraries You can remove a file from a VI library using the File»Edit VI Library… option. With the Edit VI Library dialog box that appears, you also can mark files as Top Level, which has two uses. First, when you create an application using the application builder libraries, the Top Level setting indicates which VIs are to open automatically when you run the application. Second, if you double-click on a specific library from the file system on Windows or Macintosh, or if you launch your G development environment with a library name specified on a command line under Windows or UNIX, G opens all top level VIs automatically. For more complex editing operations, you can use the llbedit.vi in the general\examples\llbedit directory. This directory also contains several subVIs that can help you create your own tools for editing LLBs. G Programming Reference Manual 2-30 © National Instruments Corporation Chapter 3 Building SubVIs This chapter discusses the concept of hierarchical design in your G applications and explains two methods of creating subVIs. The chapter also describes two utilities—the Hierarchy window, which displays the hierarchy of your VIs, and the Find utility, which finds occurrences of subVIs, as well as other objects or strings of text that you indicate. Hierarchical Design One of the keys to creating G applications is understanding and using the hierarchical nature of a VI. After you create a VI, you can use it as a subVI in the block diagram of a higher level VI. Therefore, a subVI is analogous to a subroutine in C. Just as there is no limit to the number of subroutines you can use in a C program, there is no limit to the number of subVIs you can use in a G program. You also can call a subVI inside another subVI. When creating an application, you start at the top-level VI and define the inputs and outputs for the application. Then, you use other VIs as subVIs to perform the necessary operations on the data as it flows through the block diagram. If a block diagram has a large number of icons, you can group them into a lower-level VI to maintain the simplicity of the block diagram. This modular approach makes applications easy to debug, understand, and maintain. You can create a subVI from a VI, or you can create a subVI from a selection (portion) of a VI. Both methods are described in this chapter. Creating SubVIs from VIs The icon of a VI is its graphical symbol. The connector of a VI assigns controls and indicators to input and output terminals. If you want to call your VI from the block diagram of another VI, first create an icon and connector for it. This section explains how to create and edit a VI icon and connector. © National Instruments Corporation 3-1 G Programming Reference Manual Chapter 3 Building SubVIs Creating the Icon To create an icon, make sure you are in edit mode. Either double-click on the icon in the top-right corner of the front panel, or pop up on the icon and select Edit Icon…, as shown in the following illustration. Remember, you must be in edit mode in the front panel window to get this menu. After you select Edit Icon…, the Icon Editor appears. G Programming Reference Manual 3-2 © National Instruments Corporation Chapter 3 Building SubVIs Use the tools to the left of the window, shown in the preceding illustration, to create the icon design in the fat-pixel editing area. The normal-size image of the icon appears in the appropriate box to the right of the editing area. Depending on the type of monitor you are using, you can design a separate icon for display in monochrome, 16-color, and 256-color mode. You design and save each icon version separately. The editor defaults to Black & White, but you can click on one of the other color options to switch. You can copy from a color icon to a black-and-white icon, and from black and white to color as well, by using the Copy from options at the right of the Icon Editor. Note: It is best to create a black-and-white icon. If you design a color icon, it does not show up if you add it to the Functions palette. Also, you cannot print it out and it does not show up on a black-and-white monitor. G uses the blank black-and-white icon in these cases. The tool icons to the left of the editing area perform the following functions. pencil Draws and erases pixel by pixel. Use the <Shift> key to restrict drawing to horizontal and vertical lines. line Draws straight lines. Use the <Shift> key to restrict drawing to horizontal, vertical, and diagonal lines. dropper Selects a color to be the foreground color from an element in the icon. Use the <Shift> key to select the background color with the dropper. fill bucket Fills an outlined area with the foreground color. rectangle Draws a rectangular border in the foreground color. Double-click on this tool to frame the icon in the foreground color. Use the <Shift> key to constrain the rectangle to be a square. © National Instruments Corporation 3-3 G Programming Reference Manual Chapter 3 Building SubVIs filled rectangle Draws a rectangle bordered with the foreground color and filled with the background color. Double-click to frame the icon in the foreground color and fill it with the background color. Use the <Shift> key to constrain the rectangle to a square. select Selects an area of the icon for moving, copying, or deleting. Double-click on the entire icon to select it. Double-click on the entire icon and then press the <Delete> key to erase it. Use the <Shift> key to constrain the rectangle to a square. text Enters text into the icon. Double-click on this tool icon to select a different font. foreground/background Displays the current foreground and background colors. Click on each to get a palette from which you can choose new colors. Holding down the <Ctrl> (Windows); <option> (Macintosh); <meta> (Sun); or <Alt> (HP-UX) key temporarily changes all of the tools except the select tool to the dropper. The buttons to the right of the editing screen perform the following functions when you click on them. Note: Undo Cancels the last operation you performed in the Icon Editor. OK Saves your drawing as the VI icon and returns to the front panel. Cancel Returns to the front panel without saving any changes. You can cut, copy, and paste the entire icon using these options from the menu or pressing <Ctrl> (Windows); <command> (Macintosh); <meta> (Sun); or <Alt> (HP-UX) plus x for cut, c for copy, and v for paste. G Programming Reference Manual 3-4 © National Instruments Corporation Chapter 3 Building SubVIs Defining Connector Terminal Patterns You send data to and receive data from a subVI through the terminals in its connector pane. You define connections by choosing the number of terminals you want for the VI and by assigning a front panel control or indicator to each of those terminals. Only the controls and indicators you use programmatically by wiring to the subVI require terminals on the connector pane. If the connector for your VI is not displayed already in the upper right corner of the front panel, choose Show Connector from the icon pane pop-up menu, as shown in the following illustration. The block diagram does not have a connector pane. The connector replaces the icon in the upper right corner of the front panel. G selects a terminal pattern for your VI with as many terminals on the left of the connector pane as controls on the front panel, and as many terminals on the right of the connector pane as indicators on the front panel. Each of the rectangles on the connector represents a terminal area, and you can use them either for input to or output from the VI. If you want to use a different terminal pattern for your VI, you can select a different pattern. © National Instruments Corporation 3-5 G Programming Reference Manual Chapter 3 Building SubVIs Selecting and Modifying Terminal Patterns To select a different terminal pattern for your VI, pop up on the connector and choose Patterns from the pop-up menu. A solid border highlights the pattern currently associated with your icon, as shown in the previous illustration. To change the pattern, choose a new one. If you choose a new pattern, any assignment of controls and indicators to the terminals on the old connector pane is lost. If you want to change the spatial arrangement of the connector terminal patterns, choose one of the following commands from the connector pane pop-up menu: Flip Horizontal, Flip Vertical, or Rotate 90 Degrees. G disables these items if any terminal connections exist. Assigning Terminals to Controls and Indicators After you decide which terminal pattern to use for your connector, you must then assign front panel controls and indicators to the terminals. Follow these steps: 1. G Programming Reference Manual Click on a terminal of the connector. The tool automatically changes to the Wiring tool. The terminal turns black. 3-6 © National Instruments Corporation Chapter 3 Building SubVIs 2. Click on the front panel control or indicator you want to assign to the selected terminal. A marquee frames the selected control. 3. Position the cursor in an open area of the front panel and click on it. The marquee disappears and the selected terminal turns to gray, indicating that the terminal has been assigned. © National Instruments Corporation 3-7 G Programming Reference Manual Chapter 3 Building SubVIs Note: If the connector terminal turns white, then a connection was not made. Repeat steps 1 through 3 until the connector terminal turns gray. Although you use the Wiring tool to assign terminals on the connector to front panel controls and indicators, no wires are drawn between the connector and these controls and indicators. 4. Repeat steps 1 and 2 for each control and indicator you want to connect. You also can select the control or indicator first, and then select the terminal. You can choose a pattern with more terminals than you need. You can leave some extra terminals unconnected if you anticipate making changes to the VI in the future that require a new input or output. Having the extra connections available means that the new input or output does not affect other VIs that already are using this VI as a subVI. Unassigned terminals do not affect the operation of the VI. You also can have more front panel controls than terminals. The connector pane has, at most, 28 terminals. If your front panel contains more than 28 controls and indicators that you want to use programmatically, group some of them into a cluster and assign the cluster to a terminal on the connector. Required, Recommended, and Optional Connections for SubVIs G has a feature that can keep you from forgetting to wire subVI connections—indications of required, recommended, and optional connections in the connector pane and the same indications in the Help window. Inputs and outputs of VIs that come in vi.lib have been premarked as Required, Recommended, or Optional. G sets inputs and outputs of VIs that you create to Recommended by default. When an input is marked as Required, you cannot run the VI as a subVI without wiring it correctly. When an input or output is marked as recommended, you can run the VI, but the Error List window lists a warning if warnings are enabled. To see if connections are Required, Recommended, or Optional, or to mark them as one of these states, click on a terminal in the connector pane and select an option from the This Connection Is submenu. A checkmark indicates its status, as shown in the following illustration. G Programming Reference Manual 3-8 © National Instruments Corporation Chapter 3 Building SubVIs In the Help window, Required connections appear in bold, Recommended connections are in plain text, and Optional connections are in grayed-out text. Deleting Terminal Connections You can delete connections between terminals and their corresponding controls or indicators individually or all at once. To delete a particular connection, pop up on the terminal you want to disconnect on the © National Instruments Corporation 3-9 G Programming Reference Manual Chapter 3 Building SubVIs connector and choose Disconnect This Terminal from the pop-up menu, as shown in the following illustration. The terminal turns white, indicating that the selected connection no longer exists. To delete all connections on the connector, choose Disconnect All Terminals from the pop-up menu anywhere on the connector. G also deletes all existing connections automatically if you select a new pattern from the Patterns palette. If you delete a control or indicator from the front panel, it is disconnected from its connector terminal, if one exists. Confirming Terminal Connections To see which control or indicator is assigned to a particular terminal, click on a control, indicator, or terminal with the Wiring tool when the connector pane is visible. G selects the corresponding assigned object. Creating SubVIs from VI Selections You can convert a portion of a VI into a subVI that can be called from another VI. You select a section of a VI, select Edit»SubVI From Selection, and the section becomes a subVI. Controls and indicators are created automatically for the new subVI, the subVI is wired automatically to the existing wires, and an icon of the subVI replaces the selected section of the block diagram in your original VI. G Programming Reference Manual 3-10 © National Instruments Corporation Chapter 3 Building SubVIs Creating a subVI from a selection is the same as removing the selected objects and replacing them with a subVI, except for the following behaviors: Note: • None of the front panel terminals included in the selection are removed from the caller VI. Instead, the front panel terminals are retained on the caller VI and are wired to the subVI. • All attributes included in the selection are retained on the caller VI and are wired to the subVI. The selected attributes are replaced by front panel terminals in the subVI which act as channels for transferring the value of an attribute, in or out of the subVI. • When a selection includes a local variable, it is replaced by a front panel terminal in the subVI. The local variable is retained on the caller VI and is wired to the subVI. When more than one instance of the same local variable is selected, the first instance becomes a front panel terminal and the rest remain as local variables in the subVI. Only one instance of the local variable is retained on the caller VI; the rest of the selected instances are removed from the caller and moved to the subVI. • Because local variables can either read or write from a front panel terminal, when instances of both read and write local variables are selected, two front panel objects are created in the subVI—one to pass the value of the local variable into the subVI and another to pass the value out of the subVI. The front panel terminal created to represent the read local variables has the suffix “read” added to its name, and the front panel terminal created to represent the write locals has the suffix “write” added to its name. Currently there is no Undo option to undo the creation of a subVI. However, selecting File»Revert can undo the creation of a subVI by reverting to the VI as it existed before the last save that you have made. Rules and Recommendations The ability to create a subVI from a selection can be a great convenience but might not be as simple as it seems. Careful planning still is required to create a logical hierarchy of VIs. Moreover, you must consider which objects should be included in the selection, so that you can avoid situations where the functionality of a resulting VI is affected adversely. In cases where a problem definitely occurs, G does not make a subVI out of the selection but does present a dialog box to explain why. In cases where there is only a potential problem, a dialog box © National Instruments Corporation 3-11 G Programming Reference Manual Chapter 3 Building SubVIs appears with an explanation of the potential problem. You then must decide whether or not to continue. Tip: If there are no local variables or Attribute Nodes in a selection, you might want to use a Sequence Structure to encapsulate the code you want sent to a subVI and preview the results. The following rules and recommendations can help you use this G feature effectively. Number of Connections Do not make very large selections that create a subVI with more than 28 inputs and outputs, the maximum number of connections on a connector pane. Keep in mind that each front panel terminal, each attribute, and certain local variables included in the selection require a slot in the connector pane; a selection with a large number of these items might run out of connector pane slots. To avoid exceeding the maximum terminals, select a smaller section of the diagram, or group data into arrays and clusters before selecting a region of the diagram to convert. Cycles Try to avoid making selections that create cycles in the diagram. Cycles occur if a data flow originates from an output of the subVI and terminates as an input to the subVI. Identifying cycles while making selections is difficult, but G detects them for you. When G detects a cycle, it displays a dialog box prompting you either to create a new VI from the selection or to cancel. If you choose to create a new VI, a new Untitled VI is created from your selection. The selected items in the original diagram are left untouched. Attribute Nodes within Loops Do not include Attribute Nodes within a loop in your selection. Because an Attribute Node is retained on the caller VI and wired to the subVI, execution of the subVI does not update the value of the attribute on every iteration of the loop. You cannot make a subVI in such cases. G Programming Reference Manual 3-12 © National Instruments Corporation Chapter 3 Building SubVIs Illogical Selections Do not convert selections into a subVI that do not make sense. For example, it does not make sense to convert a selection consisting of one object inside a Sequence Structure and another object outside of the Sequence Structure without including the Sequence Structure itself. G disallows such selections and displays an explanation of the problem. Locals and Front Panel Terminals within Loops Try to avoid including local variables or front panel terminals inside a loop in your selection. Because selected front panel terminals or locals are retained on the caller VI and wired to the subVI, execution of the subVI does not update the value of these items on every iteration of the loop. This can cause a change in the functionality of the caller VI. G displays a warning in such cases; you must decide whether to continue or cancel. Case Structures Containing Attribute Nodes, Locals, or Front Panel Terminals Try to avoid including a Case Structure containing an Attribute Node, front panel terminal, or local variable to which a value is written. In such cases, when the subVI is executed, a specific value always is written to the object because you wire it to the subVI. Although it exists in the original block diagram, a value can be written only when either the TRUE or FALSE part of the Case Structure executes. This can change the functionality of the caller VI. G displays a warning in such cases; you must decide whether to continue. If you continue, you first must edit the subVI to supply a value in all cases. © National Instruments Corporation 3-13 G Programming Reference Manual Chapter 3 Building SubVIs Consider the following illustration as a simple example. The Case Structure is selected for conversion into a subVI. The front panel terminal Output is left out in the original diagram and connected to the subVI through a connector as shown in the following illustration. In the original block diagram, G wrote a value to Output only when the FALSE part of the case executed. However, when the selection turns into a subVI, G always writes a value to Output regardless of whether the TRUE or FALSE part of the case was executed within the subVI. You need to edit the subVI to supply data for the extra cases. G Programming Reference Manual 3-14 © National Instruments Corporation Chapter 3 Building SubVIs Using the Hierarchy Window The Hierarchy window displays a graphical representation of the calling hierarchy for all VIs in memory, including type definitions and global variables. You can configure many aspects of the display in the Hierarchy window. For example, you can have the layout displayed horizontally or vertically, and you can include or exclude VIs in vi.lib, global variables, or type definitions. Other useful features of the Hierarchy window include the ability to access the VI Setup…, Edit Icon…, Show VI Info…, and Print Documentation… options, the ability to drag or copy and paste hierarchy nodes to a block diagram of another VI as a subVI, and the ability to search for hierarchy nodes by name. Opening the Hierarchy Window You can open the Hierarchy window in any of the following ways: • Select Project»Show VI Hierarchy. The Hierarchy window is shown with the VI of the current active window as the focus node. • Under the pop-up menus of subVIs, global variables, or type definitions, select Show VI Hierarchy. The Hierarchy window appears with the selected subVI, global variable, or type definition as the focus node. • If the Hierarchy window is already open, you can bring it to the front by selecting it from the list of open windows under the Windows menu. The Hierarchy window can be switched between horizontal and vertical display through an option in the View menu or by pressing the Horizontal Layout or Vertical Layout button at the top of the window. In a horizontal display, subVIs are shown to the right of their calling VIs; in a vertical display, they are shown below their calling VIs. © National Instruments Corporation 3-15 G Programming Reference Manual Chapter 3 Building SubVIs SubVIs always are connected with lines to their calling VIs. The window shown in the following illustration is displayed horizontally. Arrow buttons and arrows beside nodes indicate what is displayed and what is hidden, as follows: • A red arrow button pointing towards the node indicates that some or all subVIs are hidden. Clicking on the button shows the immediate subVIs of the node. • A black arrow button pointing towards the subVIs of the node indicates that all immediate subVIs are shown. • A blue arrow pointing towards the callers of the node indicates that the node has additional callers that are not shown. If a node has no subVIs, no red or black arrow buttons are shown. G Programming Reference Manual 3-16 © National Instruments Corporation Chapter 3 Building SubVIs A node becomes the focus node, indicated by being surrounded by a thick red border, when an operation is performed on it. It becomes defocused when you perform an action on another node. As you move your cursor over objects in the Hierarchy window and your cursor becomes idle over a node, G displays the name of the node below the icon of the node. If you prefer, you can use an option in the View menu to show the full path instead of the name. You can double-click on any icon in the Hierarchy window to open the associated VI. If you show the Help window and move the cursor over an icon, G displays the Help window information for that VI. Hierarchy Window Options Several options let you control the display of the Hierarchy window; others let you perform actions on nodes displayed in the window. Options are available in the View menu, in buttons near the top of the Hierarchy window, in the pop-up menu of a node, and through mouse clicks. You also can access the View menu by popping up on an empty space in the Hierarchy window. © National Instruments Corporation 3-17 G Programming Reference Manual Chapter 3 Building SubVIs View Menu Options The View menu contains the following options related to the display of the Hierarchy window. Many of the options are also available from buttons near the top of the window. • Redraw—Redraws the window layout to minimize line crossings and maximize symmetry, which is useful after successive operations on hierarchy nodes. If a focus node exists, the window is scrolled to make that node visible. If no focus node exists, the window is scrolled to make the first root showing subVIs visible. • Show All VIs—Displays all hidden VIs. There is no focus node after this option has been selected. The option does not affect other settings in the View menu. In other words, VIs in vi.lib, global variables, and type definitions that are not included in the hierarchy still are hidden. • Vertical Hierarchy—Arranges the nodes from top-to-bottom with the calling VIs above their subVIs. • Horizontal Hierarchy—Arranges the nodes from left-to-right with the calling VIs to the left of their subVIs. • Include VIs in vi.lib—Toggles the Hierarchy window to include or exclude VIs in vi.lib. • Include Globals—Toggles the Hierarchy window to include or exclude globals. G Programming Reference Manual 3-18 © National Instruments Corporation Chapter 3 Building SubVIs • Include Type Defs—Toggles the Hierarchy window to include or exclude type definitions. • Full VI Path in Label—Toggles the Hierarchy window to display either the full VI path or simply the name of the VI in the Tip strip for each hierarchy node. Hierarchy Toolbar Buttons A toolbar in the Hierarchy window contains buttons that affect the display of the window. The buttons, which perform some of the same actions as items in the View menu, are described as follows: Redo Layout Redraws the window layout to minimize line crossings and maximize symmetry, which is useful after successive operations on hierarchy nodes. If a focus node exists, the window is scrolled to make that node visible. If no focus node exists, the window is scrolled to make the first root showing subVIs visible. Vertical Layout Arranges the nodes from top to bottom with the calling VIs above their subVIs. Horizontal Layout Arranges the nodes from left to right with the calling VIs to the left of their subVIs. Include VI Lib Toggles the Hierarchy window to include or exclude VIs in vi.lib. Include Globals Toggles the Hierarchy window to include or exclude globals. Include Type Definitions Toggles the Hierarchy window to include or exclude type definitions. © National Instruments Corporation 3-19 G Programming Reference Manual Chapter 3 Building SubVIs Hierarchy Node Pop-Up Menu If you pop up on a node (subVI, global variable, or type definition) displayed in the Hierarchy window, a menu appears with options for controlling the display or carrying out commands related to the selected node. The options are described as follows: • Highlight Connections—Makes the selected node the focus node and highlights in red the edges connecting its immediate callers and subVIs. • Show Immediate SubVIs—If the node is hiding all or some subVIs, this option expands the node to show all of its immediate subVIs. The edges connecting the node to its subVIs are highlighted in red. The option is toggled with Hide All SubVIs. • Hide All SubVIs—If a node is showing all immediate subVIs, this option collapses the node to hide its entire subVI chain. The option is toggled with Show Immediate SubVIs. • Show VI Hierarchy—Makes the selected node the focus node and displays the nodes belonging to its call chain and subVI chain. Unrelated roots are also visible, but all of their subVIs are hidden. The edges connecting the call chain of a node and subVI chain are highlighted in red. G Programming Reference Manual 3-20 © National Instruments Corporation Chapter 3 Building SubVIs • Show All SubVIs—Makes the selected node the focus node and expands its entire subVI chain. The edges connecting the subVI chain of the node are highlighted in red. • Show All Callers—Makes the selected node the focus node and expands its entire call chain. The edges connecting the call chain are highlighted in red. • Edit Icon…—Displays the Icon Editor for editing of the icon of the node. • VI Setup…—Displays the VI Setup dialog box for the node. • Get Info…—Displays the Get Info dialog box for the node. • Open Front Panel—Opens the front panel of the VI, global, or type definition. • Print Documentation…—Brings up the Print Documentation dialog box, from which you can choose the portion of the VI you want to print. For more information on this dialog box, see the Selecting Print Options section of Chapter 5, Printing VIs. Hierarchy Node Mouse-Click Sequences Mouse-click sequences are available for selecting nodes, for copying or dragging nodes, and for shortcuts to certain pop-up menu options. Where applicable, the sequences are performed with the Positioning tool selected. The shortcut mouse clicks are as follows. For a more complete description of options available in the pop-up menu, see the section Hierarchy Node Pop-Up Menu of this chapter. • Clicking on the red arrow button executes the Show Immediate SubVIs action. • <Shift>-clicking on the red or black arrow button executes the Show All SubVIs action. • Pressing <Ctrl-click> (Windows); <option-click> (Macintosh); <meta-click> (Sun); and <Alt-click> (HP-UX); on the node executes the Show VI Hierarchy action. • Double-clicking on the node executes the Open Front Panel action. • Single-clicking on the node selects it for dragging to a block diagram or copying to the Clipboard to use as a subVI. © National Instruments Corporation 3-21 G Programming Reference Manual Chapter 3 Building SubVIs • By <Shift>-clicking on and holding the mouse button down while selecting, you can select multiple nodes for copying to other block diagrams or front panels. You also can make multiple selections by dragging a rectangle over the objects you want to select. • Pressing the <Tab> key toggles between the Positioning and the Scroll tool of the Tools palette. Finding Hierarchy Node Mechanism A Find Hierarchy Node mechanism is available to search currently visible nodes in the Hierarchy window by name. You can initiate the search by simply typing in the name of the node. A small Search window appears displaying the text that has been typed. The search takes place immediately and highlights a matching node by displaying a Tip strip of its name. In the following illustration the Find Hierarchy Node mechanism has found the node named drawJoint.vi. A search is performed as you type; thus, when no node matches the characters currently displayed in the Search window, the system beeps and no more characters can be typed. You then can use the <Backspace> or <Delete> key to delete one or more characters, so that you can resume typing. G Programming Reference Manual 3-22 © National Instruments Corporation Chapter 3 Building SubVIs The Search window disappears automatically if no keys are pressed for a certain amount of time. You can press the <Esc> key to remove the Search window immediately. When a match has been made on a node, you can use the right or down arrow key, or the <Enter> on Windows and Sun or the <Return> key on Macintosh and HP-UX, to find the next node that matches the search string. To find the previous node that matches, you can press the left or up arrow key, or <Shift-Enter> on Windows and Sun or <Shift-Return> on Macintosh and HP-UX. Finding VIs, Objects, and Text When developing an application consisting of multiple subVIs or even a single large VI, you might want to find occurrences of a particular object or string of text. The Project»Find command can help you find all instances of the following objects with the names you indicate: • VIs • Built-in functions • Type definitions • Global variables • Local variables • Attribute Nodes • Breakpoints • Front panel terminals • Text For information on type definitions, see the Type Definitions section in Chapter 22, Custom Controls and Type Definitions. For information on local and global variables, see Chapter 21, Global and Local Variables. For information on Attribute Nodes, see Chapter 20, Attribute Nodes. For information on breakpoints, see the Placing Breakpoint Tools section of Chapter 4, Executing and Debugging VIs and SubVIs. In addition to the Find command, many objects have pop-up options that help you quickly find related objects. For example, if you pop up on a control, an option helps you find the corresponding terminal as well as any local variables or Attribute Nodes associated with it. © National Instruments Corporation 3-23 G Programming Reference Manual Chapter 3 Building SubVIs Find Dialog Box To bring up the Find dialog box, select Project»Find…, or press <Ctrl-f> (Windows); <command-f> (Macintosh); <meta-f> (Sun); or <Alt-f> (HP-UX). As a shortcut, you can select a piece of text or an object before accessing the dialog box. The dialog box appears, with the text or object preselected for the search. Finding VIs and Other Objects To search for VIs or other objects, click on the Objects button in the Find dialog box. To select the object you want to search for, click on the button after the words Select Object. The Select Objects menu appears. G Programming Reference Manual 3-24 © National Instruments Corporation Chapter 3 Building SubVIs The options available in this menu are as follows: • Functions—Brings up the Functions palette so you can select built-in functions, VIs, or any objects that you have customized to appear in the Functions palette. • VIs—Displays a palette of all VIs in memory that are not located in vi.lib. • Type Defs—Displays a palette of all type definitions in memory that are not located in vi.lib. • Globals—Displays a palette of all global VIs in memory that are not located in vi.lib. • Objects in vi.lib—Displays all VIs, type definitions, and global variables that are located in vi.lib. • Others—Displays a menu from which you can select Attribute Nodes, breakpoints, and front panel terminals. • VIs by Name…—Invokes the Select VIs by Name dialog box, which displays all VIs in memory by name in alphabetical order. You can type the name of the object to jump quickly to the item in the list you want. With the three checkboxes (VIs, Globals, and Type Defs), you can include and exclude different types of objects to be displayed in the list box. © National Instruments Corporation 3-25 G Programming Reference Manual Chapter 3 Building SubVIs Finding Text To search for specific text, click on the Text button in the Find dialog box. The dialog box is displayed as follows. Search String Options You can type in the text you want to find, and optionally limit the scope of the search to specific areas of VIs (front panel, block diagram, show VI info text, or history information) or components of objects, such as the label or description. The following options are available for indicating the search string: • Match Case—Finds only text strings that exactly match the case (uppercase or lowercase) of the characters you type in. • Match Whole Word—Finds text strings only if they are preceded and followed by a non-alphanumeric character such as a space or a plus sign (+), or the start or end of a line. (If this option is not selected, the command matches any string, regardless of if it is a fragment of a larger string or not.) • Regular Expression—Handles the character string as a regular expression. The regular expression has the same specifications the Match Pattern function (see Online Help»Function and VI Reference for those specifications). G Programming Reference Manual 3-26 © National Instruments Corporation Chapter 3 Building SubVIs Text Search Options The More Options… button invokes the Text Search Options dialog box, which has options for configuring the scope of the text search for each VI. The options indicate if and where to search text that is visible or hidden. The options are as follows: Note: • Search in VI’s—Indicates whether to search the front panel of a VI, block diagram, Get Info text, or History window text. At least one of these must be checked. • Search in Object’s Label—Indicates whether to search visible or hidden object name labels. • Search in Object’s Data & Parts—Indicates if you need to search visible or hidden data and parts.The data and parts of an object consist of everything belonging to an object except for the name label of the object. You also have the option of searching the description of various objects. At least one of the options in the Search in Object’s Label and Search in Object’s Data & Parts must be checked. The Text Search options are saved from search to search; therefore, if you do not find a string of text that is expected to exist, make sure that the Text Search Options are set appropriately. Narrowing the Search Scope Three options in the Search Scope ring menu indicate the VIs to be searched: • © National Instruments Corporation All VIs in Memory—Indicates the search scope as all VIs that currently are loaded. Two checkboxes are available to include or exclude VIs in vi.lib and the Hierarchy window. 3-27 G Programming Reference Manual Chapter 3 Building SubVIs • Selected VIs—Selects a custom set of VIs to search. The Hierarchy window can be included or excluded from the search scope. The Select… button brings up the Select VIs option in the Search dialog box. • Name of a VI—Searches for a specific VI only. The name of the VI in this ring item depends on the active VI when you invoked the Find dialog box. Click on the Find button to begin searching for the text or you have selected. Search Results Window After you have completed a search, if there is more than one search result, the Search Results window displays all search results, as shown in the following illustration. If only one result is found, the result is immediately highlighted, bypassing the Search Results window. You can display this window also by selecting Project»Search Results…. The following options are available in the Search Results window: • Clear—Clears and frees memory used to store search results. • Go To—Highlights the currently selected search result. You also can do this by double-clicking on the item. Items that already have been highlighted are checked. • Find…—Invokes the Find dialog box. G Programming Reference Manual 3-28 © National Instruments Corporation Chapter 3 • Building SubVIs Stop—Appears in place of the Find… button during a search. If there is a long search through many VIs, the Search Results window updates search results as they are found and shows the status of the search. You use the Stop button to interrupt the search. If you delete an object or VI and it is part of a search result, then the item entry of that result is disabled. Notice, however, that modifying text does not update the search results. Therefore, you might highlight a text search result that no longer matches the search criteria. In that case, perform another find to update the search results. Finding Next and Previous Search Items Select Project»Find Next to highlight the next and previous results in the search list. For hidden text, all objects needed to display the text are made temporarily visible as grayed-out objects and the text is selected; when you click on the mouse or press a key, the objects are hidden again. Find Pop-Up Menu for Global and Local Variables and Attribute Nodes A Find pop-up menu item is available on controls, front panel controls and indicators, global variables, locals variables, and Attribute Nodes. You can pop up on a local variable or Attribute Node to find its corresponding control, front panel terminal, or other local variables and Attribute Nodes. Conversely, controls and front panel controls and indicators have pop-up menus to find all corresponding locals and Attribute Nodes. From a global node, you can find its corresponding global definition or all other global nodes. Conversely, global controls have a pop-up menu for finding all corresponding global references in memory. If more than one result is found, the Search Results window appears. © National Instruments Corporation 3-29 G Programming Reference Manual Executing and Debugging VIs and SubVIs Chapter 4 This chapter discusses how to operate and debug VIs, and explains how to set up VIs and subVIs for special execution modes. Executing VIs Running VIs You can run a VI by selecting Operate»Run or by clicking on the Run button. G compiles the VI if necessary. Run button VI running at top level While the VI is executing, the Run button changes appearance. If the VI is running at its top level (meaning it has no callers and therefore is not a subVI), the Run button changes to look like the illustration shown to the left. If the VI is executing as a subVI, the Run button changes to look like the illustration shown to the left. VI caller is running Press the Run Continuously button to run the VI over and over, until you stop or pause execution. Run Continuously button Stop button Pressing the Stop button aborts execution of the top-level VI. If a VI is used by more than one running top-level VI, the button appears grayed out. Pause button Pressing this button pauses execution. You can press it again at any time to continue execution. © National Instruments Corporation 4-1 G Programming Reference Manual Chapter 4 Executing and Debugging VIs and SubVIs You can run multiple VIs at the same time. After you start the first one, switch to the front panel or block diagram of the next one and start it as described previously. Notice that if you run a subVI as a top-level VI, all caller VIs are broken until the subVI completes. You cannot run a subVI as a top-level VI and as a subVI at the same time. If your VI runs but does not perform correctly, see the sections Debugging Broken VIs and Debugging Executable VIs later in this chapter. When you edit a VI, the toolbar contains several tools used for editing VIs, including the Font ring, the Alignment ring, and the Distribution ring. When you run a VI, those tools are replaced with debugging tools, as shown in the following illustration. Run button If you pop up on a control while running a VI, you can see that all objects have a much simpler set of options. These are the same as the options in the Data Operations submenu that you see in pop-up menus when you edit VIs. G Programming Reference Manual 4-2 © National Instruments Corporation Chapter 4 Executing and Debugging VIs and SubVIs You can cut, copy, or paste the contents of the control, set the control to its default value, and read the description of the control with options in this menu. Some of the more complex controls have additional options. For example, an array has options you can use to copy a range of values or go to the last element of the array. When editing a VI, the pop-up menu of an object contains an editing menu and a Data Operations submenu, as shown in the following illustration. This submenu contains the same options you see when © National Instruments Corporation 4-3 G Programming Reference Manual Chapter 4 Executing and Debugging VIs and SubVIs running a VI plus an additional option, the Make Current Value Default option. The Operate menu on the menu bar contains commands for executing the current VI. The following sections discuss several fundamental execution-related tasks. Stopping VIs Stop button Normally, you should let the VI run until it completes. However, if you need to halt execution immediately, click on the Stop button or select Operate»Stop. The Stop command aborts the top-level VI at the earliest opportunity. The halted VI most likely did not complete its task, so you cannot rely on any data it produces. Although G closes files open at the time and halts any data acquisition that might be in progress, you should avoid designing VIs that rely on the Stop button or Stop menu option. For example, if you create a VI that executes indefinitely within a While Loop until stopped by the operator, wire the conditional terminal of the loop with a Boolean switch on the front panel. If you want to prevent an operator from inadvertently aborting your VI by clicking on the Stop button, hide it by deselecting the VI Setup»Window Options»Show Abort Button option from the icon pane pop-up menu on the front panel of the VI. See Chapter 6, Setting up VIs and SubVIs, for information on setting window options. G Programming Reference Manual 4-4 © National Instruments Corporation Chapter 4 Executing and Debugging VIs and SubVIs Running VIs Repeatedly Run Continuously button VI running continuously To execute a VI repeatedly, click on the Run Continuously button. The VI begins executing immediately, and the Run Continuously button changes from outlined arrows to filled arrows while the VI is running. Click on the Run Continuously button again to stop the VI. The VI stops when it has completed normally. The behavior of the VI and the state of the toolbar during continuous run is the same as during a single run started with the Run button or the Operate»Run command. Data Logging on the Front Panel Front panel data logging logs a time stamp and the data in all front panel controls of a VI to a separate datalog file. You can have several separate files, each filled with logged data from different tests. You can retrieve this data using interactive retrieval through the VI, programmatic data retrieval, or standard file I/O functions. Each VI maintains a log file binding, which shows where the datalog file to which it will log front panel data resides. If the binding is “clear,” meaning that the location is unspecified, the VI prompts you for the location of the file. Configure and control front panel data logging by selecting the Operate menu and its Data Logging submenu, as shown in the following illustration. © National Instruments Corporation 4-5 G Programming Reference Manual Chapter 4 Executing and Debugging VIs and SubVIs When automatic data logging is enabled for a VI, G logs the front panel of the VI any time the VI completes execution. You can tell if automatic data logging is enabled for a VI by looking at the Operate»Log at Completion option. Selecting Operate»Log at Completion enables automatic data logging for a VI if it is disabled and disables it if it is enabled. To interactively log front panel data for a VI, select Operate»Data Logging»Log…. Note: A waveform chart returns only one data point at a time with front panel data logging. If you wire an array into the chart indicator, the data log contains the array subset that was displayed on the chart for that record. Enter button You can change the log file binding of a VI with the Operate»Data Logging»Change Log File Binding… option. You can select a specific record by typing the record number and then clicking on the Enter button or pressing the <Enter> key on the numeric keypad. You can mark the selected record for deletion by clicking on the Delete button. When the selected record is marked for deletion, the Delete button changes to a full trash can. Clicking on the full trash can unmarks Delete button the selected record for deletion. Selected records are not deleted until you select Operate»Data Logging»Purge Data…, or until you switch out of data retrieval mode, either by clicking on the OK button or Record marked selecting Retrieve… again. If any records still are marked for deletion for deletion button when you switch out of data retrieval mode, you are asked if you want to delete the marked records. Click on the OK button to return to the VI whose data log you have been viewing. Selecting Operate»Clear Log File Binding disassociates the VI from any associated log file. The next time you log from the front panel data of the VI, you will be prompted to specify the log file. To view logged data interactively, select the Operate»Retrieve… option. The toolbar becomes the data retrieval toolbar, as shown in the following illustration. G Programming Reference Manual 4-6 © National Instruments Corporation Chapter 4 Executing and Debugging VIs and SubVIs The highlighted number indicates which record currently is selected for viewing. The numbers in square brackets indicate the range of records logged. The date and time indicate when the selected record was logged. You can view the next or previous record by clicking on the up arrow or down arrow, respectively. You also can use the up or down arrows on your keyboard. Retrieving Data Programmatically You can retrieve data logged from a VI by using the Enable Database Access option or using standard file I/O functions to read the file as a datalog file. Accessing Databases You also can retrieve data by using the Enable Database Access option.You can access this option from the pop-up menu of a subVI that has logged front panel data in the associated datalog file of the VI, as shown in the following illustration. A halo that looks like a file cabinet appears around the datalog file. This halo has terminals for accessing data from the datalog file. If you run the calling diagram, the subVI does not execute. Instead, you retrieve data from a specified record of the datalog file. It also returns the time that the data was logged, and a © National Instruments Corporation 4-7 G Programming Reference Manual Chapter 4 Executing and Debugging VIs and SubVIs Boolean value indicating whether the indicated record number is invalid. The following illustration shows the halo terminals for accessing the logged data. G Programming Reference Manual 4-8 © National Instruments Corporation Chapter 4 Executing and Debugging VIs and SubVIs If the subVI has n logged records, you can wire any number from –n to n – 1 to the record # terminal. You can access records relative to the first logged record using non-negative record numbers. 0 means first record, 1 means second record, and so on, through n – 1, which stands for the last record. You can access records relative to the last logged record using negative record numbers. –1 means last record, – 2 means second to the last, and so on, through –n, which means the first record. If you wire a number outside the range –n to n – 1 to the record # terminal, the invalid record #? output is set to TRUE, and no data is retrieved. Retrieving Data Using File I/O Functions You also can retrieve data that has been logged from the front panel of a VI using file I/O functions that belong to G. Each record in the datalog file created by front panel data logging is a cluster containing a time stamp. It also contains a cluster of an unsigned 32-bit integer for seconds since G reference time as well as an unsigned, 16-bit integer for additional milliseconds. This integer is followed by a cluster of the front panel data in panel order. You can access the records of datalog files created by front panel data logging using the same G file I/O functions that you use to access programmatically created datalog files. Enter the appropriate type, described previously, as the type input to the File Open function, as shown in the following example. © National Instruments Corporation 4-9 G Programming Reference Manual Chapter 4 Executing and Debugging VIs and SubVIs Debugging VIs Debugging Broken VIs A VI cannot compile or run if it is broken. The VI Run button typically appears broken while you are creating or editing it, until you wire all the icons in the diagram. If it still is broken after you finish wiring the icons, try selecting Edit»Remove Bad Wires or selecting <Ctrl-b> (Windows); <command-b> (Macintosh); <meta-b> (Sun); or <Alt-b> (HP-UX). Often, this fixes a broken VI. Broken run button Warning button To find out why a VI is broken, click on the Broken Run button. An Error List window appears listing all the errors. This window is shown in the following illustration. You also can access this box by clicking on the Warning button of a VI, or by selecting Windows»Show Error List. The Warning button for a VI is only visible if the VI has a warning (such as overlapping objects) and you have checked the Show Warnings option in the Error List window. You can use the Preferences dialog box to configure G to show warnings by default. To locate a particular error, double-click on the text that describes it. G shows the error by bringing the relevant window to the front and G Programming Reference Manual 4-10 © National Instruments Corporation Chapter 4 Executing and Debugging VIs and SubVIs highlighting the object causing the error. You also can view errors and warnings for other VIs by selecting the name of the VI from the VI List pop-up menu. The following list contains some of the most common reasons for a VI being broken during editing. • A function terminal requiring an input is unwired. For example, you must wire all inputs to arithmetic functions. You cannot leave unwired functions on the diagram while you run the VI to try out different designs. • The block diagram contains a broken wire because of a mismatch of data types or a loose, unconnected end. You can remove broken wires, including wire stubs you cannot see, with the Edit»Remove Bad Wires command or by typing <Control B>. • A subVI is broken, or you edited its connector after you placed its icon in the diagram. • You might have a problem with an object you have made invisible, disabled, or otherwise altered through an Attribute Node. Restore the object using the Attribute Node to fix the problem, if possible. Interpreting Error Messages The following list contains some possible errors in a form similar to the way they look in the Error List window. Table 4-1. Error Messages Error Messages Descriptions Function Name: contains unwired or bad terminal. A required input is not wired or the type is inappropriate. Wire the required inputs with the proper data types. Code Interface Node: object code not loaded. You did not link the object code of a CIN properly. Pop up on the node and reload the code. Control: control does not match its type definition. Edit the control to match, or pop up and update or disconnect the type definition VI from the control. Enumeration has duplicate entries. All the items in an enumeration control must be unique and distinct. © National Instruments Corporation 4-11 G Programming Reference Manual Chapter 4 Executing and Debugging VIs and SubVIs Table 4-1. Error Messages (Continued) Error Messages Descriptions More Errors.... G shows only 100 errors at one time. Unlisted errors appear after you fix the listed errors. For Loop: N is unwired and there are no input indexing tunnels. Unless N is wired or an array is indexed on input, the loop cannot determine how many iterations to execute. Global or Local Variable: named component doesn’t exist. The name of a variable has changed since you last loaded the VI and the name in the global or local variable no longer matches. Pop up on the variable and select another name. Global Variable: subVI is missing. G was not able to find the global subVI when it loaded the calling VI, perhaps because you changed the name. Replace the bad global subVI with a good one. Node: A subroutine priority VI cannot contain an asynchronous node. You cannot use an asynchronous function, such as Wait, in a VI that has a priority level equal to subroutine. Right Shift Register: type is undefined. You must remove unused shift registers. Right Shift Register: some but not all left sides are wired. A shift register must have inputs for all the left sides or for none. Sequence: One or more sequence locals were never assigned. You forgot to wire to a Sequence Structure local variable. Remove unused sequence locals. subVI name: bad linkage to subVI. The connector pattern of the subVI changed since you last loaded the subVI, or you forgot to assign controls or indicators of the subVI to connector terminals. In the former case, you can use the Relink command in the subVI pop-up menu. G Programming Reference Manual 4-12 © National Instruments Corporation Chapter 4 Table 4-1. Executing and Debugging VIs and SubVIs Error Messages (Continued) Error Messages Descriptions subVI name: recursive references (dispose it). You have changed the name of the calling VI to be the same as one of its subVIs, and now G registers this change as the VI calling itself recursively. (The VI and subVI are probably in different directories.) G prevents recursion when you attempt to place a VI on its own block diagram. subVI name: LV Subroutine link error. A problem exists with linkage to a CIN routine. subVI name: A Subroutine priority VI cannot call a non-subroutine priority subVI. You must make the subVI execute at subroutine priority or change the calling VI to something other than subroutine priority. subVI name: subVI is already running. You cannot run a VI if one of its subVIs already is running as a subVI of another VI. subVI name: subVI is in either panel order or cluster order mode. You cannot run a VI if you ar changing the panel or cluster order of one of its subVIs. subVI name: subVI is in interactive retrieval mode. You cannot run a VI if one of its subVIs is in interactive retrieval mode. subVI name: subVI is missing. G was not able to find the subVI when it loaded the calling VI, perhaps because you changed the name. replace the bad subVI with a good one, or open the missing subVI if you can find it. subVI name: subVI is not executable. The subVI is broken. Open it and repair its errors. Terminal: The associated array or cluster on the front panel has no elements; its type is undefined. You must place a control or indicator in the array or cluster. Type Definition: can’t find valid type definition. G was not able to find the type definition VI when it loaded the calling VI, perhaps because you changed the name. Open the missing type definition VI if you can find it, pop up on the bad control, and disconnect it from the type definition, or replace it with a good control. © National Instruments Corporation 4-13 G Programming Reference Manual Chapter 4 Executing and Debugging VIs and SubVIs Table 4-1. Error Messages (Continued) Error Messages Descriptions (Un) bundle By Name: Empty cluster, or some components are unnamed. The input cluster wired to the Bundle By Name function is either empty or has some components that are not labeled. Unit: bad unit syntax. The text in the node is not a legal unit expression. A ? is placed immediately before the unrecognizable character. If you encounter messages that are not self-explanatory, and are not listed in this chapter, contact National Instruments. Correcting Broken VI Range Errors A range error indicator appears in place of the Run button in the following circumstances. Range Error indicator • You configured a control on a subVI to stop execution when it receives an out-of-range value (through the Data Range… option of the control), and the control receives such a value. • You configured an indicator on a subVI to stop execution when it tried to return an out-of-range value to a calling VI, and the indicator attempted to return such a value. • An operator enters an out-of-range value into a control that you set to stop execution on error, as long as that the VI is not running at the time. You can determine which control or indicator is out of range by its change in appearance, as shown in the following illustration. G Programming Reference Manual 4-14 © National Instruments Corporation Chapter 4 Note: Executing and Debugging VIs and SubVIs A VI or subVI can pass out-of-range values to one of its indicators without halting execution. The error condition exists only when a subVI attempts to return such a value. Also, an operator can enter out-of-range values into a control while its VI is executing. The out-of-range error condition only prevents the VI from starting, not from continuing once it already has started. Debugging Executable VIs If your program executes but does not produce the expected results, you often can solve the problem by taking the following steps. • Eliminate all VI warnings. If you select the Show Warnings option in the Error List window, the listbox identifies the warnings for your VI. Then, you can determine the causes and eliminate them from your VI. • Check wire paths to ensure that the wires connect to the proper terminals. Triple-clicking on the wire with the Operating tool highlights the entire path. A wire that appears to emanate from one terminal actually might emanate from another, so look closely to see where the end of the wire connects to the node. • Use the Help window (Help»Show Help) to make sure that both functions and Tip strips are wired correctly. • Verify that the default value for functions or subVIs that have unwired inputs is what you expect. • Use breakpoints, execution highlighting, and single-stepping to determine if the VI is executing as you planned. Make sure you disable these modes when you do not want them to interfere with performance. • Use the probe feature described in the Using the Probe Tool section of this chapter to observe intermediate data values. Also, check the error output of functions and subVIs, especially those performing I/O. • Observe the behavior of the VI or subVI with various input values. For floating-point numeric controls, you can enter the values NaN and ±Inf in addition to normal values. • Check to make certain that execution highlighting is turned off in subVIs, if your VI runs more slowly than expected. Also, close subVI windows when you are not using them. © National Instruments Corporation 4-15 G Programming Reference Manual Chapter 4 Executing and Debugging VIs and SubVIs • Check the representation of your controls and indicators to see if you are receiving overflow because you have converted a floating-point number to an integer or an integer to a smaller integer. Also refer to the Recognizing Undefined Data section of this chapter. • Check the data range and range error action of controls and indicators. They might not be taking the error action you want. • Check for For Loops that inadvertently might execute zero iterations and produce empty arrays. Also refer to the Execution Highlighting and Recognizing Undefined Data sections of this chapter. • Verify that you initialized shift registers properly, unless you specifically intend them to save data from one execution of the loop to another. • Check the order of cluster elements at the source and destination points. Although G detects data type and cluster size mismatches at edit time, G does not detect mismatches of elements of the same type. Use the Cluster Order… option on the cluster shell pop-up menu to check cluster order. • Check the node execution order. Nodes that are not connected by a wire can execute in any order. The spatial arrangement of these nodes does not control the order. That is, unconnected nodes do not execute from left to right, top to bottom on the diagram as statements do in textual languages. • Check that there are not any extraneous VIs. Unlike functions, unwired subVIs do not always generate errors (unless you configure an input to be required or recommended). If you mistakenly place an unwired subVI on the block diagram, it executes when the diagram does, and consequently your program might end up doing extra actions. • Check that you do not have hidden VIs. You inadvertently might have hidden subVIs three ways—by dropping one directly on top of another node; by decreasing the size of a structure without keeping the subVI in view; or by placing one off the main diagram area. In the last case, scroll the block diagram window to its limits. Also check the inventory of subVIs used in the VI against the Project menu options This VI’s SubVIs and Unopened SubVIs to determine if any extraneous subVIs exist. You also can look in the Hierarchy window to see the subVIs for a VI, or in the Error List window to see a list of hidden objects (as long as the Show Warnings checkbox is selected). To help avoid corruption caused G Programming Reference Manual 4-16 © National Instruments Corporation Chapter 4 Executing and Debugging VIs and SubVIs by hidden VIs, you can indicate that inputs to VIs are required; for information, see Required, Recommended, and Optional Connections for SubVIs in Chapter 3, Building SubVIs. Recognizing Undefined Data There are two mnemonics that can appear in floating-point digital displays to indicate faulty computations or meaningless results. NaN (not a number) is the symbol that represents a particular floating-point value that operations such as taking the square root of a negative number can produce. Inf is another special floating-point value produced, for example, by dividing one by zero. Undefined data can corrupt all subsequent operations. Floating-point operations propagate NaN and ± Inf, which, when explicitly or implicitly converted to integers or Booleans, become meaningless values. For example, dividing one by zero produces Inf, but converting that value to a word integer produces the value 32,767, which appears to be a normal value. Before converting to integer types, check intermediate floating-point values for validity unless you are sure that this type of error does not occur in your VI. Executing a For Loop zero times can produce unexpected values. For example, the output of an initialized shift register is the initial value. However, if you do not initialize the shift register, the output is either the default value for the data type—0, FALSE, or empty string—or the output is the last value loaded into the shift register when the diagram last executed. Indexing beyond the bounds of an array produces the default value for the array element data type. You can do this inadvertently in a number of ways, such as indexing an array past the last element using a While Loop, supplying too large a value to the index input of an Index Array function, or supplying an empty array to an Index Array function. When you design VIs that can produce undefined output values for certain input values, you should not rely on special values such as NaN or empty arrays to identify the problem. Instead, make sure your VI either produces an error message that identifies the problem or produces only defined default data. For example, if you create a VI that uses an incoming array to auto-index a For Loop, you need to evaluate the operation of the VI if © National Instruments Corporation 4-17 G Programming Reference Manual Chapter 4 Executing and Debugging VIs and SubVIs the input array is empty. You either can produce an output error code or substitute predefined values for the values created by the loop. Note: A floating-point indicator or control with a range of –Infinity to +Infinity still can generate a range error if you send NaN to it. Understanding Warnings If an object is hidden completely by another object, G generates a warning to indicate that all objects are not visible. For example, if a terminal is hidden under the edge of a structure, or tunnels are on top of each other, a warning message is placed in the Error List window. Warnings do not prevent you from running a VI; they are intended to help you debug potential problems in your programs. Debugging Features The following debugging features are discussed in this section: • Single-stepping through a VI to observe each execution step • Highlighting execution to watch the data flow as it occurs • Using a probe to display data • Setting breakpoints to pause execution, so that you can single-step, probe wires to see their data, or edit indicators • Suspending execution to edit indicators, to control the number of times to execute, or to go back to the beginning of the VI Single-Stepping through VIs Pause button Step Over button For debugging purposes, you might want to execute a block diagram node by node. This form of execution is called single-stepping. While executing a VI, you can start single-stepping by clicking on the Pause button. If you have not yet started executing a VI, you can start single-stepping by pressing the Start Single-stepping button. From single-stepping you can return to normal execution at any time by clicking on the Pause button. While the VI is running in single-step mode, you can press any of the active three step buttons to proceed to the next step. The step button you press determines where the next step executes. If you idle your cursor over any of the step buttons, a Tip strip appears with a description of what the next step will be if you press that button. G Programming Reference Manual 4-18 © National Instruments Corporation Chapter 4 Executing and Debugging VIs and SubVIs You might want to use execution highlighting as you single-step through a VI, so you can follow data as it flows through the nodes. See the Execution Highlighting section in this chapter. An Example of Single-Stepping through a VI The following illustration shows an example of a VI that is single-stepping (Caller 1.vi). This VI currently is running on behalf of the VI Caller 3.vi. The subVI, Fibonacci.vi, currently is executing (you can tell this by the arrow glyph on the Run button). The VI, Factorial.vi, is the next node to be executed. Clicking on the Step Into button opens its block diagram and starts single-stepping. Clicking on the Step Over button executes the subVI and pauses. Clicking on the Step Out button finishes executing the current frame of the loop and pauses. After stepping into the subVI Fibonacci.vi and stepping into the loop, clicking on the Step Out button and holding down the mouse for a second, a menu appears from which the user can select how far the VI should execute before pausing. Selecting Block Diagram runs the VI until all nodes on the block diagram of the VI have executed, at which time execution pauses. © National Instruments Corporation 4-19 G Programming Reference Manual Chapter 4 Executing and Debugging VIs and SubVIs Selecting one of the VIs on the call stack runs that VI until it is finished. At that point, the caller of the selected VI pauses. Using Step Buttons The step buttons are as follows: Step Over button Step Into button Step Out button Press the Step Over button to execute a structure (sequence, loop, etc.) or a subVI and then pause at the next node. The keyboard shortcut is <Ctrl> (Windows); <command> (Macintosh); <meta> (Sun); or <Alt> (HP-UX) followed by the right arrow key. Press the Step Into button to execute the first step of a subVI or structure (sequence, loop, etc.) and then pause at the next step of the subVI or structure. The keyboard shortcut is <Ctrl> (Windows); <command> (Macintosh); <meta> (Sun); or <Alt> (HP-UX) followed by the down arrow key.The step buttons affect execution only in a VI or subVI that is in single-step mode. If a VI in single-step mode has one subVI that is also in single-step mode and one that is in normal execution mode, the first subVI single-steps when called but the second executes normally when called. Press the Step Out button to finish executing the current block diagram, structure, or VI and pause. The keyboard shortcut is <Ctrl> (Windows); <command> (Macintosh); <meta> (Sun); or <Alt> (HP-UX) followed by the up arrow key. When the VI finishes executing, the step buttons become grayed-out. G Programming Reference Manual 4-20 © National Instruments Corporation Chapter 4 Executing and Debugging VIs and SubVIs Reading Call Chains When a subVI is paused, a Call Chain ring appears. This menu lists the chain of callers from the top-level VI down to this subVI. but keep in mind that this is not the same as the Project»This VI’s Caller’s option, which lists all calling VIs regardless of whether they currently are executing. When you select a VI from the Call Chain ring, its block diagram opens and the VI calling the current subVI is selected. This helps you distinguish the current instance of the subVI if the block diagram contains more than one instance. Call Chain ring In addition to the keyboard shortcuts given in the Using Step Buttons, the following commands are available: • When single-stepping through a subVI or structure, clicking on the Step Out button while holding the mouse down brings up a menu from which you can select how far the VI should execute before pausing. • Double-clicking on front panel controls and indicators, local variables, and global variables displays and highlights the corresponding block diagram object. • Pressing the <Ctrl> (Windows); <option> (Macintosh); <meta> (Sun); or <Alt> (HP-UX) key while double-clicking on a subVI brings its block diagram to the front. Execution Highlighting For debugging purposes, it is helpful to view an animation of the execution of the VI block diagram. To use this feature, click on the Hilite Execution button. The button changes its appearance. Click on this button at any time to return to off on normal view mode. You commonly use execution highlighting in Hilite Execution button conjunction with single-step mode to gain an understanding of how data flows through nodes. Highlighting greatly reduces the performance of a VI. With execution highlighting, the movement of data from one node to another is marked by bubbles moving along the wires. Additionally, in © National Instruments Corporation 4-21 G Programming Reference Manual Chapter 4 Executing and Debugging VIs and SubVIs single-stepping, the next node blinks rapidly as shown in the following illustration sequence. G Programming Reference Manual 4-22 © National Instruments Corporation Chapter 4 Executing and Debugging VIs and SubVIs When you are single-stepping through a subVI with the Hilite Execution button on, an execution glyph on the subVI icon of the block diagram indicates which VIs are running and which are waiting to run. running waiting to run Block Diagram The Hierarchy window displays whether a VI is paused and/or suspended. (For more information about the Hierarchy Window, see the Using the Hierarchy Window section of Chapter 3, Building SubVIs.) The arrow in the following illustration indicates a subVI that is running regularly or single-stepping. The pause glyph indicates a subVI that is paused and/or suspended. A green pause glyph (or a hollow glyph if displayed in black and white) indicates that this subVI pauses when called. A red pause glyph (or a solid glyph if displayed in black and white) indicates that this subVI currently is paused. paused Hierarchy Window Using the Probe Tool You can use the Probe tool to check intermediate values in a VI that executes but produces questionable or unexpected results. For example, you might have a complicated block diagram with a series of operations, any one of which might be returning incorrect data. Probe tool selected One way to look for the source of the questionable results is to wire an indicator to the output wire from one of the operations to display the intermediate results. But placing an indicator on the front panel and wiring its terminal to the block diagram is not a convenient debugging mechanism. It is time-consuming and creates unwanted items on your front panel and block diagram that you later must delete. © National Instruments Corporation 4-23 G Programming Reference Manual Chapter 4 Executing and Debugging VIs and SubVIs Select the Probe tool and place its cursor on a wire, or pop up on the wire and select Probe. As shown in the following illustration, the floating Probe window appears, with no data displayed within. As soon as you run the VI, the Probe window displays data passed along the wire. Each probe is numbered automatically and uniquely. The wire to which it is attached is marked with the same number. This helps you keep track of which probe is associated with which wire. However, if the name of the front panel control is as long as or longer than the Probe window, the number is not visible. You can use the probe in conjunction with execution highlighting, single-stepping, or breakpoints to view values more easily. During single-stepping or pausing at a breakpoint, data is updated immediately if it is available. Then you can examine the inputs of a node when execution halts at the node. You can insert the probe before running your VI to see the data. In single-stepping, you also can create a probe for a wire that has executed and it updates to show the contents of the wire. This is useful when you have set a breakpoint on a node and you want to examine its inputs. You cannot change data with the probe, and the probe has no effect on VI execution. If you pop up on the indicator of the Probe window, you can find the associated wire, by selecting Find Wire, as shown in the following illustration. G Programming Reference Manual 4-24 © National Instruments Corporation Chapter 4 Executing and Debugging VIs and SubVIs If you select the Find Wire option, the block diagram containing that wire comes to the front of all VIs and the wire is highlighted. Use Reinitialize to Default to reset the value displayed in the Probe window to its default value. Use the Copy Data option to copy the data to other numeric controls in the same VI or in other VIs. Creating Probes When you create a probe, you create a default-style probe to match the data type of the wire. With numeric data types, for example, a digital indicator is used to probe the data of a wire. If you prefer, you can select a control for the probe from the built-in controls, or from controls that have been saved as custom controls or type definitions. To do so, pop up on the wire, select Custom Probe, and then select a control from the Custom Probe palette that appears to the right. If you choose Select a Control…, you can use the file dialog box to select any custom control or type definition that was saved in the file © National Instruments Corporation 4-25 G Programming Reference Manual Chapter 4 Executing and Debugging VIs and SubVIs system. Type definitions are treated just like standard custom controls when used to probe data. Only those parts of the Custom Probe palette that might match the data type of the wire are enabled. If you choose a control that cannot have the same data type as the wire, G signals this mismatch with a beep. For example, with arrays and clusters, you cannot use the array and cluster shells from the Array & Cluster palette, because they are not completed data types. You can add your own palettes to the end of the Custom Probe palette, just as you can add them to the Controls palette. See Chapter 7, Customizing Your G Environment, for more information on how to do this. Placing Breakpoint Tools Breakpoint tool Clear Breakpoint cursor You can place a breakpoint on a VI, node, or wire to set a pause to occur during execution. Nodes include subVIs, functions, structures, Code Interface Nodes (CINs), Formula Nodes, and Attribute Nodes. When a block diagram has a breakpoint, execution pauses after all nodes on the G Programming Reference Manual 4-26 © National Instruments Corporation Chapter 4 Executing and Debugging VIs and SubVIs diagram have executed. When a wire has a breakpoint, execution pauses after data has passed through the wire. When you reach a breakpoint during execution, you can single-step through execution, probe wires to see their data, change values of front panel controls, or continue running to the next breakpoint or until execution is completed, depending on which one occurs first. To set a breakpoint, select the Breakpoint tool in the Tools palette and then click on the block diagram, node, or wire. Click this tool on the same object at any time to remove the breakpoint. The appearance of the tool indicates if a breakpoint is set or cleared, as shown at the left. The following table indicates how breakpoints are displayed and when execution pauses, in relation to where breakpoints are placed. Table 4-2. Location of Breakpoint Breakpoint Placement How Breakpoint Is Highlighted When Pause Will Occur Block diagram Red border around block diagram. If the diagram is inside a structure, the red border is inside the structure as well. When the end of the block diagram is reached. Node Red border framing the node. Just before the node executes. At this point all the input signals into the node can be probed with the Probe tool. Wire Red bullet in the middle of wire. If a probe is attached to the wire, the probe has a red border. After data has passed through the wire. © National Instruments Corporation 4-27 G Programming Reference Manual Chapter 4 Executing and Debugging VIs and SubVIs In the following example, the wire with the attached probe has a breakpoint. The VI pauses after the probe has generated data. In the next example, the Increment node has a breakpoint. The VI pauses before Increment executes. One wire also has a breakpoint. The VI pauses after Multiply has executed. And in the following example, the For Loop has a breakpoint. The VI will pause after Multiply has executed. G Programming Reference Manual 4-28 © National Instruments Corporation Chapter 4 Executing and Debugging VIs and SubVIs When a VI pauses because of a breakpoint, its block diagram is brought to the front (if the front panel was closed, it is opened as well), and the node or wire that caused the break is highlighted with a marquee. Breakpoints are saved with a VI, but only become active during execution. Suspending Execution You can edit indicators, execute the subVI as many times as you want before returning to the caller, or go back to the beginning of the subVI by suspending execution of a SubVI. To set a subVI in suspend mode, open the subVI and check the Operate»Suspend when Called option. This option also can be accessed by popping up on the connector pane on the front panel while in run mode, and selecting Setup»Execution Options»Suspend when Called…. The subVI automatically suspends when it is called. If you check this option when single-stepping, the VI does not switch into suspend mode immediately. If you want to suspend execution at a particular call to a subVI, use the SubVI Node Setup… option from the pop-up menu of the subVI node, instead of the Suspend when Called option. The SubVI Node Setup… suspends execution at that particular instance of the subVI only. Recognizing Automatic Suspension A VI is suspended automatically if, during its execution, a control or an indicator goes out of range. The terminal or local variable that caused the out-of-range error is selected. A subVI with a control or indicator set to stop on a range error has a conditional breakpoint. If a range error occurs, the subVI pauses as if it © National Instruments Corporation 4-29 G Programming Reference Manual Chapter 4 Executing and Debugging VIs and SubVIs encountered a breakpoint. If no range error occurs, the subVI executes normally. When data passed to a subVI causes a range error, the front panel of the subVI opens or comes to the foreground and the subVI remains in suspend mode. At this time, the values on the subVI controls are the inputs passed by the calling VI, and you can change the values if you want. In fact, you must change them to run the subVI if the range error indicator is on. The indicators of the subVI display either default values or values from the last execution of the subVI during which its front panel was open. Using Toolbar Buttons When SubVIs Are Suspended Run button If you want to execute the current subVI before returning to the caller, press the Run button (or select the Operate»Run command) while in suspend mode. You can repeat the execution as many times as you want. When the subVI completes, the indicators display results from that execution of the subVI. However, you can change the indicator values if you want to return different values to the calling VI. In fact, the suspend mode is the only time you can set values on indicators. Click on the Run button again when you are ready to return the indicator values of the subVI to the calling VI. If you want to go back to the beginning of the VI, click on the Skip to Beginning button. Skip to Beginning Return to Caller The Return to Caller button appears when a suspended subVI is idle. Click on it to return to the caller VI. Notice that you can return to a caller without executing the current VI. If you want to execute it, be sure to press the Run button before returning to the caller. Viewing Hierarchy Windows During Suspension The Hierarchy window displays an exclamation point glyph to indicate a subVI that has been suspended. The following illustration shows a subVI in the Hierarchy window with the Suspend when Called option is on. G Programming Reference Manual 4-30 © National Instruments Corporation Chapter 4 Executing and Debugging VIs and SubVIs Disabling Debugging Features To reduce memory requirements and to increase performance slightly, you can compile a VI without various debugging features. To do this, go to VI Setup»Window Options from the connector pane pop-up menu on the front panel and deselect the checkboxes for Show Run Button, Show Continuous Run Button, Show Abort Button, or Allow Debugging. Commenting out Sections of Diagrams In some cases, you might want to execute a VI with a section of the block diagram disabled. The easiest way to do this is to enclose the section of diagram that you want disabled in a Case Structure with a constant Boolean wired to the selector. Put the diagram you want to disable in the frame of the Case Structure that does not execute. If the Case Structure produces any values, enter a value for the output tunnels. © National Instruments Corporation 4-31 G Programming Reference Manual Chapter 5 Printing VIs This chapter discusses printing issues in G. Printing in G There are three primary ways to print VIs in G. • You can use the Print Window… option to make a quick printout of the contents of the current window. • You can make a more comprehensive printout of a VI, including information about the front panel, block diagram, subVIs, controls, VI history, and so on, by selecting the Print Documentation… option. • You can use the G programmatic printing feature to make VIs that can print under the control of your application. In addition, you can use the Serial Port VIs to send text to the printer if you have a printer connected to your serial port; doing so generally requires some knowledge of the command language of the printer. In Windows and UNIX, another option for printing is to use the System Exec VI located in Functions»Communication. On the Macintosh, you can use the AESend Print Document VI located in Functions»Communication»AppleEvent. In Windows, you also can use dynamic data exchange (DDE) to tell another application to print data. Printing Configuration There are two dialog boxes that affect the appearance of all printouts, regardless of the method you use to print: the Printing dialog box and the Preferences dialog box. You use the Printing dialog box of the Preferences dialog box to tell G how it should print. You can choose the following dialog box, for example, to implement PostScript printing. © National Instruments Corporation 5-1 G Programming Reference Manual Chapter 5 Printing VIs To configure information and formatting that is printer specific, use the Printer Setup… (Page Setup in UNIX and on the Macintosh) option from the File menu. For example, with most printers, you change the orientation of printouts (landscape versus portrait) using this dialog box. Many printers also have options for font substitution, paper size, and other printer specific settings. Printer Setup… (Page Setup for the Macintosh and UNIX) settings are saved with your VI. PostScript Printing To produce higher quality printouts, you can use the Preferences dialog box, which contains options for customizing the way G prints, including the option to select PostScript printing (if you have a PostScript printer). If you have a PostScript printer, you can take advantage of the following benefits. • PostScript printouts reproduce the image of the screen more accurately. • PostScript facilitates high resolution graphs. • PostScript reproduces patterns and line styles more accurately. You use the Preferences dialog box to indicate if you want to use PostScript printing. If you select PostScript printing, you have the option to select PostScript level 2, or Color/Grayscale, which supports color printing. See Chapter 7, Customizing Your G Environment, for information on the Preferences dialog box. Printing the Active Window You can use the Print Window… option to print out the contents of the currently active window (front panel or block diagram). Using this option, you can make a quick printout with the minimum number of prompts. For more comprehensive printouts of VIs, use the Print Documentation… menu option. Print Window… formats the printout so that it looks the same as it does when you set the VI to print programmatically. The Execution Options section of the VI Setup dialog box contains a few options which give you more control over the way your VI looks when you print programmatically or when you print using Print Window…. See the Setting Page Layout section later in this chapter for information on these options. G Programming Reference Manual 5-2 © National Instruments Corporation Chapter 5 Printing VIs Selecting Print Options If you want a more detailed printout of the contents of a VI, use the Print Documentation… option, shown in the following illustration. This option displays a dialog box you can use to select from several VI formats. You also can create your own custom format. Setting Printout Formats The Print Documentation dialog box has five different print formats. The icon for each of these formats is shown to the left of the description. The Icon, Description, Panel and Diagram format (the default) prints the icon, VI description, front panel and block diagram. The Using the Panel format prints the front panel, VI description, and the control names and their descriptions. The Using as a SubVI format prints the icon, connector, VI description, and the terminals (data types), names, and descriptions of the connected controls. This format is similar to the G function reference format. © National Instruments Corporation 5-3 G Programming Reference Manual Chapter 5 Printing VIs The Complete Documentation format prints everything, including the icon, connector, description, front panel, information about all front panel controls, the block diagram, and a list of the names of the subVIs. The Custom format prints using the current custom settings. You can change the custom settings by selecting Configure… after you select the custom option. See the Creating Custom Print Settings section in this chapter for information on this dialog box. Choosing Layout Options The Print Documentation dialog box contains several page layout options that control scaling, page breaks, and headers for the printout. These are described as follows. Scale Front Panel to Fit and Scale Block Diagram to Fit—These two options control whether the panel and diagram sections are scaled to fit. These options cause G to scale the front panel and/or block diagram down to no less than one-fourth the original size to fit on the fewest number of pages possible. Print Header—Prints a header at the top of every page. This header includes the page number, the VI name, and the last modification date of the VI. Page Breaks Between Sections—Inserts a page break between the following sections: • Connector icon and description • Front panel • List of front panel control details • Block diagram • Block diagram details • VI hierarchy • List of subVIs Creating Custom Print Settings To bring up the Custom Print Settings dialog box, select the Custom button in the Print Documentation dialog box. After you select Custom, the Configure button is activated. Click on this button to see the dialog box shown in the following illustration. G Programming Reference Manual 5-4 © National Instruments Corporation Chapter 5 Printing VIs This dialog box displays the categories of items that you can print. These categories are listed in the order that they appear on the printout. In addition, the page layout options in this dialog box control scaling, page breaks, and headers for the printout. The icon for each of the custom print setting options is shown to the left of the description. Icon and Description VI Connector and Icon—Prints a picture of the VI icon along with its inputs and outputs. VI Description—Prints the VI description. Front Panel—Prints the front panel. Controls—Prints a list of the names of the controls and indicators. When an array, cluster, or refnum is encountered, the subcontrols are © National Instruments Corporation 5-5 G Programming Reference Manual Chapter 5 Printing VIs printed. You can select the following options from the pop-up menu next to this option. Descriptions—Prints the descriptions next to the control names. Include Data Type Information—If you print to the printer, then the terminal for each control is printed to the left of the control name. If you save to a text file, the data type is printed after the description. Block Diagram—Prints the block diagram. Hidden Frames—Prints the nonvisible frames of Case Structures and Sequence Structures. Repeat Higher Level Frames—When printing nonvisible frames, prints the visible ones again, in sequence. VI Hierarchy—Prints a description of the current VI hierarchy in memory, with lines showing connections between VIs and their subVIs. The current VI is highlighted with a box. List of SubVIs—Prints the icon, name, and path of all subVIs used. VI History—Prints the history information, if any, for the current VI. Printing Section Headers In addition to the layout options found in the Print Documentation dialog box, the Custom Print Settings dialog box has a Print Section Headers option. Print Section Headers—Prints a header for each section (for example, a heading such as List of SubVIs before the subVI information). When printing using Print Documentation, this selection is set automatically for each format. G Programming Reference Manual 5-6 © National Instruments Corporation Chapter 5 Printing VIs Programmatic Printing If you want to print something under the control of your VI, rather than interactively as with the Print Window and Print Documentation dialog boxes, use programmatic printing. With this type of printing, you can program your VI to print after every execution. You also can program it to print out the contents of a specific front panel or a specific control during execution—perhaps in response to the user pressing a Print button. Programmatic printing allows you to control when printouts occur, as well as the appearance of your printouts, such as if or not a header is printed. To implement programmatic printing, select Operate»Print at Completion. When this option is on, G prints the contents of that front panel any time the VI completes execution. If the VI is a subVI, G prints when that subVI finishes execution, before it returns to the caller. Controlling When Printouts Occur In some cases, you do not want a VI to print out every time. You might want it to occur only if the user presses a button, or if some condition occurs, such as a test failure. You also might want more control over the format for your printout. Or, you might want to print only a subset of the controls, or even just one specific control. You can create a subVI whose panel is formatted the way you want the VI to look. Instead of selecting Operate»Print at Completion on your VI, select it from the subVI. When you want a printout, you can call the subVI, passing the data to it to be printed out. With this organization, you have complete control over the appearance of the printout, using G controls and tools to create very simple or complex printouts. Enhancing Printouts Using transparency and the Color tool, you can hide portions of controls that you do not want to be visible in your printouts. For example, you can use transparency to simplify the appearance of the edges of controls. © National Instruments Corporation 5-7 G Programming Reference Manual Chapter 5 Printing VIs Use graphical objects from the Decorations palette to highlight sections of your printout. For example, you might surround a section of controls with a box to set it off from the remainder of your panel. You also can use bitmapped graphics to customize your printout, adding elements such as company logos to your report. Setting Page Layout The settings in Edit»Preferences and in Printer Setup (Page Setup for the Macintosh and UNIX) affect the appearance of your printouts. You also can use VI Setup»Execution Options to implement or disable some layout options that affect the appearance of your printout. These page layout options, shown in the following illustration, also affect the behavior of the Print Window…. The Print Panel When VI Completes Execution option is another way to turn on programmatic printing. If you select Print Header, a header including the VI name, the last modification date, and the page number appears at the top of each page. If you select Scale to Fit, and the panel is bigger than a single page, the printout scales down to as little as one-fourth the original size to fit the panel on as few pages as possible. If you select Surround Panel with Border, G prints a box around the panel. G Programming Reference Manual 5-8 © National Instruments Corporation Chapter 5 Printing VIs Using Alternative Printing Methods You might find that the previously mentioned method of printing is not appropriate for your application. There are some additional techniques that address various printing concerns. For example, the previous method of printing is geared towards printing an entire page of data. In some applications, you might prefer to print data on a line-by-line basis. If you have a line-based printer connected to your serial port, you can use the Serial Port VIs to send text to the printer. Doing this generally requires some knowledge of the command language of the printer but has worked well for a number of applications developed by G users. If G cannot print data the way you want, you might consider using another application to print your data by saving the data to a file and then printing from the other application. © National Instruments Corporation 5-9 G Programming Reference Manual Chapter Setting up VIs and SubVIs 6 This chapter discusses how you can use the VI Setup and SubVI Node Setup dialog boxes to customize the behavior of a subVI. You can use these dialog boxes to create subVIs that show their panels when they are called and to enable and disable features of a panel, such as the scrollbars, the toolbar, and the window resizing capability. Creating Pop-Up Panels A single front panel is sometimes too restrictive if you need to present numerous options or displays. The best solution to this problem is to organize your VIs so that high-level options are presented in your topmost VI and related options are presented by subVIs. When G calls a subVI, it ordinarily runs without opening its front panel. You can use the VI Setup or SubVI Node Setup dialog boxes to make a subVI open its front panel when the subVI is called and close the front panel when the subVI completes execution. You access the VI Setup dialog box by popping up on the VI icon in the top-right of a front panel and selecting VI Setup…, as shown in the following illustration. You must be in edit mode. © National Instruments Corporation 6-1 G Programming Reference Manual Chapter 6 Setting up VIs and SubVIs This dialog box contains several options for customizing the look and behavior of the VI. Use the ring at the top of the dialog box to select from three different option categories—Execution Options, Window Options, and Documentation. VI Setup Options Execution Options Initially, the VI Setup dialog box presents you with execution options for the current VI. The Execution Options are shown in the following illustration. If you want a subVI panel to open as soon as the top-level VI is loaded, turn on the Show Front Panel When Loaded option. Two of the most useful options of this page are Show Front Panel When Called and Close Afterwards if Originally Closed. If you turn these options on for a subVI, that subVI front panel opens automatically when the subVI is called and then closes automatically if it was originally closed. The Run When Opened option is another useful option you can use to set up a VI to start running automatically when it opens. Setting the Suspend When Called option is the same as selecting Operate»Suspend when Called. This debugging option is described in G Programming Reference Manual 6-2 © National Instruments Corporation Chapter 6 Setting up VIs and SubVIs the Debugging Features section of Chapter 4, Executing and Debugging VIs and SubVIs. The Reentrant Execution and Priority options are fairly advanced features that affect the way a VI executes. You need them only in special applications. These options are discussed in the Reentrant Execution and VI Setup Priority Setting sections, respectively, of Chapter 24, Understanding the G Execution System. You can use the remaining options to set your VI to print when executed and customize the way it looks when printed in this way. Programmatic printing is discussed in detail in the Programmatic Printing section of Chapter 5, Printing VIs. Documentation Options The dialog box in VI Setup»Documentation, shown in the following illustration, presents you with options concerning entries made to the History window, which displays the development history of the VI. For information on the History window, see the VI History Window section in Chapter 25, Managing Your Applications. To use any of the first four options in the Documentation menu, the Use History Defaults (In Preferences Dialog) option must be deselected. If you select the option, G uses the history preferences instead. The history preferences are identical, except that they set up the defaults used when you create any new VI, although the VI Setup documentation options apply only to the current VI. © National Instruments Corporation 6-3 G Programming Reference Manual Chapter 6 Setting up VIs and SubVIs If you check the Add an entry every time this VI is saved option, G adds an entry to the VI history every time you save the VI. If you have not entered a comment in the Comment box of the History window, only a header is added to the history. The header contains the revision number if that option is checked in the Preferences»History dialog box, the date and time, and the name of the VI. If you check the Prompt for comment when this VI is closed option, the History window appears so that you can enter a comment when you close a VI that has changed since you loaded it, even if you already have saved the changes. If you check the Prompt for comment when this VI is saved option, the History window appears when you save so that you can enter a comment. This is useful if you prefer to comment on your changes when you finish making them instead of as you are editing. If you do not set this option, you cannot change the history of the VI after you select Save until the save is finished. Note: G does not prompt you to enter a comment when you save or close a VI if the only changes you made were changes to the history. The options to the right of the VI Setup»Documentation dialog box create access to online help files that you have created. Put your cursor in the Help Tag box and type in a topic to display for this VI. Then type in the path to the help file in the Help Path box, or click the Browse… button and find the file. The filename and path of the file appears in the Help Path box. After you have set these options, clicking on the online help icon at the bottom of the Help dialog box accesses the help file you selected. See Chapter 1, Introduction to G Programming, for information on creating your own help files. Window Options The window options apply to the VI when it is in run mode, but not in edit mode. You can use these options to control the ability of a user to interact with the program by restricting access to G features, and by changing the way the window looks and behaves. You can make your VI look and act like a dialog box, in that the user cannot interact with other windows while this window is open. You also can remove the scrollbars and the toolbar, and set a window to be centered or sized automatically to fit the screen. G Programming Reference Manual 6-4 © National Instruments Corporation Chapter 6 Setting up VIs and SubVIs The window options are shown in the following illustration. Dialog Box prevents the user from interacting with other windows while this option window is open, just as a system dialog box does. If you turn off the Allow User to Close Window checkbox in the VI Setup dialog box, the Window Options dialog box hides the close box for the VI front panel, and dims the File»Close option. With this VI setup option, you can ensure that a user cannot close a run-time or pop-up VI front panel inadvertently. Allow Run-Time Pop-Up Menu determines if objects on this front panel can display a pop-up menu of data operations in run mode. When you select the Hilite <Return> Boolean option, G highlights any Boolean currently associated with the <Enter> (Windows and HP-UX), or <Return> (Macintosh and Sun) key. You associate keys with controls using the Key Navigation dialog box, which is described in the Key Navigation Option for Controls section of Chapter 8, Introduction to Front Panel Objects. The Size to Screen option automatically resizes the panel of a VI to fit the screen when the VI is switched to run mode and when it is loaded into memory. The VI does not retain a record of its original size and location, so it stays in the same place if you switch back to edit mode. Auto-Center automatically centers the front panel on the user's computer screen when the VI is opened or when it is switched to run mode. © National Instruments Corporation 6-5 G Programming Reference Manual Chapter 6 Setting up VIs and SubVIs Other options toggle between showing and hiding various window features. You can hide individual buttons by deselecting them, or hide the entire toolbar by deselecting the Show Toolbar option. Enable Log/Print at Completion enables or disables automatic data logging (see the Data Logging on the Front Panel section in Chapter 4, Executing and Debugging VIs and SubVIs), and programmatic printing (see the Programmatic Printing section in Chapter 5, Printing VIs). Caution: If you hide the menu bar and the toolbar, there is no visible means of changing from run mode back into edit mode. Use the <Ctrl-m> (Windows); <command-m> (Macintosh); <meta-m> (Sun); or <Alt-m> (HP-UX) hot key that corresponds to the Operate»Change to Edit Mode option to change the VI back to edit mode, where the menu bar and palette are visible. The options do not take effect until the VI starts running. SubVI Node Setup Dialog Box The following dialog box appears when you select SubVI Node Setup… from the node pop-up menu of a subVI on the block diagram. These options are a subset of the options in the VI Setup dialog box. The difference between the two sets of options is that you use the SubVI Setup dialog box to specify options that relate to a specific call to a subVI, although you use the subVI execution options of VI Setup to specify the behavior of all calls to that VI. G Programming Reference Manual 6-6 © National Instruments Corporation Chapter Customizing Your G Environment 7 This chapter discusses how to customize your G environment by setting preferences, and by changing the contents of the Controls and Functions palettes. Setting G Preferences Preferences Dialog Box Options To customize your application and configure some default parameters, you use the various Preferences dialog boxes. You access the Preferences dialog boxes by selecting Edit»Preferences…, as shown in the following illustration. © National Instruments Corporation 7-1 G Programming Reference Manual Chapter 7 Customizing Your G Environment Use the pull-down menu at the top of the dialog box to select among the different categories of preferences, as shown in the following illustration. Path Preferences You can specify the directories that G searches when looking for VIs as well as the paths G uses for temporary files and the library directory. If not already selected, select Paths from the pull-down menu in the Preferences dialog box to bring up the dialog box shown in the following illustration. G Programming Reference Manual 7-2 © National Instruments Corporation Chapter 7 Note: Customizing Your G Environment The format of pathnames—the use of colons, slashes, or backslashes— differs slightly on different platforms. In the Path Preferences dialog box is another pull-down menu, shown in the following illustration, from which you select the path category you want to view or edit. In the dialog box that appears, many items are grayed out and inactive because G is set to use the default path. If you want to change one of these preferences, deselect the Use Default checkbox, as shown in the following illustration. Library, Temporary, and Default Directories The Library Directory, Temporary Directory, and Default Directory are single directories (folders). When you edit one of these paths, you have options to type in a new path and replace the existing © National Instruments Corporation 7-3 G Programming Reference Manual Chapter 7 Customizing Your G Environment path, or browse the file dialog box to select a path. This is shown in the following illustration. path category current value new value The Library Directory shows the absolute pathname to the directory containing vi.lib and any library directories you supply. The default is the directory containing your G development environment. The Temporary Directory shows the absolute pathname to the directory for temporary files, which varies according to platform, as follows: • (Windows) The default is the directory containing your G development environment. • (Macintosh) In System 6, the default is the G folder. Under System 7, the default is an invisible folder called Temporary Items at the top of your hard drive, which is where Apple recommends that temporary files be stored. If your G development environment crashes, the temporary files are moved into the trash when you restart. • (UNIX) The default is the /tmp directory. The Default Directory shows the absolute pathname to the default directory, which is the initial directory the file dialog box displays. The Default Directory function in the Functions»File I/O»File Constants palette also returns this value. The default is the current working directory. Changes to the Default Directory take place immediately. Note: All changes to the Library Directory, Temporary Directory, and Default Directory options take effect when you relaunch your G development environment. G Programming Reference Manual 7-4 © National Instruments Corporation Chapter 7 Customizing Your G Environment VI Search Path The VI Search Path is used only when your G development environment searches for a subVI, control, or external subroutine that is not in the expected location. It lets you list the path of directories for G to search. When you edit the search path, you are given more options than for the other paths—you can add new items in specific locations, remove paths, and select from a list of special paths. The list contains paths that your G development environment searches, in the order that it searches them. To add a new directory, you first need to decide when your G development environment searches that directory relative to the other directories. Select an adjacent directory from the list. Then use either the Browse… button, which displays a file dialog box, or the special pull-down menu, which contains a list of special paths, to select the directory that your G development environment searches. You also can edit or enter this path in the string control next to these options. Finally, use Insert Before, Insert After, or Replace to add that option to the list. When you select a path, G normally searches that directory, but not its subdirectories. You can make the search hierarchical by appending a * as a new path item. Some examples on different platforms: • (Windows) To search the directory C:\VIs\ recursively, you enter C:\VIs\* • (Macintosh) To search recursively the VIs folder on the HD disk, you enter HD:VIs:* • (UNIX) To search recursively /usr/home/gregg/vis, you enter /usr/home/gregg/vis/*. © National Instruments Corporation 7-5 G Programming Reference Manual Chapter 7 Customizing Your G Environment You can use the special pull-down menu shown in the following illustration, which is located to the right of the Browse… button, to select from several special directories. These directories are as follows: • <vilib> as a path entry is a symbolic path that refers to the vi.lib directory inside of the Library Directory. • <topvi> is a symbolic path that refers to the directory containing the top-level VI. • <foundvi> refers to a list of directories that LabVIEW builds each time a VI is loaded. During a search, any directory in which LabVIEW finds a subVI, or that you manually select, is added to this list. Use this symbolic path so that if you move or rename a directory of VIs, and then open a calling VI, you manually have to find that directory only once for that load. You also can remove a path using the Remove button, which places the removed path into the string box, in case you decide to re-insert it elsewhere in the list. Note: Changes to the VI Search Path option take effect immediately. Performance and Disk Preferences While it executes, G maintains temporary files on disk. For example, when you save a VI, G first saves it into a temporary file. If the save is successful, the original is replaced with the new file. G needs a fair amount of disk space for these operations. To avoid problems, G normally checks for available disk space in the temporary directory at launch time. If you have less than 500 KB of disk space free, G alerts you and quits. If you have less than 2 MB available, G warns you, but continues. You can turn these warnings off or change the levels at which they alert you using the Performance and Disk dialog box, accessed from the Preferences pull-down menu. G Programming Reference Manual 7-6 © National Instruments Corporation Chapter 7 Customizing Your G Environment The Performance and Disk Preferences dialog box is shown in the following illustration. Notice that one option is only available on Windows 3.1, and some other options are only available on the Macintosh. Except for the Deallocate memory as soon as possible option, changes to the Performance & Disk options take place when you restart your computer. The options in this dialog box are as follows: Deallocate memory as soon as possible—Forces G to deallocate the memory of a VI after it completes execution. Doing this can improve memory usage in some applications because subVIs deallocate their memory immediately after executing. However, it probably slows performance because G has to allocate and deallocate memory more frequently. Note: Changes to the Deallocate memory as soon as possible option take effect immediately. (Windows 3.1) Use default timer—The timing functions in G use the built-in Windows timer. This timer has, by default, a resolution of 55 ms (it increments 18 times a second). This means that the Tick Count, Wait, and Wait Until Next ms Multiple VIs in G only have 55 ms resolution. Notice, however, that you can specify more accurate timing © National Instruments Corporation 7-7 G Programming Reference Manual Chapter 7 Customizing Your G Environment rates to the DAQ VIs, because they use the built-in timers of the DAQ boards to control the acquisition rate. You can increase the resolution of the Tick Count, Wait, and Wait Until Next ms Multiple VIs to 1 ms by increasing the resolution of the built-in timer of Windows to 1 ms. If you increase the timer resolution, your software timing loops are more accurate. Under certain circumstances, you might not want to increase the timer resolution from 55 ms. Changing the resolution increases the number of timer tick interrupts from 18 interrupts per second to 1000 interrupts per second. If you are performing other interrupt intensive operations, you might exceed the capacity of your PC to handle the interrupt load, which might lock up or crash your PC. DAQ operations that use programmed I/O instead of DMA to transfer data between the DAQ board and PC memory are interrupt intensive. Do not change the timer tick resolution to 1 ms if you plan to perform any of the following operations at high transfer rates: • Buffered analog input using the PC-LPM-16 • Buffered analog output using the AT-MIO-16, MC-MIO-16, or Lab series boards • Buffered digital I/O using the DIO-24, DIO-96, or Lab series boards • Buffered analog input or output with DMA disabled in WDAQCONF using any DAQ board Transfer rates of approximately 30 ksamples/sec or higher on a 386 25 MHz machine causes interrupt load problems with the 1 ms timer resolution. Transfer rates of approximately 75 to 80 ksamples/sec or higher on a 486 33 MHz machine, or 100 ksamples/sec or higher on a 486 50 MHz machine, might cause interrupt load problems. The timing functions in G for Windows 95/NT have a timer resolution of 1 ms, the maximum resolution possible under Windows 95/NT. Slower machines might have lower resolution. (Macintosh) Compact memory during execution—Directs G to compact memory approximately once every 30 seconds. Compaction reduces fragmentation by moving allocated memory to a single location. A disadvantage to this option is that compaction takes time and might cause a short lull in performance while G is compacting memory. G Programming Reference Manual 7-8 © National Instruments Corporation Chapter 7 Customizing Your G Environment (Macintosh) Cooperation level—With this option, you can control how cooperative G is with other background applications. If you set it to Low, G does not share time very frequently with other applications. Setting it low improves the performance of G, but it causes the performance of any other applications that run in parallel to decrease. If you set it to High, G performance suffers, but other applications have more time to execute. Check available disk space during launch—Checks amount of disk space available in the temporary directory as G launches. You can check whether you want G to use the default in two cases: abort if less than 500 KB, or warn if less than 2,000 KB. Note: Changes to the Check available disk space during launch option take effect when you relaunch G. Changes to the Use default timer, Compact memory during execution, and Cooperation level options take effect immediately. Front Panel Preferences The Front Panel Preferences dialog box is shown in the following illustration. The options in this dialog box are as follows: Open the control editor with double click—Makes easy access available to the Control Editor window, where you can customize the appearance of a front panel control or indicator. © National Instruments Corporation 7-9 G Programming Reference Manual Chapter 7 Customizing Your G Environment End text entry with Return key (same as Enter key)—Makes the <Enter> (Windows); <return> (Macintosh); <Return> (Sun); or <Enter> (HP-UX) on the alphanumeric keyboard function like the <Enter> key on the numeric keypad, ending text entry. If you select this option, you can embed new lines by pressing <Ctrl-Enter> (Windows); <option-return> (Macintosh); <meta-Return> (Sun); or <Alt-Return> (HP-UX). (Windows, Macintosh) Override system default function key settings—By default, your operating system might use some function keys for system purposes. For example, on the PC, pressing F10 is the same as pressing the <Break> key. On the Macintosh, F1 to F4 usually are treated as Cut, Copy, Paste, and Clear. If you turn this override option on, the function keys are not used for system purposes but are passed instead to G as standard function keys. Use localized decimal point—Uses the decimal separator for the system instead of the period. For example, in many countries, the comma is used as a decimal point. Turn this option on if you want G to pay attention to the way you have configured your system. Turn it off if you want G to use periods in all cases for the decimal point. Use smooth updates during drawing—When G updates a control with smooth updates off, it erases the contents of the control and draws the new value. This can result in a noticeable flicker as the old value is erased and replaced. Using smooth updates, G draws data to an offscreen buffer and then copies that image to screen instead of erasing a section of the screen. This avoids the flicker caused by erasing and drawing. However, it can slow performance, and it requires more application memory because an offscreen drawing buffer has to be maintained. Use transparent name labels—Directs G to use labels that you can see through. (Sun) Support numeric keypad on Sun keyboards—Turns on support for the Sun keyboard, including keypads, arrow keys, and the Help key. Do not turn this option on if you are using a non-Sun keyboard (for example, if you are using an X terminal or a PC running X software). Blink speed—Sets the blinking speed for front panel objects, to the default 1,000 milliseconds or a speed that you type in. Blinking is a basic attribute turned on with Attribute Nodes. See Chapter 20, Attribute Nodes, for more information. G Programming Reference Manual 7-10 © National Instruments Corporation Chapter 7 Note: Customizing Your G Environment Changes to options in the Front Panel Preferences dialog box take effect immediately. Block Diagram Preferences The Block Diagram Preferences dialog box is shown in the following illustration. The options in this dialog box are as follows: Show dots at wire junctions—Directs G to place dots where two wires cross, making it easier to differentiate between such junctions and wires that branch. Show tip-strips over terminals—Directs G to place parameter names over terminals when you idle your cursor over them in functions and subVIs. Show wiring guides—Shows wire stubs that indicate data type and data direction for each parameter when the cursor is idled over a block diagram node. Show subVI names when dropped—Directs G to label a subVI with the name of the original VI when you drop it on the block diagram, and to show the label. © National Instruments Corporation 7-11 G Programming Reference Manual Chapter 7 Customizing Your G Environment Note: Changes to options in the Block Diagram Preferences dialog box take effect immediately. Debugging Preferences The Debugging Preferences dialog box is shown in the following illustration. The options in this dialog box are as follows: Show data bubbles during execution highlighting—Animates execution flow by drawing bubbles along the wires. You might want to turn this feature off if it significantly slows down performance on your computer. Auto probe during execution highlighting—Probes scalar values automatically, drawing their values on the diagram. You can turn off this feature if you find that it clutters the display. Show warnings in error box by default—Displays warnings in addition to errors in the Error List dialog box. A warning does not mean that the VI is incorrect; it just points out a potential problem in your block diagram. Warn about objects unavailable in the student edition—If you have selected the previous option about warnings, this option includes warnings about objects unavailable in the LabVIEW Student Edition. G Programming Reference Manual 7-12 © National Instruments Corporation Chapter 7 Note: Customizing Your G Environment Changes to options in the Debugging Preferences dialog box take effect immediately. Color Preferences The Color Preferences dialog box is shown in the following illustration. Windows, UNIX only This dialog box lets you change the colors used by G for various items. If you do not select the Use default colors checkbox, you can click on any rectangle to change the color. The options are the following: Front Panel—You can select a color for the front panel of new VIs. Changing the color does not affect old VIs. Block Diagram—You can select a color for the block diagram of new VIs. Changing the color does not affect old VIs. Scrollbar—You can select a color for scrollbars. This option affects only the VIs that are currently open. Coercion Dots—You can select a color for the dots indicating coercion of numerical data. This option affects only the VIs that are currently open. (Windows, UNIX) Menu Text—You can select a color for text used in menus. © National Instruments Corporation 7-13 G Programming Reference Manual Chapter 7 Customizing Your G Environment (Windows, UNIX) Menu Background—Lets you select a color for the background used in menus. Blink Foreground—Lets you select the foreground color for a blinking object. Affects only a blinking object in its blink state. Blinking is a basic attribute turned on with Attribute Nodes. See Chapter 20, Attribute Nodes, for more information. Blink Background—Lets you select the background color for a blinking object. Affects only a blinking object in its blink state. Use default colors—Uses the default choice of colors for all items listed in this dialog box. You must turn this off if you wish to change any of these colors. (UNIX) Provide extra colors—Toggles between a 216-color palette and a 125-color palette. A larger palette can cause a noticeable flash when you switch between windows. Note: Changes to options in the Color Preferences dialog box take effect immediately. Font Preferences The Font Preferences dialog box lets you change three categories of predefined fonts: the Application font, System font, and Dialog font. You select the category of font you wish to change from the pop-up menu above the text box. The dialog box with Application Font selected is shown in the following illustration. G Programming Reference Manual 7-14 © National Instruments Corporation Chapter 7 Customizing Your G Environment G uses the three categories of fonts for specific portions of its interface. The fonts are predefined according to the platform, as follows: Use default font—Uses the default font, as defined by G in keeping with the different platforms, as described previously. Custom font—This checkbox is checked automatically if you change any font characteristics through the Font Style… option. Font Style…—Brings up a dialog box that lets you change font characteristics. Note: Changes to options in the Font Preferences dialog box take effect immediately. For specific information on how the fonts are predefined or for information about the portability of fonts, see the section Resolution and Font Differences in Chapter 27, Portability Issues. © National Instruments Corporation 7-15 G Programming Reference Manual Chapter 7 Customizing Your G Environment Printing Preferences The Printing Preferences dialog box is shown in the following illustration. Keep in mind that some options are available on certain platforms only. (Windows, Macintosh) Standard printing—Directs G to format the VI print data (front panel, diagram, icon, etc.) and print it using standard drawing commands. Use this option if you want to print to a file (assuming your printer driver supports printing to a file), if your printer does not have PostScript support, or if you want your printer driver to do the PostScript translation instead of G. (Windows only) Allow printer dithering—Directs G to use printer dithering when creating the drawing commands. Applicable for black and white printing, printer dithering is a method of adding gray scales to an image instead of only black and white areas. This option is not dependent on printer type. (Windows only) Scale printer fonts—Enables a more complicated algorithm to select a different font if the first one doesn’t scale correctly. If all of the text on your printed VI does not appear, or if it is too large, you can try this option to see if it improves the appearance of the printout. This option is not dependent on printer type. PostScript printing—Directs G to translate the VI print data in PostScript (.PS) format and send it to the printer as PostScript text. If G Programming Reference Manual 7-16 © National Instruments Corporation Chapter 7 Customizing Your G Environment you have a PostScript printer and a PostScript printer driver, the printout is a graphics image. Do not select this option if your printer or printer driver does not support PostScript printing or you will have a printout containing nonsense. PostScript level 2—Tells G that the connected printer supports PostScript level 2. If this box is checked, G sends PostScript level 2 code to the printer. If the box is not checked, G sends Color/Grayscale code. Color/Grayscale is a subset of PostScript level 2. Select this option only if your printer supports PostScript level 2. (Windows, UNIX) Bitmap printing—Directs G to create a bitmap, draw all data for that page into the bitmap, and then send the bitmap to the printer. This method takes longer to print than the other two, but can yield a more accurate representation of the text and fonts than standard printing, even though the printout is not as high resolution as with PostScript printing. The bitmap image is in color for color printers and black and white otherwise. Note: Changes to options in the Printing Preferences dialog box take effect immediately. History Preferences As explained in Chapter 25, Managing Your Applications, each VI has a History window that displays the development history of the VI. With the History Preferences dialog box, you can choose the default settings for the History window of new VIs. © National Instruments Corporation 7-17 G Programming Reference Manual Chapter 7 Customizing Your G Environment The History Preferences dialog box is shown in the following illustration. The options in the History dialog box are divided into two groups. The first group contains five options for indicating when and how entries to the History window are added for new VIs. The second group of options in the History Preferences dialog box concerns how you log in to G, which in turn determines the name G inserts in the headers to comments entered in the VI History window. Options concerning History window entries can be specified for individual VIs through the VI Setup»Documentation dialog box. See Documentation Options in Chapter 6, Setting up VIs and SubVIs, for information about accessing the options. The options in this dialog box are as follows: Add an entry every time VI is saved—Directs G to add an entry to the VI history every time you save the VI. If you have not entered a comment in the Comment box of the History window, only a header is added to the history. (The header contains the revision number if that option further down in this dialog box is checked, the date and time, and the name of the VI.) Prompt for comment when VI is saved—Directs G to bring up the History window when you save so that you can enter a comment. This is useful if you prefer to comment on your changes when you finish G Programming Reference Manual 7-18 © National Instruments Corporation Chapter 7 Customizing Your G Environment making them instead of as you are editing. If you do not set this option, you will not have a chance to change the history of the VI after you select Save until the save is finished. Prompt for comment when VI is closed—Similar to the previous option, except that G only prompts you when you close a VI, rather than every time you save. You are prompted if the VI changed any time since you loaded it, even if you have already saved the changes. Note: G does not prompt you to enter a comment when you save or close a VI if the only changes you made were changes to the history. Record comments generated by the editor—Causes the editor to insert comments into the History window when certain events occur. The events that cause automatic comments are conversion to a new version of LabVIEW or BridgeVIEW, subVI changes, and changes to the name or path of the VI. Show revision number in titlebar—Adds the revision number to the header of the History window. The revision number starts at zero and is incremented every time you save the VI. It will not be incremented however, if the only changes you made were changes to the VI history. The login options are as follows: (Windows and Macintosh only) Login automatically with the registration name—Uses the name of the registered user of the application. Show the login prompt at startup time—Prompts you for a user name when your application is started. The user name can be changed any time by selecting Edit»User Name; the prompt displays a menu of all user names so-far entered into LabVIEW with this option. © National Instruments Corporation 7-19 G Programming Reference Manual Chapter 7 Customizing Your G Environment Note: This option is a LabVIEW-only feature. BridgeVIEW has its own login security system in which the Edit»User Name option does not appear. You can switch to another user name (the system user name or your application registration name) in Windows or on the Macintosh, or the system user name in UNIX, without having to type it in by using the pull-down menu shown in the preceding illustration. You also can type in a name, which appears in the list thereafter. (Windows NT, Macintosh with file sharing only, and UNIX) Login automatically with the system user name—Assuming that a user name has been defined, causes G to use the system login name of the current user. Note: Changes to options in the History Preferences dialog box take effect immediately. G Programming Reference Manual 7-20 © National Instruments Corporation Chapter 7 Customizing Your G Environment Time and Date Preferences The Time and Date Preferences dialog box is shown in the following illustration. The options in this dialog box control the default displays of time and date in the digital displays of new controls and indicators. You can override the defaults in this dialog box for individual digital displays, as explained in the Format and Precision of Digital Displays section of Chapter 9, Numeric Controls and Indicators. The options in this dialog box are as follows: Default date format—Determines whether the month, day, or year comes first in digital displays. Default time format—Determines whether time in digital displays is based on a 12-hour or 24-hour clock. Date Separator—Determines the character used to separate the month, day, and year (in the order selected in the Default date format option) of digital displays. Time Separator—Determines the character used to separate the hours and minutes past the hour in digital displays. Note: Changes to options in the Time and Date Preferences dialog box take effect immediately. © National Instruments Corporation 7-21 G Programming Reference Manual Chapter 7 Customizing Your G Environment Miscellaneous Preferences The Miscellaneous Preferences dialog box is shown in the following illustration. Windows, Macintosh only The options in this dialog box are as follows: Open VIs in run mode—Opens VIs in run mode rather than edit mode. Show tip-strips—Toggles the display of Tip strips. (Windows, Macintosh) Use native file dialogs—Uses the operating system's native file dialog boxes in G so that they look similar to those of other applications on your machine (with a few exceptions discussed at in the next paragraph). When this preference is not selected, G uses its own platform-independent file dialog boxes, which add some convenient features, such as providing a list of recent paths and reducing the steps necessary to save VIs in VI libraries. In a few cases, the native file dialog box of the operating system does not have the functionality required by G. In such cases, G uses its own file dialog box even when this option is selected. On the Macintosh, if you wire the pattern input or if you wire the datalog type input and use a select mode of 1 (select new file), 2 (select new or existing file), 4 (select new directory), or 5 (select new or existing directory), G uses its own file dialog box. In Windows, even if you wire the pattern input, G uses its own file dialog box. G Programming Reference Manual 7-22 © National Instruments Corporation Chapter 7 Customizing Your G Environment (Windows, Macintosh) Allow drop-through clicks—You can set G so that clicking only once on the mouse activates and selects an object in an inactive window. This reduces the number of mouse clicks required from two to one. (Normally, the first click activates the window and the second click passes through as a click in the window.) Use hot menus—With this option, you can navigate the menus using the mouse without keeping the left mouse button pressed. This ergonomic feature relieves strain on the hand. Note: Changes to options in the Miscellaneous Preferences dialog box take effect immediately. How Preferences Are Stored Usually, you do not have to edit preference information manually or know its exact format, because the Preferences dialog box takes care of it for you. Preferences are stored differently on each platform, as described in the following paragraphs. (Windows) Preference information is stored in a LabVIEW.INI file in your LabVIEW directory, if you are a LabVIEW user. The format for this file is similar to other .INI files, such as the WIN.INI file. It begins with a section marker [LabVIEW]. If you are a BridgeVIEW user, you can find preference information stored in a BridgeVIEW.INI file in your BridgeVIEW directory . The format for this file is similar to other .INI files. It begins with a section marker [BridgeVIEW]. This is followed by variable labels and their values, such as offscreenUpdates=True. If a configuration value is not defined in LABVIEW.INI, LabVIEW checks to see if there is a [LabVIEW] section of your WIN.INI file, and if so, checks for the configuration value in that file. Note: The references to WIN.INI files applies only to Windows 3.1. If you are a BridgeVIEW user, this information does not apply to the Windows platform you are using. You also can specify a preference file on the command line when you start LabVIEW or BridgeVIEW. For example, to use a file named lvrc instead of .labview.ini, type labview -pref lvrc. © National Instruments Corporation 7-23 G Programming Reference Manual Chapter 7 Customizing Your G Environment (Macintosh) You can create a LabView Preferences file in your System Folder that contains preference information. Under System 6, this preference file is created at the top level of the System Folder; however, under System 7, it is created in the Preferences folder of the System Folder. If you want, you can copy your LabVIEW Preferences file to the LabVIEW folder. When launched, LabVIEW always looks for the Preferences file in the LabVIEW folder. If not found there, it looks in the System Folder, and if not found there, it creates a new one in the System Folder. By moving Preferences files between desktop and the LabVIEW folder, you can create multiple Preferences for multiple users or uses. (UNIX) Preference information normally is stored in a source file in your home directory. If you change a parameter from the Preferences dialog box, G writes the information to this file. The following information is supplied for those who want more information on the storage format and the rules for finding preference information. Preference entries consist of a preference name followed by a colon and a value. The preference name is the executable name followed by a period (.) and a token. When LabVIEW searches for preference names, the search is case-sensitive. You have the option to enclose the preference value in double or single quotation marks. For example, to use a default precision of double and use a search path that recursively searches the a particular directory, you specify the following preference entries. labview.defPrecision : double labview.viSearchPath : "/usr/lib/labview/*" LabVIEW also searches for preferences in a file named labviewrc in the applications directory. For example, if you have installed your LabVIEW files in /opt/labview, preferences are read out of both /opt/labview/labviewrc and the .labviewrc file in your home directory. Entries in the .labviewrc file override conflicting entries in the labviewrc file. You might want to use this global preference file to store things that are the same to all users such as the VI search path. G Programming Reference Manual 7-24 © National Instruments Corporation Chapter 7 Customizing Your G Environment You also can specify a preference file on the command line when you start LabVIEW. For example, to use a file named lvrc instead of .labviewrc, type labview -pref lvrc. Caution: The labviewrc file is still read in this case. Also, keep in mind that changes made in the Preferences dialog box are written to the lvrc file in this example. Customizing the Controls and Functions Palettes G has a powerful set of tools for customizing the Controls and Functions palettes in any of the following ways: • You can add your own VIs and controls to the palettes by saving them in the user.lib or instr.lib directories. • You can add your own VIs and controls to the palettes by using the Edit»Edit Control & Function Palettes option. • You can set up the palettes so they automatically change as you add or remove files from specific directories. • You can rearrange the built-in palettes to make the functions you use frequently more easily accessible. • You can set up different views for different users, hiding some functions to make G easier to use for one user while providing the full capabilities for another user. Adding VIs and Controls to user.lib and instr.lib The simplest method for adding new entries to the Controls and Functions palettes is to save them inside of the user.lib directory. When you restart G, the User Libraries subpalette of the Functions palette contains subpalettes for each directory, llb, or .mnu file in user.lib and entries for each file in user.lib. The Instrument I/O palette of the Functions palette corresponds to the instr.lib directory. You might want to put instrument drivers in this directory to make them easily accessible from the palettes. Note: The vi.lib directory contains files from National Instruments. Do not save files into vi.lib because these files are overridden when you upgrade G. © National Instruments Corporation 7-25 G Programming Reference Manual Chapter 7 Customizing Your G Environment Installing and Changing Views Controls and Functions palette information is stored in the menus directory of the directory of your application. The menus directory contains directories corresponding to each view that you create or install. This organization makes it easy to transfer views to other people. To give someone else a copy of a view, give the person a copy of the directory of the view from the menus directory. After placing it in his or her menus directory, the view becomes available. To switch to another view, select Edit»Edit Control & Function Palettes. Then select the view that you want from the menu setup ring. To create your own view, see the description in the following Palettes Editor section. For more details on how views are organized, see the How Views Work section later in this chapter. Palettes Editor For more control over the layout and contents of the Controls and Functions palettes, use the Edit»Edit Control & Function Palettes option. When you have selected this option, you enter the Palettes Editor. The Edit Palettes dialog box appears. In this editor, you can rearrange the contents of palettes by dragging objects to new locations. If you want to delete, customize, or insert objects, pop up on a palette as shown in the following illustration, or pop up on an object within a subpalette. With the pop-up options, you can modify anything within the User Libraries menu (corresponds to user.lib) or the Instrument I/O menu (corresponds to instr.lib). If you want to edit the top-level Controls or Functions palettes or any of the other predefined menus, G Programming Reference Manual 7-26 © National Instruments Corporation Chapter 7 Customizing Your G Environment you must first create a new view by selecting new setup… from the menu setup ring in the Edit Palettes dialog box. After selecting a new setup, any menu that you modify that is part of the default menu set is copied to the directory of your view in the menus directory before changes are made to it. This protection of the built-in palettes ensures that you can experiment with the palettes without corrupting the default view. If you want to add a new object in a new row or column of a subpalette, pop up in the space at the right edge or bottom of the subpalette. You also can create new rows or columns by dragging objects to the area to the right or bottom of the palette. Creating Subpalettes When you add a palette, you can move it to a new location, edit the subpalette icon, or rename the palette using the Palettes Editor. If you want to create a palette from scratch or “hook in” a palette that is not in user.lib or vi.lib, you can use the Insert»Submenu… option from the pop-up menu in the Palettes Editor. When you select this option, you are presented with the following dialog box. © National Instruments Corporation 7-27 G Programming Reference Manual Chapter 7 Customizing Your G Environment You can store submenu information in VI libraries or in .mnu files. A menu file or LLB can contain one Functions palette and one Controls palette. Select Create a new menu file to insert a new, empty palette. You then are prompted for a name for the palette and a file to contain it. It is recommended that you add a .mnu extension to the file to indicate that it is a menu (palette). In addition, it is recommended that you either store the .mnu file in the directory of your view in the menus directory or in the same directory that contains the controls or VIs that the menu largely represents. Select Link to an existing menu file if you have an existing palette that you want to add to the Controls or Functions palette file. Select Link to a directory if you want to create a palette with entries for all the files in the directory. Selecting this option also recursively creates subpalettes for each of the subdirectories, VI libraries, or .mnu files within the directory. These palettes automatically update if you add new files to or remove files from the directories that you selected. You can enable or disable the automatic update setting for a subpalette by selecting the Automatic Update From Directory pop-up option. This option actually creates menu (palette) files inside of each directory that is recursed into. Select Link to a library if you want to link to the Controls palette or Functions palette that is a part of a VI library. As with the previous G Programming Reference Manual 7-28 © National Instruments Corporation Chapter 7 Customizing Your G Environment setting, the palette for a library automatically updates as you add files to the library. Notice that you can mix VIs, functions, and subpalettes within a palette freely. Also, a palette can contain VIs from different locations. Moving Subpalettes Because clicking on a subpalette opens it, you cannot move a subpalette by dragging it. To move a subpalette, you can select the Move Submenu option from its pop-up menu. As a shortcut, you can hold down the <Shift> key while you click a subpalette to drag it instead of opening it. How Views Work Both .mnu files and VI library files are binary files that can contain one Controls palette and one Functions palette. In addition, both types of files contain an icon for the Controls and Functions palettes. Each submenu that you create must be stored in a separate file. When you select a view, G looks for a directory in the menus directory. It builds the top-level Controls and Functions palettes from the root.mnu file within that directory. The top-level palettes then link to other .mnu or VI library files for each subpalette within the palette. If you link in a directory, you initiate a search to check if the directory contains a dir.mnu file. If so, the directory uses that .mnu file as the subpalette for the directory. Otherwise, your application creates a dir.mnu file based on the contents of the directory. For each VI (or control), an entry is created. For each subdirectory, .mnu file, or VI library, your application creates a subpalette. G automatically updates the palettes within a VI library as you add files to or remove files from the VI library. You have the option to set a .mnu file to update based on the contents of a directory. To change this setting, select Synchronize with Directory from the pop-up menu of the subpalette icon. Although it is a good idea to have the .mnu file in the same directory with which it is synchronized, you actually can select any directory. In addition to reflecting a specific directory, you can have additional VIs or controls from other directories in the same palette. You also can remove VIs from the palette by selecting Delete Item from the pop-up menu. © National Instruments Corporation 7-29 G Programming Reference Manual Introduction to Front Panel Objects Chapter 8 This chapter introduces the front panel and its two components— controls and indicators. It also explains how to import graphics from other programs to use in your controls. Building the Front Panel Controls and indicators on the front panel are the interactive input and output terminals of the VI. You use controls to supply data to a VI, and indicators display the data generated by the VI. This section explains a few editing options common to all controls and indicators. The Controls palette on the front panel is shown in the following illustration. If you idle your cursor over any square of the panel, the name of the collection of controls is displayed. The types of controls in the palette, from left to right, top to bottom, are as follows: • Numeric controls—For entering and displaying numeric quantities. • Boolean controls—For entering and displaying TRUE/FALSE values. © National Instruments Corporation 8-1 G Programming Reference Manual Chapter 8 Introduction to Front Panel Objects • String & Table controls—For entering and displaying text. • List & Ring controls—For displaying and/or selecting from a list of options. • Array & Cluster controls—For grouping sets of data. • Graph controls—For plotting numeric data in chart or graph form. • Path & Refnum controls—For entering and displaying file paths and for passing refnums from one VI to another. • Decorations—For adding graphics to customize front panels. These objects are for decoration only, and do not display data. • Select a Control…—For choosing a custom control of your own design. Front Panel Control and Indicator Options When you pop up on a control or indicator on the front panel while editing a VI, you see a menu like the one shown in the following illustration. The options above the line in the pop-up menu are common to all controls and indicators. Some controls and indicators do not have any of the options shown below the line—Representation, Data Range…, and Format & Precision…—in their pop-up menus. Objects in the Controls palette initially are configured as controls or indicators. For example, if you choose a toggle switch from the Boolean palette, it appears on the front panel as a control, because a toggle switch is usually an input device. Conversely, if you select an LED, it G Programming Reference Manual 8-2 © National Instruments Corporation Chapter 8 Introduction to Front Panel Objects appears on the front panel as an indicator, because an LED is usually an output device. However, you can reconfigure all controls to be indicators, and indicators to controls, by choosing the Change to Control or Change to Indicator commands from the pop-up menu of the object. The Numeric palette contains both a digital control and a digital indicator because you use both frequently. The String palette also contains both a string control and a string indicator. The Find Terminal option on the control and indicator pop-up menus highlights the block diagram terminal for the control or indicator. This option is useful for identifying a particular object on a crowded block diagram. The Create Attribute Node option creates an Attribute Node for the object. You can use Attribute Nodes to control various properties of the object programmatically. The Show submenu shows a list of the parts of a control that you can choose to hide or show, such as the name label. When editing a VI, the pop-up menu for a control contains a Data Operations submenu. Using items from this menu, you can cut, copy, or paste the contents of the control, set the control to its default value, make the current value of the control its new default, and read or change the control's description. (When editing a VI, you can paste data into an indicator.) Some of the more complex controls have additional options; for example, the array has options you can use to copy a range of values and to show the last element of the array. The following illustration shows the edit mode Data Operations submenu for a numeric control. This submenu is the only part of the pop-up menu of a control available while the VI is running. © National Instruments Corporation 8-3 G Programming Reference Manual Chapter 8 Introduction to Front Panel Objects If you pop up on a control while a VI is running, you can change only the value of a control. While running a VI, you cannot change most characteristics of a control, such as its default value or description. Replacing Controls The Replace option of the pop-up menu of an object displays the Controls palette from which you can choose a control or indicator to take the place of the current item on the front panel. Use Replace when you want to choose a different style of control, but do not want to lose all of the editing options you have selected for the control up to that point. Selecting Replace from the pop-up menu preserves as much information as possible about the original control, such as its name, description, default data, dataflow direction (control or indicator), colors, size, and so on. However, the new control keeps its own data type. Wires from the terminal of the control or local variables remain connected on the block diagram. The more similar the control is to the one being replaced, the more the original characteristics can be preserved. As an example, the following illustration shows a slide being replaced by a different style of slide. G Programming Reference Manual 8-4 © National Instruments Corporation Chapter 8 Introduction to Front Panel Objects The next illustration shows the result. The new slide has the same height, scale, value, name, description, and so on. If you were to pop up and replace the slide with a string instead, only the name, description, and data flow direction are preserved, because a slide does not have much in common with a string. Another way to replace a control that does not use the Replace pop-up menu and does not preserve any characteristics of the old control involves copying the control to the Clipboard. This method does keep the connections on the block diagram and VI connector. Copy the new control to the Clipboard. Then select the old control that you want to replace with the Positioning tool, and select Edit»Paste. The old control is discarded and the new control is pasted in its place. Key Navigation Option for Controls All front panel controls have a Key Navigation… option. You use this option to associate a keyboard key combination with a control. When a user enters that key combination while running the VI, G acts as though the user had clicked on that control. The associated control becomes the key focus. If the control is a text control, any existing text within that control is highlighted, ready for editing. If the control is a Boolean control, the state of the button is toggled. Note: The Key Navigation… option is disabled for indicators, because you cannot enter data into an indicator. You also can use the Key Navigation… option to indicate whether a control should be included when the user tabs from control to control while running. © National Instruments Corporation 8-5 G Programming Reference Manual Chapter 8 Introduction to Front Panel Objects You can use the Key Navigation… option to associate function keys with various buttons that control the behavior of a panel. You can use it to define a default button for VIs that behave like a dialog box, so that pressing the <Enter> (Windows and HP-UX), or <Return> (Macintosh and Sun) key becomes the same as clicking on the default button. If you associate the <Enter> or the <Return> key with a dialog box button, G automatically draws that button with a special thick border around it, as shown in the following illustration. There are two important things to know about the <Enter> or the <Return> key: 1. If you associate the <Enter> or the <Return> key with a control, then no control on that front panel ever receives a carriage return. Consequently, all strings on the front panel are limited to a single line. 2. When you tab from control to control, buttons are treated specially. If you tab to a button and press the <Enter> or <Return> key, the button you tabbed to is toggled, even if another control has the <Enter> or <Return> key as its key navigation setting. You cannot assign the same key combination to more than one control in a given front panel. G Programming Reference Manual 8-6 © National Instruments Corporation Chapter 8 Introduction to Front Panel Objects When you select the Key Navigation… option, G displays the following dialog box. You use the ring at the top left of this dialog box to select the key for this control. You can define the key to be a single key, or a key held in combination with a modifier key, such as the <Shift> key. In addition to the <Shift> key modifier, you can choose the menu key, which is the <Alt> (Windows and HP-UX); <command> (Macintosh); or <meta> (Sun) key. The options in this ring are shown in the following illustration. © National Instruments Corporation 8-7 G Programming Reference Manual Chapter 8 Introduction to Front Panel Objects A list of the current keyboard associations, labeled Current Assignments (shown in the preceding illustration), is located at the top right of the Key Navigation dialog box. Panel Order Option Controls and indicators on a front panel have a logical order, called panel order, that is unrelated to their position on the front panel. The first control or indicator you create on the front panel is element 0, the second is 1, and so on. If you delete a control or indicator, the panel order adjusts automatically. You can change the panel order by selecting Edit»Panel Order…. The appearance of the front panel G Programming Reference Manual 8-8 © National Instruments Corporation Chapter 8 Introduction to Front Panel Objects changes, because it is now in panel order edit mode, as shown in the following illustration. The white boxes on the controls and indicators show their current places in the panel order. Black boxes show the new place in the panel order of the control or indicator. Clicking on an element with the panel order cursor sets the position of the element in the panel order to the number displayed inside the Tools palette. You can change this number by typing a new number into it. When the panel order is the way you want it, click on the Enter button to set it and exit the panel order edit mode. Click on the X button to revert to the old panel order and exit the panel order edit mode. X Button The panel order determines the order in which the controls and indicators appear in the records of datalog files produced by logging the front panel. Customizing Dialog Box Controls dialog ring dialog button There are several types of dialog box controls: dialog rings (which are numeric), dialog buttons (which are Boolean), dialog checkmarks, and dialog buttons. The dialog controls change appearance depending on which platform you are using. Each appears with the color and appearance typical of that platform. © National Instruments Corporation 8-9 G Programming Reference Manual Chapter 8 Introduction to Front Panel Objects (Windows) The dialog button appears as a three-dimensional rectangular gray button. The dialog ring appears as a flat black-and-white rectangle, as shown in the following illustration. Windows (Macintosh) The dialog button appears as a two dimensional black-and-white oval. The dialog ring appears as a black-and-white rectangle with a drop shadow, as shown in the following illustration. Macintosh (UNIX) The dialog button appears as a three-dimensional rectangular gray button. The dialog rings appears as a flat, black-and-white rectangle with drop shadow, as shown in the following illustration. You cannot color the dialog button or the dialog ring. Sun and HP-UX Because these controls change appearance, you can create VIs with controls whose appearance is compatible with any of the computers that can run G. Using these controls, along with the checkmark and radio button Booleans, simple numeric controls, simple strings, and the dialog fonts, you can create a VI that adapts its appearance to match any computer you use the VI on. By using the VI Setup options to hide the menu bar and scrollbars and control the window behavior, you can create VIs that look like standard dialog boxes for that computer. Customizing Controls Using Imported Graphics You can import graphics from other programs for use as background pictures, as items in ring controls, or as parts of other controls. (For more information on using graphics in these controls, see Chapter 13, List and Ring Controls and Indicators, and Chapter 22, Custom Controls and Type Definitions.) G Programming Reference Manual 8-10 © National Instruments Corporation Chapter 8 Introduction to Front Panel Objects Before you can use a picture in G, you have to load it into the G Clipboard. There are one or two ways to do this, depending on your platform, as described below. (Windows) If you can copy an image directly from a paint program to the Windows Clipboard and then switch to G, G automatically imports the picture to the G Clipboard. Or, you can use the Import Picture from File… option from the Windows Edit menu to import a graphics file into the G Clipboard. In Windows 3.1, you can use the latter method on CLP, EMF, GIF, PCX, BMP, TARGA, TIFF, LZW, WMF, and WPG files. On Windows 95/NT, you can use EMF, WMF, and CLP files. (Macintosh) If you copy from a paint program to the Clipboard and then switch to G, G automatically imports the picture to its Clipboard. (UNIX) You can use the Import Picture from File… option from the UNIX Edit menu to import a picture of type X Window Dump (XWD), which you can create using the xwd command. (All Platforms) When a picture is on the G Clipboard, you can paste it as a static picture on your front panel, or you can use the Import Picture option of a pop-up menu, or the Import Picture options in the Control Editor. For an example of how to import graphics from other programs, see general\controls\custom.llb. © National Instruments Corporation 8-11 G Programming Reference Manual Numeric Controls and Indicators Chapter 9 This chapter explains how to create, operate, and configure the various styles of numeric controls and indicators. When you select Controls»Numeric from the palette, a new palette of controls and indicators appears, as shown in the following illustration. Numeric controls and indicators are either digital, slide, rotary, ring, enumerated, color box, or color ramp controls. © National Instruments Corporation 9-1 G Programming Reference Manual Chapter 9 Numeric Controls and Indicators Digital Controls and Indicators A digital numeric control and indicator are shown in the following illustration. Digital numerics are the simplest way to enter and display numeric data. Use the Operating tool and any of the following methods to increase or decrease the displayed value: Operating tool Enter button • Click inside the digital display window and enter numbers from the keyboard. • Click on the increment or decrement arrow of the digital control or indicator. • Place the cursor to the right of the digit you want to change and press the up or down keyboard arrow. The Enter button appears on the Tools palette to remind you that the new value replaces the old only when you press the <Enter> key on the numeric keypad, click outside the display window, or click on the Enter button. While the VI is running, any of these actions prevent G from interpreting intermediate values as input. For example, while changing a value in the digital display to 135, you do not want the VI to receive the values 1 and 13 before getting 135. This rule does not apply to values you change using the increment/decrement arrows. Numeric controls accept only the following—decimal digits, a decimal point, +, –, uppercase or lowercase e, and the terms Inf (infinity) and NaN (not a number), and in absolute time format the following characters: /, :, and uppercase or lowercase a, m, p, and m. If you exceed the limit for the selected representation, G coerces the number to the natural limit. For example, if you enter 1234 into a control set for byte integers, G coerces the number to 127. If you incorrectly enter non-numeric values such as aNN for NaN, or Ifn for Inf, G passes over them and uses the previous value. The increment buttons usually change the ones digit. Increasing a digit beyond 9 or decreasing below 0 affects the appropriate adjacent digit. G Programming Reference Manual 9-2 © National Instruments Corporation Chapter 9 Numeric Controls and Indicators Increasing and decreasing repeats automatically. If you click on an increment button and hold the mouse button down, the display increases or decreases repeatedly. If you hold the <Shift> key down while increasing the value repeatedly, the size of the increment increases by successively higher orders of magnitude. For example, by ones, then by tens, then by hundreds, and so on. As the range limit approaches, the increment decreases by orders of magnitude, slowing down to normal as the value reaches the limit. In a digital control for time and date, individual components (second, minute, hour, day, month, year) as well as individual relative time components can be increased and decreased. To increase a digital display by a digit other than the ones digit, use the Operating tool to place the insertion point to the right of the target digit. When you are finished, the ones digit again becomes the increment digit. Numbers might become too large to fit in the digital display on the control. You can view the complete value by resizing the control, increasing its length horizontally. Digital Numeric Options You can change the defaults for digital numerics through their pop-up menus. The pop-up menu for a digital numeric is shown in the following illustration. © National Instruments Corporation 9-3 G Programming Reference Manual Chapter 9 Numeric Controls and Indicators Displaying Integers in Other Radixes You can display signed or unsigned integer data in hexadecimal, octal, and binary form, in addition to decimal form. To change the form, select Show»Radix from the numeric pop-up menu. A d appears on the housing of the numeric display as shown in the following illustration. If you click on the d, the menu shown in the previous illustration appears. The number 32,753 is displayed in each radix in the following illustration. Changing the Representation of Numeric Values You can choose from 12 representations for a digital numeric control or indicator. Use the Representation option from the control or indicator pop-up menu to change to 32-bit single-precision (SGL), 64-bit double precision (DBL), extended-precision (EXT) floating-point numbers, or one of the six integer representations: signed (I8) or unsigned (U8) byte (8-bit), signed (I16) or unsigned (U16) word (16-bit), or signed (I32) or unsigned (U32) long (32-bit) integers. You also can choose complex extended-precision (CXT), complex double-precision (CDB), or G Programming Reference Manual 9-4 © National Instruments Corporation Chapter 9 Numeric Controls and Indicators complex single-precision (CSG) floating-point numbers. These choices are shown in the following illustration. © National Instruments Corporation 9-5 G Programming Reference Manual Chapter 9 Numeric Controls and Indicators Range Options of Numeric Controls and Indicators Each representation has natural minimum and maximum range limits. For example, signed byte integers are limited to values from –128 through 127, although floating-point numbers have the ranges shown in the following table. Table 9-1. Precision Note: Range Options of Floating-Point Numbers Single Double Extended (platformdependent) Minimum Positive Number 1.5E–45 5.0E–324 1.9E–4951 Maximum Positive Number 3.4E38 1.7E308 1.1E4932 Minimum Negative Number –1.5E–45 –5.0E–324 –1.9E–4951 Maximum Negative Number –3.4E38 –1.7E308 –1.1E4932 Although G can process in the range shown in Table 9-1, the range of extended floating-point numbers it can represent and display in text format is ±9.9999999999999999E999. You can choose other limits within these natural bounds with the Data Range… option from the pop-up menu. The following dialog box appears. G Programming Reference Manual 9-6 © National Instruments Corporation Chapter 9 Numeric Controls and Indicators Numeric Range Checking You also can limit intermediate values to certain increments. For example, you might limit word integers to increments of 10, or single-precision floating-point numbers to increments of 0.25. If you change either the limits or the increment, you need to decide what to do if a VI or the operator attempts to set a value outside the range or off the increment. You have the following options: Ignore G does not change or flag invalid values. Clicking on the increment and decrement arrows changes the value by the increment you set, but the value does not go beyond the minimum or maximum values. Coerce G changes invalid values to the nearest valid value automatically. For example, if the minimum is 3, the maximum is 10, and the increment is 2, valid values are 3, 5, 7, 9, and 10. G coerces the value 0 to 3, the value 6 to 7, and the value 100 to 10. © National Instruments Corporation 9-7 G Programming Reference Manual Chapter 9 Numeric Controls and Indicators Suspend G suspends execution of a VI or subVI when a value is invalid. When you choose to suspend on invalid values, G keeps a copy of all the front panel data in memory in case you need to open the front panel to show an error. A top-level VI with controls whose values are invalid cannot run. If the value of a control is invalid before a subVI runs (when a subVI is about to execute), the VI is suspended. The front panel of the VI opens (or becomes the active window) and the invalid control(s) are outlined in red (or a thick black line on a black-and-white monitor). The toolbar on the block diagram of a suspended subVI looks like the following illustration. You must set the control to a valid value before you can proceed. When all control values are valid, the toolbar looks like the following illustration, and you can click on the Run button to continue execution. Run button Return to Caller button If the value of an indicator or control becomes invalid while a subVI is running, execution pauses as if there were a breakpoint. The front panel of the VI opens (or becomes the active window). The indicator(s) and control(s) that are currently invalid are outlined in red (or a thick black line on a black-and-white monitor). When a suspended VI finishes execution, if there are any invalid values, the Return to Caller button is disabled, as shown in the following illustration. You must set indicators to valid values before you can return to the calling VI. You also can change the control values to produce valid outputs and run the subVI again by clicking on the Run button. When G Programming Reference Manual 9-8 © National Instruments Corporation Chapter 9 Numeric Controls and Indicators all indicator values are valid, the toolbar looks like the following illustration, and you can click on the Return to Caller button to continue execution. Format and Precision of Digital Displays You can select the format of your digital displays for numerics or for time and date. If numeric, you can choose if the notation is floating-point, scientific, engineering, or relative time in seconds, and you can select their precision, that is how many digits to the right of the decimal point they display, from 0 through 20. The precision you select affects only the display of the value; the internal accuracy still depends on the representation. To change any of these parameters of the digital display, select Format & Precision… option from the display pop-up menu. The dialog box opens in numeric format, as shown in the following illustration. © National Instruments Corporation 9-9 G Programming Reference Manual Chapter 9 Numeric Controls and Indicators You can see an example at the top of the dialog box as you make selections. Examples of format and precision settings on a digital control are shown in the following illustration. floating-point notation 4 digits of precision scientific notation 6 digits of precision engineering notation 3 digits of precision relative time seconds To format absolute time and/or date, select Time & Date from the Format ring at the top of the dialog box. The dialog box changes, as shown in the following illustration. You can format for either time or date, or both. If you enter only time or only date, G infers the unspecified components. If you do not enter time, G assumes 12:00 a.m. If you do not enter date, it assumes the previous date value. If you enter date, but the control is not in a date G Programming Reference Manual 9-10 © National Instruments Corporation Chapter 9 Numeric Controls and Indicators format, G assumes the month, day, and year ordering based on the settings in the Preferences dialog box. If you enter only two digits for the year, G assumes the following: any number less than 38 is in the twenty-first century, otherwise the number is in the twentieth century. Though absolute time is displayed as a time and date string, it is represented internally as the number of seconds since 12:00 a.m. Jan. 1, 1904, Universal Time. G keeps track of these components internally. Note: When a control is in absolute time format, you always have the option to enter time, date, or time and date. If you do not want G to assume a date, use relative time. Notice the examples at the top right of the dialog box, which change as you make selections. The valid range for time and date differs across computer platforms as follows: (Windows) 12:00 a.m. Jan. 2, 1970 – 12:00 a.m. Feb. 4, 2106 (Windows NT) 12:00 a.m. Jan. 2, 1970 – 12:00 a.m. Jan. 17, 2038 (Macintosh) 12:00 a.m. Jan. 2, 1904 – 12:00 a.m. Jan. 2, 2040 (UNIX) 12:00 a.m. Dec. 15, 1901 – 12:00 a.m. Jan. 17, 2038 These ranges might be up to a few days wider depending on your time zone and if daylight saving time is in effect. © National Instruments Corporation 9-11 G Programming Reference Manual Chapter 9 Numeric Controls and Indicators Slide Numeric Controls and Indicators The slide controls and indicators are shown in the following illustration. Each slide has a digital display. You can use the digital displays to enter data into slide controls, as explained in the Digital Controls and Indicators section of this chapter. You can use the Operating tool on such parts as the slider, the slide housing, the scale, and increment buttons to enter data or change values. The slider is the part that moves to show the value of the control. The housing is the stationary part that the slider moves on or over. The scale indicates the value of the slider, and the increment buttons are small triangles at either end of the housing. An example of a slider is shown in the following illustration. G Programming Reference Manual 9-12 © National Instruments Corporation Chapter 9 Numeric Controls and Indicators You can drag the slider with the Operating tool to a new position. If the VI is running during the change, intermediate values might pass to the program, depending on how often the VI reads the control. You also can click on a point on the housing and the slider snaps to that location as shown in the following illustration. Intermediate values do not pass to the program. If you use a slide that has increment buttons, you can click on an increment button, as shown in the following illustration, and the slider moves slowly in the direction of the arrow. Hold down the <Shift> key to move the slider faster. Intermediate values might pass to the program. Just like the digital numerics, slides have Representation, Data Range…, and Format & Precision options in their pop-up menus. These options work the same as they do for digital displays, except that © National Instruments Corporation 9-13 G Programming Reference Manual Chapter 9 Numeric Controls and Indicators slides cannot represent complex numbers. Slides also have other options. The following illustration shows a slide pop-up menu. The Show»Digital Display option of the pop-up menu controls the visibility of the digital display of the slide. Slide Scale The scale submenu options apply to the scale for the slide only. The scale pop-up menu is shown in the following illustration. The Marker Spacing option is discussed in the section, Scale Markers. G Programming Reference Manual 9-14 © National Instruments Corporation Chapter 9 Numeric Controls and Indicators The Format & Precision option functions as described in the Format and Precision of Digital Displays section of this chapter. The Style option shows you the palette shown in the following illustration. You can display a scale with no tick marks or no scale values, or you can hide the scale altogether. The Mapping item shows you the option of linear or logarithmic scale spacing, as shown in the following illustration. If you change to Logarithmic spacing, and the low scale limit is less than or equal to 0, the limit automatically becomes a positive number, and G revalues other markers accordingly. Keep in mind that scale options, including the mapping functions, are independent of the slide data range values, which you change with the Data Range pop-up option. If you want to limit your data to logarithmic values, you need to change the data range to eliminate values less than or equal to zero. Scale Markers The scale of a numeric control or indicator has two or more markers, which are labels that show the value associated with the marker position. You can change the outer two markers, the scale limits, and you can change any inner markers from even spacing to place them anywhere you want. © National Instruments Corporation 9-15 G Programming Reference Manual Chapter 9 Numeric Controls and Indicators Changing Scale Limits The outer two markers are the scale limits. They are not required to coincide with the range limits, but they can be a subset of the range of the control or indicator. For example, the default range of a 16-bit signed integer control or indicator is –32,768 to 32,767. However, you can set the data range to be –1,000 to 1,000 and then set the scale limits to be 0 and 500. scale range data range representation limits You can change the minimum, maximum, and increment of a scale interactively in five ways using either the Operating tool or the Labeling tool. If you want to change a scale programmatically, use the Attribute Node. See Chapter 20, Attribute Nodes, for more information on changing a scale programmatically using the Attribute Node. • If you type a new maximum value into its display, the minimum stays the same, and G recalculates the increment automatically. • If you type a new minimum value into its display, the maximum stays the same, and G recalculates the increment automatically. • If you type the current minimum value into the maximum display, G flips the scale so that what was formerly the minimum is now the maximum, and can flip the scale so that what was formerly the maximum is now the minimum. G also recalculates the increments. • If you type into any intermediate marker, the increment becomes that value minus the minimum. • If you change the size of the slide, the increment adjusts so that the markers do not overlap. Selecting Non-Uniform Scale Marker Distribution By default, scale markers are evenly spaced. If you want, you can indicate exactly where inner markers for a scale are located. This is useful for marking a few specific points on a slide (such as a set point or threshold). If you want non-uniform marker distribution, select Scale»Marker Spacing»Arbitrary from the pop-up menu of the scale. G Programming Reference Manual 9-16 © National Instruments Corporation Chapter 9 Numeric Controls and Indicators Then, you can pop up on the slide and select Scale»Add Marker or pop up on the marker and select Add Marker. A marker appears at an arbitrary location, as shown in the following illustration. To delete an arbitrary marker, pop up on the slide and select Scale»Delete Marker or pop up on the marker and select Delete Marker. When a marker is created, you can type a number in the marker; the location changes automatically to match the number. You also can move markers by dragging ticks, the small lines beside the data points of the scale. To do so, idle the Operating tool over the ticks. The cursor changes to show that the ticks can be moved, as shown in the following illustration. In Uniform mode, dragging a tick changes the marker distribution. In Arbitrary Markers mode, dragging a tick moves only the current marker, without changing the other markers. Pressing the <Ctrl> (Windows); <option> (Macintosh); <meta> (Sun); or <Alt> (HP-UX) © National Instruments Corporation 9-17 G Programming Reference Manual Chapter 9 Numeric Controls and Indicators key while dragging creates a new marker. (If the ticks are hidden, as chosen in the Scale»Style dialog box, you cannot drag them.) The arbitrary markers affect only the inner markers, not the two end markers. If no arbitrary markers are visible in the current range, the scale reverts temporarily to uniform markers. Text Scale You also can use text labels on numeric scales. Labels are useful because you can associate strings with integer values. This configuration is useful for selecting mutually exclusive options. To implement this option, select Text Labels from the slide pop-up menu. The slide control appears with default text labels, min and max, and you can begin typing immediately to enter the labels you want. Press <Shift-Enter> (Windows and HP-UX), or <Shift-Return> (Macintosh and Sun) after each label to create a new label, and <Enter> on the numeric keypad after you have finished your last label. You can use the Labeling tool to edit min and max labels in the text display or on the slide itself. G Programming Reference Manual 9-18 © National Instruments Corporation Chapter 9 Numeric Controls and Indicators You can pop up on the text display and select Show»Digital Display to find out what numeric values are associated with the text labels you create. These values always start at zero (on the bottom of vertical slides and on the left or right of horizontal slides) and increase by one for each text label. Use the Add Item After or Add Item Before option from the text display pop-up menu to create new labels, as shown in the following illustration. You also can press <Shift-Enter> (Windows and HP-UX), or <Shift-Return> (Macintosh and Sun) to advance to a new item when you are editing the existing items. © National Instruments Corporation 9-19 G Programming Reference Manual Chapter 9 Numeric Controls and Indicators Filled and Multivalued Slides The Numeric palette contains four controls that are configured to fill from the minimum to the slider value. These controls include a vertical slide, a horizontal slide, the tank, and the thermometer. Using the Fill Options item in the pop-up menu, you can turn all slides into fill slides, and you can turn fill slides into regular slides. Normally, you have three choices, as shown in the following illustration. These are fill from the minimum value to the slider location, fill from the maximum value to the slider location, or use no fill. You also can show more than one value on the same slide. To do so, choose Add Slider from the pop-up menu. A new slider appears along with a new digital display as shown in the following illustration. When you do this, two more options appear in the Fill Options palette: Fill to Value Above and Fill to Value Below. These options apply to the active slider. All five options appear in the following illustration. For an example of slide controls and indicators, see general\controls\alarmsld.llb. G Programming Reference Manual 9-20 © National Instruments Corporation Chapter 9 Numeric Controls and Indicators Rotary Numeric Controls and Indicators The rotary numeric controls and indicators are shown in the following illustration. © National Instruments Corporation 9-21 G Programming Reference Manual Chapter 9 Numeric Controls and Indicators The rotary objects have most of the same options as the slide. The sliders (or needles) in rotary objects turn rather than slide, but you operate them the same way you operate slides. Rotary controls, like linear controls, can display more than one value, as shown in the preceding illustration. You add new values by selecting Add Needle from the pop-up menu, in the same way you add new values to slides. If you move the Positioning tool to the scale, the tool changes to a rotary cursor. If you click on and drag the outer limits of the scale, you can change the arc that the scale covers. If you click on and drag the inner markers of the scale, you can rotate the arc; it still has the same range but different starting and ending angles. This procedure is shown in the following illustration. Hold down the <Shift> key to snap the arc to 45-degree angles. Place the cursor on the knob scale, where it changes appearance to a double arrow horseshoe. G Programming Reference Manual 9-22 © National Instruments Corporation Chapter 9 Numeric Controls and Indicators Dragging outer markers changes the size of the scale arc. Dragging inner markers rotates the arc. Tick marks of rotary scales can be dragged with the Operating tool, just like linear scales. Ticks also can be unevenly distributed in a similar manner to linear scales. See the section Selecting Non-Uniform Scale Marker Distribution for more information. For more information on ring controls and indicators, see Chapter 13, List and Ring Controls and Indicators. © National Instruments Corporation 9-23 G Programming Reference Manual Chapter 9 Numeric Controls and Indicators Color Box The color box displays a color corresponding to a specified value. The color value is expressed as a hexadecimal number with the form RRGGBB, in which the first two numbers control the red color value, the second two numbers control the green color value, and the last two numbers control the blue color value. An example is shown in the following illustration. You can set the color of the color box by clicking on it with either the Operating or Color tool to display a Color palette, as shown in the following illustration. Releasing your mouse button on the color you want selects that color. Color boxes typically are used on the front panel as indicators. The easiest way to set the color of a color box is to use the color box constant, from the Functions»Numeric»Additional Numeric Constants palette in the block diagram window. Wire the color box constant to the color box terminal on the block diagram. Clicking on the color box constant with either the Operating tool or the Color tool displays the same Color palette that you use to set the color box. If you want to change the color box indicator on the front panel to various colors which indicate different conditions, you can use a series of color box constants inside a Case Structure. The small T in the Color palette represents the transparent color. G Programming Reference Manual 9-24 © National Instruments Corporation Chapter 9 Numeric Controls and Indicators Color Ramp The color ramp displays a color corresponding to a specified value. You can configure a color scale, which consists of at least two arbitrary markers, each consisting of a level and the display color corresponding to that level. As the input value changes, the color displayed changes to the color corresponding to that value. An example is shown in the following illustration. overflow color color display area ramp underflow color digital display You create these pairs using the arbitrary markers of the color scale. Each arbitrary marker specifies a level and has a color associated with it. When the color ramp first appears on the front panel, it is set to have three levels. Level 0 is set to the value 0, and the color black. Level 1 is set to the value 50 and the color blue. Level 2 is set to the value 100 and the color white. You can add levels, change the values, and set the colors as you choose. Use the Interpolate Colors option of the color ramp pop-up menu to select a color if the control interpolates colors to display shades of color for values between the indicated levels, or changes to a specific color only when the input value reaches a level specified in the color array. If Interpolate Colors is off, the color is set to the color of the largest level less than or equal to the current value. © National Instruments Corporation 9-25 G Programming Reference Manual Chapter 9 Numeric Controls and Indicators The color array always is sorted by level. The scale on the ramp corresponds to the largest and smallest values in the array. When the minimum or maximum of the scale changes, the color array levels are redistributed automatically between the new values. The color scale has a number of options, which you can display or hide. These options include the unit label, the digital display, and the ramp. The ramp component of this control has an extra color at the top and the bottom of the scale. You can use these colors to select a color to display if an overflow or an underflow occurs. Click on these areas with the Operating tool and select your overflow and underflow colors from the Color palette. Both the color ramp and the color box are used to display a numeric value as a color. With the color ramp, you can assign any range of numbers to any range of colors. The color box, however, displays only the color specified by the red, green, and blue components of the numeric value; any given value always maps to the same color. Note: The color ramp can have as many colors as your monitor can handle, but no more colors than what are available on your monitor. You can use the color scale to indicate color tables for the Intensity Graph and Intensity Chart controls. See Chapter 15, Graph and Chart Controls and Indicators, for more information on these controls. Unit Types Any numeric control can have physical units, such as meters or kilometers/second, associated with it. Any numeric control with an associated unit is restricted to a floating-point data type. Units for a control are displayed and modified in a separate but attached label, called the unit label. You can show this label by selecting the option from the pop-up menu, as shown in the following illustration. G Programming Reference Manual 9-26 © National Instruments Corporation Chapter 9 Numeric Controls and Indicators When the unit label is displayed, you can enter a unit using standard abbreviations such as m for meters, ft for feet, s for seconds, and so on. If you are not familiar with which units are acceptable, enter a simple unit such as m, then pop up on the unit label and select Unit…. A dialog box appears that contains information about the units that are available. You can use this dialog box to replace your first unit with a more appropriate choice. The following numeric control is set to have units of meters per second. © National Instruments Corporation 9-27 G Programming Reference Manual Chapter 9 Numeric Controls and Indicators Table 9-6-1 through Table 9-6-5 list all the units you can use with the units feature. Table 9-2. Quantity Name Unit Abbreviation plane angle radian rad solid angle steradian sr time second s length meter m mass gram g electric current ampere A thermodynamic temperature kelvin K amount of substance mole mol luminous intensity candela cd Table 9-3. Quantity Name G Programming Reference Manual Base Units Derived Units with Special Names Unit Abbreviation frequency hertz Hz force newton N pressure pascal Pa energy joule J power watt W electric charge coulomb C 9-28 © National Instruments Corporation Chapter 9 Table 9-3. Derived Units with Special Names (Continued) Quantity Name Unit Abbreviation electric potential volt V capacitance farad F electric resistance ohm Ohm conductance siemens S magnetic flux weber Wb magnetic flux density tesla T inductance henry H luminous flux lumen lm illuminance lux lx Celsius temperature degree Celsius degC activity becquerel Bq absorbed dose gray Gy dose equivalent sievert Sv Table 9-4. Additional Units in Use with SI Units Quantity Name © National Instruments Corporation Numeric Controls and Indicators Unit Abbreviation time minute min time hour h time day d plane angle degree deg 9-29 G Programming Reference Manual Chapter 9 Numeric Controls and Indicators Table 9-4. Additional Units in Use with SI Units (Continued) Quantity Name Unit plane angle minute ' plane angle second " volume liter l mass metric ton t area hectare ha energy electron volt eV mass unified atomic mass unit u Table 9-5. Quantity Name CGS Units Unit Abbreviation area barn b force dyne dyn energy erg erg pressure bar bar Table 9-6. G Programming Reference Manual Abbreviation Other Units Quantity Name Unit Fahrenheit temperature degree Fahrenheit degF Celsius temperature difference Celsius degree Cdeg 9-30 Abbreviation © National Instruments Corporation Chapter 9 Table 9-6. Numeric Controls and Indicators Other Units (Continued) Quantity Name Unit Abbreviation Fahrenheit temperature difference Fahrenheit degree Fdeg length foot ft length inch in length mile mi area acre acre pressure atmosphere atm energy calorie cal energy British thermal unit Btu Entering Units If you try to enter an invalid unit into a unit label, G flags the invalid unit by placing a ? in the label, as shown in the following illustration. Notice that you must enter units using the correct abbreviations or G flags it, as shown in the following illustration. © National Instruments Corporation 9-31 G Programming Reference Manual Chapter 9 Numeric Controls and Indicators Also, keep in mind that you cannot enter ambiguous units. Thus, m/ss is flagged in the following illustration, because it is not clear if it means meters per second squared, or (meters/seconds) * seconds. To resolve ambiguity, you have to enter the units differently, as shown in the three examples to the right. You cannot select units for a chart or graph unless you wire them to an object that has an associated unit. Then, you can show the unit that the chart or graph has acquired through the connection. You can change this unit to another unit that measures the same phenomenon, but not to a unit measuring a different class of quantity or quality. For example, if an input to a chart carries the unit mi, you can edit the chart unit to ft, in, or m, but not to N, Hz, min, acre, or A. G Programming Reference Manual 9-32 © National Instruments Corporation Chapter 9 Numeric Controls and Indicators Units and Strict Type Checking A wire connected to a source that has a unit associated with it can connect only to a destination with a compatible unit, as shown in the following illustration. In the case of the previous illustration, the distance display is scaled automatically to display kilometers instead of meters, because that was the specified unit for the indicator. You cannot connect signals with incompatible units, as shown in the following illustration. If you select List Errors from the pop-up menu © National Instruments Corporation 9-33 G Programming Reference Manual Chapter 9 Numeric Controls and Indicators for the broken wire shown below, the List Errors window indicates that the error is Wire: unit conflict. Some functions are ambiguous with respect to units and cannot be used with signals that have units. For example, the Add One function is ambiguous with respect to units. If you are using distance units, Add One cannot tell whether to add one meter, one kilometer, or one foot. Because of this ambiguity, the Add One function and similar functions cannot be used with data that has associated units. One way around this difficulty is to use a numeric constant with the proper unit and the addition function on the block diagram to create your own Add One unit function. Note: You cannot use units in Formula Nodes. G Programming Reference Manual 9-34 © National Instruments Corporation Chapter 9 Numeric Controls and Indicators Polymorphic Units If you want to create a VI that computes the root mean square value of a waveform, you have to define the unit associated with the waveform. A separate VI is necessary for voltage waveforms, current waveforms, temperature waveforms, and so on. In order to have one VI to do the same calculation, regardless of the units received by the inputs, G has polymorphic unit capability. Create a polymorphic unit by entering $x, where x is a number (for example, $1). You can think of this as a placeholder for the actual unit. When the VI is called, G substitutes the units you pass in for all occurrences of $x in that VI. The $x place holder always gets passed a unit that is expressed in base units, for example, meters, meters/sec, not feet, inches, and so on. A polymorphic unit is treated as a unique unit. It is not convertible to any other unit and propagates throughout the diagram just as other units do. When it is connected to an indicator that also has the abbreviation $1, the units match and the VI can compile. $1 can be used in combinations like any other unit. For example, if the input is multiplied by 3 seconds and then wired to an indicator, the indicator must be $1 s units. If the indicator has different units, the block diagram shows a bad wire. If you need to use more than one polymorphic unit, you can use the abbreviations $2, $3, and so on. A call to a subVI containing polymorphic units computes output units based on the units received by its inputs. For example, suppose you create a VI that has two inputs with the polymorphic units $1 and $2 that creates an output in the form $1 $2 / s. If a call to the VI receives inputs with the unit m/s to the $1 input and kg to the $2 input, the output unit is computed as kg m / s^2. Suppose a different VI has two inputs of $1 and $1/s, and computes an output of $1^2. If a call to this VI receives inputs of m/s to the $1 input and m/s^2 to the $1/s input, the output unit is computed as m^2 / s^2. If this VI receives inputs of m to the $1 input and kg to the $1/s input, however, one of the inputs is declared to be a unit conflict and the output is computed (if possible) from the other. A polymorphic VI can have a polymorphic subVI because the respective units are kept distinct. © National Instruments Corporation 9-35 G Programming Reference Manual Boolean Controls and Indicators Chapter 10 This chapter discusses how to create, operate, and configure Boolean controls and indicators. Creating and Operating Boolean Controls and Indicators A Boolean control or indicator has two values—TRUE or FALSE. Boolean controls and indicators are available from the Controls»Boolean palette, as shown in the following illustration. © National Instruments Corporation 10-1 G Programming Reference Manual Chapter 10 Boolean Controls and Indicators Some Boolean controls that simulate mechanical pushbuttons, toggle switches, and slide switches are shown in the following illustration. Note: The dialog button, dialog checkmark, and dialog radio button look different on each platform. For information about dialog box controls on various platforms, see the Customizing Dialog Box Controls section in Chapter 8, Introduction to Front Panel Objects. Some Boolean indicators that simulate LEDs and lights are shown in the following illustration. Clicking on a Boolean control with the Operating tool toggles it between its TRUE (on) and FALSE (off) states. In run mode, clicking on an indicator has no effect because indicators are for output only. In edit mode, you can operate both controls and indicators. G Programming Reference Manual 10-2 © National Instruments Corporation Chapter 10 Boolean Controls and Indicators Configuring Boolean Controls and Indicators Each Boolean control or indicator has several options available in its pop-up menu. The pop-up menu for a Boolean object is shown in the following illustration. The options above the dotted line in the pop-up menu are common to all controls and indicators and are described in the Front Panel Control and Indicator Options section of Chapter 8, Introduction to Front Panel Objects. The Data Range and Mechanical Action options are discussed later in this chapter. Changing Boolean Labels Several controls in the Boolean palette display text and are called labeled Booleans. Initially, the buttons display the word ON in their TRUE state and the word OFF in their FALSE state, as shown in the following illustration. Then, when you click on the button with the Operating tool, the control toggles to the opposite state. In edit mode, you can use the Labeling tool to change the text in either state, for example, YES instead of ON. © National Instruments Corporation 10-3 G Programming Reference Manual Chapter 10 Boolean Controls and Indicators By default, the text is centered on the button. If you want to move the text, select Release Text from the pop-up menu. At this point, use the Positioning tool to reposition the text, or choose the option Lock Text in Center. Select the Boolean text, then use the Text menu to change the font, size, and color of the text. You also can remove the Boolean text from both states by toggling the Boolean Text option on the Show submenu. The Boolean controls that do not appear in the palette as labeled Booleans are unlabeled by default. However, you can select Boolean Text from the Show submenu to make them labeled. You can move the Boolean text in these Booleans. Their text is not locked in the center of the button unless you select Lock Text in Center from the pop-up menu. If you want to change the font of either the name label or the Boolean text without changing both, select what you want to change with the Labeling tool, and then use the Font ring options to make the changes you want. Stopping on a Boolean Value If you want to recognize when a conditional test fails to produce the correct Boolean value, select Suspend if True or Suspend if False from the Data Range submenu of the Boolean pop-up menu. Boolean Data Range Checking You might want to detect errors in Boolean values. If you expect a Boolean to always be TRUE, you can select Data Range»Suspend If False from the submenu of the Boolean pop-up menu. If you expect the Boolean to always be FALSE, you can select Data Range»Suspend If True to catch errors. If the unexpected Boolean value occurs, the VI suspends before or after it executes as described for the Suspend option of numeric range. Configuring the Mechanical Action of Boolean Controls Boolean controls have six types of mechanical action. Select the appropriate action for your application from the pop-up menu Mechanical Action palette, shown in the following illustration. In these palette symbols, M stands for the motion of the mouse button G Programming Reference Manual 10-4 © National Instruments Corporation Chapter 10 Boolean Controls and Indicators when you operate the control, V stands for the output value of the control, and RD stands for the point in time that the VI reads the control. The Switch When Pressed action changes the control value each time you click on it with the Operating tool, in a manner similar to that of a light switch. The action is not affected by how often the VI reads the control. The Switch When Released action changes the control value only after you release the mouse button during a mouse click within the graphical boundary of the control. The action is not affected by how often the VI reads the control. The Switch Until Released action changes the control value when you click on it, and retains the new value until you release the mouse button. At this time, the control reverts to its original value, similar to the operation of a door buzzer. The action is not affected by how often the VI reads the control. With Latch When Pressed action, the control changes its value when you click on it, and retains the new value until the VI reads it once. At this point, the control reverts to its default value, whether or not you keep pressing the mouse button. This action is similar to that of a circuit breaker and is useful for stopping While Loops or for getting the VI to do something only once each time you set the control. © National Instruments Corporation 10-5 G Programming Reference Manual Chapter 10 Boolean Controls and Indicators The Latch When Released action changes the control value only after you release the mouse button within the controls graphical boundary. When your VI reads it once, the control reverts to the old value. This guarantees at least one new value. The Latch Until Released action changes the control value when you click on it, and retains it until your VI reads it once or you release the mouse button, depending on which one occurs last. For an example of Boolean controls and indicators, see general\controls\booleans.llb. Customizing Booleans with Imported Pictures You can design your own Boolean style by importing pictures for the TRUE and FALSE state of any of the Boolean controls or indicators. This process is explained in the Using the Control Editor section of Chapter 22, Custom Controls and Type Definitions. G Programming Reference Manual 10-6 © National Instruments Corporation Chapter String Controls and Indicators 11 This chapter discusses how to use string controls and indicators, and the table. You can access these objects through the Controls»String & Table palette, shown in the following illustration. Using String Controls and Indicators A string control and string indicator are shown in the following illustration. You enter or change text in the string control using the Operating tool or the Labeling tool. As with the digital control, new or changed text does not pass to the diagram until you press the <Enter> key on the numeric keypad, click on the Enter button in the Tools palette, or click outside the control to terminate the edit session. Pressing the <Enter> (Windows and HP-UX), or <Return> (Macintosh and Sun) key on the alphanumeric keyboard enters a carriage return. © National Instruments Corporation 11-1 G Programming Reference Manual Chapter 11 String Controls and Indicators When the text reaches the right border of the display window, the string wraps to the next line, breaking on a natural separator such as a space or tab character. Note: When running a VI, you use the <Tab> key to move to the next control. When editing a VI, pressing the <Tab> key changes tools. To enter a tab character into a string, select the ‘\’ Codes option from the string pop-up menu and type \t. To enter a linefeed into a string, press the <Enter> (Windows and HP-UX), or <Return> (Macintosh and Sun) key on the alphanumeric keyboard, or select the ‘\’ Codes option from the string pop-up menu and type \n. To enter a carriage return into a string, select the ‘\’ Codes option from the string pop-up menu and type \r. LabVIEW users should refer to Table 12-1, LabVIEW ‘\’ Codes, for a complete list of ‘\’ codes. For information on manipulating strings, see the Online Reference» Function and VI Reference»String Functions topic. Also, see the examples in general\strings.llb. String Control and Indicator Options Strings have special features that you can access through the string pop-up menu, shown in the following illustration. G Programming Reference Manual 11-2 © National Instruments Corporation Chapter 11 String Controls and Indicators Scrollbar Option The Scrollbar option from the string pop-up Show submenu is disabled unless you have increased the size of your string enough for a scrollbar to fit. If you select this option, a vertical scrollbar appears on the string control or indicator as shown in the following illustration so that you can display text not visible in the string control. You can use this option to minimize the space taken up on the front panel by string controls that contain a large amount of text. If the menu item is dimmed, you must make the string taller to accommodate the scrollbar before choosing this option. Display Types Options in the middle section of the string pop-up menu let you select whether a string displays data as it normally does, displays backslash codes in place of nonprintable characters, displays in password mode (using an “*” in place of each character), or displays hexadecimal characters. Normal Display Option The Normal Display option displays all characters as typed (with the exception of characters created with special keys such as the <Tab> or <Esc> key, which are nondisplayable). Backslash (‘\’) Codes Display Option By choosing the option ‘\’ Codes Display from the string pop-up menu you instruct G to interpret characters immediately following a © National Instruments Corporation 11-3 G Programming Reference Manual Chapter 11 String Controls and Indicators backslash (\) as a code for nondisplayable characters. The following table shows how G interprets these codes. Table 11-1. Code G ‘\’ Codes G Interpretation \00 - \FF Hex value of an 8-bit character; must be uppercase \b Backspace (ASCII BS, equivalent to \08) \f Form feed (ASCII FF, equivalent to \0C) \n Linefeed (ASCII LF, equivalent to \0A) \r Carriage return (ASCII CR, equivalent to \0D) \t Tab (ASCII HT, equivalent to \09) \s Space (equivalent, \20) \\ Backslash (ASCII \, equivalent to \5C) Use uppercase letters for hexadecimal characters and lowercase letters for the special characters, such as form feed and backspace. Thus, G interprets the sequence \BFare as hex BF followed by the word are, whereas G interprets \bFare and \bfare as a backspace followed by the words Fare and fare. In the sequence \Bfare, \B is not the backspace code, and \Bf is not a valid hex code. In a case like this, when a backslash is followed by only part of a valid hex character, G assumes a 0 follows the backslash, so G interprets \B as hex 0B. Any time a backslash is not followed by a valid hex character, G does not recognize the backslash character. You can enter some nondisplayable characters from the keyboard, such as a carriage return, into a string control, whether or not you select ‘\’ Codes Display. However, if you enable the backslash mode when the display window contains text, G redraws the display to show the backslash representation of any nondisplayable characters as well as the \ character itself. Suppose the mode is disabled and you enter the following string. left \right\3F G Programming Reference Manual 11-4 © National Instruments Corporation Chapter 11 String Controls and Indicators When you enable the mode, the following string appears because the carriage return after left and the backslash characters following it are shown in backslash form as \n\\. left\n\\right\\3F Suppose now that you select ‘\’ Codes Display and you enter the following string. left \right\3F When you disable the mode, the following string appears because G originally interpreted \r as a carriage return and now prints one. \3F is the special representation of the question mark (?) and prints this way. left ight? Now if you select ‘\’ Codes Display again, the following string appears. left\n\right? Indicators behave in the same way. In these examples, the data in the string does not change from one mode to the other. Only the displayed representation of certain characters changes. The backslash mode is very useful for debugging programs, and for sending nonprintable characters to instruments, serial ports, and other devices. Password Display Option With the Password Display option, the string control displays an “*” for each character entered into it. When you read the data of the string from the block diagram, however, you read the actual data that the user entered. If you try to copy data from the control, only the * characters are copied. Hex Display Option Use the Hex Display option to display the string as hex characters rather than alphanumeric characters. © National Instruments Corporation 11-5 G Programming Reference Manual Chapter 11 String Controls and Indicators Limit to Single Line Option The Limit to Single Line option prevents you from entering a carriage return into a string while typing into it. Tables A table is a 2D array of strings. The following illustration is an example of a table with all its features shown. call indicated by index values column headings vertical index horizontal index vertical scrollbar row headings horizontal scrollbar A table has row and column headings which are separated from the data by a thin, open border space. You enter headings when you place the table on the front panel, and you can change them using the Operating tool or Labeling tool. You can update or read headings using the Attribute Node. The index display indicates which cell is visible at the upper left corner of the table. You can operate these indices just as you do on an array. Resizing Tables, Rows, and Columns You can resize the table from any corner with the Resizing tool. You can resize individual rows and columns in a table by dragging one of the border lines with the Positioning tool. When the tool is placed properly G Programming Reference Manual 11-6 © National Instruments Corporation Chapter 11 String Controls and Indicators to drag a line, one of the drag cursors shown in the following illustration appears. Click on a line and drag it to resize the row or column. You can use the <Shift> key while dragging a border line to size multiple rows or columns to be all the same size. If the row or column you are resizing is inside an area of the table you have selected (outlined in blue or bold), all the rows or columns in the table also are equally sized. Thus, the uneven horizontal rows in the following illustration to the left become evenly spaced in the illustration to the right. Entering and Selecting Data Tables You can use the keyboard to enter data into a table rapidly. Click inside a cell with either the Operating tool or the Labeling tool, type in your data. The <Enter> (Windows and HP-UX), or <Return> (Macintosh and Sun) key on the alphanumeric keyboard enters your text and moves the cursor into the cell below. The <Enter> key on the numeric keypad enters your data and terminates the entry. Pressing the <Shift> key while pressing the arrow keys moves the entry cursor through the cells. You can select individual cells with the Operating tool or by double-clicking, and you can extend the selection by pressing <Shift-click> and then dragging. Moving outside the current contents of the table scrolls the table while extending the selection. A border appears around selected cells to © National Instruments Corporation 11-7 G Programming Reference Manual Chapter 11 String Controls and Indicators indicate that they have been selected. You can turn scrolling on or off using the Selection Scrolling option in the table pop-up menu. You also can select all the data in a table, or all the data in a row or column. Position the Operating tool at the upper left corner of the table to select all data. A special, double-arrow cursor appears when the tool is positioned properly as shown in the following illustration. Click on the area to select the data. To select an entire row or column of data, position the Operating tool at the left border of a row, or at the top of a column. Again, a special arrow cursor appears when the tool is properly positioned, shown in the illustration that follows. Click on and drag across width of column or height of row to select the data. You can copy, cut and paste data, using the Copy Data, Cut Data, and Paste Data options in the Data Operations submenu of the pop-up menu. If you cut any row or rows of data, all rows below it move up, as shown in the top portion of the following illustration. If you cut any column of data, all columns to the right scroll left, as shown in the bottom portion of the illustration. G Programming Reference Manual 11-8 © National Instruments Corporation Chapter 11 String Controls and Indicators Selecting a row After cutting row Selecting a column After cutting column To show a selected area of data, you can turn the option on or off by selecting or deselecting Data Operations»Show Selection. The row and column headings of a table are not part of the table data. Table headings are a separate piece of data, and you can read and set them using the Attribute Node. The table is the same as a two-dimensional array of strings as far as the block diagram is concerned. Because of this, string functions can manipulate tables. See the Online Reference»Function and VI Reference»String Functions topic for information on using these functions. © National Instruments Corporation 11-9 G Programming Reference Manual Path Controls and Indicators and Refnums Chapter 12 This chapter describes how to use file path controls and refnums, which are available from the Controls»Path & Refnum palette, shown in the following illustration. Path Controls and Indicators A path control and path indicator are shown in the following illustration. © National Instruments Corporation 12-1 G Programming Reference Manual Chapter 12 Path Controls and Indicators and Refnums You can use path controls and indicators to enter and display, respectively, the location of a file or directory in a file system using the standard syntax for a given platform. If a function that is supposed to Path Symbol return a path fails, it returns an invalid path. When an invalid path is displayed by a path control or indicator, the Path symbol changes to the Not a Path symbol, and <Not A Path> appears in the text field to Not a Path Symbol indicate that the path is invalid. You can change the value of a path control from a valid path to an invalid path by clicking on the Path symbol and selecting the Not a Path option from the menu. This is shown in the following illustration. In the same way, you can change the value of a path control or indicator from an invalid path to a valid empty path by clicking on the Not a Path symbol and selecting the Valid Path option from the menu. You might use this Not a Path value as the default value for a path control on your VI. In this way, you can detect when the user has not entered a path, in which case the user can use a file dialog box for choosing a path. Refnums The Path & Refnums palette contains several refnum controls, shown in the following illustration. These refnums generally are used to identify I/O operations. G has seven refnum data types for various kinds G Programming Reference Manual 12-2 © National Instruments Corporation Chapter 12 Path Controls and Indicators and Refnums of I/O. For each refnum, there is a corresponding control. The following illustration shows the different kinds of refnums. Byte Stream File RefNum Data Log File RefNum VISA Session RefNum Device RefNum Occurrence RefNum Network Connection RefNum VISA Address RefNum To open a file, you must specify the path of the file you want to open. Because you can open more than one file at a time, you need to indicate which operations apply to which open file. The path control is not sufficient for this, because you can open one file more than once, concurrently. When you open a file, G returns a refnum that identifies that file. You use this refnum in all subsequent operations that relate to that file. You can think of this refnum as a unique number produced each time you open a file to identify it. When you close the file, the refnum is disassociated from it. Note: You only need to use a refnum control or indicator if you want to pass a refnum between two VIs. If you are a LabVIEW user, refer to Chapter 5, VISA Transition Library Reference in the LabVIEW Instrument I/O VI Reference Manual, for information on the two VISA refnums. There are two kinds of file refnums, one for datalog files and one for byte stream files. Because datalog files have an inherent structure, the Data Log File RefNum is used to pass the refnum as well as a description of the file type to (or from) calling VIs. The Data Log File RefNum is resizeable, like a cluster. You place a control inside the refnum that defines the © National Instruments Corporation 12-3 G Programming Reference Manual Chapter 12 Path Controls and Indicators and Refnums structure of the file. For a file that contains numbers, you create a datalog refnum containing a number. If each record in the file contains a pair of numbers, you place a cluster inside the refnum, and then place two numeric controls inside the cluster. The remaining refnums are easy to use, because they do not have any options. The Byte Stream File RefNum is used with byte stream files, either text or binary files. Typically, you use it when you open or create a file in one VI but want to perform I/O on the file in another VI. You need a refnum control on the front panel of the VI that performs I/O, and a refnum indicator on the front panel of the VI that opens or creates the file. The Device RefNum is used with the device I/O functions available for the Macintosh. It is used only when you open a device in one VI but want to perform I/O on the device in another VI. Note: You rarely need to use a Device RefNum control on your front panel. These controls are used in the Instrument I/O VIs in vi.lib to access the G GPIB and serial device drivers. You only need to use a Device RefNum control if you have to write a special-purpose G device driver for the Macintosh. The Network Connection RefNum is used with the TCP/IP VIs. You generally use it when you open a network connection in one VI but want to perform I/O on the network connection in another VI. The Occurrence RefNum is used with the occurrence functions. You use it only when you generate an occurrence in one VI but want to set or wait for the occurrence in another VI. The following illustration shows the front panel and block diagram of a VI that uses and returns an Occurrence RefNum generated in another VI. front panel G Programming Reference Manual 12-4 block diagram © National Instruments Corporation Chapter 12 Path Controls and Indicators and Refnums The following illustration shows the front panel and block diagram of a VI that uses and returns a Byte Stream File RefNum generated in another VI. front panel block diagram The following illustration shows the front panel and block diagram of a VI that uses and returns a Data Log File RefNum generated in another VI. Datalog files can contain any data type. The datalog file in the following example contains numeric data. front panel block diagram The following illustration shows the front panel and block diagram of a VI that uses and returns a Network Connection RefNum generated in another VI. front panel © National Instruments Corporation 12-5 block diagram G Programming Reference Manual List and Ring Controls and Indicators Chapter 13 This chapter describes the listbox and ring controls and indicators, which are available from the Controls»List & Ring palette, shown in the following illustration. The List & Ring palette contains eight controls—Text Ring, Menu Ring, Dialog Ring, Pict Ring, Text & Pict Ring, Single Selection Listbox, Multiple Selection Listbox, and Enumerated Type. This chapter discusses the ring controls, listbox controls, and the enumerated type controls, in that order. For information about the attributes of listbox and ring controls, see Chapter 20, Attribute Nodes. Listbox Controls Listbox controls are used to present users with a list of options. An example is shown in the following illustration. There are two types of listbox controls—Single Selection in which only one option can be © National Instruments Corporation 13-1 G Programming Reference Manual Chapter 13 List and Ring Controls and Indicators selected, and Multiple Selection, in which one or more options can be selected. In addition to displaying a list of text options, you can have one of several different symbols drawn next to each item (as in the Save dialog box, where directories and files have different symbols). You can detect the currently selected option(s) by reading the value of the control. By using an Attribute Node, you also can detect which item, if any, the user double-clicked on. Finally, you can choose to have some options grayed-out (non-selectable) using the Attribute Node. Creating a List of Options When you put a listbox on a front panel, it contains no text. You can create the list of options in edit mode by typing them with the Labeling tool, or in run mode by using the Attribute Node. Separate individual options by entering a carriage return. If you can determine the options when you create the VI, you might want to type in the options while in edit mode. If you can determine the options at run time (for example, a list of files), use the Attribute Node. Selecting Listbox Items There are three ways to select items in a listbox—by using the mouse, by using the arrow keys, or by typing part of the name of the option you want. • G Programming Reference Manual Mouse—Use the Operating tool to select items. With the Multiple Selection Listbox, you can select more than one item by <Shift>-clicking on additional items. 13-2 © National Instruments Corporation Chapter 13 List and Ring Controls and Indicators • Arrow keys—Use the arrow keys to select items. To add the currently highlighted option to the list of selected items, press the spacebar. You can deselect a currently selected option by using the arrow keys to move to the option and then pressing the spacebar. • Typing part of the name of the option you want—Type the name of the option to select the item. You also can use the left or right arrow keys to go to the previous or next items that match the typed letters. Listbox Data Types The data type for a Single Selection Listbox is Int32. The data value for the Single Selection Listbox is a number that represents the currently selected option, with the first option having a value of zero. If no option is selected, the value is –1. The Multiple Selection listbox is an array of Int32s, where the value(s) in the array represent the currently selected option(s). If no option is selected, the value is an empty array. Listbox Pop-Up Menu Options The listbox pop-up menu includes the options shown in the following illustration. The options unique to listbox controls are described in this section. © National Instruments Corporation 13-3 G Programming Reference Manual Chapter 13 List and Ring Controls and Indicators Show You use Show from the pop-up menu, shown in the following illustration, to select which components of the listbox are visible. You also can choose to show or hide the label, the scrollbar, and the symbols. If you select Show»Symbols, the listbox adds an extra column to the left side of the list for symbols. An example of this is shown in the following illustration. Initially, no items have symbols. You can add symbols using the Attribute Node. Selection Mode You use Selection Mode from the pop-up menu to indicate how many items you can select at once. G Programming Reference Manual 13-4 © National Instruments Corporation Chapter 13 List and Ring Controls and Indicators For a Single Selection Listbox, you have selection mode options to set the listbox to support zero or one selections, or one selection, shown in the following illustration. If you select 1 Item (the default setting), then one option in the listbox always is selected (highlighted). When you click on a different option, the new option is selected (highlighted), and the previous option is deselected. If you select 0 or 1 Item, the behavior is the same, with the exception that a user can deselect the current option by <Shift>-clicking on it, leaving no options selected. In a Multiple Selection Listbox, you have the same selection mode options as the Single Selection Listbox. In addition, you can indicate that multiple options can be selected, as shown in the following illustration. By default, the Multiple Selection listbox has a selection mode in which the user can select 0 or More Items. You also can select 0 or More Items to put it into a multiple selection mode where at least one item must be selected. © National Instruments Corporation 13-5 G Programming Reference Manual Chapter 13 List and Ring Controls and Indicators Keyboard Mode You use Keyboard Mode from the pop-up menu, shown in the illustration that follows, to indicate how the listbox should treat upper and lower case characters when you select options by typing their initial letters. If you select Case Sensitive, an item is selected only if the uppercase and lowercase letters of what the user types exactly match the item. If you select Case Insensitive, case is ignored. If you select System Default (the default setting for a listbox), the listbox behaves the same way that other listboxes do for a given platform. Specifically, in Windows and on the Macintosh, the listbox is case insensitive. In UNIX, the listbox is case sensitive. Creating a Grayed-Out Dividing Line If you use a value of –1 for the symbol of an option, the listbox draws a grayed-out dividing line instead of drawing the name of the option. G Programming Reference Manual 13-6 © National Instruments Corporation Chapter 13 List and Ring Controls and Indicators Ring Controls Rings are special numeric objects that associate unsigned 16-bit integers with strings, pictures, or both. The different styles of rings are shown in the following illustration. Rings are particularly useful for selecting mutually exclusive options, such as trigger modes. For example, you might want users to be able to choose from continuous, single, and external triggering, as shown in the following illustration. In the preceding example, the ring labeled Trigger Mode has three mode descriptors, one after another, in the text display of the ring. G arranges items in a circular list (like a Rolodex) with only one item visible at a time. Each item has a numeric value, which ranges from zero to n – 1, where n is the number of items (three in this example). The value of the ring, however, can be any value in its numeric data range. It displays the last item (External, above) for any value greater than or equal to two and the first item (Continuous, above) for any value less than or equal to zero. © National Instruments Corporation 13-7 G Programming Reference Manual Chapter 13 List and Ring Controls and Indicators Users can use this ring to choose an option from an easy-to-understand list without having to know what value that option represents. The value associated with the selected option passes to the block diagram, where, for example, you can use it to select a case from a Case Structure (conditional code) that carries out the selected option. You can select an item in a ring control two ways. You can use the increment buttons to move to the next or previous item. Incrementing continues in circular fashion through the list of items as long as you hold down the mouse button. You also can select any item directly by clicking on the ring with the Operating tool and then choosing the item you want from the menu that appears. Adding Text Items to Rings A new text ring has one item with a value of zero and a display containing an empty string. You enter or change text in the ring text area as you do with labels, using the Labeling tool. Press the <Enter> (Windows and HP-UX), or <Return> (Macintosh and Sun) key or click outside the text area to finish typing. Add Item After from the text ring pop-up menu creates a new empty item following the current one. Add Item Before inserts a new item in front of the current item. If you are editing item 0 when you select Add Item After, for example, item 1 is created, ready for you to enter text for the new item. You also can press <Shift-Enter> (Windows and HP-UX), or <Shift-Return> (Macintosh and Sun) after typing in an item to advance to a new item. You add items to the menu ring or dialog ring the same way you add items to the text ring. However, the menu ring looks and operates like a pull-down menu. It has no increment buttons. You select an item by clicking on the ring and selecting an item from the menu that appears. The ring displays the currently selected item. You can pop up and select Show»Digital Display to display the numeric value associated with the current item of a ring. For every ring, the item values above the insertion point increase by one to adjust for the new item. For example, if you insert an item after item 4, the new item becomes item 5, the previous item 5 becomes item 6, 6 becomes 7, and so on. If you insert an item before item 4, the new item becomes item 4, the previous item 4 becomes item 5, 5 becomes 6, and so on. G Programming Reference Manual 13-8 © National Instruments Corporation Chapter 13 List and Ring Controls and Indicators Use the Remove Item command from the ring pop-up menu to delete any item. As with the add item commands, the numeric values of the item adjust automatically. If you set a ring indicator or control to a value smaller than zero or greater than the number of items included, the control or indicator displays the first or the last item, respectively. Adding Picture Items to Rings A new Pict Ring or Text & Pict Ring has one item with an empty picture display. You must copy a picture to the Clipboard before you can import the picture into a Pict Ring. When you have a picture on the Clipboard, pop up on the Pict Ring and select Import Picture. To add another picture, copy it to the Clipboard, then pop up on the Pict Ring and select Import Picture Before or Import Picture After, as shown in the following illustration. © National Instruments Corporation 13-9 G Programming Reference Manual Chapter 13 List and Ring Controls and Indicators Changing the Size and Text of Text & Pict Rings You can enlarge the Text & Pict Ring to make more room for the contents, just as you can enlarge all controls. You also can decrease the size. When you resize the Text & Pict Ring from one of its bottom corners, the height of the text area changes. When you resize the Text & Pict Ring from one of its top corners, the height of the picture area changes. These resizing capabilities are shown in the following illustration. Enumerated Type Controls An enumerated type control is similar to a text ring control. If data from an enumerated type is connected to a Case Structure, however, the case displays the string, or text of the item, instead of a number. The enumerated type data type is unsigned byte, unsigned word, or unsigned G Programming Reference Manual 13-10 © National Instruments Corporation Chapter 13 List and Ring Controls and Indicators long, selectable from the Representation palette. An example is shown in the following illustration. Front panel object digital display Block diagram One advantage of enumerated types over ring controls is that if you use an enumerated type on the connector pane of a subVI, then popping up to create a constant, control, or indicator will create an enumeration with the proper strings. You enter items into an enumerated type the same way you enter items into a ring, using Add Item After or Add Item Before. Or, you can use the Labeling tool. Press <Shift-Enter> (Windows and HP-UX), or <Shift-Return> (Macintosh and Sun) to enter a new item. Click on any area outside the enumerated type when you have finished entering items. If an enumerated type is wired to a Case Structure, the Case Structure must have one frame for each item in the enumerated type. Pop up on the Case Structure and select Add Case After if you need more frames. Like a ring, the value of an enumerated type is the index of its current items. You can pop up and select Show»Digital Display. All arithmetic operations except Add One and Subtract One treat the enumerated type the same as an unsigned numeric. Add One increments the last enumeration to the first, and Subtract One decrements the first enumeration to the last. © National Instruments Corporation 13-11 G Programming Reference Manual Chapter 13 List and Ring Controls and Indicators If you connect a numeric value to an enumerated type indicator, G converts the number to the closest enumeration item. If you connect an enumeration control to a numeric value, the value is the enumerated type index. To wire an enumeration control to an enumeration indicator, the enumeration items must match exactly. G Programming Reference Manual 13-12 © National Instruments Corporation Array and Cluster Controls and Indicators Chapter 14 This chapter describes how to use arrays and clusters. You access arrays and clusters from the Controls»Array & Cluster palette, shown in the following illustration. See the examples in general\examples\general\arrays.llb. The Online Reference»Function and VI Reference describes G functions, many of which can operate on arrays in addition to scalars. The Array Functions and the Cluster Functions topics describe the functions designed exclusively for array and cluster operations. Arrays An array is a variable-sized collection of data elements that are all the same type, as opposed to a cluster, which is a fixed-sized collection of data elements of mixed types. Array elements are ordered, and you access an individual array element by indexing the array. The index is © National Instruments Corporation 14-1 G Programming Reference Manual Chapter 14 Array and Cluster Controls and Indicators zero-based, which means it is in the range of zero to n – 1, where n is the number of elements in the array, as in the following illustration. index 0 1 2 3 4 5 11-element array Melissa Greg Gregg Don Duncan Thad index (continued) 6 7 8 9 10 11-element array (continued) Dean Stepan Kate Mary Mark A simple example of an array is a list of names, represented in G as an array of strings, as shown in the following illustration. Jeff Paul Rob Bruce Steve Meg Jack Brian Deb Kevin Tom List of Names in an Array of Strings Another example is a waveform represented as a numeric array in which each successive element is the voltage value at successive time intervals, as shown in the following illustration. index volts 0 0.4 1 2 3 4 5 6 7 8 0.9 1.4 0.8 -0.1 -0.7 -0.3 0.3 0.2 Waveform in an Array of Numbers A more complex example is a graph represented as an array of points where each point is a pair of numbers giving the X and Y coordinates, as shown in the following illustration. G Programming Reference Manual 14-2 © National Instruments Corporation Chapter 14 index X coord 0.4 0 Y coord 0.2 Array and Cluster Controls and Indicators 1 2 3 4 5 6 2.2 3.3 3.2 2.4 1.8 1.9 0.5 1.3 2.3 2.6 1.9 1.2 Graph in an Array of Points The preceding examples are one-dimensional arrays. A two-dimensional array requires two indices to locate an element—a column index and a row index, both of which are zero-based. In this case, we speak of an N column by M row array, which contains N times M elements, as shown in the following illustration. 0 column index 1 2 3 4 5 row 1 index 6 Column by 4 Row Array of 24 Elements A simple example is a chess board. There are eight columns and eight rows for a total of 64 positions, each of which can be empty or have one chess piece. You can represent a chess board as a two-dimensional array of strings. Each string has the name of the piece occupying the corresponding location on the board, or it is an empty string if the location was empty. Other familiar examples include calendars, train schedule tables, and even television pictures, which can be represented as two-dimensional arrays of numbers giving the light intensity at each point. Familiar to computer users are spreadsheet programs, which have rows and columns of numbers, formulas, and text. All of the one-dimensional array examples can be generalized to two dimensions. A collection of waveforms represented as a two-dimensional array of numbers is shown in the following © National Instruments Corporation 14-3 G Programming Reference Manual Chapter 14 Array and Cluster Controls and Indicators illustration. The row index selects the waveform and the column index selects the point on the waveform. 1 2 3 4 5 6 7 8 point index 0 waveform 0 0.4 0.9 1.4 0.8 - 0.1 - 0.7 - 0.3 0.3 0.2 1.6 1.4 0.9 1.1 indices 1 - 0.5 0.6 0.4 0.2 0.8 2 1.6 1.4 0.7 0.5 - 0.5 - 0.6 - 0.2 0.3 0.5 Multiple Waveforms in a 2D Array of Numbers volts Arrays can have an arbitrary number of dimensions, but one index per dimension is required to locate an element. The data type of the array elements can be a cluster containing an assortment of types, including arrays whose element type is a cluster, and so on. You cannot have an array of arrays. Instead, use a multidimensional array or an array of clusters of arrays. Consider using arrays when you need to work with a collection of similar data. Arrays are frequently helpful when you need to perform repetitive computations or I/O functions. Using arrays makes your application smaller, faster, and easier to develop because of the large number of array functions and VIs in G. G Programming Reference Manual 14-4 © National Instruments Corporation Chapter 14 Array and Cluster Controls and Indicators Creating Array Controls You create an array control by first selecting an array from Controls»Array & Cluster, as shown in the following illustration. You create an array control or indicator by combining an array shell from the Array & Cluster palette, as shown in the preceding illustration, with a valid element, which can be a numeric, Boolean, string, or cluster. The element cannot be another array or a chart. Also, if the element is a graph then only the graph data types that contain clusters instead of arrays at the top level are valid. Selecting an array from the Array & Cluster palette places an array shell on the front panel, as shown in the following illustration. index display element display A new array shell has one index display, an empty element display, and an optional label. © National Instruments Corporation 14-5 G Programming Reference Manual Chapter 14 Array and Cluster Controls and Indicators There are two ways to define an array type. You can drag a valid control or indicator into the element display window, or you can deposit the control or indicator directly by popping up in the element display area of the array and selecting a control. Either way, the control or indicator you insert fills the empty display. For example, if you want to define an array of Booleans, you either can drag a Boolean into the element display area, or you can pop up in the empty element area and select a Boolean control. Both methods are shown in the following illustrations. or G Programming Reference Manual 14-6 © National Instruments Corporation Chapter 14 Array and Cluster Controls and Indicators The pop-up menu of the index display is shown in the following illustration. Array Dimensions A new array has one dimension and one index display. You resize the index vertically or select the Add Dimension option from the index display pop-up menu to add a dimension. You shrink the index vertically or select Remove Dimension to delete it. An additional index © National Instruments Corporation 14-7 G Programming Reference Manual Chapter 14 Array and Cluster Controls and Indicators display appears for each dimension you add. Two methods for resizing are shown in the following illustrations. The dimension of an array is a choice you make when you decide how many identifiers it takes to locate an item of data. For example, to locate a word in a book you might need to go to the sixth word on the twenty-eighth line on page 192. You need three indices, 6, 28, and 192 to specify the word, so one possible representation for this book is a three-dimensional array of words. To locate a book in a library you indicate the position on the shelf, which shelf, which bookcase, which aisle, and which floor, so if you represented this as an array it uses five dimensions. To locate a word in a library then requires eight indices. Array Index Display If you think of a two-dimensional array as rows of columns, the top display is the row index and the bottom display is the column index. The combined display at the right shows the value at the specified position, as shown in the illustration that follows. G Programming Reference Manual 14-8 © National Instruments Corporation Chapter 14 Array and Cluster Controls and Indicators row value at row, column column For example, say you have an array of 3 rows and 4 columns, with values as shown in the following figure. Rows and columns are zero-based, meaning that the first column is column 0, the second column is column 1, and so forth. Changing the index display to row 1, column 2 displays a value of 6, as shown in the following illustration. If you try to display something out of range, the value display is grayed-out to indicate there is no value currently defined for that value. For example, if you tried to display an element in row 10 of the array shown previously, the display would be grayed-out as shown in the following illustration. Displaying Arrays in Single-Element or Tabular Form Array Resizing tool A new array appears in single-element form. The array displays the value of a single element—the one referenced by the index display. You also can display the array as a table of elements by resizing the array shell from any of the four corners surrounding the element. The array Resizing tool is slightly different from the usual Resizing tool when it © National Instruments Corporation 14-9 G Programming Reference Manual Chapter 14 Array and Cluster Controls and Indicators is over the array shell resizing handles, and the cursor changes to the usual symbol when you begin to resize. An example is shown in the following illustration. Usual Resizing symbol The following illustration shows how to resize a one-dimensional array either vertically or horizontally to show more elements simultaneously. The index display contains the index of the element in the left or upper left corner of the table. By changing the index, you can display different sections of a large or multidimensional array. For one-dimensional (1D) arrays, the index identifies the column of the left-most visible element. For two-dimensional (2D) or higher arrays, the bottom two indices identify the coordinates of the upper left visible element. In the left portion of the following illustration, this element is [3,4]. G Programming Reference Manual 14-10 © National Instruments Corporation Chapter 14 Array and Cluster Controls and Indicators If you view a three-dimensional (3D) array as a book of pages that are composed of lines (rows) of characters (columns), the table displays part or all of one page. The figure at the right in the following illustration shows the first four columns of the first two rows of page three of the array. element [3,4] element [0,0] of page 3 page row column If you want to hide the array indices, pop up on the outer frame and turn off the Show»Index Display option from the array pop-up menu. The following illustration shows an example of what a tabular array looks like without the index display. If you want to display an array in an orientation different from the tabular array format, you can display the elements in a cluster on the front panel and process them in an array. To do this, use the Array To Cluster and Cluster To Array functions discussed in the Online Reference»Function and VI Reference»Cluster Functions topic. Operating Arrays You operate the element of the array exactly as if it were not part of the array. You operate the index display the same way you operate a digital control. To set the value of an array control element, bring the element into view with the index display, then set the value of the element. Default Sizes and Values of Arrays You cannot fix the size of a G array. However, when you set the default values of an array control, you also set the default size. Do not make the default size larger than necessary. Keep in mind that if you set an array © National Instruments Corporation 14-11 G Programming Reference Manual Chapter 14 Array and Cluster Controls and Indicators to have a large default value, all of the default data is saved along with the VI, thus increasing the size of your file. A new array shell without an element is undefined. It has no data type and no elements and it cannot be used in a program. After you assign an element to the array, it is an empty array (its length is 0). Although it also has no defined elements, you still can use it in the VI. The array control dims all elements, indicating they are undefined. The following illustrations show an array control in single-element form that is wired to an array indicator in tabular form with five elements displayed. The first figure shows that both arrays are empty (element values are undefined). If you set the index display of the array control to 9 and set the element value at index 9 to 5.4, the data in the array expands to 10 elements (0 to 9). The value of element 9 is the value you set, 5.4 in this example. G assigns to the other elements the default value of the digital control, 0.00. After running the VI, the indicator displays the same values. Selecting Reinitialize to Default for an element resets that element only to its default value. Now assume you change the default value of a numeric element from 0.0 to 1.0. You can do this by changing the value in the indicator with the Operating tool and then popping up on the element and selecting Make Current Value Default. Or, you can choose the Data Range… option from the pop-up menu. Assume you also set the value of element 12 to 7.0. The array now has 13 elements. The values of the first 10 elements do not change, but elements 10 and 11 have the new default G Programming Reference Manual 14-12 © National Instruments Corporation Chapter 14 Array and Cluster Controls and Indicators value of 1.0, and element 12 has the assigned value of 7.0. This example is shown in the following illustration. If you now select Reinitialize to Default from either the shell or the index pop-up menus, the array reverts to the 10-element array shown in the previous example. To increase the size of an array from [Ni by Nj by Nk…] to [Mi by Mj by Mk…], assign a value to the new last element [Mi – 1, Mj – 1, Mk – 1…]. To decrease the size, first execute the Data Operations»Empty Array command from the index array pop-up menu, then set the array and values to the size you want, or select the unwanted subset of the array and select the Data Operations»Cut Data option from the pop-up menu, as explained in the following sections. Array Elements When in run mode, you can use the <Tab> key either to move the key focus between front panel controls or between elements within a single array. Initially, the <Tab> key moves the key focus between front panel controls. To have it move between the elements within a specific array, first <Tab> to that array. Then use the <Ctrl> (Windows); <command> (Macintosh); <meta> (Sun); or <Alt> (HP-UX) key and the down arrow, which you can use to move between the array elements. If you want to return to tabbing between controls, use the <Ctrl> (Windows); <command> (Macintosh); <meta> (Sun); or <Alt> (HP-UX) key and the up arrow. Finding the Size of Arrays To find the size of an array control or indicator, select Data Operations»Show Last Element from the index array pop-up menu. © National Instruments Corporation 14-13 G Programming Reference Manual Chapter 14 Array and Cluster Controls and Indicators Moving or Resizing Arrays Always move the array by clicking on the shell border or the index display and then dragging it. If you drag the element in the array, it separates from the array, because the shell and elements are not locked together. If you inadvertently drag the element when you meant to drag the shell, cancel the operation by dragging the element back into the shell or past the front panel window border before releasing the mouse button. You also cancel a resizing operation by dragging the border past the front panel window before releasing the mouse button. If the array is part of the current selection, then grabbing an element drags the array. You can resize the array index vertically from any corner, or horizontally from the left. Selecting Array Cells You can copy data from and paste data to arrays by taking these steps. 1. To select the data, set the array index to the first element in the data set you want to copy. 2. Then, select the Data Operations»Start Selection option from the array pop-up menu. 3. Next, set the array index to the last element in the data set you want to copy. 4. Finally, select the Data Operations»End Selection option from the array pop-up menu. When you are in run mode, these options are directly available when you pop up on an array. The selection process is detailed in the following example. An Example of Selecting Array Cells Begin by selecting Show Selection from the pop-up menu. Show Selection must be activated for your selected cells to be visibly marked. A border surrounds selected cells. You can select Add Element Gap from the pop-up menu. This separates the cells by a thin open space. Although it is not necessary to add the element gap, this open border improves the appearance of the array. When you select cells, this open space is filled by a thick border, denoting the selected cells. If you do not add the element gap, the selection border appears over the selected cell edge. G Programming Reference Manual 14-14 © National Instruments Corporation Chapter 14 Array and Cluster Controls and Indicators You define the cells for selection with the array index. The following example uses a two dimensional array. Set the array index for 1,1. Choose Start Selection from the pop-up menu. Set the array index to 3,3. Choose End Selection from the pop-up menu. The selected cells are surrounded by a blue border (thick black on a monochrome system). The selection includes the cells denoted by lower index numbers but not the cells denoted by the higher index numbers. If you want to include © National Instruments Corporation 14-15 G Programming Reference Manual Chapter 14 Array and Cluster Controls and Indicators the cells from 1,1 to 3,3, you need to set the index to 4,4 before choosing End Selection. After you select cells, you can cut or copy the data to paste into other cells. When you finish, notice that one border line remains highlighted. This is an insertion point, and remains in the array. To hide this line, you can deselect the Show Selection option from the pop-up menu. You can eliminate this line without deselecting Show Selection by emptying the selection. Set the index to 0 in all dimensions, and then select Start Selection and End Selection. This makes the selection run from 0 to 0 in all dimensions, which is what the selection is set to when you first place it on the front panel. G Arrays and Arrays in Other Systems Most programming languages have arrays, although few have the number of built-in array functions that G contains. Other languages typically stop at the fundamental array operations of extracting an element or replacing an element, leaving it to the users to build more complex operations themselves. G has these fundamental operators, so you can map a program in another language directly to a VI in G, but you usually can create a simpler and smaller diagram if you start over in G and use the higher-level array functions of G. The example that follows shows a fragment of a C program that sums the squares of the elements of an array, the direct translation to a G block diagram, and two redesigned versions that are more efficient than the translation. G Programming Reference Manual 14-16 © National Instruments Corporation Chapter 14 Array and Cluster Controls and Indicators . . . sum = 0 for (i = 0; i < 100; i ++ ) sum += x[i] * x[i]; . . . C Code Fragment sum x G Direct Translation sum x G Auto-Indexing Version sum x G Optimal Version Index Array function icon The indexing operation for extracting an element is represented in C by brackets [ ] following the array name and enclosing the index. In G, this operation is represented by the Index Array function icon shown at left. The array is wired to the top left terminal, the index is wired to the © National Instruments Corporation 14-17 G Programming Reference Manual Chapter 14 Array and Cluster Controls and Indicators bottom left terminal, and the array element value is wired to the right terminal. The following example shows the fundamental operation of replacing an array element. The fragment of FORTRAN code generates a histogram of random numbers (the random number generator produces values between 0 and 1), and so does the G version. You can disregard the +1 in the FORTRAN computation of J; the addition is needed because FORTRAN arrays are one-based. . . . DO 10 I = 1, 10000 J = 100.0 * RAND( ) + 1 H(J) = H(J) + 1 10 CONTINUE . . . h h G Direct Translation Replace Array Element function The indexing operation for inserting or replacing an element is represented in FORTRAN by parentheses( ) on the left side of the equal sign following the array name, and enclosing the index. In G, this operation is represented by the Replace Array Element function icon (shown at left). The array is wired to the top left terminal, the replacement value is wired to the middle left terminal, the index is wired to the bottom left terminal, and the updated array is wired from the right terminal. Before you can use an array in most programming languages you first must declare it and, in some cases, initialize it. In G, building an array control or indicator on the front panel is equivalent to declaring an G Programming Reference Manual 14-18 © National Instruments Corporation Chapter 14 Array and Cluster Controls and Indicators array. Defining a default value for it is equivalent to giving the array an initial value. Most languages require you to indicate a maximum size for an array as part of the declaration. The information about the size of the array is not treated as an integral part of the array, which means you have to keep track of the size yourself. In G, you do not have to declare a maximum size for arrays, because G automatically preserves the size information for the array. Furthermore, with G, you cannot store a value outside the bounds of an array. In many conventional programming languages, there is no such checking, and consequently you inadvertently can corrupt memory. Clusters A G cluster is an ordered collection of one or more elements, similar to structures in C and other languages. Unlike arrays, clusters can contain any combination of G data types. Although cluster and array elements are both ordered, you access cluster elements by unbundling all the elements at once rather than indexing one element at a time. Clusters are also different from arrays in that they are of a fixed size. As with an array, a cluster is either a control or an indicator; a cluster cannot contain a mixture of controls and indicators. You can use clusters to group related data elements that appear in multiple places on the diagram, which reduces wire clutter and the number of connector terminals subVIs need. Most clusters on the block diagram have a common wire pattern, although clusters of numbers (sometimes referred to as points) have a special wire pattern. Common Cluster Wire Pattern Cluster of Numbers Wire Pattern You can connect terminals only if they have the same type. For clusters, this means that both clusters must have the same number of elements, and corresponding elements—determined by the cluster order—must match in type. G coerces numbers of different representations to the same type. © National Instruments Corporation 14-19 G Programming Reference Manual Chapter 14 Array and Cluster Controls and Indicators For information on functions that manipulate clusters, see the Online Reference»Function and VI Reference»Cluster Functions topic. Creating Clusters You create a cluster control or indicator by installing any combination of Booleans, strings, charts, graph scalars, arrays, or even other clusters into a cluster shell. You access the cluster shell from the Controls palette, as shown in the following illustration. A new cluster shell has a resizable border and an optional label. When you pop up in the empty element area, the Controls palette appears. You can place any element from the Controls palette in a cluster. You can drag existing objects into the cluster shell or deposit them directly inside by selecting them from the cluster pop-up menu. The cluster takes on the data direction (control or indicator) of the first element you place in the cluster, as do subsequently added objects. Selecting Change To Control or Change To Indicator from the pop-up menu of any cluster element changes the cluster and all its elements from indicators to controls or from controls to indicators. Operating and Configuring Cluster Elements With the exception of setting default values and the Change to Control and Change To Indicator options, you configure controls and G Programming Reference Manual 14-20 © National Instruments Corporation Chapter 14 Array and Cluster Controls and Indicators indicators the same way you configure controls and indicators that are not in a cluster. Cluster Elements When in run mode, you can use the <Tab> key either to move the key focus between front panel controls, or between elements within a single cluster. Initially, the <Tab> key moves the key focus between front panel controls. To have it move between the elements within a specific cluster, first <Tab> to that cluster. Then use the <Ctrl> (Windows); <command> (Macintosh); <meta> (Sun); or <Alt> (HP-UX) key and the down arrow, which you can use you to move between the cluster elements. If you want to return to tabbing between controls, use the <Ctrl> (Windows); <command> (Macintosh); <meta> (Sun); or <Alt> (HP-UX) key and the up arrow. Cluster Default Values To set the default value of the entire cluster to the current value of each individual element, pop up on the frame and select the Data Operations»Make Current Value Default command from the cluster pop-up menu. To reset all elements to their individual default configurations, select the Data Operations»Reinitialize To Default Values command from the cluster pop-up menu. To change the default value of a single element in a cluster, pop up on that particular element and select Make Current Value Default. Cluster Element Order Cluster elements have a logical order that is unrelated to their positions within the shell. The first object you insert in the cluster is element 0, the second is 1, and so on. If you delete an element, the order adjusts automatically. You can change the current order by selecting the © National Instruments Corporation 14-21 G Programming Reference Manual Chapter 14 Array and Cluster Controls and Indicators Cluster Order… option from the cluster pop-up menu. The appearance of the element changes, as shown in the following illustration. new place in order Enter button current place in order The white boxes on the elements show their current places in the cluster order. The black boxes show the new position of the element in the order. Clicking on an element with the cluster order cursor sets the position of the element in the cluster order to the number displayed inside the Tools palette. Change this order by typing a new number into that field. When the order is as you want it, click on the enter button to set it and exit the cluster order edit mode. Click on the X button to revert to the old order. X button The cluster order determines the order in which the elements appear as terminals on the Bundle and Unbundle functions in the block diagram. For more information on these functions, see the Online Reference» Function and VI Reference»String Functions topic. Moving or Resizing Clusters Cluster elements are not permanent components of clusters. That is, you can move or resize elements independently even when they are in the shell. To avoid inadvertently dragging them out, click on the shell when you want to move a cluster, and resize clusters from the shell border. If you inadvertently drag an element when you meant to drag the whole cluster, you can cancel the operation by dragging the element back into the shell or past the front panel window border before releasing the mouse button. You also cancel a resizing operation by dragging the border past the front panel window before releasing the mouse button. G Programming Reference Manual 14-22 © National Instruments Corporation Chapter 14 Array and Cluster Controls and Indicators You can shrink clusters to fit their contents by selecting Autosizing from the pop-up menu, shown in the following illustration. Cluster Assembly G has three functions for assembling or building clusters. The Bundle and Bundle By Name functions assembles a cluster from individual elements or replaces individual elements with elements of the same © National Instruments Corporation 14-23 G Programming Reference Manual Chapter 14 Array and Cluster Controls and Indicators type. The Array To Cluster function converts an array of elements into a cluster of elements. Bundle Function Bundle function The Bundle function, which you obtain from the Array & Cluster palette of the Functions palette, appears on the block diagram with two element input terminals on the left side. You can resize the icon vertically to create as many terminals as you need. The element you wire to the top terminal becomes element 0 in the output cluster, the element you wire to the second terminal becomes element 1 in the output cluster, and so on. As you wire to each input terminal, a symbol representing the data type of the wired element appears in the formerly empty terminal shown in the following illustration. You must wire all the inputs that you create. In addition to input terminals for elements on the left side, the Bundle function also has an input terminal for clusters in the middle as shown in the following illustration. You use this terminal to replace one or more elements of an existing cluster wire without affecting the other elements. See the Replacing Cluster Elements section in this chapter for an example of using this function to replace elements in a cluster. Bundle By Name Function Bundle By Name function The Bundle By Name function, also in the Functions»Cluster palette, is similar to the Bundle function. Instead of referencing fields by position, however, you reference them by name. Unlike the Bundle function, you can access only the elements that you want to access. For each element you want to access, you need to add an input to the function. G Programming Reference Manual 14-24 © National Instruments Corporation Chapter 14 Array and Cluster Controls and Indicators Because the name does not denote a position within the cluster, you must wire a cluster to the middle terminal as well. You can use the Bundle By Name function only to replace elements by name, not to create a new cluster. You might, however, wire a data type cluster to the middle terminal, and then wire all of the new values as names to produce this same behavior. For example, suppose you have a cluster containing a string called Name and a number called Age. After placing the Bundle By Name function, you first need to connect an input cluster to the middle terminal of the Bundle By Name function. After you have wired the middle terminal, you can select elements you want to modify by popping up on any of the left terminals of the Bundle By Name function. You then see a list of the names of the elements in the source cluster. After you select a name, you can wire a new value to © National Instruments Corporation 14-25 G Programming Reference Manual Chapter 14 Array and Cluster Controls and Indicators that terminal to assign a new value to that element of the cluster. An example of this is shown in the following illustrations. You can resize the Bundle By Name function to show as many or as few elements as you need. This is different from the Bundle function, which requires you to size it to have the same number of elements as are in the resulting cluster. G Programming Reference Manual 14-26 © National Instruments Corporation Chapter 14 Array and Cluster Controls and Indicators If you pop up on the Bundle By Name function when the cluster contains a cluster, you find a pull to the side submenu that you can use to access individual elements of the subcluster by name, or select all elements. The Bundle By Name function is useful when you are working with data structures that might change during the development process. If your modification involves the addition of a new element, or a reordering of the cluster, the change does not require changes to the Bundle By Name function, because the names are still valid. For example, if you modified the previous example by adding the new element and weight to the source and destination clusters, the VI is still correct. This example is shown in the following illustration. Bundle By Name is particularly useful in larger applications in conjunction with type definitions. By defining a cluster that might change as a type definition, any VI that uses that control can be changed to reflect a new data type by updating the file of the type definition. If the VIs use only Bundle By Name and Unbundle By Name to access the © National Instruments Corporation 14-27 G Programming Reference Manual Chapter 14 Array and Cluster Controls and Indicators elements of the cluster, you can avoid breaking the VIs that use the cluster. See the Type Definitions section of Chapter 22, Custom Controls and Type Definitions, for more information on type definitions. Also, see the Unbundle By Name Function section of this chapter. Array To Cluster Function Array To Cluster function The Array To Cluster function, which you select from the Array palette of the Functions palette, converts the elements of a 1D array to elements of a cluster. This function is useful when you want to display elements within a front panel cluster indicator, but you also want to manipulate the elements by index value on the block diagram. Use the Cluster Size… option from the function pop-up menu to configure the number of elements in the cluster. The dialog box that appears is shown in the following illustration. The function assigns the 0th array element to the 0th cluster element, and so on. If the array contains more elements than the cluster, the function ignores the remaining elements. If the array contains fewer elements than the cluster, the function assigns the extra cluster elements the default value for the element data type. The illustration that follows shows how to display an array of data in a front panel cluster indicator. With this technique, you can organize the array elements on the front panel to suit your application. You might use a tabular array indicator instead, but that limits you to a fixed display format–horizontal with the lowest element at left and an attached index display. G Programming Reference Manual 14-28 © National Instruments Corporation Chapter 14 Array and Cluster Controls and Indicators Cluster Disassembly G has three functions for disassembling clusters. The Unbundle and Unbundle By Name functions disassemble a cluster into individual elements, and the Cluster To Array function converts a cluster of identically typed elements into an array of elements of that type. Unbundle Function Unbundle function The Unbundle function, which you obtain from the Array & Cluster palette of the Functions palette, has two element output terminals on the right side. You adjust the number of terminals with the Resizing tool the same way you adjust the Bundle function. Element 0 in the cluster order passes to the top output terminal, element 1 passes to the second terminal, and so on. The cluster wire remains broken until you create the correct number of output terminals. When the number of terminals is correct, the wire © National Instruments Corporation 14-29 G Programming Reference Manual Chapter 14 Array and Cluster Controls and Indicators becomes solid. The terminal symbols display the element data types, as shown in the following illustration. Unbundle By Name Function Unbundle By Name function The Unbundle By Name function, also in the Array & Cluster palette of the Functions palette, is similar to the Unbundle function. Instead of referencing fields by position, however, you reference them by name. Unlike the Unbundle function, you can read only the elements that you want to read; you do not have to have one output for every cluster element. For example, the following is a panel with a cluster of three elements, weight, height and age. When connected to an Unbundle By Name function, you can pop up on an output terminal of the function and select an element that you want to read from the names of the components of the cluster, as shown in the following illustration. G Programming Reference Manual 14-30 © National Instruments Corporation Chapter 14 Array and Cluster Controls and Indicators You can resize the function to read other elements, shown in the following illustration. Keep in that you do not have to read all of the elements and that you can read them in arbitrary order. One of the advantages of the Unbundle By Name function over the Unbundle function is that it is not as closely tied to the data structure of the cluster. The Bundle function always must have exactly the same number of terminals as it has elements. If you add or remove an element from a cluster connected to an Unbundle function, you end up with broken wires. With the Unbundle By Name function, you can add elements to and remove elements from the cluster without breaking the VI, as long as the elements were not referenced on the diagram. © National Instruments Corporation 14-31 G Programming Reference Manual Chapter 14 Array and Cluster Controls and Indicators For example, with the previous cluster, you add a string for birthdate, and the diagram still is correct. This example is shown in the following illustration. As with Bundle By Name, the Unbundle By Name function is particularly useful in larger applications in conjunction with type definitions. See the Bundle By Name Function section of this chapter and the Type Definitions section of Chapter 22, Custom Controls and Type Definitions, for more information. Cluster To Array Function Cluster To Array function The Cluster To Array function, which you obtain from the Conversion palette of the Functions palette, converts the elements of a cluster into a 1D array of those elements. The cluster elements must all be the same type. The array contains the same number of elements as the cluster. Cluster elements cannot be array elements. If you have a cluster of N-dimensional arrays that you want to convert to an (N + 1)-dimensional array, you must unbundle the cluster elements with the Unbundle function and wire them to a Build Array function. The Cluster To Array function is useful when you want to group a set of front panel controls in a particular order within a cluster, but you also G Programming Reference Manual 14-32 © National Instruments Corporation Chapter 14 Array and Cluster Controls and Indicators want to process them as an array on the block diagram, as shown in the following illustration. Replacing Cluster Elements Sometimes you want to replace, or change the value of, one or two elements of a cluster without affecting the others. You can do this by unbundling a cluster and wiring the unchanging elements directly to a Bundle function along with the replacement values for the other element. The following example shows a more convenient method. This example computes the number of hours until New Year using the date-time cluster. Because the cluster input terminal (middle terminal) of the Bundle function is wired, the only element input terminals that need to be wired are those with replacement values. © National Instruments Corporation 14-33 G Programming Reference Manual Graph and Chart Controls and Indicators Chapter 15 This chapter describes how to create and use the graph and chart indicators in the Controls»Graph palette. A graph indicator is a two-dimensional display of one or more plots. The graph receives and plots data as a block. A chart also displays plots, but it receives the data and updates the display point by point or array by array, retaining a certain number of past points in a buffer for display purposes. In addition to the information in this chapter, you might find it helpful to study the graph and chart examples. These examples are located in general\examples\general\graphs. G has three kinds of graphs and two kinds of charts. These are shown in the following illustration starting at the top from left to right— waveform chart, waveform graph, XY graph, intensity chart, and intensity graph. © National Instruments Corporation 15-1 G Programming Reference Manual Chapter 15 Graph and Chart Controls and Indicators Creating Waveform and XY Graphs You can obtain a waveform graph and XY graph from the Controls» Graph palette. Examples of these graphs are shown in the following illustration. The waveform graph plots only single-valued functions with points that are evenly distributed with respect to the x-axis, such as acquired time-varying waveforms. The XY graph is a general-purpose, Cartesian graphing object you can use to plot multivalued functions such as circular shapes or waveforms with a varying timebase. Both graphs can display any number of plots. Each of these graphs can accept several data types. This minimizes the extent to which you need to manipulate your data before displaying it. These data types are described in the next section. Following the section on graph data types are sections describing some of the more advanced options of the graph. These include customizing the appearance of the graph, displaying and manipulating cursors, and displaying a legend for the graph. Plotting Single-Plot Graphs Waveform Graph Data Types For single-plot graphs, the waveform graph accepts two data types. These data types are described in the following paragraphs. The first data type that the waveform graph accepts is a single array of values. The graph interprets the data as points and increments them by G Programming Reference Manual 15-2 © National Instruments Corporation Chapter 15 Graph and Chart Controls and Indicators one, starting at x = 0. The following diagram illustrates how you can create this kind of data. The second data type is a cluster of an initial x value, a ∆x value, and an array of y data. The following diagram illustrates how you can create this kind of data. XY Graph Data Types The XY graph accepts two data types for a single-plot graph. These data types are described in the following paragraphs. © National Instruments Corporation 15-3 G Programming Reference Manual Chapter 15 Graph and Chart Controls and Indicators The first data type that the XY graph accepts is a cluster containing an x array and a y array. The following diagram illustrates how you can create this kind of data. The second data type is an array of points, where a point is a cluster of an x value and a y value. The following diagram illustrates how you can create this kind of data. G Programming Reference Manual 15-4 © National Instruments Corporation Chapter 15 Graph and Chart Controls and Indicators Plotting Multiplot Graphs You can display multiple plots on a single waveform or XY graph. For the most part, you use arrays of the data types described in the previous section to describe multiple plots for display in a single graph. Because G does not accept arrays of arrays, in a case where creating an array of a single plot data type produces an array of arrays, you can use either 2D arrays or arrays of clusters of arrays. Waveform Graph Data Types The multiplot waveform graph accepts five data types, which are described in the following paragraphs. The first data type that a multiplot graph waveform accepts is a two-dimensional array of values, where each row of the data is a single plot. The graph interprets this data as points, with the points starting at x = 0 and incremented by one. If you select the Transpose Array option from the graph pop-up menu, each column of data is handled as a plot. This is particularly useful when sampling multiple channels from a data acquisition board, because that data is returned as 2D arrays, with each channel stored as a separate column. The following example shows how you use a graph to display two signals, where each signal is a separate row of a two-dimensional array. The second data type is a cluster of an x value, a ∆x value, and a two-dimensional array of y data. The y data is interpreted as described for the previous data type. This data type is useful for displaying © National Instruments Corporation 15-5 G Programming Reference Manual Chapter 15 Graph and Chart Controls and Indicators multiple signals that were all sampled at the same regular rate. The following diagram illustrates how you can create this kind of data. The third data type is an array of clusters of an array of y data. The graph interprets this data as points, with the points starting at x = 0 and incremented by one. Use this data structure instead of a two-dimensional array if the number of elements in each plot is different. For example, if you need to sample data from several channels but not for the same amount of time from each channel. Then, you need to use this data structure because each row of a two-dimensional array must have the same number of elements, but the number of elements in the interior arrays of an array of clusters can vary. G Programming Reference Manual 15-6 © National Instruments Corporation Chapter 15 Graph and Chart Controls and Indicators The following illustration shows how to create the appropriate data structure from two arrays. To see an example of this concept, look at the Waveform Graph VI in the general\examples\general\graphs\gengraph.llb directory. Another way to convert arrays into elements of an array of clusters is to use the Build Cluster Array function. The fourth data type is a cluster of an initial x value, a ∆x value, and an array of clusters of an array of y data. Use this data structure instead of a two-dimensional array if the number of elements in each plot is different. For example, if you need to sample data from several channels, but not for the same amount of time from each channel. Then, you need to use this data structure because each row of a two-dimensional array must have the same number of elements, but the number of elements in the interior arrays of an array © National Instruments Corporation 15-7 G Programming Reference Manual Chapter 15 Graph and Chart Controls and Indicators of clusters can vary. The following diagram illustrates how you can create this kind of data. Notice that the arrays are bundled into clusters using the Bundle function, and the resulting clusters built into an array with the Build Array function. You can use the Build Cluster Array, which creates arrays of clusters of specified inputs, instead. The fifth data type is an array of clusters of an x value, a ∆x value, and an array of y data. This is the most general of the waveform graph multiplot data types, because you can specify a unique starting point G Programming Reference Manual 15-8 © National Instruments Corporation Chapter 15 Graph and Chart Controls and Indicators and increment for the x-axis of each plot. The following diagram illustrates how you can create this kind of data. XY Graph Data Types The XY graph accepts two multiplot data types, as described in the following paragraphs. Both of these data types are arrays of clusters of the single plot data types described previously. The first data type is an array of clusters of plots, where a plot is an array of points. A point is defined as a cluster containing an x and y value. The following diagram illustrates how you can create this kind of data. © National Instruments Corporation 15-9 G Programming Reference Manual Chapter 15 Graph and Chart Controls and Indicators G Programming Reference Manual 15-10 © National Instruments Corporation Chapter 15 Graph and Chart Controls and Indicators The second data type is an array of plots, where a plot is a cluster of an x array and a y array. The following diagram illustrates how you can create this kind of data. Setting Custom Options on a Graph Both graphs have optional parts that can be shown or hidden using the Show submenu of the graph pop-up menu. These options include a legend, from which you can define the color and style for a particular plot; a palette that you use to change scaling and format options while the VI is running; and a Cursor palette that you use to display multiple cursors. Following is a picture of a graph showing all of these optional components except for the Cursor palette, which is illustrated in the Graph Cursors section. © National Instruments Corporation 15-11 G Programming Reference Manual Chapter 15 Graph and Chart Controls and Indicators label major grids minor grids legend y-scale x-scale palette Graphs have many options you can use to customize your data display. The graph pop-up menu is shown in the following illustration. Transpose Array is available with the waveform graph only. Scale Options Graphs automatically adjust their horizontal and vertical scales to reflect the array of points you wire to them. You can turn this G Programming Reference Manual 15-12 © National Instruments Corporation Chapter 15 Graph and Chart Controls and Indicators autoscaling feature on or off using the Autoscale X and Autoscale Y options from the Data Operations or the X Scale/Y Scale submenus of the pop-up menu for the graph. You also can control these autoscaling features from the palette for the graph, as described later in this chapter. Autoscaling on is the default setting for graphs. However, autoscaling can cause the graph to run more slowly. You can change the horizontal or vertical scale directly using the Operating or Labeling tool, just as you can with any other control or indicator. The graph point density is set automatically. The Data Operations submenu of the graph pop-up menu includes a Smooth Updates option that uses an offscreen buffer to minimize flashing. This feature can cause the graph to run more slowly, depending on the computer and video system you use. The X and Y scales each have a submenu of options, as shown in the following illustration. Marker Spacing By default, marker values for x and y scales are uniformly distributed. If you prefer, you can specify marker locations anywhere on the x or y © National Instruments Corporation 15-13 G Programming Reference Manual Chapter 15 Graph and Chart Controls and Indicators scale. This is useful for marking a few specific points on a graph (such as a set point or threshold). If you want non-uniform marker distribution, choose X or Y Scale» Marker Spacing»Arbitrary Markers from the pop-up menu for the scale. After making this selection, if you move the Operating tool over a tick mark, the cursor changes to the double arrow cursor shown in the following illustration. You can now create a new marker by dragging the existing tick mark with the <Ctrl> (Windows); <option> (Macintosh); <meta> (Sun); or <Alt> (HP-UX) key selected, or you can move the existing tick mark anywhere on the scale you want by dragging it. You can add or delete a marker by popping up on the graph or the scale and selecting Add Marker or Delete Marker. When a marker is created, you can type a number in the marker to change its location. G Programming Reference Manual 15-14 © National Instruments Corporation Chapter 15 Graph and Chart Controls and Indicators Formatting Click on Formatting… to bring up the dialog box shown in the following illustration. Select the options in this dialog box to set the following graph properties. Scale Style—Use this option to select major and minor tick marks for the scale. Major tick marks are points corresponding to scale labels and minor tick marks are interior points between labels. You also use this palette to decide if you want the markers for a particular axis to be visible. Mapping Mode—Use this option of the scale menus to decide if the scale displays data using a linear or a logarithmic format. Grid Options—Clicking on these options brings up a palette of grid types to select if you want no gridlines, gridlines only at major tick mark locations (points corresponding to scale labels) or major and minor tick marks (minor tick marks are interior points between labels). The control next to the grid pop-up is a color ring you can use to select the color for the gridlines. Scaling Factors—You use the scaling factors to specify the initial value and spacing between points on a waveform chart or graph, or along the scales of an intensity chart or graph. You also can use these © National Instruments Corporation 15-15 G Programming Reference Manual Chapter 15 Graph and Chart Controls and Indicators scaling factors to scale your data for display. For example, if your data was binary sampled data in a range of –2,048 to 2,047, you scale this data to its appropriate voltage values of –10 to 10 by specifying an additive offset of 2,038, and a scaling factor of 4,096/20 = 204.8. Format & Precision—At the top of the dialog box is a pop-up menu from which you can decide if the X or Y scale is formatted for numerics or for time and date. If you select Numeric formatting, you can choose if the notation is floating-point, scientific, engineering, or relative time in seconds; if the notation is (decimal, unsigned decimal, hexadecimal, octal, and binary); and you can select the precision, that is how many digits are displayed to the right of the decimal point, from 0 through 20. The precision you select affects only the display of the value; the internal accuracy still depends on the representation. Examples are shown in the dialog box as you select each combination of options. If you select Time & Date formatting, the dialog box changes, as shown in the following illustration. You can format for either absolute time or date, or both. If you edit a scale and enter only time or only date, the unspecified components are inferred. If you do not enter time when editing, it assumes 12:00 a.m. If you do not enter a date, the previous date value is assumed. If you enter date, but the scale is not in a date format, the month, day, and year G Programming Reference Manual 15-16 © National Instruments Corporation Chapter 15 Graph and Chart Controls and Indicators ordering are assumed based on the settings in the Preferences dialog box. If you enter only two digits for the year, the following is assumed: any number less than 38 is in the twenty-first century, otherwise the number is in the twentieth century. Although absolute time is displayed as a time and date string, it is represented internally as the number of seconds since 12:00 a.m. January 1, 1904, Universal Time. Note: When a scale is in absolute time format, you always have the option to enter time, date, or time and date. If you do not want G to assume a date, use relative time. Notice the examples at the top right of the dialog box, which change as you make selections. The valid range for time and date differs across computer platforms as follows: • (Windows) 12:00 a.m. Jan. 2, 1970 – 12:00 a.m. Feb. 4, 2106 • (Windows NT) 12:00 a.m. Jan. 1, 1970 – 12:00 a.m. Jan. 3, 2040 • (Macintosh) 12:00 a.m. Jan. 2, 1904 – 12:00 a.m. Jan. 2, 2040 • (UNIX) 12:00 a.m. Dec. 15, 1901 – 12:00 a.m. Jan. 17, 2038 These ranges might be up to a few days wider depending on your time zone and if daylight saving time is in effect. Autoscale Use AutoScale (X or Y) to turn the autoscaling option on or off. Loose Fit Normally, G rounds the end markers of the scale to whole numbers. If you want the scales to be set to exactly the range of the data, turn off the Loose Fit option in the graph pop-up menu. With a loose fit, the numbers are rounded to a multiple of the increment used for the scale. For example, if the markers increment by five, the minimum and maximum values are set to a multiple of five. Panning and Zooming Options The Graph palette is included with any graph you drop onto the front panel. This palette has controls for panning (scrolling the display area © National Instruments Corporation 15-17 G Programming Reference Manual Chapter 15 Graph and Chart Controls and Indicators of a graph) and for zooming in and out of sections of the graph. A graph with its accompanying Graph palette is shown in the following illustration. If you press the x autoscale button, shown at the left, the graph autoscales the X data. If you press the y autoscale button, shown at the left, the graph autoscales the Y data. If you want the graph to autoscale either of the scales continuously, click on the lock switch, shown at the left, to lock autoscaling on. By using the scale format buttons, shown left, you can maintain run-time control over the format of the X and Y scale markers respectively. You use the remaining three buttons to control the operation mode for the graph. Normally, you are in standard operate mode, indicated by the plus or crosshatch. In operate mode, you can click in the graph to move cursors around. If you press the Panning tool, shown to the left, you switch to a mode in which you can scroll the visible data by clicking on and dragging sections of the graph. If you press the Zoom tool, shown at the left, you can zoom in on a section of the graph by dragging a selection rectangle around that section. If you click on the Zoom tool, you see a pop-up menu you can G Programming Reference Manual 15-18 © National Instruments Corporation Chapter 15 Graph and Chart Controls and Indicators use to choose some other methods of zooming. This menu is shown in the following illustration. A description of each of these options follows. Zoom by rectangle. Zoom by rectangle, with zooming restricted to x data (the y scale remains unchanged). Zoom by rectangle, with zooming restricted to y data (the z scale remains unchanged). Undo last zoom. Resets the graph to its previous setting. Zoom in about a point. If you hold down the mouse on a specific point, the graph continuously zooms in until you release the mouse button. Zoom out about a point. If you hold down the mouse on a specific point, the graph continuously zooms out until you release the mouse button. Note: For the last two modes, zoom in and zoom out about a point, <Shift>-clicking on zooms in the other direction. Legend Options The graph uses a default style for each new plot unless you have created a custom plot style for it. If you want a multiplot graph to use certain characteristics for specific plots (for instance, to make the third plot blue), you can set these characteristics using the legend, which can be shown or hidden using the Show submenu of the graph pop-up menu. You also can indicate a name for each plot using the legend. © National Instruments Corporation 15-19 G Programming Reference Manual Chapter 15 Graph and Chart Controls and Indicators When you select Legend, only one plot appears. You can create more plots by dragging down a corner of the legend with the Resizing tool. After you set plot characteristics, the graph assigns those characteristics to the plot, regardless of if the legend is visible. If the graph receives more plots than are defined in the legend, the graph draws them in default style. When you move the graph body, the legend moves with it. You can change the position of the legend relative to the graph by dragging the legend to a new location. Resize the legend on the left to make more room on the labels, or on the right to make more room on the plot samples. By default, each plot is labeled with a number, beginning with zero. You can modify this label the same way you modify other labels. To the right of the plot label is the plot sample. Each plot sample has its own pop-up menu to change the plot, line, color, and point styles of the plot. The array of points you wire to the graph are displayed with the characteristics you assign it in the graph legend. The plot sample pop-up menu is shown in the following illustration. The Common Plots option helps you configure a plot for any of six popular plot styles, including a scatter plot, a bar plot, and a fill to zero G Programming Reference Manual 15-20 © National Instruments Corporation Chapter 15 Graph and Chart Controls and Indicators plot. Options in this subpalette are preconfigured for the point, line, and file styles in one step. The Point Style, Line Style, and Line Width options display styles you can use to distinguish a plot. The line width subpalette contains widths thicker than the default 1 pixel, as well as the hairline option. The latter option has no effect on the screen display, but prints a very thin line if the printer and print mode support hairline printing. Note: In Windows, wide pens can be only in the solid style. The Bar Plots option has a selection of vertical bars, horizontal bars, or no bars at all. The Fill Baseline option sets what the baseline fills to. Zero fills from your plot to a baseline generated at 0. Infinity fills from your plot to the positive edge of the graph. –Infinity fills from your plot to the negative edge of the graph. By using the bottom portion of this menu, you can select a specific plot of this graph to fill to. The Interpolation option brings up the palette shown in the following illustration, in which you choose how the graph draws lines between plotted points. The first option does not draw a line, making it suitable for a scatter plot. The option at the bottom left draws a straight line between plotted points. The two stepped options, which link points with a right-angled elbow, are useful for creating histogram-like plots. The © National Instruments Corporation 15-21 G Programming Reference Manual Chapter 15 Graph and Chart Controls and Indicators option at the top right plots the y-axis first, although the option at the bottom right plots the x-axis first. The Color option displays the palette for selecting the plot color. You also can color the plots on the legend with the Color tool, and you can change the plot colors while running the VI. To change the properties of highlighted text, use the Font ring in the toolbar. Waveform Charts The waveform chart is a special type of numeric indicator that displays one or more plots. Charts are different from graphs in that charts retain previous data, up to a maximum which you can define. New data is appended to the old data, letting you see the current value in context with previous data. For an example of a waveform chart, see general\examples\general\graphs\charts.llb. Waveform Chart Data Types You can pass charts either a single value or multiple values at a time. As with the waveform graph, each value is handled as part of a uniformly-spaced waveform, with each point spaced one point from the previous one along the x-axis. You can pass either a single scalar value or an array of multiple values to the chart. The chart handles these inputs as new data for a single plot. G Programming Reference Manual 15-22 © National Instruments Corporation Chapter 15 Graph and Chart Controls and Indicators Following are diagrams illustrating how you can use the chart for each of these kinds of data. You receive the best performance from a chart when you pass it multiple points at a time, because the chart has to be redrawn only once for each waveform instead of once for each point. You can pass data for multiple plots to a waveform chart in several ways. The first method is to bundle the data together into a cluster of scalar numerics, where each numeric represents a single point for each of the plots. An example of this is shown in the following illustration. © National Instruments Corporation 15-23 G Programming Reference Manual Chapter 15 Graph and Chart Controls and Indicators If you want to pass multiple points for plots in a single update, you can wire an array of clusters of numerics to the chart. Each numeric represents a single point for each of the plots. An example of this is shown in the following illustration. If the number of plots you want to display cannot be determined until runtime, or you want to pass multiple points for plots in a single update, you can wire a two-dimensional array of data to the chart. As with the waveform graph, rows are normally handled as new data for each plot. G Programming Reference Manual 15-24 © National Instruments Corporation Chapter 15 Graph and Chart Controls and Indicators You can use the Transpose Array option of the waveform chart pop-up menu to handle columns as new data for each plot. Waveform Chart Options The chart has most of the same features as the graph, including the legend and palette, and they work the same way. (See the Scale Options and Legend Options sections of this chapter for more information.) The waveform chart does not have support for cursors. The following illustration shows the chart pop-up menu. © National Instruments Corporation 15-25 G Programming Reference Manual Chapter 15 Graph and Chart Controls and Indicators With the Show submenu of the chart pop-up menu, you can show or hide optional digital display(s) and a scrollbar. The Digital Display option displays the latest value being plotted. The last value passed to the chart from the diagram is the latest new value for the chart. There is one digital display per plot. You can view past values contained in the buffer by scrolling the x-axis to a range of previously plotted values using the scrollbar, or by changing the x scale range to view old data. The chart has a limit to the amount of data it can remember to avoid running out of memory. When the chart reaches that limit, the oldest point(s) are thrown away to make room for new data. The default size of this buffer is 1,024 points. You can change the length of this buffer using the Chart History Length… option from the chart pop-up menu. Chart Update Modes To change the way the chart behaves when new data is added to the display, use the Update Mode option from the Data Operations submenu of the pop-up menu of the chart, shown in the following illustration. The three options—strip chart, scope chart, and sweep chart—are illustrated in the following pictures, and described in the subsequent paragraphs. The default mode is strip chart. G Programming Reference Manual 15-26 © National Instruments Corporation Chapter 15 Graph and Chart Controls and Indicators The strip chart mode has a scrolling display similar to a paper tape strip chart recorder. As each new value is received, it is plotted at the right margin, and old values shift to the left. The scope chart mode has a retracing display similar to an oscilloscope. As each new value is received, it is plotted to the right of the last value. When the plot reaches the right border of the plotting area, the plot is erased and plotting begins again from the left border. The scope chart is significantly faster than the strip chart because it is free of the processing overhead involved in scrolling. The sweep chart mode acts much like the scope chart, but it does not blank when the data hits the right border. Instead, a moving vertical line marks the beginning of new data and moves across the display as new data is added. © National Instruments Corporation 15-27 G Programming Reference Manual Chapter 15 Graph and Chart Controls and Indicators Stacked Versus Overlaid Plots By default, the chart displays multiple plots by overlaying one on top of the other, like graphs drawn on the same grid. An example of overlaid plots is shown in the following illustration. You can display multiple plots alternatively by stacking one above the other, with a different Y scale for each plot, by selecting the Stack Plots option from the chart pop-up menu. If you do this, the Y scale for each G Programming Reference Manual 15-28 © National Instruments Corporation Chapter 15 Graph and Chart Controls and Indicators chart can have a different range. An example of stacked plots is shown in the following illustration. When you input data to the chart as a cluster, the chart automatically stacks the correct number of plot displays. When you input data as a 2-D array, you must create the correct number of plot displays using the Legend, available in the Show submenu of the pop-up menu. As you enlarge the Legend display to increase the number of plots, the number of stacked plot displays increases to match. Intensity Graphs The intensity graph is essentially the same as the intensity chart, except it does not retain previous data. Each time it is passed new data, the new data replaces old data as it arrives. For an example of an intensity graph, see general\examples\graphs\ intgraph.llb. Intensity Graph Data Type The intensity graph accepts two-dimensional arrays of numbers, where each number is mapped by the chart to a color. Rows of the data you pass in are displayed as new columns on the chart. If you want rows to appear as rows, use the Transpose Array option from the chart pop-up menu. Intensity Graph Options The intensity graph works much like the intensity chart, except it does not have the chart update modes. Because each update replaces the © National Instruments Corporation 15-29 G Programming Reference Manual Chapter 15 Graph and Chart Controls and Indicators previous data, it does not have a scrollbar, and it does not have history options. The intensity graph can have cursors like other graphs. Each cursor displays the X, Y, and Z values for a specified point on the graph. See the Graph Cursors section of this chapter for more information on manipulating the cursors on the graph. You set the color mapping in the same way that you set it for the intensity chart. Graph Cursors For each graph, you can display a Cursor palette that you use to put cursors on the graph. You can label the cursor on the plot. You also can use a cursor as a marker. When you use a cursor as a marker, you lock the cursor to a data plot so that the cursor follows the data. Cursors can be set and read programmatically using the Attribute Node. You can set a cursor to lock onto a plot, and you can move multiple cursors at the same time. There is no limit to the number of cursors that a graph can have. G Programming Reference Manual 15-30 © National Instruments Corporation Chapter 15 Graph and Chart Controls and Indicators Following are illustrations of a waveform graph and an intensity graph with the Cursor palette displayed. Waveform Graph Intensity Graph © National Instruments Corporation 15-31 G Programming Reference Manual Chapter 15 Graph and Chart Controls and Indicators Each cursor for a graph has the following parts. • A label • X and Y coordinates, and Z coordinate, if applicable • A button that marks the plot for movement with the plot cursor pad • A button that controls the look of the cursor • A button that determines if the cursor is locked to a plot or can be moved freely These parts are shown in the following illustration. Cursor movement control Select button for cursor movement Cursor name Y position X position Z position Cursor display control Lock control The Cursor palette behaves like an array. You can stretch it to display multiple cursors, and you can use the index control to view other cursors in the palette. Use the Show options on the pop-up menu to display the index control. G Programming Reference Manual 15-32 © National Instruments Corporation Chapter 15 Graph and Chart Controls and Indicators To delete a cursor, you must select it using the Start Selection and End Selection options on the Data Operations pop-up menu, and then cut the cursor with the Cut option on the same menu. See the Selecting Array Cells section of Chapter 14, Array and Cluster Controls and Indicators, for more information. You can move a cursor on a graph or chart by dragging it with the Operating tool, or by using the cursor movement control. Clicking the arrows on the cursor movement control causes all cursors selected to move in the specified direction. You select cursors either by moving them on the graph with the Operating tool, or by clicking on the select button for a particular cursor. In the following example, the top two cursors can be moved vertically downwards. cursor display control Clicking on the cursor display control with the Operating tool displays a pop-up menu that you can use to control the look of the cursor and the visibility of the cursor name on the plot. This pop-up menu is shown in the following illustration. From this menu you can select the style of the cross hairs. The cross hairs can consist of a vertical and/or horizontal line extending to infinity, a smaller vertical and/or horizontal line centered about the cursor location, or no cross hairs, as shown in the following illustration. © National Instruments Corporation 15-33 G Programming Reference Manual Chapter 15 Graph and Chart Controls and Indicators You also can choose the style of point to use for marking the cursor location and the color for the cursor as shown in the following illustration. G Programming Reference Manual 15-34 © National Instruments Corporation Chapter 15 Graph and Chart Controls and Indicators Select the Visible Name option from this menu to make the cursor name visible on the plot, as shown in the following illustration. Selecting Bring into View moves the cursor back into the displayed region of the graph. This is helpful when the cursor has moved out of visible range. Selecting this option changes the (x,y) coordinate position of the cursor. Selecting Goto Cursor moves the displayed region of the graph so that the cursor is visible. The cursor position remains constant, but the scales change to include the cursor selected. The size of the displayed region also stays constant. This feature is helpful when the cursor is used to identify a point of interest in the graph, such as a minimum or a maximum, and you want to see that point. unlocked locked You can use the last button for each cursor to lock a cursor onto a particular plot. By clicking on the lock button you see a pop-up menu that you can use to lock the cursor to a specific plot. If you lock the cursor onto a plot, the button changes to a closed lock. This pop-up menu is shown in the following illustration. © National Instruments Corporation 15-35 G Programming Reference Manual Chapter 15 Graph and Chart Controls and Indicators The Allow Drag option determines if you can move the cursor with the mouse. If Allow Drag is selected, you can move, or drag the cursor. If Allow Drag is deselected, you cannot move the cursor around on the plot. If you have Allow Drag selected, the options below the dotted line of the menu determine how you can move the cursor with the mouse. Select Free if you want to place or move the cursor anywhere on the graph. Select Snap to Point if you want the cursor to always attach itself to the nearest point on any plot. Select Lock to Plot to attach the cursor to a specific point. The first time you select Lock to Plot, the cursor attaches itself to the first point on the plot. After freeing the locked cursor and moving it to any new position, selecting Lock to Plot moves the cursor to the last location of the locked cursor. Below the second dotted line of this menu is a list of the plots you can lock to (for example, Plot 0, Plot 1, Plot 2, and so on). A large number of options are available for creating, controlling, and reading cursors or markers programmatically using the Attribute Node for a graph. See Chapter 20, Attribute Nodes, for further information. Intensity Charts The intensity chart is a way of displaying three dimensions of data on a two-dimensional plot by placing blocks of color on a Cartesian plane. The intensity chart accepts a two-dimensional array of numbers. Each number in the array represents a specific color. The indices of an element in the two-dimensional array set the plot location for this color. G Programming Reference Manual 15-36 © National Instruments Corporation Chapter 15 Graph and Chart Controls and Indicators The following illustration shows the concept of the intensity chart operation. Input Array Color Map Definition Column = y Row = x 0 1 2 0 10 50 13 1 45 61 10 2 6 13 5 Array Element =z Color 5 6 blue purple 10 lt red 13 dk red 45 orange 50 yellow 61 green Resulting Plot 3 dk red lt red blue yellow green dk red lt red orange purple 2 1 0 1 2 3 4 5 You can define the colors for the intensity chart interactively, by using the color scale, or you can define them programmatically through the chart Attribute Node. The Color Mapping section later in this chapter explains the procedure for assigning a color to a number. The array indices correspond to the lower left vertex of the block of color. The block has a unit area, as defined by the array indices. The intensity chart can display up to 256 discrete colors. After a block of data has been plotted, the origin of the Cartesian plane is shifted to the right of the last data block. When new data is sent to the © National Instruments Corporation 15-37 G Programming Reference Manual Chapter 15 Graph and Chart Controls and Indicators intensity chart, the new data appears to the right of the old data, as shown in the following illustration. New Input Array Column = y Row = x 0 1 2 0 61 45 5 1 45 5 61 2 Resulting Plot 3 dk red lt red blue blue green yellow green dk red orange blue lt red orange purple green orange 2 1 0 1 2 3 (0) 4 (1) 5 (2) When the chart display is full, the oldest data scrolls off the left side of the chart. See examples of intensity charts in general\examples\general\graphs\intgraph.llb. Intensity Chart Options The intensity chart shares many of the optional parts of the other charts, most of which can be shown or hidden from the Show submenu of the graph pop-up menu. These options include a palette you use to change scaling and format options while the VI is running. In addition, because the intensity chart has a third dimension (color), a scale similar to a G Programming Reference Manual 15-38 © National Instruments Corporation Chapter 15 Graph and Chart Controls and Indicators color ramp control is used to define the range and mappings of values to colors. Following is a picture of a graph showing all of these optional components except for the Cursor palette, which is discussed in the Graph Cursors section of this chapter. z scale — color scale y scale x and y grids scale x scale palette scrollbar Intensity charts have many options you can use to customize your data display. The intensity chart pop-up menu is shown below in the following illustration. © National Instruments Corporation 15-39 G Programming Reference Manual Chapter 15 Graph and Chart Controls and Indicators Most of these options are identical to the options for the waveform chart. With the Show menu, you can show and hide the color scale for the z scale. The X Scale and Y Scale menus are identical to the corresponding menus for the waveform chart. The intensity chart maintains a history of data from previous updates. You can configure this buffer by selecting Chart History Length… from the chart pop-up menu. The default size for an intensity chart is 128 points. Notice that the intensity chart display can be very memory intensive. For example, to display a single precision chart with a history of 512 points and 128 y values requires 512 * 128 * 4 bytes (size of a single), or 256 kilobytes. If you want to display large quantities of data on an intensity chart, make sure enough memory is available to G. The intensity chart supports the standard chart update modes of strip chart, sweep chart, and scope chart. As with the waveform chart, you select the update mode from the Data Operations menu. Color Mapping You can set the color mapping interactively in the same way that you define the colors for a color ramp numeric control. See the description of the color ramp control in Chapter 9, Numeric Controls and Indicators, for more details. You can set the colors used for display programmatically using the Attribute Node in two ways. First, you can specify the value-to-color mappings to the Attribute Node in the same way you do it with the color scale. For this method, you specify the Z Scale Info: Color Array attribute. This attribute consists of an array of clusters, in which each cluster contains a numeric limit value, along with the corresponding color to display for that value. When you specify the color table in this manner, you can specify an upper out-of-range color using the Z Scale Info: High Color attribute, and a lower out-of-range color using the Z Scale Info: Low Color. The total number of colors is limited to 254 colors, with the lower and upper out of range colors bringing the total to 256 colors. If you specify more colors, then the 254 color table is created by interpolating between the specified colors. Another way to set the colors programmatically is to specify a color table using the Color Table attribute. With this method you can specify an array of up to 256 colors. Data passed to the chart is mapped to indices in this color table based upon the color scale. If the color scale ranges from zero to 100, a value of zero in the data is mapped to index G Programming Reference Manual 15-40 © National Instruments Corporation Chapter 15 Graph and Chart Controls and Indicators one, and a value of 100 is mapped to index 254, with interior values interpolated between one and 254. Anything below zero is mapped to the out of range below color (index zero), and anything above 100 is mapped to the out of range above color (index 255). Note: The colors you want your intensity chart (or graph) to display are limited to the exact colors and number of colors that your video card has. You are also limited by the number of colors that G allocates for your display. © National Instruments Corporation 15-41 G Programming Reference Manual Chapter Introduction to the Block Diagram 16 This chapter describes terminals and nodes—two of the three elements you use to build a block diagram (the third consists of wires). Terminals and Nodes You create block diagrams with terminals, nodes, and wires. Terminals are ports through which data passes between the block diagram and front panel, as well as between nodes on the block diagram. Terminals underlie the icons of functions and VIs. The following illustration shows an example of a terminal pattern on the left and its corresponding icon on the right. To display the terminals for a function or VI, pop up on the icon and select Show»Terminals. Nodes are program execution elements. They are analogous to statements, operators, functions, and subroutines in conventional programming languages. Wires are the data paths between input and output terminals. Terminals G has many types of terminals. In general, a terminal is any point to which you can attach a wire. G has control and indicator terminals, node terminals, constants, and specialized terminals on structures. Terminals that supply data, such as front panel control terminals, node output terminals, and constants, also are called source terminals. Node input terminals and front panel indicator terminals also are called destination or sink terminals because they receive the data. © National Instruments Corporation 16-1 G Programming Reference Manual Chapter 16 Introduction to the Block Diagram Control and Indicator Terminals You enter values into front panel controls and, when a VI executes, the control terminals pass these values to the block diagram. When the VI finishes executing, the output data passes from the block diagram to the front panel indicators through the indicator terminals. The symbols for some of the G control and indicator terminals are shown in Table 16-1, G Control and Indicator Terminal Symbols. Each symbol encloses a picture that suggests the data type of the control or indicator and, in the case of numerics, the representation as well. Control terminals have a thicker border than indicator terminals. Because a terminal belongs to its corresponding control or indicator, you cannot delete a terminal; if you want to delete a control, do it from the front panel. An array terminal encloses one of the data types shown in square brackets, and takes on the color of the data type of the array. Table 16-1. Control G Control and Indicator Terminal Symbols Indicator Description Extended-precision floating-point Orange Double-precision floating-point Orange Single-precision floating-point Orange Complex extended-precision floating-point Orange Complex double-precision floating-point Orange Complex single-precision floating-point Orange Unsigned 32-bit integer G Programming Reference Manual 16-2 Color Blue © National Instruments Corporation Chapter 16 Table 16-1. Control Introduction to the Block Diagram G Control and Indicator Terminal Symbols (Continued) Indicator Description Color Unsigned 16-bit integer Blue Unsigned 8-bit integer Blue 32-bit integer (long word) Blue 16-bit integer (word) Blue 8-bit integer Blue Cluster Brown or Pink Array Varied Path Aqua Refnum Aqua Boolean Green String Pink Constants Constants are terminals on a block diagram that supply data values directly to the block diagram. User-defined constants are defined prior to program execution, and you cannot change their values during execution. Universal constants have fixed values. User-Defined Constants The easiest way to create a constant is to pop up on an input or output and select Create Constant. These constants are also available from various palettes in the Functions palette, depending on their type. Most are located at the bottom or top of the relevant palette, such as the numeric, enumerated, and ring constants in the bottom row or the Numeric palette. Three constants—the color box, listbox symbol ring, and error ring constants—are located in the Numeric»Additional © National Instruments Corporation 16-3 G Programming Reference Manual Chapter 16 Introduction to the Block Diagram Numerics subpalette. The path constant is in the File I/O»File Constants subpalette. The constants are shown in the following illustration. You can label your constant by popping up on the constant and selecting Show»Label. A highlighted text box appears, indicating that you can type into it immediately without changing the tool. The user-defined constants, like labels, resize automatically as you enter information into them. If you resize or change the shape of a label or string constant, you can select Size to Text from its pop-up menu, and the constant or label resizes itself automatically to fit its contents. You use the Operating tool to set the value of a user-defined constant the same way you set the value of a digital control, Boolean slide switch, or string control on the front panel. The numeric and string constants resemble front panel numeric controls and have pop-up menus similar to the pop-up menus of controls, as shown in the following illustration. G Programming Reference Manual 16-4 © National Instruments Corporation Chapter 16 Introduction to the Block Diagram You can use the arrow keys to increment or decrement a new numeric constant or one with its value selected. This is particularly useful when programming control parameters with low values like 1, 2, or 3. © National Instruments Corporation 16-5 G Programming Reference Manual Chapter 16 Introduction to the Block Diagram The enumerated constant is similar to the ring constant except that the mnemonics (strings associated with an integer value) are considered part of the type. When an enumeration is wired to the selection terminal of a Case Structure, cases are named according to the mnemonics of the enumeration rather than traditional numeric values. The numeric representation of an enumeration is always an unsigned byte, word, or long. The ring constant associates text with a number, the same way a ring control on the front panel does. The value of the ring constant is an unsigned 16-bit integer. Although you can change the representation of a ring constant to any numeric type except complex, the value is still always an integer from zero to n – 1. You can select colors from the color box constant to use with the color box control, a control whose values correlate to specific colors. Set the color box by clicking on it with the Color tool or the Operating tool and choosing the color you want from the Color palette. The listbox symbol ring constant is used to assign symbols to items in a listbox control. The error ring constant is a predefined ring. You click on the constant with the Operating tool and select the error message you want from the dialog box that appears, which is shown in the following illustration. This ring is useful with the file I/O functions, because it makes the diagrams more descriptive. For example, if you try to open a nonexistent file using the Open File function, the function returns an error code of 7. You can test for this condition by comparing the error code output to an error ring set to a value of File Not Found (7). G Programming Reference Manual 16-6 © National Instruments Corporation Chapter 16 Introduction to the Block Diagram You can use the path constant to create a constant path value on the block diagram. The path, string, and color box constants are resizable, yet the Boolean, numeric, ring, and enumeration constants are not. The default representation of the numeric constant is a double-precision floating-point number if you enter a floating-point number, a long integer if you enter an integer, or a double-precision complex number if you enter a complex number. For example, the representation is long integer if you enter '123' and a double-precision floating-point number if you enter '123.'. You can change the representation with the Representation option from the constant pop-up menu. Universal Constants Universal constants are of two types: universal numeric constants and universal string constants. • Universal numeric constants—Set of high-precision and commonly used mathematical and physical values, such as pi and the speed of light. • Universal string constants—Set of commonly used nondisplayable string characters, such as line feed and carriage return. © National Instruments Corporation 16-7 G Programming Reference Manual Chapter 16 Introduction to the Block Diagram For more information on these constants, see Online Reference» Function and VI Reference. Nodes Nodes are the execution elements of a block diagram. The six types of nodes are functions, subVIs, structures, Code Interface Nodes (CINs), Formula Nodes, and Attribute Nodes. Functions and subVI nodes have similar appearances and roles in a block diagram, but they have substantial differences. They are explained in the following sections. CINs are interfaces between the block diagram and code you write in conventional programming languages, such as C or Pascal. If you are a LabVIEW user, refer to the LabVIEW Code Interface Reference Manual for more information. Structures, which supplement the G dataflow programming model to control execution order, are discussed briefly in the Structures section of this chapter; for in-depth information, see Chapter 18, Structures. Formula Nodes, which supplement G functions by using formulas on the block diagram, are discussed in Chapter 19, Formula Nodes. Attribute Nodes, which change control attributes programmatically, are discussed in Chapter 20, Attribute Nodes. Functions Functions are elementary nodes built into G. They perform elementary operations like adding numbers, file I/O, and string formatting. G functions do not have front panels or block diagrams. When compiled, they generate inline machine code. See Online Reference»Function and VI Reference for detailed descriptions of individual functions. You select functions from the Functions palette, as shown in the following illustration. G Programming Reference Manual 16-8 © National Instruments Corporation Chapter 16 Introduction to the Block Diagram When you select a function, its icon appears on the block diagram. To display its label, pop up on the icon and select Show»Label. You can change the label if you want by highlighting the text with the Labeling tool and typing over it. You can use the label of the function to annotate its purpose in the block diagram. You can use the Help window to see how to wire the function, or you can select Show»Terminals from the icon pop-up menu, as shown in the following illustration to see precisely where the terminals are located. © National Instruments Corporation 16-9 G Programming Reference Manual Chapter 16 Introduction to the Block Diagram When terminals are showing, select Show»Terminals again to show the icon for the function instead. When you wire to a function, you wire to one of its terminals. Some array and cluster functions have a variable number of terminals. For example, if you build an array of three elements, the Build Array function needs three input terminals, but if you build one with 10 elements, the function needs 10 terminals. You can change the number of terminals of the expandable functions by resizing the icon with the Resizing cursor in the same way you resize other G objects, as shown in the following illustration. You can enlarge or reduce functions, but you cannot shrink a function if it causes any wired terminals to disappear. You also can change the number of terminals with the Add and Remove commands from the pop-up menu for a terminal, as shown in the illustration that follows. The Remove command removes the terminal on which you popped up and disconnects the wire, if the terminal is G Programming Reference Manual 16-10 © National Instruments Corporation Chapter 16 Introduction to the Block Diagram wired, although the Add command adds a terminal immediately after it. The full names of these commands vary with the function. Structures When you are programming, you sometimes need to repeat sections of code a set number of times or while a certain condition is true. In other situations, you need to execute different sections of code when different conditions exist or execute code in a specific order. G contains four special nodes, called structures. They help you to control code execution, which otherwise is not possible within the G dataflow framework. Each structure has a distinctive, resizable border that you use to enclose the code that executes under the structure's special rules. For this reason, the diagram inside the structure border is called a subdiagram. You can nest subdiagrams. G uses the following structures to execute code. • For Loop—Repeats execution a set number of times. • While Loop—Repeats the execution of its subdiagram while a condition is TRUE. • Case Structure—Contains multiple subdiagrams, only one of which executes depending on the value passed to its selector terminal. • Sequence Structure—Executes code in the numeric order of its subdiagrams. © National Instruments Corporation 16-11 G Programming Reference Manual Chapter 16 Introduction to the Block Diagram Because structures are nodes, they have terminals that connect them to other nodes. For example, the terminals that feed data into and out of structures are called tunnels. Tunnels are relocatable connection points for wires from outside and inside the structures. See Chapter 18, Structures, for more information. Replacing and Inserting Block Diagram Objects Suppose you used an Increment function in the block diagram in which you should have used the Decrement function. You can delete the Increment function node and then select the Decrement node from the Functions palette and rewire it. You also can use the Replace option in the Increment node pop-up menu. Selecting Replace accesses the Functions palette, from which you can choose the Decrement function. The advantage of this method is that the new node is placed where the old node was and does not disturb the wiring. You can replace a function with any other function, although if the number of terminals or data types in each function node is different, you might have broken wires. You also can use Replace to replace a constant with another constant or a structure with another similar structure, such as a While Loop with a For Loop. Note: When using Replace, if you select a VI whose name is the same as one already in memory, the replaced node refers to the VI that was already in memory, not the VI you selected. Wire pop-up menus have an Insert option. Choosing Insert accesses the Functions palette, from which you can choose any function or VI on the palette. The editor then splices the node you choose into the wire on which you popped up. You must be careful to check the wiring if the node has more than one input or output terminal, however, because the wires might not connect to the terminal you expected. G Programming Reference Manual 16-12 © National Instruments Corporation Chapter 16 Introduction to the Block Diagram Adding Constants, Controls, and Indicators Automatically Instead of creating a constant, control, or indicator by selecting it from a menu and then wiring it manually to a terminal, you can pop up on the terminal and choose Create Constant, Create Control, or Create Indicator to create an object with an appropriate data type automatically. Assuming it makes sense to do so, the constant, control, or indicator created is wired automatically for you. For example, if you need a constant for the position mode input of a File I/O function, you can pop up on the input and select Create Constant. The editor creates an enumerated type for you. Assuming the mode input is not wired already to something else, the new constant is wired automatically. Other useful places to pop up include the outputs of functions or VIs, constants, and terminals for front panel controls or indicators. © National Instruments Corporation 16-13 G Programming Reference Manual Chapter Wiring the Block Diagram 17 This chapter explains how to connect terminals on the block diagram by wiring them together. Wiring Techniques You use the Wiring tool to connect terminals. The cursor point or hot spot of the tool is the tip of the unwound wire segment, as shown in the following illustration. wiring cursor hot spot The symbol to the left represents the mouse. In the wiring illustrations in this chapter, the arrow at the end of this mouse symbol shows what area to click on, and the number printed on the mouse button indicates how many times to click on it. To wire from one terminal to another, click the Wiring tool on the first terminal, move the tool to the second terminal, and then click on the second terminal as shown in the preceding illustration. It does not matter which terminal you click on first. The terminal area blinks when the hot spot of the Wiring tool is correctly positioned on the terminal. Clicking on that terminal connects a wire to it. When you have made the first connection, the spool icon draws a wire as you move the cursor © National Instruments Corporation 17-1 G Programming Reference Manual Chapter 17 Wiring the Block Diagram across the diagram, as if the wire were unwinding from a spool. You do not need to hold down the mouse button. To wire from an existing wire, perform the operation just described, starting or ending the operation on the existing wire. The wire blinks when the Wiring tool is correctly positioned to fasten a new wire to the existing wire. You can wire directly from a terminal outside a structure to a terminal within the structure using the basic wiring operation. G creates a tunnel where the wire crosses the structure boundary, as shown in the following illustration. Wires unwind from terminals vertically or horizontally, depending on the direction in which you first move the Wiring tool. Wires move vertically if you move the tool up or down, and they move horizontally if you move the tool left or right. The connection is centered on the G Programming Reference Manual 17-2 © National Instruments Corporation Chapter 17 Wiring the Block Diagram terminals, regardless of the exact position of the hot spot when you click the mouse button on it as shown in the following illustration. You can bend your wire s at a ninety degree angle once without clicking on it. You click on the mouse to tack the wire and change direction, as shown in the following illustration. Note: You also can change between horizontal and vertical directions by pressing the spacebar. You can untack the last tack point by pressing <Ctrl-click> (Windows); (<option-click> (Macintosh); <meta-click> (Sun); <Alt-click> (HP-UX). If the last tack point is the terminal or wire on which you first clicked, untacking removes the wire completely. © National Instruments Corporation 17-3 G Programming Reference Manual Chapter 17 Wiring the Block Diagram You can double-click with the Wiring tool to begin or terminate a wire in an open area as shown following. terminating in an open area beginning in an open area When wires cross, a small gap appears in the first wire drawn, as if it were underneath the second wire, as shown here. When you are wiring a complicated, built-in node or subVI, it is important to pay attention to the wire stubs and the tip strips that appear as the Wiring tool approaches the VI icon. Wire stubs, the truncated wires shown around the VI icon to the left, indicate the data type by their style, thickness, and color. (For details, refer to the Quick Reference Card.) Dots at the end of the stubs indicate inputs, although outputs have no dots. The direction in which the stubs are drawn indicates the suggested direction to wire to produce clean diagrams. When you wire a terminal, the wire stub no longer appears for that terminal. G Programming Reference Manual 17-4 © National Instruments Corporation Chapter 17 Wiring the Block Diagram You also might want to take advantage of the Help window feature that highlights each connector pane terminal. With this feature, you can see exactly where wires need to connect. The three connections of the Add function are shown as a simple example in the following illustration. Block Diagram Note: Help Window The feature just illustrated does not work for expanding functions, like the Array Bundle function for example. Wire Stretching You can move wired objects individually or in groups by dragging the selected objects to the new location using the Positioning tool. The © National Instruments Corporation 17-5 G Programming Reference Manual Chapter 17 Wiring the Block Diagram wires connected to the selected objects stretch automatically. The wire stretching capability is demonstrated in the following illustration. If you duplicate the selected objects or move them from one diagram into another—for example, from the block diagram into a structure subdiagram—the connecting wires remain behind, unless you select them as well. Note: Wire stretching occasionally creates wire stubs or loose ends, discussed in the Wire Stubs and Loose Ends subsections of the Solving Wiring Problems section of this chapter. You must remove the stubs or loose wires for the VI to execute. The easiest way to do this is to select the Edit»Remove Bad Wires command. Selecting, Moving, and Deleting Wires A wire segment is a single horizontal or vertical piece of wire. The point at which three or four wire segments join is a junction. A bend in a wire is where two segments join. A wire branch contains all the wire segments from junction to junction, terminal to junction, or terminal to terminal if there are no junctions in between. One mouse click with the Positioning tool on a wire selects a segment. Double-clicking on it selects a branch. Triple-clicking on it selects an entire wire. Press the <Delete> key or <Backspace> key to remove the selected portion of wire. This process is shown in the following illustration. G Programming Reference Manual 17-6 © National Instruments Corporation Chapter 17 Wiring the Block Diagram segment segment junction bend One click selects a segment. Two clicks select a branch. Three clicks select an entire wire. To reposition a wire segment, drag it to the new location with the Positioning tool. You can reposition one or more segments by selecting and dragging them. You also can move selected segments one pixel at a time by pressing the arrow keys on the keyboard. Adjacent, unselected segments stretch to accommodate the change. You can select and drag © National Instruments Corporation 17-7 G Programming Reference Manual Chapter 17 Wiring the Block Diagram multiple wire segments, even discontinuous segments, simultaneously as shown in the following illustration. Sometimes repositioning a wired object results in an extra segment or oddly positioned wire segment, as shown in the preceding example. If you do not like the way the wire looks, you can move it. Use the <Shift> key to restrict the wire drag in horizontal or vertical direction. The direction in which you initially move determines if the wire is limited to horizontal or vertical translation. When you move a tunnel, a wire connection normally is maintained between the tunnel and the wired node, as shown in the following illustration. G Programming Reference Manual 17-8 © National Instruments Corporation Chapter 17 Wiring the Block Diagram Moving a tunnel sometimes creates an extra wire segment that lies beneath the structure border, however. You cannot select and drag this segment because it is hidden, but it disappears if you drag the segment © National Instruments Corporation 17-9 G Programming Reference Manual Chapter 17 Wiring the Block Diagram connected to it, as shown in the following illustration. If you are unsure about which wire is connected to a tunnel, triple-click on the wire. To select the parts of a wire inside and outside a loop structure at the same time, select the part of the wire on one side of the structure and hold down the <Shift> key while you select the part of the wire on the other side of the structure. You can add an object to a group of previously selected objects by holding down the <Shift> key while you select the new object. Also, you can drag a selection rectangle around both parts of the wire. The structure is not selected unless you completely surround it with a selection rectangle. Other nodes need only to touch the rectangle to be selected. Wiring Off-Screen If a block diagram is too large to fit on the screen, you can use the scrollbars to move to an off-screen area and drag the objects you need there. G Programming Reference Manual 17-10 © National Instruments Corporation Chapter 17 Wiring the Block Diagram You can scroll the diagram automatically while you are wiring by dragging the Wiring tool slightly past the edge of the block diagram window. Solving Wiring Problems Bad Wires When you make a wiring mistake, a broken wire, which is indicated by a dashed line, appears instead of the wire pattern. Sometimes you have a faulty wiring connection that is not visible because the broken wire segment is very small or is hidden behind an object. If the Run button shows a broken arrow (as shown at the left) but you cannot see any problems in the block diagram, select Edit»Remove Bad Wires in case there are hidden, broken wire segments. If the Run button returns to its unbroken state (shown at the left), you corrected the problem. If not, click on the Broken Run button to see a list of errors. If you do not know why a particular wire is broken, pop up on the broken wire and choose List Errors from the pop-up menu, shown below. The Error List dialog box appears and lists the errors. Click on one of the errors. Doing this selects the erroneous wire, which you then can delete or repair. For more information, see the Debugging Broken VIs and Debugging Executable VIs sections in Chapter 4, Executing and Debugging VIs and SubVIs. © National Instruments Corporation 17-11 G Programming Reference Manual Chapter 17 Wiring the Block Diagram The following figure shows a list of some possible wire errors. They cannot all occur simultaneously for a single wire. For information on wiring Structures, see the Structure Wiring Problems section, in Chapter 18, Structures, in this manual. Wire Type, Dimension, Unit, or Element Conflict A type mismatch occurs when you wire two objects of different data types together, such as a numeric and a Boolean as shown in the following illustration. A file refnum conflict results when you wire refnums for two datalog files of different record types. The dimension conflict and element conflict errors occur in similar situations—when you wire two arrays together whose elements match but whose dimensions do not, and when you wire two clusters whose elements have type differences, respectively. The unit conflict occurs when you wire together two objects that do not have commensurable units. These problems typically arise when you inadvertently connect a wire to the wrong terminal of a function or subVI. Select and remove the wire and rewire to the correct terminal. You can use the Help window to avoid this type of error. In other situations, you might have to change the type of one of the terminals. G Programming Reference Manual 17-12 © National Instruments Corporation Chapter 17 Wiring the Block Diagram Multiple Wire Sources You can wire a single data source to multiple destinations, but you cannot wire multiple data sources to a single destination. In the example that follows you must disconnect one source. During front panel construction, you might have dropped a control when you meant to drop an indicator. If you try to wire an output value to the terminal of a front panel control, you see a multiple sources error. Pop up on the terminal and select the Change To Indicator command to correct this error. No Wire Source Two examples of wires with no sources are shown in the following illustration. In one case, a tunnel supplies data to the Reciprocal function, but nothing supplies data to the tunnel. In the other case, two function inputs are wired together, but there is no data source for them. The solution to the problems is to wire a data source to the tunnel and to the Add and Increment functions, respectively. You also see this error if you wire together two front panel indicator terminals when one should be a control. In this case, pop up on one terminal and select the Change To Control command. © National Instruments Corporation 17-13 G Programming Reference Manual Chapter 17 Wiring the Block Diagram Loose Ends Loose ends, shown in the illustration that follows, are wire branches that do not connect to a terminal. These can result from wire stretching, from retracing during the wiring process, or from deleting wired objects. Selecting Edit»Remove Bad Wires disposes of loose ends. Wire Stubs When you wire to a terminal, you seldom click on the terminal when the cursor is exactly at its center. When you are off-center, a wire segment automatically attaches itself from the click point to the terminal center. If you then remove the wire going to the terminal, a wire stub can remain, causing a Broken Run button. This problem is shown in the following illustration. click point added segments terminal center remnant left when you delete horizontal segment To avoid this situation, triple-click on a wire to make sure all portions are selected, and then delete it. You also can use Edit»Remove Bad Wires to delete the stubs. G Programming Reference Manual 17-14 © National Instruments Corporation Chapter 17 Wiring the Block Diagram Wire Cycles Wires must not form cycles. That is, wires must not form closed loops of icons or structures as shown in the following illustration. The execution system cannot execute cycles because each node waits on the other to supply it data before it executes. The Shift Registers section of Chapter 18, Structures, describes the correct way to feed back data in a repetitive calculation. Wiring Situations to Avoid The following sections describe situations that do not produce bad wires but do make the block diagram difficult to read or make it appear to do things it actually does not do. Note: Remember, when you are unsure of what connects to a wire, you can double-click on the wire to select the branch or triple-click to select the entire wire. Looping Wires A loop of wire is not an error but is a poor design because it unnecessarily clutters the diagram. Double-click on one of the branches to select it, then delete it. A wire loop is shown in the following illustration. © National Instruments Corporation 17-15 G Programming Reference Manual Chapter 17 Wiring the Block Diagram Hidden Wire Segments Try to avoid wiring under a structure border or between overlapped objects, because some segments of the resulting wire might be hidden. An example of hidden wire segments is shown in the following illustration. You can create hidden wire segments inadvertently, such as when you move a tunnel or enlarge a structure, as shown in parts 1 and 2 of the preceding example. Parts 3 and 4 of this example show one way you can make this diagram less confusing. You can drag the wire segment connected to the constant so that the hidden wire segments reappear. Press the <Shift>key to constrain the wire drag and reduce the likelihood of creating loose ends. G Programming Reference Manual 17-16 © National Instruments Corporation Chapter 17 Wiring the Block Diagram Wiring underneath Objects Wires connect only those objects that you click on. Dragging a terminal or icon on top of a wire makes it appear as if a connection exists when it does not, as shown at the left of the illustration that follows (1, 2, 3 on the left). Dragging a wire through an icon or terminal also appears to make a connection, but the wire is actually behind the icon, as shown at the right of the illustration (1, 2, 3 on the right). Avoid these situations because they are confusing visually. See the Understanding Warnings section in Chapter 4, Executing and Debugging VIs and SubVIs, for more information on this problem. © National Instruments Corporation 17-17 G Programming Reference Manual Chapter 18 Structures This chapter describes how to use the For Loop, While Loop, Case Structure, and Sequence Structure. These structures are in the Functions»Structures palette, as shown in the following illustration. See general\structs.llb for examples of how to use these structures. Structures are nodes that supplement the flow of execution in a block diagram, just as control structures do in a conventional programming © National Instruments Corporation 18-1 G Programming Reference Manual Chapter 18 Structures language. The icon for each G structure is a resizeable box with a distinctive border, as shown in the following illustration. Sequence Structures For Loop While Loop Case Structures Boolean Case Structure Multiframe Numeric Case Structure Single Frame Sequence Structure Multiframe Sequence Structure Structures behave like other nodes in that they execute automatically when their input data is available, and they supply data to their output wires only when execution completes. However, each structure executes its subdiagram according to the rules described in the following sections. A subdiagram is the collection of nodes, wires, terminals, and space that resides within the structure border. The For Loop and While Loop each have one subdiagram. The Case and Sequence structures, however, can have multiple subdiagrams stacked like cards in a deck with only one G Programming Reference Manual 18-2 © National Instruments Corporation Chapter 18 Structures visible at a time. You construct subdiagrams the same way that you construct the top-level block diagram; subdiagrams can contain block diagram terminals, nodes (including other structures), and wires. You create terminals for passing data into and out of a structure automatically where wires connecting outside nodes and inside nodes cross the structure boundary. These boundary terminals are called tunnels. Tunnels always have one edge exposed to the inside of the structure and one edge exposed to the outside. A tunnel always resides on the border of the structure, but you can move it anywhere along that border by dragging it with the Positioning tool. You can think of tunnels as way stations for data flowing into or out of a structure. Depending upon the type of structure, the data can be transformed by the tunnels. Structures also have other terminals that are particular to each type of structure. These terminals are described with the appropriate structures in the following sections. For Loop and While Loop Structures You use the For Loop and While Loop to control repetitive operations, either until a specified number of iterations has completed (For Loop) or until a specified condition is no longer true (While Loop). For Loop count terminal A For Loop executes its subdiagram count times, where the count equals the value contained in the count terminal. You can set the count explicitly by wiring a value from outside the loop to the left or top side of the count terminal, or you can set the count implicitly with auto-indexing (see the Auto-Indexing section in this chapter for more information). The other edges of the count terminal are exposed to the inside of the loop so you can access the count internally. The iteration terminal contains the current number of completed iterations; 0 during the first iteration, 1 during the second, and so on up to N – 1. Both the count and iteration terminals are signed, long integers with a range of 0 through 231 – 1. If you wire a floating-point number to the count terminal, G rounds it off, if necessary, and coerces it to within the range. If you wire 0 to the count terminal, the loop does not execute. iteration terminal © National Instruments Corporation 18-3 G Programming Reference Manual Chapter 18 Structures The For Loop is equivalent to the following pseudocode: for i = 0 to N – 1 Execute subdiagram While Loop A While Loop executes its subdiagram until a Boolean value you wire to the conditional terminal is FALSE. G checks the conditional terminal value at the end of each iteration, and if the value is TRUE, another iteration occurs, so the loop always executes at least once. The default value of the conditional terminal is FALSE, so if it is unwired, the loop iterates only once. The iteration terminal behaves exactly as it does in the For Loop. conditional terminal The While Loop is equivalent to the following pseudocode: Do Execute subdiagram (which sets condition) iteration terminal While condition is TRUE Both loop structures can have terminals called shift registers that you use for passing data from the current iteration to the next iteration. See the Shift Registers section of this chapter for more information. Placing Objects inside Structures You can place an object inside a structure by dragging it inside, or by building the structure around the object. You cannot put an object inside a structure by dragging the structure over the object. If you move a structure and it overlaps another object, your application displays the object it considers to be in front. If you put the structure completely over another object, and your application makes it the frontmost object, it displays a thick shadow to warn you that the object is below, not inside the structure. Otherwise, the structure is hidden completely by the object. (For information on which objects your application selects as frontmost, see the section Positioning Objects in Chapter 2, Building VIs.) Both situations are shown in the following illustration. G Programming Reference Manual 18-4 © National Instruments Corporation Chapter 18 Structures Placing and Sizing Structures on the Block Diagram When you select a structure from Functions»Structures and prepare to put it on your diagram, you see a small icon of the structure in place of your cursor. This icon is ready to be placed on your block diagram. You either can click on and release your mouse button to drop a small, default-size structure on the diagram, or you can click on the diagram while holding down the mouse and drag the structure to the size you want. An example is shown in the following illustration. You also can © National Instruments Corporation 18-5 G Programming Reference Manual Chapter 18 Structures size the structure after you have dropped it on the diagram by clicking on any corner with the Resizing cursor and dragging. Placing Terminals inside Loops Inputs to a loop pass data before loop execution. Outputs pass data out of a loop only after the loop completes all iterations. You must place a terminal inside a loop when you want the loop to check the value of the terminal on each iteration. For example, when you place the terminal of a front panel Boolean control inside a While Loop and wire the terminal to the loop conditional terminal of the loop, the loop checks the value of the terminal at the end of every iteration to determine whether it should iterate again. You can stop this While Loop, shown in the following figure, by changing the value of the front panel control to FALSE. G Programming Reference Manual 18-6 © National Instruments Corporation Chapter 18 Structures If you place the terminal of the Boolean control outside the While Loop, as shown below, you create an infinite loop. If the control was TRUE at the start, changing the value of the front panel control to FALSE does not stop the execution of this loop because the value is not propagated until the loop stops and the VI is re-run. If you inadvertently create an infinite loop, you can stop it by aborting the VI. Click on the abort button to stop execution. Auto-Indexing For Loop and While Loop structures can index and accumulate arrays at their boundaries automatically. These capabilities collectively are called auto-indexing. When you wire an array of any dimension from an external node to an input tunnel on the loop border and enable auto-indexing on the input tunnel, components of that array enter the loop one at a time, starting with the first component. The loop indexes scalar elements from one-dimensional arrays, one-dimensional arrays from two-dimensional arrays, and so on. The opposite action occurs at output tunnels–elements accumulate sequentially into one-dimensional arrays, one-dimensional arrays accumulate into two-dimensional arrays, and so on. © National Instruments Corporation 18-7 G Programming Reference Manual Chapter 18 Structures The following illustration shows the appearance of tunnels on the loop structure borders with and without auto-indexing. The wire becomes thicker as it changes dimensions at the loop border. 1 2 3 You often use For Loops to process arrays sequentially. For this reason, array tunnels have auto-indexing enabled by default when you wire an array into or out of a For Loop. While Loops are not commonly used for that purpose, so they are not enabled for auto-indexing by default. To enable or disable auto-indexing on a tunnel on the loop border, you must pop up on the tunnel at the loop border and choose Enable Indexing or Disable Indexing. Auto-Indexing for Setting the For Loop Count When you begin auto-indexing on an array entering a For Loop, it automatically sets the count to the size of the array, thus eliminating the need for you to wire to the count terminal explicitly. If you start auto-indexing for more than one tunnel, or if you do set the count explicitly, the count becomes the smallest of the choices. So if two auto-indexed arrays enter the loop, with 10 and 20 components respectively, and if you wire a value of 15 to the count terminal, the count is 10, and the loop indexes only the first 10 components of the second array. Auto-indexing output arrays receive a new output element from every iteration of the loop. Therefore, auto-indexed output arrays are always equal in size to the number of iterations (10 in the previous example). If auto-indexing is disabled, only the value from the last iteration of the loop is passed. G Programming Reference Manual 18-8 © National Instruments Corporation Chapter 18 Structures Auto-Indexing with While Loops When you begin auto-indexing for an array entering a While Loop, the While Loop indexes the array the same way as a For Loop does. However, the number of iterations a While Loop executes is not limited by the size of the array, because the While Loop iterates as long as a certain condition is TRUE. When a While Loop indexes past the end of the array, the default value for the array element type passes into the loop. Auto-indexing output arrays receive an output element from each iteration of the While Loop. They continue to grow in size as long as the While Loop executes. Note: Auto-indexing with a While Loop that iterates too many times can cause you to run out of memory. If you are a LabVIEW user, see Chapter 4, Arrays, Clusters, and Graphs, of the LabVIEW Tutorial Manual for further information about building arrays with While Loops to prevent this problem. Executing a For Loop Zero Times When you set the count to zero, a For Loop does not execute its subdiagram at all. The value of all scalar data leaving the For Loop conforms to the following rules. • An output array created by auto-indexing at an output tunnel is empty. • The output from an initialized shift register is the initial value. See the Shift Registers section of this chapter for more information. • An array passed through a non-indexing output tunnel is also empty. • All scalars passed through non-indexing output tunnels are undefined, and you cannot rely on their value. The loop count is set to zero or defaults to zero in two ways. You can auto-index an empty input array, or you can wire a zero or a negative number to the count terminal explicitly. You must wire to the count terminal unless you auto-index an input array. When you auto-index input arrays or set the loop count with a variable, analyze the diagram to determine whether a zero count can occur, and if so, what the effects would be. © National Instruments Corporation 18-9 G Programming Reference Manual Chapter 18 Structures Shift Registers Shift registers, which are available in For Loops and While Loops, are local variables that feed back or transfer values from the completion of one iteration to the beginning of the next. By selecting Add Shift Register from the loop border pop-up menu, you can create a register anywhere along the vertical boundary, as shown in the following illustration. This menu item is not available from the top or bottom edge of the structure. You can reposition a shift register along the vertical boundary by dragging it. A shift register has a pair of terminals directly opposite each other on the vertical sides of the loop border. The right terminal, the rectangle with the up arrow, stores the data at the completion of an iteration. G shifts that data at the end of the iteration, and it appears in the left terminal, the rectangle with the down arrow, in time for the next iteration. You can use shift registers for any type of data, but the data you wire to the terminals of each registers must be of the same type. You can create multiple shift registers on a particular structure. To initialize a shift register, wire a value from outside the loop to the left terminal. If you do not initialize the register, the loop uses as the initial value the last value inserted in the register when the loop last executed, or the default value for its data type if the loop has never before executed. Use initialized shift registers to ensure consistent behavior. LabVIEW users should see Chapter 3, Loops and Charts, of the LabVIEW Tutorial Manual for further information on using G Programming Reference Manual 18-10 © National Instruments Corporation Chapter 18 Structures uninitialized shift registers. BridgeVIEW users can refer to Chapter 10, Loops and Charts, of the BridgeVIEW User Manual. When the loop finishes executing, the last value stored in the shift register remains at the right terminal. If the right terminal is wired outside of the loop, this last value passes out when the loop completes. This property is shown in the following illustration. Resizing cursor To add or remove terminals to a particular shift register, use the Resizing cursor to resize the left terminals. Alternatively, you can use the Add Element command from the shift register pop-up menu to add more left terminals to the shift register. Added terminals appear directly below the one on which you pop up. Use the Remove Element command to remove the terminal on which you pop up. The following illustration shows both methods. The only way to remove extra wired © National Instruments Corporation 18-11 G Programming Reference Manual Chapter 18 Structures terminals is to choose Remove Element from the shift register pop-up menu. Selecting Remove All deletes the shift register. The left, topmost terminal holds the value from the previous iteration, i – 1. The terminal immediately under the uppermost terminal contains the value from iteration i – 2, and so on, with each successive terminal. If you initialize one left terminal of a shift register, you must initialize all of them. The following pseudocode shows a three-value running average routine equivalent to the G block diagram. a = b = 0 for i = 0 to N – 1 avg = (x[i] + a + b)/3 b = a a = x[i] G Programming Reference Manual 18-12 © National Instruments Corporation Chapter 18 Structures For an example of how a shift register is set up, see general\structs.llb\Random Average.vi. Case and Sequence Structures Both Case and Sequence structures can have multiple subdiagrams, configured like a deck of cards, of which only one is visible at a time. At the top of each structure border is the subdiagram display window, which contains a diagram identifier in the center and decrement and increment buttons at each side. The diagram identifier indicates which subdiagram is currently displayed. If the diagram identifier is numeric, it is followed by a diagram identifier range, which shows the minimum and maximum values for which the structure contains a subdiagram. Boolean Case Structure Multiframe Numeric Case Structure Case Structures Single frame Sequence Structure © National Instruments Corporation Multiframe Sequence Structure Sequence Structures 18-13 G Programming Reference Manual Chapter 18 Structures Clicking on the decrement (left) or increment (right) button displays the previous or next subdiagram, respectively. Decrementing from the first subdiagram displays the last, and incrementing from the last subdiagram displays the first subdiagram. Other uses of the display window are explained in the Case Structures and Sequence Structures sections of this chapter. See general\structs.llb\SquareRoot.vi for an example of a Case Structure. Case Structures selector The Case Structure has one or more subdiagrams, or cases, exactly one of which executes when the structure executes. This depends on the value of the Boolean or numeric scalar you wire to the external side of the selection terminal or selector. If a Boolean is wired to the selector, the structure must have two cases, True and False. If a numeric is wired to the selector, the structure can have from 0 to 215 – 1 cases. If you wire an enumeration to the selector, there must be one subdiagram for each enumeration item. The case identifiers are the same as the enumeration item names. If the structure does not have the appropriate number of cases, the VI in which it appears is broken. To add more cases, follow the procedure outlined in the Adding Subdiagrams section of this chapter. (If you wire a floating-point number to the selector, G rounds it to the nearest integer value. G coerces negative numbers to zero and values higher than the highest-numbered case to the last case.) Note: Case statements in other programming languages generally do not execute any case if a case value is out of range. If you do not want out-of-range values to activate the highest or lowest cases, you either must pretest the selector data for out-of-range numbers, or include a trap case that does nothing for out-of-range values. You can position the selector anywhere along the left border, but you must wire the selector. The selector automatically adjusts to the data type. If you change the value wired to the selector from a numeric to a Boolean, cases 0 and 1 change to FALSE and TRUE. If other cases exist (2 through n), G does not discard them, in case the change in data types is accidental. However, you must delete these extra cases before the structure can execute. G Programming Reference Manual 18-14 © National Instruments Corporation Chapter 18 Structures The same principle applies if you wire an enumeration to the selector and there are more cases than items in the enumeration. The diagram identifier for such cases is displayed as a grayed-out numeric identifier to indicate that these cases must be deleted before the structure can execute. The data at all input terminals (tunnels and selection terminal) is available to all cases. Cases are not required to use input data or to supply output data, but if any case supplies output data, all must do so. If you do not wire data to an output tunnel from every case, the tunnel turns white, as in the top example in the following illustration, and the run button shows a broken arrow. When all cases supply data to the tunnel, it turns black, as in the bottom example in the following illustration, and the run button appears unbroken. Incorrect Correct Adding, moving, and deleting Case subdiagrams are discussed after the following section on the Sequence Structure, because these operations are similar for both structures. © National Instruments Corporation 18-15 G Programming Reference Manual Chapter 18 Structures Sequence Structures The Sequence Structure, which looks like a frame of film, consists of one or more subdiagrams, or frames, that execute sequentially. For an example of a VI that uses a Sequence Structure, see general\structs.llb\TimingTemplate.vi. Determining the execution order of a program by arranging its elements in sequence is called control flow. BASIC, C, and most other programming languages have inherent control flow, because statements execute in the order in which they appear in the program. The Sequence Structure is a way of obtaining control flow when data dependencies are not sufficient. A Sequence Structure executes frame 0, followed by frame 1, then frame 2, until the last frame executes. Only when the last frame completes does data leave the structure. Within each frame, as in the rest of the block diagram, data dependency determines the execution order of nodes. You use the Sequence Structure to control the order of execution of nodes that are not data dependent. A node that receives its data directly or indirectly from another node has a data dependency on the other node and always executes after the other node completes. You do not need to use the Sequence Structure when data dependency exists or when the execution order is unimportant. This situation occurs often when you want to determine how long a function takes. The Tick Count VI returns the start and end time in milliseconds. The time is not needed to perform the function, so there is no data dependency between time measurement and the function. As shown in the following illustration, the Tick Count VI to the left of the sequence structure executes before the sequence structure. Then the function executes in frame 0 and the time elapsed calculation is done in frame 1. The sequence structure enforces the proper execution order. G Programming Reference Manual 18-16 © National Instruments Corporation Chapter 18 Structures Output tunnels of Sequence Structures can have only one data source, unlike Case Structures. The output can emit from 4any frame, but keep in mind that data leaves the structure only when it completes execution entirely, not when the individual frames finish. Data at input tunnels is available to all frames, as with Case Structures. To pass data from one frame to any subsequent frame, use a terminal called a sequence local. To obtain a sequence local, choose Add Sequence Local from the structure border pop-up menu. This option is not available if you pop up on a sequence local or over the subdiagram display window. You can drag the terminal to any unoccupied location on the border. Use the Remove command from the sequence local pop-up menu to remove a terminal. An outward-pointing arrow appears in the sequence local terminal of the frame containing the data source. The terminal in subsequent frames contains an inward-pointing arrow, indicating that the terminal is a source for that frame. In frames before the source frame, you cannot use © National Instruments Corporation 18-17 G Programming Reference Manual Chapter 18 Structures the sequence local, and it appears as a dimmed rectangle. The following illustrations show the sequence local terminal. Sequence local cannot be used. Sequence local is sink of data. Sequence local is source of data. Cannot wire an input value to a sequence local that is a source. Editing Case and Sequence Structures Because editing and manipulating the Case and Sequence structures involves similar techniques, the following examples show only the Case Structure and its pop-up menus. For Sequence Structures, replace the word case with the word frame. A new Case Structure has two cases, but can be edited to have one case as well. A new Sequence Structure has one frame. Moving between Subdiagrams The fastest way to view the next lower or higher subdiagram is to click on the decrement or increment button in the display window. If you want to jump over several subdiagrams, click on the subdiagram identifier and select the destination subdiagram from the pop-up menu, as shown in the following illustration. You also can use the Show Case command from the border pop-up menu. G Programming Reference Manual 18-18 © National Instruments Corporation Chapter 18 Structures Adding Subdiagrams You can add subdiagrams several ways. If you select the Add Case After command from the structure border pop-up menu, as shown in the illustration that follows, G inserts an empty subdiagram after the currently visible one. For example, an empty subdiagram at position 3 is created from subdiagram 2 using Add Case After. A complementary command, Add Case Before, appears in the same pop-up menu. These commands also appear in the diagram identifier pop-up menu. © National Instruments Corporation 18-19 G Programming Reference Manual Chapter 18 Structures If you select Duplicate Case from either the structure border pop-up menu or the diagram identifier pop-up menu, as shown below, a copy of the visible subdiagram is inserted after itself. When you add or remove subdiagrams, the editor automatically adjusts the diagram identifiers to accommodate the inserted or deleted subdiagrams. Deleting Subdiagrams To delete the visible subdiagram, choose Remove Case from the structure border pop-up menu, shown below. The values of higher numbered subdiagrams adjust automatically. This command is not available if only one subdiagram exists. G Programming Reference Manual 18-20 © National Instruments Corporation Chapter 18 Structures Reordering Subdiagrams To move a subdiagram to another location, select Make This Case from the structure border pop-up menu, as shown below, and choose a new value from the hierarchical menu that appears. The editor automatically adjusts the diagram identifiers of other subdiagrams. © National Instruments Corporation 18-21 G Programming Reference Manual Chapter 18 Structures Structure Wiring Problems The following sections discuss faulty connections with structures. Assigning More Than One Value to a Sequence Local You can assign a value to the local variable of a Sequence Structure in only one frame, although you can use the value in all subsequent frames. The illustration to the left below shows the value pi assigned to the sequence local in frame 0. If you try to assign another value to this same local variable in frame 1, you produce a bad wire. This error is a variation of the multiple sources error. Failing to Wire a Tunnel in All Cases of a Case Structure Wiring from a Case Structure to an object outside the structure results in a bad tunnel if you do not connect a source in all cases to the object, as shown in part 1 of the following example. This is a variation of the no source error because at least one case does not show a data value if it executed. Wiring to the tunnel in all cases, as shown in part 2 of this example, corrects the problem. This is not a multiple sources violation because only one case executes and produces only one output value per execution of the Case Structure. G Programming Reference Manual 18-22 © National Instruments Corporation Chapter 18 Structures 2 1 Overlapping Tunnels Because G creates tunnels as you wire, tunnels sometimes overlap. Overlapping tunnels do not affect the execution of the diagram, but they can make editing difficult. Avoid creating overlapping tunnels. If they occur, drag one tunnel away to expose the other. Look at the following example. © National Instruments Corporation 18-23 G Programming Reference Manual Chapter 18 Structures It is difficult to tell which tunnel is on top. You can make mistakes if you try to wire to one of them while they overlap, although you always remove the bad wires and try again. If you need to wire from an object inside a structure to an object outside when one such wire already exists, do not wire through the structure again as shown in the above illustration. Instead, begin the second wire at the tunnel. In this example, two overlapping tunnels do not cause a problem. But if this was a Case Structure, two overlapping bad tunnels might have appeared to be wired in each case. You always can remove all the wires from a tunnel to make it vanish and then rewire correctly. If your VI has tunnels that are completely overlapping, a warning appears in the Error List window if you have selected Show Warnings. See the Understanding Warnings section in Chapter 4, Executing and Debugging VIs and SubVIs, for more information on these problems. Wiring from Multiple Frames of a Sequence Structure This next illustration shows another variation of the multiple sources error. Two Sequence Structure frames attempt to assign values to the same tunnel. The tunnel turns white to signal this error. G Programming Reference Manual 18-24 © National Instruments Corporation Chapter 18 Structures Wiring underneath Rather than through a Structure To wire through a structure you must click either in the interior or on the border of the structure, as shown below. If you do not click in the interior or on the border of the structure, the wire passes underneath the structure, as shown below. When the Wiring tool crosses the left border of the structure, a highlighted tunnel appears to indicate that the editor will create a tunnel at that location as soon as you click on the mouse button. If you continue to drag the tool through the structure without clicking on the mouse until the tool touches the right border of the structure, a second highlighted tunnel appears on the right border. If you continue to drag the Wiring tool past the right border of the structure without clicking on it, both tunnels disappear, and the wire passes underneath the structure rather than through it. © National Instruments Corporation 18-25 G Programming Reference Manual Chapter 18 Structures Examine the following illustration. If you tack down the wire inside the structure, however, the wire goes through the structure even if you continue dragging the Wiring tool past the right border. Removing Structures without Deleting Items in a Structure You can remove a structure (For Loop, While Loop, Case Structure, or Sequence Structure) without losing the contents of the structure. If you pop up on any of these objects, you see an option for deleting the structure. In the case of For Loops and While Loops, the contents of the loop are copied to the underlying diagram. In addition, any wires that were connected by tunnels are connected together automatically. In the case of a Case Structure or Sequence Structure, removing the structure only preserves the current frame or case. All other frames or cases are deleted, and you are warned that you will lose hidden frames or cases and are given a chance to cancel the operation. G Programming Reference Manual 18-26 © National Instruments Corporation Chapter 19 Formula Nodes This chapter describes how to use the Formula Node to execute mathematical formulas on the block diagram. The Formula Node is available from Functions»Structures. © National Instruments Corporation 19-1 G Programming Reference Manual Chapter 19 Formula Nodes Using Formula Nodes The Formula Node is a resizable box similar to the four structures (For Loop, While Loop, Case Structure, and Sequence Structure). Instead of containing a subdiagram, however, the Formula Node contains one or more formula statements delimited by a semicolon, as in the following example. Formula statements use a syntax similar to most text-based programming languages for arithmetic expressions. You can add comments by enclosing them inside a slash–asterisk pair (/*comment*/). See general\structs.llb\Equations.vi for an example of a VI that uses a Formula Node. The pop-up menu on the border of the Formula Node contains options to add input and output variables, as shown in the illustration that follows. G Programming Reference Manual 19-2 © National Instruments Corporation Chapter 19 Formula Nodes Output variables are distinguished by a thicker border. There is no limit to the number of variables or formulas in a Formula Node. No two inputs and no two outputs can have the same name. However, an output can have the same name as an input. Every variable used in the Formula Node for a calculation must be declared as either an input or an output. Intermediate values, that is, outcomes of operations calculated after input(s) to the node but before the final output from the node, must be declared as outputs. However, intermediate values do not need to be wired to nodes external to the © National Instruments Corporation 19-3 G Programming Reference Manual Chapter 19 Formula Nodes Formula Node. For example, in the following illustration the y variable and the z variable must both be declared as outputs. You can change an input to an output by selecting Change to Output from the pop-up menu, as shown in the following illustration. You can change an output to an input by selecting Change to Input from the pop-up menu, as shown below. All variables are floating-point numeric scalars, whose precision depends on the configuration of your computer. Variables cannot have units. All input variables that appear in the formulas must be wired. All output variables that are wired must be assigned in at least one statement; that is, they must be on the left side of an equal sign. An G Programming Reference Manual 19-4 © National Instruments Corporation Chapter 19 Formula Nodes output variable might appear in an expression on the right side of an equal sign, but G does not veify if it has been assigned in a previous statement. When an assignment occurs as a subexpression, the value of the subexpression is the value assigned; for example x = sin (y = pi/3) π π assigns --- to y, and then assigns sin --- to x. 3 3 If a syntax error occurs, you can click on the Broken Run button to see the error listing. In the listing, the Formula Node displays a portion of the formula with a # symbol marking the point at which the formula box detected the error. Formula Node Functions and Operators All function names must be lowercase. Table 19-1 shows the names of the Formula Node functions. Table 19-1. Function Formula Node Functions Corresponding G Function Name Description abs(x) Absolute Value Returns the absolute value of x. acos(x) Inverse Cosine Computes the inverse cosine of x in radians. acosh(x) Inverse Hyperbolic Cosine Computes the inverse hyperbolic cosine of x in radians. asin(x) Inverse Sine Computes the inverse sine of x in radians. asinh(x) Inverse Hyperbolic Sine Computes the inverse hyperbolic sine of x in radians. atan(x) Inverse Tangent Computes the inverse tangent of x in radians. atanh(x) Inverse Hyperbolic Tangent Computes the inverse hyperbolic tangent of x in radians. © National Instruments Corporation 19-5 G Programming Reference Manual Chapter 19 Formula Nodes Table 19-1. Function Formula Node Functions (Continued) Corresponding G Function Name Description ceil(x) Round to +Infinity Rounds x to the next higher integer (smallest int is greater than or equal to x). cos(x) Cosine Computes the cosine of x in radians. cosh(x) Hyperbolic Cosine Computes the hyperbolic cosine of x in radians. cot(x) Cotangent Computes the cotangent of x in radians (1/tan(x)). csc(x) Cosecant Computes the cosecant of x in radians (1/sin(x)). exp(x) Exponential Computes the value of e raised to the x power. expm1(x) Exponential (Arg) – 1 Computes the value of e raised to the x power minus one (ex – 1). floor(x) Round to –Infinity Truncates x to the next lower integer (largest int is smaller than or equal to x). getexp(x) Mantissa & Exponent Returns the exponent of x. getman(x) Mantissa & Exponent Returns the mantissa of x. int(x) Round To Nearest integer Rounds its argument to the nearest even integer. intrz(x) Round Toward 0 Rounds x to the nearest integer between x and zero. ln(x) Natural Logarithm Computes the natural logarithm of x (to the base e). G Programming Reference Manual 19-6 © National Instruments Corporation Chapter 19 Table 19-1. Function Formula Nodes Formula Node Functions (Continued) Corresponding G Function Name Description lnp1(x) Natural Logarithm (Arg + 1) Computes the natural logarithm of (x + 1). log(x) Logarithm Base 10 Computes the logarithm of x (to the base of 10). log2(x) Logarithm Base 2 Computes the logarithm of x (to the base 2). max(x,y) Max & Min Compares x and y and returns the larger value. min(x,y) Max & Min Compares x and y and returns the smaller value. mod(x,y) Quotient & Remainder Computes the remainder of x/y, when the quotient is rounded toward –Infinity. rand( ) Random Number (0–1) Produces a floating-point number between 0 and 1 exclusively. rem(x,y) Remainder Computes the remainder of x/y, when the quotient is rounded to the nearest integer. sec(x) Secant Computes the secant of x radians (1/cos(x)). sign(x) Sign Returns 1 if x is greater than 0, returns 0 if x is equal to 0, and returns –1 if x is less than 0. sin(x) Sine Computes the sine of x radians. sinc(x) Sinc Computes the sine of x divided by x radians (sin(x)/x). sinh(x) Hyperbolic Sine Computes the hyperbolic sine of x in radians. © National Instruments Corporation 19-7 G Programming Reference Manual Chapter 19 Formula Nodes Table 19-1. Function Formula Node Functions (Continued) Corresponding G Function Name Description sqrt(x) Square Root Computes the square root of x. tan(x) Tangent Computes the tangent of x in radians. tanh(x) Hyperbolic Tangent Computes the hyperbolic tangent of x in radians. x^y xy Computes the value of x raised to the y power. Formula Node Syntax The Formula Node syntax is summarized below using Backus–Naur Form (BNF) notation. Square brackets enclose optional items. <assignlst> = <outputvar> = <aexpr> ; [ <assignlst> ] <aexpr>:=<expr> | <outputvar> = <aexpr> <expr>:=<expr> <binaryoperator> <expr> |<unaryoperator> <expr> |<expr> ? <expr> : <expr> |( <expr>) |<inputvar> |<outputvar> |<const> |<function> ( <arglist> ) <binaryoperator>:= + | - | * | / | ^ | != | == | > | < | >= | <= | && | || <unaryoperator>:=+ | - | ! <arglist>:=<aexpr>[ , <arglist> ] <const>:=pi | <number> G Programming Reference Manual 19-8 © National Instruments Corporation Chapter 19 Formula Nodes The precedence of operators is as follows, from lowest to highest. = assignment ? : conditional || logical or && logical and != == inequality, equality < > <= >= other relational: less than, greater than, less than or equal, greater than or equal + - addition, subtraction * / multiplication, division + - ! unary: positive, negative, logical not ^ exponentiation Exponentiation and the assignment operator are right-associative (groups right to left). All other binary operators are left-associative. The numeric value of TRUE is 1 and FALSE is 0 (for output). The logical value of 0 is FALSE, and any nonzero number is TRUE. The logical value of the conditional expression <lexpr> ? <texpr>: <fexpr> is <texpr> if the logical value of <lexpr> is TRUE and <fexpr> otherwise. Formula Node Errors Table 19-2 lists errors detected by the Formula Node. Table 19-2. Error Message © National Instruments Corporation Formula Node Errors Error Message Meaning syntax error Misused operator, and so on. bad token Unrecognized character. 19-9 G Programming Reference Manual Chapter 19 Formula Nodes Table 19-2. Error Message G Programming Reference Manual Formula Node Errors (Continued) Error Message Meaning output variable required Cannot assign to an input variable. missing output variable Attempt to assign to a nonexistent output variable. missing variable References a nonexistent input or output variable. too few arguments Not enough arguments to a function. too many arguments Too many arguments to a function. unterminated argument list Formula ended before argument list close parenthesis seen. missing left parenthesis Function name not followed by argument list. missing right parenthesis Formula ended before all matching close parentheses seen. missing colon Improper use of conditional ternary operator. missing semicolon Formula statement not terminated by a semicolon. missing equals sign Formula statement is not a proper assignment. 19-10 © National Instruments Corporation Chapter 20 Attribute Nodes This chapter describes how to use Attribute Nodes to set and read attributes of front panel controls programmatically. Some useful attributes include display colors, control visibility, menu strings for a ring control, graph or chart plot colors, and graph cursors. Creating Attribute Nodes You create an Attribute Node by selecting the Create»Attribute Node option from the pop-up menu of a front panel control or from the terminal of the control. © National Instruments Corporation 20-1 G Programming Reference Manual Chapter 20 Attribute Nodes Selecting this option creates a new node on the diagram located near the terminal for the control, as shown in the following illustration. If the control has a label associated with it, the label for the control is used for the initial label of the Attribute Node. You can change the label after the node has been created. If you pop up on an attribute terminal, and then choose Select Item, you see a menu of attributes that you can set for or read from the control, as shown in the following illustration. You can use a shortcut to the list of attributes by clicking on the Attribute Node with the Operating tool. You choose to read or to set attributes by selecting either the Change to Read or Change to Write option from the Attribute Node pop-up menu, as shown in the illustration that follows. G Programming Reference Manual 20-2 © National Instruments Corporation Chapter 20 Attribute Nodes You can set an attribute when the small direction arrow is located on the left side of the terminal. You can read an attribute when the arrow is located on the right side of the terminal. direction arrow You can read or set more than one attribute with the same node by enlarging the Attribute Node. New terminals are added as the node enlarges. © National Instruments Corporation 20-3 G Programming Reference Manual Chapter 20 Attribute Nodes You associate a terminal with a given attribute by clicking on the terminal with the Operating tool and selecting an attribute from the Attribute Node pop-up menu. You can create more than one Attribute Node by cloning an existing node, or by selecting the Create»Attribute Node option again. To clone an existing node, click on that node and drag it with the Positioning tool while holding down the <Ctrl> (Windows); <option> (Macintosh); <meta> (Sun); or <Alt> (HP-UX) key. However, you cannot copy and paste an Attribute Node using the Edit menu commands. Each node can have both read and write attribute terminals. G Programming Reference Manual 20-4 © National Instruments Corporation Chapter 20 Attribute Nodes The attributes for a cluster and for a numeric control inside the cluster are shown in the following illustration. Some controls, such as the graph, have a large number of attributes you can read or set. Some of these attributes are grouped into categories and listed in submenus, such as the Format & Precision category for a numeric control. You can choose to set all of the attributes at once by selecting the All Elements option of the submenu. You also can set one or more of the elements individually by selecting the specific © National Instruments Corporation 20-5 G Programming Reference Manual Chapter 20 Attribute Nodes attribute(s). The Format & Precision option on a numeric control is shown in the following illustration as an example. After you create an Attribute Node, the Find Control and Find Terminal options of the terminal and control pop-up menus change to submenus that help you find Attribute Nodes. In the same way, the Attribute Node has options to find the control and the terminal it is associated with. See general\attribute.llb for an example of how to use an Attribute Node. Using Attribute Node Help The Help Window and Online Reference (Help menu) are invaluable tools for implementing Attribute Nodes. You can use them to find descriptions, data types, and acceptable values for attributes. For more information, refer to the Attribute Node Help section in Chapter 1, Introduction to G Programming. G Programming Reference Manual 20-6 © National Instruments Corporation Chapter 20 Attribute Nodes Base Attributes There are many attributes available for modifying the various front panel objects in your application. This section discusses Visible, Disable, Key Focus, Blinking, Position, and Bounds attributes, which are common to nearly all front panel objects. Visible Attribute You can set or read the visibility of a front panel object with the Visible Attribute. The associated object is visible when TRUE, hidden when FALSE. In the following illustration, the digital control is set to an invisible state. A Boolean TRUE value makes the control visible again, as shown. Block Diagram Front Panel Visible = TRUE Visible = FALSE Disabled Attribute You can control whether a user has access to an object, by implementing the Disabled Attribute. A value of zero enables an object so that the user can operate it. A value of one disables the object, preventing operation. A value of two disables and grays out the object. You can disable user access to a digital control. The control does not change appearance when disabled in the first example. In the second © National Instruments Corporation 20-7 G Programming Reference Manual Chapter 20 Attribute Nodes example, the user access to the digital control is disabled and is grayed out. Key Focus Attribute With the Key Focus Attribute, you can make a control be the key focus or check to see if it currently has the focus. A control that has key focus behaves as though you tabbed over to that control to make it active. On most controls, you can enter values into the control by typing them with the keyboard. You also can set the key focus on the front panel by pressing the < Tab> key while in run mode or by pressing the hot key associated with the control (assigned by using the Key Navigation option). You can make a digital control the key focus. Then you can enter a new value in the control without selecting it with the mouse. Blinking Attribute By using the Blinking Attribute, you can read or set the blink status of an object. If you set this attribute to TRUE, a front panel object blinks. The blink rate and colors are set in the Preferences dialog box. When you set this attribute to FALSE, the object stops blinking. G Programming Reference Manual 20-8 © National Instruments Corporation Chapter 20 Attribute Nodes In the following illustration, the front panel indicator is set to blinking. Block Diagram Front Panel: Normal Front Panel: Blinking Position Attribute You can set or read the position of the upper left corner of an object on the front panel with the Position Attribute. The position is determined in units of pixels relative to the origin of the Panel window, which is initially the top left corner of the window but may be somewhere else if you have scrolled the window. This attribute consists of a cluster of two unsigned long integers. The first item in the cluster (Left) is the location of the left edge of the control relative to the origin of the Panel window, and the second item in the cluster (Top) is the location of the top edge of the control relative to the top edge of the Panel window. By activating the Position Attribute Node, the digital control changes its location on the front panel in the following illustration. © National Instruments Corporation 20-9 G Programming Reference Manual Chapter 20 Attribute Nodes Bounds Attribute (Read Only) The Bounds Attribute reads the boundary of an object on the front panel in units of pixels. The value includes the control and all of its parts, including the label, legend, scale, and so on. This attribute consists of a cluster of two unsigned long integers. The first item in the cluster (Width) is the width of objects in pixels, and the second item in the cluster (Height) is the height of the object in pixels. The Bounds Attribute is a read-only attribute. It does not resize a control or indicator on the front panel. Most objects have other attributes for resizing, such as the Plot Area Size attribute for Graphs and Charts. This attribute is useful when you need to read the overall size of a control, including all optional parts, so that you can position other controls in relation to the control with which you are working. You can determine the bounds of the digital control, as shown in the following illustration. Examples of Attributes Specific to Controls or Indicators In the following sections, you can learn about common applications of Attribute Nodes. See the general directory to explore other uses of the Attribute Node. Changing Plot Color on a Chart The attributes shown at left set or read the active plot (the trace for which subsequent trace-specific attributes are set or read) and the plot color for the active plot. Active Plot is an integer corresponding to the plot you want and Plot Color is an integer representing a color. You can access the Plot Color by selecting Plot Info»Plot Color from the attribute list. This Attribute Node changes the plot color of the plot specified by the Active Plot attribute. In the following example, the color of the random G Programming Reference Manual 20-10 © National Instruments Corporation Chapter 20 Attribute Nodes number plot changes color when the values go above a limit set by the user. Notice that the active plot is specified before the plot color is changed. Setting the Strings of a Boolean Attribute This Boolean attribute sets or reads the labels on a Boolean control. The input is an array of four strings that correspond to the False, True, True Tracking, and False Tracking states. • True and False: On and Off states of the Boolean. • True and False Tracking: Temporary transition levels between the Boolean states. True Tracking is the transition when the Boolean is changed from True to False. False Tracking is the transition from False to True when the Boolean attribute is changed.The tracking applies only to Booleans with “Switched When Released” and “Latch When Released” mechanical action. These mechanical actions have a transitional state until you release the mouse. The text strings “True Tracking” and “False Tracking” are displayed during the transitional state. © National Instruments Corporation 20-11 G Programming Reference Manual Chapter 20 Attribute Nodes You can set the display strings for the Switch controls to the string choices Stop, Run, and Stop? and Run? The following illustration shows how to set the display strings. Block Diagram Front Panel Setting the Strings of Ring Controls The ring control is a pop-up menu control that holds the numeric value of the currently selected item. You can use it to present the user with a list of options. If the options cannot be determined until run time, you can use the Attribute Node to set the options. See Chapter 13, List and Ring Controls and Indicators, for more information about ring controls. In the following example, the user is presented with a panel that has a ring control which displays a list of tests. The user selects a test and then presses the Execute Test button to continue. The block diagram shown in the illustration that follows reads a list of valid tests from a file and passes the list, represented as an array of strings, to an Attribute Node for the ring control. The diagram then G Programming Reference Manual 20-12 © National Instruments Corporation Chapter 20 Attribute Nodes loops, waiting for the user to click on the Execute Test button. This gives the user a chance to select a test from the ring control, or to fill in information for other controls. When the user selects a test, the string corresponding to the numeric value of the ring control is read and then passed to a VI that executes the test. Using a Double-Clicked Listbox Item The Double-Click attribute is a read-only attribute specific to listboxes. This attribute indicates the item on the front panel on which you double-clicked. The value of the Double-Click attribute is set when you double-click on an item or type < Enter> (Windows or UNIX) or <Return> (Macintosh and Sun) after you select an item. The double-click value is –1 if nothing has been double-clicked. It is reset to –1 after it is read using the Attribute Node. It also is reset to –1 if the you select a different item, or if you set any of the other attributes. © National Instruments Corporation 20-13 G Programming Reference Manual Chapter 20 Attribute Nodes The following illustration is an example of how to use the Double-Click Attribute Node to determine what test to execute. The False Case is executed when double-click is –1 and the True Case is executed when the user has double-clicked on a test number in the listbox. Selectively Presenting Users with Options As users make selections, you might want to present them with other options. There are three possibilities. 1. One option is to use pop-up subVIs. You can create subVIs that have the options you want to present to the user. By using the Show Front Panel when Called and Close Afterwards if Originally Closed options of VI Setup»Execution Options when you create your subVI, you can have one of these subVIs open when called. 2. Another method for presenting options is to use the Visible option of Attribute Nodes to selectively show and hide controls. 3. The third method for presenting options is to use the Disabled option of Attribute Nodes to disable controls selectively. When a control is disabled, the user cannot change the value. Reading Graph Cursors Programmatically You can use attributes to access information from one plot on a multi-plot graph, or one thumb on a multi-thumb slide, but you must indicate which item is being operated on. The multiple cursors on a graph are a good example of an attribute that must be activated before it can be accessed from the diagram. The following block diagram shows a VI that displays data in a graph and programmatically reads the position of graph cursors. G Programming Reference Manual 20-14 © National Instruments Corporation Chapter 20 Attribute Nodes Working through a While Loop, the VI first activates the Min Value cursor, and reads its numerical value. Next, the VI activates and reads the Max Value Cursor. Then the VI calculates and displays information about the cursor selection on the front panel. When you press the Confirm button, the VI exits the loop and confirms the cursor positions. See the examples in general\graphs\zoom.llb for an application of programmatically reading graph cursors. © National Instruments Corporation 20-15 G Programming Reference Manual Chapter Global and Local Variables 21 This chapter describes how to define and use global and local variables. You can use global variables to access a particular set of values easily. Local variables serve a similar purpose within a single VI. Global and local variables are advanced G concepts. Be sure to study this chapter carefully before using them. For examples of how to use global and local variables, see general\globals.llb and general\locals.llb. Global Variables A global variable is a built-in G object. You define a global variable by creating a special kind of VI, with front panel controls that define the data type of the global variable. There are two ways to create multiple global variables. You can create several VIs, each with one item, or you can create one multiple global VI by defining multiple data types on the one global variable front panel. The multiple global VI approach is more efficient, because you can group related variables together. You can create a global variable by selecting the global variable from the Functions»Structures palette. global node A node for the global variable appears on the block diagram. © National Instruments Corporation 21-1 G Programming Reference Manual Chapter 21 Global and Local Variables Double-click on the node to open a front panel. You use this panel to define the data type for one or more global variables. Note: Assign a name to each control, because you must refer to a specific global variable by name. After you have defined the data types for the global variables, save the global VI. The following illustration is an example front panel describing three global types—a number, a string, and a cluster containing two values. After you place a global variable on a block diagram and define a front panel for it, the node is associated with the front panel. Because a global variable can define multiple globals, you must select which global you want to access from a particular node. Select a global variable by popping up on the node and selecting the item by name from the Select Item menu as shown in the following illustration. Or, you can click on the node with the Operating tool and select the item you want. G Programming Reference Manual 21-2 © National Instruments Corporation Chapter 21 Global and Local Variables You either can write to a global variable or read from a global variable. Writing to a global variable means the value of the global is changed; reading from a global means the global is accessed as a data source. If you want to write to or read from a global, select the Change to Write Global or the Change to Read Global option of the global variable pop-up menu. After you define a global variable, you can place it in other VIs using Functions»Select a VI…. If you select a global variable from the file dialog box, G places the global variable node on the diagram. You also can clone, copy and paste, or drag-copy a global from the Hierarchy window. Local Variables With a local variable you can write or read one of the controls or indicators on the front panel of your VI. Writing to a local variable has the same result as passing data to a terminal, except that you can write to it even though it is a control, or read from it even though it is an indicator. Also, you can have any number of local variable references © National Instruments Corporation 21-3 G Programming Reference Manual Chapter 21 Global and Local Variables to a particular front panel control, with some in write mode, and others in read mode. In effect, with a local variable reference you can use a front panel control as both an input and an output. Note: You must make sure that the label you choose for your local variable is associated with a front panel object. If your local variable is not associated with a front panel object, it will not work. local variable icon The easiest way to create a local variable is to pop up on the front panel control or terminal and select Create»Local. A local is created automatically on the block diagram. Another way to create a local is to select the local variable from Functions»Structures, shown below. local variable node If there are no controls on the front panel of your VI, a node that looks similar to a global variable appears. If you already have placed controls on the front panel, the local variable node appears with the name of one of your controls showing. You can pop up on the node, or click on it with the Operating tool to select the control you want to read or set from a list of the top-level front panel controls, as shown in the following illustration. You also can determine whether you want to write to or read from the control by selecting either the Change to Write Local or the Change to Read Local options. G Programming Reference Manual 21-4 © National Instruments Corporation Chapter 21 Global and Local Variables The following is an illustration showing how you can have multiple local variables accessing the same control, with each having a different sense, either read or write. You use the age variable twice in the diagram, once to write to, and another time to read from. Be careful to sequence the access to local variables or global variables so you can produce the results you want, as in the preceding example. There is no guarantee that the “Write” to age will occur before the “Read” from age if you do not create the proper sequencing yourself. © National Instruments Corporation 21-5 G Programming Reference Manual Custom Controls and Type Definitions Chapter 22 This chapter introduces custom controls and type definitions. You can customize a front panel control or indicator to make it better suited for your application. For example, you might want to make a Boolean switch that shows a closed valve when the switch is off and an open valve when the switch is on, a slide control with its scale on the right side instead of on the left, or a ring control with predefined text or picture items. You can save a control or indicator that you have customized in a directory or VI library, just as you do with VIs. Then, you can use this control on other front panels. You also can create an icon for your custom control, and have the name and icon of the control appear in the Controls palette. If you need the same control in many places in your VIs, you can create a master copy of that control, called a type definition. When you make a change to the type definition, you automatically update all the VIs that use it. The following sections explain how to make these and other custom alterations to controls. Custom Controls Using the Control Editor Make certain that you are in edit mode to customize a control. On the front panel, place a control that is most like the one you want to create. For example, to create a slide with its scale on the right, start by placing any vertical slide on the front panel. With the Positioning tool, select the slide control and then choose Edit»Edit Control…. This option is available only when you have © National Instruments Corporation 22-1 G Programming Reference Manual Chapter 22 Custom Controls and Type Definitions selected a control. You can edit only one control at a time from a front panel. A window opens displaying a copy of the control. This window, shown in the following illustration, is called the Control Editor, and it is titled Control N, which is the name assigned to the Control Editor window until you save the control and assign it a permanent name. The Control Editor window looks like a front panel, but it is used only for editing and saving a single control; it has no block diagram and cannot run. edit mode customize mode A Control Editor has an edit mode and a customize mode; the current mode is indicated by a button in the toolbar, as shown to the left of this text. A Control Editor is in edit mode when it first opens. In edit mode you can change the size or color of a control, and select options from its pop-up menu just as you do in edit mode of any front panel. In customize mode you can change the parts of a control individually. Customize mode is described in detail later in this chapter. G Programming Reference Manual 22-2 © National Instruments Corporation Chapter 22 Custom Controls and Type Definitions After you have edited a control, you can use it in place of the original control on the front panel that you were building when you opened the Control Editor. You also can save it to use on other front panels. Applying Changes from a Custom Control When you are ready to replace the original front panel control with your new custom control, select File»Apply Changes from the main menu of the Control Editor. The file dialog box appears, asking you to name and select a location for your custom control. If your original front panel is the only place you use the custom control, you can close the Control Editor window without saving the control. Be sure to save the original VI with the custom control in place to preserve your work. If you want to use the custom control on other front panels in the future, you must save it as described in the Saving Custom Controls section of this chapter. The Apply Changes option is only available after you make changes to the control. Apply Changes is disabled if there is no original control to update. This happens when you delete or replace the original control, when you close the original front panel, or when you have opened a custom control that you saved earlier by selecting File»Open. Valid Custom Controls not-OK button If the Control Editor has more than one control in it, the not-OK button appears. A valid custom control must be a single control, though it can be a cluster of other controls. The not-OK button appears temporarily while you move controls in and out of a cluster or array. To see an © National Instruments Corporation 22-3 G Programming Reference Manual Chapter 22 Custom Controls and Type Definitions explanation for the error, click on the not-OK button. If there is more than one control in the Control Editor the error message reads: There are extra objects on the front panel that do not belong to the custom control. If there are no controls, the error message reads: There must be one control on the front panel for a custom control to be valid. If you try to put a type definition control on the front panel of the Control Editor, the error message reads: You cannot use a Type Definition in the control editor unless it is inside another control, such as a cluster or array. See the Type Definitions section later in this chapter for more information. Saving Custom Controls If you want to use your custom control on other front panels, choose File»Save as… from the main menu of the Control Editor. You save a control the same way you save a VI, in a directory or in a VI library. A directory or VI library contains controls, VIs, or both. If you close the Control Editor window without saving your changes to the control, a dialog box asks you if you want to save the control. Using Custom Controls When you save the custom control, you can use it on other front panels by selecting the Controls»Select a Control… from the front panel of any VI. For more information about adding a custom control to the Controls palette, see the Customizing the Controls and Functions Palettes section of Chapter 7, Customizing Your G Environment. G Programming Reference Manual 22-4 © National Instruments Corporation Chapter 22 Custom Controls and Type Definitions Making Icons control icon If you save your controls so that they appear in the Controls palette, you should make an icon representing the control before you save it. Pop up or double-click on the icon square in the top right corner of the Control Editor window to create an icon for the control. This icon represents the control in the palette when you save the control in a library directory. Independent Instances of Custom Controls You can open any custom control you have saved by selecting File»Open. A custom control always opens in the Control Editor window. Changes you make to a custom control when you open it do not affect VIs that are using that control. When you use a custom control on a front panel, there is no connection between that instance of the custom control and the file or VI library where it is saved; each instance is a separate, independent copy. You can, however, create a connection between control instances on various VI front panels and the master copy of the control. To do this, you must save the custom control as a type definition or a strict type definition. Then, any changes you make to the master copy affect all instances of the control in all the VIs that use it. See the Type Definitions section later in this chapter for more information. Customize Mode Option You can make more extensive changes to a control in the customize mode of the Control Editor. Change between edit and customize mode by clicking on the mode button in the toolbar belonging to the Control Editor, or by selecting Change to Customize Mode or Change to Edit © National Instruments Corporation 22-5 G Programming Reference Manual Chapter 22 Custom Controls and Type Definitions Mode from the Operate menu while the Control Editor is the active window, as shown in the following illustrations. Independent Parts All G controls are built from smaller parts. For example, a slide control consists of a scale, a housing, a slider, the increment and decrement arrows, a digital display, and a name label. The parts of a slide are pictured in the following illustration. G Programming Reference Manual 22-6 © National Instruments Corporation Chapter 22 Custom Controls and Type Definitions increment arrow name label digital display scale slider housing unit label decrement arrow A Slide Control When you switch to customize mode in the Control Editor, the parts of your control become independent. You can make changes to each part without affecting any other part. For example, when you click and drag on the scale of the slide with the Positioning tool, only the scale moves. You can select parts and align or distribute them using the Alignment or Distribution rings from the toolbar; or change their layering order by selecting Move Forward or Move Backward from the Edit menu. Customize mode shows all parts of the control, including any that were hidden in edit mode, such as a name label or the radix on a digital control. Because the parts of a control are detached from each other, you cannot operate or change the value of the control while in customize mode. Notice that the Operating tool is disabled. The Wiring tool is always disabled in a Control Editor because you are not using the block diagram when you are in Customize mode. Control Editor Parts Window To help you size and position control parts, select Windows»Show Parts Window. The floating window that appears identifies the parts of the control, and shows you the exact position and size of each part. The © National Instruments Corporation 22-7 G Programming Reference Manual Chapter 22 Custom Controls and Type Definitions Current Part display in the Parts window displays a picture and the name of the part currently selected in your Control Editor window. You can see a menu of all the parts by clicking on the current part display. You also can scroll through the parts of the control by clicking on the current part display increment or decrement arrow. When you change the part shown in the current part display, that part is selected on the control in the Control Editor window. When you select, change, or pop up on another part of the control in the Control Editor window, the part showing in the current part display also changes. The illustration that follows shows the Control Editor window on the left overlaid by the Control Parts window on the right. The name label of the slide is the current part, and is selected in the Control Editor window. The Control Parts window shows the menu of parts that you see when you click on the current part display. This example shows that the name label is the current part, but that you are about to change to the scale part. The Control Parts window shows you the exact position and size of the current part. These values are pixel values. When you move or resize a part in the Control Editor, the position and size in the Parts window are updated. You also can enter the position and size values directly in the Control Parts window to move or resize the part in the Control Editor. This is useful when you need to make two parts exactly the same size, or align one part with another. In the preceding illustration, the Parts G Programming Reference Manual 22-8 © National Instruments Corporation Chapter 22 Custom Controls and Type Definitions window displays the position and size of name label of the slide—the upper left corner of the label is at the pixel coordinates (74, 84), and the label is 20 pixels high by 45 pixels wide. The Control Parts window disappears if you switch to some other window. The Control Parts window reappears when you return to the Control Editor. Customize Mode Pop-Up Menus for Different Parts In customize mode, the pop-up menu for the control as a whole is replaced by a pop-up menu for each part. When you pop up on a part, you see a menu with some options available in edit mode, and some options available only in customize mode. Different parts have different pop-up menus. There are three basic types of parts you can customize. • Cosmetic parts, such as the slide housing, slider, and the increment and decrement arrows, are the most common. Cosmetic parts display a picture. • Text parts, such as the name label of the slide. Text parts consist of a picture for the background (usually just a rectangle) and some text. • Controls as parts, such as the slide, which uses a numeric control for a digital display. Knobs, meters, and charts also use a numeric control for a digital display. Some controls are even more complicated than that; for example, the graph uses an array of clusters for its cursor display part. The following sections describe the different parts and their pop-up options in more detail. Cosmetic Parts A cosmetic part is a par that has no dynamic user interaction or indication. The following illustration shows a pop-up menu for a cosmetic part, such as a slide housing. To pop up on a cosmetic part, you © National Instruments Corporation 22-9 G Programming Reference Manual Chapter 22 Custom Controls and Type Definitions must be in customize mode. You must pop up on the part itself, not on the picture of the part in the Control Parts window. The following list describes the options available from the pop-up menu. • Copy to Clipboard—Places a copy of the picture of the part on the Clipboard. If you select Copy to Clipboard for the slide housing, the Clipboard contains a picture of a tall, narrow inset rectangle. This Clipboard picture can be pasted onto any front panel or imported as the picture for another part using Import Picture. These pictures are just like the Decorations in the Controls palette. When you need simple shapes like the housing rectangle for other parts, there are several advantages to using pictures copied from other parts, instead of making them in a paint program. Pictures taken from existing parts or decorations look better than pictures made in a paint program when you change their size. For example, a rectangle drawn in a paint program can only grow uniformly, enlarging its area but also making its border thicker. A rectangle copied from a part like the slide housing keeps the same thin border when resized. Another advantage is that built-in parts appear basically the same on both color and black-and-white monitors. In addition, you can color pictures taken from parts or decorations with the Color tool. Pictures imported from another source keep the colors they had when they were imported, because those colors are a part of the definition of that picture. • G Programming Reference Manual Import Picture—Replaces the current picture of a cosmetic part with the picture that is currently on the Clipboard. Use this option to individually customize the appearance of your controls. For example, you could import pictures of an open and closed valve for a Boolean switch. If there is not a current picture on the Clipboard, Import Picture is disabled. 22-10 © National Instruments Corporation Chapter 22 Custom Controls and Type Definitions There is a shortcut in the Control Editor for importing pictures into a Boolean control. When you are in edit mode (you do not have to be in customize mode), you can select Import Picture»True or Import Picture»False from the pop-up menu of a Boolean. Doing this imports the picture into both the normal state and the corresponding transition state. You also can import different pictures for the transition states in customize mode. To do this, first pop up on the button and use Picture Item to change the third picture. With the True»False picture on the Clipboard, pop up again and select Import Picture. Repeat these steps for the fourth (False»True) picture. • Import at Same Size—Replaces the current picture, but keeps the original size of the part, shrinking or enlarging the Clipboard picture to fit. If there is not a current picture on the Clipboard, Import at Same Size is disabled. • Revert—Restores the part to its original appearance. Revert does not change the position of the part. If you opened the Control Editor window by selecting Edit Control from a front panel, the editor reverts the part to the way it looks on that front panel. If you opened the Control Editor window by selecting File»Open, Revert is disabled. • Original Size—Sets the picture of a part to its original size. This is useful for pictures that you imported from other applications, and then resized. Some of these pictures do not look as good as the original when resized, and you might want to restore their original size to fix them. If you have not imported a picture, Original Size is disabled. Cosmetic Parts with More than One Picture Some cosmetic parts have more than one picture, which they display at different times. These different pictures are all the same size and use the same colors. For example, the increment arrow of the slide is a picture of a triangle, normally raised slightly from the background. It also has another picture, a recessed triangle, that appears while you are clicking on it with the Operating tool to increment the value of the slide. The © National Instruments Corporation 22-11 G Programming Reference Manual Chapter 22 Custom Controls and Type Definitions illustration that follows shows the two pictures of an increment arrow in action. A cosmetic part with more than one picture has the Picture Item option on its pop-up menu, as shown in the following illustration. Picture Item displays all the pictures belonging to a cosmetic part. The picture item that is currently displayed has a dark border around it. When you import a picture, you change only the current picture item. To import a picture for one of the other picture items, first select that picture item and then import the new picture. Cosmetic Parts with Independent Pictures A cosmetic part with more than one picture can have pictures of different sizes, which each use different colors. The slide, for example, uses two pictures of different sizes to show which slider is active on a multi-value slide. The slide in the following example uses a bigger triangle to show that the middle slider is the active one. G Programming Reference Manual 22-12 © National Instruments Corporation Chapter 22 Custom Controls and Type Definitions A Boolean switch also has more than one picture. Each picture can be a different size and have different colors. A Boolean switch has four different pictures—the first shows the false state; the second shows the true state. You use the third and fourth pictures when you set the mechanical action of a Boolean control to either Switch When Released or Latch When Released. Until you release the mouse button, the value of the Boolean does not change with these two mechanical actions. Between the time you click on the button and the time you release the click, the Boolean shows the third or fourth picture as an intermediate state. The third picture is for the true to false transition state, and the fourth is for the false to true state. In the following illustration of a toggle switch, the third and fourth pictures are the same, but this is not always the case. 1: False © National Instruments Corporation 2: True 22-13 3: T F 4: F T G Programming Reference Manual Chapter 22 Custom Controls and Type Definitions When a cosmetic part can have different sized pictures, the part has the Independent Sizes option on its pop-up menu, as shown in the following illustration. Independent Sizes is an option you can turn on only when you are in customize mode if you want to move and resize each picture individually without changing the other pictures of the cosmetic part. Normally, this option is not checked; and, when you move or resize the current picture of the cosmetic part, its other pictures also move the same amount or change size proportionally. Text Parts A text part is a picture with some text. The pop-up menu for a text part, such as a name label, has some items identical to those on the pop-up menu of a cosmetic part. The other items on this menu are the same as the text pop-up menu in front panel edit mode. An example pop-up menu for a text part is shown in the following illustration. G Programming Reference Manual 22-14 © National Instruments Corporation Chapter 22 Custom Controls and Type Definitions Only the background picture for the text part is shown in the Parts window, not the text itself. The background picture can be customized, not the text. Scale Parts A scale is a special kind of text part with markers for the text. A picture of the scale is the background for each of its markers. This background is usually a transparent rectangle and therefore not visible, but you can see it if you color one of the scale markers. A scale has the same options on its pop-up menu as a text part, along with other options relating only to scales. This menu is shown in the following illustration. Reverse Ticks changes the tick marks on a vertical scale from the right side to the left, or from left to right. On a horizontal scale, it changes the tick marks from the top to the bottom, or from bottom to top. On a rotary scale, such as the scale on a knob, dial, gauge or meter, it changes the tick marks from the outside to the inside, or from the inside to the outside. Reverse Ticks does not move the scale. You can position the scale by dragging it when you are in customize mode. Hold the <Shift> key down when dragging the scale of the slide to restrict the movement to one direction only. Controls as Parts A control can include other controls as parts. A common example of this is the digital display on a slide, knob, meter, or chart. There is no difference between the digital display and the ordinary, front panel © National Instruments Corporation 22-15 G Programming Reference Manual Chapter 22 Custom Controls and Type Definitions digital control, except that the digital display is serving as part of another control. The digital display is also made up of parts. When you are editing the original control in the Control Editor, the digital display behaves as a single part, so you cannot change or move its parts individually. You can, however, open the Control Editor for the digital display and customize it there. To customize a control that is a part of another control, open the Control Editor for it. You can open the Control Editor window for the part directly from the original front panel, if it can be selected separately from the main control in edit mode. The digital display can be selected separately from the slide control, for example. Then, you can choose Edit»Edit Control & Function Palettes. You always can open the Control Editor window for the part from the Control Editor window of the main control. Select the part in the Control Editor and choose Edit»Edit Control & Function Palettes. Control editors can be nested in this way indefinitely, but most controls use other controls as parts only at the top level. An exception is the graph, which uses complicated controls as parts, which, in turn, use other controls as parts. You cannot open a second Control Editor window for the main control already being customized. The following illustration shows the Control Editor for the slide on the left, and a Control Editor window for the digital display on the right. You do not have to be in customize mode to open a nested Control Editor window unless you are unable to select the control part in edit mode. G Programming Reference Manual 22-16 © National Instruments Corporation Chapter 22 Custom Controls and Type Definitions Adding Cosmetic Parts to Custom Controls When you are making a custom control in the Control Editor, you can make even more changes to its appearance by adding cosmetic or text parts to it. If you paste a picture or text from the Clipboard, create a label with the Labeling tool, or select a picture from Controls»Decorations, that picture or text becomes a part of your control and appears with the control when you place it on a front panel. You can do this in either edit or customize mode in the Control Editor. You can move, resize, or change the layering order of the new part, just like any other part. Your addition appears as a decoration part in the Control Parts window in customize mode. You also can delete decoration parts when you are in the Control Editor. © National Instruments Corporation 22-17 G Programming Reference Manual Chapter 22 Custom Controls and Type Definitions The following illustration shows a custom graph that has some decoration parts, including the Title of Graph label, the Legend: label, and the box around the legend parts. When you use a custom control on other front panels, you can change the size of any decoration parts that you added, but you cannot move them. Custom Control Caveats There are some things you need to be aware of when you make custom controls. • Pictures created on one platform look slightly different when loaded on another platform (this applies to pictures imported into a Pict Ring or used as background on any front panel as well). For example, a picture with an irregular shape or a transparent background might have a solid white background on another platform. See the Picture Differences section in Chapter 27, Portability Issues. • Control Editor can change only the appearance of a control; it cannot change the behavior of a control. This has two implications. – You cannot change the way a control displays its data. – You cannot change the way a control behaves when you edit it, especially when you resize it. For example, when you make a ring control taller, the increment and decrement arrows also increase in height. If you move the increment and decrement arrows so they are side by side at the bottom of the ring, the ring continues to make them become taller when it increases, and you produce some strange results. G Programming Reference Manual 22-18 © National Instruments Corporation Chapter 22 • Custom Controls and Type Definitions Custom controls often look correct, but occasionally behave oddly. If you like the control the way you have made it but are not pleased with its irregular editing behavior, read about strict type definitions in the next section, Type Definitions, to learn how editing can be restricted. Type Definitions A type definition is a master copy of a control. You use the Control Editor to create the master copy, or type definition. Type definitions are useful when you use the same kind of control in many VIs. You can save the control as a type definition, and use that type definition in all your VIs. Then, if you need to change that control, you can update the single type definition file instead of updating the control in every VI that uses it. General Type Definition: Matching Data Types A type definition forces the control data type to be the same everywhere it is used. Use a type definition when you want to use a control of the same data type in many places and when you might want to change that data type automatically everywhere it is used. For example, suppose you make a type definition from a double-precision digital control, and that you subsequently use that type definition in many different VIs. Later, you change the type definition to a 16-bit integer digital control. When you change the type definition, you can update every VI that uses that type definition automatically, or if you prefer, you can check if the type definition in a VI needs to be updated. You also can make a type definition that is a cluster, such as a cluster of two integers and a string. If you change that type definition to a cluster of two integers and two strings, you can update the type definition everywhere it is used. As long as the data type matches the master copy, a type definition can have a different name, description, default value, size, color, or even a different style of control (for example, a knob instead of a slide). Strict Type Definition: Everything Must Match A type definition also can force almost everything about the control to be identical everywhere it is used, not just its data type but also its size, color, and appearance. This is called a strict type definition. © National Instruments Corporation 22-19 G Programming Reference Manual Chapter 22 Custom Controls and Type Definitions The only aspects of a control that can be different from the master copy of a strict type definition is the name, description, and default value. As an example, suppose you make a strict type definition that is a double-precision digital control with a red frame. Like the general type definition, if you change the strict type definition to an integer, you automatically update every VI that uses it, or you can check to make sure if they need to be updated. Unlike the general type definition, however, other changes to the strict type definition, such as changing the red frame color to blue, also requires VIs using the strict type definition to be updated. Note: Many Attribute Nodes are not available for strict type definitions. However, the attributes that are available for strict type definitions are those that affect the appearance of the control, such as Visible, Disabled, Key Focus, Position and Bounds. Creating Type Definitions You make a type definition by setting the ring on the toolbar in a Control Editor window, as shown in the following illustration. Set up the control the way you want it, and choose File»Save in the Control Editor window. You can open any type definition you have saved by selecting File»Open. A type definition always opens in a Control Editor window. Any changes you make to a type definition affect all VIs that are using it. Using Type Definitions Place general type definitions and strict type definitions on the front panel of a VI as you would any custom control. You can edit and operate a type definition on your front panel as you would any other control. Note: You cannot edit a strict type definition on your front panel except to change its name, description, or default value. G Programming Reference Manual 22-20 © National Instruments Corporation Chapter 22 Custom Controls and Type Definitions You can tell that a control is a type definition when you see the type definition options in its pop-up menu, as shown in the following illustration. You can recognize a strict type definition on your front panel because you cannot edit it, and most of its pop-up menu options are missing. For each type definition that you use on a front panel, the VI keeps a connection to the file or VI library in which it is saved. You can see this connection in action if you place a type definition on a front panel and then select it and choose Edit»Edit Control…. The Control Editor that opens is the type definition you saved, with the name you gave it, instead of the generic Control N. Updating Type Definitions Your G development environment ensures that the data type is the same everywhere a type definition is used and that everything about a strict type definition is the same everywhere it is used. You can update any general type definitions or strict type definitions on your front panel that are incorrect automatically, replacing the one on your front panel with an exact copy of the one saved in the file or VI library. If you have edited an instance of a type definition on your front panel extensively, such as coloring and resizing it, you might not want this automatic update feature. You can pop up on the type definition on your front panel and turn off the Auto-Update from Type Def. option. Instead of automatically updating this type definition when necessary, the VI has a broken run arrow and the type definition on the front panel is disabled. You cannot run the VI until you fix the type definition, either by selecting the option Update from Type Def. from the pop-up menu, or by changing the data type to match the type definition. When you use a type definition, you can assign a different default value to it. However, if the data type of the type definition changes, all default data is updated from the master copy. If the data type does not change, the individual default values can be preserved. © National Instruments Corporation 22-21 G Programming Reference Manual Chapter 22 Custom Controls and Type Definitions Searching for Type Definitions Because G must keep a connection to the type definition, the file or VI library containing the type definition must be available to run a VI using it. If you open a VI, and if a type definition that the VI needs is not found, the type definition control on the front panel is disabled and the run arrow is broken. To fix this problem, you must either find and open the correct type definition, or pop up on the disabled control and select Disconnect From Type Def. Disconnecting from the type definition removes the restrictions on the data type of the control and appearance, making it into an ordinary control. You cannot re-establish that connection unless you find the type definition and replace the control with it. Cluster Type Definitions If you use a type definition or strict type definition that is a cluster, it is a good idea to use the Bundle By Name and Unbundle By Name functions on the block diagram to access the elements of the cluster, instead of the Bundle and Unbundle functions. These functions reference elements of the cluster by name instead of by cluster order, and are not affected when you reorder the elements or add new elements to the cluster type definition. If you delete an element that you are referencing in Bundle by Name or Unbundle By Name, you have to change your block diagram. Refer to the description of these functions in Chapter 14, Array and Cluster Controls and Indicators, for more information. G Programming Reference Manual 22-22 © National Instruments Corporation Calling Code from Other Languages Chapter 23 This chapter explains various methods of calling code written in other languages. These methods include using platform-specific protocols; creating a Code Interface Node to call code written specifically to link to VIs, and using a Call Library Function node to call Dynamic Link Libraries (DLLs) in Windows, Code Fragments on the Macintosh, and Shared Libraries on UNIX. An additional method is using the LabWindows/CVI Function Panel converter to convert an instrument driver written in LabWindows/CVI. Executing Other Applications from within Your VIs You can execute other applications from within your VIs. The methods are different on Windows and UNIX than on the Macintosh. (Windows, UNIX) You use System Exec to execute other applications from within your VIs. You can use the simple System Exec VI from the Functions»Communication palette to execute a command line from your VI. The command line can include any parameters supported by the application you plan to launch. If you can access the application through TCP/IP (or DDE in Windows), you might be able to pass data or commands to the application. See the reference material for the application you plan to use to see the extent of its communication capability. If you are a LabVIEW user, you also can refer to Chapter 1, Communication Applications in LabVIEW, of the LabVIEW Communications VI Reference Manual, for more information on techniques for using networking VIs to transfer information to other applications. (Macintosh) You use Apple Event VIs to execute other applications from within your VIs. Apple Events are a Macintosh-specific protocol through which applications can communicate with each other. They can be used to send commands between applications. You also can use them to launch other applications. If you are a LabVIEW user, see Chapter 1, Communication Applications, of the LabVIEW Communications VI © National Instruments Corporation 23-1 G Programming Reference Manual Chapter 23 Calling Code from Other Languages Reference Manual for details of different methods for using Apple Event VIs in G to launch and control other applications. Using the Call Library Function You can call most standard shared libraries (in Windows these are Dynamic Link Libraries or DLLs, on the Macintosh they are Code Fragments, and on UNIX they are Shared Libraries) using the Call Library Function node. The Call Library Function node includes a large number of data types and calling conventions. You can use it to call functions from most standard and custom-made libraries. The Call Library Function node is most appropriate when you have existing code that you want to call, or if you are familiar with the process of creating a DLL in Windows, Code Fragments on the Macintosh, or Shared Libraries on UNIX. Because a library uses a format that is standard among several development environments, you should be able to use almost any development environment to create a library that G can call. Check the documentation for the compiler you are using to see if it can be used to create standard shared libraries. See the section Call Library Function later in this chapter for a detailed description of this node. Using Code Interface Nodes For applications in which you need the highest performance, or you want to pass arbitrary data structures to C code, you can create a Code Interface Node (CIN). By using CINs, you can call code written specifically to link to G VIs. The CIN is a very general method for calling C code from G. You can pass arbitrarily complex data structures to and from a CIN. In some cases, you might have a higher performance using CINs because data structures are passed to the CIN in the same format they are in when stored in G. To have this level of performance, however, you must learn how to create a CIN. This requires that you be a good C developer and take sufficient time to create the CIN you need. Also, because CINs are more tightly coupled with G, there are restrictions on which compilers you can use. G Programming Reference Manual 23-2 © National Instruments Corporation Chapter 23 Calling Code from Other Languages If you are a LabVIEW user, you can refer to the LabVIEW Code Interface Reference Manual for information on how to create Code Interface Nodes. Call Library Function (Windows, UNIX) Using the Call Library function directly, you can call a Windows 3.1, 16-bit DLL, a Windows 95/NT, 32-bit DLL, a Macintosh Code Fragment, or a UNIX Shared Library function directly. (Macintosh) The Call Library function uses the Macintosh Code Fragment Manager (CFM). This is standard on all PowerMac machines. 680x0 Macintosh computers need the CFM extension. Additionally, the Call Library Node on 680x0 Macintosh computers cannot call variable argument functions. Shared libraries on the Macintosh operate differently than on other platforms. A file might contain more than one code fragment, each of which has a name. The Call Library Function, shown at left, is available from Functions»Advanced. If you double-click on the Call Library Function or select Configure… from its node pop-up menu, G displays a dialog box you can use to specify from the library, function, parameters, and return value for the node as well as calling conventions in Windows. When you click the OK button, the node automatically adds the correct number of terminals, and sets the terminals to the correct data types. The return value for the function returns to the right terminal of the top pair of terminals of the node. If there is no return value, this pair of terminals is unused. Each additional pair of terminals corresponds to a parameter in the functions parameter list. You pass a value to the function by wiring to the left terminal of a terminal pair. You read the value of a parameter after the function call by wiring from the right terminal of a terminal pair. © National Instruments Corporation 23-3 G Programming Reference Manual Chapter 23 Calling Code from Other Languages The Call Library Function dialog box is shown in the following illustration. As you select options in the dialog box, an indicator at the bottom, called Function Prototype, displays the C prototype for the selected function. Note: In Windows 3.1, an upper limit of 29, 4-byte arguments can be passed using the Call Library Function. Double-precision floating-point parameters passed by value are 8-byte quantities and therefore count as two arguments. Thus, you are limited to 14 double-precision, floating-point parameters passed by value. Note: In Windows 3.1, DLLs must be 16-bit. In Windows 95/NT, DLLs must be 32-bit. If you have a 16-bit DLL that you want to call from Windows 95/NT, you either must recompile it as a 32-bit DLL or create a “thunking” DLL. Refer to Microsoft documentation for information on thunking DLLs. Calling Conventions (Windows) Use the calling conventions of the ring to select the calling conventions for the function. The default calling convention for Windows 3.1 is Pascal, and Standard C for Windows 95/NT. This default corresponds to the calling convention that is used by most DLLs. The alternative G Programming Reference Manual 23-4 © National Instruments Corporation Chapter 23 Calling Code from Other Languages option is to use C calling conventions. Refer to the documentation for the DLL you are trying to call to determine which calling conventions you should use. In Windows 3.1, almost all DLLs use Pascal calling conventions. In Windows 95/NT, almost all DLLs use standard C calling conventions. Parameter Lists Initially, the Call Library Function has no parameters, and has a return value of void. You can click on the Add a Parameter Before and Add a Parameter After buttons to add parameters to the function. You can click on the Delete this Parameter button to remove a parameter. You can use the parameter ring to select different parameters or the return value. When selected, you can change the parameter name to something more descriptive. The parameter name does not affect the call, but it is propagated to output wires. Descriptive names make it easier to switch between parameters. Indicate the type of each parameter using the type ring. The return type is limited to either Void, meaning the function does not return a value, or Numeric, shown in the following illustration. For parameters, you can select Numeric, String, or Array data types, as shown in the following illustration. When you select an option from the type ring, you see more options you can use to indicate details about the data type and how to pass the data to the library function. The Call Library Node has a number of different options for data types, because of the variety of data types required by different libraries. Refer to the documentation for the library you call to determine which data types to use. • © National Instruments Corporation Void—The type void is only accepted for the return value. This option is not available for parameters. Use it for the return value if your function does not return any values. 23-5 G Programming Reference Manual Chapter 23 Calling Code from Other Languages • Numerics—For numeric data types, you must indicate the exact numeric type using the data type ring. Options include the following: – Signed and unsigned versions of 8-bit, 16-bit, and 32-bit integers – Four-byte, single-precision numbers – Eight-byte, double-precision numbers You cannot use extended-precision numbers and complex numbers because they are not generally used in standard libraries. You also need to use the format ring to indicate if you want to pass the value or a pointer to the value. In Windows 3.1, you cannot use either single-precision or double-precision data types as the return type. This is because there is no standard method for DLLs to return single-precision and double-precision numbers, so this sort of return is implemented differently by each compiler that does it. If you need to return a single-precision or a double-precision number, pass the data back as a parameter instead of as the return value. • Note: Arrays—You can indicate the data type of arrays (using the same options as for numeric data types), the number of dimensions, and the format to use in passing the array. Use the Format option to select if you want to pass a pointer to the array data, or pass a pointer to a G array, which includes a four-byte value for each dimension followed by the data. If you select Array Data Pointer, you probably need to pass the array dimension as separate parameter(s). In Windows 3.1, the Call Library Node uses only the array data pointer format for arrays. Additionally, in Windows 3.1 you can indicate that the data should be passed using a Huge pointer. You can use a Huge pointer if you need to pass more than 64 K. You should only turn this option on if the DLL you are calling expects a Huge pointer of data. If you try to pass a Huge pointer to a function that expects a normal pointer, the application might crash. If the library function that you are calling is written specifically for G, you should use the G array format, because it explicitly includes the size information. For most conventional libraries, however, use the array data pointer, and pass the size of the array as a separate parameter(s). G Programming Reference Manual 23-6 © National Instruments Corporation Chapter 23 Caution: Calling Code from Other Languages Do not attempt to resize an array with system functions, such as realloc. Doing so might cause your system to crash. In Windows 3.1, you cannot use the String Handle format. • Strings—You can specify the string format for strings. The options for string format are C, Pascal, or G. Base your selection of the string format on the type of string that the library function expects. Most standard libraries expect either a C string (string followed by a ∅ character) or a Pascal string (string preceded by a length byte). If the library function that you are calling is written specifically for G, then you might want to use the string format, which consists of four bytes for length information, followed by string data. Caution: Do not attempt to resize a string with system functions, such as realloc. Doing so can cause your system to crash. Calling Functions that Expect Other Data Types In some cases, you might encounter a function that expects a data type G does not use. For example, you cannot use the Call Library Function to pass an arbitrary cluster, or an array of non-numeric data. Depending on the data type, you might be able to pass the data by creating a string or array of bytes that contains a binary image of the data that you want to send. You can create binary data by typecasting data elements to strings and concatenating them. Another option is to write a library function that accepts data types G does use, and parameters to build the data structures that the library function expects, then calls the library function. Finally, you can write a code interface node instead. Code interface nodes can accept arbitrary data structures, but take some time to master because you have to understand data formats and storage in G. LabWindows/CVI Function Panel Converter Note: This feature is not available on the Macintosh. The LabWindows/CVI Function Panel converter automates the process of converting instrument drivers written in LabWindows/CVI so they © National Instruments Corporation 23-7 G Programming Reference Manual Chapter 23 Calling Code from Other Languages can be used in G. A LabWindows/CVI instrument driver consists of a C source and header files, a Dynamic Link Library (DLL) (Windows) or shared library (UNIX) containing the compiled code, and a LabWindows/CVI-specific file called a Function Panel (FP) file. Function Panel files are used in LabWindows/CVI so that users can specify arguments and return values when editing a C function call statement by filling in values in a pop-up window. The LabWindows/CVI Function Panel converter converts each function into a VI, using the information in the CVI FP file to determine the type, data representation, and placement of controls on the VI front panels. Each generated VI uses a Call Library Function node on its block diagram to call the appropriate C routine in the appropriate driver library. Although many instrument drivers are written completely on the diagram without calling library functions, the LabWindows/CVI Function Panel converter has advantages in some cases. For instruments where a G driver is not available, this tool makes it relatively easy to take advantage of a CVI driver if one exists. Given the option, however, a true G driver consisting of G diagrams is preferable because it is easy for customers to view and modify, and because it multitasks well within the G environment. Library calls are synchronous, so any VIs running in parallel pause for the duration of the call. Conversion Process If you select File»Convert CVI FP File…, a dialog box appears asking you to select a LabWindows/CVI Function Panel file. When you have selected an FP file, you see the following dialog box, in which you can indicate where to save new VIs and what driver functions to convert. G Programming Reference Manual 23-8 © National Instruments Corporation Chapter 23 Calling Code from Other Languages You specify the destination directory or VI library in the topmost text box. The suggested destination is shown, and you can change the path to place the new VIs that G creates anywhere you want. You can use the Browse… button to specify the destination using a file dialog box in the usual way. The Instrument Prefix text box shows the instrument prefix as shown by the function panel file. This prefix is prepended by CVI to all C function names in the Function Panel tree. The converter likewise prepends this prefix to the names of VIs it generates. The suggested prefix is shown, based on the DLL, but you can change or delete this string as you want. The remainder of the dialog box is devoted to the selection of function panels items to convert. A list box lists all items in the function panel tree, indented hierarchically by class, as in LabWindows/CVI. The class names are listed as well, but are grayed-out and not selectable. Initially, all nodes found in the Function Panel file are selected. Selected items are indicated by a checkmark symbol (✔), non-selected items by no symbol, and class names by a rectangle. © National Instruments Corporation 23-9 G Programming Reference Manual Chapter 23 Calling Code from Other Languages Double-clicking on an item toggles selection. The Select All and Deselect All buttons can be used for convenience. You also can click on an item once to move the highlighted bar to that item and click on Rename. This pops up the following simple dialog box for renaming an FP item. The Options… button brings up the following dialog box. The conversion options are as follows: Leave VI Front Panels Open—Causes the converter to leave VIs in memory with their front panels open when conversion is complete rather than disposing of each VI after it is saved to disk. (Off by default.) Create Library Call on Block Diagram—Causes the converter to place a Call Library Function node on the block diagram of each VI G Programming Reference Manual 23-10 © National Instruments Corporation Chapter 23 Calling Code from Other Languages and wire up all front panel terminals appropriately. If this option is not on, only the front panel is created; nothing is dropped on the block diagram. (On by default.) Assume 16-bit DLL—(Windows 3.1) Causes the converter to treat the Integer type from the LabWindows/CVI function panel as an INT16 rather than an INT32 when creating the type descriptor describing the arguments to the Call Library Function. This is necessary when calling DLLs created with some third-party compilers such as Borland C. (On by default.) Add Instrument Error I/O Checking—Causes the converter to drop error-handling code on the block diagram of each VI created. If you select this option, Error In and Out clusters are dropped on the front panel, positioned below all other controls and indicators derived from the LabWindows/CVI function panel. The front panel terminals and Call Library Function on the block diagram are enclosed in a case structure, which is executed only if the status field of Error In is FALSE, indicating no error. (On by default.) Use SubVI for CVI Error Conversion—Drops a subVI on the block diagram of each VI to map LabWindows/CVI-style error codes to G-style error clusters suitable for feeding to the General Error Handler.The integer return value from the Call Library Function node, the Error In cluster, and the name of the current VI is passed to the subVI. If an error is detected by the subVI, it is passed to Error Out, with status set to TRUE. If a warning is detected, it is passed to Error Out, but with status set to FALSE. Otherwise, Error In is passed to Error Out. If this option is not set, no subVI is dropped, and the block diagram is constructed so that an error is indicated in Error Out only if the Call Library Function return value is less than zero. (On by default.) Include CVI Class Names in VI Names—Automatically creates a name for each VI based on either the function panel name or the C function name for each instrument driver option. If this option is checked, the Class name associated with the LabWindows/CVI function panel is prepended to the automatically generated name for the function. Use C Function Names for VIs—Normally, the converter constructs the names of the VIs it generates directly from the function panel item names by merely prepending the instrument prefix and appending .vi. Unfortunately, this approach does not always produce unique names for each item, because LabWindows/CVI does not require that the “leaves” of the function © National Instruments Corporation 23-11 G Programming Reference Manual Chapter 23 Calling Code from Other Languages panel tree have unique names. Setting this option causes the converter to construct VI names from the actual C function names that the FP items correspond to, thereby guaranteeing unique results. To avoid problems caused by duplicate names, the converter checks to see if all items are unique when it builds the list of function panel items to be displayed. Non-unique items are flagged with a null symbol and are not selectable by double-clicking on them. To prevent problems caused by duplicate names, the converter brings up a one-button alert when it first opens its dialog box if it detects such name conflicts, and automatically turns on the Use C Function Names option. If you prefer to use the function panel names instead, you can turn off this option manually, and then individually rename the items that have name conflicts. Renamed items retain their user-supplied names even when the Use C Function Names option is changed. Capitalize and Remove Underscores in Names—Because names built from C function names tend to be less “pretty” than those derived from the function panel item names, this option attempts to make them “prettier” by capitalizing initial letters and replacing underscores with spaces. Because it cannot expand abbreviations, the results still might not be as pleasing as the FP names, but this is inevitable if you have duplicate FP item names you do not want to rename individually. Convert All Control Names to Lowercase—Converts control names to lowercase to conform to VXI Plug&Play standards. Assign Instrument Driver Icon Based on Name—Assigns icons to VIs based on the name of the generated VIs. The converter searches for keywords such as initialize, close, self-test, reset, configure, or measure in the name of the function and uses the corresponding icon. If no keywords are found, a default icon is used. Additionally, the instrument prefix is stamped into the icon at the top left, up to a maximum of seven characters. Default Size for Array Parameters—When an instrument driver DLL outputs an array, the memory into which the DLL writes the array must be preallocated and passed into the DLL. With this option, you can select the default size, in elements, to allocate for arrays. When a Call Library Node function has an array as an argument, the converter drops an Initialize Array function to create an array to pass into the node. The initial size of such arrays is specified by the Default Size for Array Parameters option. A G Programming Reference Manual 23-12 © National Instruments Corporation Chapter 23 Calling Code from Other Languages warning is generated in the .out file so that you can easily find VIs containing this construct and handle special cases individually. Selecting OK at the main LabWindows/CVI Function Panel Converter dialog box brings up a file dialog box so you can select the library corresponding to the FP file being converted (if the Create Library Call option is set). Canceling this dialog box simply leaves the library path unspecified in the Call Library Function node; it does not abort conversion. After you click OK, the converter brings up a working status dialog box to display the name of each new VI as it is created. A log file named prefix.out is created, listing all the VIs that were created, and any warnings or errors that occurred during conversion. If any warnings or errors do occur, you are notified to look at this file when conversion is complete. © National Instruments Corporation 23-13 G Programming Reference Manual Chapter Understanding the G Execution System 24 This chapter explains VI multitasking and execution. With the execution system, you can run multiple VIs simultaneously. In addition, within a given VI you might have several parallel branches, each of which can also execute simultaneously. In normal use, you do not need to be concerned with the details of how multitasking takes place. You can think of portions of a diagram as executing in parallel, and multiple VIs as running in parallel. With the execution system multitasking capability, you can edit a VI while others run, or you can single-step through a VI while others run at full speed. Also, if you inadvertently build a VI with an infinite loop, it should not lock up the computer or prevent other VIs from executing. In some applications, such as process control applications, you might need a better understanding of how the multitasking system works. The following section covers this topic. Multitasking Most computers have only one processor, meaning only one task can execute at any given time. Multitasking is achieved by running one task for a short amount of time and then having other tasks run. As long as the amount of time that each task has is small enough, you have the appearance of having multiple tasks running simultaneously. There are two kinds of multitasking—preemptive and cooperative. With a preemptive multitasking system, each task is given a limited amount of time to execute. When the time is up for a given task, one task is forced to pause while another starts execution. Preemptive multitasking is not currently available on all operating systems and is not used currently by the execution system. Cooperative multitasking, which is more common in current, small computer operating systems, relies on each task being written to share time. Each task is responsible for deciding when it should relinquish © National Instruments Corporation 24-1 G Programming Reference Manual Chapter 24 Understanding the G Execution System time to other tasks. If any task fails to share time, that task ends up locking out other tasks until it is ready to share time. The execution system is a cooperative multitasking system, which means it can execute multiple tasks in parallel. Because it is cooperative, you have no assurances that a given task executes within a specific amount of time. Some nodes in G are synchronous, meaning they do not multitask (a complete list of these nodes is given in the Synchronous Nodes section later in this chapter). If any synchronous nodes execute a lengthy process, other tasks temporarily might be locked out of execution. In practice, this rarely causes problems because the number of synchronous nodes is relatively limited, and the actions they execute generally take only a small amount of time. Cooperation When the compiler compiles a diagram into machine code, the code is generated so that it periodically checks to see whether there are any other pending tasks and if it is time to have other tasks execute. The execution system maintains a queue of active tasks. Assuming all tasks have the same priority, the first task executes for a certain amount of time. Then, that task is put at the end of the queue, and the next task executes for a time. When a task completes execution, the execution system removes it from the queue. The execution system executes the first element of the queue by calling the generated code of the VI. At some point, the generated code of that VI checks with the execution system to see if it should assign another task to execute. If not, the code for the VI continues to execute. Task Switching The currently executing task surrenders execution to other tasks in a number of situations described in the following list. 1. The code of a VI occasionally checks to see how long it has been executing. If the VI has not had a complete amount of time (roughly 110 msecs), then it continues to execute. Otherwise, it surrenders to the scheduler. 2. If the VI encounters a Wait, Wait for Occurrence Dialog Box Function, or Device I/O function (which are used by the GPIB and Serial Port VIs), the VI surrenders to the scheduler. G Programming Reference Manual 24-2 © National Instruments Corporation Chapter 24 Understanding the G Execution System 3. When a VI surrenders to the scheduler, the scheduler selects the highest priority VI on its queue to run next. This can be the same VI that was running previously. The scheduler also can assign mouse and key events to the user interface code before rerunning a VI. 4. If there is nothing of equal or higher priority, the VI continues to execute. When a VI wait completes, or the I/O finishes, the VI is put back on the queue in order of its priority. Synchronous Nodes As mentioned previously, a few nodes are synchronous, meaning they do not multitask with other nodes. Code Interface Nodes (CINs) and all computation functions execute synchronously. Most analysis VIs contain CINs and therefore execute synchronously. For example, an FFT executes to completion without assigning other tasks to execute in parallel, regardless of how long the FFT executes. Almost all other nodes are asynchronous. Structures, I/O functions, timing functions, and subVIs that you build all execute asynchronously. Prioritizing Tasks of the Same Priority Level There are two methods for prioritizing parallel tasks. One is to change a VI's priority using the priority setting of VI Setup. The other is to make strategic use of Wait functions. In most cases, you probably should not change the priority of a VI from the default priority. Using priorities to control execution order might not produce the results you expect. If used incorrectly, using priorities to control execution order can result in completely pushing aside the lower priority tasks. Wait Functions for Prioritizing Tasks Instead of using the priority setting in VI Setup, you can use the Wait function to make less important tasks execute less frequently. For example, if you have several loops in parallel and you want some to execute more frequently, put the Wait functions in the lower priority tasks. This causes them to execute less frequently, relinquishing more time to other tasks. © National Instruments Corporation 24-3 G Programming Reference Manual Chapter 24 Understanding the G Execution System In many cases, doing this is sufficient. You probably do not need to change the priorities using the VI Setup options. VI Setup Priority Setting If you decide to use priorities, and you do not want high priority VIs to push aside lower priority VIs, make sure to put Wait functions in lower priority sections of the high priority VIs. You change the priority of a VI using the Priority option in the VI Setup dialog box. There are five levels of priority: 0, 1, 2, 3, and subroutine, with 0 the lowest and subroutine the highest priority. Higher priority VIs execute before lower priority VIs. That is, if the execution queue contains two VIs of each priority level, the level 3 VIs share execution time exclusively until both of them finish. Then, the level 2 VIs share execution time exclusively until both of them finish, and so on. The exception to this occurs if the higher priority VIs call a Wait function or a Device I/O function (which are used by GPIB and Serial Port VIs). In this case, the higher priority VIs are taken off the queue until the Wait or I/O is complete, assigning other tasks (possibly with lower priority) to execute. Notice that as soon as the wait or I/O is complete, the execution system reinserts the pending task on the queue in front of lower priority tasks. Subroutine Priority Level The previous discussion explains how multitasking works with priority levels 0 through 3. If you set a VI to subroutine priority (the highest level), the behavior is slightly different. When a VI runs at subroutine priority, no other VI can run until the subroutine priority VI finishes executing, even if the other VI is also marked as a subroutine. With subroutine VIs, the execution system does not multitask execution of VIs. In addition, subroutine VI execution is streamlined so that front panel controls and indicators are not updated when the subroutine is called. Watching a subroutine VI front panel reveals nothing about its execution. A subroutine VI might call other subroutine VIs, but it might not call a VI with any other priority. Use subroutine VIs in situations in which you want to put a simple computation having no interactive elements into a reusable subVI, where the call overhead for the subVI is minimized. G Programming Reference Manual 24-4 © National Instruments Corporation Chapter 24 Understanding the G Execution System Reentrant Execution Under normal circumstances, the execution system cannot execute multiple calls to the same subVI simultaneously. If you try to call a non-reentrant subVI from more than one place, one call executes and the other call waits for the first to finish before executing. If you make a VI reentrant (using VI Setup), each instance of the call maintains its own state of information. Then, the execution system runs the same subVI simultaneously from multiple places. Reentrant execution is useful in the following situations. • When a VI waits for a specified length of time or until a timeout occurs. • When a VI contains data that is not to be shared between multiple instances of the same VI, as opposed to a global variable, which is a VI whose data you want to share. You begin reentrant execution through the Execution Options of the VI Setup dialog box. If you select reentrancy, several other options become unavailable, including the following. • Opening a front panel when loaded • Opening a front panel when called • Execution highlighting • Single-stepping These options are disabled because the subVI must switch between different copies of the data and different execution states with each call, making it impossible to display its current state continuously. Examples in which You Should Use Reentrancy Using a VI That Waits The following reentrant example discusses a VI, called Snooze, which takes hours and minutes as input and waits until that time arrives. If you want to use this simultaneously in more than one location, the VI needs to be reentrant. © National Instruments Corporation 24-5 G Programming Reference Manual Chapter 24 Understanding the G Execution System The Get Time In Seconds function reads the current time in seconds and the Seconds to Date/Time and converts this value to a cluster of time values (year, month, day, hour, minute, second, and day of week). A Bundle function replaces the current hour and minute with values representing a later time on the same day in the front panel Time To Wake Me cluster control. The adjusted record then is converted back to seconds, and the difference between the current time in seconds and the future time is multiplied by 1,000 to obtain milliseconds. The result passes to a Wait function. Lunch and Break are two VIs that use Snooze as a subVI. The Lunch VI, whose front panel and block diagram are shown in the following illustration, waits until noon and pops up a front panel reminding the operator to go to lunch. The Break VI pops up a panel reminding the operator to go on break at 10:00 a.m. The Break VI is identical to the Lunch VI, except that the pop-up subVIs are different. G Programming Reference Manual 24-6 © National Instruments Corporation Chapter 24 Understanding the G Execution System For Lunch and Break to execute in parallel, Snooze must be reentrant. Otherwise, if you started Lunch first, Break would have to wait until Snooze woke up at noon, which would be two hours late. Using a Storage VI Not Meant to Share Its Data Another situation that requires reentrancy is when you make multiple calls to a subVI that stores data. Suppose you create a subVI, ExpAvg, which calculates a running exponential average of four data points. To remember the past values, ExpAvg uses an uninitialized shift register with three left terminals. If you are a LabVIEW user, see Chapter 3, Loops and Charts, of your LabVIEW Tutorial Manual for more information on uninitialized shift registers. If you are a BridgeVIEW user, refer to Chapter 10, Loops and Charts of the BridgeVIEW User Manual. Next, suppose you have a VI that uses ExpAvg to calculate the running average of two data acquisition channels. For example, you are monitoring the voltages at two points in a process and want to view the exponential running average on a strip chart. The diagram contains two ExpAvg nodes. The calls alternate, one for Channel 0, then one for Channel 1. Assume Channel 0 executes first. If ExpAvg is not reentrant, the call for Channel 1 uses the average computed by the call for © National Instruments Corporation 24-7 G Programming Reference Manual Chapter 24 Understanding the G Execution System Channel 0, and the call for Channel 0 uses the average computed by the call for Channel 1. By making ExpAvg reentrant, each call can execute independently without danger of sharing the data. G Programming Reference Manual 24-8 © National Instruments Corporation Chapter Managing Your Applications 25 This chapter contains information about managing your files in G. File Arrangement Using VI Libraries You can group multiple VI files by saving them as VI libraries (by convention, the names of these files end with the extension .llb). Or you can save VIs as individual files and group them within directories. For a comparison of the two methods, see the Saving VIs section of Chapter 2, Building VIs. If you use VI libraries, you might want to divide your application into multiple VI libraries. Put the high level VIs in one VI library, and set up other VI libraries to contain VIs separated by function. It is easier to manage your VIs if you organize your files in this manner. Another reason to break your VIs into multiple VI libraries is because saving files takes longer as the size of your VI library increases. When you save a VI into a VI library, the library is copied to the temporary directory, the VI is compressed and saved into the VI library, and the VI library is copied back to the original directory. This copying process helps prevent accidental corruption of the original file, but it also takes longer to save VIs. A good rule of thumb is to avoid creating VI libraries that are larger than 1 MB. Notice there is no real limit on the size of a library, and the time to load VIs from VI libraries does not noticeably change regardless of the size of the VI library. Another way to speed up the time it takes to save VIs, whether or not they are in VI libraries, is to make sure that your temporary directory is on the same drive (partition, in UNIX) as your VIs. You can copy files faster if the source and destination are on the same drive (or partition). If you use VI libraries, you can emphasize the top-level VIs by using File»Edit VI Library… from the menu option to mark certain VIs as top-level. G lists these files at the beginning of the file list in the file © National Instruments Corporation 25-1 G Programming Reference Manual Chapter 25 Managing Your Applications dialog box. There is no similar option for directories, but you can emphasize your top-level VIs by placing subVIs into subdirectories. Backing Up Your Files Accidents happen. Hard drives crash, and file systems can become corrupt. It is best to make a backup copy of your VIs at least once a week, and preferably once a day. You should copy them to another drive or to tape. As an example of the problems that can occur, one user accidentally corrupted the VI library that contained several weeks of work. When prompted for a destination for a data file, this user had selected his VI library, at which point he wrote data over his own VI library. Fortunately he was able to recover most of the contents of his VI library, but only by good luck was it possible. Distributing VIs When you are ready to distribute your VIs, consider whether you want to distribute the VIs with or without the block diagrams. Using the Save with Options dialog box, you can remove diagrams from your VIs. If you save your VIs without a diagram, the VI cannot be modified by other users. If you save your VIs without diagrams, be careful not to overwrite your original versions. Note: VIs without diagrams cannot be converted to future versions of the application or to other platforms. During conversion, you need to recompile your VIs. Without a block diagram, a VI cannot be recompiled. You also should consider what environment users need to use to run your VIs. Do you want end users to have a development system or a run-time application? A run-time application is appropriate when you do not expect your users to make modifications to your VIs. A run-time application contains simplified menus, and users cannot edit VIs or view block diagrams. G Programming Reference Manual 25-2 © National Instruments Corporation Chapter 25 Managing Your Applications Run-time applications are built using the LabVIEW Application Builder libraries. When you build a run-time application with these libraries, you must answer these three questions. • Do I want to embed a VI library in the application? • Do I want the application to have an Open menu item? • Do I want the application to have a Quit menu item? If you choose to embed a VI library in the application, the library is combined with a run-time engine into a single file. When this file is launched, it automatically opens all top-level VIs in the library. If you do not embed a VI library, the application can be used to open any VI when it is launched, assuming the VI was saved with a development system for that platform. If you enable the Open menu item, you can use the application to open and run any VI in the file system, regardless of whether the application has an embedded VI library. By embedding a VI library, you can create a completely stand-alone application, one that prevents the user, or customer, from accessing the source VIs even if the user has the development system. If you plan to ship multiple VI suites to the same customer, the single run-time application with the Open menu item enabled proves more efficient than separate embedded applications. This is true because each embedded application contains a copy of the run-time code, which is roughly 2 to 3 MB. To create a run-time application, you need the Application Builder libraries, which are sold separately. If you are a LabVIEW user, see the LabVIEW Release Notes included with the Application Builder software for details on how to build an application. Note: Because the BridgeVIEW execution system consists of several separate pieces, the Application Builder does not work for building BridgeVIEW run-time applications. Save with Options Dialog Box The Save with Options dialog box makes it simple for you to save an entire hierarchy of VIs for distribution. You can use this dialog box to selectively save an entire hierarchy, without the VIs in vi.lib, and save all external subroutines that are referenced by VIs in your © National Instruments Corporation 25-3 G Programming Reference Manual Chapter 25 Managing Your Applications hierarchy. The Save with Options dialog box is shown in the following illustration. By selecting from the options on the left of the Save with Options dialog box, you can select from a set of predefined save options. As you select options, the area at the right shows the behavior of your current selection. You can customize the behavior by selecting specific options from the right section of the dialog box. • Changed VIs—Saves any changes to the front-most VI and its subVIs. This option is useful as a quick way to save changes. • Development Distribution—Saves all non-vi.lib VIs, controls, and external subroutines to a single location (either a directory or library). This option is an easy way to save a hierarchy that is to be transported to another G development system, because the other development system has its own vi.lib. • Application Distribution—Saves all VIs, controls, and external subroutines, including the ones in vi.lib to a single location and removes the diagrams from all of the VIs. If you want to create a run-time application that has an embedded library, you can use this option to create the library to embed. To actually create a run-time application, you need the Application Builder libraries, which are sold separately. • Custom Save—Selects the specific options you want from the Selected Options area of the dialog box, if none of the predefined options fit your needs. G Programming Reference Manual 25-4 © National Instruments Corporation Chapter 25 Managing Your Applications Designing Applications with Multiple Developers If you have multiple developers working on the same project, you need to spend some design time defining responsibilities to ensure that the project works well. Start by considering the top-level design of your application and create an outline. You should create stub VIs for the major components of your application. A stub VI is a prototype of a subVI. It has inputs and outputs, but is incomplete. It serves as a place holder for future VI development at which time you add functionality. Creating stub VIs for LabVIEW users is described in Chapter 10, Program Design, in your LabVIEW Tutorial Manual. BridgeVIEW users should refer to Chapter 15, Program Design of your BridgeVIEW User Manual. Once you have verified that the stub VIs provide the functionality you expect, you can determine which components individual developers should work on. To simplify matters, you might place the major stub VIs in separate directories or VI libraries which can then be managed by different developers. Keeping Master Copies You should probably keep the master copies of your project VIs on a single computer. You can institute a check-in/check-out policy to ensure control over what changes in your VIs. With this policy, a developer could check out a copy of the VIs, like checking a book out of the library. During that time, nobody should touch the files that the developer has checked out. The developer would then check in the finished VIs after making any changes. There are several applications that can help control access to files and maintain different revisions of files. There is currently no way of performing a comparison between VIs, other than a visual comparison, so you need to be meticulous with your check-in/check-out policy to avoid multiple developers working on the same VIs at the same time. VI History Window In addition to its front panel and block diagram, a VI has a History window that displays the development history of the VI, including revision numbers. Each user who changes a VI can record any changes made in the history. This feature should help users keep track of changes to a VI as they are made. However, the VI history does not © National Instruments Corporation 25-5 G Programming Reference Manual Chapter 25 Managing Your Applications provide a method for comparing two VIs to detect differences. G saves the history as part of the VI. It consists of a series of comments entered by those users who have made changes to the VI. Note: Unless you have selected the Record comments generated by LabVIEW option in either the VI Setup»Documentation or the Edit»Preferences» History dialog box, the comments in a VI history are not automatically created. Anyone who makes changes to the VI must type in the information and keep the history up to date. The History window is available when you are editing the VI by selecting Windows»Show History or pressing the key equivalent, <Ctrl-y> (Windows); <command-y> (Macintosh); <meta-y> (Sun); or <Alt-y> (HP-UX). The following illustration shows an example History window. As you edit the VI, you can type a description of important changes into the Comment box near the top of the window. When you are finished making changes, you add the comment to the history by clicking on the Add button. If there is a comment in the Comment box when you save the VI, it is added to the history automatically. Once you add a comment, it is a permanent part of the history. You cannot rewrite the history, so be sure to check your comments before adding them. G Programming Reference Manual 25-6 © National Instruments Corporation Chapter 25 Managing Your Applications The box at the bottom of the window displays the history of the VI. The dialog box shows a header for each comment in the history that includes the revision number of the VI, the date and time, and the name of the person who made the change. You can see that three comments have been added to this history, and each is displayed with a header. Because the preceding illustration is only an example, the comments are short; you can make them as long as you want when editing your own VIs. The History window is fairly large with the history showing, but you can hide the history by clicking on the History arrow (the small black triangle to the left of the word). This makes the window small enough that it stays out of your way while you are editing the VI. When you want to see the history again, click on the same arrow and the history reappears. An example is shown in the following illustration. You can also change the size of the history and comment boxes by resizing the window. Revision Numbers The revision number is also a part of the history of the VI and is an easy way to see if the VI has changed (and how it changed, if you commented on your changes). The revision number starts at zero and is incremented every time you save the VI. The current revision number (the one on disk) is displayed in the Get Info… dialog box. It is also displayed in the titlebar of the VI if the option to do so is checked in the dialog box of Edit»Preferences»History. © National Instruments Corporation 25-7 G Programming Reference Manual Chapter 25 Managing Your Applications The number displayed in the History window or VI window is the next revision number; that is, the number that is saved on disk if you save the VI. It is the current revision number plus one. When you add a comment to the history, the next revision number is included in the header of the comment. For example, if you were to click on the Add button in the example, your comment would be added to the history with the revision number 4. Then if you save the VI, the current revision number would be 4, and the comment that applies to the changes you just made would be labeled with the same number. Note: The revision number is not incremented when you save the VI if the only changes you made were changes to the VI History. In many cases, there are gaps in revision numbers between comments because you saved the VI without entering a comment. This is not a problem. In fact, the revision number is useful because it is independent. Suppose you receive a copy of a VI from another user. Later, you want to know if the other user updated the VI since you received your copy. You can easily tell by looking at the revision numbers, even if the other user made a change without adding comments. If the revision number only changed when you added a comment, it would be a comment number, not a revision number. The revision number is even more effective when combined with the history. If users have been adding comments to the history, you can tell what changes were made since you last received a copy. Resetting History Information Under the comment box there is a button labeled Reset. Pressing Reset erases the history and optionally resets the revision number to zero. This is useful when you copy a VI and want to start the new VI with a clean slate (no history). Because the history is strictly a developer tool, the history is removed automatically when you remove the block diagram of a VI. The History window is not available in the run-time version, but the revision number is available in the VI Information dialog box even for VIs that have had their block diagrams removed. You can remove the revision number using the Reset button to reset the history of your VI before you remove the block diagram. G Programming Reference Manual 25-8 © National Instruments Corporation Chapter 25 Managing Your Applications Printing History Information When you print a VI, you can include the history and revision number by selecting Complete Documentation from the Print Documentation dialog box. If you want to change the format of the printout to include only the history information, you can use the Custom Print Settings button to indicate exactly what you want to print. Additionally, you can export the history information to a file by selecting Save Text Info from the Print Documentation dialog box. Setting Related VI Setup & Preference Dialog Box Options The VI Setup and the Preferences dialog boxes both have options you can use to indicate how VI history should behave. You can use the VI Setup options to indicate for a given VI if and when history information is automatically recorded. See the Documentation Options section of Chapter 6, Setting up VIs and SubVIs, for information on these settings. You can use the Preferences dialog box options to indicate what the default history settings are for new VIs. You can also use this dialog box to indicate a user name entered in history information. See the History Preferences section of Chapter 7, Customizing Your G Environment, for information on these settings. © National Instruments Corporation 25-9 G Programming Reference Manual Chapter 26 Performance Issues This chapter is divided into three sections. The first section discusses the Performance Profiler, a feature that shows you data about execution time of your VIs. The second section discusses factors that affect run-time speed. The third section discusses factors that affect memory usage. Performance Profiling The VI Performance Profiler is a powerful tool for determining where your application is spending its time, as well as how it is using memory. This information is invaluable in finding the hot spots of your application so that you can make the best use of the VIs that take up the most time. It has an interactive tabular display of time and memory usage for each VI in your system. Each row of the table contains information for a specific VI. The time spent by each VI is broken down into several categories as well as summarized in a few statistics. The Profile window calculates the minimum, maximum, and average time spent per run of a VI. You can use the interactive tabular display to view all or parts of this information, sort it by different categories, and look at the performance data of subVIs when called from a specific VI. © National Instruments Corporation 26-1 G Programming Reference Manual Chapter 26 Performance Issues Select Project»Show Profile Window to access the Profile window. The following illustration shows an example of the window already in use. There are several things to notice about the window. First, the collection of memory usage information is optional. This is because the collection process can add a significant amount of overhead to the running time of your VIs. You must choose whether to collect this data before starting the Profiler by checking the Profile Memory Usage checkbox appropriately. This checkbox cannot be changed once a profiling session is in progress. The following buttons are available on the Profile window. • Start—Enables the collection of performance data. It is best to start a profiling session while your application is not running. This way, you can ensure that you measure only complete runs of VIs, and not partial runs. • Snapshot—Views the data that is currently available. This gathers data from all the VIs in memory and displays it in the tabular display. • Save—Saves the currently displayed data to disk as a tab-delimited text spreadsheet file. This data can then be viewed in a spreadsheet program or by VIs. • Reset—Erases all the current Profiler information from the table so that you can start a new profiling session. G Programming Reference Manual 26-2 © National Instruments Corporation Chapter 26 Performance Issues Viewing the Results You can choose to display only parts of the information in the table. Some basic data is always visible, but you can choose to display the statistics, details, and (if enabled) memory usage by checking or unchecking the appropriate checkboxes in the Profile window. Performance information also is displayed for Global VIs. However, this information sometimes requires a slightly different interpretation, as described in the category-specific sections below. Performance data for subVIs when called from a specific VI can be viewed by double-clicking on the name of a VI in the tabular display. When you do this, new rows appear directly below the name of the VI containing performance data for each of its subVIs. When you double-click on the name of a Global VI, new rows appear for each of the individual controls on its front panel. You can sort the rows of data in the tabular display by clicking in the desired column header. The current sort column is indicated by a bold header title. Timings of VIs do not necessarily correspond to the amount of elapsed time that it takes for a VI to complete. This is because multi-threaded execution system can interleave the execution of two or more VIs. Also, there is a certain amount of overhead taken up that is not attributed to any VI, such as the amount of time taken by a user to respond to a dialog box, or time spent in a Wait function on a block diagram, or time spent to check for mouse clicks. The basic information that is always visible in the first three columns of the performance data consists of the following items: • VI Time—Total time spent actually executing the code of this VI and displaying its data, as well as time spent by the user interacting with its front panel controls (if any). This summary is broken down into sub-categories in the Timing Details described below. For Global VIs, this time is the total amount of time spent copying data to or from all of its controls. To see timing information on individual controls in a Global VI, you can double-click on the name of the Global VI. • SubVIs’ Time—Total time spent by all subVIs of this VI. This is the sum of the VI time (described above) for all callees of this VI, as well as their callees, etc. © National Instruments Corporation 26-3 G Programming Reference Manual Chapter 26 Performance Issues • Total Time—Sum of the above two categories, calculating the total amount of time. Timing Information When the Timing Statistics checkbox is checked, the following columns become visible in the tabular display: • # Runs—Number of times that this VI completed a run. For Global VIs, this time is the total number of times all of its controls were accessed. • Average—Average amount of time spent by this VI per run. This is simply the VI time divided by the number of runs. • Shortest—Minimum amount of time the VI spent in a run. • Longest—Maximum amount of time the VI spent in a run. When the Timing Details checkbox is checked, you can view a breakdown of several timing categories that sum up to the time spent by the VI. For VIs that have a lot of user interface, these categories can help you see what operations are taking the most time. • Diagram—Time spent only executing the code that was generated for the diagram of this VI. • Display—Time spent updating front panel controls of this VI with new values from the diagram. • Draw—Time spent drawing the front panel of this VI. Draw time includes the following: • G Programming Reference Manual – The time it takes simply to draw a front panel when its window just has been opened, or when it is being revealed after being obscured by another window. – The time that is conceptually Display time, because it is caused by new values coming in from the diagram but occurs because the control is transparent and/or overlapped. These controls must invalidate their area of the screen when they receive new data from the diagram so everything in that area can redraw in the correct order. Other controls can draw immediately on the front panel when they receive new data from the diagram. More overhead is involved in invalidating and redrawing— most (but not all) of which shows up in the Draw timings. Tracking—Time spent tracking the mouse while the user was interacting with the front panel of this VI. This can be significant for some kinds of operations, such as zooming in or out of a graph, 26-4 © National Instruments Corporation Chapter 26 Performance Issues selecting items from a pop-up menu, or selecting and typing text in a control. • Locals—Time spent copying data to or from local variables on the diagram. Experience with users has shown that this time can sometimes be significant, especially when it involves large, complex data. Memory Information When the Memory Usage checkbox is checked (remember that this is only available if the Profile Memory Usage checkbox was selected before you began the profiling session), you can view information about how your VIs are using memory. These values are a measure of the memory used by the data space for the VI and do not include the support data structures necessary for all VIs. The data space for the VI contains not just the data explicitly being used by front panel controls, but also temporary buffers that are implicitly created by the compiler. The memory sizes are measured at the conclusion of the run of a VI and might not exactly reflect its total usage. For instance, if a VI creates large arrays during its run but reduces their size before the VI finishes, the sizes displayed do not reflect the intermediate larger sizes. Two sets of data are displayed in this section—data related to the number of bytes used, and data related to the number of blocks used. The execution system uses independent blocks of memory for arrays, strings, paths, and pictures (from the Picture Control Kit). Large numbers of blocks in the memory heap of your application can cause an overall degradation of performance (not just execution). The categories of Memory Usage are the following: • Average Bytes—Average number of bytes used by the data space of this VI per run. • Min Bytes—Minimum number of bytes used by the data space of this VI for an individual run. • Max Bytes—Maximum number of bytes used by the data space of this VI for an individual run. • Average Blocks—Average number of blocks used by the data space of this VI per run. • Min Blocks—Minimum number of blocks used by the data space of this VI for an individual run. © National Instruments Corporation 26-5 G Programming Reference Manual Chapter 26 Performance Issues • Max Blocks—Maximum number of blocks used by the data space of this VI for an individual run. Speeding Up Your VIs The compiler compiles your VIs and produces code that generally executes very quickly. When working on time critical applications, you might want to do all you can to obtain the best performance out of your VIs. This section discusses factors that affect execution speed and suggests some programming techniques to help you obtain the best performance possible. You should examine the following items to determine the causes of slow performance. • Input/Output (files, GPIB, data acquisition, networking) • Screen Display (large controls, overlapping controls, too many displays) • Memory Management (inefficient usage of arrays and strings, inefficient data structures) Other factors, such as execution overhead and subVI call overhead can have an effect, but these are usually minimal and not the most critical source of slow execution. Input/Output Input/Output calls generally incur a lot of overhead. They often take an order of magnitude more time than the time it takes to perform a computational operation. For example, a simple serial port read operation might have an associated overhead of several milliseconds. This amount of overhead is true for any application that uses serial ports. The reason for this overhead is that an I/O call involves transferring information through several layers of an operating system. The best method for addressing too much overhead is to minimize the number of I/O calls you make. Your performance improves if you can structure your application so that you transfer a lot of data with each call, instead of making multiple I/O calls using smaller amounts of data. For example, if you are creating a data acquisition (NI-DAQ) VI, you have a couple of options for reading data. You can use a single-point data transfer function such as the AI Sample Channel VI or you can use a multi-point data transfer function such as the AI Acquire Waveform G Programming Reference Manual 26-6 © National Instruments Corporation Chapter 26 Performance Issues VI. If you need to acquire 100 points, you could use the AI Sample Channel VI in a loop with a Wait function to establish the timing. Or you can use the AI Acquire Waveform VI with an input indicating that you want 100 points. You can produce much higher and more accurate data transfer rates by using the AI Acquire Waveform VI, because it uses hardware timers to manage the data transfer. In addition, overhead for the AI Acquire Waveform VI is roughly the same as the overhead for a single call to the AI Sample Channel VI, even though it is transferring much more data. Screen Display Updating controls on a front panel can frequently be one of the most time expensive operations in an application. This is especially true if you use some of the more complicated displays, such as graphs and charts. This overhead is minimized to a certain extent by the fact that most of the controls are intelligent; they do not redraw when they receive new data if the new data is the same as the old data. Graphs and charts are exceptions to this rule. If redraw rate becomes a problem, the best solutions are to reduce the number of controls you use, and keep the displays as simple as possible. In the case of graphs and charts, you can turn off autoscaling, scale markers, and grids to speed up displays. If you have controls that are overlapped with other objects, their display rate is cut down significantly. The reason for this is that if a control is partially obscured, more work has to be done to redraw that area of the screen. Unless you have the Smooth Updates preference on, you will probably see more flicker when controls are overlapped. As with other kinds of I/O, there is a certain amount of fixed overhead in the display of a control. You can pass multiple points to an indicator at one time using some controls, such as charts. You can minimize the number of chart updates you need to make by passing more data to the chart each time. You can see much higher data display rates if you collect your chart data into arrays so that you can display multiple points at a time, instead of displaying each point as it comes in. When you design subVIs whose front panels are closed during execution, you do not need to worry about display overhead. If the front © National Instruments Corporation 26-7 G Programming Reference Manual Chapter 26 Performance Issues panel is closed, you do not have the drawing overhead for controls, so graphs are no more expensive than arrays. Other Issues Parallel Diagrams When you have multiple diagrams running in parallel, the execution system switches between them periodically. If some of these loops are less important than others, use the Wait function to ensure that the less important loops use less time. For example, consider the following diagram. There are two loops in parallel. One of the loops is acquiring data, and needs to execute as frequently as possible. The other loop is monitoring user input. The loops receive equal time because of the way this program is structured. The loop monitoring the user’s action has a chance to run several times a second. In practice, it is usually acceptable if the loop monitoring the button executes only once every half second, or even less often. By calling the Wait (ms) function in the user interface loop, you allot significantly more time to the other loop. G Programming Reference Manual 26-8 © National Instruments Corporation Chapter 26 Performance Issues SubVI Overhead When you call a subVI, there is a certain amount of overhead associated with the call. This overhead is fairly small (on the order of tens of microseconds), especially in comparison to I/O overhead and display overhead, which can range from milliseconds to tens of milliseconds. However, this overhead can add up in some cases. For example, if you call a subVI 10,000 times in a loop, this overhead might take up a significant amount of time. In this case, you might want to consider whether the loop can be embedded in the subVI. Another option that you might consider is turning certain subVIs into subroutines (using the VI Setup Priority option). When a VI is marked as a subroutine, the execution system minimizes the overhead to call a subVI. There are a few trade-offs, however. Subroutines cannot display front panel data (G does not copy data from or to the front panel controls of subroutines), they cannot contain timing or dialog box functions, and they do not multitask with other VIs. Subroutines are short, frequently executed tasks and are generally most appropriate when used with VIs that do not require user interaction. Unnecessary Computation in Loops Avoid putting calculations in loops if the calculation produces the same value for every iteration. Instead, move the calculation out of the loop and pass the result into the loop. © National Instruments Corporation 26-9 G Programming Reference Manual Chapter 26 Performance Issues For example, examine the following diagram. The result of the division is the same every time through the loop; therefore you can increase performance by moving the division out of the loop, as shown in the following illustration. Now, refer to the diagram in the illustration that follows. G Programming Reference Manual 26-10 © National Instruments Corporation Chapter 26 Performance Issues If you know that the value of the global variable is not going to be changed by another concurrent diagram or VI during this loop, this diagram wastes time by reading from the global variable and writing to the global every time through the loop. If you do not need the global variable to be read from or written to by another diagram during this loop, you might use the following diagram instead. Notice that you need the shift registers to pass the new value from the subVI to the next iteration of the loop. The following diagram is a common mistake that some beginning users make. Since there is no shift register, the results from the subVI never pass back to the subVI as its new input value. © National Instruments Corporation 26-11 G Programming Reference Manual Chapter 26 Performance Issues Memory Usage G handles many of the details which you normally have to worry about in a conventional programming language transparently. One of the main challenges of a conventional language is memory usage. In a conventional language, you, the programmer, have to take care of allocating memory before you use it, and deallocating it when you finish. You also have to be particularly careful not to accidentally write past the end of the memory you allocated in the first place. Failure to allocate memory or to allocate enough memory is one of the biggest mistakes that programmers make in conventional, text-based languages. Inadequate memory allocation is also a difficult problem to debug. The dataflow paradigm for G removes much of the difficulty of managing memory. In G, you do not allocate variables, nor assign values to and from them. Instead, you create a diagram with connections representing the transition of data. Functions that generate data take care of allocating the storage for that data. When data is no longer being used, the associated memory is deallocated. When you add new information to an array or a string, enough memory is allocated automatically to manage the new information. This automatic memory handling is one of the chief benefits of G. However, because it is automatic, you have less control over when it happens. If your program works with large sets of data, it is important to have some understanding of when memory allocation takes place. An understanding of the principles involved can result in programs with significantly smaller memory requirements. Also, an understanding of how to minimize memory usage can also help to increase VI execution speeds because memory allocation and copying data can take a considerable amount of time. Virtual Memory If you have a machine with a limited amount of memory, you might want to consider using virtual memory to increase the amount of memory available for applications. Virtual memory is a capability of your operating system by which it uses available disk space for RAM storage. If you allocate a large amount of virtual memory, applications perceive this as memory that is generally available for storage. G Programming Reference Manual 26-12 © National Instruments Corporation Chapter 26 Performance Issues For applications, it does not matter if your memory is real RAM or virtual memory. The operating system hides the fact that the memory is virtual. The main difference is speed. With virtual memory, you occasionally might notice more sluggish performance, when memory is swapped to and from the disk by the operating system. Virtual memory can help run larger applications, but it is probably not appropriate for applications that have critical time constraints. Macintosh Memory When you launch an application on the Macintosh, the system allocates a single block of memory for it, from which all memory is allocated. When you load VIs, components of those are loaded into that memory. Similarly, when you run a VI, all the memory that it manipulates is allocated out of that single block of memory. You configure the amount of memory that the system allocates at launch time using the File»Get Info command from the Finder. Keep in mind that if your application runs out of memory, it cannot increase the size of this memory pool. Therefore, you should set up this parameter to be as large as is practical. If you have a 16 MB machine, consider the applications that you want to run in parallel. If you do not plan to run any other applications, set the memory preference to be as large as possible. VI Component Memory Management A VI has four major components. • Front panel • Block diagram • Code (diagram compiled to machine code) • Data (control and indicator values, default data, diagram constant data, and so on.) When you load a VI, the front panel, the code (if it matches the platform), and the data for the VI are loaded into memory. If the VI needs to be recompiled because of a change in platform or a change in the interface to a subVI, then the diagram is loaded into memory as well. You also can load the code and data space of subVIs into memory. Under certain circumstances, you can load the front panel of some subVIs into memory as well. This can occur, for example, if the subVI © National Instruments Corporation 26-13 G Programming Reference Manual Chapter 26 Performance Issues uses Attribute Nodes, because Attribute Nodes manipulate state information for front panel controls. More information on subVIs and their panels is discussed later in this chapter. An important point in the organization of VI components is that you generally do not use too much memory when you convert a section of your VI into a subVI. If you create a single, huge VI with no subVIs, you end up with the front panel, code, and data for that top-level VI in memory. However, if you break the VI into subVIs, the code for the top-level VI is smaller, and the code and data of the subVIs reside in memory. In some cases, you actually might see lower run-time memory usage. This idea is discussed later in this chapter in the section, Monitoring Memory Usage. You also might find that massive VIs take longer to edit. You do not see this problem as much if you break your VI into subVIs, because the editor can handle smaller VIs more efficiently. This is in addition to the fact that a more hierarchical organization to your VIs is generally easier to maintain and read. Note: If the front panel or block diagram of a given VI is much larger than a screen, you might want to break it into subVIs to make it more accessible. Dataflow Programming and Data Buffers In dataflow programming, you do not generally use variables. Dataflow models usually describe nodes as consuming data inputs and producing data outputs. A literal implementation of this model would produce applications that can use very large amounts of memory and have sluggish performance. Every function would produce a copy of data for every destination to which an output is passed. The compiler improves on this implementation by attempting to determine when memory can be reused, and by looking at the destinations of an output to determine whether it is necessary to make copies for each individual terminal. For example, in a more traditional approach to the compiler, the following diagram would use two blocks of data memory, one for the input and one for the output. G Programming Reference Manual 26-14 © National Instruments Corporation Chapter 26 Performance Issues The input array and the output array contain the same number of elements, and the data type for both arrays is the same. Think of the incoming array as a buffer of data. Instead of creating a new buffer for the output, the compiler reuses the input buffer. This saves memory, and also results in faster execution, because no memory allocation needs to take place at run time. The compiler cannot reuse memory buffers in all cases, however, as shown in the following illustration. A single source of data is being passed to multiple destinations. The destinations want to modify the data to produce resulting arrays. In this case, the compiler creates new data buffers for two of the functions and copies the array data into the buffers. Thus, one of the functions is reused by the input array, and the others are not. This diagram uses about 12 KB (4 KB for the original array and 4 KB for each of the extra two data buffers). © National Instruments Corporation 26-15 G Programming Reference Manual Chapter 26 Performance Issues Now, examine the following diagram. As before, the input branches to three functions are the same. However, in this case none of them need to modify the data. If you pass data to multiple locations, all of which read the data without modifying it, G does not need to make a copy of the data. This diagram uses up about 4 KB of data. Finally, consider the following diagram. In this case, the input branches to two functions, one of which wants to modify the data. There is no dependency between the two functions. Therefore, you can predict that at least one copy needs to be made so the replace array element function safely modifies the data. In this case, the compiler schedules the execution of the functions in such a way that the function that wants to read the data executes first, and the function that wants to modify the data executes last. This way, the Replace Array Element function reuses the incoming array buffer without generating a duplicate array. If the ordering of the nodes is important, you should G Programming Reference Manual 26-16 © National Instruments Corporation Chapter 26 Performance Issues make the ordering explicit by using either a sequence or an output of one node for the input of another. In practice, the analysis of diagrams by the compiler is not perfect. In some cases, the compiler might not be able to determine the optimal method for reusing diagram memory. Monitoring Memory Usage There are a couple of methods for determining memory usage. If you select Help»About LabVIEW… (if you are a LabVIEW user) or Help»About BridgeVIEW… (if you are a BridgeVIEW user), you see statistics that summarize the total amount of memory used by your application. This memory includes memory for VIs as well as memory that the application uses. You can check this amount before and after execution of a set of VIs to obtain a rough idea of how much memory the VIs are using. You can obtain a view of the dynamic usage of memory by your VIs with the Performance Profiler. It keeps statistics on the minimum, maximum, and average number of byes and blocks used by each VI per run. See the Performance Profiling section, at the beginning of this chapter, for more details. As shown in the following illustration, you can use Windows»Show VI Info… to have a breakdown of the memory usage for a given VI. The left column of this information summarizes disk usage, and the right column summarizes how much RAM currently is being used for various components of the VI. Notice that these statistics do not include memory usage of subVIs. © National Instruments Corporation 26-17 G Programming Reference Manual Chapter 26 Performance Issues A fourth method for determining memory usage is to use a VI called the Memory Monitor VI (in memmon.llb inside of the general directory). This VI uses CINs to determine memory usage for all VIs in memory. Rules for Better Memory Usage The main point of the previous discussion is that the compiler attempts to reuse memory intelligently. The rules for when the compiler can reuse memory and when it cannot are fairly complex, and are discussed at the end of this chapter. In practice, the following rules can help you to create VIs that use memory efficiently. • Breaking a VI into subVIs generally does not hurt your memory usage. In fact, in many cases, memory usage improves, because the execution system can reclaim subVI data memory when the subVI is not executing. • Do not worry too much about copies of scalar values; it takes a lot of scalars to make a dent in memory usage. • Do not overuse global and local variables when working with arrays or strings; reading a global or local variable causes a copy of the data of the variable to be generated. • On open front panels, do not display large arrays and strings unless it is necessary. Indicators on open front panels retain a copy of the data that they display. • If the front panel of a subVI is not going to be displayed, do not leave unused Attribute Nodes on the subVI. Attribute Nodes cause the front panel of a subVI to remain in memory, which can cause unnecessary memory usage. • Do not use suspend data range on time/memory critical VIs. The front panel for the subVI needs to be loaded to check range checking, and extra copies of data are made for the subVIs controls and indicators. • In designing diagrams, watch for places where the size of an input is different from the size of an output. For example, if you see places where you are increasing the size of an array or string frequently using the Build Array or Concatenate Strings functions, you are generating copies of data. • Use consistent data types for arrays and watch for coercion dots when passing data to subVIs and functions; when you change data types, the output is a new buffer. G Programming Reference Manual 26-18 © National Instruments Corporation Chapter 26 • Performance Issues Do not use complicated, hierarchical data types (for example, arrays of clusters containing large arrays or strings, or clusters containing large arrays or strings). You might end up using more memory, and performance suffers. See the section on Developing Efficient Data Structures later in this chapter for more details and suggestions for tactics in designing your data types. Memory Issues in Front Panels When a front panel is open, controls and indicators keep their own, private copy of the data that they display. The following illustration shows the increment function, with the addition of front panel controls and indicators. When you run the VI, the data of the front panel control is passed to the diagram. The increment function reuses the input buffer. The indicator then makes a copy of the data for display purposes. Thus, there are three copies of the buffer. This data protection of the front panel control prevents the case in which you enter some data into a control, run the associated VI, and see the data change in the control as it is passed in-place to subsequent nodes. Likewise, data is protected in the case of indicators so that they can reliably display the previous contents until they receive new data. With subVIs, you can use controls and indicators as inputs and outputs. The execution system makes a copy of the control and indicator data of the subVI in the following conditions. • © National Instruments Corporation The front panel is in memory—this can occur for any of the following reasons. – The front panel is open. – The VI has been changed, but has not been saved (all components of the VI remain in memory until the VI has been saved). – The panel uses data printing. – The diagram uses Attribute Nodes. 26-19 G Programming Reference Manual Chapter 26 Performance Issues • The VI uses local variables. • The panel uses data logging. • A control uses suspend data range checking. A few of these reasons are not intuitive and need further explanation. One reason concerns attributes such as chart history. For an Attribute Node to be able to read the chart history in subVIs that are not open, the control or indicator needs to go through the motions of displaying the data that is passed to controls and indicators. Because there are numerous other attributes like this, the execution system keeps subVI panels in memory if the subVI uses Attribute Nodes. If a front panel uses front panel datalogging or data printing, then controls and indicators maintain copies of their data. In addition, panels are kept in memory for data printing so that the panel can be printed out. If a VI uses Suspend data range checking, data is copied to and from all front panel controls and indicators. The front panel values are retained so that the front panel can be displayed if any data goes out of range. Do not use Suspend range checking if memory and speed are a major concern. Remember, if you have set a subVI to display its front panel when called using VI Setup or SubVI Setup, the panel is loaded into memory when the subVI is called. If you have set the Close if Originally Closed option, the panel is removed from memory when the subVI finishes execution. SubVIs Can Reuse Data Memory In general, a subVI can use data buffers from its caller as easily as if the diagrams of the subVI were duplicated at the top level. For most subVIs, you do not use more memory if you convert a section of your diagram into a subVI. For VIs with special display requirements, as described in the previous section, there might be some additional memory usage for front panels and controls. Local Variables Cannot Reuse Data Memory When you create subVIs, you create a connector pane that describes how data is passed to and from the subVI. The data buffers that come from terminals that are connected to a connector pane can reuse data buffers from calling VIs. Local variables cannot do this. Instead, when G Programming Reference Manual 26-20 © National Instruments Corporation Chapter 26 Performance Issues you read from a local variable, you create a new buffer for the data from its associated control. If you use local variables to transfer large amounts of data from one place on the diagram to another, you generally use more memory, and consequently have slower execution speed than if you can transfer data using an alternative wire path. Global Variables Always Keep Copies of Their Data When you read from a global variable, you create a copy of the data that is stored in that global variable. When manipulating large arrays and strings, the time and memory needed to manipulate global variables can be considerable. This is especially inefficient when dealing with arrays if you only want to modify a single array element, then store the entire array. If you read from the global variable in several places in your diagram, you might end up creating several buffers of memory. One technique for minimizing memory usage in this case is to use an uninitialized shift register in a subVI. This technique can combine the compactness of a global variable with the efficiency of a shift register. Understanding When Memory Is Deallocated Consider the following diagram. After the Mean VI has executed, the array of data is no longer needed. Because determining when data is no longer needed can become very complicated in larger diagrams, the execution does not deallocate the data buffers of a particular VI during its execution. © National Instruments Corporation 26-21 G Programming Reference Manual Chapter 26 Performance Issues If the execution system is low on memory, it deallocates data buffers used by any VI that is not currently executing. The execution system does not deallocate memory used by front panel controls, indicators, global variables, or uninitialized shift registers. Now, consider the same VI described previously as a subVI to a larger VI. The array of data is created and used only in the subVI. If the subVI is not executing and the system is low on memory, it might deallocate the data in the subVI. This is a case in which using subVIs can save on memory usage. Determining When Outputs Can Reuse Input Buffers If an output is the same size and data type as an input, and the input is not needed elsewhere, the output can reuse the input buffer. As mentioned previously, in some cases even when an input is used elsewhere, the compiler and the execution system can order code execution in such a way that it can reuse the input for an output buffer; however, the rules for this are complex and should not be counted on. Consistent Data Types If an input has a different data type from an output, the output cannot reuse that input. For example, if you add a 32-bit integer to a 16-bit integer, you see a coercion dot that indicates that the 16-bit integer is being converted to a 32-bit integer. The 32-bit integer input can be usable for the output buffer, assuming it meets all of the other requirements (for example, the 32-bit integer is not being reused somewhere else). In addition, coercion dots for subVIs and many functions imply a conversion of data types. In general, the compiler creates a new buffer for the converted data. To minimize memory usage, you should use consistent data types wherever possible. Doing this produces fewer copies of data because of promotion of data in size. Using consistent data types also makes the compiler more flexible in determining when data buffers can be reused. In some applications, you might consider using smaller data types. For example, you might consider using four-byte, single-precision numbers instead of eight-byte, double-precision numbers. However, you should carefully consider which data types are expected by subVIs you can call, because you want to avoid unnecessary conversions. G Programming Reference Manual 26-22 © National Instruments Corporation Chapter 26 Performance Issues How to Generate Data of the Right Type Refer to the following example in which an array of 1,000 random values has been created and added to a scalar. The coercion dot at the Add function occurs because the random data is double precision, while the scalar is single precision. The scalar is promoted to a double precision before the addition. The resulting data is then passed to the indicator. This diagram uses up 16 KB of memory. The following illustration incorrectly attempts to correct this problem by converting the array of double-precision random numbers to an array of single-precision random numbers. It uses the same amount of memory as the previous example. © National Instruments Corporation 26-23 G Programming Reference Manual Chapter 26 Performance Issues The best solution, shown in the following illustration, is to convert the random number to single precision as it is created, before you create an array. Doing this avoids the conversion of a large data buffer from one data type to another. Avoid Constantly Resizing Data If the size of an output is different from the size of an input, the output does not reuse the input data buffer. This is the case for functions such as Build Array, String Concatenate, and Array Subset which increase or decrease the size of an array or string. When working with arrays and strings, try to avoid constantly using these functions, because your program uses more data memory, and executes more slowly because it is constantly copying data. Example 1: Building Arrays As an example, consider the following diagram which is used to create an array of data. This diagram creates an array in a loop by constantly calling Build Array to concatenate a new element. The input array is not reused by Build Array. Instead, the VI continually resizes the output buffer to make room for the new array, and copies data from the old array to the new array. The resulting execution speed is very slow, especially if the loop is executed many times. G Programming Reference Manual 26-24 © National Instruments Corporation Chapter 26 Performance Issues If you want to add a value to the array with every iteration of the loop, you can see the best performance by using auto-indexing on the edge of a loop. With For Loops, the VI can predetermine the size of the array (based on the value wired to N), and resize the buffer only once. With While Loops, auto-indexing cannot be quite as efficient, because the end size of the array is not known. However, While Loop auto-indexing avoids resizing the output array every iteration by increasing the output array size in large increments. When the loop is finished, the output array is resized to the correct size. The performance © National Instruments Corporation 26-25 G Programming Reference Manual Chapter 26 Performance Issues of While Loop auto-indexing is nearly identical to For Loop auto-indexing. Auto-indexing assumes that you are going to add a value to the resulting array with each iteration of the loop. If you need to conditionally add values to an array, but you can determine an upper limit on the array size, you might consider preallocating the array and then using Replace Array Element to fill up the array. When you are finished filling up the array values, you can resize the array to the correct size. The array is created only once, and Replace Array Element can reuse the input buffer for the output buffer. The performance for this is very similar to the performance of loops using auto-indexing. If you use this technique, you need to be careful that the array in which you are replacing values is large enough to hold the resulting data, because Replace Array Element does not resize arrays for you. An example of this process is shown in the following illustration. G Programming Reference Manual 26-26 © National Instruments Corporation Chapter 26 Performance Issues Example 2: Searching through Strings You can use the Match Pattern function to search a string for a pattern. Depending on how you use it, you might slow down performance by unnecessarily creating string data buffers. The following illustration shows the Help window for Match Pattern. Assuming you want to match an integer in a string, you can use [0–9]+ as the regular expression input to this function. To create an array of all integers in a string, you need to use a loop and call Match Pattern repeatedly until the offset value returned is –1. The following diagram is one method for scanning for all occurrences of integers in a string. It initially creates an empty array, and then each time through the loop, searches the remaining string for the numeric pattern. If the pattern is found (offset is not –1), this diagram uses Build Array to add the number to a resulting array of numbers. When there are no values left in the string, Match Pattern returns –1 and this diagram completes execution. One problem with this diagram is that it uses Build Array in the loop to concatenate the new value to the previous value. Instead, you can use auto-indexing to accumulate values on the edge of the loop. Notice that © National Instruments Corporation 26-27 G Programming Reference Manual Chapter 26 Performance Issues you end up seeing an extra, unwanted value in the array from the last iteration of the loop where Match Pattern fails to find a match. A solution is to use array subset to remove the extra unwanted value. This is shown in the following illustration. The other problem with this diagram is that you create an unnecessary copy of the remaining string every time through the loop. Match Pattern has an input you can use to indicate where to start searching. If you remember the offset from the previous iteration, you can use this number to indicate where to start searching on the next iteration. This technique is shown in the following illustration. Developing Efficient Data Structures One of the points made in the previous section is that hierarchical data structures such as arrays of clusters containing large arrays or strings, or clusters containing large arrays or strings, cannot be manipulated efficiently. This section explains why this is so and describes strategies for choosing more efficient data types. G Programming Reference Manual 26-28 © National Instruments Corporation Chapter 26 Performance Issues The issue with complicated data structures is that it is difficult to access and change elements within a data structure without causing copies of the elements you are accessing to be generated. If these elements are large, as in the case where the element itself is an array or string, these extra copies use more memory and the time that it takes to copy the memory. You can generally manipulate scalar data types very efficiently. Likewise, you can efficiently manipulate small strings and arrays where the element is a scalar. In the case of an array of scalars, the following code shows what you would have to do to increment a value in an array. This is quite efficient because no extra copies of the overall array need to be generated. Also, the element produced by the Index Array function is a scalar, which can be created and manipulated efficiently. The same is true of an array of clusters, assuming the cluster contains only scalars. In the following diagram, manipulation of elements becomes a little more complicated, because you now have to use Unbundle and Bundle. However, because the cluster is probably small (scalars use very little memory), there is no significant overhead involved in accessing the cluster elements and replacing the elements back into the original cluster. © National Instruments Corporation 26-29 G Programming Reference Manual Chapter 26 Performance Issues If you have an array of clusters where each cluster contains large sub-arrays or strings, indexing and changing the values of elements in the cluster can be more expensive in terms of memory and speed. When you index an element in the overall array, a copy of that element is made. Thus, a copy of the cluster and its corresponding large subarray or string is made. Because strings and arrays are of variable size, the copy process can involve memory allocation calls to make a string or subarray of the appropriate size, in addition to the overhead to actually copy the data of a string or subarray. This might not be significant if you only plan to do it a few times. However, if your application centers around accessing this data structure frequently, the memory and execution overhead might add up quickly. The solution is to look at alternative representations for your data. The following three case studies present three different applications, along with suggestions for the best data structures in each case. Case Study 1: Avoiding Complicated Data Types Consider an application in which you want to record the results of several tests. In the results, you want a string describing the test and an array of the test results. One data type you might consider using to store this information is shown in the following illustration. To change an element in the array, you have to index an element of the overall array. Now, for that cluster you have to unbundle the elements to reach the array. You then replace an element of the array, and store the resulting array in the cluster. Finally, you store the resulting cluster G Programming Reference Manual 26-30 © National Instruments Corporation Chapter 26 Performance Issues into the original array. An example of this is shown in the following illustration. Each level of unbundling/indexing might result in a copy of that data being generated. Notice that a copy is not necessarily generated. The rules for when a copy is made are complex, and are discussed in LabVIEW Technical Note 020, Minimizing the Number of Data Buffers. Copying data is costly in terms of both time and memory. The solution is to try to make the data structures as flat as possible. For example, in this case study you could break the data structure into two arrays. The first array would be the array of strings. The second array would be a 2D array, where each row is the results of a given test. This result is shown in the following illustration. © National Instruments Corporation 26-31 G Programming Reference Manual Chapter 26 Performance Issues Given this data structure, you can replace an array element directly using the Replace Array Element function, as shown in the following illustration. Case Study 2: Global Table of Mixed Data Types Here is another application in which you want to maintain a table of information. In this application, you decide you want the data to be globally accessible. This table might contain settings for an instrument, including gain, lower and upper voltage limits, and a name used to refer to the channel. To make the data accessible throughout your application, you might consider creating a set of subVIs to access the data in the table, such as the following subVIs, the Change Channel Info VI and the Remove Channel Info VI. The following section presents three different implementations for these VIs. G Programming Reference Manual 26-32 © National Instruments Corporation Chapter 26 Performance Issues Obvious Implementation With this set of functions, there are several data structures you could consider for the underlying table. First, you might use a global variable containing an array of clusters, where each cluster contains the gain, lower limit, upper limit, and the channel name. As described in the previous section, this data structure is difficult to manipulate efficiently, because you generally have to go through several levels of indexing and unbundling to access your data. Also, because the data structure is a conglomeration of several pieces of information, you cannot use the Search 1D Array function to search for a channel. You can use Search 1D Array to search for a specific cluster in an array of clusters, but you cannot use it to search for elements that match on a single cluster element. Alternative Implementation 1 As with the previous example, you could choose to keep the data in two separate arrays. One could contain the channel names. The other array can contain the channel data. The index of a given channel name in the array of names is used to find the corresponding channel data in the other array. Notice that because the array of strings is separate from the data, you can use the search 1D Array function to search for a channel. In practice, if you are creating an array of 1,000 channels using the Change Channel Info VI, this implementation is roughly twice as fast as the previous version. This change is not very significant because there is other overhead that is affecting performance. If you have read through the Memory Usage section of this chapter, you might have seen a note indicating that you should avoid overusing local and global variables. When you read from a global variable, a copy of the data of the global variable is generated. Thus, a complete copy of the data of the array is being generated each time you access an element. The next method shows an even more efficient method that avoids this overhead. Alternative Implementation 2 There is an alternative method for storing global data, and that is to use an uninitialized shift register. Essentially, if you do not wire an initial value, a shift register remembers its value from call to call. If you are a © National Instruments Corporation 26-33 G Programming Reference Manual Chapter 26 Performance Issues LabVIEW user and are not familiar with uninitialized shift registers, see Chapter 3, Loops and Charts, of the LabVIEW Tutorial Manual before continuing with this discussion. If you are a BridgeVIEW user, see Chapter 10, Loops and Charts in your BridgeVIEW User Manual for similar information. The compiler handles access to shift registers efficiently. Reading the value of a shift register does not necessarily generate a copy of the data. In fact, you can index an array that is stored in a shift register and even change and update its value without generating extra copies of the overall array. The only problem with a shift register is that only the VI that contains the shift register can access the data of the shift register. On the other hand, the shift register has the advantage of modularity. What you can do is make a single subVI with a mode input that specifies whether you want to read, change, or remove a channel, or whether you want to zero out the data for all channels, as shown in the following illustration. The subVI would contain a While Loop with two shift registers—one for the channel data, and one for the channel names. Neither of these shift registers should be initialized. Then, inside the While Loop you would place a Case Structure connected to the mode input. Depending on the value of the mode, you could read and possibly change the data in the shift register. G Programming Reference Manual 26-34 © National Instruments Corporation Chapter 26 Performance Issues Following is an outline of a subVI with an interface that could handle these three different modes. Only the Change Channel Info code is shown. For 1,000 elements, this implementation is twice as fast as the previous implementation, and four times faster than the original implementation. Case Study 3: A Static Global Table of Strings The previous example looked at an application in which the table contained mixed data types, and the table might change frequently. In many applications, you have a table of information that is fairly static once created. The table might be read from a spreadsheet file. Once read into memory, you mainly use it to look up information. © National Instruments Corporation 26-35 G Programming Reference Manual Chapter 26 Performance Issues In this case, your implementation might consist of the following two functions, Initialize Table From File and Get Record From Table. One way to implement the table would be to use a two-dimensional array of strings. Notice that the compiler stores each string in an array of strings in a separate block of memory. If there are a large number of strings (for example, more than 5,000 strings), you might put a load on the memory manager. This load can cause a noticeable loss in performance as the number of individual objects increases. An alternative method for storing a large table is to read the table in as a single string. Then, build a separate array containing the offsets of each record in the string. This changes the organization so that instead of having potentially thousands of relatively small blocks of memory, you have instead one large block of memory (the string) and a separate smaller block of memory (the array of offsets). This method might be more complicated to implement, but it can be much faster for large tables. G Programming Reference Manual 26-36 © National Instruments Corporation Chapter 27 Portability Issues This chapter discusses issues related to transporting VIs between platforms. Portable and Nonportable VIs VIs are portable among all the platforms that your application runs on, as long as the versions of the application are the same. VIs containing CINs or platform-specific features such as DDE are not portable, In this case, a VI ports, but it is broken. G uses the same file format on all platforms. You can transfer VIs from one system to another system, either by disk or over a network. After the file is on the new system, you can open the VI. Your application detects that the VI is from another platform and recompiles the VI to use the correct instructions for the current processor. If you transfer VIs on a disk formatted for a different platform, you might need to use a utility program, such as Apple File Exchange on the Macintosh, to read the disk. You cannot port the following VIs: • VIs distributed in the vi.lib directory. Each distribution contains its own vi.lib, so do not move VIs in vi.lib across platforms. • VIs containing CINs. You see an object code not found error if the CIN is from a different platform. If you write your CIN source code in a platform independent manner, you can recompile it on another platform and relink it to the ported VI. • VIs containing the Call Library function. The VI can port, but is broken unless it can find a library of the same name. • Platform-specific communication VIs such as AppleEvents on the Macintosh and DDE on Windows. • In Port and Out Port Utility VIs for Windows and the Peek and Poke Utility VIs for Macintosh. © National Instruments Corporation 27-1 G Programming Reference Manual Chapter 27 Portability Issues Porting between Platforms There are several things you can do to ease porting between platforms. Portability issues include differences in filenames, separator characters, resolutions and fonts, possible overlapping of labels, and differences in picture formats. One consideration is the filename. Filenames are limited to eight characters plus an optional three-character extension, typically .vi in DOS/Windows 3.x and in FAT volumes in Windows NT. Macintosh filenames can have 31 characters. Windows 95/NT and UNIX filenames can have 255 characters, including the .vi extension. To avoid complications, either save VIs with short names, or save them into a VI library. A VI library is a single file that can contain multiple VIs. A library name must conform to platform limits, but VIs in libraries can have names up to 255 characters, regardless of platform. Thus, VI libraries are the most convenient format for transferring VIs, because libraries eliminate most file system dependencies. See the Saving VIs section in Chapter 2, Building VIs, for more information on creating VI libraries. Separator Character Differences If you are developing a VI for use on multiple platforms, do not use any of the platform-specific path separator characters [( \ ), ( / ), and ( : )] in your filenames. Avoid any special characters in your filenames because these can be interpreted differently by different file systems. For example, hidden files in UNIX begin with a period. Resolution and Font Differences Another portability issue concerns differences in screen resolution and fonts. Fonts can vary from platform to platform, so after porting a VI, you might have to choose new fonts to obtain an appealing display. When designing VIs, keep in mind that there are three fonts which best map between platforms—the Application font, the System font, and the Dialog font. These predefined fonts and the real fonts they map to are as follows: • G Programming Reference Manual The Application font is the default font. It is used in the Controls palette, the Functions palette, and for new controls. 27-2 © National Instruments Corporation Chapter 27 • • Portability Issues – (Windows) The U.S. version of Windows usually uses the Arial font. The size depends on the settings of the video driver, because you frequently can set up higher resolution video drivers to use Large Fonts or Small Fonts. In the Japanese version of Windows, the application uses the font that Windows uses for file names in the program manager. – (Macintosh) The application uses the same font used in the Finder for file names for the Application font. For example, on the U.S. Macintosh system, the application uses Geneva, although on the Japanese Macintosh system, the application uses Osaka. – (UNIX) The application uses Helvetica by default. The System font is the font used for menus. – (Windows) The application uses Helvetica, with the size dependent upon the video driver. – (Macintosh) The application normally uses Chicago in the U.S. system software, Osaka in the Japanese system software, and so on. – (UNIX) The application normally uses Helvetica for this font. The Dialog font is the font G uses for text in dialog boxes. – – (Windows) In the U.S. version of Windows, this font is a bold version of the Application font. In the Japanese version of Windows, this font is the same as the System font. (Macintosh) The application uses the same font as the System font. – (UNIX) The application normally uses Helvetica for this font. On HP-UX, this font is the same as the System font. When you take a VI that contains one of these fonts to another platform, your application ensures that the font maps to something similar on that platform. If you do not use the predefined fonts, but instead select a specific font such as Geneva or New York, the font can change size on the new platform because of the differences in the fonts available and differences in the resolution of the display. If you select Geneva or New York on the Macintosh, the application cannot match it on the Sun or HP-UX, and the application uses the font named fixed. If you take a VI with unrecognized fonts to Windows, you might not have a good mapping to a new font. © National Instruments Corporation 27-3 G Programming Reference Manual Chapter 27 Portability Issues If you use a predefined font on a section of text, National Instruments recommends that you do not change the size of that text. If you change the font to something other than the default size and then take the VI to a different platform, the application tries to match the font with the new size, which might be inappropriate given the resolution of the screen. For example, an application font with size 10 (one pixel bigger than the default) looks good on the Macintosh (Geneva 10) but looks very tiny on Windows with a high-resolution video driver, where it is three pixels smaller than the default. Overlapping Labels When you move a VI to a new platform, controls and labels might change size, depending on if the fonts are smaller or larger. G tries to keep labels from overlapping their owners by moving them away from the owning control. Also, every label and constant has a default attribute called Size to Text. When you first create a label or constant, this attribute is set, so the bounds of the object resize as necessary to display all of the enclosed text. If you ever manually resize the object, the application turns off this attribute (the item in the pop-up menu is no longer checked). With Size to Text turned off, the bounds of the object stay constant, and the application clips (or crops) the enclosed text as necessary. If you do not want the application to clip text when you move between systems or platforms, leave this attribute on for labels and constants. Most Sun and HP monitors are much larger and have a higher resolution than PC and Macintosh monitors. If you are a Sun or an HP-UX user, do not make your front panels very large if you want them to port well. For best results, avoid overlapping controls and leave extra space. If a label even partially overlaps another object and the font is enlarged, it might end up overlapping the control. Picture Differences The most basic type of picture contains a bitmap, a series of values specifying the color of each pixel in the picture. More complex pictures might contain any number of commands that are executed every time the picture is drawn. Pictures containing drawing commands are created by drawing programs or in the draw layer of a graphics application. Bitmap-based pictures are created by paint programs or in the paint layer of a graphics application. G Programming Reference Manual 27-4 © National Instruments Corporation Chapter 27 Portability Issues Bitmaps are common storage formats for pictures on all platforms. If you use pictures that contain bitmaps on your front panels, the pictures usually look the same when you load your VIs on another platform. However, pictures containing drawing commands might include some commands that are not supported on other platforms, for example clipping and pattern filling. These pictures might look strange on other platforms. Check how your VIs look on another platform if you expect them to be used there. You still can use a drawing program or the draw layer of a graphics application to create your pictures. But to make them more portable, paste the final picture into a paint program or into the paint layer of a graphics application before importing the picture. (Windows 95/NT and Macintosh,) With some applications on Windows 95/NT and many graphics applications on Macintosh, you can cut or copy a picture with a non-rectangular shape. In Macintosh, for example, you can use a Lasso tool like the one shown at the left to select the outline of a circle, triangle, or a more complicated shape like a musical note. Other platforms might have to draw these irregular shapes on a rectangular white background. In Windows 95/NT, look for applications that support enhanced metafiles if you want pictures with irregular shapes and pictures that scale well. © National Instruments Corporation 27-5 G Programming Reference Manual Appendix Data Storage Formats A This appendix discusses the formats in which you can save data. This information is most useful to advanced users, such as those using code interface nodes (CINs) and those reading from or writing to files used by the file I/O functions. This appendix explains how data is stored in memory, the relationship of type descriptors to data storage, and the method by which data is flattened for file storage on disk. Data Formats for Front Panel Controls and Indicators Booleans Booleans are 16-bit integers. The most significant bit contains the Boolean value. If bit 15 is set to 1, the value of the control is TRUE; if it is set to 0, the value is FALSE. Numerics Extended When extended-precision numbers are saved to disk, they are stored in a platform-independent 16-bit format. In memory, the size and precision varies depending on the platform. (Windows) Extended-precision floating-point numbers have 80-bit format (80287 extended-precision format). © National Instruments Corporation A-1 G Programming Reference Manual Appendix A Data Storage Formats (68K Macintosh) Extended-precision floating-point numbers have 96-bit format (MC68881-MC68882 extended-precision format). (Power Macintosh) Extended-precision floating-point numbers are stored as two double-precision floating-point numbers combined, that is, the double-double format that Apple has. For more details, see Inside Macintosh PowerPC Numerics. head tail (Sun) Extended-precision floating-point numbers have 128-bit format. (HP-UX) Extended-precision floating-point numbers are stored the same as double-precision floating-point numbers, as shown in the next illustration. Double Double-precision floating-point numbers have 64-bit IEEE double-precision format (format default). Single Single-precision floating-point numbers have 32-bit IEEE single-precision format. G Programming Reference Manual A-2 © National Instruments Corporation Appendix A Data Storage Formats Long Integer Long integer numbers have 32-bit format, signed or unsigned. Word Integer Word integer numbers have 16-bit format, signed or unsigned. Byte Integer Byte integer numbers have 8-bit format, signed or unsigned. Arrays You can store arrays through the size of each dimension of any array in long integers, followed by the data. Because of alignment constraints of certain platforms, the dimension size might be followed by a few bytes of padding so that the first element of the data is correctly aligned. If you are a LabVIEW user, see the Alignment Considerations section of Chapter 2, CIN Parameter Passing, of the LabVIEW Code Interface Reference Manual for further information. The example that follows shows a one-dimensional array of single-precision floating-point © National Instruments Corporation A-3 G Programming Reference Manual Appendix A Data Storage Formats numbers. The decimal numbers to the left represent the offsets of locations in memory from which the array begins. This illustration shows a four-dimensional array of word integers. You store Boolean arrays differently from Boolean scalars. An array of Booleans is stored as packed bits. The dimension size for Boolean arrays is expressed in bits instead of bytes. You store the 0th bit in the highest order bit of its memory word (215), and the 15th bit in the lowest order bit of its memory word (20) as shown in the following illustration. G Programming Reference Manual A-4 © National Instruments Corporation Appendix A Data Storage Formats The following illustration shows an example of a two-dimensional Boolean array. G stores the 0th element of each dimension in a new word integer and ignores unused bits from previous dimensions. Strings G stores strings as if they were one-dimensional arrays of byte integers (8-bit characters). Paths Paths are stored with the path type and number of path components in word integers, followed immediately by the path components. The path type is 0 for an absolute path and 1 for a relative path. Any other value of path type indicates that the path is invalid. Each path component is a Pascal string (P-string) in which the first byte is the length, in bytes, of the P-string (not including the length byte). Clusters A cluster stores elements of varying data types according to the cluster order. You store scalar data directly in the cluster. Arrays, strings, handles, and paths are stored indirectly. The cluster stores a handle that points to the memory area in which the data actually has been stored. © National Instruments Corporation A-5 G Programming Reference Manual Appendix A Data Storage Formats Because of alignment constraints of certain platforms, the dimension size might be followed by a few bytes of padding so that the first element of the data is correctly aligned. If you are LabVIEW user, see the Alignment Considerations section of Chapter 2, CIN Parameter Passing, of the LabVIEW Code Interface Reference Manual for further information. The illustrations that follow show a cluster containing a single-precision floating-point number, an extended-precision floating-point number, and a handle to a one-dimensional array of unsigned word integers, presented in that order. For more information, see Chapter 14, Array and Cluster Controls and Indicators. • (Windows) • (Macintosh) • (Sun) G Programming Reference Manual A-6 © National Instruments Corporation Appendix A • Data Storage Formats (HP-UX) In the next example, the embedded clusters are not stored indirectly. Instead, the data is stored inside the embedded clusters directly, as if the data were not embedded in the subcluster. Only arrays, strings and handles are stored indirectly. Type Descriptors Each wire and terminal in the block diagram has a data type associated with it. You can keep track of this type with a structure in memory called a type descriptor. This descriptor is a string of word integers that can describe any data type in G. Numeric values are written in hexadecimal, unless otherwise noted. The generic format of a type descriptor is: <length> <typecode>. Some type descriptors have additional information following the type code. Arrays and clusters are structured or aggregate data types because © National Instruments Corporation A-7 G Programming Reference Manual Appendix A Data Storage Formats they include other types. For example, the cluster type contains additional information about the type of each of its elements. The first word (16 bits) in any type descriptor is the length, in bytes, of that type descriptor (including the length word). You can reserve the high-order byte of the type code for internal use. When comparing two type descriptors for equality, it is a good idea to ignore this byte; two descriptors are equal even if the high-order bytes of the type codes are not. The type code encodes the actual type information, such as single-precision or extended-precision floating-point number, as listed in the following table. These type code values might change in future versions. The xx in the type descriptor columns represent reserved values and should be ignored. Data Types The following tables list scalar numeric and non-numeric data types, the type codes, and type descriptors. Scalar Numeric Data Types Table A-1. Data Type Type Code Type Descriptor (numbers in hexadecimal) (numbers in hexadecimal) Byte Integer 01 0004 xx01 Word Integer 02 0004 xx02 Long Integer 03 0004 xx03 Unsigned Byte Integer 05 0004 xx05 Unsigned Word Integer 06 0004 xx06 Unsigned Long Integer 07 0004 xx07 Single-Precision Floating-Point Number 09 0004 xx09 Double-Precision Floating-Point Number 0A 0004 xx0A G Programming Reference Manual A-8 © National Instruments Corporation Appendix A Table A-1. Data Storage Formats Scalar Numeric Data Types (Continued) Data Type Type Code Type Descriptor (numbers in hexadecimal) (numbers in hexadecimal) Extended-Precision Floating-Point Number 0B 0004 xx0B Single-Precision Complex Floating-Point Number 0C 0004 xx0C Double-Precision Complex Floating-Point Number 0D 0004 xx0D Extended-Precision Complex Floating-Point Number 0E 0004 xx0E Enumerated Byte Integer 15 <nn> xx15 <k> <k pstrs> Enumerated Word Integer 16 <nn> xx16 <k> <k pstrs> Enumerated Long Integer 17 <nn> xx17 <k> <k pstrs> Single-Precision Physical Quantity 19 <nn> xx19 <k> <k base-exp> Double-Precision Physical Quantity 1A <nn> xx1A <k> <k base-exp> Extended-Precision Physical Quantity 1B <nn> xx1B <k> <k base-exp> Single-Precision Complex Physical Quantity 1C <nn> xx1C <k> <k base-exp> Double-Precision Complex Physical Quantity 1D <nn> xx1D <k> <k base-exp> Extended-Precision Complex Physical Quantity 1E <nn> xx1E <k> <k base-exp> © National Instruments Corporation A-9 G Programming Reference Manual Appendix A Data Storage Formats Table A-2. Data Type Non-Numeric Data Types Type Code Type Descriptor Boolean 20 0004 xx20 String 30 0004 xx30 Handle 31 0006 xx31 <kind> Path 32 0004 xx32 Pict 33 0004 xx33 Array 40 <nn> 0x40 <k> <k dims> <element type descriptor> Cluster 0x50 <nn> 0x50 <k> <k element type descriptors> The minimum value in the size field of a type descriptor is 4 (as shown in the first table). However, any type descriptor can have a name appended (a Pascal string) in which case the size is larger by the length of the name. Notice that the array and cluster data types each have their own type code. They also contain additional information about their dimensionality (for arrays) or number of elements (for clusters), as well as information about the data types of their elements. In the following example of an enumerated type for the items am, fm, fm stereo, each group represents a 16-bit word. The space enclosed in quotes (" ") represents an ASCII space. 0016 0015 0003 02a m02 fm 09f m" "st er eo 0016 indicates 22 bytes total. 0015 indicates an enumerated byte. 0003 indicates that there are three items. In the following example of a physical quantity for the double-precision width units m / s each group represents a 16-bit word. 000E 001A 0002 0002 FFFF 0003 0001 000E indicates 14 bytes total. 0x1A indicates that these are double-precision width units. 0002 indicates two base-exponent pairs. G Programming Reference Manual A-10 © National Instruments Corporation Appendix A Data Storage Formats 0002 denotes the seconds base index. FFFF is the exponent of seconds. 0003 denotes the meters base index. 0001 is the exponent of meters. Note: All physical quantities are stored internally in terms of base units, regardless of what unit they are displayed as. Table 9-2, Base Units, shows the nine bases which are represented by indices 0-8 for radians-candela. Array The type code for an array is 0x40. Immediately after the type code is a word containing the number of dimensions of the array. Then, for each dimension, an unsigned long integer contains the size, in elements, of that dimension. Finally, after each of the dimension sizes, the type descriptor for the element appears. The element type might be any type except an array. The dimension size for any dimension might be FFFFFFFF (–1). This means that the array dimension size is variable. Currently, all arrays are variable-sized. The actual dimension size is stored with the data. The dimension size is always greater than or equal to zero. The following is a type descriptor for a one-dimensional array of double-precision floating-point numbers: 000E 0040 0001 FFFF FFFF 0004 000A 000E is the length of the entire type descriptor, including the element type descriptor. The array is variable-sized, so the dimension size is FFFFFFFF. Notice that the element type descriptor (0004 000A) appears exactly as it does for a scalar of the same type. The following is an example of a type descriptor for a two-dimensional array of Booleans. 0012 0040 0002 FFFF FFFF FFFF FFFF 0004 0020 Cluster The type code for a cluster is 0x50. Immediately after the type code is a word containing the number of items in the cluster. After this word is the type descriptor for each element in cluster order. For example, consider a cluster of two integers: a signed-word integer and an unsigned long integer: 000E 0050 0002 0004 0002 0004 0007 000E is the length of the type descriptor including the element type descriptors. © National Instruments Corporation A-11 G Programming Reference Manual Appendix A Data Storage Formats The following is a type descriptor for a multiplot graph (the numeric types can vary): 0028 001E 0018 000E 0004 0040 0001 FFFF FFFF1D array of 0050 0001...1 component cluster of 0040 0001 FFFF FFFF...1D array of 0050 0002...2 component cluster of 000A... double-precision floating-point number 0004 0003... long integer Flattened Data Two internal functions convert data from the format in memory to a form more suitable for writing to or reading from a file. Because strings and arrays are stored in handle blocks, clusters containing these types are discontiguous. In general, data is stored in tree form. For example, a cluster of a double-precision floating-point number and a string is stored as an 8-byte floating-point number, followed by a 4-byte handle to the string. The string data is not stored adjacent in memory to the extended-precision floating-point number. Therefore, if you want to write the cluster data to disk, you have to get the data from two different places. Of course, with an arbitrarily complex data type, the data might be stored in many different places. When data is saved to a VI file or a datalog file, it flattens the data into a single string before saving it. This way, even the data from an arbitrarily complex cluster is made contiguous, instead of being stored in several pieces. When G loads such a file from disk, it must perform the reverse operation—it must read a single string and unflatten it into its internal G form. The flattened data is normalized to a standard form so that the data can be used unaltered by VIs running on any platform. It stores numeric data in big endian form (most-significant byte format), and it stores extended precision floating-point numbers as 16-byte quantities using the Sun extended-precision format described earlier in this section. Similar transformations might be necessary when reading data written by other applications. Note: When writing data to a file for use by an application other than G, you might need to transform your data after flattening it. Other Windows G Programming Reference Manual A-12 © National Instruments Corporation Appendix A Data Storage Formats applications typically expect numeric data to be in little endian form (least-significant byte first). Other Windows and Macintosh applications typically expect extended-precision floating-point numbers to be in the 80-bit and 96-bit formats described previously, respectively. The Flatten to String and Unflatten from String block diagram functions (described in the G Function Reference online help) use the internal flatten and unflatten functions. Scalars The flattened form of any numeric type, as well as the Boolean type, contains only the data in big endian format. For example, a long integer with value –19 is encoded as FFFF FFED. A double-precision floating-point number with a value approximately equal to ¼ is 0X 40 09 21 FB 54 44 2D 18. A Boolean True is 8xxx, 9xxx, …, Exxx, or Fxxx. The file form for extended-precision numbers is based on the SPARC quadruple-precision form, which is a 16-bit biased exponent, followed by a mantissa which is 112 bits long. The Macintosh and PC have an explicit bit, the bit left of the binary point. In normalized numbers, this bit is always a one. It is only a zero when the exponent is zero (very small, denormalized numbers). On the SPARC, the bit left of the binary point is an implicit bit (assumed always to be one) which does not appear in the representation. Strings, Handles, and Paths Because strings, handles, and paths have variable sizes, the flattened form is preceded by a “normalized” long integer that records their length in bytes. For paths, this length is preceded by four characters: PTH0. For instance, a string type with value ABC is flattened to 0000 0003 4142 43. The flattened format is similar to the format that the string takes in memory. However, handles and paths do not have a length value preceding them when they are stored in memory, so this value comes from the actual size of the data in memory, and prepends it when the data is flattened. Arrays The data for a flattened array is preceded by “normalized” long integers that record the size, in elements, of each of the dimensions of the arrays. © National Instruments Corporation A-13 G Programming Reference Manual Appendix A Data Storage Formats The slowest varying dimension is first, followed in order by the succeeding, faster-varying dimensions, just as the dimension sizes are stored in memory. The data follows immediately after these dimension sizes in the same order in which it is stored in memory. Also, this data is flattened if necessary. The following is an example of a two-dimensional array of six 8-bit integers. { {1, 2, 3}, {4, 5, 6} } is stored as 0000 0002 0000 0003 0102 0304 0506. The following is an example of a flattened one-dimensional array of Boolean variables: {T, F, T, T} is stored as 0000 0004 B000. (The binary encoding of “B” is 1011.) Boolean arrays are stored as packed bits unlike other arrays. Clusters A flattened cluster is the concatenation (in cluster order) of the flattened data of its elements. So, for example, a flattened cluster of a word integer of value 4 (decimal) and a long integer of value 12 is 0004 0000 000C. A flattened cluster of a string ABC and a word integer of value 4 is 0000 0003 4142 4300 04. A flattened cluster of a word integer of value 7, a cluster of a word integer of value 8, and a word integer of value 9 is 0007 0008 0009. To unflatten this data, you just use the reverse process. The flattened form of a piece of data does not encode the type of the data; you need the type descriptor for that. The Unflatten From String function requires you to wire a data type as an input, so that the function can decode the string properly. G Programming Reference Manual A-14 © National Instruments Corporation Appendix B Common Questions about G This appendix answers some of the questions commonly asked by G users. Charts and Graphs How do I wire data to a chart or graph? Show the Help window and move the Wiring tool across a graph terminal in the block diagram to see a brief description of how to wire basic graph types. There are excellent examples on graphs and charts in the general\graphs directory. What is the basic difference between charts and graphs? Charts and graphs differ in the way they display and update data. VIs with graphs usually collect the data in an array and then plot it on the graph, similar to a spreadsheet that first stores the data then generates a plot of it. In contrast, a chart appends new data points to those already in the display. In this manner, you can see the current reading or measurement in context with data previously acquired. The length of the chart history buffer can be set by a pop-up option on the chart. Of course, it is possible to implement a history buffer with the graph indicators as well; however, this needs to be done in the block diagram. These features are already built into the chart. How do I flip the scales on my chart or graph? To flip the scales for the x-axis or y-axis, use the attribute X Flipped or Y Flipped. If the X Flipped attribute is set to TRUE, then the minimum of the x-axis scale is set to the right and the maximum to the left. Similarly, if the Y Flipped attribute is set to TRUE, the minimum of the y-axis scale is at the top and the maximum is at the bottom. © National Instruments Corporation B-1 G Programming Reference Manual Appendix B Common Questions about G How do I make a chart or graph display information in a time format? Graphs and charts can display numeric information in a relative time format. Use the X Scale»Formatting… or Y Scale»Formatting… pop-up option to set the x-axis or y-axis scale format to Relative Time. How do I make the x-axis of a chart display real time? See the example VI called Real-Time Chart.vi, located in general\graphs\charts.llb. It unbundles the date time cluster from the Seconds to Date/Time function into hours, minutes, and seconds. It then converts these numbers into the number of seconds that have elapsed since midnight. Finally, this number is used as an input to the Xo and delta X attribute of a chart that has its x-scale formatting set to Relative Time. Or you can use the Absolute Time Format & Precision option. How do I clear a chart programmatically? Wire an empty array to the History Data attribute. The data type of this empty array is the same as the data type wired to the chart. There is an excellent example which illustrates this technique in general\graphs\charts.llb\How to Clear Charts & Graphs.vi. How do I avoid the flashing from the graph each time it is updated? Use the Smooth Updates option to keep graphs from flashing. This option is located in the Data Operations submenu of the graph pop-up menu. Using Smooth Updates means that panels first redraws the graphs to an off-screen buffer before copying the image to the display. While producing a smoother update to the indicators, this option is generally slower and requires more memory. Smooth Updates can be set globally through the Edit»Preferences»Front Panel dialog box. It can be turned on or off for individual graphs from their pop-up menus. G Programming Reference Manual B-2 © National Instruments Corporation Appendix B Common Questions about G How do I update a graph without clearing it? All the graphs (waveform, XY, and intensity) always clear before writing new data; however, it is a simple procedure to keep track of the data previously written to the graph and append new data with each write. The general\arrays.llb\Separate Array Values.vi demonstrates the technique of using the Build Array function to append new values to an array. If you are a LabVIEW user, refer to Chapter 4, Arrays, Clusters, and Graphs, of the LabVIEW Tutorial Manual. How can I create a bar graph? See the examples in general\graphs\ bargraph.llb. This VI library contains an example bar graph and two VIs you can use to create bar graphs out of an array input. The G Picture Control Toolkit also can create bar graphs. How can I create polar plots and Smith charts? The G Picture Control Toolkit contains examples with routines to create polar plots and Smith charts. The toolkit is a versatile graphics package for creating arbitrary front panel displays. The Picture VI Library, which ships with the toolkit, implements a common set of drawing commands for building the graphic images. How can I make a label for the y-axis that is rotated 90 degrees? BridgeVIEW and LabVIEW do not have the capability to rotate text. To use rotated text, first create it in an application that has this capability, such as Windows Paintbrush, and save the graphic in a format that can be imported (see the Customizing Controls Using Imported Graphics section of Chapter 8, Introduction to Front Panel Objects, for more information on importing graphics). You can then import this graphic and place it on the y-axis of the graph or chart. How do I place a text label on a cursor? You must first use the Cursor Name Visible attribute to display the cursor name. You can then use the Cursor Name attribute to assign a name to the cursor or edit the name in the cursor display of the graph on the front panel. © National Instruments Corporation B-3 G Programming Reference Manual Appendix B Common Questions about G After I’ve added a cursor to my graph, how do I remove it? You must empty the array that contains the clusters holding the information of each cursor. Select Data Operations»Empty Array from the pop-up menu of the cursor display, or write an empty array to the Cursor List Attribute Node programmatically. Error Messages and Crashes What should I do when a dialog box appears stating that my application is out of memory? LabVIEW and BridgeVIEW allocate memory as needed, but arrays and strings must be stored in a contiguous block of memory. If your LabVIEW or BridgeVIEW application is unable to find a block of unused memory (physical or virtual) that is large enough for the string or array, a dialog box appears to indicate that it was not able to allocate the required memory. If you want to save changes to your VIs after G runs out of memory, you might save your VIs to another location or make sure that you have a backup copy. After you restart G with more memory, you can load these VIs into memory, check to see that the save was successful, and proceed in your VI development. (Windows) What do I do if LabVIEW or BridgeVIEW crashes when printing? This crash might be related to the video driver. See the question below concerning random crashes on Windows for information on how to proceed. While running LabVIEW or BridgeVIEW, what should I do if I receive a failure message which includes a source code file and line number? This indicates that an error has occurred and the application cannot proceed. Please notify National Instruments of this message and explain what action triggered the message. G Programming Reference Manual B-4 © National Instruments Corporation Appendix B Common Questions about G (Windows) What should I do if LabVIEW or BridgeVIEW tends to crash randomly? The crashes might be general protection faults or failure messages which include a source code file and line number. Often random crashes involve problems with the video driver on the machine. To establish if this is the case, use standard VGA as the video driver. To change video drivers, select VGA from the list of video drivers in Windows Setup. LabVIEW and BridgeVIEW use the standard Windows API for its graphical calls; however, we have found that many video drivers do not fully conform to this standard. If the crashes do not occur with the standard VGA driver, then it is a good idea to see an update to your video driver.You should be able to obtain the latest release of the video driver software from both the manufacturer of your PC and the manufacturer of the video card. Several customers have reported success after updating their drivers, particularly when using the Mach32 (shipped with ATI boards and Gateway machines) or Cirrus Logic video drivers. If the situation is not resolved by updating the video driver, contact National Instruments. (Windows) What should I do if I receive a memory parity error, followed by a General Protection Fault? Memory parity errors are the result of bad memory in your machine. This memory might be virtual memory, indicating a problem on your hard disk, or physical memory, indicating a bad SIMM. To check for problems with your hard disk, use a standard disk utility package such as Norton Utilities. To check for problems with physical RAM, you need to physically rotate the SIMMs in your machine, rebooting the PC after each rotation. When the bad SIMM is placed in the lowest bank of memory, the machine will not boot at all. It is a good idea to replace the SIMM. © National Instruments Corporation B-5 G Programming Reference Manual Appendix B Common Questions about G Platform Issues and Compatibilities What is required to transfer VIs between platforms? When a VI file is brought to another platform, no conversion is necessary for LabVIEW or BridgeVIEW to read it. When G opens the VI, it recognizes that it has been compiled for a different platform, and recompiles it for the new platform. This means that you must include the block diagram of a VI if you want to take it to another platform. For VIs containing CINs, you need to recompile the CINs on the new platform and then relink them to the ported VI. You should eliminate platform-specific functions (for example, Apple Events for Macintosh, DDE for Windows, and so on) before you port a VI to another platform. You can move VIs between platforms using networks, modems, and disks. VIs are saved in the same file format on all platforms. If you transfer VIs across a network using ftp or modem, make sure that you specify a binary transfer. If disks are the method of transfer, you need disk conversion utilities to read the disks from other platforms. Conversion utilities change the format of files stored on disk because each platform (Macintosh, Windows, Sun) saves files to disk in a different format. Most file conversion utilities not only read files from another platform, but also write files in the disk format of that platform. For example, there are utilities such as MacDisk and TransferPro available for the PC that transfer Macintosh disks to the PC format and vice versa. On the Macintosh, DOS Mounter and Apple File Exchange are two utilities that convert files on DOS-formatted disks to the Macintosh format and vice versa. For the Sun and HP, there is PC File System (PCFS) that helps SunOS and HP-UX to read and write DOS-formatted disks. To ease porting between platforms, you can save your VIs into a VI library. To facilitate saving all your VIs into a library, you can select the Development Distribution option from the Save with Options dialog box. In this way, you can save all non-vi.lib VIs, controls, and external subroutines to a single library. G Programming Reference Manual B-6 © National Instruments Corporation Appendix B Common Questions about G Printing When using automatic (programmatic) printing while executing a VI, why is the information not printed until the VI stops executing? Programmatic printing by design does not print a VI or subVI until it stops execution. For printing during execution, use a) File»Print Window to print the front panel manually, or b) a call to a subVI that accepts the input data to its controls (the front panel might be identical to that of the executing VI) and prints its “results” with programmatic printing. For more details see the section Programmatic Printing in Chapter 5, Printing VIs. How do I print a single control from the front panel (for example, a graph)? To print only a graph from the front panel, create a subVI with a graph on its front panel. 1. Change the graph from an indicator to a control. 2. Open the subVI and select Operate»Print at Completion. 3. Assign the subVI a connector and pass the data from the graph on the main VI to the graph on the subVI. Every time your main VI calls the subVI, it automatically prints the graph. How can I print a string? Use the Serial Port Init.vi to initialize the port where the printer is connected (LPT1, LPT2, and so on, on the PC, or the printer port on the Mac) and then the Serial Port Write.vi to write the string to the initialized port. The printer sees the data at the port and prints it. Doing this generally requires some knowledge of the command language of your printer, but has worked well for a number of applications developed by LabVIEW and BridgeVIEW users. If you are a LabVIEW user, see Appendix C, Serial I/O Common Questions, as well as Chapter 8, Serial Port VI's of the LabVIEW Instrument I/O VI Reference Manual for more details. © National Instruments Corporation B-7 G Programming Reference Manual Appendix B Common Questions about G (Windows and UNIX) Use the System Exec VI to print a file through a command line function. The VI is located in Functions» Communication»AppleEvent. For more details see the section Using Alternative Printing Methods, in Chapter 5, Printing VIs. You also can use the programmatic print option, as described in the previous question. (Macintosh) You can use the AESend Print Document VI to direct the other application to print a document. The VI is located in Functions»Communication»Apple Event. For more details see the section Using Alternative Printing Methods, in Chapter 5, Printing VIs. You also can use the programmatic print option as described in the previous question. How do I print all the data on a waveform chart? The Waveform Chart only prints the displayed data when you print the front panel. To print all the data in a chart, including that in the history buffer, first autoscale the x-axis of the chart by popping up on the chart, showing the chart palette and locking the x-axis, or setting the x-axis programmatically through a chart Attribute Node. Why does LabvIEW or BridgeVIEW crash when printing? On Windows, this crash might be related to the video driver. See the question concerning random crashes on your platform in the section Error Messages and Crashes for information on how to proceed. How do I use PostScript printing? If your printer works with PostScript language, first install and use the PostScript printer driver for your printer. Go to Edit» Preferences»Printing and select PostScript printing. If you have a PostScript printer, you can take advantage of the following benefits: • PostScript printouts reproduce the image of the screen more accurately. • PostScript facilitates high-resolution graphs. • PostScript reproduces patterns and line styles more accurately. G Programming Reference Manual B-8 © National Instruments Corporation Appendix B Common Questions about G When I select PostScript printing, why does my printout yield a pile up of printed text at the top of the page? Printing translates the VI print data into PostScript (.PS) format and sends it to the Windows printer driver as PostScript text. If your printer driver does not work with PostScript printing, the printout consists of the actual text of the PostScript file instead of a graphics image. See the previous PostScript question for more information. What should I do if the text on labels and front panel controls is clipped when the VI prints? This occurs when the size of the font for the printer does not match the size of the font on the monitor. • If your printer works with PostScript language, use the PostScript printer driver for your printer to maintain higher quality printouts. See the question above for more information on PostScript printing. • Enlarge the labels and front panel controls so that, when the text expands because of a font mismatch, the text still fits in the control or label boundary. • Find a font which is the same size on both the monitor and the printer. Many printer drivers have font substitution algorithms to assist this process. • (Windows) Use bitmap printing, which makes the printout exactly match what you see on the monitor. (Windows) How do I select bitmap printing? Go to Edit»Preferences and select Printing. The last option on the screen is Bitmap printing. Miscellaneous What is info-LabVIEW and how do I subscribe? Info-LabVIEW is a user-sponsored and supported network of LabVIEW and BridgeVIEW users. Users can post information to a specific e-mail address (see below); the posting is then broadcast to all users subscribing to the list. Other users then might respond back to the group or perhaps directly to the individual who wrote the post. © National Instruments Corporation B-9 G Programming Reference Manual Appendix B Common Questions about G Several power users, as well as some National Instruments employees, subscribe to the list and respond to various issues. Overall the Info LabVIEW group has been received extremely well. Although the group is not connected with National Instruments, official responses are made on occasion to the group. Most of the time the conversations take place strictly between G users. Users who want to subscribe to the list should send e-mail to this address: [email protected] There are two ways for users to receive the postings—the standard format and digest format. Standard format means you receive the postings as they occur. Digest format means you receive one package at the end of each day containing all postings for the day. Indicate digest format in the e-mail messages you send to info-LabVIEW-request if you want to receive one bulk message daily. After you have subscribed to the list, you receive postings from other subscribers. Traffic in the group is fairly active, from 10 to 30 postings per day. To post information to the list, send e-mail to this address: [email protected] How can I load and run VIs dynamically? When a subVI exists in the block diagram of another VI, the subVI is loaded into memory as soon as the calling VI is loaded into memory. For memory considerations, you might want to load and unload VIs dynamically from memory during the execution of your program. You can use the VI Control VIs to do this. These are located in the Functions»Advanced»VI Control palette. For more information on these VIs, see the Function and VI Reference located in the Online Reference. G Programming Reference Manual B-10 © National Instruments Corporation Appendix B Common Questions about G (Macintosh) In addition to the platform-independent VI Control VIs, you can use Apple Events on the Macintosh to dynamically load and run VIs. The VIs are located in the palette Functions»Communication»AppleEvent or its subpalette LabVIEW Specific Apple Events, and are called: • AESend Finder Open • AESend Open, Run, Close VI • AESend Run VI • AESend Close VI How do I replace a subVI with another VI that has the same name? LabVIEW and BridgeVIEW reference all VIs by name, and thus never load two VIs with the same name, regardless of the paths to those VIs. This includes subVIs. When you select Replace on a subVI to replace it with a VI of the same name, G realizes it already has a copy of the VI in memory, and “replaces” the VI with itself. To load the new copy of the subVI, you must first remove the old copy from memory. The VIs currently are listed in the Windows menu. The easiest way to remove the subVI from memory is to close the subVI and any other VIs that call the subVI. Open the new copy of the subVI into memory, check File»Show VI Info… to confirm that this is the version you want, and then re-open the main VI. When the VI tries to link to the subVI, it finds a copy in memory (the new version) and uses it rather than search for the previous version. The solution to many of these problems is always to give subVIs unique names. Loading two VIs that call two distinct subVIs with the same name causes problems. For example, main1.vi and main2.vi both call distinct subVIs which are both named subVI.vi. 1. main1.vi is loaded into memory, subVI.vi is loaded in because it is called by main1.vi. 2. main2.vi is loaded into memory, linker information signals LabVIEW or BridgeVIEW to load subVI.vi. The application recognizes that it already has subVI.vi loaded into memory, tries © National Instruments Corporation B-11 G Programming Reference Manual Appendix B Common Questions about G to link main2.vi with this subVI.vi. If the connector pane is exactly the same, it will probably link fine (but the behavior may be very peculiar). If the connector pane is different, the user receives a bad linkage error. Solution: Always give subVIs unique names. When loading and executing multiple VIs, how is the priority of execution assigned to the VIs? You can use the G execution system to execute multiple VIs or subdiagrams in parallel and to assign priorities to VIs. Priorities range from 0 (low) to 3 (high), with an additional, highest, level of subroutine. At any one time only one section of code executes; other sections wait on an execution queue. If the code does not complete in a given time period, G puts it back on the queue, and the frontmost queue element starts running. In this fashion, execution passes round-robin between VIs or subdiagrams. You can alter the priority of a VI through the dialog box in VI Setup. A VI with high priority automatically bumps its subVIs to the same level of priority. For example, if main.vi has priority 3 (high) and subVI.vi has priority 1 (not as high), then when main.vi calls subVI.vi, subVI.vi has priority 3. With priorities, the G internal execution queue has multiple entry points. The queue is always ordered via priority, as in this example: sss322211111 If a new item with priority 3 is placed on the queue, then the queue would look like the following: sss3322211111 The new “3” item is placed behind all s items (compiled as subroutines) and other priority 3 items. A potential danger in using VI priority is that low priority items never execute if higher level tasks are always available to run. Also, priority does not indicate which of two items in parallel is executed first. If something with high priority is put on the queue, it executes as soon as the currently executing lower priority node checks the queue. G Programming Reference Manual B-12 © National Instruments Corporation Appendix B Common Questions about G How can G service interrupts without using polling? Occurrences are a method for G to make a section of code wait for a particular event. For example, you can write a CIN that spawns a process (in Windows through a DLL, for example) that generates an occurrence when an event takes place in the DLL. A particular section of diagram code is executing, and another section or VI is waiting for the event. When the event happens, it logs the occurrence in LabVIEW or BridgeVIEW, and the appropriate code begins to execute as soon as its turn on the queue comes up. Internally, LabVIEW and BridgeVIEW look at the queue when it finishes a block of “atomic” code. This means that if something else is executing it must complete before the occurrence, and hence the interrupt, is handled. Note: There is no definite time limit on how long this might be, particularly if the VI contains CINs, which may take a very long time to complete execution. With nested While Loops, how do I stop both loops without anything in the outer loop executing after the inner loop stops? Put the code you do not want to execute on the last iteration into a Case Structure. It is best if the condition terminal of the inner loop is connected to the selection terminal of the Case Structure. What is Panel Order? Edit»Panel Order determines the order of the objects on the front panel. In other words, if you were using <Tab> on the keyboard to move between objects, the key focus would change from object to object in the order determined by the panel order. Only controls can receive key focus; the <Tab> key does not switch focus to indicators. By default, the panel order is the order in which you create objects on the front panel. With front panel data logging, the panel order determines the order in which the different objects are compacted into a cluster within the file. © National Instruments Corporation B-13 G Programming Reference Manual Appendix B Common Questions about G How can I have LabVIEW or BridgeVIEW to launch a particular VI automatically? By default, LabVIEW and BridgeVIEW launch and create an Untitled1.vi. You might want your application to launch a particular VI automatically. You also can set the VI to run when loaded, so that launching LabVIEW or BridgeVIEW not only opens your VI but also starts running it. Set the appropriate Execution Options in VI Setup… to make a VI run when opened. If you specify a library (.llb) to be opened when your application is launched, it opens all VIs marked Auto Load. Use File»Edit VI Library… to mark VIs with Auto Load. Finally, if you specify a library and no VIs are marked Auto Load, a file dialog box prompts the user to select a VI within the specified .llb. To tell LabVIEW or BridgeVIEW to launch a particular VI, follow the instructions that follow for the relevant platform. (Windows) Select the LabVIEW or BridgeVIEW icon, select File»Properties (in Program Manager), and change the pathname in Command Line to point towards your VI. For example, to make LabVIEW load test.vi automatically, set the Command Line to: c:\labview\labview.exe test.vi If test.vi is inside a library called test.llb, then: c:\labview\labview.exe “test.llb\test.vi” You may need to specify the full path to the VI. (Macintosh) There is no way to have the LabVIEW application to launch a particular VI on the Macintosh automatically; however, you can launch a VI by double-clicking on its icon in the Finder. If you have multiple copies of LabVIEW installed on your machine, the Finder determines which copy launches when you double-click on the VI (you have no control over which copy is launched). For example, the Finder may decide to launch the Run-Time System if you have both the Run-Time System and Full Development System installed. If you are running System 7, you can use Drag & Drop to launch one or more VIs, or VI libraries. G Programming Reference Manual B-14 © National Instruments Corporation Appendix B Common Questions about G (UNIX) LabVIEW responds to command-line options to launch a particular VI when opened. Therefore, you can type: labview/usr/home/test.vi or labview/usr/home/test.llb/test.vi to launch the Test VI, depending on the correct path. You can use a simple script to make a command that launches LabVIEW with a particular VI. How do I programmatically change the entries of an enumerated type? You cannot programmatically change the type (the strings) of an enumerated data type, just as you cannot programmatically change an integer control into a double or a string control into a path control. The strings in an Enum are a part of its data type and thus can only be changed during edit time. It is possible to read the strings of the Enum through an Attribute Node, but you cannot write them using an Attribute Node. If you need to programmatically change the text values in the Enum, use a text ring control instead. You can use the ring control to programmatically read and write the strings through the Strings[] attribute. Because text rings are just numeric controls, they do not associate the strings with their data type. How do I hide the menu bars of a VI? All VI attributes, including whether the menu bar and the toolbar are displayed, are set through the dialog box in VI Setup…. To access the VI Setup dialog box, pop up on the VI icon in the upper-right corner of the front panel and select VI Setup…, or double-click on the VI icon. See Chapter 6, Setting up VIs and SubVIs, for more details. © National Instruments Corporation B-15 G Programming Reference Manual Appendix B Common Questions about G How do I disable mouse interrupts to improve performance? Interrupts caused by moving the mouse or clicking it on an item take CPU time. In some extremely time-critical applications, this interrupt activity can result in a loss of data or some other problem with the application. There is no known way to disable mouse interrupts while an application is running. Make sure that the mouse does not move during the time-critical portions of your application. G Programming Reference Manual B-16 © National Instruments Corporation Appendix Customer Communication C For your convenience, this appendix contains forms to help you gather the information necessary to help us solve your technical problems and a form you can use to comment on the product documentation. When you contact us, we need the information on the Technical Support Form and the configuration form, if your manual contains one, about your system configuration to answer your questions as quickly as possible. National Instruments has technical assistance through electronic, fax, and telephone systems to quickly provide the information you need. Our electronic services include a bulletin board service, an FTP site, a FaxBack system, and e-mail support. If you have a hardware or software problem, first try the electronic support systems. If the information available on these systems does not answer your questions, we offer fax and telephone support through our technical support centers, which are staffed by applications engineers. Electronic Services Bulletin Board Support National Instruments has BBS and FTP sites dedicated for 24-hour support with a collection of files and documents to answer most common customer questions. From these sites, you can also download the latest instrument drivers, updates, and example programs. For recorded instructions on how to use the bulletin board and FTP services and for BBS automated information, call (512) 795-6990. You can access these services at: United States: (512) 794-5422 or (800) 327-3077 Up to 14,400 baud, 8 data bits, 1 stop bit, no parity United Kingdom: 01635 551422 Up to 9,600 baud, 8 data bits, 1 stop bit, no parity France: 01 48 65 15 59 Up to 9,600 baud, 8 data bits, 1 stop bit, no parity FTP Support To access our FTP site, log on to our Internet host, ftp.natinst.com, as anonymous and use your Internet address, such as [email protected], as your password. The support files and documents are located in the /support directories. © National Instruments Corporation C-1 G Programming Reference Manual FaxBack Support FaxBack is a 24-hour information retrieval system containing a library of documents on a wide range of technical information. You can access FaxBack from a touch-tone telephone at (512) 418-1111. E-Mail Support (currently U.S. only) You can submit technical support questions to the appropriate applications engineering team through e-mail at the Internet addresses listed below. Remember to include your name, address, and phone number so we can contact you with solutions and suggestions. BridgeVIEW: [email protected] DAQ: [email protected] LabVIEW: [email protected] Lookout: [email protected] Fax and Telephone Support National Instruments has branch offices all over the world. Use the list below to find the technical support number for your country. If there is no National Instruments office in your country, contact the source from which you purchased your software to obtain support. Telephone Australia Austria Belgium Canada (Ontario) Canada (Quebec) Denmark Finland France Germany Hong Kong Israel Italy Japan Korea Mexico Netherlands Norway Singapore Spain Sweden Switzerland Taiwan U.K. 03 9879 5166 0662 45 79 90 0 02 757 00 20 905 785 0085 514 694 8521 45 76 26 00 90 527 2321 01 48 14 24 24 089 741 31 30 2645 3186 03 5734815 02 413091 03 5472 2970 02 596 7456 95 800 010 0793 0348 433466 32 84 84 00 2265886 91 640 0085 08 730 49 70 056 200 51 51 02 377 1200 01635 523545 Fax 03 9879 6277 0662 45 79 90 19 02 757 03 11 905 785 0086 514 694 4399 45 76 26 02 90 502 2930 01 48 14 24 14 089 714 60 35 2686 8505 03 5734816 02 41309215 03 5472 2977 02 596 7455 5 520 3282 0348 430673 32 84 86 00 2265887 91 640 0533 08 730 43 70 056 200 51 55 02 737 4644 01635 523154 Technical Support Form Photocopy this form and update it each time you make changes to your software or hardware, and use the completed copy of this form as a reference for your current configuration. Completing this form accurately before contacting National Instruments for technical support helps our applications engineers answer your questions more efficiently. If you are using any National Instruments hardware or software products related to this problem, include the configuration forms from their user manuals. Include additional pages if necessary. Name __________________________________________________________________________ Company _______________________________________________________________________ Address ________________________________________________________________________ _______________________________________________________________________________ Fax (___ )___________________ Phone (___ ) ________________________________________ Computer brand ________________ Model ________________ Processor___________________ Operating system (include version number) ____________________________________________ Clock speed ______MHz RAM _____MB Mouse ___yes ___no Display adapter __________________________ Other adapters installed _______________________________________ Hard disk capacity _____MB Brand _____________________________________________ Instruments used _________________________________________________________________ _______________________________________________________________________________ National Instruments hardware product model __________ Revision ______________________ Configuration ___________________________________________________________________ National Instruments software product ____________________________ Version ____________ Configuration ___________________________________________________________________ The problem is: __________________________________________________________________ _______________________________________________________________________________ _______________________________________________________________________________ _______________________________________________________________________________ _______________________________________________________________________________ List any error messages: ___________________________________________________________ _______________________________________________________________________________ _______________________________________________________________________________ The following steps reproduce the problem:____________________________________________ _______________________________________________________________________________ _______________________________________________________________________________ _______________________________________________________________________________ _______________________________________________________________________________ _______________________________________________________________________________ Hardware and Software Configuration Form Record the settings and revisions of your hardware and software on the line to the right of each item. Complete a new copy of this form each time you revise your software or hardware configuration, and use this form as a reference for your current configuration. Completing this form accurately before contacting National Instruments for technical support helps our applications engineers answer your questions more efficiently. National Instruments Products DAQ hardware _______________________________________________________________ Interrupt level of hardware ______________________________________________________ DMA channels of hardware _____________________________________________________ Base I/O address of hardware ____________________________________________________ Programming choice ___________________________________________________________ National Instruments software version(s) ___________________________________________ Other boards in system _________________________________________________________ Base I/O address of other boards _________________________________________________ DMA channels of other boards ___________________________________________________ Interrupt level of other boards ___________________________________________________ Other Products Computer make and model ______________________________________________________ Microprocessor _______________________________________________________________ Clock frequency or speed _______________________________________________________ Type of video board installed ____________________________________________________ Operating system version _______________________________________________________ Operating system mode ________________________________________________________ Programming language _________________________________________________________ Programming language version __________________________________________________ Other boards in system _________________________________________________________ Base I/O address of other boards _________________________________________________ DMA channels of other boards ___________________________________________________ Interrupt level of other boards ___________________________________________________ Documentation Comment Form National Instruments encourages you to comment on the documentation supplied with our products. This information helps us provide quality products to meet your needs. Title: G Programming Reference Manual Edition Date: October 1996 Part Number: 321296A-01 Please comment on the completeness, clarity, and organization of the manual. _______________________________________________________________________________ _______________________________________________________________________________ _______________________________________________________________________________ _______________________________________________________________________________ _______________________________________________________________________________ _______________________________________________________________________________ _______________________________________________________________________________ If you find errors in the manual, please record the page numbers and describe the errors. _______________________________________________________________________________ _______________________________________________________________________________ _______________________________________________________________________________ _______________________________________________________________________________ _______________________________________________________________________________ _______________________________________________________________________________ _______________________________________________________________________________ Thank you for your help. Name _________________________________________________________________________ Title __________________________________________________________________________ Company _______________________________________________________________________ Address ________________________________________________________________________ _______________________________________________________________________________ Phone (___ )__________________________ Fax (___ ) _________________________________ Mail to: Technical Publications National Instruments Corporation 6504 Bridge Point Parkway Austin, TX 78730-5039 Fax to: Technical Publications National Instruments Corporation (512) 794-5678 Glossary Prefix Meaning Value m- milli- 10–3 µ- micro- 10–6 n- nano- 10–9 Symbols ∞ Infinity. π Pi. ∆ Delta. Difference. ∆x denotes the value by which x changes from one index to the next. A absolute path Relative file or directory path that describes the location relative to the top level of the file system. active window Window that is currently set to accept user input, usually the frontmost window. The titlebar of an active window is highlighted. Make a window active by clicking on it, or by selecting it from the Windows menu. ANSI American National Standards Institute. array Ordered, indexed set of data elements of the same type. array shell Front panel object that houses an array. It consists of an index display, a data object window, and an optional label. It can accept various data types. © National Instruments Corporation G-1 G Programming Reference Manual Glossary artificial data dependency Condition in a dataflow programming language in which the arrival of data, rather than its value, triggers execution of a node. ASCII American Standard Code for Information Interchange. asynchronous execution Mode in which multiple processes share processor time. For example, one process executes while others wait for interrupts during device I/O or while waiting for a clock tick. ATE Automatic test equipment. Attribute Node Special block diagram nodes you can use to control the appearance and functionality of controls and indicators. auto-indexing Capability of loop structures to disassemble and assemble arrays at their borders. As an array enters a loop with auto-indexing enabled, the loop automatically disassembles it with scalars extracted from one-dimensional arrays, one-dimensional arrays extracted from two-dimensional arrays, and so on. Loops assemble data into arrays as they exit the loop according to the reverse of the same procedure. autoscaling Ability of scales to adjust to the range of plotted values. On graph scales, this feature determines maximum and minimum scale values, as well. autosizing Automatic resizing of labels to accommodate text that you enter. B block diagram Pictorial description or representation of a program or algorithm. In G, the block diagram, which consists of executable icons called nodes and wires that carry data between the nodes, is the source code for the VI. The block diagram resides in the block diagram window of the VI. BNF Backus-Naur Form. A common representation for language grammars in computer science. Boolean controls and indicators Front panel objects used to manipulate and display or input and output Boolean (TRUE or FALSE) data. Several styles are available, such as switches, buttons and LEDs. G Programming Reference Manual G-2 © National Instruments Corporation Glossary breakpoint A pause in execution. You set a breakpoint by clicking on a VI, node, or wire with the Breakpoint tool from the Tools palette. Breakpoint tool Tool used to set a breakpoint on a VI, node, or wire. broken VI VI that cannot be compiled or run; signified by a broken arrow in the run button. Bundle node Function that creates clusters from various types of elements. byte stream file File that stores data as a sequence of ASCII characters or bytes. C case One subdiagram of a Case Structure. Case Structure Conditional branching control structure, which executes one and only one of its subdiagrams based on its input. It is the combination of the IF, THEN, ELSE, and CASE statements in control flow languages. cast To change the type descriptor of a data element without altering the memory image of the data. chart See scope chart, strip chart, and sweep chart. CIN See Code Interface Node. cloning To make a copy of a control or some other G object by clicking the mouse button on it while pressing the <Ctrl> (Windows); <option> (Macintosh); <meta> (Sun); or <Alt> (HP-UX) key and dragging the copy to its new location. (UNIX) You also can clone an object by clicking on the object with the middle mouse button and then dragging the copy to its new location. cluster A set of ordered, unindexed data elements of any data type including numeric, Boolean, string, array, or cluster. The elements must be all controls or all indicators. cluster shell Front panel object that contains the elements of a cluster. © National Instruments Corporation G-3 G Programming Reference Manual Glossary Code Interface Node (CIN) Special block diagram node through which you can link conventional, text-based code to a VI. coercion The automatic conversion G performs to change the numeric representation of a data element. coercion dot Glyph on a node or terminal indicating that the numeric representation of the data element changes at that point. Color tool Tool you use to set foreground and background colors. Color Copy tool Copies colors for pasting with the Color tool. compile Process that converts high-level code to machine-executable code. VIs are compiled automatically before they run for the first time after creation or alteration. conditional terminal The terminal of a While Loop that contains a Boolean value that determines whether the VI performs another iteration. connector Part of the VI or function node that contains its input and output terminals, through which data passes to and from the node. connector pane Region in the upper right corner of a front panel window that displays the VI terminal pattern. It underlies the icon pane. constant See universal constant and user-defined constant. continuous run Execution mode in which a VI is run repeatedly until the operator stops it. You enable it by clicking on the Continuous Run button. control Front panel object for entering data to a VI interactively or to a subVI programmatically. control flow Programming system in which the sequential order of instructions determines execution order. Most conventional text-based programming languages, such as C, Pascal, and BASIC, are control flow languages. Controls palette Palette containing front panel controls and indicators. conversion Changing the type of a data element. count terminal The terminal of a For Loop whose value determines the number of times the For Loop executes its subdiagram. G Programming Reference Manual G-4 © National Instruments Corporation Glossary CPU Central Processing Unit. current VI VI whose front panel, block diagram, or Icon Editor is the active window. custom PICT controls Controls and indicators whose parts can be replaced by graphics and indicators you supply. D data acquisition Process of acquiring data, typically from A/D or digital input plug-in boards. data dependency Condition in a dataflow programming language in which a node cannot execute until it receives data from another node. See also artificial data dependency. data flow Programming system consisting of executable nodes in which nodes execute only when they have received all required input data and produce output automatically when they have executed. G is a dataflow system. data logging Generally, to acquire data and simultaneously store it in a disk file. G file I/O functions can log data. data storage formats The arrangement and representation of data stored in memory. data type descriptor Code that identifies data types, used in data storage and representation. datalog file File that stores data as a sequence of records of a single, arbitrary data type that you specify when you create the file. While all the records in a datalog file must be of a single type, that type can be complex; for instance, you can specify that each record is a cluster containing a string, a number, and an array. Description box Online documentation for a G object. destination terminal See sink terminal. dialog box An interactive screen with prompts in which you describe additional information needed to complete a command. dimension Size and structure attribute of an array. © National Instruments Corporation G-5 G Programming Reference Manual Glossary drag To drag the mouse cursor on the screen to select, move, copy, or delete objects. DUT Device under test. E empty array Array that has zero elements, but has a defined data type. For example, an array that has a numeric control in its data display window but has no defined values for any element is an empty numeric array. EOF End-of-File. Character offset of the end of file relative to the beginning of the file (that is, the EOF is the size of the file). execution highlighting Feature that animates VI execution to illustrate the data flow in the VI. external routine See shared external routine. F FFT Fast Fourier transform. file refnum An identifier that G associates with a file when you open it. You use the file refnum to indicate that you want a function or VI to perform an operation on the open file. flattened data Data of any type that has been converted to a string, usually, for writing it to a file. For Loop Iterative loop structure that executes its subdiagram a set number of times. Equivalent to conventional code: For i=0 to n-1, do .... Formula Node Node that executes formulas that you enter as text. Especially useful for lengthy formulas that would be cumbersome to build in block diagram form. frame Subdiagram of a Sequence Structure. free label Label on the front panel or block diagram that does not belong to any other object. G Programming Reference Manual G-6 © National Instruments Corporation Glossary front panel The interactive user interface of a VI. Modeled from the front panel of physical instruments, it is composed of switches, slides, meters, graphs, charts, gauges, LEDs, and other controls and indicators. function Built-in execution element, comparable to an operator, function, or statement in a conventional language. Functions palette Palette containing block diagram structures, constants, communication features, and VIs. G G Graphical programming language. global variable Non-reentrant subVI with local memory that uses an uninitialized shift register to store data from one execution to the next. The memory of copies of these subVIs is shared and thus can be used to pass global data between them. glyph A small picture or icon. GPIB General Purpose Interface Bus is the common name for the communications interface system defined in ANSI/IEEE Standard 488.1-1987 and ANSI/IEEE Standard 488.2-1987. Hewlett-Packard, the inventor of the bus, calls it the HP-IB. graph control Front panel object that displays data in a Cartesian plane. H handle Pointer to a pointer to a block of memory; handles reference arrays and strings. An array of strings is a handle to a block of memory containing handles to strings. Help window Special window that displays the names and locations of the terminals for a function or subVI, the description of controls and indicators, the values of universal constants, and descriptions and data types of control attributes. The window also accesses the Online Reference for G. hex Hexadecimal. A base-16 number system. © National Instruments Corporation G-7 G Programming Reference Manual Glossary hierarchical palette Menu that contains palettes and subpalettes. Hierarchy window Window that graphically displays the hierarchy of VIs and subVIs. housing Nonmoving part of front panel controls and indicators that contains sliders and scales. Hz Hertz. Cycles per second. I icon Graphical representation of a node on a block diagram. Icon Editor Interface similar to that of a paint program for creating VI icons. icon pane Region in the upper right corner of the front panel and block diagram that displays the VI icon. IEEE Institute for Electrical and Electronic Engineers. indicator Front panel object that displays output. Inf Digital display value for a floating-point representation of infinity. inplace execution Ability of a function or VI to reuse memory instead of allocating more. instrument driver VI that controls a programmable instrument. I/O Input/Output. The transfer of data to or from a computer system involving communications channels, operator input devices, and/or data acquisition and control interfaces. iteration terminal The terminal of a For Loop or While Loop that contains the current number of completed iterations. G Programming Reference Manual G-8 © National Instruments Corporation Glossary L label Text object used to name or describe other objects or regions on the front panel or block diagram. Labeling tool Tool used to create labels and enter text into text windows. LED Light-emitting diode. legend Object owned by a chart or graph that display the names and plot styles of plots on that chart or graph. M marquee A moving, dashed border that surrounds selected objects. matrix Two-dimensional array. MB Megabytes of memory. menu bar Horizontal bar that contains names of main menus. mnemonic A string associated with an integer value. modular programming Programming that uses interchangeable computer routines. N NaN Digital display value for a floating-point representation of not a number, typically the result of an undefined operation, such as log(–1). nodes Execution elements of a block diagram consisting of functions, structures, and subVIs. nondisplayable characters ASCII characters that cannot be displayed, such as newline, tab, and so on. not-a-path A predefined value for the path control that means the path is invalid. not-a-refnum A predefined value that means the refnum is invalid. © National Instruments Corporation G-9 G Programming Reference Manual Glossary numeric controls and indicators Front panel objects used to manipulate and display or input and output numeric data. O object Generic term for any item on the front panel or block diagram, including controls, nodes, wires, and imported pictures. Object pop-up menu tool Tool used to access the pop-up menu for an object. one-dimensional Having one dimension, as in the case of an array that has only rows. Operating tool Tool used to enter data into controls as well as operate them. Resembles a pointing finger. P palette Menu of pictures that represent possible options. pixmap A standard format for storing pictures in which each pixel is represented by a color value. A bitmap is a black and white version of a pixmap. platform Computer and operating system. plot A graphical representation of an array of data shown either on a graph or a chart. polymorphism Ability of a node to automatically adjust to data of different representation, type, or structure. pop up To call up a special menu by clicking on an object with the right mouse button (on Window, Sun, and HP-UX) or while holding down the command key (on the Macintosh). pop-up menus Menus accessed by popping up, usually on an object. Menu options pertain to that object specifically. Positioning tool Tool used to move, select, and resize objects. probe Debugging feature for checking intermediate values in a VI. G Programming Reference Manual G-10 © National Instruments Corporation Glossary Probe tool Tool used to create probes on wires. programmatic printing Automatic printing of a VI front panel after execution. pseudocode Simplified language-independent representation of programming code. pull-down menus Menus accessed from a menu bar. Pull-down menu options are usually general in nature. R reentrant execution Mode in which calls to multiple instances of a subVI can execute in parallel with distinct and separate data storage. representation Subtype of the numeric data type, of which there are signed and unsigned byte, word, and long integers, as well as single-precision, double-precision, and extended-precision floating-point numbers, both real and complex. resizing handles Angled handles on the corner of objects that indicate resizing points. ring control Special numeric control that associates 32-bit integers, starting at 0 and increasing sequentially, with a series of text labels or graphics. S scalar Number capable of being represented by a point on a scale. A single value as opposed to an array. Scalar Booleans and clusters are explicitly singular instances of their respective data types. scale Part of mechanical-action, chart, and graph controls and indicators that contains a series of marks or points at known intervals to denote units of measure. scope chart Numeric indicator modeled on the operation of an oscilloscope. Scroll tool Tool used to scroll windows. sequence local Terminal that passes data between the frames of a Sequence Structure. © National Instruments Corporation G-11 G Programming Reference Manual Glossary Sequence Structure Program control structure that executes its subdiagrams in numeric order. Commonly used to force nodes that are not data-dependent to execute in a desired order. shared external routine Subroutine that can be shared by several CIN code resources. shift register Optional mechanism in loop structures used to pass the value of a variable from one iteration of a loop to a subsequent iteration. sink terminal Terminal that absorbs data. Also called a destination terminal. slider Moveable part of slide controls and indicators. source terminal Terminal that emits data. string controls and indicators Front panel objects used to manipulate and display or input and output text. strip chart A numeric plotting indicator modeled after a paper strip chart recorder, which scrolls as it plots data. structure Program control element, such as a Sequence, Case, For Loop, or While Loop. stub VI A nonfunctional prototype of a subVI. It has inputs and outputs, but is incomplete. It is used during early planning stages of a VI design as a place holder for future VI development. subdiagram Block diagram within the border of a structure. subVI VI used in the block diagram of another VI; comparable to a subroutine. sweep chart Similar to scope chart; except a line sweeps across the display to separate old data from new data. T table-driven execution A method of execution in which individual tasks are separate cases in a Case Structure that is embedded in a While Loop. Sequences are specified as arrays of case numbers. terminal Object or region on a node through which data passes. G Programming Reference Manual G-12 © National Instruments Corporation Glossary Tip strip Small yellow text banners that identify the terminal name and make it easier to identify function and node terminals for wiring. tool Special cursor you can use to perform specific operations. toolbar Bar containing command buttons that you can use to run and debug VIs. Tools palette Palette containing tools you can use to edit and debug front panel and block diagram objects. top-level VI VI at the top of the VI hierarchy. This term distinguishes the VI from its subVIs. two-dimensional Having two dimensions, such an array having both rows and columns. tunnel Data entry or exit terminal on a structure. type descriptor See data type descriptor. U universal constant Uneditable block diagram object that emits a particular ASCII character or standard numeric constant, for example, pi. user-defined constant Block diagram object that emits a value you set. UUT Unit under test. V VI See virtual instrument. VI library Special file that contains a collection of related VIs for a specific use. virtual instrument Program in LabVIEW or BridgeVIEW; so-called because it models the appearance and function of a physical instrument. © National Instruments Corporation G-13 G Programming Reference Manual Glossary W While Loop Loop structure that repeats a section of code until a condition is met. Comparable to a Do loop or a Repeat-Until loop in conventional programming languages. wire Data path between nodes. Wiring tool Tool used to define data paths between source and sink terminals. G Programming Reference Manual G-14 © National Instruments Corporation Index A Left Edges, 2-12 Right Edges, 2-12 Top Edges, 2-12 Vertical Centers, 2-12 All Elements option, 20-5 Allow Drag option, 15-36 Allow Run-Time Pop-Up Menu option, 6-5 Allow User to Close Window option, 6-5 <Alt> key bringing subVI block diagram to front, 4-21 changing Icon Editor tools to dropper, 3-4 cloning Attribute Nodes, 20-4 cloning objects, 2-13 creating new scale marker, 9-17 to 9-18 cutting, copying, and pasting icons (note), 3-4 moving between array elements, 14-13 moving between cluster elements, 14-21 Step Into button shortcut, 4-20 Step Out button shortcut, 4-20 Step Over button shortcut, 4-20 <Alt-b>, removing bad wires, 4-10 <Alt-click> copying and transferring colors, 2-26 executing Show VI Hierarchy action, 3-21 untacking last tack point (note), 17-3 <Alt-f>, bringing up Find dialog box, 3-24 <Alt-h> (help key), 1-7 <Alt-m>, switching from run mode to edit mode (note), 6-6 <Alt-Return>, embedding newlines, 7-10 <Alt-Shift>, bringing up temporary Tools palette, 2-4 Apple Event VIs, executing other applications from within VIs, 23-1 absolute time and date formatting digital displays, 9-10 to 9-11 graph indicators, 15-16 to 15-17 Active Plot Attribute, 20-10 to 20-11 Add a Parameter After option, 23-5 Add a Parameter Before option, 23-5 Add an entry every time this VI is saved option, 6-4 Add Case After option, 13-11, 18-19 Add Case Before option, 18-19 Add command, 16-10 to 16-11 Add Dimension option, 14-7 Add Element Gap option, 14-14 Add Element option, 18-11 Add Input option, 19-3 Add Item After option enumerated type controls, 13-11 ring pop-up, 13-8 text display pop-up, 9-19 Add Item Before option enumerated type controls, 13-11 ring pop-up, 13-8 text display pop-up, 9-19 Add Marker option, 9-17 Add Needle option, 9-22 Add Output option, 19-3 Add Sequence Local option, 18-17 Add Shift Register option, 18-10 Add Slider option, 9-20 Advanced palette, 23-3 AESend Print Document VI, 5-1 aligning objects, 2-11 to 2-12 Bottom Edges, 2-12 example, 2-11 Horizontal Centers, 2-12 © National Instruments Corporation I-15 G Programming Reference Manual Index AppleEvent option, Communications menu, 5-1 Application Distribution option, 25-4 Application font, 2-18 applications, managing, 25-1 to 25-9. See also calling code from other languages. backing up files, 25-2 distributing VIs, 25-2 to 25-4 keeping master copy, 25-5 multiple developers, 25-5 to 25-9 storing VIs in libraries, 25-1 to 25-2 using Save with Options, 25-3 to 25-4 Application Distribution, 25-4 Changed VIs, 25-4 Custom Save, 25-4 Development Distribution, 25-4 VI History window, 25-5 to 25-9 example, 25-6 printing history information, 25-9 recording comments (note), 25-6 related VI Setup and Preferences dialog options, 25-9 resetting history information, 25-8 revision numbers, 25-7 to 25-8 Apply Changes option, 22-3 arbitrary scale markers. See scale markers. Array & Cluster palette, 14-1, 14-5 Array Resizing tool, 14-9 array shell creating array controls, 14-5 to 14-7 element display, 14-5 index display, 14-5 placing on front panel, 14-5 undefined, 14-12 Array To Cluster function, 14-28 to 14-29 arrays and array controls, 14-1 to 14-11 Array Resizing tool, 14-9 creating, 14-5 to 14-11 array dimensions, 14-7 to 14-8 combining array shell with valid element, 14-5 defining array type, 14-6 to 14-7 index display pop-up menu, 14-7 G Programming Reference Manual data storage formats, A-3 to A-5 data type, 23-6 to 23-7 default size and values, 14-11 to 14-13 definition, 14-1 description, 14-1 to 14-4 displaying in single-element or tabular form, 14-9 to 14-11 empty arrays, 14-12 finding array size, 14-13 flattened data, A-13 to A-14 G arrays vs. other systems, 14-16 to 14-19 graph array (example), 14-2 to 14-3 index display array shell, 14-5 displaying array in single-element or tabular form, 14-9 to 14-11 interpreting, 14-8 to 14-9 pop-up menu, 14-7 indexes, 14-1 to 14-2 moving, 14-14 moving between elements of arrays, 14-13 multidimensional, 14-4 one-dimensional, 14-3, 14-10 operating, 14-11 to 14-16 resizing, 14-14 selecting cells, 14-14 to 14-16 string array (example), 14-2 tabbing between elements, 14-13 three-dimensional, 14-11 two-dimensional, 14-3, 14-8 type descriptors, A-11 waveform array example, 14-2 two-dimensional (example), 14-3 to 14-4 when to use, 14-4 I-16 © National Instruments Corporation Index Attribute Nodes, 20-1 to 20-15. See also attributes. avoiding cycles in subVIs Attribute Nodes in Case Structures, 3-13 Attribute Nodes within loops, 3-12 creating, 20-1 to 20-6 associating terminal with attribute, 20-4 more than one node, 20-4 to 20-5 reading or setting attributes, 20-2 to 20-3 examples Booleans, 20-11 to 20-12 changing plot color on chart, 20-10 to 20-11 examples in examples.llb, 20-6 listbox controls, 20-13 to 20-14 presenting options to users, 20-14 reading cursors programmatically, 20-14 to 20-15 ring controls, 20-12 to 20-13 setting strings of ring control, 20-12 to 20-13 Find pop-up menu, 3-29 help information, 1-9 Help window, 20-6 pop-up menu, 20-2 setting all attributes at one time, 20-5 attributes, 20-7 to 20-10 Active Plot, 20-10 to 20-11 Blinking, 20-8 to 20-9 Bounds (read only), 20-10 Disabled, 20-7 to 20-8 Double-Click, 20-13 to 20-14 examples. See Attribute Nodes. Key Focus, 20-8 Plot Color, 20-10 to 20-11 Position, 20-9 Auto-Center option, 6-5 auto-indexing definition, 18-7 For Loop count, 18-8 © National Instruments Corporation purpose and use, 18-7 to 18-8 running out of memory (note), 18-9 While Loops, 18-9 Automatic Update from Directory pop-up option, 7-28 Autoscale X option, 15-13 Autoscale Y option, 15-13 autosizing clusters, 14-23 Autosizing option, 14-23 Auto-Update from Type Def. option, 22-21 B background colors, 2-25 Backslash ‘\’ Codes Display option available codes (table), 11-4 tab characters in strings (note), 11-2 working in backslash mode, 11-4 to 11-5 backslash character, backslash ‘\’ code (table), 11-4 <Backspace> key deleting objects, 2-13 deleting wires, 17-6 Bar Plots option, 15-21 base attributes. See attributes. bends in wires, 17-6 big endian data, A-12 bitmap printing, 7-17 black and white vs. color icons, 3-3 blinking background blinking color, 7-14 foreground blinking color, 7-14 setting blink speed of front panel objects, 7-10 Blinking Attribute, 20-8 to 20-9 Block Diagram option, Custom Print Settings dialog box, 5-6 Block Diagram Preferences dialog box, 7-11 to 7-12 illustration, 7-11 Show dots at wire junctions, 7-11 Show subVI names when dropped, 7-11 Show tip-strips over terminals, 7-11 Show wiring guides, 7-11 I-17 G Programming Reference Manual Index block diagrams, 16-1 to 16-13. See also wiring block diagrams. color settings, 7-13 components of, 16-1 constants, 16-3 to 16-8 control and indicator terminals, 16-2 to 16-3 displaying, 2-4 functions, 16-8 to 16-11 help information, 1-7 to 1-9 inserting objects, 16-12 labels for subVIs (note), 2-16 nodes, 16-1, 16-8 to 16-12 overview, 1-4 to 1-5 placing and sizing structures on, 18-5 to 18-6 printing (Block Diagram option), 5-6 Hidden Frames option, 5-6 Repeat Higher Level Frames option, 5-6 replacing objects, 16-12 resizing work space, 2-24 structures, 16-11 to 16-12 terminals, 1-4 to 1-5, 16-1 to 16-8 Boolean controls and indicators, 10-1 to 10-6 Attribute Node example, 20-11 to 20-12 changing labels, 10-3 to 10-4 customizing with imported pictures, 10-6 data range checking, 10-4 Hilite <Return> Boolean option, 6-5 illustration, 10-1 LED simulation, 10-2 light simulation, 10-2 mechanical action configuration, 10-4 to 10-6 Latch Until Released action, 10-6 Latch When Pressed action, 10-5 Latch When Released action, 10-6 Mechanical Action palette, 10-4 to 10-5 Switch Until Released action, 10-5 Switch When Pressed action, 10-5 Switch When Released action, 10-5 G Programming Reference Manual pop-up menu, 10-3 push-buttons simulation, 10-2 slide switch simulation, 10-2 stopping on Boolean value, 10-4 toggle switch simulation, 10-2 toggling between TRUE and FALSE states, 10-2 Boolean data storage formats, A-1 border, printing around panel, 5-8 Bottom Edges alignment, 2-12 Bounds Attribute (Read Only), 20-10 branch (of wires), 17-6 Breakpoint tool, 2-5, 4-26 breakpoints, placing, 4-26 to 4-29 Breakpoint tool, 4-26 Clear Breakpoint cursor, 4-26 display of breakpoints (table), 4-27 example, 4-28 to 4-29 setting breakpoint, 4-27 BridgeVIEW, switching to Basic G palette (note), 2-1 Bring into View option, 15-34 Broken Run button, 4-10, 17-11 broken VIs common reasons for broken VIs, 4-11 correcting broken VI range errors, 4-14 to 4-15 error messages (table), 4-11 to 4-14 fixing, 4-10 to to 4-11 locating errors, 4-10 Build Array function, 16-10 building front panel, 8-1 to 8-10 control and indicator options, 8-2 to 8-4 Controls palette, 8-1 to 8-2 customizing dialog box controls, 8-9 to 8-10 imported graphics for customizing controls, 8-10 to 8-11 Key Navigation option for controls, 8-5 to 8-8 Panel Order option, 8-8 to 8-9 replacing controls, 8-4 to 8-5 I-18 © National Instruments Corporation Index building subVIs, 3-1 to 3-14. See also Hierarchy window. creating from VI selections, 3-10 to 3-14 avoiding cycles, 3-12 to 3-13 Attribute Node in Case Structure, 3-13 Attribute Nodes within loops, 3-12 detection by G, 3-12 front panel terminal in Case Structure, 3-13 illogical selections, 3-13 local variable in Case Structure, 3-13 locals and front panel terminals within loops, 3-13 example, 3-14 number of connections, 3-12 rules and recommendations, 3-11 to 3-14 similarity to removing and replacing selected object, 3-11 undoing subVIs with Revert option (note), 3-11 creating icons, 3-2 to 3-4 black and white vs. color icons, 3-3 Cancel button, 3-4 cutting, copying, and pasting icons (note), 3-4 dropper tool, 3-3 Edit icon option, 3-2 fill bucket tool, 3-3 filled rectangle tool, 3-4 foreground/background tool, 3-4 Icon Editor, 3-2 line tool, 3-3 OK button, 3-4 pencil tool, 3-3 rectangle tool, 3-3 select tool, 3-4 text tool, 3-4 Undo button, 3-4 © National Instruments Corporation Find pop-up menu Attribute Nodes, 3-29 global and local variables, 3-29 finding VIs, objects, and text, 3-23 to 3-29 Find dialog box, 3-24 to 3-29 finding next and previous search items, 3-29 narrowing search scope, 3-27 to 3-28 Search Results window, 3-28 to 3-29 text, 3-26 to 3-27 VIs and other objects, 3-24 to 3-25 hierarchical design, 3-1 terminal connections, 3-5 to 3-10 assigning to controls and indicators, 3-6 to 3-8 confirming terminal connections, 3-9 to 3-10 defining patterns, 3-5 deleting terminal connections, 3-9 to 3-10 required, recommended, and optional connections, 3-8 to 3-9 selecting and modifying patterns, 3-6 white terminal indicating incomplete connection (note), 3-8 building VIs, 2-1 to 2-30 aligning objects, 2-11 to 2-12 coloring objects, 2-24 to 2-26 creating object descriptions, 2-26 to 2-27 creating VI descriptions, 2-26 to 2-27 deleting objects, 2-13 distributing objects, 2-12 dragging and dropping VIs, pictures, and text, 2-8 to 2-9 duplicating objects, 2-12 to 2-13 I-19 G Programming Reference Manual Index G environment, 2-1 to 2-6 menus, 2-6 pop-up menus, 2-6 switching to Basic G palette from BridgeVIEW (note), 2-1 Tools palette, 2-4 to 2-5 labeling objects, 2-14 to 2-22 free labels, 2-14 to 2-16 text characteristics, 2-16 to 2-22 positioning front panel and block diagram side-by-side, 2-3 positioning objects, 2-9 to 2-11 resizing objects, 2-23 front panel and block diagram work space, 2-24 labels, 2-23 to 2-24 saving VIs, 2-27 to 2-30 individual VI files, 2-28 to 2-29 VI libraries (.LLBs), 2-29 to 2-30 selecting objects, 2-7 to 2-8 from palettes, 2-1 to 2-4 multiple selection with selection rectangle, 2-7 to 2-8 <Shift>-clicking, 2-7, 2-8 terminals, created automatically with front panel object, 2-3 to 2-4 bulletin board support, C-1 Bundle By Name function accessing cluster elements, 22-22 assembling clusters, 14-24 to 14-28 Bundle function, 14-24 byte integer numeric data storage format, A-3 Byte Stream File RefNum, 12-5 calling functions that expect other data types, 23-7 Configure option, 23-3 creating parameter list, 23-5 to 23-7 array data type, 23-6 to 23-7 numeric data types, 23-6 string data type, 23-7 void data type, 23-5 overview, 23-2 calling code from other languages, 23-1 to 23-13. See also applications, managing; Call Library Function. Apple Event VIs, 23-1 Code Interface Nodes, 23-2 converting LabWindows/CVI functions. See LabWindows/CVI Function Panel converter. executing other applications from within VIs, 23-1 to 23-2 carriage return backslash ‘\’ code (table), 11-4 entering into string (note), 11-2 Limit to Single Line option, 11-6 Case Insensitive suboption, Keyboard Mode option, 13-6 Case Sensitive suboption, Keyboard Mode option, 13-6 Case Structures adding subdiagrams, 18-19 to 18-20 avoiding cycles in subVIs, 3-13 commenting out sections of diagrams, 4-31 deleting subdiagrams, 18-20 to 18-21 editing, 18-18 enumerated type wired to, 3-11 example in examples.llb.vi, 18-14 icon for, 18-2, 18-13 moving between subdiagrams, 18-18 to 18-19 out-of-range values (note), 18-14 overview, 18-13 to 18-14 purpose and use, 16-11, 18-14 to 18-15 reordering subdiagrams, 18-21 C Call Chain ring, 4-21 Call Chains, reading, 4-21 Call Library Function, 23-3 to 23-7 Call Library Function dialog box, 23-4 calling conventions (Windows), 23-4 to 23-5 G Programming Reference Manual I-20 © National Instruments Corporation Index subdiagram display window, 18-13 wiring problems, 18-22 to 18-26 Change Log File Binding option, Data Logging menu, 4-6 Change to Control option, 8-3, 14-20, 17-13 Change to Customize Mode option, 22-5 to 22-6 Change to Edit Mode option, 22-5 to 22-6 Change to Indicator option, 8-3, 14-20, 17-13 Change to Input option, 19-4 Change to Output option, 19-4 Change to Read Global option, 21-3 Change to Read Local option, 21-4 Change to Read option, 20-2 to 20-3 Change to Write Global option, 21-3 Change to Write Local option, 21-4 Change to Write option, 20-2 Changed VIs option, 25-4 Chart History Length option, 15-26, 15-40 chart indicators attributes Active Plot, 20-10 to 20-11 Plot Color, 20-10 to 20-11 intensity chart, 15-36 to 15-41 defining color mapping, 15-40 to 15-41 illustrations, 15-37 to 15-38 pop-up menu, 15-39 questions about, B-1 to B-4 waveform chart, 15-22 to 15-29 data types, 15-22 to 15-25 options, 15-25 to 15-29 stacked versus overlaid plots, 15-28 to 15-29 update modes, 15-26 to 15-28 CINs (Code Interface Nodes), 23-2 Clear Breakpoint cursor, 4-26 Clear Log File Binding option, Operate menu, 4-6 Clear option, Edit menu, 2-13 cloning objects, 2-13 Close Afterwards if Originally Closed option, 6-2 © National Instruments Corporation Cluster Order option, 4-16, 14-22 cluster shell, 14-20 Cluster Size option, 14-28 Cluster To Array function, 14-32 to 14-33 clusters, 14-19 to 14-33 assembling, 14-23 to 14-29 Array To Cluster function, 14-28 to 14-29 Bundle By Name function, 14-24 to 14-28 Bundle function, 14-24 autosizing, 14-23 cluster order, A-5 compared with arrays, 14-19 configuring cluster elements, 14-20 to 14-23 creating, 14-20 data storage formats, A-5 to A-7 default values, setting, 14-21 definition, 14-19 disassembling, 14-29 to 14-33 Cluster To Array function, 14-32 to 14-33 Unbundle By Name function, 14-30 to 14-32 Unbundle function, 14-29 to 14-30 flattened data, A-14 moving, 14-22 to 14-23 operating cluster elements, 14-20 to 14-23 order of cluster elements, setting, 14-21 to 14-22 points, 14-19 purpose and use, 14-19 replacing cluster elements, 14-33 resizing, 14-22 to 14-23 type definitions, 22-22 type descriptors, A-11 to A-12 unbundling cluster elements, 14-19 wire patterns, 14-19 Code Interface Nodes (CINs), 23-2 coercion dot color setting, 7-13 I-21 G Programming Reference Manual Index color box illustration, 9-24 numeric controls and indicators, 9-24 color box constant, 16-6 Color Copy tool, 2-5 color icons vs. black and white, 3-3 color mapping options, intensity chart, 15-40 to 15-41 Color option Font ring, 2-17 graph indicators, 15-22 Color palette illustration, 2-24 More option, 2-25 Color Preferences dialog box, 7-13 to 7-14 Blink Background, 7-14 Blink Foreground, 7-14 Block Diagram, 7-13 Coercion Dots, 7-13 Front Panel, 7-13 illustration, 7-13 Menu Background, 7-14 Menu Text, 7-13 Provide extra colors, 7-14 Scrollbar, 7-13 Use default colors, 7-14 color ramp, 9-25 to 9-26 Color Table Attribute, 15-40 to 15-41 Color tool, 2-5 coloring objects, 2-24 to 2-26 copying and transferring colors, 2-26 customizing colors, 2-25 to 2-26 foreground and background colors, 2-25 limitations, 2-24 transparent objects, 2-24 to 2-25 columns headers, 11-6 resizing, 11-6 to 11-7 <command> key cutting, copying, and pasting icons (note), 3-4 moving between array elements, 14-13 moving between cluster elements, 14-21 G Programming Reference Manual Step Into button shortcut, 4-20 Step Out button shortcut, 4-20 Step Over button shortcut, 4-20 <command-b>, removing bad wires, 4-10 <command-click>, copying and transferring colors, 2-26 <command-f>, bringing up Find dialog box, 3-24 <command-h> (help key), 1-7 <command-m>, switching from run mode to edit mode (note), 6-6 <command-Shift>, bringing up temporary Tools palette, 2-4 <command-y>, calling History window, 14-6 commenting out sections of diagrams, 4-31 comments prompting for, 6-4, 7-18 to 7-19 recording comments generated by editor, 7-19 Common Plots option, 15-20 to 15-21 common questions about G. See questions about G. Communication option, Functions menu, 5-1 Complete Documentation format, Print Documentation dialog box, 5-4, 25-9 complex double-precision (CDB), 9-4 complex extended-precision (CXT), 9-4 complex single-precision (CSG), 9-5 conditional terminal, 18-4 Configure option, Call Library function, 23-3 configuring G. See Preferences dialog box. connections for terminals. See terminal connections for subVIs. connectors accessing, 1-6 overview, 1-6 terminal patterns for subVIs. See also terminal connections for subVIs. changing spatial arrangement, 3-6 defining, 3-5 selecting and modifying, 3-6 I-22 © National Instruments Corporation Index constants, 16-3 to 16-8 creating automatically, 16-13 definition, 16-3 pop-up menus, 16-5 representation, 16-7 resizing, 16-7 universal string constants, 16-7 definition, 16-3 numeric constants, 16-7 user-defined, 16-3 to 16-7 availability in palettes, 16-3 to 16-4 color box constant, 16-6 creating, 16-3 to 16-4 enumerated constants, 16-6 error ring, 16-6 to 16-7 incrementing and decrementing, 16-5 list box symbol ring, 16-6 numeric constant pop-up menu, 16-5 numeric constants, 16-4 path constant, 16-7 ring constants, 16-6 setting values, 16-4 string, 16-4 string constant pop-up menu, 16-5 Control Editor illustration, 22-2 opening with double click, 7-9 Parts window, 22-7 to 22-9 purpose and use, 22-1 to 22-3 control flow execution, Sequence Structures, 18-16 Controls and Functions palettes, customizing, 7-25 to 7-29 adding VIs and controls to user.lib and instr.lib, 7-25 creating subpalettes, 7-27 to 7-29 installing and changing views, 7-26 moving subpalettes, 7-29 Palettes editor, 7-26 to 7-29 views, 7-29 © National Instruments Corporation controls and indicators. See also specific types. assigning terminals, 3-6 to 3-8 changing indicators to controls, 17-13 controls as parts, 22-15 to 22-17 creating automatically, 16-13 customizing dialog box controls, 8-9 to 8-10 front panel control and indicator pop-up menu options, 8-2 to 8-4 Change to Control, 8-3 Change to Indicator, 8-3 Create Attribute Node, 8-3 Data Operations submenu, 8-3 Find Terminal, 8-3 Key Navigation, 8-5 to 8-8 pop-up menu, 8-2 Replace, 8-4 to 8-5 Show submenu, 8-3 imported graphics for customizing, 8-10 to 8-11 owned labels, 2-15 panel order, 8-8 to 8-9 printing (Controls option), 5-5 to 5-6 Descriptions option, 5-6 Include Data Type Information option, 5-6 replacing controls, 8-4 to 8-5 terminals, 16-2 to 16-3 symbols (table), 16-2 to 16-3 Controls option, Custom Print Settings dialog box, 5-5 to 5-6 Controls palette accessing cluster shell, 14-20 adding custom controls, 22-1, 22-5 controls available on palette, 8-1 to 8-2 illustration, 1-3, 8-1 pop-up palette, 2-3 selecting objects, 2-1 to 2-3 temporary copy, 2-3 Conversion Options dialog box. See LabWindows/CVI Function Panel converter. Convert CVI FP File option, 23-8 I-23 G Programming Reference Manual Index cooperative multitasking. See multitasking. Copy Data option Data Operations menu, 11-8 Probe tool, 4-25 Copy option, Edit menu, 2-12 Copy to Clipboard option, cosmetic parts pop-up menu, 22-10 copying (duplicating) objects, 2-12 to 2-13 cosmetic parts, 22-9 to 22-14 adding to custom controls, 22-17 to 22-18 definition, 22-9 independent pictures, 22-12 to 22-14 more than one picture, 22-11 to 22-12 options, 22-10 to 22-11 Copy to Clipboard, 22-10 Import at Same Size, 22-11 Import Picture, 22-10 to 22-11 Original Size, 22-11 Revert, 22-11 pop-up menu, 22-10 count terminal, 18-3 crashes, questions about, B-4 to B-5 Create Attribute Node option, 8-3, 20-1, 20-4 Create Constant option, 16-13 Create Control option, 16-13 Create Indicator option, 16-13 creating VIs. See building VIs. <Ctrl> key bringing subVI block diagram to front, 4-21 changing Icon Editor tools to dropper, 3-4 cloning Attribute Nodes, 20-4 cloning objects, 2-13 creating new scale marker, 9-17 to 9-18 cutting, copying, and pasting icons (note), 3-4 moving between array elements, 14-13 moving between cluster elements, 14-21 Step Into button shortcut, 4-20 Step Out button shortcut, 4-20 Step Over button shortcut, 4-20 <Ctrl-b>, removing bad wires, 4-10 G Programming Reference Manual <Ctrl-click> copying and transferring colors, 2-26 executing Show VI Hierarchy action, 3-21 resizing working space, 2-24 untacking last tack point (note), 17-3 <Ctrl-Enter>, embedding newlines, 7-10 <Ctrl-f>, bringing up Find dialog box, 3-24 <Ctrl-h> (help key), 1-7 <Ctrl-m>, switching from run mode to edit mode (note), 6-6 <Ctrl-Shift>, bringing up temporary Tools palette, 2-4 <Ctrl-y>, calling History window, 14-6 cursors. See graph cursors. custom controls adding cosmetic parts to custom controls, 22-17 to 22-18 adding to Controls palette, 22-1, 22-5 applying changes from custom controls, 22-3 to 22-4 caveats, 22-18 to 22-19 Control Editor, 22-1 to 22-3 Control Editor Parts window, 22-7 to 22-9 controls as parts, 22-15 to 22-17 cosmetic parts, 22-9 to 22-14 independent pictures, 22-12 to 22-14 more than one picture, 22-11 to 22-12 creating, 22-1 to 22-4 current part, 22-8 independence from source file, 22-5 independent parts, 22-6 to 22-7 making icons, 22-5 opening, 22-5 pop-up menus for different parts, 22-9 purpose and use, 22-1 saving, 22-4 scale parts, 22-15 text parts, 22-14 to 22-15 using, 22-4 valid custom controls, 22-3 to 22-4 I-24 © National Instruments Corporation Index Custom format, Print Documentation dialog box, 5-4 Custom Print Settings dialog box, 5-5 Block Diagram, 5-6 Controls, 5-5 to 5-6 Front Panel, 5-5 Icon and Description, 5-5 illustration, 5-5 List of SubVis, 5-6 Print Section Headers option, 5-6 VI Hierarchy, 5-6 VI History, 5-6 Custom probe option, 4-25 Custom Probe palette, 4-26 Custom Save option, 25-4 customer communication, xxv, C-1 to C-2 customize mode, 22-5 to 22-19 adding cosmetic parts to custom controls, 22-17 to 22-18 Control Editor Parts window, 22-7 to 22-9 controls as parts, 22-15 to 22-17 cosmetic parts, 22-9 to 22-14 independent parts, 22-6 to 22-7 pop-up menus for different parts, 22-9 scale parts, 22-15 selecting, 22-5 to 22-6 text parts, 22-14 to 22-15 customizing G environment. See G environment, customizing. Cut command, Edit menu, 2-12 Cut Data option, Data Operations menu, 11-8, 14-13 CVI Function Panel Converter dialog box. See LabWindows/CVI Function Panel converter. cycles, avoiding in subVIs, 3-12 to 3-13 Attribute Node in Case Structure, 3-13 Attribute Nodes within loops, 3-12 detection by G, 3-12 front panel terminal in Case Structure, 3-13 illogical selections, 3-13 © National Instruments Corporation local variable in Case Structure, 3-13 locals and front panel terminals within loops, 3-13 D Data Log File RefNum, 12-3 to 12-5 Data Logging menu, 4-5 to 4-6 Change Log File Binding option, 4-6 data logging operation, 4-5 to 4-6 illustration, 4-5 Purge Data option, 4-6 data logging on front panel, 4-5 to 4-7 changing log file binding, 4-6 Data Logging menu, 4-5 to 4-6 deleting marked records, 4-6 enabling/disabling automatic data logging, 6-6 marking records for deletion, 4-6 retrieving data programmatically, 4-7 to 4-9 accessing databases, 4-7 to 4-9 halo terminals for accessing data, 4-7, 4-8 using file I/O functions, 4-9 viewing records, 4-6 to 4-7 waveform charts (note), 4-6 Data Operations menu Autoscale X, 15-13 Autoscale Y, 15-13 control pop-up menu options, 4-2 to 4-3 Copy Data, 11-8 Cut Data, 11-8, 14-13 Description, 2-26 Empty Array, 14-13 End Selection, 14-14 to 14-16, 15-33 front panel control and indicator pop-up menu, 8-3 Make Current Value Default, 14-21 object pop-up menu options, 4-3 to 4-4 Paste Data, 11-8 Reinitialize to Default Values, 14-21 Show Last Element, 14-13 I-25 G Programming Reference Manual Index Show Selection, 11-9 Smooth Updates, 15-13 Start Selection, 14-14 to 14-16, 15-33 Update Mode, 15-26 Data Range dialog box, 9-7 Data Range option, 4-14, 9-15, 14-12 data storage formats arrays, A-3 to A-5 Boolean, A-1 clusters, A-5 to A-7 numeric, A-1 to A-3 paths, A-5 strings, A-5 data tables. See tables. data types arrays, 23-6 to 23-7 avoiding complicated data types in structures, 26-30 to 26-32 calling functions that expect non-G data types, 23-7 examples, A-10 to A-11 listbox items, 13-3 memory considerations avoiding constant resizing of data, 26-24 to 26-28 consistent data types, 26-22 to 26-23 building arrays (example), 26-24 to 26-26 searching through strings (example), 26-27 to 26-28 generating data of right type, 26-23 to 26-24 numerics, 23-6 printing control data type, 5-6 scalar numeric (table), A-8 to A-9 storage of physical quantities (note), A-11 strings, 23-7 void, 23-5 waveform graph data types multiplot graph, 15-4 to 15-9 single-plot graph, 15-2 to 15-3 G Programming Reference Manual XY graph data types multiplot graph, 15-9 to 15-11 single-plot graph, 15-3 to 15-4 data-dependent execution, 1-5 data-driven execution, 1-5 dataflow programming data buffers, 26-14 to 26-17 overview, 1-5 datalogging. See data logging on front panel. date formatting, absolute digital displays, 9-10 to 9-11 graph indicators, 15-16 to 15-17 date preferences. See Time and Date Preferences dialog box. debugging commenting out sections of diagrams, 4-31 disabling debugging features, 4-31 execution highlighting, 4-21 to 4-23 placing breakpoints, 4-26 to 4-29 Breakpoint tool, 4-26 Clear Breakpoint cursor, 4-26 display of breakpoints (table), 4-27 example, 4-28 to 4-29 setting breakpoint, 4-27 Probe tool creating probes, 4-25 to 4-26 using, 4-23 to 4-25 reading call chains, 4-21 suspending execution, 4-29 to 4-30 options, 4-29 recognizing automatic suspension, 4-29 to 4-30 Return to caller button, 4-30 Run button, 4-30 Skip to beginning button, 4-30 using toolbar buttons during suspension, 4-30 viewing Hierarchy windows during suspension, 4-30 I-26 © National Instruments Corporation Index deleting. See also removing. data records, 4-6 graph cursors, 15-33 objects, 2-13 removing structures without deleting contents, 18-26 structures, while preserving contents, 2-13 subdiagrams, 18-20 to 18-21 terminal connections, 3-9 to 3-10 wires, 17-6 to 17-10 Description option, Data Operations menu, 2-26 descriptions. See also documentation options, VI Setup dialog box. creating objects, 2-26 to 2-27 VIs, 2-27 inability to edit subVI descriptions from calling VI diagram (note), 2-27 destination terminals, 16-1 Development Distribution option, 25-4 Device RefNum, 12-4 diagram identifier, subdiagram display window, 18-13 Diagram window, 1-4 dialog box controls, customizing, 8-9 to 8-10 Dialog Box option, VI Setup dialog box, 6-5 Dialog font, 2-18 digital controls and indicators, 9-2 to 9-11 changing representation of numeric values, 9-4 to 9-5 digital numeric pop-up menu options, 9-3 displaying integers in other radixes, 9-4 Enter button for replacing old values, 9-2 format and precision of digital displays, 9-9 to 9-11 absolute time and date, 9-10 to 9-11 example, 9-10 Format & Precision dialog box, 9-9 illustration, 9-2 incrementing and decrementing, 9-2 to 9-3 Debugging Preferences dialog box, 7-12 to 7-13 Auto probe during execution highlighting, 7-12 Show data bubbles during execution highlighting, 7-12 Show warnings in error box by default, 7-12 Warn about objects unavailable in student edition, 7-12 debugging VIs, 4-10 to 4-31 broken VIs common reasons for broken VIs, 4-11 correcting broken VI range errors, 4-14 to 4-15 error messages (table), 4-11 to 4-14 fixing broken VIs, 4-10 to 4-11 locating errors, 4-10 executable VIs, 4-15 to 4-18 problem-solving steps, 4-15 to 4-17 recognizing undefined data, 4-17 to 4-18 understanding warnings, 4-18 single-stepping through VIs, 4-18 to 4-20 example, 4-19 to 4-20 executing VIs, 4-18 to 4-19 Pause button, 4-18 Step Into button, 4-20 Step Out button, 4-20 Step Over button, 4-18, 4-20 using step buttons, 4-20 decimal separator, selecting, 7-10 Decorations palette, 5-8, 22-17 default directories, setting, 7-3 to 7-5 default timer, using, 7-7 to 7-8 Delete button, front panel data logging, 4-6 Delete Marker option, 9-17 Delete this Parameter option, 23-5 <Delete> key deleting objects, 2-13 deleting wires, 17-6 © National Instruments Corporation I-27 G Programming Reference Manual Index numeric range checking, 9-7 to 9-9 Operating tool, 9-2 purpose and use, 9-2 to 9-3 range options, 9-6 to 9-7 Data Range dialog box, 9-7 floating-point numbers (table), 9-6 numeric range checking, 9-7 to 9-9 range of extended floating-point numbers (note), 9-6 valid values, 9-2 Digital Display option, Show menu, 2-13, 15-25 digital displays, hiding, 2-13 digital numeric pop-up menu options, 9-3 directories, setting, 7-3 to 7-4, 7-5 Disable Indexing option, 18-8 Disabled Attribute, 20-7 to 20-8 Disconnect All Terminals command, 3-10 Disconnect from Type Def. option, 22-22 Disconnect This Terminal command, 3-10 discontiguous data types, A-12 disk preferences, setting. See Performance and Disk Preferences dialog box. Display Types option, 11-3 to 11-5 distributing objects, 2-12 distributing VIs considerations, 25-2 to 25-4 using Save with Options, 25-3 to 25-4 documentation, printing. See Print Documentation dialog box. documentation (National Instruments) conventions used in manual, xxiv-xxv organization of manual, xxi-xxiv advanced G topics, xxiii appendices, glossary and index, xxiii-xxiv basic G concepts, xxi-xxii block diagram programming, xxii-xxiii front panel objects, xxii G Programming Reference Manual documentation options, VI Setup dialog box, 6-3 to 6-4. See also descriptions. Add an entry every time this VI is saved, 6-4 Help Path box, 6-4 Help Tag box, 6-4 illustration, 6-3 Prompt for comment when this VI is closed, 6-4 Prompt for comment when this VI is saved, 6-4 Use History Defaults (In Preferences Dialog), 6-3 dots at wire junctions, showing, 7-11 double numeric data storage format, A-2 Double-Click Attribute, 20-13 to 20-14 double-precision representation, 64-bit (DBL), 9-4 dragging and dropping VIs, pictures, and text, 2-8 to 2-9 dropper tool, Icon Editor, 3-3 drop-through clicks, allowing, 7-23 Duplicate Case command, 18-20 duplicating objects, 2-12 to 2-13 E Edit Control & Function Palettes option, 7-24, 22-16 Edit Control option, 22-1 to 22-2 Edit Icon option, 3-2, 3-21 Edit menu Clear, 2-13 Copy, 2-12 Cut, 2-12 Edit Control, 22-1 to 22-2 Edit Control & Function Palettes, 7-24, 22-16 Move Backward, 2-11 Move Forward, 2-10 Move to Back, 2-11 Move to Front, 2-10 Panel Order, 8-8 to 8-9 I-28 © National Instruments Corporation Index Paste, 2-12 Remove Bad Wires, 4-10, 17-6, 17-11, 17-14 SubVI From Selection, 3-10 User Name, 7-19 to 7-20 Edit Palettes dialog box, 7-26 to 7-27 Edit VI Library option, 2-30 editing VIs aligning objects, 2-11 to 2-12 coloring objects, 2-24 to 2-26 creating object descriptions, 2-26 to 2-27 creating VI descriptions, 2-26 to 2-27 deleting objects, 2-13 distributing objects, 2-12 dragging and dropping VIs, pictures, and text, 2-8 to 2-9 duplicating objects, 2-12 to 2-13 labeling objects, 2-14 to 2-22 free labels, 2-14 to 2-16 text characteristics, 2-16 to 2-22 positioning objects, 2-9 to 2-11 resizing objects, 2-23 to 2-24 front panel and block diagram work space, 2-24 labels, 2-23 to 2-24 selecting objects, 2-7 to 2-8 switching from run mode to edit mode (note), 6-6 while running VIs, 4-2 to 4-4 control pop-up menu options, 4-2 to 4-3 object pop-up menu options, 4-3 to 4-4 efficient data structures. See performance issues. electronic support services, C-1 to C-2 e-mail support, C-2 Empty Array command, 14-13 empty arrays, 14-12 Enable Database Access option, 4-7, 4-8 Enable Indexing option, 18-8 Enable Log/Print at Completion option, 6-6 © National Instruments Corporation End Selection option, 14-14, 14-15, 14-16, 15-33 Enter button changing cluster order, 14-22 changing numeric control and indicator values, 9-2 data logging on front panel, 4-6 <Enter> key data tables, 11-7 entering linefeed into string (note), 11-2 finding next matching node, 3-23 Key Navigation option associations, 8-6 label names, 2-3, 2-14 setting Enter key same as Return key, 7-10 string controls and indicators, 11-1 enumerated constants, 16-6 enumerated data types, changing programmatically, B-15 enumerated type controls, 13-10 to 13-12 compared with ring controls, 13-11 illustration, 13-11 purpose and use, 13-11 to 13-12 error messages and crashes, questions about, B-4 to B-5 error ring constant, 16-6 to 16-7 errors, Formula Node (table), 19-9 to 19-10 errors for broken VIs Error List window accessing, 4-10 illustration, 4-10 possible errors (table), 4-11 to 4-14 showing warnings, 7-12 executing VIs, 4-1 to 4-9 data logging on front panel, 4-5 to 4-7 loading, questions about, B-10 to B-12 retrieving data programmatically, 4-7 to 4-9 accessing databases, 4-7 to 4-9 using file I/O functions, 4-9 running VIs, 4-1 to 4-4 buttons for running, 4-1 editing while running, 4-2 to 4-4 I-29 G Programming Reference Manual Index loading and running dynamically, B-10 multiple VIs, 4-2 running repeatedly, 4-5 stopping VIs, 4-4 execution highlighting. See highlighting execution. execution options, VI Setup dialog box, 6-2 to 6-3 Close Afterwards if Originally Closed, 6-2 illustration, 6-2 Run When Opened, 6-2 Show Front Panel When Called option, 6-2 Show Front Panel When Loaded option, 6-2 Suspend When Called, 6-2 expandable functions, 16-10 extended numeric data storage format, A-1 to A-2 extended-precision representation (EXT), 9-4 Save As, 2-28, 22-4 Save With Options, 2-28 Fill Baseline option, 15-21 fill bucket tool, Icon Editor, 3-3 Fill Options option, 9-20 Fill to Value Above option, 9-20 Fill to Value Below option, 9-20 filled and multivalued slides, 9-20 filled rectangle tool, Icon Editor, 3-4 Find command, Project menu, 3-23 Find Control option, 20-6 Find dialog box, 3-24 to 3-29 finding text, 3-26 to 3-27 More Options button, 3-27 narrowing search scope, 3-27 to 3-28 All VIs in Memory option, 3-27 Name of a VIs option, 3-28 Selected VIs option, 3-28 next and previous search items, 3-29 Objects button, 3-24 Search Results window, 3-28 to 3-29 Clear option, 3-28 Find option, 3-28 Go To option, 3-28 Stop option, 3-29 search string options Match Case, 3-26 Match Whole Word, 3-26 Regular Expression, 3-26 Select Objects menu Functions option, 3-25 Globals option, 3-25 illustration, 3-25 Objects in vi.lib option, 3-25 Others option, 3-25 Type Defs option, 3-25 VIs by Name option, 3-25 VIs option, 3-25 Text button, 3-26 F fax and telephone support, C-2 FaxBack support, C-2 File Convert CVI FP File option, 23-8 file dialog boxes, native, 7-21 to 7-22 file I/O functions, for retrieving logged data, 4-9 file management arranging files in VI libraries, 25-1 to 25-2 backing up files, 25-2 File menu Apply Changes, 22-3 Edit VI Library, 2-30 Page Setup, 5-2 Printer Setup, 5-2 Revert, 2-28, 3-11, 22-11 Save, 2-28, 22-20 Save a Copy As, 2-28 G Programming Reference Manual I-30 © National Instruments Corporation Index text search options Search in Object's Data & Parts, 3-27 Search in Object's Label, 3-27 Search in VIs, 3-27 VIs and other objects, 3-24 to 3-25 Find Hierarchy Node mechanism, 3-22 to 3-23 Find Next command, 3-29 Find pop-up menu Attribute Nodes, 3-29 global and local variables, 3-29 Find Terminal option, 8-3, 20-6 Find Wire option, 4-24 to 4-25 flattened data arrays, A-13 to A-14 clusters, A-14 handles, A-13 overview, A-12 to A-13 paths, A-13 scalars, A-13 strings, A-13 Flip Horizontal command, 3-6 Flip Vertical command, 3-6 floating-point operations and undefined data, 4-17 to 4-18 floating-point representation, 9-4 Font dialog Diagram Default checkbox, 2-18 illustration, 2-17 Panel Default checkbox, 2-18 Font Dialog command, 2-17 Font Preferences dialog box, 7-14 to 7-15 Custom font, 7-15 Font style, 7-15 illustration, 7-15 Use default font, 7-15 Font ring changing text characteristics, 2-16 Color option, 2-17 illustration, 2-17 Justify option, 2-17 Size option, 2-17 Style option, 2-17 © National Instruments Corporation font window, 2-17 fonts Application font, 2-18 changing fonts, 2-16 to 2-22 applying changes to selected objects (example), 2-21 to 2-22 example, 2-19 to 2-20 Dialog font, 2-18 differences when porting VIs between platforms, 27-2 to 27-4 predefined fonts, 2-18, 27-2 to 27-3 System font, 2-18 For Loops auto-indexing overview, 18-7 to 18-8 setting the count, 18-8 avoiding cycles in subVIs, 3-13 avoiding unnecessary computations, 26-9 to 26-11 executing zero times, 18-9 icon for, 18-2, 18-3 placing objects inside structures, 18-4 to 18-5 purpose and use, 16-11, 18-3 to 18-4 shift registers, 18-10 to 18-13 terminals inside loops, 18-6 to 18-7 foreground and background colors, 2-25 foreground/background tool, Icon Editor, 3-4 form feed, backslash ‘\’ code (table), 11-4 Format & Precision option digital displays, 9-9 to 9-11 absolute time and date, 9-10 to 9-11 example, 9-10 Format & Precision dialog box, 9-9 graph indicators, 15-16 to 15-17 Attribute Nodes, 20-6 Numeric formatting, 15-16 Scale pop-up menu, 9-15 Time & Date formatting, 15-16 to 15-17 Formatting option, graph indicators, 15-15. See also X Scale Formatting dialog box. I-31 G Programming Reference Manual Index Formula Node, 19-1 to 19-10 Bakus-Naur Form notation, 19-8 comments, 19-2 definition, 19-2 errors (table), 19-9 to 19-10 floating-point numeric scalar variables, 19-4 function names (table), 19-5 to 19-8 input and output variables, 19-3 to 19-4 pop-up menu, 19-3 syntax, 19-2, 19-8 to 19-9 syntax errors, 19-5 Formula Node palette, 19-1 frames, in Sequence Structures, 18-16 free labels, 2-14 to 2-16 copying text, 2-15 creating, 2-14 overlapping controls or indicators (note), 2-15 Free option, 15-35 front panel, 1-3 to 1-4 applying changes from custom controls, 22-3 to 22-4 building, 8-1 to 8-11 control and indicator options, 8-2 to 8-4 Controls palette, 8-1 to 8-2 customizing dialog box controls, 8-9 to 8-10 imported graphics for customizing controls, 8-10 to 8-11 Key Navigation option for controls, 8-5 to 8-8 Panel Order option, 8-8 to 8-9 replacing controls, 8-4 to 8-5 color settings, 7-13 Controls palette, 1-3 creating pop-up panels. See pop-up panels, creating. data logging, 4-5 to 4-7 help information, 1-7 illustration, 1-3 labels, 2-3 G Programming Reference Manual memory usage rules, 26-19 to 26-20 printing (Front Panel option), 5-5 resizing work space, 2-24 switching to block diagram, 1-3 terminals avoiding cycles in subVIs, 3-13 created automatically, 2-3 to 2-4 Front Panel Control and Indicator pop-up menu, 8-2 to 8-4 Change to Control, 8-3 Change to Indicator, 8-3 Create Attribute Node, 8-3 Data Operations submenu, 8-3 Find Terminal, 8-3 illustration, 8-2 Key Navigation, 8-5 to 8-8 Replace, 8-4 to 8-5 Show submenu, 8-3 Front Panel option, Custom Print Settings dialog box, 5-5 Front Panel Preferences dialog box, 7-9 to 7-11 Blink speed, 7-10 End text entry with Return key (same as Enter key), 7-10 illustration, 7-9 Open the control editor with double click, 7-9 Override system default function key settings, 7-10 Support numeric keypad on Sun keyboards, 7-10 Use localized decimal point, 7-10 Use smooth updates during drawing, 7-10 Use transparent name labels, 7-10 FTP support, C-1 Full VI Path in Label option, 3-19 function key defaults, overriding, 7-10 functions, 16-8 to 16-11 default labels, 2-15 definition, 16-8 displaying labels, 16-9 I-32 © National Instruments Corporation Index expandable functions, 16-10 overview, 16-8 Functions option, Select Objects menu, 3-25 Functions palette Advanced palette, 23-3 Communication option, 5-1 customizing. See Controls and Functions palettes, customizing. illustration, 16-9 pop-up palette, 2-3 selecting objects, 2-1 to 2-3 temporary copy, 2-3 G environment, customizing controls and functions palettes, 7-25 to 7-29 adding VIs and controls to user.lib and instr.lib, 7-25 creating subpalettes, 7-27 to 7-29 installing and changing views, 7-26 moving subpalettes, 7-29 Palettes editor, 7-26 to 7-27 views, 7-29 Preferences Dialog Box options, 7-1 to 7-24 block diagram preferences, 7-11 to 7-12 color preferences, 7-13 to 7-14 debugging preferences, 7-12 to 7-13 font preferences, 7-14 to 7-15 front panel preferences, 7-9 to 7-11 history preferences, 7-17 to 7-20 miscellaneous preferences, 7-22 to 7-23 path preferences, 7-2 to 7-6 performance and disk preferences, 7-6 to 7-9 printing preferences, 7-16 to 7-17 time and date preferences, 7-21 storing preferences, 7-23 to 7-25 Get Info option, 3-21 Global Variable palette, 21-1 global variables creating, 21-1 to 21-2 definition, 21-1 example, 21-2 Find pop-up menu, 3-29 including in Hierarchy window, 3-18, 3-19 memory considerations, 26-21 memory usage, 26-21 placing in VIs, 21-3 purpose and use, 21-1 to 21-3 selecting, 21-2 to 21-3 Globals option, Select Objects menu, 3-25 G G environment, 2-1 to 2-6. See also G environment, customizing. dataflow programming, 1-5 help information, 1-7 to 1-9 attribute node help, 1-9 block diagram help, 1-7 to 1-9 creating your own help files, 1-9 to 1-10 front panel help, 1-7 online reference, 1-9 menus, 2-6 overview, 1-1 pop-up menus, 2-6 questions charts and graphs, B-1 to B-4 error messages and crashes, B-4 to B-5 miscellaneous questions, B-9 to B-16 platform issues and compatibilities, B-6 printing, B-7 to B-9 switching to Basic G palette from BridgeVIEW (note), 2-1 Tools palette, 2-4 to 2-5 © National Instruments Corporation I-33 G Programming Reference Manual Index Goto Cursor option, 15-35 graph cursors, 15-30 to 15-36 array-type behavior, 15-32 components, 15-32 controlling appearance of, 15-33 to 15-34 cross-hairs, 15-33 to 15-34 cursor palette (illustrations), 15-31 deleting, 15-33 lock button, 15-35 moving, 15-33 point style, 15-34 purpose and use, 15-30 reading programmatically (example), 20-14 to 20-15 visible name, 15-35 graph indicators creating multiplot graph, 15-5 to 15-11 waveform graph data types, 15-5 to 15-9 XY graph data types, 15-9 to 15-11 definition, 15-1 examples located in examples, 15-1 graph cursors, 15-30 to 15-36 graph options, 15-11 to 15-22 Autoscale, 15-17 Formatting, 15-15 to 15-17 graph pop-up menu, 15-11 to 15-12 illustration, 15-12 legend options, 15-19 to 15-22 Loose Fit, 15-17 Marker Spacing, 15-13 to 15-14 panning and zooming options, 15-17 to 15-19 scale options, 15-12 to 15-17 intensity graph, 15-29 to 15-30 data type, 15-29 options, 15-29 to 15-30 questions about, B-1 to B-4 waveform and XY graphs, 15-2 to 15-22 creating single-plot graphs, 15-2 to 15-4 illustration, 15-2 G Programming Reference Manual waveform graph data types, 15-2 to 15-3 XY graph data types, 15-3 to 15-4 Graph palette, 15-1 graph pop-up menu, 15-12 graphics, importing. See also pictures. Boolean controls and indicators, 10-6 controls, 8-10 to 8-11 grayed-out dividing line, listbox controls, 13-6 Grid Options, 15-15 H handles, flattened data, A-13 headers, printing Print Header option, 5-4, 5-8 Print Section Headers option, 5-6 help information, 1-7 to 1-9 attribute node help, 1-9 block diagram help, 1-7 to 1-9 creating your own help files, 1-9 to 1-10 adding documentation, 6-4 front panel help, 1-7 locking, 1-7 online reference, 1-9 Help menu Lock Help command, 1-7 Online Reference command, 1-9 Show Help command, 1-7 Simple Help command, 1-7 Help Path box, VI Setup dialog box, 6-4 Help Tag box, VI Setup dialog box, 6-4 Help window Attribute Nodes, 20-6 wiring connection information, 17-5 <Help> key, 1-7 hex characters backslash ‘\’ code (table), 11-4 displaying strings as hex characters, 11-5 Hex Display option, 11-5 hidden labels, displaying, 2-16 Hide All SubVIs option, Hierarchy Node Pop-Up menu, 3-20 I-34 © National Instruments Corporation Index hiding digital displays, 2-13 labels, 2-13 menu bar, 6-6, B-15 Stop button, 4-4 toolbar, 6-6 hierarchy node mouse clicks sequences, 3-21 to 3-22 Hierarchy Node Pop-Up menu Edit Icon option, 3-21 Get Info option, 3-21 Hide All SubVIs option, 3-20 Highlight Connections option, 3-20 Open Front Panel option, 3-21 Print Documentation option, 3-21 Show All Callers option, 3-21 Show All SubVIs option, 3-21 Show Immediate SubVIs option, 3-20 Show VI Hierarchy option, 3-20 VI Setup option, 3-21 hierarchy of VI, printing, 5-6 Hierarchy window, 3-15 to 3-23 features, 3-15 Find Hierarchy Node mechanism, 3-22 to 3-23 node mouse-click sequences, 3-21 to 3-22 node pop-up menu options, 3-20 to 3-21 opening, 3-15 to 3-17 subVI connections to calling VIs, 3-16 to 3-17 toolbar buttons, 3-19 View menu options, 3-18 to 3-19 viewing during suspended execution, 4-30 Highlight Connections option, 3-20 highlighting execution, 4-21 to 4-23 auto probe during, 7-12 example, 4-22 execution glyphs, 4-23 Hilite Execution button, 4-21 showing data bubbles, 7-12 Hilite <Return> Boolean option, 6-5 Hilite Execution button, 4-21 © National Instruments Corporation history for VIs. See Vi history; VI History window. History Preferences dialog box, 7-17 to 7-20 Add an entry every time VI is saved, 7-18 illustration, 7-18 Login automatically with the system user name, 7-20 Prompt for comment when VI is closed, 7-19 Prompt for comment when VI is saved, 7-18 to 7-19 Record comments generated by the editor, 7-19 Show revision number in titlebar, 7-19 Show the login prompt at startup time, 7-19 to 7-20 Horizontal Centers alignment, 2-12 Horizontal Hierarchy option, 3-18 Horizontal Layout button, 3-19 hot menus, 7-23 Huge pointer (note), 23-6 I Icon, Description, Panel and Diagram format option, 5-3 Icon and Description option, 5-5 VI Connector and Icon, 5-5 VI Description, 5-5 Icon Editor Cancel button, 3-4 illustration, 3-2 OK button, 3-4 tools available, 3-3 to 3-4 Undo button, 3-4 icons creating for controls, 22-5 creating for subVIs, 3-2 to 3-4 black and white vs. color icons, 3-3 Cancel button, 3-4 cutting, copying, and pasting icons (note), 3-4 dropper tool, 3-3 I-35 G Programming Reference Manual Index Edit icon option, 3-2 fill bucket tool, 3-3 filled rectangle tool, 3-4 foreground/background tool, 3-4 Icon Editor, 3-2 line tool, 3-3 OK button, 3-4 pencil tool, 3-3 rectangle tool, 3-3 select tool, 3-4 text tool, 3-4 Undo button, 3-4 default icon, 1-6 overview, 1-6 printing (Icon and Description option), 5-5 Import at Same Size option, 22-11 Import Picture After option, 13-9 Import Picture Before option, 13-9 Import Picture option, 13-9, 22-10 to 22-11 importing graphics. See also pictures. Boolean controls and indicators, 10-6 controls, 8-10 to 8-11 ring controls, 13-9 Include Globals button, 3-19 Include Globals option, 3-18 Include Type Definitions button, 3-19 Include Type Defs option, 3-19 Include VI Lib button, 3-19 Include VIs in vi.lib option, 3-18 independent parts, 22-6 to 22-7 Independent Sizes option, 22-14 Index Array function icon, 14-17 index display for arrays array shell, 14-5 displaying array in single-element or tabular form, 14-9 to 14-11 interpreting, 14-8 to 14-9 pop-up menu, 14-7 Index Display option, 14-11 index for arrays, 14-1 to 14-2 indicators. See controls and indicators. G Programming Reference Manual ±Inf propagation by floating-point operations, 4-17 range errors (note), 4-18 info-Labview (user group), B-9 to B-10 input/output performance considerations, 26-6 to 26-7 Insert option, wire pop-up menu, 16-12 Insert Submenu dialog box, 7-27 to 7-29 Automatic Update From directory, 7-28 Create a new menu file, 7-28 illustration, 7-28 Link to a directory, 7-28 Link to a library, 7-28 Link to an existing menu file, 7-28 inserting block diagram objects, 16-12 instr.lib, adding VIs and controls, 7-25 integers, displaying in other radixes, 9-4 intensity charts, 15-36 to 15-41 illustrations, 15-37 to 15-38 options, 15-38 to 15-41 color mapping, 15-40 to 15-41 history of data, 15-40 pop-up menu, 15-39 intensity graph, 15-29 to 15-30 data type, 15-29 options, 15-29 to 15-30 Interpolate Colors option, 9-25 Interpolation option, 15-21 to 15-22 interrupts, servicing, B-13 iteration terminal, 18-3 J junction (of wires), 17-6 Justify option, Font ring, 2-17 I-36 © National Instruments Corporation Index K LabWindows/CVI Function Panel converter, 23-7 to 23-13 Conversion Options dialog box Add Instrument Error I/O Checking, 23-11 Assign Instrument Driver Icon Based on Name, 23-12 Assume 15-bit DLL, 23-11 Capitalize and Remove Underscores in Names, 23-12 Convert All Control Names to Lowercase, 23-12 Create Library Call on Block Diagram, 23-10 to 23-11 Default Size for Array Parameters, 23-12 to 23-13 illustration, 23-10 Include CVI Class Names in VI Names, 23-11 Leave VI Front Panels Open, 23-10 Use C Function Names for VIs, 23-11 to 23-12 Use SubVI for CVI Error Conversion, 23-11 conversion process, 23-8 to 23-13 CVI Function Panel Converter dialog box Browse button, 23-9 Deselect All button, 23-10 illustration, 23-9 Instrument Prefix text box, 23-9 Options button, 23-10 Rename button, 23-10 Select All button, 23-10 purpose and use, 23-7 to 23-8 Latch Until Released action, 10-6 Latch When Pressed action, 10-5 Latch When Released action, 10-6, 22-13 Left Edges alignment, 2-12 legend options for graph indicators, 15-19 to 15-22 Bar Plots, 15-21 Color, 15-22 Common Plots, 15-20 to 15-21 Key Focus Attribute, 20-8 Key Navigation option, 8-5 to 8-8 current keyboard associations, 8-8 disabled for indicators (note), 8-5 <Enter> and <Return> key associations, 8-6 Key Navigation dialog box, 8-7 Keyboard Mode option Case Insensitive suboption, 13-6 Case Sensitive suboption, 13-6 System Default suboption, 13-6 L Label command, 2-3, 2-13, 2-16 labeling objects, 2-14 to 2-22 free labels, 2-14 to 2-16 text characteristics, 2-16 to 2-22 Labeling tool, 2-5 labels copying text, 2-15 default labels for structures and functions, 2-15 differences when porting VIs between platforms, 27-3 displaying function labels, 16-9 hidden labels, 2-16 free labels, 2-14 to 2-16 front panel, 2-3 hiding, 2-13 numeric scales, 9-18 to 9-19 min and max labels, 9-18 to 9-19 overlapping, 2-15, 27-3 owned labels controls or indicators, 2-15 definition, 2-14 leaving blank, 2-15 resizing, 2-23 showing, 2-3, 2-16 subVIs on block diagram (note), 2-16 transparent, 7-10 © National Instruments Corporation I-37 G Programming Reference Manual Index Fill Baseline, 15-21 Interpolation, 15-21 to 15-22 Line Style, 15-21 Line Width, 15-21 Point Style, 15-21 libraries. See VI libraries (.LLBs). Limit to Single Line option, 11-6 Line Style option, 15-21 line tool, Icon Editor, 3-3 Line Width option, 15-21 linefeed character backslash ‘\’ code (table), 11-4 entering into string (note), 11-2 List & Ring palette, 13-1 list box symbol ring constant, 16-6 List Errors option, 17-11 List of SubVis option, Custom Print Settings dialog box, 5-6 listbox controls, 13-1 to 13-6 Attribute Node example, 20-13 to 20-14 creating list of options, 13-2 data types, 13-3 grayed-out dividing line, 13-6 Multiple Selection, 13-2 pop-up menu options, 13-3 to 13-6 illustration, 13-3 Keyboard Mode, 13-5 Selection Mode, 13-4 to 13-5 Show, 13-4 purpose and use, 13-1 to 13-2 selecting listbox items, 13-2 to 13-3 Single Selection, 13-1 symbols for listbox items, 13-4 .LLBs. See VI libraries (.LLBs). Local Variable palette, 21-4 local variables, 21-3 to 21-5 avoiding cycles in subVIs Attribute Nodes in Case Structures, 3-13 locals in Case Structures, 3-13 locals within loops, 3-13 creating, 21-4 Find pop-up menu, 3-29 G Programming Reference Manual inability to reuse data memory, 26-20 to 26-21 memory usage, 26-20 to 26-21 multiple local variables, 21-5 Lock Help command, 1-7 Lock to Plot option, 15-36 Log at Completion option, 4-6 Log option, 4-6 logging data. See data logging on front panel. logging in automatic login using system user name, 7-20 showing login prompt at startup time, 7-19 long integer numeric data storage format, A-3 loops. See For Loops; While Loops. Loose Fit option, 15-17 M Make Current Value Default option, 14-12, 14-21 Make This Case option, 18-21 managing applications. See applications, managing. manual. See documentation (National Instruments). Mapping Mode option, 15-15 Mapping option, 9-15 marker spacing adding or deleting markers, 15-14 non-uniform distribution, 15-14 Marker Spacing option graph indicators, 15-13 to 15-14 slide scale pop-up menu, 9-14 marquee, 2-7 Mechanical Action palette, 10-4 to 10-5 memory preferences. See Performance and Disk Preferences dialog box. I-38 © National Instruments Corporation Index memory usage, 26-12 to 26-36 basic concepts, 26-12 consistent data types, 26-22 to 26-28 building arrays (example), 26-24 to 26-26 searching through strings (example), 26-27 to 26-28 dataflow programming and data buffers, 26-14 to 26-17 deallocation, 26-21 to 26-22 front panels, 26-19 to 26-20 general rules for improving, 26-18 to 26-19 global variables, 26-21 input buffer reuse by output, 26-22 local variables, 26-20 to 26-21 Macintosh memory, 26-13 monitoring, 26-17 to 26-18 overview, 26-12 questions about, B-4 to B-5 showing, 2-27 subVI reuse of data memory, 26-20 VI components, 26-13 to 26-14 virtual memory, 26-12 to 26-13 menu bar definition, 2-6 hiding, 6-6, B-15 menu setup ring, 7-26 menus color settings, 7-13 to 7-14 hot menus, 7-23 pop-up menus, 2-6 pull-down menus, 2-6 using, 2-6 <meta> key bringing subVI block diagram to front, 4-21 changing Icon Editor tools to dropper, 3-4 cloning Attribute Nodes, 20-4 cloning objects, 2-13 creating new scale marker, 9-17 to 9-18 cutting, copying, and pasting icons (note), 3-4 © National Instruments Corporation moving between array elements, 14-13 moving between cluster elements, 14-21 Step Into button shortcut, 4-20 Step Out button shortcut, 4-20 Step Over button shortcut, 4-20 <meta-b>, removing bad wires, 4-10 <meta-click> copying and transferring colors, 2-26 executing Show VI Hierarchy action, 3-21 resizing working space, 2-24 untacking last tack point (note), 17-3 <meta-f>, bringing up Find dialog box, 3-24 <meta-h> (help key), 1-7 <meta-m>, switching from run mode to edit mode (note), 6-6 <meta-Return>, embedding newlines, 7-10 <meta-Shift>, bringing up temporary Tools palette, 2-4 min and max labels, numeric scales, 9-18 to 9-19 Miscellaneous Preferences dialog box, 7-22 to 7-23 Allow drop-through clicks, 7-23 illustration, 7-22 Open VIs in run mode, 7-22 Show tips-strips, 7-22 Use hot menus, 7-23 Use native file dialogs, 7-22 mouse disabling mouse interrupts, B-16 mouse click sequences for hierarchy node selection, 3-21 to 3-22 symbol for wiring block diagrams, 17-1 Move Backward command, 2-11 Move Forward command, 2-10 Move Submenu option, 7-29 Move To Back command, 2-11 Move To Front command, 2-10 moving. See also positioning objects. arrays, 14-14 between subdiagrams, 18-18 to 18-19 clusters, 14-22 to 14-23 I-39 G Programming Reference Manual Index graph cursors, 15-32 wires, 17-6 to 17-10 multidimensional arrays description, 14-4 displaying, 14-10 when to use, 14-4 multiple developers of VIs. See applications, managing. multiple selection using selection rectangle, 2-7 to 2-8 multiplot graphs. See waveform and XY graphs. multitasking, 24-1 to 24-8 cooperative definition, 24-1 execution system activities, 24-2 mechanism of, 24-1 to 24-2 task switching, 24-2 to 24-3 preemptive, 24-1 prioritizing tasks of same priority level, 24-3 reentrant execution, 24-5 examples, 24-5 to 24-8 subroutine priority level, 24-4 synchronous nodes, 24-3 VI Setup priority setting, 24-4 Wait functions for prioritizing tasks, 24-3 multivalued slides, 9-20 mouse click sequences for hierarchy node selection, 3-21 to 3-22 overview, 1-5, 16-8 structures, 16-11 to 16-12 nondisplayable characters. See Backslash ‘\’ Codes Display option. non-numeric data types (table), A-10 nonuniform scale markers. See scale markers. Normal Display option, 11-3 not a number. See NaN (not a number). Not a Path option, 12-2 Not a Path symbol, 12-2 Not-OK button, 22-3 numeric constants pop-up menu, 16-5 universal, 16-7 user-defined, 16-4 numeric controls and indicators color box, 9-24 color ramp, 9-25 to 9-26 digital controls and indicators, 9-2 to 9-11 changing representation of numeric values, 9-4 to 9-5 digital numeric pop-up menu options, 9-3 displaying integers in other radixes, 9-4 Enter button for replacing old values, 9-2 format and precision of digital displays, 9-9 to 9-11 illustration, 9-2 incrementing and decrementing, 9-2 to 9-3 numeric range checking, 9-7 to 9-9 Operating tool, 9-2 purpose and use, 9-2 to 9-3 range options, 9-6 to 9-7 valid values, 9-2 rotary numeric controls and indicators, 9-21 to 9-23 illustration, 9-21 purpose and use, 9-22 to 9-23 N NaN (not a number) propagation by floating-point operations, 4-17 range errors (note), 4-18 native file dialogs, using, 7-22 Network Connection RefNum, 12-4, 12-5 node pop-up menu. See Hierarchy Node Pop-Up menu. nodes. See also structures. definition, 16-1 functions, 16-8 to 16-11 G Programming Reference Manual I-40 © National Instruments Corporation Index O slide controls and indicators, 9-12 to 9-20 filled and multivalued slides, 9-20 illustration, 9-12 operating sliders, 9-13 overview, 9-12 scale markers, 9-15 to 9-18 Scale pop-up menu, 9-14 to 9-15 slide pop-up menu options, 9-14 slide scale, 9-14 to 9-19 text scale, 9-18 to 9-19 unit types, 9-26 to 9-35 additional units in use with SI units (table), 9-29 to 9-30 base units (table), 9-28 CGS units (table), 9-30 derived units with special names (table), 9-28 to 9-29 entering units, 9-31 to 9-33 other units (table), 9-30 to 9-31 polymorphic units, 9-35 showing unit label, 9-26 to 9-27 strict type checking and units, 9-33 to 9-34 numeric data storage formats, A-1 to A-3 byte integer, A-3 double, A-2 extended, A-1 to A-2 long integer, A-3 single, A-2 word integer, A-3 numeric data types, 23-6 Numeric formatting, graph indicators, 15-16 numeric keypad on Sun keyboards, supporting, 7-10 Numeric palette digital control and digital indicator, 8-3 illustration, 2-2, 9-1 selecting objects, 2-2 numeric range checking, 9-7 to 9-9 Coerce option, 9-7 correcting invalid values, 9-8 to 9-9 Ignore option, 9-7 Suspend option, 9-8 © National Instruments Corporation object descriptions, creating, 2-26 to 2-27 Object Pop-up Menu tool, 2-5 Objects in vi.lib option, 3-25 objects unavailable in student edition, 7-12 Occurrence RefNum, 12-4 one-dimensional arrays, 14-3, 14-10 Online Reference command, 1-9 Open Front Panel option, 3-21 Open Front Panel when loaded option, 6-6 Operate menu Change to Customize Mode, 22-5 to 22-6 Change to Edit Mode, 22-5 to 22-6 Clear Log File Binding, 4-6 Data Logging submenu, 4-5 to 4-6 Log at Completion, 4-6 Print at Completion, 5-7 Retrieve, 4-6 Run, 4-1 Stop, 4-4 Suspend when Called, 4-29 Operating tool, 2-5, 9-2 <option> key bringing subVI block diagram to front, 4-21 changing Icon Editor tools to dropper, 3-4 cloning Attribute Nodes, 20-4 cloning objects, 2-13 creating new scale marker, 9-17 to 9-18 <option-click> executing Show VI Hierarchy action, 3-21 resizing working space, 2-24 untacking last tack point (note), 17-3 <option-Return>, embedding newlines, 7-10 Original Size option, 22-11 Others option, 3-25 overlaid plots, 15-28 to 15-29 owned labels controls or indicators, 2-15 definition, 2-14 I-41 G Programming Reference Manual Index P Path symbol, 12-2 purpose and use, 12-2 Path Preferences dialog box, 7-2 to 7-6 format of pathnames (note), 7-3 illustration, 7-2 library, temporary, and default directories, 7-3 to 7-4 removing paths with Remove button, 7-6 VI search path, 7-5 to 7-6 Path symbol, 12-2 paths data storage formats, A-5 flattened data, A-13 Patterns option (terminal patterns), 3-6 Pause button, 4-1 pencil tool, Icon Editor, 3-3 Performance and Disk Preferences dialog box, 7-6 to 7-9 Check available disk space during launch, 7-9 Compact memory during execution, 7-8 Cooperation level, 7-9 Deallocate memory as soon as possible, 7-7 illustration, 7-7 Performance and Disk dialog box, 7-7 Use default timer, 7-7 to 7-8 performance issues efficient data structures, 26-28 to 26-36 alternative implementations, 26-33 to 26-35 avoiding complicated data types, 26-30 to 26-32 global table of mixed data types, 26-32 to 26-35 obvious implementation, 26-33 static global table of strings, 26-35 to 26-36 Page Breaks Between Sections option, 5-4 page layout, setting programmatically, 5-8 Page Setup option, 5-1 palettes. See also specific palettes. customizing. See Controls and Functions palettes, customizing. keeping open (note), 2-2 pop-up palettes, 2-3 removing VIs from palette with Delete Item option, 7-29 temporary copies, 2-3 Palettes editor, 7-26 to 7-29 creating subpalettes, 7-27 to 7-29 Edit palettes dialog box, 7-26 to 7-27 Insert Submenu dialog box, 7-27 to 7-29 moving subpalettes, 7-29 Panel Order option, 8-8 to 8-9 illustration, 8-9 questions about, B-13 X button, 8-9 panning options for graph indicators, 15-16 to 15-18 parallel diagrams, 26-8 to 26-9 parts of controls controls as parts, 22-15 to 22-17 cosmetic parts, 22-9 to 22-14 adding to custom controls, 22-17 to 22-18 with independent pictures, 22-12 to 22-14 with more than one picture, 22-11 to 22-12 scale parts, 22-15 text parts, 22-14 to 22-15 Password Display option, 11-5 Paste command, 2-12 Paste Data option, 11-8 Path & Refnums palette, 12-2 path constant, 16-7 path controls and indicators, 12-1 to 12-2 illustration, 12-1 Not a Path symbol, 12-2 G Programming Reference Manual I-42 © National Instruments Corporation Index memory usage, 26-12 to 26-36 basic concepts, 26-12 consistent data types, 26-22 to 26-28 building arrays (example), 26-24 to 26-26 searching through strings (example), 26-27 to 26-28 dataflow programming and data buffers, 26-14 to 26-17 deallocation, 26-21 to 26-22 front panels, 26-19 to 26-20 general rules for improving, 26-18 to 26-19 global variables, 26-21 input buffer reuse by output, 26-22 local variables, 26-20 to 26-21 Macintosh memory, 26-13 monitoring, 26-17 to 26-18 overview, 26-12 subVI reuse of data memory, 26-20 VI components, 26-13 to 26-14 virtual memory, 26-12 to 26-13 Profile window, 26-1 to 26-5 illustration, 26-2 memory information, 26-5 Reset button, 26-2 Save button, 26-2 Snapshot button, 26-2 Start button, 26-2 SubVI's Time, 26-3 timing information, 26-4 to 26-5 Total Time, 26-3 VI Time, 26-3 viewing results, 26-3 speeding up VIs, 26-6 to 26-11 input/output, 26-6 to 26-7 parallel diagrams, 26-8 to 26-9 screen display, 26-7 subVI overhead, 26-9 unnecessary computation in loops, 26-9 to 26-11 Picture Item option, 22-12 © National Instruments Corporation pictures. See also cosmetic parts. customizing Boolean controls and indicators, 8-10 to 8-11 controls, 8-10 to 8-11 differences when porting VIs between platforms, 27-4 to 27-5 dragging and dropping, 2-8 to 2-9 ring controls adding, 13-9 changing, 13-10 Plot Color Attribute, 20-10 to 20-11 Plot Info Plot Color option, 20-10 plot sample definition, 15-19 pop-up menu, 15-19 plots, 15-1 Point Style option, 15-20 points, 14-19, 15-4 polymorphic units, 9-35 pop-up menus Allow Run-Time Pop-Up Menu option, 6-5 displaying hidden labels, 2-16 illustration, 2-6 using, 2-6 pop-up panels, creating overview, 6-1 to 6-2 SubVI Node Setup dialog box, 6-6 VI Setup dialog box documentation options, 6-3 to 6-4 execution options, 6-2 to 6-3 window options, 6-4 to 6-6 portability issues, 27-1 to 27-5 ease of porting between platforms, 27-2 nonportable VIs, 27-1 overview, 27-1 picture differences, 27-4 to 27-5 I-43 G Programming Reference Manual Index questions about, B-6 resolutions and font differences, 27-2 to 27-4 labels, 27-4 predefined fonts, 27-2 to 27-3 separator character differences, 27-2 Position Attribute, 20-9 positioning objects, 2-9 to 2-11. See also moving. canceling move operation, 2-10 moving forward, 2-10 moving incrementally, 2-9 moving to back and moving backward, 2-11 moving to front, 2-10 <Shift> key for restricting direction, 2-9 Positioning tool, 2-5, 2-7 to 2-8 PostScript printing, 5-2, 7-16 to 7-17 precision of digital displays. See Format & Precision option. preemptive multitasking, 24-1 preferences. See also VI Setup dialog box. history information, 25-9 storing, 7-23 to 7-25 Preferences Dialog Box, 7-1 to 7-25 Block Diagram Preferences dialog box, 7-11 to 7-12 illustration, 7-11 Show dots at wire junctions, 7-11 Show subVI names when dropped, 7-11 Show tip-strips over terminals, 7-11 Show wiring guides, 7-11 Color Preferences dialog box, 7-13 to 7-14 Blink Background, 7-14 Blink Foreground, 7-14 Block Diagram, 7-13 Coercion Dots, 7-13 Front Panel, 7-13 illustration, 7-13 Menu Background, 7-14 Menu Text, 7-13 G Programming Reference Manual Provide extra colors, 7-14 Scrollbar, 7-13 Use default colors, 7-14 Debugging Preferences dialog box, 7-12 to 7-13 Auto probe during execution highlighting, 7-12 Show data bubbles during execution highlighting, 7-12 Show warnings in error box by default, 7-12 Warn about objects unavailable in student edition, 7-12 Font Preferences dialog box, 7-14 to 7-15 Custom font, 7-15 Font style, 7-15 illustration, 7-15 Use default font, 7-15 Front Panel Preferences dialog box, 7-9 to 7-11 Blink speed, 7-10 End text entry with Return key (same as Enter key), 7-10 illustration, 7-9 Open the control editor with double click, 7-9 Override system default function key settings, 7-10 Support numeric keypad on Sun keyboards, 7-10 Use localized decimal point, 7-10 Use smooth updates during drawing, 7-10 Use transparent name labels, 7-10 History Preferences, 7-17 to 7-20 Add an entry every time VI is saved, 7-18 illustration, 7-18 Login automatically with the system user name, 7-20 Prompt for comment when VI is closed, 7-19 I-44 © National Instruments Corporation Index Prompt for comment when VI is saved, 7-18 to 7-19 Record comments generated by the editor, 7-19 Show revision number in titlebar, 7-19 Show the login prompt at startup time, 7-19 to 7-20 Miscellaneous Preferences dialog box, 7-22 to 7-23 Allow drop-through clicks, 7-23 illustration, 7-22 Open VIs in run mode, 7-22 Show tips-strips, 7-22 Use hot menus, 7-23 Use native file dialogs, 7-22 Path Preferences dialog box, 7-2 to 7-6 format of pathnames (note), 7-3 illustration, 7-2 library, temporary, and default directories, 7-3 to 7-4 removing paths with Remove button, 7-6 VI search path, 7-5 to 7-6 Performance and Disk Preferences dialog box, 7-6 to 7-9 Check available disk space during launch, 7-9 Compact memory during execution, 7-8 Cooperation level, 7-9 Deallocate memory as soon as possible, 7-7 illustration, 7-7 Performance and Disk dialog box, 7-7 Use default timer, 7-7 to 7-8 Printing Preferences dialog box, 7-16 to 7-17 Allow printer dithering, 7-16 Bitmap printing, 7-17 illustration, 7-16 PostScript printing, 7-16 to 7-17 © National Instruments Corporation Scale printer fonts, 7-16 Standard printing, 7-16 Time and Date Preferences dialog box, 7-21 Date Separator, 7-21 Default date format, 7-21 Default time format, 7-21 illustration, 7-21 Time Separator, 7-21 Print at Completion option, 5-7 Print Documentation dialog box. See also Custom Print Settings dialog box. choosing layout options Page Breaks Between Sections, 5-4 Print Header, 5-4 Scale Block Diagram to Fit, 5-4 Scale Front Panel to Fit, 5-4 Configure button, 5-4 illustration, 5-3 setting print formats Complete Documentation format, 5-4, 25-9 Custom format, 5-4 Icon, Description, Panel and Diagram format, 5-3 Using as a SubVi format, 5-3 Using the Panel format, 5-3 Print Documentation option, 3-21, 5-1, 5-2 Print Header option, 5-4 Print Panel When VI Complete Execution option, 5-8 Print Section Headers option, Custom Print Settings dialog box, 5-6 Print Window option, 5-1, 5-2 Printer Setup option, 5-1 printing in G, questions about, B-4, B-7 to B-9 Printing Preferences dialog box, 7-16 to 7-17 Allow printer dithering, 7-16 Bitmap printing, 7-17 illustration, 7-16 PostScript printing, 7-16 to 7-17 Scale printer fonts, 7-16 Standard printing, 7-16 I-45 G Programming Reference Manual Index printing VIs, 5-1 to 5-9 active window (Print Window option), 5-2 AESend Print Document VI, 5-1 alternative printing methods, 5-9 configuring printouts, 5-1 to 5-2 overview, 5-1 PostScript printing, 5-2 programmatic printing, 5-7 to 5-8 controlling when printouts occur, 5-7 enabling/disabling, 6-6 enhancing printouts, 5-7 to 5-8 setting page layout, 5-8 selecting print options, 5-3 to 5-6 choosing layout options, 5-4 creating custom print settings, 5-4 to 5-6 Print Documentation dialog box, 5-3 printing section headers, 5-6 setting printout formats, 5-3 to 5-4 Serial Port VIs, 5-1 System Exec VI, 5-1 priorities, in multitasking. See multitasking. Probe tool creating probes, 4-25 to 4-26 purpose and use, 2-5 using, 4-23 to 4-25 Profile window, 26-1 to 26-5 illustration, 26-2 memory information, 26-5 Reset button, 26-2 Save button, 26-2 Snapshot button, 26-2 Start button, 26-2 SubVI's Time, 26-3 timing information, 26-4 to 26-5 Total Time, 26-3 VI Time, 26-3 viewing results, 26-3 programmatic printing, 5-7 to 5-8 controlling when printouts occur, 5-7 enabling/disabling, 6-6 G Programming Reference Manual enhancing printouts, 5-7 to 5-8 setting page layout, 5-8 Project menu Find, 3-23 Find Next, 3-29 Search Results, 3-28 Show VI Hierarchy, 3-15 This VI's SubVIs, 4-16 Unopened SubVIs, 4-16 Prompt for comment when this VI is closed option, 6-4 Prompt for comment when this VI is saved option, 6-4 pull-down menus, 2-6 Purge Data option, 4-6 Q questions about G charts and graphs, B-1 to B-4 error messages and crashes, B-4 to B-5 miscellaneous questions, B-9 to B-16 platform issues and compatibilities, B-6 printing, B-7 to B-9 R radix for integers, selecting, 9-4 Range Error indicator, 4-14 range options for digital controls and indicators, 9-6 to 9-7 Data Range dialog box, 9-7 floating-point numbers (table), 9-6 numeric range checking, 9-7 to 9-9 Coerce option, 9-7 correcting invalid values, 9-8 to 9-9 Ignore option, 9-7 Suspend option, 9-8 range of extended floating-point numbers (note), 9-6 Record marked for deletion button, 4-6 rectangle tool, Icon Editor, 3-3 Redo Layout button, 3-19 I-46 © National Instruments Corporation Index Redraw option, 3-18 reentrant execution enabling, 24-5 examples storage VI not meant to share data, 24-7 to 24-8 VIs that wait, 24-5 to 24-7 purpose and use, 24-5 refnum controls, 12-2 to 12-5 Byte Stream File RefNum, 12-5 Data Log File RefNum, 12-3 to 12-5 Device RefNum, 12-4 Network Connection RefNum, 12-4, 12-5 Occurrence RefNum, 12-4 purpose and use, 12-3 types, 12-3 Reinitialize to Default option arrays, 14-12, 14-13 Probe tool, 4-25 Reinitialize to Default Values option, 14-21 Remove All command, 18-12 Remove Bad Wires option, 4-10, 17-11, 17-14 Remove Case option, 18-20 Remove command, 16-10, 18-17 Remove Dimension option, 14-7 Remove Element command, 18-11 to 18-12 Remove Item option, 13-9 Remove While option, 2-13 removing. See also deleting. paths, using Remove button, 7-6 structures, without deleting contents, 18-26 reordering subdiagrams, 18-21 Replace option control and indicator pop-up menu, 8-4 to 8-5 Increment node pop-up menu, 16-12 replacing block diagram objects, 16-12 controls, 8-4 to 8-5 © National Instruments Corporation representation of numeric values available types of representation, 9-4 to 9-5 constants, 16-7 selecting, 9-4 to 9-5 Representation option, 9-4 to 9-5 Representation palette, 13-11 resetting history information, 25-8 resizing, 2-23 to 2-24 arrays, 14-14 canceling resizing operation, 2-23 clusters, 14-22 to 14-23 columns, 11-6 to 11-7 front panel and block diagram work space, 2-24 labels, 2-23 to 2-24 rows, 11-6 to 11-7 tables, 11-6 to 11-7 Resizing cursor, 2-23 resizing handles, 2-23 Resizing tool Array Resizing tool, 14-9 Usual Resizing symbol, 14-10 Retrieve option, 4-6 retrieving data programmatically, 4-7 to 4-9 accessing databases, 4-7 to 4-9 halo terminals for accessing data, 4-7, 4-8 using file I/O functions, 4-9 Return to caller button, 4-30 <Return> key data tables, 11-7 entering linefeed into string (note), 11-2 finding next matching node, 3-23 Key Navigation option associations, 8-6 label names, 2-3, 2-14 setting Enter key same as Return key, 7-10 string controls and indicators, 11-1 Reverse Ticks option, 22-15 Revert option cosmetic parts pop-up menu, 22-11 File menu, 2-28, 3-11 I-47 G Programming Reference Manual Index S revision numbers for VIs purpose and use, 25-7 to 25-8 showing, 7-19, 25-8 Right Edges alignment, 2-12 ring constants, 16-6 ring controls, 13-7 to 13-10 adding items pictures, 13-9 text, 13-8 to 13-9 Attribute Node example, 20-12 to 20-13 changing size and text, 13-9 purpose and use, 13-7 to 13-8 styles, 13-7 rotary numeric controls and indicators, 9-21 to 9-23 illustration, 9-21 operating and modifying, 9-22 to 9-23 Rotate 90 Degrees command, 3-6 rows headers, 11-6 resizing, 11-6 to 11-7 Run button executing VIs, 4-1 using during suspended execution, 4-30 VI caller is running, 4-2 VI running at top level, 4-2 Run command, 4-1 Run Continuously button, 4-1, 4-5 Run When Opened option, 6-2 running VIs, 4-1 to 4-4. See also executing VIs. buttons for running, 4-1 editing while running, 4-2 to 4-4 control pop-up menu options, 4-2 to 4-3 object pop-up menu options, 4-3 to 4-4 loading and running dynamically, B-10 multiple VIs, 4-2 running repeatedly, 4-5 switching from run mode to edit mode (note), 6-6 run-time VIs, 25-2 to 25-4 G Programming Reference Manual Save a Copy As option, 2-28 Save As option, 2-28, 22-4 Save option, 2-28, 22-20 Save With Options option, 2-28 Save with Options option, 25-3 to 25-4 saving custom controls, 22-4 saving type definitions, 22-20 saving VIs, 2-27 to 2-30 avoiding vi.lib directory (note), 2-29 copying original VI (note), 2-28 editing after saving (note), 2-28 individual VI files, 2-28 to 2-29 saving for distribution, 25-3 to 25-4 VI libraries (.LLBs), 2-29 to 2-30 scalar data types flattened data, A-13 non-numeric (table), A-10 Scale Block Diagram to Fit option, 5-4 Scale Front Panel to Fit option, 5-4 scale markers, 9-15 to 9-18 Arbitrary Markers mode, 9-17 changing scale limits, 9-16 nonuniform deleting, 9-16 to 9-18 moving, 9-17 selecting non-uniform distribution, 9-16 to 9-18 Uniform Markers mode, 9-17 scale options, graph indicators, 15-12 to 15-17 Formatting, 15-15 to 15-17 Marker Spacing, 15-13 to 15-14 scale parts, 22-15 Scale pop-up menu, 9-14 to 9-15 Format & Precision, 9-15 illustration, 9-14 Mapping, 9-15 Marker Spacing, 9-14 Style, 9-15 Scale Style option, 15-15 Scale to Fit option, 5-4 Scaling Factors option, 15-15 to 15-16 scope chart update mode, 15-27 I-48 © National Instruments Corporation Index screen display performance considerations, 26-7 Scroll tool, 2-5 Scrollbar option color settings, 7-13 string controls and indicators, 11-3 search path for VIs, setting, 7-5 to 7-6 Search Results command, 3-28 Search Results window, 3-28 to 3-29 Clear option, 3-28 Find option, 3-28 Go to option, 3-28 Stop option, 3-29 search string options Match Case, 3-26 Match Whole Word, 3-26 Regular Expression, 3-26 searching for VIs, objects, and text. See Find dialog box. section headers, printing, 5-6 Select Item menu, 21-2 Select Objects menu, Find dialog box Functions, 3-25 Globals, 3-25 illustration, 3-25 Objects in vi.lib, 3-25 Others, 3-25 Type Defs, 3-25 VIs, 3-25 VIs by Name, 3-25 select tool, Icon Editor, 3-4 selecting objects, 2-7 to 2-8 multiple selection with selection rectangle, 2-7 to 2-8 <Shift>-clicking, 2-7, 2-8 Selection Mode option, 13-4 to 13-5 Multiple Selection listbox, 13-5 Single Selection listbox, 13-5 selection rectangle for multiple selections, 2-7 to 2-8 selector terminals, 18-14 separator character differences, when porting VIs between platforms, 27-2 © National Instruments Corporation sequence locals adding, 18-17 assigning more than one value to, 18-22 Sequence Structures adding subdiagrams, 18-19 to 18-20 deleting subdiagrams, 18-20 to 18-21 editing, 18-18 example in examples.llb.vi, 18-16 icon for, 18-2, 18-13 moving between subdiagrams, 18-18 to 18-19 overview, 18-13 to 18-14 purpose and use, 16-11, 18-16 to 18-18 reordering subdiagrams, 18-21 sequence locals, 18-17 to 18-18 subdiagram display window, 18-13 wiring problems, 18-22 to 18-26 assigning more than one value to a sequence local, 18-22 failing to wire a tunnel in all cases of a Case Structure, 18-22 overlapping tunnels, 18-23 removing structures without deleting items in a structure, 18-26 wiring from multiple frames of Sequence Structure, 18-24 to 18-25 wiring underneath rather than through a structure, 18-25 to 18-26 Serial Port VIs, 5-1 setting up VIs. See SubVI Node Setup dialog box; VI Setup dialog box. shift registers, 18-10 to 18-13 adding or removing terminals, 18-11 to 18-12 definition, 18-4, 18-10 initializing, 18-10 to 18-11 left and right terminals, 18-10 <Shift> key positioning objects, 2-9 sizing multiple rows or columns, 11-7 I-49 G Programming Reference Manual Index <Shift>-clicking executing Show All SubVIs action, 3-21 selecting multiple nodes, 3-22 table rows and columns, 11-7 to 11-9 selecting and deselecting objects, 2-7 using with selection rectangle, 2-8 <Shift-Enter> key advancing through text scale labels, 9-19 creating text scale labels, 9-18 finding previous matching node, 3-23 <Shift-Return> key advancing through text scale labels, 9-19 creating text scale labels, 9-18 finding previous matching node, 3-23 Show Abort Button option, 4-4 Show All Callers option, 3-21 Show All SubVIs option, 3-21 Show All VIs option, 3-18 Show Case option, 18-18 Show Connector command, 1-6, 3-5 Show Diagram command, 1-3, 2-4 Show Digital Display option ring controls, 13-8 slide controls and indicators, 9-14 Show Error List command, 4-10 Show Front Panel When Called option SubVI Node Setup dialog box, 6-6 VI Setup dialog box, 6-2 Show Front Panel When Loaded option, 6-2 Show Help command, 1-7 Show History command, 25-6 Show Immediate SubVIs option, 3-20, 3-21 Show Last Element option, 14-13 Show option, listbox controls pop-up menu adding symbols to listbox items, 13-4 suboptions, 13-4 Show Parts Window option, 22-7 Show Radix command, 9-4 Show Selection option, 11-9, 14-14, 14-16 Show submenu option, 8-3 Show Terminals option, 16-1, 16-9 Show Toolbar option, 6-6 G Programming Reference Manual Show VI Hierarchy option Hierarchy Node Pop-Up menu, 3-20, 3-21 Project menu, 3-15 Show VI Info command, 2-27 Show Warnings option, 4-10 signed and unsigned integer representation byte (8-bit), 9-4 long (32-bit), 9-4 word (16-bit), 9-4 Simple Help option, 1-7 single numeric data storage format, A-2 single-precision representation, 32-bit (SGL), 9-4 single-stepping through VIs, 4-18 to 4-20 example, 4-19 to 4-20 executing VIs, 4-18 to 4-19 execution highlighting, 4-21 to 4-23 Pause button, 4-18 reading call chains, 4-21 Step Into button, 4-20 Step Out button, 4-20 Step Over button, 4-18, 4-20 using step buttons, 4-20 sink terminals, 16-1 Size option, Font ring, 2-17 Size to Screen option, 6-5 Size to Text option, 2-23, 16-4 Skip to beginning button, 4-30 slide numeric controls and indicators, 9-12 to 9-20 filled and multivalued slides, 9-20 illustration, 9-12 operating sliders, 9-13 overview, 9-12 scale markers, 9-15 to 9-18 Arbitrary Markers mode, 9-17 changing scale limits, 9-16 deleting arbitrary marker, 9-16 to 9-18 moving arbitrary markers, 9-17 selecting non-uniform scale marker distribution, 9-16 to 9-18 Uniform mode, 9-17 I-50 © National Instruments Corporation Index Scale pop-up menu, 9-14 to 9-15 slide pop-up menu options, 9-14 slide scale, 9-14 to 9-19 text scale, 9-18 to 9-19 smooth updates during drawing, setting, 7-10 Smooth Updates option, 15-12 Snap to Point option, 15-35 source terminals, 16-1 space character, backslash ‘\’ code (table), 11-4 spacing (distributing) objects, 2-12 speeding up VI performance. See performance issues. Stack Plots option, 15-28 to 15-29 stacked plots, 15-28 Start Selection option, 14-14 to 16, 15-32 Step Into button, 4-20 Step Out button, 4-20 Step Over button, 4-18, 4-20 stepping through VIs. See single-stepping through VIs. Stop button hiding, 4-4 purpose and use, 4-1, 4-4 Stop command, 4-4 stopping VIs, 4-4 strict type checking of units, 9-33 to 9-34 strict type definitions attribute nodes available (note), 22-20 definition, 22-19 purpose and use, 22-19 to 22-20 saving, 22-20 String & Table palette, 11-1 string constants pop-up menu, 16-5 user-defined, 16-4 string controls and indicators, 11-1 to 11-9 attribute examples Boolean controls, 20-11 to 20-12 list controls, 20-13 to 20-14 ring controls, 20-12 to 20-13 entering or changing text, 11-1 to 11-2 illustration, 11-1 © National Instruments Corporation pop-up menu options, 11-2 to 11-6 Backslash ‘\’ Codes Display, 11-3 to 11-5 Display Types, 11-3 to 11-5 Hex Display, 11-5 illustration, 11-2 Limit to Single Line, 11-6 Normal Display, 11-3 Password Display, 11-5 Scrollbar, 11-3 tables, 11-6 to 11-9 copying, cutting, and pasting data, 11-8 entering and selecting data tables, 11-7 to 11-9 illustration, 11-6 manipulating with string functions, 11-9 resizing tables, rows, and columns, 11-6 to 11-7 row and column headings, 11-9 scrolling, 11-7 to 11-8 Selection Scrolling option, 11-8 showing selected area of data, 11-9 string data type, 23-7 String palette, 8-3 strings data storage formats, A-5 flattened data, A-13 strip chart update mode, 15-26 structures. See also Case Structures; For Loops; Sequence Structures; While Loops. default labels, 2-15 definition, 16-11, 18-1 deleting while preserving contents, 2-13 efficiency considerations, 26-28 to 26-36 avoiding complicated data types, 26-30 to 26-32 global table of mixed data types, 26-32 to 26-35 static global table of strings, 26-35 to 26-36 I-51 G Programming Reference Manual Index examples located in examples.llb, 18-1 icons for, 18-2 overview, 18-2 to 18-3 placing and sizing on block diagram, 18-5 to 18-6 tunnels, 16-12 types of, 16-11 wiring problems assigning more than one value to sequence local, 18-22 failure to wire tunnel in all cases of Case Structure, 18-22 overlapping tunnels, 18-23 to 18-24 removing structures without deleting contents, 18-26 wiring from multiple frames of Sequence Structure, 18-24 to 18-25 Structures palette, 18-1 student edition, objects unavailable, 7-12 Style option Font ring, 2-17 Scale pop-up menu, 9-15 subdiagram display window Case and Sequence Structures, 18-13 diagram identifier, 18-13 subdiagrams adding, 18-19 to 18-20 definition, 18-2 deleting, 18-20 to 18-21 moving between, 18-18 to 18-19 reordering, 18-21 subpalettes creating, 7-27 to 7-29 moving, 7-29 SubVI From Selection option, 3-10 SubVI Node Setup dialog box, 6-6 illustration, 6-6 options, 6-6 SubVI Node Setup option, 4-29 G Programming Reference Manual subVIs analogous to subroutines in C, 3-1 building. See building subVIs. calling two distinct subVIs with same name, B-11 connections to calling VIs, in Hierarchy window, 3-16 to 3-17 icons representing, 1-6 inability to edit descriptions from calling VI diagram (note), 2-27 labels on block diagram (note), 2-16 memory usage, 26-20 performance considerations, 26-9 printing list of subVIs, 5-6 replacing subVI with same name, B-11 reusing data memory, 26-20 showing subVI name when dropped on block diagram, 7-11 Sun numeric keypad, supporting, 7-10 Surround Panel with Border option, 5-8 Suspend When Called option Operate menu, 4-29 SubVI Node Setup dialog box, 6-6 VI Setup dialog box, 6-2 suspending execution, 4-29 to 4-30 during debugging, 4-29 options, 4-29 recognizing automatic suspension, 4-29 to 4-30 Return to caller button, 4-30 Run button, 4-30 Skip to beginning button, 4-30 using toolbar buttons during suspension, 4-30 viewing Hierarchy windows during suspension, 4-30 sweep chart update mode, 15-26 to 15-27 Switch Until Released action, 10-5 Switch When Pressed action, 10-5 Switch When Released action, 10-5, 22-13 symbols for listbox items, 13-4 Synchronize with Directory option, 7-28 system crashes, questions about, B-4 to B-5 I-52 © National Instruments Corporation Index System Default suboption, Keyboard Mode option, 13-6 System Exec VI, 5-1, 23-1 System font, 2-18 patterns defining, 3-5 selecting and modifying, 3-6 required, recommended, and optional connections, 3-8 to 3-9 white terminal indicating incomplete connection (note), 3-8 terminals. See also tunnels. conditional terminal, 18-4 control and indicator terminals, 16-2 to 16-3 symbols, 16-2 to 16-3 count terminal, 18-3 definition, 16-1 destination terminals, 16-1 displaying, 16-1 front panel terminals avoiding cycles in subVIs, 3-13 created automatically, 2-3 to 2-4 indicator terminals, 16-1 iteration terminal, 18-3 node input terminals, 16-1 overview, 1-4 to 1-5 placing inside For and While loops, 18-6 to 18-7 selector, 18-14 shift register terminals, 18-10 sink terminals, 16-1 source terminals, 16-1 types of, 16-1 text changing fonts, 2-16 to 2-22 dragging and dropping, 2-8 to 2-9 finding, 3-26 to 3-27 menu text color, 7-13 numeric scale text labels, 9-18 to 9-19 min and max labels, 9-18 to 9-19 ring controls adding text, 13-8 to 13-9 changing text, 13-10 text display pop-up menu, 9-19 Text Labels option, 9-18 text parts, 22-14 to 22-15 T tab character backslash ‘\’ code (table), 11-4 entering into string (note), 11-2 <Tab> key moving between array elements, 14-13 moving between cluster elements, 14-21 moving between tools in Tools palette, 2-5 string controls and indicators (note), 11-2 toggling between Positioning and Scroll tools, 3-22 tables, 11-6 to 11-9 copying, cutting, and pasting data, 11-8 entering and selecting data tables, 11-7 to 11-9 illustration, 11-6 manipulating with string functions, 11-9 resizing tables, rows, and columns, 11-6 to 11-7 row and column headings, 11-9 Selection Scrolling option, 11-8 showing selected area of data, 11-9 technical support, C-1 to C-2 temporary directories, setting, 7-3 to 7-4 terminal connections for subVIs, 3-5 to 3-10 assigning to controls and indicators, 3-6 to 3-8 changing spatial arrangement, 3-6 confirming terminal connections, 3-9 to 3-10 deleting terminal connections, 3-9 to 3-10 limiting number of, when creating subVI from selections, 3-12 © National Instruments Corporation I-53 G Programming Reference Manual Index text tool, Icon Editor, 3-4 This Connection Is submenu, 3-8 to 3-9 This VI's SubVIs option, 4-16 three-dimensional arrays, 14-11 Time and Date Preferences dialog box, 7-21 Date Separator, 7-21 Default date format, 7-21 Default time format, 7-21 illustration, 7-21 Time Separator, 7-21 time formatting, absolute digital displays, 9-10 to 9-11 graph indicators, 15-15 to 15-16 timer, using default, 7-7 to 7-8 tip-strips showing tip-strings over terminals, 7-11 toggling display, 7-22 wiring block diagrams, 17-4 toolbar, hiding, 6-6 tools, 2-4 Tools palette changing between tools, 2-5 illustration, 2-4 purpose and use, 2-4 temporary copies, 2-4 tools available in palette, 2-5 Top Edges alignment, 2-12 transparent labels, selecting, 7-10 transparent objects, 2-24 to 2-25 Transpose Array option graph pop-up menu, 15-5, 15-11 intensity graph, 15-28 waveform chart pop-up menu, 15-24 tree form of data storage, A-12 troubleshooting. See questions about G. tunnels definition, 16-12, 17-2, 18-3 moving, 17-9 wiring problems failing to wire tunnel in all cases of Case Structure, 18-22 overlapping tunnels, 18-23 to 18-24 G Programming Reference Manual two-dimensional arrays, 14-3 to 14-10 definition, 14-3 displaying in single-element or tabular form, 14-9 to 14-10 example, 14-3 interpreting array index display, 14-8 to 14-9 type checking of units, 9-33 to 9-34 type definitions, 22-19 to 22-22 automatic updating, 22-21 cluster type definitions, 22-22 creating, 22-20 definition, 22-19 disconnecting, 22-22 including in Hierarchy window, 3-19 matching data types, 22-19 saving, 22-20 searching for, 22-22 strict type definitions, 22-19 to 22-20 updating, 22-21 using, 22-20 to 22-21 Type Defs option, 3-25 type descriptors array, A-11 cluster, A-11 to A-12 data types examples, A-10 to A-11 non-numeric (table), A-10 scalar numeric (table), A-8 to A-9 storage of physical quantities (note), A-11 definition, A-7 generic format, A-7 overview, A-7 to A-8 U Unbundle By Name function accessing cluster elements, 22-22 disassembling cluster elements, 14-30 to 14-32 Unbundle function, 14-29 to 14-30 unbundling cluster elements, 14-19 I-54 © National Instruments Corporation Index undefined data, 4-17 to 4-18 units, 9-26 to 9-35 entering units, 9-31 to 9-33 polymorphic units, 9-35 pop-up menu, 9-27 showing unit label, 9-26 to 9-27 strict type checking, 9-33 to 9-34 types additional units in use with SI units (table), 9-29 to 9-30 base units (table), 9-28 CGS units (table), 9-30 derived units with special names (table), 9-28 to 9-29 other units (table), 9-30 to 9-31 universal constants character, 16-7 definition, 16-3 numeric, 16-7 Unopened SubVIs, 4-16 unsigned integer representation. See signed and unsigned integer representation. Update from Type Def. option, 22-22 Update Mode option, 15-25 Use History Defaults (In Preferences Dialog) option, 6-3 User Libraries subpalette, 7-25 User Name option, Edit menu, 7-19 user-defined constants, 16-3 to 16-7 availability in palettes, 16-3 to 16-4 color box, 16-6 creating, 16-3 to 16-4 enumerated, 16-6 error ring, 16-6 to 16-7 incrementing and decrementing, 16-5 list box symbol ring, 16-6 numeric, 16-4 numeric constant pop-up menu, 16-5 path, 16-7 ring, 16-6 setting values, 16-4 string, 16-4 string constant pop-up menu, 16-5 © National Instruments Corporation user.lib, adding VIs and controls, 7-25 Using as a SubVi format option, 5-3 Using the Panel format option, 5-3 V Valid Path option, 12-2 Vertical Centers alignment, 2-12 Vertical Hierarchy option, 3-18 VI descriptions, creating, 2-27 VI Hierarchy option, 5-6 VI history. See also History Preferences dialog box. adding entries, 6-4, 7-18 printing, 5-6 VI History option, 5-6 VI History window, 25-6 to 25-9 example, 25-6 printing history information, 25-9 recording comments (note), 25-6 related VI Setup and Preferences dialog options, 25-9 resetting history information, 25-8 revision numbers, 25-7 to 25-8 VI libraries (.LLBs), 2-29 to 2-30 arranging files in VI libraries, 25-1 to 25-2 avoiding saving VIs in vi.lib directory (note), 2-29 creating, 2-30 editing contents of libraries, 2-30 including in Hierarchy window, 3-18, 3-19 reasons for saving VIs as libraries, 2-29 saving VIs in existing VI libraries, 2-30 setting library directories, 7-3 to 7-4 Top Level setting, 2-30 VI search path, setting, 7-5 to 7-6 I-55 G Programming Reference Manual Index VI Setup dialog box accessing, 6-1 documentation options, 6-3 to 6-4 Add an entry every time this VI is saved, 6-4 Help Path box, 6-4 Help Tag box, 6-4 illustration, 6-3 managing applications, 25-9 Prompt for comment when this VI is closed, 6-4 Prompt for comment when this VI is saved, 6-4 Use History Defaults (In Preferences Dialog), 6-3 execution options, 6-2 to 6-3 Close Afterwards if Originally Closed, 6-2 illustration, 6-2 Run When Opened, 6-2 Show Front Panel When Called option, 6-2 Show Front Panel When Loaded option, 6-2 Suspend When Called, 6-2 window options, 6-4 to 6-6 Allow Run-Time Pop-Up Menu, 6-5 Allow User to Close Window, 6-5 Auto-Center, 6-5 Dialog Box option, 6-5 Enable Log/Print at Completion, 6-6 Hilite <Return> Boolean, 6-5 illustration, 6-5 Show Toolbar, 6-6 Size to Screen, 6-5 VI Setup option, 3-21 View menu, Hierarchy window, 3-18 to 3-19 Full VI Path in Label option, 3-19 Horizontal Hierarchy option, 3-18 illustration, 3-18 Include Globals option, 3-18 Include Type Defs option, 3-19 Include VIs in vi.lib option, 3-18 G Programming Reference Manual Redraw option, 3-18 Show All VIs option, 3-18 Vertical Hierarchy option, 3-18 views installing and changing, 7-26 working with views, 7-29 VIs. See also applications, managing; subVIs. building. See building VIs. components, 1-1 to 1-6 debugging. See debugging VIs. definition, 1-1 editing. See editing VIs. executing. See executing VIs. finding, 3-24 to 3-25 launching automatically, B-14 to B-15 loading, questions about, B-10 to B-12 performance issues. See performance issues. portability issues, 27-1 to 27-5 ease of porting between platforms, 27-2 nonportable VIs, 27-1 overview, 27-1 picture differences, 27-4 to 27-5 questions about, B-6 resolutions and font differences, 27-2 to 27-4 separator character differences, 27-2 printing, 5-1 to 5-9 active window, 5-2 alternative printing methods, 5-9 configuring printouts, 5-1 to 5-2 history information, 5-6 options, 5-3 to 5-6 programmatic, 5-7 to 5-8 running, 4-1 to 4-4 running repeatedly, 4-5 saving, 2-27 to 2-30 individual VI files, 2-28 to 2-29 VI libraries (.LLBs), 2-29 to 2-30 stopping, 4-4 structure, 1-2 VIs by Name option, 3-25 I-56 © National Instruments Corporation Index VIs option, Select Objects menu, 3-25 Visible Attribute, 20-7 Visible Name option, 15-34 void data type, 23-5 avoiding unnecessary computations, 26-9 to 26-11 icon for, 18-2, 18-4 placing objects inside structures, 18-4 to 18-5 purpose and use, 16-11, 18-4 questions about, B-13 shift registers, 18-10 to 18-13 terminals inside loops, 18-6 to 18-7 window options, VI Setup dialog box, 6-4 to 6-6 Allow Run-Time Pop-Up Menu, 6-5 Allow User to Close Window, 6-5 Auto-Center, 6-5 Dialog Box option, 6-5 Enable Log/Print at Completion, 6-6 Hilite <Return> Boolean, 6-5 illustration, 6-5 Show Toolbar, 6-6 Size to Screen, 6-5 Windows menu Show Diagram, 1-3, 2-4 Show Error List, 4-10 Show History, 25-6 Show Parts Window, 22-7 Show VI Info, 2-27 wires bends, 17-6 branches, 17-6 dots at wire junctions, showing, 7-11 junctions, 17-6 overview, 1-5 segments, 17-6 wiring block diagrams, 17-1 to 17-17 basic wiring techniques, 17-1 to 17-5 complicated VIs, 17-4 to 17-5 deleting wires, 17-6 to 17-10 mouse symbol for Wiring tool, 17-1 moving wires, 17-6 to 17-10 off-screen areas, 17-10 to 17-11 W Warning button, accessing Error List window, 4-10 waveform and XY graphs, 15-2 to 15-22 creating multiplot graph, 15-5 to 15-11 waveform graph data types, 15-5 to 15-9 XY graph data types, 15-9 to 15-11 creating single-plot graph, 15-3 to 15-4 waveform graph data types, 15-2 to 15-3 XY graph data types, 15-3 to 15-4 definition, 15-2 graph options, 15-11 to 15-22 illustration, 15-12 legend options, 15-19 to 15-22 scale options, 15-12 to 15-17 illustration, 15-2 waveform chart, 15-22 to 15-29 cursors not supported, 15-25 data types, 15-22 to 15-25 front panel data logging (note), 4-6 options, 15-25 to 15-29 chart pop-up menu, 15-25 scope chart update mode, 15-27 stacked versus overlaid plots, 15-28 to 15-29 strip chart update mode, 15-27 sweep chart update mode, 15-27 update modes, 15-26 to 15-28 While Loops auto-indexing number of iterations, 18-9 overview, 18-7 to 18-8 running out of memory (note), 18-9 avoiding cycles in subVIs, 3-12 © National Instruments Corporation I-57 G Programming Reference Manual Index X selecting wires, 17-6 to 17-10 situations to avoid, 17-15 to 17-17 hidden wire segments, 17-16 wire loops, 17-15 wiring underneath objects, 17-17 structure wiring problems assigning more than one value to sequence locals, 18-22 failing to wire tunnels, 18-22 overlapping tunnels, 18-23 to 18-24 wiring from multiple frames of Sequence Structures, 18-24 to 18-25 wiring underneath rather than through structures, 18-25 to 18-26 tack points, 17-3 tip strips, 17-4 wire stretching, 17-5 to 17-6 wire stubs, 17-4 wiring connection information in Help window, 17-5 wiring problems dimension conflict, 17-12 element conflict, 17-12 faulty connections, 17-11 listing errors, 17-11 to 17-12 loose ends, 17-14 multiple wire sources, 17-13 no wire sources, 17-13 unit conflict, 17-12 wire cycle, 17-15 wire stubs, 17-4, 17-14 wire type conflict, 17-12 wiring guides, showing, 17-11 Wiring tool disabled in Control Editor, 22-7 hot spot, 17-1 purpose and use, 2-5 word integer numeric data storage format, A-3 G Programming Reference Manual X button, 8-9, 14-22 X Scale Formatting dialog box, 15-14 to 15-16 Format & Precision option, 15-16 Grid Options option, 15-15 Mapping Mode option, 15-15 Scale Style option, 15-15 Scaling Factors option, 15-15 to 15-16 X Scale submenu, 15-13, 15-40 XY graphs. See waveform and XY graphs. Y Y Scale submenu, 15-13, 15-40 Z Z Scale Info Attribute Color Array, 15-40 High Color, 15-40 Low Color, 15-40 zooming options, graph indicators, 15-17 to 15-19 I-58 © National Instruments Corporation