1
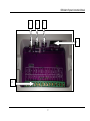
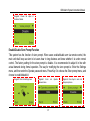
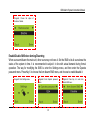
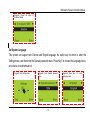
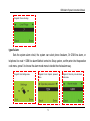
GSM Alarm System Instruction Manual Foreword Dear Users, Thanks for choosing our alarm system. For better operation of the system, please read the instruction manual carefully before using. After reading, please keep the manual carefully for future reference. 1 GSM Alarm System Instruction Manual Copyright Information The product, including but not limited to granted or pending patents, is under protection of the patent laws of PRC or other countries. We reserve the rights for modification of the specification or price of the product. 2 GSM Alarm System Instruction Manual Security Overview Read the following security precaution measures to prevent any personal injury or damage to the product, while making the best of its function. Use the correct power supply. voltage: 12V, current: >1A. To avoid the damage of the main unit caused by wrong connection, installation shall be performed by professionals. Please don’t press the touch keyboard of the main unit heavily. Please don’t use the product in damp environment. Please don’t use the product under inflammable and explosive conditions. Keep the surface of the product clean and dry. Maintain proper ventilation. 3 GSM Alarm System Instruction Manual Foreword This manual introduces the performance characteristics and operation procedure of the product. Chapter 1 Chapter 2 Chapter 3 Chapter 4 Chapter 5 Chapter 6 Chapter 7 Chapter 8 Chapter 9 Chapter 10 Functions and Advantages of Alarm System’s Main Unit Introduction of Interface and Panel of Alarm System’s Main Unit Main Unit Startup Procedure Relevant Settings for Alarm System’s Main unit Routine Use and Maintenance System Troubleshooting Service and Technical Support Appendix: Product Parameters Appendix: Factory Setting Parameters Appendix: List of countries Where the Product is Suitable for Use 4 GSM Alarm System Instruction Manual Chapter 1 Functions and Advantages Wireless GSM intelligent anti-theft electronic alarm system is an innovative mobile intelligent alarm device integrating GSM digital signal processing techniques and imported STC microprocessor, and a variety of technologies including digital voice announcer, SMS, learning code pairing, etc. In addition, this alarm system is highly automatic, giving automatic voice or SMS alert in the event of emergency without intensive manual settings required. Features of stability, reliability, safety, and humanizing control enable it to be widely used for security in shops, convenience stores, offices, villas, residential communities, etc. 128X64 dot matrix display in both Chinese and English language. The built-in clock is convenient for time checking. Original operation system for the main unit allows simple operation. Support card access control system, needless to carry the traditional remote control. 4 wired and 10 wireless zones, each can support 10 detectors (the maximum is 100). Code pairing for up to 8 wireless remote controls. Built-in intercom speakers with high acoustic quality and large volume. Arm/disarm at regular time. Preset 6 alarm phone numbers, which the main unit shall dial automatically to make voice alarm. 5 GSM Alarm System Instruction Manual Preset 3 SMS numbers, to which the main unit shall send the alarm SMS automatically. 10s of manual recording. Built-in digital voice announcer, which shall report alarm conditions automatically. Built-in SMS in English/Chinese, which shall be sent automatically. Telephone function, allowing communication with any phone via the main unit dialing. One key control to arm the system via remote control or telephone when at home or outside. Programming for alarm place: help-seeking, fire, gas, door lock, living room, window, balcony or surrounding alarm. Various programming functions for zones, such as real time, delayed, 24 hours and bypass. Learn the code pairing through wireless way. It is easy to add new parts in safe and efficient way. Various functions, such as remote control, system arming/disarming, monitoring and intercom. Inquire event recording: the main unit can record all the information of 40 alarm events automatically. Multi-arming modes: real-time arming via remote control, delayed system arming when outgoing, arming at home, arming at appointed time, remote arming via phone. Maintain the top priority of alarm: If there is alarm while calling, no matter incoming or outgoing, the main unit shall hang up call and dial the alarm phone immediately. Built-in lithium battery with high capacity to enable alarm while power-off. The system will be more secure if use GSM+Line alarm 6 GSM Alarm System Instruction Manual Chapter 2 Introduction of Interface and Panel of Alarm System’s Main Unit 1 2 3 7 GSM Alarm System Instruction Manual 1:Main unit display screen with 128X64 resolution, supporting Chinese/English language 2:Main unit status indicator POWER:Indicator for power-on and work status of the main unit Quick flicking at 1s interval means the GSM network is under registration. Flicking every 3s means the main unit is in normal standby status and ready for alarm. ARM:arming when outgoing indicator HOME:arming at home indicator SET:Setting status indicator, it shall be on when entering the system setting. SIGNAL: Wireless signal indicator, it shall be on when effective wireless signals are available or under special functions. ALARM: Alarm indicator 3:Touch keyboard: the key of the system is touch screen of resistance-type, which requires a certain level of force. DO Not press it heavily. . :Key for arming when outgoing by the main unit at appointed time :Key for arming at home by the main unit :Call key. Input phone number, and press CALL key, the main unit shall dial immediately and enter into the calling status. Press CALL key while calling to hang up. SOS:Emergency help key ESC:Clear the keyboard entry, or return to the previous step. ENTER:Confirmation key 8 GSM Alarm System Instruction Manual 5 6 7 8 4 9 GSM Alarm System Instruction Manual 4:Function interface of the main unit 1 T_VCC External keyboard power supply: 12V voltage 2 T_GND Grounding external keyboard 3 A Connecting external keyboard A 4 B Connecting external keyboard B 5 GND 6 Zone 1 7 GND 8 Zone 2 9 GND 10 Zone 3 11 GND 12 Zone 4 13 GND 14 G_ANT 15 ANT Grounding Wired zone 1 input, adopting normal on/off prober Grounding Wired zone 2 input, adopting normal on/off prober Grounding Wired zone 3 input, adopting normal on/off prober Grounding Wired zone 4 input, adopting normal on/off prober Grounding External antenna grounding External antenna 5:Built-in battery switch 10 GSM Alarm System Instruction Manual 6:POWER: Power in。 7:SP:Siren in。 8:TEL:Telephone LINE:Telephone line。 Chapter 3 Main Unit Startup Procedure It is important to startup the main unit correctly, which may affect the normal operation and service life of itself. Step1: Disconnect the main unit with power supply, for it is prohibited to operate the main unit in power on status, such as inserting/pulling off the interface kits and the SIM card Step2: Install the SIM card Step3: Insert the 12V power supply adapter of the main unit. The main unit shall enter into self-checking status and show the startup information. Check whether the POWER indicator flickers quickly every 1s. If the POWER indicator is not on, re-start the main unit after 10s interval. Repeated power on/off operations in a short while may reduce its service life. Step4: After the main unit registered successfully on the network, the POWER indicator shall flicker every 3s. 11 GSM Alarm System Instruction Manual Step5: Turn on the battery switch. Step6: Check whether the GSM signal strength is more than 3 bars, for weak signal may affect the normal operation of the main unit. Chapter 4 Relevant Settings for Alarm System’s Main Unit Enter into System Setting The setting of the main unit can only be carried out in the system setting status, in which the SET indicator shall be on. At that time, Key 2/8/4/6 is for turning the menu up/down/left/right respectively. Please follow the way below to enter into the setting: When the system is disarmed, input the 6-digit setting password (the factory setting is 888888), and then press ENTER key to confirm. When the main unit emits a beep tone, the system enters setting status with the SET indicator on, showing the setting menu for remote control. The detailed operation diagram is as follows: Diagram1: System disarmed status Diagram2: Input setting password Diagram3: Press ENTER key to enter setting status 12 GSM Alarm System Instruction Manual Add Remote control The system can support up to 8 remote controls. It is required to enter the system setting for adding remote controls. The remote controls must be coded, which may be high-rate or low-rate. For anti-interference, the software of the main unit has blocked these special coding. If the coding of the remote control is identical with the one saved in the main unit, it shall fail to add new remote control. The detailed way is as follows: enter the Remote Control menu, and then press Key 4 or 6 to choose the target one; Press Key 8 to turn to the Coding menu, and then press ENTER key to confirm; after the remote control transmits signals, and the main unit identifies the remote control, press ENTER key to confirm and save. The detailed operation diagram is as follows: Diagram1: Enter Remote control menu Diagram2: choose the target remote control, and press ENTER key 13 Diagram3: Ready to receive remote control signal. GSM Alarm System Instruction Manual Diagram 4A: the main unit can identify the remote control coding correctly Diagram 4B: The coding of remote control is identical with the one saved in the main unit Diagram5: Press ENTER key to save the remote control coding Delete Remote Control When the remote control is broken or lost, its information shall be deleted from the main unit. The deleted remote control can not control the main unit. The detailed way is as follows: enter the Remote control menu, press Key 4 or 6 to choose the target remote control. Press Key 8 to turn to the Delete menu, and then press ENTER key to confirm. The main unit shall show that the deletion is successful. The detailed operation diagram is as follows: Diagram1: menu Enter Remote control Diagram2: Choose the target remote control 14 Diagram3: Press ENTER confirm the deletion. key to GSM Alarm System Instruction Manual Code Pairing in Zone This system can support up to 10 wireless zones, each of which can save 10 detectors (the maximum is 100). It is required to enter the system setting to add new detectors. The remote controls must be coded, which may be high-rate or low-rate. For anti-interference, the software of the main unit has blocked these special coding. If the coding of the detector is identical with the one saved in the main unit, it shall fail to add new remote control. The detailed way is as follows: enter the Zone menu, and then press Key 4 or 6 to choose the target one; Press Key 8 to turn to the Coding menu, and then press ENTER key to confirm; after the detector transmits signals, and the main unit identifies the detector, press ENTER key to confirm and save. The detailed operation diagram is as follows. Diagram1: Enter Zone menu Diagram2: Choose the target zone, and then press ENTER key 15 Diagram3: Ready detector signal. to receive the GSM Alarm System Instruction Manual Diagram 4A: the main unit can identify the detector coding correctly Diagram 4B: The coding of the probe is identical with the one saved in the main unit already Diagram5: Press ENTER key to save the detector coding Delete Zone When the detector is broken or desired to be deleted, its information shall be deleted from the main unit. The deleted remote control can not control the main unit. The detailed way is as follows: enter the Zone menu, press Key4 or 6 to choose the target zone. Press Key8 to turn to the Delete menu, and then press ENTER key to confirm. The main unit shall show that the deletion is successful. The detailed operation diagram is as follows: 16 GSM Alarm System Instruction Manual Diagram1: Enter Zone menu Diagram2: Move right to choose the target zone Diagram3: Press ENTER confirm the deletion key to Change Installation Location of Zone After identifying the installation location for the detector, the system can send out correct alarm SMS. This system can support up to 8 kinds of installation locations: help-seeking in emergency, fire alarm, gas leakage alarm, door lock alarm, living room alarm, window alarm, balcony alarm and surrounding alarm, to meet the users’ requirements. The detailed way is as follows: enter the Zone menu, press Key2 or 8 to choose the installation location of zone menu. Press ENTER key to confirm and choose the relevant installation location. The detailed operation diagram is as follows: 17 GSM Alarm System Instruction Manual Diagram1: Enter Zone menu Diagram2: Turn down installation place menu to choose Diagram3: Press ENTER choose the installation place key to Diagram4: Before setting, the content of the SMS sent by the zone 1 is: Zone 01 fire alarm. After setting, the content of the SMS sent by the zone 1 is: Zone 01 gas leakage alarm. Change Zone Alarm Condition The alarm conditions for all zones of the system can be changed freely. There are 3 supporting modes: Arming alarm when outgoing/arming alarm staying home, disarming alarm. For example, when the gas 18 GSM Alarm System Instruction Manual detector is required to enable the alarm inspection all day long, it is necessary to enable alarm under system arming, home arming and system disarming. The detailed way is as follows: enter the Zone menu, press Key 2 or 8 to choose Home menu. Press ENTER key to enable or disable this function. Set the same alarm condition for outgoing arming and system disarming modes. The detailed operation diagram for changing the effective conditions for home arming is as follows: Diagram1: Enter Zone menu Diagram2: Turn down to choose Home menu Diagram4: Before setting, the zone 1 shall not make alarm in the home arming condition. After setting, the zone 1 shall make alarm in the home arming condition if being triggered. 19 Diagram3: Press ENTER choose zone condition. key to GSM Alarm System Instruction Manual Enable/Disable Siren when Zone Makes Alarm All the zones of the system can enable/disable the siren to reduce the noise interference according to the user’s demand. The detailed way is as follows: enter the Zone menu, press Key 2 or 8 to choose the Siren menu. Press ENTER key to enable or disable this function. The detailed operation diagram for changing the effective condition for siren is as follows: Diagram1: Enter Zone menu Diagram2: Turn down to choose Siren menu Diagram4: Before setting, the zone 1 enables the siren. After setting, the zone 1 shall disable the siren. 20 Diagram3: Press ENTER enable/disable the siren key to GSM Alarm System Instruction Manual Enable Delayed Alarm in Zone All the zones of the system can set delayed dialing and enable siren after a valid alarm to meet the various requirements of users. The detailed way is as follows: enter the Zone menu, press Key2 or 8 to choose the Delay menu. Press ENTER key to choose enable or disable this function. The detailed operation diagram for changing the effective condition for delayed dialing is as follows: Diagram1: Enter Zone menu Diagram2: Turn down to choose Delay menu Diagram 4: Before setting, the zone 1 shall dial the phone to make alarm with siren after a valid alarm. After setting, the zone 1 shall dial the phone to make alarm with siren after preset delayed time period. (Set the delayed time in system setting menu) 21 Diagram3: Press ENTER key enable/disable the delayed dialing to GSM Alarm System Instruction Manual Set System Alarm Phone This system can set 6 alarm phone numbers, which the system shall dial circularly to send out alarm information until one of the phones confirms the reception with key operation, and then the system shall stop dialing and the siren. Otherwise, the system shall dial circularly 3 times before stopping. The detailed way for setting the phone numbers is as follows: enter the Phone number menu, press Key 4 or 6 to choose the serial No. of phone numbers ,and press ENTER key to confirm .Input the desired phone numbers, then press ENTER key again to save. The detailed operation diagram for setting the alarm phone is as follows: Diagram1: Enter Phone number menu Diagram2: Choose target phone number, and then press ENTER. 22 Diagram3: Input phone number. GSM Alarm System Instruction Manual Diagram4: Press ENTER key to save Diagram5: Set the alarm phone 1 successfully. Delete or Modify System Alarm Phone The detailed way for deleting the phone numbers is as follows: enter the Phone Number menu, press Key 2 or 8 to choose the serial No. of phone numbers. Press ENTER key to confirm the deletion. The detailed operation diagram for deleting the alarm phone is as follows: Diagram1: Enter Phone number menu Diagram2: Choose the target phone 23 Diagram3: Turn Delete menu down to choose GSM Alarm System Instruction Manual Diagram4: Delete successfully. the phone 1 Set System Alarm SMS Number This system can set 3 alarm SMS numbers, to which the system shall send out the relevant SMS after a valid alarm. The detailed way for setting the SMS numbers is as follows: enter the SMS number menu, press Key 4 or 6 to choose the serial No. of SMS numbers, and press ENTER key to confirm. Input the desired phone numbers, then press ENTER key again to save. The detailed operation diagram for setting the SMS number is as follows: Diagram1: menu Enter SMS number Diagram2: Choose the target phone number, and then press ENTER 24 Diagram3: Input SMS number GSM Alarm System Instruction Manual Diagram4: press ENTER to save Delete or Modify System SMS number The detailed way for deleting the SMS number is as follows: enter the SMS number menu, press Key 2 or 8 to choose the serial No. of SMS numbers. Press Key 8 to choose the Delete menu, and then press ENTER key to confirm the deletion. The detailed operation diagram for deleting the SMS number is as follows: Diagram1: menu Enter SMS number Diagram2: Choose the target SMS number 25 Diagram3: Turn down to enter Delete menu GSM Alarm System Instruction Manual Diagram4: Delete SMS number 1 successfully. Set Network Center Function The network function of community shall be supported by the alarm center, the protocol of which shall be compatible with the system’s protocol or networking may not work. This system supports phone center and SMS network center. If you need to use the network function, please contact us. The setting of network function includes center phone numbers, user IDs, and other parameters. Set center phone number: enter the Network Centers menu, and the Phone Center menu, and then press ENTER key to enter setting status. Input the phone center number and save it. The detailed operation diagram is as follows: 26 GSM Alarm System Instruction Manual Diagram1: Enter Network Centers menu Diagram2: Choose Phone menu, and then confirm. center Diagram3: Input center phone number Diagram4: Save the phone number Set user ID: enter the Network Centers menu, and the Phone Center menu. Press Key 6 to move right to choose the User ID menu and press Enter. Input the user ID, press Save key to save it. The detailed operation diagram is as follows: 27 GSM Alarm System Instruction Manual Diagram1: Enter Network menu Centers Diagram2: confirm. Choose user ID and Diagram3: Input user ID Diagram4: Save the user ID Upload alarm to the network center: enter the Network centers menu, and the Phone Center menu. Press Key 6 to move right to choose the Alarm Report menu, and press ENTER to enable/disable this function. 28 GSM Alarm System Instruction Manual The detailed operation diagram is as follows: Diagram1: menu Enter Network centers Diagram2: menu Choose Alarm Report Diagram3: Choose to enable/disable the function of alarm report Diagram4: Before setting, the alarm report will not be uploaded to the network center. After setting, the alarm report shall be uploaded to the network center before being sent to users. Upload system arming/disarming report to the network center: enter Network centers menu, and then enter the Phone Center menu. Press Key 6 to move right to choose the Arm Report menu, and press 29 GSM Alarm System Instruction Manual ENTER key to enable/disable this function. The detailed operation diagram is as follows: Diagram1: menu Enter Network centers Diagram2: Choose Arm report menu Diagram4: Before setting, the information on system arming/disarming will not be uploaded to the Network center. After setting, the information on system arming/disarming shall be uploaded to the Network center. 30 Diagram3: Choose to enable/disable the function of arm report GSM Alarm System Instruction Manual Set Function of Recording for 10s This system can make recording for 10s in advance, which will be sent out via alarm phone call, giving a brief description of the alarm. Make audio recording: enter the Recording menu, and enter Start Recording menu. Press ENTER to start recording with medium volume. At this time, speak to the main unit. After counting down for 10s, the recording will stop. The detailed operation diagram is as follows: Diagram1: Enter Recording menu Diagram2: Enter Start recording menu Diagram3: Start recording Play Recording for 10s Play the audio recording: enter the Recording menu, and enter Start Recording menu. Press Key 6 to 31 GSM Alarm System Instruction Manual choose the Playback menu, and then press ENTER key to play the recording. The recording can be made again if users are not satisfied, The detailed operation diagram is as follows: Diagram1: Enter recording menu Diagram2: Enter Start recording menu Diagram3: Choose Play menu Diagram4: Start Playing record 32 GSM Alarm System Instruction Manual Set System Date The date format of this system is year/month/day, with the year range between 00-99. The setting way is: enter the Time menu, and enter the Date menu. Press Enter to input the correct date, and save it. The detailed operation diagram is as follows: Diagram1: Enter Time menu Diagram2: Enter Date menu Diagram4: Input correct date, and save it 33 Diagram3: Enter Input status GSM Alarm System Instruction Manual Set System Time The time format of this system is 24-hour format. The setting way is: enter the Time menu, and then enter the Date menu. Press Key 6 to choose the Time menu, then input correct time and save it. The detailed operation diagram is as follows: Diagram1: Enter Time menu Diagram2: Enter Date menu Diagram4: Input correct time, and save it Diagram5: Save completed 34 Diagram3: Press Key 6 to choose Time menu GSM Alarm System Instruction Manual Set Time for System Arming After setting the arming time, the main unit will enter the arming when outgoing status at the appointed time, which can save users’ time for daily manual setting. The setting way is: enter the Time menu, and then enter the Date menu. Press Key 6 to choose the Timely Arm menu, then input correct time and save it. The detailed operation diagram is as follows: Diagram1: Enter Time menu Diagram2: Enter Date menu Diagram4: Input correct time, and save it 35 Diagram3: Press Key 6 to choose Timely arm menu GSM Alarm System Instruction Manual Set Time for System Disarming After setting the arm time, the main unit will enter the disarming status at the appointed time, which can save users’ time for daily manual setting. The setting way is: enter the Time menu, and then enter the Date menu. Press Key 6 to choose the Timely disarm menu, then input correct time and save it. The detailed operation diagram is as follows: Diagram1: Enter Time menu Diagram2: Enter Date menu Diagram4: Input correct time, and save it 36 Diagram3: Press Key 6 to choose Timely disarm menu GSM Alarm System Instruction Manual Enable Wireless Control Function This system supports the function of wireless control for home appliances and sirens. To enable this function, it is required to operate in the following way: enter the Wireless Control menu, and then enter the Control menu. Press Enter key to enable this function. The detailed operation diagram is as follows: Diagram1: menu Enter Wireless Control Diagram2: Enter Control menu Diagram4: Before setting, the main unit has no function of wireless control. After setting, the main unit shall enable the function of wireless control. 37 Diagram3: Enable Choose the option of GSM Alarm System Instruction Manual Wireless Siren Code Pairing This system supports the function of wireless siren to eliminate the arrangement of wire. It is required to code pairing the wireless siren with the main unit. The way for setting is: enter the Wireless Control menu, and then enter the Control menu. Press Key 6 to enter the Wireless Siren menu, and choose the option of Transmission. Then the main unit shall transmit a wireless signal to control the code pairing of the wireless siren. The detailed operation diagram is as follows: Diagram1: menu Enter Wireless Control Diagram2: Enter Control menu Diagram4: After the ENTER key is pressed to confirm,the main unit shall transmit a wireless signal to control the code pairing of the wireless siren. 38 Diagram3: Press Key6 to choose Wireless siren menu GSM Alarm System Instruction Manual Wireless Siren Encryption When the wireless siren confronts repeated codes or interruption, it is required to encrypt the wireless siren signal transmitted by the main unit before transmission, and then make code pairing with the wireless siren again. The way for setting is: enter the Wireless Control menu, and then enter the Control menu. Press Key 6 to choose the Wireless siren menu, and press Key 8 to choose the option of Encryption. Input 4 digits randomly, and save it The detailed operation diagram is as follows: Diagram1: menu Enter Wireless Control Diagram5: Input 4 digits randomly Diagram2: Enter Control menu Diagram6: Save the numbers 39 Diagram3: Press Key6 to choose Wireless siren, and press Key 8 to choose Encryption GSM Alarm System Instruction Manual Wireless Control for Home Appliance This system can support up to 8 lines of wireless control for home appliances. Please refer to the wireless siren setting for the way to make code pairing with the home appliance. The operation of wireless control for home appliance requires the use of wireless control. Please contact us if need to use this function. Modify Operating Password The operating password is used by users for daily operation. Please take not of it properly, users can not control the main unit if the password is lost. The factory setting of the password is 1234. It is recommended to set the password to your own convenience during formal operation. The way for setting the password is: Enter the Settings menu, and then enter the Operate password menu. Input 4-digit operating password and save it. Diagram1: Enter Settings menu Diagram2: Enter Operate password menu 40 Diagram3: Input 4-digit of operating password GSM Alarm System Instruction Manual Diagram4: Save it Modify Program Password The program password is used by users for setting the system. Please remember it clearly, otherwise, users can not set the main unit. The factory setting of the password is 888888. It is recommended to set the password as the one easy to remember during formal operation. The way for setting the password is: enter the Settings menu, and then enter the Operate password menu. Press Key 6 to choose the Program password menu. Input 6-digit as program password and save it. Diagram1: Enter Settings menu Diagram2: Enter Operate password menu 41 Diagram3: Press Key6 Program password menu to enter GSM Alarm System Instruction Manual Diagram4: Input password, and save it Modify Time for Delayed Arming After pressing the ARM key, the main unit shall be in the arming status at the appointed time. The factory default time for delayed arming is 60s with the time range between 1s-99s. It is recommended to adjust it in line with actual demand during formal operation. The way for modifying the time for delayed arming is: enter the Settings menu, and then enter the Operate password menu. Press Key6 to choose the Delay arm menu. Input the desired time and save it. Diagram1: Enter into Settings menu Diagram2: Enter password menu 42 into Operate Diagram3: Press Key6 to enter into Delay arm menu GSM Alarm System Instruction Manual Diagram4: Input time, and save it Modify Time for Delayed Alarm When the function of delayed alarm is valid, the main unit shall alarm at the appointed time. The factory setting for delayed alarm is 40s with the time range between 1s-99s. It is recommended to adjust it in line with actual demand during formal operation. The way for modifying the time for delayed alarm is: enter the Settings menu, and then enter the Operate password menu. Press Key 6 to choose the Delay alarm menu. Input the desired time and save it. Diagram1: Enter into Settings menu Diagram2: Enter password menu 43 into Operate Diagram3: Press Key6 to enter into Delay alarm menu GSM Alarm System Instruction Manual Diagram4: Input time, and save it Enable/Disable Voice Prompt Function This system supports the function of voice prompt. When users arm/disarm via remote control, the main unit shall broadcast the relevant status through voice prompt. The factory setting for the voice prompt is: enable. It is recommended to adjust it in line with actual demand during formal operation. The way for modifying the voice prompt is: enter the Settings menu, and then enter the Operate password menu. Press Key 6 to choose the Voice prompt menu, and choose to enable/disable it. Diagram1: Enter Settings menu Diagram2: Enter Operate password menu 44 Diagram3: Press Key6 to enter Voice prompt menu GSM Alarm System Instruction Manual Diagram4: Choose Enable or Disable the option of Enable/Disable Siren Prompt Function This system has the function of siren prompt. When users enable/disable arm via remote control, the main unit shall beep as siren to let users hear in long distance and know whether it is under normal control. The factory setting for the siren prompt is: disable. It is recommended to adjust it in line with actual demand during formal operation. The way for modifying the siren prompt is: Enter the Settings menu, and then enter the Operate password menu. Press Key 6 to choose the Siren prompt menu, and choose to enable/disable it. Diagram1: Enter into Settings menu Diagram2: Enter password menu 45 into Operate Diagram3: Press Key6 to enter into Siren prompt menu GSM Alarm System Instruction Manual Diagram4: Choose Enable or Disable the option of Enable/Disable System Backlight The backlight of display screen and keys shall be off automatically when there is no action to press the keys. It is required to set to keep the backlight on. The factory setting for the backlight is: disable. It is recommended to adjust it in line with actual demand during formal operation. The way for modifying the backlight is: enter the Settings menu, and then enter the Operate password menu. Press Key6 to choose the Backlight on menu, and choose to enable/disable it. Diagram1: Enter Settings menu Diagram2: Enter Operate password menu 46 Diagram3: Press Key 6 to enter backlight on menu GSM Alarm System Instruction Manual Diagram4: Choose Enable or Disable the option of Enable/Disable Siren when making Emergency Help Alarm via Remote Control The factory setting is that there is no siren when users press the Emergency help key on the remote control. It is recommended to adjust it in line with actual demand during formal operation. The way for modifying the siren is: enter the Settings menu, and then enter the Operate password menu. Press Key 6 to choose the Remote siren menu, and choose to enable/disable it. Diagram1: Enter Settings menu Diagram2: Enter Operate password menu 47 Diagram3: Press Key 6 to enter Remote siren menu GSM Alarm System Instruction Manual Diagram4: Choose Enable or Disable the option of Enable/Disable SMS when Arming/Disarming When users arm/disarm the main unit, other users may not know it. Set the SMS to let all users know the status of the system in time. It is recommended to adjust it in line with actual demand during formal operation. The way for modifying the SMS is: enter the Settings menu, and then enter the Operate password menu. Press Key 6 to choose the Arm disarm SMS menu, and choose to enable/disable it. Diagram1: Enter Settings menu Diagram2: Enter Operate password menu 48 Diagram3: Press Key 6 to enter Arm disarm SMS menu GSM Alarm System Instruction Manual Diagram4: Choose Enable or Disable the option of Set System Language This system can support both Chinese and English language, the switch way for which is: enter the Settings menu, and then enter the Operate password menu. Press Key 6 to choose the Language menu, and choose to enable/disable it. Diagram1: Enter Settings menu Diagram2: Enter Operate password menu 49 Diagram3: Press Key 6 to enter Language menu GSM Alarm System Instruction Manual Diagram4: Choose Chinese or English language of Thenumber of telephone ringing After thecall from set telephone lines,Ring after how many times to answer.Method:entre into Setup system, confirm,enter into the operationcode menu, press 6 to choose telephone ringing frequency menu to decide thechoice ringing frequency Diagram1: Enter Settings menu Diagram2: Enter Operate password menu 50 Diagram3: Press Key 6 to enter line rings menu GSM Alarm System Instruction Manual Diagram4: Choose line rings typeof alarm Sets the system alarm circuit, the system can select phone linealarm, Or GSM line alarm, or telephone line road + GSM line alarm.Method: entre into Setup system, confirm,enter into theoperation code menu, press 6 to choose the alarm mode menu to decide the choicealarm way. Diagram1: Enter Settings menu Diagram2: Enter Operate password menu 51 Diagram3: Press Key 6 to enter alarm mode menu GSM Alarm System Instruction Manual Diagram4: Choose alarm mode Restore Factory Setting When the system is unstable, it is recommended to restore the factory setting in the following way: enter the Settings menu, and then enter the Operate password menu. Press Key 6 to choose the Factory setting menu, and choose the option of Restore. The main unit shall show that “Please wait back to default setting”. After restoring the factory setting, the main unit shall exit from the setting condition. Diagram1: Enter Settings menu Diagram2: Enter Operate password menu 52 Diagram3: Press Key 6 to enter Factory setting menu GSM Alarm System Instruction Manual Diagram4: Restore factory setting Emergency Setting when Forgetting Password If users forget the password, they can input order as 95175308246 in disarming status, and then the main unit shall show that “Please wait back to default password”. After restoring successfully, the factory setting for operating/program password is 1234/888888 respectively. The detailed operation diagram is as follows: Diagram1: in system disarmed status Diagram2: input order of 95175308246 Diagram4: After restoring password, the operating/program password is 1234/888888 respectively. 53 Diagram3: Restore factory setting GSM Alarm System Instruction Manual Chapter 5 Routine Use and Maintenance System Disarming The purpose of disarming the main unit is let it not in the status of alert. One way is normal disarming after operation of arming, and the other is to stop the main unit making alarm. After being disarmed, the zones shall not work except the 24-hour arming ones. Press digital keyboard of the main unit to input [User password], plus [#]. The information of “system disarmed” showing on the main unit means that the operation of disarming is successful. Remote control: press [ ] key on the remote control. The main unit control: [Password] + [ENTER]. Diagram1: System disarmed status System Arming “System arming” means that the main unit shall be armed wholly: when there is no person at home, it is 54 GSM Alarm System Instruction Manual required to detect all the armed range with all the detectors on. When any detection source (such as invasion of thief, fire or gas leakage) triggers the detector, it shall make alarm immediately. Press [ARM] key on the keyboard of the main unit, it shall beep once every 1 second after the appointed time and show the information about “system armed”, which means the arming is successful. Remote control: press [ ] key on the remote control once. The main unit armed: press [ARM] key to let the main unit arming in delayed time. Diagram1: in system armed status Home Arming “Home arming” means the main unit shall be armed partly: when there is someone at home, If it is required, for safety reasons, to enable some of the detectors (at door, window, balcony or surrounding, for example) and disable the others (such as at living room, triggered by hosts), the home arming is suitable. Press [STAY] key on the keyboard of the main unit, it shall show that “Home arm”, which means the operation is successful. 55 GSM Alarm System Instruction Manual The main unit control: press [STAY] key to let the main unit in the status of home arming. Remote control: press [ ] key on the remote control once. Diagram1: home arm status Answer Alarm Once the main unit makes alarms, the siren shall send out voice prompt and dial the preset phone numbers automatically to make voice alarm. If no one answers one of the phone calls, the main unit shall turn to dial the left phones automatically until dialing all the preset phones three times circularly. If someone responds to the phone call, he/she can hear the alarm information from the receiver. At that time, press the keys on the phone (or mobile phone) to realize various functions: Hang up directly: Just like no one answering the phone call, the main unit shall dial all the preset phones three times circularly. Press [*] key: read the alarm information. 56 GSM Alarm System Instruction Manual Press [1] key: the main unit shall stop alarm, and arm without dialing again. Press [2] key: the main unit shall stop alarm, and disarm without dialing again. Press [3] key: the main unit shall disable the siren and monitor the site for 30s. Continue pressing if more time is desired for monitoring. Identify whether there is abnormal sound at home or any thief has invaded in. Press [4] key: Enable the function of intercom on site for 30s. Remote Control After Dialing the phone numbers connected with the main unit through phones or mobile phones, users shall hear the voice prompt as “Please input the password” from the receiver after the preset ringing. After Inputting the correct password (the operating password is 1234, each of which with keytone when inputted shall be viewed as effective one), users shall hear the voice prompt as “Please input the instruction”; Otherwise, users shall hear the voice prompt as “The password is wrong, please input again”. After entering into the remote control status, users shall implement the remote control via pressing the phone keys. Press [1] key: the main unit shall enter the arming status, and users shall hear the voice prompt as “System armed” from the receiver. Press [2] key: the main unit shall enter the disarming status, and users shall hear the voice prompt as “System disarmed” from the receiver. 57 GSM Alarm System Instruction Manual Press [3] key: the main unit shall monitor the site for 30s, if continuous monitoring is required, press [3] key again to extend time for 30s. Press [4] key: Enable the function of intercom on site for 30s Emergency Help There are some accidents happening at home, such as old people or children get sick, who need first-aid, the fire breaks out at home, or ruffians invade into house to rob and calling 110 is desired. At that time, just press [SOS] key on the main unit, [ ] key on the remote control or the wireless emergency key, the alarm system shall make alarm via dialing the preset phones automatically. Remote control: press [ ] key on the remote control once. The main unit control: press [SOS] emergency key on the keyboard of the main unit Dial Phone This system has the function of dialing, via which users can dial any phone numbers directly. It can be used as a convenient fixed phone. For example, in the status of system disarmed, input the phone number [13800138000] by pressing the keyboard, and then press [CALL] key. After beeping a long sound, the main unit shall show that it is dialing the phone -13800138000. If dialing successfully, user can start communication, and after finishing, press [CALL] key again to hang up. At that time, the system is in 58 GSM Alarm System Instruction Manual the status of disarmed. Inquire Alarm Record This system can save 30 historical alarm records with the last one as the first record. When storing more than 30 records, the system shall delete the oldest one automatically. The way for inquiring the alarm records is: Input 00 in the status of system disarmed, and then press ENTER to enter the inquiry status. Press Key 4 or 6 to turn the pages to check the records. Press ESC key to exit from the inquiry status. The detailed operation diagram is as follows: Diagram1: Input 00 in status of system disarmed Diagram2: Press Key4 or 6 to check records Diagram3: Press Key4 or 6 to check records System Self-checking Although being used every day, the system shall be maintained and inspected periodically, in order to ensure its stability, reliability and security. Normally, the main unit shall be inspected wholly every three month, and the 59 GSM Alarm System Instruction Manual detectors shall be inspected every one month, at least once every three months. Main Unit Inspection: 1. Whether the main unit can be armed/ disarmed normally. 2. Whether the main unit can dial to make alarm normally. 3. Whether the main unit can receive the signal of the detector, and whether the backup battery is normal. Prober Inspection: 1. Trigger the detector by hand to check whether it can make alarm normally. 2. Inspect all the batteries of the detectors to check whether they are under voltage. 3. Test the transmission function of the wireless detector to check whether it can communicate with the main unit. Chapter 6 System Troubleshooting Fail to detect the network: Is the SIM card fit properly? Install again 60 GSM Alarm System Instruction Manual Is the PIN code of the SIM card set? Cancel it. Is the mobile signal not strong enough at the installation location? Change the place Alarm failure: Is the code normal or is code pairing successful? Identify the correct code, and carry out code pairing again. Is the prober under voltage or is its transmission distance not long enough? Replace the battery. Dialing failure: Is the mobile signal strong enough? Change the location of the main unit. Is there enough balance in the GSM card? Check and recharge it. Check whether the phone numbers have been set correctly. Siren failure: Are the positive and negative poles of the siren contacted properly? Check Is the zone set as mute alarm? Reset Voice disorder: Have users recorded voice before? Record again. Remote control failure: Is the remote control password inputted correct? (Its factory setting is 1234) 61 GSM Alarm System Instruction Manual Chapter 7 Service and Technical Support Our company guarantees that the alarm system will be free of defects in material and workmanship within 3 years since the date of shipment by the authorized distributors. If the product has been found any defect during the warranty period, please contact with the sales department or service station nearby. Under no conditions shall our company be liable for any indirect or special damage. If you get into any trouble when using the product, please contact with us directly in the China mainland or the local distributors outside PRC. You can visit our website to get the address lists of our service centers around the world. Thanks for your support. Chapter 8 Appendix: Product Parameters Input Voltage: Standby Current: Alarm Current: DC12V /1A <35mA <450mA Wireless Frequency 315MHz,2262 / 4.7MΩ 62 GSM Alarm System Instruction Manual GSM System: 900/1800MHz are available Backup Battery: Siren Loudness: NI-HI AAA*6 DC7.2V 110dB Chapter 9 /4 frequencies Appendix: Factory Setting Parameters Zone Arm at Home Type Alarm Condition Siren Zone1 Enable Disable Real-time Door lock alarm Enable Zone2 Enable Disable Real-time Living-room alarm Enable Zone3 Enable Enable Real-time Window alarm Enable Zone4 Enable Enable Real-time Balcony alarm Enable Zone5 Enable Enable Real-time Fire alarm Enable Zone6 Enable Enable Real-time Gas alarm Enable Enable Enable 24H Help alarm Disable Emergency key 63 GSM Alarm System Instruction Manual 7-10 Enable Disable Real-time Help alarm Enable Wired Zone (7-10) Enable Disable Real-time Help alarm Enable Programming password: 888888 Remote control: Enable Operating password: 1234 Siren prompt: Disable Siren duration: 180s Home appliance control: Configure optionally Chapter 10 Appendix: List of Countries Where the Product Is Suitable For Use For the product with 4 frequencies, it is available via the GSM network around the world. For the product with 900/1800MHz, it is available in the following regions: 64 GSM Alarm System Instruction Manual Asia East Asia: China, Mongolia, North Korea, Japan Southeast Asia: Philippines, Vietnam, Laos, Buna, Thailand, Malaysia, Brunei, Singapore, Indonesia, East Timor South Asia: Nepal, Bhutan, Bangladesh, India, Pakistan, Sri Lanka, Maldives Central Asia: Kazakhstan, Kyrgyzstan, Tajikistan, Turkmenistan , Uzbekistan West Asia: Afghanistan, Bahrain, Iraq, Iran, Syria, Jordan, Lebanon, Israel, Palestine, Saudi Arabia, Qatar, Kuwait, The United Arab Emirates (UAE), Oman, Yemen, Georgia, Armenia, Azerbaijan, Turkey, Cyprus Europe North Europe: Finland, Sweden, Norway, Iceland, Denmark, the Faroe Islands (Denmark) East Europe: Estonia, Latvia, Lithuania, White Russia, Russia, Ukraine, Moldova Central Europe: Poland, Czech, Slovakia, Hungary, Germany, Austria, Switzerland, Liechtenstein West Europe: Britain, Ireland, Holland, Belgium, Luxembourg, France, Monaco South Europe: Romania, Bulgaria, Serbia, Macedonia, Albania, Greece, Slovenia, Croatia, Italy, Vatican, San Marino, Malta, Spain, Portugal, Andorra 65 GSM Alarm System Instruction Manual Africa East Africa: Ethiopia, Eritrea, Somalia, Djibouti, Kenya, Tanzania, Uganda, Rwanda, Burundi, Seychelles Central Africa: Chad, Central Africa, Cameroon, Equatorial Guinea, Gabon, The Republic of Congo, The Democratic Republic of the Congo, Sao Tome and Principe West Africa: Mauritania, Western Sahara (not independent), Senegal, Gambia, Mali, Burkina Faso, Guinea, Guinea-Bissau, Cape Verde, Sierra Leone, Liberia, Ivory Coast, Ghana, Togo, Benin, Niger, Ganary Islands (Spain) South Africa: Zambia, Angola, Zimbabwe, Malawi, Mozambique, Botswana, Namibia, South Africa, Swaziland, Lesotho, Madagascar, Comorin, Mauritius, Reunion (France), Saint Helena (British) Oceania: Australia, Papua New Guinea, Solomon Islands, Vanuatu, Micronesia, Marshall Islands, Palau, Nauru, Kiribati, Tuvalu, Samoa, Fiji, Tonga, The Cook Islands (New Zealand), Guam (U.S.A.), New Caledonia (France), Polynesia, The Cook Islands (New Zealand), Wallis and Futuna (France), Niue (New Zealand), Tokelau (New Zealand), American Samoa, Mariana (U.S.A). 66