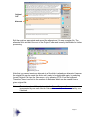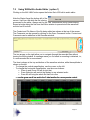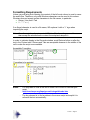
1
User Manual
Build 348
March 2013
This manual is viewable from the Help Menu,
either from the local hard drive or preferably directly from the Internet.
Note: We are continuously improving Word2WAV, so the screen captures
in this manual may be slightly different from those of the actual program. Select
Open Change History in the Help menu to see the changes which matter to you
and download the update accordingly.
Hint: After clicking on an internal hyperlink, you can come back
to where you were with an ALT-LEFT ARROW.
Page 1
If you only read ONE page ...
1. Several tutorials are available on YouTube:
- Introduction, Part 1 - Audio Setup and Script Import
- Introduction, Part 2 - Recording
- Introduction, Part 3 - Audio Editing
- Introduction, Part 4 - Batch Processing
- Basic Script Formatting
Watch them as you peruse this manual. They are available here.
2. The following two pages contain:
- Answers to FAQs
- A list of W2’s menus and keyboard shortcuts
3. Annex IV offers some troubleshooting help.
4. And remember: When everything else has failed, read the instructions ☺
5. OK, OK, you can contact us first at [email protected]
Page 2
Answers to FAQs
Problem
I cannot find my audio
files.
I cannot import a script.
My script does not import
correctly.
I need to reenter my
Registration Code every
time I start.
How do I take notes?
So many files. When am I
going to be done?
What if I have any extra
file to record?
I recorded a better take,
but I overwrote it!
When I try to batch
process to .mp3, all my
files disappear.
These cells are too
small... and I can’t read
that font.
Short dropouts, pops, or
clicks in the recordings
What about us Mac
users?
Possible Solution
They are saved in the folder
containing the script you
imported.
You need to register, but it’s
free.
The script needs to be
properly formatted. Try to
import the
WinesCatalog_Script located
in the Demo_Project Folder
(either in Word or Excel). This
will help narrowing down the
cause of the error.
You have entered a Trial
Code. W2 is now asking for a
Permanent Code. If you are
still evaluating W2, just click
“Trial.”
All electronically.
No pen. No paper.
Look at the Record Counter.
Not a problem. Just insert a
file. As many as you need!
No... it’s still there. Look into
the BU_Takes folder.
You need to install the LAME
encoder. It’s free but due to
copyrights, W2 cannot include
it in the download. The user
(you) has to do that.
Adjust them to fit your needs!
Improper hardware/software
configuration
Use VMware, Parallels, or
Boot Camp.
See...
Section 4, Import Script,
Note
Section 13.2.1, Register
Annex I
Watch the YouTube
tutorial to get started.
Section 13.3,
Permanent License
Script Edits
Enter/Edit Comments
Tag Files
Export Script As-Recorded
Section 6.2.1.1,
Record Progress Bar
Section 6.2.1.4,
Alternates
Section 6.2.1.2,
Back-up Takes
Section 9.5,
Resample/Convert Format
Section 5.1, Script Display
Parameters, and section 4,
Import Script
See Annex IV
Annex II
Still in a bind?
Contact us at mailto:[email protected].
We will make it work for you.
Page 3
Menus and Short Cuts
Menu
Title
File
Quit
Tools
Copy Current FileName
Go to Top of Script
Find File
Locate Original File
Go to Bottom of Script
Update Record Counter
View
Help
Batch Processor
Cell Formatting
Display Script
Import Script
Project Folder
Setup
Open Change History
Open
From Local Drive
Manual From Internet
Open Tutorial
About
Register Word2WAV
Description
CTRL-…
Q
Copies name of file in Active cell in the clipboard
Opens a dialog box to enter the file name
Find file used to create an alternate and makes it
the Active cell
Z
R
Should WAV files be manually added/removed
Adjust cell position, width, number, etc.
Opens the Project Folder in a separate window
Opens the Change History from the Internet
Opens the manual located in the W2_v3 Folder
Opens the latest manual from the Internet
Tutorial for Version 3 is not ready yet
Opens the Registration window
System Requirements:
-
A
F
O
Windows XP or newer
Runs well on Intel Mac using BootCamp
2 GB of RAM
10 MB of hard disk space
Page 4
B
W
D
I
P
S
M
Table of Contents
1.
2.
3.
4.
Introduction .......................................................................................................................... 6
Program Overview ............................................................................................................... 7
Format Script........................................................................................................................ 9
Import Script....................................................................................................................... 10
4.1
4.2
4.3
4.4
5.
Setup Window .................................................................................................................... 18
5.1
5.2
5.3
6.
Import Script in Batches ........................................................................................................15
Content Formatted over Multiple Columns ..........................................................................16
Automatic File Naming...........................................................................................................17
Importing PowerPoint Notes .................................................................................................17
Script Display Parameters .....................................................................................................18
Audio File Parameters............................................................................................................20
Comments + Tag/Untag Audio Files .....................................................................................21
Recorder Window .............................................................................................................. 22
6.1
6.2
Navigation ...............................................................................................................................23
Operating Modes ....................................................................................................................23
6.2.1
6.2.2
6.2.3
7.
8.
Editor Window (Not available with Standard license)................................................... 32
Script Window .................................................................................................................... 36
8.1
8.2
9.
Open Manual ...........................................................................................................................43
Open Change History.............................................................................................................43
Open Tutorials ........................................................................................................................43
About .......................................................................................................................................44
Register/Purchase ..................................................................................................................44
Program Installation .......................................................................................................... 45
12.1
12.2
13.
Cut the Beginning and/or End of the File .............................................................................39
Set Silence ..............................................................................................................................39
Normalize ................................................................................................................................40
Hiss Filter ................................................................................................................................40
Resample/Convert Format .....................................................................................................41
Help Menu........................................................................................................................... 43
11.1
11.2
11.3
11.4
11.5
12.
Make a File the Active File .....................................................................................................37
Search Files ............................................................................................................................37
Post-Processing (Not available with Standard license) ................................................ 38
9.1
9.2
9.2
9.4
9.5
11.
Manual Recording Mode........................................................................................................... 23
Auto Recording Mode ............................................................................................................... 30
Review Mode.............................................................................................................................. 30
Download Demo .....................................................................................................................45
Download Update ...................................................................................................................45
3 Steps Required to Use Word2WAV............................................................................... 46
13.1
13.2
Demo Version .........................................................................................................................46
Trial License............................................................................................................................47
13.2.1
13.2.2
13.3
13.4
Register ...................................................................................................................................... 47
Log On........................................................................................................................................ 48
Permanent License.................................................................................................................49
Upgrade License.....................................................................................................................50
14. Support ............................................................................................................................... 50
Annex I Script Formatting............................................................................................................. 1
Annex II Mac Setup........................................................................................................................ 1
Annex III Efficient Setup ............................................................................................................... 1
Annex IV Trouble Shooting .......................................................................................................... 1
Page 5
1.
Introduction
Word2WAV, or W2 for short, is a program intended for studios and independent
narrators in need of recording large numbers of audio files, each named precisely.
When developing multimedia packages, it is frequent to have hundreds or even
thousands of small audio files, often named apparently randomly by the developer.
Typically, a narrator would record all the files over one or more sessions, then take
considerable time to break the long takes into a series of smaller files, and finally name
them precisely according to the script.
This operation is tedious and time consuming, and often leads to errors in file naming –
which in turn leads to lost time in Quality Assurance. This task is worsened in studios
where the technician needs to manipulate files in a language he does not understand
and on which he has therefore little control.
W2 solves this problem by naming each audio file as it is recorded – directly from the
script – thus eliminating both the need to divide a long file and to name each subfile.
As each segment is displayed on the screen, the narrator only has to click on Record
and Stop, while W2 handles all the saving and naming tasks in the background. Various
options (described in full details in this manual) allow for Review, Rerecording, adding
Alternates, Editing of both the audio files and the script, and Batch Processing – among
other features.
Studios should look at Annex III for an efficient setup using W2. Independent narrators
do not need to be concerned with this setup.
Regardless of the user, all the mundane tasks are eliminated, thus reducing the
production time by many hours and therefore increasing the profitability of the project.
Page 6
2.
Program Overview
Using W2, a typical recording session would proceed as follows:
a. Format script according to specifications
b. Import script in database
c. Setup display parameters
d. Setup audio parameters
e. Record each segment (several recording modes are available)
• Record alternates as needed for any audio file(s)
• Edit script as needed to correct errors, add comments, etc.
• Edit audio files as needed while recording and/or reviewing
f. Review the recorded segments (several reviewing modes are available)
• Edit/rerecord audio files as needed while reviewing
g. Post process the audio files (normalize, set head/tail silences, apply filters,
change encoding, etc.).
h. Export the script as recorded for reference
Each step will be covered in details in the rest of this manual.
W2 is comprised of 6 main windows: Import, Setup, Recorder, Editor, Batch Processing,
and Script (in the order you are most likely to use them). Additional windows will be
covered as appropriate, but essentially:
• Import deals with script import/export, and manual file naming.
• Setup mainly deals with audio and display parameter setup.
• Recorder deals with the actual recording and review. It is the main/default
window.
• Editor deals with audio editing of the recorded files.
• Batch Processing deals with setting silences, normalizing, filtering, and audio
resampling and converting. It can be used as a stand alone application.
• Script makes it possible to view the script as edited, search files, find import
errors, etc.
Page 7
Import window
Setup window
Recorder window
Editor window
Batch Processor window
Script window
Page 8
For studios, access to the Import, Setup, and Batch Processor windows can be
password protected so as to prevent the narrator from interfering with the setup. The
Script window is not password protected because nothing is editable from there.
To enable the password protection, check the Required box in the Setup window. The
password is “jaguar” (without the quotes).
A dialog box will prompt for the password each time one of the protected windows is
opened.
The detailed procedure is covered in the following sections.
3.
Format Script
In order to import the script in W2, it needs to be formatted according to specifications
and saved either as a Word or an Excel file. Notes from PowerPoint can also be
imported without any special formatting requirements (see 4.4, Importing PowerPoint
Notes, for details on PowerPoint).
For the purpose of this manual:
- A script is defined as a series of entries corresponding to files which need to be
recorded and saved as separate VAW files. Ideally, each entry should contain a File
Name and a File Content. It can also contain a Comment. See Annex I for the
specifications.
- The Project Folder is defined as the folder containing the script which is imported
before recording.
- The W2_v3 Folder is defined as the folder containing the Word2WAV_v3.exe and the
W2_v3.mdb files.
Any ASCII language can be displayed in W2. In addition to English, these languages
include Spanish, French, German, Portuguese, Swedish, Norwegian, etc.
Unicode fonts used for languages such as Chinese, Japanese, Korean,
Arabic, Russian, etc. can be displayed as well but require an International license
as well as MSOffice.
Notes: -
Tabs and Returns present in the script are preserved and correctly
displayed in the Recorder window to improve readability.
Most styles however are not imported.
Page 9
4.
Import Script
Once the script has been properly formatted (see Annex I), it is ready to be imported in
W2 for recording.
W2 keeps the script as well as various information in a Microsoft Access database
located in the W2_v3 Folder created at Install time. The user needs not be concerned
with this database (W2_v3.mdb) but must not move or rename it.
Note: All the audio files created by W2 will be saved in the folder from which the script
is imported. It is therefore beneficial to create a Project Folder and to copy the
script there before importing it. This folder can be located anywhere.
From the View menu, select Import or simply press CTRL-I to open the Import window.
Page 10
The top left block will vary depending on whether MSOffice is installed or not:
MSOffice installed
MSOffice not installed
(OpenOffice falls in this category)
Format Script Using:
All font attributes of the script are
ignored and the font specified is used.
Compatible formats:
.doc, .xls
Format Script Using:
All font attributes of the script are
ignored and the font specified is used.
Compatible formats:
.doc, .xls
Preserve Script Formatting
The font attributes (bold, underline,
color, size, etc.) of the script are
preserved and displayed in the
Recording window.
Preserve Script Formatting
Not available
Compatible formats:
.doc, .docx, .xls, .xlsx
Note that this option is much slower, so
use it only if you need to preserve the
original font attributes, some styles, or
to import Unicode fonts.
Notes:
- The font cannot be changed once the script is imported.
- *.docx and *.xlsx are only available with the Preserve Script Formatting
option. Save the script as a regular .doc or .xls before importing when using
the first option.
- *.docx and *.xlsx documents require Office Word 2007 or later. If you have
an older version, even with a format converter, you need to save the file as
a .doc or .xls first.
W2 can display Unicode fonts used in languages such as
Russian, Arabic, Chinese, Japanese, etc. Although enabled in the
Trial version, an International license is required to keep using
Unicode fonts with a Permanent license. Please refer to the
website for the cost of such a license.
This option is controlled by the license, not the user (except in the
Trial version where you can turn Unicode off for testing purpose).
Unicode fonts require MSOffice.
Page 11
Specify the format of the script to import.
For PowerPoint, see 4.4, Importing PowerPoint Notes.
Then, under Specifics, specify whether the first row should be ignored or not (typically a
column header will be ignored). If the script is formatted in Word, select the table to
import. If the script is formatted in Excel, a separate window will open once the script
has been specified.
Notes: -
For Number of Columns to Import as Content, see section 4.2, Content
Formatted over Multiple Columns.
For Automatic File Naming in the top right of the window, see section 4.3,
Automatic File Naming.
Under Script Formatting, two options are available depending on the actual format of
the script. Note that the following example uses an Excel script, but the same would
apply to a Word script.
One File Per Row
Each row contains a File Name on the left
and a Content on the right. In this case,
one WAV file will be created for each row.
Files Split Over Several Rows
Here however, some rows do not contain
any file name. All the content with no file
name will be added to the content above
to create a single entry. In the above
example, the file Intro_b will include 3
paragraphs, Intro_c will include 2
paragraphs, and Intro_d will include 3.
The other rows will be not affected.
Page 12
Notes: -
Trying to import the script on the right using the One File Per Row option will
create additional files named NoFileName_1, NoFileName_2, etc.
-
One File Per Row stops at the first empty row, whereas Files Split Over
Several Rows stops at the last row of the table or worksheet.
-
Check Add a Blank Line After Each Row to increase readability of the
imported script.
-
Formatting based on styles (bullets, space after paragraph, etc.) is not
preserved when imported the script. For instances, a bulleted list needs to
be hard coded.
-
Any Comment will follow the behavior of the corresponding Content.
W2 can import up to 500 files at a time.
Most users should make sure that “1” and “500” show in the
last two boxes of that frame so that all their files are imported:
If you want to:
- Limit the number of files per batch, or
- Import scripts with more than 500 files, see section 4.1, Import Script in Batches.
Click on Import Script.
The following dialog box opens:
Word (*.doc; *.docx) or Excel (*.xls; *.xlsx) will show depending on the format and option
selected. Locate the Project Folder using standard Windows navigation techniques,
select the script, and click Open.
Notes: -
If the import folder contains WAV files, a ‘WAV_Previous_Batch’ folder will
be created and the WAV files moved to that folder. This is necessary in
order to keep the Record Progress bar and counter accurate and
meaningful. A message will indicate how many WAV files were moved.
-
*.docx and *.xlsx are only available with the Preserve Script Formatting
option. Save the script as a regular .doc or .xls before importing when using
the first option.
-
*.docx and *.xlsx documents require Office Word 2007 or later. If you have
an older version, even with a format converter, you need to save the file as
a .doc or .xls first.
Page 13
Notice the blue progress bar at the bottom of the Import window. W2 checks the script
for formatting errors as it imports it (see Annex I for detailed formatting instructions).
W2 looks for four possible errors:
• No file name,
• Empty content,
• Duplicate file name, and
• Illegal Windows characters in file names
If any of these errors is detected, the confirmation
message will indicate how many errors were incurred
in addition to the total number of files imported.
To see a list of these errors, click “Yes.”
The Script window will then open listing only the files with errors:
Error Description
No file name
Empty content
Duplicate file name
Illegal Windows characters in
the file name
Correction
“NoFileName_x” is inserted, where x
is incremented from 1 up
“EmptyContent!” is inserted
The file name is used, and “_X2” is
added to the second occurrence,
then “_X3,” etc.
The illegal characters are replaced
by the “+” sign
Error Code
N
E
D
I
An Import Error Legend is available at the bottom of the Script window as a quick
reminder.
Accept the substitutions, or correct the script file and reimport.
These errors are very common in production scripts and result in lost production time if
not detected early.
Once imported, various windows show the script name and path (along with other
information discussed elsewhere) in their title bar for easy reference.
Page 14
4.1
Import Script in Batches
If the script contains more than 500 files or if you want to import it in small batches of,
say, 200 files, in order to alternate between recording, editing, and processing, deliver
the job in installments, or whatever other reason, the batch size can be reduced.
1. Make sure the Batch Number
cell is equal to “1” since you
want to import the first batch.
2. Enter the size of the batches
(500 maximum).
The example on the right
shows 200 files per batch.
Batch Number
Batch Size
Click on the Import Script button to import the script normally. At this point, only the first
200 files (or whatever batch size was selected) is imported and the Recorder window
opens as usual.
When the recording of this first batch is complete, open the Import window to import the
next batch.
Note that the Import Next Batch
button is now enabled and indicates
the next batch number.
Click the Import Next Batch to import
the next batch.
The script does not have to be
specified again. Each time the
Import window is opened, both the current batch number and the Import Next Batch (x)
of yyy files button are updated and ready for the next import.
Note that the last batch imported will be less than the specified batch size if the script
has not been divided in equal batches, which is fine.
To abort the Batch mode and import a new script, click on the Import New Script button.
Select “No” in the warning message if you chose Import New Script by error.
Page 15
4.2
Content Formatted over Multiple Columns
When recording directories for instance, the content is typically extracted from a
database and therefore formatted over several columns, as in the following example
where the first column (A) contains the File Name, and columns 2 to 6 (B to F) contain
the content to be recorded.
In this example, since
the content is spread
over 5 columns, select
“5” in the drop down box
(Specifics section of the
Import window).
Notes: -
Default is 1. Most users should not change it.
This feature is only available with the One File per Row import option.
In this example again, the first row includes labels which are not to be recorded, so
select “Ignore First Row” before clicking the Import Script button.
Imported script,
ready to be recorded.
Page 16
4.3
Automatic File Naming
This option can be used if the client does not specify the name of each audio file. In this
case, W2 can automatically name the audio files on an incremental basis, based on a
pattern defined by the user.
Note: In this case, the first column of the script is interpreted as being the File Content
column.
Select Name Audio Files
Automatically in the Import
window.
Note that the first 3 file names
appear in the Preview windows
as you specify each parameter.
Notes: -
4.4
Most users should leave this option unchecked (block grayed out).
This feature is only available with the One File per Row import option.
Importing PowerPoint Notes
Scripts contained in the Notes of a PowerPoint presentation do not have specific
file names for recording, so use Automatic File Naming (above) to create these
file names.
Everything contained in the Notes, including the slide numbers, is included in the
script.
No special formatting is required.
Font and size will default to Times 12.
Unicode fonts are not supported when importing PowerPoint Notes.
Page 17
5.
Setup Window
Usually, the parameters do not need to be reset for each job. However, when this is
necessary, proceed as indicated below. Note that all preferences are saved when
exiting the Setup window and automatically reapplied every time W2 is launched.
From the View menu, select
Setup or simply press CTRL-S
to open the Setup window.
The left frame From words…
concerns the way the script is
displayed in the Recorder window,
while the right frame … To WAVs
concerns the way the audio files
are recorded.
5.1
Script Display Parameters
Active
File Name
Active Cell
W2 can display from 1 to 7 files at a time in the Recorder window. The file which will be
recorded next, or “active” file, when the Record button is pressed is always located in
the middle of the screen and highlighted in yellow. Note that the file name is indicated in
the top right corner of the window for information (matching color).
Note: If the file name is too long and is not fully visible, simply click on the yellow cell to
expand it temporarily.
Page 18
Having several files displayed before and after the active file allows the narrator to read
“in context,” i.e., to know whether he/she must hold his/her voice or drop it depending
on what is coming later on. Indeed, an enumeration is not read the same way a title or a
regular paragraph would be.
However, depending on the length of the text to be recorded, a choice has to be made
regarding the number of files which can are displayed concurrently. From the Setup
window, apply a setting, then click OK to see how it works in the Recorder window.
Experiment to find the best combination for each specific project.
Note: The Display setup does not modify the script or the specifications of the audio
files.
In general, the more files displayed at the same time, the better the quality of the read.
Note: If only a few files are too large for an otherwise
optimum setting, these files can be viewed in
their entirety by clicking Single Cell Display before
recording them. The normal setup will resume once
the “oversized” file has been recorded. Alternatively,
clicking the same button again (which now read
x-Cell Display) with restore the selected number
of cells right away (toggle action).
Several options are offered for the width
and location of the cells, as well as for the
alignment of the text within the cells.
Experiment to find the best setup for your
needs.
Note: Use CTRL-W to display the cell formatting section directly in the Recording
window and see the effect of the changes in real time.
Page 19
5.2
Audio File Parameters
The appearance of the Input Device Settings and Output Device Settings will depend on
the recording interface used.
ASIO Driver
Direct Sound (Non-ASIO) Driver
Note that the output volume to be used
when launching W2 can be specified.
As Saved will recall the value set when
quitting W2, whereas Equal to xx will set
the output volume to that value regardless
of the value set when quitting W2.
Then check the parameters for the WAV files which will be created.
Notes: -
-
Make sure that your sound card
or audio interface is compatible
with these specifications.
Remember that the audio files
will be saved in the directory
from where the script was
imported, called the Project
Folder.
Page 20
The input and output device setup can be checked by recording, then playing,
a short test. To that effect, use the Test Audio Setup buttons and VU-meter located
in the top right of the Setup window.
When all the parameters have been properly set, click Save to save the parameters
and close the Setup window.
Notes: -
5.3
Audio settings can be changed at any time.
Changes only affect the files recorded after the change.
Parameters are saved when exiting the Setup window.
Comments + Tag/Untag Audio Files
See section 6.2.1.5, Comments Cell,
and section 6.2.1.6, Tag/Untag Audio
Files, for information on these features.
Page 21
6.
Recorder Window
The Recorder window is the default window. It is divided in two sections:
• Left side displaying the content to be recorded in 1 to 7 cells, depending on the
setup. The yellow Active cell is always in the middle of the screen.
• Right side containing function-sensitive action buttons (operating mode selection,
navigation, record, play, edit, etc.) and recorded file information (duration and
specs).
Active Cell
The yellow cell in the center of the screen displays the content of the active file, i.e., the
one which will be recorded next. Any file can be made the active file by bringing it in the
Active cell (see section 6.1, Navigation). Several cells are provided above and below
the Active cell so the narrator can read “in context,” i.e., knows if he/she should hold
his/her voice for the rest of the sentence, read a list, etc. Depending on the average
length of the text, it may be necessary to adjust the size of the cells. The larger the
cells, the fewer will fit on the screen. See section 5.1, Script Display Parameters for
details.
Notes: -
-
The name of the active file is displayed in the yellow cell in the File Ready to
Record block. This is for information only since the file name cannot be
edited.
If the file name is too long and is not fully visible, simply click on the yellow
cell to expand it temporarily.
All actions (recording, script editing, comments adding/editing, file
tagging, etc.) are made on the Active cell. The cells above and below
the Active cell are not editable in any way.
Page 22
6.1
Navigation
Any file can be brought in the Active cell for recording, playing,
editing, adding/editing comments, or tagging by clicking on:
• Up or Down arrow to move one cell at a time
• Choosing an action in the Tools menu:
• Go to Top of Script (CTRL-A)
• Go to Bottom of Script (CTRL-Z)
• Locate a File (CTRL-L)
• Selecting a file in the Script window and clicking
on the Active button
6.2
Operating Modes
The Recorder window can perform three basic functions, selected from the top right
frame: Manual Recording, Auto Recording, or Review.
6.2.1 Manual Recording Mode
When the script is first loaded, the Active file contains the first file of the script. As
indicated above, any file can be recorded at any time by bringing it in the yellow Active
cell using one of the techniques described in section 6.1, Navigation.
Check the Display parameters to make sure you will not have to click on the vertical
scroll bar to display all the text. Note that an occasional oversized cell is acceptable
since you can click on the Single Cell Display button to enlarge the Active cell at the
time of recording. See section 5.1, Script Display Parameters for details.
Click on the Record button
and start recording the file. You can pause
the recording at any time. Press Record to resume. When finished, click on
. Make sure not to cut the end of the recording by clicking on
the Stop button
Stop too early. Excess silences can be trimmed automatically in batch mode. It is
always better to have more than not enough.
Notice that a Play button
is now visible under Record. You can either press
Play to listen to the recorded file or press Record to record it again.
When the file is playing, you can stop or pause the file at any time or wait until the end
of the file.
Page 23
Notes: -
A green Record Flag appears to the left of the cell once it has been
recorded. This flag is for convenience only in order to allow you to easily
spot where you left off, after a coffee break for instance, or to easily spot
missing recordings. It does not indicate that the recorded file is correct or
complete.
-
The VU-meter located in the top right of the window monitors
the audio while Recording or Playing. If the audio is too hot,
the Clip indicator will turn red and remain red until reset either
manually by clicking on it or automatically when stopping the
playing/recording (depending on the preference set in Setup).
-
Note that there are actually 2 VU-meters: one for recording and one for
playing, so the clip indicator may disappear and reappear depending on
which mode you are in.
-
The recording duration is shown in the bottom right in the format
min:second.millisecond (e.g., 00:41.310). The audio specs are also shown
for reference (e.g., WAV - 48 kHz - 24 bits - Mono). See Audio File
Parameters to modify them.
-
All functions are disabled while recording or playing a file.
If the recording is satisfactory, click on the Down arrow
Active cell and repeat the process.
to bring the next file in the
Page 24
6.2.1.1
Record Progress Bar
The Record Progress bar located under the Navigation
arrows gives a visual indication of what percentage of
the files have been recorded at any given time.
The white box above the bar gives an accurate count. In
this example, only 1 of the 200 files has been recorded
so far.
Like the Record Flags, the Record Progress bar does
not indicate that the recorded files are correct or
complete.
Notes: -
Shift-click on the progress bar or the counter to bring the first non-recorded
file in the Active cell. This is useful when dealing with a large number of files
and the counter displays 697/700. Just shift-click the counter to
automatically locate the first non-recorded file, and record it. Then repeat
until all the files have been recorded.
-
The progress bar and the counter only counts the WAV files in the Project
Folder. Shift_clicking actually checks the WAV files against the script. So
always shift-click to make sure the files are the correct ones (you may have
a discrepancy if you added files independently of W2, while editing with
another program for instance. If by doing so, you end up with more files than
provided by the script, the record counter will show a fraction greater than
100%, such as 546/540, and turn red to alert you to that fact).
-
See the Script window to see the recorded and non-recorded file at a
glance, and to locate/filter files.
-
The progress bar and counter can be manually updated if WAV files are
manually added to or deleted from the Project Folder (Menu>Tools>Update
Record Counter or CTL-R).
6.2.1.2 Back-up Takes
If the file needs re-recording, the “bad” take is saved automatically in the Back-up Takes
folder in the Project Folder and the new take is saved in the root of the Project Folder.
This way, all the good takes are kept together, ready for further processing, but all the
back-up takes are saved should they be needed for any reason.
All the back-up takes are time stamped, so they are easy to identify (… where is the one
I did 30 minutes ago?… ) and there is no limit to the number of takes that can be saved
for a given file.
Page 25
Project Folder containing the ‘good’ audio files
Back-up folder containing the ‘bad’ takes
Important: Do not delete or rename the BU_Takes folder (or expect a crash...).
6.2.1.3 Script Edits
The script displayed in the Active cell can be edited to correct typos, add missing words,
etc. The edited script is saved in the database. See section 10, Export As-Recorded
Script, for details on how to export a script as recorded for reference.
Notes: -
Only the content of the Active cell can be edited.
File names cannot be edited.
6.2.1.4 Alternates
An important feature of W2 is that it allows you to record alternates if, for instance, you
are not sure about the pronunciation of a word (should A.C.E. be pronounced ACE or AC-E?) or if you notice an inconsistency in the text but are not sure whether it should be
corrected or not.
Click on the Insert Alternate button located in the File Ready to Record
block.
The file is automatically duplicated and displayed in orange in the
Active cell directly under the original cell. Note that that “_Alt_” has
been added to the file name, along with a time stamp. It is therefore
possible to record several alternates of the same file if needed.
Notes: -
-
If the Active file is an Alternate, the button caption changes to Delete
Alternate. A confirmation message will appear to prevent accidental
deletion.
If the Alternate has already been recorded, the corresponding WAV file will
be moved to the BU_Takes folder upon deletion.
Page 26
Original
Cell
Alternate
Edit the script as appropriate and record the alternate as if it were a regular file. The
alternate file is stored in the root of the Project Folder and is easily identifiable for further
processing.
Note that you cannot create an alternate to a file which is already an alternate. However
the original file can be made the Active cell, ready to be duplicated again, by selecting
Locate Original File from the View menu, or by pressing CTRL-O on the keyboard.
Therefore, there is no limit to the number of alternates which can be created from a
given original file.
Note:
The total number of files displayed in the Record Progress Counter is
incremented by one each time an Alternate is created, or decremented by one
if deleted.
Page 27
6.2.1.5 Comments Cell
If the script includes a column with comments, such as direction for pronunciation,
intonation, etc., these comments are detected automatically and displayed in grey at the
bottom of the Recorder window. Since the Comments cell is connected to the Active
cell, only the comments related to the Active cell are displayed. The Comments cell is
displayed in grey just below the Active cell.
As soon as a cell becomes the Active cell, its Comments cell will open automatically if
not empty (see Note below).
Click on the Open Comments button to open an empty Comments cell and add a
comment. Note that the button label toggles between Open Comments and Close
Comments depending on the status of the Comments cell.
Note: If you do not want the Comments cell to
open automatically, uncheck the
corresponding option in the Setup window.
Remember that you can always use the
Open Comments button on the Recorder
window to open the Comments cell as needed.
Page 28
6.2.1.6 Tag/Untag Audio Files
If a given file is very long or complex, it might be desirable that you do not try
overzealously to record it in one pass without mistake. In those cases, it might be
preferable to do pick-ups without stopping the recording, leaving some edits to be done
later.
It is then convenient to “tag” the file by clicking the Tag Audio
File button located in the File Ready to Record block.
• This button toggles between ‘Tag’ and ‘Untag,’ so it is
possible to untag a previously tagged file. The actual
Comments are not affected by the Untag action.
• Only recorded files can be tagged/untagged. If the file has
not been recorded, the Tag Audio File button is grayed out.
• It is always the file in the Active cell which is
tagged/untagged.
The Comments cell opens automatically
so as to allow a comment to be added for
later retrieval. However, this feature can
be disabled by unchecking the
corresponding option in the Setup window.
Note:
The Comments cell can always be opened or closed at any time using the
Open/Close Comments button in the Recorder window.
A ‘Tagged’ marker is always inserted in
the script. See the Tagged column in the
Script window.
Use either the Export As-Recorded Script
option or the Script window to see the
tagged files along with any Comments.
In addition, a ‘TAG_’ marker can be
inserted at the beginning of the WAV file
names, if the option is selected in the Tag
WAV File Names frame in the Setup
window. Sort the Project Folder by Name
to find all the tagged files quickly.
Note: All the tags, in the script and/or at
the beginning of the file names, can
be deleted easily from the Untag All
File Names frame in the Setup
window.
Page 29
6.2.2 Auto Recording Mode
Once you decided on your tone, pace, etc., and specially if the script is made up of
numerous short files, recording can be done in Automatic mode.
Click on Auto in the top Operating Mode block to select Auto Recording mode.
In Auto Recording mode, you only have to click on Record and Stop.
Once you have clicked on Stop, W2 saves the file, moves to the next
file in the script and waits for you to click Record.
Notes: - To rerecord a file without going out of Auto mode, click on
the Re-Record Previous button. W2 will bring the previous
cell back in the Active cell, ready to re-record and proceed.
- You can use the spacebar to start/stop the recording
instead of the mouse.
6.2.3 Review Mode
Once all the files have been recorded, or at any convenient time, you can select Review
mode to automatically listen to all the files in sequence, without any intervention. This
makes it possible to listen to how the files “sound together,” and to edit/rerecorded any
unsatisfactory take.
Bring the first file of the sequence to be reviewed in the Active cell, then click on Review
in the Operating Mode block.
Two parameters can be adjusted with sliders:
- Auto Delay sets the delay between each file. Range is 0 to
2 seconds. Remember that the raw takes already include
silences at the beginning and end of the file, so 0 to
0.5 seconds are usually optimum, but experiment to find the
best setting for your needs.
- Play Tempo allows to speed up the player so as to review
faster while assuring the purpose of the review step. Range
is 0 (normal speed) to 100%. Again, experiment to find the
best setting for your needs.
Press Play to play the first file. Once the file has been played in its entirety, W2 brings
the next file up and plays it automatically.
Page 30
The automatic playing process can be paused momentarily using the
Press
button.
to resume.
Should a file needs rerecording, press
while the file is playing. W2 reverts to
Manual Recording mode. Rerecord as necessary. All options described above are
available. Once satisfied, select Review mode again and press Play to resume the
review process. It is advisable to go back one or two files before resuming play so as to
make sure the tone, level, etc. of the pick-up are consistent with the rest of the series.
The automatic Review process will stop if:
• The Stop button is pressed.
• The file has not been recorded (no green Record Flag). This reduces the risk of
missing a non-recorded file. Record the file until satisfied, then select Review
mode and press Play to resume. Again, it is advisable to go back one or two files
before resuming play so as to make sure the tone, level, etc. of the pick-up are
consistent with the rest of the series.
6.2.3.1
Review Counter
In Review mode, the Record Progress Bar and Record Progress Counter are replaced
with a Review Counter displaying the location of the currently-reviewed file in the script.
Recording Mode
Reviewing Mode
Page 31
7.
Editor Window (Not available with Standard license)
Note: Available in Trial mode but requires a Professional license once the software
is licensed.
Once a file has been recorded, it can be edited directly in W2. Click on
in the
bottom right corner of the Recorder window. Note that this button is only active if the
Active cell has been recorded.
Starting with Build 344, the user can select to use his favorite audio editor instead of the
W2 built-in editor. The audio editor to use can be selected in the bottom right of the
Setup window. These choices are recalled whenever W2 is launched.
Three options are available (select the corresponding radio button):
- Use Word2WAV built-in editor (see section 7.2 below for details)
- Use the program used by Windows when you double click on a .wav file
(search “Associate a file with a program” in Windows Help or Google).
- Use the editor of your choice. Click on the Browse button and navigate until you
locate the program you want to use. In the above example, Sound Forge will be
used to edit the audio files.
7.1
Using Your Custom Audio Editor (options 2 or 3)
If you choose not to use the W2 built-in audio editor, validate the bottom check box to
automatically back-up the audio file before opening it in your custom audio editor. This
way, once the file is edited, simply save the edit to overwrite the current file so your
Project Folder is always up to date but a back-up is always available in the Back-up
folder.
Clicking on the Edit .WAV button opens the Active file in your audio editor.
Edit to your heart’s content, then save.
Once you jump back to W2, you can play the edited file
and/or continue your W2 session.
If your edit changed the file duration, click on the
Record Duration text box to update it.
Note that the duration will be automatically updated once
your click on a Navigation arrow.
Page 32
7.2
Using W2 Built-In Audio Editor (option 1)
Clicking on the Edit .WAV button opens the Active file in W2 built-in audio editor.
Note the Status flag at the bottom left of the
screen. It will turn red while the file is being
processed by the editor. Always wait for the “Idle” status before doing further editing.
Expect a longer delay the first time the Editor window is opened since the waveform
monitor has to be built.
The Content and File Name of the file being edited are shown at the top of the screen.
The Comments can be opened by clicking on the Open Comments button. Content and
Comments can be edited as in the Recorder window.
The two arrows on the right allow you to navigate through the recorded files without
leaving the Editor window. A message warns you if a break in recording is detected, i.e.,
if a non-recorded file is encountered.
The time is shown at the top and bottom of the waveform window, while the amplitude is
shown on the left.
- To change the vertical magnification, use the cursor on the left.
- To change the horizontal magnification, use the zoom buttons:
Zoom In and Zoom Out will do just that
Zoom Selection will restrict the display to any selected audio
Zoom All will bring the whole file back into view
or use the green scroll bar and/or the 2 side handles for a more precise control.
Page 33
Seven buttons are available in the Playback frame:
- Play plays from the beginning of the file
- Play Loc. plays from the cursor location in the waveform
- Play Sel. plays only the selection in the waveform
The next 2 buttons correspond to the Pause and Stop buttons.
The last 2 buttons are Fast Rewind and Fast Forward.
The amplitude of the jump (in milliseconds) can be specified.
Note that these buttons are enabled only as applicable.
Notes: -
-
Clicking anywhere on the waveform will determine
the cursor Location as indicated by a vertical yellow
dash line.
Clicking anywhere on the waveform then dragging
the mouse to the right or the left will determine a
Selection as indicated by a white area.
Recording Duration (complete file) and Selection details are
shown to the right of the Playback frame.
All edits are made using the buttons inside the Edit frame
located to the right of the waveform:
Button
Copy
Cut
Delete
Selection
Action
Copies the Selection to the clipboard.
Copies the Selection to the clipboard, then
removes the Selection from the file.
Inserts the content of the clipboard at the cursor
Location.
Reduces (crops) the complete file to only the
Selection shown on the waveform. The rest of
the file is deleted.
Deletes the Selection from the file. The rest of
the file is unaffected.
Flatten
Selection
Reduces the level of the audio in the Selection
to zero, leaving the file duration unaffected.
Insert
Silence
Inserts a silence at the cursor Location. The
duration (in milliseconds) of that silence is
determined by the value entered in the box next
to the button. For example, 500 = 0,5 sec.
Open the Batch Processor window to apply all
effects, except Resampling/Conversion, to the
file being edited.
Insert at
Location
Crop to
Selection
Apply
Batch
Process
Remark
These 3 buttons work
like the Copy, Cut, and
Paste buttons in most
programs.
These 2 buttons do
opposite actions.
Use Delete Selection to
remove a double take
for instance.
Used to remove a noise
or a mouth smack from
instance.
Use in conjunction with
Delete Selection to
open or close the audio.
An excellent way to test
the Batch Processor
settings.
Page 34
Most edits require the rebuilding of the waveform. Wait for the “Idle” status at the bottom
of the screen:
Notes: -
Any edit can be undone (one level only) using the Undo button located in
the bottom right corner of the waveform.
-
Edits are not destructive. If you make a mistake or change your mind, the
file before editing is saved in the BU_Takes folder.
In addition to the above edits, some
recording can be punched in to finalize a
file. Several modes are available. See
Recording frame in the bottom left of the
Editor window.
Select the applicable radio button according
to the following table.
Radio Button
Insert …
Overwrite …
Append …
Delete …
Action
Punches a new recording at the
cursor Location. No existing
recording is overwritten.
Starts the recording at the cursor
Location and overwrites an
equivalent amount of existing
recording.
Starts the recording at the end of
the file. No existing recording is
overwritten.
All existing recording is deleted.
Only the new recording makes up
the edited file.
The recording can be paused
Remark
Recording starts at the
beginning of the file if the
cursor is not set.
Recording starts at the
beginning of the file if the
cursor is not set.
as required. When finished, press the Stop
button. The VU-meter is identical to the one in the Recorder window.
As soon as the recording is stopped, the waveform is rebuilt. Wait for the “Idle” status at
the bottom of the screen.
Note that the 3 buttons at the bottom right of the screen
are context sensitive. As soon as either a text or audio
edit has been made, Save and Save + Close become
active. A message will warn you should you try to close
the Editor window without first saving an edit.
Page 35
8.
Script Window
The Script window can be accessed by selecting Display Script from the View menu, or
by pressing CTRL-D on the keyboard. None of the information in this window is
editable.
Header
Rec
File #
Description
“No” if the file has not been recorded, blank if recorded.
Number of the file in the original script. Alternates are shown with a
decimal. Example 13.1 is the first alternate to 13.
Content
Displays the Content as edited.
Comments Displays the Comments as edited.
Tag
Displays “Tag” if the file has been tagged.
Duration
Displays duration of recording in minute:second:millisecond format
Err
Displays the import error if any. See Annex I for an explanation of these
errors.
Notes: -
Click on the header “Rec,” “Tag,” or “Err” columns to bring the nonrecorded, tagged, or error files, respectively, at the top of the list.
-
Click on the header “File #” to restore the files in their original order.
-
Script name and path, batch number and size, as well as the range of rows
imported from the script, are displayed in the title bar.
-
Drag the vertical line between the headers to adjust the width of the column
to the left of that bar.
Page 36
8.1
Make a File the Active File
Any file can be brought to the Active cell of the Recorder window. To do this, just click
on its row to highlight the row, then click on the Active button at the bottom of the
screen. The Recorder window will open, ready to record, play, tag/untag, or edit the
script/comment.
8.2
Search Files
Files can be selected
based on the criteria
entered in the Search
field.
In this example,
“_Facts” was used to
select these files.
Select “Contains Only”
or “Exact Match” as
appropriate.
The search is made in
the File Name, Content,
or Comments column
depending on the radio
button selected.
Clear restores all the
imported files in the list.
Note: Click on the Import Error radio button to display the files with formatting
problems.
Page 37
9.
Post-Processing (Not available with Standard license)
Note: Available in Trial mode but requires a Professional license once the software
is licensed.
Once all the files have been satisfactorily recorded and edited, it is time for postprocessing them, i.e., cut beginning and/or end of each file, set a specific silence at the
beginning and/or end of each file, normalize and/or filter them, resample the WAV files
or convert them to a different format.
Choose Batch Processor in the View menu or simply press CTRL-B to open the Bach
Processor window.
When the Batch Processor window opens, the path points to the Project Folder where
all the WAV files produced by W2 are stored.
Check that the Number of Files is correct.
Notes: -
To select another folder, use the Browse button. Any WAV files can be
batch processed by W2.
In this section, it is assumed that the Project Folder is not changed.
Page 38
Before processing the files, W2 creates a RAW_WAV_Files folder inside the Project
Folder and moves all the WAV files in this back-up folder. The processed files are then
saved back in the Project Folder. This way, all the final (processed) files are located in
the Project Folder, while all the original files are backed-up in the RAW_WAV_Files
folder.
Notes: -
The RAW_WAV_Files folder must be empty before processing the files so
as not to overwrite any original files.
If you make a mistake in processing the files (say you convert them to MP3
while your client really wanted WAV), just delete the MP3 from the Project
Folder, move the original WAVs located in the RAW_WAV_Files folder back
into the Project Folder, and reprocess them according to the correct specs.
Use the Refresh button to check your operations.
W2 can perform several operations in a single pass, then repeat these steps for all the
files in the Project Folder:
- Cut beginning and/or end of the file
- Set silence at the start and/or end of the file;
- Normalize the file;
- Filter the file
- Resample and/or convert the format of the file.
9.1
Cut the Beginning and/or End of the File
Use this function to truncate the beginning an/or end of each audio file before applying
the filters. People using excessively sensitive mics get an audible click at the beginning
an/or end of their recordings. These clicks are difficult to remove without changing the
silence threshold. For a given setup, the clicks will always be at the same 'distance’
from the beginning and/or end of the files. Experiment to find the best values for your
set-up. 20 msec and 300 msec for beginning and end, respectively, are good starting
points.
- ‘0’ will bypass the corresponding beginning or end cut.
- Uncheck to bypass both beginning and end cuts.
9.2
Set Silence
The Threshold is the level under which the sound is
considered to be silence.
In this example, the white area shows some noise which
Page 39
can be considered silence if the threshold is high enough.
A recording always contains the ambient so silence is never zero, but a level low
enough to be considered zero. Experiment with what works for you. Common values
are -26 dB to -40 dB.
Note: The Threshold can be entered either in dB or in %RMS.
W2 calculates the other value.
-
Select the first option to set the silence at the start and at the end of the file. In the
above example, silences are 200 msec. and 300 msec.
Note: The values specified are expressed in milliseconds (500 msec. = 0.5 second).
Once processed, the silence will be equal to the set value, regardless of whether
it was originally longer than, equal to, or less than said set value.
9.2
Normalize
Check Normalize to a Maximum Value. The maximum can be expressed in dB or in
%RMS. When you enter a value, W2 calculates the other value. Full scale is 0 dB or
100%. A common value is -0.3 dB or approximately 97%.
9.4
Hiss Filter
Under development. Select Open Change History in the Help menu to download the
update when ready.
Page 40
9.5
Resample/Convert Format
Check Resample and/or Convert Files.
Note: If Resample and/or Convert Files is unchecked, W2 recalls the parameters used
to record the original sound files (as defined in the Setup window). In this case,
the files retain their original properties.
Specify the parameters you need. Current options are resampled WAV, MP3 (above
example), ACM (including µ-Law), and AIFF.
Note: In order to export to MP3, Lame.exe, an external freeware and open source
command line encoder, must be present in both the C:\W2_v3 folder and the
Windows\Systems32 folder. Lame.exe can be downloaded from the Internet
(http://www.free-codecs.com/download/lame_encoder.htm for instance) and
simply copied to both the C:\W2_v3 folder and the Windows\Systems32 folder.
If the file is down-mixed to a lower frequency, an anti-aliasing filter is applied.
Once all the parameters have been specified, click on the Process button. A progress
bar will open to show the processing of the files.
Once complete, all the processed files are located in the Project Folder, ready for
delivery.
Notes: -
The original unprocessed files are stored inside the RAW_WAV_Files folder
inside the Project Folder.
All the back-up takes are stored in the BU_Takes folder inside the Project
Folder. These backup files are not batch processed.
If the Lame encoder is not found, no MP3 files will be created and the
Project Folder will be empty after processing.
All the selections and values are saved when the files are processed and recalled next
time the Batch Processor window is opened.
Page 41
10. Export As-Recorded Script
The script can be exported “as recorded” for reference. Any edit made to the content,
any inserted alternate, any comments added an/or edited, tagged status, and recording
duration are included in the exported script.
From the View menu, select Import Script or simply press CTRL-I to open the Import
window. The Export function is located in the bottom right of the Import window.
Select Word or Excel, then click on the Export As-Recorded Script button.
Note: If MSOffice is not installed, the script can only be exported in Excel format.
The blue progress bar shows the export process.
W2 exports the script, adding “_As Recorded” to the end of the script name for easy
identification.
The exported script always contains six columns:
Column #
Header
Content
Column 1
File Name
Either imported or generated by W2
Column 2
File Content
As edited during recording
Column 3
Comments
As added/edited during recording
Column 4
Tagged File
“Tag” inserted as appropriate
Column 5
Duration
Duration of recording in minute:second:millisecond
format. Blank if not recorded.
Column 6
Err
Import error code, if any. See Annex I for a
description of these error codes.
Page 42
11. Help Menu
11.1 Open Manual
This manual is viewable from the Help menu, either from the local drive or preferably,
directly from the Word2WAV website.
The manual on the local drive corresponds
to the version of W2 you first installed.
It is therefore preferable to open it from
the web since this way you will always
access the latest version.
If you prefer to access it from your local drive, download an updated version as
appropriate from the website and save it in the W2_v3 Folder.
11.2 Open Change History
Check Change History regularly to see if there
are any updates of interest to you.
The file is located on the W2 website,
so you need to be connected to the Internet.
Add –
Mod –
Fix –
Pgm –
Added feature
Modified feature
Bug fix
Change in programming, transparent to user
11.3 Open Tutorials
Choose from the list of available tutorials. These tutorial are located on YouTube, so
you need to be connected to the Internet.
Page 43
11.4 About
This screen shows the following information:
Version and Build
Demo, Trial or Permanent
license
If Permanent, what type:
Standard, Professional,
International, or Pay-PerClick
Licensed entity
Registration code
(or Installation ID if waiting
for a Trial code)
Make sure you include the Build and registration code when contacting us for support.
You can just attach a screen grab to your email.
All information sent during the Registration process can be viewed by clicking “Show
Full Registration Data” in the bottom left corner.
If you ever upgrade your license from Standard to Professional for instance, or add one
or several 1,000-file segments to Pay-Per-Click license, click on “Upgrade License”
located in the middle right to enter your new Registration code.
11.5 Register/Purchase
This menu only appears when you can register or purchase the software.
Page 44
12. Program Installation
The W2 website (www.word2wav.com)
offers two options:
It is very important that you use the option which is right for you.
12.1 Download Demo
-
Use Download Demo only if you are downloading W2 for the first time!
-
If you are a Registered user, use Download Update. See 12.2 below.
Word2WAV_v3_Full_Instal.exe installs all the necessary components on the PC and
creates a W2_v3 Folder in the C:\Program Files folder, containing the W2 program itself
(Word2WAV_v3.exe), a W2_v3.mdb database, and a Demo_Project Folder among
other things. Since your Trial or Registration code is saved in the W2_v3.mdb file, a
new full install would erase it. If you have already registered, do NOT use this option.
Use Update instead.
Note: You can change the W2_v3 Folder location at Install time only.
The Full_Install is around 5.5 MB. Download it in any directory of your choice, then
double click on the file (Word2WAV_Full_Intall.exe) to launch the installer.
Just follow the prompts. All defaults should be OK.
A shortcut
is created on the desktop.
12.2 Download Update
Updates are posted regularly to fix bugs or implement changes and/or additions.
Check Change History in the Help menu regularly to see if there are any updates of
interest to you.
Each update is identified by its Build number
(e.g., Build 335).
The current Build is displayed in the title of
the W2 frame.
Use this Update option if you have already registered your copy of W2, whether for a
Trial or a Permanent license. Simply download the file (Word2WAV_v3_Update.exe)
and run it by double clicking on it to update the required files.
Again, do not use Full_Install if you are registered.
No other action is necessary. Verify that the Build in the title bar has been updated.
Page 45
13. 3 Steps Required to Use Word2WAV
Step
Download the Demo
Register for a free
30-Day/500-FileTrial
Become a
Permanent User
at the level
of your choice
Features
As downloaded, all W2 functions are enabled, except Import
Script and Batch Processing.
Register to use a fully-functional Trial copy for 30 days –
ABSOLUTELY FREE.
Requires payment of the licensing fee.
Four licenses are available:
Standard, Professional, International, Pay-Per-Click
No more nag screen.
See below for more information on each level.
13.1 Demo Version
As downloaded, W2 can only be used with a demo script. The Import Script and Batch
Processor features are disabled. However, you can start testing most of W2’s
functionality.
The W2 Installer creates a W2_v3 directory in the root of the C:\ folder as well as a
program shortcut on the desktop. A Demo_Project Folder is created within the W2_v3
Folder. It contains a demo script (WinesCatalog) provided in Word and Excel formats to
illustrate proper formatting. The demo script is preloaded in the database, ready for
recording.
When you launch W2, click on the yellow Demo button to use W2 in Demo mode and
test its capabilities and features. You can navigate through the script, record files,
review them, record alternates, etc., to test the functionalities of the software.
All the audio files created in Demo mode will be located in the W2_v3\Demo_Project
Folder.
Do not hesitate to e-mail us at [email protected] with any questions or
comments you may have during your evaluation. All requests to add or modify features
will be taken into consideration, whether you are a registered user or not, although
preference will be given to permanent users.
If you believe that W2 can save you significant time in the recording and editing
process, it is time to register for a free 30-day/500-file trial to be able to import your own
scripts and batch process the recorded files.
Page 46
13.2 Trial License
13.2.1 Register
Launch W2 and click on the green Register button to open the Registration dialog box.
Please fill the six fields, confirming your
e-mail. The Trial code will be sent to that email so make sure it is correct.
Company name will be displayed in
the About window after registration along
with the Trial code you will receive.
All fields must be filled. Word2WAV warrants
that the information collected will be used
strictly for the purpose of issuing a license
and not communicated to any third party for
any reason whatsoever.
Once all the fields have been filled and
verified,
click on Process. W2 will calculate your
Installation ID and display it for reference.
Click on Send to email this Installation ID
and the previously-filled information directly
to [email protected].
No other information is transmitted.
W2 will then access the Internet to send the
Application data through gmail. No user
intervention is required. Just make sure that
the PC is connected before clicking OK.
A dialog box will confirm that the e-mail has
been sent.
Page 47
In case of problem, an error dialog box
should alert you to the fact. You can then
retrieve the registration data from About
option in the Help menu. Click on the “Show
Full Registration Data,” copy the text in the
yellow box and email it to
[email protected] to complete the
registration process.
You can continue using W2 in Demo mode until you receive your Trial code. You can
expect to receive it within one business day.
Once you are convinced that W2 can save you significant time in the recording and
editing process, it will be time to purchase a Permanent License (see 13.3 below).
13.2.2 Log On
Launch W2 and paste the Trial code you received in the Registration cell. This number
needs to be exactly as sent, so it is preferable to copy and paste than to retype.
A dialog box will confirm that W2 has been registered on your PC. Click Continue to
proceed.
Page 48
13.3 Permanent License
Next time you launch W2, you will be reminded
that you are in a 30-day trial period.
Please visit our website at www.word2wav.com
or just click on Purchase to send your payment.
Do not forget to indicate your Trial code.
If you have a Permanent Registration code, just
copy it in the green field and click Permanent.
From now on, W2 will launch without any nag
screen.
Otherwise, just click Trial to remain in the Trial mode until the Expiration date. Past that
date, W2 will revert to the Demo mode.
IMPORTANT:
• The Trial and Permanent Registration codes are saved in the W2_v3.mdb file
located in the W2_v3 Folder.
Do NOT rename or alter this W2_v3.mdb file in any way.
• The registration is valid for the PC sending the registration request ONLY. This is
a single PC license. If you move W2 to another PC, reformat your drive, etc., you
will need to get another Trial or Permanent Registration code. This will be
provided to you at no charge. Just contact us as [email protected].
There are four types of Permanent license:
Windows/Features
Import, Record,
Setup, Script
Standard
Yes
Professional
Yes
International
Yes
Pay-Per-Click
Yes
Notes:
Editor,
Batch Processor
Unicode
Fonts
Yes
Yes
Yes
Yes
- The Trial license is identical to the International license. Be aware that
some features WILL be disabled (see above) once you purchase a
license other than International.
- You can upgrade your license at any time through payment of the difference
between the existing and new types. No penalty (except Pay-Per-Click, see
website for details). You cannot however reduce your level. See 13.4
Upgrade License below.
- Since W2 creates regular .WAV files, you may have access to the functions
specific to the Editor and Batch Processor windows in other programs you
already own.
Page 49
13.4 Upgrade License
To upgrade your license, please visit the website
to pay the corresponding upgrading fee.
Once you have received the new license code,
open the About option in the Help menu and
click on “Upgrade License.”
Enter your code in the green box, then click on
“Process.”
If your code is correct, W2 will close to complete the
upgrade process. The new level will be available
next time you launch W2.
14. Support
If you have any questions or comments about W2, whether during your evaluation or
actually using it, do not hesitate to e-mail us at [email protected].
Note: You must have the latest Build installed before contacting us for technical
support. Please check the W2 website at www.word2wav.com for the latest
Build.
All requests to add or modify features will be taken into consideration, whether you are
a permanent user or not, although preference will be given to permanent users. You can
expect a confirmation within one business day.
Please indicate your name and phone number if desired so we can contact you to
discuss the problem as needed.
Thanks for using Word2WAV!
Page 50
Annex I
Script Formatting
General
For the purpose of this manual, a script is defined as a series of entries which need to
be recorded as audio files. Since each unit will ultimately be saved as an audio file, this
manual refers to each entry as a file.
Each file is typically (but not always) made up of a File Name, a Content, and some
Comments.
Therefore, an ideal script would look like a 2-column table (or 3-column table if there are
Comments) ...
... in Word
... or in Excel
Annex I – Page 1
Notes: -
See Automatic Naming if the client does not provide specific names for the
audio files.
See Comments if the script includes an additional column for comments.
Often, the first row contains labels which are not recorded. See Ignore First
Row for details.
In Word:
• Information above and below the table(s), including headers and footers, are
ignored.
• The script can be contained in several tables, formatted identically.
• The Content to be recorded can be spread over several columns. See Multiple
Columns for details.
• Delete all the empty rows at the end of the table to avoid importing blank rows.
In Excel:
• The import process stops at the first empty row. If only a portion of the script is
imported, check that there are no empty rows inserted in the script.
Note: See Files Split Over Several Rows to ignore blank rows.
• The Content to be recorded can be spread over several columns. See Multiple
Columns for details.
• The information must be in the leftmost rows (A, B, etc.). Delete all left rows
which are not to be imported.
Comments
The script can include an extra column with comments, such as direction for
pronunciation, intonation, etc. The Comments column is detected automatically, so no
special action is required; just add a column to the script just after the Content column.
Notes: -
The File Name needs to be in the first column, followed by the Content in
one or several columns to the right, then the Comments in the last column.
If the Auto Naming feature is used, the first column is considered to hold the
Content.
If the table or worksheet contains information in column(s) to the right of the Comment
column, that information is ignored.
Annex I – Page 2
Formatting Requirements
Unless you are using Auto Naming, the content of the left most column is used to name
the audio files. Therefore, only valid Windows characters can be used in this column.
Windows does not accept certain characters in the file names, in particular:
• Return / Line feed / Tab
• /\:*?“<>|
If an illegal character is used in a file name, W2 replaces it with a “+” sign when
importing the script.
Note: Once the script has been imported, W2 lists all the formatting errors. You can
then accept the substitutions or correct the script and reimport it.
In order to optimize display in the Recorder window, avoid Returns before or after the
text in the Content cells. Returns and Tabs are acceptable however in the middle of the
cell to make the script more readable.
Acceptable Formatting:
Formatting to be avoided:
Notes: -
You may want to look at this link to learn a lot of tricks to reformat your
script:
http://word.mvps.org/faqs/general/usingwildcards.htm
-
The key element is to find a pattern in the source script and exploit it to
reformat the text automatically.
Annex I – Page 3
Formatting Checks
When importing the script, W2 checks for the following errors:
• No file name,
• Empty content,
• Duplicate file name, and
• Illegal Windows characters in the file name
If any of these errors is detected, W2 will correct it as follows:
Error Description
No file name
Correction
Error Code
“NoFileName_x” is inserted, where x
N
is incremented from 1 up
Empty content
“EmptyContent!” is inserted
E
Duplicate file name
The file name is used, and “_X2” is
D
added to the second occurrence,
then “_X3,” etc.
Illegal Windows characters in
The illegal character is replaced by
I
the file name
the “+” sign
Once the script has been successfully imported, a confirmation message displays the
total number of files imported. Check this number to make sure all the files were
imported. If not, check the row following the last imported row to make sure it is not
empty for instance since an empty row terminates the import process in Excel.
The confirmation message will also display the number of errors, if any. You will then
have the opportunity to review these errors and decide whether to accept the
substitutions or correct the script and reimport it.
Note: If you have any problem formatting your scripts, email us at
[email protected] and we will help you with that step. Once you have
understood the requirements, it will become a routine task of only a few minutes.
Annex I – Page 4
Annex II
W2 on the Mac
Many narrators are using W2 on their Mac using VMware or Parallels.
Although VMware is reported more frequently, try both since each setup is different.
A third option is Boot Camp. We (the developers) are checking all new Builds on a Mac
Mini running Boot Camp and Windows 7, without MS Office, using 3 different inputs
(Audio-Technica AT2020 USB, Yeti USB mic, and M-Audio USB interface with an XLR
Sure mic).
If you have specific questions, please contact us at [email protected].
Annex II – Page 1
Annex III
Efficient Setup
See diagram next page.
Note: If you have a tablet like an iPad, many apps allow you to take control of your
remote PC. Just run W2 on your studio PC, but control it from the iPad (or other tablet)
in the booth. Most of these apps are free or extremely affordable. Search for “remote
desktop” in the App Store.
If you prefer a more traditional solution, check the following:
-
A reverse KVM is used between the PC and the booth, allowing you to have two
sets of keyboard, mouse and monitor to use your PC from 2 different locations. The
first set is with your PC, the second in the booth. You can see the screen and control
the PC remotely, thus avoiding the noise of the PC fan in the recording booth.
See for instance the Belkin 2-Port Reverse KVM Switch (F1D201) available from
www.pcconnection.com (manufacturers change their products constantly, so this
specific product may have changed by the time you read this).
- If the distance between your studio PC and the booth monitor is high (typically over
25 ft.), you can use a KVM extender or a balun (depending on the resolution you
need) to reach distances of 300 ft. or more. A variety of products are available, so
google these terms and find the product best suited to your needs and budget.
These products are very cool but may be pricey.
Note for studios: With W2, the technician’s work is limited to setting up the equipment
(mic position, level, etc.) as he normally would, then the control is passed to the narrator
who can handle all the recording and review by himself. Of course, the technician can
retain the full control of the session if preferred.
The technician/producer can monitor the recording to ensure the levels as well as the
narrator’s tone, energy, etc., remain optimal. He can instruct the narrator as needed to
redo a take or change his tone, etc., as he normally would. In case of a problem, the
technician/producer can take control of the recording booth without leaving his studio
seat.
A password can be used to prevent the narrator from changing the recording
parameters. See Setup.
Annex III – Page 1
Recording Booth
USB/Firewire
Interface
Reverse
KVM Switch
Mixer
A/V Studio
Annex III – Page 2
Annex IV
Trouble Shooting
Problem importing script (Error message)
1. Use the “Import Script Using” option (rather than the “Preserve Formatting”
option) in the Import window
2. If the script is formatted as .docx or an .xlsx, save it as a regular .doc or .xlx
format and try again.
Files disappearing when batch processing to .mp3
You need to install a Lame encoder. See Section 9.5, Resample/Convert Format
Short dropouts, pops, or clicks in the recordings:
There are a number of things that you can try:
1. Install DPC latency checker. This is the first step to take. Download this free utility
and read the documentation carefully. After you run the utility, you may need to disable
wireless, webcams, network cards, etc.
2. In Windows, go to System properties>Advanced>Performance and set to "Adjust to
Best Performance."
3. Make sure your audio drivers, software, and OS have the latest updates. Check for
BIOS updates as well.
4. Your buffer size or latency may be too small or too high. Recommendations (but try
values higher or lower if these don’t work):
44.1K or 48K sample rate: buffer 128 to 256
88.2K or 96K sample rate: buffer 256 to 480
176.4K or 192K sample rate: buffer 512 to 960
5. Trim your system down to the bare essentials. Initially, work with only one device. Do
not add additional devices until your first device is running smoothly. Do not run any
plugins. Add plugins only after everything else is running correctly.
6. FireWire users - You may need to purchase a third-party FireWire adapter. Some
built-in FireWire chips do not perform well. If you are running more than one AudioFire,
you may need to purchase an additional FireWire adapter. Run the ASIO FireWire
Analyzer (if you have an AudioFire product). It comes with every driver. Make sure you
download the Readme as well as this contains the documentation for this utility.
Annex IV – Page 1
Notes