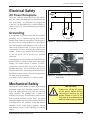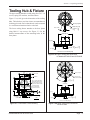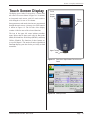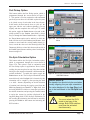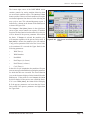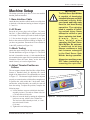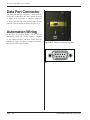
1
04 04 Intelligent Assembly Solutions 04 04 05 05 05 05 Dual Servo Spin Welder 06 06 06 06 07 07 User’s Manual 07 07 08 08 08 08 09 09 09 09 10 10 10 10 11 11 11 11 12 12 12 12 13 13 13 13 14 14 14 14 15 15 15 15 16 16 16 16 17 17 17 17 18 18 18 18 19 19 19 19 20 20 20 20 21 21 21 21 22 22 22 22 23 23 23 23 24 24 24 24 25 25 DUKANE Part No. 403–570-00 25 25 Dukane Intelligent Assembly Solutions • 2900 Dukane Drive • St. Charles, Illinois 60174 USA • TEL (630) 797-4900 • FAX (630) 797–4949 ISO 9001:2000 Dukane products are manufactured in ISO registered facilities www.dukcorp.com/us Dual Servo Spin Welder User’s Manual Copyright © 2008 Dukane Intelligent Assembly Solutions 2900 Dukane Drive St. Charles, IL 60174 USA Notice of Rights: All rights reserved. No part of this manual including the interior design, cover design and icons may be reproduced, transmitted or utilized in any form or by any means, electronic, mechanical, photocopying, recording, or by any information storage and retrieval system, without written permission from Dukane Corporation. Notice of Liability: The information contained is this manual is distributed on an “As is” basis, without warranty. While every precaution has been taken in the preparation of this manual, Dukane Corporation shall not have any liability to any person or entity with respect to any liability, loss, or damaged caused or alleged to be caused directly or indirectly by the instructions contained in this manual, or by the hardware and software products described herein. Printed in the United States of America. Dukane Part Number: 403-570-00 Dukane ultrasonic equipment is manufactured under one or more of the following U.S. Patents: 3,780,926 3,825,481 4,131,505 4,277,710 5,798,599 and 5,880,580. Page ii Dukane Manual Part No. 403-570-00 Revision History Revision Number Revision Summary Date Original release. 10/20/2008 - 00 Dukane Manual Part No. 403-570-00 Page iii Dual Servo Spin Welder User’s Manual This page intentionally left blank Page iv Dukane Manual Part No. 403-570-00 Dukane Dual Servo Spin Welder Contents Section 1 – Introduction 1 Section 2 – Safety Considerations 7 Section 3 – Unpacking and Setup 13 Section 4 – Display and Controls 21 Section 5 – Touch Screen Menus 27 Section 6 – Machine Operation 49 Section 7 – Optimizing Performance 57 Section 8 – Welder Data Export Software 65 Section 9 – Troubleshooting 71 Section 10 – Maintenance 81 Section 11 – Contacting Dukane 85 Section 12 – Specifications 89 Appendix A – Connector Pinouts 95 Appendix B – Tooling 103 Appendix C – Optional Features 107 Dukane Manual Part No. 403-570-00 Page Dual Servo Spin Welder User’s Manual This page intentionally left blank Page vi Dukane Manual Part No. 403-570-00 Section 1 - Introduction SECTION 1 Introduction Important User Information . . . . . . . . . . . . . . . . . . . . . 3 Read the Manual First . . . . . . . . . . . . . . . . . . . . . . . . . . . . 3 Notes and Tips . . . . . . . . . . . . . . . . . . . . . . . . . . . . . . . . . . 3 Caution and Warnings . . . . . . . . . . . . . . . . . . . . . . . . . . . . 3 Drawings and Tables . . . . . . . . . . . . . . . . . . . . . . . . . . . . . . 3 Dual Servo Spin Welder Overview . . . . . . . . . . . . . . . 4 Dual Servo Spin Welder Key Features . . . . . . . . . . . . 5 Dukane Manual Part No. 403-570-00 Page Dual Servo Spin Welder User’s Manual This page intentionally left blank Page Dukane Manual Part No. 403-570-00 Section 1 - Introduction Important User Information Read This Manual First Before operating the Dual Servo Spin Welder, read this User’s Manual to become familiar with the system. This will ensure correct and safe operation. The manual is organized to allow you to learn how to safely operate this system. The examples given are chosen for their simplicity to illustrate basic setup procedures. Notes and Tips Throughout this manual we use NOTES to provide information that is important for the successful application and understanding of the system. A NOTE block is shown to the right. NOTE NOTE statements provide additional information or highlight procedures. Cautions and Warnings In addition, we use special notices to make you aware of safety considerations. These are the CAUTION and WARNING blocks as shown here. They represent increasing levels of important information. These statements help you to identify and avoid hazards and recognize the consequences. Different symbols also accompany the CAUTION and WARNING blocks to indicate whether the notice pertains to a general condition or practice, an electrical safety issue, a hand protection issue or other condition. CAUTION CAUTION statements identify conditions or practices that could result in damage to the equipment or other property. WARNING Drawings and Tables WARNING statements point out conditions or practices that could result in personal injury or loss of life. The figures and tables are identified by the section number followed by a sequence number. The sequence number begins with one in each section. The figures and tables are numbered separately. The figures use arabic sequence numbers (e.g. –1, –2, –3) while the tables use roman sequence numerals (e.g. –I, –II, –III). As an example, Figure 3–2 would be the second illustration in section three while Table 3—II would be the second table in section three. Condition or Practice Dukane Manual Part No. 403-570-00 Electrical Hazard Crush Hazard Page Dual Servo Spin Welder User’s Manual Dual Servo Spin Welder Overview The Dual Servo Spin Welder excels at frictional welding of assemblies and parts which require accurate angular orientation and collapse distance. The parts can be any shape and only the weld joint must be circular. The welder uses two electric servos: a servo motor for spinning the tool, and a servo actuator for moving the machine head up and down. Both servos have highresolution encoders, enabling accurate process control. Dukane offers three models: SVT012VR, SVT032VR, and SVT042VR. Model differences are in the maximum speed, power and torque of the spin servo motor (the same vertical servo actuator is used in each). Model specifications: SVT012VR 750 RPM, 4.2 HP, 47 ft-lb Torque Spin Motor SVT032VR 3,000 RPM, 4.2 HP, 16 ft-lb Torque Spin Motor SVT042VR 4,000 RPM, 2.5 HP, 10 ft-lb Torque Spin Motor All models have a 5-inch stroke, a fixture throat depth of 8-inches, and a vertical maximum thrust of 700 pounds. Both SVT032VR and SVT042VR models have the same maximum vertical clearance of 21.3 inches (541 mm) between the bottom of the tooling hub and top of the mounting base. The SVT012VR model has a clearance of 20.4 inches (518 mm). The Dual Servo Spin Welders were designed to provide a reliable, long, and economical service life and meet the applicable CE regulations. Page Dukane Manual Part No. 403-570-00 Section 1 - Introduction Key Dual Servo Spin Welder Features • • Color touch–screen display uses Color Active Matrix Thin–Film Transistors (TFT) for high contrast and wide viewing angle even under high ambient– lighting conditions. The 192 touch–cells provide a high performance interface. Commercial subassemblies are used to ensure a longer and more economical service life than units built with proprietary components. These readily available items also lessen the need for expensive field service calls. • Ultra–rigid square support column minimizes load deflection for precise and repeatable operation. • Column–mounted direct drive 2.5 or 4.2 HP spin servo motor for faster cycle times and quick deceleration to prevent bond shearing and to produce stronger joints. • Digital rotary encoders are built into the servo motors for maximum reliablity. The spin motor encoder accurately measures and controls the final angular orientation to within 0.1° (1 part in 3600), and the vertical actuator encoder measures the distance to within .0004” (0.01 mm). • Weld by time, number of rotations, distance (absolute or relative), and energy. Built-in sensors give you the choice of weld methods and triggering by position or by spin torque. • Parameter monitoring with programmable upper and lower limits of weld time, rotations, angular orientation, energy, peak RPM, peak torque and cycle time. • Weld process profiles. Spin and vertical servo load and position data can be downloaded to a PC for review via RS-232. • Digital timer for weld time and hold time gives precise control of the spin welding process. Dukane Manual Part No. 403-570-00 • Fixture throat depth is a generous 8”. • Vertical servo actuator operation with adjustable 5” (127 mm) stroke assures quiet operation and is environmentally safe. • Industry-standard logic controller and motor controller means replacement parts are readily available. • ISO 9001 Certification means that the Dual Servo Spin Welder is manufactured to exacting quality standards. • 24–month domestic warranty assures you of reliability and quality construction. Page Dual Servo Spin Welder User’s Manual This page intentionally left blank Page Dukane Manual Part No. 403-570-00 Section 2 - Safety Considerations SECTION 2 Safety Considerations Health and Safety Tips....................................9 Plastics Health Notice..........................................10 Run Switches.......................................................10 General Safety.....................................................10 Electrical Safety.............................................11 AC Power Receptacle ......................................... 11 Grounding............................................................ 11 Mechanical Safety.........................................11 Dukane Manual Part No. 403-570-00 Page Dual Servo Spin Welder User’s Manual This page intentionally left blank Page Dukane Manual Part No. 403-570-00 Section 2 - Safety Considerations Health and Safety Tips Please observe these health and safety recommendations for safe, efficient, and injury-free operation of your welder. In this manual, the term welder and/or dual servo spin welder both refer to the Dual Servo Spin Welder. Proper Installation - Do not operate the Dual Servo Spin Welder until after the electrical system is properly installed. IMPORTANT Always wear a face shield when operating the welder. No Unauthorized Modifications - Do not modify your Dual Servo Spin Welder in any way unless authorized to do so by Dukane Corporation. Unauthorized modifications may cause injury to the operator and/ or equipment damage. In addition, unauthorized modifications will void the equipment warranty. Keep the Sheet Metal Intact - Do not remove any of the protective sheet metal enclosing the motor or controls. The servo motors and drives have exposed electrical terminals which could cause injury or death if touched. Grounded Electrical Power - Operate this equipment only with a properly grounded electrical connection. Refer to the NEMA Type 6–20R wiring diagram in Figure 2–1 and receptacle photo in Figure 3–5. If there is any question about the grounding of your AC power, have it checked by a qualified electrician. Comply with Regulations - You may be required to add accessories to bring the system into compliance with applicable OSHA (Occupational Safety and Health Administration) regulations for machine guarding and noise exposure. CAUTION Welded par ts may be hot. IMPORTANT Never operate the Dual Ser vo Spin Welder with the protective sheet metal removed. This is an unsafe practice and can result in injury. Operate Safely – Keep your hands and body away from the tool head during operation. Always wear a face shield when operating the spin welder. Be extremely careful not to let long sleeves, necklaces or long hair become entangled in the spin welder during operation. Do not operate the welder if under the influence of alcohol or drugs. Read the warning labels on prescriptions to determine if your judgement or reflexes are impaired while taking drugs. If there is any doubt, do not operate the machine. Dukane Manual Part No. 403-570-00 Page Dual Servo Spin Welder User’s Manual Plastics Health Notice Before using any Dukane welding system, be sure you are familiar with OSHA regulations from the U.S. Department of Labor about the particular type of plastic(s) you are using. When plastic materials are being processed, some of them may emit fumes and/or vapors that could be hazardous (e.g. PVC – Polyvinyl Chloride can emit chlorine gas under certain processing conditions). Make sure you use proper ventilation whenever these plastics are processed. Run Switches The dual finger run switches comply with OSHA safety regulations. Using a foot switch in place of the dual finger run switches violates OSHA regulations. General Safety Before performing any maintenance or service on the Dual Servo Spin Welder, locks and tags should be applied to all energy isolating switches. Anything that might restore energy to the welder must be locked out. You may be required to add accessories to bring the system into compliance with applicable regulations for operator safety. In the United Sates, these regulations are administered by OSHA. Page 10 Dukane Manual Part No. 403-570-00 Section 2 - Safety Considerations Electrical Safety 240V AC Power Receptacle The power cord used on the Dual Servo Spin Welder has a two–blade, grounding type plug designed for 240 VAC at 20 Amps. It is designed to be plugged into a 240 VAC, 20 Amp NEMA type 6–20R receptacle as shown in Figure 2–1. Do not alter the plug or receptacle in any way. GND G Grounding It is important for operator safety that the receptacle grounding wire be installed properly and securely attached to an effectively grounded rod. The function of the ground wire is to keep the Dual Servo Spin Welder base and housing at earth potential. In the event of a short circuit from one of the AC lines to the case, the circuit breaker will open, protecting the equipment and operator. If there is any question about the grounding of your AC power, have it checked by a qualified electrician. Grounding lugs are also provided, one on the back of the base (see Figure 2-2) and one on the back of the welder housing. You should connect a separate 14 AWG* ground wire between these lugs and an effectively grounded metal pipe. This will minimize any external electrical interference from leaking into the Dual Servo Spin Welder control circuitry. This will not compromise the safety of the power ground. * 14 AWG wire has a diameter of 1.63mm or 0.064” Mechanical Safety The Dual Servo Spin Welder is capable of developing substantial torque, force, and high rotational velocity. Keep your hands and body away from the tool head during operation. The spinning head is capable of inflicting serious injury. Never attempt to retrieve a part from a spinning tool head. Always wear a face shield when operating the spin welder. Be extremely careful not to let long sleeves, ties, necklaces or long hair become entangled in the welder during operation. Always turn machine power off when installing or removing tooling. Dukane Manual Part No. 403-570-00 Figure 2–1 240VAC–20A Receptacle Wiring J35 – Base Interface Grounding Lug Figure 2–2 Grounding Lug on Base of Dual Servo Spin Welder IMPORTANT Always turn off the AC power at the power switch before servicing or working on the welder. Failure to turn off the AC power is an unsafe practice and can result in injury or death. Page 11 Dual Servo Spin Welder User’s Manual This page intentionally left blank Page 12 Dukane Manual Part No. 403-570-00 Section 2 - Safety Considerations SECTION 3 Unpacking and Setup Unpacking Welder.........................................15 Packing List...................................................15 Work Area......................................................15 Secure to Work Bench...................................16 Bench Capacity....................................................16 Leveling................................................................16 Mounting Holes....................................................16 Tooling Hub & Fixture....................................17 AC Power......................................................18 Height Adjustment.........................................19 Control Connectors.......................................19 Dukane Manual Part No. 403-570-00 Base Interface Connector....................................19 User I/O Connector..............................................19 Slide Kit Connector..............................................19 Page 13 Dual Servo Spin Welder User’s Manual This page intentionally left blank Page 14 Dukane Manual Part No. 403-570-00 Section 3 - Unpacking and Setup Unpacking Welder The Dual Servo Spin Welder is normally packed in a corrugated carton resting on a wooden shipping pallet. To unpack the welder follow these steps. 1. Remove the straps from the carton. 2. Open the top of the carton. Carefully remove any packing materials, cables and documentation. 3. Cut the tape at the bottom corners and unfold the flaps. 4. Remove the corrugated carton, but leave the welder on the pallet. 5. Leave the power cable wrapped up until after the welder has been placed in its working area and you are ready to begin hooking up power. This will prevent accidental kinking or pinching of the power cable. Packing List After removing the shipping container, check that you have the items listed in Table 3-I. Inspect the welder for damage. Report any damage immediately to the carrier and to Dukane Ultrasonics Service at (630) 762–4900. Also see Section 11 for information on contacting Dukane. Save all shipping and packing materials so they can be inspected in processing any claims that may arise. Qty Item Part Number 1 Dual Servo Spin Welder SVT012VR or SVT032VR or SVT042VR 1 Base Interface Cable 200-1124-3 or 200-1545-01 1 Dual Servo Spin Welder Manual 1 CD with Dual Servo Spin Welder Utility 403-570-XX ___ Table 3-I Dual Servo Spin Welder Packing List Work Area Allow sufficient area on either side of the Dual Servo Spin Welder for handling material, work pieces and fixtures. Provide ample room so that the movement of an operator or helper does not interfere with the work of another. Also be aware that under extreme conditions, small droplets of molten plastic may be spun off from the upper part. Dukane Manual Part No. 403-570-00 Page 15 Dual Servo Spin Welder User’s Manual Securing to Work Bench Bench Capacity The Dual Servo Spin Welder weighs approximately 400 lbs. (182 kg). It should be attached to a table or bench capable of supporting 650 lbs. (295 kg) to accommodate the additional force imposed by the vertical movement of the motor and slide during the spin welding operation. Use mechanical means such as a forklift or hoist to place the servo spin welder on its work bench. There are two 3/4 inch lifting eyes located at the top of the column (see Figure 3–7) for a lifting ring or strap. Remove any remaining plastic wrap after the welder is in its final position. Leveling We recommend that the Dual Servo Spin Welder be leveled to within one degree. This can be accomplished using a carpenter’s level. One degree corresponds to approximately one–quarter of an inch (6 mm) deviation across the 16 inch (406 mm) width of the platen. WARNING DO NOT LIFT the Dual Servo Spin Welder manually. Lifting and/or moving the welder manually could result in personal injury. Use mechanical means to move and place the welder. Mounting Holes The base of the Dual Servo Spin Welder has two mounting holes in the front as shown in Figure 3–1. The two holes will accept either 12mm or 7/16” diameter bolts. We recommend that you securely attach the welder base to the work table using these mounting holes. Two 1/2" Holes On 131/4" Centers Figure 3–1 Mounting Hole Locations on Base Page 16 Dukane Manual Part No. 403-570-00 Section 3 - Unpacking and Setup Tooling Hub & Fixture The upper tooling attaches to a hub using four 5/16”- 18 screws, spring lock washers, and flat washers. Figure 3–2 (a & b) gives the dimensions of the tooling hubs. The hubs have precision slots to accommodate an indexing pin on the tool so that the tool can be mounted in a consistent orientation relative to the hub. 3.00 [76.2] B.C. 15X .316 [8.03] 22.5° TYP. The lower tooling fixture attaches to the base platen using M10–1.5 cap screws. See Figure 3–3 for the detailed measurements of the mounting holes in the base platen. [ ] [ + .00 + .05 .250 +- .002 .000 6.35 - .00 3.60 [91.4] .30 [7.6] + .000 1.000 - .001 25.40 - .03 .21 [5.3] ] Dimensions are in INCHES [mm] Figure 3–2aUpper Tooling Hub Dimensions for Models SVT032VR and SVT042VR 16.50 (419) 13.25 (336.6) [ + .08 .376 +- .003 .000 9.55 - .00 45° M10 X 1.5 2B TAP THRU EQUALLY SPACED AND LOCATED AT TRUE POSITION WITHIN 0.015 DIA ON (2) TWO BOLT CIRCLES 8 PLACES 7.61 (193.3) 12.38 (314.5) ] 5.90 [149.9] 7.00 inch BOLT CIRCLE 125.0 mm BOLT CIRCLE 12.00 inch BOLT CIRCLE 1.52/(38.6) 1.50/(38.1) 2.00/(50.8) M12 X 1.75 6H TAP THRU 5 PLACES 4 x .404 [10.26] (EQUALLY SPACED) 0.50 RADIUS (12.7) 6.05 (153.7) 24.84 (631) 5.00 [127.0] B.C. 0.50 DIA. HOLES (12.7) 8.25 (209.6) 2.25 TYP. (57.2) 2.63 TYP. (66.8) .50 [12.7] 3.02/(76.7) inches (millimeters) .35 [8.9] [ + .000 + .00 1.000 - .001 25.40 - .03 ] Dimensions are in INCHES [mm] Figure 3–3 Lower Base Fixture Mounting Dukane Manual Part No. 403-570-00 Figure 3–2bUpper Tooling Hub Dimensions for SVT012VR Page 17 Dual Servo Spin Welder User’s Manual AC Power 240 Volt AC Socket (NEMA 6–20R) The Dual Servo Spin Welder requires a 240 VAC 1– phase outlet rated at 20 Amps. All machine models use the same power cord and plug. The AC power cord is permanently attached to the welder. The other end of the cable has a 240 VAC, 1–phase plug shown in Figure 3–4. This is designed for a NEMA 6–20R configuration wall receptacle shown in Figure 3–5. Directly below the AC cord strain relief is the AC power switch. The switch combines the functions of a power switch and a 20 Amp circuit breaker. The breaker/switch is identical on all models and is shown in Figure 3–6. 240 Volt AC Plug (NEMA 6–20P) Figure 3–4 20–Amp 240V Figure 3–5 20–Amp 240V Plug Receptacle AC Power Cord AC Power Switch Figure 3–6 AC Power Switch and Power Cord Page 18 Dukane Manual Part No. 403-570-00 Section 3 - Unpacking and Setup Head Height Adjustment The support column features a threaded shaft for adjusting the overall height of the thruster head. The adjustment is secured by three lock nuts which prevent the thruster from moving once the overall height has been established. This is shown in Figure 3–7 and covered in detail in Chapter 6. A reference scale and index pointer are located next to the column to indicate the thruster head height. Height Adjustment Knob Lifting Eyes Height Adjustment Lock Nuts (3) Control Connectors Base Interface Connector On the rear of the housing is the base control input connector as shown in Figure 3-8. The Base Interface cable (Part No. 200-1124-3 or 200-154501) is a supplied part and is included with the welder (see Table 3-I). Connect one end of the cable to the rear thruster connector and the other end to the Base Interface connector (J35) as shown in Figure 3–7. The control cable carries the operate and emergency stop signals from the optical operate switches and abort switch on the base. If you are using custom automation, you may have separate operate and abort switches, but these still connect to the press control input on the welder. Both the base and thruster connectors are the same DB–9 type. The pinout for this connector is given in Appendix A. Connector J35 Figure 3–7 Height Adjustment and Lock Nuts User I/O Connector Directly above the DB–9 base interface connector is a HD–15 User I/O connector for custom automation applications. This is shown in Figure 3–8. The pinout for this connector is given in Appendix A. Slide Kit Connector To the right of the DB–9 base interface connector is a round 16–pin connector for controlling the optional Slide Kits. This is shown in Figure 3–8. The pinout for this connector is given in Appendix A. Figure 3–8 Electrical Control Connectors Dukane Manual Part No. 403-570-00 Page 19 Dual Servo Spin Welder User’s Manual This page intentionally left blank Page 20 Dukane Manual Part No. 403-570-00 Section 4 - Display and Controls SECTION 4 Display and Controls Touch Screen Display....................................23 Operational Switches....................................24 Emergency Stop Switch.......................................24 Opti–Touch Run Switches....................................25 Data I/O Connector.......................................25 Dukane Manual Part No. 403-570-00 Page 21 Dual Servo Spin Welder User’s Manual This page intentionally left blank Page 22 Dukane Manual Part No. 403-570-00 Section 4 - Display and Controls Touch Screen Display The display is a 4.6 inch (12 cm) wide by 3.5 inch (9cm) tall color LCD screen shown in Figure 4-1. It contains an integrated touch screen with 192 touch–sensitive cells arranged as 16 rows of 12 columns. Touch Screen Display Trigger Indicator Setup parameters and mode selections are programmed through the touch screen. A closeup view of the controls is shown in Figure 4–2. The left side of the display remains visible for most of the selected functions. The icon in the upper left corner indicates machine status. Below that are three touch cells for Run mode (Run), Weld and Post–Weld Setup (Setup), and Setup Utilities (Tools). The functions of these buttons are covered in Chapter 5. The touch cell on the right labeled Part Data displays part data for the previously welded assemblies. Upper Tooling Hub Figure 4–1 Dual Servo Spin Welder Touch Screen Panel Figure 4–2 Startup Screen Dukane Manual Part No. 403-570-00 Page 23 Dual Servo Spin Welder User’s Manual Operational Switches Emergency Stop Switch A red Emergency–Stop (E–STOP) switch is located in the center of the base as shown in Figure 4–3. The emergency stop switch must be in its reset position before the operate switches will function. To reset the Emergency Stop, twist the large red button about 45 degrees clockwise, which will cause the button to spring out. This is depicted in Figure 4–4. Left Run Switch Right Run Switch Lower Fixture E–Stop Switch Figure 4–3 Operate Switches and E–Stop POWER eset Twist to R E IN CYCL ABORT Figure 4–4 Setting and Resetting the E–Stop Page 24 Dukane Manual Part No. 403-570-00 Section 4 - Display and Controls Opti–Touch Run Switches Located on either side of the base are two optical Run switches. These are shown in Figure 4–3. These switches use Infrared (IR) sensors. They comply with OSHA and CE safety standards. Both switches are identical. Each optical–touch switch has a small red LED which is dimly illuminated whenever the power is on, as shown in Figure 4–5. When the operator places their finger in the tray, the LED brightens and a second LED in the opposite corner of the tray illuminates to indicate the switch has been activated as shown in Figure 4–6. Both switches must be activated simultaneously to initiate a weld cycle. Dimly Lit Red LED Figure 4–5 Right Operate Switch in Standby Mode, One LED Dimly Lit Brigtly Lit Red LEDs Data I/O Connector A connector for output data is provided on the rear of the welder above the power switch. This connector is a female type DB-9 as shown in Figure 4–7. It provides a computer connection to export part data, motor load and position profiles. A pinout of the Data I/O connector is provided in Appendix A. Detailed information on the data that can be obtained from the welder is given in Chapter 8. Figure 4–6 Right Switch in Operate Mode, Both LEDs Brightly Lit 55 99 11 66 Figure 4–7 DB–9 Data I/O Connector Dukane Manual Part No. 403-570-00 Page 25 Dual Servo Spin Welder User’s Manual This page intentionally left blank Page 26 Dukane Manual Part No. 403-570-00 Section 5 - Touch Screen Menus SECTION 5 Touch Screen Menus RUN Mode.....................................................29 Screen Layout......................................................29 VIEW PARTS.................................................30 SETUP Menu.................................................31 PRE-WELD Setup................................................31 WELD Setup........................................................34 POST-WELD Setup.............................................38 TOOLS Menu................................................42 SELECT SETUP Tab...........................................42 UTILITIES Tab......................................................42 SYSTEM SETUP Tab...........................................43 Setting Time and Date...................................46 Parameter Value Range................................47 Dukane Manual Part No. 403-570-00 Page 27 Dual Servo Spin Welder User’s Manual This page intentionally left blank Page 28 Dukane Manual Part No. 403-570-00 Section 5 - Touch Screen Menus RUN Mode When the welder is first turned on after the E-Stop switch is reset (see Figure 4-4), the STARTUP screen is displayed as shown in Figure 5–1 directing the operator to Activate both RUN SWITCHES to reset machine. Press both switches simultaneously and hold until a beep sounds, which will take several seconds. A second beep will sound a few seconds after the first, indicating that the welder is ready to run a weld cycle (the bar under the smiley face will become green at the same time). The message area is now clear and the STATUS icon in the upper left has changed to a smiley face with a green band below it as shown in Figure 5–2. If, when the switches are activated as described above, the tooling hub begins to oscillate instead of rotating smoothly, press the E-Stop and then check that the correct tooling inertia is entered as described later in this manual in the SETUP Menu (under TOOL SETUP). Figure 5–1 Startup Screen With E-Stop Cleared Screen Layout The screen has the same basic layout for most of the selected operations. The STATUS icon indicates the ready state of the machine. To the right of the icon is the name of the currently loaded Setup File. Below the file name is the Message Area. The three mode select buttons on the left side below the status icon select either a Run mode (RUN), a Weld Setup screen (SETUP), or the Setup Utilities screen (TOOLS). The selected mode is indicated by a darkened button. The center of the screen displays the parameters from the last weld cycle. The Part Data button on the right displays a report of previously welded parts. Figure 5–2 Run Mode Screen With Welder Reset The screen shots on this page all show the RUN mode. The RUN screen is the default startup screen. This screen needs to be selected in order to initiate a weld cycle. Just below the PROCESS DATA label as shown in Figure 5-2, there are a number of fields containing part data. The Part Nr. field identifies the current sequential part number. The Limits field indicates if the last weld was within programmed process limits and displays “–” if no limits were violated, “S” for suspect part, “B” for a bad part, or “E” for an error. A suspect or Dukane Manual Part No. 403-570-00 Page 29 Dual Servo Spin Welder User’s Manual bad part means one or more of the measured parameters was not within the limits set for the weld cycle. The Time and Date fields indicate the time and date the part was welded. Just below the WELD label, there are a number of fields with weld data for the last cycle. The displayed data lists the: • Time - Weld time (seconds) • Rotations - Number of spin motor rotations during weld • Peak RPM - Peak spin motor speed (RPM) • Peak Torque - Peak spin motor torque (% of maximum torque) • Energy - Weld energy (Joules) • Orient. - Welded part angular orientation (degrees) • Weld End - Weld end vertical position (mm) • Peak Thrust - Peak vertical actuator thrust (% of maximum thrust) • Hold End - Hold end vertical position (mm) • Hold Col - Hold collapse distance (mm) • Cycle - Total cycle time (seconds) VIEW PARTS The Part Data button on the right side of the screen displays seven part reports at a time. Each report occupies two lines and displays the same information reported on the RUN screen. The report starts with the last cycle at the bottom and works backwards toward the top. This is shown in Figure 5–3. The Page Up and Page Down buttons permit you to scroll through part data one screen at a time, Press the RUN button to return to the RUN screen. Figure 5–3 VIEW PARTS Screen Page 30 Dukane Manual Part No. 403-570-00 Section 5 - Touch Screen Menus SETUP Menu The SETUP menu is sub-divided into three tabs: PRE-WELD, WELD, and POST-WELD that are described below. Immediately after pressing the SETUP button, the Security Code screen will appear, prompting for a numerical password. If no password has been set, press the ENTER key. PRE-WELD Setup The PRE-WELD screen, containing a number of settings and options described below, is shown in Figure 5-4. Figure 5–4 PRE-WELD Screen for SETUP Menu TOOL Setup This button is used to specify parameters related to the tooling assembled to the welder shown in Figure 5-5. Enter the spin tool inertia in the TOOL Inertia (kg*cm^2) field and the weight in the TOOL Weight (kg) field. Pressing the numerical value cell displays a data entry screen shown in Figure 5-6. That also displays the minimum and maximum values allowed. The SPIN Deceleration (%) field specifies the spin motor deceleration as a percentage of motor maximum. This value can exceed 100% when welding parts because friction in the weld joint assists the spin motor in stopping. The Vac. Sense and Part Present buttons at the bottom allow the vacuum sensing and part presence options to be enabled or disabled. With either option enabled, an appropriate external input must be provided. For example, if the Part Present option is enabled, a part present signal must be activated before a weld cycle is allowed to initiate. A “frowning” face will be displayed on the RUN screen if this signal is not active. Figure 5–5 Tool Setup Screen in PRE-WELD Menu Press the DONE button to return to the PRE-WELD setup screen. Figure 5–6 Sample Data Entry Screen Dukane Manual Part No. 403-570-00 Page 31 Dual Servo Spin Welder User’s Manual TOP OF STROKE Position This button is used to set the vertical position to which the welder head returns after completing a weld cycle, as shown in Figure 5-7. A position of 0 corresponds to the highest position (which is also the machine “home” position). A non-zero setting indicates that the Top of Stroke (TOS) position is lower than the home position by the programmed amount. The TOS position can be entered directly by pressing the Position (mm) field. Alternatively, the TOS position can be “taught” by first pressing the DOWN button and selecting the VERT. Jog Speed (Low, Medium, or High), then activating the RUN switches to jog the head to the desired position, and finally pressing the Transfer button to assign the current jog position (displayed in the Jog Pos. (mm) field) as the TOS Position. Figure 5–7 TOP OF STROKE Position Setup Screen in PRE-WELD Menu The Move To button is used to move the head to the value displayed in the Position (mm) field. After pressing this button, activate both RUN switches and wait for the value in the Jog Pos. (mm) field to match the Position (mm) value. TRIGGER Position This button is used to set the vertical position at which the spin tool and machine head reach the programmed weld speeds, as shown in Figure 5-8. If Torque Triggering is disabled (see below), the weld starts at the TRIGGER Position. This position should be set slightly higher than the position at which the parts to be welded start to come in contact. Above this position, the spin motor is being accelerated from rest to the weld RPM and the head is moving rapidly down. After reaching this position, the spin RPM and vertical speeds are maintained at the programmed values. The TRIGGER Position can be entered directly into the Position (mm) field or taught by jogging the head as described in setting the TOP OF STROKE Position. Page 32 Figure 5–8 TRIGGER Position Setup Screen in PRE-WELD Menu Dukane Manual Part No. 403-570-00 Section 5 - Touch Screen Menus Part Pickup Option This button enables the Part Pickup option, which is programmed through the screen shown in Figure 59. This option is used in conjunction with automated part feed systems where it is desirable to place the parts to be joined on top of each other in the lower fixture. In this mode, the head travels down to “pick up” the upper part with the tool (without spinning), goes up slightly, and then completes the weld cycle. To enable this option, toggle the Enable button to On and set the pickup position in the Position (mm) field by direct entry or through the Teach Position button. Optionally, the Thrust Sense option can be enabled, in which the head will first travel to the Position (mm) distance, then continue to travel until the vertical actuator thrust (i.e. force) exceeds the value set in the Thrust (%) field. The Timeout (s) field sets a time limit between the arrival at the Position (mm) distance and the point of reaching the thrust sensing level. Figure 5–9 Park Pickup Setup Screen in PRE-WELD Menu Pre-Spin Orientation Option This button enables the Pre-Spin Orientation option, which is programmed through the screen shown in Figure 5-10. This option is used in conjunction with the Part Pickup option in applications where, before welding, the parts are placed on top of the other and the initial (pre-spin) angular orientation is different than the welded orientation. To enable this option, toggle the Enable button to On. The Pre-Spin Orientation can be entered directly in the Pre-Spin field. Alternatively, this orientation can be “taught” by first pressing the JOG + or JOG – buttons (depending on desired direction of rotation) and selecting the jogging speed from the SPIN Jog Speed (Low, Medium, or High) field, then activating both RUN switches to rotate the spin tool to the desired orientation, and pressing the Transfer button to assign the current jog position (displayed in the Jog Pos. (Deg.) field) as the Pre-Spin Orientation. To aid in setting the orientation, the head can be moved by pressing the DOWN or UP buttons and activating the RUN switches. Dukane Manual Part No. 403-570-00 Figure 5–10Pre-Spin Orientation Setup Screen in PRE-WELD Menu Transfer Button f The transfer icon should only be used when visually aligning the pre–spin orientation. The value displayed in the Jog (Deg.) cell has to be transferred to the Pre-Spin data field. IMPORTANT You must select the RUN mode to test any of the setups. Both RUN switches must then be activated simultaneously. Page 33 Dual Servo Spin Welder User’s Manual The Move To button is used to rotate the tool to the value displayed in the Position (Deg.) field. After pressing this button, activate both RUN switches and wait for the value in the Jog Pos. (Deg.) field to match the Position (Deg.) value WELD Setup The WELD setup is the middle tab in the SETUP menu and is shown in Figure 5-11. This screen contains the weld METHOD selection (Time, Rotation, Distance, and Energy), a button for entering Weld Parameters, and settings for several OPTIONS related to the weld phase (Orientation, Torque Trigger, and Constant Torque). Figure 5–11 WELD Main Setup Screen Weld Method Selection One of the available modes must be selected to perform a weld. Regardless of the method, the weld is considered to start at different points, depending on the Torque Trigger option setting. If Torque Trigger is OFF, the weld starts at the Trigger Position defined in the PREWELD tab. If Torque Trigger is ON, the weld starts when the desired spin torque threshold is exceeded (see Torque Trigger Option below). Time Method In this method, the weld duration is controlled by time. After choosing this method, the Weld Parameters button is used to enter the weld settings shown in Figure 5-12. The Weld Time (s) entry specifies the weld duration in seconds. Below this entry, a minimum weld time value is displayed. This value corresponds to the time needed for decelerating (i.e., slowing down and stopping) the servo motors and is included as part of the total weld time. The VERT. Speed (mm/s) sets the press weld speed in millimeters per second. The SPIN RPM specifies the spin tool speed, which is constant during the weld until the start of deceleration. The Dir. field specifies the spin direction. The DONE button causes a return to the main WELD tab screen. Page 34 Figure 5–12 Weld Parameters Screen for Time Method Dukane Manual Part No. 403-570-00 Section 5 - Touch Screen Menus Rotation Method In this method, the weld duration is controlled by completing a specified number of spin revolutions. The Weld Parameters button is used to enter the settings shown in Figure 5-13. The Weld Rotations field specifies the number of weld revolutions. The actual number of weld rotations as reported on the RUN screen after the weld will be larger than the number entered in this field and depends on the deceleration and whether final orientation is enabled (see Orientation Option below). The VERT Speed (mm/s), SPIN RPM, and Dir. fields are the same as in the Time Method. The DONE button causes a return to the main WELD tab screen. Distance Method In this method, the weld duration is controlled by vertical travel to a specified absolute or collapse distance. The Weld Parameters button is used to enter the settings shown in Figure 5-14. The Vertical (mm) field specifies the travel distance, depending on the position of the Collapse / Absolute switch located on the bottom of the screen. If the switch selection is Collapse as shown in Figure 5-14, the travel distance is measured relative to the trigger point. If the switch selection is Absolute as shown in Figure 5-15, the travel distance is measured from the press topmost, or 0 position (also referred to as the “home” position). The Teach Position button is available in the Absolute Distance mode, which allows the position to be defined by physically jogging the press down to the desired weld end position. The layout of the Teach Position screen is very similar to the TRIGGER Position screen shown in Figure 5-8. Directly below the Vertical (mm) field is the minimum weld distance, which is automatically calculated by the welder based on other parameters such as speed and deceleration. The VERT Speed (mm/s), SPIN RPM, and Dir. fields are the same as in the Time Method. The DONE button causes a return to the main WELD tab screen. Dukane Manual Part No. 403-570-00 Figure 5–13 Weld Parameters Screen for Rotation Method Figure 5–14 Weld Parameters Screen for Distance Method with Collapse Switch Selection Figure 5–15 Weld Parameters Screen for Distance Method with Absolute Switch Selection Page 35 Dual Servo Spin Welder User’s Manual Energy Method In this method, the weld duration is controlled by the amount of energy input into the weld joint as determined by the spin torque and angular rotation. The welder will maintain a constant spin speed until the programmed energy is produced, at which point the tool will decelerate and stop. The Weld Parameters button is used to enter the settings shown in Figure 5-16. The Energy (J) field specifies the weld energy in Joules. As a safety measure, the use of the Energy Method requires that the Weld Time Process Limit be enabled (refer to the Process Limits description in the POST-WELD menu later in this manual on how to set this limit). If the Upper Weld Time Limit is exceeded during the weld, the machine will stop the cycle and report an error. The VERT Speed (mm/s), SPIN RPM, and Dir. fields are the same as in the Time Method. The DONE button causes a return to the main WELD tab screen. Figure 5–16 Weld Parameters Screen for Energy Method Figure 5–17 Weld Orientation Option Screen WELD OPTIONS Several weld options are available, any combination of which may be enabled simultaneously. Orientation Option This option is used to specify the angular stopping orientation of the upper tool at the end of the weld. To enable it, press the Orientation button and then the Enable box on the screen shown in Figure 5-17. The final weld orientation is defined in the Weld field. There are two methods for setting this value: 1) direct numeric entry into the Weld field, or 2) visual alignment by jogging the spin tool to the desired orientation. To jog the spin tool, first select the SPIN Jog Speed (Low, Medium, or High) and the jog direction (JOG + or JOG -), then activate both RUN switches to rotate the tool. The current spin tool orientation is displayed in the Jog Pos. (Deg.) box. Once the head is in the desired orientation, the Transfer arrow button is used to set this value as the final Weld orientation. To aid in visually setting the orientation, the press can be jogged vertically by selecting the DOWN or UP buttons and activating both RUN switches. The Move To button allows the spin tool to be rotated to the programmed Weld orientation. After selecting this button, activate both RUN switches until the spin tool Page 36 Dukane Manual Part No. 403-570-00 Section 5 - Touch Screen Menus stops moving. The DONE button causes a return to the main WELD tab screen. Torque Trigger Option This option specifies a torque level to sense when the upper and lower parts make contact. Prior to contact, the motor is spinning the tool in the air using a very low amount torque. At contact, there is an increase in the torque required to maintain a constant angular velocity, at which point the weld is considered to start (i.e. the weld timer and counter are started). Note that the welder begins to sense the torque after reaching the TRIGGER Position. To enable this option, press the Torque Trigger button and then the Enable box on the screen shown in Figure 5-18. The Torque (% of max.) field specifies the torque level at which the weld will start. The Timeout (s) value specifies the amount of time the welder will wait between reaching the TRIGGER Position and the sensing of the torque trigger. If torque trigger does not occur within this time, the machine will abort the cycle and display an error. The DONE button causes a return to the main WELD tab screen. For this option to work properly, the torque trigger value must be set above the torque required to keep the spin tool running before part contact (i.e. in free air). To set the torque trigger value correctly, follow these steps: 1. Program all welder settings as desired (refer to other sections in this manual if needed). 2. Disable the Torque Trigger Option. 3. Verify that the VERTICAL TRAVEL LOWER LIMIT is set properly to prevent the possibility Figure 5–18 Weld Torque Trigger Option Screen of contact between the tool and fixture (refer to TOOLS, SYSTEM SETUP tab menu). 4. Press the RUN button. 5. Run a “dry” cycle (i.e. without parts) by activating both RUN switches until the spin motor stops. 6. Read the Peak Torque (%) value on the RUN screen. This value represents the torque required to keep the tool spinning in the air. 7. Enable the Torque Trigger Option and set the Torque (% of max.) field to be slightly larger (at least 2%) than the number from the previous step. Dukane Manual Part No. 403-570-00 Page 37 Dual Servo Spin Welder User’s Manual Constant Torque Option This option sets the welder to function in “Melt-Match” mode, in which the press vertical speed is continuously adjusted to match the rate of plastic melt at the joint. This is achieved by measuring the spin torque and changing the verical speed on-the-fly based on this measurement. The vertical speed is inversely proportional to the spin torque: the lower the spin torque, the higher the vertical speed, and vice versa. To enable this option, press the Constant Torque button and then the Enable box on the screen shown in Figure 5-19. The relationship between the spin torque and vertical speed is illustrated in Figure 5-20. The welder will adjust vertical speed for a measured spin torque along the lines shown. The Torque Target is the desired spin torque, which is entered into the Torque (% of max.) field on the screen. The Max. Torque value is 5% larger than the Target Torque. If the measured torque exceeds the Max. Torque, the vertical speed will be 0 until the torque drops below the maximum. The Max. Speed is the maximum allowable vertical speed, which will occur if the measured torque is 0. This value is entered in the VERT. Max (mm/s) field on the Weld Parameters screen (in the WELD tab). The Timeout (s) field specifies the maximum weld time before the machine aborts the cycle and reports an error. The actual spin torque profile achieved during the weld will depend on the Torque (% of max.) and the VERT. Max (mm/s) settings for a particular application. For example, if the actual spin torque is consistently below the specified target, the VERT. Max (mm/s) will need to be increased to cause the welder to move down faster, causing a rise in the spin torque. Figure 5–19 Weld Constant Torque Option Screen Figure 5–20 Graph of Vertical Spin Speed vs. Spin Torque for Constant Torque Option POST-WELD Setup The POST-WELD setup is the right tab in the SETUP menu and is shown in Figure 5-21. The screen is divided into two sections: Hold Setup and Part Tests. Hold Setup The Hold Setup button is used to enter parameters related to the Hold phase of the weld cycle. During this phase, the molten plastic cools and solidifies, beginning when the spin tool stops. Pressing the Hold Setup button Page 38 Figure 5–21 POST-WELD Main Setup Screen Dukane Manual Part No. 403-570-00 Section 5 - Touch Screen Menus changes the display to the screen shown in Figure 522. The MODE switch specifies if the Hold phase will be controlled by traveling a specified Distance or for a specified amount of Time. With Distance MODE selected as shown in Figure 522, the parameters for Hold motion are specified in the fields on the right and are divided into two sections: DYNAMIC and STATIC. During the Hold, the press will first complete the DYNAMIC phase, then the STATIC phase. In the DYNAMIC phase, the press moves vertically at the speed specified in Speed (mm/s) to a distance specified in Collapse (mm). In the STATIC phase, the press will maintain its position for the time specified in Dwell Time(s). It is possible to bypass either the DYNAMIC or STATIC phases by programming a 0 collapse distance or a 0 dwell time, respectively. With Time MODE selected as shown in Figure 5-23, the parameters for specifying the hold time are vertical speed in Speed (mm/s), the motion duration in Move Time (s), and time for maintaining the final position in Dwell Time (s). In addition, the Constant Thrust option is available in the Time MODE, in which the press travels down until reaching a specified vertical thrust (i.e. compression force). To enable this option, press the Constant Thrust button. The relationship between the vertical torque and vertical speed is illustrated in Figure 5-24. The press will adjust vertical speed as a response to the measured vertical thrust along the lines on the graph. The Thrust Target is the desired vertical thrust, which is entered into the Thrust (%) field on the screen. The Max. Speed is the maximum allowable vertical speed, which will occur if the measured thrust is 0. This value is entered in the Speed (mm/s) field in the DYNAMIC section. Figure 5–22 Figure 5–23 Hold Setup Screen for Time MODE Figure 5–24 Dukane Manual Part No. 403-570-00 Hold Setup Screen for Distance MODE Graph of Vertical Speed vs. Vertical Torque for Constant Thrust Option Page 39 Dual Servo Spin Welder User’s Manual Part Tests The Part Tests section is used to define limits for the weld proocess and welder behavior for cases where the process is outside the limits. The Process Limits button is used to enter limits for weld process results as shown in Figures 5-25, 5-26, and 5-27. The following limits are available: 1. Weld Time (s) 2. Weld Rotations 3. Orientation (Deg.) 4. Weld Energy (J) 5. Peak RPM 6. Peak Torque (% of max.) 7. Peak Thrust (% of max.) 8. Cycle Time (s) 9. Vertical Weld End (mm) 10. Hold Collapse (mm) 11. Hold End Position (mm) To enable a limit, press the ON/OFF box to the left of the description and enter the Lower and Upper values. Any combination of limits can be enabled simultaneously. The More Limits… button shows additional limits, and the DONE button causes the screen to return to the POST-WELD main menu. Page 40 Figure 5–25 Process Limit Definitions Screen 1 of 3 Figure 5–26 Process Limit Definitions Screen 2 of 3 Figure 5–27 Process Limit Definitions Screen 3 of 3 Dukane Manual Part No. 403-570-00 Section 5 - Touch Screen Menus The bottom right corner of the POST-WELD screen contains controls for setting machine behavior when an out-of-limit condition occurs. The Latch on Failure button specifies if the out-of-limit condition will require an acknowledgement from the user before allowing the next cycle to start. This acknowledgement request is indicated by a button on the bottom of the RUN screen as shown in Figure 5-28. The Suspect / Bad (Abort) button in the right lower corner of the screen controls two aspects of machine function. The first function is to determine if a weld cycle will be aborted if the process parameter falls outside the limits. If Suspect is selected, the machine cycle will complete regardless of the process limit results. If Bad (Abort) is chosen, the machine cycle will continue if any process parameter falls below the Lower limit, or be terminated if it exceeds the Upper limit for the following parameters: • Weld Time (s) • Weld Rotations • Peak RPM • Peak Torque (% of max.) • Peak Thrust (% of max.) Figure 5–28 RUN Screen with PART TEST FAILED Button • Cycle Time (s) In the case of cycle termination, the machine will report an error message on the RUN screen listing the parameter for which the limit was exceeded. The second function is to set the character displayed in the Limits field on the RUN screen. If the switch is set to Suspect, the Limits field will display S if the process was outside the limits. If it is set to Bad (Abort), the Limits field will display B if the process parameter was lower than the Lower limit, and E if the process parameter was higher than the Upper limit. Dukane Manual Part No. 403-570-00 Page 41 Dual Servo Spin Welder User’s Manual TOOLS Menu SELECT SETUP Tab Pressing the Tools button displays the first tab labeled Select Setup. This contains eight buttons for selecting a setup file as shown in Figure 5–29. The Machine Cycle Count in the lower right corner is the total number of weld cycles that have occurred in the machine’s lifetime. Figure 5–29 SELECT SETUP Screen in TOOLS Menu UTILITIES Tab The middle tab named UTILITIES and shown in Figure 5–30 contains buttons for renaming, copying, and erasing setups, as well as a button for accessing a screen to record other machine settings and one for exporting the graph data for the last weld. Rename Setup allows a name up to 26 characters. The keypad has the letters a through z and a caps key for A through Z, plus the numbers 0 through 9 and a space key. To rename a setup, enter a new name and then press the Rename button under the new name. Press the Done button when finished. Copy Setup copies the values of the currently loaded Figure 5–30 UTILITIES Screen in TOOLS Menu setup file to the setup file specified. To copy a setup, press the Destination Setup ID button, enter the desired number, then press the Copy button. Press the Done button when finished. Erase Setup clears all setup parameter values and restores them to factory defaults. To erase a setup, press the ERASE button, and then the DONE button. The OTHER MACHINE SETTINGS button is used as a “notepad” feature in recording the information shown in Figure 5-31 and is provided as a convenience feature for restoring the complete machine setup. The Upper Tool Nr. and Lower Tool Nr. fields can be populated with tool identification numbers. The Column Position (mm) Page 42 Figure 5–31 Record Other Machine Setetings Screen in UTILITIES Menu Dukane Manual Part No. 403-570-00 Section 5 - Touch Screen Menus field designates the position of the thruster (part of the welder surrounded by sheet metal covers) relative to the column as indicated by the scale affixed to the right side of the column and a white line printed on the rear of the welder. Once these settings are entered, pressing the DONE button causes a return to the main UTILITIES screen, where a yellow SAVE OTHER SETTINGS button appears. Press this button, then Save and DONE on the following screen to retain the settings in memory. The EXPORT LAST WELD GRAPH DATA button is used to send weld profile data information for the last cycle to an externally connected computer via the Dual Servo Spin Welder Utility (refer to Chapter 8). This data includes the spin torque, spin orientation, vertical thrust, vertical position, and vertical speed. It is displayed in graphical format in the Utility and can be exported to an ASCII file. SYSTEM SETUP Tab The third tab is labeled SYSTEM SETUP and is shown in Figure 5-32. The welder contains an assembly used to limit the downward travel of the press to prevent tooling from coming in contact. This assembly consists of a mechanical stop block with an integral proximity switch, whose position is adjusted via an elevator screw driven by a small DC motor. If, during normal operation, the press travels down and the proximity switch becomes active, the press motion will quickly decelerate to a stop. The actual physical hard stop is approximately 4 mm below this position since the stop block includes a cushion to protect the vertical servo actuator from damaging impact loads. To set the lower limit proximity switch position, first press the VERTICAL TRAVEL LOWER LIMIT button. Then press the Initialize button shown on the screen in Figure 5-33, which will cause the stop block to move all the way down, which takes 1 minute as indicated by a flashing message. When this step is completed, the screen will change as indicated in Figure 5-34. Next, jog the head down to the desired travel limit position (at least 4 mm Dukane Manual Part No. 403-570-00 Figure 5–32 SYSTEM SETUP Tab in TOOLS Figure 5–33 Vertical Lower Limit Setup Screen with Initialize Button Page 43 Dual Servo Spin Welder User’s Manual [.15 in.] above tooling contact, if possible) and press the Set Position button. The stop block will be moved up, and a flashing circle will appear next to the DOWN button when this process is complete, indicating that the proximity switch is active. Press the DONE button to return to the SYSTEM SETUP screen. The Data Export button controls whether the weld parameter data displayed on the RUN screen (Weld Time, Rotations, etc.) is sent out to a computer connected to the welder after each cycle (refer to Chapter 8). Pressing the button toggles between On and Off states. Figure 5–34 Vertical Lower Limit Setup Screen with Set Position Button The Graph Export button controls whether the weld profile data captured for the last weld is sent out to a computer connected to the welder after each cycle (refer to Chapter 8). This data includes the spin torque, spin orientation, vertical thrust, vertical position, and vertical speed. It is displayed in graphical format in the Utility and can be exported to an ASCII file. Pressing the button toggles between On and Off states. The time required to transfer the data for this option can be significant (several seconds, depending on weld duration) and may adversely affect cycle rate as the welder will not be ready to run another cycle until the transfer is complete. The Start Type button toggles from Manual to Automatic each time it is pressed. Manual is used for most operations. Automatic is used in an automated system and requires a switch closure contact on the User I/O HD-15 connector (see Figure 3–9). A pinout of the User I/O connector and automation wiring information are provided in Appendix A. Page 44 Dukane Manual Part No. 403-570-00 Section 5 - Touch Screen Menus The Home Offset (Deg.) field is used to specify an angular offset of the homing spin orientation. The tooling hub home orientation is set at the factory such that the slot in the hub shown in Figure 3-2a is closest to the front of the machine. This position is the 0 degree reference for the spin motor and all spin orientations are defined relative to it. Unless a specific situation requires a nonzero offset, it is most convenient to retain the factory default value. The Set Password button is used to set the password, which must subsequently be entered to change programmed machine settings. The default password is 0 (zero) so that password–protected screens are easily accessed by just pressing the Enter key on the Enter Password Code screen. The password is a numerical value with a maximum 10–digit value of 4 294 967 295. The password–protected screens and menus are shown in Figure 5–35. RUN SETUP PREWELD WELD POSTWELD TOOLS SELECT SETUP UTILITIES SYSTEM SETUP Set Password Figure 5–35 Password-Protected Screens and Menus The Software Info button displys a screen with software revisions of the welder components as shown in Figure 5-36. Figure 5–36 Dukane Manual Part No. 403-570-00 Welder Software Information Page 45 Dual Servo Spin Welder User’s Manual Setting Time and Date On Touch Screen The time and date displayed on the touch screen are preset at the factory for US Central Standard Time. They can be changed using the following procedure: 1. Press the upper left-hand corner (marked by 1 in Figure 5-37) and lower left-hand corner (marked by 2) at the same time. The screen shown in Figure 5-38 should appear. 2. Press the “Clock” button. The screen shown in Figure 5-39 should appear. 3. To change the date and time, first enter a numeric value. Then press the corresponding button associated with that value. For example, to set the month to May, press 5 and then the “Mon” button. Figure 5-37 Touch Screen - Time and Date 1 4. After setting the time and date, press the “Exit” button on this screen and on the next screen. 5. Wait several seconds for the touch screen to return to normal operation before welding. Figure 5-38 Touch Screen - Time and Date 2 Figure 5-39 Touch Screen - Time and Date 3 Page 46 Dukane Manual Part No. 403-570-00 Section 5 - Touch Screen Menus Parameter Value Range The minimum and maximum values of the welding parameters are listed in Table 5-I. Screen Parameter Name Min.Value TOOL Inertia Max.Value Resolution Units 1 kg* cm² 3000 (SVT012VR) 0 780 (SVT032VR) 160 (SVT042VR) SETUP> PRE-WELD TOOL Weight 0 25.0 0.1 kg SPIN Decel. 25 200 1 % TOP OF STROKE Position 0 140.00 0.01 mm TRIGGER Position 1.00 140.00 0.01 mm Part Pickup Position 1.00 140.00 0.01 mm Part Pickup Thrust 1 100 1 % Part Pickup Timeout 1 60 1 sec. Pre-Spin Orientation 0 359.9 0.1 deg. Weld Time/ sec./ Weld Rotations/ Weld Distance (Vertical) / rev./ 0.01 50000 0.01 Energy VERT. Speed SETUP> Joules .01 SPIN RPM WELD mm/ 100.00 0.01 mm/s 1 RPM 750 (SVT012VR) 5 3000 (SVT032VR) 4000 (SVT042VR) Weld Orientation 0 359.9 0.1 deg. Trigger Torque 1 100 1 % Torque Trigger Timeout 1 60 1 sec. Constant Torque 1 100 1 % Constant Torque Timeout 1 60 1 sec. .01 100 0.01 mm/s 0 140.00 0.01 Hold Dwell Time 0 100.00 0.01 sec. Hold Constant Thrust 1 100 1 % Home Offset 0 359.9 0.1 deg Hold Speed SETUP> POST-WELD Hold Move Time/ Hold Collapse sec./ mm TOOLS> SYSTEM SETUP Table 5–I Welding Parameters Dukane Manual Part No. 403-570-00 Page 47 Dual Servo Spin Welder User’s Manual This page intentionally left blank Page 48 Dukane Manual Part No. 403-570-00 Section 6 - Machine Operation SECTION 6 Machine Operation Machine Setup..............................................51 Starting a Weld Cycle....................................54 Stopping a Weld Cycle..................................55 Setup Sheet............................................. 55-56 Dukane Manual Part No. 403-570-00 Page 49 Dual Servo Spin Welder User’s Manual This page intentionally left blank Page 50 Dukane Manual Part No. 403-570-00 Section 6 - Machine Operation Machine Setup IMPORTANT The startup procedure given here is for a new machine that has just been installed. The Dual Servo Spin Welder is capable of developing substantial torque and high rotational velocity. Keep your hands and body away from the tool head during operation. The spinning head is capable of inflicting serious injury. Never attempt to retrieve a part from a spinning tool head. Always wear a face shield when operating the Dual Servo Spin Welder. Be extremely careful not to let long sleeves, necklaces or long hair become entangled in the Dual Ser vo Spin Welder during operation. 1. Base Interface Cable Attach the base interface cable from the rear of the base to the back of the thruster housing as shown in Figures 3–7 and 3–8. 2. AC Power Insert the AC power plug (refer to Figure 3–4) into a 240 VAC, 1–Phase NEMA type 6–20R receptacle rated at 20 Amps. The correct style outlet is shown in Figure 3–5. Do not alter the plug or receptacle in any way. Refer to the section on Electrical Safety in Chapter 2 if you have any questions. Ensure the AC Power Switch is in the OFF position (see Figure 3-6). 3. Attach Tooling Attach the upper tooling to the hub and torque tightly. The hub dimensions are given in Figure 3-2. The slot in the hub is intended to accept a ¼-inch standard dowel pin assembled to the upper tool for repeatable mounting orientation. Place the lower fixture on the base and attach it loosely so it can be aligned later. Always turn machine power OFF when instalaling or removing the spin tool. 4. Adjust Thruster Position on Column The rear support column of the Dual Servo Spin Welder features a threaded shaft for adjusting the overall height of the thruster head. The adjustments are shown in Figure 3-7. The thruster height should be adjusted properly to ensure that the weld head has enough travel to perform the weld (within the 5-inch stroke limit), and that the welded assembly can readily be removed from the tooling. To adjust the position, complete the following steps: a) Loosen the three rear nuts (which lock the head assembly in place). The nuts are 22mm wide, but a 7/8-inch socket will also fit. b) Raise or lower the head by turning the adjustment lead screw on top, which is also a 22mm hex. The lead screw has 8 threads per inch, so 1 turn moves the head 1/8-inch (3.18 mm). c) Tighten the rear locking nuts. Dukane Manual Part No. 403-570-00 eset Twist to R POWER E IN CYCL ABORT Figure 6–1 Setting and Resetting the E–Stop Page 51 Dual Servo Spin Welder User’s Manual 5. Reset E-Stop Reset the emergency stop button by turning clockwise. Refer to Figure 4-4. The status display on the base will change from ABORT in red to POWER in green. 6.Turn Power ON Turn on the AC power switch. 7. Set Tool Parameters On the touch screen, press the SETUP button. Press Enter on the ENTER SECURITY CODE screen if no password has been previously set, or type in the password and then Enter. Press the TOOL Setup button and enter the TOOL Inertia (kg*cm^2) and TOOL Weight (kg). Press the RUN button and wait until the PLEASE WAIT… indicator above it disappears. 8. Initialize (Home) Welder The touch screen will now instruct you to Activate both RUN SWITCHES to reset machine. This is illustrated in Figure 5–1. Once the switches are activated, both servos will first move to their respective home positions (corresponding to internal encoder reference pulses in each servo). Then the spin motor will rotate to the programmed final weld orientation set in the SETUP > WELD tab > Orientation > Weld field (Figure 5-17), and the press will move to position set in the SETUP > PRE-WELD tab > TOP OF STROKE Position > Position (mm) field (Figure 5-8). The switches can be deactivated once a beep sounds. The homing procedure is complete after the second beep sounds and the indicator directly below the yellow face icon becomes green. 9. Align Lower Fixture with Spin Tool Place a set of parts in the upper tool and lower fixture. Navigate to the SETUP > TRIGGER Position menu, press the DOWN button, and select Me or Hi in VERT. Jog Speed. Jog the press head down to a position where the weld joint can be used to align the lower fixture by activating both RUN SWITCHES. Change the vertical jog speeds as needed and use the UP button to move the head up if desired. When finished, press the DONE button and remove the parts. Page 52 Dukane Manual Part No. 403-570-00 Section 6 - Machine Operation Since the welder press force is limited in jog mode for safety purposes, the machine will disable the servos and report an error (Fault: Jog thrust limit exceeded OR Vertical servo runaway detected.) if the press is jogged down too far. If this condition occurs, the welder must be re-initialized by returning to the RUN screen, pressing RESET FAULT button, and repeating welder initialization (Step 8). 10. Set Vertical Travel Lower Limit Position To protect tooling, set the vertical press travel limit using the following steps : 1. Navigate to TOOLS > SYSTEM SETUP tab and press the VERTICAL TRAVEL LOWER LIMIT button. 2. Press the Initialize button and wait 1 minute. 3. Press the DOWN button, then activate both RUN SWITCHES to move the head down to the position where the lower limit proximity switch should be activated (at least 4 mm [.15 in.] above tooling contact, if possible, since the physical hard stop is lower than the switch position by this distance). To change speed, select a different setting in the VERT. Jog Speed box. 4. Press the Set Position button, and wait until a flashing red circle appears next to the DOWN button. 5. Press DONE. 11. Set Weld Process Parameters Select the desired setup number (1 through 8; setup 1 is default) from the TOOLS > SELECT SETUP tab menu. Input the desired weld process settings in the PREWELD, WELD, and POST-WELD tabs in the SETUP menu as described in Chapter 5. Dukane Manual Part No. 403-570-00 Page 53 Dual Servo Spin Welder User’s Manual Starting A Weld Cycle All weld cycles must be initiated from the RUN screen after the machine is initialized and with the press at the top-of-stroke position. If not already on this screen, press the RUN button first (see Figure 5-2). If you had powered down the welder or pressed the Abort button, the screen may instruct you to press the RESET FAULT button and then reset the machine by activating the RUN switches. After the reset process is completed, the welder is ready to run a cycle, which is indicated by the smiley face in the upper left corner of the screen. If a frowning face appears instead, it signifies that the welder is not ready for one of several reasons (for example, the part presence sensor is not activated if the Part Present option is enabled). To run a cycle, press both RUN switches simultaneously. The press will begin to descend and spin motor will accelerate. Both servos will reach their programmed weld speeds by the time the press reaches the trigger position (defined in SETUP > PRE-TRIGGER tab > TRIGGER Position). The Trigger Indicator (see Figure 4-1) will turn on when the weld starts, which occurs at the Trigger position if the Torque Trigger Option is disabled, or when the trigger torque is sensed if the Torque Trigger Option is enabled. The weld phase continues until the selected welding parameter (time, number of rotations, vertical distance, or energy) has been reached, at which point the Trigger Indicator turns off. The spin motor then stops and the welder begins the hold phase, during which the press moves according to the settings defined in the Hold Setup menu. To complete the cycle, the press retracts to the top-of-stroke position and the RUN screen is populated with weld process data results. The base switches must remain actuated until the start of the hold phase; otherwise, the cycle will be aborted and no weld data will be displayed. If a weld cycle completes successfully, the smiley face appears to indicate that the machine is ready to run another cycle. If a cycle terminates abnormally, a fault message will be displayed on the screen describing the error condition. The fault must be cleared and the welder reset before another cycle can be initiated. Page 54 Dukane Manual Part No. 403-570-00 Section 6 - Machine Operation Stopping a Weld Cycle During normal operation, the cycle stops automatically when the specified weld and hold phases are completed and the press returns to the top-of-stroke position. To stop a cycle before it completes, press the E-stop switch on the base, which terminates the cycle and causes power to be removed from both servo motors. Setup Sheet On the following page is a table containing all the machine settings for the Dual Servo Spin Welder. An electronic version is provided on the CD included with the machine. Dukane Manual Part No. 403-570-00 Page 55 Dual Servo Spin Welder User’s Manual DUAL SERVO SPIN WELDER - SETUP SHEET APPLICATION DATE MACHINE SETUP NUMBER TOUCH SCREEN SETTING VALUE TOOL INERTIA (KG*CM^2) TOOL W EIGHT (KG) TOOL SETUP SETUP > PREWELD SVT0___2VR MACHINE MODEL SPIN DECEL. (%) VAC. SENSE ON OFF PART PRESENT ON OFF TOP OF STROKE POSITION POSITION (MM) TRIGGER POSITION POSITION (MM) OPTIONS PART PICKUP ENABLE POSITION (MM) ON OFF THRUST SENSE THRUST (%) TIMEOUT (S) ON OFF PRE-SPIN ON OFF PRE-SPIN ORIENT METHOD (TIME, ROTATION, DISTANCE, ENERGY) TIME ROT DIST ENERGY W ELD TIME (S) / W ELD ROTATIONS / VERTICAL (MM) / ENERGY (J) SETUP > WELD W ELD PARAMETERS COLLAPSE / ABSOLUTE (DISTANCE METHOD ONLY) COLLAPSE ABSOLUTE VERT. SPEED (MM/S) SPIN RPM DIR. OPTIONS CW CCW ORIENTATION W ELD TORQUE TRIGGER TORQUE (% OF MAX.) TIMEOUT (S) ON OFF CONSTANT TORQUE TORQUE (% OF MAX.) TIMEOUT (S) ON OFF ON OFF MODE (POSITION, TIME) HOLD SETUP POSITION TIME SPEED (MM/S) MOVE TIME (S) / COLLAPSE (MM) DWELL TIME (S) CONSTANT THRUST THRUST (%) ON OFF W ELD TIME (S) W ELD ROTATIONS W ELD ENERGY (J) PROCESS LIMITS… PEAK RPM PEAK TORQUE (% OF MAX.) PEAK THRUST (% OF MAX.) CYCLE TIME (S) UPPER LIMIT ORIENTATION (DEG.) LOWER LIMIT SETUP > POSTWELD VERTICAL W ELD END (MM) HOLD COLLAPSE (MM) HOLD END POSITION (MM) LATCH ON FAILURE ON OFF FAILURE SWITCH (SUSPECT / BAD) TOOLS > SYSTEM SETUP VERTICAL TRAVEL LOWER LIMIT SUSPECT BAD LIMIT POS. (MM) HOME OFFSET (DEG.) THRUSTER Page 56 POSITION ON COLUMN (MM) MANUAL SETTING VALUE Dukane Manual Part No. 403-570-00 Section 7 - Optimizing Performance SECTION 7 Optimizing Performance Spin Welding Process...................................59 Material Considerations.................................59 Control Parameters.......................................60 Surface Speed (RPM)..........................................60 Press (Axial) Speed.............................................62 Weld Depth..........................................................62 Hold......................................................................63 Part Size........................................................63 Dukane Manual Part No. 403-570-00 Page 57 Dual Servo Spin Welder User’s Manual This page intentionally left blank Page 58 Dukane Manual Part No. 403-570-00 Section 7 - Optimizing Performance Spin Welding Process The formal definition of spin welding is “An assembly process in which thermoplastic parts with rotationally– symmetric mating surfaces are joined together under pressure using unidirectional circular motion. The heat generated during the rotational contact melts the plastic in the heat–affected zone forming a weld upon cooling.” Note that the parts themselves can be any shape, only the mating surfaces to be welded need to be circular. The spin welding process is divided into five distinct phases. In Phase I, the rotational friction generates heat. Frictional heating is intensified with both axial (press vertical) and joint surface velocities. In Phase II, the friction results in abrasive forces which strip off surface roughness, generating wear particles causing the surfaces of the polymer to begin to melt. As the polymer reaches its crystalline melting point or glass transition temperature, it enters Phase III, where heat starts to be generated by internal friction within the molten region. This continues in Phase IV, where the temperature of the molten layer remains relatively constant. Because plastics are poor conductors of heat, the surface heat is transferred slowly to the interior and much of it remains localized. At this point, the rotation is stopped and we enter Phase V where the molten material . allowed to cool under pressure for a short period called is the Hold Time. Material Considerations Materials that can be friction (i.e. vibration) welded can also be joined with by spin welding. The semicrystalline thermoplastics are more readily joined using spin welding than ultrasonics. Using compatible polymers, spin welding is capable of making reliable hermetic seals. Far–field welding is easier with spin welding than with ultrasonic welding. Additional parts can be entrapped between the upper and lower pieces during spin welding. Joining of dissimilar polymers is possible using the spin weld process although it generally produces lower strength weld joints. By designing the weld joint with an undercut, the polymer with the lower melting temperature will flow into the undercut, creating a mechanical union. Dukane Manual Part No. 403-570-00 Page 59 Dual Servo Spin Welder User’s Manual Material filler and surface contaminants (e.g. mold release agent) are two factors that will affect consistency and weld repeatability. Spin welding is more tolerant of contaminants than ultrasonic welding. Spin welding is also less affected by hygroscopic polymers, although they may still require special handling for critical applications. The moisture content can lead to bubble formation in the joint resulting in decreased weld strength. NOTE Common hygroscopic thermoplatics: ABS/Polycarbonate (Cycoloy) Polyoxymethylene (Acetal, Delrin) Polyamides (Nylon, Zytel) Polycarbonate (Lexan) Polycarbonate/Polyester (Xenoy) Polysulfone (Udel) Control Parameters There are several primary process control parameters that affect weld quality. They are the surface velocity of the weld joint, press (axial) speed, weld depth, and hold distance and time. The following sections are presented for informational purposes only and are in no way meant to serve as a rule or formula. The information is collected from publicly available books and papers. It is presented here to provide you with a general guideline for setting the initial parameters. Surface Speed For a fixed rotational spin speed (RPM), linear surface speed increases with weld joint diameter. For a fixed weld joint diameter, surface speed increases with motor RPM. Smaller diameter parts therefore usually require more RPM than larger parts of the same material. If the surface speed is too low, an adequate amount of heat will not be generated to cause sufficient melting. If the speed is too high, excessive heat in the joint could result in material degradation or reduction in viscosity leading to material flow away from the joint. The selection of the proper surface speed depends to a large degree on the material and joint geometry of the parts being welded. Some materials, such as PVC, can be readily welded for a wide range of values, while others require a narrow range. Commonly quoted values in the literature recommend using Page 60 Dukane Manual Part No. 403-570-00 Section 7 - Optimizing Performance surface speeds between 360 and 600 in./sec. However, speeds of 120 in./sec. and lower have been used with good results. The mathematical relationship between surface speed and spin speed (RPM) is given by the equation: RPM = where 60 v πD v is the surface velocity D is the average weld diameter A plot of the spin speed and average weld diameter for a number of surface speed values is shown in Figure 7-1. 4000 120 in/sec = 10 ft/sec — 3 m/sec 240 in/sec = 20 ft/sec — 6 m/sec 360 in/sec = 30 ft/sec — 9 m/sec 480 in/sec = 40 ft/sec — 12 m/sec 600 in/sec = 50 ft/sec — 15 m/sec 720 in/sec = 60 ft/sec — 18 m/sec 840 in/sec = 70 ft/sec — 21 m/sec 960 in/sec = 80 ft/sec — 24 m/sec Spin Speed (rev/min) 3000 2000 v= 1000 RPM v= 0 D 1 2 v= 240 360 v= 480 v= v=7 600 20 v = 84 v = 960 in /sec 0 120 3 4 6 Average Weld Diameter (inch) 8 10 12 Figure 7–1 Dependence of Spin Speed on the Weld Diameter for Selected Surface Speeds Dukane Manual Part No. 403-570-00 Page 61 Dual Servo Spin Welder User’s Manual Press (Axial) Speed The press speed affects the amount of contact pressure between the parts being welded, which is required to generate frictional heat. The larger the speed, the larger the rate of heat rise. In combination with the surface speed, press speed must be high enough to cause melting at the interface as opposed to grinding, but not too high as to damage the parts. Excessive press speed can also lead to stalling of the spin motor as more torque is required to maintain constant spin speed. The Dual Servo Spin Welder is capable of operating in two different press speed modes. With the Constant Torque Option (in SETUP > WELD tab) disabled, the press speed is constant during the weld. With the Constant Torque Option enabled, the press speed is variable so as to keep the spin torque constant (see Chapter 5). The latter case resembles the operation of a pneumatically driven press, where the press speed is the result of the melt rate under given air pressure and spin speed conditions. Selection of the optimum press speed depends on the material and joint geometry of the parts, as well as the surface speed. A range for initial experimentation is 0.5 to 2.0 mm/s. Weld Depth The determination of the proper weld depth is highly dependent on the application. The weld joint is typically designed for a specific weld penetration. Ideally, the weld is sufficiently deep to produce a strong, hermetically sealed assembly. An excessive depth may lead to the formation of flash (material that is ejected from the joint area during the weld and adheres to the assembly), the drawing out of reinforcing filler material and realignment of the interchain bonds in the weld plane resulting in a weak axial weld joint, and possibly part distortion. Page 62 Dukane Manual Part No. 403-570-00 Section 7 - Optimizing Performance Since weld depth affects the joint strength and the amount of flash generated, it is important to design the weld joint properly to meet both requirements simultaneously. The incorporation of flash trap features is recommended to produce acceptable appearance without compromising strength. Hold During the hold phase, vertical press travel initially brings the molten parts closer together (dynamic hold) and then allows the molten material to solidify (static hold). Amourphous plastics will normally take longer to solidify than semicrystalline plastics. The dynamic hold distance is typically a small value compared to the weld distance. An approximate staring point for initial application setup is 10% of weld distance. The static hold time can vary depending on the size of the part, but is usually in the 1-3 second range. Part Size Machine model selection will mostly depend on the weld diameter of the parts. Refer to Table 7-I for approximate guidelines. For diameters under 4 inches, the SVT032VR model is recommended due to its torque capacity. The SVT042VR model is used where high RPM (>3000) is required. Please contact the Dukane Applications Laboratory (see Chapter 11) for a recommendation concerning your specific application. Weld Diameter Range (in) Machine Model Peak RPM up to 2.0 SVT042VR 4000 .5 to 4 SVT032VR 3000 4 to 7 SVT012VR 750 Table 7- I Dukane Manual Part No. 403-570-00 Page 63 Dual Servo Spin Welder User’s Manual This page intentionally left blank Page 64 Dukane Manual Part No. 403-570-00 Section 8 - Welder Data Export Software SECTION 8 Welder Data Export Software Introduction....................................................67 Hardware and Software Requirements.........67 Installation, Startup and Cable Connections...........................67 Part Data.......................................................68 Profile Graphs...............................................69 Servo and Debug..........................................70 Dukane Manual Part No. 403-570-00 Page 65 Dual Servo Spin Welder User’s Manual This page intentionally left blank Page 66 Dukane Manual Part No. 403-570-00 Section 8 - Welder Data Export Software Introduction A Windows™ application named Dual Servo Spin Welder Utility, can be used to capture data exported by the welder to a PC. This application is also capable of importing the servo tuning database, and obtaining messages from the machine that may be useful in troubleshooting. Hardware and Software Requirements The utility requires a PC or laptop running a Windows 2000™, XP™, or Vista™ operating system. A straight DB-9 cable is needed to interface to the welder. The cable must be terminated with a male connector where it connects to the welder. Installation, Startup, and Cable Connections To install the program, Run the setup.exe file located in the Dukane Dual Servo Spin Utility Installer folder on the CD supplied with the welder and follow the prompts on the screen. Once installed, run the program. It can be accessed through: Start Menu -> All Programs -> Dukane -> Dual Servo SpinWelder Utility Connect the cable between the Data Port on the welder (located above the power switch on the rear of the welder) and a serial port on the PC or a USB-to-serial converter. If a converter is to be used, the serial communications settings should be as follows: PARAMETER Baud Rate VALUE 57600 Data Bits Parity 8 NONE Stop Bits Flow Control 1 Xon/ Xoff Dukane Manual Part No. 403-570-00 Page 67 Dual Servo Spin Welder User’s Manual Part Data Upon startup, the screen will appear as shown in Figure 8-1, with the Part Data tab selected by default. The following is a description of the items on this tab: PART DATA List This area contains a series of lines of part data, one line per part. This data is displayed after each cycle if the Data Export option in the System Setup screen on the welder is enabled (See Figure 5-32.). The data is comma delimited with the fields given in the order as follows: 1. 2. 3. 4. 5. 6. 7. 8. 9. 10. 11. 12. 13. 14. 15. 16 . Part number (ID) Test result number Test result symbol Date Time Weld time (sec.) Number of weld revolutions Weld energy (Joules) Peak spin motor RPM Peak spin motor torque (% of max.) Weld orientation (degrees) Peak vertical thrust (% of max.) Cycle time (sec.) Weld end distance (mm) Hold relative (collapse) distance (mm) Hold end distance (mm) Figure 8–1 Utility Startup Screen CLEAR Clears parts data from PC screen. WRITE TO FILE Writes parts data from the screen to a file on the computer. After pressing this button, enter the name of the file where to store the data. Add a .txt or .csv extension to the end of the file name as the generated file is in ASCII format. Saving the file with a .csv extension will allow it to be opened directly with Microsoft Excel™. Page 68 Dukane Manual Part No. 403-570-00 Section 8 - Welder Data Export Software File Write Sets the write behavior for an existing file. Write Over overwrites an existing file, while Add On appends data to the end of the file. Incoming Data This indicator will flash when data is being received from the welder. EXIT Exits program. Profile Graphs The PROFILE GRAPHS tab, shown in Figure 8-2, contains numerical and graphical representations of the following weld parameter profiles with respect to time for the last cycle: 1. Spin Position (rev.) 2. Torque (% of max.) - spin motor torque 3. Vertical Distance (mm) 4. Thrust (% of max.) - vertical actuator thrust 5. Vertical Speed (mm/s) This data is exported by the welder after each cycle if the Graph Export option in the System Setup screen is enabled (see Figure 5-32). It can also be exported on demand by pressing the EXPORT LAST WELD GRAPH DATA button in the Utilities screen (see Figure 5-30). Figure 8–2 PROFILE GRAPHS Tab Plot Data The profile data is displayed in this box with commaseparated values. The first line is a header row, containing the following parameters: total number of samples, sampling rate prior to trigger (ms), sampling rate during weld (ms), sample number at which weld started, torque trigger setting (% of max. / 10). Plot The plot shows all the profile curves (vertical axis) with respect to time (horizontal axis) in milliseconds. The icons immediately above the plot contain tools for a more detailed examination of the plot. Both the horizontal and vertical scale end values can be changed by double-clicking on the desired number and entering a new value. Dukane Manual Part No. 403-570-00 Page 69 Dual Servo Spin Welder User’s Manual Spin Torque Setpoint If torque triggering is enabled, the Torque Trigger value is displayed in this box for reference as a percentage of the spin motor maximum. WRITE TO FILE Writes the torque data to a file. Add a .txt or .csv extension to the end of the file name as the generated file is in ASCII format. Servo and Debug The SERVO PARAMETERS tab provides the ability to import a servo tuning database file. This database contains parameters necessary for proper operation of the machine for different upper tool sizes. It is set at the factory and stored on the welder in non-volatile memory. It will need to be modified only in cases where the database requires customization. The procedure of changing the database should only be performed with guidance from Dukane. Improper execution of the procedures could render the welder inoperable. The DEBUG tab is used to retrieve troubleshooting information from the welder if it is not operating properly. The welder will display the letters DB on the upper left side of the touch screen when it is put in debug mode. If the use of this function becomes necessary, instructions will be provided by Dukane. Page 70 Dukane Manual Part No. 403-570-00 Section 9 - Troubleshooting SECTION 9 Troubleshooting Welding Process............................................73 Material Choice....................................................73 Parameter Effects................................................73 Troubleshooting...................................................73 Welder...........................................................74 Mechanical...........................................................74 Electrical Power...................................................74 Base Interface Cable...........................................74 Machine Display Messages.................................74 Table 9–I Welding Process Troubleshooting..............................75 Table 9–II Machine Display Messages.... 76-79 Dukane Manual Part No. 403-570-00 Page 71 Dual Servo Spin Welder User’s Manual This page intentionally left blank Page 72 Dukane Manual Part No. 403-570-00 Section 9 - Troubleshooting Welding Process Material Choice A family of thermoplastics is usually compatible with its own type and sometimes with other types. Characteristics to consider are the melting point and coefficient of linear expansion. Even members of the same family may cause problems due to differences in the manufacturing process. For example, an extruded Polyethylene (PE) piece may not weld as well to an injection molded PE piece as it would to another extruded PE piece. Parameter Effects Surface Speed Insufficient surface speed may not allow the plastic to reach its melting temperature. Instead, it may simply erode away part of the material and stick by a clawing effect. The surface speed is determined by both the weld joint diameter and the spin motor speed. Axial Speed In conjunction with surface velocity, axial speed determines whether the plastic reaches the melting temperature. Both surface and axial speed are needed to produce sufficient frictional heating. Excessive axial speed may cause one part to scrape away part of the surface and produce a lot of flash but insufficient melt volume. Weld Depth Insufficient welding depth may not allow the melt to propagate far enough into the plastic to achieve the necessary melt volume and the required weld strength. Hold Time Insufficient holding time may prevent the plastic from solidifying and forming a strong permanent bond. Troubleshooting Table 9-I lists some potential problems with the weld process and suggested solutions. Dukane Manual Part No. 403-570-00 Page 73 Dual Servo Spin Welder User’s Manual Welder Mechanical The part fixture should be securely mounted perpendicular to, and centered under the spin axis. Electrical Power Make sure the AC power cord is plugged in to a 240 VAC, 1–phase electrical outlet with a 20 Ampere capacity. Check that the circuit is live. Also refer to Electrical Safety in Chapter 2. Base Interface Cable The cable must be plugged in to the base and the back of the press. If the cable is not plugged in, or has a fault, the base switches will not initiate any action, and the ABORT and POWER indicators on the base status display will not function. Machine Display Messages A list of all machine messages, their meaning, and possible solutions to problems are given in Table 9-II. Page 74 Dukane Manual Part No. 403-570-00 Section 9 - Troubleshooting Table 9–I Problem Overwelding Underwelding Welding Process Troubleshooting Symptom Possible Cause Recommended Solution Excessive weld flash Weld Time or Distance are too large Reduce Weld Time or Distance Welded assembly dimensions are too small Incorrect flash trap design Evaluate and correct flash trap design Low strength weld Weld Time or Distance are too small Increase Weld Time or Distance Material difficult to weld due to low friction coefficient Degrease joint interface to remove mold release agent Welded assembly dimensions are too large Consider changing material (i.e. avoid PTFE) Warped parts Check part dimensions Uneven weld interface Check molding process conditions Fixture and part are not parallel Level fixture where necessary Check that tooling is true to table Poor alignment of parts in tool and/or fixture Improve part tolerance due to cavity Excessive weld flash Nonuniform or inconsistent weld joints Low weld strength Failure when leak tested Part failure in service Change part or tool dimensions Insufficient fixture support Check for parts shifting during welding Provide features in parts for rotational driving (i.e. drive ribs or cavities) Part walls flexing during weld Redesign parts with reinforcing ribs and/or tongueand-groove joints Excessive filler or uneven distribution Reduce amount of filler Improve processing conditions to ensure even distribution of filler Moisture in parts Prevent moisture absorption after molding prior to welding Dry parts before welding Final part orientation different from programmed orientation Parts not aligned properly Deceleration too low Increase spin deceleration as high as possible (if set too high, welder will fault with tracking errors) Vertical speed too high Reduce speed to decreased spin torque required Poor tuning Determine and enter tool inertia correctly into Setup Contact DUKANE for special tuning requirements Parts not held properly by tool or fixture Dukane Manual Part No. 403-570-00 Ensure tooling does not allow excessive play Page 75 Dual Servo Spin Welder User’s Manual Table 9-II Machine Display Messages Message Description Cause Possible Solution Instructions Activate both RUN SWITCHES to reset machine Activate both RUN SWITCHES to reset machine after all motion stops Resetting of machine at startup or recovery requires the activation of both optical switches on base. Resetting of machine at startup or recovery must be initiated when the spin tool and press are stationary. - - - - Faults 1. Check for obstructions to motion outside welder Contact DUKANE service Axis move aborted Expected servo move was not completed Internal machine error Home index edge not found Spin or vertical servo motor internal index pulse(s) not detected Internal machine error Contact DUKANE service Improper servo operation request Servo controller error Internal machine error Contact DUKANE service Jog thrust limit exceeded OR vertical servo runaway detected Press thrust (force) was exceeded during jogging operations OR servo system entered runaway condition Operator E-Stop E-stop activated Part pickup not detected Sensor for upper tool vacuum not activated when expected 1. 2. Part presence sensor did not detect part Optical switches on base were de-activated during weld cycle 1. Part not present 2. Problem with sensor Switches were released after weld cycle started but before the spin motor stopped Reset E-stop switch then reset machine 1. Ensure part is present for pickup 2. Check vacuum between part and tool (line connections, vacuum generator, tool wear) 1. Ensure part is present 2. Troubleshoot sensing components Once weld cycle is started, ensure switches remain activated until spin motor stops (i.e. at beginning of hold phase) Motor controller error Internal machine error Contact DUKANE service Motor controller error Internal machine error Servo database import failed Servo tuning database import failed 1. 2. 3. Import procedure problem Cable problem Machine component failure Servo tuning data not found for the tooling inertia entered 1. Servo param select by inertia failed Slide In timeout Slide did not move to the commanded position within the allowable time Tooling inertia entered is outside allowable range Servo tuning database is missing Air pressure to slide too low Slide limit switch improperly positioned Slide jammed Contact DUKANE service 1. Contact DUKANE for import procedure 2. Check that the correct cable is used and that it is securely connected 3. Contact DUKANE service 1. Enter tooling inertia within limits stated in this manual 2. Contact DUKANE regarding importing servo tuning database Part presence not detected RUN SWITCH(ES) released too soon Servo CPU no Idle before Run Servo CPU program error Slide Out timeout Spin aborted Spin at travel limit Page 76 see Slide In timeout fault Weld cycle was aborted Number of servo motor rotations has exceeded controller counting capability 2. 1. Press is jogged in a way to produce a force on the parts larger than allowed in jog mode (most common cause) 2. Servo system feedback is malfunctioning Operator pressed E-stop switch 2. 1. 2. 3. No part present to pick up Loss of vacuum between part and tool 1. 2. 1. 2. 3. Prevent press from applying a large force on the parts in jog mode Contact DUKANE service Increase air pressure Adjust slide switch position Ensure slide can move freely Internal machine error Contact DUKANE service Weld time or number of rotations too large Reduce weld time, distance, or number of rotations Dukane Manual Part No. 403-570-00 Section 9 - Troubleshooting Table 9-II Machine Display Messages (continued) Message Spin motor not on Spin servo amplifier faulted Description Spin servo amplifier does not power up There is a problem with the spin servo amplifier Cause Internal machine error Contact DUKANE service 1. 2. 1. 2. 3. 3. 4. Spin servo tracking error Spin weld axis aborted The spin servo motor was not able to execute the spinning motion programmed in the setup Expected spin servo move was not completed Timeout on servo CPU Motor controller error Thread 1(thrd1) Timeout on servo response Servo system to command start communication error Press travel distance Vertical at travel limit exceeded controller counting capability Vertivcal servo amplifier Vertical motor not on does not power up Vertical servo amplifier faulted There is a problem with the vetical servo amplifier The vertical servo actuator was not able to execute the Vertical servo tracking error press motion programmed in the setup Possible Solution 1. 2. 3. 4. Excessive spin deceleration Excessive press weld or hold speed Amplifier disabled due to excessive temperature Amplifier failed Excessive press weld or hold speed(s) Excessive spin deceleration Joint weld diameter too large Improper tuning 4. 1. 2. 3. 4. 1. Internal machine error 2. Reduce deceleration Reduce speed(s) a) Reduce machine duty cycle b) Ensure temperature around machine is within operational limits Contact DUKANE service Reduce speed(s) Reduce deceleration Use welder model with larger spin torque capability Ensure correct tool inertia is entered in touch screen Check for obstructions to motion outside welder Contact DUKANE service Internal machine error Contact DUKANE service Internal machine error Contact DUKANE service Press travel too large Reduce weld time / distance / number of rotations, or hold distance Internal machine error Contact DUKANE service 1. 2. Amplifier disabled due to excessive temperature Amplifier failed 1. 2. a) Reduce machine duty cycle b) Ensure temperature around machine is within operational limits Contact DUKANE service Excessive press weld or hold speed Reduce speed(s) 1. Vertical weld axis aborted Expected vertical servo move was not completed Weld trigger position is below vertical travel lower limit Cycle will not start since the 1. programmed press travel is larger than the set limit 2. Internal machine error Vertical travel lower limit set too high Trigger position too large 2. 1. 2. Check for obstructions to motion outside welder Contact DUKANE service Lower vertical travel lower limit, if possible. Decrease Trigger position Table 9-II continued. . . Dukane Manual Part No. 403-570-00 Page 77 Dual Servo Spin Welder User’s Manual Table 9-II Machine Display Messages (continued) Message Description Cause Possible Solution Errors Axis stopped before weld end Spin stop before weld start Timeout on finding vertical lower limit position Timeout on torque sense Timeout on User Upper Part vacuum detect Motion on spin or vertical axes stopped before weld ended Servo controller error Moving the vertical lower limit up to desired position failed The torque trigger was not detected within the allowable time Vacuum was not detected within timeout 1. Internal machine error Check for obstructions to motion outside welder 2. Contact DUKANE service Contact DUKANE service Limit mechanism malfunctioning Contact DUKANE service Internal machine error 1. 2. 1. 2. 3. Torque trigger value set too high Parts not loaded Insufficient vacuum Vacuum sensor threshold set too high Improper part pickup position Programmed weld distance Timeout on vertical 1. Timeout too short not reached within the distance in constant torque 2. Constant Torque maximum specified time with Constant mode vertical speed set too low Torque option enabled Vertical (press) motion Vertical stop before starting stopped before spin motion Internal machine error spin started Vertical servo contact sensing failed Weld aborted by CYCLE TIME limit Weld aborted by ROTATE limit Weld aborted by RPM limit Weld aborted by THRUST limit Weld aborted by TORQUE limit Weld aborted by vertical servo stop Welder did not detect programmed thrust level Weld cycle stopped because cycle time exceeded programmed process limit Weld cycle stopped because number of revolutions exceeded programmed process limit Weld cycle stopped because motor speed was outside programmed process limit Weld cycle stopped because weld thrust was outside programmed process limits Weld cycle stopped because motor torque was outside programmed process limits Vertical (press) motion stopped before spin motion weld was complete Weld ended at TIME limit Page 78 Reduce torque trigger value Ensure parts are properly loaded 1. 2. Increase vacuum capability Decrease required vacuum sensing level Adjust Position (mm) value in Part Pickup option Increase timeout value Increase value of VERT. Max (mm/s) setting in Weld Parameters screen in setup menu Check for obstructions to motion outside welder Contact DUKANE service Ensure parts are loaded properly Increase Timeout (s) value Check the Position (mm) value – it should be set slightly (<5mm) above expected part contact Check parts to be welded, fixturing, etc. If practical, widen process limit window or adjust setup parameters Check parts to be welded, fixturing, etc. If practical, widen process limit window or adjust setup parameters Check parts to be welded, fixturing, etc. If practical, widen process limit window or adjust setup parameters Check parts to be welded, fixturing, etc. If practical, widen process limit window or adjust setup parameters Check parts to be welded, fixturing, etc. If practical, widen process limit window or adjust setup parameters 3. 1. 2. 1. 2. 1. With Part Pickup option enabled 2. with Thrust Sense, part contact was 3. not detected 1. 2. Weld process problem Limits too narrow for weld process 1. 2. Weld process problem Limits too narrow for weld process 1. 2. Weld process problem Limits too narrow for weld process 1. 2. Weld process problem Limits too narrow for weld process 1. 2. Weld process problem Limits too narrow for weld process Excessive press weld speed 1. Weld duration too short 1. 2. Weld Time, Rotations, or Distance too short Weld duration generated by 2. Deceleration too low programmed parameters is NOTE: the time for deceleration is too short counted as part of the total weld time or number of rotations Weld cycle stopped 1. Weld process problem because weld time was 2. Limits too narrow for weld outside programmed process process limits 1. 2. 1. 2. 1. 2. 1. 2. 1. 2. Reduce press weld speed 1. 2. 1. 2. Increase Weld Time, Rotations, or Distance above the “Min.” value indicated on the Weld Parameters setup screen Increase spin deceleration Check parts to be welded, fixturing, etc. If practical, widen process limit window or adjust setup parameters Dukane Manual Part No. 403-570-00 Section 9 - Troubleshooting Table 9-II Machine Display Messages (continued) Message Description Cause Possible Solution Warnings Battery life limit, press Continue Lower limit is greater than upper limit Move to Top Of Stroke before welding Process RPM is too high TOS to trigger distance is too small Vertical weld speed is too high Weld duration too short Weld trigger position is below vertical travel lower limit. The batteries in the PLC and touch screen need to be replaced Lower process limit is greater than Upper process limit Press head is not at Top of Stroke Programmed spin motor weld speed is too high Distance between Top Of Stroke position and Trigger position is too small Programmed press weld speed is too high Batteries have not been replaced in Contact DUKANE service for information approximately 5 years on battery replacement Improper process limit values entered Correct process limit values Machine jogged away from Top Of Stroke position Move press to Top Of Stroke position by using the “TOP OF STROKE Position” screen in setup menu Programmed spin weld speed is larger than machine capability Trigger position is set too high or Top Of Stroke position is set too low Programmed press weld speed is larger than machine capability 1. Weld Time, Rotations, or Distance too short Weld duration generated by 2. Deceleration too low programmed parameters is NOTE: the time for deceleration is too short counted as part of the total weld time or number of rotations Cycle will not start since the 1. Vertical travel lower limit set programmed press travel is too high larger than the set limit 2. Trigger position too large Dukane Manual Part No. 403-570-00 Reduce spin motor weld RPM Increase Trigger position value or decrease Top of Stroke position value Reduce press weld speed 1. 2. 1. 2. Increase Weld Time, Rotations, or Distance above the “Min.” value indicated on the Weld Parameters setup screen Increase spin deceleration Lower vertical travel lower limit, if possible. Decrease Trigger position Page 79 Dual Servo Spin Welder User’s Manual This page intentionally left blank Page 80 Dukane Manual Part No. 403-570-00 Section 10 - Maintenance SECTION 10 Maintenance Touch Screen Display....................................83 AC Power Cord.............................................83 Maintenance..................................................83 Dukane Manual Part No. 403-570-00 Page 81 Dual Servo Spin Welder User’s Manual This page intentionally left blank Page 82 Dukane Manual Part No. 403-570-00 Section 10 - Maintenance Touch Screen Display Do not use any solvents or abrasive cleaners on the touch screen. Apply a small amount of computer cleaner to a soft towel first. Clean the panel with the moistened towel. Do not spray or apply a cleaner directly to the interface panel. Remove grease by rubbing lightly with isopropyl alcohol. Afterward, provide a final cleaning using a CAUTION Never use anything sharp on the touch screen. Only use your finger. The screen is intended for industrial use, but can be damaged by scratching or puncturing. mild detergent and rinse with clean water. Do not use any sharp objects on the display. It should not be touched unnecessarily. It is lit by a long–life LED backlight and should not require any maintenance other than occasional cleaning. AC Power Cord The AC power cord should be kept in good condition and free from any cuts and abrasions. The AC plug should be straight with no bent prongs. Maintenance Visually inspect cables once a week, and replace or repair if necessary. Lubricate the unpainted area on the front of the support column as needed with conventional grease. Dukane Manual Part No. 403-570-00 Page 83 Dual Servo Spin Welder User’s Manual This page intentionally left blank Page 84 Dukane Manual Part No. 403-570-00 Section 11 - Contact Dukane SECTION 11 Contacting Dukane Contacting Dukane........................................87 Dukane Manual Part No. 403-570-00 Identify Equipment...............................................87 Ultrasonics Division..............................................87 Website................................................................87 Page 85 Dual Servo Spin Welder User’s Manual This page intentionally left blank Page 86 Dukane Manual Part No. 403-570-00 Section 11 - Contact Dukane Contacting Dukane Identify Equipment When contacting Dukane about a service–related problem, be prepared to give the following information: •SVT Model number and serial number •Any error indicators from the Touch Screen Display •Description of the problem and steps taken to resolve it Some problems can be solved over the telephone, so it is best to call from a telephone located near the equipment. Ultrasonics Division Mailing Address: Main Phone: Main Fax: Service & Parts Fax: Dukane Ultrasonics 2900 Dukane Drive St. Charles, IL 60174 USA (630) 797–4900 (630) 797–4949 (630) 584–0796 Website The website has information about our products, processes, solutions, and technical data. Downloads are available for many kinds of literature. You can locate your local representative at: www.dukcorp.com/us/sales/intsales.htm Dukane Manual Part No. 403-570-00 Page 87 Dual Servo Spin Welder User’s Manual This page intentionally left blank Page 88 Dukane Manual Part No. 403-570-00 Section 12 - Specifications SECTION 12 Specifications Tooling Specifications....................................91 Machine Weight.............................................91 Power Requirements.....................................97 Operating Environment.................................97 Dimensions & 5–View Drawing.....................92 Identification Numbers...................................93 Regulatory Agency Compliance....................93 Dukane Manual Part No. 403-570-00 Page 89 Dual Servo Spin Welder User’s Manual This page intentionally left blank Page 90 Dukane Manual Part No. 403-570-00 Section 12 - Specifications Tooling Specifications Tooling Size Refer to Table 5-I for maximum tooling sizes. Machine Weight The Dual Servo Spin Welder weighs approximately 400 lbs. (182 kg). It should be mounted on a table or bench capable of supporting 650 lbs. (295 kg) to accommodate the additional force imposed by the vertical movement of the motor and slide during the spin welding operation. Use mechanical means such as a forklift or hoist to place the servo spin welder on its work bench. There are two 3/4 inch lifting eyes located at the top of the column (see Figure 3–7) for a lifting ring or strap. 240 220 Volt AC Socket (NEMA 6–20R) Power Requirements The Dual Servo Spin Welder requires a 240 VAC 1– phase outlet rated at 20 Amps. All welder models use the same power cord and plug. The AC power cord has a 240 VAC, single phase plug which is designed for a NEMA 6–20R configuration wall receptacle shown in Figure 12–1. Operating Environment Figure 12–1 240V AC Single–Phase AC Receptacle Operate the Dual Servo Spin Welder within these guidelines: Temperature: 40°F to 95°F (+5°C to +35°C) Altitude: 4570 m (15,000 ft) Air Particulates: Keep the welder dry. Minimize exposure to moisture, dust dirt, smoke and mold. Humidity: 5% to 95% non–condensing @ +5°C to +30°C Dukane Manual Part No. 403-570-00 Page 91 Dual Servo Spin Welder User’s Manual Figure 12–2 Dual Servo Spin Welder Dimensions NOTE: All specifications are subject to change without notice. The specifications listed are current at the time of publication. Page 92 Dukane Manual Part No. 403-570-00 Section 12 - Specifications Identification Numbers Welder Model & Serial Number The serial number and model number tag for the Dual Servo Spin Welder are located either on the covers on the back of the machine or on the underside of the motor mounting plate just above the tooling hub. Regulatory Agency Compliance CE Marking This mark on your equipment certifies that it meets the requirements of the EU (European Union) concerning interference causing equipment regulations. CE stands for Conformité Europeéne (European Conformity). The Dual Servo Spin Welder complies with the following CE requirements. • The EMC Directive 89/336/EEC • The Low Voltage Directive 73/23/EEC. • The Machinery Directive 89/392/EEC using EN60204–1:1993 Safety of Machinery – Electrical Equipment of Machines. Part 1: Specification for General Requirements. Dukane Manual Part No. 403-570-00 CAUTION DO NOT make any modifications to the Dual Servo Spin Welder. The changes may result in violating one or more regulations under which this equipment is manufactured. Page 93 Dual Servo Spin Welder User’s Manual This page intentionally left blank Page 94 Dukane Manual Part No. 403-570-00 Appendix A APPENDIX A Connector Pinouts Base Interface Connector..............................97 User I/O Connector.......................................98 Slide Kit Connector........................................99 Data Port Connector....................................100 Automation Wiring............................... 100-101 Dukane Manual Part No. 403-570-00 Page 95 Dual Servo Spin Welder User’s Manual This page intentionally left blank Page 96 Dukane Manual Part No. 403-570-00 Appendix A Base Interface Connector The base interface connector is a DB 9–socket connector. A closeup of the base connector is shown in Figure 2–2, and a closeup of the rear thruster connector is shown in Figure 3–8. The pin numbers for the connector are shown in Figure A–1. The pin assignments and signal descriptions are given in Table A—I. A schematic of the Operate and Abort switches connected through the base Interface Connector is shown in Figure A-5. 55 99 66 Figure A–1 Base Interface Connector Signal Description Pin 1 Left Optical Switch Output 2 Right Optical Switch Output 3 +24 VDC Switched by E-Stop (Power OFF when Abort switch pushed) 4 Abort Signal 5 Ground 6 Ground 7 Ground 8 Automation Input 9 +24 VDC Power Table A-I Dukane Manual Part No. 403-570-00 11 Pin Assignments and Signal Description for the Base Interface Connector Page 97 Dual Servo Spin Welder User’s Manual User I/O Connector The User I/O connector is a HD–15 connector located directly above the base interface connector on the rear of the thruster. The connector is shown in Figure 3–8. This connector provides access to signals for interfacing to custom automation equipment. The pin numbers for the connector are shown in Figure A–2. The pin assignments and signal descriptions are given in Table A-II. 5 4 3 2 1 10 6 15 14 13 12 11 Figure A–2 User I/O Connector Input signals, such as Vacuum On Sense, can be configured as sourcing or sinking using 24 VDC and Input Common. For example, to activate the Vacuum On Sense input, connect Input Common to ground and provide 24VDC on the input pin. Outputs, such as Ready Status, are provided through relays rated at 1A@24VDC. Outputs provide contact closure to Output Common when active. Pin Signal Description Function 1 Top-Of-Stroke Status Output 2 Vacuum On Output, Part Pickup ON when welder calls for vacuum to be turned ON with Part Pickup mode enabled 3 Bad Part Status Output ON when weld process is outside defined limits with Bad option enabled 4 Suspect Part Status Output ON when weld process is outside defined limits with Suspect option enabled 5 Vacuum On Output, No Part Pickup ON when welder calls for vacuum to be turned ON with Part Pickup mode disabled (signal is deactivated if idle time between cycles is more than 5 minutes; one of the RUN SWITCHES must be turned on to reactivate signal) 6 Ready Status Output ON when welder is ready to initiate a weld cycle 7 Output Common Output Common connection 8 Fixture Clamp 1 (Right) Output Function depends on configuration: Without slide or In/Out slide: ON at start of cycle; OFF at end of cycle With Left/Right slide: ON at start of cycle when slide is commanded to move to In (Right) position; OFF at the end of cycle. 9 Fixture Clamp 2 (Left) Output Function depends on configuration: Without slide or In/Out slide: not used With Left/Right slide: ON at start of cycle when slide is commanded to move to Out (Left) position; OFF at the end of cycle 10 Spare Output 2 Not Used 11 Spare Output 3 Not Used 12 Vacuum On Sense Input Activate when sufficient vacuum in upper tool has been detected 13 Automation Start Input Activate to initiate a weld cycle (500 ms min.) with Start Type set to Automation 14 Input Common Input Common Connection 15 Spare Input 1 Not Used Table A-II Page 98 ON when press is at Top-of-Stroke position Pin Assignments and Signal Description for the User I/O Connector Dukane Manual Part No. 403-570-00 Appendix A Slide Kit Connector The slide kit interface is a round 16–pin connector located directly to the right of the base interface connector on the rear of the thruster. The Dual Servo Spin Welder is prewired to accept a Dukane slide kit without any modification or reprogramming of the press. The connector is shown in Figure 3–8. The connector will interface to a Left/Right or an In/Out slide kit, and provides activation signals to extend and retract the slide table as well as readouts of the table position switches. It also provides an input for a signal from a part presence sensor. The pin numbers for the connector are shown in Figure A–3. The pin assignments and signal descriptions are given in Table A-III. Pin 1 2 3 6 7 10 11 14 15 16 Figure A–3 Slide Kit Connector Signal Description Function 1 Ground Ground connection 2 (No Connection) --- 3 Slide Out Sense (Left) Input Activate when slide is in Out (Left) position 4 Output Common Output common connection 5 Top-of-Stroke Output (Closed at TOS) ON when press is at Top-of-Stroke position 6 Slide In Sense (Right) Input Activate when slide is in In (Right) position 7 In/Out Slide Identificaiton Input Activate to designate connected slide as In/Out type (ensure Pin 8 is disconnected) 8 Left/Right Slide Identificaiton Input Activate to designate connected slide as Left/Right type (ensure Pin 7 is disconnected) 9 Part Presence Sensor Input Activate when part presence is sensed 10 Ground Ground connection 11 Slide In (Right) Output ON when welder calls for slide to move to the In (Right) position 12 Slide Home Status Output ON when slide is in Home position NOTE: home slide position is Out (Left) 13 Ready Status Output ON when welder is ready to initiate a weld cycle 14 Slide Out (Left) Output ON when welder calls for slide to move to the Out (Left) Position 15 Ground Ground connection 16 +24V DC Switched (Power OFF when Abort switch pushed) +24V DC switched connection Table A-III Pin Assignments and Signal Description for the Slide Kit Connector Dukane Manual Part No. 403-570-00 Page 99 Dual Servo Spin Welder User’s Manual Data Port Connector The computer interface connector is located on the back of the welder above the power switch as shown in Figure A-4. It provides a computer connection to export part data and weld profile graphs. The pin numbers for the connector are shown in Figure A–4. Automation Wiring If the Dual Servo Spin Welder will be used in Automation mode, the signals normally generated by the optical switches and abort switch must be reproduced. Figure A-6 shows a wiring diagram and a description of the required signals. Figure A–4 Data Port Connector Location 5 9 1 6 Figure A–5 Data Port Connector Pins Page 100 Dukane Manual Part No. 403-570-00 Appendix A Figure A–5 Schematic of Operate and Abort Figure A–6 Wiring for Automation Dukane Manual Part No. 403-570-00 Page 101 Dual Servo Spin Welder User’s Manual This page intentionally left blank Page 102 Dukane Manual Part No. 403-570-00 Appendix B APPENDIX B Tooling Moment of Inertia........................................105 Explanaton of Inertia..........................................105 Calculating the Moment of Inertia...................... 105 Tooling and Fixure Design...........................104 Dukane Manual Part No. 403-570-00 Page 103 Dual Servo Spin Welder User’s Manual This page intentionally left blank Page 104 Dukane Manual Part No. 403-570-00 Appendix B Moment of Inertia Explanation of Inertia The moment of inertia is a measure of the mass and the mass distribution of the tool. It is defined mathematically as the product of the mass times the distance of that mass from the axis of rotation squared. For a cylinder spinning around its axis, the formula for the moment of inertia is: Inertia = 1/8 *M*D2, where Inertia is in kg-cm2 M is the mass in kg D is the cylinder diameter in cm Taking into account material density, the formula can be rewritten as: Inertia = .098 *ρ *L *D4, where ρ is the density in kg/cm3 L is the cylinder length in cm Calculating the Moment of Inertia Useful Unit Conversions 1 in. = 2.54 cm = .025 m 1 lb. = 0.45 kg 1 cm = 0.39 in. 1 m = 39.4 in. 1 kg = 2.20 lb. For spin welder applications, most tools will have a geometry close to a cylinder with internal cutouts for the parts. To estimate the inertia of such a tool, first calculate the inertia of a solid cylinder, then the inertia of the void created for the part using the density of the tool material, and then subtract the two values. Example: Aluminum tool with outside dimensions: D = 4 in. = 10.1 cm L = 2.5 in. = 6.4 cm P = 0.1 lb/in.3 (density of Aluminum) = .0028 kg/cm3 Part void: D = 3 inches = 7.6 cm L = 1 inch = 2.5 cm The inertia would be calculated as follows: Inertia, cylinder = .098* .0028* 6.4* (10.1)4 = 18.1 kg-cm2 Inertia, void = .098* .0028* 2.5* (7.6)4 = 2.3 kg-cm2 Inertia, tool = Inertia, cylinder – Inertia, void = 16 kg-cm2 Dukane Manual Part No. 403-570-00 Page 105 Dual Servo Spin Welder User’s Manual Tool and Fixture Design The most important aspect of tool and fixture design is that it is safe. Please note that using tools not provided by Dukane may result in voiding of the warranty – consult Dukane for details. Several aspects should be considered when tooling is not purchased from Dukane: • tool nest should be designed such that part being held is firmly retained in the tool so that it does not fall out before being welded • tool should surround part being held where possible – the exterior of the tool should be a continuous cylindrical surface (i.e. avoid protruding parts) • rotational play between tool and part should be minimized – this will affect the angular orientation accuracy and repeatability • tool should be as light as possible to allow for rapid deceleration and to keep machine energy consumption to a minimum • tool should be balanced as accurately as possible to avoid excessive machine vibration and bearing wear • bottom fixture should grip the part firmly to maintain accurate weld orientation and prevent undesirable vibrations during welding Page 106 Dukane Manual Part No. 403-570-00 Appendix C APPENDIX C Optional Features Upper Tool Vacuum ....................................109 Remote Touch Screen ................................110 Dukane Manual Part No. 403-570-00 Page 107 Dual Servo Spin Welder User’s Manual This page intentionally left blank Page 108 Dukane Manual Part No. 403-570-00 Appendix C Upper Tool Vacuum As an aid in holding the spinning part, the welder can optionally be equipped with vacuum in the upper tool. Two different kits are available: a complete vacuum system kit, which includes all components needed to generate, control, and transfer the vacuum to the tool (#438-963 for models SVT032VR & SVT042VR, #438-964 for model SVT012VR), and a vacuum transfer kit, which provides a means for transferring vacuum (not supplied) from a non-rotating fitting to the rotating tool (#438-952 for models SVT032VR & SVT042VR, #438-958 for model SVT012VR). The vacuum system kit is shown in Figure C-1 and the transfer kit in Figure C-2. When vacuum is supplied to the 5/16” (8mm) air fitting shown in Figure C-2, it passes through the inside of the tooling hub and exits on the inside of the O-ring at the bottom. With holes between the top of the tool and the part cavity, the vacuum holds the part in the tool while it is spinning or at rest. The welder is programmed to drive the vacuum on and off in one of two ways. With Part Pickup mode disabled, the vacuum signal (pin 5 on User I/O connector) is ON when the machine is ready to run a cycle, and OFF at the beginning of the hold phase. In this mode, the vacuum shuts off after a period of inactivity of 5 minutes to conserve air. To re-energize the vacuum, one of the RUN switches must be activated. With Part Pickup mode enabled, the vacuum signal (pin 2 on User I/O connector) is ON after pickup time elapses, and OFF at the end of the hold phase. Please refer to Table A-II for vacuum connection pinouts. Additional details on the vacuum system are provided in Dukane document #403-580 (Servo Spin Welder Vacuum System User Guide). VACUUM CONTROL ENCLOSURE VACUUM ON HUB VACUUM TRANSFER ASSEMBLY Figure C-1 Upper Tool Vacuum System Dukane Manual Part No. 403-570-00 Page 109 Dual Servo Spin Welder User’s Manual VACUUM INLET (NON-ROTATING) VACUUM TRANSFER ASSEMBLY VACUUM ON HUB Figure C-2 Upper Tool Vacuum Transfer Assembly Remote Touch Screen In situations where it is desriable to provide access to the touch screen some distance away from the welder, the remote touch screen kit (#438-965) can be used. The touch screen is mounted in a separate enclosure as shown in Figure C-3, which can be up to 15 ft. (4.5 m) away from the welder. Two cables (power and communcations) are needed to connect the touch screen with the welder. The enclosure includes mounting brackets for attachment to an external support (refer to Dukane drawing #4002283 for dimensions). This kit can be used with any Dual Servo Spin Welder model. Page 110 Figure C-3 Remote Touch Screen Components Dukane Manual Part No. 403-570-00 Dukane ISO ISO CERTIFICATION Dukane chose to become ISO 9001:2000 certified in order to demonstrate to our customers our continuing commitment to being a quality vendor. By passing its audit, Dukane can assure you that we have in place a well–defined and systematic approach to quality design, manufacturing, delivery and service. This certificate reinforces Dukane's status as a quality vendor of technology and products. To achieve ISO 9001:2000 certification, you must prove to one of the quality system registrar groups that you meet three requirements: 1. Leadership 2. Involvement 3. Quality in Line Organizations and Quality System Infrastructure. The ISO 9001:2000 standard establishes a minimum requirement for these requirements and starts transitioning the company from a traditional inspection–oriented quality system to one based on partnership for continuous improvement. This concept is key in that Dukane no longer focuses on inspection, but on individual processes. Dukane's quality management system is based on the following three objectives: 1. Customer oriented quality. The aim is to improve customer satisfaction. 2. Quality is determined by people. The aim is to improve the internal organization and cooperation between staff members. 3. Quality is a continuous improvement. The aim is to continuously improve the internal organization and the competitive position. ISO 9001:2000 CERTIFIED Dukane products are manufactured in ISO registered facilities. Please Refer to our Website At: www.dukcorp.com/us/sales/intsales.htm To Locate Your Local Representative Dual Servo Welder User's Manual Part No. 403–570–00 www.dukcorp.com/us Printed in the United States of America Dukane Corporation • Ultrasonics Division • 2900 Dukane Drive St. • Charles, Illinois 60174 USA • TEL (630) 797-4900 • FAX (630) 797–4949