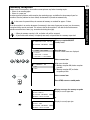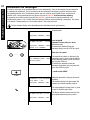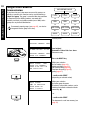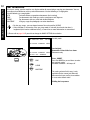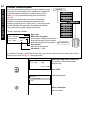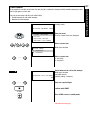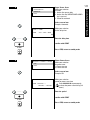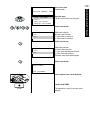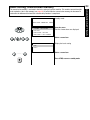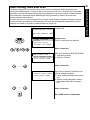
1
1
CONTENTS
DP 120F
Instruction manual
Dear Reader.
Thank you for your interest in a Toshiba Fax machine!
To allow you to get your fax machine up and running as soon
as possible, this manual only covers the most important criteria.
Complete operating instructions can be found on the CD-ROM
included with the accessories.
All items documented on the CD are highlighted in grey
both in the table of contents.
Please refer to the corresponding references on the CD for
further information
(IBM®-compatible format).
CONTENTS
2
CONTENTS
PREPARATION
Unpacking . . . . . . . . . . . . . . . . . . . . . . . . . . . . . . . 6
Remove transport fittings: . . . . . . . . . . . . . . . . . . . 7
Prepare and insert the printer unit . . . . . . . . . . . . . 7
Change toner . . . . . . . . . . . . . . . . . . . . . . . . . . . . . 8
Replace drum unit . . . . . . . . . . . . . . . . . . . . . . . . . 9
Connecting your fax machine . . . . . . . . . . . . . . . . 9
How to insert the recording paper: . . . . . . . . . . . 10
Install exit paper trays: . . . . . . . . . . . . . . . . . . . . 10
Insert memory card (optional) . . . . . . . . . . . . . . . 11
54
55
56
57
58
59
60
61
62
POLLING
INSTALLATION
The menu system . . . . . . . . . . . . . . . . . . . . . . . .
The combination keypad . . . . . . . . . . . . . . . . . . .
Enter user name . . . . . . . . . . . . . . . . . . . . . . . . .
Enter terminal ID . . . . . . . . . . . . . . . . . . . . . . . . .
Connection to PABX,
obtaining a public line/Digital PABXs . . . . . . . . .
Set language . . . . . . . . . . . . . . . . . . . . . . . . . . . .
Set date and time . . . . . . . . . . . . . . . . . . . . . . . .
Transmission options, protected transmission . .
Transmission options, reduced speed . . . . . . . . .
Transmission options, send cover sheet . . . . . . .
Transmission options, send after scan . . . . . . . .
Chain dialling . . . . . . . . . . . . . . . . . . . . . . . . . . . .
Call redial . . . . . . . . . . . . . . . . . . . . . . . . . . . . . . .
Resend (retained job) . . . . . . . . . . . . . . . . . . . . .
Cancel a retained job (with retain job) . . . . . . . .
Cancel transmission . . . . . . . . . . . . . . . . . . . . . .
12
14
15
17
18
20
21
Reserve polling . . . . . . . . . . . . . . . . . . . . . . . . . .
Reserve polling, permanent (general infobox) . . .
Reserve polling, append documents . . . . . . . . . .
Cancel polling reservation . . . . . . . . . . . . . . . . . .
Single polling . . . . . . . . . . . . . . . . . . . . . . . . . . . .
Multiple polling . . . . . . . . . . . . . . . . . . . . . . . . . .
Cancel polling . . . . . . . . . . . . . . . . . . . . . . . . . . .
Program Continous Polling . . . . . . . . . . . . . . . . .
Reverse direction . . . . . . . . . . . . . . . . . . . . . . . .
64
66
67
68
69
70
72
73
75
RECEPTION OF DOCUMENTS
Set standby mode . . . . . . . . . . . . . . . . . . . . . . . .
Reception reduction . . . . . . . . . . . . . . . . . . . . . .
Memory reception . . . . . . . . . . . . . . . . . . . . . . . .
Secure RX . . . . . . . . . . . . . . . . . . . . . . . . . . . . . .
Activate and deactivate Secure Rx . . . . . . . . . . .
Correct sequence printout . . . . . . . . . . . . . . . . . .
Multiple printout . . . . . . . . . . . . . . . . . . . . . . . . .
Delete reception . . . . . . . . . . . . . . . . . . . . . . . . .
Reception protection . . . . . . . . . . . . . . . . . . . . . .
Local copy . . . . . . . . . . . . . . . . . . . . . . . . . . . . . .
22
23
25
26
29
31
32
33
34
35
TRANSMIT DOCUMENTS
Document format . . . . . . . . . . . . . . . . . . . . . . . .
Automatic fax messages . . . . . . . . . . . . . . . . . .
Stack mode . . . . . . . . . . . . . . . . . . . . . . . . . . . . .
Useful job management . . . . . . . . . . . . . . . . . . .
Important transmission . . . . . . . . . . . . . . . . . . . .
Direct transmission . . . . . . . . . . . . . . . . . . . . . . .
Transmission using alpha dial . . . . . . . . . . . . . . .
Transmission one-touch dial . . . . . . . . . . . . . . . .
Faxing with telephone directory . . . . . . . . . . . . .
Single multi-address transmission . . . . . . . . . . .
Stored broadcast . . . . . . . . . . . . . . . . . . . . . . . . .
Monitoring (direkt) . . . . . . . . . . . . . . . . . . . . . . .
Monitoring (by job) . . . . . . . . . . . . . . . . . . . . . . .
Set resolution . . . . . . . . . . . . . . . . . . . . . . . . . . .
Set contrast . . . . . . . . . . . . . . . . . . . . . . . . . . . .
Transmission options, ECM on/off . . . . . . . . . . .
Transmission options, number of pages . . . . . . .
37
38
39
40
41
42
43
44
45
46
47
48
49
50
51
52
53
STORE NUMBERS
Alphabet dial memory . . . . . . . . . . . . . . . . . . . . .
Alphabet dial options . . . . . . . . . . . . . . . . . . . . .
Modify ABB numbers . . . . . . . . . . . . . . . . . . . . .
Delete ABB numbers . . . . . . . . . . . . . . . . . . . . . .
One-touch dial keys . . . . . . . . . . . . . . . . . . . . . . .
Cancel one-touch dial keys . . . . . . . . . . . . . . . . .
Define groups . . . . . . . . . . . . . . . . . . . . . . . . . . .
Edit groups . . . . . . . . . . . . . . . . . . . . . . . . . . . . .
Cancel groups . . . . . . . . . . . . . . . . . . . . . . . . . . .
77
79
80
81
82
84
85
87
88
REPORT PRINTS
Program selection list . . . . . . . . . . . . . . . . . . . . . 89
Transmission reports . . . . . . . . . . . . . . . . . . . . . . 89
Transmission and reception journal . . . . . . . . . . . 95
The function list . . . . . . . . . . . . . . . . . . . . . . . . . . 98
Reservation list . . . . . . . . . . . . . . . . . . . . . . . . . . 98
The dial number lists . . . . . . . . . . . . . . . . . . . . . 101
Department list . . . . . . . . . . . . . . . . . . . . . . . . . 102
Mains failure report . . . . . . . . . . . . . . . . . . . . . . 102
Delayed fax job . . . . . . . . . . . . . . . . . . . . . . . . . 103
3
ADVANCED SETTINGS
104
105
106
107
109
110
112
112
114
115
116
118
120
121
122
123
124
125
126
127
128
129
130
131
132
133
134
POSSIBLE PROBLEMS
Diagnostic program . . . . . . . . . . . . . . . . . . . . . .
Error messages in the display . . . . . . . . . . . . . .
Error codes in journal . . . . . . . . . . . . . . . . . . . .
Transmission problems . . . . . . . . . . . . . . . . . . .
Receiving problems . . . . . . . . . . . . . . . . . . . . . .
Cleaning document scanner . . . . . . . . . . . . . . .
Remove document jam . . . . . . . . . . . . . . . . . . .
How to clear a recording paper jam . . . . . . . . .
Cleaning the printer unit . . . . . . . . . . . . . . . . . .
Remote maintenance (COMLINE) . . . . . . . . . . .
Supply order . . . . . . . . . . . . . . . . . . . . . . . . . . .
Download . . . . . . . . . . . . . . . . . . . . . . . . . . . . .
Connection to PABX . . . . . . . . . . . . . . . . . . . . .
136
139
142
143
145
146
146
147
148
149
150
150
151
UK CONNECTION INFORMATION
EPA ENERGY STAR . . . . . . . . . . . . . . . . . . . . . . 152
Declaration of conformity . . . . . . . . . . . . . . . . . 152
INDEX
Index . . . . . . . . . . . . . . . . . . . . . . . . . . . . . . . . . 153
CONTENTS
Set transmission header position . . . . . . . . . . .
Reception trailer (RTI) . . . . . . . . . . . . . . . . . . . .
Permanent monitoring . . . . . . . . . . . . . . . . . . . .
Call redial . . . . . . . . . . . . . . . . . . . . . . . . . . . . . .
Volume of acoustic signals . . . . . . . . . . . . . . . .
Power saver (stand by) . . . . . . . . . . . . . . . . . . .
Cost centre management . . . . . . . . . . . . . . . . .
Department code . . . . . . . . . . . . . . . . . . . . . . . .
Modify or delete a department . . . . . . . . . . . . .
Disable department code . . . . . . . . . . . . . . . . .
Divider sheets . . . . . . . . . . . . . . . . . . . . . . . . . .
Cover sheet . . . . . . . . . . . . . . . . . . . . . . . . . . . .
Retain jobs . . . . . . . . . . . . . . . . . . . . . . . . . . . .
Query current job status . . . . . . . . . . . . . . . . . .
Basic setting, document length . . . . . . . . . . . .
Basic setting, transmission memory . . . . . . . .
Basic setting, resolution and contrast . . . . . . . .
Basic setting, ECM (error correction mode) . . .
Basic setting, protected transmission . . . . . . .
Basic setting, reception interval . . . . . . . . . . . .
Basic setting, Print density (saving toner) . . . .
Basic setting, sort copy . . . . . . . . . . . . . . . . . .
Basic setting, letter head paper . . . . . . . . . . . .
Basic setting, send after scan . . . . . . . . . . . . . .
Additional features (SUB, SEP, PWD) . . . . . . . .
Additional paper cassettes (optional) . . . . . . . .
Line 2 Mode (optional) . . . . . . . . . . . . . . . . . . .
WELCOME TO YOUR FAX MACHINE
4
A
B
C
M
D
L
E
K
F
I
H
G
A
Exit document tray
E
Centronics PC connection
I
Recording paper cassette
B
Document guides
F
Top cover release button
K
Control panel
C
Release latch for document
feed
G
Cover flap for single-sheet
feed
L
Recording paper tray
D
Document tray
H
Side cover
M Exit document extension tray
2 3 4
1
5
6 7
8
9
10
11
12
13
24
23 22
21
20 19 18 17 16 15
14
Paper jam:
Indicates that there is a
document jam or copy paper
jam (see page 146 / 148).
Paper out:
Indicates that the user must
replenish the copy paper (see
page 10).
Toner out:
Indicates that the user will use
have to replenish the toner (see
page 8).
Drum operating time:
Indicates that the printing unit
will soon have to be replaced
(see page 9).
Alarm lamp:
Indicates an operating
malfunction which cannot be
clearly identified. Please
contact service personnel in
these cases.
2 Line lamp 1
Indicates transmission on the
telephone line.
3 Line lamp 1
Indicates transmission on the
telephone line (with optional 2nd
line).
4 PC COMM lamp
If this lamp flashes, it indicates
that data are being transmitted
form the PC to the interface.
5 SUPER POWER SAVER KEY
Immediately activates the
Super Power Saver features
(see page 110).
6 DISPLAY
Displays indications about the
operating modes of your fax
machine. Your control monitor
for all function settings.
7 INSERT KEY
Inserts one character at the
current cursor position.
8 DELETE KEY
Deletes one character in the
display.
9 DIAL KEYPAD
Use this keypad to enter dial
numbers or to select menu
items.
10 MULTI KEY
To create a group consisting of
one-touch dial, ABB dial and
manual dial numbers. Available
for group dialling as well as for
group polling.
11 SPEED DIAL
Press this key to select a stored
alphabet dial number, a name or
a group.
12 REDIAL / PAUSE
Activates the last number
dialled, inserts a dialling pause.
13 MONITOR
When you press this key, the
fax machine connects to the
line and the speaker enabling
the user to listen into the call
establishment attempt is
activated. The subsequent fax
connection is handled directly,
i.e. without job administration
via the memory.
14 START KEY
Activates transmission,
reception (off-hook) and
selected menu items.
15 STOP KEY
Cancels error messages and
terminates menu input.
16 COPY KEY
The user is able to make copies
of documents which have been
inserted.
17 TX-REPORT KEY
Switches the TX Report (see
page 89) on or off for the
current transmission job.
18 MODE KEY, with status lamps
Use this key to select the
resolution for the current fax
job. The status lamps represent
the selected mode. If no status
lamp lights up, the STD
resolution has been set.
19 MENU-KEYS
Use these keys to select the
menu or a specific menu item.
20 ENTER KEY
Activates selected menu items
and also used for terminating
data input.
21 JOB CANCEL KEY
Use this key if you wish to
cancel a job which has been
stored or which is due to be
handled.
22 E-MAIL ADDRESS KEY
Use this key to enter the E-Mail
address for Internet-based fax
transmission.
23 JOB STATUS KEY
You can use this key to query
the status of individual jobs.
24 Combination keypad
Depending on the position of
the function template:
• One-touch dial keys, for
quickly dialling the number of
your fax partner
• Function keys, for direct
access to fax functions
• Keypad, for entering text.
5
WELCOME TO YOUR FAX MACHINE
1 Warning lamps
If there is a malfunction on your
fax machine, the lamp under
the corresponding symbol will
light up.
PREPARATION
6
PREPARATION
Unpacking
When unpacking your machine, please check that all parts shown here are present and in perfect condition.
1. Fax machine
8. User manual
The correct location
for your fax machine is easily
found:
near
• a 230 V AC socket*,
9. Overlay
• near a telefphone connection,
ideally with a single line
reserved for your fax machine.
10. AC Power cord
* No other equipment with high
power consumption (such as a
photocopier) or equipment
which generates electrical
noise (such as a radio,
computer, radio transmitting
and receiving equipment)
should be connected to this
mains supply.
2. Phone line cord
3. Document exit tray
11. Charger cleaner
12. Scrapper
4. Recording paper exit tray
AC power
You will find the mains connection
on the back of the machine. The
ON/OFF switch is situated above
the mains jack. Now switch your
machine on.
13. Cotton swab
Please protect your machine from:
vibration
5. Fuser cleaner
14. CD-ROM
direct sunlight
6. Developer assembly
dust
humidity
7. Drum unit
heat
7
Remove transport fittings:
Prepare and insert the printer unit
In order to prevent any transport damage, the high-quality printer unit of your new fax machine is supplied with
the additional protection of special packaging. Please also follow the enclosed instructions.
The printer unit consists of two separate components, namely the drum unit and the developer assembly.
Remove these two parts from their packaging and follow the following instructions.
1. Pull the release button to open
the fax machine.
4. Take the drum unit and insert it
into the developer assembly as
detailed in the drawing.
• Any damage to the printer drum
will impair the image quality. You
must therefore never touch the
green drum surface or expose the
drum to direct sunlight for more
than three minutes.
7. Take the fixing roller cleaner out
of its packaging and install it as
detailed in the drawings.
2. Hold the ends of the developer
assembly, and shake the
assembly several times from
side to side. This will loosen
the toner.
• Avoid touching the metal roller.
5. Use the green handles to hold the
printer unit, and place the unit in
the fax machine as detailed in the
drawing.
3. Hold the developer assembly
securely in one hand, and use
your other hand to peel the
protective film off from the
toner cartridge.
• Avoid touching the protective
film, as there may be toner
residues on the film.
6. Press lightly on the green
rectangles on the drum unit so
that the unit audibly clicks into
position.
The printer unit must be
removed before the machine
is transported or moved.
8. Use the ozone filter, if
necessary.
9. Close the cover of the fax
machine, which must audibly
click into place.
PREPARATION
Before you start to use your fax machine, please remove all transport fittings.
PREPARATION
8
Change toner
As soon as the “TONER OUT” warning lamp (see page 5) lights up on your fax machine, you should replace the
toner cartridge. The “TONER LOW“ message in the display indicates that the machine can only print out
approx. 100 more documents (depending on the print density). If you fail to replenish toner during this period,
the “TONER EMPTY“ message will appear in the display; this message indicates that no further documents will
be printed out. If toner is not replenished, incoming fax documents are saved in memory.
1. Pull the release button to open
the fax machine.
4. Press the green button on the
developer assembly, and slide
the toner cartridge in the
direction of this button. You can
then remove the unlocked toner
cartridge.
2. Hold the green handles and
remove the printer unit.
5. Take the new toner cartridge and
shake it as detailed in the
diagram. This loosens the toner.
Caution:
In case you come into contact
with toner:
• If any toner dust comes into
contact with a textile fabric,
remove only by tapping the
fabric; if necessary, brush out
or use a vacuum cleaner. Never
rub.
• Wash hands in cold water and
clean thoroughly with soap.
• Wash eyes with plenty of
water.
• If you have inhaled toner, breath
deeply in the open air.
• If toner gets in your mouth,
wash it out with plenty of
water.
• In an emergency, call a doctor.
Consumables are taken
back and recycled by your
TOSHIBA dealer.
3. Remove the drum unit from the
developer assembly.
• Do not touch the developer
roller (the black roller with a
toner coating).
• Any damage to the printer
drum will impair the image
quality. You must therefore
never touch the green drum
surface or expose the drum to
direct sunlight for more than
three minutes.
6. Place the toner cartridge on the
developer assembly and slide it
under the four guides.
7. Then proceed as detailed on
page 7.
9
Replace drum unit
1. Pull the release button to open
the fax machine.
3. Remove the drum unit from the
developer assembly.
• Do not touch the developer roller
(the black roller with a toner
coating).
• Any damage to the printer
drum will impair the image
quality. You must therefore
never touch the green drum
surface or expose the drum to
direct sunlight for more than
three minutes.
2. Hold the green handles and
remove the printer unit.
4. Take the new drum unit and
insert it into the developer
assembly as detailed in the
drawing.
5. Now proceed as described on
page 7 (the fixing roller cleaner
is not replaced).
Consumables are taken
back and recycled by your
TOSHIBA dealer.
Connecting your fax machine
Telephone conne ction
Connect your fax machine (LINE jack) to the telephone socket, as shown on the right.
Mains power connection
ON/OFF
switch
PREPARATION
As soon as the “DRUM OPERATING TIME” warning lamp (see page 5) lights up on your fax machine, you
should ensure that a new drum unit is near to hand. The “DRUM LIFE WARNING“ message in the display
indicates that the fax machine will only print out a further approx. 300 documents (depending on the print
density). If you fail to change the drum in this period, the “REPLACE DRUM” message appears in the display;
this indicates that the fax machine will not print out any more documents. If the drum unit is not replaced,
incoming fax documents are saved in memory.
PREPARATION
10
How to insert the recording paper:
Remove the paper cassette
Insert cassette index (A4).
Press down the pressure plate until
you hear it lock in place.
Place the paper so that it lies
straight in the cassette with the
side to be printed facedown and
don’t forget:
The paper cassette holds a
maximum 550 sheets (80 g/sm).
The paper is never stacked above
the limit mark.
Then: Slide the cassette into the
slot
until you hear it lock in place.
Do not use damp, wrinkled
on torn paper.
Prepare the recording paper by
flexing and fanning out the stack
to separate the sheets.
Install exit paper trays:
Install the exit paper tray fits in
the slots on the left side of the
fax.
Secure the document tray. Insert
the pins of the tray into the
corresponding receptacles. Unfold
the extension if required.
The corona wire cleaner and
scraper can be stored inside the
fax machine on the rear side.
• The corona wire cleaner and
scraper are used to clean
components of the printer unit.
Please read the instructions on
page 147.
Insert memory card (optional)
PREPARATION
For further details on these data, please contact your dealer or contractual partner.
11
INSTALLATION
12
INSTALLATION
The menu system
Your fax machine is equipped with a four-line display which provides you with information concerning all
operating modes. This display makes it more easy for you to work with the various functions of your fax
machine, and everything is set out in a clear menu. Up to four menu items are displayed on each occasion, and
a number is assigned to each of these items.
A special group of keys is used for activating the menu as well as for control activities within the various menu
levels.
The key activates the menu and moves the highlight bar up.
The key moves the highlight bar down.
The key selects the appropriate submenu level.
The key selects the superior menu level.
Once a menu item has been selected with the highlight bar via these control keys, it is activated by pressing
the ↵(ENTER) key. Alternatively, you can use the START key for this purpose.
It may well happen that more than four items are displayed
in one menu. In this case, press the / control keys
several times to display these concealed menu items.
Example: Menu 3, 1 (1. Menu item highlighted)
visible part
1.COMM. OPTIONS
2.LISTS
3.INITIAL SETUP
4.DEFAULT SETTINGS 5.MENU LIST
6.TESTMODE
One version of the menu selection procedure is to enter the corresponding number of the particular menu item.
It is not necessary to press the INSERT button. As soon as the relevant number has been entered, the menu
item is executed. This is also applicable for the concealed menu items.
If no further key is pressed during a minute, the menu is automatically exited.
Consider the following example in order to familiarise yourself with the menu system. The system prints out
the program selection list, on which you receive the complete menu structure of your fax machine.
15-MAR-00 WED
19:56
Standby mode
RESIDUAL MEMORY 100%
1.COMM. OPTIONS
2.LISTS
3.INITIAL SETUP
4.DEFAULT SETTINGS
Start the menu
The first 4 menu items are displayed.
Go to A
Go to B
Continued on next page.
A
4x
START
2.LISTS
3.INITIAL SETUP
4.DEFAULT SETTINGS
5.MENULIST
15-MAR-00 WED 19:56
Select a menu item
confirm with START
The report is printed.
RESIDUAL MEMORY 100%
PRINTING LIST
B
1.COMM. OPTIONS
2.LISTS
3.INITIAL SETUP
4.DEFAULT SETTINGS
Selecting the menu item via number:
The first 4 menu items are displayed.
Select a menu item
15-MAR-00 WED
19:56
RESIDUAL MEMORY 100%
PRINTING LIST
To select a sub menu, there is no
need to see it in the LCD. The only
requirement is that this menu item
has to be in the same menu level.
The report is printed.
13
INSTALLATION
1.COMM. OPTIONS
2.LISTS
3.INITIAL SETUP
4.DEFAULT SETTINGS Selecting a menu item with the control
keys:
The first 4 menu items are displayed.
INSTALLATION
14
The combination keypad
The combination keypad of your fax machine fulfils several functions :
• One-touch dial keys, for quickly dialling the number of your fax partner
• Function keys, for direct access to the menu
• Computer keypad, for entering text.
This multiple key assignment is rendered possible by templates, positioned over the combination keypad in a
corresponding arrangement. The keypad has a specific function depending on the position of the template.
The function keys allow quick access to frequently used functions of the fax machine:
Function
CHAIN DIAL COMM
CHARGE CODE
DELAYED COMM
DIRECT TX
LOW SPEED TX
ITU MAILBOX
COVER SHEET
PRIORITY TX
RECOVERY TX
SEND AFTER SCAN
POLLING
see page
58
112
103
42
55
91
56
41
120
131
64
Function
SUB ADDRESS COMM
PCL PRINT
JOURNAL
PREV TX RPT.
RESERVATION LIST
SECURE RX
CHECK E-MAIL
TEL LINE SELECT
TEL LIST ENTRY
TEL LIST PRINT
CONTRAST
see page
132
-95
93
98
26
-134
77
101
51
To use, position the corresponding template (function template) in such a way that the menu designations are
visible. All you then need do is press the corresponding key.
15
Enter user name
User name:
You can enter any 40 characters (max.) for the user name.
Using the „KEYBOARD“ function template renders a keyboard available that can, in principle, be used just like
that of a PC or a typewriter. An alternative character set is made available via the ALTERNATE key, where
special characters and accented letters (e.g. Umlaut) can be selected. After pressing the ALTERNATE key, the
corresponding character set is displayed by pressing the corresponding letter key. The desired character is
selected via the / control keys and inserted by pressing the ↵(ENTER) key. Pressing the ALTERNATE key
again switches the special character mode off. In order to enter numbers, please use the numerical keypad.
The following table lists the special characters assigned to the respective keys.
Key
[ALTERNATE] key
[SHIFT] Taste
Place character: The character of your choice is placed wherever the flashing cursor is located. Please use
the / keys to control the highlighted input.
Cancel characters:Move the cursor to the corresponding position and press the CANCEL key beneath the
display. The character is then deleted and the remaining characters move one place to the
left.
Replace character:Move the highlighting to the appropriate position and proceed as detailed under the
procedure for entering a new character. The character is then overwritten.
Insert character: Press the INSERT key beneath the display. To exit this mode, press the INSERT key again.
When the name is completed, press the START key.
Example: Toshiba
Continued on next page.
INSTALLATION
In order to ensure that a transmitted fax document can also be uniquely identified, a transmission header is
printed on the top 5 mm of the document. This transmis-sion header contains various items of information, incl.
the user name and the sender ID of the fax machine which trans-mitted the documents.
16
INSTALLATION
15-MAR-00 WED
19:56
Standby mode
RESIDUAL MEMORY 100%
1.COMM. OPTIONS
2.LISTS
3.INITIAL SETUP
4.DEFAULT SETTINGS
Start the menu
The first 4 menu items are displayed.
Select a menu item
SET TERMINAL ID
Make your selection
ID NAME = (MAX 40)
Operate the KEYBOARD function
template
Enter the name
Example: Toshiba
ENTER NAME
Name is ready...
ID NAME = (MAX 40)
TOSHIBA
...confirm with START
START
Continue with „Enter the terminal ID“
17
Enter terminal ID
Example:
+44-2131-12345678
Fax number
Space (to improve legibilitly)
Area code (without initial 0)
Country code
Plus symbol (for the international form)
In Germany it is obligatory to enter the terminal ID!
Continued from “Enter user name”
INT CODE?
1.ADD +
2.NOT NEEDED
Option for selecting the national or
international form.
Please always select the international form.
Select a menu item
SET TERMINAL ID
Make your selection
TEL NUMBER=(MAX 20)
+
Now enter the code
Insert a pause with pause button
.....
SET TERMINAL ID
Code is complete...
TEL NUMBER=(MAX 20)
+44-2131-158-905
...confirm with START
START
Press STOP, return to standby mode
STOP
INSTALLATION
The terminal ID which is part of the transmissing header contains the number under which your fax machine
can be reached. The number should be entered in the international format:
INSTALLATION
18
Connection to PABX, obtaining a public line/Digital PABXs
The fax unit can be connected not only to the public switched telephone network (public line) but also to a
PABX. In this case, additional parameters have to be entered.
With PABXs, the public line is obtained in various ways:
• Number
Dial one digit (or several digits) in order to obtain the public line
• Flash key
With this method of obtaining the public line, the connection circuit is interrupted briefly.
When the method of obtaining a public line has been entered, you must always press the key "❊" before
the actual number when you dial your fax partner. This is also applicable for saving the fax numbers (see
page 77).
15-MAR-00 WED
19:56
Standby mode
RESIDUAL MEMORY 100%
1.COMM. OPTIONS
2.LISTS
3.INITIAL SETUP
4.DEFAULT SETTINGS
Start the menu
The first 4 menu items are displayed.
Select a menu item
SET EXCHANGE TYPE
1.PSTN
2.PABX
The current connection type is highlighted
Continue with “Connection to main line /
PABX’s”
Go to A PSTN
Go to B PABX
A PSTN
SET EXCHANGE TYPE
1.PSTN
2.PABX
Select a menu item
Press STOP, return to standby mode
STOP
Continued on next page.
B PABX
19
Select a menu item
SET ACCESS TYPE
1.FLASH
2.DIGIT
Make your selection
Select a menu item
.....
SET ACCESS TYPE
Example: digit
ACCESS DIGIT = (1-3)
Enter the digit(s) for obtaining public line
.....
SET ACCESS TYPE
Example: 0
ACCESS DIGIT = (1-3)
0
...confirm with START
START
Press STOP, return to standby mode
STOP
INSTALLATION
SET EXCHANGE TYPE
1.PSTN
2.PABX
INSTALLATION
20
Set language
Your fax machine is set to English. Please carry out the following menu steps if you wish to use another
language for the menu and the list prints.
15-MAR-00 WED
19:56
Standby mode
RESIDUAL MEMORY 100%
1.COMM. OPTIONS
2.LISTS
3.INITIAL SETUP
4.DEFAULT SETTINGS
Start the menu
The first 4 menu items are displayed.
Select a menu item
1.ENGLISH
2.ITALIANO
3.DEUTSCH
4.FRANCAIS
.....
Select a menu item
Press STOP, return to standby mode
STOP
21
Set date and time
15-MAR-00 WED
19:56
Standby mode
RESIDUAL MEMORY 100%
1.COMM. OPTIONS
2.LISTS
3.INITIAL SETUP
4.DEFAULT SETTINGS
Start the menu
The first 4 menu items are displayed.
Select a menu item
SET TIME FORMAT
1.24 HOURS
2.12 HOURS
Make your selection
for 12- or 24-hour format
Select a menu item
Example: 24-hour format
.....
SET DATE & TIME
DD-MM-YYYY
15-03-2000
Enter the date
DAY
WED
Confirm with START
START
SET DATE & TIME
Enter the time
HH:MM
19:56
START
SET DATA MODE
1.MM-DD-YYYY
2.DD-MM-YYYY
3.YYYY-MM-DD
Select a menu item
.....
SET MONTH MODE
1.NUMERIC
2.NAME
.....
Confirm with START
Make your selection for the date format
Make your selection for the month (using
figures or the name)
Select a menu item
Press STOP, return to standby mode
STOP
INSTALLATION
Enter the current date and time at this point so that all details relating to date and time is correct. The internal
clock of your fax machine then runs automatically - even in the event of a power failure.
RECEPTION OF DOCUMENTS
22
RECEPTION OF DOCUMENTS
Set standby mode
If your fax machine is connected to the PSTN, there are two different ways of receiving documents.
Automatic reception
If the line is reserved exclusively for fax operation.
The fax machine switches over to reception as soon as the line rings. The number of rings before the fax
machine is activated can be set (see below).
The fax machine is always activated, even if the call is initiated by a voice partner.
Manual reception
If the line is used primarily for telephone traffic.
The call must be accepted manually; the fax machine is not activated when the line rings. The call must be
accepted manually; the fax machine is not activated when the line rings. The call must be accepted by an
additional telephone. If you wish to transmit a document, you must press the START key of the fax machine.
Ensure that any fax calls can be accepted by means of the external telephone. Pressing the start key
only has an effect if the handset is off-hook.
15-MAR-00 WED
19:56
Set standby mode
Standby mode
RESIDUAL MEMORY 100%
1.COMM. OPTIONS
2.LISTS
3.INITIAL SETUP
4.DEFAULT SETTINGS
Start the menu
The first 4 menu items are displayed.
Select a menu item
AUTO RECEIVE MODE
1.AUTO RECEIVE
2.MANUAL RECEIVE
Select a menu item
Example: Automatic reception
.....
AUTO RECEIVE
RING DELAY =(01-05)
02
.....
Make your selection
1. Automatic reception
2. Manual reception
Make your selection
for the number of ringing signals before the
fax machine connects to the line.
Enter the required number
Confirm with START
START
Press STOP, return to standby mode
STOP
23
Reception reduction
Original (A4)
Reception
reduction: ON
Reception reduction:
Discard:
15-MAR-00 WED
19:56
OFF
OFF
Reception reduction:
Discard:
OFF
ON
Reception reduction ON/OFF
Standby mode
RESIDUAL MEMORY 100%
1.COMM. OPTIONS
2.LISTS
3.INITIAL SETUP
4.DEFAULT SETTINGS
Start the menu
The first 4 menu items are displayed
Select a menu item
RX REDUCTION
1.ON
2.OFF
.....
Make your selection
1. Reception reduction ON
2. Reception reduction OFF
Select a menu item
Press STOP, return to standby mode
STOP
Continued on next page.
RECEPTION OF DOCUMENTS
If a fax is received which exceeds the length of the paper for received documents (e.g. due to a transmission
header – see page 104), the copy would not be able to be printed out in full. In this case, the fax machine
reduces the size of the document in scale with the original (max. 73%).
In general, this effect is not problematical. However, if the sizes of the documents must be absolutely identical,
it is necessary to deactivate the reception reduction facility. In this case, that part of the copy which no
longer fits on the page is printed out on a second page.
If you are able to do without the „rest“ of the page, activate the discard facility to suppress printout on the
second page.
RECEPTION OF DOCUMENTS
24
15-MAR-00 WED 19:56
Discard ON/OFF
Standby mode
RESIDUAL MEMORY 100%
1.COMM. OPTIONS
2.LISTS
3.INITIAL SETUP
4.DEFAULT SETTINGS
Enter the menu
The first 4 menu items are displayed.
Select a menu item
DISCARD
1.ON
2.OFF
.....
Make your selection
1. Discard ON
2. Discard OFF
Select a menu item
Press STOP, return to standby mode
STOP
25
Memory reception
In the event of a power failure, the contents of memory are retained for approx. 72 hour.
If the fax machine is to receive documents (in memory) in the event of paper-out or paper jam, the memory
reception facility must be activated. This ensures that the fax machine is still able to receive documents
outside normal business hours (e.g. at weekend or during the night).
• When the memory capacity is full, no further calls will be accepted.
• If you find that the memory is frequently too small, ask your dealer for a memory expansion!
15-MAR-00 WED 19:56
Memory reception ON/ OFF
Standby mode
RESIDUAL MEMORY 100%
1.COMM. OPTIONS
2.LISTS
3.INITIAL SETUP
4.DEFAULT SETTINGS
Start the menu
The first 4 menu items are displayed.
Select a menu item
SET MEMORY RX
1.ON
2.OFF
Make your selection
1. Memory reception ON, further reception
possible
2. Memory reception OFF, no further
reception possible
Select a menu item
.....
Press STOP, return to standby mode
STOP
15-MAR-00 WED 19:56
PAPER EMPTY
RESIDUAL MEMORY 100%
MEMORY RECEPTION
15-MAR-00 WED 19:56
PAPER JAM
RESIDUAL MEMORY 100%
MEMORY RECEPTION
Display messages for memory reception
Display in case of paper low.
or
Display in case of paper jam.
RECEPTION OF DOCUMENTS
Under certain circumstances, the machine cannot print out any further incoming copies:
• If there is no recording paper
• If there is a paper jam
In order to prevent problems with reception, the remaining pages are buffered in the memory of your fax
machine. Once the problem has been solved, the document is printed out automatically.
RECEPTION OF DOCUMENTS
26
Secure RX
In the Secure RX mode, the fax machine is ready to receive documents; however, incoming fax documents are
not printed out and are retained in memory for a defined period. This for instance prevents fax documents
which are received outside normal office hours from falling into the “wrong hands”. The user is able to set the
period during which the Secure RX mode is active. The user can also expand specific days in the week.
Outside this period, all stored faxes are automatically printed out and further documents are received without
any restriction.
Secure RX can only be activated if memory reception has been activated (see page 25).
15-MAR-00 WED 19:56
Standby mode
RESIDUAL MEMORY 100%
1.COMM. OPTIONS
2.LISTS
3.INITIAL SETUP
4.DEFAULT SETTINGS
Start the menu
The first 4 menu items are displayed.
Select a menu item
01.SECURITY CODE
02.ACTIVATE
Select a menu item
.....
A1
.....
Make your selection
1. Enter / edit security code (see A)
2. Activate Secure RX (only possible if
security code is used - see B)
SECURITY CODE ENTRY
NEW CODE
SECURITY CODE =
Enter security code (for first time)
Make your selection
for security code
SECURITY CODE ENTRY
NEW CODE
SECURITY CODE =
1234
Enter the security code
...confirm with START
START
01.SECURITY CODE
02.ACTIVATE
Make your selection
1. Enter / edit security code
2. Activate Secure RX (only possible of
security code is used)
Continued on next page.
A2
Security code edit
Make your selection for (old) security code
SECURITY CODE ENTRY
NEW CODE
SECURITY CODE =
****
Enter the old security code
...confirm with START
START
SECURITY CODE ENTRY
NEW CODE
SECURITY CODE =
.....
Make your selection
for new security code
Enter the new security code
SECURITY CODE ENTRY
NEW CODE
SECURITY CODE =
9876
...confirm with START
START
01.SECURITY CODE
02.ACTIVATE
Make your selection
1. Enter / edit security code
2. Activate Secure RX (only possible of
security code is used)
Continued on next page.
27
RECEPTION OF DOCUMENTS
.....
SECURITY CODE ENTRY
CURRENT CODE
SECURITY CODE =
RECEPTION OF DOCUMENTS
28
B
Activate/deactivate Secure RX
Make your selection
for the current security code
SECURE RX
SECURITY CODE =
Enter the current security code
.....
confirm with START
START
SECURE RX
1.ON
2.OFF
Make your selection
for configuration of Secure RX
1. Configure and activate
Secure RX
2. Deactivate Secure RX
Select a menu item
SECURE RX
TIME PERIOD =
16:00 - 09:00
.....
Make your selection for the period in which
Secure RX is active. (Move the cursor with
the / keys)
Enter the period
confirm with START
START
SET SECURE RX
FOR 24 HR OPERATION?
1.YES
2.NO
Select a menu item
(Example: Menu item 1)
.....
MONDAY
24 HR SECURE RX?
1.YES
2.NO
.....
Make your selection for Secure RX
1. Settings for day menu
2. Same setting for all days
Make your selection. Is set period
applicable for Monday?
1. YES
2. NO
Select a menu item
All days of the week (up to Sunday) can be
set individually.
Press STOP, return to standby mode
STOP
29
Activate and deactivate Secure Rx
If you wish to activate Secure RX for another period, please follow the steps on page 26.
15-MAR-00 WED 19:56
RESIDUAL MEMORY 100%
Temporary deactivation of Privileged RX
mode for printing purposes
Standby mode
Operate the Menu function template
SECURE RX
Press the corresponding function key
Make your selection
1. Reactivate Privileged RX mode
2. Temporary deactivation of Privileged RX
mode for printing purposes
SECURE RX
1.START
2.PRINT
Select a menu item
Make your selection
for the current security code
RX MEMORY LOCK
SECURITY CODE
Enter the current security code
.....
confirm with START
START
Privileged RX mode is temporarily
deactivated. The memory contents are
printed out immediately.
This mode can be set only if Secure
Rx has been configured (see
page 26).
Continued on next page.
RECEPTION OF DOCUMENTS
You can also activate the Secure Rx mode outside the set period, if for in-stance staff leave the office early. If
you have the security code, you can likewise temporarily deactivate Privileged RX mode, in order to receive a
print-out of the stored documents.
RECEPTION OF DOCUMENTS
30
15-MAR-00 WED 19:56
Reactivate Privileged RX mode
Standby mode
RESIDUAL MEMORY 100%
Operate the Menu function template
SECURE RX
Press the corresponding function key
SECURE RX
1.START
2.PRINT
Make your selection
1. Reactivate Privileged RX mode
2. Temporary deactivation of Privileged RX
mode for printing purposes
Select a menu item
The Secure RX mode is activated for the
rest of the day.
This mode can be set only if Secure
Rx has been configured (see
page 26).
31
Correct sequence printout
If you find that the memory is frequently too small, ask your dealer for a memory expansion!
15-MAR-00 WED
19:56
Standby mode
RESIDUAL MEMORY 100%
1.COMM. OPTIONS
2.LISTS
3.INITIAL SETUP
4.DEFAULT SETTINGS
Start the menu
The first 4 menu items are displayed.
Select a menu item
REVERSE ORDER PRINT
1.ON
2.OFF
.....
Make your selection
1. Correct sequence printout ON
2. Correct sequence printout OFF
Select a menu item
Press STOP, return to standby mode
STOP
RECEPTION OF DOCUMENTS
If more than one document is transmitted, it is normal to start with the first page. As received copies are
printed out face-up, this means that the received stack of documents is in reversed order. This would mean
that the first page is the last page to be printed.
Please note that the entire reception procedure is first stored in memory before it is subsequently printed out. If
the capacity of the memory is not sufficient, there will be a delay in printing out the documents in the correct
sequence.
RECEPTION OF DOCUMENTS
32
Multiple printout
As your fax machine handles all reception jobs via its memory, it is possible for several copies instead of
merely one copy to be printed out (up to 99). This means that the operator does not have to go to the
photocopier. Please note that great strain is placed on the memory if you increase the number of copies and if
several jobs are received simultaneously.
If you find that the memory is frequently too small, ask your dealer for a memory expansion!
15-MAR-00 WED 19:56
Standby mode
RESIDUAL MEMORY 100%
1.COMM. OPTIONS
2.LISTS
3.INITIAL SETUP
4.DEFAULT SETTINGS
Start the menu
The first 4 menu items are displayed.
Select a menu item
RX MULTI COPY
Make your selection
Number of incoming copies
COPY NUMBERS=(01-99)
01
.....
RX MULTI COPY
Select the required quantity
Example: 8 copies
COPY NUMBERS=(01-99)
08
...confirm with START
START
Press STOP, return to standby mode
STOP
33
Delete reception
15-MAR-00 WED 19:56
Standby mode
RESIDUAL MEMORY 77%
The
lamp flashes to indicate activity
on the line
Press the JOB STATUS key
JOB STATUS
LINE-1 RECEIVE P 001
FILE NBR = 122
EC 14400 BPS
+49 2131 158901
The current status is displayed
(RECEPTION is displayed)
Press the JOB CANCEL key
JOB CANCEL
START
CANCEL?
FILE NBR = 123
1.YES
2.NO
Confirmation prompt
...confirm with START
Current reception is terminated
RECEPTION OF DOCUMENTS
It is not possible to immediately recognise whether your fax machine is transmitting or receiving a document.
The
lamp does not distinguish between these two modes. You can only identify that a document is being
received after you press the JOB STATUS key.
RECEPTION OF DOCUMENTS
34
Reception protection
The process of receiving documents is not subject to any restriction in principle.
However, if reception protection is activated, it is only possible for the machine to receive fax documents from
partners whose fax number is stored in the fax machine. The transmitted code of the transmitter is compared
against the contents of your alphabet dial memory or one-touch dial keys. If the comparison is not successful,
the transmission is rejected.
Please note that fax reception is limited when the reception protection facility has been activated.
If you have not stored any fax numbers, no further fax documents can be received!
15-MAR-00 WED
19:56
Standby mode
RESIDUAL MEMORY 100%
1.COMM. OPTIONS
2.LISTS
3.INITIAL SETUP
4.DEFAULT SETTINGS
Start the menu
The first 4 menu items are displayed.
Select a menu item
SET PRIVILEGED RX
1.ON
2.OFF
.....
Make your selection
1. Reception protection ON
2. Reception protection OFF (normal)
Select a menu item
Press STOP, return to standby mode
STOP
35
Local copy
Sorter function ON
• Copies are sorted automatically.
• Requires adequate memory (if memory is full, the copying process is terminated. If
you find that the memory is frequently too small, ask your dealer for a memory
expansion!
• All documents are scanned into the machine, resulting in a longer copying
procedure.
1
2
3
1
2
3
1
2
3
Sorter function OFF
1
• Copies are sorted manually.
1
1
• Not much memory required.
2
2
• The copying procedure is shorter.
2
3
In the case of documents that are longer in size than A4, the excess parts are not
3
3
copied. If, however, all parts are to be copied, the Copy reduction function must be
activated.
The Copy reduction function can be activated when preparing the copy. It acts in both
axes, thus resulting in a true-to-scale reduction. Four fixed scales are available, as well as an automatic
reduction option.
If additional (optional) paper cassettes are available, a specific cassette can be accessed for each respective
copy.
• The copy is always made with „FINE” resolution ( see page 50).
Resolution “U-FINE” can be set if required.
• The „HALFTONE“ mode setting is always possible.
• Automatic copy reduction is not possible when the paper cassette selector has been set to AUTO.
• The ”LETTER HEAD PAPER” cassette is not accessed if the cassette selector has been set to AUTO.
• A copy cannot be made when the fax machine is receiving a document.
Continued on next page.
RECEPTION OF DOCUMENTS
You can use your fax machine to make one or more copies (up to 99).
You can select a sorter function if several copies of various documents are to be made simultaneously. The
copies are sorted and reproduced in the sequence in which the original documents were inserted into the
document feed.
RECEPTION OF DOCUMENTS
36
15-MAR-00 WED 19:56
Local copy
Standby mode
RESIDUAL MEMORY 100%
15-MAR-00 WED
19:56
RESIDUAL MEMORY 100%
ENTER TEL NUMBER
COPIE
COPIES=(1-99)
1
PAPER
AUTO
REDUCE
100%
COLLATE
ON OFF
100%
AUTO
86%
75%
Load original
Remember: Printed side face down
Document ready
Press COPY key
Make your selection
Select copy parameters
Example: REDUCE
Information on the reduction is displayed
Adjust reduction
START
COPIES=(1-99)
1
PAPER
AUTO
REDUCE
75%
COLLATE
ON OFF
Confirm with START
Make your selection
Activating/Deactivating sorted copies
.....
Enter amount of copies
confirm with START
START
37
TRANSMIT DOCUMENTS
The following table gives you an idea of the documents your fax machine can handle.
Single sheet
Document size (max)
Document size (min)
Effective scanning width
How many sheets can be
loaded at one time?
Thickness of paper
Quality of paper
2 or more sheets
216 mm (W) x 1000 mm (L)
148 mm (W) x 100 mm (L)
206 mm
max. 50 sheets A4
0,05 ~ 0,15 mm
0,06 ~ 0,12 mm
Uncoated on both sides
Please note:
• Documents longer than 420 mm can only be loaded manually.
• If you load several sheets at one time, they should all be of the same size and paper quality.
Problem documents ...
May not feed. This applies to
• torn, wrinkled or damp pages
• folded pages or pages with holes
• transparent pages or pages with a smooth, shiny finish
• textile or metallic douments
There are two ways of avoiding this problem:...
...by photocopying or using a carrier sheet.
Your TOSHIBA dealer can supply you with the necessary carrier sheets.
How to use carrier sheets:
Place your document face-up on the carrier sheet under the transparent cover. Carrier
sheets can be used like normal documents except for one restriction: only one carrier
sheet can be fed at one time.
How to load documents correctly
Remove any paper clips, staples and similar objects before
transmitting the document. If you intend to load documents which
are longer than A4 format, you should pull out the extension of the
document support. Push the side paper guide up against the
document(s). Now place your document(s) on the document tray up to 50 at one time - as shown.
All documents must be inserted face down!
Adjust the document guides to the edges of the sheets.
After 2 seconds, your document will be automatically pulled in by about
2 cm.
TRANSMIT DOCUMENTS
Document format
TRANSMIT DOCUMENTS
38
Automatic fax messages
To send fax messages in the traditional manner: Insert document(s), enter the fax number and the connection
is automatically established. The fax machine reads the documents into memory and then transmits them.
The advantage for the user: The document feed is only ever used for a brief period of time; irrespective of
whether a fax is being transmitted or not. (please also refer to page 39, Transmission from memory).
If you decide to use the listening-in version (see page 48) , you can also acoustically monitor the call
establishment process. This is useful whenever you have problems with establishing a connection. The reason
is frequently a wrong number, or a fax machine which is not ready to receive.
The free memory display varies depending on the utilisation level of stack memory.
15-MAR-00 WED
19:56
Standby mode
RESIDUAL MEMORY 100%
15-MAR-00 WED
19:56
RESIDUAL MEMORY 100%
ENTER TEL NUMBER
Load originalR
emember: Printed side face down
Document ready
To remove the document from the
document feed, press the STOP key again.
Enter the fax number
.....
TEL NUMBER=(MAX 128)
02131158901
The entered fax number is displayed. Any
corrections can be made using the -key,
or the complete number can be cleared by
pressing the STOP key.
To remove the documents from the
document feed before they are processed,
press the STOP key again.
...confirm with START
START
SCANNING INTO MEMORY
FILE NBR. = 01
RESIDUAL MEMORY 99%
While the document is being read into the
machine:
The machine displays the job number (file
number) and current memory capacity.
The corresponding line lamp blinks as soon
as the fax machine goes online.
15-MAR-00 WED 19:56
RESIDUAL MEMORY 99%
The display indicates normal transmission
or reception mode during this process.
39
Stack mode
This is different with your fax machine:
All documents are read into the memory and are then transmitted from this memory. Incoming documents are
also read into the memory before they are printed out. The advantage of this method is that the document tray
is virtually always free and that documents can be transmitted almost irrespective of the transmission or
receiving status of the fax machine.
Each procedure is known as a job. A job may consist of one or more documents which you can transmit to
your partners. A job can also be a multi-address transmission or a delayed transmission. Your fax machine is
able to manage 100 such jobs. Each of these jobs is placed on a stack, from where they are processed in
sequence. Your fax machine accepts jobs even while it is transmitting or receiving documents; this means that
the document tray is always ready.
The fax machine allocates a number to each job, and this number can be viewed via the job list (XX list) (s.
page 98).
The stack memory is protected via an internal battery. This means that no memory loss occurs if the machine
is switched off or if there is a power failure. As soon as the fax machine is switched on again or as soon as the
power supply is restored, the job is resumed at the point at which it was interrupted. The bridging period
depends on the memory status, although it is at least one hour.
The transmission and reception memory is activated in the basic setting of the fax machine. You can
change these basic settings to suit your individual requirements (see page 25 / 123).
Stack memory
Job XX
(e.g. transmission)
Job XX
Job 2
(e.g. broadcast)
Job 4
Job 3
Job 2
Job 1
(e.g. delayed transmission)
Enter the Jobs
Job 1
Print out via telephone line
TRANSMIT DOCUMENTS
A frequently encountered problem with fax machines is that the document tray is blocked while a document is
being transmitted; no other documents can be transmitted while the fax machine is transmitting or receiving
documents.
TRANSMIT DOCUMENTS
40
Useful job management
As the stack memory in your fax machine is so large, it may happen that several jobs have to be transmitted to
the same fax number. As a fax connection is used more economically if more data are transmitted, it would
make sense to transmit all of these jobs in a single process. Whenever it handles a new job, your fax machine
therefore checks the stack to establish whether there are additional jobs with the same fax number. If this is
the case, these jobs are handled together irrespective of their position in the stack. The job number of these
jobs is retained until stack management encounters the first job of the same fax number.
The process is recorded in the transmission journal (see page 95), with an identical sequential number.
In case of delayed transmission the jobs are sent together if time and fax number are equal.
JOB NO. 100
JOB NO. 100
JOB NO. 99
JOB NO. 99
JOB NO. 98
JOB NO. 98
JOB NO. 97
JOB NO. 97
JOB NO. 96
JOB NO. 96
JOB NO. 95
JOB NO. 95
JOB NO. 94
JOB NO. 94
JOB NO. 93
JOB NO. 93
JOB NO. 92
JOB NO. 92
JOB NO. 91
JOB NO. 91
JOB NO. 90
JOB NO. 90
OUTPUT
Some jobs of the stack have the same
fax number (black).
LINE TRANSMISSION
The first job
with the same fax number
pulls the other jobs together.
41
Important transmission
15-MAR-00 WED
19:56
Standby mode
RESIDUAL MEMORY 100%
15-MAR-00 WED
19:56
RESIDUAL MEMORY 100%
ENTER TEL NUMBER
Load original
Remember: Printed side face down
Document ready
Operate the Menu function template
PRIORITY TX
Press the corresponding function key
PRIORITY RESERVE
ENTER TEL NUMBER
SPEED DIAL KEY OR
ONE TOUCH KEY
.....
Make your selection
for Fax number
Enter the fax number
or
select alphabet dial, one-touch dial or
telephone directory (q.v.)
...confirm with START
START
TRANSMIT DOCUMENTS
The stack of your fax works according to FIFO (first in - first out). This situation can be compared to a queue:
The most recently entered job has to wait the longest. This might be problematical for transmitting a certain
document, particularly if stack memory already contains several jobs. The “important transmission” function
is available for such situations. If this function is selected, the current job is given top priority. This job is
carried out immediately after the last action, irrespective of the position in stack memory.
TRANSMIT DOCUMENTS
42
Direct transmission
In the normal transmission mode your fax machine reads all documents into the memory before they are
transmitted (see page 39). If the documents are too large for the memory or if you have too many documents,
you can also send directly from the document tray without reading the documents into the memory.
If you find that the memory is frequently too small, ask your dealer for a memory expansion!
15-MAR-00 WED
19:56
Standby mode
RESIDUAL MEMORY 100%
15-MAR-00 WED
19:56
RESIDUAL MEMORY 100%
ENTER TEL NUMBER
Load original
Remember: Printed side face down
Document ready
Operate the Menu function template
DIRECT TX
Press the corresponding function key
DIRECT TRANSMIT
1.YES
2.NO
Make your selection
for direct transmission
Select a menu item
RESIDUAL MEMORY 100%
ENTER TEL NUMBER
.....
Enter the fax number
or
select alphabet dial, one-touch dial or
telephone directory (q.v.)
...confirm with START
START
The documents are now transmitted
directly via the document feed
43
Transmission using alpha dial
Please refer to page 77 for details of how to save alphabet dialling numbers.
15-MAR-00 WED
19:56
Standby mode
RESIDUAL MEMORY 100%
15-MAR-00 WED
19:56
RESIDUAL MEMORY 100%
ENTER TEL NUMBER
Load original
Remember: Printed side face down
Document ready
Activate the dialling key
SPEED DIAL
Make your selection
for type of dialling
1. Dialling with abb. numbers
2. Dialling with telephone directory
3. Group dialling (using group numbers)
TELEPHONE NBRS LIST
1.ABB NUMBERS
2.SEARCH NAME
3.GROUP NUMBER
Select a menu item
Make your selection
for the alphabet dial number
COMM RESERVATION
ABB NUMBER=(1-999)
.....
Enter the alphabet dial number
Example: 1
COMM RESERVATION
ABB NUMBER=(1-999)
1
...confirm with START
START
COMM RESERVATION
ABB NUMBER=001
TOSHIBA EUROPE
The fax machine displays the selected
alphabet dial memory and the fax partner
allocated to this memory position.
The document is read into memory (see
page 38)
TRANSMIT DOCUMENTS
The alphabetic dialling facility enables you to enter a brief “address” instead of the (frequently long) fax number
of your partner. The real fax number is then permanently stored under this "address". The alphabetic dialling
facility thus enables you to save time with frequently used fax numbers.
TRANSMIT DOCUMENTS
44
Transmission one-touch dial
One-touch dialling provides you with a very easy method of dialling the number of your partner.
73 Spaces*) can be freely assigned to fax numbers. Simply press a single button to start the dialling
procedure.
*) Some of the one-touch dial keys of your fax machine have double assignments. As soon as you operate the
corresponding function template, additional number memory spaces are available.
Please refer to page 82 for details of how to store one-touch dialling numbers.
15-MAR-00 WED
19:56
Standby mode
RESIDUAL MEMORY 100%
15-MAR-00 WED
19:56
RESIDUAL MEMORY 100%
ENTER TEL NUMBER
Load original
Remember: Printed side face down
Document ready
Press the one-touch dial key
Example: one touch 35
ONE TOUCH = 35
TOSHIBA EUROPE
The machine displays the selected onetouch dial key and the fax partner assigned
to this one-touch dial key.
The document is read into memory (see
page 38)
45
Faxing with telephone directory
15-MAR-00 WED
19:56
Standby mode
RESIDUAL MEMORY 100%
15-MAR-00 WED 19:56
RESIDUAL MEMORY 100%
ENTER TEL NUMBER
SPEED DIAL
TELEPHONE NBRS LIST
1.ABB NUMBER
2.SEARCH LETTER
3.GROUP NUMBER
Load original
Remember: Printed side face down
Document ready
Activate the dialling key
Make your selection
for type of dialling
1. Dialling with abb. numbers
2. Dialling with telephone directory
3. Group dialling (using group numbers)
Select a menu item
ENTER SEARCH NAME:
ID NAME = (MAX20)
Make your selection
for the initial letter.
Please refer to page 15 for entering letters.
Enter the alphabet dial number
Example: “B” *)
ENTER SEARCH NAME
START
BAKER
[]
00001/00005
START
ABB NUMBER = 007
BROWN
*)
SEARCH LETTER = X
-----------------
...confirm with START
The first name is displayed
use the control keys to select the
required name
confirm with START
The fax machine displays the selected
alphabet dial memory and the fax partner
allocated to this memory position.
The document is read into memory (see
page 38)
This display appears if no name is stored
under the selected letter.
The search function is casesensitive!
TRANSMIT DOCUMENTS
This type of dialling is similar to the process of searching in a telephone directory. If you enter the initial letter
of your fax partner, the machine searches for the corresponding fax number in the alphabet dial memory or on a
configured one-touch dial key. This procedure is particularly useful when you know the names of specific fax
partners.
TRANSMIT DOCUMENTS
46
Single multi-address
transmission
USER-DEFINED GROUP
If you intend to send a document to several fax partners as
quickly as possible, this function can be used for defining a
single free group. The group is cancelled after the procedure
is completed. Direct-dialling numbers, one-touch dial
numbers and freely assignable numbers (max. 100) can be
grouped in any desired combination.
Permanently stored groups (see page 85), can also be
integrated into the group in this way.
15-MAR-00 WED
19:56
••••
FAXNO.
FAXNO.
+
FAXNO.
+
or
or
or
ABB.
ABB.
ABB.
or
or
or
ONE TOUCH
ONE TOUCH
ONE TOUCH
or
or
or
GROUP
GROUP
GROUP
Standby mode
RESIDUAL MEMORY 100%
15-MAR-00 WED 19:56
RESIDUAL MEMORY 100%
ENTER TEL NUMBER
Load original
Remember: Printed side face down
Document ready
Press the MULTI key
MULTI
MULTI GROUP
000
ENTER TEL NUMBER,
SPEED DIAL KEY OR
ONE TOUCH KEY
Make your selection
for fax number (page 38),
Alphabet dialling (page 43),
One-touch dialling (page 44),
Telephone directory (page 45),
group (page 47)
...confirm with START
(depending on selected action)
START
MULTI GROUP
[] TO PREVIOUS
ENTER MORE OR
PRESS [START]
Make your selection
for further group elements
(Previously entered dial numbers can be
called up and edited or deleted with the
control key )
-or...confirm with START
START
The document is read into memory (see
page 38)
47
Stored broadcast
15-MAR-00 WED
19:56
OT XX
GROUP XX
Alphabet dial memory
Broadcast via group number
Standby mode
RESIDUAL MEMORY 100%
15-MAR-00 WED 19:56
RESIDUAL MEMORY 100%
ENTER TEL NUMBER
Load original
Remember: Printed side face down
Document ready
Activate the dialling key
SPEED DIAL
TELEPHONE NBRS LIST
1.ABB NUMBER
2.SEARCH LETTER
3.GROUP NUMBER
Make your selection
for type of dialling
1. Dialling with abb. numbers
2. Dialling with telephone directory
3. Group dialling (using group numbers)
Select a menu item
Make your selection
for group number
GROUP NBR = (1-1999)
.....
Enter group number
GROUP NBR = (1-1999)
0007
confirm with START
START
The document is read into memory (see
page 38)
TRANSMIT DOCUMENTS
Please refer to page 85 for details of how to program
permanent groups.
999
421
338
333
240
235
•
•
•
4
3
2
1
If you have a fixed group of fax partners to whom you frequently
have to send broadcast fax messages, the stored broadcast
facility is just what you need.You can store 50 different group of
your choice. Additional you can assign each group to a one-touch
dial key. Multi-adress transmission is then carried out by pressing
the appropriate one-touch dial key.
ONE TOUCH NUMBER
TRANSMIT DOCUMENTS
48
15-MAR-00 WED
19:56
Broadcast via one-touch dial key
Standby mode
RESIDUAL MEMORY 100%
15-MAR-00 WED
19:56
Load original
Remember:Printed side face down
Document ready
RESIDUAL MEMORY 100%
ENTER TEL NUMBER
Press one-touch dial key under which a
group is stored
The document is read into memory (see
page 38)
Monitoring (direkt)
When a fax transmission is monitored, the call establishment attempt is played back via the built-in speaker.
This means that you have an additional acoustic check for monitoring the call establishment procedure. This
facility is useful whenever a connection is not established. This is frequently due to a wrong number or a fax
machine that is not ready to receive.
With the listening-in alternative, the document is not read into the memory; it is retained on the tray until
the receiving fax machine has been contacted.
15-MAR-00 WED
19:56
Standby mode
RESIDUAL MEMORY 100%
15-MAR-00 WED 19:56
RESIDUAL MEMORY 100%
ENTER TEL NUMBER
Load original
Remember: Printed side face down
Document ready
Activate monitoring
MONITOR
ON HOOK
Make your selection
for the fax number
TEL NUMBER =
.....
ON HOOK
Enter the fax number
Dialling starts
TEL NUMBER =
12345678
As soon as you hear the other fax machine
(constant whistle)
...confirm with START
START
The document is transmitted immediately
(without being read into memory).
49
Monitoring (by job)
With this listening-in version, the document is read into memory. The listening-in facility is linked to the
job as an additional option.
Please follow the descriptions of page 106 if all outgoing fax transmissions are to be played back via the
loudspeaker.
15-MAR-00 WED
19:56
Standby mode
RESIDUAL MEMORY 100%
15-MAR-00 WED
19:56
RESIDUAL MEMORY 100%
ENTER TEL NUMBER
1.COMM. OPTIONS
2.LISTS
3.INITIAL SETUP
4.DEFAULT SETTINGS
Load original
Remember: Printed side face down
Document ready
Start the menu
The first 4 menu items are displayed
Select a menu item
LINE MONITOR
1.ON
2.OFF
Select a menu item
RESIDUAL MEMORY 100%
ENTER TEL NUMBER
Make your selection
for fax number, alphabet dialling, one-touch
dial or telephone directory
...confirm with START
START
The document is read into memory (see
page 38)
TRANSMIT DOCUMENTS
When a fax transmission is monitored, the call establishment attempt is played back via the built-in speaker.
This means that you have an additional acoustic check for monitoring the call establishment procedure. This
facility is useful whenever a connection is not established. This is frequently due to a wrong number or a fax
machine that is not ready to receive.
TRANSMIT DOCUMENTS
50
Set resolution
In its basic setting, your fax machine uses high resolution for transmitting or copying your documents. You can
also adjust the resolution to suit the particular documents. Use the following as a rough guide:
Use the following as a rough guide:
STD
For hand-written or typewritten documents (basic setting)
FINE
For documents with small type such as newspapers and diagrams
U-FINE
For documents with very small and detailed diagrams
HALFTONE
256 grey stages for photographs or colour documents
• For the grey stages, you can choose between fine and superfine (U-FINE)
• If the resolution is increased or if the grey stage mode is selected, the transmission time is
lengthened (this involves additional costs!), as more lines or more information are transmitted.
*) Please refer to page 124 if you wish to change the BASIC SETTING for resolution.
15-MAR-00 WED
19:56
Standby mode
RESIDUAL MEMORY 100%
15-MAR-00 WED
19:56
RESIDUAL MEMORY 100%
ENTER TEL NUMBER
MODE
FINE
U-FINE
Load original
Remember: Printed side face down
Document ready
Press „MODE“
Press the MODE key several times to make
the required setting.
Standard resolution = All lamps off
HALFTONE
The setting selected in this way is only
applicable for the current job. When the
document has been read in, the resolution
is reset to the default value.*
Dialling the fax partners
51
Set contrast
*) Please refer to page 124 if you wish to change the basic setting of the contrast.
15-MAR-00 WED
19:56
Standby mode
RESIDUAL MEMORY 100%
15-MAR-00 WED
19:56
RESIDUAL MEMORY 100%
ENTER TEL NUMBER
Load original
Remember: Printed side face down
Document ready
Operate the Menu function template
CONTRAST
Press the corresponding function key
SET CONTRAST
1.NORMAL
2. DARKER
3. LIGHTER
.....
Make your selection
for the contrast setting
Select a menu item
COMM RESERVATION
RESIDUAL MEMORY 100%
ENTER TEL. NUMBER
The setting which has now been selected is
applicable only for the current job. When
the document has been read in, the contrast
is reset to the default value.*
Dialling the fax partner
TRANSMIT DOCUMENTS
Where the print on documents is weak or where colour character sets are used, it is possible that some
characters might not be transmitted. In such cases, you should set the contrast to darker.
On the other hand, some documents contain characters in coloured fields. In such cases, you should set the
contrast to ligther.
You can judge the effect of this setting - and thus also the quality of your fax transmission - by using the selfcopy facility (see page 35).
TRANSMIT DOCUMENTS
52
Transmission options, ECM on/off
Your fax machine is equipped with an error correction facility (ECM). If your fax partner also has an error
correction facility, this permits error-free fax transmission. One effect linked with ECM is that the transmission
time increases if there are any problems on the line. This may involve very high costs with oversees calls. For
this reason, the error correction facility can be temporarily disabled.
If the error correction mode is disabled in the basic setting (see page 125), ECM is temporarily enabled
using the adjacent method.
*) Please refer to page 125 if you wish to change the basic setting of the error correction mode.
15-MAR-00 WED
19:56
Standby mode
RESIDUAL MEMORY 100%
15-MAR-00 WED
19:56
RESIDUAL MEMORY 100%
ENTER TEL NUMBER
1.COMM. OPTIONS
2.LISTS
3.INITIAL SETUP
4.DEFAULT SETTINGS
Load original
Remember: Printed side face down
Document ready
Start the menu
The first 4 menu items are displayed
Select a menu item
SET ECM
1.ON
2.OFF
.....
The fax machine displays the current
setting
Select a menu item
RESIDUAL MEMORY 100%
ENTER TEL. NUMBER
The setting which has now been selected is
applicable only for the current job. When
the document has been read in, the
contrast is reset to the default value.*
Dialling the fax partner
Transmission options, number of pages
• Because the ratio of transmitted pages is automatically displayed when a document is transmitted from
stack memory, the function represents a feed check in this mode. If the specified number of pages is not
identical with the actual situation, the following message is displayed “PAGE # MISMATCH“.
15-MAR-00 WED
19:56
Standby mode
RESIDUAL MEMORY 100%
15-MAR-00 WED
19:56
RESIDUAL MEMORY 100%
ENTER TEL NUMBER
1.COMM. OPTIONS
2.LISTS
3.INITIAL SETUP
4.DEFAULT SETTINGS
Load original
Remember: Printed side face down
Document ready
Start the menu
The first 4 menu items are displayed
Select a menu item
PAGE NUMBER
Make your selection
for the number of pages
PAGE NUMBER =(1-999)
...confirm with START
START
RESIDUAL MEMORY 100%
ENTER TEL. NUMBER
Dialling the fax partner
TRANSMIT DOCUMENTS
Enter the number of pages to be transmitted before the transmission procedure commences (in the mode:
Direct transmission, see page 42).
Before sending a document, you can use this option to enter the number of pages being sent. The until will
compare the number of pages actually sent with the number you entered.
53
TRANSMIT DOCUMENTS
54
Transmission options, protected transmission
The transmission of documents is restricted.
You can now only send documents to fax machines whose ID is identical to the dialled fax number. You can
thus only fax your documents to specific fax partners.
*) Please refer to page 126 if you wish to change the basic setting of transmission protection.
15-MAR-00 WED
19:56
Standby mode
RESIDUAL MEMORY 100%
15-MAR-00 WED 19:56
RESIDUAL MEMORY 100%
ENTER TEL NUMBER
1.COMM. OPTIONS
2.LISTS
3.INITIAL SETUP
4.DEFAULT SETTINGS
Load original
Remember: Printed side face down
Document ready
Start the menu
The first 4 menu items are displayed
Select a menu item
SET SECURITY TX
1.ON
2.OFF
.....
The fax machine displays the current
setting
Select a menu item
RESIDUAL MEMORY 100%
ENTER TEL. NUMBER
The selected setting is applicable only for
the current job. When the document has
been read in, transmission protection is
reset. *
Transmission options, reduced speed
15-MAR-00 WED
19:56
Standby mode
RESIDUAL MEMORY 100%
15-MAR-00 WED 19:56
RESIDUAL MEMORY 100%
ENTER TEL NUMBER
Load original
Remember: Printed side face down
Document ready
Operate the Menu function template
LOW SPEED TX
Press the corresponding function key
QUALITY TX
1.OFF
2.14400BPS
3.9600BPS
Make your selection
for transmission speed
1: Maximum speed
Select a menu item
.....
The selected setting is applicable only for
the current job.
RESIDUAL MEMORY 100%
ENTER TEL. NUMBER
Dialling the fax partner
TRANSMIT DOCUMENTS
When sending documents overseas or if an increased error ratio is encountered, you should lower the
transmission speed in order to reduce the number of errors. Similar to a situation in traffic where speed is
adjusted to the given conditions!
55
TRANSMIT DOCUMENTS
56
Transmission options, send cover sheet
The cover sheet is a form which is placed at the head of your fax transmission. It is a tool to enable the
operator to classify an incoming fax more easily.
The data are entered on the cover sheet via the combination keypad (see page 14).
If you wish to use this option, you must first enable the cover sheet function (see page 118).
15-MAR-00 WED
19:56
Standby mode
RESIDUAL MEMORY 100%
15-MAR-00 WED
19:56
RESIDUAL MEMORY 100%
ENTER TEL NUMBER
COVER SHEET
Load original
Remember: Printed side face down
Document ready
Operate the Menu function template
Press the corresponding function key
COVER SHEET
1.SEND
2.PRINT
Make your selection
1. Send cover sheet
2. Print cover sheet
Select a menu item
ENTER REMOTE NAME
Enter the addressee
(refer to page 15 for the procedure)
confirm with START
START
ENTER YOUR NAME
Enter the sender
(refer to page 15 for the procedure)
confirm with START
START
Dialling the fax partner
RESIDUAL MEMORY 100%
ENTER TEL. NUMBER
Transmission options, send after scan
The basic setting for this function can be found on page 131.
15-MAR-00 WED
19:56
Standby mode
RESIDUAL MEMORY 100%
15-MAR-00 WED
19:56
RESIDUAL MEMORY 100%
ENTER TEL NUMBER
SEND AFTER
SCAN
Load originalRemember:Printed side
face down
Document ready
Operate the Menu function template
Press the corresponding function key
SEND AFTER SCAN
1.YES
2.NO
Make your selection for SEND AFTER SCAN
1. Send during scanning
2. Send after scanning
Select a menu item
WHEN MEMORY FULL
1.DELETE SCAN PAGES
2.SEND SCAN PAGES
.....
In the case of selection 1 (behaviour in the
event of a memory overflow)
1. Cancel sending (document feed ready for
use)
2. Continue sending (documents remain in
the document feed until the memory is
free)
Select a menu item
Dialling the fax partner
RESIDUAL MEMORY 100%
ENTER TEL. NUMBER
TRANSMIT DOCUMENTS
The default setting for the fax machine causes the fax machine to commence dialling immediately after
pressing the START button for a scan job. In the case of extensive fax jobs, this can result in the page number
descriptor in the TX header on the first few pages being incomplete. This in turn results in a memory overflow,
the transmission is interrupted and the document part waiting in memory is deleted. This prevents the
document feed becoming jammed.
If an extensive document is to be faxed, the basic settings should be adjusted temporarily. In this context,
transmission is only commenced after the entire document has been scanned. Furthermore, the way in which
the fax machine is to handle a memory overflow can also be set.
57
TRANSMIT DOCUMENTS
58
Chain dialling
When dialling unabbreviated numbers, the number can be made up of various parts. You are able to combine all
forms with each other:
•
•
•
•
•
One-touch dialling (see page 44)
Dialling with telephone directory function (see page 45)
Dialling with alphabet number (see page 43)
Dialling via the numeric keypad
Dialling pause (using the PAUSE key)
15-MAR-00 WED
19:56
Standby mode
RESIDUAL MEMORY 100%
15-MAR-00 WED
19:56
RESIDUAL MEMORY 100%
ENTER TEL NUMBER
CHAIN DIAL COMM
Load original
Remember: Printed side face down
Document ready
Operate the Menu function template
Press the corresponding function key
CHAIN DIAL COMM
ENTER TEL NUMBER,
ABB NBR OR
ONE TOUCH KEY
.....
Make your selection
the fax number can be made up of various
items of input
Enter the number(s)
when you are ready.
or
SPEED DAIL
or
...confirm with START
START
Dialling the fax partner
59
Call redial
If it was not possible for your fax message to be sent, this may be due to various reasons (please read
page 143). One reason may be that the other fax machine is busy. In this case, it would make sense to call
your partner again at a later time. This is done automatically by your fax; it attempts to send the fax message
again approx. every 3 minutes.
You are able to individually set the period between the call redial attempts and also the number of redial
attempts (see page 107).
Manual call redial:
If the memory contains a job which you wish to redial immediately, you can select this job and manually select
the redial procedure (see diagram).
• Manual call redial does not have any influence on the preset number of call redial attempts (see page 107).
15-MAR-00 WED
19:56
RESIDUAL MEMORY 77%
Manual call redial (from memory)
Standby mode
Requirement:
There must be at least one job which has
already been dialled and not transmitted.
REDIAL
Press the REDIAL/PAUSE key
PAUSE
REDIAL:
[ENTER]:START
[]:PREVIOUS SCREEN
[]:NEXT SCREEN
Make your selection
for selecting the required job*
after 5 seconds
SINGLE TRANSMIT
TOSHIBA EUROPA
15-03-00
19:33
FILE NBR = 008
The first available job is displayed.
Please refer to page 62 for details of the job
format
Select the job which you want to redial.
confirm with START
The job is carried out again.
START
REDIAL
NUMBER NOT LISTED
*) If there is no job available for the redial
facility, the machine displays the
following message:
TRANSMIT DOCUMENTS
Auto call redial:
TRANSMIT DOCUMENTS
60
Resend (retained job)
If your fax machine is set to retain a job (see page 120) you can resend this job by the following procedure. The
criteria applicable for a “fresh” job are applicable for the newly activated job.
You also have the option of changing the fax numbers assigned to the job.
15-MAR-00 WED
19:56
Standby mode
RESIDUAL MEMORY 77%
Operate the Menu function template
Press the corresponding function key
RECOVERY TX
RECOVERY TRANSMIT
[ENTER]:START
[CANCEL]: DELETE
[]: SEARCH
Make your selection
for selecting the required job
after 5 seconds
SINGLE TRANSMIT
TOSHIBA EUROPA
15-MAR-00
19:56
FILE NBR = 008
The first available retained job is displayed.
Please refer to page 62 for details of the job
format
Select the job which you wish to
activate.
SINGLE TRANSMIT
DUKE NUKEM
15-MAR-00
19:45
FILE NBR = 007
...confirm with START
START
SINGLE TRANSMIT
1.START
2.CHANGE
Make your selection
1: Job is reactivated unchanged
2: Fax number can be changed (not for
direct-dialling numbers / one-touch dial
numbers)
Select a menu item
Example: Change the fax number
Current fax number is displayed
TEL NUMBER =(MAX128)
1234567
.....
Enter new fax number
Confirm with START
The selected job is used again.
START
NO ENTRY
*) If no job is retained, the following error
message is display:
NOT ALLOWED NOW
*) If the “retained job” function is not
activated, the following error message is
display:
Cancel a retained job (with retain job)
15-MAR-00 WED
19:56
Standby mode
RESIDUAL MEMORY 77%
RECOVERY TX
Operate the Menu function template
Press the corresponding function key
RECOVERY TRANSMIT
[ENTER]:START
[CANCEL]: DELETE
[]: SEARCH
Make your selection
for selecting the required job
after 5 seconds
SINGLE TRANSMIT
TOSHIBA EUROPA
15-MAR-00
19:56
FILE NBR = 008
The first available retained job is displayed.
Please refer to page 62 for details of the job
format
Select the job which you wish to cancel.
SINGLE TRANSMIT
DUKE NUKEM
15-MAR-00
19:45
FILE NBR = 007
Press the JOB CANCEL key
JOB CANCEL
DELETE ?
FILE NBR. = 007
1.YES
2.NO
Confirmation prompt
...confirm with START
START
Selected job is cancelled
TRANSMIT DOCUMENTS
If your fax machine is set to retain job (see page 120), you can use the following steps to cancel the retained
job.
61
TRANSMIT DOCUMENTS
62
Cancel transmission
If you enter the wrong fax number or if you have dialled the wrong
fax partner, the relevant job has to be cancelled. It is important to
distinguish between a job which is read into memory (stack
mode, page 39) or transmitted directly (direct transmission,
page 42).
If the job is read into memory, the current action of the fax
machine is not related to the momentary operation of the
machine. In order to cancel a specific job, it is necessary to select
it specifically from other jobs which are waiting to be handled.
This is achieved by “paging” through the job stack.
JOB DELETE
JOB NO. 45
JOB NO. 44
JOB NO. 43
JOB NO. 42
JOB NO. 41
JOB NO. 40
JOB NO. 39
JOB NO. 38
JOB NO. 37
JOB NO. 36
The job is displayed as follows:
SINGLE TRANSMIT
DUKE NUKEM
15-MAR-00
19:45
FILE NBR = 007
Type of job
Name of the fax partner
(if the number is dialled via the numeric
keypad or if no name has been entered,
the machine displays the fax number). JOB CANCELED
Date and time
when the job was entered
Job number (1 - 999)
In addition to cancelling a specific job from the stack, you can also cancel the current transmission. For this
purpose, please refer to page 121 “query job status”.
DIALING
FILE NBR =
008
Cancel job during “direct transmission”
Fax machine is dialled in direct mode
(transmission)
123456789
Press STOP
STOP
CANCEL?
1.123456789
2.NO
Confirmation prompt
Select a menu item
Job is cancelled
15-MAR-00 WED
19:56
RESIDUAL MEMORY 77%
Press the JOB CANCEL key
JOB CANCEL
JOB CANCEL
1.TRANSMIT
2.JOB NUMBER
.....
Cancel menu is displayed
(Display can vary, depending on the
outstanding jobs)
Select a menu item
JOB CANCEL
[ENTER]: CANCEL
[]:PREVIOUS SCREEN
[]: NEXT SCREEN
Make your selection
for selecting the required job
after 5 seconds
SINGLE TRANSMIT
TOSHIBA EUROPA
21-MAR-00
19:33
FILE NBR = 008
The first available job is displayed.
Select the job which you wish to cancel.
SINGLE TRANSMIT
DUKE NUKEM
15-MAR-00
19:45
FILE NBR = 007
Press the JOB CANCEL key
JOB CANCEL
CANCEL?
FILE NBR. = 007
1.YES
2.NO
Confirmation prompt
...confirm with START
START
Selected job is cancelled
63
TRANSMIT DOCUMENTS
Cancel from stack
Standby mode
POLLING
Reserve polling
General:
The polling procedure is used for receiving a
document. The difference between polling and
“normal” reception is that the call is established
by the person wishing to receive the document,
and that the call charges are incurred by the
person receiving the document.
More and more companies are using the polling
facility as “FAX on DEMAND”, for instance for
providing information such as weather reports,
current price lists, stock exchange news, traffic
jam predictions, etc.
For the polling facility to be used, it must be
reserved beforehand.
POLLING
64
Polling reserved
Connection
established
End of polling.
Reserve polling
Other fax partners can poll information from your fax machine if you set up this facility with this function. Your
document which you reserve for polling is read that into the memory of the machine so that the document tray
is not blocked.
There are two types of reservation available:
• single reservation:
Your stored document is deleted as soon as the document has been polled.
• permanent reservation:
Your stored document is permanetly available for polling.
Only one document can be reserved for polling.
Polling protection
Polling reserved in this manner is not protected. I.e. every fax machine which has a polling facility is able to poll
documents from your machine. The polling protection facility is activated in order to prevent unauthorised
polling (only possible with single reservation).
Two options are available for polling protection:
1. NUMBER: With this option, you specify the number of the fax machine which is permitted to poll
documents from your machine. However, it is essential that the code of the polling fax machine is identical
to the number which you enter as polling protection.
Please enter the complete number of the polling fax machine.
Example:
Number of the polling fax machine: +44-2131-1234567890
Entry for polling protection:
4421311234567890
2. CODE: If you wish to reserve the polling facility exclusively for TOSHIBA fax machines, you can use the fourdigit TOSHIBA code as polling protection. Documents can then only be polled if this code is identical in both
fax machines.
• Only one form of polling reservation is possible at any one time.
• Please refer to page 68 for details of how to cancel polling reservation.
• The choice of resolution (see page 50) also has an effect on memory behaviour. The higher the
resolution, the higher is the strain placed on memory volume.
*) In case of memory overflow, your dealer is able to offer a memory upgrade.
15-MAR-00 WED
19:56
RESIDUAL MEMORY 100%
15-MAR-00 WED
19:56
RESIDUAL MEMORY 100%
ENTER TEL NUMBER
Load original
Remember: Printed side face down
Document ready
Operate the Menu function template
POLLING
Press the corresponding function key
POLLING
1.POLLING
2.POLLING RESERVE
3.PROG. CONT. POLL.
Make your selection
for polling modes
Select a menu item
SECURITY CODE/TEL ?
1.NO
2.SECURITY CODE
3.TEL. NO.
Polling protection?
1. No polling protection
2. TOSHIBA code
3. Telephone number
4. TOSHIBA code + telephone number
(concealed)
Select a menu item
(Example: 4 = TOSHIBA Code +
Telephone number)
.....
Make your selection
for TOSHIBA Code (4-digit number)
POLLING RESERVE
SECURITY CODE =
Enter the TOSHIBA code
.....
confirm with START
START
POLLING RESERVE
SECURITY TEL=(MAX20)
.....
Make your selection
For the number (code) of the polling fax
machine
Enter the number
...confirm with START
START
The document will be stored in memory
and is ready for polling.
65
POLLING
Reserve single polling
Standby mode
POLLING
66
Reserve polling, permanent (general infobox)
With permanent polling, the document is retained in the memory of the fax machine so that it can be
constantly polled. “FAX on DEMAND” can be configured in this way. Items of information such as weather
report, current price lists, stock market news, traffic jam forecasts, etc. can thus be constantly maintained for
polling.
• Only one form of polling reservation is possible at any one time.
• Please refer to page 68 for details of how to cancel polling reservation.
• The choice of resolution (see page 50) also has an effect on memory behaviour. The higher the
resolution, the higher is the strain placed on memory volume.
*) In case of memory overflow, your dealer is able to offer a memory upgrade.
15-MAR-00 WED
19:56
Reserve permanent polling (Infobox)
Standby mode
RESIDUAL MEMORY 100%
15-MAR-00 WED 19:56
RESIDUAL MEMORY 100%
ENTER TEL NUMBER
Load original
Remember: Printed side face down
Document ready
Operate the Menu function template
POLLING
Press the corresponding function key
POLLING
1.POLLING
2.POLLING RESERVE
3.PROG. CONT. POLL.
Make your selection
for polling modes
Select a menu item
The document is read into the memory and
is kept available for various polling attempts
until it is cancelled *
67
Reserve polling, append documents
15-MAR-00 WED
19:56
Adding/Replacing documents
Standby mode
RESIDUAL MEMORY 100%
15-MAR-00 WED
19:56
Load original
Remember: Printed side face down
Document ready
RESIDUAL MEMORY 77%
ENTER TEL NUMBER
Operate the Menu function template
POLLING
Press the corresponding function key
POLLING
1.POLLING
2.POLLING RESERVE
3.PROG. CONT. POLL.
Make your selection
for polling modes
Select a menu item
POLLING RESERVE
1.POLLING
2.PUBLIC FAX M-BOX
Select a menu item
Documents can be added only if an
existing reserved document is
selected
.....
ALREADY ASSIGNED
1.CANCEL
2.ADD
3.RETAIN
.....
Make your selection
for reservation type
Make your selection
1. Replace the existing contents with the
new contents
2. Add the new contents to the existing
contents
3. Exit the menu without making any
changes
Select a menu item
POLLING
When a document has already been reserved for polling, you can append additional documents or replace these
documents. This means that the operator is able to make additions without previously having to cancel the
entire job.
POLLING
68
Cancel polling reservation
If you have reserved a document for polling, you can cancel the reservation as follows:
15-MAR-00 WED
19:56
Standby mode
RESIDUAL MEMORY 77%
Press the JOB CANCEL key
JOB CANCEL
JOB CANCEL
1.POLLING RESERVE
2.JOB NUMBER
Make your selection
for cancel operation
Select a menu item
JOB CANCEL
[ENTER]: CANCEL
[]:PREVIOUS SCREEN
[]:NEXT SCREEN
Make your selection
for selecting the required job
after 5 seconds
POLLING RESERVE
FILE NBR =
The first available job is displayed.
Please refer to page 62 for details of the job
format
007
Select the job which you wish to cancel.
confirm with START
START
CANCEL?
FILE NBR =
1.YES
2.NO
Confirmation prompt
007
Select a menu item
.....
JOB CANCELLED
The job is cancelled
69
Single polling
15-MAR-00 WED
19:56
Standby mode
RESIDUAL MEMORY 100%
Enter the fax number of the fax machine
from which you wish to poll
.....
confirm with START
START
LOAD DOCUMENT
IF POLLING
PRESS [START]
...confirm with START
START
Make your selection
for polling protection
1. with TOSHIBA code
2. without polling protection
POLLING
SECURITY CODE ?
1.YES
2.NO
Select a menu item
.....
without protection (A) with TOSHIBA code
(B)
A
without protection
The polling procedure is stored as a job and
carried out.
B
with Toshiba code
POLLING
SECURITY CODE =
.....
START
Enter the TOSHIBA code
...confirm with START
The polling procedure is stored as a job and
carried out.
POLLING
If your fax partner has reserved a document for polling, you can poll the document using the procedure
described in the following.
If you would like to use the delayed polling facility, you must first carry out the steps described on page 103
before proceeding as follows.
POLLING
70
Multiple polling
It is not only possible to poll documents from a single fax machine; you are also able to use your fax machine
to poll documents from several fax machines. Direct-dialling numbers, one-touch dial numbers and freely
assignable numbers (max. 100) can be grouped in any combination to form a polling group.
If you wish to use the delayed multiple polling facility you must first carry out the steps described on
page 103 before proceeding as described in the following.
15-MAR-00 WED
19:56
Standby mode
RESIDUAL MEMORY 100%
POLLING
Operate the Menu function template
Press the corresponding function key
POLLING
1.POLLING
2.POLLING RESERVE
3.PROG. CONT. POLL.
Make your selection
for polling modes
Select a menu item
MULTI
MULTI POLLING
000
ENTER TEL NUMBER,
SPEED DIAL KEY OR
ONE TOUCH KEY
Press the MULTI key
Make your selection
for fax number (page 38),
Alphabet dialling (page 43),
One-touch dialling (page 44),
Telephone directory (page 45),
group (page 47)
confirm with START
(depending on selected action)
START
MULTI POLLING
[] TO PREVIOUS
ENTER MORE OR
PRESS [START]
Make your selection
for further group elements
(Previously entered dial numbers can be
called up and edited or deleted with the
control key )
- or ...confirm with START
START
.....
MULTI POLLING
SECURITY CODE ?
1.YES
2.NO
Make your selection
for polling protection
1. with TOSHIBA code
2. without polling protection
Select a menu item
without protection (A) with TOSHIBA code
(B)
Continued on next page.
B
with TOSHIBA code (B)
Make your selection Operate the Menu
function template
MULTI POLLING
SECURITY CODE =
.....
Enter the TOSHIBA code
Confirm with START
START
Multiple polling is stored and carried out
as a job.
71
POLLING
without protection (A)
Multiple polling is stored and carried out
as a job.
A
POLLING
72
Cancel polling
The process of polling a document is also a job. Proceed as follows if you wish to cancel this polling job:
15-MAR-00 WED
19:56
Standby mode
RESIDUAL MEMORY 77%
Press the JOB CANCEL key
JOB CANCEL
JOB CANCEL
1.POLLING
2.JOB NUMBER
Cancel menu is displayed
Select a menu item
JOB CANCEL
[ENTER]: CANCEL
[]:PREVIOUS SCREEN
[]:NEXT SCREEN
Make your selection
for selecting the required polling job
after 5 seconds
POLLING
12345678
15-MAR-00
FILE NBR =
The first available polling job is displayed.
19:33
018
Select the job which you wish to cancel.
POLLING
998887766
16-MAR-00
FILE NBR =
19:45
017
...confirm with START
START
START
CANCEL?
FILE NBR. = 017
1.YES
2.NO
Confirmation prompt
...confirm with START
Selected polling job is cancelled
73
Program Continous Polling
15-MAR-00 WED
19:56
Standby mode
RESIDUAL MEMORY 100%
POLLING
Operate the Menu function template
Press the corresponding function key
POLLING
1.POLLING
2.POLLING RESERVE
3.PROG. CONT. POLL.
Make your selection
for polling modes
Select a menu item
PROG. CONT. POLL
INTERVAL=(10-70) MIN
00
.....
Make your selection
for the period after which the polling
attempt is to be repeated (enter data in
steps of 10 minutes)
Enter the periods
confirm with START
START
PROG. CONT. POLL
TIME PERIOD =
08:00 - 17:00
.....
Make your selection for the period during
which program continuous polling is
active.
(Move the cursor using the / keys)
Enter the period
confirm with START
START
to
PROG. CONT. POLL.
[] FOR SETTING
SCHEDULE
MON - FRI
Make your selection for the period of the
week in which program continuous polling
is active (from-to). Use the / keys to
move the from-to cursor. Use the /
keys to set the day.
Enter the period of the week
confirm with START
START
Continued on next page.
POLLING
The polling procedure is automated with the program continuous polling. During a defined period, your fax
machine calls one or more stations in order to poll a document from the station. It is also possible for several
procedures to be carried out during the day.
74
POLLING
PROG. CONT. POLL
ENTER TEL NUMBER,
SPEED DIAL OR
ONE TOUCH KEY
Make your selection
for the numbers of fax partners to be served
with program continuous polling.
Enter...
• User-defined numbers (see page 38)
• Alphabet dialling numbers (see page 43)
• Telephone directory function (see
page 44)
• One-touch dial keys (see page 45)
Confirm with START
START
PROG. CONT. POLL
SECURITY CODE
.....
Make your selection
for polling protection
If no polling protection is wished, you can
skip the prompt with START.
Enter the TOSHIBA code
Confirm with START
START
Program continous polling is stored and
carried out as a job.
75
Reverse direction
15-MAR-00 WED
19:56
Standby mode
RESIDUAL MEMORY 100%
15-MAR-00 WED 19:56
RESIDUAL MEMORY 100%
ENTER TEL NUMBER
1.COMM. OPTIONS
2.LISTS
3.INITIAL SETUP
4.DEFAULT SETTINGS
Load original
Remember: Printed side face down
Document ready
Start the menu
The first 4 menu items are displayed.
Select a menu item
TURNAROUND POLL
SECURITY CODE ?
1.YES
2.NO
Select a menu item
without protection (A) with TOSHIBA code
(B)
.....
A
RESIDUAL MEMORY 100%
ENTER TEL NUMBER
START
Make your selection
for polling protection
1. with TOSHIBA code
2. without polling protection
without protection (A)
Make your selection
for fax number, alphabet dialling, one-touch
dial or telephone directory
...confirm with START
The document is read into memory (see
page 38)
When contact is made with the fax partner,
the document is transmitted and the
document is subsequently polled.
Continued on next page.
POLLING
With the reverse direction facility, the machine automatically polls another document after having transmitted a
document. For this to be effective, a document must have also been reserved for polling on the receiver side.
POLLING
76
B
with TOSHIBA code (B)
Make your selection for TOSHIBA Code (4digit number)
TURNAROUND POLL
SECURITY CODE =
.....
Enter the TOSHIBA code
confirm with START
START
RESIDUAL MEMORY 100%
ENTER TEL NUMBER
Make your selection
for fax number, alphabet dialling, one-touch
dial or telephone directory
...confirm with START
START
The document is read into memory (see
page 38)
When contact is made with the fax partner,
the document is transmitted and the
document is subsequently polled.
77
STORE NUMBERS
The alphabet dial facility enables you to enter a single “address”
instead of the fax number of your partner (which is frequently a
long number). This “address” can be any number between 1 and
999. The real fax number is stored under this “address”. With
frequently used fax numbers, the alphabet dial facility enables you
to save time.
A further component of the alphabet dial memory is the alternative
fax number (second number). It is dialled if no fax connection is
established under the normal fax number. Entry of the 2nd fax
number is not absolutely necessary, but it must differ from the 1st
fax number.
300 alphabet dial memories are available and the name as well as
the number of your partner can be stored in this memory. You can
use up to 20 characters of your choice in this memory (see
page 15 enter the user name).
In addition to numbers and names, it is also possible for additional
options to be assigned to an alphabet dial memory position (see
page 79, Alphabet dial options).
Example: Alphabet dial 421:
999
Fax number (128)
998
1234567890
•
•
•
2. Fax number (128)
422
0987654321
421
420
Name (20)
•
•
BBROWN
•
5
Options
4
3
2. DELAYED COMM
2
3.TX REPORT
1
4.LINE MONITOR
Alphabet dial5.QUALITY TX
memory
6.SUB ADDRESS
• Please note that, in order to obtain an outside line (when equipment is connected to a PABX), the “❊“
key must be saved before the actual fax number.
• An error message is displayed if the user attempts to store an identical fax number in the alphabetic
dialling memory. This facility prevents identical fax numbers from being stored (not applicable for
alternative numbers).
15-MAR-00 WED
19:56
Enter alphabet dial number
Standby mode
RESIDUAL MEMORY 100%
Operate the Menu function template
TEL LIST ENTRY
TEL LIST ENTRY
1.ABB NUMBERS
2.GROUP NUMBERS
3.ONE TOUCH KEYS
ENTER ABB NUMBER
OR PRESS
[BACK] : TO PREVIOUS
[STOP] : TO COMPLETE
.....
Press the corresponding
function key
The menu items are displayed.
Select a menu item
Make your selection
Enter alphabet dial number(1-999)
Enter the alphabet dial number
Example: 7
Use the key to correct data input
...confirm with START
START
Continued on next page.
STORE NUMBERS
Alphabet dial memory
78
STORE NUMBERS
ABB. NBR =
007
Make your selection
for name
ID NAME = (MAX20)
Enter the name
(see page 15 for diagram)
ABB. NBR =
007
Make your selection
for first fax number
TEL NUMBER=(MAX 128)
.....
ABB. NBR =
007
TEL NUMBER=(MAX 128)
1234567890
Enter the fax number
For obtaining the outside line
Use the key to correct data input
(when equipment is connected to
PABXs), please enter the “❊“ key
before the actual number.
...confirm with START
START
ABB. NBR =
007
Make your selection
for alternative fax number
2ND TEL NBR=(MAX128)
Enter the alternative fax number
-and / orskip with START
.....
START
COMM OPTION?
1.YES
2.NO
Select a menu item
.....
ABB. NBR = 007
PRESS ONE TOUCH KEY
TO ENTER OR
[ENTER] TO SKIP
START
Make your selection
for options
1. See alphabet dial options page 79
2. See below
ENTER ABB NUMBER
OR PRESS
[BACK] : TO PREVIOUS
[STOP] : TO COMPLETE
Assign the alphabet dial number to the onetouch dial key (see page 82)
For further procedure, see under “one-touch
dial keys”
-or...confirm with START
Make your selection
further alphabet dial numbers
-orPress STOP, return to standby mode
STOP
79
Alphabet dial options
Delayed Comm (2)
The fax partner is linked to a specific transmission time with this option, e.g. for fax partners in other time
zones; this ensures that the documents always arrive during business hours.
TX report (3)
Irrespective of the basic setting for printing out the transmission report (see page 89), the facility for printing
out the transmission report can be activated or deactivated in relation to a specific fax partner.
Line Monitor (4)
If the listening-in option is activated for a fax transmission, the call establishment attempt is played back via
the built-in speaker. This provides the operator with an additional acoustic check of the call establishment
procedure. This is useful whenever a connection is not established. The cause is frequently an incorrect
number or a fax machine which is not ready to receive.
Quality TX (5)
When sending documents overseas or if an increased error ratio is encountered, you should lower the
transmission speed in order to reduce the number of errors. Similar to a situation in traffic where speed is
adjusted to the given conditions!
Please note that, when lower transmission speeds are used, the actual transmission time is longer.
Sub adrressing (6)
This operating mode is used for sending fax documents in PC networks. The fax number (the number of the fax
server in the network) and also the subaddress of the workstation in the network must be entered to enable the
fax document to be forwarded in the network (for further information, see page 132).
Line Select (when a 2nd line is installed) (7)
Here, the public line (Line 1, Line 2) via which the document is to be transmitted to the assigned fax partner
can be preselected.
COMM OPTION?
1.YES
2.NO
Procedure up to this menu item:
See page 78
Make your selection
for options
Select a menu item
FAX OPTIONS
1.COMPLETE
2.DELAYED COMM
3.TX REPORT
Display the first options.
1. Quit option menu
2. Link specified delay
3. Activate/deactivate TX Report
4. Activate line monitoring
5. Reduce transmission speed
6. Transfer subaddress
7. Reserve specific line
STORE NUMBERS
Apart from numbers and names, it is also possible for additional options to be assigned to an alphabet dial
memory position:
STORE NUMBERS
80
Modify ABB numbers
If you wish to modify the contents of an alphabet dial number, all you have to do is simply enter the
corresponding alphabet dial number (see under “Alphabet dial number”). If this number has already been used,
a further selection option is displayed.
All stored data can be overwritten or skipped with the START key.
(Example: ABB, NBR. 7, name TOSHIBA):
Error message appears if you try to store the same fax number again in the alphabet dial memory. This is
to avoid storing equal numers.
ABB NUMBER ENTRY
ALREADY ASSIGNED
ABB. NBR = 007
TOSHIBA
Procedure as described under “Enter
alphabet dial number”: See page 77
Display message for existing alphabet dial
number
after 2 seconds
ABB NUMBER ENTRY
1.CANCEL
2. MODIFY
3. RETAIN
Menu displayed when alphabet dial number
already exists
1. Delete
2. Modify
3. Retain
Select a menu item
Option for editing the name
-and/or-
ENTER NAME
ID NAME = (MAX20)
TOSHIBA
ABB. NBR =
007
START
...confirm with START
Option for editing the first fax number
-and/or-
TEL NUMBER=(MAX 128)
1234567890
START
ABB. NBR =
007
...confirm with START
Option for editing the second fax number
-and/or-
2ND TEL NBR=(MAX128)
987654321
START
COMM OPTION?
1.YES
2.NO
...confirm with START
Option for editing
for options
YES: See alphabet dial options
NO: See below
Select a menu item
.....
ABB. NBR = 007
PRESS ONE TOUCH KEY
TO ENTER OR
[ENTER] TO SKIP
Assign the alphabet dial number to the onetouch dial key (see page 82)
Continued on next page.
...confirm with START
ENTER ABB NUMBER
OR PRESS
[BACK] : TO PREVIOUS
[STOP] : TO COMPLETE
Make your selection
further alphabet dial numbers
-orPress STOP, return to standby mode
STOP
Delete ABB numbers
If you want to delete ABB numbers just enter them.
If this number has already been used, a further selection option is displayed.
(Example: ABB, NBR. 7, name TOSHIBA):
ABB NUMBER ENTRY
ALREADY ASSIGNED
ABB. NBR = 007
TOSHIBA
Procedure as described under “Enter
alphabet dial number”: See page 77
Display message for existing alphabet dial
number
after 2 seconds
ABB NUMBER ENTRY
1.CANCEL
2. MODIFY
3. RETAIN
Menu displayed when alphabet dial number
already exists
1. Delete
2. Modify
3. Retain
Select a menu item
ABB NUMBER ENTRY
ABB NUMBER = 007
CANCELLED
after 2 seconds
ENTER ABB NUMBER
OR PRESS
[BACK] : TO PREVIOUS
[STOP] : TO COMPLETE
Make your selection
further alphabet dial numbers
-orPress STOP, return to standby mode
STOP
STORE NUMBERS
START
81
STORE NUMBERS
82
One-touch dial keys
One-touch dialling provides you with a very easy method of dialling the number of your partner. Your can assign
any fax numbers to 73 keys *. Simply press a single button to start the dialling procedure.
*) The one-touch dial keys of your fax machine have double assignments. As soon as you operate the
corresponding one-touch dial function template, additional number memory spaces are available.
Two options are available.
1. Direct configuration of one-touch dial keys
• Apart from numbers and names, it is also possible for
additional options to be assigned to a one-touch dial key
(see page 79, Alphabet dial options).
• If the operator attempts to save an identical fax number
under a one-touch dial key, the system displays an error
message. This prevents identical fax numbers from
being saved.
Criteria which can be assigned to a onetouch dial key:
Fax number (128)
ONE TOUCH
xx
1234567890
0987654321
0987654321
Name (20)
BROWN
Options
2. Delayed Comm
3.TX REPORT
4.LINE MONITOR
5.QUALITY TX
6.SUB ADDRESS
2. Assign alphabet dial number to a one-touch dial key
When the fax number has been stored in an alphabet dial
memory, it can be additionally assigned to a one-touch dial key.
This assignation is not subject to any restrictions, i.e. any onetouch dial key can be used (see page 82).
15-MAR-00 WED
19:56
RESIDUAL MEMORY 100%
TEL LIST ENTRY
User-defined assignation of alphabet dial
memories to one-touch dial keys:
999 ONE TOUCH 1
998 ONE TOUCH 8
421
338 ONE TOUCH 3
240 •
ONE TOUCH 24
•
•
•
5
•
•
4
3
2
ONE TOUCH 38
1
Alphabet dial memory
Save fax number directly on one-touch
dial key
Standby mode
Operate the Menu function template
TEL LIST ENTRY
1.ABB NUMBERS
2.GROUP NUMBERS
3.ONE TOUCH KEYS
Press the corresponding function key
The menu items are displayed.
Continued on next page.
ENTER ONE TOUCH KEY
OR PRESS
[BACK] : TO PREVIOUS
[STOP] : TO COMPLETE
Operate the corresponding function
template and press the desired onetouch dial key:
Example: 40
ONE TOUCH = 40
ID NAME = (MAX20)
Make your selection
for name
Enter the name
(see page 15 for diagram)
ONE TOUCH = 40
ID NAME = (MAX20)
BLUME
START
ONE TOUCH = 40
TEL NUMBER=(MAX 128)
.....
ONE TOUCH = 40
TEL NUMBER=(MAX 128)
1234567890
START
ONE TOUCH = 40
...confirm with START
Make your selection
for first fax number
Enter the fax number
For obtaining the outside line
Use the key to correct data input
(when equipment is connected to
PABXs), please enter the “❊“ key
before the actual number.
confirm with START
Make your selection
for alternative fax number
2ND TEL NBR=(MAX128)
Enter the alternative fax number
-and / orskip with START
.....
START
COMM OPTION?
1.YES
2.NO
Select a menu item
.....
ENTER ONE TOUCH KEY
OR PRESS
[BACK] : TO PREVIOUS
[STOP] : TO COMPLETE
STOP
Make your selection
for options
1. See alphabet dial options page 79
2. See below
Make your selection
for further one-touch dial keys
-orPress STOP, return to standby mode
83
STORE NUMBERS
Select a menu item
Make your selection
STORE NUMBERS
84
Cancel one-touch dial keys
If you wish you cancel the contents of a one-touch dial key, simply enter the corresponding one-touch dial key
in the menu (see under one-touch dial keys). If this one-touch dial key is already being used, a further selection
option is displayed (example: one-touch dial key 1, name TOSHIBA):
ONE TOUCH = 01
ALREADY ASSIGNED
ONE TOUCH = 01
TOSHIBA
Refer to page 82 for procedure as
described under “One-touch dial keys”
Display message for existing one-touch dial
key
after 2 seconds
ONE TOUCH KEY ENTRY
1.CANCEL
2.RETAIN
Menu displayed if one-touch dial key
already exists
Select a menu item
ONE TOUCH KEY ENTRY
Programming of one-touch dial key is
cancelled
ONE TOUCH = 01
CANCELLED
after 2 seconds
ENTER ONE TOUCH KEY
OR PRESS
[BACK] : TO PREVIOUS
[STOP] : TO COMPLETE
Make your selection
for further one-touch dial keys
-orPress STOP, return to standby mode
STOP
Define groups
19:56
GROUP XX
Alphabet dial memory
Define groups
Standby mode
RESIDUAL MEMORY 100%
Operate the Menu function template
TEL LIST ENTRY
Press the corresponding function key
TEL LIST ENTRY
1.ABB NUMBERS
2.GROUP NUMBERS
3.ONE TOUCH KEYS
The menu items are displayed.
Select a menu item
ENTER GROUP NUMBER
OR PRESS
[BACK] : TO PREVIOUS
[STOP] : TO COMPLETE
Make your selection
Group number (1 - 1999)
.....
Enter group number
Example: 444
START
confirm with START
Make your selection
for group name
GROUP NBR = 0444
GROUP NAME=(MAX 20)
ENTER NAME
Enter group name
(see page 15 for diagram)
GROUP NAME=(MAX 20)
SUPERGROUP
...confirm with START
START
Continued on next page.
85
STORE NUMBERS
15-MAR-00 WED
ZW XX
If you have a fixed number of partner to whom you frequently send
broadcast transmissions, the stored broadcast facility is just what
you need.
You are permitted to define 50 different groups, whereby each
group can be assigned a group number from 1 - 1999 and a name
consisting of max. 20 characters.
Each group can contain max. 373 fax partners, and these must be
stored either in the alphabet dial memory or under the one-touch
dial keys.
999
421
338
333
240
235
•
•
•
4
3
2
1
STORE NUMBERS
86
GROUP NBR = 0444
ENTER ABB NBR OR OT
[ENTER] TO COMPLETE
Make your selection
for group partner
alphabet dial number -or-one-touch dial
key
confirm with START
START
GROUP NBR = 0444
ENTER ABB NBR OR OT
[ENTER] TO COMPLETE
Make your selection
for further group partner
-or-
...confirm with START
START
GROUP NBR = 0444
PRESS ONE TOUCH KEY
TO ENTER OR
[ENTER] TO SKIP
Make your selection
for one-touch dial key to which the group
is assigned.
-orconfirm with START
START
STOP
ENTER GROUP NUMBER
OR PRESS
[BACK] : TO PREVIOUS
[STOP] : TO COMPLETE
Make your selection
for further groups
-orPress STOP, return to standby mode
87
Edit groups
GROUP NUMBER ENTRY
ALREADY ASSIGNED
GROUP NBR = 0444
SUPERGROUP
Refer to page 85 for procedure as
described under “Define groups”
Display message for existing group number
after 2 seconds
GROUP NUMBER ENTRY
1.CANCEL
2.MODIFY
3.RETAIN
Menu displayed if group number already
exists
Select a menu item
GROUP NBR = 0444
GROUP NAME=(MAX 20)
SUPERGROUP
START
GROUP NBR = 0444
ENTER ABB NBR OR OT
[ENTER] TO COMPLETE
.....
ABB NBR =
CANCEL?
1.CANCEL
2.RETAIN
007
GROUP NBR = 0444
ENTER ABB NBR OR OT
[ENTER] TO COMPLETE
START
STOP
...confirm with START
Make your selection
for group partner
If the operator enters existing group
partners, they can be cancelled (see
following example)
Enter an alphabet dial number
Make your selection
Cancel the selected group partner
1: YES
2: NO
Select a menu item
.....
START
Make your selection
for new group name
-or-
GROUP NBR = 0444
PRESS ONE TOUCH KEY
TO ENTER OR
[ENTER] TO SKIP
ENTER GROUP NUMBER
OR PRESS
[BACK] : TO PREVIOUS
[STOP] : TO COMPLETE
Make your selection
for further group partner
-and/orconfirm with START
Make your selection
for one-touch dial key to which the group is
assigned.
-orConfirm with START
Make your selection
for further groups
-orPress STOP, return to standby mode
STORE NUMBERS
If you wish to edit the contents of a group, simply enter the corresponding group number (see under “Define
groups”). If this group number already exists, a further selection option is displayed. All stored data can be
overwritten or skipped using the START key.
(Example: group number: 444, name: Supergroup)
STORE NUMBERS
88
Cancel groups
If you wish to cancel a group, simply enter the corresponding group number (see under “Define groups”). If this
group number already exists, a further selection option is displayed.
(Example: group number: 444, name: Supergroup)
GROUP NUMBER ENTRY
ALREADY ASSIGNED
GROUP NBR = 0444
SUPERGROUP
Refer to page 85 for procedure as
described under “Define groups”
Display message for existing group number
after 2 seconds
GROUP NUMBER ENTRY
1.CANCEL
2.MODIFY
3.RETAIN
Menu displayed if group number already
exists
Select a menu item
GROUP NBR = 0444
Group is cancelled
CANCELLED
after 2 seconds
ENTER GROUP NUMBER
OR PRESS
[BACK] : TO PREVIOUS
[STOP] : TO COMPLETE
Make your selection
for further groups
-or-
Press STOP, return to standby mode
STOP
REPORT PRINTS
The program selection list provides you with a complete overview of the menu system for your fax machine. It
is the only list which can be selected via the main menu item.
15-MAR-00 WED 19:56
Standby mode
RESIDUAL MEMORY 100%
1.COMM. OPTIONS
2.LISTS
3.INITIAL SETUP
4.DEFAULT SETTINGS
Start the menu
The first 4 menu items are displayed.
Select a menu item
15-MAR-00 WED 19:56
The report is printed.
RESIDUAL MEMORY 100%
PRINTING LIST
Transmission reports
The transmission reports provide you with extensive and individual information concerning the various
transmission jobs of your fax machine. You can use a special menu to adjust the appearance of these reports to
meet your specific requirements.
ALWAYS
ON ERROR
OFF
PRINT 1ST PG IMAGE?
The transmission report is always printed after every transmission.
The transmission report is printed out only if a transmission error occurs.
The transmission report is never printed out.
The first page of the document can be printed in reduced form on the
transmission report. This means that the transmission report can easily be
allocated to the document.
15-MAR-00 WED 19:56
Standby mode
RESIDUAL MEMORY 100%
1.COMM. OPTIONS
2.LISTS
3.INITIAL SETUP
4.DEFAULT SETTINGS
Start the menu
The first 4 menu items are displayed.
Select a menu item
Continued on next page.
89
REPORT PRINTS
Program selection list
90
REPORT PRINTS
01.TX REPORT
02.MEMORY-TX REPORT
03.MULTI-ADD REPORT
04.MULTIPOLL REPORT
Selection menu for various transmission
(TX) reports:
1. TX report for Direct transmission
2. TX report for Memory transmission
3. TX report for Multiple Address
transmission
4. Multipoll report
Select a menu item
(Example: Memory-TX Report)
SET MEMORY TX REPORT
1.ALWAYS
2.ON ERROR
Selection menu for Memory-TX Report
options:
1. Memory-TX report always
2. Memory-TX report only in the event of
a transmission error
Select a menu item
(Example: TX report - Always)
PRINT 1ST PG IMAGE?
1.ON
2.OFF
Select a menu item
.....
A5 SIZE PRINT
1.ON
2.OFF
.....
Selection menu for print-out with image
1. TX report with image
2. TX report without image
Selection menu for A5 print-out (only with
single-sheet feed installed) *
Select a menu item
Press STOP, return to standby mode
STOP
*) Please ensure that the format selector switch of the single-sheet feed is set to “Variable” if you wish to print
an A5 TX report from the single-sheet feed. If a different format is selected, the TX report is automatically
printed from the top paper cassette.
The various transmission reports and related options:
MEMORY-TX
REPORT
MULTI-ADD
REPORT
MULTI POLL
REPORT
RELAY ORG.
REPORT (Relay
TX list of the
relay originator)
RELAY STN
REPORT (Relay
TX list of the
relay machine)
RELAY END
REPORT (Relay
TX list of the end
machine)
Transmission report printed out after every transmission in the “direct transmission
mode” (see page 42). Print-out in A5 format also possible with single-sheet feed
installed.
Setting:
• Always printed out
• Printed out only if transmission is errored
Printed out after every memory transmission. Print-out in A5 format also possible with
single-sheet feed installed.
Setting:
• Always printed out
• Printed only if transmission is errored
• Printed with/without image of document
Printed out after entire broadcast has been completed. Setting:
• Always printed out
• Printed only if transmission is errored
• Printed with/without image of document
Printed out after entire multiple polling has been completed. Setting:
• Always printed out
• Printed only if transmission is errored
• Never printed out
This list is generated by a relay as soon as the document has been transmitted to the
relay machine. The relay settings are based on this list.*
• Always printed out
• Printed only if transmission is errored
This list is generated by the relay machine as soon as the document has been
transmitted to the end machines. This list is equivalent to a group transmission
report.*
• Always printed out
• Printed out only if transmission is errored
This list is a copy of the “Relay TX list of the end machine”. If the relay box is installed
accordingly, this list is faxed to the relay originator following completion of the relay
transmission. *
• Always printed out
• Printed only if transmission is errored
• Never printed out
*) For more detailed information, please refer to the brochure: ”Mailboxes and Relays”.
REPORT PRINTS
TX REPORT
91
REPORT PRINTS
92
Transmission report, memory TX report
MEMORY TRANSMISSION REPORT
PAGE
TIME
TEL NUMBER1
NAME
FILE NUMBER
DATE
TODOCUMENT PAGES
START TIME
END TIME
SENT PAGES
STATUS
FILE NUMBER
:
:
:
:
:
:
:
:
:
:
:
:
:
001
08.FEB.00 17:11
+44-1234567890
TOSHIBA MARKETING DP120F
084
08.FEB.00 17:11
541
01
08.FEB.00 17:11
08.FEB.00 17:11
001
OK
084
*** SUCCESSFUL TX NOTICE ***
The entries and their meanings:
FILE NUMBER:
DATE
TO / FROM
DOCUMENT PAGES
START TIME
END TIME
SEND PAGES
STATUS
Corresponds to the job number. This job number is displayed in the transmission
journal (q.v.) and also under the entry “F-xxx” in the transmission header on the
inbound copy.
The date (and the time) when the job was placed in the fax machine.
Fax number entered on the transmitted fax.
Number of document pages scanned into the machine.
Start of connection time.
End of connection time.
Number of pages actually transmitted.
see: error codes page 142.
15-MAR-00 WED 19:56
Standby mode
RESIDUAL MEMORY 77%
Operate the Menu function template
PREV.TX RPT.
Press the corresponding function key
PREVIEW TX REPORT
[COPY]: PRINT REPORT
[]:PREVIOUS SCREEN
[]: NEXT SCREEN
Make your selection
for selecting the required entry
after 5 seconds
FILE NBR = 091
+44 123 234567
21-03
19:33
OK 01
The most recent available entry is
displayed.
Select the entry which you wish to print.
FILE NBR = 088
+44 123 234567
21-03
04:25
OK 01
Press the COPY key
COPY
The required transmission report is printed
out
93
REPORT PRINTS
You can also subsequently request the transmission report for the previous 40 transmissions (first document
not illustrated):
REPORT PRINTS
94
Multi transmission report
After the successful multi-adress transmission your fax will print a list of all fax partys.
MULTI TRANSMISSION REPORT
PAGE
TIME
TEL NUMBER1
NAME
FILE NUMBER :
DATE :
DOCUMENT PAGES:
START TIME:
END TIME:
:
:
:
:
001
08.FEB.00 17:11
+44-1234567890
TOSHIBA MARKETING DP120F
085
08.FEB.00 17:11
001
08.FEB.00 17:11
08.FEB.00 17:17
SUCCESFUL
ONE TOUCH NUMBER
09
GROUP 0001
PAGES SENT
OT
ABB.
03
04
700
36 000
33 000
33 000
UNSUCCESSFUL
Multi polling report
When the multi-polling procedure has been completed, the machine lists the fax partners for whom the polling
procedure was successful and the fax partners for whom the polling procedure was not successful. This list is
always printed out when the multi-polling procedure has been completed.
GRUPPENABRUF-LISTE
PAGE
TIME
TEL NUMBER1
NAME
FILE NUMBER :
DATE :
START TIME:
END TIME:
SUCCESFUL
ONE TOUCH NUMBER
09
GROUP 0001
:
:
:
:
001
08.FEB.00 17:11
+44-1234567890
TOSHIBA MARKETING DP120F
003
08.FEB.00 17:11
08.FEB.00 17:11
08.FEB.00 17:17
OT
ABB.
UNSUCCESSFUL
03
04
700
36 000
33 000
33 000
95
Transmission and reception journal
The journal output can be modified to your specifications with the following steps:
15-MAR-00 WED 19:56
Standby mode
RESIDUAL MEMORY 100%
1.COMM. OPTIONS
2.LISTS
3.INITIAL SETUP
4.DEFAULT SETTINGS
Start the menu
The first 4 menu items are displayed.
Select a menu item
JOURNAL
01.MANUAL
02.AUTO
Select a menu item
.....
MANUAL OUTPUT
1.TX & RX JOURNAL
2.TX JOURNAL
3.RX JOURNAL
.....
The journal options are displayed
1: Printed out only if the JOURNAL key* is
pressed
2: Printed out automatically every 150 jobs
*) For “manual” output
Output options are displayed
1: Output of transmission and reception
journal
2: Output of transmission journal
3: Output of reception journal
Select a menu item
Continued on next page.
REPORT PRINTS
Your fax machine will record messages which you transmit or receive in the form of transmission and reception
journals. These lists are printed out automatically after every 150 transmissions. You can also manually request
the journal at any time.
You should file this list as a record of the document jobs; if your fax machine has to be serviced, this list can
provide valuable assistance for to cure the problem.
REPORT PRINTS
96
15-MAR-00 WED
19:56
Manual output of journal:
Standby mode
RESIDUAL MEMORY 100%
Operate the Menu function template
JOURNAL
Press the corresponding function key
PRINT NUMBER
1.1-50
(1 PAGE)
2.1-100 (2 PAGES)
3.1-150 (3 PAGES)
Selection menu for journal output
1. Output of the last 50 jobs
2. Output of the last 100 jobs
3. Output of the last 150 jobs
Select a menu item
Output of journal
.....
TRANSMISSION JOURNAL
PAGE
:
TIME
:
TEL NUMBER1 :
NAME
:
SCAN COUNT :
PRINT COUNT :
DRUM COUNT :
001
08.FEB.00 17:11
+44-1234567890
TOSHIBA MARKETING DP120F
619
(0000026B)
724
(000002D4)
7230
(00001C3E)
NBR. FILE NBR DATE
TIME DURATION PGS TO
DEPT NBR ACCOUNT MODE STATUS
001 006
02-FEB 10:28 00/14 001 +4421135
EC 603 NG B0
RECEPTIONJOURNAL
PAGE
:
TIME
:
TEL NUMBER1 :
NAME
:
SCAN COUNT :
PRINT COUNT :
DRUM COUNT :
001
08.FEB.00 17:11
+44-1234567890
TOSHIBA MARKETING DP120F
619
(0000026B)
724
(000002D4)
7230
(00001C3E)
NBR. FILE NBR DATE
TIME DURATION PGS FROM
DEPT NBR ACCOUNT MODE STATUS
001 006
02-FEB 10:28 00/14 001 +4421135
EC 603 NG B0
97
Meaning of the items in the journal:
FILE NBR
DATE
TIME
DURATION
PGS
TO/FROM
DEPT. NBR
ACCOUNT
MODUS
STATUS
Every job in the transmission and reception journal is given a sequential number (001999). The number in the transmission journal is displayed under the entry: “T- xxx“ in the
transmission header on the inbound copy. Where transmission jobs are grouped together
(see page 40), these positions are displayed under an identical number.
Corresponds to the job number. This job number is displayed under the entry: “ F- xxx“ in
the transmission header of the inbound copy.
Date of the job
Time of the job
Active duration of the job (minutes/seconds)
Number of transmitted or received pages
Fax number of the fax partner. A diamond () is displayed in front of the number if an
alternative number (see page 77) has been selected
Department code (see page 112), only displayed if journal is printed out under the master
code.
Cost centre code (see page 112)
Transmission mode (see page 97)
see: error codes page 142
Additional details relating to the operating data of the fax machine:
Scan count:
Print count:
Drum count:
Number of scanned documents
Total number of printed pages
Number of printed pages (x10), in relation to the current drum unit
Codes used for transmission modes:
HS
G3
EC
EX
P
|
◆
0
1
2
3
4
5
6
TOSHIBA High Speed mode
Group-3 transmission
ECM error correction
ECM with abbreviated protocol
Polling
Transmission from PC
Transmission via 2nd line (optional)
1. Digit (Bit/Sec = BPS)
2400
4800
7200
9600
12000
14400
V.34 (Super G3)
2nd digit (resolution)
Standard 8 x 3,85
Fine
8 x 7.7
Superfine 8 x 15.4
Ultrafine 16 x 15.4
Example:
Code 522: Transmission with 14400 BPS / U-FINE/ MMR-coding
3rd digit (Mode)
Modified Huffman (MH)
Modified READ (MR)
Modified READ (MMR)
JBIG coding
REPORT PRINTS
NBR.
REPORT PRINTS
98
Reservation list
This list illustrates the status of stack memory (see page 39). It contains all jobs which have not yet been
completed.
Standby mode
15-MAR-00 WED 19:56
RESIDUAL MEMORY 100%
Operate the Menu function template
RESERVATION
LIST
Press the corresponding function key
The reserve list is printed out
RESERVATION LIST
PAGE
TIME
TEL NUMBER1
NAME
TX/RX
:
:
:
:
001
08.FEB.00 17:11
+44-1234567890
TOSHIBA MARKETING DP120F
FILE NBR
FUNCTION
PGS
DATE
TIME
TO
087
POLLING RX
08.FEB.00 17:11 FAX1
POLL/FAX MAILBOX FILE NBR
FUNCTION
PGS
DATE
TIME
TO
RECOVERY TX
FILE NBR
FUNCTION
PGS
DATE
TIME
TO
PC JOB
FILE NBR
FUNCTION
PGS
DATE
TIME
TO
The function list
This list provides information concerning all settings of the fax machine. They correspond with the settings
which you have made. Keep this list for any service work which may be necessary.
15-MAR-00 WED 19:56
Standby mode
RESIDUAL MEMORY 100%
1.COMM. OPTIONS
2.LISTS
3.INITIAL SETUP
4.DEFAULT SETTINGS
Start the menu
The first 4 menu items are displayed.
Select a menu item
The function list is printed out
99
FUNCTION LIST
1
2
3
EXCHANGE TYPE
ACCESS TYPE
ACCESS DIGIT
KEYBOARD TYPE
MEMORY SIZE
MACHINE SETTING
4 RINGER VOLUME
5 ALARM VOLUME
6 KEY TOUCH VOLUME
7 MONITOR VOLUME
8 SUPER POWER SAVER
9 PRINTER POWER SAVER
10 START TIME
END TIME
11 FAX SEPARATOR PAGE
12 COPY SEPARATOR PAGE
13 PC SEPARATOR PAGE
14 SEPARATOR PAGE TRAY
15 ACCOUNT CODE
16 PRINT DENSITY
17 DOCUMENT LENGTH
18 LINE MONITOR
19 RECEIVE INTERVAL
20 ECM
21 DOCUMENT MODE
22 KONTRAST
23 COLLATED COPY
24 LETTER HEAD PAPER
25 REDIAL MODE INTERVAL
26 REDIAL MODE COUNTER
27 AUTO RECEIVE MODE
28
RING DELAY
29 AUTO RECEIVE MODE
(LINE2)
TX
30
31
32
33
34
35
SETTINGS
MEMORY TX
SECURITY TX
COVER SHEET
RECOVERY TX
TTI
SEND AFTER SCAN
:
:
:
:
:
:
:
:
:
:
PABX
DIGIT
0
QWERTY
8MB
:
:
:
:
:
:
:
:
:
:
:
:
:
:
:
:
:
:
:
:
:
:
:
:
:
:
4
2
4
4
MANUAL
ON
00:00
00:00
OFF
OFF
OFF
AUTO
OFF
0
1 M
OFF
3 MIN
ON
STD
NORMAL
OFF
OFF
1 MIN
0
AUTO
2
001
08.FEB.00 17:11
+44-1234567890
+44-0987654321
TOSHIBA MARKETING DP120F
RX
36
37
38
39
40
41
42
43
SETTINGS
SECURE RX
MEMORY RX
RX REDUCTION
DISCARD
REV. ORDER PRINT
PRIVILEGED RX
RTI
RX MULTI COPY
:
:
:
:
:
:
:
:
OFF
ON
ON
ON
ON
ON
OFF
1
REPORT & LIST
JOURNAL
44 MANUAL
: TX/RX
45 AUTO
: ON
FAX/POLL/RELAY REPORTS
46 COMMUNICATION REPORT: ALWAYS
47 A5 SIZE PRINT
: OFF
48 MEMORY TX
: ALWAYS (IMAGE)
A5 SIZE PRINT
: OFF
49 MULTI TX
: ALWAYS (IMAGE)
50 MULTI POLL
: ALWAYS
51 RELAY ORIGINATOR
: ALWAYS (IMAGE)
52 RELAY STATION
: ALWAYS (IMAGE)
53 RELAY DESTINATION : ALWAYS (IMAGE)
RECEPTION LIST
54 LOKAL MAILBOX
: OFF
55 REMOTE MAILBOX
: ON
56 RELAY STATION
: ON
REMOTE SERVICE
57 REMOTE ACCESS
58 DOWNLOAD
: OFF
: NO JOB
59 RDC PASSWORD
:
TOTAL PAGE
60 SCAN
61 PRINT
: 619
: 727
:TX/RX
:
:
:
:
:
:
ON
OFF
OFF
OFF
INSIDE
OFF
REPORT PRINTS
PAGE
TIME
TEL NUMBER1
TEL NUMBER2
NAME
REPORT PRINTS
100
No.
1
2
3
4
5
6
7
8
9
10
11
12
13
14
15
16
17
18
19
20
21
22
23
24
25
26
27
Type of telephone connection (for
PABXs: type of obtaining outside
line /when outside line obtained
via a digit: digit for obtaining
outside line)
Type of input of the alphanumeric
keypad
Size of memory expansion
Call ringing volume
Alarm signal volume (for fault
signalling)
Key touch volume
Monitor volume
Setting Super Power Saver
Setting Printer Power Savers
Time interval for printer Power
Saver
Status of fax separator
Status of the copy separator
sheet
Status of the printer separator
sheet
Cassette preset for the separator
sheet
Status of cost centre mode
Print density preset (toner
volume)
Max. document length
Status of line monitoring
Preset for group dialling
Basic status of error correction
Basic setting of scanning
resolution
Basic setting of scanning contrast
Status of copy sorting
Preset for jammed fax cassette
Current time interval of call redial
Number of call redial attempts per
fax partner
Set reception mode
PAGE
18
-11
109
109
109
109
110
110
110
116
116
No.
28
29
30
31
32
33
34
35
36
37
38
39
40
41
42
43
44
116
45
46
47
48
112
128
49
50
122
106
127
125
124
51
52
53
116
124
129
130
107
107
22
54
55
56
57
58
59
60
61
Number of rings before fax machine
connects to line
RX status of 2nd line
Status of transmission memory
Status of transmission security
Status of cover sheet function,
Status of subsequent transmission
Position of transmission header
Status of dialling when issuing job
Status of secure RX
Status of receive memory
Status of receive reduction
Discard off
Status of reverse order print
Status of reception security
Status of reception trailer
Number of incoming copies
Journal output criteria for manual
request
Status of automatic journal output
Status of TX report output
Status of A5 TX report output
Status of transmission report for
”memory transmission”
Status of group transmission report
Status of transmission report for
”multiple polling”
Status of TX report in relay org. mode
Status of relay transmission report
Status of the TX report to the relay
originator
Status of mailbox reception report
Transmission report for transmission in
mailbox
Status of reception report for relay
reception
Reception status for COMLINE
Status for software update
Password for COMLINE
Number of scanned documents
Number of total printouts
PAGE
22
134
123
126
118
120
104
131
26
25
23
23
31
34
105
32
95
95
89
89
89
94
94
89
89
89
89
89
89
149
150
149
95
95
101
The dial number lists
15-MAR-00 WED 19:56
Standby mode
RESIDUAL MEMORY 100%
Operate the Menu function template
Press the corresponding function key
TELEPHONE
NBRS LIST
Selection menu for various numbers
TELEPHONE NBRS LIST
1.BY NAME
2.ABB NUMBERS
3.GROUP NUMBERS
1.
2.
3.
4.
5.
All dial numbers, sorted alphabetically
Alphabet dial numbers
Group numbers
One-touch dial numbers
ALL REPORTS
Select a menu item
The required list(s) are printed out
.....
ONE TOUCH NUMBER INFORMATION
PAGE
TIME
TEL NUMBER1
NAME
:
:
:
:
001
08.FEB.00 17:11
+44-1234567890
TOSHIBA MARKETING DP120F
OT NBR. NAME/FUNCTION
ABB./FAX NBR.& E-MAIL TIME MONI BPS REPORT LINE MAILMODE
01
0001
GROUP.NBR.
GROUP NUMBER INFORMATION
PAGE
TIME
TEL NUMBER1
NAME
:
:
:
:
001
08.FEB.00 17:11
+44-1234567890
TOSHIBA MARKETING DP120F
GROUP NUMBER
NAME
OT/ABB. NUMBER
0001
ALL
ABB.
001
ABBREVIATED TEL NUMBER LIST
PAGE
TIME
TEL NUMBER1
NAME
ABB NBR. NAME
001
DP120F
:
:
:
:
001
08.FEB.00 17:11
+44-1234567890
TOSHIBA MARKETING DP120F
TEL NUMBER/ E-MAIL ADDRESS TIME MONI BPS REPORT LINE MAILMODE
35
REPORT PRINTS
The dial number lists are made up of the following lists:
• Alphabet dial numbers
• Group numbers
• One-touch dial numbers
• Relay numbers
Select a specific list or all lists in order to obtain an overview of the stored numbers.
REPORT PRINTS
102 Department list
This list is useful for controlling costs per department. If a mastercode is stored and entered, a five-digit
departement code will appear additionally.
15-MAR-00 WED 19:56
Standby mode
RESIDUAL MEMORY 100%
1.COMM. OPTIONS
2.LISTS
3.INITIAL SETUP
4.DEFAULT SETTINGS
Enter the menu
The first 4 menu items are displayed.
Select a menu item
The function list is printed out
An error message is displayed if no
departments are defined.
DEPARTMENT CODE LIST
PAGE
TIME
TEL NUMBER1
NAME
DEPT NBR
01
02
NAME
MASTER
DEPT CODE
12345
:
:
:
:
001
08.FEB.00 17:11
+44-1234567890
TOSHIBA MARKETING DP120F
TX PGS
0
RX PGS COPY PGS E
0
0
EMAILS SENT
0
Mains failure report
This list is printed out in the event of a memory loss (image memory / buffer memory) resulting from an
enduring power failure. Depending on the charge status of the internal back-up battery, as well as the size of
the image memory, the memory loss can occur within approx. one hour of a power failure.
POWER FAILURE LIST
PAGE
TIME
TEL NUMBER1
NAME
TX/RX
FILE NBR
007
POLLING/FAX M-BOX/MAILBOX
MEMORY RECEPTION
FILE NBR
RECOVERY TX
FILE NBR
:
:
:
:
001
08.FEB.00 17:11
+44-1234567890
TOSHIBA MARKETING DP120F
FUNCTION
SINGLE TX
FILE NBR
FUNCTION
MAIL FROM DATE/TIME
FROM DATE/TIME
FUNCTION
103
ADVANCED SETTINGS
You can define a specific start time for your fax jobs in order to compensate for any differences in time zones or
in order to take advantage of low-rate charges. Again, it is particularly advantageous that your document or
documents are not read into memory, as the document feed is not blocked.
The delay applicable for sending the fax job is not only limited to 24 hours: You can program the fax job up to
30 days in advance.
The setting of the start time relates to the following fax jobs:
• Single transmission
• Broadcast transmission
• Single polling
• Multiple polling
15-MAR-00 WED 19:56
Standby mode
RESIDUAL MEMORY 100%
Load original
Remember: Printed side face down
Document ready
Operate the Menu function template
DELAYED
COMM.
Press the corresponding function key
Make your selection
for start time (HH:MM) and day (DD)
DELAYED COMM
TIME = HH : MM
: DD
Enter the start time
Example: 22:33 hours on the 18th
If the delayed fax job (within the next
minute!) is to be performed on the
same day, please leave “DD” blank
.....
DELAYED COMM
TIME = HH : MM
22 : 33
DD
18
RESIDUAL MEMORY 100%
ENTER TEL NUMBER
The following fax job is linked to the start
time which has just been set.
Any fax job...
• Single transmission
• Broadcast transmission
• Single polling
• Multiple polling
ADVANCED SETTINGS
Delayed fax job
ADVANCED SETTINGS
104 Set transmission header position
The transmission header contains the code, the name, time of transmission and the current page number.
Normally it appears in the top 5 mm of the incoming copy. If this area contains important information this
information is overwritten by the transmission header. In order to prevent this from happening, you are able to
displace the transmission header. Accordingly, the transmission header is first printed before the copy is
printed. The effect is that the length of the incoming copy is extended by approx. 5 mm.
15-MAR-00 WED 19:56
Standby mode
RESIDUAL MEMORY 100%
1.COMM. OPTIONS
2.LISTS
3.INITIAL SETUP
4.DEFAULT SETTINGS
Start the menu
The first 4 menu items are displayed.
Select a menu item
TTI
1.INSIDE
2.OUTSIDE
.....
Make your selection
for transmission header position
Select a menu item
Press STOP, return to standby mode
STOP
105
Reception trailer (RTI)
Please note that, when the reception trailer is activated, the inbound fax is always reduced before being
printed out.
15-MAR-00 WED 19:56
Standby mode
RESIDUAL MEMORY 100%
1.COMM. OPTIONS
2.LISTS
3.INITIAL SETUP
4.DEFAULT SETTINGS
Start the menu
The first 4 menu items are displayed.
Select a menu item
RTI
1.ON
2.OFF
.....
Make your selection
for reception trailer
1. Reception with trailer
2. Reception without trailer
Select a menu item
Press STOP, return to standby mode
STOP
ADVANCED SETTINGS
You can activate the reception trailer facility to ensure that reception of a document is precisely documented.
The RTI is printed at the bottom of the incoming copy, and contains the current reception data such as time and
date of reception as well as the IDs of the transmitter and receiver.
ADVANCED SETTINGS
106 Permanent monitoring
When a fax transmission is monitored, the call establishment attempt is played back via the built-in speaker.
This means that you have an additional acoustic check for monitoring the call establishment procedure. This
facility is useful whenever a connection is not established. This is frequently due to a wrong number or a fax
machine that is not ready to receive.
In this setting, all transmission procedures are played back via the speaker.
15-MAR-00 WED 19:56
Standby mode
RESIDUAL MEMORY 100%
1.COMM. OPTIONS
2.LISTS
3.INITIAL SETUP
4.DEFAULT SETTINGS
Start the menu
The first 4 menu items are displayed.
Select a menu item
LINE MONITOR
1.ALWAYS
2.OFF
.....
Make your selection
for permanent monitoring
1. ALWAYS
2. OFF
Select a menu item
Press STOP, return to standby mode
STOP
107
Call redial
You can set two criteria for this call redial facility:
• Period between the call redial attempts
• Number of redial attempts
15-MAR-00 WED 19:56
Standby mode
RESIDUAL MEMORY 100%
1.COMM. OPTIONS
2.LISTS
3.INITIAL SETUP
4.DEFAULT SETTINGS
Enter the menu
The first 4 menu items are displayed.
Select a menu item
REDIAL MODE
01.INTERVAL
02.COUNTER
Select a menu item
1: see part A
2: see part B
.....
A
REDIAL MODE
INTERVAL=(01-15 MIN)
03
.....
Make your selection
Period between the call redial attempts
Make your selection
call redial interval
(default setting: 3 minutes)
Enter the required figure
confirm with START
START
Press STOP, return to standby mode
STOP
Continued on next page.
ADVANCED SETTINGS
If the machine is not able to transmit a fax job, the job is retained in memory and the machine attempts to send
the fax job again at a later date.
ADVANCED SETTINGS
108
B
REDIAL MODE
COUNTER = (00 - 14)
03
.....
Number of redial attempts
Make your selection
Number of call redial attempts
(default setting: 3 times)
Enter the required figure
confirm with START
START
Press STOP, return to standby mode
STOP
109
Volume of acoustic signals
1.
RINGER VOLUME
Ringer volume.
2.
3.
4.
ALARM VOLUME
KEY TOUCH VOLUME
MONITOR VOLUME
Volume of the warning signal indicating a malfunction.
Key touch volume
Speaker volume.
15-MAR-00 WED 19:56
Standby mode
RESIDUAL MEMORY 100%
1.COMM. OPTIONS
2.LISTS
3.INITIAL SETUP
4.DEFAULT SETTINGS
Start the menu
The first 4 menu items are displayed.
Select a menu item
01.RINGER VOLUME
02.ALARM VOLUME
03.KEY TOUCH VOLUME
04.MONITOR VOLUME
.....
Selecting the various acoustic signals
Select a menu item
(Example: Key touch)
SET KEY TOUCH VOLUME
VOLUME = (0-7)
0 1 2 3 4 5 6 7
Make your selection for ringer volume
0 Tone off
1 Quiet
.....
7 Loud
Enter the required figure
confirm with START
START
Press STOP, return to standby mode
STOP
ADVANCED SETTINGS
The volume of the acoustic signals can be set separately
ADVANCED SETTINGS
110 Power saver (stand by)
The printer unit of your fax machine requires a heat source of approx. 170° C in order to be able to print out
documents immediately. This heat source is heated at specific intervals in order to maintain the temperature at
the required level. This consumes electricity, and the fan also has to run constantly. If you wish to save electric
current or prevent the fan noise, you are able to deactivate the permanent heating facility. The heater in such
cases would only be activated if a fax document is received or printed out. There is a delay of around 20 sec.
before documents can be printed out.
Two alternatives are available:
Super Power Saver:
In this alternative, all components which are not required are switched off (almost the entire electronics) and
the display is therefore also switched off. These measures reduce the entire power consumption of the fax
machine to below 2 VA (Watt). As soon as a copy is inserted, a call is received or a PC print-out performed, the
fax machine resumes its functions.
The Super Power Saver mode is set either with a delay (which can be adjusted between 1 and 60 minutes)
after the last action, or it can be activated by the SUPER POWER SAVER key.
• The Super Power Saver mode cannot be activated when the memory is full (memory display < 100%) and
when a fault lamp is lit.
Printer Power Saver:
The printer Power Save mode only switches off the heating facility for the fixing roller and the fan. All other
functions are retained. The power consumption in this mode is approx. 15 VA (Watt).
You can use a menu for specifying the period during which the printer Power Saver mode is activated.
15-MAR-00 WED 19:56
Standby mode
RESIDUAL MEMORY 100%
1.COMM. OPTIONS
2.LISTS
3.INITIAL SETUP
4.DEFAULT SETTINGS
Start the menu
The first 4 menu items are displayed.
Select a menu item
01.SUPER P. S.
02.PRINTER P. S.
Make your selection
für Powersaver Modus
01: see part A
02: see part B
Continued on next page.
A
Select a menu item
Example: Automatic
Make your selection
for the delay time
START TIME
TIME
(01 -60) MIN
03
Enter the delay time
.....
confirm with START
START
Press STOP, return to standby mode
STOP
B
PRINTER POWER SAVER
1.ON
2.OFF
Printer Power Saver:
Make your selection
for power saver
1: Power saver on
2: Power saver off
Select a menu item
Example: ON
PRINTER POWER SAVER
TIME PERIOD =
00:00 - 00:00
.....
Make your selection
period for power saver time
Enter 00:00-00:00 to permanently
activate the power saver facility (24
hours)
Enter the period
confirm with START
START
Press STOP, return to standby mode
STOP
111
ADVANCED SETTINGS
Super Power Saver:
Make your selection
for mode
1. Active after preset delay
2. Active after the SUPER POWER SAVER
key is pressed
3. Cannot be activated
SUPER POWER SAVER
1.AUTOMATIC
2.MANUAL
3.OFF
ADVANCED SETTINGS
112 Cost centre management
Transmission jobs can be assigned to any 4-digit number. The number can be used to find the specified job
within the transmission report (see page 95). In this way, special transmission jobs can be linked to specific
cost centres.
If this function has been activated, your are able to enter the cost centre number before every transmission.
Press the START key to skip entry of the cost centre number.
15-MAR-00 WED 19:56
Standby mode
RESIDUAL MEMORY 100%
1.COMM. OPTIONS
2.LISTS
3.INITIAL SETUP
4.DEFAULT SETTINGS
Start the menu
The first 4 menu items are displayed.
Select a menu item
ACCOUNT CODE
1.ON
2.OFF
.....
Make your selection
for account code
1: Activate cost centre management
2: Deactivate mode
Select a menu item
Press STOP, return to standby mode
STOP
Department code
In order to prevent your fax machine from being used by unauthorised persons, you can lock it using a 5-digit
code. 99 such codes are possible, and a separate journal is assigned to each of these codes. It is conceivable
that this code can be used for setting up a cost centre management system. The fax machine can now only be
enabled by entering the relevant department code. The five-digit code is entered and confirmed with the START
key.
• If a fax is transmitted after being released by the department code, the name of the corresponding
department is displayed in the transmission header of the fax partner.
• The code for department number 01 is the master code. This code must be entered for creating
further department codes or cancelling existing department codes.
• If the fax machine has been enabled by a department code and if no further action takes place, the
code must be entered again after a further approx. 1 minutes.
Continued on next page.
15-MAR-00 WED 19:56
RESIDUAL MEMORY 100%
1.COMM. OPTIONS
2.LISTS
3.INITIAL SETUP
4.DEFAULT SETTINGS
Enter the menu
The first 4 menu items are displayed.
Select a menu item
DEPT CODE ENTRY
1.YES
2.NO
Make your selection
for the department code
1: Enter department code
2: Clear and cancel department codes
Select a menu item
MASTER CODE ENTRY
DEPT NR. = 01
DEPT NAME (MAX 20)
Make your selection
for the department name (this name
appears in the transmission header of the
fax partner)
Enter the department name
(see page 15 for diagram)
ENTER NAME
DEPT NAME (MAX 20)
GHOSTBUSTERS
...confirm with START
START
MASTER CODE ENTRY
DEPT NBR = 01
MASTER CODE=
.....
Make your selection
for department code
(use master code when first entered)
Enter the department code
confirm with START
START
DEPT CODE ENTRY
DEPT NUMBER (1 - 99)
Make your selection
for further departments (2 - 99)
-or-
Press STOP, return to standby mode
STOP
113
ADVANCED SETTINGS
Activating Department mode
Standby mode
ADVANCED SETTINGS
114 Modify or delete a department
Can only be accessed via master code.
15-MAR-00 WED 19:56
Standby mode
RESIDUAL MEMORY 100%
.....
Enter (!) master code
...confirm with START
START
1.COMM. OPTIONS
2.LISTS
3.INITIAL SETUP
4.DEFAULT SETTINGS
Start the menu
The first 4 menu items are displayed.
Select a menu item
DEPT CODE ENTRY
1.YES
2.NO
Make your selection
for the department code
(this menu is available only if the
master code is entered)
Select a menu item
DEPT CODE ENTRY
Make your selection
for required department
DEPT NUMBER (1 - 99)
.....
Enter the department number
confirm with START
START
DEPT CODE ENTRY
ALREADY ASSIGNED
DEPT NBR = XX
FUNNY BONES
after 2 seconds
DEPT CODE ENTRY
1.CANCEL
2. MODIFY
3. RETAIN
.....
Make your selection
1. Delete department
2. Change department criteria
3. Retain department
Department 1 cannot be cancelled as
it is permanently linked to the master
code.
Select a menu item
Proceed as indicated in the menu
Press STOP, return to standby mode
STOP
115
Disable department code
15-MAR-00 WED 19:56
Standby mode
RESIDUAL MEMORY 100%
Enter (!) master code
.....
confirm with START
START
1.COMM. OPTIONS
2.LISTS
3.INITIAL SETUP
4.DEFAULT SETTINGS
Start the menu
The first 4 menu items are displayed.
Select a menu item
DEPT CODE ENTRY
1.YES
2.NO
Make your selection
for the department code
(this menu is available only if the
master code is entered)
Select a menu item
The fax machine is permanently enabled
ADVANCED SETTINGS
If the department code is deactivated, renewed entry of the master code allows access to the previously
entered departments.
ADVANCED SETTINGS
116 Divider sheets
A divider sheet is automatically added after every transmission in
order to enable the individual fax documents received to be
distinguished more easily. On the same basis, separator pages for
copies and PC print-outs can be configured separately.
• If optional cassettes are installed, a paper cassette can also be
specified from which the separator page is to be taken.
• If a cassette has already been specified via ”LETTER HEAD
PAPER” (see page 130), the cassette selection options are
limited, accordingly.
Documents received
from fax A
Divider sheets
Documents received from fax B
FAX SEPARATOR PAGE
*********************************************************
*######################################################*
*#*****************************************************#*
FROM
+44 211 12345678
*#****************************************************#*
RECEIVED TIME
09-FEB-00 23:01
*#****************************************************#*
PAGES RECEIVED
001
*#****************************************************#*
*#*****************************************************#*
*######################################################*
*********************************************************
Continued on next page.
15-MAR-00 WED 19:56
RESIDUAL MEMORY 100%
1.COMM. OPTIONS
2.LISTS
3.INITIAL SETUP
4.DEFAULT SETTINGS
Start the menu
The first 4 menu items are displayed.
Select a menu item
FAX SEPARATOR PAGE
1.ON
2.OFF
Select a menu item
.....
COPY SEPARATOR PAGE
1.ON
2.OFF
Make your selection
for Copies separator page
Select a menu item
.....
PC SEPARATOR PAGE
1.ON
2.OFF
Make your selection
for Printer separator page
Select a menu item
.....
TRAY SELECTION
1.LOWER TRAY
2.AUTO SELECT
.....
Make your selection
for Fax separator page
(With optional cassette)
Prompt for paper cassette
1. Access to optional paper cassette
2. Freely selectable access (depending on
fill level of the paper cassettes)
Select a menu item
Press STOP, return to standby mode
STOP
117
ADVANCED SETTINGS
Activate separator pages
Standby mode
The cover sheet is a form which is placed at the head of your fax transmission. It is a tool to enable the
operator to classify an incoming fax more easily.
You are able to choose between a “normal” cover sheet which sets out the information in text form and a
“personal” cover sheet.
With the personal cover sheet, you can add a diagram to the “normal” information. This diagram is scanned
into the machine in the same way as a document and is retained in memory as the cover sheet diagram.
The following diagram illustrates the relationship between document and cover sheet.
top
Effective area
Space for logos,
graphs, diagrams,
etc.
150 mm
Effective area
Space for logos, graphs, diagrams, etc.
120 mm
Cover sheet
Document:
ADVANCED SETTINGS
118 Cover sheet
Please refer to page 56 for details
of how to send the cover sheet.
Continued on next page.
15-MAR-00 WED 19:56
RESIDUAL MEMORY 100%
1.COMM. OPTIONS
2.LISTS
3.INITIAL SETUP
4.DEFAULT SETTINGS
Start the menu
The first 4 menu items are displayed.
Select a menu item
COVER SHEET
1.ON
2.OFF
Make your selection
for cover sheet function
1. Cover sheet is activated
2. Cover sheet is cancelled
Select a menu item
WITH IMAGE ?
1.YES
2.NO
Make your selection
for cover sheet character
1. Cover sheet with diagram and text
2. Cover sheet only with text
(Example: cover sheet with diagram)
Select a menu item
COVER SHEET
LOAD DOCUMENT
Insert required cover sheet document
confirm with START
START
The document is saved as the cover sheet
diagram
119
ADVANCED SETTINGS
Save cover sheet
Standby mode
ADVANCED SETTINGS
120 Retain jobs
If a job cannot be transmitted because for instance the partner fax is busy, your fax machine attempts to redial
the number at regular intervals of approx. 3 minutes*. After the XXth* redialling, the job will be automatically
deleted from the stack and a transmission report (see page 92) will be printed out. To prevent the deletion of
such a job use this procedure. Each job will then be available for a certain time (1-24hours). If this job can not
be successfully sent during this period it will be deleted automatically from the memory.
Every time you retain a job in memory your fax prints out a transmission report (see page 92) to inform you
how long this job will be retained in memory.
To send retained jobs see page 60.
*) Depending on setting (see page 107)
If too many documents are retained in memory, the fax memory will become full since every retained job
requires memory.
If you find that the memory is frequently too small, ask your dealer for a memory expansion!
15-MAR-00 WED 19:56
Standby mode
RESIDUAL MEMORY 100%
1.COMM. OPTIONS
2.LISTS
3.INITIAL SETUP
4.DEFAULT SETTINGS
Start the menu
The first 4 menu items are displayed.
Select a menu item
RECOVERY TRANSMIT
1.ON
2.OFF
.....
Select a menu item
RECOVERY TRANSMIT
STORED TIME=(01-24)
06
.....
Make your selection
for retain job
Make your selection
for retaining time
(preset retaining time is displayed)
Input retaining time
-and/orconfirm with START
START
Press STOP, return to standby mode
STOP
121
Query current job status
Line 1
TRANSMIT P 001
Line 2
Line 3
FILE NBR= 123
EC 14400 BPS
Line 4
+44 2131 123456
Indication of activity (transmission, reception, polling, etc.)
Indication of current number of pages (P xxx)
Indication of job number
Indication of transmission type (ECM, G3, High Speed)
Indication of transmission speed (14400 BPS etc)
Indication of the ID of your partner fax
15-MAR-00 WED 19:56
Standby mode
RESIDUAL MEMORY 100%
The BUSY lamp flashes to indicate
activity on the line
Press the JOB STATUS key
JOB STATUS
Do you wish to cancel the
current status?
LINE 1 TRANSMIT P001
FILE NBR = 123
EC
SUPER G3
+44 2131 158901
The current status is displayed
LINE 1 TRANSMIT P001
FILE NBR = 123
EC
SUPER G3
+44 2131 158901
Cancel current status
The current status is displayed
Press the JOB CANCEL key
Confirmation prompt
JOB LÖSCHEN
CANCEL ?
FILE NBR = 123
1.YES
2.NO
...confirm with START
START
The current job is interrupted and the job is
cancelled
ADVANCED SETTINGS
The LINE status lamp enables you to recognise whether your fax machine is currently active. If you require
more precise information concerning this activity, you can query the current status of the machine. This status
query also enables you to cancel the current job.
The status display is made up as follows:
ADVANCED SETTINGS
122 Basic setting, document length
In the basic setting of your fax machine, the document length is limited to one meter. If the document is longer
than one meter, the machine displays the error message “document jam” after one meter is exceeded, and the
transmitted is interrupted. You are able to disable this restriction to prevent this from happening.
15-MAR-00 WED 19:56
Standby mode
RESIDUAL MEMORY 100%
1.COMM. OPTIONS
2.LISTS
3.INITIAL SETUP
4.DEFAULT SETTINGS
Start the menu
The first 4 menu items are displayed.
Select a menu item
DOCUMENT LENGTH
1.1M
2.UNLIMITED
.....
Display the basic setting
Select a menu item
Press STOP, return to standby mode
STOP
123
Basic setting, transmission memory
15-MAR-00 WED 19:56
Standby mode
RESIDUAL MEMORY 100%
1.COMM. OPTIONS
2.LISTS
3.INITIAL SETUP
4.DEFAULT SETTINGS
Start the menu
The first 4 menu items are displayed.
Select a menu item
SET MEMORY TX
1.ON
2.OFF
.....
Display the basic setting
Select a menu item
Press STOP, return to standby mode
STOP
ADVANCED SETTINGS
The transmission memory is activated in the basic setting of your fax machine. This enables transmission jobs
to be stacked as jobs in this memory (see page 39). If you disable the transmission memory, the document is
retained in the document feed until the transmission procedure is completed.
ADVANCED SETTINGS
124 Basic setting, resolution and contrast
The basic setting of contrast and resolution can be changed. Please read pages 50 et seq. for information
concerning contrast and resolution.
15-MAR-00 WED 19:56
Standby mode
RESIDUAL MEMORY 100%
1.COMM. OPTIONS
2.LISTS
3.INITIAL SETUP
4.DEFAULT SETTINGS
Start the menu
The first 4 menu items are displayed.
Select a menu item
SET RESOLUTION
1.STANDARD
2.FINE
3.U-FINE
Select a menu item
.....
SET CONTRAST
1.NORMAL
2. DARKER
3. LIGHTER
.....
Display the basic setting for resolution
1. Standard resolution (100 x 200 dpi)
2. Fine resolution (200 x 200 dpi)
3. Superfine resolution (400 x 200 dpi)
Display the basic setting for contrast
1: for normal documents
2: for mainly light documents
3: for mainly dark documents
Select a menu item
Press STOP, return to standby mode
STOP
Basic setting, ECM (error correction mode)
15-MAR-00 WED 19:56
Standby mode
RESIDUAL MEMORY 100%
1.COMM. OPTIONS
2.LISTS
3.INITIAL SETUP
4.DEFAULT SETTINGS
Start the menu
The first 4 menu items are displayed.
Select a menu item
SET ECM
1.ON
2.OFF
.....
Display the basic setting
Select a menu item
Press STOP, return to standby mode
STOP
ADVANCED SETTINGS
Your fax machine is equipped with an error correction facility (ECM). If your fax partner also has an error
correction facility, this permits error-free fax transmission. One effect linked with ECM is that the transmission
time increases if there are any problems on the line. This may involve very high costs with oversees calls. For
this reason, you can completely deactivate the ECM facility.
125
ADVANCED SETTINGS
126 Basic setting, protected transmission
The transmission of documents is restricted.
You can now only send documents to fax machines whose ID is identical to the dialled fax number. You can
thus only fax your documents to specific fax partners.
Any changes to this basic setting have far-reaching consequences!
15-MAR-00 WED 19:56
Standby mode
RESIDUAL MEMORY 100%
1.COMM. OPTIONS
2.LISTS
3.INITIAL SETUP
4.DEFAULT SETTINGS
Start the menu
The first 4 menu items are displayed.
Select a menu item
SET SECURITY TX
1.ON
2.OFF
.....
Display the basic setting
Select a menu item
Press STOP, return to standby mode
STOP
127
Basic setting, reception interval
• Extensive group dialling ( see page 46 et seq.)
• Extensive group polling ( see page 70)
• Numerous send jobs in the buffer memory
In order to ensure the possibility of receiving incoming faxes in such situations, a variable interval can be
configured for in between the respective transmission and/or polling jobs.
15-MAR-00 WED 19:56
Standby mode
RESIDUAL MEMORY 100%
1.COMM. OPTIONS
2.LISTS
3.INITIAL SETUP
4.DEFAULT SETTINGS
Start the menu
The first 4 menu items are displayed.
Select a menu item
RECEIVE INTERVAL
INTERVAL (0-15) MIN
03
.....
Make your selection
for RECEIVE INTERVAL
0: no pause
Enter the required figure
confirm with START
START
Press STOP, return to standby mode
STOP
ADVANCED SETTINGS
Fax reception may not be possible for an extended period under the following circumstances, as the fax
machine is occupied solely with the transmission of documents:
ADVANCED SETTINGS
128 Basic setting, Print density (saving toner)
If documents with a disproportionately high ratio of black are frequently received, this will result in increased
toner consumption. The intervals between changing toner will thus be correspondingly shorter. The print
density of the black regions can be reduced by a differentiated setting, thus reducing toner consumption.
15-MAR-00 WED 19:56
Standby mode
RESIDUAL MEMORY 100%
1.COMM. OPTIONS
2.LISTS
3.INITIAL SETUP
4.DEFAULT SETTINGS
Start the menu
The first 4 menu items are displayed.
Select a menu item
SET PRINT DENSITY
DENSITY(-2 TO +2)
LIGHTER
DARKER
-2 -1
0
+1
+2
Selection menu for print density
Selection of the desired value
...confirm with START
START
Press STOP, return to standby mode
STOP
129
Basic setting, sort copy
15-MAR-00 WED 19:56
Standby mode
RESIDUAL MEMORY 100%
1.COMM. OPTIONS
2.LISTS
3.INITIAL SETUP
4.DEFAULT SETTINGS
Start the menu
The first 4 menu items are displayed.
Select a menu item
COLLATE COPY DEFAULT
1.ON
2.OFF
.....
Make your selection
for copy sorting
Selection of the desired value
Press STOP, return to standby mode
STOP
ADVANCED SETTINGS
The default setting for sorting copies (see page 35) can be changed.
ADVANCED SETTINGS
130 Basic setting, letter head paper
If the fax machine is used as a PC printer, it is possible to select other paper trays (when installed). In this
context, it is customary to deposit pre-printed (letter head) paper in a specific tray. To ensure that the fax
machine does not access this tray under any circumstances (e.g. no paper in the other tray), it can be excluded
for the receipt of faxes.
• Function only available when optional paper tray installed.
• If a cassette has already been specified under „Separator page“ (see page 116), this function is no
longer available.
15-MAR-00 WED 19:56
Standby mode
RESIDUAL MEMORY 100%
1.COMM. OPTIONS
2.LISTS
3.INITIAL SETUP
4.DEFAULT SETTINGS
Start the menu
The first 4 menu items are displayed.
Select a menu item
LETTER HEAD PAPER
1.OFF
2.BYPASS
3.UPPER TRAY
.....
Selection menu for jammed fax cassette
(display depends on cassettes installed)
1. No tray exclusion
2. Single-sheet feed
3. Tray 1
4. Tray 2
5. Tray 3
Select a menu item
Press STOP, return to standby mode
STOP
131
Basic setting, send after scan
15-MAR-00 WED 19:56
Standby mode
RESIDUAL MEMORY 100%
1.COMM. OPTIONS
2.LISTS
3.INITIAL SETUP
4.DEFAULT SETTINGS
Start the menu
The first 4 menu items are displayed.
Select a menu item
SEND AFTER SCAN
1.DIAL DURING SCAN
2.DIAL AFTER SCAN
.....
Select a menu item
WHEN MEMORY FULL
1.DELETE SCAN PAGES
2.SEND SCAN PAGES
.....
Make your selection for SEND AFTER SCAN
1. Send during scanning
2. Send after scanning
In the case of selection 2 (behaviour in the
event of a memory overflow)
1. Cancel sending (document feed ready for
use)
2. Continue sending (documents remain in
the document feed until the memory is
free)
Select a menu item
Press STOP, return to standby mode
STOP
ADVANCED SETTINGS
The default setting for the fax machine causes the fax machine to commence dialling immediately after
pressing the START button for a scan job. In the case of extensive fax jobs, this can result in the page number
descriptor in the TX header on the first few pages being incomplete. This in turn results in a memory overflow,
the transmission is interrupted and the document part waiting in memory is deleted. This prevents the
document feed becoming jammed.
If extensive fax jobs are sent on a frequent basis, the basic setting should be changed accordingly so that the
transmission does not commence until the document has been scanned completely. Furthermore, the way in
which the fax machine is to handle a memory overflow can also be set.
ADVANCED SETTINGS
132 Additional features (SUB, SEP, PWD)
Because of the high level of innovation pressure in the telecommunications industry, fax technology is also
being continuously improved. The ITU-T (formerly CCITT) operates as an international body and is responsible
for ensuring standardisation of new telecommunication options. This ensures that non-proprietary compatibility
is guaranteed.
All additional features described at this point are related to fax networks, and are added as additional
information (digits) to the telefax numbers.
Please note that the partner fax machine must also support these features. These functions would
otherwise not be carried out.
SUB:
(Sub-Addressing) This mode is used for faxing documents in PC networks. The fax number (the number of the
fax server in the network) and also the sub-address of the workstation in the network must be entered to
enable the fax to be forwarded in the network.
The sub-address is entered in the form of a number with max. 20 digits.
SEP:
(Separation Polling) This mode is used for polling from a PC network. The fax number (the number of the fax
server in the network) as well as the polling address of the workstation in the network from which a fax
document is to be polled must be entered.
The polling address is entered in the form of a number with max. 20 digits.
PWD:
(Password) The password is used as additional security for actions in the PC network. This enables
transmission and polling procedures in PC networks to be protected. Facilities such as “electronic signature”
as well as PIN number mode are also possible.
The password is entered in the form of a number with max. 20 digits.
15-MAR-00 WED 19:56
Standby mode
RESIDUAL MEMORY 100%
Load original
Remember: Printed side face down
Document ready
Operate the Menu function template
SUB ADDRESS
COM
Press the corresponding function key
SUB ADDRESS COMM
1.COMPLETE
2.SUB
3.SEP
Make your selection
for additional parameters
1: complete
2: SUB
3: SEP
4: PWD
Select a menu item
Example: Sub-address (SUB)
Continued on next page.
SUB ADDRESS COMM.
SUB = (MAX. 20)
.....
Entering the subaddress
confirm with START
START
SUB ADDRESS COMM
1.COMPLETE
2.SUB
3.SEP
Prompt for further parameters
-or-
Quit menu
15-MAR-00 WED 19:56
Make your selection
the fax number
RESIDUAL MEMORY 100%
ENTER TEL NUMBER
Additional paper cassettes (optional)
If the capacity of the paper tray (550 sheets) is inadequate, you have the option of mounting an additional
paper tray (with a capacity of 550 sheets).
Furthermore, a single-sheet feed can be used, which offers both a greater store of paper and the additional
possibility of printing out TX reports on A5 paper.
If you use your fax machine as a printer, the functionality can be expanded, accordingly.
Please contact your TOSHIBA dealer for ordering a new printer unit.
133
ADVANCED SETTINGS
Make your selection
for the sub-address
ADVANCED SETTINGS
134 Line 2 Mode (optional)
If the second line (optional) is installed in your fax machine, you can configure this 2nd line in numerous ways:
Setting:
TX/RX
Effect:
The second line has the
same priority as Line 1.
RX ONLY (24HR)
The second line is used
exclusively as a
receiving line.
RX ONLY (TIMER)
The second line can be
limited to serve solely as
a receiving line within a
configurable time period.
Practical note:
The second line is also used by the fax
machine as a transmission line. If you have
a lot of faxes to transmit (e.g. in the case of
extensive multiple-address transmissions)
and value the fastest possible fax
transmission, you should choose this
setting.
If you wish your fax machine to always be
available, you can reserve the second line
exclusively for receiving faxes. In this case,
transmissions are handled via Line 1 only.
This setting represents a combination mode
for the second line. Outside the specified
time period, the second line has the same
priority as Line 1 (see first setting). Within
the specified time period, Line 2 is used
exclusively for receiving faxes (see second
setting).
These settings can be temporarily circumvented via the fax function “TEL LINE SELECT” (see page 14).
15-MAR-00 WED 19:56
Standby mode
RESIDUAL MEMORY 100%
ENTER TEL NUMBER
1.COMM. OPTIONS
2.LISTS
3.INITIAL SETUP
4.DEFAULT SETTINGS
Enter the menu
The first 4 menu items are displayed.
Select a menu item
LINE
1.TX
2.RX
3.RX
- 2 MODE
/ RX
ONLY (24 HR)
ONLY (TIMER)
Make your selection
For Line 2 mode
(Example: TIMER)
Continued on next page.
Select a menu item
RX ONLY (TIMER)
Make your selection
For time period “Receiving line only”
TIME PERIOD =
00:00 - 00:00
.....
START
STOP
Entering the new time period
Confirm with START
Press STOP, return to standby mode
135
ADVANCED SETTINGS
.....
POSSIBLE PROBLEMS
136
POSSIBLE PROBLEMS
Diagnostic program
Your fax machine has an automatic test routine which checks the correct functioning of the most important
internal components. The results of such a test are documented in a test report, which can be printed out at
any time.
You can also choose to test individual components as you see fit:
01. ADF TEST
02. KEY TEST
03. LED TEST
04. LCD TEST
05. SPEAKER TEST
06. SWITCH TEST
07. TEST PRINT
Function of the document feed (ADF)
Function of the individual keys on the control panel
Function of all LEDs
Function of the LCD display
Function of the speaker
Function of the sensor switch
Function of the printer components in the form of a print test
15-MAR-00 WED
19:56
Automatic test routine
Standby mode
RESIDUAL MEMORY 100%
1.COMM. OPTIONS
2.LISTS
3.INITIAL SETUP
4.DEFAULT SETTINGS
AUTO TEST
Start the menu
The first 4 menu items are displayed.
Select a menu item
Display of the current test procedure
(continuous movement of the display bar)
--------------
STOP
Cancel with STOP
-orA test printout is printed after approx. 6
minutes
15-MAR-00 WED 19:56
RESIDUAL MEMORY 100%
Start the menu
The first 4 menu items are displayed.
1.COMM. OPTIONS
2.LISTS
3.INITIAL SETUP
4.DEFAULT SETTINGS
15-MAR-00 WED
19:56
Select a menu item
Printout of the test report
RESIDUAL MEMORY 100%
PRINTING LIST
SELF TEST REPORT
PAGE
TIME
TEL NUMBER1
NAME
TEST CONTENTS
:
:
:
:
001
08.FEB.00 17:11
+44-1234567890
TOSHIBA MARKETING DP120F
RESULT
NOTE
DATE
OK
OK
OK
C692
AA3A
3621
08-02-2000 13:11
08-02-2000 14:22
08-02-2000 15:36
NG
57A
08-02-2000 15:42
AUTO TEST
FLASH ROM
PROGRAM
FUNCTION
LANGUAGE
SRAM
ADDRESS BUS
DATA BUS
DRAM
ADDRESS BUS
DATA BUS
MODEM
LINE (#1)
SCANNER
RAM
SHADING
CODEC
PRINTER
PHONEBOOK
INDIVIDUAL TEST
ADF TEST
KEY TEST
LED TEST
LCD TEST
SPEAKER TEST
SWITCH TEST
137
POSSIBLE PROBLEMS
Printout of the test report
Standby mode
138
POSSIBLE PROBLEMS
15-MAR-00 WED
19:56
Test of individual components:
Standby mode
RESIDUAL MEMORY 100%
1.COMM. OPTIONS
2.LISTS
3.INITIAL SETUP
4.DEFAULT SETTINGS
01.ADF
02.KEY
03.LED
04.LCD
TEST
TEST
TEST
TEST
Start the menu
The first 4 menu items are displayed.
Select a menu item
The first 4 components are displayed
Select a menu item
.....
Press STOP, return to standby mode
STOP
139
Error messages in the display
General procedure to be followed for error messages in the display
1.
2.
3.
4.
Analyse error message.
Rectify cause of error.
Press STOP key to cancel error message in display.
If necessary, switch off fax machine for 10 seconds and press STOP key again.
All error messages are retained in the display until they are acknowledged with the STOP key. If
this error message does not disappear, the cause of the error has still not been rectified.
Display
BROKEN REGISTRATION
Cause
Alphabet memory and internal
settings have been lost due to a
lengthy power failure
POWER FAILURE
Contents of the image memory
have been lost following a
power failure.
The copy flap is not locked in
place.
The upper part of your fax
machine housing has not
snapped into position.
The fax number entry memory
(one-touch/direct dial number
memory) is full.
The transmission / reception
memory is full.
SCANNER COVER OPEN
TOP COVER OPEN
ENTRY MEMORY FULL
MEMORY OVERFLOW
DOKUMENT JAM
UPPER PAPER EMPTY
Documents have jammed in the
document feeder.
(Only in conjunction with
additional paper cassettes)
No more paper in the upper
cassette.
How to correct
Press the STOP key. If the error message
does not disappear, activate the
installation procedure (see page 12) and
confirm all settings.
The internal lithium battery is possibly
depleted.
The mains error report (see page 102) is
printed out in order to provide you with a
list of lost criteria.
Allow this cover to snap carefully into
position.
Close the housing cover carefully.
Delete fax numbers you no longer need,
in order to free up memory.
Send your document(s) with a lower
resolution, or send them using the direct
mode (see page 42).
If this error persists, please contact your
dealer for a memory expansion.
Follow the instructions on page 146 to
rectify the document jam.
Load new recording paper (see page 10).
POSSIBLE PROBLEMS
Your fax machine indicates operating errors or does not carry out a function in accordance with your
requirements. Before you contact customer service, consider a moment and identify the error message in the
following list. You will probably then be able to remedy the fault yourself.
POSSIBLE PROBLEMS
140
Display
MIDDLE PAPER EMPTY
LOWER PAPER EMPTY
PAPER EMPTY
TONER LOW
TONER EMPTY
DRUM UNIT WARNING
REPLACE DRUM UNIT
CONFIRM DEV. UNIT
DEVICE ERROR XX
NETWORK DISABLED
NETWORK ERROR
PCL DISABLED
Cause
(Only in conjunction with
additional paper cassettes)
No more paper in the middle
cassette.
(Only in conjunction with
additional paper cassettes)
No more paper in the bottom
cassette.
The recording paper is empty
The toner is almost out. Only
enough toner for approx. 100
more copies.
There is not enough toner for
printing.
The printer unit is almost spent.
About 100 sheets can be
printed after this is displayed.
The drum unit is expended.
The printer unit is missing or
has not been installed correctly.
Indicates a fault in the printer
unit.
How to correct
Load new recording paper (see page 10).
The optional network interface
card (NIC) is faulty; networkspecific components are not
working correctly.
The network cable is not
connected correctly (only in the
case of an optional network
interface card)
The optional PCL card is faulty;
PCL printer components are not
working correctly.
Check that the network interface card is
installed correctly.
Load new recording paper (see page 10).
Load new recording paper (see page 10).
Install a new cartridge (see page 8).
Install a new cartridge (see page 8).
Please contact your TOSHIBA dealer to
order a new drum unit.
Replace the drum unit (see page 8).
Install the process unit correctly.
Activate the lock facility.
Contact your TOSHIBA dealer and notify
him of the code in the display message.
Check the network connection and reestablish the connection correctly.
Check that the printer card is installed
correctly.
Cause
Line 1 has no connection to the
telephone network / PBX
CHECK LINE-2
(Only if optional second
line is installed)
SORRY NOT POSSIBLE
see “Check Line-1”
Selected function not possible
at present.
How to correct
Check the line connection at the
telephone socket. If the line is connected
correctly, report the fault.
see “Check Line-1”
Read the operating instructions for any
restrictions concerning your selected
action.
141
POSSIBLE PROBLEMS
Display
CHECK LINE-1
POSSIBLE PROBLEMS
142 Error codes in journal
If “TRANSMISSION ERROR” appears in the display of your fax machine, the error code describes the specific
error. The same code is shown also in the journal and transmission report.
Code
10
11
12
13
20
22
30
Cause
No recording paper
Paper jam
Documents have jammed in the
document feed.
Open the upper covers
Power failure
Memory error
32
Transmission interrupted by the
transmitter/receiver.
Page error
33
Polling error
42
Memory overflow
50
Line busy
53
Wrong codeword
60
B0-B5
C0-C4
D0-D2
F0, F1
E0-E6
Line busy
Communication error
87
Image cannot be saved
Printer fault
How to correct
Put more paper in the paper cassette.
Remove the jammed paper (see page 147).
Follow the instructions on page 146 to rectify the
document jam.
Allow these covers to snap carefully into position.
A power failure has occurred.
If this error occurs frequently, please notify the customer
service of your TOSHIBA dealer.
Start the transmission process again or request your fax
partner to repeat the transmission process.
A specific number of pages has been set, but a different
number of pages has been sent (see page 63).
Polling was not reserved, or the password was incorrect,
or polling protection did not meet the specified criteria
(see page 69).
Send your document(s) with a lower resolution, or send
them using the direct mode (see page 42). If this error
occurs frequently, please contact your dealer for a
memory extension.
Test the connection using the listening-in option (see
page 48). Have you pressed “*” on the extension for
obtaining an outside line (see page 18)?
A document has been retrieved with the wrong
codeword (see page 69).
Send the document again.
Bad line.
The document has probably not been transmitted. You
should transmit your document again to be safe.
A printer error occurred during reception, causing a
memory overflow.
Memory overflow on the other machine. Transmit your
document again later.
143
Transmission problems
Problem
Your document is not
automatically pulled into
the feeder.
Possible causes ...
Your machine displays an error.
Document size or thickness of
paper are not acceptable.
The operator control panel is
not firmly locked.
... and solutions
If the display gives an error message,
clear the fault and delete the display with
STOP.
Check there is power on the machine.
The machine must be switched on (see
page 9).
Use acceptable documents only (see
page 37).
Close the cover. It should be firmly
locked in place on both sides.
You replaced the receiver before
pressing START.
Try again. Replace the receiver only
when you have pressed START.
Document format or paper
thickness not as specified.
The document guides are not
properly adjusted to the paper
size.
The other machine is out of
paper.
Use acceptable documents only (see
page 37).
Adjust the document guides accordingly.
You loaded your document in
the machine with the image
face-up.
Your machine’s document
reader is dirty or damaged.
Send your document again: the image
must be face-down on your document
feeder.
Make a copy of your document on your
fax machine (see page 35). If your copy
is also difficult to read, clean the
document reader.
The display is blank.
The text ”transmission” is
not displayed when you
press the START key.
The document is damaged
during sending or copying.
Your fax machine
performed transmission
correctly but the message
was not received by the
receiver.
The receiver received a
blank sheet instead of the
document sent.
The receiver reports: The
document transmitted is
difficult to read.
Ask the receiver to put paper in his
machine.
POSSIBLE PROBLEMS
Your fax machine reports an operating error or fails to perform the required function. Before you make an
unnecessary call on your service technician, take your time and see if you can help yourself. This checklist will
help you recognise and eliminate errors.
POSSIBLE PROBLEMS
144
Problem
The receiver reports: The
document transmitted is
difficult to read.
Abbreviated or one-touch
dialling do not work.
Your call does not arrive
although you have dialled
the correct number.
Possible causes ...
RESOLUTION and CONTRAST
are not set correctly.
The telephone connection is
poor.
Abbreviated or one-touch
dialling number is not correctly
stored.
If you are connected to a PABX:
You have set the wrong line
type.
Your fax machine is not
connected to the PSTN.
... and solutions
Make a copy on your fax machine (see
page 35) and adjust the settings to your
document. You can also improve
document quality: By making the print on
the photocopy darker, enlarging or
reducing. (see page 50 / 51). Then send
again.
Redial. You may get a better
conncection.
Check and correct stored numbers (see
page 77 / 82).
Set the line types to EXTENSION (see
page 18).
Plug the connecting cable of your fax
machine into the socket (see page 9).
145
Receiving problems
Problem
You press START to
receive an document. But
you receive nothing.
Possible causes ...
Your machine displays an error.
The fax machine is not
correctly connected.
The display is blank.
Your recording paper is not
fed out.
The dcoument received is
difficult to read.
You receive a completely
blank document.
The document received is
partially printed.
You can send fax
messages without any
problem, although you
cannot receive any.
There is still a document in the
feeder.
Your fax machine is set in
manual receiving mode and you
replaced the handset before
pressing START.
The operator control panel is
not closed.
The recording paper in your
machine is jammed.
Document quality is poor.
The recording paper quality is
poor.
The sender made a mistake
when loading the document.
The operator control panel of
your fax machine is not closed
properly on both sides.
Receiving protection is
activated.
... and solutions
If the display gives an error message,
clear the fault and delete the display with
STOP.
Check the wiring. See page 9.
Check there is power on the machine.
The machine must be switched on (see
page 9).
Press STOP and remove the document.
When receiving the next fax, be sure to
replace the handset only after you have
pressed START.
Close the cover. Both sides of the cover
must be firmly locked in place.
Remove the jammed paper (see
page 147).
Ask the sender to reset the resolution
and contrast or improve the quality of the
document e.g. by making the print on the
photocopy darker, enlarging or reducing.
Then have it send again.
Use acceptable recording paper (see
page 10).
Check whether the sender loaded in the
correct manner.
Close the cover. Both sides of the cover
must be firmly locked in place.
Switch off receiving protection (see
page 34).
POSSIBLE PROBLEMS
Your fax machine reports an operating error or fails to perform the required function. Before you make an
unnecessary call on your service technician, take your time and see if you can help yourself. This checklist will
help you recognise and eliminate errors.
POSSIBLE PROBLEMS
146 Cleaning document scanner
Never use abrasive materials to clean your fax machine - they could cause damage. If documents transmitted
are difficult to read, the document scanner must be cleaned. You can easily tell when: Make a test copy of the
document on your fax machine and compare the copy with the original.
Open the document feed by
pressing the corresponding release
button.
Wipe the white metal strips and
the opposing document window
with a soft cloth.
If these parts are very dirty,
you can also use a slightly
moist cloth and then wipe
off with a dry cloth.
Metal strips
Return the document feed to its
original position. Ensure that the
covers on both sides lock into
place correctly.
Document
window
Remove document jam
Leave the fax machine switched
on. Remove the remaining
documents from the document
feed.
Open the document feed by
pressing the corresponding release
button.
Remove the copy that caused the
document jam. Check the
document feed for residual scraps
of paper.
Return the document feed to its
original position. Ensure that the
covers on both sides lock into
place correctly.
147
How to clear a recording paper jam
Code
10
20
30
50
80
90
Jam position
Paper cassette. In the case of additional cassettes: Top cassette
Optional paper cassette: Middle cassette
Optional paper cassette: Bottom cassette
Single-sheet feed
Area of the paper feed (directly downstream of the tray)
Area of the paper exit (directly upstream of the paper exit)
Leave the fax machine switched
on. Open the side paper feed and, if
applicable, pull the page out.
Subsequently open the machine
cover by operating the release
lever.
Remove the printer unit from the
exposed machine.
If paper is located beneath the
metal transport roller, release the
paper by pressing the green lever
(as illustrated in the diagram).
Please take care not to tear
the paper in this context.
If part of the paper is already
located in the setting unit, it can
be pulled out in the direction
opposite to the print direction, as
illustrated in the diagram.
• Please take care not to
tear the paper in this
context.
• Caution! The setting unit
may be very hot.
DANGER OF BURNING!
• Please do not pull the
paper towards the paper
exit
Once you have ensured that both
the jammed paper and any paper
scraps have been removed, reinstall the printer unit and close the
machine and side paper feed cover.
Note
If a paper jam occurs during fax
reception, the remaining pages are
stored in the memory. Once the
paper jam has been eliminated, the
remaining pages are printed out
automatically.
POSSIBLE PROBLEMS
In the event of a paper jam in the receiving paper tray, the PAPER JAM XX” message is displayed. The two
numbers indicate the location of the paper jam in the fax machine.
POSSIBLE PROBLEMS
148 Cleaning the printer unit
If toner inadvertently ingresses into the fax machine, it may be necessary to clean the loading corona.
The loading corona
comprises a very thin, taut
wire stretched within a metal cage
along the entire length of the
image drum.
• Holding the printer unit by the
green handle, remove it from
the fax machine.
The supplied special tool enables
you to clean the charge corona
without any danger.
• Switch of the fax machine
• Pull the release button to open
the fax machine (see page 7)
• Place the cleaning tool carefully
on the metal cage (as illustrated
in the drawing) and then slide it
backwards and forwards
several times along the entire
length of the corona wire.
NOTE
The other parts of the cleaning kit
are reserved for a service call-out.
Please store these objects in a
safe place.
• Remove the developer unit from
the drum unit.
149
Remote maintenance (COMLINE)
15-MAR-00 WED
19:56
To activate remote access:
Standby mode
RESIDUAL MEMORY 100%
1.COMM. OPTIONS
2.LISTS
3.INITIAL SETUP
4.DEFAULT SETTINGS
Start the menu
The first 4 menu items are displayed.
Select a menu item
REMOTE ACCESS
1.ON
2.OFF
.....
Make your selection
1: ON
2: OFF
Select a menu item
Press STOP, return to standby mode
STOP
15-MAR-00 WED 19:56
Configure password for remote access:
Standby mode
RESIDUAL MEMORY 100%
1.COMM. OPTIONS
2.LISTS
3.INITIAL SETUP
4.DEFAULT SETTINGS
.....
Start the menu
The first 4 menu items are displayed.
SET RDC PASSWORD
Select a menu item
PASSWORD =(MAX20)
_
Make your selection
for password
Enter password (digits)
confirm with START
START
Press STOP, return to standby mode
STOP
POSSIBLE PROBLEMS
Your fax machine enables remote diagnosis to be carried out. This means that internal settings can be read and
changed via the telephone line. In order to ensure that all requirements of data protection are observed,
COMLINE is possible only if you temporarily enable your fax machine for this facility.
Remote maintenance may also be password protected.
POSSIBLE PROBLEMS
150 Supply order
As soon as consumables (drum, toner, etc.) are expended, your fax machine can order replacements
automatically. Before you configure this setting, it is advised that you contact your dealer to determine the
conditions under which this automatic order service is to be performed.
15-MAR-00 WED
19:56
Standby mode
RESIDUAL MEMORY 100%
1.COMM. OPTIONS
2.LISTS
3.INITIAL SETUP
4.DEFAULT SETTINGS
Start the menu
The first 4 menu items are displayed.
Select a menu item
SUPPLY ORDER SETUP
1.DESTINATION SETUP
2.SUPPLIES
3.OTHER INFORMATION
.....
Make your selection
1. Enter the fax number of the contractual
partner
2. Select the consumption-specific
criteria
3. Further information on the order
process
4. Printout of the order list
Select a menu item*
Press STOP, return to standby mode
STOP
*) For further details on these data, please contact your dealer or contractual partner.
Download
This menu item allows additional technical settings that should only ever be performed by your dealer's
qualified personnel.
Connection to PABX
•
•
•
•
•
Does the PABX have public line capability?
Does the PABX have DDI capability?
Have you entered the „❊“ key before the actual fax number?
How is the public line obtained (flash, number)?
Which dialling mode will be used? *
*) The factory default in Germany is MFV (multiple frequency dialling). If impulse dialling (IWV) is to be used,
please contact your dealer.
POSSIBLE PROBLEMS
If your fax machine is connected to a PABX, additional sources of errors are possible. In the event of any
problems, you should work through the following items and compare them against the current installation of
your fax machine. Where necessary consult the person who installed your PABX.
151
UK CONNECTION INFORMATION
152
UK CONNECTION INFORMATION
This TOSHIBA Facsimile Transceiver is intended for connection to public telecommunication services as
follows:
By using the cable described as TEL LINE CABLE in the packaging list of the instruction manual. This cable
plugs into the socket on the left hand side of the DP 120F which is marked LINE and the other end into the
standard PSTN analogue socket found in the UK.
This terminal equipment complies with the following requirements:
• Automatic repeat attempts
• Group 3 fax modem
• Call progress monitor
• Automatic call initiation
• Series connection facility
• Storage of telephone numbers for retrieval
• LD or MF dialling
by a predetermined code
• Operation with or without dial tone being present.
• Automatic dialling
Any other usage will invalidate the approval of the apparatus if as a result, it then ceases to conform to the
standards against which approval was granted.
We declare, that TOSHIBA is using
mark in compliance with EN 50 082-1, EN 55 022/B and EN 60 950
EPA ENERGY STAR
For more information on the ENERGY STAR
Program, please contact:
ENERGY STAR Printers/Fax Machines
US EPA (62021)
Washington, DC 20460
ENERGY STAR is an U.S. registered mark.
Addendum to the DP 120F Operator’s Manual
The United States Environmental Protection
Agency (EPA) has introduced a voluntary
program, the ENERGY STAR Program, to
encourage the widespread and voluntary use of
energy-efficient technologies that enhance the
workplace, improve product performance,
prevent pollution, and reduce your energy costs.
As an ENERGY STAR Partner, to Toshiba Europa
(I.G.) GmbH has determinded that this facsimile
model meets the ENERGY STAR guidelines for
energy efficiency. ENERGY STAR guidelines
require that all ENERGY STAR facsimiles
maintain very low power consumption during
idle state or have a „Power Saver“ feature that
will automatically stand-down to an idle state
after a period of inactivity.
Declaration of conformity
We herewith declare:
Manufacturer: Toshiba Europe GmbH
Address: Hammfelddamm 8
D-41460 Neuss,
that the product: Analog fax machine, Model: DP 80F/85F/120F,
fulfils the fundamental requirements pursuant to Article 3 of EU Directive 1999 / 5 / EC, and that the following
harmonised standards apply:
EN 60950 :1992 + A1 :1993 + A2 :1993 + A3 :1995 + A4 :1997 + A11 :1997
EN 60825 - 1 :1994 + A11 :1996
EN 55024 :1998
EN 55022 :1998 Class A
EN 61000-3-2 :1995 + A1 :1998 + A2 :1998
EN 61000-3-3 :1995
Council Decision 1998 / 482 / EC of 20.07.98 (CTR 21)
The device is designed for all analog PBX interfaces in the European Union, as it has been tested pursuant to
TBR 21.
153
INDEX
F
P
A5 Transmission report .... 90, 134
Alphabet dial memory .............. 75
Alternative fax number ............. 77
Fault lamp ................................... 5
Faults, during reception .......... 145
Faults, during transmission .... 143
Fine .................................. 50, 124
Flash key .................................. 18
Paper cassette ................. 10, 134
Paper jam ............................... 146
Paper size ......................... 37, 134
PBX .......................................... 18
Photo ........................................ 50
Poll reservation, cancel ............ 68
Polling protection ..................... 64
Polling, delete ........................... 72
Polling, multiple ........................ 70
Polling, permanent .................... 73
Polling, single polling ................ 69
Power saving ......................... 110
Printer unit .................................. 7
Printout, correct sequence ....... 31
Private branch exchange .. 18, 150
Program selection list .............. 89
Public line ................................. 18
PWD ....................................... 132
B
Broadcast transmission .......... 46,
Buffer memory ......................... 39
G
C
Grey .......................................... 50
Group dialling ........................... 46
Group ........................................ 46
Group, free ............................... 46
Call counter .............................. 22
Cancel transmission ................. 62
Cancel transmission ................. 62
Chain dialling ............................ 58
Cleaning, scanner ................... 146
Code ................................. 17, 104
COMLINE ................................ 151
Consumables ...................... 7, 150
Contrast ........................... 51, 124
Copy ......................................... 35
Corona .................................... 148
Cost items .............................. 112
Cover sheet ...................... 56, 118
I
Important transmission ............ 41
Impulse dialling ...................... 151
Infobox ..................................... 66
J
Job management ..................... 40
Job status .............................. 121
Job ................................... 39, 120
Journal ............................. 95, 112
D
L
Date .......................................... 21
Delayed fax job ....................... 103
Delete direct dialling number .... 81
Delete receipt ........................... 33
Delete, groups .......................... 88
Department code .................... 112
Developer assembly ................... 7
Dialling mode ......................... 151
Direct dialling ........................... 75
Direct-dialling keys, delete ....... 84
Direct-dialling ..................... 44, 82
Document jam ........................ 146
Document length .............. 37, 122
Documents ............................... 37
Drum unit ................................... 9
Letterhead paper .................... 130
Line monitoring ................ 48, 106
List, departments ................... 102
List, dial numbers ................... 101
List, functions ........................... 98
List, reservations ...................... 98
M
Main connection ...................... 18
Memory card ............................ 11
Memory ...................... 25, 39, 120
Memory, send from .................. 39
Memory, send from ............ 39, 42
Menu ........................................ 12
Multiple frequency dialling ..... 151
Multiple printout ....................... 32
E
ECM ................................. 52, 125
Edit direct dialling number ........ 80
Edit groups ............................... 87
Error codes ............................. 142
Error messages ...................... 139
Extension ......................... 18, 151
N
Network error report .............. 102
New transmission .................... 60
Number of calls ........................ 22
Number of rings ....................... 22
O
One-touch dial keys .................. 82
R
Receiving problems ................ 145
Receiving, automatic ................ 22
Receiving, manual .................... 22
Receiving, memory .................. 25
Receiving, paper ....................... 10
Receiving, privileged ................ 26
Reception trailer (RTI) ............ 105
Redialling .......................... 59, 107
Reduction, copies ..................... 35
Reduction, reception ................ 23
Remote maintenance ............. 149
Report, broadcast ..................... 94
Report, group polling ................ 94
Report, send memory ............... 92
Report, send ............................. 89
Reserve polling ................... 64, 66
Resolution ........................ 50, 124
Ringer volume ........................ 109
RTI .......................................... 105
S
Secure receiving ...................... 34
Secured transmission ...... 54, 126
SEP ......................................... 132
Separator ................................ 116
Single-sheet feed ................... 133
Standby .................................. 110
STD .................................. 50, 124
SUB ........................................ 132
Sub-addressing ...................... 132
Subscriber terminal connection . 9
Superfine .......................... 50, 124
INDEX
A
INDEX
154
T
Telephone book function ........... 45
Telephone jack ............................ 9
Telephone network,
connection to ............................. 9
Time ......................................... 21
Toner .......................................... 8
Toner, changing .......................... 8
TOSHIBA Code ................... 64, 69
Transmission header ........ 17, 104
Transmission
report on A5 ..................... 90, 134
Transmission report: ................ 89
Transmission security ...... 54, 126
Transmission speed ................. 55
Transmission, delayed ............ 102
TTI .................................... 17, 104
U
Ultra-fine .......................... 50, 124
Unabbreviated dialling (chain
dialling)..................................... 58
User name ................................ 15
V
Voice ........................................ 20
Volume ................................... 109