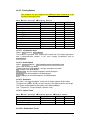
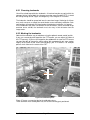
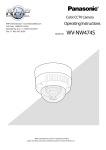
1
RHP-CT (Camera Tracker) / CloseView Instruction Manual
RHP International, Inc
PO BOX 4242, Middletown NY 10940
USA
www.ROCK2000.com - 1-888-919-2263
CloseView 4.4.14
Manual Revision 5
For Desktop and 19” Units
DynaPel CloseView
Page 2
1 New in CloseView 4.4
New features in CloseView 4.4 appliance compared to CloseView 4.3
•
Main Menu CloseView: New menu entry System Setup containing:
o Setup Wizard
o Joystick/Controller
o PTZ Camera
o Fixed/Overview Camera(s)
o Calibration
Now each section is accessible independently to setup wizard workflow
Input Controller:
o Separate input addresses for PTZ and CloseView.
Address #1 assigned to CloseView
Address #2 assigned to PTZ
• Manual Target Selection via Joystick/Controller
• Action command ‘Stick to current Target’ (Default Call Preset 90)
• Action command ‘Switch to next Target’ (Default Set Preset 90)
• Save/Restore configuration file is extended to print out the saved CloseView
configuration
• Automatic re-init of domes available for Pelco cameras, Interceptor, EyeMax2
• Introduced Pan/Tilt speed scaling, which avoids scrolling through the
OnScreenMenu when a DVR or Video server is used to control CloseView.
• Pelco Esprit has a new feature in the advanced settings: Top Speed Angle
defines the Angle the camera uses its top speed. This can be used to avoid
overswings of the camera.
• Adjustable Object agility in Motion Tracker settings
•
•
New cameras supported:
o Pelco Esprit
o Cynix Domes
CV P30T / CV N30T (30x outdoor, Techwin module)
SV P30T / SV N30T (30x Indoor, Techwin module)
MV P10T / MV N10T (10x Minidome, indoor, Techwin module)
MX P10T / MX N10T (10x Minidome, outdoor, Techwin module)
o Pelco ExSite
o ForwardVision MIC1-400 (Pelco Protocol)
o ForwardVision MIC1-412 (18x and 36x Zoom module, Pelco Protocol)
DynaPel CloseView
Page 3
1.1
CloseView 4.4 - How to use the new features
1.1.1 System Setup
CloseView System Setup is now accessible using separated menu entries for each
part to setup. Therefore a new menu entry in the main menu was placed: System
Setup. Changing settings is now designed more user-friendly because you do not
have to navigate through the whole wizard again even only one setting has to be
changed. Setup wizard is initiated automatically only for initial setup after update if
necessary, if your video norm for the fixed camera has changed or if you access the
wizard explicitly via CloseView OSD.
The selectable items within the Setup Menu are:
System Setup
•
Start Setup Wizard: This menu entry allows you to go through the complete
setup tasks using the known Setup Wizard functionality
•
Joystick/Controller: Within this menu entry you are able to define the
settings for your Joystick/Controller
•
PTZ Camera: Within this menu entry you are able to perform all settings
needed to identify, access and steer you installed PTZ
•
Fixed/Overview Camera(s): Depending on the number of fixed cameras
used in your setup you can define the specific setting for single up to four
fixed cameras
•
Calibration: Depending on the number of fixed cameras used in your setup
you are able to calibrate one up to four cameras within this menu entry.
Each of the setup sections can be left by ‘Cancel’ without saving the changes made.
For how to use and perform the settings in detail please refer to the corresponding
chapters of your user manual (see Chapter 3.5 Operating The Setup Wizard)
DynaPel CloseView
Page 4
1.1.2
Input Controller
Within this version of CloseView a new convenient feature is realized. Now you are
able to address CloseView and PTZ via separate addresses. This feature allows you
to manually control (e.g. via Keyboard, Controller, DVR etc.) the PTZ and to perform
settings in your CloseView unit at the same time without affecting each other. In
combination with the action command mapping you got a powerful possibility to
access and to control your equipment.
To set the desired addresses go through the following steps:
1. Select CloseView Main Menu/System Setup/Joystick/Controller.
2. Choose desired protocol.
3. Enable Selection Mode
4. If you have enabled the selection mode the menu entry for selection timeout
appears. Set this parameter to an appropriate value.
5. Set Address CloseView e.g. to ‘1’
6. Set Address PTZ e.g. to ‘2’
Note:
If CloseView address and PTZ address have the same value Selection Mode will be
disabled automatically.
7. Set COM Mode, Baud Rate and Parity according to your equipment
8. Apply Settings (or Cancel Settings to leave without changes)
9. Leave CloseView OSD.
You have completed your settings and CloseView has stored them. From now on
select your CloseView application or PTZ camera by choosing the corresponding
address via your Keyboard/Controller.
1.1.3
Manual Target Selection
This new feature is available if you have selected CloseView Main Menu/User
Settings/Viewing Options/Objects/Relevant or /All and the previous described
Selection Mode is enabled. This feature allows you to select an object to be tracked
by CloseView as target manually. CloseView then tracks the selected object until it
disappears out of field of view means it is lost as CloseView target and switches back
to previous tracking mode.
1.1.3.1
How to select a target manually:
Note:
Make sure you have set two different addresses for CloseView and PTZ camera,
enabled the Selection Mode in the CloseView Menu (see Input Controller) and
switched the Viewing Options/Objects to Relevant or All. To select a target manually
at least two objects have to exist as minimal possibility of selection.
1. Set address to ‘CloseView’ via Joystick as described within the user manual
of the controller you are using
DynaPel CloseView
Page 5
2. By moving your joystick up/down or left/right Select Target is highlighted in
the left corner on screen and a blue box appears around the selected object.
To select anther object as target move the cursor to the desired object to be
tracked. To select a different target you have time as long as the timeout for
Selection Mode was set. If this time has timed out CloseView goes back into
the previous mode. (see Input Controller)
3. Now press ‘Enter’ (default: IRIS OPEN) on your controller if you want to
activate the target selection or press ‘Cancel’ (default: ‘IRIS CLOSE’) if you
don’t.
4. The selected object is assigned as target immediately and tracked by
CloseView until it is lost as target.
5. If you have chosen ‘Cancel’ CloseView goes back into the previous tracking
mode.
•
•
•
If CloseView is in PTZ Mode ‘OFF’ during you are selecting a target manually
CloseView will be switched to tracking mode temporarily until the target which
is selected disappears.
If CloseView is in 'Joystick' mode during you are selecting a target manually
CloseView will switch to object tracking mode.
If CloseView operates in ‘Multi channel Mode’ (e.g. Split screen, Quad mode)
any visible object from any channel can be selected.
1.1.4 Action commands "Stick to current target" and "Switch to next target"
These action commands are available in the menu User Settings/Joystick
Options/Command Mapping/Stick to Target or Next Target
1.1.4.1
Action Command Stick to Target (Default: GoTo Preset 90)
When issued, Target Selection is set to "Single Object" tracking mode temporarily.
The selected object is tracked until it is lost as CloseView target.
1.1.4.2
Action Command Switch to Next Target (Default: Set Preset 90)
When issued, Target Selection shall switch to next object immediately (as if "dwell
time" was over for the current target).
Both modes overwrite Priority Area behavior temporarily, e.g. if Stick to Target is
selected for a low priority object, no higher priority object switches the tracking away
from it, unless the selected object disappears. Also, if Next Target is given for a high
priority object, CloseView switches to objects with lower priority.
1.1.5 Pan/Tilt speed scaling (DVR / VideoServer control fix)
Some DVRs or Video Servers issue very high speed commands only, when
operating through their Client Software. Those High speed command are interpreted
as a series of speed commands in CloseView. This may lead to the problem, that it is
not possible to navigate through the OSD or position the crosshairs precisely. Now
this feature will scale down all speed commands coming in on the Joystick port.
Just go to the “Advanced” menu in the Joystick setup and scale down the values
using the Front keypad, until the remote device operates correctly
DynaPel CloseView
Page 6
1.1.6 Adjustable Top Speed angle
Pelco Esprit has a new feature in the advanced settings: Top Speed Angle defines
the Angle the camera uses its top speed. This can be used to avoid overswinging of
the camera. Increase the value to let the Esprit drive its full speed only above the
selected angle.
1.1.7 Adjustable Object agility
This setting controls how close the CloseView Tracker can follow objects changing
direction in the Overview image. Increase the number to be able to follow rapidly
changing objects. Lower the number to get smoother tracking.
This entry can be found in “User settings / Motion Tracking”
1.2
How to Save and load a configuration with DynaPel
CloseView
1.2.1 CloseviewConfig – Save/Restore your CloseView configuration –
With CloseView a little program with great advantages comes along now. With this
feature it’s easy to save all the settings made for a specific CloseView configuration.
This is very helpful during installation or if a system setup has to be redone. Read the
following carefully to get familiar with the use and advantages of this feature.
Note: SAVE THE CONFIGURATION RIGHT AFTER SUCCESSFUL
INSTALLATION!
This will save a lot of time in the case of a system breakdown or unauthorized
manipulation of the setup or will help the support to find problems if occurring.
1.2.2 How to get started with CloseviewConfig under WINDOWS:
1. Install the application (file Name: CloseViewConfig.exe) into a directory of
your PC. This is done simply by copying or extracting the file into the desired
folder. We would recommend creating a new directory named
CloseViewConfig or similar).
2. On Windows Desktop select Start/Run/Cmd (Command line interpreter)
3. Change to the directory where you have been installing the application.
DynaPel CloseView
Page 7
4. Then type CloseViewConfig -h on the command line. The syntax and
program parameters are shown.
Example: Command line window
1.2.3
How to SAVE a Configuration:
1. Connect a serial null-modem cable from your PC COM Port to the
CloseView SubD COM port.
2. Disconnect WAGO Terminal Block from communication adapter to be sure
the serial connection can’t be disturbed by other signals.
3. Open CloseView OSD and change user to Admin
4. Choose Save/Restore Config in the CloseView Main Menu
5. Select the COM Port (CloseView side) where the load is to be routed over
6. Select Baud Rate (if different to default)
7. Choose Save/Restore Config in the CloseView Save/Restore Config Menu
8. Type CloseViewConfig –down with the desired parameters on the command
line.
Example: CloseViewConfig –down –dev COM1 CloseViewConf.txt
It is a good idea to code the name of the site (e.g. Audi-Smith), number/model
of the camera in your setup, the serial number, or the camera positions and
the date into the filename like here:
CVConf_Audi-Smith_Pelco-No-5_North_SN1234_2007-10-12.txt
Note: -dev represents the used COM Port on PC-side
9. Depending on the used options the configuration is now down-loaded from
your CloseView unit
10. Check User Mode before and after you loaded/saved a configuration!
1.2.4
How to LOAD a Configuration:
1. Connect a serial null-modem cable from your PC COM Port to the
CloseView SubD COM port.
2. Disconnect WAGO Terminal Block from communication adapter to be sure
the serial connection can’t be disturbed by other signals.
3. Open CloseView OSD and change user to Admin
4. Choose Save/Restore Config in the CloseView Main Menu
DynaPel CloseView
Page 8
5. Select the COM Port (CloseView side) where the load is to be routed over
6. Select Baud Rate (if different to default)
7. Choose Save/Restore Config in the CloseView Save/Restore Config Menu
8. Type CloseViewConfig –up with the desired parameters on the command
line.
Example: CloseViewConfig –up –dev COM1 CloseViewConf.txt
Note: -dev represents the used COM Port on PC-side
9. Depending on the used options the configuration is now up-loaded from your
CloseView unit
10. Check User Mode before and after you loaded/saved a configuration!
NOTE: The calibration was not saved and has to be redone. All Other data is
copied from the file.
DynaPel CloseView
Page 9
Brief Installation Overview
Minimal system setup – applies to both desktop and 19” version:
- a PTZ camera, e.g. Pelco Spectra III
- plus a stationary wide angle overview camera
- run video from overview camera to Video In of CloseView
- run serial control from PTZ to the Camera-COM port of CloseView
- run Video Out from CloseView and video from PTZ to monitors
- do not feed the video from the PTZ into CloseView
P T Z (D o m e ) c a m e ra
D e ta il V id e o
C a m e ra C O M
te rm in a l b lo c k s
B id ire c tio n a l
s e ria l lin e
D yn a P e l
C lo s e V ie w
V id e o
OUT
P la c e d c lo s e -b y
O v e rv ie w c a m e ra
V id e o
IN
O v e rv ie w
V id e o
/w d iag n o s tic
o v e rla y
O v e rv ie w V id e o
DynaPel CloseView is an innovative and unique product. Here is a brief
description of the 6 essential steps needed for successful installation.
This overview also helps you to find more detailed information within the manual.
1. Make sure your intended camera equipment meets CloseView’s requirements:
•
•
•
Your PTZ camera is among the types supported by this CloseView version,
and the camera’s serial wiring enables bi-directional (4-wire) communication
(see chapter 7 and 0)
Adjust the PTZ camera to the address, baud rate and protocol type specified
in this manual or adjust the corresponding values in the PTZ Settings section
of the Setup Wizard, once the CloseView appliance is running.
The overview camera and PTZ camera should be mounted as close together
as possible (see chapter 0).
DynaPel CloseView
Page 10
2. Make all connections to the CloseView appliance (see chapter 2.1)
•
•
•
•
•
Connect the video signal from the Overview camera to Video In
Connect Video Out to some monitor
Connect the video signal from the PTZ camera to another monitor
Connect the serial cable from the PTZ camera to the CloseView appliance
Power-up the system
3. If you don’t see the welcome screen of the Setup Wizard, issue a factory reset
(see chapter 3.6.6.5)
4. The new Setup Wizard will guide you through the setup process.
Help screens are available for each of the following setup steps:
•
•
•
•
Configure your optional remote controller
Configure the built-in webserver1
Establish communication with your PTZ camera
Calibration of your camera pair (fixed overview and PTZ camera)
5. To calibrate the CloseView system for your camera pair (see 3.5.5 and 0)
•
•
•
Select the landmarks with the crosshair, and aim the PTZ camera accordingly
– either with the keypad or with your optional remote controller.
Don’t forget to start the calculation process after all landmarks are set
After the calculation, verify your calibration by checking the landmarks
After successful calibration, the Setup Wizard will automatically save your setup,
and quit.
6. The remaining user settings can be changed from a normal On-Screen-Display.
If necessary, customize the other user settings, e.g.
•
•
Adjust the Minimum Object Size (see chapter 3.6.4.3.5.6)
Specify exclusion areas or priority areas if necessary (see chapter 3.6.4.4)
Usually, step 6 can’t be completed right at the initial setup. To optimize the system
behavior, monitor its performance for some time and make adjustments.
When satisfied with your setup, leave the Admin Mode and engage User Mode, in
order to prevent this setup from being accidentally overwritten (see chapter 3.2 and
3.6.7).
1
Only the DP192-xx 19” rack-mounted units have a built-in webserver. Please ignore all
references to the webserver if you are using a DynaPel desktop unit.
DynaPel CloseView
Page 11
Table of Contents
CLOSEVIEW INSTRUCTION MANUAL ............................................................................ 1
1
NEW IN CLOSEVIEW 4.4............................................................................................. 3
1.1
MOST IMPORTANT CHANGES TO PREVIOUS MANUAL ......ERROR! BOOKMARK NOT
DEFINED.
1.1.1
Changes / additions to PTZ camera types/models... Error! Bookmark not
defined.
PELCO ........................................................................Error! Bookmark not defined.
LG.................................................................................Error! Bookmark not defined.
Cynix Speed Dome....................................................Error! Bookmark not defined.
1.2
CLOSEVIEW 4.4 - HOW TO USE THE NEW FEATURES ............................................. 4
1.2.1
System Setup .................................................................................................. 4
1.2.2
Input Controller................................................................................................ 5
1.2.3
Manual Target Selection................................................................................ 5
1.2.4
How to select a target manually: .................................................................. 5
1.3
ACTION COMMANDS "STICK TO CURRENT TARGET" AND "SWITCH TO NEXT
TARGET" ................................................................................................................................ 6
1.3.1
Action Command Stick to Target (Default: GoTo Preset 90)................... 6
1.3.2
Actions Command Switch to Next Target (Default: Set Preset 90) ........ 6
1.4
HOW TO SAVE AND LOAD A CONFIGURATION WITH DYNAPEL CLOSEVIEW .......... 6
1.4.1
CloseviewConfig – Save/Restore your CloseView configuration –......... 7
1.4.2
How to get started with CloseviewConfig under WINDOWS: .................. 7
1.4.3
How to SAVE a Configuration:...................................................................... 8
1.4.4
How to LOAD a Configuration: ..................................................................... 8
BRIEF INSTALLATION OVERVIEW ................................................................................ 10
2
INTRODUCTION & INSTALLATION ........................................................................ 16
2.1
CONFIGURATION OVERVIEW .................................................................................. 17
2.1.1
What you need to get started...................................................................... 17
2.1.2
Using multiple fixed overview cameras ..................................................... 22
2.1.3
General Safety Precautions ........................................................................ 24
2.1.4
Safety Instructions for Rack Mounted Units ............................................. 24
2.2
ON PTZ CAMERAS .................................................................................................. 25
2.2.1
Integration into an existing PELCO Environment .................................... 25
2.2.2
PTZ lost .......................................................................................................... 28
2.2.3
Accessing the OnScreenMenu of the PTZ camera ................................. 28
2.2.4
Connecting the PTZ camera ....................................................................... 29
2.3
REMOTE CONTROL VIA SERIAL JOYSTICK ............................................................. 31
2.3.1
List of supported Joystick Protocols........................................................... 31
2.3.2
How to connect the optional external joystick .......................................... 31
2.3.2.1 Connecting a RS-232 Joystick................................................................ 32
2.3.2.2 Connecting a RS-422/485 Joystick........................................................ 32
2.3.3
Controlling several CloseViews from one Joystick .................................. 33
2.3.4
Using external serial devices to remotely control the CloseView unit .. 35
2.3.4.1 Control the CloseView OSD.................................................................... 35
2.3.4.2 Control the attached PTZ camera .......................................................... 35
2.3.4.3 Action Commands .................................................................................... 36
2.4
VIDEO INPUT / VIDEO OUTPUT ............................................................................... 38
2.5
NETWORK CONNECTION ........................................................................................ 38
3
SYSTEM SETUP .......................................................................................................... 39
3.1
OVERVIEW ............................................................................................................... 39
DynaPel CloseView
Page 12
3.2
OPERATING LEVELS / PASSWORD PROTECTION .................................................. 40
3.2.1
Admin Level ................................................................................................... 40
3.2.2
User Level...................................................................................................... 40
3.3
OPERATING MODES ................................................................................................ 41
3.3.1
Setup Mode / Setup Wizard ........................................................................ 41
3.3.2
Active Mode / Nighttime Mode / PTZ on ................................................... 41
3.3.3
Inactive Mode / Daytime Mode / PTZ off................................................... 41
3.3.4
Scheduled Mode ........................................................................................... 42
3.3.5
Update Mode ................................................................................................. 42
3.4
USING THE ON-SCREEN-DISPLAY ......................................................................... 43
3.4.1
Hardware Reset ............................................................................................ 43
3.4.2
Controlling the OSD...................................................................................... 44
3.4.3
Manipulating OSD menu items ................................................................... 44
3.4.3.1 Submenu.................................................................................................... 44
3.4.3.2 Action.......................................................................................................... 45
3.4.3.3 Numerical Value........................................................................................ 45
3.4.3.4 Selection..................................................................................................... 45
3.4.3.5 Flag ............................................................................................................. 45
3.4.3.6 Text ............................................................................................................. 45
3.4.3.7 Box / Quadrangle ...................................................................................... 46
3.4.3.8 Marker......................................................................................................... 46
3.5
OPERATING THE SETUP WIZARD ........................................................................... 47
3.5.1
Joystick........................................................................................................... 48
3.5.1.1 Joystick Protocol ....................................................................................... 48
3.5.1.2 Joystick Address ....................................................................................... 48
3.5.1.3 Joystick COM Mode ................................................................................. 49
3.5.1.4 Joystick Baud Rate................................................................................... 49
3.5.1.5 Joystick Parity............................................................................................ 49
3.5.1.6 Apply Settings............................................................................................ 49
3.5.1.7 Back ............................................................................................................ 49
3.5.1.8 Skip/Disable Joystick................................................................................ 49
3.5.2
Webserver...................................................................................................... 50
3.5.2.1 IP Address.................................................................................................. 50
3.5.2.2 Subnet Mask / Gateway........................................................................... 50
3.5.2.3 Apply Settings............................................................................................ 50
3.5.2.4 Back ............................................................................................................ 50
3.5.2.5 Skip/Disable Webserver .......................................................................... 51
3.5.2.6 Advanced Settings.................................................................................... 52
3.5.3
PTZ Camera .................................................................................................. 53
3.5.3.1 Protocol/Type ............................................................................................ 53
3.5.3.2 Address ...................................................................................................... 53
3.5.3.3 COM Mode................................................................................................. 54
3.5.3.4 Baud Rate .................................................................................................. 54
3.5.3.5 Parity........................................................................................................... 54
3.5.3.6 Apply Settings............................................................................................ 54
3.5.3.7 Back ............................................................................................................ 54
3.5.4
Fixed Cameras .............................................................................................. 55
3.5.4.1 Input Video Format ................................................................................... 55
3.5.4.2 Input Geometry.......................................................................................... 55
3.5.4.3 Horizontal Border ...................................................................................... 55
3.5.4.4 Vertical Border........................................................................................... 56
3.5.4.5 Apply Settings............................................................................................ 56
3.5.4.6 Back ............................................................................................................ 56
3.5.5
Calibration of multiple overview cameras ................................................. 57
DynaPel CloseView
Page 13
3.5.6
Calibration of one overview camera channel ........................................... 57
3.5.6.1 Set Landmark 1...4 ................................................................................... 57
3.5.6.2 Check Landmark 1...4 .............................................................................. 58
3.5.6.3 Calculate .................................................................................................... 58
3.5.6.4 Apply Calibration ....................................................................................... 58
3.5.6.5 Ignore Channel.......................................................................................... 58
3.5.6.6 Back ............................................................................................................ 59
3.5.6.7 Erase Calibration ...................................................................................... 59
3.5.7
Finishing the Setup Wizard ......................................................................... 59
3.6
OSD USER MENU TREE ......................................................................................... 60
3.6.1
CloseView Main Menu ................................................................................. 60
3.6.2
CloseView Mode ........................................................................................... 60
3.6.3
Scheduler Configuration .............................................................................. 61
3.6.3.1 Set Current Date/Time ............................................................................. 61
3.6.3.2 Schedule 1 ................................................................................................. 62
3.6.3.3 Schedule 2 ................................................................................................. 63
3.6.3.4 Valid days of week.................................................................................... 63
3.6.4
User Settings ................................................................................................. 64
3.6.4.1 PTZ Behavior............................................................................................. 64
3.6.4.2 Motion Tracking......................................................................................... 66
3.6.4.3 Target Selection ........................................................................................ 68
3.6.4.4 Priority/Exclusion Areas ........................................................................... 73
3.6.4.5 Alarm Settings ........................................................................................... 74
3.6.4.6 Joystick settings ........................................................................................ 75
3.6.4.7 Viewing Options ........................................................................................ 77
3.6.4.8 Save/Load User Settings ......................................................................... 80
3.6.5
Start Setup Wizard........................................................................................ 80
3.6.6
System State ................................................................................................. 81
3.6.6.1 Firmware Version...................................................................................... 81
3.6.6.2 Co-Processor Info..................................................................................... 81
3.6.6.3 System Status ........................................................................................... 81
3.6.6.4 Reboot ........................................................................................................ 81
3.6.6.5 Factory Reset ............................................................................................ 81
3.6.6.6 Info on Updates......................................................................................... 82
3.6.6.7 Firmware Update ...................................................................................... 82
3.6.7
User / Admin Level ....................................................................................... 82
3.6.7.1 Current Level ............................................................................................. 82
3.6.7.2 Change Admin PIN................................................................................... 82
3.6.7.3 Return to User Level ................................................................................ 82
3.6.7.4 Enter Admin PIN ....................................................................................... 82
4
ON USING THE BUILT-IN WEBSERVER ............................................................... 83
4.1
CONFIGURING THE W EBSERVER ........................................................................... 83
4.1.1
Creating a new SSL certificate ................................................................... 83
4.2
REMOTE CONFIGURATION OF YOUR 19” UNIT ....................................................... 84
4.3
FIRMWARE UPDATE OF YOUR DP-192X 19” UNIT ................................................ 85
5
TECHNICAL INFORMATION..................................................................................... 88
5.1
SOFTWARE AND HARDWARE DESCRIPTION .......................................................... 88
5.1.1
Hardware Description: Desktop Unit.......................................................... 88
5.1.2
Hardware Description: 19” Unit................................................................... 89
5.2
WIRING INSTRUCTIONS () ....................................................................................... 90
5.2.1
Terminal Blocks (Camera-COM, Joystick-COM & Relay) ...................... 90
5.2.2
Update-COM / DSub connector.................................................................. 91
5.2.3
Alarm Relay ................................................................................................... 91
DynaPel CloseView
Page 14
5.3
FRONT SIDE LEDS .................................................................................................. 92
5.3.1
Green desktop LED ...................................................................................... 92
5.3.2
Red desktop LED.......................................................................................... 92
5.3.3
19” LEDs ........................................................................................................ 93
6
FIRMWARE UPDATES OF DESKTOP UNITS....................................................... 94
6.1
6.2
6.3
6.4
7
GENERAL ................................................................................................................. 94
REQUIREMENTS ...................................................................................................... 94
SPECIFICATION OF SERIAL CABLES USED FOR THE UPLOAD ................................ 94
STEPS TO PERFORM A FIRMWARE UPDATE ........................................................... 95
DETAILED LIST OF SUPPORTED PTZ CAMERA TYPES ................................. 97
7.1
7.2
7.3
7.4
7.5
7.6
7.7
7.8
7.9
7.10
7.11
7.12
7.13
7.14
7.15
8
TECHNICAL INFORMATION ON THE VARIOUS PTZ TYPES ..................................... 97
AMERICAN DYNAMICS / TYCO / SENSORMATIC........................................ 97
BOSCH / PHILIPS AUTODOME ............................................................................ 98
COHU ..................................................................................................................... 98
DYNAPEL ................................................................................................................. 99
ELMO...................................................................................................................... 99
FORWARDVISION .................................................................................................. 100
GE / KALATEL / INTERLOGIX.......................................................................... 100
HONEYWELL / ULTRAK ................................................................................... 101
PELCO ................................................................................................................. 102
QUICKSET........................................................................................................... 103
SAMSUNG........................................................................................................... 103
SILENTSENTINEL / CBC ....................................................................................... 103
SONY.................................................................................................................... 104
VICON .................................................................................................................. 104
MORE ABOUT CALIBRATION ............................................................................... 106
8.1
W HY DO I HAVE TO CALIBRATE? .......................................................................... 106
8.2
HOW DOES CALIBRATION WORK? ........................................................................ 106
8.3
HOW TO CALIBRATE?............................................................................................ 106
8.3.1
Choosing landmarks................................................................................... 107
8.3.2
Marking the landmarks............................................................................... 107
8.4
VERIFYING THE CALIBRATION ............................................................................... 108
8.5
ADJUSTING/OPTIMIZING THE CALIBRATION ......................................................... 108
8.6
CALIBRATION LIMITATIONS ................................................................................... 108
8.7
W HEN DO I HAVE TO RE-CALIBRATE? .................................................................. 109
9
CONTACT & SUPPORT ........................................................................................... 110
10
APPROVAL OF STANDARDS, FCC & CE CONFORMANCE ...................... 111
10.1 INSTALLATION ADVISORIES .................................................................................. 111
10.2 CE COMPLIANCE STATEMENT ............................................................................. 112
10.2.1 CloseView 19” rack mount ........................................................................ 112
10.2.2 CloseView Desktop .................................................................................... 112
11
INDEX....................................................................................................................... 113
DynaPel CloseView
Page 15
2 Introduction & Installation
To ensure compliance with FCC and CE rules, please read chapter 10,
Approval of Standards, and follow the Installation Advices given in chapter
10.1.
DynaPel CloseView hardware comes in two different shapes:
Figure 1: Desktop unit
Figure 2: 19" rack-mounted unit DP192-xx
[19”]
[Desktop]
This manual covers both hardware versions. Sections which apply to
only one of the versions will be marked by either [19”] or [Desktop].
The major differences between the two are:
•
•
•
•
19” has a built-in webserver for remote configuration
19” receives its firmware updates from the webserver, desktop units receive
them via their serial COM port
19” runs on 110 VAC, desktop runs on 12 VDC
19” also has S-Video connectors
The 19” unit usually is a two channel device, i.e. it houses two DynaPel Holon video
processing boards. It can thus run two CloseView channels or one CloseView
channel and e.g. one DynaPel SteadyEye video stabilization channel (see also
chapter 5.3.3)
DynaPel CloseView
Page 16
2.1
Configuration Overview
The purpose of the CloseView appliance is to get automatic close-up views of
moving objects within an otherwise stationary scene. Two cameras are required: a
static overview or reference camera with a large field of view, and a PTZ camera
controlled by the CloseView appliance. The CloseView appliance analyzes the
video from the reference camera and automatically directs a PTZ to zoom in on
"suspicious" activity.
See the Brief Installation Overview at the beginning of this manual in order to guide
you through the installation process.
Messages written like this, will give you concise answers to your most urgent
questions throughout the manual.
Besides this manual there is a separate document called
”Camera Positioning Guidelines for DynaPel CloseView”.
It helps you plan your CloseView installation and addresses question like maximum
tracking range, how many CloseView units you’ll need to cover a given area, and
what lenses to choose for your overview cameras.
Your CloseView unit should come with a copy of this document, but it is also
available by download or by email to [email protected].
2.1.1 What you need to get started
CloseView requires the following external devices:
•
•
•
•
A fixed standard analog security camera (the overview camera) for input
A 1st display (the overview monitor) to show the camera output plus overlaid
information from the CloseView appliance
A camera (the PTZ camera) whose pan, tilt and zoom can be controlled over
a RS232 or RS422 serial port
A 2nd display (the PTZ monitor) for viewing the output of the PTZ camera
The pair of monitors may of course be replaced by some DVR to which the video
signals from the PTZ camera and from the CloseView appliance are fed.
The alarm output, which closes an output relay whenever a target is encountered,
can be used to trigger recording using an external VCR, DVR, or frame grabber.
A remote controller like the PELCO KBD300A is an optional, but fully supported
feature. You can use it to override CloseView and steer the PTZ camera manually,
and you can also use it to navigate through the On-Screen-Menus of CloseView.
[19”]
The 19” rack version also features a built-in webserver. This webserver
connects to your LAN and allows you to configure the user settings remotely
from a PC via your preferred web browser.
Note that this built-in webserver can’t stream the video signal! To fully
benefit from the new web feature, an additional streaming server to provide
you with the video outputs from both CloseView and the PTZ is highly
recommended.
DynaPel CloseView
Page 17
Both cameras have to be mounted as close together as possible without intruding
into each other’s field of view and without hindering the free movement of the PTZ
camera.
The motion detection relies on a static (non-moving) overview camera.
Make sure that overview camera is mounted solidly. In doubt, use a DynaPel
SteadyEye video stabilization unit to suppress any shake or vibrations.
As the PTZ camera has moving parts, make sure that its movements won’t cause the
overview camera to vibrate.
P T Z (D o m e ) c a m e ra
D e ta il V id e o
C a m e ra C O M
te rm in a l b lo c k s
B id ire c tio n a l
se ria l lin e
D yn a P e l
C lo se V ie w
V id e o
OUT
P la c e d c lo s e -b y
O v e rv ie w c a m e ra
V id e o
IN
O v e rv ie w
V id e o
/w d ia g n o s tic
o v e rla y
O ve rv ie w V id e o
Figure 3: Minimum configuration of CloseView
Note that there is no connection from the video output of the PTZ camera to the
CloseView appliance.
Above image shows the desktop unit. The 19” unit can be configured in a similar
manner, except for the fact that it has also the video connectors on the back panel.
The operator must be able to watch the video from both the PTZ and the CloseView
unit at the same time. The operator should be able to reach the CloseView front
panel.
Necessary cables and power sources:
• Power supply for the CloseView appliance
• Power supply to both cameras
• Video cable from Overview Cam to the appliance
• Video cable from appliance to 1st monitor
• Serial cable (4 wires2) from PTZ camera to appliance
• Video cable from PTZ camera to 2nd monitor
2
PTZs with half-duplex serial communication need only two wires (see Error! Reference
source not found.).
DynaPel CloseView
Page 18
Figure 4: Standard configuration of CloseView with remote PTZ controller
Above diagram also works with the 19” unit, except for the fact that also the video
connectors are located on its back panel.
For configurations with more than one reference camera see below.
DynaPel CloseView
Page 19
Figure 5: Maximum(*) configuration of a 19” CloseView unit
19“ CloseView fully integrated into an environment with your DVR and an additional
video streaming server. To keep this diagram simple, only one of the two channels of
the 19” CloseView unit is in use.
DynaPel CloseView
Page 20
The maximum desktop configuration would look nearly the same, except for the LANPC used to control CloseView via its webbrowser.
(*) Maximum configuration with a single reference camera.
For multiple reference cameras see below.
DynaPel CloseView
Page 21
2.1.2 Using multiple fixed overview cameras
For planning your CloseView installation, consult the separate document
“Camera Positioning Guidelines for DynaPel CloseView”.
CloseView 4.0 now allows you to use up to four fixed overview cameras to monitor a
wider tracking area and to make better use of the capabilities of your PTZ camera
(see chapter 3.5.4).
Since the CloseView hardware still has only one video input, you’ll have to provide a
4-way or 2-way video splitter to fuse the images from the overview cameras into one
standard analog video signal.
Figure 6: Using multiple overview cameras with one PTZ
DynaPel CloseView
Page 22
On top of the traditional configuration with one single overview camera, CloseView
now supports three additional geometries:
The geometry called Quad
receives a video signal that was
fused from the feeds of four (or
three) overview cameras.
A standard quad video splitter is
used to combine the four signals
into one.
The orientation and opening
angle of the four cameras can
be chosen arbitrarily.
But all four cameras must be
mounted close to the PTZ.
Figure 7: Geometry with 4 overview cameras
and a quad video processor
The geometry Top/Bottom Split
receives a video signal that was
merged from two overview cameras in
a way, that the two images sit on top
of each other.
Figure 8: Geometry with 2 overview
cameras and a top/bottom video splitter
The geometry Left/Right Split
receives a video signal that was
merged from two overview
cameras in a way, that the two
images are shown side-by-side.
Figure 9: Geometry with 2 overview cameras
and a left/right video splitter
DynaPel CloseView
Page 23
2.1.3 General Safety Precautions
While installing the CloseView appliance, take the following precautions to avoid
equipment damage or personal injury:
•
•
.
•
•
•
To prevent electric shock, do not remove the outer cover. There are no userserviceable parts inside. Refer servicing to qualified service personnel.
Make sure that the PTZ camera is not blocked and that it moves freely as soon
as CloseView is powered up.
To reduce the risk of fire or shock hazard, do not expose this equipment to rain
or moisture
Any equipment connected to CloseView’s alarm output must not exceed the
alarm relay’s specifications (See chapter 5.2.3 Alarm Output).
Surge / lightning protection: To avoid electrical surges to damage the
equipment, use appropriate surge protectors for any wiring with risk for surges
or lightning strike.
2.1.4 Safety Instructions for Rack Mounted Units
[19”]
Elevated Operating Ambient Temperature
Installing the equipment in a closed or multi-unit rack assembly, the operating
ambient temperature of the rack environment may be greater than room
ambient. Therefore, considerations should be given to installing the
equipment in an environment compatible with the given maximum rated
ambient temperature of 104°F or 40°C.
Reduced Air Flow
Do not install a unit in a rack where the air flow is compromised. Any side,
front or back of a unit used for air flow through the unit must not be in direct
contact with the rack.
Mechanical Loading
Mounting of the equipment in the rack should be such that a hazardous
condition is not achieved due to uneven mechanical loading.
Circuit Overloading
Considerations should be given to the connection of the equipment to the
supply circuit and the effect that overloading of circuits might have an
overcurrent protection and supply wiring. Appropriate considerations of
equipment nameplate ratings should be used when addressing this concern.
Reliable Grounding
Reliable grounding of rack-mounted equipment should be maintained.
Particular attention should be given to supply connections others than direct
connections to the branch circuit (e.g. use of power strips).
Summation of Touch Currents
Considerations should be given to the summation of touch currents when
installing the equipment in a closed or multi-unit rack assembly.
DynaPel CloseView
Page 24
2.2
On PTZ cameras
The CloseView application supports a variety of PTZ camera types or PTZ camera
control protocols.
The set of supported protocols is limited by the fact, that these protocols must be
able to give a position feedback telling the cameras internal current pan, tilt, and
zoom values, if requested – this requires bi-directional serial communication between
CloseView and the PTZ.
The PTZ cameras are connected to CloseView’s serial port ”Camera” via terminal
blocks.
Camera-COM transmits either RS-422 or RS-232 signals, depending on the selected
PTZ camera type and on the user’s preferences.
For an overview of supported PTZ cameras see chapter 7.
The standard of serial communication and the baud rate used, as well as the address
of the attached PTZ camera can be changed with the Setup Wizard.
All PTZ cameras should be operated at their fastest possible baud rate to reach
optimal target tracking performance.
2.2.1 Integration into an existing PELCO Environment
CloseView uses the PELCO D-protocol to control the attached PTZ camera. It relies
crucially on the back channel, which enables the camera to send reply messages to
the CloseView – a feature which is neither available in the PELCO P-protocol, nor in
the PELCO Coaxitron protocol.
Remote controllers like the keyboard KBD300A most often use the PELCO Pprotocol.
The PELCO Spectra III family itself is able to understand both protocols alternately.
The Manual Override Feature takes serial D- or P-protocol as input, and sends out
either D-protocol (when CloseView itself controls the PTZ camera) or the same
protocol it receives from the remote controller.
DynaPel CloseView
Page 25
PELCO Spectra III
PELCO D-protocol
(bi-directional)
used by CloseView
itself
COM
PTZ
P- or D-protocol
(uni-directional)
used by remote
controllers
COM
Joystick
PELCO
environment
(Switches etc.)
finally
generating
P- or D-protocol
DynaPel
CloseView
PELCO
Control
Keyboard
Figure 10: Integration into a PELCO environment
Note that this scheme has the PELCO Spectra camera attached immediately to
the CloseView appliance and all switches, converters etc. only on the remote input
side of the appliance!
To connect a PELCO KBD300A control keyboard to your DynaPel CloseView, i.e. to
access its TX+/TX- wires transmitting the serial commands intended either for the
PTZ camera or the CloseView unit itself, use e.g. the PELCO KBDKIT or KBDKIT-X:
DynaPel CloseView
Page 26
Figure 11: Connecting a PELCO KBD300A joystick
Connect these two wires to RX+/RX- of Joystick-COM of your CloseView unit.
DynaPel CloseView
Page 27
2.2.2 PTZ lost
When you issue Apply Settings in the PTZ Settings submenu of the Setup Wizard,
CloseView tries to establish the serial communication to the PTZ camera.
If this attempt fails, you will receive a PTZ lost message in the lower right corner of
the video image.
The message PTZ lost may also appear at any time when CloseView no longer
receives the expected responses from the PTZ camera within the expected time.
Such a condition can only be detected while there are targets to track, since only
then will there be communication between CloseView and the PTZ.
There are several possible reasons for this PTZ lost message:
•
A missing power supply for the PTZ camera (can you see its video output?)
•
A improperly selected PTZ type or protocol (see 3.5.3.1, Protocol/Type)
•
A improperly set camera address (see 3.5.3.2, Address)
•
Improperly or incompletely wired terminal block connecting the PTZ camera
to the CloseView appliance (see below)
•
Wrong baud rate or RS-232 instead of RS-422 (see 3.5.3.3 and 3.5.3.4)
•
Interrupted connectivity of the serial cable between the CloseView appliance
and the PTZ camera (think of a broken wire or a cold solder joint)
Verify that the correct serial cable is connected to the CloseView appliance.
Verify that the communication parameters set at the PTZ camera are as you think
they are (e.g. camera address, baud rate, etc.).
2.2.3 Accessing the OnScreenMenu of the PTZ camera
The operator can access the OSD of the PTZ camera through CloseView.
The “Enter PTZ menu” command (default is “SetPreset 95”) has to be issued from
the Keyboard to get into the menu.
Please see also the Chapter “Action commands”
This feature is available for the following cameras:
• Pelco Spectra
the text “! PTZ OSD ON!” will be shown on the overview video.
When the PTZ’s OSD is active, the dome cannot be moved.
The “Exit PTZ menu” command (default is “CallPreset 95”) has to be issued from
the Keyboard to get rid of the “PTZ OSD ON” Text and return to normal
CloseView operation.
• DynaPel Interceptor
the text “! PTZ OSD ON!” will be shown on the overview video.
When the PTZ’s OSD is active, the dome cannot be moved.
• DynaPel EyeMax
the text “! PTZ OSD ON!” will be shown on the overview video.
When the PTZ’s OSD is active, the dome cannot be moved.
DynaPel CloseView
Page 28
2.2.4 Connecting the PTZ camera
The PTZ camera connects to the Camera-COM serial port (see also 5.2.1) of your
CloseView unit.
If your PTZ camera uses RS-422/485 full duplex for its serial control
communication, connect the 4 wires to the appropriate pins (camera) on the terminal
block (see below) at the back panel of your DynaPel unit.
If your PTZ camera uses RS-422/485 half duplex for its serial control
communication, connect the 2 wires to the T+/- camera pins on the terminal block
(see below) at the back panel of your DynaPel unit.
If your PTZ camera uses RS-232 for its serial control communication, the cable
coming from your camera is probably equipped with a 9-pin DSub plug. Retrieve the
3 wires RX, TX, and GND from the cable, e.g. by removing the plug, and connect
them to the appropriate terminal blocks (see below) at the back panel of your 19”
unit.
The DSub plug marked “Update” at the back panel of CloseView unit can’t be used to
connect your RS-232 camera, since it is hardwired to the Joystick-COM port. But you
can use it to connect a RS-232 controller, e.g. a DVR emulating a joystick.
Figure 12: Terminal blocks at back panel of the 19” CloseView unit
Desktop units use the same connector with the same pin assignment.
The set of 16 pins is used for Camera-COM, Joystick-COM and the alarm relay.
Different manufacturers have differing names for the pins T+,T-,R+,R- which also
reflects the fact that the PTZ camera receives what CloseView transmits and vice
versa:
Terminal Block
DynaPel
PELCO etc.
SENSORMATIC
1
Unused
2
TRData In Low (-)
3
T+
R+
Data In High (+)
4
R+
T+
Data Out High (+)
5
RTData Out Low (-)
How to connect a full duplex RS-422/485 camera
Terminal Block
DynaPel
Half duplex connection
2
TData 3
T+
Data +
How to connect a half duplex RS-422/485 camera
DynaPel CloseView
Page 29
Terminal Block
DynaPel
1
GND
2
TX
3
Unused
4
RX
5
Unused
How to connect a RS-232 camera
GND
RX
DSub-9 pin
(cable from camera)
5
3
TX
2
SONY, BOSCH etc.
As with every serial communication, there will be at least a 50% chance to confuse
send and receive.
In doubt, exchange RX with TX for RS232, or (R+, R-) with (T+, T-) for RS422.
To be on the safe side both of the following rules should be applied when the PTZ
camera is attached:
•
•
Some PTZ cameras seem not to communicate properly without a monitor
attached to their video output.
Most cameras require some time to boot-up after they are switched on. Wait
for their booting process to finish before you power-up the CloseView
appliance. This ensures that the PTZ camera is already waiting and able to
establish the control dialogue.
DynaPel CloseView
Page 30
2.3
Remote Control via Serial Joystick
Here, we will generally use the term joystick for any kind of external controller, be it
a control keyboard or even a DVR emulating a joystick.
CloseView can translate between joystick protocol and PTZ protocol.
You can thus steer a SONY PTZ camera from a PELCO control keyboard!
The address of the joystick is independent of the PTZ camera address. CloseView
will adapt the address received from the joystick, before it passes on the commands
to the PTZ.
But the address specified as Joystick Address (see 3.5.1.2) must match the setting
on your remote controller. All received commands, which do not belong to this
specific address will be grounded by CloseView.
Your joystick protocol doesn’t have to match your PTZ camera protocol. You can e.g.
steer a VICON PTZ from a PELCO joystick.
If you are using a PTZ camera, that does not understand your joystick control
protocol, CloseView will translate the joystick commands into the native protocol of
your PTZ. This translation should at least work for the standard commands like pan
left, pan right, tilt up, tilt down, zoom in, zoom out, etc.
2.3.1 List of supported Joystick Protocols
Joystick Protocol
BOSCH Autodome
ELMO / DYNACOLOR
PELCO-P
PELCO-D
VIDEOALARM
American dynamics(**) / AD ASCII
LG Multix
Example of Brand / Model
BOSCH/PHILIPS Autodome Controller
ELMO ESD-CC1(*)
PELCO KBD300A
Hi-Speed PTZ Controller AU40E
VIDEOALARM VLC485
ControlCenter 300 (ADCC0300)
LG Keyboard
Pelco-P is fairly wide spread:
There are third party joysticks, which are Pelco-P compatible, and most DVRs
support Pelco-P to steer an attached Pelco-compatible PTZ.
(*) Use an RS232-to-RS422 converter with the ELMO ESD-CC1, since the joystick
COM port doesn’t support RS-422 half-duplex.
(**) Only via MatrixSwitch (e.g. MegaPowerLT – see there) and SensorNet to RS-422
Converter (RCSN422)
2.3.2 How to connect the optional external joystick
The joystick connects to the Joystick-COM serial port (see also 5.2.1 and 5.2.2) of
your CloseView unit.
DynaPel CloseView
Page 31
2.3.2.1 Connecting a RS-232 Joystick
If your joystick/remote controller uses RS-232 for its serial control
communication, the cable coming from it should already be
equipped with such 9-pin DSub plug. This might also apply to
DVRs emulating a joystick.
Connect such RS-232 joysticks to the DSub plug marked Update
(see chapter 5.2.2) at the back panel of your CloseView unit.
Different manufacturers have differing names for the pins Tx and Rx, which also
reflects the fact that CloseView receives what the joystick transmits and vice versa:
Dsub-Pin
3
5
DynaPel
RX
GND
Your Joystick
TX
GND
How to connect a RS-232
joystick to CloseView’s
DSub9 Update Port
You should not have to worry about this pin assignment. The serial cable from your
joystick should match the receiving port of CloseView – but you never know.
Although it will be more convenient to use the DSub plug, you could also use the
terminal blocks to connect your RS-232 joystick. See chapter 5.2.1 or the printing on
the back panel for the proper pin layout.
2.3.2.2 Connecting a RS-422/485 Joystick
If your joystick uses RS-422/485 for its serial control communication, connect the two
wires to the appropriate terminal blocks (see below) at the back panel of your
CloseView unit.
Figure 13: Terminal blocks at back panel of the 19” CloseView unit
Desktop units use the same connector with the same pin assignment.
Different manufacturers have differing names for the pins T+,T-,R+,R- which also
reflects the fact that CloseView receives what the joystick transmits and vice versa:
Terminal Block
6
7
8
9
10
DynaPel CloseView
DynaPel
unused
(T-)
(T+)
R+
R-
PELCO etc.
SENSORMATIC
T+
T-
Data Out High (+)
Data Out Low (-)
Page 32
How to connect a RS-422/485 joystick
As with every serial communication, there will be at least a 50% chance to confuse
send and receive.
In doubt, exchange RX with TX for RS232, or (R+, R-) with (T+, T-) for RS422.
The DSub plug could also be used to connect a RS-422/485 joystick (see chapter
5.2.1), but we recommend to use the terminal blocks instead.
2.3.3 Controlling several CloseViews from one Joystick
Most remote controllers allow you to control several PTZ cameras from one joystick.
The intended camera is distinguished by its camera address.
Since each CloseView unit asks for a joystick address (see chapter 3.5.1.2), you can
connect one remote controller to several CloseView units, and assign each one a
different address:
Figure 14: Controlling several CloseViews from one joystick
In the diagram above, one joystick is used to control two CloseView units (A and B).
Each of those units is connected to a corresponding PTZ camera.
Each PTZ has its camera address, which you can typically set via its dip switches.
Here PTZ A is assigned address 5 and PTZ B is assigned address 8.
Hence, the PTZ Address (see chapter 3.5.3.2) of CloseView A must be set to 5 and
of CloseView B to 8 – else you’d get PTZ lost.
The joystick allows you to select an address too. This address must match the
Joystick Address (see chapter 3.5.1.2) specified in the Setup Wizard.
Here CloseView A listens to address 6 while CloseView B listens to 3.
Cascading serial devices as depicted in above diagram is not recommended for
RS-232, but will work with RS-422.
DynaPel CloseView
Page 33
For
RS-422,
connect
the
joystick and the
CloseView units
as shown here:
19”
Cascading the 2 CloseView units in a 19“ version is just done analogously by linking
the two Joystick COM ports.
1-to-1 connection of pins 6-10
from
joystick
Figure 15: Joystick connection at a 2-channel 19" CloseView unit
Connect pins 6-10 of the terminal blocks of each channel, i.e. pin 6 to pin 6, 7
to 7, etc.
DynaPel CloseView
Page 34
2.3.4 Using external serial devices to remotely control the
CloseView unit
It is possible to control CloseView from a variety of remote devices using the serial
interface.
Devices are e.g.:
• Serial Joysticks
• DVRs
• Video Streaming Servers
• Other remote devices having a serial port output.
These devices all use the “Joystick” serial port on CloseView to issue commands.
Using this feature a full remote configuration can be done.
To control the OSD of CloseView or to control the PTZ manually, the commands sent
have to match one of the “Joystick Addresses” set in the Setup Wizard.
2.3.4.1 Control the CloseView OSD
Send CV_Enter_OSD Action command (default SetPreset 93) to evoke the
CloseView OSD.
After that you can navigate using the Joystick Lever (or the equivalent buttons of
remote Viewer).
ENTER / CANCEL are mapped per default to Iris Open / Iris Close.
All commands can be remapped using the Action command mapping
2.3.4.2 Control the attached PTZ camera
PTZ control is turned over to the external device automatically as soon as the device
sends any commands to the camera address specified as Joystick Address in the
CloseView Setup Wizard. The control is not on CloseViewe during this time and for
the time specified as Joystick Timeout (See chapter 3.6.4.6.1, Joystick Timeout). The
control can be given back to CloseView by sending the “Action command”
CV_Return_Ctrl .
While PTZ control is not done by the automatic algorithm in closeView , the message
Joystick will be displayed in the lower right corner of the video output.
DynaPel CloseView
Page 35
2.3.4.3 Action Commands
Action commands are special commands sent by external devices via serial
connection to CloseView. They are shortcuts for OSD menu item selections.
2.3.4.3.1 Command Mapping
There are some special commands which can be mapped almost freely to commonly
available keyboard commands.
Available commands are:
Iris Open / Iris Close
Focus near / Focus far
Zoom wide / Zoom Tele
Set Preset <number> / Get Preset <number>
Aux ON <number> / Aux OFF <number>
Not all mappings are available for every camera and also not all commands are
avaliable for every camera model.
Each command is mapped separately, so you will have to change those one by
one using the new settings already for the further entries.
Action command Description
name
CV_PTZ_OFF
Suspends CloseView camera control. This
command can be used to control CloseView
by an external Scheduler
CV_PTZ_ON
External Scheduler: Resumes CloseView
camera control
CV_Ret_Ctrl
Return PTZ control to CloseView after using
external control devices
CV_Enter_OSD
Enters the CloseView OSD menu for
alterations
Enter_Dome_OSD Enters the PTZ camera’s OSD menu for
alterations.
(only avaliable for EyeMax, Interceptor and
Pelco Spectra)
(For Spectra, the corresponding GotoPreset
command has to be issued to acknowledge
that the PTZ camera OSD was left)
Recalib_Dome
Either reboots the camera or performs a
PTZ camera reset. (Available for EyeMax)
Default value
SetPreset 91
GotoPreset 91
SetPreset 94
SetPreset 93
SetPreset 95
SetPreset 99
Please be careful with the following mappings, since they may result in
problems accessing the CloseView OSD menu.
CloseView
navigation
command
CV_Enter_button
Description
Default value
Confirms Entries in the CloseView OSD
IrisOpen
menu tree
CV_Cancel_button Leaves OSD menu or cancels current entry, IrisClose
2.3.4.3.2 Access Level
DynaPel CloseView
Page 36
To be able to avoid non-administrators changing anything by issuing Action
commands, the access can be limited to the administrator only.
DynaPel CloseView
Page 37
2.4
Video Input / Video Output
NTSC or PAL output is adapted automatically according to the video input.
DynaPel CloseView automatically detects NTSC of PAL video input from the
overview camera (see chapter 3.5.4.1). Its video output will be of the same type as
the input.
[19”]
The 19” unit also detects composite or S-video input automatically. The
corresponding output signal is fed to both the BNC and the S-video
connector. The presence of a valid video input signal will be confirmed by the
green Video In LED.
Whenever there is no – or no sufficient – video input signal, the CloseView system
will show a message screen saying Video Input Signal Missing.
Normal operation will resume as soon as the input signal is detected again.
IMPORTANT: If the new video input signal and the previous signal have
differing video norms (e.g. replacing a NTSC by a PAL camera), the system
will reboot itself and start up in Setup mode.
CloseView has slightly higher demands on the quality of the video input signal than
common TV monitors. If the quality of the video signal is poor, synchronization and
auto-detection may fail.
The video circuitry inside CloseView will erase any embedded Pelco Coaxitron
signals coming from the overview camera.
2.5
Network Connection
[19”]
The 19” rack-mounted units feature a built-in webserver, which connects to
your LAN via a standard RJ-45 CAT5 cable.
This webserver facilitates remote control of your CloseView unit from any
standard webbrowser.
However, the built-in webserver can’t stream the video signal. To get the most
out of the network functionality, you should use an additional video streaming
server to get also both the PTZ’s and CloseView’s video output onto your
computer.
Whenever the webserver communicates with CloseView, the message WEB
will be displayed in the upper right corner of CloseView’s video output.
DynaPel CloseView
Page 38
3 System Setup
3.1
Overview
Installing DynaPel CloseView requires the user to adjust a number of settings. The
On-Screen Display, which is rendered over the video output, is the main user
interface. This OSD can be controlled locally from the keypad at your CloseView unit,
or remotely from an optional PTZ joystick, or via LAN from your webbrowser.
The logic governing these user modifiable configurations and parameters has
changed substantially between CloseView 3.1 and its preceding versions:
The modifiable data is now split into two sections: setup data and user data:
•
Setup data comprises the critical configuration information which can/must
be set at the initial installation. It includes the PTZ and joystick communication
settings, the IP address of the internal webserver, and the calibration.
They are now handled exclusively by the Setup Wizard.
•
User data contains the remaining settings, which are used to optimize your
system, e.g. by placing priority/exclusion areas. Typically, these settings can
only be adjusted after the system has been running for some time.
The setup data will be saved automatically, when the entire Setup Wizard has been
run through completely.
The user data will be saved to flash memory automatically, each time you turn off
the OSD, so you don’t have to save any of your settings explicitly to keep them after
the next reboot.
Reading from or writing to the flash memory will cause the video output image to
flicker a little. This is perfectly normal.
In order to prevent your preferred settings from being overwritten accidentally, a new
“backup settings” feature has been introduced. You can explicitly save your user
configuration into the flash memory, and retrieve it via OSD later on.
Setup data and user data will be retained when you upgrade your CloseView unit to a
new firmware version.
DynaPel CloseView
Page 39
3.2
Operating Levels / Password Protection
You can operate the system either at Admin Level or at User Level. These levels are
selected from the OSD. Admin Level is pre-selected at the first power-up. After the
first installation, the Admin Level can and should be protected by a PIN.
CloseView can completely prevent alterations in the setup, if User Level is chosen.
Use Admin Level while you set up the system. Once you are satisfied with its
behavior, choose an Admin PIN and turn the system to User Level to prevent
any alteration to the system setup.
3.2.1 Admin Level
•
•
•
•
•
•
•
•
Needed during installation and calibration
Pre-selected at the first power-up
All existing functionalities are available
Allows you to evoke the Setup Wizard
Allows you to issue a factory reset of the entire system
Needed for firmware updates
Protected by a 4-digit PIN / password
The default password is 2902
3.2.2 User Level
•
•
•
Intended for every day operation. Only system info is accessible.
Parts of the OSD menu tree are hidden or inaccessible
User can be locked out completely from any alteration in the settings.
The access level for the “Action commands” has to be set correctly to
fully lock out the user.
DynaPel CloseView
Page 40
3.3
Operating Modes
The appliance can be run in one of four modes: Setup, Active, Inactive and Update.
The new Scheduled mode automatically switches between Active and Inactive mode
according to a user-specified schedule.
Setup Mode will be evoked automatically, when you first power up the
system. After successful installation, the unit will control the PTZ while in
Active Mode. In Inactive Mode, CloseView does not attempt to steer the
PTZ.
3.3.1 Setup Mode / Setup Wizard
Before your CloseView appliance is fully operational, the communication between
CloseView and the PTZ, between it and the optional external keyboard, and the IP
settings of its internal webserver3 have to be configured. Also, both cameras must be
calibrated against each other (see also chapter 0, More about Calibration).
The setup mode is evoked automatically, when CloseView starts for the first time,
when the current environment does no longer match the previous configuration, or if
the operator triggers this mode manually from the OSD (see chapter 3.6.5).
While the system is in Setup Mode, the label SETUP will be displayed in the lower left
corner.
The new Setup Wizard will guide you through this entire process. It will supply you
with helpful information in time, and ensures an appropriate succession of setup
steps.
3.3.2 Active Mode / Nighttime Mode / PTZ on
Active Mode is the intended operating mode when any moving object is suspicious
per-se and CloseView is supposed to control the PTZ camera.
Whenever an object is tracked, the PTZ camera receives commands from CloseView
over its serial port, which will make it zoom in and follow the ‘suspicious’ activity.
If an optional remote controller (e.g. PELCO KBD300A) is connected, the operator
can override the CloseView appliance at any time and steer the PTZ camera
manually.
In this mode, the video shown at the output is the one from the overview camera plus
additional overlaid diagnostic information, which can be configured using the OSD.
3.3.3 Inactive Mode / Daytime Mode / PTZ off
Inactive Mode is intended for manual PTZ control during busy day time, when the
PTZ camera is to be controlled by the operator.
CloseView does not attempt to steer the PTZ, but it still tracks objects on its video
output and triggers the alarm relay if configured accordingly.
PTZ OFF is displayed in the lower left corner of the video output.
This mode is also reflected by the red LED Alarm 2 on the 19” front panel, or the
single, unnamed red LED on the front panel of your desktop unit.
Active Mode and Inactive Mode are switched from the OSD, or remotely via the
webserver.
3
19” only
DynaPel CloseView
Page 41
3.3.4 Scheduled Mode
Scheduled Mode indicates that the internal scheduler is engaged. Then CloseView
will switch between its Active Mode and Inactive Mode according to a user-specified
time schedule (see chapter 3.6.3).
3.3.5 Update Mode
Update Mode uploads a new firmware and reprograms CloseView’s flash memory.
(See chapter 6, Firmware Updates.)
While CloseView receives the new firmware, all normal tracking operation is stopped
and UPDATE is displayed in the lower left corner.
After the firmware update, the CloseView unit will reboot itself.
DynaPel CloseView
Page 42
3.4
Using the On-Screen-Display
The on-screen display (OSD) provides the menus to change various settings of the
CloseView appliance. The OSD is evoked and manipulated by the six-button keypad
at the front panel of the CloseView box. Settings changed using the OSD will be
stored in a flash memory that is protected from power interruption.
Figure 16: The six keypad buttons: Red, Left, Up, Down, Right, and Green
Note that the OSD may also be operated from the optional remote controller (see
chapter 2.3) or via the built-in webserver.
[19”]
In the 19” rack-mounted units, two independent channels share one
common keypad.
Therefore you must select one
channel
by
pressing
the
corresponding white button,
before you can use the keypad.
Figure 17: LEDs at 19" frontpanel
Selecting one channel will
immediately evoke the main
OSD menu and will be confirmed
by a fast blinking yellow
CloseView LED on the 19” front
panel.
While one channel is selected, it locks the keypad, so you can’t simply select
the other channel.
Once you have made the desired changes in the OSD, leaving the menus
will also deselect the keypad, so that it again becomes available for both
channels.
3.4.1 Hardware Reset
[19”]
Pressing a pointed object into the opening labeled “Reset” will trigger a
hardware reset. It causes the system to reboot without erasing the stored
user settings.
[Desktop]
Pressing the RED and the GREEN button at the same time will trigger a
hardware reset. It causes the system to reboot without erasing the stored
user settings.
DynaPel CloseView
Page 43
3.4.2 Controlling the OSD
The green button evokes the main menu of the OSD.
The arrow buttons facilitate navigation through the OSD.
The red button closes the OSD.
•
•
•
•
•
UP/DOWN changes the selected item within one menu level.
LEFT returns to the preceding higher menu level.
RIGHT enters the currently selected submenu or starts editing the currently
selected value.
RED (Cancel) leaves the currently selected value unchanged and returns to the
parent menu if some value was being edited. If RED is pressed from within a
submenu, the OSD is turned off, and will start at the main menu when evoked
again.
GREEN (Enter) confirms the changes that were made to the currently selected
value. Note that most of these changes will take effect immediately.
If an optional remote PTZ control joystick is used to operate the OSD, the joystick
lever obviously generates the UP, DOWN, LEFT, RIGHT commands.
The RED/CANCEL command is mapped to the IRIS CLOSE button,
the GREEN/ENTER command is mapped to IRIS OPEN.
Menu items may be locked or read-only – either permanently or only at the current
state of the system. Locked/Read-only items are identified by having their values
shown in inverted characters, i.e. dark text on light foreground.
Read-only values can’t be altered; locked submenus can’t be entered.
Parts of the OSD menu tree are context sensitive. Hence, menu items may be hidden
- depending on the operating level and on the other OSD parameters. E.g. the postmotion recording item will only be displayed, if the motion recording mode was set to
video, as the corresponding value is used only by this mode.
3.4.3 Manipulating OSD menu items
You might want to proceed to chapter 3.5 Operating the Setup Wizard, if you
feel that the handling of the OSD is sufficiently self-explanatory.
The items of the OSD menus belong to several classes, each of which has its
particular behavior. This chapter serves as a general OSD handling manual, while
chapter 3.6 describes the actual meaning of the OSD menu-tree entries.
3.4.3.1 Submenu
•
•
•
•
•
•
Identified by symbol --> in its parent menu
Locked submenus are marked -XUP/DOWN select menu items
RIGHT/GREEN enters selected menu item
LEFT returns to preceding (higher) menu level
RED turns off the entire OSD
DynaPel CloseView
Page 44
3.4.3.2 Action
•
•
•
•
•
•
•
Identified in its parent menu by symbol !!
Triggers some event (e.g. starting the calculation of the calibration)
If the action executes immediately, RIGHT or GREEN trigger the action, and
the symbol changes temporarily to ok.
Actions that might be dangerous (such as overwriting previous data) will not
execute immediately, but will require an additional confirmation step:
UP/DOWN selects o.k./cancel
RIGHT/GREEN execute either o.k. or cancel
LEFT/RED return to parent menu
3.4.3.3 Numerical Value
•
•
•
•
•
•
•
Identified in its parent menu by its numerical value
Has upper and lower limits, for example [0..10]
May indicate a suggested default value, for example [0..10] dft: 5
RIGHT/LEFT selects the digit to be changed
UP/DOWN increments/decrements the selected digit (automatically staying
within the given limits)
GREEN accepts the new value and returns to parent menu
RED discards changes and returns to parent menu
3.4.3.4 Selection
•
•
•
•
•
•
Identified in its parent menu by the name describing the current setting
Limited number of discrete settings, such as low, medium, high
UP/DOWN changes selected setting
GREEN accepts the new setting and returns to parent menu
RED discards changes and returns to parent menu
RIGHT behaves like GREEN, LEFT behaves like RED
3.4.3.5 Flag
•
•
Behaves like a ‘selection’ with only the two values on and off.
If the flag is considered harmless, RIGHT/GREEN will immediately toggle the
flag.
3.4.3.6 Text
•
•
•
•
•
•
•
•
Identified in its parent menu by the text itself
E.g. name to be inserted onto the image to identify the scenery
Texts that are longer than the width of the video screen can be scrolled
through
Has an individual, limited maximum length that cannot be exceeded by editing
RIGHT/LEFT selects the position (letter) to be edited within the text
UP/DOWN cycles through the alphabet at the selected position
GREEN accepts the new text and returns to the parent menu
RED discards changes and returns to the parent menu
DynaPel CloseView
Page 45
3.4.3.7 Box / Quadrangle
•
•
•
•
•
•
•
•
•
•
•
•
Identified in its parent menu by symbol [] or [ ]
[] identifies an yet unset box, [ ] one which has already been set
Used to specify e.g. a priority/exclusion area (see 3.6.4.4.1)
UP/DOWN/LEFT/RIGHT move the currently selected, highlighted corner
Adjust the top-left corner of the box
Pressing GREEN 1st time switches to opposite corner of the box
Adjust the bottom-right corner of the box
Pressing GREEN 2nd time accepts the box and returns to previous menu
Pressing RED 1st time returns to previous corner of the box
Re-adjust the top-left corner of the box …
Pressing RED 2nd time discards changes and returns to previous menu
An analogous scheme is used for Quadrangles
3.4.3.8 Marker
•
•
•
•
•
•
•
•
•
•
Identified in its parent menu by symbol [+] or by +
+ identifies a yet unset marker, [+] one whish has already been set
Defines e.g. a landmark point used during calibration (see 3.5.6.1)
Consists of a crosshair position in the overview image and a corresponding
direction of the PTZ camera
Pressing UP/DOWN/RIGHT/LEFT now moves the crosshair
Adjust the position of the crosshair
- Pressing the same button repeatedly will accelerate the movement,
changing the direction will reset the speed to its initial small value.
- Pressing GREEN 1st time switches from moving the crosshair to
moving the PTZ camera, which is confirmed by AIMING PTZ in the
lower right corner.
Adjust the direction of the PTZ camera using UP/DOWN/RIGHT/LEFT
Pressing RED now, switches from moving the PTZ camera back to moving
the crosshair
Pressing GREEN 2nd time terminates the process and accepts the settings
RED discards changes and returns to parent menu
Moving the crosshair and especially aiming the PTZ becomes much more
convenient, when you use a remote control joystick rather than the keypad on the
front panel.
Note: Some TV monitors have a significant amount of overscan - which means they
don’t show the entire output image. So there might be an invisible image margin that
is still important. It could hide some source of disturbance that should be covered by
an exclusion area. When moving the calibration crosshairs they might even
disappear within the overscan margin around the image, which is valid for the
CloseView appliance but is not displayed by your monitor.
DynaPel CloseView
Page 46
3.5
Operating the Setup Wizard
The new Setup Wizard guides you through the initial installation process. It contains
•
•
•
•
•
Communication with the optional remote joystick controller
Configuration of the built-in webserver
Communication with the attached PTZ camera
Specifying the geometry of overview cameras
Calibration of the overview/PTZ camera pair(s)
The Setup Wizard will only allow this sequence of steps. In exchange, it will provide
you with on-screen help for each step.
The Setup Wizard will be evoked at the first power-up of the system or after a factory
reset. You can also start it explicitly from the OSD (see chapter 3.6.5).
[19”]
NOTE: You have to select one of both channels by pressing the
corresponding white button, before you can use the keypad at the
frontpanel of the 19” units.
DynaPel CloseView
Page 47
3.5.1 Joystick
See also chapter 2.3 Remote Control via Serial Joystick to learn more about the use
of an optional remote control joystick.
Item
Joystick Protocol
Joystick Address 1
Joystick Address 2
Joystick COM Mode
Joystick Baud Rate
Joystick Parity
Joystick Timeout [sec]
Apply Settings
Back
Skip/Disable Joystick
Class
Selection
Numerical value
Numerical value
Selection
Selection
Selection
Numerical value
Action
Action
Action
3.5.1.1 Joystick Protocol
Values: No Joystick (default), Pelco-P, Pelco-D, Bosch/Philips Autodome,
AD ASCII, AD, LG Multix.
The control protocol used by the optional remote controller can be selected
independently from the protocol used by your PTZ camera.
Choosing No Joystick is equivalent to triggering Skip/Disable Joystick.
3.5.1.2 Joystick Address
Most PTZ controllers allow you to steer several PTZ cameras in a common network,
where the individual camera is selected by its address number.
CloseView allows you to assign different addresses to joystick and PTZ camera. It
will translate the commands for you, but the Joystick Address specified here must
match the corresponding setting on your control keyboard.
Consult the manual of your control keyboard on how to find out or alter the selected
camera address.
NOTE: The D-address and P-address of a PELCO Spectra/Esprit camera
can’t be chosen independently. Their relation is always D = P – 1.
Selecting Pelco-D as joystick protocol means, that you must enter the Daddress here.
CloseView can be configured so that it listens to 2 addresses. This simplifies usage
of control devices which are able to send commands only to the associated video
channel.
3.5.1.2.1 Address 1
Values: 0…255
Can be used to have CloseView listen to a certain address (e.g associated with the
overview camera).
3.5.1.2.2 Address 2
Values: 0…255
DynaPel CloseView
Page 48
Can be used to have CloseView listen to another address (e.g associated with the
PTZ camera).
NOTE: Please be aware that a reasonable setting of BOTH addresses is required to
avoid that multiple domes move at the same time, if a command is issued by the
operator.
3.5.1.3 Joystick COM Mode
Values: RS232, RS422
This item changes the serial communication mode between the joystick and the
CloseView appliance.
3.5.1.4 Joystick Baud Rate
Values: 1200, 2400, 4800, 9600, 19200
This item changes the baud rate of serial communication between the joystick and
the CloseView appliance.
Consult the joystick manual on how to find out or alter its baud rate.
3.5.1.5 Joystick Parity
Values: None, Even, Odd
This item changes the serial communication between the joystick and CloseView. It
will be set automatically whenever a new Joystick Protocol (see chapter 3.5.1.1) is
selected.
You should not have to change this setting.
3.5.1.6 Apply Settings
Trigger this action when you have made the necessary changes to the joystick
communication parameters. Your settings will then be activated and you can try to
use the joystick.
3.5.1.7 Back
Triggering this action takes you back to the previous step of the Setup Wizard. Here
Back returns you to the initial welcome screen.
3.5.1.8 Skip/Disable Joystick
If you are not going to use a remote control joystick, or want to configure this device
later, skip the configuration step of the joystick here.
Skip/Disable Joystick is equivalent to selecting No Joystick for Joystick Protocol.
DynaPel CloseView
Page 49
3.5.2 Webserver
[19”]
• Only channel 1 of each 19“ unit is empowered to configure the webserver.
Therefore, this setup step will be skipped for channel 2.
• Using the built-in webserver is optional.
• The webserver takes about 30 seconds to boot – so you might encounter
an info screen saying “waiting for the webserver to finish booting”.
• Whenever the webserver communicates with CloseView, the message
WEB will be displayed in the upper right corner of CloseView’s video output.
Item
IP Address
Subnet Mask
Gateway
Apply Settings
Back
Skip/Disable Webserver
Advanced Settings
Class
nnn.nnn.nnn.nnn
nnn.nnn.nnn.nnn
nnn.nnn.nnn.nnn
Action
Action
Action
Submenu
Default settings for the IP parameters:
• IP address:
192.168.010.010
• Subnet mask:
255.000.000.000
• Gateway:
000.000.000.000
3.5.2.1 IP Address
Assign a different IP address to each 19” DynaPel unit connected to your
LAN.
As the SSL certificate depends on the IP address, we recommend to also
Reset SSL settings each time you change the IP address.
3.5.2.2 Subnet Mask / Gateway
Consult you network administrator to set the Subnet Mask and default
Gateway.
3.5.2.3 Apply Settings
Trigger this action, when you have made the necessary changes to the
webserver parameters. The webserver must be rebooted to engage the new
settings. Rebooting takes approx. 30 seconds.
3.5.2.4 Back
Triggering this action takes you back to the previous step of the Setup
Wizard. Here Back returns you to the Joystick menu.
DynaPel CloseView
Page 50
3.5.2.5 Skip/Disable Webserver
If you are not going to use the built-in webserver, or want to configure this
device later, skip the configuration step of the webserver here.
DynaPel CloseView
Page 51
[19”]
3.5.2.6 Advanced Settings
Item
Reset SSL settings
Reset web password
Class
Action
Action
3.5.2.6.1 Reset SSL settings
Triggering this action will cause the built-in webserver to generate a new
SSL key. This will keep it occupied for approx. 5 minutes! After creating a
new SSL key, you should erase the old SSL certificate in your webbrowser.
3.5.2.6.2 Reset web password
Triggering this action will reset the user name and the associated password:
• Default user name:
dp192
• Default password:
dp192
DynaPel CloseView
Page 52
3.5.3 PTZ Camera
Unlike the configuration of the remote joystick and the webserver, setting up the
communication with the attached PTZ camera is a must.
You will only be allowed to proceed in the configuration process, once you have
successful bi-directional communication with the PTZ camera.
See chapters 0 On PTZ Cameras and 7 Detailed List of Supported PTZ Camera
Types for help with connecting your PTZ correctly.
Item
Protocol/Type
Address
COM Mode*
Baud Rate
Parity*
Apply Settings
Back
Class
Selection
Numerical value
Selection
Selection
Selection
Action
Action
(*) COM Mode and Parity are set automatically according to the selected
Protocol/Type.
If you can’t establish a working communication with your PTZ camera and
always get PTZ lost, first think of broken wire, only then of changing these
values.
3.5.3.1 Protocol/Type
Values: No PTZ(default), Bosch Autodome, Cohu, DynaPel-A / EyeMax ,
DynaPel-D, ELMO DynaColor/PTC, GE Impacnet, Pelco-D/Esprit,
Pelco-D/Spectra, Quickset, Sensormatic, Sony Visca/EVI, Ultrak
Diamond, Vicon Surveyor
Communication with the specified PTZ will only be attempted after triggering Apply
Settings.
Selecting a different Protocol/Type will also change the COM Mode and Baud Rate to
values considered typical for this camera. So, first change the PTZ Type, then adjust
the other communication parameters.
If you select No PTZ as Protocol/Type and issue Apply Settings, no attempts will be
made to communicate with the PTZ. After specifying the overview camera geometry,
the calibration step will be skipped and the Setup Wizard will proceed to the end of
the setup process.
The message NO PTZ can be suppressed by turning the Text Label off (see
3.6.4.7.8.1).
3.5.3.2 Address
Most PTZ camera models allow you to operate several cameras in a common
network, where the individual camera is selected by its address number.
Consult the camera manual on how to find out or alter its address.
DynaPel CloseView
Page 53
NOTE: If PELCO Spectra or Esprit is selected, there will be two items:
P-Address and D-Address.
Since you can’t choose the two independently, you only have to set one of
them. Their relation is P = D+1.
3.5.3.3 COM Mode
Values: RS232, RS422 full-dplx, <RS422 half-dplx>(*)
This item changes the serial communication mode used for controlling the PTZ
camera. It will be set automatically whenever a new Protocol/Type (see chapter
3.5.3.1) is selected. It should only become necessary to change this value, if e.g. an
RS232-to-RS422 converter is used to connect the camera to the CloseView
appliance.
*) this value is different for different cameras, but it cannot be changed.
3.5.3.4 Baud Rate
Values: 1200, 2400, 4800, 9600, 19200
This item changes the baud rate of serial communication used for controlling the PTZ
camera. It will be set automatically to the fastest possible value whenever a new PTZ
Type (see chapter 3.5.3.1) is selected.
Consult the camera manual on how to find out or alter its baud rate.
3.5.3.5 Parity
Values: None, Even, Odd
This item changes the serial communication used for controlling the PTZ camera. It
will be set automatically whenever a new Protocol/Type (see chapter 3.5.3.1) is
selected. You should not have to change this setting.
3.5.3.6 Apply Settings
Trigger this action when you have chosen the correct PTZ Type and made all the
necessary changes to the PTZ communication parameters.
The system will then attempt to set up the dialogue with the PTZ camera. If this
succeeds, PTZ FOUND will be displayed briefly and you will advance to the
Calibration menu.
If you persistently get PTZ LOST, return to this menu and adjust the parameters, or
consult chapter 2.2.2.
3.5.3.7 Back
In the desktop units, Back returns you to the Joystick menu,
In the 19” units, Back will return you to the Webserver menu.
DynaPel CloseView
Page 54
3.5.4 Fixed Cameras
CloseView 4.0 now accepts multiple overview cameras. As it still has only one video
input connector, the video signals from the cameras must be merged externally by a
video splitter or quad video processor (see chapter 2.1.2 Using multiple fixed
overview cameras).
This section deals with the configuration of 1-, 2-, or 4-camera geometries.
Item
Input Video Format
Image Geometry
Horizontal Border(*)
Vertical Border(**)
Apply Settings
Back
Class
Selection (read-only)
Selection
Line
Line
Action
Action
3.5.4.1 Input Video Format
Values: NTSC, PAL
This read-only item identifies the type of video input signal.
3.5.4.2 Input Geometry
Values: Single Camera(Default), Top/Bottom Split, Left/Right Split,
and Quad
This item identifies how many overview camera signals were fused into the current
video input of CloseView (by means of a video splitter of quad video processor).
See also chapter 2.1.2 Using multiple fixed overview cameras.
•
Single Camera is the classic configuration of one overview camera fed
directly into CloseView’s video input.
•
Top/Bottom Split corresponds to a geometry, where two overview
cameras are fed into a video splitter creating two cinemascope-like images,
one on top of the other.
•
Quad corresponds to a geometry, where four (or three) overview cameras are
being fed into a quad processor creating an output image consisting of four
quadrants.
•
Left/Right Split works too.
3.5.4.3 Horizontal Border
(*) This item is only visible with Image Geometries Top/Bottom Split or Quad
After selecting this item, move the corresponding (orange) line up or down until it
coincides with the horizontal border created by your video splitter or quad video
processor between its input images.
Moving either the horizontal or vertical border will invalidate any already
existing calibration! Make sure to adjust them correctly now, to spare you the
hassle of re-calibration afterwards.
DynaPel CloseView
Page 55
3.5.4.4 Vertical Border
(**) This item is only visible with Image Geometries Left/Right Split or Quad
After selecting this item, move the corresponding (orange) line left or right until it
coincides with the vertical border created by your video splitter or quad video
processor between its input images.
3.5.4.5 Apply Settings
Trigger this action when you have chosen the correct Image Geometry and – if
applicable and necessary - adjusted the Horizontal Border and Vertical Border.
The system will then advance to the Calibration menu.
3.5.4.6 Back
Back returns you to the PTZ Camera menu.
DynaPel CloseView
Page 56
3.5.5 Calibration of multiple overview cameras
Each overview camera must be calibrated separately.
If you choose a multiple input camera geometry (Top/Bottom Split,
Left/Right Split, or Quad), CloseView will receive its video input from a video
splitter or quad video processor.
This input will therefore consist of two or four “channels”, i.e. image areas belonging
to one overview camera each.
You will have to repeat the calibration process explained in the following chapter
3.5.6 once per camera channel, i.e. one, two, or four times.
The Setup Wizard will direct you through this procedure beginning with the upper left
channel and ending with the lower right channel.
The channel currently being calibrated will be highlighted (by shadowing the other
ones).
When calibrating a Quad geometry, the currently selected channel will also be
zoomed up to help you place the landmarks and aim the PTZ correctly.
3.5.6 Calibration of one overview camera channel
See also chapter 0, More about Calibration for some helpful background information
on this setup step.
•
•
•
•
You must specify all four landmarks first
Only then will Calculate become enabled.
This triggers the calculation which takes less than one minute
After calculation, verify the correct correspondence between the overview
camera and the PTZ by checking the landmarks.
When satisfied, issue Apply Calibration.
Item
Set Landmark 1
Check Landmark 1
…
Set Landmark 4
Check Landmark 4
Calculate
Apply Calibration
Ignore Channel
Back
Erase Calibration
Class
Marker
Action**
…
Marker
Action**
Action*
Action**
Action***
Action
Action**
3.5.6.1 Set Landmark 1...4
Unset landmarks are identified by + and become labeled [+] after being located.
Setting a landmark consists of two steps. First you move the orange crosshair to a
landmark point in the overview image. When you press the green button, control
DynaPel CloseView
Page 57
switches to the PTZ and Aiming PTZ is displayed in the overview image. Now use
your keypad/joystick/controller to aim the PTZ camera to the same landmark point.
When done, press the green button again.
You can use either the keypad or your remote joystick or even your webbrowser to
set the crosshair and move the PTZ.
See also chapter 3.4.3.8, Marker on how to manipulate these landmarks.
3.5.6.2 Check Landmark 1...4
(**) These menu items are only available once a valid calibration has been
calculated.
When you trigger Check Landmark, the orange crosshair will highlight the landmark
point in the overview image, while the calibration data is used to point the PTZ
camera into the corresponding direction.
While the PTZ is focused on that landmark, CHECKING appears in the lower left
corner of the CloseView video output.
There are some underlying model assumptions about the configuration of the two
cameras and the landmarks (see chapter 0, More about Calibration).
If those assumptions are not fully met – for example the parallax might be not as small as
necessary – the PTZ positions shown in Check Landmark will deviate from the ones
specified in Set Landmarks. This deviation won’t vanish, no matter how precisely you
aim the crosshair and the PTZ.
Normally the PTZ camera will point to the center of each target box. Adjusting the
parameters Intra Object Offset (see 3.6.4.1.2.2), you can shift the aim within these
boxes.
3.5.6.3 Calculate
(*) This menu item will only be available after all 4 landmark points are set, but while
there is no valid calibration yet.
Triggering this event starts the calculation process that may take up to one minute.
Before the actual calculation is started, the landmarks and corresponding PTZ
directions are checked. To calculate a valid calibration, the landmarks must meet the
following criteria:
•
They must be spread over the entire image
•
They must not reside on a common straight line
•
They must not be clustered
•
They must not all have the same distance from the image center
If your current distribution of landmarks doesn’t meet this criteria, you will be asked to
re-distribute the landmarks and start the calculation again.
3.5.6.4 Apply Calibration
(**) This menu item is only available once a valid calibration has been calculated.
This action finishes the calibration process for the current channel and proceeds to
the next channel or takes you to the end of the Setup Wizard.
3.5.6.5 Ignore Channel
(***) This menu item is only available until a valid calibration is calculated.
This action skips the calibration of this channel and proceeds to the next channel or
to the end of the Setup Wizard.
Without calibration, CloseView is unable to point the PTZ camera to a detected
target.
DynaPel CloseView
Page 58
This feature makes sense, if you have e.g. chosen a Quad geometry with only three
input feeds or if one of the cameras exists, but is not intended for tracking.
If you intend to run CloseView without a PTZ camera – e.g. for demonstration or
testing purposes – rather choose “No PTZ” for Protocol/Type in section 3.5.3.1, than
ignoring the channel here instead.
3.5.6.6 Back
Back returns you to the PTZ Camera menu.
3.5.6.7 Erase Calibration
(**) This action is only available once a valid calibration has been calculated for the
current channel.
Triggering this action invalidates the current calibration data.
You could use this function when you attach another PTZ camera to your CloseView
system without wanting to do a complete Factory Reset (see chapter 3.6.6.5).
3.5.7 Finishing the Setup Wizard
After calibrating all video channels, the Setup Wizard is finally finished. It will
automatically save all settings to the flash memory.
You should now take some time to watch CloseView’s tracking performance critically,
and then start to optimize some of the user settings described in the following
chapter.
DynaPel CloseView
Page 59
3.6
OSD User Menu Tree
The OSD menu tree has context sensitive components, so that some items are only
visible/reachable when they are necessary or ready.
The system may either be operated at Admin Level or at the restricted User Level.
The latter only shows a reduced subset of the OSD menu tree.
Note that the OSD may also be operated from the optional remote controller (see
chapter 2.3) or via the webserver.
The ‘free’ part of the OSD – the one not governed by the Setup Wizard – is
concerned with the User Data. These settings are used to optimize the system
behavior. Typically, such parameters should only be tweaked after the system has
been running for some time.
[19”]
This User Data can also be controlled from you LAN-PC via a comfortable
web interface.
3.6.1 CloseView Main Menu
Item
CloseView Mode
Scheduler Configuration
User Settings
Start Setup Wizard
System State
User/Admin Level
Class
Selection
Submenu
Submenu
Action
Submenu
Submenu
Admin
available
available
available
available
available
available
User
available
available
available
hidden
available
available
3.6.2 CloseView Mode
CloseView Mode refers to the operating modes Active, Inactive, and Scheduled (see
chapter 3.3).
PTZ on selects Active Mode, where CloseView controls the PTZ camera.
PTZ off selects Inactive Mode, where the PTZ camera is controlled manually.
Scheduled engages the internal scheduler, which switches between Active Mode
and Inactive Mode according to one of the user-specified time schedules.
The Scheduled mode will be indicated by the symbol (S) in the lower left corner.
Since the internal scheduler needs valid clock readings, engaging the scheduler
might produce a screen asking you to adjust the built-in clock (see chapter 3.6.3.1).
DynaPel CloseView
Page 60
3.6.3 Scheduler Configuration
The scheduler won’t work, i.e. turn the PTZ control on/off, unless
CloseView Mode Scheduled is selected (see chapter 3.6.2)!
Main Scheduler Configuration
Item
Class
Set Current Date/Time
Submenu
Schedule 1
Submenu
Schedule 2
Submenu
Admin
available
available
available
User
available
available
available
This submenu contains the configuration of the internal scheduler. These settings will
only be observed, while CloseView Mode (see above) is set to Scheduled.
The internal scheduler switches between CloseView’s Active Mode and Inactive
Mode according to the user-specified time schedules.
In Active Mode, CloseView analyzes the video input from the overview camera and
steers the PTZ camera to follow one of the identified targets.
In Inactive Mode, CloseView still analyzes the video. But the identified objects are
only highlighted by bounding boxes on the video output (see chapter 3.6.4.7).
CloseView does not attempt to steer the PTZ camera.
The internal scheduler offers two separate schedules. Schedule 1 is intended for
working days, e.g. Monday..Friday, while Schedule 2 will then be used during the
weekend or on holidays (every weekday will be governed by one of the two
schedules).
If a normal working day happens to be a holiday, e.g. 4th of July on a Tuesday, you
can temporarily declare Tuesdays to be governed by Schedule 2.
The external scheduler allows the operator to toggle between Active Mode and
Inactive Mode directly from his control keyboard – simply by sending (see also Error!
Reference source not found.) either Set-Preset 91 (for Inactive Mode) or
Goto-Preset 91 (for Active Mode).
3.6.3.1 Set Current Date/Time
Main Scheduler Configuration Set Current Date/Time
Item
Class
Admin
User
Year
Numerical value
available
available
Month
Selection
available
available
Day
Numerical value
available
available
Weekday
Selection
available
available
Hour
Selection
available
available
Minute
Numerical value
available
available
The CloseView units have a built-in real-time clock. Only the latest CloseView
hardware comes with a battery-buffered power-supply to this clock, so the clock
might have to be set after each power interruption.
If the scheduler is engaged (i.e. a valid time is needed), the user will be asked for the
current time automatically whenever CloseView detects a clock reset.
DynaPel CloseView
Page 61
3.6.3.1.1 Year
Values: 2000..2099
Even though the current year is not yet used in the user-specific schedules, setting it
correctly is necessary to get the correct handling of leap years and to identify power
interruptions of the built in real time clock.
3.6.3.1.2 Month
Values: January..December
3.6.3.1.3 Day
Values: 1..31
Please refrain from entering non-existent dates like February 30th.
3.6.3.1.4 Weekday
Values: Sunday..Saturday
3.6.3.1.5 Hour
Values: 12 AM .. 11 PM
3.6.3.1.6 Minute
Values: 0..59
There is no need to start the clock explicitly after adjusting any of these settings. New
values will take effect immediately – the seconds will also be reset to zero then.
3.6.3.2 Schedule 1
Main Scheduler Configuration Schedule 1
Item
Class
Admin
On/Off Time 1
Submenu
available
On/Off Time 2
Submenu
available
On/Off Time 3
Submenu
available
User
available
available
available
Schedule 1 is intended as a daily schedule. It consists of up to 3 times to activate
CloseView, and up to 3 times to deactivate it.
Each of these six switching events has also an option void, indicating that it is not
used.
Think of a simple schedule, wanting your CloseView unit to be active each night from
e.g. 8pm till 7am the next morning. Then you’d just set On-Time 1 to 8pm and OffTime 1 to 7am, and keep the other entries set to void.
A more complex schedule only excluding the daily rush hours from 7am till 9am and
from 5pm till 7pm would then use Off-Time 1 at 7am, On-Time 1 at 9am, Off-Time 2 at
5pm and On-Time 2 at 7pm.
3.6.3.2.1 On/Off Time
Main Scheduler Configuration Schedule 1 On/Off
Item
Class
Admin
PTZ off: Hour
Selection
available
PTZ off: Minute
Selection
available
PTZ on: Hour
Selection
available
PTZ on: Minute
Selection
available
DynaPel CloseView
Page 62
Time
User
available
available
available
available
3.6.3.2.1.1 Hour
Values: VOID, 12 AM .. 11 PM
3.6.3.2.1.2 Minute
Values: 00..59
The switching times will be executed with a precision of approx. 10 seconds.
The scheduler won’t work, i.e. turn the PTZ control on/off, unless
CloseView Mode Scheduled is selected (see chapter 3.6.2).
3.6.3.3 Schedule 2
Main Scheduler Configuration Schedule 2
Item
Class
Admin
On/Off Time 1
Submenu
available
On/Off Time 2
Submenu
available
On/Off Time 3
Submenu
available
Valid days of week
Submenu
available
User
available
available
available
available
Schedule 2 offers an alternative 24h-schedule, just like Schedule 1.
The intended use is to have two different schedules for work days and weekends.
So, each day either of the two schedules will rule.
By default, Schedule 1 is valid every day.
The submenu Valid days of week lets you specify those days of week –
typically the weekend -, which you want to be governed by the Schedule 2.
So, if you want CloseView to be active during the entire weekend, specify On-Time 1
of Schedule 2 to be 12am, keeping the other 5 switching times void.
Then declare Schedule 2 valid on each Saturday and Sunday.
If a holiday happens to fall onto a regular working day, you can temporarily modify
the Valid days of week.
So, if for example July 4th will be a Tuesday, you can at some time during the week
before declare Schedule 2 valid on Tuesdays. Then you have again the entire
following week to restore the normal course of time.
3.6.3.4 Valid days of week
Main Scheduler Configuration Schedule 2 Valid days of
week
Item
Sunday
Monday
Tuesday
Wednesday
Thursday
Friday
Saturday
Class
Flag
Flag
Flag
Flag
Flag
Flag
Flag
Values: schedule 1, schedule 2
DynaPel CloseView
Page 63
Admin
available
available
available
available
available
available
available
User
available
available
available
available
available
available
available
3.6.4 User Settings
Main User Settings
Item
PTZ Behavior
Motion Tracking
Target Selection
Priority/Exclusion Areas
Alarm Settings
Viewing Options
Save/Load User Settings
Class
Submenu
Submenu
Submenu
Submenu
Submenu
Submenu
Submenu
Admin
available
available
available
available
available
available
available
User
available
available
hidden
hidden
hidden
available
hidden
Admin
available
available
…
User
available
hidden
…
3.6.4.1 PTZ Behavior
Main User Settings PTZ Behavior
Item
Class
Agility
Numerical value
Adjust …
Submenu
Adjust …
…
If you are using multiple overview cameras, there will be a separate “Adjust …”
submenu for each input channel.
3.6.4.1.1 Agility
Default Value: 100%
Agility affects the speed, with which CloseView makes the PTZ camera move.
A value bigger than 100% will cause faster movements, but might lead to jerky and
nervous motion. A value below 100% will slow down the PTZ movements.
3.6.4.1.2 Adjust … Calibration
When you are using a configuration with multiple overview cameras, there will
be an individual Adjust … Calibration submenu for each camera input
channel.
Main User Settings PTZ Behavior Adjust …
Item
Class
Admin
Zoom Gain
Numerical value
available
Intra Object Offset
Submenu
available
User
available
available
3.6.4.1.2.1 Zoom Gain
Default Value: 100%
After calibration the CloseView application should know how to aim and zoom the
PTZ camera properly at any detected object. If you feel that the PTZ camera tends to
zoom in either too close or too wide, change Zoom Gain to values smaller or bigger
than 100%.
DynaPel CloseView
Page 64
3.6.4.1.2.2 Intra Object Offset
On default, the PTZ will be aiming at the center of each object. These settings
allow you to choose an aim somewhere else within the targets bounding box.
Main User Settings PTZ Behavior Adjust Calibration Intra Object Offset
Item
Class
Admin
User
Vertical Offset
Selection
available
available
Horizontal Offset
Selection
available
available
NOTE: If choosing a non-default value for either of these parameters, you
might want to adjust Zoom Gain too.
3.6.4.1.2.2.1 Vertical Offset
Values: AUTOMATIC, top, high, center (default), low, bottom
top, bottom shift the aim to the upper or lower edge of the bounding box.
high, low correspond to ¼ or ¾ of the vertical extension of the box.
NOTE: To aim the PTZ to the face of a pedestrian, you can change the
Vertical Offset to high.
CloseView 4.0 now also offers an automatic person classification. When Vertical
Offset is set to AUTOMATIC, targets which are classified as persons will make the
PTZ aim at their head (the top section of the object box) rather than at their navel
(the center of the object box).
Such targets will show a smaller green box within their normal orange bounding box,
if visualization of bounding boxes (see Error! Reference source not found.) is
activated.
3.6.4.1.2.2.2 Horizontal Offset
Values: far left, left, center (default), right, far right
far left, far right shift the aim to the left or right edge of the bounding box.
left, right correspond to ¼ or ¾ of the horizontal extension of the box.
DynaPel CloseView
Page 65
3.6.4.2 Motion Tracking
If you are using multiple overview cameras, the settings in this Motion Tracking
submenu will be available for each channel independently.
Main User Settings Motion Tracking
Item
Class
Environment Presets
Submenu
Sensitivity
Submenu
Admin
available
available
User
available
hidden
3.6.4.2.1 Environment Presets
Environment Presets have been defined for the most common CloseView
applications. Selecting one of these presets adjusts a whole set of internal
parameters to appropriate values at the same time.
Main User Settings Motion Tracking Environment Presets
Item
Class
Admin
User
Help
Action
available
available
Previous Preset
Text
read-only
read-only
Outdoor
Action
available
available
Outdoor sticky
Action
available
available
Indoor
Action
available
available
Indoor sticky
Action
available
available
3.6.4.2.1.1 Previous Preset
Previous Preset gives the name of the last activated preset, such as Indoor.
3.6.4.2.1.2 Preset: Outdoor
The Outdoor 2 setting suits scenarios with bright lighting and rather small objects
Use this preset for instance to track vehicles on a parking lot
3.6.4.2.1.3 Preset: Outdoor sticky
The Outdoor sticky setting is similar to the Outdoor preset, but the target selection is
stickier. An object will remain the target even if it briefly stops moving.
3.6.4.2.1.4 Preset: Indoor
The Indoor setting suits scenarios with rather dim lighting and rather big objects
3.6.4.2.1.5 Preset: Indoor sticky
The Indoor sticky is similar to the Indoor preset, but the target selection is stickier.
An object will remain the target even if it briefly stops moving.
Use this preset for instance in a room with several people.
DynaPel CloseView
Page 66
3.6.4.2.2 Sensitivity
The parameter Sensitivity determines what amount of change in the
overview image is tolerated as noise, respectively what is counted as real
motion.
Objects are identified by their movement. If there is a lot of ‘motion noise’ in the
image – for example, trees moving in the wind, vibrating mount of the overview
camera, camera noise due to poor lighting – a lower sensitivity might be desirable to
prevent creation of ‘ghost objects’.
Remember that you can also exclude problem areas, which will always trigger
erroneous motion (e.g. a nearby street or a flickering fluorescent light) by covering
them with an exclusion area (see chapter 3.6.4.4).
Main User Settings Motion Tracking Sensitivity
Item
Class
Admin
Sensitivity Control
Selection
available
Accepted Noise Level
Numerical value
available*
Adjust every .. minutes
Numerical value
available*
Sensitivity Level
Selection
available**
User
-
3.6.4.2.2.1 Sensitivity Control
Values: automatic, manual
Setting automatic will adjust this parameter periodically to the specified Accepted
Noise Level.
While the system tries to adjust Sensitivity, the performance of the tracker
might become slightly impaired.
Setting manual lets the user adjust this important parameter.
3.6.4.2.2.2 Accepted Noise Level
(*) This item is only available when Sensitivity Control is set to automatic
•
You should not have to adjust this parameter.
3.6.4.2.2.3 Adjust every .. minutes
(*) This item is only available when Sensitivity Control is set to automatic
If changes in lighting are caused by the succession of day and night you won’t need
adjustments that often. If the changes are caused by artificial lights which go on and
off, you’ll want to adjust as often as possible.
3.6.4.2.2.4 Sensitivity Level
(**) This item is only available when Sensitivity Control is set to manual
Values: high, medium, low
(Selecting a new Environment Preset will adjust this value automatically.)
The value custom appears, if auto-adjustment was used before.
DynaPel CloseView
Page 67
3.6.4.3 Target Selection
In the CloseView terminology, at any time there may be several objects.
One of them is selected as the current target for the PTZ camera.
Main User Settings Target Selection
Item
Class
Selection Mode
Selection
Dwell Time per Object
Numerical value
Inactivity Behavior
Submenu
Overload Behavior
Submenu
Selection Rules
Submenu
Admin
available
available*
available
available
available
User
available
read-only*
hidden
hidden
hidden
3.6.4.3.1 Selection Mode
Values: Multiple Objects or Single Object
If Single Object is chosen, the tracked object will be followed as long as it
continues to move within the field of view of the overview camera.
Multiple Objects sweeps through the list of currently identified objects, and
selects one after the other as the current PTZ target.
Objects in priority areas (see chapter 3.6.4.4) will be picked as preferred targets.
3.6.4.3.2 Dwell Time per Object
(*) This item is only relevant/available if Multiple Objects is selected.
It determines the duration in units of 1 second, after which the PTZ switches to the
next object.
3.6.4.3.3 Inactivity Behavior
Main User Settings Target Selection Inactivity Behavior
Item
Class
Admin
User
Action on Inactivity
Selection
available
Delay
Numerical value
available
PTZ Cmd Type
Selection
available*
PTZ Cmd Number
Numerical value
available*
Whenever the last target has disappeared, a period of inactivity follows for the PTZ.
This submenu allows you to specify, what the PTZ shall do during such times without
a target to track – you can e.g. send the PTZ camera to an internal preset position or
make it run one of its preprogrammed patterns.
To send your PTZ to its Preset 15 whenever the last target has disappeared,
choose Action on Inactivity Send PTZ Cmd, select PTZ Command Type Goto
Preset, and set PTZ Command Number to 15.
3.6.4.3.3.1 Action on Inactivity
Values: PTZ inactivity(default), Send PTZ Cmd
The default setting PTZ inactivity simply ceases to steer the PTZ as long as
there are no new targets. You can still control the PTZ from your joystick during these
times.
Send PTZ Cmd lets you specify a certain command like ‘Go to Preset 15’, which will
be sent whenever CloseView runs out of targets for the PTZ.
DynaPel CloseView
Page 68
3.6.4.3.3.2 Delay (in seconds)
Values: 1..99 , default 10
This setting defines the time in seconds between the disappearance of the PTZ
target and the actual invocation of the “Action on inactivity”
3.6.4.3.3.3 PTZ Command Type
Values: Goto Preset(default), Run Pattern
(*) This item is only if Send PTZ Cmd is chosen as Action on Inactivity.
The default setting Goto Preset sends to attached PTZ camera to one of its
preprogrammed, fixed preset positions as long as there are no new targets.
Run Pattern will make the PTZ run one of its preprogrammed scanning patterns
until CloseView has found a new target to track.
3.6.4.3.3.4 PTZ Command Number
Values: 1..99
(*) This item is only if Send PTZ Cmd is chosen as Action on Inactivity.
Your PTZ camera will have a certain number of pre-programmable preset positions
and/or scanning patterns.
See the manual of your PTZ camera to learn how many of these presets
and patterns actually exist for your specific camera model.
Also, not all of them will have been pre-programmed to sensible values.
CloseView will automatically translate your so selected Inactivity Behavior into the
proper commands of your PTZ camera’s communication protocol.
3.6.4.3.4 Overload Behavior
Overload Behavior determines what CloseView should do with the PTZ in a situation
when there are too many objects to sensibly pick one of them as the target.
Main User Settings Target Selection Overload Behavior
Item
Class
Admin
User
Action on Overload
Selection
available
Overload limit [objects]
Numerical value
available*
Delay
Numerical value
available*
PTZ Cmd Type
Selection
available*
PTZ Cmd Number
Numerical value
available*
-
3.6.4.3.4.1 Action on Overload
Values: None(default), PTZ inactive, Send PTZ Cmd or Send PTZ Home
None means ‘no special treatment of overload’. No matter how many objects,
CloseView will always try to pick one of them as the next target.
PTZ inactive will simply cease steering the PTZ. It will remain were it was, until
either the number of possible targets decreases under the Overload Limit, or until the
PTZ camera’s internal no-communication-program kicks in – e.g. Pelco’s Park Time
Feature.
Send PTZ Cmd lets you specify a certain command like ‘Go to Preset 15’, which will
be sent whenever CloseView runs out of targets for the PTZ.
DynaPel CloseView
Page 69
Send PTZ Home will move the camera to a home position. This home position
corresponds to the image of the overview camera, i.e. the PTZ will aim at the center
of the overview image and zoom out as wide as possible.
If you are using multiple overview cameras, the home position corresponds to the top
left camera channel.
3.6.4.3.4.2 Overload limit
(*) This item is only if something different from None is chosen as Action on
Overload.
It determines the minimum number of objects that will make CloseView switch to
overload.
3.6.4.3.4.3 Delay (in seconds)
Values: 1..99 , default 10
This setting defines the time in seconds between the disappearance of the PTZ
target and the actual invocation of the “Action on overload”
3.6.4.3.4.4 PTZ Command Type
Values: Goto Preset(default), Run Pattern
(*) This item is only if Send PTZ Cmd is chosen as Action on Overload.
The default setting Goto Preset sends to attached PTZ camera to one of its
preprogrammed, fixed preset positions as long as there are no new targets.
Run Pattern will make the PTZ run one of its preprogrammed scanning patterns
until CloseView has found a new target to track.
3.6.4.3.4.5 PTZ Command Number
Values: 1..99
(*) This item is only if Send PTZ Cmd is chosen as Action on Overload.
Your PTZ camera will have a certain number of pre-programmable preset positions
and/or scanning patterns.
See the manual of your PTZ camera to learn how many of these presets
and patterns actually exist for your specific camera model.
Also, not all of them will have been pre-programmed to sensible values.
CloseView will automatically translate your so selected Overload Behavior into the
proper commands of your PTZ camera’s communication protocol.
DynaPel CloseView
Page 70
3.6.4.3.5 Selection Rules
CloseView uses heuristic rules to select the next target among its current set of
detected objects.
This submenu contains parameters to influence these rules.
Main User Settings Target Selection Selection Rules
Item
Class
Admin
User
Threshold
Numerical value
Available
Suppress irrelevant objects
Selection
Available
Priority behavior
Selection
Available
Object size behavior
Selection
Available
Object sizes (for each channel)
Submenu
Available *
Far Small Object
Box
Available
Near Small Object
Box
Available
Far Big Object
Box
Available
Near Big Object
Box
Available
*) The object sizes are in submenus for each channel, if the setup requires more than
one channel.
3.6.4.3.5.1 Threshold
Values: 0..100, default: 20
Adjust this value to influence the target selection.
A relevance measure between 0% and 100% is assigned to each object.
It defines the border between “good / relevant” and “bad” objects.
Good objects will be taken into account for selection of the target where the PTZ
camera will be steered to. Depending on the actual setting in Suppress
irrelevant objects the bad objects are suppressed or just lowered in
relevance.
Lower the threshold value to get more objects possibly selected. This means that
more objects with lower relevance will be selected as target.
3.6.4.3.5.2 Suppress irrelevant objects
Values: Yes (default), No
Objects with a relevance lower than the threshold will be defined as irrelevant and
never be taken into account as target for the PTZ camera.
3.6.4.3.5.3 Priority behavior
Values: Hard (default), Soft
This value defines the influence of Priority areas (see chapter 3.6.4.4) on the
selection of the next target.
• Hard: As soon as a relevant object enters a priority area with higher priority than
the one the actual target is in, CloseView switches to this target. This target is
followed as long as the dwell time is not over or the object is lost.
This can be used to make sure that any objects entering in an important area are
tracked immediately. CloseView keeps tracking objects in all not excluded areas,
when there is no object in a priority area.
• Soft: CloseView will switch to a new object only if the target is lost or the dwell
time is over.
This setting is intended for backward compatibility to previous versions only.
DynaPel CloseView
Page 71
3.6.4.3.5.4 Object size behavior
Values: Hard, Soft (default)
• Hard: Any object exceeding the minimum or maximum values defined for the
actual channel will be discarded and never will be target for the PTZ camera.
• Soft: Objects exceeding the limits for the minimum or maximum values just
decrease in relevance, so that they could still be selected, but the probability for
selection is lowered.
3.6.4.3.5.5 Object Sizes
Typically, objects in the upper part of the image will be farther away than objects in
the lower part. A real world object, e.g. a car, will – while its real world size stays the
same – become smaller, the higher its position within the image.
To compensate for this perspective effect, you can now specify typical sizes for small
and big objects on the lower and upper image boundaries:
3.6.4.3.5.6 Far Small Object
Mark the size of the smallest relevant objects near the upper image border.
3.6.4.3.5.7 Near Small Object
Mark the size of the smallest relevant objects near the lower image border.
3.6.4.3.5.8 Far Big Object
Mark the size of the biggest relevant objects near the upper image border.
3.6.4.3.5.9 Near Big Object
Mark the size of the biggest relevant objects near the lower image border.
Note #1: since the position of the rectangle is also taken into account you have to
place the object rectangle near the upper border, otherwise the tracking may be
affected in an unwanted way.
Note #2: If the object size behavior is Hard , you have to make sure that the small /
big object sizes are smaller than your smallest / largest object you want to be
tracked, otherwise it will be discarded.
For plausible reasons, the
• Far Small Object
• Near Small Object
• Far Small Object
• Far Big Object
must be smaller than the
must be smaller than the
must be smaller than the
must be smaller than the
Far Big Object
Near Big Object
Near Small Object
Near Big Object
Example:
You try to track e.g. people, but want to exclude small things (like e.g. pets) and
larger things like e.g. cars.
The small object size has to be larger than a pet but smaller than a person.
The large object size has to be set larger than a person, but smaller than a car.
For the far end place the rectangles near positions where real objects should be
tracked (near the upper border of the screen).
For the near end place the rectangles near positions where real objects should be
tracked (near the lower border of the screen).
DynaPel CloseView
Page 72
3.6.4.4 Priority/Exclusion Areas
Main User Settings Priority/Exclusion Areas
Item
Class
Admin
Area 1
Quadrangle
available
Priority 1
Selection
available
…
…
…
Area 20
Quadrangle
available
Priority 20
Selection
available
User
…
-
Exclusion areas specify image regions that shall be ignored. Things moving there will
not be identified as targets, nor will they attract the PTZ camera. Each exclusion area
has to be explicitly activated by setting its corresponding priority value to exclude.
Priority areas specify image regions of elevated importance for the tracker.
Whenever a new target is due to be picked (see chapter 3.6.4.3 Target Selection),
objects in priority areas are the first ones to become the target for the PTZ.
To prioritize areas not only over the background, but also among each other, their
priority value may be varied between Prio 1 and Prio 20.
The current implementation offers 20 areas. (For their visualization, see also chapter
3.6.4.7.7)
3.6.4.4.1 Area x
Specifies the position of the priority/exclusion area. See also 3.4.3.7.
3.6.4.4.2 Priority x
Values: exclude, normal, Prio 12 (lowest) … Prio 1 (highest),
Default: normal
Each area has a priority level affecting the probability of objects to be selected as
targets. A high priority area will be shown in red. The lower the priority is the more
the area gets yellow. The lowest priority area has already an elevated priority
compared to the background.
The default value of this priority is normal, indicating that the area is as important as
the background. The background has no color assigned
Setting the priority to exclude turns the marked area into an exclusion area.
After setting a priority/exclusion area, you must specify its priority to a
value other than the normal default!
DynaPel CloseView
Page 73
3.6.4.5 Alarm Settings
See chapter 5.2.3 for the technical specifications/rating of the alarm relay.
The settings in this submenu determine the behavior of the alarm relay.
Main User Settings Alarm Settings
Item
Class
Motion Recording Mode
Selection
Snapshot Duration
Numerical Value
Snapshot Delay
Numerical Value
Post Motion Recording
Numerical Value
Admin
available
available*
available*
available**
User
-
3.6.4.5.1 Motion Recording Mode
Values: Off (default), Video, Snapshot
Motion Recording Mode determines when and how the alarm output relay is
triggered.
Off:
Video:
Snapshot:
Alarm relay stays in normal position permanently.
As long as there is an object being tracked, the alarm relay is
activated. This could, for example, switch on your VCR until the object
disappears.
For each object that becomes the new tracking target, the output relay
gets triggered for the time specified as Snapshot Duration.
This could for example trigger a frame grabber device
connected to the PTZ camera to take one close-up still image of each
tracked object.
If a mode other than Off is selected, the current state of the relay will be displayed
on the overview screen. (See chapter 3.6.4.7.9, Show Relay State).
3.6.4.5.2 Snapshot Duration
(*) Snapshot Duration is only used with Motion Recording Mode Snapshot
Default: 1
When a snapshot is triggered, the alarm output relay switches to its non-normal state
for the amount of time specified by Snapshot Duration. Time is specified in 1/10th
of a second with an effective tolerance of about 1/10th of a second.
3.6.4.5.3 Snapshot Delay
(*) Snapshot Delay is only visible with Motion Recording Mode Snapshot
Default: 0
When a new object becomes the current tracking target, the PTZ camera will need
some time to catch it. The Snapshot Delay determines this amount of time the
system waits before a snapshot of the new target is triggered. Time is specified in
1/10th of a second with an effective tolerance of about 1/10th of a second.
DynaPel CloseView
Page 74
3.6.4.5.4 Post Motion Recording
(**) Post Motion Recording is used only with Motion Recording Mode Video
Default: 0
Motion Recording Mode Video is intended to keep a video recorder running as long
as there is a target being tracked. The value Post Motion Recording specifies
the amount of time that the relay will remain in its non-normal state after this target
has disappeared. Time is specified in 1/10th of a second with an effective tolerance of
about 1/10th of a second.
3.6.4.6 Joystick settings
3.6.4.6.1 Joystick Timeout
Even when CloseView is in Active Mode, manipulating the joystick will immediately
transfer the PTZ control from CloseView to the operator.
Joystick Timeout determines the duration in seconds after which CloseView will
resume control of the PTZ camera, beginning with the latest command sent from the
joystick.
When CloseView regains control of the PTZ camera, the camera will remain in its
current position until CloseView finds is a new target to be tracked.
3.6.4.6.2 Command Mapping
There are some special commands which can be mapped almost freely to commonly
available keyboard commands.
Available commands are:
• Iris Open / Iris Close
• Focus near / Focus far
• Zoom wide / Zoom Tele
• Set Preset <number> / Get Preset <number>
• Aux ON <number> / Aux OFF <number>
Not all mappings are available for every camera and also not all commands are
avaliable for every camera model.
Each command is mapped separately, so you will have to change those one by
one using the new settings already for the further entries.
Action command Description
name
CV_PTZ_OFF
Suspends CloseView camera control. This
command can be used to control CloseView
by an external Scheduler
CV_PTZ_ON
External Scheduler: Resumes CloseView
camera control
CV_Ret_Ctrl
Return PTZ control to CloseView after using
external control devices
CV_Enter_OSD
Enters the CloseView OSD menu for
alterations
Enter_Dome_OSD Enters the PTZ camera’s OSD menu for
alterations.
(only avaliable for EyeMax, Interceptor and
DynaPel CloseView
Page 75
Default value
SetPreset 91
GotoPreset 91
SetPreset 94
SetPreset 93
SetPreset 95
Recalib_Dome
Pelco Spectra)
(For Spectra, the corresponding
GotoPreset command has to be issued
to acknowledge that the PTZ camera
OSD was left. DO NOT MAP TO OTHER
THAN SetPreset<number>)
Either reboots the camera or performs a
PTZ camera reset. (Available for EyeMax)
SetPreset 99
Please be careful with the following mappings, since they may result in
problems accessing the CloseView OSD menu.
CloseView
navigation
command
CV_Enter_button
Description
Default value
Confirms Entries in the CloseView OSD
IrisOpen
menu tree
CV_Cancel_button Leaves OSD menu or cancels current entry, IrisClose
3.6.4.6.3 Access Level
To be able to avoid non-administrators changing anything by issuing Action
commands, the access can be limited to the administrator only.
DynaPel CloseView
Page 76
3.6.4.7 Viewing Options
This submenu lets you configure the additional visual information to be
overlaid in the output video.
Main User Settings Viewing Options
Item
Class
Help
Action
Visualization Style
Selection
Show Objects
Selection
Relevance
Flag
Object Tracks
Submenu
Actual PTZ Position
Flag
Actual PTZ Window
Flag
Priority/Exclusion Areas
Flag
Text Label
Submenu
Relay State
Flag
Video Split Lines
Flag
Clock
Flag
Admin
available
available
available
available
available
available*
available*
available
available
available**
available
available
User
available
available
available
available
available
available*
available*
available
available
available**
available
available
3.6.4.7.1 Visualization Style
Values: Color(default), Black&White
The standard visualization color scheme doesn't work well if the video input comes
from a black-and-white camera. In this case, change Visualization Style to
Black&White.
3.6.4.7.2 Show Objects
Values: relevant(default), off, target only, relevant, all
Draws a box around each object.
The box around the tracked object is orange, other boxes are white.
Off: no boxes shall be displayed
Target only: only the orange target box shall be displayed
Relevant: only relevant objects shall be displayed
All: all objects (also irrelevant objects) shall be displayed
3.6.4.7.3 Relevance
If this item is set to on, the objects’ relevances for target selection will be shown.
The higher the numbers (0-100), the more relevant is the object to be the next target.
This can be used to determine the quality of the detected objects.
(see. “Threshold” in “Target selection->selection rules”)
3.6.4.7.4 Object Tracks
Main User Settings Viewing Options Object Tracks
Item
Class
Admin
User
Show Object Tracks
Flag
available
available
Length of Tracks [s]
Numerical value
available
available
Tracks Persist [s]
Numerical value
available
available
3.6.4.7.4.1 Show Object Tracks
DynaPel CloseView
Page 77
Turns the visualization of the object traces on/off
3.6.4.7.4.2 Length of Tracks
Each object will leave behind a trace corresponding to ... seconds of its previous
movement.
3.6.4.7.4.3 Tracks Persist
Once an object has stopped, its track will disappear after … seconds.
3.6.4.7.5 Actual PTZ Position
A crosshair will be displayed in the overview video, showing the current PTZ position
according to the camera’s position feedback.
(*) Although it would be neat indeed, this feature cannot be used during
calibration! The necessary information that converts the current PTZ direction
into a pixel position in the overview video will only be available after the
calibration process itself.
3.6.4.7.6 Actual PTZ Window
A quadrangle will be displayed in the overview video, showing the current PTZ
window according to the camera’s position feedback.
3.6.4.7.7 Priority/Exclusion Areas
Marks any priority/exclusion areas with priority value other than normal by a
corresponding box (See chapter 3.6.4.4 Priority/Exclusion Areas).
Exclusion areas are shown as darkened boxes; Priority areas vary in color from
yellow (Prio 1) to red (Prio 12).
Visualization is turned off while the OSD menu is activated, but will reappear when
further priority/exclusion areas are being set.
Figure 18: Exclusion areas
DynaPel CloseView
Page 78
In this picture two exclusion rectangles are used to exclude the windows of the
opposite building on the right and the traffic on the distant street between the two
buildings.
3.6.4.7.8 Text Label
Renders a text label, specified by the user, into the upper left corner of the output
video.
Main User Settings Viewing Options Text Label
Item
Class
Admin
Show Text Label
Flag
available
Label Text
Text
available
User
available
available
3.6.4.7.8.1 Show Text Label
Turns the rendering of the Label Text into the upper left corner on/off.
Setting Show Text Label to off will also suppress the NO PTZ message.
3.6.4.7.8.2 Label Text
Specifies the text to be inserted into the upper left corner.
3.6.4.7.9 Relay State
(**) This item is only available with Motion Recording Modes Snapshot or Video.
If activated, the current state of the alarm output relay (either relay open or relay
closed) is inserted into the upper right corner of the image.
Changing Motion Recording Mode to Off will switch Show Relay State to Off
automatically, while changing it to either Snapshot or Video will switch it to On.
Change Show Relay State manually if you do not like this automation.
3.6.4.7.10 Video Split Lines
When you are using multiple overview cameras, i.e. CloseView receives its video
input from a video splitter or quad video processor, this viewing option will highlight
the border lines between the different camera channels.
They thus reflect the settings of the Horizontal Border (see 3.5.4.3) and the Vertical
Border (see 3.5.4.4).
3.6.4.7.11 Clock
Activating this option will display the real-time clock in the upper right corner of the
video.
The clock will become displayed automatically, when the Internal Scheduler is
engaged (see 3.3.4, Scheduled Mode).
See chapter 3.6.3.1 of the Scheduler submenu in order to adjust the current
date/time.
DynaPel CloseView
Page 79
3.6.4.8 Save/Load User Settings
Main User Settings Save/Load User Settings
Item
Class
Admin
Save Backup Settings
Action
available
Load Backup Settings
Action
available*
User
-
All user modifiable settings will be saved to EEPROM automatically. The Setup Data
gets saved when you leave the Setup Wizard, the normal User Data gets saved
whenever you leave the OSD main menu.
If you want to prevent a particular user configuration from being overwritten
accidentally, you can save them to the flash memory.
Note: This only refers to the User Data, not to the Setup Data (see chapter 3.1)!
Reading from and writing to flash memory will cause the video output
to flicker for a moment – that’s perfectly normal.
3.6.4.8.1 Save Backup Settings
Triggering this action will write your current User Data to the flash memory.
3.6.4.8.2 Load Backup Settings
(*) This function is only available, if Backup User Settings have been saved before.
Triggering this action reads the previously saved Backup User Settings from flash
memory and engages the new configuration.
3.6.5 Start Setup Wizard
Triggering this action starts the Setup Wizard (see chapter 3.5).
The Setup Wizard will be started automatically at the first power-up of the
system, or whenever the current configuration does no longer match the
stored Setup Data.
This will happen when you start the system with a PAL video input,
while its previous configuration belongs to a NTSC camera.
DynaPel CloseView
Page 80
3.6.6 System State
Main System State
Item
Firmware Version
Co-Processor Info
System Status
Reboot
Factory Reset
Info on Updates*
Firmware Updates*
Class
Text
Submenu
Numerical Value
Action
Action
Action
Action
Admin
read-only
read-only
read-only
available
available
available*
available*
User
-
[Desktop]
(*) The OSD entries Info on Updates and Firmware Updates exist only
in desktop units.
3.6.6.1 Firmware Version
NOTE: Please fill in the fields Firmware Version and Co-Processor Info in chapter
9, Contact, and make sure to supply this information with every support request to
your DynaPel service partner.
3.6.6.2 Co-Processor Info
Main System State Co-Processor Info
Item
DNA Type
DNA Version
Serial2 Type
Serial2 Version
Class
Numerical Value
Numerical Value
Numerical Value
Numerical Value
Admin
locked
locked
locked
locked
User
-
These numbers identify the hardware equipment of your DynaPel CloseView unit.
3.6.6.3 System Status
This numerical code contains valuable information in case you need technical
support. Please have the current value of this menu item at hand, when you contact
your DynaPel service partner.
3.6.6.4 Reboot
Reboot causes a reboot of the system without erasing the user settings.
Hence, triggering this feature does roughly the same as power-cycling the appliance.
[Desktop]
You can also trigger a hardware reset by pressing the RED and the
GREEN button of the keypad simultaneously.
[19”]
You can also trigger a hardware reset by pressing some pointed object
into the opening labeled “Reset” underneath the front panel LEDs.
3.6.6.5 Factory Reset
After issuing a factory reset, the system invalidates all stored Setup Data and User
Data and reboots itself.
After powering up again, all settings have returned to the initial values they had,
when the unit left the factory.
DynaPel CloseView
Page 81
You will then have to run through the entire Setup Wizard again.
If you just want to restart the appliance without erasing the user settings,
use the Reboot feature above.
[Desktop]
3.6.6.6 Info on Updates
This help screen tells you how to obtain firmware updates for you
CloseView unit.
3.6.6.7 Firmware Update
Triggering this menu item will put your CloseView unit into Update Mode
(see 3.3.4), awaiting new firmware to be uploaded from your PC over
the COM2 serial port.
3.6.7 User / Admin Level
For the meaning of User Level and Admin Level see chapter 3.2.
Main User/Admin Level
Item
Current Level
Change Admin PIN
Return to User Level
Enter Admin PIN
Class
Selection
Numerical value
Action
Numerical value
Admin
read-only
available
available
hidden
User
read-only
hidden
hidden
available
3.6.7.1 Current Level
Values: User, Admin
Current Level shows the current Operating Level.
3.6.7.2 Change Admin PIN
This item is only available at Admin Level
As your are already logged in as Admin, this item allows you to change the 4-digit
Admin PIN.
The default value of this PIN is 2902.
The dummy value **** shown in the OSD hides the current PIN.
3.6.7.3 Return to User Level
This item is only available at Admin Level
Leaves Admin Level and runs the system at User Level from then on.
3.6.7.4 Enter Admin PIN
This item is only available at User Level
When you enter the correct 4-digit Admin-PIN, you'll be promoted to Admin Level
from then on.
The dummy value **** shown in the OSD hides the current PIN.
DynaPel CloseView
Page 82
4 On Using the Built-in Webserver
[19”]
The yellow LED Status 2 on the front panel of your 19” DynaPel unit indicates
whenever the built-in webserver is busy or not ready. Whenever the
webserver communicates with CloseView, the message WEB will be displayed
in the upper right corner of CloseView’s video output.
4.1
Configuring the Webserver
Only Channel 1 (the left one) of the two channels of each 19” unit is
empowered to configure the webserver. This configuration process is
integrated as step No. 2 of the Setup Wizard (see chapter 3.5.2). There you
will also find the default IP Address etc.
Before the first use of the integrated webserver, its IP address and Subnet
Mask must be set.
Changes to the webserver settings will only become activated, when you
issue Apply Settings, which will reboot the webserver. Rebooting takes about
30 seconds.
4.1.1 Creating a new SSL certificate
After the IP settings are set successfully, we recommend generating a new
SSL certificate, as it depends on the previously set IP address. You can reset
the current SSL certificate within the Setup Wizard from the OSD (see chapter
3.5.2.6.1).
Generation of a new SSL certificate takes several minutes for the webserver
to compute. During this time you can’t access the webserver. This is also
indicated by the yellow LED Status 2 on the front panel of your 19” unit.
After each generation of the SSL certificate you should check your browser
for obsolete DP-192X certificates and delete them. Otherwise you will get an
error message from your browser, when it receives a new certificate which
doesn’t match the one already stored in the browser.
DynaPel CloseView
Page 83
Figure 20: Webserver: main page
Figure 19: Webserver: login
[19”]
Figure 20 & 21 show screen shots from a webbrowser accessing the built-in
webserver of the 19” unit.
In the example above, the IP Address was set to 010.000.008.005 in the
Setup Wizard of a DP-192-22 unit (see chapter 3.5.2.1). To access this
webserver from your PC’s webbrowser, enter the URL (web address)
The default IP Address is:
http://192.168.10.10
log in (see Figure 19) with
default user name:
default password:
dp192
dp192
When you are logging in for the first time, you should change user name and
password on the page Change User Settings.
If you forgot your password, you can reset both user name and password to
their default values for the Setup Wizard (see chapter 3.5.2.6.2).
You should terminate each session by clicking on the Logout link on the start
page. After 10 minutes of inactivity from your webbrowser, you will be logged
out automatically.
4.2
Remote Configuration of your 19” unit
There are two modes of configuring CloseView via your webbrowser:
• Using the html forms by clicking on the links Channel 1/Channel 2
(see Figure 20)
• Or you can use the Keypad Emulation
DynaPel CloseView
Page 84
The forms are more convenient, but work only for the User Data section of
CloseView (see 3.1 and 3.6).
[19”]
Using the forms, you can change settings on your browser and transmit the
new configuration by clicking the Send Configuration button. The structure
and functionality of those forms are very similar to the OSD User Menu Tree
described in chapter 3.6.
Using the Keypad Emulation, you directly control CloseView’s OSD just the
same way as with the real keypad on the front panel of your 19” unit. So this
also works for the Setup Wizard.
Using the Keypad Emulation requires an additional device which shows you
the video output of CloseView, e.g. a video streaming server.
4.3
Firmware Update of your DP-192X 19” unit
For Firmware Updates of desktop units please refer to chapter 6.
Updating the firmware of your 19” unit is conducted via the webbrowser
functionality. You will receive the new firmware as a DFA file – a DynaPel
Flash Archive.
To obtain such a DFA file, you can
• contact your local DynaPel sales representative
• contact DynaPel technical support by email to [email protected]
• try the download section of www.DynaPel.com
Use your webbrowser to log in on your 19” unit, click on Update and follow
the instructions to upload the DFA file onto your DP-192-X.
The update process will take about 10 minutes and your browser will show
pages like in the following screen shots:
DynaPel CloseView
Page 85
Figure 21: Starting a Firmware Update
DynaPel CloseView
Figure 22: Firmware Update finished
Page 86
[19”]
After starting the upload process, eight things will happen:
1)
2)
3)
4)
5)
Your web browser converts the DFA file into a request for the web server
Your PC transmits this request to the built-in web server of your 19” unit
The web server unpacks and checks the new firmware
The web server transmits firmware to CloseView channel 1
CloseView channel 1 verifies the firmware and reprograms its flash
memory
6) The web server transmits firmware to CloseView channel 2
(DP192-22 only)
7) CloseView channel 2 verifies the firmware and reprograms its flash
memory
8) Web server updates its own firmware too
Step 1) happens without CloseView knowing.
The other steps are reflected by flashing LEDs at the front panel of your 19”
unit:
Step 2:
Web server receives data from PC:
Step 3:
Web server unpacks/checks data:
Step 4:
transfer web server CloseView 1:
Step 5:
reprogram CloseView 1:
Step 6:
transfer web server CloseView 2:
Step 7:
reprogram CloseView 2:
Step 8:
reprogramming web server:
Status2 of channel 1 flashing slowly
Status2 of channel 1 flashing fast
Status1 & Status2 of channel 1 blinking
Alarm1 & Alarm2 of channel 1 blinking
Status1 & Status2 of channel 2 blinking
Alarm1 & Alarm2 of channel 2 blinking
Alarm1 of both channels on
Steps 5, 7, and 8 are critical.
ANY INTERRUPTION DURING THIS PHASE WILL DAMAGE YOUR
SYSTEM PERMANENTLY!
The entire process takes several minutes - please be patient!
CloseView will change into Update Mode (see 3.3.4) as soon as step 4/6) is
entered.
Do not interrupt the update process until your 19” unit reboots itself otherwise you will permanently damage it!
After the update is finished, validate it by comparing the configuration number
of CloseView (see also 3.6.6.1) and the version number of the webserver
shown on the first web page, with the corresponding numbers of the update
file.
DynaPel CloseView
Page 87
5 Technical Information
5.1
Software and Hardware Description
The CloseView appliance is based on the Equator BSP video processor running on
DynaPel’s embedded system HOLON, equipped with a DynaPel DNA2030 coprocessor. The core algorithm runs under the real-time operating system ECOS,
which is booted from flash memory.
To ensure compliance with FCC and EC rules, read chapter 10, Approval of
Standards, and heed the Installation Advices given in chapter 10.1.
5.1.1 Hardware Description: Desktop Unit
Input/Output Connections (See also chapter 5.2, Wiring Instructions):
Power Supply
12V DC in,
Power Plug 2.5x5.5x14mm, Center+
Video In
CVBS (Color or BW), 75 Ω BNC connector
auto-sensing for NTSC/PAL, always use shielded 75 Ω cables
Video Out
CVBS, 75 Ω BNC connector, NTSC/PAL (depending on input),
always use shielded 75 Ω cables
1st Serial Port
Camera
may transmit RS232 or RS422 depending on selected PTZ
camera and connects via terminal blocks on back panel
2nd Serial Port
Joystick/Update
may receive RS232 or RS422 from external control joystick,
can receive/transmit RS232 for firmware uploads from PC,
connects via terminal blocks or 9-pin DSub (female socket)
Alarm Relay
Relay connected to terminal blocks on back panel of 19” unit
Never exceed the relay’s capacity (See chapter 5.2.3 Alarm
Output)
Keypad
A 6-button keypad is connected in order to setup the CloseView
appliance using on-screen menus.
Specifications:
Power Source (external):
110-240 VAC 50/60 Hz
Power Consumption:
Approx. 6 Watts 12 V DC / 1200 mA
Operating environment:
Temperature: 30-120°F (0-50°C)
Humidity:
20-95%, non-condensing
Metrics:
Height: 2.2” (5.5 cm)
Length: 7.3” (18.5 cm)
DynaPel CloseView
Page 88
Width:
Weight:
6.7” (16.9 cm)
2.4 lbs (1.1 kg)
Design and specifications are subject to change without notice.
5.1.2 Hardware Description: 19” Unit
Input/Output Connections (See also chapter 5.2, Wiring Instructions):
Power
100-240VAC in, 50/60Hz, 25W
Video In*
CVBS (Color or BW), 75 Ω BNC connector and S-video connector
auto-sensing for NTSC/PAL and for BNC/S-video,
always use shielded 75 Ω BNC cables
Video Out*
CVBS, 75 Ω BNC connector and S-video connector,
NTSC/PAL (depending on input), output on both BNC and Svideo, always use shielded 75 Ω BNC cables
1st Serial Port
Camera*
may transmit RS232 or RS422 depending on selected PTZ
camera and connects via terminal blocks on back panel
2nd Serial Port
Joystick*
may transmit RS232 or RS422 from external control joystick
connects via terminal blocks or 9-pin DSub (female socket)
Alarm Relay*
Relay connected to terminal blocks on back panel of 19” unit
Never exceed the relay’s capacity (See chapter 5.2.3 Alarm
Output)
Keypad
A 6-button keypad is connected in order to setup the CloseView
appliance using on-screen menus.
IP Network
RJ-45 connector for CAT-5 LAN cable on back panel of 19“ unit
(*) The 19” units (DynaPel DP192-X) are usually equipped with two channels, i.e. two
DynaPel HOLON video processing boards.
Such a 19” unit therefore has one individual set of connectors for video in/out,
Camera-COM, Joystick-COM and alarm relay per each channel, while both channels
share their power supply, keypad and network connection.
Specifications:
Power Supply (internal):
100-240 VAC, 50/60 Hz, 0.25-0.15 A
Fuses:
2 x T 2A H 250V
Power Consumption:
Approx. 25 Watts
Operating Conditions:
Maximum Ambient Temperature: 32-104°F
Humidity: 20-95%, non-condensing
Metrics:
Height: 1 Unit (44 mm)
Width: 19” (430 mm)
Length: 11” (280 mm)
Weight: 4.8 lbs (2.2 kg)
Design and specifications are subject to change without notice.
DynaPel CloseView
Page 89
(0-40°C)
5.2
Wiring Instructions (4)
Figure 23: Back panel of desktop unit
Update/Joystick
Camera Joystick Relay
Video Out
Video In
Figure 24: Back panel of 19" unit
5.2.1 Terminal Blocks (Camera-COM, Joystick-COM & Relay)
Since there are no standard plugs for RS-422 devices or the alarm relay, they are
connected simply via a row of 16 terminal blocks.
4
Terminal Block
Device
1
2
3
4
5
6
7
8
9
10
11
12
13
14
15
16
Camera-COM
Camera-COM
Camera-COM
Camera-COM
Camera-COM
**Joystick-COM
**Joystick-COM
**Joystick-COM
**Joystick-COM
**Joystick-COM
Relay
Relay
Relay
unused
unused
unused
RS422 full
duplex
function
unused
*T*T+
*R+
*Runused
*T*T+
*R+
*R-
RS422 half
duplex
function
unused
DataData+
unused
unused
unused
Not supported
Not supported
Not supported
Not supported
normally closed
common
normally open
GND
GND
GND
RS232
function
GND
*TX
unused
*RX
unused
GND
unused
*TX
unused
*RX
See also Chapter “Approval of Standards, FCC & CE conformance” in this manual
DynaPel CloseView
Page 90
(*) T±/TX is data sent from CloseView to your PTZ or remote controller.
Therefore it connects to R±/RX.
R±/RX is data received by CloseView from your PTZ or remote controller.
Therefore it connects to T±/TX.
You won’t need a screwdriver or a
soldering iron to connect your wires to the
terminal blocks.
Just use the small plastic hook as directed
in this photo:
Figure 25: Using the plastic hook for the
terminal blocks
5.2.2 Update-COM / DSub connector
If your remote control keyboard or joystick uses RS232, you might prefer to connect it
via a standard serial cable to 9-pin female DSub socket marked Update.
With DynaPel desktop units, this port is also used for firmware updates uploaded
from your PC (see chapter 6).
Pin
1
2
3
4
5
6
7
8
9
RS-232
1
For details, see also chapter
2.3.1 ’How to connect the
optional external joystick’
5
RX
TX
6
9
GND
You must connect a 9-pin female connector to the Update-COM, mating the T± of
your controller with the R± of CloseView.
5.2.3 Alarm Relay
Relay specifications:
• Max. load:
0.5 A at 60 VDC
• Max. load:
1.0 A at 30 VAC
For information on how to configure the alarm relay see chapter 3.6.4.5.
DynaPel CloseView
Page 91
5.3
Front side LEDs
[Desktop]
There are two LEDs at the front panel of the CloseView desktop unit.
5.3.1
Green desktop LED
The green LED simply indicates power supply on/off.
5.3.2
Red desktop LED
The red LED indicates abnormal conditions:
• It will be turned on immediately at each power-up
• It will be switched to blinking, after CloseView has booted.
If the LED remains on statically, CloseView didn’t boot successfully. This
might indicate a previous failed firmware update or some other problem
with the flash memory.
• It will be turned off after CloseView has run through its initialization
phase and actually starts tracking.
If the LED remains blinking, CloseView remains stuck in its initialization
process. This might e.g. be due to a missing input video signal.
• It will be turned on while CloseView is in Inactive Mode (see 3.3.3),
since in this mode tracking of objects relies solely on the operator.
When the alarm output is used, the red LED will also reflect the current
state of the alarm relay. It is turned on, whenever the relay is in its nonnormal statue.
DynaPel CloseView
Page 92
[19”]
Each channel of your 19“unit is equipped with 10 LED on its front panel:
5.3.3 19” LEDs
Underneath the green Power
LED you will find a column of
yellow Product-ID LEDs.
Both channels may run different
DynaPel CCTV applications. So
your Channel 2 might run
CloseView
doing
automatic
tracking, while Channel 1 offers
SteadyEye video stabilization.
Figure 26: LEDs at 19" front panel
DP-192-X is the common name for the family of DynaPel’s 19” rack mounted
CCTV devices. These two-channel units come with different software
configurations. Currently the following options/combinations are available:
Product name
DP-192-10
DP-192-11
DP-192-12
DP-192-20
DP-192-22
Channel 1
SteadyEye
SteadyEye
SteadyEye
CloseView
CloseView
Channel 2
void
SteadyEye
CloseView
void
CloseView
The Product-ID LED tells you which product is installed on this channel.
Normally one of these LEDs should be illuminated.
A quickly blinking Product-ID LED indicates that the keypad is currently
selected/assigned to this channel.
For a CloseView channel, the 5 status LEDs of the right column have the
following meaning:
LED
color
Video In
green
Alarm 1
red
Alarm 2
red
Status 1
Status 2
yellow
yellow
DynaPel CloseView
meaning (when illuminated)
video input from overview camera
detected (see 2.4)
PTZ lost
(PTZ communication failed, see 2.2.2)
Inactive Mode / PTZ off
(manual PTZ control, see 3.3.3)
Target being tracked
Webserver busy / not ready
Page 93
6 Firmware Updates of Desktop Units
Please refer to chapter 4.3 for instructions on how to update 19” units.
[Desktop]
This chapter explains how to update your unit already running CloseView
4.0!
Consult the old manual when you intend to upgrade from something
else towards CloseView 4.0.
6.1 General
The new firmware will be uploaded from a normal PC via its RS-232
COM1 port.
The DynaPel Update-Server software for Microsoft Windows5 is available
from DynaPel. New firmware images will be also available from DynaPel
(see the Requirements section, chapter 6.2).
Uploading new firmware requires a monitor to be attached to the
CloseView unit. No video input source (overview camera) is needed.
6.2 Requirements
• CloseView appliance with a monitor attached to its video output
• PC running Microsoft Windows6 with a RS-232 serial port and
at least 5 Mbytes of free hard disk space
• Sufficient user privileges at your PC to access its serial port COM1
• User supplied serial null modem cable
-
DynaPel Update-Server software
(available from DynaPel by email to [email protected]
-
New flash image for your DynaPel CloseView appliance
(file format *.DFI)
(will be available from DynaPel by email to [email protected])
6.3 Specification of serial cables used for the upload
Uploading the new firmware is performed through SubD 9 Update-COM
port of your DynaPel CloseView desktop unit.
5
A corresponding command line tool for Linux is available on special request.
Update has been tested successfully from laptop and desktop computers running Microsoft
Windows 95, 98, ME, 2000, or XP.
6
DynaPel CloseView
Page 94
[Desktop]
To connect COM1 of your computer to Update-COM of your DynaPel
unit, you will need a standard serial null-modem cable. These cables
have 9-pin DSub plugs of female gender on their ends. You can get
such e.g. at
www.radioshack.com using part number 55010600, or at
www.conrad.com using part number 979970 – 62
Pin connections:
1
2
3
4
5
6
7-8
7-8
3
2
6
5
4
1
At least you have to use a cable, using pins #2, #3, and #5
ADVICE: In doubt, use a normal desktop PC rather than a laptop computer
for this upgrade procedure. The serial ports of laptops (if they still have one)
tend to behave strangely and – unlike desktop PCs – sometimes fail to
synchronize with the CloseView appliance.
6.4 Steps to perform a firmware update
WARNING: To avoid damage to your equipment, observe the following
instructions closely when attempting to update the firmware, especially the
given sequence of steps.
1. Turn off the CloseView appliance by disconnecting its power
supply.
2. Disconnect the terminal block from the CloseView unit.
3. Connect video output
Connect a video monitor to CloseView’s Video OUT BNC plug.
4. Connect the serial line
Connect the serial cable to your PC’s COM1 port and to the
Update-COM port of CloseView.
5. Start the upload server software on your PC, and select the new
firmware image (e.g. CloseView_4_1.dfi) with its file browser
6. Navigate to the Update Menu
Enter OSD -> System State -> Firmware update
or
hold the UP and DOWN button pressed during reboot of the unit
7. Trigger the upload process on the PC, follow the instructions
given by the application
After both devices have synchronized7, the upload process itself will
take some 9 minutes.
7
If synchronization still fails, try setting the PC’s COM port parameters manually to:
19200 Baud, 8 data bits, no parity, 1 stop bit
DynaPel CloseView
Page 95
[Desktop]
8. After uploading the software and its successful decryption, the
system will proceed with reprogramming of the flash memory.
The screen will show color bars during reprogramming of the flash.
ANY INTERRUPTING DURING THIS PHASE WILL DAMAGE THE
PRODUCT PERMANENTLY!
THE APPLIANCE WILL HAVE TO BE TURNED IN TO DYNAPEL
SERVICE FOR REPAIR.
9. Please wait about 5 Minutes, and do not press any key, and do
not reconfigure cabling
After re-programming of the flash memory, the appliance will powercycle itself and start up with a message screen informing you that the
update was successful.
ANY INTERRUPTING DURING THIS PHASE WILL DAMAGE THE
PRODUCT PERMANENTLY!
10. Turn off the appliance, disconnect the PC
11. Restart CloseView again
Reconnect the optional external control joystick.
Power-up the appliance again to finally run the new firmware.
DynaPel CloseView
Page 96
7 Detailed List of Supported PTZ Camera Types
For detailed information needed to connect the cameras see chapter 2.2.4
The CloseView application supports a variety of PTZ camera types or PTZ camera
control protocols.
The set of supported protocols is limited by the fact, that these protocols must be
able to give a position feedback telling the cameras internal current pan, tilt, and
zoom values, if requested – this requires bi-directional serial communication between
CloseView and the PTZ.
The PTZ cameras are connected to CloseView’s serial port ”Camera” via terminal
blocks.
Camera-COM transmits either RS-422 or RS-232 signals, depending on the selected
PTZ camera type and on the user’s preferences.
7.1
Technical information on the various PTZ types
General Rules which apply to all PTZ camera models:
Disable proportional pan, auto-pan-tilt-speed, ZAP or whatever the
manufacturer chooses to call the feature, which makes the camera move
slower with higher zoom setting.
• Disable Auto Flip, Electronic Image Flip, Auto-Pivot or whatever the
manufacturer chooses to call the feature, which turns the image upside down
when the camera looks straight down.
• For optimal tracking performance, all PTZ camera should be operated at its
maximum baud rate.
These things should be done prior to installation. Only with DynaPel
Interceptor, EyeMax and the Pelco Spectra series you can access the PTZ menu
to alter some settings.
•
7.2
AMERICAN DYNAMICS / TYCO / SENSORMATIC
Model
SpeedDome Ultra 6
SpeedDome Ultra 7
Camera
Firmware (***)
FW >= V 1.07
FW >= V 1.07
CloseView PTZ driver
COM
Duplex
RS-422
full
SENSORMATIC
DynaPel CloseView
Page 97
Protocol
AD SpeedDome
AD SpeedDome
Baud
rate
4800
Tracking
Performance
++
++
Parity
Address
none
1
7.3
BOSCH / PHILIPS AutoDome
Model
AutoDome G3A/ENV (18x, D/N)
AutoDome G3A/ENV (Others)
AutoDome G3B (BasicDome)
Camera
Firmware (***)
FW >= V 5.1
FW >= V 5.1
Bosch/AutoDome
Bosch/AutoDome
Bosch/AutoDome
AutoDome G4
Bosch/AutoDome
CloseView PTZ driver
BOSCH Autodome (G3A)
•
•
7.4
COM
Duplex
RS-232
full
Baud
rate
9600
Tracking
Performance
++
+ (**)
Not
Supported
Not
Supported
Parity
Address
none
1
The camera has not been tested successfully with its serial communication
set to RS-422.
To bridge longer distances, the RS232 signal has to be converted to
RS422 and back again to RS232 using 2 pcs. of a RS232<->RS422
converter.
COHU
Model
3850
3920 i-Dome
3950 i-View
CloseView PTZ driver
COHU
7.5
Protocol
Camera
Firmware (***)
FW >= V 1.16
COM
Duplex
RS-422
full
Protocol
Not Supported
++
Not Supported
Cohu
Cohu
Cohu
Baud
rate
9600
Tracking
Performance
Parity
Address
none
1
Cynix
Camera
Model
Firmware (***)
Protocol
Cynix CV-P30T / Cynix CV-N30T FW >= 1.3T10
Pelco-D
Cynix SV-P30T / Cynix SV-N30T
Cynix MV-P10T / Cynix MV-N10T FW >= 1.4T10VA Pelco-D
Cynix MX-P10T / Cynix MX-N10T
Baud
Parity
rate
PELCO-D/ Cynix
RS-422
half
9600
none
• Only Samsung Techwin camera modules “T” are currently supported
• Turn OFF Zoom proportional Pan/Tilt
• Turn OFF Auto Flip
• Set Jog Max Speed” to “360 deg/sec
CloseView PTZ driver
DynaPel CloseView
COM
Duplex
Page 98
Tracking
Performance
++
++
Address
1
7.6
DynaPel
Model
Camera
Firmware (***)
EyeMax1 (NOT EyeMax2)
CloseView PTZ driver
DynaPel-A
COM
Duplex
DynaPel-A / EyeMax
RS-422
• Disable Proportional Directional PT
Model
Half
Camera
Firmware (***)
Interceptor In/Outdoor, 26x Zoom
Interceptor Outdoor, 36x Zoom
EyeMax2, 26x Zoom
EyeMax2, 36x Zoom
CloseView PTZ driver
DynaPel-D / 26x
DynaPel-D / 36x
• Disable Proportional Pan
• Disable Auto Flip
7.7
Protocol
Baud
rate
19200
+++
Parity
Address
none
1
Protocol
Duplex
RS-422
RS-422
Full
Full
Baud
rate
9600
9600
Tracking
Performance
+++
+++
+++
+++
DynaPel-D
DynaPel-D
DynaPel-D
DynaPel-D
COM
Tracking
Performance
Parity
Address
none
none
1
1
ELMO
Model
PTC-100S, PTC-110R
CloseView PTZ driver
SONY Visca
Model
PTC-200C
PTC-400C
ESD-300S, ESD-300DR
Camera
Firmware (***)
FW >= V 3.25
COM
Duplex
RS-232
full
Camera
Firmware (***)
FW >= V 3.9
FW >= V 3.0
Baud
rate
9600
COM
Duplex
Parity
Address
none
1
Protocol
ELMO DynaColor/PTC
RS-422
Half
Page 99
Baud
rate
9600
Tracking
Performance
+
Sony Visca
Tracking
Performance
+
+
Not Supported
Elmo/Dynacolor
Elmo/Dynacolor
Elmo/Dynacolor
CloseView PTZ driver
DynaPel CloseView
Protocol
Parity
Address
none
1
7.8
ForwardVision
Model
MIC1-400
MIC1-400
Camera Firmware
(***)
FW >= 17OCT120CD
FW >= 07JAN131DD
CloseView PTZ driver
COM
Duplex
Protocol
Ext. Pelco-D
Ext. Pelco-D
Baud
rate
++
++
Parity
PELCO-D / ForwardVision
RS-422
full
9600
none
MIC1-400
• Turn off “PTZ Scale” (= “Prop. P/T”; Set Preset #87 to turn it off);
Model
MIC1-412 (18x Zoom)
MIC1-412 (36x Zoom)
CloseView PTZ driver
Camera Firmware
(***)
FW >= 04APR412BD
FW >= 04APR412BD
COM
Duplex
Protocol
Parity
PELCO-D / ForwardVision
RS-422
full
9600
none
MIC1-412 / 18x
PELCO-D / ForwardVision
RS-422
full
9600
none
MIC1-412 / 36x
• Turn off “PTZ Scale” (= “Prop. P/T”; Set Preset #87 to turn it off);
• switch between Thermal/Optical video with Set/Call Preset #77
7.9
Address
P:1, D:None
Tracking
Performance
++
++
Ext. Pelco-D
Ext. Pelco-D
Baud
rate
Tracking
Performance
Address
P:1, D:None
P:1, D:None
GE / KALATEL / INTERLOGIX
Model
CyberDome
Legend
CloseView PTZ driver
Camera
Firmware (***)
FW >= V 3.18
COM
GE IMPACNET / GE Legend
RS-422
• Disable Proportional Zoom
• Disable Zoom Variable Tilt
• Disable Electronic Image Flip
• Set manual PTZ speeds to maximum
DynaPel CloseView
Duplex
Half
Page 100
Protocol
Not Supported
++
Kalatel ASCII
GE ImpacNet
Baud
rate
9600
Tracking
Performance
Parity
Address
none
1
7.10 HONEYWELL / ULTRAK
Model
RapidDome VCL
UltraDome KD6
CloseView PTZ driver
Camera
Firmware (***)
Protocol
Not Supported
+++
Honeywell VCL
FW >= V 518 584- Ultrak Diamond
2980 Rev J
COM
Duplex
Baud
rate
9600
Tracking
Performance
Parity
Address
U. Diamond/HD6, KD6
RS-422
full
even
1
• Disable PASS
• Disable Auto-Pivot
• Use proper data cables, terminate, if necessary. (units seem to be sensitive
against electrical noise on the data lines)
Model
UltraDome KD6i/HD6i
CloseView PTZ driver
Camera
Firmware (***)
Protocol
+++
FW >= V 519 543- Ultrak Diamond
1980 Rev. H
COM
Duplex
Baud
rate
9600
Tracking
Performance
Parity
Address
U. Diamond/HD6i, KD6i
RS-422
half
even
1
• Disable PASS
• Disable Auto-Pivot
• Use proper data cables, terminate, if necessary. (units seem to be sensitive
against electrical noise on the data lines)
DynaPel CloseView
Page 101
7.11 PELCO
There are several camera manufacturers who claim that their PTZ cameras are
compatible with the Pelco-D protocol.
None of them, however, supports the full extended-D protocol. The extension
contains the back channel that enables the PTZ camera to return messages to its
controller. This feature is indispensable for any PTZ camera which is to co-operate
with CloseView.
Installation note:
• Turn off proportional pan
Model
Spectra II, BC
Spectra III SE, CBW
Spectra III SE, C/M22
Spectra III, TC16
Spectra III, CBW18
Spectra Mini 114R
CloseView PTZ driver
PELCO-D / Spectra 3 / Mini
Model
Spectra IV SE, TC16
Spectra IV SE, CBW18
Spectra IV SE, C/M22
Spectra IV SE, CBW23
Spectra IV SE, CBW35
CloseView PTZ driver
PELCO-D / Spectra 4
Model
Esprit, CBW18
Esprit, C16
Esprit, C22
CloseView PTZ driver
PELCO-D / Esprit
DynaPel CloseView
Camera
Firmware (***)
Protocol
Not Supported
+++
++ (**)
++ (*)
++ (**)
++
Ext. Pelco-D
FW >= V 1.13
Ext. Pelco-D
FW >= V 1.13
Ext. Pelco-D
FW >= V 1.13
Ext. Pelco-D
FW >= V 1.13
Ext. Pelco-D
FW >= V 1.20.0007 Ext. Pelco-D
COM
Duplex
RS-422
full
Camera
Firmware (***)
FW >= V 1.05
FW >= V 1.05
FW >= V 1.05
FW >= V 1.05
FW >= V 1.05
COM
Duplex
RS-422
full
Camera
Firmware (***)
FW >= V 3.05
FW >= V 3.05
FW >= V 3.05
COM
Duplex
RS-422
full
Page 102
Baud
rate
9600
Parity
Address
none
P:1, D:None
Protocol
Parity
Address
none
P:1, D:None
Protocol
Tracking
Performance
++
+ (**)
+ (**)
Ext. Pelco-D
Ext. Pelco-D
Ext. Pelco-D
Baud
rate
9600
Tracking
Performance
+ (**)
+ (**)
+ (**)
+ (**)
++
Ext. Pelco-D
Ext. Pelco-D
Ext. Pelco-D
Ext. Pelco-D
Ext. Pelco-D
Baud
rate
9600
Tracking
Performance
Parity
Address
none
P:1, D:None
Camera
Firmware (***)
Model
ExSite, CBW23
ExSite, C22
FW >= V 1.13
FW >= V 3.05
CloseView PTZ driver
PELCO-D / ExSite
COM
Duplex
RS-422
full
Protocol
+
+ (**)
Ext. Pelco-D
Ext. Pelco-D
Baud
rate
9600
Tracking
Performance
Parity
Address
none
P:1, D:None
7.12 QUICKSET
Camera
Firmware (***)
Model
QuickEye/QPT-20
COM
Duplex
RS-422
full
Baud
rate
9600
Tracking
Performance
+
QuickSet
CloseView PTZ driver
QUICKSET
Protocol
Parity
Address
none
1
7.13 SAMSUNG
Camera
Firmware (***)
Model
SCC-641
SCC-643
SCC-C6403
SCC-C6405
SCC-C6407
FW >= V 2.006
FW >= V 1.013
CloseView PTZ driver
COM
Duplex
Samsung / SCC-C6407
RS-422
full
Protocol
Not Supported
Not Supported
+ (in CV 4.3.2)
Not Supported
++
Samsung
Samsung
Samsung
Samsung
Samsung
Baud
rate
19200
Tracking
Performance
Parity
Address
none
1
7.14 SilentSentinel / CBC
Model
Oculus Rugged Dome
CloseView PTZ driver
Camera
Firmware (***)
FW >= V 1.1.10
COM
Duplex
Protocol
++
Overview
Baud
rate
9600
Parity
SilentSentinel Oculus
RS-422
half
none
• Turn off “Joystick -> Zoom Divide By”;
• Turn off “Joystick -> Flip Mode”
• DO NOT USE INCLINE Mounting option, it will not work correctly
DynaPel CloseView
Page 103
Tracking
Performance
Address
1
7.15 SONY
Installation Notes:
• Do not cascade more than one of these cameras when you want to control
them from the CloseView appliance.
• The standard SONY cable which connects these cameras to a DSub-9 serial
port of your PC won’t work.
• Contact [email protected] for the description of a matching cable.
Model
EVI-D30
EVI-D31
EVI-D70
EVI-D100
Camera
Firmware (***)
FW >= V 0.05
FW >= V 0.05
FW >= V 1.05
CloseView PTZ driver
SONY Visca
Model
SNC-RZ25N/P
SNC-RZ25N/P
SNC-RZ30N/P
SNC-RZ30N/P
COM
Duplex
RS-232
full
SONY SNC
Baud
rate
9600
COM
Duplex
RS-232
full
Parity
Address
none
1
Protocol
Sony Visca
Sony CGI (HTTP)
Sony Visca
Sony CGI (HTTP)
Baud
rate
9600
Tracking
Performance
+ (**)
++
++
+++
Sony Visca
Sony Visca
Sony Visca
Sony Visca
Camera
Firmware (***)
FW >= V 3.03
CloseView PTZ driver
Protocol
Tracking
Performance
Not Supported
Not Supported
+++
Not Supported
Parity
Address
none
1
7.16 VICON
•
•
Disable Zoom Scalable Pan/Tilt
Set Max. manual P/T Speed to maximum
Model
Camera
Firmware (***)
Surveyor VFT-C18
Surveyor VFT-C22
Surveyor VFT-C23
CloseView PTZ driver
VICON Surveyor
DynaPel CloseView
Protocol
+ (**)
+
+ (**)
Vicon
Vicon
Vicon
COM
Duplex
RS-422
full
Page 104
Baud
rate
9600
Tracking
Performance
Parity
Address
none
1
NOTES:
(*) Exact Camera Model was not tested by DynaPel, but field tested by 3rd party
These Models should be compatible, but may not perform exactly as specified.
(**) Exact Camera Model was not tested, but assumed to be compatible.
Camera is assumed to have only minor differences to tested model
These models may not work!!
(***) Fields with no entry mean that the firmware version is not known.
Camera Manufacturers develop their cameras further, so a lower Firmware version
than the tested may not work.
A higher Firmware is assumed to work, since most changes of the camera firmware
are additions, not alterations.
NOTE: In general it is good practice to ask DynaPel prior to any final action, if in
doubt about the compatibility.
Send an email to [email protected], or call 888-DYNAPEL having exact camera
Brand,Model, Lens Type and Firmware at hand.
DynaPel CloseView
Page 105
8 More about Calibration
For considerations about maximum detection distance, what kind of camera lens to
use, and where to place the cameras etc., please consult the separate document
Camera Positioning Guidelines for DynaPel CloseView.
CloseView sees the world through the overview camera. Calibration tells
CloseView how to point the PTZ camera to what the overview camera sees.
Calibration enables the CloseView appliance to aim the PTZ camera onto any object
that is visible to the overview camera. It establishes a geometric relationship between
the reference/overview camera and the PTZ camera.
8.1
Why do I have to calibrate?
The CloseView appliance detects objects - roughly speaking - as pixel areas in the
video signal from the overview camera, and must learn how to calculate pan/tilt
angles and zoom settings to make the attached PTZ camera aim at and zoom in on
that specific target object.
The CloseView appliance has little a-priori knowledge of the technical details of the
reference camera and the PTZ camera as well as about their distance and relative
orientation. But this is crucial information necessary to determine the pan, tilt, and
zoom values
This information could be obtained by direct input of parameters like focal lengths,
radial distortion of the overview lens, size of CCD chips, polar and azimuth angles of
both cameras relative to each other and relative to the line connecting the camera
centers.
But we didn’t want our customers to go through this hassle.
As this information depends on your individual set-up, it cannot be readily delivered
with the CloseView unit. Hence, we cannot provide any preset calibration.
8.2
How does calibration work?
Instead, the calibration algorithm used in the CloseView appliance requires the
operator to simply select some landmark points by moving a crosshair onto them,
and then to manually move the PTZ camera so that this landmark appears in the
center of the PTZ image.
After having set the required number of landmark points, a complex calculation
process must be triggered which determines all the necessary parameters.
The data obtained from this calculation will be saved automatically in the permanent
memory of the CloseView unit as soon as you leave the Setup Wizard.
8.3
How to calibrate?
The calibration process consists of four steps:
1. Choose the required number of landmarks.
2. Mark these landmarks with the crosshair, and aim the PTZ camera
manually.
3. Trigger the calculation process.
4. Verify the calibration.
DynaPel CloseView
Page 106
8.3.1 Choosing landmarks
You will be asked to provide four landmarks. A landmark may be any point within the
common field of sight of both the reference overview camera and the PTZ. It should
be striking enough to find it again unambiguously in the image of PTZ camera.
The landmarks should be spread well over the overview image. Gathering all of them
on a small area or on a straight line would lead to a non-satisfactory calibration. Such
configurations of landmarks will therefore be rejected when calculation is triggered.
As the calibration also takes into account the lens distortions, which most wide-angle
overview lenses exhibit, the landmarks must also vary in their distance from the
image center.
8.3.2 Marking the landmarks
Note that the calibration may also be done using the optional remote control joystick.
If you use a remote joystick to position the PTZ camera, you can adjust the zoom of
the PTZ manually. If you use the keypad or the webbrowser to steer the PTZ camera
you won’t be able to change the zoom setting. We recommend to put some marker
roughly at the center of the screen which displays your PTZ camera – for example
place a small sticker on the center of the CRT.
Figure 27: Calibration phase
Figure 27 shows a screenshot during the calibration phase.
Three landmarks have already been set, the last one currently gets positioned.
DynaPel CloseView
Page 107
8.4
Verifying the calibration
The result of the calculation may be verified in three ways:
1. You can check each landmark from the Calibration menu of the Setup Wizard
(see chapter 3.5.6.2). Now the PTZ camera will be pointed into the direction
calculated from the calibration data and the corresponding landmark position
in the overview image.
Or,
2. Activate the visualization of the Actual PTZ Position (see chapter 3.6.4.7.5).
Now you can compare the highlighted section of the overview image with
what you receive from your PTZ.
Or,
3. You can provide CloseView with a physical target object that lures the PTZ
camera towards it.
If the calibration data is not able to aim the PTZ camera with the desired precision,
this could have several reasons:
•
The match between the crosshair positions of the landmarks and their
corresponding PTZ directions provided by you is not good enough.
► Check and re-adjust either of them, and re-try the calculation.
•
You mistook landmarks, and for instance the PTZ direction for landmark #1
looks at landmark #2
► Check and re-adjust either of them, and re-try the calculation.
8.5
Adjusting/Optimizing the calibration
Normally the PTZ camera will be aimed at the center of each object.
If your “objects” are pedestrians, your area of interest will focus on their faces. Or if
you monitor a parking lot, you might want to catch the license plates of the cars.
You can support this by shifting the aim of the PTZ within the target rectangle to a
position other than the center. In order to do so, use the Intra Object Offset (see
chapter 3.6.4.1.2.2).
8.6
Calibration Limitations
The calibration will fulfill its task to aim the PTZ camera properly only if certain
conditions are granted.
The major requirement is that the so-called parallax must be small. This means that
- seen from any object that is to be tracked - the two cameras (reference camera and
PTZ) must appear to be sufficiently close enough to each other.
As long as no object is closer than 10 times the distance between
the two cameras, the resulting calibration should work fine.
The calibration process has been successfully tested for overview cameras with up
to 170° field of view, and should cope with most lens distortions.
DynaPel CloseView
Page 108
Contact [email protected] if your intended environment doesn’t meet these
requirements.
If you plan on using an annular overview camera (with a donut-shaped image)
contact [email protected] too.
8.7
When do I have to re-calibrate?
The calibration process calculates parameters that are specific to both cameras, their
relative orientation and distance.
Re-calibration becomes necessary when any of these conditions is changed, such
as:
•
•
•
•
•
Exchanging any of the cameras for a different model
Changing the mounting of either of the cameras
Changing the zoom of the overview camera
After a ‘factory reset’ of the CloseView appliance
Whenever you suspect the calibration no longer fulfills its task
If both cameras are mounted on a common rig, the rig can be moved around and reoriented without necessarily requiring a new calibration.
DynaPel CloseView
Page 109
9 Contact & Support
Before you contact your DynaPel support partner, please have the Firmware
Version (see 3.6.6.1) and the coprocessor Co-Processor Info (see 3.6.6.2) at hand,
and read out the current System Status (see 3.6.6.3).
Firmware:
_______________
DNA-203X:
Type ______ Version ____
Status:
_______________
Serial2:
Type ______ Version ____
DynaPel contact addresses:
For America, Asia:
DynaPel Systems Inc
7740 Trinity Road; Bldg A, Unit 101
Memphis, TN. 38018
USA
Tel: +1 901 624 2150
Fax: +1 901 624 0663
Toll free phone (US only): 800 997 7934
Toll free fax (US only): 800 998 7934
Mail:
[email protected]
Technical support: 1-888-DYNAPEL
e-mail: [email protected]
web: www.dynapel.com
toll free: +1 888-DYNAPEL
For Europe, Middle East, and Africa:
DynaPel Systems Inc.
Smøråsveien 22
5238 Rådal
Norway
phone: +47 55 62 80 30
fax:
+47 55 62 80 31
e-mail: [email protected]
web: www.dynapel.com
tech support: +1 888-DYNAPEL or +49-89-127394-17
DynaPel CloseView
Page 110
10 Approval of Standards, FCC & CE conformance
Conformance to FCC and CE standard will only be ensured, if the Installation
Advisories of chapter 10.1 are observed.
Information to the user:
NOTE: This equipment has been tested and found to comply with the limits
for a Class A digital device, pursuant to part 15 of the FCC Rules. These
limits are designed to provide reasonable protection against harmful
interference when the equipment is operated in a commercial environment.
This equipment generates, uses, and can radiate radio frequency energy and,
if not installed and used in accordance with the instruction manual, may
cause harmful interference to radio communications. Operation of this
equipment in a residential area is likely to cause harmful interference in which
case the user will be required to correct the interference at his/her own
expense.
Hints to resolve interference problems:
If this equipment does cause harmful interference to radio or television
reception, which can be determined by turning the equipment off and on, the
user is encouraged to try to correct the interference by one or more of the
following measures:
Re-orient or relocate the receiving antenna.
Increase the separation between the equipment and receiver.
Connect the equipment into an outlet on a circuit different from that to
which the receiver is connected.
Consult the dealer or an experienced radio/TV technician for help.
Changes or modifications:
Changes or modifications not expressly approved by DynaPel Systems Inc.
can void the user's authority to operate the equipment.
10.1 Installation Advisories
•
We recommend using RG59 75 Ω coaxial cables to connect the video input
and output. The video input cable has to be provided with a NiZn-ferrite. The
ferrite has to be positioned near to the Video-In BNC connector. Proposed
ferrite:
No. 74271112 STAR-TEC Round cable snap ferrite
Würth Elektronik http://www.we-online.com
Shielded (24AWG or better) twisted pair cables have to be used for
connecting to the serial ports PTZ-COM, Joystick-COM ,Update-COM and the
relay port.
[Desktop]
It has to be ensured, that the cable shield is grounded on both sides.
[19”]
It has to be ensured, that the cable shield is grounded at least on the
DP-192-X side. Preferably, that shield should be grounded on both
sides.
•
•
The usage of a shielded cable for connecting to alarm output is
recommended.
DynaPel CloseView
Page 111
10.2 CE Compliance Statement
10.2.1
CloseView 19” rack mount
CE Declaration of Conformity
Manufacturer
DynaPel Systems Inc
7740 Trinity Road, Building A; Unit 101
Memphis, TN 38018 USA
Declares this CE-marked product
Product Number
Complies With
Compliance Standards
Close View dyn006.00-a1
2004/108/EC Electromagnetic Compatibility Directive
EN 55022 1998 + A1:2000 + A2:2000, Class A
Radio disturbance characteristics
Information Technology Equipment
EN 61000-6-2: 2001
Immunity for industrial environments
EN 61000-3-2 : 1998
Harmonic current emissions
EN 61000-3-3 : 1996
Voltage fluctuations and flicker
European Representative
HOLON Technology GmbH
Nymphenburgerstr 90e
80636 Munich
Germany
10.2.2
CloseView Desktop
CE Declaration of Conformity
Manufacturer
DynaPel Systems Inc
7740 Trinity Road, Building A; Unit 101
Memphis, TN 38018 USA
Declares this CE-marked product
Product Number
Complies With
Compliance Standards
Close View dyn006.00-a1
2004/108/EC Electromagnetic Compatibility Directive
EN 55022 1998 + A1:2000 + A2:2000, Class A
Radio disturbance characteristics
Information Technology Equipment
EN 61000-6-2: 2001
Immunity for industrial environments
EN 61000-3-2 : 1998
Harmonic current emissions
EN 61000-3-3 : 1996
Voltage fluctuations and flicker
European Representative
DynaPel CloseView
HOLON Technology GmbH
Nymphenburgerstr 90e
80636 Munich
Germany
Page 112
11 Index
Active Mode ...... See Operating Modes
Admin Level ...... See Operating Levels
Agility............. See PTZ Camera:Agility
Alarm Relay
Configuration .................................74
Motion Recording Mode ................74
Rating ............................................92
Red LED ........................................93
AMERICAN DYNAMICSSee
PTZ
Camera:SENSORMATIC, See PTZ
Camera:SENSORMATIC, See PTZ
Camera:SENSORMATIC
Automatic Vertical Adjustment..........65
Backup User Data...................... 39, 80
BOSCH .................... See PTZ Camera
Cables ...............................................18
Network .........................................38
serial ............................... 29, 32, 118
video ........................................... 118
Calibration ................................ 57, 113
Adjustment .. See Intra Object Offset
Automatic Adjustment ...................65
How To ................................. 57, 113
Intra Object Offset ................ 65, 115
Landmarks...................... 57, 58, 114
Limitations .................................. 115
Manual Adjustment .............. 65, 115
OSD Menu.....................................57
Parallax....................................... 115
Verification............................ 58, 115
Zoom Gain.....................................64
Camera COM........... 29, 33, 49, 54, 91
Parity .............................................54
Cameras
Annular Cameras ....................... 116
How to mount them .............. 18, 115
Overview Cameras..................... 116
PTZ....................... See PTZ Camera
Clock .................................................79
COHU....................... See PTZ Camera
COM Camera ....................................29
COM Joystick ....................................32
COM Update .....................................32
Conformance
CE, FCC ..................................... 118
Contact address............................. 117
Control Keyboard ............. See Joystick
Daytime Mode ... See Operating Modes
DNA-2030 Version ............................81
DP-192 Variants................................94
DynaPel CloseView
DynaPel EyeMax ..... See PTZ Camera
DynaPel InterceptorSee PTZ Camera,
See PTZ Camera
ELMO ....................... See PTZ Camera
Environment Presets ........................66
Errors
Video Input Signal Missing ...........38
Exclusion Areas ................................73
Visualization ..................................78
Factory Reset ...................................81
Firmware Updates ............................96
Flash Images.................................96
Server Software ............................96
Triggering ......................................82
Webserver.....................................86
Firmware Version..............................81
Fixed Cameras
Geometry
Left/Right Split .....................22, 55
Quad ....................................22, 55
Single...................................22, 55
Top/Bottom Split..................22, 55
Horizontal Border ..........................55
Vertical Border ..............................56
Flash Images .. See Firmware Updates
GENERAL ELECTRICSee
PTZ
Camera
Hardware Description .......................89
Hardware Reset................................43
HONEYWELLSee PTZ Type:ULTRAK,
See PTZ Type:ULTRAK
Inactive Mode ... See Operating Modes
Inactivity Behavior.............................68
Installation...................................10, 17
Intra Object Offset........See Calibration
IP Address ...................See Webserver
Joystick .............................................31
Address .............................31, 33, 48
Configuration.................................48
OSD control...................................44
Protocol BOSCH ...........................31
Protocol ELMO/DYNACOLOR .....31
Protocol PELCO-D........................31
Protocol PELCO-P ........................31
Protocol VIDEOALARM ................31
Timeout .........................................75
Joystick COM........................32, 33, 91
Keypad44, See also Webserver :
Keypad Emulation
Reset .............................................43
Page 113
Select Channel ..............................43
LED ............................................94
LAN ............................. See Webserver
Landmarks ...................See Calibration
LED
green .............................................93
red..................................................93
LEDs..................................................94
Inactive Mode ................................94
Keypad Selected ...........................94
Product ID......................................94
PTZ lost .........................................94
Video Signal ..................................94
Webserver busy ............................95
Left/Right Geometry................... 22, 55
Motion Recording ModeSee
Alarm
Relay
Multiple Cameras ..............................55
Multiple Object Mode ........................68
Network ....................... See Webserver
Nighttime Mode. See Operating Modes
NO PTZ
hide message ................................79
NTSC.................. 55, See Video Signal
Object Size........................................72
Operating Levels
Admin Level...................................40
User Level .....................................40
Operating Modes ..............................41
Active Mode............................ 41, 60
Daytime Mode ...............................42
Inactive Mode ......................... 42, 60
LED ............................................94
Nighttime Mode .............................41
PTZ off...........................................42
PTZ on...........................................41
Scheduled......................................60
Scheduled Mode ...........................42
Setup Mode ............................ 38, 41
Update Mode.................................42
OSD Handling
Class Action ..................................45
Class Box ......................................46
Class Flag......................................45
Class Marker .................................46
Class Numerical Value..................45
Class Selection..............................45
Class Submenu .............................44
Class Text......................................45
How To ..........................................44
Joystick..........................................44
OSD Tree
User Menu .....................................60
Wizard Menu .................................47
Overload Behavior ............................69
DynaPel CloseView
Overscan...........................................46
PAL ...........................See Video Signal
PAL ...................................................55
Parallax ...........................................115
Parity.................................................54
Password ..........................................52
Pedestrians
Zoom on Face ...............................65
PELCO
Coaxitron-Protocol ..................25, 38
D-Address .....................................54
D-Protocol .....................................25
KBD300A ......................................26
P-Address .....................................54
P-Protocol .....................................25
Proportional Pan feature.........4, 107
System Environment.....................25
PELCO EspritSee PTZ Camera, See
PTZ Camera
PELCO SpectraSee PTZ Camera, See
PTZ Camera
PHILIPS ..... See PTZ Camera:BOSCH
Power Supply..............................89, 90
Presets........ See Environment Presets
Priority Areas ....................................73
Visualization ..................................78
PTZ Camera .............................25, 100
Address .............................31, 33, 53
Agility.............................................64
Configuration.................................53
Connecting the PTZ Camera ........29
Inactivity Behavior.........................68
Intra Object Offset....See Calibration
PTZ Type
BOSCH Autodome ..................102
COHU ......................................102
detailed list...............................100
DynaPel EyeMax.....................103
DynaPel Interceptor.................103
ELMO.......................................104
GE............................................105
PELCO Esprit ..................105, 108
PELCO Spectra.......................107
QUICKSET ..............................108
SENSORMATIC ..... 100, 108, 109
SONY...............................103, 110
ULTRAK ..................................106
VICON Surveyor..............110, 111
Zoom Gain ....................................64
PTZ lost
LED ...............................................94
PTZ off .............. See Operating Modes
PTZ on .............. See Operating Modes
Quad Geometry ..........................22, 55
Quad Video Processor .....................22
Page 114
QUICKSET............... See PTZ Camera
Remote Controller............ See Joystick
Reset
Factory Reset ................................81
Reboot ...........................................81
via keypad .....................................43
Safety ................................................24
Scheduler
external scheduler.........................61
internal scheduler..........................61
real-time clock ...............................62
Scheduled Mode ...........................42
work days / weekends...................63
Selection Rules .......................... 71, 72
Sensitivity ..........................................67
SENSORMATICSee PTZ Camera,
See PTZ Camera, See PTZ Camera
Serial Communication.......................91
Update/DSub.................................92
Serial null-modem Cable ..................97
Setup Data ................................. 39, 47
Setup Mode....... See Operating Modes
Setup Wizard.................. 39, 40, 41, 47
Calibration .....................................57
Fixed Cameras ..............................55
Joystick..........................................48
PTZ Camera..................................53
Starting Manually...........................80
Webserver .....................................50
Single Camera Geometry .......... 22, 55
Single Object Mode...........................68
SONYSee PTZ Type, See PTZ Type,
See PTZ Type
SSL.... See: Webserver : Configuration
Support........................................... 117
S-Video .................... See Video Signal
System State.....................................81
Target Selection................................68
Far/Near Big/Small Objects ..........72
Overload Behavior ........................69
Selection Rules ...................... 71, 72
Top/Bottom Geometry ............... 22, 55
DynaPel CloseView
TYCOSee
PTZ
Camera:SENSORMATIC, See PTZ
Camera:SENSORMATIC, See PTZ
Camera:SENSORMATIC
ULTRAKSee PTZ Type, See PTZ
Type
Update COM...............................32, 92
Update Mode .... See Operating Modes
User Data....................................39, 60
Saving/Loading Backup ................80
User Level..........See Operating Levels
Version
Coprocessor................................117
DNA-2030 .....................................81
Firmware ...............................81, 117
VICON Surveyor ...... See PTZ Camera
Video Input Signal Missing ...............38
Video Signal......................................55
LED ...............................................94
Norm PAL/NTSC...........................38
Overscan .......................................46
S-Video..........................................38
Video Splitter ....................................22
Viewing Options................................77
Bounding Boxes ............................77
Clock .............................................79
Color Scheme ...............................77
Object Tracks ................................77
Priority/Exclusion Areas ................78
PTZ Position..................................78
Suppress ‘NO PTZ’ .......................79
Text Label .....................................79
Visualization........See Viewing Options
Webserver.........................................84
Configuration...........................50, 84
Default Password..........................52
Firmware Updates.........................86
How to connect .............................38
IP Address.....................................50
Keypad Emulation.........................85
LED ...............................................95
Wizard..................... See Setup Wizard
ZoomGain ....................See Calibration
Page 115