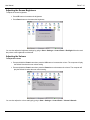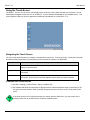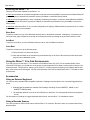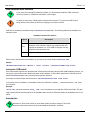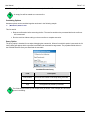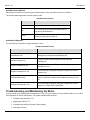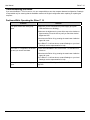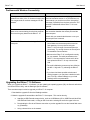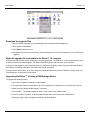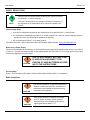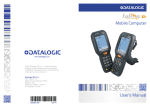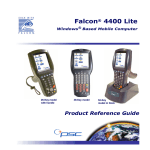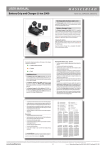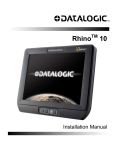
1
Rhino TM 10 User Manual Datalogic Mobile S.r.l. Via S. Vitalino 13 40012 - Lippo di Calderara di Reno Bologna - Italy Rhino™10 User's Manual Software Version: 1.0.x Part Number: 822001160 Ed.: 12/2011 Datalogic Mobile, Inc. Eugene, OR 97402 U.S.A. http://www.mobile.datalogic.com © 2011 Datalogic Mobile, Inc. • All rights reserved. • Protected to the fullest extent under U.S. and international laws. • Copying or altering of this document is prohibited without express written consent from Datalogic Mobile, Inc. Datalogic and the Datalogic logo are registered trademarks of Datalogic S.p.A. in many countries including the U.S.A. and the E.U. • Rhino is a trademark of Datalogic Mobile S.r.l. Other brands and product names may be trademarks of their respective owners. • Reasonable measures were taken to ensure that the information provided is complete and accurate at the time of publication. • Datalogic Mobile, Inc. is not responsible for errors of omission or inaccuracies, as material becomes dated shortly following publication. However, Datalogic reserves the right to change any product specification at any time without prior notice. The information contained herein is provided solely for the purpose of allowing customers to install, operate, configure, and develop applications for Datalogic manufactured equipment and is not to be released, reproduced, or used for any other purpose without written permission of Datalogic Mobile, Inc. The Bluetooth® word mark and logos are owned by Bluetooth SIG, Inc. and any use of such marks by Datalogic Mobile, Inc. is under license. Wi-Fi is a registered certification mark of the Wi-Fi Alliance. Microsoft, WindowsCE, and the WindowsCE logo are registered trademarks of Microsoft Corporation in the United States and/or other countries. Contents Safety Information .......................................................................................................................................................1 Service and Support ...................................................................................................................................................1 Web Support...........................................................................................................................................................1 Related Documents ................................................................................................................................................1 Telephone Support .................................................................................................................................................1 The Rhino™ 10 Vehicle Computer .............................................................................................................................2 Product Overview ...................................................................................................................................................2 Optional Features ...................................................................................................................................................2 Keypad....................................................................................................................................................................3 Using the Touch-Screen.........................................................................................................................................5 Using the Rhino™ 10 in Cold Environments ..........................................................................................................6 Accessories ............................................................................................................................................................6 Increasing Memory Storage .................................................................................................................................12 Understanding WindowsCE ......................................................................................................................................12 Finding Information on WindowsCE .....................................................................................................................12 Learning the Basic Skills ......................................................................................................................................12 Communicating with Rhino™ 10 ..........................................................................................................................15 Customizing the Rhino™ 10.................................................................................................................................18 Launching an Application Automatically...............................................................................................................21 Troubleshooting and Maintaining the Rhino .............................................................................................................25 Troubleshooting the Rhino ...................................................................................................................................26 Upgrading the Rhino™ 10 Software.....................................................................................................................27 Cleaning the Screen .............................................................................................................................................29 Accessories for the Rhino.....................................................................................................................................29 Appendix A – Specifications .....................................................................................................................................34 < page intentionally left blank> Rhino™ 10 User Manual Safety Information Your safety is extremely important. Read and follow all warnings and cautions in this document before installing, handling, and operating Datalogic equipment. You can be seriously injured, and equipment and data can be damaged if you do not follow the safety warnings and cautions. Warning: Warnings alert you to procedures that involve some amount of personal risk and may require special training or tools. Caution: A caution alerts you to an operating procedure, practice, condition, or statement that must be strictly observed to prevent equipment damage or destruction, or corruption or loss of data. ESD Sensitive: The operation requires an ESD safe working area and procedures to prevent equipment damage and possible voiding of warranty. Note: Notes either provide extra information about a topic or contain special instructions for handling a particular condition or set of circumstances. Service and Support Web Support Visit the Datalogic web site at http://www.Datalogic.com and select Datalogic Mobile at the top of the page. Then, select Support & Services for all your support needs including submitting a support request, access to software updates, and links to download our current manuals. Related Documents The Datalogic web site also contains our documents that you can download for free. To download documents 1. Visit http://www.mobile.datalogic.com. 2. Select Support & Services. 3. Select Manuals. 4. Choose the Product documentation you want to download. Telephone Support For telephone support, select Contact Us on the Datalogic Mobile web page and select your country. Before you call Datalogic Product Support, make sure you have the following information ready: Operating system version, displayed on main screen. Serial number from label on back of unit If you are using terminal emulation (TE), know the version and protocol. If you are not using TE, know the language your custom application was written in and the tools you used to create it. 1 User Manual Rhino™ 10 The Rhino™ 10 Vehicle Computer The Datalogic Rhino™ 10 is a rugged Vehicle Computer designed for real-time data collection applications in warehousing, distribution, work-in-process, time and attendance, and stationary applications. Use this chapter to familiarize yourself with the Rhino™ 10 Vehicle Computer. Product Overview The Rhino™ 10 includes these standard features: 520 MHz Intel XScale PXA270 processor 128 MB Flash memory 128 MB RAM Two USB host ports Two serial ports Summit 802.11 b/g radio (CF10G) Secure Digital High Capacity (SDHC) socket for memory expansion up to 32 GB Optional Features We also offer other Rhino™ 10 models that include additional features such as: Ethernet port (extended temperature version only) Extended temperature operation range (-30°C to 60°C) 2 Rhino™ 10 User Manual Keypad The Rhino™ 10 has a 3 button Keypad on the lower front of the unit, Down, Up and Power. A LED on the keypad indicates the power state of the Rhino. Down Up Power Using the Power Button Press the Power ( ) button for 5 seconds to put the Rhino™ 10 into Suspend mode. In Suspend mode, the Rhino™ 10 continues to supply power to all memory, but turns off power to most hardware. When you press the Power button to turn the Rhino™ 10 back on, the computer resumes where it was when you turned it off. Power Consumption (Typical): Input Voltage On (no peripherals) Suspend (no peripherals) 12 V 0.7A 230 mA 24 V 0.38 A 180 mA 36 V 0.25 A 70 mA 48 V 0.2 A 50 mA When a Rhino™ 10 is suspended and resumes, the 802.11 connection requires re-authentication. This can take anywhere from 3 seconds to several minutes depending on your system’s re-authentication requirements. Status LED The Rhino™ 10 uses three brightness levels on the green status LED to indicate the status of power and operation. LED State Status OFF Not connected to a power source or the power source is off. Dim Connected to a live power source, unit is in the suspend state. Blinking Unit running Bright Unit Booting 3 User Manual Rhino™ 10 Adjusting the Screen Brightness To adjust the screen brightness: Press UP button to increases the brightness. Press Down button to decreases the brightness. You can also adjust the brightness settings by going to Start > Settings > Control Panel > Backlight. Move the track bar pointer to the brightness level desired. Adjusting the Volume To adjust the volume Press and hold the Power button then press the UP button to increases the volume. The computer will play the Default Sound at the new volume setting. Press and hold the Power button then press the Down button to decreases the volume. The computer will play the Default Sound at the new volume setting. You can also adjust the volume settings by going to Start > Settings > Control Panel > Volume & Sounds. 4 Rhino™ 10 User Manual Using the Touch-Screen The Rhino™ 10 has a 10.4 inch color VGA display with a resolution of 640 x 480 pixels with a touch-screen. The default display that appears when you turn on the Rhino™ 10 is the Windows Embedded CE 6.0 standard screen. This screen appears unless you have an application installed to automatically run on the Rhino™ 10. Navigating the Touch-Screen You can use the stylus accessory or a finger to navigate the touch screen. If using your finger, it is best to use the tap and hold technique, particularly on small items such as command or toolbars in an application. Action Description Tap Touch the screen once with the stylus or finger to select options, open or close applications, or launch menus. Drag Hold the stylus or your finger on the screen and drag across the screen to select text and images. Tap and hold Tap and hold the stylus or your finger on an item to see a menu of actions available for that item. On the pop-up menu that appears, tap the action you want to perform. Calibrate the Touch-Screen 1. Tap Start > Settings > Control Panel > Stylus > Calibrate Tab. 2. Tap Calibrate and follow the instructions to align the screen. Note that alignment input occurs when you lift the stylus from each location. When complete, simply tap the screen to return to the Touch panel control panel. If the touch-screen is so out of alignment that you cannot open the Start menu, you may need to use a pointing device such as a USB mouse to select the Calibrate control. 5 User Manual Rhino™ 10 Resetting the Rhino™ 10 There are several reset methods for the Rhino™ 10. A warm boot terminates an unresponsive application and clears the working RAM, but preserves the RAM and flash file systems. Registry is restored from persistent memory if available or returned to factory default. A cold boot forces all applications to close, completely reinitializing the system. It clears the working RAM and RAM file system, but the flash file system is preserved. Registry is restored from persistent memory if available or returned to factory default. A clean boot restores the Rhino™ 10 to a clean configuration: the registry, RAM and flash file systems return to a clean status that conforms to factory default. Warm Boot To perform a warm boot, go to the \Windows directory and run the Reboot command. Alternatively, if necessary you can remove the upper left panel by removing the 4 screws and reboot by pressing the push button under the cover. Cold Boot To perform a cold boot, go to the \Windows directory and run the Cold Reboot command. Clean Boot To perform a clean boot, do the following steps: 1. Perform a Warm or Cold boot as above. 2. Press and hold down the up and down keys simultaneously on the front of the terminal until the terminal displays the touch calibration screen. Using the Rhino™ 10 in Cold Environments If you are going to use the Rhino™ 10 in extreme cold conditions below 0°C (32°F) for an extended period of time (more than 20 minutes), you should turn on the power at room temperature for at least 5 minutes prior to using it in the cold environment. This process of “warming up” the Rhino™ 10 helps preserve the lighting on the display and the flexibility of the touch-screen and keypad. We also recommend the use of the low temperature Rhino™ 10 model for these environments. Accessories Using an External Keyboard You can use many standard USB compatible keyboards. Datalogic recommends the use of a sealed/ruggedized keyboard: Sealed/rugged keyboards are available from Datalogic including: full sized QWERTY, ABCD, or mini QWERTY USB keyboards The keyboard attaches to one of the two USB ports on the Rhino. It is automatically detected and prepared for use. For information on installing the rugged keyboard and its mount, see the Rhino™ 10 Installation manual. Using a Barcode Scanner Your can use either a USB or serial scanner with the Rhino™10 computer. Be sure to order your scanner with the appropriate cable. 6 Rhino™ 10 User Manual Connecting a USB Scanner 1. Loosen the screws on the USB retainer and move the retainer away from the USB connector. 2. Plug the cable into one of the USB ports. Depending on the scanner you are attaching, you may hear a series of beeps and the Good Read light may flash. 3. Slide the USB retainer toward the connector until it is firmly against the USB connector. Tighten the two screws. 4. The USB port will recognize the scanner as a type of Human Input Device (HID) and configure it automatically to function as a keyboard input. Any application that accepts keyboard input will receive the output from the USB scanner. There is now visual indication that the USB scanner is operational. 5. To test, simply open an application that accepts keyboard input, such as WordPad and scan a label to see the data on the screen. Connecting a Serial Scanner The serial ports can supply either 5V or 12V power on pin 9 of the connector. The factory default is 5V on both COM1 and COM2. Verify which voltage the scanner requires. If you need to change the voltage, see the Installation Manual for directions. If necessary, attach the cable to the tethered scanner. 1. Attach the scanner’s RS-232 cable to the appropriate COM connector on the Rhino. Depending on the scanner you are attaching, you may hear a series of beeps and the Good Read light may flash. Tighten the screws to make sure the cable stays attached during use. 2. To receive data from the scanner, two approaches can be used. 3. Custom application software can manage the serial port, configured it and accept data under control of the application. 4. The included ScanWedge application can be used to configure the serial port and convert the serial received data to keyboard characters that can then be used by any application that accepts keyboard input. Using ScanWedge ScanWedge allows the Rhino to receive serial and/or Bluetooth data from devices such as Barcode Scanners or RFID readers via the serial ports or a USB Dongle. Received data is pushed into the keyboard buffer so that it is available to applications. You can start ScanWedge in two ways. 1. Double Tap MyDevice->Windows, and then double tap on the ScanWedge Icon. 2. Select Start->Programs->ScanWedge. The first time after a clean boot, both serial ports and Bluetooth are disabled. To enable a port, tap on the system tray icon. This will open the configuration dialog box. 7 User Manual Rhino™ 10 3. Select the tab for the port you want to use. Set the parameters to match the device you are connecting. Termination characters are stripped from the data sent by the scanner and new termination characters are added as defined in the checkboxes. These settings are common for all ports. You can check the configuration by sending data from your device (scan a label). If the data is received with no errors it is shown in the Test Data text box. If there were errors when receiving the data, the error will be shown next to the Baud Rate drop down for the Serial Ports and below the Devices list box for Bluetooth. Framing errors usually indicate an incorrect baud rate setting. 4. Once you have successfully configured the ports click Save to save your setup parameters. At this point the dialog will be closed and a white icon will be in the system tray. If you want to change the configuration, simply tap on the system tray icon to open the configuration dialog box. If you want to disable ScanWedge, select “Disable” in the baud rate dropdown in both COM tabs, uncheck “Enabled” on the Bluetooth tab and SAVE. A confirmation dialog will ask if you really want to disable ScanWedge. ScanWedge will not restart on the next boot, but remain disabled. 8 Rhino™ 10 User Manual If you want to temporarily disable ScanWedge, click Exit. A confirmation dialog will ask if you really want to disable ScanWedge. The next time you start ScanWedge it will restore the ports as you configured them. ScanWedge will also resume on the next boot. Verify that your scanner is working by opening any application that accepts keyboard data, such as WordPad, then scan a barcode label and the data will appear in the application. Bluetooth 1. Select the Bluetooth Tab. On the first entry, the Enabled checkbox will be unchecked. 2. Select Enabled. ScanWedge will attempt to initialize the radio. Any problems will be displayed on the status line. 3. Plug in your Bluetooth dongle, tap Enable and the Scan button will become active. Bluetooth Devices require discovery to be recognized by the Rhino™ 10. Your scanner manual will have instructions on how to start a discovery process. 9 User Manual Rhino™ 10 4. Once the scanner is in discovery mode, simply tap “Scan” on the Bluetooth tab. After a few seconds a list of all available Bluetooth device names will be displayed in the Devices list box. 5. Select the device you want to pair with the Rhino™ 10 and tap “Pair”. If the scanner has security enabled an Authentication Request dialog will appear. You can use an attached keyboard or use the SIP to enter the PIN. 10 Rhino™ 10 User Manual 6. Once the scanner is paired, you can test it by scanning a label and examining the Test Data box. At this point, you should save the configuration. Once the pairing has been saved ScanWedge will attempt to re-pair with the scanner on each power up or whenever ScanWedge is restarted. When the dialog appears simply tap Scan to re-pair with the scanner. 11 User Manual Rhino™ 10 Increasing Memory Storage You can use an SD card to increase file storage and install software. The Rhino™ 10 currently supports SD and SDHC cards that hold up to 32 GB of information. The SD card slot is located on the top of the Rhino™ 10 under the left top cover. See the Installation manual on how to install a SD memory card. Once installed, the SD Memory card is treated by WinCE as a Hard Disk called StorageCard. You (or your application) can use the SD Memory as you would any Hard Disk or USB flash drive. Understanding WindowsCE This chapter introduces Microsoft WindowsCE. WindowsCE and many other software features on the Rhino™ 10 come directly from Microsoft or other third parties. While Datalogic makes every effort to evaluate these technologies, Datalogic makes no guarantees about the suitability of the software for any specific use. Use the command bar at the bottom of the screen to perform tasks in programs. The command bar includes menus, icons, and the onscreen keyboard. While using your Rhino, keep these key points in mind: Tap Start on the navigation bar, located at the bottom left of the screen, to quickly move to programs, files, and settings. Tap and hold an item to see a pop-up menu containing a list of actions you can perform. Pop-up menus give you quick and easy access to the most common actions. Finding Information on WindowsCE Use these Links for additional information about Microsoft WindowsCE: msdn.microsoft.com/support/ support.microsoft.com/ news.microsoft.com Learning the Basic Skills This section describes the basic concepts of using and customizing your Rhino™ 10 Computer. Using the Default Screen When you turn on your Rhino™ 10 for the first time each day, you see the Default screen. Status icons display information such as when the Rhino™ 10 is connected to the network, to the Internet, or has a scanner attached. You can tap an icon to open the associated setting or program. Accessing Programs You can switch from one program to another by selecting it from the Start menu. (You can customize which programs you see on this menu. See the configuration section.) To access programs Tap Start > Programs and then the program name. 12 Rhino™ 10 User Manual The following is a partial list of programs that are on your Rhino™ 10, in the order they appear in the Start menu. Programs->Device Tools->Wavelink Avalanche Programs->Summit->SCU Command Prompt Internet Explorer Task Manager Windows Explorer Favorites Documents Settings -> Control Panel Network and Dial-UP Connections Taskbar and Start Menu Help Run Entering Information You can enter information on your Rhino™ 10 in several ways depending on the program you are using: Software Input Panel External Keyboard Software Keyboard (optional) Barcode Scanner Software Keyboard or External Keyboard Use the Software Input Panel or an external keyboard to enter information in any program on your Rhino™ 10 Computer. In either case, the characters appear as typed text on the screen. Software Keyboards The Rhino™ 10 comes with 4 Software Keyboards, also called Software Input Panels (SIP), allowing you to input data using an on-screen keypad. To select a SIP, click the icon in the lower right corner of the screen in the system tray. This may be a keyboard or a pen icon. This will display the list of four software keyboards. Clicking on the desired keyboard will cause it to display on the screen. 13 User Manual Rhino™ 10 The Keyboard and Large Keyboard selections are standard Microsoft keyboards, and work just as a standard keyboard. The small input panel works best with a stylus while the Large Keyboard works best with a finger. The Numeric Keypad takes up less space on the screen, and allows inputting numeric data. Clicking SHIFT on the Numeric Keypad will shift the SIP into function key mode allowing the user to input F1-F12. 14 Rhino™ 10 User Manual Vertical Keypad provides the same functionality as the Numeric Keypad, but in a vertical orientation. Typing With the Onscreen Keyboard On the soft keyboard that is displayed, tap the keys with your stylus or finger. To type lowercase letters, tap the keys. To type a single uppercase letter or symbol, tap the Shift key. To type multiple uppercase letters or symbols, tap the CAP key. Selecting Typed Text If you want to edit or format typed text, you must select it first. Drag the stylus across the text you want to select. You can cut, copy, and paste text by tapping and holding the selected words and then tapping an editing command on the pop-up menu or by tapping the command under Menu. Communicating with Rhino™ 10 Rhino™ 10 has three communications options, Activesync, Ethernet and 802.11 radio. Each option is described below. Using Activesync NOTE: Activesync works only through the serial connection since both USB ports are configured for host only communications. The Windows CE image provided for the Rhino™ 10 includes facilities necessary to establish a connection with a host computer using ActiveSync. To do this, ActiveSync should be installed on the host computer. It may be downloaded from Microsoft's website: (http://www.microsoft.com/windowsmobile/activesync/activesync45.mspx) Cable A standard null modem cable is required (can use Datalogic P/N 94A051020). This cable should have the following pinout: DB9 Male DB9 Male 1&4 6 2 3 3 2 5 5 6 1&4 7 8 8 7 Do not connect pin 9. In order to establish a connection between the target (Rhino™ 10) and the host (ActiveSync) manually, the following steps are required: On Host (workstation) 1. Make sure no other applications are using the COM1 port. 15 User Manual Rhino™ 10 2. Connect the null modem cable on COM1 of the Host. 3. Configure ActiveSync to use COM1. The following settings should be applied in the ActiveSync Connection Settings dialog box: On Rhino™ 10 1. Make sure no other application is using the COM1 port. In particular, check if ScanWedge is running and if so, open the dialog and Exit. 2. Navigate to \Windows and locate ActiveSyncLauncher. 3. Connect the serial cable to Com1 (the right most DB9) 4. Double tap ActiveSyncLauncher. A dialog box will appear, and show the status of the connection process. 16 Rhino™ 10 User Manual 5. When connected, the dialog box will close and the ActiveSync icon will appear in the system tray. Troubleshooting Host doesn’t recognize when the serial cable is connected, or doesn’t respond. If a previous host application left the COM1 port in an unknown state. Try starting the host manually by opening the Connection settings dialog and click “Connect” then connecting the serial cable, then click next on the host immediately followed by double tapping ActiveSynceLauncher on the Rhino™ 10. Once ActiveSync has successfully connected to the Rhino, it should disconnect and reconnect without this manual step on the host. Rhino™ 10 connects, but the host doesn’t. This is usually caused by either an incorrect or bad cable or even a bad serial port on the Host. Check the continuity and pinout of the cable and try a different host. This can also be caused if the host has been configured to use ActiveSync at a fixed baud rate. You can change this by editing the host registry to set the following: HKEY_CURRENT_USER\Software\Microsoft\Windows CE Services SerialNoAutoBaud = 0 enable auto baud rate detection. If AutoBaud must stay disabled, note what baud rate is set in SerialBaudRate. On the Rhino, change the baud rate to match the host. To do this, open “Start >> Settings >> Network and Dial-up connections”, then click and hold on ConnForMsASync and open its properties. Click on “Configure…” and set the baud rate to the same as the host. Close everything and try connecting. Neither side connects This is usually caused by a bad cable, an incorrectly wired cable, connecting to the wrong serial port on either the host or the Rhino, or a bad host serial port. Setting up Ethernet Communications (Ethernet models only) Ethernet communications usually do not require special configuration. The Rhino™ 10 default settings are configured to use DHCP to automatically get an IP address from a DHCP server. To change these settings select Start -> Settings -> Network and Dialup Connections. Then select DM9CE1 and set the parameters to work with your network. Note: Windows Embedded CE does not have native support for allowing direct Network browsing (No “Network Neighborhood” ) or for allowing network clients to access the Rhino™ 10 (Rhino™ 10 will not show up in “Network Neighborhood”). 17 User Manual Rhino™ 10 Setting Up 802.11 Radio Communications The Rhino™ 10 has an internal 802.11 b/g radio from Summit Data Communications. The Rhino™ 10 uses the Summit Client Utility (SCU) to configure the radio. Go to http://www.summitdatacom.com for latest version of the Summit Users guide. Click on the Support - > Documentation tab and select the User Guide for Windows CE.NET. If you know the setup parameters you need, you can login as an administrator. To log in as an administrator, tap Admin Login and enter the administrator password in the dialog box. The default password is SUMMIT (case sensitive). The administrator password can be changed on the Global tab. Summit also has white papers on a verity of topics from security to difference in radio types. See the Summit Web site for access to these white papers. Customizing the Rhino™ 10 You can customize the Rhino™ 10 by adjusting settings and/or installing additional software. Adding or Removing Programs Programs added to your Rhino™ 10 at the factory are stored in protected Flash Memory and cannot be removed. All other programs and files added to the Rhino™ 10 after factory installation are stored in RAM or Flash Disk. You can install any program created for the Rhino, as long as the computer has enough memory available. Go to the Microsoft WindowsCE web site or other sources on the web to find software. Windows Embedded CE 6.0 uses a RAM based file system and most folders are actually located in RAM and are not saved through a power loss. MyDevice takes you to the root directory of the system. All of the folders are in RAM. Storage devices available would be the following: Storage Type Description FlashDisk The internal Flash memory in the Rhino™ 10 is usually around 57 MB. Storage Card A Flash card in either the SD or CF slots. Hard Disk A USB storage device such as a USB Flash Drive, USB external Hard Drive, or USB external CD ROM drive Developing and Installing Applications Use this chapter to understand the guidelines for developing applications for use on the Rhino™ 10. You will also find information on installing applications and automatically launching them. This chapter describes: Developing Applications for the Rhino™ 10 Installing Applications on the Rhino™ 10 Launching an Application Automatically Developing Applications for the Rhino™ 10 The Rhino™ 10 Vehicle Computers can run applications programmed in Microsoft Visual Studio 2005 or later using .NET Compact Framework 2.0 or 3.5. Use this section to understand the hardware and software you need to: Develop a new Windows application for the Rhino™ 10. Develop a Web-based application for the Rhino™ 10. 18 Rhino™ 10 User Manual Developing a Windows CE Application To develop applications for the Rhino™ 10, all you need is Visual Studio 2005 (or newer) Express or Professional and a network connection. There are several books available on developing applications for Windows CE devices (books on Windows Mobile are also useful). Please note that the Rhino™ 10 comes with .NET Compact Framework 3.5 preinstalled. Connect Visual Studio to the Rhino™ 10 On the Rhino Get the IP address by double tapping on the rightmost network icon in the system tray. You should get a dialog box with DM9CE1 in the title. If you are not connected with wired Ethernet or prefer to use the WiFi connection, double tap on the left network icon and you should get a dialog with SDC-CF10G. Whichever you use, write down the IP address for configuring Visual Studio. In Visual Studio 2008 In the upper left corner, change the Target Device to Windows CE Device. Target Device Connect To Device Device Options Just to the left of the device type drop down list is “Device Options”. 1. Click to open. Under Device Tools, select “Devices”. On the right side, click Properties. 2. Make sure Transport: shows TCP Connect Transport. Click the Configure button. 3. Select radio button “Use specific IP address:” and type in the IP address of the Rhino. 4. Click OK. Click OK again. At this point you may want to change the name of this connection to something like “Datalogic Rhino”. This will enable easy identification of the Rhino™ 10 setup in the future. 5. Click OK. 6. Now test the connection by clicking on “Connect to device”. The dialog will show the status and finally “Connection Successful”. You are now ready to develop and test your application. The first time you “run” Visual Studio will ask you to choose where to deploy. Simply select “Datalogic Rhino” (or whatever you named the connection), uncheck the checkbox “Show me this dialog every time I deploy the application”, and click “deploy”. Your application will be sent to the Rhino™ 10 and run under the Visual Studio debugger. Developing a Web-Based Application You can develop web-based data collection applications for use on the Rhino™ 10 using Microsoft Internet Explorer Embedded. Internet Explorer is available from the Start menu and provides all of the common elements you expect to find in a browser. 19 User Manual Rhino™ 10 Developing server applications for use with Remote Desktop Protocol The Rhino™ 10 supports Microsoft Remote Desktop Protocol (RDP). RDP allows the Rhino™ 10 to connect to a server and automatically execute server based applications using the Rhino™ 10 as a remote interface device. All of the features in the Rhino™ 10 are available to the server application. Developing terminal applications for use with terminal emulators The Rhino™ 10 includes Wavelink 4-in-1 Terminal Emulation client already pre-loaded and pre-licensed. See the Wavelink user documentation on this product at www.wavelink.com. Installing Applications on the Rhino™ 10 There are several ways you can install applications on the Rhino™ 10: You can package your application as a cabinet (.cab) file and install it on the Rhino™ 10. If you have a simple application, you may only need to install the .exe file. You can copy a directory structure that contains the application, supporting files, DLLs, images, and data files. Datalogic recommends using .cab files to install your applications. The Rhino™ 10 uses standard Windows CE .cab files and will install third-party .cab files. You can have your .cab files place your application in any of these memory locations on the Rhino™ 10: Flash File Store. The Flash File Store is an area of storage which is embedded in a section of the system flash memory. This storage is not erased during a reboot. Although it might be erased during the reflashing process (or a clean boot). The optional SD card. If you are using an SD card, this should be the primary location to place application installation files as it is not erased during a reflashing process. There are several ways you can install files and applications on the Rhino™ 10: USB Flash Drive SD card Network transfer Wavelink Avalanche (refer to the Avalanche user manual at www.wavelink.com) The following sections explain how to use each one of these processes to install your application on the Rhino™ 10. Installing Applications Using Your USB Flash Drive To install applications using a USB Memory device 1. Copy your application file to the USB Flash Drive. 2. Insert the USB Flash Drive into one of the USB ports on the Rhino™ 10. 3. Copy the application onto the FlashDisk or the StorageCard. Installing Applications Using Your SD Card To install applications using an SD card: 1. Copy your application file to an SD card. 2. If you are using an FTP server, or Wavelink Avalanche to copy the files to the SD card, place the application in the SD Card folder located in My Windows Mobile-Based Device. 20 Rhino™ 10 User Manual 3. Once you have copied the necessary files to your SD card, insert the SD card into the Rhino™ 10. Note the SD Card slot is contained inside the upper left cover of the Rhino. 4. Navigate to the StorageCard folder on the Rhino 10 and run your application. Installing Applications Using Network Transfer 1. Open Internet Explorer 2. Enter the URL of a server on your Network, e.g.: \\MyServer\Files. 3. Navigate to the folder you need and select the file you want to transfer. On the menu select Edit -> copy. 4. Open Explorer (Start->Programs->Windows Explorer) and navigate to the disk and folder where you want to store the application. On the edit menu select Edit->Paste. Installing Applications Using Activesync Refer to the previous section titled Communicating with Rhino™ 10 Using Activesync for details about using this communication tool. Launching an Application Automatically To launch an application automatically, the Rhino10 uses a registry entry to tell it the application name and how long to delay before launching the application. All entries are located in the HKLM\Startup registry key. Each application you want to launch requires its own Registry Key and two values. 1. A string value named “Process0” with a value set to the path and filename of the application. 2. A DWORD value named “Process0Delay” with a value set to the number of seconds to delay before launching the application. The easiest way to enter new registry values into the Rhino10 is to use Microsoft Visual Studio 2008 Remote Tools. AutoStart The AutoStart program provides three functions: Allows you to create a list of applications (with optional command line arguments) to run automatically prior to loading CAB files. Automatically reinstalls specified CAB files when the Rhino™ 10 is cold booted. Allows you to create a list of applications (with optional command line arguments) to run automatically after loading CAB files. AutoStart launches each time the Rhino is rebooted executing each line with the specified command line arguments. It will take into account any AutoStart options at the beginning of the line. Upon a Cold Boot, AutoStart installs all the CAB files located in the \FlashDisk\CAB folder. If the CAB folder does not exist, no CAB files will be installed. AutoStart will then run the Autostart.ini from the \FlashDisk directory, executing each line with the specified command line arguments. It will take into account any AutoStart options at the beginning of the line. Installing CAB files Copy any CAB files you want to install into the \FlashDisk\CAB folder. These CAB files will then be automatically installed in alphabetical order the next time you start the device. 21 User Manual Rhino™ 10 How AutoStart Uses Wceload If you intend to create highly interactive installers, you should either install the CABs manually or review the section on “Interactive CAB Install” in this chapter. In certain environments, CAB files will be deleted after execution. To prevent the CAB file from being deleted, write protect the file before copying the file onto the device. CAB files are installed by AutoStart using the Wceload.exe application. The following table shows available command line option AutoStart command line options Option Description /noui Specifies that you will not be prompted for any input during the installation. If the CAB file is signed, any responses will automatically be answered ‘Yes.’ If the CAB is unsigned, then any responses will be answered ‘No.’ /silent Suppresses dialog boxes during the installation. Please refer to the Microsoft documentation on your device for further details on Wceload.exe. Sample: \Windows\Wceload.exe /delete 1 /noui /silent “\FlashDisk\CAB\<cab file>” Interactive CAB Install If the CAB installer requires user interaction that must be performed during the AutoStart CAB installation process, you can specify a special file name to disable the silent mode installation. If this mode is specified, the CAB file will be installed with Wceload without any command line arguments specified. An example of what AutoStart would execute is: \Windows\Wceload.exe <cab file> To force this mode of installation via AutoStart, rename the CAB file to include a ‘_’ character before the “.cab” extension of the file. Example: “File.cab” should be renamed “File_.cab” to force AutoStart to not install the CAB in silent mode. This specially-named CAB file should be placed in the AutoStart folder with other CAB files intended for installation on the next reboot. Autostart.ini Autoexec.ini, which uses AutoCE on some older models, has been changed. These files should be renamed to Autostart.ini and reformatted as described in “Autostart.” 22 Rhino™ 10 User Manual Autostart.ini is a text file that AutoStart will run upon startup of the Rhino, and after any CAB files are installed. This file should be placed in the \FlashDisk folder. AutoStart will run the Autostart.ini file on each reboot of the device. Line Formatting Each line of the Autostart.ini can consist of Autostart options, an executable, and any command line arguments. < Autostart option(s)> <full path to executable> <command line arguments> Sample: - \windows\pword.exe \file.doc The following table breaks down the sample Autostart.ini line. Autostart.ini line formatting Autostart option(s) - Full path to executable \windows\pword.exe Command line arguments \file.doc Spaces must be placed between each component of the line in the Autostart.ini. If the executable path is in a folder that contains spaces in the name, quotes are required to distinguish what the actual executable name is. The following is an example of this: “\Program Files\ScannerApp.exe” /run (valid) \Program Files\ScannerApp.exe /run (invalid) The second line is an invalid line because there is no way to distinguish the executable from the argument. AutoStart Options The table below shows options you can use when writing a line in the Autostart.ini file. Options for Autostart.ini Description Comment: This line will not be executed. Character ‘#’ OR ‘ ‘ (space) Comments This may only be used as the first character of the line. If the comment option is specified in the options elsewhere, it is ignored. Do not wait on line completion: This will cause the line ‘-’ to execute and immediately move onto the next line. Query: Request user confirmation when running the executable. ‘?’ This will halt parsing the Autostart.ini until the confirmation is answered. This is intended for debugging the Autostart.ini file. Execute only on Cold Reset ‘!’ 23 User Manual Rhino™ 10 Cold Reset Only: This will cause the line to execute only after a Cold Reset. An empty line will be treated as a comment line. Combining Options Autostart options can be combined together as shown in the following sample: ?- \Windows\Pword.exe This line would: Request confirmation before executing the line. The next line would not be processed before the confirmation is answered. Run the next line without waiting on the current line to complete execution. Query Option The query option is intended for use when debugging the autostart.ini. When a line with this option is executed, the following dialog will appear with the specified executable and command line arguments. The populated fields shown in the AutoStart Execute Query are described the next table. AutoStart Execute Query Field Description Line Number This is the line number in the script being executed. Exe The executable as parsed by AutoStart. Args The argument as parsed by AutoStart. The fields may be broken up into multiple lines (as shown in the example) due to limited space in the dialog. 24 Rhino™ 10 User Manual AutoStart Query Options Parentheses are used to surround the given field and make it very clear what the value of the field is. The following table describes the results of each choice: AutoStart Query actions Button Action Yes The current line will execute. No The current line will not execute. AutoStart will continue parsing the Autostart.ini. Cancel The current line will not execute and AutoStart will discontinue parsing the Autostart.ini. Autostart.ini Samples The next table is a collection of sample Autostart.ini lines. Sample Autostart.ini lines Line Description ? \windows\wceload.exe “\My Documents\Sample.cab” This will confirm the execution of \Windows\wceload.exe with specified argument “\My Documents\Sample.cab” \Program Files\App.exe (invalid) This will execute \Program with the argument Files\App.exe. \Program Files\App.exe /run (invalid) This will execute \Program with the argument Files\App.exe /run. “\Program Files\App.exe” /run This will execute the program \Program Files\App.exe with the argument /run. ?- \Windows\Pword.exe This will confirm the execution of \Windows\Pword.exe. If the execution is confirmed, AutoStart will immediately process the next line. !”\Program Files\App.exe” /run This will execute the program \Program Files\App.exe with the argument /run ONLY after a Cold Reset. Troubleshooting and Maintaining the Rhino If you encounter any problems while using the Rhino™ 10, look in this chapter to find a possible solution. You will also find information on routine maintenance. This chapter contains these sections: Troubleshooting the Rhino™ 10 Upgrading the Rhino™ 10 Troubleshooting the Boot Process (Clean Booting) Cleaning the Screen 25 User Manual Rhino™ 10 Troubleshooting the Rhino If you send the Rhino™ 10 in for service, it is your responsibility to save the computer data and configuration. Datalogic is responsible only for ensuring that the hardware matches the original configuration when repairing or replacing the computer. Problems While Operating the Rhino™ 10 Problem You press Power and nothing happens. Solution • Make sure you are connected to a power supply (the green LED should be on or blinking). • Make sure the brightness is not set all the way to the darkest or lightest setting. Press the UP key until you reach the desired brightness level. • Warm boot the Rhino 10 by pressing the reset button inside the upper left cover. • If the Rhino™ 10 will not reboot, contact Datalogic or your local Datalogic service representative for help. The Rhino™ 10 appears to be locked up and you cannot enter data. • Press and hold Power to turn off the Rhino™ 10 and then turn it back on. • Warm boot the Rhino 10 by pressing the reset button inside the upper left cover. • If the Rhino™ 10 will not reboot, contact Datalogic or your local Datalogic service representative for help. You tap the screen and nothing happens. 26 • Align your screen. For help, see Calibrate the Touch Screen on page five. Rhino™ 10 User Manual Problems with Wireless Connectivity Problem Solution When you turn on the Rhino™ 10 after it was suspended for a while (10 to 15 minutes or longer) and it no longer sends or receives messages over the network. The host may have deactivated or lost your current terminal emulation session. In a TCP/IP direct connect network, you need to turn off the “Keep Alive” message (if possible) from the host so that the TCP session is maintained while a Rhino™ 10 is suspended. The network connection icon in the taskbar appears to be communicating, but the host computer is not receiving any data from the Rhino™ 10. In a TCP/IP network, there may be a problem with the connection between the access point and the host computer. Check with your network administrator or use your access point user’s manual. The Rhino™ 10 is not communicating with the access point. • The Rhino™ 10 is not connected to the access point. Make sure the access point is turned on and operating. You may also be using the Rhino™ 10 out of range of an access point (no green bars). Try moving closer to an access point to reestablish communications. • Make sure the Rhino™ 10 is configured correctly for your network. The radio parameters on the Rhino™ 10 must match the values set for all access points the Rhino™ 10 may communicate with. • The radio initialization process may have failed on the 802.11 b/g radio. Try rebooting the Rhino™ 10. • If you have tried these possible solutions and nothing happens, you may have a defective radio card. For help, contact Datalogic or your local Datalogic service representative. Upgrading the Rhino™ 10 Software When you upgrade the Rhino™ 10 software, you are updating the operating system (OS), the Summit radio driver and Summit Client Utility, and the Datalogic specific software. There are three steps involved to upgrade your Rhino™ 10 computer: 1. Download the upgrade file from the Datalogic website. 2. Make the upgrade file accessible to the Rhino™ 10 computer. This can be done by; a. Attaching a USB External storage device, such as a USB Memory Drive, USB External Hard Disk, USB External Card reader, or using an SD Card via the existing slot under the upper left cover. b. Downloading the file via an Ethernet connection to put the upgrade file onto the internal flash memory (Flashdisk). c. Using a shared drive on the network. 27 User Manual Rhino™ 10 3. Use the Datalogic Image Updater to install the software on the Rhino™ 10 Flash Memory. Download the upgrade files 1. Start your web browser and go to the Datalogic web site at www.mobile.datalogic.com 2. Go to Support > Downloads. 3. Select Rhino™ 10 from the list. 4. Download the file onto the local computer, external storage device, or shared network drive to be used for the upgrade. Make the upgrade file accessible to the Rhino™ 10 computer If using an external memory device, simply plug it into one of the Rhino™ 10 USB ports. Verify the connection by going to Start->Programs->Windows Explorer. The External USB storage device should show as a “Hard Disk”. If using a file downloaded on the internal flash memory, verify the file by going to Start->Programs->Windows Explorer and clicking on Flashdisk. Navigate to the folder where the file was stored. If using a network shared drive, go to Start->Programs->Windows Explorer and click on Network. Navigate to the network shared drive to where the file was stored. Upgrading the Rhino™ 10 Using a USB Storage Device To upgrade the operating system 1. Go to Start->Programs->Datalogic->ImageUpdater 2. Click the Browse button and navigate to where the update file is located and click on the file, then click OK. 3. Make sure that “Failsafe NK.BIN Update” is selected. 4. Click “Update”. The update progress is shown on the bottom of the update window. 5. Once the update is complete, close the update window and remove the external storage device. 6. Reboot by going to Start->Programs->Datalogic->Software Reboot. 28 Rhino™ 10 User Manual Cleaning the Screen To keep the Rhino™ 10 in good working order, you may need to clean the screen whenever necessary depending on the environment in which you use the computer. Use a soft lint-free cloth or paper towel The cloth may be used dry or lightly damped with a mild cleaner or Ethanol. Suitable cleaning products are commercially available pre-packaged for use; one example of such a product is Klear Screen™, or off the shelf products such as Glass Plus® Glass and Surface Cleaner. Be sure the cloth is only lightly damped, not wet. Never apply cleaner directly to touch panel surface. Wipe dry Never apply cleaner directly to touch panel surface! Never use acidic or alkaline cleaners, products that contain Ammonia, Phosphates, or Ethylene Glycol, or organic cleaners such as paint thinner, acetone, tolulene, xylene, propyl or isopropyl alcohol, or kerosene. Products containing less than 4% Isopropyl Alcohol are acceptable if all excess cleaner is removed. Accessories for the Rhino Many accessories are available for use with the Rhino™ 10. Accessories are grouped into several categories: Mounts for the rugged computer. Keyboards for data input. Scanners for barcode input. External Antennas for specific 802.11 requirements. External Power Supplies for extended range of input power. Please contact your Datalogic sales representative for a current list of options. 29 User Manual Rhino™ 10 SAFETY REGULATIONS Read this manual carefully before performing any type of connection to the Rhino™ 10 vehicle computer. NOTE The user is responsible for any damages caused by incorrect use of the equipment or by inobservance of the indication supplied in this manual. General Safety Rules Use only the components supplied by the manufacturer for the specific Rhino™ 10 being used. Do not attempt to disassemble the Rhino™ 10 vehicle computer, as it does not contain parts that can be repaired by the user. Any tampering will invalidate the warranty. Do not submerge the Rhino™ 10 in liquid products. For further information, refer to this manual and to the Datalogic Mobile web site: www.mobile.datalogic.com. When using a Power Supply This device is intended to be connected to a UL Listed/CSA power supply which supplies power directly to the Rhino™ 10 rated 12 – 50 VDC, min 20W max 60W, which supplies power directly to Rhino™ 10. For other power sources refer to the wiring diagram for the power cable. CAUTION RISK OF EXPLOSION IF BATTERY IS REPLACED BY AN INCORRECT TYPE. DISPOSE OF USED BATTERIES ACCORDING TO THE INSTRUCTIONS. Product Safety Rhino™ 10 is compliant to IEC 60950-1:2005, 2nd Ed and EN 60950-1:2006 + A11 standards Radio Compliance CAUTION CAUTION 30 Use only the supplied or an approved replacement antenna. Unauthorized antennas, modifications or attachments could damage the product and may violate laws and regulations. Most modern electronic equipment is shielded from RF signals. However, certain electronic equipment may not be shielded against the RF signals generated by Rhino™ 10. Rhino™ 10 User Manual United States FCC Class B This equipment has been tested and found to comply with the limits for a Class B digital device, pursuant to Part 15 of the FCC Rules. These limits are designed to provide reasonable protection against harmful interference when the equipment is operated in a residential environment. This equipment generates uses and can radiate radio frequency energy. If not installed and used in accordance with this user's manual, it may cause harmful interference to radio communications. Note that even when this equipment is installed and used in accordance with this user's manual, there is still no guarantee that interference will not occur. If this equipment is believed to be causing harmful interference to radio or television reception, this can be determined by turning the equipment on and off. If interference is occurring, the user is encouraged to try to correct the interference by one or more of the following measures: Reorient or relocate the receiving antenna Increase the separation between the equipment and the receiver Connect the equipment to a power outlet on a circuit different from that to which the receiver is connected Consult the dealer or an experienced radio technician for help In radio systems configured with mobile computers and access points, the frequencies to be used must be allowed by the spectrum authorities of the specific country in which the installation takes place. Be absolutely sure that the system frequencies are correctly set to be compliant with the spectrum requirements of the country. The Radio modules used in this product automatically adapt to the frequencies set by the system and do not require any parameter settings. This is a Class B product. In a domestic environment this product may cause radio interferences in which case the user may be required to take adequate measures. The User is cautioned that changes or modifications not expressly approved by Datalogic for compliance could void the User’s authority to operate the equipment. The antenna(s) used for this transmitter must not be co-located or operating in conjunction with any other antenna or transmitter. Operation is subject to the following two conditions: (1) this device may not cause interference, and (2) this device must accept any interference, including interference that may cause undesired operation of the device. Canada This Class B digital apparatus complies with Canadian ICES-003. Cet appareil numérique de la classe B est conforme à la norme NMB-003 du Canada. Equipment is certified to the requirements of RSS-210 for 2.4-GHz per IEEE 802.11 (b)(g). This device and its antenna(s) must not be co-located or operating in conjunction with any other antenna or transmitter. Europe 1999/5/EEC R&TTE Compliant 31 User Manual Rhino™ 10 WEEE Compliance Informazione degli utenti ai sensi della Direttiva Europea 2002/96/EC L’apparecchiatura che riporta il simbolo del bidone barrato deve essere smaltita, alla fine della sua vita utile, separatamente dai rifiuti urbani. Smaltire l’apparecchiatura in conformità alla presente Direttiva consente di: evitare possibili conseguenze negative per l’ambiente e per la salute umana che potrebbero invece essere causati dall’errato smaltimento dello stesso; recuperare materiali di cui è composto al fine di ottenere un importante risparmio di energia e di risorse. Per maggiori dettagli sulle modalità di smaltimento, contattare il Fornitore dal quale è stata acquistata l’apparecchiatura o consultare la sezione dedicata sul sito www.mobile.datalogic.com. Information for the user in accordance with the European Commission Directive 2002/96/EC At the end of its useful life, the product marked with the crossed out wheeled wastebin must be disposed of separately from urban waste. Disposing of the product according to this Directive: avoids potentially negative consequences to the environment and human health which otherwise could be caused by incorrect disposal enables the recovery of materials to obtain a significant savings of energy and resources. For more detailed information about disposal, contact the supplier that provided you with the product in question or consult the dedicated section at the website www.mobile.datalogic.com. Information aux utilisateurs concernant la Directive Européenne 2002/96/EC Au terme de sa vie utile, le produit qui porte le symbole d'un caisson à ordures barré ne doit pas être éliminé avec les déchets urbains. Éliminer ce produit selon cette Directive permet de: éviter les retombées négatives pour l'environnement et la santé dérivant d'une élimination incorrecte récupérer les matériaux dans le but d'une économie importante en termes d'énergie et de ressources Pour obtenir des informations complémentaires concernant l'élimination, veuillez contacter le fournisseur auprès duquel vous avez acheté le produit ou consulter la section consacrée au site Web www.mobile.datalogic.com. Información para el usuario de accuerdo con la Directiva Europea 2002/96/CE Al final de su vida útil, el producto marcado con un simbolo de contenedor de bassura móvil tachado no debe eliminarse junto a los desechos urbanos. Eliminar este producto de accuerdo con la Directiva permite de: evitar posibles consecuencias negativas para el medio ambiente y la salud derivadas de una eliminación inadecuada recuperar los materiales obteniendo así un ahorro importante de energía y recursos 32 Rhino™ 10 User Manual Para obtener una información más detallada sobre la eliminación, por favor, póngase en contacto con el proveedor donde lo compró o consultar la sección dedicada en el Web site www.mobile.datalogic.com. Benutzerinformation bezüglich Richtlinie 2002/96/EC der europäischen Kommission Am Ende des Gerätelebenszyklus darf das Produkt nicht über den städtischen Hausmüll entsorgt werden. Eine entsprechende Mülltrennung ist erforderlich. Beseitigung des Produkts entsprechend der Richtlinie: verhindert negative Auswirkungen für die Umwelt und die Gesundheit der Menschen ermöglicht die Wiederverwendung der Materialien und spart somit Energie und Resourcen Weitere Informationen zu dieser Richtlinie erhalten sie von ihrem Lieferanten über den sie das Produkt erworben haben, oder besuchen sie unsere Hompage unter www.mobile.datalogic.com. 33 User Manual Rhino™ 10 Appendix A – Specifications Physical and Environmental Specifications Description Height: 9.2 in (23.4 cm) Width: 10.7 in (27.3 cm) Depth: 2.0 in (5.2 cm), 2.6 in (6.6 cm) at connectors Weight: 5.5 lbs (2.5 kg) Operating Voltage: 12-60 VDC input Backup: Rechargeable Nickel Metal Hydride Electrical rating: 12V 4A max, 48V 1A Operating temperature: Rhino™ 10: -10° to 50° C (14° to 122°F) Low temp. model: -30° to 60° C (-22° to 140°F) 34 Storage temperature: -30° to 70° C (-22° to 158°F) Humidity: 0 to 100% RH Rhino™ 10 User Manual Datalogic Mobile S.r.l. Via S. Vitalino, 13 11 40012 - Lippo di Calderara Bologna - Italy dichiara che Rhino™ 10 modelli con funzionalità radio 802.11b/g sono conformi alle Direttive del Consiglio Europeo sottoelencate: declares that the Rhino™ 10 models with 802.11b/g radio feature are in conformity with the requirements of the European Council Directives listed below: déclare que le Rhino™ 10 modèles avec 802.11b/g radio intégrés sont conformes aux spécifications des Directives de l’Union Européenne ci-dessous: bescheinigt, daß das Gerät Rhino™ 10 modelle mit 802.11b/g radio-funktionalität der nachstehend angeführten Direktiven des Europäischen Rats: declare que el Rhino™ 10 modelos con funcionalidad radio 802.11b/g cumple con los requisitos de las Directivas del Consejo Europeo, según la lista siguiente: 1999/5/EEC R&TTE and 2004/108/EC EMC Directives Questa dichiarazione è basata sulla conformità dei prodotti alle norme seguenti: This declaration is based upon compliance of the products to the following standards: Cette déclaration repose sur la conformité des produits aux normes suivantes: Diese Erklärung basiert darauf, daß das Produkt den folgenden Normen entspricht: Esta declaración se basa en el cumplimiento de los productos con la siguientes normas: EN 55022: 2006 + A2 :2010 DECEMBER 2010 INFORMATION TECHNOLOGY EQUIPMENT (CLASS B ITE) : RADIO DISTURBANCE CHARACTERISTICS ETSI EN 301 489-1/17 V1.8.1, APRIL 2008 ELECTROMAGNETIC COMPATIBILITY AND RADIO SPECTRUM MATTERS (ERM); ELECTROMAGNETIC COMPATIBILITY (EMC) STANDARD FOR RADIO EQUIPMENT AND SERVICES; PART 17: SPECIFIC CONDITIONS FOR 2,4GHZ WIDEBAND TRANSMISSION SYSTEMS AND 5GHZ HIGH PERFORMANCE RLAN LIMITS AND METHODS OF MEASUREMENTS EQUIPMENT ETSI EN 300 328 V1.7.1, OCTOBER 2006 ELECTROMAGNETIC COMPATIBILITY AND RADIO SPECTRUM MATTERS (ERM); WIDEBAND TRANSMISSION SYSTEMS; DATA TRANSMISSION EQUIPMENT OPERATING IN THE 2,4GHZ ISM BAND AND USING WIDE BAND MODULATION TECHNIQUES; HARMONIZED EN COVERING ESSENTIAL REQUIREMENTS UNDER ARTICLE 3.2 OF THE R&TTE DIRECTIVE EN 60950-1:2006 AMENDMENT A11:2009 INFORMATION TECHNOLOGY EQUIPMENT - SAFETY - BASIC RESTRICTIONS FOR RF EXPOSURE IN COUNCIL RECOMMENDATION 1999/519/EC 2006/95/EC Low Voltage Directive EN 60950-1:2006 AMENDMENT A11:2009 INFORMATION TECHNOLOGY EQUIPMENT - SAFETY - PART 1: GENERAL REQUIREMENTS 2002/95/EC RoHS Directive Restriction of the use of certain hazardous substances in electrical and electronic equipment 2002/96/EC WEEE Directive Lippo di Calderara, December 8, 2011 Paola Chientaroli Quality Assurance Manager 35 www.mobile.datalogic.com World wide Sales Network available from: www.mobile.datalogic.com/contacts Datalogic Mobile S.r.l. Via S. Vitalino, 13 40012 Lippo di Calderara di Reno Bologna - Italy Telephone: (+39) 051-3147011 Fax: (+39) 051-3147561 ©2011 Datalogic Mobile S.r.l. 12/11