1
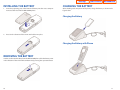
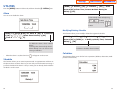
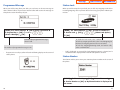
Home Page
OfficeServ Wireless
TECHNICAL MANUAL
T A B L E
USER INSTRUCTIONS
TABLE OF CONTENTS SEPTEMBER 2005
O F
C O N T E N T S
USER INSTRUCTIONS
PART
Table of Contents
DESCRIPTION
1
OfficeServ Wireless Quick Setup Guide
2
OfficeServ Wireless Quick Software Upgrade Guide
3
WIP-5000M Quick Reference Guide
4
WIP-5000M User Guide
Home Page
Table of Contents
OfficeServ Wireless Quick Set Up Guide
Step 1: Connect System Components
1. Turn off system power.
2. Insert WLI into slot (500R2:1 to 3; 100R2: 1 to 3 of base cabinet; 7200: 1 to 5).
3. Load IDCS 500R2 or 100R2 or 7200 system with MCP2 software version 2.4x or up.
4. Use MMC 806 to install card.
5. Connect Combo APs (aka. WBS, WBS24, AP, type A, CWBS) to WLI using straight data cable; see
pin assignments for 500R2 and 100R2.
6. Turn on power.
a. Combo AP power LED will be on after all data are programmed.
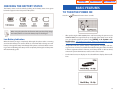
Step 2: Pre-determinate the following data
1. System ID or SSID
2. System Key
3. System IP address
4. System Gateway IP address
5. AP RF channels (frequency planning)
6. AP IP addresses
7. Handset IP addresses
e.g.
Sample Configuration Table (1 WLI + 2 Combo APs + 4 Handsets)
1. System IP:
165.213.97.185
2. System gateway:
165.213.97.1
3. System ID:
123456 (must be numeric, max 6 digits)
4. System Key:
12345 (must be nonzero numeric, max 5 digits)
5. AP TX Power:
Level 4 (max)
6. AP1 IP:
165.213.97.11
7. AP1 RF CH:
1
8. AP2 IP:
165.213.97.12
9. AP2 RF CH:
11
nd
10. 2 WBS IP:
165.208.144.10 (leave it as default)
11. Handset 1 IP:
165.213.97.101
12. Handset 2 IP:
165.213.97.102
13. Handset 3 IP:
165.213.97.103
14. Handset 4 IP:
165.213.97.104
15. WEP key:
Disable
16. CODEC:
G729
© SAMSUNG Telecommunications America
1
Home Page
Table of Contents
Step 3: Programming Wireless Voice
1. Enter the technician mode (MMC 800, pw: 4321).
2. MMC 830
a. Verify the desirable system IP and gateway address are in place.
e.g.
System IP: 165.213.97.185
Gateway: 165.213.97.1
3. MMC 831
a. If there is MGI card in the system, then make sure the VoIP phone and MGI IP addresses are
not conflict with VoWLAN IP addresses.
4. MMC 849; skip any field that is not mentioned.
a. Use password “0000” to enter.
[ENTER PASSWORD ]
[0000
]
b. Enable VoWLAN registration.
[REGISTER VoWLAN]
[ENABLE
]
c. Select “Combo AP” type.
[SELECT AP TYPE ]
[COMBO WBS
]
5. MMC 845
a. Set WLAN data; use right soft key to move to the right field.
i.
Set system ID.
[WLAN: SYSTEM ID ]
[123456
]
ii. Set system KEY.
[WLAN: SYSTEM KEY]
[12345
]
iii. Set system RF channel selection.
[WLAN: RF CHANNEL]
[USE CH 1: 01 ]
•
Use/Select channel 1, 6 and 11 only.
iv. Set TX power level for the entire system.
[WLAN: WBS TX PWR]
[LEVEL 4
© SAMSUNG Telecommunications America
]
2
Home Page
Table of Contents
b. Set up WBS24s (APs):
i.
Use volume key to scroll until CWBS1 appear. The cursor must be under the first
st
character to have CWBS to show up. Use left soft key to move cursor to the 1
character position.
ii. Set IP addresses; repeat these steps for all APs.
[CWBS1 : IP ADDR ]
[165.213. 97. 11 ]
iii. Set Gateway.
[CWBS1 : GATEWAY ]
[165.213. 97.
1 ]
iv. Set Net mask.
[CWBS1 : NET MASK]
[255.255.255.
0 ]
v. Set RF channel; use different channel for each AP.
[CWBS1 : RF CHAN ]
[USE CH 1:01
]
Note: If RF Channel shows NONE or 0, AP will keep rebooting.
vi. Set TX power for individual AP; level 4 is max.
[CWBS1 : TX POWER]
[LEVEL 4
]
Note: After the above setting, access point will start powering up. It will take about 1
minute to be operational. In idle state, the LED PWR, WLI, and WLAN will stay on and
LD1 and LD2 are off. You MUST wait for the AP in idle state before starting
handset registration.
6. MMC 848
a. Set handset IP address for each handset.
[IP:001 USED:
]
[165.213. 97.101 ]
7. Handset Registration
a. Need to un-register first, if handsets have previous registration data.
i.
Press <menu>, <6>, <3>, <password> (default 1234), <1> to un-register.
b. Enter the following info to register the handset:
i.
Press <Menu>.
ii. Select <6> for System.
iii. Select <1> for Registration.
iv. Select <1> for System 1.
© SAMSUNG Telecommunications America
3
Home Page
Table of Contents
v. Select <1> for DHCP mode.
vi. Enter System SSID, e.g. 123456, and press <OK>.
vii. Enter user ID, e.g. 1212, and press <OK>; all handsets have the same default ID & PW.
viii.Enter password, e.g. 0000, and press <OK>.
ix. Skip encryption by pressing <OK>. (It takes about 30 seconds to complete one
handset registration.)
x. Default wireless IP handset extension number starts with 3301. Use MMC 724 to
change numbering plan.
c. Repeat the above process for each handset.
Step 4: Optional Wireless Data Set Up
1. Connect data cable between Combo AP LAN connector and data network.
a. Combo AP doesn’t have DHCP server built-in. Either the data network provide DHCP
function or client device need to use static IP to access data network.
b. Combo AP SSID is hidden. This is security feature. We don’t want to broadcast SSID to
everyone. If one uses Laptop to scan all available wireless networks, the SSID 123456 will
not show up. One needs to type in the assigned SSID.
2. Set up laptop PC to access data; laptop PC must have 802.11b/g Wi-Fi card. Set up example for
Windows 2000.
a. Click <Start>, <Settings>, <Network and Dial-Up Connections>.
b. Enable WLAN network by right click “Local Area Connection 3” (WLAN device) and select
“Enable”.
c. Enter WLAN network properties by right click “Local Area Connection 3” and select
“Properties”.
d. Click <Configure> tab.
e. Select <Wireless Network>.
f.
Under Network Name (SSID), enter system ID, e.g. 123456.
g. Click <OK>.
h. Double click “Internet Protocol (TCP/IP)”.
i.
Select “Obtain IP Address Automatically” and “Obtain DNS Server Address Automatically”,
or enter static IP address and DNS server address manually.
j.
Select <OK>, and <OK>.
© SAMSUNG Telecommunications America
4
Home Page
Table of Contents
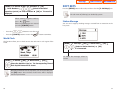
iDCS 500 Release 2 / OfficeServ
Connection between 8WLI 50pin Champ Connector and RJ-45 Connector
The cable you use to connect the 8WLI card with the WBS24 is a Twisted-pair cable that
the one end is RJ-45 Connector (Connected with WBS24) and the other end is champ
connector (Connected with 8WLI) as shown in the figure below.
WBS24
8WLI
1
to
25
© SAMSUNG Telecommunications America
26
to
50
1…8
5
Home Page
Table of Contents
iDCS 500 Release 2 / OfficeServ
8WLI Side
Port
Signal
50P Champ
Pin
D Channel data
#1
Sync line
D Channel data
#2
Sync line
D Channel data
#3
Sync line
D Channel data
#4
Sync line
D Channel data
#5
Sync line
D Channel data
#6
Sync line
D Channel data
#7
Sync line
D Channel data
#8
Sync line
© SAMSUNG Telecommunications America
COLOR
26
W-BL
1
BL-W
27
W-O
2
O-W
29
W-BR
4
BR-W
30
W-S
5
S-W
32
R-O
7
O-R
33
R-G
8
G-R
35
R-S
10
S-R
36
BK-BL
11
BL-BK
38
BK-G
13
G-BK
39
BK-BN
14
BN-BK
41
Y-BL
16
BL-Y
42
Y-O
17
O-Y
44
Y-BN
19
BN-Y
45
Y-S
20
S-Y
47
V-O
22
O-V
48
V-G
23
G-V
6
Home Page
Table of Contents
iDCS 100 Release 2 / OfficeServ
Base Cabinet
Station #
S4WLI Side
Signal
50P Champ
Pin
SLOT1
#1
SLOT1
#2
SLOT1
#3
SLOT1
#4
SLOT2
#1
SLOT2
#2
SLOT2
#3
SLOT2
#4
SLOT3
#1
SLOT3
#2
D Channel data
Sync line
D Channel data
Sync line
D Channel data
Sync line
D Channel data
Sync line
D Channel data
Sync line
D Channel data
Sync line
D Channel data
Sync line
D Channel data
Sync line
D Channel data
Sync line
D Channel data
© SAMSUNG Telecommunications America
COLOR
26
W-BL
1
BL-W
27
W-O
2
O-W
28
W-GN
3
GN-W
29
W-BR
4
BR-W
30
W-S
5
S-W
31
R-BL
6
BL-R
32
R-O
7
O-R
33
R-G
8
G-R
36
R-BN
9
BN-R
35
R-S
10
S-R
36
BK-BL
11
BL-BK
37
BK-O
12
O-BK
38
BK-G
13
G-BK
39
BK-BN
14
BN-BK
40
BK-S
15
S-BK
41
Y-BL
16
BL-Y
42
Y-O
17
O-Y
43
Y-G
18
G-Y
44
Y-BN
19
BN-Y
1 2
3 4
5
6 7
8
RJ-45 CONNECTOR
7
Home Page
Base Cabinet
Station #
S4WLI Side
Signal
50P Champ
Pin
Sync line
SLOT3
#3
SLOT3
#4
Table of Contents
D Channel data
Sync line
D Channel data
Sync line
© SAMSUNG Telecommunications America
COLOR
45
Y-S
20
S-Y
46
V-BL
21
BL-V
47
V-O
22
O-V
48
V-G
23
G-V
49
V-BN
24
BN-V
8
Home Page
Table of Contents
Remarks
1.
Handset has hidden mode for the following info:
a. Software version
b. IP address
c. MAC address
d. Phone State
e. Display RSSI, voice quality is guarantee when CQ>=45
To access the hidden mode:
2.
•
In Idle state: <menu>, <hold>, <*>, <#>
•
In conversation state (only RSSI): <music key>, <#>
AP TX power setting (5 levels, including Default level):
a. Level 1: 10 mW, 10 dBm
b. Level 2: 25 mW, 14 dBm
c. Level 3: 50 mW, 17 dBm
d. Default: 85 mW, 18 dBm
e. Level 4: 100 mW, 20 dBm
3.
2 WBS (AP) IP address is used for wireless voice communications only. It can be any IP
address. It doesn’t have to be on the same subnet address range as the system. Leave it at
its default.
4.
Static WBS (AP) IP is only used for WAP-B (Basic) type. It doesn’t apply to WAP-A (Combo)
type.
5.
If WEP key is used, user needs to enter all 13 numeric digits. System takes 13 ASCII digits WEP
key, no variable size is allowed.
6.
When handset is out of range,
nd
a. It will maintain the call for 30 seconds to allow user to come back to the coverage area;
b. It will keep searching AP (in pre-defined time interval).
c. Once in range, handset will automatically re-registered and in service.
7.
DNS server info is not used in MMC 845.
8.
Handset can be cleared (de-registered) from system by using MMC 849.
a. After selecting the extension number, move the right softkey to the field “FORCED”
[WIP REGISTER CLEAR]
[3301 : FORCED
© SAMSUNG Telecommunications America
]
9
Home Page
Table of Contents
b. Press right softkey again
[WIP REGISTER CLEAR]
[ARE YOU SURE?NO
]
c. Press <1> to start the process
9.
If handset hangs up, removing and re-inserting the battery can reset to idle.
10.
Useful MMCs
•
MMC 847: Display status of WLI and WAP
•
MMC 815: Customer database copy
•
MMC 724: Dial numbering plan
o
Wireless IP handset is under “IP STN NUM PLAN”
o
For 500M version, VoWLAN starts with IDX061
o
For 500L version, VoWLAN starts with IDX121
o
For 7200, VoWLAN starts with IDX061
o
For 100, VoWLAN starts with IDX033
•
MMC 805: Adjust voice path gain
•
MMC 217: Station pair assignment
•
MMC 210: To change call forward setting
•
MMC 846: To change handset registration user id and password
•
MMC 844: IP Station Type (handset is “Mobile Phone” type)
•
MMC 101: Reset handset password
© SAMSUNG Telecommunications America
10
Home Page
Table of Contents
OfficeServ Wireless
Quick Software Upgrade Guide
Wireless Access Point – WBS24 (Combo)
REQUIREMENTS:
1. A working iDCS 500R2/100R2 or OS 7200 VoWLAN system
2. A PC with Ethernet network card or 802.11b Wi-Fi client card
SET UP:
1. Wired network card (recommended method)
a. Method 1: Connect laptop PC Ethernet port and AP LAN port to a common Hub/Switch, or
b. Method 2: Connect laptop PC Ethernet port to the AP LAN port via a crossover cable.
2. Wireless LAN card
a. Move laptop PC within the AP coverage range, say less than 10 ft
b. Set SSID to the system ID, e.g. 123456.
i.
Samsung access points do not broadcast SSID to the air. This is for security reason. If
you use a PC to scan all available wireless networks, you won’t find it. You need to
enter the SSID manually and let PC connect to it.
ii. After connection, you can use PING command under DOS windows to check the
connectivity. E.g. >ping 165.213.97.11. If may take a while for PC to find it.
c. If you move PC from one access point coverage to another, the PC may still connect to the
previous AP. You may need to disable and enable the WLAN card in the PC to force to
connect to the desired AP.
STEPS:
1. Set up PC TCP/IP address to the same subnet range.
e.g. Windows 200 OS with wired network card
a. Click <Start>, <Settings>, <Network and Dial-Up Connections>
b. Right click “Local Area Connection” and select “Properties”
c. Double click “Internet Protocol (TCP/IP)”
d. Select “Enter the following IP address” and enter the PC IP address, e.g.
i.
IP address: 165.213.97.10
ii. Subnet mask: 255.255.255.0
iii. Default gateway: 165.213.97.1
© SAMSUNG Telecommunications America
1
Home Page
Table of Contents
e. Select <OK>, and <OK>
2. Connect to the Web page of the access point by using Internet Explorer web browsing
application software.
a. Enter the IP address of the AP at the address bar and press GO
e.g. 165.213.97.11
3. After access point web page pops up, select <Upgrade> menu and enter
a. User name: wlan
b. Password: wlan
4. Use <Browse..> button to select the file.
a. Default file name is http_upload.tar
5. Click <Upgrade> button to start the process
6. After finish downloading, click <Restart> to complete the process.
© SAMSUNG Telecommunications America
2
Home Page
Table of Contents
Handset
The user registration data will be preserved during the software upgrade process. After software
upgrade, turn-on the handset will automatically re-register to the system.
REQUIREMENTS:
1. A working iDCS 500R2/100R2 or OS7200 VoWLAN system with one access point.
2. A PC with network card.
3. TFTP server software for PC.
a. E.g. “SolarWinds” or “WinTFTP Server”
SET UP:
1. Method 1: Connect laptop PC Ethernet port and AP LAN port to a common Hub/Switch, or
2. Method 2: Connect laptop PC Ethernet port directly to the AP LAN port via a crossover cable.
STEPS:
1. Run TFTP server software
e.g. WinTFTP Server 1.0
b. Set up upload filename path and make sure file is in the directory
e.g. C:\temp
2. Check the downloader software version.
a. Turn off the handset power by press-hold <end> key for 2 seconds.
b. Press <5> and <END> at the same time to turn on the handset. Check the Downloader
version number.
3. If the downloader software is not v3.02 and above, you need to upgrade the downloader
(boot) software. If you upgrade the main software with the old version of downloader, the
handset will be unusable. Skip this process if you have the right downloader version.
a. Be extra carefully performing the following process (make sure the battery is full and
is in RF coverage range), if this process fails for any reason the handset is unusable.
You will need to send it back to Samsung for repair.
b. While in the downloader mode,
i.
Press <2> “Download App.” to enter the downloading mode
ii. Press <1> to “Edit IP”
1. Assign an IP address for handset. e.g. 165.213.97.200
2. Press <OK>
3. Enter SSID of the system. e.g. 123456
4. Press <OK>
© SAMSUNG Telecommunications America
3
Home Page
Table of Contents
5. Press <OK> to skip WEP key entry
6. Press <2> to disable WEP key. The display will flash between “SAMSUNG” and “**
Downloader **”. The handset is ready to download the software.
c. Ping handset IP address from the DOS Windows of the PC. E.g. >ping 165.213.97.200 –t
d. After receiving the response from the pinging, use CTRL-C to cancel the command.
e. Open Internet Explorer, enter the handset IP address at the address field, and click GO. E.g.
165.213.97.200
f.
After handset web page pops up, enter password of the handset (default 1234), and select
“Download”.
g. Enter TFTP server address (PC IP address). e.g. 165.213.97.10
h. Enter file name. e.g. downloader_v302.r0 and click <Start Download> button. The
handset LCD will show running numbers and “Burning”.
i.
After completion, the handset LCD will show “Download OK”, then flash between
“SAMSUNG” and “** Downloader **”.
j.
Remove the handset battery and re-insert the battery.
k. Turn on the handset power. The handset LCD will show “Burning”, “Extracting”, and
“Complete”. After that the 2nd line of display will show “upgrade main pgm”.
l.
Remove the handset battery and re-insert the battery.
4. Start downloading the main software
a. Enter the downloading mode
i.
Press <5> and <END> at the same time while in power off mode. The downloader
version should be v3.02 or above.
ii. Press <2> “Download App.” to enter the downloading mode
iii. Press <1> to “Edit IP”
1. Assign an IP address for handset. e.g. 165.213.97.200
2. Press <OK>
3. Enter SSID of the system. e.g. 123456
4. Press <OK>
5. Press <OK> to skip WEP key entry
6. Press <2> to disable WEP key. The display will flash between “SAMSUNG” and “**
Downloader **”. The handset is ready to download the software.
b. Ping handset IP address from the DOS Windows of the PC. E.g. >ping 165.213.97.200 -t
c. After receiving the response from the ping, use CTRL-C to cancel the operation.
d. Open Internet Explorer, enter the handset IP address at the address field, and click GO. E.g.
165.213.97.200
© SAMSUNG Telecommunications America
4
Home Page
Table of Contents
e. After handset web page pops up, enter password of the handset (default 1234), and select
“Download”.
f.
Enter TFTP server address (PC IP address). e.g. 165.213.97.10
g. Enter file name. e.g ofsr_v03.01.00_050627.r0 and click <Start Download> button. The
handset LCD will show running numbers and “Burning”.
h. After completion, the handset LCD will show “Download OK”
i.
Remove the handset battery and re-insert the battery.
j.
Turn on the handset power and press <menu>, <hold>, <*>, <#> and <1> to check the
software version number.
Note: When program other handsets, it is better to assign different IP address (e.g. 165.213.97.201) for
each handset.
© SAMSUNG Telecommunications America
5
Home Page
Table of Contents
Wireless Line Interface - WLI
REQUIREMENTS:
1. A working iDCS 500R2/100R2 or OS7200 VoWLAN system
2. A PC with serial cable to connect to WLI serial port
a. S4WLI for 100R2 requires cross over 9-pin serial cable.
b. 8WLI for 500R2 requires straight 9-pin serial cable.
c. 4WLI for 7200 requires 9-pin serial cable to RJ-45 connector
i.
SIO pin 2 (TX) to RJ45 Pin 3 (TX)
ii. SIO pin 3 (RX) to RJ45 Pin 6 (RX)
iii. SIO pin 5 (GND) to RJ45 Pin 4 (GND)
3. Terminal emulation SW ex. “Tera Terminal”
STEPS:
1. Use “Tera Terminal” with the following serial port setting
a. Bits per second: 9600
b. Data bits: 8
c. Parity: none
d. Stop bits: 1
e. Flow control: none
2. After establish communications, press <enter> key then the screen will show WLI>
3. Enter “flo”
4. Select ‘1’ then the following message will show up.
Selected 1> Single- WLI HEX FILE Loading
Please Start Loading!!
5. Click the ‘Send file’ under File Menu.
6. Go to the file folder and select the “WLIROM.HEX” file and click the [Ok] button. Example of the
file name convention”
a. iDCS 500R2: 8WLIROM.HEX
b. iDCS 100R2: MWLIROM.HEX
c. OS 7200: 4WLIROM.HEX
7. The screen will show the file updating status.
a. During this process, all APs are turned off.
© SAMSUNG Telecommunications America
6
Wireless.qxp
8/3/2005
3:41 PM
Page 1
Home Page
EARPIECE
Table of Contents
LCD PANEL
HEADSET JACK
ICON
VOLUME
MENU
MUTE
MENU
VOICE MAIL / STATION MSG
POWER / END
TALK
PHONE BOOK / CALL LOG
TRANSFER
VOLUME / RING SETTING
CONFERENCE
HOLD
VIBRATION MODE
KEYPAD LOCK
MICROPHONE
ON/OFF
Press and Hold
Mute On/Off
Press
Make a Call
Press digits then
User Option
Press
Hang Up
Press
Vibration Mode On/Off
Press and Hold
Keypad Lock On
Press and Hold
Keypad Lock Off
Enter Pre-Set Password
(1, 2,3,4)
Received Call Waiting
Camp On
Press
Answer a Call Press
Hold
Press
to put your
current call on hold
Take Off Hold Press
Voice Mail
Press
Q U I C K
R E F E R E N C E
G U I D E
and then
Home Page
Table of Contents
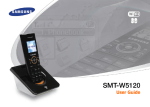
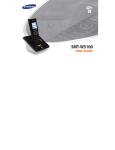
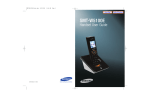
WIP-5000M Guide
TABLE OF CONTENTS
SAFETY CONCERNS
..................................................................................1
Conventions........................................................................................................................1
Symbols ................................................................................................................................1
Warning ................................................................................................................................2
Caution ................................................................................................................................4
PREPARATION ....................................................................................................5
WIP-5000M
User Guide
About This Guide ..............................................................................................................5
Overview of WIP-5000M ................................................................................................5
Phone Layout ....................................................................................................................6
Button Descriptions ........................................................................................................7
Icon Description ................................................................................................................8
Unpacking ..........................................................................................................................9
Installing the Battery ....................................................................................................10
Removing the Battery ..................................................................................................10
Charging the Battery ....................................................................................................11
Checking the Battery Status ......................................................................................12
BASIC FEATURES ..........................................................................................13
To Turn the Power On ..................................................................................................13
To Turn the Power Off ..................................................................................................14
Making a Call....................................................................................................................14
Answering a Call ............................................................................................................16
Volume Adjustment ....................................................................................................16
Setting Vibration Mode................................................................................................17
Setting the Automatic Key Lock ..............................................................................17
Entering Characters ......................................................................................................18
September 2005
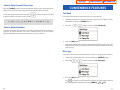
CONVENIENCE FEATURES................................................................21
APPLICATION MENUS............................................................................24
Samsung Telecommunications America reserves the right without prior notice to revise information in
this guide for any reason. Samsung Telecommunications America also reserves the right without prior
notice to make changes in design or components of equipment as engineering and manufacturing
may warrant. Samsung Telecommunications America disclaims all liabilities for damages arising from
the erroneous interpretation or use of information presented in this guide.
Menu Structure ..............................................................................................................24
Phone Book ......................................................................................................................29
Utilities ..............................................................................................................................34
Soft Keys ............................................................................................................................37
Home Page
Table of Contents
WIP-5000M Guide
Volume/Ring ....................................................................................................................41
Phone Settings ................................................................................................................43
System ................................................................................................................................51
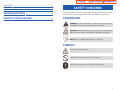
SAFETY CONCERNS
TROUBLESHOOTING ..............................................................................56
For product safety and correct operation, the following information must be given
to the operator/user and shall be read before the installation and operation.
PRODUCT SPECIFICATIONS ..........................................................58
CONVENTIONS
WARNING: Provides information or instructions that the reader
should follow in order to avoid personal injury or fatality.
CAUTION: Provides information or instructions that the reader should
follow in order to avoid a service failure or damage to the system.
NOTE: Indicates additional information as a reference.
SYMBOLS
Indication of a general caution
Indication for prohibiting an action for a product
Indication for commanding a specifically required action
1
Home Page
Table of Contents
WIP-5000M Guide
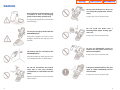
WARNING
Do not connect conductive objects, such
as neckless or coins, to the charging
phones of the battery (metallic part).
Do not place the phone in a dusty area
or in fluctuating temperature environments.
It may cause a fire or electric shocks.
The object may explode and cause fire due
to overheating.
Use only the charger provided with the
WIP-5000M phone.
Using other chargers can result in overheating or explosion and may cause malfunction.
The battery shall be used only for the
WIP-5000M phone.
Do not install the phone near a
heater(cigarette lighter, heating apparatus, etc.).
It may cause a fire or electric shocks.
Do not use inflammable solvent or
material near the phone. Do not store
them near the phone.
It may cause a fire or electric shocks.
Using the battery for other purposes may
cause malfunction, fire, or electric shock.
Do not put instruments that contain
water such as vases, cups, cosmetics,
and medicines, or small metals near the
phone.
If the phone makes(horrible) noise, bad
smell, or smoke, immediately call the
Service Center.
It may cause a fire or electric shocks.
Moisture in the phone can cause a fire and
electric shocks.
2
3
Home Page
CAUTION
Table of Contents
WIP-5000M Guide
PREPARATION
ABOUT THIS GUIDE
?[6. System]
Before execute the [MENU]?
?[3. Unregistration], double check
whether this function should be executed since all phone information registered to the system will be deleted.
This user guide provides instructions for the use of Samsung’s WIP-5000M mobile
phone. Please take the time to study this guide to become familiar with the operation of your WIP-5000M and the benefits this new phone can provide. Keep this
guide handy.You may need to look up instructions for infrequently used features.
OVERVIEW OF WIP-5000M
Use a soft dry cloth to clean the phone.
Do not use any chemical solvents like
wax, benzene, alcohol, thinner, mosquito spray, aerosol, lubricant, or detergent.
The WIP-5000M(Wireless IP-Phone Mobile type) is the wireless mobile phone that
allows a voice communication through IEEE 802.11b wireless LAN.
WIP-5000M supports voice communication using IEEE802.11b WLAN. Based on
IEEE802.11b standard, VoIP voice signals received are compressed to a voice
CODEC and transferred as data packets.
The use of chemicals on the phone may
cause fading/ discoloring or damage to the
parts.
Do not install the phone on an unstable
place or near the direct rays of sunlight.
It may cause severe damage to the parts of
the phone, and your phone may not work
properly.
Do not separate, repair nor remodel the
phone arbitrarily.
If a repair is needed, please contact where
the phone was purchased or call the
Service Center.
4
5
Home Page
PHONE LAYOUT
Table of Contents
WIP-5000M Guide
BUTTON DESCRIPTION
The following figure shows the main elements of your phone.
Button
Description
Used when calling or receiving an outside trunk
call/when transferring a call
Volume
MENU
Used when controlling the volume of voice or key
tone
Used when entering the menu mode
Used when moving the menu bar upward
Used when moving the menu bar downward
Used when moving the menu bar to the right
direction/Directory/Call on Hold
Used when moving the menu bar to the left
direction/Message/Conference call
OK
Used when selecting or saving the selected item
for function settings
C/MUTE
Used when erasing letters or moving to an upper
menu
TRSF
Used when connecting to another phone number
while a phone call is in progress
HOLD
Used when holing a call
CONF
Used when making a conference
4/
0~9
#/
Used when applying the vibration mode
Used when dialing or entering characters
Used when applying the automatic key lock
Used when turning the power on/off, when returning to the initial screen or when terminating the call
6
7
Home Page
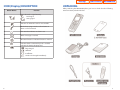
ICON (Display) DESCRIPTION
Button Names
Features
Table of Contents
WIP-5000M Guide
UNPACKING
After purchasing the WIP-5000M phone, you have to check that the following
items have been packed in the box.
This indicates the signal intensity.
: weak signal
: strong signal
This turns on when the service is not available.
Blinks when trying to make a call and turns on
when a call is connected.
The status that indicates an alarm is set.
When a message is received.
Vibration function or vibration function is enabled.
Indicates that the automatic key lock is enabled.
Indicates the battery charging level.
: fully charged
: sufficient
: insufficient
: needs to be charged immediately
8
9
Home Page
Table of Contents
WIP-5000M Guide
INSTALLING THE BATTERY
CHARGING THE BATTERY
1.
After checking each component of the phone, charge the battery as shown in the
figure below.
Insert the projecting part at the bottom of battery into the recess compartment area of the back of the WIP-5000M phone.
Charging the Battery
2.
Press it in the direction of the arrow until it clicks into place.
Charging the Battery with Phone
REMOVING THE BATTERY
In order to take out the battery from the WIP-5000M phone, slide the battery cover
in the direction of the arrow while simultaneously pressing the separator button.
10
11
Home Page
CHECKING THE BATTERY STATUS
The battery status can be checked by looking at the battery status icons given
below that appear on the LCD panel of the phone.
Table of Contents
WIP-5000M Guide
BASIC FEATURES
TO TURN THE POWER ON
Press the
button for more than 2 seconds.
When using the phone for the first time after purchase, fully charge
the battery before use since the battery may be discharged.
•
After purchasing the WIP-5000M phone and first turning the power on, the
‘UNREGISTERED’ message will show up on the top of the initial screen. In this
case, you should register the phone using [MENU] 6. System 1.
Registration. For detailed procedures, refer to the descriptions on the
‘System’ submenu of the ‘Application Menus’ in this User Guide.
•
If registration fails, the system displays a ‘Unregistered’ or ‘Register Fail’ message on screen. In such cases, follow the troubleshooting procedure described
in ‘Phone registration failure’ of ‘Annex’, and if the problem is still not solved,
contact the system administrator, reseller, or the service center.
•
For the initial screen, one display can be selected from 3 displays shown as follows.
Low Battery Indication
When the battery energy is completely discharged, the phone makes a warning
sound and the battery icon starts to blink. It is recommended to change to a new
battery or charge the battery immediately. If the phone is still used after the warning sound and blinking, the battery will be completely discharged and the power
will automatically go off.
12
13
Home Page
•
Table of Contents
WIP-5000M Guide
Press the [C/MUTE] button for a short time to modify an incorrectly
entered number, one by one. Press the [C/MUTE] button for a long time
to completely delete all the incorrectly entered numbers at once.
Refer to ‘5. Phone Settings’ section in ‘Application Menus’ of this
guide for selecting the initial screen.
2.
TO TURNTHE POWER OFF
Press the
Press the
•
button.
Press the
button to hang up the phone.
button for more than 2 seconds.
Using the Call Log
And then the phone automatically turns off.
You can view not only the latest calls or received phone numbers but also absent
subscriber messages.This is achieved by simply selecting the desired phone number for information or to make a call.
1.
Press the
2.
Using the
button.
buttons to view the call history.
MAKING A CALL
There are several ways to make a call for the convenience of you. However, only the
basic function will be introduced in this guide.
Refer to ‘Phone Book’ section in ‘Application Menus’ of this guide for
how to use the latest originating number, latest called number, directory or abbreviated dial numbers.
Using the Dial Keypad
1.
Press the phone number.
•
14
(
3.
: Latest received number,
: Latest called number)
Select the phone number and press the
button.
The maximum of up to 64 phone numbers can be saved in the list. If
they are all filled up, the oldest phone number will be erased when a
new phone number is saved.
Press only the extension number for internal calls.(e.g., 3345) Press [9]
first, then the phone number for external calls.(e.g., 9023459568).
15
Home Page
ANSWERING A CALL
Press any button except [Volume] button, or
tion while the phone is ringing.
button to start a conversa-
Table of Contents
WIP-5000M Guide
If a key is pressed during a call, the key tone will not be played unless
when using an earphone.
Voice Volume Adjustment
While having a conversation on the phone, you can adjust the voice volume from
the other party.
Select the one of 5 volume levels you want by pressing the [Volume] button
while having a conversation.
VOLUME ADJUSTMENT
You can adjust the bell volume, key button volume, and voice volume from the
other party.
Bell Volume Adjustment
You can adjust the bell volume while the phone is ringing by pressing the
[MENU] button.
Refer to ‘Volume’ section in ‘Application Menus’ of this guide for how to adjust the
bell volume.
SETTING THE VIBRATION MODE
For not interrupting other people in public places or during a meeting, you can set
the phone to vibration instead of ringing.
To Set Up the Vibration Mode
Press the 4 /
button for more than 2 seconds on the initial screen. Then the
vibration mode icon
will be displayed on the top of phone screen and the
phone will vibrate instead of ringing if there is an incoming call.
Key Button Volume Adjustment
To Disable the Vibration Mode
You can adjust the volume with key button while on the phone. Select the one of
5 volume levels you want by pressing the [Volume] button in the initial screen.
Press the 4 /
button for more than 2 seconds on the initial screen.Then the
vibration mode icon
disappears and the vibration mode will be disabled.
SETTING THE AUTOMATIC KEY LOCK
In order to protect your privacy, this function prevents others from viewing your
information. When the automatic key lock is set, no keys of the phone will work,
and functions other than answering a call cannot be used until you enter the password.
16
17
Home Page
To Set Up the Automatic Key Lock
Press the # /
button for more than 2 seconds on the initial screen. Then, the
screen will display the automatic key lock icon
.
To Disable the Automatic Key Lock
buttons to move the cursor. Modify the desired
characters using the [C/MUTE] buttons and place the cursor on the appropriate
button for a long time and
location to insert the characters. If a character to be entered is the same as the last
then the password input window will appear. Once the password is entered, the
entered character, press the
phone returns to the initial screen and the automatic key lock function is disabled.
one space.
ENTERING CHARACTERS
DIAL BUTTON
This section describes how to enter uppercase/lowercase English characters and
special characters.
Buttons Used for Entering Characters
The buttons used for entering the characters are as follows.
•
•
[MENU] button: Screen for entering [ENG(uppercase)] appears first and a
menu bar prompting you to select [eng(lowercase)/Sym(Special character)]
on the lower part of the screen.
button: Enter the desired characters from [ENG/eng/Sym].
How to Enter Uppercase and Lowercase in English
Pressing the [MENU] button allows you to enter English Uppercase letters automatically and to select one type from the [KOR/eng/Sym] located on the lower
part of the screen using the
18
WIP-5000M Guide
Then, the screen will provide an input field for the character type you selected and
the other two character types will appear on the menu bar. For example, if [eng] is
selected, [KOR/ENG/Sym] will appear on the menu bar.
Press the
At the automatic key lock status, press the # /
Table of Contents
•
buttons to move the cursor right
COUNT
1
2
3
0
‘space’
1
.
2
A
B
C
3
D
E
F
4
G
H
I
5
J
K
L
6
M
N
O
7
P
Q
R
8
T
U
V
9
W
X
Y
4
*
/
#
#
@
4
S
Z
To enter characters, press the button where a desired character is displayed
repetitively to display the next character.(e.g., If the number [5] button is
pressed, the character ‘J’ is entered. If the [5] button is pressed once more, the
‘K’ is entered.)
In order to enter 4 or #, press and hold the [4] button or the [#]
button.
buttons.
19
Home Page
How to Enter Special Characters
buttons and press the [OK]
button to enter the character on the screen.
WIP-5000M Guide
CONVENIENCE FEATURES
Press the [MENU] button and select [Sym] from the menu bar on the lower part
of the screen. Then the special characters are displayed in the same order.
Select desired special characters using the
Table of Contents
Call Back
If an internal call cannot be connected, you can reserve the call.
1.
If the other party does not answer your call or if he or she is in ‘Busy’ or in ‘Do
Not Disturb’ status, press [MENU] button.
2.
Press the
3.
Press the [OK] button.
•
Your phone will ring when the other party either finishes the call or clears the
DND function. Once you pick up your phone, the phone of the other party
starts to ring.
+-/4=.,!?_:;[]()”&@~‘^%#$<>|’{}
button and move to [1: Call Back].
How to Enter Numbers
Press the dial button for more than 2 seconds so that numbers are entered irrespective of which character has been selected from out of the English
Uppercase/English Lowercase/Special Characters has been entered.
Message
If an internal call cannot be connected, you can leave a message (phone number).
1.
If you made a call but the call is not connected, press [MENU] button.
2.
Press the
3.
Press the [OK] button.
•
The
button and move to [2: Message].
icon appears on the other party’s phone. The other party can check
the message(phone number) by pressing [MENU] [3] [1].
20
21
Home Page
Table of Contents
Camp On
Holding a Call
If an internal call cannot be connected, you can make the other party’s phone to
play an urgent sound and wait for the other party to answer your call.
This is used to hold a call for a while during a phone conversation.
The urgent sound cannot be heard while the other party is busy. The bell starts to
ring when the other party hangs up the call.
1.
If you made a call but the call is not connected, press [MENU] button.
2.
Press the
1.
Press the [Hold] button during a phone conversation.
2.
Press the [Hold] button again to resume your conversation.
WIP-5000M Guide
Mute on a Call
This is used to block your voice from your phone during a call. But you can still hear
the other party.
button and move to [3: Camp On].
1.
Press the [C/MUTE] button during a phone conversation.
2.
Press the [C/MUTE] button again to resume your voice.
Call Park
While on an outside call conversation, you can park this call and let others pickup
the call.
3.
Press the [OK] button.
Automatic Park with Paging Function
Voice Mail
If the
icon shows up in the handset display, there is either a voice mail mes-
sage or a station message for the station. To check and access the messages:
1.
Press the
2.
Press [1] to access the station messages.
3.
Press [2] to connect to the Voice Mail System.
1.
Press the [MENU] button during an outside phone conversation.
2.
Press the [1] button and enter the page zone.
3.
Press the
button after paging to park call.
Manual Park Orbits
button.
1.
Press the [TRSF] button, feature code, and orbit number, while on an outside
conversation.
Pick Up a Parked Call
Call Transfer
1.
This is used to transfer a call to a designated phone number during a phone conversation.
Pick Up a Held Call
1.
Press the [Transfer] button during a phone conversation.
2.
Enter the phone number to be transfer, and then press the
1.
button.
button and the extension number.
Turn Auto Answer On or Off by pressing [MENU], [HOLD], [✱], [#], [8].
Missed Calls
1.
22
Press the feature code (e.g. 12),
button and the extension number.
Auto Answer
1.
While in transfer status, press the [Transfer] button again to reconnect to the original caller.
Press the feature code (e.g. 10),
Press [OK] to display missed call information.
23
Home Page
Table of Contents
WIP-5000M Guide
APPLICATION MENUS
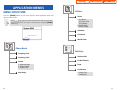
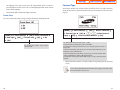
MENU STRUCTURE
Press the [MENU] button in idle mode, then the main application menu will
appear on the screen.
Utilities
1
Alarm
1. Set Alarm
Ring One Time
Ring Always
2. Reset Alarm
3. Alarm Melody
The [_ _ _] sign appears at the bottom of the LCD screen if a submenu is found. You can select a sub-menu by using the [MENU]
button. E.g.:
2
Schedule
3
Calculator
4
World Clock
Phone Book
1
Outgoing Calls
2
Incoming Calls
3
Search
1. Samsung Logo
2. Display Name
3. Display Time
4
24
New Entry
Soft Keys
1
Station MSG
2
Do Not Disturb
3
Page
4
Conference
1. Group Conf
2. Conference
25
Home Page
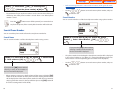
Volume / Ring
1
Phone Settings (Continuation)
2
Ring Tone
3
Ring Volume
4
Warning
6
1
Edit Name
2
Display
1. Samsung Logo
2. Display Name
3. Display Time
3
Change PIN
4
Language
1. Korean
2. English
3. Italian
Delete Lists
1. Del Phone Book
2. Del Outgoing
3. Del Incoming
Back Light
1. Light Time
8 Seconds
20 Seconds
Always Off
2. Power Save
On
Off
7
Forward Type
1.
2.
3.
4.
5.
6.
Phone Settings
26
WIP-5000M Guide
Ring Type
1. Ring
2. Vibrate
3. Vibrate and Ring
5
Table of Contents
8
Off
All Calls
Busy Calls
No Answer
Busy/No Answer
Do Not Disturb
Program Msg
1. On
2. Off
9
Station Lock
1. Unlocked
2. Locked Outgoing
3. Locked All Calls
0
Station Number
4
Reset
1. Reset All
2. Reset Func.
# LCD Contrast
27
Home Page
You must enter your password to use the ‘5.Phone Settings’ menu.
Table of Contents
WIP-5000M Guide
PHONE BOOK
Press the [MENU] button in idle mode, and then select the [1. Phone book] icon
to find out various methods to make a call.
Outgoing Calls
After view only the latest dialed phone number, select the desired phone number
and make a call.
System
1
Registration
2
System Setting
1. System 1
2. System 2
3. Encryption Key
(
•
3
Unregistration
: Latest dialed number,
: Failed call)
The maximum of up to 32 phone numbers can be saved in the list. If they are
all filled up, the oldest phone number is erased when a new dialed phone
number is saved.
[MENU] 1. Phone Book [OK] 1. Outgoing Calls (Select the phone number) [OK] or
Press the
button to turn off the power. If you remove the bat-
tery from the phone, all the recently dialed numbers will be deleted.
Incoming Calls
After view only the latest dialed phone number, select the desired phone number
and make a call.
(
28
: Latest dialed number,
: Failed call)
29
Home Page
[MENU] 1. Phone Book [OK] 2. Incoming Calls The maximum of up to 32 phone numbers can be saved in the list. If they are
all filled up, the oldest phone number is erased when a new dialed phone
number is saved.
WIP-5000M Guide
•
Refer to ‘Entering Characters’ section in ‘Basic Features’ of this guide for entering characters.
•
Use the
(Select the phone number) [OK] or
•
Table of Contents
buttons to move between phone number, and press
to make the call.
Search Number
You can search and make a call the desired phone number using a phone number.
Press the
button to turn off the power. If you remove the bat-
tery from the phone, all the recently dialed numbers will be deleted.
Search Phone Number
You can search the phone number from the saved phone number list.
Search Name
1. Phone Book [OK] 3. Search 2. Search
[MENU]
You can search and make a call the desired phone number using a name.
Number Enter a Phone Number [OK] If you press the [OK] button without
entering a number, all the numbers in
the list saved will be displayed.
•
The phone number list including the related phone number will be displayed
in the order of addresses. (e.g., When ‘2’ is entered, the following phone lists
which include ‘2’ and corresponding phone number will be displayed.)
•
Use the
[MENU] 1. Phone Book [OK] 3. Search 1. Search Name
Enter a Name [OK] buttons to move between phone number, and press
to make the call.
If you press the [OK] button without
entering a name, all the numbers in
the list saved will be displayed.
•
30
When entering a name, press the first letter of that name and hit the [OK]
button. Then, the numbers of all the phone numbers starting with that letter
will be displayed and the related phone number list will show up automatically.(e.g., Enter the name ‘J’ in the input field and press the [OK] button. All
the names starting with ‘J’ will be listed.)
31
Home Page
Search Speed Dial Number
Table of Contents
WIP-5000M Guide
[MENU] 1. Phone Book [OK] 3. Search 1/2/3 You can search and make a call the desired phone number using a phone number.
Enter Name/Phone Number/Speed Dial Number [OK] [MENU]
1:Edit Modify Phone Number
[OK]
To delete the phone number, select ‘2:
Delete’.
[MENU] 1. Phone Book [OK] 3. Search 3. Search Sp.
•
Dial Enter a Speed Dial Number Name [OK] Using the [C/MUTE] button and dial buttons, modify the phone number
and press the [OK] button to save it.
New Entry
If you press the [OK] button without
entering a speed dial number, all the
numbers in the list saved will be displayed.
•
This function allows you to make a call to the desired party by simply pressing
a speed dial number for longer than 2 seconds. For example, if the number
‘123456’ is saved to the [1] button, you can simply press the [1] button until a
call is connected to ‘123456’. This function works only on the initial screen.
•
If the speed dial number is more than two digits, press the last number of the
two digits for a long time.
This function allows you to save the new phone number by using the menu function.
[MENU] 1. Phone Book [OK] 4. New Entry Enter
Name, Phone Number (Home, Office, Mobile), Speed Dial
Number [OK]
Modifying/Deleting Phone Number
This is the method to modify or delete the saved phone number.
•
You can directly enter the phone number on the idle mode, and save that
number using the
•
32
button.
Enter the name that you want to save by using the dial buttons(up to 10 characters). Refer to ‘Entering Characters’ section in ‘Basic Features’ of this guide for
entering characters.
33
Home Page
Table of Contents
WIP-5000M Guide
UTILITIES
[MENU] 2. Utilities [OK] 2. Schedule [OK] Select
Press the [MENU] button in idle mode, and then select the [2. Utilities] icon.
[OK] Enter Time, Contents Select Melody/No
Dates
Melody [OK]
Alarm
You can set or disable the alarm.
Select melody or No melody using
button.
Select melody type using
button.
Modifying/Deleting Schedule
[MENU] 2. Utilities [OK] 1. Alarm [OK] 1.Set Alarm
[OK] (Select Alarm Interval) [OK]
Enter Alarm Time [OK]
This function allows you to modify or delete the registered schedule.
[MENU] 2. Utilities [OK] 2. Schedule [OK] Select
[OK] [MENU] 1: Modify Modify Time/ Contents/
Dates
To disable the alarm, select ‘2. Reset
Alarm’.
To change the alarm melody, select ‘3.
Alarm Melody’. You can choose one
among 10 melodies.
Melody [OK]
To delete a schedule, select ‘2: Delete’.
Calculator
•
When the alarm is set, the alarm icon
will appear on the screen.
Schedule
This function allows you to do four basic operationa (addition, subtraction, multiplication and division).
This function allows you to enter important tasks or appointments and then set
the phone alarms on those dates. So, you can easily use this function to manage a
personal schedule. If the alarm is set up as mute, you can directly check what the
schedule is on the screen.
34
35
Home Page
Table of Contents
WIP-5000M Guide
[MENU] 2. Utilities [OK] 3. Calculator [OK]
SOFT KEYS
Enter Numbers Press the [MENU] button in idle mode, and then select the [3. Soft Keys] icon.
(Select Arithmetical
Operation Symbol) Enter Numbers [OK] The result is
displayed.
The sub menus of [Soft Keys] are decided by system.
When entering negative numbers,
press # /
Station Message
button.
When incorrect numbers are entered,
You can send a reply by checking messages received from an extension on the
busy state.
press the [C/MUTE] button.
•
Press the
button to reuse the result.
•
Press the [C/MUTE] button to reset or the
button to terminate.
World Clock
This function allows you to check current date and time in each region of the
world.
[MENU] 3. Soft Keys [OK] 1. Station MSG [OK] (Select a Station Number) [OK]
1: Reply Call is Connected.
To delete the message, select ‘2:
Delete’.
[MENU] 2. Utilities [OK] 4. World Clock [OK] (Move the Meridian Line) The Corresponding Time of
Each Capital Name will be shown.
Move the meridian line to the city where you are located and press
the [OK] button. Time and date of other cities will be displayed
based on your location.
36
37
Home Page
WIP-5000M Guide
Table of Contents
Do Not Disturb
Conference
You can deny all of call requests anytime you want to.
You can call multiple parties to have a conversation in one channel. Up to five persons, including the person holding the conference, can participate in a conference
call.
Loading Conference Group
You can load a conference group from the system and have a conference with the
group.
[MENU] 3. Soft Keys [OK] 2. Do Not Disturb [OK]
1:On DND Mode is Set Up
To disable DND mode, select 2: Off’.
•
When DND (Do Not Disturb) mode is set up, the ‘DND’ message and the
icon will appear on the initial screen.
[MENU] 3. Soft Keys [OK] 4. Conference [OK] 1. Group Conf. [OK] 1:Load [OK] Group list is
displayed (Select a Group) [OK] Group members are connected. Paging
This function allows you to page through your phone at the specific area in the
system.
To modify or delete the group, press the [MENU] button and then select ‘1: Edit’, or ‘2: Delete’.
Saving Conference Group
Members that are frequently called upon for a meeting can be saved to the system
as a group. A group saved to the system can be conveniently used later by selecting ‘Group Conference’.
[MENU] 3. Soft Keys [OK] 3. Page [OK] (Select Page Zone) [OK] My voice is announced through
the phone.
38
39
Home Page
[MENU] 3. Soft Keys [OK] 4. Conference [OK] 1. Group Conf [OK] 2: Save [OK] Entering Group
Name [OK] Enter Phone Number of Member Enter Phone Number of Next Member [OK]
Table of Contents
WIP-5000M Guide
VOLUME/RING
Press the [MENU] button in idle mode, and then select the [4. Volume/Ring]
icon.
You can press the
function.
in idle mode to perform the same
Entering Each Member
You can have a conference by entering directly phone number of each member.
Ring Type
You can select the modes of call sound such as the ring, vibration, ring after vibration.
[MENU] 3. Soft Keys [OK] 4. Conference [OK] 2. Conference [OK] Enter Phone Number of Member [OK] Enter Phone Number of Next Member [OK]
[MENU] 4. Volume/Ring [OK] 1. Ring Type [OK] (Ring/Vibrate/Vibrate & Ring) [OK]
•
The
mark means that you have completed entering the phone number.
•
The
mark means that you have failed the call connection.
•
The
mark means that you have connected with the member.
You can retrieve a conference group or a phone number saved in the
phone by pressing [MENU] button at the phone number entry
screen.
For information about how to set the vibration mode, refer to the
description of ‘Setting the Vibration Mode’ section in ‘Basic Features’
of this guide.
Ring Tone
This function enables you to select one bell melody out of a selection of 10
melodies.
[MENU] 4. Volume/Ring [OK] 2. Ring Tone [OK] (Select Melody) [OK]
40
41
Home Page
Table of Contents
WIP-5000M Guide
Ring Volume
PHONE SETTINGS
This function enables you to adjust the bell volume.
Press the [MENU] button in idle mode, and then select the [5. Phone
Settings] icon. The submenus are not displayed until a password is entered.
Editing Name
This function enables you to enter random characters on the screen displayed on
the initial screen.
[MENU] 4. Volume/Ring [OK] 3. Ring Volume [OK] (Select Bell Volume) [OK]
You can adjust the volume of the bell by using the [Volume]
button.
[MENU] 5. Phone Settings [OK] Enter a Password 1. Edit Name Warning
•
This function enables you to hear a warning tone when you move to a shadow
zone during a call.
[OK] Enter your Name [OK]
Refer to ‘Entering Characters’ section in ‘Basic Features’ of this guide for entering characters.
If you save your name in your phone, your name will be displayed on
the other party’s phone when you are connected to another party
(intercom user). (This applies only when your phone number is not
saved in the phone book of the intercom user.)
Display
This function enables you to select the background of the initial screen that
appears when power on.
[MENU] 4. Volume/Ring [OK] 4. Warning [OK] (Select On/Off) [OK]
[MENU] 5. Phone Settings [OK] Enter a Password 2. Display [OK] 42
(Select a Screen) [OK]
43
Home Page
Table of Contents
WIP-5000M Guide
Password
Delete Lists
This function enables you to prevent others from using your phone by changing
the initial factory set password of the phone. The initial password is set to 1234.
This function enables you to delete phone numbers registered in the phone book
or calling numbers and called numbers.
[MENU] 5. Phone Settings [OK] Enter a Password [MENU] 5. Phone Settings [OK] Enter a Password 3. Change PIN [OK] Enter New Password [OK] 5. Delete Lists [OK] 1. Del Phone Book Enter a
Enter New Password Again [OK]
Password (Yes/No) [OK]
Language
To delete the list of calling numbers saved in the phone
book, select ‘2. Del Outgoing’.
To delete the list of called numbers saved in the phone
book, select ‘3. Del Incoming’.
This feature enables you to set the language displayed on the screen of the
phone.
Screen Back Light
This function enables you to delete phone numbers registered in the phone book
or calling numbers and called numbers.
Lighting Time
[MENU] 5. Phone Settings [OK] Enter a Password 4. Language [OK] (Select Language) [OK]
This function enables you to set the time for background lighting, which lights
automatically when the keys are pressed or a messages appears.
[MENU] 5. Phone Settings [OK] Enter a Password 6. Back Light [OK] 1. Light Time [OK] (Select Light Time) [OK]
44
45
Home Page
•
The lighting of the LCD screen turns off automatically unless a button is
pressed within 8 seconds.You can also set the lighting duration to 20 seconds
or turn off the lighting.
•
Select ‘Always Off’ to disable the light at all times.
Table of Contents
WIP-5000M Guide
Forward Type
This feature enables you to forward your incoming calls to a specific extension,
group of extensions or external number when you are unable to receive an incoming call.
Power Save
You can set the mode of the energy-saving to disable the backlight of LCD.
[MENU] 5. Phone Settings 7. Forward Type [MENU] 5. Phone Settings [OK] Enter a Password Type) [OK] [OK] [OK] Enter a Password (Select Forward
Enter a Forward Number [OK]
6. Back Light [OK] 2. Power Save [OK] 1: On
[OK]
To disable the forward mode, select ‘1: Off’.
To forward all incoming calls, select ‘2: All Calls’.
To forward incoming calls when you are using the phone, select ‘3:
Busy Calls’.
To forward incoming calls when you cannot answer within the specified time, select ‘4: No Answer’.
To forward incoming calls when you are busy or cannot answer within the specified time, select ‘5: Busy/No Answer’.
To forward incoming calls when DND mode is set up, select ‘6: Do Not
Disturb’.
To disable the Power Save mode,
select ‘2: Off’.
•
When the forward mode is set up, the ‘FWD’ message will appear on the initial
screen.
To use the ‘5: Busy/No Answer’ function, the ‘3: Busy Calls’ and ‘4: No
Answer’ functions must be set.
46
47
Home Page
Table of Contents
WIP-5000M Guide
Programmed Message
Station Lock
When you will be away from your desk, you can leave an absence message to
advise internal callers of your status. Internal callers will receive the message on
their phone screen when they call you.
When you will be away from your desk, you can lock any outgoing trunk calls or
incoming/outgoing calls to prevent others from using your phone without permission.
[MENU] 5. Phone Settings [OK] Enter a Password [MENU] 5. Phone Settings [OK] Enter a Password 8. Program Msg [OK] 1: On 9. Station Lock [OK] (Select a Message) [OK]
[OK]
To disable the lock mode, select ‘1: Unlock’.
To lock any outgoing trunk calls, select ‘2: Lock Outgoing’. At
this time, the outgoing station calls are not locked.
To lock any outgoing/incoming trunk, and station calls,
select ‘3: Lock All Calls’.
To disable the programmed message,
select ‘2: Off’.
The number of programmed messages is 20.
•
If anyone tries to call you, caller will see the following display on the screen of
caller’s phone.
(Select Lock Option)
•
‘LCK’ is displayed on screen if the ‘Lock Outgoing’ option is selected, and a
shadowed ‘LCK’ is displayed if the ‘Lock All Calls’ option is selected.
Station Number
This feature enables you to view your extension phone number on the screen of
the phone.
[MENU] 5. Phone Settings [OK] Enter a Password 0. Station Number [OK] My Phone Number is displayed on
the screen.
48
49
Home Page
WIP-5000M Guide
Table of Contents
Reset
SYSTEM
This function enables you to initialize all the functions and status of a phone.
Press the [MENU] button in idle mode, and then select the [6. System] icon.
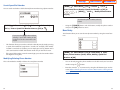
The systems which support the WBS24 (Access Point), WIP-5000M
are as follows:
iDCS 100 Release 2 / OfficeServ
iDCS 500 Release 2 / OfficeServ
OfficeServ 7000 Series
[MENU] 5. Phone Settings [OK] Enter a Password ✱. Reset [OK] [OK] Enter a Password Phone Registration
This function enables you to register a phone via the system.
(Select Reset Option)
(Yes/No) [OK]
Registering at the DHCP system
This function enables your phone to register at the system which supports the
dynamic IP mode.
[MENU] 6. System [OK] 1. Registration To reset the status of a phone, select ‘1: Reset All’. All the
saved records as well as the phone options are deleted.
To reset the options for the phone functions, select ‘2: Reset
Func.’.
(Select System to Register) Mode Enter Password LCD Contrast
This feature support to set the LCD contrast if you want to change it.
Enter SSID [OK] [OK] [OK] [OK] Enter User ID Enter Encryption Key 1: DHCP
[OK] [OK]
•
SSID: Enter the ESSID set on the WBS24, a Wireless LAN access device.
•
User ID: Enter the ID of the phone user registered to the system.
•
Password
•
Encryption Key: This is an encryption key for security. Use the 128 bit WEP
key. When the encryption key is set on the system, consult the system administrator and enter the value set on the system.
[MENU] 5. Phone Settings [OK] Enter a Password #. LCD Contrast [OK] (Control ‘Bright/Dark’
density)
50
51
Home Page
Table of Contents
WIP-5000M Guide
Registering at the Static IP System
System Setting
This function enables your phone to register at the system which supports the
static IP mode.
While using a phone registered to a system, you can transfer to another system for
connection. To use this function, the phone should already be registered to the
system. Refer to the [1. Registration] procedure of [6. System] for descriptions on how to register a phone.
[MENU] 6. System [OK] 1. Registration [OK] (Select System to Register) [OK] 2: Static IP Mode [OK] (Select AP Type) [OK] Enter Phone IP Address [OK] Enter Second WBS IP
Address [OK] Enter System SSID [OK] Enter User ID
[OK] Enter Password [OK] Enter Encryption Key
[MENU] 6. System [OK] 2. System Setting [OK] [OK]
(Select System) [OK] Confirm the
When registering to a system set to Static IP mode, be careful not to
enter an IP address already being used by another phone.
•
If you enter nothing and press the [OK] button, the default IP address is
entered.
•
SSID: Enter the ESSID set on the WBS24, a Wireless LAN access device.
•
User ID: Enter the ID of a user registered to the system.
•
Password
•
Encryption Key: This is an encryption key for security. Use the 128 bit WEP
key. When the encryption key is set on the system, consult the system administrator and enter the value set on the system.
Access Point(AP) is a component of a Wireless LAN that connects
Wire LAN with Wireless LAN APs are usually standalone devices that
can be connected to an Ethernet hub or a server.
You can select either combo or basic as the type of an AP. Inquire
your system administrator for information on the type of AP currently connected to the system.
52
Information of the System [OK]
Select [1: System1] or [2: System2]
Inquire your system administrator for information on whether the
system connected to the phone is Sytem1 or System2. To newly register a phone to System2, select System2 and register the phone
according to the ‘Phone Registration’ procedure described earlier.
Encryption Key
You can set the encryption key(WEP key) in the system which should be entered
when you register the phone. You can register the phone to the system only by
additionally setting or clearing the encryption key without having to enter the
system information again.
53
Home Page
[MENU] 6. System [OK] 2. System Setting [OK]
3. Encryption Key [OK] 1: Enable [OK] Enter
Table of Contents
WIP-5000M Guide
Double check whether this function should be executed since all
phone information registered to the system will be deleted.
Encryption Key [OK]
To disable the encryption key, select
‘2: Disable’.
This is a 128 bit WEP key for security.
Consult the system administrator and
enter the value set on the system.
WEP is a security protocol defined by the Wi-Fi standard to provide a
wireless LAN security level similar to that of wired LAN. Wi-Fi devices
basically support WEP, and additionally WPA and 802.11i. WIP-5000M
currently supports Enhanced Security SSID and 128 bit WEP.
Unregistration
While using a phone registered to te system, the user of the phone can delete the
phone information from the system. The user password must be entered before
clearing a phone registration.
[MENU] 6. System [OK] 3. Unregistration [OK]
Enter Password Select
(Yes/No) from
[Unregistration] Menu [OK] Reboot after selecting
[Unregistering], and the screen changes to [Unregistered]
starting screen.
54
55
Home Page
TROUBLESHOOTING
•
Table of Contents
WIP-5000M Guide
If the phone does not work despite the above measures, contact the
Samsung Electronics service center.
Phone registration failure
Possible problems and troubleshooting steps for your phone are described
below. Check the troubleshooting steps before contacting your Authorized
Samsung Reseller.
•
Check if the power of the system or AP is on and reregister the phone.
•
Move to a serviceable area of the system or AP and reregister the phone.
The LCD does not light up
•
If the problem is not solved, contact the Samsung service center.
•
Calls are disconnected frequently
Battery is discharged. Recharge the battery and turn the phone on again.
The bell does not ring or the ring sound is too low
•
Move to another area since the frequency is unstable.
•
Check if the phone is set to vibration mode.
•
•
Adjust the volume at [MENU] [4. Volume/Ring] [3. Ring Volume].
If calls are still disconnected frequently, contact the Samsung Electronics
service center.
The phone operates abnormally or does not operate at all
The lamp on the charger flashes yellow
•
•
Take the battery out from the charger and put the battery in again.
•
If the yellow light continues to flash, clean the charging phones of the
charger.
•
If the yellow light continues to flash despite the above measures, contact the
Samsung Electronics service center.
Take the battery out and insert it again, and turn the phone on again. If the
problem continues, contact the Samsung Electronics service center.
The battery is not empty but the phone does not turn on
•
Take the battery out and put it in again, and turn the phone on.
•
Take the battery out, clean the charging phones of the battery. Then put the
battery back in, and turn the phone on.
Voices echo during a call
•
Press the [Volume] button and adjust the volume or move to another area.
The
indicator appears on screen and calls cannot be made
•
Your phone may not be registered on the system. Use the phone after
registration.
•
Move to an area where service can be provided.
•
Check if the power of the system or AP is on.
56
57
Home Page
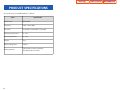
PRODUCT SPECIFICATIONS
The specifications of the WIP-5000M are as follows.
Items
Specification
Model Name
WIP-5000M
Frequency
2400 ~ 2483.5 MHz
Size (mm)
43 (width) x 126 (length) x 19 (height)
Operating Temperature
0 ~ 45o C
Operating Humidity
0 ~ 90%
Weight
95 g
Battery Charge Time
2 Hours
Battery Duration
Call Duration: 2 Hours 30 Minutes
Standby Duration: 25 Hours
58
Table of Contents
WIP-5000M Guide