1
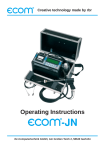
USER’S MANUAL
1
2
This user’s manual is also available in French,
German and Spanish at:
www.cybersnipa.com/downloads/download_home.htm
1. Introduction........................................................1
2. Removing the USB Flash Drive Module............1
3. System Requirements:......................................2
4. Features............................................................2
5. Flash Drive Installation:.....................................2
6. Removal of Flash Drive.....................................3
7. Carry it Easy™ Software...................................3
8. Additional software installation..........................4
9. Basic Functions.................................................6
10. Replacing the batteries....................................7
11. Care and Maintenance....................................7
12. Warranty..........................................................7
13. Registering your Dog Tag’s.............................7
14. Available from Cyber Snipa........................8-11
1. Introduction
Thank you for purchasing the Cyber SnipaTM Dog
Tags with USB Flash Drive. This manual will guide
you through the uses and management software
included.
Your Cyber SnipaTM Dog Tags is a storage device
with additional features including:
1)
2)
3)
4)
5)
Mini-grip pliers
Star screwdriver with bottle cap opener
Flat head screwdriver with nail file side
Removable USB Flash Drive Module
LED torch light
www.cybersnipa.com
2. Removing the USB Flash Drive Module
You will notice the USB flash drive can be
removed altogether from the housing. This allows
you to plug it into hard to reach USB ports or
simply remove for safety when travelling on a
plane. Please follow the instructions carefully:
i. Extend the USB flash drive from the Dog Tag
ii. Then pull the unit gently in the direction shown
in the diagram below:
Extend the USB part to this position
3. System Requirements:
The following system requirements are needed to
ensure this product works as intended:i. Computer: IBM PC/AT or compatible, Power
Macintosh, PowerBook, iMAC or iBook
ii. Operation System: Windows 98, Windows
ME, Windows 2000, Windows XP, Linux 2.4
and up, MAC OS 9.0 or up.
iii. Connection port: USB
iv. Minimum Hard Disk Drive space: 3 MB4.
Features
By plugging this device into the USB port of
you PC or MAC computer, you can easily copy
or move your data around without any external
power supply.
Your Dog Tags with USB Flash Drive also supports
security protection and can be formatted as a USB
ZIP Drive or as a boot-disk. With the help of the
software, provided you will be able to partition a
general purpose, secure or a boot USB disk. You
can also readjust the capacities of each partition.
Features Summary
Gently pull the unit to remove
Use the same procedure to replace the Flash
Drive Module. Ensure you hear the distinct “click”
sound to confirm that is has securely re-attached.
• Support for USB 2.0 specification
• Hardware + Software dual level data
protection
• Three bytes (24 bit) real time hardware
ECC for correcting data errors
• Support for both administrator and user
level security
• USB HDD and USB ZIP boot functionality
(need PC motherboard support)
• Partition support for general purpose,
secure or USB boot disk
• Capacity readjustment support for
partitioning the USB disk
• Read/Write protection switch
• Compatibility for both PC and MAC
computers
• Driver free operations (except windows 98)
• Plug and play, hot-removable
• No external power supply required
• Small size, light-weight and robust
• Working environment: 0 - 45
• Working power supply: 5V DC (supplied by
computer through USB port)
5. Flash Drive Installation:
5.1 MS Windows 98 OS
i. Start up your computer.
ii. Insert the accompanied CD-ROM disc into your
CD-ROM drive.
iii. Plug the USB drive into a USB port on the
computer.
iv. Windows will display the message “Found
new hardware”. Please follow the windows steps
to install the expected software from the root
directory of the CD-ROM drive until the process
finishes.
5.2 MS Windows ME/2000/XP OS
i. Start up your computer.
ii. Plug the USB drive into a USB port on the
computer.
iii. Windows will display the “Found new hardware”
message box and will indicate that the system will
automatically install related drivers. You only need
to click the “OK” button in order to let the computer
find and install the proper driver for your PC.
Cyber Snipa Dog Tags Manual
3
5.3 MAC OS 9.0
i. Start up your computer.
ii .Plug the USB drive into a USB port on the
computer.
iii. MAC OS will automatically detect the USB drive
and install it.
iv. Drivers for Mac OS 8.6 are available from
www.apple.com.
5.4 Linux Kernel 2.4 or up
Depending on your distribution of Linux, you may
be able to simply plug the USB drive in and go.
Otherwise you may need to mount the USB drive
manually:
i. Change to the root user
ii. Type “mount/dev/sda1/mnt.”
To unmount:
i. Change to the root user
ii. Type “umount/mnt.”
6. Removal of Flash Drive
To avoid loss of data, wait for the LED indicator
to flash slowly or remain constantly illuminated
before removing it from the USB port.
Removal using windows 98, ME or 2000
It is important to deactivate the Flash Drive
before removal. Double click on the memory
storage device icon on the task bar. A window
called “Remove and Deactivate Hardware” will
appear. Select the relevant USB device and click
“Deactivate”. Ensure the LED is either blinking
slowly or off before removal.
www.cybersnipa.com
4
Removal with Windows XP
You can remove the Flash Drive at any time if the
LED indicator is blinking slowly or not at all. If the
light is blinking quickly it means there is some data
transferring. (Try not to remove the flash drive to
avoid losing data. )
Carry it Easy™ software includes the following features:
Removal with Mac OS 9.0 and above
Ensure all applications using the Flash Drive are
closed. Double click on the desktop symbol for the
Flash Drive and click on “Deactivate”. The Flash
Drive will then be safe to remove.
7.2 Favourites synchronization (Internet
Explorer & Firefox)
Carry all your links and access them from any
computer.
7.1 Portable Microsoft Outlook Express®
Have all your e-mails and contacts with you and
use them on computers that have Outlook®
Express installed.
7.3 No-Trace Browsing with Internet Explorer &
Firefox access
No need to let everyone know where you have
been on the Internet 7.4 My Documents synchronization
Just a few clicks and take with you all the files
you need.
7. Carry it Easy™ Software
When you first connect your Flash Drive you
will notice Carry it Easy™ software available for
installation. This award winning software program
has a Free 30 day trial period. Double click to
install this and follow the prompts. If you would
like to purchase a full license please click on the
“About Carry it Easy™” tab and click the “Activate”
button. This will take you to a secure online
site. The online site will recognize your software
serial number and provide you with a discounted
purchase price.
7.5 Data Compression
Save space on your USB Drive. 7.6 USB Drive password protection
Protect your data. Simple and safe USB Drive
Lost & Found™ Let the finder know who you are
but don’t let him see what’s on your Flash Drive.
7.7 USB Drive information
All that you might want to know about your Flash Drive 7.8 Multilingual user interface
Get Carry it Easy™ in 7 different languages
8. Additional software installation
The mini CD also has additional software
management tools:
For your convenience, we have provided a USB
drive user management tool in this package. With
this tool, you can format the USB drive, secure the
drive, and make the USB drive as a partition.
8.1 Install and Uninstall the User Account
Management Tool
The easy to use formatting tools supports
Windows98/Me/ 2000/XP/Server 2003 operating
systems:8.1.1 Insert the CD-ROM into the CD-ROM Drive
of your computer
8.1.2 Run the setup.exe program found on the
root directory.
8.1.3 Select the item from the dialogue box and
follow the prompts.
After finishing the installation, the USB Drive
Management Tool icon will appear on the desktop.
8.2 Using the Formatting Tool
Insert the USB drive.
Double click the Flash Disk Manager icon present
on your desktop.
Click the Format button that will appear in the
loaded application.
From the dialogue box the following options will be
available to you:-
Cyber Snipa Dog Tags Manual
5
6
i. To start formatting click the “OK” button.
should pop up. Click on the software icon that you
have installed and begin using your Flash Drive.
ii. To cancel formatting click the “Cancel” button.
iii. To make a regular flash disk, select “Regular Disk”
and then click “OK” to format the disk
iv. To make a secure flash disk, select the “Secure
Disk” and type in the password, then click the “OK”
button to start making an secure flash disk.
v. To make a boot flash disk, chose the “Boot Disk”
and select “HDD Boot”, “ZIP Boot” or “ZIP Boot (63
Sector)”, then click “OK” button to make the disk.
• Note, to use the disk on your computer,
you have to find out the type of boot
disk that is supported by your computer.
Click “Login” and type in the password. Then click
the “OK” button to access the secure flash disk.
To change your password, click the “Change
Password” button. Enter your old password and
new password in the pop-up window.
Double click the icon to see login dialogue
window .
• Due to the vast number of generic
motherboards available it is impossible
for us to guarantee the boot disk will
work on all computers.
vi. To partition a flash disk you will need to drag the
sliding bar to specify the disk space size preferences.
Click the “OK” button to make the disk and get the
expected disk space partitioning.
8.3 Login and Manage Secure USB Drive
There are two methods to manage a secure flash
disk. If you are not working as the administrator then
you have only one default method.
Method 1
Insert the secure flash disk into the USB port of your
computer and run the “Flash Disk Manager” tool
from your desktop. You will see the tool’s interface
window as shown here:
www.cybersnipa.com
Then click “OK” button to change the password.
You will enter the secure disk after you
successfully change the password.
Method 2
There is a special tool in each secure disk that is
you gateway to the secure disk. Double click the
flash disk icon within the “My Computer” window.
You will now see the PWD icon.
In addition, a “Safely Remove Hardware” Icon
should appear on your tool bar. Use this to safely
remove the device if using Windows 98, ME and
2000.
Enter your password and click the “OK” button.
Now you can access your secure disk.
After you successfully changed your password,
you will be forwarded to the interface to access
the disk.
9. Basic Functions
After you have installed the application and driver
software, connect your Flash Drive to a spare USB
port. If the device is connected correctly the LED
indicator light will blink and a new drive Window
Cyber Snipa Dog Tags Manual
7
10. Replacing the batteries
The LED torch light is powered by 2 x lithium
watch batteries (CR 1025). If the batteries need
replacing, you can gain access to them by
unscrewing the battery compartment (as shown
below in the photo).
When the compartment is open, pay attention to
+ - poles of batteries when installing
AVAILABLE NOW
Insert and gently push the batteries until the door
releases
11. Care and Maintenance
• Do not dis-assemble.
• Do not immerse this product into water or
any other liquid.
• Do not plug or unplug this product with wet
hands as this may cause a short circuit.
• Do not put this product close to fire or at
locations with high temperatures.
• Avoid putting this product close to any
strong electromagnetic sources.
The Cyber Snipa™ Gamepad (patent pending)
is a weapon like no other. If you need to find the
edge when playing First Person Shooter (FPS)
PC Games, then the Cyber Snipa™ Keypad is
for you. The game pad will allow you to reach
a new level of skill that conventional keyboards
do not provide.
12. Warranty
Your Cyber Snipa Dog Tags with Flash Memory
is warranted against manufacturer defects for 1
year. If the device should show any manufacturer
defect, take it back to your place of purchase for
replacement or repair. Any tampering with the
device may void the warranty.
13. Register your Cyber Snipa Dog Tags
Go to www.cybersnipa.com to register your Cyber
Snipa Dog Tags. Each Cyber Snipa Dog Tags
comes with its own unique number. Register
online to become eligible for special offers and
updates on other Cyber Snipa products!
Improved
directional ASWD
keys
Undercase lighting
www.cybersnipa.com
Soft padded
removable
palm rest
Improved desktop
gaming space
Cyber Snipa Dog Tags Manual
AVAILABLE NOW
AVAILABLE NOW
Intelliscope Gaming Mouse
TM
The Cyber Snipa™ Scout Webcam is designed for the active gamer
on the go! Clip it onto your notebook and video conference from
anywhere around the globe... even in the dark!
The Cyber Snipa™ Scout is a high resolution USB camera designed
to clip directly onto your notebook screen. The Scout comes with a
built in microphone, as well as an internal sensor that will
automatically switch on the camera’s on-board lights when needed!
Stalk your enemies in 1000dpi Stealth mode, and when
your target is in your sights, unleash the beast within with
2400dpi ATAK mode! All with a simple push of a button!
The Cyber Snipa™ Intelliscope™ Gaming Mouse is
enhanced by the Intellilight Ambient Interface (AI) system.
This system allows the user to be intuitively informed of
the DPI setting during combat situations. You never need
to remember what setting you are in! By the illuminated
glow on and around the Mouse, you are
intuitively informed if the DPI setting is set for ATAK
mode or precision STEALTH mode needed for sniping. A
stunning looking mouse with all the grunt you need. Truly
beauty and the beast all in one package!
The Cyber Snipa™ Spotter Webcam is the latest addition to the Cyber Snipa’s™
family of hi-tech, cutting edge products. Sporting a detachable 7 to 18 times
zoom lens, the Webcam is ideal for a variety of uses, including:
• Personal security
• Chatting on the net
• Multimedia presentations
• Web broadcasts eg: SKYPE™
www.cybersnipa.com
Cyber Snipa Dog Tags Manual
AVAILABLE NOW
Pack all your Gaming
Peripherals in one easy
to carry bag!
Constructed from high
quality wear resistant
fabric, the Lan Bag is
designed to pack and
protect all your precious
gaming peripherals in
an easy to carry, highly
www.cybersnipa.com
portable carry all solution!
Now you can arrive
fresh and organized at
your Lan party or gaming
tournament with the ease
and style of a pro!