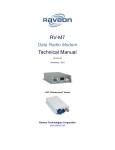
1
RV-M7-VM MURS Da t a Radio Modem
T e ch n ic a l M an ua l
Version A0
Feb 2010
Raveon Technologies Corporation
2780 La Mirada Drive, Suite C
Vista, CA 92081
www.raveontech.com
Table of Contents
1.
General Information about the RV-M7 .......................................................... 4
1.1.
1.2.
1.3.
1.4.
1.5.
2.
Overview ....................................................................................................... 7
2.1.
3.
Features......................................................................................................................................... 7
Specifications ................................................................................................ 8
3.1.
3.2.
3.3.
3.4.
3.5.
4.
Congratulations! ............................................................................................................................. 4
NOTICE ......................................................................................................................................... 4
Safety / Warning Information ......................................................................................................... 4
Safety Training information: ........................................................................................................... 4
FCC Compliance Information ......................................................................................................... 6
General .......................................................................................................................................... 8
Transmitter..................................................................................... Error! Bookmark not defined.
Receiver......................................................................................................................................... 8
User Input and Output Signals ....................................................................................................... 8
Model Numbers.............................................................................................................................. 9
Electrical Inputs and Outputs ...................................................................... 10
4.1.
LEDs ............................................................................................................................................ 10
4.2.
DC Power .................................................................................................................................... 10
4.3.
-WX weatherproof Version ............................................................. Error! Bookmark not defined.
Power Cord ............................................................................................ Error! Bookmark not defined.
4.4.
RS232 serial cable for –WX version .............................................. Error! Bookmark not defined.
4.5.
Optional EIA-485/RS-485 Serial I/O............................................... Error! Bookmark not defined.
RS-485 Connector Pin Out .................................................................... Error! Bookmark not defined.
Configuring ............................................................................................ Error! Bookmark not defined.
Bias and Termination Resistors ............................................................. Error! Bookmark not defined.
4.6.
RS422/EIA-422 Serial I/O Connector............................................. Error! Bookmark not defined.
Configuring for RS-422 .......................................................................... Error! Bookmark not defined.
Bias and Termination Resistors ............................................................. Error! Bookmark not defined.
4.7.
Low Power Mode (LPM) ................................................................ Error! Bookmark not defined.
5.
User Serial Port Commands ....................................................................... 12
5.1.
5.2.
5.3.
5.4.
5.5.
5.6.
5.7.
5.8.
5.9.
5.10.
5.11.
6.
Overview ...................................................................................................................................... 12
Command Mode .......................................................................................................................... 12
Setting a Parameter ..................................................................................................................... 12
Reading a Parameter ................................................................................................................... 13
CONFIG Button............................................................................................................................ 13
Exiting the Command Mode ......................................................................................................... 14
Password Protection .................................................................................................................... 14
Restoring Factory Defaults ............................................................ Error! Bookmark not defined.
Command Mode Commands ....................................................................................................... 15
Other non-AT commands............................................................................................................. 17
Factory Default Settings................................................................. Error! Bookmark not defined.
Using the M7 Modem – Packet Mode ......................................................... 18
6.1.
Setup ........................................................................................................................................... 18
6.2.
Programming Channels and Frequencies.................................................................................... 19
6.3.
Data Transmission ....................................................................................................................... 19
Serial Port Baud Rate .......................................................................................................................... 19
Flow Control ......................................................................................................................................... 19
Packet Size .......................................................................................................................................... 20
Key-On_Data ....................................................................................................................................... 20
Busy-Channel Lock Out ....................................................................................................................... 20
6.4.
Data Reception ............................................................................................................................ 20
6.5.
Addressing (Packetized Mode only)............................................................................................. 21
Addressing Basics ............................................................................................................................... 21
Hexadecimal Numbers......................................................................................................................... 21
Setting A System-Wide Address .......................................................................................................... 22
Broadcast Transmissions ..................................................................................................................... 22
The Address Mask ............................................................................................................................... 22
Addressing Examples: ......................................................................................................................... 23
6.6.
Error Correction ........................................................................................................................... 24
6.7.
Store-and-Forward Repeating ....................................................... Error! Bookmark not defined.
Using the M7 Modem – Streaming Mode ....... Error! Bookmark not defined.
7.
7.1.
7.2.
7.3.
7.4.
7.5.
8.
9.
Streaming Mode Operation ............................................................ Error! Bookmark not defined.
Baud Rate Selection ...................................................................... Error! Bookmark not defined.
Bit Errors ........................................................................................ Error! Bookmark not defined.
Carrier Detect ................................................................................ Error! Bookmark not defined.
Serial Data Flow Control ................................................................ Error! Bookmark not defined.
Installation ................................................................................................... 25
FCC Licensing Information ............................. Error! Bookmark not defined.
9.1.
9.2.
10.
M7 Diagnostic Provisions ......................................................................... 27
10.1.
10.2.
10.3.
10.4.
10.5.
10.6.
10.7.
10.8.
Overview of Diagnostics .............................................................................................................. 27
Reading the Diagnostic Information ............................................................................................. 27
Status and Statistics Command ................................................................................................... 27
ATST Command .......................................................................................................................... 29
ATST2 Command ........................................................................................................................ 29
ATST3 Command ........................................................................................................................ 30
ATST4 Command ........................................................................................................................ 30
AutoStatus ................................................................................................................................... 30
Tune-up and Alignment ............................... Error! Bookmark not defined.
11.
11.1.
11.2.
11.3.
11.4.
11.5.
Periodic Calibration ........................................................................ Error! Bookmark not defined.
Center Frequency .......................................................................... Error! Bookmark not defined.
TX Deviation .................................................................................. Error! Bookmark not defined.
TX Modulation Balance .................................................................. Error! Bookmark not defined.
RX Carrier Detect........................................................................... Error! Bookmark not defined.
SkyLine Compatibility .................................. Error! Bookmark not defined.
12.
12.1.
12.2.
13.
14.
Setting the Over-The-Air Data Rate ............................................... Error! Bookmark not defined.
Debug Related Commands.......................................................................................................... 26
General .......................................................................................... Error! Bookmark not defined.
Configuring M7 to Communicate with a SkyLine ........................... Error! Bookmark not defined.
Antenna Information .................................... Error! Bookmark not defined.
Appendix A. Serial Port Hardware .......................................................... 32
14.1. Serial Port Data and Handshaking Signals .................................................................................. 32
14.2.
Null modem without handshaking ............................................................................................ 34
14.3.
Compatibility issues ................................................................................................................. 34
14.4.
Null modem with full handshaking ........................................................................................... 35
14.5.
Compatibility issues ................................................................................................................. 35
15.
Troubleshooting........................................................................................ 36
Symptom:
Symptom:
Symptom:
Symptom:
Symptom:
Symptom:
Symptom:
16.
Unit will not receive ............................................................................................................ 36
Unit will not transmit ........................................................................................................... 36
Receive light blinks, but no data is received ...................................................................... 36
Long delay before transmitting ........................................................................................... 37
Cannot enter Command Mode ........................................................................................... 37
Modem appears dead. ....................................................................................................... 37
Repeater will not repeat. .................................................................................................... 37
Mechanical ............................................................................................... 38
1. General Information about the RV-M7
1.1.
Congratulations!
Congratulations on your purchase of a M7 radio modem – the most advanced
radio modem of its kind available today.
Please take a few minutes to read this manual carefully. The information
presented here will allow you to derive maximum performance from your radio
modem. After reading it, keep the manual handy for quick reference, in case
questions arise later on.
1.2.
NOTICE
Besides the fuse, there are no user-serviceable points inside this transceiver.
All service work must be referred to your Authorized Service Center or
Raveon Technologies Service Department.
1.3.
Safety / Warning Information
WARNING - DO NOT operate theRV-M7-VM radio modem when bystanders
are within 2 feet (.6 meters) of the antenna.
Blasting Caps and Blasting Areas
To avoid possible interference with blasting operations, turn off this radio or
remove the DC power when you are near electrical blasting caps, in a
blasting area, or in areas posted: “Turn off two-way radio.” Obey all signs
and instructions.
Potentially Explosive Atmospheres
Turn off your radio prior to entering any area with a potentially explosive
atmosphere. Do not install this product for use in areas with potentially
explosive atmospheres. Do not remove, install, or charge batteries in such
areas. Sparks in a potentially explosive atmosphere can cause an explosion
or fire resulting in bodily injury or even death.
Note: The areas with potentially explosive atmospheres referred to above include fueling
areas such as below decks on boats, fuel or chemical transfer or storage facilities, areas
where the air contains chemicals or particles, such as grain, dust or metal powders, and any
other area where you would normally be advised to turn off your vehicle engine. Areas with
potentially explosive atmospheres are often but not always posted.
1.4.
Safety Training information:
Antennas used for this transmitter must not exceed an antenna gain of 0 dBd.
The radio modem must be used in fixed vehicle-mount configurations or at
fixed base-station sites. It is not intended for portable applications.
This radio is restricted to occupational use, work related operations only
where the radio operator must have the knowledge to control the exposure
conditions of its passengers and bystanders by maintaining the minimum
separation distance of following range. Failure to observe these restrictions
may result in exceeding the FCC RF exposure limits.
Antenna Installation:
For rear deck trunk installation, the antenna must be located at least the
following range away from rear seat passengers and bystanders in order to
comply with the FCC RF exposure requirements.
For model RV-M7-VM:
Radiated frequency and Distance
RV-M7-VM 152MHz
1.97 Feet (0.6 m)
FCC ID: SRS-M7-VM
Raveon Technologies Corporation
For vehicular roof top installation, the antenna must be placed in the center of
the roof.
1.5.
FCC Compliance Information
This device complies with part 15 of the FCC Rules. Operation is subject to
the following two conditions: (1) This device may not cause harmful
interference, and (2) this device must accept any interference received,
including interference that may cause undesired operation.
Changes or modifications not expressly approved by the party responsible for
compliance could void the user’s authority to operate the equipment.
NOTE: The manufacturer is not responsible for any radio or TV interference
caused by unauthorized modifications to this equipment. Such modifications
could void the user’s authority to operate the equipment.
This product also complies with FCC Part Part 95 Subpart J of the FCC rules
and regulations.
The Federal Communications Commission (FCC), with its action in ET Docket
93-62, has adopted a safety standard for human exposure to Radio
Frequency (RF) electromagnetic energy emitted by FCC-certified equipment.
This product meets the uncontrolled environmental limits as stated in OET65C (01-01) when operated in accordance with the operation guidelines
described in this manual. Proper operation of this radio device according to
the instructions in this publication will result in user exposure substantially
below the FCC recommended limits.
This equipment generates, uses, and radiates radio frequency energy, and if
not installed and used in accordance with the instructions, may cause harmful
interference. However, there is no guarantee that interference will not occur. If
this equipment does cause interference to radio or television reception, which
can be determined by turning the equipment off and on, the user is
encouraged to correct the interference by one of the following measures:
•
Reorient or relocate the receiving antenna.
•
Increase separation between the equipment and receiver.
•
Connect the equipment to an outlet on a circuit different from which the receiver is
connected.
•
Consult the dealer or an experienced radio/TV technician.
2. Overview
The M7 RF data radio is a rugged high-performance, high-speed narrow-band
data modem. It contains a receiver, a transmitter, and modem, creating an
easy-to-use transparent data radio link. The M7’s user interface is
asynchronous RS-232 data into and out of the M7 (CMOS level optional).
Modem operation is virtually transparent to the user and the configuration of
the modem is via the user serial port.
Unlike any other radio modem on the market, the M7 may be operated in
either a “Packetized Mode” or a “Streaming Real-Time Mode”. There are
advantages to each approach, and your choice depends upon how your
system operates.
For privacy and network versatility, the M7 incorporates a 16 bit identification
code. Its protocol also uses a 16bit CRC to guarantee the integrity of the
data. Perfect for SCADA and telemetry applications, the M7 can be used for
simple point-to-point data communication applications, or for more
sophisticated point-to-multipoint, peer-to-peer, or mesh networks.
Although the M7 is the easiest to use modem on the market, its reprogrammability makes it extremely versatile. Most parameters within the
modem may be re-configured to optimize it for specialized operations,
extended range, or higher data throughput.
2.1.
•
•
•
•
•
•
•
•
•
•
•
•
•
•
•
•
•
•
Features
Built-in radio transceiver with integrated modem
Easy to use. Plug-in, Turn-on, and GO. Transmit data in = Receive data out.
Lowest current draw in industry.
Wide input voltage with high-efficiency switching voltage regulator.
Integrated Packet data protocol and built-in Streaming Real-Time operation.
ARQ error correction and retransmission capability. Totally transparent to the application.
Capable of store-and-forward repeating operation.
Small sized and very rugged extruded enclosure.
16 bit addressing for up to 65,525 different unique device addresses per channel
Supports group and broadcast transmissions. Network mask allows groups of any size.
2 watts of RF output. Other RF power levels available upon request.
Easily configured using “AT” commands
Very fast Transmit-to-Receive turn around time.
RS-232 serial input and output. Programmable serial baud rates up to 57600.
Programmable over-the-air data rates for long-range or high-speed
Automatic key of transmitter on data.
RF carrier-detect is not required receiving. No squelch setting required.
SkyLine and FireLine compatibility mode for use in older Sonik radio systems.
3. Specifications
3.1.
General
All measurements made per TIA-603-B
DC input voltage ...............................................................................................................................9-16V DC
Size
............................................................................................................. 5.0 X 3.76W X 0.95H
Weight
.................................................................................................................. 6 ounces (0.17kg)
DC input voltage 10-16V DC
Internal fuse
................ 3A mini blade. Littlefuse part number 0297003 or Raveon part, number 1X726-3
FCC ID
Model RV-M7-VMC-N ...................................................................................... SRS- M7-VM
3.1. Transmitter
Maximum RF power output ................................................................................................................. 2.0 watts
Maximum duty cycle ............................................................................................................... 50% at full power
Maximum transmit frequency deviation ............................................................................................. ± 2.25kHz
Occupied bandwidth ..........................................................................................................................................
TX spurious outputs ............................................................................................................................ < -70dBc
3.2.
Receiver
Typical RX sensitivity (1% BER)
9600bps, 4-level, 12.5kHz channel ......................................................................... -109dBm
4800bps, 2-level ..................................................................................................... -113dBm
2400bps .................................................................................................................. -116dBm
1200 and 800bps .................................................................................................... -118dBm
RX selectivity
- .................................................................................................................................... 50dB
Spurious and image rejection ................................................................................................................... -60dB
RX intermodulation rejection ................................................................................................. -60dB at 2400bps
Conducted spurious emissions............................................................................................................ <-20dBm
3.3.
User Input and Output Signals
Serial port baud rates ................................................. 1200, 2400, 4800, 9600, 19200, 38400, 57600, 115200
Voltage levels
.....................................................................RS-232, RS-422, and RS-485 complaint levels
Modem handshake signals ...................................................................................... RTS, CTS, DTR, DSR, CD
RF I/O
.......................................................................................................................... 50 ohm BNC
Power
............................................................................................................. B+ input and Ground
Power Connector ........................................................................ Phoenix 18 36 18 9 ( Raveon P/N 1J165-3 )
11 kHz (12.5k
3.1. Frequencies
The RV-M5-VB-N2 MURS modem has five user selectable channels. The
channel is selected with the ATHP command. The RV-M5-VB-N2 modem is
factory-set to these five channels, and the modem cannot be programmed to
operate on any frequency other than these five.
1
2
3
4
5
151.820 MHz
151.880 MHz
151.940 MHz
154.570 MHz
154.600 MHz
3.2.
Electrical Inputs and Outputs
The front panel of the M7 modem has these features:
1.
2.
3.
4.
5.
3.3.
RF connector
Power LED
Status LED (Receive data = green, TX = red)
9-Pin Serial I/O connector
DC Power Jack
LEDs
The status LED visually show the current status of the radio.
Status LED (TX) This LED blinks red when the transmitter keys and is
putting out RF power. It blinks green upon the reception of data or RF carrier.
Power LED (PWR) This LED does a short blink, once every two seconds,
indicating to the user that the power to the modem is ON and the modem is
working. When the modem is in the command mode, this LED will blink on
and off, once per second.
3.4.
DC Power
DC power for the modem is connected to the 2-pin DC power input jack
labeled DC IN. Use the supplied cable to connect the DC power. The red
wire is positive (+) and the black wire is negative (-). Its connection is
optional, as the user may alternately apply power to Pin 9 and ground to pin 5
of the 9-pin I/O connector.
The M7 modem is supplied with a DC power cable, Raveon part number
1C738-1.
Note: The M7 has in internal 3-amp mini-fuse (automotive type) to protect it
and its power source against reverse voltage and serious hardware failures.
In the event it is blown due to a reverse voltage, it may be replaced by
removing the internal circuit board and unplugging the fuse. This must be
done by a qualified electronic technician using ESD precautions.
RS232/EIA232 Serial I/O Connector
The RS232 9-pin serial I/O connector is a female 9-pin D-subminiature
connector having the following pins configuration. It is pinned out so that it
may be plugged directly into a computer or PC’s 9-pin COM port.
Front-view of DB-9 connector on modem (female)
Pin
Name
Dir
Function
1
CD
out
Carrier detect
2
3
4
RxD
TxD
DTR
out
in
in
Receive data
Transmit data
Data terminal
ready
5
GND
6
DSR
7
RTS
Ground
connection
out
Data Set Ready
in
Request to send
out
8
CTS
9
Power
Clear to send
In/out
DC power (not
Ring signal)
Level / Specification
If enabled, indicates presence of carrier.
Logical 0 (+ voltage on RS-232) means carrier
is present. If disabled, it is asserted (0)
whenever the modem is operational, and not in
the configuration mode. It will be a 1 when the
modem is in the configuration mode.
Data out of the modem.
Data into the modem.
Normally ignored by the M7 modem. May
control the power-state of the modem in lowpower mode if this feature is enabled.
Signal and power ground
Normally is set to 0 when modem is powered on
and running. Modem sets to a 1 when in lowpower mode.
Used to stop/start the flow of data coming out of
the modem TxD pin. 0 = OK to send, 1 = don’t
send. Leave disconnected if not used.
Used to stop the flow of data going into the RxD
pin from the device connected to the M7. 0 =
OK to send, 1 = don’t send. If the M7 cannot
accept more data, it will negate this signal (set
to a 1).
User may supply the DC power to the modem
on this pin.
Note: RS-232 signals use positive and negative voltages to represent digital 1s and 0s. A positive
voltage is a 0, and a negative voltage is a digital 1.
This pin-out allows it to be directly plugged into a computer’s 9-pin serial port
using a conventional 9-pin RS-232 serial cable. To connect it to a modem, or
computer peripheral that has a serial port, you will need a “null-modem”
cable. See Appendix A for more information on wiring a null-modem cable.
To configure the M7 modem for RS-232 operation, use the ATIO 0 command.
RS-232 is the default operation mode for the connector. RS-485 is a factory
option. See the next section for details on the RS-485 option.
4. User Serial Port Commands
4.1.
Overview
The serial portion the RF modem is used to send and receive data over the
air, as well as to configure the RF modem. In normal operation, the user
sends data into the TxD pin of the user port, and this data is transmitted over
the air. Received data from another RF modem is output to the user via the
RxD pin of the user port. This is the default operating condition of the RF
modem. No special characters, hardware control lines, or timing is required
to operate the M7 modem.
There is also a “Command Mode” used to program and configure the M7. In
the Command Mode, the M7 modem accepts commands via the serial port
TxD pin. The commands can be used to change certain internal parameters
of the M7 modem as well as to read-out the current configuration and
diagnostic statistics.
4.2.
Command Mode
The M7 modem may be put into a “Command Mode”, by entering a sequence
of three plus characters (+++). To keep the M7 modem from unintentionally
entering the Command Mode because of the +++ pattern occurring in a
stream of data entering the modem, there must be a pause in the data stream
before the +++ as well as a pause after the +++ is sent. If either pause is
missing, the modem will not enter the command mode.
Using serial communications software such as HypterTerminal, send the 3character command sequence “+++” while observing times of silence before
[BT (Silence Before Sequence) Command] and after [AT (Silence After
Sequence) Command] the command characters. The default BT and AT
times are 500mS.
The default sequence for entering
entering into AT Command Mode:
1. No characters sent for ½ a second.
2. Input three (3) plus characters (“+++”) within ½ of a second.
3. No characters sent for ½ a second.
When the M7 modem first enters the Command Mode, it sends the phrase
“M7” out it serial port, and then an “OK” sequence. The “OK” sequence is a
sequence of 4 characters:
An “O”, “K”, <CR>, and <LF> characters (<CR> = ASCII 0D,
4.3.
<LF> = ASCII 0A)
Setting a Parameter
To set a parameter in the M7 modem, enter the Command Mode as
described above. Then enter the proper AT command, a space, the
parameter, and then a carriage return. For Example, to set the address of the
M7 modem to 1234, enter the following command:
ATDT 1234 <CR>.
Once a Parameter is changed, the modem will begin using the new
parameter and the new parameter is saved to non-volatile.
4.4.
Reading a Parameter
To read the value of a particular setting, issue the command, with no
parameter. The modem will return the value followed by an “OK”. The
modem’s OK response is:
The value in ASCII decimal format.
A <CR> <LF> (<CD> = ASCII 0D, <LF> = ASCII 0A).
An “O”, “K”, <CR>, and <LF> sequence.
For example, if the user enters the command to read the M7’s modem
address and its address was 1234, the user would issue the following
command:
ATDT<cr>
and the modem will respond with:
1234 <CR> <LF> OK <CR> <LF>
To get on-line help with a command, enter the command and put a question
mark in for the parameter. For example, to see what the ATDT command is
for, type ATDT ?. The modem will respond by listing a brief description of the
command. To see a list of all commands, type HELP.
4.5.
CONFIG Button
If certain parameters within the modem are modified in a manor that causes
the modem to cease functioning or if the user cannot enter the command
mode via the “+++” method described above, there is a small push button
internal to the M7 modem to assist in this case. This CONFIG button may be
pressed at any time, and forces the modem into a known operational state.
The CONFIG button is located inside the modem. Remove the rear cover,
exposing the two circuit boards. The button is in the center of the lower circuit
board as shown below.
The default settings that the modem will revert to when the CONFIG button is
pressed are:
1. Serial port 9600 baud, 8 data bits 1 stop, no parity
2. ATCT setting set to 60000 (60 second time-out)
3. Serial port on the front of the unit in RS232 mode, 9600bps, N/8/1.
If the unit was configured for RS-485, RS-422, or Ethernet, you must
disconnect other devices and use an RS-232 device to configure the M7.
Even though the serial baud rate reverts to 9600 baud when the CONFIG
button is pressed and the IO port is RS232, it will revert back to the settings
programmed into the M7 modem once the Command Mode is exited.
Note: If the user-interface is password protected, and the Config button on
the M7 is pressed, for security reasons, the encryption phrase is
automatically erased.
4.6.
Exiting the Command Mode
There are three ways to exit the command mode. They are:
1. ATCN Issuing the ATCN. The M7 radio will exit the command mode, and
begin normal operation.
2. EXIT Issuing the EXIT. The M7 radio will exit the command mode, and
begin normal operation.
3. Time Out. After a pre-set amount of time (60 seconds is the factory
default time), the modem will automatically exit the Command Mode, and
continue normal operation. Changes will not automatically be saved. This
time-out duration may be set with the ATCT command.
4.7.
Password Protection
One M7 series products with firmware version C0 or higher, the user interface
may be password protected. If it is password protected, the radio will output a
“password:” prompt when entering the command mode.
When in the command mode, to enable the use of a password enter:
Password xxxx <CR>
Where xxxx is the 2-7 digit password you would like to protect the user
interface with.
To disable password protection, enter:
Password 0 <CR>
Note: If the user-interface is password protected, and the Config button on
the M7 is pressed, for security reasons, the encryption phrase is
automatically erased.
4.8.
AT
Command
Command Mode Commands
Command Description
Parameters
Factory
Default
AK
Enable/Disable ARQ – When ARQ is enabled, this modem
will automatically send an ACK packet back to a modem that
sends it data. 0=off, 1=on.
Range: 0 – 1
BD
Baud Rate – Sets serial COM port baud rate (bps). Over-theair (throughput) baud rate is set with ATR2 command.
If a PC’s serial baud rate is set higher than the fixed over-theair baud rate of the module, hardware handshaking may be
required.
Range: 0 – 7
0 = 1200 5= 38400
1 = 2400 6=57600
2 = 4800 7=115200
3 = 9600
4 = 19200
3
Range: 0-1
1
1 = Enable
0 = Disable
0
BC
CH
CN
CT
Busy Channel Lock Out – Enable/disable the BCL. If
enabled, the modem will not transmit on a radio channel that
is busy (has RF on if). 0-OFF, 1=ON.
Configure Hardware Flow Control – Enable (1) or disable
(0) flow control. When enabled, the modem will monitor the
RTS line, and if it is negated, stop sending data out the serial
port. If disabled, the modem will ignore the state of RTS, and
always send out charators.
Exit AT Command Mode – Exits module from AT Command
Mode and returns it to Idle Mode. Parameters are not saved
in EEPROM.
Command Time Out – If no valid commands have been
received via the serial port within this time period (in
milliseconds), modem returns to normal operation mode from
Command mode. If the CONFIG button inside the M7 is
pressed, this parameter will be automatically set to 60000.
none
none
Range: 100-60000mS
60000
DT
Destination Address to call– Sets address of the modem to
send data to. Note, this parameter is entered in HEX format.
Each digit may be a 0,1,2,3,4,5,6,7,8,9,A,B,C,D,E,or an F.
Range: 0-FFFF
E
Echo – Character echo set on (E1) or off (E0). This applies to
the Command Mode only.
Range: 0 , 1
F
Display frequencies – Display all of the frequencies
programmed into all of the channel memories.
Channel Number – Select separate channels to minimize
interference between multiple sets of modules operating in the
same vicinity.
Range: 1 - 6
IC
Read Current Draw Read the current draw in mA. Accuracy
is within 20% of actual current draw.
Range: 0-9999
L
Enable/Disable the LEDs – 1 = LEDs always off. This
reduces some power consumption. 0 = LED operate normally.
Address Mask – Configures local and global address space.
Each digit may be a 0,1,2,3,4,5,6,7,8,9,A,B,C,D,E,or F. In
most applications, this is kept at FFFF.
Unit Address – Configures the individual; address for this unit.
Each digit may be a 0,1,2,3,4,5,6,7,8,9,A,B,C,D,E,or F. Note:
FF is interpreted as a group. See addressing section.
MY
Company Confidential
15
1234
0 (no echo)
N/A
HP
MK
0 (no AKCs
sent)
1
N/A
0
0 or 1
Range: 0000 - FFFF
FFFF
Range: 0000 - FFFF
1234
Raveon Technologies Corp.
NB
Parity – Selects parity format. Settings 0-4 transfer 8-bits over
antenna port and generate the parity bit on the RF receiving
side.
Range: 0 – 5
0 = none
1 = Odd
2 = Even
3 = Mark (1)
4 = Space (0)
0
ND
Number of Data Bits – Set/read the number of data bits.
Range: 5 - 8
8
NS
Stop Bits – Selects the number of stop bits.
Range: 1-2
1
PO
RF Power Output. Set or show the RF power output setting.
Value is in percent, from 0% to 40%. Use and RF wattmeter to
confirm the power setting, and adjust the % accordingly to
obtain the desired RF power level.
0-40
40
R3
RQ
RS
RV
SL
Serial Port time out – Number of mS of no activity on the
serial port before transmitting the data in its buffer.
Receiver Signal Level – Reads the Receiver Signal
strength this instant, and returns the level in dBm.
RSSI (Receive Signal Strength Indicator) – Returns the
signal level of last received packet. The reading is in dBm.
Usable for relative comparison of signals, but absolute value
is within10dB at -90dBm.
Disable Remote Access – When enabled (set to a 0), the
modem will respond to over-the-air RPR requests, Pings, and
over-the-air commands. Default is OFF (1).
Serial Number – Reads and returns a unique serial number
for thjs unit.
SH
Show – Display the configuration of the modem. This will
return a page of ASCII characters, showing the main
configuration parameters.
ST
Statistics – Show the unit’s operational statistics. See
Statistics section of user manual.
SV
Range: 1 - 5000
20 (mS)
Range: -40 to –130 (dBm)
-
No parameters. Returns a
number : -50 to –140
(dBm) varies by model.
none
0 = Remote Access on
1 = Remote Access off
Read Only
1 - 999999999
1
unique
none
None
0, 1,2, 3, 4, or 5
None
Save – Save all the parameters to EEPROM. This command
must be used if changed parameters are to be stored in nonvolatile memory, and used next time the modem is powered
up. Modem exits configuration mode after this command is
executed. It saves all parameters except the frequency (The
frequency is automatically saved when an ATFT, ATFR, or
ATFX command is executed)
none
None
TD
Transmit Test Data – When issued, the modem will begin
transmitting data. The type of data sent is set in the
parameter. Entering a <CR> will terminate the transmission.
0 = Go back to normal
1 = Random
2 = Hop up/dn one channel
3 = 1010T at ¼ baud rate
4 = TX all 0s
5 = TX all 1s
6 = Test Points ON
7 = Transmit CW
8 = Transmit 1010101T
TE
Read product temperature – Read the internal temperature
of the unit’s circuit board in degrees Celsius.
-40 to +99
-
TT
Max Packet Size – Set the maximum number of bytes in an
over-the-air packet.
1 - 512
80
VB
Read DC input Voltage– Returns the DC input voltage
reading, in mV (12500 = 12.5VDC input).
None
none
VR
Firmware Version – Returns firmware version currently
loaded on the module.
Read Only, 3
characters
none
** indicates values that are calibrated in the factory and are unit-specific. If the “Radio
Type” is changed, these will need to be re-calibrated.
Company Confidential
16
Raveon Technologies Corp.
4.9.
Other non-AT commands
SHOW
Show/display an overview of the radio’s configuration.
None
-
PING
Ping another modem. Format is PING xxxx, where xxxx is
the ID of the modem to ping. If remote access is enabled on
xxxx, it will respond.
XXXX
-
Company Confidential
17
Raveon Technologies Corp.
5. Using the M7 Modem – Packet Mode
5.1.
Setup
1. Connect a DC power source to the DC IN connection on the front of the
modem.
2. Connect a good quality antenna, cut to the operating frequency, to the BNC
connector on the front of the modem. Use a good antenna, and place is at
high-above obstructions as possible.
3. Connect a computer terminal, or PC computer running HyperTerminal, to the
9-pin I/O connector. The factory default serial ports settings are 9600 bps, 8
data bits, 1 stop, no parity.
4. Program the modem’s operating frequency to your desired operating
frequency. This is done with the ATFX xxx.xxxxx command. See the section
“Serial Port Commands” for information describing the various parameters
that may be modified in the modem. In most applications, the default settings
from the factory will work fine.
5. Using the AT commands, change any of the default operating parameters that
must be modified. From the factory, the modems are configured and shipped
ready-to-use. Out of the box, they will communicate on the default radio
channel using the factory defaults. In general, the parameters you may want
to modify will be:
ATHP x
Channel number to use (1-5).
ATMT 0
0 for normal Packetized operation. Default mode.
ATAK
0 for no ARQ, 1 if this unit sends ACKs. Default is no ARQ.
ATRB
Set the number of retries if ARQ is used (x). 0 if no ARQ used.
Factory default is no ARQ.
ATBD
Serial port baud rate
ATMY
The ID of this unit. Default is 1234.
ATMK
The network address mask. Default is FFFF.
ATDT
The address of the unit this modem will talk to. Default is 1234.
ATBC
Enable/disable busy channel lock-out.
6. Connect your serial data device to the 9-pin connector on the front of the
modem.
The radio is now ready to use. Any serial data going into the modem will be
transmitted over the air, and any data received over the air will be sent out the
serial port.
Remember, that from the factory, all M7 modems are configured to simply work.
Plug in power and connect to the serial port at 9600 baud, and the modems will
communicate on the default channel. Change the channel frequency to your
specific frequency, and they will be ready to work on your channel.
Company Confidential
60
Raveon Technologies Corp.
5.2.
Programming Channels
The M7 modem has memory for up to 6 channels. A channel is a pair of
frequencies, one for transmit and one for receive. They may be different or they
may be the same. You may program any valid frequency into any channel
number. To program a channel, perform the following steps.
1. Change to the channel you wish to program, using the ATHP x command,
where x is the channel number.
2. Review the frequency setting with the ATF command.
3. To change the radio channel, use the ATHP x command while the modem is
in the command mode.
5.3.
Data Transmission
To transmit data, send one or more bytes of data into the serial port of the
modem. When a full packet of data has been collected into the internal buffer of
the modem, or when there is a pause in the data, the modem will automatically
key its transmitter, and send the data over the air.
Serial Port Baud Rate
While the modem is transmitting, the user may continue to send more data into
the M7. Because the buffers in the M7 are full-duplex, the serial port data rate
and the over-the-air data rates are independent. The serial port baud-rates may
be set slow to accommodate legacy equipment, or set at high-speed to minimize
latency. The over-the-air data rate us usually 4800 baud for narrow-band
channels, and 9600 baud for wide-band, although faster or slower rates may be
used.
In Packet Mode, selection of the serial port baud-rate is important. As shown
above, if the serial port baud-rate is the same as the over-the-air baud rate and
the packets are short, the channel utilization is only about 50%. But, if the serial
port baud rate is set much higher, say 2-8X the over-the air rate, the channel
utilization becomes near 100%.
Because the M7 can handle serial-port data rate far in excess of the over-the-air
rate, the efficiency of the M7 in Packet Mode is approximately the same as other
brand modems that cannot operate in a Packet Mode — with the added benefit
or ARQ, error-free data, and addressing.
Note that many Windows applications which use the serial port, such as
HyperTerminal, put large gaps between the bytes of data they send out the serial
port. If an application is not getting the desired throughput, verify that it is not an
artifact of the Operating System or the computer.
Flow Control
If large amounts of data will be sent with the M7, it may be possible to overflow
the internal data buffer. To ensure the transmit buffer does not overflow, enable
and use hardware flow control. Hardware flow control is enabled with the ATCH
Company Confidential
60
Raveon Technologies Corp.
1 command. Note that the M7 modem will always indicate the status of its
internal buffer using the CTS signal on the DB-9 serial connector. When CTS is
negated, the internal buffers are more than 80% full. When it is asserted and it is
“Clear to Send”, the buffers are less than 80% full.
Packet Size
The over-the-air packet size may be set with the ATTT xx command. Once the
modem receives one full packet of data into via the serial port, it will
automatically key the transmitter and send the data. Factory default is 80 bytes.
Key-On_Data
When serial data is entering the M7’s RS-232 port, the M7 looks for pauses in
the data as indication that it is time to send a packet of data over the air. The
factory default duration of the pause it looks for is 20mS, but the user may
change this to over values using the ATR3 xxx command, where xxx is in
milliseconds.
Busy-Channel Lock Out
If your system operation require the M7 modem to monitor-before-transmit, of if
you do not want the M7 to transmit on a channel that is busy, you can enable
“Busy-Channel-Lockout”, using the ATBC 1 command. ATBC 0 disables BCL,
and thus the modem will transmit whenever it has data to send out. The factorydefault is BCL disabled. Use caution when enabling it, as a CW interferer, PC
with poor shielding, or some other source of RF can stop the modem from
transmitting. The threshold where the M7 senses RF carrier, and determines
that the channel is busy is set by the ATRA command. This is factory calibrated
to an equivalent RF level of approximately -110dBm.
5.4.
Data Reception
When the modem receives data over the radio, it checks it for errors, and if it is
error-free, it will send it out the serial port. Again, the serial port may be set to
any baud rate the user wishes, and the radio receiver and transmitter will
continue to operate independently of the baud rate.
When the modem receives a signal, it will assert the CD hardware signal on the
RS-232 serial port if it was configured to do so.
In general, the slower the over-the-air data rate, the easier it is for the modem to
receive the signal, and thus the more communication range the radio will have.
M7 modems have a unique switched-filter along with digital signal processing,
that gives them more range a lower data rates. See Section Error! Reference
source not found. Error! Reference source not found. for more information
about choosing the over-the-air data rate.
Company Confidential
60
Raveon Technologies Corp.
5.5.
Addressing (Packetized Mode only)
Addressing Basics
One of the more powerful aspects of the M7 modem is its addressing scheme.
Incorporating addressing in the modem allows multiple radio systems on the
same frequency to co-exist, and not interfere with each other. Also, some user
application cannot tolerate receiving data that was not intended for it, and by
setting the addresses in the modems properly, the system can be configured to
allow reception of only data intended for the recipient.
If addressing is not needed or desired, it can be turned off so that all modems
receive data from all other modems, and all modems can talk to all other
modems.
Each M7 contains a 16 bit address, called its Unit Address, and is represented as
a 4 digit hexadecimal number. M7 address may be any number between 0000
and FFFF, which is effectively 65,535 different addresses. Every M7 has a Unit
Address programmed into it, as well as the ID of the unit it will send data to. The
Unit Address is programmed with the ATMY xxxx command, and the Unit
Address of the destination modem (the Destination Address) is configured with
the ATDT xxxx command.
The defaults UNIT ID in al M7 modems is 1234, and 1234 is the default for the
destination ID. An Address Mask is used to select which digits of the address will
be used to determine if a particular reception was intended for the M7 modem.
The default Address Mask is FFFF, which means all digits will be used.
Hexadecimal Numbers
For those not familiar with hexadecimal numbers, a hexadecimal digit represents
a 4-bit binary pattern. There are 16 possible values
(0,1,2,3,4,5,6,7,8,9,A,B,C,D,E,and F). These 16 values represent 4 bits of
information, thus 4 hexadecimal digits can represent 16 bits of information. The
hexadecimal numbers represent 4 bit data in the following way:
Hexadecimal Table
Hex #
0
1
2
3
Binary
0000
0001
0010
0011
Hex #
5
6
7
8
Binary
0100
0101
0110
0111
Hex #
8
9
A
B
Binary
1000
1001
1010
1011
Hex #
C
D
E
F
Binary
1100
1101
1110
1111
When communicating over the air, M7 modems transmit their Unit Address and
the Destination Address along with the data. Receiving modems check the
received Destination Address, and see if it matches their Unit Address. If it does
match, the receiving modem outputs the data it received via its serial port. If it
does not match, the receiving modem discards the data, and does not send it out
the serial port.
Company Confidential
60
Raveon Technologies Corp.
Setting A System-Wide Address
If individual addressing is not needed in your system, there are two ways to
ensure it is not used. One way is to set all modems in the system with the same
Unit Address and destination address. From the factory, these are both set to
1234, and thus, all modems can communicate with all other modems, using the
address 1234. The advantage of using this system-wide address, is that if there
are other M7 modems on the channel, but in some other system, they probably
will not have the same Unit Address, and thus will not interfere with your system.
To reduce the possibility of data cross-talk, the system implementer may wish to
use a different system-wide address for the Unit Address instead of 1234. There
are over 65,000 addresses available.
An alternate way to disable addressing altogether, is set the Address Mask to
0000 (ATMK 0000 command). This tells the M7 to ignore the address, and
receive every transmission. The disadvantage to this method is the adjacentsystem problem. If there is another M7 system on the same channel, all
modems with the 0000 mask will receive them also.
Most users who do not use individual modem addressing, choose to set a global
system address, and have all modems in their system use the same Unit ID and
same destination address.
Broadcast Transmissions
The double FF is used to identify a broadcast packet. A transmission with a two
digit FF in the first two positions of the destination ID, or in the last two positions
of the destination ID, will be interpreted as a broadcast, and any modem with an
ID that matches the two non-FF digits will receive the data. For example,
sending data with a destination ID of 12FF will be received by any modem with a
unit ID 1200 through 12FF. Sending data with a destination ID of FF34 will be
received by any modem with a unit ID of 0034 through FF34.
The Address Mask
The reason to use hexadecimal digits to represent the unit address, is that along
with the Unit Address programmed into the M7, there is an “Address Mask”
programmed into it. The default mask is FFFF. The address mask is also used
to determine if a particular data transmission should be received by the modem.
For most applications, where one modem talks to one modem, or where all
modems in the system communicate with all other modems in the system, the
Address Mask should stay set to FFFF.
Only in systems where some modems should only talk to certain other modems,
might you want to change the address mask. Whenever data is received over
the air, the Destination Address of the transmission is logically “ANDed” with the
Address Mask in the receiving modem. This is the Effective Destination Address.
The receiving M7 also ANDs its own Unit Address with its Address Mask. The
result is the Effective Unit Address. The Effective Unit Address is compared to
the Effective Destination Address, and if the two are identical, the data will be
received.
Company Confidential
60
Raveon Technologies Corp.
Note: Logically
1 AND 1 = 1,
0 AND 0 = 0,
1 AND 0 = 0,
0 AND 1 = 0
` Figure 1 (Address Filtering)
M7 receives data
over-the-air to
Destination Address
xxxx
“AND” them
together
M7 has Unit
Address yyyy
M7 has
Address Mask
“AND” them
together
zzzz
Compare the two
results from these
two ANDs
Output the data via
serial port if the two
results were
identical
One effect of this is that an address mask of 0000 will cause the M7 modem to
received any data from any unit that transmits. The Destination Address will
effectively be ignored if the mask is set to 0000.
Addressing Examples:
Example 1 (default configuration)
Sending Destination Address = 1234
Receiving Unit Address = 1234
Receiving Unit’s Address Mask = FFFF
Result: Unit will receive the data, because the addresses identically match. When the
addresses are identical, the value of the mask is not important.
Notes: This is the default configuration. All units have address 1234, and all modems will talk
to all other modems with address 1234.
Example 2 (a configuration that won’t work)
Sending to Destination Address = 1236
Receiving Unit Address = 1234
Receiving Unit’s Address Mask = FFFF
Result: No data will be received, because the address do not match, and the address mask
of FFFF requires that all digits in the address match. .
Example 3 (able to receive a data from a group, 1230 – 123F)
Sending to Destination Address = 1236
Receiving M7 Unit Address = 1234
Receiving M7 Address Mask = FFF0
Company Confidential
60
Raveon Technologies Corp.
Result: Data will be received. 1236 ANDed with FFF0 is 1230. 1234 ANDed with FFF0 is
1230. The results of the ANDing match, and thus the data will be received.
Example 4 (able to receive from a group, xx34 where xx is any two digits)
Sending Destination Address = 2234
Receiving M7’s Unit Address = 1234
Receiving M7’s Address Mask = 00FF
Result: Data will be received. 2234 AND 00FF equals 0034. 1234 AND 00FF equals 0034,
therefore they match. The results of the ANDing match, and thus the data will be received.
5.6.
Error Correction
The M7 modem has a built-in error correction mode, commonly referred to as
Automatic Repeat request (ARQ). It works by checking each reception for errors,
and if the data is OK, it sends a short “ACK” packet back over the air telling the
sending station the data was OK.
The M7 modem uses a traditional Carrier Sense Multiple-Access (CSMA)
algorithm with randomized re-try time slots to determine when to re-transmit
packets that must be re-sent. The duration between re-tries increases as the
number of attempts increases.
If received data has an error in it or if the receiving modem does not get the data
due to interference, the receiving modem does not send the ACK back, and the
sending station will automatically re-send the data. There are two aspects to
configuring ARQ:
1)
Enable the ARQ mode in the modem to allow it to transmit ACKs
(ATAK 1 command). This command enables the modem to transmit
ACK packets.
2)
Configure the number of retries the modem should attempt if an ACK
packet is not received back when it sends data (ATRB xx command).
For example, if you set ATRB to 5 with the ATRB 5 command, the
modem will wait for an ACK whenever it sends data. If it receives and
ACK back from the modem that it sent data to, it will do nothing more.
But if it does not receive an ACK, it will resend the same data, trying up
to 5 more times.
The factory default condition is not to send or require ACK packets, so if you wish
to use this mode, program the M7 to transmit ACKs with the ATAK 1 command.
This will cause the modem to send an ACK anytime it receives data from another
modem. Note: If the destination address was a broadcast (FFFF, FFxx, or
xxFF), it will not wait for an ACK.
The number of times it retries to send data that does not get through (does not
get an ACK) is up to the user, but a number of 5 is usually a good compromise.
If after 5 times, the data does not get through, then there probably is something
seriously wrong with the channel or system.
The retried-transmissions are randomly spaced at intervals between
approximately 200mS and 400mS, increasing by 50mS for each attempted
Company Confidential
60
Raveon Technologies Corp.
transmission. Once the modem has sent its data the number of times the user
specified in the ATRB xx command, the data is discarded, and the modem will
continue to operate as normal.
It is very important that if one modem is configured to send ACK packets (ATAK
1) that all other modems communicating with it are also set to expect ACK
packets using the ATRB xx command.
To disable ARQ (the default condition of the modem), disable ARQ with the
ATAK 0 and set retries to zero with the ATRB 0 command.
6. Installation
1.
Secure the M7 modem using the four mounting holes on the side flanges
of the unit.
2.
Connect a DC power source to the DC IN connection on the front of the
modem. Use the supplied cable, and connect the RED wire to +, and the
black wire to – (ground). The black wire and the case of the M7 should
be connected to earth ground.
3.
Connect a good quality antenna, tuned to the operating frequency, to the
RF connector on the front of the modem. Use a good antenna, and place
is at as high-above obstructions as possible.
4.
A separation distance of at least 20 centimeters must be maintained
between the transmitter's radiating structures and the body of the user or
nearby persons.
5.
Connect the computer, terminal, controller, or other hardware device that
will be using the M7 modem to its DB-9 serial I/O connector using a
shielded cable. Secure it to the M7 with the two mounting screws on the
sides of the DB-9 connector.
6.
If the antenna is mounted out doors, us a lighting arrestor in-line with the
antenna, and properly ground the antenna and the M7 chassis to an earth
ground.
Company Confidential
60
Raveon Technologies Corp.
6.1.
Debug Related Commands
Bench Testing
(Must be in command mode to test. Enter +++ at the keyboard to put unit into config/test mode.)
ATTD x
Various transmit test routines.
0 = Go back to normal mode. Stops the test.
1 = Random data transmit.
2 = Hop up/down one channel
3 = Force PLL to fast lock mode
4 = Transmit all 0s
5 = Transmit all 1s
6 = Enable the test points on the PCB.
7 = Transmit CW on center of channel
8 = Transmit preamble (101010 pattern)
SHOW
Display an overview of the configuration.
Ping xxxx
Ping another modem over the air. Transmits a request to xxxx to see if
xxxx can hear the sending station. If it does, it answers with a response
transmission, containing its ID and the signal strength of the reception. .
ATST
Display statistics of how the modem is working.
ATST 1
Display statistics of how the modem’s GPS is working (if installed).
AT$5
Display RSSI. It will scroll the reading until another character comes in
the serial port.
Packet Counter
The packet counter mode will output packet count statistics once per minute. It
will output the number of packets received in the last minute as well as the
running total. T
ATPE
Begin counting and displaying the packet counters every minute
ATPE 1
Reset the packet counters back to zero
ATPE 2
Stop counting and displaying packet counters
Upon power up, the packet counter feature is always disabled.
Company Confidential
60
Raveon Technologies Corp.
7. M7 Diagnostic Provisions
7.1.
Overview of Diagnostics
Internal to the M7 radio modem, is a powerful 32-bit microprocessor. Along with
handing all aspects of radio modulation and demodulation, the microprocessor
also maintains an extensive array of diagnostic information.
This section details the diagnostic information available, and describes how to us
the information to optimize or troubleshoot a M7 radio network.
7.2.
Reading the Diagnostic Information
M7 diagnostic information is read using AT commands, while the unit is in the
Command Mode. Refer to the section “User Serial Port Commands” to learn
how to put the M7 modem into the Command Mode.
To see a general overview of how the modem has been operating, us the ATST
command (status request command), without any parameter. The radio modem
will respond with a list of certain operation statistics that it maintains. All statistics
start counting at 0. The ATST 1 command can be used to reset all statistics
back to 0, except the run-time timers.
Other operation and configuration statistics are available using the ATST
command, with a parameter to specify the desired statistic. The following table
describes the various statistics available.
7.3.
Status and Statistics Command
AT
Command
Command Description
Response
ST
General Communication Statistics – This command will cause the
M7 to output a table of various operational statistics.
Statistics
overview screen
ST1
GPS Statistics – Statistics related to the GPS operation, if installed.
GPS Statistics
overview screen
ST2
Low-level internal statistics – Returns various low-level statistics.
These are subject to change in various firmware revisions.
Low-level
statistics screen
ST3
Compile date and time – Returns the data and the time that the
firmware was compiled.
ST4
Run Time – Returns the amount of time that the modem has been
powered up and running.
ST9
Reset all statistics counters
Company Confidential
Date and time
Run time display
screen
OK
60
Raveon Technologies Corp.
ST10
Statistic Read – Returns numeric values, comma separated, of all
statistics as described in the ST command.
Company Confidential
60
Run time display
screen
Raveon Technologies Corp.
7.4.
ATST Command
The ATST command, will return the following information:
STATISTICS
Good RX Packets :
With Bad CRCs
:
With Bad Noise
:
Bytes received
:
Bytes transmitted:
nnn
nnn
nnn
nnn
nnn
Packets send
:
nnn
ACKs received
:
nnn
ACKs transmitted :
Pkts last minute :
UART errors
:
nnn
nnn
nnn
(packets received over the air with no bit-errors and correct address)
(over-the-air packets with bit errors that were discarded)
(receptions that were aborted due to noise, CW jamming, lost signal…)
(number of bytes this modem received, and sent out its serial port)
(number of bytes this modem received via the serial port, and
transmitted over the air)
(number of packets this modem has transmitted over the air.
Retransmissions in the ARQ mode are not counted)
(Number of ACK packets this modem received, when ARQ was
enabled)
(Number of ACK packets sent over-the-air in the ARQ mode)
(Number of packets received during the last minute)
(serial port framing and overrun errors. Usually these are caused by
incorrect serial port settings)
OK
If there is a hardware problem, there may be one ore more hardware error
messages listing the error types (CPU Exceptions, OS Rebooted, or
Fatal OS failures). Consult the factory if any of these messages ever
appear.)
7.5.
ATST2 Command
The ATST2 command, will return additional lower-level statistics:
RF FIFO overruns :
Wrong address
:
Duplicate packets:
Missing ACKs
:
TX FIFO overflows:
RX FIFO overflows:
OS loop time
:
OS Speed
VCO Bias
Config
OK
:
:
:
Company Confidential
(number of times the modem was too busy to receive data over-the-air)
(packets with addresses intended for some other unit. Also will count
apparent false packets due to random noise)
nnn (number of packets discarded because they already were received, and
subsequently re-received due to ARQ mode or a repeater)
nnn (number of transmissions in ARQ mode, where this sending M7 did not
receive an ACK back as it expected to)
nnn (number of bytes of data that came into the M7 over-the-air, and there
because there was no buffer space for the data, were discarded. If
greater than 0, the serial-port baud-rate should in increased. )
nnn (number of bytes of data came into the M7’s serial port, and there was
no room in the M7 to buffer the data before transmission, so these
bytes were discarded. If greater than 0, flow-control should be enabled,
hardware flow-control implemented, or the serial-port baud rate
reduced.)
nnn (number of times OS executes, per baud. Typical 10-200. 0 or >5000
means there is a serious OS problem).
nnn (speed of the main Operating System, in Hz. Typical 8000-30000. )
nnn (the DAC value that biases the VCO in the radio. 0-1024 = 0-3.3V)
hhhh (hexadecimal representation of an internal configuration word.)
nnn
nnn
60
Raveon Technologies Corp.
7.6.
ATST3 Command
The ATST3 command, will return the time and date the firmware in the M7 was compiled.
7.7.
ATST4 Command
The ATST4 command will return internal timers that tell how long the modem has been powered
up and running. All of these timers restart a 0 upon power up.
Run time:
Years: nnn
Days : nnn
Hours: nnn
Min:
nnn
Sec:
nnn
Uptime:nnn
OK
7.8.
(number of years running)
(number of days running, resets to 0 after one year)
(number of hours running, resets to 0 after 23 hours, 59 minutes, 59 seconds)
(number of minutes running, resets to 0 after 59 minutes, 59 seconds)
(number of seconds running, resets to 0 after 59 seconds)
(number of seconds running. Does not reset.
AutoStatus
The auto-status feature of the M7 enables it to automatically transmit a packet of status
information. By default, this feature is disabled.
To enable the Auto Status feature, use the ATAS xxx command, where xxx is the status interval
in minutes. The interval may be between 1minute an 65000 minutes (45 days).
The general format of the message that the modem will send is:
[an ASCII STX character, 02]
BEGIN STATUS
ATMY=1234
ATVR=D1
ATDT=1234
ATVB=12300
UPTIME=120
OSERR=0
PRX=1295
PTX=7933
[an ASCII ETX character, 03]
The first character is a Start of Text character. This is followed by the phrase “BEGIN STATUS”.
Each line in the status transmission is terminated with an ASCII carriage return (0D) and line feed
(0A).
As new features are added to the M7, there may be new status lines added, but all M7 modems
with Revsion D or higher firmware support at a minimum, the above shown status parameters.
The status transmission will end with an ASCII 0 character, the End of Text character.
The parameters passed in the status message are:
ATMY The ID of the modem sending the status.
ATVR The firmware version in the modem
ATDT The ID the modem is programmed to send data to.
ATVB DC voltage, in millivolts of the DC input to the modem.
UPTIME Number of seconds since this modem has turned on.
OSERR The number of Operatin System Errors. Normally this is 0.
PRX The number of packets this modem has received.
Company Confidential
60
Raveon Technologies Corp.
PTX The number of packets this modem has transmitted.
The ID code that the status information is sent to, is set with the ATMA xxxx command.
Whenever a status transmission is sent, the “TO ID” of the transmission is the address set using
the ATMA command. This allows the system to be configured in a way the normal modem
communications take place between the modems, and the status information only is delivered to
modems that need to receive it.
Company Confidential
60
Raveon Technologies Corp.
8. Appendix A. Serial Port Hardware
8.1.
Serial Port Data and Handshaking Signals
In computer terminology, the RF modem is considered a “Data Communications
Equipment” device, or DCE. The user’s hardware that the modem is connected
to is considered “Data Terminal Equipment”, or DTE.
Following is a description of how data and control is communicated over the
various serial port signals between the modem (DCE) and another device (DTE)
that the modem’s I/O port is connected to.
TxD (INPUT)
This line is used to transmit data from the DTE to the DCE. It is maintained at a
logical 1 state when nothing is transmitted. If Hardware Flow Control is enabled
in the modem, the terminal will start to transmit data to the modem when a logical
1 is present on all of the following lines:
•
•
Clear To Send (output from modem)
Request to Send (output from the DTE)
RxD (OUTPUT)
This circuit is used to receive data from the DCE to the DTE. The modem will
start to transmit data to the DTE when a logical 1 is present on all of the following
lines:
•
•
Data Terminal Ready (reply that it is OK to send)
Data Set Ready (asserted by the modem)
RTS
On this line, the DTE will send a signal when it wants to receive data from the M7
modem. The M7 modem will not output data unless this pin is low, or “Flow
Control” has been disabled in the modem set-up. When a DTE (such as a PC or
microcontroller) wants to stop the flow into it, it negates RTS. Negated "Request
To Send" (digital 1) means "request NOT to send to me" (stop sending). When
the DTE is ready for more bytes it asserts RTS (digital 0) and the flow of bytes to
it resumes. DCE equipment works the same way but sends the stop signal out
the CTS pin. Thus it's RTS/CTS flow control using 2 lines. The user may turn
this feature off or on, using the ATCH command. The default is OFF. To turn it
on, issue an ATCH 1 command.
CTS
This signal is an output from the M7, and it indicates the M7’s ability to send
more data. If the user tries to send more data into the M7 than the M7 can
transmit over the air, it will negate the signal on this pin. The CTS may be
asserted when the serial-port data rate is greater to or equal to the over-the-air
Company Confidential
60
Raveon Technologies Corp.
rate. For example, if the over-the-air data rate is set to 2400 baud, and the user
is send data into the modem at 9600 baud, the modem will negate the CTS
signal once the M7’s internal data buffers become full.
CD
On this line the modem indicates to the DTE that it has received a carrier from a
remote device. It will assert this signal any time there is a carrier detected. The
modem may be configured to assert this when an RF carrier is detected (any onchannel RF, voice or data), assert it only when another RF modem signal is
detected, or always assert it. The operation of this line is configured with the
ATR1 command. The default is 1 (asserts when M7 data is detected on the radio
receiver).
DTR
This line is an input to the M7. It is normally ignored because the default
configuration of the M7 modem is to ignore this signal. If the DTR line is enabled
for use, using the ATK5 1 command, the DTR input line can be used to put the
M7 modem into its SLEEP mode. With DTR enabled, anytime the DTR line is a
logic 0, the M7 will be operating normally. With DTR enabled, anytime the DTR
line is a logic 1, the M7 will go into a SLEEP mode, drawing much less DC
power.
Company Confidential
60
Raveon Technologies Corp.
8.2.
Null modem without handshaking
Sometimes, a “Null Modem” cable may be required to connect the M7 modem to
another device. The specific connections are very dependent upon the type of
hardware and handshaking used, but the following sections should help in
configuring a null-modem cable.
How to use the handshaking lines in a null modem configuration? The simplest
way is to don't use them at all. In that situation, only the data lines and signal
ground are cross connected in the null modem communication cable. All other
pins have no connection. An example of such a null modem cable without
handshaking can be seen in the figure below.
Simple null modem without handshaking
(DB-9 Female shown. Same wiring for male-to-male cable)
8.3.
Connector 1
Connector 2
Function
2
3
Rx
Tx
3
2
Tx
Rx
5
5
Signal ground
Compatibility issues
There is a problem, if either of the two devices checks the DSR or CD inputs.
These signals normally define the ability of the other side to communicate. As
they are not connected, their signal level will never go high. This might cause a
problem.
The same holds for the RTS/CTS handshaking sequence. If the software on
both sides is well structured, the RTS output is set high and then a waiting cycle
is started until a ready signal is received on the CTS line. This causes the
software to hang because no physical connection is present to either CTS line to
make this possible. The only type of communication which is allowed on such a
null modem line is data-only traffic on the cross connected Rx/Tx lines.
Company Confidential
60
Raveon Technologies Corp.
8.4.
Null modem with full handshaking
In this null modem cable, seven wires are present. The cable is shown in the
following figure.
Null modem with full handshaking
(DB-9 Female shown. Same wiring for male-to-male cable)
Connector 1
Connector 2
2
3
Rx
Tx
3
2
Tx
Rx
4
6
DTR
DSR
5
5
Signal ground
6
4
DSR
DTR
7
8
RTS
CTS
8
7
CTS
RTS
8.5. Compatibility
Function
issues
The null modem cable with full handshaking does not permit the older way of flow
control to take place. The main incompatibility is the cross connection of the RTS
and CTS pins. Originally, these pins are used for a question/answer type of flow
control. When the full handshaking null modem cable is used, there is no request
anymore. The lines are purely used for telling the other side if communication is
possible.
The main advantage of this cable is, that there are two signaling lines in each
direction. Both the RTS and DTR outputs can be used to send flow control
information to the other device. This makes it possible to achieve high
communication speeds with this type of null modem cable, provided that the
system has been designed for it.
Company Confidential
60
Raveon Technologies Corp.
9. Troubleshooting
Symptom: Unit will not receive
Solution #1. Verify that the modem is on the correct RF channel. If it is, the RX LED should
blink every time another modem tries to transmit to it. If the RX LED does not blink when it
should be receiving, it is on the wrong RF frequency.
Soultion #2. If the addresses match, and RX LED blinks but still no reception of data, verify
that the RTS signal is asserted. The M7 will not output data if the RTS signal on the DB-9 I/O
connector is not asserted. If the user’s hardware cannot assert the RTS hardware line, disable
hardware flow control in the M7 modem, using the ATCH 0 command.
Solution #3. If the RX LED blinks, verify that the Unit Address of the sending modem matches
the unit address of the receiving modem. If this is OK, verify that the over-the-air baud rate of all
modems is the same (ATR2 command).
Solution #4. Verify Low Power Mode. The M7 has an optional Low Power Mode (LPM). If
LPM is enabled, the M7 will power down whenever the DTR line of the serial port is turned off.
The Power LED will blink once every 10 seconds in the LPM mode. The ATSM command is
used to set or read the Low Power Mode. ATSM 1 enables it, and ATSM 0 disables it. If LPM is
used (ATSM 1), then the M7 will turn off when the DTR line is off, or the program connected to
the serial port is closed, or the RS-232 connector is un plugged.
Symptom: Unit will not transmit
Solution #1. Verify that CTS is wired. Some devices that could be connected to the M7 will
require the CTS signal to be asserted. The M7 does assert this signal, but if the wire is not
connected, you device may not be outputting data to the M7. If the TX LED blinks, the M7 is
transmitting data. Every time data enters the modem, the TX LED should blink
Solution #2. Verify that serial port timeout is OK. The ATG0 command sets the number of
microseconds that the M7 will look for in the serial input data stream. If a pause greater than this
value happens, the modem will transmit. If the ATG0 paramter is set very large, say 2000000,
this means 2 seconds, and the modem may simply be waiting a long time
Solution #3. Verify that the radio channel is clear or BCL is off. The ATBC 1 command
enables Busy Channel Lockout. If BCL is on, the modem will not transmit on a busy channel.
The ATBC 0 command turns it off, and thus the modem will transmit when it needs to, regardless
if the channel is busy. The RX led on the front of the modem is illuminated whenever the radio
channel is busy (RF present).
Solution #4. Verify Low Power Mode. The M7 has an optional Low Power Mode (LPM). If
LPM is enabled, the M7 will power down whenever the DTR line of the serial port is turned off.
The Power LED will blink once every 10 seconds in the LPM mode. The ATSM command is
used to set or read the Low Power Mode. ATSM 1 enables it, and ATSM 0 disables it. If LPM is
used (ATSM 1), then the M7 will turn off when the DTR line is off, or the program connected to
the serial port is closed, or the RS-232 connector is un plugged.
Symptom: Receive light blinks, but no data is received
Solution #1. Verify Input/Output Configuration. The M7 has numerous I/O options. RS232 is
standard, but Ethernet, RS485 or RS422 may be configured also. Use the ATIO command to
view how the I/O is configured. ATIO 0 is the default (RS232 mode).
Solution #2. Verify the serial port baud rate. This is difficult if it is set wrong, because you
cannot enter the command mode to check it. Try all possible baud rates, and see if one of them
works with the modem. Alternately, remove the rear cover of the modem, and press the CONFIG
button. This will force the modem into the Command Mode, as well as set the serial port to 9600
Company Confidential
60
Raveon Technologies Corp.
baud, 8 data bits, one stop, and no parity. If the baud-rate was OK, verify the AT, BT and CT
times, that they are long enough for you to enter the +++ string.
Symptom: Long delay before transmitting
Solution #1. Verify that serial port timeout is OK. The ATR3 command sets the number of
milliseconds that the M7 will look for in the serial input data stream. If a pause greater than this
value happens, the modem will transmit. If the ATG0 parameter is set very large, say 2000, this
means 2 seconds, and the modem may simply be waiting a long time. Typical settings for this
parameter are 20 (20mS).
Symptom: Cannot enter Command Mode
Solution #1. Verify the serial port baud rate. This is difficult if it is set wrong, because you
cannot enter the command mode to check it. Try all possible baud rates, and see if one of them
works with the modem. Alternately, remove the rear cover of the modem, and press the CONFIG
button. This will force the modem into the Command Mode, as well as set the serial port to 9600
baud, 8 data bits, one stop, and no parity. If the baud-rate was OK, verify the AT, BT and CT
times, that they are long enough for you to enter the +++ string.
Solution #2. Handshaking. You may have hardware handshaking enabled on your terminal
program, but the hardware or cable may not support it. Disable hardware handshaking on your
terminal program to verify this is the issue.
Symptom: Modem appears dead.
Solution #1. Verify the power is on. When the modem has good DC power, the PWR LED
will blink once per second. If it is not blinking, either the modem does not have power, the
modem is broken, or the LEDs have been disabled via the ATL0 command.
Solution #2. Verify the internal fuse OK. There is an internal fuse in the RV-M7, protecting it
from reverse-voltage and electrical failures. If the power LED does not blink or come on when
DC is applied, check the fuse and replace it with the same type 3-amp mini fuse, and try again. If
you replace the fuse, the unit must be carefully check for damage and proper operation before
being installed. If you replace the fuse, you must use a Littlefuse brand fuse, part number
0297003 or Raveon part, number 1X726-3 to maintain calibration of your unit.
Solution #3. Verify Low Power Mode. The M7 has an optional Low Power Mode (LPM). If
LPM is enabled, the M7 will power down whenever the DTR line of the serial port is turned off.
The Power LED will blink once every 10 seconds in the LPM mode. The ATSM command is
used to set or read the Low Power Mode. ATSM 1 enables it, and ATSM 0 disables it. If LPM is
used (ATSM 1), then the M7 will turn off when the DTR line is off, or the program connected to
the serial port is closed, or the RS-232 connector is un plugged.
Symptom: Repeater will not repeat.
Solution #1. Verify the repeater’s Unit ID is unique. An RV-M7 configured to be a repeater
will not repeat messages it originated. If other units in the system have the same ID as the
repeater, the repeater will not repeat them because it thinks the it originated the transmission.
Set the MTID of the repeater to a unique ID number.
Company Confidential
60
Raveon Technologies Corp.
10. Mechanical
Company Confidential
60
Raveon Technologies Corp.
Limited One Year Warranty
If within one year from date of purchase, this product fails due to a defect in material or
workmanship, Raveon Technologies, Incorporated will repair or replace it, at Raveon’s sole
discretion. This warranty is extended to the original consumer purchaser only and is not
transferable.
This warranty does not apply to: (a) product damage caused by accident, dropping or abuse in
handling, acts of God or any negligent use; (b) units which have been subject to unauthorized
repair, opened, taken apart or otherwise modified; (c) units not used in accordance with
instructions; (d) damages exceeding the cost of the product; (e) batteries; (f) the finish on any
portion of the product, such as surface and/or weathering, as this is considered normal wear and
tear; (g) transit damage, initial installation costs, removal costs, or reinstallation costs; (h) damage
due to lighting, floods, fire, or earthquakes.
RAVEON TECHNOLOGIES INCORPORATED WILL NOT BE LIABLE FOR INCIDENTAL OR
CONSEQUENTIAL DAMAGES. SOME STATES DO NOT ALLOW THE EXCLUSION OR
LIMITATION OF INCIDENTAL OR CONSEQUENTIAL DAMAGES, SO THE ABOVE
LIMITATION OR EXCLUSION MAY NOT APPLY TO YOU. THIS WARRANTY IS IN LIEU OF
ALL OTHER EXPRESS OR IMPLIED WARRANTIES. ALL IMPLIED WARRANTIES, INCLUDING
THE WARRANTY OF MERCHANTABILITY AND THE WARRANTY OF FITNESS FOR A
PARTICULAR PURPOSE, ARE HEREBY MODIFIED TO EXIST ONLY AS CONTAINED IN THIS
LIMITED WARRANTY, AND SHALL BE OF THE SAME DURATION AS THE WARRANTY
PERIOD STATED ABOVE. SOME STATES DO NOT ALLOW LIMITATIONS ON THE
DURATION OF AN IMPLIED WARRANTY, SO THE ABOVE LIMITATION MAY NOT APPLY TO
YOU.
This warranty gives you specific legal rights and you may also have other rights which vary from
state to state.
Warranty service is available by mailing postage prepaid to:
Raveon Technologies Corporation
990 Park Center Drive
Suite C
Vista, CA 92081
To obtain warranty service, include a copy of the original sales receipt or invoice showing the
date, location, and price of purchase. Include a written description of the problem with the
product, a phone number and name of person who may be contacted regarding the problem, and
the address to where the product should be returned.
Products repaired under warranty will typically have their program memories erased and reset to
factory default settings.
Company Confidential
60
Raveon Technologies Corp.