1
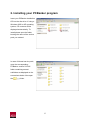
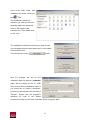
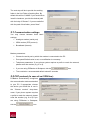
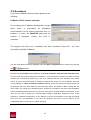
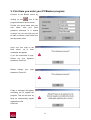
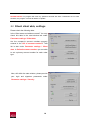
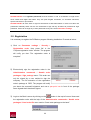
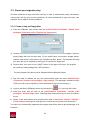
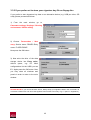
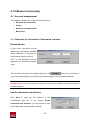
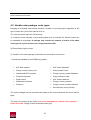
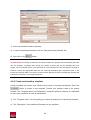
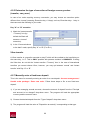
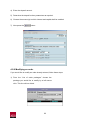
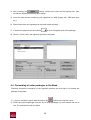
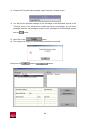
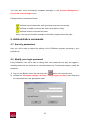
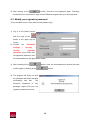
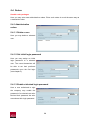
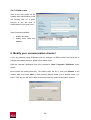
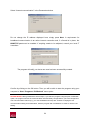
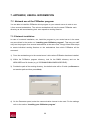
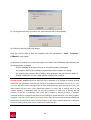
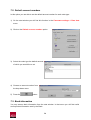
PCBanker
USER MANUAL
1
1. Introduction .......................................................................................................................... 3
2. Installing your PCBanker program.................................................................................... 5
2.1 Communication settings ................................................................................................ 7
2.2 PPP protocol (in case of an ISDN line):........................................................................ 7
2.3 Broadband....................................................................................................................... 8
3. First time you enter your PCBanker program .................................................................. 9
3.1. Check client data, settings .......................................................................................... 10
3.2. Registration.................................................................................................................. 11
3.3. Create your signature key .......................................................................................... 12
3.3.1 Create a key on floppy disc................................................................................... 12
3.3.2 If you prefer not to store your signature key file on floppy disc....................... 13
4. PCBanker functionality ..................................................................................................... 14
4.1. Account management.................................................................................................. 14
3.1.1 Requests for information / Statements, bulletins ............................................... 14
Download data ................................................................................................................ 14
Handle statements and bulletins ................................................................................... 14
Export data ..................................................................................................................... 15
4.1.2 Account balance..................................................................................................... 15
4.1.3 Daily executed transactions .................................................................................. 16
4.1.4 Account history...................................................................................................... 16
4.2. Handle order package, order types ........................................................................... 17
4.2.1 The order entry window ....................................................................................... 18
4.2.2 Manually enter a HUF transfer order................................................................. 18
4.2.3 Create and handle a template .............................................................................. 19
4.2.4 Manually enter a foreign currency transfer order............................................. 20
4.2.5 Determine the type of execution of foreign currency orders (transfer, carry
over) ................................................................................................................................. 22
Viber transfer ................................................................................................................. 22
4.2.7 Manually enter a fixed term deposit.................................................................... 22
4.2.8 Modifying an order ............................................................................................... 23
4.3. Electronic signature of order packages ..................................................................... 24
4.4. Forwarding of order packages to the Bank .............................................................. 25
5. Administrative commands................................................................................................. 27
5.1. Security parameters .................................................................................................... 27
5.2. Modify your login password....................................................................................... 27
5.3. Modify your signature password ............................................................................... 28
5.4. Orders........................................................................................................................... 29
5.4.1 Administrative orders ........................................................................................... 29
5.4.1.1 Delete a user ........................................................................................................ 29
5.4.1.2 Set initial login password................................................................................... 29
5.4.1.3 Enable a blocked login password...................................................................... 29
5.4.1.4 Add a user ........................................................................................................... 30
6. Modify your communication channel............................................................................... 30
7. APPENDIX, USEFUL INFORMATION......................................................................... 32
7.1. Network use of the PCBanker program.................................................................... 32
7.1.2 Network installation:............................................................................................. 32
7.2. Default account numbers............................................................................................ 34
7.3. Bank information ........................................................................................................ 34
2
1. Introduction
Welcome as a new user of the PCBanker program! We hope that you will be satisfied by the
scope of services available via the PCBanker. MKB Bank would like to successfully cooperate with their clients.
Please browse through the page ‘FOR YOUR SECURITY / Useful advice’ at www.mkb.hu to
make sure you are using PCBanker in the most secure way possible.
http://www.mkb.hu/red_for_your_sec/useful_advice/useful_advice.mkb
The essence of this electronic client banking system
By installing PCBanker on a computer which has internet access you will be able to
efficiently handle orders and transactions with the Bank and manage the accounts of your
company at your own workplace.
With the aid of PCBanker it will take you a matter of minutes to execute bank transactions or
access the most up-to-date information provided by the Bank. You may immediately
ascertain whether a given money transfer has arrived at your account or instantly check the
latest bank rates.
In developing the PCBanker system we have afforded great care to data protection. All data
transaction between your workplace and the Bank will be encrypted.
A single installation of the PCBanker electronic banking system can handle several clients at
one time. So, if you are working for a group you will be able to manage the accounts of all
group members you are in charge of.
Run into a problem or a question while using this software or managing your accounts?
Please do not hesitate to enlist our help. If you are in Hungary, our operator will take your call
24 hours a day on 06-40-333-666.
3
Technical prerequisites for the use of PCBanker
Hardware:
•
IBM compatible PC computer (min. 486DX CPU), with 60 MB free hard disk capacity
(the installation takes roughly 25 MB, the rest is necessary for operation)
•
VGA or SVGA graphics card, colour monitor (if possible with a 800x600 resolution
and at least 256 colours)
•
32 MB memory (the program works with 16 MB but will not be able to handle larger
data files)
•
broadband internet access, ISDN landline, or a landline suitable for fax (even an
extension line is fine), or Hayes compatible modem (possibly MNP5 property, min.
speed 19.2 kb/s)
•
CD drive
•
floppy (optional), or USB key, or any data carrier which can be connected to the
computer (e.g. SD card)
•
printer (optional)
Software:
•
Windows’95, Windows’98, Windows ME, Windows 2000, Windows NT 4.0 or
Windows XP
•
MS Internet Explorer 4.0 or higher, or Firefox browser
The PCBanker client banking system does not require a constant internet connection since
data exchange takes only a few minutes. In virtually all cases the existing IT infrastructure
will do the job.
4
2. Installing your PCBanker program
Insert your PCBanker installation
CD into the disc drive. If using a
Windows 2000 or XP operating
system, CD contents will be
displayed automatically. To
install please open the folder
bearing the name of the service
pack you ordered.
In case of Normal service pack,
open the corresponding
PCBanker version 5.02-XX
folder containing several
subfolders as displayed on the
screenshots below. Now open
the
folder.
5
Once in the Disk1 folder, start
installation by double clicking on
the
file.
The installation wizard will
welcome you. Now choose your
language within the drop-down
menu in the middle of the
welcome box. Then double click
on the icon.
The installation wizard will welcome you. Now choose
your language within the drop-down menu in the middle
of the welcome box.
button.
Then double click on the
Now the program will ask for the
installation data. By default a pcbankar
folder will be created on the C:\ HDD
drive; this will be the installation folder. If
you would like to install it elsewhere,
provide the desired path with the help of
“Browse”. Please find the program’s
individual
ID
code
in
the
sealed
envelope provided by your bank consultant. Enter and press “Next”.
6
The next step will be to provide the working
folder in the line Folder of working files. By
default this will be C:\MKB. If you would like to
install it elsewhere, provide the desired path
with the help of “Browse”. If you are satisfied
with the path of that folder, press “Next”.
2.1 Communication settings
You may choose between three basic
settings:
•
Analogue modem (serial port)
•
ISDN modem (PPP protocol)
•
Broadband (Internet)
Modem parameters:
•
Choose the serial port by which the modem is connected to the PC.
•
Port speed:Default value is set; no modification is necessary.
•
Telephone parameters: If your phone system requires a prefix to reach the network,
please enter the number (e.g. 0 or 9).
•
If you are using PCBanker in Budapest, tick the
•
Time restriction: recommended default value 45 seconds.
2.2 PPP protocol (in case of an ISDN line):
PCBanker automatically recognises
the communication devices attached
to your PC. If appropriate, choose
the device you would like to use in
the “Choose modem” drop-down
menu. If your phone system requires
a prefix to reach the network, please
enter the number (e.g. 0 or 9).If you
are using PCBanker in Budapest,
tick the
box.
7
box.
2.3 Broadband
If you have broadband internet access please do the
following.
PCBanker TCP/IP network parameter
Do not change the IP address displayed here, simply
press
“Next”.
A
precondition
for
broadband
communication is a live internet connection and, if a
firewall is in place, the #8005TCP port must be
enabled.
If
necessary,
contact
your
local
IT
consultant.
The program will inform you if installation has been successful. Press OK – you have
successfully installed PCBanker!
You are now able to start the program from the Start / Programs menu, where you will see
the
shortcut.
PLEASE NOTE! DO NOT install PCBanker on several computers with the same individual code,
as in this case the program will become inoperative. If you would like to manage your data in several
locations not connected via network (e.g. from your notebook and from your workplace PC), please
ask for as many extra codes (free of charge) as required and ensure you use a different code with
each installation. It is NOT possible to reinstall PCBanker as this may cause severe disfunctioning of
the program and may cause data loss and temporary failure. So please do NOT reinstall with the
same code if you change your operating system. However it is possible to move the entire installation
and the installed program will work very much the same way in another software environment. In this
case you only have to modify your communication settings if applicable. Following a move of the
program to a different configuration, do not attempt to connect to the Bank’s server with the original
copy from your old workstation! If you have any difficulty, feel free to ask the advice of our
TeleBANKár staff on 06-40-333-777 (within Hungary).
8
3. First time you enter your PCBanker program
Connect to the Bank’s server by
clicking on the
icon in the
program window’s top left corner.
Provide your group name and your
user
name,
then
your
initial
password delivered in a sealed
envelope. At your next login you will
be able to choose a user name from
the drop-down menu.
Upon your first login to the
bank
server,
up
to
three
messages will appear:
If you are authorised to sign:
Please
set
your
signature
password. Press OK.
Please
change
your
login
password. Press OK.
Finally a message will appear
reminding you to register the
program. This can be done by
filing an electronically signed
registration order.
Press OK.
9
PLEASE NOTE! The program will mark any password entered with stars. Passwords are not case
sensitive; the program converts all letters to capitals.
3.1. Check client data, settings
Please check the following data:
Is the Client name and address correct? You may
check this data in the start window tab under
Parameter settings / Client data.
Are the company’s account numbers properly
entered in the List of account numbers? That
list is also under Parameter settings / Client
data. In Default account numbers you are able
to set a primary account number for each order
type.
Now, still within the start window, please provide
your login and signature passwords under
Parameter settings / Security.
10
PLEASE NOTE! Your signature password must be between 7 and 12 characters in length and it
must contain both digits and letters. Only use plain English characters, no accented characters,
special characters or punctuation.
PLEASE NOTE! All users have to login for themselves as described above in order to set their own
passwords. Naturally those who are not authorised to sign will only be asked to provide their login
password. Users can change any of their passwords at any time under Parameter settings.
3.2. Registration
It is necessary to register the PCBanker program following installation. Proceed as below:
1) Click on Parameter settings / Security /
Registration order, then press OK in the
“Prepare registration order” window. The program
will notify you that “The registration order is
complete”.
2) Electronically sign the registration order in the
Administrative commands / Handle order
packages / Sign package menu. This order can
only be signed by a user entitled to sign the
company. The file extension of the registration
order’s package is .REG. The program will notify
you about the successful signature and now a pen-point icon in front of the package
name signals that it has been signed.
3) Login to the Bank’s server by clicking on the
button in the top left corner. Now send
the registration order with the help of the Administrative commands / Handle order
packages / Send order file menu section “Send order package to the bank”.
11
3.3. Create your signature key
All users authorised to sign need their own key in order to electronically verify transactions,
concurrently with the key and the password. All users authorised to sign need their own
signature key in addition to their password.
3.3.1 Create a key on floppy disc
1) From the PCBanker main screen enter the Administrative commands / Handle order
packages / Enter new order / Register key floppy menu.
2) Choose the user from the list whose signature key you would like to prepare. Insert an
empty floppy disc into the disc drive. (If you would rather use another storage device,
read the next section.) Now click on the “Prepare key disc” button. The program will notify
you when the key is complete by asking you to remove the floppy disc.
3) Remove disc, then click on the “SAVE” button in the upper left corner, the program
will create an order package with .RFP extension.
The thus prepared key disc must be validated with the Bank as follows:
1) Sign the order to validate the key disc electronically under the menu Administrative
commands / Handle order packages / Sign package. (The package’s extension will be
.RFP and it can only be signed by a user authorised to sign for the company.)
2) Login to the Bank’s PCBanker server by clicking at the
icon in the top left corner.
3) Send this order with the help of the Administrative commands / Handle order
packages / Send package menu. Following data transmission log out from the Bank’s
server.
4)
Return to the start window and provide printer data in Parameter settings / Settings /
Printer settings and prepare a test printout to check the set up has been successful.
You have now successfully registered the program and will be able to take advantage of all
functions.
12
3.3.2 If you prefer not to store your signature key file on floppy disc
If you prefer to store signature key data on an alternative device (e.g. USB pen drive, SD
card), please proceed as follows:
1)
From
the
main
window,
go
to
Parameter settings / Settings / Running
environment / INI file editing.
2) Choose Transactions / New
entry. Section name: DRIVES Entry
name: FLOPPYDRIVE.
Now press the OK button.
3) Now write the drive of the data
storage device into Entry value,
without
space,
e.g.:
F:\.
Most
configurations list the USB1 port as
F:\. Again press the OK button. Now
you may close all windows and
panels in order to return to the main
window.
PLEASE NOTE! If you choose another device, always keep your signature data in the root folder; do
not create a folder of its own since the signature will not work in this way. E.g. F:\ (NOT: F:\signature\)
13
4. PCBanker functionality
4.1. Account management
This chapter is divided into 4 main functional sections:
•
Requests for information
•
Orders
•
Handling of standing data
•
Bank rates
3.1.1 Requests for information / Statements, bulletins
Download data
In this menu, download account
statements and bulletins available
within PCBanker. If required you
may instantly create a printout.
Click on the Download account
statements or Download bulletins
menu.
Then choose a start and a closing date and press the
button. On completion of
a successful data request, you will find the requested data in the Downloaded data list.
PLEASE NOTE! If you do not provide a start and a closing date, PCBanker will download the last
available statement.
Handle statements and bulletins
Click View to open the line selected in the
Downloaded
data
list.
If
you
choose
Delete
statements and bulletins, you may provide a date
and all data older than that will be deleted.
14
PLEASE NOTE! Deletion does not extend to the Bank’s server. You may at any time download again
data thus deleted.
Export data
Use this menu to export data downloaded e.g. to your private computer, or to be processed
in your company’s financial system. PCBanker is able to export in SAP and TXT formats.
PLEASE NOTE! In the case of multiple accounts, the “Filter” function available in the main menu
allows you to determine to which account numbers the export relates to.
4.1.2 Account balance
Here you are able to view the current balance of the accounts managed in
PCBanker. You must be online with the Bank’s server when requesting this
information, do so by pressing the
button in the upper left corner. Then choose
15
the Account balance option and a pop-up window will display the available amount.
PLEASE NOTE! If you request the balance of an account to which you are not authorised,
the amount will be marked ******.
4.1.3 Daily executed transactions
Here you may always view the transactions filed and executed on any given day. If there
were no transactions, the pop-up window will be empty.
4.1.4 Account history
Here you may view the transactions of an
account within a given period. Click on
Account history, and then press the
button. Now choose the required
account number and enter the interval. Click
on
OK
to
download
the
requested
information.
16
PLEASE NOTE! If you do not provide a date PCBanker will download the data of the last day on
which transactions took place.
4.2. Handle order package, order types
Handling an individual order always involves a number of recurring steps, regardless of the
type of order form you will be required to fill in.
The most important steps are the following:
1) Create the order manually or by importing data from an external file. Several orders can
be uploaded as a package. A package may contain any number of orders of the same
order type for a given account on a single execution date.
2) Electronically sign the order.
3) Transfer of the order package to the Bank and verification of execution.
Transactions handled by the PCBanker program:
•
HUF bank transfer
•
HUF credit drawdown
•
Foreign currency carry-over
•
Group transfer order
•
International HUF transfers
•
Foreign currency credit drawdown
•
Fixed term deposits
•
Group collection order
•
Postal orders
•
HUF credit instalment
•
Withdrawal of deposit
•
Foreign currency transfer
•
Collection
•
Foreign currency credit instalment
•
Documentary money transfer
The order packages will be processed according to the contract between the client and the
Bank.
The menu for entering a new order is Account management / Handle order package /
Enter new order. Simply choose the desired order type.
17
4.2.1 The order entry window
For every order type the entry window consists of the following main sections:
•
Principal data
•
Beneficiary data
•
Transaction details
4.2.2 Manually enter a HUF transfer order
This is the menu for manually entering a new order: Account management / Handle order
package / Enter new order. Follow these steps to file a new order.
1) If you are managing several accounts, choose the desired account from the “Principal and
account to be charged” drop-down menu. The program will load the appropriate currency
and the account name.
2) Fill in the masks “Name of beneficiary” and “Account of beneficiary”. The program will
automatically load the “Bank of beneficiary”.
3) Tick the “Resident” box if the beneficiary is a Hungarian resident with a Central Bureau of
Statistics number (KSH szám). If the beneficiary is not a resident, choose the appropriate
country code from the drop-down menu.
4) Enter the text of any communication to your partner, if
appropriate.
5) Enter the amount to be transferred.
6) Enter the execution date. If you do not provide a date, the program will load today’s date.
18
7) Enter the certificate number (optional).
8) In case of a partial performance, tick the “Part performance allowed” box.
9) Now click on the
button.
PLEASE NOTE! If entering several items one after the other, the program will automatically put these
into one package. A package may contain any number of items and only the package has to be
signed, not the individual items. If you would like to enter transactions to be forwarded to the bank in
advance, choose the appropriate date from the “Planned forwarding date” drop-down menu. If you
provide an execution date in the future, the items will be placed into today’s package but the bank will
execute the transaction on the appropriate date.
4.2.3 Create and handle a template
Using a template will render more efficient the process of entering transactions. Press the
button to create a new template. Provide your partner’s data in the pop-up
window. The “Template name” and “Description” masks are optional. However, it is advisable
to name your templates for ease of identification.
1) The “Template name” can be anything you choose to enable you to identify the template.
2) The “Description” is for additional information on the template.
19
3) Now fill in the “Name of beneficiary” and “Account of beneficiary” masks. The program
will load the “Bank of beneficiary”.
4) Tick the “Resident” box if the beneficiary is a Hungarian resident with a Central Bureau of
Statistics number (KSH szám). If the beneficiary is not a resident, choose the appropriate
country code from the drop-down menu.
5) In “Communication”, provide any note to the beneficiary or ID number regularly attached
to the transaction.6)
In case of a partial performance, tick the “Part performance
allowed” box.
7) Now click on the
button.
PLEASE NOTE! You cannot provide variable transaction details in a template, except for the ticking
the “Part performance allowed” box. The above steps apply to all order types.
4.2.4 Manually enter a foreign currency transfer order
This is the menu for manually entering a new order: Account management / Handle order
package / Enter new order. Follow these steps to file a new order.
1) If you are managing several accounts, choose the desired account from the “Principal and
account to be charged” drop-down menu. The program will load the appropriate currency
and the account name.
2) Fill in the mask “Name and address of beneficiary’s bank”. In case of an international
20
transfer, also provide the SWIFT code and the IBAN account number in the appropriate
masks. In case of a Hungarian bank it is not necessary to provide a SWIFT code; the
domestic account number will be sufficient.
3) Tick the “Resident” box if the beneficiary is a Hungarian resident with a Central Bureau of
Statistics number (KSH szám). If the beneficiary is not a resident, choose the appropriate
country code from the drop-down menu.
4) Enter the text of any communication to your partner, if
appropriate.
5) Enter the currency of the beneficiary account.
6) Enter the amount to be transferred.
7) Enter the currency of the amount.
8) Mark the repartition of local and foreign charges.
9) Provide the execution date. If you do not provide a date, the program will load today’s
date.
10) If appropriate, mark the
“Instant transfer / Treasury”
box, or fill in the
“Communications to the
bank” mask. (For details
see section 3.2.5.)
11) Choose the transaction’s
title from the “International
payments title".
12) If appropriate, fill in the
“Communications to the
bank” mask.
13) Now click on the
button.
21
4.2.5 Determine the type of execution of foreign currency orders
(transfer, carry over)
In case of an order requiring currency conversion, you may choose an execution option
different from ‘normal’ (meaning, Execution day + 2 days), such as, Execution day + 1 day. In
that case mark the following in your order.
Day “A” or “B” execution
1) Mark the “Instant transfer
/ Treasury” box (by
default the Bank will
assume a ‘normal’
execution).
2) In the “Communications
to the bank” mask, specify Day “A” or “B” (E or E+1)
Viber transfer
A Viber transfer is a transfer executed on day E which will be credited to the beneficiary on
the same day, i.e. E. This is ONLY possible with partners resident in HUNGARY. If ticking
the Viber box, do not tick the “Instant transfer / Treasury” box. In the case of international
transfers you cannot choose Viber, however, you may opt between ‘normal’ and ‘instant
transfer’ with Day “A” or “B”.
4.2.7 Manually enter a fixed term deposit
This is the menu for manually entering an order for a new deposit: Account management /
Handle order package / Enter new order. Follow these steps to file a new fixed term
deposit.
1) If you are managing several accounts, choose the account of deposit from the “Principal
and account to be charged” drop-down menu. The program will load the appropriate
currency and the account name.
2) Choose the desired deposit from the “Type of deposit” drop-down menu.
3) The program will load the value of “Disposition at maturity” corresponding to that type.
22
4) Enter the deposit amount.
5) Determine the deposit’s other parameters as required.
6) Choose the account(s) to which interest and capital shall be credited.
7) Now press the
button.
4.2.8 Modifying an order
If you would like to modify an order already entered, follow these steps:
1) From the “List of order packages” choose the
package you would like to modify by a left mouse
click. This line will turn black.
23
2) Choose the option “Modify package” from the “Edit orders” menu. Package details will
appear including the items. Choose a item to be modified by a left mouse click, and
change the data as required.
3) When completed, press the
button in order to validate the modified position.
PLEASE NOTE! An electronically signed package cannot be modified. Any modification can only be
effectuated after deleting the signature of the given package. Following modification it has to be
signed again.
4.3. Electronic signature of order packages
1) From the “List of order packages” select the package you would like to sign by a left
mouse click. This line will turn black.
2) Choose the option “Sign package” from the “Edit orders” menu.
3) Now you will find the selected package in the “Packages to be signed” section of the Sign
package window. If you would like to sign more than one package you can move more
packages from the “All packages” window to the “Packages to be signed” section, with
the
button.
24
4) After pressing the
button, choose your name as the signing user, then
provide the signature password and confirm.
5) Insert the data device containing your signature key data (floppy disc, USB pen drive
etc.).
6) Should more than one signature be required, repeat this step.
an icon will appear next to the package.
7) If electronic signature was successful
8) Click on “Close” when the signature process is complete.
4.4. Forwarding of order packages to the Bank
Following successful completion of the signature process the final step is to forward the
package to the Bank.
1) Log in to the Bank’s server with the help of the
button in the top left corner.
2) Select the required package from the “List of order packages” by a left mouse click on its
line. The selected line will turn black.
25
3) Choose the “Forward order package” option from the “Forward” menu.
4) You will find the selected package in the “Packages to be forwarded” section of the
“Forward” menu. If you would like to forward more than one package, you can move
packages from the “All packages” window to the “Packages to be forwarded” section
with the
button.
5) Now click on the
button.
6) The program will notify you that forwarding has been successful.
Now press the
and the
buttons.
26
You may also verify successfully forwarded packages in the Account Management /
Forwarded order packages menu.
Package status is marked as follows:
: The Bank has processed the order (positions have been accounted).
: The Bank is unable to process the order, the position is faulty.
: The Bank is about to process the order.
empty : No status information available in the Bank’s system about this order.
5. Administrative commands
5.1. Security parameters
Here you will be able to adjust the settings of the PCBanker program according to your
preferences.
5.2. Modify your login password
Every PCBanker user will be able to change their own password once they are logged in,
including those who are authorised to view information only. Follow these steps to modify the
password:
1) Log in to the Bank’s server with the help of the
button in the top left corner.
2) Choose the “Parameter settings / Security / Change login password” menu and enter
the new password in the appropriate mask.
27
3) After clicking at the
button, enter the new password again. Following
confirmation you will be able to login to the PCBanker program with your new password.
5.3. Modify your signature password
This is available only to users who are authorised to sign.
1) Log in to the Bank’s server
with the help of the
button in the upper top left
corner.
2) Choose
the
settings
/
“Parameter
Security
Change
/
signature
password” menu. Enter your
old signature password, then
the new password in the appropriate masks.
3) After pressing at the
button, enter the new password a second time and
button.
confirm again by clicking at the
4) The program will notify you that
the password has been changed
successfully
electronic
and
that
signatures
the
of
any
packages signed with your old
signature password are void.
28
5.4. Orders
Handle order packages
Here you may enter new administrative orders. Enter such orders in much the same way as
a transaction order.
5.4.1 Administrative
orders
5.4.1.1 Delete a user
Here you may delete a selected
user.
5.4.1.2 Set initial login password
Here you may assign an initial
login password to a selected
user. The users themselves will
be able to set their preferred
passwords upon the first login
(see chapter 3).
5.4.1.3 Enable a blocked login password
Here a user authorised to sign
the company may enable the
password of a selected user who
blocked their password but who
remembers their login password.
29
5.4.1.4 Add a user
Here a new user profile can be
created and authorisation levels
set. Double click on a given
account to set the level of
authorisation for the given user.
Other functions available:
•
Modify user data
•
Modify client name and
address
6. Modify your communication channel
If you are presently using PCBanker with an analogue or ISDN modem but would like to
change to broadband access, please follow these steps:
Start the “newuser” application from your computer’s “Start / Programs / PCBanker” menu
option.
Now provide the working directory. The default value will be C: \mkb (use Browse to set
another path, then press Next). If that directory already exists, give it another name, e.g.
mkb1. That way you will still be able to use the previously used communication channel.
30
Select “Internet communication” in the Parameter window.
Do not change the IP address displayed here, simply press Next. A requirement for
broadband communication is an active internet connection and, if a firewall is in place, the
#8005TCP port must be enabled. If anything needs to be adjusted, consult your local IT
consultant.
The program will notify you that a new user has been successfully created.
Confirm by clicking on the OK button. Then you will be able to start the program using your
computer’s “Start / Programs / PCBanker2” menu option.
PLEASE NOTE! Having followed the above steps, if you start the program using the plain “PCBanker”
option, the program will use the communication channel initially configurated. If you have configured a
new communication channel (e.g. your new broadband access) with “newuser” keeping the old
communication setting as an alternative, start the program with “PCBanker2” in order to use the new
setting.
31
7. APPENDIX, USEFUL INFORMATION
7.1. Network use of the PCBanker program
You are able to install the PCBanker client program to your network server in order to use
it from several workstations. The various workstations will use the same PCBanker main
directory as well as maintaining their own respective working libraries.
7.1.2 Network installation:
In case of a network installation, too, install the program to your central server in the same
way as outlined in the section on “Installing your PCBanker program”. That way your staff
may use the program from several workstations at the same time. Simply follow these steps
to create individual working libraries on the workstations from which PCBanker will be
accessed:
1) From the workstation go to the central server’s drive where PCBanker has been installed.
2) Within the PCBanker program directory, look for the BIN32 directory and run the
NEWUSER.exe file therein (e.g. K:\PCBANKAR\BIN32\NEWUSER.EXE).
3) Provide the path of the working directory, the default value will be C:\mkb (use Browse to
set another path and then press Next).
4) On the Parameter panel, select the communication channel to be used. For the settings,
refer to the section “Installing your PCBanker program”.
32
5) The program will notify you that a new user has been set up successfully.
6) Confirm by clicking on the OK button.
Now you will be able to start the program with the workstation’s “Start / Programs /
PCBanker” menu option.
In the case of network use, set access rights to the files in the PCBanker main directory and
its subdirectories as follows:
All files readable at the same time by an unlimited number of programs.
If a program reads a file it cannot be opened by another program for writing.
If a program has opened a file for writing, other programs may not write nor read in it.
Enable modification of a file’s date without modifying file contents.
PLEASE NOTE! PCBanker does not allow joint use of packages. If for example a package is being
modified at one workstation, that package cannot be accessed from elsewhere. On the “List of order
packages” the lines of those packages used by other workstations at a given time will be in grey. The
client program will only carry out the automated update if no other user is working with it on the
network. Similarly, a registration order can only be forwarded if no other user is working with the
program. At the time of forwarding other users will be unable to start the program. A signature
password cannot be changed at the same time a package is signed elsewhere. The client program’s
Parameter settings / Users / Active local users menu option shows the users presently working with
the program. Synchronisation of the concurrent copies of the client programs (protection of files from
concurrent writing) takes place via the creation of so-called lock files.
33
7.2. Default account numbers
In this option you are able to set the default account number for each order type.
1) On the start window you will find this function in the Parameter settings / Client data
menu.
2) Click on the Default account numbers option.
3) Select the order type the default account
of which you would like to set.
4) Choose an account number from
the drop-down menu.
5) Press the
button.
7.3. Bank information
You may access bank information from the start window. In that menu you will find useful
and important information sent by the Bank.
34
1) Log in to the Bank’s PCBanker server with the help of the
icon in the top left corner.
menu option.
2) On the login panel choose the
3) Select the line of the type of information you would like to view.
4) Click on the
button.
button will be activated.
5) Once the data has been downloaded, the
6) Now click on the
button to display the information.
35