1
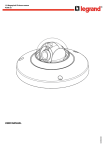
• IP Modular camera 1,3 MP
4 306 60
LE04761AB
USER MANUAL
Indice
1 Accessories
............................................................................................................................ 3
2 General Introduction................................................................................................................. 4
2.1 Feature......................................................................................................................................................................4
2.2 Specifications .........................................................................................................................................................5
3 Framework
3.1 Rear Panel
3.2 Side Panel
3.3 Front Panel ............................................................................................................................ 7
.........................................................................................................................................................7
.........................................................................................................................................................9
.........................................................................................................................................................9
4 Installation ............................................................................................................................ 10
4.1 Install Auto iris Lens...............................................................................................................................................10
4.2 Install Manual Lens.................................................................................................................................................10
4.3 Remove Lens ...........................................................................................................................................................11
4.4 SD Card Installation ...............................................................................................................................................11
4.5 Remove SD Card .....................................................................................................................................................12
4.6 I/O Port .....................................................................................................................................................................12
5 Factory Default Setup .......................................................................................................................... 13
6 Connecting to a device and opening the web application................................................. 17
6.1IE options confuguration for config tool and IE............................................................................. 17
6.2
Connection with Mozilla Firefox or Google Chrome..................................................................... 18
7 Quick Configuration Tool...........................................................................................................19
7.1 Introduction..........................................................................................................................................19
7.2 Searching/Connecting........................................................................................................................19
7.3 Connecting with the configuration tool..........................................................................................21
7.4 Main interface of the tool...................................................................................................................23
8 Resetting the camera..................................................................................................................24
2
1 Accessories
Name
Qty
IP Camera
1
C/CS adapter
1
Quick Start Guide
1
CD
1
12V power adapter
1
3
2 General Introduction
2.1 Features
User Management
Different user rights for each group, one user belongs to one group.
The user right can not exceed the group right.
Data Transmission
Support cable network data transmission via Ethernet.
Storage Function
Support central server backup function in accordance with configuration and setup
in alarm or schedule setting.
Support record via Web and the recorded file are stored in the client-end PC.
Support local SD card hot swap.
Alarm Function
Real-time respond to local alarm input and video detection as user pre-defined
activation setup and exert audio prompt(allow user to pre-record audio file).
Realize real-time video detect such as motion detect, camera masking and video
loss.
Network Monitor
Supports one-channel audio/video data transmit to network terminal
Max supports 10 connections.
Adopt the following audio and video transmission protocol: HTTP, TCP, UDP,
MULTICAST, RTP/RTCP and etc.
Support web access, widely used in WAN.
Network Management
Configuration and management via Ethernet.
Support device management via web.
Support various network protocols.
Peripheral Equipment
Support peripheral equipment connection via the RS232 port.
Support serial port (RS232/RS485) transparent data transmission.
Power
PoE
Assistant Function
External power adapter. Support DC 12V/AC 24V power supply.
Support Power over Ethernet (PoE). Conform to the IEEE802.3af standard.
Connect the device to the switch or the router that supports PoE function to realize
the network power supply.
To guarantee proper performance, make sure the power source can supply at least
10W power.
Day/Night mode auto switch (ICR switch.)
Support system resource information and running status real-time display.
Support log function.
4
2.2 Specifications
Please refer to the following sheet for IPC performance specification.
Model
Parameter
System
Main Processor
OS
System resources
Support real-time network, local record, and remote operation at the same
time.
System status
SD card status, bit stream statistics, log ,software version ,online user
Image Sensor
APTINA CMOS 1,3 MP
1280 (H) *960 (V)
Day/Night Mode
Yes
Auto iris
Yes
Gain Control
Video parameter
Embedded LINUX
Remote operation interface such as WEB or VMS.
White Balance
Electronic Shutter
Video Compression Standard
Video Frame Rate
Video Bit Rate
Fixed/Auto
Manual/Auto
Manual/Auto (It ranges from 1/50 to 1/10000)
H.264
PAL: Main stream (1280*960@15fps) extra stream,(D1@12fps)
Main stream (1280*720@25fps) extra stream (D1@12fps)
160k~8Mbps. Support customized setup.
Video Flip
Does not support mirror. Support flip function.
Video Quality
1~6 level (The 6th level has the highest quality)
Snapshot
Max 1f/s snapshot. File extension is JPEG
Privacy Mask
Each channel supports max 4 privacy zones
Video Setup
Support parameter setup such as brightness, contrast, etc.
Video information
Lens Interface
Audio Input
Audio
TI Da vinci high performance DSP
User Interface
Pixel
Channel title, time title, video loss, motion detect, privacy mask.
C/CS (adapter provided).
3,5 mm Jack in.
Audio Output
3,5 mm Jack out.
Audio Bit Rate
8 kbps.
Audio Compression Standard
Video
Ref. 4 360 61
G711a/G711u/PCM.
Motion Detect
396 (18*22) detection zones: sensitivity level ranges from 1 to 6
(the 6th level has the highest sensitivity).
Activation event, alarm device, audio/video storage, image snapshot, log,
email SMTP function and etc.
Video Loss
Activation event, alarm device, audio/video storage, image snapshot, log,
email SMTP function and etc.
Privacy mask
Sensitivity level ranges from 1 to 6. Each sensitivity level is the percentage
of the privacy mask zone.
Activation event, alarm device, audio/video storage, image snapshot, log,
email SMTP function and etc.
5
Model
Parameter
General Parameter
AUX
Interface
Network
Record and
Backup
Alarm Input
Record Priority
Record Search Mode
Local Storage
Storage Management
Ref. 4 360 61
2-channel input 1-channel output (NO-NC).
Manual>Alarm >Motion detect>Schedule.
Support local data search via time/date, event type (alarm, motion detect,
external alarm) and file type (record/image).
Support local SD card hot swap.
Support display local storage status.
Network Protocol
HTTP, TCP/IP, ICMP, RTSP, RTP, UDP, RTCP, SMTP, FTP, DHCP, DNS, DDNS,
PPPoE.
Remote Operation
Monitor, playback, system setup, file download, log information,
maintenance , upgrade, etc.
Video Output
Network Interface
Power
Power Consumption
Analog video output BNC port.
10/100 Base-T Ethernet.
Support AC24V/DC12V power. Support PoE.
<10W.
Working Temperature
-10 ~ +55°C.
Working Humidify
10% ~ 90%.
Dimensions
Weight
70 * 63.2 * 149.5 mm.
650 g.
6
3 Framework
3.1 Rear Panel
The rear panel is shown as below.
Refer to the following sheet for detailed information.
Interface Name
Connector
VIDEO OUT
Video output port
AC 24V/ DC 12V
Power port
STATUS
Indicatin Light
BNC
Output analog video signal.
Power port.
Input 12V DC or 24V AC.
Red light
System boot up: red light is on
Safe mode: red light flashes
System upgrades: red light flashes
System resets: red light flashes.
Green light
Normal working status: green light
is on.
Display record status: if recording
green light flashes.
Yellow light
Wireless data transmission: yellow
light flashes.
Detect the wireless device: yellow
light is on.
Current series does not support this
function right now.
3G/WIFI port
IN
Function
Alarm input port
I/O port
Alarm input port 1.
Receive the signal from external
alarm device.
Alarm output port.
Send alarm signal to alarm device.
NO: Normal open alarm output port.
C: Alarm output common port.
NO
C
1-ch alarm output
G
GND
A
RS485 port
RS485- port.
B
RS485 port
RS485+port.
Alarm input ground port.
7
Interface Name
RX
Connector
RS232 port
Function
RS232 RX port (receive).
TX
RS232 TX port (send).
G
GND
NA
C
D/N Switch Port
RS232 Ground port.
Connect this port to manage ICR
switch external input.
Restore factory default setup.
When system is running normally
(power indication light is red), press
the RESET button for at least 5 s,
system will restore factory default
setup.
RESET
RESET button
AUDIO OUT
Audio output port
Audio output
3.5mm Jack port.
Output audio port.
AUDIO IN
Audio input port
Audio input
3.5mm Jack port.
Input audio port.
LAN
Network port
Ethernet port
SD
Connect standard Ethernet cable.
Support PoE function.
Connect SD card.
Note:
When you install the SD card:
make sure current card is not in write
mode then you can install it to the
camera.
When you remove the SD card:
make sure current card is not in write
mode.
Otherwise it may result in data loss
or card damage. Before hot swap,
please stop record operation.
SD card port
Make sure the device is securely
connected to earth.
GND
8
3.2 Side Panel
The side panel is shown as below.
3.3 Front panel
The front panel is shown as below.
9
4 Installation
4.1 Install Auto iris Lens
Follow the steps listed below for auto iris lens installation.
1- Remove the sensor protection cap of the device, and then line up the lens to the proper installation position. Turn clockwise until the lens is fixed firmly.
2- Insert the lens cable socket to the auto lens connector in the side panel.
3- When it is ∞, you can turn the adjust screw to adjust the focus circle to adjust the focal distance.
4.2 Install Manual Lens
Install C type lens
- Remove the sensor protection cap; use the cross-head screwdriver to remove the screw near the focal circle.
- Turn counter clockwise to move the focal circle out for several millimeters.
- Focus manually.
- Use the cross-head screwdriver to fix the screw back firmly. Secure the focal circle.
- Install the C/CS adapter to the camera.
- Line up lens to the proper installation. Turn clockwise to fix the lens firmly.
Install CS type lens
-
-
-
Remove the sensor protection cap; use the cross-head screwdriver to remove the screw near the focal circle. Turn counter clockwise to move the focal circle to the end and now you can focus manually.
Use the cross-head screwdriver to fix the screw back firmly. Secure the focal circle.
Line up lens to the proper installation. Turn clockwise to fix the lens firmly.
10
4.3 Remove Lens
Follow the steps listed below to remove lens.
1- Turn the lens counter clockwise and then remove it from the camera.
2- Unplug the auto lens cable socket from the auto lens connector.
3- If there is no lens, put the sensor protection cap back to protect the sensor.
4.4 SD Card Installation
Follow the steps listed below to install SD card.
1- Use the screwdriver to loosen the SD card protection screw in the rear panel, and remove the SD card protection cap from the camera.
2- Install the SD card to the camera according to the proper installation position.
3- Put the SD card protection cap back.
4- Use the screwdriver to fix the SD card protection cap screw firmly to secure the SD card protection cap in the camera.
11
4.5 Remove SD card
Follow the steps listed below to remove SD card.
1- Use the screwdriver to loosen the screw of SD card protection cap in the rear panel. Remove the cap from the camera.
2- Follow the SD card direction to remove the SD card.
3- Insert the SD card protection cap.
4- Use the screwdriver to fix the screw to secure the protection cap.
4.6 I/O Port
1
2
1 Install Cable
Follow the steps listed below to install the cable.
- Use the small slotted screwdriver to press the corresponding button of cable groove.
- Insert the cable into the groove and then release the screwdriver.
2 Remove Cable
Follow the steps listed below to remove the cable.
- Use the small slotted screwdriver to press the corresponding button of cable groove.
- Remove the cable out of the groove and then release the screwdriver.
12
5 Factory Default Setup
Please refer to the following sheet for factory default setup information.
Function configuration type
General Setup
Main stream
Encode Setup
Extra stream
Item Name
Default setup
Date format
Y-M-D
DST
Disable by default
Date separator
‘_’
Time format
24H
Language
English
When HDD is full
Overwrite
Record duration
8 min
Device No.
8
Video type
PAL
Channel
Channel01
Compression
H.264
Enable audio and video
General bit stream
Main stream
Resolution
720P
Frame rate
25
Bit stream control
VBR
Bit stream value
8192
I frame interval control
50
Extension stream
Main stream
Audio/Video enable
Disable audio and video
Resolution
D1
Frame rate
25
Bit stream control
CBR
Bit stream value
2048
I frame interval control
50
Image color
Brightness: 50
Contrast: 50
Saturation: 50
Hue: 50
Watermark
Enable
Stream type: All
Type: Character
Character: Digital CCTV
Privacy Mask
Never
Time title
Enable. OSD transparent (read-only):0
Channel title
Enable. OSD transparent (read-only):0
Channel
Ch01
Pre-record
1 second
Schedule setup
Time Setup
13
Start time
0:00:00
End-time
23:59:59
Record
Period 1 : Enable motion detection/
alarm
Function configuration type
Record setup
Item Name
Default setup
Snapshot
Time Setup
Week
COM Setup
Network setup
Alarm setup
Period 1 : Enable motion detection/
alarm
Sunday
Option
COM01
Function
Console
Data bit
8
Stop bit
1
Baud rate
115200
Parity
None
Ethernet
Port 01
DHCP
Disable
IP address
192.168.1.108
Subnet mask
255.255.0.0
Gateway
192.168.0.1
Device name
Device factory default name
TCP port
37777
HTTP port
80
UDP port
37778
Max connection
4
Network transmission QoS
Disable
Remote host
Multiple broadcast group
IP address
239.255.42.42
Port
36666
Email setup
Disable
Multiple DDNs
Disable
NAS setup
Disable
NTP setup
Disable
Alarm server
Disable
Event type
Local alarm
Alarm input
Input 01, disable
Type
Normal open
Period Setup
Period: Start time 0:00:00
End time:23:59:59
Period 1:enable Week: Sunday
Anti-dither
0 second
Alarm output
Disable
Alarm latch
10 seconds
Record channel
1, enable
Record latch
10 seconds
Send email
Enable
PTZ activation
Disable
Event type: never
Address: 0
Capture
Disable
14
Function configuration type
Video detection
PTZ Setup
Default and Backup
Item Name
Default setup
Event type
Motion detection
Channel
Ch01, Disable
Sensitivity
3
Time period setup
Period:
Start time 0:00:00
End time:23:59:59
Period 1:enable
Week: Sunday
Anti-dither
5 seconds
Alarm output
Disable
Alarm latch
10 seconds
Record channel
Disable
Record latch
10 seconds
Send email
Disable
PTZ activation
Event type: Never
Address: 0
Disable
Capture
Disable
Channel
Ch01
Protocol
DH-SD1
Address
1
Baud rate
9600
Data bit
8
Stop bit
1
Parity
None
All
Disable
General
Disable
Encode
Disable
Schedule
Disable
RS232
Disable
Network
Disable
Alarm
Disable
Video detection
Disable
Maintain
Disable
Camera
Disable
Channel No.
Disable
Abnormity
Advanced
Even Type
No disk, Disable
Alarm Output
Disable
Alarm Latch
10 seconds
Send email
Disable
admin/admin (reusable)
888888/888888(reusable)
666666/666666(reusable)
default
User account
Snapshot
Channel
15
Ch01
Function configuration type
Item Name
Snapshot
Advanced
Auto maintain
Camera config
Auto Registration
DNS Setup
Default setup
Snapshot mode
Snapshot_Timing
Frame rate
1f/s
Resolution
1080P
Quality
80%
Auto reboot
2.00 each day
Auto delete old
files
Never
Channel
1
Exposure Mode
Auto
Night Vision
Auto
Backlight Compensation
N/A
Auto Iris
On
Scene Mode
Auto
Signal Type
Inside
Mirror
N/A
Rotate
Support
SN
1
IP
0.0.0.0
Port
7000
DNS
8.8.8.8
Alternative DNS
8.8.8.8
16
6 Connecting to a device and opening the web application
6.1 IE options configuration for config tool and and IE
This device supports web access and management via PC.
System pops up warning information to ask you whether install control “webrec.cab” or not. Click “OK” button, system can
automatically install the control.
If you can’t download the ActiveX file, you can lower the IE security level or disable anti-phishing filter. Be sure you are
logged with administrator rights in your Windows session.
17
6.1.1 Connection with the Search Tool
Refer to chapter “5.2.1 Connecting to the device’s web interface”
6.1.2 Connection with Internet Explorer
IP camera factory default setup: :
- IP address: 192.168.1.108
- User name: admin
- Password: admin
Open Internet Explorer and input IP camera address in the address bar.
For example, if your camera IP is 192.168.1.108, input http://192.168.1.108 in IE address bar.
Entrez l’adresse IP de votre enregistreur vidéo
6.2 Connection with Mozilla Firefox or Google Chrome
Go to Apple web site, download and install QuickTIme (www.apple.com/quicktime/download)
Then open Firefox or Chrome and input the IP DVR address in the browser URL.
!
Remarque : Avec ces navigateurs, l’apparence de l’interface peut être différente et certains boutons peuvent ne pas
apparaître
18
7 Quick Configuration Tool
7.1 Introduction
Quick configuration tool is used to search for current IP address, modify IP address. It can also be used to perform
a software upgrade or to modify settings. This tool only applies to the IP addresses in the same network segment.
Before using the Quick Configuration Tool, please check that this software is in updated version.
7.2 Searching/Connecting
Select and double click the “ConfigTool.exe’” in the application directory.
The version of Config tool should be at least 1.0.5.
7.2.1 Connecting to the device’s web interface
To find connected devices in the same segment network, click the “refresh” button. The tool will search for the
connected devices and display the device IPv4 and IPv6 in the form list.
In the device list interface, you can view device IP addresses (IPv4 and IPv6), port number, subnet mask, default
gateway and MAC address.
1 - Select IPv4 address, the IPv6 addresses disappear and right click on the highlighted line.
19
2- Select “Open Device Web” item to go to the web interface:
2
If you can’t connect, ckeck you internet explorer security settings as described in chapter 4.
20
7.3 Connecting with the configuration tool (to change the IP address or upgrade the device software.
To find devices connected to the network, click the “Refresh” button. The tool will search for devices connected to the
network and display them in the form of the list
1
2
3
7
5
4
9
8
6
10
%"
N
11
!"
Description
1
Number.
2
Device IP address.
3
Device TCP port.
4
Device subnet mask.
5
Device default gateway.
6
Device MAC address.
7
Select “IPv4” or “IPv6” or “All”.
8
“Upgrade” button opens the interface to upgrade the device firmware See below (8).
9
Refresh the list.
10
“Login” button opens the login interface to confirm login, password and port and configure the
device. See below (10).
11
Disconnect.
21
(8) “Upgrade” button opens the interface to upgrade the device firmware:
! 1
2
4
3
N
5
6
Description
1
Select a check box of a device or several devices with same commercial references into this list.
2
Click “Open” button and select the new firmware in the PC directory.
3
Click “Upgrade” button, the devices will be upgraded. Be careful don’t cut off the network connection.
4
Click “Cancel” button to stop the upgrade.
5
“Add” button configures manually s a new device IP and port.
6
“Return” button comes back to the previous interface.
(10) “Login” button opens the login interface.
- Highlight the network information device (single click in the list)
- Click the “Login” button (or double-click the highlighted line)
- The following page opens:
Note: Here any information cannot be modified. Click the “Login” button in login popup window to open the main interface mode where the network and system settings can be changed
22
7.4 Main interface of the tool
7.4.1 Network settings
Functions
DHCP Enable
IPv4/IPv6
IP Address
Subnet Mask
Gateway
Mac Address
Save
Return
Description
Enables or disables the DHCP
function.
Select IPv4 or IPv6 in the combo list. The IP addresses can be
changed.
IP address of the device.
Subnet mask of the device.
Gateway of the device.
MAC address of the device.
Save the modifications.
Comes back to the previous
interface.
7.4.2 System Information
Before using the camera, please check that its software is in updated version.
Functions
SN
Software Version
Device Name
Synchronization with PC
PC Date
PC Time
Manal Setup
Return
23
Description
Serial number of the device
Software version of the device
User name
Synchronisation of the device’s date and time the PC.
Click on “Sync” to synchronise, then on “save”.
Date on the PC.
Time on the PC.
Manual setting of the device’s
date and time. Enter the
required date and time. Click
“Sync” button to synchronise
and “save”
Return to the previous interface.
7.4.3 System Upgrade
Before using the Camera, please install its updated software version.
Functions
Upgrade File/Open
Current Progress/Upgrade
Return
Description
Click here to select the file
to be upgraded
Click here to start the upgrading procedure
Return to the search interface
Steps to upgrade the intertnal software
- Click the “Open” button.
- Select and add the *.bin internal software file (firmware)
- Click the the “Upgrade” button. Then the file is transmitted to the device and the device
automatically upgrades itself.
- Then, click the “OK “button to end the procedure.
8 Resetting the camera
- Click on the «Reset» button (located inside the camera ) during 10 seconds
- Wait for the auto reboot of the camera
- The camera is now in factory default settings
24