1
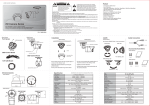
2 Megapixel HDcctv Indoor/Outdoor IR Dome Camera User Manual Products: BLK-HDM1IR, BLK-HDM2IR BLK-HDM1IR (left) and BLK-HDM2IR (right) Please read this manual before using your camera, and always follow the instructions for safety and proper use. Save this manual for future reference. BLK-HDMxIR_CM ! WARNING CAUTION Changes or modifications not expressly approved by the manufacturer could void the user’s authority to operate the equipment. To prevent electric shock and risk of fire hazards: Use a power source that is within specification only. Do NOT expose this appliance to rain or moisture. REGULATORY NOTICE This device complies with Part 15 of the FCC Rules. Operation is subject to the following two conditions: (1) This device may not cause harmful interference, and (2) This device must accept any interference received, including interference that may cause undesired operation. This equipment has been tested and found to comply with the limits for a Class A digital device, pursuant to Part 15 of the FCC Rules. These limits are designed to provide reasonable protection against harmful interference in a residential installation. This equipment generates, uses, and can radiate radio frequency energy and, if not installed and use in accordance with the instructions, may cause harmful interference to radio communications. Operation of this equipment in a residential area is likely to cause interference, in which case the user will be required to correct the interference at his own expense. LEGAL NOTICE Observint Technologies (Observint) products are designed to meet safety and performance standards with the use of specific Observint authorized accessories. Observint disclaims liability associated with the use of non-Observint authorized accessories. The recording, transmission, or broadcast of any person’s voice without their consent or a court order is strictly prohibited by law. Observint makes no representations concerning the legality of certain product applications such as the making, transmission, or recording of video and/or audio signals of others without their knowledge and/or consent. We encourage you to check and comply with all applicable local, state, and federal laws and regulations before engaging in any form of surveillance or any transmission of radio frequencies. Other trademarks and trade names may be used in this document to refer to either the entities claiming the marks and names or their products. Observint disclaims any proprietary interest in trademarks and trade names other than its own. No part of this document may be reproduced or distributed in any form or by any means without the express written permission of Observint. © 2012 by Observint, Inc. All Rights Reserved. 11000 N. Mopac Expressway, Building 300, Austin, TX 78759 For Sales and Support, please contact your distributor. ii Table of Contents SECTION 1 SECTION 2 SECTION 3 SECTION 4 APPENDIX A APPENDIX B Precautions. . . . . . . . . . . . . . . . . . . . . . . . . . . . . . . . . . . . . . . . . . . . . . . . . . . . . . . . . . . . . . . . . . . . . . . . . . . . . . iv Introduction . . . . . . . . . . . . . . . . . . . . . . . . . . . . . . . . . . . . . . . . . . . . . . . . . . . . . . . . . . . . . . . . . . . . . . . . 1 Features. . . . . . . . . . . . . . . . . . . . . . . . . . . . . . . . . . . . . . . . . . . . . . . . . . . . . . . . . . . . . . . . . . . . . . . . . . . . . . . . . 1 1.1 BLK-HDM2IR camera . . . . . . . . . . . . . . . . . . . . . . . . . . . . . . . . . . . . . . . . . . . . . . . . . . . . . . . . . . . . . . . . 2 1.2 BLK-HDM1IR camera . . . . . . . . . . . . . . . . . . . . . . . . . . . . . . . . . . . . . . . . . . . . . . . . . . . . . . . . . . . . . . . . . 4 Installation . . . . . . . . . . . . . . . . . . . . . . . . . . . . . . . . . . . . . . . . . . . . . . . . . . . . . . . . . . . . . . . . . . . . . . . . . 5 2.1 General Guidelines. . . . . . . . . . . . . . . . . . . . . . . . . . . . . . . . . . . . . . . . . . . . . . . . . . . . . . . . . . . . . . . . . . . 5 2.2 Camera drop cable. . . . . . . . . . . . . . . . . . . . . . . . . . . . . . . . . . . . . . . . . . . . . . . . . . . . . . . . . . . . . . . . . . . 5 2.3 BLK-HDM2IR camera mounting. . . . . . . . . . . . . . . . . . . . . . . . . . . . . . . . . . . . . . . . . . . . . . . . . . . . . . . . 6 2.4 BLK-HDM1IR camera mounting. . . . . . . . . . . . . . . . . . . . . . . . . . . . . . . . . . . . . . . . . . . . . . . . . . . . . . . . 7 2.5 Camera adjustments . . . . . . . . . . . . . . . . . . . . . . . . . . . . . . . . . . . . . . . . . . . . . . . . . . . . . . . . . . . . . . . . . 7 Software Setup. . . . . . . . . . . . . . . . . . . . . . . . . . . . . . . . . . . . . . . . . . . . . . . . . . . . . . . . . . . . . . . . . . . . . . 9 3.1 Menu operation . . . . . . . . . . . . . . . . . . . . . . . . . . . . . . . . . . . . . . . . . . . . . . . . . . . . . . . . . . . . . . . . . . . . . 9 3.2 MODEL . . . . . . . . . . . . . . . . . . . . . . . . . . . . . . . . . . . . . . . . . . . . . . . . . . . . . . . . . . . . . . . . . . . . . . . . . . . . 10 3.3 EXPOSURE . . . . . . . . . . . . . . . . . . . . . . . . . . . . . . . . . . . . . . . . . . . . . . . . . . . . . . . . . . . . . . . . . . . . . . . . . 10 3.4 WHITE BALANCE. . . . . . . . . . . . . . . . . . . . . . . . . . . . . . . . . . . . . . . . . . . . . . . . . . . . . . . . . . . . . . . . . . . . 12 3.5 IMAGE. . . . . . . . . . . . . . . . . . . . . . . . . . . . . . . . . . . . . . . . . . . . . . . . . . . . . . . . . . . . . . . . . . . . . . . . . . . . . 13 3.6 INTELLIGENCE . . . . . . . . . . . . . . . . . . . . . . . . . . . . . . . . . . . . . . . . . . . . . . . . . . . . . . . . . . . . . . . . . . . . . . 14 3.7 SPECIAL FUNCTION. . . . . . . . . . . . . . . . . . . . . . . . . . . . . . . . . . . . . . . . . . . . . . . . . . . . . . . . . . . . . . . . . . 15 3.8 DISPLAY. . . . . . . . . . . . . . . . . . . . . . . . . . . . . . . . . . . . . . . . . . . . . . . . . . . . . . . . . . . . . . . . . . . . . . . . . . . 15 Specifications . . . . . . . . . . . . . . . . . . . . . . . . . . . . . . . . . . . . . . . . . . . . . . . . . . . . . . . . . . . . . . . . . . . . . . 17 Troubleshooting. . . . . . . . . . . . . . . . . . . . . . . . . . . . . . . . . . . . . . . . . . . . . . . . . . . . . . . . . . . . . . . . . . . . 19 Camera Dimensions. . . . . . . . . . . . . . . . . . . . . . . . . . . . . . . . . . . . . . . . . . . . . . . . . . . . . . . . . . . . . . . . . 20 Camera with vandalproof housing. . . . . . . . . . . . . . . . . . . . . . . . . . . . . . . . . . . . . . . . . . . . . . . . . . . . . . . . . . 20 Camera with plastic housing. . . . . . . . . . . . . . . . . . . . . . . . . . . . . . . . . . . . . . . . . . . . . . . . . . . . . . . . . . . . . . . 20 2 Megapixel HDcctv Indoor/Outdoor IR Dome Cameras iii PRECAUTIONS Precautions Do not install the camera in extreme temperature conditions. Use the camera in environments where temperature is between 14 °F and 122 °F. Ensure adequate ventilation. Do not install or use the camera in an environment where the humidity is high. It can degrade the image quality. Do not install the camera under unstable lighting conditions. Severe lighting changes or flicker can cause the camera to work improperly. Never use the camera close to a gas or oil leak. These chemicals can damage the camera. Do not drop the camera or subject it to physical shocks. These can cause malfunctions to occur. Never point the camera at intense light. Smear or blooming may occur, and it can damage the CCD. Do not expose an indoor camera to rain or spill liquids on it. If it gets wet, wipe it dry immediately. Liquids can contain minerals that corrode electronic components. Check the power source to ensure that it is within specifications before connecting it to the camera. iv SECTION 1: INTRODUCTION SECTION 1 Introduction These high definition indoor/outdoor IR dome cameras feature a Panasonic CMOS sensor with a 2 – 10 mm lens, wide dynamic range, dual voltage range support (24 Vac, 12 Vdc), and on-screen display (OSD) for control and setup. These cameras are available with either a durable plastic or vandalproof outdoor enclosure. Features • • • • • • • • • • • • • • • Wall or ceiling mounting through 3-axis camera bracket IP67 rated (outdoor camera) Safety strap keeps dome cover attached while making adjustments 1/3” Panasonic CMOS sensor Full HD resolution Day or day/night operation Vari-focal lens 2~10 mm Wide dynamic range (WDR) Digital noise reduction (DNR, 2D + 3D) Privacy mask function Defog function On screen display (OSD) Intelligent motion detection HD-SDI/CVBS Output Multi Protocol (PELCO-D, PELCO-P) 2 Megapixel HDcctv Indoor/Outdoor IR Dome Cameras 1 SECTION 1: INTRODUCTION Lens Assembly Lens Controls Access Door IR Array Lens Controls Inside Housing Tilt Lock Thumb Screw Cover Strap Anchor Point Tilt/Pan Gimbal Video Out Joystick / OSD Control Internal Components Lens Controls Access Door Lens Housing Far (L) – Near (R) focus control and set screw Tele (L) – Wide (R) zoom control and set screw Tilt/Pan Gimbal Lens controls 1.1 BLK-HDM2IR camera BLK-HDM2IR cameras include a rugged die-cast aluminum vandalproof enclosure and are IP67 rated. They are flush surface mountable using the mount adaptor box supplied. 2 SECTION 1: INTRODUCTION 1.1.1 What’s in the box Your camera includes the following: • • • • • • • Security tool Machine screws (4) Mounting cap Mounting screws (4) L-wrench User manual Dome bracket (optional) What’s in the box Optional dome bracket for wall and ceiling mounting 2 Megapixel HDcctv Indoor/Outdoor IR Dome Cameras 3 SECTION 1: INTRODUCTION 1.1.2 What you need To install the camera you will need: • • 12 Vdc 1 A or 24 Vac 1 A power source Tools for mounting the camera 1.2 BLK-HDM1IR camera 1.2.1 What’s in the box Your camera includes the following: • • • • Mounting screws (4) L-wrench User manual Dome bracket (optional) What’s in the box Optional dome bracket 1.2.2 What you need To install the camera you will need: • • 4 12 Vdc 1 A or 24 Vac 1 A power source Tools for mounting the camera SECTION 2: INSTALLATION SECTION 2 Installation 2.1 General Guidelines • Outdoor installations: Ensure the cover is secured to the dome base with the machine screws provided and rubber seals. Dome cover Machine screw Rubber seal Dome base • Dome/window care: Handle the dome carefully to prevent scratching. If a scratch appears over the lens, adjust the dome window to move the scratch away from the lens. CAUTION • • Keep dome cover and camera lens clean. To avoid smearing, do not expose the camera lens to a strong light source such as the sun or spot lights. Monitor impedance: Set the monitor impedance switch to 75 Ω. Power supply: To avoid fire or shock hazard, use only a UL listed power supply. 2.2 Camera drop cable Drop cable connectors / wires definitions: • • • Power: red sleeved connector; 12 Vdc / 24 Vac non-polarized HD-SDI: BNC connector Pigtail wires: —— RS-485(+): blue wire —— RS-485(-): green wire 2 Megapixel HDcctv Indoor/Outdoor IR Dome Cameras 5 SECTION 2: INSTALLATION Camera drop cable 2.3 BLK-HDM2IR camera mounting The camera can be installed on a junction box or directly to a wall or ceiling. 1. Attach the surface mount bracket to the ceiling or wall using four (4) mounting screws. 2. Connect the dome base to the surface mount bracket using the screws with rubber rings provided. 3. Route the power and video cables to the camera location and attach them to the camera drop cable (see General guidelines above). 4. Attach the dome base to the surface mount bracket using the four machine screws provided. 6 SECTION 2: INSTALLATION 2.4 BLK-HDM1IR camera mounting 1. Connect the dome base to the mounting surface using four (4) screws. 2. Route the power and video cables to the camera location and attach them to the camera drop cable (see General guidelines above). 2.5 Camera adjustments 1. Attach a video setup monitor to the yellow CVBS (yellow) connector on the drop cable, the RCA connector on the camera PC board, or setup a remote monitor for viewing video from the camera. 2. Power on the camera and video monitor. 3. While observing video from the camera, adjust the gimbal pan/tilt/horizon to aim the camera in the preferred direction. Pan adjustment (rotate gimbal) Tilt adjustment 2 Megapixel HDcctv Indoor/Outdoor IR Dome Cameras 7 SECTION 2: INSTALLATION After adjusting the tilt, tighten the tilt/lock thumb screw. Horizon adjustment 4. Adjust the image with the focus and zoom levers. See the photo “Lens controls” on page 2. After setting the focus and zoom tighten the focus and zoom set screws until snug. 5. Configure your camera using the software menus in the OSD. See Software Setup in the following section of this manual. 6. Place the dome cover over the base and adjust the dome window. Tighten the captive screws that secure the cover to the base. 7. Clean the camera dome with an approved glass cleaning solution and a lint free cloth. —— —— Dust can be removed from the unit by wiping it with a soft damp cloth. To remove stains, gently rub the surface with a soft cloth moistened with a mild detergent solution, then rinse and dry it with a soft cloth. Remove all foreign particles, such as plastic or rubber materials, attached to the camera housing. These may cause damage to the surface over time. CAUTION 8 Do not use benzene, thinner or other chemical products on the camera assembly; these may dissolve the paint and promote damage of the surfaces. Before using any chemical product, read the accompanying instructions carefully. SECTION 3: SOFTWARE SETUP SECTION 3 Software Setup Use the SETUP joy stick on the OSD control panel to navigate through the menu system. Press the joy stick down (toward the PC board) to enter the SETUP menu or select an entry, rock the stick up or down to highlight an item in the list, and left or right display the option you want to select. 3.1 Menu operation Navigation through the menu system is performed with the joystick located inside the camera dome cover assembly. You can rock the joystick to the right, left, up , or down, and press the joystick down (Set functions). Video monitor RCA connector Joystick • • • • • Up button : Moves the cursor upwards in the menu. Use this button to select an item or adjust the parameters. Down button : Moves the cursor downwards in the menu. Use this button to select an item or adjust the parameters. Right button : Moves the cursor to the right in the menu. Use this button to select or adjust the parameters of the selected item. The parameter changes each time this button is pressed. Left button : Moves the cursor to the left in the menu. Use this button to select or adjust the parameters of the selected item. The parameter changes each time this button is pressed. Set button : Executes selections and displays a submenu for an item with the mark. 2 Megapixel HDcctv Indoor/Outdoor IR Dome Cameras 9 SECTION 3: SOFTWARE SETUP The main MENU consists of a list of sub-menus or displays the option selected for a camera function. When sub-menus are available, the symbol is shown. 3.2 MODEL MODEL: Select model type: D&N (day and night) / COLOR / IR SMART / IR CDS 3.3 EXPOSURE To open the EXPOSURE menu, rock the joystick down (or up) to highlight EXPOSURE, then press the joystick down (set, select). • • • • • • • • 10 BRIGHTNESS: Adjust brightness level: 0 (dark) ~ 20 (bright) steps LENS: DC / MANUAL SHUT SPEED: Can be set in AUTO or MANUAL: AUTO / 1/30 (25), 1/60 (50), 1/120 (100), 1/240, 1/500, 1/1000, 1/2000, 1/4000, 1/8000, 1/16000,1/30000, 1/60000 s FLICKERLESS: On / Off DSS: Select maximum DSS (Digital Slow Shutter): OFF / x2, x3, x4 AGC: Select Auto Gain Control OFF / ON WDR/BLC: Select WDR (Wide Dynamic Range) or BLC (Back Light Compensation). NOTE: When WDR is ON, ACE and DEFOG function will not turn on. —— WEIGHT : Adjust WDR level 0 ~ 3 BLC —— AREA : Control BLC area according to light condition. —— POS-X : Adjust the window X-Axis position —— POS-Y : Adjust the window Y-Axis position SECTION 3: SOFTWARE SETUP —— —— • SIZ-X : Adjust the window X-Axis size SIZ-Y : Adjust the window Y-Axis size DAY&NIGHT : Select Day&Night. The MODEL mode determines content of the DAY&NIGHT submenu. D&N Model —— Mode: AUTO / DAY / NIGHT / EXT —— Delay : 0 ~ 255 second —— BURST : OFF / ON —— THRS : LOW / MIDDLE / HIGH. Select Day&Night change level. Higher level make the night mode changed in lower illumination. —— GAP : LOW / MIDDLE / HIGH: Select Day to Night mode change and Night to Day mode change. COLOR Model —— —— —— —— —— AUTO / DAY / NIGHT / EXT Delay : 0 ~ 255 second BURST : OFF / ON THRS : LOW / MIDDLE / HIGH GAP : LOW / MIDDLE / HIGH IR SMART Model —— AUTO »» Delay : --»» BURST : OFF / ON »» THRS : --»» GAP : --- IR SMART OFF IR SMART ON IR CDS Model —— AUTO / DAY / NIGHT »» Delay : --»» BURST : OFF / ON »» THRS : --»» GAP : --2 Megapixel HDcctv Indoor/Outdoor IR Dome Cameras 11 SECTION 3: SOFTWARE SETUP • SMART IR : OFF / ON. NOTE: SMART IR function only works with IR Smart Model. —— THRS : Set-up Smart IR turns on point. When you level up the value, Smart IR turns on in a low light condition. —— AREA : Set up areas to control Smart IR function. When BLC mode is on, Smart IR area is following BLC area. —— POS-X : Adjust the window X-Axis position —— POS-Y : Adjust the window Y-Axis position —— SIZ-X : Adjust the window X-Axis size —— SIZ-Y : Adjust the window Y-Axis size —— IR COMP: Compensate when IR fluctuation occurs. Objects in front of camera must be at least 1 foot away from camera. 3.4 WHITE BALANCE • • 12 AWB : Select WHITE BALANCE mode. AUTO / PRESET / MANUAL / INDOOR / OUTDOOR —— AUTO : Automatically adjusts color according to the lighting. —— PRESET : It is a fixed white balance mode that may be automatically readjusted only by pressing PRESET —— MANUAL : You can change WB as changing “RED GAIN” and “BLUE GAIN” in manual mode. »» RED GAIN : Adjust R gain value 0 ~ 20 »» BLUE GAIN : Adjust B gain value 0 ~ 20 —— INDOOR : Set color temperature to be Indoor light (3700 K) —— OUTDOOR : Set color temperature to be Outdoor light (5100 K) CHROMA : Adjust CHROMA gain value 0 ~ 20 steps SECTION 3: SOFTWARE SETUP 3.5 IMAGE • • SHARPNESS : Adjust sharpness level: 0 ~ 10 steps MIRROR : Select a flip mode: OFF / H / V / H&V —— H : You can flip the picture horizontally on the screen —— V : You can flip the picture vertically on the screen —— H&V : You can flip the picture horizontally & vertically on the screen H Mirror Off • • • • H Mirror ON Freeze : Select real or still mode: OFF / ON E.ZOOM : Select maximum digital zoom magnification: x1 ~ x12, x14, x15, x18, x21, x25, x32 HLC : Select High Light Compensation to mask out intense light sources affecting the camera’s image: OFF / ON —— ON LEVEL : 0 ~ 20 steps. COLOR : Black, White, Yellow, Cyan, Green, Magenta, Red, Blue ACE : Select Digital WDR (Wide Dynamic Range): OFF / ON. NOTE: When ACE is On, WDR/BLC and DEFOG function can not turn on. 2 Megapixel HDcctv Indoor/Outdoor IR Dome Cameras 13 SECTION 3: SOFTWARE SETUP WDR Off • • • DNR : Select Digital Noise Reduction: AUTO / OFF / LOW / MIDDLE / HIGH D.COMPRESS : Use this function only with IP camera. Set to OFF. GAMMA: Set gamma level for best display 3.6 INTELLIGENCE • 14 PRIVACY : Hide an area you want to hide on the screen: OFF / ON —— MASK# : Select mask area number (0 ~ 31) —— MODE : Set-up masking areas. (OFF / ON) —— X-POS : Adjust the mask X-Axis position —— Y-POS : Adjust the mask Y-Axis position —— X-SIZ : Adjust the mask X-Axis size —— Y-SIZ : Adjust the mask Y-Axis size —— COLOR : Cyan, Green, Magenta, Red, Blue, Black, White, Yellow —— TRANS : Select mask transparency level (0 ~ 4) WDR ON SECTION 3: SOFTWARE SETUP 3.7 SPECIAL FUNCTION • • • • • • • • • • SHADING DET : Sets the shading calibration that the lens will perform. Only occurs when the entire screen is viewed in white light.(OFF / ON) SHADING : Select Lens shading compensation. (OFF / ON) DEFECT DET : Compensates for bad pixels that my occur. Occurs when the whole screen is in full black or if there is bad pixelation and it changes the THRS values until the screen is fixed. (OFF / ON) DEFOG : Carry out defog function: OFF / ON —— LEVEL : adjust amount of fog on display screen: 0 ~ 10. NOTE: When DEFOG is On, ACE and WDR/BLC function can not turn on. SYSTEM : Select NTSC or PAL. (NTSC / PAL) HD FORMAT : Select Digital output 1080P or 720P. (1080P / 720P) PG : Select Color pattern generator (OFF / ON) CVBS : Select Composite signal (OFF / ON) COMM : Set up the camera ID, baud rate, protocol —— ID : Select the camera ID: 1 ~ 255 —— BAUD RATE : Select serial communication speed: 2400 / 4800 / 9600 / 19200 / 38400 / 57600 / 115200 bps —— PROTOCOL : Select operating protocol: PELCO-D / PELCO-P / UPDATE DEFAULT : All the settings will be restored to the factory default. 3.8 DISPLAY 2 Megapixel HDcctv Indoor/Outdoor IR Dome Cameras 15 SECTION 3: SOFTWARE SETUP • • DISP SEL : Select display item. —— ID : OFF / ON —— TITLE : OFF / ON —— EZOOM : OFF / ON SET TITLE : Select camera title menu (Text edit) Set Title character set (on-screen) 16 SECTION 4: SPECIFICATIONS SECTION 4 Specifications Table 1.Component Specifications Component Value Image Sensor 1/3" Panasonic CMOS Total Pixels 2010 (h) x 1108 (v) = 2,227,080 (pixel) Active Pixels 1944 (h) x 1092 (v) = 2,122,848 (pixel) Scanning system Progressive Resolution Digital : 1920 x 1080 (1080p / 30 fps), 1280 x 720 (720p / 60 fps) Analog : 700 TVL Min. Illumination Color : 1.0 lux , B/W : 0.5 lux Color DSS : 0.002 lux , BW DSS : 0.001 lux Video output HD-SDI Analog : NTSC, PAL(without WDR) S/N ratio > 50 dB (AGC off) Function Model D&N / COLOR / IR SMART / IR CDS Exposure BRIGHTNESS 0 ~ 20 steps LENS DC / Manual SHUT SPEED Auto / Manual ( 1/30 (1/25) ~ 1/60000 ) DSS Off / x2 / x3 / x4 AGC Off / On WDR/BLC Off / WDR / BLC DAY&NIGHT Auto / Day / Night / Ext SMART IR Off / On White Bal Auto / Preset / Manual / Indoor / Outdoor Image SHARPNESS 0 ~ 10 steps MIRROR Off / H / V / H&V FREEZE Off / On E.ZOOM x1 ~ x32 HLC Off / On ACE Off / On 2 Megapixel HDcctv Indoor/Outdoor IR Dome Cameras 17 SECTION 4: SPECIFICATIONS Component Value DNR Off / Low / Middle / High / Auto D.COMPRESS OFF / ON INTELLIGENCE PRIVACY Off / On (32 points) SPECIAL FUNC SHADING DET Off / On SHADING Off / On DEFECT DET Off / On DEFOG Off / On SYSTEM NTSC / PAL HD FORMAT 1080P / 720P PG Off / On CVBS Off / On COMM ID (1 ~ 255) Baud rate (2400 / 4800 / 9600 / 19200 / 38400 / 57600 / 115200) DEFAULT ON / DONE Language English OSD Text 0~9,A~Z,a~z Electrical Power Source 12 Vdc TYPE : 12 Vdc ± 10 % DUAL TYPE : 12 Vdc ± 10 % , 24 Vac ± 10 % Power Consumption 12 Vdc TYPE : 250 mA DUAL TYPE : 350 mA (12 Vdc ± 10 %) , 250 mA (24 Vac ± 10 %) IR 27 each (IR Type) General Power Input DC JACK Video Output (HD-SDI) BNC connector Operating Temperature +14 °F ~ +122 °F (-10 °C ~ +50 °C), Humidity : 0 % RH ~ 80 % RH Storage Temperature -4 °F ~ +140 °F (-20 °C ~ +60 °C), Humidity : 0 % RH ~ 90 % RH 18 APPENDIX A: TROUBLESHOOTING APPENDIX A Troubleshooting If you experience problems you cannot resolve, please contact your distributor. Problem Solution Nothing appears on the screen. - Check the power connections. - Check the video cable connections. - Ensure that the lens mode is set to DC (VIDEO) when using a VIDEO (DC) lens. The video image is not clear. - Clean the lens with a soft, clean cloth. - Adjust the monitor screen for room lighting conditions. Move the camera if necessary. The screen is dark. - Adjust the contrast feature of the monitor. - If you have an intermediate device, set the 75Ω /Hi-Z properly, and check the terminals. The MOTION DETECTION function is not working - Is “MOTION DETECTION” mode turned on? - Is the MD Sensitivity set too low? Increase the sensitivity. - Check the setting of the MD AREA. The WDR function is not working - Is the WDR level too low? - Is the AE Mode set to MANUAL? WDR is disabled in MANUAL exposure mode. Colors are not quite right. - Is the camera facing directly into sunlight or fluorescent light? - Is the auto-iris lens is being used? - Check the connection of the lens connector cable. The Day&Night function doesn’t work. - Is the AGC (EXPOSURE menu) set to OFF? The Auto Day&Night Function doesn’t work if the AGC is OFF. - Check the D <—> N level. 2 Megapixel HDcctv Indoor/Outdoor IR Dome Cameras 19 APPENDIX B: CAMERA DIMENSIONS APPENDIX B Camera Dimensions 2.95" 4.96" 1.38" 1.61" Camera with vandalproof housing 2.95" 1.52" 1.75" 1.81" 2.09" Camera with plastic housing 3.29" 20