1
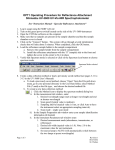
c. Click “Baseline” on the photometer button bar, verify the wavelength range
and that the sample chamber cover is closed and then click OK to start the
baseline measurement
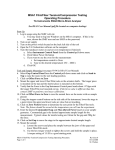
11. Load the sample into the sample compartment and if desired, load a reference into the
reference compartment.
If using the 8-cell holder:
i. Load your samples in the 8-cell holder. If using the Auto scan mode,
start with the front compartment (the compartment closest to the red
dot) and load the samples sequentially. The number of samples should
match the number of cells selected previously in the method file.
ii. Move to cell position 1 if using Auto scan mode, or to the first sample
if using Single scan mode.
iii. If desired, turn on the temperature controller power switch located on
the back of the controller. To manually set the desired measurement
temperature (see pages 2-6 and 2-7 in the Instruction Manual for
TMSPC-8), use the front panel of the temperature controller to:
1. Press Mode button to select Normal mode
2. Use the Up/Down arrows to select the desired temperature
3. Press Start button
12. Click the “Start” button on the instrument bar to initiate the measurement
13. Adjust the overlay graph Y axis values as desired (the X axis will scale automatically)
14. When the scan is complete:
a. If using Single scan mode, a New Data Set dialog box will appear. Enter a
filename and select your data directory and then click OK.
b. If using Auto scan mode, the New Data Set dialog box will not appear. Data
from each sample will automatically appear in separate filenames in the data
window.
Note: At this point, the data is only stored in temporary memory, but not to the
computer disk.
15. To save the data to the computer disk
a. Select “Save As” from the File pull down menu
b. If more than one dataset is present in the data window, click on the Select
button to choose the desired dataset
c. Select your personal directory in the User Data folder to save the file and enter
a filename
d. Select the desired file type in the “Save As Type” list:
i. Spectrum files (.spc) to save as a spectrum file for the UVProbe
software
ii. Data Print Table (.txt) to save the data as a text file
e. Click Save
16. See the UVProbe Tutorial instruction manual (pages 2-8 through 2-17) and on line
help files for an explanation of the various data manipulation and analysis functions
17. To open a previously saved file for data analysis, choose “Open” from the File pull
down menu and select the .spc file of interest.
Page 3 of 4
Revision 3
10/06/2010
M. Walters