1
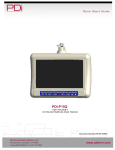
HEALTHCARE GRADE DVD PLAYER PDI-DVD-SH User Manual Document Number: PD196I160R1.DOC Important Safety Instructions CLASS 1 LASER PRODUCT CAUTION: TO REDUCE THE RISK OF ELECTRIC SHOCK, DO NOT REMOVE COVER (OR BACK). NO USER SERICEABLE PARTS INSIDE. REFER SERVICING TO QUALIFIED SERVICE PERSONNEL. The lightning flash with arrowhead symbol, within an equilateral triangle, is intended to alert the user to the presence of un-insulated “dangerous voltage” within the product’s enclosure that may be of sufficient magnitude to constitute a risk of electric to persons. The exclamation point within an equilateral triangle is intended to alert the user to the presence of important operating and maintenance (servicing) instructions in the literature accompanying the appliance. CAUTION: This product employs a Laser System. To ensure proper use of this product, please read this owner’s manual carefully and retain it for future reference. Please refer servicing to qualified service personnel. Use of controls, adjustments, or the performance of procedures other than those specified herein may result in hazardous radiation exposure. To prevent direct exposure to the laser beam, do not try to open the enclosure. Visible laser radiation present when opened. DO NOT STARE INTO BEAM. WARNING: TO REDUCE THE RISK OF FIRE OR ELECTRIC SHOCK. DO NOT EXPOSE THIS PRODUCT TO RAIN OR MOISTURE. WARNING: Do not install this product in a confined space such as a bookcase or similar unit. CLEANING AND DISINFECTING Do not immerse this product. Clean the exterior of this product with a dry lint free cloth. Do not use abrasive or chemical cleaning agents. CAUTION: Do not block any ventilation openings. Install in accordance with the manufacturer’s instructions. CAUTION: These servicing instructions are for use by qualified service personnel only. To reduce the risk of electric shock, do not perform any servicing other than that contained in the operating instructions unless you are qualified to do so. 1 NOTE TO CABLE TV INSTALLER This reminder is provided to call the cable TV system installer’s attention to Article 820-40 of the National Electrical Code. The code provides for proper grounding and, in particular, specifies that the cable ground shall be connected to the grounding system of the building, as close to the point of the cable entry as practical. Important Safety Instructions 1) Read these instructions. 2) Keep these instructions. 3) Heed all warnings. 4) Follow all instructions. 5) Do not use this apparatus near water. 6) Clean only with dry cloth. 7) Do not block any ventilation openings. Install in accordance with the manufacturer’s instructions. 8) Do not install near any heat sources such as radiators, heat registers, stoves, or other apparatus (including amplifiers) that produce heat. 9) Do not defeat the safety purpose of the polarized or grounding-type plug. A polarized plug has two blades with one wider than the other. A grounding type plug has two blades and a third grounding prong. The wide blade or the third prong is provided for your safety. If the provided plug does not fit into your outlet, consult an electrician for replacement of the obsolete outlet. 10) Protect the power cord from being walked on or pinched particularly at plugs, convenience receptacles, and the point where they exit from the apparatus. 11) Only use attachments/accessories specified by the manufacturer. 12) Use only with the cart, stand, tripod, bracket, or table specified by the manufacturer, or sold with the apparatus. When a cart is used, use caution when moving the cart/apparatus combination to avoid injury from tip-over. 13) Unplug this apparatus during lightning storms or when unused for long periods of time. 14) Refer all servicing to qualified service personnel. Servicing is required when the apparatus has been damaged in any way, such as power-supply cord or plug is damaged, liquid has been spilled or objects have fallen into the apparatus, the apparatus has been exposed to rain or moisture, does not operate normally, or has been dropped. 15) Apparatus shall not be exposed to dripping or splashing and no objects filled with liquids, such as vases, shall be placed on the apparatus. 16) CAUTION: Danger of explosion if battery is incorrectly replaced. Replace only with the same or equivalent type. 17) WARNING: the battery pack or batteries installed shall not be exposed to excessive heat such as sunshine, fire or the like. 18) Install in accordance with the manufacturer’s instructions. Do not use any cover over the TV, or enclose the AC/DC adapter, with any objects like a cloth or box 2 which blocks the vents. This will cause the TV to overheat and present a fire hazard. Always leave sufficient space around the product for ventilation. 19) To prevent injury, this apparatus must be securely attached to the floor/wall in accordance with the installation instructions. 20) WARNING: Changes or modifications to this unit not expressly approved by the party responsible for compliance could void the user’s authority to operate the equipment. 21) The MAINS plug or an appliance coupler is used as the disconnect device, the disconnect device shall remain readily operable. The images in this manual are only for reference and they may differ from the actual ones. 3 FCC Compliance This device complies with part 15 of the FCC Rules. Operation is subject to the following two conditions: • This device may not cause harmful interference. • This device must accept any interference received, including interference that may cause undesired operation. This equipment has been tested and found to comply with limits for Class B digital device, pursuant to part 15 of the FCC Rules. These limits are designed to provide reasonable protection against harmful interference in a residential installation. This equipment generates, uses and can radiate radio frequency energy and, if not installed and used in accordance with the instructions, may cause harmful interference to radio or television reception, which can be determined by turning the equipment off and on. The user is encouraged to try to correct the interference by one or more of the following measures: • Reorient or relocate the receiving antenna on the affected receiver. • Increase the separation between this device and the receiver. Connect this device into an outlet on a circuit different from that to which the receiver is connected. • Consult the dealer or an experienced radio/TV technician for help. This Class B digital apparatus complies with Canadian ICES-003. Accessories (included with DVD Player) AV Cables User Manual PD108-432 Remote Control NOTE: Accessories and their parts numbers are subject to change without prior notice. 4 Contents Important Safety Instructions..................................................................................... 1 FCC Compliance.......................................................................................................... 4 Overview ...................................................................................................................... 6 Front View................................................................................................................. 6 Right Side View ........................................................................................................ 7 Top View ................................................................................................................... 7 Remote Control ........................................................................................................... 8 System Connections................................................................................................. 11 Connecting to a TV using an RF Coax Cable..........................................................11 Connecting to a TV using the Component Input (YPbPr)........................................11 Connecting to a TV using the HDMI Input .............................................................. 12 Connecting to a TV using the AV Output ................................................................ 12 Notes on Discs .......................................................................................................... 13 Playback Operation................................................................................................... 14 VIDEO - DVD Playback .......................................................................................... 14 AUDIO - CD Playback ............................................................................................ 16 JPEG Playback....................................................................................................... 17 Using USB Flash memory and Memory cards........................................................ 19 System Setup............................................................................................................. 20 Wall Mounting ............................................................................................................ 24 LOCATION GUIDELINES ........................................................................................... 24 Definition.................................................................................................................... 25 Troubleshooting ........................................................................................................ 26 Specifications ............................................................................................................ 28 5 Overview Front View 1. 2. 3. 4. 5. 6. 7. 8. 9. Remote IR Sensor Receives the signal from the remote control for operation. Display Screen Displays the relevant status of the player when the unit is powered. (PLAY) Button Press to confirm selection or start playback. (Pause) Button : Press to pause the playback. Press(PLAY) button to resume normal playback. FR Press to play backwards. FF Press to play forwards. EJECT button Press to eject the disc. Power Button Press to turn the unit On or Off. Disc Tray Cover 6 Overview Right Side View 1. SD/MS/MMC Card Slot Used to insert the SD/MS/MMC card. 2. USB Port USB port for connection of USB Flash Drives/Sticks. 3. Disc Tray Slot Used to load disc. Top View Remove the top cover in the direction shown to access the connector ports for external signal cables. 1. R/F Cable Input 4. L/R AV Output Jacks RF cable TV signal input. Connect L/R AV signal source. 2. CH4/CH3 5. Y/Pb/Pr (Y/Cb/Cr) Jacks Modulate RF channel 3 or 4 selector Connection for the Y/Pb/Pr output. switch. 6. HDMI Output Jack 3. R/F Cable Output Connection for HDMI signal. Modulated RF cable TV signal. 7 Remote Control 1. EJECT button Press to eject the disc. 2. Power button Press to turn the player power On or Off. 3. PAUSE button 4. ► PLAY button Press it once to pause playback. Press the PLAY button to resume playback. Press to start playback. 5. / button 6. 0-9 number buttons 7. MENU button Press to search backward/forward during playback. Select numbers by pressing these buttons. Press to access the DVD disc menu during playback. 8 Remote Control 8. 9. 10. 11. 12. 13. 14. 15. 16. 17. 18. 19. 20. 21. 22. Cursor button(▲▼◄►) ▲▼◄►:Press to select different options. ▲▼(VOL+/VOL-): Increase or decrease the volume. OK button Press to access playback or confirm your selection. USB/CARD button Press to enter the USB/MS/MMC/SD mode. ZOOM button Press to operate various zoom functions. MUTE button Press to mute or un-mute the sound. STOP button Press to stop playback. Then press the PLAY button to resume playback from where stopped. Press this button twice to stop playback completely. REP button Press to repeat a chapter, title or the entire disc. / PREV/NEXT button : Press to return to the previous list, track or chapter. : Press to skip to the next list, track or chapter. GOTO button Press to select the desired disc starting time, title or chapter. SUBT button When playing a DVD coded with multi-subtitles, press to select a subtitle language or to turn subtitles off. TITLE button Press to display title menu if it exits in the disc. AUDIO button Press to select different languages when a DVD disc with multiple audio languages is played. Press to select different audio track when a CD disc is played. INFO button Press repeatedly to display or cancel the detailed information of the disc during playback. A-B button Press to play a section of the disc from point A to point B. Press once to select the starting point A, press again to select the end point B. During A-B repeat playback, press this button to cancel the repeat. SETUP button Press to enter the player’s setup menu. 9 Remote Control Preparation of Remote Control Follow the steps below to install the battery. 1. Pull the battery tray out from the remote control in the direction of the arrow. 2. Load a new battery properly with the (+) sided up. 3. Insert the battery tray back into the remote control. Battery type: CR2025 3V Battery service life: approximately 1 year under normal use (at room temperature). Use of Remote Control Point the remote control unit to the remote sensor within the range of 5 meters and angles of 60 degree, and without obstacles between remote control and remote sensor. Note ¾ ¾ ¾ ¾ ¾ Improper use of the battery may cause overheating, explosion or ignition, which can result in an injury or a fire. Battery leakage may damage the remote control. Do not expose the remote control unit to direct sunlight. Do not recharge, disassemble, deform or heat the battery. Immediately replace a dead battery. Remove battery if the remote is not used for a long period of time. 10 System Connections • Do not connect the power cord until all connections have been made. • Match the color code when connecting audio and video cables. Connecting to a TV using an RF Coax Cable Follow the drawing below to connect the DVD player to a TV's Audio/Video input with a RF coax cable. Connecting to a TV using the Component Input (YPbPr) Use Component AV Cables (not supplied) to connect the Y/Pb(Cb)/Pr(Cr)jacks on the rear panel of the TV to the DVD Player’s component outputs.Ensure that the corresponding input (e.g: Component 1 or Component 2) is enabled in the “Source Setup” menu of the television. NOTE: The Y/Pb/Pr jacks on your DVD player are sometimes labeled Y/Cb/Cr or Y/B-Y/R-Y. If so, connect the cables to like colors. 11 System Connections Connecting to a TV using the HDMI Input Follow the figure below to connect an HDMI Cable(not supplied) to the HDMI jack on the rear panel of the TV. Verify that the corresponding mode(e.g: HDMI 1 or HDMI 2) is enabled in the TV’s setup menu. Connecting to a TV using the AV Output Follow the figure below to connect a TV to the AV output jacks on the rear panel of the DVD player. Connection is color-coded. After connection, ensure that the corresponding (e.g: COMPOSITE VIDEO) mode is enabled in the Source Setup menu of the television. 12 Notes on Discs Compatible Disc Formats DISC LOGO DIAMETER 12cm DVD PLAYBACK TIME/ PLAYABLE SIDES 133 min (SS-SL) 242 min (SS-DL) 266 min (DS-SL) 484 min (DS-DL) 41 min (SS-SL) 8cm 75 min (SS-DL) 82 min (DS-SL) 150 min (DS-DL) 12cm 74 min 8cm 20 min CD JPEG 12cm Please follow Disc’s instructions: Care of Discs Holding Discs Hold the Disc by the edges as shown, when loading or removing from the player. Cleaning Fingerprints or stains on the disc may affect the quality of sound and picture. To clean your discs, use a soft clean cloth to wipe them. If necessary, moisten a soft cloth with diluted detergent to remove heavy dirt or fingerprints. Do not wipe in a circular direction as shown in the figure. the center of the disc to the outer edge as shown. 13 Gently wipe from Playback Operation PLEASE READ THE FOLLOWING INSTRUCTIONS CAREFULLY BEFORE USING YOUR DVD PLAYER FOR THE FIRSTTIME. WARNING: Do not play poor quality discs to avoid damaging the lens inside the player. Pre-operation 1. 2. 3. 4. 5. 6. Plug power cord into wall outlet Press Power button once on the unit. Press Eject to remove a loaded disc. Insert desired disc into the slot with the disc Label Side up (showing). The player will search disc and enter the disc searching status. Adjust the volume with VOL+/VOLbutton on remote control. To turn the player off, press Power button again. AV Output Playback in the AV mode is the same for Composite, HDMI, or Component YPbPr. Please refer to the following instructions for these modes. NOTE: the corresponding input must first be selected on the TV for proper display of the signal. VIDEO - DVD Playback Region code DVD units and discs are coded by region. If the region number described on the DVD disc does not correspond to the region number of this product, this product cannot play the disc. Play After loading a DVD disc, the screen will display a menu. Press buttons to select the item and press OK button to play. Pause During playback, pressbutton on the remote control to pause playback and press it repeatedly to start step-by-step playback. Press(Play) to resume normal playback. Stop During playback, press button once to stop playback and press(Play) to resume normal playback. Press button twice repeatedly to stop playback completely. 14 Playback Operation Previous and Next During playback, press button once to go to the beginning of the current chapter and press it again to go to the previous chapter; press to go to next chapter. Fast Playback During playback, press button to start fast backward playback; press button to start fast forward playback. Press(Play) to return to normal playback during fast playback. ZOOM During playback, press ZOOM button repeatedly to shift among 2x - 3x - 4x - 1/2 - 1/3 1/4 - normal size in sequence. A-B During playback, press A-B button to select the segment to repeat. Press once to select the starting point A, press again to select the end point B and the unit will play the segment between A-B continuously. Press A-B button the third time to cancel the repeat. MENU During playback, press MENU button to display the root menu on the screen. On the menu, press the button to select item and press the OK button to confirm. Or press the 0-9 and +10 buttons to select the item directly. TITLE In general, the contents of a DVD disc can be divided into several titles, and also there are several menus in a title. During playback, press the TITLE button to display the title menu on the screen. On the menu, press the button to select title and press the OK button to confirm. Or press the 0-9 then press OK to select the item directly. REPEAT Press it repeatedly to repeat a Chapter, Title, All or cancel repeat in sequence. Note: Some discs do not support the repeat function. AUDIO Press to select the program’s audio language, if the disc supports multi-lingual languages. SUBTITLE Press to select the subtitle language, or to turn off subtitles if active. Note: The disc must contain multiple subtitled languages. 15 Playback Operation INFO Press to open or close display of the detailed information of current playback. GOTO During playback, press the GOTO button to enter the menu to select desired title, chapter, or playback time, etc. On the menu, use the button to select the item and press the OK button to enter. Use the number button or button to set and press the OK button to confirm. Press the GOTO button again to exit. Note: Some DVD discs do not support the search function. AUDIO - CD Playback The player will play all tracks on a CD disc by default. You can use the and buttons, or number buttons to select a track. Pause During playback, pressbutton on the remote control to pause playback and press (PLAY) to resume normal playback. Stop During playback, press once to stop playback and press(PLAY) to resume the normal playback. Press button twice repeatedly to stop playback completely. Previous and Next During playback, press button to go to the previous track; press button to go to next track. Fast Playback During playback, press button to start fast backward playback; press button to start fast forward playback. During fast playback, press (Play) button to return to normal playback. REPEAT Press it repeatedly to repeat a Track, All or cancel repeat in sequence. INFO Press INFO button to open or close display of the detailed information of current playback. AUDIO Press AUDIO button repeatedly to select sound track as follows: Mono Left Mono Right Mix-Mono Stereo 16 Playback Operation GOTO During playback, press GOTO button repeatedly to enter desired disc playback time, track time or track. On each menu, use the 0-9 buttons and OK button to input number and the unit will jump there. JPEG Playback After loading a JPEG disc, the screen displays the root folder. Press to select a folder and press OK button to enter. On the folder, press to select files and press (Play) button to play; press to return to the previous folder. Pause During playback, pressbutton on the remote control to pause playback and press button again or(Play) to resume normal playback. Stop During playback, press button to enter picture preview mode. Press button to select a picture and press OK button to play. Previous and Next During playback, press button to go to the previous picture; press button to go to next picture. ZOOM During playback, press ZOOM button first and then press button to zoom in the picture as follows: 50%-200%; press button to zoom out the picture as follows: 200%-50%. MENU During playback, press MENU button to return to folder mode. Press the OK button to resume normal playback. REPEAT Press it repeatedly and repeat mode will shift as follows: Single Repeat One Repeat Folder GOTO During playback, press the GOTO button and press 0-9 buttons to select and show the desired picture. In folder mode, press to highlight folder number, then press 0-9 buttons to input desired number. 17 Playback Operation Picture Rotate While viewing a picture, press the button to rotate the picture. During playback, press the button to rotate the current picture clockwise: During playback, press the button to rotate the current picture counterclockwise: During playback, press the button to flip the current picture horizontally : During playback, press the button to flip the current picture vertically: Note: Some picture CD discs are restricted and picture zooming, rotation, and flipping may not function. 18 USB and SD/MS/MMC Card Function Using USB Flash memory and Memory cards 1. Plug power cord into wall outlet. 2. 3. Turn the player on. Insert the USB memory stick into the USB port or insert the SD/MMC/MS into the SD card slot (see the figure on the right). Note: Prior to connecting the device, make sure that the USB memory stick or the SD card contains files. 4. Press the USB/CARD button on the remote to popup the media selection menu as shown: 5. Press the ▲▼ button to select USB memory playback or MCR for the SD/MS/MMC playback, and then press the OK button to start. Please see the figure below: 6. 7. Press the ▲▼ button to select the folder, and press OK button to enter. Press the ▲▼ button to select the desired picture. Then press fPLAY button to start playback. 8. Press STOP button to stop playback. Press fPLAY button to start playing from the beginning of the current picture. Press the ◄ button to return to the folder menu. NOTES: The screen display varies according to the content of the USB stick or the SD/MMC/MS card. Pull out the USB memory or SD/MS/MMC card directly after the files have finished played. 19 System Setup You can change the default settings of this unit to customize its performance to your own preference. NOTE: Stop and remove the disc to enter the System Setup menu. To set up your system: 1. Press the SETUP button on the remote control. 2. The setup menu will appear on the screen. It includes General Setup Page, Audio Setup, Dolby Digital Setup, Video Setup Page and Preference Page. You can exit from the setup menu by pressing SETUP button again at any time during setting. 3. Press the direction buttons or to select a sub-menu to set up. 4. Press the direction buttons or to select the item that you want to set up in the sub-menu. General Setup Page The items included on this menu are shown at left. Press to highlight this item. Pressto enter. Press button to choose the proper selection. Press OK to confirm and press to exit. 1. TV Display • 4:3/PS: The aspect ratio is 4:3; black bars are added to the left and right of the display image. • 4:3/LB: The aspect ratio is 4:3; black bars are added to the top and down of the display image. • 16:9/Wide Squeeze: The aspect ratio is 16:9; the picture is stretched proportionately to fill the screen. 2. 3. Angle Mark • On: The screen will display angle symbols when a multi-angle DVD is running. • Off: The angle symbol will not be displayed. OSD Lang Used to select the display language for the on-screen menus. 4. Captions This item is used to turn the captions on or off. 5. Screen Saver • On: Enables the screen saver if the unit is not operated for several minutes. • Off: This function is turned off. 20 System Setup 6. Last Memory • On: If the disc is stopped, or ejected and then reinserted again, the player will be at the same point where it was stopped. • Off: This function is turned off. NOTE: Some discs may not support these functions. Audio Setup Page The items included on this menu are shown at left. Press to highlight this item. Press to enter. Press button to choose the proper selection. Press OK to confirm and press to exit. 1. 2. Speaker Setup • LT/RT: Output mixed audio in Dolby format. • Stereo: Output stereo signal. HDCD Press to highlight this item. Pressto enter. Press button to choose the proper selection. Press OK or to enter the item. • Off: The unit will not support HDCD function. • 1X: Turn on the HDCD function and select the speed: X1. • 2X: Turn on the HDCD function and select the speed: X2. Dolby Digital Setup The items included on this menu are shown at left. Press to highlight this item. Press to enter. Press button to choose the proper selection. Press OK to confirm and press to exit. 1. Dual Mono • Stereo: Outputs stereo sound. • L-Mono: Outputs Left channel sound only. • R-Mono: Outputs Right channel sound only. • Mix-Mono: Outputs Mono sound. 21 System Setup 2. Dynamic Used to adjust the linear dynamic compression rates for different compression effects. Section is only active during Dolby digital sound. Video Setup Page The items included on this menu are shown at left. Press to highlight this item. Press to enter. Press button to choose the proper selection. Press OK to confirm and press to exit. 1. Resolution This item is used to set the player’s resolution for connecting the external AV signal source. 2. Quality This item is used to adjust the video quality of the Screen. It includes: sharpness, brightness and contrast. Preference Page The items included on this menu are shown at left. Press to highlight this item. Press to enter. Press button to choose the proper selection. Press OK to confirm and press to exit. Note: The DVD Disc must be removed from the player or stop playback to allow the Preference Page to appear. 1. TV Type Select between TV types PAL or NTSC. NTSC is used for North America. 2. PBC Use to turn on/off the PBC. 3. Audio Sets the audio languages. 4. Subtitle Sets the subtitle languages. 22 System Setup 5. Disc Menu Sets the menu languages. 6. Parental Allows parental control of movies according to rating. 7. Password Sets the password. There is no default password. 8. Default This item is used to reset the unit to factory presets. Press button to highlight this item. Press to select the “Reset”. Press OK to reset all settings to default status. 23 Wall Mounting LOCATION GUIDELINES The model PDI-DVD-SH Health care Grade DVD is a specialized DVD player. This DVD Player is intended for entertainment and educational purposes for use in a hospital, a nursing home, a medical-care center, or a similar health-care facility in which installation is limited to a non-hazardous area in accordance with the National Electrical Code, ANSI/NFPA 70. This unit should be wall mounted only and should not be taken into the bed or operated directly from the bed. The Player is designed for mounting to PDI manufactured mounts (not supplied with player). Optional PD168-028 Wall Plate Mounting 1. Position Wall Plate and locate four mounting holes. Secure the plate to the wall with #8 fasteners (not supplied). A fastener and anchor system appropriate for the existing wall construction should be employed. Dry Wall Nylon or Moly bolt Concrete Wall Lag Screw Wood Stud Wall Wood Screw 2. Position DVD player keyhole’s over the wall plate posts, insert, and seat player onto plate. 3. Attach DVD player to plate using security hole inside cable access cabinet and screw. NOTE: The back of the PDI-DVD-SH also incorporates a 100mm VESA hole pattern. 24 Definition Letterbox screen This refers to a screen on which the playback picture of wide-screen DVDs appears with black bands running along the top and bottom. Pan & Scan screen This refers to a screen on which the playback picture of wide-screen DVDs is cut off at the left and right sides. Title, Chapter (DVD) DVDs are divided into some large sections (titles) or some small sections (chapters). Each section is numbered: these numbers are called Title number or Chapter number. Title 1 Title 2 Chapter1 Chapter 1 Chapter2 ………… Track (CD) CDs are divided into some sections (tracks). Each section is numbered; these numbers are called Track number. Track 1 Track 2 Track 3 …… JPEG JPEG is a common picture format that offers a small file size and low quality loss rates for pictures. Hundreds of pictures can be stored in a disc in this format. 25 Troubleshooting If you suspect there is something wrong with the DVD player, immediately turn the power off. Disconnect the power cord and check that there is no smoke or excessive heatcoming from the unit. Never open or try to repair the unit yourself. There are no user serviceable parts inside. PROBLEM POSSIBLE CAUSE The disc cover may not be closed. POSSIBLE SOLUTION Close the disc cover. There may be no discs in the Put a disc in to the DVD drive. DVD drive. The player cannot play. There is no sound. The disc may be flipped upside down. Put the disc in with the label side up. The disc may be dirty or warped. Clean or change the disc. The player's region code may not as the same as the region code of DVD disc. Make sure the player's region code is the same as the region code of DVD disc. There may be water on the lens. Remove the disc and keep the player being powered off for at least two hours. The system connection may not be correct. Connect the system correctly. The speakers may be turned down or muted. Turn up speaker volume and verify the TV is unmuted. The sound setup of the DVD disc may not be correct. Setup the sound of the DVD correctly. The disc may be dirty or warped. Clean or change the disc. 26 Troubleshooting PROBLEM POSSIBLE CAUSE POSSIBLE SOLUTION The TV may not be set to a correct video mode. Choose the correct video mode. The system connection may not be correct. Connect the system correctly. The disc may be dirty or warped. Clean or change the disc. There may an obstruction between the remote control and the player. Remove the obstruction between the remote control and the player. The remote control may not be pointed at the player. Point the remote control at the player directly. The battery of the remote control may not be inserted correctly. Make sure the polarity of the battery is correct. The battery of the remote control may be out of power or weak. Replace the battery. There is no picture. Poor AV performance. The remote control does not work Other possibilities: Static or other external interference may have caused the player to malfunction. To restore Proper operation, please disconnect the AC power cord from the wall outlet and then re-connect the power cord to the wall outlet. If the problem still exists, please disconnect the AC power cord and consult your service center or a qualified technician. 27 Specifications Laser Wavelength 780/650nm Video System PAL/NTSC Frequency Response 20Hz-20kHz Audio Signal-to-noise Rate ≥90dB Audio distortion + noise ≤-70dB Channel Separation ≥70dB (1kHz) Dynamic Range ≥80dB (1kHz) Audio Out Output Level 2V±0.2 1.0, Load 10kΩ Video Out ±2.5dB (1kHz) Output Level 1VP-P±0.2, Load 75Ω Unbalanced Negative Power 120V AC, 60 Hz, 8Watts Dimensions 11.5” (292mm) x 7.6” (192mm) x 2.0” (51mm) Weight Approximate2.5 lbs (1.12 Kg) DESIGN AND SPECIFICATIONS ARE SUBJECT TO CHANGE WITHOUT NOTICE OR OBLIGATION Manufactured under license from Dolby Laboratories. “Dolby” and the double-D symbol are trademarks of Dolby Laboratories. Confidential unpublished works. © 1992 -1997 Dolby Laboratories, Inc. All rights reserved. 28 Limited Warranty PDI Communication Systems Inc., (“PDI”) warrants, to the original purchaser only, that the PDI-DVD-SH will be free from defects in materials and workmanship, under normal use, for 1 year from the date of original purchase. This warranty does not cover any other equipment that may have been included with PDI’s shipment of this product. After receipt of written notice of a defect or malfunction occurring during the warranty period, PDI will repair or replace goods returned to its Springboro, Ohio location, at its discretion, free of charge to the original purchaser, the whole or any component part of any product manufactured by PDI and found by PDI to be defective. As a condition to obtaining warranty service, written notification must be received by PDI within at least ten (10) days after defect is first observed. Repair of said product requires it to be shipped to the PDI factory in Springboro, Ohio. All shipments shall be F.O.B. Springboro, Ohio, and all shipping and, freight charges to PDI’s factory shall be paid by the customer. This warranty shall not apply to any PDI products subjected to improper use, negligence or accident; nor to tampering, alterations, or repairs by others, without PDI’s specific prior written authorization. For information regarding authorized servicing and all other information pertaining to this warranty, please contact PDI COMMUNICATION SYSTEMS, Inc. at 40 Greenwood Lane, Springboro, Ohio 45066 or phone 937-743-6010. This warranty gives specific legal rights and you may also have other rights, which vary from state to state. PDI’s liability under this warranty is limited to repair or replacement of defective products and parts as provided above. PDI shall not be liable for incidental or consequential damages.* The warranty contained herein is in lieu of all other expressed or implied warranties, including any implied warranty of merchantability or fitness for any particular purpose. PDI neither assumes nor authorizes any person to assume, on its behalf, any other obligation or liability. *Some states DO NOT allow the exclusion of limitation of incidental or consequential damages or a disclaimer of warranties implied by law, so the above limitation or exclusion may not apply. The information and technical data in this manual is believed accurate, but is not warranted and is subject to change without notice or obligation. ”PDI” and “Better Solutions Are Within Reach” are registered trademarks of PDI Communication Systems, Inc. Copyright © 2004-2010 by PDI Communication Systems, Inc. All rights reserved 29 30 Communication Systems, Inc. 40 Greenwood Lane Springboro, Ohio 45066 http://www.pdiarm.com Better Solutions are Within Reach® 31 Document Number: PD196I160R1.DOC