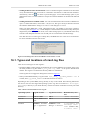
1
Build 13.0.5130
HIPE Owner's Guide
1. Welcome
Welcome to HIPE, the Herschel Interactive Processing Environment! This guide contains everything
you need to know about the main software tool for the analysis of Herschel data.
Here is what the next pages have in store for you:
• Section 2 – Installing HIPE and performing basic configuration.
• Section 3 – Basic concepts about HIPE.
• Section 4 – Fine-tuning every aspect of HIPE with the Preferences dialogue window.
• Section 5 – The Help System and its browsing and search features.
• Section 6 – Extending HIPE with plug-ins.
• Section 7 – Managing memory.
• Section 8 – Managing running jobs.
• Section 9 – Opening and running scripts.
• Section 10 – Running scripts outside HIPE.
• Section 11 – Editing scripts and configuring the editor.
• Section 12 – Managing log messages.
• Section 13 – Saving and restoring variables and sessions.
• Section 14 – Managing calibration sources.
• Section 15 – Viewing data products and observations.
• Section 16 – Giving feedback about HIPE.
• Section 17 – HIPE views.
• Section 18 – HIPE perspectives.
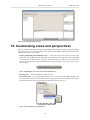
• Section 19 – Customising views and perspectives.
• Section 20 – Mouse click behaviours and keyboard shortcuts.
• Section 21 – Managing monospaced fonts.
• Section 22 – Comparison tables to translate the most used IDL commands into HIPE.
There is much more to HIPE than is contained in this manual:
• If you want to learn more about graphical tools to download, visualise and analyse your data, check
the Data Analysis Guide.
• If you want to learn the scripting language used in HIPE and master the command line interface,
have a look at the Scripting Guide.
• See the Welcome page of the HIPE Help System for links to our YouTube and Twitter channels.
1
HIPE Owner's Guide
Build 13.0.5130
Tip
What is the relationship between the HCSS, HIPE and DP? HCSS (Herschel Common Science System) encompasses all software for the Herschel Science Ground Segment
(Commanding, Proposal handling, Mission Planning, etc), in addition to the Data Processing (DP) system. The DP system includes Standard Product Generation (SPG), Quality
Control Pipeline (QCP), Quick Look Analysis (QLA) and Interactive Analysis (IA).
HIPE stands for Herschel Interactive Processing Environment and is the main gateway
to the DP system.
2. Installing HIPE
Warning
Before installing HIPE, make sure that your default file compression program can unzip
FITS files without corrupting them. Otherwise calibration files shipped with HIPE may
be corrupted during installation.
Under Windows, WinZip is known to cause this problem. WinZip has an option called
TAR file smart CR/LF conversion , in the Miscellaneous tab of the Configuration dialogue
window (at least up to version 15.0), that is enabled by default and causes the corruption.
Disable the option to solve this problem. You can also use other software such as 7-Zip.
In case of any other problems during installation check the Known Issues page or contact
the Herschel Helpdesk via the Herschel Science Centre website.
You can download HIPE from the Herschel Science Centre on this page (please open this link in a
new window/tab) . Installation instructions and a list of supported platforms are provided on the page.
Developer builds. Development builds are available via the Continuous Integration system. These
builds are untested and potentially unstable, and are meant only for Herschel software developers. If
you are not a software developer, but you still want to get access to these developer's builds for any
particular reason, see Section 2.2 .
Java.
HIPE needs the Java SE Runtime Environment version 6 (version 7 for HIPE 12 or later).
Windows and Linux installers come with an integrated Java environment. If you are using a Mac
you can check which Java version is installed by running Applications → Utilities → Java → Java
Preferences . Make sure to select the same Java version as recommended in the HIPE download page,
or a newer one. To update your Java version, use the Mac OS software update feature.
Note
Since Mac OS 10.7, Apple no longer provides Java. Java 7 requires Mac OS 10.7.3 or
later and should be downloaded from Oracle Java page (please open this link in a new
window/tab) . More information on how to install Java on Mac OS is available here .
If you are using a developer build of HIPE, you must install a compatible Java version separately,
irrespective of the operating system you are running.
Note
HIPE only supports the Oracle Java platform. To see if your Java installation is supported,
choose Help → Check Java platform in HIPE.
Memory requirements. The minimum amount of memory needed is two GBytes. Four GBytes
are the highly recommended minimum for data processing; more may be needed in some cases, such
as large PACS maps.
You can set the maximum amount of memory available to HIPE during installation. To change the
maximum available memory afterwards, choose Edit → Preferences and change the value in the
Startup & Shutdown section of the preferences window.
2
HIPE Owner's Guide
Build 13.0.5130
Versant database. You can also specify the name and location of a Versant database during installation. Only advanced users and calibration scientists should need to specify a database. If you are
unsure about this option, you can safely skip it.
2.1. Upgrading and uninstalling
To uninstall HIPE, follow the usual uninstallation procedure for your operating system, or execute
the uninstall_hipe command in the uninstall_hipe directory, located in the HIPE installation
directory.
It is possible to install different HIPE versions alongside each other. To upgrade HIPE to a new version
you do not need to uninstall the previous version first.
Note
Most files of a HIPE installation are stored into a .hcss.d directory within your home
directory. This directory is shared among all the HIPE installations on a computer, which
means that the uninstaller will not clean it up to avoid damaging other installations. You
can remove this directory manually after you have removed HIPE completely from your
system. Any HIPE installations left will stop working after removing this directory.
If you install and upgrade many HIPE versions, over time the size of your .hcss.d directory can
grow to several gigabytes. To free this space, follow these steps:
1. Uninstall all the HIPE versions on your computer.
2. Delete the .hcss.d directory.
3. Reinstall all the HIPE versions you need.
2.2. Installing developer builds
To install developer builds, follow these steps:
1. Download the dedicated
item=hcss.installer.zip .
installer
from
http://herschel.esac.esa.int/hcss/repository.php?
2. Unzip the installer file. A new directory HcssInstaller is created.
3. Open a command line prompt and go to the HcssInstaller directory.
4. Execute the hcss.installer command (on Linux and Mac) or the hcss.installer.bat command (on
Windows). See the remainder of this section for the syntax of these commands.
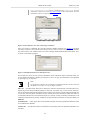
Figure 1. The syntax of the developer builds installer.
• Command options are preceded by two dashes. To see a list of all available options, run the command with the --help option. Two useful options are the following:
• --doc Controls whether to install documentation (default is yes). Use as --doc=yes or -doc=no . If no documentation is installed locally, HIPE automatically falls back to the online
documentation.
• --src Controls whether to install the source code (default is no). Use as --src=yes or -src=no . You can run HIPE without installing its source code, but you will not be able to use
the Source button in task dialogue windows.
3
HIPE Owner's Guide
Build 13.0.5130
• The project is the part of HIPE you want to install. Use hcss to install everything,
hcss.dp.core to install only the core system (without instrument-specific software),
hcss.dp.hifi to install core software plus HIFI-specific software, and hcss.dp.pacs or
hcss.dp.spire to install core software plus PACS- or SPIRE-specific software, respectively.
Specifying a project is mandatory.
• Tre track correspond to a major HIPE version and its minor versions. For example, use track 9.0
to download a developer build leading to HIPE 9.0 or to a 9.x version. Specifying a track number
is mandatory.
• The build number indicates the specific HIPE build you want to install. If you omit this number,
the latest available build is downloaded.
The developer build is installed in a subdirectory of the directory from which you launched the installer. To uninstall the developer build, delete its directory. However, note that developer builds store
software in the .hcss.d directory just like user releases.
For more information on the developer build installer, see http://herschel.esac.esa.int/hcss/install.php .
2.3. Configuring HIPE for a proxy server
You can configure HIPE for use with a proxy server during installation. To change proxy settings
after installation, add or edit the following entry in the installed.properties file within the
HIPE installation directory:
java.vm.options = -Dhttp.proxySet=true
-Dhttp.proxyHost=proxyserver.myinstitute.com
-Dhttp.proxyPort=8888
All the above properties must be on the same line of text.
Since HIPE connects to the Herschel Science Archive via the https protocol, you must also configure
the proxy for this protocol, by adding the same three properties with -Dhttps instead of -Dhttp .
If the proxy requires authentication, add the following two properties:
-Dhttp.proxyUser=myUserName -Dhttp.proxyPassword=myPassword
3. HIPE basic concepts
The building blocks of HIPE are views (windows embedded in the main HIPE interface) organised into
perspectives. HIPE also offers viewers to visualise many types of data, such as images and spectra.
Figure 2. The components of HIPE.
4
HIPE Owner's Guide
Build 13.0.5130
Click a view title to make the view active. When a view is active, its title tab is highlighted (see
Figure 3). There can be only one active view at any time.
Figure 3. Active (left) and inactive (right) HIPE view.
Depending on which view is active, you will see different icons on the HIPE toolbar (see Figure 4).
The icons on the right are related to perspectives and never change. The icons on the left, apart from
the first two (to create/open a file) may change or become deactivated when you switch to a different
view. Figure 4 shows the icons that appear when you work on a file in the Editor view.
If you cannot find an icon in the toolbar, it is probably because the active view does not use it.
Figure 4. The HIPE toolbar.
For a list of available views, see Section 17. For a list of available perspectives, see Section 18.
3.1. The HIPE Welcome screen
When you start HIPE for the first time you are greeted by a Welcome screen with six icons, as shown
in Figure 5.
Figure 5. The Welcome screen.
You can return to the Welcome screen at any time by clicking the
icon at the top right of the HIPE
window. The following table describes the icons in the Welcome screen.
Icon
Description
Takes you to the Workbench perspective (for information on perspectives in
HIPE see Section 18). The default workbench is shown in Figure 37. This is the
5
HIPE Owner's Guide
Icon
Workbench
Build 13.0.5130
Description
main work area for doing data analysis. Here you can look at data values, plot
spectra and images, create scripts for batch processing and run analysis tools.
The contents of the workbench can be updated with various views available under the Window menu (see Section 17 on available views).
Opens a window with four more icons, providing access to data held either locally or at a remote site (for example the Herschel Science Archive). It also allows the import of FITS and text table files.
Data access
For more information on these features see the Data input/output in Data Analysis Guide chapter of the Data Analysis Guide.
Opens the HIPE Help System in your default Web browser. For more information
see Section 5.
Documentation
Opens the Preferences dialogue window. For more information see Section 4.
Preferences
Checks if a new user release is available. The same feature is available by choosing Help → Software Updates. This feature only works with user releases. It does
not work with developer builds.
Updates
External tools
Shows a set of icons linking to Virtual Observatory tools, including Topcat, Aladin, SPLAT-VO and VOSpec. Clicking on any of the icons launches the external VO tool. Help with these tools is not provided within HIPE documentation,
except for the HSA browser interface which is described in the Data Analysis
Guide in Data Analysis Guide.
When you click on the icon of an external application, it will be automatically
downloaded and launched. After the download you may see a security dialogue
window telling you that the application's digital signature is missing or has an
error. For the applications shown in this window you can safely click the Run
button. You can check the Always trust content from this publisher checkbox to
avoid being prompted again.
An external application is downloaded the first time you click on its icon, and
whenever a new version becomes available. Note that the application will be
downloaded even if you have a version already installed on your hard disk.
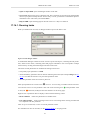
4. Setting properties and preferences
HIPE's behaviour is controlled by preferences and properties. Preferences include the most common
and frequently used settings. Properties are more advanced settings which you should change only if
you know what you are doing.
Choose Edit → Preferences or press Alt+Enter to open the Preferences dialogue window:
6
HIPE Owner's Guide
Build 13.0.5130
Figure 6. The HIPE preferences window.
You can set preferences in the available categories and revert to the default values at any time. You
can also export/import the values of the preferences to/from an XML file.
Press the Advanced button to open the list of properties, including configuration properties, specific
to Herschel software, and system properties, affecting your system as a whole.
Figure 7. The HIPE advanced properties window.
Properties in bold are not set to their default values. Click the column headers to change the ordering
of the properties. Write anything in the Filter by property name field to show only the properties whose
name contains that text.
To modify a property, double click in the Value field, change the value and press Enter or click
anywhere else to confirm. The Source file field now shows the file where the custom value has been
stored. Note that not all properties can be modified.
To reset a property to its default value, right click on the corresponding row and choose Reset to
default from the menu.
7
HIPE Owner's Guide
Build 13.0.5130
HIPE reads properties from these files (with home and install being your home directory and
HIPE installation directory, respectively):
1. install/installed.properties.
2. All the .properties files in install/config/properties.
3. home/.hcss/user.props. These properties affect all Herschel software on your system.
4. home/.hcss/hipe.props. These properties affect all HIPE versions on your system.
HIPE reads files in the order above, so for instance a property set in hipe.props overrides the
same property set in installed.properties. If you choose to modify property files directly,
you should only have to modify the last two files. Restart HIPE for any change to take effect.
Warning
Property files are not encrypted. If you store sensitive information in a property file, set
access permissions so that only you can read the file, and avoid sharing it with other users.
See the documentation of your operating system for how to limit access permissions to
files.
Tip
If you want a list of all the properties in text format, choose Help → About, click on the
Config tab and press Copy to Clipboard. You can then paste the list to a text editor.
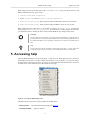
5. Accessing help
Open the HIPE Help System by choosing Help → Help Contents. Help pages open in a new tab of
your default web browser. The help contents are installed on your computer, so you do not need to
be connected to the Internet. However, if you are not connected some advanced features will not be
available, such as the comments box at the bottom of each page.
Figure 8. Accessing the HIPE Help System.
The following are some of the entries available in the Help menu:
• Help Contents:
opens the offline Help System (see Figure 9).
• Working in HIPE:
opens this manual.
8
HIPE Owner's Guide
• What's New:
Build 13.0.5130
opens the What's New page on the Herschel public Wiki.
• Data Reduction: opens a submenu from which you can access the data reduction guides for
HIFI, PACS and SPIRE.
• Help on Editor view: opens a help page about the active view (the Editor view in this case).
This entry is visible only when a view is active.
• Online Help: opens the online Help System. The contents are mostly the same as the offline version,
except that it contains the most recent updates.
Figure 9. The HIPE Help System home page.
As shown in Figure 9, the HIPE Help System window contains three components:
• A toolbar at the top of the screen.
• An area on the left-hand side, containing the Table of Contents (TOC), the search facility and the
glossary. More advanced material appears towards the bottom of the Table of Contents.
In the Table of Contents, manuals are grouped into categories and represented by a folder icon next
to a plus sign. Click on the plus sign to view the contents of a manual. You can do the same with
manual sections containing subsections. Click on any entry to display the corresponding page.
• The main screen area where the documents appear. When you start the Help System, this area shows
nine boxes with links to the most important topics. Two buttons at the bottom lead to external
YouTube and Twitter resources for learning more about HIPE.
5.1. Searching the help system
Click the Search tab to display the search interface.
Figure 10. The search interface.
9
HIPE Owner's Guide
Build 13.0.5130
Enter your search keywords and press Enter, or click the GO button, to perform a search. You can
search for multiple terms and link them with AND and OR logical operators.
For more information on limiting the search to one or more manuals or categories, see Section 5.2.
Logical operators, limited searches and other advanced features are also available by using the following syntax in each search box:
• Boolean operators: herschel AND (archive OR store); archive NOT store;
+archive -store. The boolean operator words must be upper case.
Note that when writing multiple search keywords in the same text box, the default operator
is OR. If you want to find text where all your keywords are present, you must link the keywords
explicitly with AND.
• Wildcards: te?t; maxim*. A question mark replaces a single character, an asterisk replaces from
zero to any number of characters.
• Boosting a term: herschel^4 archive. The boosted term is considered more relevant, which
influences the ordering of results. The default boost level is one.
• Proximity searches: the string "herschel
archive within ten words from each other.
archive"~10 searches for herschel and
• Fuzzy search: herschel~; herschel~0.6. Finds words with similar spelling. You can specify
a fuzziness level between zero and one (the default is 0.5). Lower values of the fuzziness parameter
mean that greater spelling variations are considered.
• Limit search to one manual: manual:hipeowner AND herschel; (manual:hipeowner
OR manual:quickstart) AND herschel. For a list of identification strings for the manuals, see the drop-down list. Each string is listed next to the manual name: for instance, Quick Start
Guide (quickstart). Some strings (like howtos for the Data Analysis Guide) do not resemble the
name of the manual for historical reasons.
Grouping search results. By default, search results in the glossary are displayed first. Click the
cog icon to set how the other results are grouped. You can choose to group results by manual or by
category, or not to group results at all. The default is to group search results by category.
You can dynamically change the grouping of results, without having to repeat the search.
Note
When you use the search feature for the first time, HIPE must build the search index. This
can take up to a few minutes, depending on the speed of your system and on the amount
of installed documentation. A progress bar tells you how close HIPE is to completing the
operation.
After the index has been built, subsequent searches take a negligible time.
Tip
When you click on a search result, HIPE opens the corresponding page at the top, not
at the location of the word you searched for. You can reach the word quickly with your
browser's search function. However, if there are many search results, it is likely that your
browser's search will first find all the occurrences of the word in the list of results, before
finding it in the documentation page.
To avoid this problem, you can switch to another tab, such as TOC or Glossary, to hide
the list of search results.
10
HIPE Owner's Guide
Build 13.0.5130
5.2. Limiting the search scope
To limit your search to one or more manuals or categories (for instance Analysis Tools), follow these
steps:
1. Click Filter in the search interface.
The Search Options pop-up window opens (see Figure 11).
2. Click on any manuals or categories you want to be included in the search. Clicking on more manuals
and categories adds to the current selection, it does not replace it.
Alternatively, click Search all except developer's manuals to include all manuals except those in
the Developer Reference category.
To clear the current selection, click any of the first two options.
3. Click OK.
The pop-up window closes. The selection you made will be used in all the following searches.
Figure 11. The search interface.
5.3. Navigating the help
You can move around help pages, create bookmarks and access PDF versions of manuals via the
toolbar at the top of the HIPE help window, shown in Figure 12.
Figure 12. The toolbar of the HIPE Help System.
• The Previous page and Next page icons lead to the previous and next page in the manual you are
viewing. They let you move through a manual, not through your browsing history. For that, use the
Back and Forward buttons of your browser.
11
HIPE Owner's Guide
Build 13.0.5130
• The Show permanent link icon gives you the full address of the page you are viewing. This is useful
if you want to add the page to your browser's favourites or share the address with others.
• The Synchronise TOC icon will show the current page in the Table of Contents pane, for example
by expanding the nodes leading to it.
• Yajahs is the engine that powers the HIPE Help System. The name stands for Yet Another JAva
Help System.
5.4. Help outside HIPE
When you quit HIPE, links in any help pages of the offline Help System will not work anymore. Even
if you restart HIPE, you will have to open the Help System again. This of course does not apply to
the online help opened with Help → Online Help.
To access the offline help outside HIPE you can use the hipe_help command, found in the apps
directory in your HIPE installation (the bin directory if you are using a developer build). This command starts the Help System and opens the following window:
Figure 13. The standalone Help System.
The window stays open as long as the Help System is running. Click the Display button whenever
you want to display the help in a tab of your browser. Click Exit to stop the Help System. The other
controls in this window are useful only to developers of the Help System.
5.5. For advanced users: accessing the Javadoc
If you are comfortable with Javadoc documentation, you can access it from the HIPE Help System by
clicking on any of the developer reference manuals listed in the Developer Reference section at the
bottom of the Table of Contents. To obtain the traditional frame-based Javadoc layout, click on the
FRAMES link on any Javadoc page. To get back to the HIPE Help System layout, use the Back button
of your browser (clicking on the NO FRAMES link will not work). To have both layouts available, open
the Javadoc layout in a new tab or window of your browser, by right-clicking on the FRAMES link.
6. Extending HIPE with plug-ins
You can extend HIPE with plug-ins. To manage plug-ins, choose Tools → Plug-ins. A dialogue window opens where you can install new plug-ins, and inspect and uninstall existing ones. Click Find
more to visit a web page with a list of available plug-ins. Click Install new to install a plug-in from
the Web or from your hard disk.
Among the plug-ins currently available on the HIPE plug-ins page are the following:
• SPIRE Photometric Interactive Analysis (SPIA).
from SPIRE scan maps.
Facilitates artifact removal and map-making
• PACS Calibration Products. Loads the PACS calibration products from a web server and installs the files on your computer.
• PACS Simple Aperture Photometry.
single or multiple PACS frames.
Performs aperture photometry of unblended sources on
12
HIPE Owner's Guide
• CASSIS.
Build 13.0.5130
Spectral analysis toolset.
• ScanAmorphos.
Imports data from the ScanAmorphos program into HIPE.
• Photometric and spectroscopic convolution.
PSF.
• Cosmology.
Convolves images and line flux maps to the same
Performs common cosmological calculations.
• Herschel Quick Look.
Accesses Herschel quick look data products.
For more information on using plug-ins see the user's manual of the plug-in framework on the Herschel
public TWiki.
Note
The plug-ins on the download page are provided "as is", without any warranty. The Herschel Science Centre does not provide support for third-party plug-ins.
To learn more about plug-in development, see the author's manual on the Herschel public TWiki.
7. Managing memory
Setting the amount of memory available to HIPE.
You can set this value during installation. To
change it afterwards, choose Edit → Preferences, go to Startup & Shutdown and change the Maximum
memory value. Restart HIPE for the change to take effect.
Monitoring used memory. The memory bar in the HIPE status bar shows the amount of memory
used by HIPE (see Figure 14). The bar goes from green to orange and then to red as the amount of
used memory increases.
A vertical line in the bar shows the highest memory consumption during the session. You can reset
this value to the current memory consumption by hovering your mouse pointer on the memory bar
and clicking Reset in the tooltip that appears.
The maximum memory available to HIPE can vary slightly over time. This is reflected in the value
shown by the memory bar. The maximum memory value is not expected to vary more than 10% from
the value defined at installation or in the Preferences window.
Freeing memory from unused data.
HIPE automatically frees memory from unused data whenever necessary. This is known as garbage collecting. You can also free memory manually as follows:
• Delete any unused variables.
• Run garbage collection manually by clicking the bin icon next to the memory bar (see Figure 14).
To do the same from the command line, issue this command:
System.gc()
• Check for tasks retaining data in their outputs. Follow these steps:
1. Choose Edit → Preferences. The Preferences dialogue window appears.
2. Click on Tasks in the list on the left. The General > Tasks panel appears on the right-hand side.
3. Tick the Detect tasks that retain data checkbox.
4. Click OK at the bottom of the dialogue window.
Each time you run garbage collection manually, HIPE shows you any tasks that retain data in their
output values. You can then choose to clean the data from some or all of these tasks.
13
HIPE Owner's Guide
Build 13.0.5130
Figure 14. The memory bar and garbage collector icon in the HIPE status bar.
8. Managing running jobs
A job is any operation that HIPE can carry out, such as running a script or executing a task.
• Monitoring running jobs. Whenever HIPE is running a job, the throbber icon in the status bar
becomes animated, and the state of advancement is shown in the progress bar (see Figure 15). If
you are running a script, the progress bar also shows the line being executed.
•
Stopping jobs. To stop a running job, click the
icon in the HIPE toolbar or in the running
jobs pane (see Figure 15), where you can choose whether to stop a single job or all running jobs.
A job may not stop immediately when you click the stop icon. For example, tasks that do not check
frequently enough for the stop signal sent by HIPE may keep running even after you click the stop
icon.
Figure 15. The running jobs pane, memory bar and throbber icon in the HIPE status bar.
9. Opening and running scripts
Opening scripts.
You can open a Jython script in the Editor view in the following ways:
• Choose File → Open File.
• Double click on the script in the Navigator view.
14
HIPE Owner's Guide
Build 13.0.5130
• If you opened the file in a previous HIPE session, choose it from File → Open Recent.
Running scripts from the Editor view.
toolbar:
You can run scripts with the following four icons in the
•
Run: runs either a single statement of your script (the one indicated by the arrow) or all the
selected statements at once.
•
Run all: runs the entire script.
•
Stop: stops execution of the script. The current statement of the script will be completed before
the script stops running. This can lead to a delay before the script stops.
Running scripts in debugging mode. This mode allows you to pause the script at certain locations,
and inspect and change the value of any variable. This is useful for finding the cause of problems in
the script. See the Scripting Guide for details: Section 1.37 in Scripting Guide.
Running scripts without opening them. To run a script without opening it, right click on it in the
Navigator view and choose one of the following options:
• Run Script. HIPE runs the script. Variables generated by the script appear in the Variables view.
This corresponds to the following command, where path/to/myscript.py is the path to the
script:
execfile("path/to/myscript.py")
• Run in Background. HIPE runs the script. Variables generated by the script do not appear.
This corresponds to the following command, where path/to/myscript.py is the path to the
script:
bg('execfile("path/to/myscript.py")')
Running a script in the background can be useful, for example, when you have a script that generates a
complicated plot. You want the plot to appear, but without the related variables populating the Variables view.
10. Running scripts outside HIPE
HIPE's main executable (hipe) file substitutes (from HIPE 12.0) the jylaunch standalone script interpreter.
Note
Please note that, in this section, and to avoid the ambiguity of only changing the case
between the GUI version (HIPE) and the command line version (hipe), several expressions
are used to explicitly refer to the command line version:
• hipe batch command
• hipe as (a) batch processor
• hipe as (a) script interpreter
• batch version of hipe
• batch-mode hipe / hipe in batch mode
15
HIPE Owner's Guide
Build 13.0.5130
You can now run scripts from a command line window outside HIPE using hipe executable as a batch
processor:
hipe myscript.py
The graphical UI of HIPE does not need to be in execution for you to use the hipe batch command.
All the modules automatically imported by HIPE in a GUI session are also imported by hipe when
ran as batch processor, so you do not have to add extra import statements to your scripts. The batch
version of hipe takes the same amount of time to start as the GUI version.
The hipe executable is the same file you use to launch a graphical session of HIPE so it is located in
the apps directory in your HIPE installation.
As a command-line script interpreter, hipe accepts the following options:
-help
Displays the options of the hipe batch command (same as in this list).
-properties
Sets values for one or more properties. A property and its value are
separated by a = sign. Property-value pairs are separated by a colon.
Example:
hipe -properties
hcss.foo.database=my_database:hcss.foo.instrument=PACS myscript.py
Properties set on the command line override the same properties defined in the hipe.props and user.props files. Some properties, such as java.vm.memory.max , can only be set in a file. See
Section 4 for more information on properties and property files.
-settings
Lists all the available properties and their values.
-log
Sets the log level of different components, that is, the amount of information written to the terminal while the script runs. You can configure different log levels for different software modules (packages),
as in the following example:
hipe -log
herschel.share=OFF:herschel.cus=INFO myscript.py
You can choose among the following levels: SEVERE , WARNING
, INFO , CONFIG , FINE , FINER and FINEST . Going from
FINEST to SEVERE , fewer and fewer messages are displayed, leaving only the most important ones. You can also set the level to ALL ,
to see all log messages, or to OFF , to see no messages.
See Section 12 for more information on managing logging levels.
Displays the version of HIPE. For example, 8.0 2504 . These are
-version
the same numbers you see when you choose Help → About in the
GUI version of HIPE.
Warning
Some HIPE plug-ins, such as Unit Conversion Tool, Herschel Quick Look and Cassis, do
not initialise properly with hipe as a batch processor . If you have scripts that use features
of these plug-ins, they may not run correctly with batch-mode hipe .
Graphical interfaces and hipe in batch mode.
If the script opens a graphical interface, this will
also work when running the script with hipe as a script interpreter . You can check this by running
the following script:
16
HIPE Owner's Guide
Build 13.0.5130
from javax.swing import *
myAnswer = ""
possibleAnswers = ["HIFI", "PACS", "SPIRE", "No clue", "All three"]
while myAnswer == "":
myAnswer = JOptionPane.showInputDialog(None, "Favourite Herschel instrument?", \
"Test", JOptionPane.QUESTION_MESSAGE, None, possibleAnswers, possibleAnswers[4])
if myAnswer == None:
myAnswer = ""
print "Your answer is: " + myAnswer
Plots and batch-mode HIPE. Plots are created and displayed normally when running a script with
batch-mode hipe . However, any plot window will disappear as soon as the script is completed. To
preserve the plot, you can save it to file before the script ends. For more information on saving plots
to file see the Data Analysis Guide : Section 3.8 in Data Analysis Guide .
10.1. Remote execution of scripts
A typical way in which batch-mode hipe is used is to run scripts on a remote computer. The following
are some best practices for remote computing:
• Avoid graphical interfaces as much as possible.
• Edit and test scripts on a local computer, using small test datasets.
• Create log files. You can do so on Linux with the following command:
hipe myscript.py &> session.txt
You can also redirect standard output to file from within your Jython script, with this command:
import sys
sys.stdout = open('myfile.txt', 'w')
• Process your data in stages. Save intermediate results wherever appropriate.
• If you want to examine images, save them as JPG files.
11. Editing scripts and configuring the editor
You can edit Jython scripts and other text files in the Editor view.
When you open a Jython script or a text file, a set of editing commands becomes available under the
Edit menu and as icons in the HIPE toolbar.
To configure the editor, choose Edit → Preferences and go to Text Editor under Editors & Viewers.
Here you can configure the following:
• Whether to enable autosave to save open files automatically at regular intervals.
• Whether to show a vertical bar at a given column. This is useful if you want to keep all lines
below a certain length.
• Whether to show line numbers.
• Whether to highlight the current line, that is, the line the cursor is at.
To configure specific options for the Jython editor, choose Edit → Preferences and go to Jython Editor
under Text Editor. Here you can configure the following:
• By how many spaces to shift a line when using the Shift left and Shift right commands.
• The size in spaces of the tab character.
17
HIPE Owner's Guide
Build 13.0.5130
• Whether to indent code automatically.
• Whether to close brackets automatically. Whenever you type a (, [ or { character, the corresponding closing character is added automatically.
• Whether to show hidden characters, like spaces (shown with a dot) or end-of-line characters.
• The predefined colours for keywords, comments, numbers and other language elements (highlighting).
Warning
In the case of very long scripts (nearing the maximum of Jython script size) the highlighting refresh can slow down text edition. In that case, you can disable highlighting
altogether to improve performance. To do that, uncheck the Apply syntax highlighting
checkbox.
For a selection of keyboard shortcuts available when working on scripts in the Editor view see Section 20.2.
Tip
To quickly write a variable name in the Editor or Console view, drag and drop the variable
from the Variables view, and HIPE will paste its name.
You can also drag and drop any selected text between the Editor and Console views.
12. Managing log messages
HIPE components send log messages about their activities. You can see these log messages in the Log
view, described in Section 17.11. If you started HIPE from a command line window, you can also see
the log messages in that window.
This section explains how to fine-tune the amount of log messages shown in the command line window, and how to save log messages to file. Note that these instructions do not apply to the Log view.
Log levels.
Any log message belong to one of these levels:
• SEVERE, indicating a serious failure.
• WARNING, indicating a potential problem.
• INFO, indicating an information message.
• CONFIG, indicating a configuration message.
• FINE, FINER and FINEST, indicating progressively more fine-grained messages about the running of the software.
You can manage how log messages are sent to the console and to file. With console we mean the
command line prompt from which you started HIPE, not the Console view in HIPE. If you started
HIPE by double clicking an icon, you will not see a console.
To manage log messages, create a file called userlogging.properties in the .hcss directory
within your home directory, and copy the following lines into the file:
handlers = java.util.logging.ConsoleHandler, java.util.logging.FileHandler
.level = WARNING
java.util.logging.FileHandler.pattern = %h/java%u.log
java.util.logging.FileHandler.limit = 50000
java.util.logging.FileHandler.count = 1
java.util.logging.FileHandler.append = false
18
HIPE Owner's Guide
Build 13.0.5130
java.util.logging.FileHandler.formatter = herschel.share.log.api.StandardFormatter
java.util.logging.ConsoleHandler.level = INFO
java.util.logging.ConsoleHandler.formatter =
herschel.share.log.api.StandardFormatter
For your changes to take effect, restart HIPE after creating or modifying this file.
• The first line of the file lists the handlers of log messages, separated by commas. This example lists
the ConsoleHandler and FileHandler, which means that log messages will be sent to the
console and to file. If you do not want log messages to be sent to the console or to file, delete the
corresponding handler from this line.
• The .level = WARNING line defines the overall logging level. Only messages of the same or
higher level than the one on this line will be shown. You can use ALL to show all log messages. You
are unlikely to need log messages on a more fine-grained level than INFO, unless you are trying
to diagnose a problem with HIPE.
Individual handlers can override this global setting: in the userlogging.properties file
shown above, the ConsoleHandler defines a different level.
Warning
If you use a very fine-grained log level with a FileHandler, HIPE could slow down
to the point of becoming unresponsive, because of the high number of log messages
to be written to file.
• java.util.logging.FileHandler.pattern defines the format of the log file name
and location. The default is to have files placed in your home directory, with names such as
java0.log. See the FileHandler documentation for details on how to define the format.
• java.util.logging.FileHandler.limit is the maximum size in bytes of the log file.
• java.util.logging.FileHandler.count is the maximum number of log files that can
be created. For example, setting this parameter to 2 means that there will be at most two files, with
names like java0.log.0 and java0.log.1. These are rotating files. For example, if you start
a new HIPE session when the two files have already been created, the contents of java0.log.0
are moved to java0.log.1, and java0.log.0 receives log messages from the current HIPE
session. The oldest log contents in java0.log.1 are deleted. This rule does not apply if the
append property is set to true (see below).
• java.util.logging.FileHandler.append controls whether log messages from new
HIPE sessions are appended to old messages, rather than replacing them. If set to true, log messages are appended to the most recent log file.
13. Saving and restoring variables and sessions
Saving and restoring variables automatically.
To enable automatic saving and restoring of vari-
ables across HIPE session, choose Edit → Preferences, go to Startup & Shutdown and tick the Save
variables on exit checkbox. If you tick the Ask which variables to restore at startup checkbox, HIPE
will offer you at each startup a choice of variables to restore.
Not all variable types can be saved and restored. Among those that can be saved and restored are the
following:
• Numbers and strings.
• Arrays, metadata, datasets and products.
• Observation contexts and other contexts. Only loaded references are saved.
19
HIPE Owner's Guide
Build 13.0.5130
Warning
Saving and restoring large variables can slow down HIPE considerably.
Saving and restoring variables from the command line. You can save and restore variables at
any moment during a HIPE session, by using the save and restore commands as shown by the
following example:
#
a
b
c
Define three variables
= 1
= [1,2,3]
= "Hello world"
# Save two of the above variables
save("ab.ser", "a,b")
# Save all variables
save("all.ser")
# Make all variables invalid
a = b = c = None
print a,b,c
# Restore a,b,c
restore("all.ser")
print a, b, c
Note
Use the extension .ser when saving variables to file. If you use another extension, HIPE
shows a warning message.
Saving and restoring full HIPE sessions. Use the File → Session menu to export the current HIPE
session to file, or to import a saved session. You can export one or more variables, preferences (the
ones you set via Edit → Preferences) and configuration properties (stored in .props files such as
hipe.props). For more information on preferences and properties see Section 4.
Warning
The file format of variables exported with File → Session → Export has changed from
HIPE 10. This means that HIPE 10 or higher will not be able to read session variables
exported with HIPE 9, and vice-versa.
If you exported variables with HIPE 9 or a previous version, follow this workaround to
read them in HIPE 10 or higher:
1. Open HIPE 9 and import the exported variables with File → Session → Import.
2. Set Save variables on exit in the Preferences dialogue window, under General → Startup & Shutdown.
3. Exit HIPE 9.
4. Open HIPE 10. The variables shall be restored in the Variables view.
5. Export the variables with the new format of HIPE 10, with File → Session → Export.
14. Managing calibration sources
The Herschel calibration source database contains all the information on celestial sources used for
calibration, both primary and secondary calibrators. These sources are planets (notably Uranus and
Neptune), bright stars that are still bright at far-infrared wavelengths, and asteroids. The Herschel
20
HIPE Owner's Guide
Build 13.0.5130
instrument calibration scheme uses this set of stellar, planet and asteroid calibrators and models for
determining the overall calibration of the photometers and spectrometers on board the spacecraft.
Planets. Physical modelling of planetary atmospheres has lead to the formulation of very accurate
predictive models (of order 1% across the Herschel bandwidth). Currently, calibration uses models
updated with Herschel spectroscopic data that has constrained the fluxes for the giant planets. Models
2 and 3 for Neptune are used by SPIRE and PACS respectively (from R. Moreno).
Stars. Stellar models are based on the work of Dehaes et al (2011; A and A 533, 107). Stellar
atmosphere models provide the prime flux calibrators for PACS. Primary stellar calibrators which
have such models are the following:
• alpha Boo
• alpha Cet
• alpha Tau
• beta And
• beta Peg
• beta Umi (excess noted at SPIRE wavelengths, dropped as a calibrator standard)
• gamma Dra
• Sirius
PACS calibration also uses a set of faint secondary stellar calibrators.
Asteroids. Asteroids need careful modelling to take care of the time variability due to, for instance,
rotation. Full asteroid light curve modelling, together with Herschel and asteroid ephemerides, allow
for predictions of fluxes across the Herschel mission. In addition, specific models provide flux information for asteroids measures taken for calibration purposes (see Mueller and Lagerros 2002, A and
A 381, 324).
14.1. What can I get from the database?
The database contains all the models and fluxes used in the flux calibration of Herschel. You can also
get asteroid flux predictions for the main asteroids, including the main calibrators. Plus models for the
specific time and date of calibration observations made by PACS and SPIRE of asteroids. HIFI does
not use asteroids for calibration purposes.
General information and fluxes for calibration standards are available. Calibration model spectra of
planets/asteroids/stars can be displayed in a HIPE session or saved as FITS files to disk.
Celestial calibration sources are only part of the flux calibration of instruments. For instance, internal loads are used by HIFI and the telescope background itself can be used for PACS and SPIRE
spectrometer calibration. For full information on flux calibration of any of the instruments, check the
published instrument in-flight calibration documents.
14.2. Using the Calibration Source Database
The Calibrators view is part of the Workbench perspective. If you cannot see the view, open it by
choosing Window → Show View → Reference → Calibrators.
After opening the Calibrators view you should connect to the Official database. Select it from the
drop-down list and press Connect button.
Note
You can also choose Local to connect to a local database, although you most probably
will not need to. The local database must be a local pool, whose name is defined by the
21
HIPE Owner's Guide
Build 13.0.5130
hcss.calibration.local property, with default value calsdb_test. For more
information on local pools, see the Data Analysis Guide in Data Analysis Guide. For more
information on how to set properties, see Section 4.
Figure 16. The Calibrators view after connecting to a database.
Once you connect to a database, the view fills with the available calibrators (see Figure 16), grouped
into Planets & Moons, Asteroid and Fixed Targets (stars). Click on a source to display basic information in the Outline view. Double click on a source to display detailed information in the Editor view,
as shown in the following figure.
Figure 17. Detailed information on a calibration source.
Several tabs give access to more specific information on the calibration objects. Some tabs allow you
to save tabular information to FITS by pressing Save Table or to copy text information to the clipboard
by pressing Copy to clipboard.
Note
Not all tabs have complete sets of information. Although information will be increased in
this database over time it is not yet a complete repository.
Flux tab. Provides fluxes and errors in Jansky for reference measurements in the Herschel wavelength range. None are provided for planets or asteroids, since these vary over the course of the mission as the distance between Herschel and object changes. The articles referenced are listed under the
Articles tab. Note that these information are not used in the overall calibration of Herschel unless it
is indicated under the General tab that the object is a primary or faint (secondary) standard star. Full
calibration information for primary calibrators used by Herschel instruments are stored as SEDs (see
SED tab).
Transition tab. A few objects have some limited molecular transition ground measurements which
are included in the database.
Articles tab.
the object.
Provides full reference information to particularly relevant calibration information on
22
HIPE Owner's Guide
Line Surveys tab.
tion.
Build 13.0.5130
Currently not used, but intended to include references to spectral line informa-
Spectral Line Surveys tab. Currently not used, but intended to include information from line surveys including on-ground observations.
SED tab. Provides links to planet and stellar SEDs for the primary and some other calibrators.
These are model SEDs which are believed to have systematic errors of order two per cent (see Dehaes
et al, 2011; Moreno, private communication).
• Plotting a SED. Click to select the SED you want and press Plot at the bottom of the tab. Note
that this plot is only meant as a quick look and does not provide all the information stored, including
all header information.
If looking at several SEDs, press the Clear button after you have finished with each one, otherwise
the plotting scales and labels could be corrupted.
• Saving a SED to FITS. Click Download to save all the SED information to a FITS file. It is
much easier to read this file back into HIPE if you give it a .fits extension. This is not automatic.
• Loading a saved SED into HIPE. Find the FITS file in the Navigator view and double click on
it. HIPE creates a new variable and show its contents in the Editor view.
Double click spectrum in the Data panel to open the spectrum with the default viewer in a new tab
of the Editor view. Right click and choose Open With to select a viewer. Select Dataset Viewer to
see the data in tabular form.
To extract a data column into a one-dimensional array, issue a command like the following in the
Console view:
b = neptune_test_FITS.get("spectrum").getData("T_b")
This assumes that neptune_test_FITS is the name of the variable created after loading the
FITS file. The command creates a one-dimensional array of the brightness temperature.
Figure 18. SED plot for alpha Boo.
Operational Days tab. This tab is available only for asteroids. Since the fluxes vary considerably
due to rotation as well as relative satellite-asteroid positions, information for asteroids is provided for
each day of the mission. To view flux and SED information for asteroids, open this tab and select a
range of dates. The fluxes plus other information, including approximate position in various units, and
apparent diameter (scroll window results to the right) appear after you click the Search button.
23
HIPE Owner's Guide
Build 13.0.5130
Note that these fluxes are not good enough for final calibration purposes. For specific operational days
and observation ids, more accurate models have been made with improved updated ephemeris and best
model parameters that fit the precise time of the observations. If you have a calibration observation of
an asteroid taken as part of one of the instrument calibration programs, then look at its date, follow the
above instructions to display the operational day information then select the day of your observation by
clicking on it in the list displayed. Then click View Seds. This opens a window similar to that obtained
under the SED tab for planets and stars. Click on the SED wanted for the obsid you are working with.
You can then plot and save it as described in the SED tab paragraph.
15. Inspecting data
Any item appearing in the Variables or Outline views with a green dot to its left can be opened with
one of HIPE viewers. See Section 17.15 for how to display the contents of a variable with the default
tool or with another available tool.
An example is shown for a SimpleImage. A right-click on a variable of this type in the Variables
view shows there are three viewers (see Figure 19). The Product Viewer shows associated metadata
and array values (see following section); the Wcs explorer shows WCS settings; the Standard Image
Viewer displays the image.
Figure 19. Available viewers are shown with a right-click.
See the Data Analysis Guide for information on viewers in HIPE, in particular the sections on data
display of the Data Analysis Guide, that is image in Data Analysis Guide, product metadata in Data
Analysis Guide and spectrum viewing in Data Analysis Guide. The next sections introduce the generic
data product viewer, the observation viewer and the dataset viewer.
15.1. Inspecting products
All Herschel data come packaged as products. The Product Viewer, shown in Figure 20, gives you a
summary of the product and lists the metadata and data it contains.
Figure 20. The Product Viewer.
24
HIPE Owner's Guide
Build 13.0.5130
The Data section is divided into two areas. The left area shows a hierarchy of the product contents.
Click on an item to open it in the right area, in its default viewer. You can maximise the viewer by
clicking the
icon. Above the viewer there is a reference you can use in the Console view to extract
the data and assign it to a variable. Click the
icon to copy the reference to the clipboard. In the
case shown in Figure 20, you would assign the data to a variable with this command:
HIPE> myImage = myProduct["image"]
Right click on an item in the left area to open a menu with the following options:
• Open: opens the item in its default viewer, in a new tab inside the Editor view.
• Open With: allows you to choose the viewer for opening the item.
• Send to: sends the item to a FITS file, a text file or to a Virtual Observatory-enabled application.
• Create Variable: creates a variable referring to the item, much like you can do manually by copying
and pasting the item reference to the Console view.
Tip
Another way to create a variable is to drag the item to the Variables view.
15.2. Inspecting observations
An observation is packaged as an observation context , a kind of product containing other products,
so it is not surprising that the Observation Viewer , shown in Figure 21 , is very similar to the Product
Viewer .
Figure 21. The Observation Viewer.
All the features of the Product Viewer also work in the Observation Viewer . In addition, note the
following:
• The Summary section may include a thumbnail image. Click on the thumbnail to enlarge it. Click
again to go back to the Observation Viewer . The thumbnail does not open in the HIPE image viewer.
• Red entries in the left area of the Data section have not been loaded into memory. HIPE does not
load an entire observation at once to save time and memory space. Click on a red entry to load it
into memory and display it.
15.3. Inspecting datasets
25
HIPE Owner's Guide
Build 13.0.5130
HIPE data inside products come in tabular form and are packaged in datasets . Datasets are automatically shown within the Product Viewer and the Observation Viewer . You can also open a dataset
separately by right clicking on its name and choosing Open With → Dataset Viewer.
The Dataset Viewer shows the metadata associated with a dataset and the tabular data itself.
Figure 22. The Dataset Viewer. Note the pop-up option to display numbers in hexadecimal.
Changing the column ordering. Click a column header to sort the table rows according to the
values in that column. Click a second time to reverse the sorting order. Click a third time to restore
the default order.
Changing the format of integer numbers. To display integer numbers (types int and long) in
hexadecimal, right click on a cell with an integer number and choose Display numbers in hexadecimal.
To return to the decimal display, right click on a cell with a hexadecimal value and choose Display
numbers in decimal. These settings apply to all the integer values in a table.
Changing the format of dates. To display dates (such as the startDate and endDate fields in
the metadata) in International Atomic Time (TAI), right click on a cell with a date value and choose
Display dates in TAI. To return to the display in Coordinated Universal Time (UTC), right click on a
cell with a date value and choose Display dates in UTC. These settings apply to all the date values in a
table. For more information on TAI and UTC, see the Scripting Guide: Section 9.1 in Scripting Guide.
Editing values. To edit values in a dataset, right click on any cell and choose Allow editing. You
can then double click on any cell to edit its contents. All the changes you make are echoed to the
Console view. To stop editing values, right click on any cell and choose Stop editing.
For more information on datasets, see the following sections of the Scripting Guide:
• Section 2.3 in Scripting Guide
• Section 2.4 in Scripting Guide
• Section 2.5 in Scripting Guide
16. Giving feedback
You can send feedback about HIPE in the following ways:
• Opening a Helpdesk ticket. Choose Help → HSC Helpdesk. The Helpdesk page opens in your
default browser. Use this method to contact the official support service.
• Sending feedback on HIPE. Choose Help → Give Feedback. A new email message opens in your
default email client. Use this method to send informal feedback to HIPE developers.
26
HIPE Owner's Guide
Build 13.0.5130
• Sending feedback on the documentation. Leave a comment using the comment box at the bottom
of any documentation page. You must be connected to the Internet to send and read comments.
Alternatively, click the
icon at the top of the help page. A new email message opens in your
default email client. Use this method to send private informal feedback to the Herschel Editorial
Board.
• Sending information on HIPE crashes. You can send information about crashes to HIPE developers. To enable this feature, choose Edit → Preferences, then go to Startup & Shutdown and tick
the checkbox labelled Show dialogue box when a crash dump file is created.
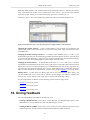
When you restart HIPE after a crash, a dialogue box asks you whether to send, open or delete a
crash dump file (see Figure 23). A crash dump file contains useful information to help developers
diagnose the problem. If you click Send, a new email message opens in your default email client,
with the crash dump file attached. You can add your own text and then send the message.
Note that there are two main types of dump files, and HIPE does not create one in all situations.
For more information see the next section.
Figure 23. The dialogue box shown when HIPE is restarted after a crash.
16.1. Types and locations of crash log files
There are two main types of crash log files:
• Sometimes HIPE crashes because the underlying Java Virtual Machine has crashed. In this case,
the JVM produces a log file called hs_err_pid*.log , where * is the process identification
number. This log file is created in the directory HIPE was started from.
These log files do not trigger the dialogue box shown in Figure 23 .
• When you kill HIPE manually, a log file called hipe_dump_ yyyymmdd_hhmmss .txt is
created, where yyyymmdd_hhmmss are the date and time of creation.
Depending on how you kill HIPE, the log file may or may not be created. The following table shows
the various cases for each supported operating system. Log files are created in a .hcss/apps/
hipe/dumps directory in your home directory. See the last column of the table to locate your home
directory.
Table 1. Where and when HIPE creates a log file
Operating system
Log file created
Log file not created
Home directory location
Linux/Unix
Ctrl+C or kill
kill -9
/home/ username
Mac OS
Ctrl+C , kill or Force
Quit
kill -9
/Users/ username
Windows
taskkill or Task Man-
taskkill /f or Task
ager → Applications
27
C:\Documents and
Manager → Processes Settings\ username (Windows XP),
C:\Users\ user-
HIPE Owner's Guide
Operating system
Log file created
Log file not created
Build 13.0.5130
Home directory location
name (Windows
Vista, 7)
16.2. Crash dumps automatically generated by the operating system
Crash log files only contain limited information about the machine, loaded classes and the faulted
process. Each of the operating systems supported by Java and HIPE has a different mechanism for
creating a more complete snapshot of the process when it fails. There are resources at Oracle's website
on how to create or collect Java crash dumps for further analysis (usually loading them in a debugger
), but it is outside the scope of this section. Please check Troubleshooting Guide for Java SE 6 with
HotSpot VM (please open this link in a new window/tab) or Troubleshooting Guide for Java SE 7
Desktop Technologies for more information.
In the next section you can find a platform-independent method for creating partial memory dumps
using only Java tools.
16.3. Advanced: Creating dump files manually
You can copy portions of memory to file while HIPE is executing. This is useful if HIPE has frozen
or if you suspect a memory leak (memory useage constantly increasing due to a bug).
To create a memory dump you need the Java Development Kit (JDK) for your system. To see if the
JDK is already installed, open a terminal window and issue this command:
javac -version
You should get the version number, for example 1.6.0_33.
If you do not have the JDK installed, follow these steps to install it:
• Windows and Linux: go to Oracle's Java for developers homepage (please open this link in a new
tab/window) and click the Download button inside the box Java Platform, Standard Edition below
the label JDK or click the Download button with the Java logo just above the box. Follow the
instructions on the website to download and install.
• Mac: the JDK is provided by Apple. Install it via Software Update.
Note
From Mac OS 10.7 and Java 7, Apple does not provide any Java component. To install
the JDK on Mac OS, you should download it from the page mentioned above.
Once you have the JDK installed, follow these steps to create a memory dump file:
1. Find the process number corresponding to HIPE. Open a command line window and issue this
command:
jps
You should get a result like this one:
10408 Launcher
10527 Jps
10423 HipeStarter
The HipeStarter process is the one you are interested in. In this case the process number is
10423.
28
HIPE Owner's Guide
Build 13.0.5130
2. Create the dump file. There are two commands you can use according to the situation.
• If you suspect a memory leak. Issue this command:
jmap -dump:format=b,file=hipe-heap.bin 10423
This command creates a dump file hipe-heap.bin for process 10423. Remember to use the
process number you found in the previous step. You can choose any file name you want instead
of hipe-heap.bin.
The dump file can be very large. Do not send it by email, but put it somewhere HIPE developers
can download it from.
• If you suspect that HIPE got stuck in an infinite loop. Issue this command:
jstack 10423 > hipe-stack.txt
This command puts some information about process 10423 in the hipe-stack.txt file. Remember to use the process number you found in the previous step. You can use any file name
you want instead of hipe-stack.txt.
The resulting file is small and can be sent via email.
17. HIPE views
A view is any window embedded in the main HIPE window. The views available in HIPE are described
in the following sections.
17.1. Herschel Science Archive
With this view you can log into the Herschel Science Archive (HSA) and open its graphical interface.
See the Data Analysis Guide in Data Analysis Guide for more information.
Figure 24. The Herschel Science Archive interface view.
17.2. Export Herschel Data from HIPE
With this view you can export Herschel data as loose files or as a compressed archive. You can export
a local pool, whatever it contains, or a full observation. The observation is exported with the same
directory structure found in the tar files retrieved from the Herschel Science Archive.
For more information see the Data Analysis Guide: Section 1.11 in Data Analysis Guide.
17.3. Product Browser
This view is the main component of the Product Browser perspective (see Section 18.1). It allows you
to query and browse products stored locally or remotely.
For more information see the Data Analysis Guide: Section 1.7 in Data Analysis Guide.
17.4. Product Tree
29
HIPE Owner's Guide
Build 13.0.5130
Like the Product Browser view, this view is also part of the Product Browser perspective.
When you select a product in the Variables view, the Product Tree view gives you additional information.
Figure 25. The Product Tree view.
The top area shows the metadata associated with the product. The lower left area shows a tree structure
of all the inner products and datasets contained in the product. This is especially useful for exploring
entire observations, which have an "onion" structure made of several layers. The lower right area
shows the unique identifier for any product selected in the lower left pane. This identifier is useful if
you want to manage the product via the command line. Click the icon to the right of the identifier to
copy the string to the clipboard.
This layout is also used in the product and observation viewers, described in Section 15.
17.5. Save Products to Pool
In this view you can save data products from your session into a pool. See the Data Analysis Guide for
examples: Section 1.9 in Data Analysis Guide. This section describes the Save Products Tool, which
looks the same as the Save Products to Pool view.
17.6. Calibrators
With this view you can browse and retrieve products from the database of Herschel calibration sources.
For more information on managing calibration sources see Section 14.
Figure 26. The Calibrators view.
30
HIPE Owner's Guide
Build 13.0.5130
17.7. Calibration sets
This view is available only if you install the PACS-specific components of HIPE.
With this view you can inspect the release notes and file list for all the installed PACS calibration
sets. Click on the number of the calibration set you want to examine and choose Release Notes for
selected set or Calibration File list for selected set from the drop-down list. Release notes may be
missing from older calibration sets.
17.8. Console
The Console view provides a command-line interface to all HIPE commands and functions.
Most graphical tools within HIPE echo in the Console view the commands corresponding to the action
being taken. This is useful if you want to automate a certain procedure through a script.
Press the Up key to access previous commands. This feature also works across sessions: if you have
just started HIPE, pressing the Up key will show the last command of the previous session.
You can use the following special commands while in the Console view:
• !clear: clears the Console view.
• !history: displays a list of previously entered commands, each preceded by a number. Type !history -l -r to obtain a short help text on the syntax of this command.
• !n: copies from history the command identified by number n. The command is not executed automatically. For that you have to press Enter.
• !help: displays a short help text about these commands and a list of keyboard shortcuts. Many of
these shortcuts are also available in the Editor view.
Autocompletion. If you write some letters and press the Tab key, HIPE shows you a list of all
commands and variables whose names start with those letters. If there is only one match, HIPE completes the word automatically.
Configuration.
To configure the Console view, choose Edit → Preferences and go to Console
under the General → Appearance category. Here you can configure the following:
• Buffer size. The maximum number of characters than the Console view can hold.
• History size. The maximum number of lines held in the history.
• Prompt. The prompt shown before each new line.
Further information. For a selection of keyboard shortcuts available in the Console view see Section 20.2. For more information on the scripting language used by HIPE, see the Scripting Guide in
Scripting Guide.
17.9. Editor
Use the Editor view to display and edit scripts and other files.
For more information on running Jython scripts in HIPE, see Section 9. For information on editing
text files and Jython scripts, and on configuring the editor, see Section 11.
The Editor view is used for much more than editing scripts. For example, it can show detailed information about data products and observations (see Section 15) and is where the graphical interface of
data analysis tasks is shown (see Figure 32 for a typical example).
31
HIPE Owner's Guide
Build 13.0.5130
17.10. History
The History view provides a list of the commands executed at the console and from Jython scripts. It
also shows whether the command was successful or not, with the following icons:
•
The command was successful.
•
The command caused an error.
The
icon appears next to a failed command, and indicates that the row can be expanded to reveal
additional information. In particular, the Trace column will show a detailed traceback of the error
(see Figure 27). The traceback is a list of all the function calls that lead to the error location. It will
probably tell little to you, but it is invaluable to a developer for investigating a problem. If you think
that the error was caused by a HIPE bug, be sure to include the traceback in your Helpdesk report.
Right click on the traceback to copy it to the clipboard or save it to file.
Figure 27. Traceback of an error from the History view.
The following icons control the behaviour of the History view:
•
Activate recording of commands.
•
Deactivate recording of commands.
•
Clear list of recorded commands.
You can copy and save to file not just the traceback, but any cell of the Command, Error and Trace
columns of the History view. You can do so in the following ways:
• Right click on a cell. From the context menu, choose Copy to copy the cell contents to the clipboard,
or Save to save them to file.
• Click and drag the mouse pointer to select multiple cells. Press Ctrl+C (Cmd+C on a Mac) to copy
the contents to the clipboard.
• Click the header of the Command, Error or Trace column to select the entire column. Press Ctrl+C
(Cmd+C on a Mac) to copy the contents to the clipboard. Note that, when using this method with
the Command column, HIPE only copies the successful commands to the clipboard.
• Double click on any cell to copy the contents to a file called History clipping.txt. HIPE
asks you whether to create the file if it does not already exist, and opens it in the Editor view. If
the file already exists, its contents are erased.
17.11. Log
32
HIPE Owner's Guide
Build 13.0.5130
This view lists all the commands that have been executed, like the History view, but also any output
and warning generated by the system. You can filter messages according to their severity level: click
the arrow at the upper right corner of the view to reveal the menu shown in Figure 28.
Figure 28. Filtering messages in the Log view.
The following icons control the behaviour of the Log view:
•
Activate logging of messages.
•
Deactivate logging of messages.
•
Clear list of logged messages.
17.12. Navigator
The Navigator view provides access to the files and directories on your computer. Right click on any
item to display a context menu with the available actions (see for instance Figure 29). Double click
on an item to open it in HIPE with the default tool.
User areas. Click the
icon to add or remove user areas. A user area is a named link to a
directory, so that you can reach its contents with a single click from the Navigator view. See for
example the My scripts user area in Figure 29.
Figure 29. The Navigator view showing the options available for a Jython script in the My scripts user area.
17.13. Outline
This view displays information about selected items in HIPE, such as the following:
33
HIPE Owner's Guide
Build 13.0.5130
• Variables in the Variables view (see Section 17.15). If more than one variable is selected, information is displayed about the first selected variable. Common information displayed is the variable
name, type (class) and package in which the variable type is defined (see for instance Figure 30).
• Tasks in the Tasks view (see Section 17.14). You can see information on the task parameters.
• Files in the Navigator view. A preview is shown for FITS or other image files.
You cannot edit the contents of this view.
Figure 30. Outline of a variable in the Outline view.
17.14. Tasks
This view lists all the tasks (pipeline steps, data analysis routines and other tools) available in HIPE.
The tasks are listed under three folders, which you can open and close with a double click:
• Applicable: this folder is populated only when you select a variable in the Variables view. In this
case, it lists all the tasks whose primary input is compatible with that variable.
• By Category: this folder has seven subfolders (General, Image, Spectrum, Cube, Hifi, Pacs and
Spire) listing general tasks and tasks relevant to a specific instrument or data type.
• All: lists all the available tasks.
When one or more folders are open, you can type a few letters to jump to any tasks whose names
begin by those letters.
Double click on a task to open its dialogue window in the Editor view (see Figure 32 for an example).
Figure 31. The Tasks view.
Right click on a task to display a context menu with the following entries:
34
HIPE Owner's Guide
Build 13.0.5130
• Open and Open With: opens the dialogue window of the task.
• View source: displays the source code of the task. This is useful if you want to inspect the algorithm
used or if you plan to modify the task. For this entry to work, you must have selected the option to
include the source code when you installed HIPE.
• Help in URM: opens the help page for the task in the User's Reference Manual.
17.14.1. Running tasks
When you double click on a task, its dialogue window opens in the Editor view.
Figure 32. Task dialogue window.
A standard task dialogue window has three sections: Inputs and Outputs, containing the task parameters, and Execution Status, containing status and progress information. You can expand or collapse
each section by clicking the small triangle left of the section title.
The names of task parameters are formatted according to these rules:
• The primary input parameter is in bold.
• All the mandatory parameters have an asterisk following their name (for example image* in Figure 32). Note that the asterisk is not part of the parameter name.
• All other parameter names are written in plain text.
Each input parameter has a small circle
next to it. You can drag a variable from the Variables
view onto the circle to set it as parameter value. The circle becomes green
is valid, red
if the parameter value
otherwise (usually because the variable is of the wrong type).
Right click on a parameter name to display a menu with the following entries:
• Reset to default.
Resets the parameter to its default value.
• List valid variables. Prints a message to the Console view listing all the existing variables that
are compatible with this parameter.
Click Accept to run the task, or Clear to reset all parameter values.
For information on how to run tasks, see the Scripting Guide in Scripting Guide.
35
HIPE Owner's Guide
Build 13.0.5130
For information on how to develop tasks in Jython or Java, see these tutorials:
• Creating your first Jython task
• Creating your first Java task
17.15. Variables
This view shows the variables available in your session. Select a variable to obtain more information
in the Outline view (see Section 17.13). Double click on a variable to display its contents with the
default tool. Right click on a variable to display a context menu with some of the following options
(they depend on the variable data type):
• Open: displays the contents of the variable with the default tool.
• Open With: displays a submenu with a list of tools that can be used to display the contents of the
variable.
• Send to: displays a submenu with entries to save the variable to FITS file or to a local pool. See the
Data Analysis Guide in Data Analysis Guide for more information on local pools.
• Show contents: prints to the Console view a text representation of the contents of the variable.
For binary data such as images and observations, this is usually a description followed by a list of
metadata and included datasets.
• Show methods: prints to the Console view all the methods (routines) applicable to the variable. This
is useful if you are working on a script or issuing command-line instructions involving the variable.
• Rename and Delete: renames or deletes the variable.
• Help in URM: opens the entry of the User's Reference Variable corresponding to the type of the
variable. This menu entry is not available for all variable types.
• Help in DRM: opens the entry of the Developer's Reference Variable corresponding to the type
of the variable. Since this is developer documentation, it may be difficult to understand if you do
not have some programming experience.
Figure 33. Variables view with filtering menu.
The view has a toolbar with the following four icons:
36
HIPE Owner's Guide
Build 13.0.5130
•
— Removes the selected variables.
•
— Removes all variables.
•
— Clears the current selection.
•
— Toggles between the single panel view (all variables are listed together) and the two panels
view (observations are shown separately from other variables).
Click the menu at the upper right corner of the view to display a menu to filter variables according
to their type (see Figure 33).
The available options are:
• No filter: Variables are not filtered.
• Filter Products: Products in Scripting Guide containing a set of metadata entries and datasets
are shown.
• Filter Dataset: Array Datasets, Table Datasets and Composite Datasets are shown (datasets
are described summarily in the Scripting Guide in Scripting Guide and the Product Definitions
Document in Product Definitions Document).
• Filter Arrays: Numeric Arrays in Scripting Guide are shown. This does not include native
Jython arrays.
17.16. PlotXY properties
This view displays the properties of any plot components highlighted in the Outline view, as shown
in Figure 34.
Figure 34. The PlotXY properties view showing title properties.
18. HIPE perspectives
A perspective is a collection of related views. You can customise a perspective by adding, deleting
and moving views. To save space, you can also rearrange different views as tabs sharing the same
screen area.
HIPE comes with four perspectives, available in the Window → Show Perspectives menu. The Welcome perspective is described in Section 3.1
18.1. The Product Browser perspective
With the Product Browser perspective you can search for and view data from databases and data stores,
both local and remote.
37
HIPE Owner's Guide
Build 13.0.5130
For more information see the Data Analysis Guide in Data Analysis Guide.
Figure 35. The Product Browser perspective.
18.2. The Data Access perspective
With the Data Access perspective you can query and obtain data from the Herschel Science Archive
(HSA). Login is now done using the status bar at the bottom of the screen. For more information see
the Data Analysis Guide in Data Analysis Guide.
Figure 36. The Data Access perspective.
As part of the toolbar (and visible in all perspectives and views), there is an icon
to instantly
launch the HSA user interface in the same way as with the Section 17.1 Herschel Science Archive
view button.
18.3. The Workbench perspective
The Workbench perspective provides nine views for working with tasks, variables, scripts and command-line inputs. You can also navigate in your file system and check log messages and the command
history.
38
HIPE Owner's Guide
Build 13.0.5130
Figure 37. The Workbench perspective.
19. Customising views and perspectives
You can customise a perspective by deleting and adding views, and by moving, resizing and rearranging existing views. You can also undock views from the main HIPE window and dock them back.
The following actions are available:
• Closing, minimising and maximising views. Each view has the usual icons for closing (next
to the view title), minimising and maximising (in the small tab on the right-hand side). Minimised
views appear at the bottom of the workspace, above the status bar. Note that views organised as
tabs can only be minimised and maximised together, like the History, Log and Console views in
the next figure.
Figure 38. Minimised views at the bottom of the HIPE window.
• Resizing views.
Click and drag the borders of a view.
• Customising tabs. If you right click on the title of a view, a context menu appears. With the Tab
Orientation and Tab Direction submenus you can change the position and orientation of title tabs.
Experiment with the various options until you find what works best for you.
Figure 39. Customising tabs in a HIPE view.
39
HIPE Owner's Guide
Build 13.0.5130
• Moving views. To move a view within the main HIPE window, click on the view title and drag
it around. A black outline box shows where the view will be placed when you release the mouse
button.
• Undocking views. Undocking a view means turning it into an independent window, separate from
the main HIPE window. To undock a view, right click on its title and choose Undock. Alternatively,
click on its title and drag it away. A small rectangle under the mouse pointer (see Figure 40), with
no black outline anywhere in the HIPE window, means that the view will be undocked when you
release the mouse button.
You cannot undock the Editor view.
Figure 40. A view being undocked.
• Docking views. After you have undocked a view (see previous point) you can dock it again by
clicking on the tab with the view title and dragging it on the main HIPE window. A black outline
appears, showing where the docked view will be placed. To dock the view in the same position it
occupied before being undocked, right click on the tab and choose Dock from the context menu.
If you undocked a window from inside the Editor view, such as a viewer (see Section 15) or a task
(see Section 17.14.1), the context menu is not available. To dock the window, click on the tab and
drag it inside the Editor view. A black outline appears, showing where the docked window will
be placed. If you drag the tab close to other existing tabs, the black outline disappears and the tab
appears next to the others.
• Moving through tabs. If a window is too narrow to display all its tabs, three new controls appear:
two arrows to cycle through the tabs, and one more downward arrow to get the list of tabs (see
Figure 41).
Figure 41. Moving through tabs.
40
HIPE Owner's Guide
Build 13.0.5130
• Adding views. To add a view to a perspective, select it from the Window → Show View menu.
If a view is already in a perspective, it is not added again.
• Resetting a perspective.
Any change you make to a perspective is kept in future HIPE sessions.
To restore a perspective to its original settings, choose Window → Reset perspective, or click the
arrow icon on the toolbar, next to the perspectives icons (see Figure 42). You can also right click
on the icon of the modified perspective and choose Reset perspective from the context menu.
Figure 42. The icon to reset a perspective.
20. Mouse and keyboard shortcuts
20.1. Mouse clicks in HIPE
The following table shows how left, middle and right mouse clicks are simulated on different platforms.
Note
It is assumed that the standard model of mouse is a three-button mouse (even if the middle
button is a scrollwheel that allows clicking). The table below explains how to simulate
clicks using mice with less buttons.
Table 2. Mouse clicks in HIPE
Mouse click
Windows
Linux with two- Mac with two- Mac with onebutton mouse
button mouse
button mouse
Left click
Left click
Left click
Left click
Click
Middle click
Ctrl + left click
Ctrl + left click
Alt + left click
Alt + click
Right click
Right click
Right click
Ctrl + left click
Ctrl + click
Three-button mice work as expected on all supported operating systems. The Mac five-button mouse
can be configured via the Mouse utility in the Mac System Preference Pane as a standard three-button
mouse.
Different HIPE tools may associate different actions to the same mouse gesture. For details refer to
the documentation of each tool in the Data Analysis Guide.
20.2. Keyboard shortcuts
The following table lists a selection of shortcuts available in the Console view and in the Editor view
when working on scripts and other text files. For a complete list, issue the !help command in the
Console view.
Note
The keyboard shortcuts shown in the following table are for Windows and Linux computers. For Mac computers, note the following:
•
The equivalent of the Ctrl key is Cmd (the
41
key).
HIPE Owner's Guide
Build 13.0.5130
• Some Apple keyboards have one Delete key, corresponding to Backspace on PC keyboards. Other Apple keyboards have a second Delete key, called forward delete, corresponding to Delete on PC keyboards. References to Delete in HIPE documentation
are to the PC keyboard key.
See this Boot Camp page for information on mapping between Apple and PC keyboards:
Boot Camp information on keyboard shortcuts (please open this link in a new window/tab).
Action
Shortcut
Editor
Console
Incremental search. Matching words are found as Ctrl+I, Shift+Ctrl+I
you type.
Yes
Yes
Autocomplete command. In case of ambiguity, re- Tab
turns a list of possible command starting with the
letters you have typed.
No
Yes
Toggle text direction between left-to-right and Shift+Ctrl+O
right-to-left.
Yes
No
Get first entry in command history.
Ctrl+Home
No
Yes
Get last entry in command history.
Ctrl+End
No
Yes
Get previous entry in command history.
Up
No
Yes
Get next entry in command history.
Down
No
Yes
Get previous entry in command history matching Ctrl+Up
what you have typed.
No
Yes
Get next entry in command history matching what Ctrl+Down
you have typed.
No
Yes
Get command history.
Ctrl+H
No
Yes
Select all.
Ctrl+A
Yes
Yes
Remove selection.
Ctrl+\
Yes
Yes
Select previous character.
Shift+Left
Yes
Yes
Select next character.
Shift+Right
Yes
Yes
Select to beginning of line.
Shift+Ctrl+Home
Yes
Yes
Select to beginning of line, excluding command Shift+Home
prompt.
No
Yes
Select to end of line.
Shift+End
Yes
Yes
Select previous word.
Shift+Ctrl+Left
Yes
Yes
Select next word.
Shift+Ctrl+Right
Yes
Yes
Select to same position on previous line.
Shift+Up
Yes
Yes
Select to same position on following line.
Shift+Down
Yes
Yes
Select to end of text.
Shift+Ctrl+End
Yes
Yes
Select previous page.
Shift+Page Up
Yes
Yes
Select next page.
Shift+Page Down
Yes
Yes
21. Managing monospaced fonts
In some occasions HIPE may show a dialogue window asking you to change your monospaced font.
In a monospaced font, every letter occupies the same space on a line of text. HIPE uses the default
monospaced font defined by Java to show text in the editors for Jython scripts and other text files.
42
HIPE Owner's Guide
Build 13.0.5130
Sometimes, the font selected as default monospaced is not really monospaced. This can lead to display
problems in the editors: for example, the arrow indicating the next line to be executed might point
to the wrong line.
This problem may occur if you are running a HIPE session from a remote server, and the local and
remote font configurations are different.
The recommended solution is to let HIPE use an alternative font for the editors. To change the font
at a later time, choose Edit → Preferences and go to General → Appearance → Fonts. Select your
preferred monospaced font from the drop-down list and click Apply. You can also deactivate the check
for a proper monospaced font by unticking the Check monospaced font checkbox.
If you are comfortable modifying configuration files, you can change the default monospaced font
used by Java. See the following pages for details:
• For Java 6: http://download.oracle.com/javase/6/docs/technotes/guides/intl/fontconfig.html
• For Java 7: http://download.oracle.com/javase/7/docs/technotes/guides/intl/fontconfig.html
22. IDL to HIPE command mapping
The following tables contain the HIPE equivalents of the most common IDL commands and functions.
Warning
HIPE uses [row, column] as notation for two-dimensional arrays, while IDL uses
[column, row]. In addition, HIPE uses row major ordering when allocating array
elements into memory: elements in the first row are allocated first, followed by elements
in the second row, and so on. IDL uses column major ordering instead. This difference
also holds for arrays of more than two dimensions.
This means that IDL scripts involving loops on large arrays will suffer big performance
penalties unless they are adapted to row major ordering. Write your loops so that elements
are accessed in the same order they are located in memory:
x = [[1,2,3], [4,5,6]] # Two rows, three columns
# Order of elements in memory: 1 2 3 4 5 6
# Correct way of looping:
for i in range (2): # Loop on rows
for j in range (3): # Loop on columns
print x[i][j]
You should also use array operations instead of loops whenever possible. Look here for
more information: Section 2.2.10 in Scripting Guide.
Basic commands
IDL
HIPE equivalent
Create a variable
a=5
a=5
Get info on a variable type
help, a
print a.__class__
Print value of variable
print, a
print a
Create an array
a = [2., 3.]
a = Float1d([2., 3.])
Create a list
-
a = [2., 3.]
Create an automatic array
a = findgen(10)
a = Float1d.range(10)
Get info on array variable
print, a
print a
Get one element of array
print,a(1)
print a[1]
Define new 1D array of 10 ele- a = fltarr(10)
ments
43
a = Float1d(10)
HIPE Owner's Guide
Build 13.0.5130
Basic commands
IDL
HIPE equivalent
Assign value inside an array
a(4) = 219
a[4] = 219
Define new 2D array of 5 rows, a = fltarr(10,5)
10 columns
a = Float2d(5, 10)
First element index number
0
0
Pause time
wait
time.sleep()
Execute script
execute()
exec()
Plot commands
IDL
HIPE equivalent
Open a plotting window
window,retain = 2
p = PlotXY()
Plot two numeric arrays a & b
plot,a,b
p = PlotXY(a,b)
Define axis ranges and styles
plot,a,b,[xy]range =
[xy]title = "lambda"
Define line style
plot,a,b,linestyle = 1
p.style.line = 2
Define plotting symbol
plot,a,b,psym = 2
p.style.symbol = 5
Define plot title
plot,a,b,title = 'title'
PlotXY(a,b,titleText = 'title')
Overplot
oplot,a,c
p[1] = LayerXY(a,c)
Make annotations
xyouts,0.2,0.7,Label'
d.addAnnotation("Label",
0.7)
Save as postscript
set_plot,'ps'
p.saveAsEPS("file.ps")
[0.,10.], PlotXY(a,b,[xy]range = [0.,10.],
[xy]title = "$\lambda$")
0.2,
device,filename = "file.ps"
device,/close
set_plot,'X'
Save as JPG
-
p.saveAsJPG("file.jpg")
Save as PNG
-
p.saveAsPNG("file.png")
Save as PDF
-
p.saveAsPDF("file.pdf")
Further customisations
-
(right-click on plot and select
Properties)
Data import/export
mands
com- IDL
HIPE equivalent
Read a text table
readcol,'file.dat',a,b,c
t = simpleAsciiTableReader(file
= "file.dat")
Plot read data
plot,a,b
p = PlotXY(t["c0"].getData(),
t["c1"].getData())
or right-click on t and choose
Open with TablePlotter
Read a comma separated table readcol,'file.csv',
(.csv) text file
DELIMITER = ','
t = asciiTableReader(file =
"file.csv")
Read a image FITS file
im = mrdfits("image.fits")
im
=
fitsReader(file
"image.fits")
Display an image
tvcsl,im
right-click on "im" and Open
with "ImageViewer"
44
=
HIPE Owner's Guide
Data import/export
mands
com- IDL
Build 13.0.5130
HIPE equivalent
Read a cube FITS file
cube = mrdfits("cube.fits")
im
=
fitsReader(file
"cube.fits")
Display a cube
-
right-click on "cube" and Open
with "CubeAnalysisToolbox"
Read a spectrum FITS file
sp = mrdfits("spec.fits")
sp = fitsReader(file = "spec.fits")
Display a spectrum
plot,wave,flux
right-click on "sp" and Open
with "SpectrumExplorer"
Write to FITS
mwrfits,image,'image.fits'
simpleFitsWriter(product = image, file = "image.fits")
Write a text table (csv by default) get_lun,u
asciiTableWriter(table = t, file =
"file.csv")
openw,u,'file.csv'
printf,u,a,b
close,u
free_lun,u
Arithmetics commands
IDL
HIPE equivalent
Add
3+4
3+4
Multiply
3. * 4.
3. * 4.
Powers
3^4
3**4
Absolute value
abs()
absolute(), fabs()
Arc cosine
acos()
arccos()
Natural logarithm
alog()
log()
Base 10 logarithm
alog10()
log10()
Arc sine
asin()
arcsin()
Arc tangent
atan()
arctan()
Ceil
ceil()
ceil()
Conjugate
conj()
conjutage()
Cosine
cos()
cos()
Hyperbolic cosine
cosh()
cosh()
Exponential
exp()
exp()
Floor
floor()
floor()
Invert (matrix)
invert()
Matrix (module)
Bit shift operations
ishft()
right_shift(),left_shift()
Sine
sin()
sin()
Hyperbolic sine
sinh()
sinh()
Square root
sqrt()
sqrt()
Tangent
tan()
tan()
Hyperbolic tangent
tanh()
tanh()
Random 0-1 generator
randomu()
random()
Reverse array 'a'
reverse(a)
a[::-1]
45
=
HIPE Owner's Guide
Build 13.0.5130
Arithmetics commands
IDL
HIPE equivalent
Collapse array
total(a)
sum(a)
Number of elements
n_elements()
len(), size()
Number of parameters
n_params()
len(*args)
Extra parameters
_extra
**kwargs
Array size
size()
shape(),arrayvar.type()
These are external resources that you may find useful:
• IDL to Python
• Jython homepage
HIPE is based on Jython 2.5. External examples for different Jython/Python versions might not always
work.
Index
Symbols
!clear, 31
!help, 31
!history, 31
.hcss.d, 3
A
Autocompletion, 31
B
Batch processing, 15
Buffer size, 31
C
Calibration Sets view, 31
Calibration sources database, 20
Calibrators view, 30
CASSIS plug-in, 12
CIB installer, 3
options, 3
Console view, 31
configuring, 31
ConsoleHandler, 18
Convolution plug-in, 12
Cosmology plug-in, 12
Crash log files, 27
Crash logs (see Crash log files)
D
Data Access perspective, 38
Dataset viewer, 25
Debugging mode, 15
Developer builds, 2, 3
Docking a view, 39
DP (Data Processing), 1
46
HIPE Owner's Guide
Dump files
creating, 28, 28
locating, 28
E
Editor
configuring, 17
Editor view, 31
Export Herschel data from HIPE view, 29
External tools, 6
F
Feedback, 26
FileHandler, 18
Fonts
monspaced, 42
G
Garbage collector, 14
Glossary, 9
H
handler (log messages), 18
HCSS, 1
Help system, 8
navigating, 11
searching, 9
grouping results, 10
jumping to results, 10
starting outside HIPE, 12
Helpdesk, 26
Herschel Science Archive view, 29
hipe batch command , 15
graphical interfaces, 16
plots, 17
remote execution, 17
hipe.props file, 8
hipe_help command, 12
History size, 31
History view, 32
I
IDL equivalents, 43
arithmetics commands, 45
basic commands, 43
data import/export commands, 44
plot commands, 44
installed.properties file, 8
Installing, 2
developer builds, 3
J
Javadoc, 12
Jobs
monitoring, 14
stopping, 14
47
Build 13.0.5130
HIPE Owner's Guide
K
Keyboard shortcuts, 41
L
Log levels
changing, 18
saving to file, 18
Log messages, 18
Log view, 32
M
Memory
freeing, 13
monitoring, 13
setting maximum value, 13
Memory bar, 14
Monospaced font, 42
Mouse behaviour, 41
N
Navigator view, 33
O
Observation viewer, 25
Outline view, 33
P
PACS Calibration Products plug-in, 12
PACS Simple Aperture Photometry plug-in, 12
Perspectives, 37
customising, 39
PlotXY properties view, 37
Plug-ins, 12
use with batch-mode hipe, 16
Preferences, 6
Product Browser perspective, 37
Product Browser view, 29
Product Tree view, 29
Product viewer, 24
Prompt, 31
Properties, 6
Proxy server, 4
R
Resetting a perspective, 39
Restoring
variables and sessions, 19
S
Save Products to Pool view, 30
Saving
variables and sessions, 19
ScanAmorphos plug-in, 12
Scripts
editing, 17
opening, 14
48
Build 13.0.5130
HIPE Owner's Guide
running, 15
outside HIPE, 15
remotely, 17
Sessions
saving and restoring, 19
SPIA plug-in, 12
T
Tasks
help in User's Reference Manual, 35
running, 35
viewing source, 35
Tasks view, 34
Throbber, 14
Toolbar, 5
Traceback, 32
U
Undocking a view, 39
Uninstalling, 3
Upgrading, 3
User areas, 33
user.props file, 8
userlogging.properties file, 18
V
Variables
saving and restoring, 19
Variables view, 36
Views, 29
customising, 39
W
Welcome screen, 5
Workbench perspective, 38
49
Build 13.0.5130