Transcript
STARKPOWER
Charging the JumpBox4:
Use the JumpBox4 charger provided when less than two
indicator lights are visible.
1. Plug the home charger into the 110VAC wall outlet.
2. Connect the charger’s connector to the input port of the
JumpBox4.
Or
1. Plug the car charger into the cigarette lighter.
2. Connect the charger’s connector to the input port of the
JumpBox4.
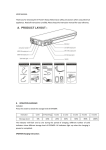
A. PRODUCT LAYOUT:
USER MANUAL
Jumper cable with clamps
Thank you for choosing the JumpBox4. Always follow
basic safety precautions when using this Jump Box. Read
all instructions carefully. Please keep this instruction
manual as a reference.
Charging from USB port to mobile phones or devices:
1. Plug the USB cable to USB 5V 2A output port.
2. Select appropriate connector for your mobile phones or
device and connect it to your mobile phone or device. The
JumpBox4 indicator lights will be ON when discharging.
Q. How many times can the JumpBox4 charge for my mobile
phone before needing recharging?
A. At least 4 times for iPhone4 mobile phone.
Q. How long will the JumpBox4 take to charge my mobile phone
full?
A. Approx. 3-5 hours depending on conditions.
Indicator light
Jump start socket
LED illumination
Press and hold the switch button 3 seconds to start the LED
illumination. Press the switch button once to reach the next
mode. 4 different modes of LED light appear in the following
sequence: (NORMAL, STROBE, SOS and OFF)
Switch Button
LED illumination
USB5V 2A Output
Home charger
Car charger
B. OPERATION GUIDE
Indicator Lights
Press the button to check the charge level of the JumperBox4.
Indicator lights
**NOTICE** FOR 12VDC SYSTEMS ONLY
Battery capacity
1 Flashing
1 solid
0%
25%
2 solid
50%
3 solid
4 solid
75%
100%
The number of solid indicator lights indicates the charge level for
the JumpBox4. Charging is complete when four indicator lights a
appear in solid color.
1
#
Parts Name
Quantity
#
1
Main product
1
5
2
Switch cable
1
6
3
Mobile phone connector
3
7
4
Home Charger
1
Parts Name
Quantity
Car Charger
1
Jumper cable with battery clamps
User Manual
2
3
Input: 12V
Remedies
5.StarkPower does not assume responsibility for any loss or damage
incurred during shipment or as a result of a force majeure.
Always use care when using the JumpBox4.
7.All warranty claims are limited to repair or replacement of the defective
product and at the sole discretion of StarkPower.
Low voltage protection of
JumpBox4 has started.
8.If StarkPower repairs or replaces the product, warranty coverage will begin
when the replacement unit is shipped. Repair or replacement may involve
the use of reconditioned units which are equivalent in function.
Do not allow the JumpBox4 to become wet.
Do not immerse the JumpBox4 in water.
Plug the charger into the
12V 1A input port to
activate and charge.
Do not operate the JumpBox4 in explosive environments where
flammable liquids, gases or dusts may be present.
Do not expose the appliance to heat sources.
G. TOXIC AND HARMFUL SUBSTANCES:
2A; 12V JumpStart4
Do not store the JumpBox4 in locations where temperatures may exceed
Composition and level of toxic and harmful substances in the JumpBox4.
1A
Pb
Hg
Cd
O
O
O
Cr(Vi)
O
PBB
PBDE
O
O
50°C or 122°F.
Charge only at ambient temperatures between 0°C to 50°C
!!
!
O:Indicates that all hazardous materials are below the MCV limit specified in the
Standard 2002/95/EC(RoHs).
Operating temperature : -20℃ to 60℃ or -4F to 140F
2
4.The warranty does not cover damage or product failure resulting from
normal wear and tear, physical abuse, improper installation, misuse,
modification or repairs by unauthorized third parties.
Do not modify or disassemble JumpBox4.
Peak current: 400A
5
3.The warranty is void if the serial number, date of purchase and label have
been removed.
The JumpBox4 is not intended for use by anyone requiring supervision.
Cause
No response when
pressing the switch
button.
Weight: 300g - 10.6 oz.
Output: 5V
2.The warranty is only valid upon presentation of the original receipt (from
dealer/retailer) by the original purchaser with the product to be repaired or
replaced.
Do not use the JumpBox4 as a toy.
Finding
Starting current: 200A
4
!
1
Time required to fully charge the unit: 6 hours
NOTE: In extremely cold temperatures, the JumpBox4 may
require a couple of attempts to warm up the unit.
I. WARRANTY INFORMATION:
1. We offer a limited warranty for this product against any defects in material
and workmanship for a period of 6 months from the date of purchase by the
end user/consumer. The conditions of the warranty are as follows:
6.StarkPower is not liable for any incidental or consequential damages
arising from the use or misuse of this product.
F. TROUBLE SHOOTING:
1
H. Warning:
1. DO NOT connect the clamps to the wrong terminal. Improper
connection will damage the JumpBox4 and the vehicle’s
battery. Do make sure blue plug for the jumper cables fits
tightly into the JumpBox4. If not, theJumpBox4 will not function
correctly and could cause the cable to melt.
2. Always check if the jumper clamps are well connected to
vehicle battery. Be aware that dirty or corroded cable terminals
in the vehicle may limit or inhibit starting performance. If in
doubt, seek professional technical assistance. DO NOT
attempt to start your vehicle more than 3 consecutive times or
the JumpBox4 may be damaged. Let the unit rest for 5 minutes
before attempting to restart your vehicle.
3. Do remove the product from the vehicle within 30s.
after the vehicle started.
4. Do NOT connect or touch RED and BLACK clamps together as
this action may cause a FIRE.
5. Do NOT disassemble the JumpBox4.
Size: 131 x 75 x 25mm - 5.16 ” x 2.95”x 1”
START
1
Q. How long will the charge last in the JumpBox4 before needing
recharging?
A. 6-12 months, however, we suggest you recharge it every 6
months.
D. TECHNICAL SPECIFICATIONS:
+
+
Q. How many times can the JumpBox4, with a full charge start a
vehicle?
A. Approximately 20 times before needing recharging.
C. PARTS LIST :
JumpBox4 vehicle instructions:
Follow the instructions shown bellow when your vehicle doesn’t
start because of a weak battery.
1. Press the switch button to make sure that the number of
indicator lights is not less than 2.
2. Connect the RED clamp to the vehicle's battery positive (+)
terminal, then connect the BLACK clamp to the vehicle's battery
negative (-) terminal.
3. Plug the clamp cable into the JumpBox4 jump start socket.
4. Start the vehicle.
5. When the vehicle starts, immediately remove the clamp cable
from the JumpBox4 and disconnect RED and BLACK clamps to
the vehicle battery terminals within 30 seconds.
12V 1A Input
Model: SP-12V4-JEP
E. FAQ:
Q. How do I turn off the JumpBox4?
A. The JumpBox4 will power off automatically when no load is
applied or when charging is complete.
3
4
Overcharge and
Overdischarge Protection
or 32°F to 122°F.
Fuse Protection
Against-reverse Plug
Only use the charger provided with the JumpBox4. When disposing of the
JumpBox4, use approved, recycling facilities in your area. Do not discard
Applied Standard:GB/T 18287-2000
in the trash.
5
6