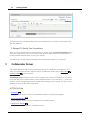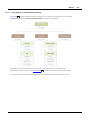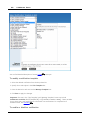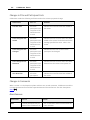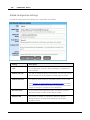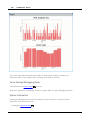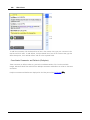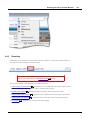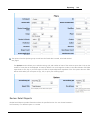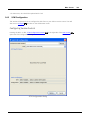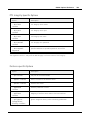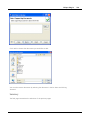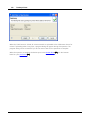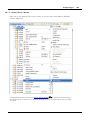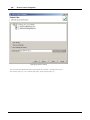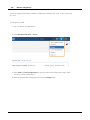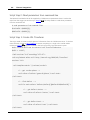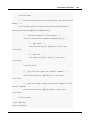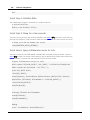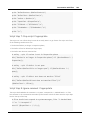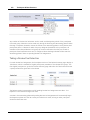
1
1 User's and Administrator's Guide © 2003-2015 SmartBear Software © 2003-2015 SmartBear Software 2 Collaborator v9.4.9400 Manual © 2003-2015 SmartBear Software All rights reserved. No parts of this work may be reproduced in any form or by any means - graphic, electronic, or mechanical, including photocopying, recording, taping, or information storage and retrieval systems - without the written permission of the publisher. Products that are referred to in this document may be either trademarks and/or registered trademarks of the respective owners. The publisher and the author make no claim to these trademarks. While every precaution has been taken in the preparation of this document, the publisher and the author assume no responsibility for errors or omissions, or for damages resulting from the use of information contained in this document or from the use of programs and source code that may accompany it. In no event shall the publisher and the author be liable for any loss of profit or any other commercial damage caused or alleged to have been caused directly or indirectly by this document. Printed December 2015 in Austin, TX, USA. © 2003-2015 SmartBear Software Contents i Table of Contents Part I General Information 1 1 Collaborator ................................................................................................................................... Overview 1 2 CodeReviewer ................................................................................................................................... 3 3 Collaborator ................................................................................................................................... Components 11 4 Review ................................................................................................................................... Workflow and Phases 14 5 How Do ................................................................................................................................... I? 18 How Do I Get .......................................................................................................................................................... Started? 19 How Do I Do Reviews? .......................................................................................................................................................... 21 How Do I Do Setup .......................................................................................................................................................... or Administrate the Server? 26 6 Contact ................................................................................................................................... Us Part II Getting Started 28 29 1 Getting ................................................................................................................................... Started For System Administrators 29 2 Getting ................................................................................................................................... Started For Developers 38 Creating Reviews .......................................................................................................................................................... 38 Participating in .......................................................................................................................................................... Reviews 43 Reworking Defects .......................................................................................................................................................... 48 Part III Collaborator Server 1 Installation ................................................................................................................................... 51 52 System Requirements .......................................................................................................................................................... 52 Database Installation .......................................................................................................................................................... 54 Zero-Configuration ......................................................................................................................................................... 54 MySQL ......................................................................................................................................................... 55 SQL Server ......................................................................................................................................................... 57 Oracle ......................................................................................................................................................... 61 Server Installation .......................................................................................................................................................... 63 Server Upgrades .......................................................................................................................................................... 75 Migrating From ......................................................................................................................................................... CodeCollaborator or PeerReview Complete 77 Testing Newer ......................................................................................................................................................... Versions 77 Platform-Specific .......................................................................................................................................................... Notes 79 2 Server................................................................................................................................... Administration 80 Network Configuration .......................................................................................................................................................... 81 Licensing .......................................................................................................................................................... 82 Content Storage .......................................................................................................................................................... 87 Backup / Migration .......................................................................................................................................................... 88 Security Considerations .......................................................................................................................................................... 93 LDAP Authentication .......................................................................................................................................................... 101 Configuring HTTPS .......................................................................................................................................................... 110 JMX Monitoring .......................................................................................................................................................... 117 Technical Specifications .......................................................................................................................................................... 119 High Availability .......................................................................................................................................................... Best Practices 121 Variable Substitution .......................................................................................................................................................... 123 © 2003-2015 SmartBear Software ii Collaborator v9.4.9400 Manual Archiving Reviews .......................................................................................................................................................... 127 Diagnostics .......................................................................................................................................................... 130 Logging .......................................................................................................................................................... 132 Troubleshooting .......................................................................................................................................................... 135 3 Collaborator ................................................................................................................................... Settings 140 General .......................................................................................................................................................... 141 Users .......................................................................................................................................................... 157 Groups .......................................................................................................................................................... 162 Syncing Groups ......................................................................................................................................................... 168 Using Groups ......................................................................................................................................................... for Organizational Hierarchy 170 Using Groups ......................................................................................................................................................... for Projects 171 Using Groups ......................................................................................................................................................... for Organizational Hierarchy and Projects 173 Using Groups ......................................................................................................................................................... for Review Pools 175 Email .......................................................................................................................................................... 177 Version Control .......................................................................................................................................................... 181 Custom Fields .......................................................................................................................................................... 183 Checklists .......................................................................................................................................................... 188 Roles .......................................................................................................................................................... 191 Review Templates .......................................................................................................................................................... 198 Triggers .......................................................................................................................................................... 201 Notification .......................................................................................................................................................... Templates 202 Automatic Links .......................................................................................................................................................... 212 Remote System .......................................................................................................................................................... Integration 214 System Status .......................................................................................................................................................... 218 220 Part IV Web Client 1 Web................................................................................................................................... Interface Client - Overview 221 2 Account ................................................................................................................................... Management 222 Log in / Log .......................................................................................................................................................... out 223 User Preferences .......................................................................................................................................................... 225 Notifications .......................................................................................................................................................... on Review Changes 230 3 Performing ................................................................................................................................... Reviews 233 Action Items.......................................................................................................................................................... 234 Creating a Review .......................................................................................................................................................... 236 Review Summary .......................................................................................................................................................... Screen 243 Reviewing Materials .......................................................................................................................................................... 256 Diff Viewer ......................................................................................................................................................... Overview 257 Reviewing ......................................................................................................................................................... Text Files 264 Reviewing ......................................................................................................................................................... Word Files (.doc and .docx) 270 Reviewing ......................................................................................................................................................... Excel Files 273 Reviewing......................................................................................................................................................... Images 277 Reviewing ......................................................................................................................................................... PDFs and Documents of Other Types 280 Reviewing ......................................................................................................................................................... URLs 284 Types of Review .......................................................................................................................................................... Comments and Defects 285 Review Chats, .......................................................................................................................................................... Comments and Defects 292 FAQs .......................................................................................................................................................... 300 4 Searching ................................................................................................................................... & Reporting 301 Searching From .......................................................................................................................................................... Web UI 301 Searching Directly .......................................................................................................................................................... From Web Browser 305 Reporting .......................................................................................................................................................... 310 5 Troubleshooting ................................................................................................................................... 318 © 2003-2015 SmartBear Software Contents Part V Desktop Clients iii 320 1 Desktop ................................................................................................................................... Clients - Overview 321 2 Client ................................................................................................................................... Installation 322 3 Configuration ................................................................................................................................... 329 Server Connection .......................................................................................................................................................... Configuration 329 4 GUI ................................................................................................................................... Client 331 Main Screen.......................................................................................................................................................... 332 SCM Configuration .......................................................................................................................................................... 334 Preferences.......................................................................................................................................................... 335 Troubleshooting .......................................................................................................................................................... 339 5 Command-Line ................................................................................................................................... Client 341 Configuration .......................................................................................................................................................... 341 Commands .......................................................................................................................................................... 343 Graphical Editor .......................................................................................................................................................... 345 Uploading Diffs .......................................................................................................................................................... 345 Troubleshooting .......................................................................................................................................................... 349 Global Options .......................................................................................................................................................... Reference 350 Command-line .......................................................................................................................................................... Reference 357 6 IDE Clients ................................................................................................................................... 358 Eclipse Plug-in .......................................................................................................................................................... 359 Install & Update ......................................................................................................................................................... 359 Preferences ......................................................................................................................................................... & Configuration 364 Action Items ......................................................................................................................................................... 367 Collaborator ......................................................................................................................................................... Perspective Window 368 Review Editor ......................................................................................................................................................... 368 Conversations ......................................................................................................................................................... View 372 Compare ......................................................................................................................................................... Editor 374 Label Decorations ......................................................................................................................................................... 375 Markers ......................................................................................................................................................... 375 Add to Review ......................................................................................................................................................... Wizard 376 Adding Files ......................................................................................................................................................... to a Review 380 AccuRev ......................................................................................................................................................... Integration 382 ClearCase ......................................................................................................................................................... Integration 382 CVS Integration ......................................................................................................................................................... 382 Git Integration ......................................................................................................................................................... 383 Perforce Integration ......................................................................................................................................................... 389 Subversion ......................................................................................................................................................... Integration 392 Troubleshooting ......................................................................................................................................................... 394 Visual Studio.......................................................................................................................................................... Add-in 395 7 Tray................................................................................................................................... Notifier 397 8 External ................................................................................................................................... Diff Viewer launcher 399 9 Print................................................................................................................................... To Review 402 Part VI Version Control Integration 1 AccuRev ................................................................................................................................... Integration 407 408 GUI Client .......................................................................................................................................................... 409 Comparing ......................................................................................................................................................... two Streams 414 Command-Line .......................................................................................................................................................... Client 414 addchanges ......................................................................................................................................................... (for AccuRev) 415 © 2003-2015 SmartBear Software iv Collaborator v9.4.9400 Manual addchangelist ......................................................................................................................................................... (for AccuRev) 417 addardiffs......................................................................................................................................................... 418 addstream ......................................................................................................................................................... 418 2 CVS................................................................................................................................... Integration 419 GUI Client .......................................................................................................................................................... 421 Comparing ......................................................................................................................................................... two Labels 423 Comparing ......................................................................................................................................................... two dates 424 Command-Line .......................................................................................................................................................... Client 425 addchanges ......................................................................................................................................................... (for CVS) 426 addcvsdiffs ......................................................................................................................................................... 427 commit (for ......................................................................................................................................................... CVS) 429 3 Git Integration ................................................................................................................................... 429 Git Server Integration .......................................................................................................................................................... 430 GUI Client .......................................................................................................................................................... 432 Comparing ......................................................................................................................................................... two branches 439 Command-Line .......................................................................................................................................................... Client 439 addchanges ......................................................................................................................................................... (for Git) 440 addchangelist ......................................................................................................................................................... (for Git) 441 addgitdiffs ......................................................................................................................................................... 442 gitaddbranch ......................................................................................................................................................... 443 Git Server Hooks .......................................................................................................................................................... 444 ensure-review-started ......................................................................................................................................................... (for Git) 445 ensure-reviewed ......................................................................................................................................................... (for Git) 446 4 IBM ................................................................................................................................... Rational ClearCase Integration 447 ClearCase Server .......................................................................................................................................................... Integration 450 GUI Client .......................................................................................................................................................... 451 Command-Line .......................................................................................................................................................... Client 460 addchanges ......................................................................................................................................................... (for ClearCase) 461 addchangelist ......................................................................................................................................................... (for ClearCase) 463 addversions ......................................................................................................................................................... (for ClearCase) 464 addactivity ......................................................................................................................................................... 467 commit (for ......................................................................................................................................................... ClearCase) 468 5 IBM ................................................................................................................................... Rational Synergy Integration 469 GUI Client .......................................................................................................................................................... 470 Command-Line .......................................................................................................................................................... Client 473 addchangelist ......................................................................................................................................................... (for Rational Synergy) 474 addversions ......................................................................................................................................................... (for Rational Synergy) 475 6 IBM ................................................................................................................................... Rational Team Concert Integration 477 Overview .......................................................................................................................................................... 478 How Integration .......................................................................................................................................................... Features Work 479 Configuring .......................................................................................................................................................... Servers and Plug-Ins 482 Configuring ......................................................................................................................................................... Collaborator Server 483 Installing Collaborator ......................................................................................................................................................... Eclipse Plug-In 485 Installing Collaborator ......................................................................................................................................................... Plug-In for Rational Team Concert 486 Configuring ......................................................................................................................................................... Collaborator Plug-In for Rational Team Concert 489 Setting and ......................................................................................................................................................... Configuring Follow-Up Actions 491 Mapping Configurations ......................................................................................................................................................... 496 Troubleshooting .......................................................................................................................................................... 500 7 Mercurial ................................................................................................................................... Integration 503 GUI Client .......................................................................................................................................................... 504 Command-Line .......................................................................................................................................................... Client 507 addchanges ......................................................................................................................................................... (for Mercurial) 507 © 2003-2015 SmartBear Software Contents v addhgdiffs ......................................................................................................................................................... 509 8 Microsoft ................................................................................................................................... Team Foundation Server Integration 510 GUI Client .......................................................................................................................................................... 511 Command-Line .......................................................................................................................................................... Client 514 addchanges ......................................................................................................................................................... (for Team Foundation Server) 515 addchangelist ......................................................................................................................................................... (for Team Foundation Server) 517 commit (for ......................................................................................................................................................... Team Foundation Server) 518 9 PTC ................................................................................................................................... Integrity Integration 518 GUI Client .......................................................................................................................................................... 519 Command-Line .......................................................................................................................................................... Client 524 addchanges ......................................................................................................................................................... (PTC Integrity Integration) 525 addchangelist ......................................................................................................................................................... (PTC Integrity Integrtion) 527 addversions ......................................................................................................................................................... (PTC Integrity Integration) 527 10 Perforce ................................................................................................................................... Integration 530 Perforce Server .......................................................................................................................................................... Integration 532 GUI Client .......................................................................................................................................................... 534 Comparing ......................................................................................................................................................... files in a Branch 538 Comparing ......................................................................................................................................................... two Labels 539 Comparing ......................................................................................................................................................... two dates 540 Command-Line .......................................................................................................................................................... Client 541 addchangelist ......................................................................................................................................................... (for Perforce) 543 addp4diffs ......................................................................................................................................................... 544 addversions ......................................................................................................................................................... (for Perforce) 545 commit (for ......................................................................................................................................................... Perforce) 548 addp4job ......................................................................................................................................................... 548 syncusers ......................................................................................................................................................... 549 update-id......................................................................................................................................................... 549 P4V / P4Win .......................................................................................................................................................... Integration 550 Perforce Server .......................................................................................................................................................... Triggers 552 ensure-review-started ......................................................................................................................................................... (for Perforce) 552 ensure-reviewed ......................................................................................................................................................... (for Perforce) 554 ensure-content-reviewed ......................................................................................................................................................... 556 update-changelist ......................................................................................................................................................... 558 11 Subversion ................................................................................................................................... Integration 561 Subversion Server .......................................................................................................................................................... Integration 563 GUI Client .......................................................................................................................................................... 566 Comparing ......................................................................................................................................................... two Revisions 570 Comparing ......................................................................................................................................................... two branches / tags 571 Comparing ......................................................................................................................................................... two dates 572 Command-Line .......................................................................................................................................................... Client 573 addchanges ......................................................................................................................................................... (for Subversion) 575 addchangelist ......................................................................................................................................................... (for Subversion) 576 addsvndiffs ......................................................................................................................................................... 577 commit (for ......................................................................................................................................................... Subversion) 578 Subversion Server .......................................................................................................................................................... Hooks 579 ensure-review-started ......................................................................................................................................................... (for Subversion) 580 ensure-reviewed ......................................................................................................................................................... (for Subversion) 582 create-review ......................................................................................................................................................... 584 Subversion-Specific .......................................................................................................................................................... Tips 585 Part VII External Integrations 1 Creating ................................................................................................................................... Custom Reports © 2003-2015 SmartBear Software 585 587 vi Collaborator v9.4.9400 Manual Database Schema .......................................................................................................................................................... 587 Example SQL: .......................................................................................................................................................... Participant Custom Fields 596 Example XPath .......................................................................................................................................................... and XSL 602 2 Bug-Tracking ................................................................................................................................... Integration 605 3 JIRA................................................................................................................................... Integration 607 Creating JIRA .......................................................................................................................................................... Tickets From Collaborator 608 Creating Collaborator .......................................................................................................................................................... Reviews From JIRA 609 Configuring JIRA .......................................................................................................................................................... and Collaborator Servers 611 1. Installing ......................................................................................................................................................... and Configuring FishEye 612 2. Installing ......................................................................................................................................................... the Collaborator Plugin for JIRA 612 3. Configuring ......................................................................................................................................................... the Collaborator Plugin for JIRA 614 4. Configuring ......................................................................................................................................................... JIRA Fields 618 5. Creating ......................................................................................................................................................... JIRA Configuration and Enabling the Integration 622 6. Configuring ......................................................................................................................................................... User Remote Accounts 624 4 GitHub ................................................................................................................................... Integration 625 Configuring GitHub .......................................................................................................................................................... Integration 628 1. Creating ......................................................................................................................................................... GitHub Configuration and Enabling the Integration 629 2. Configuring ......................................................................................................................................................... User Remote Accounts 630 5 Scripting ................................................................................................................................... 631 Mirroring Defects .......................................................................................................................................................... to an external issue-tracker 633 Syncing users .......................................................................................................................................................... from Perforce 638 Conversation.......................................................................................................................................................... with Eliza 639 6 Web................................................................................................................................... Services 647 SOAP API Web .......................................................................................................................................................... Services 648 JSON API Web .......................................................................................................................................................... Services 651 Using JSON ......................................................................................................................................................... API Web Service 652 JSON Syntax ......................................................................................................................................................... and Data Formats 654 Authentication ......................................................................................................................................................... 657 Error Handling ......................................................................................................................................................... 659 JSON API......................................................................................................................................................... Reference 660 How To ......................................................................................................................................................... 660 Manage Reviews ......................................................................................................................................... and Review Participants 661 Upload Review Materials ......................................................................................................................................... 664 Manage Users and ......................................................................................................................................... User Groups 669 671 Part VIII Techniques & Best Practices 1 Invite ................................................................................................................................... A Colleague 671 2 Review ................................................................................................................................... Pools 672 3 Multiple ................................................................................................................................... Change Changelists 674 4 Optimal ................................................................................................................................... Review Size 674 5 Metrics: ................................................................................................................................... Definitions 675 6 Metrics: ................................................................................................................................... Analysis 678 7 Tips................................................................................................................................... and Tricks 680 8 Improving ................................................................................................................................... Performance 680 681 Part IX Appendices 1 Appendix ................................................................................................................................... A: Known Issues 682 2 Appendix ................................................................................................................................... B: Version History 688 © 2003-2015 SmartBear Software Contents Version Version Version Version Version Version Version Version Version vii 9 .......................................................................................................................................................... 688 8 .......................................................................................................................................................... 696 7 .......................................................................................................................................................... 718 6 .......................................................................................................................................................... 737 5 .......................................................................................................................................................... 760 4 .......................................................................................................................................................... 786 2 .......................................................................................................................................................... 821 1 .......................................................................................................................................................... 839 0/Alpha .......................................................................................................................................................... 853 3 Appendix ................................................................................................................................... C: Java VM Options 865 4 Appendix ................................................................................................................................... D: Java Compatibility Matrix 870 Index © 2003-2015 SmartBear Software 872 1 1 General Information General Information Collaborator is a code and document review tool that helps you deliver higher quality code to QA as well as to your customer. Getting Started General Information · Tutorial (For Developers) · Overview 38 · Video Lessons 1 · Review Workflow and Phases · Performing Reviews · Collaborator Components 233 11 Using Collaborator Server Administration · Web Client · Tutorial (For Administrators) 220 · Desktop Clients · Collaborator Server 320 · Version Control Integration · Server Upgrades 407 29 51 75 For Existing Users Support & Resources · What's New in Collaborator 9 · Forums · Techniques & Best Practices 688 671 · Contact Support · Additional Resources 1.1 14 28 Collaborator Overview What is Code Review? Code Review, or Peer Code Review, is the act of consciously and systematically convening with one’s fellow programmers to check each other’s code for mistakes, and has been repeatedly shown to accelerate and streamline the process of software development like few other practices can. © 2003-2015 SmartBear Software 2 Code Review is an integral process of software development that helps identify bugs and defects before the testing phase. Code review is often overlooked as an ongoing practice during the development phase, but countless studies show it's the most effective quality assurance strategy. Meetings end up taking more time than intentionally planned. Not having a set process in place means you don't actually know if your code reviews are effective or are even happening. Collaborator is a code review and document review tool that helps development, testing and management teams work together to produce high quality code. It allows teams to peer review code, user stories and test plans in a transparent, collaborative framework — instantly keeping the entire team up to speed on changes made to the code. By enabling team members to work together to review their work, Collaborator can help you catch bugs before your software hits the market. Main features of Collaborator: · Multiple, simultaneous reviewers · Workflow supporting reviewers/authors separated by many time zones · Version control integration ClearCase and more 407 : Git, Perforce, Subversion, Mercurial, Team Foundation Server, · Cross-platform clients: web client · Defect-tracking integration 296 220 , GUI clients 320 , command-line clients 341 with severity, type, classification, checklists, and external issue-tracker · Full-featured metrics 675 , reports · Project- and role-based rules 198 310 , and data-export 317 and reporting · Command-line and web-service API 585 for integrations, extensions, automations, and triggers Supported formats of review materials: · Text files 264 (all source code files and any other text-based formats) · Microsoft Word files · Microsoft Excel files · Images 277 270 273 (.DOC and .DOCX) (.XLS and .XLSX) (.JPG, .JPEG, .PNG, and .GIF) · PDF files 280 · URL's (HTTP and HTTPS) 284 and IDE plug-ins (.PDF, and any other document types converted to PDF format) © 2003-2015 SmartBear Software 3 1.2 General Information CodeReviewer CodeReviewer is the lightweight version of Collaborator, designed especially for development groups with simpler needs and smaller budgets. CodeReviewer includes the basic features necessary for code review without the extra cost of the enterprise level features found in Collaborator. As Collaborator is essentially CodeReviewer with more features, the remainder of this owner’s manual will describe all necessary information for CodeReviewer and further detailed information pertaining only to Collaborator. Many users switch from CodeReviewer to Collaborator, so we encourage you to take a look at all parts of the manual in the event of an upgrade. The remainder of this section will describe the differences between the two products and information directed towards CodeReviewer. Set Up and Licensing CodeReviewer and Collaborator are shipped within the same installer that can be found on our downloads page. The two products are differentiated only by the license codes installed. During a trial installation, the product option will be given in the First-Run Initialization 31 phase. After installation, you can easily switch from CodeReviewer to Collaborator, or vice versa, by changing out the license code with a new one provided by your account manager. CodeReviewer/Collaborator Comparison System Administration Feature Licenses 82 Database Back-Ends CodeReviewer Collaborator Fixed licenses only Fixed and concurrent licenses available Embedded MySQL Oracle 54 55 , SQL Server 57 , 61 LDAP/ActiveDirectory Authentication 101 Not supported Supported Number of users Up to 10 Unlimited Technical support No Yes Server Configuration Options © 2003-2015 SmartBear Software 4 Features CodeReviewer Collaborator Supported Supported Supported Supported Supported Supported Supported Supported Server-Side Version Control 181 Supported Supported System Status Supported Supported Not Supported Supported Review and Uploads Access Restrictions 147 Not Supported Supported Review Custom Fields Not Supported Supported Participant Custom Fields 188 Not Supported Supported Defect Custom Fields Not Supported Supported Not Supported Supported Not Supported Supported Not Supported Supported Not Supported Supported Not Supported Supported Subscriptions 146 Bug Tracking Integration 152 User Statistics Email 158 177 Groups 218 162 185 185 Multiple Role Configurations 191 Workflow Configurations 198 Server-Side Triggers 201 Customizable Notifications 202 Automatic Links 212 Clients and Version Control Integrations Client/VCS © 2003-2015 SmartBear Software CodeReviewer Collaborator 5 General Information Web GUI Supported Supported Supported Supported External Diff Viewer Launcher 399 Supported Supported Eclipse Plugin Supported Supported Supported Supported Not Supported Supported Not Supported Supported 223 GUI Client 331 359 Visual Studio Add-in 395 Command Line Client 341 Tray Notifier 397 Version Control Integration Git 429 , Subversion 561 CVS 419 , Git 429 , Mercurial 503 , Perforce 530 , Subversion 561 , AccuRev 408 , PTC Integrity 518 , ClearCase 447 , Rational Synergy 469 , Rational Team Concert 477 , Team Foundation Server 510 Reports The table below compares the fields and metrics available in CodeReviewer with those available in Collaborator. Reports Column/Field CodeReviewer Collaborator Customizable Review Reports ID Supported Supported Review Title Supported Supported Review Creation Date Supported Supported Review Completion Date Supported Supported Workflow Supported Supported Phase Supported Supported © 2003-2015 SmartBear Software 6 Review is Private Supported Supported Creator Login Supported Supported Creator Full Name Supported Supported Author Login Supported Supported Author Full Name Supported Supported Moderator Login Supported Supported Moderator Full Name Supported Supported Reviewer Login Supported Supported Reviewer Full Name Supported Supported Observer Login Supported Supported Observer Full Name Supported Supported Defect Count Supported Supported Open Defect Count Supported Supported Overview Supported Supported Group Not Supported Supported Defects per Hour Not Supported Supported Comment Count Not Supported Supported Last Comment Not Supported Supported Idle for Not Supported Supported File Count Not Supported Supported LOC Not Supported Supported LOC Changed Not Supported Supported LOC Added Not Supported Supported LOC Removed Not Supported Supported LOC Modified Not Supported Supported © 2003-2015 SmartBear Software 7 General Information LOC Delta Not Supported Supported Review Wall-Clock Duration Not Supported Supported Total Person-Time Not Supported Supported Reviewer Time Not Supported Supported Author Time Not Supported Supported Number of Participants Not Supported Supported Average Participant Time Not Supported Supported Custom Fields Not Supported Supported Review Detail Reports Overview ID Supported Supported Status Supported Supported Title Supported Supported Creator Supported Supported Created On Supported Supported Finished On Supported Supported Wall-Clock Time Supported Supported Number of Defects Supported Supported Number of Comments Supported Supported Overview Supported Supported Total Person Time Not Supported Supported Total Reviewer Time Not Supported Supported LOC All Version (Uploaded/Changed) Not Supported Supported © 2003-2015 SmartBear Software 8 LOC Final Version (Uploaded/Changed) Not Supported Supported Document Pages (Final) Not Supported Supported Custom Fields Not Supported Supported Participants Name Supported Supported Role Supported Supported Person-Hours Not Supported Supported Per Participant Custom Fields Not Supported Supported Defect Log ID Supported Supported Creator Supported Supported File Supported Supported Location Supported Supported Text Supported Supported Defect Custom Fields Not Supported Supported Materials Summary Num Files Supported Supported Num Code Files Supported Supported Num Images Supported Supported Num Other Binaries Supported Supported Num Changelists Supported Supported LOC (Uploaded) Supported Supported LOC (Changed) Supported Supported © 2003-2015 SmartBear Software 9 General Information Num Documents Not Supported Supported Num URL's Not Supported Supported Document Pages Not Supported Supported Inspection Rate (Uploaded) Not Supported Supported Inspection Rate (Changed) Not Supported Supported Document Inspection Rate Not Supported Supported Image Inspection Rate Not Supported Supported URL Inspection Rate Not Supported Supported Binary Inspection Rate Not Supported Supported Code Defect Density (Uploaded) Not Supported Supported Code Defect Density (Changed) Not Supported Supported Document Defect Density Not Supported Supported Image Defect Density Not Supported Supported Materials Detail Path Supported Supported Version Supported Supported Annotation Supported Supported LOC Supported Supported LOC Changed Supported Supported # Comments Supported Supported Defects Supported Supported © 2003-2015 SmartBear Software 10 Overall Review Conversation Speaker Supported Supported Text Supported Supported Customizable Defect Reports Defect ID Supported Supported Review ID Supported Supported State Supported Supported Review Title Supported Supported Review Creation Date Supported Supported Review Completion Date Supported Supported Created Supported Supported Creator Login Supported Supported Creator Full Name Supported Supported File Supported Supported File Version Supported Supported Changelist ID Supported Supported Changelist Date Supported Supported Changelist Author Supported Supported Changelist Comment Supported Supported SCM Type Supported Supported Location Supported Supported Comment Supported Supported Review Group Not Supported Supported Defect Custom Fields Not Supported Supported © 2003-2015 SmartBear Software 11 General Information User Reports 1.3 ID Supported Supported Login Supported Supported Name Supported Supported E-mail Supported Supported Phone Supported Supported Last Login Supported Supported Last Activity Supported Supported Last Logout Supported Supported System Admin Supported Supported Enabled Supported Supported User Activity Supported Supported Collaborator Components Collaborator includes a server component, and a variety of clients, 3rd-party integrations, and client protocols. © 2003-2015 SmartBear Software 12 Collaborator Server 51 As with most enterprise-class software systems, a server process acts as the hub, manager, and controller of information. The server has a web-based user interface where users and administrators can do everything — create and perform reviews, configure personal and systemwide settings and run reports. The server uses a database to store all data and configuration. Web Client 221 The web browser client is used by entering an external URL in a web browser to connect to the Collaborator server. This is where most of the review will take place, where you edit, view, configure the reviews. The Web Client supports any modern browser. Command-line Client 341 Developers will typically install the cross-platform client. This tool includes a Command-Line Client that lets you upload local files (and file-changes) into new and existing reviews. The CommandLine Client also includes scripting commands for implementing custom behavior and integrating with external systems. © 2003-2015 SmartBear Software 13 General Information There are many reasons why you might want to integrate Collaborator with other systems. An issue-tracker integration point might let you synchronize Collaborator "defects" with issue-tracker "issues," or you might want to mirror review data (metrics/comments/file-differences) into the associated ticket. A reporting integration point might let you mirror Collaborator metrics into your existing reporting system (examples: defects/kLOC, defects/man-hour, kLOC/man-hour, number of defects found of different types or severities, etc). GUI Client 331 The cross-platform client install includes a graphical client to complement the web-based user interface already provided by the server. The GUI client is a cross-platform client available for Windows, Mac, and Unix/Linux users. Eclipse Integration 359 The Eclipse Plug-in gives users the ability to upload files and perform reviews from within any Eclipse-based application. A variety of applications are supported. Visual Studio Integration 395 The Visual Studio Add-in gives users the ability to upload files and perform reviews from within Microsoft Visual Studio. Version Control Integration 407 Collaborator integrates with many popular Version Control Systems. Integrations include command-line, graphical, and Eclipse plug-in clients and Version Control triggers. Server integration is supported for selected Version Control Systems and requires that a properly configured client be configured on the Collaborator server. Perforce Integration 530 Perforce users will probably want to install the Perforce Client Integration tools. These are included in the client installer 322 . Integration with P4V and P4Win lets users upload changelists into new or existing reviews just by right-clicking on the changelist. This works on both "pending" and "submitted" changelists. We also supply a special tool for use as a Perforce server trigger. For example, you can use this to enforce a rule like "Every submit on this branch requires a review". You can also use this to automatically upload all submitted changelists into Collaborator so that you can review files after they have been checked in. This can be especially useful with off-shore development groups. © 2003-2015 SmartBear Software 14 Tray Notifier 397 In addition to uploading files, the GUI Client gives you a taskbar icon that updates to show you whether you have any pending tasks in Collaborator. This is called the Tray Notifier and is available to Windows and Unix/Linux users. This allows users to easily access pertinent reviews and alerts the user of any new activity in reviews without being actively involved in the web browser client. External Integrations 585 Besides that, you can integrate Collaborator with any other external tool by using scripts, or SOAP or JSON web services. 1.4 Review Workflow and Phases This section describes a typical review and its phases. Review Creation Any of the following actions will create a review: · Clicking the "Create New Review 236 " menu option in the Web Client Home page. · Adding new materials to a new review through the GUI Client 331 , Command-Line Client Eclipse Plug-in 376 , Visual Studio Add-in 395 , or Perforce Plugins 550 . 341 , · Using the ccollab admin review create command in the Command-Line Client. · Triggering a script 631 that creates a new review. Once a review is created it goes into the Planning phase. Planning Phase In the Planning phase, only the review creator is active to customize the review using the Review Creation Wizard 236 . Here the creator enters review attributes including the title, custom fields 183 , attaches review materials 239 , and assigns participants 238 to the review. Using the "Begin Review" and "Annotate Review" buttons of the Next Steps save your current information and move the review to another phase. © 2003-2015 SmartBear Software 243 section, you can 15 General Information Annotating Phase The Annotating phase is an optional phase that an author may select before the Inspection begins. It provides the opportunity for other participants to add comments 292 , review materials 239 or open defects 296 prior to the Inspection phase. When a review is moved to Annotating, Collaborator will send notifications to all selected participants 238 inviting them to participate in the review. Like Planning, Collaborator will not automatically move the review from the Annotating phase. The Next Steps 243 section includes a "Begin Review" button for moving the review to the Inspection phase. Inspection Phase Once the review has begun, Collaborator activates all roles and notifies the participants that their actions are required in the review. Participants are presented 243 with the files, file-differences 266 , and other review material. Everyone can make comments on individual lines of a file or on entire documents. © 2003-2015 SmartBear Software 16 Comments 292 work a bit like "instant message" chat and a bit like "newsgroups". If everyone is chatting at the same time, you have a real-time "instant message" environment so the review can progress swiftly. If one or more participants are separated by many time zones or just are not currently at the computer, the chat looks like a newsgroup where you post comments and receive e-mails when someone responds. This means Collaborator works equally well no matter where your developers or reviewers are located. If reviewers find problems, they open defects 296 right from the Web Client, associated with the file and line number if applicable. Defects are tracked through Collaborator and can optionally be mirrored 299 into an external issue-tracking system. Once all required 195 participants have indicated that they are finished with the current phase, the review moves to the next phase, which will depend on whether open defects 296 remain in the review. If there are no defects or all defects have been marked external to the Completed phase. 299 or fixed 298 , the review moves If the review contains any open defects, the review moves on to the Rework phase. Rework or Fix Defects Phase In the Rework phase, the authors are the only roles active so that they may fix the defects found in the Inspection phase. When the authors are satisfied with their fixes, the fixes are uploaded into the review. The authors then indicate they are ready for the fixes to be validated by clicking the "Send to Inspection" button. © 2003-2015 SmartBear Software 17 General Information For validation, the review moves back to the Inspection phase, where reviewers have access to the new changes as well as the original changes and comments. Completed Phase Only when no open defects remain and all required participants have approved the review during inspection, then the review goes to the Completed phase. Cancelled Phase Depending on the Allow Deleting/Cancelling Reviews 149 administrative setting, there may be an option for the author or creator to cancel 243 a review. In this case, the "Delete" or "Cancel" button become enabled on the top right of the "General Information" box: Clicking the "Delete" button removes the review from the database. You can only delete a review that is in the Planning phase. A deleted review can never be restored. Clicking the "Cancel" button moves the review to the Cancelled phase. A cancelled review can only be re-activated by an administrator. © 2003-2015 SmartBear Software 18 Rejected Phase Depending on the Allow Reject Review 150 administrative setting, there may be an option for reviewers to reject 245 a review. In this case, the "Reject" button becomes enabled on the top right of the "General Information" box: Clicking the "Reject" button invokes a dialog where you can specify reject reason and then moves the review to the Rejected phase. A rejected review cannot be re-opened by anyone, even by an administrator. 1.5 How Do I? This section is included as a quick help to get you introduced to some basic tasks in Collaborator. This section is formatted in a series of questions and answers focused on describing how to use Collaborator. While the rest of the manual will serve as the ultimate reference manual, explaining each part or component of Collaborator in detail, this section will be useful if you are new to Collaborator and want to learn how to perform tasks in a quick and easy way. The following questions may not include all your questions, so if you find yourself in need of help, please contact our support team whose information is listed in the Contact Us 28 section. © 2003-2015 SmartBear Software 19 1.5.1 General Information How Do I Get Started? · See a typical code review in action? · Get started with Collaborator? 19 19 · Experiment with Collaborator without installing the product? 19 · Make sure code reviews are worth the effort without taking too much time out of my work day to try them out? 20 · Perform my first review? 20 See a typical code review in action? To get introduced to Collaborator, we recommend viewing a demo to see how it works and how a typical review is done. You can also attend a webinar (either live or recorded), where we go through a more in-depth demo and also answer your individual questions in real time! Get started with Collaborator? If you are new to Collaborator, we have heaps of reference materials that help you use and understand the product. If you want to start evaluating Collaborator or get a quick start with the basics, we suggest the Getting Started guides. Getting Started with Collaborator Server helps system administrators install and configure the main Collaborator server, while Getting Started with the Collaborator Client helps developers get started conducting code reviews with Collaborator. System Administrators Developers 29 38 We also have the User's manual that serves as a reference manual for everything you want to know about Collaborator. It is divided into sections for installation and server administration, web reviews and the web browser client, the specific integrations, and external integrations. And if you still have questions, you can always contact us with any specific questions about Collaborator. 28 . We would be happy to assist you Experiment with Collaborator without installing the product? We have a demo server waiting for you to try! The demo server is an already set up Collaborator server, so you do not have to hassle with administrating a server. 1) Visit our demo server at http://demo.smartbear.com. © 2003-2015 SmartBear Software How Do I Get Started? 2) Create a new account by supplying a login name and password of your choice under "Create a new User" and jump right into Collaborator. Note: The demo server is publicly available to everyone. Do NOT post confidential information and/or materials. For more detailed information on how to get started with the demo server, visit our blog entry here. 3) Read our Getting Started Guide for Developers 38 to quickly get caught up with the basic code review steps, or explore around by clicking random links to learn by trial and error. Make sure code reviews are worth the effort without taking too much time out of my work day to try them out? We think code reviews are awesome, but we understand you might be skeptical. And why invest in something you are not sure of? We put together some tips on how to minimize your time evaluating the code review process. This document, Is Code Review for You?, explains how to try code review for a week, how to see if it delivers solid, measurable results for your team, and how to get your team on board. Perform my first review? So you have been assigned your first review, and you are not sure what the next steps are. We’ll guide you through so you can jump right in. Just read our blog post here. © 2003-2015 SmartBear Software 20 21 1.5.2 General Information How Do I Do Reviews? · Know what parts I really need? What are all these parts? · Create a new review? 21 22 · Get around having to *Read* all comments? · Figure out what "Accept" means? 23 23 · Know why (or when) was (or will I be) I brought back to a review? · Put a review on pause? 23 23 · Finish a review/Clear an action item? 24 · Finish a stalled review? Perhaps someone left for vacation, and now the review cannot be completed. 24 · Indicate file review order? 24 · Remove a participant from a review? · Change my notification level? · Remove a file? 24 24 24 · Compare files or choose which version of a file to look at? · Change the diff viewer? I don’t like the diff viewer. 25 · Find out how much time I have spent on each review? · Do code review in Eclipse? 25 25 25 · Add files to a review from Visual Studio? · Review Office Documents? 25 · Delete/redact a comment? 25 25 · Compare ClearCase files that are on two different branches? 26 Know what parts I really need? What are all these parts? Every organization needs a Collaborator Server installed and set up. (Read the Getting Started for Server Administrators 29 for instructions.) The server process acts as the hub, manager, and controller of information. (Download the Server Installer for this component.) © 2003-2015 SmartBear Software How Do I Do Reviews? To connect to the server, you use the Web Browser Client 221 by entering a URL (provided by your Collaborator server administrator) into your web browser. The Web Browser Client is where users and administrators can do everything — create and perform reviews, configure personal and system-wide settings and run reports. The following clients are all optional but very useful. Which one works best for you depends on your version control system, code review environment, and/or personal preferences. Just read the descriptions, and choose what you need or want to use. The Command-Line Client 341 is a cross-platform client interface to the Collaborator server. It can be used for uploading files, integrating with version control, and querying the server, or as a part of an automated script in a sophisticated ALM / build system. The GUI Client 331 is a cross-platform graphical client to complement the web-based user interface already provided by the server. Use it to upload materials to a new or existing review easily by integrating with any or a combination of the following Version Control Systems: AccuRev, ClearCase, CVS, PTC Integrity, Perforce, Rational Synergy, Rational Team Concert, Subversion, and Team Foundation Server. (If you use a different VCS, you can always use the Command-Line Client.) The Tray Notifier 397 is a taskbar icon that shows whether you have any pending tasks in Collaborator. This icon allows you to easily access pertinent reviews and alerts you of any new activity in reviews without requiring active involvement in the web browser client. The Perforce P4V/P4Win plug-ins 550 integrate with the Perforce GUI clients and allows you to upload changelists into new or existing reviews just by right-clicking on the changelist. The Eclipse Plug-in application. 359 lets you upload files and create reviews from within any Eclipse-based The Visual Studio Add-in Visual Studio. 395 gives you the ability to upload files and create reviews from within Create a new review? In the Web Browser Client 221 , creating a new review is as simple as clicking on the Create New Review button at the top right of the action items section of the Collaborator home page and filling out the information in the next screen. Wait, your Create New Review link is disabled? Congratulations, you are the Collaborator administrator. By default, we do not allow admins to participate in reviews, so the link at the top right does not show up. You can change this setting by going to the Admin link on the menu bar at the top of the screen. Once you are at the Admin menu, scroll down to the "Review Process Options" and set the Allow System Administrator to Perform Reviews setting to Yes. In the Command-Line Client, use the command: ccollab admin review create to create a new review. © 2003-2015 SmartBear Software 22 23 General Information You can also create a new review when adding review materials from the GUI Client, the Eclipse Plug-in, the Visual Studio plugins, and the P4V plugins.. The client will give the option to add the material to a new review or an existing review. Be sure to select Create New Review if you want a new review. Get around having to *Read* all comments? In the default configuration, you must *Read* all comments. But you can change this! As the system administrator, you can change this setting; go to the Admin menu, look under the subcategory Roles, select a Role "set", and change Required to Read All Comments to No. This setting is configurable for each role, so you can ensure that all comments are read by someone, but not everyone. When this setting is configured to Yes, a review participant cannot click the Finish button if the review contains unread comments. When set to No for a role, this setting allows a review participant to click the Finish button even if there are unread comments. Also, you will not be brought back to a review if some other participant has commented after your clicked the Finished button. Read our extended blog entry about this feature here. But my system administrator will not change this setting... You’ll have to mark all comments read, but you can do this easily by clicking the super Mark All Comments as Read button at the top left of the Diff Viewer. You will still have to click it for every file (hey, we have to make sure you are looking at the files) but it saves you clicks in the end. Figure out what "Accept" means? We get this question often, and the short answer is: "Accept" means whatever you want it to mean, so you do not even have to use it if you do not want to. "Accept" does not have an explicit meaning in Collaborator; it is used differently in different environments. So, you can use this feature however you think best suits your review environment. Once this button is clicked, a green checkmark appears to notify participants that a comment has been Accepted. Know why (or when) was (or will I be) I brought back to a review? You may have been brought back into a review because of your Required to Read All Comments setting (See above). Read more about this here. Put a review on pause? If you cannot continue or finish reviewing because you are waiting for more information (For example,, an answer to a question you posed in a comment), you can put the review on hold by using the Wait button in the Next Steps section. "Wait" keeps you deactivated from the review until the action option you have selected occurs. So the Wait button is for when you want to come back to a review at a later time. If you don’t return and the selected activity does not occur, the review will not be marked finished, so to prevent a review from stalling, be sure to come back and finish it. © 2003-2015 SmartBear Software How Do I Do Reviews? Finish a review/Clear an action item? So you want to finish your part of the review. If you are in a role that has the ability to mark reviews finished, it is pretty simple. First, defects must be marked resolved: either fixed, deleted or tracked externally. Then, under the "Next Steps" section, select Send to Completed. If you are not the only reviewer, a list of actions will appear. You can select an action to indicate that you are finished with the review unless the selected action occurs. If you are required to read all comments, make sure all comments have been marked read before clicking Send to Completed. You will also be brought back to the review if another comment is made after you have approved a review. Finish a stalled review? Perhaps someone left for vacation, and now the review cannot be completed. Several things may prevent a review from being marked Complete. If an open defect is keeping you from closing a review, have a system administrator resolve the defect, and you will be able to finish the review. If the absent participant is the only person who has the ability to complete reviews, simply change that participant’s role in the review so that they are assigned to a role that is not required to complete the review. For more detailed information, read the blog post, "Ending a Review Now", here. Indicate file review order? You can use the "General Chat" and the "Notes" areas to annotate files and give instructions on suggested file review order. For detailed step-by-step instructions, read our blog post here. Remove a participant from a review? Removing a participant from a review simply requires clicking the red 'X' next to their name. Change my notification level? You can change the frequency at which you receive notification emails by going to your Preferences menu and then setting the Notification Level in the Notifications tab. When your individual preferences are set to the default setting, Minimal, you only get notifications resulting from other users' actions. You can also change the setting to None or All. Remove a file? Once a review has started, removing a file is only possible if there are no comments or defects linked to the file. To remove a file, click the Edit button on the "Review Materials" section of the review summary screen. You should see a [Delete] link to the left of the file or changelist, in which case click the link to delete the file. You may need to set the "View As:" option to "Separate" in order to be able to see the specific version of the file you wish to remove. © 2003-2015 SmartBear Software 24 25 General Information If you do not see the link, it indicates that comments or defects are linked to the file or changelist; you will not be able to delete the file because it would orphan comments. Compare files or choose which version of a file to look at? To view different versions of the file you are reviewing in the Diff viewer, click on Compare at the top of the Diff viewer. Collaborator shows you a list of all available versions that you can choose from. Use the radio buttons for the right and left side of the Diff Viewer to select the versions. To view only one version, set both left and right sides to the same version. You can also compare a current version to the latest Accepted version, which is detailed here. Change the diff viewer? I don’t like the diff viewer. You cannot change the aesthetics of our Diff Viewer, but if you prefer other Diff Viewer software, we do support an External Diff Viewer launcher, which you can use to review diffs in a separate diff viewer of your preference. To configure this capability, please visit the owner's manual here 399 . Find out how much time I have spent on each review? Beginning with Collaborator v6.0, user oriented reports allow you to view your own statistics even if you are not an administrator. View our blog post here. Do code review in Eclipse? With the Eclipse Plug-in, you can now review code within Eclipse. To get caught up with the new changes, visit our blog here. Add files to a review from Visual Studio? Beginning with Collaborator v6.0, the Visual Studio Add-in offers support for adding files to Collaborator from Visual Studio. To learn more about this add-in and feature, visit our blog here. Review Office Documents? Collaborator has native support for Microsoft Office Word (.doc and .docx) 270 and Excel (.xls and .xlsx) 273 documents. To review other types of Microsoft Office Documents you will need to convert them to PDF format 280 first. Delete/redact a comment? While we still don’t allow the deletion of comments, we do provide a way to indicate that a comment is now irrelevant and should not be considered for the review. Detailed steps and screenshots are available here. © 2003-2015 SmartBear Software How Do I Do Reviews? Compare ClearCase files that are on two different branches? To compare file versions that are on two different branches in ClearCase you have to specify the specific ClearCase version identifiers. Beginning with v6.0 of Collaborator you can use our GUI Client to do that; detailed steps are available here. 1.5.3 How Do I Do Setup or Administrate the Server? · Switch from internal authentication to LDAP? · Reset my password? 26 26 · Upgrade to a new version of the Collaborator server? · Change administrative control (especially in LDAP)? · How do I view metrics and reports? 27 27 · Collect data from each review participant? · Find metrics for non-text documents? · Define groups of users? 26 27 28 28 Switch from internal authentication to LDAP? The easiest way to change authentication options is to re-run the installer again. There is no need to uninstall, just run the installer over the existing installation. From there, you can choose "LDAP Authentication" when asked and provide your LDAP credentials. Reset my password? Sorry, you will have to ask your Collaborator system administrator about this one. Upgrade to a new version of the Collaborator server? 1) Back up first! 88 2) Note your Support and Upgrades date by going to Admin>Licensing . In the Current Licensing box, take note of the date next to the Upgrades Expire On: field. Make sure the version you want to upgrade to was released before this date. You can find this information by looking at the dates next to the version numbers in our Version History 688 . 3) Run the new version installer over your existing installation and choose Existing Configurations when prompted. Note: Be sure to fully read the Server Upgrades © 2003-2015 SmartBear Software 75 section. 26 27 General Information Change administrative control (especially in LDAP)? Administrative Access can be given to individual users by an existing administrator. Just have an administrator go to Admin>Users and edit the account you would like to give administrative control to. On the Editing page, set the Is Administrator field to Yes. Administrative Access allows a user to access to all reviews, reports, and also edit any review. The Special Administrator Account is a privileged account that is always allowed to login regardless of how many licenses are in use. With Internal Authentication, the special administrator account is always "admin". This cannot be changed. With LDAP, there is one user assigned as the "System Administrator". If you would like to change this assignment, go to the ROOT.xml configuration file at $INSTALLDIR/tomcat/conf/ Catalina/localhost/ROOT.xml. Near the bottom of that file is a line: <Parameter description="The name of the Collaborator system administrator who is always allowed to log in". name="systemadministrator" override="false" value="admin"/> Change the value to the login name you would like to set the account to: <Parameter description="The name of the Collaborator system administrator who is always allowed to log in". name="systemadministrator" override="false" value="XXXXXXXXXXXX"/> where XXXXXXXXXXXX is the login name of the System Administrator. Then stop and restart the service. How do I view metrics and reports? Collaborator provides built-in reports that allow you to view detailed metrics by reviews 314 , defects 315 , and users 316 . To view these reports, you must have access to reports by enabling the Reports Access 146 setting in the Admin menu. Once you have access, you may view built-in reports by clicking the Reports button that will appear at the top right menu of the Collaborator screen. Collect data from each review participant? Participant Custom Fields 188 allow administrators to collect data. To learn about enabling and utilizing this feature, please view our blog post here. © 2003-2015 SmartBear Software How Do I Do Setup or Administrate the Server? Find metrics for non-text documents? Additional metrics for binary files, such as images and PDFs, can be viewed in v6.0 and newer. To view these metrics for a single review, visit the Reports 310 section (provided you have access) and view a Review Detail Report 314 . Our blog post here includes a helpful view of the new metrics to look for. Many of our customers use our custom reporting 587 features to obtain reports tailored to their needs. Learn how to create custom SQL reports here 596 or learn about our database schema here 587 . Define groups of users? You can either set up user groups manually or by syncing them automatically to externally defined groups. To set up user groups manually, view our owner's manual here To learn how to sync, view the Group page here 168 164 . . We have also provided some examples of how to use groups that may help you in deciding how to fully utilize this feature here 163 . 1.6 Contact Us If you have questions or feature requests, drop us a line. For Technical Support: [email protected] For Sales: [email protected] More Resources These links might also be helpful: · To get acquainted with the product faster, watch video tutorials and screencasts on our web site: http://support.smartbear.com/screencasts/collaborator/ © 2003-2015 SmartBear Software 28 29 General Information · You can ask questions, search for answers, exchange comments and suggestions on our forums: http://community.smartbear.com · Learn more about using Collaborator from technical papers and blogs published at: http://support.smartbear.com/articles/collaborator/ http://blog.smartbear.com · Make sure you regularly visit our web site, http://smartbear.com, where you will find · News · Downloads · Articles, Case Studies, Webinars · Updated support options 2 Getting Started This section will briefly guide you through the steps of getting started with Collaborator. It is intended for users who want to jump right into Collaborator and start using the basic features. If you would like more detailed instructions on how to use Collaborator, please visit the appropriate sections of this manual. We have divided this section into several guides. The Getting Started For System Administrators Collaborator server. The Getting Started For Developers It consists of three stages: · Creating Reviews 38 38 29 shows you how to install and configure the describes how to work with Collaborator as a regular user. tells how to create reviews as an author. · Participating in Reviews 43 tells how to take part in reviews as a reviewer or observer. · Reworking Defects 48 tells how to get notified about the defects found by other participants and how to make corrections to your reviews. 2.1 Getting Started For System Administrators In order to use Collaborator, you must first install and configure the server side of the Collaborator. © 2003-2015 SmartBear Software 30 1. Download the Collaborator Server Navigate to SmartBear Downloads Center: http://support.smartbear.com/downloads/ collaborator/ and download the "Server Installer" that corresponds to a platform of your server. 2. Install the Collaborator Server Launch server installer and go through the wizard 63 to complete the installation. Note: During the installation you may configure advanced settings for the Collaborator server: server port, authentication type, database type and so on. For first-time and evaluation installations we suggest that you leave the default values for these settings. Once the installation is finished, your default browser will start and open the Collaborator's Web User Interface. The rest of the configuration and administration process is done using the Web User Interface. 3. Initialize Database When opening the Web User Interface for the first time after installing the Collaborator server, the database initialization screen is displayed. Click Initialize Database to continue. 4. Log Into the Web User Interface Client If you have chosen the default values for advanced settings or chosen "Internal Authentication" during the installation process, then specify "admin" as the User Name, and leave the Password field blank. Click Login. © 2003-2015 SmartBear Software 31 Getting Started If you have chosen the "LDAP Authentication" during the installation process, then specify the same username and password that you have provided when configuring your LDAP integration. Please see LDAP Authentication 101 for more information. 4. Perform First-Run Initialization Once you have logged in as the admin, you will be redirected to the First-Run Initialization page. This page is displayed only once after the installation and asks you to provide necessary information to set up the Collaborator server. The page contains the following sections: · Product Initialization - This section allows you to choose which product you would like to use: Collaborator or CodeReviewer. © 2003-2015 SmartBear Software 32 All products have the same goal, to make your peer review process easier and more effective, but Collaborator offers more functionality regarding customization, configuration and so on. To view all differences between Collaborator and CodeReviewer, please read this page 3 . · Admin User – In this section you will need to provide the administrator’s password and his contact information. Fill in the admin password, company name, the Collaborator administrator’s full name, phone number and e-mail address. The contact information is primarily there for your users to know who to contact if they are having issues with Collaborator. SmartBear only uses this information to contact you when there is a critical issue with your Collaborator installation; we will not sell or share this information. © 2003-2015 SmartBear Software 33 Getting Started Typically, the admin login is used only for administrative purposes, so we recommend that you create a separate account for yourself to use for reviewing purposes. Moreover, the first user account will also have administrative privileges. · Create Your Account and Create A Colleague's Account – In the next sections you need to specify the account data for yourself and for one of your colleagues. (Since for any review you will need minimum two participants: one author and one reviewer.) These sections only appear if you have selected Internal authentication. LDAP authenticated installations do not have this option because your usernames are already set. Enter the username, password, full name and e-mail for yourself and for the colleague. We recommend that the Collaborator usernames match your version control usernames for simplicity. Afterwards, you can create accounts for all your colleagues in the Admin | Users allow users to create their own accounts from the "Login" screen 222 (see below 157 35 section or ). Click Get License once you have entered the account data. © 2003-2015 SmartBear Software 34 5. Get Familiar With Web Client Home Page After the first-run initialization, you are redirected to the Home page. This will be the starting page for administrating and working with Collaborator. Later on, after logging in you will start your work with Collaborator from the Home page. This page looks much the same as your average Collaborator user’s home page. For the administrators the page additionally displays the Admin link on the top menu bar, the System link in page footer and disables the Create a New Review button in the main menu (since by default, Collaborator does not allow administrators to create reviews). As the Collaborator administrator, you would like to familiarize yourself with the administration settings, so click the Admin link in header menu. 6. Configure Site-Wide Administration Settings The Site-Wide Administration Settings section is where you can configure the settings of your Collaborator server. © 2003-2015 SmartBear Software 35 Getting Started The administration settings are grouped into a number of categories: General, Users, Groups and so on. You can read the detailed description of each setting in the Collaborator Settings 140 section. When configuring a Collaborator server for the first time, pay your attention to the following settings from the General category: · External URL – Enter the full URL to the main page of the web server on which Collaborator was installed, as it would be seen by external clients. · Global "Create User" When you are starting out, and you do not want to manually create usernames for all users, mark this field as "Show" so the users can create their own username and password. Mark it as "Hide" if you want to control the creation of users and usernames. · Access Restrictions – Control who has access to reviews, reports, subscriptions, and systems information. · Review Process Options – Control what users can or cannot do during the review process. · Bug-Tracking Integration – Add the URL for creating a new bug in your bug tracking system. See Bug-Tracking Integration 605 for more information. © 2003-2015 SmartBear Software 36 7. Activate Your Licence If you have an external internet connection, Collaborator will attempt to contact our licensing server so that we can automatically set you up with a 30-day trial license. Your licensing status is denoted by a description in the top toolbar. If you do not have an external connection, or if a firewall prevents access to our licensing server, you need to obtain a license code manually. If you want to obtain and enter a permanent license code, you can follow the same instructions. Click Licensing category of the Admin section. This will open a page that gives you information regarding the licensing, such as when the license expires, when the support and upgrades expire, how many seats you have and so forth. © 2003-2015 SmartBear Software 37 Getting Started Find the "Node ID" field in the "Current License" pane. The Node ID is an 8-character value that is unique to every installation. Node ID is tied to every license code we generate. Copy an 8-character value of Node ID and send it to your Account Manager to activate your license. If you do not know who your Account Manager is, just send the Node ID to [email protected]. After you send us the Node ID, you will receive an e-mail with a company key and license code. The company key is "trial" for temporary licenses and a word or phrase for permanent licenses. The license code will be a 32-character code. Enter the company key and the license code in their respective fields, and click Save. That is all. Collaborator server is installed, configured and ready for operation. © 2003-2015 SmartBear Software 38 Where to Go Next To get detailed information about the server, its configuration and maintenance, read Server Administration 51 section. To learn how to upgrade an existing Collaborator server, read Server Upgrades 75 section. To learn about using Collaborator in a daily work, see Getting Started For Developers Web User's Guide 221 sections. 2.2 38 and Getting Started For Developers Peer review process includes three major types of activity: creating reviews as an author, participating in someone else's reviews as a reviewer or observer and improving your work according to comments and defects found by another participants. This guide explains how to use Collaborator for to perform all these steps. · Creating Reviews 38 · Participating in Reviews · Reworking Defects 43 48 These guides assume that your Collaborator server has already been installed and configured 29 by your system administrator. 2.2.1 Creating Reviews You have several options for creating a review: via Collaborator Web Client, via GUI Client or via Command-Line Client. Besides you can reviews directly from Eclipse, Visual Studio or from P4V or P4Win clients for Perforce. To ease you into the process, we will start with the Web Client 221 . It does not need any client components except for web browser. 1. Open Collaborator Web Client Start your favorite web browser and navigate to the URL of the Collaborator Web Client. If you do not know the URL, ask your Collaborator administrator. The URL is defined by the External URL 141 setting. 2. Log Into the Web User Interface You will be redirected to the login screen. © 2003-2015 SmartBear Software 39 Getting Started Enter your user name and password and click Login. The username and password is typically supplied by the administrator 157 . If you use LDAP or ActiveDirectory 101 for authentication in your company, you can use that username/password with Collaborator and it will automatically create your user account. If your administrator allows user created logins, a "Create New Account" form appears on the login page where you can create your own login name and password. In this case we recommend that your account in Collaborator be identical to your version control system account. 3. Get Familiar With Web Client Home Page Once you log in, you will be redirected to the Home page. This page is a starting point for most of peer review process. © 2003-2015 SmartBear Software Creating Reviews On Home page you can check your Action Items 234 to see if you have any assigned reviews. You can also edit and change your settings and preferences by clicking Settings 225 in the menu bar on the top right of the screen. 4. Create a New Review To create a new review, click Create New Review on the Home screen. You will see a Create Review Screen created review. © 2003-2015 SmartBear Software 236 where you can specify information about the newly 40 41 Getting Started 5. Specify General Information About a Review Enter a brief description for the review to the Review Title field. The title is used all over the place -- in Action Items, in notification emails, in web page titles, and so forth. All other fields of the General Information section are optional, so you may skip them. 6. Add Review Participants The next step in creating a review is to invite people to the review, and give each of them a role to play. © 2003-2015 SmartBear Software Creating Reviews 1. Add yourself as Author 191 . 2. Add one or more of your colleagues as Reviewers 191 . You can select each user and role individually through the drop-down menu, or start typing the name of the user in the appropriate field to narrow down the user list. User/role combinations you have used recently will also appear under "Recent Participants". This makes it easy and fast to select common combinations. 7. Add Review Materials Review materials is what you are asking to review. From the Web Client you can upload the following types of content: · Arbitrary files from your computer: text files, Word documents, Excel tables, PDF's, images and so on. · Links to Web sites · Changes committed to a pre-configured 181 version control system Let's upload some text file to a review. 1. Scroll to the Review Materials section. 2. Click the Upload button. 3. Select Files from the drop-down list. 4. In the ensuing dialog, choose one or more files you want to attach and then click Upload. Once you have attached anything to a review, it will be listed in the Review Materials section. Most Collaborator users do not use the Web Client for attaching source files, reserving it for adding supporting documents. Instead, most of our users opt to use the GUI Client, the Command-Line Client, or add source files directly from Eclipse, Visual Studio or from P4V or P4Win clients for Perforce. These clients need to be installed on your computer and properly configured, however they provide an extensive integration with Source Control Systems and/or IDEs. © 2003-2015 SmartBear Software 42 43 Getting Started To learn how to add review materials via these clients, please read the respective sections in the manual: GUI Client 331 , Command-Line Client 341 , Eclipse Plug-in 359 , Visual Studio Add-in 395 or P4V / P4Win Integration 550 . 8. Start the Review Click Begin Review to start a review. In the ensuing list select when Collaborator should re-invite you to the review. Other participants will receive notifications about your new review, and it will be displayed in their Action Items 234 list. Where to Go Next To learn how to take park in someone else's reviews as a reviewer or observer, see Participating in Reviews 43 . To learn how to get to know about the issues other participants have found in your review, see Reworking Defects 48 . 2.2.2 Participating in Reviews When someone invites you to a review, you receive an email notification. To take part in this review you need to open Collaborator Web Client. © 2003-2015 SmartBear Software Participating in Reviews 1. Log Into the Web User Interface Start your favorite web browser and navigate to Collaborator Web Client URL. If asked, enter your user name and password in the login screen. In the Action items list on the Home screen, you will see a new incoming review. 2. Open Review Summary Screen Click the review in the Action items list to open it in the Review Summary see the details about this review. 243 screen where you can Notice that you are the active participant of this review and the review is in the Inspection phase. 3. Inspect Review Materials Scroll to the Review Materials section and click the uploaded file (or the first of several uploaded files). The Diff Viewer 257 will open. © 2003-2015 SmartBear Software 44 45 Getting Started Diff Viewer displays the contents of the chosen file and allows to add your comments and defects on this file. The Viewer appearance changes a little depending on a type of the current file. If a version history is available for the file (for example, when it was added from a source control system or when it was reworked by the author), the Viewer shows the current and previous versions of the file and highlights the differences between them. 4. Add Your Comments, Look for and Verify Defects While reviewing, you most likely find some issues with the materials or would like to ask or tell something to the author. For this purpose you can add comments and defects. If you are reviewing a file that has already been reworked, then you will need to verify whether the defects have been fixed. · To add a comment, click on the line (in text files) or area (in supporting docs) you want to comment on, type your comment and click Add. Comments are threaded into a conversation that stays tied to a specific line or area. © 2003-2015 SmartBear Software Participating in Reviews · To add a defect, click on the line (in text files) or area (in supporting docs) to which you want to attribute the defect, enter issue description and click Add as Defect. In the ensuing pane specify defect severity level and type and click Add Defect. · To mark a previously found defect as fixed, scroll to the line (in text files) or area (in supporting docs) where the defect was found, and press Mark Fixed. Besides creating comments and defects that relate to a specific line or area you can also create comments and defects that relate to entire files (in the Overall section of Diff Viewer) as well as comments and defects that relate to the whole review (in the Chat section of the Review Summary screen). See Review Chats 292 for more information on making conversation during reviews. © 2003-2015 SmartBear Software 46 47 Getting Started When you have examined the current file, you can proceed to another file that was uploaded to the review (if any). To view the next or previous files, you may use the File navigation buttons on the Diff Viewer toolbar: To return back to Review Summary screen, click Back button on the Diff Viewer toolbar. 5. Finish Inspection Having inspected all the files that were uploaded to the review, scroll to the Next Steps section of the Review Summary screen. In this section you need to indicate whether you are finished with the inspection or waiting on further actions from other participants. · To signal other participants that you have temporarily stepped out from the review but plan to return, press Wait. In the ensuing list select when Collaborator should re-invite you to the review. Wait Options · To signal other participants that you have inspected the uploaded files, press green button. The exact caption of the button varies depending on the phase the review will move to. If you have created any defects, then the button caption will be "Send to Rework" and pressing it will return the review back to author to fix the found defects. Otherwise, the caption will be "Send to Completed" and pressing it will indicate that you approve the changes in the uploaded materials. A review cannot be completed until all defects are resolved: either marked as fixed, deleted, or tracked externally 299 . © 2003-2015 SmartBear Software Participating in Reviews Where to Go Next To learn how about correcting the found defects as an author, see Reworking Defects 2.2.3 48 . Reworking Defects When one of review participants has noticed some issues with your work and created defects, the review is returned back to you. 1. Log Into the Web User Interface Start your favorite web browser and navigate to Collaborator Web Client URL. If asked, enter your user name and password in the login screen. In the Action items list on the Home screen, you will see your review that was returned. It will have the "Rework defects" state. You will need to fix the defects found by other participants. 2. Open Defect Log of the Review Summary Screen Click the review to open the Review Summary screen and scroll to the Defect Log section. © 2003-2015 SmartBear Software 48 49 Getting Started This section lists all found defects, their location and description. The Review Materials section also displays information about defects and comments, however groups it per files. 3. Get Information About a Particular Defect Click the Location link in the Defect Log or in the Review Materials sections. This will open the Diff Viewer and navigate to the defect. © 2003-2015 SmartBear Software Reworking Defects Read descriptions of the defects and reviewer comments. Reply if needed. To denote that you agree with the defect or comment, press "Mark Accepted". To indicate that you have read the comment or defect description, press "Mark Read". When you have examined the current file, you can proceed to another file (if any). To view the next or previous files, you may use the File navigation buttons on the Diff Viewer toolbar: To return back to Review Summary screen, click Back button on the Diff Viewer toolbar. 4. Upload The Reworked Files Correct the defects on your computer and then upload the corrected version of the file(s) to the review. © 2003-2015 SmartBear Software 50 51 Getting Started The Status column in the Review Materials for the uploaded file will increase to indicate that the files was reworked. 5. Request To Verify Your Corrections When you have uploaded the corrected versions for all files, press the Send to Inspection button in the Next Steps section. Other review participants will be notified that you have reworked the review materials and want them to verify your changes. A review can go through multiple inspection and rework phases before it is completed. 3 Collaborator Server This chapter describes how to setup and manage the server component of Collaborator. It is useful for system administrators. Regular users of Collaborator should refer to Web Client 220 or Desktop Clients 320 sections instead. Collaborator server process acts as the hub, manager, and controller of information. The server has a web-based user interface where users and administrators can do everything — create and perform reviews, configure personal and system-wide settings and run reports. The server uses a database to store all data and configuration. In This Section · Installation 52 Covers different aspects of server and database installation, backup and upgrade. · Server Administration 80 Covers different aspects of server management and administration. · Collaborator Settings 140 Describes how to configure the Collaborator server. © 2003-2015 SmartBear Software 52 Related Topics of Interest · Web Client 220 Describes the web user interface of Collaborator. · Desktop Clients 320 Describes GUI Client, Command-Line Client, plugins for Eclipse, Microsoft Visual Studio and other clients for desktops. 3.1 Installation This chapter covers different aspects of server and database installation, backup and upgrade. In This Section · System Requirements 52 Describes the minimum and recommended requirements to install and run Collaborator server. · Database Installation and Configuration 54 Explains how to install and prepare different databases to work with Collaborator. · Server Installation 63 Explains how to install Collaborator server. · Server Upgrades 75 Explains how to upgrade an existing Collaborator server. · Platform-Specific Notes 79 Contains additional server-related information that is specific to certain operating systems. 3.1.1 System Requirements This section describes the minimum and recommended requirements to install and run Collaborator server, as well as some steps that it is prudent to take before attempting to install Collaborator. Please note that Collaborator should run in a VM environment, but it is an unsupported scenario since it cannot guarantee suitable performance due to resource contention. Server Requirements Please ensure that you meet or exceed the following requirements to run the current version of Collaborator server. Configuration for servers with 20 or fewer concurrent users: · Modern processor with 2 cores, 2.5Ghz or better © 2003-2015 SmartBear Software 53 Collaborator Server · 4GB free RAM · 100GB free storage space · Windows, Linux, Solaris or BSD (If Windows, must be a server edition, not workstation edition) · Separate database server database) 54 is recommended. (Trial users may install on our embedded Configuration for servers with 50 or fewer concurrent users: · Modern server class processors with at least 4 cores in total, 2.5Ghz or better · 12GB free RAM. We recommend increasing the memory available to Collaborator server (instructions here 868 ) · 100GB free storage space · Windows, Linux, or Solaris (If Windows, must be a server edition, not workstation edition) · Separate database server 54 is required · Low latency link to database server · Access from all possible clients to server port without a proxy · Some kind of drive backup hardware (Example: RAID 0) · Internet access from Collaborator server For servers with greater than 50 concurrent users, please contact our support team they can help with your implementation plan. 28 so that Preparing your Collaborator server · Install the latest stable build of Oracle Java SE 8. See Java Compatibility Matrix 870 for details. · Create a database user with permission to connect via TCP/IP from Collaborator server · Create an empty schema on database server in which aforementioned database user can create, alter, read, write, update, and delete tables · Make sure that you have access to your intended server port (default 8080) through any firewall you may use © 2003-2015 SmartBear Software System Requirements · If you intend to use LDAP or Active Directory for authentication, please review the relevant section of our manual 101 . You may need to ask your LDAP or Active Directory administrator to create a dedicated user for the Collaborator server. 3.1.2 Database Installation Collaborator supports several databases: · Embedded · MySQL 55 54 . A zero-configuration embedded database useful for trials. versions 4.1, 5.0, 5.1, 5.4, 5.5, and 5.6. · Microsoft SQL Server · Oracle 61 57 versions 2000 (v8.0), 2005, 2008, 2012, 2014. version 11gR2 and 12c. For trials, the zero-configuration embedded database is the easiest way to get started. MySQL is the best choice if you need a free, open-source database. Collaborator server must be able to access your database server via TCP/IP. Collaborator requires an empty schema on the database server in which a dedicated database user can create, alter, read, write, update, and delete objects. A built-in database migration tool 90 allows you to move between any of the supported databases, so you can always get started on one and switch to another later on. Note: Oracle and SQL Server are only supported in Collaborator and are not supported by CodeReviewer. For a complete list of differences between the two products, please see the comparison page. For more about the database format, see Database Schema 3.1.2.1 587 . Zero-Configuration The server installer comes with support for the Hypersonic embedded database. As of version 8.2, we install the HSQL 2.2 database. This in-memory database is not only perfect for trials where you want to get up-and-running as easily as possible, it is also the recommended productionready database and it performs automatic daily backups. There is no need to use SQLServer, Oracle or MySQL unless you have specific needs. Using this database requires no configuration. When the server installer type, simply select "Embedded". © 2003-2015 SmartBear Software 63 asks for the database 54 55 Collaborator Server If you find that the embedded database is not going to fit your needs, the standard database migration technique 90 works with all databases, so it is possible to move all your data from the embedded database into a "real" database at any time. In addition to using the database migration technique, to move to a "real" database, you will also need to reconfigure the Collaborator server by running the Server Installation program 63 . 3.1.2.2 MySQL MySQL is a popular enterprise-class, open-source database. This is your best choice if you need a free, open-source database. Supported MySQL Versions Collaborator server can run on MySQL version MySQL 4.1, 5.0, 5.1, 5.4, 5.5, or 5.6. Downloading MySQL For downloads and documentation for all platforms, see the MySQL Developer Zone web site. You will need the MySQL Community Server component for the database itself. You can choose to install the GUI tool, MySQL Workbench, for graphical server administration, or you can use the MySQL Command Line Client. The MySQL Command Line Client is installed as part of the database server, while the GUI client is a separate install that you can get from the developer zone. Installing the Database Server First, install the Database Server component. Once you have installed the server, the last screen will give you the option to Configure the MySQL Server. If you select this, it will open a new wizard for configuration. Two parts in the configuration that are especially important: Port Number and Root Password. You will need to know both while getting your database setup and while configuring Collaborator to work with your database. For information on configuring your database server, go to the MySQL Documentation and select your MySQL version. NOTE: It is important to make sure you are using InnoDB tables. Using InnoDB tables will scale better for multiple users than MyISAM. For questions regarding configuring you MySQL database tables, see http://dev.mysql.com/doc/refman/5.0/en/mysql-config-wizard-database-usage.html. Configuring the Database Collaborator requires that a database be created. The MySQL Server install will not create a database for you. This is a manual step that you need to do. You can create a database using the MySQL Command Line Client, or using MySQL Workbench. If you plan to use the MySQL GUI client, it is important to know that the MySQL GUI Tools Bundle is reaching end of life. The instructions given in this documentation use the functionality in the current GUI client, MySQL Workbench. © 2003-2015 SmartBear Software Database Installation The steps below for creating a database were written using MySQL Workbench 5.2.16 and are subject to change. As always, the most reliable source for database creation steps is MySQL Workbench Documentation. 1. Open MySQL Workbench. 2. Create a connection to your database server. a) From the Home screen, under Server Administration, select New Server Instance. b) Follow the steps in the New Server Instance Wizard. 3. Create the database. a) Go back to the Home tab. b) Under SQL Development, select the database server connection you provided in step 2. c) In the Object Explorer, right-click and select Create Schema. d) A screen will appear and prompt you to provide a schema name. Once you have done that, click Apply. e) You will be shown the command used to create the schema, and given an option to edit it. f) Once the create command is as you want it, click Apply. g) You will be returned to the screen you saw in step 3d. Click Finish. We recommend that you create a user specifically for your Collaborator database rather than using the super-user, root. To do this in MySQL Workbench, see the documentation at MySQL Schema Privileges. All of these changes go into effect immediately. You do not have to restart the MySQL server for changes to take effect. During the GUI installation screens 63 for the Collaborator server, you will be prompted for the MySQL server host name, TCP/IP port, database name, user name, and password. The installer will report any connectivity errors. When you visit the web page for Collaborator it will detect that you have a new database and will create all tables, indexes, and views for you automatically. The following SQL script can be used to create a database and a database user for Collaborator and configure the required permissions for that user (be sure to change the database name, user login and password as appropriate): CREATE DATABASE IF NOT EXISTS ccollabdb CHARACTER SET utf8 COLLATE utf8_unicode_ci; CREATE USER 'collabuser' IDENTIFIED BY 'password'; GRANT © 2003-2015 SmartBear Software 56 57 Collaborator Server ALTER, CREATE, CREATE TEMPORARY TABLES, CREATE VIEW, DELETE, DROP, EXECUTE, INDEX, INSERT, LOCK TABLES, SELECT, UPDATE ON TABLE ccollabdb.* TO collabuser; FLUSH PRIVILEGES; MySQL Limitations · MySQL 4.x does not support the concept of a database VIEW object. Therefore custom reporting views 593 are only present with v5.x servers. · Important: The MySQL native restore feature does not automatically clear the database before restoring from backup. You can use the MySQL native restore feature, but you must manually drop all tables in the database before you run the restore. By doing this, you will ensure an exact reproduction of your backed-up database. Option two is to use the alternative method 90 provided by Collaborator. 3.1.2.3 SQL Server Supported SQL Server Versions Collaborator supports Microsoft SQL Server 2000 (v8.0), 2005, 2008, 2012 and 2014. Notes: · SQL Server is only supported in Collaborator and is not supported by CodeReviewer. For a complete list of differences between the two products, please see the comparison page. © 2003-2015 SmartBear Software Database Installation · SQL Server 2000 is no longer supported by Microsoft. The drivers necessary for interaction with SQL Server 2000 are supplied by Microsoft and may no longer be available in the future. We strongly suggest upgrading to a newer version of SQL Server. Installing Microsoft SQL Server Drivers There are various JDBC drivers that can be used for SQL Server. Please see the SQL Server Developer Center documentation for specific details about your database installation. You can download JDBC drivers for the SQL Server version you are using from the Microsoft web site. · SQL Server 2012 and 2014: Microsoft SQL Server JDBC Driver 4.0 Documentation and Download Note that this driver does not support SQL Server 2000. · SQL Server 2000, 2005 and 2008: Microsoft SQL Server JDBC Driver 3.0 Documentation and Download This package contains two .jar files: sqljdbc.jar and sqljdbc4.jar. Only sqljdbc4.jar will work on Java 6.0 and later. To install the driver, delete the sqljdbc.jar file, and copy sqljdbc4.jar into the lib directory according to the instructions below. Microsoft added support for SQL Server 2012 to this driver as a hotfix. They recommend using the 4.x driver for SQL Server 2012 installations. To install the driver: 1. Download the preferred driver. 2. Stop the Collaborator server, if it is running. 3. Go to the <Collaborator installation directory>/tomcat/lib folder. 4. Remove sqljdbc.jar or sqljdbc4.jar, if they are in this folder. 5. Copy the downloaded sqljdbc4.jar file to that folder. If you have sqljdbc.jar in the downloaded package, DO NOT copy it to this folder. 6. Start the Collaborator server. © 2003-2015 SmartBear Software 58 59 Collaborator Server Setting Up the Database You need to create an empty database for Collaborator. You can do this, for example, in SQL Server Management Studio. When installing 63 Collaborator on a server, the installation wizard will prompt for the SQL Server host name, TCP/IP port number, the database name, user name, and password. The wizard will report any connectivity errors. When you log in to the Collaborator Web Client for the first time after installation, it detects that you have a new database and will create all tables, indexes, and views for you automatically. Important notes: · When creating the database, be sure to select a case insensitive collation so that the case of column names (and user names and text searches) does not matter. · It is recommended that you create a user account just for Collaborator and give this account full access to the database and no access to other databases. Also, we recommend using a SQL Server account instead of Windows-based authentication, because the Collaborator service might not be running under a normal Windows-based login. To use an SQL Server account, you may need to change Collaborator's settings. See below. · Collaborator uses the TCP/IP protocol for data exchange. By default, in SQL Server this protocol is disabled. To enable it, open the SQL Server Configuration Manager and navigate to Network Configuration > Protocols. Make sure TCP/IP is enabled. · By default, SQL Server is configured to use dynamic ports, which means that the port used is changed each time the service is restarted. To use a static port instead, open the TCP/IP settings and change the IPAll setting value. Empty the TCP Dynamic Ports box and specify the desired port number in TCP Port. Using SQL Server Authentication To use SQL Server account, you may need to change the connection Collaborator's settings: 1. After downloading the driver package from one of the links above, extract the files. 2. Copy the platform-specific sqljdbc_auth.dll to the tomcat subfolder of your <Collaborator installation folder>. 3. Open the following file in any text or XML editor -- <Collaborator installation folder>/tomcat/conf/Catalina/localhost/ ROOT.xml 4. Insert the IntegratedSecurity=true value into the url attribute of the <Resource driverClassName="org.hsqldb.jdbcDriver" ... > element that describes the JDBC configuration. © 2003-2015 SmartBear Software Database Installation After the change, the element will look something like this -- <Resource driverClassName="org.hsqldb.jdbcDriver" ... url="jdbc:sqlserver://SERVER:1433;databaseName=DATABASE-NAME; IntegratedSecurity=true" ... username="DOMAIN\USERNAME" validationQuery="select 1 ... " /> 5. Restart the Collaborator service. Known Limitations · In SQL Server 2000, text fields can contain 8000 characters maximum. This includes changelist descriptions, review overview text, and comment and defect text. SQL Server 2005 and later has no such restriction. Troubleshooting · If you get the error "The TCP/IP connection to the host has failed. java.net. UnknownHostException", you probably need to enable TCP/IP for your database. See Setting Up the Database 59 above. · By default, when Collaborator is installed, the service runs under the Local System account. If you are using SQL Server authentication rather Windows-based authentication, the Local System account must have the permissions necessary to communicate with the database. An error like "Error: Login failed for user 'domain\user$'". indicates that the Local System account does not have these permissions. To handle this situation, you can either grant your Local System account permissions to your database server, or edit the account the Collaborator service is using. To edit the account: § On your Collaborator server computer, from the Control Panel > System and Security > Administrative Tools, open Services. § Find ccollab-server in the service list and stop the service. § Right-click on ccollab-server, and select Properties from the context menu. This will open the Properties dialog § Go to the Log On tab. § Select This account and then specify the name and password for the account you want the Collaborator service to operate. Note: The account that you specify must have sufficient privileges on the machine, where the service is running (for instance, file system privileges for folder creation to allow the service create temporary subfolders in the Collaborator server installation folder). § Click Apply. § Start the ccollab-server service. © 2003-2015 SmartBear Software 60 61 · Collaborator Server If you are using SQL Server with named instances, it is important to know your port configuration. By default, named instances use dynamic ports. This means, every time SQL Server is restarted, it will search for available ports and assign one to your database. In this situation, you might have trouble finding the port upon which your database is running and could see errors when trying to connect to your database with Collaborator. Possible solutions: § If you are using named instances with dynamic ports, do not specify a port when providing Collaborator your SQL Server connection information. By leaving the port unspecified, a request will be sent to your SQL Server instance on port 1434 that will search for the port your database is running on and will then send that information back to Collaborator. § Alternatively, try using a static port. See Setting Up the Database 3.1.2.4 59 above. Oracle This manual assumes you already have Oracle Database Server installed and running. Note: Oracle is only supported in Collaborator and is not supported by CodeReviewer. For a complete list of differences between the two products, please see the comparison page. Supported Versions The versions we have tested against are: · 10gR2 Express Edition · 11gR2 Personal Edition · 12c Standard Edition Your mileage may vary with other versions. Contact us if you have problems -- we are interested in fixing bugs! Setting up the database Create a database for Collaborator. It is recommended that you also create a username/ password pair just for Collaborator and give this account full access to the database and no access to other databases. During the GUI installation screens 63 for the Collaborator server, you will be prompted for the Oracle server host name, TCP/IP port (default is 1521), database service name (not the SID!), user name, and password. The installer will not report any connectivity errors. © 2003-2015 SmartBear Software Database Installation Warning: The database service name is not the same thing as the SID! This change was made by Oracle in version 9iR2. The database service name is fully-qualified, corresponding to GLOBAL_DBNAME in an .ora file. An example would be mysid. mydomain.com. The database service name is also sometimes referred to as "TNS alias" or "connect descriptor". The SID is the shorter name, corresponding to SID_NAME in an .ora file. When you first visit the web page for Collaborator, it will detect that you have a new database and will create all tables, indexes, and views for you automatically, or give you an appropriate error message if there is a connectivity problem. Connectivity problems should be resolved by rerunning the installer. Oracle Limitations The length of long strings is limited to 1023 characters. This applies to fields such as custom fields, changelist text, comment text, and defect text. Troubleshooting We use the Oracle JDBC driver to connect to your Oracle database. The driver has a few undocumented behaviors that may come as a surprise. There are threads on Oracle's tech support forums about this. Most of the problems arise in the GLOBAL_DBNAME field in your SID_DESC entry from your listener.ora file. A typical entry might look like this: (SID_DESC = (GLOBAL_DBNAME = mysid.mydomain.com) (ORACLE_HOME = /appl/oracle1/product/10.2.0.1) (SID_NAME = mysid) ) Most other Oracle-based programs use the SID_NAME field to identify the database, but the JDBC driver uses GLOBAL_DBNAME. This would cause a connection error in the example above. Also note that the database service name is not the same thing as the SID. This change was made by Oracle in version 9iR2. The installer asks for the database service name, not the SID. The database service name is also sometimes referred to as "TNS alias" or "connect descriptor". © 2003-2015 SmartBear Software 62 63 Collaborator Server Typically, this means you should use the GLOBAL_DBNAME in the installer (that is, mysid. mydomain.com) and not just the SID (that is, mysid). 3.1.3 Server Installation Collaborator uses a stand-alone web server for a cross-platform, no-client, firewall-friendly user interface. Please review the System Requirements 52 section before continuing. The Graphical Installer Installers can be run in a graphical, interactive mode or an automatic mode. For first installation, you will need to run the graphical version so you can select options. First, you need to download the correct installer for your platform from our website: http://support.smartbear.com/downloads/collaborator/ Normal Installation The first screen of the wizard lets you know it is working: © 2003-2015 SmartBear Software Server Installation The second screen is the EULA (End User License Agreement): The next screen (assuming this is not an upgrade installation) allows you to select the disk location for the installation files. Permissions here are important: © 2003-2015 SmartBear Software 64 65 Collaborator Server This directory should be writable by the server because several dynamic files are created here including web server logs, temporary storage, and long-term storage for file content uploaded by users. All of these locations can be changed if it is critical that the installation location be readonly, but this requires significant work on the part of the administrator and makes upgrades more difficult. Make sure at least 5 gigabytes of space is available in the named directory. Your users will need the space for file uploads. You can always move the file upload directory. The next screen allows you to select whether to configure advanced options. By default, this checkbox is unselected and the default options are recommended for first-time and evaluation installations. © 2003-2015 SmartBear Software Server Installation The next screen allows you to specify the approximate number simultaneous users and automatically configure your server to support this number of users. © 2003-2015 SmartBear Software 66 67 Collaborator Server The next screen will ask where you would like to create the Collaborator's shortcut. Click "do not create a Start Menu folder" if you would not like to create a folder for Collaborator. © 2003-2015 SmartBear Software Server Installation After this, the installer lays down the server files, stopping any existing server if necessary. Once the new files are installed, the server is started automatically, and the installer tells you it is finished: © 2003-2015 SmartBear Software 68 69 Collaborator Server After you click Finish, a web browser will open, pointed at your installed server. Warning: If the server has not quite had enough time to fully start up, it might take a while for the web page to load and it might even fail to open. Just "refresh" the browser. Advanced options and Upgrade installations If the Collaborator installer detects a single, previous installation, the installation folder and all configuration settings are automatically set for the installation - though they can be edited, if desired. If the Collaborator installer detects multiple previous installations, the following screen is presented and you can select which installation, if any, you would like to upgrade. © 2003-2015 SmartBear Software Server Installation When selecting the 'Configure Advanced Settings" checkbox, the following screen configures the web server settings: © 2003-2015 SmartBear Software 70 71 Collaborator Server The port number should be selected as to not conflict with any existing services. The installer will attempt to connect to this port when you click Next; if the port is already taken by another process, you will get a warning message. You can elect to try a different port or continue. Continue at your own risk -- probably the server will not be able to start up and you will have to make the port available and restart the server manually. Additionally, your firewall settings may prevent remote access on the default port or on your selected port. In order to allow access, you will have to modify your firewall settings accordingly. For more information see the troubleshooting section 394 . Next, you configure the database connection. The database should already be installed and ready 54 : © 2003-2015 SmartBear Software Server Installation For trial installations, you will probably want to select the default "Embedded" database should migrate 90 to a full-featured database before you use the server in production. 54 . You If you picked anything but the "Embedded" database, the next screen lets you configure the connection to the database server: © 2003-2015 SmartBear Software 72 73 Collaborator Server The exact format of this screen depends on the database you chose. The Username and Password fields here refer to the database username and password. Typically, you will want to create a special database username and password for the Collaborator application so you can control exactly which data it has access to. This usually means full access to the database created for Collaborator and no access to any other database. The next screen lets you decide how users will be authenticated in Collaborator. © 2003-2015 SmartBear Software Server Installation The simplest setting is "Internal," which means Collaborator should maintain usernames/ passwords in its own database. If your company uses LDAP or ActiveDirectory, you can use that method to authenticate users in Collaborator, which means you do not have to maintain the Collaborator user list at all. If you select the LDAP method you will get an additional wizard screen that lets you supply the settings for your LDAP server. See the LDAP section 101 for details. You will also have the option to choose "Existing LDAP authentication configuration" if you are upgrading 75 an existing installation. The Non-Graphical Installer If you are upgrading the server instead of installing from scratch, you have the option of installing without any graphical user interface. We recommend that you always use the graphical interface when possible because it gives you the chance to review settings, especially new settings that we might have added since your last installation. © 2003-2015 SmartBear Software 74 75 Collaborator Server To run the installer without a GUI, run the installer from a command-line using the -q switch. To set the installation directory from the command-line, use the -dir [directory] switch. The -q switch gives you a silent install and will not prompt you for any installation instructions. If you would like to be prompted for installation instructions without using the graphical installer, you can run the installer from the console using the -c command. Installing more than one server instance on a single machine All server instances need to be running on unique and available ports. Each server instance will also need a separate database and license code. On Windows, install the different instances in different directories, on different ports, with separate database instances. This will get all of the software installed, but only the last one will be properly installed as a service. To install the others as a service, run the following command from the command line: <install-dir>\ccollab-server /install service-name This will install that instance as a Windows service with the specified service name. To uninstall a service that was misnamed or no longer used: <install-dir>\ccollab-server /uninstall service-name On *nix platforms, you should install the server in multiple directories and then edit your /etc/ init.d scripts accordingly. Installing on a system with multiple JRE installations See Known Issues With Installation Collaborator. 3.1.4 682 for instructions on selecting a specific JRE to be used by Server Upgrades Back Up Before Upgrading! As with all software, you should always perform a complete backup upgrade. 88 before attempting an For major releases, we also recommend that you install the new version on a test machine using a copy of your current database. Test a typical workflow on the system to make sure it works and there are no surprises for your users. See Testing Newer Versions 77 for details. If you are upgrading a CodeCollaborator or PeerReview Complete server, please see Migrating From CodeCollaborator or PeerReview Complete 77 . © 2003-2015 SmartBear Software Server Upgrades Upgrading from Installers Upgrading the server component works exactly like installing 63 the component. Warning: Do not uninstall the server first. Just install the upgrade over the existing installation. The installation screens are the same except that existing configuration will be automatically preloaded. This means that clicking [Next] repeatedly will do the right thing in most cases. Of course, we recommend that you read each screen in case we added additional options. Windows-Only: The system will be taken off-line while the upgrade takes place and will start automatically after the upgrade completes. When upgrading using a 64 bit installer on a server installed using the 32 bit installer, be sure to verify the install directory is the same as you currently have. The 64 bit installer will NOT automatically detect the existing install directory of a Collaborator install that was done using the 32 bit installer. In this scenario, simply edit the install location to be the fully qualified path of the existing install directory. Unix-Only: The installer will not automatically stop or start the server, so if the server is currently running you will need to manually stop it, perform the upgrade, and then restart it. After the upgrade validate the configuration of your Java Database Connectivity (JDBC) modules. Upgrading an outdated server (say from version 7 to version 9) may remove stored JDBC modules. Upgrading Database Schema With minor and major releases, we sometimes change the database schema. © 2003-2015 SmartBear Software 76 77 Collaborator Server In this case, the database schema needs to be upgraded before the server can be used. After the installer completes and you go to the main web page, you will get a special message saying the database needs upgrading. A button allows you to start the upgrade. Schema upgrades are automatic. Once the database schema is upgraded, you cannot then go back to a previous version. This is one of the many reasons why backups are important! 3.1.4.1 Migrating From CodeCollaborator or PeerReview Complete In 2013, SmartBear released the Collaborator. This product merges and replaces both CodeCollaborator and PeerReview Complete. This page provides considerations for migrating from these products to Collaborator. Incompatibility with Older Clients If the Collaborator server was upgraded from a previous installation of CodeCollaborator or PeerReview Complete, Collaborator users must also upgrade their Collaborator client applications. You can find the number of oldest stable client application, as well as specify your own minimal allowable build number in the Administrator Settings 153 . Client applications whose build number is lower than Minimum Client Build 153 are incompatible with the current version of Collaborator server. Server/Database Upgrade Procedure Once you upgrade to Collaborator 8.0 or higher, you cannot downgrade to CodeCollaborator and PeerReview Complete. Neither the database nor the installation directory supports installing a prev8.0 version on top of a post-v8.0 version. This means: Back up everything 88 before you perform the upgrade. This is good advice any time you upgrade any software, but it is especially important when migrating from CodeCollaborator or PeerReview Complete because you cannot downgrade. Upgrading an existing CodeCollaborator or PeerReview Complete server and database to Collaborator server works just like any other server upgrade 75 . All your current settings will be preserved. 3.1.4.2 Testing Newer Versions If you are currently using Collaborator and want to try a newer version without risking your existing installation, there are a couple ways to install a newer version in an existing Collaborator environment while still maintaining the integrity of your existing version. © 2003-2015 SmartBear Software Server Upgrades Fresh Installation This option allows a quick and easy way to try Collaborator from scratch. However, you will not have access to all your existing review and user data. To test a new Collaborator server with a blank database, download and install 63 the newer version of the Collaborator server software. If you are installing onto the same machine as your existing Collaborator server software, be sure to specify a different directory, port number, and database instance. Installing it in the same directory will upgrade your current installation, and you will not be able to "undo". Parallel Operation This option allows you to continue running the old version of Collaborator in parallel with the newer version you are testing. 1. Do a complete backup 88 of your existing Collaborator server 2. After the backup finishes, install the exact same build of the Collaborator server software that you are currently using. For example, if you are currently running version 8.0.8001, then install version 8.5.8500 (older versions of the installer are available here). After the installer finishes it will display a web page in your default browser. That web page will have a button for creating the Collaborator database tables - do not push that button! You do not want those tables to be created because you are about to restore from your existing database. Again, if you are installing onto the same machine as your existing Collaborator server software, be sure to specify a different directory, port number, and database instance. Installing it in the same directory will upgrade your current installation, and you will not be able to "undo". 3. Restore the backup 88 that you just created to the new installation of Collaborator. 4. Then run the installer 63 for the newer version and when prompted, select the directory that contains the Collaborator server that you just installed. This will cause the installer to upgrade that installation. Windows Notes If you choose either of the above options, you will end up with two instances of the Collaborator server running: one for your older version and one that is running the newer version. If you are running both instances on the same machine and if the operating system on that machine is Windows, then there is one additional step. © 2003-2015 SmartBear Software 78 79 Collaborator Server The Collaborator server installer for Windows always uses the same Windows service name: ccollab-server. This means that after you install a second instance of the Collaborator server on a Windows system, the Windows service named ccollab-server points to the new installation. The original installation no longer has a Windows service entry and is therefore no longer running. This problem is easy to fix. In a command window set the working directory to the original installation of the Collaborator server software. Then enter this command: ccollab-server /install <service-name> You can specify anything you want for <service-name> except for ccollab-server. This will create a new Windows service with its own name for your existing Collaborator server installation. 3.1.5 Platform-Specific Notes This is additional server-related information that is specific to certain operating systems. Windows The web server is installed as a Windows Service. This means the server starts up automatically when the machine boots up, and no user needs to be logged in. The service can be started and stopped manually and even remotely. The default installation is for the service to start automatically upon system startup using the default service user. All of these settings can be changed by the administrator after installation using Microsoft's standard service configuration control panel. Warning: If you change the user under which the service runs, make sure the installation directory is still both readable and writable by the new user. Warning: If Collaborator is located on the same machine as the database, and if the Collaborator service starts up before the database service, Collaborator might fail to start up. The work-around is to restart the Collaborator service, but the fix is to use service dependencies to tell Windows that the Collaborator service is dependant on the database service. This is a standard Windows service feature. Linux / Solaris / BSD The web service is not automatically installed such that it will run automatically when the system starts up. However this is easy to set up. © 2003-2015 SmartBear Software Platform-Specific Notes The installation directory contains a file ccollab-server that can accept the usual start and stop commands. Create a symbolic link to this file from your standard installation directory (for example, /etc/rc3.d or /etc/rc.local) to cause the server to start automatically upon system startup. Warning: If Collaborator is located on the same machine as the database, make sure it starts up later in the start-up process than the database server. Otherwise, Collaborator will fail to start up. 3.2 Server Administration This chapter covers different aspects of server management and administration. In This Section · Network Configuration 81 Describes how to configure server proxies and other network configuration. · Collaborator Licensing 82 Explains how Collaborator is licensed and other license-related questions. · Content Storage 87 Explains how to organize storage for the uploaded files. · Server Backup / Restore / Migrate 88 Describes how to backup a Collaborator server, restore it from the backup and how to migrate data between databases. · Security Considerations 93 Covers various options which affect the overall security of the system. · LDAP Authentication 101 Describes how to establish LDAP authentication. · Configuring HTTPS 110 Describes how to configure HTTPS connections. · JMX Monitoring 117 Describes how to use Java's standard, built-in network monitoring system. · Technical Server Specifications 119 Describes the technical aspects of the Collaborator server. · High Availability Best Practices 121 Describes how to establish a test server. © 2003-2015 SmartBear Software 80 81 Collaborator Server · Variable Substitution 123 Describes the built-in system of variable substitution. · Archiving Reviews 127 Describes how to pack completed reviews to a ZIP archive. · Diagnostics 130 Describes the built-in diagnostics tools. · Logging 132 Describes the logging system of the Collaborator server. · Troubleshooting 135 Describes administrator actions in case of troubles. 3.2.1 Network Configuration Certain network topologies and configurations require specific configuration in the server component. Server Proxies Collaborator optionally will connect to a licensing server hosted by SmartBear via standard HTTP protocol in order to validate your license code. If you are installing Collaborator in an environment where outbound HTTP requests are required to use a proxy, you will need to configure Collaborator to use the proxy. Proxy settings are configured in the installation-directory/ccollab-server. vmoptions file. To enable an HTTP proxy, you will need to add the following lines to that file: -Dhttp.proxyHost=proxy_hostname -Dhttp.proxyPort=proxy_port -Dhttp.proxySet=true Many proxies are configured to reject connections to internal URL's via the proxy, as these connections are supposed to be made directly. For this reason, it is also a good idea to configure internal hosts as non-proxied hosts. Specifically, it is important to configure localhost (including its resolvable name), the bug tracking system, and the version control server as nonproxied hosts. These URL's are configured in Collaborator for integration purposes and a connection is made to validate the URL's entered in the configuration screens. If the proxy rejects the connections, you may not be able to properly edit those fields. To configure non-proxied hosts, add the following line to the collab-server.vmoptions file: -Dhttp.nonProxyHosts="localhost|collabserver|*.mydomain.com" © 2003-2015 SmartBear Software Network Configuration The format for the value is a list of hostnames delimited by " |" and using "*" for a wildcard. Some newer firewalls have been known to cause additional problems with HTTP proxying. For instance, some firewalls periodically redirect HTTP requests to a firewall-generated web page requiring the user to log in. These firewalls are specifically designed to limit web access to users; preventing services (such as Collaborator) from accessing web services. Organizations with such firewalls will need to work with their network administrators to exempt Collaborator from this policy or otherwise allow access. 3.2.2 Licensing SmartBear offers both fixed-seat and floating-seat licensing plans. Licensing Options and Definitions Fixed Seats - With a fixed-seat license, you are allowed a fixed number of "named users". A "named user" is a human being (not a machine) that is active in the past 30 days. Therefore, if some users never log in, or if a user leaves the group and does not log in again, that user does not count towards the fixed-seat license. Fixed-seat licensing is more appropriate when most users will be using the product daily. Floating Seats - With a floating-seat license, you are allowed a maximum number of "concurrent users". A user is considered "active" if he/she has accessed the server with a web browser, the Eclipse Review Editor, or the Eclipse Compare Editor in the past hour and has not explicitly logged out. Users with any Collaborator page open in a browser will remain logged in regardless of whether they are actively navigating through the site. Floating-seat licensing is more appropriate when you have many users that will use the system only occasionally. In both cases, a "user" is a human being, not tied to a particular machine or client. This means that if someone uses both the Eclipse client, stand-alone client, and command-line client, plus uses Collaborator on a work machine and laptop, that all counts as one "seat" whether fixed or floating. When you disable 161 a user, that user immediately does not count against your license usage. That user will not be able to log in, and if the user is in the middle of something the user will be kicked out of the system. NOTE: We do not support both fixed and floating seats on the same server. NOTE: Each license key is linked to the node ID, and it gets carried over during server migration. Therefore, a new license key is not needed when migrating the server. Exceeding the license limit How does the system behave when you exceed the license limit? © 2003-2015 SmartBear Software 82 83 Collaborator Server Once you have maxed out granted seats, either in fixed or floating schemes, the next user who attempts to log into the system is shown an error message and is not allowed in. The message will explain that all licenses are in use and will prompt that user to contact his system administrator. Additionally, an automatic notification is sent to the administrator, informing that a user was denied due to license limit. Note that "log in" can either mean "logging in from the front page" or "going back into the system after hours of inactivity". In the latter case, a cookie is used to automatically log the user back in. Normally, this is completely transparent, but if this auto-login will cause the system to go over the licensed limit, the user will see the error message. This all applies to users who are not already active. The users who were already legally using the system continue uninterrupted. It is the users who come in after that point in time who are not allowed in. One way to get back under the limit is to disable 161 user accounts. This works for both fixed and floating seat schemes. If you do this the license is made immediately available for another user. If the user you disabled continues to use the system or tries to log in, that user will receive an appropriate error message explaining he has been locked out and to contact his system administrator. The system administrator 162 is always allowed to log in, even if the license has been exceeded. This allows you to remedy the licensing problem, either by disabling users until you are under the limit, or to install a new license code that has been provided to you. You can also manually log out a user. Monitoring license usage There are several ways to keep track of licenses used. · On the Users Administration 157 screen current usage numbers are displayed. You can also manually disable or logout users if you need to reclaim licenses quickly. · On the System Status 218 screen you can see historical activity patterns. · On the Current License section of the Licensing · You can use JMX 117 82 screen. to monitor usage and licensing information. How many licenses do I need? It is hard to give guidance because it varies quite a bit. Generally the best advice is: Just try Collaborator. There is a report on the User Administration 157 page that tells you exactly how many "fixed" and "floating" seats you would be using right now. Use that empirical information to determine which is cheaper. © 2003-2015 SmartBear Software Licensing Typically, a trial does not involve everyone, and typically the usage pattern is not exactly the same as when it will be deployed, so you will have to estimate. Still, you will be doing so with some real numbers. Here are some additional pointers: · If you have developers in many timezones, floating usually becomes more economical. · If each person will be inside Collaborator at least once per day (either as author or reviewer), typically fixed seats are cheaper. If less frequently than that, floating. · If you expect large spikes in usage -- where perhaps everyone is online at once during a review crunch -- you will want fixed. Otherwise, you have to get enough floating to handle that peak usage. When Requesting Your License Code In order to generate a license code you will need to send us the Node ID from your Collaborator server installation. To find the Node ID, do the following: 1. Log into Collaborator with any user that has administrative access. 2. Go to the "Admin" screen from the menubar at top-right: © 2003-2015 SmartBear Software 84 85 Collaborator Server 3. Select "Licensing" from the list of sub-categories on the left: 4. There will be a table at the top of the page called "Current License". Look for the Node ID field, and there will be an 8-character code. That is your Node ID. © 2003-2015 SmartBear Software Licensing Entering Your License Code When you receive your license code, the license code is entered into the Collaborator server. Client software does not have to be specially licensed. To enter your license code, do the following: 1. Go to the Licensing page. (See steps 1-3 above as if you were looking for your Node ID 84 .) 2. Below the "Current License" box, there will be a "Configuration" box. In the "Company Key" field, enter the company key. In the "License Codes" field, enter the license code given to you by SmartBear sales: 5. Click "Save" to complete changes. 6. If there are any errors they will be displayed at the top of the screen. Otherwise your licensing information (number of fixed and floating seats) will be displayed. Updating License Code You can also receive updated licenses from the SmartBear server after your initial license set-up. You must have an external Internet connection to do so. Just click on the "Update from SmartBear" button near the bottom of the Configuration box: © 2003-2015 SmartBear Software 86 87 3.2.3 Collaborator Server Content Storage Most review data is stored in the database. The one exception to this is the contents of the files under review. These are stored in a directory described as the "content cache". The internal structure of the content cache is subject to change between versions of Collaborator, so we do not recommend altering the contents of the content cache directly without specific instructions from SmartBear technical support. Choosing a Location for the Content Cache The default location for the content cache is the collaborator-content-cache subdirectory of the install directory. In many environments, this may not be an acceptable location. Here are some things to consider when choosing a content cache location: · File permissions may not allow writing in the installation directory. · Maintenance of network storage may be easier if backups are already in place and disk usage is monitored automatically. · Network storage allows for warm standby Collaborator servers to be available in the event of failure of the primary server. Configuring the Location of the Content Cache If a determination is made that the default content cache location is unacceptable, the location can be changed in installation-directory/tomcat/conf/Catalina/localhost/ROOT. xml. Find the Parameter element with the name attribute "content-cache". The "value" attribute of this element should be the path to the content cache. Relative paths are interpreted relative to the installation directory. If the content cache location is changed on an active server, it must be restarted before the change will take effect. If the content cache is not also copied over to the new location, users will see a message that content is missing and was probably archived by the administrator. To prevent this, it is best to shut down the server, copy the content cache to the new location, and then restart the server. If you encounter this error message when trying to open a file in a review, "content is missing and was probably archived by the administrator". This can be caused by either of these conditions: 1) the admin has not moved the content cache to the new location, 2) the cache.properties needs to be set as follows: version=2 © 2003-2015 SmartBear Software Content Storage lazy-upgrade-from-version=1 Sharing the Content Cache Sharing the content cache between servers is not supported. The only environment where Collaborator servers should be configured to use the same content cache is if one is configured as a warm backup for the primary server. A warm backup is a system that configured, but not running. It can be started in the event of primary server failure to reduce down time. Upgrading Content Store Format There is a new file content store format that works better with many filesystems by having a deeper directory structure, reducing the number of files in each directory. The format of the cache is determined by the cache.properties file located at the root of the content-cache directory. By default this is installation-directory/tomcat/collaborator-content-cache. This file is a Java properties file (spec). There are two configuration keys, "version" and "lazy-upgrade-from-version". The "version" key determines whether to use the new format (2), or the old format (1) for storing new data. The "lazy-upgrade-from-version" key determines whether to search for and upgrade data stored in the old format (1), or not (blank). For example, here are the values you would use to store data in the new format and automatically upgrade data in the new format when requested: version=2 lazy-upgrade-from-version=1 To just use the new format version=2 lazy-upgrade-from-version= To just use the old format version=1 lazy-upgrade-from-version= 3.2.4 Backup / Migration Collaborator can be backed up while it is running. Also, there is a system for migrating data from one database to another. © 2003-2015 SmartBear Software 88 89 Collaborator Server Collaborator stores almost all data in the database initially set up for it. It also uses a local directory to store copies of uploaded files. These are the two systems that need to participate in the backup/restore process. Backing up the Database NOTE: Each license key is linked to the node ID, and it gets carried over during server migration. Therefore, a new license key is not needed when migrating the server. The mechanism for backing up the database depends on the database. See the documentation for your database for details. You can easily create a backup dump of your database into a zip file using the command line (and scripts): ccollab admin wget “/data/server?dump=1" > backup.zip The backup.zip file will be created within your home or user profile directory depending on your OS. You may specify the following parameters when creating a database dump: · &obfuscate - Specifies whether to copy the data as is (&obfuscate=0) (default), or to obfuscate all sensitive information, like file contents, user names and so on ( &obfuscate=1). · &withserverlogs - Specifies whether to include server logs (&withserverlogs=1) or not (&withserverlogs=0) (default). · &withfiles - Specifies whether to include content of all files (&withfiles=1) or not ( &withfiles=0) (default). · &configonly - Specifies wether to create a whole system dump (&configonly=0) (default) or to save the system settings (&configonly=1). A subset of the four parameters listed above can be appended to the "/data/server?dump=1" URL. For example, the command below will perform a complete backup of your entire environment, which will include both the server logs and content cache. ccollab admin wget "/data/server?dump=1&withserverlogs=1&withfiles=1" > backup.zip © 2003-2015 SmartBear Software Backup / Migration There is an alternate method for backing up the database which is to perform the first half of a database migration 91 and save the migration data file. Backing up the File Cache The local directory you need to back up is located here (by default -- it can be changed by the system administrator): installation-directory/tomcat/collaborator-content-cache Typically, a backup mechanism will either copy this directory elsewhere or will keep a zip or other compressed archive file updated with the contents. You can do this while Collaborator is running, although most backup mechanisms will run at off-peak hours. Files in this cache are stored in such a way that a file is written only once and thereafter is never changed. This means incremental backups of the directory are particularly easy -- only new files must be copied. Most file-copy utilities have a mode that means "only copy new files". Restoring a Collaborator Backup To restore a Collaborator installation, first restore the database as directed in your database documentation. Then, install the Collaborator server software. Finally, restore the contents of the collaborator-content-cache directory in the new installation directory. You can do this last step while Collaborator is running. If you have used the database migration technique to back up the database, refer to steps 3-11 of Restoring the Data Dump File 92 for instructions on migrating the database data. Migrating Data Between Databases Collaborator has a generic mechanism for migrating data between databases -- even if the databases are completely different types. Applications of this migration technique include: · migrating between the embedded database and one of the other databases when a trial moves to a production environment · backing up a database in a database-independent and easily-inspected manner · when we add support for a new database and you want to switch over to it · we need to debug your database and you need to send a "dump" of your data to SmartBear Technical Support 135 © 2003-2015 SmartBear Software 90 91 Collaborator Server There are two halves to the migration process: Creating the migration data dump file, and "restoring" the data dump file into a Collaborator installation. 1. Creating the Migration Dump File To create the migration data dump file, log into the Collaborator web server, and click the System link at the bottom of the screen: Near the top of the screen is a form and a button which will allow you to download a whole system dump: Making the appropriate selection: 1. Data Format: Normal - Selecting "Normal" will leave the data as is. Obfuscated - Selecting "Obfuscated" will change the data to conceal sensitive information. 2. Server Logs: Include server logs - Selecting this will include server logs in dump. Note: If you are creating a dump file to send to technical support, it is important to include the server logs. do not include server logs - Selecting this will not include server logs in the dump file. © 2003-2015 SmartBear Software Backup / Migration 3. File Contents: No file content - Selecting "No file content" will not include file content. Include all file content - Selecting this will include all file content, but this will also cause a longer download. 4. Which Data: Complete database dump - This must be selected for a whole system dump. System configuration only - no review data - Selecting this will only save the system settings. Once you have filled out the form, click the "Download Dump File" button to download the database dump file. This is a ZIP file containing all your database data in a platform- and database-independent XML format, plus additional files that describes your server environment. 2. Restoring the data dump file Loading this data into another Collaborator installation requires some effort. This process is intentionally complex to prevent accidental destruction of real data. Below are the steps to restoring a database migration data dump file: 1. Verify your Collaborator Server install. Make sure the Collaborator server version and build number are identical between the server that created the data dump file and the server that is loading it. If the versions do not match exactly, the restore might not succeed. SmartBear maintains installers for previous versions of the server if you need one. You can always upgrade to another version after the migration. Be sure when running the installer, you give the correct connection parameters to point the server to the database to which you plan to migrate. Note: Even if the Collaborator Server install location is not changing, you will still need to rerun the installer to point Collaborator to the correct database. Once the install is complete, a browser window should open. Do NOT initialize the database as prompted in the browser. 2. Move the dump file into a known location. In this example we will assume the location is: c:\temp\ccollab-dump.zip 3. Make sure the Collaborator server where you will load the dump is not running. This will not work on a running server. 4. Open the Tomcat session configuration file located here: installation-directory/tomcat/conf/Catalina/localhost/ROOT.xml 5. Find the parameter called database-migration-data-path, or create one if it does not already exist. It should look something like this: © 2003-2015 SmartBear Software 92 93 Collaborator Server <Parameter name="database-migration-data-path" value="c:\temp \ccollab-dump.zip" override="false" /> 6. Make sure the value string matches the location of the dump file, as in the example above. Use an absolute file path. 7. Save the configuration file. 8. Use a database administration tool to make sure the database configured for use with Collaborator has no tables in it. If there are any tables in the database the restore will not work. This prevents accidental restoring over an existing database. 9. Start the Collaborator server. 10. The server will automatically load the data from the database migration data dump file. If there were any problems with migration, you will see a helpful error message in the server log 139 . The server will also log progress reports as data is loaded up, so if you have a large database and you wish to monitor migration progress you can "tail" the log file to see what's happening. Loading migration data can take a long time, so be patient! 11. Upon starting after restoring a migrated database, email notifications will be disabled. This is to prevent users from receiving spurious duplicate email notifications when administrators restore into test configurations. You may re-enable email notifications from the email administration page 177 . 3.2.5 Security Considerations Collaborator administrators need to be aware of several security issues and options which affect the overall security of the system. This section covers those issues. · File System Security 94 · HTTP Transport Security · XMLRPC Security 94 94 · User Session Information Storage / Cookies · Obfuscating Database Passwords · Obfuscating LDAP Passwords 95 95 98 © 2003-2015 SmartBear Software Security Considerations File System Security Collaborator relies on the underlying operating system as a foundation for overall system security. Several potentially sensitive items are stored in the local filesystem, including database credentials, LDAP credentials (if used), and file contents. Care should be taken to maintain system security of the server's operating system, so this information is not compromised. SmartBear does not have any specific security expertise, so we recommend you follow the guidance of your operating system's vendor. HTTP Transport Security By default, the Collaborator server operates over regular HTTP. This means that all communications between clients and servers are unencrypted on the wire. Therefore, it is possible for someone with access to the network to use network sniffing tools to gather information from that traffic. Some things that are available over the wire are file contents, user conversations, and even authentication credentials (usernames and passwords). If wire-level security is a concern, administrators should configure the server to use secure http (HTTPS) 110 . XMLRPC Security Prior to version 5.0, Collaborator relied on trusted clients to participate in authentication of users. As of 5.0, the default install is to not trust the clients and instead force them to provide credentials with each XMLRPC request. While this is more secure, and is the recommended configuration, we recognize that this configuration breaks older clients. So, we have implemented the following compromise: 1. Client compatibility is controlled by an application parameter configured in the context configuration file (.../tomcat/conf/Catalina/localhost/ROOT.xml). The parameter name is "client-compatibility" and if the value is set to "true", older clients are allowed to connect to this server. 2. By default, upgrades from 4.0 will have client compatibility enabled -- that is, older clients will still be allowed to connect to the server. This is in recognition of the fact that server upgrades usually lead client upgrades by some period of time. We recommend that client compatibility be disabled as soon as clients can be upgraded. 3. By default, new installs will have client compatibility disabled. The assumption here is that new server installs will usually correspond to new client installs. Unless there are existing older clients (4.0 or earlier), it is not advisable to change this setting. Note: This setting is explicitly a stop-gap for backwards compatibility. In the future, we expect to break backwards compatibility with 4.0 clients and always require preemptive authentication. However, this setting is expected to remain in place for all 5.x builds. © 2003-2015 SmartBear Software 94 95 Collaborator Server User Session Information Storage / Cookies There are two cookies that store user login and session information (CodeCollaboratorLogin and CodeCollaboratorTicketId respectively). The expiration date of the session cookies is so far in the future that they will never expire, but there is a server setting that overrides that expiration date and controls the length of time that the session is valid. This setting is called " Login Ticket Time-To-Live 153 " and can be configured by the Collaborator admin. This setting is not an idle timeout; it is an absolute time the ticket will remain valid after it is created. The application server-managed session cookie, JSESSIONID, is only valid during the session and it is used to identify the session, but it does not contain any user information. We also store some WebUI preferences locally, but that data also does not contain any user information. Obfuscating Database Passwords Some environments dictate that sensitive passwords stored in configuration files be obfuscated. In the case of Collaborator, this most commonly occurs in conjunction with the database connection information stored in <server install path>/tomcat/conf/Catalina/ localhost/ROOT.xml. Starting in Collaborator 8.4.8403, obfuscating the database password has preliminary support as a post-install operation. Three forms of obfuscation are supported: base64 encoding, base64encoded AES 128 bit and base64-encoded AES 256 bit. AES obfuscation uses ECB mode with a fixed key and PKCS#5 padding. Of the three forms, base64-encoding is the recommended process, if sufficient, as it is simpler. Base64 obfuscation: 1. Stop your Collaborator server instance. See Platform-Specific Notes Windows, Linux, Solaris and BSD platforms. 79 for instructions for 2. Open the <server install path>/tomcat/conf/Catalina/localhost/ROOT.xml file in your chosen text editor. 3. Locate the <Resource ... /> XML tag. This tag declares the database configuration of your Collaborator server. 4. Append the "factory" attribute to the Resource tag: <Resource ... factory="com.smartbear.ccollab. CollaboratorBasicDataSourceFactory"/> 5. Using the tool of your choice, generate a base64-encoded version of your database password (as found in the "password" attribute of the Resource tag). Many base64-capable tools and online encoder/decoder interfaces exist, a web search for "base64 encode" should prove illuminative. © 2003-2015 SmartBear Software Security Considerations 6. Prepend the encoded string with "$1$". This indicates to Collaborator that plain base64 encoding is being used. For example, the existing password "testpass" would become "$1$dGVzdHBhc3M=". 7. Replace the value of the existing "password" attribute with the string composed in the prior step. The Resource tag will look similar to: <Resource ... password="$1$dGVzdHBhc3M=" factory="com.smartbear. ccollab.CollaboratorBasicDataSourceFactory"/> 8. Save the ROOT.xml file. 9. Restart your Collaborator server instance. The server should come up without issue with the obfuscated password. AES-128 obfuscation: Note: base64 is recommended due to simplicity unless your environment absolutely requires this level of obfuscation. 1. Stop your Collaborator server instance. See Platform-Specific Notes Windows, Linux, Solaris and BSD platforms. 79 for instructions for 2. Open the <server install path>/tomcat/conf/Catalina/localhost/ROOT.xml file in your chosen text editor. 3. Locate the <Resource ... /> XML tag. This tag declares the database configuration of your Collaborator server. 4. Append the "factory" attribute to the Resource tag: <Resource ... factory="com.smartbear.ccollab. CollaboratorBasicDataSourceFactory"/> 5. Using the command line interface, in the <server install path>/tomcat/ directory of your Collaborator instance, execute the following command line: java -cp webapps/ROOT/WEB-INF/lib/smartbear-ccollab-server.jar: webapps/ROOT/WEB-INF/lib/commons-codec-1.3.jar:lib/tomcat-dbcp.jar: lib/commons-logging-api.jar com.smartbear.ccollab. CollaboratorBasicDataSourceFactory (On windows platforms, replace ":" in the command above with ";".) 6. Enter your password when prompted and specify the encoding format as "aes128". The program will then output the encoded string, which has a prefix of "$2$" to indicate that AES128 obfuscation is being used. For example, the pre-obfuscation password "testpass" would become "$2$Nobujw9X9ZJsSOYapNZh+w==". © 2003-2015 SmartBear Software 96 97 Collaborator Server 7. Replace the value of the existing "password" attribute with the string composed in the prior step. The Resource tag will look similar to: <Resource ... password="$2$Nobujw9X9ZJsSOYapNZh+w==" factory="com. smartbear.ccollab.CollaboratorBasicDataSourceFactory"/> 8. Save the ROOT.xml file. 9. Restart your Collaborator server instance. The server should come up without issue with the obfuscated password. AES-256 obfuscation: Note: base64 is recommended due to simplicity unless your environment absolutely requires this level of obfuscation. 1. To enable AES-256 encryption you need to install Java Cryptography Extension (JCE) Unlimited Strength Jurisdiction Policy Files. They can be downloaded from the Oracle's website: Java Cryptography Extension for JRE 7 and Java Cryptography Extension For JRE 8. Download and install the JCE package as described in the README.TXT file shipped within the downloaded archive. 2. Stop your Collaborator server instance. See Platform-Specific Notes Windows, Linux, Solaris and BSD platforms. 79 for instructions for 3. Open the <server install path>/tomcat/conf/Catalina/localhost/ROOT.xml file in your chosen text editor. 4. Locate the <Resource ... /> XML tag. This tag declares the database configuration of your Collaborator server. 5. Append the "factory" attribute to the Resource tag: <Resource ... factory="com.smartbear.ccollab. CollaboratorBasicDataSourceFactory"/> 6. Using the command line interface, in the <server install path>/tomcat/ directory of your Collaborator instance, execute the following command line: java -cp webapps/ROOT/WEB-INF/lib/smartbear-ccollab-server.jar: webapps/ROOT/WEB-INF/lib/commons-codec-1.3.jar:lib/tomcat-dbcp.jar: lib/commons-logging-api.jar com.smartbear.ccollab. CollaboratorBasicDataSourceFactory (On windows platforms, replace ":" in the command above with ";".) © 2003-2015 SmartBear Software Security Considerations 7. Enter your password when prompted and specify the encoding format as "aes256". The program will then output the encoded string, which has a prefix of "$3$" to indicate that AES256 obfuscation is being used. For example, the pre-obfuscation password "testpass" would become "$3$w8MhPu6t7vobGeNvTx8RoA==". 8. Replace the value of the existing "password" attribute with the string composed in the prior step. The Resource tag will look similar to: <Resource ... password="$3$w8MhPu6t7vobGeNvTx8RoA==" factory="com. smartbear.ccollab.CollaboratorBasicDataSourceFactory"/> 9. Save the ROOT.xml file. 10.Restart your Collaborator server instance. The server should come up without issue with the obfuscated password. Obfuscating LDAP Passwords Starting in Collaborator 8.5.8501, LDAP passwords may be obfuscated in a similar fashion to the database password above. Three forms of obfuscation are supported: base64 encoding, base64-encoded AES 128 bit and base64-encoded AES 256 bit. AES obfuscation uses ECB mode with a fixed key and PKCS#5 padding. Of the three forms, base64-encoding is the recommended process, if sufficient, as it is simpler. Base64 obfuscation: 1. Stop your Collaborator server instance. See Platform-Specific Notes Windows, Linux, Solaris and BSD platforms. 79 for instructions for 2. Open the <server install path>/tomcat/conf/Catalina/localhost/ROOT.xml file in your chosen text editor. 3. Locate the <Realm ... /> XML tag. This tag declares the LDAP (JNDI) authentication resource that Collaborator uses. 4. Change the "className" attribute of the Realm tag to "com.smartbear.ccollab.auth. CollaboratorJNDIRealm": <Realm ... className="com.smartbear.ccollab.auth. CollaboratorJNDIRealm"/> 5. Using the tool of your choice, generate a base64-encoded version of your database password (as found in the "connectionPassword" attribute of the Realm tag). Many base64-capable tools and online encoder/decoder interfaces exist, a web search for "base64 encode" should prove illuminative. © 2003-2015 SmartBear Software 98 99 Collaborator Server 6. Prepend the encoded string with "$1$". This indicates to Collaborator that plain base64 encoding is being used. For example, the existing password "testpass" would become "$1$dGVzdHBhc3M=". 7. Replace the value of the existing "connectionPassword" attribute with the string composed in the prior step. The Realm tag will look similar to: <Realm ... className="com.smartbear.ccollab.auth. CollaboratorJNDIRealm" connectionPassword="$1$dGVzdHBhc3M="/> 8. Save the ROOT.xml file. 9. Restart your Collaborator server instance. The server should come up without issue with the obfuscated password. AES-128 obfuscation: Note: base64 is recommended due to simplicity unless your environment absolutely requires this level of obfuscation. 1. Stop your Collaborator server instance. See Platform-Specific Notes Windows, Linux, Solaris and BSD platforms. 79 for instructions for 2. Open the <server install path>/tomcat/conf/Catalina/localhost/ROOT.xml file in your chosen text editor. 3. Locate the <Realm ... /> XML tag. This tag declares the LDAP (JNDI) authentication resource that Collaborator uses. 4. Change the "className" attribute of the Realm tag to "com.smartbear.ccollab.auth. CollaboratorJNDIRealm": <Realm ... className="com.smartbear.ccollab.auth. CollaboratorJNDIRealm"/> 5. Using the command line interface, in the <server install path>/tomcat/ directory of your Collaborator instance, execute the following command line: java -cp webapps/ROOT/WEB-INF/lib/smartbear-ccollab-server.jar: webapps/ROOT/WEB-INF/lib/commons-codec-1.3.jar:lib/tomcat-dbcp.jar: lib/commons-logging-api.jar com.smartbear.ccollab. CollaboratorBasicDataSourceFactory (On Windows platforms, replace ":" in the command above with ";") © 2003-2015 SmartBear Software Security Considerations 6. Enter your password when prompted and specify the encoding format as "aes128". The program will then output the encoded string, which has a prefix of "$2$" to indicate that AES128 obfuscation is being used. For example, the pre-obfuscation password "testpass" would become "$2$Nobujw9X9ZJsSOYapNZh+w==". 7. Replace the value of the existing "connectionPassword" attribute with the string composed in the prior step. The Realm tag will look similar to: <Realm ... className="com.smartbear.ccollab.auth. CollaboratorJNDIRealm" connectionPassword="$2$Nobujw9X9ZJsSOYapNZh+w=="/> 8. Save the ROOT.xml file. 9. Restart your Collaborator server instance. The server should come up without issue with the obfuscated password. AES-256 obfuscation: Note: base64 is recommended due to simplicity unless your environment absolutely requires this level of obfuscation. 1. To enable AES-256 encryption you need to install Java Cryptography Extension (JCE) Unlimited Strength Jurisdiction Policy Files. They can be downloaded from the Oracle's website: Java Cryptography Extension for JRE 7 and Java Cryptography Extension For JRE 8. Download and install the JCE package as described in the README.TXT file shipped within the downloaded archive. 2. Stop your Collaborator server instance. See Platform-Specific Notes Windows, Linux, Solaris and BSD platforms. 79 for instructions for 3. Open the <server install path>/tomcat/conf/Catalina/localhost/ROOT.xml file in your chosen text editor. 4. Locate the <Realm ... /> XML tag. This tag declares the LDAP (JNDI) authentication resource that Collaborator uses. 5. Change the "className" attribute of the Realm tag to "com.smartbear.ccollab.auth. CollaboratorJNDIRealm": <Realm ... className="com.smartbear.ccollab.auth. CollaboratorJNDIRealm"/> 6. Using the command line interface, in the <server install path>/tomcat/ directory of your Collaborator instance, execute the following command line: © 2003-2015 SmartBear Software 100 101 Collaborator Server java -cp webapps/ROOT/WEB-INF/lib/smartbear-ccollab-server.jar: webapps/ROOT/WEB-INF/lib/commons-codec-1.3.jar:lib/tomcat-dbcp.jar: lib/commons-logging-api.jar com.smartbear.ccollab. CollaboratorBasicDataSourceFactory (On windows platforms, replace ":" in the command above with ";".) 7. Enter your password when prompted and specify the encoding format as "aes256". The program will then output the encoded string, which has a prefix of "$3$" to indicate that AES256 obfuscation is being used. For example, the pre-obfuscation password "testpass" would become "$3$w8MhPu6t7vobGeNvTx8RoA==". 8. Replace the value of the existing "connectionPassword" attribute with the string composed in the prior step. The Realm tag will look similar to: <Realm ... className="com.smartbear.ccollab.auth. CollaboratorJNDIRealm" connectionPassword="$3$w8MhPu6t7vobGeNvTx8RoA=="/> 9. Save the ROOT.xml file. 10.Restart your Collaborator server instance. The server should come up without issue with the obfuscated password. 3.2.6 LDAP Authentication By default the Collaborator server authenticates users against the users in its database. For large organizations with hundreds or thousands of users in multiple product groups, it is simply impractical to add each would-be Collaborator user to the database. For this reason, Collaborator can integrate with an existing LDAP directory (or ActiveDirectory) to perform user authentication. When LDAP authentication is configured, Collaborator authenticates users attempting to login against their entry in the directory. When a user logs in 223 for the first time, a user account is created for them automatically in Collaborator to store their user preferences. Users must be authenticated by logging into the Collaborator server through the web GUI before the client is able to recognize the user and can be configured. Warning: Only users with accounts can be assigned to roles within reviews, so it is not possible to add a user to a review who has not previously logged in to Collaborator. Internally, Collaborator uses the Tomcat Servlet Container's JNDI Realm for LDAP authentication. For a detailed description of how it works and for complete configuration information, consult the JNDI Realm Documentation. Note: LDAP Authentication is only supported in Collaborator and is not supported by CodeReviewer. For a complete list of differences between the two products, please see the comparison page. © 2003-2015 SmartBear Software LDAP Authentication Configuring Collaborator with LDAP The installation wizard 63 provides a screen to perform basic configuration of LDAP authentication. This wizard minimally configures Collaborator to use LDAP authentication. For advanced configuration, see Advanced Configuration 106 . When LDAP authentication is selected, you are prompted for the following items: · LDAP Connection URL - This is a URL where Collaborator can connect to the LDAP server. The format of the url is: ldap://servername:port The standard default port for LDAP is 389. · User Pattern - This string instructs Collaborator how to locate a user within LDAP. The format of the string is the same as the LDAP distinguished name of a user with the username replaced with the string {0}. · System Administrator - The username of the system administrator. The system administrator will always be able to log in and administer license codes and user accounts. This account takes the place of the admin account when using internal authentication. © 2003-2015 SmartBear Software 102 103 Collaborator Server Active Directory Microsoft Active Directory is an LDAP compliant directory and can be used to authenticate users to Collaborator. However, in typical Active Directory environments, more configuration is needed than can be provided by the installation wizard. Specifically, the username that users log in with typically corresponds to the sAMAccountName attribute of their record. Because this is not part of their LDAP distinguished name (DN), Collaborator cannot create a DN directly from the userentered username to bind to the directory. Instead, Collaborator must query the directory to get the user's distinguished name and then attempt the bind. To configure this, you will need to first install Collaborator, specifying LDAP authentication and then manually edit the configuration file. The configuration file in question is installation-directory/tomcat/conf/Catalina/ localhost/ROOT.xml. Locate the Realm element in the context file and replace it with the following: <Realm className="org.apache.catalina.realm.JNDIRealm" connectionName="[email protected]" connectionPassword="xxxx" connectionURL="ldap://xxxx.com:389" referrals="follow" userBase="CN=Users,DC=xxxx,DC=xxxx,DC=com" userSearch="(sAMAccountName={0})" userSubtree="true" allRolesMode="strictAuthOnly" /> You will need to update the attributes which have xxxx'ed out fields. The fields connectionName and connectionPassword define a user account the Collaborator will use to connect to Active Directory to find the user records. If anonymous connections are allowed to your directory (not typical), then these attributes are not required. When using LDAP, you will also want to set the "collaborator-authentication" value="true" to value="false", as follows: <Parameter description="Is the Code Collaborator database used for authentication?" name="collaborator-authentication" override="false" value="false"/> © 2003-2015 SmartBear Software LDAP Authentication Warning: Modifying the ROOT.xml file will cause Tomcat to dynamically reload the Collaborator application, terminating any active sessions. Changes to ROOT. xml should be done in the context of stopping and restarting the Collaborator service (that is, in a production environment coordinating the restart with user activity), regardless of whether the service itself is actually stopped and restarted, or just reloaded by Tomcat. To use security groups or other user attributes to restrict access to Collaborator, you can refine the userSearch query to return only users that meet your requirements. The configuration examples above are a starting place for configuring Active Directory authentication. Additional configuration may be required because of specific configuration details of the directory. The JNDI Realm Documentation describes the different operational modes and explains each of the configuration attributes, and may be helpful in debugging the issue. The directory administrator that manages the directory will be a valuable resource in resolving the issue, either directly, or in conjunction with SmartBear's Customer Support team. If the directory administrator is unavailable, SmartBear's Customer Support team can help you resolve configuration issues, but often do not have enough information about the directory schema, permissions, and so on, to efficiently resolve issues. We will walk you through several basic configurations that we have seen work with other directories. Having an LDAP browser tool available (there are many good free and commercial browsers available) when you call will help answer some of the questions required to properly configure your server. In some cases, we will still need to discuss details with your directory administrator. Secure LDAP (LDAPS) Configuring Collaborator to communicate securely with an LDAP server using LDAPS (LDAP over SSL) can be done, but requires manual configuration outside of the installer wizard. To configure LDAPS, first install Collaborator configured for normal LDAP access. The service will start automatically upon completion of the install, so you will need to shut it down to continue configuration. Open the context configuration file (installation-directory/tomcat/ conf/Catalina/localhost/ROOT.xml) in a text editor and find the Realm configuration element. It will look something like the following: <Realm className="org.apache.catalina.realm.JNDIRealm" connectionURL="ldap://localhost:389" userPattern="uid={0},ou=people,dc=mycompany,dc=com" allRolesMode="strictAuthOnly" /> © 2003-2015 SmartBear Software 104 105 Collaborator Server If you are configuring Collaborator for use with Microsoft Active Directory using LDAPS, follow the Active Directory instructions 103 to make a best effort to configure the realm for your Active Directory server. Do not worry if you do not get it exactly right or cannot test the connection because the server refuses insecure connections. That issue can be resolved once connectivity is established. To the realm configuration above (or your Active Directory realm configuration), you will need to add an attribute 'protocol' with the value 'ssl' and you will probably need to change the 'connectionURL' attribute to an LDAPS url. The updated configuration below highlights the changes: <Realm className="org.apache.catalina.realm.JNDIRealm" connectionURL="ldaps://localhost:636" userPattern="uid={0},ou=people,dc=mycompany,dc=com" allRolesMode="strictAuthOnly" protocol="ssl" /> Depending on the LDAP server's SSL certificates, this configuration may be enough to establish the connection. However, often companies generate their own SSL certificates signed by their own Certificate Authority (CA) certificate. Unless additional measures are taken, these certificates may not be trusted so Collaborator will still not connect to the LDAP server. To establish trust, you will need to create a "key store" and import the public key of either the Certificate Authority or the public key of the LDAP server as a trusted certificate. Obtain from your LDAP or network administrator the appropriate certificate file. Then using Java's keytool (located in $JAVA_HOME/ bin), import the certificate into a key store for Collaborator using the following command: keytool -import -alias ldapserver -keystore <collab install dir>/ tomcat/conf/collab.ks -trustcacerts -file <path to chain certificate file> Important: You will likely be prompted to confirm the validity of the certificate. It is imperative for the security of the overall system that you verify the key matches the trusted material. Before accepting the certificate, you should contact the administrator that sent you the certificates and verify that the certificate fingerprints that you see match the certificate fingerprints that they intended to send you. For more information on why this step is important, see the note in the keytool documentation. © 2003-2015 SmartBear Software LDAP Authentication The final step is to configure Collaborator to use the newly created keystore. Open installation-directory/ccollab-server.vmoptions in a text editor and add the following lines: -Djavax.net.ssl.trustStore=<installation-directory>/tomcat/conf/ collab.ks -Djavax.net.ssl.trustStorePassword=<the password> Upon restart, the Collaborator service should be connecting to the LDAP server via SSL. If you are still getting errors, check that the other LDAP configuration options have been configured correctly. If you are using Active Directory, it is now worth revisiting the Active Directory configuration above. Finally, a note on troubleshooting SSL connections: adding the following line to the ccollabserver.vmoptions file will enable Java's network debug logging. -Djavax.net.debug=all Upon restarting Collaborator, this information will be written to <installation-directory>/output. log. If you need assistance interpreting this log, contact SmartBear Customer Support. Note: Do not run in a production environment with network debug logging enabled. This will severely impact the performance of the system and will also consume vast quantities of disk space. Advanced Configuration The basic configuration provided by the installer sets up the simplest possible LDAP configuration. Many more sophisticated configurations are possible, but require manually editing the context configuration file (installation-directory/tomcat/conf/Catalina/localhost/ ROOT.xml). Users From Different Organizational Units Sometimes it is necessary for users from different organizational units to have access to Collaborator. If you are using direct-bind configuration using the userPattern attribute, you can change the configuration to use userPatternArray instead where the value is a colonseparated list of user patterns. For example, if there are users in ou=foo,dc=mycompany, dc=com and ou=bar,dc=mycompany,dc=com identified by their uid attribute, you can set the userPatternArray attribute as follows: © 2003-2015 SmartBear Software 106 107 Collaborator Server userPatternArray="(uid={0},ou=foo,dc=mycompany,dc=com):(uid={0}, ou=bar,dc=mycompany,dc=com)" Restricting Access If you need to restrict access to Collaborator, we recommend that you configure your Realm definition to use userSearch for searching for user accounts rather than userPattern for direct bind (see Active Directory Configuration 103 for examples). With userSearch, you can expand your search criteria to include only members of the specified group or groups. For example, the following userSearch would restrict access to only members of the ccusers security group: userSearch="(&(sAMAccountName={0})(memberOf=CN=ccusers, OU=Security Groups,OU=Accounts and Groups,DC=xxxx,DC=xxxx,DC=com))" Please note that the ampersand (&), needs to be SGML encoded to "&" because the configuration file is an XML document. If you need to broaden the search criteria, you can use the OR operator, "|". For example, to allow users who are in group "foo" or group "bar" (or both), you might use: userSearch="(&(sAMAccountName={0})(|(memberOf=CN=foo,OU=groups, DC=xxxx,DC=com)(memberOf=CN=bar,OU=groups,DC=xxxx,DC=com)))" Above, the inner OR requires that the user be a member of group "foo" or group "bar". The outer AND ensures that that user's login also matches the one provided to the Collaborator login form. Administrator Rights When users first log in to Collaborator, their user account is created automatically, as a standard user account. It is possible to have users in certain roles (see Restricting Access above) to automatically receive administrator privileges. This configuration is done in the installationdirectory/tomcat/conf/Catalina/localhost/ROOT.xml file. Near the bottom of the ROOT.xml file, there is a section of server parameters (Parameter XML elements). These are name-value pairs of configuration options. To configure certain LDAP groups to be assigned administrator rights, create an admin-roles parameter and for its value specify a pipe-separated ("|") list of LDAP group names. You must also add 'userRoleName="memberOf"' to the Realm configuration. The admin-roles parameter requires an exact match, including case. New users that are members of the specified LDAP groups will be given administrator privileges when their accounts are created. Users that already have accounts in Collaborator will not automatically be promoted to administrator. Those privileges will need to be assigned manually from the Admin screen. © 2003-2015 SmartBear Software LDAP Authentication Obfuscating LDAP Passwords Starting in Collaborator 8.5.8501, LDAP passwords can be obfuscated. Two forms of obfuscation are supported: base64 encoding, and base64-encoded AES (128 bit or 256 bit, ECB mode, using a fixed key and PKCS#5 padding). For instructions on enabling LDAP passwords obfuscation, see Security Considerations 98 . Warning: After making changes to the ROOT.xml file, you will need to restart the Collaborator service for the changes to take effect. Troubleshooting LDAP: There is a process that we go through to help people debug their LDAP issues. You can do it on your own (of course, if you get stuck you can always contact technical support). We recommend using the JXplorer LDAP browser for this task because it is a Java tool and as such it uses the same underlying LDAP library that Collaborator will use. Here is the process: Download and install JXplorer, following the recommended installation guidelines. Start up JXplorer. From the File menu, choose Connect. In the connect dialog ("Open LDAP/DSML Connection"), specify the following: Host: the hostname portion of the connectionURL attribute from the Realm declaration in ROOT.xml. Port: the port portion of the connectionURL attribute from the Realm declaration in ROOT. xml. Usually this is 389, which is the default if unspecified. Some Active Directory configurations require connecting to the "Global Catalog" which is port 3268 (you may see errors that say "DomainDnsZones.foo.bar.com" which means you need to use this port). Base DN: The value of the userBase attribute from from the Realm declaration in ROOT.xml. Security Level: User + Password Security User: The value of the connectionName attribute from the Realm declaration in ROOT.xml. This should be a name that looks like an email address (jason@…) or something that looks like an LDAP distinguished name (uid=jason,ou=people,dc=mycompany,dc=com) Security Password: The value of the connectionPassword attribute from the Realm declaration in ROOT.xml. Click Ok to connect to establish the connection. © 2003-2015 SmartBear Software 108 109 Collaborator Server If the connection establishes normally, you should see the Explore tree populate with some nodes that represent entities in your directory. Note: You may see a Error that "Search partially failed!" This seems to be normal and is a consequence of the way Active Directory does its searching. If the connection fails to establish normally, check the error message that explains the failure. Is it a network issue? This could mean that the hostname or port number is wrong or that a firewall (local or on the network somewhere) is preventing the connection to the LDAP server. It could also mean that the LDAP server is simply offline. Double check your connection information and firewalls and if you still cannot connect, contact your LDAP administrator. (This error looks like: "Error opening connection: 192.168.10.441:389") Is it a login issue? The specific error messages that come back will depend on the LDAP server in question, but if it is a "security" related message it probably means the user DN or password is wrong. Double check those and try to reestablish the connection. If that fails, perhaps the LDAP account does not exist or does not have query permissions on the directory. Consult your LDAP administrator for help getting the appropriate access. An example of an error message from an Active Directory server is as follows: Error opening connection: [LDAP: error code 49 - 80090308: LdapErr: DSID-0C090334, comment: AcceptSecurityContext error, data 52e, vece If it is neither of those issues, send the error message verbatim to SmartBear technical support (the JXplorer error dialog accepts Ctrl-C to copy the message to the clipboard), or consult Google or your LDAP administrator. Once the connection is established, it is time to verify the search parameters. From the Search menu, select "Search Dialog". In the Search dialog, confirm that the "Start Searching From" is set to the value of the userBase attribute from the Realm declaration in ROOT.xml. Search Level should be set to "Search Full Subtree". Select the "Text Filter" tab at the bottom of the search dialog. Copy and paste the userSearch attribute from the Realm declaration in ROOT.xml into the text filter box (for example, (sAMAccountName={0})). Replace the {0} with the value of a user that you expect to be able to login. For example, if the user would use the login jason and the filter is (sAMAccountName={0}), change this value to (sAMAccountName=jason). Press the Search button. Exactly one result should be returned. If zero results are returned, then the query is at fault. Some possible causes: The user name as substituted into the filter is incorrect. © 2003-2015 SmartBear Software LDAP Authentication The user does not exist or does not exist within the subtree rooted at userBase. The filter itself is too restrictive. Filters can be arbitrarily complex with AND and OR clauses. If the filter is complex, we recommend simplifying the query down to only the username portion (the place where the {0} occurs) and verifying that portion and then building up the query to the ultimate query, verifying that at each step the user account is still findable. If the user is returned and you know that user's password (for example, if it is the Code Collaborator administrator account), verify that the account can login using JXplorer. Select the user from the results tree. Select the Table Editor tab. Copy the distinguishedName attribute to the clipboard. From the File menu, select Connect. Follow the login procedure as above, substituting the user's distinguished name (on the clipboard) for User DN and that user's password for Password. If that login fails, it is possible that the password is incorrect or has been changed or that the account has been disabled or locked. Consult with your LDAP administrator to confirm that the account has "bind access" as necessary. 3.2.7 Configuring HTTPS The basic Collaborator installation configures the server to handle requests over standard HTTP. In many environments this is sufficient as the network is trusted. However some organizations require that all network applications are secured with Transport Layer Security (TLS) or Secure Sockets Layer (SSL). Collaborator supports HTTP over TLS (or HTTPS), but this requires additional manual server configuration: What you need Certificates In order to authenticate to clients, the Collaborator server must have a "Certificate" that serves as proof of identity. Certificates come in two forms: Certificate Authority (CA) signed certificates and "self-signed" certificates. CA signed certificates provide an additional level of security because they can be automatically verified and do not rely on human verification. By providing you a certificate, the Certificate Authority is vouching for your identity. Software systems such as web browsers and the Java Runtime Environment (JRE) include the public keys of the trusted Certificate Authorities that are used to verify server certificates were vouched for by a trusted CA. To acquire a CA signed certificate, contact the appropriate person in your IT department. Self-signed certificates have the advantages of being free and easy to generate. The disadvantage of self-signed certificates is that they cannot be automatically verified. Instead, their security relies on users verifying the certificate signature against a signature obtained through another, ideally secure, channel. © 2003-2015 SmartBear Software 110 111 Collaborator Server Keystores A keystore is Java's mechanism for storing cryptographic keys and certificates. The persistent form of a keystore is a password protected file on disk. A keystore may contain "key entries" that allow applications with access to the keystore to authenticate themselves to users or other services. A keystore is also used to store "trusted certificate entries" that contain the public keys of services that are trusted and certificate authorities that are trusted to vouch for services. To enable HTTPS in Collaborator, you will need to create a keystore with the server's certificate (either CA- or self-signed) and if CA-signed, the certificate authority's "chain certificate". Follow the instructions below to create a keystore with the type of certificate you will be using to secure Collaborator. Note: In order to use SSL with Collaborator, you must use one of the methods outlined below. Collaborator will no longer support using existing certificates or keys, or keystores in nonstandard locations. Creating a keystore for Collaborator Creating a private key and certificate in your keystore To get started, you must use Java's keytool command (located in $JAVA_HOME/bin). Running keytool as follows will create a new private key and install a self-signed certificate: keytool -genkey -alias tomcat -keyalg RSA -validity 360 -keysize 2048 -keystore <collab install dir>/tomcat/conf/collab.ks You will be prompted to answer a series of questions. When you are prompted to enter your first and last name, enter the host and domain name you intend to use to address the Collaborator server instead. For example: What is your first and last name? [Unknown]: collab.aus.smartbear.com Once you complete the rest of the prompts and assigned a password to the keystore, you have created a private key and a self-signed certificate. Be sure to remember the password you set, as you must include it in your server configuration. © 2003-2015 SmartBear Software Configuring HTTPS For many organizations, this is sufficient to guarantee security. However, web browsers and the Collaborator client will request confirmation from end users, unless the certificate is not signed by an existing certificate authority. You can read more about this process in the "Accepting SelfSigned Certificates" section at the bottom of this page. If you wish to have a certificate authority sign your server certificate, please follow the steps outlined in "Creating a CSR" below. Creating a CSR (Certificate Signing Request) Once the steps above have been followed, you can create a certificate signing request with the following command: keytool -certreq -alias tomcat -keystore <collab install dir>/tomcat/ conf/collab.ks -file tomcat.csr You will be prompted to enter the keystore password. This should create a file named "tomcat. csr" which you will need to provide to your signing authority. This may be Verisign, Thawte, another certificate vendor, or a group internal to your organization. Once they have verified the information provided, the signing authority will send you a certificate file. Importing CA-signed Certificates If you are using a CA-signed certificate, you will need the server certificate and the CA's chain certificate (or root certificate). The CA chain certificates are publicly available, but the instructions for acquiring them vary by certificate authority. To get the CA chain certificate, inquire of the IT person in your organization responsible for procuring SSL certificates for services. Once you have the certificates, import them into a new keystore using the Java "keytool" program (located in $JAVA_HOME/bin). To import the CA chain certificate: keytool -import -alias root -keystore <collab install dir>/tomcat/ conf/collab.ks -trustcacerts -file <path to chain certificate file> To import the server certificate: keytool -import -alias tomcat -keystore <collab install dir>/tomcat/ conf/collab.ks -trustcacerts -file <path to server certificate file> © 2003-2015 SmartBear Software 112 113 Collaborator Server Remember the keystore password you select, as you will need this when configuring the Collaborator server. Alternate method to import server and chain certificate simultaneously Some popular signature authorities now provide both a primary and intermediate certificate. The steps below may work more effectively in those cases than the steps above. First, assemble a single file containing all of the certificates (primary, intermediate, and server) provided to you by your signature authority. On UNIX systems: cat primary.cert intermediate.cert tomcat.cert > combined.txt On Windows, you will likely want to use notepad and simply copy and paste all of the provided certificates into a single file. Save that file as combined.txt. Once you have that, run the following command: keytool -import -alias tomcat -trustcacerts -file combined.txt This will import all three (or more) certificates at the same time, establishing the correct chain of trust. Configuring the Collaborator Server The final step in configuring the Collaborator server is to instruct the server to use SSL and tell it what certificates to use. This is done by editing the server.xml file located in <install directory>/tomcat/conf. In server.xml, locate the "Connector" element and replace it with the following: <Connector protocol="org.apache.coyote.http11.Http11Protocol" port="8443" minSpareThreads="5" maxSpareThreads="75" enableLookups="true" disableUploadTimeout="true" acceptCount="100" maxThreads="100" scheme="https" secure="true" SSLEnabled="true" protocols="TLSv1.2,TLSv1.1,TLSv1" keystoreFile="conf/collab.ks" keystorePass="<the keystore password>" clientAuth="false" sslProtocol="TLS"/> Note, you will need to replace the keystore password in the above XML snippet. © 2003-2015 SmartBear Software Configuring HTTPS That is all the required configuration. Restart the server and it will be operating over SSL on port 8443. Be sure to update the External URL 141 in the server settings to reflect the correct https URL. Impact on Clients After you have generated the keys for the server, you may wish to distribute its signature to users so they can validate the certificate when asked. To do this, first export the certificate to a file: keytool -export -keystore <collab install dir>/tomcat/conf/collab.ks -alias tomcat > collab.cert Then print the certificate information that you will need to distribute. Of particular interest are the fingerprints. To do this, run keytool as below: keytool -printcert -file collab.cert This will print something like the following: Owner: CN=collab.aus.smartbear.com, OU=SmartBear, O=SmartBear, L=Austin, ST=TX, C=US Issuer: CN=collab.aus.smartbear.com, OU=SmartBear, O=SmartBear, L=Austin, ST=TX, C=US Serial number: 463251eb Valid from: Fri Apr 27 14:41:31 CDT 2007 until: Thu Jul 26 14:41:31 CDT 2007 Certificate fingerprints: MD5: 67:D7:74:5E:72:9D:B2:82:88:3F:33:AA:A0:41:01:F0 SHA1: E2:4A:1F:9B:9A:38:0F:6B:7B:33:12:73:1B:50:76:30:AC:A6:B2:EA If the certificate used to secure Collaborator is a CA signed certificate from a trusted CA, there will be very little impact on users. The only thing that they must do is configure their clients 329 with the correct HTTPS url. © 2003-2015 SmartBear Software 114 115 Collaborator Server If you are using a self-signed certificate or the certificate cannot be automatically verified, users will be asked to verify the certificate by comparing its signature to the published signatures for the service. The exact nature of this confirmation varies by client, but the process is the same: look at the certificate the server presents and confirm that its signature matches the published signature. In the web browser, the certificate confirmation dialog looks something like this: The above screenshot is from Firefox, but other browser users will see a similar dialog. The users will need verify that the fingerprint (or signature) of the certificate by comparing it to the signature of that you distributed for the server. © 2003-2015 SmartBear Software Configuring HTTPS When the command line client fails to validate the server's certificate, it also offers the user a chance to manually validate the certificate. This conversation looks like the following: ~bdurette/work> ccollab login http://myserver.com bdurette password The SSL certificates sent by the server could not be validated: No trusted certificate found It is possible, though unlikely, that someone may be trying to intercept your communication with this service. If you have questions about the validity of the certificate, please check with your administrator. What would you like to do? P: Print the certificate chain. A: Accept the certificate permanently (automatically accept this certificate in the future). T: Temporarily accept this certificate (confirm again upon next connection). R: Reject the certificate. P Subject: CN=Collaborator, OU=SmartBear, O=SmartBear, L=Austin, ST=TX, C=US Issuer: CN=Collaborator, OU=SmartBear, O=SmartBear, L=Austin, ST=TX, C=US Serial Number: 463251eb SHA1 Fingerprint: e2:4a:1f:9b:9a:38:0f:6b:7b:33:12:73:1b:50:76:30:ac: a6:b2:ea MD5 Fingerprint: 67:d7:74:5e:72:9d:b2:82:88:3f:33:aa:a0:41:01:f0 What would you like to do? P: Print the certificate chain. © 2003-2015 SmartBear Software 116 117 Collaborator Server A: Accept the certificate permanently (automatically accept this certificate in the future). T: Temporarily accept this certificate (confirm again upon next connection). R: Reject the certificate. A Collaborator connection information set. Connection is good. Certificates that are accepted permanently are stored in a local keystore in $HOME/.smartbear/ trustedcertificates. This file can safely be deleted to remove all trusted certificates. If this is done, the user will have to reauthorize any certificates that are self-signed (or signed by a CA that is not in the Java trusted keystore). If you want each client to automatically recognize and authorize your internal CA without being prompted to do so, one solution is to accept the key with one client, and then distribute the trustedcertificates file that is generated. To reiterate, the default location for Unix clients is: ~/.smartbear/trustedcertificates and Windows clients: %USERPROFILE%\.smartbear\trustedcertificates If you are capable of distributing files to all user's machines, distributing that file to those locations will prevent remaining users from seeing the prompt. Additional Resources · Tomcat SSL Configuration HOW-TO · Tomcat HTTP Connector Configuration · keytool - Java Key and Certificate Management Tool 3.2.8 JMX Monitoring You can monitor many aspects of the Collaborator server via JMX, Java's standard, built-in network monitoring system. © 2003-2015 SmartBear Software JMX Monitoring Setting up a basic JMX system To enable JMX you must add Java properties to the server startup script. To do that, edit the file ccollab-server.vmoptions which is found inside the server installation directory. Inside this file, add the following lines: -Dcom.sun.management.jmxremote=true -Dcom.sun.management.jmxremote.port=54321 -Dcom.sun.management.jmxremote.authenticate=false -Dcom.sun.management.jmxremote.ssl=false The first line enables JMX. The second line sets the TCP/IP port number for the JMX protocol, and of course you can use a value other than the example 54321. The last two lines disable JMX authentication and security. Note: You must restart the Collaborator server before these settings take effect. You can now use any JMX console software to access the Collaborator JMX variables. Sun's Java installation ships with a simple JMX console which can be found in [Java-Install-Dir]/bin/ jconsole.exe. If you use Sun's console, select the "Remote" tab in the connection dialog and specify the host name, the port given in the configuration above. Leave "User Name" and "Password" blank. Supported JMX data There are various things you can monitor with JMX, and this manual cannot cover them all. The data specific to Collaborator can be found under "MBeans," then under the root tree node " com.smartbear.ccollab". Under there you will find one child tree node for each installation of Collaborator, named by the web page it is installed under. The default is just a simple forward slash. Under that node is various data. Of particular note is "ApplicationStateCache" and "ServletState". This contains basic information about logins, licensing, versioning, and product usage. More complex JMX server configurations A full description of how to configure JMX is outside the scope of this manual. It is completely standardized and documented on Sun's web site. A good resource to get you started is this: © 2003-2015 SmartBear Software 118 119 Collaborator Server http://java.sun.com/j2se/1.5.0/docs/guide/management/agent.html 3.2.9 Technical Specifications This section describes the technical aspects of the Collaborator server. This information is not generally needed for server administration. Server Technology The web server is Apache Tomcat v6.0.29. Collaborator itself is a collection of standard J2EE servlets, packaged in the standard WAR format that can be used inside any J2EE servlet container. Tomcat is the only servlet container specifically supported by SmartBear. Tomcat is a sophisticated, scalable stand-alone web server with support for HTTPS 110 , LDAP authentication 101 , advanced HTTP protocol options, database pools, load-balancing, and more. For more information about how Collaborator is configured under Tomcat, see the Tomcat Configuration Reference. Starting and Stopping the Server Windows The server is a Windows Service. This means you can start, stop and restart the server just like any other service. The typical way is through the "Services" Control Panel. You can also use "net start ccollab-server" and "net stop ccollab-server" from the command-line. Unix The server is a shell script in the installation directory called ccollab-server. You can use the usual "start" and "stop" directives, which also means the script can be used directly in an init.d system. If you encounter the error "Error 1: Incorrect function" when starting the server as a service on Windows, or the server fails to start with no error, possible remedies are: - free up memory for the service by removing -Xmx or -Xms in the ccollab-server. vmoptions file. - confirm a valid Java version/environment by running 'java -version' in you Java bin directory. © 2003-2015 SmartBear Software Technical Specifications Recommended Hardware For trials, you can use any hardware available. We have lots of customers who have done pilots on "servers" such as laptops and regular workstations. For small groups (30 users or less) doing small reviews, the server is not demanding on CPU, memory, disk access, or database access; if you run the server on a workstation, you will never know it is there. For permanent installations, and to support hundreds or thousands of users, please review our hardware recommendations in the System Requirements 52 section. We run our own scalability tests using similar hardware. Our standard "smoke test" is 500 caffeinated users, most hitting Review Summary 243 and Side-by-Side 264 pages, a few in administrative 141 and reporting 310 pages. This represents far more activity than 500 real users. Performance Tuning General tips for making the server run as fast as possible: · Use the latest version of the server and client. We are constantly improving speed bottlenecks as they are reported. Upgrade to the latest version, or scan the version history 688 to see if any speed improvements were made. · Increase the "chat refresh interval 143 " setting. This will make the chat pane update more slowly but can reduce stress on the server by many times. The default value is 5 seconds, but 15, 30, or even 60 seconds can work and reduce server load. · Make sure nothing else is running on the Collaborator Server. Often another server or process running on the same machine as our server will take up CPU cycles or slam the hard drive. For small installations it is quite common (and appropriate) for Collaborator to share a server, but for larger installations or when you are trying to squeeze out more performance you should dedicate a server. · Increase the number of allowed database connections (instructions here 137 ). Even if you are not getting errors on the web page about running out of connections, the web server threads might still be waiting for database connections to become available. (Error messages do not appear until those waits start timing out.) · Increase the speed of the connection between the database server and the Collaborator Server. Collaborator makes many small database queries, so decreasing network latency should improve performance. We recommend that Collaborator and the database server be connected via gigabit ethernet. · Increase the number of server threads (instructions here 137 ). Just as with database connections, more server threads means less waiting for browser connections on a busy server. © 2003-2015 SmartBear Software 120 121 Collaborator Server · Increase the max number of simultaneous connections in your browser. Both Internet Explorer and Firefox default to just two simultaneous connections to a server. You can increase this to 4 or more. This will not help if you have a very slow connection (for example, a modem), because slow connections are probably already maxed out. · Make sure caching is enabled in your browser. Sometimes a browser's static cache is disabled; make sure it is enabled (at least for connections to our server). We have lots of styles, Javascript, and images that normally are cached. · Tune the memory settings for Collaborator Server (instructions here 865 ). More memory will often improve performance, but large documents in particular require a great deal of it, and often also require to change your Garbage Collector settings. If your users perform document reviews frequently, visit this section. Monitoring You can monitor our application like any other. Like many enterprise-ready Java applications, you can monitor using JMX 117 . 3.2.10 High Availability Best Practices The Collaborator server is generally very stable and resilient. In most environments it is appropriate to simply try configuration changes or upgrades in-place (backup 88 first, of course). However if the server is in constant use by a large number of users, or if Collaborator is vital for your business processes, it may be a good idea to be more cautious. To ensure that a change will not cause a problem on your production Collaborator server, it is best to try it first on a test server. Creating a Test Server A test server should mirror your production server as closely as possible so that the results of the change are reproducible. Follow these steps to create a test server: 1) Provision a machine - this should be physically different hardware than the machine that is running your production Collaborator server, and ideally it should have the same specifications. It does not have to be a perfect match, but the closer you get it to the production server the more confident you will be when testing the change. a) Hardware - this is not that important to get exactly identical unless you are concerned about performance issues. b) Operating System - this is important. Make sure you install the same operating system version, especially if you are using Windows. © 2003-2015 SmartBear Software High Availability Best Practices c) Java Virtual Machine - this is vitally important. Make sure that you install exactly the same version of Java. d) Network Configuration - this is usually not that important unless your change involves communicating with an external system like LDAP 101 , a database service running on a different machine, or configuring https 110 . e) Database - this is very important, especially when testing upgrades to new versions of Collaborator. Warning: The test server must have its own database. Do not run the test server with your production database! 2) Install the Collaborator server a) Download the installer for exactly the same version as your production server. b) Run the installer. You can click "next" through all the screens and accept the default settings, because those will be overwritten anyway in step 4 122 . c) When you click "Finish" in the installer it will open a browser to a page that says "Initialize database". DO NOT press the button, instead close the browser. d) Shut down the Collaborator server. 3) Copy your content-cache - this directory stores the content of the files being reviewed and can become very large. The directory is configured in the installation-directory/tomcat/ conf/Catalina/localhost/ROOT.xml file and defaults to installation-directory/ tomcat/collaborator-content-cache. Copy the entire directory to the test server in the same location. a) You can skip this step and your content-cache will simply be empty. Everything will work except when you look at the content of files in old reviews you will see a message "This content has been archived by the Administrator". b) Another option is to use a network share to your production server's content-cache, mounted to the test server's file system. While not ideal this is fairly safe because Collaborator only ever writes to the content-cache, never deletes. 4) Copy your configuration a) Copy the following files from your production server to your test server: installation-directory/ccollab-server.vmoptions installation-directory/tomcat/conf/collab.ks (may not exist) installation-directory/tomcat/conf/Catalina/localhost/ROOT.xml © 2003-2015 SmartBear Software 122 123 Collaborator Server b) Edit the " installation-directory/tomcat/conf/Catalina/localhost/ROOT. xml" file using a text editor and change the database information (url, username, password) to point to the test database. 5) Copy your database data - migrate a copy of the data from your production database to your test database as described in Backup/Migration 88 . 6) Start up Collaborator. a) Immediately disable email notifications 177 so that your users do not get double notifications from your production server and your test server. b) Click around and make sure everything works. Note that licensing is not an issue - since you have migrated your database your license will work on the test server. Testing a Change Once you have set up your test server you can use it to test any change you are considering to Collaborator, especially upgrades to new versions or global configuration changes. One good way to test the server is the built-in diagnostic tool. Run the diagnostics after executing the change and look for any difference in the results. 130 before and 3.2.11 Variable Substitution In a few areas of server configuration (Notification templates 202 , Collaborator triggers 201 , Perforce triggers 552 ) you are allowed to use variable substitution to insert useful live data into a text-based template. This section details those variables and how they work. Syntax Variable substitution is indicated with a dollar sign followed by curly braces surrounding the variable name. For example, to access the review.creator.name variable you would use this: ${review.creator.name} When embedding in other text, variables are inserted into the text wherever they should be replaced. An example that is commonly used in the changelist-update Perforce trigger 552 is: ID ${review.id}: "${review.title}" by ${review.participants.rolename} Context © 2003-2015 SmartBear Software Variable Substitution Not all of the substitution variables are applicable in all contexts. In general, notification templates 202 use ${review.*}, ${role.*}, ${actor.*} for the sender and ${user.*} for the recipient. The Review Created trigger 201 uses ${review.*} and ${user.*} is the review creator. The Review Phase Changed trigger 201 uses ${review.*} and ${user.*} (not ${actor.*}). The Added File trigger 201 uses ${review.*}, ${changelist.*} and ${files.paths}. The Notifications Sent trigger 201 uses ${review.*} and ${user.*}. The Defect Activity trigger 201 uses ${actor.*} and ${defect.*}. The User Created trigger 201 uses ${user.*}. And the Role Changed trigger 202 uses ${review.*}, ${user.*} and ${role.*}, where ${role.*} stands for the new current role. Also, pay your attention that not all of the variables are available at the moment the trigger fires. In this case they will return "Not available" instead of their value. Reference The following table lists all the variable substitutions. Variable ${review.id} ${review.title} ${review. workflow} ${review.phase} ${review.phase. previous} ${review. custom.*} Description The numeric ID of a review. Example: 4235 The title field of a review. This variable is not available for the Review Created trigger. The name of the workflow this review is currently in. If you change the name in workflow configuration 198 this text changes too, so be careful of scripts which depend on this value. The name of the phase this review is currently in, for example, "Inspection" or "Completed" or "Canceled". The name of the previous phase of the review. Valid only in the context of a phase change. The value of one of the review custom fields 183 . The final variable component should be the full title of the custom field, including whitespace and so forth. If this review does not have this field because the user has not entered it yet, if there is a default value it will be returned. If this review does not have this field because the workflow does not include the field, you will get an error message. If you supply the name of a custom field that does not exist, you will get an error message to that effect including the list of valid custom field names. You can use this fact to create an error on purpose to get the list of valid custom fields. © 2003-2015 SmartBear Software 124 125 Collaborator Server ${review. creator.*} ${review. author.*} User information corresponding to the creator of the review. The asterisk should be replaced by a user-specific variable (described elsewhere). So for example, the user's full name would be ${review. creator.name}. User information corresponding to the primary author assigned in the review. The asterisk should be replaced by a user-specific variable (described elsewhere). So for example, the user's full name would be ${review.author.name}. ${review. participants. rolename} ${review. participants. rolelogin} List of role/user pairs of the people assigned to the review. In the rolename case the user's full names are used; in rolelogin the user's system login names are used. Roles are named by the display name as configured 191 ; be careful when writing scripts that depend on this text, and remember that different workflows can define different text for the role name. ${review. changesummary} A multi-line summary of the changes in the review, lines (+add, *mod, del) for each file. ${review. shortchangesumm ary} ${review. defectlog} ${review.group. title} ${review.group. guid} ${user.id} ${user.login} ${user.name} ${user.email} ${user.phone} ${files.paths} A short summary of the changes in the review, total lines (+add, *mod, -del) for all the files in the review. The log of all defects in a review. Title of the group associated with the review. GUID of the group associated with the review. The unique ID of the user in our own database. The system login for the user. If LDAP authentication 101 is being used, this is the user's LDAP login. The login is unique for every user in the system. The user's full name, as they configured it themselves. This is not guaranteed to be unique in the system. The user's email address, or blank if it is not configured. The user's phone number field, exactly as they configured it themselves. A set of file paths, in no particular order, separated by the pipe symbol. This is typically a set of paths in the SCM server style, not local file paths. This variable is not available for the Review Created trigger. © 2003-2015 SmartBear Software Variable Substitution ${changelist. paths} ${changelist. scmid} ${changelist. author} Same as ${files.paths}. This variable is not available for the Review Created trigger. The ID of this changelist according to the SCM system. For example, Perforce changelist ID or Subversion revision number. This variable is not available for the Review Phase Changed trigger. The author of the changelist according to the SCM system. Note that although this username might correspond to a user in Collaborator, this is not required. Further note that because this is a simple text field and not a user object, you cannot continue with other sub-fields like email or phone number. ${defect.id} ${defect. creator.*} ${defect.file} ${defect.line} The unique ID of this defect in our own database. User information corresponding to the creator of the defect. The asterisk should be replaced by a user-specific variable (described elsewhere). So for example, the user's full name would be ${defect. creator.name}. The full path to the file this defect is attached to, or a blank string if the defect was review-wide. The line number in the file where this defect is attached, or 0 if this defect is attached to the overall file, the overall review, or something else that's not relevant to a specific line. Note that this line number refers to the file at the time of review; in the future the file can change and line numbers can change with it. ${defect.text} ${defect. isexternal} ${defect. externalname} ${defect. isfixed} ${defect. custom.*} The text entered in the comment field for this defect. This can be long and multi-lined. Boolean text "true" if the defect is currently marked external, "false" if the defect is currently open. The external name specified when the defect was marked external. Boolean text "true" if the defect is currently marked fixed, "false" if the defect is currently open. The value of one of the defect custom fields 183 . The final variable component should be the full title of the custom field, including whitespace and so forth. © 2003-2015 SmartBear Software 126 127 Collaborator Server If this defect does not have this field because the workflow does not include the field, you will get an error message. If you supply the name of a custom field that does not exist, you will get an error message to that effect including the list of valid custom field names. You can use this fact to create an error on purpose to get the list of valid custom fields. ${role.title} ${role. description} ${actor.*} The title of the role assigned to the user in the review The description of the role assigned to the user in the review The user responsible for triggering this action. The asterisk should be replaced by a user-specific variable (described elsewhere). 3.2.12 Archiving Reviews Collaborator can pack reviews to an external Zip archive. Only the reviews in the Completed, Cancelled or Rejected phases 14 can be archived. You can use this feature to keep historical records of the reviews (for instance, because of regulatory requirements), or to export review information to a non-proprietary format. Creating Archives There are two ways to archive reviews: from the Web Client and from the command-line. To archive a review from the command-line call the ccollab admin archive command. See command description for its syntax and examples. To archive a review from within the Web UI: 1. Open the desired review in the Review Summary screen Collaborator's search 301 and reporting 310 systems. 243 . To find the reviews, you may use 2. Scroll to the General Information section and press the "Save To ZIP" button. © 2003-2015 SmartBear Software Archiving Reviews This will invoke a standard Save As dialog where you can specify the location for the archive. Creating Archives Automatically You may use Collaborator server triggers to archive reviews automatically. The general idea is to install the Command-Line Client on a server machine and call the ccollab admin archive command via the server's phase change trigger 201 . Below are the detailed steps of how to achieve this: 1. Install the Collaborator client 322 on the same machine where Collaborator server is installed. 2. Specify the connection parameters 329 for the client. 3. Create a directory to store the archived reviews. In this example that will be c:\archivedreviews on Windows platforms and /archived-reviews on Unix platforms. 4. Login to the Collaborator web interface as an administrator. 5. Go to the Admin->Triggers 201 page 6. Find the "Review Phase Changed" trigger, and configure it as follows: Windows platforms Unix platforms Executable: c:\program files Executable: /usr/local/ \collaborator client\ccollab. exe ccollab_client/ccollab © 2003-2015 SmartBear Software 128 129 Collaborator Server Parameters: admin archive Parameters: admin archive ${review.id} --zip-path c: \archived-reviews ${review.id} --zip-path / archived-reviews You nay need to change paths to the Collaborator command line client and to the archives folder as necessary. Note: In the example above the trigger does not check if the phase has transitioned to completed, cancelled or rejected. Since the ccollab admin archive command ignores in-progress reviews you can simply call it on every phase changed event. If your team is using the tool heavily, then you should create a shell script or batch file, and check the review phase before calling the ccollab admin archive command. This will result in improved performance, but is not really necessary for small or medium sized installations. The Archive Contents For each review a separate archive is created. Generated files have the names in the format "review-ID-archive.zip", where ID stands for the identifier of the review. Each archive contains the following information about the review: · The ReviewDetails.pdf file contains a PDF version of the Review Detail Report 310 . · The material_conversations subfolder contains all comments, defects and conversations that were made during the review. For each of the commented files a separate PDF version is created that holds the contents of the file and the comments and defects related to this file. · Review materials. § If the archive was created from Web UI, it contains all revisions of the materials that were uploaded to the review. If a file was uploaded multiple times (as it typically happens during rework), the archive will contain a copy of each file revision. § If the archive was created with the ccollab admin archive command, the amount of review materials is specified by the --zip-option parameter. The naming structure of subfolders that store review materials, depends on how the materials were uploaded. For changes uploaded via version control system, the folder name will contain the name of SCM, the name of the repository and (if available) the ID of the changeset ("git-git. example.com_foo_repo.git-85d2f5ccb7f27e1628c09e4d1373f"). For uploads of arbitrary files, the folder names will contain the "upload-file-" portion followed by the date and time ("upload-file2015-08-18-02-58-59"). © 2003-2015 SmartBear Software Archiving Reviews Remarks: · The "Allow Archive to zip 147 " setting controls who can use this feature. The possible values are: administrators 161 , group administrators 167 , or all users (considering the access permissions 147 of the chosen review). · Only the reviews in the Completed, Cancelled or Rejected phases 14 can be archived. · To keep the order in which the comments were made, the coordinate comments (pushpins) now have an integer number. 289 During the upgrade to Collaborator 9.3 all in-progress reviews have been updated and their pushpins (if any) were numbered. Converting only in-progress reviews during the upgrade, ensures that upgrading the server to 9.3 does not take too long. To append ordinal numbers to pushpins in all completed reviews, administrators can use the respective command in the Diagnostic Utility 130 . (This however may take some time to accomplish.) · The built-in PDF viewer of Windows 8, 8.1 and 10 do not support overlay layers in PDF files. Collaborator uses such layers to render coordinate comments (pushpins) 289 in PDF versions of review materials for archived reviews. Because of this, pushpins will not be displayed if the PDF file from the archive is opened in the built-in PDF viewer of Windows 8, 8.1 and 10. As a workaround, please install the Adobe Acrobat Reader or any other full-featured PDF viewer. 3.2.13 Diagnostics The Collaborator server offers several diagnostics you can run to check the health of your installation. A failure result from one of the diagnostics does not necessarily represent an actual error, but may assist you and/or SmartBear technical support in debugging a problem with your server. Accessing Diagnostics To get to the diagnostics go to the Collaborator web server and click the System link at the bottom of the screen: Scroll down to the "Debugging" section and click on "Diagnostic Utility". © 2003-2015 SmartBear Software 130 131 Collaborator Server Running Diagnostics To run a diagnostic click on one of the links, or click on the RUN ALL DIAGNOSTICS link to run all diagnostics. Some of the diagnostics take a long time to complete, and may impact the performance of your server while the diagnostic is running. See notes for each diagnostic below. Verify Database Schema This diagnostic checks the schema of your database to make sure that it is what Collaborator expects. This diagnostic runs very quickly and will not impact performance on your server. Fix Database Data This diagnostic looks for invalid data in the database and fixes the data to be inside allowable ranges. If you have a large database this diagnostic may take some time to complete and could impact performance on your server while it is running. Generally it is only necessary to run this diagnostic if you have been told to do so by Smart Bear technical support. Delete Old Notification Data This diagnostic deletes notification data older than 90 days. Fix Duplicate Users Differing By Case This diagnostic looks for users whose logins differ only by case and merges them to a single user account. This is used to repair problems caused by a bug in older versions of the Collaborator server that allowed users to be created whose logins differed only by case. This diagnostic usually runs quickly and will not impact performance on your server. Add Numbers to Pushpins in Completed Reviews Starting with Collaborator 9.3, we assign numbers to coordinate comments and defects (pushpins) 289 . During the upgrade to Collaborator 9.3 all in-progress reviews have been updated and their pushpins (if any) were numbered. Converting only some of the reviews at time of upgrade was made for the performance optimization. This tool allows to add numbers to the pushpins of all completed reviews as well. Using this tool may take some time depending on the number of completed reviews with documents you have and the number of pushpins to alter. Database Integrity This diagnostic checks that database data is self-consistent and sensible. Some failures in this diagnostic are common and do not necessarily represent real errors. This diagnostic may take a long time to run (scales linearly with size of your database) and will impact performance on your server while it is running so it is best to run it only when the server is not in use. © 2003-2015 SmartBear Software Diagnostics Content Cache Integrity Check This diagnostic checks that the on-disk file content cache is present, readable, and that all content therein is properly indexed. This diagnostic takes a long time to run (scales linearly with number and size of files in your content cache). Content Cache Cleanup This diagnostic deletes files from the on-disk file content cache that is not properly indexed, meaning the MD5 of the file content does not match the name of the file. This diagnostic takes approximately the same time to run as the Content Cache Integrity Check. You should back up your Content Cache before running this diagnostic. Clean up Reviews with invalid detached Changelists This diagnostic fixes orphaned comments and defects. It re-attaches Changelists to reviews that were detached and resulted in orphaned comments or defects. Fix Duplicate Metadata Values This diagnostic searches for and fixes metadata values which should be unique, but contain duplicate or multiple values. Fix All Users group missing some members This diagnostic looks for users who are not members of the group 'All Users' and adds them to the group Fix Subscriptions This diagnostic searches for and removes subscriptions that have no author or file pattern 3.2.14 Logging Collaborator servers log messages to several log files which are user configurable (with two exceptions). The configurable log files are all, by default, located in <installationdirectory>/tomcat/logs. They are collab.log (and numbered generations of same when logs roll) for application level logging; tomcat.log for the application server logs; and license. log which logs license usage events, such as user login and logout (if enabled). The logs that do not allow user configuration are located in the installation directory and are named output.log and error.log which capture the standard out and standard error streams from the application. Normally, Collaborator does not write to standard out or error, but some of the libraries that it uses do. Occasionally, these logs will be helpful for debugging issues in one of those libraries. © 2003-2015 SmartBear Software 132 133 Collaborator Server Configuring Logging Using Configuration Files Collaborator uses a sophisticated logging system, log4j, to manage the logging. Because of the breadth of configuration options available in log4j, it is not possible to document everything here (the log4j documentation is available at http://logging.apache.org/log4j/1.2/manual.html). However, in this section, we will cover some common scenarios. The configuration file for collab.log and license.log can be found at <installationdirectory>/tomcat/webapps/ROOT/WEB-INF/classes/log4j.properties. The file is a plain text Java properties file and can be edited with any text editor. Changes will take effect when the server is restarted. Note: Edits to the log4j.properties file will not be saved between updates to Collaborator. Upon editing this file, it is a good idea to save a backup of the file in a location outside the Collaborator installation tree. Basic Debug Logging The most common configuration change that system administrators will make is to turn on debug logging. This can be useful when working with SmartBear technical support to resolve issues (though this is not always required). To enable debug logging, find the first non-comment line in the file: log4j.rootLogger=info, CodeCollaborator This line configures the base level logging to "info" level and attaches an appender named "CodeCollaborator" that will be configured later in the file. To enable debug logging, simply replace "info" with "debug" and restart the server. Do not change the name of the appender as this will result in the log configuration not being available via JMX 134 . Running a production system at debug logging level can cause performance issues, so it is not recommended unless specifically directed by SmartBear technical support. Log Rolling By default the collab.log file is rolled when it reaches 10Mb and saves 10 generations of files, for a total of 110Mb of disk space potentially consumed. Both of these values can be configured in the log configuration file. The following lines specify these values: log4j.appender.CodeCollaborator.MaxFileSize=10MB log4j.appender.CodeCollaborator.MaxBackupIndex=10 System administrators may change these values as necessary to capture additional logging information or conserve disk space as necessary. © 2003-2015 SmartBear Software Logging Enabling License Logging Collaborator can log license events (users logging in and out) to help you understand your license consumption. By default this is disabled as it is normally not necessary. The system status 218 page includes graphs which are helpful for understanding the total license consumption. However, drilling down to find what users are using the system when requires turning on license logging. To do this, change the license logging level from "warn" to "info": log4j.logger.com.smartbear.ccollab.license=warn, CodeCollaboratorLicense The license log appender is also configured to roll like the collab.log and this configuration can be changed in a similar manner. However, it is important that you not change the appender name from "CodeCollaboratorLicense" as this will result in the log configuration not being available via JMX 134 . Controlling Logging with JMX If the Collaborator server has JMX management enabled 117 , the logging level can be changed at runtime. All of the log configuration MBeans are available at com.smartbear.ccollab:/:Logging. Changing the "priority" on "Application Logger" or "License Logger" will change the base level of logging for the application and the license log respectively. The appenders are found under the names "Application Log" and "License Log". The max size, number of backups, and even the file names, can be changed in JMX. The changes will not take effect until the "activateOptions" operation is invoked. In jconsole operations are found in a separate tab. © 2003-2015 SmartBear Software 134 135 Collaborator Server Note: Changes to logging made via JMX are not persisted across server restarts. Editing the Application Log Configuration in jconsole 3.2.15 Troubleshooting When something goes wrong, refer to this section. Known Issues Check the Known Issues Appendix 682 to see whether SmartBear already knows about this issue. Version History Check the Version History on the SmartBear website to see if this issue has been resolved in a later release. Getting server information To get debugging information about the server, go to the Collaborator web server and click the System link at the bottom of the screen: © 2003-2015 SmartBear Software Troubleshooting Downloading server dumps for SmartBear technical support Sometimes it will be useful for SmartBear technical support to get a "dump" of your server configuration and database data. You do this by filling out the form at the top of the System page. Data Format You can dump the entire database in a normal format, or set the "Data Format" field to "Obfuscated," which will dump the data after passing through a filter that converts potentially sensitive information into unhackable text. For example, users are renamed "user1," "user2," and changelist text is replaced by the MD5 of that text. If file contents are included in the dump, each line of file content is replaced with the MD5 of that line to enable us to reproduce exactly the right line numbers and diffs you are seeing. This can be used to send us data when you are worried there might be sensitive information. If you are worried about whether we are really cleaning all the data, you can check out the dump file yourself. It is just a ZIP file containing XML with information, so it is easy to inspect. In fact, if you still see some data you would like to change or delete, you can just do that in the XML, re-zip the file, and send it to us. Server Logs You can choose to include all server logs or none at all. © 2003-2015 SmartBear Software 136 137 Collaborator Server File Contents You can choose to include all file content or none at all. Which Data Here you can choose whether you would like to perform a complete database dump or just include the system configuration. Review Dumps If just one review is broken, you can send us a dump of just the one review. To do that, first go to the review in question, then click the System link as before. Now you will see an additional field in the form for downloading review data (which includes all the file content as well). Diagnostics Collaborator has some built-in diagnostics 130 that may be helpful in diagnosing a problem. You may be prompted to run one of these diagnostics by SmartBear technical support. The server is running slowly Check out our performance tuning 120 suggestions and use recommended hardware 120 . Large files consistently fail to upload or render In order to review large artifacts, we recommend increasing the memory available to Collaborator server (instructions here 865 ). Email is not working If email is not working, here are some things to try: · Make sure the SMTP Host and SMTP Port settings · Try sending a test email 177 177 . Look in the server logs · If you just performed a database migration/restore need to enable it in the settings 177 . are correct. 139 90 for error messages. , email is automatically disabled. You Getting "Idle Timeout Waiting for Object" Error This error is shown when the database connection pool runs out of connections to the database. © 2003-2015 SmartBear Software Troubleshooting The fix is to increase the number of connections allowed in the pool. The server is capable of running with many more connections than the default; we keep the default fairly low so that in smaller installations we are not taking up too many database resources. Fix this by going into the Tomcat servlet context XML file located here: installation-directory/tomcat/conf/Catalina/localhost/ROOT.xml Edit the property called maxActive and increase the number of connections. Even doubling this number is normal. A rule of thumb is to have 3 times the database connections (and server threads) as the number of simultaneous users you have under the biggest load. The Collaborator server must restart for this change to take effect. You do not need to do anything to your database server. Warning: Modifying the ROOT.xml file will cause Tomcat to dynamically reload the Collaborator application, terminating any active sessions. Changes to ROOT. xml should be done in the context of stopping and restarting the Collaborator service (that is, in a production environment coordinating the restart with user activity), regardless of whether the service itself is actually stopped and restarted, or just reloaded by Tomcat. Frequently this problem also implies that you should have more web server threads in addition to more database connections. To increase that, edit the maxThreads property from this XML file: installation-directory/tomcat/conf/server.xml Stop and restart the server to load new settings from the server.xml file. "NoHttpResponseException: The server ... failed to respond" Error This error can occur if a client connection times out after the default 20 seconds. A heavily loaded Collaborator server or limited resources can be the root of this problem, and investigating the server performance and network connectivity may be warranted. Regardless, the connection timeout can be increased by editing the millisecond value of the connectionTimeout variable in the server.xml file described above. For example, for a timeout of 60 seconds, use: connectionTimeout="60000" © 2003-2015 SmartBear Software 138 139 Collaborator Server "IllegalStateException: ... Session already invalidated" Error This error indicates a client XML-RPC session timeout. This can occur uploading large files, for example, a 300 DPI color PDF document. Refer to the smartbear.rpc.session.timeout property in Java VM Options 865 . Setting this value on the Collaborator server to 600 seconds (10 minutes) will allow for uploading much larger files. The Server Log Collaborator is configured by default to perform a very limited amount of logging. The primary purpose of the logs is to record information about error conditions that could potentially arise. When working with SmartBear Technical Support to diagnose issues often it will be helpful to send the logs (or a portion thereof) for investigation. The logs are located in the following directory: installation-directory/tomcat/logs Enable server-side debug logging To enable verbose server-side logging, edit this file: <installation-dir>/tomcat/webapps/ROOT/WEB-INF/classes/log4j. properties At the bottom you will find a line called: log4j.logger.com.smartbear=info Change the "info" to "debug". You will have to restart the server for changes to take effect. Remember to revert these changes after reproducing the problem and copying off the log file because this creates a large number of logging messages and degrades server performance. Change the settings so the server can be accessed remotely To change the Windows Firewall settings: Start > All Programs > Accessories > System Tools > Security Center © 2003-2015 SmartBear Software Troubleshooting Click the "Manage security settings for: Windows Firewall" link. On the General tab, make sure the "do not allow exceptions" box is not checked. On the Exceptions tab, click "Add Port" For "Name", use "Collaborator", for "Port number", 8080. Leave TCP selected. If you want, you can click the "Change scope" button to get more options about who can and cannot connect to the port. Click "OK" in each dialog to save the settings and try connecting again. Contacting Technical Support For technical support and general inquires, contact us 3.3 28 . Collaborator Settings As a system administrator, you can configure Collaborator's settings to however you would like. This may be useful in better managing users and how they perform reviews. These settings can be found and changed by simply clicking on "Admin" at the top menu bar. This button is only available to users that are Collaborator administrators. The administration settings are grouped into a number of categories: · The General behaviour. · The Users 141 157 category holds settings that control Collaborator look and feel, abilities and category allows to create users, view user statistics and edit user accounts. · The Groups 162 category allows to create and organize user groups. Groups of users are used for reporting, filtering and for assigning reviews to multiple users. · The Email 177 category holds settings for e-mail notifications of review activity. · The Version Control system. 181 category allows to integrate Collaborator with your version control · The Review/Participant/Defect Custom Fields 183 categories allow to create your own fields for users to annotate reviews, participants and defects with necessary information. © 2003-2015 SmartBear Software 140 141 Collaborator Server · The Checklists 188 category allows to create and manage a list of items that should be checked in every review. · The Roles 191 category allows to specify the rights and privileges of review participants. · The Review Templates 198 category allows to create and manage review templates: sets of roles, custom fields, and other options that determine the behavior and rules of a review. · The Triggers 201 category configures Collaborator to run an external script or application when certain events occur. · The Notification Templates 202 category allows to customize the content of notification emails that Collaborator sends to review participants. · The Automatic Links fragments as links. 212 category specifies regular expression patterns to treat certain text · The Remote System Integration GitHub servers. · The Licensing 82 214 category allows to establish integration with JIRA or category manages Collaborator licenses. · The System Status 218 category displays various data about server, database, connection and allows to perform server backup and debugging. 3.3.1 General External URL The URL to use as the "official" URL for the Collaborator server. This URL will be reported to clients, used in notification emails, and so forth. It should be something that is accessible from as many other computers as possible. If the port number is other than default 80, then specify it as well. © 2003-2015 SmartBear Software General © 2003-2015 SmartBear Software 142 143 Collaborator Server Company / Unit Arbitrary text that will be displayed at the top of the Collaborator web page. This distinguishes the server from other servers. This personalizes the server and also makes it easy for users to distinguish between different installations you might have. User Login Prompt The text to display on the front page when the user logs in. This text is displayed just below the "Username" field. The default text suggests using the same login as the version control system, however you might want to change this to be more specific, or in the case of LDAP authentication 101 , you could instruct the user to use that login. Global "Create User" If you are not using LDAP authentication 101 , every user in the system must be explicitly created. The system administrator can create users at any time, but an easier technique is to allow users to create their own accounts from the "Login" screen 222 . When this option is enabled, this create-account form is displayed, otherwise it is hidden. This option does not make sense if you are using LDAP authentication because in that case user accounts are created automatically when a user first successfully authenticates on the Login screen. Use Global Tab Width If 'Yes' all users will use the same tab width. If 'No' each user can configure their own preference (the global setting is the default). Global-Tab Width Width of a tab (in spaces) for all users to use when displaying reviewed files 266 . Chat Refresh Interval The minimum time (in seconds) to wait before auto-updating chat conversations 292 in the diff viewer 264 . If increase the refresh time, new chat display will become less responsive, but server load will decrease. This also reduces contention for connections on the browser side because most modern browsers limit the number of simultaneous server connections to 2. Name Abbreviation Length The minimum number of letters to use when abbreviating user names during a review. Defect Label (singular) User-visible label for "defect" (lower case). Shows in phrases, like "Marked defect fixed". If the word 'defect' has a negative connotation in your environment, specify a different word (for instance, "item" or "finding" and so on). © 2003-2015 SmartBear Software General Defects Label (plural) User-visible label for "defects" (lower case). Shows in phrases, like "Can not finish because there are open defects". If the word 'defects' has a negative connotation in your environment, specify a different word (for instance, "items" or "findings" and so on). Select Group Prompt Text to display on the 'New Review' page prompting user to select a Group to associate with the Review. Group Label (singular) User-visible label for "Group". Shows in phrases, like "This Review is associated with that Group". Group Label (plural) User-visible label for "Groups". Shows in phrases, like "Select one of the Groups to associate with the Review". Compact View When this option is enabled, some user interface elements will be collapsed to occupy less vertical space. Allow Users to Move Comments [BETA] Allow users to move comments in MS Word documents (.doc and .docx) 273 , PDFs 283 and images 280 . Supported in Chrome and Firefox only. © 2003-2015 SmartBear Software 144 145 Collaborator Server © 2003-2015 SmartBear Software General Allow Regular Users to Perform System Dump Should regular users be allowed to perform system dump? Reports Access Who should be allowed to view the "Reports" section of the user interface? You can choose everyone, everyone but with review permissions applied, only administrators, or disabled (no one). Selecting "Yes" will give users, as well as administrators, access to the system debugging information. Enabled for everyone: Everyone will see the "Reports" section; no restrictions are enforced on what information is returned. Respect permissions: Everyone will see the "Reports" section; users can only see report content for reviews that they can access. Note that since administrators can always access all reviews, this setting does not affect the content of their reports. Administrators only: Only administrators will see the "Reports" section. Disabled: No one will see the "Reports" section. Subscriptions Access Selecting "Users" will allow users, as well as administrators, access to edit subscriptions. Choose "Administrators" to give access to only administrators. Subscriptions Mode Mandatory Enforce Role: Subscribed users must be participants in a review, and they must use the role specified on their subscription page. Mandatory do not Enforce Role: Subscribed users must be participants in a review, however they can change their role once added to the review. Requested: Subscribed users are automatically added to a review but can be manually removed. Disabled: Subscriptions are not used. Allow Subscriptions as ... The Administrator can choose whether users that subscribe to a review can subscribe as a Moderator, Reviewer, or Observer by choosing "Allow" or "do not Allow" from the drop downs below. Restrict Access to Fix Defect Should the system restrict the participants that can mark a defect fixed? If set to Yes, only the creator of the defect and administrators will be able to mark a defect fixed. Otherwise, all roles that are allowed to mark a defect fixed will have such a privilege. © 2003-2015 SmartBear Software 146 147 Collaborator Server Restrict Access to Review Content Should the system always restrict access to review content such that only certain users are allowed to view the review? In each review 238 the review creator can select to further restrict access. Administrators can always access all reviews. Anyone: No global restrictions on who can access reviews Group Based: Users must have access to the review's associated group 163 to access reviews Participants: Users must be participants in the review to access reviews Participants and Group Based: Users must be participants in the review and currently have access to the review's associated group to access reviews Participant or Group Based: Users may be participants in the review or have access to the review’s associated group to access reviews Restrict Uploads to / Deletes from Review Should only creators of a review be allowed to upload files to and delete files from a review? Search Sets the limits on the Search feature. "Allow Searching of all text" enables unrestricted searching, while "Limit searches to review numbers only" limits the search feature to only allow searching for review ID numbers. Allow Invite by Email? Should it be possible to invite a colleague by e-mail Restrict Email Invite Used for the "Invite a colleague" feature, the regular expression in this field is used to match email addresses that can be invited to Reviews. For example, '[\w\.-][email protected]'. Allow Archive to zip Should the system restrict access to archiving of reviews If set to "yes," only review creators and administrators will be allowed to upload files to or delete files from the review. However, the option will be available on the Create Review screen 236 to override at the review creator's discretion. If set to "no," all participants will be allowed to upload and delete files. Administrators: Only users with administrator feature. 161 671 ? 127 ? privileges can use this Group Administrators: Only users with administrator administrator 167 privileges can use this feature. 161 or group All users: All users, who can access the review (based on the review permissions 147 ), can use this feature. © 2003-2015 SmartBear Software General © 2003-2015 SmartBear Software 148 149 Collaborator Server Allow System Administrator to Perform Reviews Should the main system administrator be allowed to participate in reviews? If you are using internal authentication the setting is typically "no" because the main "admin" account is special and should be used only for system configuration and not to actually do reviews. If you are using LDAP authentication 101 the setting is typically "yes" because the main administrator is usually an actual human being who will also want to participate in reviews. This setting affects whether the system account is allowed to create a new review 236 and whether it appears in, for example, drop-down lists for review participants 238 . Allow "Mark All Read" Should users be given the option to "mark all conversations read" in one click in the conversation area of the diff viewer 295 ? This is a convenient operation, so most administrators leave this enabled. However this makes it easy for someone to not actually read a lot of comments because they are not forced to visit each conversation individually. Allow Reopening Completed Reviews Once a review has completed, should participants be allowed to re-open the review just by making an additional comment? Allow Editing Completed Reviews Once a review has completed, should participants be allowed to edit the review title and custom fields? Create a Commit Action Item for Completed Reviews By default, when a pre-commit review is completed, the author(s) are given an action item as a reminder to commit the changes to the underlying source control system. The author then has the option of using the Tray Notifier to commit the changes. In some workflows, this is not the correct behavior. In that case, choose "Do Not Create" to avoid this prompt. Allow Deleting/ Cancelling Reviews Should the review creator or author be able to cancel the review at any time? If not allowed, an administrator is still able to re-open a review by clicking a link. If "do not allow" is selected, only an administrator will have the permissions to cancel a review. Other participants are never allowed to cancel a review. © 2003-2015 SmartBear Software General Allow Reject Review Reject review allows a user to stop a review which has passed the planning state but yet in a terminal state such as completed or cancelled. Rejecting a review is different than cancelling or deleting because the administrator can require the user to specify a reason for the rejection. The reason values can be configured in the Review Custom Fields section of the administration pages. Administrators can always reject reviews. Select Administrators and Reviewers to allow non-observer participants to reject reviews. Default Review Deadline If set to non-zero, this is the default number of days until reviews are due. If zero, users will not be prompted for a review deadline 237 when creating a new review. Show Metrics Should users be able to see that metrics are collected including time spent in review, number of defects, and so on? If set to "No", metrics are still collected and can be retrieved directly from the database 587 , however the information is not displayed to the user during review 254 or in the reports 310 section. Allow Combined Review View Allow the review creator to specify that multiple changelists should be displayed combined as if they were one large changelist. We do not recommend using this setting unless you are sure your users will understand what they are seeing. This mode can confuse changes that are actually part of the review with changes that happened between files in the changelist. Character Sets for Diff Viewer Give users the option to view file contents in various character sets. Usually Collaborator's character set auto-detection will detect the correct character set, but when it does not, users will be able to select between these character sets for displaying the file contents. To avoid confusion, limit this list to the character sets that you expect your users to require. Click [Supported Character Sets] to view all supported character sets. © 2003-2015 SmartBear Software 150 151 Collaborator Server Enable Electronic Signature Electronic Signatures allow users in the selected role(s) to either sign off on or decline to sign off on a completed review. Global based electronic signatures adds an additional sign-off process for all reviews. Users whose roles were selected in the "Roles that are required to sign-off on Reviews 151 " setting will be required to sign or decline the review once it is completed. Template based electronic signatures add an additional sign-off process only to reviews with specific templates. Users whose roles were selected in the Role Configuration 197 screen will be required to sign or decline the review once it is completed. Roles that are required to sign-off on Reviews Here, the admin can select one or more roles that will be prompted to sign off on Completed reviews. Sign Review Prompt This is the text that will appear on the review summary screen next to the Sign button. This setting takes effect when global based electronic signatures are enabled. © 2003-2015 SmartBear Software General Decline Review Prompt Create Bug URL This is the text that will appear on the review summary screen next to the Decline button. The URL to your bug tracking system that creates a new bug. Optionally use the special text BUGSUBJECT as the starting subject line for the bug. This setting is used when the user is prompted to create a bug in your external issue tracking system. To track a defect externally, the user must first create the defect in Collaborator, then select and edit that defect to choose the 'Track Externally' option. For example, with FogBugz the URL might look like this: http://bugserver/default.php?command=new&pg=pgEditBug In Bugzilla the URL would look something like this: http://bugserver/enter_bug.cgi © 2003-2015 SmartBear Software 152 153 Collaborator Server Client Installer Link URL to the version of the client installers that you want presented to users of the system. This is typically redirected to an intranet page maintained by the administrator. Minimum Client Build Minimum allowable build number for the various client applications including the Command-Line Client 341 , the GUI Client 331 , the Tray Notifier 397 , and the Eclipse Plug-in 359 . Use this to ensure your clients are reasonably up to date. This is especially important if there is a feature or bug-fix you know is necessary for your system. The help text in the GUI will identify the oldest stable, compatible build number and will list the most recent known build number for your reference. Login Ticket Time-To-Live Defines how long a login ticket should remain valid. A value of '0' indicates that the ticket remains valid eternally. © 2003-2015 SmartBear Software General System Message Administrators can optionally insert a message to be displayed throughout the system. This can be useful for reminders, Collaborator announcements, or general information. Restricted File Types Specifies which files cannot be uploaded to reviews (to avoid malicious file uploads). By default Collaborator blocks the following file types: executable files (.exe), batch files (.bat), Windows Installer files (.msi), Mac OS disk images (.dmg) and Unix script files (.sh). Filename matching is done using the '*' and '?' wildcards characters. '*' matches 0 or more contiguous characters, and '?' matches exactly one character. The character matching is case-insensitive on Windows platforms and case-sensitive on all other platforms. © 2003-2015 SmartBear Software 154 155 Collaborator Server Binary File Types Binary files attached to reviews are not displayed in the Diff Viewer 264 , and instead must be opened by external applications. Here you can configure which files are to be treated as binary. By default, Microsoft Word, Microsoft Excel and Rich Text files are considered binary. Filename matching is done using the '*' and '?' wildcards characters. '*' matches 0 or more contiguous characters, and '?' matches exactly one character. The character matching is case-insensitive on Windows platforms and case-sensitive on all other platforms. Image File Types Image files are reviewed in the browser in the diff viewer using a special image diff viewer 277 . Here you can configure which files are treated as images. By default, GIF, JPEG, and PNG images are handled as images. The content of the files must be renderable by the users' browsers for images to actually be reviewable. Images that require special software to view should be treated as Binary Files 155 so they can be rendered by that software. Filename matching is done using the '*' and '?' wildcards characters. '*' matches 0 or more contiguous characters, and '?' matches exactly one character. The character matching is case-insensitive on Windows platforms and case-sensitive on all other platforms. © 2003-2015 SmartBear Software General Show System Fun Facts Fun facts are lines of information displayed on the home page. Collaborator rotates through a number of internal facts based on aggregate review metrics. If this is set to "Hide" and there are no extra fun facts listed, this feature is completely disabled. Extra Fun Facts Additional lines to be displayed can be entered in this field. Review Reject Reasons List of reasons to choose from when rejecting a review empty if providing a reason is not required. © 2003-2015 SmartBear Software 245 . Leave this list 156 157 3.3.2 Collaborator Server Name A caption for the block of extra links. Extra Dashboard Links List of additional links to be displayed on the Home page. One link per line. Links should be specified in the following format: LinkTitle - LinkURL Users The user management page lets you add, disable, and manage user accounts. Creating New Users This form lets you create new users in Collaborator. If you are using LDAP authentication 101 you will not see this form because users are created automatically when they first log into the system. Login names must be unique in the system; Collaborator will not allow you to create a second user with the same login. The full name is used when displaying the user in the interface, and the email address is used to send notification messages. After you create a user you are returned to the same screen. This makes it easy to add multiple users quickly. © 2003-2015 SmartBear Software Users Warning: When creating new user accounts, it is a good idea to make the login name identical to the user's version control login. One advantage is that the user does not have to remember a new login. Another advantage is that certain features are enabled in Collaborator because it can correlate users from version control changelists with Collaborator users. Finally cross-system reporting becomes much easier when the logins are the same. Statistics The statistics box shows information about users and usage of Collaborator: This can help monitor your usage and determine how many seats are necessary. The User List The user list shows every user in the system along with key information about each: © 2003-2015 SmartBear Software 158 159 Collaborator Server You can sort the user list by: · Login · Full Name · Last Activity (oldest first) · Last Activity (most recent first) You can filter the user list by: · Show all users · Hide disabled users · Show only logged-in users © 2003-2015 SmartBear Software Users · Show only administrators · Show users missing name · Show users missing email · Show users missing phone number The [Edit]link allows you to update any user setting 225 from basic contact information to personal display and notification settings. The [Log Off]link allows you to immediately log off a logged-in user 160 . The first column of icons tells you several things about the user's recent activity and how the user is counting towards server licensing 82 . Icon (non e) Logged in? Consuming floating-seat license? Consuming fixed-seat license? Yes Yes Yes No No Yes No No No The second column of icons tells you about the user's access rights: Icon Is user an administrator? Is user allowed to log in? Yes Yes No Yes No No You will notice that the admin account never counts towards licensing. This is one of the special characteristics of the System Administrator Account 162 . Log User Off Administrators also have the ability to force a user to log out of Collaborator to make a seat available. To do so, just click the [Log Off] link that will appear to the left of the logged in username. This feature should be used carefully as the user will immediately be logged off. Once a user is forced out, the next time they access Collaborator, they will be required to reenter their username/password to gain access. © 2003-2015 SmartBear Software 160 161 Collaborator Server Deleting & Disabling Users You cannot delete users in Collaborator because the user record is necessary for reporting and for viewing old reviews that they were a part of. However you can disable a user. Disabling a user does several things immediately: · The user can no longer log in. · If the user is already logged in, he is automatically and immediately logged off. · The user does not show up in standard user lists, like in list for inviting to a review. · The user will not receive any notifications or broadcast messages 177 . · The user immediately does not count towards either floating-seat or fixed-seat licensing 82 . The user will continue to appear in the general user list at the end, and an administrator can reenable a user at any time. To disable or enable a user, click the [Edit] link next to that user on the user list and change the "Is Enabled" flag: Administrative Access Users with administrative access are allowed to access the "Admin" menu from the menubar and all screens therein. They also have a variety of other permissions described elsewhere in this manual, including but not limited to: · Administrators can look at all reviews, regardless of whether they have been marked restricted 236 . · Administrators can do anything with defects in any review: create, delete, edit, externalize, and mark fixed, regardless of their role or even non-participation in that review. · Administrators can edit characteristics of any review including changing custom field content, changing the list of participants, and canceling the review. To set or clear a user's administrative access, click the [Edit] link next to that user on the user list and change the "Is Administrator" flag: © 2003-2015 SmartBear Software Users Warning: Be careful if you are an administrator and you are editing your own user information. If you say that you are not an administrator, you are not from that point forward! If you do this by accident it can be remedied by another administrator, or the System Administrator in particular (see below). The Special "System Administrator" Account One user account is special: The System Administrator Account. How do you know which account is this special one? If you are using internal authentication, the System Administrator Account is always called admin (this cannot be changed). If you are using LDAP authentication 101 , the account is determined during installation 63 . The System Administrator Account has the following special properties: · There can be only one. One to rule them all. · The System Administrator is always an administrator; administrative access cannot be revoked. (This is prevented in the user interface so you cannot revoke access, even by mistake.) · The System Administrator can always log in. Even if the server license has been exceeded, this account is still allowed to log in. 3.3.3 Groups Group Administration User "Groups" is an optional feature that allows you to define groups of users within your organization, so reviews can be associated with a group. Groups can be used to model your organization's hierarchy and/or project assignments. Each group can contain multiple users and can also contain other groups. Each user can be in more than one group. You can specify group administrators who are able to maintain individual groups. The word "Group" is configurable in the General Settings "Project", or whatever else. 141 , so you could change it to "Team", or Association With Reviews If a user is a member of a single group that can be associated with a review 166 , reviews created by that user are automatically associated with that group. If a user is a member of more than one group that can be associated with a review 166 , an additional field is displayed when creating a review: © 2003-2015 SmartBear Software 162 163 Collaborator Server The list of groups to select from is calculated by first creating a list of all groups that contain the review creator as a member. All groups in that list are then checked to see if they are a child group of any other group(s). Parent groups are added to the list recursively. In the settings for a group there is an option to disallow associating that group with reviews 166 . This is useful for creating groups that are used for reporting or filtering only. When a group and all its sub-groups cannot be associated with reviews, then this group is not displayed in the Group list. When a group cannot be associated with reviews, but some of its sub-groups can be associated with reviews, then the parent group is displayed in the Group list, but cannot be selected. Associating a group with a review makes it easier to select participants for that review because the Person list can optionally be filtered by group. The filter is calculated by starting with the users that are members of the selected group. If the selected group also contains child groups, then the users that are members of those child groups will also be added. The search for child groups is done recursively. Restricting Access Groups can be used to limit access to reviews by setting Restrict Access to Review Content 145 in the general settings. When the group access restriction feature is used, the list of users who have access to the review is calculated by starting with the users that are members of the group that is associated with the review. If that group also contains child groups, then the users that are members of those child groups will also be added. The search for child groups is done recursively. Finally, if the group associated with the review is a child of any other group(s) then the users that are members of those parent groups will also be added. The search for parent groups is done recursively. Sample Group Hierarchies It may be difficult to understand how best to use groups based on the rules given above. We have provided a few examples of how they are usually used: · Using Groups for Organizational Hierarchy 170 © 2003-2015 SmartBear Software Groups · Using Groups for Projects 171 · Using Groups for Organizational Hierarchy and Projects 173 Maintaining Groups Groups can be created and modified in one of two ways: manually (with the web user interface see the sections below, starting with Creating New Groups 164 , or with the command-line scripting command ccollab admin group create) or automatically via the command-line scripting ccollab admin group sync command. "Group Administrators" can be assigned to administer individual groups. A group administrator is a regular (not full administrator) user who can manage a specific group. Group administrators are allowed to create child groups of groups they administer, but are not allowed to create top-level groups. If you have only a few groups it is easiest to manage them manually. If you have many groups or if you are mirroring them from an external system like LDAP, it is best to manage them automatically using the "sync" command. The command-line "sync" command interface is provided to make it easy to mirror group definitions in to Collaborator from an external system. The ccollab admin group sync command uses the contents of an XML file (schema) to update Collaborator's group definitions. See the Syncing Groups 168 topic for more information. Collaborator tracks which groups were created manually and which were defined via ccollab admin group sync. Groups that were defined manually are not overwritten as a result of using ccollab admin group sync. See the Using Groups for Organizational Hierarchy and Projects 173 example to see how this can be useful. Creating New Groups To make use of this feature, first create a title for your group, and click "Create Group". © 2003-2015 SmartBear Software 164 165 Collaborator Server Group List Once a group is created, the group will appear in the Group List. In the Group List, you can edit the configuration details or delete the group by clicking the appropriate link. The Group List also shows the number of reviews associated with the group, whether or not the group can be associated with reviews, whether or not the group is enabled, and any descriptions given to the group. Note group administrators will only see groups listed that they can administer. Deleting a Group To delete a group, click the [Delete] link next to the group's title in the Group List. You can only delete a group if it is not associated with reviews. If the group is associated with reviews, you must first associate those reviews with a different group before deleting it; alternatively, you could instead disable the group in order to prevent future reviews from being associated with it. Group administrators are further restricted to only being able to delete groups that they are group administrators of and that have no child groups. This restriction is to prevent group administrators from indirectly creating top-level groups. Editing a Group To edit a group, click on the [Edit] link next to the group's title in the Group List. You will be directed to the "Edit Group" page. © 2003-2015 SmartBear Software Groups Title Human-readable title for the group, used in drop-down menus and other UI elements. This does not have to be unique across all groups. Guid Machine-readable ID for group, unique across all groups. If the group was created using the Web Client, this is generated automatically. If the group was created using the sync command, this ID is supplied in the XML file. Description Human-readable description for the group. This is displayed on the " New Review 237 " page when associating a group with a review 162 . Allow associate with Reviews If this is set to "Yes", this group is selectable from the Group drop-down list when associating a group with a review 162 . If "No", this group will be hidden or disabled in the Group list. For an example, see Using Groups for Organizational Hierarchy and Projects 173 . Is Enabled Groups can be disabled when they are no longer in use. Disabled groups still show up in reports because reviews may be associated with them. © 2003-2015 SmartBear Software 166 167 Collaborator Server Group administrators are regular (not full administrator) users who are allowed to administer this group. Group administrators can edit 165 all of the fields of the group. Group administrators can add or remove group administrators for the group, even themselves, but they can not remove the last group administrator from the group. Group administrators can add or remove user members 168 of the group. Users that are group administrators may or may not also be regular members of the group. Group administrators are not allowed to directly edit the list of child groups of the group, but they can create new child groups of the group. The group administrator that creates a child group is automatically a group administrator of that child group. You can add multiple groups to be children of the group. This may be helpful if a group is constituted by a number of sub-groups. The "group hierarchy" created by Group -> Child Group relationships is important for the associate with review 162 and access control 163 algorithms. © 2003-2015 SmartBear Software Groups Groups can have specifically named member users, or they can automatically contain all users as members. Group membership is important for the associate with review 162 and access control 163 algorithms. 3.3.3.1 Syncing Groups Collaborator provides a simple web UI for creating and managing groups, but when groups are used to represent organizational hierarchy 170 for large companies the web UI becomes unmanageable. Such groups are usually already stored in an external system such as LDAP, so Collaborator provides the ability to "sync" it is groups from an external system. Group Sync XML The ccollab admin group sync command takes as input an XML file describing all the groups being synced, their relationships, and their member users. The XML format is simple and a full schema is provided. For an example see Using Groups for Organizational Hierarchy 170 . The Collaborator administrator should write a script that queries the external system (that is, LDAP) and creates this XML. Syncing The Collaborator administrator should run the sync script periodically. Collaborator will examine the group sync xml and make the appropriate changes in the system. Processing the sync is not very resource intensive, so you probably do not need to worry about load on the Collaborator server. Users The group sync xml describes which users are admins and/or members of which groups. There are two options if the XML describes users who do not yet have accounts in Collaborator, controlled by the --create-user option of the ccollab admin group synccommand: © 2003-2015 SmartBear Software 168 169 Collaborator Server · Create the member-user - If the --create-user option is specified, a user account is created for the user. Note the user does not consume a license 82 until they log in. · Ignore the member-user - If the --create-user option is not specified (default behavior), t he member-user is ignored and a user account is not created. This is useful if you have a large organization but only a small subset of the employees are using Collaborator. Removing Groups Groups may be removed from the external system. There are two options if the XML no longer describes a group which was created in an earlier sync, controlled by the --delete-groups option of the ccollab admin group sync command: · Delete the group · Disable the group - If the --delete-groups option is specified, the group is deleted. However if the group can not be deleted because it has associated reviews 165 , an error is returned and the sync is canceled. - If the --delete-groups option is not specified (default behavior), the group is marked disabled. This always works, regardless of whether there are reviews associated with the group. Renaming groups Groups are uniquely identified by a GUID which is specified in the group sync xml. To rename the group simply specify a group with the same GUID but a different title. Manual groups Sometimes it is useful to sync groups with an external system but also manually specify some groups using the Web Client or the ccollab admin group create command. For an example see Using Groups for Organizational Hierarchy and Projects 173 . Collaborator keeps track of which groups were created using sync and which groups were created manually. Manually created groups are not deleted or disabled on subsequent syncs just because they are not in the group XML. The web UI displays a warning when manually editing a group that was created by sync. Manually created groups can contain synced groups as children, but not vice-versa. © 2003-2015 SmartBear Software Groups 3.3.3.2 Using Groups for Organizational Hierarchy The Groups 162 feature is flexible enough to allow you to model any organization. As an example, suppose your company's Action Games Division org chart looked like this: Companies this large typically store their org chart in an LDAP system. The Collaborator administrator can write a script that synchronizes 168 Collaborator groups with the LDAP system. For example, the XML to create the organizational structure shown above would look like this: © 2003-2015 SmartBear Software 170 171 Collaborator Server Sample XML<groups>?<group guid="action-games-division" title="Action Games Division" allow-associate-with-reviews="false"><member-group guid="technology"/><member-group guid="production"/><member-group guid="product-management"/><member-user login="jbuson"/></group>?<group guid="technology" title="Technology" allow-associate-with-reviews="false"><member-group guid="controls"/><member-group guid="uis"/><member-user login="rjameson"/></group>?<group guid="production" title="Production" allow-associate-with-reviews="false"><member-group guid="game-concepts"/><member-group guid="game-design"/><member-user login="dgillerman"/></group>?<group guid="product-management" title="Product Management" allow-associate-with-reviews="false"><member-user login="jjohansen"/></group>?<group guid="controls" title="Controls" allow-associate-with-reviews="false"><member-user login="abaisle"/><member-user login="jclover"/></group>?<group guid="uis" title="UIs" allow-associate-with-reviews="false"><member-user login="sbeam"/><member-user login="tlai"/><member-user login="mforrest"/><member-user login="jhighwagon"/></group>?<group guid="game-concepts" title="Game Concepts" allow-associate-with-reviews="false"><member-user login="sburke"/><member-user login="jclover"/></group>?<group guid="game-design" title="Game Design" allow-associate-with-reviews="false"><member-user login="slee"/><member-user login="dbickford"/><member-user login="aelam"/><member-user login="tdavis"/></group></groups> Note - we have assumed that user's logins are created by prefixing the first character from their first names to their last names. All of the groups have "Allow associate with Review 166 " set to "No". Reporting based on group membership The reporting system can be used to create reports based on group membership. For example, all reviews where a member of a department was a participant, or all reviews created by a member of a department, and so on. 3.3.3.3 Using Groups for Projects The Groups 162 feature is flexible enough to allow you to model any structure. As an example, if you wanted to model a group of projects from a software gaming company: © 2003-2015 SmartBear Software Groups Since there is only a few groups we create them manually using the web UI. First create a group called FPS Projects. The FPS Projects group would have only one user in it: Jeffrey Buson. It would also have three child groups: Western, SciFi, and Medieval. The Western, SciFi, and Medieval groups would each contain the users that are assigned to those projects. Associating groups with reviews We set "Allow associate with Review 166 " to "Yes" for the Western, SciFi, and Medieval groups. In this example we are using groups to represent projects, so we configure the singular group label 144 to "Project" and the plural group label 144 to "Projects". When a user in one of those groups creates a review it will be associated with a group. Most of the users are only members of one group, so when they create a review they do not have to manually choose a group - the review is automatically associated with their group. The users "Anna Basie" and "Scott Bean" are members of both the Western and Medieval groups, so when they create a review they are prompted to select one of those "Projects" to associate with the review. Filtering the participant list When a user creates a review they can choose to filter the participant list 163 by that group. When Amanda Elam creates a review, if she selects "Filter possible participants by 'SciFi' Project" then the participant drop-downs will only contain Dave Gillerman, Jim Clover, Son Lee, and Tracy Davis. This is useful at large companies to make the list of users more manageable. © 2003-2015 SmartBear Software 172 173 Collaborator Server Restricting Access based on group Access to reviews can be restricted based on associated group. The restriction can be set for all reviews or just for a particular review. For example, if a review was associated with the Western group and group access restriction was enabled, then it would be accessible to Scott Beam and Jeffrey Buson, but not accessible to Jason Johansen. Reporting based on associated group You can display, sort and filter reports by the associated group, so you know which project the review was for. Finishing projects When a project is finished, we mark it is group disabled. This means the group can no longer be associated with reviews, but it is still in the system for reporting purposes. 3.3.3.4 Using Groups for Organizational Hierarchy and Projects The Groups 162 feature is flexible enough to allow you to model any structure. You might want to use groups to represent an organizational hierarchy like the Using Groups for Organizational Hierarchy 170 example and use groups to represent projects like the Using Groups for Projects 171 example. This is supported and gives us all the advantages of both approaches. Creating Groups We create the groups to represent organizational hierarchy using the sync process as described in the Using Groups for Organizational Hierarchy 170 example. We create the groups to represent the projects manually as described in the Using Groups for Projects 171 example. Collaborator remembers which groups were created manually and which were created using sync, so the sync process does not delete the manually created project groups. Assigning Group Members Instead of manually naming each user that is a member of each project group like we did in the Using Groups for Projects 171 example, we can indicate that all the members in an organizational hierarchy department are working on a project by making the organizational hierarchy group a child of the project group. This is much easier than assigning individual user members, but we lose some fine-grained control. © 2003-2015 SmartBear Software Groups Associating groups with Reviews All of the organizational hierarchy groups have the "Allow associate with review 166 " option set to "No". The Western, SciFi, and Medieval project groups have the "Allow associate with Review 166 " option set to "Yes". We configure the singular group label 144 to "Project" and the plural group label 144 to "Projects". When a user creates a review it will be associated with a project group. If the user's organizational hierarchy group is only a member of one project group then when they create a review they do not have to manually choose a group - the review is automatically associated with the project group. If a user's organizational hierarchy group is a member of more than one project group then when they create a review they are prompted to select one of those "Projects" to associate with the review. Filtering the participant list When a user creates a review they can choose to filter the participant list 163 by that group. This lets a user filter the list of participants by only the users working on the project associated with the review. This is useful at large companies to make the list of users more manageable. Restricting Access based on group Access to reviews can be restricted based on associated group. The restriction can be set for all reviews or just for a particular review. For example, if a review was associated with the Western group and group access restriction was enabled, then only users working on the Western project would be able to access it. Reporting based on group membership The reporting system can be used to create reports based on group membership. For example, all reviews where a member of a department was a participant, or all reviews created by a member of a department, and so on. Reporting based on associated group You can also display, sort and filter reports by the associated group, so you know which project the review was for. Finishing projects When a project is finished, we mark it is group disabled. This means the group can no longer be associated with reviews, but it is still in the system for reporting purposes. © 2003-2015 SmartBear Software 174 175 3.3.3.5 Collaborator Server Using Groups for Review Pools Groups for Review Pools Review Pools are Groups that can be selected as participants in a Review 672 . To enable Review Pools, a Collaborator administrator must define specific Groups to be selectable for Review Pools. You can configure Groups for Review Pools specifically for use as Review Pools, or select Review Pools from an existing group hierarchy. Using Groups for Review Pools without a Group Hierarchy As a Collaborator administrator, if you do not already use a group hierarchy, or if it does not make sense to use it for Review Pools, then you should create Groups only for use by Review Pools. Create one or more Groups containing the users who are candidate participants. For each Group to be used as a Review Pool without a group hierarchy, enable Review Pool Participant and disable Associate With Reviews. Shown below is an example where several Groups have been created specifically for use as Review Pools. Using Groups for Review Pools with Group Hierarchy As a Collaborator administrator, if you have a group hierarchy already defined for your organization, you may designate any existing Groups to also be used for Review Pools. For each group to additionally be used for Review Pools, enable Review Pool Participant and leave Associate with Reviews enabled. Shown below is an example organization where the leaf groups have been enabled for use as Review Pools. © 2003-2015 SmartBear Software Groups © 2003-2015 SmartBear Software 176 177 3.3.4 Collaborator Server Email Enable Email Notifications Email notifications are now optional. If enabled, users will have the option to receive notifications of review activity via email. © 2003-2015 SmartBear Software Email SMTP Host The domain name or IP address of the server to use to send SMTP messages. This machine must be configured to accept mail from the server on which Collaborator is installed. If your email server is Exchange you will need to get your Exchange administrator to enable anonymous SMTP. If this setting is not established properly, no emails will be sent. SMTP Port The port number to connect on when sending SMTP messages, typically 25. The port number might be different if a spam filter is set up in front of the primary server; in this case you probably want to bypass the spam machine, or else put a rule on the spam machine to allow Collaborator to send messages. If this setting is not established properly, no emails will be sent. Send Email as User Determines which user will be listed in the "From Address" in emails sent by Collaborator. If you elect to use the "default address," emails will come from the default address given elsewhere in this configuration screen. Otherwise the system will attempt to send email from the user that caused the message to be sent. For example, if a user causes a "new review" notification to be sent, that user's email address will be used as the "from" address. Some messages cannot be associated with a particular user and will still be sent from the default address. Default "From" Address The email address to use in the "From Address" field in notification emails. Typically this is the system maintainer's email address. Subject Prefix This text will be pre-pended to the subject line of any email sent by Collaborator. This assists end users with mail filtering and helps to train or configure spam-filters to identify Collaborator notifications as non-spam. Notification List Specifies an e-mail address or mailing list that will receive a copy of every notification 230 that Collaborator sends. This field can be blank. Tech Support Address The email address to use for technical support questions. For example, this is used in the [Support] link in the web page footer. By default this is the email address for Collaborator Technical Support, but often the system maintainer wants to get these emails first for internal resolution. © 2003-2015 SmartBear Software 178 179 Collaborator Server Test E-Mail Address Usually left blank; if an address is supplied here a test message will be sent to this address when the form is submitted. This is used to test the email system. The email address is not saved. © 2003-2015 SmartBear Software Email Stalled Review Threshold When a review is in progress and a reviewer has not marked the review complete and has not made a comment in this number of hours, send a special notification to that reviewer. To disable stalled review notifications, set this value to zero (0). Stalled Review Alert Repeat If a reviewer is stalling a review (see above), repeat the notification this often (in hours) if the review continues to be stalled. Stalled Review Check Interval Specifies how often to check for stalled reviews. Bulk-Email Facility At the end of the email configuration dialog is a form that allows the administrator to send an email to all users 157 in the system. This is easier than maintaining a separate email mailing list for users. A typical use is to broadcast scheduled maintenance of the system, especially before and after a system upgrade 75 . © 2003-2015 SmartBear Software 180 181 3.3.5 Collaborator Server Version Control Collaborator integrates closely with your version control server to select which files to review. The administrator can configure the Collaborator server to be able to connect directly with version control. This allows users to select checked-in changelists to review from the web UI without having to install and configure client-side tools. Users can also configure their connection to the various version control servers using the client tools 321 so they can review changes before committing them. If you use more than one version control server Collaborator recognizes this and displays the files from the different servers separately. Configuring Version Control Server Templates Each version control system that Collaborator supports for server-side integration has a configurable "template". The configuration in this template is copied in to a version control server entry when you click Create in the Configure a new version control server form, or when a version control server entry is created automatically because a client uploaded files from a server that does not map 183 to any of the existing version control server entries. Each version control system that supports server-side version control integration includes different options in the Version Control Server Template: · Git 430 · Perforce 532 · Subversion · ClearCase 563 450 · Rational Team Concert 478 Configuring Servers Next is the list of currently configured servers, or a message if you have not created any yet: © 2003-2015 SmartBear Software Version Control Entries in this table are created automatically when one of the client tools uploads files from a server that does not map 183 to any of the servers we currently know about. You can edit or delete entries in this list. A form to create a new entry always appears at the bottom of the screen: Editing Server Configuration The exact fields you need to configure the connection to a version control server depends on the version control system: Most of the version control server entries have at a minimum these two fields: Title The title is used to indicate this version control server to other users of Collaborator, so it should be something that everyone will understand, even if they are going through proxies, VPNs, or other such things. Attach changelists from browser If enabled, this feature lets users select committed changelists to review directly from the web browser, without having to install any client programs. All of the version control systems also require that you specify the path to the command-line client executable for that system. This is a good example of something you might want to specify in the version control server template 181 , since it is probably going to be the same for all the version control server entries you configure. © 2003-2015 SmartBear Software 182 183 Collaborator Server If you want to enable the Attach changelists from browser 182 feature, then the server will also require some sort of authentication. This is the version control server account that Collaborator should use when querying that version control server. Note that Collaborator will use this account no matter who is logged in! You can click Test Connection at the bottom of the form to make sure that Collaborator can successfully communicate with the server. NOTE: This test simply verifies that specified server appears to be a valid repository; it does NOT verify that your username and password can update the repository. Client Configuration Mapping An unfortunate thing happens when client tools are separately configured for version control access: they can have different names for the same physical version control server. It is hard or impossible for the Collaborator server to automatically figure out whether these two names represent the same server or two different version control servers. The administrator can fix this using the Client Configuration Mapping section of the server configuration form. You can configure Java-style regular expressions to match against each of the fields that our client tools upload. If the version control server entry was created automatically then these fields are already filled out and you probably do not need to change them. The fields available are different for each version control system: When you submit this form, the list of configurations updates to indicate which configurations match and which do not match the current patterns. This makes it easy to iterate until you have covered exactly the right cases. 3.3.6 Custom Fields Collaborator supports custom fields for reviews and defects. A special type of review custom field is also supported: participant custom fields. Participant custom fields apply to a review, but allow each user to specify their own value for the field. Custom fields may be any of four types: Singleline String, Multi-line String, Drop-down List, and Multi-Selection. Although these fields show up in different places in the user interface, the administrative interface for configuring these fields is identical. It shows up in the Review Custom Fields, Participant Custom Fields, and Defect Custom Fields subsections of the administrative interface. Consequences of Changing Custom Fields The conscientious administrator will realize that it could be disastrous to change custom field settings while a review is taking place. If someone is filling out custom fields and simultaneously a new one is added, what happens? If a review is going on and a new field is added or a field is removed, what happens? If you view an old review with defects and you have since added, removed, or changed defect custom fields, what happens to the defect data? © 2003-2015 SmartBear Software Custom Fields Collaborator is smart about handling dynamically changing custom fields even while reviews are in progress or already complete. If fields are added after the fact, reviews and defects will show a dash or "N/A" to indicate that this value was not given. Any new creations or edits of existing creations will force the user to fill in values for the new fields. If fields are deleted, existing values are simply ignored. If there are changes to field titles, descriptions, or other non-value items, existing values are unaffected. If the values in drop-down lists change such that a value given previously no longer exists, the previous value will still hold for that field, although if the user then edits the field he will be forced to pick a new valid value. Fields that are deleted in the administrative interface are removed from the user's interface immediately. The original data is still preserved in the database for reporting but is no longer available to the user in the various client interfaces. Custom Fields and Reports There are consequences of custom fields on external reporting systems such as Excel, Access, Crystal Reports, and Business Objects. The custom field system inside the database is fairly involved and not intuitive. Therefore for your convenience Collaborator maintains several database VIEW objects that cause custom field data to appear as if it was a standard table in the database. The two VIEW objects are reviewcustom and defectcustom. In each case one column refers to the unique ID of the associated object, then Collaborator generates columns for each of the other custom fields and fills in the values for each, using NULL if the value is not specified. Warning: It is not uncommon to see NULL values in custom field views. If a review is in a workflow 198 that does not support certain fields, they will be NULL. If a review was created before a certain custom field existed, the value will be NULL. Warning: If you change custom fields Collaborator will immediately change the VIEW definitions in the database. This can break existing queries and reports unless those queries have been designed to be immune to such changes. For example, you should refer to columns by name and not by their order. Custom Fields and Searching The search engine expect. 301 is aware of all custom fields and will scan data in custom fields you would © 2003-2015 SmartBear Software 184 185 Collaborator Server Custom Field Configuration When you view either the Review Custom Fields, Participant Custom Fields, or Defect Custom Fields subsection, a list of already customized fields will appear at the top of the list: Collaborator will come with default custom fields, an "Overview" review custom field and "Severity" and "Type" defect custom fields. They will appear collapsed as exemplified by the Severity custom field. Click on the blue triangle to the left of the custom field title, and the section will expand so that you may view/edit the settings. Expanded sections will look like the Type custom field. Each existing custom field comes in a box with a toolbar of commands to the right of the title: © 2003-2015 SmartBear Software Custom Fields The Move Up / Move Down commands let you change the order of the fields as it will appear to users. Delete removes the custom field from the system forever, so use with caution. At the bottom of the custom fields list, there will be a customizable form where you will be able to create a new custom field: A custom field's data type cannot be changed once it is created; everything else about the field can be modified at any time. Types are one of: · Single-Line Text. A single line of text, scrolling horizontally if needed for length. Maximum length is 255 characters. Various validation options. · Multi-Line Text. Multiple lines of text, scrolling horizontally and vertically as needed. Maximum length is database-dependant, but always at least 8192 characters, and typically more like many millions of characters. · Drop-Down List. A drop-down list of pre-defined choices. Exactly one selection is required. · Drop-Down List Series. A hierarchical series of drop-down lists of pre-defined choices. © 2003-2015 SmartBear Software 186 187 Collaborator Server · Multi-Select List. A drop-down list of pre-defined choices. User may select zero, one, or multiple values. The Title of a field is displayed to the user as a prompt, much like "Type" and "Title" are shown in the screenshot above. Tip: Avoid to name fields very much alike. Prefer more descriptive names. Otherwise, it may confuse users when selecting an appropriate field. Besides, there is a known issue 683 that custom field names which differ only by double quote characters (") may break Oracle reporting views. The Description of a field is shown as help-text below the field, prompting the user as to the intent of the field. All textual fields allow for a minimum and maximum length. Minimums can be zero if it is OK for the user to leave the field blank. Single-Line string fields also allow for an optional Java-style regular expression validator. If given, the content of the field must match the regular expression exactly. It is important to note that if you use a Validator, that field will be automatically required. If you do not want the field to be required, you must use a Validator that will allow the field to accept empty values AND set the Minimum Length to 0. The Drop-Down List type requires a list of options. These are in plain text. To change the order of items, just copy/paste the items in the list. If you change just capitalization, the item is altered inplace; if you change an item more than just in capitalization the system considers the previous item to be deleted and the current item to be added. Warning: If you think you are renaming a drop-down item, you are not! The system considers "renaming" as deleting the old item and creating a new item. Rearranging items without renaming works as expected, as does changing just capitalization in an item. This confusing situation will be remedied in a future version. The Drop-Down List Series type requires a title that is pipe-delimited and a list of options that are also pipe-delimited, and the number of elements must match. For example, if you title the field "Product|Version|Area", you will need list elements that match, like: "Review|5.0|Misc", "Review|5.0| CLI", "NewProduct|1.0|Development". These hierarchical custom fields will automatically populate the remaining fields if no other options are available. Note: When running reports, the text entered must exactly match the list item, including pipe characters. For example, "Review|5.0|Misc" ... For example, if the list elements are "A|B|C", "D|E|F" and "D|G|H", selecting "A" in the first dropdown will automatically populate the second and third drop-down elements with "B" and "C", respectively, as there are no other valid options for "A". Selecting "D" will not automatically populate the remaining drop-downs, as there are multiple options associated with "D". © 2003-2015 SmartBear Software Custom Fields Why Are not My Custom Fields Showing Up in My Reviews? Once you have created a new custom field, you may not see them automatically in your reviews. If you have more than one template defined, custom fields will be automatically be disabled on all templates. To enable custom fields, go to the Review Templates screen, edit the appropriate template and change the setting for that specific custom field to "Yes". You can also define a Review Custom Field and Participant Custom Field to be visible only during certain phases of the review. This can be useful for storing fields only used by scripts or triggers. This is changed via the "Visible Phase" drop-down. You can set Review Custom Fields or Participant Custom Fields to be mandatory by a certain phase of the review by setting the “Due by Phase” dropdown. The phase set in the “Visible Phase” dropdown should be earlier than the phase set in the “Due by Phase” dropdown. Note that mandatory participant custom fields are only mandatory for participants in charge of changing the phase (planning phase: author; annotation phase: all participants; inspection phase: reviewers, and so on). Notes About Participant Custom Fields Participant custom fields have some unique behaviors. First, they cannot be visible only in the planning phase, as this would not give the participants an opportunity to specify their values for the fields. Second, if a required participant custom field is visible only within the Inspection phase, users may not "Finish" the inspection phase without specifying their values for the fields. Finally, participant custom fields may be edited while the review is in the complete phase without reopening the review. This is to support post-review survey questions. For examples of reporting on Participant Custom Fields, see: · Example SQL: Participant Custom Fields · Example XPath and XSL 3.3.7 596 602 Checklists When you want to remind reviewers to look for items in a review that have been recurring problems (perhaps security issues for a reviewer who is a security specialist or integration issues for another), a checklist is the answer to make sure that the code is thoroughly reviewed before it is considered complete. You can configure checklists and the items that they include from the Checklist wizard on the Admin page: © 2003-2015 SmartBear Software 188 189 Collaborator Server You can make a new checklist, edit a checklist, or disable a checklist. After a checklist has been disabled, you can enable it. Checklist names must be unique. Checklist items must be unique within a checklist. © 2003-2015 SmartBear Software Checklists The checklist item list always has space for 10 new items. If you need more space, click SAVE and the list refreshes with your current items and space for 10 more. After you have created the checklist, apply the checklist to a template. Only one checklist can be applied to a template. Go to the Review Templates tab on the Admin page and edit the template to make sure that the template you are using has checklists set up: © 2003-2015 SmartBear Software 190 191 Collaborator Server Select the checklist you want to include in the review, and then select Mandatory or NonMandatory from the dropdown box. Mandatory checklists must have all items checked before the review can be approved. If you revise a checklist after it has been applied to a review, the current review is not affected. The revised checklist applies only to future reviews. When a reviewer checks off an item, the Chat section on the Review Summary page shows the information for that item. Collaborator notes the name of the reviewer and the date and time the item was checked off. If the reviewer who checked an item unchecks it, the system notes that he has unchecked the item and the date and time. For auditing purposes, each checklist status change is included in the Review Details Report. Make sure that Checklist History is set to Display Checklist History. 3.3.8 Roles A "Role" in Collaborator indicates the way in which a person participates in a review. Roles Collaborator supports four "roles" for review participants. The following roles are configured by default but administrators can configure completely different templates. Author Authors are the people responsible for the changes or documents under review. Usually they are responding to comments and questions made by reviewers and observers. In the "Fix Defects" phase the review will be "in their court" and on their Action Items 234 list. Reviewer © 2003-2015 SmartBear Software Roles Reviewers are responsible for inspection, creating defects, and so on. With multiple reviewers, they will hopefully come to a consensus about each questionable item, but this is not required by the system. Reviewers typically create defects 296 , but again this is not required. Observer Observers are involved and make comments but they are not "vital" to the review. If all other participants mark the review "complete," the review goes to the next phase regardless of observer state. Observer roles are usually used when you want to bring in someone who has special expertise on an issue. Moderator (optional, not enabled by default) The Moderator maintains the pace and tenor of the review. This is an optional role that does not exist in the default installation. This is used for more formal review workflows where one person leads and controls the review. Different styles of review require different roles with different terminology and rules for what each rule is allowed to see and do in a review. Formal reviews might have four roles with strict rules, informal reviews might have just an author and reviewer, and a "self-check" review might just require an author with optional external reviewer. Users interact with roles when they are creating a new review 247 in a review. 238 or editing the list of participants The Role Configuration screen lets you set up any number of sets of roles. Each set is given a name and corresponds to some concept of a review. Any number of role configurations can be specified. The names here are never shown to an end user; they are used only when selecting a role configuration as part of a review workflow 198 . In each role configuration you can have between 1 and 4 roles. A variety of options are available when editing an existing role configuration or creating a new one: © 2003-2015 SmartBear Software 192 193 Collaborator Server Configuration Title The title of this configuration. This is strictly an administrative thing -- users of the system will never see this title. They see review workflows 198 instead. Title The name of the role as it will appear in drop-down lists and online help text. The user will use this title as the primary mechanism for referring to the role. Use a blank title to indicate that this role should be completely disabled. The "Author" role must always be in the second column, although it can be renamed. It must always exist. The concept of the "author" is a special one in the system because the author always has special responsibilities. For example, when a review is in "Rework" phase the author's Action Items 234 list will say "Rework defects found" whereas other participants will see "(No Action Required) Waiting for author to rework defects". Description A description of the role that will be prominently displayed to the user in all client user interfaces where roles are chosen, most prominently in the Participants 238 section of the Create Review wizard. © 2003-2015 SmartBear Software Roles Can change own defects If "None", this role will be allowed to create defects, but will not be allowed to mark their own defects fixed, edit their own defects, or delete their own defects. If set to "Fix and Edit", this role will be able to create defects, mark their own defects fixed, and edit their own defects, but will not be allowed to delete their own defects. If set to "Fix, Edit, and Delete", this role will be able to create defects, mark their own defects fixed, edit their own defects, and delete their own defects Administrators can always change or delete any defect, regardless of this setting. In all but the most informal of reviews, authors are typically not allowed to mark defects fixed, but all other roles are allowed. This setting also applies to the ability to externalize Can change other users' defects 299 a defect. If "None", this role will not be allowed to mark other users' defects fixed, edit other users' defects, or delete other users' defects. If set to "Fix and Edit", this role will be able to mark other users' defects fixed and edit other users' defects, but will not be allowed to delete other users' defects. If set to "Fix, Edit, and Delete", this role will be to mark other users' defects fixed, edit other users' defects, and delete other users' defects Administrators can always change or delete any defect, regardless of this setting. © 2003-2015 SmartBear Software To enable this setting, the Restrict Access to Fix Defect must be set to "No". 146 This setting also applies to the ability to externalize a defect. 299 setting 194 195 Collaborator Server Marks reviews "finished" If true, users with this role will be presented with a button in the Next Steps screen 255 that allows the user to say to the group: "I am finished looking at this review". The user will be brought back into the review if another user makes a non-trivial comment. If false, the user is told "You must wait for other users". Typically everyone except the author has this feature enabled. The author is usually not in control of when the review finished so his "I am finished" decision is not interesting. Phase-change waits for "finished" If true, the review does not change phases until this user says he is "finished" with the review in the Next Steps screen 255 . A phasechange might be inspection -> rework or inspection -> complete. For this to be true, "Marks reviews finished" must also be true. Typically this will be enabled for reviewers but disabled for observers where the user has been invited but we do not want the review held up. © 2003-2015 SmartBear Software Roles Required to read all comments Please note that "Marks reviews finished" and "Phase-change waits for finished" must both be set to "yes" in order for this setting to be evaluated for the selected roles. Changes here will have no effect if one or both of those settings are set to "no" for the specified role. If yes, participants in this role will be required to mark comments read before finishing the review. Typically participants collaborate and discuss potential issues, so they are required to read each other's comments. However, some workflows have each participant work independently. Setting this configuration to "no" is usually applied to observertype roles because they are frequently called in for something specific and do not need to "hang around" and see what other users have to say. This is also helpful in workflows where the reviewers independently submit comments to the author, who is then in charge of all changes without having to communicate back to reviewers. Note that this setting does not prevent anyone from coming back to the review and continuing to actively participate at any time. Allowed to modify review General Information Should this role be allowed to modify the review title, template, custom fields and other data of the General Information 245 section? Typically there is no harm in allowing this, but you might want to lock down exactly who has the last word on the review custom fields and title. © 2003-2015 SmartBear Software 196 197 Collaborator Server Electronic Signature Should this role be required to either sign off on or decline to sign off on a completed review? This setting takes effect when template based electronic signatures 151 are enabled in the General Settings 141 screen. Min # per review The minimum number of users with this role required in the review. Can be zero to indicate "This role completely optional". Most often used with reviewers or moderators to require at least one, or with a "very careful" review where multiple reviewers are required. Max # per review The maximum number of users with this role required in the review. The maximum supported number per role is 999. Usually there is no reason to limit the number of users who can participate as a role in a review, except for highly formal reviews where a strict process is required. Min # required to finish review The minimum number of users with this role required to approve the review in order to complete it. This value should be less than or equal to a value specified in "Min # per review" for the respective role. If the user role allows to mark the review as finished and this value is 0, then all users with this role must approve the review to "close" it. If the user role is not obligated to approve reviews and this value is 0, then all users with this role are not required to "close" a review. © 2003-2015 SmartBear Software Review Templates 3.3.9 Review Templates A "Review Template," or a "Review Workflow," is a particular set of roles, custom fields, and other options that determine the behavior and rules of a review. Small installations might have only one template. Some installations will want a template for "quick" reviews (self-checks during active development of new features), another for "standard" (one author, one reviewer, suitable for most reviews), and another for "very strict" (reviews of a stable branch, core module, stable files or particularly difficult piece of code). Still others might require different templates in different development groups all using a single server. The Review Templates section in the Admin screen allows an administrator to configure these templates. Template Management The default configuration is to have only a single active template, and this is adequate for many smaller installations and trials. When there is exactly one template, the user is not prompted to select a template when he creates a review 238 ; the one template is automatically selected. If additional templates are added later, the template that was the singleton is still applied to those existing and completed reviews. You cannot have fewer than one active template. The user interface will not allow you to disable the last template in your system; users need something to control the rules of the review. You also cannot delete templates. Old templates are needed for existing and completed reviews that depended on that template. You can, however, mark templates as "disabled," in which case they appear only in the administrative interface but never when creating a new review. Existing reviews with that template continue to their completion so as to not disrupt their progress: Here "Formal Inspection" has been disabled. © 2003-2015 SmartBear Software 198 199 Collaborator Server Editing Templates Every template has a Name and Description. Both of these are shown to the user for reference. For each template you can specify whether it will prompt for review reject reasons some of the predefined checklists 188 . 245 , or display © 2003-2015 SmartBear Software Review Templates Each template can include an arbitrary set of custom review, participant and defect fields 183 . The master list of all possible custom fields is set up separately; here you can configure which of those fields to display to the user during this template. This makes it possible to have templates with various field requirements, but where the same field can be reused across templates, the database and user interface will make that plain. Each template also specifies a single role configuration 191 to use for that review. Changing the Template being used in a review What happens when a review changes its template, or when a template definition changes when a review is already in progress or complete? © 2003-2015 SmartBear Software 200 201 Collaborator Server A review can only change template during the Planning phase. This means once the review is under way, the template is fixed. This makes sense -- it would be hard to change, for example, the role configuration 191 when participants are already invited and performing their respective tasks! During the planning phase the wizard interface prevents the user from making incorrect moves. Editing a template that is in use If you edit a template that is currently in use by a review, the template will be set to disabled but it will continue to be used by the open review. A new template with the same name containing your changes will be automatically created. The newly created template will be used by all reviews created/edited after this change. Editing a template will not re-open old reviews. 3.3.10 Triggers Collaborator can execute an external script or application when certain events occur. This is useful when integrating Collaborator with other systems such as issue-tracking, ALM, or builds. Possible uses of triggers include: · Mirror defects created in Collaborator into an external issue-tracking system. · Set a flag in a system when a review completes. · Intercept all notifications sent from Collaborator to log them or to send the notification in a way other than standard email or RSS. · Send notifications to a mailing list when certain events occur. The Triggers section of the Administration page lets you configure the various triggers: · Review Created - Review created. No files or participants yet. · Review Phase Changed - Review phase changed. For instance from "Planning" to "Inspection" or from "Inspection" to "Canceled". · Added Files - Files and/or changelists attached to a review. · Notifications Sent - A email, RSS or other type of notification was sent to someone. · Defect Activity - A defect was added, modified, or marked open/fixed. Use the defect unique ID to determine the difference. · User Created - A new user was created. This runs whether or not the creation was automated or manual. © 2003-2015 SmartBear Software Triggers · Role Changed - A participant's role has changed. For instance, a participant was added to a review, removed from a review or promoted from one role to another. The Executable field specifies the application to run. If this is a script, use the script executable here (for example, Perl, PHP, Python). This must be an absolute path to the application; the form will complain if the file cannot be found or executed. The Parameters field is a list of arguments to supply to the executable. If this is a script, the absolute path to the script itself is typically the first argument. There are many special arguments you can supply that will be replaced by Collaborator when the application is executed. For example, ${review.title} will be replaced by the title of the review associated with the given triggering event. See the Variable Substitution 123 chapter for details. Please note, that not all of the variables are available at the moment the trigger fires. In this case they will return "Not available" instead of their value. For example, the ${review.title} is not available for the Review Created trigger as the review does not yet has a title when the trigger fires. 3.3.11 Notification Templates Using settings on the Notification Templates page, you can customize the content of notification e-mails that Collaborator sends to review participants (see Notifications on Review Changes 230 ). About Notification Types At the top of the page, there is a drop-down list of available notifications: © 2003-2015 SmartBear Software 202 203 Collaborator Server You can find detailed description of events below 204 in this topic. To modify a notification template 1. Select the desired notification from the drop-down list. 2. Specify the e-mail subject in the Title Template box. 3. Enter the desired e-mail text into the Message Template box. 4. Click Save to apply the changes. Important: The text in the “Title Template” and “Message Template” boxes can include Collaborator variables (like ${review.id} or ${review.creator.name}). These variables let you insert user- and review-specific information into notifications. For complete list of available values, see Variables 123 . To enable or disable a notification © 2003-2015 SmartBear Software Notification Templates 1. Select the desired notification from the drop-down list. 2. Select the Suppress Notification check box to disable the notification. Clear this check box to enable the notification. To return to default settings · Simply click Restore Default Templates on the page. How to Determine Notification Recipients Quickly To indicate notification recipients, Collaborator puts the following keywords at the beginning of notification name: Recipie nt Description Author The author of the review, for which the event is generated. The author is also called "review creator". User All participants of the review (except for the author). List All participants of the review (except for the author) and also the e-mail address (or mailing list) specified by the Notification List 177 setting of Collaborator. Using these notifications are convenient for notifying multiple users, including those users who are not mentioned in the Participants list of a review. Reviewe r All users with a Reviewer role on the review. Poke The user, who is poked (that is, notified explicitly). Event Descriptions The drop-down list at the top of the setting page 202 displays notifications in alphabetical order. Below is a list of notifications organized by their type. O Review Phase Notifications 205 O Changes in File and Participant Lists O Changes in Comments O Miscellaneous 211 © 2003-2015 SmartBear Software 211 211 204 205 Collaborator Server Review Phase Notifications Below is a description of notifications that Collaborator sends when a review phase changes: Annotatin g 205 Inspection Canceled Planning 208 205 Complete d 205 Rework 209 Signing 209 207 Stalled 210 Rejected 208 · Annotating The following notifications indicate that the review is in the Annotating phase: Notificatio n Sent To Remarks List Annotatin g All review participants and recipients of the Notification List e-mails Just a notification that the review is in the Annotating phase. User Annotatin g All review participants A notification that the review is in the Annotating phase. The default message template also describes the recipient’s role in the review. · Canceled The following notifications indicate that the review has been canceled: Notification Sent To List Cancel All review participants and recipients of the Notification List e-mails User Cancel All review participants The default notification message mentions the user, who canceled the review. · Completed The following notifications indicate that all the reviewers have marked the review as completed, and that the author needs to mark it as completed as well in order for the review to be finished: © 2003-2015 SmartBear Software Notification Templates Notification Sent To Author Finish Review Required Review author List Author Finish Review Required All review participants and recipients of the Notification List e-mails Note: Configurations on the Admin | Roles 191 page have the Marks reviews "finished" 195 setting. It specifies, to which roles the above-mentioned notifications are applicable. If this setting does not specify that some role can mark reviews as "finished", Collaborator does not send notifications to the participants that have this role. The following notifications indicate that the review has been completed: Notification Sent To Remarks Author Complete Checkin Review author Indicates that the review has been completed, and the author can commit the changes to the source control. Author Complete Checkin Unread Review author Indicates that the review has been completed, but has unread comments. The author can commit the changes to the source control, but should read the comments before doing this. Author Complete Nocheckin Review author Indicates that the review has been completed. Author Complete Nocheckin Unread Review author Indicates that the review has been completed and that there are unread comments in it. List Complete Checkin All review participants and recipients of the Notification List e-mails Indicates that the review has been completed, and the author can commit the changes to the source control. List Complete Checkin Unread All review participants and recipients of the Notification List e-mails Indicates that the review has been completed, but has unread comments. The author can commit the changes to the source control, but should read the comments before doing this. © 2003-2015 SmartBear Software 206 207 Collaborator Server Notification Sent To Remarks List Complete Nocheckin All review participants and recipients of the Notification List e-mails Indicates that the review has been completed. List Complete Nocheckin Unread All review participants and recipients of the Notification List e-mails Indicates that the review has been completed and that there are unread comments in it. User Complete All review participants A notification that the review has been completed. User Complete Unread All review participants A notification that the review has been completed and that there are some unread comments in it. Note: the list above contains the Checkin and Nocheckin notifications that are very similar to each other. The notification message, which Collaborator sends, depends on the "Create a Commit Action Item for Completed Review" setting (you can find it on the Admin | General 141 setting page). If the setting's value is Create, then Collaborator sends the "Checkin" notifications. Otherwise, it sends the "Nocheckin" notifications. · Inspection The following notifications indicate that the review is in the Inspection phase. Notification Sent To Remarks Author Inspection Review author Indicates that the review has got to the Inspection phase and that the author can respond to comments. List Inspection Resume All review participants and recipients of the Notification List e-mails Indicates that the review returned back to the Inspection phase and that participants can review the author's proposed fixes. © 2003-2015 SmartBear Software Notification Templates Notification Sent To Remarks List Inspection Resume Chat All review participants and recipients of the Notification List e-mails Indicates that the review returned back to the Inspection phase and that it has comments that participants need to read. List Inspection Start All review participants and recipients of the Notification List e-mails Indicates that the review has got to the Inspection phase for the first time. User Inspection Resume All review participants Indicates that the review returned back to the Inspection phase and that participants can review the author's proposed fixes. User Inspection Resume Chat All review participants Indicates that the review returned back to the Inspection phase and that it has comments that participants need to read. User Inspection Start All review participants Indicates that the review has got to the Inspection phase for the first time. · Planning The following notifications indicate that the review returned back to the Planning phase. The author needs to finish planning in order for inspection to be able to continue. Notification Sent To Author Continue Planning Review author List Continue Planning All review participants and recipients of the Notification List e-mails · Rejected The following notifications indicate that the review has been rejected. The default notification message says what user rejected the review. © 2003-2015 SmartBear Software 208 209 Collaborator Server Notification Sent To List Reject All review participants and recipients of the Notification List e-mails User Reject All review participants · Rework The following notifications indicate that the review is in the Rework phase. The author needs to rework found defects: Notification Sent To Author Rework Review author List Rework All review participants and recipients of the Notification List e-mails User Rework All review participants · Signing Collaborator sends these notifications to indicate that reviewers need to sign the review 151 Notification Sent To Remarks Author Review Signed Review author Indicates that the author has signed the review. Author Review Signed Checkin Review author Indicates that the author has signed the review. . Note: The two notifications above are similar to each other. The notification message, which Collaborator sends, depends on the "Create a Commit Action Item for Completed Review" setting (you can find it on the Admin | General 141 setting page). If the setting's value is Create, then Collaborator sends the "Checkin" notification. Otherwise, it sends the other notification. List Complete Waiting for Signature All review participants and recipients of the Notification List e-mails Indicates that the review needs to be signed for approval. List Signature Declined All review participants and recipients of the Notification List e-mails Indicates that some participant has declined to sign the review. © 2003-2015 SmartBear Software Notification Templates Notification Sent To Remarks User Complete Signature All review participants The review has been completed and needs to be signed by participants. · Stalled The following notifications indicate that the review is stalled and needs some activity: Notification Sent To Remarks List Review Stalled Author Not Reworking All review participants and recipients of the Notification List e-mails Indicates that the review is stalled because the author needs to fix some defects. List Review Stalled Reviewer Not Finished All review participants and recipients of the Notification List e-mails Indicates that the review is stalled because a reviewer needs to approve it. Review Stalled Author Finish Annotating Review author Indicates that the review is stalled in the Annotating phase. It is waiting for the author to begin the Inspection phase. Review Stalled Author Not Reworking Review author Indicates that the review is stalled in the Reworking phase, and that the author should fix defects. Review Stalled Reviewer Not Finished Participants with the Reviewer role Indicates that the review is stalled in the Reworking phase. The default message specifies the reviewer, who needs to approve the review in order for it to be completed. User Waiting Failed All review participants Indicates that the review is stalled because some review participants have already approved the review and others are waiting for each other. © 2003-2015 SmartBear Software 210 211 Collaborator Server Changes in File and Participant Lists Collaborator sends the following notifications when the review's properties change: Notification Sent To Remarks List New Files All review participants and recipients of the Notification List e-mails Indicates that new files have been added to the review. List In Progress User Added All review participants and recipients of the Notification List e-mails Indicates that one or more users have been added to the review. The default notification message specified the users' roles in the review. List In Progress User Changed All review participants and recipients of the Notification List e-mails Indicates that the role of some review participant has changed. List in Progress User Removed All review participants and recipients of the Notification List e-mails Indicates that one or more users have been deleted from the review's Participants list. User New Files All review participants Indicates that new files have been added to the review. Changes in Comments When a review is in the Inspection phase and there are unread comments, Collaborator sends the List Inspection Resume Chat and User Inspection Resume Chat notifications. See their descriptions above 207 . Miscellaneous Notification Sent To Poke A review participant that you poked in the Collaborator UI Remarks Just a notification that the review needs the user's attention. © 2003-2015 SmartBear Software Notification Templates See Also Notifications on Review Changes Variables 230 123 3.3.12 Automatic Links Collaborator creates links in text that is typed by users as review comments, custom fields, and so on. Several types of links are created automatically: · URL's create links to that URL · Names of files in the review create links that open that file in the diff viewer · Line numbers (for example, 'line 345') in a file comment create links to that line in the diff viewer You can define your own Automatic Links to integrate Collaborator with external systems. Each Automatic Link consists of a regular expression pattern, URL format, and optionally a tooltip. When a match is found, Collaborator creates a hyperlink around the matching text. The URL of the hyperlink and the tooltip are constructed by replacing references to groups with the text selected by the corresponding capturing groups in the regular expression. Examples of external systems you might want to link to include issue/bug trackers, build tools, or documentation library systems. Creating New Automatic Links To create a new Automatic Link, click the New Automatic Link button. © 2003-2015 SmartBear Software 212 213 Collaborator Server Title Human-readable title for this automatic link, only used in the Automatic Link Configuration page. Regular Expression A JavaScript-style regular expression regular expression that identifies a reference to the external tool in text. This is used matched against user-entered text in review titles, custom fields, comments, and defects. You must include at least one one grouping expression (parenthesis). This is combined with the URL Format to link to construct the hyperlink to the external tool. For example: case\s*(\d+) This would match a string like Case 1423 but not 500 cases. This is the standard way to refer to a bug in FogBugz. Case Sensitive Evaluate regular expression case-sensitively. Usually this is set to "no". URL Format URL to link to, with references to groups captured in the regular expression above, in the form $groupNumber. Example using FogBugz: © 2003-2015 SmartBear Software Automatic Links http://fogbugz.bugserver/?$1 Tooltip Optional tooltip for link, with references to groups captured in the regular expression above, in the form $groupNumber. Example: Go to Case $1 3.3.13 Remote System Integration These settings allow to configure integration between Collaborator and the remote systems like JIRA or GitHub. See JIRA Integration 607 and GitHub Integration 625 for details. The Integration Status panel indicates which of integrations are currently operating and allows to enable of disable pre-configured integrations. To create a new configuration for a remote system, select the system and press Create button. The Remote System Configuration List panel lists all existing configurations for remote systems and allows to modify or delete them. © 2003-2015 SmartBear Software 214 215 Collaborator Server GitHub Configuration Settings For GitHub Configurations the following set of parameters are available: Setting Description Title The configuration name as it will be displayed in Collaborator's user interface. GitHub repo URI The URL of GitHub repository to be tracked. You can copy it from the Clone URL field of the repository's main page on GitHub. GitHub API token The personal access token for the GitHub account to be tracked. Read Creating an access token for command-line use on GitHub documentation to learn how to obtain it. The default set of token scopes is enough for integration with Collaborator. Branch to track One or several coma-separated names of branches to track. If this field is empty, "master" branch will be tracked. Endpoint URI This setting is needed for repositories hosted on GitHub Enterprise servers. It specifies the API URI of your GitHub Enterprise server. © 2003-2015 SmartBear Software Remote System Integration Ignore pushes for branches Optional. One or several coma-separated names of branches to ignore. Collaborator will not create reviews for pushes to the specified branches. After specifying these values, you can click TEST CONNECTION to verify if you entered data correctly. Read Configuring GitHub Integration integration with GitHub. 628 for step by step instructions on enabling and configuring JIRA Configuration Settings For JIRA Configurations the following set of parameters are available: Setting Description Title The configuration name as it will be displayed in Collaborator's user interface. © 2003-2015 SmartBear Software 216 217 Collaborator Server Server URI The JIRA server's URL and port. Admin username, and Admin password The user name and password that the plugin will use for connecting to JIRA. It is recommended that the specified user has administrator permissions in JIRA. After specifying these values, you can click TEST CONNECTION to verify if you entered data correctly. Setting Description Update review phase Specifies if the Collaborator plugin will automatically update the review status in JIRA items that are connected with that review. Update review participants Specifies if the Collaborator plugin will automatically update the list of review participants in JIRA items that are connected with that review. Project List A string containing the keys of JIRA projects, to which Collaborator will add new items. This setting's value is used as a default value for the JIRA Project custom field (see below). If you are going to create items in several projects, enter several keys and separate them with commas. Tip: click LOAD PROJECTS to read project keys from the JIRA instance specified by the Server URI setting. Project keys are case-insensitive. Issue Type The type of the JIRA items to be created from Collaborator. You can specify one item type only. Important: This setting is case-sensitive. Specify the type exactly as it is written in JIRA settings. Review Templates If JIRA integration is currently running, the page additionally displays the Review Templates list. In this list you can specify which of review templates 198 should display the special review custom field 183 named JIRA Project. © 2003-2015 SmartBear Software Remote System Integration JIRA Project is a drop-down field which lists JIRA projects, to which Collaborator can add new items. Just after the creation, the JIRA Project field is hidden. To show this field in the desired template, just click the Enable link next to template name. Read Configuring JIRA Integration integration with JIRA. 611 for step by step instructions on enabling and configuring 3.3.14 System Status Collaborator system status reports can be found on the System Status page. Charts The "Peak Usage" chart plots the maximum number of simultaneous users, measured by day. The "Active Users" chart displays the total number of users during the day: © 2003-2015 SmartBear Software 218 219 Collaborator Server This is most useful when determining the number of floating seats necessary to handle your Collaborator traffic. In the example above, 4 floating seats would be sufficient. Server Backup/Debugging Dump You can also find the server backup 88 form here. Many server parameters are displayed. These are typically useful only when debugging problems. System Information Following the debugging forms, charts will display a long list of charts is a long list of system information. These charts will include: · Debugging (Diagnostic Utility 130 ) © 2003-2015 SmartBear Software System Status · Client/Server Connection · Database Connection · Server Properties · VM Information These charts will be mainly used to gather system information for our Technical Support when trouble should arise. 4 Web Client This chapter describes the web user interface of Collaborator. The Web Client allows you to perform all types of peer review tasks: create reviews as an author, participate in someone else's reviews as a reviewer or observer, inspect the review materials and so forth. In order to use the Collaborator's Web Client, your administrator must first install and configure 51 the server part of Collaborator. The topics of this section contain detailed information on working with web client. In This Section · Web Client - Overview 221 Provides general information about Collaborator's Web Client. · Account Management 222 Contains information on your Collaborator's user account settings, logging in and logging out operations and subscribing to notifications. · Performing Reviews 233 Describes creating, performing, and managing peer reviews. · Searching & Reporting 301 Describes how to search for reviews and how to create reports. · Troubleshooting 318 Describes how to gather a support logs in case of troubles. Related Topics of Interest · Collaborator Server 51 Describes the server component of Collaborator. © 2003-2015 SmartBear Software 220 221 Web Client · Desktop Clients 320 Describes GUI Client, Command-Line Client, plugins for Eclipse, Microsoft Visual Studio and other clients for desktops. 4.1 Web Interface Client - Overview The Collaborator's Web Client allows you to perform all types of peer review tasks: create reviews as an author, participate in someone else's reviews as a reviewer or observer, inspect the review materials and so forth. Requirements In order to use the Collaborator's Web Client, your administrator must first install and configure 51 the server part of Collaborator. The Web Client supports the following browsers: · Microsoft Internet Explorer 8.0 and later (To upload files from this browser, your administrator should enable Adobe Flash 865 component) · Microsoft Edge · Mozilla Firefox 3.x and later · Apple Safari 3.x and later · Google Chrome 3.x and later Other browsers and versions might work to varying degrees. Opening Web Client To open the Collaborator's Web Client just start a web browser and navigate to the URL of the Collaborator Server. If you do not know the URL, ask your Collaborator administrator. If you have not been authenticated, you will be redirected the Log-in Screen Home Page will be displayed. 223 . Otherwise, the © 2003-2015 SmartBear Software 222 Collaborator Web Client Home Page From the Home Page you can: · Check your Action Items 234 to see if you have any assigned reviews. · View detailed information about the review in the Review Summary Screen · Create new reviews · Search 301 236 243 . . for specific reviews or generate various reports · Manage your user preferences 225 and notifications 230 310 . . · Read news, release announcements, webinar invitations and other information from the SmartBear. 4.2 Account Management Topics of this section contains information on your Collaborator's user account settings, logging in and logging out operations and subscribing to notifications. In This Section · Logging In and Logging Out 223 Describes how to log in to and log out from Collaborator. © 2003-2015 SmartBear Software 223 Web Client · User Preferences 225 Provides information on user account settings. · Notifications on Review Changes 230 Contains information on notifications that Collaborator sends to inform review participants on review changes. 4.2.1 Log in / Log out When you visit the main Collaborator web page, you are prompted with a log-in screen: The URL to this screen will depend on your system administrator. It often includes a special port number. Typically, accounts in Collaborator will be identical to your version control system account. If your account is not set up, you will need to contact an administrator to set one up 157 . If you use LDAP or ActiveDirectory 101 for authentication in your company, you can use that username/ password with Collaborator and it will automatically create your user account. Some system administrators will have enabled 141 a "Create an account" form on the front page: © 2003-2015 SmartBear Software Log in / Log out Once you are logged in, the system displays this fact at the top of the screen: You can log out using the "Logout" button in the menu bar, but this is usually not necessary. © 2003-2015 SmartBear Software 224 225 Web Client If you do not explicitly log out, the system will give your browser a cookie so the next time you go into a page you will not have to re-login first. 4.2.2 User Preferences To edit your settings and preferences, use the Settings menubar command: Account Information Login The token you use to log into 223 the system. Typically this will be identical to your version control login name. Normally, you cannot edit your own login name. However, system administrators are able to edit anyone's login name, so contact an administrator if you need this done. © 2003-2015 SmartBear Software User Preferences Password The password needed to log into the system. Can be blank for "no password," although in all cases the password will be displayed with many dots as shown in the screenshot above. This prevents the causal observer from knowing anything about your password, even its length. When changing your password you have to type it in twice to confirm. Full Name Your full, real name. This is displayed to other users everywhere in the system. You can change this setting at any time. If you leave this field blank your login name will be used for your name. This is undesirable however; most other users will not know you by your login name. Phone Number The phone number other users can reach you at. This field is optional. Time Zone Your time zone. This will be used to determine users's displayed date/time. This is defaulted to the time zone selected on the Collaborator server Is Administrator Controls whether you are a system administrator 161 . Typically, you are not able to change this field. Only if you are an administrator yourself can you change this. Be careful: If you remove administrative access from yourself, there is no going back! (Unless another administrator adds you back.) Is Enabled This field is used by system administrators to determine whether you are allowed 161 to log into the system. If you are looking at your preferences, you can log in, so you will always see this as "enabled". © 2003-2015 SmartBear Software 226 227 Web Client Notification Preferences E-Mail Address The e-mail address that you want all notifications delivered to, and also to display to other users in the system in case they want to contact you directly via email. Although this field is technically not required, you really should fill it in, and if you do not, you will get a warning in your Action Items list 234 . Notification Level This controls how many e-mails you want to get. See the [Explain] link for details on the options. Generally, these are the choices: · Get all notifications, even if you were the cause of the notification event · Get notification only of those events that you did not cause yourself · Get no email notifications Get CC'ed This allows you to get CC'ed if you are the author of the review when you make a modification to the review. © 2003-2015 SmartBear Software User Preferences Display Preferences Tutorial Mode Controls whether those little yellow tutorial boxes are displayed throughout the system. By default, these boxes are displayed to help you understand the user interface. Version Ordering Controls how versions are displayed, alphabetically or by order of upload. Materials Display Mode Allows the selection of the default display mode (Overlay or Separate) of materials on the Review Summary page. File View Controls which style should be used to display files within a changelist. Choices include Compressed Tree, Tree, or Flat. Compact View When enabled, the Review Summary screen is presented in a format that uses less vertical space. Diff Viewer Default Version Comparison Allows the user to select which two versions are presented, by default, when the diff viewer is launched. The available options are: · Two most current versions · Current vs. base version · Current vs. latest Accepted · First Uploaded vs. Last Uploaded © 2003-2015 SmartBear Software 228 229 Web Client Review Subscriptions Preferences Review Subscriptions allow you to automatically subscribe and be included in reviews with a preferred author. Under the "review creator" field, select the login name of the user to whose reviews you would like to be subscribed. If no authors are selected for a given review, the subscription will use the name of the review creator instead - unless the review creator is flagged as a system admin. You can also choose whether you would like to be Reviewer, Observer, or Moderator in the review. File Subscriptions Preferences File Subscriptions allow you to automatically subscribe and be included in reviewers where a particular file is under a review. Like Review Subscriptions 229 , you can choose your role as a Reviewer, Observer, or Moderator. Select an Ant-style expression as the pattern to match the file (s) of interest. The expression will be matched to the file path alone; it will not look for matches in the complete repository path with URL and other server descriptions. Ant-style expressions can include "*" to match any substring within a given directory, or "**" to match any substring of any length, ignoring directory separators. If possible, avoid beginning the pattern with wildcard characters as it can significantly decrease the performance of subscription processing. © 2003-2015 SmartBear Software User Preferences Remote Accounts Preferences Remote Accounts allow you to specify correspondence between your user name in Collaborator and your logins on various remote servers. These settings are used to match user names for Collaborator integrations with remote JIRA or GitHub servers. For JIRA integration you can also specify the default value for the JIRA project setting. 4.2.3 Notifications on Review Changes You can subscribe to notifications about changes in reviews, in which you participate. Collaborator will notify you about changes in review statuses and activities of other participants. The notifications can come through email or RSS. Subscribing to Email Notifications 1. Log in to the Collaborator Web Client. 2. Click Settings on the home page. This will open the Preferences page for your account. 3. Switch to the Notifications tab: © 2003-2015 SmartBear Software 230 231 Web Client 4. On the tab, check your email address and specify the desired notification level (see below 232 ). 5. Click Save to apply the changes. Subscribing to RSS Notifications 1. Log in to the Collaborator Web Client. 2. Click RSS in the menu on the right: Who Can Receive Notifications Collaborator can send notifications both to review author as well as to other participants. The user needs to be in an active "Wait 243 " state, which is an option at the very bottom of the Review Summary 243 screen under "Next Steps". If a user is waiting for an action, they will be informed via email once that action takes place. If you do not participate in a review, but want to be notified about its status, you can do the following: · Ask the review author or administrator to add you into the review (they can add you as an observer). © 2003-2015 SmartBear Software Notifications on Review Changes · Create an author-based subscription created by the particular author. 229 which will automatically add you to the reviews By default, Collaborator notifies you about actions of other users on the review. To get all notifications, including ones for actions initiated by you, change your notification level setting to All (see below 232 ). When Collaborator Sends Notifications Collaborator sends notifications when an author, or a participant makes changes to a review, namely: · When a review phase changes. Collaborator sends notifications when a review gets to the Annotating phase, or when it is Completed, Canceled or Rejected. Administrators can enable notifications for specific phases and disable them for others. (These notifications are sent both to active participants and to waiting participants.) · When a review requires some action. For instance, Collaborator is clever enough to detect situations when a review stalls 180 , and notifies the participants that the review requires some action in order for it to be completed. · When a participant adds a comment to the review, or creates a defect. (These notifications are sent to participants who are waiting for review activity 243 .) · When participants add files to a review. (These notifications are sent to participants who are waiting for review activity 243 .) · When you add new participants to or remove them from a review. The entire list includes several dozens of events. You can control your overall notification level only (see below 232 ). Administrators can enable or suppress specific notifications 202 . When Collaborator Does Not Send Notifications · Collaborator does not send notifications for reviews that are in the Planning phase. · Collaborator does not send repeated notifications. If several events occur within the review, then only the notification of the first event is sent. After which, the notification recipients have their state set to "Active". They will not receive further notifications. · By default, Collaborator does not send notifications to the user who changed a review. (However, this can be controlled by the Notification Level 232 setting.) See below 233 for information on why you can miss a notification. Setting the Desired Notification Level 1. Log in to the Collaborator Web Client (if you have not logged in yet). © 2003-2015 SmartBear Software 232 233 Web Client 2. Go to Settings | Notifications. 3. Choose the desired level from the Notification Level combo box. The following choices are possible: None No notifications except for those that the administrator sends explicitly. Minimal Default. You will get notifications on other review participants’ activities on a review. “Non-activity” notifications will not be sent. All You will receive all the available notifications. Changing Notification Message Text Regular users are not allowed to customize the text of notification messages. You need to have administrator permissions in order to customize the notification message text 202 . Why Do I Fail to Get Notifications? Below are some typical reasons for this: · A review is in the Planning phase (Collaborator does not send notifications for such reviews). · You are active participant of the review. · Your role in the review is not one that would receive the notification in question. · You chose the None notification level in your Collaborator account’s settings. Check the settings and select either Minimal or All level. · You are the user who modified the review and your notification level is Minimal (default). By default, Collaborator does not notify the user, who made some change, about this change. If you want to receive such notifications, change your notification level to All. · The administrator could disable notifications of certain types or disable all the notifications. Please ask the administrator to check their settings. · Your email client can have active filter or anti-spam rules that delete the notification emails or move them to a Junk folder. Please check the rules of your email client. 4.3 Performing Reviews This chapter describes creating, performing, and managing peer reviews. © 2003-2015 SmartBear Software 234 In This Section · Review Overview 14 Describes a typical review and its phases. · Action Items 234 Describes what are Action Items. · Creating a Review 236 Explains how to create reviews. · Review Summary Screen 243 Describes elements of the Review Summary screen. · Reviewing Materials 256 Tells about reviewing different types of materials: text and code files, PDFs, Word and Excel files, images and URLS. · Types of Review Comments and Defects 285 Describes which types of global and context specific comments and defects you can use in Collaborator. · Review Chats, Comments and Defects 292 Describes how to communicate during a review. · FAQ's 300 Gives answers to some of frequently asked questions about review process. 4.3.1 Action Items Action Items are relevant, current things that you are included in. You can view your "Action Items" on your homepage by clicking the "Home" button on the top right of your screen: You can select which action items are shown, by selecting the check-boxes for "Incoming", "Outgoing" and/or "Completed". When the "Incoming" check-box is active, you will view all reviews in which you are a reviewer or an observer. The "Outgoing" option will show all reviews in which you are the author. "Completed" will list recently completed reviews. You can also sort action items by clicking on the column labels, "Review", "Progress", "Author" or "My Role". © 2003-2015 SmartBear Software 235 Web Client Your Action Item list is updated immediately if anything changes. You can refresh this screen manually; the home page refreshes automatically every five minutes. When you have an Action Item directing you to commit files, you remove it by clicking the review link on the left. Collaborator uses these Action Items to track whether review materials have been submitted to version control. If Collaborator does not have enough information to determine that the materials are already versioned it will create a reminder for you when the review is completed. For recently completed reviews the Action Items list displays the "Dismiss" link to confirm that the review has been finished and dismiss it from the list of your active reviews. Action Items are also visible in other clients, but that is covered in the separate User Guides. Progress values for action items: Annotate Review Action you have been invited by the author to annotate the review Commit files Action you need to commit your files to source control Finish Creating Action you need to finish creating the review Fix Configuration Action not review related - you need to finish filling out your user configuration information Perform Action you need to perform the review Respond to Comments Action you need to respond to comments in the review Review cancelled NonAction the review has been cancelled Review completed NonAction the review has been completed Review rejected NonAction the review has been rejected Rework defects Action you need to rework the defects in the review © 2003-2015 SmartBear Software Action Items 4.3.2 Sign review Action you need to sign the review Waiting for annotation NonAction you are waiting for others to annotate the review Waiting for comments NonAction you are waiting for others to make comments on the review Waiting for defect rework NonAction you are waiting for open defects in the review to be reworked Waiting for other reviewers NonAction you are waiting for others to complete the review Waiting for signatures NonAction you are waiting for others to sign the review Creating a Review To create a new review, click the "Create New Review" button on the Home screen: You will see a Create Review Screen where you can specify information about the newly created review. Creating a review involves the following steps: · Specify General Information · Assign Review Participants · Add Review Materials 238 239 · Start the Review Procedure © 2003-2015 SmartBear Software 237 243 236 237 Web Client Specifying General Information About a Review In the General Information section you can specify the following data about a new review: · Review Title - a brief description for the review. The title is used all over the place -- in Action Items 234 , in notification emails, to web page titles, and so forth. Titles do not have to be unique in the system; reviews already have a unique ID that is assigned by the server. (In the example given above, the unique ID is "6".) · Role - your role in the current review. This field is read-only. Your and other participant's roles will be set through the Participants section described below 238 . · Created - a date when the review was created and a user who created it. This field is read-only and filled out automatically. · Group - a group of users associated with the review. This field only appears when the Groups feature 162 is enabled and you belong to some user group. Once you select a group, the participants list will be updated accordingly to show only those users belonging to the selected group. If you belong to only one user group, the group is set automatically. Changing the user group will cause you to lose any unsaved data applied to the review and may invalidate any saved data that is not applicable to the new group. © 2003-2015 SmartBear Software Creating a Review · Template- a template for the review. The template defines all the rules and workflow that governs the review. This includes custom fields for reviews and defects as well as the set of roles and rules for participants in the review. Your system administrator will have already configured 198 the templates you can pick from and probably has some guidelines as to which templates should be used under which circumstances. If there is only one configured template, this template will be applied automatically. · Deadline - a date when the review should be completed. This field only appears if a system administrator has set the default review deadline 150 to a value other than 0. In that case, you will see the Deadline field with a default date that is calculated based on the value provided by the administrator. You can set the review deadline to any date that is on or after the current date. On the day before the deadline, participants will see a note in their action items that review is 'Due today'. This is intended to alert participants that if the review is not completed by midnight of the current day, it is overdue. · Completed On - a date when the review was completed. This field is read-only and filled out automatically. · Restrict Access - allows you to limit those users who may access your review. By default, any user in the system can view and comment on any review at any time. However, there are circumstances where you may want to restrict viewing to those users specifically invited to the review, and this option enables you to do so. Please note that system administrators are able to view all reviews regardless of restricted access selections, and also have the ability to require 141 that all reviews be restricted. In such cases, you will not be given an option to restrict access. · Restrict uploads/Deletions - allows you to limit who can upload files into the review and delete files from the review. If this setting is enabled, only the creator and the administrators will be allowed to upload or delete files. · Overview - a detailed description of the review. This field is optional and does not have to be filled out if you would like to leave it empty. Assigning Review Participants The next step in creating a review is to invite people to the review, and give each of them a role to play. In the Participants section you need to select your role on this review and add other participants. © 2003-2015 SmartBear Software 238 239 Web Client The commonly-used roles are as follows: · Author: Responsible for the files under review and probably responsible for fixing any defects that are found. · Reviewer: Responsible for finding defects; is allowed to mark defects "fixed". The review is not finished until all reviewers approve it. · Observer: Invited to the review but if all other participants are finished the review is complete. Useful when this user is not available just now and you do not want to wait for him to show up. · Moderator: Controls the pace and flow of the review; coordinates other people and decides when the review changes phases. Note, that the number of roles, their names and abilities are configured by your administrator Therefore the list of user roles on your server may be different from the list above. 191 . You can select each user and role individually through the drop-down menu, or start typing the name of the user in the appropriate field to narrow down the user list. User/role combinations you have used recently will also appear under "Recent Participants". This makes it easy and fast to select common combinations. Each invitee can be assigned only one role. However, there is no limit on the number of invites, and, unless the administrator has configured 191 things otherwise, there can be more than one user per role. Adding Materials To A Review Review materials is what you are asking to review. Various types of materials can be uploaded into the review. This includes but is not limited to: · Files controlled by a version control system: changes committed to a remote server (pushed commits), changes that are not yet committed to a server (un-pushed commits), local changes, differences between files, changelists, branches and so forth. © 2003-2015 SmartBear Software Creating a Review · Arbitrary files from your local disk: text files, Word documents, Excel tables, PDF's, images and so on. · Links to Web sites Once you have attached anything to a review, it will be listed in the Review Materials section. Attaching Review Materials From Client Components The most common way to get files attached to a review is to use one of the client components: Command-Line Client 341 , GUI Client 331 , Eclipse Plug-in 359 , Visual Studio Add-in 395 or Plug-ins for Perforce Visual Client 550 . All of these clients can integrate with version control system and/or easily upload local files or file-differences to the server. Local changes from files controlled by Git have been uploaded into this review via client. Attaching Review Materials From Web Client It is also possible to upload content directly from the Web Client. The advantage of performing this action from a web browser is that you do not need to install and configure the client. From the Web Client you can upload the following types of content: · Changes committed to a pre-configured 181 version control system · Arbitrary files from your computer · Links to Web sites Attaching Changelists From Web Client In order to perform these steps, your Collaborator server must be connected to a version control system as described in Collaborator Administration - Version Control 181 . To add a changelist: · Click the Upload button. © 2003-2015 SmartBear Software 240 241 Web Client · Select the name of the connected version control system from the drop-down list: · In the ensuing dialog, enter the unique IDs of the desired changelists and then click Attach. You can attach any number of changelists to a single review. Also, you can attach changelists from different version control servers to a single review. If there is an error retrieving that version or communicating with the server, you will see an error message. Attaching Live URL's You can attach live links to web sites. Attaching a live URL will display the live contents of the link during the review (rather than a local copy of the content). This feature is useful for accessing a document on a Wiki or document management system, particularly if you link to a specific version of that document. To add a web link: · Click the Upload button. · Select URL from the drop-down list. · In the ensuing dialog, enter the desired URL and then click Attach. © 2003-2015 SmartBear Software Creating a Review Notes: · The URL must be a valid web URL, which should include the protocol specification (either http:// or https://). · You will also see an error message if the specified URL is malformed. · Collaborator does not check whether the specified resource is available. In fact, since it is a link, the contents and availability of the document can change at any time. · Collaborator displays the referred resource in a frame. The server can send requested contents with anti-framing headers. You will not see the referred content in this case. Depending on the web browser you use, you will see an empty frame or an error message saying that the content cannot be displayed in a frame: Attaching Arbitrary Files You can also attach any arbitrary file (images, PDFs, and binary file types) from your local hard drive: · Click the Upload button. · Select Files from the drop-down list. · In the ensuing dialog, choose one or more files you want to attach and then click Upload. © 2003-2015 SmartBear Software 242 243 Web Client Completing the Review Creation The last step allows you to start the review immediately or to keep it for annotating: Click Begin Review to start a review. Other participants will receive notifications about your new review, and it will be displayed in their Action Items 234 list. Click Annotate Review to apply the current changes, and proceed to the Annotating phase. Any participants you have selected will be notified that the review is in the Annotating phase and they will be invited to add their comments and review materials. The review will not begin until you select the "Begin Review" button on the Review Summary page. Canceling a review before it starts To cancel a review before it begins, use the Delete button on the top right of the "General Information" box: 4.3.3 Review Summary Screen You will know that you are part of a review because it will show up in your Action Items list clicking the link for a review will take you to the Review Summary screen. 234 , © 2003-2015 SmartBear Software Review Summary Screen The Review Summary Screen is displayed any time you are creating, editing or participating in a review. It is split up into several sections: · General Information · Participants · Defect Log 247 247 · Overall Chat 249 · Review Materials · Next Steps 245 250 255 Each section of the Review Summary screen can be collapsed and expanded, individually, by clicking the icon in the upper right hand corner of each section: © 2003-2015 SmartBear Software 244 245 Web Client General Information Section The General Information section provides a graphical overview of the current status of the review. The image below shows the information about a review during the rework phase: The General Information section is divided into thirds. The left third includes information about your status within the review. The middle third shows a graphical representation of the current stage that the review is in. The right third lists the number of participants, defects, chat messages and files. The right third also has a number of buttons: Edit, Details, Cancel, Reject, Reopen or Save To ZIP. Selecting "Edit" will take you to the Edit Review screen. To have permission to do this, you must be either a participant in the review or an administrator, and the review must be in progress (that is not canceled or complete), and the role rules 191 for your role must allow you to do this. Selecting "Details" will direct you to the Review Details Report 314 tailored to the open review. Selecting "Cancel" will cancel the review. To have permission to do this, you must be authorized 149 to do so by the administrator, and the review must be in progress (that is, not already canceled or complete). Warning: Once a review is canceled it can only be reactivated by an admin. Users will still be able to find this review when searching and can view it in a read-only capacity, but the review cannot be restarted by users without administrative rights. Selecting "Reject" will open the following dialog which allows you to select a reason for rejecting the review: © 2003-2015 SmartBear Software Review Summary Screen Rejecting a review differs from cancelling in two ways: - When rejecting a review a reason for the rejection can be required by the administrator and will be displayed in the review details. - A rejected review cannot be re-opened. You might also be able to Reopen a review after a review is finished. You must be allowed 149 to do so by the system administrator (the Reopen button is not shown in the screenshot above). Selecting "Save To ZIP" will create an ZIP archive 127 containing all the information related to the review. This button is displayed only for the reviews in the completed phase. The table in the lower part of the General Information section shows the overall information about the review. Most of the fields mirror the title and custom fields supplied by the review creator, though your role and any custom fields will also be displayed here. Checklist Section If there are checklists, the Checklist section displays. Unchecked items have a red background, checked items have a check on the left and a green background. © 2003-2015 SmartBear Software 246 247 Web Client You can sort checklists by Status, Title, User or Date. If checklists are mandatory, all items must be checked before the review can be approved. Checklists are managed in the admin section and added to review templates. Any user can check or uncheck items on the checklist and the system will record each event in the chat log while showing only the latest state on the actual checklist items. Participants Section The Participants section lists all participants in the review, their status, and their role: The drop-down list at the top left allows you to select the way participants are grouped when displayed in this section. The options are "Group by Role", "Group by State" or "Group by None". The "Group by None" option lists all participants in the review in a single list which is sortable by clicking the headers for each column (name, role, state). You can send e-mail to an individual participant by clicking the mail icon in the Action column associated with the participant you wish to email. To send an e-mail to all participants, click the "Email Everyone" button at the top of the participants section. You can also use the Poke feature to send someone a notification immediately. To use this feature, click the icon in the Action column associated with the participants you wish to poke. This may be useful when a certain participant has stalled the review or when you would like to invite a "finished"/"waiting" participant back into the review. You can also poke all participants using the "* Poke Everyone" button at the top of the participants section. Defect Log Section The Defect Log lists all defects found in the review: © 2003-2015 SmartBear Software Review Summary Screen Initially the log will be empty. As defects are created for the review as a whole or on individual files and line numbers, all defects are collected and listed here. For defects associated with particular files, links to that file and line number appear in the table for fast access. All defect custom fields are shown in the table. When, as the reviewer, you have verified that a defect you found has been fixed, you can indicate this by clicking Mark Fixed. The defect is then redrawn to reflect this: You can mark the defect open again if you change your mind. Open the defect by clicking Reopen . © 2003-2015 SmartBear Software 248 249 Web Client You can also externalize 299 a defect if you want to indicate that the defect will be fixed sometime after the review is complete. The defect must first be created, as normal, and then a user can click Edit and select Track Externally to use the external defect tracking software (if it has been configured by the administrator). If a defect is tracked externally, it will be indicated by a blue bug with a blue arrow icon as shown below: Only certain participants will be able to mark defects fixed. Which roles are allowed to do this depends on the system configuration 191 . Also the user that created the defect is allowed to mark it fixed, and administrators are always allowed to mark any defect fixed. Most of the time you will create defects 296 and mark them fixed files) or on specific areas (in other types of documents). 298 on individual lines (in text Overall Review Chat You can chat with other users about this review as a whole, rather than chatting on individual lines: © 2003-2015 SmartBear Software Review Summary Screen You can also use this section to enter defects related to the review. Clicking the "As Defect" button will change the interface to include a drop-down list that will allow you to select a defect Severity (required for all defects): There is much to say about chat and defects, but this interface is identical to the one in the Review Chats 292 , so please see that section for details. Review Materials Section © 2003-2015 SmartBear Software 250 251 Web Client The Review Materials section is the heart of the review: All files are displayed and users can view content and differences and chat and create defects on specific lines of a file. Toolbar The toolbar has the following items: · Download - Allows to download review materials to your local computer. The item holds the following sub-items: o Download Files - This downloads a ZIP file to the local hard drive containing all files with subdirectory structure preserved. This means you can test the proposed file changes locally: Just download the ZIP file and expand it in your own development environment. This is also useful in the single-committer model for when you want to actually commit the changes. This can take the place of a patch file. © 2003-2015 SmartBear Software Review Summary Screen Warning: Downloading files to your local hard drive can have unintended consequences. Make sure you do not have changes of your own that you are overwriting. Also, remember that the author of these changes might not be synched to exactly the same versions of all files in version control, so if your local test fails this might be the reason. You can also download individual file versions from the diff viewer 264 , but the Download Files toolbar link is the more common way because you get all files at once. o · · Download Diff - This downloads a unified diff of all files in the review. Upload - Allows to upload data from your local computer to current review. Uploads can be disabled by review creator 238 and by administrator 147 . The item holds the following subitems: o <Pre-configured Version Control System> - Attach changes from one of preconfigured 181 version control repositories. o Files - Attaches arbitrary files from your computer. o URL - Attaches live URL link. o Local Changes - Attaches local files using the command-line client, GUI Client, or P4V integration. View as - This allows you to change the display of files from the overlay format to the separate format. To change from Overlay mode to Separate mode, simply click on the toggle switch between the two options. In Overlay mode all files from multiple changelists are displayed in one list. In Separate mode each of the changelists is displayed separately. · External Diff - This downloads a diff file for viewing in an external diff viewer. · Delete - This deletes a changelist from the review materials. If you have multiple changelists in the review, you will need to go to separate view in order for the button to be enabled. You cannot delete an arbitrary file from a changelist. You can only delete the entire changelist. You cannot delete changelists that have comments to any file. Ability to delete review materials can be disabled by review creator 238 and by administrator 147 . The conversation section of the Files list shows when comments and defects have been made, and the line number associated as well as when comments have been approved. © 2003-2015 SmartBear Software 252 253 Web Client Conversation status icons Ico n Meaning User has clicked "Accepted" User has made a Comment User has created a Defect, which is currently "Open" User has created a Defect, which is currently marked "Fixed" User has created a Defect, which is currently marked "Tracked Externally" File list The file list shows the files in this changelist. This part of the screen may look different depending on the selected View as 252 setting. The icon next to the file name indicates what operation was performed to the file. Icon Meaning © 2003-2015 SmartBear Software Review Summary Screen File was modified File was added File was removed from a changelist File was reverted before the review has started File was deleted File was reverted during the review Click on a file to open the content 264 of that file and view all comments associated with that file. Notes, Location, Metrics, and Status The Notes column allows any user to annotate the files. To edit the note click in the note column. This is typically used for messages to all reviewers such as "review this file first", or "ignore this file". The Location column indicates where within the file the conversation represented by this row is located. Yellow alert bubbles mean there is activity on that line that the current user has not yet marked read. Click on a line number to open the content 264 of that file and view that conversation. The three columns with the green +, white/black circle and red -, respectively show metrics for the number of lines that have been added, changed, and deleted since the previous version in version control, with special cases for situations like added or deleted files. These counters are not updated if files are added from the Web Client. The Status column shows cumulative status of a file based on combining the actions of all previous changelists uploaded to the review. © 2003-2015 SmartBear Software 254 255 Web Client Drag-and-Drop Support You can add files to current review by dragging and dropping files directly on to the Review Summary screen. (Please note, for Internet Explorer to support multi-file drag and drop Adobe Flash Player must be installed.) Next Steps At the bottom of the Overview screen, you can find a "Next Steps" section that allows each review participant to move the review from one phase to another, or to wait in the current phase until certain specified activity occur. To learn more about review phases, see the Review Overview 14 topic. The choice options in "Next Steps" vary depending on the current and the expected phases of the review and the role of the participant. The choice options can be: Wait, Begin Review, Annotate Review, Send to Completed, Send to Rework, Send to Inspection and so forth. Pressing any of the "Next Steps" buttons (except for Wait) indicates that you have passed through the current review phase and moves the review to another phase. Pressing the Wait button keeps the review in its current phase. Most of the choices also allow to select in which case Collaborator will notify you of certain activities related to the given review. The action options are: · Any Activity Occurs - any action that occurs in the review; for example, comments, file uploads, or added participants · Activity by Author Occurs - any action that occurs in the review that is initiated by the author © 2003-2015 SmartBear Software Review Summary Screen · File Activity Occurs - any action that occurs to change the file content of the review; for example, the upload of a new file or the upload of a new version of an existing file · You are Poked - only notifies you in the event that you are poked The "Home" link in the lower part of "Next Steps" section will lead you to Home screen of web client. The "Next Review" link will open the next review in your Action Items list 234 . Electronic Signatures in Next Steps When electronic signatures 151 are enabled, users will see Sign and Decline buttons. Clicking either button requires a user to provide their login and password to complete the action. This makes the electronic signature compliant with FDA regulations. When a reviewer signs or declines a review, the Next Steps section of the Review Summary page says, "This Review has been Signed Off" or "This Review has been Declined". The Chat section shows the signature information. Collaborator notes the name of the reviewer and the date and time the review was signed or declined. For auditing purposes, you can go to the Review Details Report. Make sure that Comments Section Format is set to Display All Comments, and in the Overall Review Conversation section, you can see the signature information. 4.3.4 Reviewing Materials The Review Materials screen, or the diff viewer, is where most of the reviewing takes place. The commenting format and functionality will differ depending on what file type you are reviewing. We support the following: · Text files 264 (including source code and any other text-based formats) · Microsoft Word files · Microsoft Excel files · Images 277 · PDF files 270 273 (.DOC and .DOCX) (.XLS and .XLSX) (.JPG, .JPEG, .PNG, and .GIF) 280 (.PDF, and any other document types converted to PDF format) © 2003-2015 SmartBear Software 256 257 · URL's 4.3.4.1 Web Client 284 (HTTP and HTTPS) Diff Viewer Overview The Review Materials screen or Diff Viewer includes a number of configuration and display options that may change depending on the specific type of file that is being reviewed. The appearance of the Diff Viewer when reviewing souce code files The Diff Viewer is divided into a number of sections: · Chat Pane and associated toolbar options · Diff Viewer Toolbar · Diff Viewer Header 259 258 (Which includes the Display Options pane 259 ) 262 · Diff Viewer Content (The actual content under review) NOTE: The Diff Viewer now opens in the same window and tab, when launched from the Review Summary screen. To open it in a new window, you can Shift+click the link. © 2003-2015 SmartBear Software Reviewing Materials Chat Pane On the left of the main diff viewer page, there is a pane for chat threads. This pane allows you to add both global and content-specific comments and defects to the document you are reviewing. Comments may hold any information concerning the review: a question, a clarification, a remark, an encouragement, whatever else. Defects indicate a problem that needs to be fixed. To learn more about global and content-specific comments and defects, see Types of Review Comments and Defects 285 . At the top of the chat pane, you will find a series of buttons that control whether or not certain types of comments appear in full or in collapsed states (to save viewing space). Note that defects, count as unread comments until they are accepted/marked read. The first three icons control whether defects appear collapsed or expanded in the chat panel. The red bug controls the display for open defects, the green bug controls the display for fixed defects and the blue bug controls the display for defects tracked externally. The final three icons control the display of non-defect conversations. The white conversation bubble controls the display for all comments, the yellow hazard sign controls the display for unread comments and the green checkmark controls the display for conversations that have been marked accepted. © 2003-2015 SmartBear Software 258 259 Web Client To learn how to make conversation during the review, see Types of Review Comments and Defects 285 and Review Chats, Comments and Defects 292 topics. Diff Viewer Toolbar The toolbar at the top of the Diff Viewer includes options for altering the display of information and navigation through documents within the review. Back Button Returns the user to the review summary page for the current review. Display Button Opens the Display Options panel 259 . File Navigation The Previous file "<- File" and Next file "File ->" buttons navigate to the previous or next file in the review, respectively. Comment Navigation The Previous comment "<- Prev" and Next comment "Next ->" buttons navigate to the previous or next comment or defect in the current document, based on the settings in the Display options 260 . External Launches the current document review in an external diff viewer. Download Diff Downloads a Diff file of the current document. Display Options Panel This panel contains various options that determine what data is displayed by the viewer and how it is displayed. Some options are only shown for certain types of files. © 2003-2015 SmartBear Software Reviewing Materials Prev/Next Wrap Determines whether the user is prompted to continue from the beginning of the document once reaching the end of the document when using the 'Prev' and 'Next' buttons to navigate through comments and/or defects. Prev/Next Filter Determines which locations within the file the viewer navigates to when using the 'Prev' and 'Next' buttons and controls which types of comments, defects or differences are expanded in the Chat pane and displayed in the viewer. © 2003-2015 SmartBear Software Read Comment Navigates from one read comment to another. Expands all read comments in the Chat pane. Accepted Comment Navigates from one accepted comment to another. Expands all accepted comments in the Chat pane. Unread Comment Navigates from one unread comment to another. Expands all unread comments in the Chat pane. Open Defect Navigates from one open defect to another. Expands all open defects in the Chat pane. External Defect Navigates from external open defect to another. Expands all external defects in the Chat pane. Fixed Defect Navigates from one fixed defect to another. Expands all fixed defects in the Chat pane. 260 261 Web Client Difference Navigates from one difference to another. Enables highlighting of additions, deletions and differences in the viewer. These settings can be used separately or in combination with each other. The setting values are synchronized with the corresponding toolbar options of the Chat pane. Orientation Text This group of options is shown when a previous revision of the file is available. Orient ation Specifies whether the diff viewer displays in side-by-side mode or over/under mode. Displa y Order Determines which pane is considered the 'After' pane, for the purposes of highlighting additions and deletions. This group of options is shown when reviewing text-based files. Wrap Lines Controls whether lines of text are wrapped to the width of the pane. NOTE: When 'Wrap Lines' is not selected, an option will appear at the bottom of the text section to enable/disable synchronized scrolling of the panes. Syntax Coloring Controls whether syntax-specific coloring is used, when supported. Ignore Whitespace Controls whether white-space is included in determining version differences. Ignore Capitalizati on Controls whether capitalization is included in determining version differences. Skip Unchanged Determines whether large blocks of unchanged content is displayed. These gaps will appear, in the diff viewer as 'Skipping X lines...' and will include the two links labeled 'More', which will allow you to see more of this skipped content. Context Lines Defines the number of lines of context that are presented surrounding changes. © 2003-2015 SmartBear Software Reviewing Materials View Options Spreadsheet Tab Width Sets the number of spaces per tab. Font Size Allows customization of the font size. Font Family Allows customization of the font family Character Encoding Specifies the character encoding for the file. This group of options is shown when reviewing images, Microsoft Word files or PDF files. Scale Specifies the zoom level of content. You can set the scale to various percentages, Page Width or Full Page. Show Marker s Specifies whether to display or hide pushpin markers for coordinate comments and defects 289 . Only inactive markers are hidden. To hide all markers, select Overall section of Chat pane and press Hide Markers. This group of options is shown when reviewing Microsoft Excel files. Evaluat e Formul as Specifies whether to evaluate formulas and display the resulting value, or to display the formula itself. Ignore Empty Cells Specifies whether to ignore empty cells when viewing differences. Diff Viewer Header The content of the header will vary, depending on the type of file being reviewed and the selected orientation. The diff viewer displays different version of the same file that have been added to the review. The comparison is performed based on the MD5 checksum of the full content (it is not dependent on our diff algorithm or the users's diff options) - so different versions that are identical in content will not be displayed as different versions in the diff viewer. Versions are further identified by an icon which appears adjacent to the version number denoting: © 2003-2015 SmartBear Software 262 263 Web Client A checked-in version A checked-in version that has been accepted A local, pending version A local, pending version that has been accepted Header content for Over/Under display of a text file. Header content for Side-By-Side display of a text file. The content of the header functions identically, regardless of the display type chosen and includes the following components: Review number File: After: The review number serves as a direct link to the Review Summary page for the current review. It functions exactly the same as the Back button 259 on the toolbar. Displays the name of the file currently visible in the diff viewer pane. Allows the selection of the specific uploaded version of the file to be displayed in the 'After' pane. Each file version is identified by its SHA-1 hash value. Additionally, the file folder icon adjacent to this field can be used to download the selected version of the file. © 2003-2015 SmartBear Software Reviewing Materials Before: 4.3.4.2 Allows the selection of the specific uploaded version of the file to be displayed in the 'Before' pane. Each file version is identified by its SHA-1 hash value. Additionally, the file folder icon adjacent to this field can be used to download the selected version of the file. Reviewing Text Files When reviewing text files (including source code and any other text-based formats), the review screen becomes the diff viewer. Here, you can see file content, differences with previous versions of the file, and all comments and defects for the file all on one screen. Viewing Differences The Collaborator diff view displays any text either side-by-side or in an over-under orientation. Both views have all the same options and functionality, so users should feel free to use whatever is most comfortable. Since differences in the content could affect users' orientation preference, changing the orientation is simple, just click the Display button in the top toolbar 259 and select the orientation you would like to use. Standard View with Side-by-Side Orientation © 2003-2015 SmartBear Software 264 265 Web Client Standard View with Over/Under Orientation The over and under orientation merges both versions of the file together. Unchanged lines are displayed as one, while added and deleted lines are highlighted with the appropriate line number for the version. The left two columns in blue correlate to the versions listed above the main file view respectively. Making Comments and Marking Defects On the left of the main diff viewer page, there is a pane for chat threads, where you can view and make comments and mark defects that should be fixed. When reviewing text files, you can create global 287 , annotation 287 , overall for file revision 288 and line 288 comments and defects. To add line comments, click the desired line of text in the content view, type your comment in the text box and click "Add". To add defects, click the desired line of text in the content view, type the defect description, click "Add As Defect" and fill-in the required fields. © 2003-2015 SmartBear Software Reviewing Materials To learn more about communicating during the reviews, see Types of Review Comments and Defects 285 and Review Chats, Comments and Defects 292 topics. Menubar Right at the top, above the main file view, a menubar is displayed with a few possible actions. Buttons with blue triangles to the right will display drop-down menus when clicked on. For a list of all of the features of the menubar, please review the Diff Viewer Overview 257 section. The File Content View To the right of the chat session, there is the main file view. This is where you can view file content and differences. The format of the main file on your local Collaborator screen may be different depending on how you have configured the Display options 259 for the Diff Viewer. If differences are being shown, the interface automatically scrolls to the first difference (unless you got to this screen by clicking on a particular line number, in which case the screen will be centered on that line number). Below the file content is a small area which shows the currently selected line in an over-under view. This is most useful when the content view is in side-by-side mode, but the differences are not immediately clear in that view. © 2003-2015 SmartBear Software 266 267 Web Client Legends The differences are noticeably highlighted and color coded as explained by the legend. The colorcode legend for changes, additions and deletions appears below. Changes appear in a yellow, additions are green and deletions are red. The diff view is completely navigable from the keyboard. You can move around the file, jump to changes, and make comments and defects. To get the list of keyboard shortcuts, click the "Help" link in the menu bar, then "Keyboard Shortcuts". © 2003-2015 SmartBear Software Reviewing Materials Skip Unchanged If the "Skip Unchanged shown below: 259 " option is enabled, unchanged lines will be hidden in the diff viewer as If you would like to get more lines of context, just click either "More" link. The top link will show the next 25 lines of context, while the bottom link will show the last 25 lines of context. Syntax Coloring When the "Syntax Coloring 259 " option is on, files of the following types are marked up with syntax coloring. If the file type is not recognized, it is displayed without highlighting. The file viewer will color language syntax for certain file types. Although Collaborator works with any text files, this feature helps read these languages and formats more easily: · ASPX · C · C++ © 2003-2015 SmartBear Software 268 269 Web Client · CSS · HTML · Java · JavaScript · JSP · Perl · PHP · Python · Ruby · SGML · Shell Scripts · Visual Basic (VB) · XML · XAML By default, Collaborator does not apply syntax highlighting to files larger than 500000 bytes. However, you can change this value via the "MaxHighlightSize" setting in JMX console: © 2003-2015 SmartBear Software Reviewing Materials 4.3.4.3 Reviewing Word Files (.doc and .docx) About Word Support Collaborator supports reviewing Microsoft Word documents both in .doc and .docx formats. You can · Download discrete versions of the original documents. · View highlighted differences between discrete versions. · Insert comments and defects, marked by pushpins, into the documents to simplify conversation. Tip: You can install Collaborator plugin for Microsoft Word to upload your documents directly from Microsoft Word. Note: if you have the Track Changes setting enabled in your Word document, you have to accept the changes before uploading the document to Collaborator. Otherwise, Collaborator will treat the deleted text as if it were never deleted. © 2003-2015 SmartBear Software 270 271 Web Client Downloading Original Files Collaborator stores Word documents with the review. It converts them to PDF to render them in the diff viewer. You can download the original .doc and .docx files from the Review Summary screen. You can also get them by clicking the following button next to the selection list at the top of the diff viewer: Viewing Highlighted Differences Collaborator automatically finds and highlights differences between the document versions that you uploaded and selected for review. Both versions uses standard highlighting: red for deletions and green for additions. Documents can have content that displays, for example, on page 2 of the original version and on page 4 of the reviewed version. The diff viewer recognizes these changes, promotes comments to correct places in the newer version and navigates the Before and After panes independently to make this content visible during the review. To navigate each page independently, use pagination controls at the bottom of the diff viewer: © 2003-2015 SmartBear Software Reviewing Materials Making Comments and Marking Defects On the left of the main diff viewer page, there is a pane for chat threads, where you can view and make comments and mark defects that should be fixed. When reviewing Word files, you can create global 287 , annotation 287 , overall for file revision 288 , coordinate (pushpin) 289 and label 290 comments and defects. To comment on specific text in a document, simply click the document at a point where you would like your comment to appear and begin typing. Collaborator will insert a pushpin ( ) to indicate the comment. The number in the pushpin head corresponds to the comment's order within the current page of the document. You can hide pushpins by clicking the pushpin toggle button on the toolbar. Use this feature if a pushpin overlaps an important part of the document. Alternatively, you may specify an arbitrary label, such as "Section 5.1", to describe the content you are referring to. Using labeled locations decreases the confusion that can occur when large changes occur in a text document resulting in the pushpins not being adjacent to the corresponding text. Label text may not be updated. Except the fact that documents are highlighted with pushpins and text files are highlighted by line, the way you use review chats 292 when reviewing Word documents is very similar to the way you use them when reviewing text files. © 2003-2015 SmartBear Software 272 273 Web Client To learn more about communicating during the reviews, see Types of Review Comments and Defects 285 and Review Chats, Comments and Defects 292 topics. Moving Comment Pushpins You can move an existing pushpin to a new position in a document. The feature works in Mozilla Firefox and Google Chrome, and should be enabled by administrator 144 . To move a comment: 1. Select the desired comment. 2. Press and hold the Move Comment handle ( ). 3. Drag and drop the handle over the new position in the document. Document Review Notes · If you have the Track Changes setting enabled in your Word document, you have to accept the changes before uploading the document to Collaborator. Otherwise, Collaborator will treat the deleted text as if it were never deleted. · After you have uploaded a Word document, Collaborator starts converting it to a specific format that it uses to find differences. This takes some time (several minutes for large documents). During the conversion, you can open the document in the diff viewer. However, you are not allowed to make comments, browse pages and see differences until the conversion is over. Once it finishes, Collaborator enables the page navigation controls and highlights the diffs. · To keep the computer performance reasonable Collaborator limits the number of documents it will convert concurrently to four by default. If you upload a document while the conversion pool is full, the document will wait until there is room for it. This can take several minutes. If you experience server performance degradation, try configuring Java VM memory settings 868 . If you continue experiencing problems or need further assistance, please contact our Support Team 28 . · We recommend running the Collaborator server on a computer that has at least 4 CPUs (or cores) and has more than 2GB of memory allocated for the Java virtual machine. The memory requirement may increase depending on the typical document size your users upload. 4.3.4.4 Reviewing Excel Files About Excel Support © 2003-2015 SmartBear Software Reviewing Materials Collaborator adds native support for Excel which allows the user to do reviews of Excel files. This is useful particularly for users who want to compare files such as QA test plans. Every effort is made to keep the Excel format, so a review shows the entire workbook (spreadsheet), which can consist of multiple worksheets. Note: When a file is uploaded for review, hidden rows are shown. Also, fill color and font color are stripped from the spreadsheet. If the use of color is essential to your spreadsheet, for example, if you are using charts, then consider converting the spreadsheet to PDF format 280 . Review is recommended. Some formatting options are ignored. You may need to save your file with "word wrap" enabled to more easily see the content during reviews. Worksheet is often abbreviated as "sheet". As in Excel, the UI displays a list of tabs at the bottom of the workbook for switching between worksheets. Only one worksheet is displayed at a time. Worksheets can be added, deleted, renamed, and re-ordered. When you click in a cell, the value is displayed in the cell detail pane (equivalent to the formula bar in Excel). The values for the selected cell appear in the cell detail pane with the value for the "after" version on top: © 2003-2015 SmartBear Software 274 275 Web Client Display The Display button has specific options for an Excel review. When you select Evaluate Formulas, only the evaluated result of the formula is shown, not the formula itself. You can toggle this through the Display button or the Evaluate Formulas button at the bottom of the diff viewer. You can also toggle Display Empty Cells, which provides shading for emply cells, as shown above. Viewing Differences Since it is difficult to diff versions of Excel to meet all use cases, some changes may not be highlighted in diffs in the way that people would expect. We will continue to work on the Excel diff feature to meet the broadest set of needs. As part of the review, you can do diffs of the files that show the contents of a cell (either formula or result). You can navigate around the spreadsheet by selecting the cell location. The UI displays a diff of two versions of a spreadsheet side-by-side. There is a panel at the bottom that shows the contents of the selected cell in both versions of the spreadsheet on top of one another for easy visual comparison. The use of color allows you to quickly identify changes in diffs so that you can address just what has been modified, added or deleted between versions of the Excel file under review. Added cells have a green background. Deleted cells have a red background. Modified cells have a yellow background. All other cells (empty or not) display with a white background. *No* empty cells are highlighted, even if they are different (added or deleted) Formulas Formulas are not displayed by default. Depending on the Evaluate Formulas option, the cell content is the formula (for example, "=1+1") or the value of the formula (for example, "2"). You can also toggle formulas by the button in the cell detail pane. When you click in a cell, the value is displayed at the bottom in the formula space. © 2003-2015 SmartBear Software Reviewing Materials If you click the Evaluate Formulas button, the value displays in the cell detail pane: Making Comments and Marking Defects On the left of the main diff viewer page, there is a pane for chat threads, where you can view and make comments and mark defects that should be fixed. When reviewing Excel files, you can create global 287 , annotation 287 , overall for file revision 288 and cell 291 comments and defects. To comment on specific cell within an Excel spreadsheet, click the desired cell in the content view, type your comment in the text box and click "Add". To add defects, click the desired cell in the content view, type the defect description, click "Add As Defect" and fill-in the required fields. Conversations on cells are displayed in alphabetical order by sheet name, not in the sheet order found in the version content. In the example above, 3Sheet would come before Blah. The name of the chat includes the name of the sheet followed by the location of the cell being discussed. For example, 3sheetC10. © 2003-2015 SmartBear Software 276 277 Web Client To learn more about communicating during the reviews, see Types of Review Comments and Defects 285 and Review Chats, Comments and Defects 292 topics. 4.3.4.5 Reviewing Images Images can be reviewed within the tool and not as external binary files. Image files must be renderable by the browser and be configured by the administrator 155 to be treated as images. By default, JPEG (.jpg and .jpeg), GIF (.gif), and PNG (.png) files are treated as images. Uploading Images To review images, just attach 242 them to the review as you would any other file, and when you open the diff viewer, the content area will display the images for review. Viewing Differences Images can be reviewed in two different manners: side-by-side or overlaid. Toggling between the two layouts is as simple as changing the Diff View setting in the Display 259 menu. The side-by-side view displays the before and after images separately, one next to another. This layout is useful to see both images at the same time. © 2003-2015 SmartBear Software Reviewing Materials Side-by-Side Image Review The overlaid view displays the after image over the before image (as image layers on photo editors). The Transparency selector adjusts the opacity of the top image and thus allows you to blend the two images together. This layout is useful to see the subtle differences between two images, including alignment differences and color variation. Overlaid Image Review © 2003-2015 SmartBear Software 278 279 Web Client Zoom Both the side-by-side and overlaid view support zooming the images 262 in the display. Whether zoomed in or out, the comment markers still refer to pixel locations in the image at 100% zoom, so subpixel comments are not supported. If a zoom operation would cause the currently selected location to scroll offscreen, the image will be scrolled to recenter the selected location. The image rescaling for the zoom function is provided by the browser and may introduce artifacts depending on the type of image and the scaling algorithm chosen by the browser. Making Comments and Marking Defects On the left of the main diff viewer page, there is a pane for chat threads, where you can view and make comments and mark defects that should be fixed. When reviewing image files, you can create global 287 , annotation 287 , overall for file revision 288 , coordinate (pushpin) 289 and label 290 comments and defects. To comment on specific location, simply click the image at a point where you would like your comment to appear and begin typing. Collaborator will insert a pushpin ( ) to indicate the comment. The number in the pushpin head corresponds to the comment's order within the current image. © 2003-2015 SmartBear Software Reviewing Materials The pins may be turned off by clicking the pushpin toggle in the image review toolbar at the bottom of the content pane. This is useful when the pushpins cover important parts of the image. Alternatively, you may specify an arbitrary label, such as "Tools menu", to describe the content you are referring to. Using labeled locations decreases the confusion that can occur when large changes occur in an image resulting in the pushpins not being adjacent to the corresponding context. Label text may not be updated. To learn more about communicating during the reviews, see Types of Review Comments and Defects 285 and Review Chats, Comments and Defects 292 topics. Moving Comment Pushpins You can move an existing pushpin to a new position in a document. The feature works in Mozilla Firefox and Google Chrome, and should be enabled by administrator 144 . To move a comment: 1. Select the desired comment. 2. Press and hold the Move Comment handle ( ). 3. Drag and drop the handle over the new position. 4.3.4.6 Reviewing PDFs and Documents of Other Types Collaborator includes native support for PDF files. Additionally, you may convert any other document type (for example, PowerPoint slides or OpenOffice documents) into PDF format and upload it to Collaborator. Uploading PDFs To review PDF documents, just attach 242 them to the review as you would any other file and when you open the diff viewer, the content area will display the documents for review. Uploading Arbitrary Document Types To upload any arbitrary document, you need to convert the desired document to PDF format using a conversion tool and then upload it to the review. Popular converters include (but are not limited to): · OpenOffice · PrimoPDF · pdftk © 2003-2015 SmartBear Software 280 281 Web Client · Microsoft Save as PDF or XPS Add-in To upload PowerPoint documents you can install Collaborator plugin for Microsoft PowerPoint. This plugin saves a PowerPoint slide deck as a PDF, and then uploads it to a Collaborator review. Viewing Differences Documents can only be viewed in a single or side-by-side layout. There is no over-under view available currently for PDF documents. Note: Collaborator does not compare document file content. Differences in text will not be highlighted, and coordinate-based comments and defects of a previous revision will remain in the same location on newer revision. Side-by-Side PDF Review Scrollbars are available for each version of the document. You can also hide the version shown on the right by clicking on the arrow in the separator between the two versions. You are also able to move the separator to show more or less of either version. To do this, hover the mouse over the separator until the arrows appear, and click and drag until it reaches the desired location. Changing Pages To change pages, use the arrows at the bottom left of the comparison screen. © 2003-2015 SmartBear Software Reviewing Materials The arrows will allow you to go to the Previous Page or the Next Page. You can also manually enter a page number and hit enter to jump to any arbitrary page. The page numbers will refer to the latest upload of the document shown. Zoom Both the side-by-side and single view support zooming 262 the images in the display. Zooming out is useful if the page is too large to display in the browser window without scrolling. Zoom is also useful for more precise placement of the comment markers. However, whether zoomed in or out, the comment markers still refer to pixel locations in the image at 100% zoom, so subpixel comments are not supported. If a zoom operation would cause the currently selected location to scroll offscreen, the image will be scrolled to recenter the selected location. Rescaling of documents is performed by rerendering the document on the Collaborator server and could be slow depending on the size of the document and the selected image scale. Making Comments and Marking Defects On the left of the main diff viewer page, there is a pane for chat threads, where you can view and make comments and mark defects that should be fixed. When reviewing PDF files, you can create global 287 , annotation 287 , overall for file revision 288 , coordinate (pushpin) 289 and label 290 comments and defects. To comment on specific text in a document, simply click the document at a point where you would like your comment to appear and begin typing. Collaborator will insert a pushpin ( ) to indicate the comment. The number in the pushpin head corresponds to the comment's order within the current page of the document. © 2003-2015 SmartBear Software 282 283 Web Client You can hide pushpins by clicking the pushpin toggle button on the toolbar. Use this feature if a pushpin overlaps an important part of the document. Alternatively, you may specify an arbitrary label, such as "Section 5.1", to describe the content you are referring to. Using labeled locations decreases the confusion that can occur when large changes occur in a text document resulting in the pushpins not being adjacent to the corresponding text. Label text may not be updated. To learn more about communicating during the reviews, see Types of Review Comments and Defects 285 and Review Chats, Comments and Defects 292 topics. Moving Comment Pushpins You can move an existing pushpin to a new position in a document. The feature works in Mozilla Firefox and Google Chrome, and should be enabled by administrator 144 . To move a comment: 1. Select the desired comment. 2. Press and hold the Move Comment handle ( ). 3. Drag and drop the handle over the new position in the document. © 2003-2015 SmartBear Software Reviewing Materials 4.3.4.7 Reviewing URLs URL's can also be reviewed in Collaborator. However, it is important to note certain limitations. Currently, URL's are rendered in the browser as "live". This implies that clicking on a link on the URL page will direct you to a new page. This also means that you will not be able to anchor comments in the same manner as in image and document reviews. With our current URL review functionality, newer versions of the URL will not be displayed with older versions, meaning you cannot display multiple versions of the same web page. If you would like to compare multiple URL versions, we recommend that you take static snap shots of the web page and use the image review functionality 277 of Collaborator. Uploading URL's To upload a URL, use the Attach URL 241 feature on the review creation page. Making Comments and Marking Defects As mentioned above, you will not be able to anchor comments. Instead, you can specify an arbitrary label describing a part of the page or otherwise indicating to other participants what you are commenting on. In older versions of Collaborator, comments in URL's were anchored to a fake "line". Those comments will continue to be displayed, but will be sorted after the new labeled locations. © 2003-2015 SmartBear Software 284 285 Web Client URL Review 4.3.5 Types of Review Comments and Defects There are two main types of messages in Collaborator: comments and defects. Comments may hold any information concerning the review: a question, a clarification, a remark, an encouragement, whatever else. These are the major mean of communication during the review process. Defects indicate a problem that needs to be fixed. Defects have some text that describes the problem and also can have any number of additional fields. These are all completely configurable 183 by the system administrator and can also vary depending on the review workflow 238 that was originally selected for the review. Because this is completely configurable, this manual cannot say exactly what the fields will be or what they mean; ask your administrator for details. It is common to see fields like severity, type, checklist item, and phase-injected. Every defect is given a unique number, on the server. There will only ever be a single defect with the given ID, no matter how many defects, documents or reviews exist on the server. All defects found during a review are listed in the Defect Log Screen 243 , (so you will not overlook any of them). 247 section of the Review Summary © 2003-2015 SmartBear Software Types of Review Comments and Defects Note: The word "defect" has many connotations that are inappropriate for peer review. This does not mean the problem will be mirrored in an external issue-tracking system, and it does not necessarily mean it was a bug! Even "bad documentation" can be a defect. A "defect" is just a way of identifying something that needs to be fixed. Moreover, if the word "defect" has a negative connotation in your environment, your Collaborator administrator can change it to another term 143 . Color Highlighting of Comments and Defects To indicate the status of the comment or defect they are highlighted in different colors. The following color notations are used for message backgrounds in the Chat pane, for line indents of text files, for pushpins and for cell borders: Color Meaning Blue The currently selected conversation. Red An open defect. Yellow An unread comment. Green A fixed defect or an external defect. Gray No defects. Global and Content Specific Comments and Defects Comments and defects can be global or context specific. That is, they may relate to the entire review, or to certain review materials or even to particular line, coordinate, cell in one of the reviewed files. Collaborator has the following sub-types of comments and defects: · Global (Review Chat) · Annotation 287 287 · Overall for File Revision or URL · Line 288 © 2003-2015 SmartBear Software 288 286 287 Web Client · Coordinate (Pushpin) · Label · Cell 289 290 291 Global Comments and Defects(Review Chat) These comments or defects relate to the entire review as a whole (not to some specific review materials). Can be used with all reviews. Global comments and defects are displayed in the Chat 243 . 249 section of the Review Summary Screen To add comments to the Chat section, simply type your comment in the text box and click "Add". To add defects, type the defect description, click "Add As Defect" and fill-in the required fields. Annotation Comments These type of comments provide short description (annotation, notes or some other short info) about a particular file revision or URL. Can be used with all review materials. Defects cannot be of annotation type. Annotation comments are displayed in the Notes column of the Review Materials the Review Summary Screen 243 . 250 section of © 2003-2015 SmartBear Software Types of Review Comments and Defects To add annotation comments, click the plus button in the Notes column, enter annotation text and click "Save". Overall Comments and Defects for File Revision or URL These comments or defects relate to a particular file revision or URL (as a whole, but not to some specific part if it). Can be used with all kinds of review materials. Overall comments and defects are displayed in the Overall section of Chat pane in the Diff Viewer 257 . To add comments to the Overall section, simply type your comment in the text box and click "Add". To add defects, type the defect description, click "Add As Defect" and fill-in the required fields. Line Comments and Defects These comments or defects relate to a particular line within a file. Can be used with text-based files and their revisions. Multiple comments and defects can relate to the same line of text. Line comments and defects are displayed in the Chat pane of the Diff Viewer © 2003-2015 SmartBear Software 257 . 288 289 Web Client To add line comments, click the desired line of text in the content view, type your comment in the text box and click "Add". To add defects, click the desired line of text in the content view, type the defect description, click "Add As Defect" and fill-in the required fields. Coordinate Comments and Defects (Pushpins) These comments or defects relate to a particular coordinates within a file. Can be used with images, Microsoft Word files and PDF files. Multiple comments and defects can relate to the same coordinate. Pushpin comments and defects are displayed in the Chat pane of the Diff Viewer 257 . © 2003-2015 SmartBear Software Types of Review Comments and Defects To add pushpin comments, click the desired location in the content view, type your comment in the text box and click "Add". To add defects, click the desired location in the content view, type the defect description, click "Add As Defect" and fill-in the required fields. Pushpins created via Web Client or command-line client display an integer number in their head: The number corresponds to the order in which that pushpin was added to the document page or image. Pushpins created via Eclipse Plug-in do not display any ordinal numbers: Note: During the upgrade to Collaborator 9.3 all in-progress reviews have been updated and their pushpins (if any) were numbered. Converting only in-progress reviews during the upgrade, ensures that upgrading the server to 9.3 does not take too long. To append ordinal numbers to pushpins in all completed reviews, your administrators can use the respective command in the Diagnostic Utility 130 . (This however may take some time to accomplish.) Label Comments and Defects These comments or defects relate to an arbitrary label within a file. Can be used with images, Microsoft Word files and PDF files. The label text must describe the content (for example, "Section 5.1 on page 23") it relates to. (Since, label comments/defects do not have any other markers that bind the content and the label.) Multiple comments and defects can relate to the same label. © 2003-2015 SmartBear Software 290 291 Web Client Using labeled locations decreases the confusion that can occur when large changes occur in a document or image resulting in the pushpins not being adjacent to the corresponding context. Label text may not be updated. Label comments and defects are displayed in the Chat pane of the Diff Viewer 257 . To add label comments, scroll the Chat pane to the "Start conversation at" box, specify label text and text of the comment and click "Add". To add defects, perform the same steps as for label comments, but click click "Add As Defect" and fill-in the required fields. Cell Comments and Defects These comments or defects relate to a particular cell within an Excel spreadsheet. Can be used with Excel files and their revisions. Multiple comments and defects can relate to the same cell. Conversations on cells are displayed in alphabetical order by sheet name, not in the sheet order found in the version content. The name of the chat includes the name of the sheet followed by the location of the cell being discussed. For example, 3sheetC10. Cell comments and defects are displayed in the Chat pane of the Diff Viewer 257 . © 2003-2015 SmartBear Software Types of Review Comments and Defects To add cell comments, click the desired cell in the content view, type your comment in the text box and click "Add". To add defects, click the desired cell in the content view, type the defect description, click "Add As Defect" and fill-in the required fields. 4.3.6 Review Chats, Comments and Defects Viewing differences 257 between documents is merely the beginning. The key to reviewing documents is communication. There are various global and content-specific types of comments and defects in Collaborator. See Types of Review Comments and Defects 285 for detailed description of each type. This topic describes how to communicate during a review. Making Conversation -- Chatting at particular lines, coordinates, cells To start a new chat session, just click on a desired location (line, coordinates, cell) and start typing. The interface will open up automatically and accept your chat message: © 2003-2015 SmartBear Software 292 293 Web Client When you click "Add", your message is transmitted to all other users and you have started a threaded conversation for that particular location (line, coordinates, cell). In this case, it would look something like this: Notice how the conversation is now threaded by line (112) and how a little icon appears next to the source where the conversation was made. When you type the name of a file in the same review, it will turn into a link to that file. You can also link to a different line number in the current file by typing "line NNN". © 2003-2015 SmartBear Software Review Chats, Comments and Defects When another user chats on that same line, that message appears in yellow and yellow bubbles help to make the conversation stand out as needing to be read. The screen updates immediately without the need for a browser "refresh": To clear this "unread chat" state, send a chat message back to the other user. You can also click the green checkmark button to 'Accept' the comment or the 'Mark Read' button. © 2003-2015 SmartBear Software 294 295 Web Client "Accept" means whatever you want it to mean. If you want, you can never use the Accept button at all. The actual effect of clicking "Accept" on a conversation is to mark that conversation read, and to put a green check mark next to that conversation in the Inspection page (main review page with list of files). Those check marks are visible to all users. Many people use "Accept" as sort of a bookmark within the review to keep track of what files they have already looked at. Some people use it to mean explicit agreement with the conversation (as opposed to simply not replying, which is implicit agreement). If you want to clear the "unread chat" state without saying something, click the Mark Read button (there is also a 'Mark All Read' button at the bottom of the chat pane): Redacting Comments People have a knack for typing things that for various reasons they should not. © 2003-2015 SmartBear Software Review Chats, Comments and Defects When you do this, you can redact your harsh, erroneous or otherwise inappropriate statement by clicking the "X" to the right of your comment. The "X" will appear when you mouse-over the specific comment you would like to redact. The comment will then be displayed in a much more difficult to read manner. This styling is meant to deter the casual reader from actually reading the text. You cannot undo redacting a comment. If you have accidentally redacted a comment, you can copy the text from the redacted comment into a new comment. System administrators are allowed to redact any comment. Normal users are allowed to redact comments they authored. Creating Defects -- indicating that something is wrong When you want to indicate that there is a problem that needs to be fixed -- not just more chat -you open a defect. Do this using the As Defect drop-down below the comment field: Besides the comment text, defects can have any number of additional fields. These are all completely configurable 183 by the system administrator and can also vary depending on the review workflow 238 that was originally selected for the review. Because this is completely configurable, this manual cannot say exactly what the fields will be or what they mean; ask your administrator for details. It is common to see fields like severity, type, checklist item, and phaseinjected. © 2003-2015 SmartBear Software 296 297 Web Client Once the defect is created, it is added to the chat area and a defect log is started on that line: Every defect is given a unique number, on the server; in the example above the number is D1. There will only ever be a single defect numbered D1, no matter how many defects, documents or reviews exist on the server. You can have any number of defects on a single line; all will be logged into the list beneath the chat area. You can Edit a defect by clicking [Edit] in the defect log. Or Delete a defect by clicking [Delete] (available after clicking Edit). All of these activities will be logged into the chat conversation area as an audit trail of what happened. © 2003-2015 SmartBear Software Review Chats, Comments and Defects Warning: It is tempting to delete a defect once the author has corrected the problem, but this is the wrong thing to do. You want to keep the defect record around, just mark it "fixed". This process is described next. Delete a defect only if it turns out that it really was not a defect at all. Warning: The word "defect" has many connotations that are inappropriate for peer review. This does not mean the problem will be mirrored in an external issue-tracking system, and it does not necessarily mean it was a bug! Even "bad documentation" can be a defect. A "defect" is just a way of identifying something that needs to be fixed. Moreover, if the word "defect" has a negative connotation in your environment, your Collaborator administrator can change it to another term 143 . Verifying that defects have been fixed Later, after the author has attempted to fix the defects and has uploaded the new files to the review, the reviewers will verify that the fixes do fix the defect and do not open more defects in the process. When the fix is verified, click [Mark Fixed] to indicate this fact. The conversation area and defect log will be updated to reflect this new state: © 2003-2015 SmartBear Software 298 299 Web Client Externalizing defects Sometimes you decide that a defect should be fixed at a later date. You do not want to mark it fixed because it is not fixed yet. But you do not want to delete it either because it is still a defect. The answer is to use the [Track Externally] link as shown below: This does two things. First it prompts you to create a new defect in your external issue tracker, then allows you to type in the associated issue ID in a field. Second, it changes the state of the defect from "Open" to "Tracked Externally". This special state tells everyone else that (a) the review can complete but (b) the problem was not fixed during the review and (c) how to find the external issue for further auditing. The state appears on the Review Overview 247 screen with a special icon: © 2003-2015 SmartBear Software Review Chats, Comments and Defects You can always undo the "Tracked Externally" state by clicking on the associated link [REOPEN]. This link will be in the place where [Track Externally] was. This will re-open the defect, restoring it to the state it had before the externalization. 4.3.7 FAQs Can I highlight a range of lines in a file? Currently there is no way to highlight a range of lines, although this is asked for frequently. We are going to implement this feature, but there are some subtle UI considerations that are not immediately obvious. For example, say person A highlights lines 10-20. Then B wants to highlight lines 15-25. The UI must make those ranges and how to highlight those ranges clear. Then what if C wants to comment on just line 10, the edge of A's range? The conversation threads need to make sense, the highlighting needs to represent these cases clearly, and it has to be clear how to highlight one of those or make a new comment. This is why it is not trivial, but we are working on it. How can I delete files in a review? Currently, files can be deleted from a review as long as there are no comments and/or defects associated. The New Review page 239 has a link that removes uploaded changesets. One option is to cancel 243 the review and start another. Also, note that you can optionally annotate 243 uploaded files before the review is started. This step additionally allows the author a chance to verify the right files are in the review. © 2003-2015 SmartBear Software 300 301 Web Client How does Collaborator calculate the lines of code (LOC) metrics? Collaborator uses different LOC calculation methods for different file types. Also, these calculating methods can provide slightly different results for the review summary, diff viewer, review detail and recently completed reviews reports. Here are some basic concepts: · Collaborator calculates the LOC metrics only for text files that are in some source control repository. It does not calculate these metrics for the files that are outside of any source control. LOC metrics are not calculated for Word, Excel and PDF documents, as well as images and other binary files. · To determine LOC metrics for the text files that are in a source control, Collaborator uses differences between the base and current file versions. 4.4 Searching & Reporting Various reports 310 and a sophisticated search 301 engine help you track reviews completed, reviews in progress, and changes in version control that have not been reviewed. Collaborator also creates metrics 678 reports for things like time spent in reviews, time between phases, kLOC/hour reviewed, defects per kLOC, time per defect, and many others. Reports can be viewed on-line or exported in a variety of formats. Reports can also be saved and e-mailed. In This Section · Searching From Web UI 301 Describes different ways to find a review from the Web Client. · Searching Directly From Web Browser 305 Describes hot to search for Collaborator reviews directly from the browser's address bar or search box. · Reporting 310 Describes customizable pre-built reports. 4.4.1 Searching From Web UI Collaborator has a sophisticated search facility allowing you to find reviews in many ways. Uses include: · Find reviews by review ID. · Find reviews with substrings in title and custom fields · Find reviews with specific participants 238 183 . . © 2003-2015 SmartBear Software Searching From Web UI · Find reviews of particular changelists by check-in comment or changelist ID. · Find reviews of certain files by file path. · Find reviews having a substring in comment or defect text. Starting a Search To start a search you can type the search term into any of the following: · The search box at the left side of the menubar: Entering search term in Web User Interface · The address bar or search box of your browser (if your Collaborator server was added as browser's search provider 305 ): Entering search term in Mozilla Firefox The system will automatically search in all the ways listed above. If you have entered the review ID number, you will automatically be taken to review. See Jumping to Reviews 304 section for details. © 2003-2015 SmartBear Software 302 303 Web Client Search Results The number of displayed search results will be limited if the search produces too many results. The default number displayed will usually be "10". This can be changed in the form that will appear at the top of the search results. To display more or less than shown, change the value in the "number of search results" field and click "search". Because there are many types of searching, each result block is drawn separately. For example, below are the results of searching inside review title and custom field text: Note several features of the search results: · Text at top of the block explains exactly what the block is searching on. · Reviews are displayed in creation-date order, most recent first. · Specific search term is highlighted in yellow. · Jump to a review by clicking the ID link. · When there are many results, a message appears near the top in green. You may notice that some reviews do not have the yellow highlight. Why did these reviews match the search? This search looks not only at the review title and participants but also in all custom fields. Those fields are not, however, displayed in this view, so nothing can be highlighted. (Custom fields are not shown because there can be a large number of them which would make the search results difficult to read.) © 2003-2015 SmartBear Software Searching From Web UI Here is another example where the block is searching over files present in the review: Jumping to Reviews You can jump to a review by entering the unique review ID number into the search box. If the number entered matches a review ID number, you will automatically be taken to review. This allows you to bypass search results and quickly find the searched review. Enter the Review ID number into the search box at the left side of the website menubar: The browser will be automatically directed to Review # 5024: © 2003-2015 SmartBear Software 304 305 4.4.2 Web Client Searching Directly From Web Browser You can add Collaborator to the list of search engines of your browser. In this case you can search for reviews, participants, files and other directly from your browser's address bar or search box. How it works To perform a search in Collaborator from within the web browser, we need to add your Collaborator server as the browser's search provider. (See instructions below 305 .) Once this is done, you can open any arbitrary web page (not necessary from Collaborator Web UI) and enter the desired search term in the browser's address bar or search box. Then you need to select Collaborator as the search provider (if it is not set as the default provider) and press Search. © 2003-2015 SmartBear Software Searching Directly From Web Browser Entering search term in Internet Explorer Entering search term in Google Chrome Entering search term in Mozilla Firefox Your Collaborator server will perform a search and display search results for the given term. © 2003-2015 SmartBear Software 306 307 Web Client Results of Collaborator search Adding Collaborator as Browser's search engine Collaborator uses the OpenSearch technology to act as the browser's search provider. The exact instructions on adding custom OpenSearch providers depends on a browser. Below are instructions for the most popular browsers. Internet Explorer: 1. Create a *.reg file with the following content: Windows Registry Editor Version 5.00 [HKEY_CURRENT_USER\Software\Microsoft\Internet Explorer\SearchScopes \Collaborator] "DisplayName"="Collabortor" "URL"="http://yourServer.com/go?page=SuperSearch&superSearchField= {searchTerms}" "FaviconPath"="C:\\loclPathToFavicon\\CC.ICO" "FaviconURLFallback"="http://yourServer.com/i/cc.ico" © 2003-2015 SmartBear Software Searching Directly From Web Browser 2. Change http://yourServer.com to the actual URL of your Collaborator server (including the protocol name: http or https). 3. Save the file and run it. 4. Confirm to make changes to the registry. 5. (Optional) Open Internet Explorer, go to Tools | Manage Add-ons | Search Providers, and set Collaborator as the Default Search Provider. Google Chrome: 1. Navigate to navigate to the URL of the Collaborator Web Client. 2. Click Chrome menu. 3. Select Settings. 4. Go to the "Search" section. 5. Press "Manage Search Engines". 6. Under "Other search engines" select "Collaborator" © 2003-2015 SmartBear Software 308 309 Web Client 7. Specify a more memorable text shortcut for the Keyword field. That is, instead of the full URL of your Collaborator server enter, for example, "collab". Keywords are entered in the address bar to denote which of search engines to use. 8. Press "Make default". This will add your Collaborator server as the default search engine. 9. Press Done and close Chrome settings. Later on you may restore your default search engine and use the specified keyword to search for the term on your Collaborator server. Mozilla Firefox: 1. Navigate to navigate to the URL of the Collaborator Web Client. 2. Open the search engine list and select "Add Review search". Firefox will add it to your list and make it the active search engine. © 2003-2015 SmartBear Software Searching Directly From Web Browser 4.4.3 Reporting Collaborator has a number of customizable pre-built reports. To access the customizable prebuilt reports, click the Reports menubar option: If you are not an administrator, you may or may not have access to view reports depending on the Reports Access 146 setting. The pre-built reports are divided into the following groups: · Customizable Review Reports 312 - generate a list of reviews that meet certain requirements (reviews having the specified phase, status, duration and so forth). · Review Detail Reports 314 - display detailed information about a particular review. · Customizable Defect Reports · Customizable User Reports · List Reports 316 315 316 - generate a list of defects that meet certain requirements. - generate a list of users that meet certain requirements. - generate lists of users and SCM changes. © 2003-2015 SmartBear Software 310 311 Web Client Additionally, you can retrieve data from Collaborator database and create your own custom reports 587 using an external reporting tool such as Excel, Access, Crystal Reports, or Business Objects. For further information on this approach, see Creating Custom Reports 587 . General Procedure To generate any of the built-in reports: 1. Choose the type of a report that you need and click its name. 2. On the ensuing page, specify the desired options for the report: column set, filters, sorting and so on. To reset the report options and filters, you can press Revert button. 3. Click Run or Update button to generate the report with the specified criteria and parameters. The report will be displayed in the Results pane in the bottom of the page. 4. (Optional.) Use the toolbar on the top right of the Results box to export or print report results: · The Link will bring up a pop-up window with a direct link to the current customized report (with all the current options and filters preserved). You can bookmark this link to use whenever you want to revert back to the review configuration. · The SQL will display an SQL query that was used to generate the current report. You can use this SQL query when creating custom reporting tool 587 . · The Printable button will prepare the report in a printable format. © 2003-2015 SmartBear Software Reporting 312 · The CSV button will export the report in comma-separated values format. Note the CSV output format does not consume a license. Each of the pre-built reports is described in the sections below. Customizable Review Reports The reports from the Customizable Review Reports group generate a list of reviews that meet certain requirements. Collaborator comes with the following pre-configured review reports: Once you click on a report name, you will be directed to another page where you can tailor the report to your preferences. On the top the page you can view and edit customizable options for the report. The options are divided in several groups: Columns, Filters and Options. The options from the Columns group control which fields to display for the report. This section gives you the option of showing or hiding certain fields, allowing you to choose how much or how little you report. Note that the fields may not be identical to the example given above. The quantity and content of the fields will depending on how your local Collaborator configuration is set up. © 2003-2015 SmartBear Software 313 Web Client Most of the field names are self-explanatory. Here are definitions for some of the abbreviations: · LOC - Total number of lines of code · LOC Added - Lines added · LOC Removed - Lines deleted · LOC Modified - Lines with modifications · LOC Delta - Change in line count, that is, current - previous · LOC Changed - Also known as churn, this is lines added + removed + modified To learn about the other metrics of the reviews, see Metrics: Definitions 675 and Metrics: Analysis 678 . The options from the Filters group define which reviews to include or exclude from the report. Use this section to filter out your search results. Again, your fields will reflect your local Collaborator configuration. © 2003-2015 SmartBear Software Reporting 314 The options from the Options group control how the found data is sorted, titled and divided into pages. The Options sections allows you to edit the sorting, title, and number of rows of the review. A report has a limit on the number of rows that can be displayed: 50 rows by default. You can change the number in the "Max # Rows" field. Whe report data to CSV, SQL or print the report all rows are exported/printed regardless of the This option does not affect will be visible when you use export to SQL, CSV, or print your resulting report. Review Detail Reports Review Detail Reports provide information about the specified review. You can choose between a brief summary or a detailed report on a review. © 2003-2015 SmartBear Software 315 Web Client Once you click on a report name, you will be given the following form: Enter the unique review ID number, and change the pre-defined report options as you wish. Any reports of this type display the Overview and Participants sections. The Defects, Materials, Checklist History, Comments and File Activity sections can be displayed or hidden depending on how you configure the format fields. Review Detail Reports are also accessible through the Review Summary Screen 245 . Customizable Defect Reports The reports from the Customizable Defect Reports group generate a list of defects that meet certain requirements. They include the following reports: © 2003-2015 SmartBear Software Reporting Clicking a report name will open a page where you can configure the criteria for the defect reports. On the top the page you can view and edit customizable options for the report. The options are divided in several groups: Columns, Filters and Options. The options are analogous to those of Customizable Review Reports 312 , but these reports are centered around defects. User Reports The reports from the User Reports group generate a list of users that meet certain requirements. They include the following reports: Clicking a report name will open a page where you can configure the criteria for the user reports. On the top the page you can view and edit customizable options for the report. All reports from this group, except for the User Detail Report, have the options analogous to those of Customizable Review Reports 312 . For the User Detail Report you will need to input the ID of the desired user and specify time period for which to generate the report. List Reports The List Reports generate various types of data about Collaborator users and source control management integration. They include the following reports: © 2003-2015 SmartBear Software 316 317 Web Client · The User List report lists the users registered on the current Collaborator server and indicates whether the user is active and when they last accessed the server. By default the report lists all the users. To filter the user list, enter a value into the User Login or User Full Name fields. In this case the report will list only the users whose login or full name contain the specified value. · The Reviews by Changelist report lists the reviews having SCM changelists linked to the review. By default the report lists the reviews changed during the current week. To specify another time period for the changes, enter the desired values into the Start Date and End Date fields. To filter the review list, enter a value into the Change List Author or Changelist ID fields. In this case the report will list only the changelists whose author or ID contain the specified value. · The Changes List report lists the SCM changes linked to the review. By default the report lists the changes made during the current week. To specify another time period for the changes, enter the desired values into the Start Date and End Date fields. · The Changes, Unreviewed report lists the changes that have been submitted to SCM but have not yet been reviewed. By default the report lists the changes made during the current week. To specify another time period, enter the desired values into the Start Date and End Date fields. To filter the changes list, enter a value into the Author or Changelist ID fields. In this case the report will list only the changes whose author or ID contain the specified value. Each list report has the same basic structure. In the upper part it contains several filter fields and in the lower part it displays a table that lists the users, changes or reviews that match the specified criteria. Warning: Report data is cached by the server automatically. This makes it fast to page through data, but can be confusing since data is not updated automatically when you just refresh the page. To "really" refresh data, click the Update button under the list of filters. You can export list reports into CSV, PDF, or Excel. Just click the appropriate link under the filters. © 2003-2015 SmartBear Software Reporting If none of pre-built reports suits your needs, you can always create your own custom report 4.5 Troubleshooting Collaborator has a new debugging feature which makes gathering support logs easy. The first step is to click the ‘Report Error’ link at the bottom of the web UI. © 2003-2015 SmartBear Software 587 . 318 319 Web Client A ‘Report an error’ dialog box will automatically launch once the link is clicked. Click ‘Capture Debugging Log’ and then go through the steps that originally caused the error. The log will automatically capture the error information. Once the error has been reproduced, click ‘DONE’ at the bottom of the screen in the flashing Capturing Debug Log dialog box. A Submit Error Report dialog box will be displayed. Fill out the form and click ‘Report Error’ to send the information and open a case with SmartBear support. © 2003-2015 SmartBear Software 320 Note: Log files may accumulate in the temp directory if users enable debugging and do not disable it. These logs are capped at 50MB but if many users leave debugging on, the number of files can impact performance. These files can be deleted if they are not needed and administrators could set up a system task to clean that temp folder of anything older than 2 weeks (for example). 5 Desktop Clients This chapter describes various desktop client applications and plugins, that simplify and expedite your daily work with Collaborator. In order to use any of Collaborator clients, your administrator must first install and configure 51 the server part of Collaborator. In This Section · Desktop Clients - Overview 321 Provides general information about Collaborator's desktop clients. · Client Installation 322 Contains information on your Collaborator's user account settings, logging in and logging out operations and subscribing to notifications. © 2003-2015 SmartBear Software 321 Desktop Clients · Configuration 329 Describes how to configure client's connection to Collaborator server and to version control system. · GUI Client 331 Describes a cross-platform GUI client. · Command-Line Client 341 Describes a cross-platform command-line client. · IDE Clients 358 Describes plugins for Eclipse and Visual Studio that allow creating reviews directly from these IDE's · Tray Notifier 397 Describes a helper tray notifier client. · External Diff Viewer launcher 399 Describes a helper tool that allows to launch an external difference viewer for Collaborator reviews. · Print To Review 402 Describes a virtual printer driver that submits documents for review. Related Topics of Interest · Collaborator Server 51 Describes the server component of Collaborator. · Web Client 220 Describes the web user interface of Collaborator. 5.1 Desktop Clients - Overview Collaborator has a variety of clients for creating reviews and uploading files for review. While the Collaborator web server user interface provides the capability for uploading documents and, for some SCM integrations, the capability for creating reviews from committed changes, a client simplifies and expedites this process. Also, importantly, a client allows reviews to be created from local modifications to SCM files that are not accessible on the SCM server (that is, Collaborator clients allow for pre-commit reviews). Client/Server Version Compatibility As a general rule, older clients will work with a newer version of the server, but clients will not work with servers that are older than the client. However, it is always recommend to use the same client version as the server if at all possible. © 2003-2015 SmartBear Software 322 SCM Integration All Collaborator clients integrate with SCM systems, for identifying files under source control and ease of selecting modified files to be uploaded to the Collaborator server for a review. Files are uploaded as changelists. For SCM systems that do not implicitly support changelists, the clients have mechanisms for selecting a group of files to be uploaded to a review. The SCM integration understands adds, changes and deletes but does not currently track or detect file renames or moves. Creating Reviews and Uploading Files For Review Each client also provides a means for creating a review, and for attaching a changelist to an existing review. Other Features Additional features are available depending on the client. The client right for your development environment may be determined by your SCM system, or just a matter of personal choice. 5.2 Client Installation The Client Installer includes the following components: · GUI Client 331 · Command-Line Client · Tray Notifier 341 397 · External Diff Viewer launcher 399 · Perforce P4V/P4Win plug-ins 550 · Version Control System triggers The client installer is cross-platform and can be run in an interactive GUI mode or silently from the command-line. Getting the Installer Go to our website to get the latest installer for your platform: http://downloads.smartbear.com © 2003-2015 SmartBear Software 323 Desktop Clients Installers are provided for Windows, Linux/Solaris and Mac OS X. We also supply the raw files without a managing installer in the form of a compressed tar archive. Note: If you have previously installed the client with the 32 bit installer and are now wanting to run the 64 bit installer, you must first uninstall the 32 bit client. This will not remove any existing configuration data, like preferences, SCM configurations, default browsers and so on. Graphical Installation This is the recommended way to install the client software because you get a chance to see all the configuration options and allow the installer to validate your configuration. After the welcome screen, you are prompted with the EULA (End User License Agreement): © 2003-2015 SmartBear Software 324 The next screen lets you select where to lay down the files for the installation: © 2003-2015 SmartBear Software 325 Desktop Clients The next screen lets you configure how and if your Start Menu (Windows only) is modified. This does not affect the behavior of the command-line client itself: Next, you configure your connection to the Collaborator server: © 2003-2015 SmartBear Software 326 When you configure the URL, be sure to remember to specify the protocol (for example, http:// or https://) and port number, and path. Leaving out one of those things is the most common mistake. Your username and password must already exist 157 on the server. Log into from a web browser to test your account information. 223 the server first If you use a proxy, supply your proxy information as well. If the connection to the server cannot be established, you will get an error dialog and an explanation of the problem: If you select "Retry", you can supply different configuration information and try again. Otherwise, if you select "Continue", the installation will continue but you will still need to set up your configuration 342 . © 2003-2015 SmartBear Software 327 Desktop Clients After this step, you will be prompted for additional tasks. On Windows you will have the option to configure the Collaborator Tray Notifier to run on Startup. On all platforms, there will be an option to configure the integrations in the Perforce Visual Tools. If this option is selected, the installer will attempt to configure the P4V and P4Win integrations 550 for the current user. Other users will still need to configure the integrations manually. Once you click "Next," the installer will complete: © 2003-2015 SmartBear Software 328 Unattended Installation To run the installer without a GUI, run it from the command-line using the -q switch. In this case, you can also use the -dir [directory] switch to specify the target install directory. The -q switch gives you a silent install and will not prompt you for any installation instructions. If you would like to be prompted for installation instructions without using the graphical installer, you can run the installer from the console using the -c command. This installation technique can also be used to install clients remotely on many workstations. Warning: When run in unattended mode, the installer cannot verify the client's connection with the Collaborator server. You might have to manually configure the connection with the server. Installing on a system with multiple JRE installations See Known Issues with the Collaborator by Collaborator. © 2003-2015 SmartBear Software 682 for instructions on selecting a specific JRE to be used 329 5.3 Desktop Clients Configuration Clients will need to be configured to both the Collaborator server and the SCM server. Your client may have been successfully configured to the Collaborator server by the installer during the installation 322 process. If it has not been properly configured, please visit the Server Connection Configuration section 329 for detailed instructions. Please make sure that your client is also configured to your version control or SCM. For instructions on how to do so, please visit the configuration sections under the appropriate client: · GUI Client SCM Configuration 334 · Command-Line Client SCM Configuration 5.3.1 341 Server Connection Configuration If you used the graphical installer 323 , your connection to the Collaborator Server should be configured already. Otherwise, you will be prompted when you try to connect. The GUI Client, Command-Line Client, Tray Notifier, and SCM Triggers share a common server connection configuration file 331 . The server connection configuration can be set with a graphical interface 329 using GUI Client or the Tray Notifier, or on the command-line 330 using the Command-Line Client. Graphical Server Connection Preferences Selecting File -> Preferences on the GUI Client main screen 332 or selecting Preferences in the Tray Notifier context menu 398 open the graphical Server Connection preferences page. © 2003-2015 SmartBear Software Server Connection Configuration GUI Client Server Connection preferences The Server URL must include the correct port number and path if applicable. The user name and password are the same as you use when logging into the web server 223 (the password is requested when you log in for the first time). The proxy settings should be used if you have a client proxy between your workstation and the server. Use the Test Connection button to make sure the connection is working. If it fails, the error message will be helpful. Command-line Server Connection Global Options The Command-Line Client uses the following global options Collaborator Server: · url 351 350 to specify the connection to the - The server's fully-qualified URL. · user 351 - The user name for the login (same as web user login requested and stored the first time you log in. © 2003-2015 SmartBear Software 223 ). The password is 330 331 Desktop Clients · server-proxy-host 351 - The proxy's URL (specify if you connect to the Internet via proxy). · server-proxy-port 351 - The port number to use on the proxy server (if connect via proxy). Use the ccollab login command to connect to the Collaborator Server and save your server connection options to the configuration file. You can try testing your configuration 342 to verify the configuration is working. Configuration Files Collaborator uses several configuration files to store configuration. When a user sets server connection configuration using the graphical interface 329 or the command-line 330 , the settings are stored inside a directory called .smartbear inside the user's home directory. (Under Windows, the "home directory" is your "Documents and Settings" Profile directory.) The .smartbear directory and the configuration files therein can be placed in other locations to establish default behavior. Each of the locations is loaded in a particular order of precedence, with each successive location overriding the settings (if any) in the previous locations: 1.INSTALLDIR/.smartbear Here INSTALLDIR refers to the Collaborator installation directory. This is typically /opt/ ccollab-cmdline under Unix or C:\Program Files\Collaborator Client under Windows. This is most useful for system-wide default settings. 2.PROFILEDIR/.smartbear Here PROFILEDIR refers to a directory specified using the Java property smartbear. profile on one of the Collaborator Client executables. With this property defined, the client will look in this directory for more configuration. This is most useful for executable-specific default settings, such as settings just for SCM server-side triggers. 3.USERDIR/.smartbear Here USERDIR refers to the user's home directory (under Windows, your "Documents and Settings" Profile directory). This is the default location for configuration settings to be stored, and is useful for userspecific settings. 5.4 GUI Client The GUI Client is a cross-platform client interface to the Collaborator server. It is used for uploading files, either before or after check-in. This chapter includes: © 2003-2015 SmartBear Software 332 · Main Screen 332 · SCM Configuration · Preferences 335 · Troubleshooting 5.4.1 334 339 Main Screen Main Screen The GUI Client's main screen contains a list of SCM configurations. Each SCM Configuration entry shows its SCM system, Configuration and Local Path (if any). Use the SCM Configuration buttons 332 on the right side of the screen to add or modify an SCM Configuration. Use the Add to Review buttons 333 on the bottom of the screen to upload review materials to the Collaborator Server. GUI Client Main Screen Server Connection configuration If you used the graphical installer 323 , your connection to the Collaborator Server should be configured already. Otherwise, you will be prompted when you try to connect. You can also select File -> Preferences in the system menu to open the Server Connection preferences 329 page. SCM Configuration buttons The buttons on the right side of the main screen are used to add or modify an SCM Configuration in the SCM Configurations list. © 2003-2015 SmartBear Software 333 Desktop Clients · Add... adds a new SCM Configuration · Edit... edits the selected SCM Configuration · Remove removes the selected SCM Configuration Add to Review buttons The buttons on the bottom of the main screen are used to upload materials to a new or existing Review on the Collaborator Server. The buttons available will depend upon the selected SCM Configuration. Different buttons are available for different SCM systems: · AccuRev · CVS · Git 410 421 432 · IBM Rational ClearCase · IBM Rational Synergy · Mercurial 452 470 504 · Microsoft Team Foundation Server · PTC Integrity · Perforce 512 520 536 · Subversion 567 Keyboard Shortcuts The GUI Client also offers keyboard shortcuts as follows: File Menu Alt + F = File menu Alt + P = Preferences Alt + X = Exit Help Menu Alt + H = Help menu Alt + L = Capture Debugging Log Alt + E = Email Support... Alt + A = About Collaborator © 2003-2015 SmartBear Software Main Screen * For Mac users, 'Alt' should be replaced with 'Cmd.' 5.4.2 SCM Configuration This section will describe how to configure the GUI Client to your SCM or version control. You will also have to configure 329 the client to the Collaborator server. Configuring Version Control Pressing the Add... or Edit... SCM Configuration buttons opens the SCM Configuration dialog. 332 SCM Configuration dialog © 2003-2015 SmartBear Software on the right side of the main screen 332 334 335 Desktop Clients Local Path If you have a copy of your source on your local machine, enter its location into the optional Local Path field using the Browse button. Press the Validate... button to detect your SCM and SCM Configuration. Scm Specific Options If there are additional settings necessary to connect to your SCM system, select your SCM system using the SCM drop-down to show the available options. The Collaborator integration requires that a command-line client be installed. There are different options available for each SCM system: · AccuRev · CVS · Git 409 421 432 · IBM Rational ClearCase · IBM Rational Synergy · Mercurial 451 470 504 · Microsoft Team Foundation Server · PTC Integrity · Perforce 519 534 · Subversion 5.4.3 511 566 Preferences The Preferences menu will allow you to change the settings for: · Server Connection · External Diff Viewer launcher · Miscellaneous To view preferences, click on File -> Preferences in the main screen 397 of the GUI Client: © 2003-2015 SmartBear Software Preferences You can also view the Preferences menu via the Context Menu © 2003-2015 SmartBear Software 398 of the Tray Notifier. 336 337 Desktop Clients Server Connection Here you can configure the client connection to the server. Please note that if you are connecting to a server using https and the server uses a self-signed certificate, you must run "ccollab login" using the command line client first to import the certificate information to your keystore. © 2003-2015 SmartBear Software Preferences External Diff Viewer launcher Here you can configure settings for the External Diff Viewer launcher. There are two separate External Diff Command settings, one for comparing two versions of a single file, and one for comparing multiple files (two directory trees). The External Diff Command field contains the absolute path to the executable the External Diff Viewer launcher will launch. The Arguments field contains arguments passed to the executable. Certain variables specified in the Argument field are substituted when the external diff command is invoked. Click the Variables button to view the list of available variables and their descriptions. As mentioned in the External Diff Viewer launcher section 399 , we have included preset arguments to use with the following diff viewers: SourceGear DiffMerge, Araxis Merge, IDM UltraCompare, Guiffy, and Beyond Compare. To use one of the presets, just click the appropriate button (for example, Guiffy) under External Diff Command Presets. © 2003-2015 SmartBear Software 338 339 Desktop Clients Miscellaneous In the Miscellaneous tab, you can change the refresh interval (in seconds) and the preferred browser. Checking Force New Browser Window will force Collaborator to open any new instances in a new window instead of a new tab in browsers that support such behavior. 5.4.4 Troubleshooting Anti-Virus Software If you have any anti-virus software Collaborator client. 686 running, first determine whether it is interfering with the 682 to see whether SmartBear already knows about this issue. Known Issues Check the Known Issues Appendix © 2003-2015 SmartBear Software Troubleshooting Linux packages On RedHat Enterprise Linux or Fedora Core, you may need to install the following package names to use our GUI client. If the GUI client will not start successfully, please be sure that these packages are installed. glib2 glibc gtk2 libX11 libXau libxcb libXext libXi libXtst Capturing a debugging log If you are experiencing problems with the GUI Client, especially if the problem is related to your SCM system, it will help SmartBear technical support if you send in a debugging log. To capture a debugging log, select Help -> Capture Debugging Log from the system menu on the Main Screen 332 . Debug Log © 2003-2015 SmartBear Software 340 341 Desktop Clients After the Debug Log window has opened, go back to the Main Screen 332 window and recreate your problem. You should see log messages being created in the Debug Log window. After you have recreated the problem, go back to the Debug Log window and select the Save Log button. This will prompt you for a convenient place on your machine to save the log file. Please send the log file along with a full description of what you were trying to do when the error occurred to [email protected]. 5.5 Command-Line Client The Command-Line Client is a cross-platform client interface to the Collaborator server. It can be used by a human for uploading files, integrating with version control, and querying the server, or as a part of an automated script in a sophisticated ALM / build system. This chapter includes: · Configuration · Commands 341 343 · Graphical Editor · Uploading Diffs 345 345 · Troubleshooting 349 · Global Options Reference · Command-line Reference 5.5.1 350 357 Configuration The Command-Line Client needs to be able to connect with your Collaborator Server, connect with your SCM system, and may need to launch a graphical editor for selecting files to be uploaded to reviews. The following sections describe configuring 329 the Command-Line Client for these actions. Global Options The Command-Line Client supports many global options 350 and sub-command options. Global options may be specified on the command-line before the sub-command for each invocation, or they can be saved and applied to all future invocations using the set sub-command. Default settings for global options can also be set using one or more configuration files 343 . © 2003-2015 SmartBear Software Configuration Configuring Collaborator Server Connection If you used the graphical installer 323 , your connection to the Collaborator Server should be configured already. Otherwise, you will be prompted when you try to connect. Try testing your configuration 342 to verify the configuration is detected correctly. You can also manually configure your connection 330 using the login sub-command. Configuring Version Control In most cases, the Command-Line Client can automatically detect your SCM system configuration. Try testing your configuration 342 to verify the configuration is detected correctly. If the Command-Line Client is unable to detect your SCM system, or if you want to override the detected settings, you can specify SCM configuration settings using global options 350 : · AccuRev 415 · ClearCase · CVS · GIT 461 425 439 · PTC Integrity · Perforce 524 542 · Subversion 574 · Team Foundation 514 Testing Configuration Settings To test the current configuration settings, go to working copy of your repository (the place on your local machine where files from an SCM system are checked-out) and execute: ccollab info This prints the current effective Collaborator and version control configuration settings. If you have not specified the scm 351 global option, the Command-Line Client will attempt to automatically detect your SCM configuration. You will see some error messages if the configuration is not valid. If all goes well you should see something like this: © 2003-2015 SmartBear Software 342 343 Desktop Clients Connecting to Collaborator server http://myserver:8080 Connected as: John Doe (jdoe) Auto-detecting SCM System for 'C:\mycode' Detected Subversion SCM Username: jdoe SCM Config: repo=http://mysvnserver/repos/myrepo Graphical Editor Configuration The Command-Line Client uses the default system text editor to display files to be uploaded for review. You can override this to point to any other text editor using the editor 351 global option. Some editors on some platforms are launched as detached processes. This will cause the Command-Line Client to continue before the editor is closed, losing any changes made to the file list. The editor-prompt 351 global option can be used to pause the Command-Line Client after the editor is launched and wait for user keyboard input before continuing. Configuration Files Collaborator uses several configuration files 331 to store default global options. When a user saves a global option 350 setting (using ccollab set), the setting is stored inside a directory called .smartbear inside the user's home directory. (Under Windows, the "home directory" is your "Documents and Settings" Profile directory.) Global options specified by command-line switches configuration files. 5.5.2 350 override settings stored in the Commands Basic Commands The Command-Line Client provides a few basic commands which are unrelated to uploading files to the Collaborator Server: · help - Display help on using the Command-Line Client · login - Verify and/or change connection to the Collaborator Server · info - Validates server connection and SCM configuration © 2003-2015 SmartBear Software Commands · set - Save a global option 350 setting Upload Commands The primary function of the Command-Line Client is to upload review materials (files) to the Collaborator Server. The recommended commands to use vary by Version Control System: · AccuRev Commands 408 · ClearCase Commands · CVS Commands · Git Commands 448 419 429 · Mercurial Integration 503 · PTC Integrity Commands · Perforce Commands 518 530 · Rational Synergy Commands · Subversion Commands 469 561 · Team Foundation Commands 510 In addition to the Version Control specific commands, the Command-Line Client provides a few basic upload commands that work for any (or no) Version Control system: · addfiles - Upload local files without diffs · addchanges - Uploads locally modified files controlled by an SCM · adddiffs - Upload local or arbitrary diffs (see Uploading Diffs 345 ) Upload commands that deal with files managed by Version Control systems should be called from any sub-folder within the working copy of your repository (the place on your local machine where files from an SCM system are checked-out). Otherwise, the commands may fail to detect the SCM configuration. © 2003-2015 SmartBear Software 344 345 Desktop Clients Scripting Commands The Command-Line Client also includes many commands meant for constructing custom scripts, usually used for integrating with external systems or implementing custom behaviors. For more information see Scripting 631 . 5.5.3 Graphical Editor The addchanges and addactivity 467 commands can launch a graphical editor with a file list so you can review the files about to be uploaded and make any corrections you wish: The ### sequence is a comment. If all lines with files are deleted the operation is aborted. In this example there are two modified files, one file being added, and one being deleted. If not otherwise configured, the command-line uses the default system editor to display the file list. See Graphical Editor Configuration 343 for information on specifying a different text editor to be used. 5.5.4 Uploading Diffs You can upload arbitrary file differences using the ccollab adddiffs command. This subject is complex enough to warrant its own section in the manual. Uploading Local File Diffs You can upload local file differences with the adddiffs command: ccollab adddiffs <review> path-from path-to The path-from and path-to fields are paths to two files or directories to compare, and <review> is an integer review-id, 'new', 'ask', or 'last'. For example, this command would upload any differences found as a change-set as a new review: © 2003-2015 SmartBear Software Uploading Diffs ccollab adddiffs new /old/directory /new/directory Uploading Arbitrary Diffs You can also upload arbitrary differences with the adddiffs command. Assuming textual diffs have already been generated in a file called diffs.txt, use this: ccollab adddiffs review diffs.txt Or you can pipe the results of another diff command right into the ccollab process using a single dash instead of a file path. For example, this command uses the GNU diff command to generate a unified diff format, then uploads it directly into review #2534: diff -u100 dir1 dir2 | ccollab adddiffs 2534 After you upload diffs to the server you will see the "changelist" appear similar to this: Uploading Differences from Version Control If you want to upload differences generated by a version control command-line tool, you should use the ccollab add*diffs command specific to your version control system (if available) instead of ccollab adddiffs. Version Control specific add*diffs commands: · addardiffs 418 (AccuRev · addcvsdiffs 427 (CVS · addgitdiffs 442 (Git 419 429 408 ) ) · addhgdiffs 509 (Mercurial · addp4diffs 544 (Perforce · addsvndiffs 577 ) 503 530 ) (Subversion © 2003-2015 SmartBear Software ) 561 ) 346 347 Desktop Clients These commands integrate with version control servers and supply exactly the right command-line switches to the underlying version control command-line to minimize server transmissions and maximize features like fully reproducing both previous and current versions of the document. Many of the pitfalls with diffs described below are avoided when using ccollab add*diffs. Supported Diff Formats There are many kinds of diff formats out there. Our software supports many of them; if you find a format that is not working, please let us know 28 so we can get your diff format into our unit tests. · Unified The unified format starts with a two-line header naming the previous and name versions of a file, plus optional file information. Then it follows with diff-chunks starting with "@@" and then having both unmodified lines and added/removed lines. An exact definition of the format can be found here. Any number of these file-diffs can be strung together. Our software parses all of the files and uploads each as a "before" and "after" version. Context lines are preserved; lines skipped are reconstructed (more about this later 348 ). · UltraCompare Text Format We support the proprietary text format emitted by the 3rd party commercial command-line tool UltraCompare. This is a Unicode diff with full file context making it an excellent format that preserves all file content. Although this utility emits only one file difference at a time, you can concatenate any number of these diffs together and upload them in one shot through the ccollab command-line. This can be especially handy if you are writing a script to automate this process. · Subversion Style Subversion outputs a two-line header for each file; one starts with "Index:" and names the file in question, the next is a row of equal signs. Following the header is any of three types of diff output; we support all three but you should use the unified format for best results 348 . Any number of these file-diffs can be strung together. Note that with Subversion you should use addsvndiffs 577 instead of adddiffs. · Perforce Style Perforce has a variety of output formats; we support all of them. One is just the Unified format specified above. The other uses a one-line file header that shows the "before" and "after" file paths and version numbers with other file data, and then uses any of three types of diff output to encode the diffs. We support all three but you should use the unified format for best results 348 . Any number of these file-diffs can be strung together. Note that with Perforce you should use addp4diffs 544 instead of adddiffs. · CVS Style Similar to Subversion Style (see above) but has additional lines of output besides just those two file header markers. Note that with CVS you should use addcvsdiffs 427 instead of adddiffs. © 2003-2015 SmartBear Software Uploading Diffs · GNU Format The GNU format shows just additions, deletions, and modifications with no file context. An exact definition of the format can be found here. We do not recommend you use GNU format because (1) it does not support file names or multiple files and (2) it does not support context lines which causes problems when reconstructing files 348 . · RCS Format The RCS format shows just additions and deletions with no file context. We do not recommend you use RCS format because (1) it does not support file names or multiple files and (2) it does not support context lines which causes problems when reconstructing files 348 . · Araxis Merge, BeyondCompare, GuiffyMerge, GNU diff, xdiff, and other tools With these diff utilities, use an export option that creates unified diffs with lots of context. See the guidelines below 348 . When the command-line utility is uploading diffs it will print out the format that was detected. If it complains that the format is unknown, attach a copy of your diff data to an email to our tech support department 28 so we can add support for your format. Context Lines and Reconstructing Files Most diff formats skip over lines that were unchanged, possibly leaving a few lines of "context" around each modification. This might be OK for "patch" utilities but it is not good when you want to do a review. Why not? When you do the review, if you do not have many lines of context you cannot see much beyond the diffs themselves. Our software is smart enough to reconstruct the two files as well as possible, retaining all line numbers, but of course there will be gaps. Here is how the side-by-side view context: © 2003-2015 SmartBear Software 266 looks with some differences that only had three lines of 348 349 Desktop Clients You can see the "*** unspecified line placeholder ***" text where the diff skipped over lines. How to prevent this? It depends on how you are generating diffs. Here are some guidelines: · Always use Unified diff format 347 , not RCS or GNU. Those others do not support lines of context at all, nor do they support filenames so your uploads will be "anonymous". · Always include a lot of context with your Unified diff format. The way to specify this varies depending on your diff utility. For example, using GNU diff the command-line option is u1000 where "1000" is the number of lines of context. Selecting a big number like 1000 is not unreasonable! Reviewers will thank you for it. · Use the version-control specific ccollab add*diffs 346 commands whenever you can. This automatically selects the right command-line switches to maximize context while minimizing data transmissions. 5.5.5 Troubleshooting Check here for common problems and their solutions. © 2003-2015 SmartBear Software Troubleshooting Anti-Virus Software If you have any anti-virus software Collaborator client. 686 running, first determine whether it is interfering with the 682 to see whether SmartBear already knows about this issue. Known Issues Check the Known Issues Appendix Version History Check the Version History on the SmartBear website to see if this issue has been resolved in a later release. I try to run ccollab but it says File Not Found. Under Windows, sometimes the installer is not able to update the PATH variable due to system configuration or permissions. Or the PATH variable is updated but the system requires a log-out or log-in before it is in the PATH. Under Unix systems, the PATH variable needs to be updated if you did not install in a standard location such as /bin or /usr/bin. I try to upload files managed by an SCM system but detect a valid SCM configuration ccollab fails to You should call the upload commands from any sub-folder within the working copy of your repository (the place on your local machine where files from an SCM system are checked-out). Running with debug logging enabled Running the command-line client with the --debug 351 option will create a log file called ccollab.log in your current working directory. If you contact technical support with a problem and they cannot reproduce it, they will typically ask you to do this and send them that debug log. 5.5.6 Global Options Reference Description The following topic lists the available command-line global options. © 2003-2015 SmartBear Software 350 351 Desktop Clients Global Options can be specified on the command-line, or they can be saved and applied to every command using ccollab set. General Options Option Description --browser <value> Browser to launch (for example, 'firefox', 'ie', or 'default') --debug Run in debug mode, create a ccollab.log file in current directory --editor <value> External editor to use for editing file list --editor-prompt Prompt user for input to signal editing of file list complete --force-newbrowser Force browser to open new window (only works for some platforms and browsers) --no-browser Do not pop up a web browser when the command completes --non-interactive do not interact with user --password <value> Password to use when connecting to the application server --quiet do not display progress messages --scm <value> Manually sets the SCM system type, for example, "perforce" or "none" for no SCM System. Clearing this option causes the SCM system to be auto-detected --server-proxyhost <value> Proxy server URL to use to connect to the application server --server-proxyport <value> Proxy server port number to use to connect to the application server --url <value> URL to use when connecting to the application server --user <value> Username to use when connecting to the application server --use-json-api Execute commands using JSON API engine, which works faster. Since Collaborator 9.2.9200, Command-Line Client uses JSON API engine by default. This option is no longer required. © 2003-2015 SmartBear Software Global Options Reference Option Description --use-legacy-api Execute commands using the legacy XML RPC engine, which works slower. AccuRev-specific Options Option Description --accurev-depot <value> AccuRev depot name --accurev-exe <value> Full path to the `accurev` command-line client --accurev-ancalgorithm <value> Which algorithm to use when calculating the predecessor, either predecessor, previous-occupant, or basis-version ClearCase-specific Options Option Description --ccrc-server-url <value> CCRC server URL (for ClearCase Remote Client integration only) --ccrc-user <value> CCRC username (for ClearCase Remote Client integration only) --ccrc-passwd <value> CCRC password (for ClearCase Remote Client integration only) --clearcase-exe <value> Full path to the `cleartool` command-line client --clearcaseupdate-snapshot Whether to update ClearCase snapshot views prior to uploading files for review © 2003-2015 SmartBear Software 352 353 Desktop Clients CVS-specific Options Option Description --cvs-exe <value> Full path to the `cvs` command-line client --cvsroot <value> Connection to the CVS repository Git-specific Options Option Description --git-exe <value> Full path to the 'git' command line client --git-skip-index Should changes be uploaded from the working tree instead of from the index (like `git commit -a`) Mercurial-specific Options Option Description --mercurial-exe <value> Full path to the 'mercurial (hg)' command line client © 2003-2015 SmartBear Software Global Options Reference PTC Integrity-Specific Options Option Description --mks-host <value> PTC Integrity server name. --mks-port <value> PTC Integrity server port. --mks-user <value> PTC Integrity user name. --mks-passwd <value> PTC Integrity user password. --mks-expandkeywords Specifies whether to expand keywords in source files. The arguments use the --mks prefix as MKS Integrity is a former name of PTC Integrity. Perforce-specific Options Option Description --p4 <value> Full path to the P4 executable --p4port <value> How to connect to the Perforce server --p4user <value> Perforce user name --p4passwd <value> Perforce password or ticket --p4client <value> Mapping of Perforce server data to the local machine --p4-ignoreintegrationhistory <value> Ignore integration history when calculating predecessor © 2003-2015 SmartBear Software 354 355 Desktop Clients Option Description --p4charset <value> Perforce character set used for translation of Unicode files --p4-requireempty-defaultchangelist If true, do not allow uploads if the default changelist contains files --p4-specifycommand-charset <value> Should a character set be specified for communication with Perforce Rational Synergy-specific Options Option Description --ccm-exe <value> Full path to the `ccm` command-line executable --ccm-user <value> User Name to use when starting a Rational Synergy session --ccm-passwd <value> Password to use when starting a Rational Synergy session --ccm-engine-host <value> Host the Rational Synergy Engine will run on --ccm-databasepath <value> Path of the Rational Synergy database to connect with --ccm-localdatabase-path <value> Path of the local Rational Synergy database, typically c:/temp/ ccm or /tmp/ccm --ccm-remoteclient Start Rational Synergy sessions as a Remote Client --ccm-server-url <value> Server URL for Web-Mode Rational Synergy servers © 2003-2015 SmartBear Software Global Options Reference Subversion-specific Options Option Description --svn-exe <value> Full path to the `svn` command-line executable --svn-look-exe <value> Full path to the `svnlook` command-line executable (used by Subversion triggers) --svn-repo-url <value> Subversion repository URL --svn-user <value> Subversion user name --svn-passwd <value> Subversion password --svn-requireclientcertificatepassword <value> Use this if you have a non-empty and unsaved password for your SSL Client Certificate --svn-auto-add Treat unversioned files as if they had been added to Subversion --svn-recurseexternals Recurse in the 'svn:externals' directories as if they were part of the same repository --svn-repo-path <value> Full path to the repository (used by Subversion Triggers) Team Foundation Server-specific Options Option Description --tfs-exe <value> The path to Team Foundation "tf" command-line client. --tfs-collection <value> The name of Team Foundation Project Collection to work with. (Only for TFS clients 2010 and later.) © 2003-2015 SmartBear Software 356 357 5.5.7 Desktop Clients Option Description --tfs-server <value> The name of Team Foundation server to work with. (Only for TFS clients 2005 and 2008.) --tfs-user <value> The name of Team Foundation alternate user name (atypical). --tfs-passwd <value> The password of the alternate user. Command-line Reference Description Use the ccollab command to perform a number of Collaborator tasks from the command-line. Command Line Syntax: ccollab [global-options] command [command-options] Sub-Commands Sub-Command Description help Display help on using the Command Line Client info Validates server connection and SCM configuration login Verify and/or change connection to the server logout Clears the stored password and/or login ticket id, and invalidates the user's login ticket on the server set Save a global option setting addchanges Attaches locally-modified files to a review addfiles Attaches local files to a review without diffs © 2003-2015 SmartBear Software Command-line Reference Sub-Command Description addchangelist Attaches an atomic changelist to a review adddiffs Attaches file differences to a Review addsvndiffs addardiffs 577 Uploads diffs generated from accurev diff command 418 addcvsdiffs 427 Uploads diffs generated from cvs diff command addgitdiffs 442 Uploads diffs generated by git diff command addhgdiffs 509 Uploads diffs generated by hg diff command addp4diffs 544 Uploads diffs generated from p4 diff2 command addversions addactivity Attaches any 2 given versions to a review 467 Attaches file versions in a ClearCase activity to a review actionitems List current action items addstream Attaches pending differences from an AccuRev stream 418 browse Launch a browser to the Collaborator Server homepage commit Commit changes in the review addp4job Adds all numbered local changes that fix a job to the review 548 addurls Attaches urls to a review admin Perform administration tasks gitaddbranch 5.6 Uploads diffs generated from the svn diff command 443 Uploads diffs between the specified git branch and the remote-tracking branch. IDE Clients Collaborator provides a number of plugins for most popular integrated development environments (IDEs). These plugins allow you to create Collaborator reviews directly from the user interface of your favorite IDE. © 2003-2015 SmartBear Software 358 359 Desktop Clients See the section below for your IDE: · Eclipse 359 (including, Eclipse-based applications) · Microsoft Visual Studio 5.6.1 395 Eclipse Plug-in The Collaborator Eclipse Plug-in works with many Eclipse-based applications. Features · View with Action Item display · Perform Reviews 368 · Label Decorations · Markers 375 · Upload files 367 without leaving Eclipse 375 for local files under review on local files for Defects in Reviews from local hard drive 376 · Integrates with existing source control plug-ins including AccuRev 382 , ClearCase Git 383 , Perforce 389 , Rational Team Concert 477 , and Subversion 392 . · Update site 359 382 , CVS 382 , for automatic plug-in install and upgrade. Compatibility Eclipse base version 3.4 or higher (released versions only). Eclipse-based applications known to work with the plug-in: · Eclipse SDK · IBM WebSphere 5.6.1.1 Install & Update Update Site Eclipse can be configured to automatically download the Collaborator plug-in, and even to check periodically for updates. If you already know how to do this, all you will need to know is that our Eclipse update site is located here: © 2003-2015 SmartBear Software Eclipse Plug-in http://eclipse.smartbear.com/9.0 Otherwise, read on for step-by-step installation instructions. Installation Instructions Here are detailed instructions for how to install our plug-in in Eclipse: 1. Open Eclipse IDE. 2. Select Help | Install New Software from the main menu. © 2003-2015 SmartBear Software 360 361 Desktop Clients 3. Type "http://eclipse.smartbear.com/9.0" in the Work with field and press Enter. Then check "Collaborator" and click Next. 4. Click Finish to start the install. © 2003-2015 SmartBear Software Eclipse Plug-in 5. A progress dialog appears as Eclipse installs the plug-ins. 6. Some of our plug-ins are not signed. In that case you will get this warning dialog. Just click OK. 7. Eclipse might ask you to restart the workbench. You probably should. 8. Done! Uninstallation Instructions To uninstall the plugin: 1. Open Eclipse IDE. © 2003-2015 SmartBear Software 362 363 Desktop Clients 2. Select Help | About from the main menu. 3. Click Installation Details. This will open a dialog with more details about your installation. 4. Click the Installed Software tab to see a list of the software items that you have installed into your system. 5. Select Collaborator and click Uninstall. Additionally you will need to remove the Collaborator's Eclipse Plug-in files from the Eclipse plugins folder. This is especially important if you plan to re-install the plugin later. 1. Go to Eclipse plugins folder. It is typically located at the following path: <Program Files>/Eclipse/<EclipseCodeName>/plugins 2. Select all jar-files and folders that start with com.smartbear.collaborator. 3. Delete these files and folders from the Eclipse plugins folder. © 2003-2015 SmartBear Software Eclipse Plug-in 5.6.1.2 Preferences & Configuration You must configure your connection to the Collaborator server; all other preferences are optional. You can find the Eclipse Plug-in configuration in the Preferences dialog along with all other application preferences: The Server URL must include the correct port number and path if applicable. The Username and Password are the same as you use when logging into the web server 223 . The password entry is presented on the following connection form: © 2003-2015 SmartBear Software 364 365 Desktop Clients Use the Test Connection button to make sure the connection is working. If it fails the error message will be helpful. © 2003-2015 SmartBear Software Eclipse Plug-in Action Items View refresh interval Open the Collaborator Perspective when opening a Review Warn if SCM system is unsupported Open Reviews in Eclipse Editor File Content Cache © 2003-2015 SmartBear Software How often to refresh the Action Items View 367 with data from the server. Markers 375 and Label Decorations 375 are also refreshed at this time. Automatically switch to the Collaborator Perspective 368 when opening a Review. When adding files to a Review 380 , warn if SCM system (or client) is not supported. Open Reviews in the Eclipse Review Editor 368 . If this option is not checked, Reviews will be opened in a browser. The estimated size of the local file content cache. Press Clear to delete the local content cache (content will be automatically downloaded from the server as needed). 366 367 Desktop Clients The Collaborator Eclipse Plug-in registers itself with Eclipse to be started automatically when Eclipse starts up. This is necessary to refresh Markers 375 and Label Decorations 375 automatically. If you un-check Collaborator from the Plug-ins activated on startup list then Markers 375 and Label Decorations 375 will not appear until the first time you show the Action Items View 367 . 5.6.1.3 Action Items To open your Collaborator Action Items in Eclipse, select Window -> Show View -> Action Items. Your Collaborator Action Items appear in Eclipse as a View: © 2003-2015 SmartBear Software Eclipse Plug-in Double-clicking any item will open the Review in the Review Editor browser, depending on your preferences 366 . 368 or your configured web The list of Action Items automatically refreshes periodically (the rate is configurable 366 ). You can refresh manually using the double-arrow icon in the toolbar. Markers 375 and Label Decorations 375 refresh at the same time as Action Items. If there was an error communicating with the server, the View will display an error message instead and you might need to visit your preferences 364 to fix connection settings: 5.6.1.4 Collaborator Perspective Window The Collaborator Perspective window is useful for organizing your screen to perform reviews in Eclipse. By default it contains the Editor Area, the Conversations View 372 , and the Action Items View 367 . The Collaborator Perspective window can be configured a Review from the Action Items View 367 . 5.6.1.5 366 to open automatically when you open Review Editor Double-clicking an Action Item 367 will open the associated Review in the Review Editor. (If you prefer, you can configure your preferences 366 to open the Review in a web browser instead.) This editor lets you perform a Review without leaving Eclipse. The content of the editor updates automatically as the Review changes (other users make comments, new files are uploaded, and so on). © 2003-2015 SmartBear Software 368 369 Desktop Clients When the Review Editor is active, the Conversations View conversation. 372 will show the overall Review The General Information 245 section shows you information about the Review as a whole, and lets you edit certain fields, including Review custom fields 183 . The Participants 247 section shows the users participating in this Review and their Roles. You can change a user's Role by dragging-and-dropping them to a different Role. You can remove a user from the Review by right-clicking and selecting Remove from the context menu. Click the Add Participants... icon in the toolbar of the Participants section to toggle the section for adding a new Participant to the Review. © 2003-2015 SmartBear Software Eclipse Plug-in Drag users from the list to one of the Role lists above to add them to the Review in that Role. You can also click one of the Add <Role> buttons to add the selected users to the Review in that Role. Click on the links in the Recent Participants area to quickly assign recent participants to the Review. Typing in the Filter field will filter the users list to help you find the users you want. The Participant Custom Fields section shows the value of Participant Custom Fields 183 for each Participant. Note this section only appears if the Template 198 of this Review has Participant Custom Fields configured. The Defect Log 247 section shows all of the Defects in the Review, both overall Review Defects and Defects on files. © 2003-2015 SmartBear Software 370 371 Desktop Clients The Review Materials 250 section shows the changelists and files which are part of the Review. Double-click on a file to open it in the Compare Editor. The section toolbar controls how the materials are presented: Tree View The presentation of folders. You can select from Compressed Tree, Tree, and Flat. Expand All Expand all levels in the tree. Collapse All Collapse all levels in the tree. Right-click on the "Version Control" icon to set your Display Preference for that Version Control system. Depending on the Version Control system and available changelists, you can select from Do not Roll Up, Roll Up All Changelists, and Roll Up Non-Atomic Changelists. Conversations on files are listed underneath the files in the tree. If the conversation has unread comments the icon is highlighted in yellow. © 2003-2015 SmartBear Software Eclipse Plug-in The Moving On 255 section allows you to specify whether you are Waiting on Review activity or have Finished with the Review (with the option to re-engage based on future activities). These choices move reviews into different phases. The options in "Moving On" vary depending on the Phase of the Review and your Role. "Moving On" also allows you to control - to a certain extent the notifications you receive for a particular Review. 5.6.1.6 Conversations View The Conversations View displays conversations on the most recently focused Review Editor 368 or Compare Editor 374 . For the Review Editor 368 the Conversations View shows the overall Review conversation. For the Compare Editor 374 the Conversations View shows all the conversations on the file. © 2003-2015 SmartBear Software 372 373 Desktop Clients Unread Comments are highlighted with a yellow background. You can mark conversations Accepted or Read. You can add Comments. You can create or modify Defects. You can start a conversation at a new location or add to an existing one. Right-click on a Comment and select Redact to redact it. Redacted comments are grayed-out. © 2003-2015 SmartBear Software Eclipse Plug-in 5.6.1.7 Compare Editor Double-clicking on a file in the Review Editor 371 opens it in the standard Eclipse Compare Editor. Conversations on the file are shown in the Conversations View active. 372 when the Compare Editor is The exact appearance of the Compare Editor depends on the type of file being compared. The Collaborator Eclipse Plug-in uses the compare viewer registered in your Eclipse installation for that file type, and then tries to add review-related controls on a best-effort basis. Side-by-side Compare Viewers If the registered compare viewer for the file type is based on the standard Eclipse side-by-side compare viewer, the Collaborator Eclipse Plug-in adds a drop-down menu above each content pane to select which versions of the file you want to compare. If the file was uploaded from your machine, you can select Local File from the menu to compare against the local version of the file. Comparing against the local version of the file lets you navigate the code in your workspace (for example, ctrl-click to open a type or method implementation), and edit the code in-place. You can also right-click on the pane containing the local file and select from many of the same context menu options that you can when you rightclick on the file in the normal Eclipse editor. © 2003-2015 SmartBear Software 374 375 Desktop Clients Text Compare Viewers If the registered compare viewer for the file type is based on the standard Eclipse text compare viewer, the Collaborator Eclipse Plug-in adds a ruler to the left content pane showing the state of each conversation on the file. Clicking on a line selects that conversation in the Conversations View 372 , or starts a new conversation if there is not already one on that line. Syntax highlighting is shown if it is supported by the registered compare viewer for the file type. 5.6.1.8 Label Decorations A green check-mark is displayed on files in your workspace which are currently under review. This decoration is updated whenever your Action Items 367 refresh. You can disable this decoration using the standard Eclipse preferences page under General->Appearance->Label Decorations>Collaborator. 5.6.1.9 Markers The Eclipse Plug-in creates Eclipse Markers for every Defect in a Review that is on a file that came from your computer. The Markers are updated when your Action Items 367 refresh. Problems View Markers appear as Problems of different severity, depending on the Defect state. · Open Defect -> Error · Externalized Defect -> Warning · Fixed Defect -> Info © 2003-2015 SmartBear Software Eclipse Plug-in Marker Bar When you open a file in an Eclipse text-based editor, Markers appear in the Eclipse Marker Bar. Different Icons are used for each Defect state. 5.6.1.10 Add to Review Wizard The Add to Review Wizard lets you add review materials to a new review or an already existing review. The first page of the Add to Review Wizard asks you which review you would like to add materials to. You can create a new review and add the materials into the newly created review, or you can add the review materials to an existing review. To add materials to a new review, select "Create New Review," and type a title to name your new review. To add materials to an existing review, select "Add to Existing Review". Choose the review you would like to add the materials to. The list of possible reviews is created automatically by querying the server. This will generally be the same as the list of reviews in your Action Items 234 list. At this point, you can Finish the wizard or click Next to get more options. © 2003-2015 SmartBear Software 376 377 Desktop Clients Select Review Materials The next page lets you choose exactly which materials are added to the review. This page looks different depending which materials you are adding to the review: Adding Files to a Review 380 Adding (Perforce) Pending Changelists to a Review 389 Adding (Subversion) Revisions to a Review 393 Adding (Perforce) Submitted Changelists to a Review 391 Select Supporting Documents The next page allows you to upload additional files from anywhere on your local hard drive: © 2003-2015 SmartBear Software Eclipse Plug-in Click "Add" to choose the documents you would like to add: You can also remove documents by selecting the document in the list above and clicking "Remove". Summary The final page summarizes the selections of the previous pages: © 2003-2015 SmartBear Software 378 379 Desktop Clients When the Finish button is clicked, all review materials are uploaded to the Collaborator Server for review. If uploading takes a long time, a progress dialog will appear during this operation. The progress dialog can be minimized if you do not want to wait for the operation to complete. When the operation is complete the Review open in the Review Editor based on your preferences 366 . 368 , or in the browser © 2003-2015 SmartBear Software Eclipse Plug-in 5.6.1.11 Adding Files to a Review Right-click on any Working Sets, Projects, Folders, or Files and select either Add to Review from the Team menu. Clicking Add to Review will launch the Add to Review Wizard 376 . The wizard will include a page that shows the list of resources you selected, allowing you to select exactly which ones you want to upload: © 2003-2015 SmartBear Software 380 381 Desktop Clients Any files you selected specifically will appear here. If you picked groups of files (that is, directories, projects, and so on), that are managed by AccuRev, ClearCase, CVS, or Subversion these will be scanned for modified files, and those modified will be in the list. Check boxes allow you to pick more or fewer files than you originally selected. The Show Unchanged Files option allows you to select files which have not been modified. The Team | Add to Review command uploads local copies of selected files. Once uploaded, they will be no longer synchronized with the SCM. To denote this, the Eclipse Plug-in displays an " Unsupported SCM System or Client 366 " warning when you try to upload the local copies of files. To upload files to a review and keep them synchronized with the SCM: · in CVS, add them from the Synchronize 382 view. · in Perforce, add them from the P4 Pending Changelists Changelists 391 view. · in Subversion, add them from the Synchronize Finishing the Add to Review Wizard 376 392 389 view or from the P4 Submitted view or from the History 393 view. will upload your files to the Collaborator Server. © 2003-2015 SmartBear Software Eclipse Plug-in 5.6.1.12 AccuRev Integration The Collaborator Eclipse Plug-in integrates with the AccuRev AccuBridge for Eclipse plugin from http://www.accurev.com/accubridge-eclipse.html. Adding AccuRev files to a Review Files managed by AccuRev can be uploaded to the Collaborator Server by Adding Files to a Review 380 . 5.6.1.13 ClearCase Integration The Collaborator Eclipse Plug-in integrates with the IBM Rational ClearCase SCM Adapter Plug-in from http://ibm.com, or the open source ClearCase plugin for Eclipse from http://sourceforge.net/ projects/eclipse-ccase. Note - the Collaborator Eclipse Plug-in ClearCase integration requires that the ClearCase cleartool be installed. Adding ClearCase files to a Review Files managed by ClearCase can be uploaded to the Collaborator Server by Adding Files to a Review 380 . Supported Versions The Collaborator Eclipse Plug-in supports versions through ClearCase 8.x. The Collaborator Eclipse Plug-in supports only ClearCase Remote Client (CCRC) v.8.x. 5.6.1.14 CVS Integration The Collaborator Eclipse Plug-in integrates with the CVS Eclipse Plug-in from http://eclipse.org. (The CVS plug-in usually comes bundled with the base Eclipse install.) Adding CVS files to a Review Files managed by CVS can be uploaded to the Collaborator Server by Adding Files to a Review . 380 Adding CVS files to a Review from the Synchronize View Files managed by CVS can also be added to a review from the Synchronize view. Right-click on any projects, folders, or files in the Synchronize view and select either Add to New Review or Add to Existing Review. © 2003-2015 SmartBear Software 382 383 Desktop Clients The Add to Review Wizard 376 will launch with the selected files. 5.6.1.15 Git Integration With the Collaborator Eclipse Plug-in, you can add project files, files from Git commits and repository branches to a review directly from the Eclipse IDE. This topic explains how you can do this. Requirements To integrate with Git and Eclipse, Collaborator's Eclipse Plug-in requires that the EGit plug-in to be installed in your Eclipse IDE. The EGit plug-in typically comes bundled with the Eclipse package. For more information on it, see http://wiki.eclipse.org/EGit/User_Guide. Add Git Files to a Review To add your project's files to a review, follow these steps: 1. In Eclipse IDE, open the Package Explorer view. © 2003-2015 SmartBear Software Eclipse Plug-in 2. Right-click your project or any of the project's files and select Team | Add to Review from the context menu: This will invoke the Add to Review 376 wizard. 3. In the wizard, you specify the review name, and the project files and auxiliary documents to be attached to the review. For detailed information on steps to be completed, see the wizard description 376 . After you click Finish on the last page of the wizard, the wizard will send review data to the Collaborator server. © 2003-2015 SmartBear Software 384 385 Desktop Clients Adding Git Commits to a Review Adding a Git commit to a review means including copies of all the files of this commit to the review. Follow these steps: 1. In Eclipse IDE, open the History view. It lists Git commits. 2. In the History view, right-click a commit and choose Add to Review from the context menu: This will invoke the Add to Review 376 wizard. Known issue: In the Indigo version of the Eclipse IDE, the "Add to Review" item is present in the context menu only when you invoke it for the first time. Later, it is hidden from the menu. To solve the problem re-open the History view. 3. On the first page of the Add to Review wizard, you can select the commits, whose files the review will include. By default, this page contains only the commit that you selected in the History view. To add more commits to the list, type the commit identifier into the Enter Commit IDs text box and click Add. © 2003-2015 SmartBear Software Eclipse Plug-in Click Next to continue. 4. On the subsequent pages of the wizard, you can specify the review name and auxiliary files to be included into the review. After you go through all the pages of the wizard, it will upload the review data to the Collaborator server. Adding Files From Different Git Branches to a Review The difference between two branches is in the committed files and the number of commits. Adding "differences" to a review means adding copies of all the files of all "different" commits to the review. Follow these steps: 1. In Eclipse IDE, switch to the Git Repositories view. It displays the contents of your Git repository. 2. In the Get Repositories view, select the the desired branches. 3. Right-click the selection and choose Add Branches to Review from the context menu: © 2003-2015 SmartBear Software 386 387 Desktop Clients This will invoke the Add Git Diffs to Review wizard. 4. In the wizard, specify the review name -- © 2003-2015 SmartBear Software Eclipse Plug-in -- and then select the branches to be passed to the git diff command (the Collaborator Eclipse Plug-in calls this command to determine the files to be added to the review): © 2003-2015 SmartBear Software 388 389 Desktop Clients The before and after are just Collaborator's terms to differentiate the branches. We suppose that one of these branches matches the original, or main, branch of your repository, and another branch contain the files that you modified while working on some feature. 5. Go through other pages of the wizard to complete the review creation. 5.6.1.16 Perforce Integration The Collaborator Eclipse Plug-in integrates with the Perforce using the Eclipse (P4Eclipse) Plug-in from http://www.perforce.com/product/components/eclipse-plugin. Adding a Pending Changelist to a Review Right-click on one or more Pending Changelists in the P4 Pending Changelists view and select Add to New Review or Add to Existing Review. © 2003-2015 SmartBear Software Eclipse Plug-in Clicking one of the Add to Review items will launch the Add to Review Wizard 376 . The wizard will include a page that shows the Pending Changelists you selected, allowing you to select exactly which ones you want to upload: Any Pending Changelists you selected specifically will appear here. You may select more or fewer Pending Changelists than you originally selected. Finishing the Add to Review Wizard Server. © 2003-2015 SmartBear Software 376 will upload your Pending Changelists to the Collaborator 390 391 Desktop Clients Adding Submitted Changelists to a Review Right-click on one or more Submitted Changelists in the P4 Submitted Changelists view and select Add to New Review or Add to Existing Review. Clicking one of the Add to Review items will launch the Add to Review Wizard 376 . The wizard will include a page that shows the Submitted Changelists you selected, allowing you to select exactly which ones you want to upload: Any Submitted Changelists you selected specifically will appear here. You may select more or fewer Submitted Changelists than you originally selected. Finishing the Add to Review Wizard Server. 376 will upload the Submitted Changelists to the Collaborator © 2003-2015 SmartBear Software Eclipse Plug-in 5.6.1.17 Subversion Integration The Collaborator Eclipse Plug-in integrates with the Subclipse and Subversive Subversion Plugins. Adding Subversion files to a Review Files managed by Subversion can be uploaded to the Collaborator Server by Adding Files to a Review 380 . Adding Subversion files to a Review from the Synchronize View Files managed by Subversion can also be added to a review from the Synchronize view. Rightclick on any projects, folders, or files in the Synchronize view and select Add to Review. The Add to Review Wizard © 2003-2015 SmartBear Software 376 will launch with the selected files. 392 393 Desktop Clients Adding a Subversion Revision to a Review Revisions are shown in the History view. Right-click on a Revision and select Add to Review. Clicking Add to Review will launch the Add to Review Wizard that shows the Revision you selected: 376 . The wizard will include a page The Revision you selected specifically will appear here. You may select more or fewer Revisions than you originally selected. © 2003-2015 SmartBear Software Eclipse Plug-in Finishing the Add to Review Wizard 376 will upload the Revision to the Collaborator Server. 5.6.1.18 Troubleshooting If you run across any issues or problems, send the error log along with your question to Support 28 . To get the error log, go to "Help" -> "About Eclipse". Under the Help menu, click on "About" Then, click on "Installation Details". © 2003-2015 SmartBear Software 394 395 Desktop Clients Click the "Configuration" tab. Click the "Copy to Clipboard" button and save it in a file. Then click "View Error log" and save that information in a file as well. Send both files to Support 28 , along with a description of what you were trying to do when you encountered the error. 5.6.2 Visual Studio Add-in The Visual Studio Add-in is deprecated. We are currently working on a new add-in that will support Visual Studio 2013 and 2015. The Collaborator Visual Studio Add-in allows files or changelists (for those SCM systems that support them) to be submitted for review from within the Visual Studio Solution Explorer, when the Solution, or when one or more Projects or Folders or Files are selected. Features · Integrates with the Solution Explorer in Visual Studio · Creates or adds to reviews from locally modified files, or from changelists · Integrates with the SCM system configured for the GUI Client 334 Compatibility Visual Studio 2005, 2008, 2010, 2012 and 2013. © 2003-2015 SmartBear Software Visual Studio Add-in Installation Make sure the GUI Client is installed 322 and configured for your Collaborator server system 334 . Then run the Visual Studio Add-in standalone installer, available here. 335 and SCM The Visual Studio Add-in installer does not update the PATH environment variable to include the installed application folder (which is unnecessary if installing to the same application folder as the GUI Client). If installing to a different location, make sure to change your path to include the installed location. The Visual Studio Add-in requires the .NET 3.5 Framework. If it is not already installed on your system, the installer will prompt you to install the .NET framework first. To uninstall, run the installer again, or use the Control Panel Add/Remove Programs applet. Usage The Visual Studio Add-in is invoked from the Solution Explorer. A right mouse button click on a file, project or solution will bring up the context menu where you can select to Review changes 396 or Review changelists 396 . Review Changes Selecting the "Collaborator - Review changes" menu item will find modified files under the directory associated with the current Solution Explorer selection to be added to a new or existing review. Review Changelists Selecting the "Collaborator - Review changelists" menu item will allow changelists associated with your configured SCM system to be added to a new or existing review. Limitations and Known Issues No validation is done for installing the "Collaborator - Review changelists" menu item - not all SCM systems support changelists. The installer does not update the PATH to include the installed application folder. Troubleshooting The Visual Studio Add-in shells out to the GUI Client 331 - if it is is not already configured and working, the Visual Studio Add-in will not work. If you are experiencing issues with the Visual Studio Add-in, first verify the GUI Client works. © 2003-2015 SmartBear Software 396 397 Desktop Clients For us to look into an issue with Visual Studio Add-in, please enable debug logging and send us the resulting log file. Debug logging is enabled by editing the .config file for the Visual Studio Add-in and setting the Debug value to "1": <add key="Debug" value="1"/> Both the .config file and the .log file reside in the "Smart Bear\Visual Studio Addin" subdirectory under the Common Application Data Folder, which, depending on your Windows platform, is typically one of these directories: "%ALLUSERSPROFILE%\SmartBear Software\Visual Studio Addin" on Windows 7 and Vista, or "%ALLUSERSPROFILE%\Application Data\SmartBear Software\Visual Studio Addin" on Windows XP Note that the files in this directory do not have general user write permission under Vista and Windows 7. To modify the .config file, either run your editor with administrator privileges, or run the Visual Studio Add-in configuration utility with the "debug" command: CcollabAddinConfig debug Then restart Visual Studio, reproduce the issue, close Visual Studio, and find the debug log file. Contact our technical support 28 and send the debug log file along with problem description. The Visual Studio Add-in configuration utility also has a "nodebug" command to turn off debug logging. We also welcome any suggestions about the current implementation - usability, appearance, functionality or other feedback that would help improve the Visual Studio Add-in. To submit problem reports or suggestions, open Add/Remove Programs from the Control Panel and select Support Information under Visual Studio Add-in. Submit the displayed version number along with your description of the issue. 5.7 Tray Notifier The Tray Notifier is a cross-platform tray notifier client interface to the Collaborator server. It can be used to provide an easy way to see what reviews you are currently participating in, and prompt notification when a review requires your attention. Starting the Tray Notifier The Tray Notifier is an executable named ccollabtray. On Windows machines the graphical installer 323 includes an option to automatically run the Tray Notifier on startup (a shortcut to ccollabtray is placed in the Windows Start Menu Startup folder). Non-Windows platforms have to manually start ccollabtray. © 2003-2015 SmartBear Software 398 Configuring the Tray Notifier If you used the graphical installer 323 , your connection to the Collaborator Server should be configured already. Otherwise, you will be prompted when you try to connect. You can also select the Preferences item in the context menu 398 to open the preferences dialog. Use the Server Connection Preferences 329 page to configure the connection information to your Collaborator Server. Using the Tray Notifier Clicking on the Tray Notifier opens a list of your current Action Items. Tray Notifier Action Items The Action Items list can be resized and moved by dragging it is borders. Action Items which are urgent appear with a red icon. Action Items which are not urgent appear with a green icon. Double-clicking on an Action Item opens a page in a browser window which lets you perform the action. Commit Action Items will open a wizard that will walk you through committing your files. Most changes can be committed with the tray notifier, but often changes to the directory structure will require that you use your SCM's tools directly. The Tray Notifier icon changes to show a check-mark to alert you when there are new Action Items that require your attention. Context Menu The context menu of the Tray Notifier (right-click on Windows) includes several options: © 2003-2015 SmartBear Software 399 Desktop Clients Tray Notifier context menu · Open GUI launches GUI Client · Refresh immediately checks the Collaborator Server for updated Action Items · Home Page opens your Collaborator Home Page · Preferences opens the client preferences dialog 234 in a browser window 329 · About... tells you information about your installation · Exit shuts down the Tray Notifier 5.8 External Diff Viewer launcher The cross- platform External Diff Viewer launcher allows users to use a separate diff viewer of their choice to view diffs related to a particular review. The External Diff Viewer launcher ships with Source Gear DiffMerge 401 but also has preset arguments for the following: · Araxis Merge · IDM UltraCompare · Guiffy · Beyond Compare. Launching External Diff for a single file There is an External button in the main diff viewer toolbar 259 : © 2003-2015 SmartBear Software 400 This button will launch the external diff viewer, which will compare the two versions of the single file shown in main diff viewer. You can change the versions shown to any option listed in the Diff Viewer Header 262 . Launching External Diff for multiple files There is an External Diff button for each changelist listed in Review Materials 250 : This will allow you to compare multiple files in the external diff viewer. Starting the External Diff Viewer launcher When first launching the External Diff Viewer launcher by clicking either of the two buttons above, you may be asked which application you would like to open the file. Choose "Open with" and click "Browse". You will be prompted to choose an application: © 2003-2015 SmartBear Software 401 Desktop Clients Choose the "ccollabexternaldiff.exe" under the "Collaborator Client" folder, and click open. In the "Opening File" window, click "Do this automatically for files like this from now on" to save these settings, and click "OK". The External Diff Viewer launcher will open Source Gear Diff Merge immediately. For more information on Diff Merge, visit http://sourcegear.com/diffmerge/. © 2003-2015 SmartBear Software 402 Screen shot of single file comparisons in Diff Merge Preferences To configure your external diff viewer, visit the Preferences 5.9 338 menu in the GUI Client. Print To Review The Print To Review functionality is deprecated and will be removed from the product in future releases. We recommend uploading your documents in Word 270 , Excel 273 or PDF 280 formats instead. SmartBear Print To Review employs a Windows printer driver to submit documents for review. Windows applications can use Print To Review to add their document to a new or existing review. Documents are uploaded as images of the original document. Features · Any Windows application that can print is supported. · Previously unsupported documents formats, for example, Open Office documents, can now be reviewed. © 2003-2015 SmartBear Software 403 Desktop Clients Compatibility Windows XP SP2, Server 2003, Windows Vista and later Windows releases running on both 32-bit x86 and 64-bit hardware. Not all of these platforms are fully tested. Report any incompatibilities or problems to SmartBear. Please ask us if you are interested in support on other Windows platforms. Print To Review requires the .NET 3.5 Framework. If it is not already installed on your system, the installer will prompt you to install the .NET framework first. Image Quality Like any printer driver, the image quality of documents uploaded for review is a function of the resolution and color depth. The default settings are for 150 DPI and 256 colors with halftoning. For improving font quality on text documents, 300 DPI black and white would be a better setting. For documents where the picture quality and color is important, 300 DPI and true color can be used. Keep in mind, however, that this latter setting can render extremely large documents. The driver compresses the image outputs in PNG format, but at that setting a busy color bitmap (that is, without much compression) can easily generate image sizes upwards of 10MB per page. Print To Review will not upload documents bigger than the client is allowed to upload (see upload truncation size in client properties 868 ). Excess pages will be replaced with a page indicating that the document has been truncated. Installation Make sure the GUI Client is installed standalone installer, available here. 322 and configured 335 . Then run the Print To Review If the Print To Review is installed to the same directory as the Collaborator client, then the PATH environment variable will not need to be updated. Otherwise, the Print To Review installer will update the PATH to include the installed application folder, and will display a notification that a reboot is necessary before Print To Review can be used. Uninstalling Run the original installer, or uninstall via the Control Panel Add/Remove Programs menu. If a manual uninstall becomes necessary, refer to Advanced User Uninstall 407 . Important Notes for Vista and later Windows Platforms Windows releases starting with Vista, including Windows 7 and Server 2008, exhibit some different behaviors than previous Windows releases. Most notably, Windows UAC (User Account Control) on these platforms introduces some security features which affect the install, uninstall, and operation of Print To Review. © 2003-2015 SmartBear Software 404 Install and uninstall for Print To Review should be with an administrator account (not necessarily the Administrator user but a user with administrator privileges) or from a console window run as Administrator, for the most straightforward experience. Otherwise, depending on your UAC settings, you will be prompted during install and uninstall to run with Administrator privileges. During uninstall, you may be prompted with a notification that the Print Spooler is using the files: Select Continue at this prompt to uninstall the driver files. When uninstalling on Windows Vista or later, errors can occur if the spooler still has the driver files locked. This occurs when uninstalling within about a minute of printing to Print To Review and leaves Print To Review in an uninstallable state. The only simple recourse is to reinstall Print To Review and then uninstall again. Any of these steps will avoid this issue: · Wait one minute after printing to Print To Review before uninstalling · Stop then restart the spooler service before uninstalling · Restart your system before uninstalling © 2003-2015 SmartBear Software 405 Desktop Clients Upgrading Print To Review does not support upgrades. To install a new version, please follow the uninstall instructions above, restart your system, and then install the desired version. To Print To Review From within your Windows application, click Print and select Print To Review as the Printer. After printing your document, the GUI Client is launched to add the document to a review. On Windows Vista and later, depending on the UAC settings, GUI Client launches without foreground focus, and instead is displayed as a highlighted icon in the task bar and must be selected. Then choose a new or existing review, and next you will be prompted to enter a name for your document. This will be the name associated with the document images in the review: © 2003-2015 SmartBear Software 406 Note that you may include path characters in the name, and the document name will be displayed with the path in the review. Once you have given the required information and click Finish, a browser window will open pointing to the review with your document images. Limitations and Known Issues Documents to be uploaded to the Collaborator server are currently limited in size by the file truncation size defined in the Java VM Client Properties 868 . Higher resolutions and color depths of Print To Review jobs increase the document image sizes uploaded for review. For documents that are too large, pages will be uploaded until the file truncation limit is encountered, and the remaining pages are discarded. Print To Review appends a page to these documents indicating the truncation. Printing at a lower resolution or in black and white is a workaround. Otherwise, increase the defined file truncation size. Printing in a Remote Terminal environment currently cannot launch the GUI Client to print a document. These jobs are held in the print queue. Troubleshooting Windows XP SP2 and Server 2003 To submit problem reports or suggestions, open Add/Remove Programs from the Control Panel and select Support Information under Print To Review. Submit the displayed version number along with your description of the issue. Windows Vista platforms and later To submit problem reports or suggestion, open Programs and Features and find SmartBear Print To Review. The version number will be listed in the column labeled Version. If the Version column is not shown, click on the column headers and select to add the Version column. Submit the displayed version number along with your description of the issue. © 2003-2015 SmartBear Software 407 Desktop Clients Advanced User Uninstall We of course recommend using Print To Review as installed by the installer. However, if it is customized in anyway (such as renaming the printer) or if a manual uninstall is otherwise desired, follow these steps. Print To Review is installed as both an application and a printer driver. Manual uninstall of the driver can be done just as with any other printer driver. The print driver and port monitor can be deleted through the Server Properties dialog in the Print Spooler. The order of uninstalling the driver should be: · Delete the printer · Delete the printer driver · Delete the CCOLLAB: port · Uninstall the Print To Review application (this will generate errors but will complete) 6 Version Control Integration Collaborator integrates with many popular Version Control Systems. Integrations include command-line, graphical, and Eclipse plug-in clients and Version Control triggers. Server integration is supported for selected Version Control Systems and requires that a properly configured client be configured on the Collaborator server. See the section below for your Version Control System: · AccuRev · CVS · Git 408 419 429 · IBM Rational ClearCase · IBM Rational Synergy 447 469 · IBM Rational Team Concert · Mercurial 477 503 · Microsoft Team Foundation Server · PTC Integrity 510 518 © 2003-2015 SmartBear Software 408 · Perforce 530 · Subversion 6.1 561 AccuRev Integration This section describes Collaborator integration with AccuRev: GUI Client 409 The GUI Client can upload local changes to files 411 controlled by AccuRev before they are promoted. This includes both kept and modified files in the local Workspace. The GUI Client can also upload pending changes in a Stream 414 , differences in a Transaction 412 , and arbitrary AccuRev diffs 413 . Command-Line Client 414 The Command-Line Client can upload local changes to files 415 controlled by AccuRev before they are promoted. This includes both Kept and modified files in the local Workspace. The CommandLine Client can also upload pending changes in a Stream 418 , differences in a Transaction 417 , and arbitrary AccuRev diffs 418 . Eclipse Plug-in The Eclipse Plug-in 359 integrates the AccuRev AccuBridge for Eclipse plugin from http://www. accurev.com/accubridge-eclipse.html so you can upload 376 locally modified files to a Review. Supported Versions Our Command-Line Client uses your own AccuRev command-line client (accurev) to communicate with the server. We support these versions: · v4.5.3, 5.5 Because we use client applications already present on your computer, we support all protocols, authentications, proxies, and other client configuration options you are currently using. Support for Copy / Move Collaborator fully supports AccuRev's file and directory copy/move semantics. Thus, if a file is copied or moved rather than added from scratch, it will show up that way in the various user interfaces. © 2003-2015 SmartBear Software 409 Version Control Integration Support for Directory-level New/Delete/Copy/Move Collaborator partially supports AccuRev's concept of directories (not just files) being altered. All files underneath the directories in question will be scanned, uploaded and represented properly in the GUI. The directories themselves will not be shown in any GUI, or even in the file list 345 confirmation screen presented by the command-line client. This all works correctly even if, for example, you move a parent directory and alter/add/delete a file within that directory in the same changelist. You will get the correct content for the file but the directory itself will not be listed in the review. Support for Include / Exclude Rules Collaborator treats files or folders that conform to AccuRev's include rules as added or modified files/folders, while files and folders that conform to exclude rules are treated as deletions. To denote files and folders that were added or removed due to include/exclude rules, Collaborator uses the following descriptions of change types: · INCLUDED - The file was added because of include rule. · EXCLUDED - The file was removed because of exclude rule. · INCLUDED_DIR - The folder and all its files and sub-folders were added because of include rule. · INCLUDED_DIR_ONLY - The folder but not any of its files or sub-folders were added because of include rule. · EXCLUDED_DIR - The folder and all its files and sub-folders were removed because of exclude rule. 6.1.1 GUI Client AccuRev-specific Options The SCM Configuration dialog 334 has several AccuRev-specific options. If there is no AccuRev Workspace on your machine, you can still review committed AccuRev Transactions by specifying the AccuRev Depot name option. © 2003-2015 SmartBear Software GUI Client AccuRev SCM Configuration Uploading files to a Review Selecting an AccuRev SCM Configuration in the GUI Client main screen 332 causes three Add to Review buttons to appear. The Add Changes... 411 button uploads modified files in a Workspace. The Add Transactions... 412 button uploads the files in committed Transactions. The Add AccuRev Diffs... 413 button uploads arbitrary diffs, or compares the differences between two Streams 414 . © 2003-2015 SmartBear Software 410 411 Version Control Integration Uploading AccuRev files to a Review Add Changes Press the Add Changes... button to upload modified files in a Workspace to the Collaborator Server for review. © 2003-2015 SmartBear Software GUI Client Add Changes Add Transactions Press the Add Transactions... button to upload the files in an AccuRev Transaction to the Collaborator Server for review. © 2003-2015 SmartBear Software 412 413 Version Control Integration Add Transactions Add AccuRev Diffs Press the Add AccuRev Diffs... button to upload arbitrary AccuRev diffs to the Collaborator Server for review. Add AccuRev Diffs © 2003-2015 SmartBear Software GUI Client You can enter arbitrary AccuRev diff options, or select the Streams tab difference between two Streams. 6.1.1.1 414 to compare the Comparing two Streams Press the Add AccuRev Diffs... 413 button on the main screen upload the difference between two Streams. 332 and then select the Streams tab to Upload the difference between two Streams 6.1.2 Command-Line Client Commands recommended for AccuRev ccollab addchanges 415 - Attaches locally-modified files to a review ccollab addchangelist ccollab addardiffs ccollab addstream 418 418 © 2003-2015 SmartBear Software 417 - Attaches an atomic changelist to a review - Uploads diffs generated from accurev diff command - Attaches pending differences from an AccuRev stream 414 415 Version Control Integration The addchanges 415 command will upload local changes to files controlled by AccuRev before they are promoted. This includes both kept and modified files in the local workspace. The addchangelist 417 command will upload a list of AccuRev transactions. Configuration In most cases, the Command-Line Client can automatically detect your AccuRev configuration. Try testing your configuration 342 to verify the configuration is detected correctly. If the Command-Line Client is unable to detect your AccuRev configuration or you want to override the detected settings, you can manually specify AccuRev settings using global options . 352 To manually configure the Command-Line Client to use AccuRev, execute the following command: ccollab set scm 351 accurev AccuRev-specific Options Option Description --accurev-depot <value> AccuRev depot name --accurev-exe <value> Full path to the `accurev` command-line client --accurev-ancalgorithm <value> Which algorithm to use when calculating the predecessor, either predecessor, previous-occupant, or basis-version Example: ccollab set accurev-depot MyDepot 6.1.2.1 addchanges (for AccuRev) Description The ccollab addchanges command uploads locally modified files controlled by AccuRev to a review on the Collaborator server. © 2003-2015 SmartBear Software Command-Line Client Command Line Syntax: ccollab [global-options] addchanges [--upload-comment <value>] <review> <file-spec> [<file-spec> ...] Command Options Option Required? Description global-options No A number of global or SCM-specific global options. See Command-line Global Options Reference 350 . --upload-comment <value> No A comment to be used for the uploaded files. Default is Local changes. <review> Yes Identifier of the desired review (an integer number), or a new, ask, or last string. <file-spec> [<file-spec> ...] Yes Files to be added and/or folders to scan for modified files. Separate multiple file and folder names with spaces. If a file or folder name contains spaces, enclose this name is quotes. ccollab scans folders recursively. The resulting list includes the name of modified files. "Modifications" include include edits, additions, deletions, branches, integrations, moves, copies, and so on. After the scan is complete, a file list is presented in a graphical editor so you can review the files to be uploaded and make correct the list, if needed. Examples: To create a new review and add all changes in the current directory and below, plus the file foo. txt, you would use: ccollab addchanges new . foo.txt To upload modified files from the current working directory and all subdirectories to review 123: © 2003-2015 SmartBear Software 416 417 Version Control Integration ccollab addchanges 123 . To upload file foo.txt and modified files from c:\dev\project into a brand new review: ccollab addchanges new foo.txt c:\dev\project 6.1.2.2 addchangelist (for AccuRev) Description The ccollab addchangelist command attaches all files from a submitted AccuRev changelist (transaction) to a review on the Collaborator server. Command Line Syntax: ccollab [global-options] addchangelist <review> <changelist> [<changelist> ...] Command Options Option Required? Description [global-options] No A number of global or AccuRev-specific global options. See Command-line Global Options Reference 350 . <review> Yes Identifier of the desired review (an integer number), or a new, ask, or last string. <changelist> [<changelist> ... ] Yes Identifier(s) of the desired changeset(s) in your source control. Examples: To upload Transactions t4321 and t7568 to a new review: ccollab addchangelist new 4321 7568 To upload Transactions t5432 and t12654 to review 111: ccollab addchangelist 111 5432 12654 © 2003-2015 SmartBear Software Command-Line Client 6.1.2.3 addardiffs Description The ccollab addardiffs command uploads differences between arbitrary versions of files in AccuRev. The differences are generated using the native 'accurev diff' command of AccuRev. Command Line Syntax: ccollab [global-options] addardiffs [--upload-comment <value>] <review> [<user-diff-arg> [<user-diff-arg> ...]] Command Options Option Required? Description --upload-comment <value> No Comment used to upload files (defaults to command-line arguments) <review> Yes Must be either an integer review-id, 'new', 'ask', or 'last' <user-diff-arg> [<userdiff-arg> ...] No Command-line arguments to pass directly to the diff command Examples: ccollab addardiffs 698 -a -b -v "My Stream" Remarks: · Do not use diff arguments that affect the diff output such as '-c' or '-G'. The Collaborator command-line client will automatically select an output format that ensures you will get all the data you need on the server. · This command does not upload added or deleted files due to AccuRev limitations. 6.1.2.4 addstream Description The ccollab addstream command uploads differences pending promotion in an AccuRev stream. © 2003-2015 SmartBear Software 418 419 Version Control Integration Command Line Syntax: ccollab [global-options] addstream [--upload-comment <value>] <review> [<stream>] Command Options 6.2 Option Required? Description --upload-comment <value> No Comment used to upload files <review> Yes Must be either an integer review-id, 'new', 'ask', or 'last' <stream> No Specify an AccuRev stream by name, or leave blank to use the current workspace CVS Integration This section describes Collaborator integration with CVS: GUI Client 421 The GUI Client can upload local changes to files 422 controlled by CVS before they are checked into version control. The GUI Client can also upload arbitrary CVS diffs 423 , or the difference between two Labels 423 or dates 424 . Command-Line Client 425 The Command-Line Client can upload local changes to files controlled by CVS before they are checked into version control. The Command-Line Client can also upload arbitrary CVS diffs. Eclipse Plug-in The Eclipse Plug-in 359 integrates with the Eclipse CVS team plug-in so you can upload modified files with full support from the CVS Eclipse code. 376 locally © 2003-2015 SmartBear Software 420 Supported Versions Our Command-Line Client 341 uses your own CVS command-line client (cvs) to communicate with the server. We support these versions: · v1.11.1 and later · v1.11.0 and before, only ccollab addcvsdiffs 427 is supported · CvsNT (Windows-only) The Eclipse Plug-in 359 uses the Eclipse CVS plug-in to communicate with the CVS server. Because we use client applications already present on your computer, we support all protocols, authentications, proxies, and other client configuration options you are currently using. © 2003-2015 SmartBear Software 421 6.2.1 Version Control Integration GUI Client CVS-specific Options The SCM Configuration dialog 334 has several CVS-specific options. CVS SCM Configuration Uploading files to a Review Selecting a CVS SCM Configuration in the GUI Client main screen 332 causes several Add to Review buttons to appear. The Add Changes... 422 button uploads modified files in a CVS checkout. The Add CVS Diffs... 423 button uploads arbitrary diffs, or compares the difference between two Labels 423 or dates 424 . © 2003-2015 SmartBear Software GUI Client Uploading CVS files to a Review Add Changes Press the Add Changes... button to upload modified files in a CVS checkout to the Collaborator Server for review. Add Changes © 2003-2015 SmartBear Software 422 423 Version Control Integration Add CVS Diffs Press the Add CVS Diffs... button to upload arbitrary CVS diffs to the Collaborator Server for review. Add CVS Diffs You can enter arbitrary CVS diff options, or compare the difference between two Labels dates 424 . 6.2.1.1 423 or Comparing two Labels Press the Add CVS Diffs... 423 button on the main screen upload the difference between two Labels. 332 and then select the Labels tab to © 2003-2015 SmartBear Software GUI Client Upload the difference between two Labels 6.2.1.2 Comparing two dates Press the Add CVS Diffs... 423 button on the main screen the difference between two dates. © 2003-2015 SmartBear Software 332 and then select the Dates tab to upload 424 425 Version Control Integration Upload the difference between two dates 6.2.2 Command-Line Client Commands recommended for CVS ccollab addchanges 426 ccollab addcvsdiffs ccollab commit 429 - Attaches locally-modified files to a review 427 - Uploads diffs generated from cvs diff command - Commit changes in the review The addchanges 426 command will upload local changes to files controlled by CVS before they are checked into version control. Configuration In most cases, the Command-Line Client can automatically detect your CVS configuration. Try testing your configuration 342 to verify the configuration is detected correctly. © 2003-2015 SmartBear Software Command-Line Client If the Command-Line Client is unable to detect your CVS configuration or you want to override the detected settings, you can manually specify CVS settings using global options 353 . To manually configure the Command-Line Client to use CVS, execute the following command: ccollab set scm 351 cvs CVS-specific Options 6.2.2.1 Option Description --cvs-exe <value> Full path to the `cvs` command-line client --cvsroot <value> Connection to the CVS repository addchanges (for CVS) Description The ccollab addchanges command uploads locally modified files controlled by CVS to a review on the Collaborator server. Command Line Syntax: ccollab [global-options] addchanges [--upload-comment <value>] <review> <file-spec> [<file-spec> ...] Command Options Option Required? Description global-options No A number of global or SCM-specific global options. See Command-line Global Options Reference 350 . --upload-comment <value> No A comment to be used for the uploaded files. Default is Local changes. <review> Yes Identifier of the desired review (an integer number), or a new, ask, or last string. © 2003-2015 SmartBear Software 426 427 Version Control Integration Option Required? Description <file-spec> [<file-spec> ...] Yes Files to be added and/or folders to scan for modified files. Separate multiple file and folder names with spaces. If a file or folder name contains spaces, enclose this name is quotes. ccollab scans folders recursively. The resulting list includes the name of modified files. "Modifications" include include edits, additions, deletions, branches, integrations, moves, copies, and so on. After the scan is complete, a file list is presented in a graphical editor so you can review the files to be uploaded and make correct the list, if needed. Examples: To create a new review and add all changes in the current directory and below, plus the file foo. txt, you would use: ccollab addchanges new . foo.txt To upload modified files from the current working directory and all subdirectories to review 123: ccollab addchanges 123 . To upload file foo.txt and modified files from c:\dev\project into a brand new review: ccollab addchanges new foo.txt c:\dev\project 6.2.2.2 addcvsdiffs Description The ccollab addcvsdiffs command uploads differences between arbitrary versions of files in CVS. The differences are generated using the native 'cvs diff' command of CVS. Command Line Syntax: ccollab [global-options] addcvsdiffs [--upload-comment <value>] <review> [<user-diff-arg> [<user-diff-arg> ...]] © 2003-2015 SmartBear Software Command-Line Client Command Options Option Required? Description --upload-comment <value> No Comment used to upload files (defaults to command-line arguments) <review> Yes Must be either an integer review-id, 'new', 'ask', or 'last' -skipN No Specifies whether to skip the -N --newfile argument of the cvs diff command. By default, the diffs generated by Collaborator contain information about new files. Use -skipN argument to generate diffs for already committed files. <user-diff-arg> [<user-diffarg> ...] No Command-line arguments to pass directly to the diff command Remarks: Do not use diff arguments that affect the diff output such as '-u -U --unified', '-c -C --context', '-brief', '-e -ed', '-f --forward-ed', '-n --rcs', or '-y --side-by-side'. The Collaborator command-line client will automatically select an output format that ensures you will get all the data you need on the server. Examples: To upload the changes between labels build-391 and build-401: ccollab addcvsdiffs review -skipN -r build-391 -r build-401 To upload the changes between dates 2006-01-01 and 2006-02-01: ccollab addcvsdiffs review -skipN -D 2006-01-01 -D 2006-02-01 To upload the changes in the last 7 days: ccollab addcvsdiffs review -skipN -D "7 days ago" © 2003-2015 SmartBear Software 428 429 6.2.2.3 Version Control Integration commit (for CVS) Description The ccollab commit command submits the changes from a pre-commit review to source control. Be sure to include a relevant comment. Command Line Syntax: ccollab [global-options] commit [--comment <value>] [--dismiss-only] [--force] <review> Command Options Option Required? Description --comment <value> No Comment for reviewed changes --dismiss-only No Just dismiss the Action Item --force No Ignore potential problems <review> Yes Must be either an integer review-id, 'ask', or 'last' Example: ccollab commit 25 --comment "my code" --force 6.3 Git Integration This section describes Collaborator integration with Git: Git Server Integration 430 The Collaborator server can pull commits directly from your Git repository for review, without users needing to install any client programs. GUI Client 432 The GUI Client can upload arbitrary Git diffs and provides a special user interface for specifying branches as diff arguments. The GUI Client can also upload local changes to files that have been added to the Git index. © 2003-2015 SmartBear Software 430 Command-Line Client 439 The Command-Line Client can upload arbitrary Git diffs and changes to files that have been added to the Git index. Supported Versions Our integration uses your own installed Git command line client executable to generate differences for review. We require Git v1.7.4 or later. Because we use client applications already present on your computer, we support all protocols, authentications, proxies, and other client configuration options you are currently using. NOTE: If you intend to add unpushed commits, you must have an upstream tracking branch set. You can tell Git and Collaborator which upstream branch to compare against by running the command: git branch --set-upstream [localbranch] [upstreambranch] Submodule Support Currently Collaborator ignores and submodule changes when adding changelists or diffs from the super project. To add the submodule differences you must navigate into the submodule itself and add the files from there. 6.3.1 Git Server Integration The Collaborator server can be configured to communicate directly with a Git repository. This allows users to review commits completely from the browser, without having to install any client programs. To enable this feature, first install and configure a Git client on the Collaborator server and then create an entry for your Git repository in the Version Control 181 tab of the administration interface. Version control server entries are also created automatically if one of the client programs uploads files from a repository that does not match any of the currently configured servers. © 2003-2015 SmartBear Software 431 Version Control Integration Title The title is displayed to users, so it should be something that everyone will understand, even if they are going through proxies, VPNs, or other such things. When a version control server entry is created automatically, this is filled in with "Git". Attach changelists from browser If enabled, this feature lets users select commits to review directly from the web browser, without having to install any client programs. Git Executable Full path to the 'git' command line client Git Repository Full path to a Git repository. This is only necessary if you enable "Attach changelists from browser". The repository can be "bare". Click the Test Connection to make sure Collaborator can contact your Git repository. Client Configuration Mapping You can supply Java-style regular expressions to map changelists from this Git repository uploaded from our client tools. It is important to set up these regular expressions so that files uploaded by the various Collaborator client tools are correctly associated with this server-side Git configuration. © 2003-2015 SmartBear Software Git Server Integration 6.3.2 Repository Host Pattern Match on the client's configured remote origin URL (remote.origin. url). Note clients may have various network configurations that make the URL look different. First Commit Hash Pattern Match on the first commit hash returned from running "git revlist --max-parents=0 HEAD". GUI Client Git-specific Options The SCM Configuration dialog 334 has one Git-specific option. The full path to the Git command line executable on your local file system should be specified if it is not already on your system path. Note that for Git Local Source Code Location is not optional. Configure client to work with Git Uploading files to a Review Selecting a Git SCM Configuration in the GUI Client main screen to appear. © 2003-2015 SmartBear Software 332 causes Add to Review buttons 432 433 Version Control Integration Uploading Git files to a review Add Changes Selecting Add Changes... allows you to upload the modifications that are currently in the index. These are the modifications that would be committed if you typed 'git commit' from a command line. © 2003-2015 SmartBear Software GUI Client Add Changes Add Unpushed Commits Selecting Add Unpushed Commits... selects all commits in your local branch that have not been pushed to its tracking branch. NOTE: This assumes that you have set up branch tracking in Git. If you see an error when running Add Unpushed Commits... (like, "Error initializing local changelists") make sure that your current branch has a tracking branch set. You can set this up, initially by running "git config branch.autosetupmerge always". You can set this up on an existing branch by running "git branch --set-upstream name-of-branch name-of-upstream". © 2003-2015 SmartBear Software 434 435 Version Control Integration Add Commits Selecting Add Commits... allows you to upload commits, whether they have been pushed or not. You can add a specific commit by adding the commit ID and clicking "Add": © 2003-2015 SmartBear Software GUI Client Add Git Diffs Press the Add Git Diffs... button to upload arbitrary Git diffs to the Collaborator Server for review. © 2003-2015 SmartBear Software 436 437 Version Control Integration Upload arbitrary Git diffs Press the Add Git Diffs... button and then click on the Branches tab to upload the differences between two branches to a review. Specify the branches by selecting from the before and after dropdown menus. © 2003-2015 SmartBear Software GUI Client Upload the difference between two branches © 2003-2015 SmartBear Software 438 439 6.3.2.1 Version Control Integration Comparing two branches Press the Add Git Diffs... 432 button on the main screen 332 and then select the Branches tab to upload the differences between two branches to a review. Specify the branches by selecting from the before and after dropdown menus. Upload the difference between two branches 6.3.3 Command-Line Client Commands recommended for Git ccollab addchanges 440 - Attaches locally-modified files to a review. ccollab addchangelist ccollab addgitdiffs 442 ccollab gitaddbranch 441 - Attaches an atomic changelist to a review. - Uploads differences generated by git diff command. 443 - Uploads all differences between the specified branch and the remote-tracking branch. © 2003-2015 SmartBear Software Command-Line Client Configuration No extra configuration is required to use Git with the Command-Line Client. 6.3.3.1 addchanges (for Git) Description The ccollab addchanges command uploads locally modified files controlled by Git to a review on the Collaborator server. Command Line Syntax: ccollab [global-options] addchanges [--upload-comment <value>] <review> <file-spec> [<file-spec> ...] Command Options Option Required? Description global-options No A number of global or SCM-specific global options. See Command-line Global Options Reference 350 . --upload-comment <value> No A comment to be used for the uploaded files. Default is Local changes. <review> Yes Identifier of the desired review (an integer number), or a new, ask, or last string. <file-spec> [<file-spec> ...] Yes Files to be added and/or folders to scan for modified files. Separate multiple file and folder names with spaces. If a file or folder name contains spaces, enclose this name is quotes. ccollab scans folders recursively. The resulting list includes the name of modified files. "Modifications" include include edits, additions, deletions, branches, integrations, moves, copies, and so on. © 2003-2015 SmartBear Software 440 441 Version Control Integration Option Required? Description After the scan is complete, a file list is presented in a graphical editor so you can review the files to be uploaded and make correct the list, if needed. Examples: To create a new review and add all changes in the current directory and below, plus the file foo. txt, you would use: ccollab addchanges new . foo.txt To upload modified files from the current working directory and all subdirectories to review 123: ccollab addchanges 123 . To upload file foo.txt and modified files from c:\dev\project into a brand new review: ccollab addchanges new foo.txt c:\dev\project 6.3.3.2 addchangelist (for Git) Description The ccollab addchangelist command attaches all files from an unpushed or committed Git changelist to a review on the Collaborator server. Command Line Syntax: ccollab [global-options] addchangelist <review> <changelist> [<changelist> ...] Command Options Option Required? Description [global-options] No A number of global or Git-specific global options. See Command-line Global Options Reference 350 . <review> Yes Identifier of the desired review (an integer number), or a new, ask, or last string. © 2003-2015 SmartBear Software Command-Line Client Option Required? Description <changelist> [<changelist> ... ] Yes Identifier(s) of the desired changeset(s) in your source control. Examples: To upload Unpushed Commits 4321 and 7568 to a new review: ccollab addchangelist new 4321 7568 To upload Commits 5432 and 12654 to review 111: ccollab addchangelist 111 5432 12654 6.3.3.3 addgitdiffs Description The ccollab addgitdiffs command uploads differences between arbitrary versions of files in Git. The differences are generated using the native 'git diff' command of Git. Command Line Syntax: ccollab [global-options] addgitdiffs [--upload-comment <value>] <review> [<git-diff-arg> [<git-diff-arg> ...]] © 2003-2015 SmartBear Software 442 443 Version Control Integration Command Options Option Required? Description --upload-comment <value> No Comment used to upload files (defaults to command-line arguments) <review> Yes Must be either an integer review-id, 'new', 'ask', or 'last' <git-diff-arg> [<git-diffarg> ...] No Options which should be passed to the git diff command Remarks: Do not use diff arguments that affect the diff output such as '-U unified'. The Collaborator command-line client will automatically select an output format that ensures you will get all the data you need on the server. Examples: To upload all changes between the revision 8 revisions ago and the revision 4 revisions ago: ccollab addgitdiffs review master~8 master~4 To upload all changes in your local working directory: ccollab addgitdiffs review 6.3.3.4 gitaddbranch Description The ccollab gitaddbranch command uploads all differences between the given branch and the remote branch being tracked for changes. Command Line Syntax: ccollab [global-options] gitaddbranch <review> [<branch>] [<upstream>] © 2003-2015 SmartBear Software Command-Line Client Command Options Option Required? Description <review> Yes Must be either an integer review-id, 'new', 'ask', or 'last' <branch> No Name of a branch whose changes should be added. Default is the current checkout branch. <upstream> No Name of the remote-tracking branch to be compared against. If omitted Collaborator will try the default upstream branch (which was set via the git branch --set-upstream-to command-line key). Examples: To upload all differences between the "foo_feature" branch and the "origin/master" repository: ccollab gitaddbranch new foo_feature origin/master 6.3.4 Git Server Hooks The ensure-review-started 445 and ensure-reviewed 446 hooks ensure that files cannot be committed unless certain conditions are met. If a user attempts to commit files that do not meet those conditions, an error message describing the unfulfilled conditions will be displayed and the files will not be committed. If the conditions are met, the commit will be allowed to continue normally. The ensure-review-started hook requires that the review exist; ensure-reviewed requires that the review be completed. If you are familiar with Gerrit (an open source Git-focused review package), you can implement a similar workflow for your engineering staff using Collaborator and git triggers. Further information may be found on the Smart Bear blog in the "Gerrit-Style Code Review with Collaborator" post. Linking reviews with commits To use the ensure-review-started 445 and ensure-reviewed 446 hooks, you must require developers to put the review ID somewhere in the Git commit message. The format of this text is completely up to you; you will need to supply a Java-style regular expression that identifies this text and specifically calls out the review ID inside that text. The regular expression is specified using the -review-id-regex hook command option. © 2003-2015 SmartBear Software 444 445 Version Control Integration Here are some common ways of specifying the review ID and the corresponding regular expressions. Note that regular expressions are case-insensitive and you must identify the review ID portion with parenthesis: Text --review-id-regex Review: 4233 review:\s*(\d+) rID4233 rid(\d+) (review 4233) \(review (\d+)\) This text can appear in-line with other text or in a more formal "form-style" layout. Because you control the regular expression, you can control exactly what this looks like. For more information about Git hooks in general, see the Git documentation. 6.3.4.1 ensure-review-started (for Git) Description Use the ensure-reviewed trigger to ensure that the review that was created for the specified changelist has been completed by the time you submit the changelist to the Git repository. If the review has not been completed, the trigger blocks the submit operation and displays an error message informing the user about the problem. Command Line Syntax: ccollab [global-options] admin trigger ensure-reviewed [--review-idregex <value>] <changelist-id> Command Options Option Required? Description <changelist-id> Yes The changelist identifier. --review-id-regex <value> No A regular expression that identifies the review ID in the commit is comment. © 2003-2015 SmartBear Software Git Server Hooks Installation To install this trigger you will typically create an update hook. If you already have an update hook, you can add our tool wherever it is appropriate; otherwise you will need to create an executable hook as described in the Git documentation. The update hook should iterate over the commits being pushed and call this trigger for each one of them, and then exit with a non-zero exit code if any of the trigger invocations failed. Example shell script: #!/bin/sh refname="$1" oldrev="$2" newrev="$3" for commit in `git rev-list $oldrev..$newrev -- ''` do /collab/install/ccollab --url <collabUrl> --user <collabUser> -password <collabPasswd> --scm git admin trigger ensure-reviewed $commit exitcode=$(($exitcode + $?)) done exit $exitcode Note our use of "exit" to ensure that the hook script terminates with a non-zero exit code if our trigger rejects one of the commits. 6.3.4.2 ensure-reviewed (for Git) Description Use the ensure-review-started trigger to ensure that a review for the specified changelist has been started. The trigger blocks the submit operation if there is no review for the changelist in Collaborator, and displays an error message telling that the changes need to be reviewed before submitting them to the Git repository. Command Line Syntax: ccollab [global-options] admin trigger ensure-review-started [-review-id-regex <value>] <changelist-id> © 2003-2015 SmartBear Software 446 447 Version Control Integration Command Options Option Required? Description <changelist-id> Yes The changelist identifier. --review-id-regex <value> No A regular expression that identifies the review ID in the commit is comment. Installation To install this trigger you will typically create an update hook. If you already have an update hook, you can add our tool wherever it is appropriate; otherwise you will need to create an executable hook as described in the Git documentation. The update hook should iterate over the commits being pushed and call this trigger for each one of them, and then exit with a non-zero exit code if any of the trigger invocations failed. Example shell script: #!/bin/sh refname="$1" oldrev="$2" newrev="$3" for commit in `git rev-list $oldrev..$newrev -- ''` do /collab/install/ccollab --url <collabUrl> --user <collabUser> -password <collabPasswd> --scm git admin trigger ensure-review-started $commit exitcode=$(($exitcode + $?)) done exit $exitcode Note our use of "exit" to ensure that the hook script terminates with a non-zero exit code if our trigger rejects one of the commits. 6.4 IBM Rational ClearCase Integration Topics of this section describe Collaborator integration with IBM Rational ClearCase. © 2003-2015 SmartBear Software 448 ClearCase Server Integration 450 To take advantage of ClearCase integration, configure the Collaborator server so that it communicates with a ClearCase repository directly, without any client software. GUI Client 451 The GUI Client can scan ClearCase for checked-out files and upload them before they are checked in 453 . It uploads changes from your activities 454 or changes from an activity or activities that you name 455 . It can also upload any versions of ClearCase files after they are checked in. Command-Line Client 460 The Command-Line Client can scan for checked-out files and upload them before they are checked in, upload any versions of ClearCase files after they are checked in, or upload UCM change sets for review. Eclipse Plug-in The Eclipse Plug-in 359 integrates with the IBM Rational ClearCase SCM Adapter plug-in or with the open source ClearCase plug-in for Eclipse so you can upload 376 locally modified files with full support from your ClearCase eclipse plug-in. Supported Versions Our integration uses your own ClearCase command-line client (cleartool) to communicate with the server. We support these versions: · Rational ClearCase and Rational ClearCase LT, versions 4.1 through 8.x · Rational ClearCase Remote Client, version 8.x Because we use client applications already present on your computer, we support all protocols, authentications, proxies, and other client configuration options you are currently using. Support for ClearCase UCM Collaborator supports ClearCase UCM activities. The change set associated with a ClearCase activity can be added to a review using the Command-Line Client 341 addactivity 467 command. For each file in the activity, the latest version in the activity and the predecessor of the earliest version in the activity are uploaded to the review. © 2003-2015 SmartBear Software 449 Version Control Integration A Note about ClearCase Activities Uploading activities for review generates file differences based on Multiple Version Changelists 674 . Support for ClearCase Remote Client (CCRC 8.x only) Collaborator integration with CCRC uses the Rational Change Management Server API. When running the Collaborator client installer, there is an edit field allowing you to select the location of the Rational CM API jar files on your system. The required files are: · · · · remote_core.jar stpcc.jar stpcmmn.jar stpwvcm.jar These files are installed by the ClearCase Remote Client under the Rational Shared Resource Directory. The directory should look similar to one of the following: C:\Program Files\IBM\IMShared\plugins\com.ibm.rational.teamapi_8.0.0. v20110916_0625, or /opt/eclipse/plugins/com.ibm.rational.teamapi_8.0.0.v20110916_0625 Find the location of the files on your system and select or enter it during install so the Collaborator installer can make them available to the Collaborator client. The installer will copy them to the following subdirectory under the Collaborator client installation directory: ui/plugins/com.smartbear.collaborator_9.4.xxxx/libs If using the RPM installer, you will have to manually copy these files to the correct subdirectory. Once installed, create a ClearCase SCM configuration using the the same connection parameters to the ClearCase CM server as your ClearCase Remote Client. These are your username and password, and the ClearCase TeamWeb services URL. For example, if your ClearCase server host name is cc-server, the default server URL would be: http://cc-server:16080/ccrc Be careful to specify your connection parameters correctly. These parameters are not authenticated up front, instead calling back when server activity must take place. If the authentication is wrong, a cascade of errors can occur which can exhaust the RPC connections to the CM server. © 2003-2015 SmartBear Software 450 Troubleshooting CCRC Views CCRC views can get corrupted in a way that causes the CM API to generate exceptions when trying to upload CCRC files to a review. We do not know the cause of these exceptions, but selecting "Refresh->Repair->Vob Tag Directories" from the view context menu in the CCRC client, or deleting and recreating the view, fixes this condition. 6.4.1 ClearCase Server Integration The Collaborator server can be configured to communicate directly with a ClearCase repository. This allows users to review commits completely from the browser, without having to install any client programs. To enable this feature: 1. Install and configure a ClearCase client on the Collaborator server. 2. In Collaborator, click Admin on the home page and then select Version Control from the menu on the left: 3. Add information about your ClearCase repository to Collaborator. To do this, click Edit for the ClearCase item in the Version Control Server Templates section. The following edit form will appear. Enter your repository details there: © 2003-2015 SmartBear Software 451 Version Control Integration 4. Save the changes. 6.4.2 GUI Client ClearCase-specific Options The SCM Configuration dialog 334 has one ClearCase-specific option. Select the checkbox Update snapshot view if you want your ClearCase snapshot views to be updated prior to uploading files to a review. © 2003-2015 SmartBear Software GUI Client Uploading files to a Review Selecting a ClearCase SCM Configuration in the GUI Client main screen 332 enables several options for adding files for review. The Add Changes... 453 button finds modified files or allows selection of unmodified files, for uploading to a review. The Add My Activities... 454 button uploads changes from your activities. The Add Activities... 455 button uploads changes from an activity or activities that you name. The Add Versions... 455 button uploads arbitrary versions of files stored in ClearCase. © 2003-2015 SmartBear Software 452 453 Version Control Integration Uploading ClearCase files to a Review Add Changes Press the Add Changes... button to upload checked-out files to the Collaborator Server for review. © 2003-2015 SmartBear Software GUI Client Add Changes Add My Activities Press the Add My Activities... button to upload files from selected activities which you own to the Collaborator Server for review. Add My Activities © 2003-2015 SmartBear Software 454 455 Version Control Integration Add Named Activities Press the Add Activities... button to upload changes from a named ClearCase activity to the Collaborator Server for review. You cannot upload activities that have CHECKEDOUT versions if you are not the activity owner. Add Named Activities Add Versions Press the Add Versions... button to upload versions of files in your working copy to the Collaborator Server for review. Specify a name for the review or select an existing review and then click Next. You will be prompted to select one or more files in your checkout path (which was specified in the SCM Configuration dialog) 334 . © 2003-2015 SmartBear Software GUI Client Select files Click Next. Do not press Finish yet. © 2003-2015 SmartBear Software 456 457 Version Control Integration Specify versions The next page of the wizard lists the files that you have selected. You need to specify which versions of these files should be added to the review. Enter the ClearCase versions of each file to Before and After columns. Rows corresponding to directories are not editable. To specify a ClearCase version you can use the 'local' and 'LATEST' keywords. To learn about these keywords, see ccollab addversions 464 command-line reference. To fill the before and after versions for all listed files automatically, specify the needed version in the Autofill After versions or Autofill Before versions edit boxes and click Apply. To clear previously specified versions for all listed files, enter empty string to the Autofill edit boxes and click Apply. © 2003-2015 SmartBear Software GUI Client Automatically fill in before/after values You can also specify a branch you want to work with: © 2003-2015 SmartBear Software 458 459 Version Control Integration Specifying branch name You can input the absolute branch version path (for instance, "\main\branch_new_1 \sub_branch_new_1\1") or a relative path (like, "\sub_branch_new_1\1"). © 2003-2015 SmartBear Software GUI Client 6.4.3 Command-Line Client Commands recommended for ClearCase ccollab addchanges 461 - Attaches locally-modified files to a review ccollab addchangelist 463 - Attaches an atomic changelist to a review ccollab addversions 464 - Attaches any 2 given versions to a review ccollab addactivity 467 - Attaches file versions in a ClearCase activity to a review ccollab commit The addchanges checked in. 415 468 - Commit changes in the review command will scan for checked-out files and upload them before they are There is an option for the addchanges 461 command that allows local changes to be uploaded with a predecessor version in another branch as the previous version. The --diffbranch 462 option is used for this: © 2003-2015 SmartBear Software 460 461 Version Control Integration ccollab addchanges --diffbranch branch-name review file-or-dir [fileor-dir] ... For example, to create a new review and add all changes in the current directory and below, and compare them to the predecessor versions in the \main branch, you would use: ccollab addchanges --diffbranch main new . You can also use the special branch name pre to refer to the predecessor branch. For example, to add the local changes to hello.c compared to the most recent predecessor version in the previous branch to review 45, you would use: ccollab addchanges --diffbranch pre 45 hello.c The addversions command will upload arbitrary versions of ClearCase files after they are checked in. The addactivity 467 command will upload UCM change sets for review. Configuration In most cases, the Command-Line Client can automatically detect your ClearCase configuration. Try testing your configuration 342 to verify the configuration is detected correctly. If the Command-Line Client is unable to detect your ClearCase configuration or you want to override the detected settings, you can manually specify ClearCase settings using global options 350 . To manually configure the Command-Line Client to use ClearCase, execute the following command: ccollab set scm 6.4.3.1 351 clearcase addchanges (for ClearCase) Description The ccollab addchanges command uploads locally modified files controlled by ClearCase to a review on the Collaborator server. © 2003-2015 SmartBear Software Command-Line Client Command Line Syntax: ccollab [global-options] addchanges [--diffbranch <value>] [--uploadcomment <value>] <review> <file-spec> [<file-spec> ...] Command Options Option Required? Description global-options No A number of global or SCM-specific global options. See Command-line Global Options Reference 350 . --diffbranch <value> No (ClearCase only) Specify either branch-name or "pre" to determine the earlier version for upload. See Remarks. --upload-comment <value> No A comment to be used for the uploaded files. Default is Local changes. <review> Yes Identifier of the desired review (an integer number), or a new, ask, or last string. <file-spec> [<file-spec> ...] Yes Files to be added and/or folders to scan for modified files. Separate multiple file and folder names with spaces. If a file or folder name contains spaces, enclose this name is quotes. ccollab scans folders recursively. The resulting list includes the name of modified files. "Modifications" include include edits, additions, deletions, branches, integrations, moves, copies, and so on. After the scan is complete, a file list is presented in a graphical editor so you can review the files to be uploaded and make correct the list, if needed. Remarks: The '--diffbranch' option allows local changes to be uploaded with a predecessor version in another branch as the previous version. © 2003-2015 SmartBear Software 462 463 Version Control Integration For example, to create a new review and add all changes in the current directory and below, and compare them to the predecessor versions in the \main branch, you would use: ccollab addchanges --diffbranch main new . You can also use the special branch name 'pre' to refer to the predecessor branch. For example, to add the local changes to hello.c compared to the most recent predecessor version in the previous branch to review 45, you would use: ccollab addchanges --diffbranch pre 45 hello.c Examples: To create a new review and add all changes in the current directory and below, plus the file foo. txt, you would use: ccollab addchanges new . foo.txt To upload modified files from the current working directory and all subdirectories to review 123: ccollab addchanges 123 . To upload file foo.txt and modified files from c:\dev\project into a brand new review: ccollab addchanges new foo.txt c:\dev\project 6.4.3.2 addchangelist (for ClearCase) Description The ccollab addchangelist command attaches all files from a submitted ClearCase changelist (activity) to a review on the Collaborator server. Command Line Syntax: ccollab [global-options] addchangelist <review> <changelist> [<changelist> ...] Command Options Option Required? Description [global-options] No A number of global or ClearCase-specific global options. See Command-line Global Options Reference 350 . © 2003-2015 SmartBear Software Command-Line Client Option Required? Description <review> Yes Identifier of the desired review (an integer number), or a new, ask, or last string. <changelist> [<changelist> ... ] Yes Identifier(s) or names of the desired activity (ies) in your source control. Examples: To upload Activities add_new_scm_support and add_extended_version_parsing to a new review: ccollab addchangelist new add_new_scm_support add_extended_version_parsing To upload Activities AnActivity and AnotherActivity to review 111: ccollab addchangelist 111 AnActivity AnotherActivity 6.4.3.3 addversions (for ClearCase) Description The ccollab addversions command appends the specified versions (revisions) of a file controlled by ClearCase on your computer to a review. Command Line Syntax: ccollab [global-options] addversions [--upload-comment <value>] [-version-spec <value> [<value> ...]] <review> [<file-path>] [<version>] [<predecessor-version>] Command Options Option Required? Description [global-options] No A number of global or SCM-specific global options. See Command-line Global Options Reference 350 . --upload-comment <value> No A comment to be used for the uploaded files. Default is Local changes. © 2003-2015 SmartBear Software 464 465 Version Control Integration Option Required? Description --version-spec <value> [<value> ...] No The version to be added to a review. A version-spec value consist of three components: path version [previous-version], where path is the file name or server path of the file, version is the file version to be reviewed, and previous-version is an optional version, against which version should be compared. If any of these arguments contains spaces, enclose it in quotes. Typically a version-spec is not used in the command line. We recommend specifying the file and version using the <file-path>, <version> and the <predecessor-version> arguments (see below). <review> Yes Identifier of the desired review (an integer number), or a new, ask, or last string. <file-path> No The name and path of the file, whose versions are to be added to the review. Important: If you use this option, you should also specify <version> (see below). <version> No Required, if <file-path> is specified. The version (revision) of the file to be added to the review. You can specify the keyword local to tell the command to use the local version of the file. <predecessorversion> No Preceding file version to be added to the review. If you skip this argument, Collaborator will attempt to determine the preceding version based on the information from the source control. © 2003-2015 SmartBear Software Command-Line Client Remarks · If you skip the predecessor version, Collaborator will generate diffs using the predecessor version reported by your source control system. · By default, the command lets you add versions of one file only. To add versions of multiple files, create a text file and specify this file in the command line as the standard input stream (stdin): ccollab addversions last < versionlist.txt Each line in the file must consist of the following components: path version [predecessor-version ]. For information on them, see description of the version-spec arguments. · If you skip the file name and versions in the command line, the command will expect to read them from the standard input stream (stdin). Below are some examples for reading versions from the standard input: ccollab addversions 86753 ccollab addversions last < versionlist.txt cat versionlist.txt | ccollab addversions new · When specifying the version in the command line or in an input file, you can use the keyword local to denote the version corresponding to the local version of the file. The local keyword can only be used for the first version argument, not for the predecessor version. Examples: Some examples of specifying versions on the command line for ClearCase: ccollab addversions new hello.c \main\mydev\6 \main\8 ccollab addversions last Main.java /main/dev/31 To compare the local version of the ClearCase file/directory to a previous version in an edit list or input list, use 'local' as the initial version. If the file/directory is checked out as '/main/ CHECKEDOUT', then 'local' is equivalent to using '/main/CHECKEDOUT' as the initial version. Otherwise 'local' would refer to the latest version of the file/directory. For example, if the local file hello.c is at version '/main/9' and has predecessor '/main/8' then all of the following lines would be equivalent: hello.c /main/9 hello.c local hello.c /main/9 /main/8 hello.c local /main/8 © 2003-2015 SmartBear Software 466 467 Version Control Integration You can also reference a LATEST version, for example: ccollab addversions new hello.c \main\ga_1.0\6 \main\LATEST To upload a version with no predecessor version, use '\main\0': ccollab addversions new hello.c \main\ga_1.0\6 \main\0 To compare the version "/main/2" of the directory "W:/user_name_ccrctut_pvob/server" to the version "/main/3" , please run the following command and the difference will be uploaded to Collaborator. ccollab addversions new W:/user_name_ccrctut_pvob/server /main/2 / main/3 6.4.3.4 addactivity Description The ccollab addactivity command attaches file versions from one or more ClearCase activities to a review. Command Line Syntax: ccollab [global-options] addactivity [--diffintegration] [--uploadcomment <value>] <review> <activity-name> [<activity-name> ...] © 2003-2015 SmartBear Software Command-Line Client Command Options Option Required? Description --diffintegration No Use LATEST version from default integration stream, if available, as the predecessor version --upload-comment <value> No Comment used to upload files (default is "Local changes") <review> Yes Must be either an integer review-id, 'new', 'ask', or 'last' <activity-name> [<activityname> ...] Yes Specify one or more ClearCase activities by name, or use 'all' to include all activities in the current view Remarks: · For each file in the activity, the latest version in the activity and the predecessor of the earliest version in the activity are uploaded to the review. · You can specify multiple activity names on the command line. You can also use the word 'all' as the activity name to include all activities in the current view. If multiple activities are given, the changeset uploaded is the union of all changes in each of the activities. · You can use the --diffintegration option to include the default integration stream in determining version content for review. For the most recent version, this option will scan the versions of each file in the given activity as well as the versions of those files in any associated rebase activities, to determine the most recent version. For the previous version for each file in the activity, this option will use the LATEST version in the default integration branch (if available) as the previous version. 6.4.3.5 commit (for ClearCase) Description The ccollab commit command submits the changes from a pre-commit review to source control. Be sure to include a relevant comment. © 2003-2015 SmartBear Software 468 469 Version Control Integration Command Line Syntax: ccollab [global-options] commit [--comment <value>] [--dismiss-only] [--force] <review> Command Options Option Required? Description --comment <value> No Comment for reviewed changes --dismiss-only No Just dismiss the Action Item --force No Ignore potential problems <review> Yes Must be either an integer review-id, 'ask', or 'last' Example: ccollab commit 25 --comment "my code" --force 6.5 IBM Rational Synergy Integration This section describes Collaborator integration with Rational Synergy: GUI Client 470 The GUI Client can upload Tasks into Collaborator. You can upload Pending Tasks 471 or Completed 472 Command-Line Client 473 The Command-Line Client can upload Tasks into Command-Line Client. Supported Versions Our integration uses your own Rational Synergy command-line client (ccm) to communicate with the server. The integration was developed against the Rational Synergy 7.1 toolset, and should work with the latest 6.x and 7.x releases. © 2003-2015 SmartBear Software GUI Client 6.5.1 GUI Client Rational Synergy-specific Options The SCM Configuration dialog 334 has several Rational Synergy-specific options. These can be set as necessary to override Rational Synergy options derived from the environment. Synergy SCM Configuration Uploading files to a Review Selecting a Rational Synergy SCM Configuration in the GUI Client main screen 332 causes several Add to Review buttons to appear. The Add Pending Tasks... 471 button uploads pending changelists. The Add Submitted Changelists... 537 button uploads submitted changelists. © 2003-2015 SmartBear Software 470 471 Version Control Integration Uploading Synergy Files to a Review Add Pending Tasks Press the Add Pending Tasks... button to upload the files in a pending Task to the Collaborator Server for review. © 2003-2015 SmartBear Software GUI Client Add Rational Synergy Pending Tasks Add Rational Synergy Completed Tasks Press the Add Completed Tasks... button to upload the files in a completed Task to the Collaborator Server for review. © 2003-2015 SmartBear Software 472 473 Version Control Integration Add Rational Synergy Completed Task 6.5.2 Command-Line Client Commands recommended for Rational Synergy ccollab addchangelist ccollab addversions 475 474 - Attaches an atomic changelist to a review - Attaches any 2 given versions to a review The addchangelist 543 command will upload Rational Synergy tasks into Collaborator. You can upload tasks either before or after they are completed. Configuration The Command-Line Client can may need some configuration. Try testing your configuration verify the configuration is detected correctly. 342 to If the Command-Line Client is unable to detect your Rational Synergy configuration or you want to override the detected settings, you can manually specify Rational Synergy settings using global options 354 . © 2003-2015 SmartBear Software Command-Line Client To manually configure the Command-Line Client to use Rational Synergy, execute the following command: ccollab set scm 351 synergy Rational Synergy-specific Options 6.5.2.1 Option Description --ccm-exe <value> Full path to the `ccm` command-line executable --ccm-user <value> User Name to use when starting a Rational Synergy session --ccm-passwd <value> Password to use when starting a Rational Synergy session --ccm-engine-host <value> Host the Rational Synergy Engine will run on --ccm-databasepath <value> Path of the Rational Synergy database to connect with --ccm-localdatabase-path <value> Path of the local Rational Synergy database, typically c:/temp/ ccm or /tmp/ccm --ccm-remoteclient Start Rational Synergy sessions as a Remote Client --ccm-server-url <value> Server URL for Web-Mode Rational Synergy servers addchangelist (for Rational Synergy) Description The ccollab addchangelist command attaches all files from a pending or a completed Rational Synergy changelist (tasks) to a review on the Collaborator server. © 2003-2015 SmartBear Software 474 475 Version Control Integration Command Line Syntax: ccollab [global-options] addchangelist <review> <changelist> [<changelist> ...] Command Options Option Required? Description [global-options] No A number of global or SCM-specific global options. See Command-line Global Options Reference 350 . <review> Yes Identifier of the desired review (an integer number), or a new, ask, or last string. <changelist> [<changelist> ... ] Yes Identifier(s) of the desired changeset(s) in your source control. The first argument is the review specifier, subsequent arguments are the IDs of the Pending Tasks or Completed Tasks to upload. Examples: To upload Pending Tasks 4321 and 7568 to a new review: ccollab addchangelist new 4321 7568 To upload Completed Tasks 5432 and 12654 to review 111: ccollab addchangelist 111 5432 12654 6.5.2.2 addversions (for Rational Synergy) Description The ccollab addversions command appends the specified versions (revisions) of a file controlled by Rational Synergy on your computer to a review. Command Line Syntax: ccollab [global-options] addversions [--upload-comment <value>] [-version-spec <value> [<value> ...]] <review> [<file-path>] [<version>] [<predecessor-version>] © 2003-2015 SmartBear Software Command-Line Client Command Options Option Required? Description [global-options] No A number of global or SCM-specific global options. See Command-line Global Options Reference 350 . --upload-comment <value> No A comment to be used for the uploaded files. Default is Local changes. --version-spec <value> [<value> ...] No The version to be added to a review. A version-spec value consist of three components: path version [previous-version], where path is the file name or server path of the file, version is the file version to be reviewed, and previous-version is an optional version, against which version should be compared. If any of these arguments contains spaces, enclose it in quotes. Typically a version-spec is not used in the command line. We recommend specifying the file and version using the <file-path>, <version> and the <predecessor-version> arguments (see below). <review> Yes Identifier of the desired review (an integer number), or a new, ask, or last string. <file-path> No The name and path of the file, whose versions are to be added to the review. Important: If you use this option, you should also specify <version> (see below). <version> No Required, if <file-path> is specified. The version (revision) of the file to be added to the review. You can specify the keyword local to tell the command to use the local version of the file. © 2003-2015 SmartBear Software 476 477 Version Control Integration Option Required? Description <predecessorversion> No Preceding file version to be added to the review. If you skip this argument, Collaborator will attempt to determine the preceding version based on the information from the source control. Remarks · If you skip the predecessor version, Collaborator will generate diffs using the predecessor version reported by your source control system. · By default, the command lets you add versions of one file only. To add versions of multiple files, create a text file and specify this file in the command line as the standard input stream (stdin): ccollab addversions last < versionlist.txt Each line in the file must consist of the following components: path version [predecessor-version ]. For information on them, see description of the version-spec arguments. · If you skip the file name and versions in the command line, the command will expect to read them from the standard input stream (stdin). Below are some examples for reading versions from the standard input: ccollab addversions 86753 ccollab addversions last < versionlist.txt cat versionlist.txt | ccollab addversions new · When specifying the version in the command line or in an input file, you can use the keyword local to denote the version corresponding to the local version of the file. The local keyword can only be used for the first version argument, not for the predecessor version. Example: ccollab addversions review hello.c:csrc:1 3.2.5 3.2 6.6 IBM Rational Team Concert Integration Collaborator integrates with Rational Team Concert allowing you to automatically synchronize the approver lists of Collaborator reviews and Team Concert work items, and automatically create reviews for change sets. Topics of this section provide detailed information on the integration. © 2003-2015 SmartBear Software 478 In This Section O Rational Team Concert Integration - Overview 478 Provides brief information on integration functionality and requirements. O How Integration Features Work 479 Explains how the integration features work and how you can benefit from using them. O Configuring Servers and Plug-Ins 482 Describes how to prepare Collaborator, Rational Team Concert and Eclipse IDE in order for the integration features to work properly. O Troubleshooting 482 Describes possible issues and typical solutions for them. 6.6.1 Overview About Integration Collaborator tightly integrates with Rational Team Concert. The integration helps you easily create reviews for Team Concert's work items, synchronize the list of reviewer participants and work item's approvers, and update the state attribute of users in the Approvals list automatically when the review status changes. For detailed information on the features, see How Integration Features Work 479 . Required Plug-Ins The integration functionality is provided by two plug-ins: · One of them is installed on the Rational Team Concert server machine. · Another plug-in can be installed on user computers that have the Eclipse IDE. Both plug-ins come in one .zip archive that you can download from our web site: O http://support.smartbear.com/downloads/collaborator/ To download, click the link "Rational Team Concert Plug-In: Update Site & Instructions" on the page. For information on installing and configuring the plug-ins and servers, see topics of the Configuring Servers and Plug-Ins 482 section. We strongly recommend that you read it. © 2003-2015 SmartBear Software 479 Version Control Integration Requirements · Integration with Rational Team Concert requires Rational Team Concert versions 2 - 6. Collaborator 7 and later supports Rational Team Concert versions 4 and 6. If you have Team Concert versions 2 or 3, you need to use CodeCollaborator version 6. · To use some of the features, you need to have an Rational Team Concert plug-in for the Eclipse IDE on the computer, where you have Eclipse installed. 6.6.2 How Integration Features Work Important: This topic describes how Collaborator integrates with Rational Team Concert and Eclipse. In order for the described integration features work, you need to configure the Rational Team Concert and Collaborator servers properly. See Configuring Servers and Plug-Ins 482 . O Creating Reviews Automatically 479 O Creating Reviews From Eclipse Manually 480 O Synchronizing the Approvals and Participants Lists O Updating Approver State O Demonstration 481 482 482 O Troubleshooting 482 Creating Reviews Automatically Collaborator's plug-in for Rational Team Concert tracks the changes of a work item state. If you change the state of a work item and if the work item has a changeset linked to it, the plug-in creates a review for that work item in Collaborator and attaches the changeset to this review. The plug-in also creates a review, if you add a changeset to a work item that has no changesets associated with it. If a review was created in this way, Collaborator will track changes in the work item's Approvals list and update the review's Participants list appropriately. Also, you will see the status of a user work on the review in the State column of the Approvals list. Note: The plug-in does not update a review, if you update an existing changeset. © 2003-2015 SmartBear Software How Integration Features Work Requirements: · To use automatic review creation, you need to -§ Install § Set up 486 491 and configure 489 the Collaborator plug-in for Rational Team Concert. follow-up actions in Rational Team Concert. · To take advantage of user list and state synchronization, you also need to configure Collaborator server. 483 the Creating Reviews From Eclipse Manually Rational Team Concert plug-in for Eclipse extends the Eclipse IDE with the Pending Changes view. Collaborator's Eclipse plug-in inserts a new Add To Review item to the context menu of this view: Creating a review from a changeset Select this item and then follow instructions of the subsequent wizard to create a review for the changeset or to attach the changeset to an existing review. © 2003-2015 SmartBear Software 480 481 Version Control Integration Note: Collaborator does not support synchronization of the Approvals and Participants user lists and tracking the state for such reviews. These features work only for reviews that are created automatically (see above). Requirements: to use this feature, you need to -· Have Rational Team Concert plug-ins installed into your Eclipse IDE. · Install 485 the Collaborator plug-in for Eclipse. Synchronizing the Approvals and Participants Lists For reviews that were created automatically on the work item's state change, Collaborator synchronizes the contents of the work item's Approvals list and the review's Participant list: · When you append a Reviewer entry (user) to the Approvals list, Collaborator includes the same user into the Participants list of the review as a Reviewer. This also works in the opposite way: if you add users to participants, they are also added to approvers. · Synchronization also works for deletion: if you remove a user from participants in Collaborator, the plug-in will remove that user from the Approvals list of your work item. Note, however, that the opposite deletion operation is not available at the moment, that is, if you delete a user from the Approvals list of a work item, Collaborator will not remove that user from the Participants list. Notes: · In order for this feature to work, the user must have the same name in Collaborator and in Rational Team Concert. · When tracking changes made to the Approvals list, Collaborator tracks the addition of Reviewer entries only. If you add an entry of the Approver type, the review's Participants list will not be updated. · Collaborator updates the Approvals list after the review left the Planning phase and moved to the Annotating phase. Any participant that was added during the Planning phase will also be included into the work item once you move the review to the Annotating phase. · Collaborator synchronizes only those users, whose role allows them to finish the review. Participants that do not need to finish the review (for example, Observers) are not added to the work item's Approvals list. Similarly, if you remove such a user from the Participants list, they will not be deleted from the Approvals list. If you assign a participant a role that does not allow them to finish review (for example, change the role from Reviewer to Observer), Collaborator will delete this participant from the Approvals list. · Once again, synchronization works for those reviews that were created automatically. It does not work for the reviews that were created through the "Add To Review" menu command. © 2003-2015 SmartBear Software How Integration Features Work If you do not want automatic updates of the user list, disable the Add reviewers and Remove reviewers settings of the Collaborator server. See Configuring 483 Collaborator Server 483 . Requirements: to use this feature, you need to -· Configure · Install · Set up 486 491 483 the Collaborator server. and configure 489 the Collaborator plug-in for Rational Team Concert. follow-up actions in Rational Team Concert. Updating Approver State If a review was created automatically on the work item's state change, Collaborator tracks the changes made to the review phase. If a user completes the review, or cancels or rejects it, Collaborator updates the State attribute of that user in the Approvals list. · If a user completed the review, the state is changed to Approved. · If a user cancels or rejects the review, the state is changed to Rejected. Requirements: to use this feature, you need to -· Configure · Install · Set up 486 491 483 the Collaborator server. and configure 489 the Collaborator plug-in for Rational Team Concert. follow-up actions in Rational Team Concert. Demonstration Watch the following video to see Collaborator's integration with Rational Team Concert: http://www.youtube.com/watch?v=DGVi0gjvpUg Troubleshooting See Troubleshooting 6.6.3 500 . Configuring Servers and Plug-Ins Topics of this section describes how to configure the Collaborator server and plug-ins to use the Rational Team Concert integration features. © 2003-2015 SmartBear Software 482 483 Version Control Integration In This Section O Configuring Collaborator Server 483 O Installing Collaborator Eclipse Plug-In 485 O Installing Collaborator Plug-In for Rational Team Concert 486 O Configuring the Collaborator Plug-In on the Rational Team Concert O Setting Up and Configuring Follow-Up Actions O Mapping Configurations 6.6.3.1 489 491 496 Configuring Collaborator Server To use Collaborator with Rational Team Concert, you need to configure your Collaborator server. Follow these steps: 1. Download the "Rational Team Concert Plain Java Client" libraries that match your Rational Team Concert version to your Collaborator server computer from the https://jazz.net web site. 2. Extract the files from the downloaded .zip to some temporary directory. 3. Delete the following .jar files from the temporary folder. This will prevent conflicts with libraries that the Collaborator server already uses. The .jar file names may include version numbers. Delete the files that matches the names below, regardless of the version number in their name: · commons-io · org.apache.commons.codec · org.apache.commons.httpclient · org.apache.commons.logging · javax.servlet 4. Stop the Collaborator server. 5. Copy the extracted .jar files from the temporary directory to <Your_Collaborator_Server_Dir>/ tomcat/webapps/ROOT/WEB-INF/lib. © 2003-2015 SmartBear Software Configuring Servers and Plug-Ins Important: This directory is a work directory of the tomcat server. Its contents is deleted when you install (or re-install) Collaborator. So, make sure to have the Collaborator server installed before copying the .jar files. Otherwise, these files will be deleted during Collaborator installation (or re-installation). 6. Start the Collaborator server. 7. Open the Collaborator Web Client. Select Admin from the main menu. This will open the Administration settings page. 8. Choose Version Control from the menu on the left. Scroll the page down to the Configure a new version control server section (it is at the end of the page). 9. Create a new configuration for Rational Team Concert: · Select Rational Team Concert from the SCM System drop-down list and click Create: · Specify the new configuration's settings: Title The configuration name. It identifies the configuration in Collaborator. Server URI The address of your Rational Team Concert server. Typically, this is a Public URI of the server. If the Public URI is inaccessible to you for some reason, you can specify the server's IP address. Admin user name, and The user account and password that Collaborator will use to connect to the Rational Team Concert server. Admin password Note: This account must have administrator permissions in Rational Team Concert. Add reviewers Specifies whether Collaborator will track addition of new entries (users) to a work item's Approvals list and adds the appropriate users to a review's Participants list. See How Integration Features Work 479 . Remove reviewers Specifies whether Collaborator will track deletion of entries (users) in the Participants list and update the work item's Approvals list accordingly. See How Integration Features Work 479 . © 2003-2015 SmartBear Software 484 485 Version Control Integration Update assignment s Specifies whether Collaborator updates the State attribute of a user in a work item's Approvals list when that user completes, cancels or rejects the review. See How Integration Features Work 479 . Click Save after you specified the settings. To check if the settings are correct click Test Connection (do this after saving the settings). If the test succeeds, you will see a notification message at the top of the page. 10. Important: To take advantage of all integration features, you need to map the Rational Team Concert configurations you have in Collaborator. To do this, you need to have at least one review created through Rational Team Concert. For step-by-step explanation, see Mapping Configurations 496 . Other Configuration Actions In addition to configuring the Collaborator server, you also need to install and configure special plug-ins for Rational Team Concert. For complete information on this, see topics of the Configuring Servers and Plug-Ins 482 section. 6.6.3.2 Installing Collaborator Eclipse Plug-In To create Collaborator reviews manually 479 from the Eclipse IDE, you need to install and configure the Collaborator plug-in for Eclipse. This topic provides detailed information on this. Note: The Collaborator plug-in for Eclipse extends the functionality of Rational Team Concert plug-ins for Eclipse. If these Team Concert plug-ins are not installed, the Collaborator plug-in for Eclipse will not work. To install and configure the Collaborator plug-in for Eclipse: 1. Download the update site .zip package with the plug-in from our web site: · Open this web page in a web browser: O http://support.smartbear.com/downloads/collaborator/ © 2003-2015 SmartBear Software Configuring Servers and Plug-Ins · To start downloading, click either the Eclipse Plug-In: Update Site & Instructions link, or the Rational Team Concert Plug-In: Update Site & Instructions link in the section that corresponds to your operating system. (both link leads to the .zip file that includes the Collaborator for Eclipse plug-in. Important: Rational Team Concert Client 3 installs with and requires Java 5. To work with that version of the Team Concert Client, you need CodeCollaborator 6.5. If you download and use the update site package of Collaborator ver. 7 or later, the plug-in's functionality will be limited. The workaround is to modify the eclipse.ini file to point to Java 7 (see below). 2. Follow the Eclipse plug-in's Install & Update instructions plug-in. 359 to setup and configure the Eclipse 3. If your version of Eclipse uses Java 5 or 6, then it is necessary to change the eclipse.ini file to use Java 7. Details about this change can be found at the following site: O http://wiki.eclipse.org/FAQ_How_do_I_run_Eclipse%3F Here is an example of the change: -vm C:\Program Files\Java\jdk1.7\jre\bin\javaw.exe Other Configuration Actions If you are going to create reviews manually, then all you need is to install and configure the Collaborator plug-in for Eclipse. To use other integration features 479 , you need to install configure the Collaborator server and install and configure special plug-ins for Rational Team Concert. For complete information on this, see topics of the Configuring Servers and Plug-Ins 482 section. 6.6.3.3 Installing Collaborator Plug-In for Rational Team Concert This topic explains how to install the Collaborator plug-in for Rational Team Concert. 1. Download the update site .zip package with the plug-in from our web site: · Open this web page in a web browser: O http://support.smartbear.com/downloads/codecollaborator/ · To start downloading, click the link Rational Team Concert Plug-In: Update Site & Instructions in the section that corresponds to your operating system. Important: Since version 8.5.8500 Collaborator (both Server and Client parts and all plug-ins) requires Java 7. © 2003-2015 SmartBear Software 486 487 Version Control Integration Rational Team Concert 3 installs with and requires Java 5. To work with this system, you need to install Collaborator RTC update-site plug-in from CodeCollaborator/PeerReview Complete versions 65xx (as only these versions supported Java 5) and the CodeCollaborator/PeerReview Complete Server versions 7.x. Rational Team Concert 4.x, 5.x and 6.x install with and require Java 6. To work with these systems you need to install Collaborator RTC update-site plug-in from versions 7.0-8.4.8406 (as these versions support Java 6) and Collaborator Server from 7.0 to the latest version. 2. Extract files from the downloaded .zip archive to the <$JAZZ_ROOT>/ccollab-update-site folder on the Rational Team Concert server computer. For example, the folder name can be like C: \Program Files\IBM\JazzTeamServer\ccollab-update-site. 3. Copy the com.smartbear.ccollab-profile.ini file from this folder to the <$JAZZ_ROOT>\server\conf \ccm\provision_profiles folder. 4. Now you need to reset your Jazz Team Server: · Open the following web page in your web browser: If you use Rational Team Concert 4-6: O https://$Your_Jazz_server/jts/admin?internal#action=com.ibm.team.repository. admin.serverReset If you use Rational Team Concert 3 or earlier: © 2003-2015 SmartBear Software Configuring Servers and Plug-Ins O https://$Your_Jazz_server/jazz/admin?internal=true · On the page, click Request Server Reset. This will command Rational Team Concert to load the Collaborator plug-in next time the Rational Team Concert service restarts. 5. Restart the Jazz Server. To do this: · Select Stop the Jazz Team Server from Windows' Program Files menu, or run the shutdown.bat file in the Jazz Install directory. · Run the server by selecting Start the Jazz Team Server from the Program Files menu: © 2003-2015 SmartBear Software 488 489 Version Control Integration 6. Check whether the plug-in is loaded: · Open the Component Status page: https://$Your_Jazz_server/ccm/admin?internal=true#action=com.ibm.team.repository.admin. componentStatus · Click the refresh icon next to the Component Status item in the left-side menu to update the page after it loads. · Check that the com.smartbear.rtc.process.ICodeCollaboratorService service is active. · Now click Provision Status in the menu menu entry: · Search for smartbear on the page and make sure that the plug-in has been installed and initialized. Provision Status page: Checking whether the plug-in is installed Provision Status page: Checking whether the plug-in is started Other Configuration Actions After you installed the plug-in, you need to configure it. See Configuring the Collaborator Plug-In for Rational Team Concert 489 . 6.6.3.4 Configuring Collaborator Plug-In for Rational Team Concert After installing the Collaborator plug-in for Rational Team Concert, you need to configure it. Follow these steps: © 2003-2015 SmartBear Software Configuring Servers and Plug-Ins 1. Login to the Change and Configuration Manager at https://$Your_Jazz_server/ccm/admin, for example, https://rtc-demo.local:9443/ccm/admin. 2. Select Advanced Properties from the menu on the left and then scroll down to the Collaborator section: 3. Configure the settings and save them (see the image below). The settings have self-descriptive names, and hardly require explanation. Two notes: · The Collaborator User ID setting specifies the user account that sends notifications on file uploads. Uploads from RTC to Collaborator will appear to have been done by this user. Collaborator is unable to display the name of the RTC user that actually made the changes, this is a limitation of the RTC/Collaborator integration. This account should have administrator permissions in Collaborator. · Specify host and port if you connect to Collaborator via proxy. © 2003-2015 SmartBear Software 490 491 Version Control Integration Other Configuration Actions After configuring the plug-in, you can proceed with setting up the follow-up actions Team Concert. 491 in Rational Also, after you created your first review from Rational Team Concert, you need to map configurations 496 in Collaborator settings. 6.6.3.5 Setting and Configuring Follow-Up Actions After you installed 486 the Collaborator plug-in for Rational Team Concert, you need to configure follow-up actions in Team Concert. O Configuring Follow-Up Actions O Action Parameters 491 493 § Update Reviews for Each Linked Work Item § Upload Changes From Work Item 493 494 Creating Follow-Up Actions 1. In the Rational Team Concert Client, open your project by clicking its name in the Stream section: © 2003-2015 SmartBear Software Configuring Servers and Plug-Ins This will open the Team Area view. 2. In the Team Area view, select Operation Behavior from the tree on the left and then go to Source Control | Save Change Set Links and Comments on the right and add a follow-up action Update reviews for each linked work item to it. 3. Select Operation Behavior from the tree on the left, then choose Work Items | Save Work Item (server) on the right, and add the follow-up Upload changes from work item to it: © 2003-2015 SmartBear Software 492 493 Version Control Integration Action Parameters Update Reviews for Each Linked Work Item This follow-up action creates a review associated to a work item when a new changeset is added to that work item. The changeset must be new. If you add changes to some existing changeset associated with the work item, the review is not automatically updated. In this case, you need to change the work item's state and save the changes. If you have another follow-up action configured (see below) this will update the review. The action's settings are stored in an XML file. You can change the action settings, and they will override the plug-in's settings 489 . To do this, simply edit the XML file of the action. Below is a sample XML snippet with action settings: <followup-action description="Collaborator - Update Reviews for each linked Work Item" id="com.smartbear.collaborator.rtc.process. ChangeSetModified" name="Collaborator - Update Reviews for each linked Work Item"> <CollaboratorURL value="http://localhost:8080"/> <CollaboratorProxyHost value="proxyhost"/> <CollaboratorProxyPort value="22"/> <CollaboratorUserID value="admin"/> <CollaboratorUserPassword value="123"/> © 2003-2015 SmartBear Software Configuring Servers and Plug-Ins <retries value="1"/> <retryDelayMs value="500"/> </followup-action> Here are some notes on the file contents: · All child elements of the followup-action element are optional. If you do not specify some values, they are taken from the global plug-in settings. · The CollaboratorProxyPort and CollaboratorProxyPort can have empty values to override the global plug-in settings. · If you need to specify the user that will work for multiple Collaborator servers, create a user with the same name and password on all the needed Collaborator servers and then specify this user name and password in the global plug-in settings. · The password is stored as plain text on the XML configuration. · The action requests some information from the Team Concert repository. This information may be unavailable at the moment the action runs, so the action may need to wait for an answer. To prevent possible issues dues to these delays, use the retries and retryDelayMs values. The retries value specifies the number of times the follow-up action repeats its requests, and the retryDelayMs value indicates the number of milliseconds the action will wait for a response. Both settings accept only positive integer numbers as their values. Since the delay can depend on the Rational Team Concert server settings, there are no predefined value that will work on every server configuration. You can start using small numbers for the values (like 3 retries and 500 ms delay) and then increase or decrease these values until you find a configuration that works best for you. Upload Changes From Work Item The Collaborator plug-in uses this follow-up action to track the changes of a work item state. The action's settings are stored in an XML file. You can change the action settings, and they will override the plug-in's settings 489 . To do this, simply edit the XML file of the action. Below is a sample XML snippet with action settings: <followup-action id="com.smartbear.collaborator.rtc.process. UploadToCollab"> <CollaboratorURL value="http://localhost:8080"/> <CollaboratorProxyHost value="proxyhost"/> <CollaboratorProxyPort value="22"/> <CollaboratorUserID value="admin"/> <CollaboratorUserPassword value="123"/> <type value="Defect"/> <type value="Enhancement"/> © 2003-2015 SmartBear Software 494 495 Version Control Integration <type value="Task"/> <StateChangedTo value="New"/> <OnStatus type="Story" state="Implemented"/> <updateReviewers value="false"/> <newReviewOnCancel value="false"/> </followup-action> Here are some notes on the file contents: · All the elements are optional. · The settings CollaboratorURL, CollaboratorProxyHost, CollaboratorProxyPort, CollaboratorUserID, and CollaboratorUserPassword override the plug-in settings' values 489 . · There are several elements that define the scope of work items, for which Collaborator will create reviews automatically: § type specifies the work item types for that Collaborator will create reviews. You can specify multiple type elements in the settings. You specify a type by its display name, not by its id. This name is case-sensitive. § StateChangedTo specifies the work item states that Collaborator will trace (Collaborator will create a review for a work item when this work item is switched to the specified state). You can use multiple StateChangedTo elements in the settings. § OnStatus combines functionality of both type and StateChangedTo. It specifies a couple of values (type and state) in one setting. These values can be types and states specified by the type and StateChangeTo elements, or any other types and states. That is, OnStatus elements is just one more way to define the conditions that trigger review creation. There can be multiple OnStatus elements in the settings. · The Collaborator plug-in can trace changes in the Approvals list of a work item. When you add an entry of the Reviewer type to this list, the plug-in sends a command to the Collaborator server to update the Participants list of the review associated with that work item. See How Integration Features Work 479 . The updateReviewers setting lets you enable or disable this functionality. If the value is true or not specified, the Collaborator will update the Participants list of a review. To disable this functionality, set the value to false. · The newReviewOnCancel option specifies whether the follow-up action will create a new review for a work item, if its previous review was canceled or rejected. At that, all the changes from the work item changesets will be added to the new review. After the new review is created, the action replaces a link to the previous review with a new review link. The work item will have only one link to a review. © 2003-2015 SmartBear Software Configuring Servers and Plug-Ins Other Configuration Actions In addition to configuring the Collaborator plug-in for Rational Team Concert and follow-up actions, you also need to configure the Collaborator server. For detailed information on this, see topics of the Configuring Servers and Plug-Ins 482 section. 6.6.3.6 Mapping Configurations Why Configuration Mapping Is Needed To exchange data with Rational Team Concert, Collaborator uses two types of configurations: · A version control configuration that you create in Collaborator (on the Admin > Version Control setting page. See Configuring Collaborator Server 483 ). This configuration is needed to send data from Collaborator to Rational Team Concert. Let's call it client Team Concert configuration as it is created on the Collaborator side, which is client for your Rational Team Concert instance. · Automatically stored information about the Team Concert server you are using. Collaborator automatically captures and stores this data when you are creating a review from Team Concert. You can see it in the Client Configuration Mapping section in Collaborator's Version Control setting page (see the image below). Collaborator uses this information later for proper functioning of integration functions. Let's call this configuration a server Team Concert configuration as it contains server properties: © 2003-2015 SmartBear Software 496 497 Version Control Integration Suppose, that in Collaborator you change a review that came from Team Concert. To send information about the changes to Team Concert, Collaborator will use the client configuration. However, it needs to know to what Team Concert instance the client configuration corresponds (because in general, you can have several Team Concert servers and can use different configuration properties for them). By mapping configurations of the client and server types, you can set this correspondence. You need to map configurations only once, there is no need to do this every time you create a review. Requirements To map client and server Team Concert configurations, you need to have at least one review that came from Team Concert (that is, that was created through the Collaborator plugin for Team Concert). Else, the list of server configurations in the Client Configuration Mapping section will be empty. Mapping Steps 1. Log in to Collaborator as administrator. 2. Go to Admin > Version Control settings. © 2003-2015 SmartBear Software Configuring Servers and Plug-Ins 3. Select your Rational Team Concert configuration for editing. 4. Look at the list of server configurations and specify Java-style regular expressions in the Team Repository Pattern, Component Pattern and Component UUID Pattern edit boxes. Note: if you use only one Team Concert project, specify .* in all the edit box (like on the image below). 5. Click Save. The Matches column will indicate if a server configuration matches the specified regular expressions: Server Configuration Parameters Par am ete r Description Te am rep osi tor y The URL of your Team Concert repository. © 2003-2015 SmartBear Software 498 499 Version Control Integration Par am ete r Description Co mp on ent an d Co mp on ent UU ID Parameters of your Team Concert project. To view them: · In Eclipse, in Project Explorer, right-click the project and select Properties from the context menu. · In the subsequent Properties dialog, select Jazz Source Control from the tree on the left. Find the parameter values on the right: © 2003-2015 SmartBear Software Configuring Servers and Plug-Ins Other Configuration Actions In addition to configuring the Collaborator server, you also need to install and configure special plug-ins for Rational Team Concert. For complete information on this, see topics of the Configuring Servers and Plug-Ins 482 section. 6.6.4 Troubleshooting This topic lists typical issues for the Collaborator integration with Team Concert and possible solutions for them. O General Notes O Issues 500 500 Synchronizing the Review Participants List 500 Automatic Review Creation and File Uploading Manual Review Creation 501 502 O Getting Client and Server Logs 502 General Notes In order for Collaborator and Rational Team Concert to integrate successfully, you need to configure the Rational Team Concert and Collaborator servers, as well as install and configure special plugins. If some feature is not working, then most likely some setting is invalid. Check the settings according to the information in the Configuring Servers and Plug-Ins 482 section. Issues Synchronizing the Review Participants List For reviews that were created automatically, Collaborator synchronizes the work item's Approvals and the review's Participants lists (see How Integration Features Work 481 ). If the synchronization does not work, check the following: · Look at the review phase. Collaborator does not synchronizes the lists if the review is in the Planning phase. © 2003-2015 SmartBear Software 500 501 Version Control Integration · The review must be created automatically. Synchronization does not work for the reviews that were created with the "Add to Review" command. · Check if the user has the same names in Collaborator and Team Concert. Users with different names are not synchronized. · Make sure the Add reviewers and Remove reviewers settings of the Collaborator server are enabled. See Configuring 483 Collaborator Server 483 . · Check the connection between Collaborator and Team Concert. To do this, log in to Collaborator as administrator, go to Admin > Version Control, find your Rational Team Concert configuration there and click Test Connection. · Check the user's roles in Collaborator and Team Concert. In Collaborator, the user should have a role that allows the user to finish reviews. By default, this is the Reviewer role, Observers are ignored. In Team Concert's, the user be added to the Approvals list as a Reviewer. Approvers are ignored. · Check the Client Configuration Mapping settings of Collaborator and make sure the configuration matches the desired Team Concert server. See Mapping Configurations 496 . Automatic Review Creation and File Uploading If Collaborator does not create reviews automatically when a work item's state changes, or if the files failed to upload to the review, check the following: · Check the user names in Collaborator and Team Concert. They should be the same. Otherwise, errors will occur. · Check if the Collaborator plugin for the Rational Team Concert server is installed and enabled. To do this, request the Provision Status page from the Team Concert server (https://< your-team-concert-server:port>/ccm/admin?internal=true#com.ibm.team. repository.admin.provisionStatus) and search for smartbear on it. The page should say the Collaborator is installed and enabled. For information on installing and configuring the plugin, see Installing Collaborator Plug-In for Team Concert 486 and Configuring Collaborator Plug-in for Team Concert 489 . · Get the ccm.log file from the Team Concert server (see below). If the log says that follow-up actions of Collaborator cannot be found, set up and configure these actions. See Setting and Configuring Follow-Up Actions 491 . · If Collaborator does not create reviews, or creates them for unexpected item states, check the follow-up actions' settings. · Check the work item categories in Team Concert. For example, if you are trying to create a review for work item that belongs to a team area, make sure this item does not use the project configuration. © 2003-2015 SmartBear Software Troubleshooting · Get the log file from the Team Concert Client (see below). If the log reports about issues with class versions, make sure you installed the appropriate version of Collaborator's Eclipse plugin. If you use Rational Team Concert 3, you need to use the plugin from previous version of Collaborator. See a note in Installing Collaborator Plug-In for Rational Team Concert 486 . Manual Review Creation If you experience issues when creating reviews manually from the Team Concert client in Eclipse IDE, then most likely there are issues with the Collaborator's Eclipse plugin: · Check the installation folder of your Team Concert client. If it is installed in the <Program Files> folder, this may cause problems for Eclipse. In this case, we recommend that your user account has administrator privileges and that you run the Client as administrator. · Get the log file from the Team Concert Client (see below). If the log reports about issues with class versions, make sure you installed the appropriate version of Collaborator's Eclipse plugin. If you use Rational Team Concert 3, you need to use the plugin from previous version of Collaborator. See a note in Installing Collaborator Plug-In for Rational Team Concert 486 . Getting Client and Server Logs When some functionality does not work, you need to examine the Team Concert logs to understand what went wrong. To get the log of an Eclipse-based Team Concert client: · In the Team Concert client, select Help > About Rational Team Concert from the main menu. · In the subsequent About dialog box, click Installation Details. · In the subsequent dialog, switch to the Configuration tab and click View Error Log there. To get the server log of Team Concert: · On the server computer, go to the <Jazz Team Server>/server/logs folder. · View the ccm.log file. If the Team Concert server is installed on WebSphere, the log file will be in the logs directory of the Application server where Team Concert is installed. © 2003-2015 SmartBear Software 502 503 6.7 Version Control Integration Mercurial Integration This section describes Collaborator integration with Mercurial: GUI Client 504 The GUI Client can upload arbitrary Mercurial diffs. The GUI Client can also upload local changes to files that are managed by Mercurial. Command-Line Client 507 The Command-Line Client can upload arbitrary Mercurial diffs and uncommitted changes to files that are managed by Mercurial. Supported Versions Our integration uses your own installed Mercurial command line client executable to generate differences for review. We require hg v1.0 or later, as we use the -U flag to provide full context lines of differences so that the uploaded versions can contain the full file content of the previous and current file versions. The TortoiseHg client is not supported. Because we use client applications already present on your computer, we support all protocols, authentications, proxies, and other client configuration options you are currently using. © 2003-2015 SmartBear Software GUI Client 6.7.1 GUI Client Mercurial-specific Options The SCM Configuration dialog 334 has one Mercurial-specific option. The full path to the Mercurial command line executable on your local file system should be specified if it is not already on your system path. Configure client to work with Mercurial Uploading files to a Review Selecting a Mercurial SCM Configuration in the GUI Client main screen buttons to appear. © 2003-2015 SmartBear Software 332 causes Add to Review 504 505 Version Control Integration Uploading Mercurial files to a review Add Changes The Add Changes... button will be disabled if you have not specified a working copy in the Local Path field of the SCM Configuration dialog 334 . Selecting Add Changes... allows you to upload your local modifications. These are the modifications that would be committed if you typed 'hg commit' from a command line. © 2003-2015 SmartBear Software GUI Client Add Changes Add Mercurial Diffs Press the Add Mercurial Diffs... button to upload arbitrary Mercurial diffs to the Collaborator Server for review. Note that if you did not specify a Local Source Code Location in the SCM Configuration dialog 334 , then you will need to provide absolute paths in your diff options. © 2003-2015 SmartBear Software 506 507 Version Control Integration Upload arbitrary Mercurial diffs 6.7.2 Command-Line Client Commands recommended for Mercurial ccollab addchanges 507 - Attaches locally-modified files to a review ccollab addhgdiffs 509 - Uploads diffs generated by hg diff command Configuration No extra configuration is required to use Mercurial with the Command-Line Client 6.7.2.1 addchanges (for Mercurial) Description The ccollab addchanges command uploads locally modified files controlled by Mercurial to a review on the Collaborator server. © 2003-2015 SmartBear Software Command-Line Client Command Line Syntax: ccollab [global-options] addchanges [--upload-comment <value>] <review> <file-spec> [<file-spec> ...] Command Options Option Required? Description global-options No A number of global or SCM-specific global options. See Command-line Global Options Reference 350 . --upload-comment <value> No A comment to be used for the uploaded files. Default is Local changes. <review> Yes Identifier of the desired review (an integer number), or a new, ask, or last string. <file-spec> [<file-spec> ...] Yes Files to be added and/or folders to scan for modified files. Separate multiple file and folder names with spaces. If a file or folder name contains spaces, enclose this name is quotes. ccollab scans folders recursively. The resulting list includes the name of modified files. "Modifications" include include edits, additions, deletions, branches, integrations, moves, copies, and so on. After the scan is complete, a file list is presented in a graphical editor so you can review the files to be uploaded and make correct the list, if needed. Examples: To create a new review and add all changes in the current directory and below, plus the file foo. txt, you would use: ccollab addchanges new . foo.txt To upload modified files from the current working directory and all subdirectories to review 123: © 2003-2015 SmartBear Software 508 509 Version Control Integration ccollab addchanges 123 . To upload file foo.txt and modified files from c:\dev\project into a brand new review: ccollab addchanges new foo.txt c:\dev\project 6.7.2.2 addhgdiffs Description The ccollab addhgdiffs command uploads differences between arbitrary versions of files in Mercurial. The differences are generated using the native 'hg diff' command of Mercurial. Command Line Syntax: ccollab [global-options] addhgdiffs [--upload-comment <value>] <review> [<user-diff-arg> [<user-diff-arg> ...]] Command Options Option Required? Description --upload-comment <value> No Comment used to upload files (defaults to command-line arguments) <review> Yes Must be either an integer review-id, 'new', 'ask', or 'last' <user-diff-arg> [<user-diffarg> ...] No Command-line arguments to pass directly to the diff command Remarks: Do not use diff arguments that affect the diff output such as '-U unified'. The Collaborator command-line client will automatically select an output format that ensures you will get all the data you need on the server. Examples: To upload all changes between revisions 4 and 8: ccollab addhgdiffs new -r 4 -r 8 To upload all changes in your local working directory: © 2003-2015 SmartBear Software Command-Line Client ccollab addhgdiffs new . 6.8 Microsoft Team Foundation Server Integration This section describes Collaborator integration with Team Foundation Server. GUI Client 511 The GUI Client can upload local changes to files 512 in a Team Foundation Server Workspace. The GUI Client can also upload the files in a Shelveset 513 or Changeset 514 . Command-Line Client 514 The Command-Line Client can upload local changes to files 515 controlled by Team Foundation Server before they are checked in. The Command-Line Client can also upload the files in a Shelveset 517 or Changeset 517 . Supported Versions Team Foundation Server versions 2005 through 2015 are supported by the Command-Line Client 514 and the GUI Client 511 . Our client integrations use the installed TF command line client executable (tf.exe) to communicate with Team Foundation Server. Because we use client applications already present on your computer, we support all protocols, authentications, proxies, and other client configuration options you are currently using. The Team Foundation Server integration will not work with non-English installations of Visual Studio .NET. Regional settings for other locales are supported, but installing a non-English Visual Studio prevents correct parsing of the TF command line output. When using Team Explorer Everywhere clients our client will need access to the server for changelist information without being prompted for a password. To do this you will need to save your login information to your credentials cache using the TF_AUTO_SAVE_CREDENTIALS environment variable, which is documented here. Once you have set this you will need to use a mutating command (such as checkout, checkin, and so on) and enter your credentials one more time for it to stick. © 2003-2015 SmartBear Software 510 511 6.8.1 Version Control Integration GUI Client Team Foundation specific Options The SCM Configuration dialog 334 has several Team Foundation specific options. Team Foundation SCM Configuration In most cases it is enough to specify the path to Team Foundation Workspace on your computer to the "Local Source Code Location" option and the path to Team Foundation command-line client to "TF Executable" option. If you have no Team Foundation Workspace on your computer, you can still review Team Foundation Shelvesets or Changesets. In this case you will need to specify the following options: Collection Name - The name of Team Foundation Project Collection to work with. (for TFS clients 2010 and later) © 2003-2015 SmartBear Software GUI Client Server Name - The name of Team Foundation server to work with. (for TFS clients 2005 and 2008) Alternate user - The name of Team Foundation alternate user name (atypical). Alternate User Password - The password of the alternate user. Uploading files to a Review Selecting an Team Foundation SCM Configuration in the GUI Client main screen 332 causes three Add to Review buttons to appear. The Add Changes... 512 button uploads modified files in a Workspace. The Add Shelvesets... 513 button uploads the files in Shelvesets. The Add Changesets... 514 button uploads the files in committed Team Foundation Changesets. Uploading Team Foundation files to a Review Add Changes Press the Add Changes... button to upload modified files in a Workspace to the Collaborator Server for review. © 2003-2015 SmartBear Software 512 513 Version Control Integration Add Changes Add Shelvesets Press the Add Shelvesets... button to upload the files in a Shelveset to the Collaborator Server for review. See the Add Changesets... button if you want to add a Shelveset to the review that's not in your list of shelvesets. Add Shelvesets © 2003-2015 SmartBear Software GUI Client Add Changesets Press the Add Changesets... button to upload the files in a Team Foundation Changeset to the Collaborator Server for review. You can also add a named Shelveset to the review in this dialog by entering a shelveset name instead of a changeset number. Add Changesets 6.8.2 Command-Line Client Commands recommended for Team Foundation Server ccollab addchanges 515 - Attaches locally-modified files to a review ccollab addchangelist ccollab commit 518 517 - Attaches an atomic changelist to a review - Commit changes in the review The addchanges 515 command will upload local changes to files controlled by Team Foundation before they are checked in. The addchangelist 517 command will upload a the files in a Shelveset or Changeset. Configuration In most cases, the Command-Line Client can automatically detect your Team Foundation configuration. Try testing your configuration 342 to verify the configuration is detected correctly. © 2003-2015 SmartBear Software 514 515 Version Control Integration If the Command-Line Client is unable to detect your Team Foundation configuration or you want to override the detected settings, you can manually specify Team Foundation settings using global options 350 . To manually configure the Command-Line Client to use Team Foundation, execute the following command: ccollab set scm 351 tfs Team Foundation Server-specific Options 6.8.2.1 Option Description --tfs-exe <value> The path to Team Foundation "tf" command-line client. --tfs-collection <value> The name of Team Foundation Project Collection to work with. (Only for TFS clients 2010 and later.) --tfs-server <value> The name of Team Foundation server to work with. (Only for TFS clients 2005 and 2008.) --tfs-user <value> The name of Team Foundation alternate user name (atypical). --tfs-passwd <value> The password of the alternate user. addchanges (for Team Foundation Server) Description The ccollab addchanges command uploads locally modified files controlled by Team Foundation Server to a review on the Collaborator server. Command Line Syntax: ccollab [global-options] addchanges [--upload-comment <value>] <review> <file-spec> [<file-spec> ...] © 2003-2015 SmartBear Software Command-Line Client Command Options Option Required? Description global-options No A number of global or SCM-specific global options. See Command-line Global Options Reference 350 . --upload-comment <value> No A comment to be used for the uploaded files. Default is Local changes. <review> Yes Identifier of the desired review (an integer number), or a new, ask, or last string. <file-spec> [<file-spec> ...] Yes Files to be added and/or folders to scan for modified files. Separate multiple file and folder names with spaces. If a file or folder name contains spaces, enclose this name is quotes. ccollab scans folders recursively. The resulting list includes the name of modified files. "Modifications" include include edits, additions, deletions, branches, integrations, moves, copies, and so on. After the scan is complete, a file list is presented in a graphical editor so you can review the files to be uploaded and make correct the list, if needed. Examples: To create a new review and add all changes in the current directory and below, plus the file foo. txt, you would use: ccollab addchanges new . foo.txt To upload modified files from the current working directory and all subdirectories to review 123: ccollab addchanges 123 . To upload file foo.txt and modified files from c:\dev\project into a brand new review: ccollab addchanges new foo.txt c:\dev\project © 2003-2015 SmartBear Software 516 517 6.8.2.2 Version Control Integration addchangelist (for Team Foundation Server) Description The ccollab addchangelist command attaches all files from Team Foundation Server shelvesets or changesets to a review on the Collaborator server. Command Line Syntax: ccollab [global-options] addchangelist <review> <changelist> [<changelist> ...] Command Options Option Required? Description [global-options] No A number of global or AccuRev-specific global options. See Command-line Global Options Reference 350 . <review> Yes Identifier of the desired review (an integer number), or a new, ask, or last string. <changelist> [<changelist> ... ] Yes Identifier(s) of the desired changeset(s) or shelveset(s) in your source control. The first argument is the review specifier, subsequent arguments are the IDs of the Shelvesets or Changesets to upload. Note that the changesets are searched first - if a changeset is found, it will be added to the review. To avoid any naming conflicts, always use at least one non-numeric character in your shelveset names. Examples: To upload Shelvesets MyShelveset and todays_work to a new review: ccollab addchangelist new MyShelveset todays_work To upload Changesets C3 and C12654 to review 111: ccollab addchangelist 111 3 12654 © 2003-2015 SmartBear Software Command-Line Client 6.8.2.3 commit (for Team Foundation Server) Description The ccollab commit command submits the changes from a pre-commit review to source control. Be sure to include a relevant comment. Command Line Syntax: ccollab [global-options] commit [--comment <value>] [--dismiss-only] [--force] <review> Command Options Option Required? Description --comment <value> No Comment for reviewed changes --dismiss-only No Just dismiss the Action Item --force No Ignore potential problems <review> Yes Must be either an integer review-id, 'ask', or 'last' Example: ccollab commit 25 --comment "my code" --force 6.9 PTC Integrity Integration Both GUI and command-line clients of Collaborator integrate with PTC Integrity: · GUI Client 519 The GUI Client can find and upload changes by pending or committed PTC Change Packages, by specific file version number, or by modified working files in local sandboxes. · Command-Line Client 524 The Command-Line Client can find and upload changes by pending or committed PTC Change Packages, or by modified working files in local sandboxes. © 2003-2015 SmartBear Software 518 519 Version Control Integration Supported PTC Integrity Versions Collaborator uses Java client API that communicates with the PTC client (PTC Source) installed on your system. Collaborator supports the client versions starting from MKS Source 2007 and later (MKS Source and MKS Integrity are former names of PTC Source and PTC Integrity). MKS 2006 clients with the latest fix packs are also supported. Since Collaborator works with a client applications that is installed on your computer, it supports all the protocols, authentication types, proxies, and other configuration options that you are using. Windows Installation On Windows operating systems, Collaborator's integration modules require 32-bit Java Runtime Environment. 64-bit JRE is not supported at the moment. Linux Installation To integrate with PTC Source on Linux, Collaborator's Java client API requires the following environment variables to be set: export PATH=[integrity-client-install-dir]/bin:$PATH export LD_LIBRARY_PATH=[integrity-client-install-dir]/lib/ linux:$LD_LIBRARY_PATH 6.9.1 GUI Client Setting PTC Integration Options In order for Collaborator to be able to work with PTC Integrity, you need to specify connection settings in Collaborator's GUI Client. To do this: 1. Launch the GUI Client. 2. Click Add on the main screen. The Add SCM Configuration 334 dialog will appear: © 2003-2015 SmartBear Software GUI Client PTC Source Control Settings 3. In the dialog: · Select MKS Source in the SCM drop-down list. · Specify the desired PTC Integrity server (host), port, user name and password. We would like to remind that there is no need to specify some or all of these settings, if your PTC Integrity client automatically connects to the PTC Integrity server using default local settings. After you close the dialog, your PTC Integrity configuration will be added to the SCM Configurations list on the main window of the GUI Client. Adding Files to Review To add files to a review: © 2003-2015 SmartBear Software 520 521 Version Control Integration 1. In the SCM Configurations list on the GUI Client's main screen, select your PTC Integrity configuration. This will enable several "Add" buttons below the list. 2. Click these buttons to append files to a review on the Collaborator server. © 2003-2015 SmartBear Software GUI Client What Buttons Do · Add Changes - Appends modified files from local PTC sandboxes. After you click the button, you can choose the files to be added: © 2003-2015 SmartBear Software 522 523 Version Control Integration · Add Pending Change Packages - Append all the files from a pending change package. Click the button and select the change package you need: · Add Change Packages - Appends files from a committed change package to a review. Click the button and select the desired change package: Note on Adding Change Packages Adding a pending or committed change package to a review generates file differences based on Multiple Version Changelists 674 . © 2003-2015 SmartBear Software Command-Line Client 6.9.2 Command-Line Client To work with PTC source clients, you can use the following Collaborator's: · ccollab addchanges · ccollab addchangelist · ccollab addversions Configuration In most cases, the Command-Line Client can automatically detect your PTC configuration and connection settings. Try testing your configuration 342 to check whether the settings are detected correctly. If the Command-Line Client is unable to detect your PTC configuration, or if you want to override the detected settings, you can manually specify PTC settings using global PTC settings 350 . To manually configure the Command-Line Client to use PTC, run the following command-line: ccollab set scm 351 mks Global PTC-Specific Command-Line Options Option Description --mks-host <value> PTC Integrity server name. --mks-port <value> PTC Integrity server port. --mks-user <value> PTC Integrity user name. --mks-passwd <value> PTC Integrity user password. --mks-expandkeywords Specifies whether to expand keywords in source files. The arguments use the --mks prefix as MKS Integrity is a former name of PTC Integrity. © 2003-2015 SmartBear Software 524 525 6.9.2.1 Version Control Integration addchanges (PTC Integrity Integration) Description The ccollab addchanges command appends files that are controlled by PTC Integrity client (PTC Source) and that are located on your computer to a review on the Collaborator server. Command Line Syntax: ccollab [global-options] addchanges [--upload-comment <value>] <review> <file-spec> [<file-spec> ...] © 2003-2015 SmartBear Software Command-Line Client Command Options Option Required? Description global-options No A number of global or PTC-specific global options. See Command-line Global Options Reference 350 . --upload-comment <value> No A comment to be used for the uploaded files. Default is Local changes. <review> Yes Identifier of the desired review (an integer number), or a new, ask, or last string. <file-spec> [<filespec> ...] Yes Files to be added and/or folders to scan for modified files. Separate multiple file and folder names with spaces. If a file or folder name contains spaces, enclose this name is quotes. ccollab scans folders recursively. The resulting list includes the name of modified files. "Modifications" include include edits, additions, deletions, branches, integrations, moves, copies, and so on. After the scan is complete, a file list is presented in a graphical editor so you can review the files to be uploaded and make correct the list, if needed. Examples: The following command line creates a new review and add all changes in the current folder and its subfolders, plus the foo.txt file, to the new review: ccollab addchanges new . foo.txt The following command line uploads modified files from the current working folder and its subfolders to review with the identifier 157: ccollab addchanges 157 . The following command uploads the foo.txt file and modified files from the c:\dev\project folder to the review, to which you uploaded files last time: ccollab addchanges last foo.txt c:\dev\project © 2003-2015 SmartBear Software 526 527 6.9.2.2 Version Control Integration addchangelist (PTC Integrity Integrtion) Description The ccollab addchangelist command attaches all files from a change package controlled by PTC Integrity client (PTC Source) to a review on the Collaborator server. Command Line Syntax: ccollab [global-options] addchangelist <review> <changelist> [<changelist> ...] Command Options Option Required? Description [global-options] No A number of global or PTC-specific global options. See Command-line Global Options Reference 350 . <review> Yes Identifier of the desired review (an integer number), or a new, ask, or last string. <changelist> [<changelist> ... ] Yes Identifier(s) of the desired changeset(s) in your source control. Examples: The following command uploads the change packages 1:2 and 3:2 to a new review: ccollab addchangelist new 1:2 3:2 The following command adds the change packages 1:1 and 3:1 to the review with the identifier 182: ccollab addchangelist 182 1:1 3:1 6.9.2.3 addversions (PTC Integrity Integration) Description The ccollab addversions command appends the specified versions (revisions) of a file controlled by the PTC Integrity client (PTC Source) on your computer to a review. © 2003-2015 SmartBear Software Command-Line Client Command Line Syntax: ccollab [global-options] addversions [--upload-comment <value>] [-version-spec <value> [<value> ...]] <review> [<file-path>] [<version>] [<predecessor-version>] Command Options Option Required? Description [global-options] No A number of global or PTC-specific global options. See Command-line Global Options Reference 350 . --upload-comment <value> No A comment to be used for the uploaded files. Default is Local changes. --version-spec <value> [<value> ...] No The version to be added to a review. A version-spec value consist of three components: path version [previous-version], where path is the file name or server path of the file, version is the file version to be reviewed, and previous-version is an optional version, against which version should be compared. If any of these arguments contains spaces, enclose it in quotes. Typically a version-spec is not used in the command line. We recommend specifying the file and version using the <file-path>, <version> and the <predecessor-version> arguments (see below). <review> Yes Identifier of the desired review (an integer number), or a new, ask, or last string. <file-path> No The name and path of the file, whose versions are to be added to the review. © 2003-2015 SmartBear Software 528 529 Version Control Integration Option Required? Description Important: If you use this option, you should also specify <version> (see below). <version> No Required, if <file-path> is specified. The version (revision) of the file to be added to the review. You can specify the keyword local to tell the command to use the local version of the file. <predecessorversion> No Preceding file version to be added to the review. If you skip this argument, Collaborator will attempt to determine the preceding version based on the information from the PTC Integrity source control. Examples: The following command line adds versions (revisions) 1.95 and 1.88 of the hello.c file to the review 861: ccollab addversions 861 hello.c 1.95 1.88 The following command adds these revisions to a new review: ccollab addversions new hello.c 1.95 1.88 Remarks · If you skip the predecessor version, Collaborator will generate diffs using the predecessor version reported by your source control system. · By default, the command lets you add versions of one file only. To add versions of multiple files, create a text file and specify this file in the command line as the standard input stream (stdin): ccollab addversions last < versionlist.txt Each line in the file must consist of the following components: path version [predecessor-version ]. For information on them, see description of the version-spec arguments. · If you skip the file name and versions in the command line, the command will expect to read them from the standard input stream (stdin). Below are some examples for reading versions from the standard input: ccollab addversions 86753 © 2003-2015 SmartBear Software Command-Line Client ccollab addversions last < versionlist.txt cat versionlist.txt | ccollab addversions new · When specifying the version in the command line or in an input file, you can use the keyword local to denote the version corresponding to the local version of the file. The local keyword can only be used for the first version argument, not for the predecessor version. 6.10 Perforce Integration This section describes Collaborator integration with Perforce: Perforce Server Integration 532 The Collaborator server can pull submitted changelists directly from your Perforce server for review, without users needing to install any client programs. It can also enforce file content access permissions 533 (protections) configured in Perforce. GUI Client 534 The GUI Client can upload Changelists into Collaborator. You can upload Pending 536 or Submitted 537 Changelists, but you cannot upload the Default Changelist. The GUI Client can also upload arbitrary Perforce diffs 537 , files in a Branch 538 , or the difference between two Labels 539 or dates 540 . Command-Line Client 541 The Command-Line Client can upload Changelists into Command-Line Client. You can upload Changelists Pending or Submitted Changelists, but you cannot upload the Default Changelist. The Command-Line Client can also upload arbitrary Perforce diffs. Eclipse Plug-in The Eclipse Plug-in 359 can upload 376 Perforce changelists. Just right-click on any changelist entry in Eclipse, either before or after it is submitted. P4V and P4Win Collaborator comes with plug-ins to P4V and P4Win 550 that let you right-click on any changelist (pending or submitted) and add to a new or existing review. © 2003-2015 SmartBear Software 530 531 Version Control Integration Perforce Server Triggers Perforce server-side triggers can ensure code is reviewed 552 . There is also a trigger to automatically update a changelist 552 with information about the review of that changelist. Perforce Changelist Renumbering Perforce nearly always renumbers changelists upon submission, but when you are doing precommit reviews Collaborator always has the pre-submit number. We have included a script you can customize that will ask Perforce what a changelist's number was before it was submitted, and update changelists in Collaborator to have the new number. This requires a Collaborator client and server 5.0.5005 or better, and a Perforce client and server 2007.3 or later. This script is intended to be run periodically via cron or a similar task scheduler. Perforce Changelist Renumbering Script Supported Versions Our integration uses your own Perforce command-line client (p4) to communicate with the server. We support all client and server versions later than 2002.1. Our Eclipse Plug-in supports Perforce's eclipse plugin version 2009.2.234487 or later. Because we use client applications already present on your computer, we support all protocols, authentications, proxies, and other client configuration options you are currently using. This includes configuration from environment variables, $P4CONFIG files, p4 set registry values, and so forth. Support for Branch / Integrate Collaborator fully supports Perforce's file branching and integration semantics. If files in a changelist are marked for branching, they are not considered "changed". The file content itself is not changed; only the file paths are being changed. If files in a changelist are being integrated, this works just like a regular change. Many customers choose to review integrations especially carefully since the changes might interact in unexpected ways. Support for Copy / Move Collaborator fully supports Perforce's file copy/move semantics. Thus, if a file is copied or moved rather than added from scratch, it will show up that way in the various user interfaces. Support for Directory-level New/Delete/Copy/Move Collaborator partially supports Perforce's concept of directories (not just files) being altered. © 2003-2015 SmartBear Software 532 All files underneath the directories in question will be scanned, uploaded and represented properly in the GUI. The directories themselves will not be shown in any GUI. Support for Shelvesets Collaborator supports adding Perforce Shelvesets to reviews. 6.10.1 Perforce Server Integration The Collaborator server can be configured to communicate directly with your Perforce server. This allows users to review submitted changelists completely from the browser, without having to install any client programs. To enable this feature, first install and configure a Perforce client on the Collaborator server and then create an entry for your Perforce server in the Version Control 181 tab of the administration interface. Version control server entries are also created automatically if one of the client programs uploads files from a server that does not match any of the currently configured servers. Title The title is displayed to users, so it should be something that everyone will understand, even if they are going through proxies, VPNs, or other such things. When a version control server entry is created automatically, this is filled in with the server address (p4port) of the server. Attach changelists from browser If enabled, this feature lets users select submitted changelists to review directly from the web browser, without having to install any client programs. © 2003-2015 SmartBear Software 533 Version Control Integration P4 Executable Full path to the P4 executable P4PORT Address to use to connect to the server. When a version control server entry is created automatically, this is filled in with the server address obtained from the client. P4USER Perforce user name P4PASSWD Perforce password or ticket P4CHARSET Perforce character set used for translation of Unicode files Perforce Protections The Collaborator server can be configured to check Perforce protections with the Perforce server whenever a user tries to access a file. When enabled, Collaborator will check access permission with your Perforce server whenever a user tries to access the content of a file managed by this server. Note that this assumes that the user's Perforce username is the same as their Collaborator login. To check Perforce protections the configured P4USER 533 must have Perforce "super" permission. If you do not want to provide an account with that level of permission, you can instead configure a script for Collaborator to run instead of calling 'p4 -s protects' directly. The script will be passed arguments "-p <p4port> -u <user> -h <host> <depotPath>". For example, this script could be implemented as a Windows batch file: @p4 -u admin -s -p %2 protects -u %4 -h %6 %7 © 2003-2015 SmartBear Software Perforce Server Integration The script must produce exactly the same stdin, stdout, and process error code as if Collaborator ran "p4 -s protects" directly. Also make sure the script runs as fast as possible, because it will be invoked every time any user tries to view the contents a file from this server. Client Configuration Mapping You can supply Java-style regular expressions to map changelists uploaded from our client tools to this Perforce server. It is important to set up these regular expressions so that files uploaded by the various Collaborator client tools are correctly associated with this server-side Perforce configuration. P4PORT Pattern Match on the client's configured P4PORT. Using the Server Address Pattern 534 is better, but clients before 5.0.5009 did not upload "Server Address", so you can configure this as a fallback. Server Address Pattern Match on the "Server Address" returned from running "p4 -p <p4port> info" on the client. This is generally more reliable than matching on the P4PORT, and works through Perforce proxy servers and other complications. When a version control server entry is created automatically, this is filled in with the server address obtained from the client. 6.10.2 GUI Client Perforce-specific Options The SCM Configuration dialog 334 has several Perforce-specific options. These can be set as necessary to override Perforce options derived from the environment. © 2003-2015 SmartBear Software 534 535 Version Control Integration Perforce SCM Configuration © 2003-2015 SmartBear Software GUI Client Uploading files to a Review Selecting a Perforce SCM Configuration in the GUI Client main screen 332 causes several Add to Review buttons to appear. The Add Pending Changelists... 536 button uploads numbered, pending changelists. The Add Submitted Changelists... 537 button uploads submitted changelists. The Add Perforce Diffs... 537 button uploads arbitrary diffs, compares files in a Branch 538 , or compares the difference between two Labels 539 or dates 540 . Uploading Perforce files to a Review Add Perforce Pending Changelists Press the Add Perforce Pending Changelists... button to upload the files in a Perforce pending changelist to the Collaborator Server for review. You cannot upload the default changelist. Add Perforce Pending Changelists © 2003-2015 SmartBear Software 536 537 Version Control Integration Add Perforce Submitted Changelists Press the Add Perforce Submitted Changelists... button to upload the files in a Perforce submitted changelist to the Collaborator Server for review. Add Perforce Submitted Changelists Add Perforce Diffs Press the Add Perforce Diffs... button to upload arbitrary Perforce diffs to the Collaborator Server for review. © 2003-2015 SmartBear Software GUI Client Add Perforce Diffs You can enter arbitrary Perforce diff options, compare files in a Branch difference between two Labels 539 or dates 540 . 538 , or compare the 6.10.2.1 Comparing files in a Branch Press the Add Perforce Diffs... upload the files in a Branch. © 2003-2015 SmartBear Software 537 button on the main screen 332 and then select the Branch tab to 538 539 Version Control Integration Upload the files in a Branch 6.10.2.2 Comparing two Labels Press the Add Perforce Diffs... 537 button on the main screen upload the difference between two Labels. 332 and then select the Labels tab to © 2003-2015 SmartBear Software GUI Client Upload the difference between two Labels 6.10.2.3 Comparing two dates Press the Add Perforce Diffs... 537 button on the main screen upload the difference between two dates. © 2003-2015 SmartBear Software 332 and then select the Dates tab to 540 541 Version Control Integration Upload the difference between two dates 6.10.3 Command-Line Client Commands recommended for Perforce ccollab addchangelist ccollab addp4diffs 544 ccollab addversions ccollab commit 548 ccollab addp4job 543 - Attaches an atomic changelist to a review - Uploads diffs generated from p4 diff2 command 545 - Attaches any 2 given versions to a review - Commit changes in the review 548 - Adds all numbered local changes that fix a job to the review ccollab admin syncusers 549 - Synchronizes the Perforce user list with the Collaborator server ccollab admin changelist update-id 549 - Updates the changelist ID so Collaborator reflects the renumbered Perforce changelist ID © 2003-2015 SmartBear Software Command-Line Client The addchangelist 543 command will upload Perforce changelists into Collaborator. You can upload changelists either before or after they are submitted, but you cannot upload the default changelist. Configuration In most cases, the Command-Line Client can automatically detect your Perforce configuration. Try testing your configuration 342 to verify the configuration is detected correctly. If the Command-Line Client is unable to detect your Perforce configuration or you want to override the detected settings, you can manually specify Perforce settings using global options . 354 To manually configure the Command-Line Client to use Perforce, execute the following command: ccollab set scm 351 perforce Perforce-specific Options Option Description --p4 <value> Full path to the P4 executable --p4port <value> How to connect to the Perforce server --p4user <value> Perforce user name --p4passwd <value> Perforce password or ticket --p4client <value> Mapping of Perforce server data to the local machine --p4-ignoreintegrationhistory <value> Ignore integration history when calculating predecessor --p4charset <value> Perforce character set used for translation of Unicode files --p4-requireempty-defaultchangelist If true, do not allow uploads if the default changelist contains files © 2003-2015 SmartBear Software 542 543 Version Control Integration Option Description --p4-specifycommand-charset <value> Should a character set be specified for communication with Perforce If your Perforce server requires ticket-based authentication (server security level 3) then the configured p4passwd will be used to automatically issue 'p4 login' and acquire a new ticket as necessary. If you want to ignore the integration history of files when determining the previous version of the file and look only at the path you should set p4-ignore-integration-history to yes like so: ccollab set p4-ignore-integration-history yes 6.10.3.1 addchangelist (for Perforce) Description The ccollab addchangelist command attaches all files from a pending or a submitted Perforce changelist to a review on the Collaborator server. Command Line Syntax: ccollab [global-options] addchangelist <review> <changelist> [<changelist> ...] Command Options Option Required? Description [global-options] No A number of global or Perforce-specific global options. See Command-line Global Options Reference 350 . <review> Yes Identifier of the desired review (an integer number), or a new, ask, or last string. <changelist> [<changelist> ... ] Yes Identifier(s) of the desired changeset(s) in your source control. © 2003-2015 SmartBear Software Command-Line Client The first argument is the review specifier, subsequent arguments are the IDs of the Pending Changelists or Submitted Changelists to upload. You cannot specify the default changelist. Examples: To upload Pending Changelists @4321 and @7568 to a new review: ccollab addchangelist new 4321 7568 To upload Submitted Changelists @5432 and @12654 to review 111: ccollab addchangelist 111 5432 12654 6.10.3.2 addp4diffs Description The ccollab addp4diffs command uploads differences between arbitrary versions of files in Perforce. The differences are generated using the native 'p4 diff2' command of Perforce. Command Line Syntax: ccollab [global-options] addp4diffs [--upload-comment <value>] <review> [<p4-diff-arg> [<p4-diff-arg> ...]] © 2003-2015 SmartBear Software 544 545 Version Control Integration Command Options Option Required? Description --upload-comment <value> No Comment used to upload files (defaults to command-line arguments) <review> Yes Must be either an integer review-id, 'new', 'ask', or 'last' <p4-diff-arg> [<p4-diffarg> ...] No Options which should be passed to the p4 diff2 command Remarks: Do not use diff arguments that affect the diff output such as '-q', '-t', '-d<flag>', or 's<flag>'. The Collaborator command-line client will automatically select an output format that ensures you will get all the data you need on the server. Examples: ccollab addp4diffs 698 //depot/file1 //depot/file2 ccollab addp4diffs new //depot/...@1523 //depot/... ccollab addp4diffs 698 -b my-branch 6.10.3.3 addversions (for Perforce) Description The ccollab addversions command appends the specified versions (revisions) of a file controlled by Perforce on your computer to a review. Command Line Syntax: ccollab [global-options] addversions [--upload-comment <value>] [-version-spec <value> [<value> ...]] <review> [<file-path>] [<version>] [<predecessor-version>] © 2003-2015 SmartBear Software Command-Line Client Command Options Option Required? Description [global-options] No A number of global or Perforce-specific global options. See Command-line Global Options Reference 350 . --upload-comment <value> No A comment to be used for the uploaded files. Default is Local changes. --version-spec <value> [<value> ...] No The version to be added to a review. A version-spec value consist of three components: path version [previous-version], where path is the file name or server path of the file, version is the file version to be reviewed, and previous-version is an optional version, against which version should be compared. If any of these arguments contains spaces, enclose it in quotes. Typically a version-spec is not used in the command line. We recommend specifying the file and version using the <file-path>, <version> and the <predecessor-version> arguments (see below). <review> Yes Identifier of the desired review (an integer number), or a new, ask, or last string. <file-path> No The name and path of the file, whose versions are to be added to the review. Important: If you use this option, you should also specify <version> (see below). <version> No Required, if <file-path> is specified. The version (revision) of the file to be added to the review. You can specify the keyword local to tell the command to use the local version of the file. © 2003-2015 SmartBear Software 546 547 Version Control Integration Option Required? Description <predecessorversion> No Preceding file version to be added to the review. If you skip this argument, Collaborator will attempt to determine the preceding version based on the information from the source control. Examples: The following command line adds versions (revisions) 1.95 and 1.88 of the hello.c file to the review 861: ccollab addversions 861 hello.c 1.95 1.88 The following command adds these revisions to a new review: ccollab addversions new hello.c 1.95 1.88 Remarks · If you skip the predecessor version, Collaborator will generate diffs using the predecessor version reported by your source control system. · By default, the command lets you add versions of one file only. To add versions of multiple files, create a text file and specify this file in the command line as the standard input stream (stdin): ccollab addversions last < versionlist.txt Each line in the file must consist of the following components: path version [predecessor-version ]. For information on them, see description of the version-spec arguments. · If you skip the file name and versions in the command line, the command will expect to read them from the standard input stream (stdin). Below are some examples for reading versions from the standard input: ccollab addversions 86753 ccollab addversions last < versionlist.txt cat versionlist.txt | ccollab addversions new · When specifying the version in the command line or in an input file, you can use the keyword local to denote the version corresponding to the local version of the file. The local keyword can only be used for the first version argument, not for the predecessor version. © 2003-2015 SmartBear Software Command-Line Client 6.10.3.4 commit (for Perforce) Description The ccollab commit command submits the changes from a pre-commit review to source control. Be sure to include a relevant comment. Command Line Syntax: ccollab [global-options] commit [--comment <value>] [--dismiss-only] [--force] <review> Command Options Option Required? Description --comment <value> No Comment for reviewed changes --dismiss-only No Just dismiss the Action Item --force No Ignore potential problems <review> Yes Must be either an integer review-id, 'ask', or 'last' Example: ccollab commit 25 --comment "my code" --force 6.10.3.5 addp4job Description The ccollab commit command adds all numbered local changes that fix a job to the review. Command Line Syntax: ccollab [global-options] addp4job <review> <job-name> © 2003-2015 SmartBear Software 548 549 Version Control Integration Command Options Option Required? Description <review> Yes Must be either an integer review-id, 'new', 'ask', or 'last' <job-name> Yes Perforce changes that fix this job will be added to the review Example: ccollab addp4job new new_job 6.10.3.6 syncusers Description The ccollab admin syncusers command synchronizes the Perforce user list with the Collaborator server. All users from Perforce will be be mirrored into Collaborator. Command Line Syntax: ccollab [global-options] admin syncusers Remarks: · The algorithm is smart enough not to overwrite existing users, only adding new users, so this can be run periodically by a script to keep the lists in sync. · This is not necessary -- or desirable -- if you are using LDAP authentication. · You must be logged in as an administrator to execute this command. 6.10.3.7 update-id Description The ccollab admin changelist update-id command updates all references to the old changelist ID so Collaborator reflects the renumbered Perforce changelist ID. © 2003-2015 SmartBear Software Command-Line Client Command Line Syntax: ccollab [global-options] admin changelist update-id <old-id> <newid> Command Options Option Required? Description <old-id> Yes Old ID of Perforce changelist. <new-id> Yes New ID of Perforce changelist. Example: ccollab --scm p4 --p4port p4server:1666 admin changelist update-id 123 147 6.10.4 P4V / P4Win Integration The Collaborator client installer includes an integration point with P4V and P4Win. When you right-click on one or more Changelists in the GUI a new menu item appears at the bottom of the Tools menu allowing you to add those Changelists to a Review. Installation If you installed the client yourself and opted to "Configure Addons To Perforce Visual Tools 327 ", then you should not have to manually configure the Perforce visual tools integrations. However, if the Collaborator client was installed by an administrator on your computer, or the configuration failed at install time, you can manually configure them as follows: P4V Installation Go to the "Tools" menu in P4V and choose "Manage Custom Tools...". In the dialog box click "Import Tools...". In the ensuing open-file dialog, navigate to the Collaborator Client installation directory and select the P4V-Tools-Import.txt or P4V-Tools-Import.xml file. P4Win Installation Go to the "Tools" menu in P4Win and choose "Import..".. In the ensuing open-file dialog, navigate to the Collaborator Client installation directory and select the P4Win-Tools-Import.txt file. © 2003-2015 SmartBear Software 550 551 Version Control Integration There should now be a menu item under "Tools" with the text "SmartBear - Add to Review". It will be dimmed unless a Changelist is selected. Warning: The plug-ins will work only if the Perforce command-line tool (p4) is in your PATH environment variable. It is also available in the pop-up menu when you right-click a Changelist: Working with multiple Perforce workspaces and servers The P4V/P4Win plug-ins work perfectly and automatically with multiple Perforce servers and servers. All the Perforce connectivity parameters are taken from the UI, so whatever workspace, server, and authentication you are currently using when you right-click the item will be used automatically be the plug-in. None of this affects the behavior or configuration of the command-line client freely use the plug-ins without disturbing that configuration. 342 , so you can Troubleshooting If you are experiencing problems with the P4V/P4Win plug-ins, it will help SmartBear technical support if you send in a debugging log. To do this, edit the custom tool configuration (Tools > Manage Custom Tools > Edit), and add a --debug argument to the beginning of the arguments list. This will create a ccollab.log file in the "current working directory" which is either the Perforce install directory or the "Start in" directory specified in the Custom Tool configuration. © 2003-2015 SmartBear Software P4V / P4Win Integration Please contact our technical support 28 and send the log file along with a full description of what you were trying to do when the error occurred. 6.10.5 Perforce Server Triggers Topics of this section provide information on the Collaborator-specific triggers added to Perforce by Collaborator's Perforce Server Integration package. Triggers Follow the links below to learn more about a trigger: Trigger Description ensurereviewstarted Ensures that a review has been started (created in Collaborator) for the submitted changelist. 552 ensurereviewed Ensures that a review has been completed for the submitted changelist. 554 ensurecontentreviewed Ensures that a review has been completed for the submitted changelist, and that the changelist was not changed after the review was over (that is, that the file contents and the file list are the same). 556 updatechangelist Appends or updates review-specific information in a changelist's description. 558 Related Materials For general information on Perforce triggers, see Chapter 6 of the Perforce System Administrator's Guide. 6.10.5.1 ensure-review-started (for Perforce) Description Use the ensure-review-started trigger to ensure that a review for the specified changelist has been started. The trigger blocks the submit operation if there is no review for the changelist in Collaborator, and displays an error message telling that the changes need to be reviewed before submitting them to the Perforce repository. © 2003-2015 SmartBear Software 552 553 Version Control Integration For Perforce this trigger has "change-content" type and is invoked after the changelist creation and file transfer, but before file commit. Command Line Syntax: ccollab [global-options] admin trigger ensure-review-started [-ignore-integrate] [--review-id-regex <value>] <changelist-id> Command Options Option Required? Description <changelist-id> Yes The changelist identifier. --ignoreintegrate No If specified, Collaborator ignores the merge changes to the source control (that is, the trigger is not fired for these changes. See below). --review-id-regex <value> No A regular expression that identifies the review ID in the commit is comment. Installation To install the trigger, add a line like this to your Perforce Triggers list: ccollab content //depot/... "/usr/bin/ccollab --url <collabUrl> -user <collabUser> --password <collabPasswd> --scm perforce --p4port <p4port> --p4client %client% --p4user <p4user> --p4passwd <p4passwd> admin trigger ensure-review-started %changelist%" Some notes: · Specify your installation directory for ccollab and replace <values> with appropriate data. Also, type all parameters in a single line even though the text above occupies several lines. · The Perforce user that you specify must have at least read-only access to the repository. · On Unix systems, Perforce incorrectly recognizes arguments that include spaces. It ignores quotes and other standard ways of indicating that the data with spaces is actually one argument. The workaround is to use a separate bash script to call our trigger. © 2003-2015 SmartBear Software Perforce Server Triggers Remarks · The trigger ignores changelists that correspond to new branch creation. Creating a new branch does not involve changes in code, so it does not require a review. · Perforce treats branch merge changelists like ordinary changelists as they bring changes to source code and can introduce bugs. So, by default, the trigger handles this type of changes. However, since the merge changelists often include a large number of files and since you often need to merge several branches, this approach could require cumbersome reviews to be performed many times. To avoid possible issues, use the --ignore-integrate command-line option. If it is specified, the trigger will ignore changelists that include "merge" changes only. Make sure to review changes in one branch before merging them with other branches. · For information on Perforce triggers, see Chapter 6 of the Perforce System Administrator's Guide. 6.10.5.2 ensure-reviewed (for Perforce) Description Use the ensure-reviewed trigger to ensure that the review that was created for the specified changelist has been completed by the time you submit the changelist to the Perforce repository. If the review has not been completed, the trigger blocks the submit operation and displays an error message informing the user about the problem. For Perforce this trigger has "change-content" type and is invoked after the changelist creation and file transfer, but before file commit. Command Line Syntax: ccollab [global-options] admin trigger ensure-reviewed [--ignoreintegrate] [--review-id-regex <value>] <changelist-id> Command Options Option Required? Description <changelist-id> Yes The changelist identifier. © 2003-2015 SmartBear Software 554 555 Version Control Integration Option Required? Description --ignoreintegrate No If specified, Collaborator ignores the merge changes to the source control (that is, the trigger is not fired for these changes. See below). --review-id-regex <value> No A regular expression that identifies the review ID in the commit is comment. Installation To install the trigger, add a line like this to your Perforce Triggers list: ccollab content //depot/... "/usr/bin/ccollab --url <collabUrl> -user <collabUser> --password <collabPasswd> --scm perforce --p4port <p4port> --p4client %client% --p4user <p4user> --p4passwd <p4passwd> admin trigger ensure-reviewed %changelist%" Some notes: · Specify your installation directory for ccollab and replace <values> with appropriate data. Also, type all parameters in a single line even though the text above occupies several lines. · The Perforce user that you specify must have at least read-only access to the repository. · On Unix systems, Perforce incorrectly recognizes arguments that include spaces. It ignores quotes and other standard ways of indicating that the data with spaces is actually one argument. The workaround is to use a separate bash script to call our trigger. Remarks · The trigger ignores changelists that correspond to new branch creation. Creating a new branch does not involve changes in code, so it does not require a review. · Perforce treats branch merge changelists like ordinary changelists as they bring changes to source code and can introduce bugs. So, by default, the trigger handles this type of changes. However, since the merge changelists often include a large number of files and since you often need to merge several branches, this approach could require cumbersome reviews to be performed many times. To avoid possible issues, use the --ignore-integrate command-line option. If it is specified, the trigger will ignore changelists that include "merge" changes only. Make sure to review changes in one branch before merging them with other branches. © 2003-2015 SmartBear Software Perforce Server Triggers · For information on Perforce triggers, see Chapter 6 of the Perforce System Administrator's Guide. 6.10.5.3 ensure-content-reviewed Description Use the ensure-content-reviewed trigger to ensure that the review created for the specified changelist has been completed and that the file list and file contents were not changed by the time you submit the changelist. If the review has not been completed or if the review contains changed files or updated file list, the trigger blocks the submit operation and displays an error message informing the user about the problem. Command Line Syntax: ccollab [global-options] admin trigger ensure-content-reviewed [-ignore-integrate] [--no-keywords --review-id-regex <value>] <changelist-id> Command Options Option Required? Description <changelist-id> Yes The changelist identifier. --ignoreintegrate No (Perforce only.) If specified, Collaborator ignores the merge changes to the source control (that is, the trigger is not fired for these changes. See below). --no-keywords No If specified, this option disallows keyword expansion in source files. Expanding the keywords may cause Perforce to consider the files as changed. --review-id-regex <value> No A regular expression that identifies the review ID in the commit is comment. © 2003-2015 SmartBear Software 556 557 Version Control Integration Installation To install the trigger, add a line like this to your Perforce Triggers list: ccollab content //depot/... "/usr/bin/ccollab --url <collabUrl> -user <collabUser> --password <collabPasswd> --scm perforce --p4port <p4port> --p4client %client% --p4user <p4user> --p4passwd <p4passwd> admin trigger ensure-content-reviewed %changelist%" Some notes: · Specify your installation directory for ccollab and replace <values> with appropriate data. Also, type all parameters in a single line even though the text above occupies several lines. · The Perforce user that you specify must have at least read-only access to the repository. · On Unix systems, Perforce incorrectly recognizes arguments that include spaces. It ignores quotes and other standard ways of indicating that the data with spaces is actually one argument. The workaround is to use a separate bash script to call our trigger. Remarks · The trigger ignores changelists that correspond to new branch creation. Creating a new branch does not involve changes in code, so it does not require a review. · If your source files use Perforce RCS keywords, we would recommend using the --nokeywords command-line option to prevent keyword expansion. Expanded keywords (like $Date$, $Change$ and some others) may cause changes to the source code. · Perforce treats branch merge changelists like ordinary changelists as they bring changes to source code and can introduce bugs. So, by default, the trigger handles this type of changes. However, since the merge changelists often include a large number of files and since you often need to merge several branches, this approach could require cumbersome reviews to be performed many times. To avoid possible issues, use the --ignore-integrate command-line option. If it is specified, the trigger will ignore changelists that include "merge" changes only. Make sure to review changes in one branch before merging them with other branches. · For information on Perforce triggers, see Chapter 6 of the Perforce System Administrator's Guide. © 2003-2015 SmartBear Software Perforce Server Triggers 6.10.5.4 update-changelist Description It is convenient to have information like review id and participants' names in the description of a changelist, for which you created a review in Collaborator. Use this trigger to append reviewspecific information to or update it in the description automatically. If you use this trigger as a "submit" trigger, it will add or update review-specific values in the description of a pending changelist when you are submitting this changelist to the repository. If you use this trigger as a "form-in change" trigger, then users will see the updated description whenever they edit the changelist. All review-specific values appear in a single line in the description. You specify the values to be added in the command line (see below). Command Line Syntax: ccollab [global-options] admin trigger update-changelist [-description-prefix <value>] [--description-template <value>] <changelist-spec> Command Options Option Required? Description --descriptionprefix <value> Yes Specifies the prefix text for the review line in changelist description. The trigger uses this text to find the review line in the description (see the Remarks section below 559 ). --descriptiontemplate <value> Yes A single-line string that contains an arbitrary text and review-specific data to be posted to the changelist description. To insert review-specific values, use Collaborator variables 123 (${...}). See examples in the Installation section below 559 . <changelist-spec> Yes %changelist% for a trigger of the submit or commit type, or %formfile% for a trigger of the form-in type. © 2003-2015 SmartBear Software 558 559 Version Control Integration Installation To install the trigger, add a line like one of those below to your Perforce Triggers list: · Example 1: Adding the trigger as a submit trigger: ccollabupdatechangelist change-commit //depot/... "/usr/bin/ccollab --url <collabUrl> --user <collabUser> --password <collabPasswd> --scm perforce --p4port <p4port> --p4user <p4user> --p4passwd <p4passwd> -p4client <p4client> admin trigger update-changelist --descriptionprefix 'Review: ' --description-template 'ID ${review.id} by ${review.participants.rolename}' %changelist% · Example 2: Adding the trigger as a form-in trigger: ccollabupdatechangelist form-in change "/usr/bin/ccollab --url <collabUrl> --user <collabUser> --password <collabPasswd> --scm perforce --p4port <p4port> --p4user <p4user> --p4passwd <p4passwd> admin trigger update-changelist --description-prefix 'Review: ' -description-template 'ID ${review.id} by ${review.participants. rolename}' %formfile% Some notes: · Specify your installation directory for ccollab and replace <values> with appropriate data. Also, type all parameters in a single line even though the text above occupies several lines. · The Perforce user that you specify must have read-write access to the changelist. · On Unix systems, Perforce incorrectly recognizes arguments that include spaces. It ignores quotes and other standard ways of indicating that the data with spaces is actually one argument. The workaround is to use a separate bash script to call our trigger. Remarks · The --description-prefix option serves as an identifier of the review line in the changelist description. The trigger uses it to find the review-specific string within the description. If the string is found, the trigger updates information in-place. If the string is not found, the trigger appends a new line with review-specific data to the end of the description. © 2003-2015 SmartBear Software Perforce Server Triggers · If there is a review in Collaborator that matches the specified changelist, the changelist description is always updated (either in-place, or appended as it was described above). If there is no review for the specified changelist, the description is updated only if the prefix is already present in the description. If the prefix is not found, the trigger does not append review-specific data to the description. · If the specified changelist is used in several reviews, then the ${review.id} variable will refer to the most recent of these reviews. · For information on variables that you use to insert review-specific data, see Variable Substitution 123 . The examples in the Installation section insert the review identifier and a list of participants, plus the appropriate English words. · For information on Perforce triggers, see Chapter 6 of the Perforce System Administrator's Guide. © 2003-2015 SmartBear Software 560 561 6.11 Version Control Integration Subversion Integration Topics of this section describes Collaborator integration with Subversion. Overview · Server Integration The Collaborator server can upload files from committed revisions directly from your Subversion server to a review, without users needing to install any client programs. See Subversion Server Integration 563 . Subversion server-side hooks can ensure code is reviewed 579 or automatically create reviews 579 . · GUI Client Integration Collaborator's GUI Client can upload local changes to files 567 in a Working Copy, or upload files in Revisions 568 . The GUI Client can also upload arbitrary Subversion diffs 569 , or the difference between two Revisions 570 , branches/tags 571 , or dates 572 . See Integrating Through Collaborator 566 . · Command-Line Client Integration Collaborator's Command-Line Client can upload local changes to files in a Working Copy, or upload the files in committed Revisions. The Command-Line Client can also upload arbitrary Subversion diffs. See Integrating Through Command-Line Client 573 . · Eclipse Plug-in Integration Collaborator's Eclipse Plug-in 359 integrates with the Subclipse and Subversive plug-ins, so you can upload locally modified files 376 or the files in Revisions 393 . Supported Subversion Versions Collaborator's Command-Line and GUI clients use the Subversion command-line client (svn) to communicate with the Subversion server. They supports Subversion 1.4.x - 1.8.x. For versions 1.3.x and earlier only the ccollab addsvndiffs 577 command is supported. The TortoiseSVN client is not supported, unless it is installed along with the "command line client tools" option. Since Collaborator clients work through the Subversion command-line client that is already present on your computer, Collaborator supports all protocols, authentications, proxies, and other client configuration options that you are currently using. Collaborator's Eclipse Plug-in integrates with the Subclipse and Subversive Eclipse plug-ins and supports the following versions of these plug-ins: · Subclipse 1.6.x · Subclipse 1.4.x © 2003-2015 SmartBear Software 562 · Subversive 0.7.9.20110207-1700 Support for Directory-Level Changes Collaborator partially supports Subversion's concept of directories (not just files) being altered. All the files in directories in question will be scanned, uploaded and represented properly in the Collaborator's GUI. The directories themselves will not be shown, or even in the file list confirmation screen presented by the command-line client. This works correctly even in cases, when you move a parent directory and change, add or delete a file in that directory. In the review, you will get the correct content for the file, but the directory itself will not be listed. Note this limitation affects "commit" functionality. If a directory and a file in it were included in a review and then modified, the Collaborator client will not be able to commit them automatically. The workaround is to commit the changes manually and then "dismiss" the commit Action Item. Support for svn+ssh The Collaborator clients support running Subversion over SSH (the svn+ssh:// protocol). On some systems, especially those under Unix, Mac OS X or Cygwin/Windows, this will probably work correctly out-of-the-box. If your SSH connection displays a banner, this will interfere with the client being able to parse the Subversion output correctly. We would recommend suppressing banner output by adding the "-q" option to your SSH executable -- svn_ssh = ssh -q -- or by creating a local SSH configuration file and adding the following line to it: LogLevel QUIET On some Windows computers, you might have to configure Subversion to default to your SSH client. To do this: · Go to the <Documents and Settings>\username\Application Data \Subversion folder, and open the config file for editing. · In the [tunnels] section of this file, find a line that starts with ssh=. · In the line, specify your SSH client. For example: ssh = "C:\\Program Files\\PuTTY\\Plink.exe" -l <your username> Note: It is important to use double slashes. © 2003-2015 SmartBear Software 563 Version Control Integration Support for Symlinks Collaborator partially supports Subversion's ability to version symlinks. If a committed revision contains a symlink, and you attached this revision to a review, Collaborator will be able to display the symlink contents correctly. However, if a symlink was added to a review before you commit the changes to Subversion, Collaborator displays an incorrect content for the symlink (the symlink will be traversed). Changes to Properties Collaborator does not support reviews of the changes made to Subversion properties. 6.11.1 Subversion Server Integration The Collaborator server can be configured to communicate directly with your Subversion server. This allows users to review committed revisions completely from the browser, without having to install any client programs. To enable this feature, first install and configure a Subversion client on the Collaborator server and then create an entry for your Subversion server in the Version Control 181 tab of the administration interface. Version control server entries are also created automatically if one of the client programs uploads files from a server that does not match any of the currently configured servers. © 2003-2015 SmartBear Software Subversion Server Integration Title The title is displayed to users, so it should be something that everyone will understand, even if they are going through proxies, VPNs, or other such things. When a version control server entry is created automatically, this is filled in with the URL the client used to connect to the Subversion server. Attach changelists from browser If enabled, this feature lets users select committed revisions to review directly from the web browser, without having to install any client programs. svn Executable Full path to the 'svn' executable Repository URL Subversion repository URL. When a version control server entry is created automatically, this is filled in with the URL the client used to connect to the Subversion server. Username Subversion user name Password Subversion password Click the Test Connection to make sure Collaborator can contact your Subversion server. If you get an "untrusted certificate authority" error, this is probably because your Subversion server is using a self-signed certificate. You can click Accept Certificate to tell Collaborator to permanently accept the certificate. Client Configuration Mapping You can supply Java-style regular expressions to map changelists uploaded from our client tools to this Subversion server. It is important to set up these regular expressions so that files uploaded by the various Collaborator client tools are correctly associated with this server-side Subversion configuration. Repository URL Pattern © 2003-2015 SmartBear Software Match on the client's configured repository URL. This is not very reliable because clients may have various network configurations that make the URL look different. It is usually far better to use the Repository UUID Pattern 565 . 564 565 Version Control Integration Repository UUID Pattern Match on the "Repository UUID" returned from running "svn info". This is a unique ID generated by every Subversion repository, and usually works perfectly for identifying uploads to this Subversion server. When a version control server entry is created automatically, this is filled in with the "Repository UUID" obtained from the client. © 2003-2015 SmartBear Software GUI Client 6.11.2 GUI Client Subversion-specific Options The SCM Configuration dialog 334 has several Subversion-specific options. Subversion SCM Configuration © 2003-2015 SmartBear Software 566 567 Version Control Integration Uploading files to a Review Selecting a Subversion SCM Configuration in the GUI Client main screen 332 causes several Add to Review buttons to appear. The Add Changes... button will be disabled if you have not specified a working copy in the Local Path field of the SCM Configuration dialog 566 . The Add Changes... 567 button uploads modified files from a Working Copy. The Add Revisions... button uploads files in committed Revisions. The Add Subversion Diffs... 569 button uploads arbitrary diffs, or compares the difference between two Revisions 570 , branches / tags 571 , or dates 572 . 568 Uploading Subersion files to a Review Add Changes Press the Add Changes... button to upload modified files in a Subversion working copy to the Collaborator Server for review. The Add Changes... button will be disabled if you have not specified a working copy in the Local Path field of the SCM Configuration dialog 566 . © 2003-2015 SmartBear Software GUI Client Add Changes Add Revisions Press the Add Revisions... button to upload committed Revisions to the Collaborator Server for review. All of the files modified in the selected Revisions will be uploaded. © 2003-2015 SmartBear Software 568 569 Version Control Integration Add Subversion Revisions Add Subversion Diffs Press the Add Subversion Diffs... button to upload arbitrary Subversion diffs to the Collaborator Server for review. © 2003-2015 SmartBear Software GUI Client Add Subversion Diffs You can enter arbitrary Subversion diff options, or compare the difference between two Revisions 570 , branches / tags 571 , or dates 572 . 6.11.2.1 Comparing two Revisions Press the Add Subversion Diffs... 569 button on the main screen to upload the difference between two Revisions. © 2003-2015 SmartBear Software 332 and then select the Revisions tab 570 571 Version Control Integration Upload the difference between two Revisions 6.11.2.2 Comparing two branches / tags Press the Add Subversion Diffs... 569 button on the main screen to upload the difference between two branches / tags. 332 and then select the Branches tab © 2003-2015 SmartBear Software GUI Client Upload the difference between two branches / tags 6.11.2.3 Comparing two dates Press the Add Subversion Diffs... 569 button on the main screen upload the difference between two dates. © 2003-2015 SmartBear Software 332 and then select the Dates tab to 572 573 Version Control Integration Upload the difference between two dates 6.11.3 Command-Line Client Commands recommended for Subversion ccollab addchanges 575 - Attaches locally-modified files to a review ccollab addchangelist ccollab addsvndiffs ccollab commit 578 577 576 - Attaches an atomic changelist to a review - Uploads diffs generated from the svn diff command - Commit changes in the review The addchanges 575 command will upload local changes to files controlled by Subversion before they are checked into version control. The addchangelist 576 command will upload committed Subversion revisions. The changelist 577 id is the Subversion Revision number. All the files involved in the Revision are uploaded. © 2003-2015 SmartBear Software Command-Line Client Configuration In most cases, the Command-Line Client can automatically detect your Subversion configuration. Try testing your configuration 342 to verify the configuration is detected correctly. If the Command-Line Client is unable to detect your Subversion configuration or you want to override the detected settings, you can manually specify Subversion settings using global options 356 . To manually configure the Command-Line Client to use Subversion, execute the following command: ccollab set scm 351 subversion Subversion-specific Options Option Description --svn-exe <value> Full path to the `svn` command-line executable --svn-look-exe <value> Full path to the `svnlook` command-line executable (used by Subversion triggers) --svn-repo-url <value> Subversion repository URL --svn-user <value> Subversion user name --svn-passwd <value> Subversion password --svn-requireclientcertificatepassword <value> Use this if you have a non-empty and unsaved password for your SSL Client Certificate --svn-auto-add Treat unversioned files as if they had been added to Subversion --svn-recurseexternals Recurse in the 'svn:externals' directories as if they were part of the same repository --svn-repo-path <value> Full path to the repository (used by Subversion Triggers) © 2003-2015 SmartBear Software 574 575 Version Control Integration If you want to review committed Subversion revisions but you do not have a working copy checked out, you must configure your Subversion URL using svn-repo-url. 6.11.3.1 addchanges (for Subversion) Description The ccollab addchanges command locally modified files controlled by Subversion to a review on the Collaborator server. Command Line Syntax: ccollab [global-options] addchanges [--upload-comment <value>] <review> <file-spec> [<file-spec> ...] Command Options Option Required? Description global-options No A number of global or Subversion-specific global options. See Command-line Global Options Reference 350 . --upload-comment <value> No A comment to be used for the uploaded files. Default is Local changes. <review> Yes Identifier of the desired review (an integer number), or a new, ask, or last string. <file-spec> [<filespec> ...] Yes Files to be added and/or folders to scan for modified files. Separate multiple file and folder names with spaces. If a file or folder name contains spaces, enclose this name is quotes. ccollab scans folders recursively. The resulting list includes the name of modified files. "Modifications" include include edits, additions, deletions, branches, integrations, moves, copies, and so on. © 2003-2015 SmartBear Software Command-Line Client Option Required? Description After the scan is complete, a file list is presented in a graphical editor so you can review the files to be uploaded and make correct the list, if needed. Examples: To create a new review and add all changes in the current directory and below, plus the file foo. txt, you would use: ccollab addchanges new . foo.txt To upload modified files from the current working directory and all subdirectories to review 123: ccollab addchanges 123 . To upload file foo.txt and modified files from c:\dev\project into a brand new review: ccollab addchanges new foo.txt c:\dev\project 6.11.3.2 addchangelist (for Subversion) Description The ccollab addchangelist command attaches all files from a submitted Subversion changelist (revision) to a review on the Collaborator server. Command Line Syntax: ccollab [global-options] addchangelist <review> <changelist> [<changelist> ...] Command Options Option Required? Description [global-options] No A number of global or PTC-specific global options. See Command-line Global Options Reference 350 . <review> Yes Identifier of the desired review (an integer number), or a new, ask, or last string. © 2003-2015 SmartBear Software 576 577 Version Control Integration Option Required? Description <changelist> [<changelist> ... ] Yes Identifier(s) of the desired changeset(s) in your source control. Examples: To upload revisions r4321 and r7568 to a new review: ccollab addchangelist new 4321 7568 To upload revisions r5432 and r12654 to review 111: ccollab addchangelist 111 5432 12654 6.11.3.3 addsvndiffs Description The ccollab addsvndiffs command uploads differences between arbitrary versions of files in Subversion. The differences are generated using the native 'svn diff' command of Subversion. Command Line Syntax: ccollab [global-options] addsvndiffs [--upload-comment <value>] <review> [<user-diff-arg> [<user-diff-arg> ...]] © 2003-2015 SmartBear Software Command-Line Client Command Options Option Required? Description --upload-comment <value> No Comment used to upload files (defaults to command-line arguments) <review> Yes Must be either an integer review-id, 'new', 'ask', or 'last' <user-diff-arg> [<user-diffarg> ...] No Command-line arguments to pass directly to the diff command Remarks: Do not use diff arguments that affect the diff output such as '--diff-cmd', '-x [-extensions]', '--summarize', or '--non-interactive'. The Collaborator command-line client will automatically select an output format that ensures you will get all the data you need on the server. Examples: ccollab addsvndiffs 698 -r 2:16 ccollab addsvndiffs new -r PREV http://my.svn.server/svn/repo ccollab addsvndiffs 698 -c 10534 src/java ccollab addsvndiffs new OLDURL[@OLDREV] NEWURL[@NEWREV] 6.11.3.4 commit (for Subversion) Description The ccollab commit command submits the changes from a pre-commit review to source control. Be sure to include a relevant comment. Command Line Syntax: ccollab [global-options] commit [--comment <value>] [--dismiss-only] [--force] <review> © 2003-2015 SmartBear Software 578 579 Version Control Integration Command Options Option Required? Description --comment <value> No Comment for reviewed changes --dismiss-only No Just dismiss the Action Item --force No Ignore potential problems <review> Yes Must be either an integer review-id, 'ask', or 'last' Example: ccollab commit 25 --comment "my code" --force 6.11.4 Subversion Server Hooks Triggers recommended for Subversion ccollab admin trigger ensure-review-started 580 - Changelist cannot be submitted until review of this changelist exists ccollab admin trigger ensure-reviewed 582 - Changelist cannot be submitted until review of this changelist has been completed ccollab admin trigger create-review 584 - Creates a new Review for a changelist if no Review already exists The ensure-review-started 580 and ensure-reviewed 582 hooks ensure that files cannot be committed unless certain conditions are met. If a user attempts to commit files that do not meet those conditions, an error message describing the unfulfilled conditions will be displayed and the files will not be committed. If the conditions are met, the commit will be allowed to continue normally. The ensure-review-started hook requires that the review exist; ensure-reviewed requires that the review be completed. © 2003-2015 SmartBear Software Subversion Server Hooks The create-review 584 hook automatically creates a review in Collaborator after the revision is committed to the Subversion server. Because you can supply the regular expression for identifying reviews, you can provide users with the ability to review before check-in without having an additional review automatically created after the check-in. This way some groups (or just some check-ins arbitrarily) can use pre-commit review and others post-commit, and either way you know all code has been reviewed or at least that a review of all code exists in the system. Linking reviews with commits To use the ensure-review-started 580 and ensure-reviewed 582 hooks, you must first require developers to put the review ID somewhere in the Subversion commit message (also optionally for the create-review 584 hook). The format of this text is completely up to you; you will need to supply a Java-style regular expression that identifies this text and specifically calls out the review ID inside that text. The regular expression is specified using the --review-id-regex hook command option. Here are some common ways of specifying the review ID and the corresponding regular expressions. Note that regular expressions are case-insensitive and you must identify the review ID portion with parenthesis: Text --review-id-regex Review: review:\s*(\d+) 4233 rID4233 rid(\d+) (review \(review (\d+)\) 4233) This text can appear in-line with other text or in a more formal "form-style" layout. Because you control the regular expression, you can control exactly what this looks like. For more information about Subversion hooks in general, see the Subversion documentation. 6.11.4.1 ensure-review-started (for Subversion) Description Use the ensure-review-started trigger to ensure that a review for the specified changelist has been started. The trigger blocks the submit operation if there is no review for the changelist in Collaborator, and displays an error message telling that the changes need to be reviewed before submitting them to the Subversion repository. © 2003-2015 SmartBear Software 580 581 Version Control Integration Command Line Syntax: ccollab [global-options] admin trigger ensure-review-started [-review-id-regex <value>] <changelist-id> Command Options Option Required? Description <changelist-id> Yes The changelist identifier. --review-id-regex <value> No A regular expression that identifies the review ID in the commit is comment. Installation To install this trigger you will need to create a pre-commit hook. If you already have a pre-commit hook, you can add our tool wherever it is appropriate; otherwise you will need to create an executable hook as described in the Subversion documentation (typically a batch file under Windows or a shell script under Linux/Mac). Example Windows batch file: "C:\Program Files\Collaborator Client\ccollab.exe" --url <collabUrl> --user <collabUser> --password <collabPasswd> --scm subversion --svnuser <svnUser> --svn-passwd <svnPasswd> --svn-repo-path %1 --svnlook-exe "C:\Program Files\Subversion\bin\svnlook.exe" admin trigger ensure-review-started --review-id-regex "review:\s+(\d+)" %2 || exit 1 Example Linux/OSX shell script: /collab/install/ccollab --url <collabUrl> --user <collabUser> -password <collabPasswd> --scm subversion --svn-user <svnUser> --svnpasswd <svnPasswd> --svn-repo-path $1 --svn-look-exe /usr/bin/svnlook admin trigger ensure-review-started --review-id-regex "review:\s+(\d +)" $2 || exit 1 © 2003-2015 SmartBear Software Subversion Server Hooks Note our use of "exit 1" to ensure that the script terminates with a non-zero exit code if our trigger application fails. Remarks · You must specify the --svn-repo-path and --svn-look-exe global options. · You need to specify the --svn-user and --svn-passwd global options. At that, in order for this hook to work smoothly you will need your Subversion usernames and Collaborator logins to match (differs at most in capitalization). This ensures that when a developer checks in code the review is created under his Collaborator account. If you do not do this the hook will still work, but reviews will be created under the system administrator's account. Someone will have to log into the system with that account and assign the review to someone else. · You must require developers to put the review ID somewhere in the Subversion commit message. The format of this text is completely up to you; you must supply a Java-style regular expression that identifies this text and specifically calls out the review ID inside that text using the --review-id-regex command option. 6.11.4.2 ensure-reviewed (for Subversion) Description Use the ensure-reviewed trigger to ensure that the review that was created for the specified changelist has been completed by the time you submit the changelist to the Subversion repository. If the review has not been completed, the trigger blocks the submit operation and displays an error message informing the user about the problem. Command Line Syntax: ccollab [global-options] admin trigger ensure-reviewed [--review-idregex <value>] <changelist-id> Command Options Option Required? Description <changelist-id> Yes The changelist identifier. --review-id-regex <value> No A regular expression that identifies the review ID in the commit is comment. © 2003-2015 SmartBear Software 582 583 Version Control Integration Installation To install this trigger you will need to create a pre-commit hook. If you already have a pre-commit hook, you can add our tool wherever it is appropriate; otherwise you will need to create an executable hook as described in the Subversion documentation (typically a batch file under Windows or a shell script under Linux/Mac). Example Windows batch file: "C:\Program Files\Collaborator Client\ccollab.exe" --url <collabUrl> --user <collabUser> --password <collabPasswd> --scm subversion --svnuser <svnUser> --svn-passwd <svnPasswd> --svn-repo-path %1 --svnlook-exe "C:\Program Files\Subversion\bin\svnlook.exe" admin trigger ensure-reviewed --review-id-regex "review:\s+(\d+)" %2 || exit 1 Example Linux/OSX shell script: /collab/install/ccollab --url <collabUrl> --user <collabUser> -password <collabPasswd> --scm subversion --svn-user <svnUser> --svnpasswd <svnPasswd> --svn-repo-path $1 --svn-look-exe /usr/bin/svnlook admin trigger ensure-reviewed --review-id-regex "review:\s+(\d+)" $2 || exit 1 Note our use of "exit 1" to ensure that the script terminates with a non-zero exit code if our trigger application fails. Remarks: · You must specify the --svn-repo-path and --svn-look-exe global options. · You need to specify the --svn-user and --svn-passwd global options. At that, in order for this hook to work smoothly you will need your Subversion usernames and Collaborator logins to match (differs at most in capitalization). This ensures that when a developer checks in code the review is created under his Collaborator account. If you do not do this the hook will still work, but reviews will be created under the system administrator's account. Someone will have to log into the system with that account and assign the review to someone else. · You must require developers to put the review ID somewhere in the Subversion commit message. The format of this text is completely up to you; you must supply a Java-style regular expression that identifies this text and specifically calls out the review ID inside that text using the --review-id-regex command option. © 2003-2015 SmartBear Software Subversion Server Hooks 6.11.4.3 create-review Description The admin trigger create-review trigger automatically creates a review in Collaborator after the change is committed to the Subversion server. It is smart enough to not create reviews if they have already been created for this code. Command Line Syntax: ccollab [global-options] admin trigger create-review [--add-on-match <value>] [--review-id-regex <value>] <changelist> Command Options Option Required? Description --add-on-match <value> No If a review ID regex matches, add this changelist to the review --review-id-regex <value> No Regular Expression that identifies Review ID in commit comment <changelist> Yes SCM-specific ID of an atomic set of changes Installation For Subversion, to install this trigger you will need to create a post-commit hook. If you already have a post-commit hook, you can add our tool wherever it is appropriate; otherwise you will need to create an executable hook as described in the Subversion documentation (typically a batch file under Windows or a shell script under Linux/Mac). Example Windows batch file: "C:\Program Files\Collaborator Client\ccollab.exe" --url <collabUrl> --user <collabUser> --password <collabPasswd> --scm subversion --svnuser <svnUser> --svn-passwd <svnPasswd> --svn-repo-url svn://url/to/ repo --svn-exe "C:\Program Files\Subversion\bin\svn.exe" admin trigger create-review --review-id-regex "review:\s+(\d+)" %2 || exit 1 © 2003-2015 SmartBear Software 584 585 Version Control Integration Example Linux/OSX shell script: /collab/install/ccollab --url <collabUrl> --user <collabUser> -password <collabPasswd> --scm subversion --svn-user <svnUser> --svnpasswd <svnPasswd> --svn-repo-url svn://url/to/repo --svn-exe /usr/ bin/svn admin trigger create-review --review-id-regex "review:\s+(\d +)" $2 || exit 1 Note our use of "exit 1" to ensure that the script terminates with a non-zero exit code if our trigger application fails. Remarks: · You need to specify the --svn-user and --svn-passwd global options. · For this hook to work smoothly you will need your Subversion usernames and Collaborator logins to match. Here "match" means "differs at most in capitalization". This ensures that when a developer checks in code the review is created under his Collaborator account. If you do not do this the hook will still work, but reviews will be created under the system administrator's account. Someone will have to log into the system with that account and assign the review to someone else. · You may optionally specify a regular expression that identifies a Collaborator review ID inside a Subversion commit message. If you supply the regular expression, the create-review hook will check for this text in commit messages and automatically not create a new review if a noncanceled review with that ID already exists. This allows some users to do pre-commit review and others post-commit, and either way you know all code has been reviewed or at least that a review of all code exists in the system. 6.11.5 Subversion-Specific Tips · Error messages about "inconsistent line ending style" indicate that the file(s) being operated on have mixed line endings (typically Unix and DOS-style) and that one or more of them has the subversion property svn:eol-style set to native. This is a fatal error as subversion stops processing when the condition is found. The fix is to either force the line endings to a consistent state (that is, typically either all unix or all DOS-style) or propdel the svn property if there is a need for mixed line endings. A variety of methods are available to automate conversion of line ending styles; the free utility unix2dos/dos2unix exists for many platforms for example. 7 External Integrations Integrating Collaborator into other systems, scripts, and processes is easy. A wide variety of integration mechanisms is available. © 2003-2015 SmartBear Software 586 Reporting-writing tools 587 Collaborator comes with a few built-in reports their own. 310 , but almost everyone wants to make reports of You can use any external reporting system including Excel, Access, Crystal Reports, and Business Objects. Bug-tracking systems 605 Collaborator can integrate with external issue-tracking systems such as TeamTrack, Bugzilla, JIRA, and FogBugz. Integration can be done in several ways depending on the type of integration you require. JIRA Integration 607 Collaborator provides advanced support for JIRA, giving you the possibility to easily integrate these two products into your work processes. This allows you to create Collaborator reviews from JIRA tickets' linked commits or use JIRA as notification channel. GitHub Integration 625 Collaborator provides support for GitHub and GitHub Enterprise, giving you the possibility to review the changes pushed to GitHub repository or pull requests in that repository. The integration saves the time and efforts needed to synchronize your commits on GitHub and Collaborator reviews. Scripting 631 Scripting is the way to implement custom behaviors in Collaborator. You can run scripts on your user's machines, or from the server machine, possible invoked with a trigger. Almost any action you can do in the Web Client can be done from a script. Web Services 647 Collaborator server has two versions of web services: SOAP and JSON. Web service runs on a server and waits for special kind of requests. Upon receiving a request the server processes it and sends the results in response. You can use SOAP and JSON services from various applications to interact with the Collaborator server. © 2003-2015 SmartBear Software 587 7.1 External Integrations Creating Custom Reports Collaborator comes with a number of pre-built and customizable reports 310 . However, if you would like to automate a report for integration with external tools or applications, or if you would like to create your own reports, you can access the underlying database directly. (Note: SmartBear does not support querying Hypersonic of the other databases 54 supported by Collaborator.) 54 databases. You will need to use one Creating Custom SQL Reports In many cases, you may want report output slightly different than one of the existing customizable reports. In these cases, it may be simplest to begin with a report that outputs most of the data that you want, then modify its database query as needed. 1. Open a customizable report 310 that best matches the type of report you would like to create. 2. Choose the columns you wish to display in the report, and the criteria by which you would like to filter the results. 3. Click the "Save" button. 4. Verify that the first few results contain the data you expect. 5. Click the "SQL" link at the top-right of the Results pane. This will download a SQL query appropriate for your database which you can use as a starting point for your custom report. 6. Reference the Collaborator database schema 587 and documentation for your database's SQL dialect (MySQL, Oracle, or Microsoft SQL) to modify the query as you see fit. 7. Execute the query directly against the database using whatever SQL tool you like. Some tools that can run SQL queries include: Excel, Access, Crystal Reports, and Business Objects. Custom XSL Reports You can alternatively use the Command-Line Client to retrieve XML data regarding a review. For samples of this, see: Example XPath and XSL 602 . 7.1.1 Database Schema This section covers the Collaborator database schema and some special features of the database we created specifically to support external custom reporting applications. © 2003-2015 SmartBear Software Database Schema The Database is Read-Only! Never change data in the database directly. Although we support read-only access to the database for reporting and automation, if you make changes to data in the database yourself you could irreparably destroy the integrity of the database. Database Schema The diagram below shows only the major tables in the Collaborator database and which files should be linked with which other fields when creating queries. There are more tables which are either (a) purposefully undocumented or (b) described below but which do not have relationships to other tables. The diagram does not contain those tables in the interest of simplicity: Database Schema © 2003-2015 SmartBear Software 588 589 External Integrations Warning: SmartBear reserves the right to change any of the table definitions whenever there is a minor point-release of the product. Note: The table/view names above are approximations. In some cases, the names may be altered slightly (for example,,,,,, vowels are removed). We are committed to backwards-compatibility with the reporting views 593 , and with our own client software 341 . Here is a brief description of each table: activity Activity log of users' actions during review. This is used to compute metrics such as inspection rate. Each row represents a slice of time where the user was active. There might be many slices for a given user in a single review. Each slice includes a duration (in seconds) and a "start time" that is encoded both as a database date/time ( activity_startdate) and as a number of seconds since 1970-01-01 00:00:00 GMT (activity_startsecs). The activity action code (activity_code) tells whether the user was acting in the capacity of an author (A), reviewer (R), or was doing rework (F) as opposed to actually reviewing. Also there is a code for when someone views the review but is not a participant (P). It almost always best to use the reporting views 593 to access activity data so you do not get your query wrong. The technique and motivation behind this system is described in our metrics section 675 . assignment List of user <--> review combinations. For each user who was "assigned" to a review, notes the role associated with that user. The assignment_actioncode field is used internally to understand what general status that user has in the review currently. You should not depend on this field as we might change it in the future. Refer to the assignment_state view for names and descriptions for these codes. changelist Every time a set of files is uploaded to the server a "changelist" record is created. Most changelists will be associated with a review through joinreviewchangelist, but some may not be for various reasons. Changelists are linked to version where the actual file content is represented. © 2003-2015 SmartBear Software Database Schema If the changelist is of files from a local hard drive, the "local GUID" field will contain a globally-unique made-up identifier for that upload. If the changelist was derived from something already checked into version control (for example, a Perforce or Subversion changelist), then this field will be blank. The date, author, and check-in comment are all listed if known. To the extent possible this will match usernames with version control. Also linked is the SCM table ID. This ties the changelist to a specific version control server. Changelists from different servers might match in other details but are actually unrelated. If the changelist happened to have an associated identifier in a version control system, that is also recorded. Otherwise that field is blank. comment Represents a comment made by a user in some conversation. This includes not only actual chat but indirect events such as "marked read" and "created defect" and "new file uploaded". Also included is the file (version) and line number the comment is associated with, however both of those fields are optional. They are linked to user ID and review ID as well. defect Represents a defect made by a user in some conversation. Also included is the file (version) and line number the defect is associated with, however both of those fields are optional. They are linked to user ID and review ID as well. A state field indicates whether the defect is still open or fixed. We will be adding more state to this field in the future. filemetric s Holds basic change metrics for file versions. Each filemetrics record is tied to one version record. You should only depend on the values of this table for versions directly associated with changelists. The other metrics are often incomplete. There are technical reasons for this; we will not be changing this behavior. groupdescr iption groupusers Represents a group 162 . Some of the groups are defined in the web UI and some are built-in internal groups automatically defined by Collaborator Joins the groupdescription table with the user table to represent the users that are direct members of a group. A user can be a member of zero, one, or many groups. © 2003-2015 SmartBear Software 590 591 External Integrations groupgroup s groupances try joinreview changelist metadatade scription metadatava luecharact er metadatava luedate metadatava lueinteger metadatava luestring metadatava luestringb ig metadatase lectitem Joins the groupdescription table with itself to represent the groups that are direct members of a group. A group can be a member of zero, one, or many groups. The behavior of this table is intentionally undocumented. Joins reviews and changelists. A changelist can be associated with zero, one, or many reviews, and a review can be associated with zero, one, or many changelists. All of these tables have to do with "meta-data" which means any data where the data schema itself is dynamic. Most notably, all review and defect custom fields 183 are a kind of meta-data. You should not use the meta-data tables directly. Their relationships are very complex and we change how they work regularly as we add more features. Instead, access meta-data through the reporting views described below 593 . This contains all the information you need for custom fields and formats it nicely as an added bonus. Information for all the drop-down items in any custom field. Each item is matched to a particular custom field. The "title" is the text displayed to end users. A "sequence" number defines the order of the elements (the IDs are not an order). Items can also be individually enabled or disabled. notificati on Holds the history of notification messages that have been sent out to clients. Clients might choose (or not) to get notifications by email, RSS feed, and so on. This table is periodically cleaned out by the server. There will always be some backlog of events for each user (for example, for use in creating the RSS feed for a user), but you cannot depend on any particular number of events to be saved. reportcate gory reportfilt er reporttemp late review Internal server use. Do not depend on this table. Holds one record for each review in the system. © 2003-2015 SmartBear Software Database Schema The "creator" is the user who created the review, or the system administrator if the review was created automatically. Use the review custom field view reviewtemp late role scm user 593 to access review custom field data. Internal server use. Do not depend on this table. Represents all of the roles from all role-sets. Each role has a "standard" name that never changes and the custom name that was set by the user. Contains one record for each SCM server that has ever been reported by a client. It is OK if there are duplicate records for a given SCM system. This separates changelists from different systems. This table will probably change in the future. One record for each user who can log into the system. User ID 1 is the special system administrator. Key user information and preferences are stored here. Additional user preference information is stored as meta-data and is accessible from the special userprefs view. The user_initials field is deprecated and should be ignored. Passwords are stored in hashed form so that a casual observer cannot deduce a password. If you need to reset a password, set this field to: d41d8cd98f00b204e9800998ecf8427e version One record for every version of every file that has ever been uploaded to the server. Join with changelist to see the group they were uploaded with. Each version includes the full file path to the original document. If this file was retrieved from version control, this will be the version control server path, not the path on the user's local hard drive. The version name is the version control-specific name of the version of the file. This is typically a number or set of numbers. The version change-type indicates whether this represents a file addition, deletion, modification, and so on. Sometimes the system does not know. You should use this as a guide but not depend on it because there are exceptions to the "type" rules and we add new types periodically. The current values are: ? A B D I - Unknown Added Branched Deleted Integrated © 2003-2015 SmartBear Software 592 593 External Integrations M - Modified R - Reverted U - Uploaded Sometimes the version will have a "previous" version. This typically means the version that came before it in version control. This is used internally and is tricky; there are lots of exceptions and we can change exactly what this means. The content MD5 is the MD5 sum of the raw content of the file. This can be used to link a version with the on-disk file content stored in the content cache. It can also be used as a check to see whether two versions are identical. Reporting Views For databases that support the concept of a "View," Collaborator creates a set of Views specifically for the purpose of external report-writers. You should use these Views whenever possible; we will make sure that the definitions of these Views remain the same even if we change the database schema in future versions. You can also use these Views as a guide for how to create other custom queries. Here are the special reporting Views: assignment_view assignment_state defects_by_path defectcustom Contains columns from the assignment table which will be maintained in the event of a future schema change. Contains names and descriptions for the codes used in the actioncode column of the assignment table. One row per review reporting file path, lines of code reviewed, and number of defects. These are the custom fields you have defined for defects, one row for each defect. If you change the custom field definition, the layout of this table will change as well (automatically, and immediately). Warning: Because the exact custom field titles are used for column names, if you change the title of a custom field it will change the definition of this view. With review workflows 198 , each review might have a different subset of custom fields. In this case fields are NULL when they are not applicable. © 2003-2015 SmartBear Software Database Schema defectcustom_compat defect_custom_dropd owns defect_state defect_view participant_singlel ine_values participant_multili ne_values participant_select_ values phase review_activity Same as defectcustom, but column names are in the form custom_id_N where "N" is the custom field ID as displayed in the custom fields admin page 183 . The columns are ordered exactly the same as defectcustom, so you can also tell which is which by comparing the two views. This table contains a list of the possible values as defined in drop-down and multi-select Defect Custom Fields. Contains "defect state" codes and names. Join on this table if you would like to display more user-friendly defect state names. Contains columns from the defect table which will be maintained in the event of a future schema change. Shows Participant Custom Field values that users have selected in reviews. This table only shows values for "Single-Line Text" type custom fields. A NULL value means that a custom field was defined for a review's template, but the user did not specify a value. Shows Participant Custom Field values that users have selected in reviews. This table only shows values for "Multi-Line Text" type custom fields. A NULL value means that a custom field was defined for a review's template, but the user did not specify a value. Shows Participant Custom Field values that users have selected in reviews. This table shows values for "Drop-Down" and "MultiSelect" type custom fields. A NULL value means that a custom field was defined for a review's template, but the user did not specify a value. In the case of Multi-Select fields, if a user selected multiple values then multiple rows will appear in the results, one for each selection. Represents the various phases a review can be in. For each unique combination of review, user, and role, reports the person-hours 676 spent. This includes data for current review participants only. If a user was a participant but is not now, that person will not be included in this result. However that time will be included in the review_activity_summary view. review_activity_sum mary © 2003-2015 SmartBear Software One row per review reporting author, reviewer, rework hours, and total person-hours 676 spent in the review. 594 595 External Integrations · total_person_hours -- a total of all time spent in the review · author_rework_hours -- time spent by the author during the "rework" phase. · author_hours -- time spent by the author outside of the rework phase. · reviewer_hours -- total time spent by reviewers. (active & passive) · active_reviewer_hours -- time spent by "active" reviewers (that is, reviewers required to finish a review.) · passive_reviewer_hours -- time spent by "passive" reviewers (that is, those not required to finish a review.) review_comment_summ ary One row per review reporting author, reviewer, and total number of comments made in the review. review_defect_summa ry One row per review reporting the number of defects created in that review. review_metrics_summ ary review_version_list review_version_summ ary reviewcustom One row per review reporting a variety of standard metrics such as inspection rate, defect rate, defect density, and the individual numbers used to form those ratios. Some values will contain NULL values because of divide-by-zero errors. Lists all versions actually associated with a review, although with the associated review. One row per review reporting the number of files and line metrics 675 (total, added, modified, removed) for all files in the review. These are the custom fields you have defined for reviews, one row for each review. If you change the custom field definition, the layout of this table will change as well (automatically, and immediately). With review workflows 198 , each review might have a different subset of custom fields. In this case fields are NULL when they are not applicable. © 2003-2015 SmartBear Software Database Schema reviewcustom_compat review_custom_dropd owns review_view role_view userprefs userprefs_compat user_view 7.1.2 Same as reviewcustom, but column names are in the form custom_id_N where "N" is the custom field ID as displayed in the custom fields admin page 183 . The columns are ordered exactly the same as reviewcustom, so you can also tell which is which by comparing the two views. This table contains a list of the possible values as defined in drop-down and multi-select Review Custom Fields. Contains columns from the review table which will be maintained in the event of a future schema change. Contains columns from the role table which will be maintained in the event of a future schema change. Additional user preferences, one row per user. Most user information and preferences are stored in the user table; the rest is here. Same as userprefs, but column names are in the form custom_id_N where "N" is an internal ID used to store user preferences. The columns are ordered exactly the same as userprefs, so you can tell which is which by comparing the two views. Contains columns from the user table which will be maintained in the event of a future schema change. Example SQL: Participant Custom Fields What Are Participant Custom Fields? In Collaborator, we introduced Per-Participant Custom Fields 183 . This allows you to create a field in a review (via its review template) to which each review participant can assign his or her own value. This allows collection of any type of data that may be different for each participant. Representing this data in table/column style is sometimes less than useful, especially since, generally, you will want to perform some calculation on the data before displaying it. To aid you in this, we have created views in the database to help you retrieve these values and perform calculations on them. Examples in MySQL Below is a sample of how to query Participant Custom Fields in MySQL 55 , using MySQL Workbench to connect directly to the database. The syntax will be similar for Oracle and MSSQL, though you may need to reference the documentation for your particular database. You will also need to use a SQL query tool that is able to connect to those databases. © 2003-2015 SmartBear Software 596 597 External Integrations Participant Custom Fields In these examples, we will use the following Participant Custom Fields: © 2003-2015 SmartBear Software Example SQL: Participant Custom Fields We will also use a review (#3919) with some sample data entered for the custom fields: © 2003-2015 SmartBear Software 598 599 External Integrations Simple Data The simplest method of selecting the data from the database is just to show the values as they were entered by users. To do this, we will use one of the views 587 for Participant Custom Fields that have been defined in the database. SELECT * FROM participant_singleline_values WHERE reviewId IN (3919, 3918); Note that, for the purposes of these examples, we are limiting the results to two reviews. Review #3918 only has one participant (it is still in planing phase), who has not yet specified a value for Outside Time. Review #3919 has three users, two of which have specified values for Outside Time. A Note About Database Data Types Collaborator stores all values for Custom Fields as strings, or sequences of letters and numbers. This is fine for the purposes of displaying the data (as above), but if you want to perform calculations on the data, you will need to tell your database to convert the strings into a meaningful number type, such as an integer, or a floating point number. In MySQL, you perform this data conversion using the CONVERT() function. © 2003-2015 SmartBear Software Example SQL: Participant Custom Fields SQL also contains a 'NULL' value, which represents the absence of a specified value. If you want to replace NULL values with some meaningful default value, use the IFNULL() function. Generally, aggregate functions like SUM() and AVG() will exclude NULL values from their calculations, so you will not need this function. Sums If we would like to find the sum of Outside Time for each review, we can modify the query to be: SELECT reviewId, SUM(CONVERT(value, SIGNED INTEGER)) outsideTime FROM participant_singleline_values WHERE reviewId IN (3919, 3918) AND fieldName = 'Outside Time' GROUP BY reviewId; In the SELECT line, we now explicitly list each of the columns we wish to select. We use the CONVERT() function to convert the values to (signed) integers, and then the SUM() function to add them up. We also specify that the summed value should be named "outsideTime". In the WHERE clause, we have added an additional 'AND' clause. This makes sure that we only sum up values of the correct field type: 'Outside Time'. Because we are using an aggregate function (SUM()), we have to specify which pieces of data we want to perform that calculation on. In this case, we want the sum for each review, so we specify "GROUP BY reviewId". The database server first groups all results with the same review ID together, then sums the values for each of those groups. © 2003-2015 SmartBear Software 600 601 External Integrations Averages To perform averages, the query is nearly identical, we just replace the SUM() function with the average function, AVG(): SELECT reviewId, AVG(CONVERT(value, SIGNED INTEGER)) avgOutsideTime FROM participant_singleline_values WHERE reviewId IN (3919, 3918) AND fieldName = 'Outside Time' GROUP BY reviewId; Note that these may or may not be the results you were expecting, depending on how you wish to treat NULL values. In the above results, NULL values have been excluded from the calculation of the average, so what we are really seeing is the average of 27 and 45. If you instead want to treat NULL values as if they were 0, you need to specify that in your query using the IFNULL() function. IFNULL(x,y) says that if x is NULL, return y. (Otherwise, it just returns x.) So we will modify our query like this to treat NULLs as if they were 0: SELECT reviewId, AVG(IFNULL(CONVERT(value, SIGNED INTEGER),0)) avgOutsideTime FROM participant_singleline_values WHERE reviewId IN (3919, 3918) AND fieldName = 'Outside Time' GROUP BY reviewId; © 2003-2015 SmartBear Software Example SQL: Participant Custom Fields Note that, now that we treat missing (NULL) values as zeros, the average Outside Time for Review #3919 is the average of 27, 45, and 0. Also note that the missing values for Review #3918 are also interpreted as zeros, so we get a 0 result instead of a NULL. 7.1.3 Example XPath and XSL If you feel more comfortable handling XML conversions than connecting directly to a database, you can instead get data about reviews using the command ccollab admin review-xml. This command has one required argument, the review ID. By default, it will output the entire XML document for the review. However, there are optional arguments of --xpath and --xsl-file which allow you to query the resulting document for particular information. XPath XPath allows you to address XML elements in an XML document much like paths in a file system. The hierarchy in an XPath expression tells the XPath parser where in the XML document to find elements. For example, to get the section of the review-xml document that contains participant custom fields, you would use an XPath expression like this: /reviews/review/participant-custom-fields Below is an example command invocation and its response: $ ccollab admin review-xml 3919 --xpath /reviews/review/participantcustom-fields © 2003-2015 SmartBear Software 602 603 External Integrations <participant-custom-fields> <user userId="70"> <outside-time metaDataId="198" title="Outside Time">27</outsidetime> <affected-components metaDataId="199" title="Affected Components">APIs Business Logic Database Back-end</affected-components> <rating metaDataId="197" title="Rating">5</rating> </user> <user userId="71"> <outside-time metaDataId="198" title="Outside Time">45</outsidetime> <affected-components metaDataId="199" title="Affected Components"/> <rating metaDataId="197" title="Rating">2</rating> </user> <user userId="72"> <outside-time metaDataId="198" title="Outside Time">0</outside-time> <affected-components metaDataId="199" title="Affected Components"/> <rating metaDataId="197" title="Rating"/> </user> </participant-custom-fields> Finding Particular Values To get all values of a particular type, you will need to specify a few more path elements. Note in the sample above that all of the Participant Custom Fields are grouped by the user that specified them. Within that user tag, each of the fields gets a unique XML tag which is a normalized form of the title of the custom field title. The value for that field is stored as text inside of that field's tag. So, to get the values for the Rating field, you would use the following XPath expression: /reviews/review/participant-custom-fields/user/rating/text() © 2003-2015 SmartBear Software Example XPath and XSL Below is an example invocation, and its output: ccollab admin review-xml 3919 --xpath "/reviews/review/participantcustm-fields/user/rating/text()" 5 2 Note that we had to quote the XPath expression because some command-line shells interpret parentheses as non-literal characters. XSLT XSLT (Extensible Stylesheet Language Transformation) is a subset of XSL which can be used to transform an XML document into another format. You can use XPath expressions along with XSLT to perform more complicated data queries. For example, if we want to show all "rating" values and the user ID of the user who set them, we can use a file like this: File: sample.xslt <?xml version="1.0" encoding="iso-8859-1"?> <xsl:stylesheet version="1.0" xmlns:xsl="http://www.w3.org/1999/XSL/ Transform"> <xsl:output method="text"/> <xsl:template match="/"> <!-- Output CSV of Participant Custom Fields --> <!-- Header: --> <xsl:text>UserID</xsl:text> <xsl:text>, </xsl:text> <xsl:text>Field Name</xsl:text> <xsl:text>, </xsl:text> <xsl:text>Field Value</xsl:text> <xsl:text> </xsl:text><!-- linefeed --> <xsl:for-each select="/reviews/review/participant-custom-fields/ user"> © 2003-2015 SmartBear Software 604 605 External Integrations <xsl:value-of select="@userId"/> <xsl:text>, </xsl:text> <xsl:value-of select="rating/@title"/> <xsl:text>, </xsl:text> <xsl:value-of select="rating/text()"/> <xsl:text> </xsl:text> </xsl:for-each> </xsl:template> </xsl:stylesheet> Here is how you would use the above XSL file, and some sample results: $ ccollab admin review-xml 3919 --xsl-file sample.xslt UserID, Field Name, Field Value 70, Rating, 5 71, Rating, 2 72, Rating, Note that user #72 has not specified a value for Rating, so that value is empty. 7.2 Bug-Tracking Integration Collaborator can integrate with external issue-tracking systems such as TeamTrack, Bugzilla, JIRA, and FogBugz. Integration can be done in several ways depending on the type of integration you require. Hyperlinked Issues Collaborator can identify external issue references in titles, custom fields, comments, defects, and more, and automatically hyperlink them to the right web page in your external issue tracker. For example, here at SmartBear we use the word "Case" followed by a number to identify a issue in our bug system. So we configured Collaborator to search for text in the (regular expression) form of "\bcase\s*(\d+)" and automatically hyperlink the number part (in the grouping symbols) to FogBugz, our external issue tracker. See this section 212 for details on how to do this configuration. © 2003-2015 SmartBear Software 606 Referring to issues in the Review Overview It is common to want to associate one or more issues with each review. The easiest way to do this is to create a custom review field 183 and set the regular expression validator to ensure that only properly-formatted issues are entered in. You should also set up the issue-hyperlink feature described above so that these fields are interactive. Externalizing: Moving a defect from Collaborator to an external issue tracker Sometimes you find a defect during review that you do not want to fix just now. In this case you want to move the defect from Collaborator into an external issue tracker. You also want to record this state and audit trail in the review. The externalized defects details. 299 feature allows you to do just that. See that section of the manual for It is unusual to integrate beyond this point This is the extent to which most of our customers go with integration. Most people do not want review defects mirrored into an external issue tracker because these defects were never "delivered". For example, if you had done the peer review side-by-side with someone, you would not enter in defects then -- you would just fix them! Usually the QA department runs off the issue tracker for verification. How can QA verify something that was not necessarily externally broken (for example, some function was not checking input values carefully) or something just in the file (for example, some method was not documented properly). Mirroring defects from Collaborator into an external issue tracking system You can use the server-side trigger 201 that runs every time a defect is added, edited, marked fixed, or deleted. Your trigger would locate the corresponding external issue record and update it. This integration takes a bit of work. We do not have it pre-built because everyone's external issue-tracking system is different. For an example see this scripting tutorial © 2003-2015 SmartBear Software 633 . 607 7.3 External Integrations JIRA Integration Collaborator provides advanced support for JIRA, giving you the possibility to easily integrate these two products into your work processes. This allows you to create Collaborator reviews from JIRA tickets' linked commits or use JIRA as notification channel. The integration saves the time and efforts needed to synchronize your JIRA items and Collaborator reviews, and helps you be concentrated on your business tasks rather than on the integration procedures. How the Integration Works The integration means that -· You can create JIRA tickets directly from the Collaborator user interface: Use this functionality to create a JIRA item for your colleagues to remind them to review documents. For more information, see Creating JIRA Tickets From Collaborator 608 . · You can create Collaborator's reviews from within the JIRA item screens -- (The items must have Git or Subversion commits attached via Atlassian FishEye.) This feature significantly streamlines the review creation process. © 2003-2015 SmartBear Software 608 For more information, see Creating Collaborator Reviews From JIRA 609 . Requirements To use the integration features, you need to configure certain settings on your JIRA and Collaborator servers. Additionally, to be able to create Collaborator's reviews from JIRA, you will need to install and configure Atlassian FishEye and install and configure the Collaborator plugin for JIRA. For detailed information, see Configuring JIRA and Collaborator Servers 7.3.1 611 . Creating JIRA Tickets From Collaborator When integration between JIRA and Collaborator is enabled and properly configured, you can create JIRA tickets directly from the Collaborator user interface. To create JIRA ticket, do the following: 1. Login to Collaborator Web Client 2. Open the desired review in the Review Summary Screen 243 . 3. In the General Information section find the JIRA project field and select a JIRA project where you want to create the new item. 4. Scroll to the Participants section. 5. Click the Create JIRA ticket link next to the participant name. Collaborator will perform the following actions: · Create a new item in the specified project, · Fill-in item's Title and Description with the information from the review, · Assign this item to a JIRA account linked 230 with the chosen participant, · Add a link to the created JIRA ticket in the Participants section. © 2003-2015 SmartBear Software 609 External Integrations The newly created JIRA item will look like this: 7.3.2 Creating Collaborator Reviews From JIRA Once FishEye integration with JIRA is established, commits from the source code systems can be linked to JIRA tickets. This allows to quickly monitor what changes were made and with what ticket they are related. Collaborator integration with JIRA expands this duo and allows to unite commits from the source code systems, JIRA tickets and code reviews. When integration between JIRA and Collaborator is enabled and properly configured, JIRA users gain ability to create Collaborator reviews from within the JIRA item screens. To create a Collaborator review from JIRA item screen, do the following: 1. Open a JIRA item which has some Git or Subversion commits attached. 2. Press the Create/Update Review button (at the top-left of the 'view issue' page) © 2003-2015 SmartBear Software Creating Collaborator Reviews From JIRA This will creates a new review in Collaborator. The new review gets a link to the original JIRA issue and the Review Materials section of new review contains the same commits that were linked to the original JIRA item. Once the review is created, the JIRA item screens display new section named Review Information. © 2003-2015 SmartBear Software 610 611 External Integrations This section displays the link to the associated review, its current phase and list of review participants. 7.3.3 Configuring JIRA and Collaborator Servers In order to enable integration between JIRA and Collaborator, you need to prepare both JIRA and Collaborator servers. Besides, in order to create Collaborator's reviews from JIRA, you will need to install and configure Atlassian FishEye and Collaborator Plugin for JIRA. Preparing JIRA Server 1. Install and Configure Atlassian FishEye. JIRA.) 612 2. Install Collaborator Plugin for JIRA. (Needed for creating Collaborator reviews from JIRA.) 612 3. Configure Collaborator Plugin for JIRA. JIRA.) 4. Configure JIRA Fields. 614 (Needed for creating Collaborator reviews from (Needed for creating Collaborator reviews from 618 © 2003-2015 SmartBear Software Configuring JIRA and Collaborator Servers Preparing Collaborator Server 5. Create JIRA Configuration and Enable the Integration. 6. Configure User Remote Accounts. 7.3.3.1 622 624 1. Installing and Configuring FishEye To be able to create Collaborator reviews from JIRA items, you will need to establish the integration between FishEye and JIRA. If this feature is not required, you may skip the steps of this section and proceed to Configuring JIRA Fields 618 . What is FishEye? Atlassian FishEye is a server tool that allows you to track changes in source control repositories. FishEye integrates with JIRA to allow users link commits in source controls with JIRA items. Installing and Configuring FishEye To enable the integration between FishEye and JIRA follow the steps below: 1. Install and start FishEye on your server. For detailed instructions how to do this, please see Installing FishEye on Windows and Installing FishEye on Linux and Mac in FishEye's documentation. 2. Specify which source control repositories FishEye should monitor. This must be a Git or a Subversion repository, as other source control systems are not yet supported by Collaborator Plugin. For detailed instructions how to do this, please see Starting to use FishEye and Adding an external repository in FishEye's documentation. Ok, now we can install the Collaborator Plugin for JIRA 7.3.3.2 612 . 2. Installing the Collaborator Plugin for JIRA To be able to create Collaborator reviews from JIRA items, you will need to install and configure special Collaborator plugin for JIRA. If this feature is not required, you may skip the steps of this section and proceed to Configuring JIRA Fields 618 . The Collaborator plugin for JIRA serves to exchange data between Collaborator and JIRA. Follow the steps below to install it: 1. Download the plugin from the SmartBear website: http://smartbear.com/plugins/ © 2003-2015 SmartBear Software 612 613 External Integrations 2. Log in to your JIRA as an administrator (or a user with administrator permissions). 3. In JIRA, go to JIRA Administration > Add-ons: JIRA can ask you to enter the user name and password once again. 4. On the next screen, select Manage Add-ons on the left and then click Upload add-on on the right: 5. In the subsequent dialog box, specify the plugin's file name and click Upload: © 2003-2015 SmartBear Software Configuring JIRA and Collaborator Servers The plugin will be installed in JIRA. You will see it at the end of the add-on list. After installing the plugin, you need to configure its settings 7.3.3.3 614 . 3. Configuring the Collaborator Plugin for JIRA To be able to create Collaborator reviews from JIRA items, you will need to configure the Collaborator plugin for JIRA. If this feature is not required, you may skip the steps of this section and proceed to Configuring JIRA Fields 618 . After installing 612 the Collaborator plugin in JIRA, you need to configure it. Follow these steps: 1. In JIRA, go to JIRA Administration > Projects: © 2003-2015 SmartBear Software 614 615 External Integrations 2. Click your project in the list: 3. Scroll the subsequent screen down and click Collaborator at the bottom left: © 2003-2015 SmartBear Software Configuring JIRA and Collaborator Servers You will see the Collaborator plugin's settings: © 2003-2015 SmartBear Software 616 617 External Integrations 4. Specify the settings' values: Collaborator Settings Setting Description Collaborator Url The address and port of the Collaborator server. Collaborator Username and Password The user name and password that the plugin will use for connecting to the specified Collaborator server. Important: the user should have administrator permissions in Collaborator. © 2003-2015 SmartBear Software Configuring JIRA and Collaborator Servers After specifying these values, you can click Test Collaborator Connection to verify if you entered data correctly. FishEye Settings The Collaborator plugin uses FishEye to get information on files to be included in a review, when you are creating a Collaborator's review from JIRA. Setting Description FishEye Url The address and port of the FishEye server. FishEye Username The name of the FishEye account that the plugin will use for monitoring source control commits. Important: the user should have administrator permissions in FishEye. FishEye Password The password for connecting to FishEye. After specifying these values, you can click Test FishEye Connection to verify if you entered data correctly. 5. After you specified the setting values, click Save. Besides configuring the Collaborator plugin for JIRA, you also need to configure the visibility of certain JIRA fields 618 . 7.3.3.4 4. Configuring JIRA Fields To exchange data between Collaborator and JIRA, the Collaborator Plugin uses a number of JIRA fields. To create JIRA tickets, the integration uses Summary, Issue Type and Assignee built-in fields. In order to create new tickets successfully, these built-in fields must be visible on JIRA screens that you use to create and update issues. These fields are visible by default. To update information about current review status and list of review participants, the integration creates three custom fields - Review Id, Review Participants and Review Phase. The later three custom fields become available after you create at least one review from JIRA. To be able to update the review status and participants, these custom fields must be visible on JIRA screens that you use to create and update issues. These fields are hidden by default. Typically the "Default screen" is used both for creating and updating issues in JIRA, however this may vary depending on your JIRA configuration. © 2003-2015 SmartBear Software 618 619 External Integrations If some of required JIRA fields are hidden, Collaborator will display the "Field <name> cannot be set" error. To configure the fields: 1. Log in to JIRA as an administrator. 2. Go to JIRA Administration > Issues: 3. Select Fields > Field Configurations to open the View Field Configurations page, which lists all your field configurations. 4. Select the desired field configuration and click the Configure link. © 2003-2015 SmartBear Software Configuring JIRA and Collaborator Servers 5. In the ensuing View Field Configuration page locate the following fields: · Summary · Issue Type · Assignee · Review Id · Review Participants · Review Phase 6. Make sure these fields are visible in current configuration. To display a field that is currently hidden, click Show link next to its name: © 2003-2015 SmartBear Software 620 621 External Integrations You have prepared your JIRA server for integration with Collaborator. You will also need to change certain settings on the Collaborator server. © 2003-2015 SmartBear Software Configuring JIRA and Collaborator Servers 7.3.3.5 5. Creating JIRA Configuration and Enabling the Integration 1. Open the Collaborator login page in a browser, and log in to Collaborator as an administrator. 2. In Collaborator, go to Admin > Remote System Integration 3. Under Configure a new remote system, select JIRA and click Create. 4. This will display the configuration settings. 5. Specify the setting values: Setting Description Title The configuration name as it will be displayed in Collaborator's user interface. Server URI The JIRA server's URL and port. Admin username, and Admin password The user name and password that the plugin will use for connecting to JIRA. © 2003-2015 SmartBear Software 622 623 External Integrations It is recommended that the specified user has administrator permissions in JIRA. After specifying these values, you can click TEST CONNECTION to verify if you entered data correctly. Setting Description Update review phase Specifies if the Collaborator plugin will automatically update the review status in JIRA items that are connected with that review. Update review participants Specifies if the Collaborator plugin will automatically update the list of review participants in JIRA items that are connected with that review. Project List A string containing the keys of JIRA projects, to which Collaborator will add new items. This setting's value is used as a default value for the JIRA Project custom field (see below). If you are going to create items in several projects, enter several keys and separate them with commas. Tip: click LOAD PROJECTS to read project keys from the JIRA instance specified by the Server URI setting. Project keys are case-insensitive. Issue Type The type of the JIRA items to be created from Collaborator. You can specify one item type only. Important: This setting is case-sensitive. Specify the type exactly as it is written in JIRA settings. 6. After you specified the values, click Save. This will create a JIRA configuration. 7. Scroll the Admin > Remote System Integration screen up to the Integration Status section. This section allows you to quickly enable or disable integrations with remote systems. 8. Locate the Enable JIRA Integration setting and change it to Yes. © 2003-2015 SmartBear Software Configuring JIRA and Collaborator Servers 9. Once the JIRA configuration is enabled, Collaborator automatically creates a new review custom field 183 named JIRA Project and displays the Review Templates panel. In this panel you need to specify which of the templates should display the JIRA Project field. JIRA Project is a drop-down field which lists JIRA projects, to which Collaborator can add new items. Just after the creation, the JIRA Project field is hidden. To show this field in the desired template, just click the Enable link next to template name. Now the integration between Collaborator and JIRA is configured and running. The last thing we need to do is to link Collaborator user accounts with JIRA user accounts. 7.3.3.6 6. Configuring User Remote Accounts When you create a JIRA item from Collaborator, the latter should know the assignee user name in JIRA. Similarly, when you create a Collaborator review from JIRA, the Collaborator plugin should know your user name in Collaborator to specify the review participants correctly. If the name of Collaborator user account coincides with the name of JIRA user account, then integration will link these two accounts automatically. If the name of Collaborator user account differs from the name of JIRA user account, then this user must specify his/her JIRA account name in the Remote Accounts 230 section of User Preferences 225 of Collaborator. To do this: 1. Open the Collaborator login page in a browser, and log in to Collaborator © 2003-2015 SmartBear Software 624 625 External Integrations 2. In Collaborator, go to Settings. 3. Switch to Remote Accounts section. 4. Enter your JIRA account name into the JIRA Username field and press Save. 7.4 GitHub Integration Collaborator provides support for GitHub and GitHub Enterprise, giving you the possibility to easily integrate these two products into your work processes. The integration saves the time and efforts needed to synchronize your commits on GitHub and Collaborator reviews. How the Integration Works Collaborator tracks changes at pre-defined GitHub repository and automatically creates reviews in Collaborator upon: o pull requests in one or several specified branches of the repository, o pushes to one or several specified branches of the repository. (The latter can be suppressed via the "Ignore pushes for branches 215 " setting.) © 2003-2015 SmartBear Software 626 On the Collaborator server, the review is assigned to the user who has associated username filled in the Remote Accounts 230 tab of their settings panel. The Review Materials section will hold the files that were modified on the GitHub server. © 2003-2015 SmartBear Software 627 External Integrations Besides, the integration updates data in a previously created reviews, when: o further commits are made in a branch which initiated a pull request, o a commit was made that resolves file merge conflict. Requirements To use the integration features, you need to obtain a personal access token on GitHub and configure certain settings on the Collaborator server. Read Configuring GitHub Integration 628 for detailed instructions. © 2003-2015 SmartBear Software 628 Technical Details · When a review is created, the integration uploads a copy of files that were modified on the GitHub server. That is, Collaborator does not depend on commit IDs or any other references to modified files, since it gets the files itself. Keep this information in mind when rebasing a pull request. Collaborator does not track commit IDs and does not pull the source when needed. If you rebase in such a way that remote branch can be fast-forwarded then no problems are to expect. If you use "git push -force" we cannot guarantee flawless operation. Also, it might be a problem with "comments" in chat. · Integration creates reviews on any pull requests - no matter whether it came from the same repository of from forked repository. · When a pull requests causes file conflict, the integration acts as follows. Once a file conflict could be resolved automatically, the merge commit will not be added to the review. If a file conflict was resolved manually (that is, if some files have been changed to complete the merge), then GitHub integration will update the review with the changes from the resolving commit. Known Issues · Due to limitations of the GitHub API, it is not presently possible to sync over review materials larger than 1MB (for example, large image or document files); to be clear this applies to individual files of greater than 1MB size. 7.4.1 Configuring GitHub Integration In order to enable integration between GitHub and Collaborator, you need to: 1. Create GitHub Configuration and Enable the Integration 629 2. Link the owner of GitHub repository with some of Collaborator users © 2003-2015 SmartBear Software 630 629 7.4.1.1 External Integrations 1. Creating GitHub Configuration and Enabling the Integration 1. Open the Collaborator login page in a browser, and log in to Collaborator as an administrator. 2. In Collaborator, go to Admin > Remote System Integration 3. Under Configure a new remote system, select GitHub and click Create. 4. This will display the configuration settings. 5. Specify the setting values: Setting Description Title The configuration name as it will be displayed in Collaborator's user interface. GitHub repo URI The URL of GitHub repository to be tracked. You can copy it from the Clone URL field of the repository's main page on GitHub. GitHub API token The personal access token for the GitHub account to be tracked. Read Creating an access token for command-line use on GitHub documentation to learn how to obtain it. The default set of token scopes is enough for integration with Collaborator. Branch to track One or several coma-separated names of branches to track. If this field is empty, "master" branch will be tracked. © 2003-2015 SmartBear Software Configuring GitHub Integration Endpoint URI This setting is needed for repositories hosted on GitHub Enterprise servers. It specifies the API URI of your GitHub Enterprise server. Ignore pushes for branches Optional. One or several coma-separated names of branches to ignore. Collaborator will not create reviews for pushes to the specified branches. After specifying these values, you can click TEST CONNECTION to verify if you entered data correctly. 6. After you specified the values, click Save. This will create a GitHub configuration. 7. Scroll the Admin > Remote System Integration screen up to the Integration Status section. This section allows you to quickly enable or disable integrations with remote systems. 8. Locate the Enable GitHub Integration setting and change it to Yes. Now the integration between Collaborator and GitHub is configured and running. Also we need to link some Collaborator user account to the GitHub account owner. 7.4.1.2 630 of repository 2. Configuring User Remote Accounts In order to assign GitHub reviews to the appropriate person, we need to link the owner of GitHub repository with some of Collaborator user accounts. If Collaborator fails to match the GitHub repository owner with any of Collaborator users, then it will not create any reviews from GitHub. If the name of a Collaborator user account coincides with the name of a GitHub user account, then integration will link these two accounts automatically. If the name of a Collaborator user account differs from the name of a GitHub user account, then this user must specify their GitHub account name in Collaborator's User Preferences 225 > Remote Accounts 230 . To do this: 1. Open the Collaborator login page in a browser, and log in to Collaborator. 2. In Collaborator, go to Settings. © 2003-2015 SmartBear Software 630 631 External Integrations 3. Switch to Remote Accounts section. 4. Enter the name of GitHub repository owner into the GitHub Username field and press Save. Now GitHub integration is fully configured. 7.5 Scripting Scripting is the easiest way to implement custom behaviors with Collaborator. Command-Line Client You can use the Command-Line Client to script actions on your user's machines, or install it on the same machine as the Collaborator Server and invoke it with a trigger 201 . The Command-Line Client can create, delete, and edit reviews, including templates and review custom fields. It can assign or remove participants within a review, and even move reviews to the next phase (for example, from "planning" to "inspection"). It can also create comments and defects, including defect custom fields, and mark defects as external. You can use the Command-Line Client to create, edit, enable or disable user accounts. It can be used to set up user information like email addresses and phone numbers. It can also be used to set up author or file-based subscriptions. Batching Commands Often when scripting you find that you need to run multiple Command-Line Client commands. It is OK to simply run them one after the other in your script, but it is more efficient to group them together using the ccollab admin batch command. The batch command takes as input an XML file which lists the commands to be run and optionally global options to use to run them. © 2003-2015 SmartBear Software 632 It is faster to run multiple commands using the batch command because the Command-Line Client only has to connect and authenticate with the Collaborator Server once. Also the XML input format is useful if the data you are passing to the Command-Line Client contains characters difficult to encode on the command-line like line feeds, quotes, or multi-byte characters. Extracting Data The ccollab admin review-xml command lets you extract data from one or more reviews in your script. You can supply an XSL file to format the output, or an XPATH expression to select only the specific data you need. You can even use XPATH functions to perform some computation. You can also query the server for a list of reviews using the built-in reports 310 , and then use the ccollab admin wget command to download the CSV output format 312 to be parsed by your script. Note the CSV output format of the reports does not consume a license. For example, to get a list of the reviews currently in progress run: ccollab admin wget "/go? page=ReportReviewList&formSubmittedreportConfig=1&reviewIdVis=y&revie wTitleVis=y&data-format=csv&phaseFilter=inprogress" Prompting You can disable all interactive prompting by specifying the non-interactive If non-interactive server url 351 , user Server. 351 351 351 global option. is not specified, the Command-Line Client will automatically prompt for 351 as necessary when it connects to the Collaborator , and password You can also use the special value "ask" when specifying the review parameter. Using "ask" will cause the Command-Line Client to interactively prompt the user with the list of reviews they are currently involved in. If you are invoking more than one command, you can use the special value "last" in combination with "ask". Using "last" will cause the Command-Line Client to address the review most recently accessed by the Command-Line Client. Typically the first command in the script will use "ask" and then subsequent commands use "last" to access the same review. Opening a Browser Collaborator is fundamentally a web-based tool and the actual reviewing goes on in a browser. Many Command-Line Client commands automatically open a browser to allow the user to take the next step. You can prevent the Command-Line Client from opening a browser by specifying the no-browser 351 global option. You can also explicitly open a browser using the ccollab browse command. Note the browse command ignores the no-browser 351 global option. © 2003-2015 SmartBear Software 633 External Integrations "Virtual" Script Users Often when setting up scripting it is convenient to create a Collaborator user which the script will use to log in to the Collaborator server. Simply create a user in the normal way and give the credentials (login and password) to the script. The command-line scripting commands will not cause the "virtual" script user to consume a license (except ccollab admin wget, if the URL it is loading consumes a license). Downloading file version content A special URL lets you download the binary contents of any file version efficiently. The URL is authenticated, so you have to use ccollab admin wget. Note the version content URL does not consume a license. For example, to get a file version with ID 12345: ccollab admin wget "/data/server?versionid=12345" The 'wget' command can also be used to: Get all diffs in a review: ccollab admin wget "/diff?context=<context>&reviewid=<review id>" Get diffs from two specific versions: ccollab admin wget "/diff?context=<context>&reviewid=<review id>&versionids=<version a>,<version b> 7.5.1 Mirroring Defects to an external issue-tracker In this tutorial we will set up a script that will automatically mirror defects found during a peer review in Collaborator to an external issue-tracking system. In this tutorial we will mirror defects to FogBugz, but the steps in this tutorial can be modified to mirror defects to any external issuetracker. Outline When a Defect is created in Collaborator the Defect activity trigger 201 invokes a script which creates a new "Case" in FogBugz with a link back to the review. Then the Defect in Collaborator is marked "external" with a link to the mirrored Case in FogBugz. © 2003-2015 SmartBear Software Mirroring Defects to an external issue-tracker Prerequisites The script in this example is written in Perl, so the server must have the Perl runtime installed. The script invokes the Collaborator Command-Line Client, so that needs to be installed on your server machine as well. Be sure to install these prerequisites so that they are accessible and executable by the system user which is running the Collaborator server (this is especially important on Unix systems). Script Step 1: Set up constants The script will need to know a few values to do it is work. These will be hard-coded in to the script: # URL to the Collaborator Server $CCOLLAB_URL = "http://localhost:8080"; # Login of Collaborator User who will mark the Defect as external $CCOLLAB_USER = "admin"; # Password of Collaborator User who will mark Defect as external $CCOLLAB_PASSWORD = ""; # URL to the FogBugz server $FOGBUGZ_URL = "http://bugs"; # Email of user to use to create Case in to FogBugz $FOGBUGZ_USER_EMAIL = "person\@yourcompany.com"; # Password of user to use to create Case in to FogBugz $FOGBUGZ_USER_PASSWORD = "yourpasswordhere"; Script Step 2: Read parameters from command-line The Review ID, Defect ID, and Defect title will be supplied by Collaborator as parameters when it invokes the script from the trigger (we set that up in Step 9 637 ). The script needs to read those parameters from the command-line: # read parameters from command-line © 2003-2015 SmartBear Software 634 635 External Integrations $reviewId = $ARGV[0]; $defectId = $ARGV[1]; $defectTitle = $ARGV[2]; Script Step 3: Logon to FogBugz The script will use the FogBugz web services API to mirror the Defect in to FogBugz. In order to use the API we first have to "logon" and acquire an "authentication token": # logon to FogBugz my $response = get("$FOGBUGZ_URL/api.php? cmd=logon&email=$FOGBUGZ_USER_EMAIL&password=$FOGBUGZ_USER_PASSWORD") ; # extract authentication token $response =~ /<token>(?:<!\[CDATA\[)?([^\]]+)(?:\]\]>)?<\/token>/; my $token = $1; Script Step 4: Create Case in FogBugz The script creates a "Case" in FogBugz, setting the title of the Case to the text from the Collaborator Defect, and putting a link back to the Collaborator server in the description of the Case. Note that the Defect title and Case description have to be escaped because they are going in to a "get" URI. The script extracts the resulting Case ID and saves it for later: # create new Case $defectTitle = uri_escape($defectTitle); $description = uri_escape("Defect D$defectId mirrored from Collaborator Review $reviewId ($CCOLLAB_URL/index.jsp? page=ReviewDisplay&reviewid=$reviewId)"); $response = get("$FOGBUGZ_URL/api.php? token=$token&cmd=new&sTitle=$defectTitle&sEvent=$description"); # extract Case ID $response =~ /ixBug="(\d+)"/; my $case = $1; © 2003-2015 SmartBear Software Mirroring Defects to an external issue-tracker Script Step 5: Logoff from FogBugz The script logs off from FogBugz, invalidating the authentication token: # log off from FogBugz (invalidate authentication token) $response = get("$FOGBUGZ_URL/api.php?token=$token&cmd=logoff"); Script Step 6: Mark Collaborator Defect as "external" The script runs the Command-Line Client ccollab admin review defect mark-external command to mark the Defect as external. The "external-name" of the Defect is the Case number in FogBugz (which will appear as a link after Step 8 637 ): # mark Defect as "external" in Collaborator $ccollabOptions = "--url $CCOLLAB_URL"; $ccollabOptions .= " --user $CCOLLAB_USER"; $ccollabOptions .= " --password \"$CCOLLAB_PASSWORD\""; $ccollabOptions .= " --quiet --non-interactive"; system("ccollab $CCOLLAB_OPTIONS admin review defect mark-external $defectId \"Case $case\""); This step in the script works fine if you have configured Collaborator to work with MySQL. With any other database, the process is slightly more complicated - please contact technical support 28 for more details. Step 7: Test the script from the command-line That is our whole script! Here it is in finished form: mirror-defect.pl (opens in a new window). Do not forget to replace the constants in the script (urls, users, passwords and so on) with the appropriate values for your environment, then copy the script to an accessible place on your server. The script needs to be readable by the system user which is running the Collaborator server. Before you configure the Collaborator server to invoke the script automatically, test it manually by opening a console on your server machine running it on the command-line. Be sure to log in to your server machine as the user which is running the Collaborator server. First create a review and create a defect in the review, then run the script. For example, if you created Review 1234 with Defect D5678, then run the script with this command: C:\Perl\perl.exe "C:\Program Files\Collaborator Server\mirror-defect. pl" 1234 5678 "mirrored Defect title" You should see output similar to this: © 2003-2015 SmartBear Software 636 637 External Integrations Mirrored Defect D5678 in FogBugz as Case 91011 Connecting to Collaborator Server http://localhost:8080 Connected as: Collaborator Administrator (admin). D5678 marked as external When you refresh your browser in Collaborator you should see the Defect has been marked as external, with the description "Case 91011". Step 8: Set up Bug-Tracking integration link Using the Collaborator built-in Bug-Tracking hyperlink function, set up the text "Case <number>" to automatically hyperlink to that Case number in FogBugz 605 . Now if you go back to look at Defect D5678 in Collaborator the text "Case 91011" should be a hyperlink to Case 91011 in FogBugz. Step 9: Invoke Script from a trigger Make sure you have Step 7 636 working before you move on to this step. The last thing we need to do is tell the Collaborator server to automatically invoke the mirror-defect.pl script when a Defect is created. We do this with the Defect Activity trigger 201 . We will use these values: Executable: C:\Perl\perl.exe Parameters: "C:\Program Files\merge2.2\specs\collab\Baggage\mirrordefect.pl" "$review.id" "$defect.id" "$defect.txt" Defect Activity Trigger Note that it is important to use the FULL PATH of both the Perl runtime and the mirrordefect.pl script. Also note that the parameters are enclosed in quotes in case they have spaces in them. The Review id 124 , Defect id 126 , and Defect text 126 come from substitution variables 123 . © 2003-2015 SmartBear Software Mirroring Defects to an external issue-tracker Finished That is it! Now when anyone creates a Defect in Collaborator it will be automatically mirrored to FogBugz, and the Defect will be "marked as external" with a link to the Case in FogBugz. Note that for performance reasons the trigger runs after the Defect is created in a separate thread, so you may have to refresh your browser a couple of seconds after creating the Defect to see it automatically externalized. 7.5.2 Syncing users from Perforce In this tutorial we will write a script that will create a corresponding Collaborator user for every Perforce user. The script can be run periodically to pick up any new Perforce users. This script performs the same actions as the ccollab admin syncusers 549 command. Outline The script runs the Perforce p4 users command, parses the output, and then calls the Collaborator Command-Line Client ccollab admin user create command for every user. If the user already exists then the ccollab admin user create command fails and the script goes on to the next user. Prerequisites The script in this example is written in Perl, so you must have the Perl runtime installed. The script invokes the Collaborator Command-Line Client, so that needs to be installed as well. Note you must be a Collaborator Administrator in order for this script to work. Script Step 1: Get users from Perforce The script runs the p4 users command to get the a list of all user records from Perforce. # Get users from Perforce @p4Users = `p4 users`; Script Step 2: Parse fields from Perforce user record The script extracts the user name, email, and full name from the Perforce user record. #parse fields from Perforce user record $p4User =~ /(\S+)\s*<([^>]*)>\s*\((.*?)\)\s*accessed.*/; $user = $1; © 2003-2015 SmartBear Software 638 639 External Integrations $email = $2; $fullName = $3; Script Step 3: Create user in Collaborator The script runs the Command-Line Client ccollab admin user create command to create the user in Collaborator. If a user with that name already exists, the command fails and the script goes on to the next user. #create user in Collaborator - does nothing if user already exists system("ccollab admin user create \"$user\" --email \"$email\" -full-name \"$fullName\""); Finished That is it! Here is the script in finished form: syncusers-p4.pl (opens in a new window). You can run this script periodically (for example, with a cron job) and it will keep your Perforce users and Collaborator in sync. 7.5.3 Conversation with Eliza In this tutorial we will set up a script that will let a user have a conversation with the classic ELIZA program. Eliza will appear to chat using comments in a Review. Eliza will only respond to comments in conversations that have a Defect containing her name. Conversation with Eliza © 2003-2015 SmartBear Software Conversation with Eliza Outline When a Defect is created in Collaborator the Defect Activity trigger 201 launches a Perl script in the background. The script polls Collaborator for comments using the Command-Line Client. When it finds a new comment, it passes the comment to an implementation of the ELIZA program, and then posts Eliza's response to the conversation using the Command-Line Client. The script runs indefinitely until the Defect is marked fixed or deleted, or the Review is finished. Prerequisites The script in this example is written in Perl, so you must have the Perl runtime installed. The Perl script invokes the Collaborator Command-Line Client, so that needs to be installed on your server machine. Be sure to install the Command-Line Client so that it is accessible and executable by the system user which is running the Collaborator server (this is especially important on Unix systems). The script uses a clone of ELIZA written in Perl called Chatbot::Eliza which must be installed. Script Step 1: Set up constants The script will need to know a few values to do it is work. These will be hard-coded in to the script: # URL to the Collaborator Server $CCOLLAB_URL = "http://localhost:8080"; # Login of Collaborator User who Eliza will use for chat # should be a Collaborator administrator $CCOLLAB_USER = "eliza"; # Password of Collaborator User who Eliza will use for chat $CCOLLAB_PASSWORD = "eliza"; # Seconds to sleep before polling for new chat $REFRESH_DELAY_SECONDS = 4; © 2003-2015 SmartBear Software 640 641 External Integrations Script Step 2: Read parameters from command-line The Review ID and Defect ID will be supplied by Collaborator as parameters when it invokes the script from the trigger (we set that up in Step 12 647 ). The script needs to read those parameters from the command-line: # read parameters from command-line $reviewId = $ARGV[0]; $defectId = $ARGV[1]; Script Step 3: Create XSL Transform The script needs to extract multiple pieces of information from the Collaborator server. To do that more efficiently it uses an XSL Transform to extract everything in a single call to ccollab admin review-xml (Step 6 643 ). The XSL is inlined in the Perl script using "here-document" syntax. #xslt file we will use to extract info from Collaborator $xslt = <<XSLT; <?xml version="1.0" encoding="UTF-8"?> <xsl:stylesheet xmlns:xsl='http://www.w3.org/1999/XSL/Transform' version='1.0'> <xsl:template match='//reviews/review'> <!-- get review phase --> <xsl:value-of select='general/phase'/><xsl:text> </xsl:text> <!-- find defect --> <xsl:for-each select='defects/defect[\@defectId=$defectId]'> <!-- get defect status --> <xsl:value-of select='status'/><xsl:text> </xsl:text> <!-- get defect text--> <xsl:value-of select='text'/><xsl:text> </xsl:text> © 2003-2015 SmartBear Software Conversation with Eliza </xsl:for-each> <!-- find the conversation we are talking on (the one with the defect) --> <xsl:for-each select='conversations/conversation[defects/ conversation-defect/\@defect-id=$defectId]'> <!-- find last comment in conversation --> <xsl:for-each select='comments/comment[last()]'> <!-- get author --> <xsl:value-of select='\@creator'/><xsl:text> </xsl:text> <!-- get text --> <xsl:value-of select='text()'/><xsl:text> </xsl:text> </xsl:for-each> <!-- get file-path (empty for overall comment) --> <xsl:value-of select='\@file-path'/><xsl:text> </xsl:text> <!-- get line-number (empty for overall comment or file overall comment) --> <xsl:value-of select='\@line-number'/><xsl:text> </xsl:text> </xsl:for-each> </xsl:template> </xsl:stylesheet> © 2003-2015 SmartBear Software 642 643 External Integrations XSLT Script Step 4: Initialize Eliza The Chatbot::Eliza program is initialized by a simple constructor. # initialize Eliza $eliza = new Chatbot::Eliza; Script Step 5: Sleep for a few seconds The rest of the script loops until the script decides to exit (Step 7 644 ). Every time it starts the loop, the script first sleeps for a few seconds to make sure it does not put too much load on the server. # sleep so we do not hammer the server sleep($REFRESH_DELAY_SECONDS); Script Step 6: Query Collaborator server for info The script invokes the ccollab admin review-xml command, passing in the XSL created in Step 3 641 on STDIN. The output is then parsed to get the Review Phase, Defect status, Defect text, comment Author, comment text, and optionally file path and line number. # Query Collaborator server for info $pid = open2(*CCOLLAB_OUTPUT, *XSL_INPUT, "ccollab $ccollabOptions admin review-xml $reviewId --xsl-file -"); print XSL_INPUT $xslt; close(XSL_INPUT); chomp(($spacer, $reviewPhase, $defectStatus, $defectText, $author, $inputChat, $filePath, $lineNumber) = <CCOLLAB_OUTPUT>); close(CCOLLAB_OUTPUT); waitpid($pid,0); #cleanup filePath and lineNumber chop($filePath); chop($lineNumber); #debug print "reviewPhase = $reviewPhase\n"; © 2003-2015 SmartBear Software Conversation with Eliza print "defectStatus = $defectStatus\n"; print "defectText = $defectText\n"; print "author = $author\n"; print "inputChat = $inputChat\n"; print "filePath = \"$filePath\"\n"; print "lineNumber = \"$lineNumber\"\n"; print "\n"; Script Step 7: Stop script if appropriate The script runs in an infinite loop, but we do not really want it to go forever! The script exits if any of the following conditions are true: · The Review finishes (no longer in inspection phase) · The Defect is fixed or deleted (no longer open) · The Defect text does not mention Eliza # safety - quit if review is not in Inspection phase die ("Review is no longer in Inspection phase") if ($reviewPhase !~ / Inspection/); # safety - quit if defect is not open die ("Defect $defectId is no longer open") if ($defectStatus !~ / open/); # safety - quit if defect text does not mention "Eliza" die ("Defect $defectId text does not mention Eliza") if ($defectText !~ /Eliza/); Script Step 8: Ignore comment if appropriate The script checks whether the comment is a "system" comment like "** Marked Read**" or if the last comment in the conversation was made by Eliza herself. In both of these cases the script skips back to the top of the loop. # Eliza should not respond to system messages, like "** Marked Read **" or "** Accepted **" next if ($inputChat =~ /^\*\*/); © 2003-2015 SmartBear Software 644 645 External Integrations # Eliza should not talk to herself next if ($author =~ /$CCOLLAB_USER/); Script Step 9: Get response from ELIZA The script passes the user's comment to the ELIZA program and gets back her response. # Get response from Eliza $outputChat = $eliza->transform($inputChat); #debug print "$outputChat\n"; print "\n"; Script Step 10: Upload Eliza's response to Collaborator The script uploads Eliza's response to the conversation using the ccollab admin review comment create command. # build command to upload Eliza's comment to Collaborator $uploadCommand = "ccollab $ccollabOptions admin review comment create $reviewId \"$outputChat\""; # file path is optional (no file path for overall review chat) if ($filePath) { $uploadCommand .= " --file \"$filePath\""; } # line number is optional (no line number for overall review chat or overall file chat) if ($lineNumber) { $uploadCommand .= " --line-number $lineNumber"; } #debug print "Running $uploadCommand\n"; © 2003-2015 SmartBear Software Conversation with Eliza # upload Eliza's comment to Collaborator system("$uploadCommand"); Step 11: Test the script from the command-line That is our whole script! Here it is in finished form: eliza.pl (opens in a new window). Do not forget to replace the constants in the script (url, user, password) with the appropriate values for your environment, then copy the script to an accessible place on your server. The script needs to be readable by the system user which is running the Collaborator server. Before you configure the Collaborator server to invoke the script automatically, test it manually by opening a console on your server machine running it on the command-line. Be sure to log in to your server machine as the user which is running the Collaborator server. First create a Review and create a Defect in the Review with the word "Eliza" in it, then run the script. For example, if you created Review 1234 with Defect D5678, then run the script with this command: /usr/bin/perl /home/rpaterson/eliza.pl 1234 5678 You should see output similar to this: reviewPhase = Inspection defectStatus = open defectText = Hello Eliza? author = rpaterson inputChat = Created Defect D11: Hello Eliza? filePath = "SymlinkTest.java" lineNumber = "73" How do you do. Please state your problem. Running ccollab --url http://localhost:8080 --user eliza --password "eliza" --quiet --non-interactive admin review comment create 1234 "How do you do. Please state your problem". --file "SymlinkTest.java" --line-number 73 The script will loop until you mark the Defect fixed or deleted, or finish the Review. When you refresh your browser in Collaborator you should see Eliza's comment. © 2003-2015 SmartBear Software 646 647 External Integrations Step 12: Invoke Script from a trigger Make sure you have Step 11 646 working before you move on to this step. The last thing we need to do is tell the Collaborator server to automatically invoke the eliza.pl script when a Defect is created. We do this with the Defect Activity trigger 201 . We will use these values: Executable: /usr/bin/perl Parameters: -e "exit unless fork; system('/usr/bin/perl /home/ rpaterson/eliza.pl ${review.id} ${defect.id} ');"" Defect Activity Trigger Note that it is important to use the FULL PATH of both the Perl runtime and the eliza.pl script. Also note the quotes and spaces - they are important. The Review id 124 , and Defect id 126 come from substitution variables 123 . The Perl snippet included in the Parameters field causes the script to be launched in a background process. Finished That is it! Now when anyone creates a Defect in Collaborator the script will be invoked. If the Defect has the word "Eliza" in it then the script will monitor that conversation for comments and have Eliza respond to them. 7.6 Web Services Web services provide external programmatic interfaces to Collaborator server. You can use web services from different client applications to run various commands on a server. Currently Collaborator offers two types of services: SOAP and JSON. To exchange data with SOAP web services, you can use any programming language that has a SOAP client library. To learn how to use these services, see SOAP API Web Services 648 . To exchange data with JSON web services, you can use in any client application that can send and process HTTP requests. To learn how to use these services, see JSON API Web Services 651 . © 2003-2015 SmartBear Software 648 We recommend using JSON services, because they are faster and resource friendly. SOAP services were introduced in version 7 and are now obsolete. 7.6.1 SOAP API Web Services SOAP web services were introduced in version 7 and are now obsolete. We recommend using JSON web services 651 , because they are faster and resource friendly. Using the service The service resides on your Collaborator server at the following URL: · http(s)://yourServer.com/services/ The service receives and sends data using Simple Object Access protocol (SOAP). SOAP API Reference Complete reference on all API objects and methods is available at: · http(s)://yourServer.com/javadoc/SOAP/ Note that, while we use the standard Javadoc format to document the methods available in the API, as a SOAP service, it can still be used from multiple programming languages. The exact names of methods and types in your programming language will depend on how the programming language and SOAP library interpreted the WSDL. If you have requests or suggestions regarding our web services, please contact support would love to hear your feedback. 28 . We Sample Code The below code is written in Java, and uses the Apache CXF SOAP library to make a few sample calls to Collaborator. But you can use similar code with other SOAP libraries and in other programming languages. Please see the documentation for those libraries/languages for details. First, we begin by running the wsdl2java utility, which contacts the server, requests the WSDL definition of the web services, and creates Java classes which mirror the functionality offered by the server: © 2003-2015 SmartBear Software 649 External Integrations wsdl2java -compile -client http://collab.aus.smartbear.com/services/ CodeCollaborator_7001?wsdl Once those classes are generated and compiled, we can import them into our sample Java app and use them to talk to the web service: import com.smartbear.ccollab.service.api.v7001.CodeCollaborator; import com.smartbear.ccollab.service.api.v7001.ActionItem; import org.apache.cxf.jaxws.JaxWsProxyFactoryBean; import java.util.List; /** Sample of getting Action Items from the server in Java with CXF: * Follows http://cxf.apache.org/docs/a-simple-jax-ws-service.html */ public class ShowActionItems { public static void main(String[] args) throws Exception { // Request an implementation of the interface CodeCollaborator from CXF: JaxWsProxyFactoryBean factory = new JaxWsProxyFactoryBean(); factory.setServiceClass(CodeCollaborator.class) ; // Point to your server, obviously. :) factory.setAddress("http://collab.aus.smartbear.com/services/ CodeCollaborator_7001"); CodeCollaborator client = (CodeCollaborator) factory.create(); // A few commands can be run without any kind of authentication: String version = client.getProductVersion(); System.out.println("Server version: " + version); // But most commands require authentication and will fail if you // are not authenticated: © 2003-2015 SmartBear Software SOAP API Web Services try { client.getActionItems(); } catch (Exception e) { System.out.println("Got exception w/o auth: " + e.toString()); } // So, let's authenticate: String username = args[0]; String password = args[1]; // Collaborator uses ticket-based authentication so that you do not have // to send username/pass w/ every request. // More savvy clients should SAVE the login ticket (not the password) // and re-use it across invocations . // Here, we just call getLoginTicket() every time ShowActionItems is run. String ticket = client.getLoginTicket(username, password); if (ticket == null) { System.out.println("Username/password incorrect".); return; } // Methods that require authentication expect to find username/ ticket in HTTP basic auth. // We will create a new client that sends those with each request: factory.setUsername(username); factory.setPassword(ticket); // (Yep, ticket! Not password.) client = (CodeCollaborator) factory.create(); © 2003-2015 SmartBear Software 650 651 External Integrations // NOW our call to the method that requires authentication will succeed: List<ActionItem> items = client.getActionItems(); for (ActionItem item: items) { System.out.println(item.getText()); } } } 7.6.2 JSON API Web Services This section describes the JSON API version of the web services. Using web services you can easily integrate your application with Collaborator. The benefit of JSON API version of the services is that you can exchange data with almost any client application. (Unlike SOAP API that requires special libraries for implementation.) The section covers the following questions: Using JSON API Web Service 652 Gives general overview of the web service API and demonstrates how to use it from Web Client and from client applications. JSON Syntax and Data Formats 654 Describes the syntax of request and response objects. Authentication 657 Explains different variants of logging into a server. Error Handling 659 Tells about server reaction on errors and describes the format of error list. JSON API Reference 660 Gives a link to the complete reference on all objects and commands of JSON API and describes how to work with this reference. © 2003-2015 SmartBear Software JSON API Web Services How To 660 Describes how to perform typical tasks using JSON API. 7.6.2.1 Using JSON API Web Service JSON API lets you integrate any external tool with Collaborator. To do this, you need to exchange data between your application and your Collaborator server. To use the web service you need to send requests to web service endpoint URL and receive responses from it. The service receives and sends data in JavaScript Object Notation (JSON). For detailed information on JavaScript Object Notation, see JSON Syntax and Data Formats 654 . Endpoint URL The web service resides on your Collaborator server at the following endpoint URL: · http(s)://yourServer.com/services/json/v1 Using JSON API Web Client To get acquainted with service requests and responses, you can open the endpoint URL in a web browser. It will display a simple form, where you can write JSON commands and get service responses within the same page. Let us try to call some JSON commands manually: 1. Open a web browser and navigate to JSON API web service URL: · http(s)://yourServer.com/services/json/v1 2. Enter the following command into the input field: [ {"command" : "ServerInfoService.getVersion"}, {"command" : "Examples.echo","args" : {"echo" : "Some text."}} ] 3. Press "Submit Query" button. After the page is reloaded you will get the response from the service with the results of your commands: [ { "result" : { "version" : "9.0.9000" © 2003-2015 SmartBear Software 652 653 External Integrations } }, { "result" : { "echo" : "Some text." } } ] Later on you can use JSON API web interface to try and debug JSON commands manually before sending them programmatically from your client application. Using JSON API From Client Applications The client and server exchange data in the JSON format via HTTP(s) requests and responses. Client application must send POST requests to JSON web service endpoint URL. The requests should contain a JSON object in their body or in the POST variable named "json". For multipart requests the JSON object must be either in a "json" string part or in a "json" query parameter. A JSON object in a request specifies a list of commands to be executed and arguments for these commands. Here is an example of a POST request: POST http://yourServer.com/services/json/v1 HTTP/1.1 User-Agent: JSON API Content-Type: application/json;charset=utf-8 Host: yourServer.com Content-Length: 138 [ {"command" : "ServerInfoService.getVersion"}, {"command" : "Examples.echo","args" : {"echo" : "Some text."}} ] A multipart variant of the same request will be: POST http://yourServer.com/services/json/v1 HTTP/1.1 Content-Type: multipart/form-data; boundary=------------------------acebdf13572468 User-Agent: JSON API Host: yourServer.com © 2003-2015 SmartBear Software JSON API Web Services Content-Length: 265 ---------------------------acebdf13572468 Content-Disposition: form-data; name="json" Content-type: text/plain;charset=utf-8 [ {"command" : "ServerInfoService.getVersion"}, {"command" : "Examples.echo","args" : {"echo" : "Some text."}} ] ---------------------------acebdf13572468-On receiving the request, the server processes each command in order and builds up a response. The JSON object in response contains a list of results corresponding to each of the command that you submitted. Each result consists of either the return values for that command, or a list of errors returned by the command. See Error Handling 659 . The response to the any of the requests above will be: HTTP/1.1 200 OK Server: Apache-Coyote/1.1 Content-Type: application/json;charset=utf-8 Content-Length: 68 Date: Thu, 27 Nov 2014 10:55:25 GMT [{"result":{"version":"9.0.9000"}},{"result":{"echo":"Some text."}}] In further examples of this section, we will omit request and response headers (when their content is not important) and give only the examples of JSON parts. 7.6.2.2 JSON Syntax and Data Formats All data-interchange with the service is performed in JavaScript Object Notation (JSON). JSON uses two data structures: a collection of name/value pairs and an ordered list of values. JSON engine ignores whitespace, tabulation, and newline characters, however you can use them to improve readability. © 2003-2015 SmartBear Software 654 655 External Integrations JSON Objects In Requests A JSON object that is sent in web service requests (request object) specifies a list of commands to be executed and arguments for these commands. The simplest variant of a JSON request object is: [ {"command" : "MethodName1"} ] The "command" : "MethodName1" pair defines which command a server should run. The method name is specified using dot notation. For example "ServerInfoService.getVersion", or "Examples.checkLoggedIn". If a method needs some arguments, then you will need to add the "args" : { } pair which specifies a list of arguments: [ {"command" : "MethodName1", "args" : {"argumentName1":"value1","argumentName2":"value2",..."argumentNameN" :"valueN"} } ] The "argumentName" : "value" pairs define argument names and their values. A value can be a string in double quotes, or a number, or true or false or null, or an object or an array. When a method needs more then one argument, the "argumentName" : "value" pairs are separated by commas. Argument pairs can be specified in any order. You can create batch commands, that is, pass several commands in one JSON request object. Different commands should be separated by commas. For example: [ {"command" : "ServerInfoService.getVersion" }, {"command" : "Examples.echo", "args" : {"echo" : "Some text."} }, {"command" : "SessionService.setMetadata", © 2003-2015 SmartBear Software JSON API Web Services "args" : { "clientName" : "HTML JSON API Tester", "expectedServerVersion" : "9.0.9000" } } ] JSON Objects In Responses A JSON object that is received in web service responses (response object) contains a list of results corresponding to each of the command that was submitted. Each result consists of either the "result" : { } pair that lists the command return values (if any), or the "errors" : [ ] pair that lists the errors returned by the command. (See Error Handling 659 for details). Results for several commands that were passed in a single JSON request object are returned as a comma separated list. For example the response object for the previous request will be: [ { "result" : { "version" : "9.0.9000" } }, { "result" : { "echo" : "Some text." } }, { "result" : { } } ] Date and Time Format To specify date and time values, use strings having the format "YYYY-MM-DDTHH:mm:ssZ". For example: "2008-01-01T22:50:00Z" or "2008-01-01T16:50:00-06:00". The table below describes the parts of this format. YYY Y Year M M Month DD Day of the month T Specifies the start of a time notation. HH Hours © 2003-2015 SmartBear Software 656 657 External Integrations mm Minutes ss Seconds Z Time zone. The value in this position can be one of the following: Z - indicates UTC time +hh:mm - indicates that the input time is the specified offset after UTC time. -hh:mm - indicates that the input time is the absolute value of the specified offset before UTC time. 7.6.2.3 Authentication For the majority of commands, you will need to be logged in to the server. Therefore you may need to pass your authentication information along with the request. Important: All data (including user credentials) that is sent via HTTP protocol is sent in plain text format. We recommend using HTTPS protocol for secure client/server communication. Read Configuring HTTPS 110 to learn how to enable it. General Information JSON API web service uses session authentication. Authentication data are valid only while executing batch commands were sent in the same request. Authentication takes place inside of the JSON request. No special cookie handling is required. To execute the commands from another request you will need to pass authentication information again. Tip: To verify if you are logged in for the current batch of commands, call the Examples. checkLoggedIn command. The preferred way to authenticate is to send a user login and a special alpha-numeric identifier called login ticket. The benefit of login ticket is that you do not have to specify your password explicitly. Using login tickets works faster if a server uses LDAP authentication 101 . Besides, the users will have an option of invalidating login tickets 153 if they want to make very sure they are logged out of the system everywhere. © 2003-2015 SmartBear Software JSON API Web Services Generating Login Tickets To perform first-time authentication and generate a login ticket, use the SessionService. getLoginTicket command. It accepts user login and password as input arguments and returns a login ticket which you can use in your subsequent requests. The following request logs in as "jsmith" and obtains a login ticket for further usage: [ {"command" : "Examples.checkLoggedIn"}, {"command" : "SessionService.getLoginTicket", "args":{"login":"jsmith","password":"qwerty12345"}}, {"command" : "Examples.checkLoggedIn"} ] The server will send the following response: [ { "result" : { "loggedIn" : false } }, { "result" : { "loginTicket" : "0123456789abcdef0123456789abcdef" } }, { "result" : { "loggedIn" : true } } ] Authenticating With Login and Login Ticket To authenticate using a login and login ticket use the SessionService.authenticate method. It accepts user login and login ticket as input arguments. The following request logs in using a login ticket: [ {"command" : "Examples.checkLoggedIn"}, {"command" : "SessionService.authenticate", "args": {"login":"jsmith","ticket":"0123456789abcdef0123456789abcdef"}}, {"command" : "Examples.checkLoggedIn"} ] © 2003-2015 SmartBear Software 658 659 External Integrations The server response will be: [ { "result" : { "loggedIn" : false } }, { "result" : {} }, { "result" : { "loggedIn" : true } } ] 7.6.2.4 Error Handling Responses form the JSON API web service contain a list of results corresponding to each of the command that was submitted. Each result may contain either a "result" : { } pair that lists the command return values (if any), or the "errors" : [ ] pair that lists the errors returned by the command. If an error occurs during processing a request having multiple commands, the service stops execution of further commands and sends a response object with the results of preceding commands and the error description for the current command. The Format of Error Descriptions The returned "errors" : [ ] pair holds an array with one or more error descriptions. Each error description has the following fields: 1. "code" - Short error code, which you can use for error handling. 2. "message" - More detailed description of the error. This message can be displayed to the end-users. 3. "data" - Any extra data that is relevant for the particular error. This is an optional field and it may be omitted. Sample Error Descriptions Below are several examples of error descriptions: · Unneeded parenthesis in command name: [ { "errors" : [ { "code" : "NoSuchCommand", "message" : "The command 'ServerInfoService.getVersion()' does not exist." } ] } ] · Incorrect authentication: © 2003-2015 SmartBear Software JSON API Web Services [ { "errors" : [ { "code" : "AuthenticationFailed", "message" : "Could not authenticate user 'jsmith' using password provided." } ] } ] 7.6.2.5 JSON API Reference Complete reference on all API objects and methods is available at the following URL: · http(s)://yourServer.com/javadoc/jsonapi/ The reference lists all the commands that are available to JSON web service and describes the fields of the request and response objects. API reference documentation uses Javadoc notation to describe the objects, methods and interfaces. In order to use the command, object or field in your JSON requests, you need to convert the Javadoc notation to Java Script Object Notation. To determine a name of the desired JSON field, remove the "get" prefix from the method name and put the first letter to lower case. For example, a Javadoc description for the LoginTicketRequest interface says that it has the getLogin and getPassword methods. A JSON object that corresponds to this interface will look like this: {"login": "jsmith", "password": "js123"} 7.6.2.6 How To This topic demonstrates how to perform some typical tasks via JSON API Web services: Manage Reviews and Review Participants 661 1. List reviews assigned to a specified user 2. Create new review 3. Add/change participants of a review Upload Review Materials 664 1. Add files through a /content upload servlet © 2003-2015 SmartBear Software 660 661 External Integrations 2. Add files with a multipart HTTP requests Manage Users and User Groups 669 1. Create new user 2. Add user to group In order to perform all these tasks you need to be logged in to Collaborator server. Therefore in each sample below we will first call the SessionService.authenticate command to provide user credentials. See Authentication 657 topic for details. 7.6.2.6.1 Manage Reviews and Review Participants To manage reviews and review participants use the ReviewService interface. It provides methods for creating and editing reviews, adding, updating, removing and poking participants, adding review materials, changing review phases, managing comments and conversations and so on. 1. List reviews assigned to a specified user 2. Create new review 661 662 3. Add/change participants of a review 663 List reviews assigned to a specified user To get a list of reviews we will use the UserService.getActionItems command which returns a list of incoming and outgoing action items 234 a user is included in. Request: [ {"command" : "SessionService.authenticate", "args": {"login":"jsmith","ticket":"0123456789abcdef0123456789abcdef"}}, {"command" : "UserService.getActionItems"} ] Response example: [ { "result" : { } }, { "result" : { "actionItems" : [ © 2003-2015 SmartBear Software JSON API Web Services { "nextActionText" : "Waiting for comments", "text" : "(No action required) Waiting for comments: Review #10254: \"Fix for case 34534 \"" }, { "nextActionText" : "Finish creating", "text" : "Finish creating: Review #10435: \"Documentation review\"" }, { "nextActionText" : "Waiting for Defect rework", "text" : "(No action required) Waiting for Defect rework: Review #10188: \"Message Templates\"" } ] } } ] Create new review To create a review use the ReviewService.createReview command. It accepts a number of arguments that define the creator (creator), review title (title), deadline date and time ( deadline), specify who can access the review (accessPolicy) and other parameters. All parameters are optional. Deadline date and time should be specified in a "YYYY-MM-DDTHH:mm:ssZ" format described in JSON Syntax and Data Formats 654 . The accessPolicy argument may have one of the following constants: ANYONE, GROUP, PARTICIPANTS, GROUP_AND_PARTICIPANTS, GROUP_OR_PARTICIPANTS. The request below creates a new review: [ {"command" : "SessionService.authenticate", "args": {"login":"jsmith","ticket":"0123456789abcdef0123456789abcdef"}}, {"command" : "ReviewService.createReview", "args" :{ "creator" : "jsmith", "title" : "Check JDK version", "deadline" : "2015-02-01T09:00:00Z", "accessPolicy" : "PARTICIPANTS", "customFields": [ {"name":"Overview", "value":["Please check the JDK version that we use."]}, © 2003-2015 SmartBear Software 662 663 External Integrations {"name":"Incident ID", "value":["1321654"]} ] } }] On success the command returns an identifier of a newly created review. Response example: [ { "result" : { } }, { "result" : { "reviewId" : 10463 } } ] NOTE: A newly created review is not yet ready for working on it. To processed, we need to assign review participants 663 and add review materials 664 . Add/change participants of a review Web service API offers two commands for assigning participants of the review: ReviewService.setAssignments and ReviewService.updateAssignments. The setAssignments command clears the list of existing review participants (if any) and assigns participants and roles anew. The updateAssignments command adds new participants and changes the roles of existing participants. Both commands have the same set of arguments: reviewId - the ID of the review whose participants we want to add or modify. assignments - an array that defines review participants and their roles. Each element of the array must be either a {"user", "role"} object or a {"poolGuid", "role"} object. In the first case the object will denote an individual participant and his role, while in the second it will denote a group of users (review pool 672 ) that can partake in a review and the role for this group. The "role" argument can be one of the following constants: AUTHOR, MODERATOR, OBSERVER, READER, REVIEWER, TESTER. [ {"command" : "SessionService.authenticate", "args": {"login":"jsmith","ticket":"0123456789abcdef0123456789abcdef"}}, {"command" : "ReviewService.updateAssignments", "args":{"reviewId":"10463", "assignments": [ © 2003-2015 SmartBear Software JSON API Web Services {"user":"jsmith", "role":"AUTHOR"}, {"user":"mike", "role":"REVIEWER"}, {"poolGuid":"1234567890", "role":"OBSERVER"} ]} } ] 7.6.2.6.2 Upload Review Materials To upload review materials use the the ReviewService.addFiles command. This command is rather complex and allows different variants of adding materials to a review. The files may reside on your local computer or be stored in a source code management system. Moreover, the command can add files to an existing review or to create a new review. You will describe the following use-cases: 1. Adding local files through a /content upload servlet 2. Adding local files with a multipart HTTP requests 665 667 Depending on the particular use-case, the syntax of the addFiles command and the number of its arguments will vary. For example, to add materials to an existing review you need to specify the "reviewID" argument. If this argument is omitted, the addFiles command will create a new review with the attached files. On success the addFiles command returns an ID of the review where the files were added. Add files to a review To add files that are stored on a local computer you need to archive them beforehand. The archived files must follow special conventions described bellow. Once the archive is created you can send it to a Collaborator server and attach files to a review. There are two ways to do this: · Use the /contentupload servlet to upload the archive and the subsequent JSON request to attach files. · Send a single multipart request containing both "json" commands and the archive. Preparing files for upload Prior to uploading files to the Collaborator server you need to prepare them as follows: 1. Copy the needed files to a temporary folder. © 2003-2015 SmartBear Software 664 665 External Integrations 2. Rename each file to its MD5 checksum. In lower-case letters, without any extension. Suppose that we want to upload a file named "listobject.h" having an MD5 checksum of 198575c00a884ae27968e2fcf7d0a26d. Then the file must be renamed to "198575c00a884ae27968e2fcf7d0a26d". 3. Pack the files into a Zip archive. The name of the resulting Zip archive is not important. Uploading files via /contentupload servlet Every Collaborator server has a servlet for uploading data to reviews. It resides at the following URL: yourServer.com/contentupload The servlet accepts multipart HTTP requests that contain Zip archives with files. The file upload request must conform to RFC 1867: Form-based File Upload in HTML. The servlet requires authentication parameters in the request before processing file uploads. Authentication can be provided with the following methods: · Header: Authorization header that conforms to the Basic Authentication Scheme from RFC 2617. Authorization: Basic bXl1c2VyOm15cGFzcw== · Header cookies: CodeCollaboratorLogin and CodeCollaboratorTicketId. (To obtain a valid CodeCollaboratorTicketId you need to login via web-interface.) Cookie: CodeCollaboratorLogin=jsmith; CodeCollaboratorTicketId=0123456789abcdef0123456789; If the upload is successful, the servlet will respond with a 200 (OK) status. Below is an example of multipart HTTP request to the /contentupload servlet: POST http://yourServer.com/contentupload HTTP/1.1 Content-Type: multipart/form-data; boundary=------------------------acebdf13572468 User-Agent: JSON API Host: yourServer.com/ Cookie: CodeCollaboratorLogin=jsmith; CodeCollaboratorTicketId=0123456789abcdef0123456789; © 2003-2015 SmartBear Software JSON API Web Services Content-Length: 1394 ---------------------------acebdf13572468 Content-Disposition: form-data; name="file"; filename="localFiles. zip" Content-Type: application/x-zip-compressed <Binary data of the localFiles.zip file> ---------------------------acebdf13572468-- Once the archive is uploaded successfully, the server unpacks it. Later on the you need to send a command to add an already uploaded files to reviews. To add files that were uploaded beforehand, use the following syntax of the addFiles command: {"command" : "ReviewService.addFiles", "args" : { "reviewId": "<Id>", OPTIONAL "changelists" : [{ REQUIRED "commitInfo" : {<commitInfo>}, OPTIONAL "versions" : [ { REQUIRED "md5" : "<md5Checksum>", REQUIRED "localPath" : "<LocalPathToFile>", OPTIONAL "scmPath" : "<PathToFileInSCM>", OPTIONAL "action" : "<ActionType>", OPTIONAL "source" : "<SourceType>", OPTIONAL "baseVersion" : OPTIONAL }, {<version2>},..., {<versionN>}] }, {<changelist2>},..., {<changelistN>}] } When adding already uploaded files, we should specify their MD5 checksums (md5) and either their local paths (localPath) or their paths in SCM (scmPath). All other arguments are optional. Notice that archive name is not specified, as the archive has already been unpacked. The example below, attaches an uploaded file to the specified review: © 2003-2015 SmartBear Software 666 667 External Integrations [{"command" : "SessionService.authenticate", "args" : {"login" : "jsmith","ticket" : "0123456789abcdef0123456789abcdef"}}, {"command" : "ReviewService.addFiles", "args" : { "reviewId" : "10463", "changelists" : [{ "versions" : [ { "md5" : "198575c00a884ae27968e2fcf7d0a26d", "localPath" : "c:\\work\\collab\\files\\listobject.h", "source" : "LOCAL" } ] }] } }] Uploading files with a multipart request In this approach both the JSON commands and one or more archives to be attached are sent in the same multipart request. The JSON request must be sent in a string part named "json" or as part of the query string as "json" parameter. The attached files must be sent in parts whose names coincides with the archive names. See RFC 1341: The Multipart Content-Type for detailed description of multipart requests. To add files that are sent within the same HTTP request, use the following syntax of the addFiles command: {"command" : "ReviewService.addFiles", "args" : { "reviewId": "<Id>", OPTIONAL "zipName" : "<zipNameForCommand>", OPTIONAL "changelists" : [{ REQUIRED "commitInfo" : {<commitInfo>}, OPTIONAL "versions" : [ { REQUIRED "md5" : "<md5Checksum>", REQUIRED "zipName" : "<zipNameForChangelist>", OPTIONAL "localPath" : "<LocalPathToFile>", OPTIONAL "scmPath" : "<PathToFileInSCM>", OPTIONAL © 2003-2015 SmartBear Software JSON API Web Services "action" : "<ActionType>", OPTIONAL "source" : "<SourceType>", OPTIONAL "baseVersion" : OPTIONAL }, {<version2>},..., {<versionN>}] }, {<changelist2>},..., {<changelistN>}] } When adding files with a multipart request, we should specify the names of archive (zipName), MD5 checksums of individual files ( md5) and either their local paths (localPath) or their paths in SCM (scmPath). The archive name ( zipName) can be given at the command level or per changelist. The zipName arguments are interchangeable, however at least one of them must be specified. All other arguments are optional. As mentioned above, the attached files must be sent in parts whose names matches the values of zipName arguments of the AddFiles command: --boundary separator Content-Disposition: form-data; name="<zipName>"; filename="<zipName>" Content-Type: application/x-zip-compressed <Binary data of the archive file> The overall example of a multipart request may look like this: POST http://yourServer.com/services/json/v1 HTTP/1.1 Content-Type: multipart/form-data; boundary=------------------------acebdf13572468 User-Agent: JSON API Host: yourServer.com Content-Length: 2041 ---------------------------acebdf13572468 Content-Disposition: form-data; name="json" Content-Type: application/json;charset=utf-8 [{"command" : "SessionService.authenticate", © 2003-2015 SmartBear Software 668 669 External Integrations "args" : {"login" : "jsmith","ticket" : "0123456789abcdef0123456789abcdef"}}, {"command" : "ReviewService.addFiles", "args" : { "reviewId" : "10463", "changelists" : [{ "zipName" : "localFiles.zip", "versions" : [ { "md5" : "198575c00a884ae27968e2fcf7d0a26d", "localPath" : "c:\\work\\collab\\files\\listobject.h", "source" : "LOCAL" } ] }] } }] ---------------------------acebdf13572468 Content-Disposition: form-data; name="localFiles.zip"; filename=" localFiles.zip" Content-Type: application/x-zip-compressed <Binary data of the localFiles.zip file> ---------------------------acebdf13572468-- 7.6.2.6.3 Manage Users and User Groups To perform administrative operations over the users of Collaborator server use the UserService interface. It has methods for creating, editing and deleting users and user subscriptions. To perform administrative operations over user groups use the GroupService interface. It has methods for creating, editing and deleting groups, adding subgroups, add users to groups, excluding users from groups and so forth. To call any of the UserService or GroupService commands the current user (that is a user who requests to run the command) must have administrator privileges on the Collaborator server. © 2003-2015 SmartBear Software JSON API Web Services Create new user To create new user, we will call the UserService.create command. It has two obligatory parameters: login and password. Additionally you can enter the users full name (fullName), phone number (phone), email (email) and specify whether it will be an active user (enabled) and whether the user will have administrative privileges (admin). [ {"command" : "SessionService.authenticate", "args": {"login":"jsmith","ticket":"0123456789abcdef0123456789abcdef"}}, {"command" : "UserService.create", "args" : { "login" : "alice", "password" : "alice", "fullName" : "alice alice", "phone" : "345345345", "email" : "[email protected]", "enabled" : "true", "admin" : "false"} } ] Add user to a group To add a user to some existing group, we will call the GroupService.addUser command. The command has two parameters: a login of a user to be added ( memberLogin) and group identifier 166 (guid). [ {"command" : "SessionService.authenticate", "args": {"login":"jsmith","ticket":"0123456789abcdef0123456789abcdef"}}, { "command" : "GroupService.addUser", "args" : { "memberLogin" : "alice", "guid" : "549ce60e-ea35-46fb-9e39-54529a049abf" } } ] © 2003-2015 SmartBear Software 670 671 8 Techniques & Best Practices Techniques & Best Practices At SmartBear, we are experts in all kinds of peer review. In this part of the manual, we cover techniques and best practices in code review and in Collaborator. Topics covered include: · Invite A Colleague 671 Describes how to invite a colleague who currently do not have a Collaborator user account. · Review Pools 672 Explains how to assign a group of users as participant of the review. · Multiple Change Changelists 674 Describes the specifics of working with changelists that accumulate changes to file versions over time. · Optimal Review Size 674 Describes which review sizes are optimal for peer review process. · Metrics: Definitions 675 Which metrics should you collect during reviews? Which metrics are collected automatically by Collaborator? How are they calculated and what exactly do they mean? · Metrics: Analysis 678 What do you do with raw metrics numbers? How do you collect those which are not collected automatically? What can metrics really tell us? Where might they lead us astray? · Tips and Tricks 680 Are there any short-cuts to help me get the results I want? · Improving Performance 680 Describes several ways to improve the speed of Collaborator. 8.1 Invite A Colleague Overview A person currently cannot be added as a participant in a Review until they have a Collaborator user account. This is created the first time they login (even with LDAP integration enabled). The "Invite a colleague" feature makes it possible to invite someone to a Review even if they do not currently have a Collaborator user account, though they will have to create one. © 2003-2015 SmartBear Software 672 Admin Setting A setting under Admin -> General -> Access Restrictions 147 allows administrators to specify a regular expression that must match against email addresses being invited to Review. The regular expression must match the entire email address, by default it is ".*" which should match all email addresses entered. The administrator can narrow the available addresses by modifying the regular expression. For example: ".*@mycompany.com" or ".*@mycompany.com|.*@contractor.com". If an administrator want to disable this feature entirely they can simply enter "This feature is disabled"., which will not match any email address. Using the Feature When the feature is enabled, each comment added in the Web UI (in any phase other than the Planning phase) will be evaluated to see if it includes e-mail addresses that matches the regular expression. If so, the user is presented with a dialog stating: "Your comment mentioned an email address. Would you like to invite [list of email addresses in comment] to this Review?" If the user selects "Yes", their default e-mail client will be opened with a standard invitation that they can edit and send. If the user selects "No", the email address is ignored. NOTE: In addition to the regular expression mechanism for configuring and disabling this feature, the user may be presented with different dialogues depending on other access control specifications. For example, if participant-based access restrictions are in place, the user will be notified that the invited users will not be able to access this review. If group-based access restrictions are in place, the system cannot know whether the invited individual will be able to access the review, or not. In this case, the user is notified that the invited person may not be able to access the review. 8.2 Review Pools Using Review Pools Review Pools allow an Author to select a Group as a participant, for a given Role, in a review. Groups which have been configured for use as Review Pools 175 will be displayed in the New Participant dropdown on the Review Summary page. © 2003-2015 SmartBear Software 673 Techniques & Best Practices Any number of Review Pool selections can be made, each designating a Role of the participants from each group. Selections can be made only during the Planning and Annotating phases. When Planning is complete, the Author moves the review to the Annotating phase to notify Review Pool participants there is a Review for which they may designate themselves as the participant. All members of the selected Review Pool group will receive notifications that they are invited to participant. Email notifications are sent, if configured. Note that Begin Review will also start the Annotating phase if there are pending Review Pool assignments. Taking a Review Pool Selection For each Review Pool assignment, the Participants section of the Review Summary page displays a Take button, which is enabled for eligible participants (members of the Review Pool group). The first eligible participant to go the the Review Summary page and select the Take button becomes a participant with the given Role in the Review. The Review remains in Annotating until all pending Review Pool assignments are taken - the Inspection is not allowed to begin until then. A review in the Annotating phase with pending Review Pool assignments will automatically begin the Inspection phase once the last review pool selection is made, as long as other participant constraints have been met. © 2003-2015 SmartBear Software 674 Configuring For Review Pools In order to enable Review Pools, a Collaborator Administrator will need to configure Groups to be used for Review Pools 175 . 8.3 Multiple Change Changelists A changelist is a generic SCM concept representing a set of changes in version control. Changelists for some SCM systems like Perforce and Subversion are atomic entities, representing a single unit of changes that occur at the same time. Other SCM systems have changelists that accumulate changes to file versions over time, allowing multiple changes (versions) of any given file within the same changelist. Some examples of this latter type of changelist are ClearCase Activities and PTC Change Packages. For these multiple-version changelists, the changelist represents an accumulation of changes to each of the source files in it. In most cases, in the context of a review or in thinking about what the changelist represents, users are interested in the difference represented by the accumulation of changes in the changelist, that is, for each source file the difference between the latest version occurring in the changelist and the version content that existed before the first change in the changelist. Collaborator calculates differences based on this, when a multiple-version changelist is uploaded to a review. This can be confusing in some circumstances. If an added file is part of the changelist, and there are subsequent changes to that file in the changelist, then uploading this changelist for review will result in the latest change to that file appearing as an add in the changelist. In other words, it will have no predecessor. In an SCM system where added files are always version 1.1, a review of a changelist having version 1.5 of a file with no predecessor is incongruent with the versioning of the SCM system. Yet this is exactly what the accumulation of changes to that file in the changelist represent - a sum total of changes that did not exist before the changelist. While it might be possible to find and upload all versions of each file that occur in a multipleversion changelist and make them available for comparison in Collaborator, in our experience this makes for an unnecessarily complicated review - this is less of a peer review feature and more of a version history browser feature. If a review is to be conducted on successive revisions to a file in this way, the review should be conducted at each iteration of the changelist. Uploading the same changelist to the same review as each successive set of changes is made as part of the rework step of the review will result in all of the versions of each file being available in the it, and each version being available for inspection by the other review participants. 8.4 Optimal Review Size We sometimes get asked by customers how large their reviews should be. It is a difficult question to answer because it depends a lot on the review culture of the team and the nature of the content being reviewed. Opinions vary widely on what the optimal size should be. © 2003-2015 SmartBear Software 675 Techniques & Best Practices Creating many tiny reviews is not optimal because of there is some static overhead for each review (setting up participants and metadata, and so forth). There is also a mental penalty for "context switching" when a reviewer changes their attention between two different reviews. Creating a few giant reviews is not optimal because there is a limited amount of time a reviewer can truly concentrate on a review. Our studies have shown the maximum time to be about 90 minutes. If the review is too large to process in 90 minutes then the review is less effective defects will be missed and time will be wasted as the reviewer's attention wanders. Based on our research we recommend the following Optimal Size for reviews, with the understanding that one size does not fit all: · 3 participants · 15 files, 3 versions each (3 changelists) · 2 overall defects, 5 file defects · 30 file conversations · 8 comments per conversation Collaborator is designed to give the best experience at this size. However we do try to support a wide range of sizes so that customers can do what works best for them. Note though that reviews that are more than an order of magnitude larger than this Optimal Size will start to perform sluggishly. See also · Best practices for peer code review - a web site article that describes a successful peer review strategy. 8.5 Metrics: Definitions Collaborator collects a variety of raw metrics automatically. This section defines these metrics; a later section 678 discusses what these metrics can tell us. Lines of Code The most obvious raw metric is "number of lines of source code". This is "lines" in a text-file context. Often this is abbreviated "LOC". Collaborator does not distinguish between different kinds of lines. For example, it does not separately track source lines versus comment lines versus whitespace lines. © 2003-2015 SmartBear Software 676 For code review metrics, often you usually want to use general lines of code and not break it down by type. Often the code comments are just as much a part of the review as the code itself -check for consistency and ensuring that other developers will be able to understand what is happening and why. Collaborator calculates LOC metrics as the lines that are different than the original version of the SCM controlled files. In this context, LOC metrics do not make sense for files that are not managed by a SCM or for non-source files (for example, Office documents). The uploaded lines value from the review details report counts all lines on the source files, including unchanged lines, while the changed lines value only counts lines that are different than the original version of the source file. The LOC metrics displayed on the Review Summary page include added lines, changed lines and deleted lines. These numbers are calculated comparing the latest uploaded version of each SCM managed file against the original version of that file. If there is more than one version of a file in the review, only the metrics for the latest upload will be displayed in the Overlay view in the materials section. On the other hand, if the Separate view is selected in the materials section, the LOC metrics of each individual version against its base version will be displayed. Time in Review How much time (person-hours) did each person spend doing the review? Collaborator computes this automatically. This raw metric is useful in several other contexts, usually when compared to the amount of file content reviewed. Developers (rightly) hate using stopwatches to track their activity, but how can Collaborator -- a web server -- automatically compute this number properly? Our technique for accurately computing person-hours came from an empirical study we did at a mid-sized customer site. The goal was to create a heuristic for predicting on-task person-hours from detailed web logs alone. We gave all review authors and reviewers physical stop-watches and had them carefully time their use of the tool. Start the stopwatch when they began a review, pause if they break for any reason -- email, bathroom, instant messenger. The times were recorded with each review and brought together in a spreadsheet. At the same time, we collected detailed logs of web server activity. Who accessed which pages, when, and so forth. Log data could easily be correlated with reviews and people so we could "line up" this amalgamation of server data with the empirical stopwatch times. Then we sat down to see if we could make a heuristic. We determined two interesting things: © 2003-2015 SmartBear Software 677 Techniques & Best Practices First, a formula did appear. It goes along these lines: If a person hits a web page, then 7 seconds later hits another page, it is clear that the person was on-task on the review for the whole 7 seconds. If a person hits a web page, then 4 hours later hits another page, it is clear that the person was not doing the review for the vast majority of that time. By playing with various threshold values for timings, we created a formula that worked very well -- error on the order of 15%. Second, it turns out that humans are awful at collecting timing metrics. The stopwatch numbers were all over the map. People constantly forgot to start them and to stop them. Then they would make up numbers that "felt right," but it was clear upon close inspection that their guesses were wrong. Some people intentionally submitted different numbers, thinking this would make them look good (that is, "Look how fast I am at reviewing!"). So the bottom line is: Our automated technique is not only accurate, it is more accurate than actually having reviewers use stopwatches. The intrinsic error of the prediction heuristic is less than the error humans introduce when asked to do this themselves. Total Person-Time The total of all recorded time that all the users were looking at review. Total Person-Time is an aggregate value for all users taking part in a review, while Time in Review is counted for each separate user. Reviewer Time and Author Time are subsets of Total Person-Time, limited to the time that was spent in the reviewer and author roles, respectively. Defect Count How many defects did we find during this review? Because reviewers explicitly create defects during reviews, it is easy for the server to maintain a count of how many defects were found. Furthermore, the system administrator can establish any number of custom fields 183 for each defect, usually in the form of a drop-down list. This can be used to subdivide defects by severity, type, phase-injected, and so on. File Count How many files did we review? Usually the LOC metric 675 is a better measure of "how much did we review," but sometimes having both LOC and number of files is helpful together. For example, a review of 100 files, each with a one-line change, is quite different from a review of one file with 100 lines changed. In the former case, this might be a relatively simple refactoring; with tool support, this might require only a brief scan by a human. In the latter case, several methods might have been added or rewritten; this would require much more attention from a reviewer. © 2003-2015 SmartBear Software 678 Wall-Clock Time, Review Wall-Clock Duration How much time has passed since the review was created and till the review was completed (or now, if the review is still in progress). This is a useful metric if you want to make sure all reviews are completed in a timely manner. 8.6 Metrics: Analysis It is fine to collect metrics, but what do they tell us? It is tempting to apply them in many different contexts, but when are metrics telling us something and when are we reading too much into the numbers? Defect Density Defect Density is computed by: ( number of defects ) / ( 1000 lines of code ). This is the number of defects found, normalized to a unit amount of code. 1000 lines of code, or "kLOC" is often used as a standard base measure. The higher the defect density, the more defects you are uncovering. It is impossible to give an "expected" value for defect density. Mature, stable code might have defect densities as low as 5 defects/kLOC; new code written by junior developers may have 100200. What can defect density tell us? Let's make an experiment. We take a reviewer and have him inspect many different source files. Source files vary in size from 50 lines to 2000 lines. The reviewer inspects about 200 lines at a time so as not to get tired. We will record the number of defects found for each file. What would we expect to find? First, longer files ought to have more defects than shorter ones, simply because there is more code. More code means more that could go wrong. Second, some files should contain more defects than others because they are "risky" -- maybe because they are complex, or because their routines are difficult to unit-test, or because their routines are reused by most of the system and therefore must be very accurately specified and implemented. If we measure defect density here, we handle the first effect by normalizing "number of defects" to the amount of code under review, so now we can sensibly compare small and large files. So the remaining variation in defect density might have a lot to do with the file's "risk" in the system. This is, in fact, the effect we find from experiments in the field. So defect density can, among other things, determine which files are risky, which in turn might help you plan how much code review, design work, testing, and time to allocate when modifying one of those files. © 2003-2015 SmartBear Software 679 Techniques & Best Practices Now let's make another experiment. We will take a chunk of code with 5 known algorithm bugs and give it to various reviewers. We will see how many of the defects each review can find in 20 minutes. The more defects a reviewer finds, the more effective that reviewer was at finding the defects. This is a simple way to see how effective each reviewer is at reviewing that kind of code. Of course in real life the nature of the code and the amount of code under review varies greatly, so you cannot just look at the number of defects found in each review -- you naturally expect more defects from a 200-line change than from a 2-line change. Defect density provides this normalization so you can compare reviewers across many reviews. If you are comparing defect density across many reviews done by a single person, you are measuring the relative "risk" of various files and modules. Inspection Rate Inspection Rate is computed by: ( Lines of Code Reviewed ) / ( Total Person-Time ). This is a measure of how fast we review code. A sensible rate for complex code might be 100 LOC/hour; generally good reviews will be in the range of 200-500 LOC/hour. Anything 800 LOC/ hour or higher indicates the reviewer has not really looked at the code -- we have found by experiment that this is too fast to actually read and critique source code. Some managers insist that their developers try to increase their inspection rate. After all this means "review efficiency" is improving. This is a fallacy. In fact, the slower the review is, the better job the reviewers are doing. Careful work means taking your time. Instead, use inspection rate to help you predict the amount of time needed to complete some code change. If you know this is roughly a "1000-line change" and your typical inspection rate is 200 LOC/hour, you can budget 5 hours for the code review step in your development. If anything, a manager might insist on a slower inspection rate, especially on a stable branch, core module, or close to product release when everyone wants to be more careful about what changes in the code. Inspection Rate (Changed) metric counts only lines of code that were changed (added, removed, or modified). Inspection Rate (Uploaded) metric counts only lines of code that were uploaded in the review. Defect Rate Defect Rate is computed by: ( Number of defects ) / ( Total Person-Time ). This is the speed at which reviewers uncover defects in code. Typical values range between 5 and 20 defects/hour, possibly less for mature code, but not usually much greater. The same caveats about encouraging faster or slower inspection rates apply also to defect rates. Read the Inspection Rate section for details. © 2003-2015 SmartBear Software 680 Metrics Applied If we have learned one thing about metrics and code review it is: Every group is different, but most groups are self-consistent. This means that metrics and trends that apply to one group do not necessarily apply to another, but within a single group metrics are usually fairly consistent. This between-group difference can be attributed to the myriad of variables that enter into software development: The background, experience, and domain knowledge of the authors and reviewers, programming languages and libraries, development patterns at different stages of a product's life-cycle, project management techniques, local culture, the number of developers on the team, whether the team members are physically together or separate, and so forth. 8.7 Tips and Tricks This section will describe workarounds and tricks we use for Collaborator. Picking reviews through the Command-Line Client When sending files to a review through the Command-Line Client, use "last" instead of the review ID to pick the last review or "ask" to be prompted with choices to pick. Custom Fields with Date and Times Collaborator does not have date or time custom fields, but you can closely approximate a date or time by using regular expression validation of single line text fields. For dates, the following regular expression requires a date in the 20th or 21st century that is approximately valid (yes, it accepts 31 days each month): (?:19|20)\d\d-(?:0[1-9]|1[012])-(?:0[1-9]|[12][0-9]|3[01]) The following regular expression validates a time on a 24 hour clock: (?:[01][0-9]|2[0-3]):[0-5][0-9] The two could be combined to accept a date and time field. Be sure you set the description of the field to describe exactly the format you are looking for so that users do not have to parse the regular expression to know what to enter. 8.8 Improving Performance If your Collaborator server is not working as fast as you would like there are a couple of things you can try: 1) Use a modern browser. The latest versions of Internet Explorer, Firefox, Chrome, and Safari all render much faster than Internet Explorer 7 or 8: © 2003-2015 SmartBear Software 681 Techniques & Best Practices 2) Make your reviews a reasonable size. Collaborator supports a wide range of review sizes, but reviews that are larger than 10x our recommended optimal size 674 can become uncomfortably slow. 3) Make sure your database is fast. Collaborator spends much of its time accessing the database, so this needs to be as fast as possible. If the database is not located on the same physical server as Collaborator, make the network connection to the database as fast as possible. 4) Try a different database. MySQL is convenient for small to medium environments, but with larger databases (~100k reviews or more) SQL Server or Oracle often perform better. 5) Tune the server parameters. Try increasing the maximum heap size sizes of the various server caches. 9 865 and/or tweaking the Appendices Appendix A: Known Issues & Errata 682 Current known issues in the server and various client components, including integrations with other systems. Appendix B: Version History 688 Complete version history for each public release of the various components. Appendix C: Java VM Options 865 © 2003-2015 SmartBear Software 682 Overview of Java options useful for Collaborator configuration. Appendix D: Java Compatibility Matrix 870 Describes which versions of Java environment are required to run different versions of Collaborator. 9.1 Appendix A: Known Issues These are the major known issues currently known for all Collaborator components. Many of the issues have workarounds; those are given here as well. Get notified automatically when a new version is available! SmartBear announces new publicly-available versions of Collaborator at our forum located at: http://community.smartbear.com/t5/Collaborator/Collaborator-ReleaseNotifications/td-p/97024 Known Issues with the Collaborator · After updating to Collaborator 9.3, some review materials that had pushpins may end up with duplicated pin numbers (pin numbering being related to the new review archiving feature). This has no impact on review material conversations, defeects, etc. only the numbering of the pins. This problem would occur only in reviews that existed prior to update; all reviews created afterwards would be unaffected. · Due to limitations of the GitHub API, it is not presently possible to sync over review materials larger than 1Mb (for example, large image or document files); to be clear this applies to individual files of greater than 1Mb size. · The built-in PDF viewer of Windows 8, 8.1 and 10 do not support overlay layers in PDF files. Collaborator uses such layers to render coordinate comments (pushpins) 289 in PDF versions of review materials for archived reviews 127 . Because of this, pushpins will not be displayed if the PDF file from the archive is opened in the built-in PDF viewer of Windows 8, 8.1 and 10. As a workaround, please install the Adobe Acrobat Reader or any other full-featured PDF viewer. · Excel files with high column counts may cause severe performance degradation when viewed in the Collaborator web application (for example, for review of differences). Depending on the processor and memory resources of the client machine, this may be noticed at varying numbers of column counts. For a typical desktop, experimentally we have noticed that approximately 500 columns is where performance begins to suffer noticeably and 3000 columns is the point at which it becomes infeasible to effectively work with the Excel file in question. © 2003-2015 SmartBear Software 683 Appendices · 8.2.8200 does not work with Oracle databases (field name exceeds Oracle's 30-character limit). 8.2.8201 corrects this problem and works with all supported databases. · Double quote characters (") in custom field names may break Oracle reporting views. Custom field names become column headers in the views, and Oracle does not allow double quotes in column names. Because of this, Collaborator removes double quote characters from the names of custom fields when it creates reporting views for Oracle databases. If some custom field names differ only by double quotes this would result in an "ORA-00957: duplicate column name" error in server logs. To resolve the issue, you may either remove one of duplicate column names from the reporting view, or rename the custom fields to avoid coincidence. · 8.2 - There is a known issue with Excel diffs. Some changes may not be highlighted in the way that people would expect. We are aware of this and intend to make resulting diffs more understandable in the future. · PDF files that contain a blank page will cause the following exception when opened in the Diff Viewer: BinaryFileConversionException: Conversion failed.The third party library we use for document conversion is not handling the blank page properly. Until this library is fixed by the third party vendor, there is a workaround to this issue: Remove the blank page from the PDF file and upload the new version to the review. If you see this error in the Diff Viewer, simply click 'OK' to dismiss the error, and choose another version of the file to review, from the drop down menu in the Diff Viewer, that does not contain a blank page. · Drag and Drop and HTML 5 uploads do work in IE 10 - but you have to set the browser to 'standards' mode. · Known Issue for MSSQL with Code Collaborator versions < 6505 or 7017: When importing a CC dump, older versions of Code Collaborator will try to import an entire table's data in a single transaction, which may overflow your SQL server's transaction log and cause an error during import. If you need to do an import using one of these versions (as part of a data migration), please use one of the following workarounds: 1) Adjust the maximum size of transactions in your MSSQL server so that the import can finish. 2) If you are migrating FROM another MSSQL server, you can do the migration using native MSSQL dump/restore. · Internet Explorer 7 (IE7) suffers from performance issues with the latest versions. This is due to limitations in that browser that forced alternate implementations that are not as efficient. We recommend users upgrade to a newer version of the browser. · The "Pricepeep" addon for Firefox is incompatible with Collaborator and has been reported to result in browser instability and crashing. · Customers using GIT will need to use 7.x clients with 7.x servers as 6.x clients will not correctly add versioning information for the 7.x server. · Loading large dump files to Oracle may take up to a full day to complete. This appears to be an issue with Oracle driver and is under investigation. © 2003-2015 SmartBear Software 684 · The ability to perform diffs on PDF files has been added, but this applies only to newly uploaded PDF files. PDF files added to reviews prior to the upgrade will not have diff or comment promotion support and should continue to treated as images, as in previous versions. · Chat panel may not select correct comment when clicking on a comment near the top or bottom of the chat panel. The workaround for this behavior is to use the previous and next buttons in the diff viewer toolbar to navigate the comment list. · OSX Mountain Lion sometimes gives the "Installer.app is damaged and cannot be opened" error message. This is actually bad messaging on Apple's part. To fix this, go to your System Preferences window and then click on Security and Privacy. From the general tab, change the "Allow Applications Downloaded From" section to have "Anywhere" selected. The installer should then work as expected. · If the installer cannot find a JRE on your system, it will prompt you for the location of a suitable JRE. On systems with multiple JREs installed, it may be necessary to specify to the installer which JRE should be used for Collaborator. On Windows platforms, running the installer with the -manual argument will suppress the JRE search and cause the installer to prompt for the JRE location (specifically, java.exe). On *nix platforms, you can specify the JRE location by setting the INSTALL4J_JAVA_HOME_OVERRIDE environment variable to the JAVA_HOME value. Known Issues with the Server Component 51 · Case 65225: Using the web client to connect to a server on localhost will prevent uploads from the flash player - which is used on IE to allow uploads from the review summary page. · Case 34564: Reports have missing data. When the server is running on Linux systems, there can be issues with unavailable fonts or available fonts with sufficiently different font metrics that can cause the reporting engine to not render content. Workaround: Install the Microsoft True Type fonts (msttcorefonts on Debian-based systems). · Case 61360: Some pre-operation trigger scripts may need to add a sleep/delay in order to function correctly, as the triggers run prior to saving in-flight data to the database. · Case 64684: SOAP support incompatible with Java 1.6.0_03 Known Issues with the Web Browser Client 221 · If your charts are not being displayed, verify that <collab install dir>/tomcat/temp exists and is writable by the user that runs the server. · Drag and drop of documents to reviews does not work in versions of Firefox prior to 8 and does not work with Internet Explorer or Safari. (IE users with the latest flash can upload multiple files using the "Upload Files" link on the Review Summary page. · PeerReview Complete 2012 Beta - Internet Explorer 7 is not supported during the beta. © 2003-2015 SmartBear Software 685 Appendices · Debug log in 7.0 (Click "Report Error" link in footer): Done/Cancel buttons disappear if the user navigates to a legacy screen without the new UI elements. · Case 26177: Chat log 292 incorrectly encodes leading spaces, so sometimes when entering, for example, code snippets the text does not come out as expected. Workaround: Put a little character (for example, a period) at the beginning of the line. · Case 43101: When clicking on the link of a file in the Review Overview page the file will not be displayed at front if IE is set up to open pop-ups in tabs. Workaround: Go to Tools -> Internet Options -> Tab Settings -> Select "Always open popups in a new window. · Sometimes, after an upgrade, when a user logs in she sees a CSS page dump in the browser instead of going to the home page. Workaround: Just go directly to the homepage. Because you are already authenticated, that will work. · Case 30131: In some very special cases the intra-line difference-engine does not properly highlight the inside of the line. The entire line is still highlighted, so users are still properly shown the main lines of the differences. · Case 27502: Increasing the default font size in Firefox v1.5.0.7 or IE 7 can result in a very distracting (but still functional) user interface. Workaround: Change back to the default font size. · Safari 3 is supported, but there are known issues with Safari 2.x. · When running Firefox with the Firebug or Greasemonkey plug-in, the Side-by-Side view is sluggish to load. This is even true when Firebug is marked "disabled". · Search results may not return all results without noting the truncation. This can happen if many results match the search but are inaccessible to the user. · Diff viewer keyboard shortcuts do not work in Opera. In general, Opera is not a supported browser 221 . While most functionality is available, some features, such as keyboard shortcuts do not work. · When upgrading from 2.1 to 4.0 the server sometimes starts up with a JDBC error. Solution: Check the database and LDAP password fields in installation-directory/tomcat/ conf/Catalina/localhost/ROOT.xml. Repeated dollar signs ('$'), necessary in Collaborator 2.1, are not required. Remove them and restart. · Custom reports with a large number active columns or filters; or with long filter text can break the bookmark, SQL, Printable, and CSV links in Internet Explorer. Because the links contain all the filter information, the URL's can exceed the IE's maximum URL length (2083 characters). Workaround: Use Firefox for complex reports · Character set differences that change the location or number of line breaks can change the way comments get promoted. Workaround: If necessary, use the auto-detected character set to make comments and mark conversations read. © 2003-2015 SmartBear Software 686 · Character set differences that change the location or number of line breaks result in metrics that may not be perfectly correct. The metrics for files are computed using the auto-detected character set. · If there are multiple files with the same filename (but different paths) in a review the automatically linked filenames in review text (custom fields, chat, and so forth) may not link to the intended file. Known Issues with Anti-Virus Software · Anti-virus software is known to interfere with launching sub-processes and communicating with SCM clients. If you experience any problems with a Collaborator client hanging or getting unexpected results, and you have anti-virus software running, disable the anti-virus software and try reproducing the problem. If you subsequently contact technical support, let them know that you have anti-virus software running. Known Issues with the Command-Line Client 341 · Case 31758: Can get an ClassCastException using the new v2.0 client against a v1.x server with certain commands and with certain v1.x servers. Workaround: Make sure your client and server versions match. · Case 24209, 23958: The system PATH variable is not always updated properly by the installer 322 , or the PATH variable is updated but running applications are not notified, so it takes the user logging out of Windows or even rebooting before the command-line client can be used. Workaround 349 : Reboot your machine. Or try just logging out and logging back in to Windows. · Case 34477: Command-line echo passwords back when you type them. Workaround: Use Java v1.7. · Control Characters in text are replaced with the Unicode Replacement Character. This is most often encountered with smart quotes pasted into changelist descriptions. · Also see issues for specific version control integrations below. Known Issues with the Eclipse Plug-in 359 · 7.3 servers are incompatible with older Eclipse clients. Known Issues with the GUI Client 331 · Git users on Windows systems may need to modify their path to allow the client to detect their SCM. The default Windows system PATH entry defaults to "...\git\cmd". Changing this to "...git \bin" should allow the client to properly detect the SCM when the client is launched from the tray notifier. © 2003-2015 SmartBear Software 687 Appendices Known Issues with the Tray Notifier 397 · Dock Icon on MacOS: The tray notifier process creates an icon in the MacOS dock. If you launch the GUI Client it creates another copy of the same dock icon. Known Issues with CVS Integration 419 · Case 42393: Error initializing Add to Review Wizard occurs with reason 'CVSROOT may only specify a postive, non-zero integer port'. This is an error reported by the CVS command line client (cvs.exe) when there is an unexpected colon in the the CVSROOT value. The Collaborator client requires that cvs.exe work normally on the repository. Using a different CVS client, such as the Cygwin client, can fix this problem. Known Issues with Perforce Integration 530 · Case 34890: Files on certain changelists show up as new files -- without a "previous version" diff. Workaround: This is known to happen with certain 2005 versions of Perforce. Upgrading to the latest Perforce client fixes this issue. Known Issues with Subversion Integration 561 · Directory entries are ignored - so adding an entire directory does not show up in a review. · Symlinks are not supported pre-commit - a Symlink uploaded pre-commit will show invalid content in a review. Known Issues with Team Foundation Server Integration 510 · Case 42153: "Unable to determine the source control server" error can occur when adding modified files. There must be a corresponding Team Foundation Server working folder for the directory configured in the GUI client, or the directory specified for the command line client to avoid this error. · Case 42787: Team Foundation Server integration will not work with non-English installations of Visual Studio .NET. Regional settings for other locales are supported, but installing a nonEnglish Visual Studio prevents correct parsing of tf.exe output. © 2003-2015 SmartBear Software 688 9.2 Appendix B: Version History Get notified automatically when a new version is available! SmartBear announces new publicly-available versions of Collaborator using a forum thread. If you want to subscribe to the Release Notification thread to get all release notifications, you can do so here: http://community.smartbear.com/t5/Collaborator/Collaborator-Release-Notifications/td-p/97024 Links to individual versions: · Version 9 688 · Version 8 696 · Version 7 718 · Version 6 737 · Version 5 760 · Version 4 786 · Version 2 821 · Version 2 839 · Version 0/Alpha 9.2.1 853 Version 9 9.4.9400 - December 8, 2015 · added - Rejected and Cancelled reviews can also be archived to Zip 127 (COLLAB-1323) · added - Support for Rational Team Concert 6.0 (COLLAB-999) · added - Use CSRF tokens during web transactions to prevent cross-site request forgery (COLLAB-1241) · added - Administrators can specify a list of file types restricted for upload malicious file uploads) (COLLAB-1234) 154 (to avoid · added - Filter user-input to avoid cross-site scripting vulnerability (COLLAB-1233) © 2003-2015 SmartBear Software 689 Appendices · added - Commands to administer remote system integrations via Command-Line Client (COLLAB-1306) · added - File upload security improvement. (COLLAB-1102) Web clients, by default, use an HTML5-based component for file uploads instead of the older Adobe Flash method. This is supported in Microsoft Edge, Mozilla Firefox 40 and later, Google Chrome 43 and later, and Apple Safari 8 and later. However, the HTML5 method is not supported by Internet Explorer. Should file uploads by IE clients be required, please ask your administrator to re-enable Flash upload support via the relevant setting in the Collaborator server's vmoptions 865 file. · added - GitHub integration: New "Ignore pushes for branches creation for raw pushes to the specified branches. 215 " setting to skip review · fixed - GitHub integration: Polling thread stops if a comment exists on the pull request before Collab processes it (COLLAB-1373) · fixed - GitHub integration creates multiple reviews with a single push to master (COLLAB-1352) · fixed - Critical error when upgrading from 9.0 if database misses version data for some comments (COLLAB-1338) · fixed - JSON API: UserService: login values are case insensitive (COLLAB-1327) · fixed - Cannot click on a pushpin and have it select the conversation (COLLAB-1310) · fixed - GitHub integration is pulling extra commits into reviews (COLLAB-1299) · fixed - GitHub integration commits in the diff viewer show wrong timestamp (COLLAB-1298) · fixed - Some groups are missing from the pick-list of new reviews (COLLAB-1273) · fixed - Use TLSv1.2 protocol on Java 1.6 clients (COLLAB-1213) · fixed - Incorrect time stamp is displayed in DiffViewer for ClearCase Activity in 9200 Client (COLLAB-1174) · fixed - Updated Apache PDFBox library to version 1.8.10 to resolve a number of PDF-related document handling issues (COLLAB-1091) · fixed - Eclipse client dependency for JGit makes it difficult to install into RTC Eclipse client (COLLAB-962) · fixed - DiffViewer does not show upload number correctly when uploading git diffs multiple times (COLLAB-885) · fixed - The --non-interactive option is ignored when SSL certificate cannot be validated (COLLAB-357) © 2003-2015 SmartBear Software Version 9 · deprecated - Print To Review 402 virtual printer driver - Collaborator now offers the ability to attach Word 270 , Excel 273 and PDF 280 documents directly to a review. Additionally, you can install Collaborator add-ins for Word and PowerPoint. · deprecated - SOAP API 648 - Collaborator introduced a new JSON API in January 2015 and the limited SOAP API is no longer needed. · deprecated - XML-RPC API - Collaborator's XML-RPC API is no longer needed because of the introduction of the JSON API. · deprecated - Visual Studio Add-in 395 - We are currently working on a new add-in that will support Visual Studio 2013 and 2015 (and, hopefully, provide a much better user experience than the existing one). 9.3.9300 - October 13, 2015 · added - Completed reviews can now be archived to Zip · added - The style of coordinate comments and defects 127 289 . (COLLAB-1105) (pushpins) have been changed. Now the pushpins display an integer number in their head: The number corresponds to the order in which that pushpin was added to the document page or image. (COLLAB-1179) Note: During the upgrade to Collaborator 9.3 all in-progress reviews have been updated and their pushpins (if any) were numbered. Converting only in-progress reviews during the upgrade, ensures that upgrading the server to 9.3 does not take too long. To append ordinal numbers to pushpins in all completed reviews, your administrators can use the respective command in the Diagnostic Utility 130 . (This however may take some time to accomplish.) · added - Collaborator News panel in the WebUI 221 . (COLLAB-1104) This panel displays news, release announcements, webinar invitations and other information from the SmartBear. · added - AES-256 encryption 95 for database and LDAP passwords. (COLLAB-1077) · added - Send notification to the administrator when a user access was denied due to license limit 82 . (COLLAB-985) · added - Support for Oracle 12c database. (COLLAB-1121) · added - Support for Microsoft Team Foundation Server 2015. (COLLAB-1144) · added - Support for Microsoft Windows 10 (both server and client components of Collaborator). (COLLAB-1095) · added - Support for Microsoft Edge browser in Web Client. (COLLAB-1096) · fixed - Changes of document(s) uploaded to a review were not highlighted. (COLLAB-1145) · fixed - JIRA Configuration did not remove the trailing slash from Server URI. (COLLAB-1138) · fixed - Git's "The file will have its original line endings in your working directory." message was not ignored. (COLLAB-1107) © 2003-2015 SmartBear Software 690 691 Appendices · fixed - Collaborator did not apply the ASCII expansion to Perforce wildcards. (COLLAB-1103) · fixed - JSON API was not implemented for the "ccollab admin review-xml" command. (COLLAB1084) · fixed - Customer's completed reviews showed the "overdue" status. (COLLAB-1066) · fixed - The smartbear.ccollab.upload.ignore.binary.file property was ignored by JSON APIs. (COLLAB-998) · fixed - Private or non-SCM files prevented review uploads from Eclipse Plug-in. (COLLAB-945) · fixed - The location data for defects within documents was displayed incorrectly in the Defect report. (919) · fixed - Some users could log in even if all floating licenses was consumed. (COLLAB-694) · fixed - The filters of the Diff Viewer's chat panel did not function properly. (COLLAB-710) · fixed - The Before and After drop-down lists of the Diff Viewer displayed file ids rather than commit ids for GitHub files. · fixed - Diff Viewer navigates between files alphabetically even when File View is set to "Compressed Tree". (COLLAB-389) 9.2.9200 - July 9, 2015 · added - JIRA integration 607 · added - GitHub integration 625 · added - Electronic signatures 151 can now be configured on templates basis (COLLAB-633) · added (open source, beta): IntelliJ IDEA plugin (https://github.com/SmartBear/ideacollaborator-plugin) · added - Eclipse Plug-in, GUI Client, and Command-Line Client all now use the JSON API completely and by default (to get old behavior specify --use-legacy-api 352 option with Command-Line Client) · fixed - fixed HostGUID handling by JSON API; primarily affecting Perforce environments (COLLAB-1053) · fixed - Table naming issue in Oracle-based environments (COLLAB-1041) · fixed - Defect marking in Eclipse conversation tab stops changing colors (COLLAB-1035) · fixed - Action item list not refreshing after defect creation in Eclipse plugin (COLLAB-1034) · fixed - Respect a Perforce changelist's comment when submitting it to Collaborator (COLLAB1021) © 2003-2015 SmartBear Software Version 9 · fixed - Diff viewer should handle empty and broken files (COLLAB-1005) · fixed - Collab tray notifier UnsupportedOperationException error (COLLAB-1003) · fixed - NullPointerException when ccollab addchangeslist is run with Perforce (COLLAB-966) · fixed - Eclipse client could not create line defects (COLLAB-979) · fixed - Failure to create new review in GUI client when debug was turned on (COLLAB-964) · fixed - Always allow listed authors to upload content to a review, regardless of restrictions (COLLAB-959) · fixed - Unclear GUI client error message during "test connection" if a 9.x client is used with a < 9.0 server (COLLAB-955) · fixed - Improved client support for copy-participants operation (COLLAB-954) · fixed - Improved client support for saving defect id on creation/editing (for "last" argument) (COLLAB-953) · fixed - Made checking mandatory custom fields consistent for defect commands in CLI in both legacy and JSON API modes (COLLAB-952,1069,1070) · fixed - Mandatory review custom field was not working for annotating phase (COLLAB-948) · fixed - Mandatory review custom field was not made obvious with the typical red label for mandatory fields (COLLAB-947) · fixed - Incorrect "send to completed" button and associated description for author in a "formal inspection" template review (COLLAB-937) · fixed - Clarified docs and enhanced behavior of assignReviewPool API call (COLLAB-923) · fixed - Made sure that review phase "Rework" always identifies as such w/ trigger substitution variables ${review.phase}/${review.phase.previous} (COLLAB-918) · fixed - Cannot delete .docx documents from review materials (COLLAB-878) · fixed - addcvsdiffs does not work w/ -N cvs option; use -skipN option to addcvsdiffs if needed (COLLAB-738) · fixed - Verify that we can run on JRE 8 (COLLAB-682) · fixed - Perforce update-changelist trigger fails when workspace has the "Host" field specified (COLLAB-667) · fixed - Uploading a new version of a file changed chat icons from acceptance to chat icon (COLLAB-226) © 2003-2015 SmartBear Software 692 693 Appendices 9.1.9101 - April 15, 2015 · added - New "First uploaded vs. Last uploaded" option for the Diff Viewer Default Version Comparison 228 setting (COLLAB-841) · added - JSON API: Allow defects and comments to be queried by review/user (COLLAB-840) · added - JSON API protocol implementation for trigger commands (COLLAB-799) · added - Allow pre-configuration of scale parameters during server installation (COLLAB-884) · fixed - Download Client Installers button points to version 8 download page (COLLAB-910) · fixed - Infinite Loading message when clicking Next button in diff viewer (COLLAB-888) · fixed - Mandatory review subscriptions prevent review from moving to completed phase (COLLAB-797) · fixed - Browser launching is broken in all *nix operating systems, including mac for all client apps (COLLAB-603) · fixed - Author receives "Respond to comments" email when all review pool slots are taken and review begins (COLLAB-601) · fixed - AccuRev addchanges fails when getting item transaction (COLLAB-503) · fixed - Blank default start menu folder name for client install (COLLAB-917) · fixed - addhgdiffs command with JSON causes NullPointer exception (COLLAB-886) · fixed - addfiles command does not allow to load "local" files when SCM set to "perforce" (COLLAB-867) 9.1.9100 - March 25, 2015 · added - Most Command-Line Client commands (except for triggers) now support the --usejson-api 351 global option. · added - Support for JSON API in GUI Client. Now this API is the default for GUI Client (COLLAB779) · added - Support for JSON API in Eclipse Plug-in (COLLAB-855) · added - Add participant state to the Detailed Report (COLLAB-804) · added - Track user file activity from the Review Detail Reports (COLLAB-743) · added - The caption of the Approve button now changes depending on the next phase (COLLAB-564) · added - Add Collaborator to the list of web browser's search engines 305 (COLLAB-821) © 2003-2015 SmartBear Software Version 9 · fixed - Restrict upload if restrict access is set to "Yes" (COLLAB-849) · fixed - Running the ccollab admin review create command with the --use-json-api option requires the template ID (COLLAB-848) · fixed - Command line output for admin user create is confusing (COLLAB-833) · fixed - ccollab logout fails on Linux (COLLAB-832) · fixed - Eclipse client will not connect to 9.0 server (COLLAB-829) · fixed - JSON API with addchangelist and invalid login ticket dies, instead of prompting for password (COLLAB-819) · fixed - Reverted file are not removed from the review (COLLAB-567) · fixed - Git/Eclipse: Cannot add multiple commits (COLLAB-811) · fixed - RTC work item approvals do not get updated when a review is deleted in Collaborator (COLLAB-839) · fixed - Word document-handling memory consumption issues (COLLAB-539) · fixed - Perforce syncusers command issues; refactoring to fully support --use-json-api (COLLAB801) 9.0.9001 - February 3, 2015 · added - JSON API: review deletion, adding urls to review, dismiss commit todo, move review to annotate (COLLAB-760) · added - JSON API: findByGuid and getMembers added to GroupService (COLLAB-789) · added - JSON API: findByGuid and findByLogin to UserService (COLLAB-790) · added - JSON API: findById and getParticipants to ReviewService (COLLAB-788) · fixed - JSON API: fixed admin group create (COLLAB-771) · fixed - JSON API: fixed missing Action categories (COLLAB-715) · fixed - review pool notifications should send even if review has started (COLLAB-741) · added - added ability to stop users from deleting review pools via vmoptions (COLLAB-780) · fixed - handling of first git commit (COLLAB-769) · fixed - emailing everyone now includes all members of assigned review pools (COLLAB-742) · fixed - changed review title (COLLAB-767) © 2003-2015 SmartBear Software 694 695 Appendices · fixed - MKS products now referred to as PTC in UI after company acquisition (COLLAB-753) · fixed - Eclipse plugin client author field autofills (COLLAB-758) · fixed - review xml now includes review pool data (COLLAB-580) 9.0.9000 - January 20, 2015 * FIRST RELEASE OF v9.0! * Major features: · JSON API web service 651 - a fast and effective way to exchange data between your application and Collaborator server. · Git integration with Collaborator Eclipse Plug-in · Command-line APIs were refactored. · Support for Visual Studio 2013, SQL Server 2014, SVN 1.8. · [beta] Ability to move comments in MS Word documents (.doc and .docx) images 280 . Supported in Chrome and Firefox only. 273 , PDFs 283 and · added — Command-Line Client now has the --use-json-api 351 global option. If this option is specified, the Collaborator server will use a faster JSON API to execute commands. · added — Display full path in a tooltip for truncated file path at top of diff viewer (COLLAB452) · fixed — Server-side debugging contains plain text passwords (COLLAB-699) · fixed — Cannot approve a review due to unread comments, but there are no unread comments (COLLAB-721) · fixed — CVS does not upload all the file as "cvs diff" (COLLAB-299) · fixed — Child group loses its child relationship when modified by group admin (COLLAB-683) · fixed — Spaces removed after PDF conversion (COLLAB-686) · fixed — Schema check misidentifies standard Oracle triggers (COLLAB-557) · fixed — Inviting a colleague sends an invalid link to the review (COLLAB-652) · fixed — broken I/O behavior around password prompts (COLLAB-735) © 2003-2015 SmartBear Software Version 9 · fixed — Changing review template wipes file-subscription's participants (COLLAB-534) · fixed — Populated mandatory review custom field prevents review from changing phases (COLLAB-720) · fixed — Square bracket in custom field name breaks database views in MS SQL (COLLAB-547) · fixed — Unable to login after upgrade from v.8100.008: Logging install4j errors and ErrorCode404Handler info entries (COLLAB-56) 9.2.2 Version 8 8.5.8502 - November 11, 2014 · fixed — Coordinate locators limited to 1 million across the whole server (COLLAB-631) · fixed — Web UI Slow loading additional lines of code when p4protects is enabled (COLLAB634) · added — Support for Subversive in Eclipse Luna (COLLAB-514) · fixed — Notification Table Cleanup Task does not work (COLLAB-590) · fixed — Action Item list retrieval is unacceptably slow (COLLAB-608) · fixed — Add pending changelist for Perforce fails (COLLAB-656) · fixed — Error parsing variables added as key: value in p4 set (COLLAB-651) · fixed — Improve user message for ensure-diffs-reviewed errors (COLLAB-609) · fixed — Disable "Delete" button when "Restrict Uploads to Review:" is set to Yes (COLLAB-661) · fixed — Modifying and saving a local file from the diff viewer in Eclipse does not save the file to disk (COLLAB-626) · fixed — Redact accidental inclusion of plaintext password from command-line debug log (COLLAB-616) · fixed — Eclipse: error with svnkit 1.7+ (COLLAB-545) · fixed — enhanced error messages from ensure-diffs-reviewed (COLLAB-609) · fixed — clarified initial configuration screen on product installation (COLLAB-660) · fixed — improve error messaging when git HEAD revision can not be found (COLLAB-640) · discontinued support — we have stopped supporting the following outdated and rarely used SCMs: IBM CMVC, Borland StarTeam, Seapine Surround SCM, SourceGear Vault and Microsoft Visual Source Safe. © 2003-2015 SmartBear Software 696 697 Appendices · Installers are now digitally signed on applicable platforms (Windows, OSX). 8.5.8501 - September 30, 2014 · feature — Allow obfuscation of LDAP passwords in ROOT.xml (COLLAB-330) · fixed — addgitdiffs does not generate LOC metrics (COLLAB-597) · fixed — Issue of converting pdf files with empty pages at the end (COLLAB-576) · fixed — Mac Installer cannot find Java JRE (COLLAB-577) · fixed — Orphaned row in assignment table breaks group admin page (COLLAB-572) · fixed — Client Installer - Ubuntu- Installer does not create links to executables (COLLAB-559) · fixed — Discarded MKS change packages showing in GUI client (COLLAB-252) · fixed — PDF conversion error (COLLAB-594) 8.5.8500 - August 26, 2014 · feature — Collaborator Server now can run on MySQL version 4.1, 5.0, 5.1, 5.4, 5.5 and 5.6. (COLLAB-305) · feature — Added syntax highlighting for XML and XAML files (COLLAB-494) · fixed — p4 addchangelist uses too much memory when checking file integrations on some cases (COLLAB-454) · fixed — Discarded MKS change packages showing in GUI client (COLLAB-252) · fixed — ensure-diffs-reviewed selects contained diffs as possible conflicts (COLLAB-515) · fixed — Prevent the uploading of certain binary files based on Admin settings Collaborator Client configuration 868 (COLLAB-448) 155 and · fixed — smartbear.ccollab.upload.truncate.size no longer works (COLLAB-440) · fixed — Numbered/lettered bullet list adds extra spaces in diff viewer (COLLAB-469) · fixed — Problem with php file on diff viewer due to syntax coloring display setting (COLLAB477) · fixed — Removed hardcoded timeout (30s) for triggers, timeout is configurable via VM option now (COLLAB-442) · fixed — Participant custom fields cannot be modified in the completed phase (COLLAB-439) © 2003-2015 SmartBear Software Version 8 · fixed — Defect and comment timestamp is not displayed in the Web UI on the non-compact view (COLLAB-436) · fixed — Regression - We do not support parentless git commits on 8405, but it was supported on Collab 6507 (COLLAB-445) · fixed — DOM error when clicking next file (COLLAB-487) · fixed — Exception when clicking review from action items (COLLAB-486) · fixed — Slow diff viewer refresh performance for Excel spreadsheets (COLLAB-460) · fixed — Apparent unresponsiveness when interacting with comments in the diff viewer (COLLAB-460) · fixed — Select Custom field with its values changed causes issue on reviews with the old values selected (COLLAB-473) · fixed — Wrong file name and extension for review file from mercurial (COLLAB-489) · fixed — Participant list gets truncated after 10k users (COLLAB-77) · fixed — No action items for review pool participants (COLLAB-507) · fixed — p4 - broken symbolic links cause issues with ensure-reviewed triggers (COLLAB-457) · fixed — Document Diff viewer throws exception before document is finished converting (COLLAB-498) · fixed — Support MKS Integrity 10 (COLLAB-411) · fixed — Document conversion failure when restricted fonts are included (COLLAB-316) · fixed — ClearCase \main\LATEST does not work anymore (COLLAB-535) · fixed — Eclipse - Support for Subversive in Eclipse Luna (COLLAB-514) · fixed — Update mysql jdbc driver, 5.1.6->5.1.31 (COLLAB-305) · fixed — Review Pools: Can move a review forward without one (COLLAB-500) · fixed — ClearCase "local" keyword does not work in Client (COLLAB-556) 8.4.8406 - June 17, 2014 · feature — Added new status for AccuRev incl/excl (COLLAB-269) · feature — Added new setting to user roles configuration: "Minimum number required to finish review". It defines a minimum number of approval required in order to complete the review. © 2003-2015 SmartBear Software 698 699 Appendices · fixed — Document converts incorrectly with extra lines (COLLAB-358) · fixed — Include offending diff output on ensure-diffs-reviewed response (COLLAB-349) · fixed — Link button in reports is saving URL's that are too large (COLLAB-435) · fixed — Change default from 'Any Activity' to 'File Activity' (COLLAB-344) · fixed — ensure-diffs-reviewed fails when there are shared changes between collab and the scm (COLLAB-406) · fixed — New version of Chrome (and IE9) does not auto-scroll while typing in long diff comments (COLLAB-186) · fixed — Workflow around Review Pools is not ideal (COLLAB-262) · fixed — NPE in admin batch execution of adding a git changelist (COLLAB-397) · fixed — Excel files cannot be viewed in IE8 (COLLAB-368) · fixed — Populated and expanded defect custom fields hidden from view (COLLAB-418) · fixed — ClearCase supports relative branch path in “AddVersions" (COLLAB-398); ClearCase should recover the input version information when error occurs (COLLAB-399); ClearCase AddVersion should provide an option to allow if unchanged CHECKOUT files are loaded (COLLAB-400),Show All Files > Branch Name not working properly (COLLAB-421), Review #10161 · fixed — Fixed Database Integrity errors and checks on the Assignment and FileMetrics tables (COLLAB-293) · fixed — make initialization error page clearer (COLLAB-366) · fixed — ClearCase > Add Versions > Show All Files > Branch Name not working properly (COLLAB-421) · fixed — ClearCase supports relative branch path in "AddVersions"(COLLAB-398); ClearCase should recover the input version information when error occurs (COLLAB-399);ClearCase AddVersion should provide an option to allow if unchanged CHECKOUT files are loaded (COLLAB-400) · fixed — Suppress stacktrace output for document conversion failure (COLLAB-331) · fixed — Diff Viewer - Display order of after before in bottom detail pane (COLLAB-131) · fixed — Extra spaces show up in diff viewer in IE11 (COLLAB-362) · fixed — Perforce Server integration. Adding changelists from server bypasses user access (COLLAB-359) © 2003-2015 SmartBear Software Version 8 · fixed — Cannot sort Defect ID column on the defect log of the review summary page (COLLAB-356) · fixed — addfiles sends an email for each file (COLLAB-303) · fixed — scmFindOrCreate does not send all info to the server (COLLAB-378) · fixed — RTC - Incorrect "Pending" label on the "Add to Review" dialog (Case COLLAB-324) · fixed — The external URL admin setting is reset when the server starts with no DB connection (COLLAB-392) · fixed — Environment P4CLIENT overrides command's P4CLIENT on p4v (Windows) (COLLAB369) · fixed — Make git ignore warning: lines on stderr from commands · fixed — AccuRev - Incorrect conversion of changelist date (COLLAB-388) · fixed — Change default from 'Any Activity' to 'File Activity’ (COLLAB-344) · fixed — Fail to load in the dump file which contains the specific character (COLLAB-372) 8.4.8405 - May 13, 2014 · fixed — Improved performance of chat message/defect rendering for large reviews (COLLAB313) · fixed — Solved issue where addfiles command improperly calculated LOC metrics for nonSCM files (COLLAB-373) · added — Made comment locations clickable in search results (COLLAB-294) 8.4.8404 - May 6, 2014 · fixed — Minimum client version set as "0" in server vs client version error message (COLLAB308) · fixed — License logging does not work and need to record license denials in the license.log file (COLLAB-335 & COLLAB-348) · fixed — Notifications - Back in Inspection Phase email sent at the wrong time (COLLAB-281) · fixed — Cannot add to existing review with Collaborator and SVN or Git (COLLAB-317) · fixed — Replace the loading indicator (COLLAB-310) · fixed — Non-SCM files, documents and spreadsheets are calculating LOC metrics when they should not (COLLAB-140) © 2003-2015 SmartBear Software 700 701 Appendices · fixed — Problem with compare/sort on 1.7+ JREs (COLLAB-338) · fixed — ClearCase Addversion fails when there is only one input version (COLLAB-353) · fixed — License logging does not work and need to record license denials in the license.log file (COLLAB-335 & COLLAB-348) · fixed — Calculation for number of comments in review detail report includes "accepted" comments (COLLAB-312) · fixed — Failed uploads result in a missing path in VersionData (COLLAB-337) · fixed — Calculation for number of comments in review detail report includes "accepted" comments (COLLAB-312) · fixed — WebUI displays (no comment) when there is not a comment (COLLAB-346) · fixed — Open the diff viewer with the upload in which the defect was created as the "after" version (COLLAB-133) · fixed — Collaborator sends a notification email for each uploaded file (ClearCase) whether the file changed or not (COLLAB-325) · fixed — First cut at resolving client date issues (COLLAB-320) · fixed — Diff viewer gives no clear indication that reworked files are new (COLLAB-253) · fixed — Home Displays user has no Action Items on home page before it really determines if the user has Action Items (COLLAB-136) · fixed — RTC - Changelists are uploaded in wrong order (COLLAB-53) · fixed — Materials section. Some of the materials disappear when switching between overlay and separate (COLLAB-49) · fixed — RTC - Changing Work Item state re-uploads unmodified files (COLLAB-289) · fixed — RTC - Add context menu to add delivered change sets to a review from the History view (COLLAB-307) · fixed — Group Admins cant set the 'All Users' flag of a group to true (COLLAB-212) · fixed — Send author inspection notice to users with notification preference set to MINIMAL (COLLAB-268) 8.4.8403 - March 25, 2014 · added — ability to obscure database passwords in ROOT.xml (COLLAB-261) · added — admin has ability to limit subscriber role (COLLAB-57) © 2003-2015 SmartBear Software Version 8 · fixed — Eliminated duplicate logins when trailing spaces are included (COLLAB-69) · fixed — Fixed issue with Previous/Next diff filter (COLLAB-78) · fixed — Authors are now notified if they are not the creator of the review (COLLAB-85) · fixed — Memory issue with AccuRev loading (COLLAB-126) · fixed — Issue with non-participants having certain edit permissions (COLLAB-135) · fixed — Issue with user selecting a new template and getting error (COLLAB-142) · fixed — Database integrity diagnostic JoinReviewChangelist error after failed web upload in IE (COLLAB-148) · fixed — UI issue with General Info area being overwritten (COLLAB-157) · fixed — Footer incorrect (COLLAB-166) · fixed — Issue with Group members creating a review that includes non-Group members as the reviewer. Can’t check off items in checklist (COLLAB-167) · fixed — Lack of warning when mandatory participant is removed from a review (COLLAB-174) · fixed — Exception error with review pools (COLLAB-176) · fixed — P4 passwords showing in Web UI debug logs (COLLAB-178) · fixed — ClearCase issue with addversions if there are changes in subdirectory (COLLAB-181) · fixed — Issue with plugins newer than the server version of Eclipse (COLLAB-183) · fixed — Get email/full name data upon account creation (COLLAB-205) · fixed — Field not cleared after creating a group (COLLAB-210) · fixed — Style issue in the diff viewer – breaks if the conversation is resized (COLLAB-216) · fixed — Ensure diffs reviewed does not automatically detect merged changes (COLLAB-218) · fixed — Raise notification subject line to 256 characters (COLLAB-222) · fixed — List Review Stalled notification template using Review Stalled Author template (COLLAB-227) · fixed — Fields not cleaned after creating user (COLLAB-234) · fixed — Reviews not appearing in action items for author (COLLAB-236) · fixed — Setting "Review template" to the same template in the command line wipes out participants (COLLAB-239) © 2003-2015 SmartBear Software 702 703 Appendices · fixed — Unable to remove group admins using group sync (COLLAB-240) · fixed — Review general information: Admin can see only groups where he is a member of. (COLLAB-245) · fixed — Make all searches case insensitive (COLLAB-247) · fixed — Memory issue with SCM.Uploadchangeset() with Subversion (COLLAB-250) · fixed — Action item arrow is red even though no action can be done (COLLAB-254) · fixed — Review Creator cannot edit General Info (COLLAB-271) · fixed — GIT issue if there is a file named HEAD in the directory (COLLAB-275) · fixed — P4 addchangelists broken for certain versions (COLLAB-286) · fixed — Add option to allow uploading other user's perforce pending changelists (COLLAB287) · fixed — "AddChanges" fails in CVS (COLLAB-290) · fixed — RTC: “Save change set links and Comments” follow up is now triggered. (COLLAB-54) · fixed — RTC: No new reviews are generated if Work Items are linked to rejected or cancelled review (COLLAB-204) · fixed — RTC - All changesets are not uploaded if one is empty (COLLAB-279) · fixed — RTC: “Add to Review” to be available for changesets in RTC that have been delivered (COLLAB-208) · fixed — Clearcase: Adding changes via addchanges from parent directories cause the changes to be added as "uploaded files" (COLLAB-238) · fixed — ClearCase addversions/addchanges fails when using relative path for Windows (COLLAB-298) 8.4.8402 - March 6, 2014 · fixed — Oracle support hotfix (COLLAB-257) 8.4.8401 - February 19, 2014 · added — **Accepted** messages now shown on review reports (COLLAB-38) · added — Added comment link in search results screen (COLLAB-42) · fixed — Calendar week starts on Monday instead of Sunday (COLLAB-15) © 2003-2015 SmartBear Software Version 8 · fixed — Single-Review dumps contain LabelLocation records for all reviews (COLLAB-27) · fixed — PDF Conversion causes long query warnings (COLLAB-23) · fixed — Vertical Tab control code breaks Review-XML parser (COLLAB-25) · fixed — Checklist records not cleaned up when Review is deleted (COLLAB-29) · fixed — Config only dumps sometimes will not load due to false positive on Duplicate MetaData (COLLAB-30) · fixed — DOCX upload never completes (COLLAB-40) · fixed — Deleting Admin email now generates error instead of going to first run initialization screen (COLLAB-41) · fixed — Hourly time calculations in reports stop at 24 hours instead of 30 hours now before rolling into days (COLLAB-55) · fixed — Notification errors in some cases in Collab.log (COLLAB-24) · fixed — Adding a review pool group to two different parent groups breaks participants list (COLLAB-76) · fixed — MS Office graphics objects do not render in diff viewer (COLLAB-79) · fixed — Broken keyboard shortcuts in Diff Viewer (COLLAB-90) · fixed — Changing template in completed review causes a hang (COLLAB-112) · fixed — Diff convos scrolled off screen when you click them (COLLAB-122) · fixed — Could not select the participant from specific group (COLLAB-124) · fixed — Loading AccuRev history used too much memory (COLLAB-126) · fixed — Overview text box is now larger (COLLAB-127) · fixed — ClearCase 'Local' does not work in 'addversions' command (COLLAB-130) · fixed — DB import fails with "java.io.IOException: Data format error: Character reference "&#" (COLLAB-134) · fixed — Cannot display timeline of deleted reviews (COLLAB-145) · fixed — Perforce client-ownership check does not respect case-sensitivity setting (COLLAB152) · fixed — MS SQL Server 2012 - unable to import system dump files (COLLAB-168) · fixed — Review deadline is showing dummy data on the Reports (COLLAB-170) © 2003-2015 SmartBear Software 704 705 Appendices · fixed — RTC - Reopening a review does not change the Work Item approval status (COLLAB175) · fixed — RTC - Cannot upload change sets when the number of changes is hidden in the RTC client (COLLAB-187) · fixed — Option to filter users when adding them to groups does not work properly (COLLAB192) · fixed — CodeReviewer webpage showing when clicking Help from Collaborator (COLLAB-194) 8.3.8301 - December 10, 2013 · added — Major performance boost for files with many convos (Case 66490) · added — Delete work item assignments when a reviewer is removed from a review (Case 76684) · added — RTC - automatic Work Item approvals (Case 71231) · added — Respect max rows in printable and csv report versions (Case 76670). · added — Invite emails mentioned in comment to Review (Case 76479) · added — RTC - Add Collaborator reviewers as Work Item assignments (Case 73575) · fixed — Checklist - If you enter two CL items with same name, you simply get kicked to a new screen with an error, lose work (Case 76056). · fixed — 8.3 Triggers failing on locked clients on 2011.1 (Case 71642) · fixed — Fixed server memory leak w/ large uploaded files. (Case 76672) · fixed — 8.3 - Group Synch XML Functionality (Case 76644) · fixed — Recognize emails with '+' (Case 76652) · fixed — 8.3: Uploaded file chat message may link 'wrong' version of the file (Case 74198) · fixed — Remove user agent XSS vulnerability (Case 76661) · fixed — Search button gradient (Case 75989) · fixed — Fix alignment of "Next Steps" and "Search" buttons (Case 76656) · fixed — Explain existing Review load in 'Add to Review' wizard (Case 76651) · fixed — Deadlines change automatically with timezones (Case 76640) © 2003-2015 SmartBear Software Version 8 · fixed — 8.3 - Capturing connection errors deeper than one level(Case 76643) · fixed — TEE clients were breaking when trying to get the properties or content of a deleted file (SF Case 8309) · fixed — Support Directory in ClearCase(Case 69826, Review#9789) · fixed — AddDiffs relative tag causing issues to arise in some cases when trying to add comments/defects in the diff viewer (SF case 8413) · fixed — roles who are not allowed to modify the general information section of a review can now check/uncheck checklist items and modify participant custom fields (case 76610) · fixed — deadline column not sortable on home page (case 76192) 8.2.8202 - October 29, 2013 · added — Support http://www.opensearch.org (Case 75699) · added — Decouple "eval formulas" detail toggle and option (Case 75243) · added — "Home" link on the dashboard refreshes action items (Case 75323) · added — Support for Excel ".xlsm" file format (Case 75461) · added — Sign/decline reviews in Eclipse (Case 74648) · added — Command-line scripting commands for signatures (Case 74648) · added — Add "Signature Status" to review list reports (Case 74649) · added — View for reporting on Electronic Signatures (Case 74649) · added — Create Views in embedded database (Case 74150) · added — Show signature status in 'ccollab admin review-xml' (Case 74649) · added — Show signature status in Review Detail Report (Case 74649) · added — "Signed/Pending signature/Declined by" filter to reports (Case 74649) · fixed — Reduced memory usage, improving server performance. Should reduce OOM errors with large document reviews. (Case 75814) · fixed — Eclipse plugin: fail to create new review. (Case 76312) · fixed — Display more detail about web upload errors (Case 75990) · fixed — Reduce db queries for Review Summary page (Case 76239) © 2003-2015 SmartBear Software 706 707 Appendices · fixed — Search cannot find drop-down custom fields in Embedded database (Case 75833) · fixed — Show "N/A" instead of "null" when deadlines disabled (Case 76000) · fixed — Grey disabled list options in IE8 (Case 75998) · fixed — Load "existing reviews" in GUI just-in-time (Case 75606) · fixed — Link community section to active forum (Case 75668) · fixed — Better error message converting old Excel files (Case 75317) · fixed — Reordering Excel sheets shows bogus modifications (Case 75937) · fixed — Checklist - Add more line items functionality (Case 75209). · fixed — RTC - Reviews are created for work items with no changesets (Case 74785) · fixed — Add possibility to add group admins in group sync and fix documentation for group sync command (Case 75608) · fixed — RTC - Cannot upload new changes from Work Item when previous review is deleted (Case 72633) · fixed — Command-line help displays args in wrong order (Case 75743) · fixed — Synergy - Make Windows-only parameter -n optional (Case 75851) · fixed — Text diff options do not work after changing "Wrap Lines" (Case 75614) · fixed — RTC: Reviews are generated for the work item creator and not the owner (Case 73064) · fixed — Preserve review pool status for groups in group-sync when the review pool flag is not given again (Case 75562) · fixed — Materials with the same name from different components are munged together (Case 75454) · fixed — Only showing one tab in Spreadsheet diff (Case 75369) · fixed — Changelist names and descriptions are wrong (Case 75061). · fixed — Electronic Signature enabled, signatory not included in review participants (Case 75512) · fixed — Changelist names and descriptions are wrong (Case 75061). · fixed — Link downloads wrong version in diff viewer (Case 75738) · fixed — Make web UI buttons look less "flat" (Case 75319) © 2003-2015 SmartBear Software Version 8 · fixed — Review Summary page scrolls when checklist clicked (Case 75148) · fixed — Overview shows participant count of previous review (Case 74904) · fixed — Zoom image diff correctly on window resize (Case 75371) · fixed — Make web UI buttons less "flat" (Case 75319) · fixed — Better error message on old Excel formats (Case 75317) · fixed — Show participant signature status in Eclipse (Case 74648) · fixed — checklists with spaces make review-xml malformed (Case 75491). · fixed — Retain leading whitespace in comments (Case 74970). · fixed — Checklist - Add more line items functionality (Case 75209). · fixed — Triggers failing on locked clients on 2011.1 (Case 71642) · fixed — Suppress "encode illegal character" warning (Case 74809) · fixed — "View As" label sometimes misaligned (Case 75170) · fixed — Re-layout custom field sections on show/hide (Case 74406) · fixed — RTC - Error uploading deleted file when file already exists on review and has comments (Case 75251) · fixed — Unused column in admin/users view (Case 74884). · fixed — Unused column in admin/users view (Case 74884). · fixed — Navigate to next/prev diff in spreadsheets (Case 74961) · fixed — Materials sections columns collapse in "compressed" mode (Case 74469) · fixed — Commit Comments not displayed for ClearCase(Case 75806) · fixed — Commit Comments not displayed for ClearCase(Case 75806) · fixed — Problem in 8.2 when adding a changelist and a folder was modified but not moved (case 75556) · fixed — comment text wrapping problems(Case 75598). · fixed — Error uploading changelist in subversion when NodeKind was invalid (case 75444) · fixed — Support a version-extended base filename for Clearcase Addversions(Case 69562, fix unit test) © 2003-2015 SmartBear Software 708 709 Appendices · fixed — Eclipse - Review Pools do not show up in list of addable participants in Eclipse(Case 70282, fix unit test) · fixed — reviews sometimes showing up multiple times in action items after a template change (case 75216) · fixed — 8.2.8200 had upgrade issues with Oracle backed servers (case 75426) · fixed — Allow upload of multiple changelists in web UI (Case 71476) · fixed — can now add TFS shelvesets with a leading or trailing space (case 73868) · fixed — Users are now allowed to accept if they have opened a defect in a chat thread and users can no longer accept the same thread multiple times in a row (case 72236) · fixed — creating custom fields no longer automatically adds them to a template (case 74089) · fixed — Participant status no longer switches to 'Approved' upon review cancellation or rejection, the status stays as it was (case 73163) · fixed — Support a version-extended base filename for Clearcase Addversions(Case 69562, Review #9462) · fixed — you can no longer set the maximum value for the length of a custom field to be less than the minimum value (case 74440) · fixed — invalid subscriptions are no longer allowed to be created, added diagnostic to remove invalid subscriptions already in place (case 68450) · fixed — Support a version-extended base filename for Clearcase Addversions(Case 69562) · fixed — Eclipse - Review Pools do not show up in list of addable participants in Eclipse(Case 70282) 8.2.8201 - August 28, 2013 · fixed — Corrected a field name that prevented Oracle databases from starting with 8.2.8200 (Case 75426) 8.2.8200 - August 27, 2013 · added — Excel Support · added — Checklist Support · added — Make custom fields mandatory by a phase in the review (Case 71847) · added — RTC - Implement switch to add reviewers to review from work item assignments (Case 73574) · added — Git support to "ensure-reviewed" and "ensure-review-started" triggers (Case 68627) © 2003-2015 SmartBear Software Version 8 · added — RTC - Indicate which work item types under which states should trigger generating/ updating review (Case 73572) · added — Installer includes Active Directory authentication option (Case 73443) · added — RTC - Allow multiple Collaborator servers per RTC server (Case 73571) · added — Verify Database Schema now run at server start (Case 69166) · added — Diagnostics now add their results to the log file. (Case 69166) · fixed — BOTH - Perforce: Error when submitting a deleted symlink (Case 74037). · fixed — Clicking file convo location links with spaces do not focus&scroll convo in diff viewer (Case 71652). · fixed — Collaborator: Community section should be disabled by default (Case 74924) · fixed — "Next Steps" shows too many buttons in Planning with review pools (Case 70425) · fixed — Custom Defect Field Description Placement (Case 70746) · fixed — Problem opening reviews due to invalid role ID (Case 70705) · fixed — master - Review Summary - View separate - Status shows 'Initial' on all changelists (Case 70703). · fixed — master - Can add user to review even when user does not have access (Case 73065) · fixed — 'local' modifier is broken for perforce addversions (Case 73758) · fixed — Defect Custom Fields Ignore Default Value Params (Case 74591). · fixed — Master - workflow should stay in Rework until Author kicks it out (Case 65518) · fixed — Master - Group and Template inputs can only display 25 elements (Case 73546). · fixed — Supportability: Set default lazy-upgrade value to '1' instead of blank (Case 74602). · fixed — Changelists rolled up under 'View as: Separate' (Case 74174) · fixed — no padding around community section. (Case 74288) · fixed — do not block web UI while triggers running (Case 69159) · fixed — Triggers run after database transaction complete (Case 74260) · fixed — Possible deadlock promoting convos on documents (Case 73356) · fixed — Add pref to disable decorating workspace files (Case 72153) © 2003-2015 SmartBear Software 710 711 Appendices · fixed — Error opening diff viewer in Eclipse 4.3 Kepler (Case 74171) · fixed — Cannot open diff viewer in Eclipse 4.x (Case 70492) · fixed — Validate Automatic Link regex works in Javascript (Case 73901) · fixed — Handle Automatic Link errors (Case 73901) · fixed — Incorrect Quoting in ExternalDiffLauncher (Case 72222) · fixed — Action items do not have urls if "external URL" not specified (Case 70688) · fixed — Error uploading files with HTTPS and Proxy (Case 73807) · fixed — Hide "take review pool" icon for non-pool participants (Case 72882) · fixed — Cannot reject review with certain "reasons" (Case 73549) · fixed — Both - Upload P4 shelved files from Web UI uploads empty diffs when there are pending files in the changelist. (Case 70421) · fixed — P4 Passwords are output in plaintext by DebugCommandRunner (Case 73062) · fixed — Web debug log stack traces not deobfuscated correctly (Case 73595) · fixed — directory contents after a directory move not being shown when adding subversion revisions, initial commit. (Case 73161) · fixed — Review Summary - View separate - Status shows "Initial" on all changelists (Case 70703) · fixed — Page keeps reloading if fails "single server" check (Case 73467) · fixed — Subversion triggers respect "Restrict Access" rules (Case 72912) · fixed — Perforce triggers respect "Restrict Access" rules (Case 72912) · fixed — Report on Review access restrictions (Case 73202) · fixed — do not log scary warning about client log file (Case 67725) · fixed — Uploading .pdf, .doc, and .docx files leaks memory. (Case 72595) · fixed — Stuck at dancing bear if try to go "back" (Case 72007) · fixed — Improved rendering speed for large text diffs (Case 72135) · fixed — Disable "Email Everyone" when no one to email (Case 72710) · fixed — Action items error when Review Pool user cannot access Review (Case 73200) © 2003-2015 SmartBear Software Version 8 · fixed — Check Permissions for Report & Version access (Case 73040) · fixed — Community section has misleading text when cannot show online version (Case 72940) · fixed — Error leaving Review in Phase with invisible PCF (Case 74333) · fixed — Defect log entries should open latest version of file (Case 73748) · fixed — Defaults for custom fields are now stored properly so changes in a default do not change the history of reviews. (case 73999) · fixed — Addchanges from the GUI client now works with SVN 1.8 (case 73980) · fixed — CCRC 8.0 plugin support (Case 72806) · fixed — review-xml now does not show metrics section if user does not have access to reports (case 70738) · fixed — review, version, and changelist data accessable even when there is no user by navigating to data/urls. Initial commit (case 70738) · fixed — Edit participant custom fields on Review Summary page (Case 72275) · fixed — review-xml now does not show metrics section if user does not have access to reports (case 70738) · fixed — review, version, and changelist data accessable even when there is no user by navigating to data/urls. Initial commit (case 70738) · fixed — Review summary error with review pools and restrict access (Case 73201) 8.1.8100 - May 29, 2013 · Initial release of CodeReviewer and CodeReviewer Pro · added — daily automatic backups for HSQLDB (Case 70617) · added — FREE, PRO, Collaborator: Community page (Case 71082) · fixed — "Recent Participants" links not displayed in Eclipse (Case 72881) · fixed — Recent participants section not showing recent participants when 'All Users' Group is selected (Case 72022) · fixed — Confusing version information for added files (Case 70637) · fixed — Before and After not displaying correctly (Case 72263) · fixed — Typing in comment box slow on IE8 (Case 72402) © 2003-2015 SmartBear Software 712 713 Appendices · fixed — No markers displayed on PDF file when lots of defects are added (Case 72551) · fixed — Prevent Cross-site-scripting attacks by correctly escaping parameters before redisplaying on some pages (Case 72282) · fixed — Prevent cross-frame-scripting attacks by adding header X-FRAME-OPTIONS: SAMEORIGIN to HTTP Responses (Case 72283) · fixed — Typing in comment box slow on IE8 (Case 72402) · fixed — Document Review - Pushpins in wrong location (Case 70455) · fixed — FREE: Free version links to support phone and email(Case 72904) · fixed — FREE: Admin page "Additional Features" list is difficult to read(Case 72794) · fixed — CodeReviewer - GUIClient shows all SCM instead of git and SVN only.(Case 72734) · fixed — CodeReviewer: The "My Activity" button needs to be disabled.(Case 72736) · fixed — CodeReviewer - Version Control: available features that should not be.(Case 72702) · fixed — DiffViewer throws exception when Empty Document file(.docx) in version 0 (Case 72191) · fixed — review not changing state to approved after reviewers were moved to observers (case 72023) · fixed — Error Viewing PDF Documents After Upgrade(blank page pdf) (Case 70154) · fixed — corrupted VSS diffs hang client (case 71910) · fixed — TFS gated build changesets generate 'Missing changeset date' error (case 71790) · fixed — NoClassDefFoundError creating TFS shelvesets (cases 71641, 71771) · fixed — do not npe if changelist is missing (cases 71068, 71767) · fixed — multiple issues when communicating with newer Subclipse clients using SVN 1.7 (case 70330) 8.0.8003 - April 15, 2013 · added — Detect OpenJDK (Case 71563) · fixed — Review: Materials and Participant Section break after user takes review pool. (Case 71711) · fixed — NPE when adding a review pool and mandatory subscriptions are enabled (case 71395) © 2003-2015 SmartBear Software Version 8 · fixed — GUI client runs out of window handles (case 70850, case 71368) · fixed — Increase default PermGen space to alleviate OutOfMemory errors (Case 70849) · fixed — warn when participants cannot access review (Case 70794) · fixed — Hidden mandatory custom field error trying to Begin Review (Case 71719) · fixed — Renaming Root.xml does not work in 8.0 (Case 71591) · fixed — Error uploading .docx to review (Case 66861, Case 70376) · fixed — Could not Begin Review when there is invisible custom field selected (Case 71451) · fixed — phase view does not include new 7.0 phases (case 70869) · fixed — Issue with "Done Editing" (Case 71033) · fixed — CCRC 8.0 and CCRC getVersions support(Case 66839) · fixed — client installer effectively freezes when installing p4 tools under certain conditions (Case 70975) · fixed — disable review pools in "participants" drop-down if not allowed to add (Case 70424) · fixed — Review Materials Section: Columns are not lining up (Case 70046) · fixed — HCF with no valid values causes error (Case 71184) · fixed — Errors when adding a changeset that contains an "evil twin" scenario (Case 71298) · fixed — Could begin Review even when the required custom Fields has no value yet (Case 70976) · fixed — Drop-down series custom field name overflows column (Case 71032) · fixed — better error message for Moved Temporarily / Moved Permanently errors while accessing /contentupload (Case 70157) · fixed — do not prompt user to enable debug mode (Case 69595) · fixed — custom fields replicate when navigating from home screen and reviews (Case 70968) · fixed — Update changelist trigger needs to run as change-submit (Case 70793) · fixed — Problem adding this Word document to a review (Case 69591) · fixed — Line numbers overlapping in diff viewer (Case 70302) · fixed — Action Item missing link if External URL not configured (Case 70688) © 2003-2015 SmartBear Software 714 715 Appendices · fixed — Fully reset search box when going to next file (Case 70831) · fixed — Use "Enter" to navigate to next search result (Case 70319) · fixed — do not scroll to center when clicking convo (Case 69780) · fixed — Truncate phone number with ellipsis if too long (Case 70393) · fixed — Better tolerance for missing or corrupted documents (Case 69706) · fixed — Error using Group-based access restrictions when Review not associated with Group (Case 70530) · fixed — Cannot submit error report from login or "upgrade db" views (Case 70573) · fixed — Update browser window title when review title changes (Case 70207) · fixed — Make Drop-down series custom fields horizontal (Case 70218) · fixed — Problem adding this Word document to a review (Case 69591) · fixed — Line numbers overlapping in diff viewer (Case 70302) · fixed — Review Subs - Able to remove Mandatory do not Enforce subs from reviews (Case 70404) · fixed — Stack overflow caused by circular dependency on version history (Case 70562) 8.0.8001 - March 5, 2013 · NEW — Merged CodeCollaborator and PeerReview Complete as Collaborator! · added — The Review Summary screen has now replaced the old create and edit review screens (Case 62189) · added — You can now search .doc and .docx files in the diff viewer · added — Review pools: groups of users that can be assigned to 'take' a participatory position in a review · added — Add revert control to fields on Review General Information in edit mode (Case 69589) · added — Edit Review: Add updating spinner next to each field and update revert control image (Case 69796) · fixed — Removed RPM installer support (Case 69471) · fixed — Edit participant issues with disabled templates (Case 70280) © 2003-2015 SmartBear Software Version 8 · fixed — Edit review - template selection - will not save change if template names are same (Case 70284) · fixed — Defect HCF custom field area has strange red bar (Case 70105) · fixed — Group select too short (Case 70187) · fixed — "Done Editing" participants button does not work after going to file (Case 70061) · fixed — Line up the Files and Defect boxes under the left edge of the Cancel button (Case 70172) · fixed — Error sorting table by clicking header (Case 69987) · fixed — Auto-save causes cursor to jump on text fields (Case 70063) · fixed — The Edit buttons for general info and participants section do not line up (Case 69894) · fixed — Better tolerance for missing or corrupted documents (Case 69706) · fixed — Review Summary - No warning when changing review templates (Case 69805) · fixed — Eclipse & RTC - Find and replace CodeCollaborator & PeerReview Complete logos and icons (Case 69813) · fixed — Error refreshing diff viewer after changing versions (Case 69892) · fixed — Bogus "pending updates" warning after editing title (Case 69662) · fixed — "Download Diff" button returns backwards diff (Case 69869) · fixed — Log warnings about missing document fonts (Case 69799) · fixed — Page up/down should scroll the diff viewer (Case 66640) · fixed — Error when clicking through diff viewer before file fully loaded (Case 69637) · fixed — Edit button in participant section needs to respect whyNotAllowedToModifyReview (Case 69534) · fixed — Edit review general info: validation issue with groups when the group select is not visible (Case 69765) · fixed — Parts of the general info edit drop-downs not clickable (Case 69664) · fixed — Calculate Download/Upload menu positions dynamically (Case 69593) · fixed — Autocomplete URL with default protocol when Attaching URL's (Case 69663) · fixed — "Directory Found not in Git Repo" when "git" not in PATH (Case 69434) © 2003-2015 SmartBear Software 716 717 Appendices · fixed — Remove bogus 'lastCommentCreationDate' log warning (Case 69412) · fixed — 'Missing changeset Items' error parsing TFS changeset (Case 67093) · fixed — Review Summary - Hierarchical custom fields are not hierarchical anymore(Case 69986) · fixed — Begin Review should be disabled when General Info wait for input of the required fields(Case 69927, Review# 8846) · fixed — Review title cannot be null or over 255 characters long(Case 69850, Review #8819) · fixed — Document CollabFormAuthenticator's new functionality (Case 69887) · fixed — Review should not move to next phase if still in edit mode for either the general info section or the participants section(Case 69913) · fixed — Better error when uploading a URL/changelist to a completed review(Case 69851) · fixed — Template list contains disabled ReviewTemplates(Case 69787, Review #) · fixed — Author subscription user dropdown not working(Case 69783) · fixed — "There is no current object" and other document problems (Case 69591) · fixed — Admin Review Templates - cannot create a new template(Case 69792) · fixed — Admin - More intuitive UI for Review Template edits(Case 69011, Review #8687) · fixed — Client - always use configured URL to contact the server(Case 68993, Review#8698) · fixed — Fixed — Client - always use configured URL to contact the server(Case 68993) · fixed — Increased supportability for various SCMs by removing the word 'optional' when users are inputting the source path in the GUI client (case 61880) · fixed — NPE in p4 implementation when a filepath is expected to be a symlink and it is not (case 64001) · fixed — Missing or wrong changelist "external diff" button (Case 68873) · fixed — Admin - More intuitive UI for Review Template edits(Case 69011) · fixed — When in "Side by Side", "After" and "Before" drop-down text do not change properly (Case 68917) · fixed — Adding shelvesets from Team Explorer now has expected behavior (case 67093) © 2003-2015 SmartBear Software Version 7 9.2.3 Version 7 7.3.7304 - July 2, 2013 · fixed --- Incorrect Quoting in ExternalDiffLauncher (Case 72222) · fixed --- Action items do not have urls if "external URL" not specified (Case 70688) · fixed --- Error uploading files with HTTPS and Proxy (Case 73807) · fixed --- Both - Upload P4 shelved files from Web UI uploads empty diffs when there are pending files in the changelist. (Case 70421) · fixed --- P4 Passwords are output in plaintext by DebugCommandRunner (Case 73062) · fixed --- Web debug log stack traces not deobfuscated correctly (Case 73595) · fixed --- Page keeps reloading if fails "single server" check (Case 73467) · fixed --- Subversion triggers respect "Restrict Access" rules (Case 72912) · fixed --- Perforce triggers respect "Restrict Access" rules (Case 72912) · fixed --- Report on Review access restrictions (Case 73202) · fixed --- do not log scary warning about client log file (Case 67725) · fixed --- Uploading .pdf, .doc, and .docx files leaks memory. (Case 72595) · fixed --- Stuck at dancing bear if try to go "back" (Case 72007) · fixed --- Check Permissions for Report & Version access (Case 73040) · fixed --- Typing in comment box slow on IE8 (Case 72402) · fixed --- Errors when adding a changeset that contains an "evil twin" scenario (Case 71298) · fixed --- better error message for Moved Temporarily / Moved Permanently errors while accessing /contentupload (Case 70157) · fixed --- do not prompt user to enable debug mode (Case 69595) · fixed --- Update changelist trigger needs to run as change-submit (Case 70793) · fixed --- Problem adding this Word document to a review (Case 69591) · fixed --- Line numbers overlapping in diff viewer (Case 70302) · fixed --- do not scroll to center when clicking convo (Case 69780) © 2003-2015 SmartBear Software 718 719 Appendices · fixed --- Error using Group-based access restrictions when Review not associated with Group (Case 70530) · fixed --- Cannot submit error report from login or "upgrade db" views (Case 70573) · fixed --- Error sorting table by clicking header (Case 69987) · fixed --- Better tolerance for missing or corrupted documents (Case 69706) · fixed --- Error refreshing diff viewer after changing versions (Case 69892) · fixed --- "Download Diff" button returns backwards diff (Case 69869) · fixed --- Log warnings about missing document fonts (Case 69799) · fixed --- "Directory Found not in Git Repo" when "git" not in PATH (Case 69434) · fixed --- Remove bogus 'lastCommentCreationDate' log warning (Case 69412) · fixed --- 'Missing changeset Items' error parsing TFS changeset (Case 67093) · fixed --- 'Missing changeset Items' error parsing TFS changeset (Case 67093) · fixed --- review-xml now does not show metrics section if user does not have access to reports (Case 70738) · fixed --- review, version, and changelist data accessable even when there is no user by navigating to data/urls. Initial commit (Case 70738) · fixed --- corrupted VSS diffs hang client (Case 71910) · fixed --- TFS gated build changesets generate 'Missing changeset date' error (Case 71790) · fixed --- NoClassDefFoundError creating TFS shelvesets (Cases 71641, 71771) · fixed --- do not npe if changelist is missing (Cases 71068, 71767) · fixed --- phase view does not include new 7.0 phases (Case 70869) · fixed --- multiple issues when communicating with newer Subclipse clients using SVN 1.7 (Case 70330) · fixed ---"There is no current object" and other document problems (Case 69591) · fixed --- Increased supportability for various SCMs by removing the word 'optional' when users are inputting the source path in the GUI client (Case 61880) · fixed --- Missing or wrong changelist "external diff" button (Case 68873) · fixed --- When in "Side by Side", "After" and "Before" drop-down text do not change properly (Case 68917) © 2003-2015 SmartBear Software Version 7 · fixed --- adding shelvesets from Team Explorer now has expected behavior (Case 67093) 7.3.7303 - January 18, 2013 · added --- Syntax highlighting for .hss, .ss and .ts files · added --- Syntax highlighting for ECMA script (.es) files · fixed --- Files showing wrong upload order (Case 66561) · fixed --- Generic error popup when not allowed to access review (Case 67902) · fixed --- missing spaces on review summary page (Case 67496) · fixed --- RTC: Uploading a merged changeset results in incorrect version diff (Case 67862) · fixed --- Flat vs compressed tree (Case 62144) · fixed --- Next/Prev file button troubles in new version (Case 68084) · fixed --- Compact view causes word wrap in chat panel to not work (Case 68589) · fixed --- Error editing partially reworked changelist in separate view (Case 68506) · fixed --- better error handling for ReviewAccessException (Case 68200) · fixed --- Stuck at dancing bear after leaving diff viewer (Case 67949) · fixed --- Chat icons not showing in materials section (Case 68184) · fixed --- Materials section does not refresh correctly after review event (Case 68382) · fixed --- Diff Viewer - Prev/Next buttons do not see next diffs when a comment is made on the first diff(Case 67680) · fixed --- Conversation toolbar disappears when you select different line during defect creation (Case 67931) · fixed --- Change user agent matcher in Browser.java to match new Gecko version string (Case 67979) · fixed --- Errors after leaving diff viewer before diff is loaded (Case 67949) · fixed --- Use ticket instead of user/pass if user/pass is passed in (Case 67749) · fixed --- Cannot get electronic signatures to consistently work (Case 66367) · fixed --- Enabling electronic signatures adds completed reviews to action items (Case 68587) · fixed --- Not using External URL in some places (Case 68153) © 2003-2015 SmartBear Software 720 721 Appendices · fixed --- Diff Viewer - Next/Prev Line keyboard shortcuts do not work (Case 68218) · fixed --- Diff viewer Add Comment and Add As Defect buttons should be disabled if create not allowed (case 68373) · fixed --- Add "external name" to custom defect list reports (Case 56067) · fixed --- Error showing new version in diff viewer (Case 68219) · fixed --- Diff Viewer - Prev/Next buttons do not see next diffs when a comment is made on the first diff (Case 67680) · fixed --- AddVersion(Clearcase) from command line does not work in 7.3 (Case 67726) · fixed --- Loading port monitor dll from install directory (case 67338) 7.3.7302 - November 21, 2012 · fixed --- Add time zone info to dates in UTC reports (Case 67610) · fixed --- Unread comments improved for accessibility features (Case 67648) · fixed --- Clicking 'Create Bug in Bug Tracker' should open in a new tab (Case 65863) · fixed --- Able to modify roles without error (Case 67348) · fixed --- Allow some copy/paste functionality in text diff viewer (Case 65946) · fixed --- Blended reviews (Case 67514) · fixed --- Handling for symlinks in perforce (Case 67550) · fixed --- UI limit expanded beyond 10,000 users (Case 66400) · fixed --- diff viewer now shows side-by-side diffs of identically versioned text files (Case 65933) · fixed --- Print To Review no longer clips left margin (Case 66562) · fixed --- Debug logging no longer creates infinitely huge log files in temp (Case 65617) · fixed --- Scrolling on Firefox improved (Case 67051) · fixed --- Synchronized locking code to avoid overlapping file lock (Case 66667) · fixed --- "Show More Lines" button behavior corrected when used with wrap lines (Case 67052) · fixed --- Password showing in GUI client in plaintext (Case 66089) © 2003-2015 SmartBear Software Version 7 · fixed --- Oracle upgrade issues resolved (Case 67040) · fixed --- User_lastactivity updates while user idles on the home screen (Case 66986) · fixed --- Corrected NPE with action items if the user had no items(Case 65565) · fixed --- Changed log level from 'warn' to 'error' for some DB migration issues (Case 64473) · fixed --- Updated 'addardiffs' command documentation to cover AccuRev limitations (Case 66130) · fixed --- Catch error from P4 when files are not opened for edit (Case 66901) · fixed --- Corrected AccuRev error when file system root is inaccessible (Case 66503) · fixed --- Resize comment box as you type (Case 65616) 7.3.7301 - October 26, 2012 · Added --- Compact view options for Review Summary and Diff Viewer pages. · Added --- Improved content information on collapsed sections of Review Summary page · Added --- Authenticated SMTP support · Added --- Easy, in-application upgrade path from CodeCollaborator to PeerReview Complete · Added --- Support for Visual Studio 2012 and Windows 8 · fixed --- Oracle upgrade issue from 7222 to 723 (Case 67040) · fixed --- Reduced load on database from diff viewer (Case 65373) · fixed --- Reject review reason is no longer a custom field (Case 61600) · fixed --- Surround 'Unexpected empty version for path' error handling (Case 66261) · fixed --- Several IE bugs in diff viewer (Case 65579) · fixed --- git addchanges now works with unchanged, managed files (Case 66417) · fixed --- Accurev error handling when file system root is inaccessible (Case 66503) · fixed --- Changing version in Eclipse compare editor no longer breaks connection (Case 65305) · fixed --- Deleted files no longer show reverted icons in Review Materials section (Case 65580) · fixed --- Reduced DB contention when updating user activity (Case 66273) © 2003-2015 SmartBear Software 722 723 Appendices · fixed --- Support .DOC and .DOCX uppercase extension names (Case 66112) · fixed --- Clearcase Server Integration (Case 64295) · fixed --- Integration to CCRC with a Bad Password no longer causes lockout (Case 65551) · fixed --- Pipe symbols in custom fields now work correctly (Case 66161) · fixed --- Review Summary screen now displays while still loading materials · fixed --- Auto-adding of unversioned directories now supported on newer subclipse clients · fixed --- Eliminated a 'jump' in chat when working with defects (Case 65350) · fixed --- Non-participant comments no longer highlighted until read (Case 65102) · fixed --- Improved TFS date parsing by adding he_IL locale · fixed --- Diff viewer refreshing when no longer visible (Case 66082) · fixed --- Support for Synergy web mode (Case 63794) · fixed --- TFS date parsing no longer fails for English India locale (Case 65220) · fixed --- Handle null state passed by P4Version (Case 64548) · fixed --- Resolve null pointer exception (Case 64653) · fixed --- P4V and add pending changelist commands now grab shelved changes (Case 64460) · fixed --- ClassCastException calling protects command (Case 63322) · fixed --- P4 Error "Unicode clients require unicode enabled server is now resolved automatically (Case 64450) · fixed --- Upgrade doc conversion utility (Case 64799) · fixed --- AccuRev diff error "9002" or "9005" (Cases 65481, 65568, 65482) · fixed --- Error uploading files with proxy to server not at root (Case 65078) · fixed --- Clients now able to work on systems that do not support file locking (Case 65567) · fixed --- Correct problems running multiple commands at one time (Case 56660) · fixed --- Add template as one of the fields that can be added to a custom report (Case 64403) · fixed --- Concurrent modification exception from Eclipse client (Case 65498) · fixed --- Hide SVN "Require Client Cert Password" option on server (Case 65483) © 2003-2015 SmartBear Software Version 7 7.2.7237 - August 16, 2012 · Added --- PDF document diff support! (PeerReview Complete, only) · Added --- Multiple file upload support for IE from review summary page. · Added --- Support additional file extensions for Gosu and xml file types (case 64942) · Added --- "Synchronize Scrolling" option in non-wrapped side-by-side diff · Added --- Added functionality to upload multiple files that works in IE (using Flash) · Added --- Added another "mark all read" button at top of diff convos (Case 64110) · Updated --- Known issues 682 for this release have been updated clearing out some of the beta notes and adding new information. · fixed --- PrintToReview will now print documents for doc-diff that are more than 1 page (Case 65443, Case 65361) · fixed --- ClassCastException calling protects command (case 63322) · fixed --- Resolved null pointer exception on ensure-diffs-reviewed (Case 64653) · fixed --- subclipse addfiles throwing nullpointer in some instances if auto add is enabled · fixed --- make IE use standards mode, even on intranet sites (Case 65013) · fixed --- Problems with running multiple commands at one time.(Case 56660) · fixed --- better handling of web UI upload errors (Case 65036) · fixed --- cursor position reset labeling new convo in IE (Case 65068) · fixed --- error after switching to new version of file via popup (Case 64853) · fixed --- pressing <enter> in login fields no longer tries to log in twice · fixed --- Grabbing values set by P4CONFIG into the client connection except the ones we override (Case 64262) · fixed --- Disable login button while waiting for login response · fixed --- New users will not get created twice (Case 64356) · fixed --- review details page now hidden if the user does not have access to reports (case 64940) · fixed --- do not show system message in diff viewer (part 2 of Case 65013) © 2003-2015 SmartBear Software 724 725 Appendices · fixed --- do not linkify javascript: and other unsafe URL's · fixed --- trust admin-configured Automatic Links (Case 65011) · fixed --- fixed issue trying to add a file with haveRev #none to a review (Case 64653) · fixed --- StarTeam format diffs not auto-detected by 'ccollab adddiffs' (case 63719) · fixed --- p4 submitoptions other than submitunchanged could not handle edit-less changelists (case 64897) · fixed --- P4 Error "Unicode clients require unicode enabled server" is now resolved automatically (Case 64450) · fixed --- Allow adding yourself to a review · fixed --- Show better UI for license errors · fixed --- add ability to enter license code when upgrading(Case 63831) · fixed --- Preserve p4 jobs data in update-changelist trigger (Case 64252) · fixed --- Making a comment with no label will no longer break the review screen (Case 64738) · fixed --- Addhgdiffs no longer throws a null pointer if not inside hg repo · fixed --- Error with defect custom field of type Drop-down Series (Case 64773) · fixed --- Change "Character Encoding" option form radio group to select box · fixed --- Chat History and Review Materials sections not displayed (case 64534) · fixed --- Line number linkifying does not function(Case 57351) · fixed --- StarTeam current diff revision should be specified by -cfgd (case 64255) · fixed --- support cvs 1.12.9 date format (case 64129) · fixed --- Added files in Surround committed changelists are blank (case 64149) · fixed --- Setting system clock back no longer prevents login or logout (Case 64526) · fixed --- old urls not pointing at new resource locations (Case 63149) · fixed --- Installing RTC Eclipse plugin: Make HCF compatible with 6.5 plugin clients (Case 64232) · fixed --- Home screen filter bug (Case 63804) · fixed --- annotation dialog and defect text detail appear over login screen © 2003-2015 SmartBear Software Version 7 · fixed --- modal error dialog does not "grey out" rest of screen · fixed --- show "new version available" popup in diff viewer (Case 64268) · fixed --- always list all available versions in diff viewer drop-down · fixed --- git diff neglected deletes (Case 61431) · fixed --- automatically refresh to work around race condition for fresh servers(Case 63598) · fixed --- error clicking in diff viewer after adding more context (Case 65479) · fixed --- subversion filenames with embedded at symbols (case 63425) · fixed --- Cannot load obfuscated dumps (Case 63339) · fixed --- Diff setting "latest accepted revision" seems to be broken (Case 62421) · fixed --- Fix web mode parameter -s for Synergy (Case 63794) · fixed --- allow global options to "ccollabtray" (for example, "ccollabtray --debug) · fixed --- save zip of all log files when running ccollabgui in debug mode (Case 61874) · fixed --- Line number linkifying does not function (Case 57351) · fixed --- tweak appearance of diff viewer header (Case 64543) · fixed --- requested file subscriptions now working · fixed --- Action Items: Outgoing filter is not filtering outgoing(Case 64213 and Case 63804) · fixed --- Support path which is both file and folder in web UI (Case 64265) · fixed --- On the Review Summary page: selecting any "You are waiting and will be notified when" radio button: no longer causes IE7 screen to shake (Case 64243) · fixed --- Selecting 'no file content' on a review dump no longer results in a zip that contains files (Case 64487) · fixed --- The custom defect fields of a new defect no longer populate with the values of the previously created defect.(Case 63320) · fixed --- lines wrap in text diff with "wrap lines" disabled (Case 64229) · fixed --- text highlighting in single file no longer jumps around and highlights multiple line numbers (Case 63808) · fixed --- do not skip changed lines when comparing a file verison with itself (Case 64076) · fixed --- popup a warning and fallback if local storage quota exceeded (Case 64270) © 2003-2015 SmartBear Software 726 727 Appendices · fixed --- Support "email all" with Outlook 2003 and 2007 (Case 63212) · fixed --- Diff Viewer: Pusphins show over version drop down (Case 64317) · fixed --- Send debug log message appears behind drag and drop screen. User cannot send debug log (Case 63883) · fixed --- use admin-configured support email address (Case 61909) · fixed --- Cannot rename custom fields. (Case 64109) · fixed --- New pushpins not visible in the other version if on same page but off screen (Case 64312) · fixed --- do not offer to reset password if using LDAP authentication (Case 64167) · fixed --- making selected marker visible when hiding the rest (Case 64250) · fixed --- Added files in Surround committed changelists are blank (case 64149) · fixed --- Displaying Review Materials for large reviews is now faster. (Case 64090) · fixed --- Participants section does not use up available width on FireFox (Case 64089) · fixed --- navigate document diffs with prev/next button 7.2.7218 - June 25, 2012 · PeerReview Complete 2012 - Official release! · Added --- Diff Viewer navigation options. 257 completely overhauled with new and improved display and · Added --- Electronic signatures 256 (PRC only) · Added --- .doc and .docx diff support 270 with comment promotion (PRC only) · Added --- More detailed performance logging in debug mode for web UI · Added --- Image over-under Diff view (Case 62865) · Added -- Page Width and Full Page zoom options. Zoom options now a ListBox (Case 61239) · fixed --- Diff Viewer no longer produces exceptions with images in IE8 (Case 64346) · fixed --- Doc diffs display correctly in IE (Case 64210) · fixed --- Consecutive Git commits should not be seen as a rebase · fixed --- Eliminated error when clicking 'External Diff' (Case 64120) © 2003-2015 SmartBear Software Version 7 · fixed --- CcollabGui client hangs forever on mac when closing when changes added to review from P4V (Case 63049) · fixed --- latest rebase should not trump latest accepted for LATEST_ACCEPTED preference (case 62421) · fixed --- preserve scroll when going back to review summary from diff · fixed --- Syntax highlighting failure means php file will not display in Code Collaborator (Case 63930) · fixed --- Overlapping icons in defect log section (Case 63686) · fixed --- Check type of dragged item in order to determine overlay display (Case 63882) · fixed --- Subclipse NPE on file with Subversion missing status (case 63812) · fixed --- mercurial auto detect always returns true if .hg exists on the path ignoring errors · fixed --- Fix for move/delete and move/added (Case 62688) · fixed --- Chat panel will not place focus on selected comment if it is located toward the top or bottom of the panel (Case 63891) · fixed --- Modified check for fileapi support asking for specific functions supported (Case 63753) · fixed --- Corrected version Descriptions to avoid 'latest upload' error (Case 63923) · fixed --- Subclipse NPE on file with Subversion missing status (case 63812) · fixed --- respect "display order" pref in diff viewer, refactoring (Case 63611) · fixed --- Document diffs carry over to PDF and Image diff viewers · fixed --- Error selecting modified lines in side-by-side (Case 63809) · fixed --- no error popup for unexpected server errors · fixed --- duplicate text diff context if user clicks too quickly · fixed --- Fixed issues with the tooltip creation and with tooltips dissapearing when going to next/prev files (Case 63625) · fixed --- Subversive integration does not upload deleted files · fixed --- Changing labels for Over/Under transparency control (Case 63585) · fixed --- always expand selected convo (Case 63591) © 2003-2015 SmartBear Software 728 729 Appendices · fixed --- Fix for glitchy behavior in the drag and drop div when you hover content over the 'Drop files here' legend. (Case 63576) · fixed --- Reviews can be created from Eclipse when using a proxy on the Eclipse network connection settings (Case 62217) · fixed --- add "--p4client" to "ccollab ensure-content-reviewed" doc (Case 63413) · fixed --- improved cache performance when loading Review Overview · fixed --- improved performance of DiffCache, used when loading reviews · fixed --- do not wrap defect edit buttons 7.2.7208 - May 29, 2012 · PeerReview Complete 2012 Beta · Added --- New diff viewer · Added --- Initial support for doc/docx diffs 7.1.7111 - May 11, 2012 · fixed --- list reports are now displayed when selected (Case 63480) 7.1.7110 - May 7, 2012 · Added --- new user pref for saving overlay/separate display (Case 62262) · Added --- drag/drop support for reviews · Updated --- Performance improvements for new UI · Updated --- Changed review summary screen to support collapsible sections (Not in IE7) · Updated --- Diff viewer chat panel is now condensed and easier to use · fixed --- Updated font in diff viewer chat panel (Case 63281) · fixed --- Still display "Flat" as a view option from the prefs->Display tab (Case 63270) · fixed --- Typo in web UI "form" -> "from" (Case 63256) · fixed --- Drag and Drop div is visible in IE7 (Case 63263) · fixed --- Disabled collapsible sections in IE7 (Case 63032) · fixed --- Hierarchical custom fields now work for defects(Case 62193) · fixed --- Pushpin placement has been corrected (Case 61491) © 2003-2015 SmartBear Software Version 7 · fixed --- The highlight for the selected chat (Chat blue borders) is now displayed properly (Case 63195, Case 63207) · fixed --- Change chat comment text to 10pt font(Case 63199) · fixed --- Users should be able to add themselves to reviews if they are a member of the associated group (Case 63013) · fixed --- subclipse 1.8 throwing null pointer exception when attempting add to review (case 62794) · fixed --- Show comment input fields only for the active conversation.(Case 63094) · fixed --- Refresh review summary page when diff viewer changes · fixed --- "Submit error" UI should display the created case number (Case 63031) · fixed --- Participant setting Group By None should be saved(Case 62533) · fixed --- Links are no longer removed from the chat log when the overlay vs separate widget is clicked (Case 62792) · fixed --- Fixed participant headers alignment for all supported browsers and reduced vertical space used by the file table (Case 63020) · fixed --- Make login page work with browser "Remember Password" functionality (Case 61024) · fixed --- Update CCRC .jar filename in manual (case 63047) · fixed --- Conversation selection in diff viewer steals clicks (Case 62243) · fixed --- Error pops up when opening review (Case 62982) · fixed --- http proxies do not like /contentupload (case 61786) · fixed --- As a user the separate vs overlay slider is confusing when there is only one changelist.(Case 62583) · fixed --- Add header tags to important sections of the page (Case 62691) · fixed --- Replace sprites with image elements for meaningful images (Case 62575) · fixed --- performance improvements for diffcache misses. (Case 62893) · fixed --- Support MKS variant branches in sandbox (case 62577) · fixed --- RTC server side plugin missing dependency in feature.xml (case 62670) © 2003-2015 SmartBear Software 730 731 Appendices · fixed --- Rework status now displays correctly in both overlay and separate views (Case 61955) · fixed --- preserve scroll position of active element when page updates · fixed --- Improve performance of GWT pages (Case 62142) · fixed --- Root context not respected from links on report page (Case 61943) · fixed --- addchangelist now parses git log messages with timezones greater than UTC (Case 62442) · fixed --- IE7 issued warning on every page load over HTTPS (Case 62228) · fixed --- CollabExternalDiff viewer breaking if the version/changelist ID contained invalid filename characters (case 62184) · fixed --- filtering outgoing by author (case 62148) · fixed --- 7.x clients once again respect SSL/proxy settings. (Case 62248) · fixed --- Improve response time of the SimpleTable widget with deferred rendering (Case 62142) · fixed --- better tooltip for 'Add and Include Defect' button, and use fix Label/Text inconsistency in defect log (cases 62285, 62532) · fixed --- browse command now correctly only opens browser when specifically called · fixed --- Class Cast exception while checking if the default changelist was empty (Case 62079) · fixed --- Ignoring trailing strings after perforce year.release-number string in order to retrieve support for shelveset correctly (Case 61812) · fixed --- Added specific client to fstat and resolved commands when executing from a different client (case 61752) · fixed --- Web UI inaccessible over SSL VPN such as Juniper IVE based SA (Case 62508) · fixed --- Added dismiss button when review is completed and marked for commit. (Case 62261) · fixed --- Root context not respected from links on report page (Case 61943) · fixed --- external diff viewer not working on OSX (case 56192) · fixed --- Grabbing p4 charset options correctly in command runner (Case 62349) · fixed --- Highlight whole row of unread conversation in materials section © 2003-2015 SmartBear Software Version 7 · fixed --- author should be able to begin review from Annotating phase (case 62401) · fixed --- Download Latest Client Installer Link in dashboard view (Case 62007) · fixed --- Added text to clarify which waiting option is selected. Fixed bug that showed wrong selection when browsing through different reviews (Case 62266) · fixed --- Handle Line wrapping (Case 61829) · fixed --- reduce download size of Review Summary page by ~65% for large Reviews · fixed --- Fix accessibility issue: add "alt" property to images (Case 62154) · fixed --- Disabling filters for action items and adding loading indicator when the table is yet loading (Case 62232) · fixed --- Perforce "renumber changelists" script hangs (Case 62206) · fixed --- Reports page SQL and CSV links now working in IE browsers (case 61805) · fixed --- Changed check for unchanged files so it only checks if the client has any open files (Case 61949) · fixed --- edits now work on change-content-trigger (Case 61958) · fixed --- links in redacted comments now look more redacted (Case 61840) · fixed --- Hidden error popups block "init database" screen in debug mode (Case 61636) · fixed --- Review summary page performance improvements (Case 61501) · fixed --- Line wrapping corrected in diff viewer (Case 61829) · fixed --- Ignoring trailing strings after perforce year.release-number string in order to retrieve support for shelvesets correctly (Case 61812) 7.0.7027 - March 19, 2012 · fixed --- replaced accessibility tag information (Case 62154) · fixed --- http proxies should now work with /contentupload (Case 61786) · fixed --- renames causing TimeBuilder to error. (Case 62317, 62359) · fixed --- Perforce "renumber changelists" script hangs (Case 62206) · fixed --- Fixed typo in approve message (Case 62224) · fixed --- No Admin phone number causes Menu options still in V6 format to disapper (case 61914) © 2003-2015 SmartBear Software 732 733 Appendices · fixed --- Support Surround dates with '.' separators (case 62034) · fixed --- Archive Content Cache should go away (Case 61901) · fixed --- Added specific client to fstat and resolved commands when executing from a different client (case 61752) · fixed --- Ignoring trailing strings after perforce year.release-number string in order to retrieve support for shelvesets correctly (Case 61812) · fixed --- Typo in CC licensing message (Case 61582) · fixed --- 7.0 UI: "An unexpected error occurred" should not be presented for user errors (case 61605) · fixed --- Approving a review when unread comments are loaded causes an error (case 61660) · fixed --- RTC plugin failed to create review with long title (case 61740) 7.0.7024 - February 17, 2012 · added --- UI tweaks for diff viewer chat panel (Requirements 101488) · fixed --- Menu headers are now correctly aligned and "Home" image (Case 61820) · fixed --- Added links to several manual pages for added GIT information (61679) · fixed --- RTC plugin failed to create review with long title (case 61740) · fixed --- Approve button is disabled when there is nothing more to do. (case 61710) · fixed --- Error with svn 1.7 when user does not have access to repo root (case 61682) · fixed --- User is erroneously prompted to configure full name if full name and login name match (Case 61639) · fixed --- Display better error message in web popup · fixed --- Installer appears to hang when DB port is set to empty (Case 61692) · fixed --- Show better error message if database misconfigured (Case 61657) · fixed --- Commit from TFS reviews in a single changeset (case 61723) · fixed --- Diff Compare Dopdown Is Broken (case 61549) · fixed --- User has 'You have not configured' action item if full name matches login name (Case 61639) · fixed --- Login names with spaces in them get munged oddly on logout (Case 61329). © 2003-2015 SmartBear Software Version 7 · fixed --- We do not have a reject review button in Eclipse plugin (Case 61432) · fixed --- Changelists displayed in wrong order by automatic refresh (case 61411) · fixed --- Show "Loading" indicator while loading large reviews · fixed --- Messaging and documentation describing incompatibility with MKS on 64-bit Windows JRE (cases 60680, 60968, 61326, 61333) · fixed --- Debug Logging is not capturable on the Initialize DB screen (Case 61352) · fixed --- Changing phase of authors that upload files after review has been started (Cases 60947, 60720) · fixed --- Reduce server load of refreshing Review Summary page · fixed --- The review summary shows the materials in one order but the diff viewer considers the materials in a different order. (case 61465) · fixed --- Minimally sized GUI screen does not show Existing Reviews field (Case 61018) · fixed --- addgitdiffs fails with Unexpected Exception (NPE) when not used in a git repository (Case 61424) · fixed --- Log "long query" warnings on prepared statements · fixed --- New Server Fails to get License w/o feedback (Case 61023) · fixed --- Eclipse plugin allows you to begin review without setting a mandatory custom field (Case 56850) · fixed --- Support Surround one-line changelist history records (case 61311) · fixed --- Ignore StarTeam 'no revision of file' errors (case 61212) · fixed --- File Extension issue on Print to Review attached files (Case 61316) · fixed --- Another minor display issue with Custom Field (Case 60946) · fixed --- Command 'admin review finish' displays previous phase name (Case 61327) · fixed --- Mandatory subscriptions allowing changing of roles and sending multiple notifications on attempts to remove mandatory users (case 60176) · fixed --- do not clobber 'External URL' on startup (Case 61435) · fixed --- Improper cache headers require manual refresh (Case 61435) · fixed --- Support Surround one-line changelist history records (case 61311) · fixed --- Display shorter timestamps in chat, with detail on hover © 2003-2015 SmartBear Software 734 735 Appendices · fixed --- Suppress extra defect expando header outline (Case 61412) · fixed --- Use configured git-exe path (case 61385) · fixed --- Rework counter showing incorrect values (case 60943) · fixed --- NPE when adding empty changeset to review with RTC (Case 61255) · fixed --- Removing duplicate versions from the timeline (case 60337) 7.0.7022 — 7.0 Initial release! January 31, 2012 * FIRST RELEASE OF v7.0! * Major features: · A fully revised and streamlined user interface · Hierarchal custom fields · Support for Perforce shelvesets · Support for Git changelists · Support for ClearCase plugin using CodeCollaborator Eclipse plugin · Option to provide users with option to reject a review · Ability to log debug information from Eclipse plugin · added --- automatically list local (not in upstream) git commits in GUI · added --- gitaddbranch to automatically add diff of what is in a branch that is not upstream as one squashed diff · added --- review security option to allow participants and group members (inclusive) access to reviews · added --- added Defect log to the review summary page · added ---remember Participants section "Group by" settings · fixed --- now correctly parse SVN server certification error messaging (case 60790) © 2003-2015 SmartBear Software Version 7 · fixed --- support ClearCase Zulu format date strings (case 60137) · fixed --- now correctly parse svn server certification error messaging (case 60790) · fixed --- eclipse plugin chooses wrong default previous version (Case 60409) · fixed --- validate content on client before caching. (Case 60157) · fixed --- creator can now begin reviews via eclipse or command line even if they are not an author (case 59171) · fixed --- download Diff does not properly handle (ignore) binary files (Case 59631) · fixed --- ignore CVS banner in stderr (Cases 59676, 60698) · fixed --- blank screen when logging in for some users (case 60602) · fixed --- error with Subversive/JavaHL when no access to repo root (Case 60265) · fixed --- check version before executing shelveset commands (case 60569) · fixed --- reworked file now shows correct status (Case 60025) · fixed --- added functionality to delay review loading after executing changes page (Case 58880) · fixed --- TFS en_CA date now parses correctly (Case 60231) · fixed --- limit width of "Fun Facts" box (Case 59959) · fixed --- Get content of non-local resources in Eclipse even if out of sync (Case 60129) · fixed --- Eclipse plugin update now correctly supports all versions (Case 57778) · fixed --- null pointer exception in Eclipse client (Case 58849) · fixed --- different OS's can now add the same file to a review without causing problems due to different line endings (Case 59412) · fixed --- "Suppress Notification" checkbox stays checked (Case 59164) · fixed --- OOBE when changelist is empty (Case 61404, Case 61382) · fixed --- Retain external URL on startup (Case 61453) · fixed --- Eliminate manual refresh of cached headers (Case 61435) © 2003-2015 SmartBear Software 736 737 9.2.4 Appendices Version 6 6.5.6510 — July 25, 2012 · added --- Support for additional file extensions for Gosu and xml file types (Case 64942) · fixed --- Chat History and Review Materials sections display correctly (Case 64534) · fixed --- Obfuscated dumps can now be imported (Case 63339) · fixed --- Fix web mode parameter -s for Synergy (Case 63794) · fixed --- Line number linkification corrected (Case 57351) · fixed --- Support CVS 1.12.9 date format (case 64129) · fixed --- Added files in Surround committed changelists are no longer blank (case 64149) · fixed --- Syntax highlighting failure no longer means php file will not display in Code Collaborator (Case 63930) · fixed --- Eliminated Subclipse NPE on file with Subversion missing status (case 63812) · fixed --- TFS implementation correctly parsing Canada locale date (case 63288) · fixed --- List reports correctly displayed (case 63480) · fixed --- TEE shelvesets now supported (Case 60306) · fixed --- 'Page 1 does not exist in this document' message opening Print To Review .pdf (case 61316) · fixed --- Update CCRC .jar filename in manual (case 63047) · fixed --- http proxies do not like /contentupload (case 61786) · fixed --- Performance improvements for diffcache misses. (Case 62893) · fixed --- CollabExternalDiff viewer works if the version/changelist ID contained invalid filename characters (case 62184) · fixed --- Browse command works in batch when called with global option no-browser. 6.5.6508 — March 26, 2012 · fixed --- Fixed class cast exception while checking for empty default changelist(62079) · fixed --- Ignoring trailing strings after perforce year.release-number string in order to retrieve support for shelvesets correctly (Case 61812) © 2003-2015 SmartBear Software Version 6 · fixed --- Added specific client to fstat and resolved commands when executing from a different client (case 61752) · fixed --- Reports page SQL and CSV links not working in IE browsers due to IE URL character limits (case 61805) · fixed --- Changed check for unchanged files so it only checks if the client has any open files, to avoid error when there is none. Changed submitted version fstat check to include the version number. Added unit tests (Case 61949) · fixed --- edits do not work on change-content-trigger. Also added test case (Case 61958) · fixed --- Support Surround dates with '.' separators (case 62034) · fixed --- renames no longer cause TimeBuilder to error. (Case 62317, 62359) 6.5.6507 — February 17, 2012 · fixed --- SVN 1.7 support when user does not have access to repo root (61682) · fixed --- Commit from TFS reviews in a single changeset (Case 61723) · fixed --- Messaging and documentation describing incompatibility with MKS on 64-bit Windows JRE (cases 60680, 60968, 61326, 61333) · fixed --- Changing phase of authors that upload files after review has been started (Cases 60947, 60720) · fixed --- Minimally sized GUI screen does not show Existing Reviews field (Case 61018) · fixed --- New Server Fails to get License w/o feedback (Case 61023) · fixed --- Another minor display issue with Custom Field (Case 60946) · fixed --- Support Surround one-line changelist history records (case 61311) · fixed --- Ignore StarTeam 'no revision of file' errors (case 61212) · fixed --- rework counter showing incorrect values (case 60943) · fixed --- NPE when adding empty changeset to review with RTC (Case 61255) · fixed --- test case for TimelineGenerator fixed (case 60337) · fixed --- Removing duplicate versions from the timeline (case 60337) · fixed --- Mandatory subscriptions allowing changing of roles and sending multiple notifications on attempts to remove mandatory users (case 60176) · fixed --- Erroneous Concurrency Exception during DB init. (Case 60682) © 2003-2015 SmartBear Software 738 739 Appendices · fixed --- Now correctly parse svn server certification error messaging (case 60790) · fixed --- Problem disabling admin account · fixed --- Support ClearCase Zulu format date strings (case 60137) · fixed --- Can no longer change the role of a user who is in a review due to mandatory subscription · fixed --- Error parsing regional (Canada) date(Case 60137), Review # 6095. · fixed --- Eclipse plugin chooses wrong default previous version. (Case 60409) · fixed --- PeerReview client installer copies CCRC .jar files to wrong location · fixed --- Validate content on client before caching. (Case 60157) · fixed --- Svn URL's are now properly encoded if there are special characters within a filename 6.5.6505 — December 21, 2011 · added --- SVN 1.7 support (Case 59698) · added --- Updated Eclipse support · fixed --- Ignore CVS banner in stderr (Case 59676, 60698) · fixed --- Blank screen when logging in for some users (Case 60602) · fixed --- Error with Subversion/JavaHL when no access to repo root (Case 60265) · fixed --- Updated documentation for null return in IP4Conn (Case 60569) · fixed --- Check version before executing shelveset commands (Case 60569) · fixed --- Reworked files no longer show status as reverted (Case 60025) · fixed --- Properly support old style p4 renames (Case 60294) · fixed --- Add to Review P4V integration no longer populates add to existing review (Case 58880) · fixed --- Conversations added to Review Summary now update correctly · fixed --- TFS en_CA data parses correctly (Case 60231) · fixed --- Get content of non-local resources in Eclipse even when out of sync (Case 60129) · fixed --- More logging exceptions are without stacktraces (Case 60041) © 2003-2015 SmartBear Software Version 6 · fixed --- Eclipse plug-in versions now appear correctly (Case 57778) · fixed --- Ignore warnings about EOL-style from Git (Case 60112) · fixed --- Eclipse client no longer produces NPE when trying to load comments (Case 58849) · fixed --- Suppress Notification checkbox stays checked (Case 59164) 6.5.6503 — October 25, 2011 · added --- Users can now ignored 'accepted' comments in comment count (Case 59072) · fixed --- Adding the same file from different operating systems no longer breaks a review (Case 59412) · fixed --- Support adding files from ClearCase view-private directories (Case 58637, 59735) · fixed --- Corrected a parsing error in pending tasks (Case 57096) · fixed --- Rework counter showing incorrect values (Case 59553) · fixed --- VSS reviews will no longer hang (Case 59048) · fixed --- Line parser out-of-bounds exception corrected. · fixed --- P4 diffs correctly identifies before/after paths (Case 59166) · fixed --- Support ISO formatted TFS dates (Case 59242) · fixed --- Authors can no longer be disabled for reviews (Case 58629) · fixed --- Browse now takes the user to the review materials page instead of new review page if a review exists (Case 58501) · fixed --- Bad URL's no longer break the review material page (Case 57559) · fixed --- Correctly respect symlinks in web UI for SCM configuration (Case 59277) · fixed --- Will now select the correct ClearCase version when addversions has no previous (Case 58988) · fixed --- Corrected PRC manual favicon (Case 58624) · fixed --- admin batch version-spec now handles filenames with spaces (Case 58988) · fixed --- Corrected issue with max number of reviewers (Case 58709) · fixed --- Action items and search results now respect permissions (58315) · fixed --- Updated GUI screenshots for Synergy (Case 51728) © 2003-2015 SmartBear Software 740 741 Appendices · fixed --- Grammar error in server installer authentication page (Case55791) · fixed --- Time spent reviewing is now correct when doing code reviews (Case 54486, Case 56510) · fixed --- Open commit reminders from a deleted review will no longer send the user to a blank home screen (Case 59137) · fixed --- Corrected poking behavior for completed reviews. · fixed --- Version content already set bug 6.5.6502 — September 9, 2011 · added --- PeerReview Complete will now import database exports from CodeCollaborator as long as minor version/build numbers match. · added --- Updated manual to include alternate SSL option (Case 58976) · added --- Syntax parsing for Gosu · added --- Configuration options for synergy web-mode. · fixed --- Search results, even by review ID, will not display reviews that the user does not have permission to access (uservoice request) · fixed --- Updated manual screenshot for Synergy (Case 51728) · fixed --- Surround committed changelist paths do not start with '/' (Case 56730) · fixed --- Grammar error in server installer authentication page (Case 55791) · fixed --- Time spent reviewing is now correct. (Case 54486, Case 56510) · fixed --- Home page will no longer be blank when a review with an open commit reminder is deleted (Case 59137) · fixed --- Date in version history for 6.5.6501 now correctly shows as 2011. · fixed --- Better sorting of case-only changes in Ensure Content Reviewed Trigger (Case 58645) · fixed --- Correctly handle Surround en_GB dates and fixes for history command parsing (Case 58882) · fixed --- "Unlimited" number of reviewers is now limited to 100,000. (Case 58709) · fixed --- Zooming in on a very large PDF that strains memory limits will now produce a friendly error message. (Case 57205) · fixed --- Button text should now be consistent across reports. (Case 58794) © 2003-2015 SmartBear Software Version 6 · fixed --- Accurev uploads should no longer complain about an A:\ drive. (Case 58982) · fixed --- Updated System Status forms to remain within allotted space (Case 57616) · fixed --- Print To Review 'File does not exist' error. (Case 58931) · fixed --- No longer prevented from marking comments read/accepted when two comments collide on the same line of a diff. (Case 57504) · fixed --- Users are no longer blocked from editing a review after it is due. (Case 53495) · fixed --- Report Access Security no longer fails with Oracle. (Case 58794) · fixed --- Fixed a file upload issue with TFS that had files showing up as if they had no content. (58738) · fixed --- PRC server installer links to the correct online manuals. (Case 57677) · fixed --- Rework/rebase counter on review overview page. (Case 57203) · fixed --- Custom defect names should now show up everywhere that the defect label is used. (Case 58524, Case 57569) · fixed --- Next button should now work when looking for defects. (Case 58542) · fixed --- Added diagnostic to eliminate dangling user references. (Case 58213) · fixed --- VHDL syntax highlighting. 6.5.6501 — August 22, 2011 · added --- ClearCase Remote Client (CCRC) Support 449 . · fixed --- File upload issue resulting in empty files. · fixed --- NPE adding TFS files that have empty comments to review (Cases 58196, 58397, 58411) 6.5.6500 — July 22, 2011 * FIRST RELEASE OF v6.5! * Major features: · Report Access Security 146 features · Improved file upload support © 2003-2015 SmartBear Software 742 743 Appendices · added --- New vmoptions to adjust when review auto-update is disabled. · added --- Users can now add changelists to a review if the regex matches the review (Case 57989) · added --- Support for Eclipse alternate file systems · added --- New Report Access Security · added --- Support for batching XMLRPC requests · fixed --- Eclipse plugin now correctly referenced in PRC server (case 58623) · fixed --- Fixed a problem where going to a nonexistent review would create a NPE. (Case 57456) · fixed --- Converted a help link which opened an XML file to raw text to compensate for browser incompatibility (Case 58547) · fixed --- Improved error messages if group synchronization fails to parse correctly · fixed --- Corrected a link on the Admin panel that was opening the wrong help section (Case 57780) · fixed --- Corrected some online manual links that resulted in 404 errors (Case 57677) · fixed --- Running 'addgitdiffs' on a bare repo will no longer create a NPE (Case 58240) · fixed --- Corrected issue with Subclipse and SVN 'mergeinfo' support (Case 57555) · fixed --- Updated change type in already existing versions for TFS (Case 57371) · fixed --- Changed diff uploads to use streams · fixed --- Updated fun facts to be more generic (Case 57972) · fixed --- Several corrections to the owner's manual · fixed --- Corrected missing space in 'ccollab addversions' documentation (Case 57964) · fixed --- Removed request for 'mergeinfo unsupported' error with Subversive (Case 57555) · fixed --- Corrected '%1 is not a valid Win32 application' error when installing Print To Review (Case 58006) 6.1.6104 — May 25, 2011 · added --- support Subversive 0.7.9.20110207-1700 © 2003-2015 SmartBear Software Version 6 · fixed --- More logging during server startup · fixed --- Server triggers replacements failed for custom fields with whitespace (Case 57516) · fixed --- All Defects report filtered by group did not show defects (Case 57033) · fixed --- License expiration date is now always displayed in UTC with clear timezone indication (Case 57473) · fixed --- TFS changeset deletes not showing as deleted (Case 51361, 57371) · fixed --- Error processing filenames containing ampersands on windows (Case 57437) · fixed --- Remove spurious extra logging in Eclipse plugin · fixed --- Poor write performance when content-cache is located on a network share · fixed --- Parsing of StartTeam diff filenames with embedded spaces (Case 57197) · fixed --- Error reviewing subversion revision 1 · fixed --- Parse Surround history output with multiple continuation lines (Case 57288) 6.1.6103 — April 15, 2011 · added --- Installers for 64-bit JVMs on Windows · fixed --- Print To Review not deleting image files on cancel (Case 54914) · fixed --- "Download Diffs" fails for large reviews. (Case 56889) · fixed --- "Download Diff" link now checks SCM permissions. (Case 57110) · fixed --- "Open in external diff viewer" link now checks SCM permissions. (Case 57110) · fixed --- Ticket verification should be case-insensitive (Case 57058, 57075) · fixed --- Eclipse plugin Defect links truncated · fixed --- Eclipse plugin should post chat asynchronously · fixed --- Remove ccollab-cvs trigger from installer (Case 56876) · fixed --- Support SourceGear Vault Professional Edition (Case 56205, 56737, 56863) · fixed --- Fix Surround 'Archive error: -9014' · fixed --- "Suppress Notification" checkbox does not stay checked. (Case 56929) © 2003-2015 SmartBear Software 744 745 Appendices · fixed --- Chat pane does not load for binary files (Case 56749) · fixed --- Support path-based access control for Apache-based Subversion servers (Case 56657) · fixed --- Support blank option values on the command-line · fixed --- attachments via web UI fail (Case 56783) · fixed --- TFS commit issue (Case 56528) · fixed --- TFS shelvesets author check should be case-insensitive (case 56436) · fixed --- NPE when file has no base version (Case 56553) · fixed --- NPE on alternate git status text (Case 56443) 6.1.6102 — March 9, 2011 · fixed --- Server fix for broken `ccollab admin wget` and Eclipse plugin w/ MySQL or Oracle. (Case 56315) · fixed --- Add product name to password prompt dialog · fixed --- Fix AppSetting not found error configuring Studio Addin for debug · fixed --- Overwrite stale ticket in GUI client and Eclipse (Case 56426) · fixed --- Error committing Subversion file with spaces (Case 56534) · fixed --- Older (4.0) clients depleted database connection pool. (Case 56568) · fixed --- Invalid regular expression in ExtJS (Case 55848) · fixed --- RTC integration missing icon · fixed --- NPE refreshing Review Summary Page (Case 56462) · added --- Support MKS Source Configuration Path project types (Case 56327) 6.1.6101 — February 22, 2011 * FIRST RELEASE OF v6.1! * © 2003-2015 SmartBear Software Version 6 Major features: · Tasktop Certified Mylyn Integration · Ticket-based logins · Support Subversive Eclipse Subversion plugin 6.0.6018 — February 18, 2011 · fixed --- do not limit reviews to N changelists (Case 56011) · fixed --- Eclipse Review Editor errors "Graphic is disposed" (Case 56393) · fixed --- Attachments should be archived with other clients. 6.0.6017 — February 11, 2011 · fixed --- satisfy TaskTop requirement that the error icon used in the collaborators section of the review editor should be the one commonly used in eclipse · fixed --- satisfy TaskTop requirement that required custom fields be decorated with a warning instead of an error icon. · fixed --- LDAP auth with DOMAIN/username broken (Case 55481) · fixed --- Browser hangs loading native document conversations (.doc file) (Case 56253) · fixed --- typo in documentation for 'ccollab logout' · fixed --- TFS deleted files showing as initial (Case 55981) · fixed --- Case 56253 · fixed --- Explicitly support "M/d/yy h:mm:ss a" when parsing Surround changelists, instead of expecting this to be the default system date format (Case 56079) · fixed --- AddFiles should not attempt to add a base version (Case 56157) · fixed --- do not require Eclipse CVS plugin (Case 56175) · fixed --- Supply Subversion username and password when adding arbitrary diffs · fixed --- Allow users to further configure dynamic reports before running them. (Case 54888) · fixed --- Dynamic reports will show more useful URL's in the URL bar if possible. © 2003-2015 SmartBear Software 746 747 Appendices · fixed --- Apply and OK buttons disabled in the GUI client (Case 56120) · fixed --- NullPointerException adding pending changelist with Eclipse plugin (Cases 55998, 56080) · fixed --- remove extra prompt for password on ccollab login · fixed --- Rename products in manual. · fixed --- do not require access to Subversion repository root (Case 53783) · fixed --- do not require access to Subversion repository root (Case 53783) · added --- Support Vault Professional and 5.1.1 release (Case 56205) · added --- diagnostic to add users to ALL_USER group if they are not already in it (Cases 56090, 56101). this is an empty commit because the original commit · added --- documentation for $review.defectlog variable (Case 56196) 6.0.6016 — January 19, 2011 · added - Respect Subversive Plugin "Do not select externals" preference · added - Subversion 'svn-recurse-externals' · added - Subversion svn-auto-add 561 option to recurse in to svn:externals directories global option to treat unversioned files as "added" 561 · added - Better command-line messages for ccollab admin group member add · added - review_activity_summary (Case 55374) 593 columns: active_reviewer_hours, passive_reviewer_hours · added - Print To Review 64-bit driver (Cases 55373, 54985, 52098) · added - Extra logging around search · added - Support for Team Foundation Server 2010 (Case 54907 and others) · added - Radio buttons for Clearcase "Add versions" GUI file selection usability (Case 50471) · added - Support Subversive Eclipse Subversion plugin · added - Diagnostic to clean up duplicate values in metadatavalue* tables (Case 55633) · added - Prompt from eclipse client and standalone GUI when bad auth credentials prevent succesful server responses. © 2003-2015 SmartBear Software Version 6 · fixed - Handle TFS Russian date formats (Case 55797) · fixed - Bad warning message when uploading unversioned file using 'ccollab addfiles' · fixed - Suppress messages going to Subclipse console · fixed - Error committing Subversion files in added directories · fixed - Prevent duplicate Group members (Case 55623) · fixed - Delete duplicate Group members in Fix Database Data 131 · fixed - Eclipse resource decoration fail to update 375 and defect markers 375 diagnostic · fixed - Eclipse "Add to Review" menu item in Synchronize View missing for CVS and Subversion · fixed - Exception when running "List Reports" in Oracle (Case 55721) · fixed - GUI Client Git "Add changes" does not canonicalize filesystem path (Case 54598) · fixed - NPE in "Add changes" when adding from subdirectory of Git repo (Case 55676) · fixed - Handle missing Perforce 'haveRev' better (Case 55458) · fixed - Reviewer can incorrectly finish until file activity (Case 55456) · fixed - Reworked files showing 'Initial' status (Case 55557) · fixed - NPE in installer during ROOT.xml generation (Case 55578) · fixed - Better error message when LDAP authenticated user has not logged in to the web UI (Case 55538) · fixed - RTC server plugin fails to create review when files paths cannot be constructed (Case 55547) · fixed - Error saving Review custom fields in Eclipse plugin · fixed - Performance - Only search "user" comments, not system comments · fixed - Skip change set links that are missing a workspace hint in RTC Server Plugin · fixed - Translate ClearCase LATEST to actual version · fixed - Try harder to not run out of memory when running Perforce commands (Case 46879) · fixed - Tray Notifier always thinks there are new Action Items · fixed - Can not add pending Perforce changelist from Eclipse Plugin (Case 55064) © 2003-2015 SmartBear Software 748 749 Appendices · fixed - Improve initial load speed of diff page (Case 55306) · fixed - Command-line process execution fails with msysgit (Case 55322) · fixed - Collapse paths in tree when selecting locally modified files in "Add versions" UI (Case 50471) · fixed - Stop storing password supplied at command line prompt in config file · fixed --- ClassCastException in "Fix Duplicate Users Differing By Case" Diagnostic. (Case 55910) 6.0.6013 — November 17, 2010 · added --- Support KB, MB and GB suffixes for smartbear.ccollab.upload.truncate.size (Case 54922) · added --- Eclipse plugin support for reviewing URL's · added --- Show "pins" in Eclipse Compare Editor for images and documents · added --- Support for document review in Eclipse plugin · added --- The assignment_state database view describes actioncodes in the assignment table. (Case 55049) · added --- Find changes on ClearCase branch for Add Versions (Case 50471) · added --- Edit participant custom fields in Eclipse plugin Review Editor · added --- New "ccollab admin review edit --participant-custom-field" option · added --- Clearcase: UI for add versions from branch (Case 50471) · added --- Ability to "Poke" a Review participant in the Eclipse Plugin · added --- Eclipse Plugin Review Editor show participant state using icons and font · added --- Support Vault 5.0.4/Fortress 2.0.4 (Case 54773) · added --- Double-click an entry in the Eclipse plugin Review Editor defect log to open the associated file · added --- Show extended information in Eclipse plugin Review Editor defect log tooltip · added --- "File" and "Location" columns in Eclipse Review Editor defect log section · added --- Specify custom label for conversations in Eclipse Plugin © 2003-2015 SmartBear Software Version 6 · fixed --- Throttle error messages about old/unsupported clients. (Case 55194) · fixed --- Next/prev buttons in diff viewer failed after changing version comparison. (Case 55166, 54870) · fixed --- NPE when converting null dates to strings (Case 55179) · fixed --- Initial setup page changed user logins instead of adding new users. (Case 54771) · fixed --- Support non-English locales with Subclipse integration (Case 55185) · fixed --- Allow single-word user names (Case 54528) · fixed --- Version change without content change shows 'Uploaded File' instead of change metrics (Case 55130) · fixed --- Wrong version uploaded for ClearCase activities with unordered changes (Case 54648) · fixed --- Change server.xml defaults to improve server behavior under load · fixed --- Upgrade Tomcat to 6.0.29 · fixed --- NPE updating defect markers in Eclipse plugin (Case 55064) · fixed --- User selections should include user logins for disambiguation · fixed --- Links in dynamic reports were broken on first page load. (Case 54934) · fixed --- Respect custom field phase visibility in Eclipse Plugin · fixed --- Review overview fails to load - NPE with empty label location on Oracle backend (Case 54839) · fixed --- Client installer removes other P4V custom tools (Case 54448) · fixed --- Improve 'Invalid ClearCase version' message (Case 54975) · fixed --- Visual Studio Addin unloads when solution is closed (Case 52634) · fixed --- Visual Studio Addin should display error message if nothing to do (Case 54661) · fixed --- Eclipse plugin mangles multi-line text custom fields (Case 54867) · fixed --- Wrong base version for Vault rolled back versions (Case 53902) · fixed --- Eclipse Plugin Review Editor NPE with CodeReviewer (Case 54790) · fixed --- Prevent MKS host name truncation (Case 53470, 54780) · fixed --- Prepopulate Print To Review document name (Case 54123) © 2003-2015 SmartBear Software 750 751 Appendices · fixed --- Defect Custom field order not respected (Case 54717) · fixed --- P4V integration does not prepopulate review title (Case 54449) · fixed --- New comment text box in Eclipse plugin does not expand correctly as you type · fixed --- Error uploading reverted CVS file in Eclipse plugin (Case 54587) · fixed --- Be more lenient for administrator full names in support of non-Latin-1 character sets (Case 51433) · fixed --- Error using relative paths with 'ccollabgui addchanges' (Case 54459) 6.0.6012 — October 1, 2010 · added --- Documentation for content-cache format prop file · added --- Compare against any local file in Eclipse plugin · added --- Select line in Eclipse plugin Compare Editor when conversation focused in Conversations View · added --- Compare against any local file in Eclipse plugin · added --- "Refresh" button to Eclipse Review Editor · added --- Display links for URL's and emails in Eclipse Plugin Conversations View · added --- Links in Eclipse Plugin Conversations View · added --- Links in Eclipse Plugin custom fields and defect text · added --- Linkify-as-you-type in Eclipse Plugin · added --- Display Review ID in "Add To Review" wizard confirmation page (Case 54371) · added --- Log IP address of old clients (Case 54392) · added --- New reporting views. (Case 54438) · added --- Option to suppress notifications by type/template · added --- Interim 'ccollab logout' command that clears password (Case 54065) · fixed --- HTML markup displayed in Eclipse plugin 'Moving On' section · fixed --- Multi-selected files not uploading from addin · fixed --- Defect links and comment box sometimes disabled improperly in Eclipse plugin © 2003-2015 SmartBear Software Version 6 · fixed --- do not mark review editor dirty just because custom field values are not yet assigned · fixed --- NullPointerException committing from tray notifier · fixed --- Eclipse Review Editor "Moving On" section missing controls after pressing "Begin Review" · fixed --- Make Conversation ruler background color match file in Eclipse Compare Editor · fixed --- Missing checked graphic in diff viewer · fixed --- Eclipse plugin Compare Editor "Too Many Differences" error" · fixed --- Erroneous Concurrency Exception on upgrade (Case 54087) · fixed --- Can no longer create multiple custom fields that differ only by case (Case 54087) · fixed --- Corrected features-not-supported-in-CodeReviewer list · fixed --- Email notifier log message says "seconds" instead of "milliseconds" · fixed --- Display image for file type in Eclipse Compare Editor · fixed --- Prefs page fails to render tabs in IE7 · fixed --- In Notification Template admin screen, sort the templates by display name. · fixed --- Make 'browser' global option case-insensitive (Case 50407) · fixed --- Keep Eclipse Plugin Action Items View and Editors in sync · fixed --- Use custom label for "Defect" in Eclipse Plugin · fixed --- Eclipse plugin "Could not get defect attribute from defect marker" error (Case 54349) · fixed --- Sort next file/previous file the same as the review overview screen, collating case (case 54132) · fixed --- p4 \r\r\n line endings confuse ensure-content-reviewed trigger (Case 54213) · fixed --- Better error messages for Eclipse Plugin (Case 54350) · fixed --- do not overwrite file content when restoring from backup (Case 54401) · fixed --- Installer should automatically replace old P4V custom tool definitions (Case 54450) · fixed --- Updated manual to document all views. Corrected view name to: defects_by_path (Case 54437) · fixed --- Dynamic Defect Report filter by Review Completion Date (Case 54226) © 2003-2015 SmartBear Software 752 753 Appendices · fixed --- Error upgrading server if no diffs cached (Case 54381) 6.0.6011 — September 8, 2010 * FIRST GA RELEASE OF v6.0! Note: 6.0 Beta clients (6.0.6001 - 6.0.6009) are not compatible with the GA 6.0.6011 server (5.0 clients *are* compatible with 6.0.6011 server). If you were using a 6.0 beta client please upgrade your client to the GA version 6.0.6011. · added --- do not allow saving password via ccollab set (use ccollab login instead) · fixed --- Group Admins 167 may delete groups they admin (Case 52208) · fixed --- Last Comment shows if redacted 295 (Case 53732) · fixed --- Error entering new Comments on "local file 374 " version in Eclipse plugin (Case 53820) · fixed --- Create distinct changelists for unmanaged files uploaded via ccollab addfiles (Case 52713) · fixed --- Append indicator page to end of truncated Print To Review documents · fixed --- do not allow new conversations when comparing against changed local file Eclipse plugin · fixed - Eclipse plugin Defect Markers deleted 375 and Label Decorations 375 374 in do not clear when Review · fixed - Print to Review displays "No Title" error (Case 53929) · fixed --- NPE on Review Detail Report · fixed --- User Reports 316 314 (Case 53682) specify "System Admin" instead of ambiguous "Admin" (Case 53084) · fixed --- Removed unused 'issue' table (Case 52652) · fixed --- ccollab addchanges --diffbranch option should not return CHECKEDOUT versions (Case 53680) 6.0.6009 — August 8, 2010 © 2003-2015 SmartBear Software Version 6 · added --- New file content store format for better FS performance. · added --- Print To Review and Studio Addin launch 'Add To Review' GUI wizard · added --- Enable log level management through JMX · added --- External diff launcher preset for BeyondCompare on Linux · added --- Supported browsers now include Chrome · added --- Display graphical UI for P4V integration · added --- P4V integration upload multiple changelists at once · added --- Show user login to disambiguate user names on Group admin page (Case 53589) · added --- Click on a line in the Eclipse compare viewer and start typing to add comment · fixed --- Added troubleshooting info to the manual for p4v/p4win plugin (Case 53579) · fixed --- Added keyboard shortcuts for GUI client to manual (Case 53578) · fixed --- Eclipse client new chat box does not size correctly with t