1
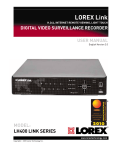
Smart Access Control System Software User Manual Version 1.0 Copyright © MaCaPS International Ltd. 2002 Smart Access Control System Software – User Manual Version 1.0 This manual was produced by MaCaPS International Ltd. MaCaPS International Ltd. http://www.macaps.com.hk E-mail: [email protected] Disclaimer Information in this document is subject to change without notice. Companies, names, and data used in examples herein are fictitious unless otherwise noted. No part of this document may be reproduced or transmitted in any form or by any means, electronic or mechanical, for any purpose, without the express written permission of MaCaPS International Ltd. Trademarks Smart Access Control System is copyright of MaCaPS International Ltd. 1997-2002 MaCaPS International Ltd. All rights reserved. HID is a trademark or registered trademark of HID Corporation. Mifare is a registered trademark of Philips Electronics N. V. Octopus Card and the Octopus Card logo, are registered trademark of Octopus Cards Limited. Pentium is registered trademarks of Intel Inc. Proximity is registered trademarks of Proximity Technology Inc. Windows is a registered trademark of Microsoft Corporation. All other product, service, or company names mentioned herein are claimed as trademarks and trade names by their respective companies. ii Smart Access Control System Software – User Manual Version 1.0 Table of Contents 1. Introduction...................................................................................................1 1.1 Purpose of the Document ........................................................................................... 1 1.2 Target Audience........................................................................................................... 1 1.3 Related Documents..................................................................................................... 1 1.4 Abbreviations............................................................................................................... 1 1.5 Characters Representation Convention ...................................................................... 1 1.6 Standard Notations...................................................................................................... 1 1.7 Document Overview .................................................................................................... 2 1.8 Revision History .......................................................................................................... 3 2. Overview of Smart Access Control System ……………………………………4 2.1 Access Control ............................................................................................................ 4 2.2 Personal Computer with ACS Software ...................................................................... 5 2.3 Smart Event Server ..................................................................................................... 5 2.4 Smart Access Door Controller..................................................................................... 6 2.5 Card Reader................................................................................................................ 6 2.6 Access Cards .............................................................................................................. 7 3. Installing Smart Access Control System Software……………………….……8 3.1 Minimum System requirements................................................................................... 8 3.2 Installation Procedure.................................................................................................. 8 4. Starting the ACS Software………………….………………………………….10 4.1 Starting the ACS Software......................................................................................... 10 4.2 Logging In.................................................................................................................. 10 4.3 The ACS Software Main Window .............................................................................. 10 4.4 Logging Out............................................................................................................... 11 4.5 Exiting the ACS Software .......................................................................................... 11 5. System User Administration…..………………………………….…………….12 5.1 Changing the Current System User .......................................................................... 12 5.2 System User Administration Window ........................................................................ 12 5.3 System User Access Rights ...................................................................................... 13 5.4 Adding System User.................................................................................................. 13 5.5 Modifying or Deleting a System User........................................................................ 14 5.6 Exiting the User Administration Window ................................................................... 14 6. Managing the Server Database…………………………..……………………15 6.1 Server Management Window.................................................................................... 15 6.2 Enabling All Event Server Connection ...................................................................... 16 6.3 Adding Event Server.................................................................................................. 16 iii Smart Access Control System Software – User Manual Version 1.0 6.4 Modifying or Deleting a Event Server........................................................................ 17 6.5 Downloading Data to Server ..................................................................................... 17 6.6 Setting Transaction Log Interval................................................................................ 17 6.7 Exiting the Server Management Window.................................................................. 17 7. Managing Door Controller………………………………….…………………..18 7.1 Door Controller Management Window ...................................................................... 18 7.2 Adding Door Controller.............................................................................................. 19 7.3 Modifying or Deleting a Door Controller .................................................................... 20 7.4 Configuring the Alarm Option .................................................................................... 21 7.5 Configuring the Reader Option ................................................................................. 22 7.6 Configuring the Time Zone Option and Door Access Scheme ................................. 24 7.7 Exiting the Door Controller Management Window .................................................... 25 8. Managing the User Database………………………………………………….26 8.1 User Management Window....................................................................................... 26 8.2 Adding User............................................................................................................... 27 8.3 Modifying or Deleting a User..................................................................................... 29 8.4 Browsing Users Information ...................................................................................... 29 8.5 Exiting the Door Controller Management Window .................................................... 30 8.6 Managing Door Group............................................................................................... 30 8.7 Door Group Management Window............................................................................ 30 8.8 Adding Door Group.................................................................................................... 31 8.9 Modifying or Deleting a Door Group.......................................................................... 32 8.10 Exiting the Door Group Management Window........................................................ 33 8.11 Select Door Group Window ..................................................................................... 33 8.12 Add Door Group to User.......................................................................................... 34 9. Controlling Door Manually……………………….……………………………..35 9.1 Manual Door Control Window ................................................................................... 35 9.2 Unlocking door .......................................................................................................... 35 9.3 Stopping alarm of a door ........................................................................................... 36 9.4 Exiting the Manual Door Control Window ................................................................. 36 10. Managing Time Zone………………………….………………………………37 10.1 Time Zone Management Window ........................................................................... 37 10.2 Modifying a Time Zone............................................................................................ 38 10.3 Exiting the Time Zone Management Window ......................................................... 38 11. Adding Holiday……………………….………………………………………...39 11.1 Holiday Management Window................................................................................. 39 11.2 Adding a holiday ...................................................................................................... 40 11.3 Modifying, disabling and deleting record ................................................................. 40 iv Smart Access Control System Software – User Manual Version 1.0 11.4 Exiting the Holiday Management Window............................................................... 40 12. Maintaining Database…………...……………….……………………………41 12.1 The Database Maintenance Window ...................................................................... 41 12.2 Importing Transaction Database ............................................................................. 42 12.3 Exporting Transaction Database ............................................................................. 43 12.4 Deleting Transaction Database ............................................................................... 44 12.5 Importing User Record ............................................................................................ 45 12.6 Exporting User Record............................................................................................ 47 12.7 Deleting User Record.............................................................................................. 49 13. Managing Reports…………….……………………………………………….51 13.1 The Door Transaction Report.................................................................................. 51 13.2 The User Information Report................................................................................... 53 13.3 The User In Out Transaction Report ....................................................................... 54 13.4 The Month In Out Report......................................................................................... 56 v Smart Access Control System Software – User Manual Version 1.0 Figures Figure 1. Basic configuration of the ACS ................................................................................. 5 Figure 2. Smart Event Server .................................................................................................... 6 Figure 3. Smart Access Door Controller................................................................................... 6 Figure 4. Different kinds of Card Reader ................................................................................. 7 Figure 5. Starting the installation program ............................................................................... 8 Figure 6. Access Control – Login Window ............................................................................. 10 Figure 7. The ACS Software Main Window Interface ............................................................11 Figure 8. System User Administration Window ..................................................................... 12 Figure 9. Server Management Window.................................................................................. 15 Figure 10. Door Controller Management Window ................................................................ 18 Figure 11. Door Controller Management Window with Alarm Tab enabled....................... 21 Figure 12. Door Controller Management Window with Reader Tab enabled ................... 22 Figure 13 Door Controller Management Window with Time Zone Tab enabled............... 24 Figure 13 User Management Window .................................................................................... 26 Figure 14. User Information Window ...................................................................................... 29 Figure 15. Door Group Management Window ...................................................................... 31 Figure 16. Select Door Group Window................................................................................... 33 Figure 17. Manual Door Control Window............................................................................... 35 Figure 18. Time Zone Management Window ........................................................................ 37 Figure 19. Holiday Management Window .............................................................................. 39 Figure 20. Data Maintenance Window ................................................................................... 41 Figure 21. Import Transaction Window................................................................................... 42 Figure 22. Export Transaction Window .................................................................................. 43 Figure 23. Delete Transaction Window .................................................................................. 45 Figure 24. Import User Record Window................................................................................. 46 Figure 25. Export User Record Window................................................................................. 48 Figure 26. Delete User Record Window................................................................................. 49 Figure 27. Door Transaction Report Window ........................................................................ 51 Figure 28. Door Transaction Report ....................................................................................... 52 Figure 29. User Information Report Window ......................................................................... 53 Figure 30. User Information Report ........................................................................................ 54 Figure 31. User In Out Transaction Report Window............................................................. 55 Figure 32. User In Out Transaction Report............................................................................ 56 Figure 33. Month In Out Report Window................................................................................ 57 Figure 34. Month In Out Report............................................................................................... 58 vi Smart Access Control System Software – User Manual Version 1.0 1. Introduction 1.1 Purpose of the Document The primary objective of this manual is to guide the Smart Access Control System Software users to familiar with the functions of the system software and get master of the system shortly. 1.2 Target Audience The manual is intended for System Administrator, security officer etc. 1.3 Related Documents Smart Access Control System Software Specification Smart Event Servers Specification Smart Access Door Controllers Specification MMR-050xx Wiegand Output Mifare Reader and Card Specification Or Card Reader and Card Specifications from other vendors. 1.4 Abbreviations ACS Access Control System 1.5 Characters Representation Convention The following types of character fonts are used in this document to signify the corresponding identities. Courier bold indicates commands that you select from a menu. File → Open Courier font indicates messages, prompts, and program files that the system displays. C:\Program Files\AccessControl Arial bold italic indicates name of parts, components or fields in each window. Reset Record 1.6 Standard Notations The following standard notations are used to convey the following meaning only. System user The term system user refers to the ACS software user. User The term user refers to the access card holder who is added to the user database in of ACS software 1 Smart Access Control System Software – User Manual Version 1.0 Button The term button refers to a button on a toolbar or a command button which is clicked to perform some specific, individual action. Combo Box The term combo box refers to a box which is made up of a text box and a drop-down list. The system user can enter text in the text box in addition to selecting from the items inside. Check Box The term check box refers to a box which indicates its state – selected or not – by either displaying or not displaying a tick ( √ ). If you see a tick, it is selected; else it is not selected. Any number of check boxes in a group can be selected at any given time. Option Button The term option button refers to a button which indicates its state – selected or not – by either displaying or not displaying a dot ( • ). If you see a dot, it is selected; else it is not selected. Only one option button in a group can be selected at any given time. 1.7 Document Overview This document is divided in to 6 chapters as mentioned below in detail. Chapter 1 provides a brief overview about this document. Chapter 2 provides a general description about the ACS. Chapter 3 provides an installation guide of the ACS software on Windows Platform. Chapter 4 provides a guide of starting up the ACS software. Chapter 5 provides a description of system user administration. Chapter 6 provides a description of managing server database. Chapter 7 provides a description of managing door controller. Chapter 8 provides a description of managing user database. Chapter 9 provides a guide of controlling the door manually. 2 Smart Access Control System Software – User Manual Version 1.0 Chapter 10 provides a description of managing time zone. Chapter 11 provides a description of adding holiday. Chapter 12 provides a description of maintaining database. Chapter 13 provides a description of managing reports. 1.8 Revision History Revision 1.0 Issue date Distribution Author On Remarks Initial release 3 Smart Access Control System Software – User Manual Version 1.0 2. Overview of Smart Access Control System 2.1 Access Control Access control is the management of WHO goes WHERE and WHEN. Persons are uniquely identified through an access card or token, and will be able to enter only at assigned doors in assigned time and days. Beside this, it also provides Time Attendance System to enhance the company human resource management via local area network LAN. The ACS software provides a simple graphic user interface for the following functions: a. System User Administration b. Door Control c. Setup the Server Database d. Setup the Door Database e. Setup the User Database f. Setup the Time Zone Database g. Setup the Holiday Database h. Database Maintenance i. Door Transaction Report j. User Information Report k. User In Out Transaction Report l. Month In Out Report Basically, The ACS consists of following components: 1. A Personal Computer with ACS software installed 2. Smart Event Server(s) 3. Smart Access Door controller(s) 4. Card Reader(s) (with key pad) 5. Access Cards. Figure 1 shows the integration of these components to build the ACS. 4 Smart Access Control System Software – User Manual Version 1.0 Workstation P/ TC P TCP/I Event Server TCP/I P Event Server Controller Reader Up to 64 Event Servers Reader Up to 8 controllers Door Controller Reader RS485 Controller Reader Door Up to 8 controllers Up to 8 controller Door RS485 Controller Reader Controller Reader RS485 Door RS485 Door P/I P RS485 RS485 Controller Reader Controller TC Event Server Controller Door IP TCP/IP LAN/WAN Controller Reader Reader Figure 1. Basic configuration of the ACS 2.2 Personal Computer with ACS Software The Personal Computer with ACS Software installed communicates with event server(s) through the Ethernet network connection. Activities that occur at each reader and door are monitored, displayed and stored in database. Report can be generated from the database and user can control the doors(s) and card reader(s) using the ACS software. 2.3 Smart Event Server Events Server (Figure 2) is responsible for monitoring and controlling the door controller(s) through the RS-485 cable. It also stores user database from and reports access record to the central PC through Ethernet network connection. For more information, please refer Smart Event Servers Specification. 5 Smart Access Control System Software – User Manual Version 1.0 Figure 2. Smart Event Server 2.4 Smart Access Door Controller The Smart Access door controller (Figure 3) unlocks its respective door(s) or gate(s) whenever authorized people present their access card to the card reader during their assigned time and days. Besides, it monitors the status of door(s) and alarms whenever user specified condition happens. For more information, please refer Smart Access Door Controllers Specification. Figure 3. Smart Access Door Controller 2.5 Card Reader Each Smart access door controller can support 1 to 2 card readers with Wiegand output format such as Mifare, Octopus and Proximity. The card reader retrieves the access card information and determines whether the access rights are granted to the cardholder. An optionally keypad can be integrated with the card reader for password entry. For more information of specific card reader, please contact the sales representatives. 6 Smart Access Control System Software – User Manual Version 1.0 Figure 4. Different kinds of Card Reader 2.6 Access Cards The access cards provide information to card reader to authenticate the identity of cardholder. The same kind of access cards (e.g. Mifare, Octopus and Proximity) should be used with respect to the kind of card readers. For more information of specific access card, please contact the sales representatives. 7 Smart Access Control System Software – User Manual Version 1.0 3. Installing Smart Access Control System Software 3.1 Minimum System requirements - Windows 98/NT/2000/Me/XP - Pentium III 800MHz CPU - 128 MB of available RAM - 1 GB of disk space - 800x600 Display resolution - Network Interface Card 3.2 Installation Procedure 1) Close all programs before you begin installation. 2) Insert the offered CD to the CD-Rom drive. 3) Carry out the Setup.exe which is in the CD’s root directory. The Installation Wizard will launch. (Figure 5) Figure 5. Starting the installation program 4) Choose the destination folder to be installed. You can click Next button to install to the folder 8 Smart Access Control System Software – User Manual Version 1.0 C:\Program Files\AccessControl or click Browse button to choose the destination folder. 5) After the installation, you need to restart the computer before you use the ACS software. You can choose to restart now or later by selecting appropriate option button and click Finish button. 9 Smart Access Control System Software – User Manual Version 1.0 4. Starting the ACS Software 4.1 Starting the ACS Software Start ACS software from the Start menu by selecting Start → Programs →MaCapS →AccessControl 4.2 Logging In To log in the system, enter User Name and Password and then click OK button in the Access Control – Login window. (Figure 6) Figure 6. Access Control – Login Window Note For the first log in, the User Name and Password with administrator rights are "admin" and "sa" respectively. This password should be changed immediately to avoid unauthorized access to the system database. Please refer to section 5 System User Administration. 4.3 The ACS Software Main Window The main window (Figure 7) will become active after logging in. The system functions can be accessed depends on the level of access rights of system user. If invalid User Name and Password are provided or the system user clicks Cancel button in the log in window, the system functions will be disabled. For the information of access rights, please refer to section 5 System User Administration. The main window interface is described as follows: 10 Smart Access Control System Software – User Manual Version 1.0 a b c d e f g Figure 7. The ACS Software Main Window Interface a. Menu Bar This area contains the menus that control the operation of the ACS Software. b. Toolbar This area contains buttons that provide access to frequently used commands. c. System Transcript Window The Transcript Window displays system message and transaction log. d. User Photo Window This Window displays photos of recently accessed users. e. Server Status Window This Window displays the status of registered event server(s). Green box and red box represents an available and unavailable event server, respectively. f. Server Transcript Window This Transcript Window displays message of activities of the event server(s). g. Status Bar This status bar displays the current system users, system status, date and time. 4.4 Logging Out To log out the system, select System → Logout. 4.5 Exiting the ACS Software To exit the system, press Ctrl + X or select System → Exit. 11 Smart Access Control System Software – User Manual Version 1.0 5. System User Administration 5.1 Changing the Current System User To change the current system user, you need to log out and then log in the system: 1) Select System → Logout. 2) Select System → Login. 3) Enter User Name and Password and then click OK button in the Access Control – Login window. 5.2 System User Administration Window System user can add new system user and delete an existing system user through the use of User Administration window (Figure 8). To open the System User Administration window, select System → Admin User. The System User Administration Window consists of the following: a b c d Figure 8. System User Administration Window a. Toolbar This area contains buttons that provide access to frequently used commands. b. User Setting Frame 12 Smart Access Control System Software – User Manual Version 1.0 This frame contains fields for displaying and setting system user details. c. System User Table This table displays a list of system user names and their access rights. d. Status Bar This status bar displays the location of current selected system user in System User Table and whether any information is modified. 5.3 System User Access Rights In the ACS software, the access rights levels, in descending order are: Administrator, Power User and User. Different access rights level can perform different set of system functions. The details are summarized in the following table. System Function Administrator Power User User System user Administration Yes No No Door Control Yes Yes Yes Setup the Server Database Yes No No Setup the Door Database Yes No No Setup the User Database Yes Yes No Setup the Time Zone Database Yes No No Setup the Holiday Database Yes No No Database Maintenance Yes No No Generates Reports Yes Yes Yes Table 1. Privileges of different levels of access rights 5.4 Adding System User To add a new system user: 1) Click the New Record icon in the Toolbar. 2) Enter the User Name, Password and choose the corresponding access rights in the User Setting Frame. 3) To reset the information in the User Setting frame, click the Reset Record icon in the toolbar. 13 Smart Access Control System Software – User Manual Version 1.0 4) After entering the system user information, click the Save Record icon to save the setting. The new user name and its access rights are displayed in the System User Table. 5.5 Modifying or Deleting a System User To modify or delete an existing system user: 1) Select the user in the System User Table. The user’s detail will be displayed in the User Setting Frame. 2) To delete the system user, click Delete Record icon in the toolbar. Then click the Yes button of the message box to confirm. 3) After modifying the system user information, click the Save Record icon to save the setting. 5.6 Exiting the User Administration Window To exit the User Administration Window, click the Exit icon in the toolbar. A message box will appear if any modified information is not saved. Click the Yes button to save the modified information. 14 Smart Access Control System Software – User Manual Version 1.0 6. Managing the Server Database This section demonstrates how to create, modify, delete event server, download data to event server and set the transaction log interval through the use of the Server Management Window. 6.1 Server Management Window To open the Server Management Window (Figure 9), select Database → Server or click the Setup the Server Database icon in the toolbar of the Main Window. The Server Management Window consists of the following: a b d c e f Figure 9. Server Management Window a. Toolbar This area contains buttons that provide access to frequently used commands. b. Server Connection Frame This area provides system user to select whether to enable all event server connection. c. Server Setting Frame 15 Smart Access Control System Software – User Manual Version 1.0 This frame contains fields for displaying and setting event server details. d. Server Setting Command Buttons This area contains buttons that send command to the event server. e. Event Server Table This table displays a list of event server name(s) and their IP address(es). f. Status Bar This status bar displays the location of current selected server in Event Server Table and whether any information is modified. 6.2 Enabling All Event Server Connection To make connection with the server(s), the Enable All Event Server Connection check box should be selected. Otherwise, no transaction record is received even there is server added. 6.3 Adding Event Server To add a new event server: 1) Click the New Record icon in the Toolbar. 2) Enter the Server Name, IP address, User Name and Password to the Server Setting frame. 3) If you want to enable the connection with the new server, select the Enable Get Transaction check box. Note To enable individual connection with specific server, both the Enable All Event Server Connection check box and Enable Get Transaction check box of the specific server should be selected. 4) To reset the information in the Server Setting frame, click the Reset Record icon in the toolbar. 5) After entering the event server information, click the Save Record icon to save the setting. The new server name and its IP address are displayed in the Event Server Table. 16 Smart Access Control System Software – User Manual Version 1.0 6.4 Modifying or Deleting a Event Server To modify or delete an existing event server: 1) Select the server in the Event Server Table. The server’s detail will be displayed in the Server Setting frame. 2) To delete the event server, click Delete Record icon in the toolbar. Then click the Yes button of the message box to confirm. 3) After modifying the event server information, click the Save Record icon to save the setting. 6.5 Downloading Data to Server User access list of specific door and door controller information is downloaded to the corresponding event server. To download updated data to the server, click the Download Updated Data button and wait until the operation finish. The data which differs from that inside the server will be downloaded. To download all data into the server, click the Download All Data button and wait until the operation finish. 6.6 Setting Transaction Log Interval The transaction log interval is the time between two consecutive communications between PC and server. The default interval is 5 seconds. To set the transaction log interval, click the Set Transaction Log Interval button and enter the time in terms of seconds, then click Save button. 6.7 Exiting the Server Management Window To exit the Server Management Window, click the Exit icon in the toolbar. A message box will appear if any modified information is not saved. Click the Yes button to save the modified information. 17 Smart Access Control System Software – User Manual Version 1.0 7. Managing Door Controller This section demonstrates how to create, modify, and delete door controller, and how to set the alarm, reader and time zone option through the use of Door Controller Management Window. 7.1 Door Controller Management Window To open the Door Controller Management Window (Figure 10), select Database → Door or click the Setup the Door Database icon in the toolbar of the Main Window. The Door Controller Management Window consists of the following: a b c d e f g Figure 10. Door Controller Management Window 18 Smart Access Control System Software – User Manual Version 1.0 a. Toolbar This area contains buttons that provide access to frequently used commands. b. Door Tab This tab contains fields for displaying and setting the detail of the selected door controller. c. Alarm Tab This tab contains options for setting the alarm of the selected door controller. d. Reader Tab This tab contains options for setting the card reader(s) of the selected door controller. e. Time Zone Tab This tab contains options for setting the time zone and door access scheme of the selected door controller. f. Door Controller Table This table displays a list of door controller(s) and its/their current setting. g. Status Bar This status bar displays the location of current selected door in Door Controller Table and whether any information is modified. 7.2 Adding Door Controller There are several fields to enter for adding a door controller: a. Door Name User specified door name which is easy to remember. b. Server Name It is the name of server which is connected to the door controller. c. Door Number This is the unique door number to locate each door controller from the event server. There are up to 8 door controllers for each event server. d. Continue Open Time It is the time for the door to unlock. The time can be ranged from 1 to 63 seconds. To add a new door controller: 1) In the Door Controller Management Window, click the Door Tab. 2) Click the New Record icon in the Toolbar. 3) Enter the Door Name, Server Name, Door Number and Continue Open Seconds. 19 Smart Access Control System Software – User Manual Version 1.0 4) To reset the information, click the Reset Record icon in the toolbar. 5) After entering the door controller information, click the Save Record icon to save the setting. The door controller setting is displayed in the Door Controller Table. 7.3 Modifying or Deleting a Door Controller To modify or delete an existing door controller: 1) Select the door in the Door Controller Table. The door controller’s detail will be displayed. 2) To delete the door controller, click Delete Record icon in the toolbar. Then click the Yes button of the message box to confirm. 3) After modifying the door controller information, click the Save Record icon to save the setting. 20 Smart Access Control System Software – User Manual Version 1.0 7.4 Configuring the Alarm Option Figure 11. Door Controller Management Window with Alarm Tab enabled User can configure the door controller to make the card reader alarm if unauthorized condition happens. To configure the alarm option: 1) Click the Alarm Tab. 2) Select the door in the Door Controller Table. The door controller’s detail will be displayed. 3) To enable the alarm function, select the Alarm if exceeding Maximum Open Second option button and choose the Max. Open Second. Note If the No Alarm option button is selected, the alarm function is disabled. If the Alarm if exceeding Maximum Open Second option button is selected, the card reader will alarm if the door opening time is more than the Max. Open Second field. Max. Open 21 Smart Access Control System Software – User Manual Version 1.0 Second refers to the maximum door opening time without alarm if the alarm is enabled. 4) To disable the alarm function, select the No Alarm option button. 5) Click the Save Record icon to save the setting. 7.5 Configuring the Reader Option Figure 12. Door Controller Management Window with Reader Tab enabled To configure the reader option: 1) Click the Reader Tab. 22 Smart Access Control System Software – User Manual Version 1.0 2) Select the door in the Door Controller Table. The door controller’s detail will be displayed. 3) If the card reader has the keypad feature, select Yes or No button of the Keypad option button group to control this feature. Else select No button for the Keypad option button. 4) Select Single Door or Double Box option button. Note If the door controller controls a single door, select the Single Door option button to lock once the door has been opened. If the door controller controls a double door, select the Double Door option button to lock the door until the door closes. 5) Click the Save Record icon to save the setting. 23 Smart Access Control System Software – User Manual Version 1.0 7.6 Configuring the Time Zone Option and Door Access Scheme Figure 13 Door Controller Management Window with Time Zone Tab enabled User can specify time zone and door access scheme for a door controller. To configure the time zone option and door access scheme: 1) Click the Time Zone Tab. 2) Select the door in the Door Controller Table. The door controller’s detail will be displayed. 3) Select the time zone scheme from the Time Zone combo box. Note Time zone is a setting of the door’s valid access time. There are up to 128 time zones. For more information of setting up a time zone, please refer to section 10 Managing Time Zone. 24 Smart Access Control System Software – User Manual Version 1.0 4) Select door access scheme. Select the option button of appropriate door access scheme for inside and outside the door’s valid access time. Note If the keypad feature is disabled, the option with a password label will be disabled. 5) Click the Save Record icon to save the setting. 7.7 Exiting the Door Controller Management Window To exit the Door Controller Management Window, click the Exit icon in the toolbar. A message box will appear if any modified information is not saved. Click the Yes button to save the modified information. 25 Smart Access Control System Software – User Manual Version 1.0 8. Managing the User Database This section demonstrates how to create, modify, delete user, and add accessible door(s) through the use of User Management Window. 8.1 User Management Window To open the User Management Window (Figure 14), select Database → User or click the Setup the User Database icon in the toolbar of the Main Window. The User Management Window consists of the following: a e b f c g d h i j Figure 13 User Management Window a. Toolbar This area contains buttons that provide access to frequently used commands. b. Personal Information Frame This frame contains fields for displaying and setting user’s personal information. c. Staff Information Frame 26 Smart Access Control System Software – User Manual Version 1.0 This frame contains fields for displaying and setting user’s staff information. d. Smart Card Information Frame This frame contains fields for displaying and setting user’s access card information. e. Personal Picture Frame This frame contains fields for displaying and setting user’s photo. f. Door Setting Frame This frame contains fields for displaying and setting user’s accessible door information. g. Added Door List Table This table displays a list of servers and doors added for the selected user. h. Door Group Command Buttons This area contains buttons that adds a door group for the selected user and manage door group. For more information, please refer to section 8.6 Managing Door Group. i. User Table This table displays a list of user names and their saved setting. j. Status Bar This status bar displays the location of current selected user in User Table and whether any information is modified. 8.2 Adding User Adding a user involves entering user information and assigning appropriate door(s) to him/her. To add a new user: 1) Click the New Record icon in the Toolbar. 2) Enter the First Name, Last Name and Sex of the user in the Personal Information frame. 3) Enter the Staff Code, Department and Position of the user in the Staff Information frame. If a user with the department name or position is added before, you can choose these fields from the combo boxes. 4) Enter the Card ID, Password and optional Expiration Date in the Smart Card Information frame. The password is necessary if the keypad feature is enabled. If the check box in Expiration Date field is selected, the function of user’s card will be disabled after that date. Note The card ID can be retrieve from card by placing the card on the card reader after clicking the From Reader button, or by clicking the From Log, the card ID will be retrieved from the latest invalid door transaction. In other words, system user can click the From 27 Smart Access Control System Software – User Manual Version 1.0 Reader button and then present the card to the card reader of the PC, or placing the card to card reader of any door and then click the From Log button to retrieve the card ID. 5) User’s photo can be added optionally. In the Personal Picture frame, click Browse button to insert the photo. To remove the photo, click the Remove button. 6) Select an event server from the server combo box. A list of door(s) is displayed in the Door List in the Door Setting frame. To add a door for the user, Double click on the specific door in the Door List or select a door from the Door List and click > button. To add all door(s) of the selected server for the user, click >> button. If door(s) of another event server is/are needed to add, select another event server from the server combo box and repeat this step. Note For a large organization, you can add group of doors to the users having the same department or position to minimize the management time. For more information, please refer to section 8.6 Managing Door Group. 7) To remove door(s) from the added door list, select a door from the Added Door List Table and click < button to remove the added door, or click << button to remove all added door(s). 8) The time zone setting of each door can be changed here instead of using the Door Controller Management Window. Double click on the required door in the Added Door List Table to select the time zone and click OK button. 9) To reset the information, click the Reset Record icon in the toolbar. 10) After entering the door controller information, click the Save Record icon to save the setting. The door controller setting is displayed in the Door Controller Table. 28 Smart Access Control System Software – User Manual Version 1.0 8.3 Modifying or Deleting a User To modify or delete an existing user: 1) Select the user in the User Table. The user’s detail will be displayed. 2) To delete the user, click Delete Record icon in the toolbar. Then click the Yes button of the message box to confirm. 3) After modifying the user information, click the Save Record icon to save the setting. 8.4 Browsing Users Information To browse all user information, you can click the Browse button which is located below the Smart Card Information frame. The following window will appear. Figure 14. User Information Window The content of User Table is displayed in the User Information Window. You can search the user information by selecting the searching field and enter search text, followed by clicking the Search button. 29 Smart Access Control System Software – User Manual Version 1.0 To select a user to edit, double click on the required row. The User Information Window will close and the user’s detail will be displayed in the Door Controller Management Window. 8.5 Exiting the Door Controller Management Window To exit the Door Controller Management Window, click the Exit icon in the toolbar. A message box will appear if any modified information is not saved. Click the Yes button to save the modified information. 8.6 Managing Door Group This section demonstrates how to create, modify, and delete door group, add accessible door group(s) to each user and how to manage door group through the use of Door Group Management Window and Select Door Group Window. 8.7 Door Group Management Window We can create, modify, and delete door group in Door Group Management Window. To enter this window, click the Preset Group button in the User Management Window. The Door Group Management Window consists of the following: 30 Smart Access Control System Software – User Manual Version 1.0 a b c d e Figure 15. Door Group Management Window a. Toolbar This area contains buttons that provide access to frequently used commands. b. Door Group Name This field is system user provided door group name. c. Door Group Setting Frame This frame contains a Server combo box, Door List, Added Door List Table and few buttons to allow system user to add/delete door(s) to/from group. d. Door Group Table This table displays a list door group names. e. Status Bar This status bar displays the location of current door group in Door Group Table and whether any information is modified. 8.8 Adding Door Group To add a new door group: 1) Click the New Record icon in the Toolbar. 31 Smart Access Control System Software – User Manual Version 1.0 2) Enter the Door Group Name. 3) Select an event server from the server combo box. A list of door(s) is displayed in the Door List of the Door Group Setting frame. To add a door into the group, Double click on the specific door in Door List or select the door from the Door List and click > button. To add all door(s) of the selected server into the group, click >> button. If door(s) of another event server is/are needed to add, select another event server from the server combo box and repeat this step. 4) To remove door(s) from the added door list, select a door from the Added Door List Table and click < button to remove the added door, or click << button to remove all added door(s). 5) The time zone setting of each door can be changed. Double click on the required door in the Added Door List Table to select the time zone and click OK button. 6) To reset the information, click the Reset Record icon in the toolbar. 7) After entering the door group information, click the Save Record icon to save the setting. The new door group name is displayed in the Door Group Table. 8.9 Modifying or Deleting a Door Group To modify or delete an existing door group: 1) Select the group in the Door Group Table. The door group’s detail will be displayed. 2) To delete the door group, click Delete Record icon in the toolbar. Then click the Yes button of the message box to confirm. 3) After modifying the door group information, click the Save Record icon to save the setting. 32 Smart Access Control System Software – User Manual Version 1.0 8.10 Exiting the Door Group Management Window To exit the Door Group Management Window, click the Exit icon in the toolbar. A message box will appear if any modified information is not saved. Click the Yes button to save the modified information. 8.11 Select Door Group Window In Select Door Group Window, we can add a group of door(s) to each user. To enter this window, click the Select Group button in the User Management Window. The Select Door Group Window consists of the following: a b Figure 16. Select Door Group Window a. Door Group Table This table displays a list door group names to add for each user. b. Door Group Setting Frame This frame contains a Server combo box, Door List and Added Door List Table to allow user to view the door(s) of each group. 33 Smart Access Control System Software – User Manual Version 1.0 8.12 Add Door Group to User To add a group of door to user, double click the door group name in the door group table. The Select Door Group Window will close and the door group is added. 34 Smart Access Control System Software – User Manual Version 1.0 9. Controlling Door Manually The ACS software can monitor the status of each door and control it when special condition happens. System user can control the lock and alarm of each door through the use of Manual Door Control Window. 9.1 Manual Door Control Window The Manual Door Control Window consists of the following: a b c Figure 17. Manual Door Control Window a. Door List This area contains a list of door and event server names. b. Door Control Buttons This area contains command buttons to manually control the door c. Door Status List This area contains a list of status of door and event servers. 9.2 Unlocking door To unlock a door: 1) Select the required door from the door list. 2) Click the Unlock Door button. The status of the selected door will show the door is unlocked. 35 Smart Access Control System Software – User Manual Version 1.0 9.3 Stopping alarm of a door To stop the alarm of a door: 1) Select the required door from the door list. 2) Click the Stop Alarm button. The status of the selected door will show the door’s alarm is stopped. 9.4 Exiting the Manual Door Control Window To exit the Manual Door Control Window, click the Exit button. 36 Smart Access Control System Software – User Manual Version 1.0 10. Managing Time Zone Time zone is a setting of the door’s valid access time. A time zone can apply to both user and door setting. There are up to 128 time zones. Each time zone has 8 days, including Sunday to Saturday and holidays. And each day is divided into 96 time slots with 15 minutes a slot. System user can configure each time slot of each time zone through the use of Time Zone Management Window. 10.1 Time Zone Management Window To open the User Management Window (Figure 18), select Database → Time Zone or click the Setup the Time Zone Database icon in the toolbar of the Main Window. The Time Zone Management Window consists of the following: b a d e c Figure 18. Time Zone Management Window a. Time Zone List This area contains a list of time zone. b. Time Slot Table This table displays the time slot setting of the selected time zone. Each cell in the table 37 Smart Access Control System Software – User Manual Version 1.0 represents a 15 minutes time slot. c. Time Zone Name This field is for system user to input the specific Time Zone Name. d. Time Zone Setting Buttons This area contains buttons for the save, reset, and exit command. e. Status Bar This status bar displays the location of current selected Time zone in Time Zone List and whether any information is modified. 10.2 Modifying a Time Zone To modify a time zone: 1) Select the required time zone from the time zone list. The saved setting will be displayed in the Time Slot Table. 2) Modify the Time Zone Name. 3) Modify the Time Slot Table by selecting/deselecting the appropriate cell(s). A cross mark ( X ) in the cell means the cell is selected and the door/user for the time zone to be added is accessible in that time slot. Highlight the appropriate cell(s) and right click to choose Select/Deselect the cell(s) from the pull down menu. 4) To reset the information, click the Reset button. 5) Click the Save button to save the change(s). 10.3 Exiting the Time Zone Management Window To exit the Time Zone Management Window, click the Exit button. 38 Smart Access Control System Software – User Manual Version 1.0 11. Adding Holiday System user can specify holiday(s) for his/her organization using the Holiday Management Window. Then he/she can configure the holiday time slots in the Time Zone Management Window. 11.1 Holiday Management Window To open the Holiday Management Window (Figure 19), select Database → Holiday or click the Setup the Holiday Database icon in the toolbar of the Main Window. The Holiday Management Window consists of the following: a b c d e Figure 19. Holiday Management Window a. Holiday Check Box This area contains check boxes to enable a holiday. 39 Smart Access Control System Software – User Manual Version 1.0 b. Holiday Name / Remark This field is for system user to input the holiday name or remark of holiday. c. From Date This area contains the starting day of holiday. d. To Date This area contains the ending day of holiday. e. Holiday Setting Buttons This area contains buttons for the save, reset, and exit command. 11.2 Adding a holiday To add a holiday record: 1) Select the Holiday X check box to enable specific holiday, where X is the holiday number. 2) Enter the Holiday name, starting day and ending day (From Date and To Date). 3) To reset the information, click the Reset button. 4) Click the Save button to save the setting. 11.3 Modifying, disabling and deleting record To modify, disable and delete a holiday record: 1) Modify the Holiday name, starting day and ending day (From Date and To Date). 2) To disable, deselect the Holiday X check box, where X is the holiday number. 3) To reset the information, click the Reset button. 4) Click the Save button to save the change(s). 11.4 Exiting the Holiday Management Window To exit the Holiday Management Window, click the Exit button. 40 Smart Access Control System Software – User Manual Version 1.0 12. Maintaining Database The transaction record and user information are stored in database. To allow the data to be exchangeable, the ACS software offers database migration tools through the use of Database Maintenance Window. Also, it is a good practice for the system administrator to monitor the database size to ensure the effectiveness of software and backup the database periodically to reduce the chance of data loss. 12.1 The Database Maintenance Window To open the Database Maintenance Window (Figure 20), select Database → Database Modification in the Main Window. The Database Maintenance Window consists of the following: a b Figure 20. Data Maintenance Window a. Transaction Database Frame The area contains buttons to import, export and delete the transaction database. b. User Database Frame The area contains buttons to import, export and delete the user database. 41 Smart Access Control System Software – User Manual Version 1.0 12.2 Importing Transaction Database To import transaction from a text file: 1) Click the Import button in the Transaction Database frame to open the Import Transaction Window. The Import Transaction Window consists of the following: b a c d e Figure 21. Import Transaction Window a. Import File Path This field is for system user to input the path of importing file. b. Import and Exit Button This area contains buttons for the import and exit command. c. Progress Bar This area contains progress bar to monitor the progress of database import. d. Delimiter Frame This area contains option buttons of Delimiter. Delimiter is a character to separate the columns of database table. e. Text Qualifier Frame This area contains option buttons of Text Qualifier. Text Qualifier is a character to determine the start and the end of a text string. 2) Enter the Import File Path or click the Browse icon to locate the database file. 42 Smart Access Control System Software – User Manual Version 1.0 3) Select the Delimiter and Text Qualifier option buttons to tell the software the format of the importing file. Note The Delimiter is a character to separate columns of database table while the Text Qualifier is a character to determine to the start and the end of a text string. System User should be aware of the format of importing text file. 4) Click the Import button and wait until the progress bar shows the importation is finished. 5) Click Exit button to exit the window. 12.3 Exporting Transaction Database To export transaction to a text file: 1) Click the Export button in the Transaction Database frame to open the Export Transaction Window. The Export Transaction Window consists of the following: a c b d e f Figure 22. Export Transaction Window a. Date The area contains fields for system user to specific the starting and ending days of the transaction record to be exported. b. Export File Path 43 Smart Access Control System Software – User Manual Version 1.0 This field is for system user to input the path of exporting file. c. Export and Exit Button This area contains buttons for the export and exit command. d. Progress Bar This area contains progress bar to monitor the progress of database export. e. Delimiter Frame This area contains option buttons of Delimiter. Delimiter is a character to separate columns of database table. f. Text Qualifier Frame This area contains option buttons of Text Qualifier. Text Qualifier is a character to determine to the start and the end of a text string. 2) Enter the starting and ending date for database export. 3) Enter the Export File Path or click the Browse icon to locate the database file. 4) Select the Delimiter and Text Qualifier option buttons to tell the software the format of the exporting file. 5) Click the Export button and wait until the progress bar shows the exportation is finished. 6) To cancel to exportation, click Exit button to exit the window. 12.4 Deleting Transaction Database System administrator can delete different kinds of transaction record of a period from database. To delete transaction record from database: 1) Click the Delete button in the Transaction Database frame to open the Delete Transaction Window. The Delete Transaction Window consists of the following: 44 Smart Access Control System Software – User Manual Version 1.0 a b c Figure 23. Delete Transaction Window a. Date The area contains fields for system user to specific the starting and ending days of the transaction record to be deleted. b. Transaction Type Check Boxes This area contains check boxes of different kinds of transaction record. c. Remove and Exit Buttons This area contains buttons for the remove and exit command. 2) Enter the starting and ending date. 3) Select the required type the transaction record. 4) Click the Remove button and click Yes button to confirm. 5) Click Exit button to exit the window. 12.5 Importing User Record To import user record from a text file: 1) Click the Import button in the User Database frame to open the Import User Record Window. The Import User Record Window consists of the following: 45 Smart Access Control System Software – User Manual Version 1.0 a b c d e f g h i Figure 24. Import User Record Window a. Import File Path This field is for system user to input the path of importing file. b. Import and Exit Button This area contains buttons for the import and exit command. c. Door Groups This area contains chosen door groups to be added to the importing user. d. Delimiter Frame This area contains option buttons of Delimiter. Delimiter is a character to separate columns of database table. e. Text Qualifier Frame This area contains option buttons of Text Qualifier. Text Qualifier is a character to determine to the start and the end of a text string. f. Card ID Match Frame 46 Smart Access Control System Software – User Manual Version 1.0 This area contains option buttons to determine whether an existing user record is updated with an importing user record if their card IDs are the same. g. Update Items Frame This area contains check boxes to select which kind(s) of information is/are included when updating. h. Record With Different Card ID Frame option button This area contains option buttons to determine whether to create a new record for an importing record which card ID is different with those of existing records. i. Log File Path This field is for system user to input the path of database importation logging file. 2) Enter the Import File Path or click the Browse icon to locate the database file. 3) Select to add any door group to the importing users. 4) Select the Delimiter and Text Qualifier option buttons to tell the software the format of the importing file. 5) Select the required option button in the Card ID Match frame and select the required check box(es) in the Update Items frame. 6) Select the required option button in the Records With Different Card ID frame. 7) Enter the Log File Path by typing or click the Browse icon to locate the file. 8) Click the Import button and wait until the progress bar shows the importation is finished. 9) Click Exit button to exit the window. 12.6 Exporting User Record To export user record to a text file: 1) Click the Export button in the User Database frame to open the Export User Record Window. The Export User Record Window consists of the following: 47 Smart Access Control System Software – User Manual Version 1.0 a b c d e Figure 25. Export User Record Window a. Export User Option The area contains option buttons to select whether to export user to different files whose are separated by different door or department. b. Export and Exit Button This area contains buttons for the export and exit command. c. Progress Bar This area contains progress bar to monitor the progress of database export. d. Delimiter Frame This area contains option buttons of Delimiter. Delimiter is a character to separate columns of database table. e. Text Qualifier Frame This area contains option buttons of Text Qualifier. Text Qualifier is a character to determine to the start and the end of a text string. 2) Select Export All User To One File to output one file, or select to export users to different files by their department or each door. 3) Select the Delimiter and Text Qualifier option buttons to tell the software the format of the exporting file. 48 Smart Access Control System Software – User Manual Version 1.0 4) Click the Export button and wait until the progress bar shows the exportation is finished. Note The exporting file(s) will be located in the DataFile folder under the destination folder which is specified during installation. The default path of the exporting fils(s) is: C:\Program Files\AccessControl\DataFile 5) To cancel to exportation, click Exit button to exit the window. 12.7 Deleting User Record To delete user record(s) from database: 1) Click the Delete button in the User Database frame to open the Delete User Record Window. The Delete User Record Window consists of the following: b a c d Figure 26. Delete User Record Window a. Delete User Option The area contains combo boxes to list the users who meet the selecting criteria. b. Delete and Exit Button This area contains buttons for the delete and exit command. c. User List 49 Smart Access Control System Software – User Manual Version 1.0 This area lists the user(s) who meet(s) the selected criteria in Delete User Option. d. Select All User Button This button is for selecting all users in the User List. 2) Select Delete Option by choosing the required group and data. A list of user(s) satisfying the option is displayed. 3) Select the user(s) to be deleted in the User List. Click Select All User button to select all users. 4) Click the Delete button and enter your administrator password to confirm. 5) Click Exit button to exit the window. 50 Smart Access Control System Software – User Manual Version 1.0 13. Managing Reports The ACS software features a reporting function to generate formatted, readable report of user required information. 13.1 The Door Transaction Report The door transaction report generates report with respect to the door name. To open the Door Transaction Report Window (Figure 27), select Report → Door Transaction Report or click Door Transaction Report from the pull down menu beside the Generate Report icon in the toolbar of the Main Window. The Door Transaction Report Window consists of the following: a b c Figure 27. Door Transaction Report Window a. Information Display Option The area contains combo boxes to list the sorted transaction records which meet the selecting criteria in specified period. b. List, Report and Exit Button This area contains buttons for the list, report and exit command. c. Preview List 51 Smart Access Control System Software – User Manual Version 1.0 This area contains preview of specified transaction records. To generate the door transaction report: 1) Select the Period, Sort By and List By option in the Information Display Option. Note The Sort By option control the order of displaying record while the List By option limits which record to be displayed. 2) Click the List button. A preview of report with your specified information will be displayed on the preview list. 3) Click Report button to generate a report (Figure 28). Or repeat step 1 if the information of preview list is not suitable. 4) Click the Print icon to print out the report, or click the Export icon to export to an html file. Figure 28. Door Transaction Report 52 Smart Access Control System Software – User Manual Version 1.0 13.2 The User Information Report The user information report generates report of a list of user details. To open the User Information Report Window (Figure 29), select Report → User Information Report or click User Information Report from the pull down menu beside the Generate Report icon in the toolbar of the Main Window. The User Information Window consists of the following: a b c Figure 29. User Information Report Window a. Information Display Option The area contains combo boxes to list and sort users. b. List, Report and Exit Button This area contains buttons for the list, report and exit command. c. Preview List This area lists the user(s) who meet(s) the selected criteria in Information Display Option. To generate the user information report: 1) Enter the List By option to select the user record to list. And choose the Sort By option to decide the display order. 53 Smart Access Control System Software – User Manual Version 1.0 2) Click the List button. A preview of report with your specified information will be displayed on the preview list. 3) Click Report button to generate a report (Figure 30). Or repeat step 1 if the information of preview list is not suitable. 4) Click the Print icon to print out the report, or click the Export icon to export to an html file. Figure 30. User Information Report 13.3 The User In Out Transaction Report The user in out transaction report generates report with respect to user name. To open the User Information Report Window (Figure 31), select Report → User In Out Transaction Report or click User In Out Transaction Report from the pull down menu beside the Generate Report icon in the toolbar of the Main Window. 54 Smart Access Control System Software – User Manual Version 1.0 The User In Out Transaction Window consists of the following: a b c Figure 31. User In Out Transaction Report Window a. Information Display Option The area contains combo boxes to list and sort users. b. List, Report and Exit Button This area contains buttons for the list, report and exit command. c. Preview List This area contains preview of specified transaction records. To generate the User In Out report: 1) Select the Period, Sort By and List By option in the Information Display Option. Note The Sort By option control the order of displaying record while the List By option limits which record to be displayed. 2) Click the List button. A preview of report with your specified information will be displayed on the preview list. 55 Smart Access Control System Software – User Manual Version 1.0 3) Click Report button to generate a report (Figure 32). Or repeat step 1 if the information of preview list is not suitable. 4) Click the Print icon to print out the report, or click the Export icon to export to an html file. Figure 32. User In Out Transaction Report 13.4 The Month In Out Report The Month In Out report generates monthly report of a user’s transactions. To open the User Information Report Window (Figure 33), select Report → Month In Out Report or click Month In Out Report from the pull down menu beside the Generate Report icon in the toolbar of the Main Window. 56 Smart Access Control System Software – User Manual Version 1.0 The Month In Out Window consists of the following: b a c d e f Figure 33. Month In Out Report Window a. Toolbar This area contains buttons that provide access to frequently used commands. b. List Button This area contains button for the list command. c. Information Display Option The area contains combo boxes to list and sort users. d. Preview List This area lists the daily information with the selected criteria in Information Display Option. e. User List This area lists the users. f. Status Bar This status bar displays the location of current selected user in User List and his/her name and department. To generate the User In Out report: 1) Select the month and List By option in the Information Display Option. The From to To dates should be the first and last days of the month, respectively. 57 Smart Access Control System Software – User Manual Version 1.0 2) Click the List button. User details are displayed in user list. 3) Click Next or Previous button to until the required user name is displayed in the status bar. The preview of report with that user will be display on the preview list. 4) Click Report button to generate a report (Figure 34). Or repeat step 1 if the information of preview list is not suitable. 5) Click the Print icon to print out the report, or click the Export icon to export to an html file. Figure 34. Month In Out Report 58