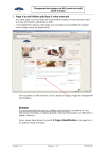
1
ONLINE Join us! www.iru.org User Manual IRU Academy Accredited Training Institutes (ATIs) Worldwide professional excellence in road transport IRU Academy Online AOL USER MANUAL FOR IRU ACADEMY ACCREDITED TRAINING INSTITUTES (ATIS) This User Manual is in addition to the Computer Based Training (CBT) package on the use of the IRU Academy Online made available to your ATI. COPYRIGHTS 1. 2. All contents of this publication, its idea and scheme, logos, trademarks, etc. are protected worldwide by copyright and other intellectual property rights. Any translation, representation, copy, reproduction, dissemination or use of all or part of this publication, in any form by any means, without prior written permission of the Head – IRU Academy of the International Road Transport Union (IRU), is illegal. Offenders make themselves liable to legal proceedings and sanctions. DISCLAIMERS 3. Though the information contained in this publication has been elaborated with the greatest care, the IRU does not guarantee that there are no errors, omissions nor does it provide any other warranty or make any representations as to the accuracy, reliability, exhaustiveness or up-to-dating of the contents of the publication. The IRU hereby disclaims any liability or responsibility arising from the use of the information or data contained in this publication. Consequently: - the user hereby is aware and agrees that neither the IRU, nor any other party or anyone cooperating with the IRU on a voluntary or paid basis, shall be liable for the contents of this publication and its use and shall not in any way be liable for any loss or damage whatsoever, including the inappropriate, improper or fraudulent use of this publication, - no user should act on the basis of this publication without referring to the ADR Agreement and national Dangerous Goods regulations in force and/or applicable international transport conventions and national regulations. 4. The mention of companies or partners in this publication does not imply that they are endorsed or recommended by the IRU in preference to others. 5. The designation of countries, territories, cities and the presentation of related material in the present studies shall not be considered as implying any standpoint whatsoever on the part of the IRU concerning the political or legal status of any country, territory or city, or of its authorities, or concerning the delimitation of its frontiers or boundaries. International Road Transport Union (IRU), IRU Academy 3, rue de Varembé, B.P. 44 1211 Geneva 20 Switzerland © 2014 International Road Transport Union (IRU). All rights reserved. Printed July 2014, Geneva Page 2 of 182 pages Table of Contents 1 2 3 4 5 6 Access, Login and Homepage ............................................................................................... 5 1.1 Access ............................................................................................................................ 5 1.2 Login ............................................................................................................................... 6 1.2.1 Login as a New Training Institute ..................................................................... 6 1.2.1.1 Entry of a New Contact Person ....................................................... 19 1.2.1.2 Copying of a Previously Entered Contact Person ........................... 23 1.2.1.3 Completing the Training Institute’s Contact Persons Entry ............. 24 1.2.2 Login as an Existing Accredited Training Institute .......................................... 24 1.3 ATI Homepage ............................................................................................................. 26 1.3.1 Navigation ....................................................................................................... 27 1.3.2 Contact IRU Academy .................................................................................... 27 1.3.3 Logout ............................................................................................................. 27 1.4 Change Password ........................................................................................................ 28 Accreditation Process .......................................................................................................... 29 2.1 New Training Institutes ................................................................................................. 29 2.1.1 Start New Accreditation – New Training Institutes ......................................... 30 2.1.1.1 Entry of a New Contact Person ....................................................... 42 2.1.1.2 Copying of a Previously Entered Contact Person ........................... 46 2.1.1.3 Completing the Training Institute’s Contact Persons Entry ............. 47 2.1.2 Start New Accreditation – Existing Training Institutes .................................... 49 2.2 Existing Training Institutes ........................................................................................... 53 2.2.1 Entry of a New Instructor ................................................................................ 55 2.2.2 Copying of an Existing Instructor .................................................................... 58 2.3 Accreditation Questions ............................................................................................... 62 2.4 Training Fees and ATI Agreement ............................................................................... 70 2.5 Payment of the Accreditation Fee ................................................................................ 74 2.5.1 Settlement of Accreditation Fees by Credit Card Payments .......................... 75 2.6 ATI Completion of the Accreditation Process .............................................................. 78 2.7 IRU Academy Completion of the Accreditation Process .............................................. 82 Staff Management ................................................................................................................. 83 3.1 Add a Staff Member ..................................................................................................... 85 3.2 Modify a Staff Member ................................................................................................. 86 3.3 Delete a Staff Member ................................................................................................. 88 3.4 (Re-)Assign Role to a Staff Member ............................................................................ 89 3.5 Scan and Attach General Manager’s Signature After Accreditation ............................ 91 Instructor Management (After Accreditation) .................................................................... 98 4.1 Adding New Instructor After Accreditation ................................................................. 100 4.2 Removing an Instructor After Accreditation ............................................................... 103 4.3 Changing an Instructor After Accreditation ................................................................ 106 Class Management ............................................................................................................. 109 5.1 Create a New Class ................................................................................................... 110 5.2 View or Modify a Class ............................................................................................... 113 5.2.1 “Students in Class” ....................................................................................... 115 5.3 Delete a Class ............................................................................................................ 116 Student Management.......................................................................................................... 117 6.1 Create a Student ........................................................................................................ 118 6.1.1 Create New Student – Student Profile screen .............................................. 118 6.1.1.1 First Column: Personal Data ......................................................... 119 6.1.1.2 Second Column: Professional Data .............................................. 120 6.1.1.3 Student Profile – Completed ......................................................... 121 6.1.2 Student “From Another ATI” ......................................................................... 122 6.2 Modify an Existing Student......................................................................................... 124 6.2.1 “Quick Student Selector”............................................................................... 124 6.2.2 List of Students ............................................................................................. 125 Page 3 of 182 pages 7 8 9 10 11 12 13 14 15 6.2.2.1 Hide Diploma, Close Web Site Check Boxes................................ 125 6.2.2.2 Diploma ID ..................................................................................... 127 6.2.2.3 Student ID – Student Profile screen .............................................. 128 6.2.2.4 “Student Profile” Third Column: Graduate Data ............................ 129 6.2.2.5 “View the Graduate Private Page” ................................................ 129 6.2.2.5.1 “Certificates/Diplomas” .......................................................................... 130 6.2.2.5.2 “Previous Enrollments” .......................................................................... 131 6.3 Delete a Student......................................................................................................... 132 Add (Enroll) a Student to a Class ...................................................................................... 132 7.1 Add a Student from Class Management .................................................................... 132 7.1.1 “Add New Student” Box ................................................................................ 133 7.2 Add (Enrol) a Student from Student Profile Page ...................................................... 136 End of Class Actions: Student Results, Printing ............................................................ 137 8.1 Enter Student Results ................................................................................................ 137 8.2 Print Diplomas and Joining Letters ............................................................................ 139 8.2.1 Print Certificates/Diplomas ........................................................................... 140 8.2.2 Print Joining Letter ........................................................................................ 141 List of Transactions ............................................................................................................ 142 9.1 “Transactions Selector” .............................................................................................. 142 9.2 “List of Transactions” .................................................................................................. 143 ATI Agreement and Resulting Obligations....................................................................... 144 10.1 Produce Annex B of the New IRU Academy ATI Agreement .................................... 145 Import of Students in AOL ................................................................................................. 148 11.1 Preparing the Students’ Data File for Import in AOL.................................................. 148 11.1.1 Student and Card Data Specifications .......................................................... 148 11.1.2 Data File Format and Limitations .................................................................. 151 11.2 Editing the Students’ Data File ................................................................................... 152 11.3 Importing the Students’ Data File ............................................................................... 153 11.3.1 Massive Students Import, Without Enrolment Into a Class .......................... 153 11.3.1.1 Sending the Student Data File for Import ...................................... 154 11.3.1.2 Actual Import of the Students Data File ........................................ 157 11.3.1.3 Enrolment of Imported Students in ATI’s Classes......................... 158 11.3.2 Direct Students Import and Enrolment Into a Class ..................................... 160 11.3.2.1 Creating a Class Where Imported Students Should be Enrolled .. 160 11.3.2.2 Checking the Students’ Data File for Existing Students ................ 164 11.3.2.3 Actual Import of the Students Data File and Direct Students’ Enrolment into the Class ............................................................................... 165 Export of Graduates from AOL .......................................................................................... 166 12.1 Understanding AOL Export Data Files ....................................................................... 166 12.1.1 Graduate Data Specifications ....................................................................... 166 12.1.2 Data File Format ........................................................................................... 168 12.1.3 Editing the Graduate and Card Data File ..................................................... 169 12.2 Exporting Graduate and Card Data from AOL ........................................................... 170 Scanning and Attaching Official Authority / Examination Body Signatures on IRU Academy Certificates / Diplomas ......................................................................... 174 Adding Barcodes on IRU Academy Certificates / Diplomas .......................................... 179 Direct Certificate / Diploma Veracity Check ..................................................................... 180 15.1 Direct Check using the ‘Check Qualification Certificate’ Function ............................. 181 15.2 Direct Check using the Certificate / Diploma GS1 QR Barcode ................................ 182 Page 4 of 182 pages 1 Access, Login and Homepage 1.1 Access To start using Academy On-Line, you need the following: A computer running Internet Explorer 6.0 or higher An internet connection Adobe Acrobat 6.0 or higher (to print Certificates/Diplomas). First connect to https://demo.iruacademyonline.com. The following screen will appear: Academy Homepage NOTE: Be sure to disable any pop-up blocking software, otherwise you will not be able to display the AOL screens. Pop-up blockers often come with customised toolbars such as those supplied by Yahoo, Google, etc. You need to either disable all of them or press <CTRL F5>, which bypasses ALL pop-up blockers. Page 5 of 182 pages 1.2 Login To Login, you must have a User Name and Password. The way you log into AOL v3.0 depends on whether you are logging in as a new Training Institute for the first time (without being accredited for any IRU Academy programme), or as an already existing (Accredited) Training Institute, when you can login into the AOL “ATI Module”. 1.2.1 Login as a New Training Institute If you are a training institute interested in becoming accredited for any of the IRU Academy programmes, you need to: go to the AOL v3.0 Homepage (at URL: https://www.iruacademyonline.com) click on the “ATI Accreditation Module” button. AOL will display the ATI login page: Page 6 of 182 pages Select the “This is my First Time on this web site” radio-button, enter your valid “Email” address and click on the “Continue” button: AOL displays the ATI Accreditation “Section I Introduction” screen tab: Page 7 of 182 pages To identify yourself as a representative of the training institute interested in becoming accredited for an IRU Academy programme, select your “Title”, enter your “Name”, “First Name”, “Job Title”, “Telephone” number, “Mobile” telephone number, then click on the “Submit & Continue” button: AOL immediately sends you a ‘New AOL Login Account Information’ on the e-mail you have indicated in the “Section I Introduction” screen tab and displays a message to check the email for your login information: Click on the “OK” button to close the message and return to the AOL Homepage: To proceed with starting the accreditation process, check your e-mail (indicated in the previous step) where you should find an ‘Activate your IRU Academy On-Line (AOL) Accreditation Account – New AOL Login’ message received from [email protected]: Page 8 of 182 pages Open this e-mail message and you will find the automatically-generated first time ‘User Name’ and ‘Password’ which you should use for login into the AOL ATI Accreditation Module in order to start the accreditation process: You will then need to use the details given in the ‘Activate your IRU Academy On-Line (AOL) Accreditation Account – New AOL Login’ message to logon to the AOL ATI Accreditation Module by selecting the “I am a Staff Member of an already Accredited Training Institute (ATI) or an Institute which has started the accreditation process” radiobutton, entering the “User Name” and “Password” provided to you in the e-mail message and by clicking on the “Continue” button: Page 9 of 182 pages AOL will display the ATI Accreditation “Section I Introduction” screen tab completed with the details you have entered previously and with the (automatically-generated) “User Name” and “Password” (same as in the e-mail received on the account you indicated): Click on the “Submit & Continue” button to start the accreditation process as a new ATI. AOL will take you to the “Programme Selection” page: Page 10 of 182 pages Select the “Programme” and “Course” you want to start the accreditation process for, indicate the estimated number of students your training institute expects to have for the selected programme and course during the current and the next 2 calendar years, then click on the “Submit & Continue” button: AOL displays an empty “Section II Training Institute” screen tab: Page 11 of 182 pages Enter your training institute details, select the appropriate ‘Branch’ radio-button and click on the “Submit & Insert Logo” button: AOL will then take you to the “Submit your Training Institute (TI) logo” page: Page 12 of 182 pages To attach your training institute’s logo, click on the “Browse” button above the “Attach Positive Logo File” button, then select the location and the file (required format: *.jpg or *.gif, maximum size 356*290 pixels) and click on the “Attach Positive Logo File” button. You also have the possibility of attaching the negative of your training institute’s logo if you wish. To do so, follow the same procedure as described for attaching a positive file by using the “Browse” and “Attach Negative Logo File” buttons instead. Complete the required information on the “Submit your Training Institute (TI) logo” page and click on the “Submit” button to continue: AOL displays a message asking you to contact an IRU Academy Administrator in order to proceed further with the accreditation request: Click on the “OK” button to close the message and return to the AOL Homepage: Page 13 of 182 pages At the moment you see this message on your screen the IRU Academy receives an automatic e-mail from AOL, informing it that your training institute intends to start the accreditation process for the programme and course you have selected. The IRU Academy will then need to allow you to continue the accreditation process and will inform you accordingly once this is done. You will then need to login into the AOL ATI Accreditation Module once again with the details given in the ‘Activate your IRU Academy On-Line (AOL) Accreditation Account – New AOL Login’ message by selecting the “I am a Staff Member of an already Accredited Training Institute (ATI) or an Institute which has started the accreditation process” radio-button, entering the “User Name” and “Password” provided to you in the e-mail message and by clicking on the “Continue” button: AOL will display the ATI Accreditation “Section II Training Institute” screen tab completed with the details you have entered previously: Page 14 of 182 pages Click on “Submit & Insert Logo” and AOL will display the “Submit your Training Institute (TI) logo” page as you have completed it in the previous step: Page 15 of 182 pages Click on the “Submit” button to continue and AOL will display the ‘Section III Authorities’ screen tab, allowing you to enter data about the official authority and examination body related to the programme and course you want to become accredited for: If there is no Examination Body designated in your country for the programme and course you want to become accredited for, make sure you have selected the “There is no Examination Body” check box. Enter your country’s Official Authority and responsible person details, then click on the “Submit & Continue” button: Page 16 of 182 pages In case you have left the “There is no Examination Body” check-box unselected, AOL will display the ‘Section III Authorities’ screen tab, allowing you to enter data about the examination body related to the programme and course you want to become accredited for: Enter your country’s Examination Body and responsible person details, then click on the “Submit & Continue” button: Page 17 of 182 pages AOL will display the ‘Section III Authorities’ screen tab, allowing you to enter data about your training institute’s contact persons and their responsibilities: N.B. For each programme your training institute wants to become accredited by the IRU Academy you need to indicate the General Manager, Programme Manager, Liaison Person, Finance Manager and Principal AOL Administrator. You will normally have the same person as the training institute’s General Manager, but the other functions may be held by different persons based on the programme. One and the same contact person of the training institute can hold several functions at the same time (e.g. it can happen that the Principal AOL Administrator is also the Programme Manager and the Liaison Person, while the General Manager is also the Finance Manager). Note that ONLY YOUR training institute’s GENERAL MANAGER AND PRINCIPAL AOL ADMINISTRATOR CAN ENTER / CHANGE DATA in the AOL ATI Accreditation Module. All other persons (Programme Manager, Liaison Person and Finance Manager) can only access and modify their own data in the AOL ATI Accreditation Module, while they can use all the functions of the ATI Module. There are two ways of entering data about each of your training institute’s contact persons concerned with the accreditation: entry of a new contact person details under a role copying of previously-entered contact person details Page 18 of 182 pages 1.2.1.1 Entry of a New Contact Person For each of your training institute’s persons connected with the accreditation process (General Manager, Programme Manager, Liaison Person, Finance Manager, Principal AOL Administrator): 1) enter the contact information and, if necessary, click on the “Insert Signature” button: 2) Click on the “Print Signature Form” button to produce a PDF signature form with instructions on how to attach signatures: Page 19 of 182 pages 3) Print the PDF form, have it signed by the person in the ‘Signature Box’, then scan the signed form and save the scanned image on your PC / network: Page 20 of 182 pages 4) After having selected the file containing the scanned signature using the “Browse” button, click on the “Attach Signature File” button and AOL will display the attached signature on the page: 5) Click on the “Submit & Continue” button and AOL will save all details of the new contact person you have just entered and display the ‘Section III Authorities’ screen tab, allowing you to enter data about your training institute’s next contact persons in the same way as described above (in the case, the next contact person details you are expected to enter are those of your training institute’s Programme Manager): Page 21 of 182 pages 6) Continue entering details of your training institute’s next contact person concerned with the programme you want to become accredited for – in the same way as described above in points 1-5, or by copying a previously entered contact person, as described below (section 1.2.1.2). Page 22 of 182 pages 1.2.1.2 Copying of a Previously Entered Contact Person To copy one of your training institute’s previously entered contact persons and assign them another role in the accreditation process: 1) select the “Select Existing Staff Member” check-box and click on the “Name” dropdown list to select the previously entered contact person: 2) The selected contact person’s details are displayed: Page 23 of 182 pages 3) Click on the “Submit & Continue” button and AOL will save all details of the contact person you have just copied and display the ‘Section III Authorities’ screen tab, allowing you to enter / copy data about your training institute’s next contact persons in the same way as described above (in the case, the next contact person details you are expected to enter are those of your training institute’s Liaison Manager). 1.2.1.3 Completing the Training Institute’s Contact Persons Entry Continue the data entry / copying of all your training institute’s contact persons concerned with the programme you want to become accredited for as described above in sections 1.2.1.1 or 1.2.1.2. When AOL displays the ‘Section III Authorities’ screen tab, allowing you to enter / copy data about your training institute’s ‘Supplementary AOL Administrator’ or ‘Supplementary Programme Manager’, you may choose to either enter / copy their details or leave these 2 roles blank and simply click on the “Submit & Continue” button. AOL displays a message asking you to contact an IRU Academy Administrator in order to proceed further with the accreditation request: Click on the “OK” button to close the message and return to the AOL Homepage: At the moment you see this message on your screen the IRU Academy receives an automatic e-mail from AOL, informing it that your training institute has finished entering information about its contact persons who will be involved in the accreditation process. From this moment on, each of your training institute’s contact persons can login into the ATI Accreditation Module with the User Name and Password assigned upon the contact person’s data entry. In other words, as of this moment the first time user login account (in our example User Name = ‘aol11585’ and Password = ‘Tra21408’) is disabled and can no longer be used for login into AOL. 1.2.2 Login as an Existing Accredited Training Institute If you are the ATI General Manager, Programme Manager, Liaison Person, Finance Manager or Principal AOL Administrator, AOL v3.0 will have created and supplied you with a User Name and Password. If you do not already have this information, contact your ATI’s General Manager or Principal AOL Administrator. If you are an ATI user, AOL v3.0 will have created and supplied you with a User Name and Password. If you do not already have this information, contact your Principal AOL Administrator. Page 24 of 182 pages Once you have this information, click on the “ATI Module” hyperlink on the ATI Homepage above to display the Login screen. Enter your User Name in the User Name field. Enter your Password in the Password field. Click the “Login” button to continue. This will take you to your ATI Homepage. Page 25 of 182 pages 1.3 ATI Homepage At the top of the ATI Homepage are six blue buttons (and a yellow ‘Logout’ button) which give access to the following four ATI functions: Class Management This module is used to create and manage classes, enrol students and provides access to the diploma/certificate/joining letter printing functions. These features are described in section 4. Student Management This module is used to create and manage student information, as well as for enrolling students to previously created classes. These features are described in section 6. List of Transactions This module is used to display and print Academy On-Line transactions. These features are described in section 9. Staff Management This module is used to create and manage staff information for other ATI staff then General Manager or Principal AOL Administrators. These features are described in section 3. Page 26 of 182 pages Instructor Management This module is used to manage your ATI’s instructors after your ATI has obtained an IRU Academy accreditation in any training programme. These features are described in section 4. Contact IRU Academy This module is used to create an e-mail intended for the IRU Academy generic e-mail address ([email protected]) reserved for your communications with the IRU Academy and support concerning the use of AOL. 1.3.1 Navigation From these ATI function screens, you change screens by clicking on the function buttons, yellow or blue (e.g. “Select”, “View”) or by clicking a hyperlink (e.g. TTRCOADR6910103). You can view information and enter data by typing it in a field, by selecting it from a drop-down menu, or by checking or un-checking a check box. All actions MUST be confirmed by clicking the “Update” button. If you leave a screen without updating, the database will not change and you will lose the data you entered. To return to the previous screen, some screens have a blue “Back” button or a blue “Cancel” button. Otherwise you can leave a screen by clicking on the “ATI Home Page” button. Each screen also has the following two buttons at the top of the page: 1.3.2 Contact IRU Academy Click the blue “Contact IRU Academy” button you create an Email in your Email system to [email protected]. 1.3.3 Logout On the ATI Homepage, click the yellow “Logout” button to leave the ATI Homepage and return to the AOL Home Page. Page 27 of 182 pages 1.4 Change Password If you wish to change your Password, click the blue “Change Password” button on any screen except the ATI Homepage. The following screen will appear: Change Password Enter the current and new password, confirm the new password and click the “Update” button. Page 28 of 182 pages 2 Accreditation Process The new AOL version enables all training institutes interested in becoming accredited to contact the IRU Academy and manage the entire accreditation process from the moment of demonstrating first intention to become accredited by the IRU Academy for any programme. It also enables the new training institutes to enter and submit all information necessary for the accreditation process, including settlement of the accreditation fees (by bank transfer or by credit card payment, based on an IRU Academy invoice produced by the AOL application). ATIs that have already started the accreditation process or have already been accredited by the IRU Academy for one programme can use AOL v3.0 to submit requests for accreditations for other programmes. In such cases, all ATI data previously submitted during passed accreditation processes can be re-used, thus saving the ATI effort in re-entering the same data several times. 2.1 New Training Institutes If you are a training institute interested in becoming accredited for any of the IRU Academy programmes, you need to: go to the AOL v3.0 Homepage (at URL: www.academyonline.org) click on the “ATI Accreditation Module” button; follow the steps for creation of your (temporary) first time user account and for the creation of your Training Institute’s staff involved in the accreditation process (see section 2.1.1 below). Page 29 of 182 pages 2.1.1 Start New Accreditation – New Training Institutes If you are a training institute interested in becoming accredited for any of the IRU Academy programmes, you need to: go to the AOL v3.0 Homepage (at URL: www.academyonline.org) click on the “ATI Accreditation Module” button. AOL will display the ATI login page: Select the “This is my First Time on this web site” radio-button, enter your valid “Email” address and click on the “Continue” button: Page 30 of 182 pages AOL displays the ATI Accreditation “Section I Introduction” screen tab: Page 31 of 182 pages To identify yourself as a representative of the training institute interested in becoming accredited for an IRU Academy programme, select your “Title”, enter your “Name”, “First Name”, “Job Title”, “Telephone” number, “Mobile” telephone number, then click on the “Submit & Continue” button: AOL immediately sends you a ‘New AOL Login Account Information’ on the e-mail you have indicated in the “Section I Introduction” screen tab and displays a message to check the email for your login information: Click on the “OK” button to close the message and return to the AOL Homepage: To proceed with starting the accreditation process, check your e-mail (indicated in the previous step) where you should find an ‘Activate your IRU Academy On-Line (AOL) Accreditation Account – New AOL Login’ message received from [email protected]: Page 32 of 182 pages Open this e-mail message and you will find the automatically-generated first time ‘User Name’ and ‘Password’ which you should use for login into the AOL ATI Accreditation Module in order to start the accreditation process: You will then need to use the details given in the ‘Activate your IRU Academy On-Line (AOL) Accreditation Account – New AOL Login’ message to logon to the AOL ATI Accreditation Module by selecting the “I am a Staff Member of an already Accredited Training Institute (ATI) or an Institute which has started the accreditation process” radiobutton, entering the “User Name” and “Password” provided to you in the e-mail message and by clicking on the “Continue” button: Page 33 of 182 pages AOL will display the ATI Accreditation “Section I Introduction” screen tab completed with the details you have entered previously and with the (automatically-generated) “User Name” and “Password” (same as in the e-mail received on the account you indicated): Click on the “Submit & Continue” button to start the accreditation process as a new ATI. AOL will take you to the “Programme Selection” page: Page 34 of 182 pages Select the “Programme” and “Course” you want to start the accreditation process for, indicate the estimated number of students your training institute expects to have for the selected programme and course during the current and the next 2 calendar years, then click on the “Submit & Continue” button: AOL displays an empty “Section II Training Institute” screen tab: Page 35 of 182 pages Enter your training institute details, select the appropriate ‘Branch’ radio-button and click on the “Submit & Insert Logo” button: AOL will then take you to the “Submit your Training Institute (TI) logo” page: Page 36 of 182 pages To attach your training institute’s logo, click on the “Browse” button above the “Attach Positive Logo File” button, then select the location and the file (required format: *.jpg or *.gif, maximum size 356*290 pixels) and click on the “Attach Positive Logo File” button. You also have the possibility of attaching the negative of your training institute’s logo if you wish. To do so, follow the same procedure as described for attaching a positive file by using the “Browse” and “Attach Negative Logo File” buttons instead. Complete the required information on the “Submit your Training Institute (TI) logo” page and click on the “Submit” button to continue: AOL displays a message asking you to contact an IRU Academy Administrator in order to proceed further with the accreditation request: Click on the “OK” button to close the message and return to the AOL Homepage: At the moment you see this message on your screen the IRU Academy receives an automatic e-mail from AOL, informing it that your training institute intends to start the accreditation process for the programme and course you have selected. The IRU Academy will then need to allow you to continue the accreditation process and will inform you accordingly once this is done. Page 37 of 182 pages You will then need to login into the AOL ATI Accreditation Module once again with the details given in the ‘Activate your IRU Academy On-Line (AOL) Accreditation Account – New AOL Login’ message by selecting the “I am a Staff Member of an already Accredited Training Institute (ATI) or an Institute which has started the accreditation process” radio-button, entering the “User Name” and “Password” provided to you in the e-mail message and by clicking on the “Continue” button: AOL will display the ATI Accreditation “Section II Training Institute” screen tab completed with the details you have entered previously: Page 38 of 182 pages Click on “Submit & Insert Logo” and AOL will display the “Submit your Training Institute (TI) logo” page as you have completed it in the previous step: Click on the “Submit” button to continue and AOL will display the ‘Section III Authorities’ screen tab, allowing you to enter data about the official authority and examination body related to the programme and course you want to become accredited for: Page 39 of 182 pages If there is no Examination Body designated in your country for the programme and course you want to become accredited for, make sure you have selected the “There is no Examination Body” check box. Enter your country’s Official Authority and responsible person details, then click on the “Submit & Continue” button: In case you have left the “There is no Examination Body” check-box unselected, AOL will display the ‘Section III Authorities’ screen tab, allowing you to enter data about the examination body related to the programme and course you want to become accredited for: Page 40 of 182 pages Enter your country’s Examination Body and responsible person details, then click on the “Submit & Continue” button: AOL will display the ‘Section IV Institute Staff’ screen tab, allowing you to enter data about your training institute’s contact persons and their responsibilities: Page 41 of 182 pages N.B. For each programme your training institute wants to become accredited by the IRU Academy you need to indicate the General Manager, Programme Manager, Liaison Person, Finance Manager and Principal AOL Administrator. You will normally have the same person as the training institute’s General Manager, but the other functions may be held by different persons based on the programme. One and the same contact person of the training institute can hold several functions at the same time (e.g. it can happen that the Principal AOL Administrator is also the Programme Manager and the Liaison Person, while the General Manager is also the Finance Manager). Note that ONLY YOUR training institute’s GENERAL MANAGER AND PRINCIPAL AOL ADMINISTRATOR CAN ENTER / CHANGE DATA in the AOL ATI Accreditation Module. All other persons (Programme Manager, Liaison Person and Finance Manager) can only access and modify their own data in the AOL ATI Accreditation Module, while they can use all the functions of the ATI Module. There are two ways of entering data about each of your training institute’s contact persons concerned with the accreditation: entry of a new contact person details under a role copying of previously-entered contact person details 2.1.1.1 Entry of a New Contact Person For each of your training institute’s persons connected with the accreditation process (General Manager, Programme Manager, Liaison Person, Finance Manager, Principal AOL Administrator): 1) enter the contact information and, if necessary, click on the “Insert Signature” button: Page 42 of 182 pages 2) Click on the “Print Signature Form” button to produce a PDF signature form with instructions on how to attach signatures: 3) Print the PDF form, have it signed by the person in the ‘Signature Box’, then scan the signed form and save the scanned image on your PC / network: Page 43 of 182 pages 4) N.B. After having selected the file containing the scanned signature using the “Browse” button, click on the “Attach Signature File” button and AOL will display the attached signature on the page: If you had chosen to attach the scanned signature of your ATI’s General Manager, this scanned signature will automatically be produced on all printed IRU Academy certificates/diplomas your ATI issues to its graduates. In case you have not scanned and attached your General Manager’s signature in the course of the accreditation process, you can still do it after having obtained accreditation from the IRU Academy using the AOL ATI Module. You can find more details on how to scan and attach your ATI General Manager’s signature after accreditation and using the AOL ATI Module in section 3.5. Page 44 of 182 pages 5) Click on the “Submit & Continue” button and AOL will save all details of the new contact person you have just entered and display the ‘Section IV Institute Staff’ screen tab, allowing you to enter data about your training institute’s next contact persons in the same way as described above (in the case, the next contact person details you are expected to enter are those of your training institute’s Programme Manager): 6) Continue entering details of your training institute’s next contact person concerned with the programme you want to become accredited for – in the same way as described above in points 1-5, or by copying a previously entered contact person, as described below (section 2.1.1.2). Page 45 of 182 pages 2.1.1.2 Copying of a Previously Entered Contact Person To copy one of your training institute’s previously entered contact persons and assign them another role in the accreditation process: 1) select the “Select Existing Staff Member” check-box and click on the “Name” dropdown list to select the previously entered contact person: 2) The selected contact person’s details are displayed: Page 46 of 182 pages 3) Click on the “Submit & Continue” button and AOL will save all details of the contact person you have just copied and display the ‘Section III Authorities’ screen tab, allowing you to enter / copy data about your training institute’s next contact persons in the same way as described above (in the case, the next contact person details you are expected to enter are those of your training institute’s Liaison Manager). 2.1.1.3 Completing the Training Institute’s Contact Persons Entry Continue the data entry / copying of all your training institute’s contact persons concerned with the programme you want to become accredited for as described above in sections 2.1.1.1 or 2.1.1.2. When AOL displays the ‘Section III Authorities’ screen tab, allowing you to enter / copy data about your training institute’s ‘Supplementary AOL Administrator’ or ‘Supplementary Programme Manager’, you may choose to either enter / copy their details or leave these 2 roles blank and simply click on the “Submit & Continue” button. AOL displays a message asking you to contact an IRU Academy Administrator in order to proceed further with the accreditation request: Click on the “OK” button to close the message and return to the AOL Homepage: At the moment you see this message on your screen the IRU Academy receives an automatic e-mail from AOL, informing it that your training institute has finished entering information about its contact persons who will be involved in the accreditation process. From this moment on, each of your training institute’s contact persons can login into the ATI Accreditation Module with the User Name and Password assigned upon the contact person’s data entry. In other words, as of this moment the first time user login account (in our example User Name = ‘aol11585’ and Password = ‘Tra21408’) is disabled and can no longer be used for login into AOL. Page 47 of 182 pages After you have completed the process of creating all your Training Institute’s contact persons involved in the accreditation process, the next step in the process, consisting of setting the ‘Accreditation Fees’ and the ‘Accreditation Fees Payment Method’ agreed with your training institute, needs to be undertaken by the IRU Academy. Once this is done, AOL will automatically inform you that you can continue the accreditation process by sending an ‘Accreditation Process Started’ e-mail message to your Principal AOL Administrator’s e-mail account provided. An example of this e-mail message is shown in the figure below: Your training institute’s General Manager or Principal AOL Administrator will then need to use their own login details (User Name and Password) to logon to the AOL ATI Accreditation Module in order to continue the accreditation process. The remaining steps of the accreditation process are the same as those which are described in section 2.2 below for accreditation processes initiated by existing training institutes. Page 48 of 182 pages 2.1.2 Start New Accreditation – Existing Training Institutes If you are a training institute which has already obtained IRU Academy accreditation for one or more programme(s) and you want to become accredited for any other IRU Academy programme, your training institute’s General Manager or Principal AOL Administrator need to logon to the AOL ATI Accreditation Module in order to initiate the accreditation process: After clicking on the “Continue” button, you will be requested to indicate the role within your training institute with which you are accessing the AOL ATI Accreditation Module. Remember that ONLY the General Manager and the Principal AOL Administrator roles have the right to start a new accreditation process! Make sure you select ‘GM’ (General Manager) or ‘PA’ (Principal AOL Administrator) from the “Roles” dropdown list, enter your “Password again and click on the “Continue” button to continue. Page 49 of 182 pages AOL will then display the “Welcome Back” page: Select the “I would like to submit a new application for course accreditation” check-box and click on the “Submit & Continue” button in this page. Page 50 of 182 pages AOL will then display the “Programme Selection” page: Select the new “Programme” and “Course” you want to start the accreditation process for, indicate the estimated number of students your training institute expects to have for the selected programme and course during the current and the next 2 calendar years, then click on the “Submit & Continue” button: Page 51 of 182 pages AOL displays the “Section II Training Institute” screen tab completed with your data submitted in the course of the accreditation procedures for the previous programmes: The accreditation process will then start for the new IRU Academy programme as described in the previous section 2.1.1. You can then: 1) modify the data on each of the screens, if necessary, or 2) re-confirm (keep) the data displayed on each of the screens 3) do not forget to click on the lower right-hand button on each screen (in the case above, on the “Submit & Insert Logo” button). The remaining part of the accreditation process is exactly the same as described above, in section 2.2. Page 52 of 182 pages 2.2 Existing Training Institutes As soon as AOL informs you that you can continue the accreditation process by sending an ‘Accreditation Process Started’ e-mail message, your training institute’s General Manager or Principal AOL Administrator need to logon to the AOL ATI Accreditation Module in order to continue the accreditation process: When you click on the “Continue” button, AOL will take you to the “Section IV Institute Staff” screen tab and will display your own details as previously entered: Page 53 of 182 pages You can change some of your own details (note that no change is possible to your User Name!) or enter / copy details of some of the other contact persons of your training institute (Programme Manager, Liaison Person, Finance Manager, Supplementary AOL Administrator or Supplementary Program Manager) in accordance with the procedure described in sections 2.1.1.1 or 2.1.1.2 above. Keep clicking on the “Submit & Continue” button to enter / copy (or simply confirm) all your training institute contact persons’ details until AOL displays the “Section V Instructor(s)” screen tab: There are two ways of entering data about each of your training institute’s instructors’ data: entry of a new (principal or additional) instructor details (in the course of the accreditation process) copying of an existent (principal or additional) instructor details managing (principal or additional) instructors after accreditation (for more details, see section 4) Page 54 of 182 pages 2.2.1 Entry of a New Instructor For entering a new instructor, you need to select his/her “Title”, enter the “Name”, “First Name”, “Job Title”, “Date of Birth” (in format ‘DD-MMM-YYYY’), “Telephone” number, “Mobile” number, “Email” address, “User Name” and “Password”, as shown in the figure below: You have also the possibility to add a scanned signature to the Instructor’s profile by clicking on the “Insert Signature” and following the same procedure as described above in section 2.1.1.1. Page 55 of 182 pages Click on the “Submit & Continue” button and AOL will take you to the next page of the “Section V Instructor(s)” screen tab asking you to answer the instructor questions: Answer the 2 instructor questions, enter any related comments in the “Please comment if appropriate” field and click on the “Submit & Continue” button: Page 56 of 182 pages AOL displays the “Section V Instructor(s)” screen tab allowing you to enter / copy details about any additional instructor(s) you may have for courses related to this programme: Note that AOL does not require the ATIs to indicate any additional instructors for a programme. If your ATI does not have any other instructors involved in the given programme than the principal instructor, you may simply click on the “Submit & Continue” button without entering / copying any additional instructor details: this will bring you to the next step of the accreditation process (described in section 2.3 below). Page 57 of 182 pages 2.2.2 Copying of an Existing Instructor AOL allows you to “copy” details of any instructors registered in the system rather than recreating them again. This feature facilitates the instructor data entry process and supports assignment of the same instructor (as Principal or Additional instructor) to several programmes. In order to “copy” an existent instructor details rather than entering them once again, when in the “Section V Instructor(s)” screen tab: select the “Please select existing instructor” check-box and select the instructor’s “Name” from the dropdown list: AOL displays all details of the instructor selected for “copying” in the “Section V Instructor(s)” screen tab: Page 58 of 182 pages You will notice that in case you are copying an existent instructor the generated “User Name” will contain a suffix “.6”, whereby the digit “6” means that the same instructor is becoming related to a 6th programme accreditation. The reason for this is that each instructor needs to have a separate (AOL ATI Module) login profile for managing each of the programmes to which he/she is assigned. Enter the “Password” for the ‘copied’ instructor and click on the “Submit & Continue” button: Page 59 of 182 pages AOL will then display a warning message which you should confirm by clicking on “Yes” if you wish to ‘copy’ the selected instructor’s details and continue with the accreditation process: AOL will take you to the next page of the “Section V Instructor(s)” screen tab asking you to answer the instructor questions about the instructor being copied: Answer the 2 instructor questions for the instructor you are ‘copying’, enter any related comments in the “Please comment if appropriate” field and click on the “Submit & Continue” button: Page 60 of 182 pages AOL will then take you through the process of answering the instructor and quality process questions related to the accreditation requested, explained in section 2.3 below. Page 61 of 182 pages 2.3 Accreditation Questions As soon as you finish entering details of your ATI’s Principal (and any Additional) Instructor(s) and answer the questions related to this/these instructors, AOL displays the “Section VI Q: Principal Instructor” screen tab asking you a set of questions concerning the programme your ATI is requesting accreditation for: Answer each of the questions by following the instructions on the question’s page and click on “Submit & Continue”. When you click on “Submit & Continue” after answering the last question in the “Section VI Q: Principal Instructor” screen tab: Page 62 of 182 pages AOL will take you through the set of ‘Quality Process Questions’ displayed in the “Section VII Q: Quality Process” screen tab as shown in the figure below: Answer each of the questions by following the instructions on the question’s page and click on “Submit & Continue”. Page 63 of 182 pages When you click on “Submit & Continue” after answering the last question in the “Section VII Q: Quality Process” screen tab: AOL will display a message saying that your principal administrator must receive training on how to use the Academy On-Line (AOL) Internet application: Click on continue: the “OK” button to Page 64 of 182 pages At the same time, AOL will automatically send an “ATI Answered All Questions – Evaluate Answers” e-mail to the IRU Academy (with a copy to your ATI’s Principal AOL Administrator): After having clicked on “OK” in the previous message, AOL will take you to the “Section IX Review: Application” screen tab and will display a message with useful information about the remaining part of the accreditation process: Page 65 of 182 pages Click on the “OK” button and AOL displays your ATI’s Application data in the “Section IX Review: Application” screen tab: By clicking on the “Update” links in the application data you can navigate to the appropriate screen tab with a possibility to modify the chosen data. From the “Section IX Review: Application” screen tab, you can do the following: 1) Click on the “View Questions & Answers” button to have all questions and answers displayed, with a possibility to change any of the selected answers – AOL will then display all the accreditation questions and your answers to each of them: Page 66 of 182 pages To modify any of your answers, select the answer to change (by selecting the related ‘Change Answer(s)’ check-box and clicking on the “Change Selected Answers” button). Click on the “Back” or the “View Data” button to go back to the application data page. 2) Click on the “View Comments” button to have the comments you have entered for a particular question displayed, with a possibility to change any of the selected comments – AOL will then display all the accreditation questions, answers and your comments related to each of them: To modify any of your comments, select the comment to change (by selecting the related ‘Change Comment(s)’ check-box and clicking on the “Change Selected Comments” button). Click on the “Back” or the “View Data” button to go back to the application data page. Page 67 of 182 pages 3) Click on the “Print To Pdf” button to have all the accreditation application data prepared for printing in PDF format – AOL will then create a PDF file with all the application data and popup a “File Download” window: Click on the “Open” button to view the application in PDF format and be able to print it: You can then save a copy of the application form completed with your ATI’s data or print it. Simply close down Adobe Acrobat Reader to return to the AOL “Section IX Review: Application” screen tab. Page 68 of 182 pages 4) After having ensured that all the application data are correct, click on the “Approve & Continue” button – AOL displays the “Section X Training Fees“ screen tab: Page 69 of 182 pages 2.4 Training Fees and ATI Agreement As soon as you finish entering application data AOL moves you to the “Section X Training Fees“ screen tab allowing your training institute to fulfil the requirements stemming out of the new IRU Academy ATI Agreement. Your obligations in accordance with the new IRU Academy ATI Agreement are explained in more details in section 10 below, which is why here you will only find instructions on the steps you need to undertake on this screen tab restricted to the accreditation process only. Select the currency in which your training institute intends to charge / charges students enrolled to classes of the programme for which you want to become accredited from the “ATI local currency” dropdown list, enter the cost your training institute charges to each student enrolled to classes of this programme in the “Full training cost applied per student” field and click on the “Update Annex A” button. Page 70 of 182 pages AOL then saves the data you have entered and displays the next “Section XI Review: ATI Agreement” screen tab: Page 71 of 182 pages From the “Section XI Review: ATI Agreement” screen tab, you can do the following: 1) Save and print the IRU Academy ATI Agreement in 2 copies which your training institute will then need to sign and return to the IRU Academy (together with the completed and signed Annex A to the IRU Academy ATI Agreement) – see point 2) below for instructions how to produce and print Annex A to the IRU Academy ATI Agreement 2) Click on the “Produce Annex A” button – AOL will then display Annex A to the IRU Academy ATI Agreement in PDF format: Save and print Annex A to the IRU Academy ATI Agreement in 2 copies which your training institute will then need to sign and return to the IRU Academy (together with the signed IRU Academy ATI Agreement) 3) Remember not to use the “Produce Annex B” button in the course of the accreditation process, but only after IRU Academy accreditation is granted and at the end of the calendar year! You will find more information about this button and action in section 10.1 below. If you still decide to click on the “Produce Annex B” button, AOL will display an error message: Page 72 of 182 pages 4) When you have finished printing both the IRU Academy ATI Agreement and its Annex A, click on the Approve & Continue” button – AOL will then display the “Section XII Pay & Submit” screen tab: Page 73 of 182 pages 2.5 Payment of the Accreditation Fee At the end of the accreditation process, AOL takes you to the “Section XII Pay & Submit“ screen tab allowing your training institute to settle the Accreditation fee for the programme for which it wants to become accredited by the IRU Academy. Depending on the mode of payment of the accreditation fee agreed in advance between your training institute and the IRU Academy, the “Section XII Pay & Submit” screen tab displays with or without a “Pay & Submit” button in the lower right-hand corner of the screen – just below the “Print Invoice To PDF” button (in the figure below, without such a button): We will explain here only the case where the agreed method of payment of the IRU Academy Accreditation Fee is by bank transfer, based on an IRU Academy Invoice. The procedure of settlement of the accreditation fee by credit card payment is explained in more details in section 2.5.1 below. When the agreed method of payment of the accreditation fees is by bank transfer, you will first need to have the related invoice printed. You can print the IRU Academy accreditation fees invoice by clicking on the “Print Invoice To PDF” button – AOL will then create a PDF file with the invoice data and popup a “File Download” window: Page 74 of 182 pages Click on the “Open” button to view the invoice in PDF format and be able to print it: You can then save a copy of the invoice or print it. Simply close down Adobe Acrobat Reader to return to the AOL “Section XII Pay & Submit” screen tab. 2.5.1 Settlement of Accreditation Fees by Credit Card Payments As already mentioned in section 2.5 above, AOL v3.0 allows ATIs to settle the IRU Academy accreditation fee for a programme by credit card payment in a secure (Saferpay) environment. In order to be able to settle the accreditation fees by a credit card payment, your training institute would have to inform the IRU Academy when starting the accreditation process for the programme that it intends to settle these fees by credit card. Based on this, the IRU Academy would set this mode of payment when entering the accreditation fees and allowing the training institute to start the accreditation process. When your training institute completes all other accreditation steps and your General Manager (or Principal AOL Administrator) reaches the final “Section XII Pay & Submit“ screen tab, you will notice that the “Section XII Pay & Submit” screen tab displays a “Pay & Submit” button in the lower right-hand corner of the screen: Page 75 of 182 pages You can click on the “Print Invoice To PDF” button if you want to have the IRU Academy invoice for payment of the accreditation fee for the given programme printed. To proceed with the settlement of the accreditation fee by credit card payment, click on the “Pay & Submit” button. AOL displays the Saferpay terminal tab completed with the payment details: Select the credit card type (MasterCard or Visa) and click on “Next” – AOL takes you to the Saferpay “Card Data” screen tab: Page 76 of 182 pages Enter your credit card number, expiry date, card verification code (3-digit code on the reverse of the credit card), enter the cardholder’s name and click on the “Pay” button. After a successful verification of the credit card details entered on the above screen, Saferpay will display the “Confirmation” screen tab to inform you about the acceptance of the payment. Upon closing of the Saferpay “Confirmation” screen tab, AOL will take you back to the “Section XII Pay & Submit” screen tab and will confirm that the credit card payment has been made. Page 77 of 182 pages 2.6 ATI Completion of the Accreditation Process Following the settlement of the accreditation fee, you have completed the entire AOL computerised accreditation process. In accordance with the usual accreditation procedure, the IRU Academy will then start considering your accreditation request and will also register the progress in AOL. At this stage, you need to log out from AOL by clicking on the “Logout” button: The next time your training institute’s Principal AOL Administrator will receive an automatic e-mail message is when the IRU Academy will confirm receipt of your payment of the accreditation fee and express its readiness to grant the accreditation required in AOL. The “ATI Accreditation Fees Payment Received – IRU Academy Ready to Grant Accreditation” e-mail message your Principal AOL Administrator will receive then is given in the figure below: Page 78 of 182 pages Following this message, your ATI will need to have at least the Principal Instructor for this programme trained by the IRU Academy and the Principal AOL Administrator trained in the use of the IRU Academy On-Line (AOL) Internet application. The IRU Academy will also take into consideration all your training institute’s data submitted via AOL and by mail (signed IRU Academy ATI Agreement and its Annex A, answers to the accreditation questions, etc). The last intervention by your training institute in the AOL ATI Accreditation Module, in order to complete the accreditation process, is due at the time your Principal AOL Administrator has completed training on the use of AOL, and in any case after the above e-mail is received. Page 79 of 182 pages To conclude your training institute’s accreditation process for the given programme, your Principal AOL Administrator will need to logon to the AOL ATI Accreditation Module. AOL will then take your Principal AOL Administrator to the “Welcome Back” page: The Principal AOL Administrator will then need to: 1) select the programme for which you want to conclude the accreditation process from the “I have 1 Started Application(s)’ dropdown list 2) select the “I would like to obtain access to the live IRU Academy Online application” check-box 3) Click on the “Submit & Continue” button AOL will then display a message thanking you for the completion of the accreditation steps and asking you to logout: Click on the “OK” button to close the message. Page 80 of 182 pages AOL takes you to the “Section XII Pay & Submit” screen tab to indicate that your training institute has completed all accreditation steps: Click on the “Logout” button to log off the AOL ATI Accreditation Module and return to the AOL homepage. When you select the “I would like to obtain access to the live IRU Academy Online application” check-box and click on the “Submit & Continue” button, you will receive a copy of an “ATI Principal Administrator Ready to Use Live AOL” e-mail AOL sends automatically to the IRU Academy: Page 81 of 182 pages After having received this e-mail, AOL will automatically change your training institute’s accreditation status for the programme to ‘Pending’. The IRU Academy will then have to decide whether it will grant or deny the accreditation by registering it in AOL as well. 2.7 IRU Academy Completion of the Accreditation Process As soon as the IRU Academy decides to grant (or deny) the accreditation request by your training institute, you will receive an automatic e-mail from AOL informing you about the accreditation status change as per the IRU Academy decision. In case the IRU Academy decided to grant your training institute the accreditation requested, your Principal AOL Administrator will receive an automatic “ATI Accreditation Granted” e-mail: From the moment you receive an IRU Academy accreditation for the programme you have requested, you can no longer use the AOL ATI Accreditation Module for this accreditation. Naturally, you can use the AOL ATI Accreditation Module in case you want to start the accreditation process for another IRU Academy programme or when you will need to produce and print out Annex B to the IRU Academy ATI Agreement which is in itself a part of the section 10.1 below. From the moment you obtain an IRU Academy accreditation for one of its programmes, you can manage your classes, students and related activities by using the AOL ATI Module, after logging into it by using the credentials (User Name and Password) which have already been created for you during the accreditation process. Page 82 of 182 pages 3 Staff Management Normally, Staff Management rights are restricted to the ATI General Manager and Principal AOL Administrators. As General Manager or Administrator, you can perform administrative tasks, such as creating staff members, modifying their profiles, assigning them roles and deleting staff members. These actions are all described in this chapter. From the ATI Homepage, click on the Staff Management button, which displays the following screen: Staff Management This List of Staff Members and Roles table contains the following columns: Name Staff member’s (last) family name First Name Staff member’s first name User Name The hyperlink in this column is used to access the staff member’s profile page, and can be used to delete or modify this staff member’s information. Click the hyperlink in the User Name column. Page 83 of 182 pages Right This column displays the roles (rights) currently assigned to this staff member ATI Staff Member Profile N.B. The access rights assigned to ATI users in AOL v3.0 depend on the staff roles assigned during the accreditation process. To change any of the selected staff member’s details, re-type the correct detail over the previous entry in the appropriate field, then click the “Update” button to confirm. To delete the selected ATI staff member, click on the “Delete Staff Member” check box and confirm the deletion when asked. Page 84 of 182 pages 3.1 Add a Staff Member To add a staff member, click the “Add” button on the “Staff Management” screen. The following screen appears: ATI Staff Member Profile The “ATI Staff Member Profile” page contains the following fields: Field Name Type Title Mandatory Family Name Mandatory First Name Mandatory Job Title Mandatory Telephone Mandatory Mobile Mandatory Email Mandatory User Name Mandatory Password Mandatory Delete Staff Member Optional check box Action Select one of the titles from the dropdown list Enter the staff member’s family name in this field Enter the staff member’s first name in this field Enter the staff member’s job title at your ATI in this field Enter the staff member’s telephone number in this field Enter the staff member’s mobile number in this field Enter the staff member’s email address in this field This is the staff member’s user login name. This is the staff member’s login password This check box is used to DELETE a staff member Page 85 of 182 pages These fields are used for ATI staffmember information purposes. These fields contain the staff member’s login credentials This check box is only used to DELETE a staff member Enter the staff member’s personal information in each field. If you fail to enter information into any mandatory fields, a warming message will be displayed when you click the “Update” button. To cancel your data entry, click the “Cancel” button. Either of these actions will return you to the Staff Management screen. 3.2 Modify a Staff Member To modify data for an existing staff member click the Staff Member’s hyperlink in the “User Name” column: Page 86 of 182 pages This will display the Staff Member’s Profile Screen. You can now modify the Staff Member’s personal information. Click the Update button to confirm these changes, or click the Cancel button to cancel this operation. Staff Member Profile page fields are described in section 3.1 above. Page 87 of 182 pages 3.3 Delete a Staff Member To delete a staff member, select the desired staff member (as described in section 3.2) to display the ATI Staff Member Profile screen. Then check the Delete Staff Member check box as shown below. Click the “Update” button to confirm the Delete operation or “Cancel” to abort the operation. To confirm Staff Member deletion, you must click “Yes” on the following screen: Page 88 of 182 pages The staff member profile will then be permanently deleted. This staff member will no longer appear in the list of ATI staff members. 3.4 (Re-)Assign Role to a Staff Member To assign / reassign role to a given ATI staff member, select the desired role (click on the Role hyperlink) in the lower part of the AOL Staff Management page: Page 89 of 182 pages AOL displays the “Change Role X for: Y” screen: whereby X stands for the selected role and Y stands for the Programme name. To assign this role to another ATI staff member, select the other staff member from the “Select Existing Staff Member” dropdown list, change any of this staff member’s details, then click on the “Update” button. AOL will save your changes and display the updated Staff Management page: Page 90 of 182 pages 3.5 Scan and Attach General Manager’s Signature After Accreditation ATIs can scan and attach their scanned General Manager’s signature by using the AOL ATI Module after having obtained accreditation in any IRU Academy training programmes. The only restriction in this case is that only the ATI staff with the AOL role of ‘General Manager’ or ‘Principal AOL Administrator’ can use this AOL module and scan and attach their General Manager’s signature. In case an ATI already has one or more accreditations already granted and no accreditation requests which are not granted yet (AOL Accreditation Status ‘Started’ or ‘Pending’), applying the procedure described in this sub-section will affect all IRU Academy programmes for which the ATI has already been accredited. The procedure to follow in order to scan and attach an ATI General Manager’s signature using the AOL ATI Module (after accreditation) requires the ATI Principal AOL Administrator or General Manager to: 1) Logon to the AOL ATI Module using their appropriate login details (Username and Password): Page 91 of 182 pages 2) Click on the ‘Staff Management’ button when in the ATI Homepage: Page 92 of 182 pages 3) Click on the ‘ATI General Manager’ hyperlink in the upper part of the Staff Management page: Page 93 of 182 pages 4) Click on the ‘Signature’ button in the lower part of the Change Role ATI General Manager page: Page 94 of 182 pages 5) Click on the “Print Signature Form” button to produce a PDF signature form with instructions on how to attach signatures: Page 95 of 182 pages 6) Print the PDF form, have it signed by the General Manager in the ‘Signature Box’ (using a thick pen and aligning the signature to the left border of the frame), then scan the entire (A4 format) signed form in JPG format and save the scanned image on your PC / network: Page 96 of 182 pages 7) After having selected the file containing the scanned signature using the “Browse” button, click on the “Attach Signature File” button and AOL will display the attached signature on the page: 8) The process of attaching your General Manager’s signature is thus finished. Click on the ‘ATI Home Page’ to return to the ATI Homepage or click on the ‘Back’ button to return to the Staff Management page. Page 97 of 182 pages 4 Instructor Management (After Accreditation) The new AOL release enables all ATIs to manage their instructors, both principal and additional, for any programme they have already been accredited by the IRU Academy, after the ATI has received the accreditation. ATIs’ needs to add, remove or change their existing instructors between various IRU Academy programmes for which they have already been accredited is thus greatly facilitated and simplified as they no longer need to repeat the AOL accreditation process to do this. The only restriction in this new AOL release is that only the ATI’s Principal AOL Administrator or General Manager can manage the ATI’s instructors using the AOL ATI Module. The procedure to follow in order to manage your instructors using the AOL ATI Module (after accreditation) requires the ATI Principal AOL Administrator or General Manager to: Logon to the AOL ATI Module using their appropriate login details (Username and Password): Page 98 of 182 pages Click on the ‘Instructor Management’ button when in the ATI Homepage: This will bring you to the AOL Instructor Management page using which you can add, remove or change instructors. These actions are explained in more details in the subsections below. Page 99 of 182 pages 4.1 Adding New Instructor After Accreditation To add a new instructor and register all relevant details, after logging in the AOL ATI Module and selecting the ‘Instructor Management’ function, the ATI’s Principal AOL Administrator or General Manager need to: 1) Click on the ‘Add’ button in the Instructor Management page: Page 100 of 182 pages 2) Select the course to which you wish to assign the new instructor, enter the instructor’s details (including User Name and Password), then click on the ‘Update’ button in the ATI Instructor Profile page: Page 101 of 182 pages 3) AOL saves the new instructor and displays him/her in the updated Instructor Management page: Page 102 of 182 pages 4.2 Removing an Instructor After Accreditation To remove an existing instructor from your ATI’s list of instructors and disable his AOL login, after logging in the AOL ATI Module and selecting the ‘Instructor Management’ function, the ATI’s Principal AOL Administrator or General Manager need to: 1) Click on the ‘User Name’ hyperlink of the instructor who needs to be removed in the Instructor Management page: Page 103 of 182 pages 2) Select the ‘Delete Instructor’ check-box, then click on the ‘Update’ button in the ATI Instructor Profile page: Page 104 of 182 pages 3) AOL marks the selected instructor as deleted and displays the updated Instructor Management page without the removed instructor’s profile: Page 105 of 182 pages 4.3 Changing an Instructor After Accreditation To change an existing instructor to one of your ATI’s training programmes under IRU Academy accreditation, after logging in the AOL ATI Module and selecting the ‘Instructor Management’ function, the ATI’s Principal AOL Administrator or General Manager need to: 1) Click on the ‘Role’ hyperlink of the instructor you need to replace in the Instructor Management page (e.g. ‘Additional Instructor’ Santa Lazna needs to be replaced with Gorky Giovanowsky): Page 106 of 182 pages 2) Select the instructor with whom you want to replace the selected instructor from the ‘Select Existing Instructor’ dropdown list, then click on the ‘Update’ button: Page 107 of 182 pages 3) AOL returns to the Instructor Management page updated as per your changes: Page 108 of 182 pages 5 Class Management This chapter explains how Classes can be created, viewed and modified. From your ATI Homepage, click the “Class Management” button. You will see the following screen: Class Management This screen contains two sections. The first section contains a “Class ID” drop down list, and a “Select” button. The second section contains the following columns: Class Name The name you assign to the class Class ID This is a systemgenerated code Start Date The first day of class End Date The last day of class Students in Class Number of seats allocated to the class Page 109 of 182 pages Seats Left The application calculates the number of seat you allocate to a class minus the number of seats already reserved Delete Click this check box to delete a class 5.1 Create a New Class To add a new class, click the “Create New Class” button on the Class Management screen. The following screen will appear: New Class Creation This screen contains the following fields: Field Name Type Action Product Name Mandatory Select the PP Name from the drop down list. Class Name Mandatory Enter the class name for this class. Class ID Applicationgenerated Language Mandatory Start Date Mandatory End Date Mandatory Days in Total Mandatory Select one of the languages from the drop-down list. Enter the day and the time in the format DD-MMM-YYYY hh:mm Eg 05-Dec-2005 08:30 The time is optional Enter the number of days the course will last Page 110 of 182 pages This information is generated by IRU This allows the ATI to give a name to each class This code is unique for every class This is the language used in the class You can modify this information after as long as no Examination Date is specified for any of the students in the same class For information only This is used to calculate the Seats in Total Seats in Total Mandatory Available Seats Applicationgenerated Location Instructor Name Optional Description Enter the total number of seats (students) you can accept into this course Calculates the number of seats you allocate to a class minus the number of seats already reserved For information only Optional Applicationgenerated This information is generated by AOL IRU Fee Application(CHF) Per generated Graduates ATI BOOKING CONTACT Mandatory Name Mandatory Phone Fax Mandatory Email Website Optional Optional Published On IRU Academy Web Site Optional IRU needs this information to contact the ATI about this course For information only Click this check-box if you want the information to be published on the IRU Web Site. If this box is not ticked, students cannot see this class on the IRU Web Site Click the “Create” button, and enter the information in each field. If you fail to enter information into any mandatory fields, a warning message will be displayed when you click the “Update” button: Page 111 of 182 pages The completed screen will then look like this: Once you have entered all of the data, click the “Update” button to confirm. This will register the new data in the database, and change the heading of the above screen from “New Class Creation” to the name of the course – in this case “ADR Test Class 1”. To cancel your data entry, leave the screen by, for example, clicking the “Back” button. The data will be lost. You can now add students to the class by clicking the “Students in Class” button (described in section 7.1). Alternatively, you can click the “Back” button to return to the “Class Management” screen, from where you can create another new class, or modify or delete an existing one. Page 112 of 182 pages 5.2 View or Modify a Class NOTE: You can modify a class as long as no Examination Date has been entered for any of the students enrolled in the class! To view or modify an existing class, you must first select the class. There are two ways of doing this: 1. In the upper section of the screen, click on the Class ID drop down list. Scroll the list until you find the ID of the class you wish to modify, and then click the “Select” button: Class Management 2. Scroll the lower section until you find the class you wish to modify, and then click the hyperlink in the “Class ID” column. Either of these actions will give you the following screen: Page 113 of 182 pages You can now modify the data on this screen, except for the application-generated data, in grey. The fields are described in section 6.1, “Create a New Class”. Click the “Update” button to confirm your changes. The updated screen will look like this: Page 114 of 182 pages To cancel your data entry, leave the screen by, for example, clicking the “Back” button. The changes will be lost. Note that you can print certificates/diplomas from this course, once it is finished. For an explanation of this, see section 8.2. 5.2.1 “Students in Class” You can also get a list of students from the Class screen (above) by clicking the “Students in Class” button. The following screen appears: Page 115 of 182 pages 5.3 Delete a Class NOTE: You cannot delete a class after the Start Date! To delete a class, locate the desired class from the second section of the “Class Management” screen, then check the “Delete” check box as shown below. Click the “Update” button to confirm the Delete operation. To confirm Class deletion, you must click “Yes” on the following screen: Page 116 of 182 pages The class will then be permanently deleted. This class will no longer appear in the list of ATI classes. 6 Student Management Information about students who have taken courses, or who are about to take courses, is stored in the ATI database. This section explains how to enter information on a new student, and how to change information on existing students. This is done from the “Student Management” page. From your ATI Homepage, click the “Student Management” button. You will see the “Student Management” screen: Student Management This screen contains, at the top, the “Quick Student Selector” to locate existing students. The use of this Selector is explained in section 6.2.1. Page 117 of 182 pages 6.1 Create a Student There are two ways to create a student in your ATI’s database: If the student has never taken a course at any ATI before, enter his / her data by clicking the “Create New Student” button. If the student has taken one or more courses at another ATI, click the “From Another ATI” button to copy the details. 6.1.1 Create New Student – Student Profile screen Click on the “Create New Student” button. The “Student Profile” screen appears: The screen is divided into three columns: First Column: Personal Data Second Column: Professional Data Third Column: Graduate Data Each of the fields in the first two columns is described in the tables below. The third column, not relevant for creating a new student, is described in section 6.1.1.3. Page 118 of 182 pages 6.1.1.1 First Column: Personal Data Field Name Type Title: Mandatory Gender: Mandatory Family Name: First Name: Birth Date: Place Of Birth: Country Of Birth: Address 1: Address 2: Address 3: City: State: Action Select the title from the drop down list Click the radio button M (Male) or F (Female) Mandatory Mandatory Mandatory Enter the information Mandatory Mandatory Select the country of birth from the drop down list Mandatory Optional Optional Mandatory Optional Enter the information Postal Code Mandatory Pre: Postal Code Optional Suf: Enter the Postal Code; if it is in two parts, enter the prefix (first part) If the Postal Code is in two parts, enter the suffix (last part) Select the country of residence from the drop down list Country: Mandatory Telephone: Mobile: Fax Email Mandatory Optional Optional Mandatory Enter the information Mandatory Select the principal language spoken by the student from the dropdown list Language Page 119 of 182 pages For information only 6.1.1.2 Second Column: Professional Data Field Type Employer Name: Job Title: Address 1: Address 2: Address 3: City: State: Optional Postal Code Pre: Postal Code Suf: Country: Telephone: Mobile: Fax: Email: Action Enter information Systemgenerated Viewing Code Enroll in Class Optional Close Graduate Web Site For information only Indicates whether this student first took a course at another ATI From Another ATI: Student ID: Password: the No action Communicated to the student via the joining letter, so that he/she can access the Diplomas/Certificates Select a class If you select a class and click prom the drop “Update”, the student is down list registered in that class Click this check box if you wish to close the Student’s web site Enter Personal and Professional Data, and click the “Update” button. You will see the following screen, shown it two views with different scrolls to give the complete list of fields: Page 120 of 182 pages 6.1.1.3 Student Profile – Completed Student Profile – upper and lower scroll Page 121 of 182 pages Mandatory fields are in light yellow. To enrol a student in a class (second column, bottom), see section 7.2. 6.1.2 Student “From Another ATI” Click the “From Another ATI” button on the “Student Management” screen. The “Student Profile” screen appears: Student Profile – From Another ATI Note that it differs from the “Student Profile” screen for adding a new student in that all fields are greyed out except Student “Birth Date” and “Student ID”, and that the “From Another ATI” check box in column two is checked. Enter data in the two open fields, and click the “Validate” button. If the student has already taken a course at anther ATI, you will see the “Student Profile” screen filled out as in section 6.1.1.3 above. Press the “Update” button to complete. Page 122 of 182 pages If you enter data which does not match a student at another ATI, you will see the following error screen: You should check your data. Page 123 of 182 pages 6.2 Modify an Existing Student If you wish to modify information on an existing student, you first need to select the student from the “Student Management” page. You do this with the “Quick Student Selector” at the top of the page. 6.2.1 “Quick Student Selector” The “Quick Student Selector” contains the following columns: Name First Student Diploma ID Diploma name ID Examination Date : From The first day of the period A 6 digit Student’s Student’s A 16 character code, when the code, (last) first e.g. student may e.g. family name have taken ATITCOADR5240100 name 485466 an examination Diploma Examination Date : To The first day of the period when the student may have taken an examination There are two ways to select students: click the “All” button in the top section to get a list of all students enter data on the student in one or more of the above fields, and click the “Select” button, to get a list of selected students. Page 124 of 182 pages 6.2.2 List of Students In both cases, you will see a list of one or more students in the second section: In the second section, the data is displayed as in the first four fields of the “Quick Student Selector”. There are also two check boxes, “Hide Diploma” and “Close Web Site”. The list can be printed by clicking the “Print” button. Three actions are possible from this screen: Click one of the check boxes to hide a Diploma or close a Web Site. Click one of the Diploma ID hyperlinks to display that Diploma. Click a Student ID hyperlink to display the student Profile screen of that student. The student information can then be viewed or modified. 6.2.2.1 Hide Diploma, Close Web Site Check Boxes Click the “Hide Diploma” check box next to any diploma, then click the “Update” button, in order to hide this diploma from viewing on the Web site. Click the “Close Web Site” check box next to any student, then click the “Update” button, in order to hide this student’s Web site. Page 125 of 182 pages In the case where there are multiple diplomas or multiple students, clicking on the “All” check boxes above the “Hide Diploma” and “Close Web Site” columns selects all the diplomas or students. For example, all students’ web sites have been selected for closing in the following screen: Clicking the “Update” button will now close these students’ web sites. Page 126 of 182 pages 6.2.2.2 Diploma ID Click one of the Diploma ID hyperlinks (for example TTRCOADR6910103) to display that Diploma in PDF format. Page 127 of 182 pages 6.2.2.3 Student ID – Student Profile screen Click a Student ID hyperlink (for example 328427) to display the Student Profile screen of that student. Page 128 of 182 pages The student information can then be viewed or modified. Any changes must be confirmed by clicking the “Update” button. Note that because this is an existing student, the Third Column of the “Student Profile”, Graduate Data, is now relevant. The other two columns have already been described in sections 6.1.1.1 (Personal Data) and 6.1.1.2 (Professional Data). 6.2.2.4 “Student Profile” Third Column: Graduate Data The first two columns of the “Student Profile” are described in section 6.1.1. The third column consists of: the box “View The Graduate Private Page” the box “Certificates/Diplomas” the button “Previous Enrollments”. The elements in this column are only relevant for existing students. 6.2.2.5 “View the Graduate Private Page” This window has a drop-down list “User Intent” with three options: /J1 /P1 /STUDENTS1 A list of certificates which the student has obtained from IRU can be seen on the Graduate’s private web pages. Each graduate has three private web pages. They are identical, except for the promotional message at the beginning. The graduate is given three viewing codes, one for each page. The three pages relate to: Job inquiries, suffix /J1 Professional activities, suffix /P1 Private student activities, suffix /STUDENTS1 By choosing the appropriate suffix from the drop down list, you can view any of these pages. Click on any of these options and view the web page. Page 129 of 182 pages Click on the hyperlink code of any TTRCOADR6910103) to see the document. 6.2.2.5.1 of these documents (for example “Certificates/Diplomas” Also in the third column of the “Student Profile” screen is the “Certificates/Diplomas” box. This scroll-down box lists the codes all the Certificates and Diplomas earned by the student. Clicking the hyperlink of the code will display the Certificate/Diploma in a separate window. Click the “Hide” check-box, and click the “Update” button, so that the link to this Certificate/Diploma is not displayed on the Web site. Page 130 of 182 pages 6.2.2.5.2 “Previous Enrollments” This page also has the button “Previous Enrollments”. Clicking on this button will show you previous courses that the student has taken at your ATI. If the student has no previous enrolments, the following screen will appear: Page 131 of 182 pages 6.3 Delete a Student A student cannot be deleted. Hiding his / her diplomas and closing his / her Web Site (see section 6.2.2.1) will serve in blocking information on that student reaching the outside. 7 Add (Enroll) a Student to a Class There are two ways to add a student to a class: from the “Class Management”, select a class, then click the “Add a Student” button. You may do this when you first create the class, or when you have several students to add to the same class. Note that the student(s) must already be in the ATI database. from the “Student Management” function, “Student profile” page, create or select a student, then click the “Enrol in Class” drop down list from the “Student Profile” screen. You may do this when you first create a student. Note that the class must already be in the ATI database. 7.1 Add a Student from Class Management Click the “Add New Student” button from a selected class “Class Management” screen: Page 132 of 182 pages and you get the following screen: 7.1.1 “Add New Student” Box Note that this box only appears if students can be added to the class, that is, if the start date of the class has not yet passed. You can select a student with this box in two ways: To get a list of one or a limited number of students, enter data for the student(s) in any one of the three fields (“Family Name”, “First Name” and “Student ID”), can click the “Select” button. To get a list of all students, click the “All” button. You will see a list of the student or students which fit your selection. In the example below, the student with Family Name “some” was selected: Page 133 of 182 pages To add a student to the class list, click the yellow “Select” box on the right, and then click the “Update” button. Page 134 of 182 pages You will return to the previous page, and the student will have been added to the class list: You can now repeat the operation, if you wish. Note that you can also print diplomas from this page. This operation is described in section 8.2. Page 135 of 182 pages 7.2 Add (Enrol) a Student from Student Profile Page Select a student with the “Quick Student Selector” (see section 6.2.1), and from the “Student Profile” page, second column at the bottom, click the “Enroll In Class” drop down list. This will give you a list of class codes into which you can enrol the student. The example below has only one code: Click the code, then click the “Update” button. The student is enrolled in the course. In the case where there were more classes in the list, you could enrol this student in other classes. Page 136 of 182 pages 8 End of Class Actions: Student Results, Printing When a class is finished, you must enter the student results, and print the Diplomas and the joining letters. 8.1 Enter Student Results To enter the student results of a class which has finished, display the course page from the “Class Management” menu. Click the “Students in Class” button. You will see the following Class screen: Note that the “Add New Student” box is disabled because students can no longer be added to the class; the start date of the class has passed. Page 137 of 182 pages The “Students in Class” screen contains the following data: Title Family Name First Name Student ID Diploma ID Result (%) Pass Distinction Examination Date Certificate, Diploma, Letter Printed Select Civil title of the student Student’s (last) family name Student’s first name The System-generated hyperlink in this column is used to access the student’s profile page The System-generated hyperlink in this column is used to access the student’s diploma, once available Enter here the student result The minimum pass level is set by IRU Academy. If the student equals or exceeds this level, this check box will be ticked by the system The distinction level is set by IRU Academy. If the student equals or exceeds this level, this check box will be ticked by the system When you display the Diploma on the screen for printing, this check box will be ticked by the system Once the system has produced the certificates/diplomas and joining letters, the system will indicate the date of their production in this field Check box used to activate the function of a button (Update, Print Certificates/Diplomas, Print Letters, Print Student List) You are expected to complete the only two active fields: “Result (%)” and “Examination Date”. Changes in either must be confirmed by clicking the “Update” button. Enter a student result and the examination date, tick the ‘Select’ check box and click the “Update” button. The screen is refreshed, the “Diploma ID” field, “Pass” and “Distinction” check boxes and the “Certificate/Diploma Letter Printed” field are updated, if appropriate: Page 138 of 182 pages 8.2 Print Diplomas and Joining Letters When a student has passed a course, he / she should be given a Diploma, and sent a letter (“Joining Letter”) explaining how to use the Web site. On the “Students in Class” page, click the “Select All” button: You can now print joining letters (by clicking on the “Print Letters” button) or print certificates/diplomas (by clicking on the “Print Certificates/Diplomas” button). Note that students who have not passed the exam (their result is inferior to the threshold set for the programme by the IRU Academy) are not entitled to certificates/diplomas and joining letters. This is why for such students the “Diploma ID” and “Certificate, Diploma, Letter Printed” fields will remain empty and such students will not be taken into account when you select to print letters or certificates/diplomas. Page 139 of 182 pages 8.2.1 Print Certificates/Diplomas If you click the “Print Certificates/Diplomas” button, AOL will display a PDF file containing all certificates/diplomas which can be printed: In the example above, there are 6 certificates/diplomas of students who have passed the exam in the list. Click on the Internet browser “Back” button to return to the “Students in Class” page. Page 140 of 182 pages 8.2.2 Print Joining Letter To print joining letters, select all the students in the class once you have entered the examination results and click the “Print Letters” button. The letter(s) of the selected graduate(s) will be displayed on the screen in PDF format: In the example above, there are 6 letters to students who have passed the exam in the list. Click on the Internet browser “Back” button to return to the “Students in Class” page. Page 141 of 182 pages 9 List of Transactions A “Transaction” represents the IRU Academy charge per certificate/diploma issued per graduate from any of your ATI’s classes. IRU Academy invoices the ATI for each transaction. To view a list of transactions, from the ATI Homepage, click the “List of Transactions” button. This will give you the following screen: This screen consists of the “Transactions Selector” (upper part) and the “List of Transactions” (lower part). 9.1 “Transactions Selector” The “Translation Selector” consists of a “monthly Period” drop down box, and two fields for the beginning of the List of Transactions period “LoT Period: From”) and the end of the period (“To:”). There are three ways to select the period: if you want a list for a particular month, select that month from the drop down box; the first and last days of the selected month will be automatically inserted into the “From” and “To” fields. Then click the “Search” button. if you want any other period, enter the dates in the “From” and “To” fields. Then click the “Search” button. if you want all transactions, click the “All” button. Page 142 of 182 pages 9.2 “List of Transactions” Upon clicking the “Search” or “All” button, the screen will refreshed with the relevant the “List of Transactions”: This list can be printed by clicking the “Print” button. Page 143 of 182 pages 10 ATI Agreement and Resulting Obligations The May 2011 version of the IRU Academy ATI Agreement, including the obligations of the ATIs as per the latter agreement, is entirely integrated in AOL v3.0. The list of ATI obligations of the new IRU Academy ATI Agreement and the AOL v3.0 features introduced to support each one of them is given in the table below: ATI User Manual ATI obligation AOL Module and page section ATI Accreditation Sign the IRU Academy ATI Module – screen tab 2.4 1. Agreement “Section XI Review: ATI Agreement” ATI Accreditation Module – screen tabs Complete and sign Annex A “Section X Training 2.4 2. (applied per student fees) Fees” and “Section XI Review: ATI Agreement” ATI Accreditation Complete and sign Annex B (end Module – screen tabs “Section X Training of the year number of graduates 3.3.1 3. per programme accredited by the Fees” and “Section XI Review: ATI IRU Academy) Agreement” ATI Accreditation Complete the IRU Academy 4. Module – all screen 2.3 programme application form tabs ATI Accreditation Settlement of the IRU Academy Module – screen tab 5. 2.5 accreditation fee by bank transfer “Section XII Pay & Submit” ATI Accreditation Settlement of the IRU Academy Module – screen tab 6. accreditation fee by credit card 2.5.1 “Section XII Pay & payment Submit” ATI Module – Class Systematically print IRU None management and Academy certificates / diplomas (already existing 6. Student Management to graduates from accredited in AOL v2.0) functions programmes Undergo a re-accreditation ATI Accreditation 7. process when requested to by 2.1.2 Module the IRU Academy You may refer to the instructions in the related sections of this Release Note referenced in the ‘Release Note Section’ column of the table above to find out how to fulfil your training institute’s obligations. Page 144 of 182 pages 10.1 Produce Annex B of the New IRU Academy ATI Agreement This section explains the procedure to be followed by training institutes in order for them to fulfil the obligation in accordance with clause 6.6 of the new IRU Academy ATI Agreement: “…every year, latest by 15th January, the ATI shall return to the IRU Academy Secretariat one duly completed and signed copy of Annex B for all programmes for which it holds IRU Academy accreditation”. In order to produce Annex B for a specific programme for which your training institute has been accredited over the last calendar year, follow the steps below: 1) your General Manager or Principal AOL Administrator should logon into the AOL ATI Accreditation Module with their usual credentials (and with the appropriate role) 2) select the programme for which you want to produce Annex B from the “Programme Selection” page and click on the “Submit & Continue” button: Page 145 of 182 pages 3) select the “Section X Training Fees” screen tab by directly clicking on the screen tab name: 4) select the last calendar year, enter the number of graduates from the programme as per your training institute’s evidence and click on the “Update Annex B” button: Page 146 of 182 pages 5) click on the “Produce Annex B” button in the “Section XI Review: ATI Agreement” screen tab – AOL will then display Annex B to the IRU Academy ATI Agreement in PDF format: Save and print Annex B to the IRU Academy ATI Agreement in 2 copies which your training institute will then need to sign and return to the IRU Academy. 6) Logout from the AOL ATI Accreditation Module once you have completed all previous steps 7) follow the procedure in steps 1-6 for producing Annex B forms for each other programme your training institute is accredited by the IRU Academy. Page 147 of 182 pages 11 Import of Students in AOL AOL enables all ATIs to have their student profiles automatically created based on import of student data files prepared by themselves either by means of data export from another system or by preparing student data files. In both cases, ATIs wishing to use this AOL function need to observe certain rules regarding the data and the format of the files which AOL can then import. ATIs may use the AOL student import function to significantly facilitate the creation of student profiles in AOL by automating this process in case they dispose of the students data organised in data files. 11.1 Preparing the Students’ Data File for Import in AOL In order for AOL to be able to import an ATI’s file containing students’ and driver qualification card data, automatically create the related students’ profiles and enrol them in a class, the following conditions must be met: - the ATI data file containing students and allocated cards needs to be prepared in accordance with certain technical requirements, for both the data in the file and the format of the file; the class in which imported students are to be automatically enrolled needs to be previously created by the ATI using AOL. The student and card data specifications, the file format requirements and the process of activating the function of student import and direct enrolment in a class are explained in detail in the sub-sections below. 11.1.1 Student and Card Data Specifications The student and card data made ready by ATIs for import in AOL must comply with the data type, length, cardinality (mandatory or optional data) and specific values as expected in AOL. All the fields participating in the process of creation of a student’s profile in AOL bear the same logical names as their labels visible on the AOL ‘Student profile’ page, an example of which is shown in the figure below: Page 148 of 182 pages The ‘Student ID’ and ‘Viewing Code’ values are generated by AOL upon creation of the student’s profile, while the ‘Certificates/Diplomas’ section of the Student Profile page displays those certificates/diplomas that the student has already acquired. For these reasons, the ‘Student ID’ and ‘Viewing Code’, as well as the ‘Certificates/Diplomas’ hyperlinks should not be included in the ATI’s student data files being imported in AOL. The full specification of the student profile data fields, their type, maximum length, character and example values for those fields which are specific are given in the table below: Family Name nvrchar Data Length 64 Family Name Local nvarchar 64 N Y First Name nvrchar 64 N Y First Name Local nvarchar 64 N Y Title Gender nvrchar Bit 50 1 N N Y Y Field Name Data Type Allow Nulls (Yes / No) N Mandatory Field (Yes / No) Y Page 149 of 182 pages Specific Values Latin characters Other characters Latin characters Other characters Male = 'M' / N Y 50 N Y nvarchar 40 N Y Country Of Birth nvrchar 50 N Y Language nvrchar 3 N Y Password nvrchar 50 N Y Address 1 nvrchar 80 N Y Address 1 Local nvarchar 40 N Y Address 2 nvrchar 80 Y N Address 2 Local nvarchar 40 Y N Address 3 nvrchar 80 Y N Address 3 Local nvarchar 40 Y N City nvrchar 50 N Y City Local nvarchar 40 N Y State Postal Code Prefix Postal Code Suffix nvrchar nvrchar nvrchar 50 40 40 Y N Y N Y N Country nvrchar 50 N Y Telephone Mobile Fax Email Employer Name Job Title Prof Address 1 Prof Address 2 Prof Address 3 Prof City Prof State Prof Postal Code Prefix Prof Postal Code nvrchar nvrchar nvrchar nvrchar nvrchar nvrchar nvrchar nvrchar nvrchar nvrchar nvrchar 80 80 80 80 80 80 80 80 80 50 50 N Y Y N Y Y Y Y Y Y Y Y N N Y N N N N N N N Female = 'F' Format 'DDMMM-YYYY' (e.g. '01-Jan1980') Latin characters Other characters English name of the country (e.g. 'Switzerland') 3-alpha ISO language code (ISO 639-2 code) (e.g. 'eng' for English language) Min. 8 characters, containing at least 1 digit (number) (e.g. ‘password1’) Latin characters Other characters Latin characters Other characters Latin characters Other characters Latin characters Other characters English name of the country (e.g. 'Switzerland') - nvrchar 40 Y N - nvrchar 40 Y N - Birth Date datetime Place Of Birth nvrchar Place of Birth Local Page 150 of 182 pages Suffix Prof Country Prof Telephone Prof Mobile Prof Fax Prof Email Civil Reg No Driver Licence No Driver Card ID Card Issuing Authority Card Issuing Authority Local nvrchar nvrchar nvrchar nvrchar nvrchar nvarchar nvarchar nvarchar 50 80 80 80 80 40 40 40 Y Y Y Y Y Y Y Y N N N N N N N N - nvarchar 40 Y N Latin characters nvarchar 40 Y N Other characters All mandatory fields (student data) that need to be included in the ATI’s student data files ready for import in AOL are highlighted in light red. For ensuring compatibility with national requirements for printing driver qualification cards using both English (transcription) and national language (character set), AOL allows import of necessary data for printing of bilingual driver qualification cards in both English and in the national language, using a Latin and another country-specific character set (e.g. Cyrillic or Arabic). 11.1.2 Data File Format and Limitations Besides observing the student and card data specifications mentioned in section 11.1.1 above, ATIs wishing to use the AOL Student and Card Data Import functionality need to organise the student and card data in data files observing certain file format requirements and limitations guaranteeing the proper import of the contained students data. AOL would accept for import student data organised in: - UNICODE TEXT or CSV files (*.txt or *.csv), with field names in the top row and data fields delimited by a <Tab> character; - Data files containing maximum: 300 student profiles (for massive students import, without direct enrolment into a class); 50 student profiles (for direct students import and enrolment into a class). An example of such a student data (TEXT) file prepared in accordance with the AOL requirements is given in the figure below: Page 151 of 182 pages 11.2 Editing the Students’ Data File If for any reasons you cannot comply with some of the AOL data requirements, because your data source for instance cannot provide for a specific field format, you can always edit your prepared TEXT (or CSV) data file using Microsoft Excel. To edit your data file using Microsoft Excel, start up Excel, select File / Open, select ‘Files of Type’ ‘Text Files (*.prn; *.txt; *.csv)’, locate your data file and click on ‘Open’: Click on ‘Next >’ in the ‘Text Import Wizard – Step 1 of 3’ screen: Click on ‘Next >’ in the ‘Text Import Wizard – Step 2 of 3’ screen: Click on ‘Finish’ in the ‘Text Import Wizard – Step 3 of 3’ screen: Page 152 of 182 pages Your data file will then open in Microsoft Excel: 11.3 Importing the Students’ Data File Once you have prepared your student data file for import in AOL in accordance with the specifications and requirements of the previous sections, you can initiate a request for importing the file in AOL and have AOL automatically check the file for basic consistency. AOL then allows you to proceed in 2 different ways: - Import the students from a data file (used for massive students import, without direct enrolment into a class); or - Import and automatically enrol students from a data file in a class (used for direct ATI enrolment of students after their import). The two ways to import students in AOL and the procedures to follow are explained in details in the sections below. 11.3.1 Massive Students Import, Without Enrolment Into a Class The procedure of massive import of your students’ data file consists of two steps, described in the next two sub-sections: 1. The ATI needs to send the students’ data file for import to AOL; 2. An IRU Academy user checks the data file once again, carries out the import in AOL and keeps you informed about the outcome of the import. In this way you may import large student data files containing up to 300 student records. Page 153 of 182 pages 11.3.1.1 Sending the Student Data File for Import To start the procedure of import of a students’ data file in AOL, follow the procedure described below: 1. Logon to the AOL ATI Module with your User Name and Password 2. Select ‘Student Management’ from the ATI Home Page: Page 154 of 182 pages 3. Select ‘Import Students’ on the Student Management page: AOL opens up the ‘Import Students from csv file’ page offering you to open an example of a csv file (import.csv hyperlink) or to have the example opened for editing in Excel (import.xls hyperlink): Page 155 of 182 pages 4. Click on the ‘Browse’ button, then select the file containing the students’ data to import in AOL and click on ‘Open’ in the ‘Choose File to Upload’ window: 5. Click on ‘Send file’ when back to the ‘Import Students from csv file’ page: AOL will carry out an automatic check on the file format and data consistency and will display an error message indicating the position and the nature of the first data consistency problem identified in the file selected for import: If you see such a message, edit the data file using Microsoft Excel, enter the missing student data in the indicated line, save the file and try to import again. Page 156 of 182 pages 6. When AOL accepts the student data file for import, it will give you a confirmation message in green (The file has been submitted to IRU successfully and will be imported into the system shortly). Click on the ‘ATI Home Page’ button to return to the ATI Home page when you receive the confirmation message: 11.3.1.2 Actual Import of the Students Data File Once an ATI successfully sends a student data file for import in AOL, the IRU Academy obtains an automatic e-mail from AOL asking its staff to import the data file. The IRU Academy staff will then check the data file once again in order to avoid any duplicate records in the database and will then import the data file sent from the ATI. After the attempt to actually import the data file, the IRU Academy will inform your ATI by e-mail about the outcome of the import, giving you the number of student records imported in AOL. From the moment of actual import of your students’ data file in AOL and receipt of the return information from the IRU Academy, your ATI can find the students’ profiles created in the AOL database and open any of them using the AOL ATI Module / Student Management function. Page 157 of 182 pages 11.3.1.3 Enrolment of Imported Students in ATI’s Classes Following a successful import of students in AOL, ATIs can now use the new functionality to massively enrol imported students into classes. Since the process of AOL student import does not allow import / creation of classes, the procedure which the ATI should follow if it wants to use massive enrolment of imported students in classes is the following: 1. Create a new class in AOL to be the class to which you need to enrol all students you had imported recently: 2. Click on the ‘Students in Class’ button then click on the ‘Add New Students’ button in the ‘Students in Class’ page: Page 158 of 182 pages 3. Use the new ‘Last Modification’ – ‘From’ and ‘To’ date fields in the ‘STUDENTS LIST’ page to indicate the date span when the students to be enrolled to the class have been imported in AOL (receipt of successful import e-mail from the IRU Academy): You can either indicate the dates manually or click in a date field and select the date from a calendar which appears: 4. After clicking on ‘Select’, AOL will display the results of your search in a grid in the lower of the ‘STUDENTS LIST’ page. Select the students to be enrolled to the given class one by one (by selecting their ‘Select’ check boxes) or simply click on the ‘Select All’ button to select all the students displayed in the grid: Page 159 of 182 pages 5. After having made your selection, click on ‘Update’ to enrol the selected students into the chosen class and AOL displays the Students in Class page for the chosen class: 11.3.2 Direct Students Import and Enrolment Into a Class Once you have prepared your student and card data file for import in AOL in accordance with the specifications and requirements of the previous sections, you can initiate the procedure of import of the student and card data file and automatic enrolment of the students in a class in AOL. When initiating this procedure, AOL will check the file for basic consistency. The AOL procedure of direct import of your student and card data file consists of three steps, described in the next three sub-sections: 1. The ATI needs to create a class in AOL into which it wants to have the imported students directly enrolled; 2. AOL checks the student profiles in the data file against available student records in the database and, in case it finds such, it updates the student profiles concerned with the information in the students data file; 3. The ATI user carries out the import in AOL by clicking on a button and is informed about the outcome of the import and enrolment of the students by AOL. 11.3.2.1 Creating a Class Where Imported Students Should be Enrolled To create a class in which you want to directly enrol imported students in AOL, follow the procedure described below: 1. Logon to the AOL ATI Module with your User Name and Password Page 160 of 182 pages 2. Select ‘Class Management’ from the ATI Home Page: 3. Select ‘Create New Class’ on the Class Management page: 4. Select ‘Product Name’, then click on the ‘Create’ button in the New Class Creation page: Page 161 of 182 pages AOL opens up the full ‘New Class Creation’ page offering you to enter all class details: 5. Fill in the necessary class data as usually upon creation of a new class in AOL, then click on ‘Update’ N.B. AOL now allows you to set a class ‘Start Date’ and ‘End Date’ in the past and update these dates at any time. The conditional relationship between these dates which you have to observe is: - a class ‘End Date’ cannot be earlier than the ‘Start Date’; - a class ‘Examination Date’ cannot be earlier than the ‘End Date’ and later than the current AOL system date; - the class ‘Start Date’ and ‘End Date’ can be updated at any time, as long as no ‘Examination Date’ has been set for any of the students in the same class. 6. Click on the ‘OK’ button when informed that the new class has been created Page 162 of 182 pages 7. Click on the ‘Students In Class’ button when the new class is displayed 8. Click on the ‘Import Students’ button in the Students In Class page AOL opens up the ‘Import Students from csv file’ page offering you to open an example of a csv file (import.csv hyperlink) or to have the example opened for editing in Excel (import.xls hyperlink): Page 163 of 182 pages 9. Click on the ‘Browse’ button, then select the file containing the students’ data to import in AOL and click on ‘Open’ in the ‘Choose File to Upload’ window: 10. Click on ‘Import File’ when back to the ‘Import Students from csv file’ page: 11.3.2.2 Checking the Students’ Data File for Existing Students AOL will carry out an automatic check on the file format and data consistency and will display an error message indicating the position and the nature of the first data consistency problem identified in the file selected for import: If you see such a message, edit the data file using Microsoft Excel, enter the missing student data in the indicated line, save the file and try to import again. Page 164 of 182 pages 11.3.2.3 Actual Import of the Students Data File and Direct Students’ Enrolment into the Class 11. When AOL accepts the student data file for import, it will give you a confirmation message in green (<number> students imported successfully). Click on the ‘Back’ button to return to the Students In Class page when you receive the confirmation message: AOL displays the ‘Students in Class’ page for the class into which imported students were enrolled: You can then proceed with the registration of the end of class actions (indication of examination results for the students, entering Examination Date for the students, printing certificates / diplomas and accompanying letters for the students in the class) in the usual way. N.B. Like already mentioned in section 11.3.2.1 above, AOL allows you to change the class Start Date and End Date even after enrolment of students in the class, but ONLY as long as no Examination Date has been specified for any of the students in the class! Page 165 of 182 pages 12 Export of Graduates from AOL AOL offers ATIs the possibility to export graduate and card data from ATI classes in data files designed in such a way as to ensure wide compatibility upon integration in other applications ATIs may use and their easy processing. The data specifications and the file format of the graduate data files exported by AOL are explained in detail in the subsections below. 12.1 Understanding AOL Export Data Files The graduate and card data ATIs can export from AOL consist of the ‘Graduate Personal Data’, ‘Graduate Personal Data Local’, ‘Graduate Professional Data’, their related ‘Class Data’, ‘Exam Data’ and ‘Driver Card Data’. For ATIs convenience, AOL offers the possibility to export graduate and card data from these 6 categories in accordance with the ATI’s wish and needs. Thus any time ATIs need to export graduates’ data from AOL, they may choose to export different set of data fields. For convenience, AOL keeps the ATI’s selection of graduate and card data elements for export once an export is made until the ATI changes it. 12.1.1 Graduate Data Specifications Data fields which AOL offers for export into graduates’ data files (per category) are: 1. Graduate Personal Data: Field Name Data Type Data Length 64 64 10,0 50 1 Nulls Allowed (Yes / No) N N N N N Family Name First Name Student ID Title Gender nvrchar nvrchar numeric nvrchar Bit Birth Date datetime Place Of Birth Country Of Birth Address 1 Address 2 Address 3 City State Postal Code Prefix Country Telephone Mobile Fax Email nvrchar nvrchar nvrchar nvrchar nvrchar nvrchar nvrchar nvrchar nvrchar nvrchar nvrchar nvrchar nvrchar 50 50 80 80 80 50 50 40 50 80 80 80 80 N N N Y Y N Y N N N Y Y N Language nvrchar 3 N Viewing Code numeric 7,0 N N Page 166 of 182 pages Specific Values ‐ ‐ ‐ ‘M’ = Male / ‘F’ = Female Format 'DD‐MMM‐YY' (e.g. '01‐Jan‐1980') ‐ ‐ ‐ ‐ ‐ ‐ ‐ ‐ ‐ ‐ ‐ ‐ ‐ 3‐alpha ISO language code (ISO 639‐2 code) (e.g. 'eng' for English language) ‐ 2. Graduate Personal Data Local: Field Name Family Name Local First Name Local Title Local Place Of Birth Local Country Of Birth Local Address 1 Local Address 2 Local Address 3 Local City Local State Local Postal Code Prefix Local Postal Code Suffix Local Country Local nvrchar nvrchar nvrchar nvrchar Data Length 64 64 50 50 nvrchar 50 N ‐ nvrchar nvrchar nvrchar nvrchar nvrchar 80 80 80 50 50 N Y Y N Y ‐ ‐ ‐ ‐ ‐ nvrchar 40 N ‐ nvrchar 40 N ‐ nvrchar 50 N ‐ Data Type Nulls Allowed (Yes / No) N N N N Specific Values ‐ ‐ ‐ ‐ 3. Graduate Professional Data: Field Name Employer Name Job Title Address 1 Address 2 Address 3 City State Postal Code Prefix Postal Code Suffix Country Telephone Mobile Fax Email Data Type nvrchar nvrchar nvrchar nvrchar nvrchar nvrchar nvrchar nvrchar nvarchar nvrchar nvrchar nvrchar nvrchar nvrchar Data Length 80 80 80 80 80 50 50 40 40 50 80 80 80 80 Nulls Allowed (Yes / No) Y Y Y Y Y Y Y Y Y Y Y Y Y Y Data Length 4,0 255 Nulls Allowed (Yes / No) N N N N N Specific Values ‐ ‐ ‐ ‐ ‐ ‐ ‐ ‐ ‐ ‐ ‐ ‐ ‐ ‐ 4. Class Data: Field Name Class ID Class Name Start Date End Date Instructor Name Data Type numeric nvarchar datetime datetime nvarchar 128 Specific Values ‐ ‐ ‐ ‐ ‐ 5. Exam Data: Field Name Exam Date Diploma ID Exam Result Data Type datetime numeric numeric Data Length 8,0 3,0 Nulls Allowed (Yes / No) N N N Page 167 of 182 pages Specific Values ‐ ‐ ‐ 6. Driver Card Data: Field Name Civil Reg No Driver Licence No Driver Card ID Card Issuing Authority Card Issuing Authority Local nvarchar nvarchar nvarchar Data Length 40 40 40 nvarchar 40 Y nvarchar 40 Y Data Type Nulls Allowed (Yes / No) Y Y Y Specific Values ‐ ‐ ‐ ‐ ‐ All graduates (personal and professional) data are exported using the same keyboard set (Latin or other) like the one your ATI has used upon registration of the student profiles in AOL. 12.1.2 Data File Format Besides knowing the graduate and card data specifications they can expect to find during AOL export mentioned in section 12.1.1 above, ATIs need to know how AOL organises the exported graduate and card data in data files. AOL would export graduates data organised in: - UNICODE CSV files called ‘ExportGraduates.csv’; - with field names in the top row; - with data fields delimited by a <Tab> (->|) character. An example of a graduate and card data file exported from AOL is given in the figure below: Page 168 of 182 pages 12.1.3 Editing the Graduate and Card Data File All CSV files can be edited using Microsoft Excel. As a part of the graduate and card data export procedure implemented in AOL, as soon as the graduate and card export file is produced, AOL will display a ‘File Download’ dialog window proposing you to open or to save the created file: To edit your graduate and card data file exported from AOL, click on ‘Open’ and the graduate and card data export file will open up in Microsoft Excel: If you click on ‘Save’, AOL will open up a ‘Save As’ dialogue window offering you to save the export data file under the name and at the network drive location of your choice: Page 169 of 182 pages 12.2 Exporting Graduate and Card Data from AOL To start the procedure of export of a graduates’ data file from AOL, follow the procedure described below: 1. Logon to the AOL ATI Module with your User Name and Password 2. Select ‘Class Management’ from the ATI Home Page: Page 170 of 182 pages 3. Select the class from which you want to export the graduates by clicking on the ‘Class ID’ hyperlink: 4. In the Class Details page, click on ‘Students in Class’: Page 171 of 182 pages 5. In the ‘Students in Class’ page, click on ‘Select All’ and then click on ‘Export Graduates’ 6. In the ‘Choose Graduate Data to Export’ page, select the data fields from each of the categories you want to have exported by ticking the check-boxes next to each of the data fields: You may also click the ‘Select All’ button to have all data fields of all the 4 categories selected for export. Clicking the ‘Select None’ button will unselect all data fields of all the 4 categories for export. Page 172 of 182 pages 7. To actually export the selected data fields from AOL in a file, click on the ‘Export Data’ button in the ‘Choose Graduate Data to Export’ page. AOL will then display a dialogue window proposing you to either open or save the graduates export file: To edit or save the graduate and card data file exported from AOL, refer to the instructions in section 12.1.3 above. Page 173 of 182 pages 13 Scanning and Attaching Official Authority / Examination Body Signatures on IRU Academy Certificates / Diplomas Official Authorities / Examination Bodies agreeing to sign IRU Academy certificates / diplomas issued by their national ATI(s) can scan and attach their scanned authorised representative’s signature by using the AOL ATI Module. Authorised representatives of Official Authorities / Examination Bodies can obtain access to the ATI Module upon request to the IRU Academy. Once the IRU Academy has created the Official Authority / Examination Body profile and has set the login parameters for their authorised representatives, AOL sends the login details (username and password) to the authorised representative(s) by e-mail to the address indicated in their profile. The procedure to follow in order to have the authorised representative of the Official Authority / Examination Body signature scanned and attached using the AOL ATI Module (after accreditation) requires the authorised representative to: 1) Logon to the AOL ATI Module using their appropriate login details (Username and Password): Page 174 of 182 pages 2) Click on the ‘Continue’ button when in the ATI Homepage: 3) Click on the ‘Continue’ button once again when in the Student Forecast per ATI page: Page 175 of 182 pages 4) Click on the ‘Signature’ button in the lower part of the Official Authority / Examination Body page displaying your details: 5) Click on the “Print Signature Form” button to produce a PDF signature form with instructions on how to attach signatures: Page 176 of 182 pages 6) Print the PDF form, have it signed by the General Manager in the ‘Signature Box’ (using a thick pen and aligning the signature to the left border of the frame), then scan the entire (A4 format) signed form in JPG format and save the scanned image on your PC / network: Page 177 of 182 pages 7) After having selected the file containing the scanned signature using the “Browse” button, click on the “Attach Signature File” button and AOL will display the attached signature on the page – click on the ‘Back’ button to finish the process and return to the Official Authority / Examination Body page: 8) Click on the ‘Submit & Continue’ button to save the attached scanned signature, then logout from the ATI Module to. The process of attaching your General Manager’s signature is thus finished. Page 178 of 182 pages 14 Adding Barcodes on IRU Academy Certificates / Diplomas To ensure further security and enable easy veracity checks of each IRU Academy certificate / diploma issued by the ATIs, AOL now also generates and prints unique certificate / diploma barcodes, based on the unique Diploma ID allocated automatically upon generation of each certificate / diploma. The certificate / diploma barcode used in AOL is based on the GS1 QR barcode: - integrated in each produced certificate/diploma, made up of the direct URL of the new AOL “Check Qualification Certificate” function, concatenated with the certificate / diploma ID, and ATIs may use this barcode when printing driver qualification cards, as a way to ensure veracity check of the related IRU Academy certificate / diploma as a proof of the driver’s qualification. As from the date of deployment of the present AOL release (16 July 2014), all IRU Academy certificates / diplomas issued by the ATIs will have an integrated GS1 QR barcode in the upper left-hand corner next to the graduate’s name, as shown in the image below: Due to technical constraints, the GS1 QR barcode attributed by AOL to any generated graduate certificate / diploma cannot be exported from AOL ready for its reuse for printing of driver qualification cards by the ATIs. However, to overcome this constraint, ATIs wishing to use the certificate / diploma GS1 QR barcodes for their printing on driver qualification cards may contact the IRU Academy and obtain an application which they can use to generate the identical barcodes which they can then reproduce for printing on driver qualification cards. Page 179 of 182 pages By means of the added GS1 QR barcodes on graduate certificates / diplomas generated in AOL, the process of checking the acquired professional qualification is simplified and made more straight-forward, as it is explained in the section 15 below. 15 Direct Certificate / Diploma Veracity Check AOL significantly simplifies the task of checking of the veracity of any certificate / diploma issued as a proof of the acquired professional qualification owing to the introduction of the direct ‘Check Qualification Certificate’ function and the integrated GS1 QR barcodes. Veracity of certificates / diplomas can be checked easily and at any time in either of the following 2 ways: 1. Using the new ‘Check Qualification Certificate’ function (button on the AOL Home Page): 2. By scanning of the GS1 QR barcode printed on the IRU Academy certificate / diploma (or driver qualification card) using a scanner or a mobile device (e.g. smart-phone). Please note that, unlike the ‘Public Graduate Page Access’ functionality, the new ‘Check Qualification Certificate’ function does not require any keys or passwords to be able to use it. All it simply requires is the certificate / diploma ID number as reproduced on the printer certificates / diplomas, or a mobile device able to scan GS1 QR barcodes. Page 180 of 182 pages 15.1 Direct Check using the ‘Check Qualification Certificate’ Function To directly check a qualification certificate / diploma, control authorities or anybody else wishing to do so needs to: - Open up the AOL Home Page (URL: https://www.iruacademyonline.com); Click on the ‘Check Qualification Certificate’ button - Type the ‘Certificate No’ in the Certificate / Diploma Search page and click on ‘Check’: Page 181 of 182 pages AOL then displays the certificate / diploma (without signatures) as generated upon its initial creation: 15.2 Direct Check using the Certificate / Diploma GS1 QR Barcode To directly check a qualification certificate / diploma, control authorities or anybody else wishing to do so needs to: - scan the certificate / diploma barcode using a mobile device (e.g. a smartphone); open the hyperlink displayed on screen following the successful scanning. The mobile device will then directly display on screen the AOL certificate / diploma (without signatures) as generated upon its initial creation in the same way as shown in the figure above. ***** Page 182 of 182 pages The International Road Transport Union (IRU), through its network of National Member Associations on all five continents, represents the entire road transport industry worldwide. It provides exclusive international recognition of professional excellence to Graduates holding Certificates and Diplomas delivered by IRU Academy Accredited Training Institutes (ATIs). It speaks for the operators of buses, coaches, taxis and trucks, from large fleets to ownerdrivers, in all international bodies that make decisions affecting road transport. Working with its Members and Partner Organisations for the highest professional standards, the IRU ensures the mobility of people and goods whilst improving environmental performance, safety and security. International Road Transport Union, IRU Academy 3, rue de Varembé B.P. 44 CH-1211 Geneva 20 Switzerland Tel: Fax: Email: Web: +41-22-918 20 51 (IRU Academy direct) +41-22-918 27 41 [email protected] www.iru.org/academy © 2014 IRU I-0129-1(e)