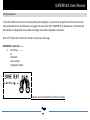
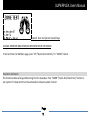
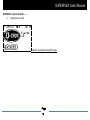
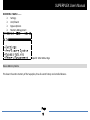
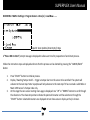
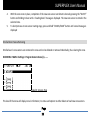
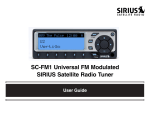
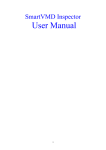
1
SUPERPLEX User’s Manual Products that work Software Release: V2.5 KE-MOBILEHQ-12- High performance, simplified wireless home security controller Thank you for purchasing this Kingdom Electronics product. For more exciting products and services, visit us at: www.kesa.co.za Developed in SA All rights reserved SUPERPLEX User’s Manual CONTENTS 1. 2. 3. 4. 5. Getting to know your Superplex Package List…………………………………………………………………………………………………………………………………….. Basic Specifications…………………………………………………………………………………………………………………………. Appearance…………………………………………………………………………………………………………………………………….. Idle menu screen Setting Up Your Superplex Power On/Off…………………………………………………………………………………………………………………………………. Battery Charging…………………………………………………………………………………………………………………………….. Interface to External Devices……………………………………………………………………………….. Exploring Quick Button Access Functions Open Menu…………………………………………………………………………………………………………………………………….. View Events History………………………………………………………………………………………………………………………… Test Zone Sensors…………………………………………………………………………………………………………………………… Panel Arm and Disarm……………………………………………………………………………………………………………………. Exploring Menu Functions Device Memory Delete…………………………………………………………………………………………………………………... Events History Memory Delete……………………………………………………………………………………………………….. Zone Sensor Bypassing……………………………………………………………………………………………………………………. New Remote Controller Enrolling……………………………………………………………………………………………………. Enrolled Remote Controller Removing……………………………………………………………………………………………. New Zone Sensor Enrolling……………………………………………………………………………………………………………… Enrolled Zone Passive Removing……………………………………………………………………………………………………… Date/Time Configurations……………………………………………………………………………………………………………….. Editing Enrolled Sensors………………………………………………………………………………………………………………….. Editing Enrolled Remotes……………………………………………………………………………………………………………….. Setting Clock alarm…………………………………………………………………………………………………………………………. Setting Auto Arm and disarm modes……….………………………………………………………………………………………. Using Features Away arming VS Stay Arming Real time alarm viewing and tracking Understanding events history logging Remote control button usage Zone sensor Health routine check Instant Messaging Notifications Page 1 SUPERPLEX User’s Manual 1. Getting to Know Your Superplex Package List Ensure the below list of items is packed in your Superplex packaging box. 1. 2. 3. 1 x Superplex Security Controller unit 1 x AC/DC wall charger 1 x Superplex User’s Manual CD Page 2 SUPERPLEX User’s Manual Basic Specifications Size: 105mm [L] x 65mm [W] x 21mm [H] Weight: 146g Max Standby time: approx 48 hours Max RF link range(insight): 250 meters Display: 128 x 64 pixel graphical [Blue backlight] Interface Port: RF Outputs to SPLEX3 receiver Will accept ROBOGUARD™ and MAMI cRED protocole Page 3 SUPERPLEX User’s Manual Appearance 1. 2. 3. 4. 5 6 5. 6. 7. 1 2 3 4 7 Page 4 UP / “Quick-Entry Zone Test” Down / “Quick-Entry Arm / Disarm” Select / “Quick-Entry Main Menu entry” Cancel or Back / “Quick-Entry Events History view” Antenna Display Charge Port SUPERPLEX User’s Manual 2. Setting up Your Superplex Power On/Off Power on: Press and hold in the CANCEL/BACK button for more than 2 seconds Power Off: Press “CANCEL/BACK” button and hold. The power down countdown timer will initialize and the system will shut down when it elapses. Tip: Power down can be aborted by pressing the “SELECT” button while countdown timer is active and decrementing. Battery Charging Plug the supplied AC/DC wall charger to AC mains and insert the charger’s pin into the Superplex’s charging port. System charging graphical message is displayed. Observe the battery level icon on display; it should indicate charging in progress by horizontal lines across the icon. When charging is complete, the battery level icon will display one solid bar. Thus four battery level status bars. Tip: Always allow full charging of the battery to maximise system’s active time and battery lifespan. Important! On first use of the Superplex, allow full charge of the battery. Should the Superplex not boot up after plugging in the charger and pressing the CANCEL button, press the reset switch for 2 seconds, located on the rear bottom right corner. Page 5 SUPERPLEX User’s Manual Interface to External Devices The Superplex is equipped with a RF output to interface to external devices. All alarm, tamper, trouble conditions can be monitored, see SPLEX3 user manual for detailed connections and operation. Output Number Port Type Configuration 1 Output Relay Function Siren 2 Output Open Collector Alarm 3 Output Relay Panic 4 Output Open Collector Tamper/Trouble 5 Output 12v LED Status Siren Output: Interface to siren control input of an external device. Its signals are as below: Superplex arming – 1 x pulse Superplex disarming – 2 x pulses Superplex disarming while alarm had triggered – 3 x pulses Detected Alarm/Tamper/ Panic – Latch (high) for 20sec or until alarm is silenced by user Alarm Output: Connect to external device to trigger when alarm detected. Signals are shown below: Alarm detection – Latch for 20sec or until alarm is silenced by user Page 6 SUPERPLEX User’s Manual Panic Output: Interface to external device to trigger when Panic alarm is detected. Signals described below: Panic alarm detection – latch (high) for 20sec or until alarm is silenced by user Tamper/Trouble output: Connect to external device to trigger when zone sensors are being tampered with or when their health status is faulted. Signals are described below: Tamper alarm detection - Latch (high) for 20sec or until alarm is silenced by user Trouble signal detection - Latch (high) for 20sec or until alarm is silenced by user Status Output: This port alerts the external device interfaced to it of the Superplex’s armed or disarmed status. Signals a described below: Superplex armed – Output is latched (high) Superplex disarmed – Output is latched (low) Superplex armed and has received alarm – Output pulsing until system disarm Page 7 SUPERPLEX User’s Manual 3. Exploring Quick Button Access Functions The user’s buttons are designed to have more than one function command in order to access multiple options depending on which page of the menu tree they’re viewing. “Quick Button Access” functions are only accessible on system’s idle menu and are described below, together with their alternating functions. Note: Ensure your Superplex is in idle menu page prior to practicing the below instructions. Snapshot: Idle Menu Page Page 8 SUPERPLEX User’s Manual Open Menu The “SELECT”/”Quick Menu Entry” button is used to enter the Superplex’s Main Menu when in idle menu level. The Main Menu is the initial page of the menu tree to allow user to access features of the Superplex. Press “SELECT”/”Quick Menu Entry” button to enter Main Menu. IDLE MENU > Main Menu >……… Settings Arm/Disarm System Bypass Options Memory Management Snapshot: Main Menu Page Page 9 SUPERPLEX User’s Manual View Events History The Superplex is capable of logging real time events into its event history memory. These events are accessible to the user using the “Quick Events Entry” button. One event’s information is displayed at the time and scrolling up or down leads to viewing a previous or next event, respectively. Event view wrapping is possible after viewing the last or first event. Press “CANCEL or BACK”/”Quick Events Entry” button to enter Events View IDLE MENU > History >……… Event number Event Date – Event Time Event Type Originator’s Name Snapshot: History Page Page 10 SUPERPLEX User’s Manual Test Zone Sensors To test if enrolled zone sensors are discoverable by the Superplex, a zone test can be performed. Enter the zone test menu and walk pass the enrolled sensor to trigger intrusion alarm (NOT TAMPER). If enrolled sensor is functional and discoverable, its designated zone number and origin name will be displayed as detected. Press “UP”/”Quick Zone Test Entry” button to enter Zone Test page IDLE MENU > Zone Test >……… Searching……………… Or Detected Zone number Originator’s Name Snapshot: Zone Test (Searching for Devices) Page Page 11 SUPERPLEX User’s Manual Snapshot: Zone Test (Device Found!) Page A SIGNAL STRENGTH INDICATION WILL BE DISPLAYED ON THE SCREEN To exit and return to Idle Menu page, press “UP”/”Quick Zone Test Entry” or “CANCEL” button. Panel Arm and Disarm This function enables arming and disarming from the Superplex. Press “DOWN”/”Quick Arm/Disarm Entry” button to arm system if it’s disarmed. Press the same button to disarm system if armed. Page 12 SUPERPLEX User’s Manual IDLE MENU > System Armed >……… Superplex is armed Snapshot: Superplex Armed Idle Page Page 13 SUPERPLEX User’s Manual IDLE MENU > System Disarmed >……… Superplex is disarmed Snapshot: Superplex Disarmed Idle Page 4. Exploring Menu Functions From the Idle Menu, the Main Menu is accessed by pressing the “Quick Main Menu” button. This leads to the menu tree as below. To navigate the menu, the primary functions of the buttons are instated over the alternative. This means “UP” and “DOWN” buttons allows user to either scroll up or down in the menu, respectively. The “SELECT” button is therefore used to accept/ enter or confirm pointed option. Finally, the “CANCEL/BACK” button is used to revert to previous menu page, cancel or exit process. Page 14 SUPERPLEX User’s Manual IDLE MENU > MAIN >……… Settings Arm/Disarm Bypass Options Memory Management Snapshot: Main Menu Page Device Memory Delete This clears the entire memory of the Superplex, thus all events history and enrolled devices. Page 15 SUPERPLEX User’s Manual IDLE MENU > MAIN > MEMORY MANAGEMENT > Erase All Memory……… Snapshot: Memory Management Page A prompt message will be displayed in order to ascertain memory clearing operation. Follow the displayed instructions. Tip: The Superplex prompt messages will often refer to “CANCEL” button as “C” and “SELECT” button as “OK”. Page 16 SUPERPLEX User’s Manual Events History Memory Delete This option will only clear all stored events and reset events counter to zero. IDLE MENU > MAIN > MEMORY MANAGEMENT > Erase Event History……… Snapshot: Memory Management Page Follow prompt message to perform operation. Page 17 SUPERPLEX User’s Manual Zone Sensor Bypassing The Superplex is equipped with the zone bypassing feature. All alarm signals from the bypassed zone sensors are ignored by system. The bypass option can be individually set or cleared for each of the 32 zones. Inactive zone bypassing is prohibited. Zones remain bypassed until cleared, only to be used if sensor is faulty. IDLE MENU > MAIN > Bypass Options……… Snapshot: Bypass Settings Page This page displays the zone number and name to be configured including its current state. “UP” button: Scroll up to the next zone “DOWN” button: Scroll down to the previous zone “SELECT” button: Set displayed zone sensor’s bypass or clear displayed zone sensor’s bypass “CANCEL/BACK” button: Abort and return to previous menu page Page 18 SUPERPLEX User’s Manual New Remote Controller Enrolling The Superplex is capable of enrolling up to eight Robo compatible remote controllers with up to four buttons. All four buttons on remote are user configurable and each remote can be granted a user’s choice name during the enrolling process. IDLE MENU > MAIN > Settings > Program Remotes……… Snapshot: Remotes Page At this point, the “REMOTES” page is displayed to allow user to select a slot to enrol a new remote controller. Slots are entities in Superplex’s memory to hold an enrolled remote controller’s information. “UP” button: Scroll up the slot selection “DOWN” button: Scroll down the slot selection “SELECT” button: Select the pointed slot and advance to next menu page (see below) “CANCEL/BACK” button: Abort and return to previous menu page Upon Slot selection of user’s choice, the menu will advance to the next page as below. Page 19 SUPERPLEX User’s Manual IDLE MENU > MAIN > Settings > Program Remotes >Slot (n)……… Snapshot: Slot Update (Slot Full!) Page This level of the menu will display Slot’s information, its status and options to either delete Slot or load new remote controller. If the Slot is available for storing new remote controller, the status message “>EMPTY<” is displayed and If the Slot has stored contents, the name of the stored remote controller is displayed rather. “UP” button: Scroll up the menu options “DOWN” button: Scroll down the menu options “SELECT” button: Select the pointed option and advance to next menu page (see below) “CANCEL/BACK” button: Abort and return to previous menu page If Slot is not in use, select the “Load New” option to advance to the next menu page as below or else follow the instructions in Enrolled Remote Controller Removing to clear Slot. Page 20 SUPERPLEX User’s Manual IDLE MENU > MAIN > Settings > Program Remotes >Slot (n) > Load New……… Snapshot: Slot Update (Slot Empty!) page A “Press >OK< to Start” prompt message is displayed to allow user time for preparation of enrolment process. Follow the instruction steps as displayed and note that the process can be aborted by pressing the “CANCEL/BACK” button. 1. 2. 3. 4. Press “SELECT” button to initialize process. Display “Waiting for Button 1” – Press the first button on remote controller to configure its function. Note: Superplex will only advance to the next step if it has received a valid Robo remote controller’s button data. Select desired button function from the four displayed options. Use the “UP” or “DOWN” buttons to scroll through the options and the “SELECT” button to accept pointed selection. Follow the instruction displayed. Repeat process in 2. And 3. For all four buttons. Note: Less than four buttons can be loaded if desired. This is done by pressing the “SELECT” button while the system prompts you to load a button. Page 21 SUPERPLEX User’s Manual 5. 6. 7. Upon the last button being loaded or skipped as mentioned above, the system will advance to the remote naming menu page. Use “UP” or “DOWN” buttons to scroll through the characters. The character pointers indicate the pointed character and the selection is through the “SELECT” button. Selected characters are displayed on text show area on display as they’re chosen. With the remote name in place, completion of the new remote controller enrolment is done by pressing the “SELECT” button and holding it down until a “Loading done” message is displayed. The new remote is stored in the selected slot. To abort process at remote naming stage, press and hold “CANCEL/BACK” button until cancel message is displayed Enrolled Remote Controller Removing Enrolled user’s remote controllers are contained in Slots and can be deleted or removed individually, thus clearing the Slot. Page 22 SUPERPLEX User’s Manual IDLE MENU > MAIN > Settings > Program Remotes >Slot (n)……… Snapshot: Remotes Page This level of the menu will display Slot’s information, its status and options to either delete Slot or load new remote controller. If the Slot is available for storing new remote controller, the status message “>EMPTY<” is displayed and If the Slot has stored contents, the name of the stored remote controller is displayed rather. “UP” button: Scroll up the menu options “DOWN” button: Scroll down the menu options “SELECT” button: Select the pointed option and advance to next menu page (see below) “CANCEL/BACK” button: Abort and return to previous menu page If the Slot contains the desired remote controller to delete select the “Erase” option to advance to the next menu page as below. Page 23 SUPERPLEX User’s Manual IDLE MENU > MAIN > Settings > Program Remotes >Slot (n) > Erase……… Snapshot: Slot Update (Slot Full!) Page A prompt message will be displayed in order to ascertain remote controller delete operation. Follow the displayed instructions. New Zone Sensor Enrolling Up to 32 zone sensors can be enrolled by the Superplex. Each zone sensor can be allocated a user defined name. See below the process to enrol new sensors. Page 24 SUPERPLEX User’s Manual IDLE MENU > MAIN > Settings > Program Sensors……… Snapshot: Sensors Page At this point, the “SENSORS” menu page is displayed to allow user to select a zone to enrol a new zone sensor. Zones are entities in Superplex’s memory to hold an enrolled zone sensor’s information. “UP” button: Scroll up the zone selection “DOWN” button: Scroll down the zone selection “SELECT” button: Select the pointed zone and advance to next menu page (see below) “CANCEL/BACK” button: Abort and return to previous menu page Upon zone selection of user’s choice, the menu will advance to the next page as below. Page 25 SUPERPLEX User’s Manual IDLE MENU > MAIN > Settings > Program Sensors >Zone (n)……… Snapshot: Zone Update (Zone Full!) Page) This level of the menu will display zone’s information, its status and options to either delete or load new zone sensor. If the zone is available for storing new a zone sensor, the status message “>EMPTY<” is displayed and If the zone has stored contents, the name of the stored zone sensor is displayed rather. “UP” button: Scroll up the menu options “DOWN” button: Scroll down the menu options “SELECT” button: Select the pointed option and advance to next menu page (see below) “CANCEL/BACK” button: Abort and return to previous menu page If the zone is not in use, select the “Load New” option to advance to the next menu page as below or else follow the instructions in Enrolled Zone Sensor Removing to clear zone. Page 26 SUPERPLEX User’s Manual IDLE MENU > MAIN > Settings > Program Sensors >Zone (n) > Load New……… Snapshot: Zone Update (Zone Empty!) Page A “Press >OK< to Start” prompt message is displayed to allow user time for preparation of enrolment process. Follow the instruction steps as displayed and note that the process can be aborted by pressing the “CANCEL/BACK” button. 1. 2. 3. Press “SELECT” button to initialize process. Display “Awaiting Tamper Code” – Trigger a tamper alarm on the sensor to be enrolled. The system will advance to the next step. Note: Superplex will only advance to the next step if it has received a valid Robo or Mami cRED sensor’s Tamper code only. At this stage the zone sensor naming menu page is displayed. Use “UP” or “DOWN” buttons to scroll through the characters. The character pointers indicate the pointed character and the selection is through the “SELECT” button. Selected characters are displayed on text show area on display as they’re chosen. Page 27 SUPERPLEX User’s Manual 4. 5. With the zone name in place, completion of the new zone sensor enrolment is done by pressing the “SELECT” button and holding it down until a “Loading done” message is displayed. The new zone sensor is stored in the selected zone. To abort process at zone sensor naming stage, press and hold “CANCEL/BACK” button until cancel message is displayed Enrolled Zone Passive Removing Enrolled user’s zone sensors are contained in zones and can be deleted or removed individually, thus clearing the zone. IDLE MENU > MAIN > Settings > Program Sensors>Zone (n)……… Snapshot: Sensors Page This level of the menu will display zone’s information, its status and options to either delete or load new zone sensors. Page 28 SUPERPLEX User’s Manual If the zone is available for storing new zone sensors, the status message “>EMPTY<” is displayed and If the zone has stored contents, the name of the stored zone sensor is displayed rather. “UP” button: Scroll up the menu options “DOWN” button: Scroll down the menu options “SELECT” button: Select the pointed option and advance to next menu page (see below) “CANCEL/BACK” button: Abort and return to previous menu page If the zone contains the desired zone sensor to delete, select the “Erase” option to advance to the next menu page as below. IDLE MENU > MAIN > Settings > Program Sensors >Zone (n) > Erase……… Snapshot: Zone Update (Zone Full!) Page) Page 29 SUPERPLEX User’s Manual A prompt message will be displayed in order to ascertain zone sensor delete operation. Follow the displayed instructions. Date/Time Configurations Date and time can be setup by user as guided below. To setup time, navigate to the menu page as below. IDLE MENU > MAIN > Settings > Date/Time Set > Set Time……… Snapshot: Time Set Page Time in hours and minutes will be displayed. The settable time parameter is indicated by a continuous digit flash. The user buttons are used to set these parameters. Page 30 SUPERPLEX User’s Manual “UP” button: Increment the selected parameter value “DOWN” button: Decrement the selected parameter value “SELECT” button: Accept the set parameter value and advance to the next “CANCEL/BACK” button: Abort and return to previous menu page Follow the above instructions to set the next parameter and press “SELECT” button to save and exit setup. To setup date, navigate to the menu page as below. IDLE MENU > MAIN > Settings > Date/Time Set > Set Date……… Snapshot: Date Set Page Date in DD/MM/YY configuration will be displayed. The settable date parameter is indicated by a continuous digit flash. The user buttons are used to set these parameters. Page 31 SUPERPLEX User’s Manual “UP” button: Increment the selected parameter value “DOWN” button: Decrement the selected parameter value “SELECT” button: Accept the set parameter value and advance to the next “CANCEL/BACK” button: Abort and return to previous menu page Editing Enrolled Sensors Zone sensors have two editable parameters which can be accessed by user. To navigate to the edit pages follow the guide below. IDLE MENU > MAIN > Edit devices > Sensors……… Zone 1 sensor information will be displayed, its user assigned name and its “Away/Stay” mode configuration. If there’s no sensor loaded, the zone will declare void state by text “EMPTY” and this will restrict attempts to alter configurable parameters. To scroll through all 32 zones and view their information, use the buttons as below. “UP” button: Scroll up to view next zone “DOWN” button: Scroll down to view previous zone “SELECT” button: Open viewed zone sensor’s editable parameters “CANCEL/BACK” button: Abort and return to previous menu page To edit the user assigned name of a zone sensor, navigate through pages as below. Page 32 SUPERPLEX User’s Manual IDLE MENU > MAIN > Edit devices > Sensors > Change name……… Enter the new desirable name of user’s choice by horizontal scrolling through the characters and selecting the appropriate. Use buttons as below “UP” button: Scroll left through characters “DOWN” button: Scroll right through characters “SELECT” button: Accept character pointed “CANCEL/BACK” button: Backspace and clear “UP” button & Hold: Automated fast scroll left /“DOWN” button & Hold: Automated fast scroll right /“SELECT” button & HOLD: Accept typed characters and save /“CANCEL/BACK” button & HOLD: exit or abort operation To edit the “Away/Stay” state of a zone sensor, navigate through pages as below. Navigate to the page as below to set zone sensor to Away state IDLE MENU > MAIN > Edit devices > Sensors > Change Mode > Away……… Navigate to the page as below to set zone sensor to Away state IDLE MENU > MAIN > Edit devices > Sensors > Change Mode > Stay……… Use buttons as below for your selections. “UP” button: Scroll up to the next option Page 33 SUPERPLEX User’s Manual “DOWN” button: Scroll down to the next option “SELECT” button: set zone sensor to current pointed option “CANCEL/BACK” button: Abort and return to previous menu page Editing Enrolled Remotes Remote controllers have one editable parameter which can be accessed by user. To navigate to the edit pages follow the guide below. IDLE MENU > MAIN > Edit devices > Remotes ……… Slot 1’s remote controller information will be displayed together with its user assigned name. If there’s no remote controller loaded, the slot will declare void state by text “EMPTY” and this will restrict attempts to alter configurable parameters. To scroll through all 8 slots and view their information, use the buttons as below. “UP” button: Scroll up to view next slot “DOWN” button: Scroll down to view previous slot “SELECT” button: Open viewed slot’s remote controller editable parameters “CANCEL/BACK” button: Abort and return to previous menu page To edit the user assigned name of a slot’s remote controller, navigate through pages as below. IDLE MENU > MAIN > Edit devices > Remotes > Change name……… Page 34 SUPERPLEX User’s Manual Enter the new desirable name of user’s choice by horizontal scrolling through the characters and selecting the appropriate. Use buttons as below “UP” button: Scroll left through characters “DOWN” button: Scroll right through characters “SELECT” button: Accept character pointed “CANCEL/BACK” button: Backspace and clear “UP” button & Hold: Automated fast scroll left /“DOWN” button & Hold: Automated fast scroll right /“SELECT” button & HOLD: Accept typed characters and save /“CANCEL/BACK” button & HOLD: exit or abort operation Setting Clock Alarm The real time clock of the Superplex enables clock alarm functionality and to set it, the below guide should be followed. There are two requirements to using the clock alarm. First set a user choice alarm time and enable clock alarm usage/function. To enable the clock alarm usage, navigate to the page as below. IDLE MENU > MAIN > Settings > Extras> Clock Alarm Set……… The current clock alarm time is displayed. Page 35 SUPERPLEX User’s Manual While in this page select “Clock Alarm ON/OFF” option and press “SELECT” button, this should toggle the state of the clock alarm usage ON/OFF. When this function is active, a clock icon will be visible at the top of the display and if function is OFF it will be remove d. To setup user choice clock alarm, navigate to the page as below IDLE MENU > MAIN > Settings > Extras> Clock Alarm Set > Set alarm time……… Time in hours and minutes will be displayed. The settable time parameter is indicated by a continuous digit flash. The user buttons are used to set these parameters. “UP” button: Increment the selected parameter value “DOWN” button: Decrement the selected parameter value “SELECT” button: Accept the set parameter value and advance to the next “CANCEL/BACK” button: Abort and return to previous menu page Follow the above instructions to set the next parameter and press “SELECT” button to save and exit setup. Setting Auto Arm and Disarm Modes The auto arm function is used to either arm or disarm the Superplex when input times set by user are reached. The settable arm time is used to automatically arm and the disarm time is used for automatically disarming the Superplex. Page 36 SUPERPLEX User’s Manual To navigate to the auto arm/disarm page, follow the lead below. IDLE MENU > MAIN > Settings > Extras> Auto Arm/Disarm……… This page when opened will offer you three option used to setup this function. The “Set Auto” used to enable or disable the auto arm function. The current values of the auto arm and disarm are displayed. Select the option, and press “SELECT” button to toggle the auto arm/disarm function. When mode is active, a circled letter “A” icon will be displayed on the top of display and removed when function is deactivated. To set the Auto arm time, navigate to the page as below. IDLE MENU > MAIN > Settings > Extras> Auto Arm/Disarm > Set Arm Time……… Time in hours and minutes will be displayed. The settable time parameter is indicated by a continuous digit flash. The user buttons are used to set these parameters. “UP” button: Increment the selected parameter value “DOWN” button: Decrement the selected parameter value “SELECT” button: Accept the set parameter value and advance to the next “CANCEL/BACK” button: Abort and return to previous menu page Page 37 SUPERPLEX User’s Manual Follow the above instructions to set the next parameter and press “SELECT” button to save and exit setup. To set the Auto disarm time; navigate to the section below. IDLE MENU > MAIN > Settings > Extras> Auto Arm/Disarm > Set Disarm Time……… Time in hours and minutes will be displayed. The settable time parameter is indicated by a continuous digit flash. The user buttons are used to set these parameters. “UP” button: Increment the selected parameter value “DOWN” button: Decrement the selected parameter value “SELECT” button: Accept the set parameter value and advance to the next “CANCEL/BACK” button: Abort and return to previous menu page Follow the above instructions to set the next parameter and press “SELECT” button to save and exit setup. IDLE MENU > MAIN > Settings > Extras> Jam Mode > Turn Jamming Detection ON/OFF……… “SELECT” button: Turn Jamming Detection ON or OFF “CANCEL/BACK” button: Abort and return to previous menu page A continuous jamming signal will trigger the Superplex to emit 7 quick beeps and log a Jamming Event Page 38 SUPERPLEX User’s Manual IDLE MENU > MAIN > Settings > Extras> Chime Mode > Turn Chime Mode ON/OFF……… “SELECT” button: Turn Chime Mode ON or OFF “CANCEL/BACK” button: Abort and return to previous menu page Chime mode will allow the user to detect movement in any zone while the Superplex is disarmed IDLE MENU > MAIN > Settings > Extras> Vibrator Mode > Turn Vibration Motor ON/OFF……… “SELECT” button: Turns Vibration Motor ON or OFF “CANCEL/BACK” button: Abort and return to previous menu page The Vibration motor will not work in conjunction with the beeper if turned off Page 39 SUPERPLEX User’s Manual 5. Using Features This section will familiarize you with using the features of the Superplex. Refer to the previous section for procedures that are not detailed. Away Arming, Stay Arming and Bypass Sensors There are two modes in which you can arm your Superplex and both modes differ in security levels. While Bypass Sensors has similar characteristics, it is not used in the same manner as the Away and Stay arming modes. Stay mode arming is used to arm all sensors besides those declared as “Stay Zones”. Stay Zones are sensors that are user selected as deliberately undiscoverable or ignored by the Superplex controller when it’s armed. This makes this mode more attractive when there’s someone in the area but some surrounding location zone sensors within the property requires to be armed. On the contrary, Away mode arming when active will arm all sensors including those marked as “Stay Zones”. This arming mode is more suitable when no one is in the vicinity. The Bypass Sensor option is used to completely isolate a certain zone sensor from the Superplex, whether the system is armed or not. This is suitable for bypassing faulty zone sensors which require maintenance. Page 40 SUPERPLEX User’s Manual Real Time Alarm Viewing and Tracking The performance of the Superplex makes it possible instant alarms as they trigger. For every alarm signal that’s triggered, its device’s name and type of alarm is displayed instantly. If another alarm triggers while the other is still active, the second alarm will be displayed just below the first one. The same goes the next alarms that follow. Due to the instant alarm display function, tracking burglars with by observing which sensors are triggered and in which sequence. Understanding Events History Logging Events History is but one of the powerful features of the Superplex which makes easy to manage your security. Below is the list of events logged. Zone sensor Arming and Disarming irrespective of Away or Stay mode Remote controller Panic alarm Zone sensor trouble alarm Zone sensor Tamper alarm Zone sensor Intruder detect alarm ( aka “Alarm”) All these events are logged in Events History memory with their assigned device names, time and date they were triggered. Page 41 SUPERPLEX User’s Manual The Events history memory can log up to 199 events and if full, the next overlapping event will be written in location 1. This overwrites the previous data stored at that location. The wrap indicator will be displayed in Idle menu should such instance exist. NB: It is up to the user to clear Events History if old data is beyond its use. Remote Controller Button Usage The Superplex controller module is packaged with two compatible Qtron remote controllers with four user buttons. All four buttons can be configured to be used for any of the three functions offered by the Superplex. The three functions available are: Remote Arm Stay mode Remote Panic Alarm Remote Arm away mode Remote Arm Stay mode is used to arm the Superplex in stay mode and the Remote Arm Away mode in away mode. The Panic alarm is used to send a panic signal from remote locations to the Superplex to trigger panic alarm. Zone Sensor Health Routine Check Zone sensors a constantly monitored for possible RF link failure, drained battery and any other failures that can bridge the system’s security. The Superplex runs these routine health inspections at defined intervals silently and reports any possible health problems of faulty zone sensors followed by event history logging. Page 42 SUPERPLEX User’s Manual Instant Messaging Notifications Another great feature of the Superplex controller is the Instant Messaging Notifications. While the system is in idle mode, any received alarming signal is indicated by a big icon after an alarm condition has exited. These icons are helpful in monitoring missed alarms or alarming conditions. All alarm signals are represented by a big inbox icon and the number of possible events that might have been missed. On the other hand, the health alarm condition is represented by a health icon also accompanied by its relative number of such condition. Both the icons are only cleared by viewing the Events history. Page 43