1
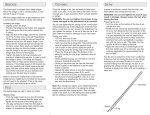
®
Installation Instructions
www.dtar.com
duncan|turner acoustic research
Wave-Length™ UST
With Load ‘N Lock Battery Access
and Volume and Tone Module
www.dtar.com
|
Information in this document is subject to
change without notice.
© 2007 D-TAR. All right reserved
|
Installation
Instructions
501055-150
P/N
Rev.
A
Contents
Important Notes – Read First..............4
Installation.............................................5
Usage......................................................9
Limited Warranty................................11
www.dtar.com
|
Important Notes – Read First
Congratulations on your purchase of a D-TAR
Wave-Length UST with Load ’N Lock Battery
Access. Once installed, this system will
not only give you great acoustic tone (with
incredible headroom thanks to its 18 volts of
power), but also the easiest battery change
ever.
IMPORTANT: Please read these instructions
in their entirety before going any further with
your D-TAR product.
WARNING: The Load ’N Lock Battery
Access requires a complex installation
that should NOT be attempted by anyone
other than a professional luthier. Do
not try this yourself. D-TAR assumes no
liability or responsibility for any damage
to your instrument resulting from the
installation process. Bring your guitar to a
professional luthier to install your WaveLength UST with Load ’N Lock Battery
Access and Volume and Tone Module.
|
Installation Instructions
Tools required
1. 7/64” and 1/8” drill bits for drilling
pickup hole.
2. Small screwdriver with 1/8’ wide blade or slightly narrower.
3. Electric drill with 1/2” chuck.
4. An acceptable 7/8” cutting bit. We recommend a Forstner bit or a hole saw. A twist drill is not recommended.
5. Medium Crescent wrench.
www.dtar.com
|
Load ‘N Lock Battery Access
Installation
1.
Carefully cut the strap button off slightly above the surface of the guitar. You can
apply a layer of masking tape around the
button before cutting to protect the
surface of the guitar. If your guitar has
a metal end pin that is screwed in place, simply unscrew it. If you intend to use a Forstner bit to drill the 7/8” hole (step 2),
it maybe necessary to fill the end pin hole with a wooden dowel first in order to establish a secure starting point for drilling the final hole
2. Drill a 7/8” diameter hole into the guitar
at the strap button. Use a Forstner bit
or a hole saw. Do not attempt to use a conventional twist drill as you will most likely damage the guitar. Anchor the guitar securely or have an assistant hold it firmly against the work bench
3.
Insert the Load ’N Lock module into the inside of the guitar and through the new hole with the inner nut installed and thick rubber washer threaded in place (refer to figs. 1, 2 and 3).
4. Screw on the outer nut.
|
Installation Instructions
FIGURE 1
FIGURE 2
FIGURE 3
www.dtar.com
|
Load ‘N Lock Battery Access
5.
IMPORTANT: The outer nut must screw down flush with the battery tube. If the battery tube is significantly below or above the surface of the outer nut, remove the Load ’N Lock from the guitar and adjust the inner nut accordingly (refer to fig. 4).
6.
Slide two AA batteries, positive terminal first, into the battery tube. Install the
jack into the battery tube by first aligning
the two white marks (refer to fig. 5). The jack should then slide smoothly into the
tube until a slight resistance is felt near the end as the electrical contacts click into place. Finish by rotating the knurled end cap until the pins drop into the slot on the outer nut. A 1/4 turn clockwise of the end cap will lock it in place. The end cap should have a slight click at the end of the 1/4 turn ensuring that the jack is securely fastened (refer to fig. 6).
FIGURE 4
|
Installation Instructions
7.
Install the piezo pickup element using the same procedures as for the
Wave-Length UST. (See Installation Instructions for Wave-Length Pickup element on pg. 10)
8. Load ’N Lock installation is complete.
FIGURE 5
FIGURE 6
www.dtar.com
|
Wave-Length Pickup Element
Important Notes – Read First
1.
Avoid any rough handling of the pickup. Bending, kinking or other physical damage could cause problems with
string balance and output level.
2.
For optimum performance and balance, the bridge slot must have a clean and
flat bottom surface. It should be free of overspray or debris and be a minimum
of 1/8” deep with 3/16” or more being preferred. The proper depth slot helps avoid excessive saddle tilt and maintains better saddle contact with the pickup. A minimum of 50% of the total saddle height must be below the top of the slot.
3.
Check the saddle to saddle slot fit before you begin work. If the saddle is too loose in the slot, it will cause excessive saddle tilt and will usually result in poor coupling to the pickup, low output and unbalanced string response. It is advisable to replace the saddle if it is too loose. Conversely, if the saddle is too tight and does not slide
in with only minimal force, the sides must
be sanded until it slides in smoothly
10
|
Installation Instructions
4.
The last 1/8” at the end of the pickup
is not active. At least ¼” of saddle
must project beyond the E strings for the pickup to produce a balanced string response. If your guitar has inadequate saddle slot extension beyond the outside strings, it will be necessary to drill a small horizontal hole at the appropriate end of the slot to extend the inactive region
of the pickup beyond the saddle. It is important to avoid disrupting the floor
of the saddle slot when doing this. To protect the slot, lay a narrow slotted screwdriver under the tip of the drill bit before drilling the horizontal hole.
(refer to Fig. 7)
5.
The two trim pots are pre-set for 3dB
of both bass and treble boost. You can adjust these to you personal preference through the two holes on the top cover of the preamp.
FIGURE 7
www.dtar.com
|
11
Wave-Length Pickup Element
Installation
1.
Remove the strings from the guitar. If
you wish to exactly duplicate the string height, you can scribe a line on the front side of the saddle where it extends above the bridge. You can later use that line
as a guide to remove material from the bottom of the saddle to compensate for the thickness of the pickup (~.034”).
2. Remove the saddle.
3.
Drill the pickup hole at a 45 degree angle at the very end of the saddle slot (either end is OK). If you have a 1/8” saddle,
a 1/8” drill bit should be used assuming it fits into the slot smoothly. If it feels
tight, use a 7/64” bit. Place the blade
of the narrow screwdriver under the tip
of the drill bit when drilling to avoid removing material from the bottom of the slot. (refer to Fig. 7)
4. Blow out the slot with compressed air and check for debris or obstructions.
5. Round the inside of the hole where it meets with the bottom of the slot using
a small file or knife. This will allow the 12
|
Installation Instructions
FIGURE 8
pickup to make a more gradual transition into the slot and promote better balance. (refer to Fig. 8)
6.
Working from the inside of the guitar, insert the pickup through the hole drilled in step 3. Continue sliding the pickup into the slot until it reaches the opposite end or, in the case of a short saddle, until it slides into the shallow hole that was drilled at the far end of the slot. (refer to note 5 under “Important Notes)
7.
Insert the saddle into the slot. If you intend to adjust the height, proceed to step 8. If you do not intend to adjust the height, skip to step 10.
8.
Note the height of the previously scribed line in relation to the top surface of the bridge. This is an indicator of the amount of material that needs to be removed. Leave a small amount of material (.005” to .010”) to be removed by hand sanding.
www.dtar.com
|
13
Wave-Length Pickup Element
a. The preferred method is to use a vertical mill with a sharp ¼” diameter end mill turning at around 1000 RPM. Set up your work carefully to ensure
even material removal.
b. A second method is to use a belt sander with an approx. 150 grit belt. Be careful to keep the saddle perpendicular to the belt and remove material evenly from the entire surface.
9.
Carefully finish sand the bottom by hand using 320 grit sandpaper on a piece of plate glass or any flat, machined surface. Check flatness of the saddle bottom by marking the entire surface with a pencil and then sanding a few extra strokes. The pencil should be removed evenly.
At this point, lightly chamfer all bottom edges of the saddle to remove the sharpness.
10. You now must carefully inspect and adjust the fit of the saddle in the slot.
14
a. The saddle should slide into the slot smoothly and with very little resistance. |
Installation Instructions
You should be able to insert and remove it with your fingertips.
b. If the fit seems very tight, the sides of the saddle can be sanded with 320 grit sandpaper.
c. Polishing or waxing the sides of the saddle will help it to seat properly under string tension and can enhance string balance and output.
d. Under some conditions, it can be beneficial to sand a small amount of
tilt on the bottom of the saddle to compensate for the natural tilt of the saddle under string tension.
e. If the saddle is too loose in the slot, it will cause excessive saddle tilt and will usually result in poor coupling to the pickup, low output and unbalanced string response. It is advisable to replace the saddle if it is too loose.
11.
Double check to make sure the saddle slot is free of debris and that the pickup is fully seated along it entire length. Insert the saddle into the slot in the proper orientation and temporarily tape it in place.
www.dtar.com
|
15
Wave-Length Pickup Element
12.
Use a cable clip to secure the excess lead wire from the pickup to the bottom of the bridge plate. This will prevent any extraneous noises from being generated by the loose lead.
13.
Install a fresh set of strings. Before you are completely up to pitch, pull firmly
back and down on the saddle to help seat it fully in the slot. Finish tuning, seat the saddle one additional time, plug into a good system and check it out. Any
remaining string balance problems can usually be corrected by tapping on
the front side of the saddle (after first unplugging, of course) using a wooden dowel and a small hammer.
16
|
Installation Instructions
Battery Installation
1.
Battery installation and removal is accomplished with a simple quarter turn
of the collet on the jack. A clockwise quarter turn locks the jack in place
and a counter-clockwise quarter turn releases the jack for battery removal and replacement. The Load ’N Lock takes two AA batteries installed with the positive terminals pointing down the tube. Be sure to align the white stripe on the jack body with the white stripe on the battery tube. If the AA batteries are inserted backwards, no damage to the unit wil occur. However, the preamp will not operate.
FIGURE 9
FIGURE 10
www.dtar.com
|
17
Disposal Guidelines
This product must not be disposed of with
your other household waste. Instead, it is
your responsibility to dispose of your waste
equipment by handing it over to a designated
collection point for the recycling of waste
electrical and electronic equipment. The
separate collection and recycling of your
waste equipment at the time of disposal
will help to conserve natural resources and
ensure that it is recycled in a manner that
protects human health and the environment.
For more information about where you can
drop off your waste equipment for recycling,
please contact your local city office, your
household waste disposal service or the shop
where you purchased this product.
18
|
Installation Instructions
Limited Warranty
D-TAR offers the original purchaser a one-year limited
warranty on both labor and materials starting from the
day this product is purchased from an authorized DTAR Dealer or as original equipment in an instrument,
provided that a qualified, professional repairperson
or luthier performed the installation. D-TAR will
repair or replace this product, at its option, if it fails
due to faulty workmanship or materials during this
period. Defective products should be returned to
your USA dealer, international distributor, or sent
direct to our factory postage prepaid along with dated
proof of purchase (e.g., original store receipt) and a
RMA number clearly written on the outside of the
box. Please call our factory for issuance of an RMA
number.
This warranty does not apply to damage to this
product or an instrument caused by misuse,
mishandling, accident, abuse, alteration, faulty
installation or installation by a non-qualified
repairperson.
Product appearance and normal wear and tear (worn
paint, scratches, etc.) are not covered by this warranty.
D-TAR reserves the right to be the sole arbiter as to the
misuse or abuse of this product. D-TAR assumes no
liability for any incidental or consequential damages,
which may result from the failure of this product. Any
warranties implied in fact or by law are limited to the
duration of this express limited warranty.
www.dtar.com
|
19
®
duncan|turner
acoustic research
www.dtar.com
5427 hollister ave. santa barbara ca 93111
tel 805.964.9610 fax 805. 964.9749
Made in China.
20
|
Installation
© 2007 Instructions
D-TAR. All right reserved